A crown braid changes the whole mood of hair. The face is open, the neckline looks cleaner, and the braid itself sits like a frame instead of shouting for attention. When it goes well, it feels secure without feeling stiff. When it goes badly, the back bunches up, the temples start to complain, and the whole halo slides a little too low by lunchtime.
That gap between polished and messy is smaller than people think. A crown braid is not magic; it’s section control, tension control, and a little patience with your own hands. Freshly washed hair tends to slip. Day-two hair usually behaves better. Curly or coily hair can make the shape look fuller and richer, while very fine hair often needs a bit of grit from dry shampoo or texturizing spray to keep the braid from collapsing into itself.
It’s also one of the few styles that can pull double duty as a low-manipulation look. Not every braid counts as a true protective style, of course, but a crown braid can keep the ends tucked away and cut down on constant brushing if the tension stays gentle and the pins are placed with some thought. The trick is making the style hold without dragging on the hairline. That balance matters more than fancy hand work.
Why a Crown Braid Earns Its Place in the Rotation
Face-framing without constant fuss: A crown braid keeps the front hair off your cheeks and eyes, which is useful when you’re cooking, working, or just tired of hair sticking to lip balm.
Second-day hair finally has a job: Hair that feels a little too lived-in for a sleek blowout often has just enough texture to grip cleanly in a braid. That slight roughness is a feature, not a flaw.
It can look strict or soft: Pull the sections snug and smooth, and the braid reads neat and controlled. Loosen the outer loops a touch and it turns into a softer halo with a little movement around the temples.
It works with more lengths than people expect: Shoulder-length hair, layered cuts, and even shorter hair can often do a modified crown or a faux halo with a few pins and a narrow braid.
The style holds up through the day better than loose hair: Once the braid is anchored correctly, the shape stays put with fewer mid-day fixes than a half-up style that keeps falling into your face.
It plays nicely with protective styling habits: Tucked ends, reduced daily combing, and a satin wrap at night make the crown braid feel less like a one-off hairstyle and more like a workable routine.
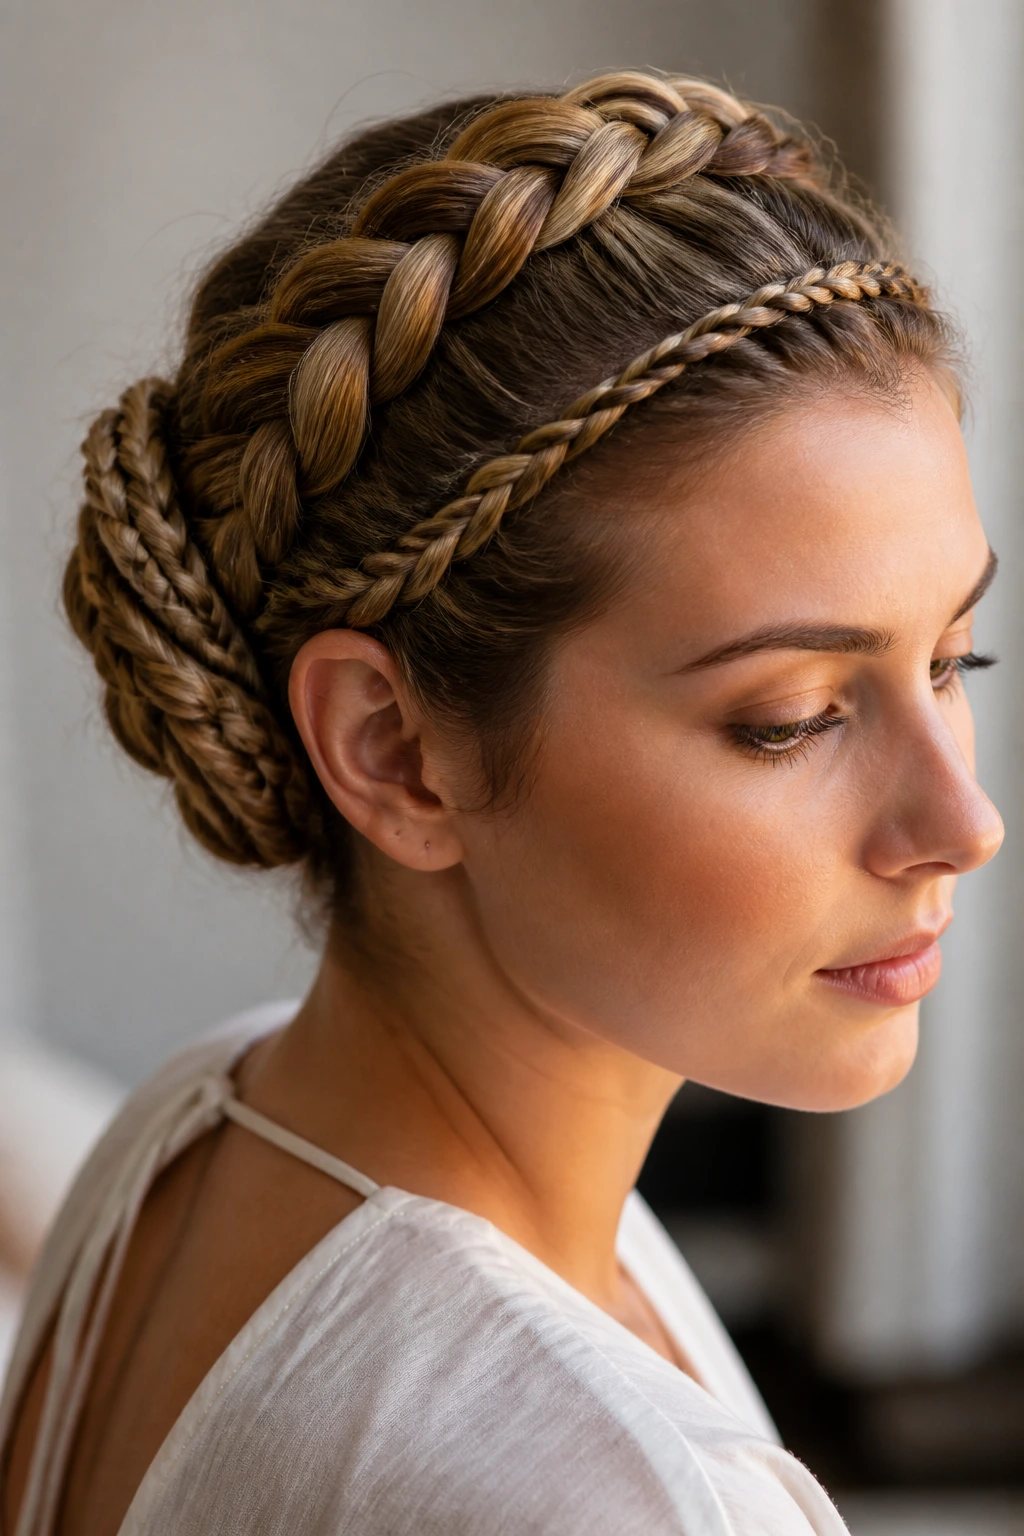
What a Crown Braid Actually Looks Like on the Head
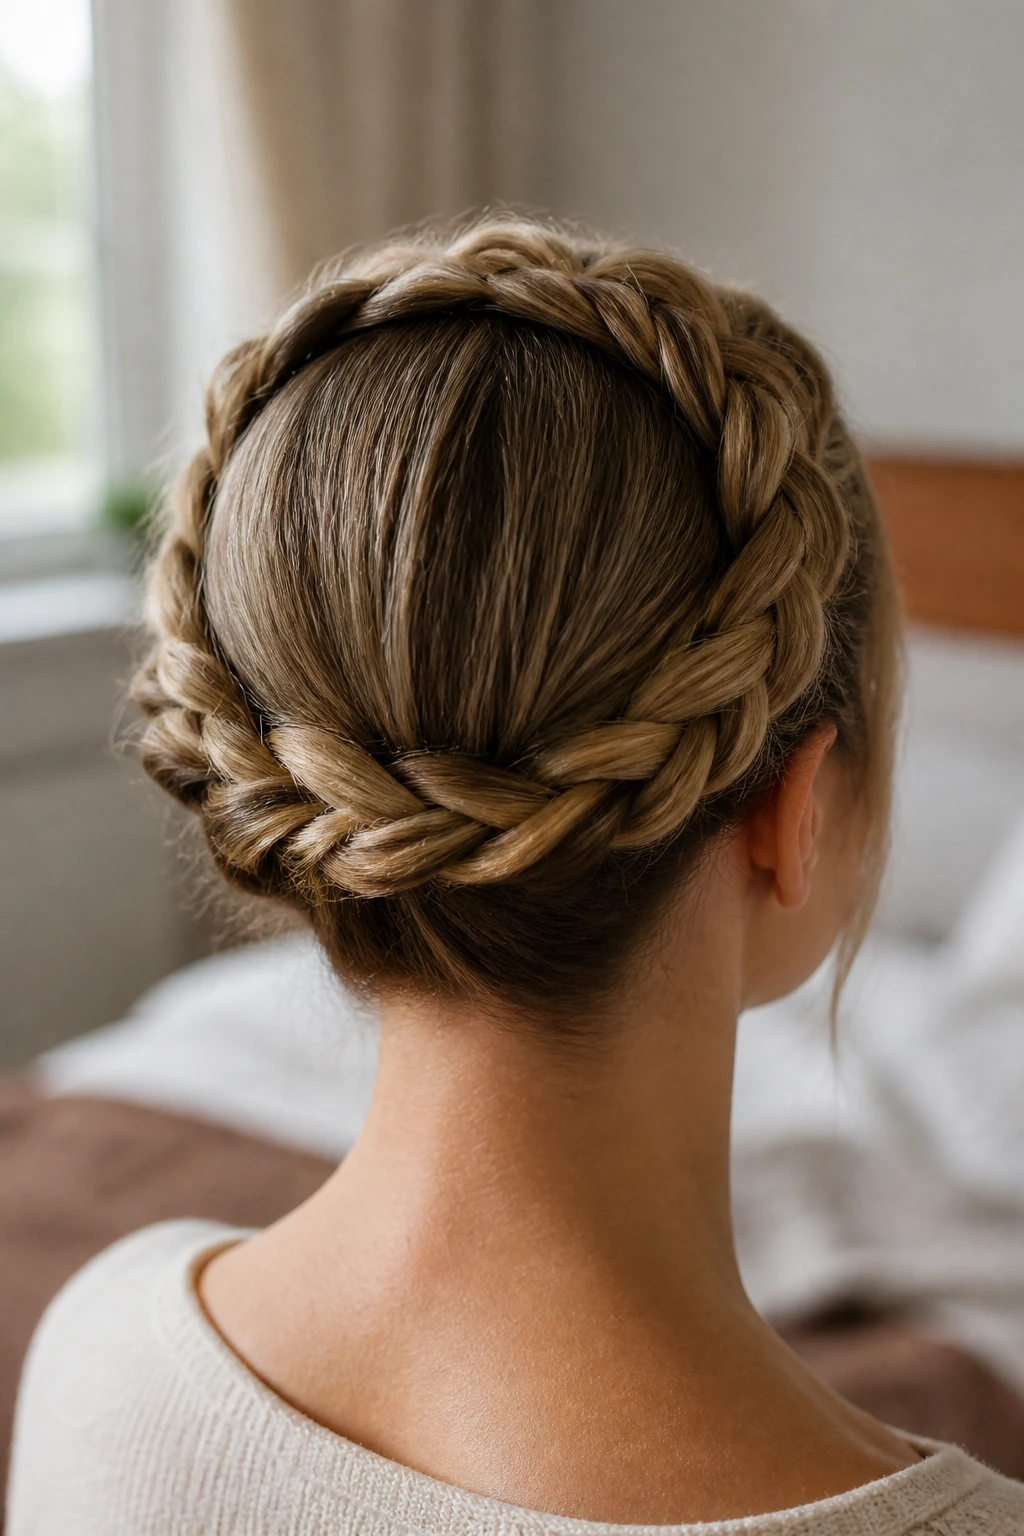
A crown braid is basically a braid that travels around the perimeter of the head, following the hairline like a stitched border. Some people use the term for a single braid that wraps all the way around. Others mean two braids that meet or cross near the top, which is often called a milkmaid braid or halo braid. The names blur together in casual use, and that’s fine. The important part is the shape: hair lifted off the face, braid visible around the head, ends tucked away or hidden.
The placement changes the feel more than most people realize. A braid that sits a half-inch behind the hairline looks neat and modern. A braid set farther back reads softer and more romantic, but it can start to feel loose if the hair around the face is fine or silky. Push it too far forward and the braid can feel like a headband with opinions. There is a sweet spot, and it usually lives just behind the outer edge of the hairline.
Thickness matters too. A chunky braid gives you that obvious woven texture, which looks great on dense hair or a textured blowout. A smaller braid can be more elegant and sit flatter against the head, which helps if you want to wear earrings, glasses, or a collar that already has visual weight. The look is not one-size-fits-all. That’s part of why it sticks around.
Single braid vs. double braid
A single crown braid tends to look smoother and more continuous. It’s the one to choose if you want the braid path to feel uninterrupted and close to the scalp.
A double-braid halo gives more control for beginners and shorter hair. Two braids are easier to make evenly than one long braid that has to travel around the whole head without wandering.
Hair Prep That Makes the Braid Grip Instead of Slipping
The prep stage decides whether the braid feels cooperative or slippery. I’d take decent prep over fancy pin work any day. A crown braid can survive less-than-perfect hands, but it will not forgive hair that’s too soft, too oily, or too freshly conditioned at the roots.
Freshly washed hair needs help
If your hair was washed the same day, start by drying it fully at the roots. Even a little dampness can make the braid puff weirdly later. A small amount of mousse, texturizing spray, or dry shampoo near the crown gives the strands some bite. You don’t need a cloud of product. You need just enough grip that the sections stop sliding through your fingers like satin ribbon.
Day-two hair usually braids better
Most people get their cleanest crown braid on hair that’s been worn once already. The cuticle is a little less slick, the parting stays where you put it, and bobby pins don’t skate around as much. If the hair feels too soft, a quick root mist of dry shampoo at the front and sides usually changes the whole feel of the style.
Curly, coily, and textured hair
For curly or coily hair, a crown braid can be gorgeous with the natural texture left in place, but the braid path may be fuller and less flat. That’s not a problem. It just changes the shape. If you want a smoother halo, stretch the hair first with twists, braids, or a low-heat blow-dry. If you want fullness, braid on the texture as it is and keep the sections consistent so the shape doesn’t get lumpy near the temples.
Fine or silky hair
Fine hair wants to escape. It slides, collapses, and tends to loosen at the first bad weather day. I like to roughen the roots with dry shampoo, then work a light-hold cream through the lengths only. Heavy oils near the scalp are a bad trade here. They make the braid shiny for about ten minutes and then start to drag it down.
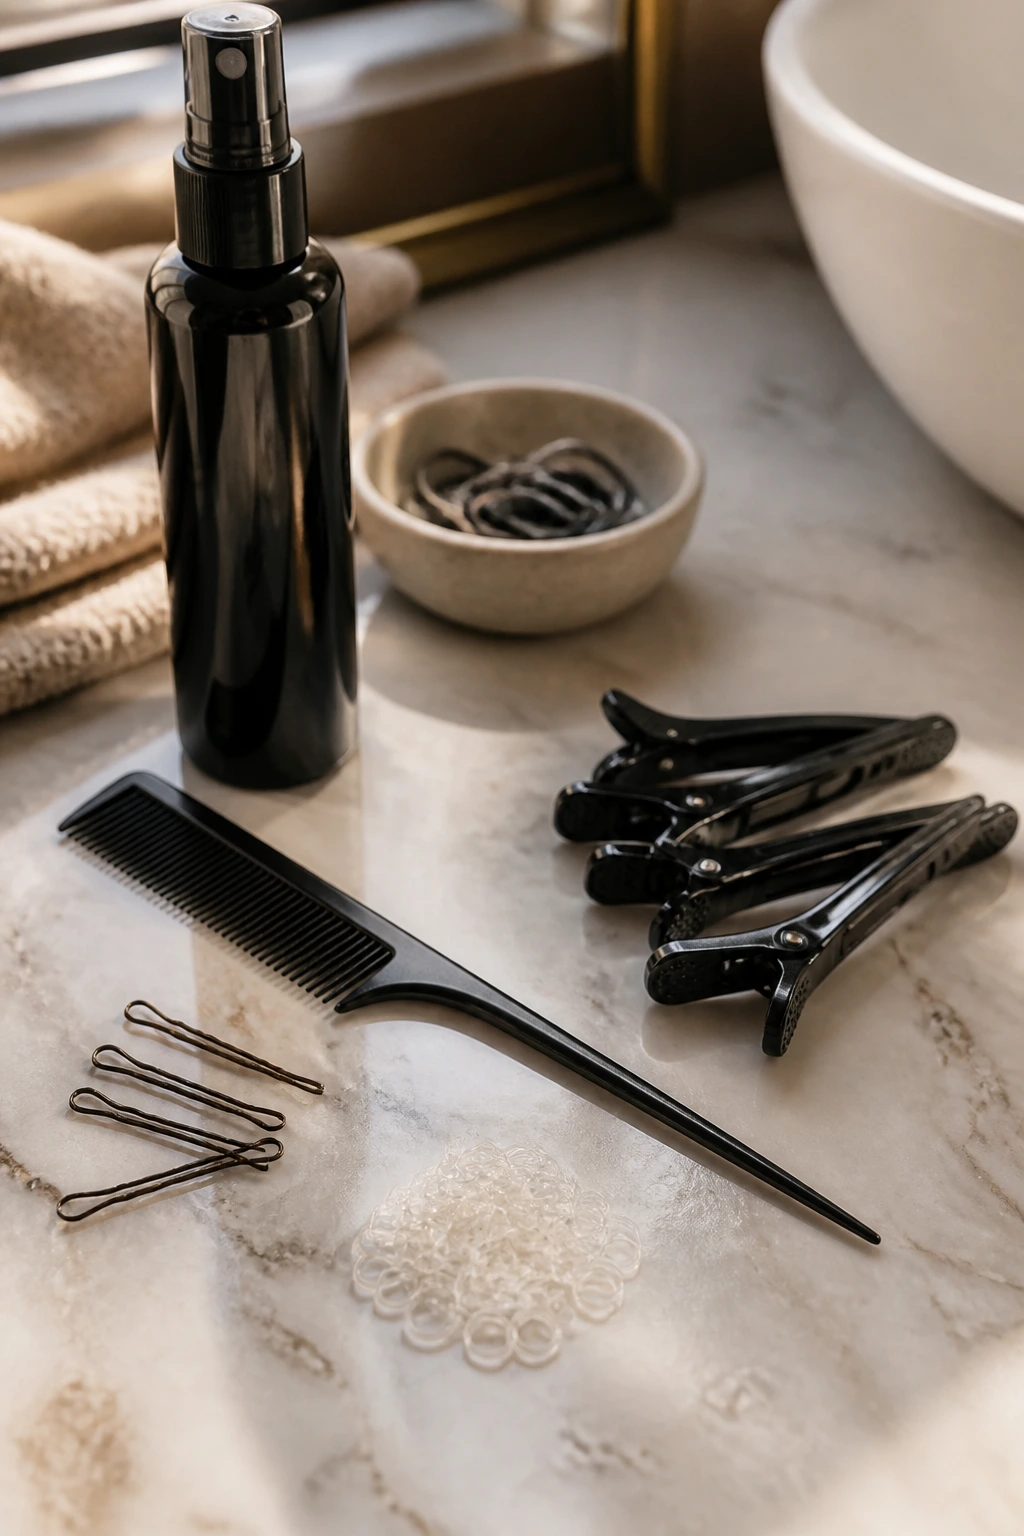
The Tools That Make the Job Easier
You can braid a crown with almost nothing, but the right tools save time and a little sanity. This is one of those styles where a decent comb matters more than a fancy finishing product.
- Tail comb or rat-tail comb: The pointed end makes clean parts and helps you lift the exact sections you want without tearing up the rest of the hair.
- Bobby pins, 8 to 12: Color-matched pins disappear better, but shape matters more than color. Slightly wavy pins grip better than slick flat ones.
- Small clear elastics: Useful for anchoring the braid ends before you hide them. They’re not glamorous. They do the job.
- Sectioning clips: These keep the unused hair out of your way while you work around the head.
- Texturizing spray or dry shampoo: Best on fine, silky, or freshly washed hair when you need the braid to hold a shape.
- Light-hold gel, cream, or edge control: A tiny amount smooths the hairline and keeps flyaways from breaking away from the braid.
- Two mirrors or one mirror plus a handheld mirror: If you’re braiding your own hair, the back of the head will lie to you. Mirrors stop the lie.
- Satin scarf or bonnet: Not for styling, but for keeping the shape overnight once you’ve finished.
Set the Part and Find Your Anchor Point
The first clean decision is where the braid will begin and where it will travel. If that line is sloppy, the rest of the style spends all its time trying to recover.
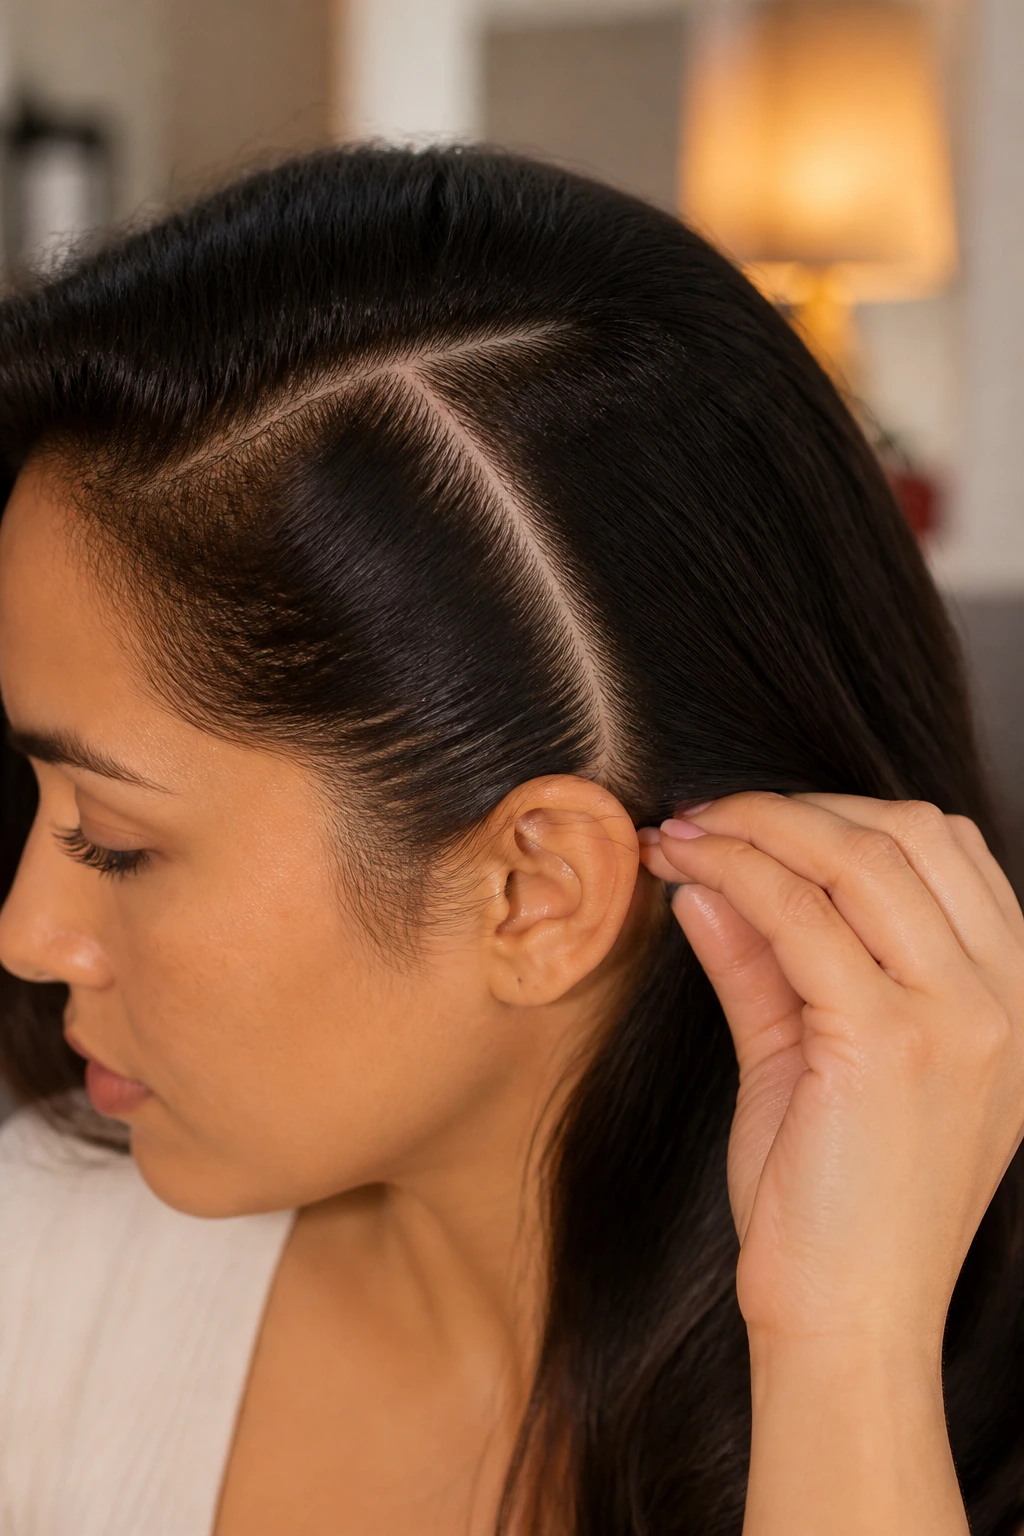
Start with dry, detangled hair. Brush or comb it through until the lengths move smoothly and the roots are free of knots. If your hair has a natural side part that you wear often, you can keep it and build the braid around it. If you want a symmetrical crown, create a center part or a shallow off-center part that suits your face and the way the braid will wrap.
A lot of people try to start too close to the front hairline. That can work, but it also makes the braid feel cramped, especially around the temples. I like to begin just behind the ear on the side that feels easiest for my dominant hand. Right-handed braiders often have a smoother time starting near the left ear and moving clockwise. Left-handed braiders may prefer the opposite. There’s no rule carved into stone. There is only the direction your hands can manage without twisting into a knot.
Make the first section small and deliberate
Take a narrow section at the starting point, about the width of a thumb or a little wider if your hair is thick. Clip the rest away so it doesn’t drift into the braid by accident. The first three crosses set the whole pattern. If those are uneven, the braid keeps revealing that choice every few inches.
Keep the hairline visible
Before you begin feeding hair into the braid, decide how far from the hairline you want the braid to sit. A clean line a quarter-inch behind the hairline gives a neat, intentional edge. If you want a softer frame, move it back slightly, but do not let it wander all the way to the crown unless you want the look of a raised braid rather than a halo.
Braid Around the Hairline Without Building Bulges
This is the part people usually overcomplicate in their head and undercontrol in their hands. The braid itself is not the hard part. Keeping it flat is.
Build the braid one small feed at a time
Take the starting section and divide it into three strands. Begin a French or Dutch braid, depending on the finish you want. In a French braid, the outer sections cross over the middle. In a Dutch braid, they cross under, which makes the braid pop outward more. Either method works for a crown. The main thing is to keep each added section close to the head and roughly the same size.
Feed in a small slice of hair from the hairline on one pass, then a matching slice from just behind it on the next pass. Don’t grab big chunks because you’re tired and want to finish faster. Big chunks make the braid bulge in some places and go thin in others. The result looks rushed, and it usually feels unstable by the time you reach the back of the head.
Let the braid follow the curve of the head
The braid should travel in a gentle arc around the perimeter, not shoot straight back. Think of it as tracing the line where a headband would sit if it were a little lower and much better behaved. If you pull the braid too far upward, it loses the crown shape. If you pull it too low, it starts to sit on the ear and the whole style reads lopsided.
Keep tension even, not tight
Firm tension is useful. Pain is not. You want the braid to feel secure in your fingers and calm against the scalp. If the temple hairs start lifting or the skin feels stretched, loosen your grip on the feed sections. That tiny adjustment keeps the style comfortable and helps it last longer because you’re not fighting little stress points all over the head.
Stop and smooth as you go
Every few passes, use your free hand to smooth the section you’re about to add. This helps prevent bumps from sneaking into the braid where the hair changes direction. If the hair starts to dry out and slip, tap a small amount of gel or styling cream along the next section, not the whole braid. Too much product turns the roots slick and makes the style collapse later.
Tuck the Ends and Make the Seam Disappear
The finish is where a crown braid goes from “nice braid” to something that looks deliberate from every angle. The seam is always the part people notice if it’s left half-done. You can hide a lot with a clean tuck and the right pins.
Once you’ve braided around the head and returned near your starting point, secure the end with a small elastic. If your braid is long enough, fold the tail under the braid path and pin it flat beneath a thicker section. If it’s shorter, you may need to create a small loop and pin that loop to the scalp so the tail disappears into the braid itself.
The pinning angle matters. Slide bobby pins in along the direction of the braid, then cross one or two pins over the first pin if the seam feels loose. That X shape holds better than a single straight pin in most hair types. It’s a tiny thing, but it saves the style from slowly opening at the back of the head while you’re distracted by something else.
Hide the join where the eye won’t linger
The back of the head is the natural hiding place. If the seam lands there, tuck it low and slightly off center instead of placing it right where the braid meets its own starting point. A tiny shift to one side can make the join disappear more completely. I’ve seen people fuss with the front for ten minutes when the real problem was a visible tail poking out near the nape. The fix was not more spray. It was better pin placement.
Loosen with intention, not chaos
If you want a softer finish, pull gently on the outer edges of the braid after it’s pinned. Do it in small sections. Don’t yank the whole thing apart. The goal is to widen the braid a little and soften the shape, not to unravel the work you just did. On thicker hair, even a mild loosening can create a fuller halo without giving up the structure.
Crown Braid Fixes for Short Hair, Layers, and Fine Strands
Not every head of hair gives you the same easy path. That’s normal. A crown braid changes shape depending on length, layers, and density, and the style gets much easier once you stop expecting the same result on every texture.
Shoulder-length hair
Shoulder-length hair can absolutely do a crown braid, but the tail often needs a little help at the end. A double-braid halo may be easier than one long braid if the ends are too short to travel all the way around cleanly. If you only have enough length for a half-circle braid on each side, that’s still a crown shape. No one is handing out points for forcing the longest possible path.
Short layers that keep escaping
Layers love to slip loose around the temples and behind the ears. I deal with that by taking slightly smaller feed sections around the face and a touch more product only on those front pieces. A strong first inch matters too. If the braid begins with a secure anchor, the shorter pieces have less room to wander.
Fine hair
Fine hair usually looks best with a bit of puff at the braid rather than an over-sleek, tiny rope. That means using texture spray, not just hairspray at the end. A soft tease at the roots near the starting point can also help the braid appear fuller where it needs support. Do not backcomb aggressively. You want lift, not knots.
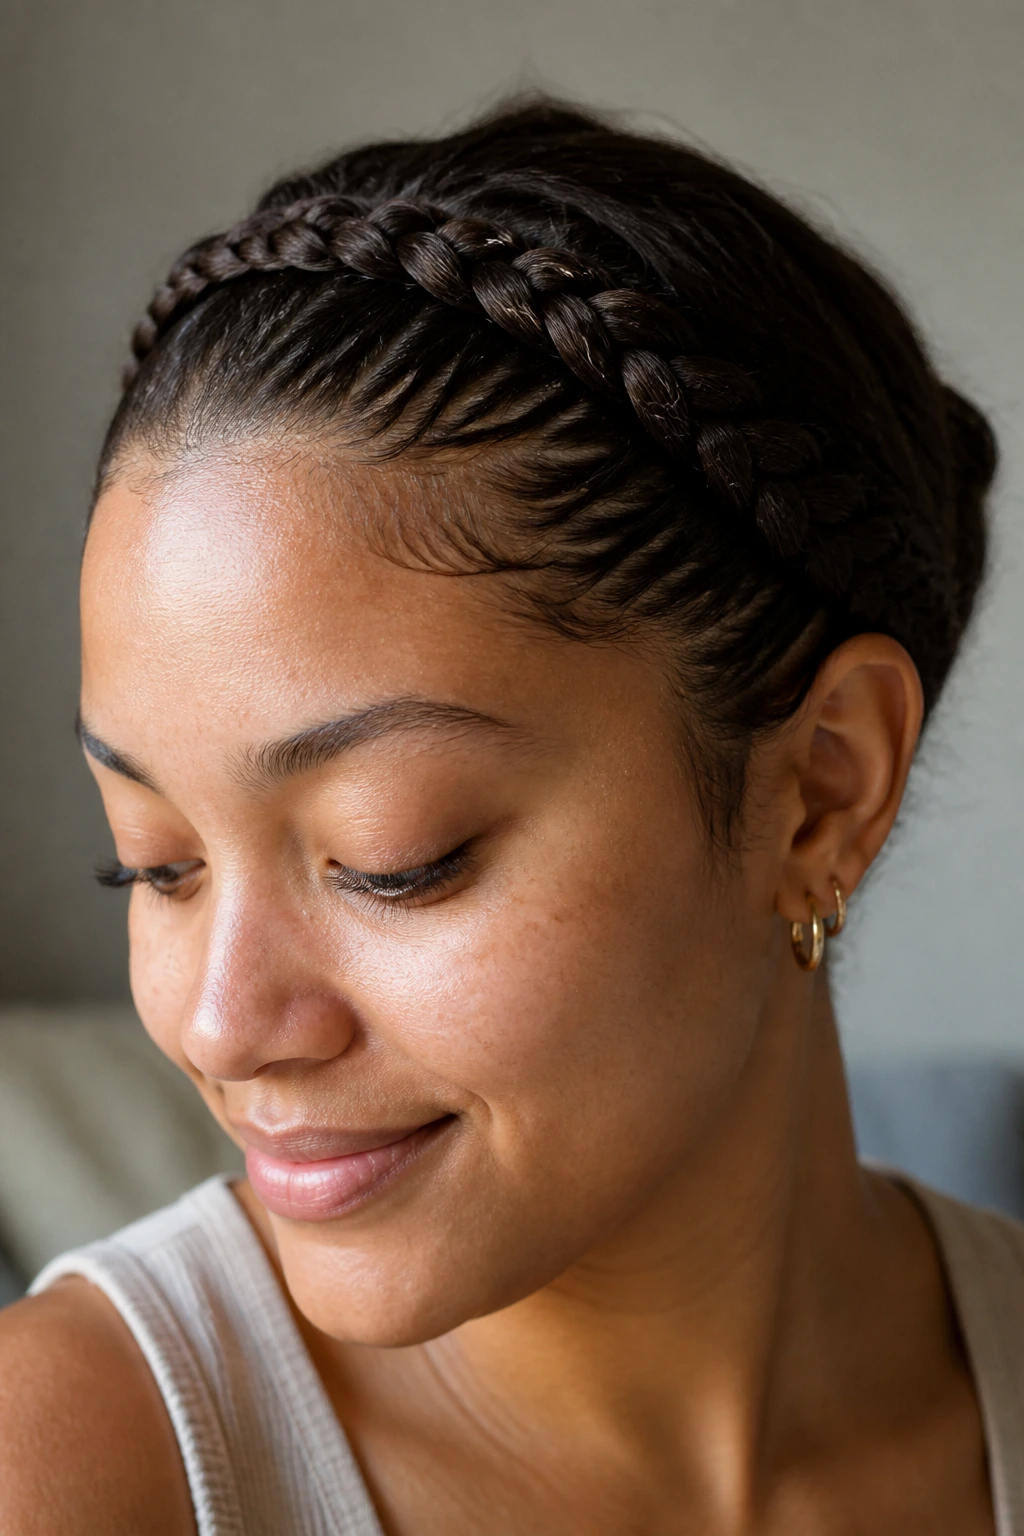
Curly and coily hair
On textured hair, a crown braid often becomes a flat twist, cornrow path, or halo braid that tracks around the head and respects the curl pattern. That can be more stable than a loose plait because the texture itself helps the style hold. If the goal is protective styling, keep the tension low, keep the edges calm, and avoid redoing the same section over and over. Repeated manipulation is the part that wears hair out faster than people expect.
Dutch, French, Rope, and Double-Braid Crown Variations
Different braiding methods change the look more than the average mirror check suggests. The braid path stays the same, but the texture, height, and feel all shift.
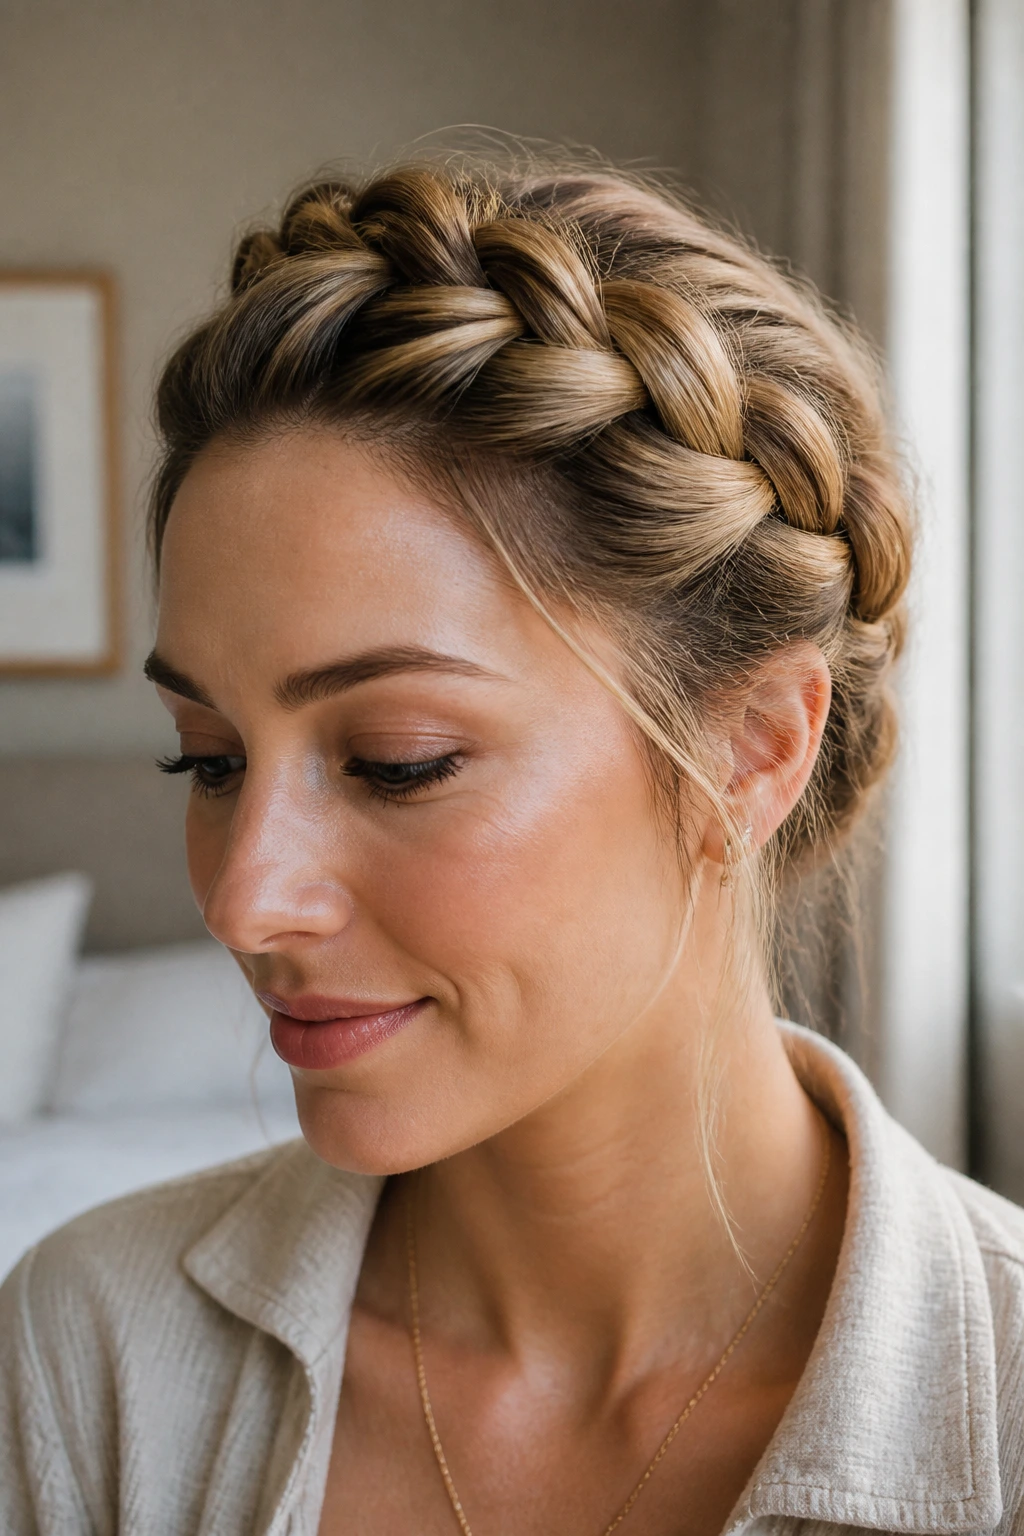
French crown braid
A French crown braid sits smoother and closer to the head. It’s the right choice when you want the braid to blend into the shape of the hairstyle rather than stick up as a separate feature. This is the version I reach for when I want the braid to look neat enough for a blazer or a sharp collar.
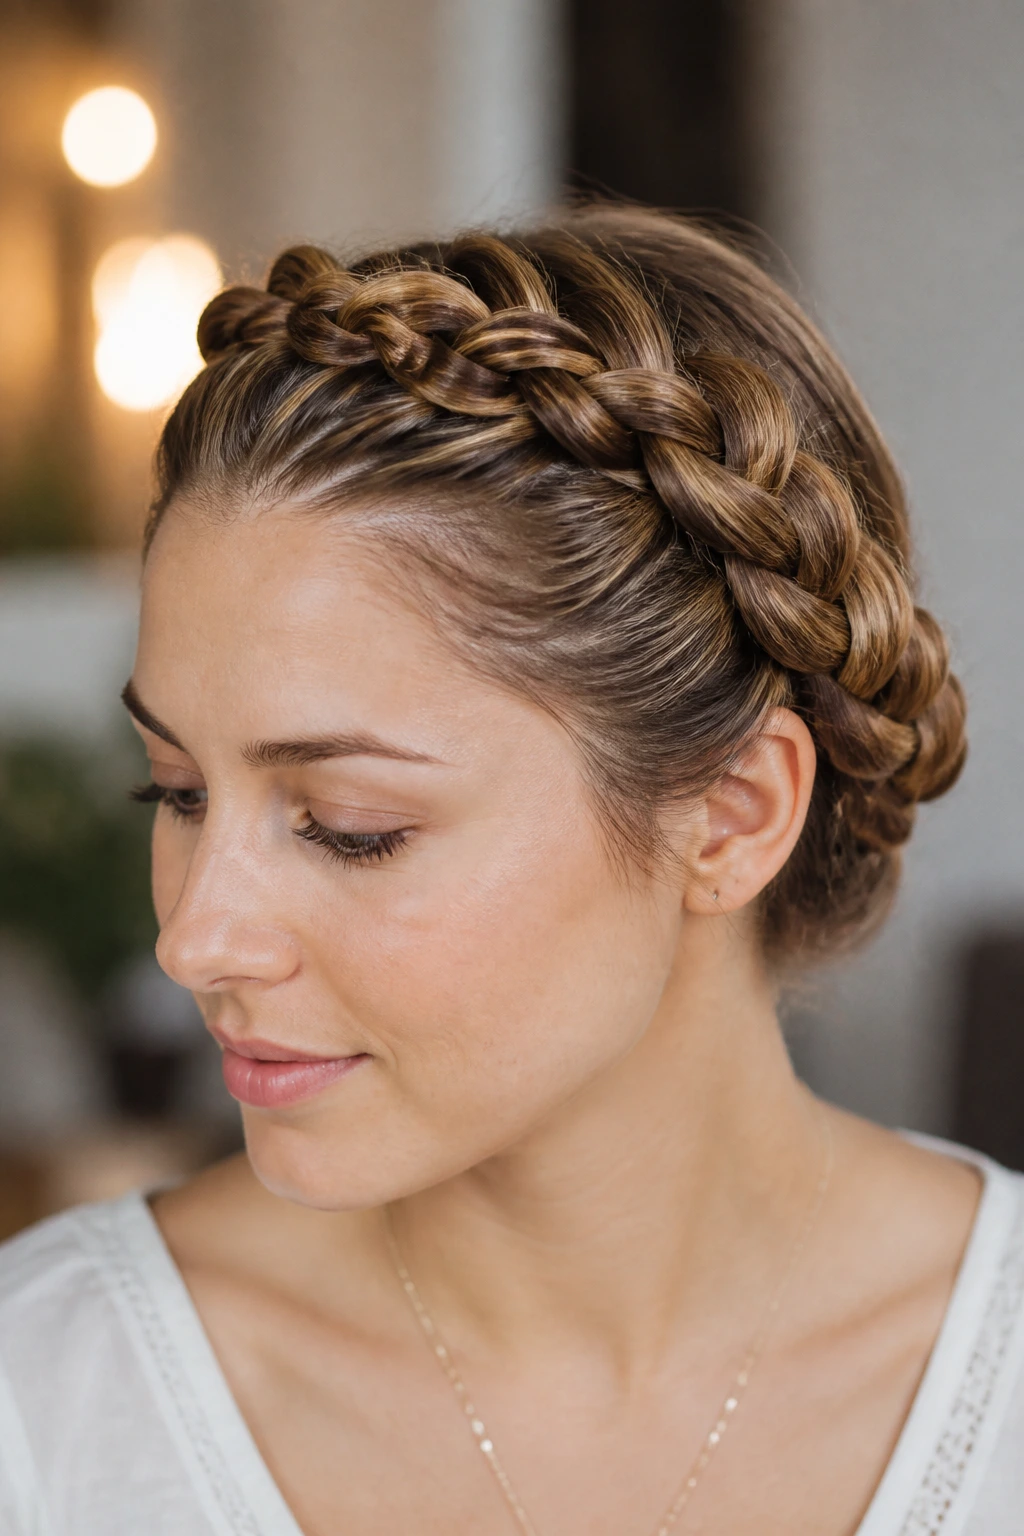
Dutch crown braid
A Dutch crown braid is the more visible option. Because the strands cross under, the braid pops outward a little and shows off the woven pattern. It has more body and tends to look fuller, which helps on thicker hair or on anyone who wants the braid to read from across the room.
Rope-twist crown
A rope-twist crown is faster and works well when the hair is slippery or when you don’t want a classic three-strand braid. Twist two sections in one direction, wrap them around each other in the opposite direction, and follow the same crown path. The texture is sleeker, less woven, and a little more modern in feel.
Double-braid halo
Two braids wrapped and pinned around the head are a blessing for beginners and shorter hair. You braid one section on each side, then pin them across the crown so the ends meet or cross discreetly. This version usually sits flatter than a single long braid and gives you more control over the final placement. If the back of your head is hard to reach, this is the version that tends to cooperate.
Small Adjustments That Keep the Style Neat All Day
A crown braid does not need a lot of fuss after it’s finished, but it does benefit from a few small checks that keep it from slowly shifting. These are the moves that make the style feel finished instead of merely assembled.
Start with grip, not shine. If the hair is too soft at the roots, the braid will loosen as you move. A touch of dry shampoo at the base of the part and along the front sides gives the braid something to hold onto.
Pin the stress points first. The braid usually loosens at the temples, behind the ears, and near the seam. Put your strongest pins there before you worry about the decorative side. That order matters.
Use the right amount of smoothing product. A pea-sized bit of cream or gel on your fingertips is usually enough for flyaways near the front. More than that and the hair starts to clump instead of lay down.
Check the braid after you move around. Sit, turn your head, tilt it down, and stand back up. If a section lifts when you bend forward, it will probably lift again later. Fix it while the mirror is still out.
Keep the braid slightly firmer than feels necessary at the start. It relaxes over time. That doesn’t mean yanking it tight. It means expecting a little give and planning for it with pin placement.
A funny thing happens with crown braids: the better they fit the head, the less you notice them. That’s the goal. If you feel like you are constantly thinking about a section near the ear, that section was pinned lazily or fed unevenly. Fix that one area instead of redoing the whole head. Half the time, the whole style only needs one smart pin.
Common Mistakes That Cause the Braid Sag or Pull
A crown braid usually fails for the same handful of reasons. None of them are mysterious. They’re all fixable once you know what the symptom means.
- Starting on hair that is too silky and clean: The braid looks neat for a few minutes, then starts slipping apart. Add texture spray or dry shampoo at the roots before you begin.
- Pulling too hard at the temples: The scalp feels sore, the front hairs stand up, and the style can even leave dents. Loosen the tension near the hairline and use smaller feed sections.
- Taking uneven sections: One side of the braid becomes thick while the other side goes thin and floppy. Use a tail comb and keep the added sections roughly the same size.
- Ignoring the seam at the back: The braid looks polished from the front but the tail sticks out behind the ear or nape. Fold the end flatter and pin it in two directions.
- Using too much oil or heavy cream at the roots: The braid feels slick and collapses faster than expected. Keep heavier products on the mid-lengths and ends, not the scalp.
- Trying to force a single braid on hair that’s too short or layered: The braid keeps falling apart because there isn’t enough length to travel cleanly. Switch to a two-braid halo or a rope-twist version instead.
The sore-temples mistake is the one I see most often. People think tighter means neater. It doesn’t. It often means shorter wear time and a headache. A crown braid should hold because it’s mapped well, not because it’s squeezing the scalp into compliance.
Variations and Alternatives Worth Trying

A crown braid does not have to look identical every time. Small changes in placement and braid type shift the whole attitude of the style.
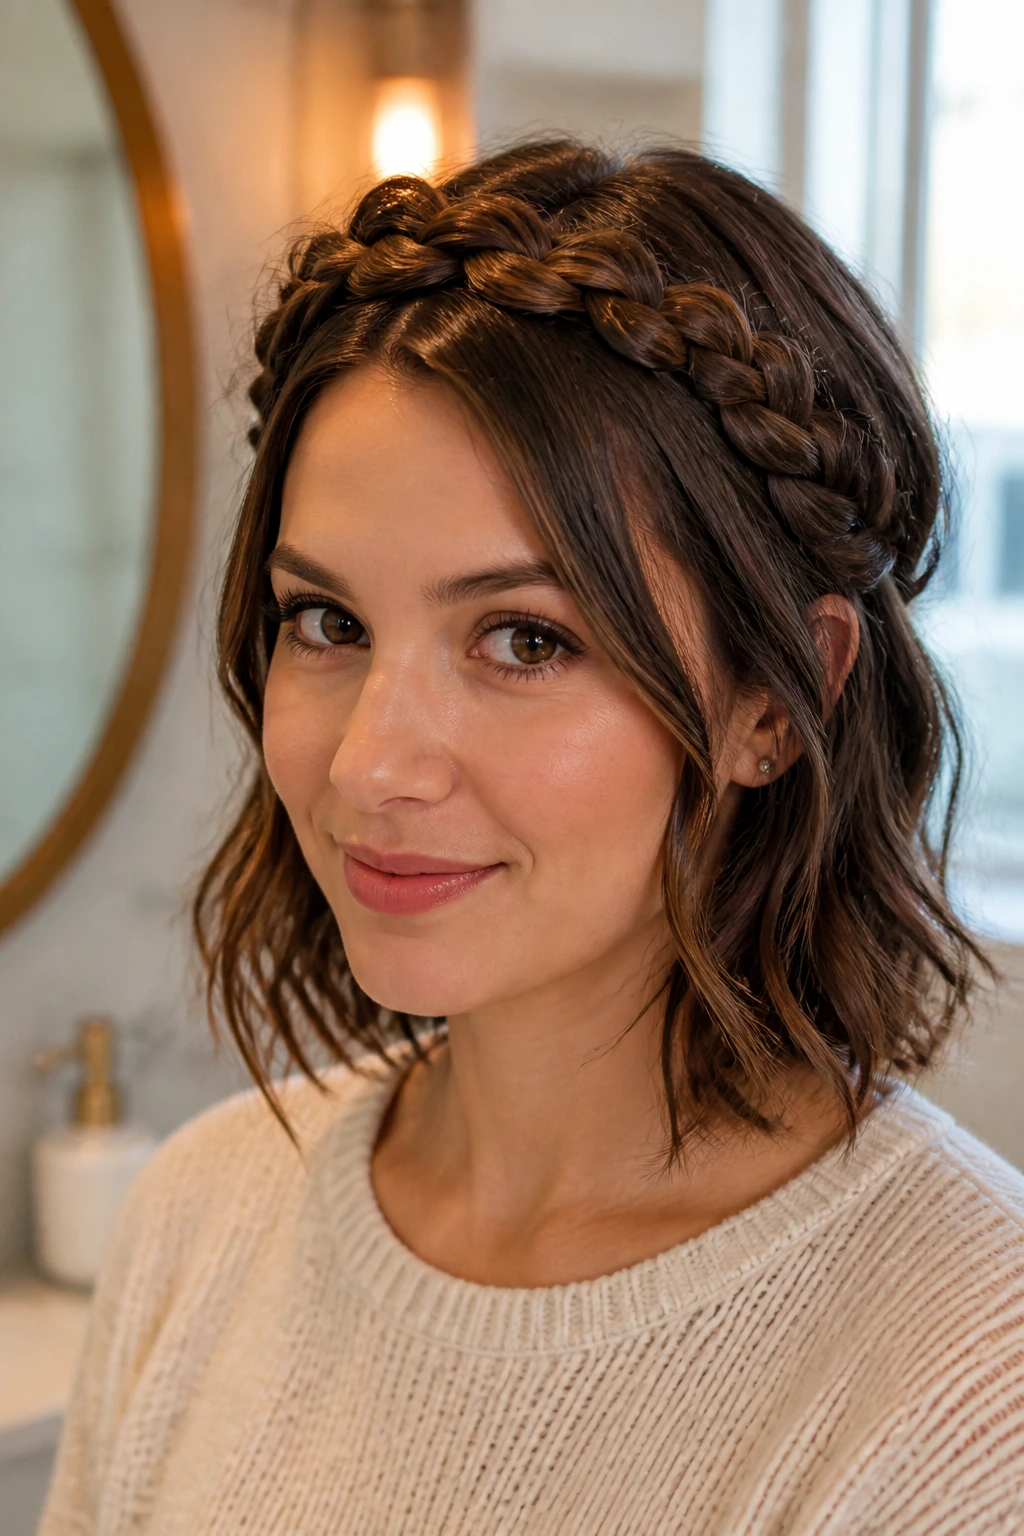
Soft Halo Crown: Loosen the outer loops after pinning and leave two thin face-framing pieces out near the temples. This version works well when you want the braid to feel a little less strict and a little more lived-in.
Braided Headband Crown: Braid a narrow section from ear to ear and pin it like a headband across the front of the hair. It’s faster than wrapping the full head and works nicely on medium-length hair that won’t quite make a full circle.
Double Milkmaid Wrap: Create two side braids and cross them over the top, pinning the ends flat beneath the opposite braid. This gives a more old-world shape and is usually easier when the hair is thick or the layers are fighting you.
Rope-Twist Halo: Swap the three-strand braid for a rope twist along the same path. It’s especially useful for slippery hair because the twist pattern holds with less hand work and less chance of one side puffing out unexpectedly.
Low Crown Tuck: Instead of wrapping high around the crown, braid closer to the nape and pin the shape lower. It feels calmer and more understated, and it can be a smart choice if the top of your head is too short for a full halo.
How to Sleep on It and Wear It the Next Day

A crown braid can survive overnight if you treat it like a style worth preserving instead of sleeping on it like an afterthought. The braid itself may stay intact, but the surface can fuzz up, and the pins can wander if they’re left exposed to pillow friction.
Before bed, check the seam and the temples. If either spot feels loose, add one more pin before you lie down. Wrap the hair in a satin scarf or sleep on a satin pillowcase. Cotton roughs up the surface and steals the smooth finish faster than people expect. If the ends are tucked tightly, they usually stay put overnight. If the style has a softer, looser finish, the scarf matters even more.
In the morning, don’t soak the whole style with water. That just ruins the shape. Instead, mist your fingertips lightly and smooth only the frizzy spots along the front and the braid surface. If the braid loosened slightly at the nape, re-pin that one spot rather than rebuilding the whole crown. A half-minute fix is usually enough.
If you want to wear the style for a second day, keep the root area from getting oily. A little dry shampoo around the front and the back seam helps the braid keep its shape, especially on fine hair. Curly and coily textures usually handle day-two wear more gracefully than silky straight hair because the surface has more natural grip. Still, any crown braid will last longer if you resist the urge to keep touching it.
One more thing: do not sleep in a crown braid that was made on damp hair. It can feel fine the first night and look flat the next morning, but damp hair trapped under pins is a bad habit. Dry it fully first. Always.
Questions People Ask Before They Start Braiding
Can I do a crown braid on short hair?
Yes, if the hair is long enough to grip for a few inches and if you’re willing to use pins for the rest. A short cut usually does better with a double-braid halo or a braided headband version rather than a full wrap around the entire head.
How do I keep the crown braid from slipping?
Build grip before you start. Dry shampoo, texture spray, or a little mousse at the roots gives the braid something to hold onto, and cross-pinning the seam at the back keeps it from opening once the hair starts to relax.
Is a crown braid a protective style?
It can be, but only when the tension is gentle and the style reduces daily manipulation. If it’s pulled too tight at the hairline or redone every morning, it stops acting like a protective style and starts acting like stress.
French or Dutch crown braid — which one looks better?
French braids sit flatter and cleaner. Dutch braids stand out more and show the braid pattern better. If you want something close to the scalp, pick French. If you want a fuller halo, pick Dutch.
What if my hair is too slippery to braid?
Use a small amount of texturizing spray or dry shampoo and work in smaller sections. If the hair still slides, a rope-twist crown or a double-braid halo is often easier than fighting a classic three-strand braid.
How tight should a crown braid feel?
Secure, not tense. If the scalp feels stretched or tender, it’s too tight. The braid should stay put without making you aware of every pin and every cross.
How do I hide the ends neatly?
Fold the tail under the braid path, pin it flat in two directions, and hide the join near the back of the head where the eye doesn’t linger. A small elastic helps anchor the end before you tuck it.
Can I wear this to sleep?
Yes, but only after the hair is fully dry and the braid is pinned securely. A satin scarf or pillowcase helps keep the surface smooth, and the braid should be refreshed lightly in the morning rather than drenched with water.
A Style That Earns Its Keep

A crown braid is one of those styles that looks harder than it is once your hands learn the path. The real work is not in making it look fancy. It’s in making the sections even, the tension calm, and the seam invisible enough that nobody spends time looking for it.
A braid like this earns its place because it can move between settings without changing its bones. It can be tidy, soft, strict, romantic, or protective, depending on how you part it and how hard you pin it. That kind of range is rare. Most hairstyles pick a lane and stay there.
Practice it on day-two hair, keep a tail comb nearby, and don’t bully the hairline into submission. The braid settles in fast once the basics are in your fingers, and after that it becomes one of those dependable styles you reach for when you want the hair off your face and the finish to look intentional.