A braid on a child with wavy hair has a funny habit. Get the part wrong or tug too hard, and it puffs at the crown, slips at the nape, and starts looking tired before lunch. Get it right, and the same head of hair suddenly behaves with a kind of easy grip that straight hair rarely gives you. The wave pattern helps the braid hold, the texture gives it shape, and the whole style can survive school, snacks, recess, and the ride home with a backpack rubbing the neckline.
That’s why braids for kids with wavy hair are such a useful lane to learn. Wavy hair sits in a middle zone: not so slippery that everything falls apart, not so tightly textured that every section fights you. The trick is knowing how much smoothing is enough, how tight is too tight, and which braid patterns keep the hair looking tidy without flattening the life out of it.
Neat braids do not have to look stiff. They should look clean at the part, secure at the ends, and comfortable enough that a child forgets about them after a few minutes. That’s the sweet spot here. Not helmet hair. Not a frizzy rescue mission. Just styles that look put together and still leave room for a kid to be a kid.
Why These Braids Earn a Spot in the Morning Routine
- Wavy hair gives braid patterns extra grip: A little bend in the strand helps three-strand braids, Dutch braids, and rope twists hold their shape better than they do on pin-straight hair.
- Most of these styles need the same small kit: A rat-tail comb, a spray bottle, a light detangler, and snag-free elastics will handle almost the whole list.
- The styles stay neat without looking severe: Clean parts and controlled flyaways do the work; you do not need to slick every strand flat to get a polished result.
- Several options work on shoulder-length hair: Not every braid here needs waist-length hair, which matters when the cut is layered or still growing out.
- They can be dressed up or kept simple: Add a ribbon for a party, leave out the extras for school, or swap a low ponytail for a bun when you need less bounce.
- They hold up better than loose waves alone: Braids keep the front pieces, temples, and ends from turning into a frizz cloud the moment the day gets active.
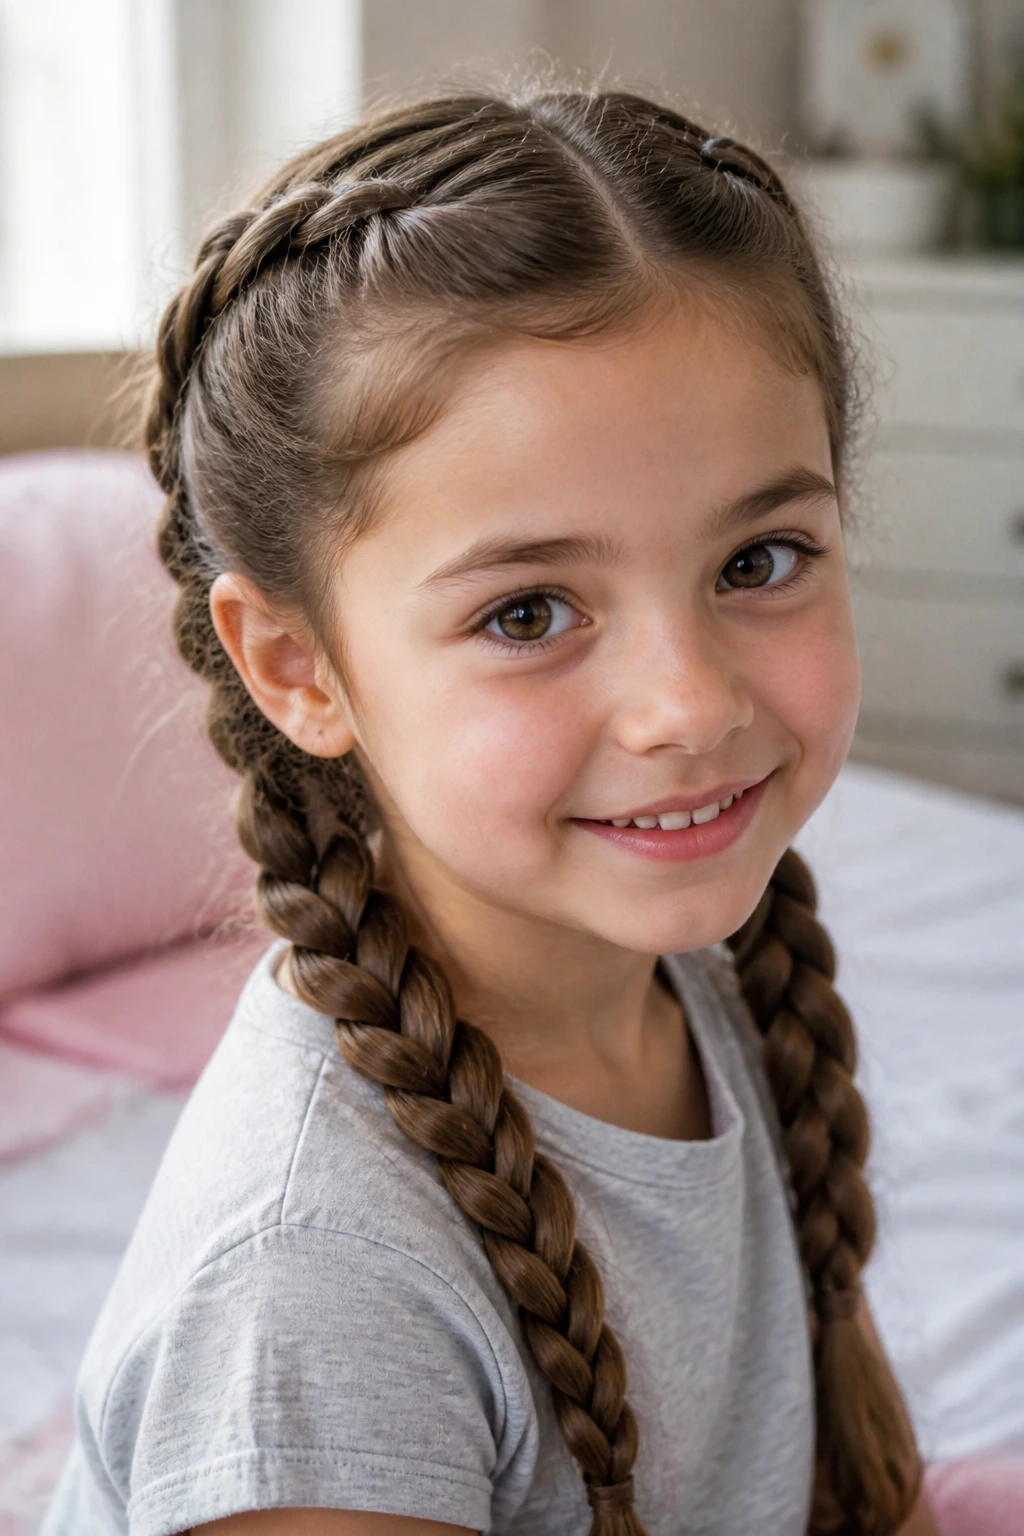
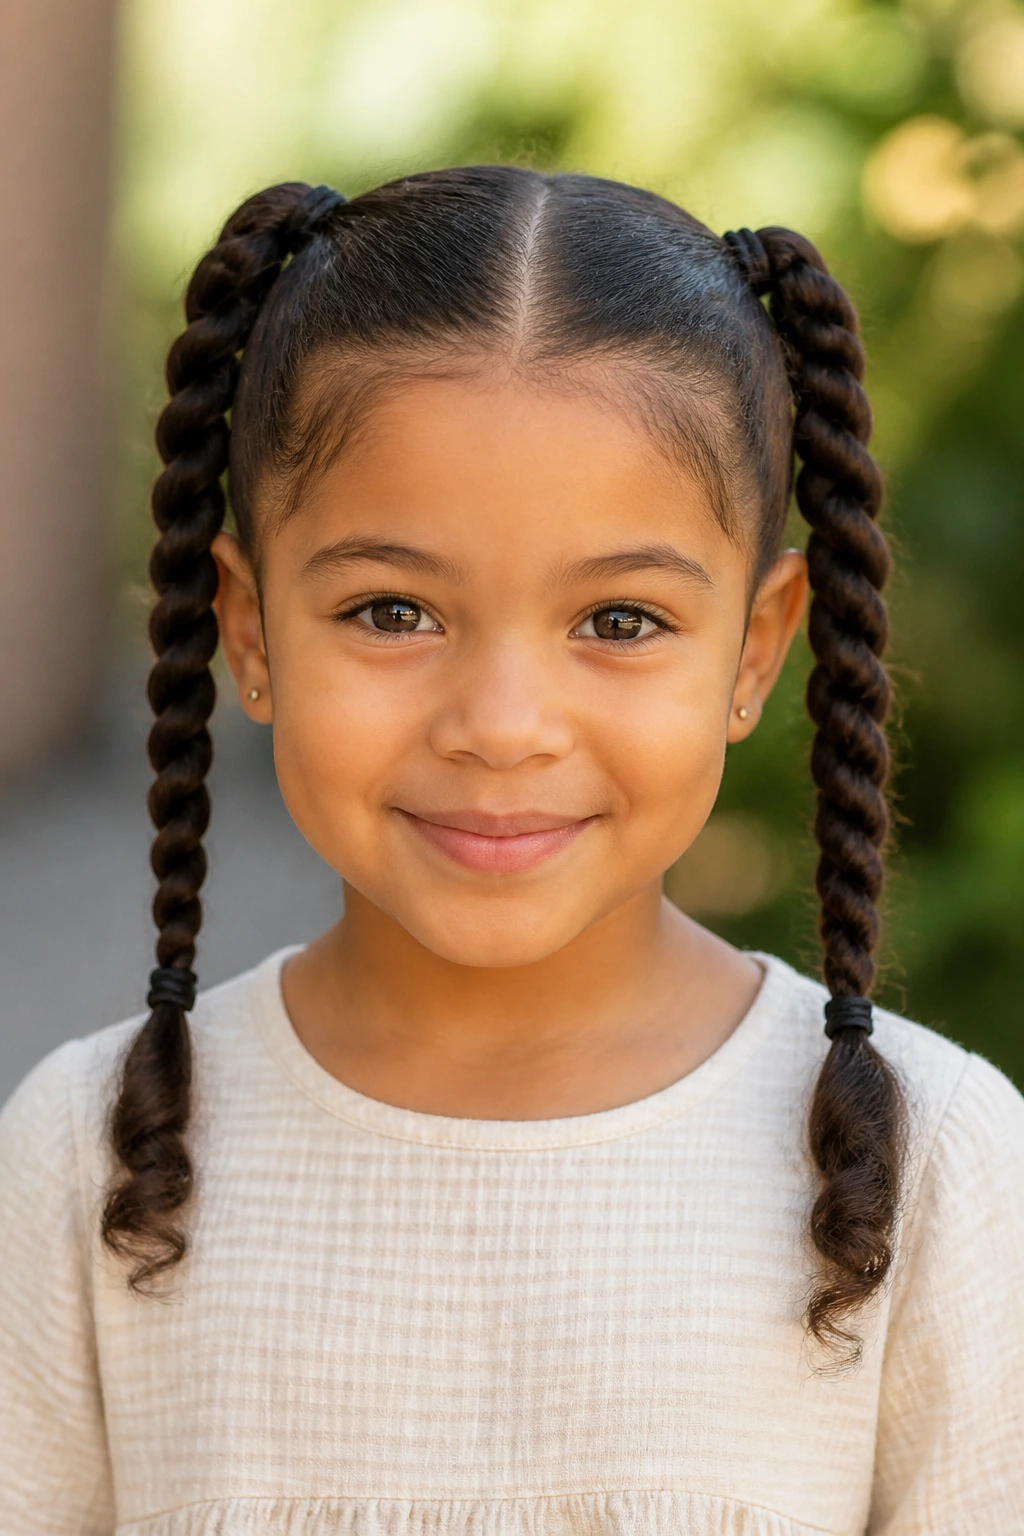
1. Classic French Braid Pigtails
This is the style I reach for when the job is plain and practical: keep the hair out of the face, keep both sides even, and make the whole head look calm. French braid pigtails work especially well on wavy hair because the texture gives the braid a little bite, so the sections don’t slither apart the way they can on very silky hair.
The neatness lives in the part and the tension. Start with a clean center part, mist the hair lightly so it is damp rather than wet, and smooth a small amount of leave-in through the mid-lengths. Then braid close to the scalp from the hairline down to the nape, keeping the first few passes snug. After that, relax your hands a little. Too much pulling at the temples is where the “neat” turns into “ouch.”
Why it stays tidy
The braid sits close to the head, which helps control the fluffy halo that wavy hair can build around the crown. If the ends are long, finish each pigtail with a small clear elastic and leave a little tail free rather than stuffing the whole thing under tension.
If you want the style to hold through a long day, this is one of the safest bets. It looks orderly from the front and still lets the wave pattern show once the braid hits the shoulder.
2. Dutch Braid Pigtails
Want the braid to show instead of blending into the hair? Dutch braid pigtails do that job better than almost anything else on this list. The braid sits on top of the hair instead of tucking underneath it, so the shape reads more sharply, especially on wavy hair with a bit of body.
The difference is small in hand and obvious in the mirror. You braid the outer sections under the middle section instead of over it, which makes the braid pop forward. On wavy hair, that raised look is a gift. The texture adds thickness, and the braid looks fuller without needing big sections.
Best when you want: a braid that reads clearly in photos, a style that looks intentional even from a distance, and a sturdier feel for school or errands.
Watch for: too much product. If you load the roots with heavy cream or oil, the braid can slide. A light mist and a small dab of styling gel at the hairline is enough.
The neatest Dutch pigtails have even section sizes from top to bottom. If one side gets fat and the other stays thin, the whole look loses its clean line. Keep the mirror close for the first few tries. After that, the hands learn the pattern fast.
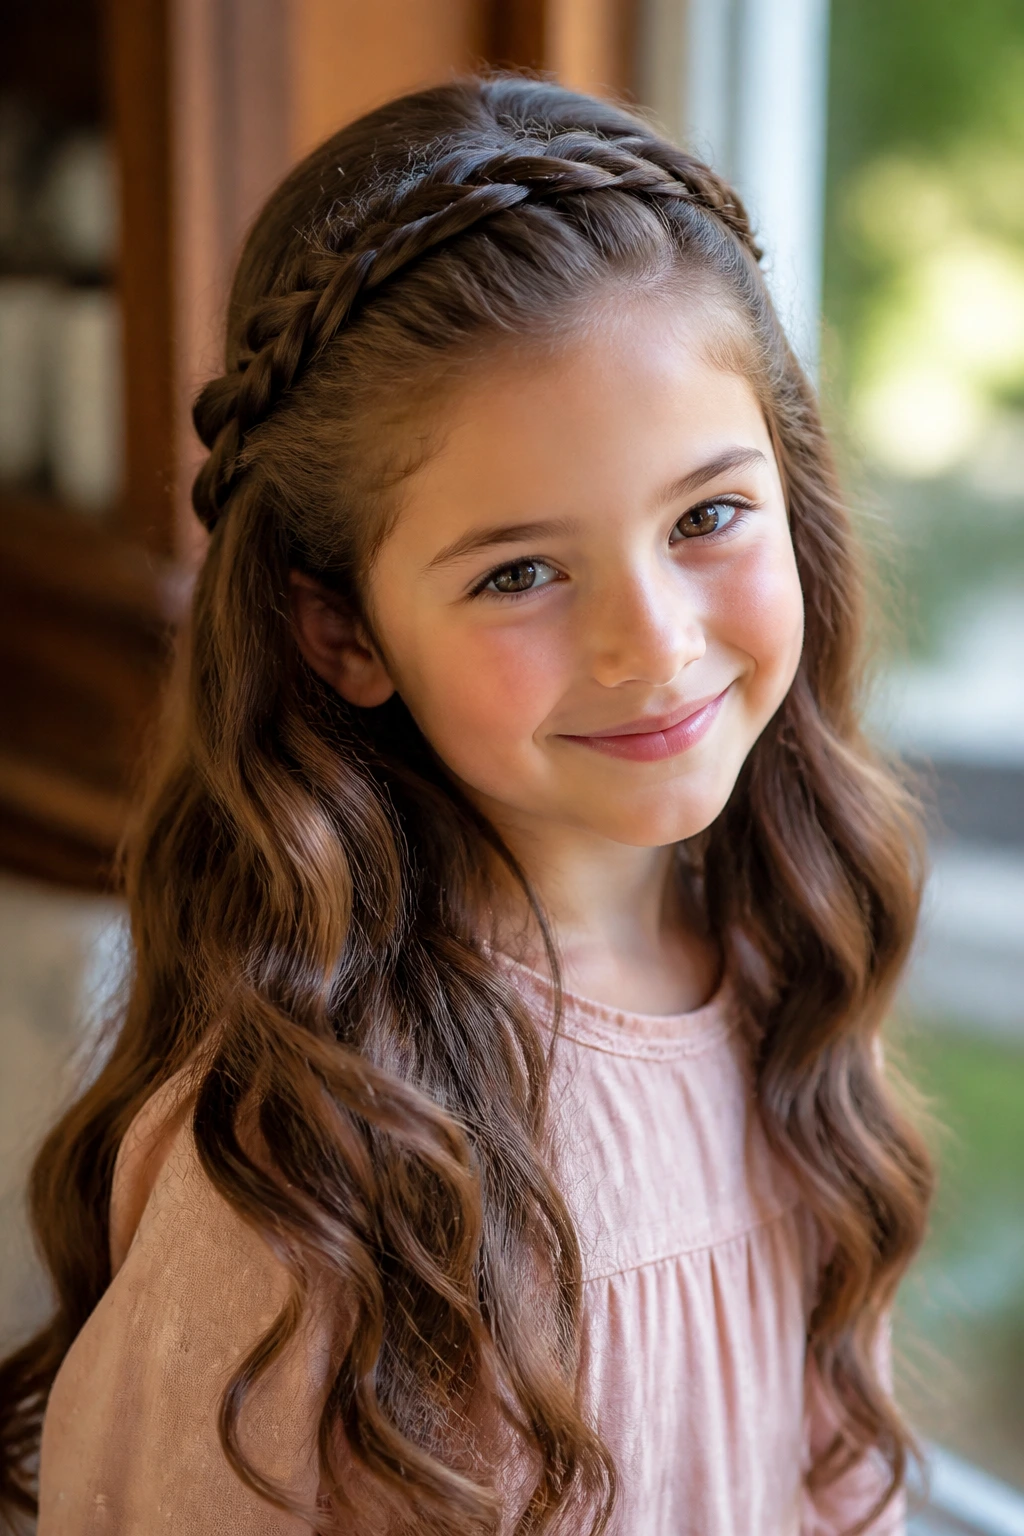
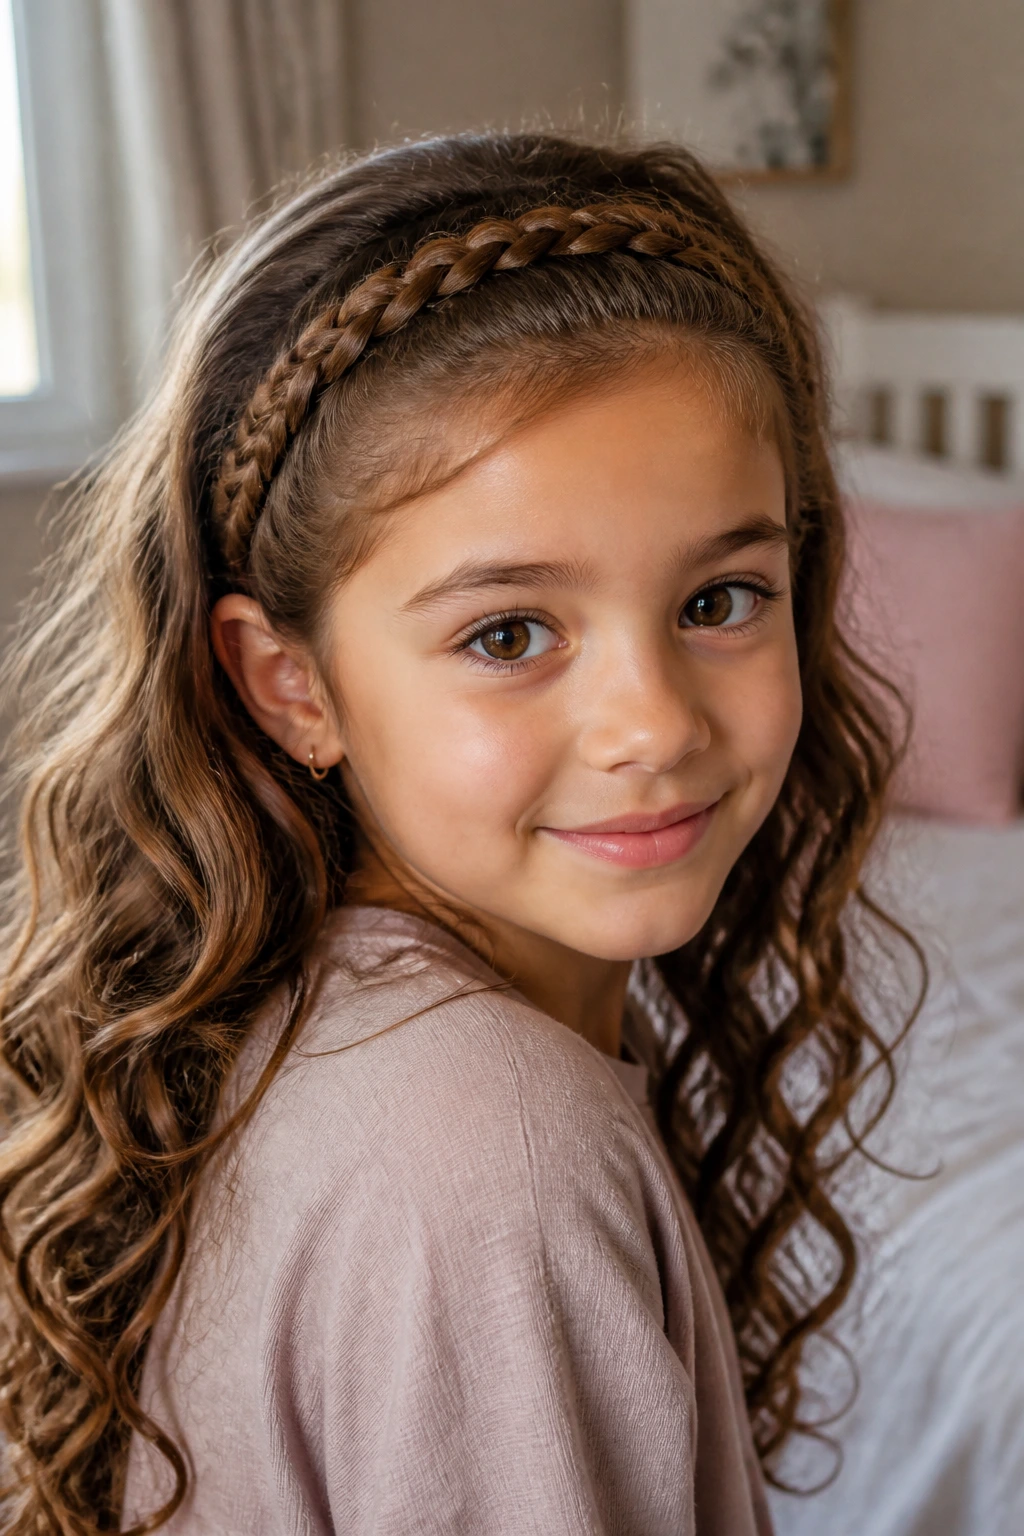
3. Half-Up French Braid Crown
Some kids want the hair down. Fair enough. Half-up French braid crown styles are the compromise I like most because they keep the front and sides under control while letting the length stay loose and wavy.
This braid starts near one temple, follows the hairline across the crown, and ends at the other side with a small tie or tucked pin. The lower hair stays free, which means you still get that wave movement at the ends. The braid itself frames the face and stops those front pieces from falling into the eyes the second the child leans forward.
Where it works best
- School pictures
- Birthday dinners
- Days when the child wants some hair down but hates strands in the face
The clean trick here is section size. Take enough hair to make the braid visible, but not so much that it drags down the front. If the hair is layered, keep a few tiny pins nearby to catch the short pieces behind the ear. Those short bits are usually the first ones to wriggle loose.
A half-up crown braid looks neat without feeling too done. That balance matters.
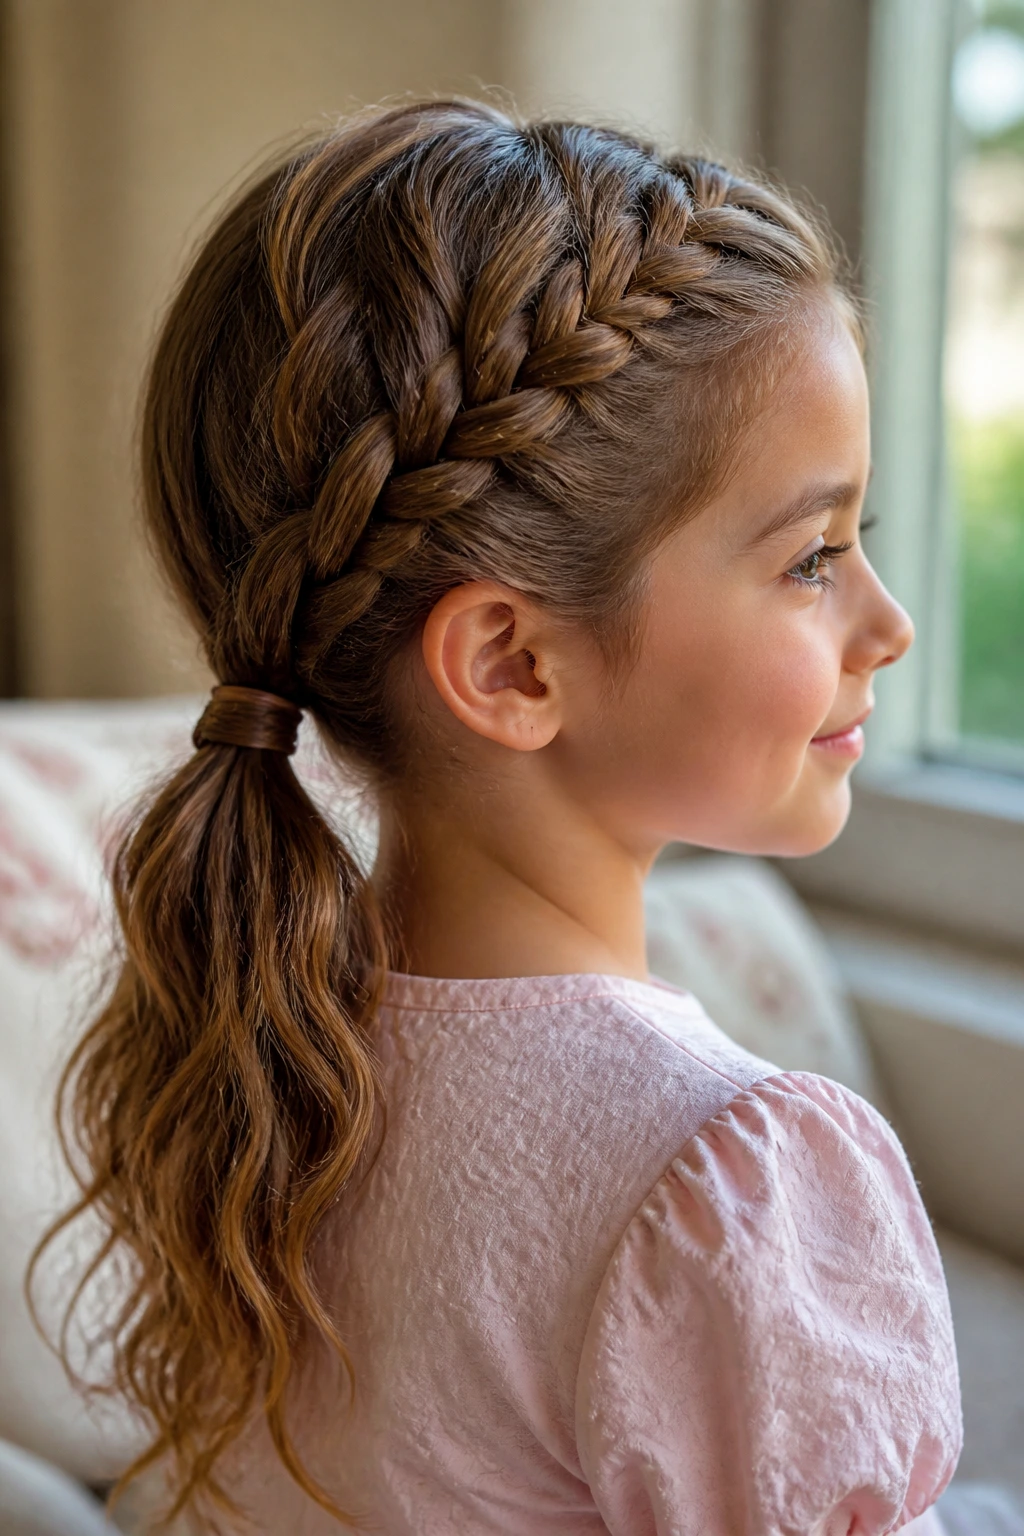
4. Side-Swept Braid into a Low Ponytail
Side braids are underrated. They solve an annoying problem fast: one side of the face always seems to collect the flyaways, and the side part often gets fuzzy before the rest of the hair does. Sweeping the braid diagonally across the head controls that whole area in one pass.
The braid begins near the front hairline on one side, then travels down toward the opposite nape before joining a low ponytail. On wavy hair, the diagonal line looks clean because the texture creates a little softness around the braid, instead of making it appear flat and severe. It’s a good style for kids who don’t want two braids or a heavy updo.
Nope, it is not lazy. It is efficient.
A low ponytail finish keeps the style from feeling fussy, and that matters when a child has to pull on a sweater, wear a backpack, or lie on the floor with a book. If you want the ponytail to look polished, wrap a small strand of hair around the elastic and pin it underneath. That tiny move changes the whole finish.
5. Rope Twist Pigtails
If you need neatness without a long braiding session, rope twists are the shortest route there. They are technically twists, not classic braids, but they belong in this collection because they hold the shape of wavy hair beautifully and look clean from across the room.
A rope twist uses two strands instead of three. Twist each strand in the same direction, then wrap them around each other in the opposite direction. That opposite motion is what gives the style its hold. On wavy hair, the twist catches the bends in the strand, so the shape stays defined with less fuss.
The nice part
Rope twists are faster than three-strand braids once your hands know the motion. They also work well when a child is impatient, because you can finish each side in a few minutes and tie it off with a small elastic.
They are strongest when the sections are even and the twist is firm at the root. If you start loose, the style can unravel at the top and look stringy by lunchtime. Keep the first inch snug, then let the twist relax a little toward the ends. That gives the braid room to move without falling apart.
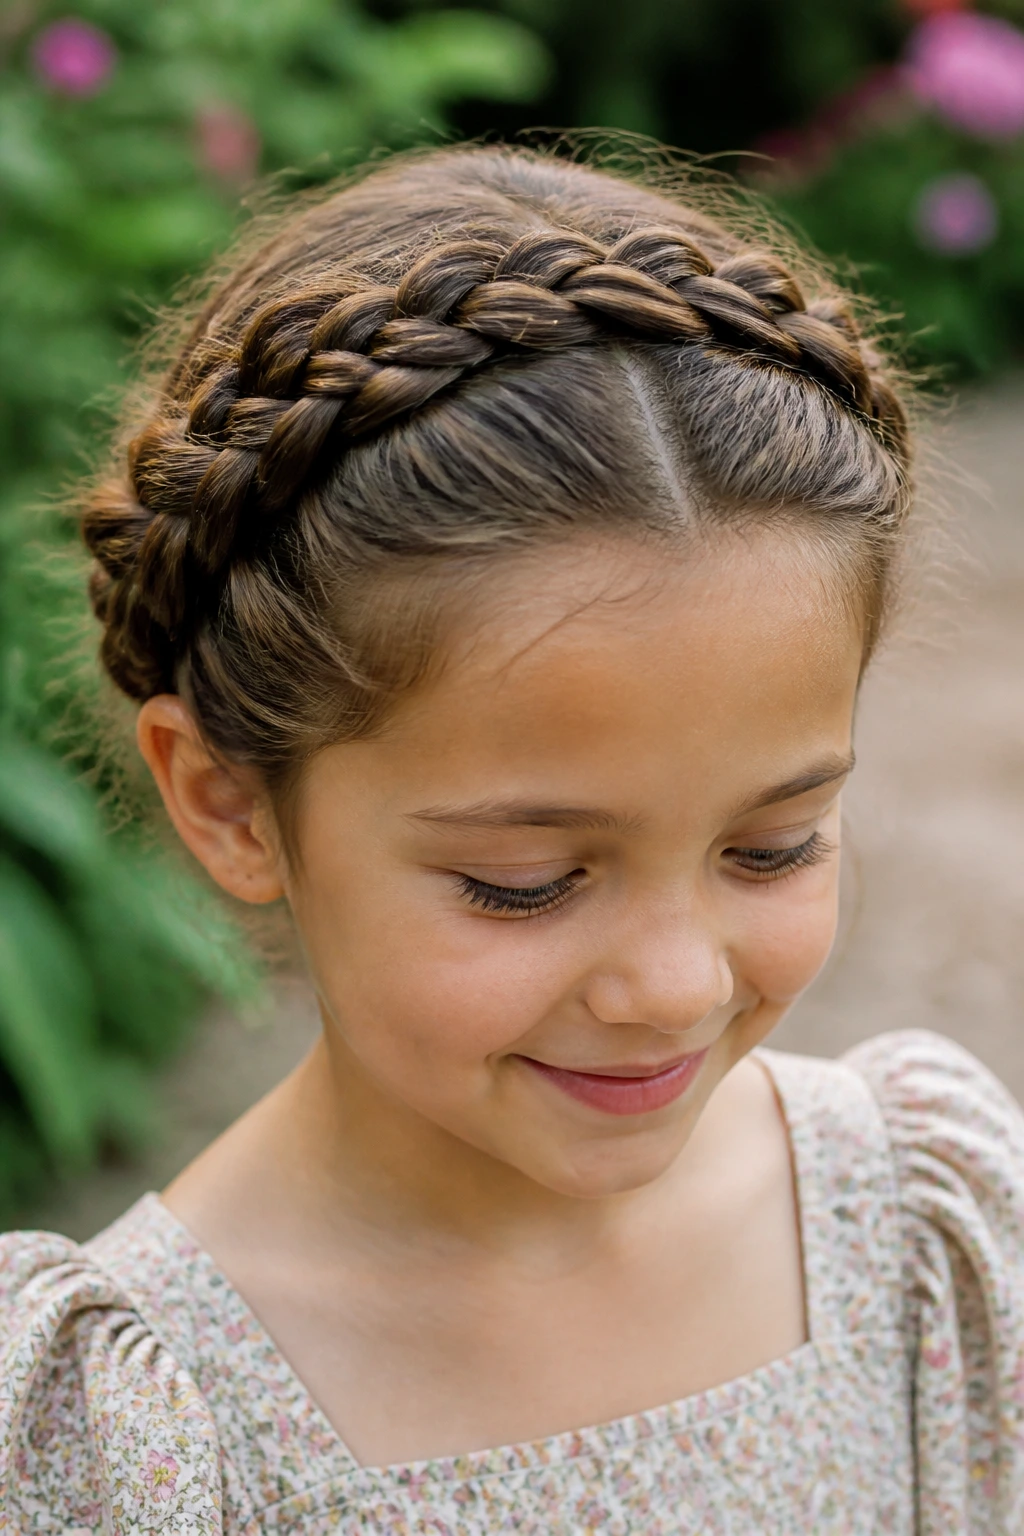
6. Lace Braid Headband
The front section is usually the trouble spot. It slips into the eyes, frizzes at the temples, and sticks up the minute a child takes off a hoodie. A lace braid headband handles that exact problem.
Unlike a full French braid, a lace braid only picks up hair from one side as it moves across the head. That makes it sit like a soft band over the crown or around the hairline. On wavy hair, the shape is tidy but not severe, and the loose lengths underneath still keep their wave.
What makes it useful
- Keeps bangs or grown-out fringe out of the face
- Works well with layers around the front
- Gives you a neat look without braiding the whole head
If the hair is a little slippery, grip the front pieces with a touch of styling cream before you begin. Do not overdo it. A pea-sized amount is plenty for the front section, and too much will make the braid slide. Pin the end behind the ear or just behind the crown, depending on where you want the band to stop.
This is one of those styles that looks more complicated than it is. That is part of the appeal.
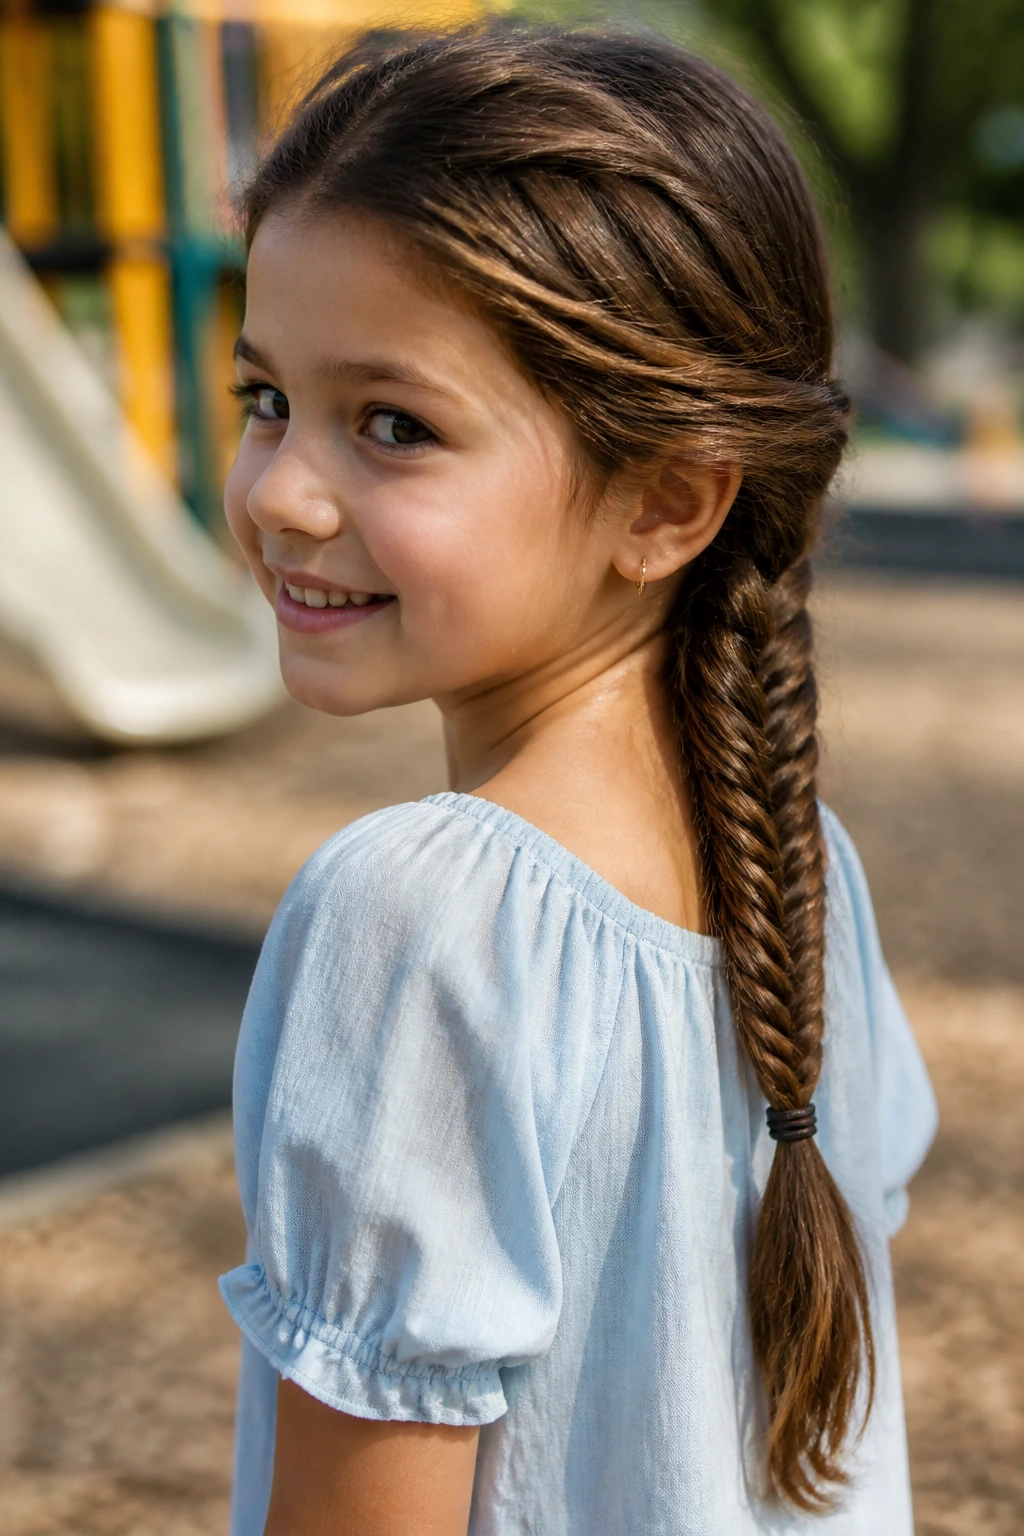
7. Fishtail Ponytail Braid
Fishtail braids look intricate because the braid uses tiny outer pieces instead of broad sections. On wavy hair, that tiny-section structure is a real advantage. It turns a loose ponytail into something neat and deliberate, and the waviness keeps the finished braid from looking too hard-edged.
Start with a low or mid ponytail so the whole style has a stable base. Then split the ponytail into two sections and move tiny pieces from the outside of each side into the opposite hand. Keep those pieces small. If you grab big sections, the braid stops looking like a fishtail and starts looking like a lumpy three-strand braid trying to escape.
The best fishtails on kids usually come from hair that is brushed smooth first and then handled gently. Wavy hair can get fuzzy if you keep pulling at it after the braid is finished, so stop once the shape is even. A soft elastic at the end and a quick finger-fluff of the braid body are enough.
This style is most useful on medium to long hair. On shorter hair, the braid ends too soon and loses the clean line that makes it work.
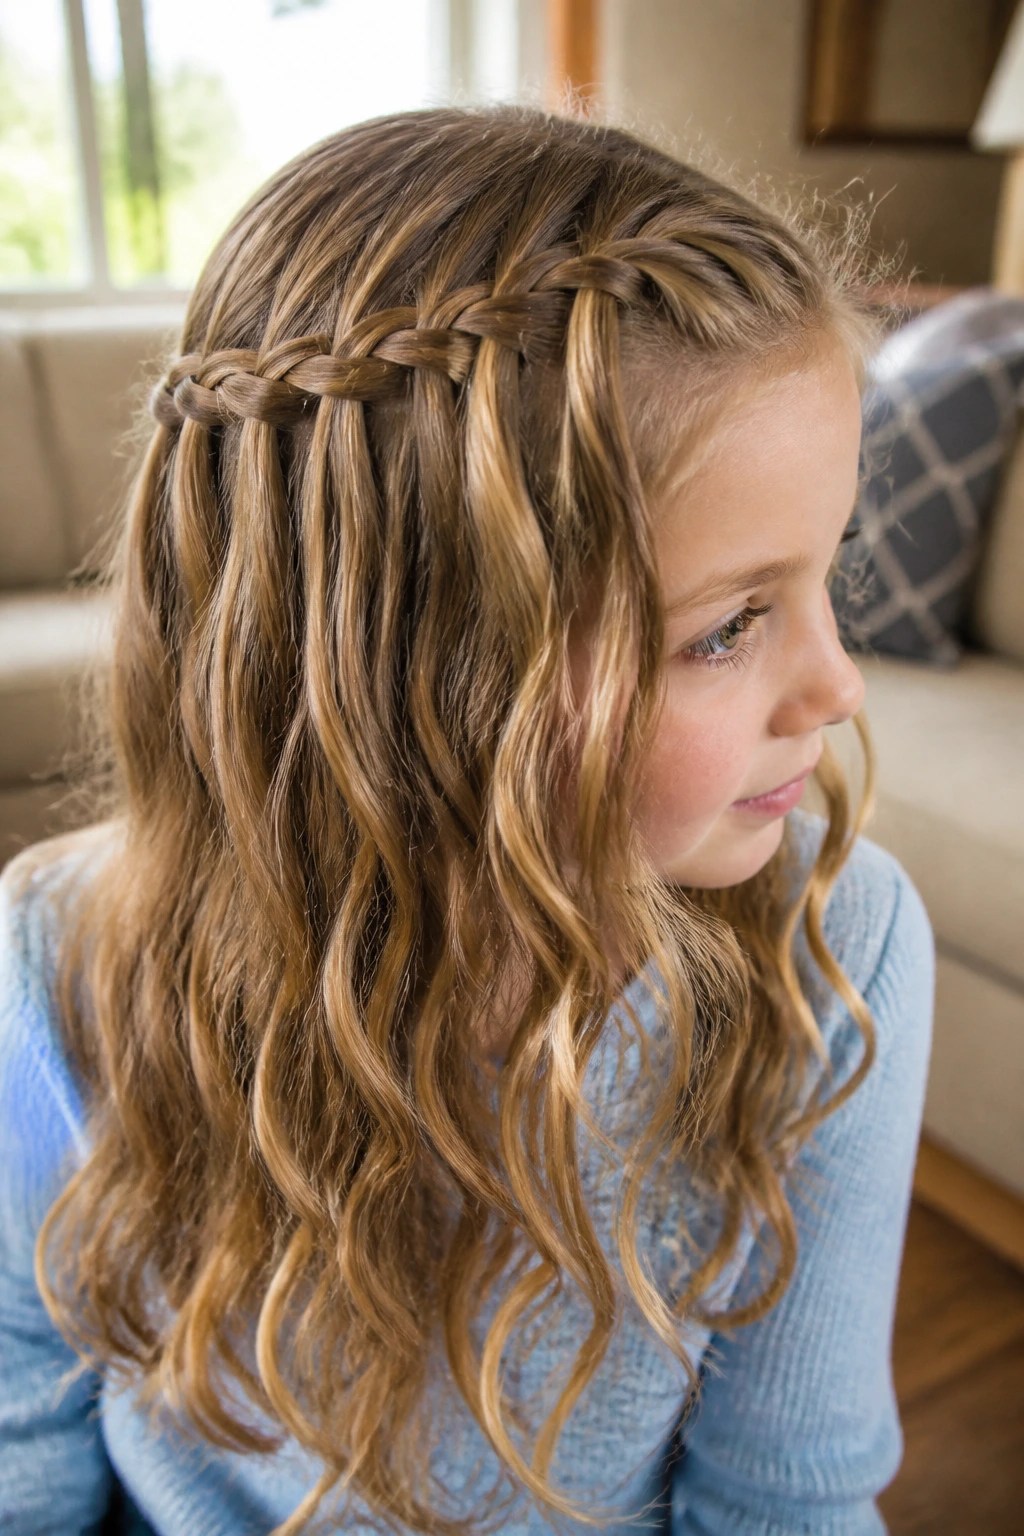
8. Waterfall Braid
The waterfall braid is the prettiest style in the group, and it knows it. It lets some hair drop through the braid as you go, which means the loose waves underneath become part of the design instead of something you’re trying to hide.
That falling-strand effect looks especially nice on wavy hair because the released pieces keep their shape. Straight hair can look a little plain here. Wavy hair gives you movement, and movement is the point.
It is not the best pick for rough play. Hair that is going to get yanked through a hoodie or twisted under a helmet will eventually pull loose from the cascade. Use this one for dinners, concerts, school events, or any day that involves sitting still longer than usual.
A few hidden pins make a big difference. Anchor the braid behind the ear and again near the back if the hair is layered. Otherwise the braid can droop. And if the child likes touching their hair, maybe skip this style altogether. Waterfall braids do not love being fondled all afternoon.
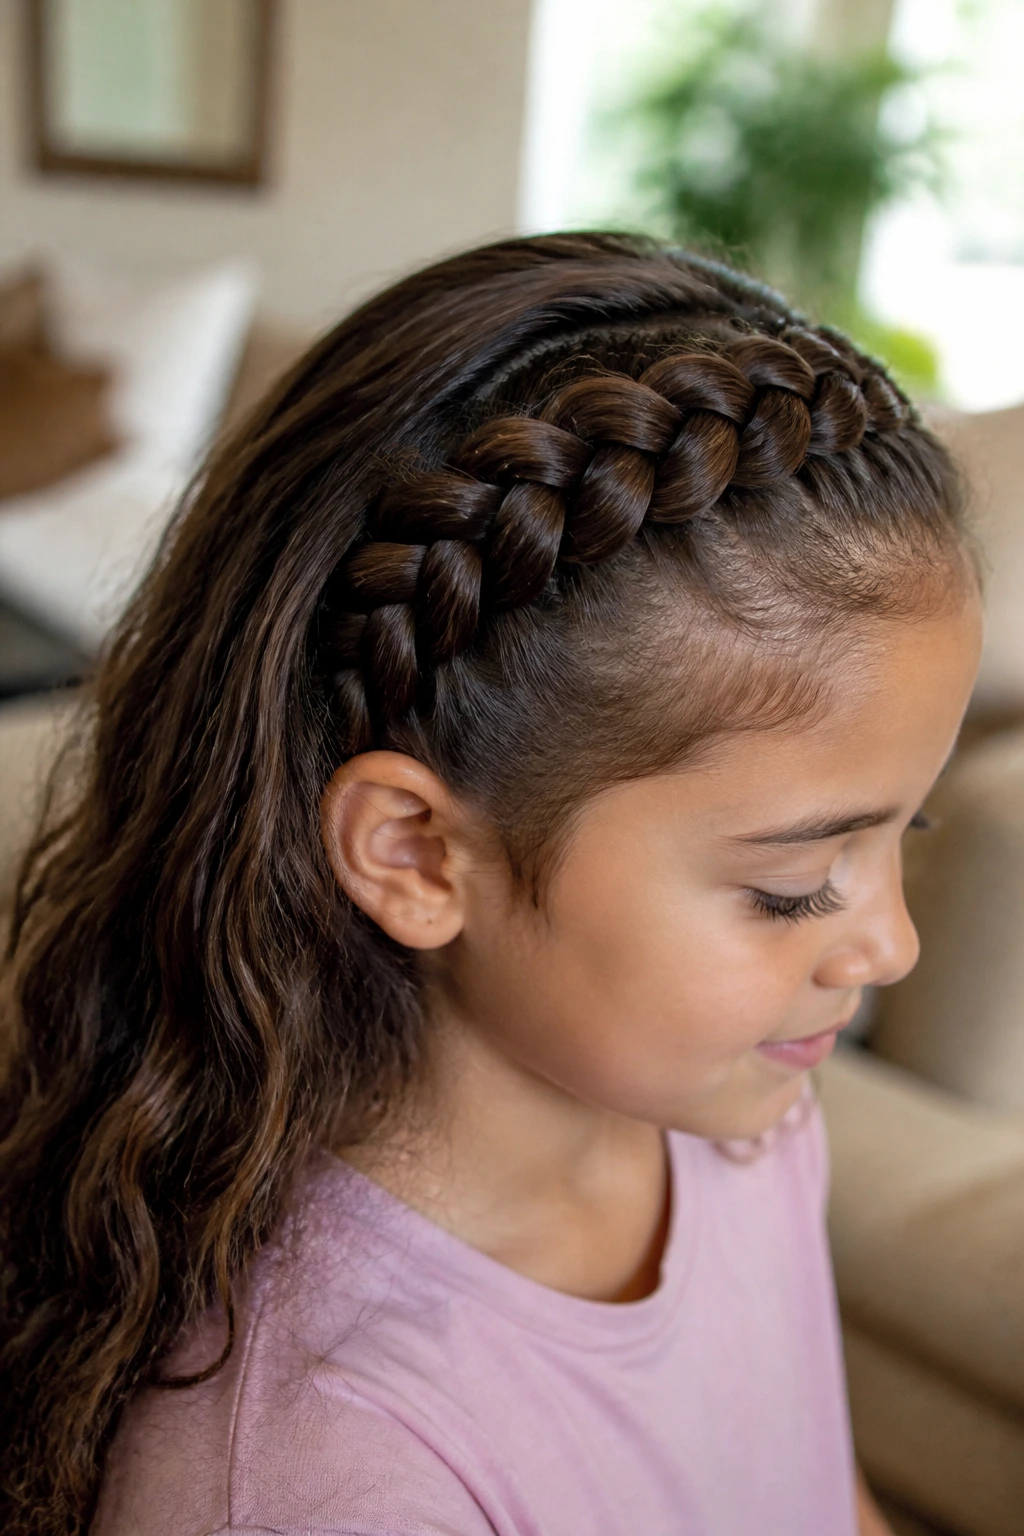
9. Four-Strand Braids
Three strands are standard. Four strands give you more width, more density, and a braid that feels firmer against thick wavy hair. If a regular braid looks a little skimpy on your child’s hair, a four-strand version fixes that fast.
The pattern takes a little more attention at first because one extra strand changes the rhythm of your hands. Still, the payoff is worth it. The braid looks richer, and the wavy texture makes the pattern read clearly instead of disappearing into itself.
Why I like it for thicker waves
It handles bulk without puffing out at the sides. It holds the shape of longer layers better than a basic braid. It looks polished in pigtails or in one braid down the back.
Take your time on the first few passes. Once the pattern is set, the braid settles into a nice rope-like line. If the hair is very layered, braid a little tighter at the start so the shorter pieces don’t drift out. Then loosen the tension slightly as you move down. That small adjustment keeps the top neat while letting the ends stay soft.
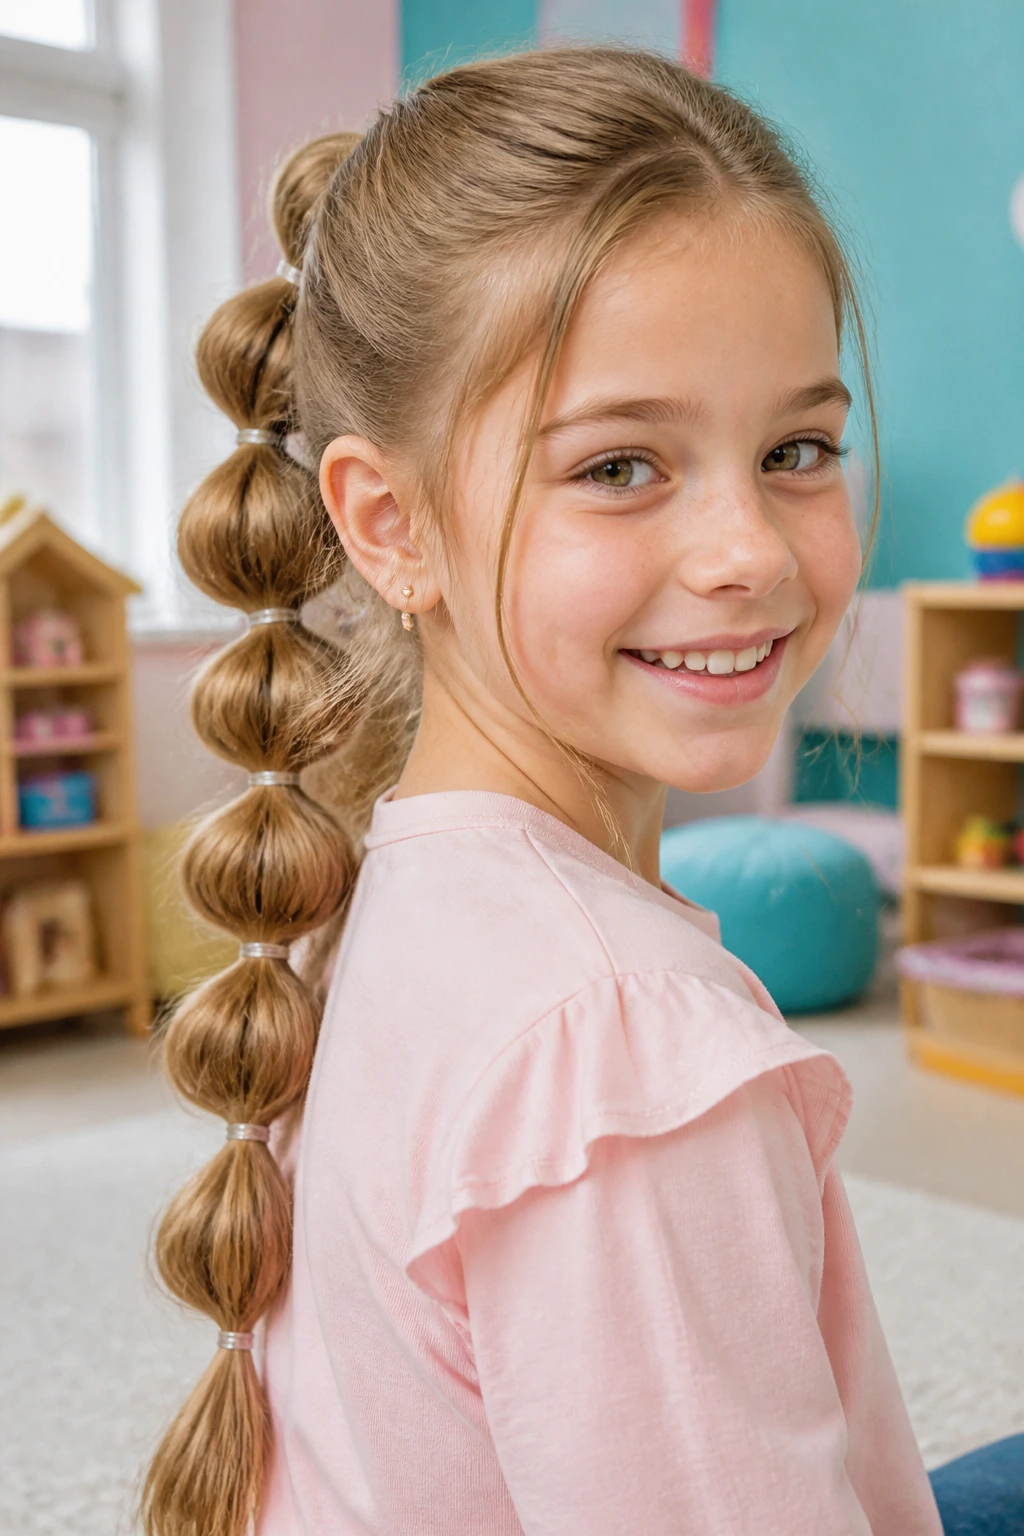
10. Pull-Through Bubble Braid
Not technically a braid. Still gets called one all the time, because it has the same “woven” feel and holds like a champ. On a child who will not sit still for long, the pull-through bubble braid is a sanity saver.
You build it from ponytails and small elastics placed down the length of the hair every inch or so. Then you split and puff each section to make the “bubbles.” Wavy hair gives those bubbles a softer outline than straight hair does, which is part of why the style looks so full.
The neat trick here is spacing. Put the elastics evenly, or the bubbles will look uneven and the whole style starts to wobble visually. If you want the braid to look tighter, keep the bubbles smaller and the elastics closer together. If you want a more playful shape, use bigger sections and fluff them out more.
This style is good for active days because it stays put and doesn’t rely on tight braiding at the scalp. That makes it a nice option when a child’s head gets sore from regular braids.
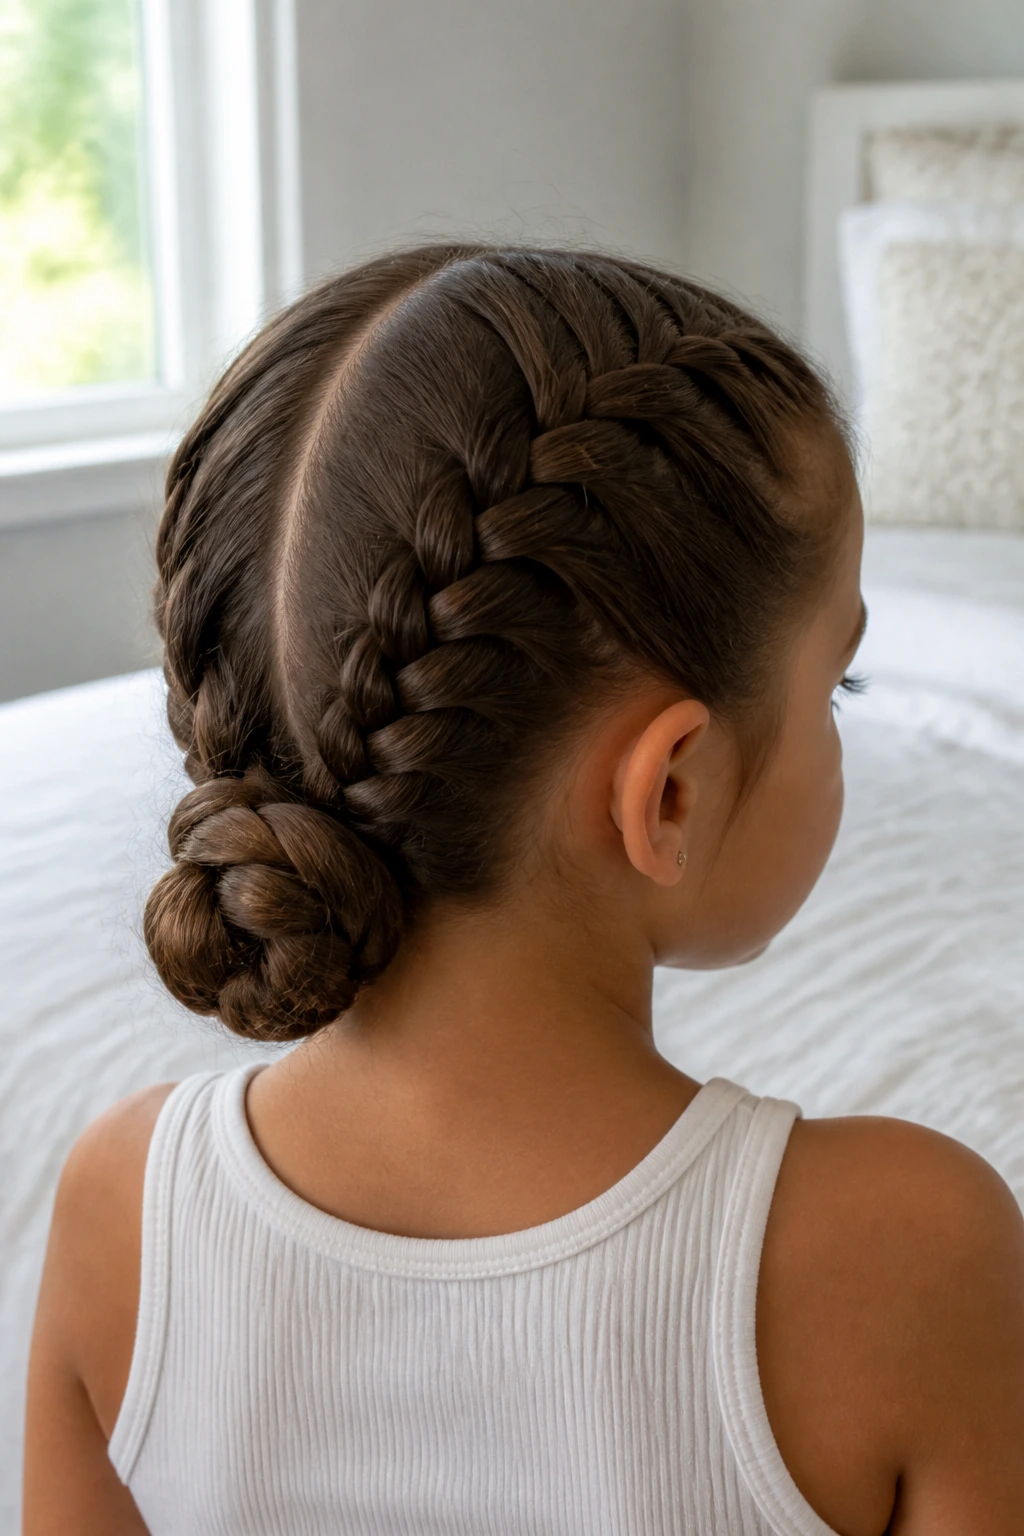
11. Braided Bun with a Center Part
A braided bun is what you pick when the neck needs to stay cool and the hair needs to stay out of the way. Center part the hair, braid each side to the nape, then twist or coil the ends into a low bun. It is tidy, secure, and a little more formal than two loose braids.
Wavy hair can make the bun look fuller without needing extra teasing. That is useful because you do not want to rough up the hair just to get volume. The braid brings structure; the bun gives you control.
Best for
- Recitals
- Uniform days
- Hot playground afternoons
- Kids who hate hair brushing their collars
Keep the bun low and anchored with pins that match the hair color. If the bun sits too high, it can pull at the scalp and slide around during the day. A low bun stays calmer. It also works better under a hood or jacket collar, which is one of those boring practical details that matters more than photo-ready styling.
The style stays neat longest when the braid ends are tucked completely under the bun instead of left poking out. Those little tails are usually the part that frays first.
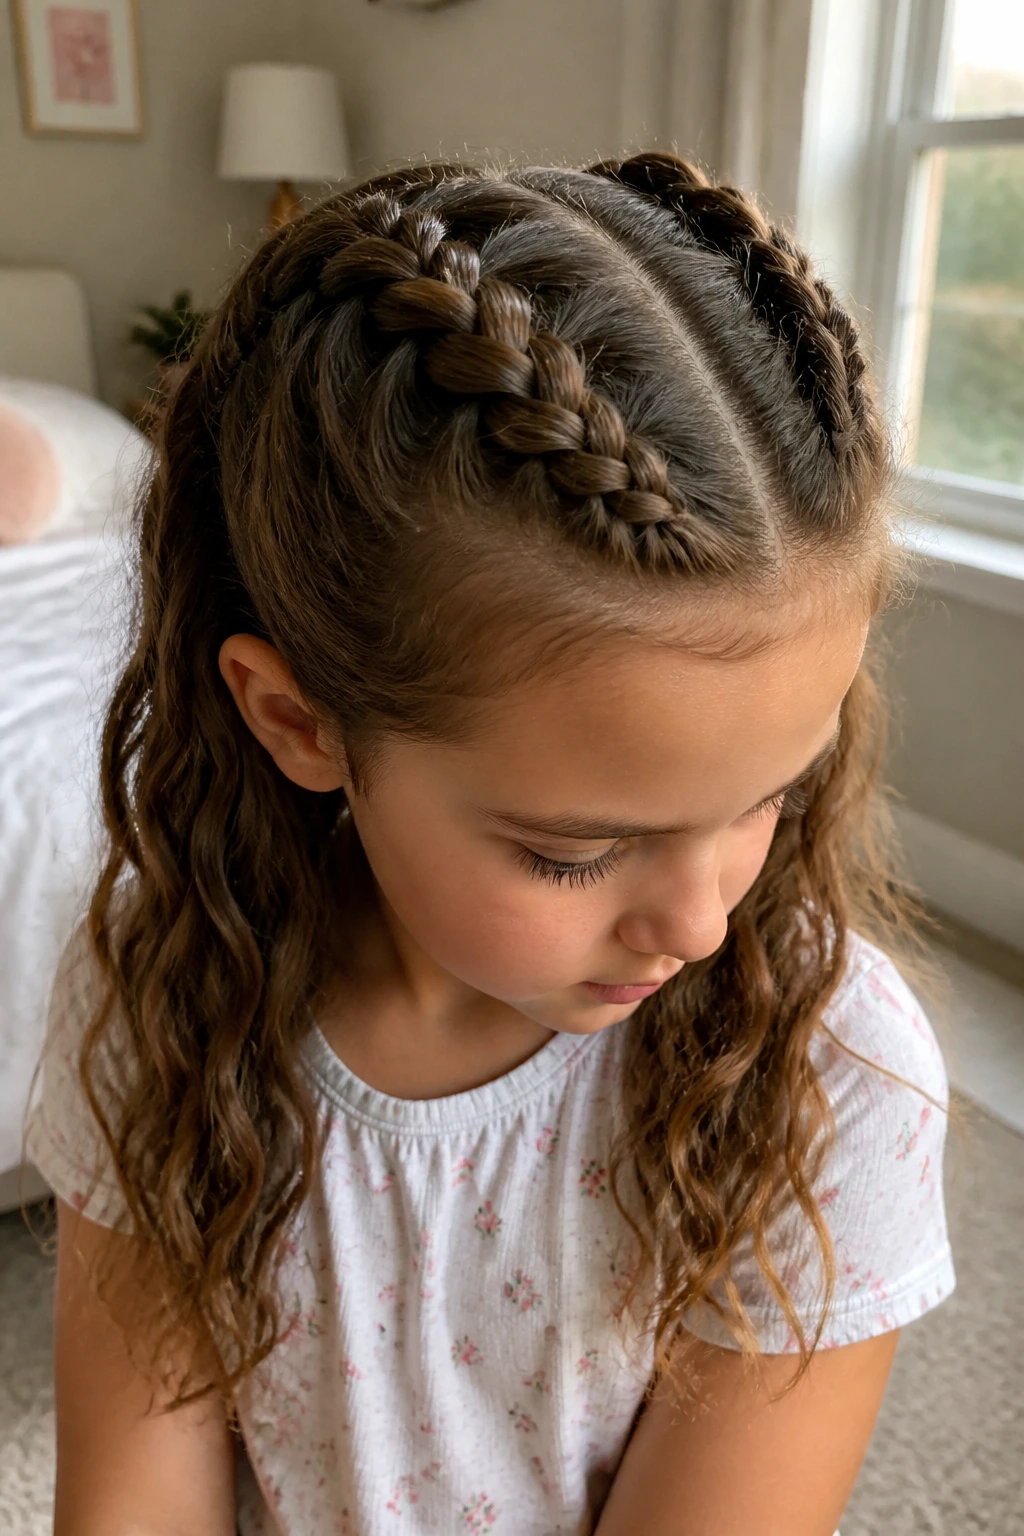
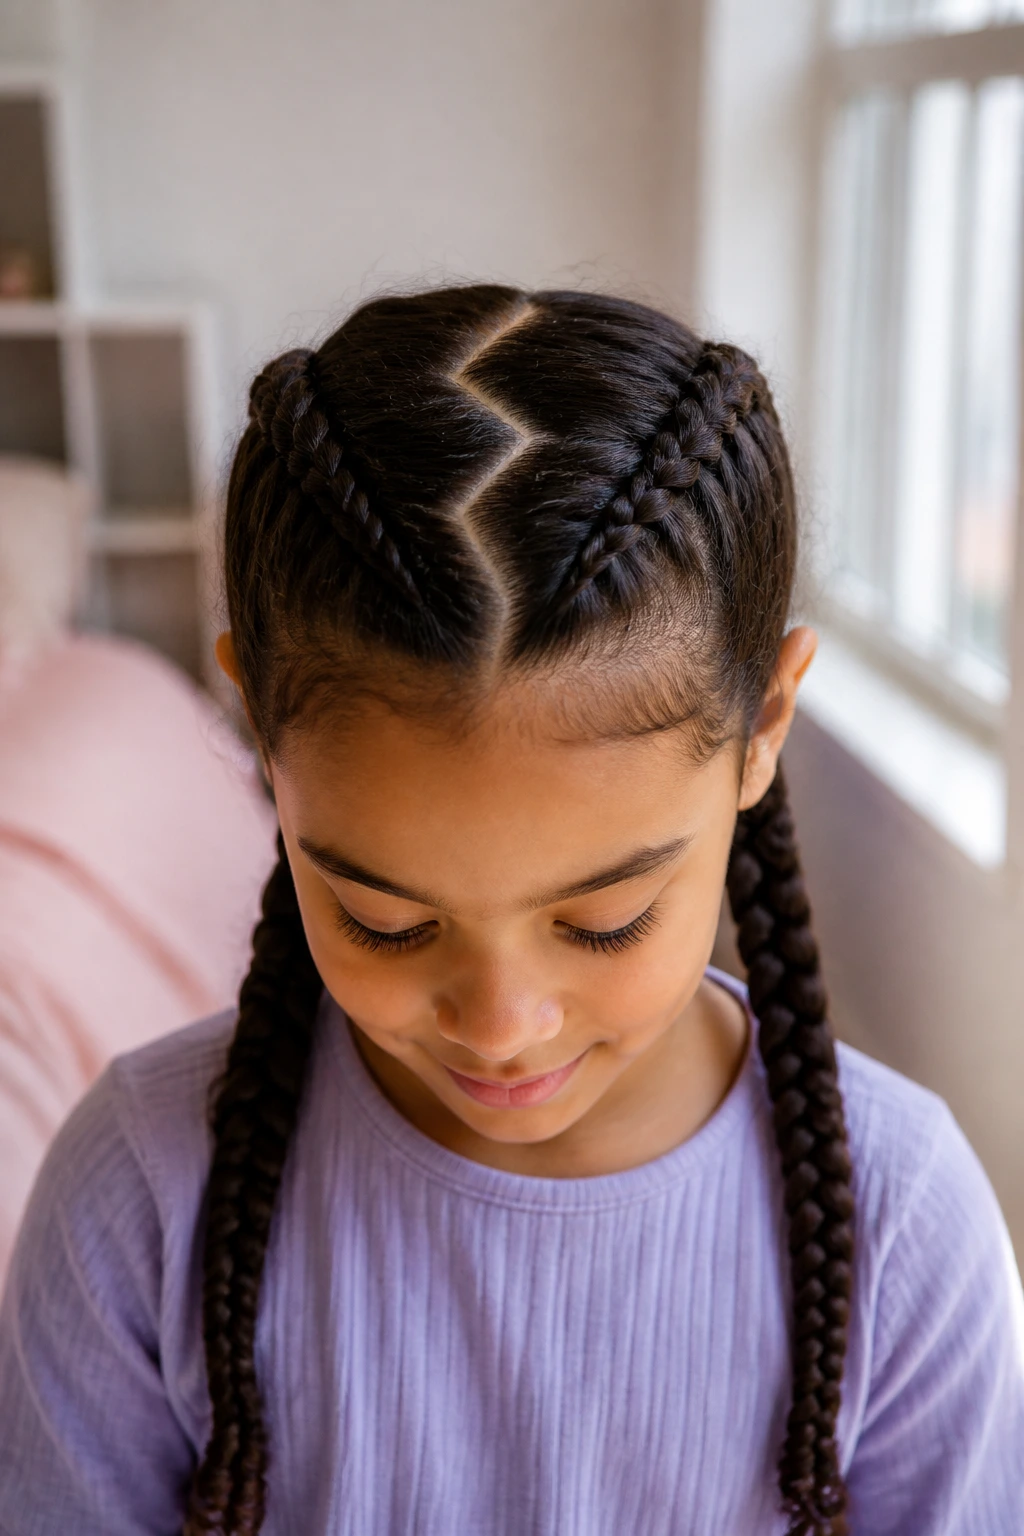
12. Zigzag Part Twin Braids
The braid itself is familiar. The part is the fun part. A zigzag part turns a plain twin-braid style into something sharper and more deliberate, and on wavy hair the angles give the whole look more character.
Use the tip of a rat-tail comb to make a shallow zigzag from the forehead back toward the crown. Do not overthink the pattern. The part does not need to look geometric to the millimeter. It just needs to break the straight line enough that the style feels playful.
That small change can make a simple braid feel special without adding real morning work. The twin braids still do the practical job of keeping the hair controlled, but the zigzag says somebody took a minute with the comb.
This style is especially nice for kids who like neat hair but get bored fast. The pattern is visible in a mirror, and kids notice that. A style that feels a little fun is easier to get through on a school morning.
13. Braided Ponytail Wrap
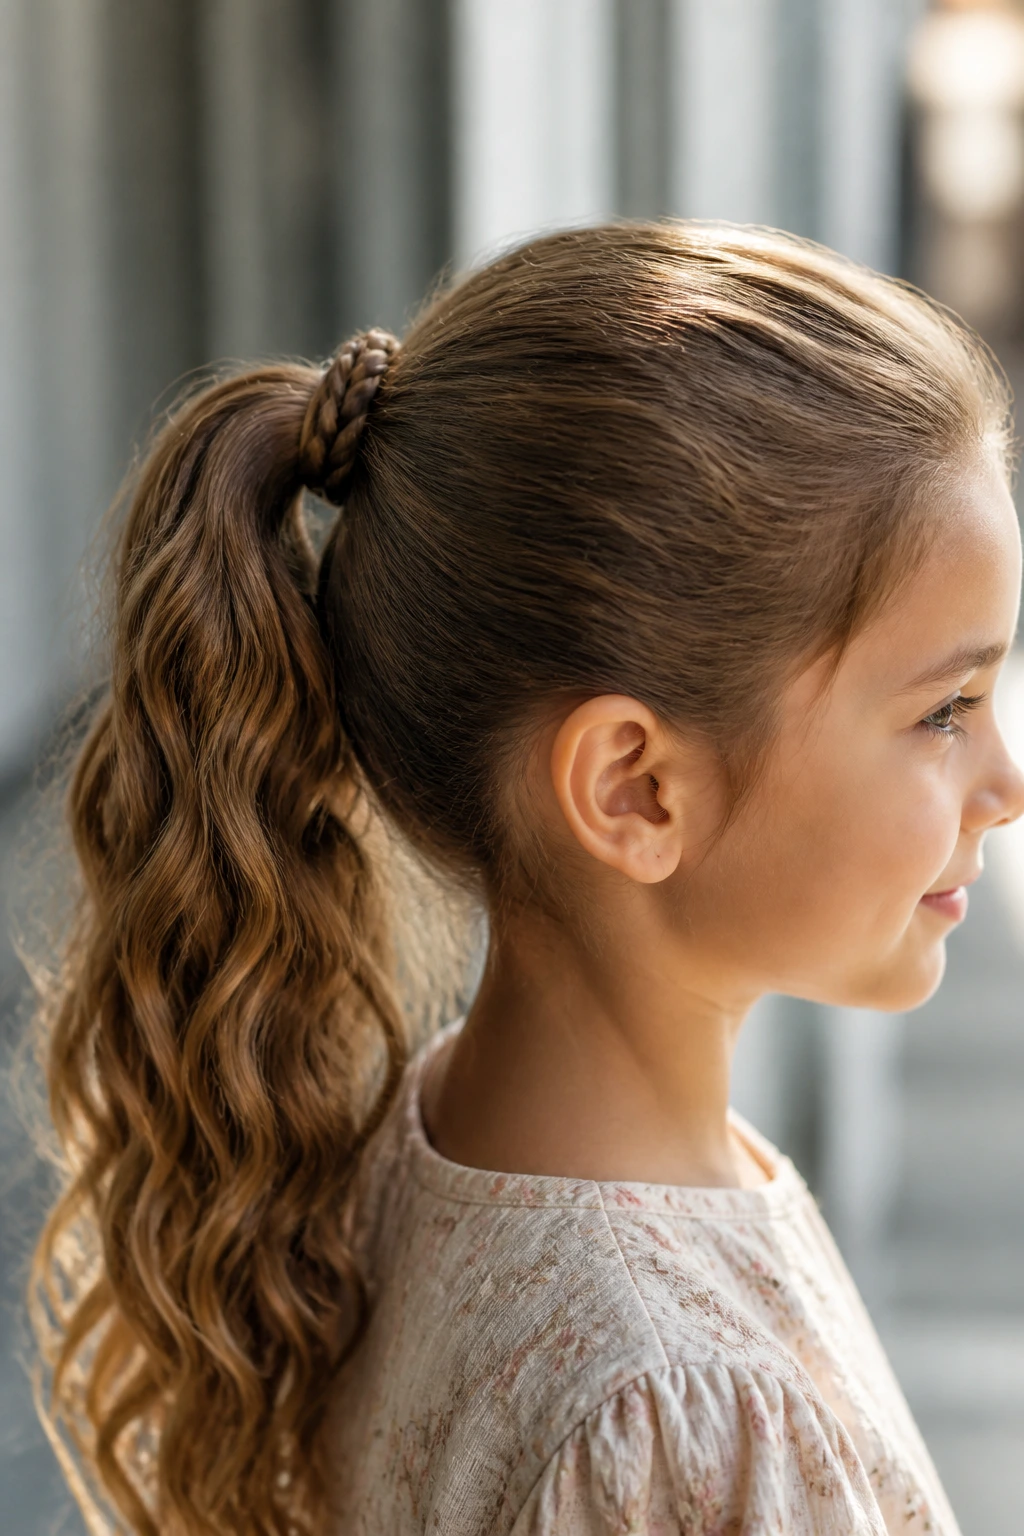
Sometimes the cleanest style is the one that hides the elastic. A braided ponytail wrap does exactly that. You gather the hair into a ponytail, braid a small section, then wrap that braid around the base to cover the tie.
It is a tiny detail, but it changes the whole finish. The wrapped braid gives the ponytail a polished base, and wavy hair in the ponytail keeps the style soft instead of stiff. It looks neat without forcing the whole head into an elaborate braid pattern.
This is a good choice when time is short. You can do the ponytail first, then use the leftover front section or a small piece from underneath to make the wrap. Secure it with a pin tucked beneath the pony so the end disappears.
If the hair is fine, use a thin braid for the wrap. If it is thick, you may need a slightly wider section so the wrap covers the elastic fully. Either way, it’s a small move with a big visual payoff.
14. Milkmaid Braids
Milkmaid braids are for longer hair, full stop. If the hair can be braided on both sides and wrapped over the head, the style gives you a clean, crown-like finish that keeps everything off the neck and face.
The look is soft, but the hold is serious. The braids cross over the top of the head and pin down at the opposite sides, which means the weight is spread across the scalp instead of sitting in one place. That helps on wavy hair, especially when the ends are thick or layered.
Use a few pins, not one giant heroic pin. Small pins crossed in an X hold better and feel less obvious to the child. If the hair at the front tends to frizz, smooth it before you wrap the braids and let the soft wave at the back stay natural.
This style is prettier than it is difficult, though it does ask for enough length to make the wrap happen without pulling. If the hair is too short, the braids will fight you and the crown will sit awkwardly. Long enough matters here.
15. Mohawk Dutch Braid
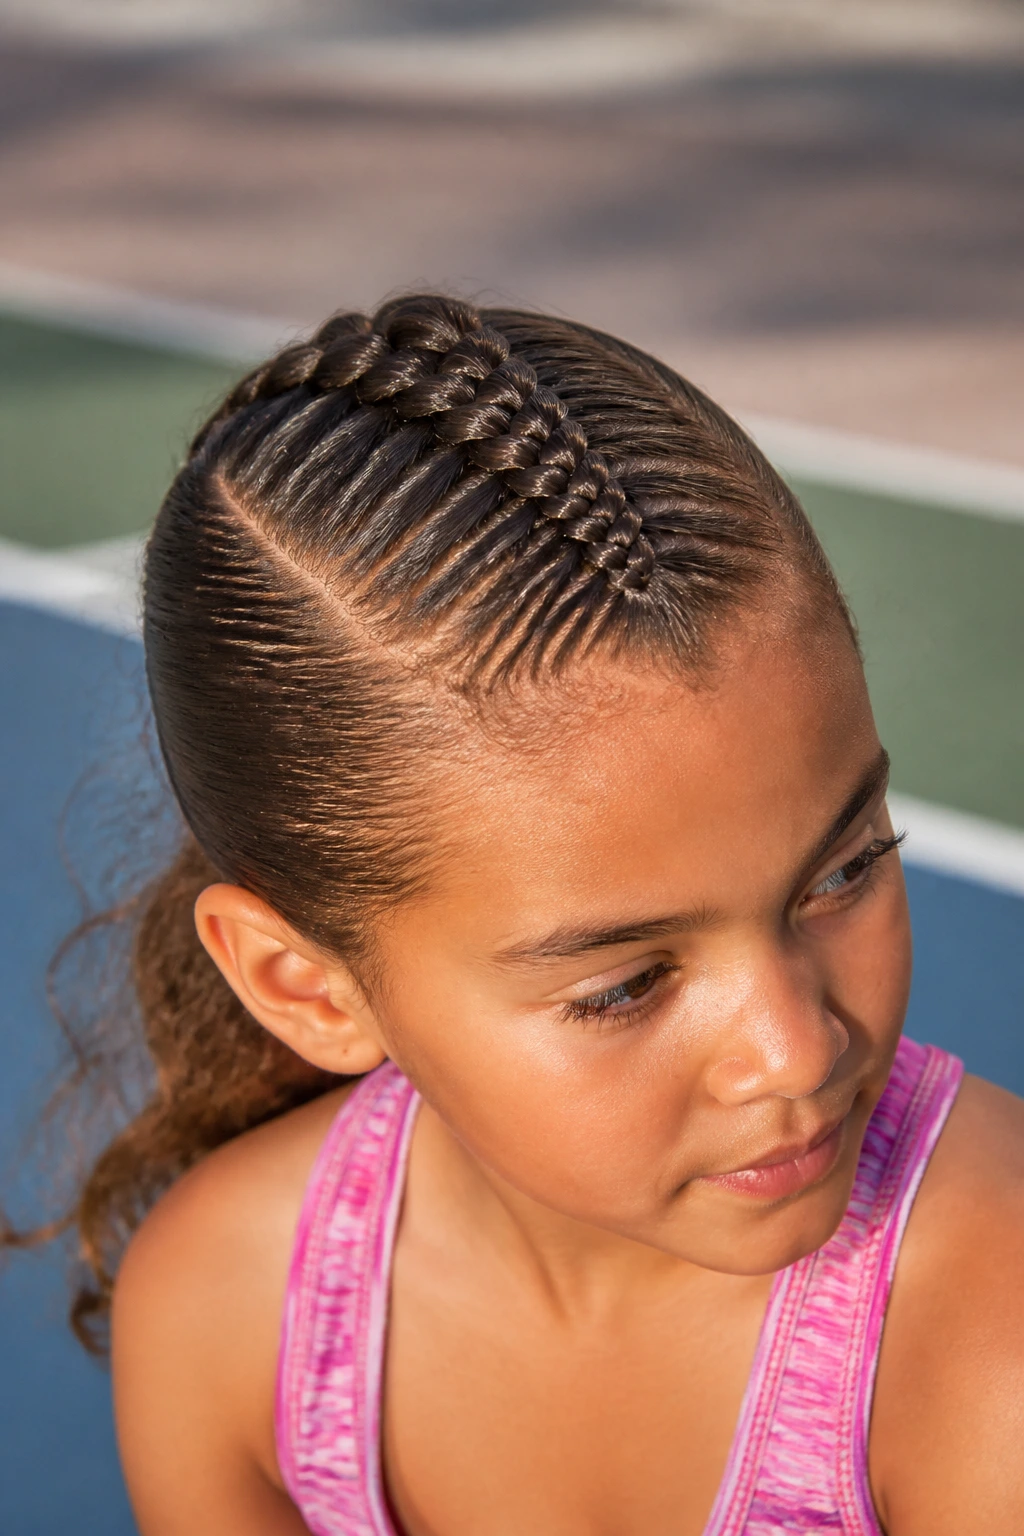
Some kids want neat. Some want neat with attitude. The Mohawk Dutch braid gives you the second one.
You braid a thick Dutch braid down the center of the head while the sides stay smoothed back or gathered close to the scalp. On wavy hair, that center ridge looks bold and tidy at the same time. It is a useful style for active kids because the sides stay controlled and the center braid keeps the hair from falling into the face.
What makes it different
The braid reads as one strong line, which helps with thick or stubborn waves. It works well under hats or sports headbands. It can end in a ponytail, a bun, or a tucked braid at the nape.
The key is not letting the side sections puff out. Brush them flat with a little water or styling gel before you begin, then keep the center braid even all the way back. If the braid starts drifting to one side, the whole mohawk effect gets lost.
This is one of the few styles here that can look a little cool without trying too hard. Kids notice that. So do adults.
16. Accent Microbraids into a Ponytail
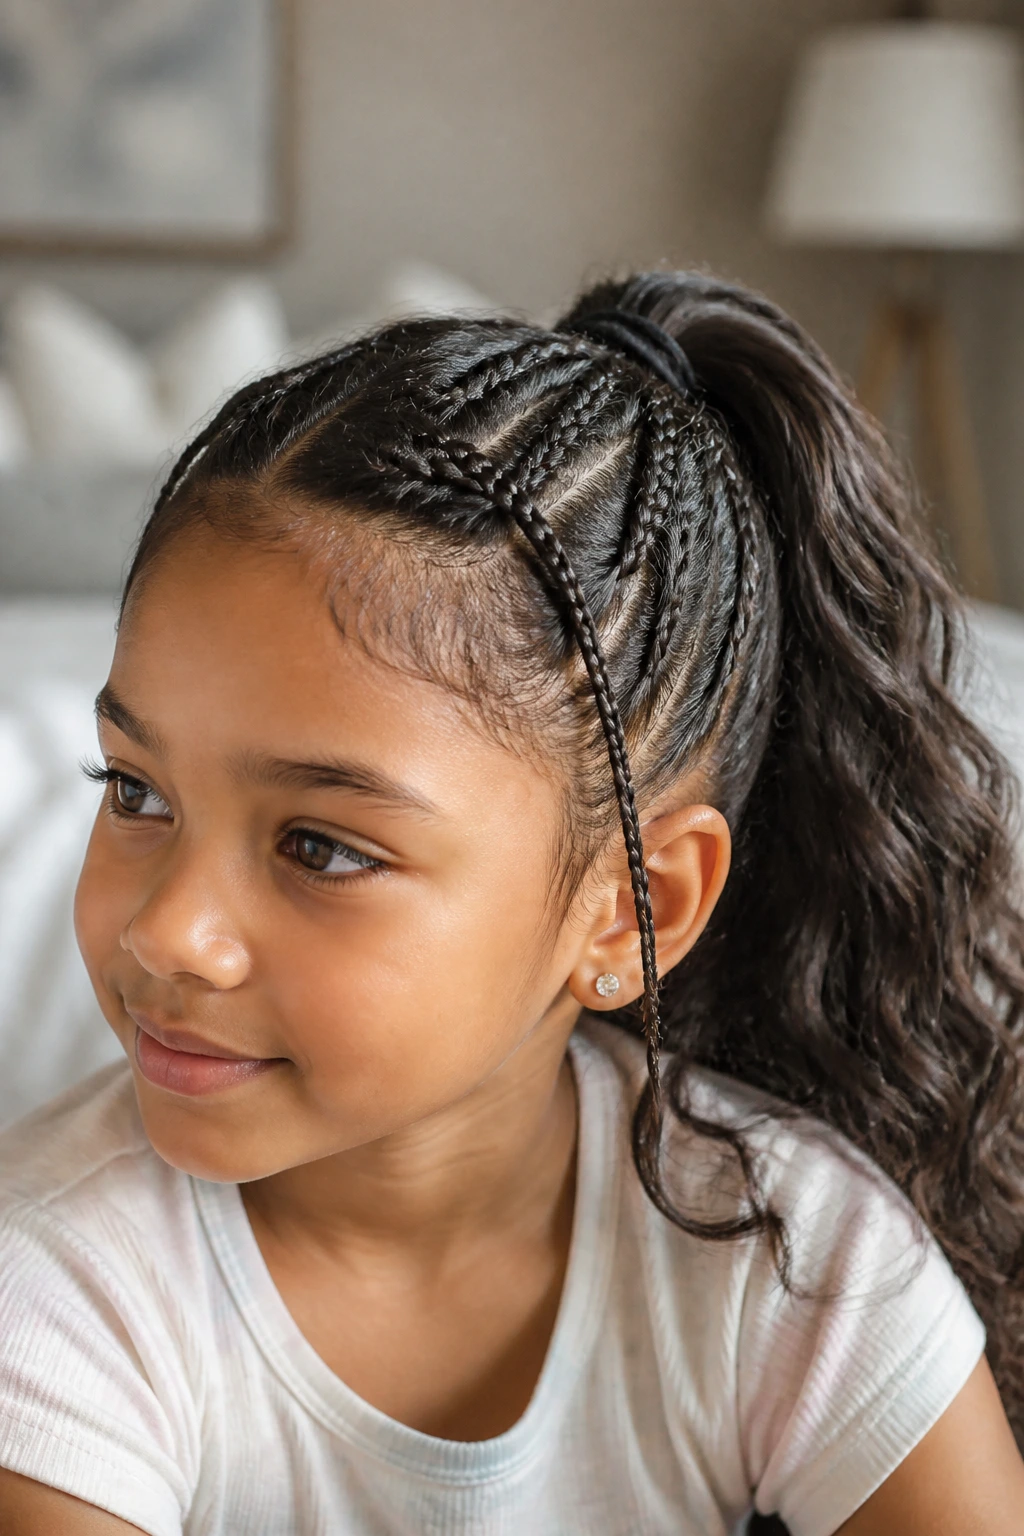
Accent microbraids are the low-commitment detail that makes a regular ponytail look planned. You take two, three, or four tiny sections near the temples or just above the ears, braid them tightly, and gather the rest into a ponytail.
That works beautifully on wavy hair because the bigger ponytail keeps its shape while the tiny braids add structure up front. It’s a clean way to deal with layers, since shorter front pieces can be braided and pinned into the pony instead of being left loose to frizz out.
This style is good when the child likes plain hair most days but still wants something extra. The detail is there if someone looks closely, but it does not take over the whole head. Nice balance.
Best trick: braid the microbraids first, then smooth the larger section into the ponytail. If you do the ponytail first, the smaller braids tend to get swallowed up or tugged out when you gather everything together. Keep the ties tiny. Big elastics make the detail look clumsy.
17. Ribbon-Woven Braids
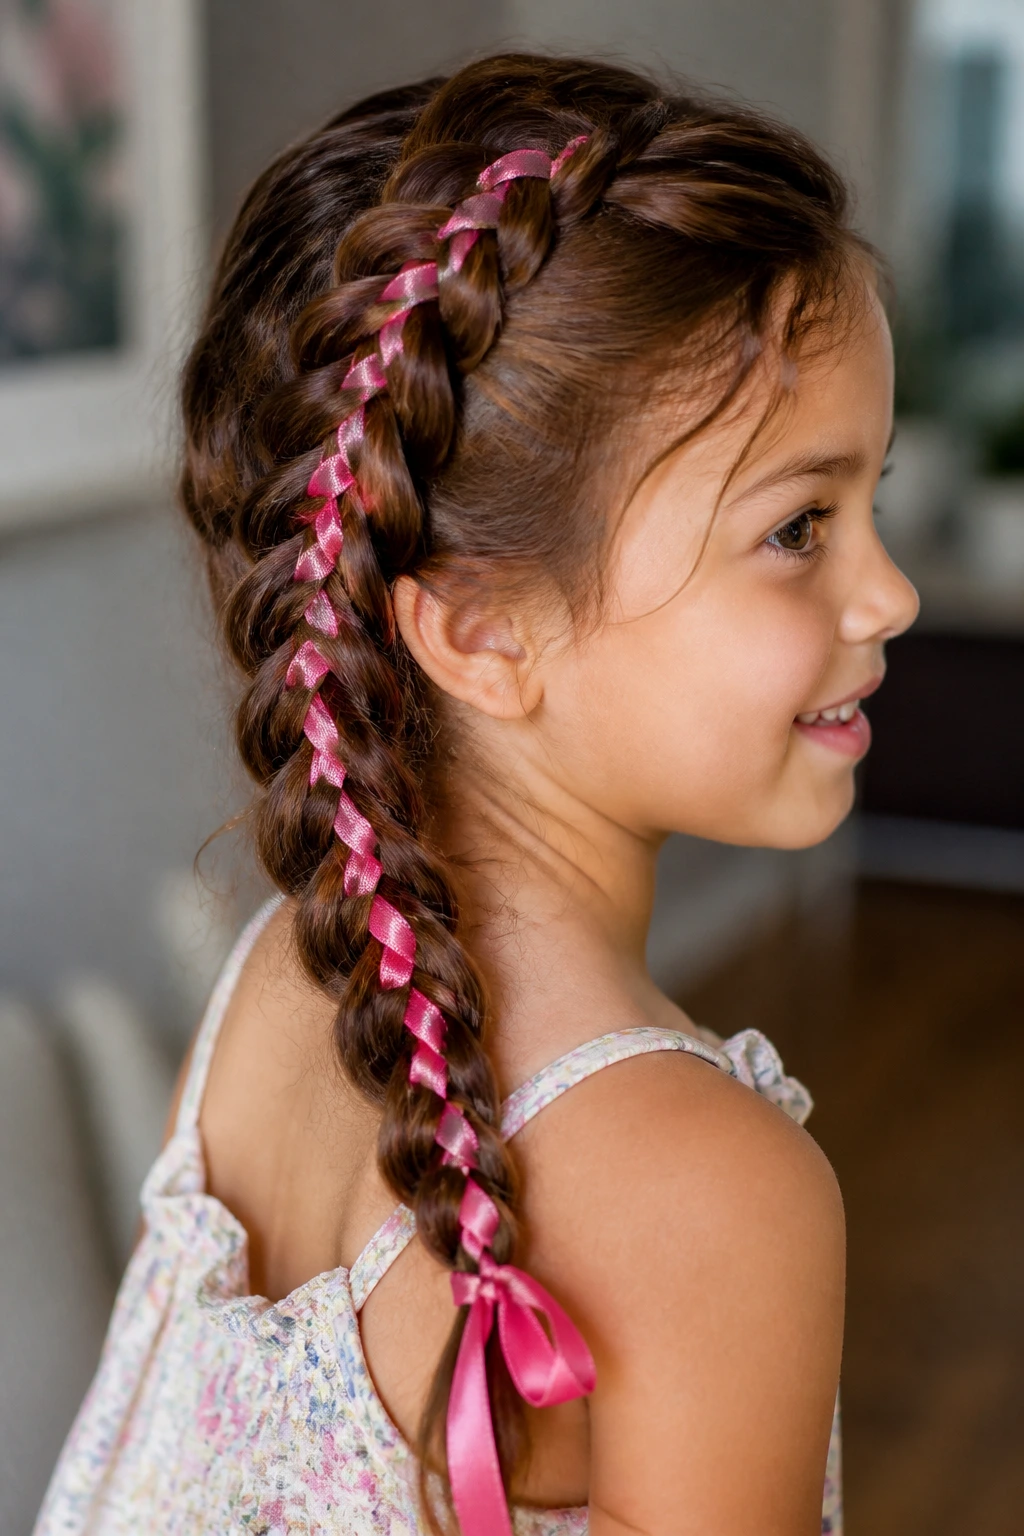
Ribbon changes the mood fast. A plain braid becomes something brighter, softer, or a little more formal depending on the color and width of the ribbon you thread through it.
On wavy hair, ribbon-woven braids look especially good because the braid body keeps a soft shape and the ribbon adds a clear line through it. Use grosgrain for more grip or satin for a smoother, dressier finish. If the hair is thick, choose a ribbon that is narrow enough to move with the braid instead of sitting on top of it like a strip of paper.
The cleanest way to do this is with a simple three-strand braid, then weave the ribbon in as you braid or thread it through at the start and carry it down. Match the ribbon to an outfit, a school color, or just a shade the kid actually likes. That last part matters. If they hate the ribbon, the style will not survive the car ride.
This is a good one for birthdays, holidays, and picture days. It still counts as a braid, but it feels dressed up.
18. Braided Crown into a Low Chignon
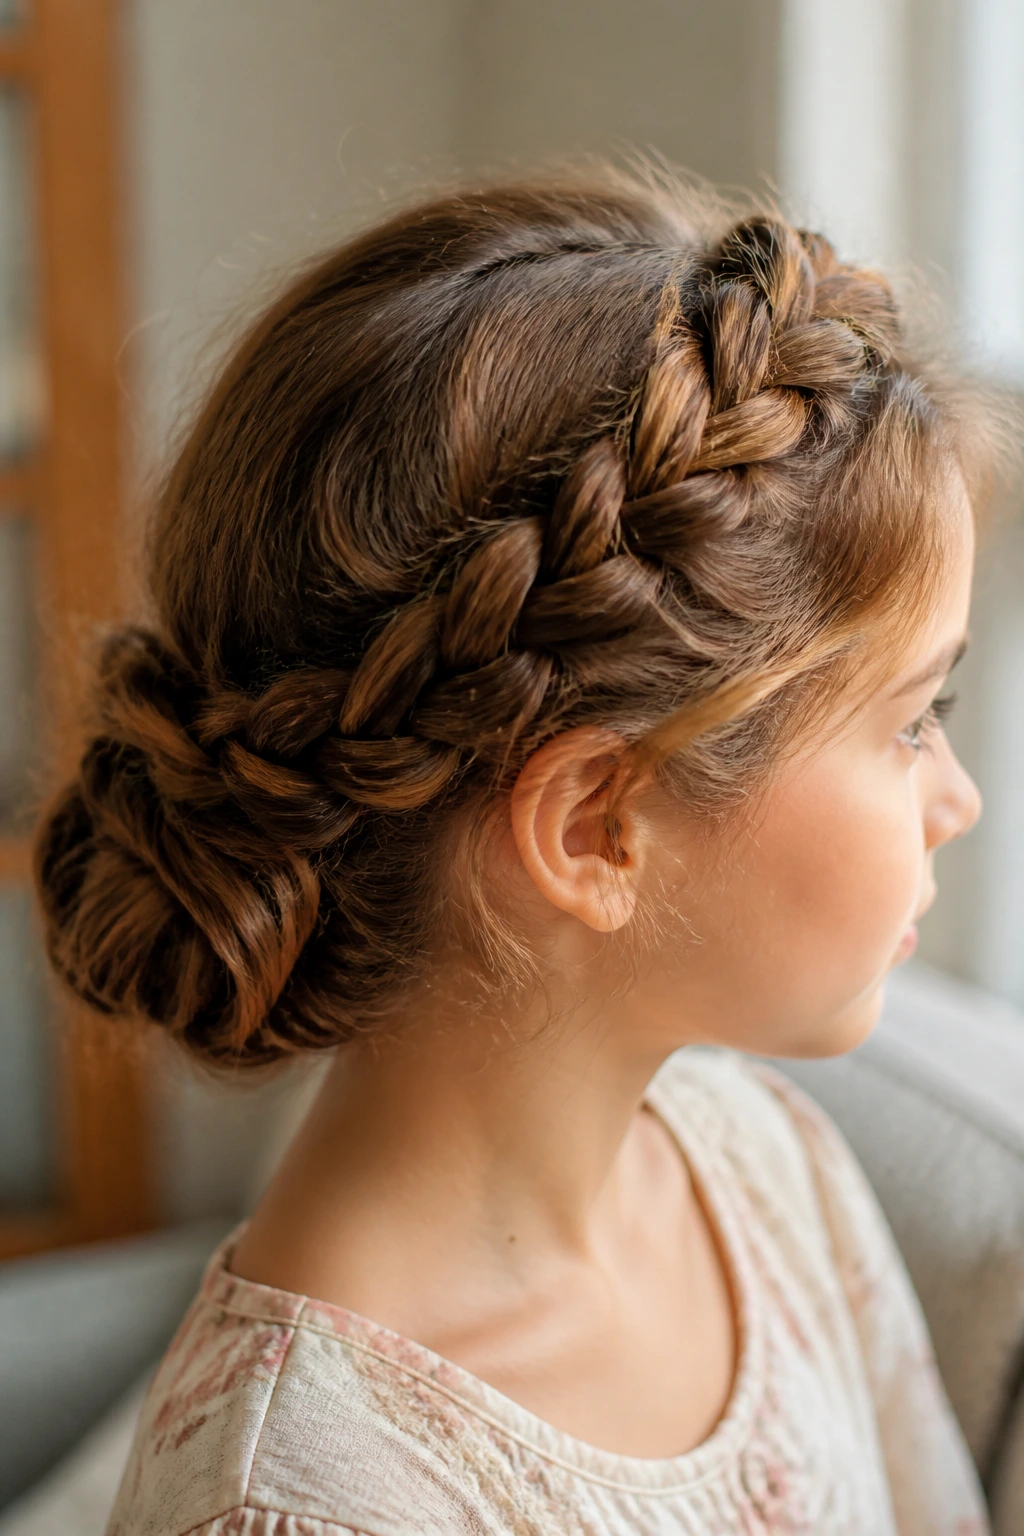
For a dressier day, this is the style that looks thought-out even when the morning was chaotic. A braided crown starts around the head, then folds into a low chignon at the nape. The braid gives you the clean line; the chignon hides the ends and keeps the shape compact.
Wavy hair works well here because the crown has texture without needing tons of teasing. The braid can be slightly loose so it doesn’t pull at the scalp, while the chignon stays neat and tucked. If the hair is long enough, this style looks calm and finished from every angle.
A few pins are the whole story. One or two pins will not hold it. Use several small pins placed where the braid tucks into the bun, and press them in flat against the scalp so they do not poke. If the child has fine hair, a tiny bit of texture spray before braiding helps the crown stay put.
This is the style I’d choose for a concert, family photos, or any day when the outfit is already doing a lot and the hair just needs to behave.
Why Braids for Kids with Wavy Hair Hold Their Shape So Well
Wavy hair has a built-in advantage: the strand is not flat, so the braid has more tiny curves to grip. That grip is why a three-strand braid often looks better on day-two wavy hair than on hair that was washed, blown dry, and brushed to glass. There’s a little friction in the texture, and friction is your friend here.
The catch is frizz. Wavy hair can swell around the braid if it’s brushed too hard or left too dry at the crown. That’s why the neatest braids usually come from hair that is lightly damp or freshly smoothed with a small amount of leave-in. You’re not trying to freeze the hair. You’re trying to keep the surface calm long enough for the braid pattern to set.
A second piece of the puzzle is parting. Clean parts make nearly every braid look better, especially twin styles and crown braids. A rat-tail comb does more for the final result than a bottle full of fancy products. That tiny line at the scalp is what people notice first. The braid is the headline, but the part is the opening sentence.
The Tools That Make the Job Less Fussy
- Rat-tail comb: Best for center parts, zigzags, and precise sectioning. The pointed end helps more than people think.
- Spray bottle with water: A light mist softens the wave pattern enough to smooth flyaways without soaking the hair.
- Light leave-in conditioner: Use a small amount through the mid-lengths and ends to reduce tangles and snap when braiding.
- Detangling brush or flexible paddle brush: Good for removing knots without roughing up the hair shaft.
- Snag-free elastics: Small clear or hair-colored elastics keep the ends secure without shredding delicate waves.
- Bobby pins and U-pins: Useful for buns, crowns, and half-up styles where the braid needs hidden anchor points.
- Small clips: These hold sections while you separate the hair, especially for Dutch braids and zigzag parts.
- Edge brush or clean toothbrush: Handy for smoothing the front hairline and taming tiny flyaways.
- Optional ribbon: Nice for birthday styles, school spirit days, or a simple color accent in a plain braid.
- Satin scrunchie: Useful for ponytail-based styles because it puts less pressure on the ends than a tight elastic.
Smart Product and Prep Choices for Neat Braids
The product choice matters more on wavy hair than most people admit. A heavy cream can make the braid slide, while too little moisture leaves the strands puffy and dry. The sweet spot is a light leave-in or detangling milk, used mostly on the mid-lengths and ends, with only a whisper near the roots.
If the hair tangles easily, start with a wide-tooth comb after the leave-in goes on. Brush from the ends upward. That sounds basic because it is basic, and basic works. The important part is not yanking through the knot all at once, because that roughs up the wave pattern and sets you up for flyaways later.
For the hairline, use very little product. A pea-sized amount of gel or styling cream can smooth the front pieces just enough for a clean part and tidy braid start. More than that starts to look greasy and can make the braid lose grip. If the child has a sensitive scalp, choose fragrance-free products and keep them off the skin as much as you can.
Freshly washed hair is not always the easiest hair to braid. Day-two waves often hold sections better because there is a little natural texture and less slip. If the hair has to be washed first, let it dry until it is only slightly damp before you start braiding. Soaked hair stretches, then shrinks as it dries, and that’s when styles loosen at the roots.
How to Wear These Braids to School, Practice, and Picture Day
Presentation: For school, the cleanest braid usually starts with a straight part, smooth roots, and ends tucked with small elastics. For picture day, a softer crown braid or ribbon detail gives the style a finished look without making it stiff. Keep the face frame tidy, but do not chase every little baby hair into submission. A few soft wisps are fine.
Accessories: Tiny bows, ribbon tails, and clear elastics are the least fussy choices. If the child wears helmets, headbands, or hoodies, keep the accessories low-profile so nothing catches when the gear goes on and off. Bulky clips look cute for about ten minutes, then they start sliding or poking.
Best for: French pigtails, Dutch pigtails, rope twists, and braided ponytail wraps usually hold up best for school and practice. Waterfall braids, ribbon braids, and crown styles are better for calmer days when the hair does not need to survive a lot of rough movement. Match the braid to the day instead of pretending every style should do everything.
Scale: For a quick weekday, choose one central braid or twin pigtails. For a dressier event, add a crown, a chignon, or a ribbon. Same hair. Different mood. That flexibility is why these styles get used over and over.
Additional Styling Moves That Make Braids Look Cleaner
Parting Trick: Clip the hair into four rough sections before you begin. It slows you down by maybe thirty seconds, and it saves you from drifting lines and uneven braid starts later. The style looks cleaner because the sections are already separated before your fingers get tired.
Flyaway Fix: Smooth the front and side hair with a damp fingertip before braiding instead of spraying the whole head again. A wet hand gives you more control, and you won’t soak the braid body. That matters when the ends are already getting fluffy.
Texture Boost: If the hair is too slippery, braid it after a light mist and a short air-dry, not immediately after a full wash. Slightly drier roots give your fingers something to hold, which is half the battle on wavy hair.
Kid-Friendly Upgrade: Add one tiny ribbon or one small bow, not six. Too many extras pull the style apart and make it annoying to wear. One accent is enough.
Make-It-Theirs: Let the child pick the side part, ribbon color, or whether the braid ends in a ponytail or bun. Kids are much more patient when the style feels like theirs instead of something imposed on them.
Night-Before Prep, Storage, and Refreshing
Braids are one of the few kid styles that can be planned the night before without turning into a mess by morning. If you want the next day to go smoothly, detangle the hair before bed, mist the ends lightly, and braid it loosely enough that the scalp does not get sore overnight. A soft satin pillowcase helps keep the braid from rubbing into a fuzzy knot while the child sleeps.
If the style is being worn for a full day, sleep braids work best when they are a little looser than daytime braids. Tight styles can leave a deep bend at the crown or a sore hairline, and there is no reason to do that to a child for the sake of neatness. Secure the ends well, though. Loose ends unravel faster than most people expect.
The next morning, refresh the front with a tiny spray of water on your hands and smooth it down. Do not soak the braid. If the braid body is fuzzy, flatten it with your palms and a whisper of leave-in rather than brushing it out. A brush will break the structure and make the flyaways worse.
Most of these styles last a full school day, and several will still look decent the next morning if the child sleeps carefully. Twin braids, Dutch braids, braids into buns, and ponytail wraps are especially good for that. Waterfall and accent-detail styles usually need more touch-up because the loose pieces are the first ones to fray.
Variations and Adaptations to Try
Ribbon-Ready School Version: Swap clear elastics for a narrow ribbon tied at the ends of French pigtails or a low ponytail wrap. It keeps the style neat but gives it a little color without making the whole head look busy. Best when the child wants something special but still needs the braid to stay out of the way.
No-Tug Sensitive-Scalp Version: Keep the braid looser at the hairline and avoid pulling the first inch too tight. This works well for kids who hate tension near the temples. A soft side braid or a low crown braid usually feels kinder than a high, tight Dutch style.
Sports-and-Helmet Version: Choose low Dutch braids, braided ponytails, or a braided bun sitting below the helmet line. That keeps the crown flatter and avoids the awkward bump that high styles can make under gear. Use small elastics and skip any bulky pins near the back of the head.
Short Wavy Hair Version: Focus on lace braids, half-up crowns, and accent microbraids. These work when the hair is too short for long plaits but long enough to control the front. Small sections matter more than full-length braids here.
Picture-Day Polish Version: Add a ribbon, a clean middle part, and a low bun or milkmaid wrap. Keep the hairline smooth and the braid sections even. That combination reads finished without turning the child’s head into a stiff sculpture.
Common Mistakes That Make Braids Look Messy Fast
The most common mistake is braiding hair that is too wet or too dry. Soaking wet hair stretches, then shrinks as it dries, which loosens the braid. Bone-dry hair frizzes and fights your fingers. The fix is simple: start with hair that is lightly damp or freshly misted, not dripping and not crunchy.
Another problem is pulling the front too hard. Tight braids can leave red marks, sore temples, and a child who spends the day touching the spot you just tightened. Keep the root tension firm enough to hold, then soften your grip once the braid is past the first inch or two.
Heavy product causes trouble too. Thick creams and oils make wavy hair slide, which is the last thing you want on a braid that needs grip. Use a light leave-in and a tiny bit of gel at the hairline if needed. That’s it. The hair should still feel like hair, not coated rope.
A fourth issue is uneven sectioning. If the pieces change size every few passes, the braid looks lumpy and the ends start to twist. Take a second to comb each section before crossing it. That pause saves you from redoing the whole side later.
Last, don’t pick a style that fights the day. A waterfall braid on the morning of gym class is asking for trouble. Save the fancier braids for calmer plans and use pigtails, buns, or rope twists when the day is going to be busy.
Variations and Adaptations to Try
Short-Morning Simple: Use one braid down the back or two plain pigtails with no extra detail. This version is for the mornings when the clock is rude and everyone is already wearing shoes. It still looks neat because the part and the ends stay controlled.
Soft-Texture Version: Keep the braid slightly looser and let the wave pattern show around the crown. This works well for kids who hate stiff hair and prefer a style that still moves. A soft braid looks relaxed, but it can still be tidy.
Dress-Up Ribbon Version: Add a ribbon woven through a braid or tied at the ends. Use a narrow ribbon so it sits with the braid instead of fighting it. It’s a nice way to make a simple braid feel special without changing the shape.
Active-Day Version: Go with Dutch pigtails, braided buns, or a braided ponytail wrap. These styles stay close to the head and leave fewer loose pieces to snag. They’re the best bet for sports, playground time, or any day with a lot of motion.
Layer-Friendly Version: Choose accent microbraids or a half-up crown so the shorter front layers have somewhere to go. That keeps them from sticking out on their own by lunchtime. Small details are often the difference between tidy and chaotic.
Frequently Asked Questions
Which braid holds best on wavy hair?
Dutch braids and French braids usually hold the best because they anchor close to the scalp and use the natural bend in the hair for grip. For extra security, start with lightly damp hair and small, even sections.
Is it better to braid wavy hair damp or dry?
Lightly damp is usually the sweet spot. Dripping wet hair stretches and shifts as it dries, while very dry hair frizzes and slips apart more easily. A light mist gives you control without flattening the wave pattern.
How do I keep flyaways under control without making the hair crunchy?
Use a tiny bit of leave-in conditioner on the mid-lengths and a pea-sized amount of gel or styling cream on the hairline only. Smooth flyaways with damp fingers, not a heavy brush, or the braid will puff back up.
Can these braids work on shoulder-length hair?
Yes, especially half-up crowns, lace braids, rope twists, and twin pigtails. Very long braids like milkmaid wraps need more length, but plenty of the neater school-day styles work on hair that just reaches the shoulders.
What if my child has layers that keep slipping out?
Choose styles that either capture the layers early, like a French braid, or hide them on purpose, like a half-up braid or accent microbraids. A few small pins at the temples can also stop short pieces from drifting loose.
Are these braids okay for sports and helmets?
The lower-profile styles are. Low Dutch braids, braided ponytails, braided buns, and rope twists sit better under gear than high buns or bulky crown styles. Keep the crown flat if a helmet is part of the day.
How can I make a braid last until bedtime?
Set the style with clean parts, secure the ends well, and avoid over-touching the braid during the day. At night, sleep on a satin pillowcase or loosely re-braid the hair so the strands do not rub into a fuzz ball.
What should I do if the braid keeps slipping out at the nape?
The hair there is often the softest and most slippery section. Tighten only the last inch before the elastic, add a second small elastic if needed, or switch to a low bun so the ends are tucked away instead of hanging loose.
Do I need heat tools for any of these styles?
No. Heat usually adds more problems than it solves for kid braids, especially on wavy hair. A comb, a light mist, and a couple of small elastics are enough for almost everything here.
Braids That Hold Their Line
Braids for kids with wavy hair work because they respect the texture instead of fighting it. That is the real trick. A little bend in the strand helps the braid grip, a clean part helps the style look intentional, and a light hand keeps the scalp from feeling tugged all day.
The styles worth repeating are the ones that match the day. Some mornings call for French pigtails. Some need a low bun or a rope twist. Some only need a small braid at the hairline to keep the front pieces out of the eyes. Pick the braid that fits the kid, the schedule, and the amount of patience left in the room.
And if the first try is slightly uneven, fine. Wavy hair forgives a lot once you learn where it wants to bend, where it wants to puff, and where it behaves best when left alone. The next time the front pieces start escaping, choose one of the simpler styles and work from there.