Black Dutch ponytail braids have a very particular kind of staying power. The braid ridge sits up off the scalp, the ponytail stays anchored where you place it, and the whole style keeps its shape long after a loose twist has started to puff and fray. On coily, curly, and stretched natural textures, that matters. A lot.
I like this family of styles because it solves two problems at once. You get the clean, sculpted look of Dutch braids at the root, and you get the movement of a ponytail at the back. That combination is especially useful when you want your hair to look finished on day one and still look decent on day four, even after sleep, errands, heat, and the kind of humidity that turns a carefully smoothed hairline into a soft halo.
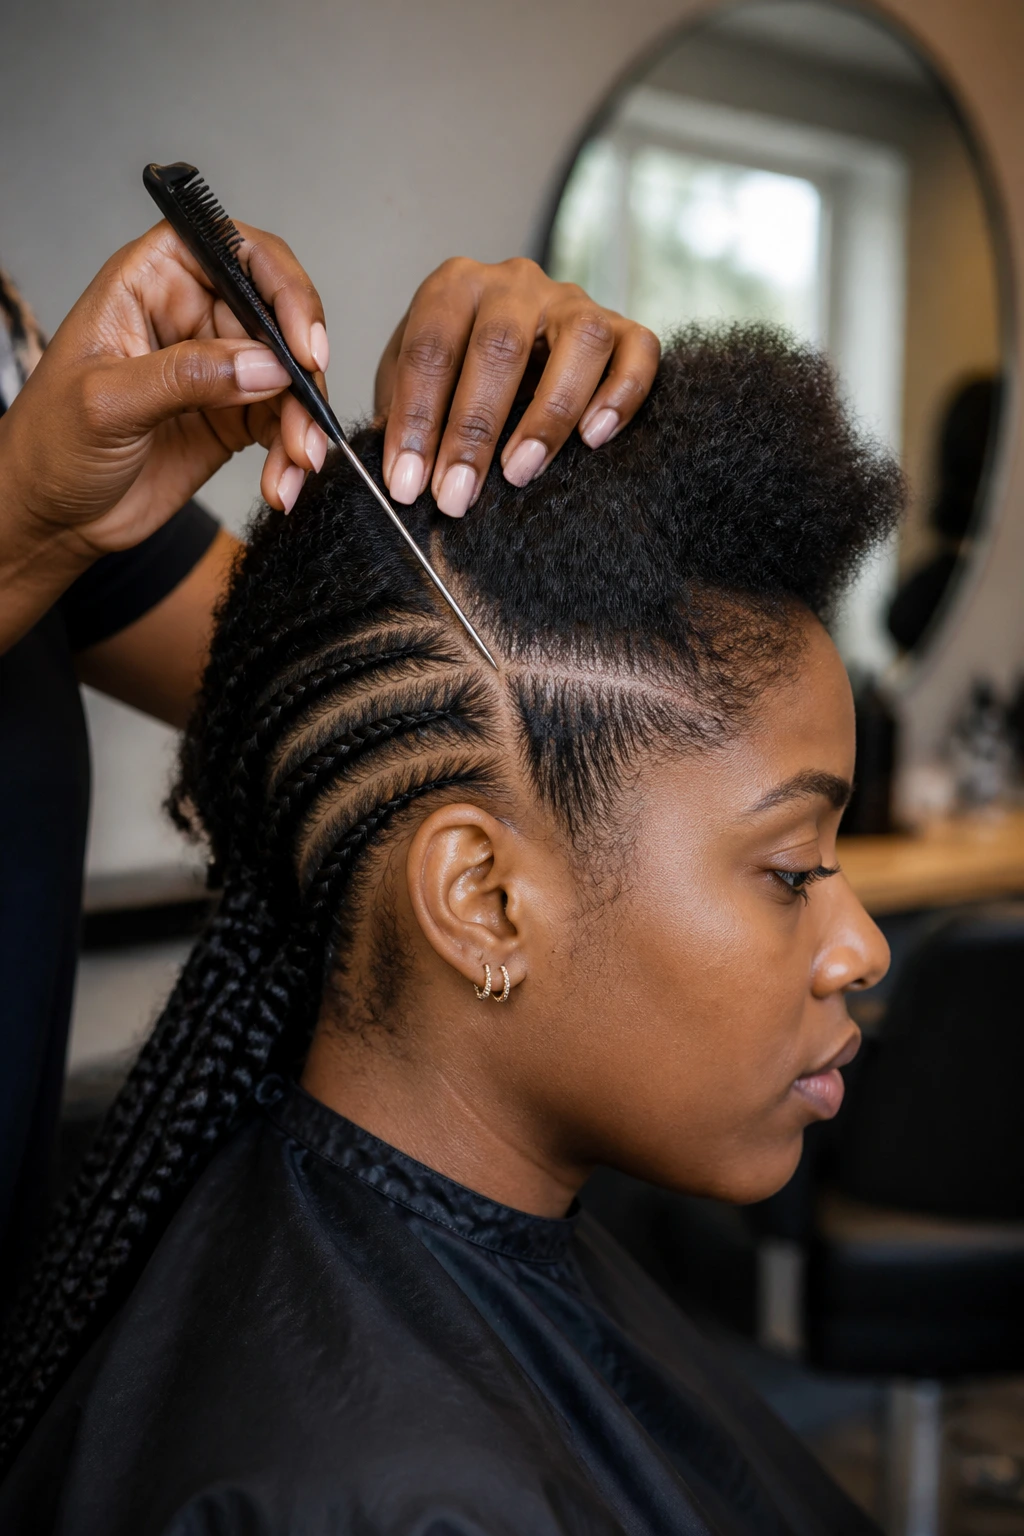
The catch is tension. Pull too hard and the front pays for it. Leave the parts sloppy and the style starts loosening at the crown before the ponytail even has a chance to shine. The best versions are tidy without being brutal, and they always start with a clean base, a controlled part, and a plan for the ends. That is where the style lives or dies.
Why These Braids Hold Their Shape Better
-
The braid ridge does the heavy lifting: Dutch braids sit raised on the scalp, so the design stays visible even when the ponytail gets moved around during the day.
-
The ponytail weight is easier to manage: Instead of dragging on loose sections all over your head, the style concentrates the length into one anchored tail.
-
They stretch a wash day without looking flat: A satin scarf and a little mousse can keep the root pattern neat for several days, which is the whole point.
-
They work with your own hair or added hair: You can keep it light with natural length or build a longer ponytail with braiding hair, wraps, or a curly extension piece.
-
The style gives you options at the front: Center part, side part, zigzag, feed-in, or curved partings all change the mood without changing the basic structure.
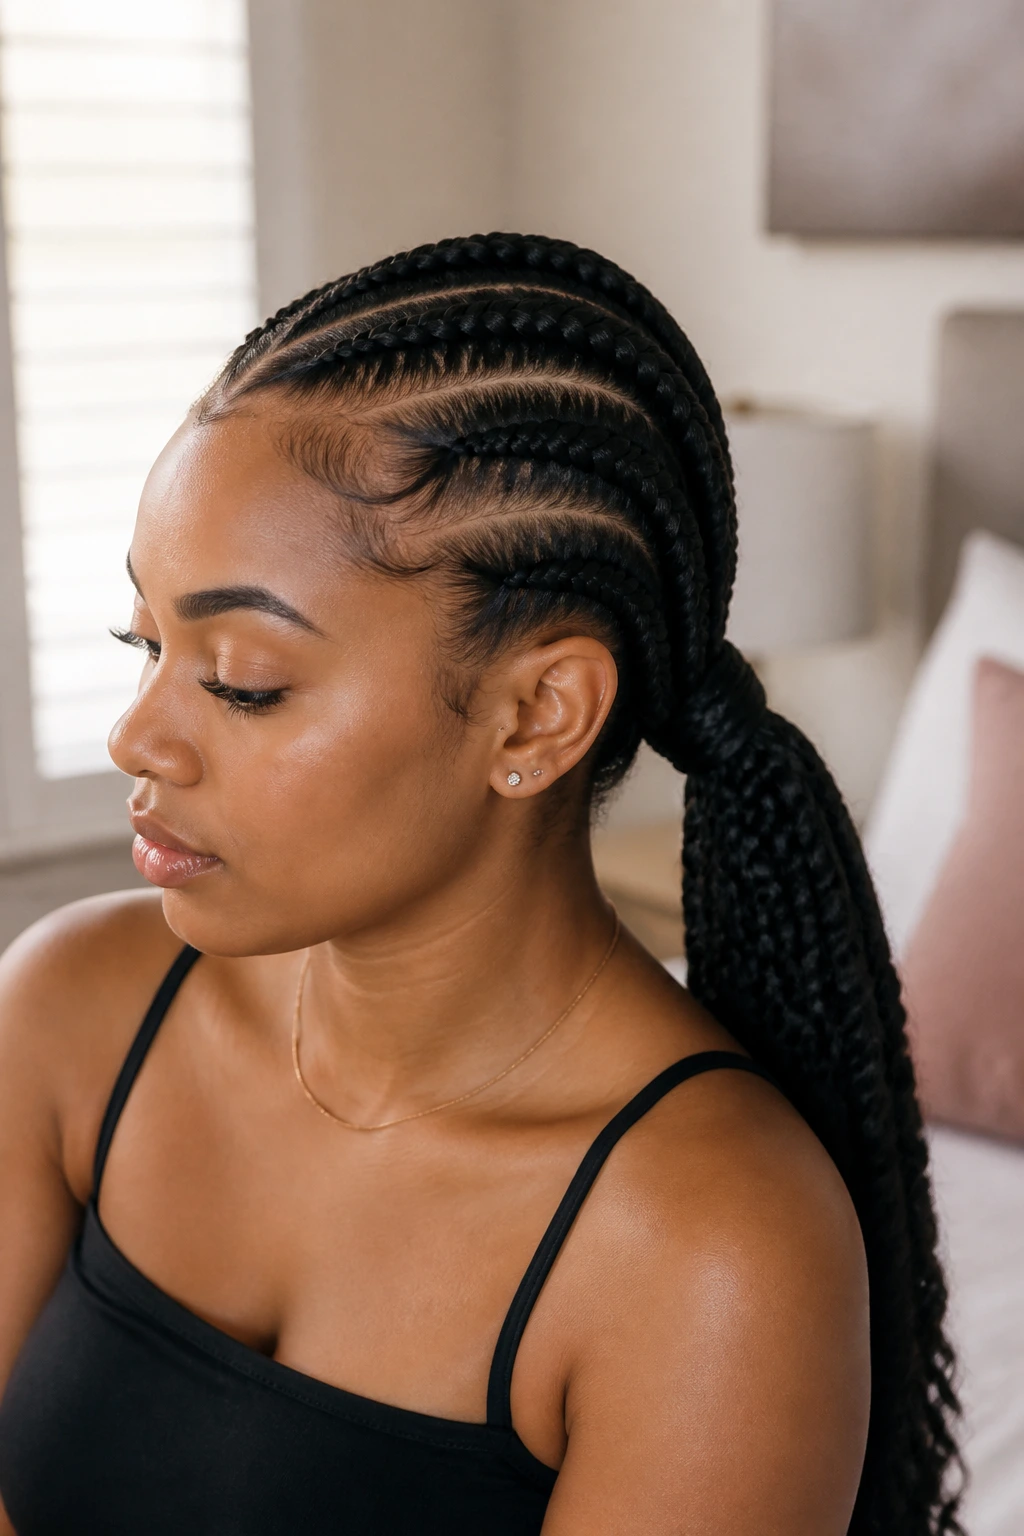
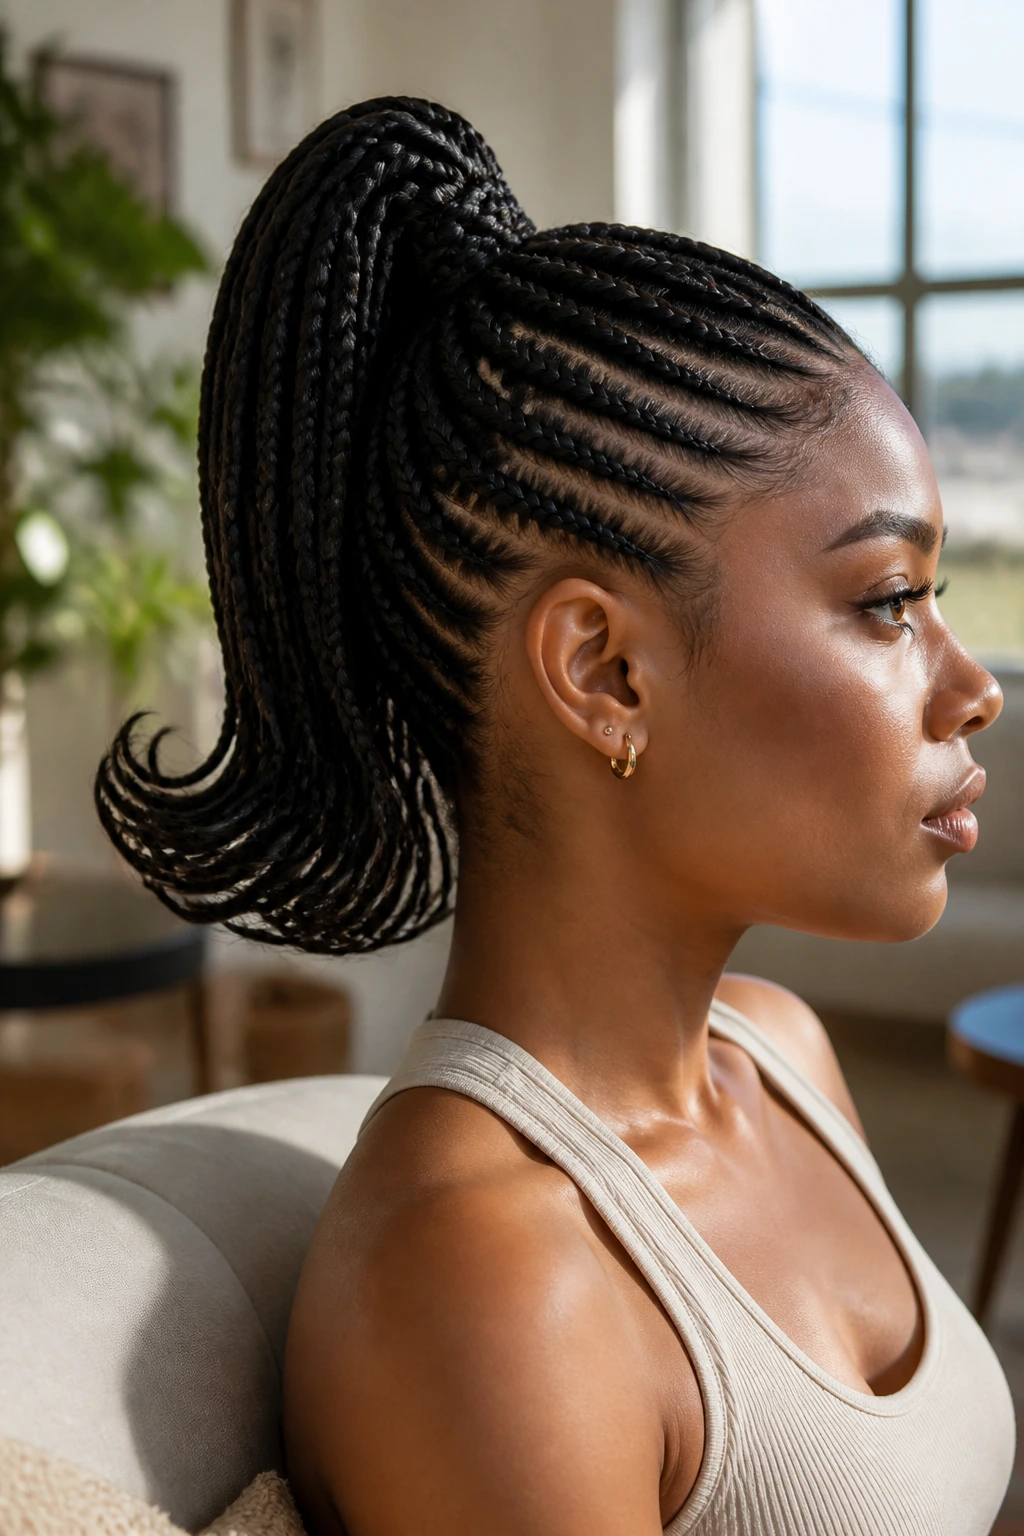
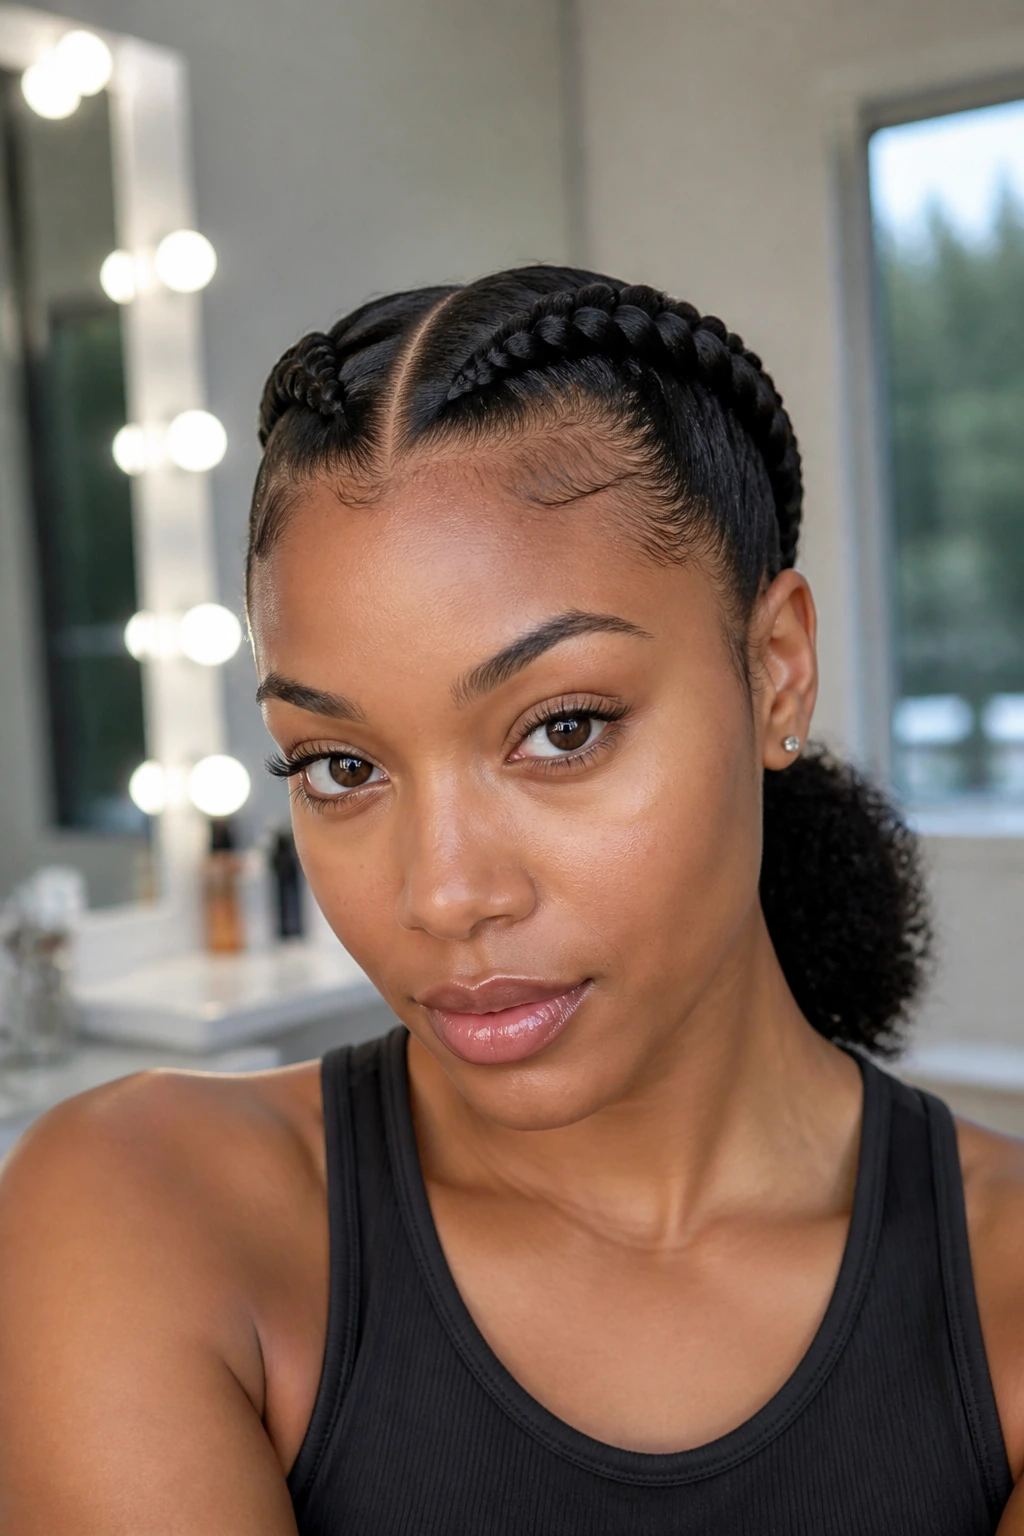
1. Sleek Center-Part Braids into a Low Ponytail
This is the cleanest version in the bunch, and it holds up because there’s nowhere for the hair to drift. The center part creates symmetry, the two Dutch braids hug the scalp, and the low ponytail sits at the nape where it won’t get knocked around by collars or headrests. If you like a style that still looks neat after a long day, start here.
Where this style shines
A low ponytail keeps the weight close to the neck, so the front stays calmer than it would with a high tail. That means less tugging around the temples and less stretching at the crown. It’s also one of the easiest Dutch braid ponytail looks to refresh with a little mousse and a scarf.
For Black hair, especially stretched natural hair, this is a solid choice when you want a polished look without the drama of a heavy top ponytail. Add braiding hair only if you want extra length; if you keep it natural, the style still reads deliberate.
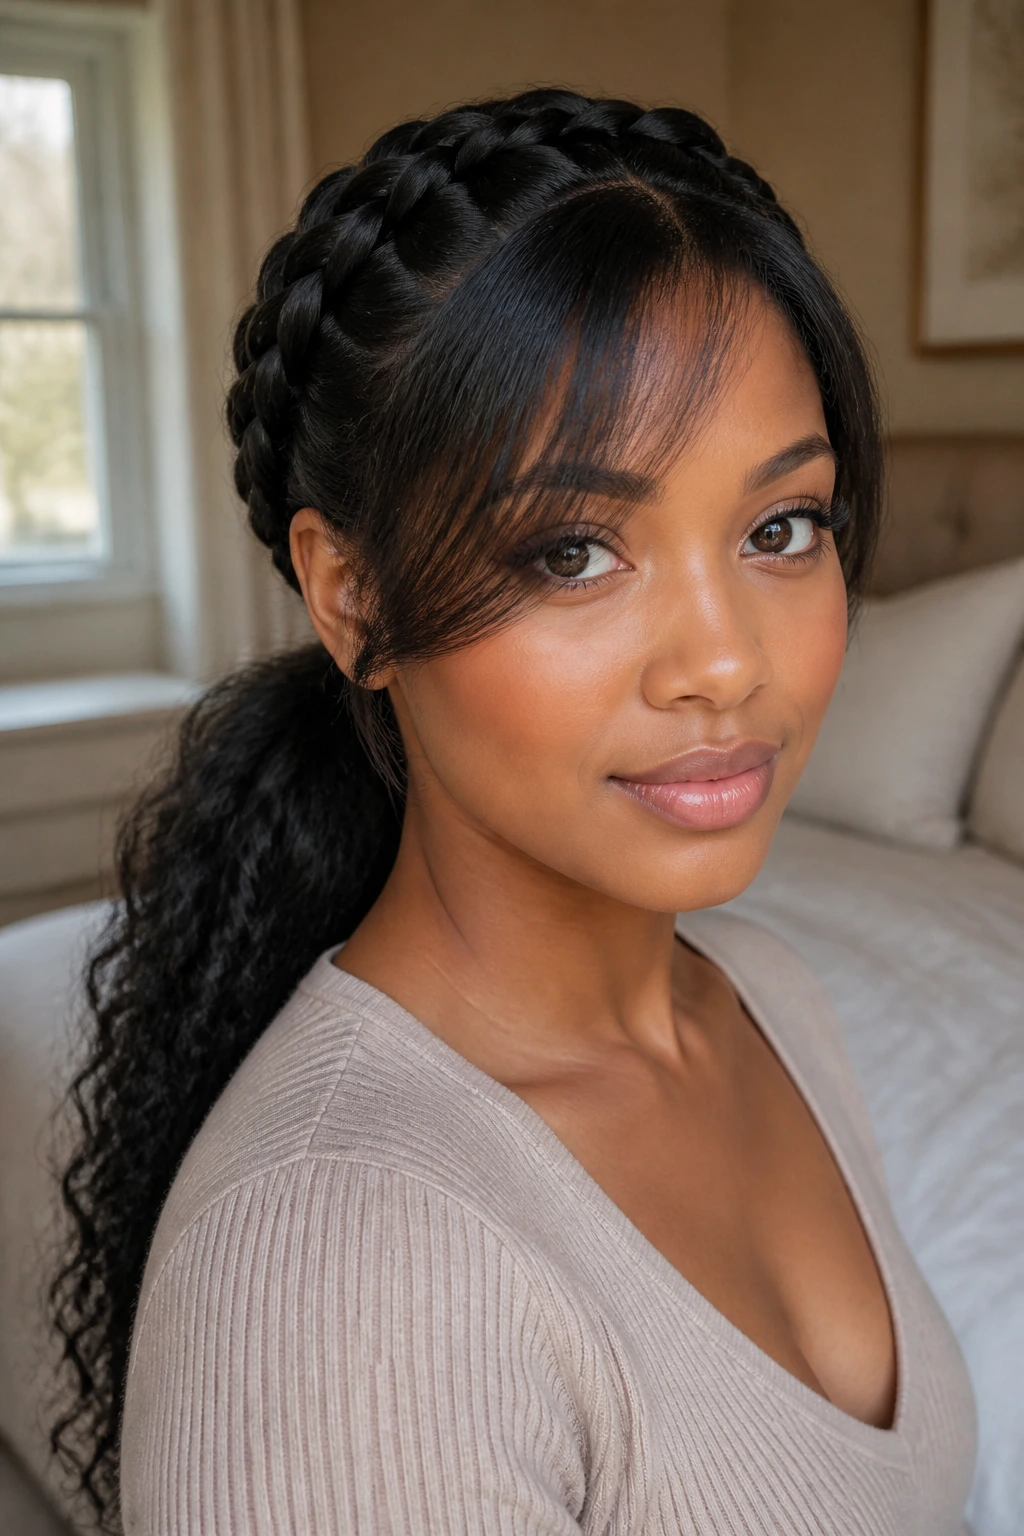
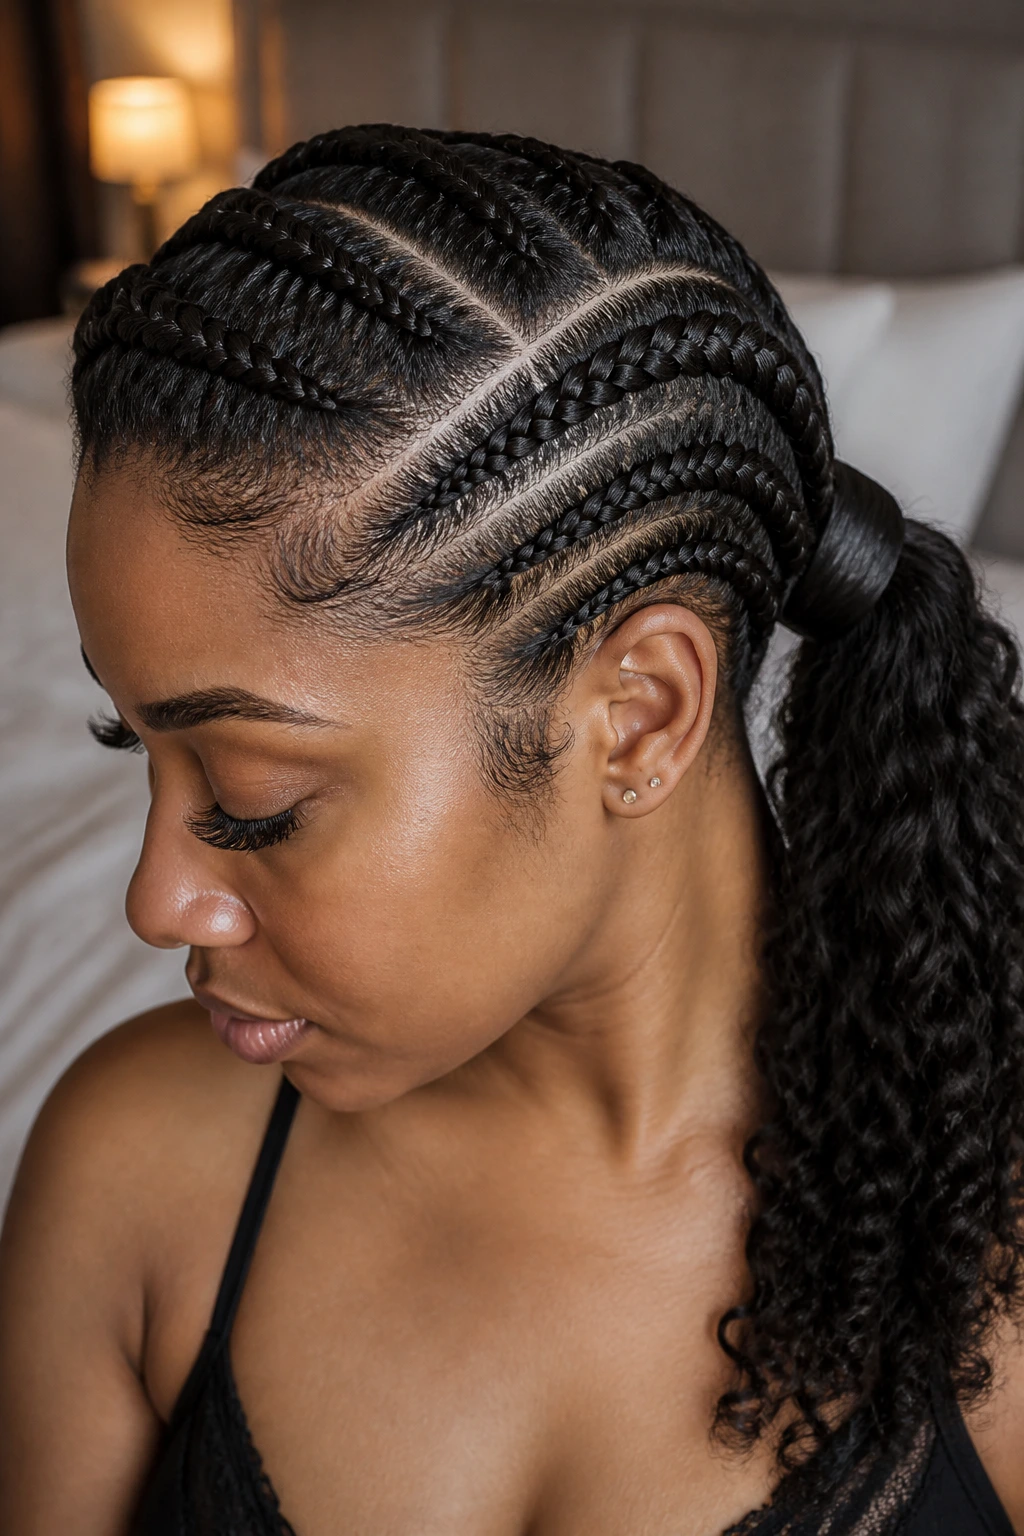
2. Deep Side-Part Braids with a Wrapped Base
Want a little more shape around the face? A deep side part changes everything. One braid rides a touch higher, the other sits lower, and the ponytail base gets hidden under a wrap of braid hair or a strip of extension hair.
That wrapped base is not just decorative. It also helps seal the transition point where braids meet ponytail, which is usually where styles start to look tired first. I prefer this version for people who like side parts but don’t want the style to collapse into one flat line by midday.
What makes it last
Keep the part sharp and the base smooth. A tiny bit of gel at the part line and a firm wrap around the ponytail anchor will keep the look cleaner for longer than a pile of edge control ever will. Too much product, though, and the front starts to flake. That’s a bad trade.
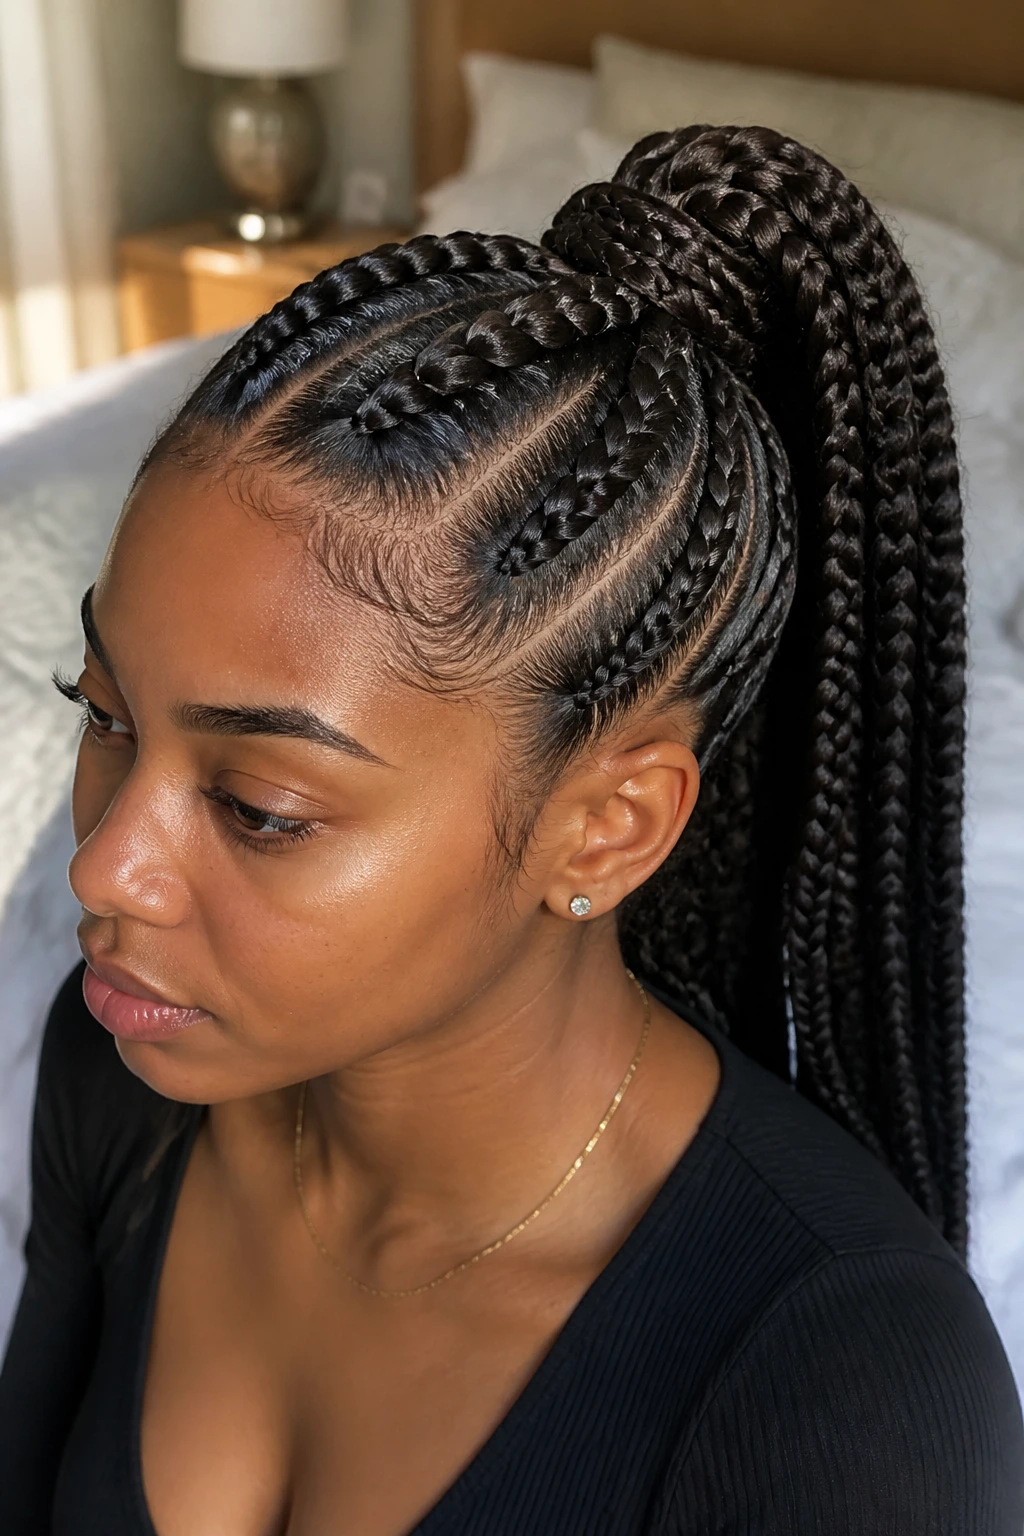
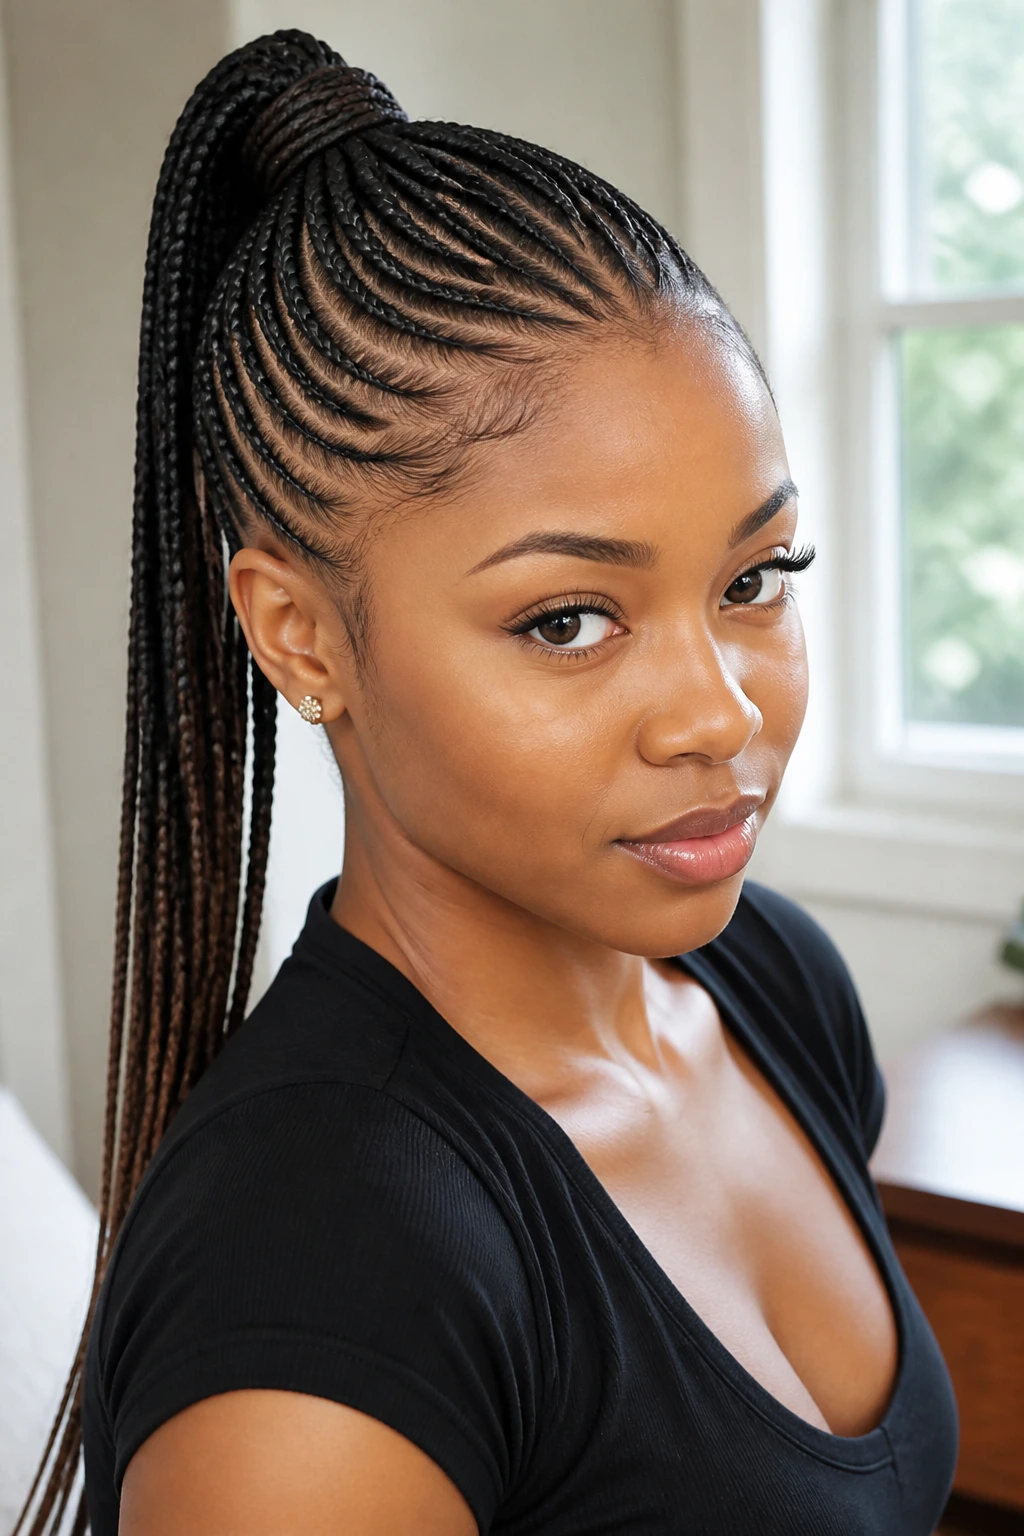
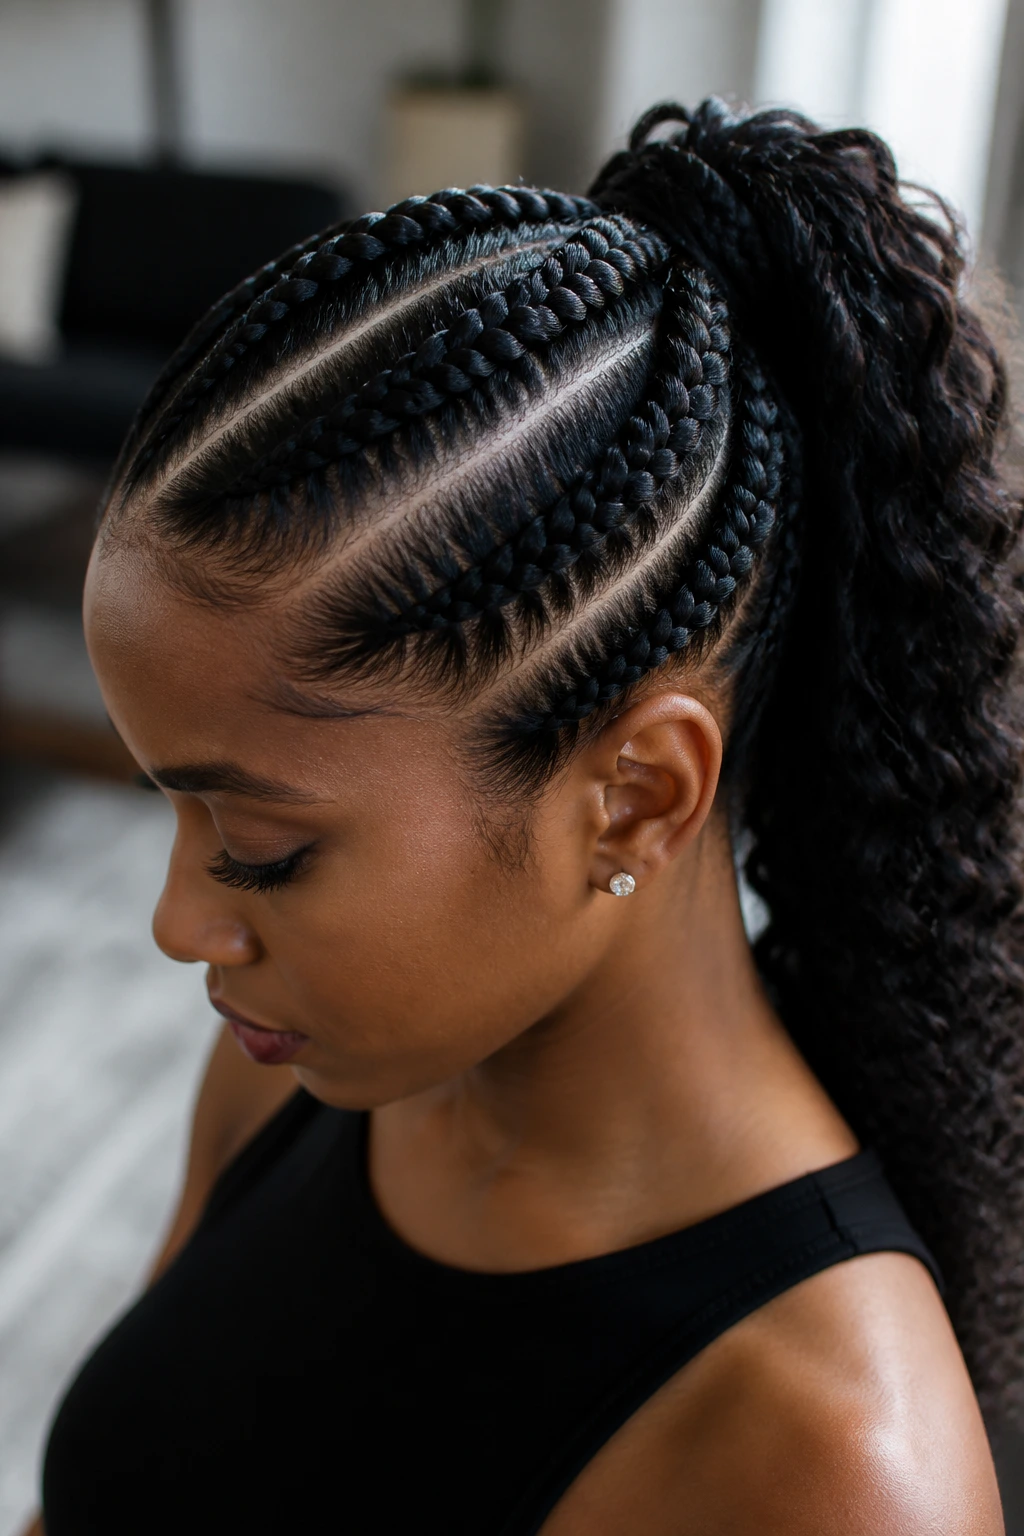
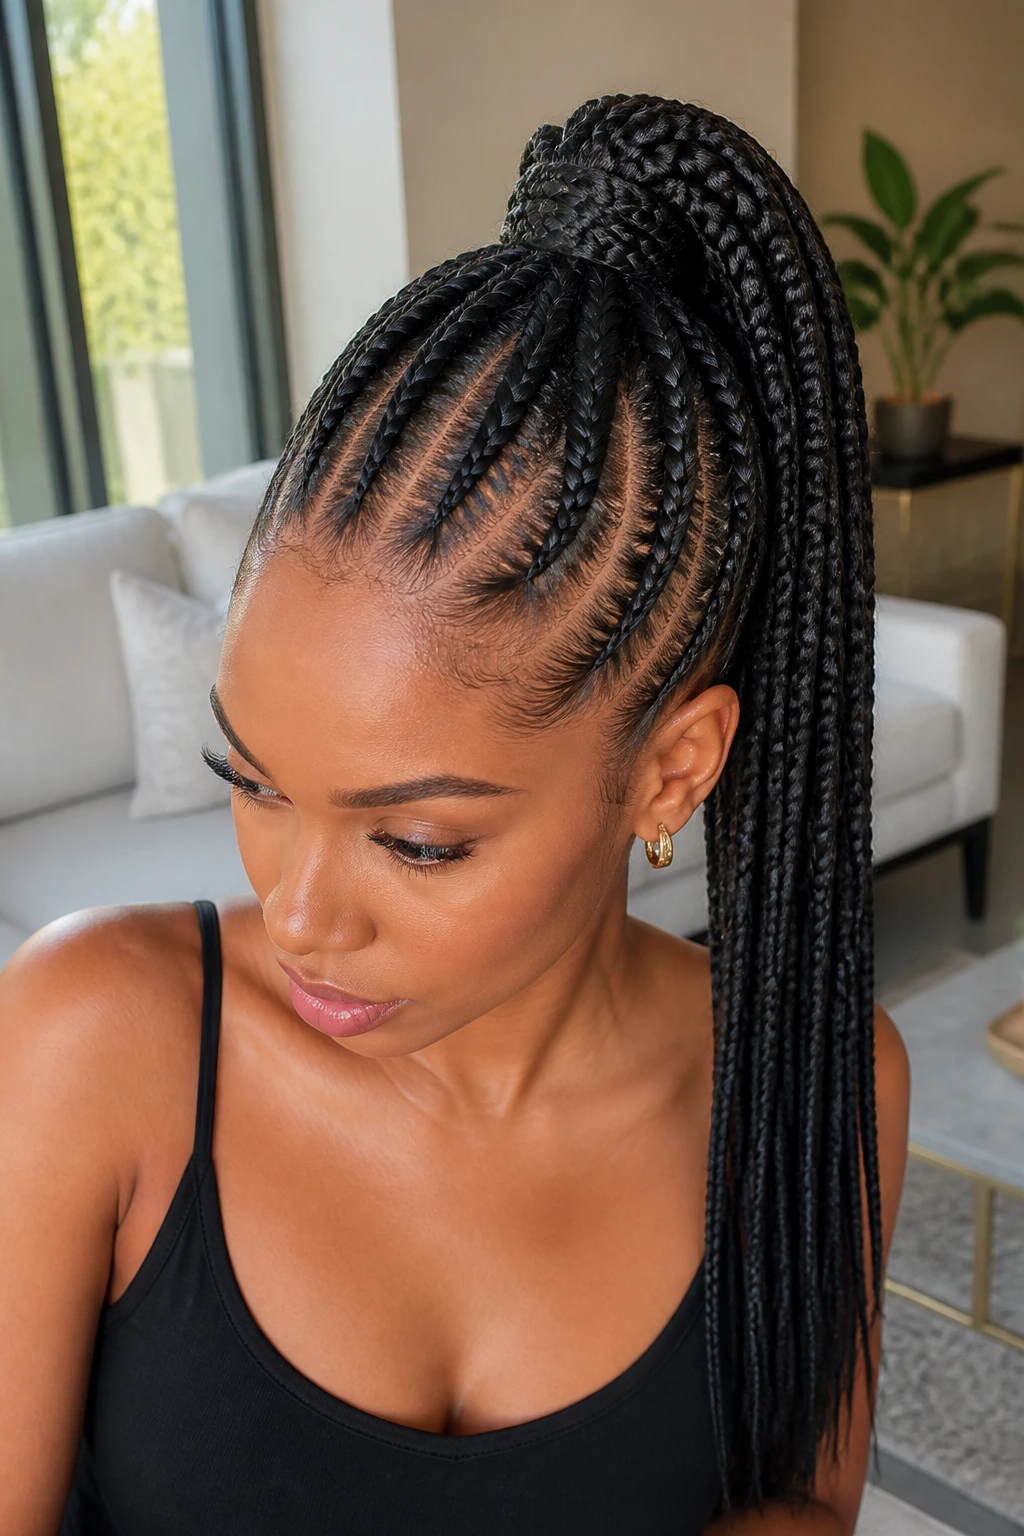
3. High Crown Braids into a Snatched Ponytail
A high ponytail gives the style lift, but the braids are what keep it from turning messy. When the Dutch braids start near the temples and angle into the crown, the whole shape rises before it falls. That creates a more sculpted silhouette than a simple pulled-back ponytail.
This one works best when you want the style to read from across the room. Gym, dinner, photo day, whatever. The high placement does put more stress on the edges, so I’d keep the tension firm but not tight, and I’d avoid loading the base with a heavy bundle of synthetic hair if your scalp tends to get sore.
Best for
- Medium to long natural hair that can support a lifted base
- A dramatic ponytail that still feels secure
- Days when you want the crown to look intentional, not puffy
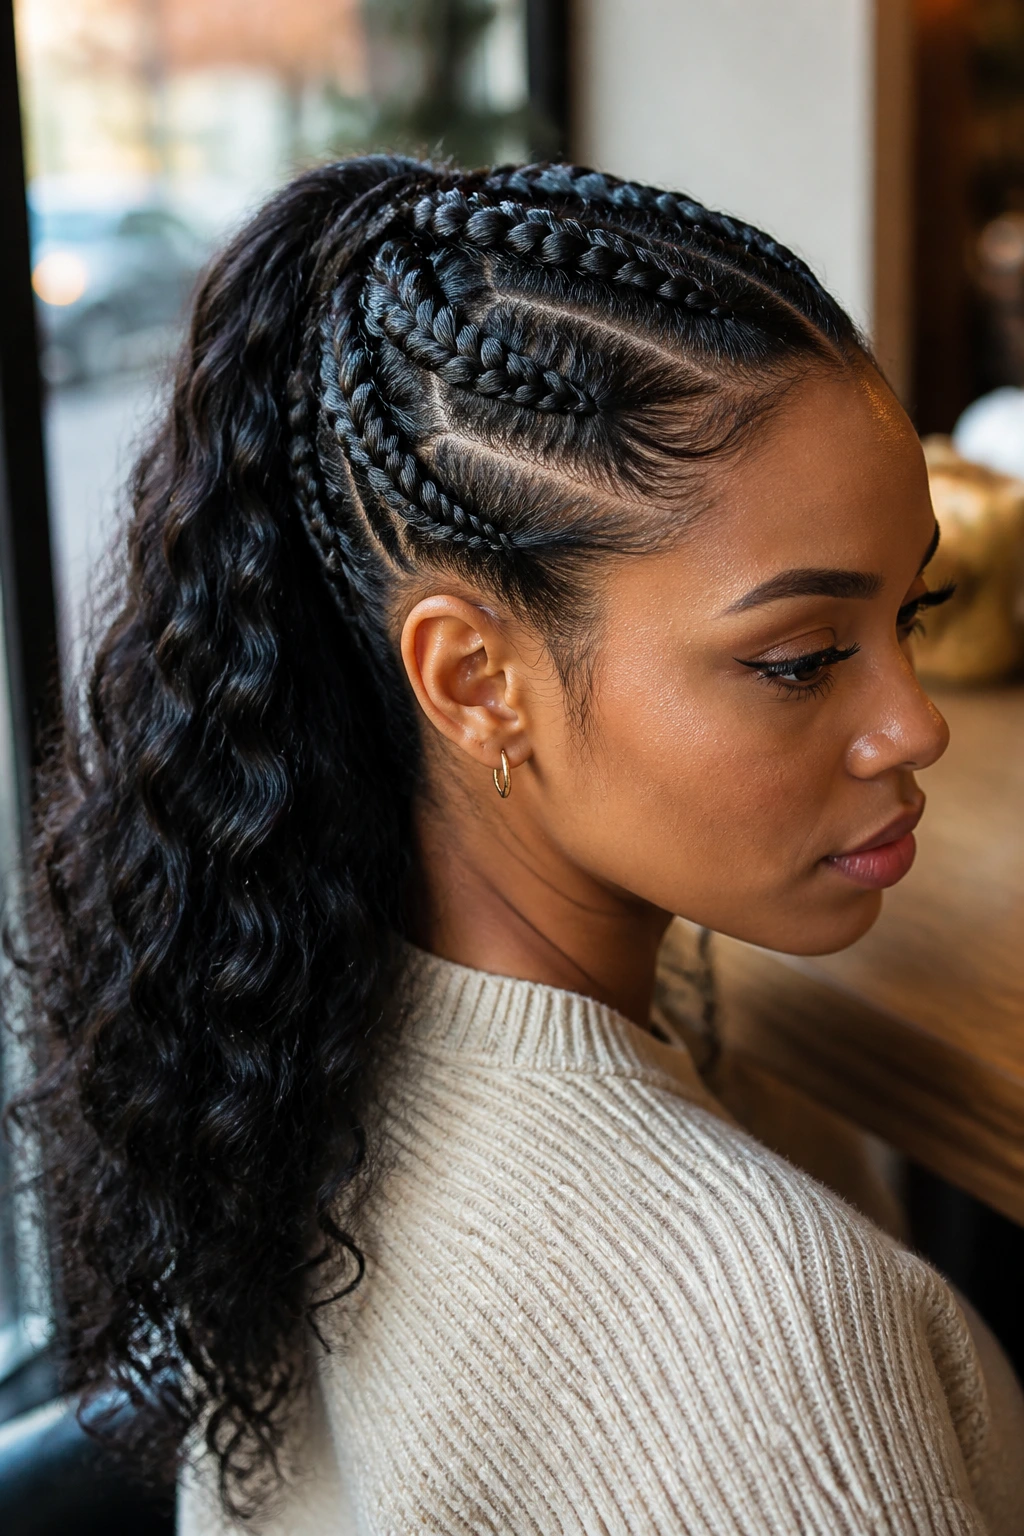
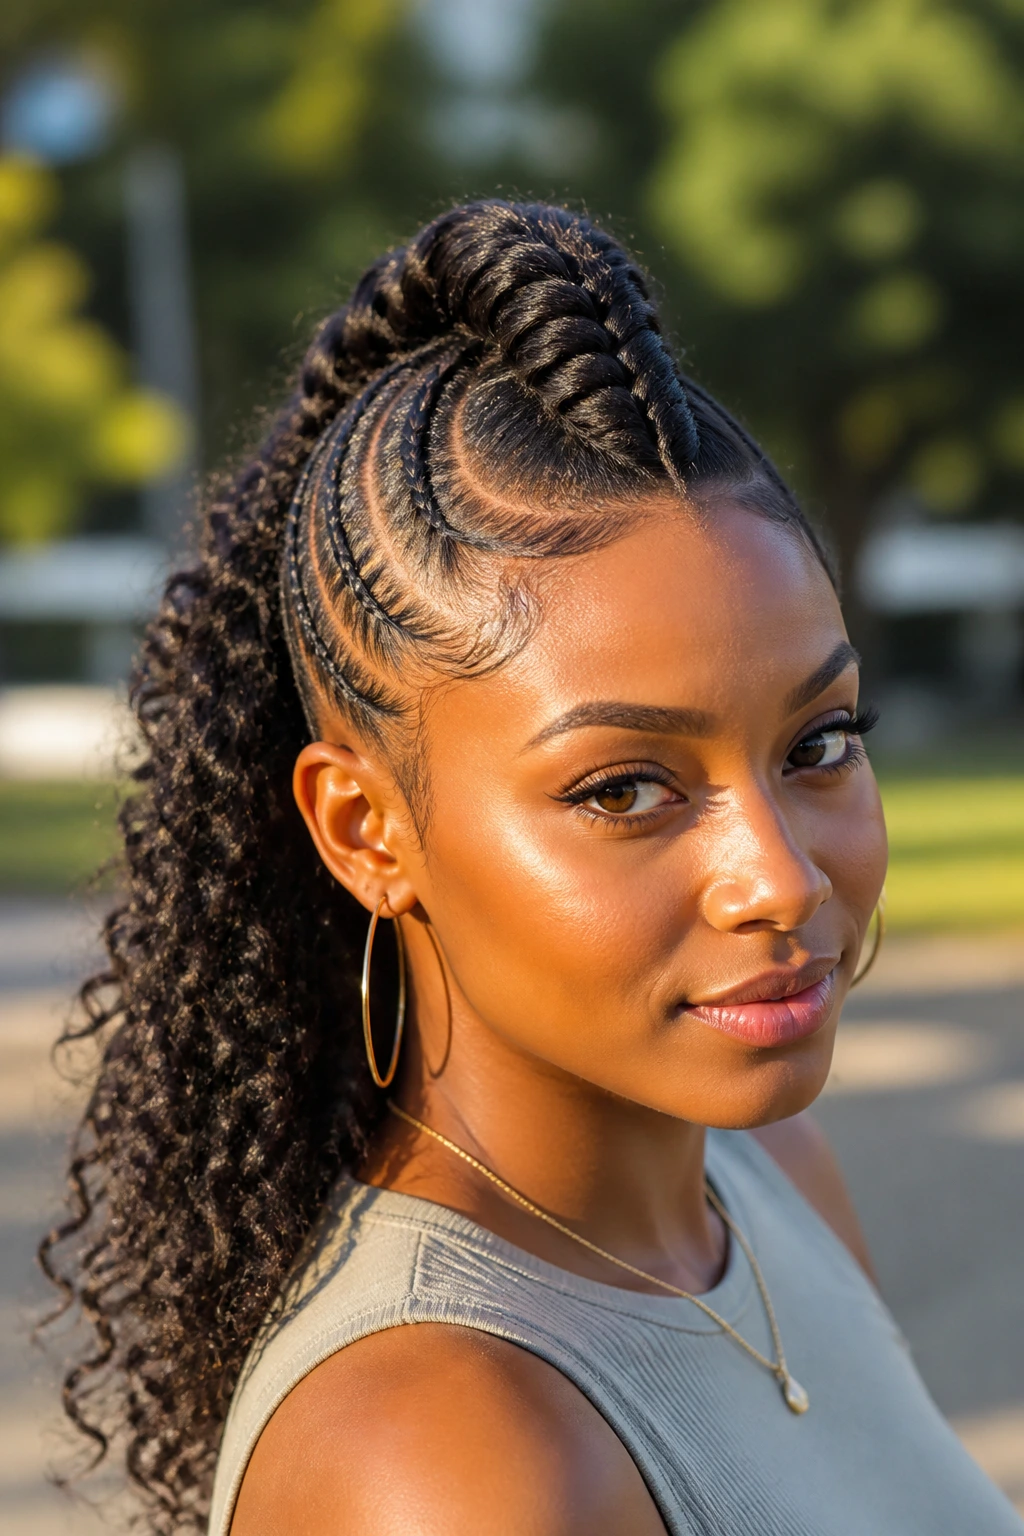
4. Dutch Braid Mohawk with Curly Ponytail Ends
This is the style for people who like a little edge. The braids run down the center like a mohawk, and the ponytail finish is left curly, wavy, or puffed out depending on the texture you want. It has movement. A lot of it.
The curly ends are useful because they hide the transition from braid to ponytail. Straight ends show every mistake at the join; curly ends are forgiving. If you’re using marley or curly extension hair, keep the ends lightly separated with your fingers instead of combing them into submission. That fluffy finish is part of the point.
Why it stays wearable
The center braid track keeps the perimeter cleaner, and the sides can be laid down with mousse and a soft scarf. You get a style that looks styled even when the curl pattern starts to loosen a little. That’s a win, not a flaw.
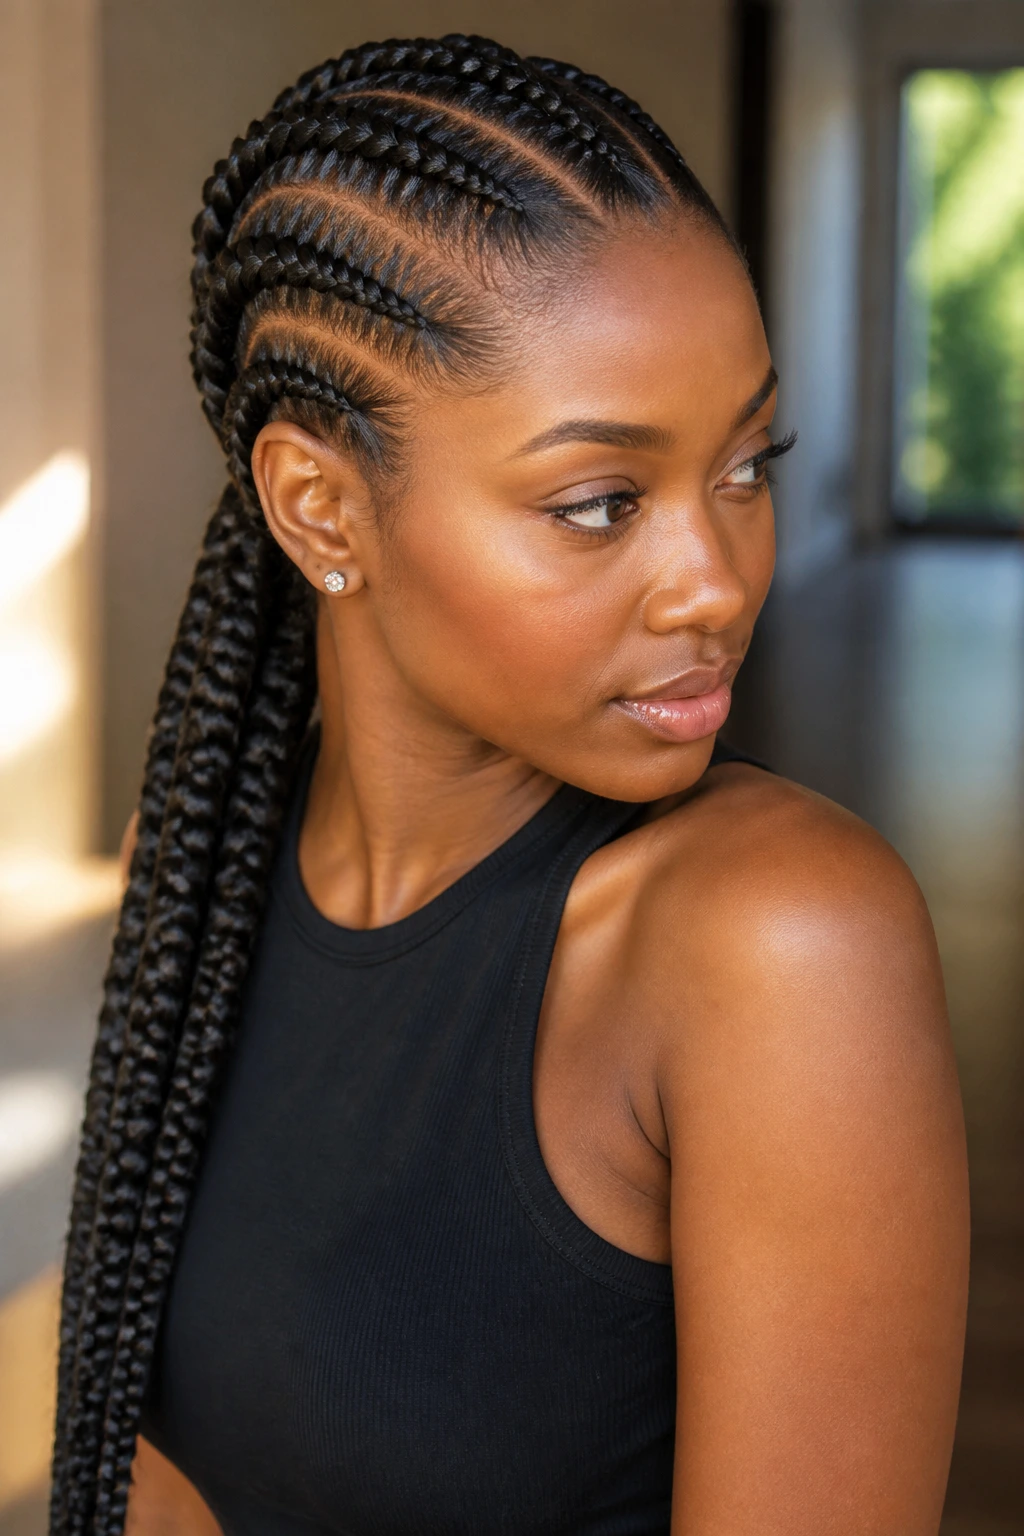
5. Feed-In Dutch Braids into a Rope-Like Ponytail
Feed-in braids create a smoother root line because the added hair is introduced gradually. That matters on Black hair, where a bulky start can make the whole style feel heavy before the ponytail even begins. With feed-in Dutch braids, the roots stay flatter and the ponytail can be built longer without looking stuffed.
I like this version when the goal is longevity. Smaller feed-ins hold their sectioning longer, and the ponytail at the back gets a stronger base. If you want a sleek finish, use a light braiding gel along the part and keep the added hair pre-stretched so the texture blends instead of fighting the natural hair.
Small detail, big difference
The first inch or two matters most. If the roots are clean and the feed-in is gradual, the rest of the style behaves better overnight. If the roots are lumpy, you’ll see it every time you turn your head.
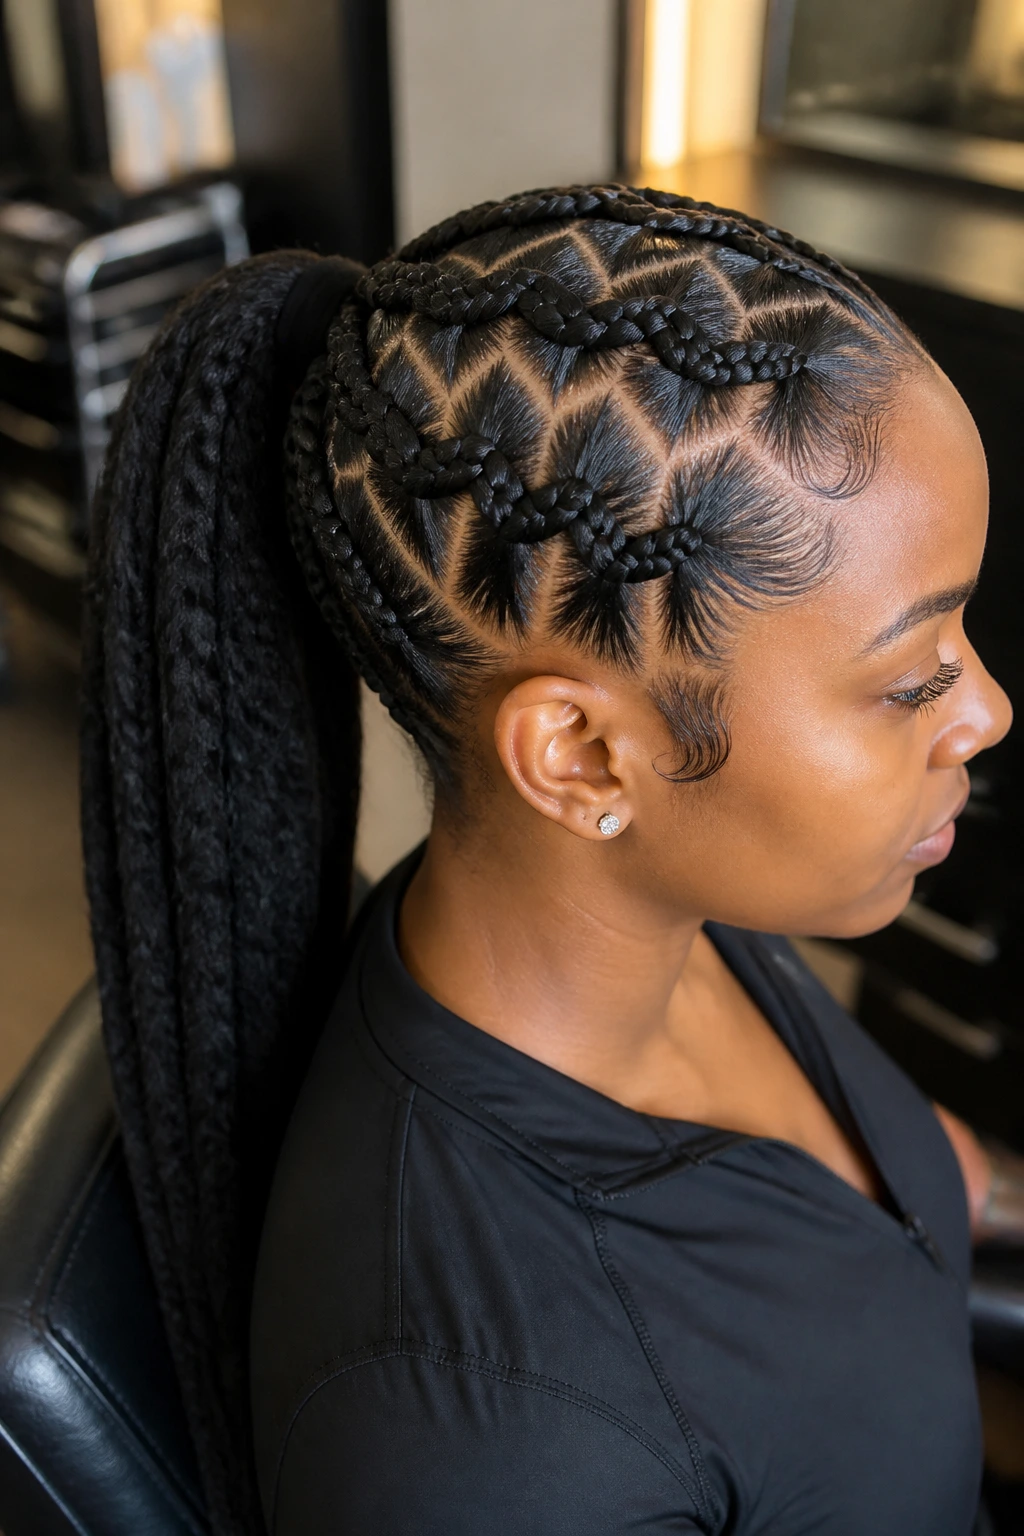
6. Stitch-Section Braids with a Bubble Ponytail
Stitch braids bring a sharper, more patterned look to the Dutch braid ponytail idea. The braid lines are sectioned in straight, visible rows, then gathered into a ponytail that gets tied off in spaced bubbles. It’s neat, graphic, and easier to keep tidy than a loose, single-length tail.
The bubble ponytail is doing a lot here. It breaks up the weight of the hair, keeps the length from pulling too hard on the base, and gives the style a little rhythm. Use small elastics that won’t snag, and tug each section gently so the bubbles look round, not sloppy.
How to wear it
This one looks especially good with hoops, a sharp liner wing, and a clean neckline. The braid geometry already does enough; you don’t need a lot of extra decoration.
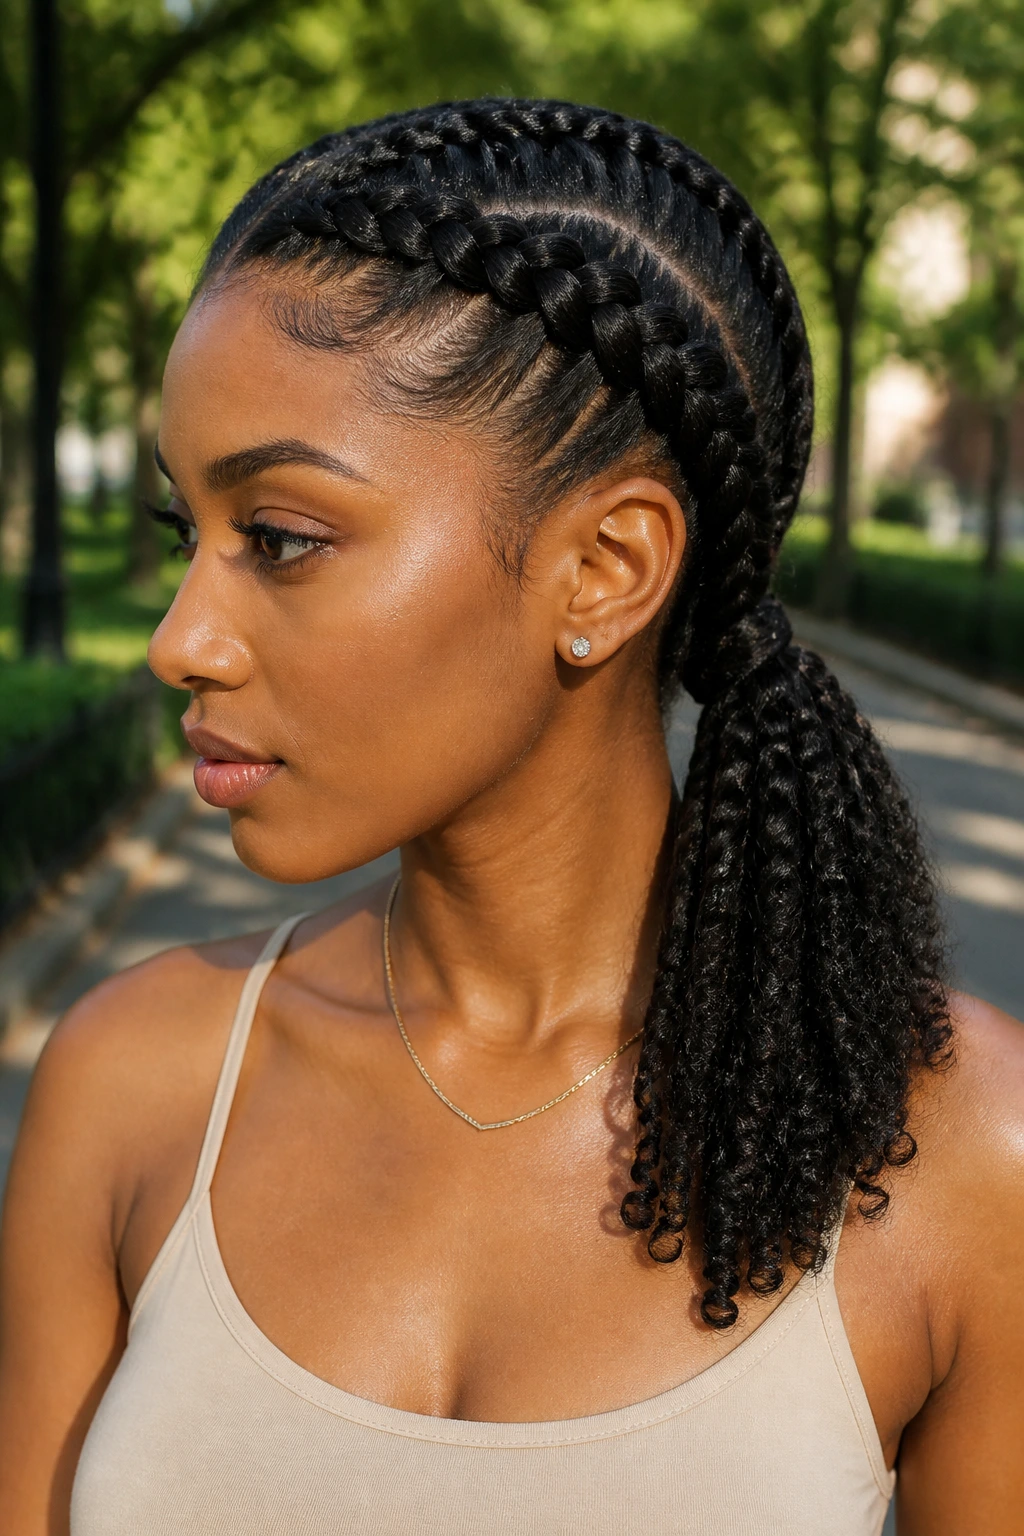
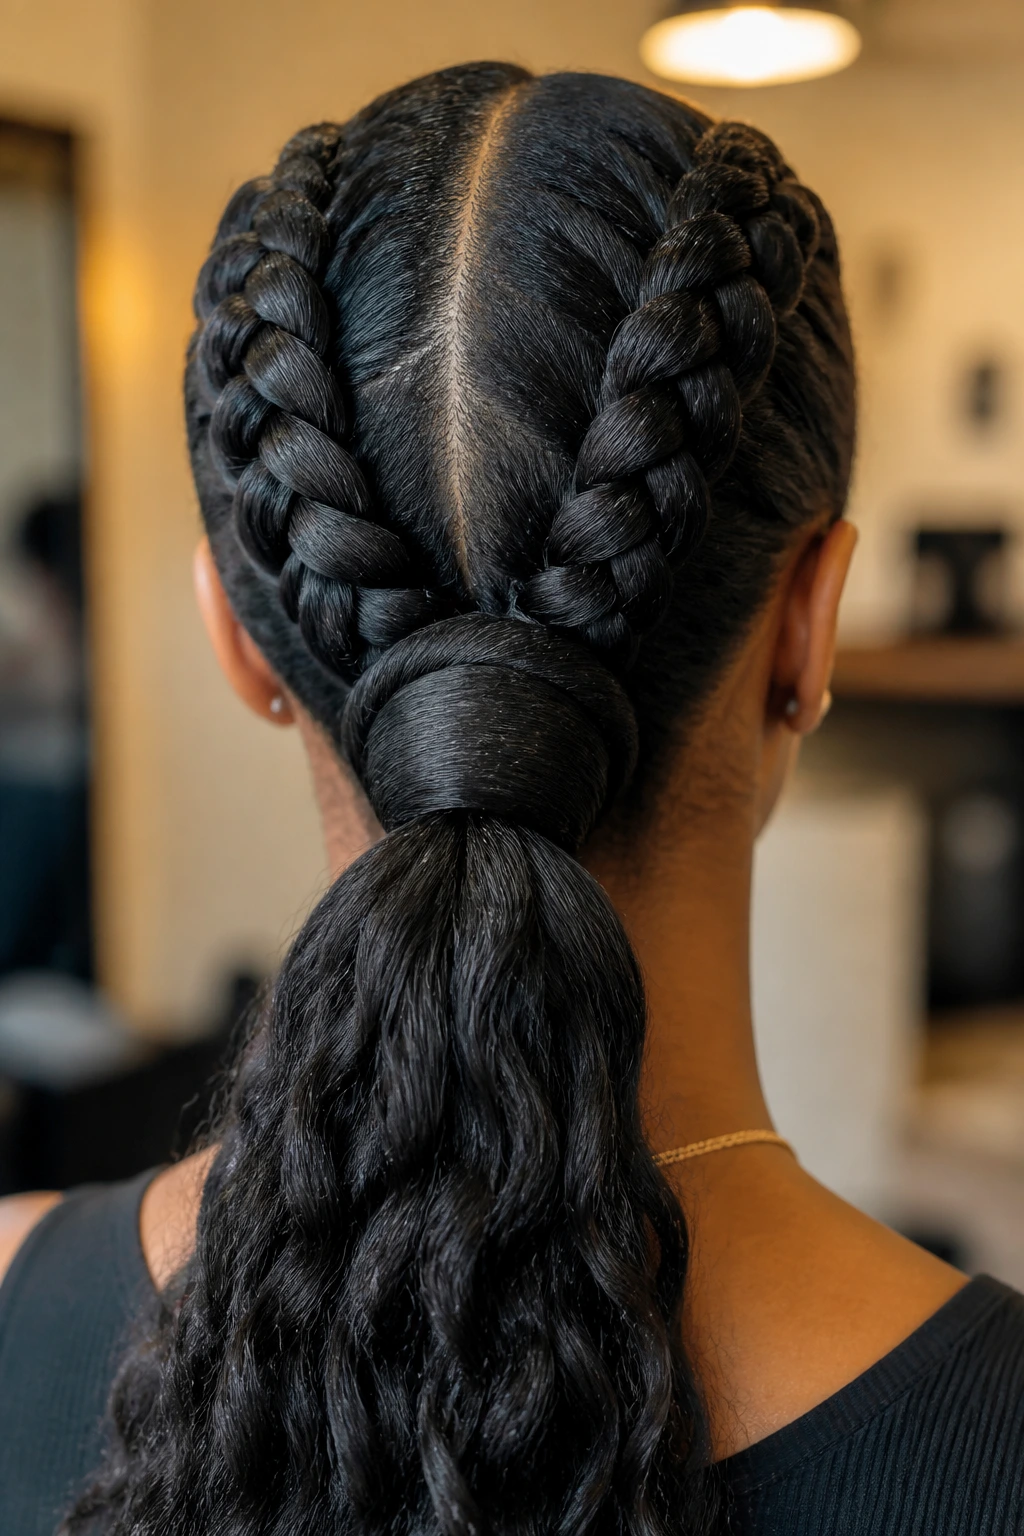
7. Double Dutch Braids Feeding One Low Ponytail
Two braids, one ponytail. Simple. Strong. Hard to mess up if your parts are clean.
The beauty of this version is balance. Each braid travels from the front or sides and meets in the back, where the lengths are tied into one ponytail. That gives the style a sturdy base and keeps the shape from twisting around on itself. If you’ve ever had a ponytail migrate to the side by the end of the day, this setup fixes that problem.
Why I keep coming back to it
It’s one of the longest-wearing structures in the whole list because the weight is evenly split before it ever reaches the ponytail holder. Less drag, less slippage, less puffing at the nape. If you want a reliable workhorse style, this is one.
8. Dutch Braids with a Curly Extension Ponytail
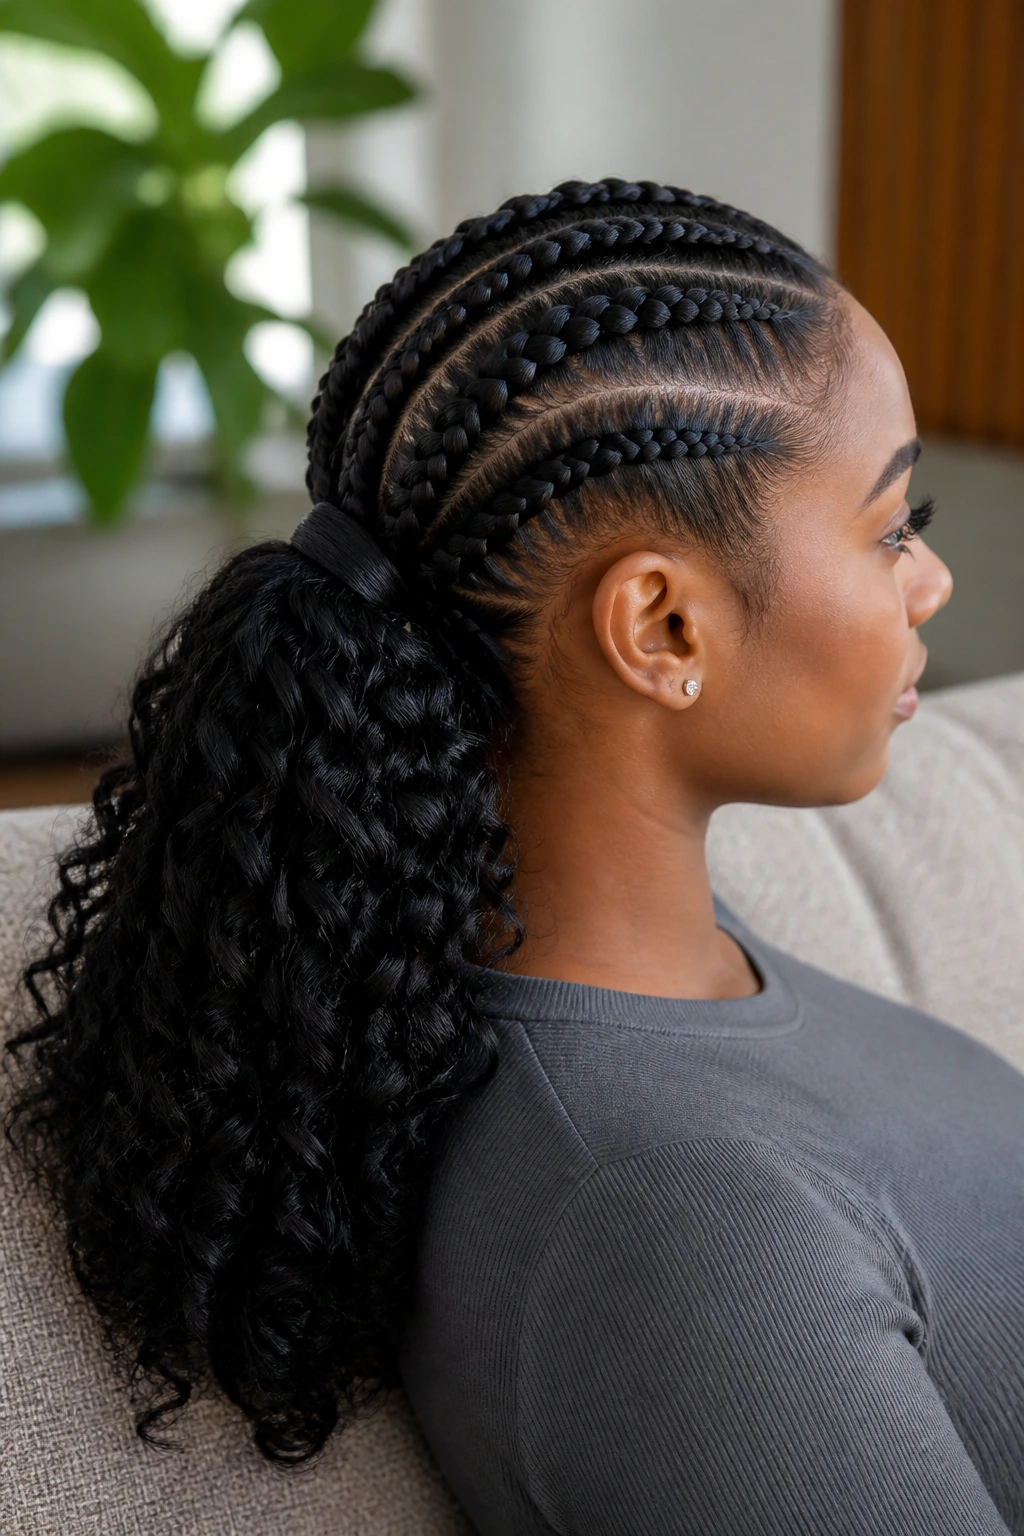
Straight ponytails are fine. Curly ponytails are better when you want softness around a strong braided root pattern.
This version pairs Dutch braids with a curly extension tail, which gives you a nice contrast between the crisp scalp work and the looser finish at the back. It’s a smart move if your natural hair is stretched and you want the length to look full without piling on too much density near the base. Use a curl pattern that matches your vibe, not somebody else’s photo.
A practical note
Keep the attachment point hidden with a wrap of hair or a small braid cuff. Once that join is neat, the whole style feels more finished. If the base is messy, the curl won’t save it.
9. Half-Up Dutch Braids into a Back Ponytail
Half-up versions are underrated. They give you the visual impact of Dutch braids in front and leave some length free below, which makes the whole style lighter on the head. That’s useful when your scalp likes a break but you still want a ponytail shape.
The top section gets braided back into a ponytail, while the lower hair can stay natural, stretched, curled, or lightly blown out. I like this for shoulder-length or medium-length natural hair because it avoids the overbuilt look that some full ponytails get. It also tends to dry faster if you’re washing your hair before styling.
Best when
You want movement at the back but don’t want all the hair gathered. The style sits somewhere between a braid and a ponytail, and that middle ground is exactly why it works.
10. Side-Swept Dutch Braids with a Shoulder-Length Tail
Side-swept braids change the mood fast. Instead of splitting everything down the center, you direct both braids toward one side and finish with a shoulder-length ponytail or a short extension tail. The result feels softer, but it still holds its structure.
This is a good look for anyone who dislikes a ponytail that hits the back of the neck all day. A shorter tail reduces friction, which means fewer tangles and less midday pulling. It’s also a smart choice if your hair is thick enough that a full-length tail would feel heavy.
Little styling detail
Tuck the tail under the collar line of your shirt or let it rest over one shoulder. That simple placement makes the whole style read more deliberate and keeps the braid line visible from the front.
11. Jumbo Dutch Braids with a Scarf-Wrapped Ponytail
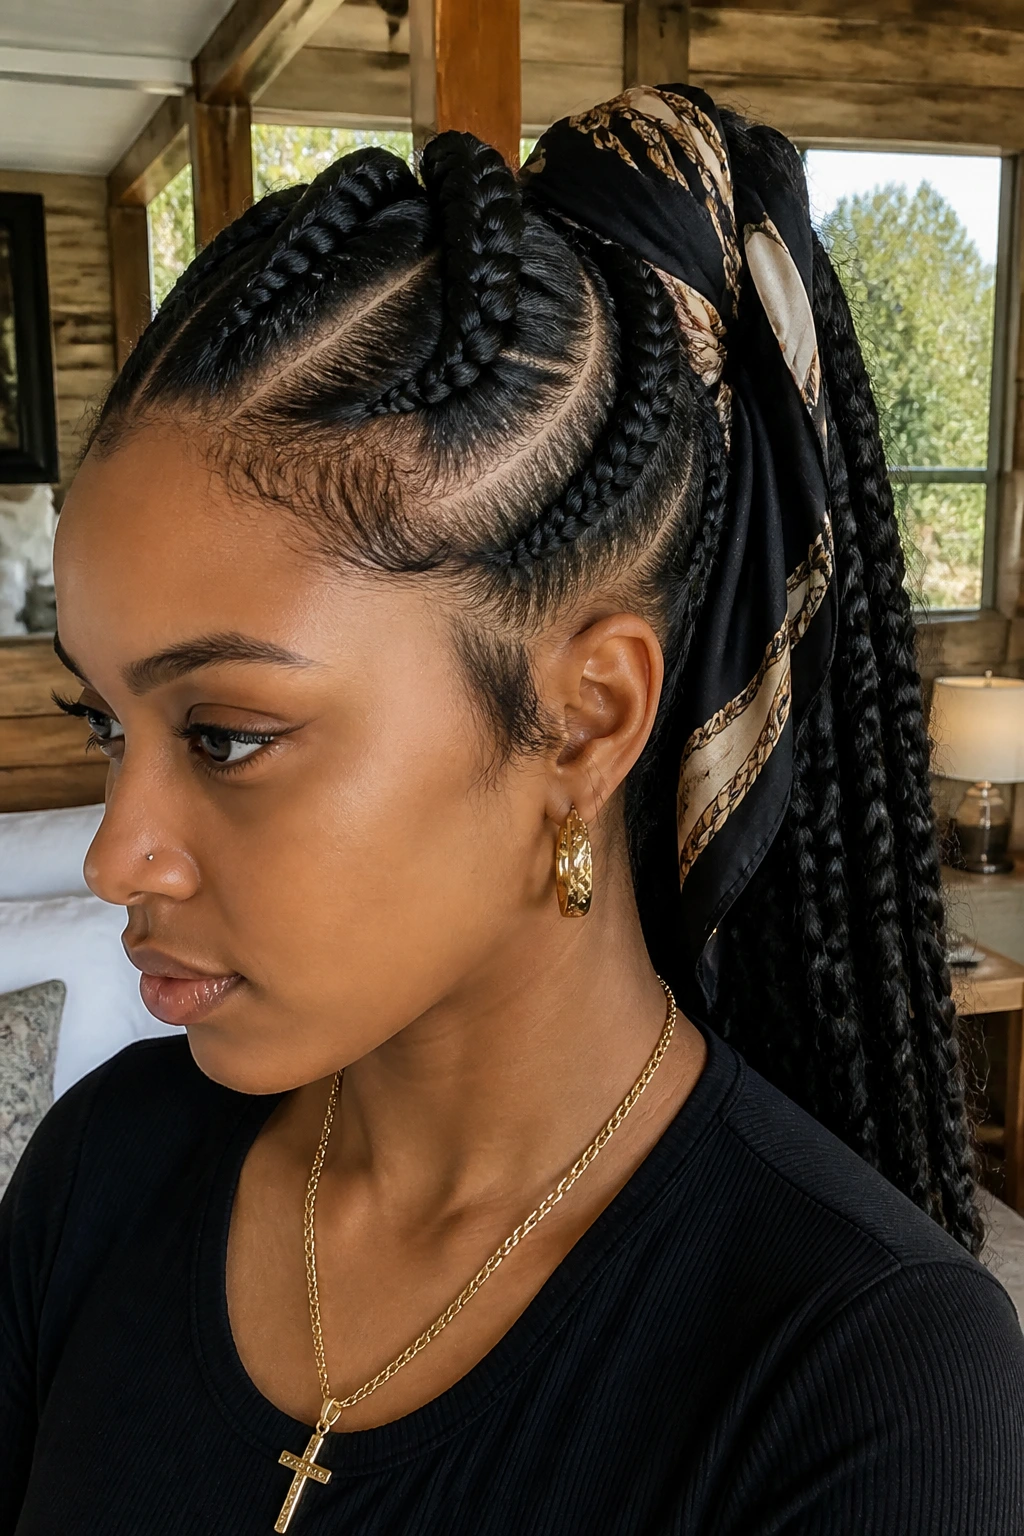
Jumbo braids do not whisper. They make a statement from the first part to the last wrap.
The larger sections mean the braid pattern appears faster, which is useful if you want a style that looks finished without spending half the day on sectioning. The scarf around the ponytail base adds both color and grip. It also hides the transition from braid to tail, which is handy when you’re working with thicker hair or a mixed-texture extension bundle.
Why this one lasts
Big braids can hold their shape well if the parts are clean and the scalp is moisturized first. I’d keep the scarf snug but not strangling the base. If it’s too tight, the style looks pulled. If it’s too loose, it slides.
12. Four Slim Dutch Braids into One Thick Ponytail
Four braids give you more control than two. They distribute the hair across the head in a way that feels balanced, and the final ponytail often looks fuller because multiple braid lengths feed into it.
This version is especially good if your hair is dense and you don’t want one heavy braid taking all the strain. The slimmer braids also hold better when you sleep, because each line keeps its own shape instead of collapsing into one broad lump. I like this style for people who want detail without going full micro-braid.
How to use the shape well
Pull the four braids toward the center back and secure them before gathering the ponytail. That small extra step keeps the base from shifting side to side. Skip it, and the style starts looking lopsided after the first scarf wrap.
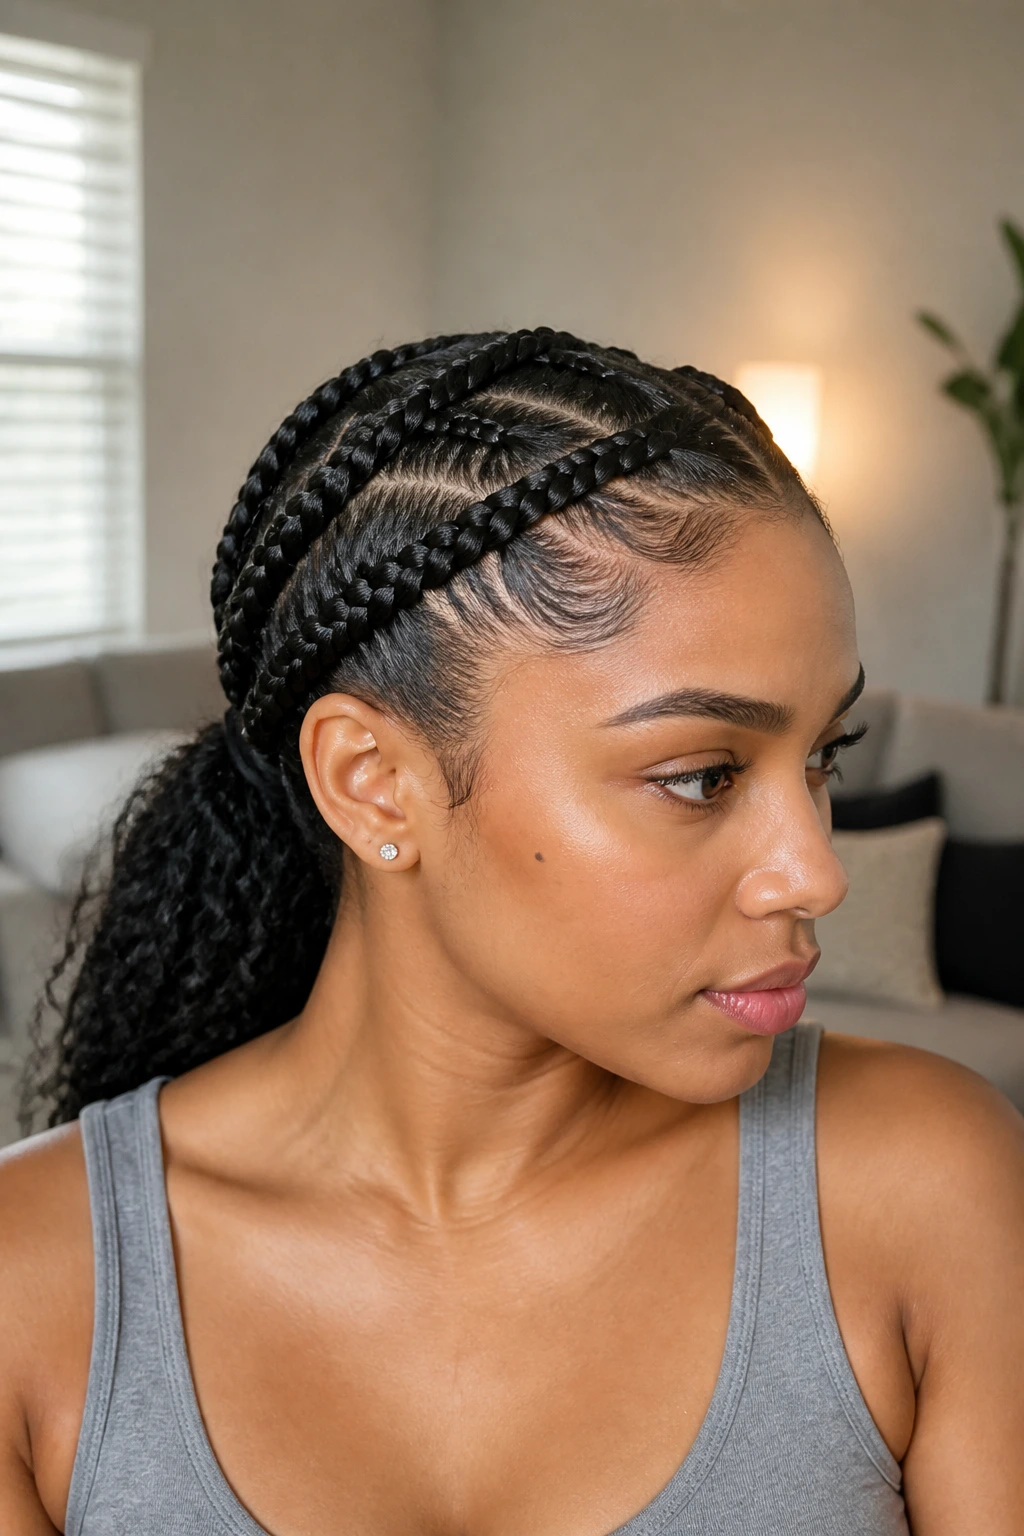
13. Zigzag Parts with a Sleek Ponytail
The parting is the star here. Zigzag parts turn a basic Dutch braid ponytail into something sharper and more playful without changing the actual structure very much.
A zigzag part works best when the lines are clean and deliberate, not shaky. Use the tip of a rattail comb and move slowly. The braid itself can stay simple and the ponytail can remain sleek, because the part does the talking. If you like styles that show detail up close, this one rewards a careful hand.
Best for long wear
The pattern itself helps disguise new growth. Straight parts show every millimeter of regrowth. Zigzags are a little more forgiving, which means the style can look neat for longer before the root area starts begging for a redo.
14. Crisscross Dutch Braids into a Low Ponytail
Crisscross braids look complicated, but the structure is really just about crossing the front sections over one another before they settle into the back. That extra movement creates a pretty visual line and keeps the style from feeling too predictable.
I like crisscross styles on Black hair because they give you a lot of visual texture without needing a huge amount of added hair. The low ponytail keeps the finish grounded. If you want to soften the shape, leave a tiny bit of hair loose at the temples; if you want it sharper, smooth everything back with a light gel and a soft brush.
What to watch
The crisscross pattern can loosen if the crossing points are too far apart. Keep the sections even, and the style will hold. Uneven spacing shows fast, especially around the hairline.
15. Dutch Braids with Beads and a Swingy Ponytail
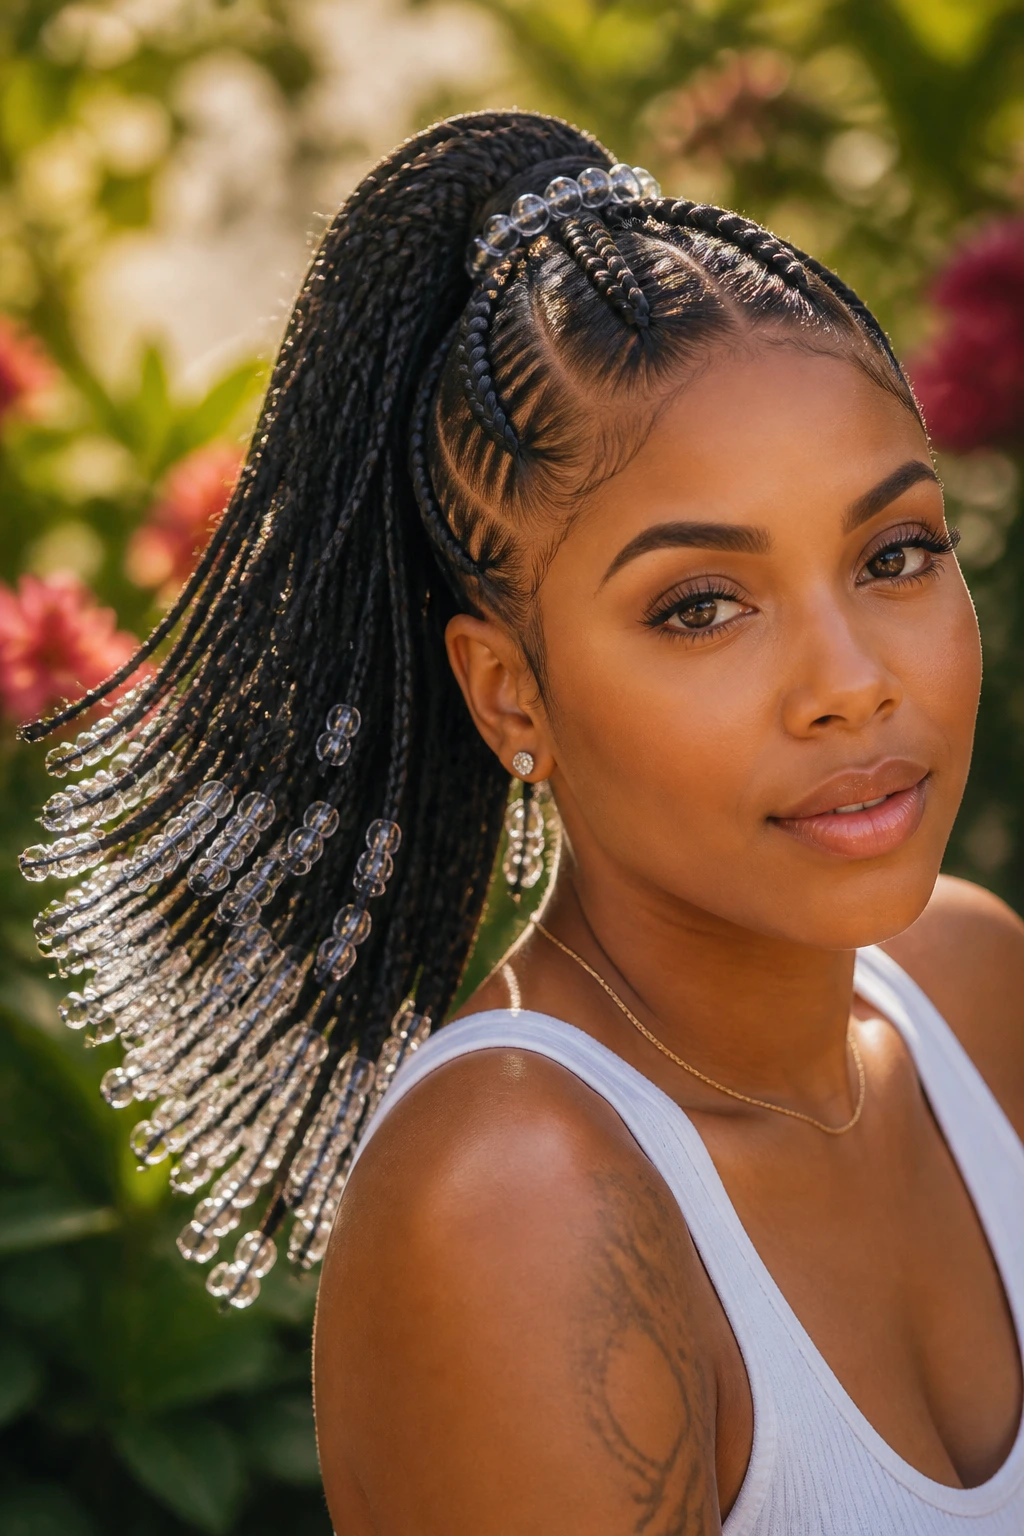
Beads change the whole feel of the style. They add sound, weight, and a little movement that plain braids can’t match. On a Dutch braid ponytail, they also help weigh down the ends just enough to keep the tail from puffing up too quickly.
Use beads sparingly if the ponytail is already thick. A few on the ends or along one braid are enough. Too many beads can make the style feel crowded and can tug at the braids while you sleep. That said, a small bead cluster near the ponytail base can look excellent with a sleek middle part.
A practical pairing
This style plays nicely with simple clothes and strong jewelry. Think big hoops, a plain tee, a tailored jacket. The hair has enough personality on its own.
16. Curved Feed-In Braids into a High Ponytail

Curved parts give the style a softer flow than straight lines do. The braids sweep around the scalp and meet at the crown, which makes the final ponytail feel more lifted and sculpted.
Feed-in hair helps here because curved parts can expose bulky beginnings if the added hair is too heavy too soon. Start small, build gradually, and keep the edges smooth with a brush and a thin layer of styling gel. If you like lifted ponytails but hate a harsh hairline, curved feed-ins are worth trying.
How it wears
It stays tidy because the parts create their own motion. Even when the ponytail gets a little tired, the braided curves still look intentional. That’s a useful trick when you need a style that ages gracefully instead of falling apart.
17. Micro Dutch Braids with a Long, Slim Ponytail
Micro braids at the front take patience, but they pay you back in wear time. Smaller sections tend to stay neat longer because each braid has less bulk to loosen at the root. That makes this style a good candidate for extended wear if your scalp can handle the finer parting.
The long, slim ponytail keeps the look elegant rather than overloaded. I wouldn’t pile on huge extension bundles here. The point is control, not mass. A thinner tail moves better, dries faster if it gets damp, and is easier to refresh with a quick mousse pass.
Where this one fits
It’s a smart option for people who want detail that lasts more than a weekend. You do need time up front, though. There is no way around that.
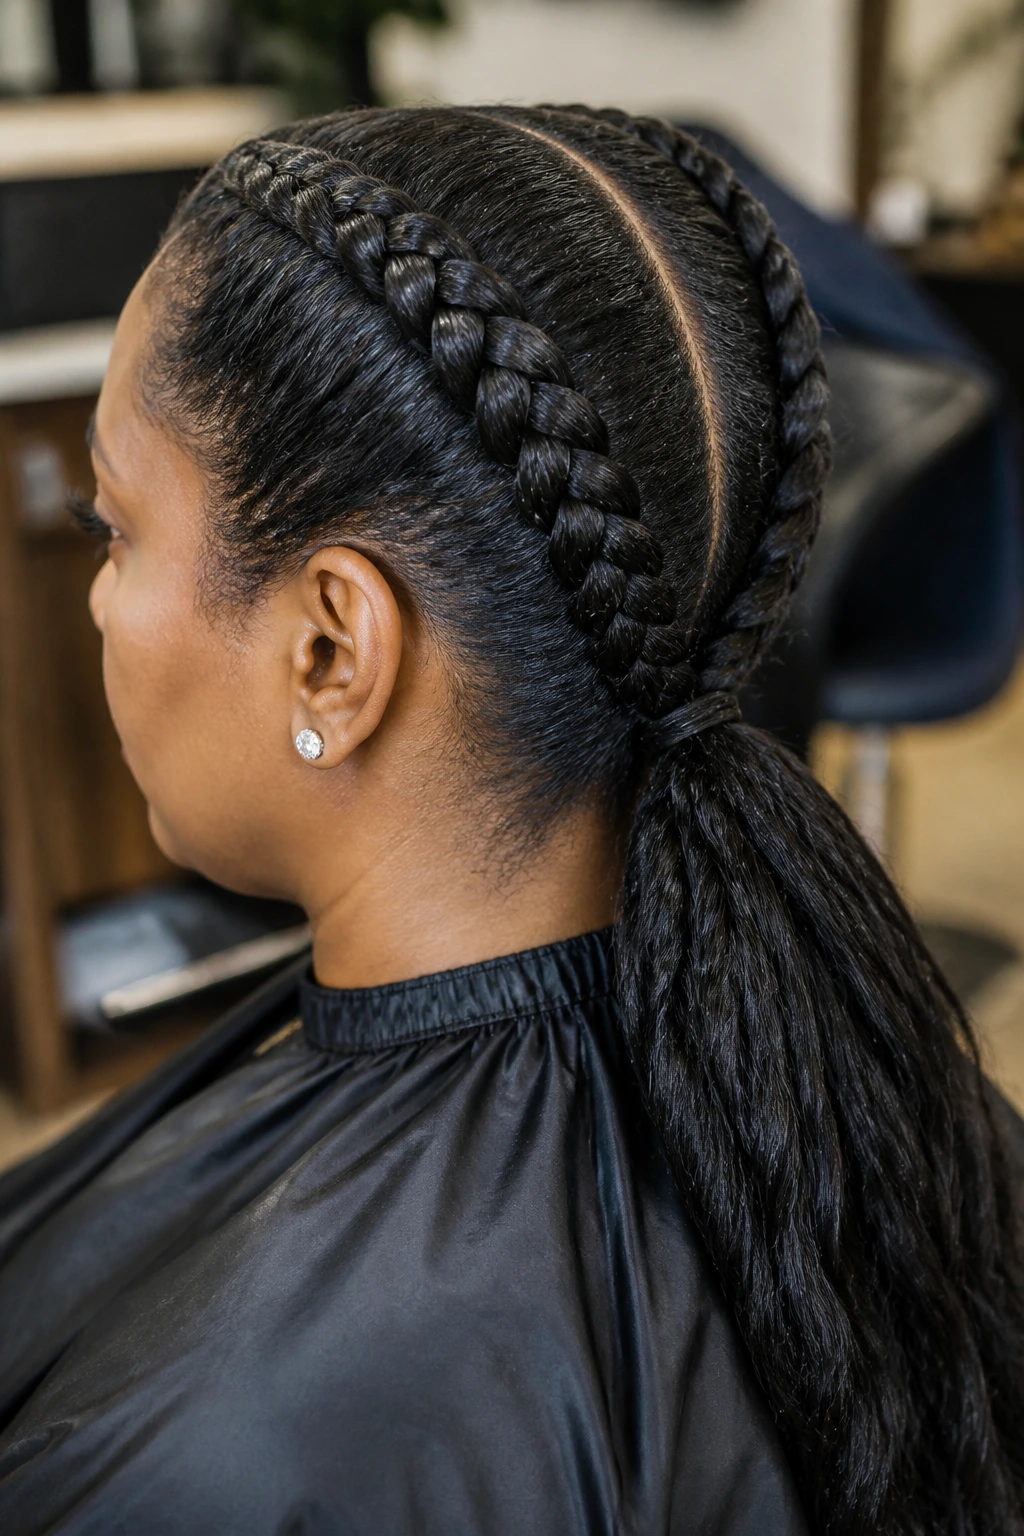
18. Dutch Braids into a Twisted Rope Ponytail
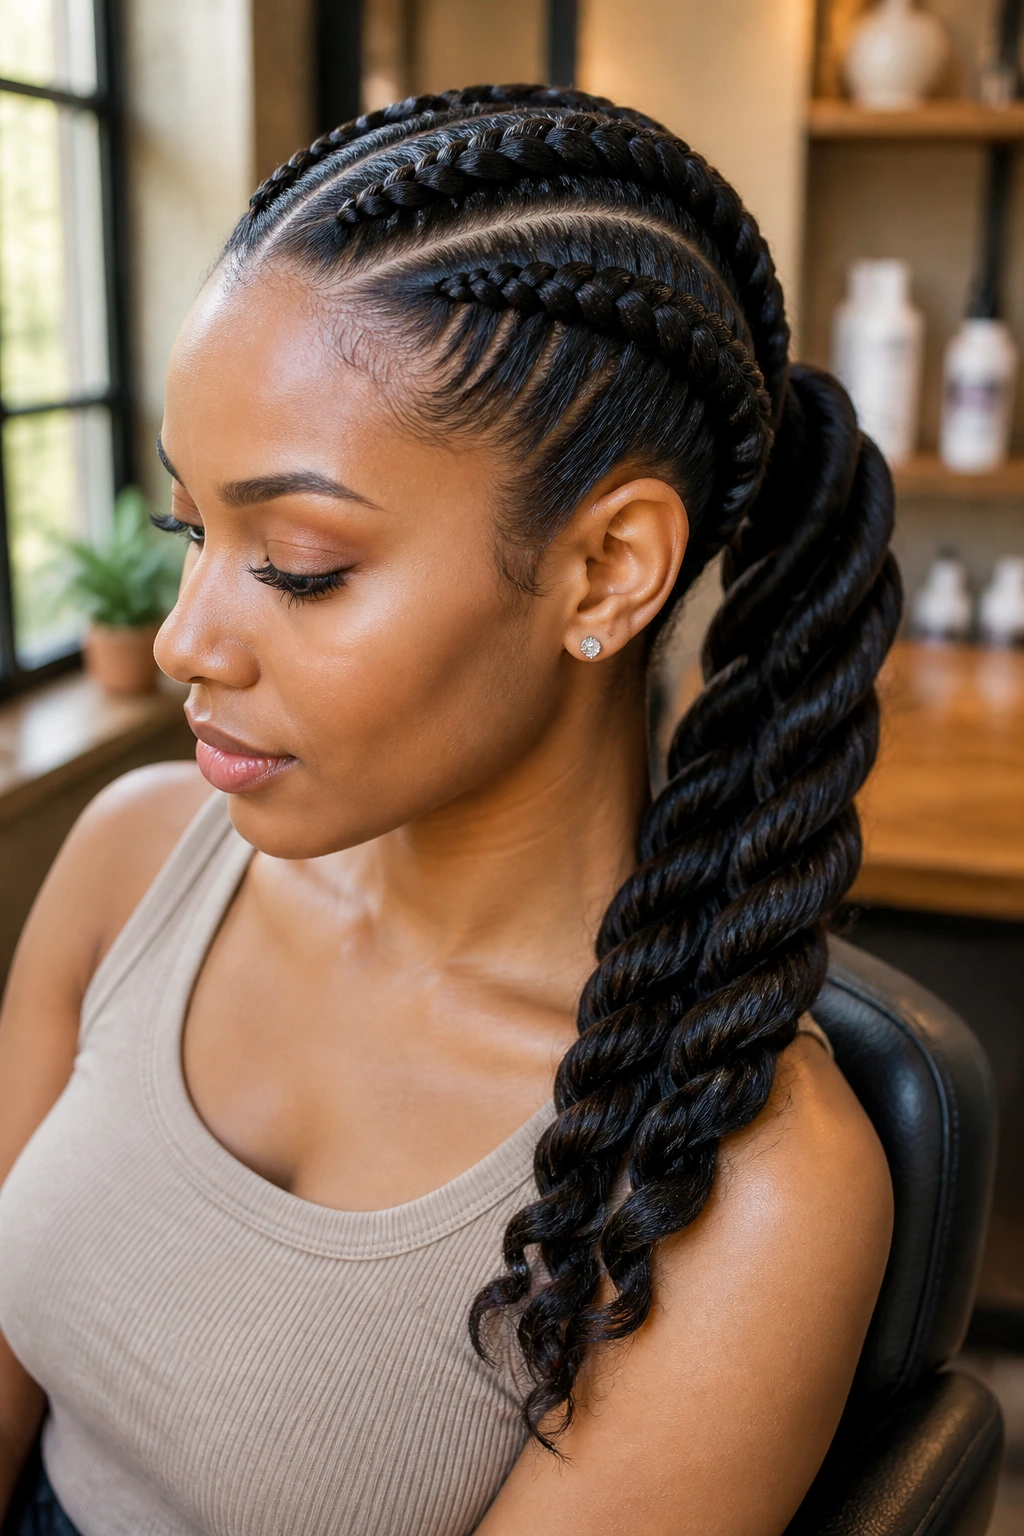
A rope ponytail gives the finish a smoother, corded look than a standard braided tail. The two sections twist around each other and hold a clean line that works beautifully with the raised Dutch braids at the front.
This style is surprisingly good for longevity because twists don’t unravel as fast as loose straight hair can. Use a touch of serum on the tail if your ends are dry, but don’t soak it. Too much oil makes the rope collapse and go limp. The sweet spot is a light sheen, not a slick coat.
Good to know
If your natural hair shrinks a lot, stretching the tail first helps the rope stay visible. The front braids keep the look anchored, and the rope finish gives you just enough movement to keep it from feeling severe.
19. Dutch Braids with a Folded-Under Ponytail Base
This is the style I’d pick when I want the ponytail to feel contained. Instead of letting the tail start with a loose knot, the ends are folded under or tucked into a wrapped base, which creates a cleaner silhouette and hides the roughest part of the join.
It’s especially useful with extension hair because the base can look bulky if it isn’t handled carefully. The folded-under finish solves that. It also reduces tangling at the nape, which is where braids and tails tend to snag first. Keep the fold secure with pins or a strong elastic wrapped with hair.
A small advantage people miss
The base stays flatter overnight. That means less morning rework, which is half the battle with long-wear styles.
20. Tapered Braids with a Flipped Ponytail
A flipped ponytail has ends that turn under or flick outward slightly, depending on how you set them. That shape adds a bit of lift at the bottom, which keeps a long braid ponytail from looking too heavy.
The tapered braid front matters because it creates a gradual shape from the scalp to the tail. If you jump from tiny roots to a huge ponytail in one step, the style can feel top-heavy. Tapering softens that transition. I like this version for people who want a polished finish that still moves when they walk.
Best version of the finish
Set the ends with foam wrap or a light setting mousse, then let them dry fully before touching them. If you rush this part, the flip falls flat fast.
21. Dutch Braids with Soft Side Bangs and a Low Ponytail
Not every ponytail has to pull everything back hard. A soft side bang or a few face-framing pieces can make the style easier to wear, especially if you like a more relaxed outline around the face.
The braids still need to be secure, but the side pieces soften the overall look and give you a little breathing room at the temples. This is a strong choice when you want the style to last and still feel gentle enough for everyday wear. Keep the bangs light. Heavy face-framing pieces can frizz before the rest of the braid even starts to move.
Why I’d choose it
It looks polished without feeling severe. Some braid styles are all structure and no softness. This one lands in the middle.
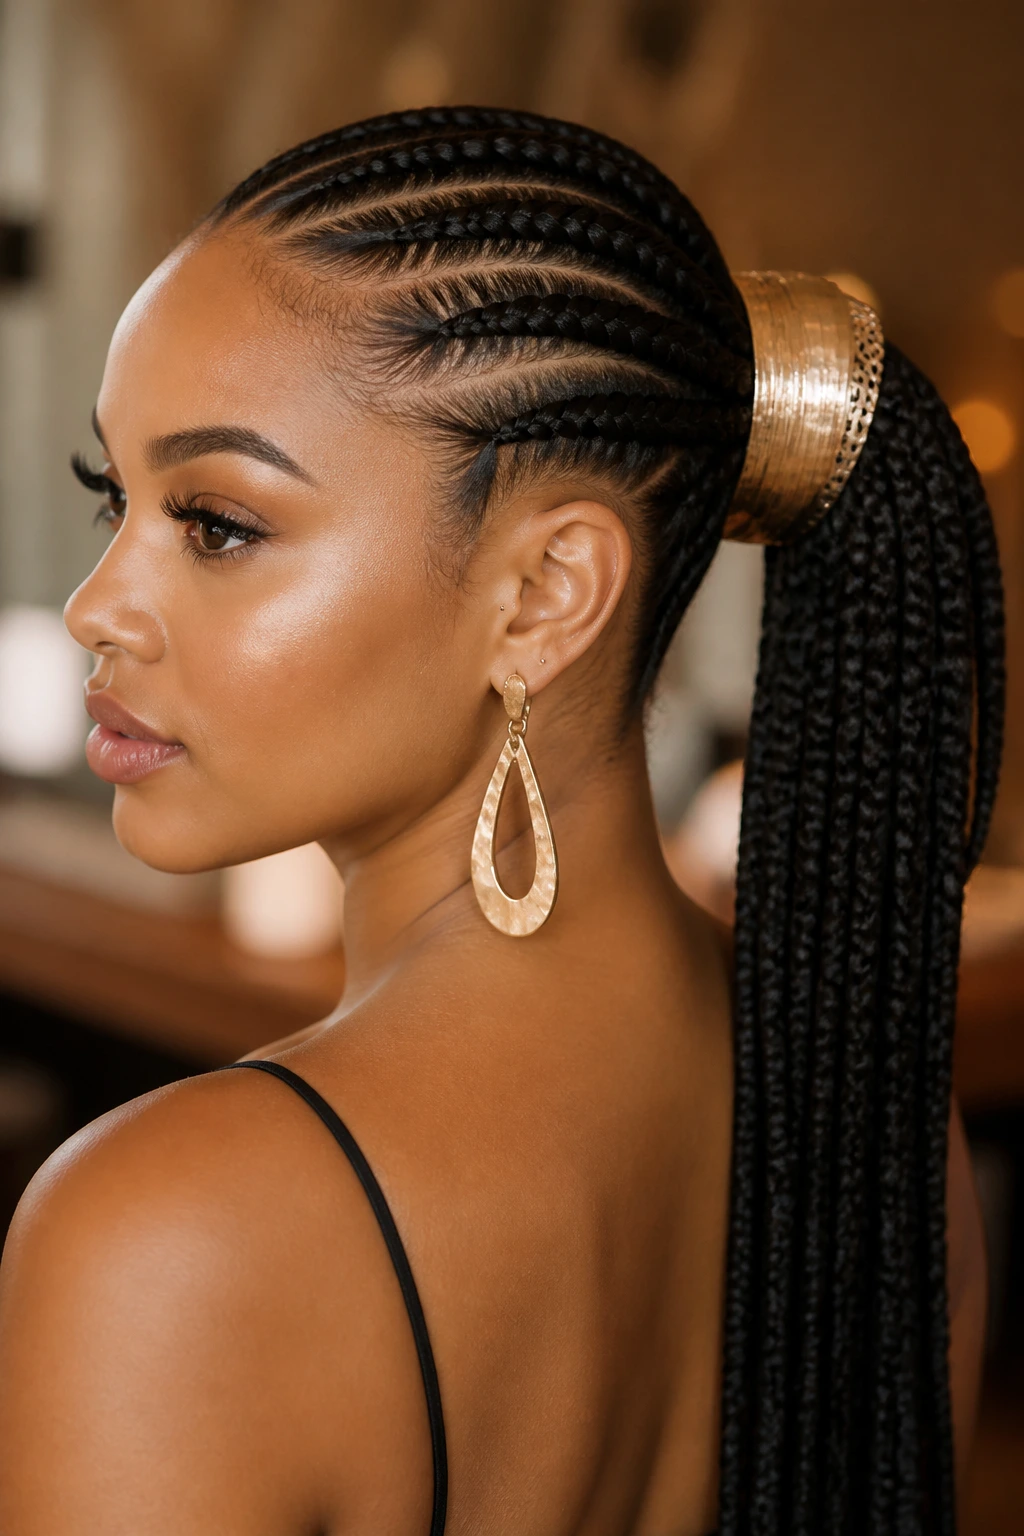
22. Sleek Back Braids with a Statement Wrap Ponytail
Finish strong. That’s the idea here.
The braids are pulled straight back into a ponytail, then the base gets wrapped with a bold strip of hair, a satin ribbon, or a decorative braid cuff. It’s the kind of finish that turns a functional protective style into a full look. If you’re wearing this for a longer stretch, the wrap also hides the part of the style that tends to loosen first.
Final styling note
Keep the wrap snug and wide enough to cover the elastic completely. A skinny, half-done wrap looks fussy. A clean wrap looks intentional and holds the whole style together.
Why Dutch Braid Ponytails Hold Up So Well on Black Hair
The structure is doing the work here, not luck.
Dutch braids anchor the hair at the scalp in a way that distributes tension across several sections instead of yanking on one spot. That matters for long wear, especially when you’re dealing with natural texture that wants to puff, coil, and shift as soon as you move around. A ponytail attached to a braid base stays neater than one attached to loose hair because the roots are already controlled.
The style also gives you room to manage bulk. Coily hair can be stretched, blown out lightly, braided in its natural state, or blended with extension hair depending on the finish you want. Because the braid ridge sits on top of the scalp, the shape remains visible even when the tail gets a little fuzzy. That’s why this style still looks decent after sleeping under a satin bonnet and waking up with one stubborn baby hair refusing to cooperate.
And yes, the base matters more than the ponytail length. A gorgeous tail attached to a sloppy part is still a sloppy style. Clean sections, moderate tension, and a properly secured wrap make the difference between a style that lasts four days and one that starts sighing by lunch.
The Tools That Make These Styles Easier
-
Rat-tail comb: Clean parts are the difference between sleek and crooked, and the pointed end helps you drag sharp lines through product.
-
Styling gel or braiding pomade: Use a light-to-medium hold product that smooths the roots without turning flaky overnight.
-
Mousse foam: Ideal for laying down flyaways and setting the braid ends once the style is finished.
-
Edge brush: Useful for controlled smoothing around the hairline, especially if you’re keeping the front neat but soft.
-
Hair clips: They keep the loose sections out of the way while you braid and save you from redoing parts.
-
Elastic bands: Small, snag-free elastics are better than rough ties that chew at the ends.
-
Braiding hair or extension pieces: Choose pre-stretched synthetic hair if you want added length without a bulky start.
-
Satin scarf or wrap strip: This helps flatten the roots and keeps the style cleaner overnight.
Smart Hair Prep and Product Choices
Start with hair that’s clean enough to hold product, but not so stripped that it feels squeaky and dry. For Black hair, a light leave-in and a bit of stretch before styling usually make the parts easier to manage. If your hair shrinks hard, banding or a low-heat blowout on stretched sections will give the braid lines a cleaner finish.
Choose your braiding hair by weight, not by hype. Long, dense extension hair looks nice in a photo and feels like a brick by day two if your scalp isn’t used to it. Pre-stretched synthetic hair is usually easier to blend because the ends don’t need as much manipulation. If you want curly ends, pick a texture that matches the natural finish of your own hair or the mood of the style.
Product-wise, less is often better. A little gel along the part and a controlled amount of foam at the end usually beats burying the scalp under sticky buildup. If your hairline is sensitive, skip heavy edge control on the tender spots and use a soft brush with a light hand. The style should hold because of the braid structure, not because you’ve glued every hair in place.
How to Wear These Styles Without Fighting the Hair
Presentation: Keep the parting clean and the finish intentional. A center part reads sharp, a side part reads softer, and zigzag or curved parts add personality without changing the base structure. If the ponytail is long, let it sit over one shoulder for a more relaxed profile; if it’s short or curled, keep it centered so the shape stays balanced.
Accessories: Hoops, cuffs, satin wraps, and a few beads can do more than another layer of product ever will. Pick one feature and let it lead. A statement wrap at the base and oversized earrings is enough; you do not need every accessory in the drawer.
Occasions: These braids work for workdays, travel, workouts, and dressier settings because they read neat even when the tail loosens a little. A high ponytail gives more drama. A low ponytail gives more staying power. Choose the one that fits your neck, your routine, and how much handling your scalp can tolerate.
Finish: A light mist of foam and a scarf press at the end makes the style look freshly done longer than constant touching. That’s the move. Hands off does more than half the products on the shelf.
Extra Tips and Polish Boosters
Moisture base: Start with a light leave-in on the stretched hair before braiding. Dry roots drink product later and start looking chalky around day two.
Grip without crunch: If your gel leaves a hard cast, soften it with a tiny bit of warm water on a cloth after the braid sets. Don’t soak the whole style.
Ponytail weight: If the tail feels too heavy, shorten it or thin the bundle. A style that tugs at the scalp every time you turn your head is not worth the extra length.
Refresh trick: Wrap the roots at night, then smooth the front with mousse in the morning and let it dry before touching it. That’s enough for most styles. More product than that usually means buildup.
Mistakes That Shorten the Wear Time
Pulling the front too tight: The style may look neat for five minutes, but the hairline will complain by the end of the day. You want secure, not strained.
Using too much extension hair: A giant ponytail can drag the roots down and make the braid base loosen faster. If the style feels heavy before you leave the house, it’s already too much.
Skipping the wrap at night: Satin matters. Cotton pillowcases rough up the braid surface, and a style that looked smooth at 8 p.m. can look fuzzy by breakfast.
Starting with un-detangled hair: Snags under the braid create little bumps that show up in the finished style. Detangle first, then section.
Loading the scalp with product: Heavy buildup makes the roots sticky and dull, then flaky. Use enough to smooth the parts, not enough to frost the scalp.
Ways to Change the Look Without Starting Over

Curly-Tail Switch: Keep the Dutch braid roots the same and swap the ponytail for a curly extension finish. Good when you want softness without changing the base work.
Low-Tension Everyday Version: Use smaller feed-ins, a low ponytail, and no extra beads or cuffs. This is the version I’d choose for long hours and a sensitive scalp.
Full-Length Glam Version: Add extension hair to the ponytail only, not the whole braid. That keeps the roots lighter while giving you the drama of a longer tail.
Side-Part Shift: Move the part a couple inches off center and the whole style changes mood immediately. It is the easiest way to make the same braid structure feel fresh.
Kid-Friendly Mini Version: Use smaller sections, shorter ponytails, and softer accessories. Less weight. Less tugging. Better attitude.
Make the Style Last: Night Care and Maintenance
A good Dutch ponytail braid can last several days if you treat it like a style, not a shrug. Sleep with a satin scarf or bonnet that covers the hairline and the ponytail base. If the tail is long, braid or twist it loosely before bed so it doesn’t tangle against your neck.
Keep your scalp clean enough to stay comfortable. A little scalp oil or a light braid spray on the part lines every few days is usually enough. Don’t drench the roots. You want the scalp to feel cared for, not soaked. If the style starts itching in a way that feels prickly or sore, that is your cue to loosen up your product routine and check the tension at the front.
Most versions wear best for about one to three weeks, depending on how much hair was added and how fast your roots puff. If the braid base starts lifting, the ponytail feels heavier than it should, or your edges feel tender instead of normal, take it down. Protective styles only protect when they’re not fighting your scalp.
Questions People Ask Before Trying These Braids

How long do Dutch ponytail braids usually last on Black hair?
If the parts are clean and the tension is sensible, most versions hold for several days to a few weeks. Styles with lighter ponytails and proper night wrapping tend to look better longer than heavy, overpacked versions.
Can you do this style without braiding hair?
Absolutely. If your own hair has enough length to form the ponytail, skip the extensions and keep the style lighter. The look still works, and your scalp will probably thank you.
What if my hair is short or heavily shrunken?
Stretching helps a lot. Banding, twist-outs, or a low-heat blowout on clean, detangled hair can give you enough length to braid neatly. If you still don’t have much length, use a small amount of added hair only at the ponytail.
Is this style good for a tender scalp?
Yes, if the braids are not pulled tight at the front. Low ponytail versions and feed-in styles are usually easier to wear than high, heavy ones. If the hairline hurts during styling, stop and redo the section. That pain is not a badge.
Can you wash the scalp while wearing it?
You can, but keep it gentle. A diluted shampoo in a nozzle bottle or a careful scalp cleanse between parts works better than flooding the whole style. Dry it fully afterward or the roots can get frizzy and stiff.
What products help the style stay neat longer?
A light gel for the parts, mousse for the finished braid surface, and a satin wrap at night are the big three. Heavy creams near the roots usually create buildup faster than they help.
Why does my ponytail keep sagging?
Either the tail is too heavy or the anchor is too loose. Reduce the extension weight, tighten the base just enough to secure it, and make sure the elastic is wrapped cleanly so it doesn’t slide.
Can I wear this style to work out?
Yes, and that’s one reason people love it. Low ponytail versions stay calmer under headphones and hoodies, while high versions need a little more re-smoothing after a sweaty session. A quick mousse refresh usually brings them back.
Braids That Keep Their Shape
A good Dutch ponytail braid does more than look neat on day one. It gives the hair a structure you can live with, sleep in, sweat in, and still recognize a few days later. That’s the sweet spot: enough shape to feel styled, enough flexibility to move through the week without fighting your own head.
The best part is how many directions you can take it. Clean and simple. Curved and dramatic. Wrapped, beaded, curly, or sleek. Once the braid base is handled well, the ponytail becomes the part that lets you show some personality.
If you choose one of these styles, keep the roots calm, the parts sharp, and the ponytail weight honest. The style will hold up far better that way, and your scalp will be a lot happier for it.