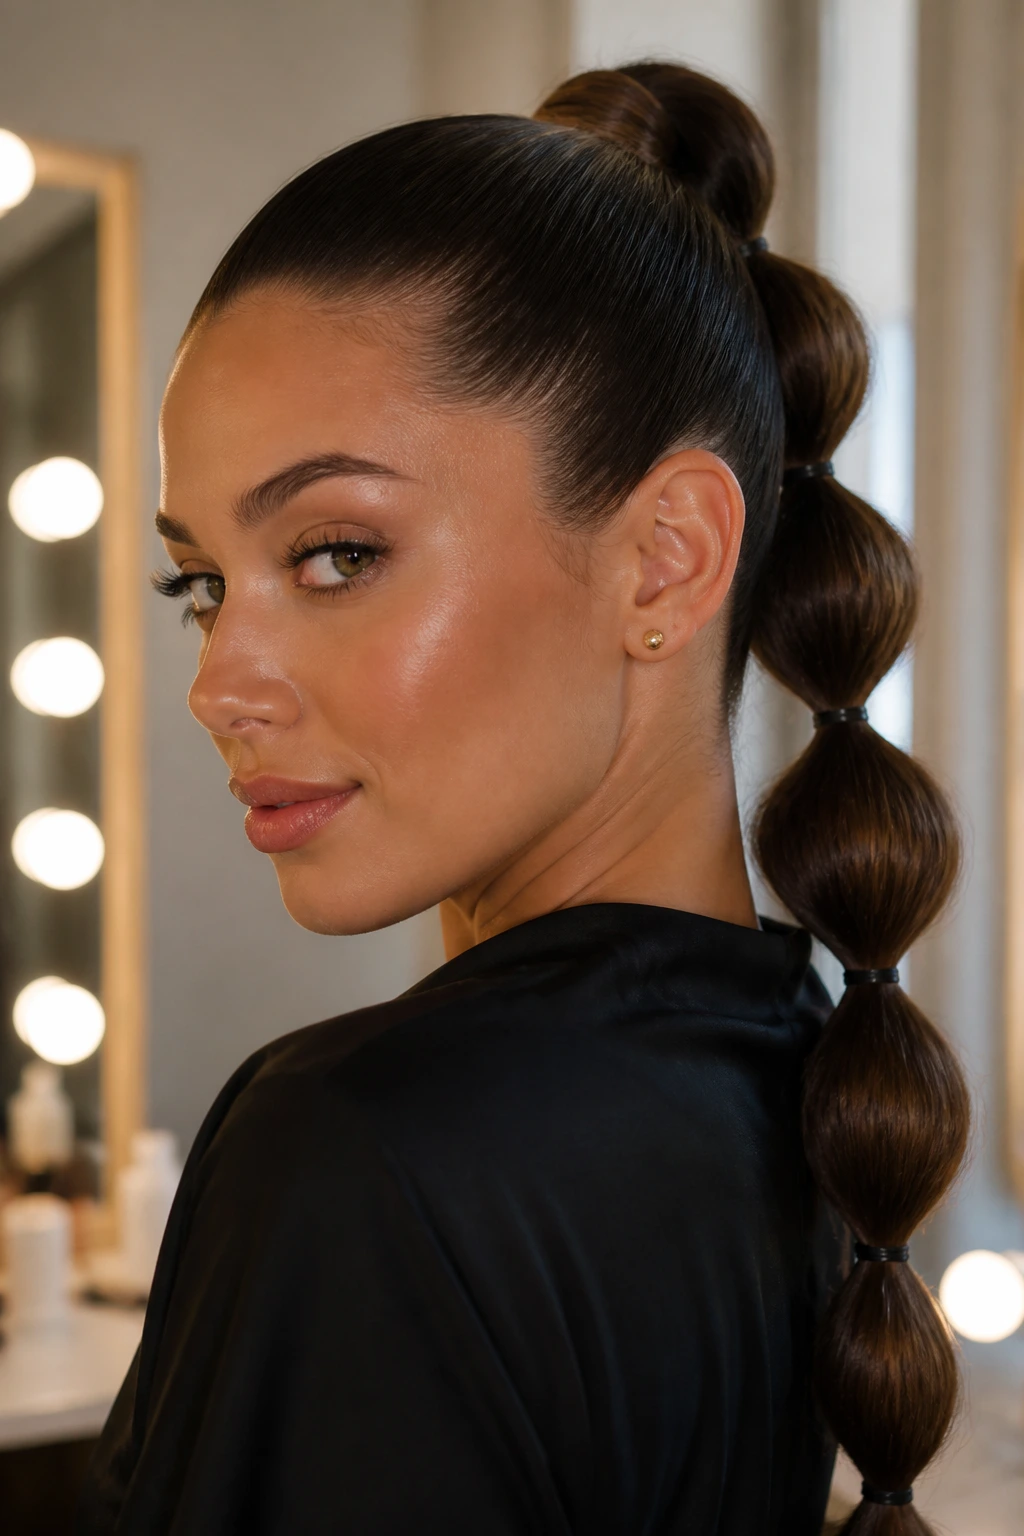
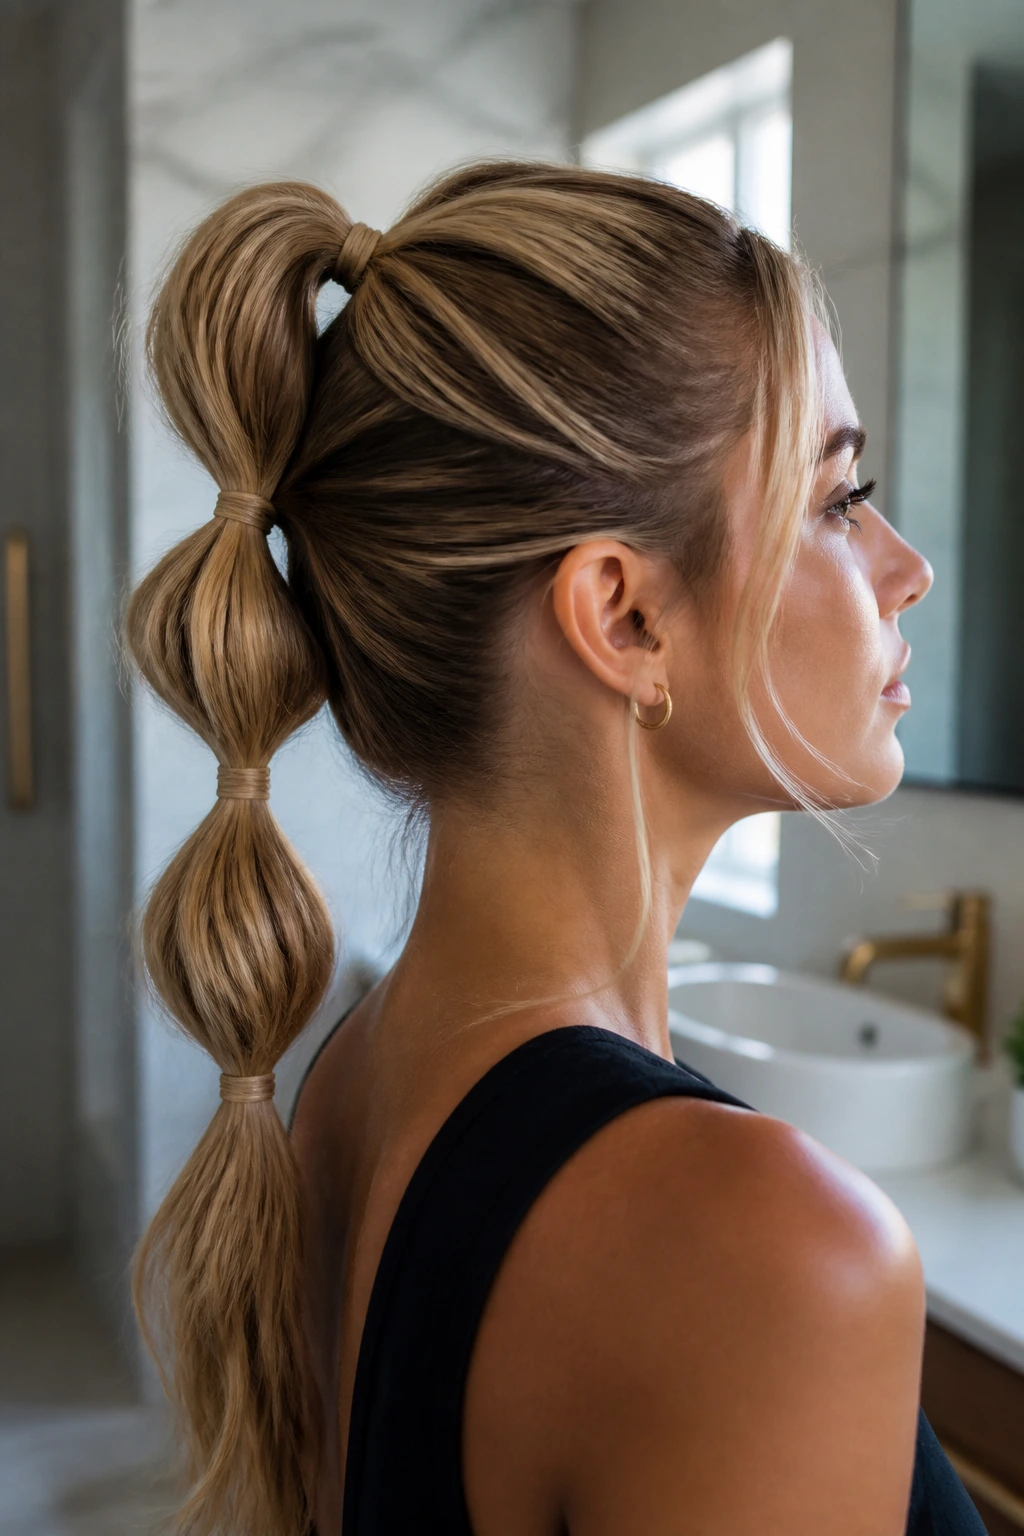
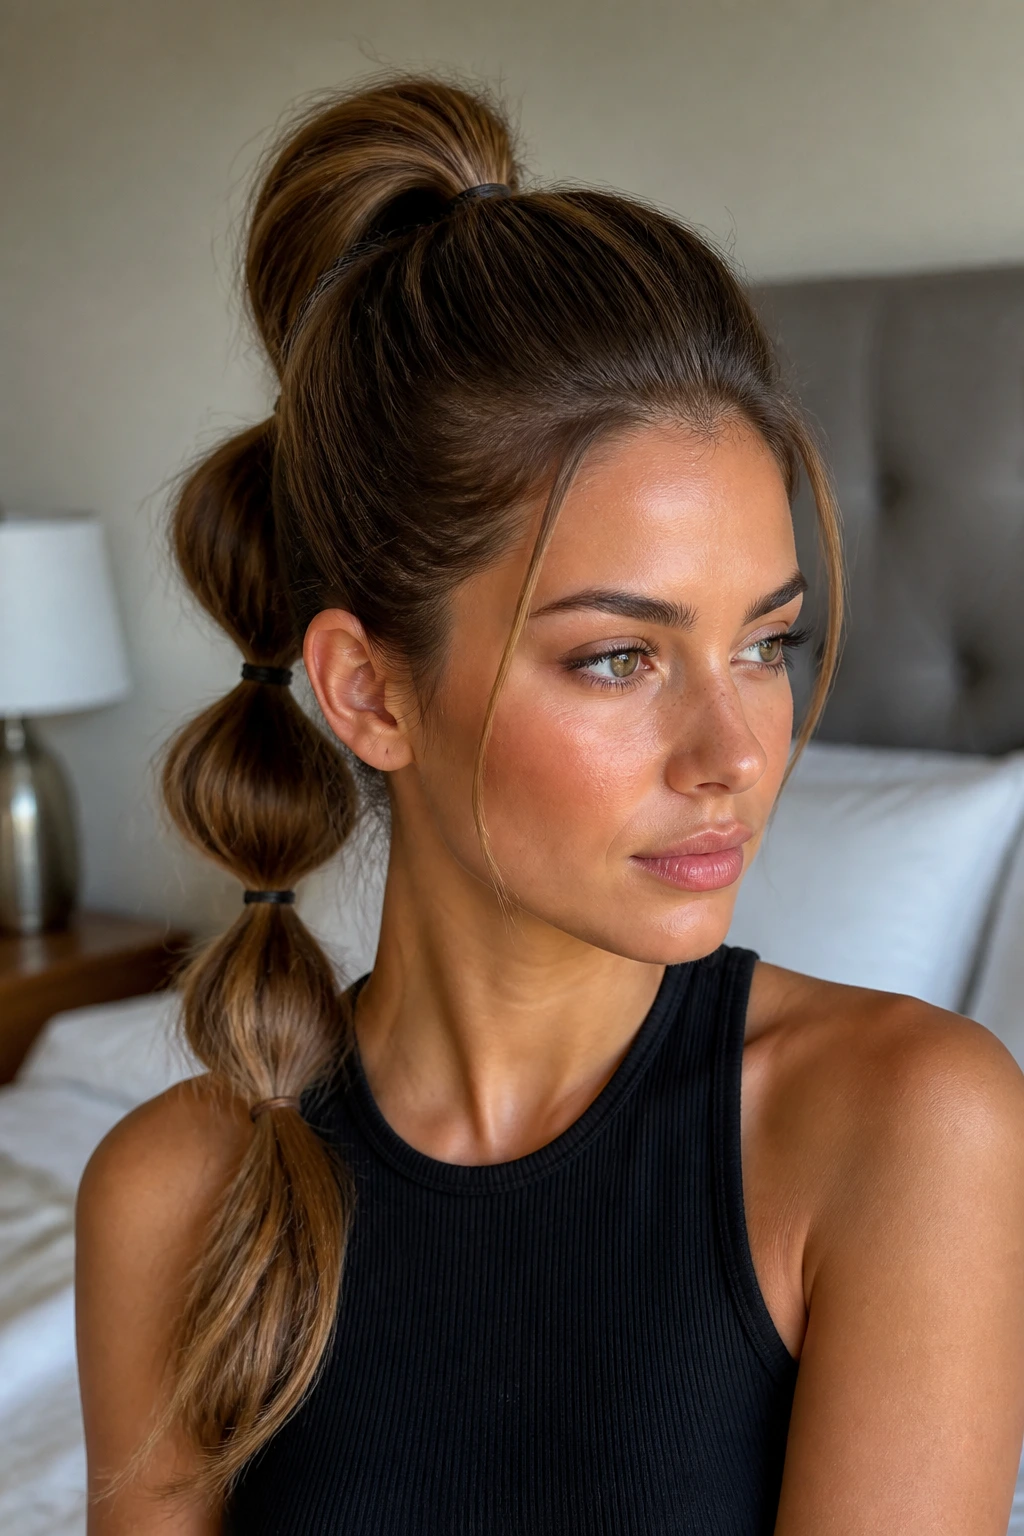
A bubble ponytail can look crisp enough for a black blazer and playful enough for a hoodie, which is part of why people keep coming back to it. The style looks fussy from a distance. Up close, it’s mostly smart spacing, a few small elastics, and enough grip in the hair so the sections don’t collapse before lunch.
That’s the real trick with a bubble ponytail: it isn’t about piling on more hardware or yanking the tail into submission. It’s about creating little pockets of air between anchors so each section reads as round and intentional. If your hair is silky, the bubbles can slide. If your hair is too dry, they can look rigid. The sweet spot sits in the middle, where the base is secure and the segments are puffed with just enough life to hold their shape.
I like this style because it solves a problem plain ponytails create all the time. Flat crown? Segment it. Uneven ends? Segment them. Hair that falls limp by noon? Segment it again. The style has enough structure to feel finished, but it doesn’t ask for the kind of patience a braid or a wrapped chignon needs. Once you get the tension right, the rest is rhythm.
Why the Bubble Ponytail Keeps Showing Up on Repeat
-
It builds shape fast: You are not weaving, twisting, or pinning ten different pieces into place. The structure comes from a series of simple ties, which means the whole style can be built with a comb, a handful of elastics, and about ten focused minutes.
-
It makes thin tails look fuller: The puffed-out sections interrupt the line of the ponytail, so the eye reads “volume” before it reads “ends.” That’s especially useful when your hair is layered or the last few inches are a little wispy.
-
It works with texture, not against it: Straight hair gives you crisp, round bubbles. Wavy hair gives you a softer, more relaxed version. Curly and coily hair turn the style into something fuller and more dimensional without much extra effort.
-
It lets you control the mood: Move the elastics close together and the ponytail feels tidy. Space them farther apart and the style gets bigger, looser, and more dramatic. Same basic method. Completely different read.
-
It’s easier to fix than a braid: If one bubble looks lopsided, you can adjust that section alone without tearing apart the whole style. That matters when you’re getting ready and do not want to start over because one segment dipped to the left.
What a Bubble Ponytail Is Really Doing to Your Hair
A bubble ponytail works because it plays with tension in a way that flatters almost every hair type. The elastic above a section holds the hair in place. The elastic below it traps the segment. Between those two points, the hair puffs out, and that puff is what creates the “bubble.” Simple idea. Slightly finicky execution.
The style looks best when the bubbles are round, not pinched. If the hair between elastics is pulled too hard, the segment narrows and starts to look like a sausage instead of a bubble. If it’s too loose, the section droops and loses the clean outline that makes the whole thing work. You want a shape that feels soft at the edges but still has a clear border.
There’s also a nice side effect here: bubble ponytails disguise a lot of the things people usually fuss over. Uneven layers? Hidden. Ends that don’t all hit the same place? Hidden. Slightly flat roots? The segmented length pulls attention away from them. That’s why the style can look more polished than a basic ponytail even when you did less actual work.
The other reason it holds attention is movement. A braid gives you texture, yes, but a bubble ponytail gives you space. Each segment catches light differently, and the negative space between elastics keeps the style from turning into one solid rope of hair. On medium and long hair, that spacing is the whole point. It makes the tail feel graphic instead of heavy.
Hair Prep That Makes the Segments Hold Their Shape
The best bubble ponytails usually start before the first elastic goes in. Hair that is too clean can be slippery. Hair that is too coated with oils or leave-in creams can go limp fast. The goal is hair with enough grip that the bubbles stay puffed, but not so much grit that brushing it feels like drag racing through tangles.
Freshly Washed Hair
Freshly washed hair can work, but it usually needs help. I’d reach for a light mousse at the roots and a small mist of texturizing spray through the mid-lengths, then rough-dry it so the strands are smooth but not glassy. If your hair is pin-straight after washing, the bubbles can slide before you’ve even finished the last segment.
Day-Old Hair
Day-old hair is often the easiest starting point. It has a little texture, the crown holds its shape better, and the ponytail tends to stay put without a wrestling match. If the roots feel a bit greasy, a few passes of dry shampoo at the base can do more than a full wash ever would for this style.
Curly and Coily Hair
Curly and coily hair gives bubble ponytails real personality, but it changes the method a little. Don’t stretch the pattern so hard that you flatten the curl pattern at the root. Keep the base neat, then let the bubbles stay slightly fuller and less uniform. The style looks better when the curls keep some of their spring instead of being forced into a blunt, slick shape.
Shorter Layers and Face-Framing Pieces
Short layers around the face can be useful, but they need a plan. If you want a clean look, smooth them back with a touch of gel or a styling stick before you secure the ponytail. If you like a softer finish, leave a few pieces out at the temples and the nape, then let the bubbles do the heavy lifting in the back.
The Tools I’d Keep on the Counter
-
A paddle brush or smoothing brush — This helps gather the hair without leaving too many bumps at the crown.
-
A rat-tail comb — The pointed end is useful for sectioning, cleaning up a part, and loosening the bubbles evenly.
-
Small clear elastics — These disappear into the hair better than thick ties, especially if your ponytail is dark or very fine.
-
Texturizing spray or dry shampoo — A little grip goes a long way when you want the bubbles to stay rounded.
-
A light hairspray — Flexible hold is enough. You want control, not helmet hair.
-
Bobby pins — Handy for hiding flyaways, anchoring face-framing pieces, or tucking a small ribbon tail.
-
A handheld mirror — Helpful if you’re doing a low bubble ponytail and want to check the back spacing before you head out the door.
-
Optional ribbon or scarf — Nice if you want a softer, more dressed-up finish around the base or between segments.
Secure the Base Ponytail Without Flattening the Crown
Start with hair that’s detangled and dry.
-
Brush through the entire head first, then decide where the ponytail should sit. A high placement gives lift and makes the bubbles read playful; a mid-height base looks balanced; a low base feels a little more refined and less bouncy.
-
If you want extra grip, mist a little dry shampoo or texturizing spray at the roots before you gather the hair. Do not soak the crown. Too much product can make the top feel dusty and stiff before the style is even built.
-
Gather the hair with your hands first, then smooth the outer layer with a brush only if needed. Over-brushing is the enemy here. It flattens the crown and erases the tiny bit of natural volume that helps the style look full.
-
Secure the base ponytail with a snug elastic. If your hair is thick or heavy, wrap the elastic twice and make sure it sits flat against the head. If the base wobbles, every bubble below it will wobble too.
Adjust the crown before moving on.
-
Tug the hair just above the elastic with both thumbs to create a little lift. You’re not trying to make a bump. You’re trying to avoid a slick, over-tight top that makes the whole ponytail feel anchored to the scalp.
-
If you want a polished finish, smooth the hairline with a pea-sized amount of gel or a styling cream on the fingertips. Use less than you think you need. A tiny bit controls flyaways; too much turns the style shiny in a greasy way.
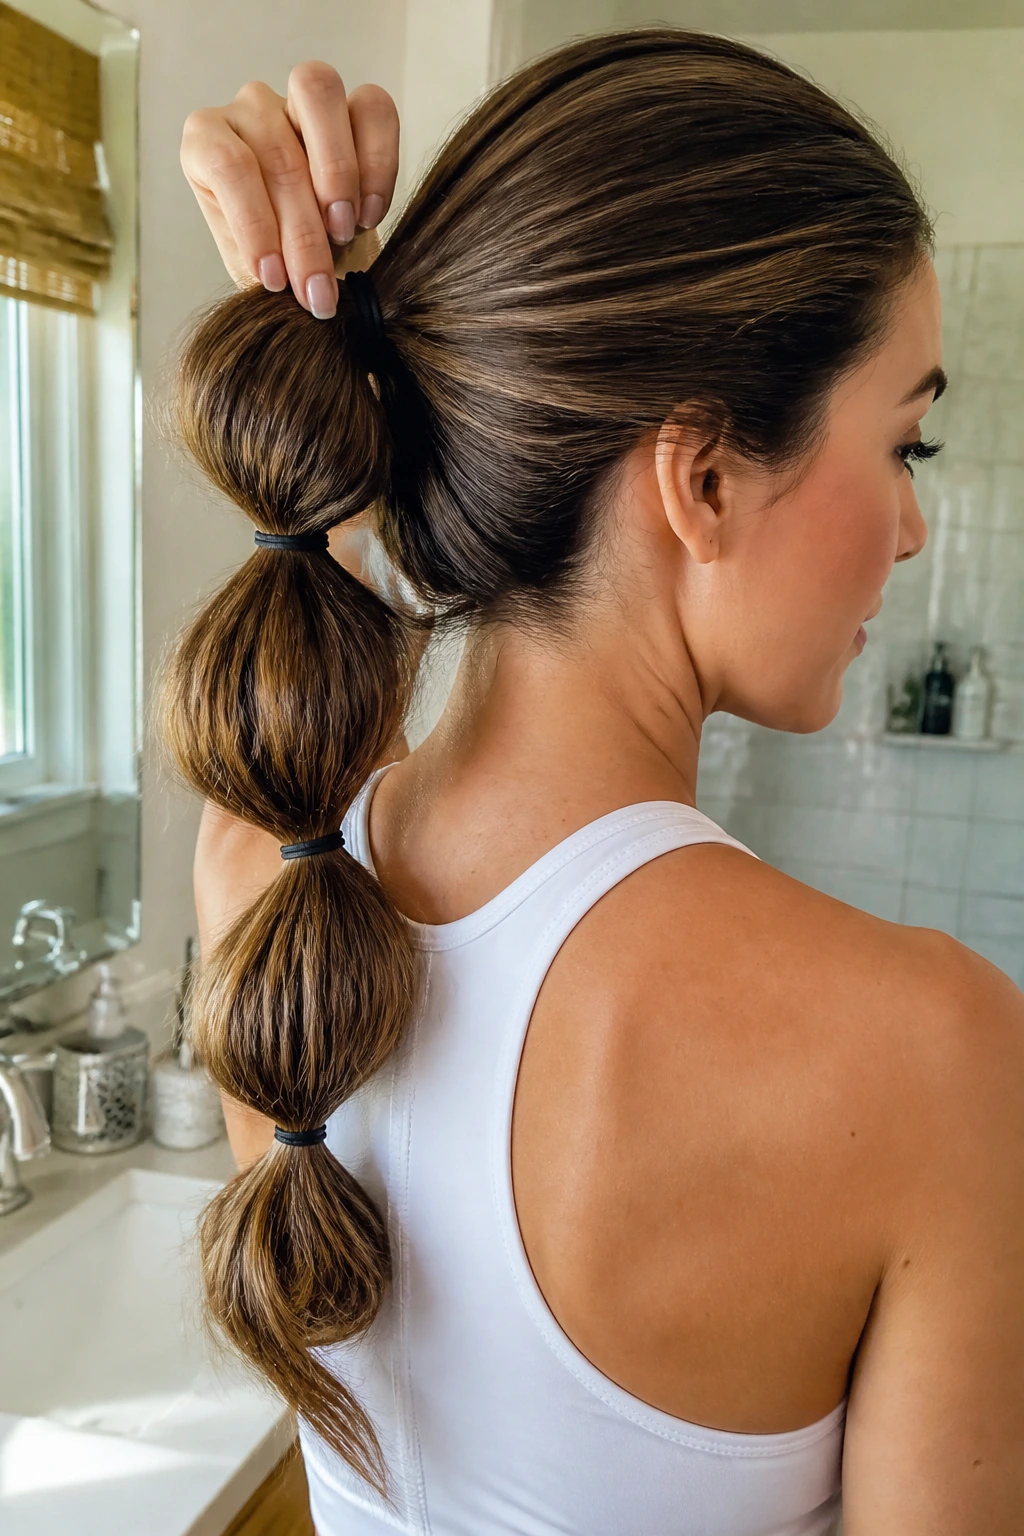
Place the First Elastic and Build the First Bubble
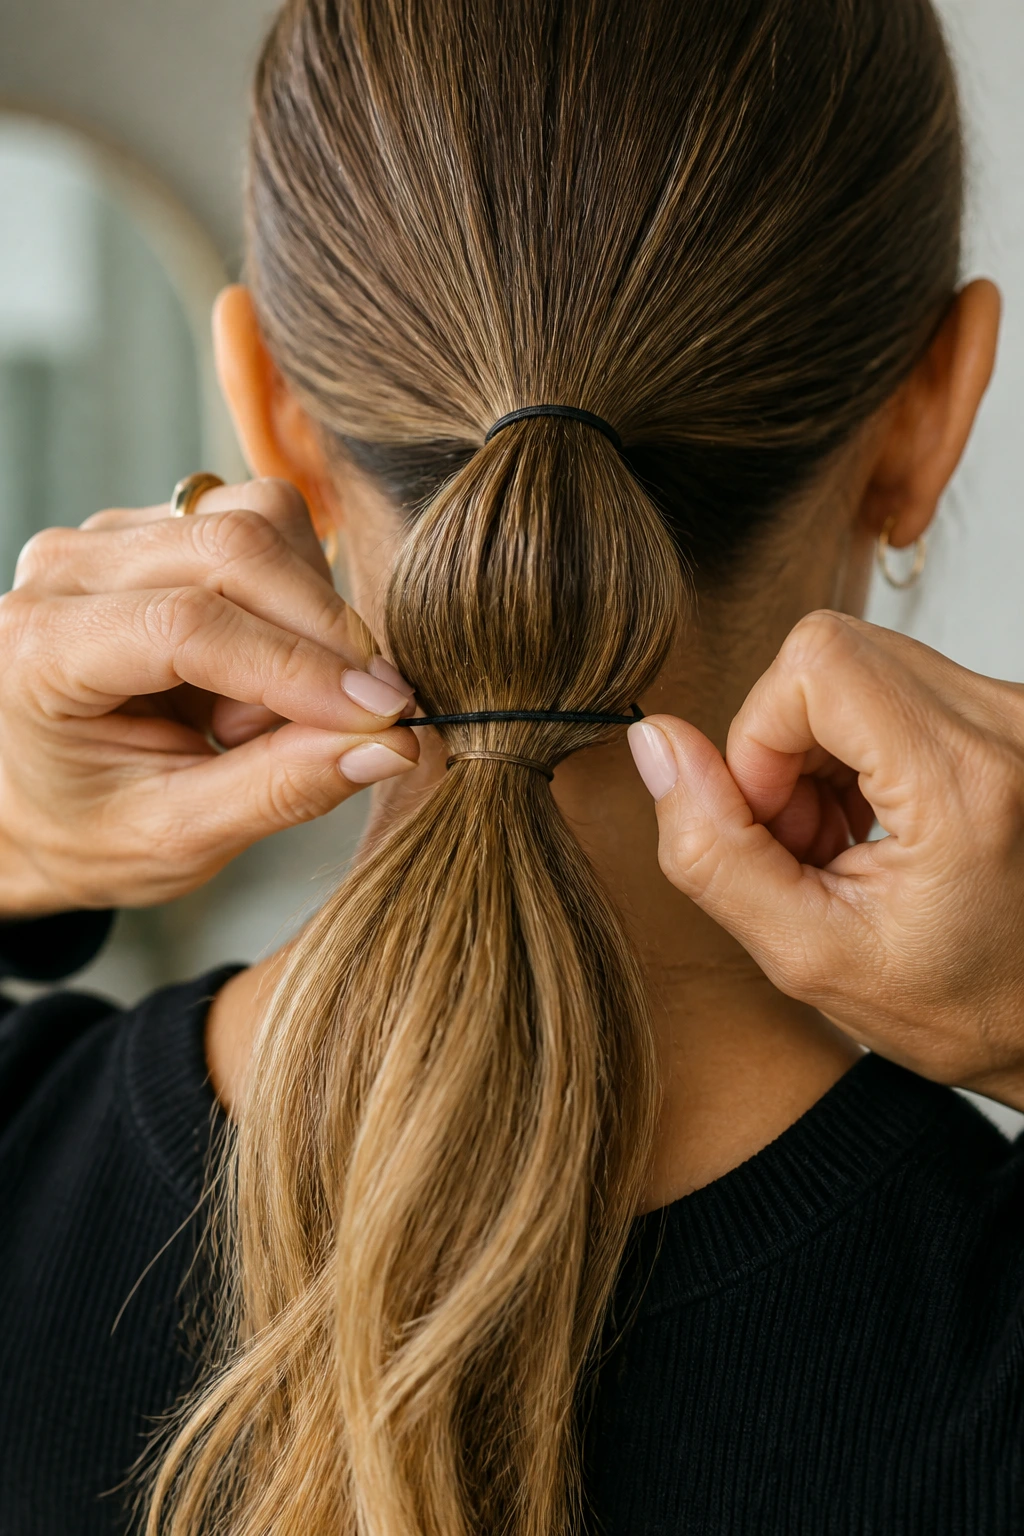
Measure the first segment before you commit.
-
Slide the first small elastic about 2 to 3 inches below the base ponytail. If your hair is short or medium length, stay closer to 2 inches. If your hair is long and dense, 3 inches usually gives the bubble enough room to puff out.
-
Hold the tail steady with one hand while you place the elastic with the other. The tension at the base should stay firm. If the ponytail starts slipping while you’re reaching down the length, the whole shape gets sloppy fast.
-
Once the elastic is in place, gently pull the sides of the section between the base and the second tie outward with your fingertips. Pull from the left and right edges, not straight from the center. That side-to-side motion is what rounds the bubble.
-
Look at the front and side profile in a mirror. If the bubble tilts to one side, give the opposite side a tiny tug. Don’t overcorrect. A slight asymmetry is easier to live with than a section that looks stretched.
-
If the segment looks flat, pinch the midpoint lightly and nudge the hair outward from underneath with the pads of your fingers. Sometimes the shape just needs coaxing. It does not need a full rebuild.
-
Keep the first bubble a little tighter than the ones below it if your hair is very fine. The first segment sets the tone. If it’s too loose, the rest of the style can drift and flatten.
Repeat the Pattern Down the Tail
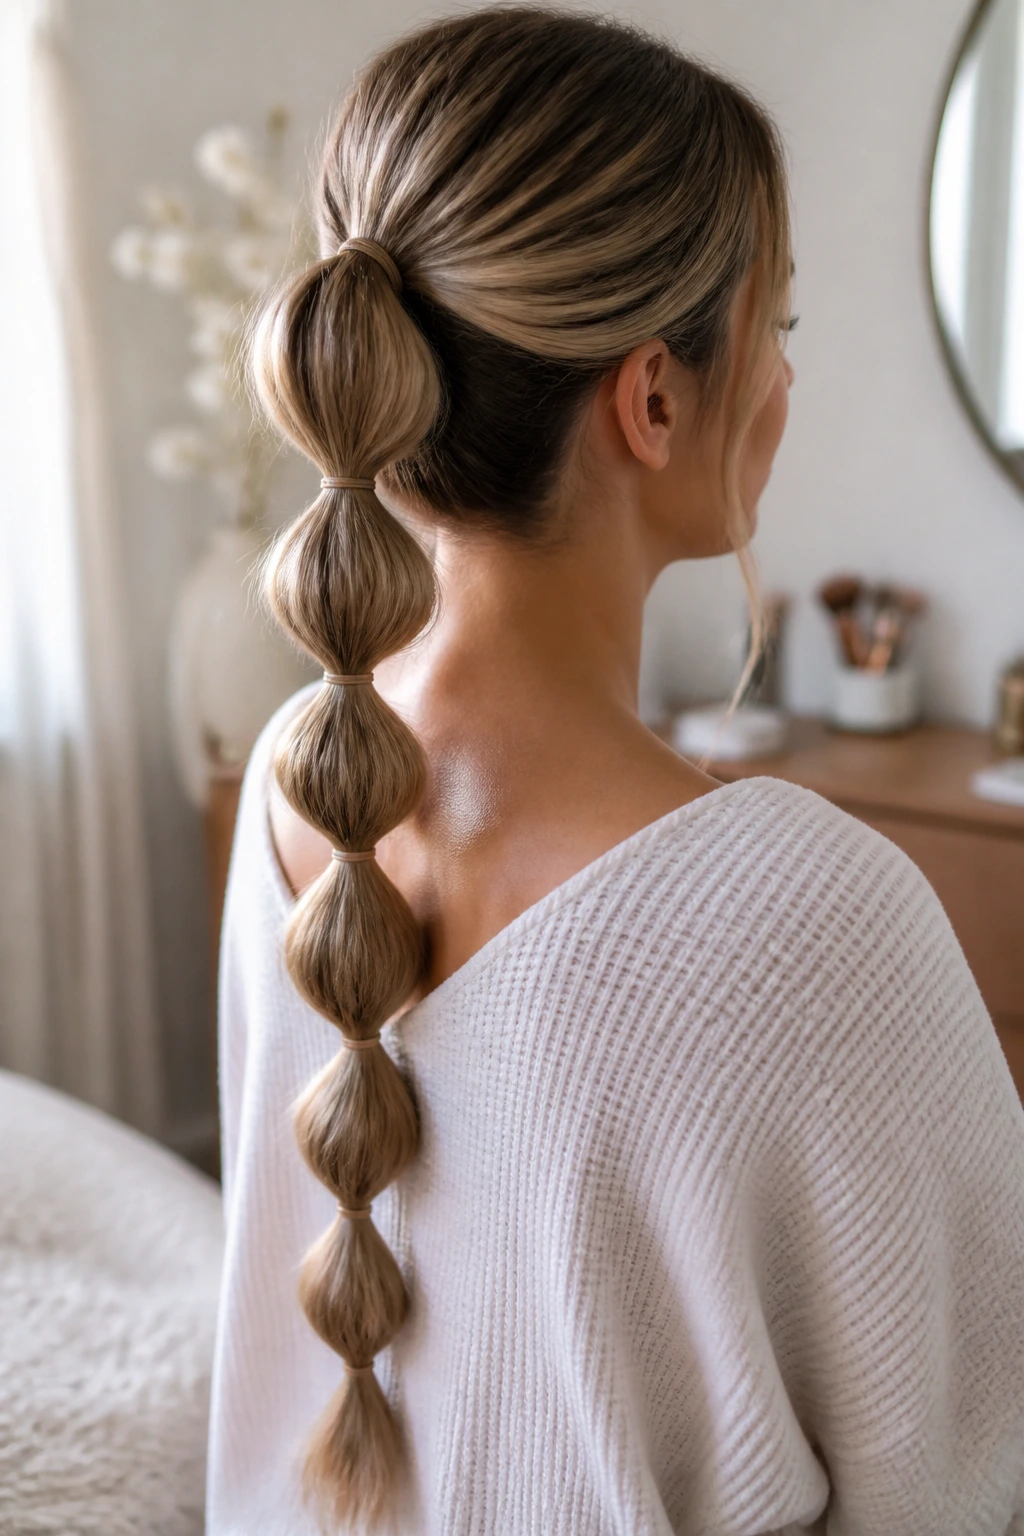
Work down the ponytail one section at a time.
-
Place the next elastic the same distance below the previous one if you want even bubbles. For most shoulder-length to long hair, that means repeating the 2- to 3-inch spacing. If the hair is very long, you can widen the gaps slightly as you go down the tail.
-
After each new elastic goes in, stop and fluff that section before you add the next one. That little pause matters. If you race to the end and then try to shape everything at once, the bubbles tend to look lumpy instead of round.
-
Use the mirror to check the tail from the side, not just straight on. Bubble ponytails can look fine from the front and crooked from the profile. The back view matters too, especially if the style sits high enough to show from behind.
-
Keep the final section smaller if your hair is layered or if the last few inches are thin. A tiny tail can look deliberate. A sagging, over-stretched end usually looks like the style ran out of steam.
-
Finish with a light mist of hairspray if you need the bubbles to hold for several hours. Aim at the surface from about 10 to 12 inches away. If you spray too close, the bubbles lose their softness and start to feel crunchy.
-
If you like a more sculpted look, gently pinch each segment once more after the spray dries for a few seconds. That keeps the bubbles rounded without making them stiff.
Make the Style Work for Fine, Thick, Curly, and Short Hair
Fine Hair
Fine hair needs help with grip more than it needs volume at the roots. I’d start with dry shampoo or texturizing spray before the ponytail goes in, then keep the elastic spacing a little tighter so the bubbles don’t sag. Smaller sections usually look better than oversized ones here. Big gaps can make the tail look thin even when it’s neatly done.
Thick Hair
Thick hair gives you volume for free, but it can also fight the elastic. Use stronger snag-free bands and consider double-looping the base if the ponytail feels heavy. The bubbles can be spaced farther apart because the hair itself will fill them out. If you try to make the sections too close, the ponytail can start looking chunky instead of clean.
Curly and Coily Hair
Curly and coily hair can make a bubble ponytail look rich and full with very little effort, which is one reason I like it so much on textured hair. Keep the base smooth, then let the bubbles stay broad and a little softer at the edges. A tiny bit of gel at the hairline and a light oil on the fingertips can help control the top without crushing the shape below.
Shorter Lengths
Short hair is a little more honest about length, so the spacing matters more. If the tail doesn’t have room for four or five full bubbles, stop at two or three and let the final section fall short and neat. A half-up bubble ponytail often works better than a full one on collarbone-length hair, because it creates the same segmented effect without asking the ponytail to do more than it can.
Styling Twists That Change the Mood in One Move
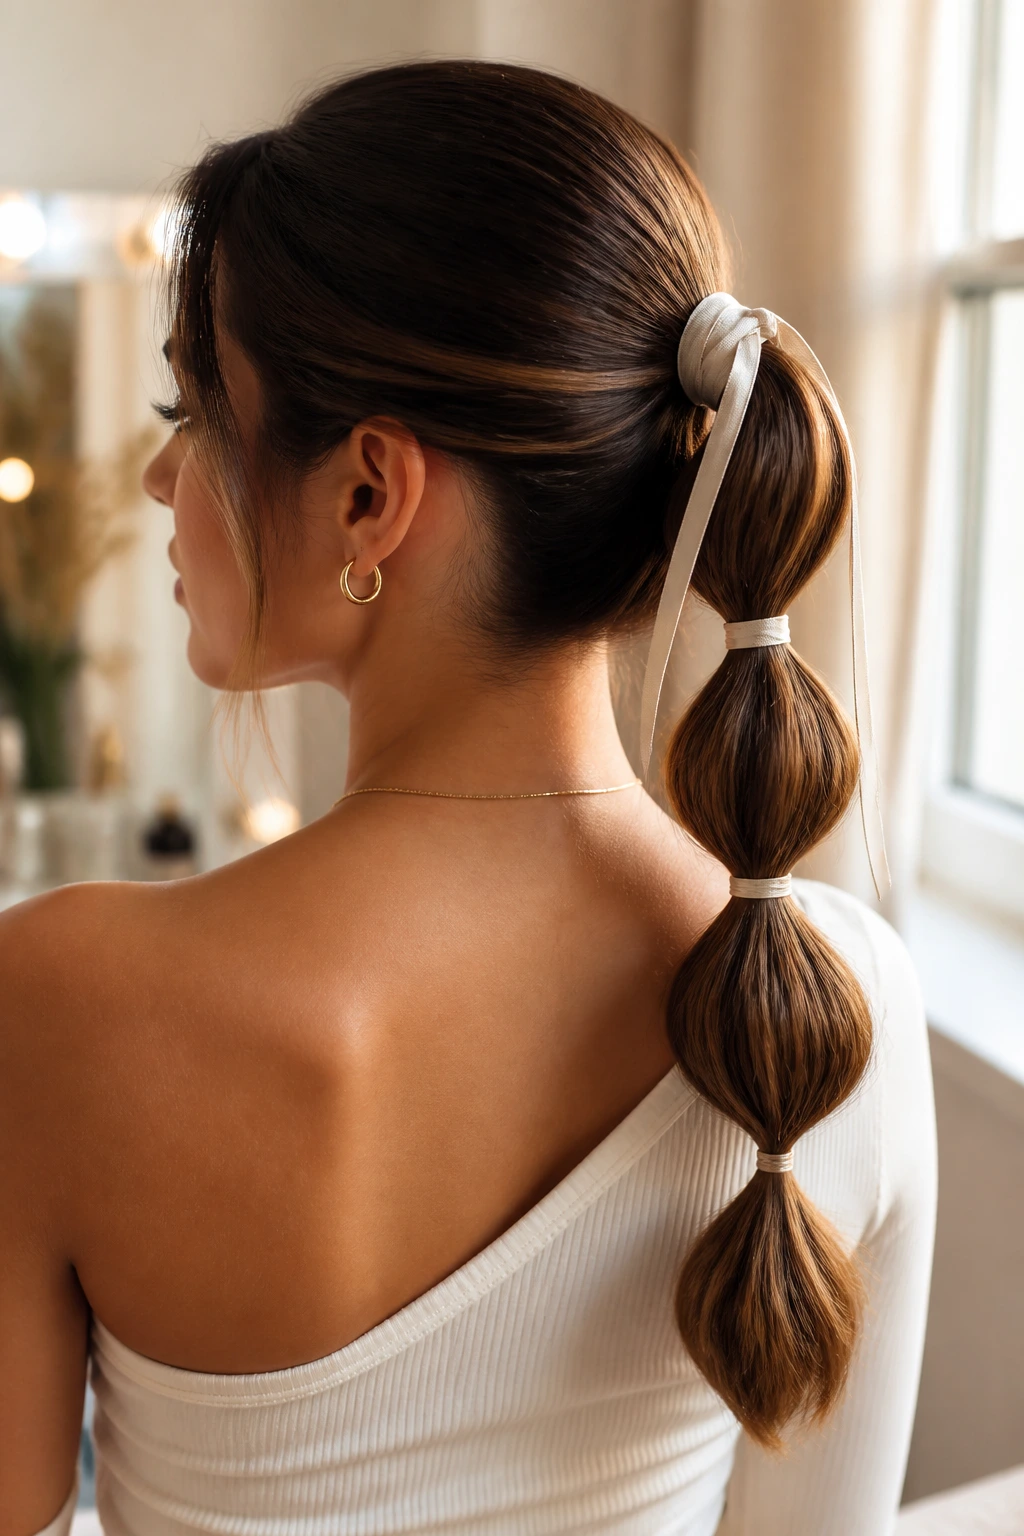
Ribbon-Wrapped Bubble
Slide a satin ribbon through the base elastic or tie it around the ponytail before you start adding the small bands. The ribbon softens the shape and gives the style a dressed-up feel without changing the structure. I like this version for weddings, dinners, or any outfit that needs a little less sporty edge.
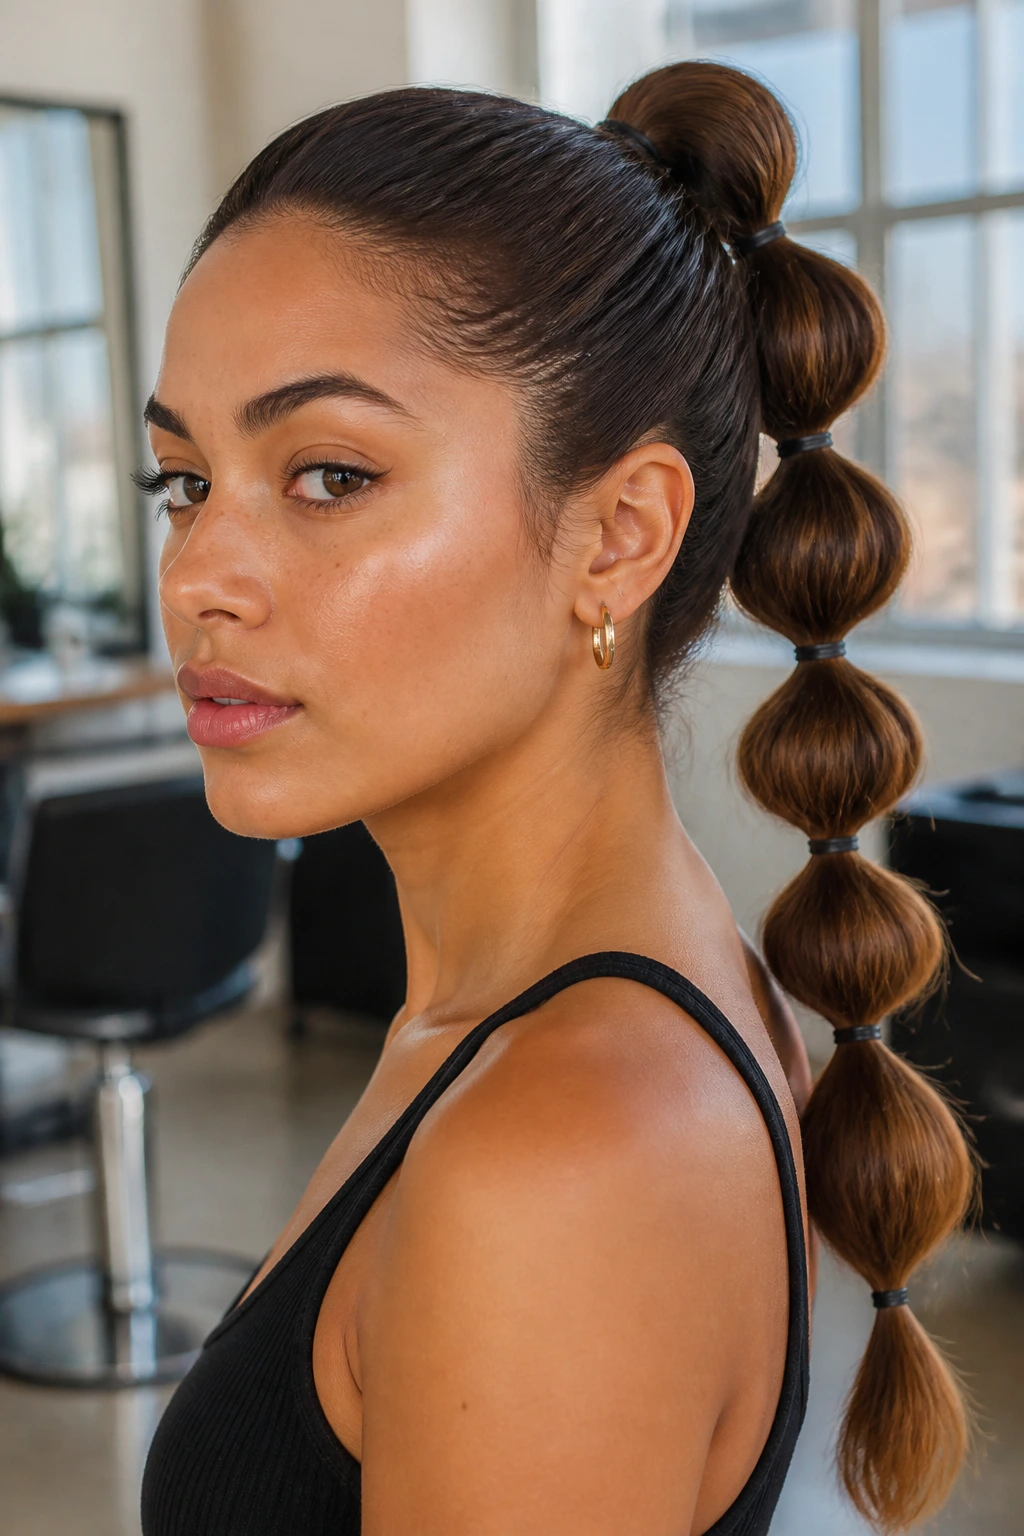
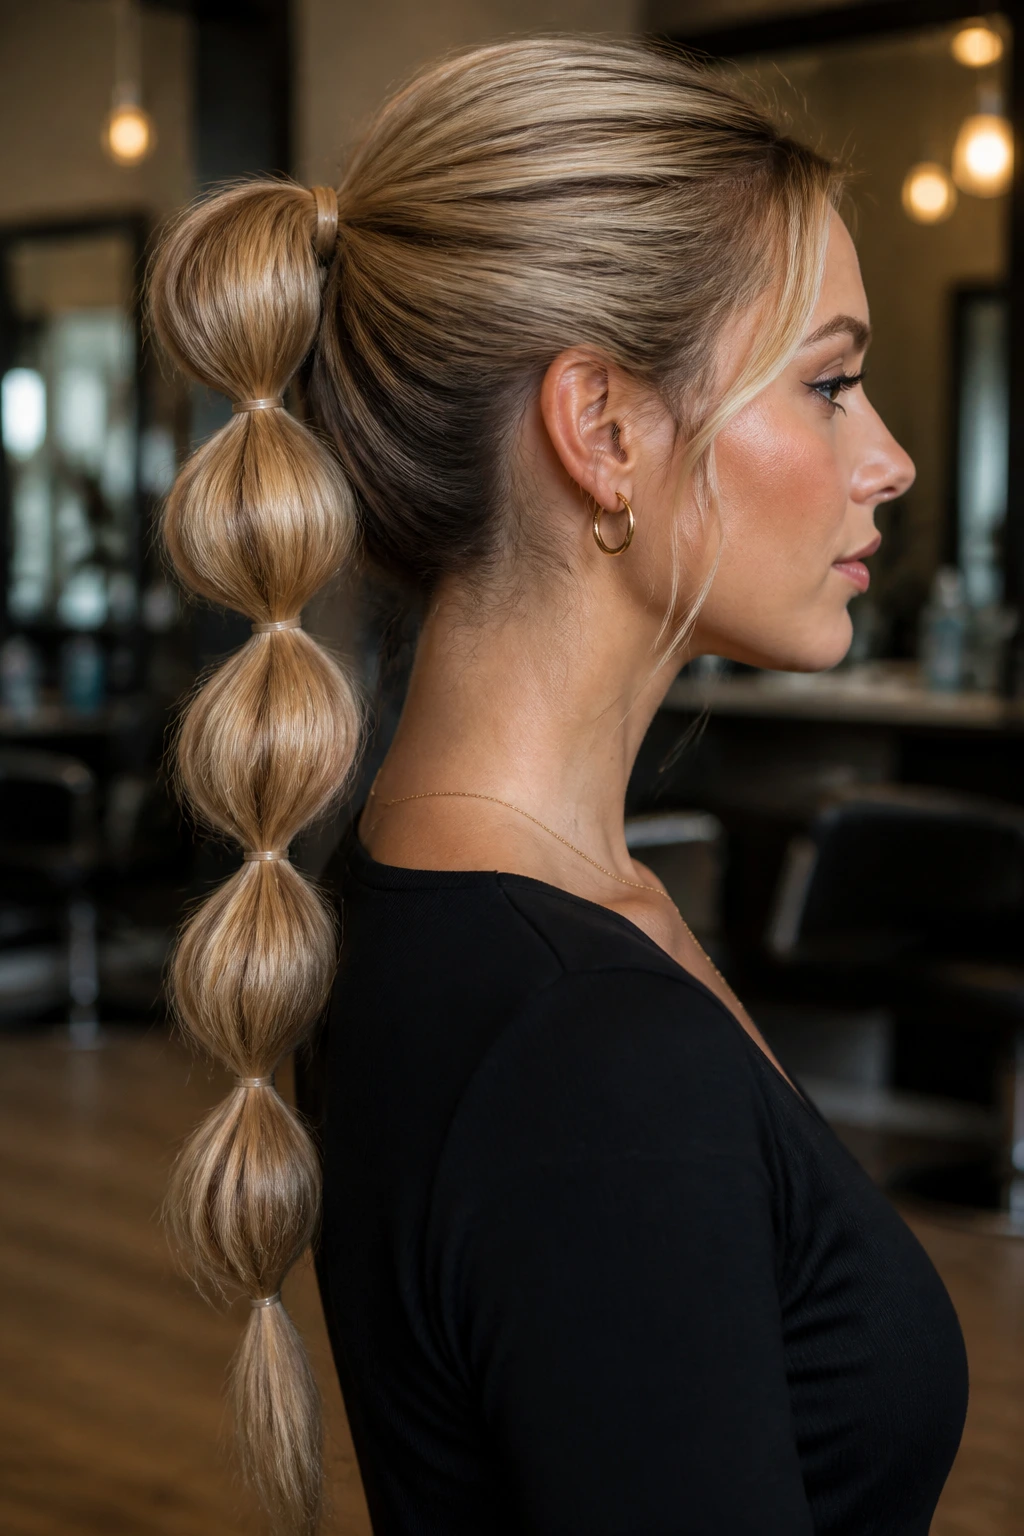
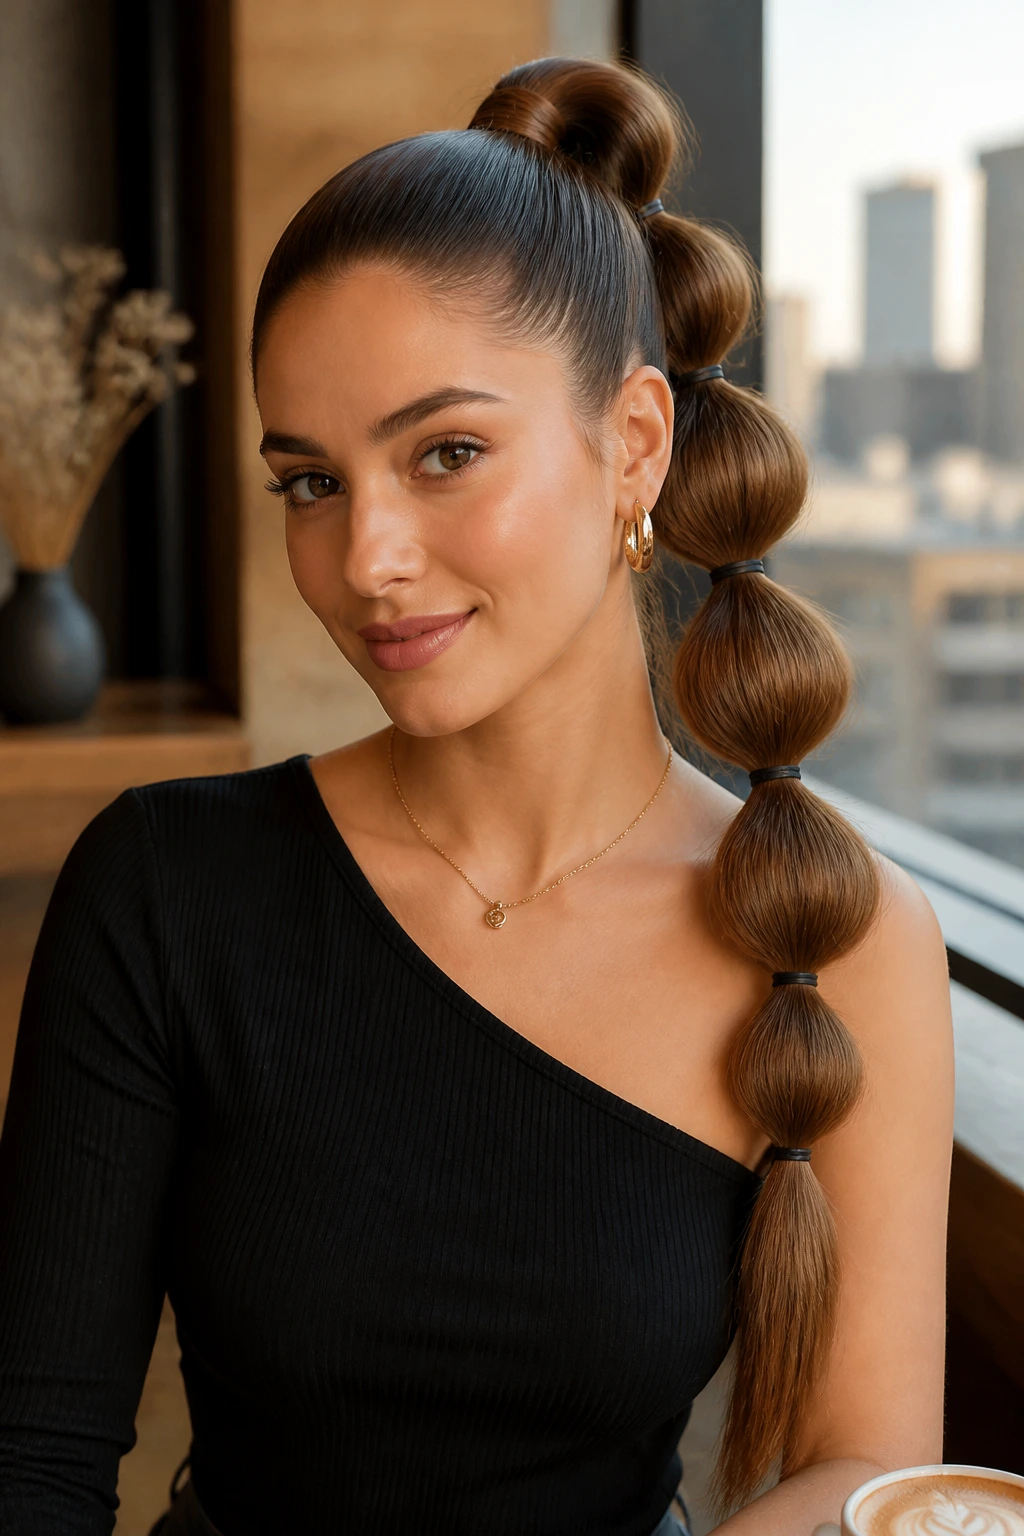
Low Sleek Bubble
Pull the ponytail low at the nape, keep the crown smooth, and use tighter spacing between elastics. The bubbles end up smaller and neater, which makes the style feel cleaner and more tailored. This version sits well with a sharp part and a plain shirt collar.
Half-Up Bubble Trail
Leave the bottom half of the hair down and build bubbles from the crown section only. It gives you the segmented look without committing all your length to one ponytail. This is the version I’d choose if the ends are dry or if you want volume at the top but softness through the rest of the hair.
Textured Weekend Bubble
Add wave spray or a light mousse, rough-dry the hair, and keep the bubbles loose. Don’t chase perfect symmetry. A slightly uneven finish makes the style feel more relaxed, and that can be a relief if you usually prefer hair that doesn’t look too “done.”
Braided Base Bubble
Start with a tiny braid at the top, then switch into the bubble sections. It gives the base a bit more visual detail and helps disguise very slippery roots. Use this if you want the style to feel a touch more intricate without turning the whole thing into a full braided ponytail.
The Small Fixes That Keep It Looking Intentional
Tension first, shape second.
If the base is secure, the rest of the style behaves. If it isn’t, you end up fighting the ponytail at every segment. I like to tighten the base once, check it from the sides, and then stop touching it unless something actually shifts.
Pull from the sides, not the middle.
That one habit changes the whole shape. Side pulling makes the bubble round and wide. Center pulling narrows the section and gives you that squeezed look that never seems to photograph or wear well in real life.
Use just enough product to create grip.
A dusting of dry shampoo or a light mist of texture spray is usually enough. Heavy creams and oils can make the elastic slip, especially near the bottom where gravity is already doing its thing. Save richer products for after the style comes out.
Wrap one strand if you want the elastics hidden.
Take a tiny piece of hair from under the ponytail, wrap it around each elastic, and pin it underneath the segment. It takes a little more time, but the finish looks cleaner when the elastics themselves disappear into the hair.
Mind the profile.
A bubble ponytail can look lovely from the mirror and awkward from the side if the spacing is uneven. Turn your head slightly and check whether the bubbles sit in a straight line. Tiny tilts are fine. A visible slope is not.
Mistakes That Flatten a Bubble Ponytail
-
Making the base too loose: If the ponytail shifts at the crown, the bubbles slide downward and lose shape. Tighten the base once, then support it with a little root grip instead of hoping the tail will behave.
-
Spacing every elastic the same without looking at the hair length: A medium-length tail needs tighter spacing than very long hair. If you place the bands too far apart, the bubbles look saggy. If you crowd them, the sections start to bunch up.
-
Pulling the center of the bubble instead of the edges: That creates a narrow, pinched shape and leaves the bubble flat on top. Tug the sides outward with your fingers and let the middle stay relaxed.
-
Starting on hair that is too slippery: Freshly conditioned hair can be beautiful and still be the wrong surface for this style. Add some dry shampoo, texture spray, or even a tiny bit of mousse before you build the ponytail.
-
Using elastics that are too thick or too obvious: Bulky bands can make the ponytail look heavy. Small clear bands usually disappear better, especially on finer hair. If your hair is very dark, dark brown elastics can work too.
-
Over-spraying at the end: A sticky finish pulls the bubbles down and makes the tail feel hard. Use a light mist, let it set for a few seconds, and leave it alone.
How to Wear It Longer, Refresh It, and Remove It Cleanly
A bubble ponytail is usually at its best on the same day you make it. That said, it can hold for a long workday, a dinner, and a few rounds of running errands if the base is secure and the hair had enough grip to begin with. For most hair types, a neat bubble ponytail stays in shape for about 6 to 10 hours before the crown starts to soften or the segments relax a little.
If you need to prepare ahead, build the base ponytail and keep the elastics nearby. You can do that a few hours early, then add and fluff the bubbles right before you leave. That saves time and keeps the segments looking fresh instead of pressed flat while you get dressed. For slippery hair, I’d skip heavy oils until after the style is complete.
To refresh the style during the day, pinch each bubble from the sides and lift it slightly upward. If one segment has slid, move the elastic up a notch and retighten the section. A quick mist of dry shampoo at the roots can revive the crown without disturbing the rest of the tail. Keep a couple of spare elastics in your bag if you know your hair tends to slip.
Removal should be gentle. Slide each elastic out one at a time instead of yanking them down the length of the hair, especially if the bands are snaggy. If you wrapped hair around the elastics, unpin those pieces first so they don’t knot at the end. A little detangling spray afterward saves your ends from taking a beating.
Bubble Ponytail Questions People Ask
How do you do a bubble ponytail on short hair?
If the hair barely reaches the collarbone, keep the spacing tight and stop after two or three bubbles. A half-up version often looks better than forcing the full length into segments it cannot hold. You want the style to look deliberate, not stretched.
What kind of elastics work best?
Small snag-free clear elastics are the easiest to hide and usually give the cleanest finish. If your hair is very dark, tiny black or brown elastics can blend in well too. Skip thick office bands; they tend to show and can leave dents.
Can curly hair use the same method?
Yes, but the bubbles usually need a little more room. Curly hair already has body, so the segments don’t need aggressive fluffing. Secure the base, space the elastics a bit farther apart, and let the curl pattern supply the volume.
Why do my bubbles keep sliding down?
The base is usually too loose, or the hair has too much slip. Tighten the first ponytail, add a bit of texture spray, and avoid heavy conditioner near the roots before styling. If the hair is freshly washed and silky, that can be enough to cause the problem on its own.
How many bubbles should I make?
As many as the length allows without crowding. Long hair might hold five or six clean bubbles. Medium hair may only give you three or four before the tail starts looking compressed. Fewer, well-shaped bubbles beat a long row of sagging ones.
Should the bubbles be the same size?
Not always. Equal spacing looks tidy, but a slight change in size can make the ponytail feel more natural. I usually keep the first two segments the most even, then loosen the spacing a little near the end if the hair length calls for it.
Can I do this on second-day hair without washing it?
Absolutely, and it often looks better that way. A little scalp texture helps the base hold, and the bubbles tend to stay rounded longer. If the roots are oily, add dry shampoo before you gather the hair.
How do I stop flyaways without making the style greasy?
Use a light styling stick, a touch of gel on your fingertips, or a fine mist of hairspray brushed over the surface with your palm. Avoid heavy creams unless your hair is very coarse. The goal is control, not coating.
A Bubble Ponytail That Holds Its Shape
A good bubble ponytail does not need a drawer full of accessories or a half-hour in front of the mirror. It needs clean tension, decent spacing, and a little judgment about how much to puff the sections. That’s the part people miss when they first try it. They focus on the elastics and ignore the shape.
Once you get the base right, the style becomes strangely forgiving. You can make it low and neat, high and playful, smooth and polished, or loose enough to feel a little undone. The bones stay the same. The mood changes with the spacing, the texture, and the amount of lift you leave between each tie. And that’s why it keeps working, even when everything else about your hair feels temporary.