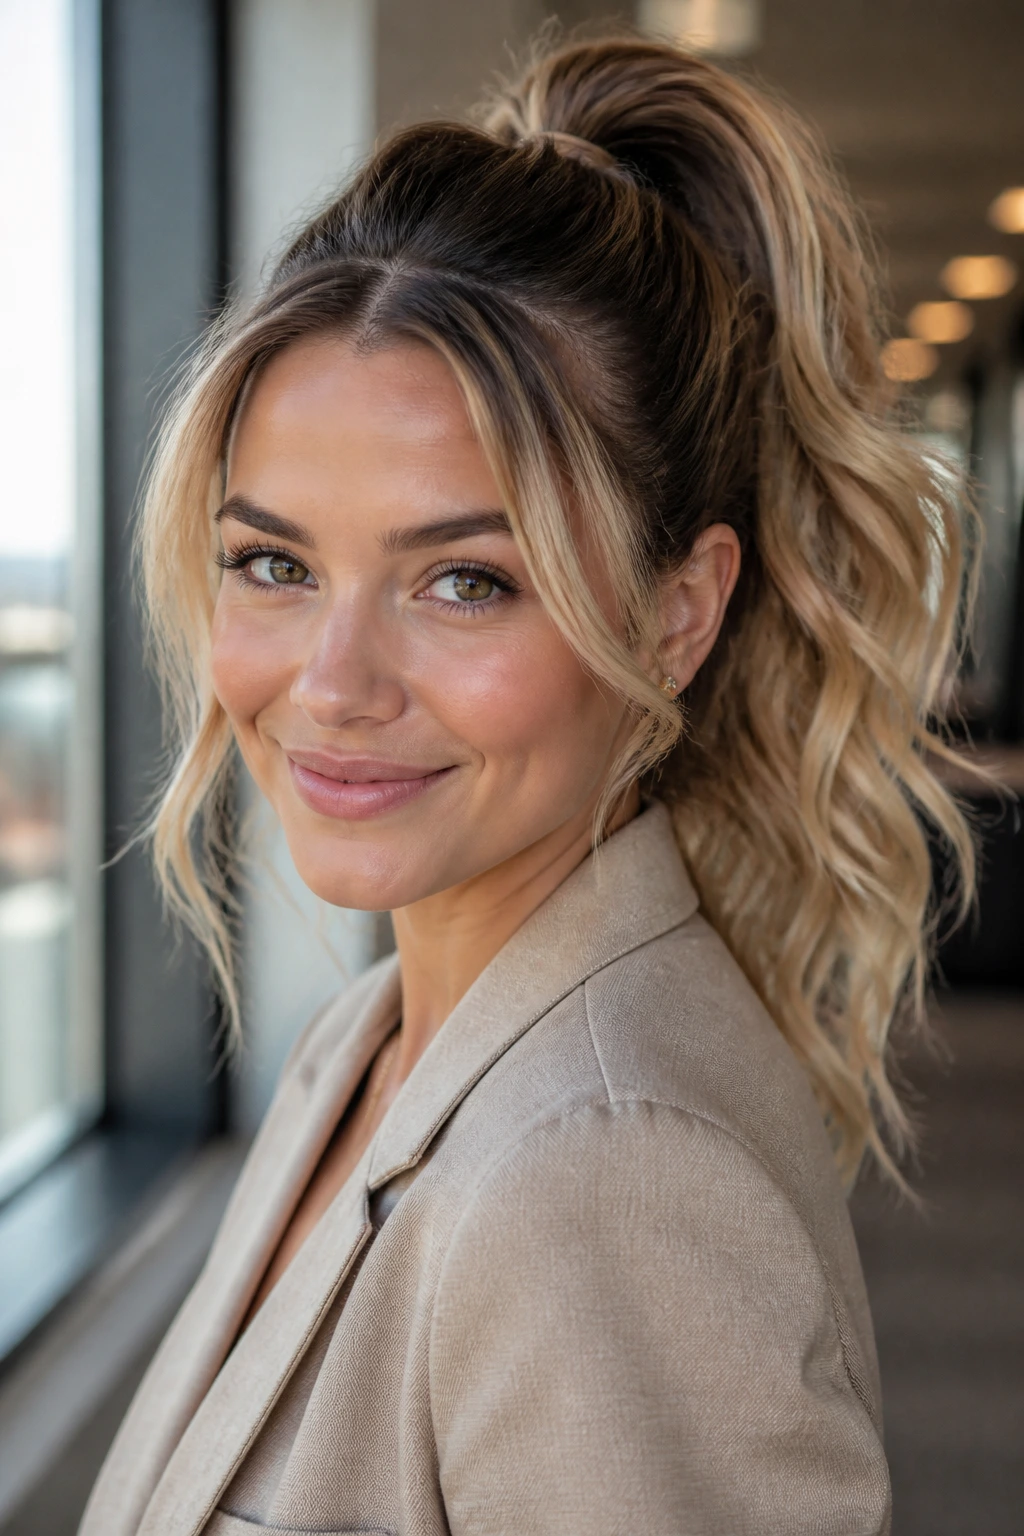
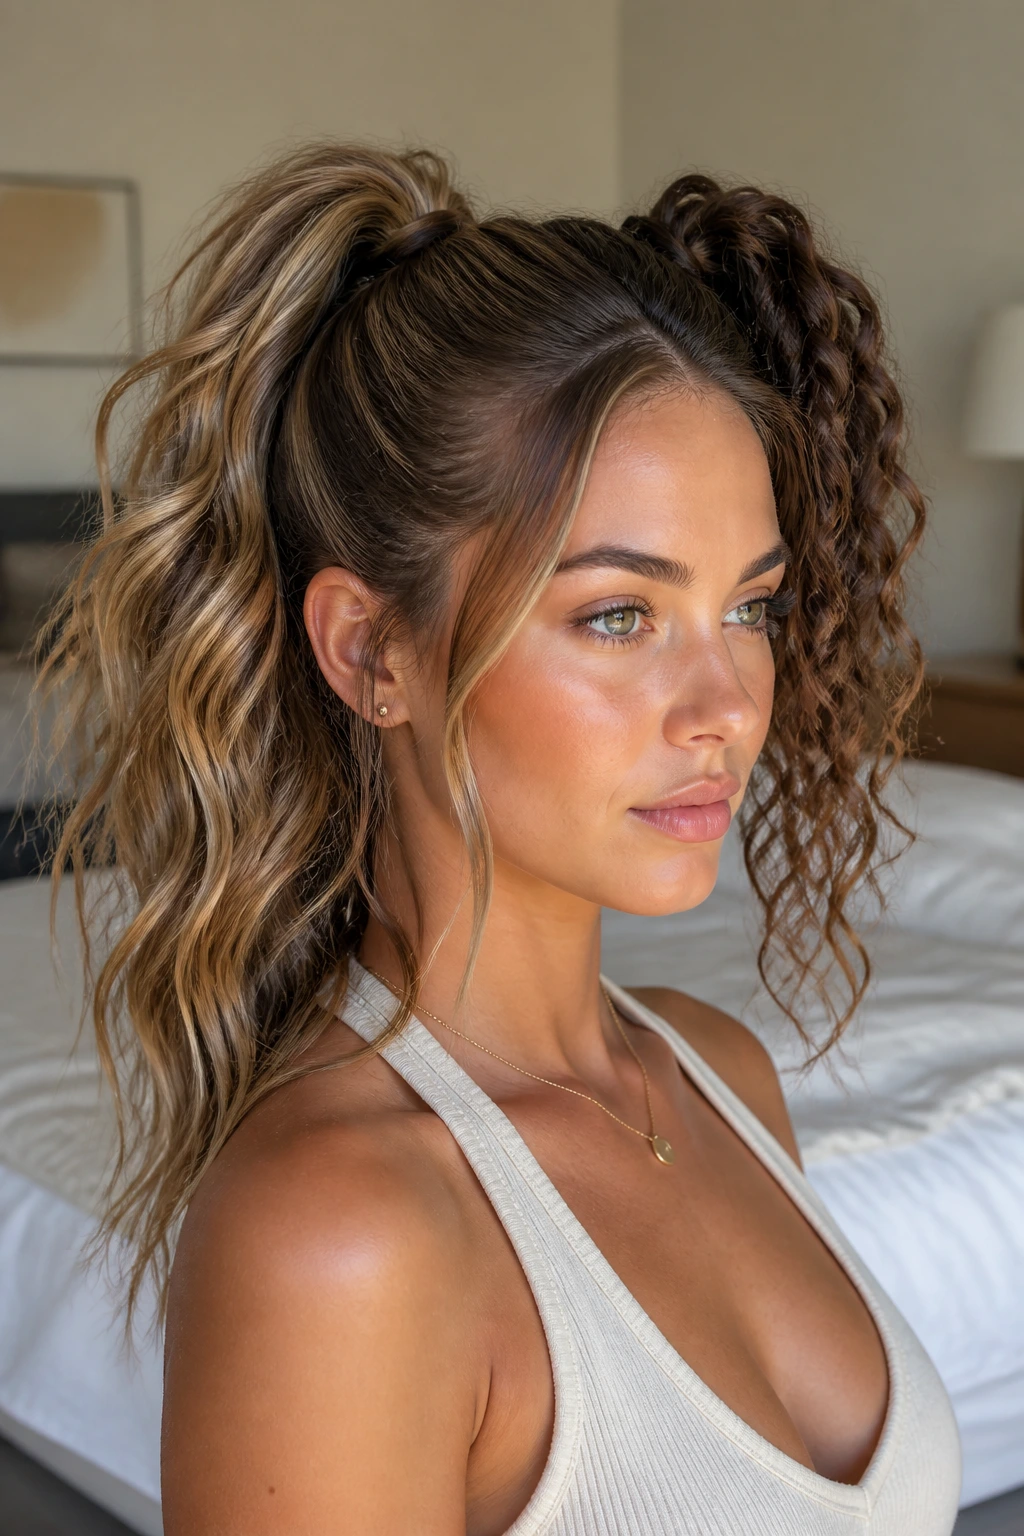
A high ponytail with beachy waves has a very specific kind of presence. It can sit under office lighting without looking stiff, then catch a little movement when you turn your head and suddenly feel less like “I had no time” and more like you meant every inch of it.
That’s the part people miss. The style isn’t one thing. It’s a clean lift at the crown, a controlled base, and lengths that bend instead of curl too neatly. When the top is smooth and the ponytail has that soft, brushed-out wave through the middle and ends, the whole look feels sharper. Softer, too. A little more lived-in. A lot less try-hard.
I keep coming back to this shape because it solves the same problem from both sides: you need your hair off your face, but you don’t want it to look like you tossed it up between emails. A rat-tail comb, a good elastic, a brush, and a curling iron around 1 to 1.25 inches do most of the work. The rest is placement, restraint, and knowing when to stop fussing.
Why These Ponytails Earn Their Keep
- Desk-Ready at the Crown: A smooth top section keeps the style from looking messy under bright office lights, even if the ponytail length has loose bends.
- Movement Without Frizz: Beachy waves give the ends swing and texture, but they’re brushed out enough to avoid the tight, springy curl that can feel too dressed up for daytime.
- Easy to Adjust for Hair Type: Fine hair gets lift from a little tease at the crown; thicker hair gets control from a tight anchor section and a wrapped elastic.
- Works With Day-Two Hair: Slightly lived-in hair holds the wave pattern better than freshly washed hair that’s too soft and slippery.
- Accessory-Friendly: Clips, scarves, wrapped sections, and braid details all change the mood without changing the basic shape.
- Fast to Refresh: A quick mist of dry shampoo at the roots and a finger-tousle through the ponytail can pull the style back together in under a minute.
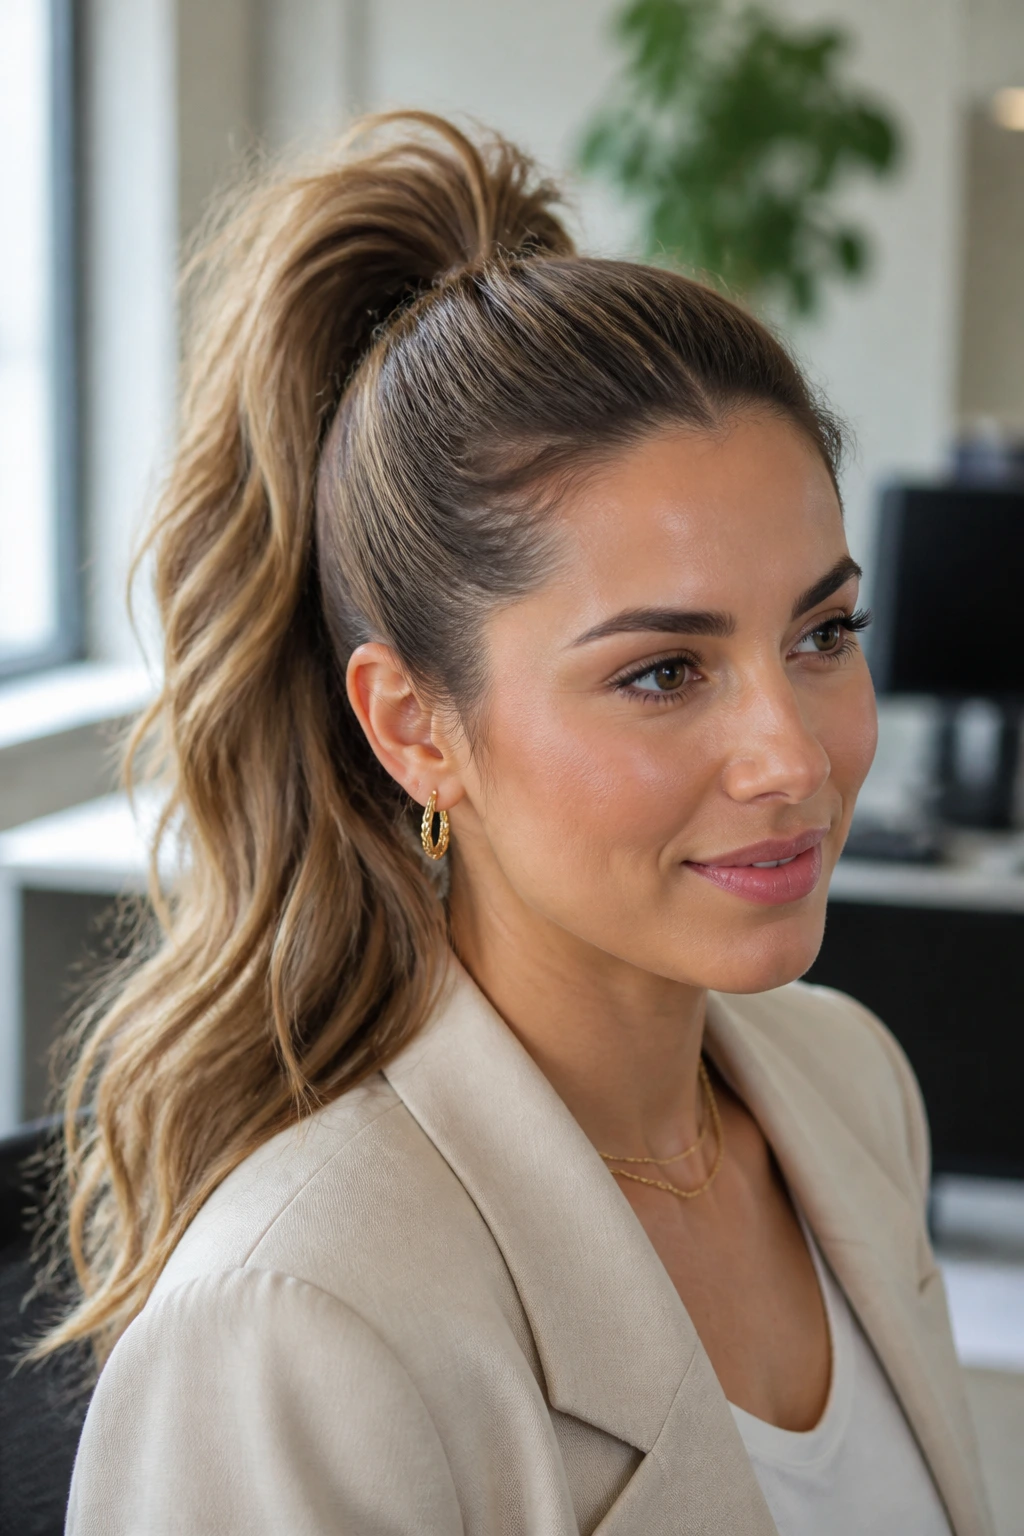
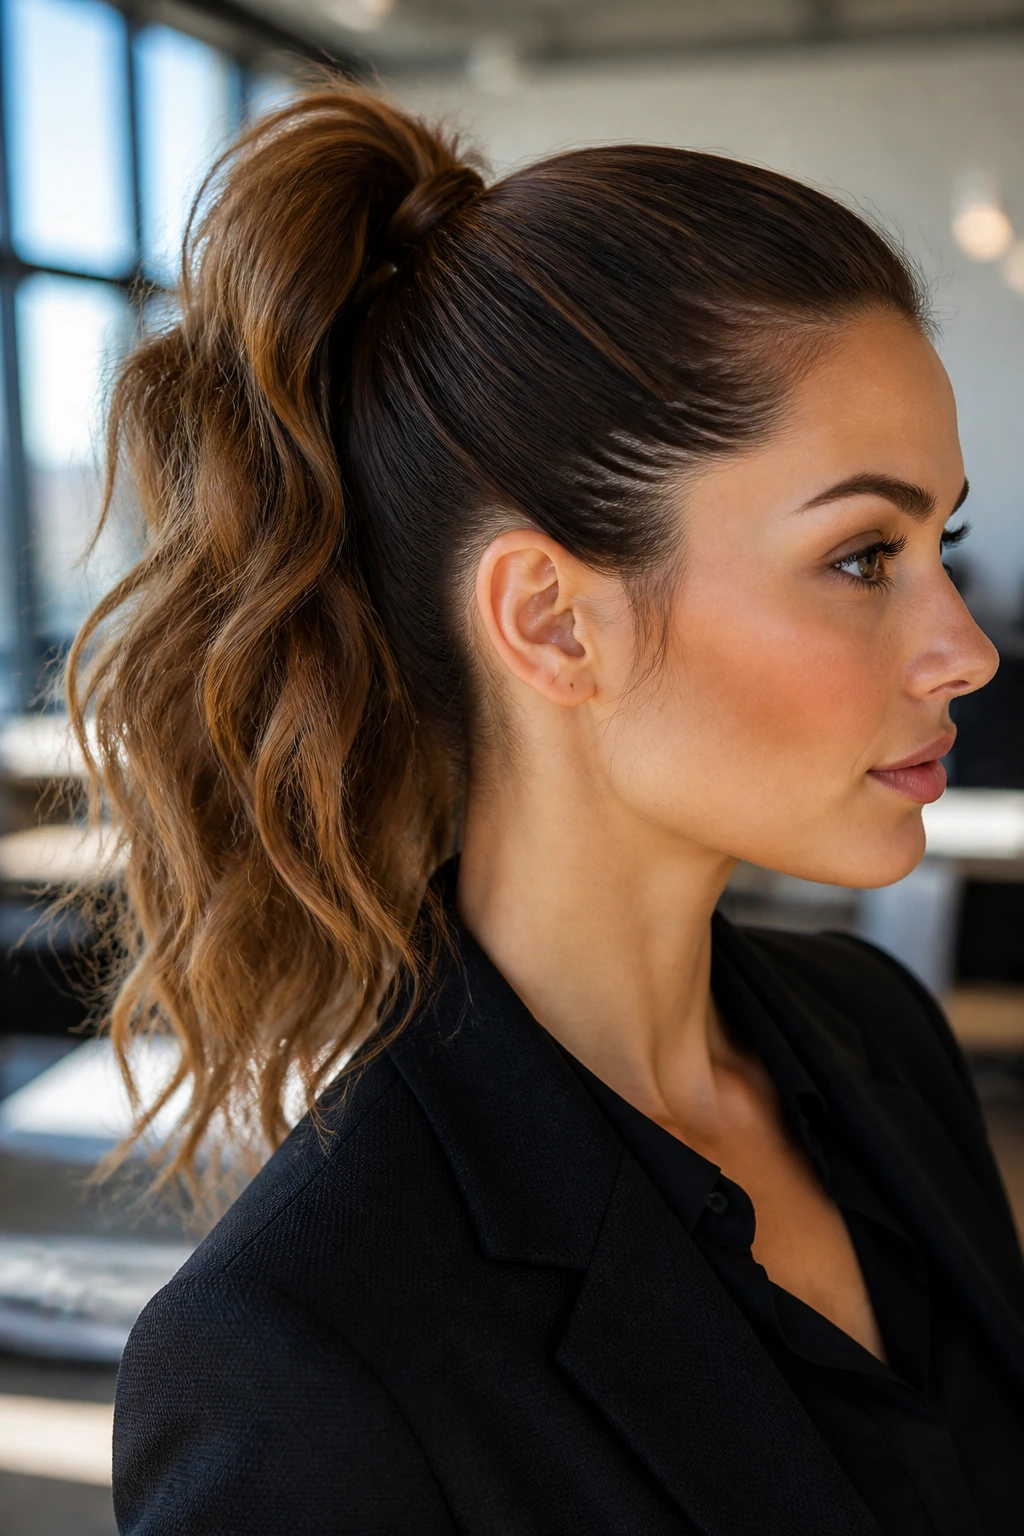
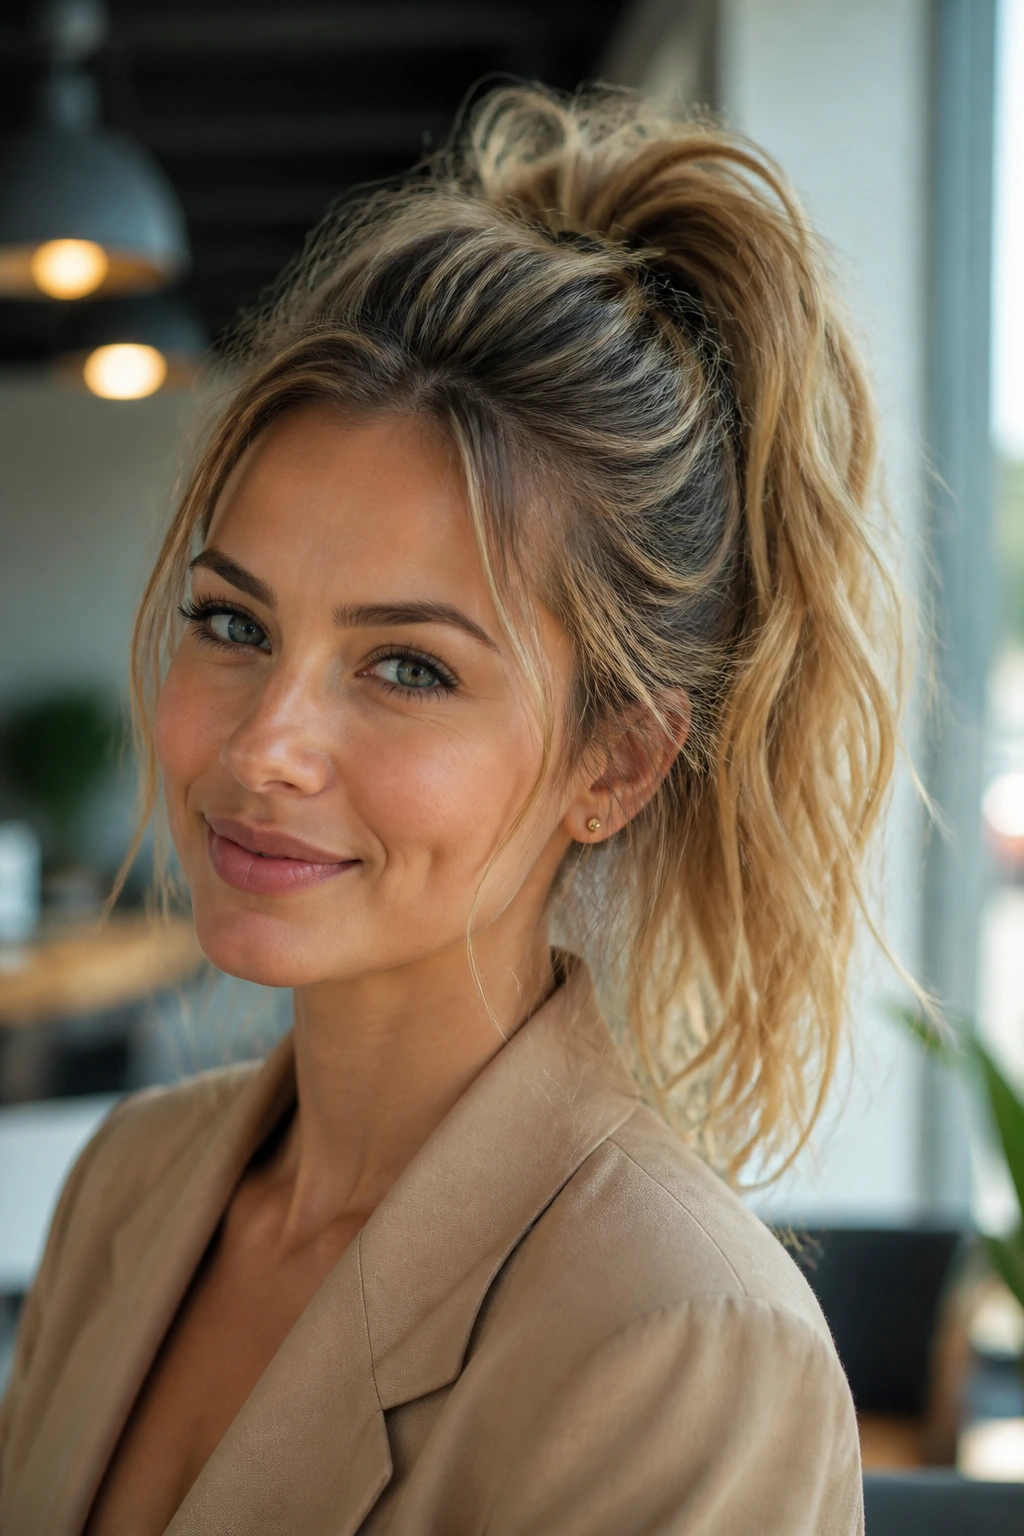
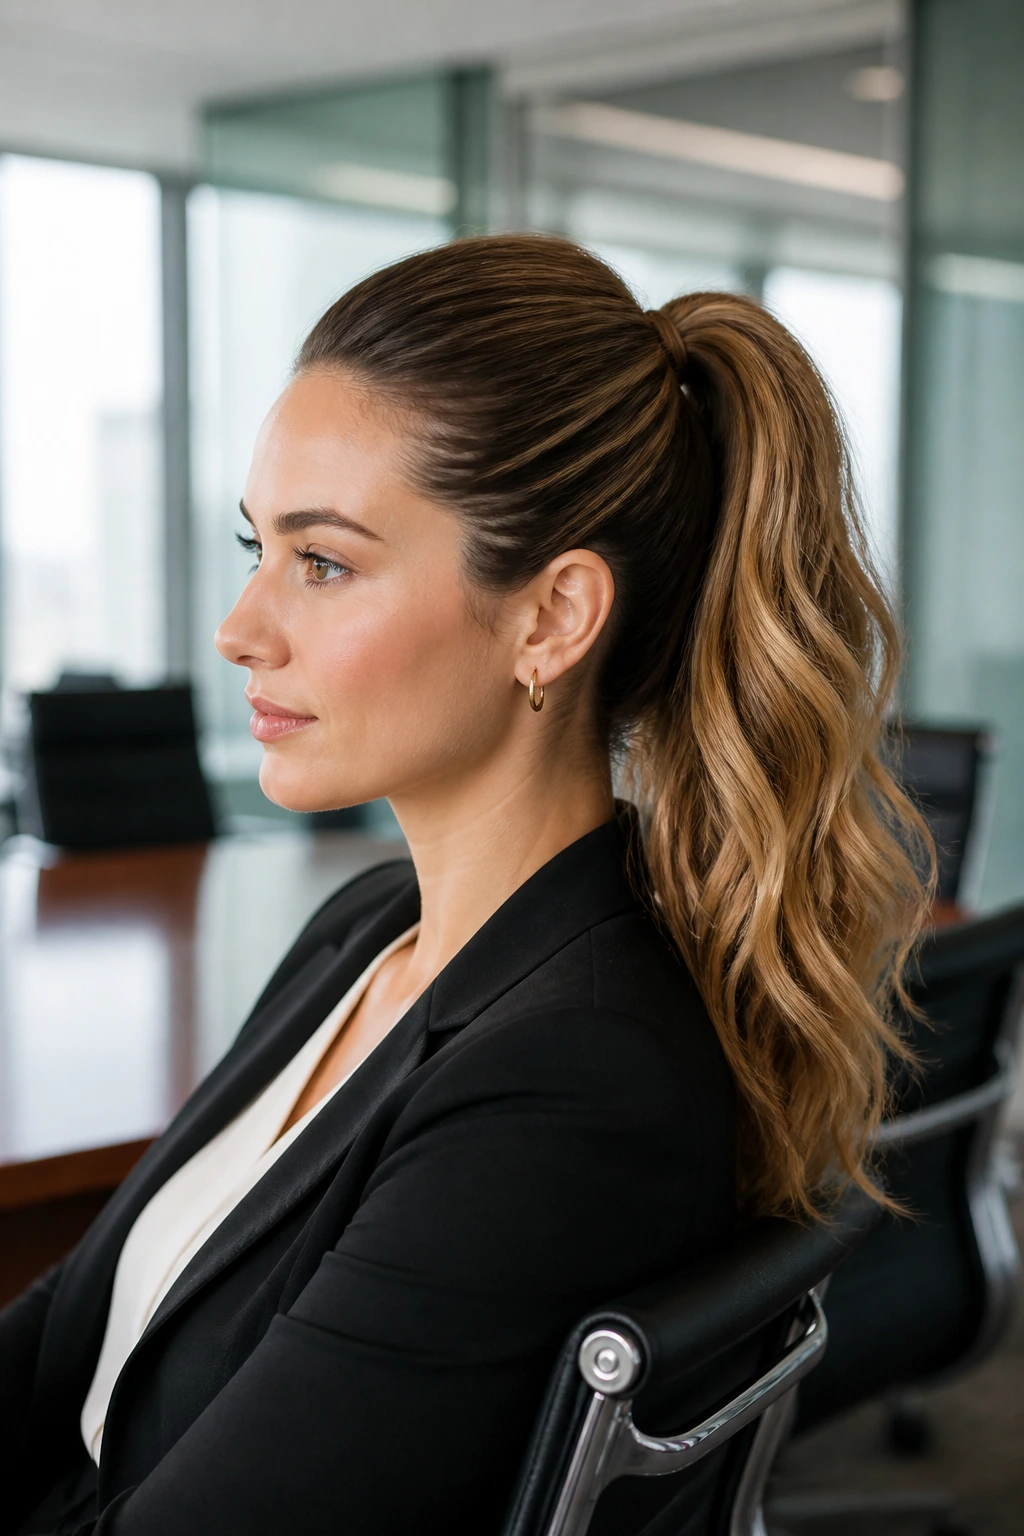
1. The Boardroom Sleek-Top Pony with Soft Beach Waves
A sleek crown and a soft wave tail are a very good pairing. The front stays polished, the ponytail still moves, and nobody has to guess whether you left the house in a rush. That’s why this one works so well for a meeting day: it has structure where people look first, then a little bend and texture where the eye lands second.
Why it reads polished without feeling severe
The trick is to keep the first inch or two above the elastic smooth, almost flat, and let the wave start lower down. If the wave begins too close to the scalp, the whole style gets fluffy fast. If it starts below the base, the ponytail still swings, but the front keeps its clean line.
I like this version for medium and long hair because it handles a sharp collar or blazer better than a fully messy ponytail. You get height, but not a giant halo of volume. That matters.
- Brush the hair back with a soft bristle brush, not a stiff paddle brush that leaves ridges.
- Mist the ponytail lengths with heat protectant before waving.
- Curl 1.5-inch sections away from the face, then leave the ends out for a looser finish.
- Finish with a tiny bit of shine serum on the last 2 to 3 inches only.
Best move: Hide the elastic with one thin section of hair, then pin the wrap underneath with a bobby pin pushed upward, not sideways.
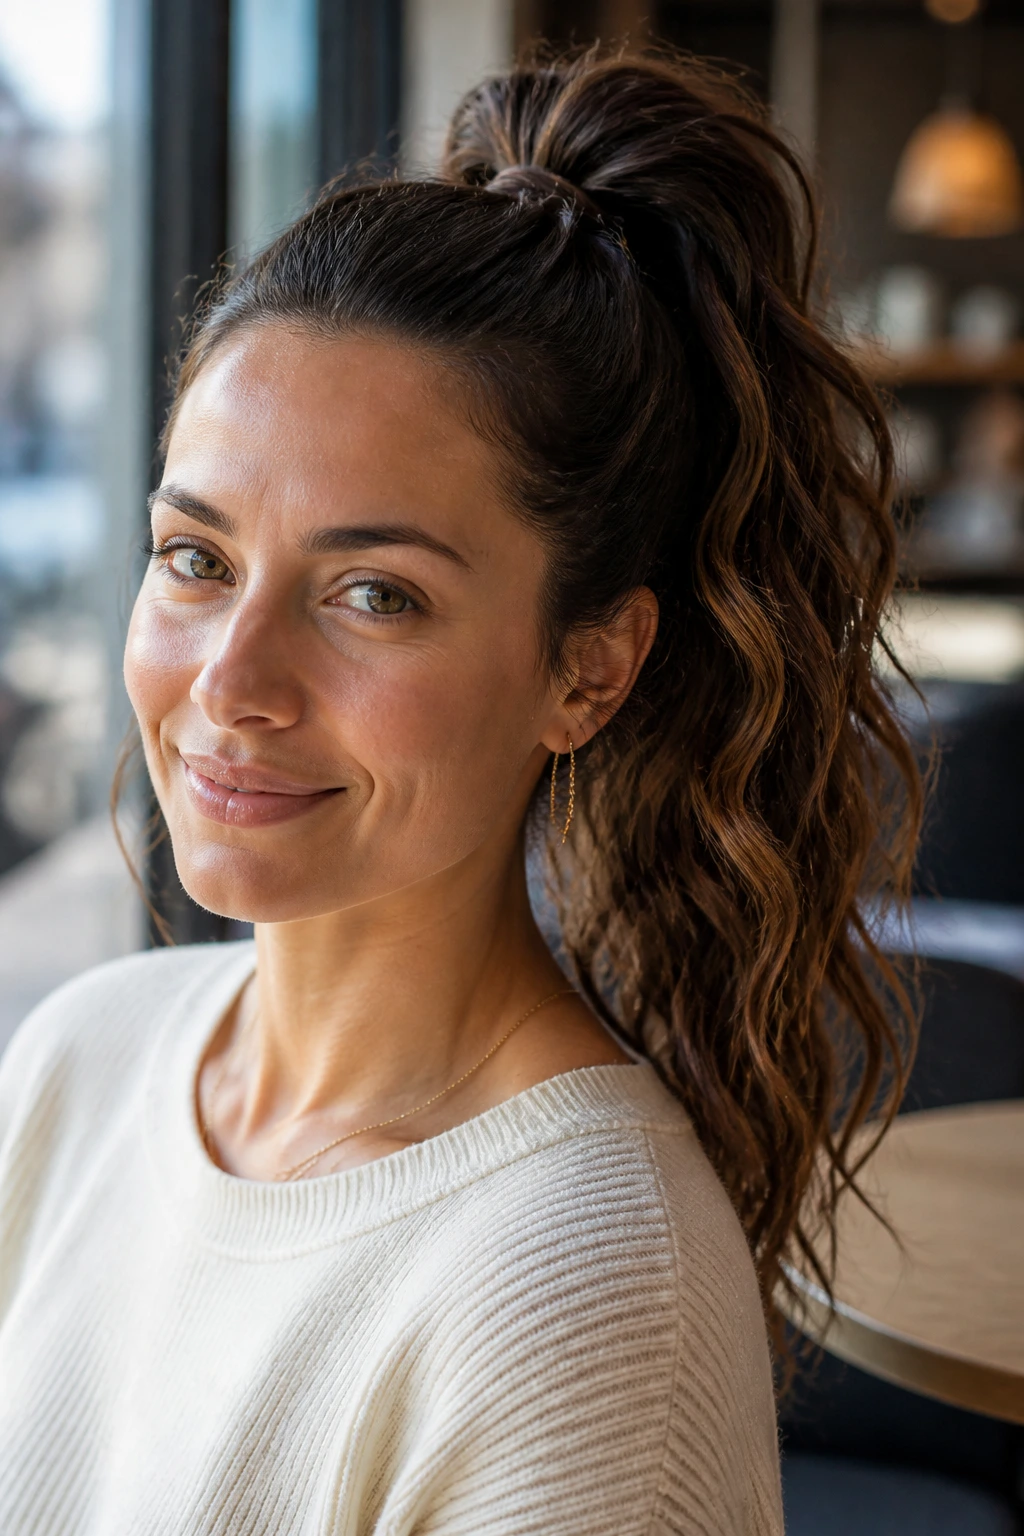
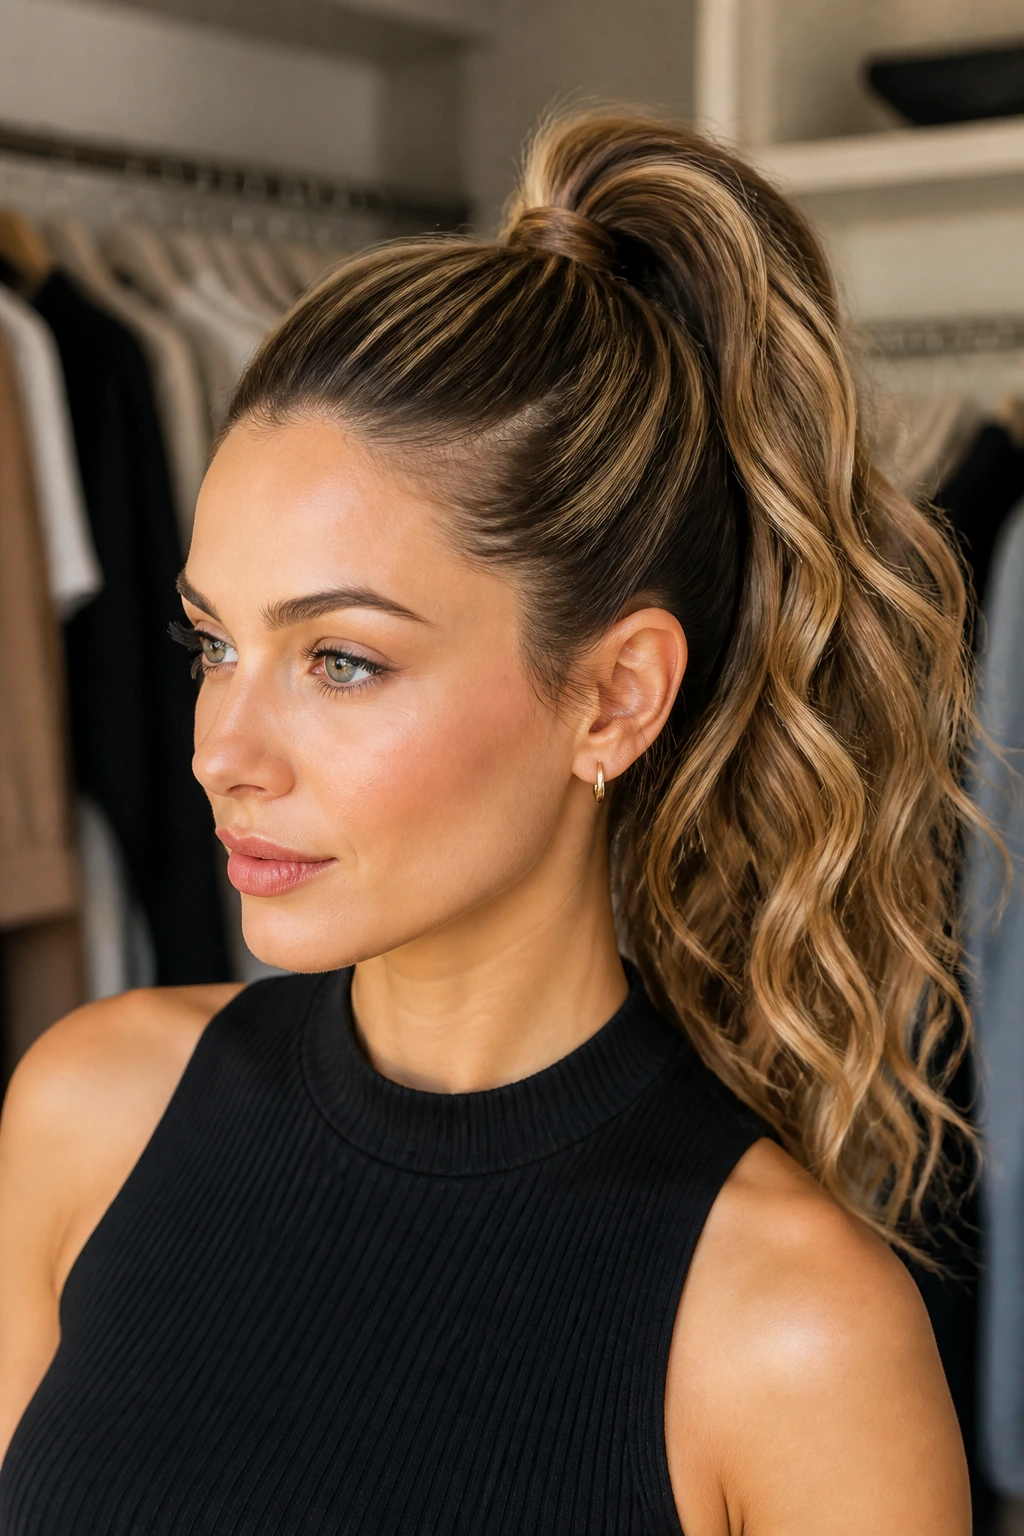
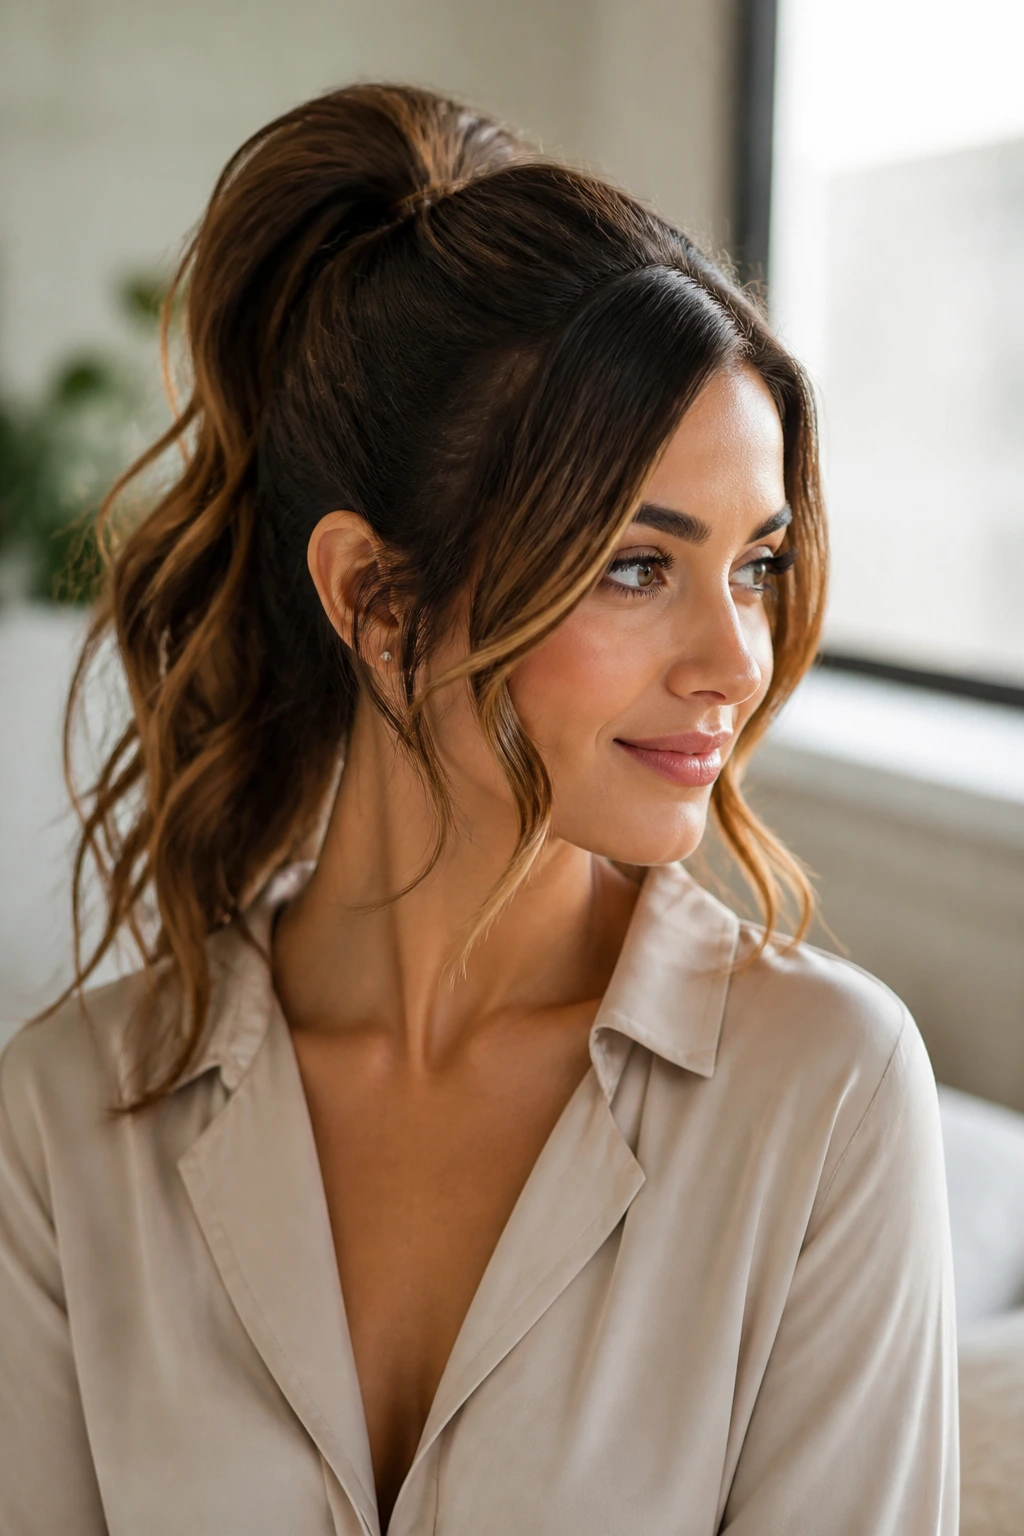
2. The Side-Part Power Pony with Face-Framing Waves
A deep side part changes the entire personality of a high ponytail. It gives the face a bit of shape, helps the crown look lifted, and makes the wave pattern in the ponytail feel intentional instead of accidental. The result is sharper than a center-part version, which is useful if you want the style to read confident rather than casual.
The face-framing pieces matter more here than people think. Keep them soft, not curled into little springs. I prefer one bend at the cheekbone and a second bend around the jawline, because that shape flatters without drawing attention to every layer you’ve ever grown out.
This one is especially good when your hair has a stubborn flat spot on one side. A side part hides it. Convenient, yes, but also smart.
How to wear it
Start with a side part that sits just off the arch of your eyebrow. Pull the ponytail slightly toward the crown rather than dead center, so the part keeps its shape. Wrap the front pieces around a curling wand for 5 to 8 seconds each, then rake them apart with your fingers once they cool.
If you want it to survive a long day, mist the roots with dry shampoo before you start. Not after. Before. That gives the hair a little grip.
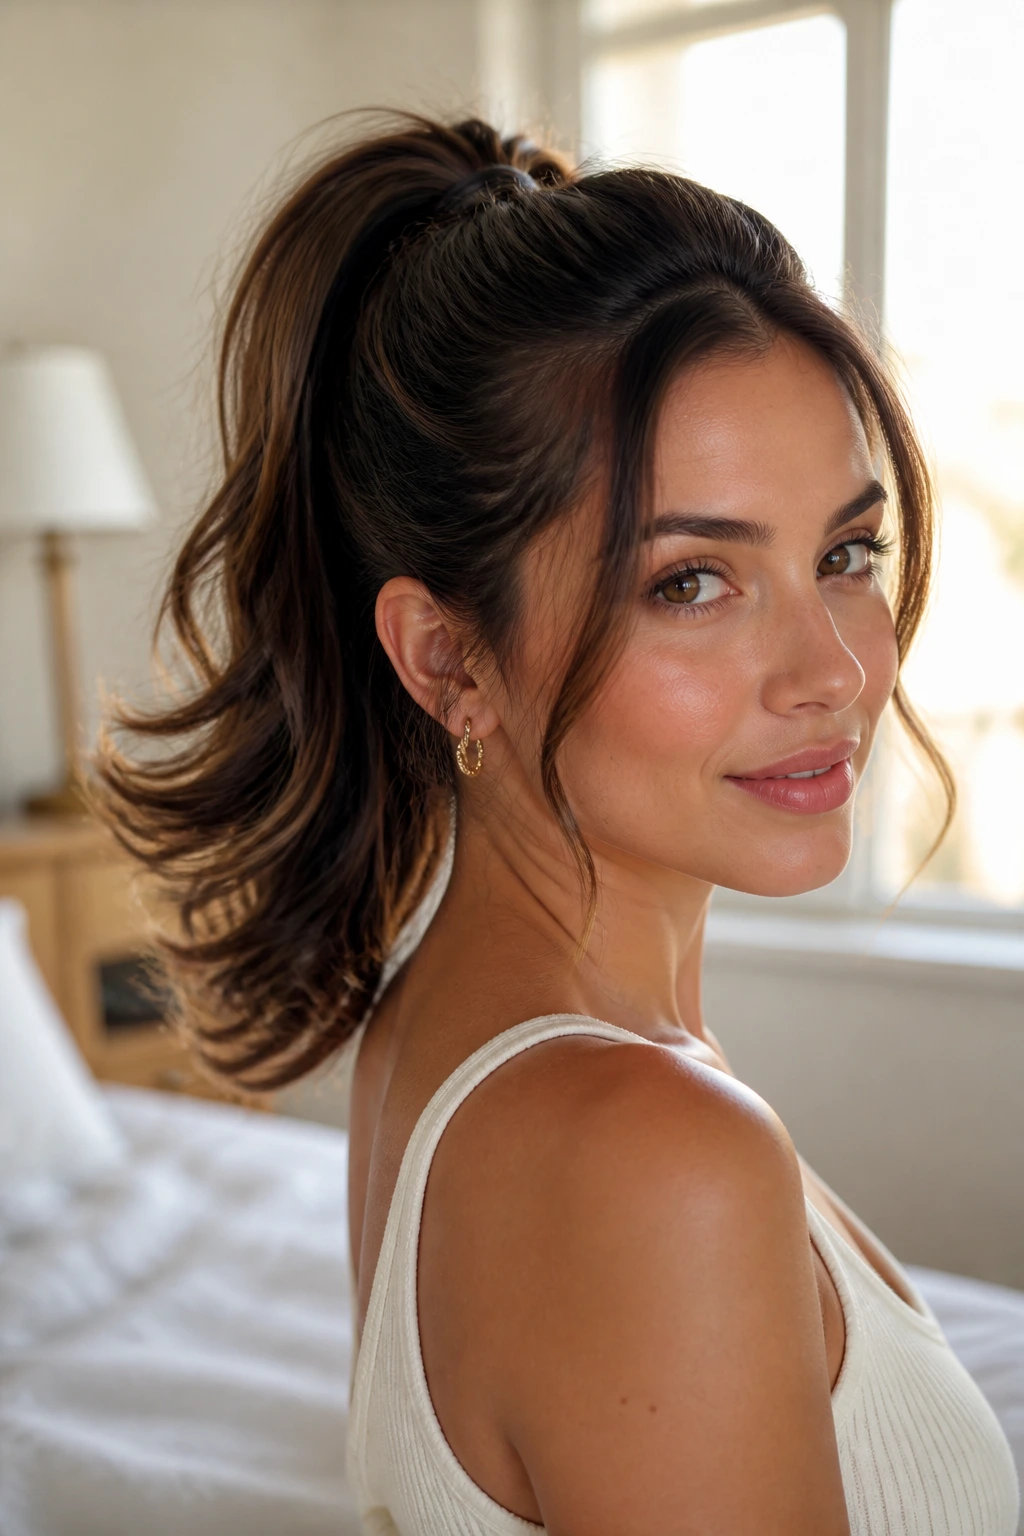
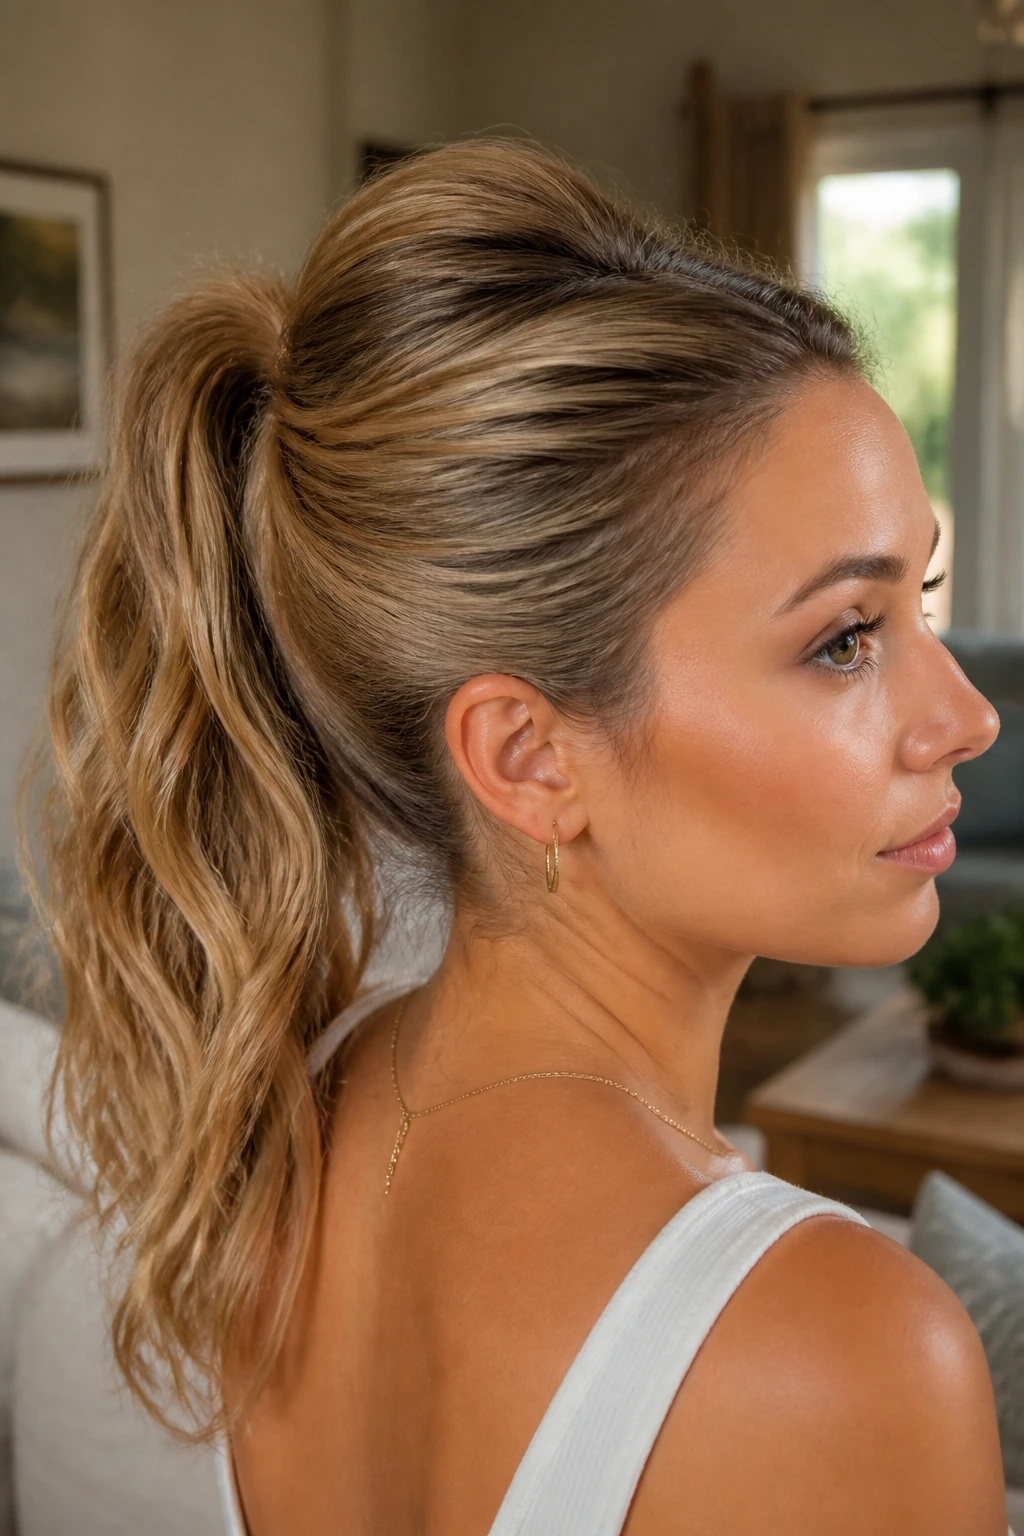
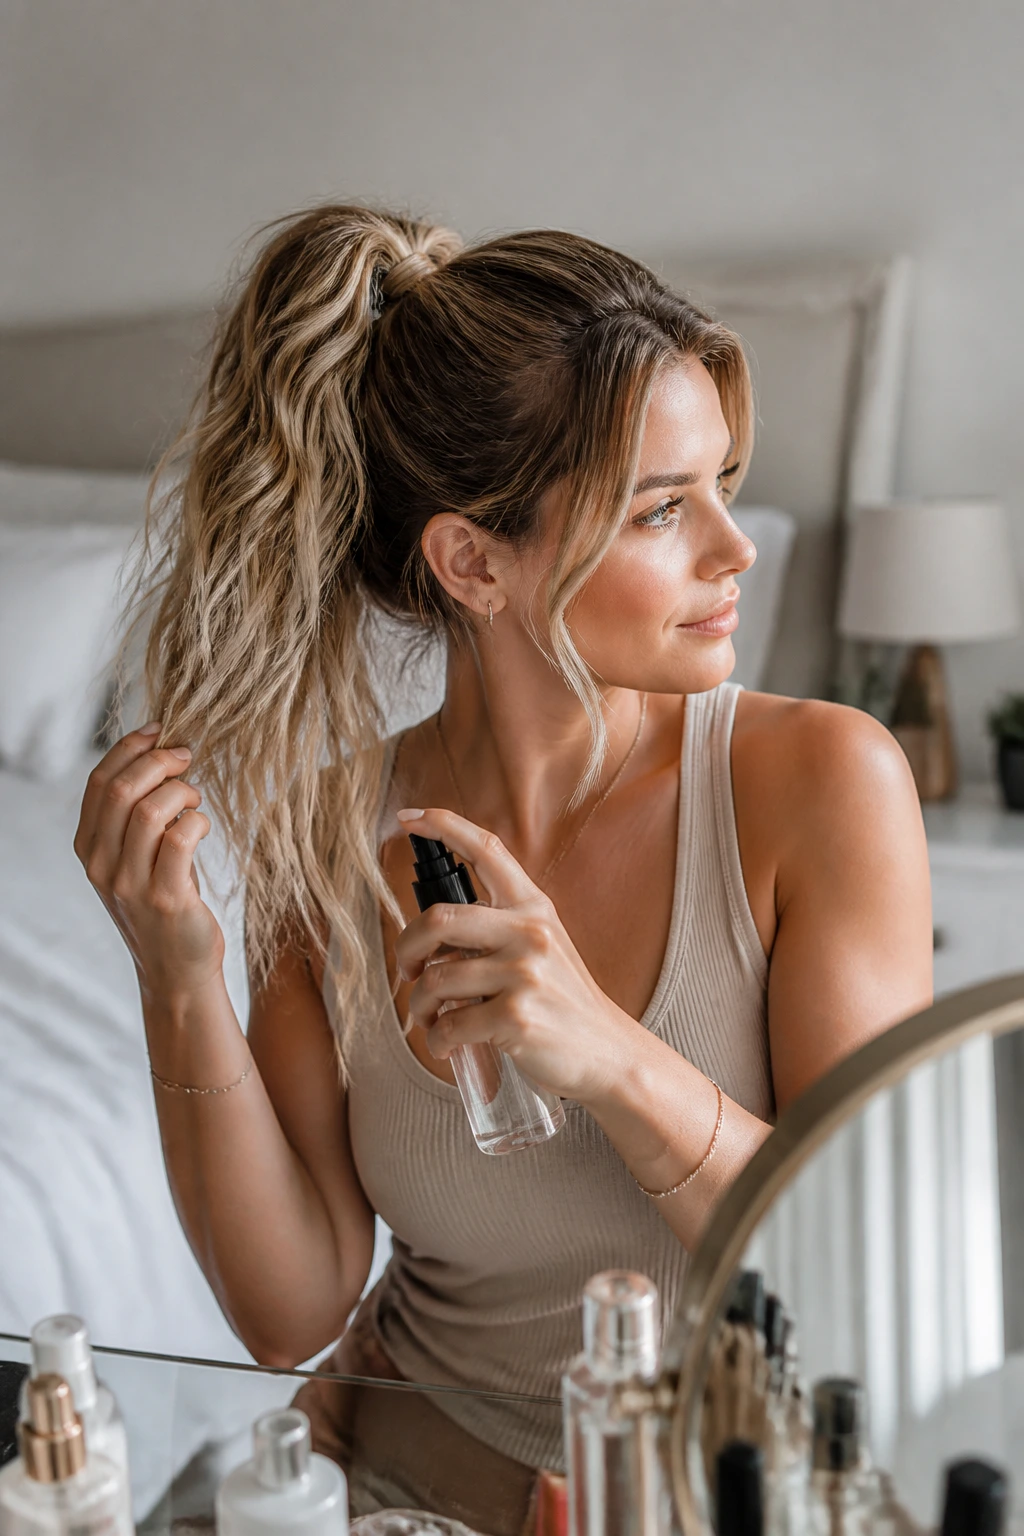
3. The Wrapped-Base Pony That Looks Done in Ten Minutes
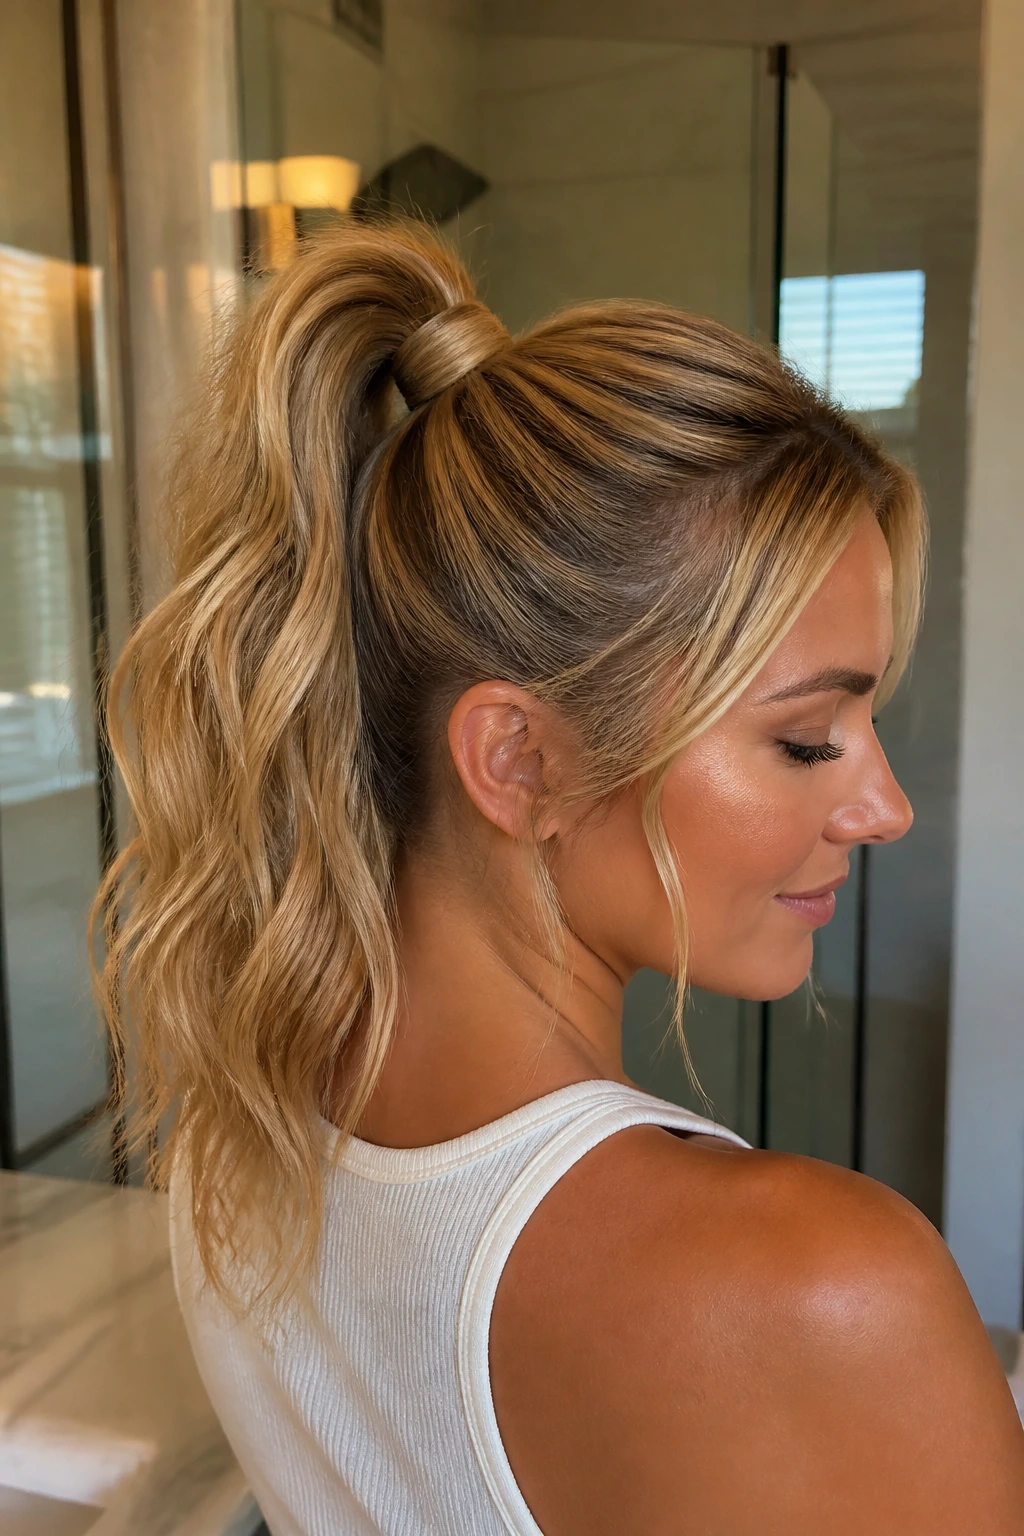
What if you need your hair up fast, but the plain elastic look feels too bare? This is the answer. A wrapped base makes even a simple high ponytail look more finished, and the beachy waves keep it from drifting into prom territory.
The beauty of this style is that the wrap does a lot of visual work. It hides the elastic, creates a cleaner base, and gives you one small polished detail without asking for a braid, clip, or extra tool. On thick hair, it helps corral the ponytail. On fine hair, it makes the shape feel fuller.
Why the wrap changes the whole look
A wrapped base interrupts the line of the elastic, which is why the ponytail suddenly looks more styled. Keep the section you use for wrapping thin — about the width of a pencil — so it lies flat. If it’s too thick, it gets bulky and starts poking out at the end.
The beachy waves should stay loose here. You want movement in the lengths, not a perfectly curled curtain. I usually wave the hair before tying it up, then brush through once with fingers, not a brush, to soften the shape.
Quick rule: Wrap the elastic once, tuck the ends under with a bobby pin, and stop. More wrapping usually just makes the base look fussy.
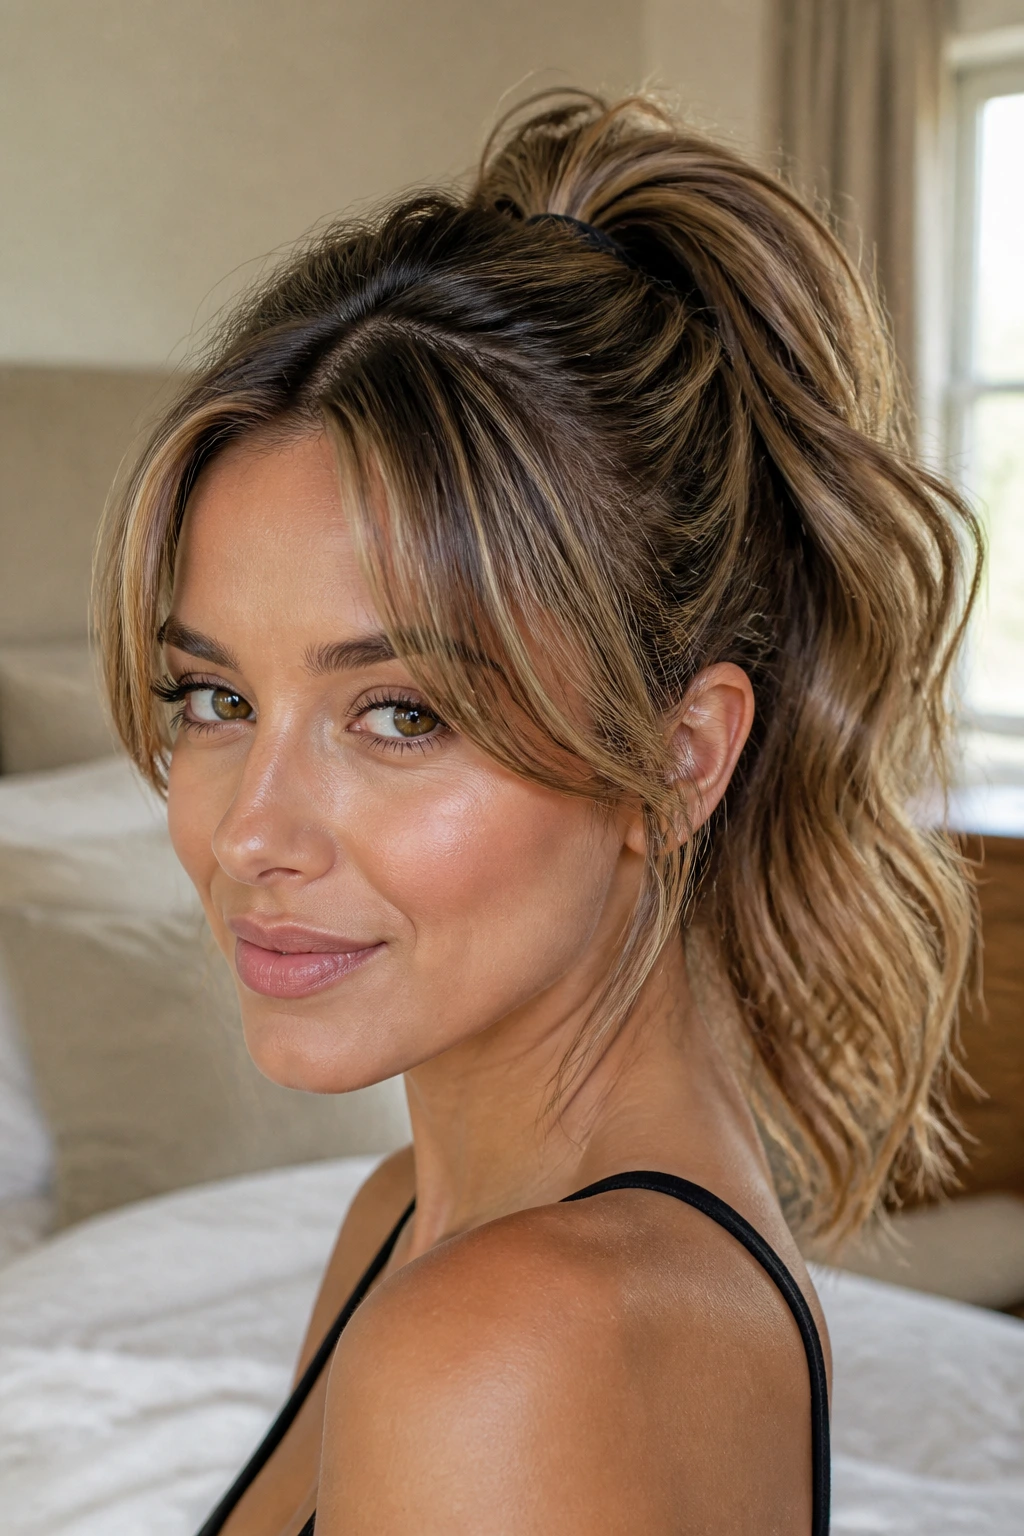
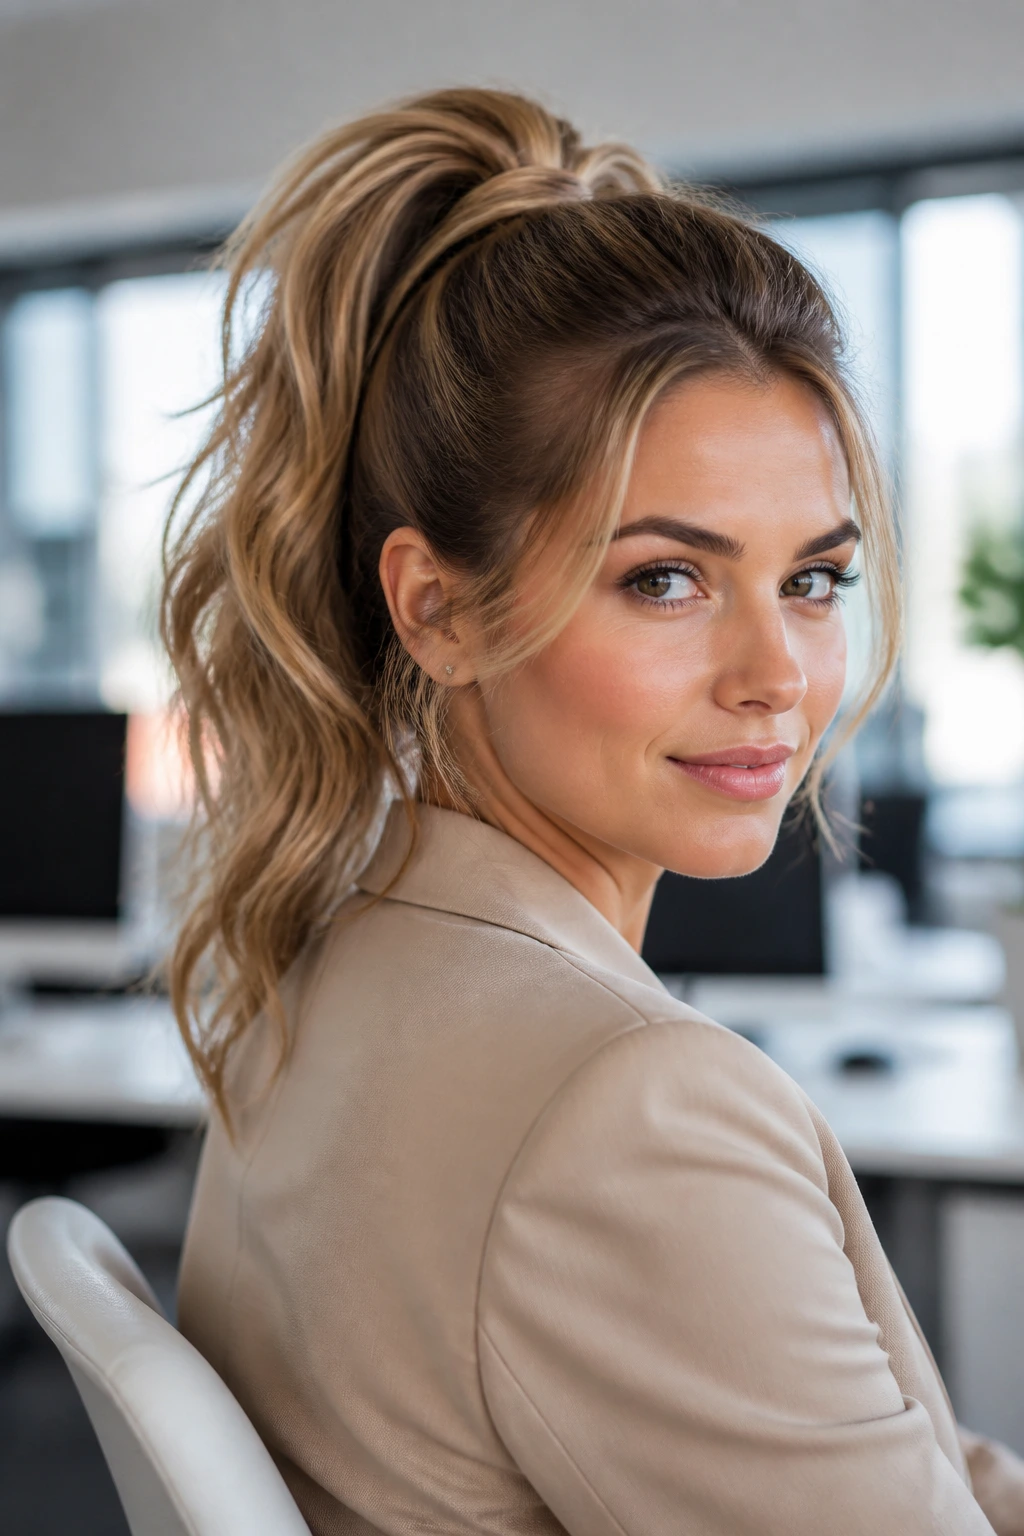
4. The Teased Crown Volume Pony for Flat Hair Days
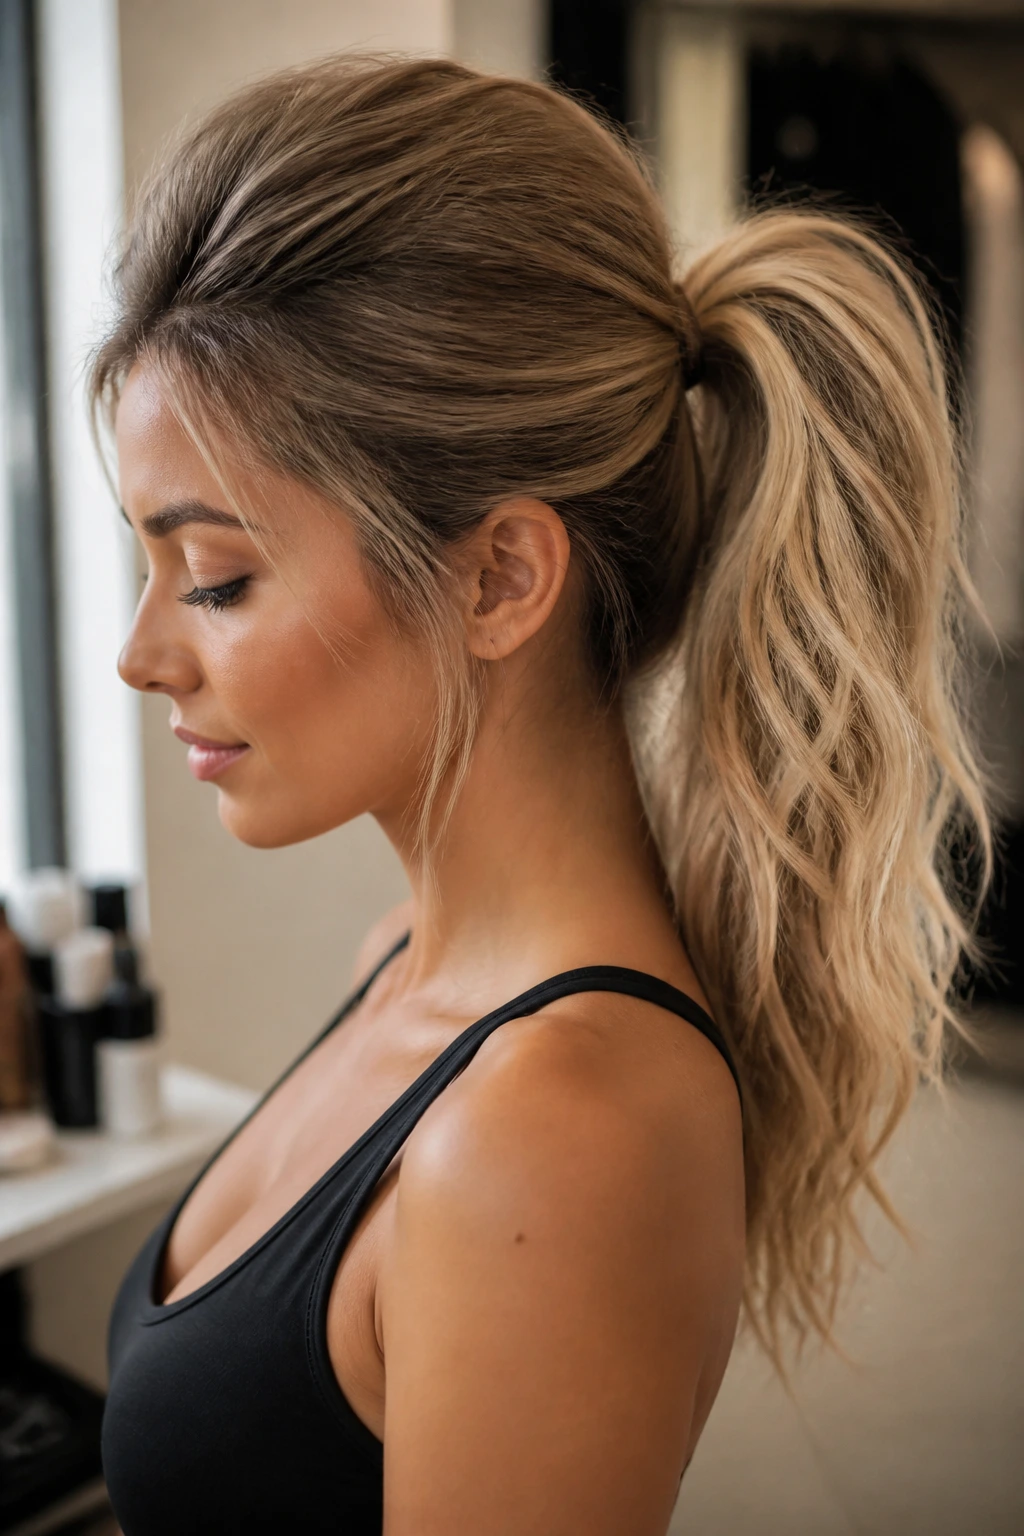
Some mornings your roots just lie there. No amount of optimism changes that. A teased crown high ponytail does, though, and when the ponytail itself has brushed-out waves, the whole style looks full without turning into a giant puffball.
This is the one I reach for when the hair is clean but too soft. It gives the top section some lift, then uses the waves to keep the length from falling limp. The ponytail ends up with a kind of bounce that feels tidy, but not stiff.
A little height goes a long way
Backcomb only the section just behind the crown, not the entire top layer. Two or three short strokes with a fine-tooth comb are enough. If you tease too much, the roots start to crack and show through, especially in bright light. That’s the part that gives the style away.
The finish matters. Use a light mist of flexible hairspray before you smooth the outer surface, then leave the ponytail ends soft. You want lift at the crown and movement below. That balance is the whole point.
- Best for fine or medium hair that drops flat fast.
- Works nicely with a slightly off-center pony placement.
- Holds better if you curl the ends after the ponytail is secured.
Best move: Pin the ponytail base slightly higher than you think you need. Gravity always wins a little by lunch.
5. The Rope-Twist Ponytail with Loose, Wavy Ends
A rope twist gives the high ponytail a little architectural line. It’s tidier than a braid, faster than a full updo, and it plays nicely with beachy waves because the texture in the lengths keeps the style from feeling too severe. I like this one when I want something that looks deliberate but not precious.
The twist can run from the temples back into the ponytail base, or it can live only on the sides. Either way, it creates a nice visual frame around the face. That’s especially handy if your layers are short and you want them to stay put instead of slipping out by midmorning.
The beachy wave part should stay slightly brushed out. Tight rope twists plus tight curls can start to feel overworked. A softer wave keeps the whole thing light.
What makes it hold together
Work with dry hair and a little texture spray. Take two sections from each side, twist them away from the face, then bring them back and secure them into the ponytail. If your hair is slippery, cross the twists over each other once before tying the elastic. That small move gives the style grip.
Finish by curling only the ponytail tail, not the twisted side sections. That keeps the top neat and the length soft. It’s a good contrast.
6. The Bubble Ponytail with Beachy Texture
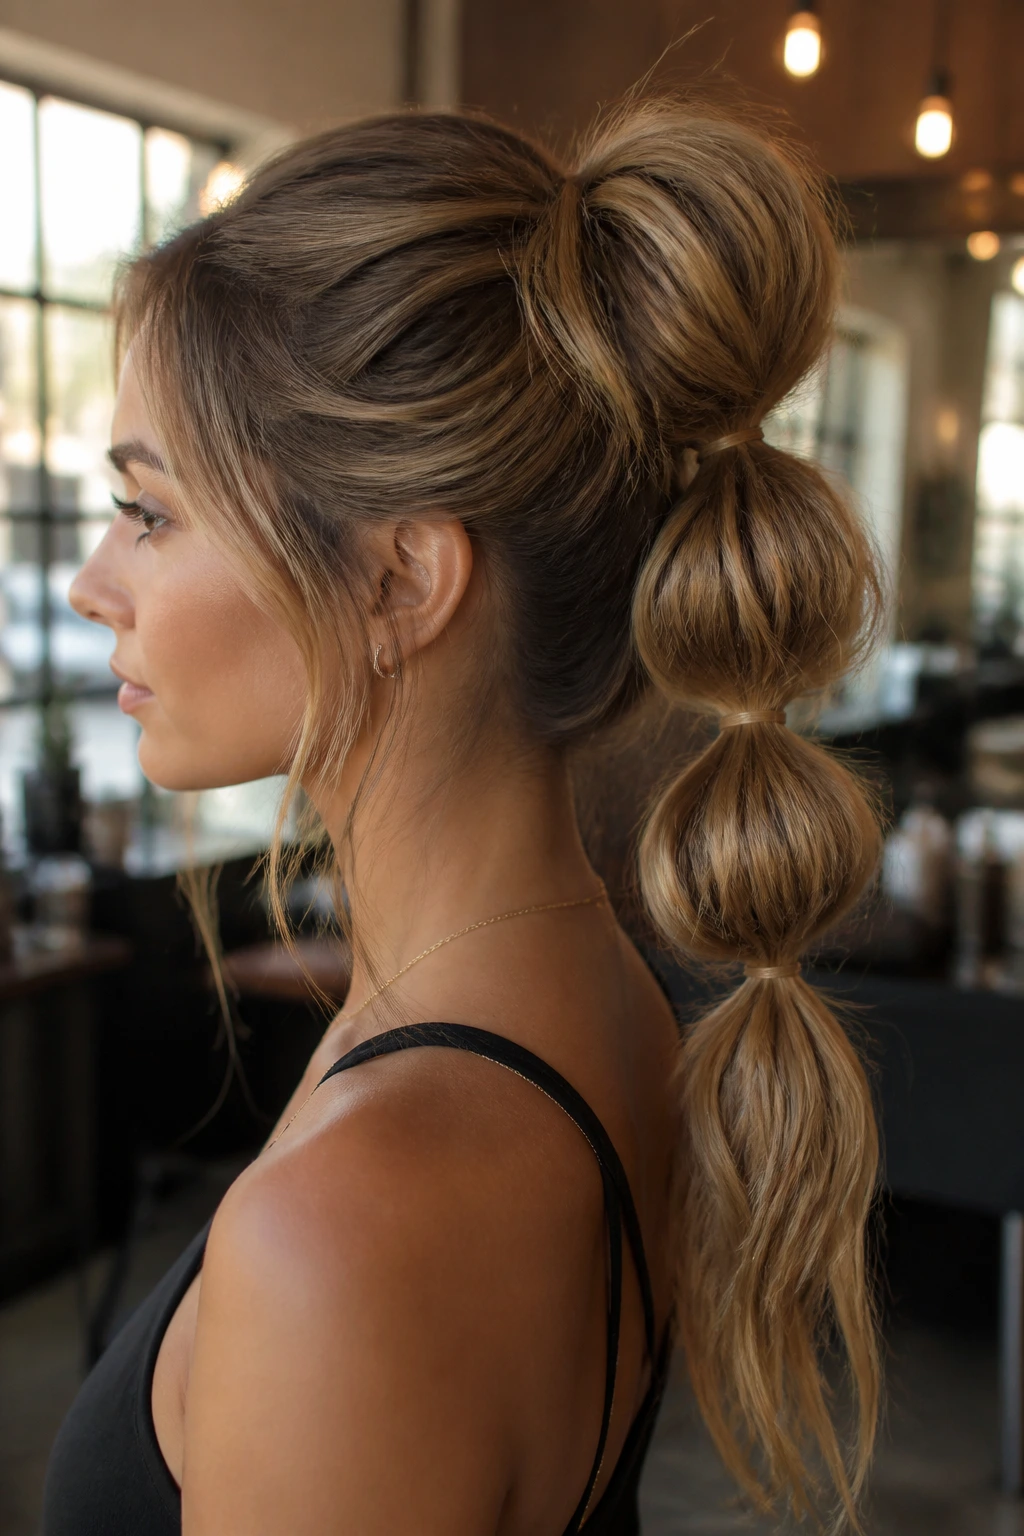
A bubble ponytail can look playful fast, so the way you handle the wave pattern matters. Keep the bubbles evenly spaced and the waves loose, and it reads modern. Pull the sections too tight, and it starts looking like a cheer routine from a decade ago.
This style works because the bubbles break up the length into tidy sections while the beachy texture stops them from feeling hard-edged. It’s a smart pick for long hair that loses shape halfway through the day, because each elastic helps anchor the shape a little more.
Why it’s better than a plain long pony
A single long pony can sag. Bubbles keep the length lifted and give you little pockets of volume between elastics. The trick is to pancake each bubble gently — tug the sides outward just a bit after securing each section. That softens the line and keeps the effect airy.
Use 3 to 5 small elastics, depending on hair length. If your hair is shoulder blade length or longer, you can usually fit four bubbles without crowding. If it’s shorter, three is cleaner.
My preference: Leave the first section just under the crown a little fuller than the rest. It keeps the head shape nice and avoids that stretched look.
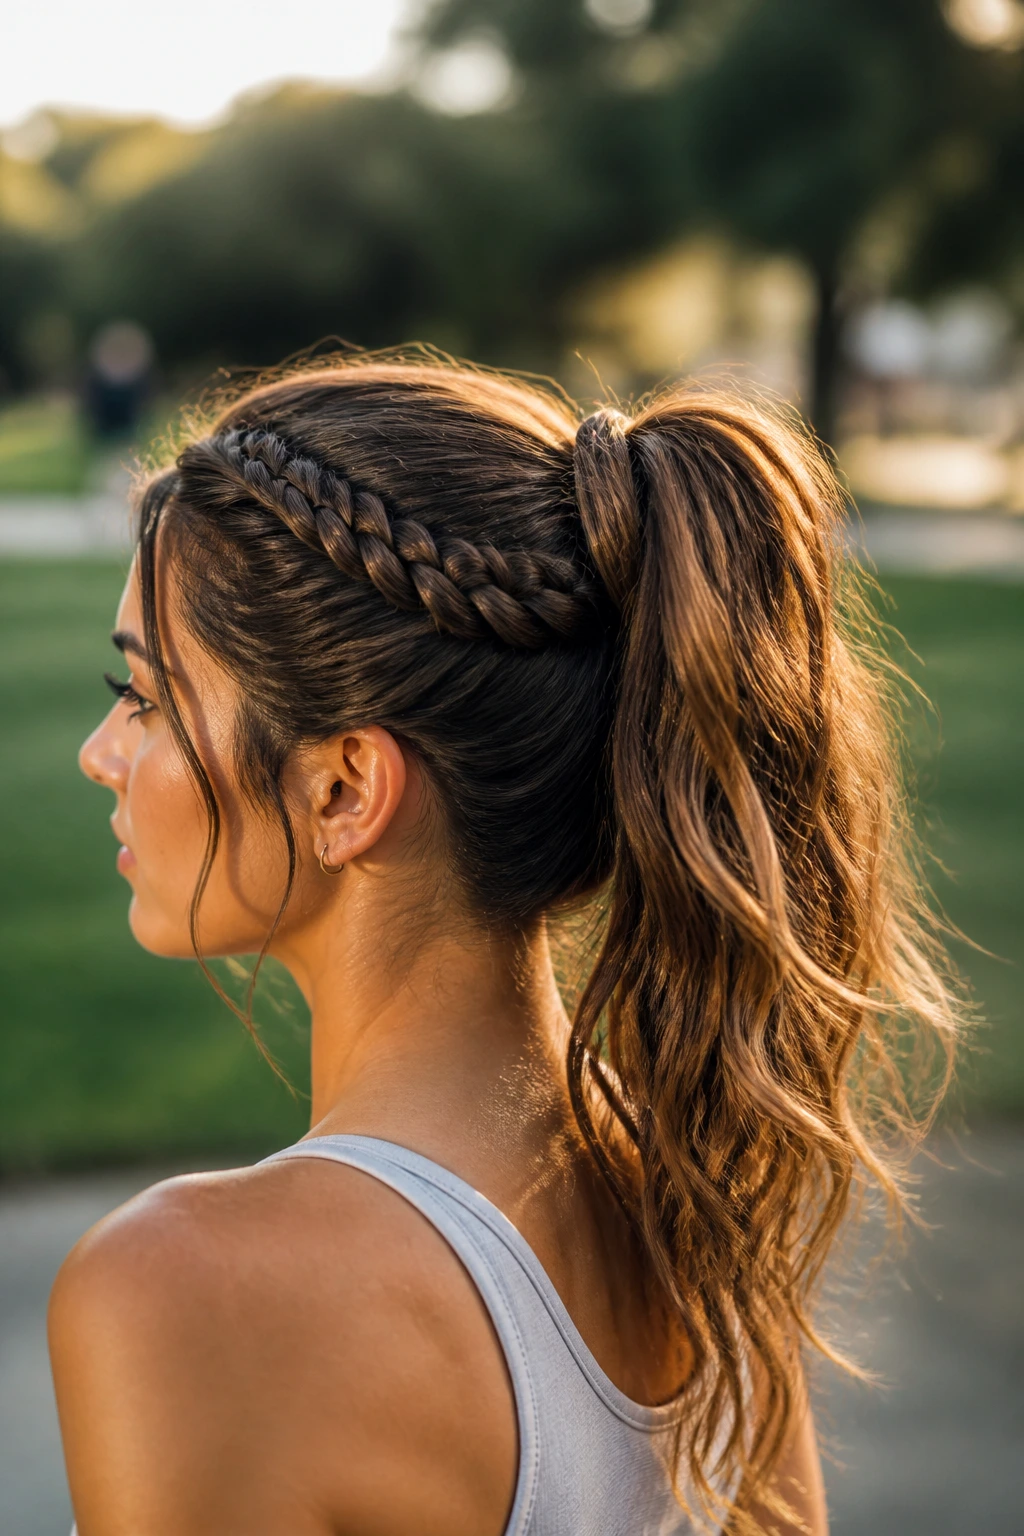
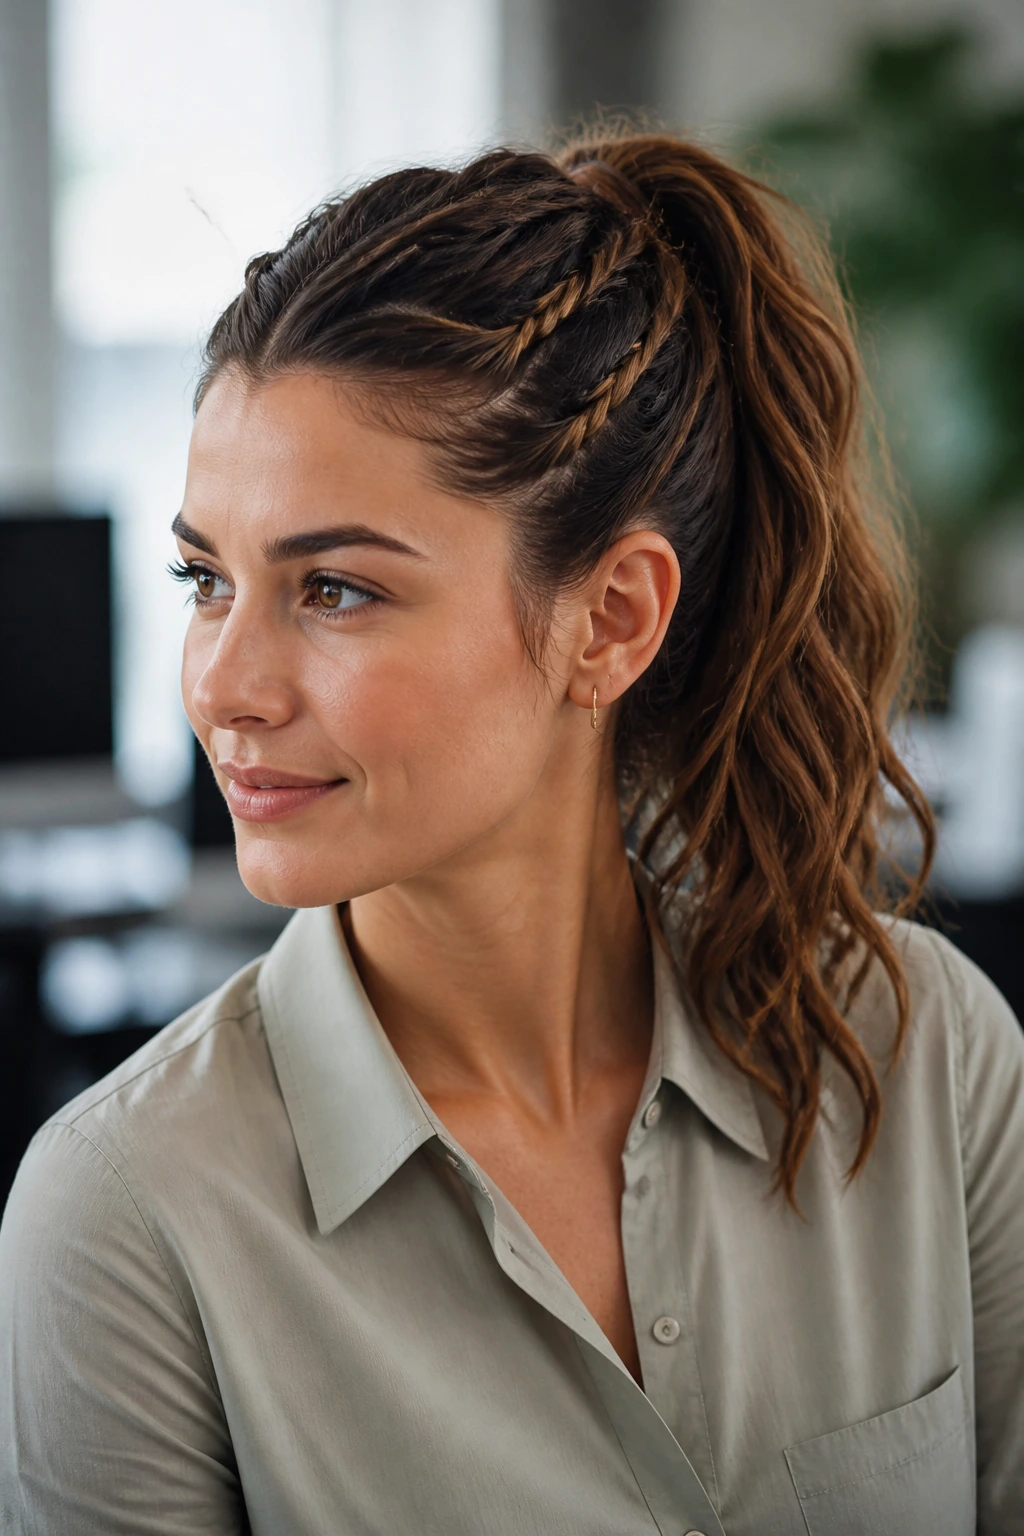
7. The Braided-Base Ponytail with Soft Wave Lengths
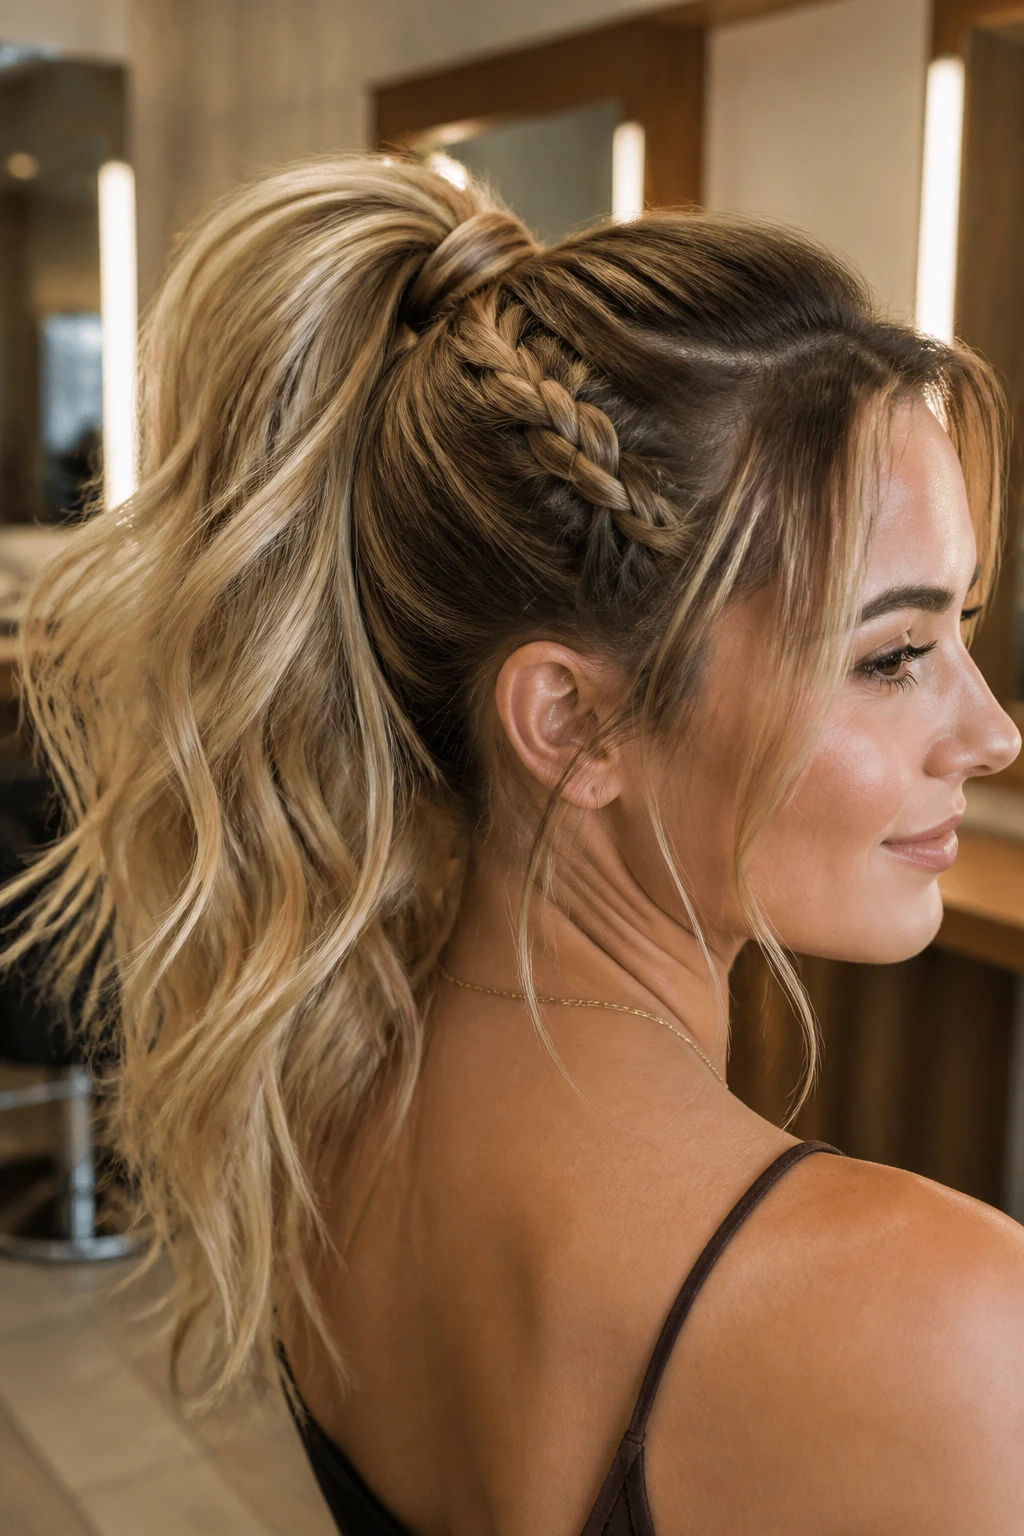
A tiny braid at the base gives you just enough detail to feel styled, but not enough to drag the whole ponytail into “special event” territory. That’s why this one works so well from weekday to weekend. The beachy waves in the ponytail lengths keep it relaxed; the braid keeps it from feeling plain.
You do not need a long braid here. A Dutch braid, a tiny three-strand braid, or even two slim side braids that meet at the elastic all do the job. The point is simply to frame the base with texture.
If you have layers that never stay tucked, this version helps more than most. The braid catches the shorter pieces and gives them somewhere to live.
Small braid, big payoff
Braid only the top or side sections for 3 to 4 inches before tying everything into a high ponytail. That keeps the style quick. Then wave the ponytail lengths in alternating directions so the texture feels a little uneven in the best way.
A tiny touch of pomade on the fingertips can smooth the braid edges without making them greasy. Use almost none. Seriously. A rice-grain amount goes farther than you think.
8. The Silk-Scarf Ponytail with Soft Waves
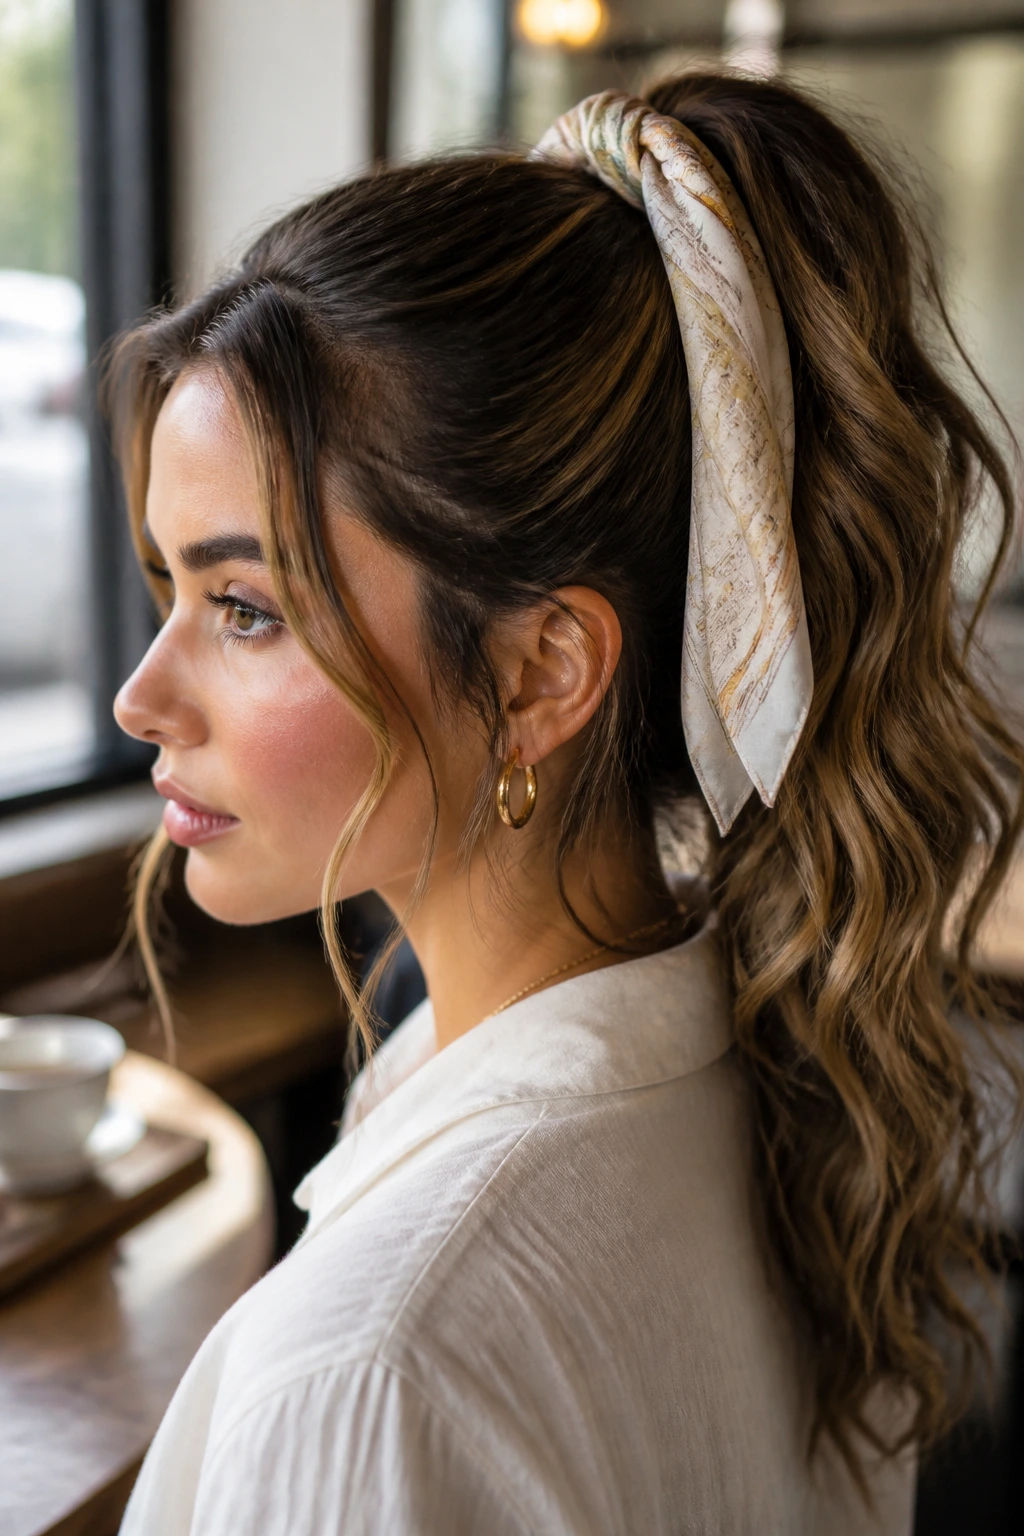
A silk scarf changes the whole mood. It can make a high ponytail feel polished enough for a presentation, then a little more styled for dinner later on. The waves are still the main event, but the scarf gives the eye a place to rest.
The best part is that the scarf can hide a lot of day-two hair behavior. A little root lift, some separated waves, maybe one or two frizzier strands near the temples — the fabric makes those things look intentional. That’s a useful trick, not a gimmick.
How to keep it from sliding
Tie the ponytail first, then knot the scarf over the elastic. If the scarf is slippery, anchor it with one hidden bobby pin behind the knot. Choose a scarf that’s narrow enough not to overwhelm the ponytail; about 1.5 to 2 inches wide works well if you’re tying it into a bow or knot.
Keep the ponytail itself loose and soft. The scarf already adds structure. You do not need a tight wave pattern here.
Best use: This is the one I’d wear on a day that starts with desk work and ends somewhere with decent lighting and small plates.
9. The Curtain-Bang High Ponytail
Curtain bangs and a high ponytail have a nice working relationship. The bangs soften the front, the ponytail lifts the profile, and the beachy waves in the length keep the whole thing from looking too neat. It’s one of the easiest ways to make a high ponytail feel face-framing without losing height.
The important part is not to over-curl the bangs. Give them a bend, not a twist. If they’re too curled, they start competing with the ponytail instead of connecting to it.
I like this style when the hair needs to look intentional but not sealed down. There’s a little air around the face, which makes it easier to wear all day.
How to shape the front pieces
Use a round brush or a medium curling iron to bend the curtain bangs away from the center, then break them up with your fingers. Pull the ponytail high but not so high that the bangs lose their framing effect. A position near the top of the ears usually works well.
The ponytail length can be waved in medium sections so the texture reads soft, not defined. If your bangs are short, keep them dry and airy. Heavy product on the fringe is a fast way to make this style collapse.
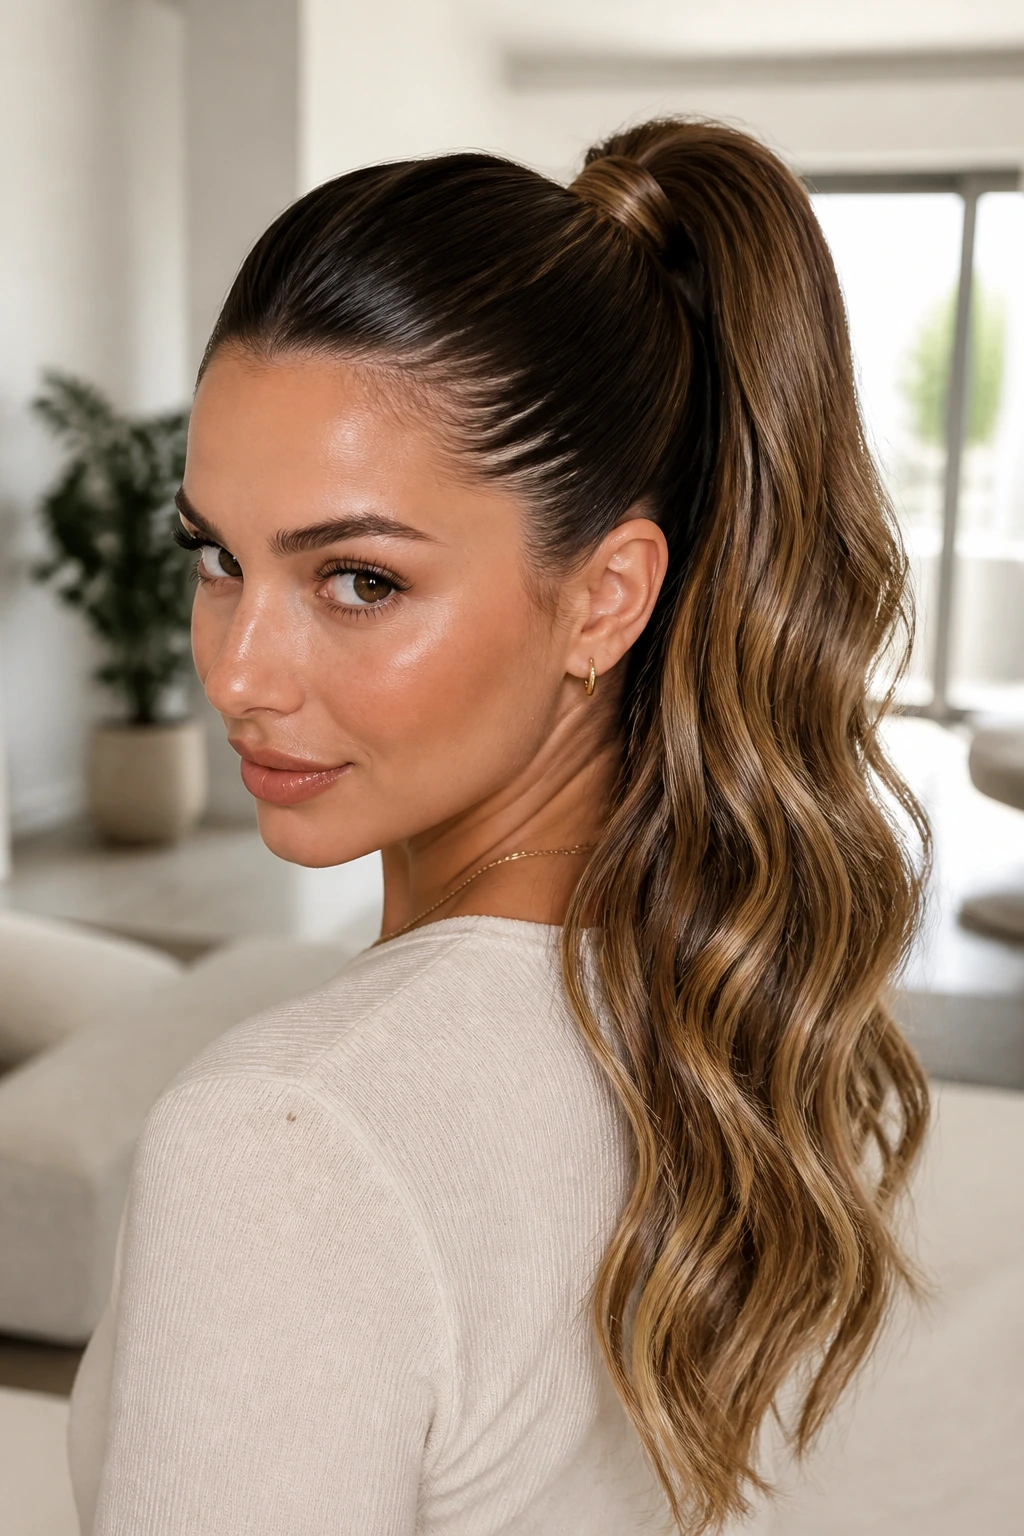
10. The Deep Side-Swoop Ponytail

A deep side-swoop gives a high ponytail a little glamour without asking for extra volume everywhere. The front sweeps across the forehead, the ponytail sits high, and the beachy waves soften the whole shape so it doesn’t feel too formal. It’s a very useful middle ground.
This is especially good if one side of your hair always falls flatter than the other. A side swoop uses that asymmetry instead of fighting it. And honestly, that’s usually the smarter move.
The ponytail itself should stay full but not fluffy. Too much lift on both sides can make the silhouette fight itself. Let the sweep do the talking.
A quick styling note
Set the front with a light spray while it’s still warm from the iron, then clip it in place for a minute or two while you finish the ponytail. That small bit of cooling helps the swoop keep its direction. After that, release it and blend it into the crown with a soft brush stroke.
If the wave pattern in the tail is strong, brush only the outer surface. Leave the inside bends alone. That keeps the volume but softens the finish.
11. The Half-Sleek, Half-Tousled Ponytail
This is the ponytail for people who like contrast. The crown is smooth enough to feel controlled, but the mid-lengths and ends stay loose and touchable. It’s a little less rigid than a sleek work pony, which makes it useful for days that move from desk to drinks.
The reason this one looks expensive, if I can use that word without being annoying, is that the eye sees two textures on purpose. The top says clean. The tail says relaxed. When they’re balanced well, the whole style looks more editorial than fussy.
Where the balance lives
The smooth section should end around the ponytail base. After that, stop polishing. Let the wave pattern start in the lengths and keep a few bends imperfect on purpose. A little irregularity looks better here than uniform curls.
This style is particularly kind to layered hair. Shorter pieces at the front stay sleek enough to behave, while the longer pieces in back can keep the wave. If your hair is one length, you can fake the same effect by curling the outermost sections a touch more loosely than the inner ones.
Tip: Use a shine spray on the crown only, and keep the ponytail texture matte. That contrast is what makes this one work.
12. The Flipped-Ends Ponytail
A flipped finish gives beachy waves a little extra movement. Instead of letting every section fall straight down, you create a soft flip at the ends, which makes the whole ponytail swing a little more when you walk. It’s subtle. You’ll notice it. Other people will think your hair just behaves well.
This is one of my favorites for shoulder-length to mid-back hair because the flip makes the length look fuller. It also helps the tail avoid that blunt, heavy drop some ponytails get after a long day.
What makes the flip look clean
Do not curl the ends into a tight ring. Bend them around the wand for only 3 to 4 seconds, then let them cool in your hand before releasing. The shape should feel like a soft hook, not a curl trying to become a spring.
This version works best when the ponytail sits high enough to lift the face but low enough that the tail has room to move. A point just below the crown usually gives the best balance.
If you want a little more polish, smooth the top with a pea-sized amount of serum before tying the elastic. Keep the serum away from the root area or the ponytail will slip.
13. The Heat-Free Wave Ponytail
Sometimes you want the ponytail without the hot tools. Maybe your hair has had enough. Maybe you’re getting ready while someone else is using the bathroom mirror and the curling iron would only slow you down. A heat-free wave ponytail gives you the same soft texture, just with a gentler method.
The texture is usually looser than a wand-created wave, and that’s not a flaw. In fact, it often looks better for daytime because the bends are less uniform. It reads more natural.
How to build it without heat
Start the night before with two or four loose braids in slightly damp hair, or twist sections into soft buns and let them dry. In the morning, break them apart, mist with texturizing spray, and gather the hair high. Leave the front pieces a little softer so they frame the face instead of sticking out.
The ponytail base should still be tidy. That contrast is what keeps the style from looking like you forgot to finish. A wrapped elastic helps a lot here.
Best move: If the waves are too strong, brush the ponytail length once with a wide-tooth comb, then stop. You want bend, not curl blocks.
14. The Glassy Crown Ponytail with Waved Lengths
A shiny crown can make waves look more expensive. It’s a sharp little contrast: smooth on top, airy through the ponytail. This style tends to read especially well with structured outfits because the shine at the root zone makes the hair feel deliberate.
The key is moderation. You want gloss, not grease. A few drops of lightweight serum or a fine mist of shine spray is enough. Too much and the crown collapses, which ruins the lift you worked for.
Where the shine should live
Keep the product at the outer surface and the ponytail tail. Do not work it into the scalp. Use a brush to distribute it across the top layer, then leave the wave sections underneath mostly untouched.
This style looks especially good on dark hair, but it works on lighter shades too if the finish is clean. If your hair tends to frizz around the hairline, smooth that area with a toothbrush-sized edge brush and a tiny bit of styling cream. Tiny. Not a scoop.
The ponytail length can be waved loosely or in a more defined pattern, depending on how formal you want it to feel. The crown shine is the anchor either way.
15. The Messy-Luxe High Ponytail
Messy can be polished if you keep the mess in the right place. That’s the whole logic of this ponytail. The crown has a little lift, the ponytail has airy, loose beachy waves, and a few flyaways are allowed to live where they naturally want to live. It should look soft, not sloppy.
I like this version when the clothes are simple and the hair needs to do some of the styling work. A plain knit, a clean shirt, even a blazer — the ponytail adds texture so the rest of the outfit doesn’t have to.
Where to stop
This one lives or dies on restraint. Pull the ponytail up, tug a few pieces loose around the temples, and then quit. That’s the hard part. Keep the waves loose and brushed through with fingers only, and don’t over-spray the front. A little movement is the point.
If you want it to last longer, secure the ponytail with a second elastic under the first one. Hidden. It helps if your hair is heavy or layered.
16. The Twisted Temple Ponytail
A twist at each temple gives you a cleaner face line and a more interesting base than a standard ponytail. It also helps shorter layers stay tucked, which is a small mercy on windy days or on days when your hair just refuses to cooperate.
The beachy waves in the tail soften the twist, so the whole look doesn’t become too neat. That balance is why this one works beyond work. It can look crisp enough for a meeting, but the texture in the ponytail keeps it from feeling stiff afterward.
Why the twist matters
Twists are quicker than braids and flatter than knots. Take a narrow section from each side, twist backward, and pin them into the ponytail base before tying the elastic. If you do the twists after the ponytail is secured, they often look bulky.
I’d keep the ponytail itself a little fuller on this one. The side details shrink the look slightly, so a fuller tail keeps the silhouette balanced. A few face-framing bends complete it nicely.
Best use: Great on medium-length hair that tends to look flat at the sides but puffier at the back.
17. The Ponytail with Hidden Claw-Clip Lift
A small claw clip under the ponytail base can add a sneaky amount of lift. You don’t see it, but you feel the difference: the ponytail sits higher, the crown gets a bit more shape, and the waves fall from a better angle. It’s one of those tricks that sounds odd until you try it once.
This is useful when your hair is dense and heavy or when your ponytail keeps drooping by midafternoon. The clip acts like a tiny support system. Not glamorous. Very effective.
What to hide and where
Lift the top section of hair slightly, clip a small claw clip just under the base, then secure the ponytail over it. Make sure the clip is smaller than your ponytail width so it disappears. If the clip is too big, the whole thing starts to feel lumpy.
The wave pattern in the tail can stay loose and touchable. In fact, that softness helps distract from any hidden structure at the crown. I would skip heavy root products here; you need the hair to grip, not slide.
18. The Event-Ready Glam Ponytail with Big Beach Waves
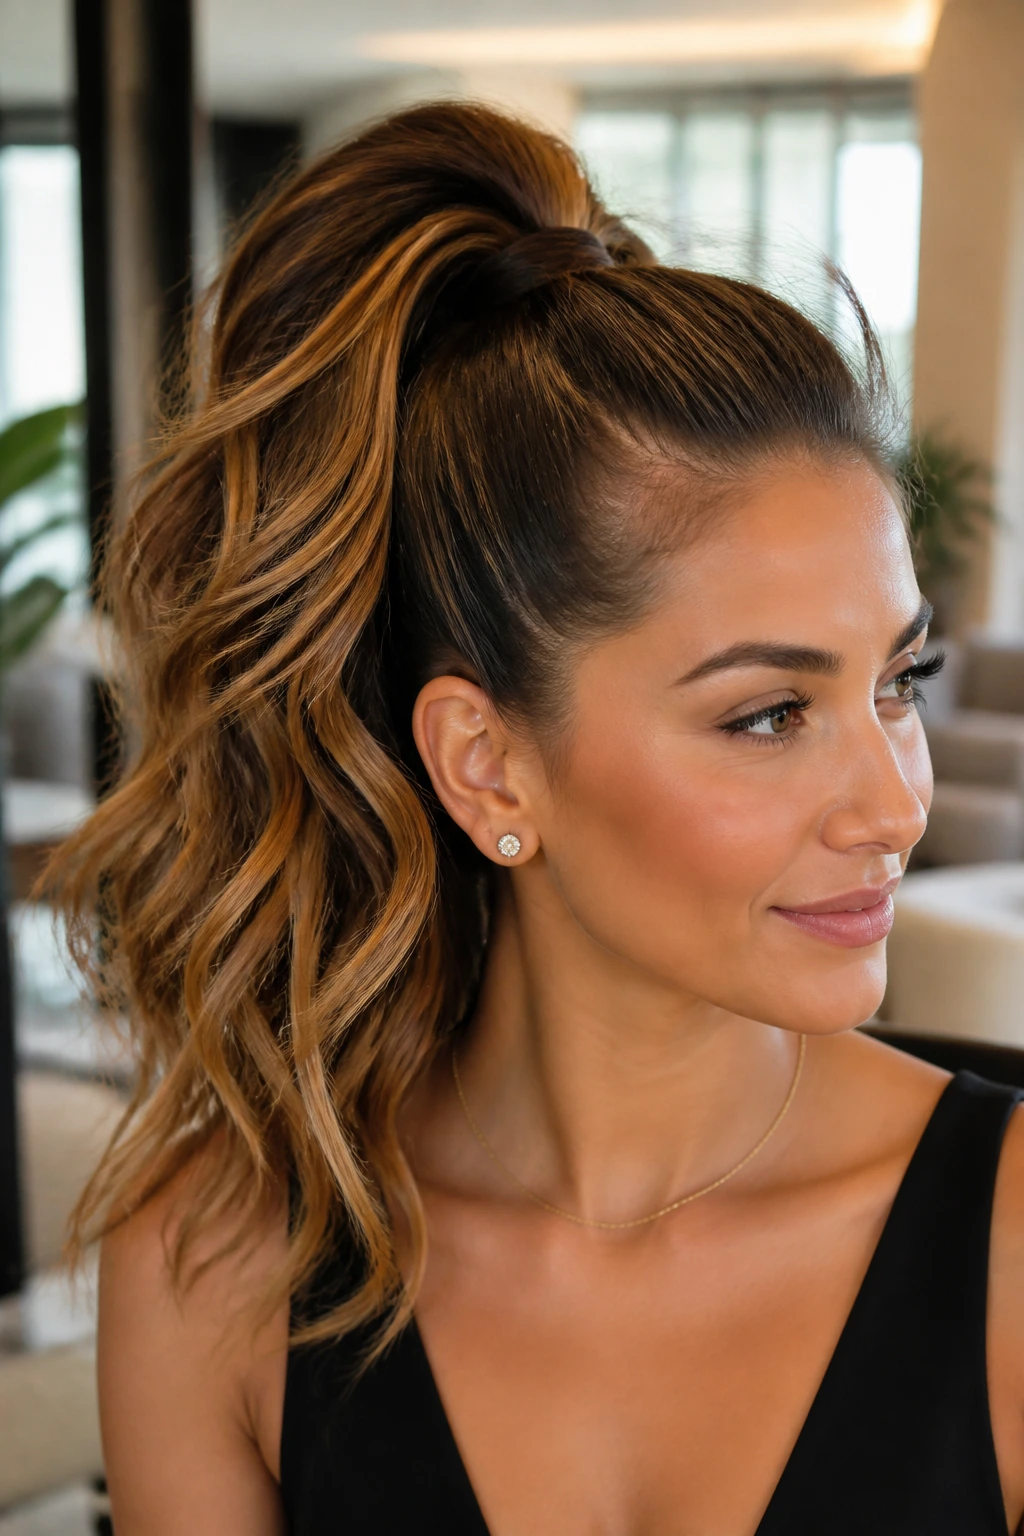
This is the version with the most presence. The ponytail sits high, the wave pattern is fuller, and the overall shape feels a little more dressed up than the others. It still works because the waves stay brushed out enough to read soft, not curled to the nines.
It’s the one I’d pick when the outfit is simple but the hair needs to carry some weight. A good ponytail can do that. You don’t need a complicated style if the shape, shine, and wave pattern are doing the work for you.
How to keep the glam from going stiff
Use larger sections when waving the hair, around 1.5 inches, and brush them apart once they’ve cooled. The wave should look broad and touchable. Then add a little extra lift at the crown with a teasing comb and smooth the top layer over it.
Wrap the base, pin it cleanly, and give the tail one final mist of flexible hairspray from about 10 inches away. If you spray too close, the ends lose movement. That’s the sort of thing people notice in person even if they can’t name it.
Why High Ponytails With Beachy Waves Work So Well
A high ponytail can be practical, but the wave pattern is what keeps it from feeling bare. The height opens up the face, the ponytail placement gives the silhouette some lift, and the loose bends soften the whole thing so it doesn’t land in strictly sporty territory.
That combination matters more than people think. A straight high ponytail often looks severe unless the hair is very thick or glossy. A fully curled one can feel too formal. Beachy waves sit in the middle, which is exactly why they work for office clothes, weekend clothes, and all the odd in-between moments where you need your hair to behave.
The best version almost always starts with a clean base. Smooth the crown. Leave the lengths soft. Keep the waves loose enough that they move when you walk. If you get those three things right, the ponytail starts pulling its weight instead of just staying out of your face.
The Styling Kit That Makes These Looks Easier

- Rat-tail comb: Best for clean parts, sectioning, and lifting the crown without making ridges.
- Soft bristle brush: Useful for smoothing the top layer before you tie the ponytail.
- 1 to 1.25-inch curling iron or wand: The sweet spot for loose beachy bends that don’t turn into tight curls.
- Heat protectant spray: Keeps the lengths from getting dry or rough, especially if you refresh the ponytail often.
- Texturizing spray: Gives the hair a little grip so the elastic and waves hold better.
- Flexible-hold hairspray: Holds the front and ends without turning them crunchy.
- Strong elastic that matches your hair color: A small detail, but it matters when you want the base to disappear.
- Bobby pins: Keep the wrap, twist, or scarf detail locked in place.
- Small teasing comb: Handy for crown lift on flatter hair days.
- Lightweight serum or shine spray: Best used sparingly on the lengths or outer top layer only.
- Optional silk scarf or small claw clip: Good for changing the vibe without rebuilding the whole style.
Smart Product and Prep Tips That Actually Matter
The product choice changes how the ponytail behaves. Fine hair usually needs grip first, shine second. That means a little dry shampoo or texturizing spray at the roots, then a light heat protectant through the lengths before you curl. Thick hair often needs the opposite: a smoother prep, a firmer elastic, and a more careful wrap so the base does not get bulky.
Don’t soak the hair in product before you tie it up. That’s how you end up with a ponytail that looks wet at the crown and fuzzy at the ends. Use small amounts, let each layer dry or settle for a minute, and then move on. Hair is much easier to control when every product has a job.
For the wave itself, a 1 to 1.25-inch barrel tends to give the most useful bend. Smaller barrels can look too curled. Bigger barrels can fall flat too fast. If your hair is very long, you can go slightly larger, but I would still brush the waves out after they cool. That’s the part that gives the style its beachy feel.
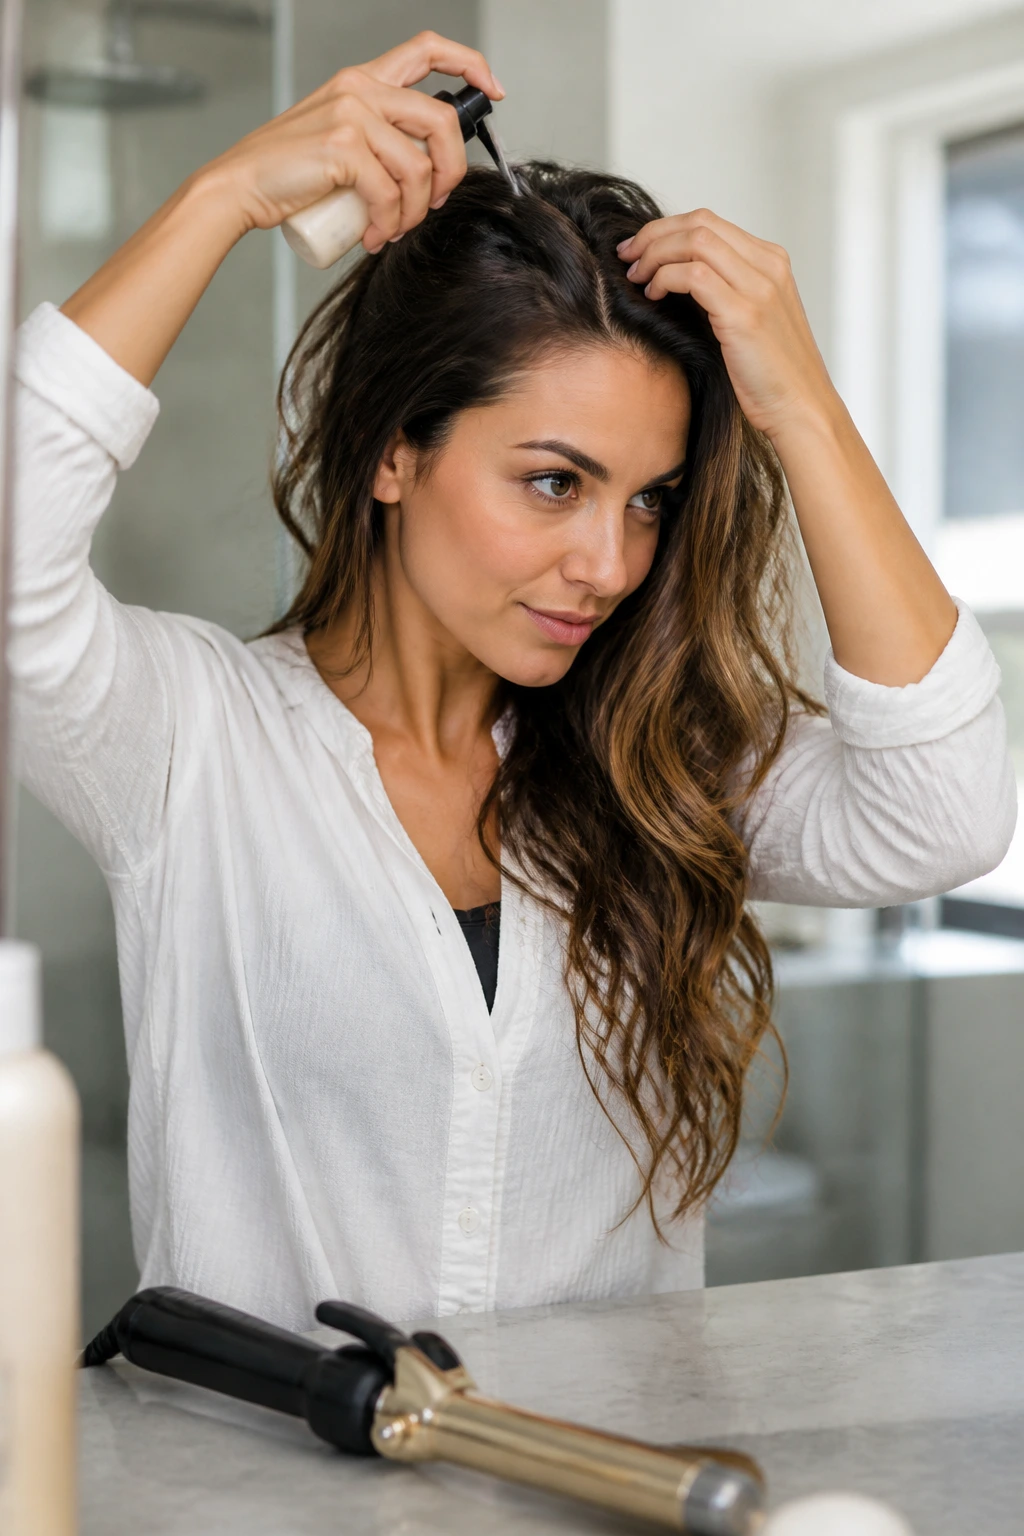
How to Make the Waves Hold Inside a High Ponytail
Root Prep: Start with dry hair and work a small amount of texture spray or dry shampoo into the root zone before you tie the ponytail. The hair needs grip at the base, not slip. If the roots are too soft, the whole style drops.
Wave Direction: Curl away from the face on the pieces that sit around the front and alternate direction through the back sections. That keeps the ponytail from looking like a row of identical spirals. Once the curls cool, rake them apart with your fingers or a wide-tooth comb.
Elastic Placement: Put the ponytail at the highest point that still feels balanced on your head, usually around the crown or slightly above. Too high, and it can start looking peppy. Too low, and you lose the lift that makes the shape work.
Finish Line: Use hairspray only after the hair has cooled. If you spray too soon, the wave pattern goes stiff and loses its soft bend. A light mist from arm’s length is enough.
Common Mistakes That Make a Ponytail Look Tired
The first mistake is placing the ponytail too far forward. It can make the face look pulled instead of lifted, and it usually shortens the neck line in a way that feels awkward. Move it back to the crown, and the whole shape gets better almost instantly.
Another common problem: curling every section the same way, all the way to the ends. That gives you ringlets, not beachy waves. Leave the last inch or two out, curl in alternating directions, and brush the shape apart after it cools. Softer is better here.
Too much serum is a quiet disaster. The hair looks fine at first, then the crown starts slipping and the ponytail loses height. Keep anything oily away from the roots and concentrate it only on dry ends if you need shine.
There’s also the over-sprayed finish. Once the hair feels stiff, it stops moving. That’s what makes a ponytail look dated fast. Flexible hold beats helmet hair every time.
Variations and Adaptations to Try
Fine Hair Lift Edition: Use a volumizing mousse at the roots before blow-drying, then backcomb a small section under the crown. Finish with a wrapped elastic and looser waves so the ponytail looks fuller without needing more hair than you have.
Thick Hair Control Edition: Skip the heavy teasing and focus on a strong base with two elastics if needed. Curl larger sections and let the waves brush into each other a little; that keeps the tail from looking too wide or puffy.
Heat-Free Weekend Edition: Build loose waves overnight with braids or twists, then gather the hair high in the morning. This works best when the hair already has some natural bend, because the goal is movement, not polish.
Accessory-Dressed Version: Add a silk scarf, barrette, or small claw clip after the ponytail is secured. Keep the rest of the look simple so the accessory feels like a feature, not clutter.
Short-Layer Friendly Version: Pull the shorter pieces at the temples into small twists or pin them back before tying the ponytail. That keeps flyaways from taking over the style and helps the face-framing shape stay intact.
Refreshing the Style, Sleeping on It, and Wearing It Again
A high ponytail with beachy waves can usually carry through a full day without much trouble, especially if the crown is anchored well and the tail isn’t overloaded with product. If you want to wear it again the next day, the best move is to take the ponytail out before bed and sleep with the waves loosely clipped or set in a soft braid. Tight sleep styles leave dents in the lengths and flatten the crown.
For a next-day refresh, mist the ponytail lengths with a little water mixed with leave-in conditioner, then scrunch with your hands and let them air for a few minutes. If the roots need help, use dry shampoo at the hairline and crown before retying. A quick touch with the curling iron on only the front pieces can bring the whole style back without redoing everything.
If you’re preserving the style for an evening event after work, keep a mini brush, a couple of bobby pins, and a travel-size texturizing spray nearby. Those three things solve most of the visible problems: a sagging crown, a loose wrap, and waves that have fallen too straight.
Frequently Asked Questions
How do I keep a high ponytail from sagging by lunchtime?
Start the ponytail a little higher than you think you need and anchor it with a strong elastic. If your hair is thick or heavy, use a second hidden elastic underneath the first one, or add a small claw clip under the base for extra lift.
Can I do beachy-wave ponytails on fine hair?
Yes, and fine hair often benefits from this style because the waves create the illusion of fullness. Use texture spray at the roots, a light teasing comb at the crown, and avoid heavy oils near the base.
Do I need to curl all of my hair before tying it up?
No. You can tie the ponytail first, then wave the lengths. That’s often easier and gives you more control over the crown. The only pieces I’d usually style first are the face-framing sections if you want them to fall neatly.
What’s the best way to hide the elastic?
Wrap a thin section of hair around the elastic once, tuck the end underneath, and pin it from below. If the hair is slippery, a tiny bit of hairspray on the wrap section before you pin it helps it stay put.
Will this work on second-day hair?
Yes, and in many cases second-day hair is better because it has more grip. If the roots are flat, add dry shampoo first. If the ends are dry, mist lightly with water or leave-in conditioner before reviving the waves.
How do I stop flyaways without making everything crunchy?
Use a soft brush or your fingertips with a tiny amount of styling cream, then finish with flexible-hold hairspray from a distance. If the spray is too close to the hair, it will lock the surface and kill the movement.
Can I wear a high ponytail with bangs or curtain pieces?
Absolutely. Curtain bangs, side-swept fringe, or even shorter face pieces work well with beachy waves. The key is to give them a bend, not a tight curl, so they frame the face instead of competing with the ponytail.
What if my waves fall out too fast?
Your sections may be too large or the barrel too big. Try a 1 to 1.25-inch curling iron, curl slightly smaller sections, and let the curls cool fully before brushing them out. A little texturizing spray before and after styling also helps.
Is this style too casual for work?
Not if the crown is neat and the elastic is hidden. The beachy part should live in the lengths, not in a messy top section. Keep the base tidy and the style reads polished fast.
A Ponytail That Pulls Its Weight
A good high ponytail with beachy waves does a rare thing: it clears the face, keeps the shape lifted, and still looks like hair you meant to wear that way. That’s why it works for a workday, a dinner reservation, a long commute, and the awkward hour between them when your hair needs to stay decent without another full reset.
The sweet spot is in the contrast. Smooth crown. Soft tail. A little shine, a little movement, and not one extra ounce of fuss. Once you get the base placement and wave texture right, the rest becomes a matter of mood, and that’s the fun part.