A braided headband has a funny little talent: it can look like a soft, decorative detail while doing very practical work. It pulls the front of the hair off the face, gives shape to a puff or bun, and makes a grow-out line look intentional instead of ignored. On the right head, it reads polished. On the wrong one, it looks either limp or painfully tight. That gap is smaller than people think, and it comes down to parting, tension, and where the braid disappears.
The style lives or dies in the first few inches near the hairline. Too much hair in the front section and the braid turns chunky in a way that swallows the face. Too little and it looks wispy, like it’s trying not to commit. Get the balance right, though, and the braid sits across the crown with that neat, slightly handmade finish that works on coils, curls, silk presses, twists, and locs.
I keep coming back to this style because it solves a real problem with a small amount of effort. You do not need a full updo. You do not need a complicated set of pins. You need a clean section, a hand that knows when to stop pulling, and enough patience to let the braid lie flat instead of fighting the shape of the head. The style looks simple from the outside. It is not careless. That is the whole point.
Why a Braided Headband Is Worth the Few Extra Minutes
-
It keeps the face open without flattening the whole head: The braid holds the front section in place while the rest of the hair can stay curly, fluffy, sleek, or tucked away in a bun.
-
It hides a little grow-out better than a slicked-back style: A soft root line or a slightly rough wash day can disappear under the braid instead of showing up in every mirror.
-
It works with low tension when you do it properly: If the braid starts with a section that is about 1 to 1½ inches wide, you can keep it secure without yanking the temples raw.
-
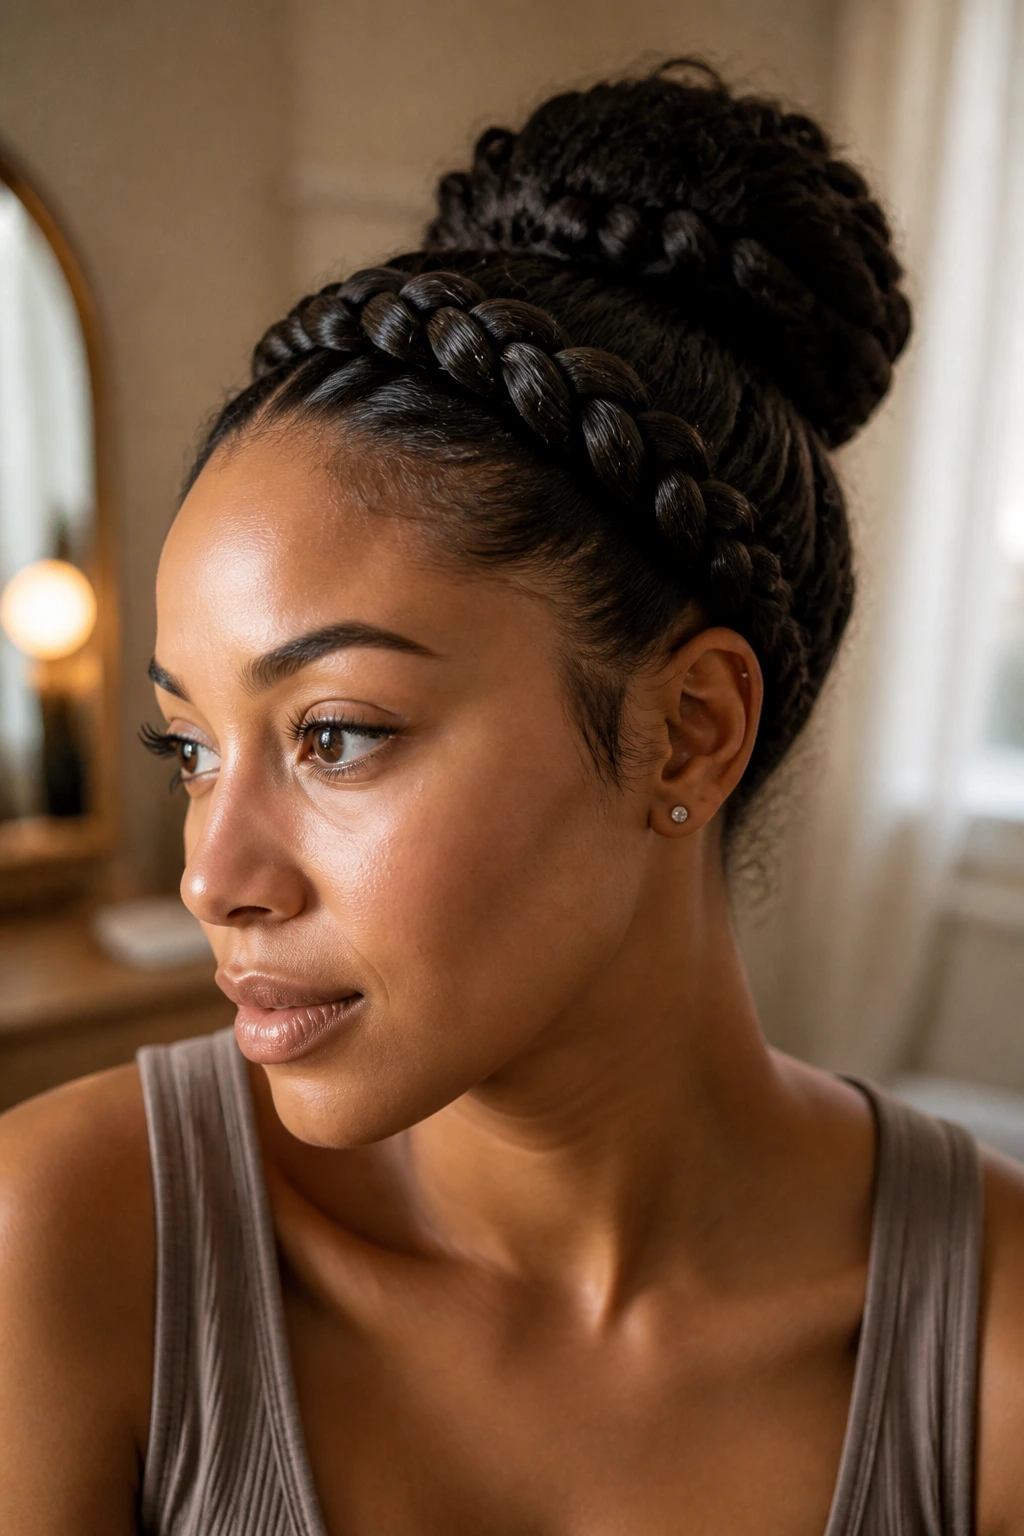
It plays well with other styles: A braided headband can frame a puff, sit over loose curls, connect to a low bun, or make twists look more finished.
-
It gives you options on short notice: Shift the part, move the anchor, or loosen the front loop, and the whole mood changes without starting over.
-
It looks more deliberate than a random side braid: The band shape draws the eye across the forehead and crown, so even simple hair suddenly feels planned.
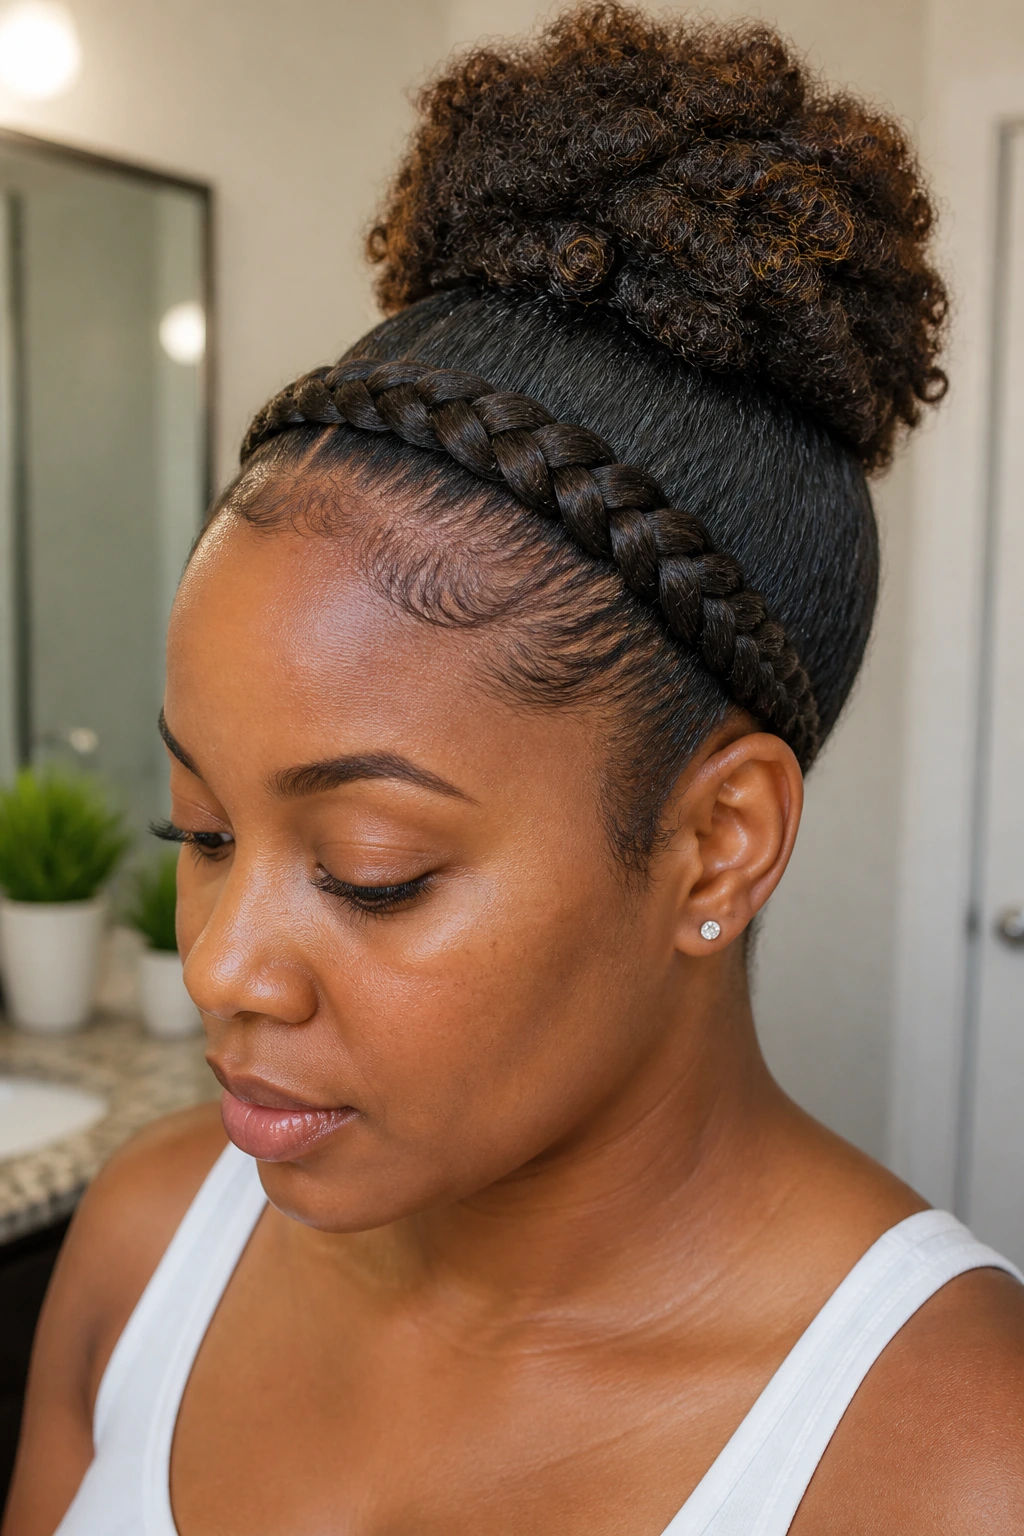
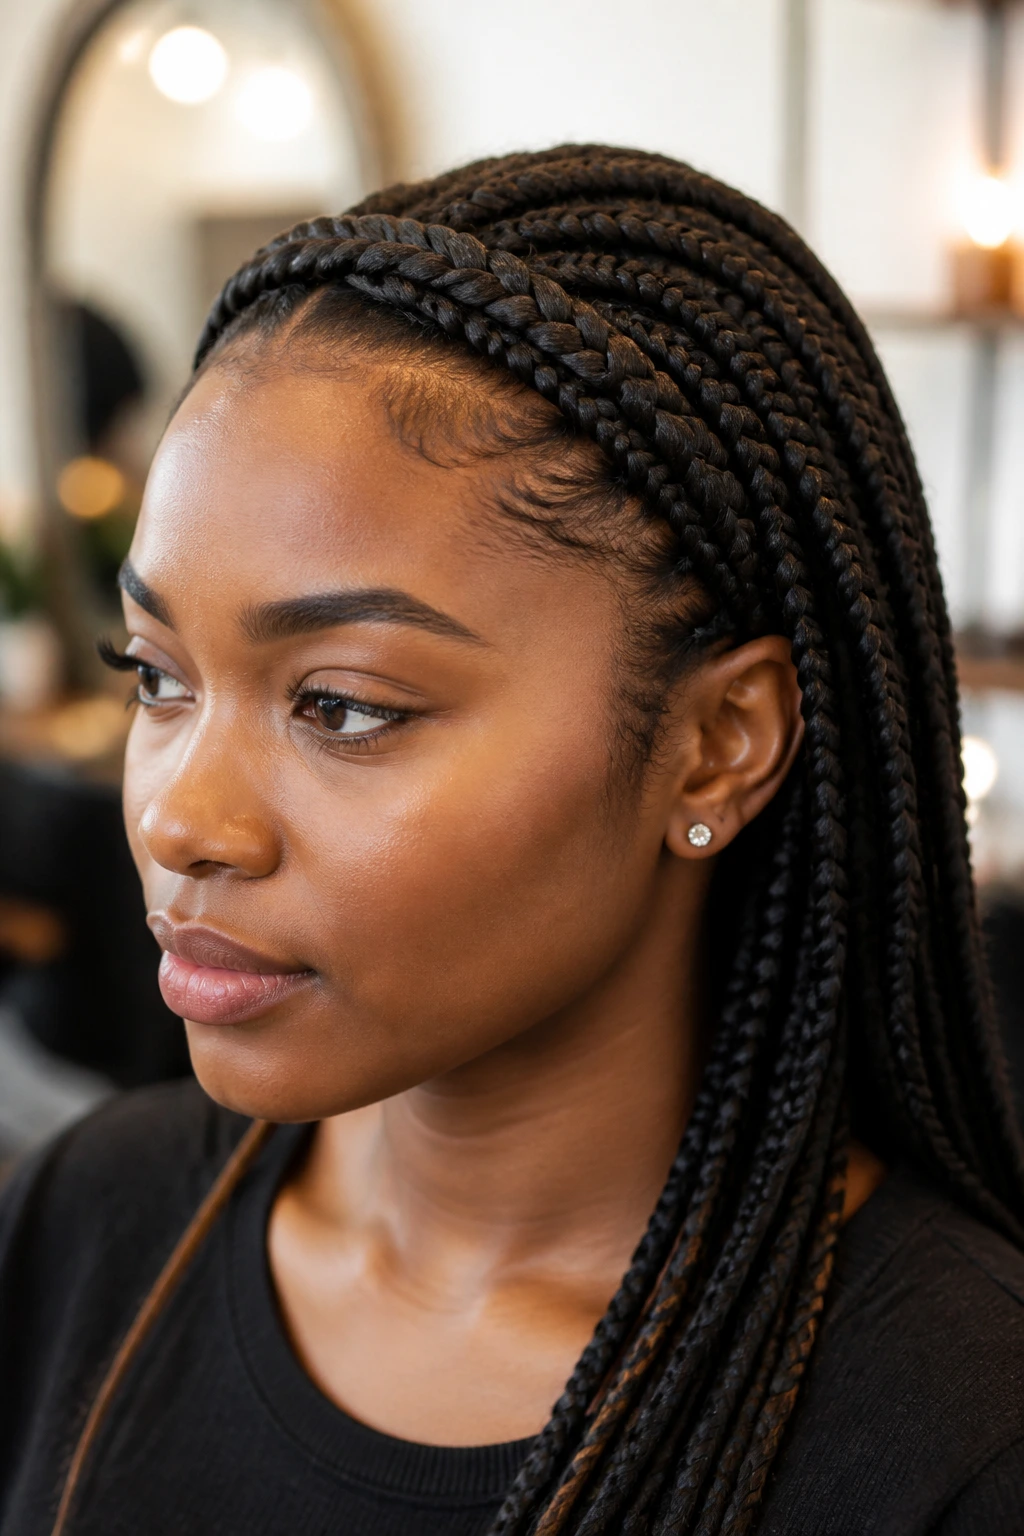
What a Braided Headband Actually Looks Like on Real Hair
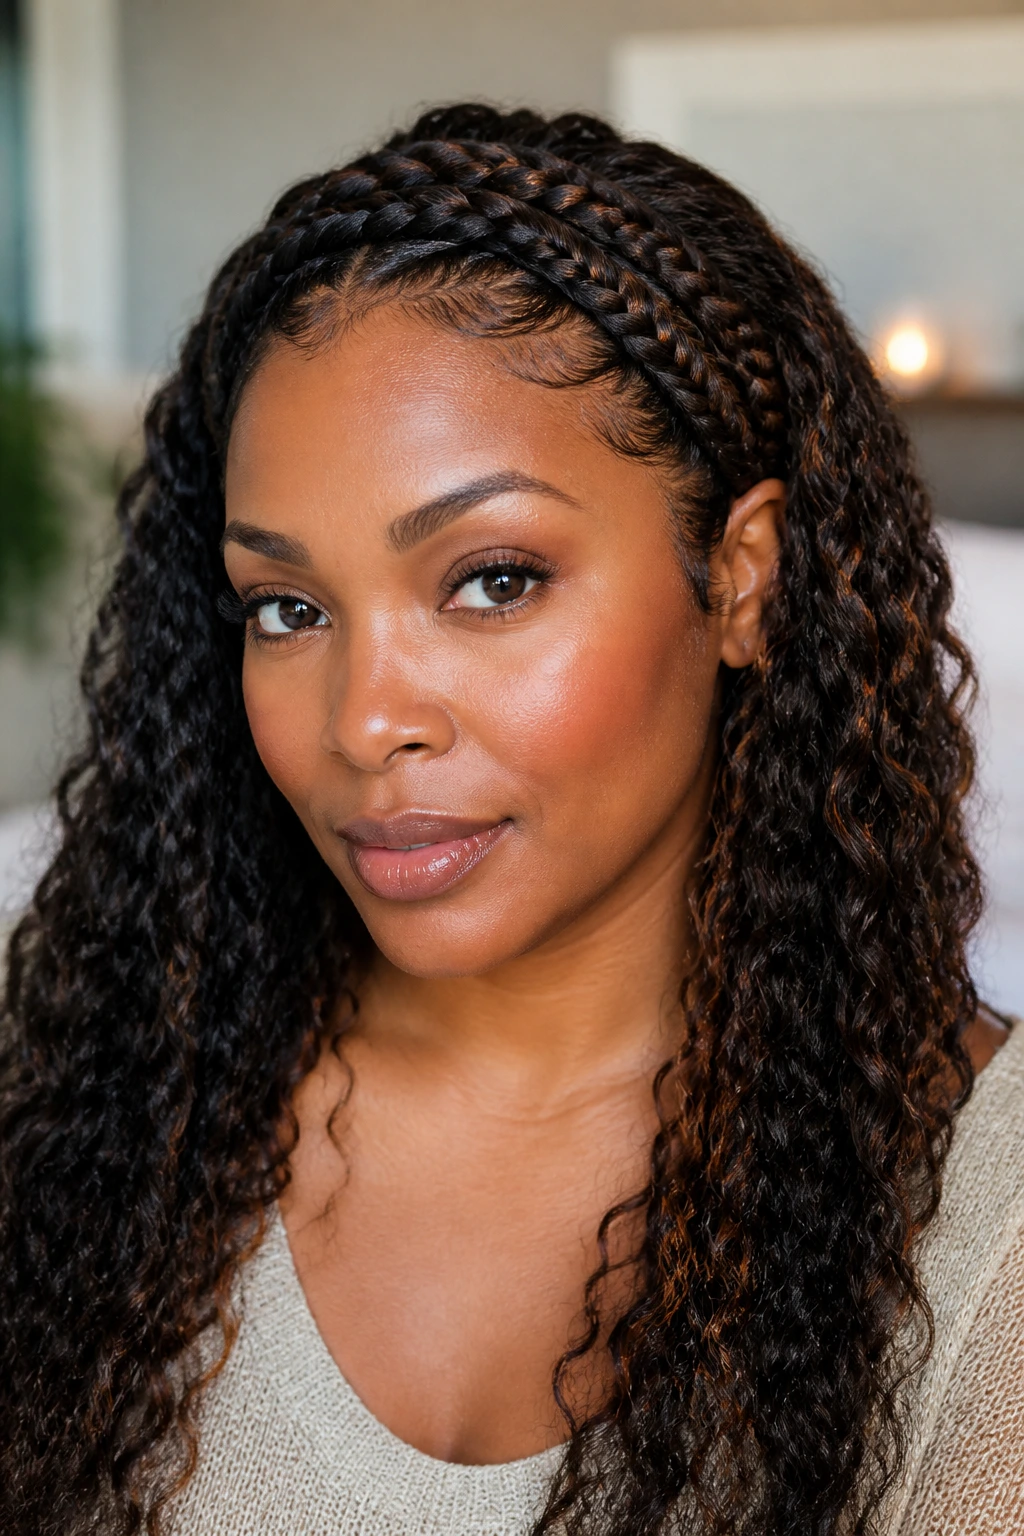
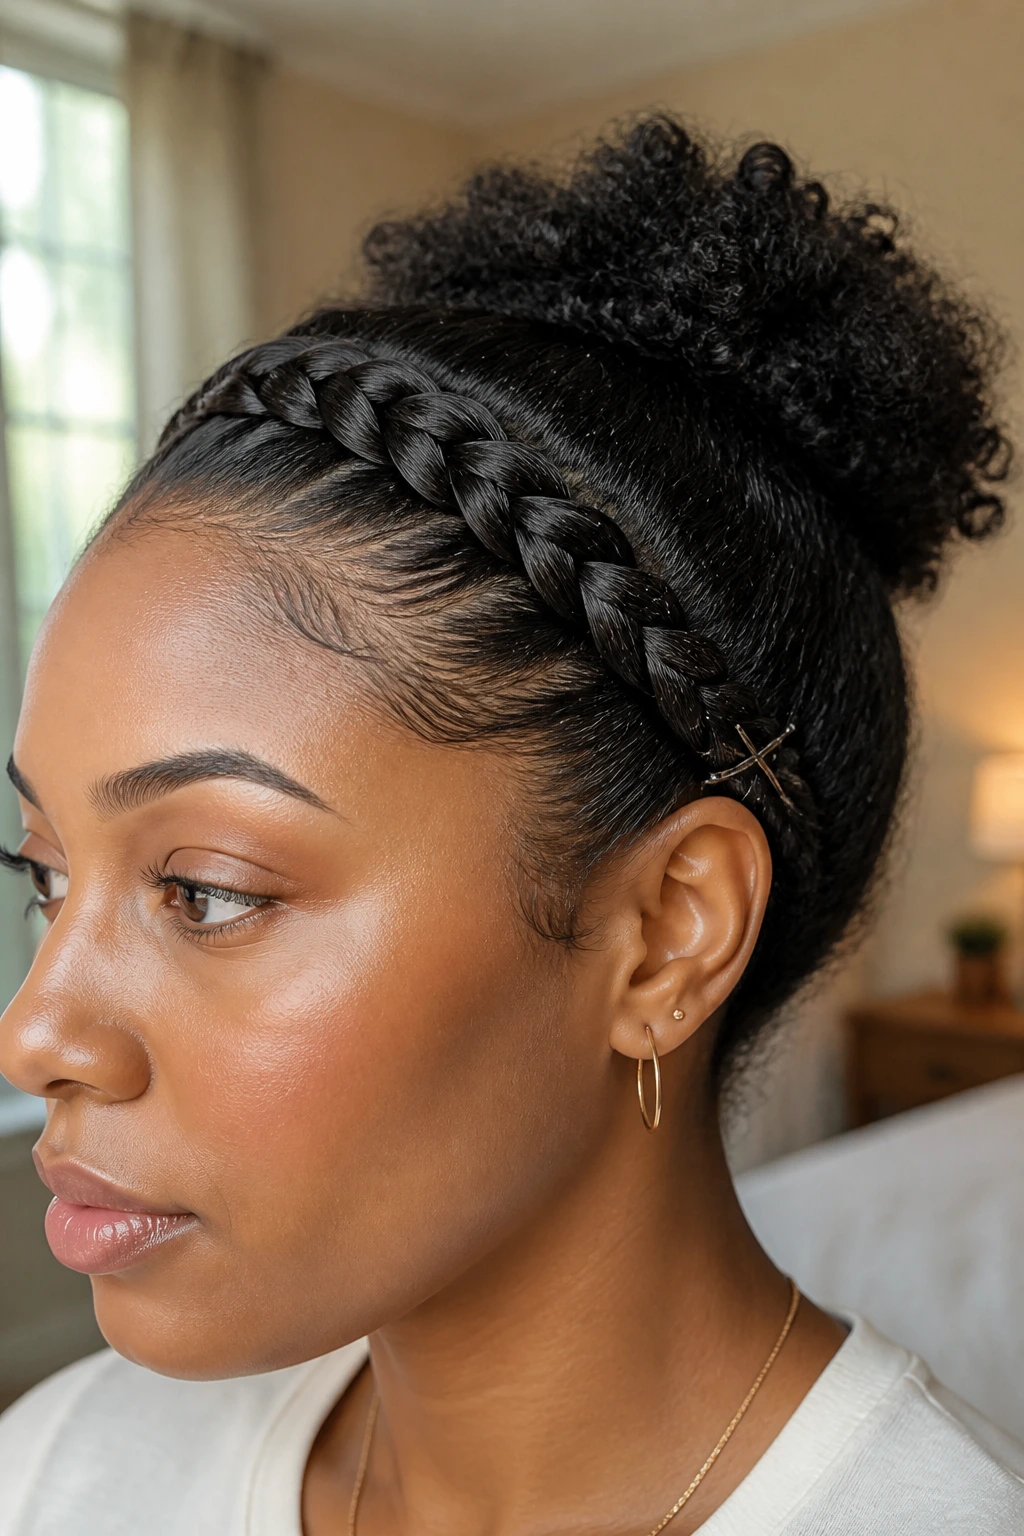
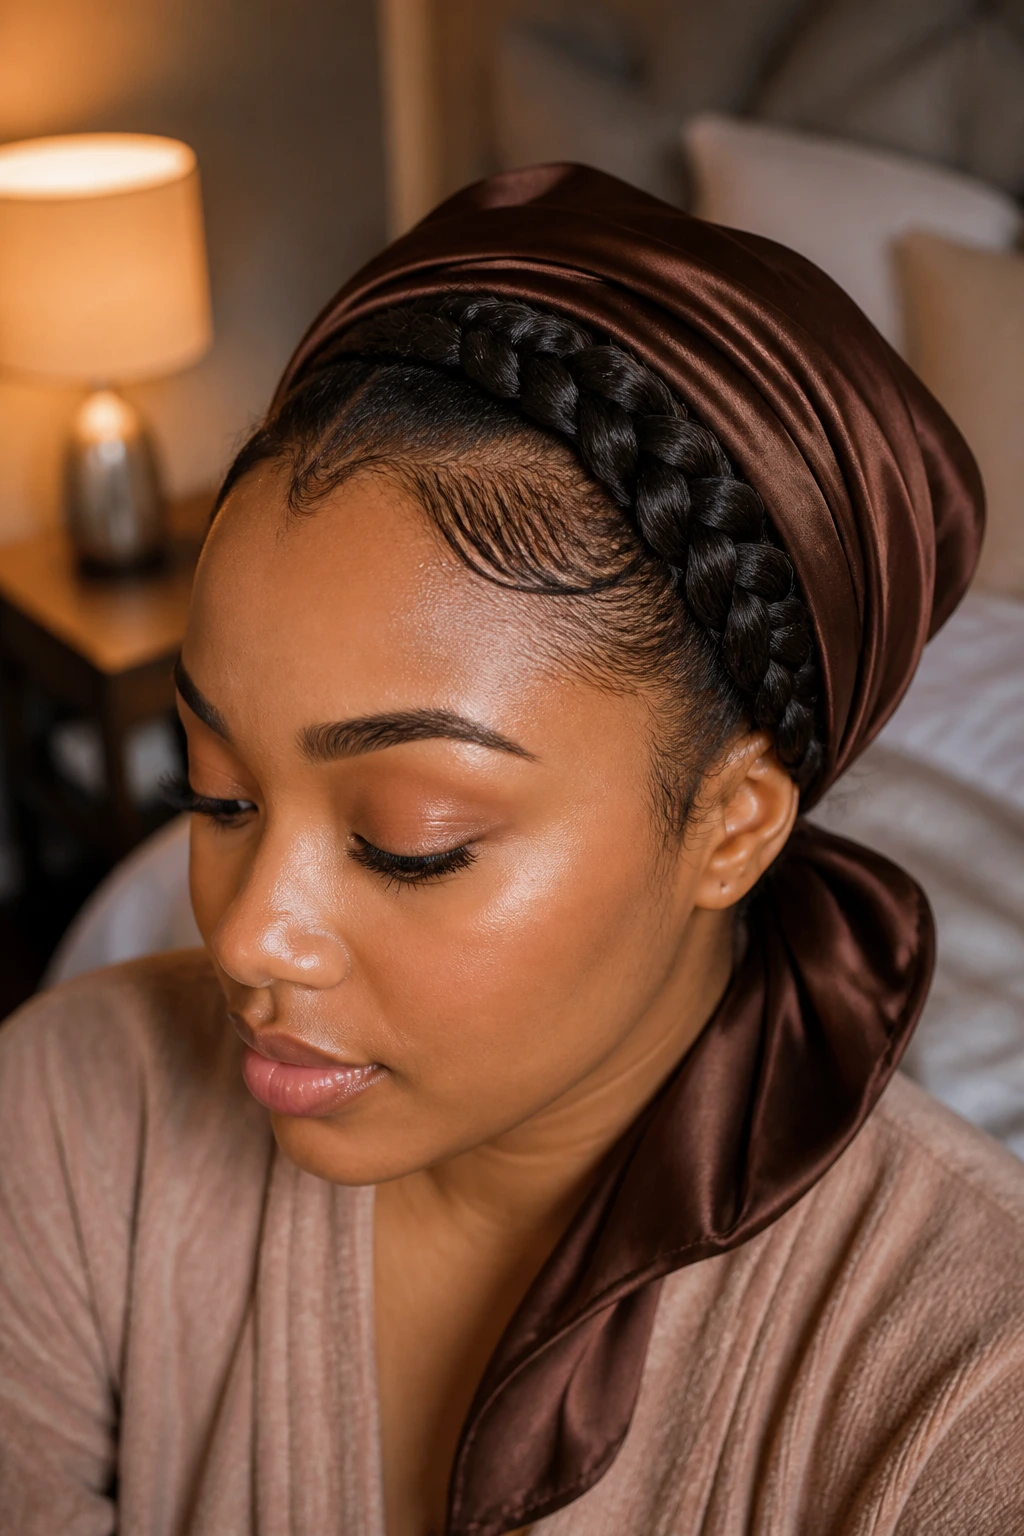
A braided headband is not one exact braid shape. It is a placement idea. The braid travels along the hairline or just above it, then disappears into the side or back of the style like a ribbon being tucked under a collar. Some versions start at one temple and cross straight over. Others sweep from a deep side part and curve around the crown. A few stay narrow and clean; others get thick and plush, especially on coily hair where the braid naturally fills out.
That difference matters because the style is less about the braid itself than the frame it creates. A narrow braid leaves more forehead showing and can feel airy. A wider braid creates more visual weight, which can be useful if the rest of the hair is dense and you want the front section to hold its own. Neither version is “better.” They solve different problems.
The prettiest versions are usually the ones that look like they were planned around the hairline rather than imposed on top of it. The braid sits where the head naturally curves. The anchor disappears under a layer of hair. The front edges are smooth, not plastered. That last part is where a lot of people go too far. The braid should look like it belongs there, not like it was tightened into place with a grudge.
A braided headband can also borrow from a French braid, a Dutch braid, a rope twist, or a flat twist. If the words blur together in your head, don’t worry. The shape is the headline. The technique just changes how raised or flat the finished band looks.
Choosing the Part, Width, and Direction
Start with the part. Seriously. The part does more work than most people give it credit for.
A deep side part makes the braid sweep across the head in a dramatic arc and gives more room for volume on the heavier side. A center part creates a more symmetrical band, which can look sleek on straight hair and balanced on curls. If your face is narrower, a slightly lower braid can soften the line across the forehead. If your forehead is already strong, keep the braid a little higher and lighter so it frames instead of crowds.
Width changes the whole mood. A 1-inch front section gives you a slim headband effect that reads delicate and tidy. A 1½- to 2-inch section makes a more obvious band, which is useful if you want the braid to stand out against dense curls or thick twists. Past that, the braid can start to dominate the style, especially near the temples. That is not automatically wrong, but it is a different look.
Direction matters more than people expect. If you braid left to right, your hands may naturally angle one way and give the braid a gentle curve. Right to left can feel tighter or looser depending on your dominant hand. There is no law here. The only rule is that the braid should follow the shape of the head instead of lifting away from it in a stiff line.
If you have baby hairs you want to keep loose, leave a thin border — about a quarter inch — at the very edge of the hairline and braid just behind it. That little strip keeps the style from looking carved into the skin.
Prep That Keeps the Front Section Smooth
A braided headband is easier on hair that has been detangled and lightly prepped, but “prepped” does not mean drenched in product. Wet hair with too much cream or oil can slide around under your fingers. Dry hair with no slip at all can feel grabby and fray before the braid is even halfway done. The sweet spot is usually clean, stretched, or at least well detangled hair with a small amount of moisture or styling aid.
On curls and coils, I like the front section either freshly washed and mostly dry or stretched from a previous set. If the hair is shrunken and springy, the braid can get lumpy because each strand wants to coil back up at a different point. A quick stretch overnight, a low heat blow-dry, or even banding can make the section easier to control. The braid does not need bone-dry stiffness. It needs enough length and calm to lie flat.
A light leave-in, a little mousse, or a small dab of gel near the hairline can help the section grip. Use less than you think. If your fingers start squeaking through the hair, there is too much. That squeak is the sound of future slippage.
Clean hair or day-two hair?
Freshly washed hair tends to be softer and a little more slippery, which can be annoying if the braid keeps sliding out of your hands. Day-two hair often has more grip and holds the pattern better. On very silky hair, a touch of texture spray or mousse can help the braid stay put. On coarser hair, too much product can cause gummy buildup at the front, and that shows up fast under a band style.
The small prep ritual that saves time later
Clip the rest of the hair away before you start. Detangle the front section with a fine-tooth comb or rat-tail comb. Then smooth the outer layer with your fingers once, not ten times. Overhandling puffed-up hair at the root is how you end up with frizz before the first cross-over.
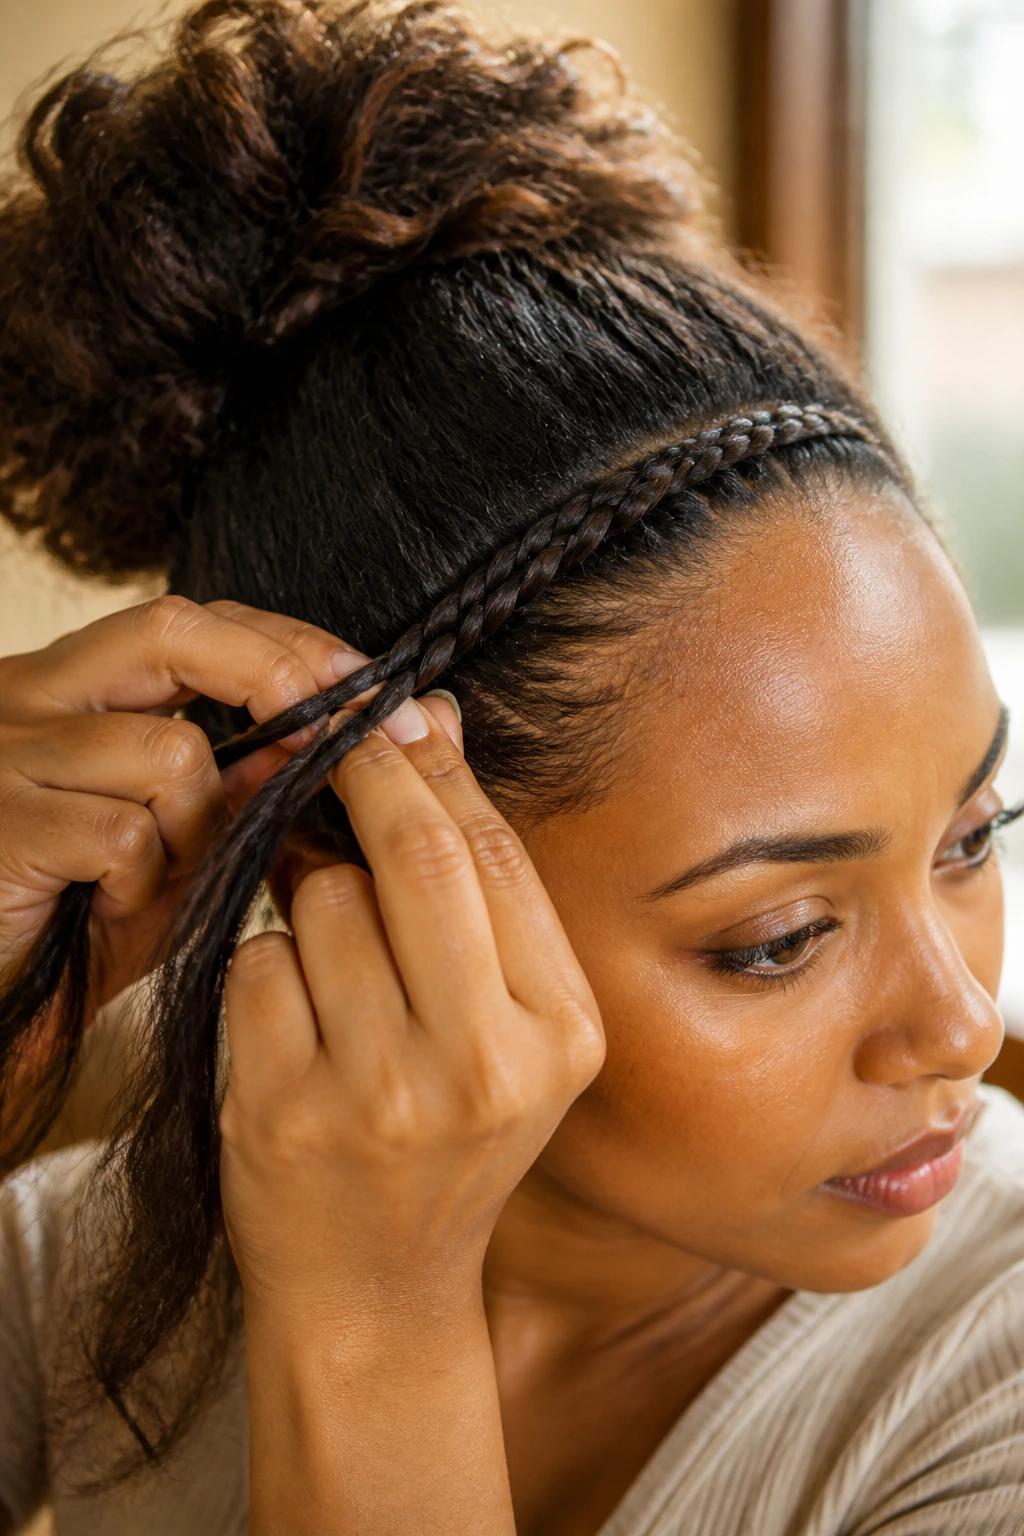
The Braiding Pattern From Temple to Temple
The exact braid pattern you choose changes how flat, raised, or dense the headband looks. The basic motion is the same: gather a small front section, add hair as you move across the hairline, and keep the braid anchored close to the scalp. The difference lives in where the strands sit.
French braid: flat and tidy
A French braid is the most forgiving option if you want the braid to melt into the head instead of sitting on top of it. The outer strands move over the middle strand while you add hair in small pieces. The finished line tends to lie flatter, which is useful when you want the braid to read like a smooth band instead of a rope.
Start at the temple with a section about 1 inch wide. Split it into three even strands. Cross the outer strand over the middle, add a thin slice of hair from the front edge, and repeat as you travel across. Keep your elbows low. If your arms lift up toward your ears, the braid will rise with them.
Dutch braid: raised and obvious
A Dutch braid is the reverse motion, with the strands crossing underneath instead of over. The result sits higher off the scalp and shows more texture. I like this version when the braid itself should be visible, especially on thick curls or textured hair that can carry the extra volume without getting lost.
It also hides unevenness better than people think. If one section is a little chunky and the next is a little tight, the raised shape softens the mismatch. You still want control, but you do not need absolute perfection.
Three-strand braid: simple and slim
A plain three-strand braid works well if you want the easiest possible version or if the hair is already smooth enough that the braid does not need extra anchoring. It will not hug the head as tightly as a French braid, so it is better for a more relaxed, decorative look than for a style that has to survive a long day of movement. Use it when the front section is short or when you plan to pin the braid down in the back.
How to Build the Braid Across the Hairline
-
Section the front hair cleanly: Clip away the back hair and separate a front strip that is about 1 to 1½ inches wide, starting at the temple or just above it.
-
Smooth the surface once: Use a light gel, mousse, or styling cream on the outer layer only, then comb it through so the section lies flat without feeling wet or sticky.
-
Start with three even strands: Split the section into three pieces and hold them close to the scalp. If one strand is much thicker than the others, the braid will twist to that side.
-
Cross and add small amounts of hair: With a French or Dutch braid, add hair in tiny slices as you move toward the opposite side. Tiny is the keyword. Large grabs make the braid bulky and uneven.
-
Follow the curve of the head: Keep the braid just above the forehead or along the hairline, depending on the look you want. If it lifts too high, the band stops framing and starts floating.
-
Stop adding hair when you reach the opposite ear area: At that point, continue braiding the remaining tail for a few stitches. A loose tail is fine if you plan to tuck it under the rest of the style.
-
Anchor the end with a small elastic or pins: Slide the tail under the back hair, a bun, or a puff, then secure it so the end cannot slowly creep out while you move around.
The whole braid should feel snug, not clamped. If your scalp already complains before you tie off the end, the braid is too tight.
How to Anchor the Braid So It Sits Like a Headband
A headband braid only looks effortless if the anchor disappears. That is the secret part. Nobody wants to see a strange knot or a thick little tail sitting by the ear like a mistake that was never fixed.
If the braid ends in loose hair, tuck the tail under the side of the style and pin it flat against a denser area. Two bobby pins crossed into an X hold better than one pin shoved in at random. The X shape catches the tail from two directions, which keeps it from drifting as the day goes on. Use pins that match your hair color if you can. Black pins vanish faster in dark hair; bronze or brown pins disappear better on medium hair.
On textured hair, a small coated elastic can be useful at the end of the braid before you tuck it. Keep it tiny. A thick elastic adds a bump, and that bump shows up under the side of the style. If the braid ends right before a bun or puff, fold the tail back into the base and pin through the folded section instead of trying to pin the very tip. The folded version is stronger and flatter.
Another method is to braid only until you reach the opposite temple and then let the tail disappear into the rest of the hair under a loose layer. This works well when the rest of the style is worn down, curly, or twisty. The key is to hide the end under enough hair that it does not peek out when you turn your head.
Blending the Crown and Hiding the Join
The join is where a good style can look messy for no good reason. You can braid neatly all the way across, then let one bad pinch of hair or one visible pin wreck the effect. Annoying. Also fixable.
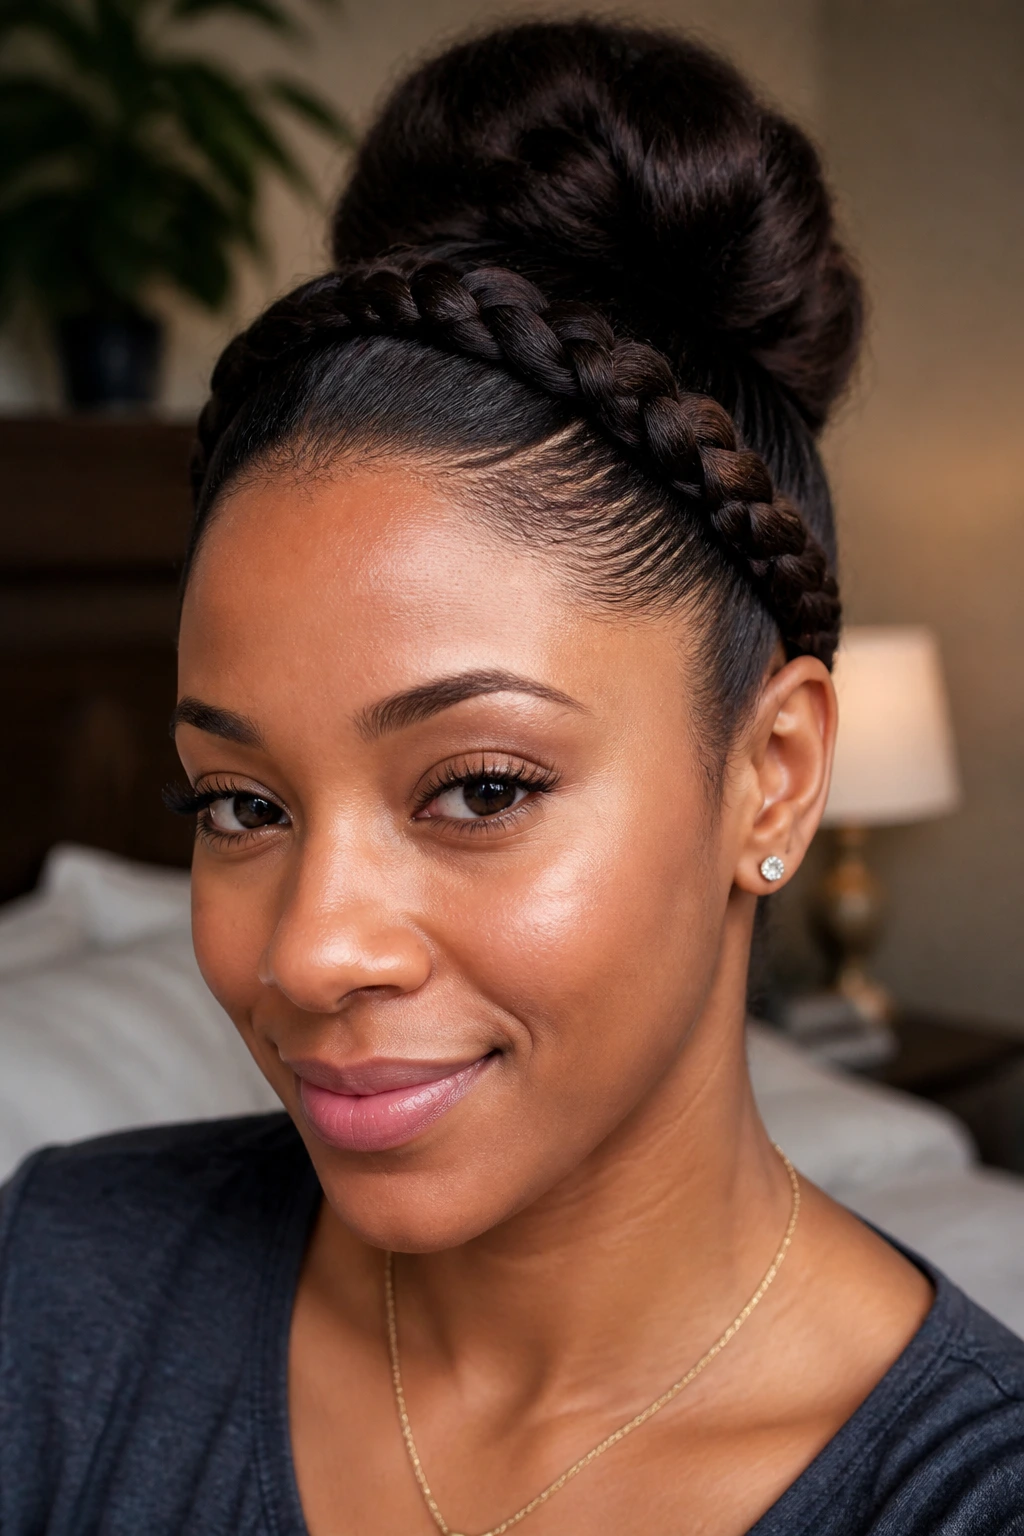
A clean join usually starts with deciding what the rest of the hair is doing. If the rest is down, the braid should tuck under a top layer at the side, then disappear into the hair’s natural movement. If the rest is going into a bun or puff, the braid can feed directly into the base and become part of that shape. If you are using twists or locs, the braid can sit between two rows or along one side and still look intentional because the texture already gives the style structure.
A little smoothing at the crown helps. I am not talking about shellacking the hair. Just enough product to tame flyaways where the braid begins and ends. A toothbrush or small bristle brush can smooth the front edge without flattening the whole style. That brush matters more than the jar of product, honestly.
If the braid feels too stark against the rest of the hair, pull the outer loops a touch wider with your fingertips. Not the whole braid — just the outer edges. That tiny adjustment makes the band look softer and less stiff, especially on thick hair where the braid can otherwise read a little severe.
Braided Headband Looks for Curls, Straight Hair, Twists, and Locs

Different textures change the finish in ways that are worth planning for instead of fighting halfway through.
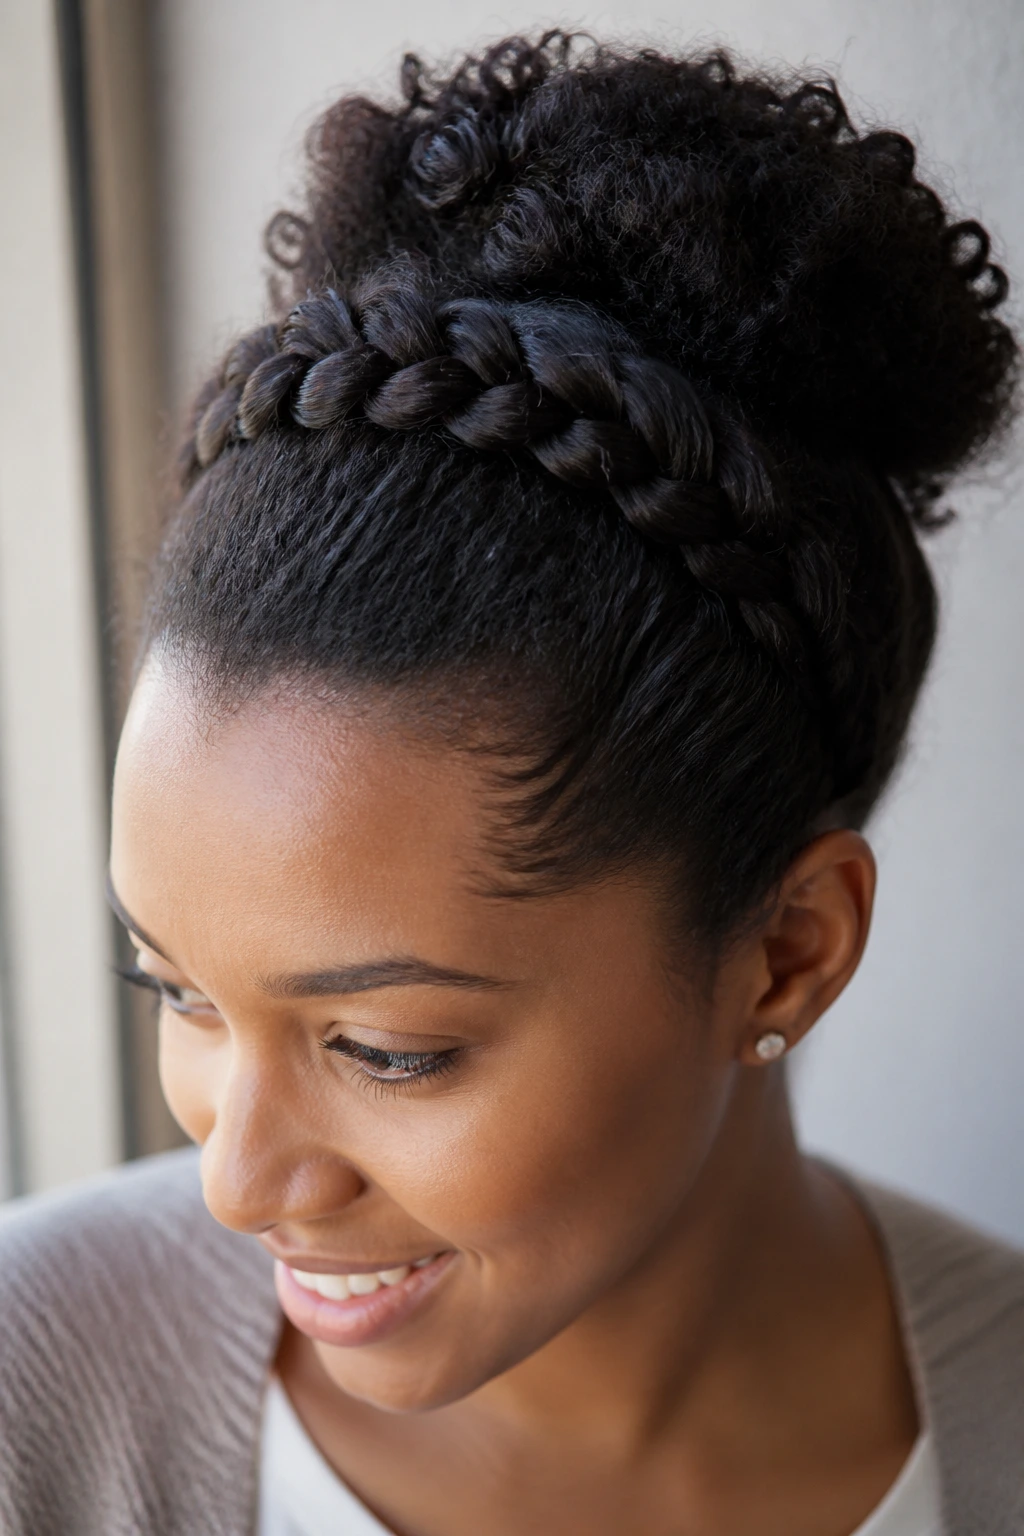
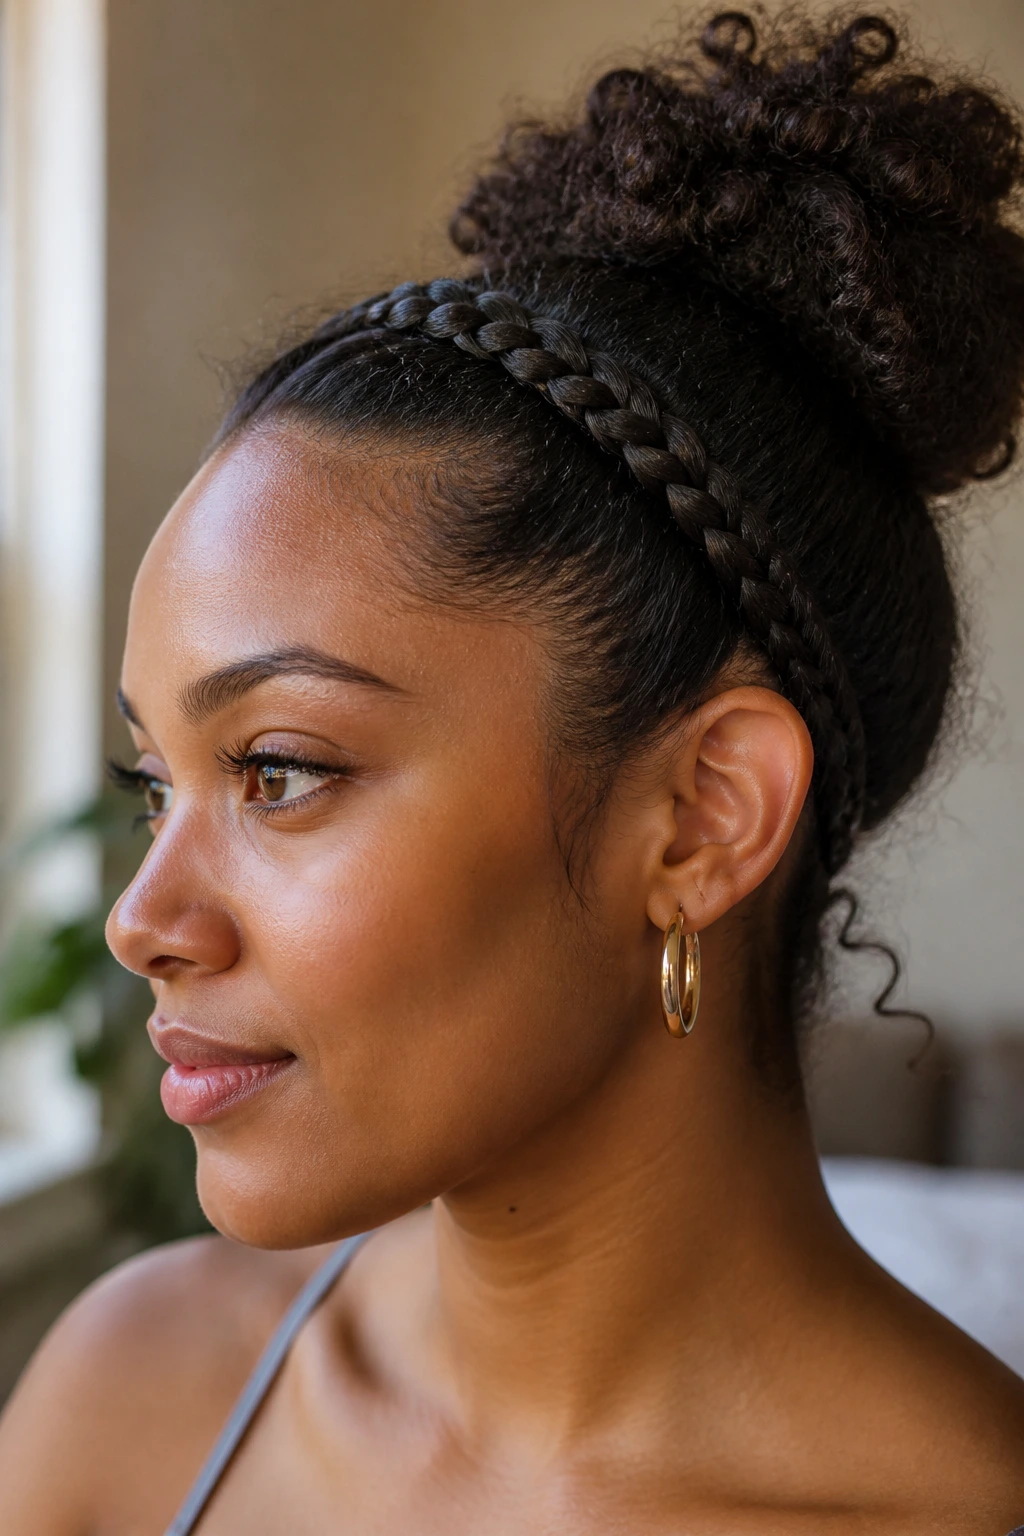
Curls and coils
On curly or coily hair, the braid can look fuller and more substantial with less effort because the strands naturally fill space. That is useful if you want the band to stand out. The catch is shrinkage. If the front section is not stretched a little, the braid can puff up unevenly and feel shorter than expected. A mild blow-dry, twist-out stretch, or banding pattern can make the braid easier to guide.
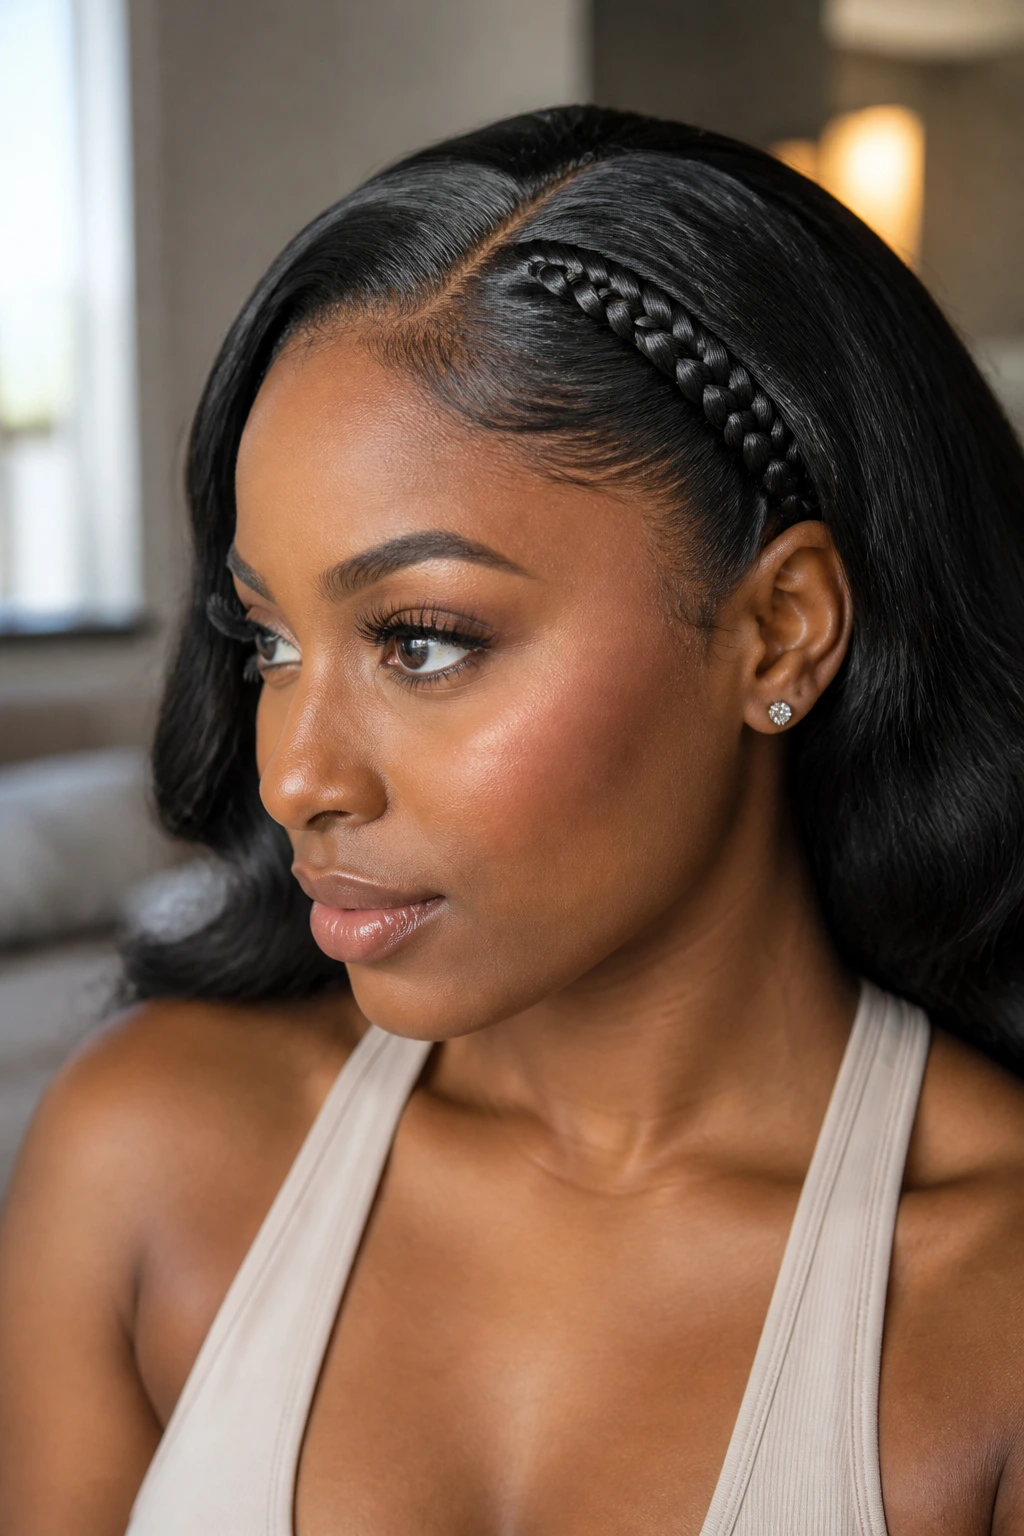
Straight or silk-pressed hair
Straight hair is smooth, which sounds nice until the braid starts sliding. Use a little more grip here — a small amount of mousse, a light hold spray, or a faint trace of gel near the root. Tighten the crossovers a little, but not enough to leave marks behind the ear. On silk presses, I would rather see a braid pinned securely than one pulled so hard that the shine gets ruined at the hairline.
Twists and locs
Twists and locs make a braided headband feel more sculptural. You can braid a smaller front section and pin it into the base, or you can twist the front portion into a faux band if the strands are too thick to braid cleanly. The texture does half the work. That means the main challenge is not structure, but weight. Keep the anchor solid so the front does not sag.
Short hair
Short hair can still do this style, but the braid may be more of a partial band than a full sweep. Use the front layers only, and let the rest of the look stay simple. A few hidden pins can turn a tiny braid into a real frame. Don’t force the braid to stretch farther than the hair wants to travel. That is where the style starts looking strained.
Keeping the Style Comfortable for Work, School, and Long Days
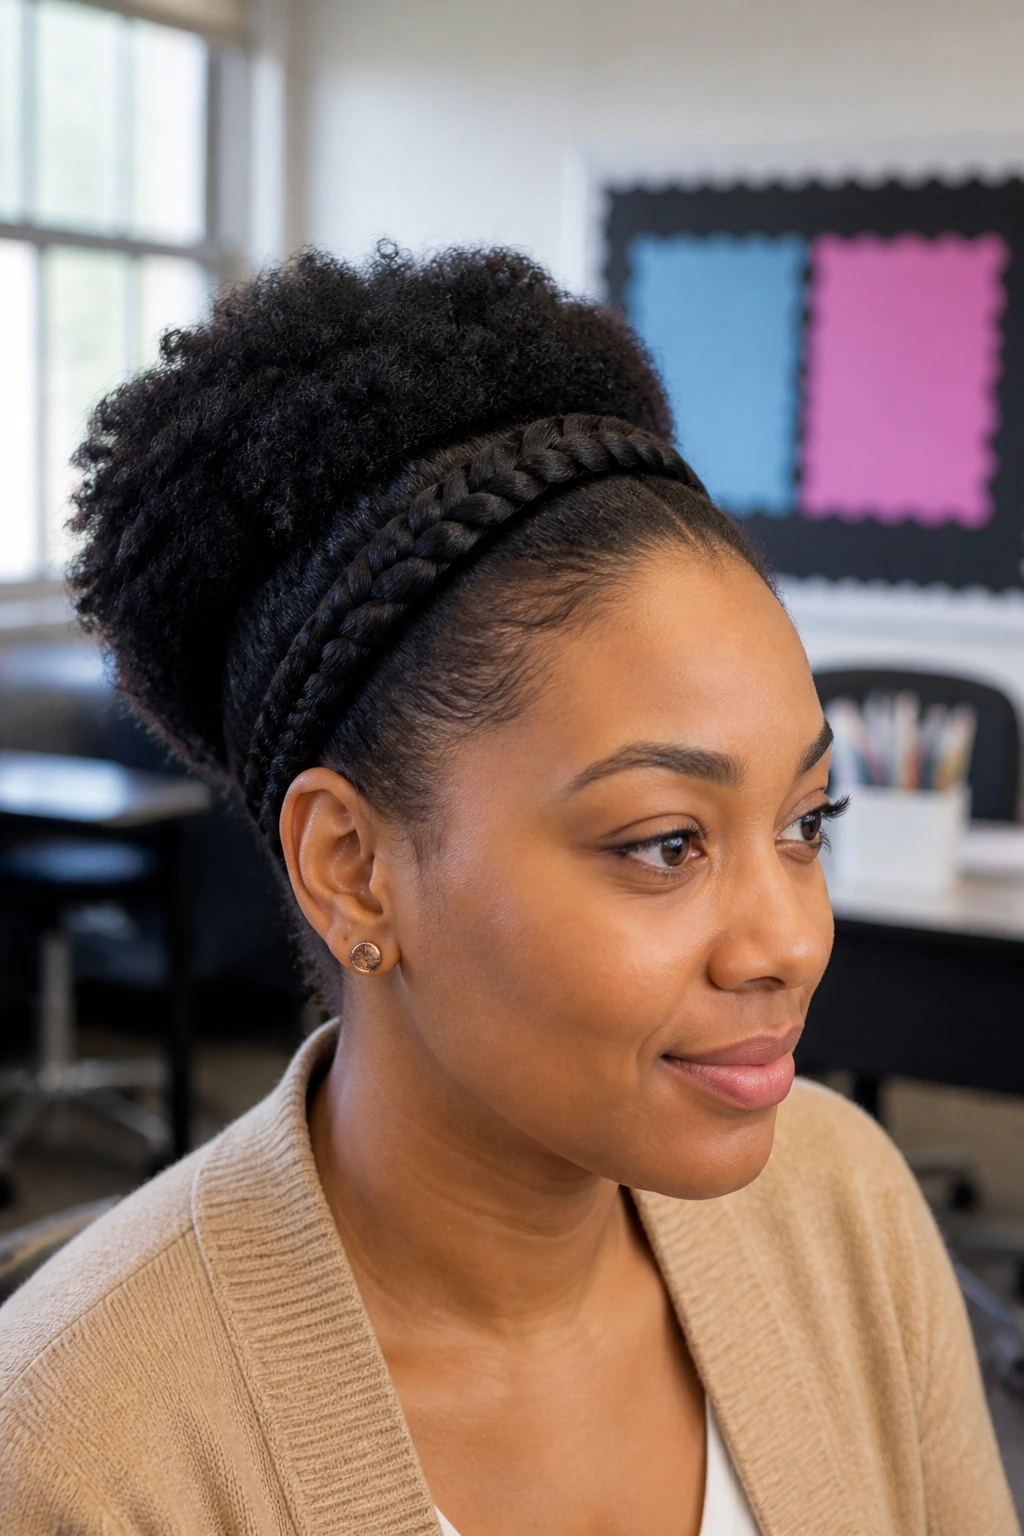
Comfort is the part that decides whether you wear the style once or keep reaching for it. A braided headband that looks neat for twenty minutes but gives you a temple headache by lunch is not a success. It is a warning.
The braid should feel secure along the scalp, especially near the start and the anchor, but it should not pull at the tiny hairs around the temple or behind the ear. If you can feel the braid every time you blink, that is too much. If you can slide a fingertip under the front edge and feel a little give, you are closer to the right tension.
A small discomfort often shows up behind one ear first. That is usually where the braid changes direction or where the pin sits awkwardly. Fix it early. Move the pin. Loosen the tail. Shift the anchor half an inch lower. Tiny corrections beat a full redo.
The other comfort issue is product buildup. Heavy gel can harden at the front and make the hair feel itchy after a few hours. A lighter hold with a clean finish is usually better than a crunchy helmet of edges. If the style needs extra control, add it in layers — a little at the root, a little at the braid, then stop. More product does not equal better hold. It often equals flakes.
Practical Tips for a Cleaner Finish
-
Grain of rice, not spoonful: Use a tiny amount of gel or edge control at the hairline first, then add more only if the section still puffs up. Too much product makes the braid slippery and dull.
-
Braid on slightly dry, stretched hair when you can: A front section that is almost dry but still has a touch of give tends to grip better than hair that is soaking wet or bone-dry.
-
Pin the end where the hair is densest: A braid tucked under thicker hair or a bun stays put much longer than one pinned into a thin outer layer.
-
Match your pins to the job: Use long bobby pins for a tucked tail, U-pins for a puff or twist base, and tiny elastics only when the tail needs an extra grip point before hiding.
-
Keep one mirror in front and one behind if you can: The back of the braid is where most sloppy anchors hide. A quick second look saves a lot of annoying adjustments later.
-
Lift, don’t yank, if you need fullness: Gently pull the outer edge of the braid with your fingertips rather than tugging the whole thing. That keeps the front line neat while adding a little width.
Common Mistakes That Make the Style Slip or Ache
-
Starting with too much hair in the front section: The braid turns bulky fast, especially near the temple. Fix it by trimming the section back to a narrower strip and keeping the added pieces small as you braid.
-
Pulling the braid too tight at the start: This is the fastest way to get a sore hairline and a style that looks strained. If your scalp feels hot or tight while you’re still braiding, stop and loosen the section before you anchor it.
-
Using heavy oil before braiding: Oil can make the strands slide apart and break the grip you need for clean crossover. If your hair needs moisture, use a light leave-in or cream first, then a tiny bit of styling product on the outside layer.
-
Leaving the tail visible near the ear: A dangling end ruins the headband effect. Tuck the tail under denser hair or secure it beneath a bun, puff, or twist base so the eye reads one continuous line.
-
Forgetting that the head curves: A braid that sits too high or too straight across the forehead can look stiff. Follow the natural curve from temple to temple and adjust your hand position as the head rounds.
Variations That Change the Mood
-
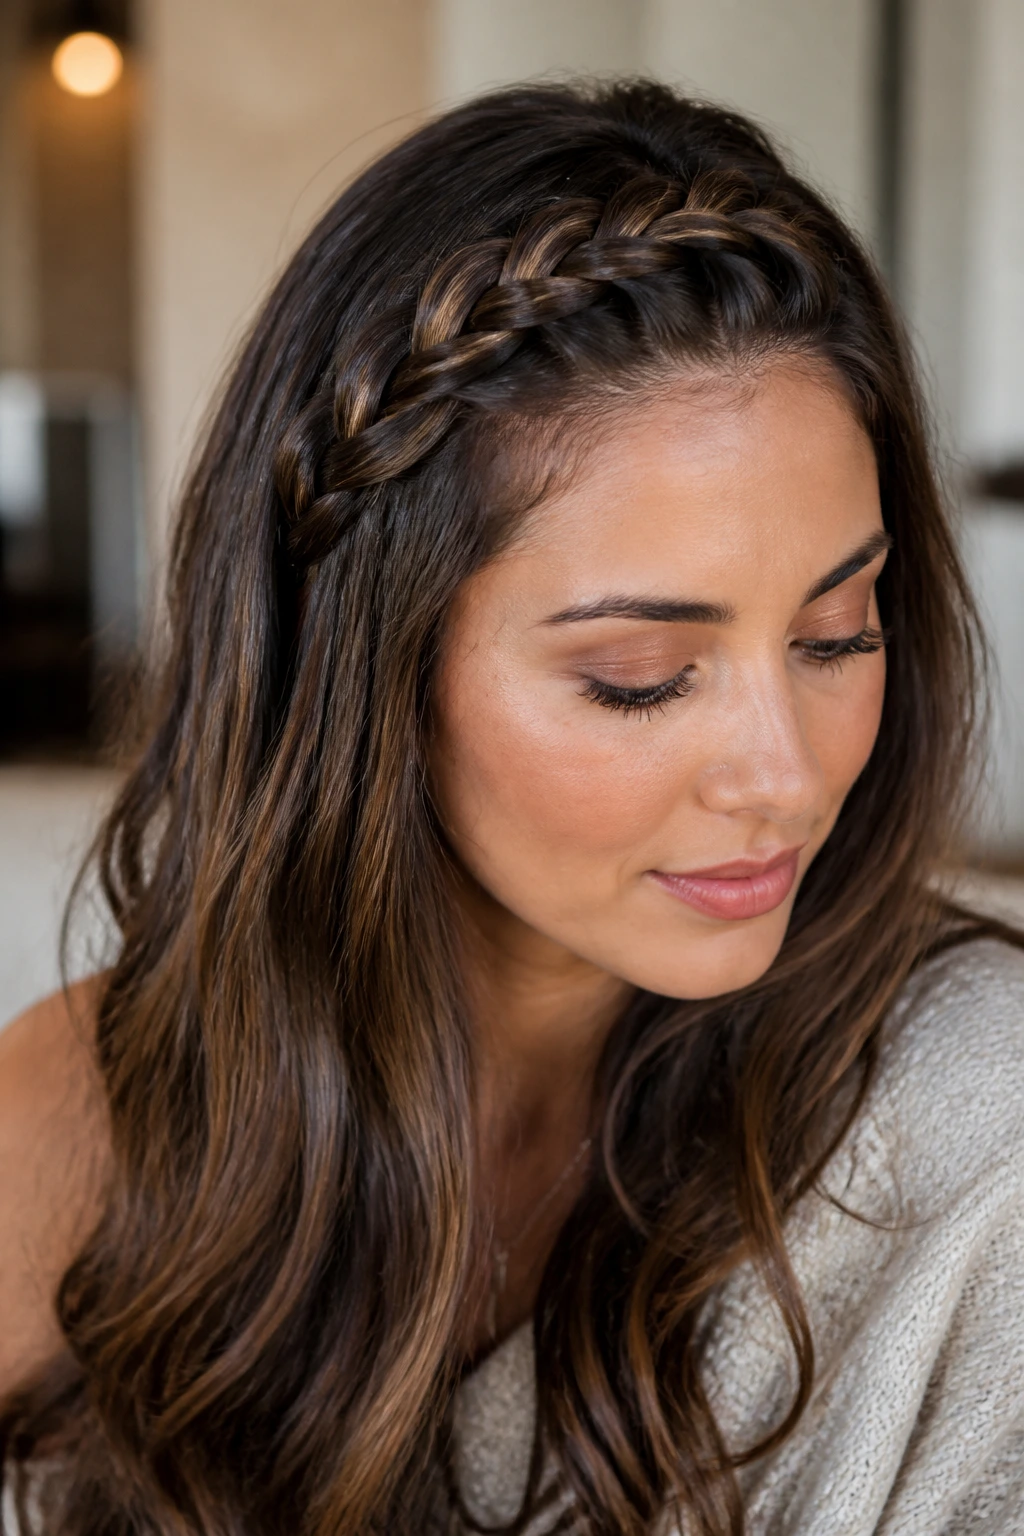
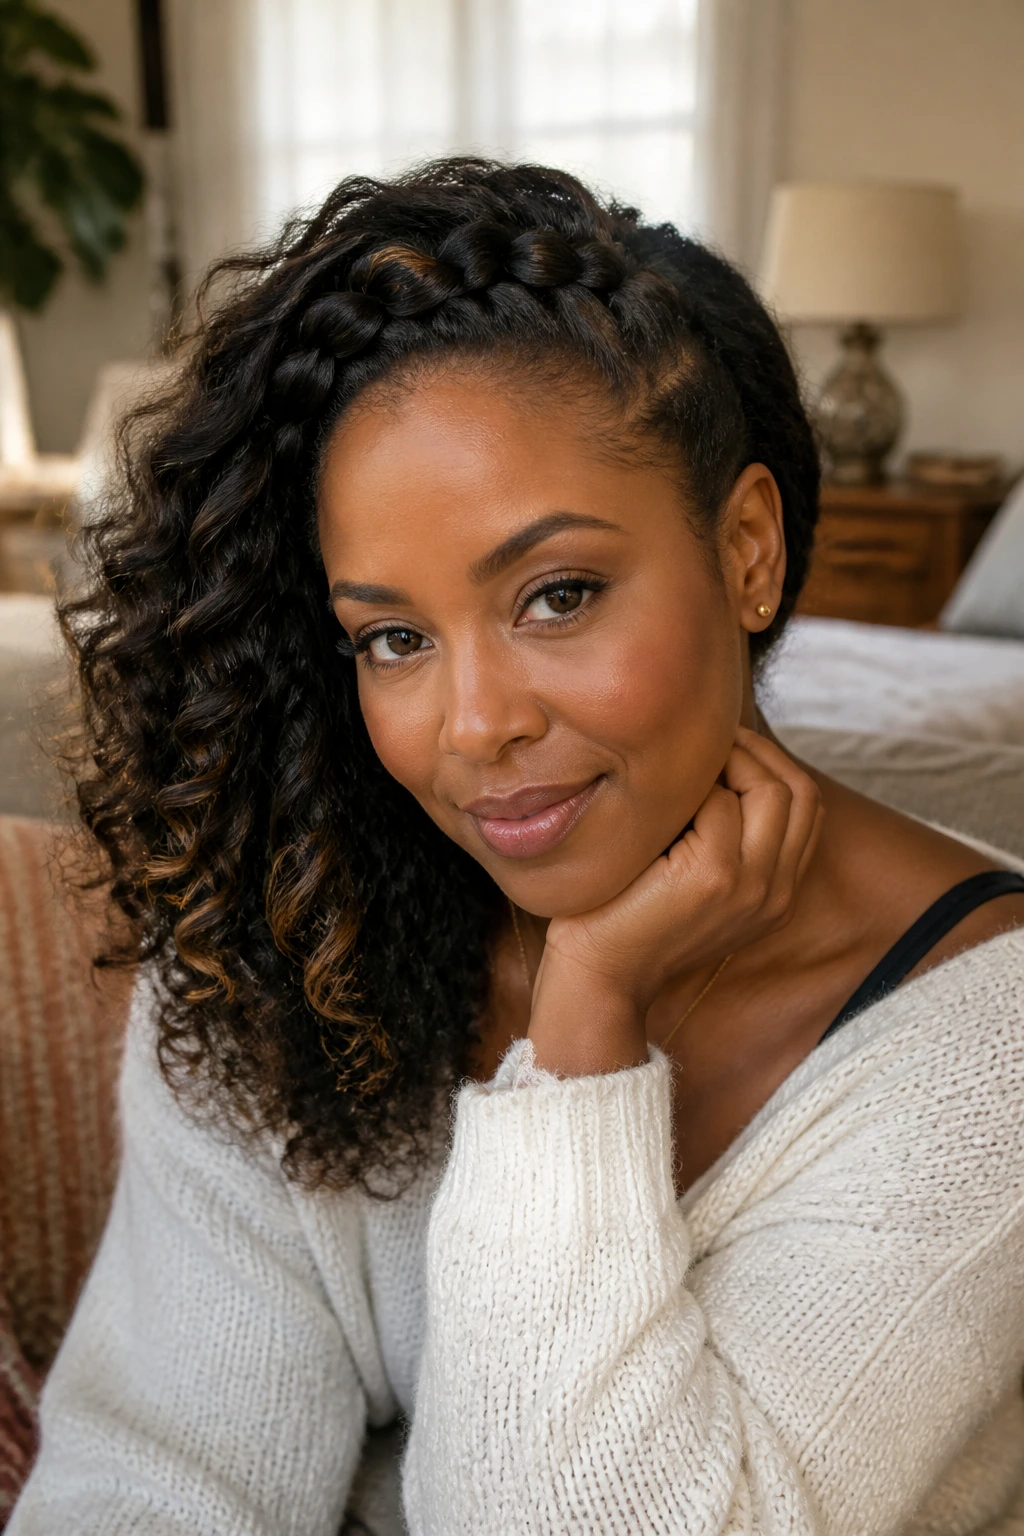
Soft Side Sweep: Start the braid a little off-center and let it curve into the opposite side, then leave the rest of the hair loose and textured. This version feels relaxed and works well with curls or waves that already have movement.
-
Sleek Temple Band: Use a Dutch braid with a deeper side part and smooth the crown with a light gel finish. The result is sharper and more structured, which suits straight hair or a low bun.
-
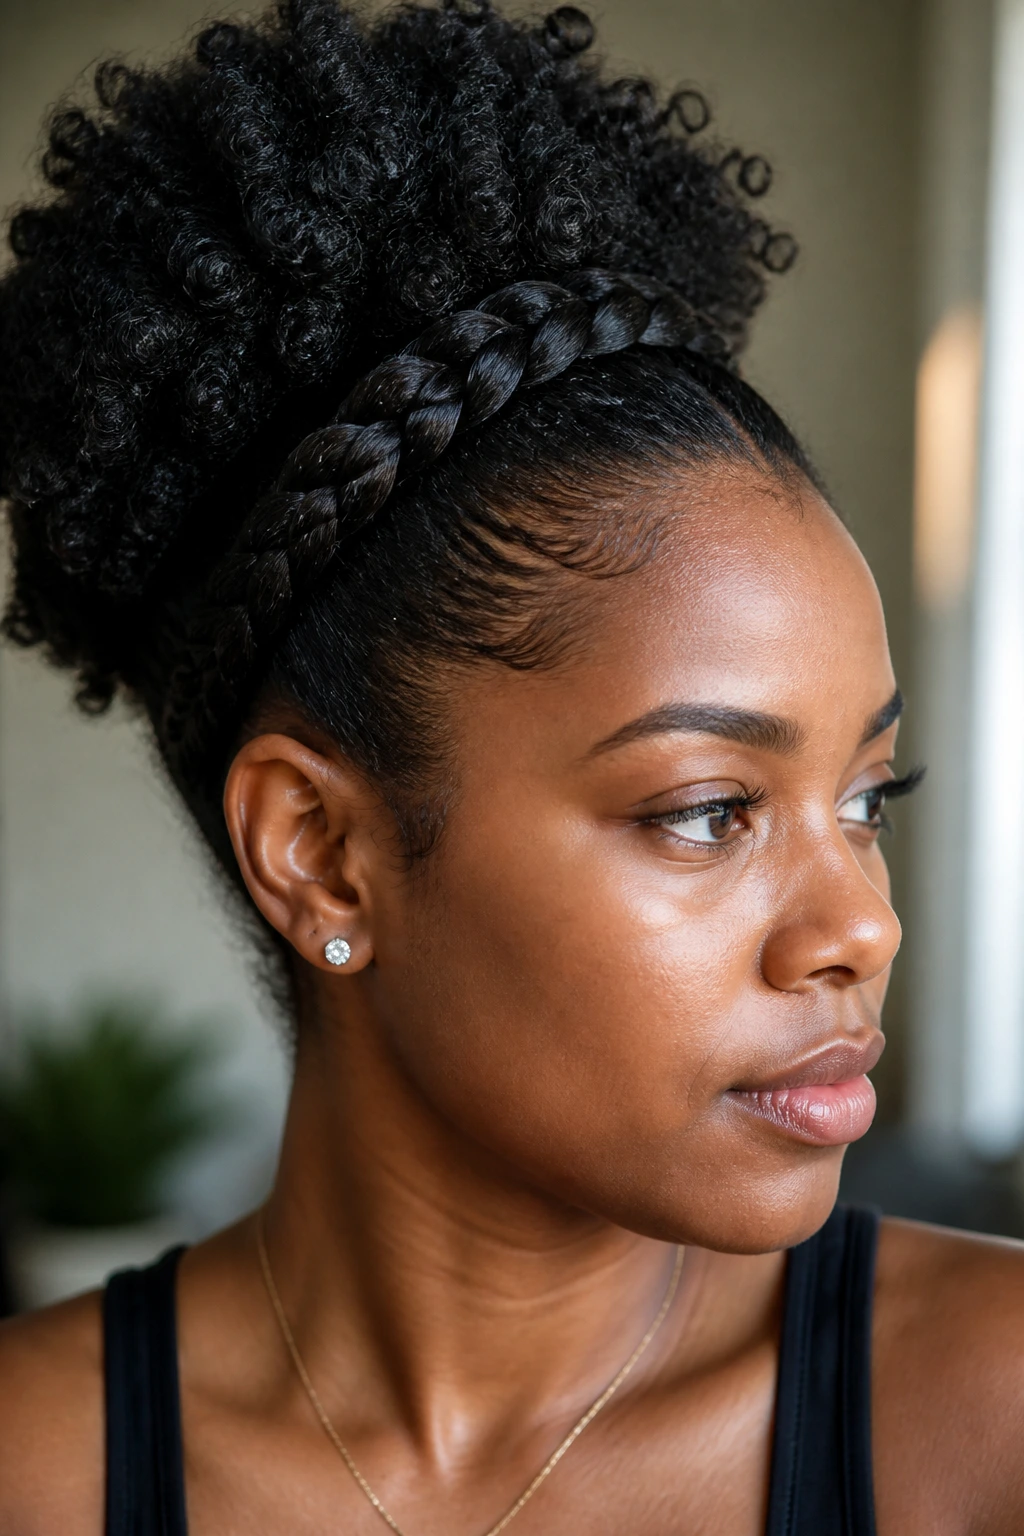
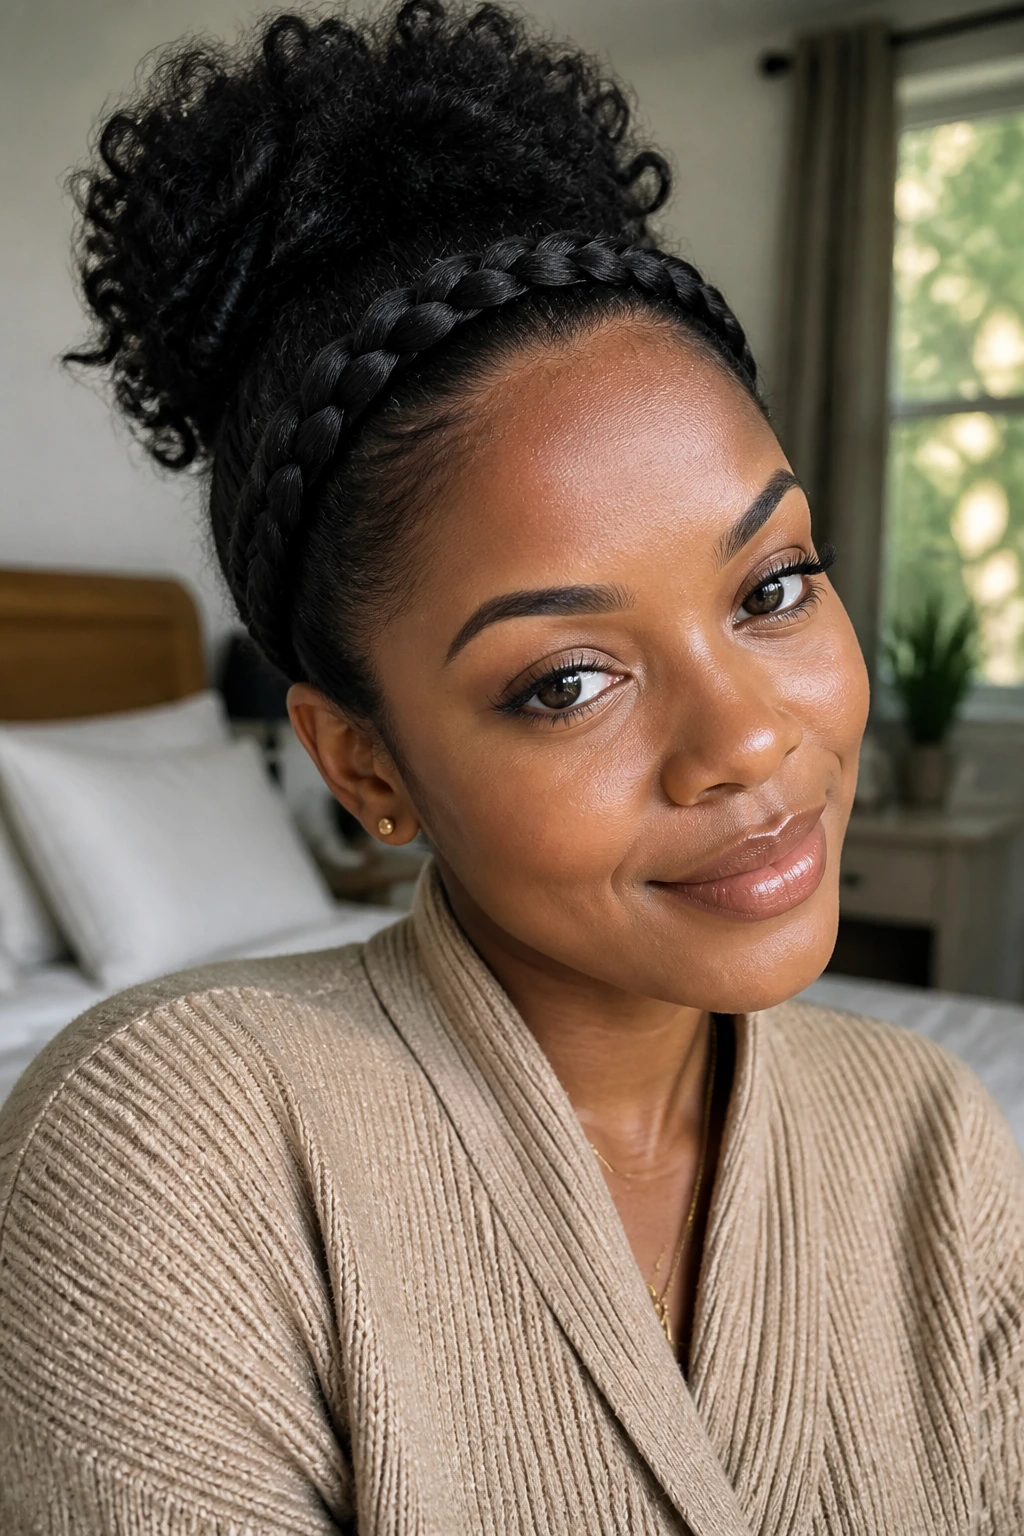
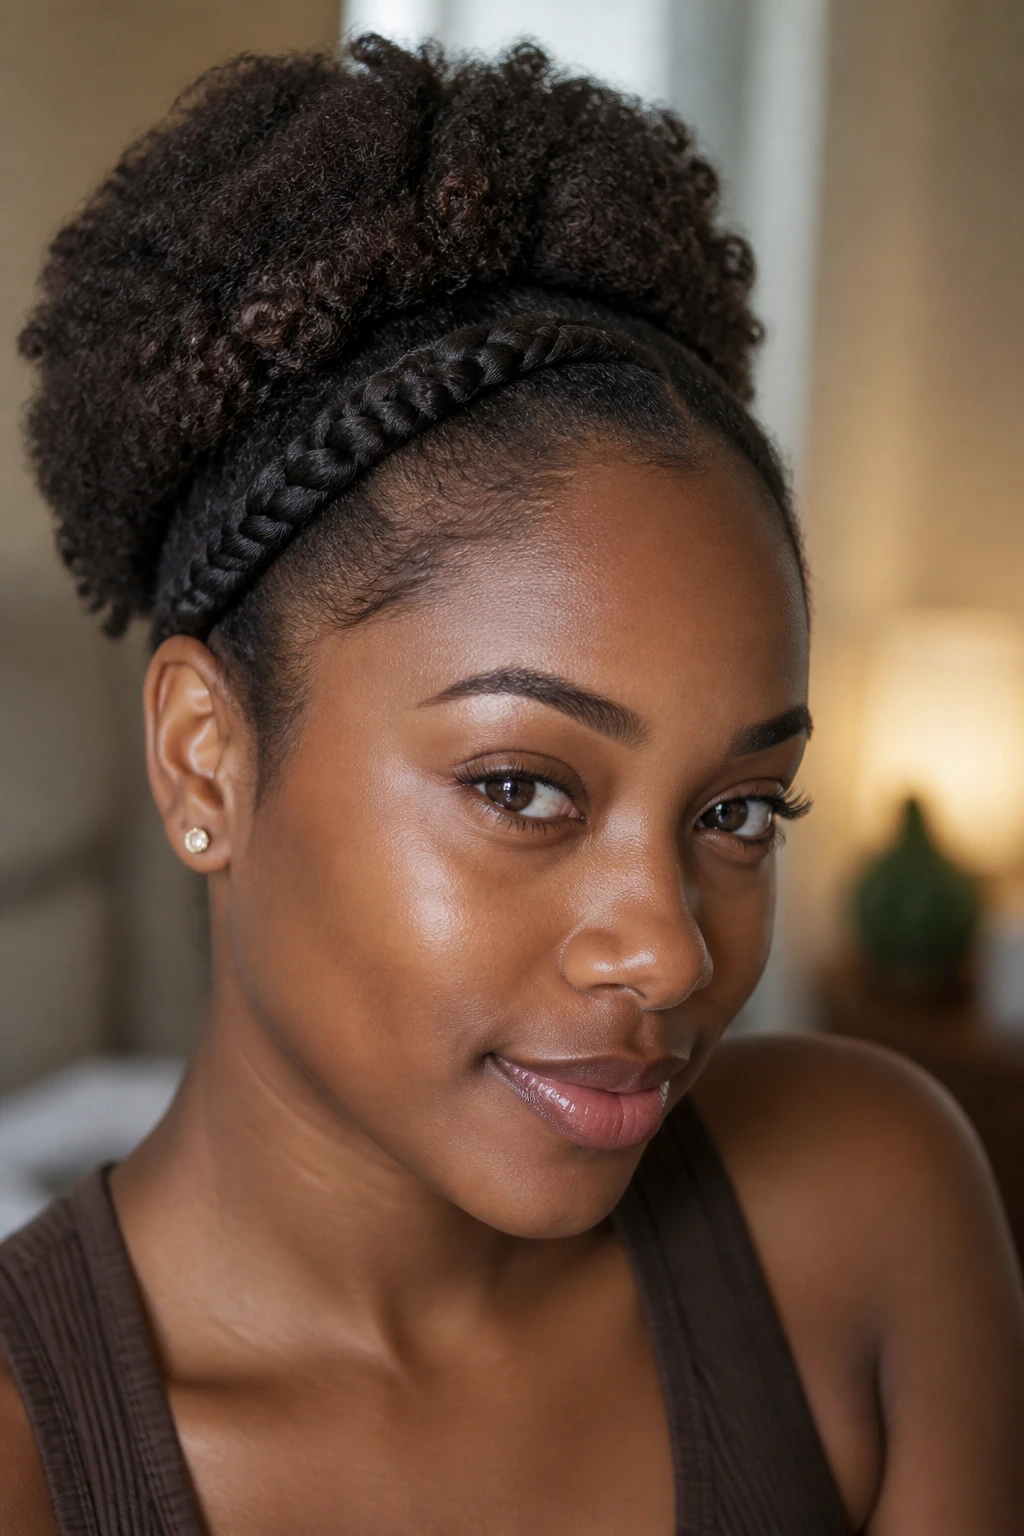
Braided Headband with a Puff Base: Feed the braid into a high or medium puff and pin the tail underneath the puff’s base. That keeps the front controlled while the back stays full and airy.
-
Twin-Texture Frame: Braid the front section, then leave the rest in twists, locs, or loose curls. The contrast between the neat band and the textured length gives the style more interest without adding much work.
-
Added-Hair Crown Band: If you want a thicker, more dramatic band, add a small amount of braiding hair into the front section. Keep the added pieces light, though — a heavy headband braid can pull at the scalp faster than you expect.
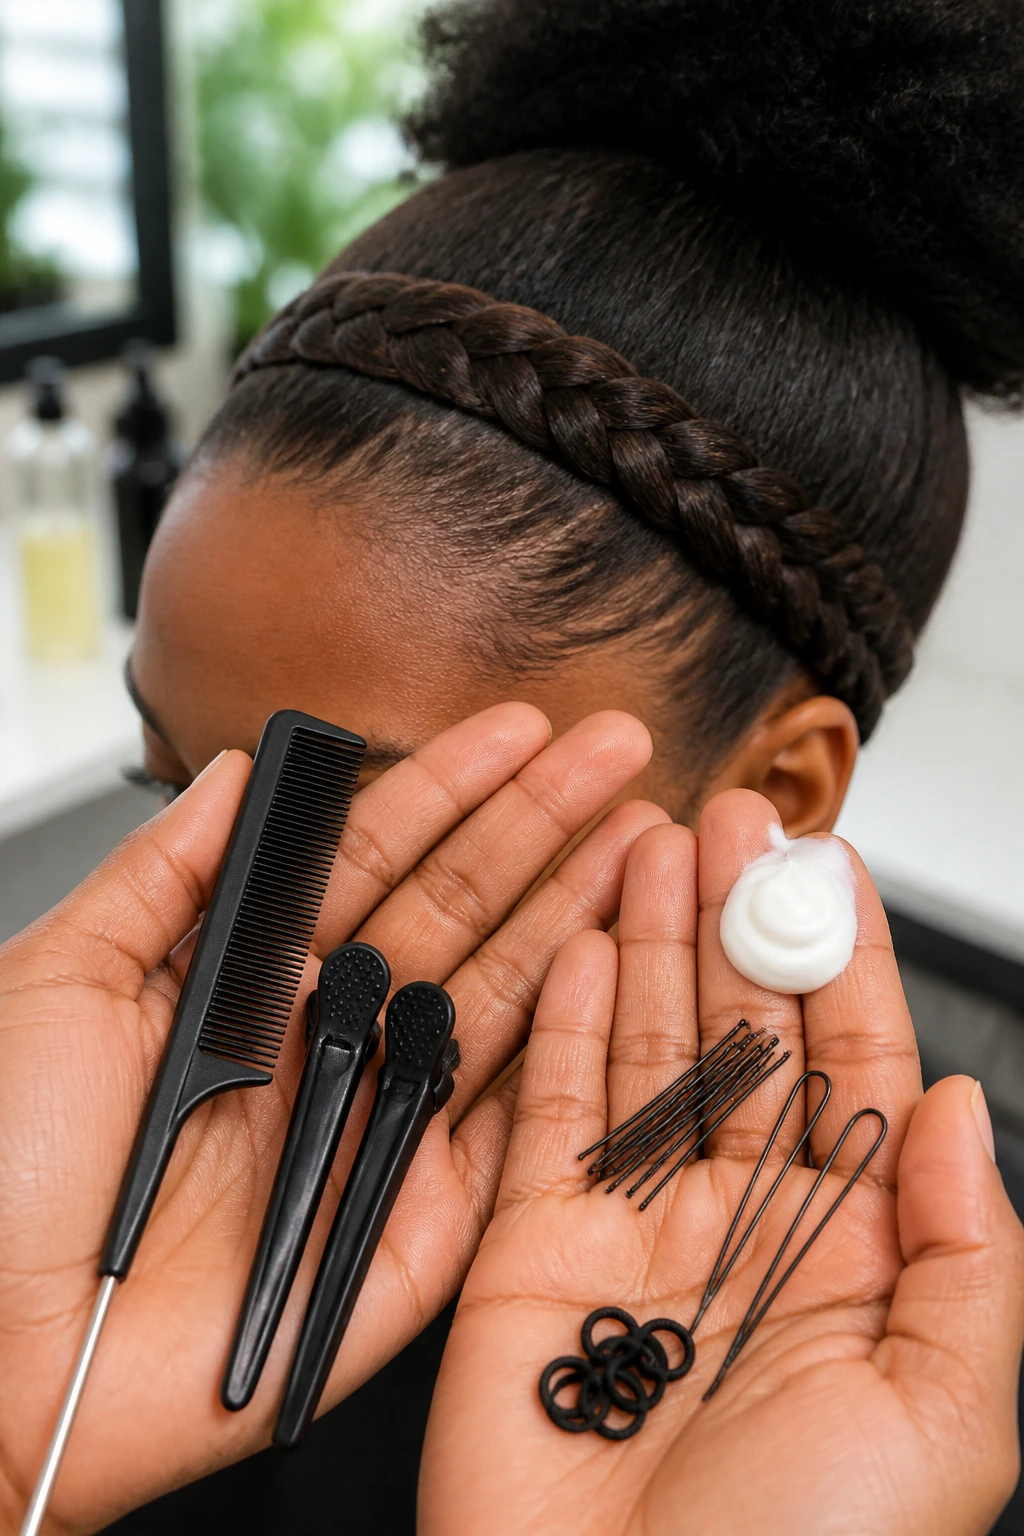
Tools, Products, and Handy Extras
-
Rat-tail comb: Best for clean parting and for lifting a precise front section without mashing the rest of the hair.
-
Duckbill clips or sectioning clips: They keep the back hair out of the way while you work on the front.
-
Small bobby pins: Use these to hide the tail, flatten the anchor, or correct a section that shifted after braiding.
-
U-pins: Better than regular pins for bulky buns, puffs, or twist bases where you need a wider grip.
-
Mini elastics: Good for securing the braid tail before tucking it away, especially on straighter textures.
-
Light leave-in or styling cream: Adds slip without turning the hair greasy.
-
Mousse or light-hold gel: Helps the front section stay smooth and makes the braid hold shape longer.
-
Fine bristle brush or small edge brush: Useful for smoothing the crown and hairline without disturbing the braid itself.
-
Hand mirror: Handy for checking the back anchor, which is where weak spots like to hide.
-
Satin scarf or bonnet: Essential for overnight maintenance if you want the style to last more than one day.
Keeping the Style Fresh Overnight and Between Washes
A braided headband usually stays nicest when you protect the front and avoid overloading the hair with more product the next day. If the braid is a simple one with no added hair, it often wears well for 1 to 3 days, especially on textured hair that already gives the braid some body. With a stronger anchor, a puff base, or tucked ends, you can stretch that a little longer. Straight hair and very silky textures tend to need more frequent touch-ups because the braid slides and loosens faster.
Sleeping without wrecking the shape
Wrap a satin scarf around the hairline and the braid before bed. If the style has a puff or bun, let the scarf cover the anchor area without flattening the whole shape into a sad lump. A bonnet works too, but make sure it is roomy enough that it does not push the braid loose at the temple. If the pins are sharp or bulky, switch them out before sleep. Nothing ruins a fresh braid faster than a pin biting into your scalp at 2 a.m.
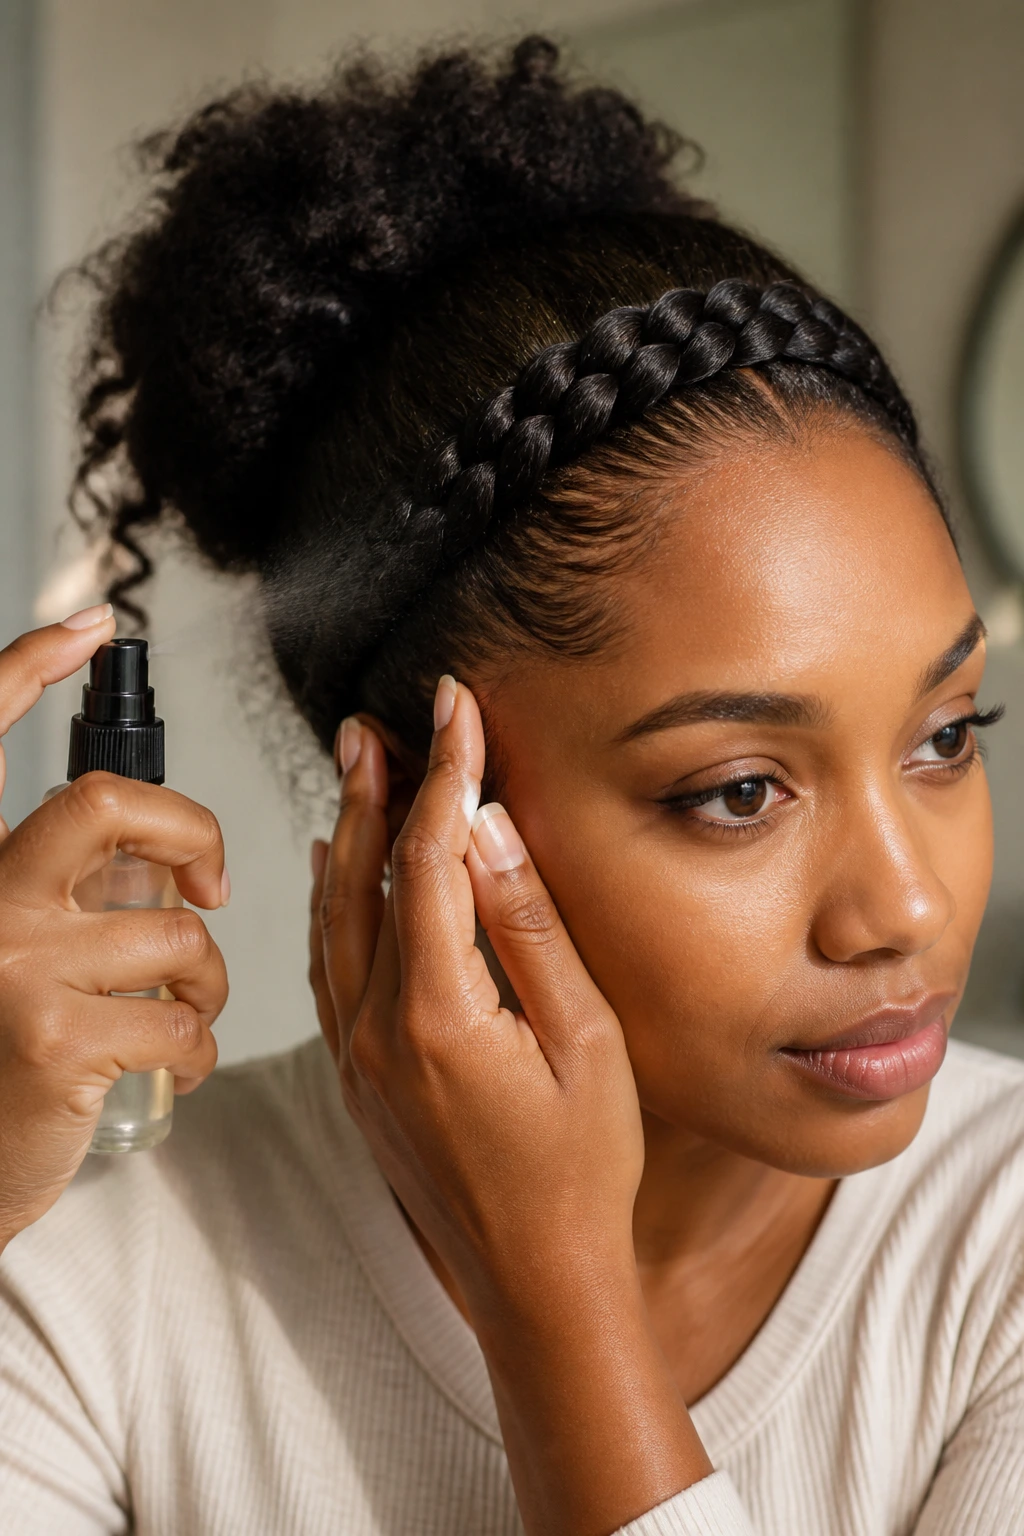
Refreshing the front
In the morning, smooth only the front edge and the places that puffed up overnight. A tiny mist of water on the fingers, a dab of leave-in, and a quick pass with a brush is usually enough. If the braid itself has gone fuzzy, resist the urge to pile on gel. Too much product creates build-up at the hairline and makes the braid look older, not neater.
Knowing when to take it down
If the scalp feels sore, the braid has started to stiffen with product, or the anchor keeps slipping no matter how many pins you use, it is time to let it go and redo it. The style should wear like a frame, not a burden. When it starts acting like a burden, the hair is telling you to stop.
Can a Braided Headband Work on Short Hair?
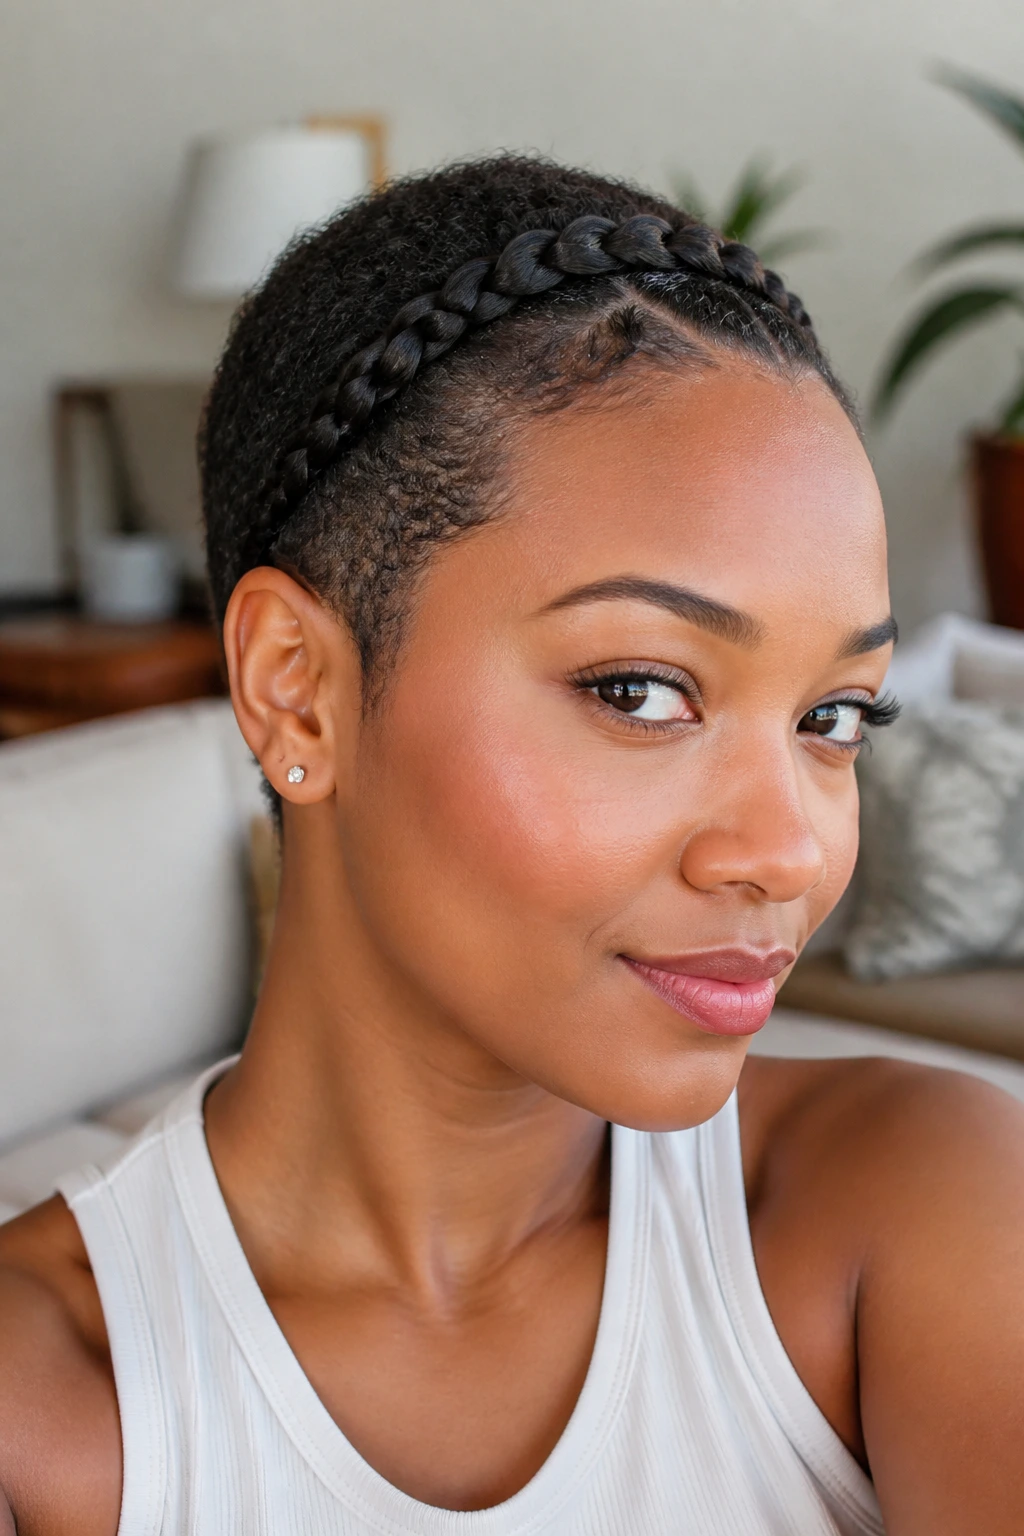
Yes, but the shape changes a little. On short hair, the braid usually becomes a partial band that frames one side of the forehead and ends sooner than it would on longer hair. That is fine. Forcing short layers to travel farther than they want usually makes the braid puff out in random spots or slip out of the anchor.
A short-haired version works best when the braid is smaller and the rest of the style stays simple. Think of it as a detail line, not a full crown. You may need more pins than you would on long hair, especially if the layers at the temples are too short to feed cleanly into the braid. A little mousse or a light gel helps the shorter pieces stay together while you work.
If the goal is a polished frame, short hair can look especially neat with a low side sweep or a tucked back section. The shape is the point. Not the length.
Is French or Dutch Better for a Braided Headband?
French braid if you want the braid to lie flatter. Dutch braid if you want the band to sit up and show more texture. That is the cleanest answer, and it usually settles the argument fast.
A French braid blends in when the rest of the hairstyle is already doing something loud — big curls, a full puff, a bun with volume. A Dutch braid adds structure when the hair is sleek, fine, or too loose to hold much shape on its own. If you want the braid to read like a real focal point, Dutch is the stronger choice. If you want it to feel tucked into the hair, French is easier.
There is no rule that says you must commit to one forever. Some heads look better with a flat start and a raised finish. Some look better with the opposite. The hairline will tell you what it wants after the first few inches.
How Tight Should the Braid Feel?
Snug enough to hold, loose enough that you would not mind wearing it for hours. That sounds annoyingly vague, but the body gives useful clues. If the scalp stings while you are still braiding, it is too tight. If the braid slips away from the head the moment you let go, it is too loose.
A good test: press a fingertip gently against the braid near the temple. You should feel resistance, not pain. The braid should stay close to the scalp, but the skin should not feel yanked or shiny. If the hairline pulls back when you smile or raise your eyebrows, tighten less, not more.
The front edge is where you need the most care. Tiny hairs there are easy to overwork, and once they are stressed, they show it fast. A slightly softer braid that you can refresh later is better than a rock-hard braid that looks great for ten minutes and then starts aching.
Can I Do This Over Box Braids, Twists, or Locs?
Yes, and that is one of the reasons this style has staying power. Braided headbands sit well over textured extensions because the front band adds shape without demanding that the whole head be redone. On box braids, you can braid a small section of your own front hair into a band and pin the tail into the rows. On twists, the front pieces can be crossed into a faux band or tucked into one twist line. On locs, the braid can serve as a front frame while the locs handle the rest of the volume.
The only thing to watch is weight. Extensions already put stress on the scalp, so don’t build a heavy front braid on top of them. Keep the band light and the anchor soft. If the style starts to drag at the temples, that is your cue to remove a little bulk instead of adding more pins.
What If the Braid Keeps Slipping Behind My Ear?
That usually means one of three things: the braid is too smooth, the anchor is too shallow, or the section is too wide for the hair density you have. A small fix often works. Add one crossed pin closer to the back of the ear, not right on top of it. You want the anchor to catch a dense patch of hair, not skim over a slippery surface.
A little texture at the base helps too. If the hair was too soft, the braid may need a touch of mousse or a tiny amount of styling cream on the outer layer before you redo that section. On fine or straight hair, a mini elastic at the end of the braid can give the tail a point to grip before you tuck it under.
If it still slips after that, move the part slightly higher or lower. Sometimes the problem is not the braid. It is the route.
Does a Braided Headband Count as a Protective Style?
It can, but only in the modest sense. A braided headband is protective when it reduces daily handling, keeps the front hair from being brushed all day, and is done with low tension. It is not automatically protective just because it has a braid in it. If the hairline is strained, the edges are slicked and scraped, or the style needs constant tugging, the hair is not getting much benefit.
Think of it as a low-manipulation style with protective potential. The braid can shield the front section from constant touching. The rest of the hair can be tucked, wrapped, or left alone. That is helpful. But the scalp still needs room to breathe, and the hairline still needs care. Protection is partly about what you do not do.
How Do I Keep the Front from Getting Frizzy So Fast?
Use less product than your instinct tells you to use, and smooth the front only once or twice while styling. Frizz often starts from overhandling, not from the braid itself. If the section is dry and rough, mist a little water on your fingers or use a light cream on the outer layer before you braid. Heavy oils and thick butters tend to sit on top of the hair and make flyaways worse after a few hours.
A satin scarf at night helps more than most people expect. So does pin placement. If the braid is anchored cleanly, it moves less during the day, which means fewer strands rub loose. If you know the front gets fuzzy fast, choose a braid that lies flatter rather than one that sits high and stands proud. Less exposed surface, less frizz.
A Small Style That Does Real Work

A braided headband earns its place because it balances polish and ease in a way that many styles try to fake. The braid gives the hair a clear line. The rest of the style gets to breathe. That combination is what makes it useful on rushed mornings, dressed-up days, and those awkward in-between stretches when your hair is not quite ready for a full reset.
The best versions are the ones that respect the hairline. Not tight. Not heavy. Just neat enough to stay, soft enough to wear, and shaped well enough that the mirror looks back at you with a little approval. Once you get that front section right, the rest becomes surprisingly flexible.
And that is the part worth keeping. A clean braid across the crown can make the whole head look intentional, even when the morning was anything but.