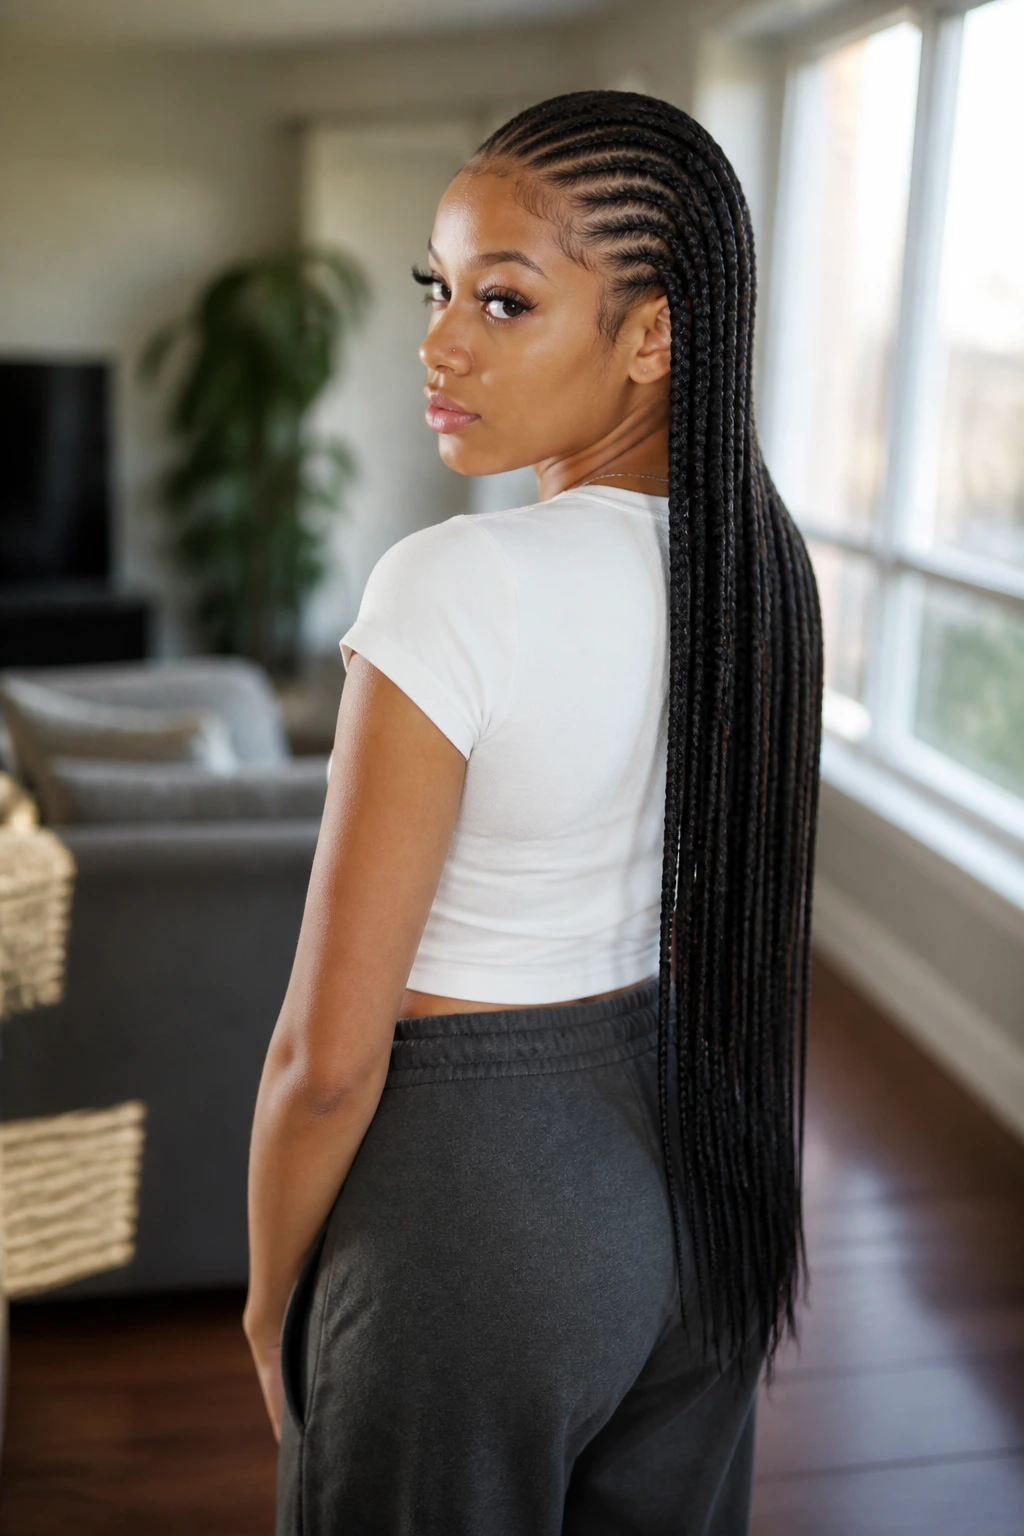
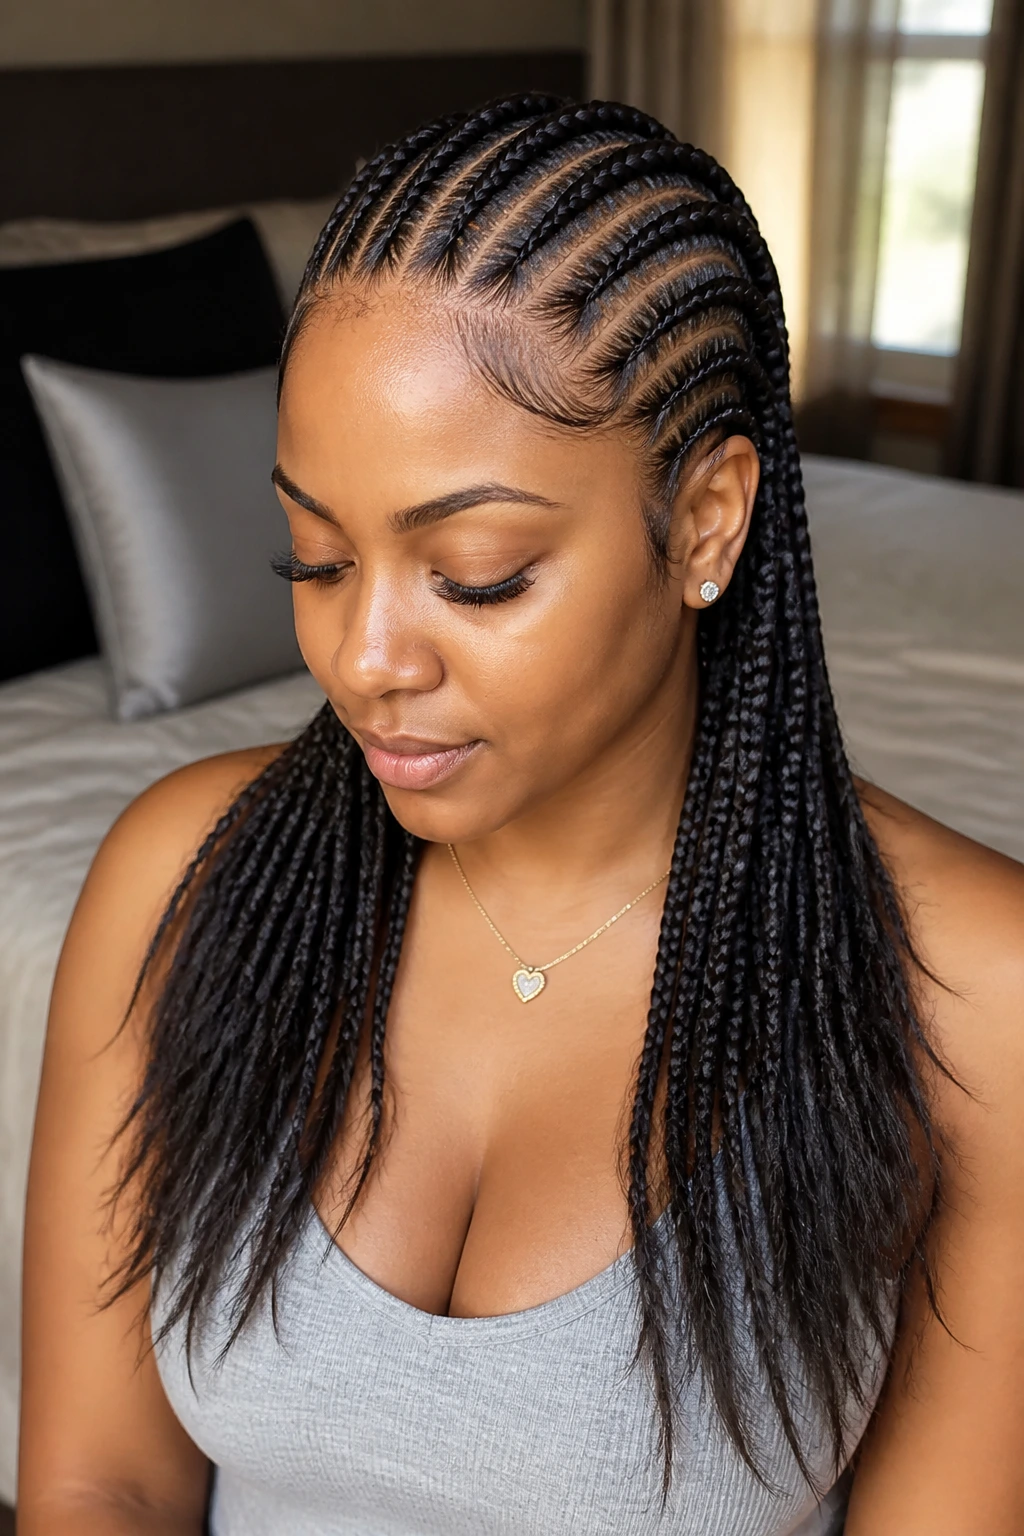
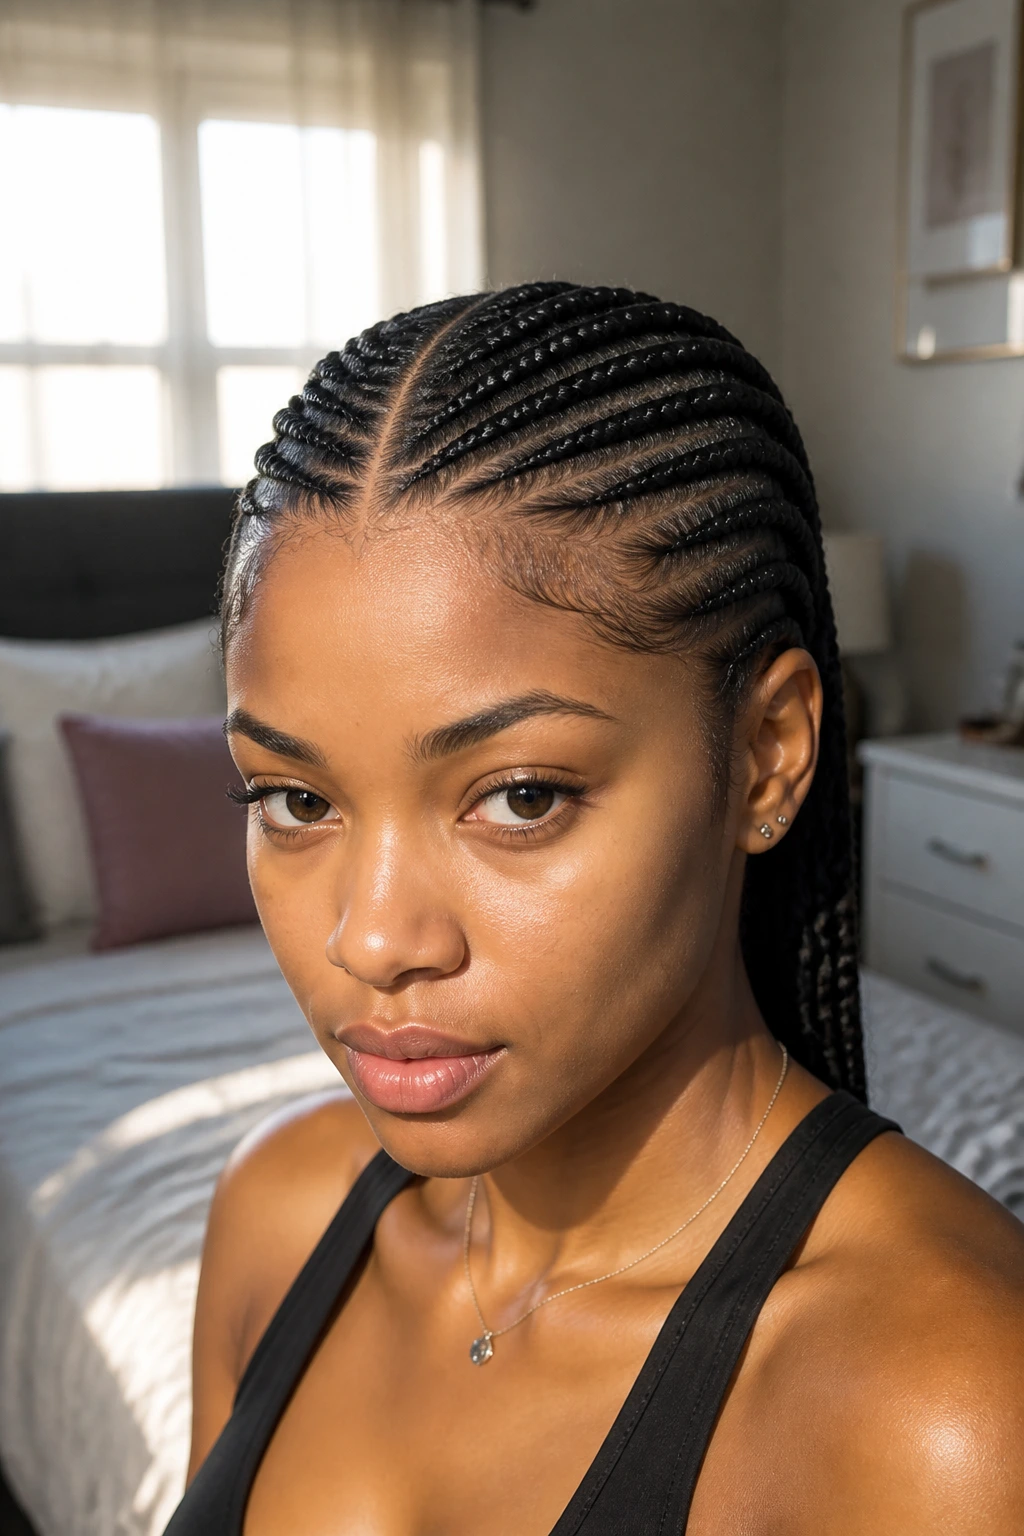
Long hair changes the math on straight-back cornrows. A row that looks crisp on shoulder-length hair can start to puff out halfway down the back when soft layers are left to fend for themselves, and that’s where the style either looks polished or a little scrambled. The fix is not brute force. It’s cleaner parting, smarter tension, and knowing which pieces should be tucked into the braid and which ones should be left to soften the line.
Soft layers are the part people underestimate. Those shorter face-framing pieces, crown pieces, and neckline bits can either make the braids feel airy and current or make the whole set look fuzzy before you’ve even finished the second row. The difference usually comes down to prep: stretched hair, a calm scalp, a small amount of product at the base, and a braid pattern that respects the way layered hair actually falls.
And that’s why straight-back cornrows keep showing up as a go-to on long hair. They can look minimal, dramatic, sporty, dressed-up, or plain expensive-looking if the parts are neat and the ends are handled well. Once the foundation is right, the rest is mostly about choosing the version that suits your layers instead of fighting them.
Why These Braids Keep Working So Well
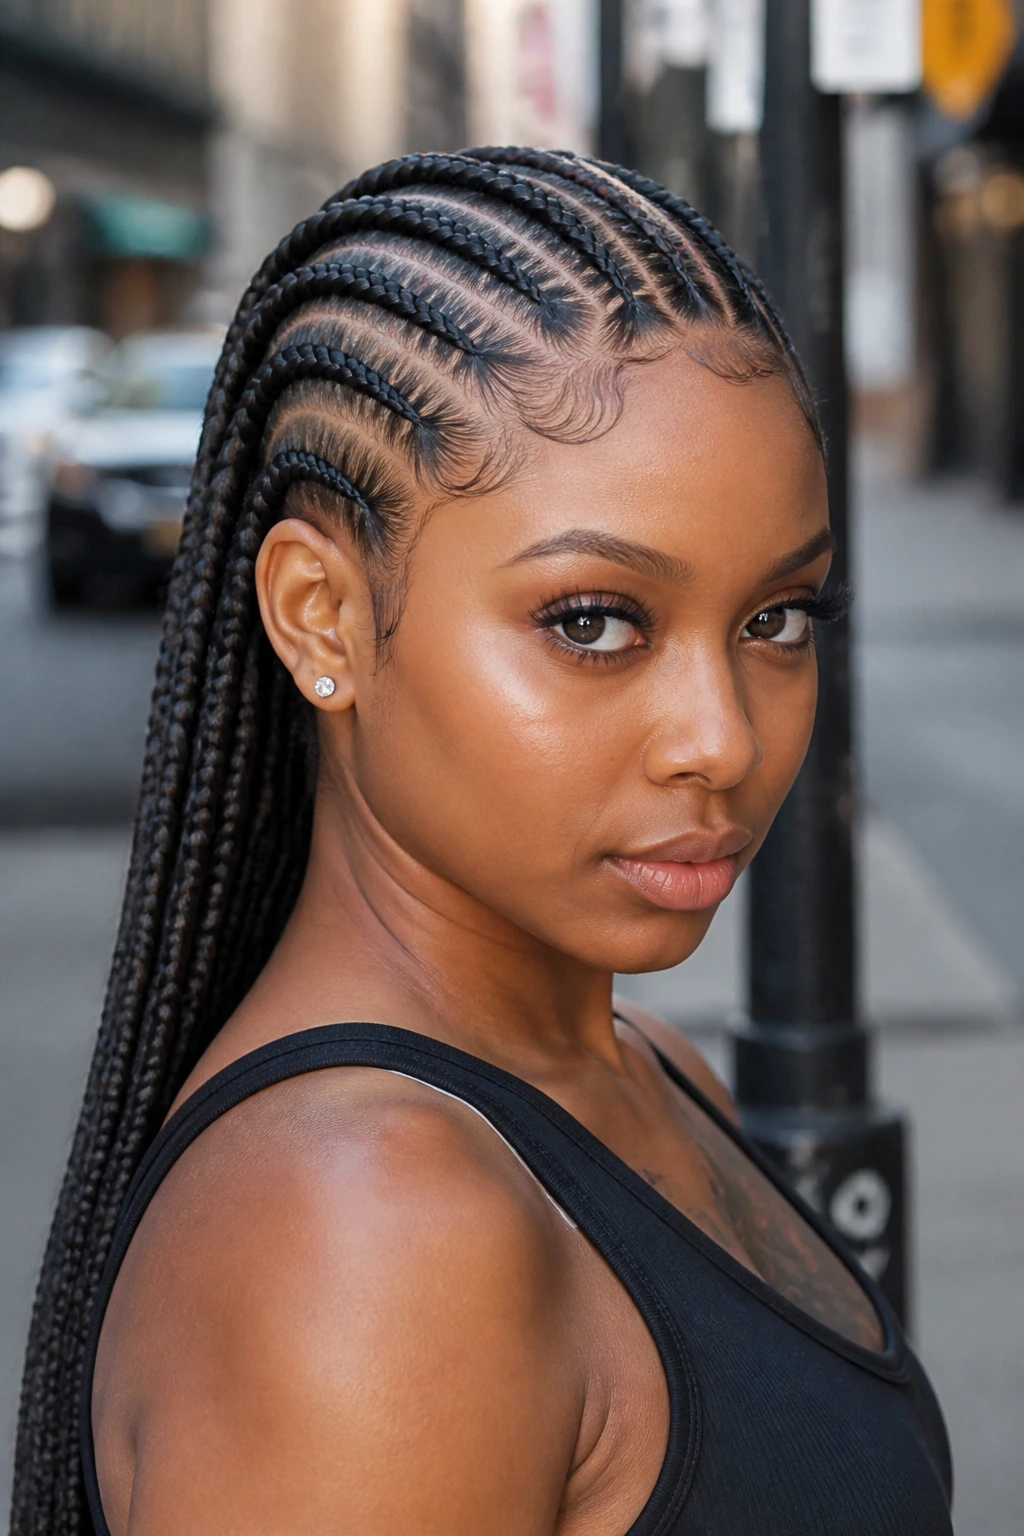
Long length gives the rows a stronger line: the braids can fall past the shoulder blades or all the way to the waist, so even a simple pattern has presence and shape.
Soft layers stop being a problem when they’re planned for: short pieces can be fed into the first inch of each row, tucked under a low ponytail, or left out on purpose near the face.
You get range without changing the whole braid pattern: one set can read clean enough for work and still look good with gold cuffs or a low bun later.
The style holds its shape better than loose long hair: once the scalp is sectioned and the braid is set, you’re not spending all day detangling ends that catch on everything.
Tension matters more than tightness: a neat row should lie flat at the base and feel secure, not sharp at the hairline or sore behind the ears.
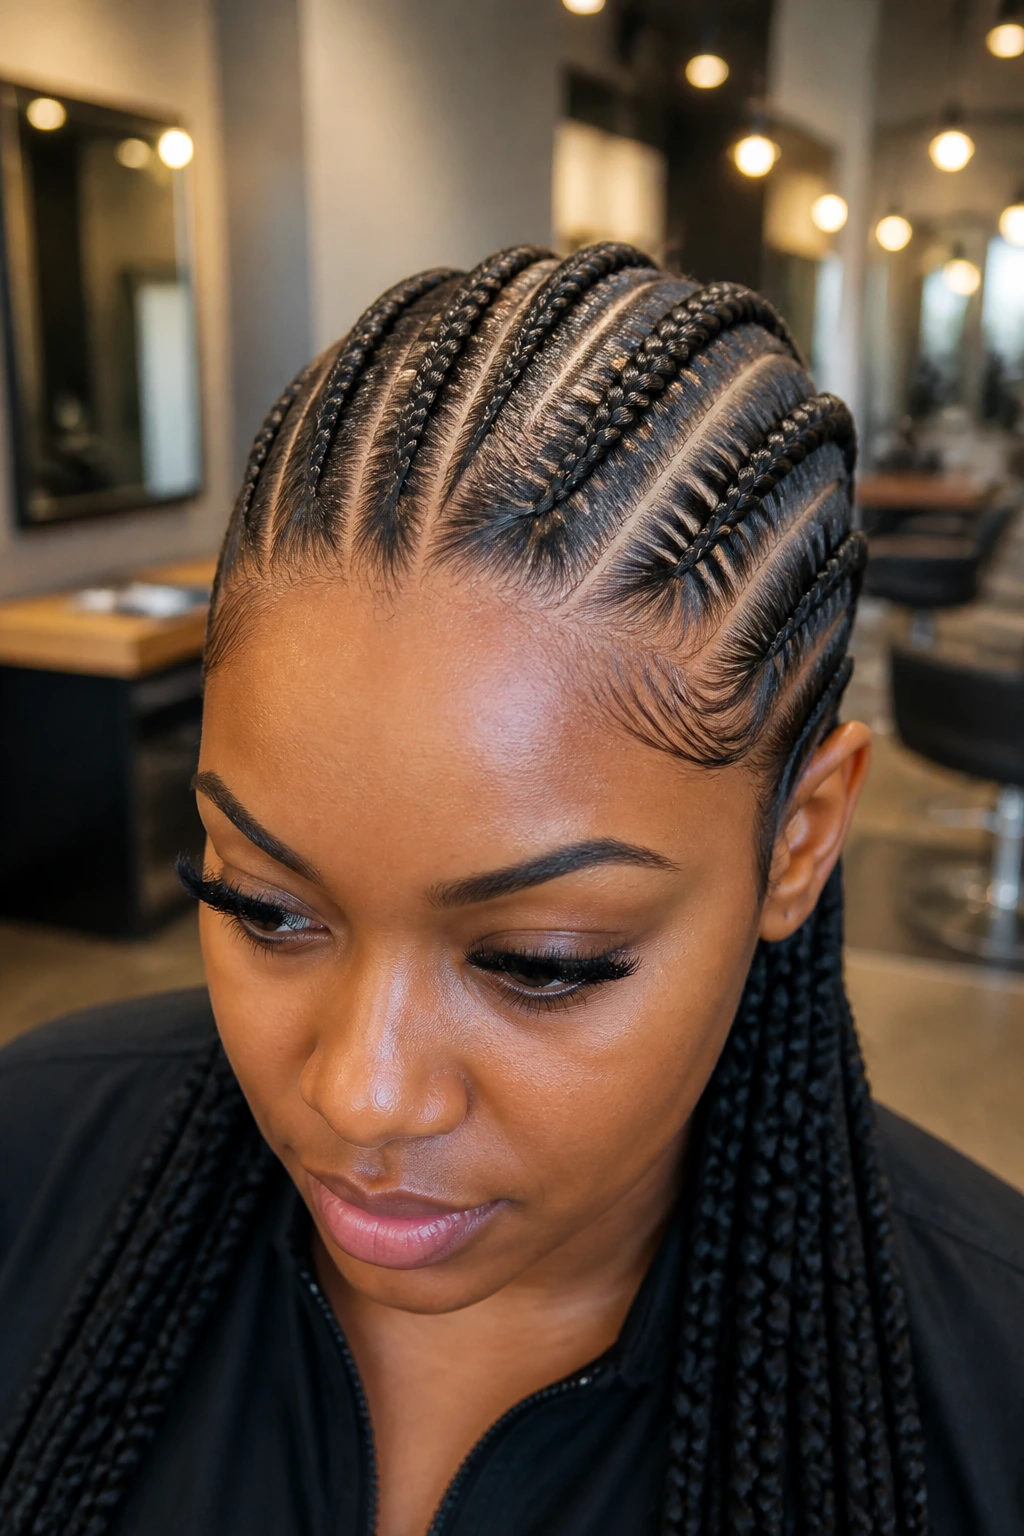
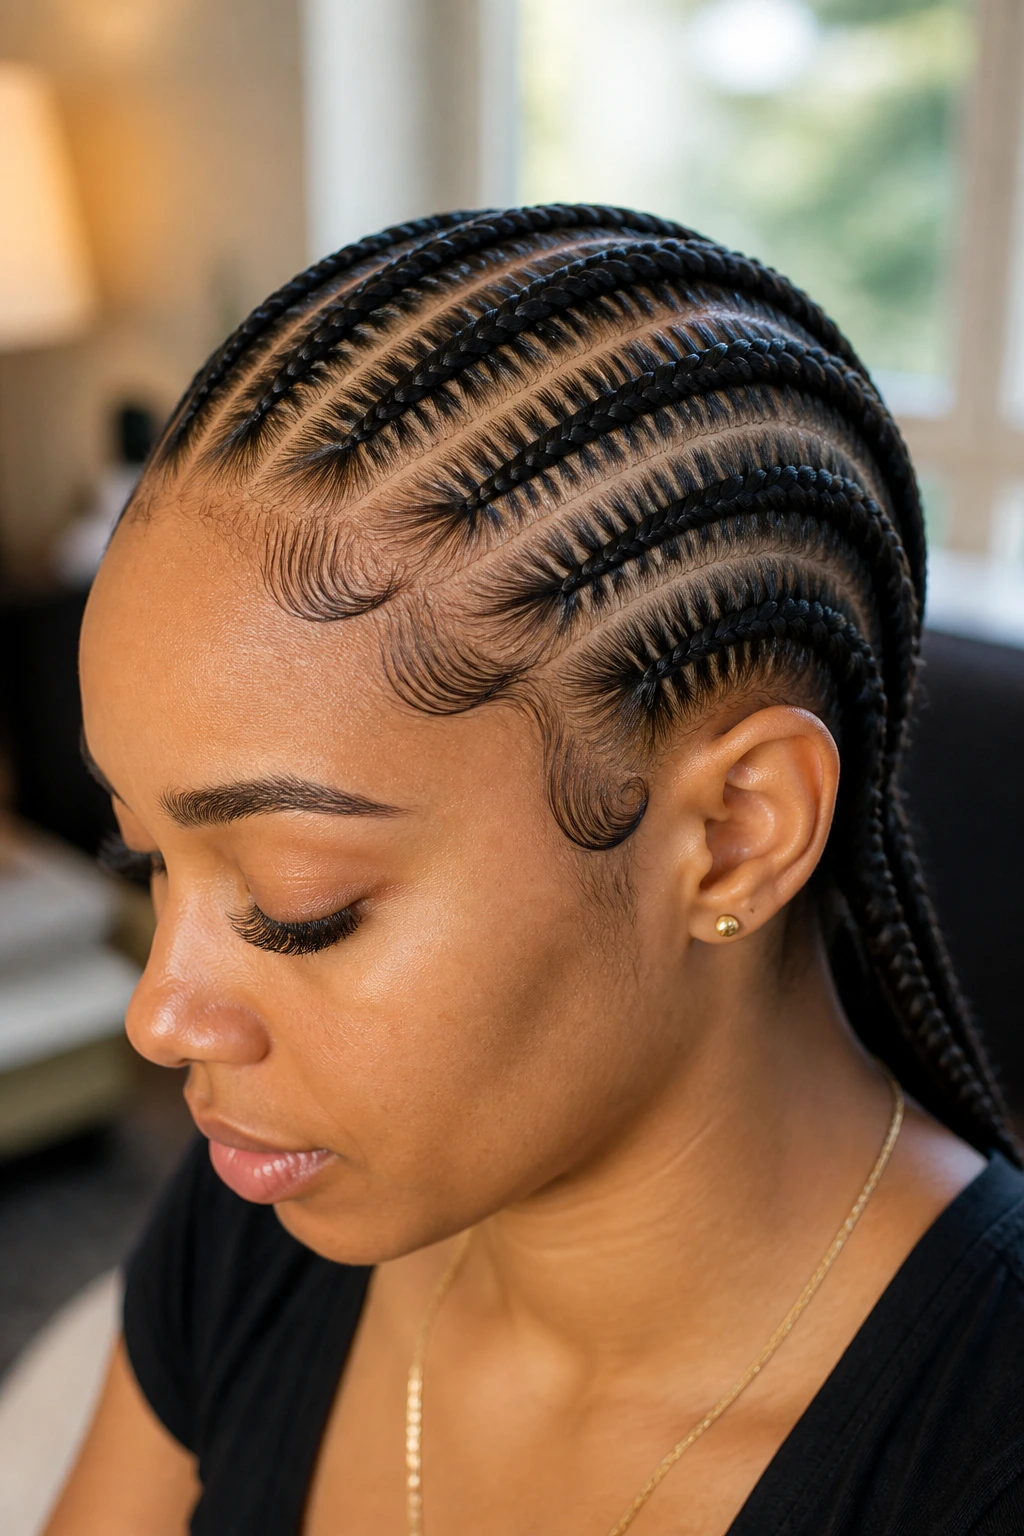
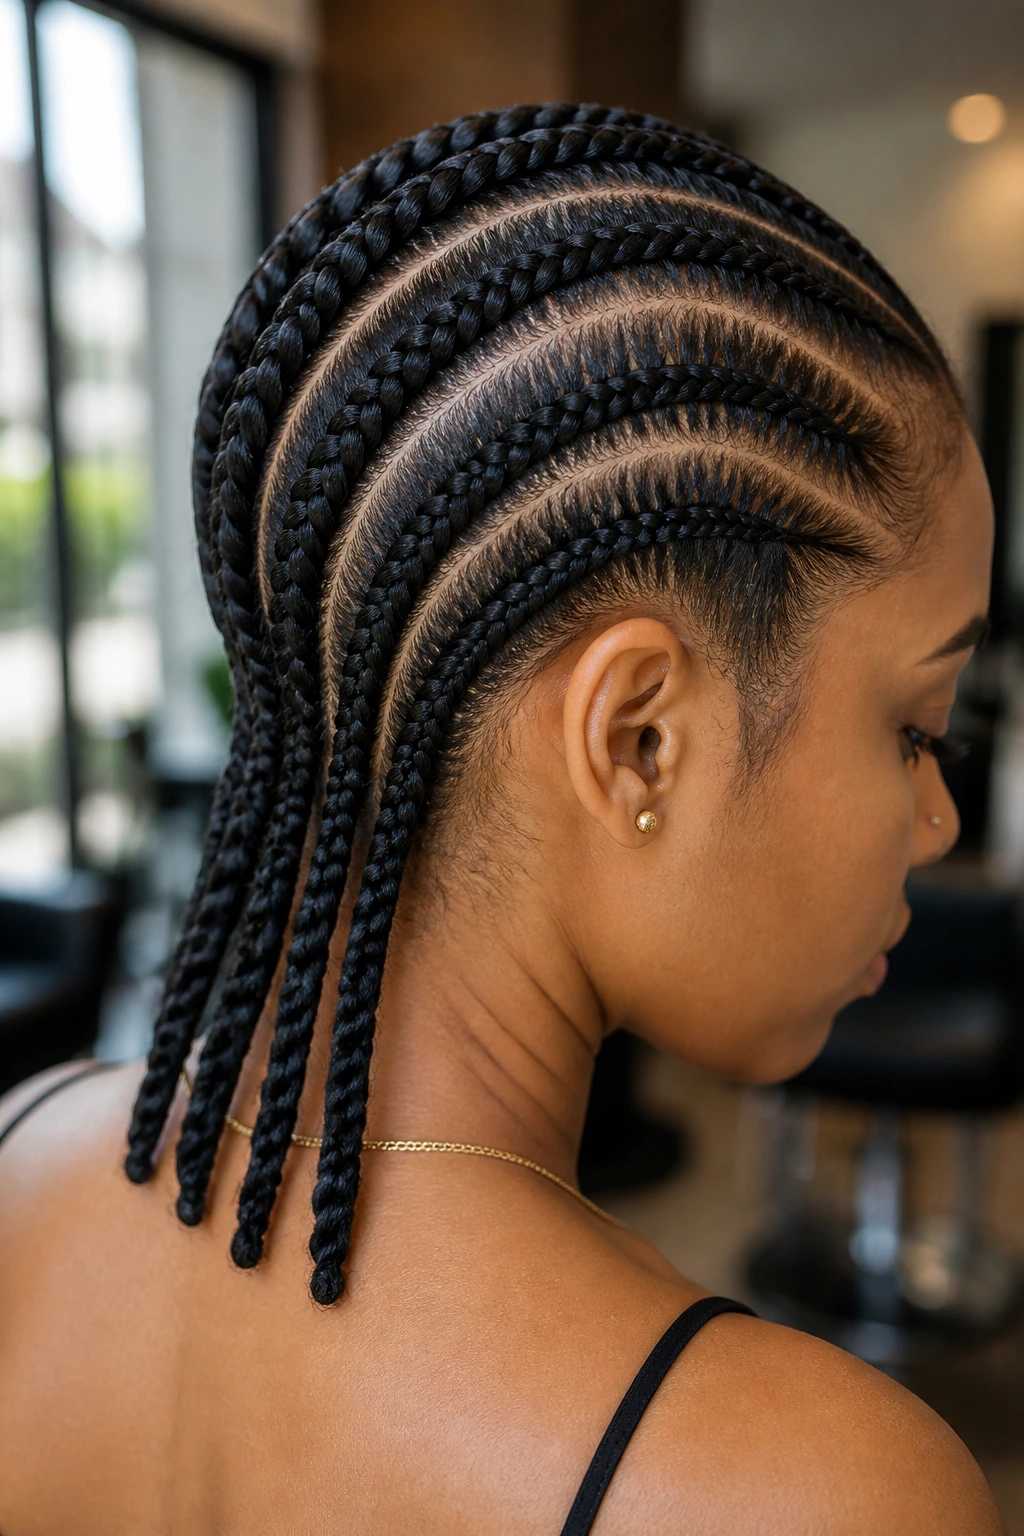
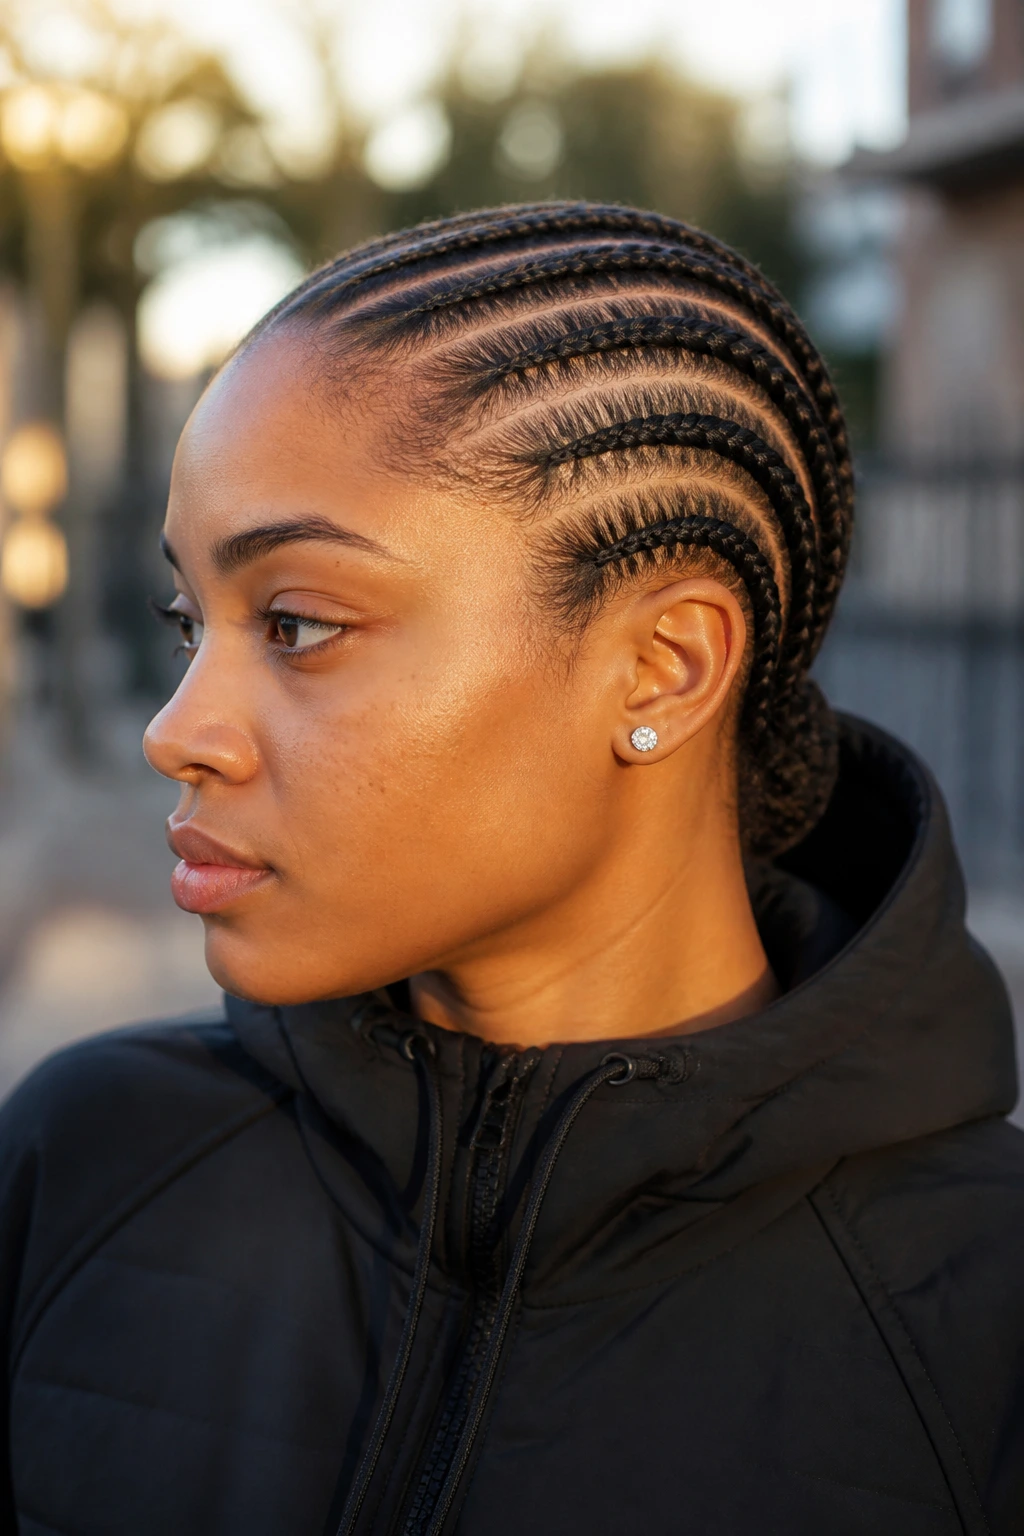
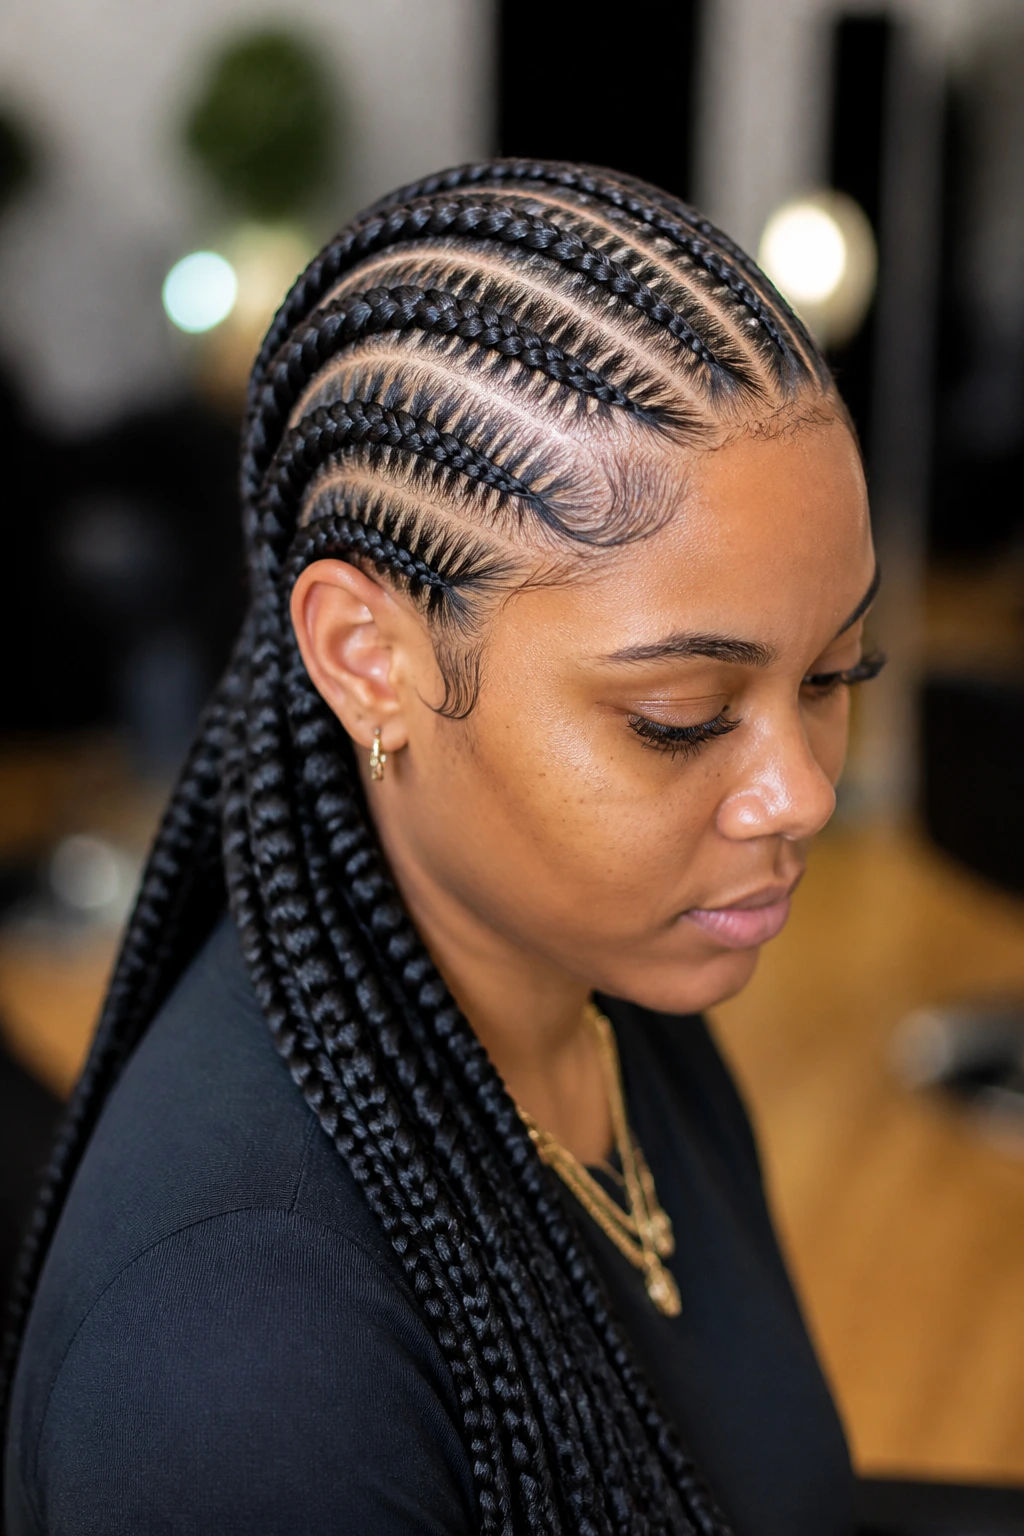
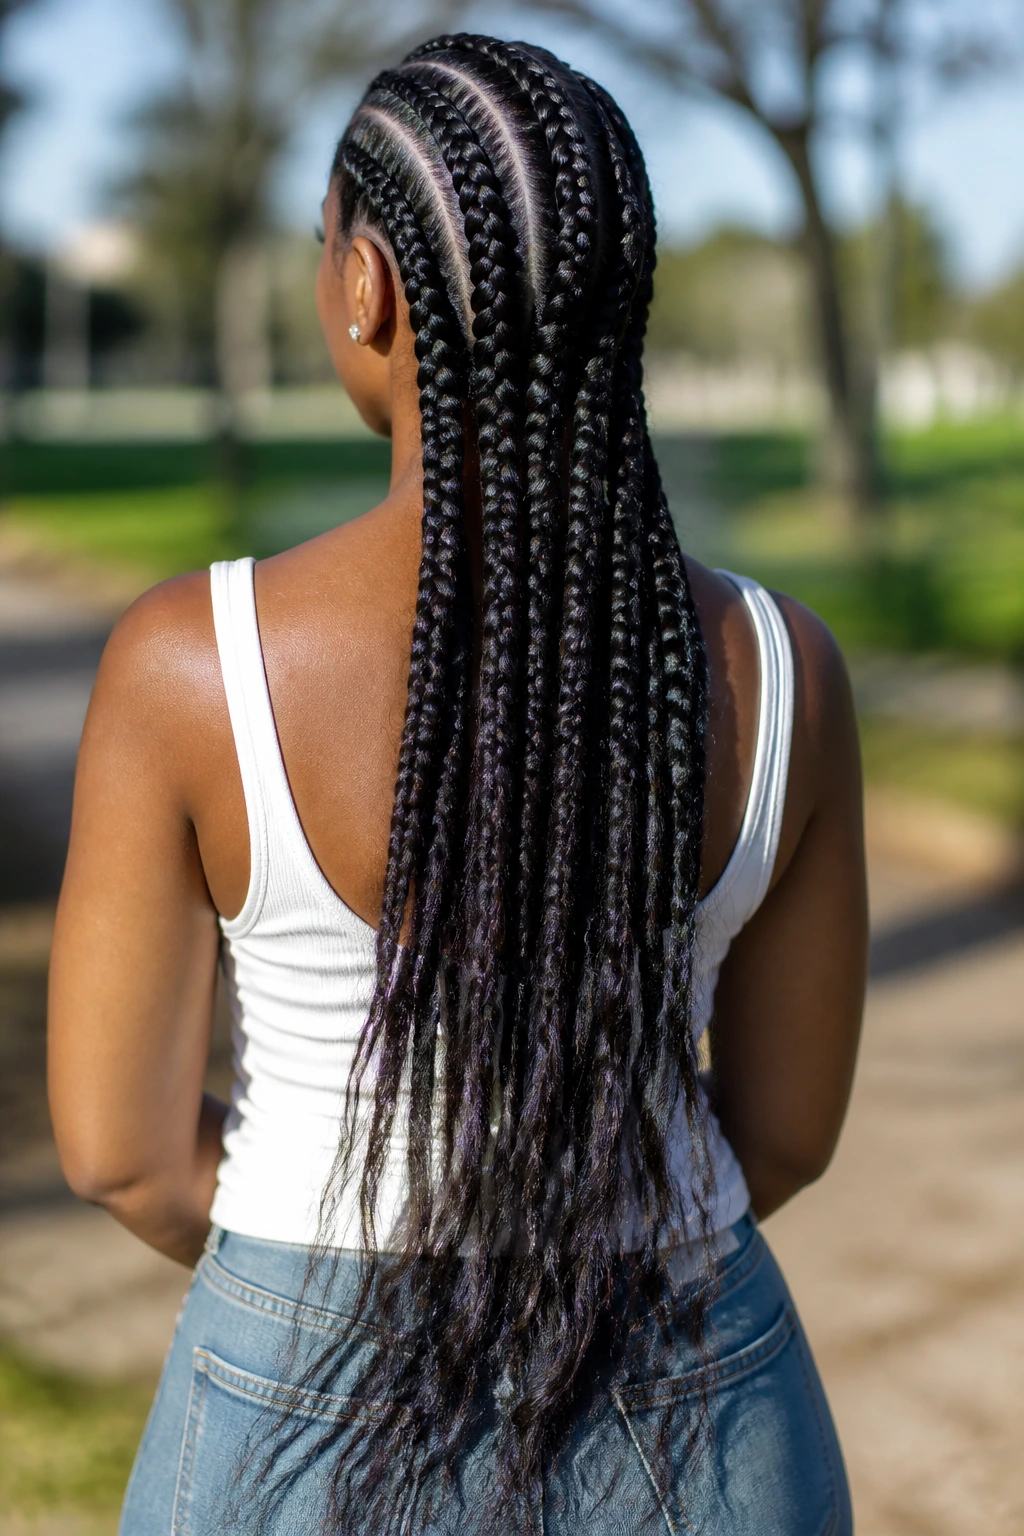
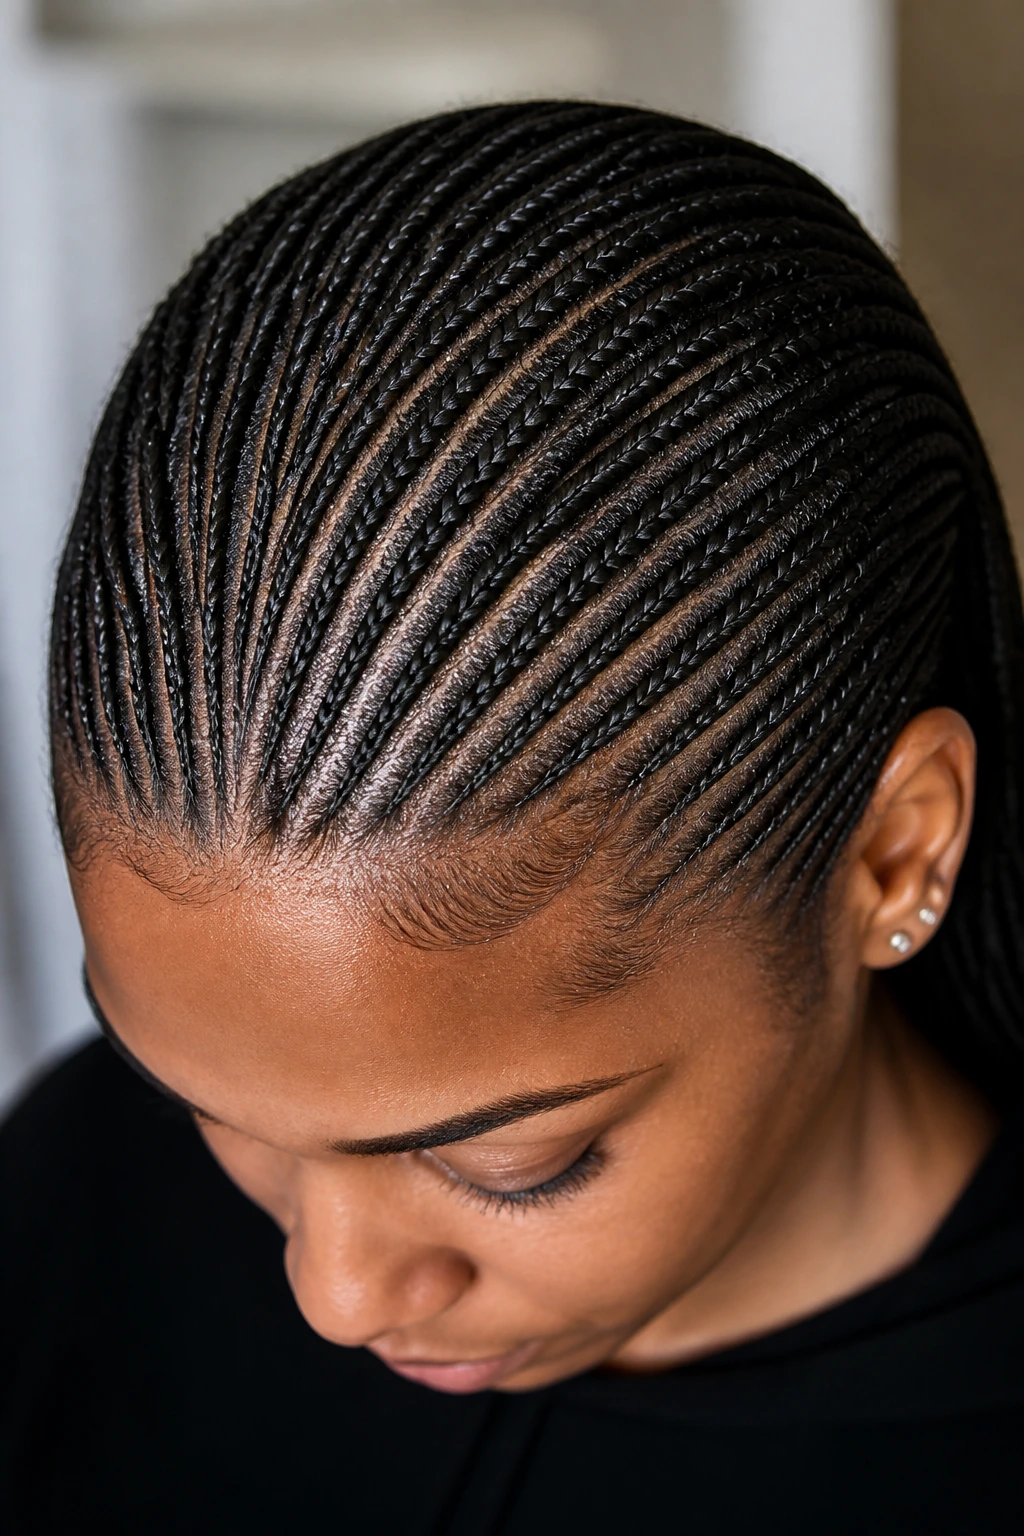
1. Center-Part Straight Backs That Read Clean From the Front
A dead-center part gives long hair a very specific kind of calm. The line runs from the forehead straight to the nape, and that simple split makes the rows feel balanced even when the length underneath is all movement and layers. I like this version when the front pieces are soft but not too short, because the middle part gives them a clear place to live instead of letting them wander.
Why it works on layered hair
The center line helps disguise uneven layer lengths. If the shortest pieces sit near the temples, they can be folded into the first row on each side and disappear into the braid instead of sticking out around the hairline. Keep the parts a touch wider at the front than you think you need; that gives the shorter layers something to grip.
A small amount of braid gel at the roots is enough here. Too much, and the hair gets stiff and chalky. Too little, and the center part collapses before the row reaches the crown.
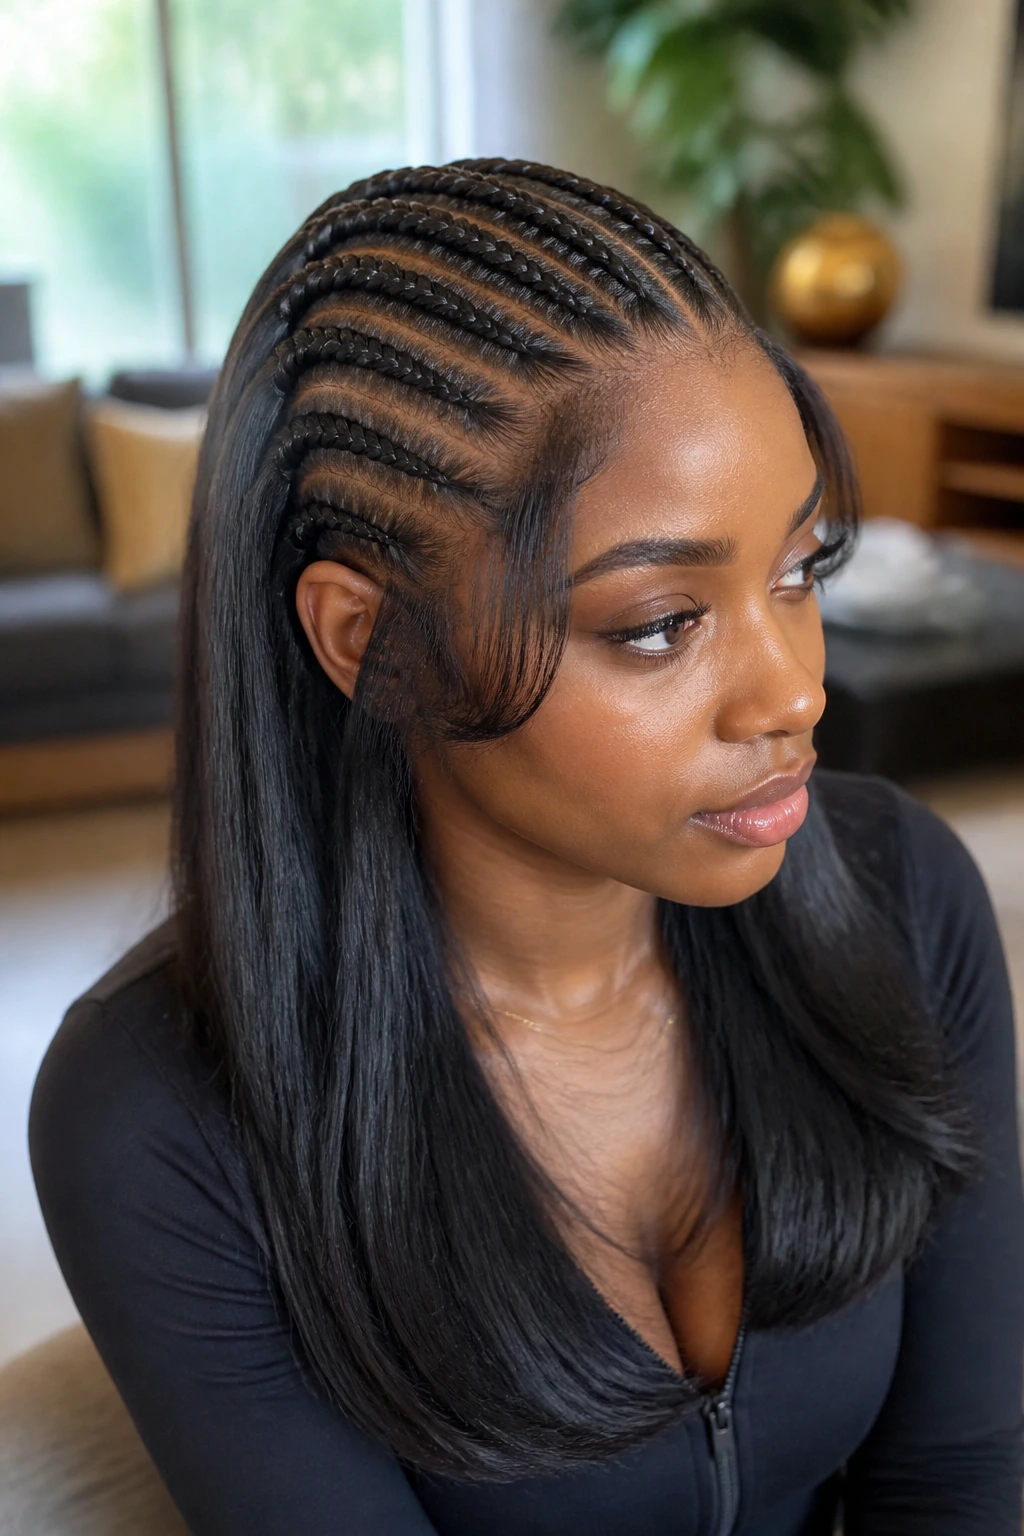
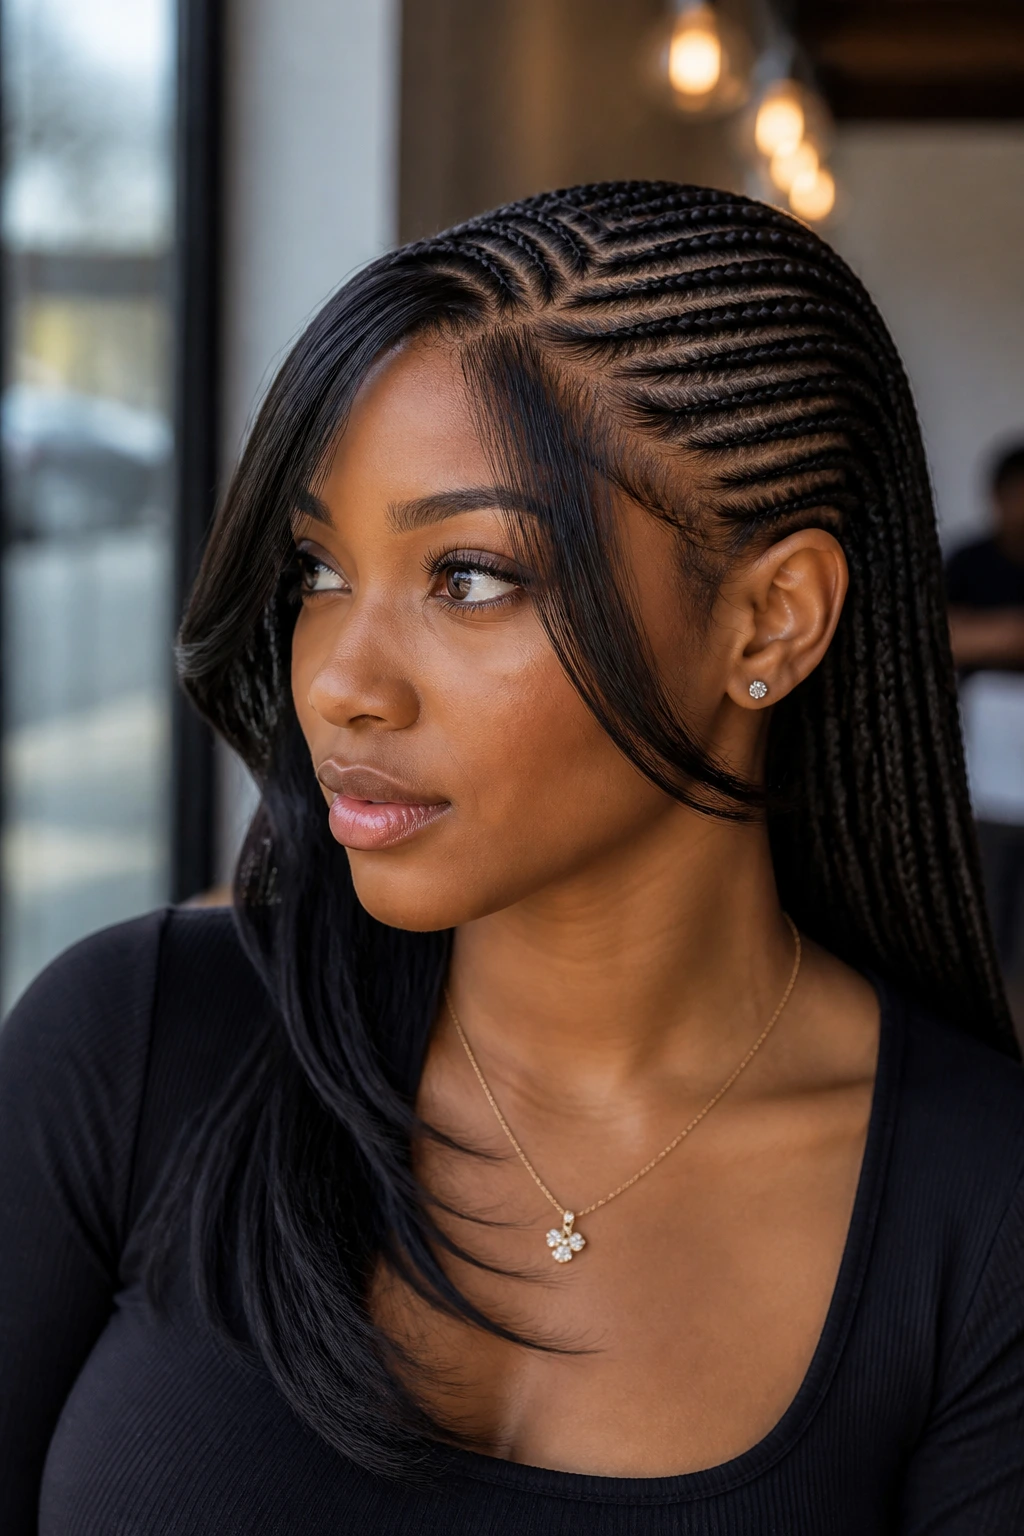
2. Off-Center Straight Backs for Softer Face Framing
An off-center part has a quieter feel than the classic middle split. It still gives you straight-back rows, but the eye travels a little diagonally first, which softens the look if your layers are cut around the face or cheekbones. This is one of those styles that looks casual on purpose, not unfinished.
If your longest front pieces sit just below the cheekbone, this is the parting pattern I’d reach for first. The braid closest to the heavier side can be slightly smaller so the hair lies flatter, while the lighter side gets a bit more feed-in at the base. That keeps the style from leaning.
No need to overcomplicate the finish. A soft wrap of mousse and a satin tie overnight will keep the part from swelling up, and the off-center line still looks sharp the next morning.
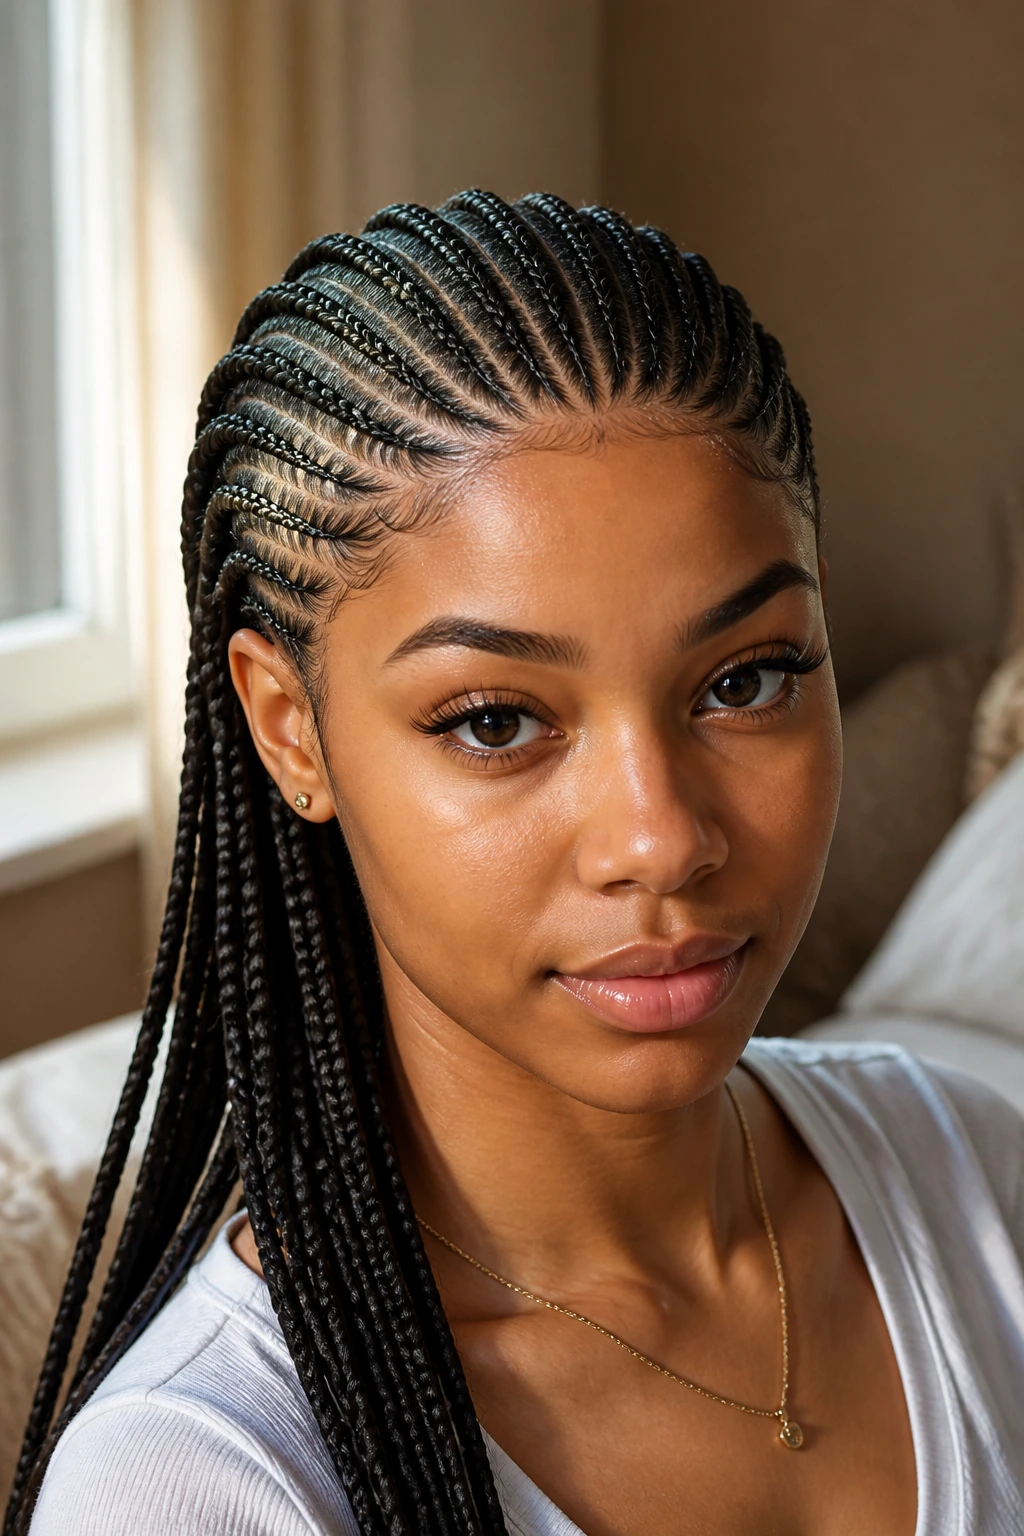
3. Knotless Feed-In Rows into a Low Braided Ponytail
This is the version I’d choose when the long hair is thick, the layers are obvious, and you want the front to feel smooth without too much bulk at the base. The feed-in method starts slimmer at the scalp and adds hair gradually, so the row doesn’t look like it’s sitting on top of the head. That matters on long hair, because heavy length can make regular cornrows look lumpy fast.
Ask for this if…
- your hairline is delicate and you hate a hard start;
- the layers at the temples need a gentler tuck;
- you want the rows to gather easily into a ponytail at the nape.
The low ponytail keeps the ends controlled, which is a relief if your length tends to brush against coats, collars, and bag straps. Wrap one braid around the elastic if you want a cleaner finish. Simple. Effective.
4. Jumbo Straight Backs That Move Fast on Long Hair
Jumbo rows are for days when you want the braid job to move quickly and still look deliberate. On long hair, the larger size turns the length into the main feature, so you get that bold back view without sitting for hours. It’s a strong choice if the layers are soft but not super short, because the bigger sections can trap flyaways without making the scalp pattern look crowded.
The tradeoff is visible parting. You need straighter lines, because big braids show every wobble in the sectioning. But when the parts are neat, jumbo rows have this clean, almost graphic look that smaller braids don’t always give you.
I prefer them with a little shine spray at the end, not heavy oil. Heavy products make jumbo braids look greasy before they’ve had a chance to settle.
5. Micro Straight Backs for a Tight, Dense Pattern
Micro rows are the opposite mood. They take longer, but the finished scalp pattern is fine and dense, which can be lovely on long hair with soft layers because the smaller sections hold short pieces more neatly. If the layers around your face are uneven, tiny rows make the whole style look controlled instead of busy.
There’s a catch. Micro cornrows need patience and a light hand. If the sections are too thin at the hairline, the braid can feel fragile, and if the tension is too high, you’ll know it within the first hour. No heroics here.
I like this look when the length is the point and the front just needs to be calmed down. It’s one of the few styles that can make a lot of hair look tidy without flattening it to death.
6. Straight Backs with Curved Corners at the Hairline
Straight rows do not have to be rigid from edge to edge. A slight curve at the front corners softens the entry point, which is especially handy when the layers around the temples are short and stubborn. Instead of forcing those pieces into a straight line that doesn’t suit the head, the curve gives the braid a more natural flow.
This is one of my favorite options for people who don’t love the look of a hard box at the front. The curve can be tiny — just enough to round the first inch of the row near the hairline. That small change makes the whole style feel more tailored.
Keep the curve symmetrical from left to right. If one side swoops and the other stays flat, the style starts to look accidental, and that’s a shame because the fix is so simple.
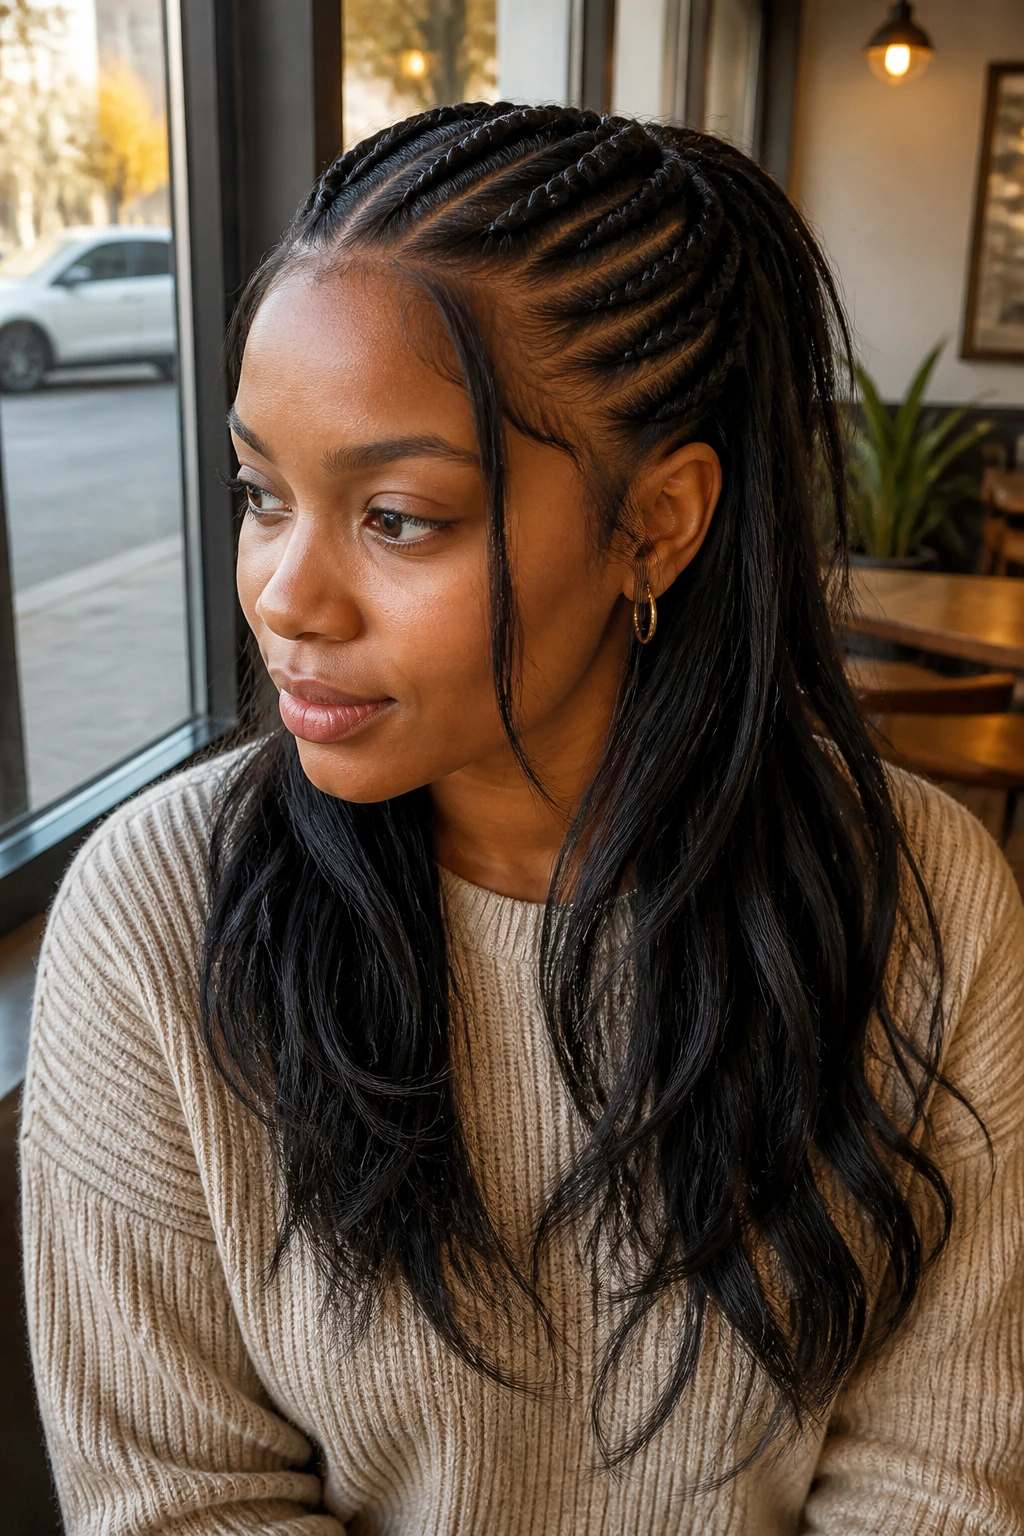
7. Half-Up Straight Backs with Loose Length Left Out
Half-up straight backs let the scalp pattern do the neat work while the ends keep some movement. On long hair with soft layers, this is a smart compromise because the top rows stay tidy and the lower length remains loose, which helps if you like seeing the cut of your layers.
The best part is the transition. The rows can stop at the crown or mid-head and gather into a small ponytail or clip, while the lower hair is left straight, waved, or lightly curled. It reads less severe than full cornrows, and the layers around the face get more freedom.
Best when you want
- a braid style that still shows off length;
- a look that works with hoops, collars, or a high neckline;
- less weight pulling on the scalp than a full set tied back all day.
8. Straight Backs Into a Low Braided Bun
A low braided bun is one of the neatest ways to finish straight-back cornrows on long hair. The rows pull everything toward the nape, where the length can be coiled, wrapped, or braided into a compact bun that stays out of the way. It’s practical, yes, but it also sharpens the whole silhouette.
This version works especially well if the layers are soft and the ends are not all the same length. The bun hides the seam where shorter pieces might otherwise stick out at the back. If you want the bun to sit flat, braid the length first and coil it close to the head. Loose coils look pretty for about five minutes, then they start to shift.
A few hairpins and a satin wrap overnight keep the bun from turning into a fuzzy knot. That part is boring. Still matters.
9. Waist-Length Straight Backs With Tiny Ends
When the hair is long enough to brush the waist, straight-back cornrows become all about line. The braids themselves are the look, not just the styling choice. Soft layers can be tucked into the base, while the finished lengths hang clean and narrow instead of flaring out like a fan.
This is the style I’d pick when I want the braid work to show, not the accessories. A row that reaches the lower back already has drama. Tiny ends help keep it neat, especially if the last few inches are sealed with a little mousse or a light setting spray.
The key is not to overload the braid with extension hair at the start. Long natural hair already brings weight. Add too much bulk, and the nape starts to feel crowded.
10. Straight Backs With Beads at the Ends
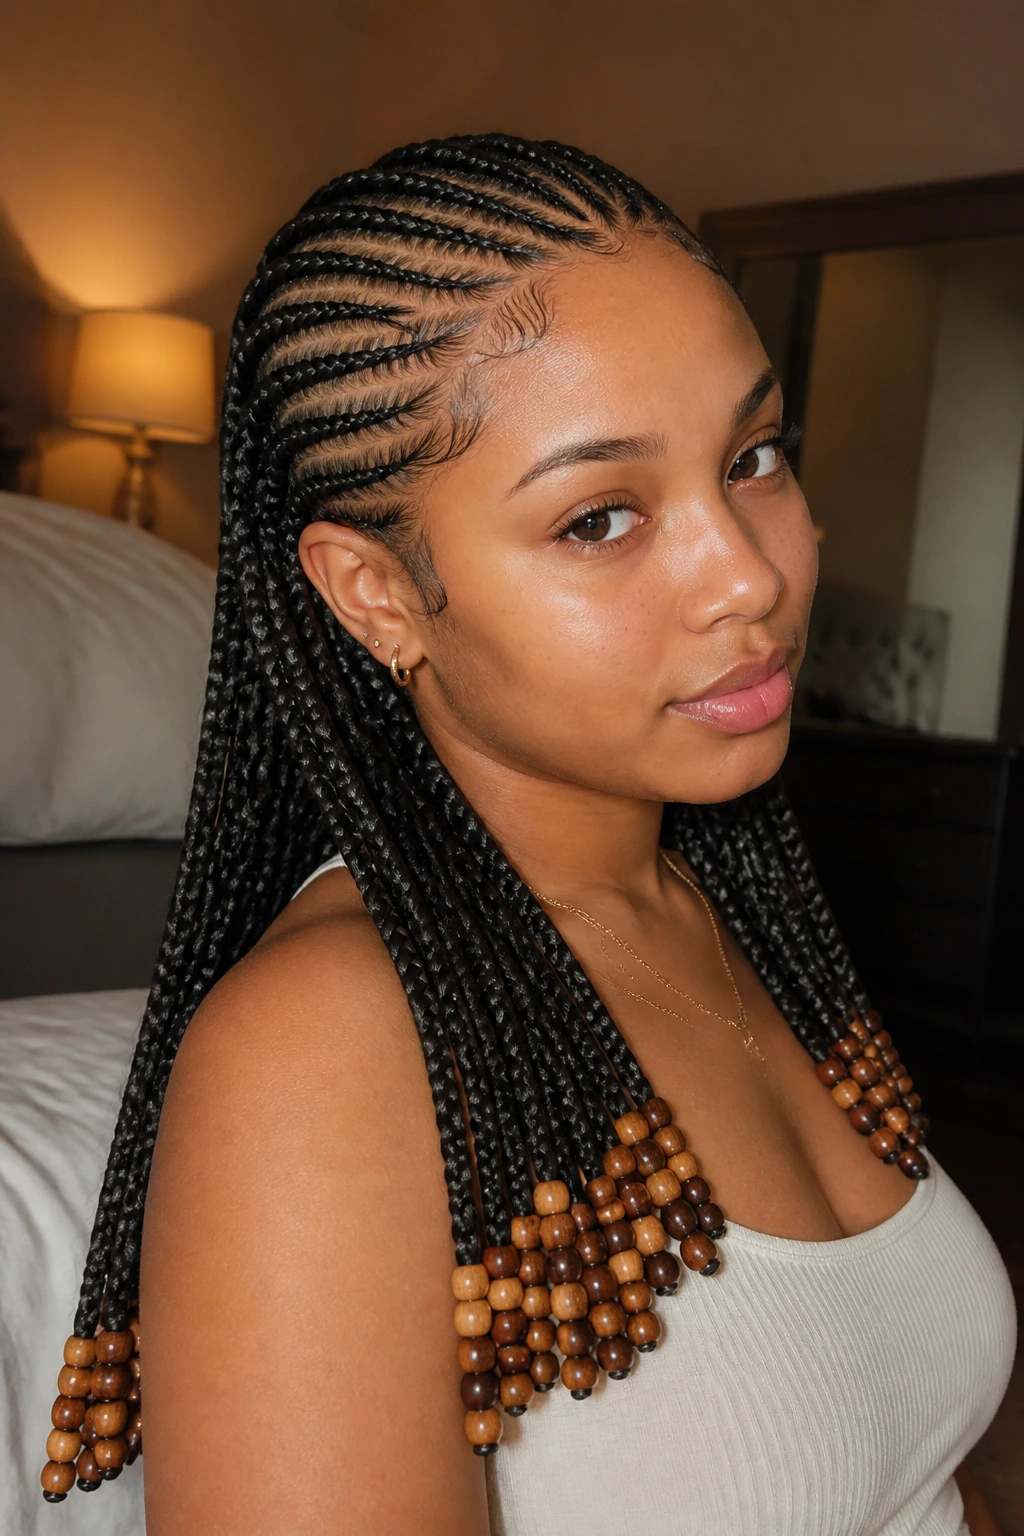
Beads change the whole mood of straight-back cornrows. They add a little sound, a little weight, and a very clear finish to the ends, which can be useful on long hair because the beads keep loose tips from frizzing outward. If the soft layers are mostly up top, beads make the rest of the style feel finished.
Go easy with the size. A few medium beads near the ends usually look better than a pile of tiny ones that clatter and tangle. I also like beads best when the braid length is already clean and narrow. On a bulky braid, they can feel fussy.
You do want secure ends here. If the braid tips are too short or too soft, the beads slide. That’s the sort of problem that shows up at the worst possible moment.
11. Stitch Cornrows With a Sharp Line Across the Scalp
Stitch braids give straight-back cornrows a segmented look. Instead of one smooth braid line, you get visible little “stitches” across the scalp, which adds structure on long hair and keeps the pattern from blending into one large block. It’s a neat choice when you want the braids to look crisp from every angle.
The style suits layered hair because the distinct sections hold the shorter pieces in place more cleanly. If your layers tend to slip out of regular rows, stitching them in smaller bands can make the braid line behave. The result looks polished, but not stiff.
What to ask for
A braider who can keep the spacing even. The stitch marks should be consistent from the front all the way to the back. If the bands get messy near the nape, the whole look loses its edge.
12. Straight Backs With Soft Side Bang Layers
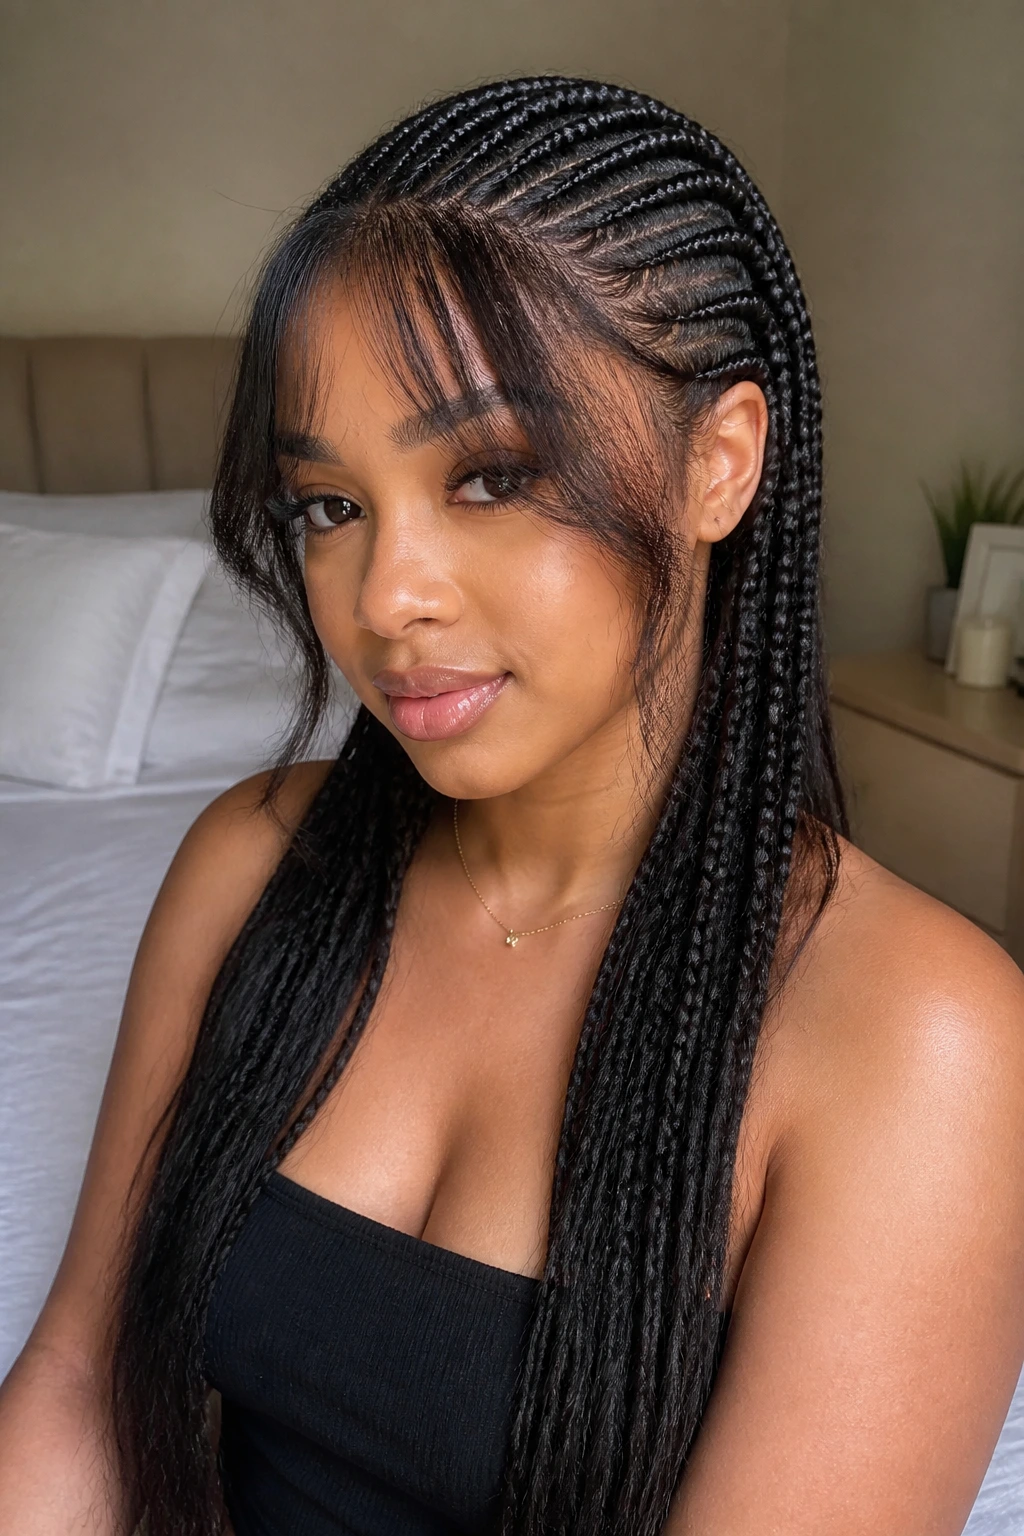
Some layered cuts need room at the front. Soft side bang pieces can be left out or lightly blended into the first row so they skim the cheek instead of being forced straight back. That small decision changes the whole face shape.
This look feels softer than a fully pulled-back style. It works when the front layers are long enough to fall neatly after a quick pass with mousse or a flat iron on low heat before braiding. If the layers are too short, leave them tucked in. Fighting a two-inch piece into a side bang is a losing game.
I like this style with a clean ear line and minimal accessories. The side pieces already do a lot, so the rest of the braid pattern should stay calm.
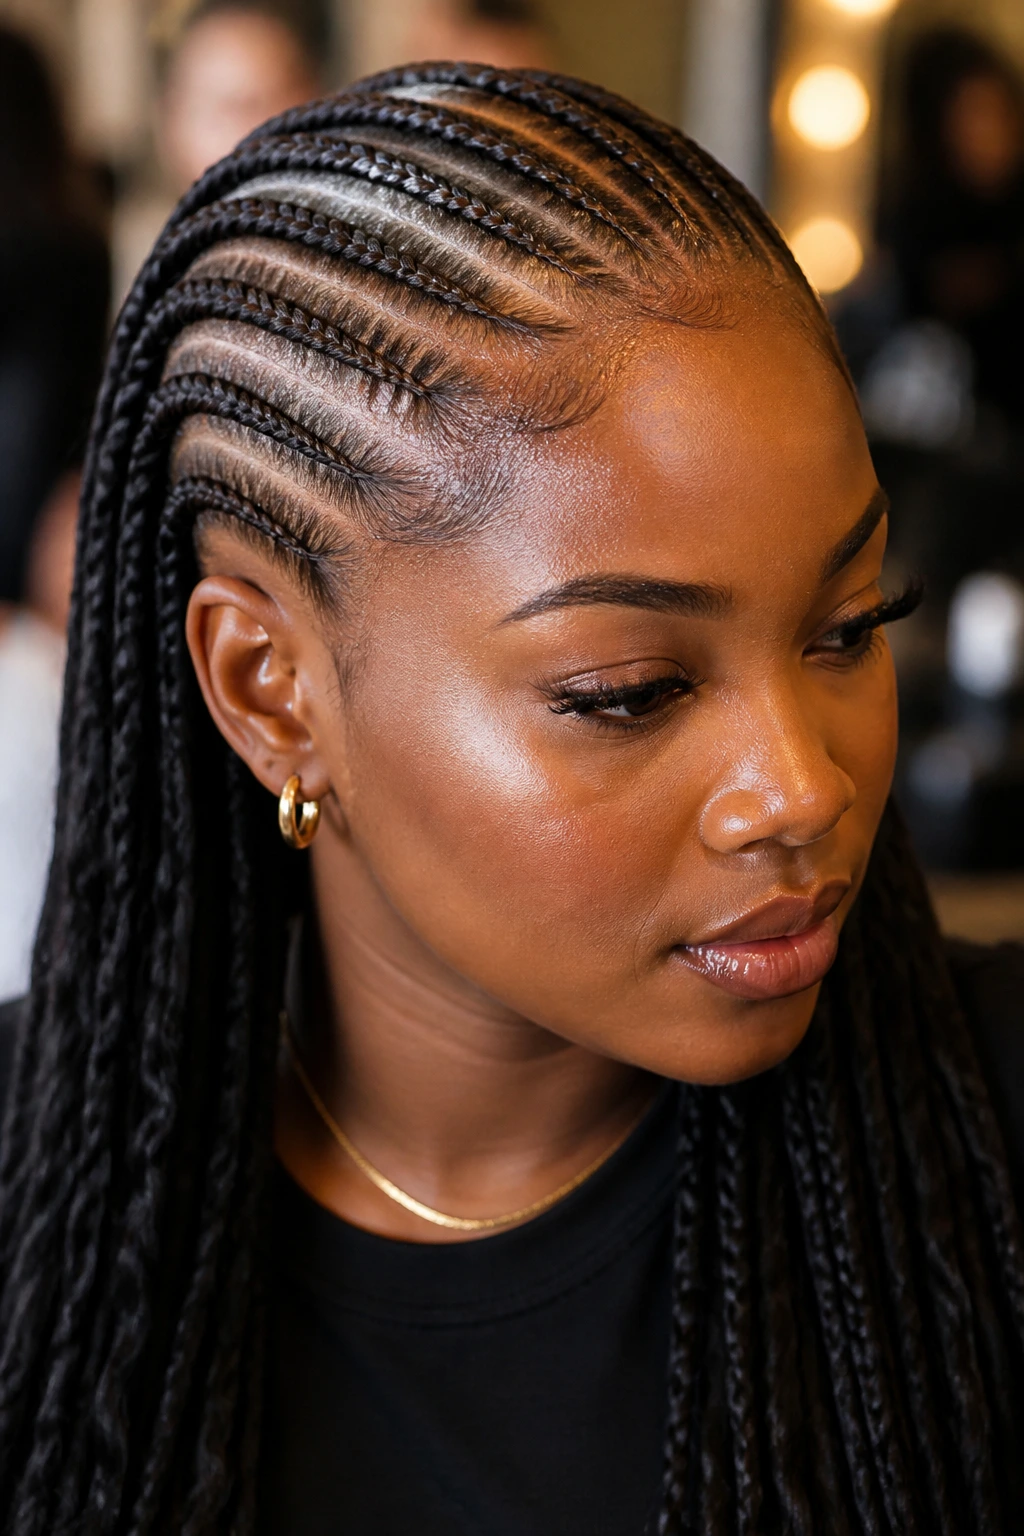
13. Straight Backs and a Polished Baby Hair Finish
A sharp baby hair finish can make straight-back cornrows look more tailored, especially on long hair where the length itself already gives the style weight. The little swoops at the hairline draw attention to the front before the eye moves back along the rows. Done well, it’s clean. Done too much, and it can start to look busy.
The trick is restraint. Use a small edge brush and a thin layer of gel, then stop. You do not need five inches of swoops to prove anything. Keep the shapes simple if the layers around the temples are already doing some work.
This finish is best when the scalp lines are immaculate. Baby hair can sharpen a braid set, but it cannot hide crooked parts. It just puts a frame around them.
14. High Ponytail Straight Backs That Stay Tight
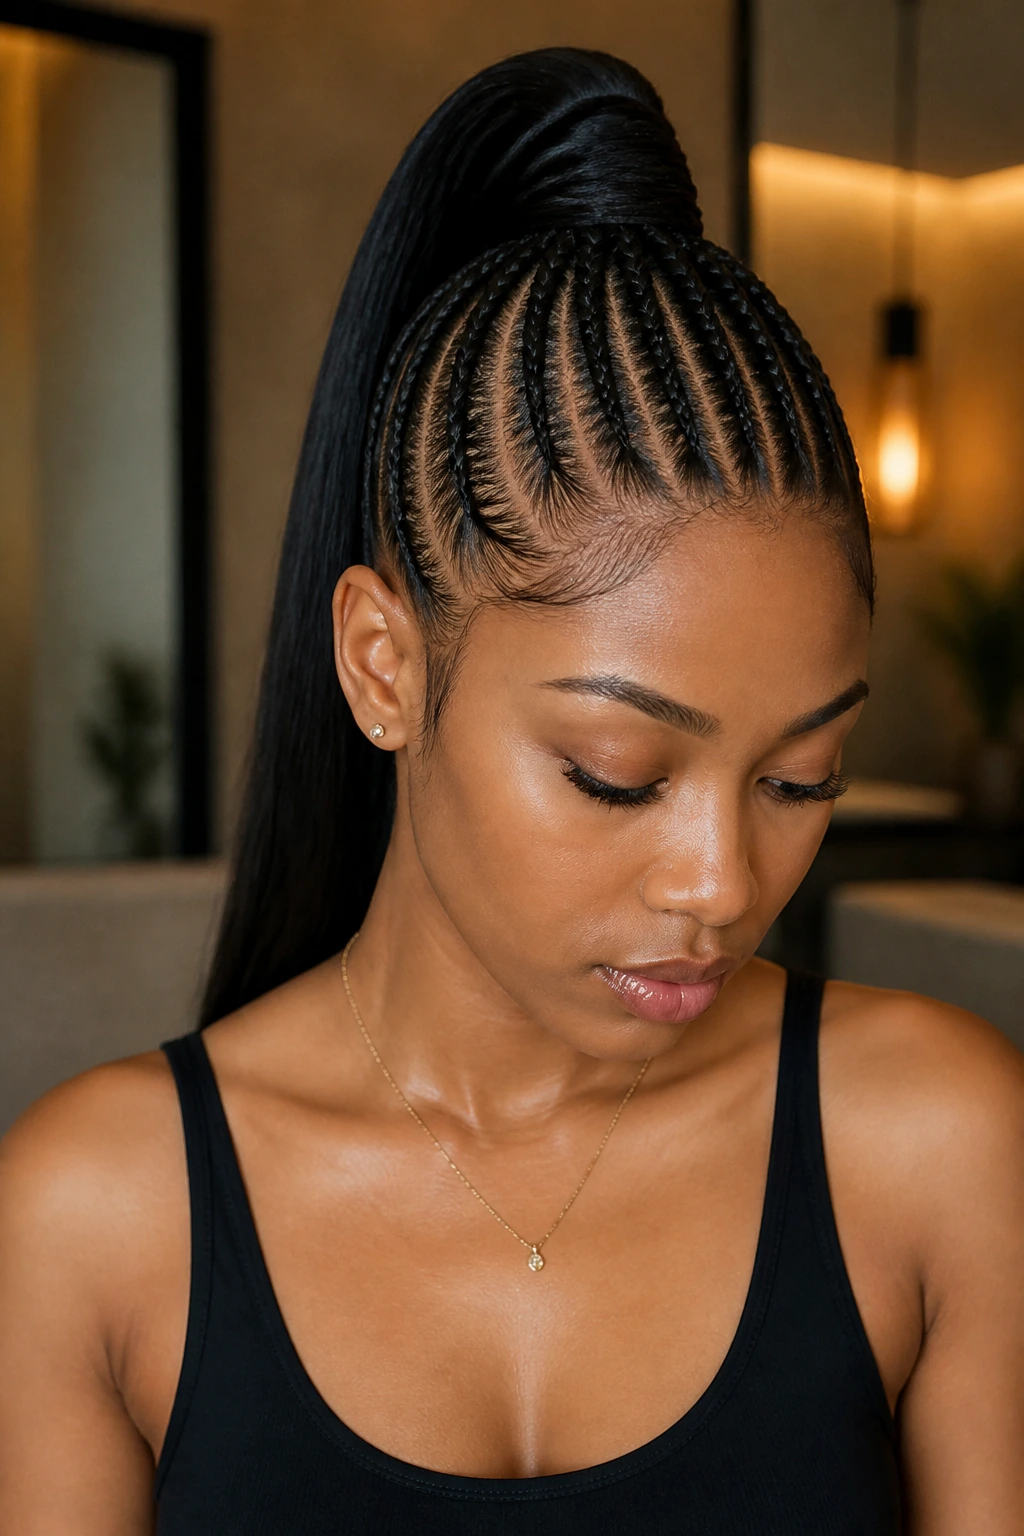
A high ponytail pulls the rows upward and out of the way, which gives long hair a very lifted look. It’s useful when the length is heavy or when the soft layers around the crown need to be secured before they start flipping loose. The ponytail turns the back of the style into one clean fall of braids.
I like this for active days because it keeps the nape cooler and stops the hair from rubbing against jackets. The high point should sit at the crown, not too far forward, or the pull becomes obvious at the temples. If the hairline is tender, skip this version. There’s no point in wearing a style that makes you wince.
Wrap the elastic with one braid if you want the base to look smoother. Small detail. Big payoff.
15. Two Braided Pigtails for a Playful Finish
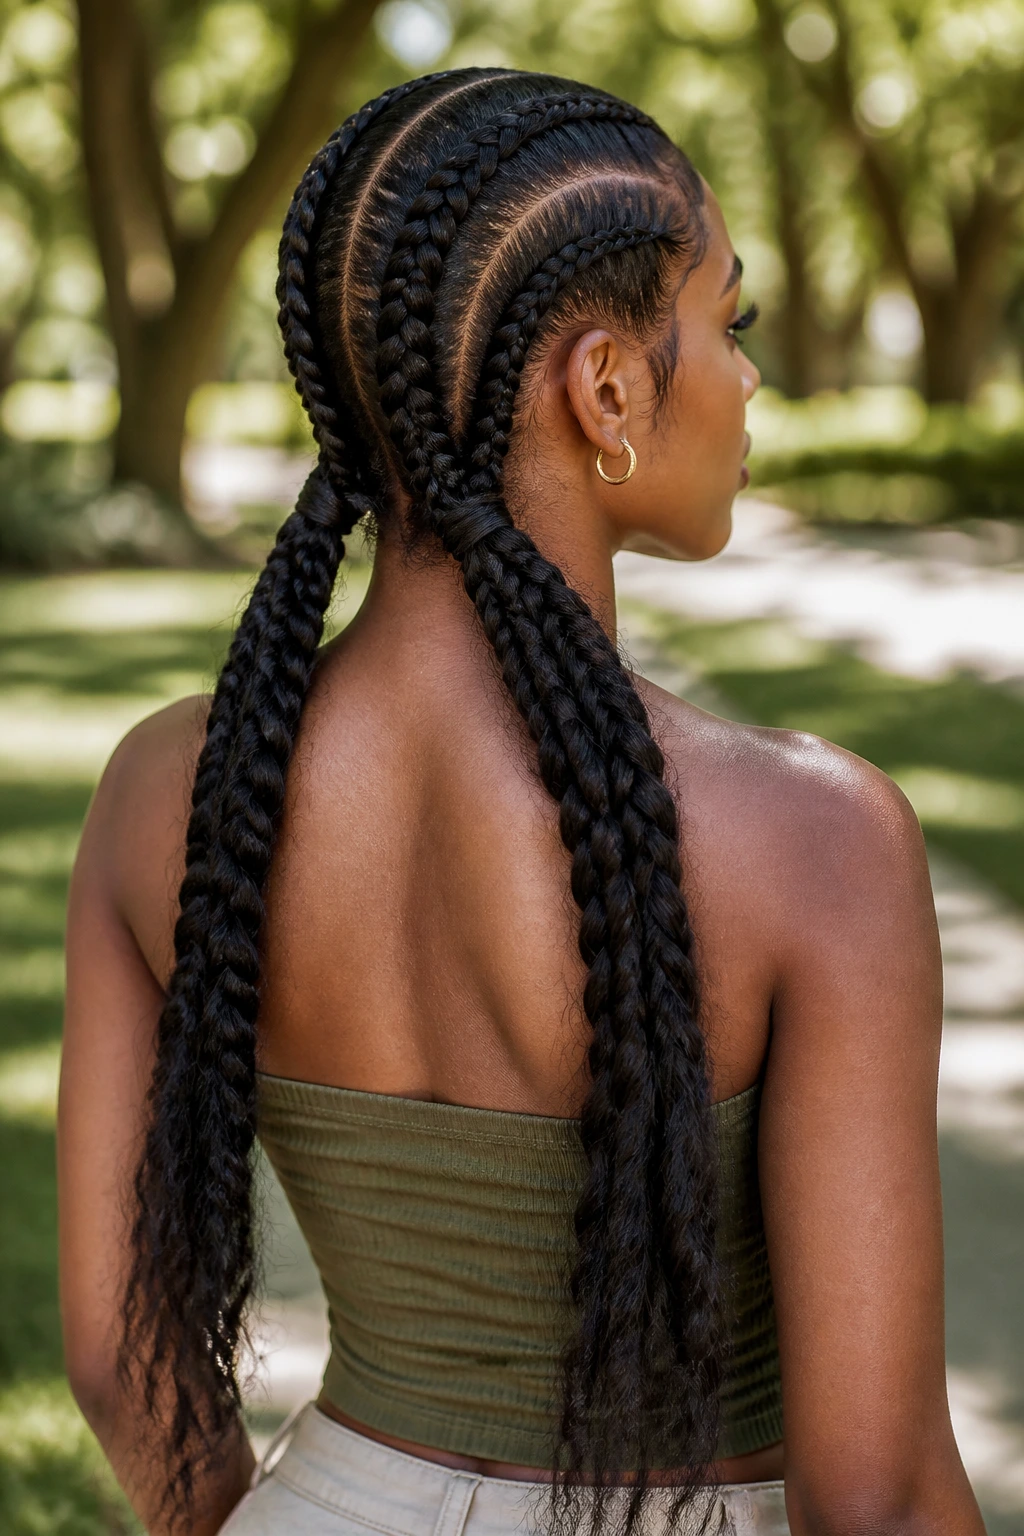
Two pigtails split the weight of long cornrows and keep the style from feeling too serious. The rows can feed into left and right tails at the back, which is especially useful if the hair is thick and the layers are long enough to create bulk. It’s a balanced look, and it photographs well from the back — sorry, had to say it plainly, because the symmetry matters.
The style also gives the layered pieces a place to settle without hanging all over the neck. If the braids are evenly sized, the pigtails can sit low or mid-height depending on how much movement you want. I’d keep the ends narrow so the look stays clean.
A middle part or slightly off-center part both work. Just don’t let one pigtail get visibly heavier than the other. You’ll see it every time you pass a mirror.
16. Straight Backs With Warm Blonde or Honey Accents

Color changes how straight-back cornrows read. Even a small amount of warm blonde or honey-toned extension hair can brighten the rows and make the parting stand out against the scalp. On long hair with layers, that little brightness helps the braid pattern feel more lifted.
This is a good choice if you want the style to look softer without changing the structure. The color can live just in the extensions, which means you do not have to dye the natural hair to get the effect. Keep the tone close to your complexion if you want it to feel blended; go a touch lighter if you want the rows to pop.
I prefer one accent shade rather than three. Too many tones and the rows start to compete with the cut itself.
17. Straight Backs Finished With Gold Cuffs
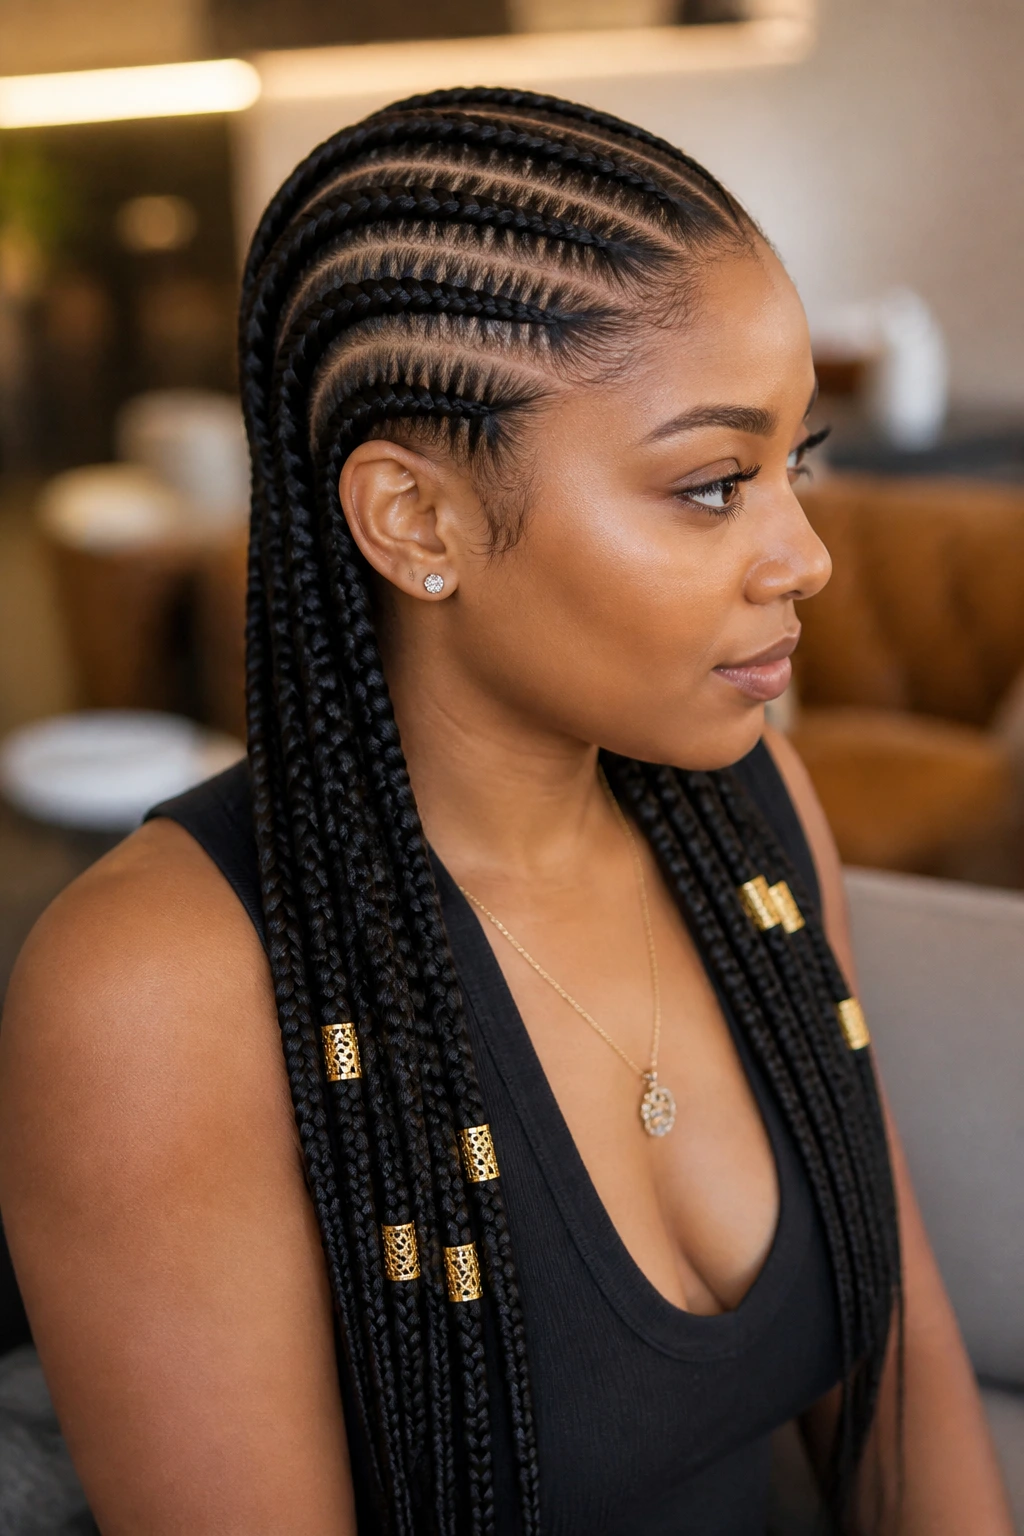
Gold cuffs are the quickest way to dress straight-back cornrows up without changing the braid pattern. Slip a few on the lower half of the rows, not every braid from root to tip. That tiny restraint matters. It keeps the style from tipping into costume territory.
Long hair gives the cuffs room to sit and flash as you move. Soft layers near the front stay the same, so the accessories don’t fight the cut. I like cuffs when the parts are clean and the ends are sealed; otherwise the metal draws attention to frizz instead of finish.
If you wear earrings, keep the rest of the jewelry simple. The braid line already does enough.
18. Rope-Ended Straight Backs for a Clean Finish
Rope ends are a tidy alternative when you don’t want loose braid tips hanging around. Once the cornrows reach the desired length, the ends are twisted into a rope-like finish or secured in a way that narrows the last few inches. That keeps the look neat and makes the style easier to tuck into collars or coats.
This finish is especially useful for long hair with soft layers because the narrowed ends hide the difference between shorter and longer strands. You get a smoother drop, less frizz, and fewer little pieces escaping at the bottom.
The braids should still feel flexible. If the rope finish is too tight or too sticky with product, the ends can look crunchy, and that defeats the point.
19. Straight Backs on Blowout-Stretched Hair
A stretched base changes everything. Straight-back cornrows on blown-out or tension-stretched hair usually lie flatter, part more cleanly, and handle soft layers better because the shorter pieces are elongated before braiding begins. That means less puff at the scalp and fewer little ends trying to spring free.
I’m picky about this one. The hair does not need to be bone-dry straight, and it certainly does not need heat damage. It does need to be stretched enough that the braider can section it without wrestling every strand. Banding, twist-stretching, or a gentle blowout all work depending on the hair’s texture and the person’s tolerance for heat.
The result is smoother, especially at the roots. You can usually see the difference by the second row.
20. Side-Swept Straight Backs With Layered Face Pieces
A side-swept variation works when the front layers naturally want to fall over one side. Instead of forcing them into a perfect frame, this version lets the heavier side do its thing while the rows travel straight back behind it. The contrast is what makes it interesting.
This style is good for people whose layers hit around the jaw or cheekbone. Those pieces can be left out, lightly curled, or brushed across one side before the braids begin. The trick is to keep the sweep soft, not theatrical. You want movement, not a curtain.
It’s a nice option if you wear glasses too. The side sweep can keep hair off the frames without making the whole look severe.
21. Tucked-Under Straight Backs for a Shorter Look
Tucking the ends under changes the silhouette in a very practical way. Long hair still gives you the length to braid, but the finished look sits closer to the head and feels shorter, lighter, and easier to manage under a hood or scarf. This is one of those styles that makes a lot of hair feel smaller, which is a blessing on busy days.
Soft layers benefit from the tuck because the shorter pieces disappear into the fold of the braid instead of hanging loose at the hem. If the braid ends are secured with pins or a wrapped finish, the whole style looks intentional from top to bottom.
It is not the most dramatic version on this list. It might be the most useful one.
22. Feathered-Ends Straight Backs With a Soft Drop
Feathered ends soften the bottom of the style the way layered bangs soften the front. Instead of stopping in a blunt line, the braid ends are trimmed, wrapped, or finished so they taper a bit. On long hair, that creates a gentler drop and keeps the final inches from feeling heavy.
This works well if your own haircut already has movement in it. The rows can be strict while the ends have a little give. That balance keeps the style from looking boxy, especially when the hair is long enough to rest against the back of the top.
You’ll want the taper to be even across all rows. If one side feathers and the other side doesn’t, the finish looks accidental. Small imbalance. Big visual difference.
23. Straight Backs With Zigzag Parts in the Front
Zigzag parting is for people who want a little edge without changing the braid direction. The rows still move straight back, but the first inch or two of the parting line jumps in a zigzag pattern, which breaks up the scalp space and gives the style more energy. It’s a neat way to make long braids feel less expected.
I like this when the front layers are soft and I want the part itself to carry some of the design. The zigzag can help hide tiny irregular pieces near the hairline too, because the eye is busy reading the pattern.
Keep the zigzag small. If the angles are too sharp, the braid line starts to look jagged rather than intentional.
24. Occasion-Ready Straight Backs With a Glossy Crown
There are days when you want the braids to look especially refined. That’s the job of a glossy crown finish: clean parts, smooth roots, and just enough sheen on the braided base to make the scalp and rows look fresh under light. On long hair, the finish matters because the length already gives the style enough drama.
This version is less about the braid pattern itself and more about the polish. A light mousse set, a careful scarf wrap, and a tiny amount of shine product around the crown can change how the style reads in person. Too much shine, though, makes the roots look oily. That line is easy to cross.
Pair it with small hoops or a clean neckline and the braids do the rest.
25. Long Straight Backs With Curled or Wrapped Ends
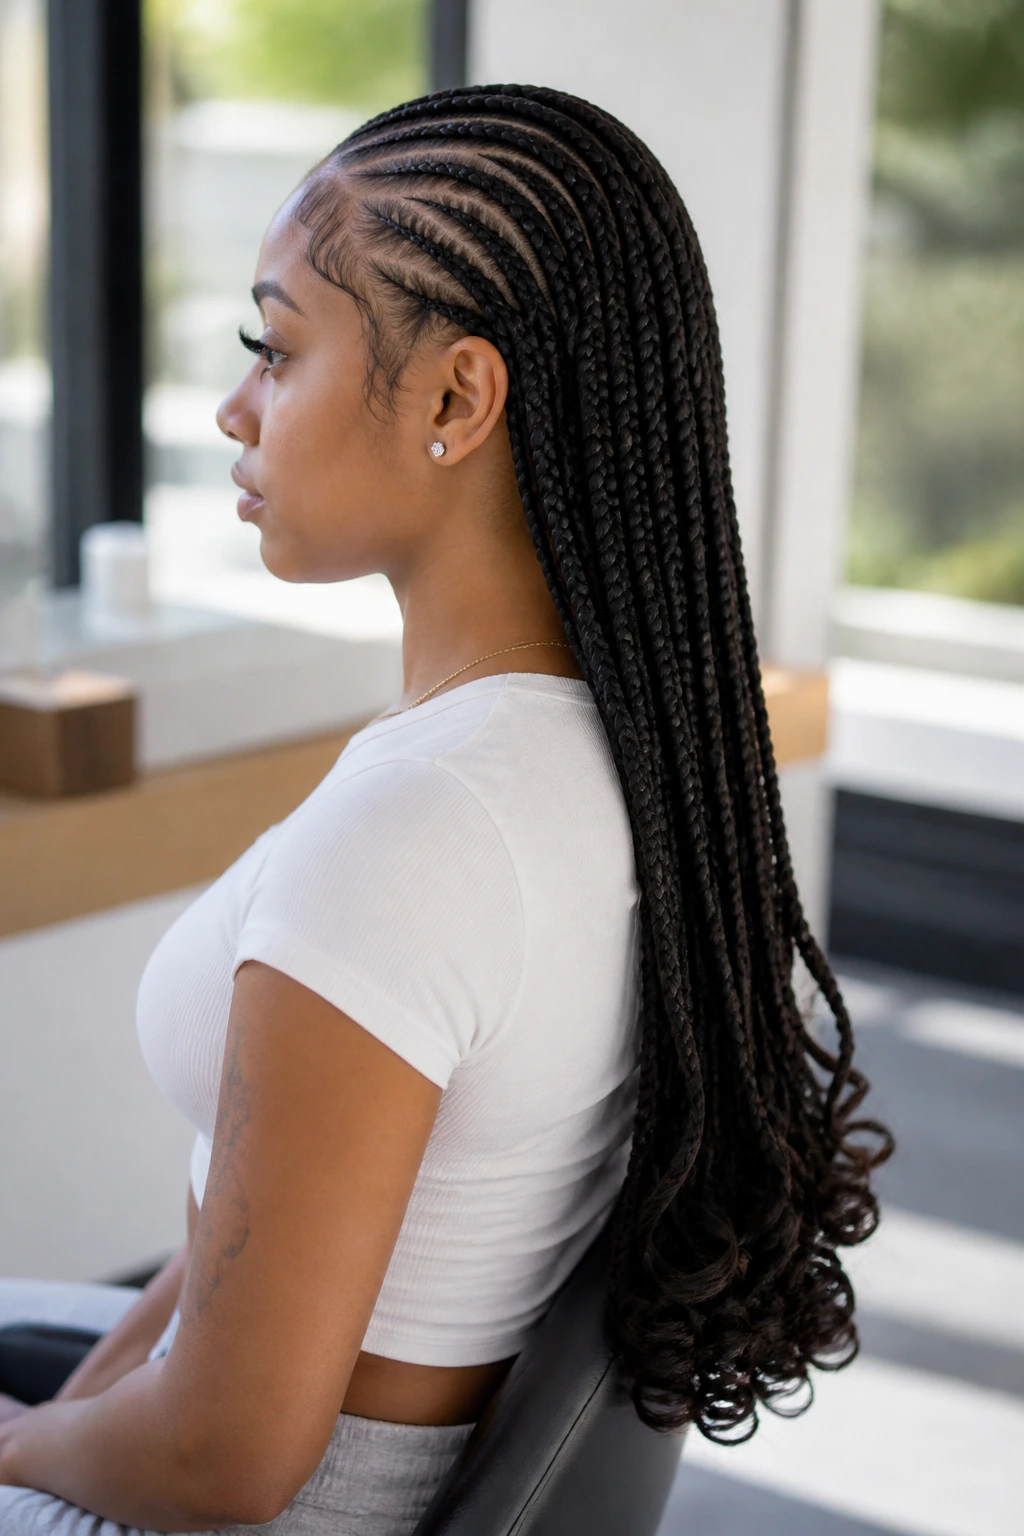
The last version is the one I reach for when I want the softness of layered hair to stay visible at the bottom. Straight-back rows hold the scalp in place, but the ends are curled, wrapped, or gently shaped so they don’t fall in one stiff line. That gives the whole look a softer finish.
This is especially good for long hair that reaches the mid-back or lower. The braid body stays straight and controlled, while the end treatment keeps the style from feeling too severe. If your layers are feathered, this finish lets them echo the movement of the braids instead of getting trapped inside them.
It’s a small adjustment, but it changes the mood. The style still reads neat. It just breathes a little more.
What Makes Straight-Back Cornrows Work on Long Hair
Straight-back cornrows suit long hair because the length gives the style a clean line to work with. A shoulder-length braid can look tidy; a waist-length braid can look deliberate. The extra inches give the rows weight, and weight matters because it helps the style settle instead of bouncing around the second you move.
Soft layers change the equation, though. They’re the pieces most likely to escape a braid line, so they need either a spot inside the row or a place outside it that makes sense. That’s why the best versions are planned around the haircut, not imposed on it. You can tuck the shorter bits into the braid, leave the front pieces loose on purpose, or use a parting pattern that creates a little forgiveness around the hairline.
There’s also the protective-style part of it. Cornrows only stay protective when the scalp is treated kindly, the braid isn’t yanked too tight, and the ends are maintained. A neat style that hurts is not a win.
Tools, Clips, and Products That Make the Braiding Day Easier
- Rat-tail comb: the pointed end makes clean parts and helps you measure braid width.
- Duckbill or sectioning clips: they keep the finished rows out of the way while you work on the next one.
- Spray bottle: a light mist helps calm flyaways and keeps sections from drying out too fast.
- Braiding gel or firm styling cream: use a thin layer at the base so the parts stay visible.
- Edge brush: useful for smoothing the hairline after the braids are in place.
- Mousse or foam wrap: a thin coat over finished rows helps lay down little frizzy bits.
- Satin scarf or bonnet: essential for keeping the parts neat overnight.
- Pre-stretched braiding hair: optional, but it saves time and keeps the added length from looking bulky.
- Small elastics: handy for ponytail or pigtail finishes.
- Hairpins: useful for buns, tucked ends, or wrapped finishes that need a little help staying put.
How to Prep Long Hair So the Parts Stay Clean
Clean prep makes or breaks straight-back cornrows. Start with hair that is washed, fully detangled, and stretched enough to section without drama. If the hair is packed with shed strands, the braid will feel rough in your hands, and the rows will swell faster once they’re done. That’s not a braid problem. That’s a prep problem.
I prefer a stretched base on long hair with layers. A blowout on low heat, banding, or a set of twist-outs that have been taken down carefully all help the sections lie flatter. If the hair is very curly and you go straight into parting, the braid base usually gets bulky. Bulky roots are the enemy of clean rows.
Use a small amount of product. That’s the part people get wrong. A pea-size bit of gel at the root line and a light spray on the lengths is enough for most heads. If the hair is loaded with heavy cream, the braids slide. If it’s bone dry, the flyaways never calm down.
How to Wear and Style the Finished Look

Presentation: Keep the parts crisp and the braids aligned if you want the style to read polished. A middle part or one bold side part usually looks cleaner on long hair than a zigzag of competing pieces.
Accessories: Gold cuffs, small hoops, a silk scarf, or a single accent bead can dress the style up fast. I’d pick one accessory family and stick with it. Too many finishes at once make the braid pattern feel noisy.
Day-to-night shift: A low ponytail, tucked ends, or a wrapped bun can make the same set look more formal without redoing the braids. That is one of the nicest parts of long straight-back cornrows. The base stays the same, but the silhouette changes with almost no effort.
Outfit pairing: Collared shirts, hoop earrings, and a clean neckline do a lot for this style. So do plain tees and a strong lip color. The braids already bring structure; the clothes don’t need to compete.
Extra Tips for a Cleaner, Longer-Lasting Finish
Parting trick: Use the nose bridge as your visual anchor for center parts and the outer edge of the eyebrow for side parts. That gives you a better line before you ever touch the comb.
Layer control: If the shortest layers keep sneaking out, braid them into the first inch of the row instead of trying to leave them free. That tiny adjustment can save the whole front.
Shine finish: A light foam wrap on the finished braids gives a softer sheen than heavy oil. Heavy oil can darken the base and make the rows separate in a greasy way.
Make-it-yours: If you wear a lot of black, cuffs or honey accents can brighten the style. If you prefer a quiet look, keep the accessories off and let the parting do the work.
Common Mistakes That Make the Braids Look Puffy or Uneven
The first mistake is braiding on hair that hasn’t been stretched enough. The symptom is a bulky base and parts that keep blurring. The fix is simple: stretch the hair first, even if it adds an extra hour to the prep.
The second mistake is too much product at the scalp. It looks slick for a minute, then it turns sticky, flakes up, and makes the rows separate. Use less than you think you need.
The third is pulling the front rows too tight. If the temples sting or the hairline feels hot, the tension is wrong. A good braid feels secure, not sharp.
The fourth is ignoring the layers. Shorter pieces at the front and crown need a plan. Either tuck them into the braid or leave them out on purpose. Half-done is what makes the style look messy.
The fifth is skipping the night wrap. A silk scarf or bonnet is not optional if you want the parts to stay clean past the first day.
Variations and Alternatives to Try

Soft Side Sweep: Shift the part off center and leave a few face-framing pieces loose. This suits layered cuts that already want to fall to one side.
Low Braided Ponytail: Gather the rows at the nape and secure them into one clean tail. Good for long days, workouts, and collar-heavy outfits.
Accessory Row Finish: Add cuffs or a few beads to only the outer rows. It keeps the style interesting without making it cluttered.
Blowout-Smooth Version: Stretch the hair before braiding so the base lies flatter. This is the best choice if your layers are very different in length.
Braided Bun Wrap: Feed the rows into a compact bun for a more formal shape. It’s neat, practical, and easy to wear with earrings or a dressy neckline.
Night Care, Refreshing, and Safe Wear Time
The best braid maintenance is boring and consistent. Wrap the hair every night with a satin scarf or sleep in a bonnet, and smooth the scarf from the front hairline to the nape so the parts don’t shift around. If the ends are long, tuck them under a pillow or loose wrap so they don’t rub rough against fabric.
Every few days, use a light braid spray or a very small amount of diluted leave-in on the lengths if they feel dry. Avoid soaking the roots. Too much moisture there can build up fast, especially on long hair. If the scalp feels itchy, a gentle scalp cleanser on a nozzle bottle works better than scratching with your nails.
Most straight-back sets stay neat for several weeks if the scalp stays calm and the tension started off right. Take them down sooner if you feel soreness, see significant buildup, or notice the nape frizzing so much that it starts matting. Protective styles are supposed to protect. They stop being useful the moment they start tugging.
Frequently Asked Questions
Can straight-back cornrows work on layered hair, or do the layers need to be grown out first?
They can work beautifully on layered hair. The trick is choosing the right finish: shorter layers can be tucked into the braid base, left out near the face, or stretched first so they blend better.
How tight should the braids feel?
Secure, not painful. You should feel the style sitting in place, but not pulling at the temples or behind the ears. If your scalp aches after an hour, the tension is too high.
Are feed-in rows better than traditional straight backs for long hair?
Feed-in rows are often gentler at the base and can look flatter on long, thick hair. Traditional cornrows can still work well, but feed-ins usually give a softer start and less bulk near the hairline.
What if the short layers keep sticking out of the braid?
That usually means the hair wasn’t stretched enough, the sections were too big, or the layers were left in the wrong place. You can either tuck those pieces into the first inch of each braid or leave them out on purpose instead of fighting them halfway through.
How long do straight-back cornrows usually last?
That depends on scalp oil, hair texture, and maintenance, but the style often stays presentable for several weeks if you wrap it nightly and keep buildup under control. If the front starts lifting early, take that as a cue to refresh or remove them.
Can I wash my scalp while wearing cornrows?
Yes, and you probably should if your scalp gets oily or itchy. Use a nozzle bottle or diluted shampoo so the product reaches the scalp without flooding the braids, then dry the roots thoroughly so moisture doesn’t linger under the rows.
Do beads, cuffs, or thread make the braids heavier?
A little, yes. One or two accents are fine, but loading every end with hardware can pull on the last row and make sleep uncomfortable. Use accessories where they help the shape, not everywhere at once.
What’s the best way to keep the parts crisp overnight?
A satin scarf tied snugly across the part lines works best. If the braids are long, add a bonnet over the scarf or tuck the lengths into a loose wrap so they don’t rub and swell.
A Shape That Holds Its Line

Straight-back cornrows on long hair with soft layers work because they respect the haircut instead of pretending the haircut doesn’t exist. The rows give structure, the length gives drama, and the layers add softness when they’re handled with a little care. That combination can look sharp for errands, polished for an event, and practical for the days when you want your hair off your shoulders.
The styles that age best are the ones with clean parts, sensible tension, and a finish that suits the hair you actually have. Pick the version that fits your layers, keep the scalp comfortable, and the braid pattern will do what it does best: stay neat, move with you, and keep looking better than it has any right to.