A round face and long hair can look sharp together, but only if the hair stops talking at the cheeks. That’s the whole trick. Sleek hairstyles for long hair and round faces work because they create long lines, clean parts, and controlled shape where it matters most — at the crown, through the middle, and past the jaw.
What usually goes wrong is easy to spot. Hair gets too wide at the sides. The part is too soft and fuzzy. The ends puff out at cheek level, and suddenly the face looks broader than it is. A sleek finish fixes that by being deliberate. Not stiff. Deliberate.
The styles below lean on straight lengths, low anchors, diagonal movement, and controlled shine. Some are polished enough for a formal event. Others are the kind of thing you can wear with a blazer, a T-shirt, or a black knit sweater and still look pulled together. The best ones do one thing well: they pull the eye down instead of out.
Why These Sleek Styles Earn Their Place in the Rotation
-
Clean lines lengthen the face: A center part, low ponytail, or narrow braid creates a vertical line that keeps the cheek area from taking over the whole silhouette.
-
Long hair stops looking heavy: Smooth roots and tucked sides keep thick length from spreading wide across the face like a curtain.
-
They work with real-life hair texture: Straight, wavy, and even curly hair can be shaped into these looks with a blow-dry, a flat iron, or a strong styling cream.
-
They hold up better than loose waves: Sleek styles stay neat when wind, humidity, or a long day at your desk would usually flatten curls and frizz the top.
-
Accessories look smarter on a polished base: A narrow clip, wrapped elastic, or slim barrette has room to breathe when the hair around it is smooth.
-
You can dial them up or down fast: The same base style can look casual with a loose finish or formal with a tighter crown and a clean part.
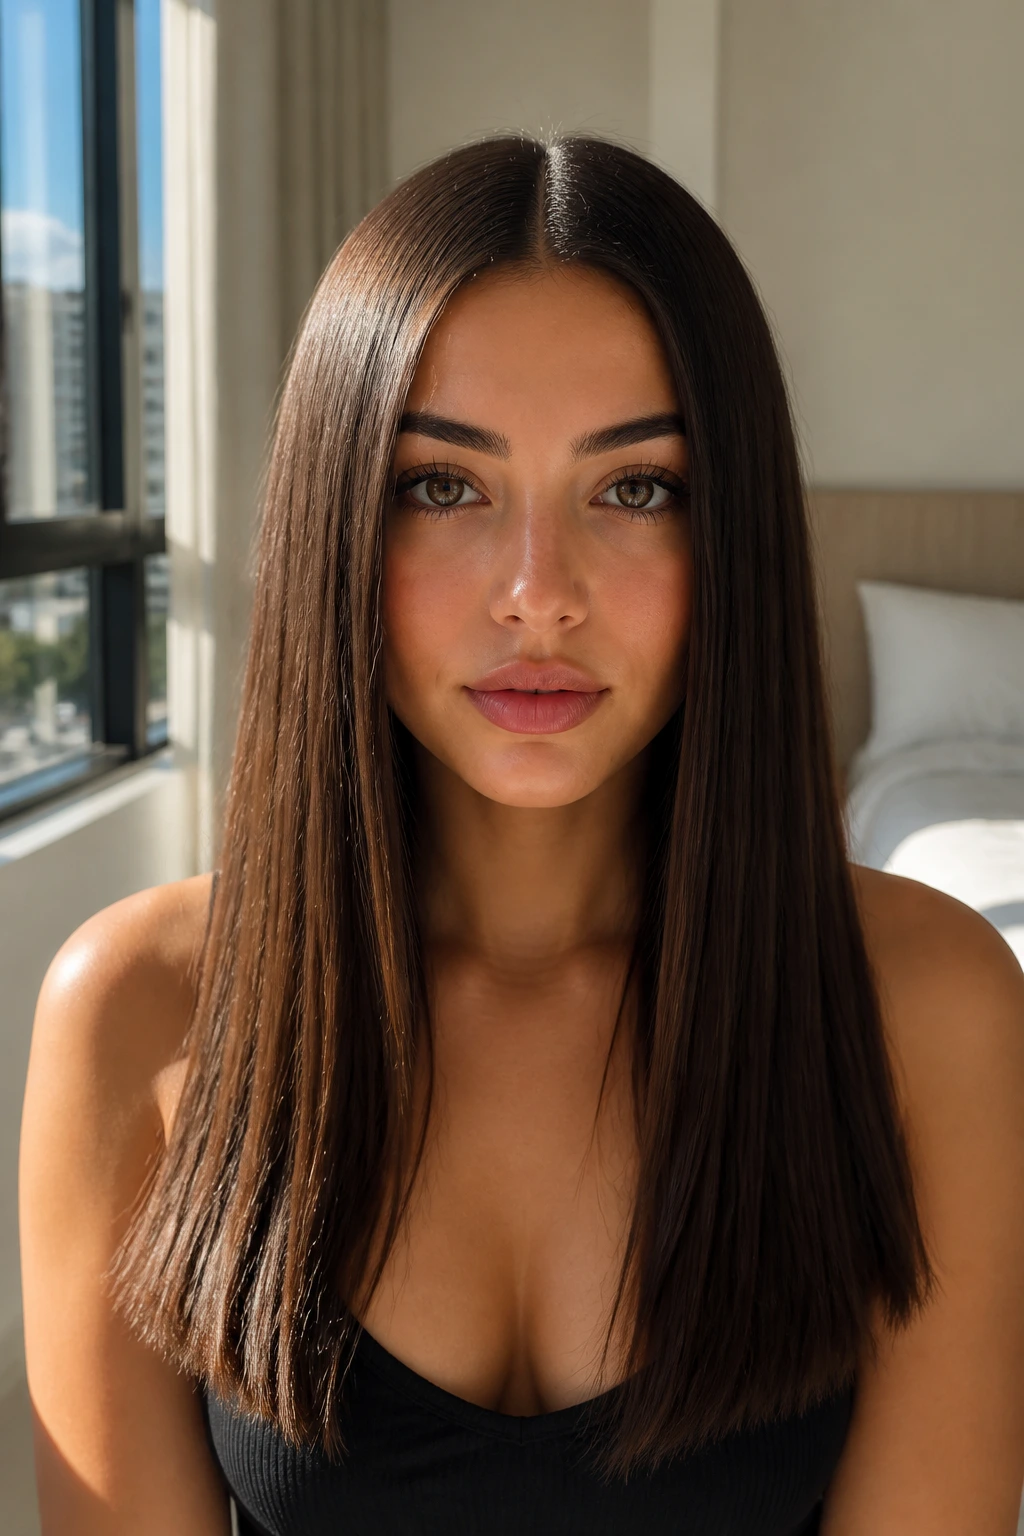
1. Glass-Hair Center Part with Long Lengths
A dead-center part and pin-straight lengths are the simplest answer when you want the face to look longer without adding extra pieces around the cheeks. This is the style that makes the hair itself do the shaping. The surface should look smooth enough that the light hits it in a clean line, not a frizzy halo.
Why It Works on a Round Face
The center part breaks the face into two narrow halves, which is exactly what a round shape needs. It creates a straight visual line from the forehead to the chin, and the long lengths keep that line going. If your hair falls below the collarbone, the effect is stronger because the eye keeps traveling down instead of stopping at the jaw.
How to Style It
Start with damp hair and work in a heat protectant from mid-lengths to ends. Blow-dry with a flat brush, then use a 1-inch flat iron in small sections if your hair bends or puffs up. Finish with 1 to 2 drops of lightweight serum pressed only into the ends. The roots should look smooth, not greasy.
Small Details That Matter
- Keep the part narrow and exact.
- Tuck both ears behind the hair if you want a cleaner line.
- Leave the ends blunt or just slightly beveled; too much curl at the bottom can widen the shape again.
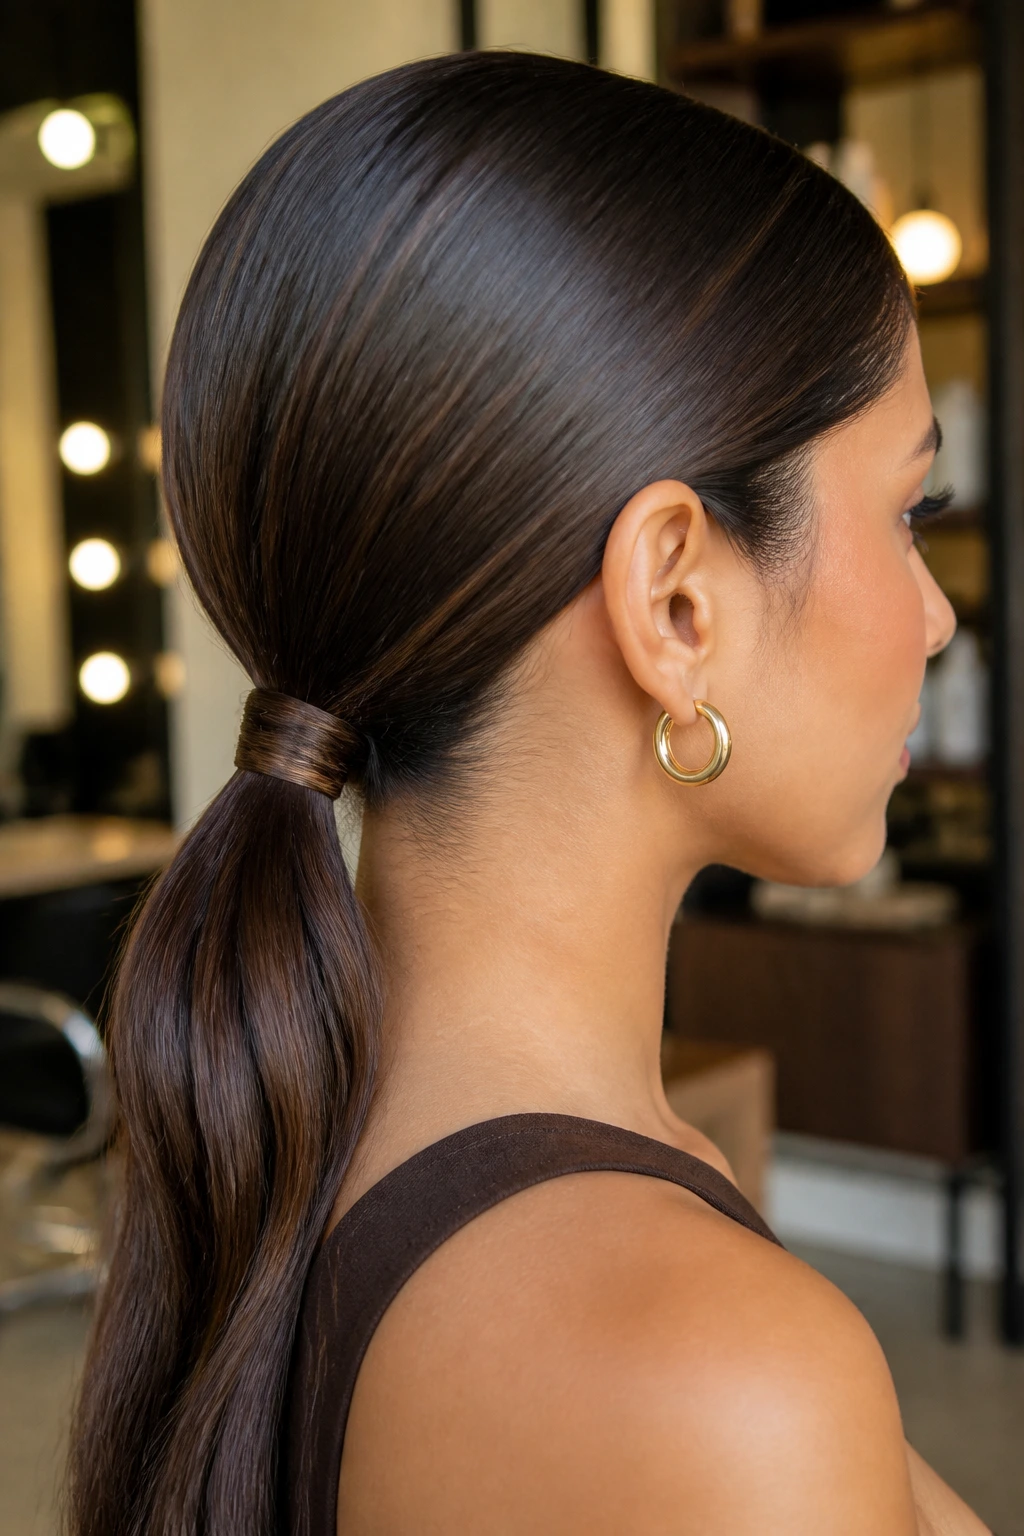
2. Low Wrapped Ponytail at the Nape
Why does a low ponytail look so much better on some round faces than a high one? Placement. A pony that sits right at the nape gives the face a long, vertical drop, while the wrapped base keeps the style from feeling plain or school-gym casual.
This version works best when the sides are brushed back smoothly and the ponytail sits tight enough to look intentional, but not so tight that it tugs the temples. Use a soft brush, gather the hair just below the occipital bone, and wrap a thin 1-inch strand around the elastic. Pin the wrap underneath with a bobby pin.
If your hair is very thick, split the ponytail into two sections before securing it, then join them under the wrap. That little move keeps the base flat. A low ponytail can go lumpy fast if the underneath layer fights back.
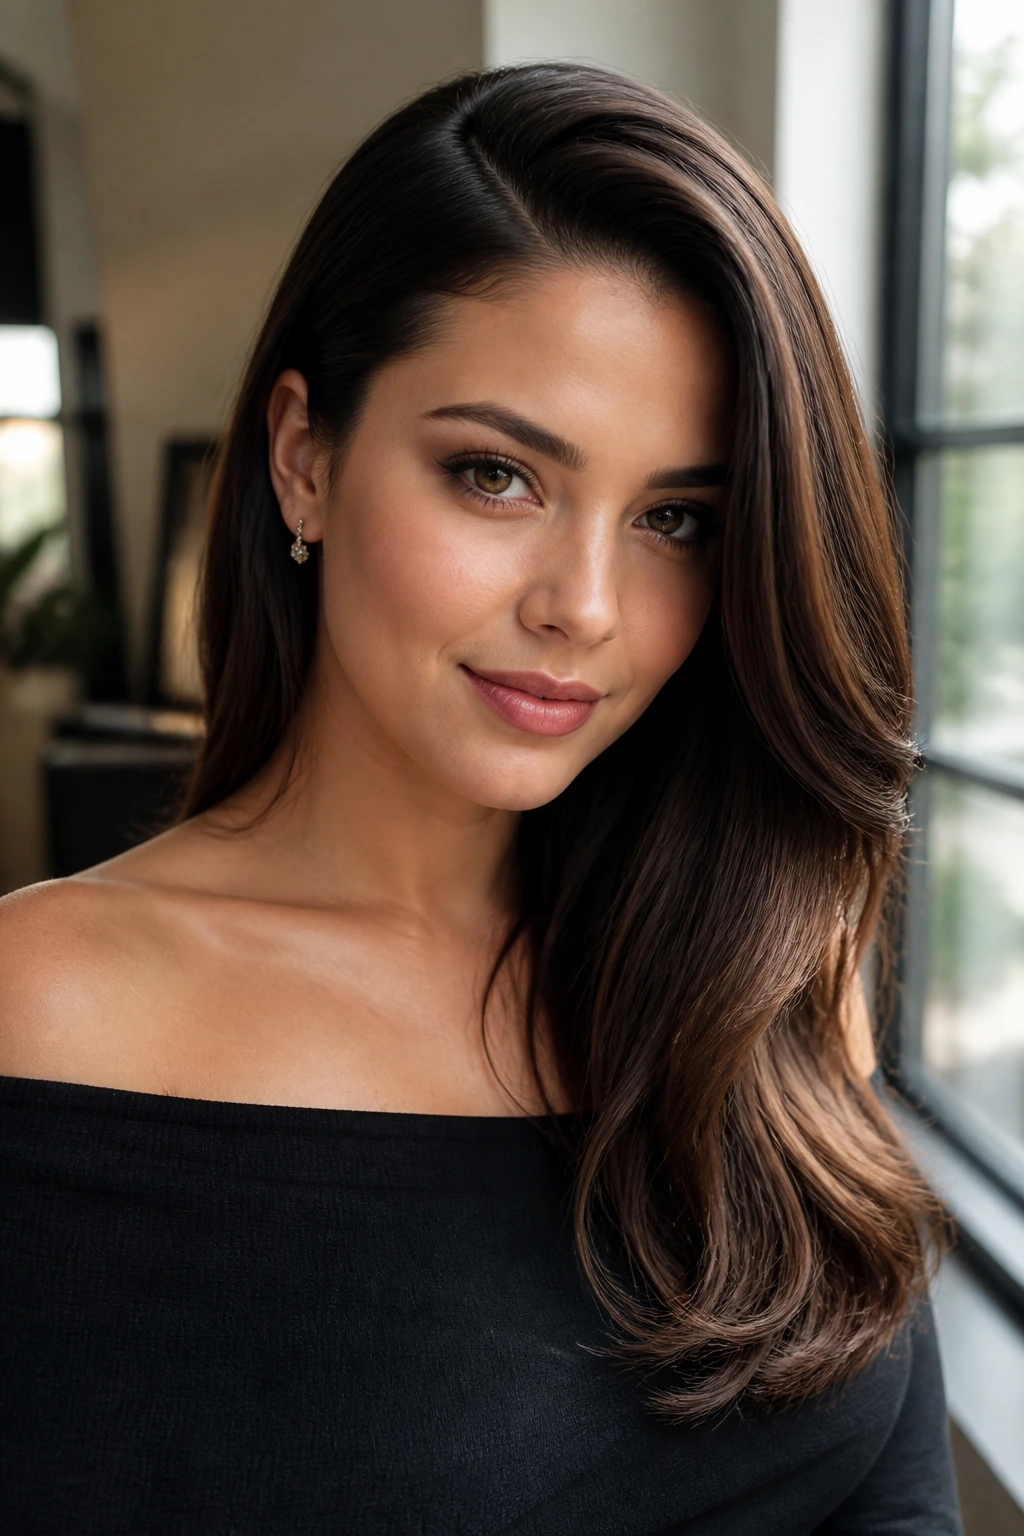
3. Deep Side-Part Sleek Blowout
A deep side part changes the whole mood. It tilts the face, opens one side, and gives the forehead less width to work with. On a round face, that diagonal line is gold.
This style is especially good if your hair has enough body to hold a bend at the ends. Blow-dry with a round brush, pulling the top section away from the face and the lengths toward the collarbone. You want the roots to lie smooth, but the ends can curve just a little. Not a flip. A bend.
A deep side part also gives you more control over volume. If one side of your face reads fuller, let the hair fall heavier on the opposite side. It sounds small. It isn’t. That one shift can change how balanced the whole style feels.
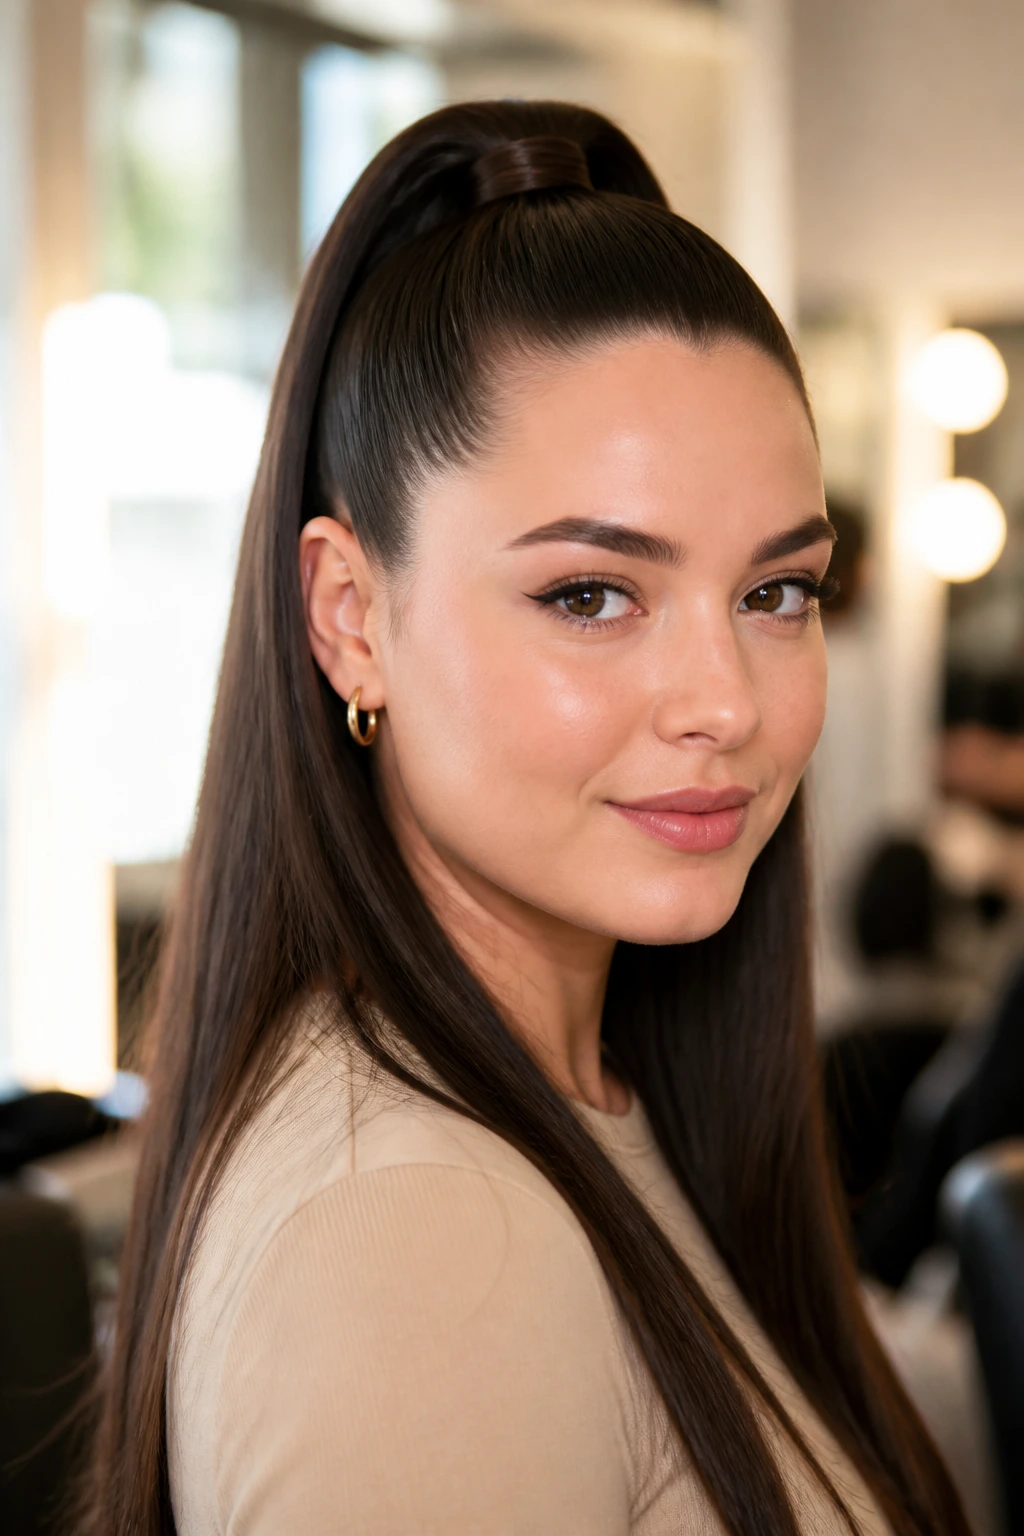
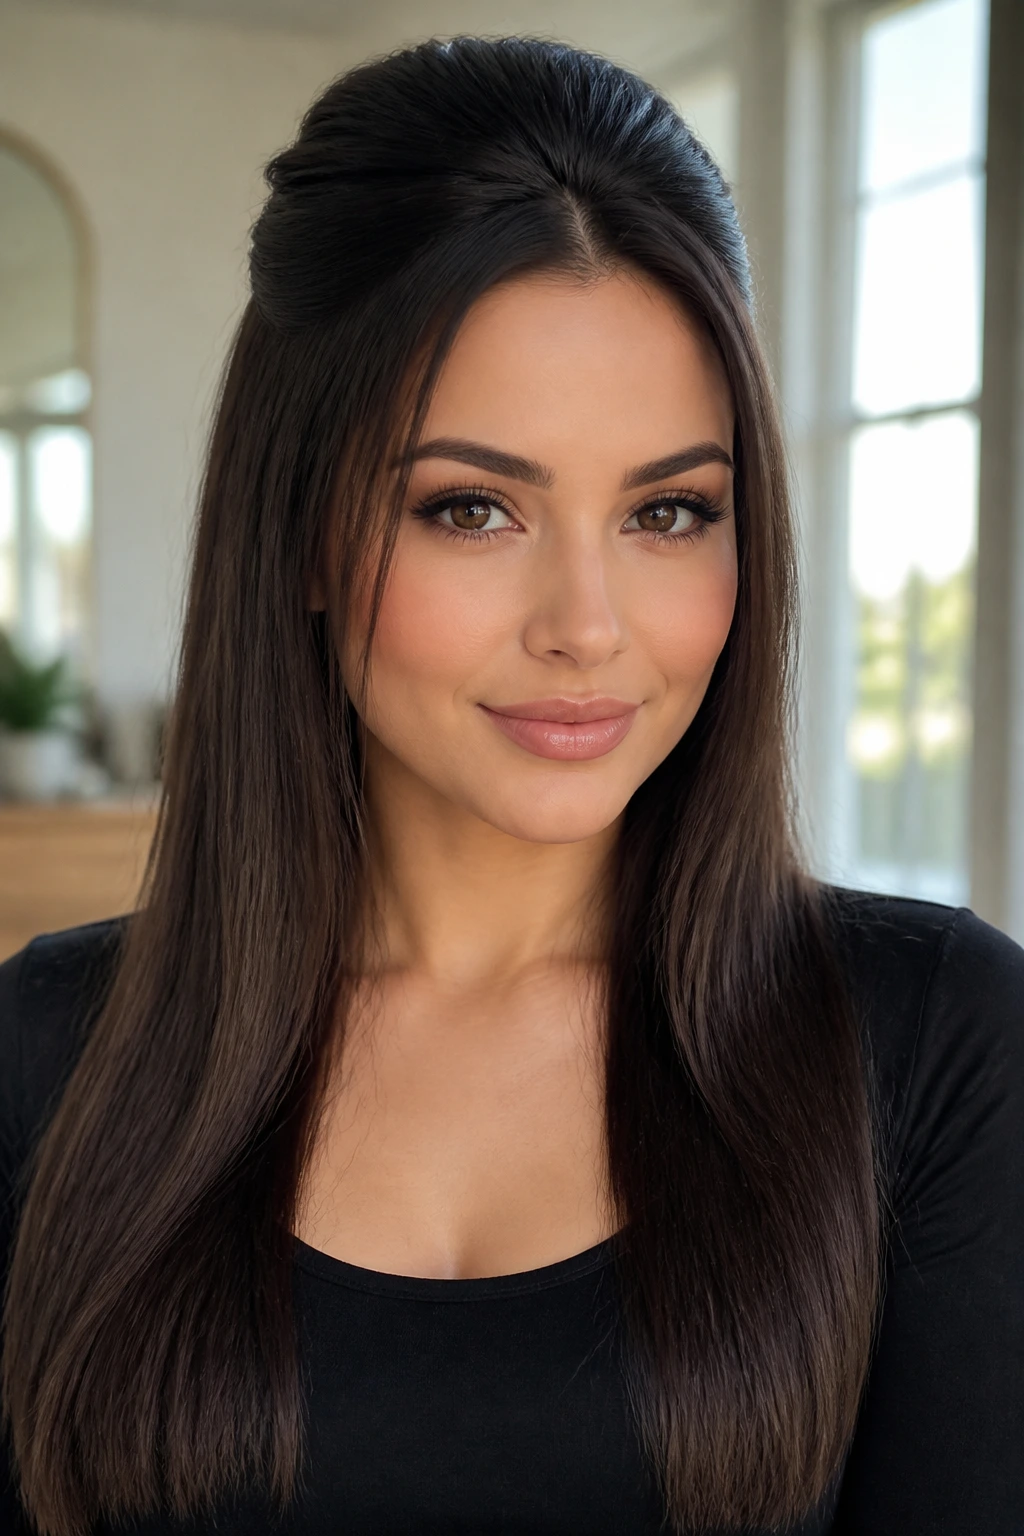
4. Half-Up Crown Lift with Straight Ends
This is the half-up style I like when the face needs height but the hair still needs to stay long and clean. The top section is pulled back just enough to build lift at the crown, and the rest hangs straight and smooth. That lift is the point.
Use your thumbs to gather the hair from temple to temple, then pull it back about 1 to 1.5 inches higher than the natural crown line. Secure it with a small elastic or a flat clip. If your hair is fine, backcomb the underneath of that crown section with 2 or 3 light strokes from a tail comb before you clip it.
The lower half should stay sleek and quiet. If the ends frizz, the whole look gets messy fast. A tiny amount of serum on the bottom 4 inches is enough.
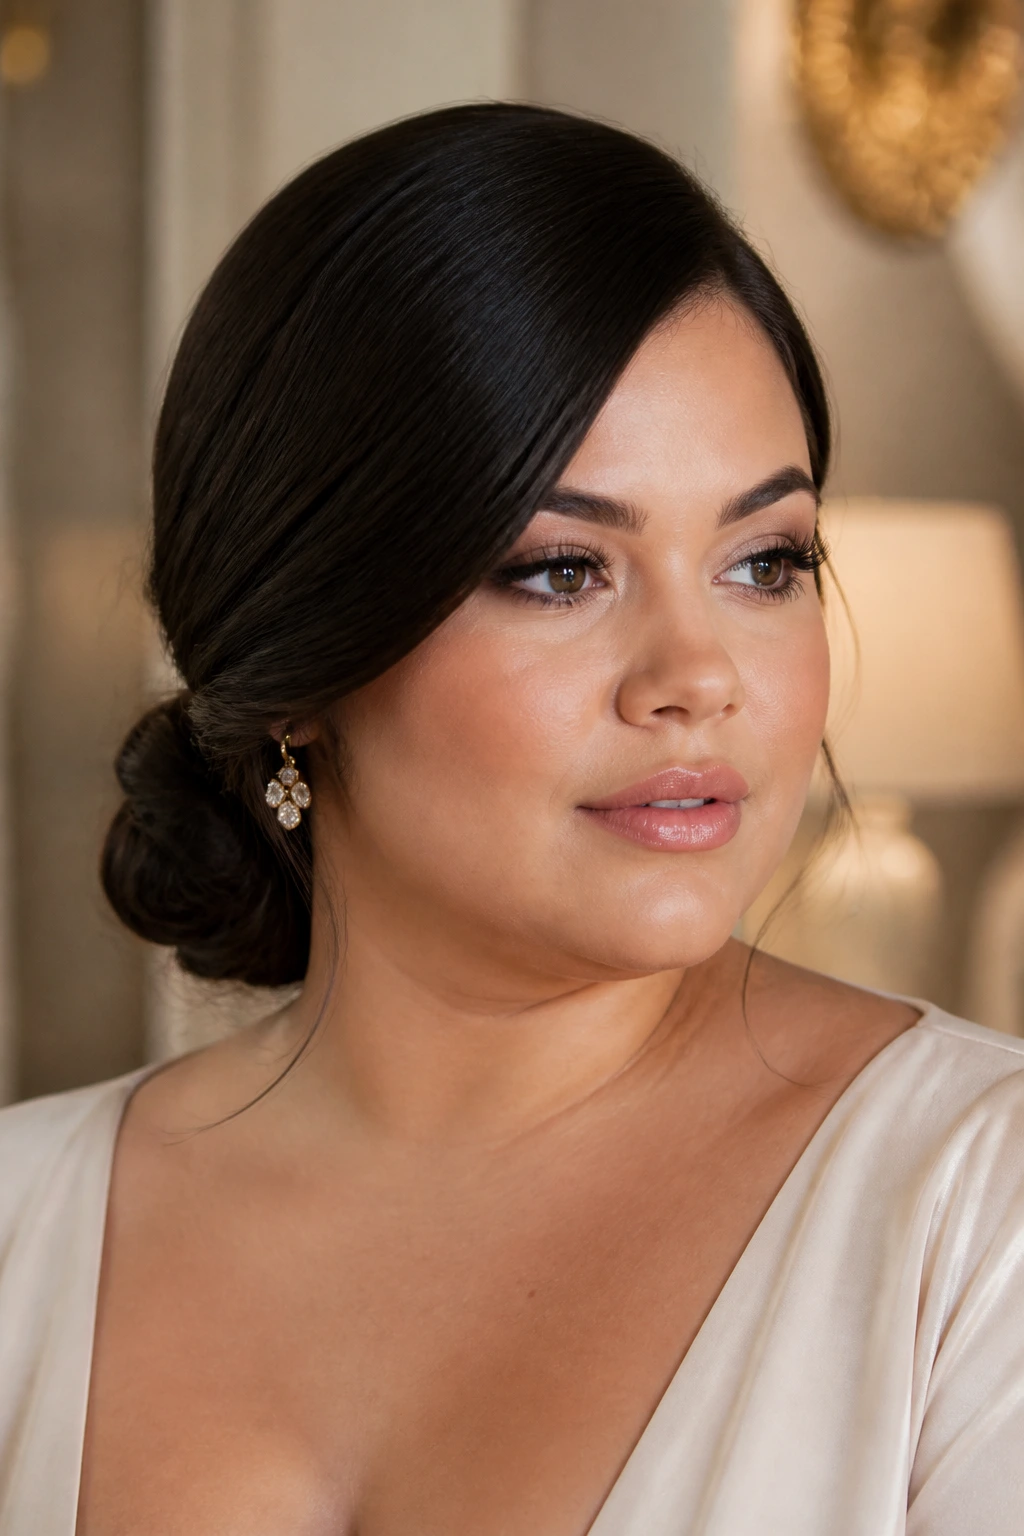
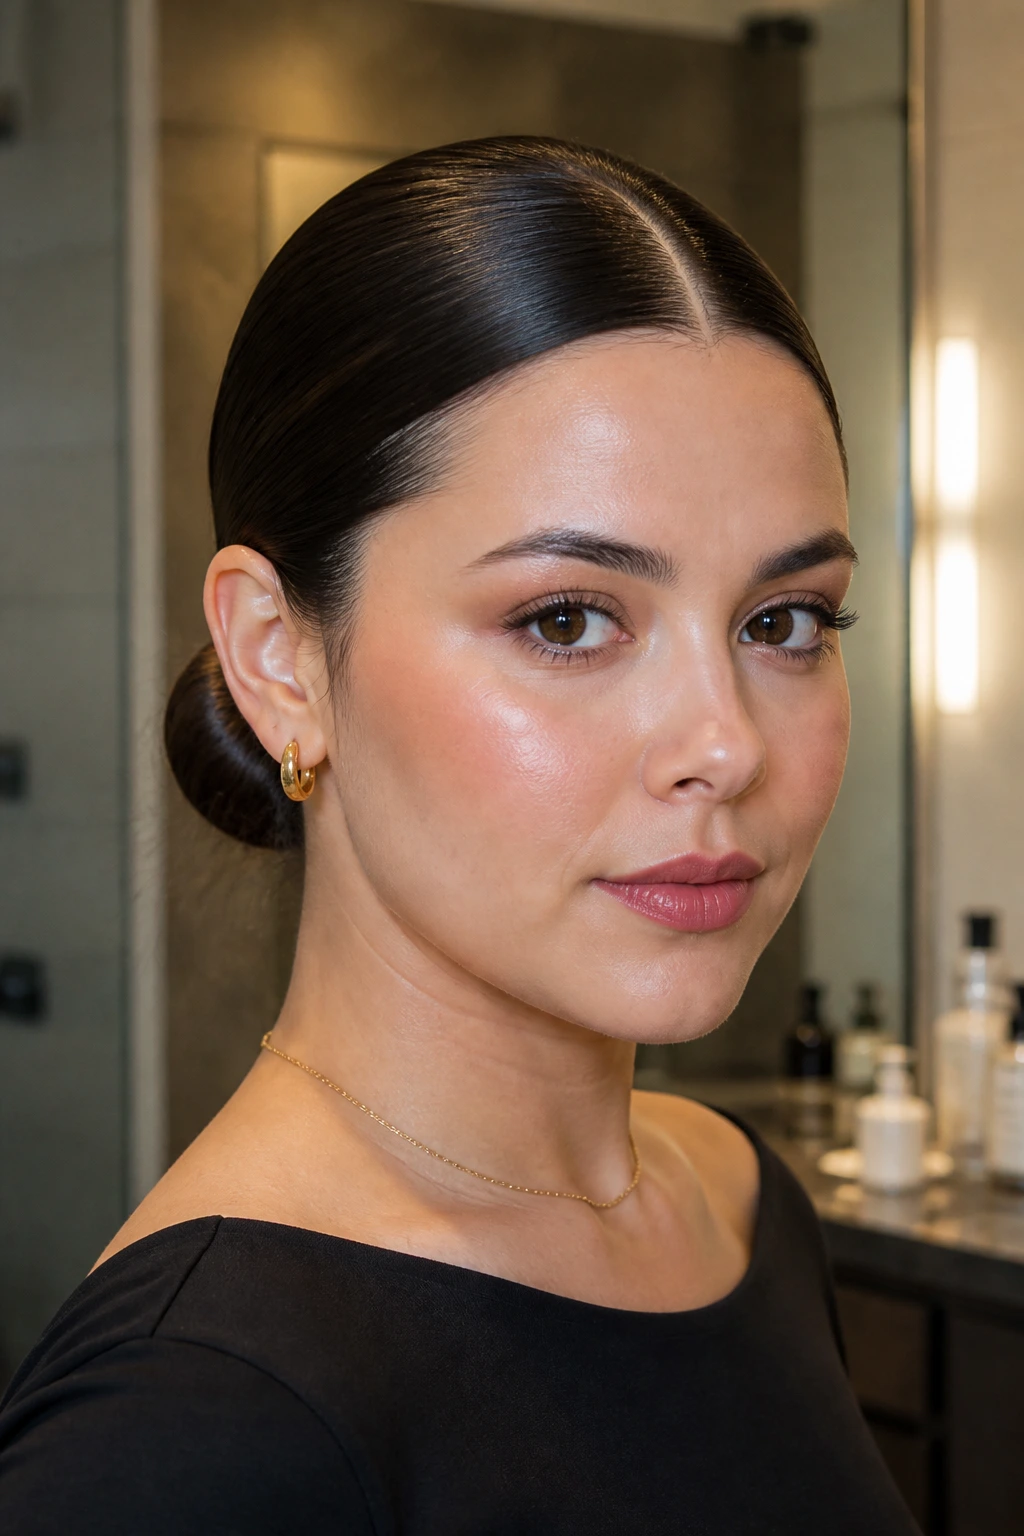
5. Sleek Low Bun with a Clean Middle Part
A low bun can look severe in the wrong hands. With the right part and a little shine, it becomes one of the cleanest ways to flatter a round face. The middle part keeps the front open, while the bun itself pulls everything downward.
Brush the hair into a low ponytail first. That step matters. It keeps the bun anchored close to the head instead of drifting upward or spreading wide. Twist the ponytail around its base, pin it flat, and smooth the surface with a light mist of hairspray on a brush, not directly on the hair. That avoids the crunchy helmet look.
If you want a softer finish, leave two slim face-framing pieces out and iron them straight. Keep them long enough to skim past the cheekbones. Short pieces right at the cheeks usually work against you.
6. High Ponytail with Face-Framing Pieces
A high ponytail earns its spot here because it adds vertical lift where a round face can use it most: above the crown. The face-framing pieces keep the style from feeling too severe and give the front some movement. The key is where those pieces start.
Pull the ponytail high enough that the base sits at or just above the crown. Then release two thin front sections and smooth them with a flat iron so they fall in narrow, glossy lines. I’d start those pieces around the jawline or collarbone, not the cheekbone. Higher than that, and they can widen the face.
This is a good style when your hair has a little natural grit or volume. The ponytail looks better with grip than with silkiness alone. If the roots are too slippery, mist them with a light hold spray before you gather the hair.
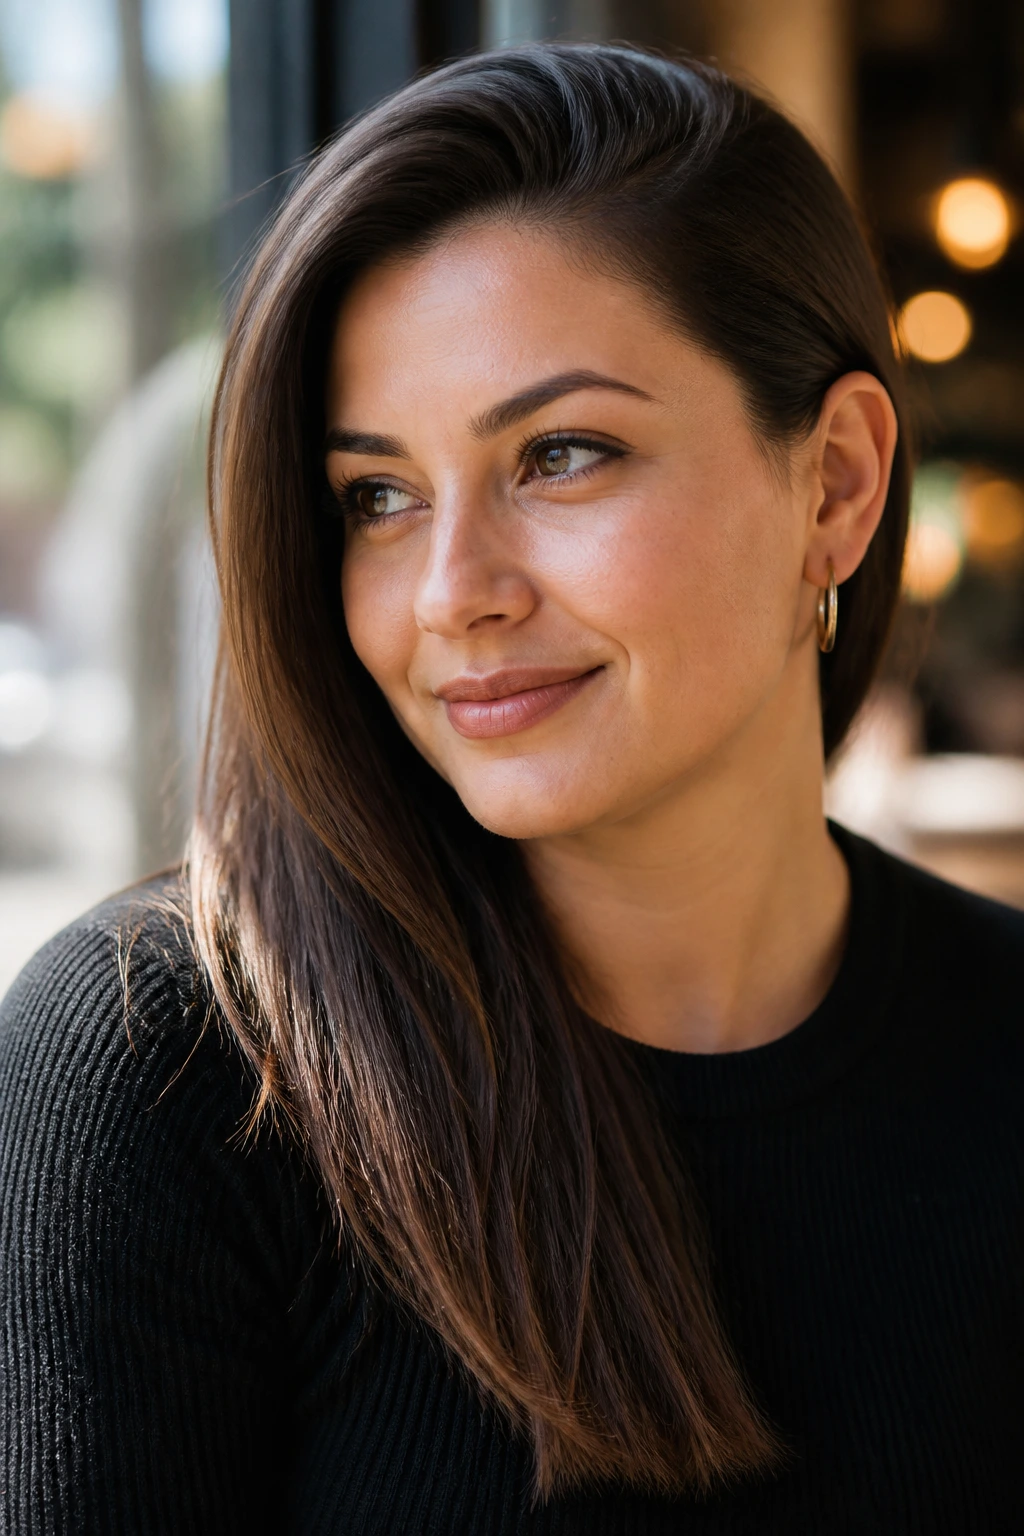
7. Side-Swept Length Tucked Behind One Ear
Sometimes the simplest change is the smartest one. A side-swept fall with one side tucked behind the ear opens the face asymmetrically, which helps a round shape look less centered and broad. It’s subtle. That’s why it works.
The style depends on contrast. One side stays smooth against the cheek and jaw. The other drapes forward in a long, clean line. That asymmetry breaks up the width that a straight, even curtain can create. If you want a little more polish, slide in a narrow barrette just above the ear on the tucked side.
This look is especially good on hair that’s straight or slightly wavy. If your hair flips out at the ends, run a flat iron only through the last 3 to 4 inches. You don’t need to iron the whole head flat just to get the effect.
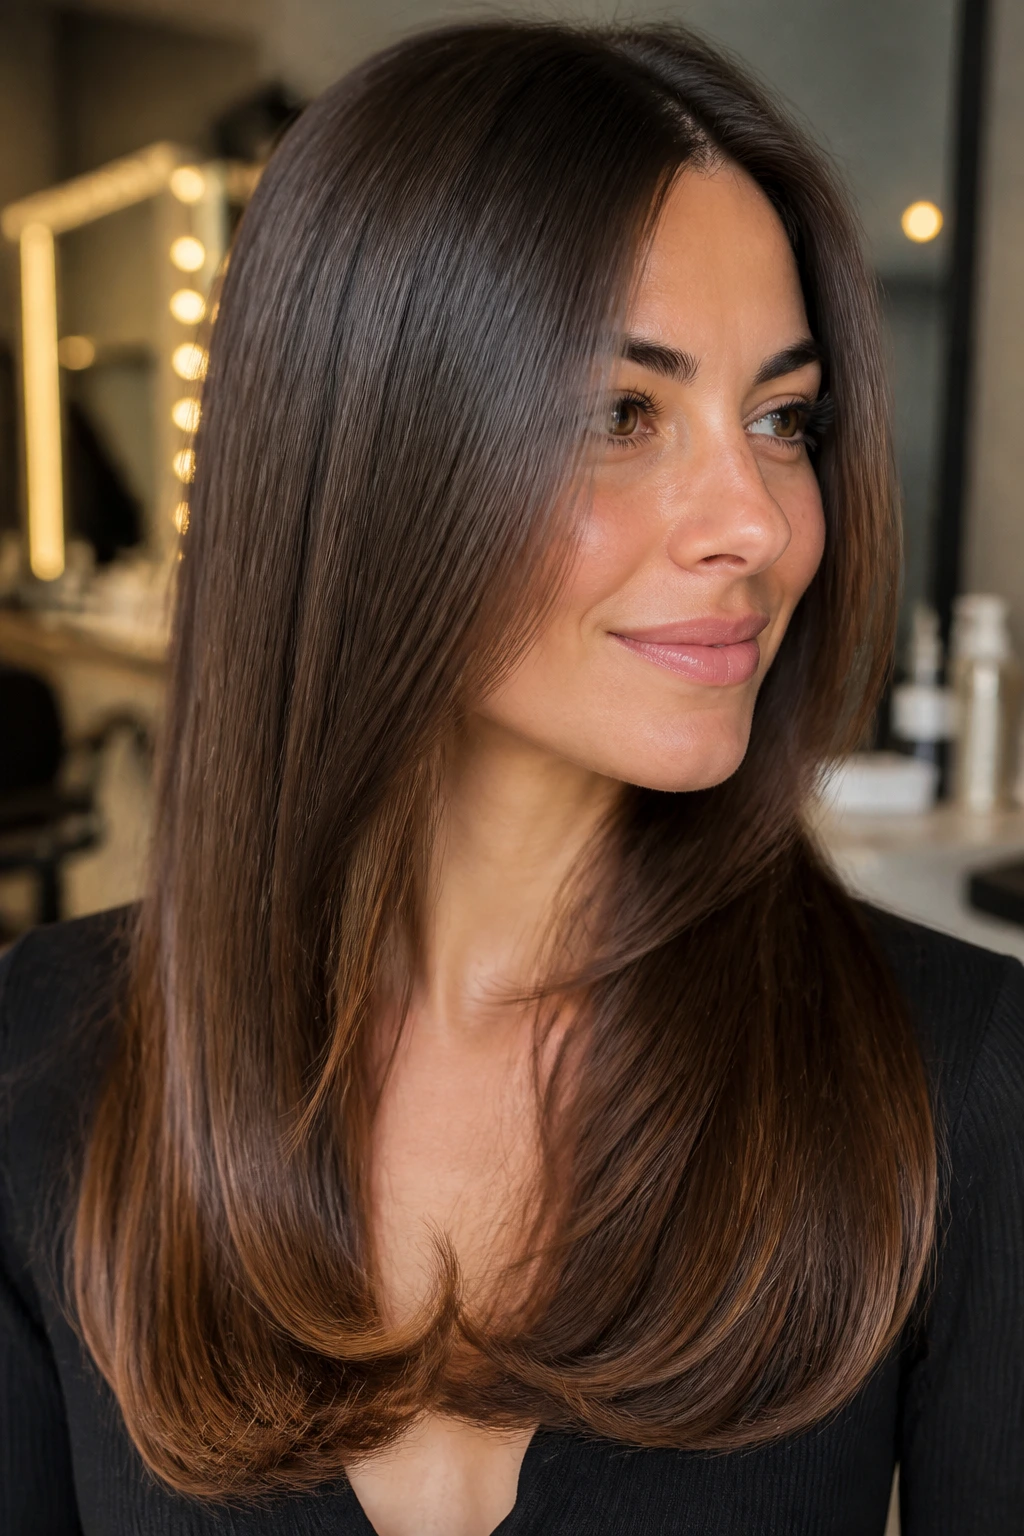
8. Bent-End Blowout with Smooth Roots
A bent-end blowout is one of those styles that looks easy and takes a bit more intention than people think. The roots stay sleek, the lengths move in a soft line, and the ends turn just enough to keep the whole thing from feeling flat. On a round face, that narrow root-to-end shape is doing real work.
Use a round brush, but keep the sections thin. If they’re too wide, the hair won’t bend cleanly. Aim the brush away from the cheeks and direct the ends toward the collarbone or slightly outward, depending on the cut. The bend should sit below the widest point of the face, not right at it.
This is one of the best styles for thick hair that tends to puff out near the bottom. A quick pass with a 1.25-inch iron on the last inch can make the shape cleaner without turning it stiff.
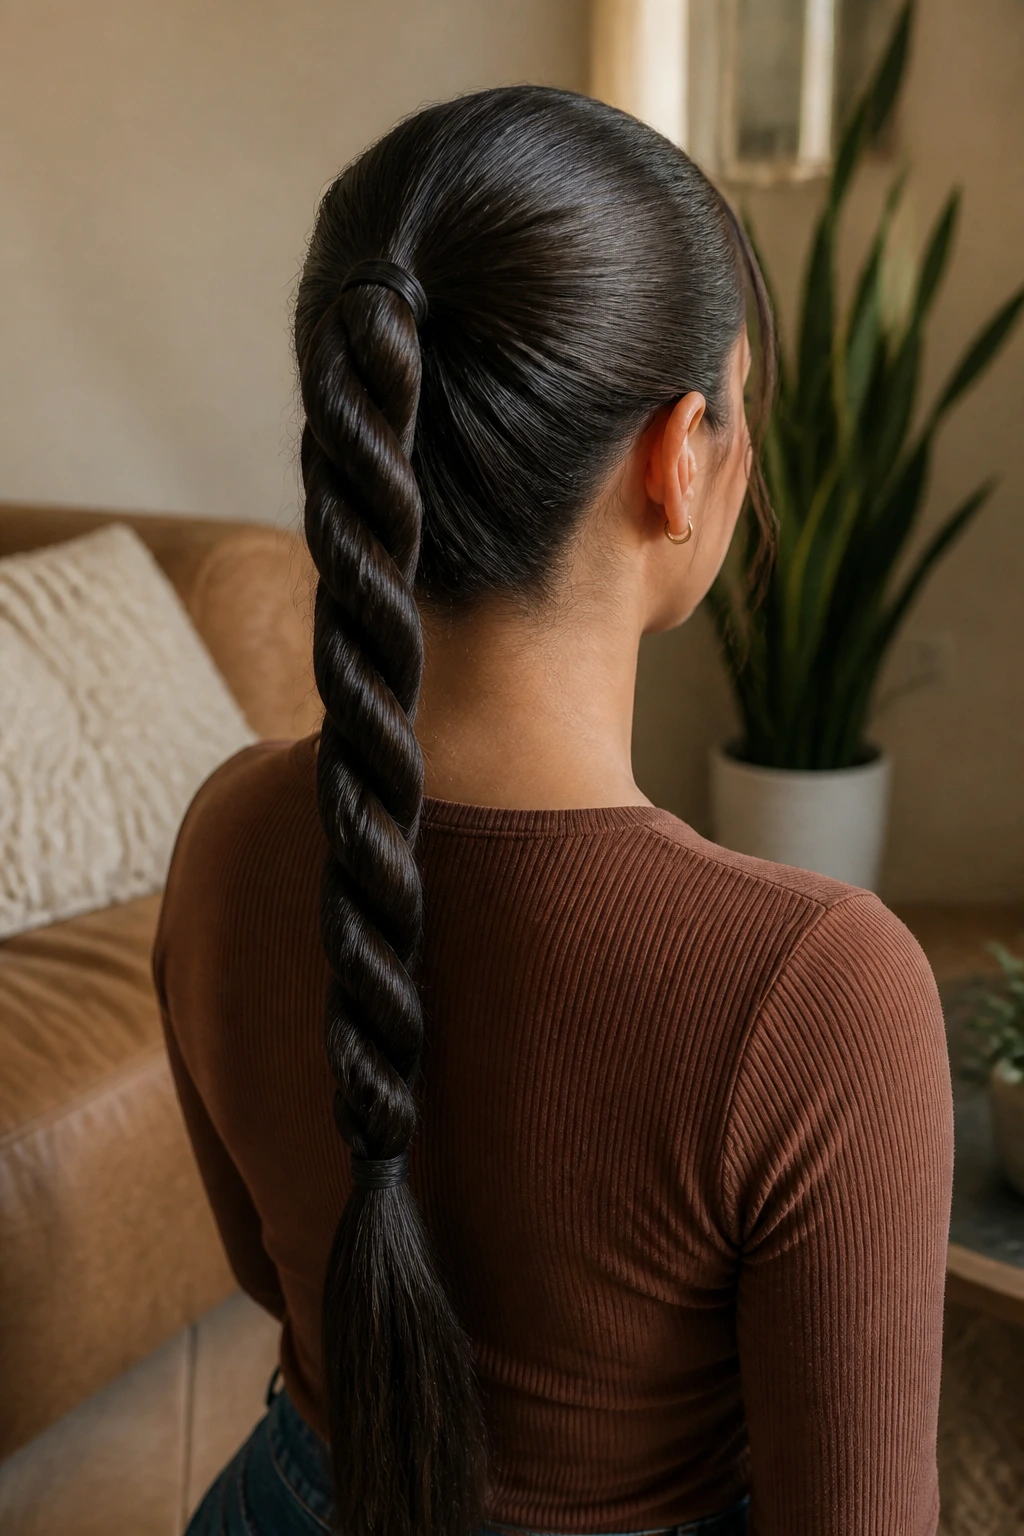
9. Rope-Braid Ponytail Down the Back
A rope braid is sleeker than a messy braid and tighter than a loose one, which is why it earns a place here. It creates a long vertical line straight down the back, and that line is good news for a round face. You’re not adding width. You’re adding length.
Gather the hair into a low ponytail, split it into two sections, twist each section in the same direction, then wrap them around each other in the opposite direction. Keep the twist snug from top to bottom. If the braid starts to loosen at the crown, the style loses its sharpness fast.
Finish with a clear elastic at the end and smooth the surface with a pea-sized amount of serum. Too much product here makes the twist look greasy, not sleek. Just enough to control flyaways. That’s all it needs.
10. Bubble Ponytail with Tight Sections
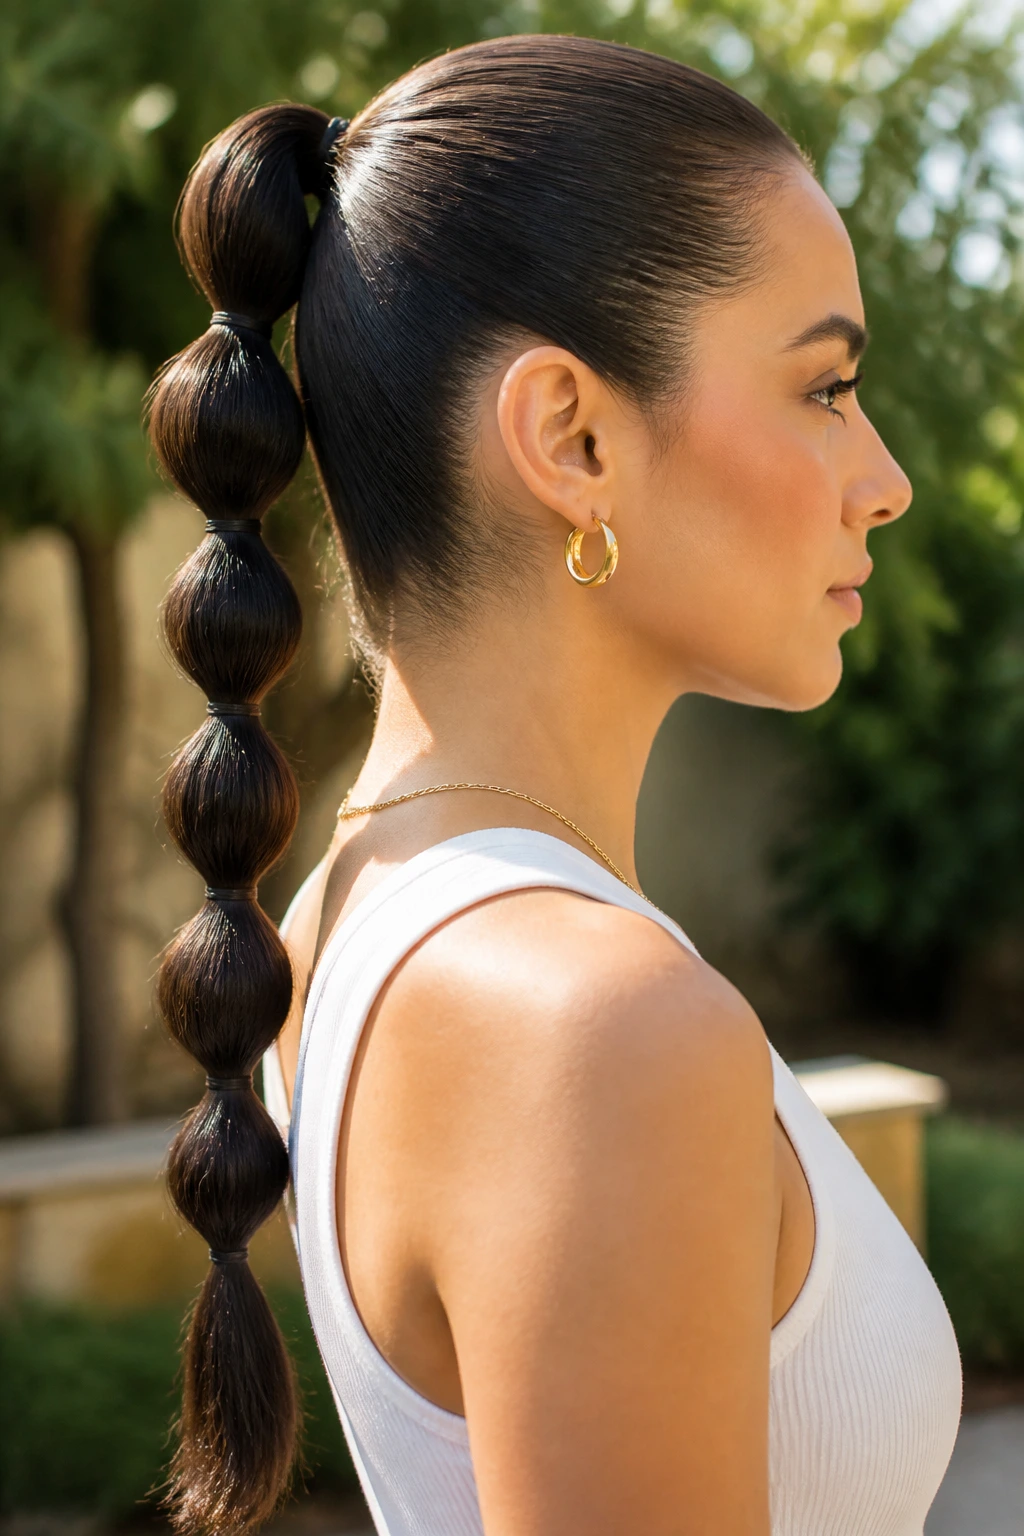
A bubble ponytail is one of the few playful styles that still looks polished on a round face. The repeated ties create a long visual column, and the little rounded sections keep the style from looking heavy at the cheeks. The spacing is what matters.
Start with a straight or slightly waved ponytail and secure it at the nape or a little above it. Then add small elastics every 3 to 4 inches down the length. After each elastic, gently tug the section between ties outward until it puffs into a neat bubble. Do not yank the bubbles too wide. That’s how the style gets bulky.
If your hair is layered, hide the shorter pieces by misting them with a light spray first and smoothing them into the ponytail before the first elastic goes in. It takes a minute. Worth it.
11. Polished Fishtail Braid over One Shoulder
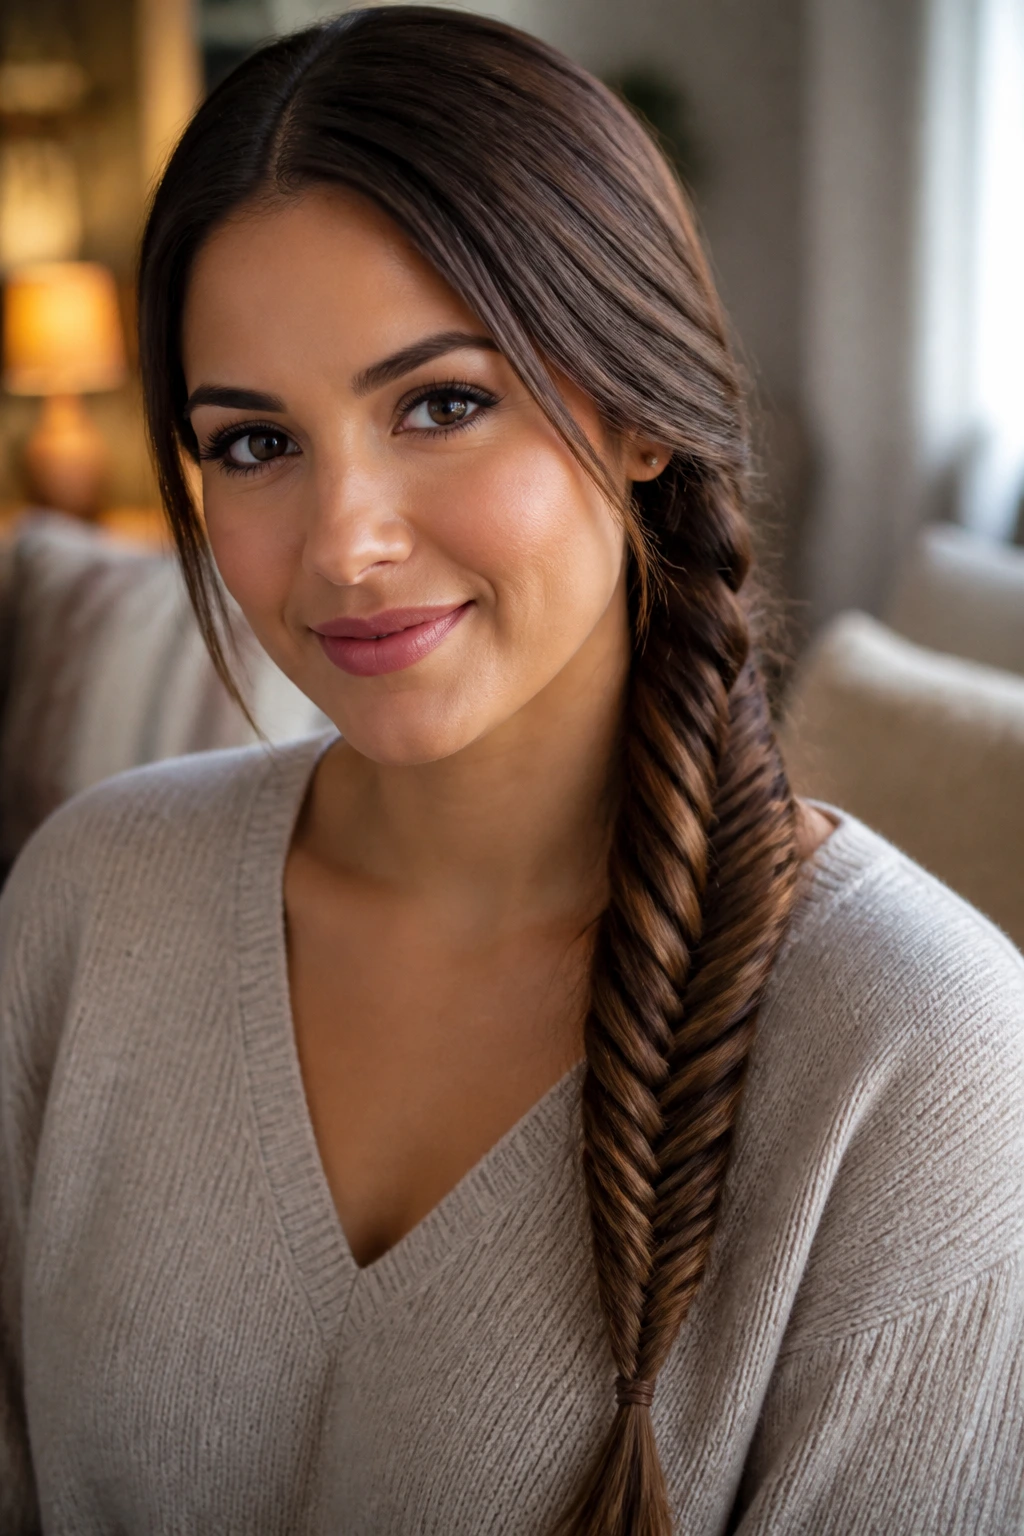
A fishtail braid over one shoulder works because it shifts the hair diagonally instead of letting it sit flat across the width of the face. That diagonal pull is flattering on a round shape. It makes the whole silhouette feel longer and a little leaner.
Keep the braid tight at the top and slightly softer through the tail. If the top is loose, the face area gets wider. Start the braid at the nape, bring it over one shoulder, and keep the plait narrow. A fishtail braid looks best when the pieces are small and the weave is clean, not chunky.
This is a good choice when you want the hair controlled but not tucked away. It still feels like long hair. It just behaves.
12. Twisted Half-Up Knot
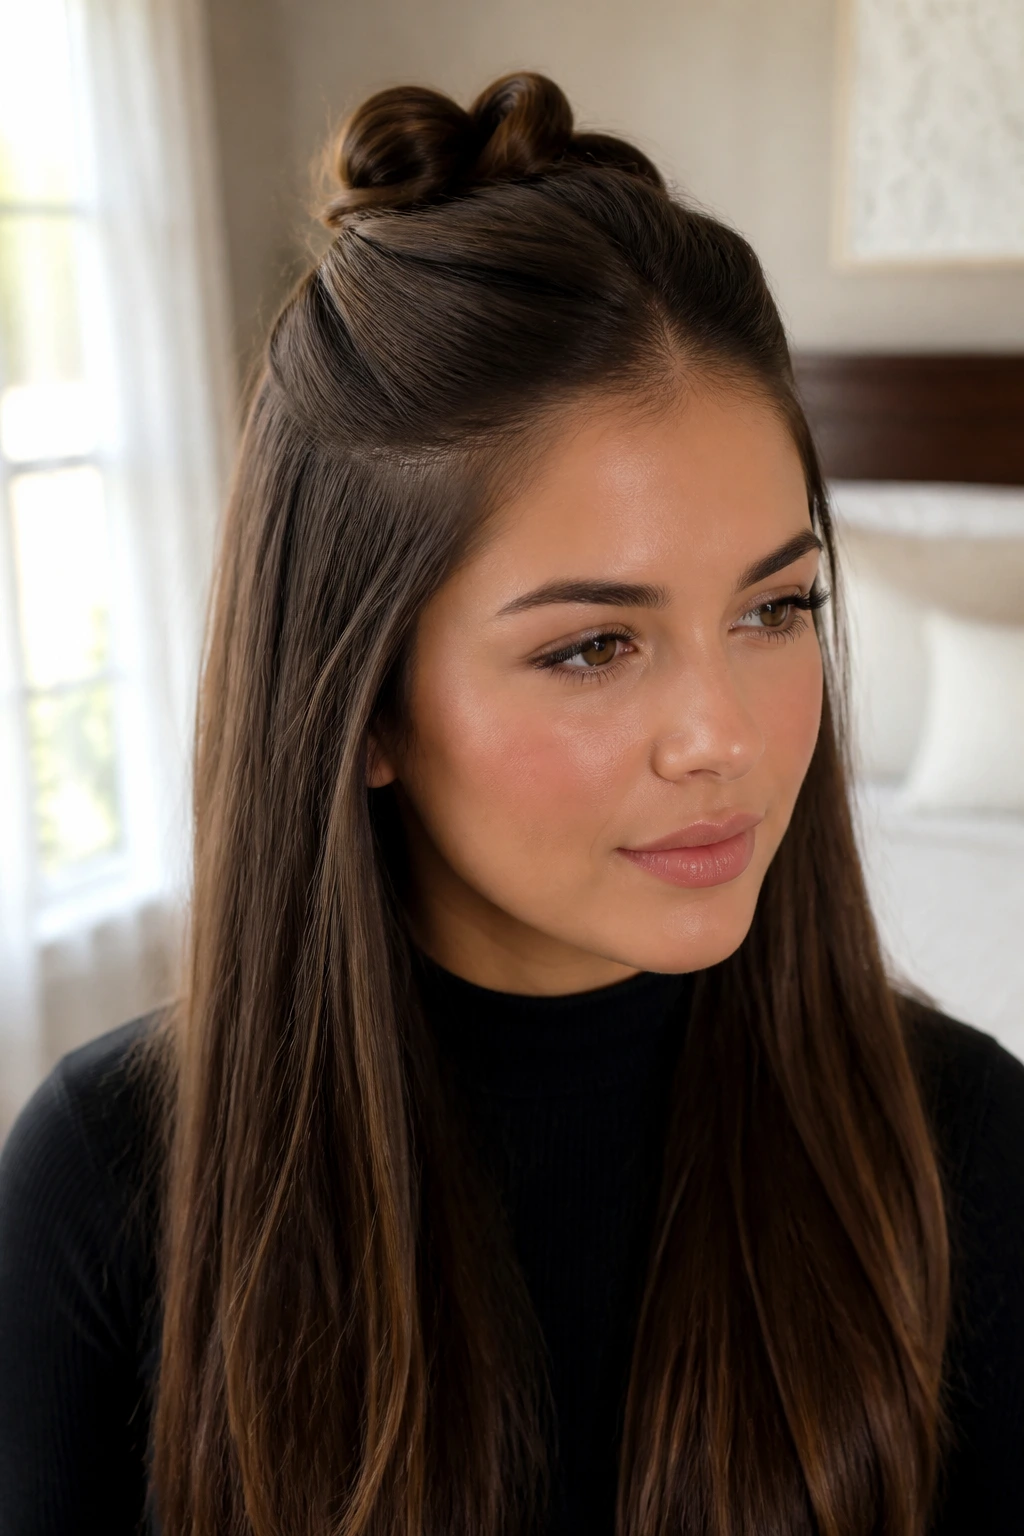
Want a half-up style that feels cleaner than a topknot and less formal than a bun? This is the one. The top sections twist back into a small knot while the lengths stay straight and long underneath. It gives lift without committing the whole head to an updo.
Take two sections from just above the temples, twist them back, and tie them together with a small clear elastic or pin them into a knot shape. Keep the crown smooth. If you pull the twist too tight, you get those annoying side ridges that broaden the face instead of slimming it.
The trick is restraint. A tiny knot works better than a big one here. The point is to open the face, not build a second hairstyle on top of it.
13. Wet-Look Comb-Back
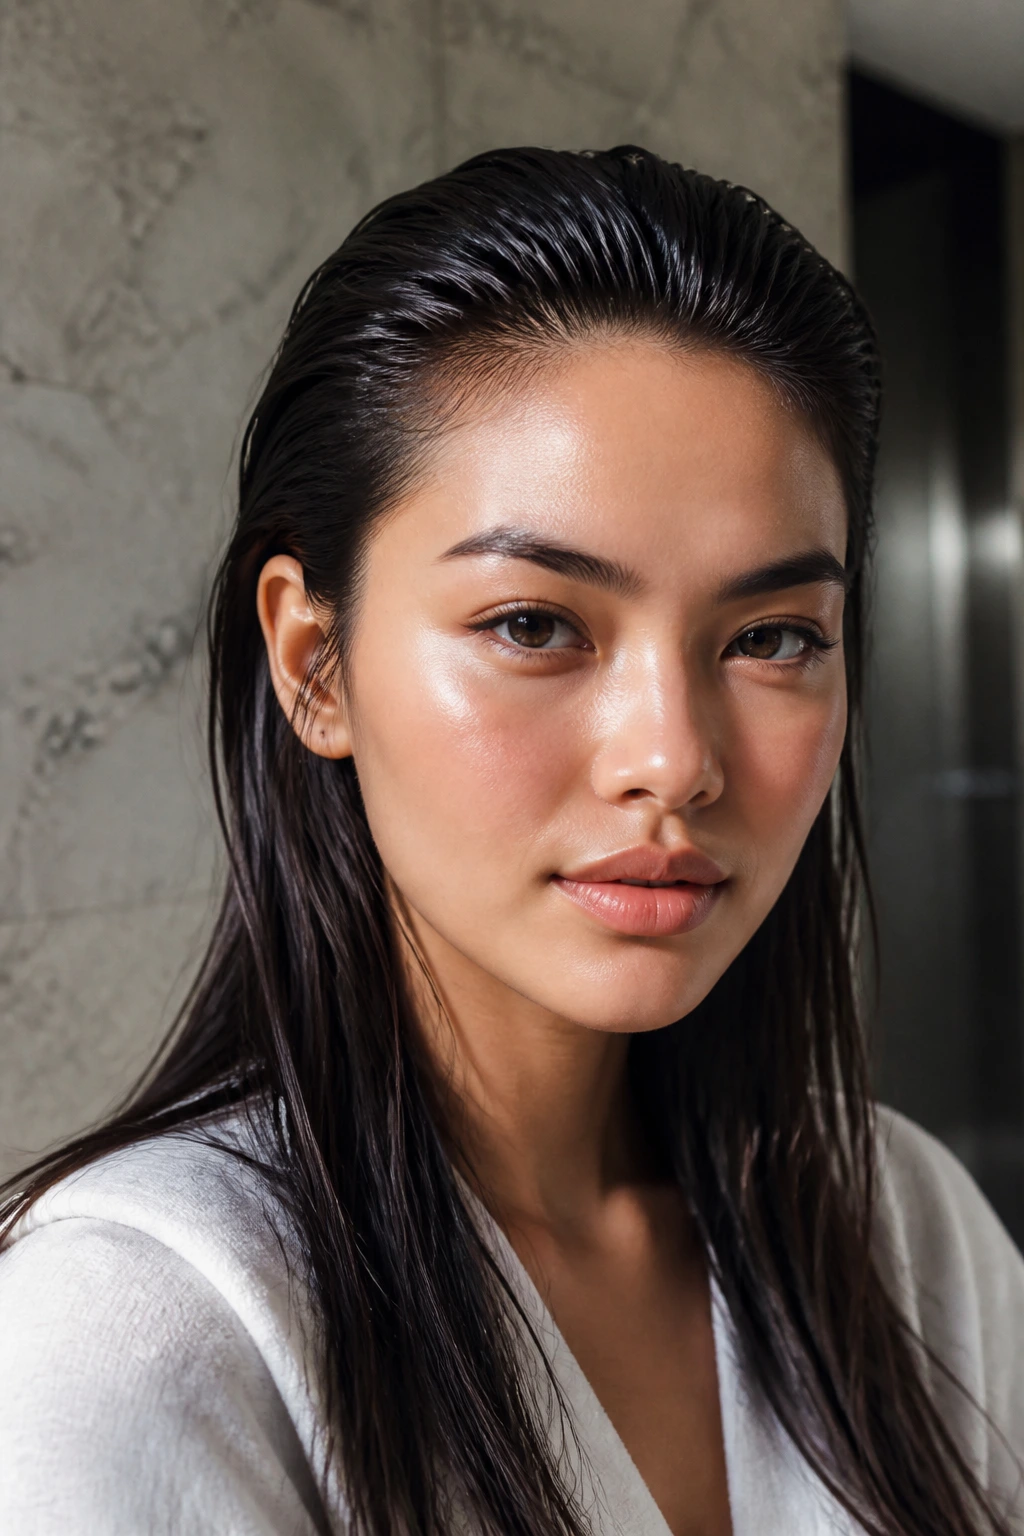
This one is blunt. It makes a statement. And on long hair, the wet-look comb-back can be gorgeous when you want the face fully open and the texture sleek from roots to ends.
Use a strong gel at the hairline and front sections, then comb the hair straight back while it is still damp. A wide-tooth comb can lay the first pass, then a fine-tooth comb can smooth the top. The sides should stay close to the head. If they puff outward, the whole point is gone.
Round faces often look best in this style when there’s a little height at the crown, not a flattened top. Lift the front a touch as you comb back, then let the rest fall straight. It keeps the style from looking pasted down.
14. Low Chignon with a Side Part
A low chignon gives round faces a clean lower anchor, and the side part keeps the front from feeling too symmetrical. That asymmetry matters. It breaks the circle.
The chignon itself can be loose or tight, but the surface should look smooth. Pull the hair back into a low ponytail off-center, twist it into a knot, and pin it flat against the nape. If your hair is heavy, use two crossed bobby pins under the knot to lock it in place.
This is one of the better styles for events where you’ll be photographed from the front and side. The side part opens one eye line, and the bun keeps the neck visible. It’s a neat combination.
15. Long Layers with Curtain Bangs
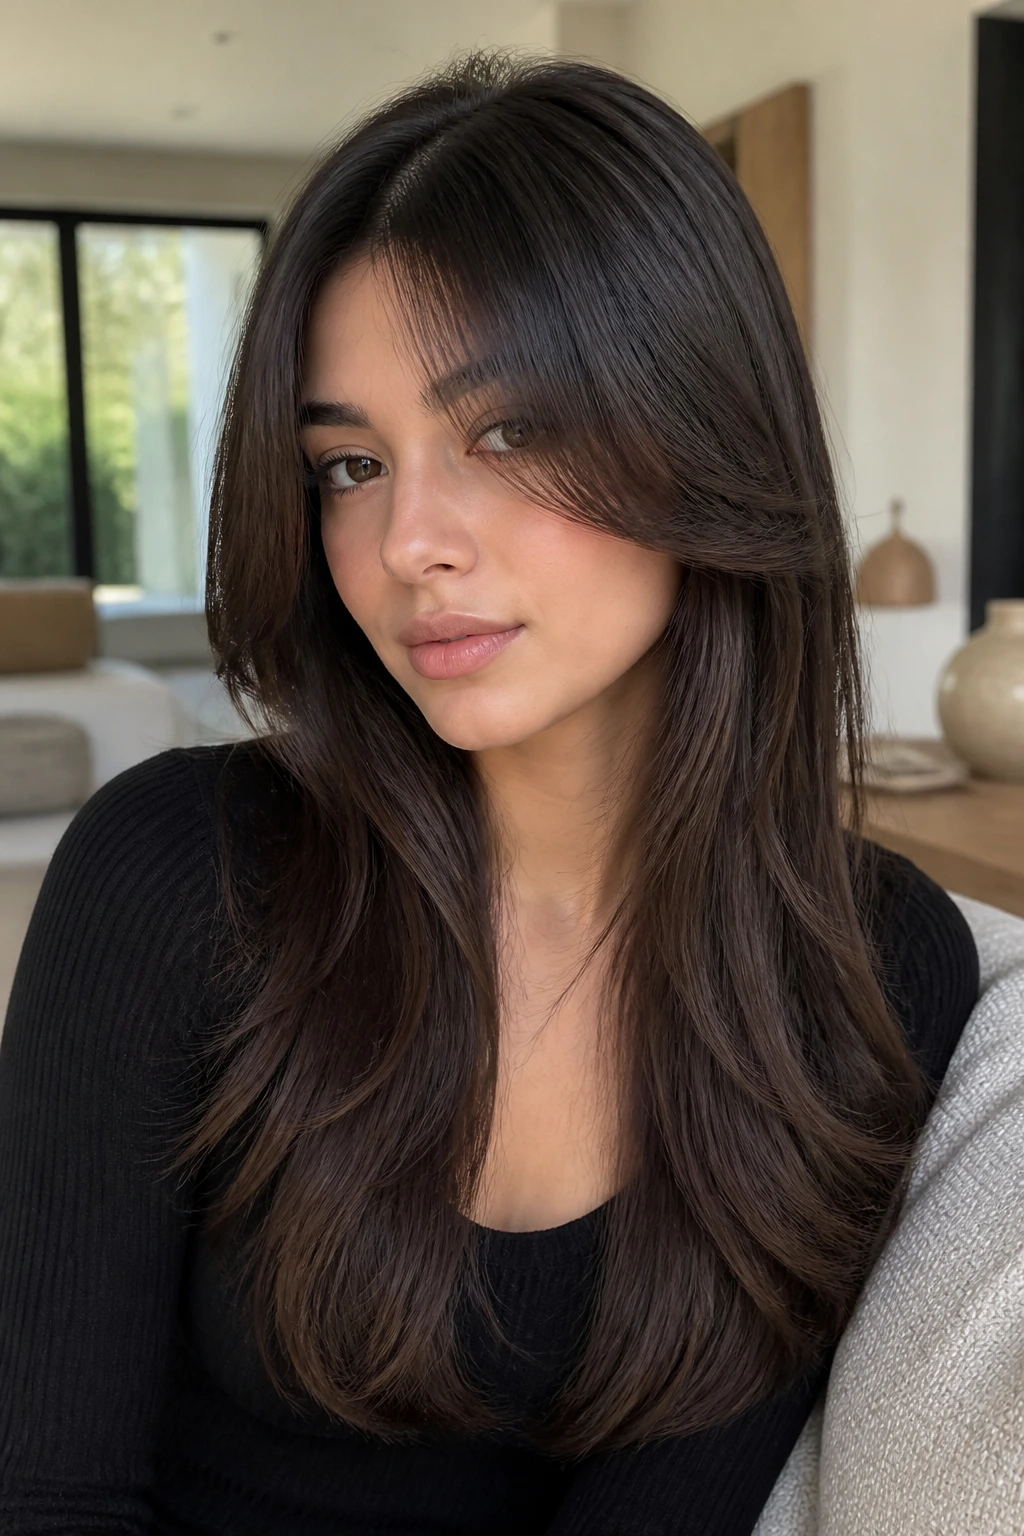
Curtain bangs can work on a round face, but only when they’re kept long enough to open rather than close the face. The shortest pieces should usually fall below the cheekbone. Any shorter, and they can make the width more obvious.
The rest of the hair should be sleek and controlled, with the layers lying flat and the ends polished. This is not a fluffy curtain-bang blowout. Keep the root area smooth, then bend the bangs away from the center with a round brush or velcro rollers. That soft outward sweep creates a frame without boxing the face in.
This style is for someone who wants movement near the front but still wants the long, glossy feel in the rest of the hair. It gives the face shape without drowning it.
16. Braided Crown into Straight Lengths
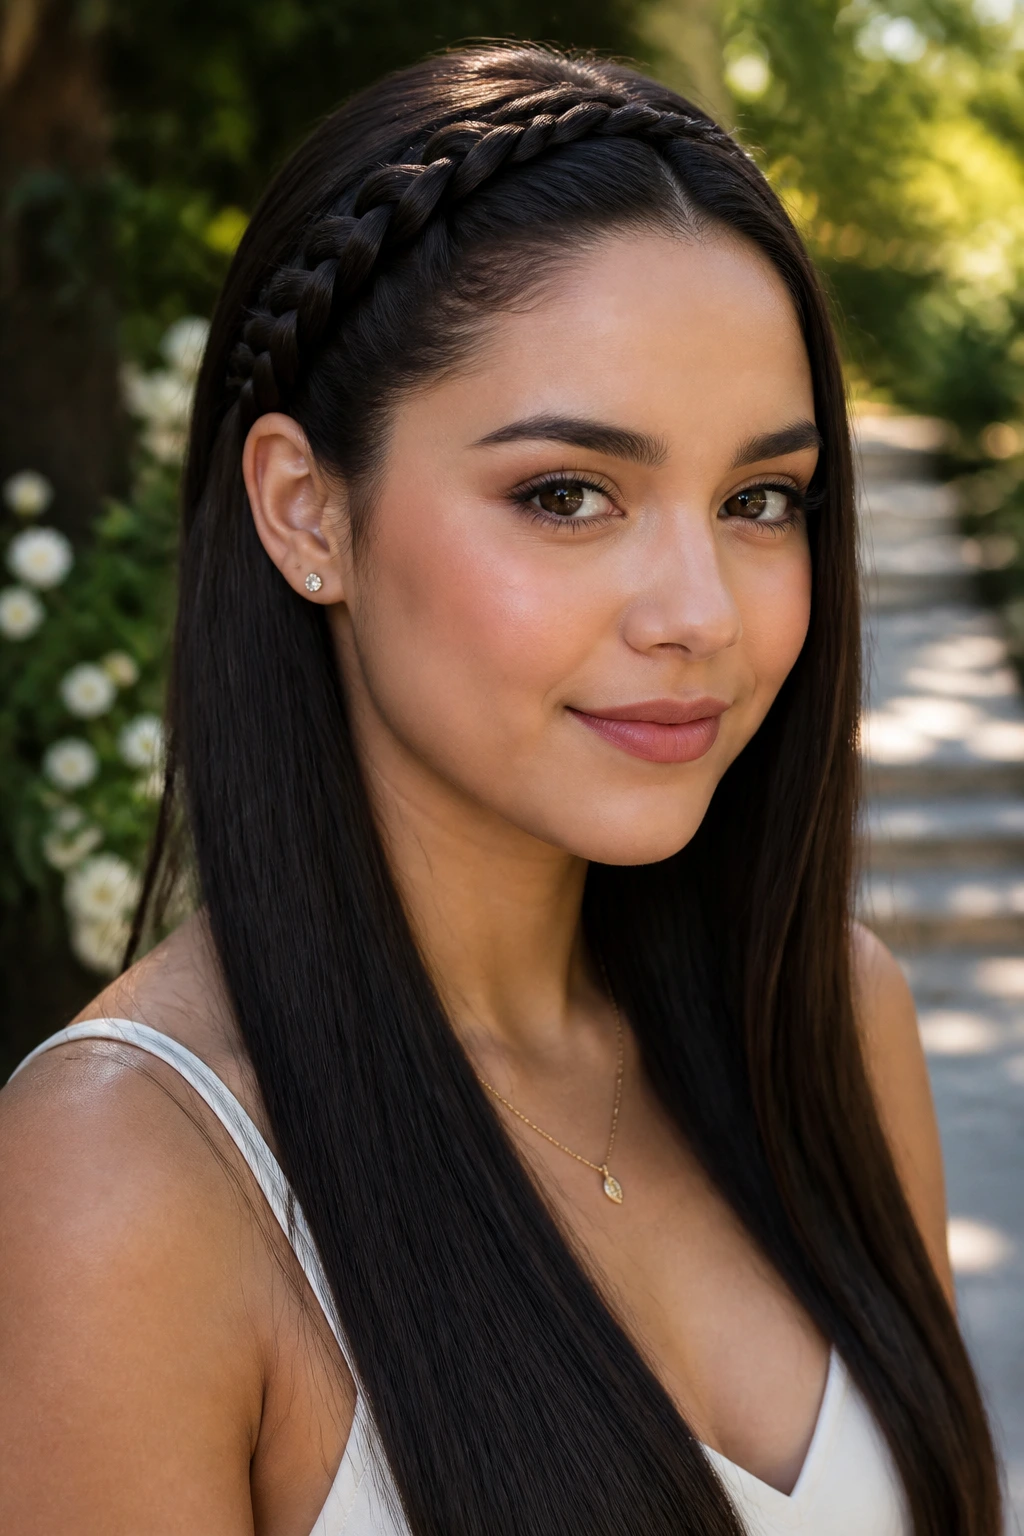
A braided crown is useful when you want the front hair pinned away but don’t want the whole head pulled back. It sends the eye upward and around, then drops into long straight lengths that continue the line downward. That combination works well on a round face because it adds interest above the cheeks.
Braid along the hairline on one side, across the top, or in a narrow Dutch braid that sits close to the scalp. Keep the braid tight and clean. Then leave the rest of the hair straight. If the braid is puffy, it adds width right where you don’t want it.
You can make this more formal with a shiny finish, or more casual by leaving the lengths perfectly smooth and bare. Either way, the crown braid creates structure.
17. One-Shoulder Sleek Tuck
Some styles flatter because they refuse to sit squarely on the head. The one-shoulder tuck shifts all the length to one side, which makes the face feel narrower and the neckline longer. It is basically asymmetry doing the heavy lifting.
Tuck the hair behind the ear on the opposite side of the shoulder you want to show, then sweep the rest forward over one shoulder. A slim clip or hidden bobby pin can hold the tucked side in place. If your hair is thick, smooth a tiny amount of serum through the top layer so the tuck stays flat and doesn’t spring out.
The finished look should feel controlled, not overworked. It’s the kind of style that looks sharp with a blazer and still makes sense with a bare shoulder or a high-neck top.
18. High Half Ponytail with a Smooth Crown
A half ponytail can go wrong fast on a round face if it sits too low and adds width at the temples. Put it high, though, and the style suddenly works with the face instead of against it. The crown lifts. The lengths stay long. The balance shifts upward.
Gather the top half of the hair at the highest point of the crown and secure it tightly. Smooth the sides back toward the ears so there’s no puff. If you want extra polish, take a tiny section from underneath and wrap it around the elastic. That small move cleans up the whole thing.
The lower hair should stay sleek and straight. If it flips out, the visual line gets busy. A single pass with an iron on the bottom few inches is usually enough.
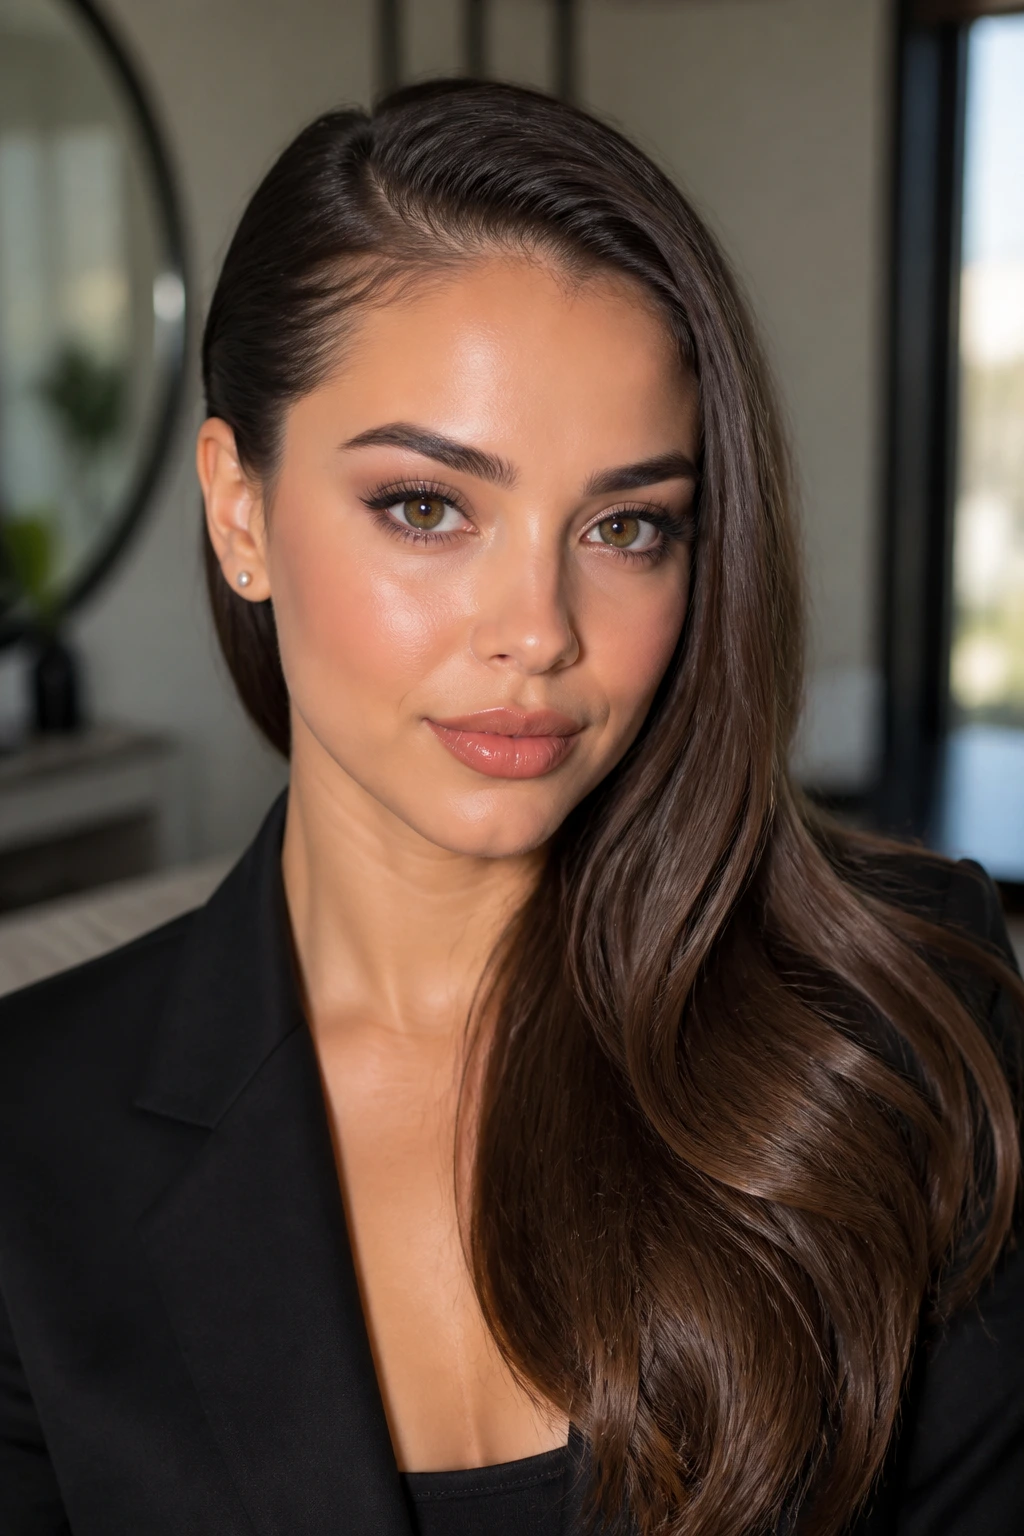
19. Slick Side Ponytail with a Hidden Elastic

A side ponytail is rarely the first style people reach for on a round face, which is exactly why it’s worth using. The off-center placement creates a diagonal line, and diagonals are your friend here. The hidden elastic keeps the base clean.
Brush the hair into a ponytail just behind one ear and a little below the occipital bone. Secure it tightly, then wrap a thin strand around the elastic so the hold disappears. Pull the top smooth with a boar-bristle brush before you tie it off. If the top is bumpy, the side ponytail loses its clean shape.
This style works especially well with straight hair, but it can also tame loose waves if you want a polished finish for dinner or an event. It has a little attitude without looking forced.
20. Long Blunt Lengths with a Narrow Middle Part
This is the cleanest, most straightforward option in the bunch. Long, blunt lengths create a straight lower edge, and the narrow middle part keeps the face open and centered. There’s no extra fluff. No side volume. No strategic messiness pretending to be effortless.
The blunt edge works best when the ends are trimmed regularly so they don’t fray into a wispy triangle. If your hair naturally grows in a fine tail at the bottom, ask for a denser finish rather than lots of feathering. Round faces usually benefit more from a clear edge than from a blown-out, airy one.
I like this style on hair that already falls fairly straight, because it lets the face shape stay visible. The hair becomes a frame, not a cloud.
Why Sleek Hairstyles for Long Hair and Round Faces Work So Well

Sleek styling is not about flattening everything to the head. That’s the part people get wrong. The better version uses structure: a clean part, a controlled crown, and lengths that fall in a narrow line past the cheeks. When those pieces show up together, the face reads longer and sharper.
Round faces usually look best when the hair does one of three things: it adds height, it adds diagonal movement, or it narrows the width at the sides. A center part does the first job. A deep side part handles the second. A low ponytail, braid, or bun does the third. You do not need all three at once. Pick one strong move and let it work.
There’s also a practical side to this. Sleek hair is easier to accessorize, easier to refresh, and usually easier to keep neat than loose, fluffy texture that breaks apart by lunchtime. That matters on long hair, where one frizzy layer near the cheeks can change the whole shape.
The Styling Tools That Make the Difference
A polished finish starts with the right tools. Nothing fancy. Just the pieces that keep long hair under control long enough to shape it properly.
- 1-inch flat iron: Best for straightening long lengths, face-framing pieces, and the last inch of the ends without making the style too broad.
- Blow-dryer with concentrator nozzle: Directs the air where you want it and keeps the root area smooth instead of puffy.
- Boar-bristle brush: Helps pull the surface sleek when you’re gathering ponytails, buns, and comb-back styles.
- Tail comb: Useful for clean parts, sectioning the crown, and keeping side pieces narrow.
- Duckbill clips: Hold sections while you work through long hair in pieces, which stops the top from getting frizzy before you finish.
- Small clear elastics: Best for bubble ponytails, half-up looks, and hidden pony bases.
- Bobby pins with a grippy finish: Better than slippery pins for wrapped buns and tucked styles.
- Lightweight serum or shine cream: A tiny amount on the ends helps the hair look smooth without flattening the roots.
- Heat protectant spray: Non-negotiable if you’re using a blow-dryer or flat iron more than once a week.
- Flexible-hold hairspray: Keeps flyaways under control while still letting the style move a little.
Smart Prep for Sleek Hairstyles for Long Hair and Round Faces
The prep step is where most sleek looks win or lose. If the roots are rough before you start, you’ll spend twice as long fixing them later. If the ends are dry and split, no amount of ironing will make the style look clean.
Wash with enough conditioner to smooth the mid-lengths, but keep it light at the roots if your scalp gets oily. After towel-drying, work in a heat protectant and a small amount of smoothing cream. For long hair, a quarter-sized amount of cream is usually enough unless the hair is very thick or coarse. Too much product near the crown makes the hair separate.
Blow-dry in sections. Always. Drying the whole head at once is how you get the fuzzy layer that ruins a sleek finish. Use the nozzle to guide the airflow downward from roots to ends. That closes the cuticle and gives you a cleaner base before the flat iron ever touches the hair.
If you’re doing a middle part, set it while the hair is damp so it dries in the right shape. If you’re doing a deep side part, place it before the roots have finished drying. Dry roots lock in shape faster than people expect.
How to Keep the Shape Smooth Without Making It Helmet-Stiff
Root Control: Keep the crown smooth, but don’t flatten it completely. A tiny bit of lift at the top keeps the face from looking wider and the whole style from sitting too low.
Section Size: Work in 1-inch sections with a flat iron or round brush when you want real sleekness. Bigger sections leave hidden bends underneath, and those bends puff out later.
Finish: Put serum only on the last few inches of the hair. The roots need movement. The ends need polish. Mixing the two is what creates greasy-looking slick hair.
Humidity Plan: If your hair frizzes the second it sees damp air, finish with a light mist of flexible hairspray over the surface, then smooth the top with a soft brush. Do not spray so much that the hair freezes in place. That old-school shell look is not the goal.
Face-Frame Control: If you leave pieces out, make them long enough to fall below the cheekbones. Short wisps at the sides usually add width. Long, narrow pieces add length. That difference is bigger than it sounds.
Common Slip-Ups That Add Width Instead of Length
The most common mistake is building volume exactly where a round face does not need it. Puffy sides at the temples, sides that fan out near the cheeks, or a wide half-up section can all make the face look broader. The fix is simple: keep the side sections close to the head and let the lift happen at the crown or below the jaw.
Another problem is over-smoothing the roots while leaving the ends bulky. That creates a top-heavy helmet shape. If you want sleek, you need the whole silhouette to read narrow from top to bottom. One flat section and one fluffy section is a bad trade.
Heavy product causes trouble too. A palmful of serum or a thick layer of smoothing cream can make long hair collapse, especially around the face. Use less than you think you need. A little shine goes farther on long hair than most people expect.
And then there’s the part. A sloppy, wide part or a center line that zigzags across the scalp will show through every time. Take 10 extra seconds with a tail comb. Those 10 seconds are doing real work.
Variations for Different Hair Textures and Lifestyles

Fine-Hair Lift: If your hair is fine, keep the crown lifted with a tiny bit of root spray before blow-drying. Avoid heavy oils and thick creams near the top, or the whole style will collapse by noon.
Thick-Hair Control: Thick hair needs smaller sections and more tension. Clip the hair into four quadrants, blow-dry one section at a time, and finish the ends with a flat iron so the bulk stays under control.
Curly-to-Sleek Finish: Curly hair can wear every style in this list, but the base needs a tension blow-dry first. Use a paddle brush or round brush, stretch the hair while drying, then press only the outer layer with the iron if needed.
Humidity-Safe Finish: In damp weather, favor low buns, wrapped ponytails, and braids over loose straight looks. The tighter styles hide a little swell at the roots better than an all-down style does.
Accessory Finish: A narrow barrette, pearl pin, or slim ribbon can sharpen a simple style fast. Keep the accessory small and lined up with the part or wrap, not floating randomly near the face.
Night Care, Refreshing, and Maintenance
Sleek hair holds up better when you protect the shape overnight. A silk pillowcase helps, but the real trick is keeping the crown from rubbing itself into frizz. If you’re wearing a ponytail or braid, switch to a loose satin scrunchie and tie it low enough that it doesn’t leave a crease at the temples.
For down styles, use a light wrap or clip the front sections back loosely before sleep. You are not trying to freeze the hair in place. You’re just trying to stop the top layer from going wild. A little frizz at the ends is easier to fix than a puffed-up crown.
Most sleek looks can be refreshed with a tail comb, a pea-sized amount of serum, and a quick pass of the flat iron on the front pieces. If the roots have gone flat but not oily, a dry shampoo at the part can buy you another day. If the style is pinned up or braided, you can usually stretch it to 2 days without much drama. Loose straight styles usually look best the same day or the next morning.
Questions People Ask Before Committing to Sleek Hair
Is a center part always the best choice for a round face?
No. A center part is excellent when you want symmetry and length, but a deep side part can be even better if your face reads especially full at the cheeks. The smart move is to test both and look at where the hair falls around the jawline.
Do bangs work with sleek styles on round faces?
Yes, but the length matters. Curtain bangs that start below the cheekbone can open the face nicely, while short blunt bangs can make the width feel more obvious. Keep the front pieces long and airy if you want the face to look longer.
How do I stop sleek hair from looking flat and lifeless?
Give the crown a little lift, even if the rest of the hair is smooth. That can be a gentle blow-dry at the roots, a half-up section, or a ponytail placed a little higher than usual. Flat is fine at the ends. Flat everywhere is the problem.
Can curly or coily hair wear these styles without fighting the texture?
Absolutely. You just need more prep. A tension blow-dry, a smoothing cream, and smaller sections will give you a clean base, and then you can decide how straight you want the final look to be.
Which of these styles is easiest for everyday wear?
The low wrapped ponytail, side-swept tuck, and sleek low bun are the fastest. They take the least time to set up and still give the face a cleaner line than loose hair does.
What if my hair is thick and keeps puffing out at the sides?
Work in smaller sections and smooth the sides toward the ears before you tie anything back. Thick hair often looks sleeker when you use more tension at the roots and less product at the ends.
How much serum should I actually use?
Less than most bottles suggest. Start with 1 drop for fine hair or 2 drops for medium to thick hair, rub it between your palms, and press it into the bottom few inches only. If the roots go glossy, you’ve used too much.
Can I wear these styles without heat?
Some of them, yes. The ponytails, buns, braids, and tucked styles can be built on air-dried hair if the texture is already smooth enough. For pin-straight styles, heat usually makes the finish cleaner and the part more precise.
A Sharper Line Wins Every Time
Round faces do not need to be hidden. They need a little structure. That’s the real appeal of sleek hairstyles for long hair and round faces: they make the face look intentional, not overworked. A clean part, a narrow base, a controlled side sweep, or a low anchor can change the whole read of the hair without asking for a dramatic cut.
The best part is how flexible these looks are. You can wear them polished, soft, severe, casual, or dressed up, and the face shape still benefits from the same basic idea: keep the width in check and let the length do its job. Once you start paying attention to where the eye lands, these styles become much easier to choose.
And honestly, that’s the useful part. Not every sleek style needs to be a big production. Some days it’s a center part and glossy ends. Other days it’s a low wrap and one tucked ear. The line is what matters, and once you know how to place it, the rest falls into place with less fuss.