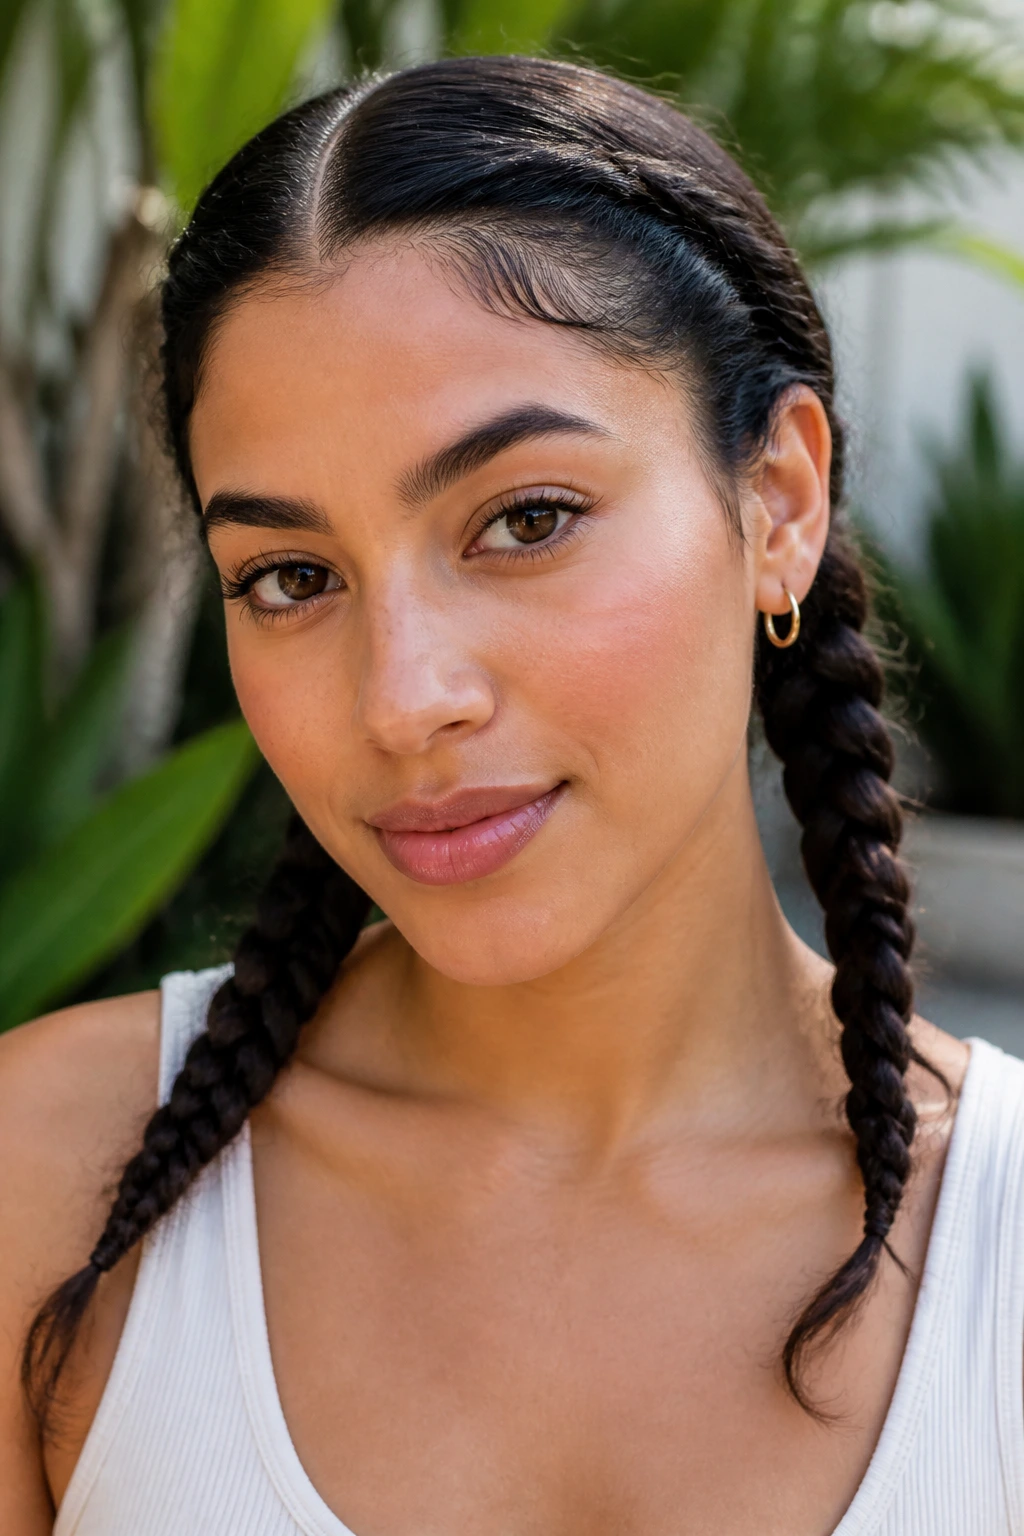
Wavy hair has a funny habit of looking polished for exactly long enough to make you trust it, and then the little bends at the temples start puffing, the nape loosens, and the braid that looked razor-clean at breakfast begins to feel like a memory. That’s why sleek braids for long-lasting wear with wavy hair need a different approach than the loose, airy braid photos that float around in inspiration boards. You want grip at the root, clean parting, and a finish that can survive a scarf, a collar, a car seat, and a full day of living.
The styles that hold best on wavy hair are rarely the flashiest ones. They’re the ones that sit flat, start with tension where the hair wants to slip, and end in a way that seals the shape instead of leaving it to unravel at the first bit of humidity. I’ve always trusted braids that look almost a little too tidy at the start. That’s where the staying power lives.
If your waves tend to spring back, frizz at the hairline, or soften into a puff by midday, the right braid can still work with you. The trick is choosing styles that respect your texture instead of fighting it. Some are built for all-day wear. Some will stretch into several days if you sleep properly. A few are better for events, while others are the sort you can set on a Sunday and still wear without feeling like you’ve lost control of your hair by Tuesday.
Why These Braids Hold Up on Wavy Hair
Built for grip, not guesswork: Wavy hair tends to slide if it’s overloaded with oil, so the best styles here use mousse, gel, or a light cream at the roots and keep the braid line snug from the first cross-over.
Flat at the scalp, tidy at the finish: Braids that hug the head—French, Dutch, cornrow, halo, and flat-twist styles—keep the wave pattern from puffing out around the ears and crown.
Less friction, more staying power: Low ponies, buns, and tucked ends rub less against clothing and pillows than loose tails, which is why they usually hold their shape longer.
Works with different wave patterns: Loose 2A waves and thicker 2C bends behave differently, but both do better when the braid is started on hair that’s mostly dry and lightly controlled.
Easy to refresh: A mist bottle, a little mousse, and a rat-tail comb are often enough to smooth the surface again without redoing the whole style.
Accessory-friendly: Sleek braids take well to cuffs, pins, and scarves because the style already has structure. You’re adding polish, not trying to save a flimsy shape.
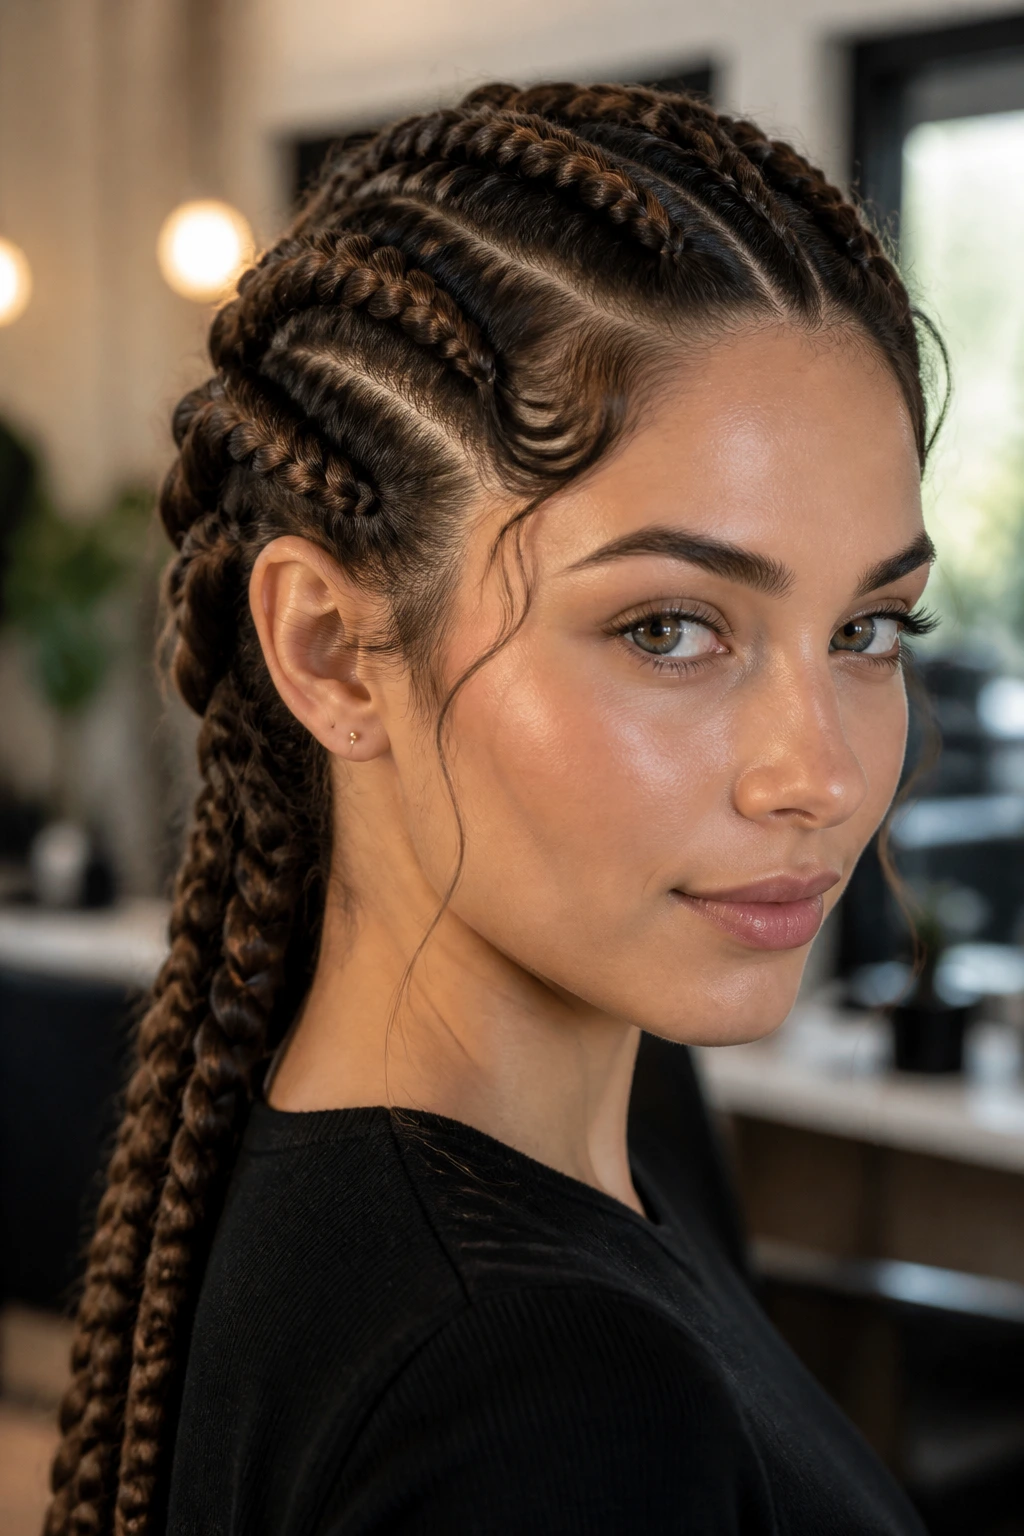
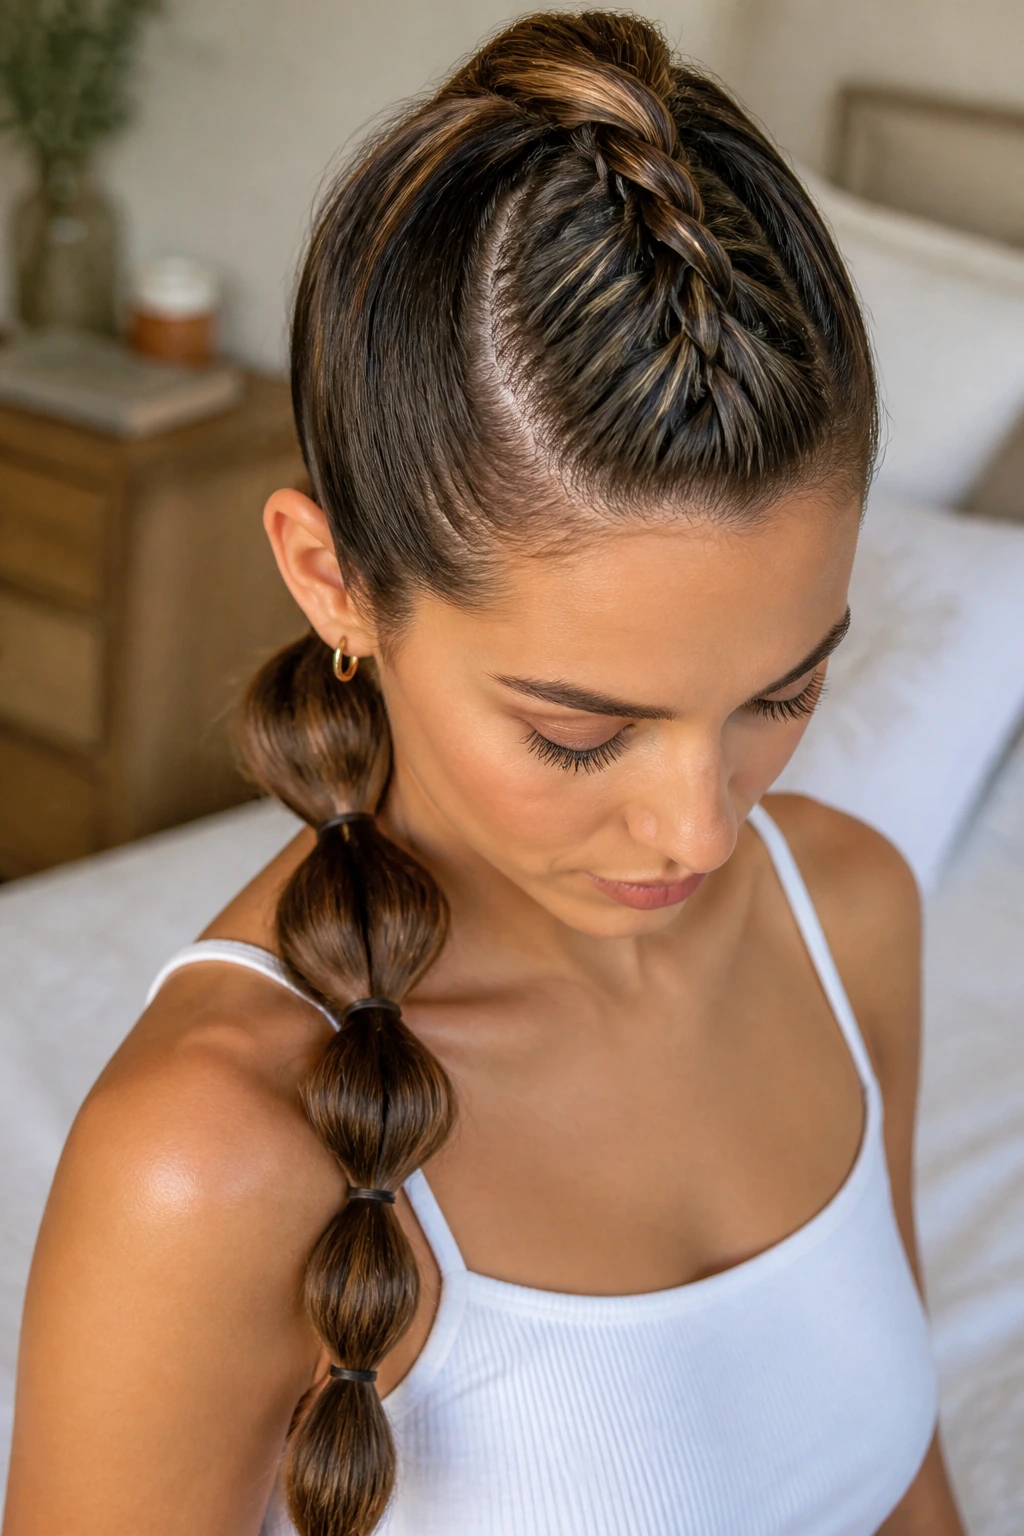
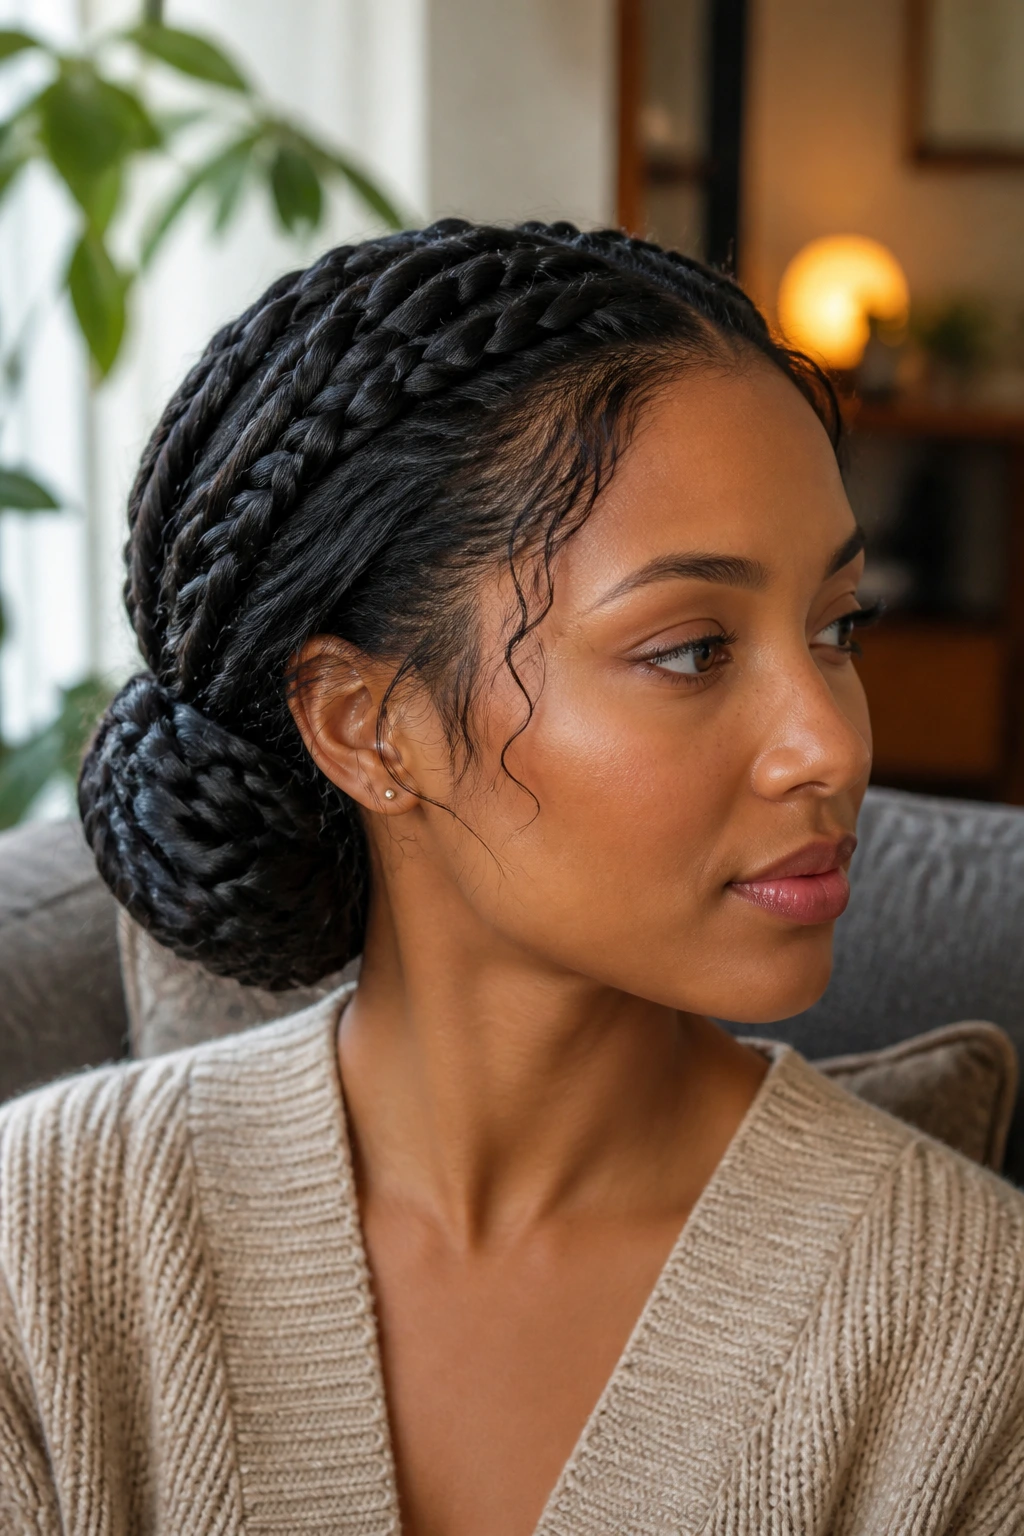
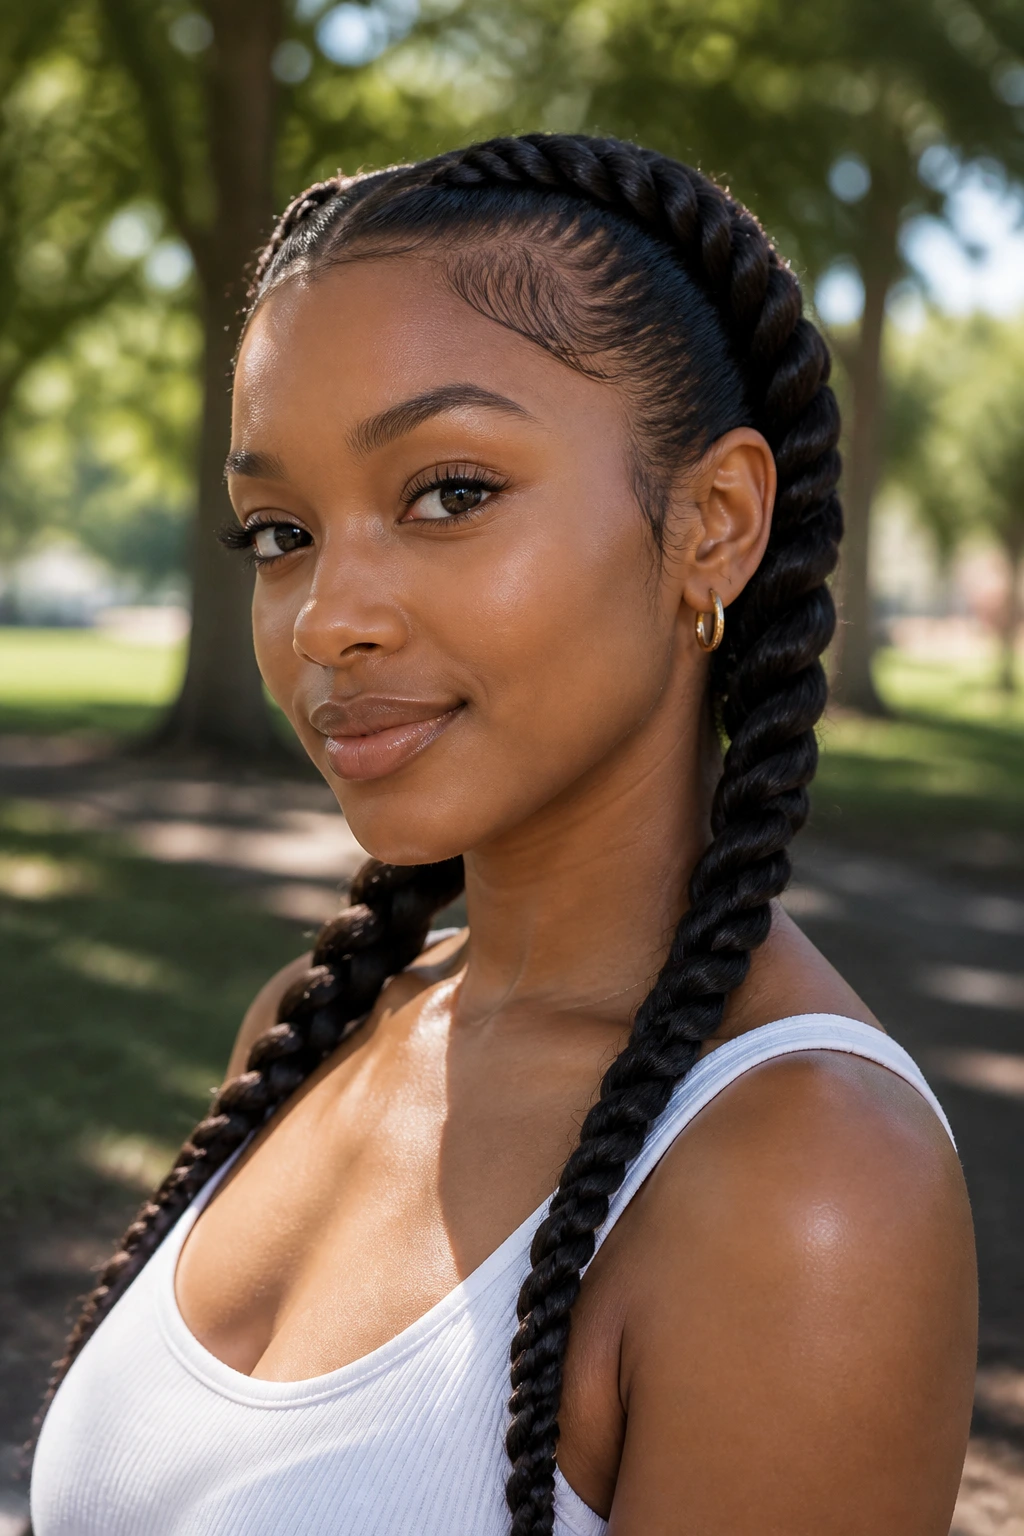
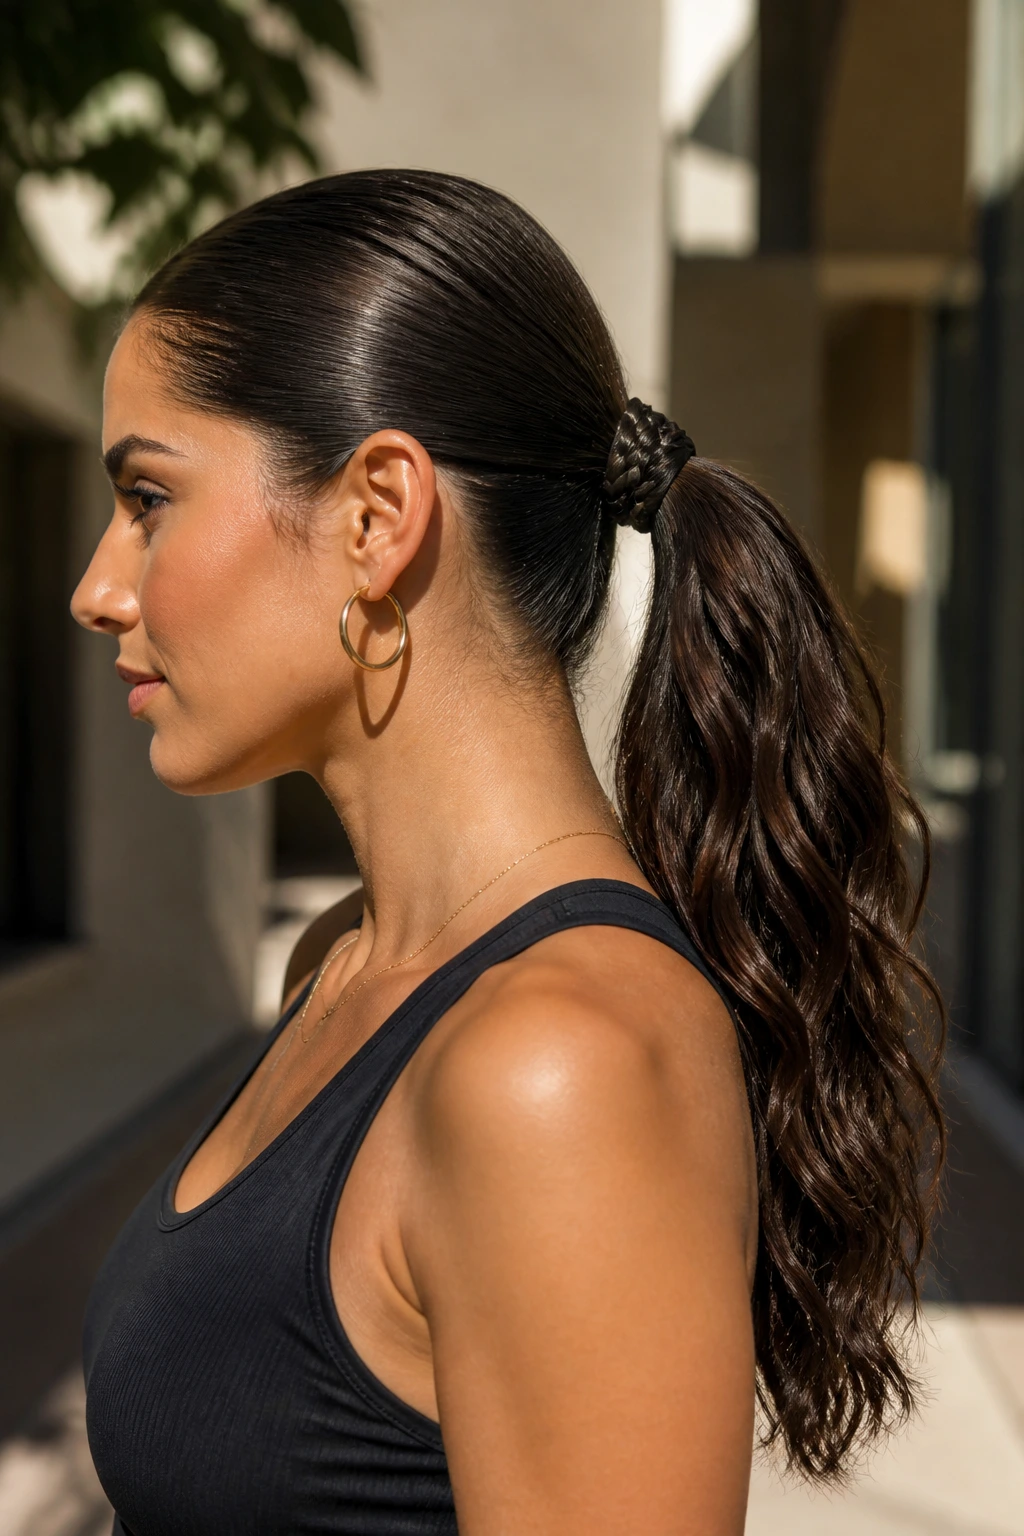
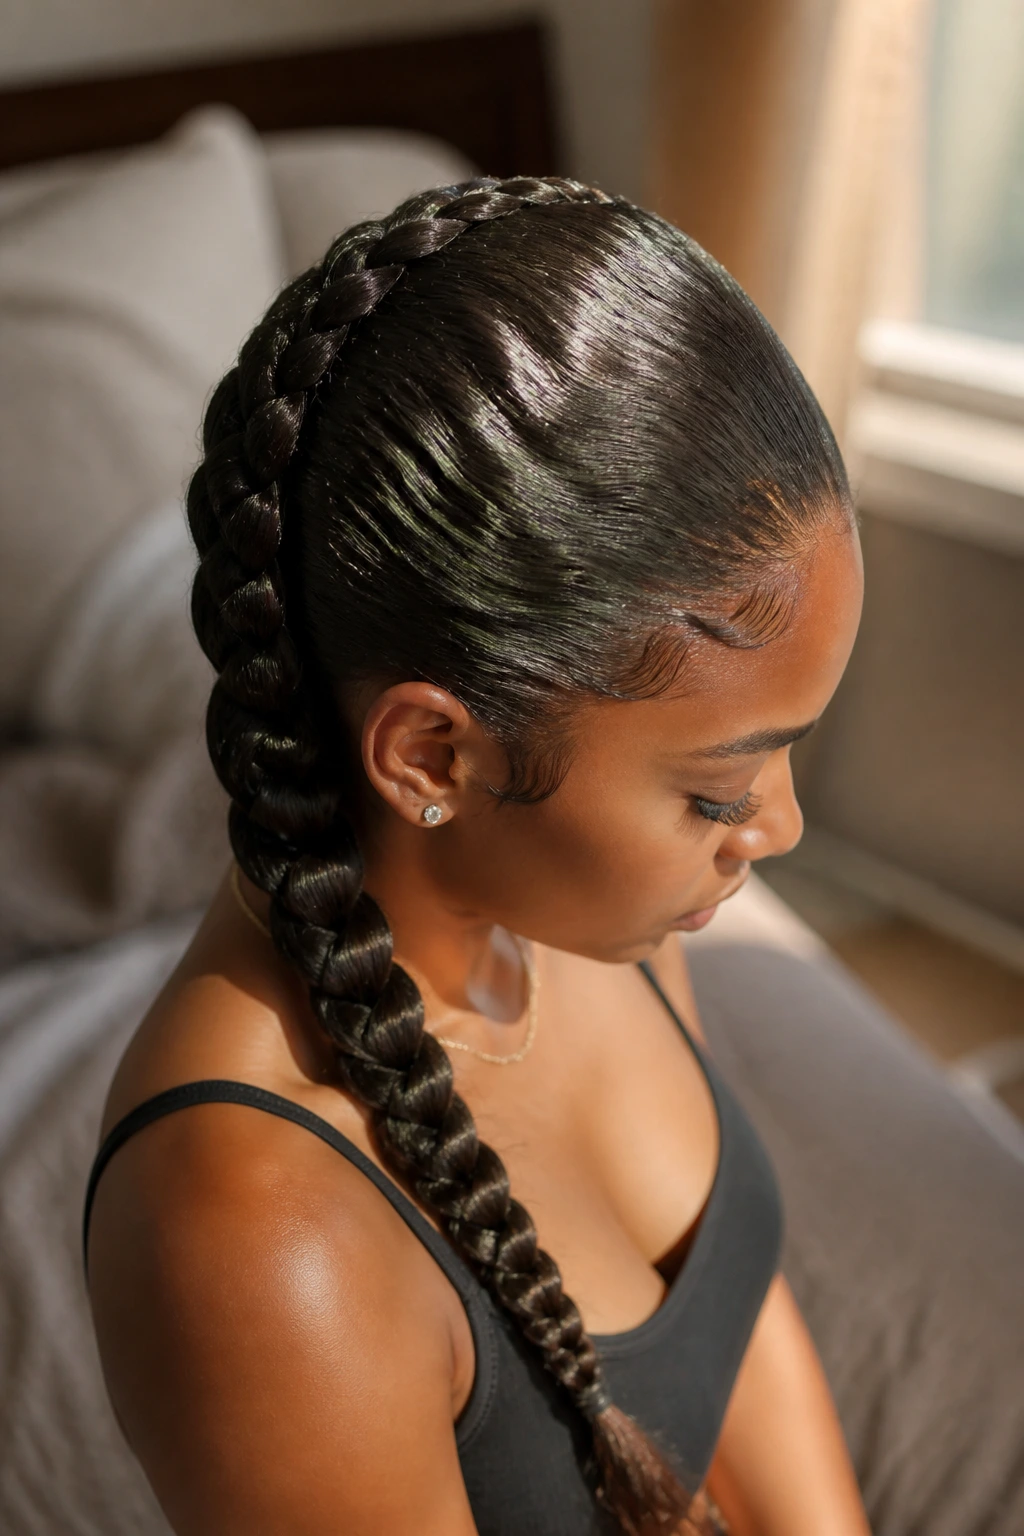
1. Sleek Dutch Braided Ponytail
A Dutch braid ponytail is one of those styles that looks neat from the front and even better from the side. The braid sits on top of the hair instead of sinking into it, which gives wavy hair some needed structure right away. Once the braid reaches the nape and drops into a ponytail, the whole style feels anchored.
Why It Works
The raised braid keeps the crown compact, which matters when your waves want to lift and expand. A tight part and a dab of mousse at the roots help the braid hold through the day without turning crunchy. Finish the tail with a soft wave or a flat-iron bend if you want more shine.
Best for: Medium to long wavy hair that frizzes at the crown.
Wear time: Usually 1 to 3 days with a satin wrap.
Tip: Wrap a thin strand around the ponytail elastic. It looks cleaner than a visible band, and it keeps the base from loosening.
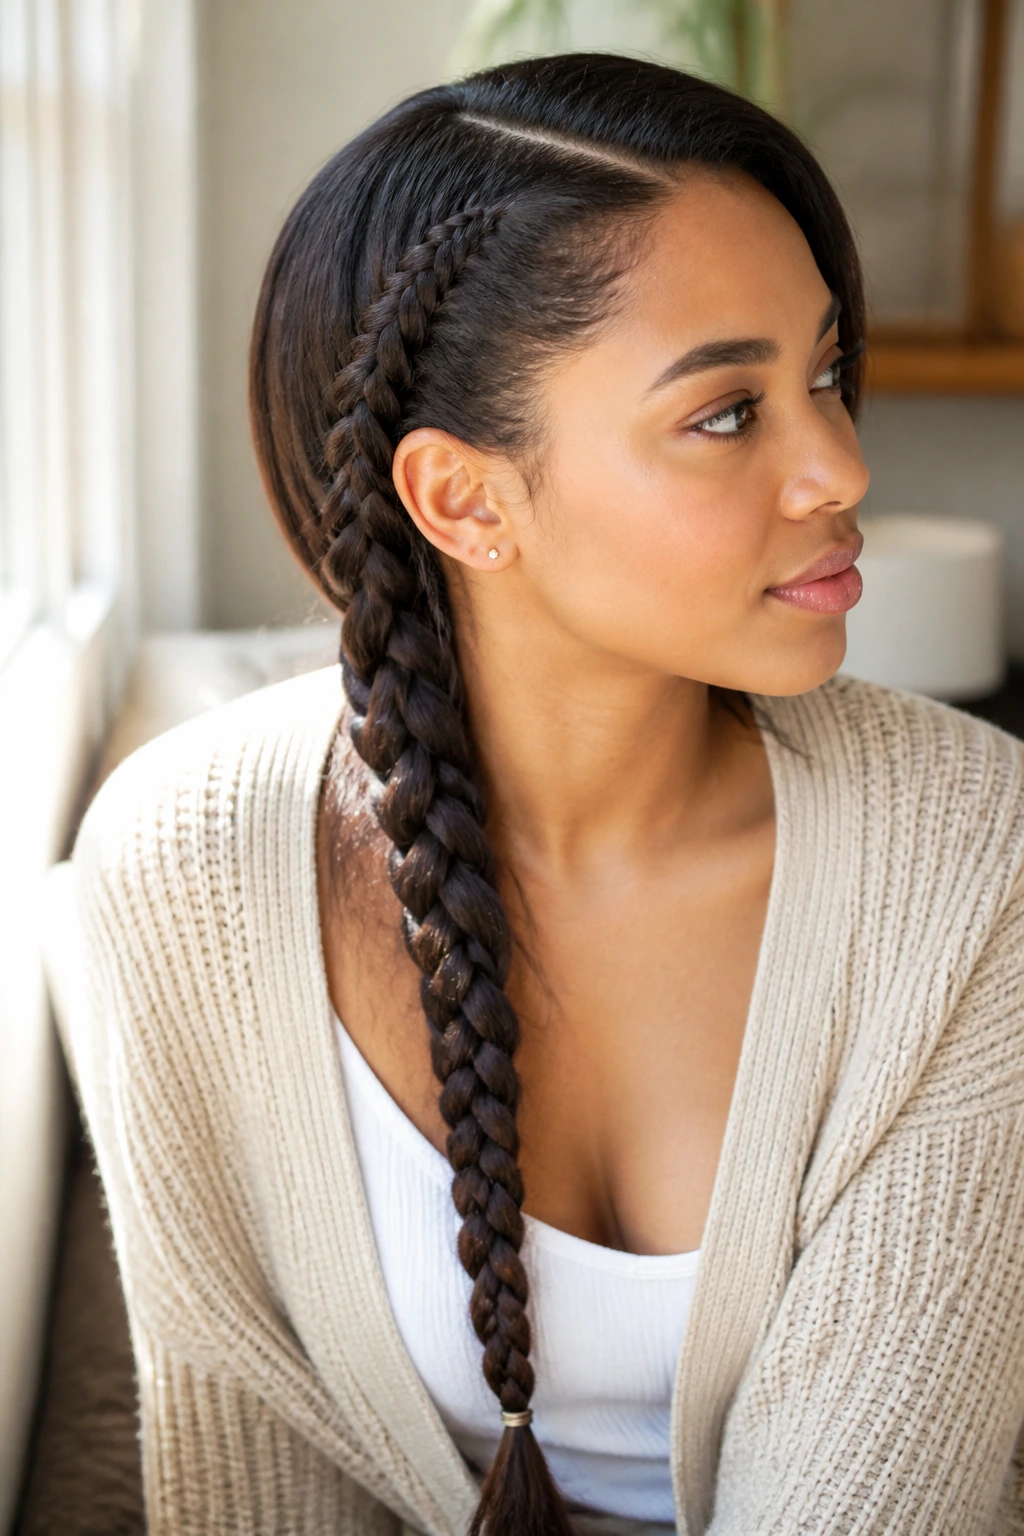
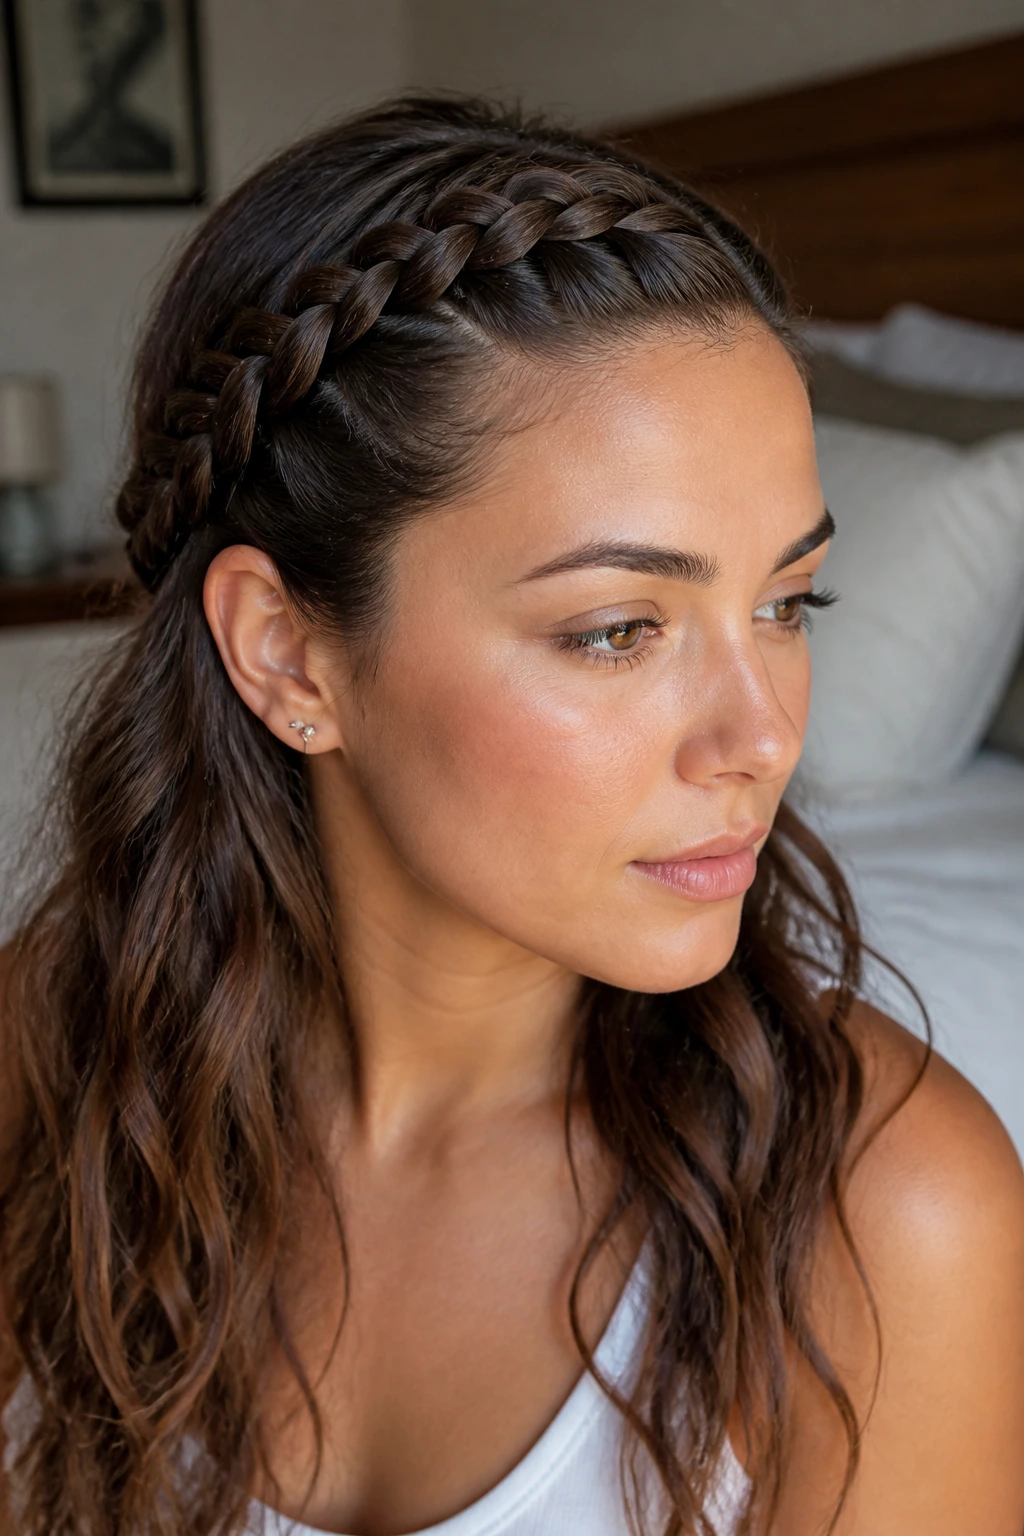
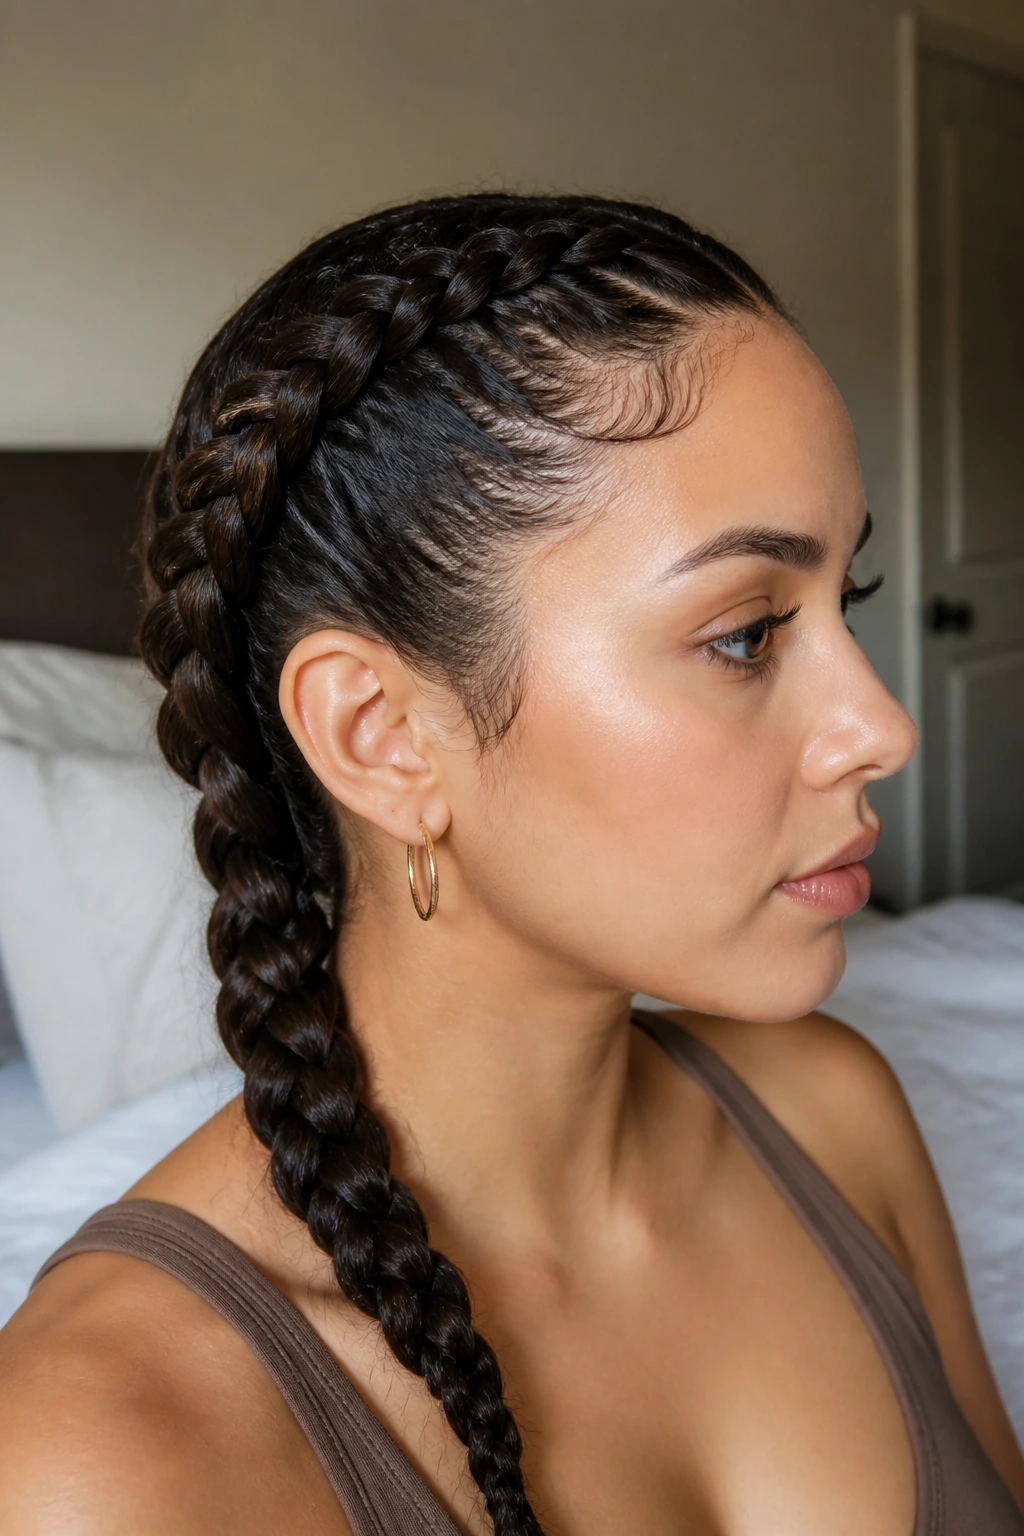
2. Center-Part French Braid
The center-part French braid is calm, tidy, and surprisingly durable when it’s done close to the scalp. It’s the kind of braid that makes wavy hair look disciplined without flattening every bit of movement out of it. The line down the middle is doing a lot of work here.
Why It Stays Put
French braids are good at catching loose wave patterns before they puff outward. Start with a clean part, smooth each side with a brush, and braid while the hair is mostly dry. If the roots are too damp, the braid will swell as it dries and lose that crisp shape.
A Few Details That Matter
- Keep the braid snug at the crown.
- Use clear elastics at the ends.
- If your hair is fine, a touch of texturizing spray at the mids helps grip.
My preference: A French braid that starts high at the forehead tends to look more polished on wavy hair than one that begins too low.
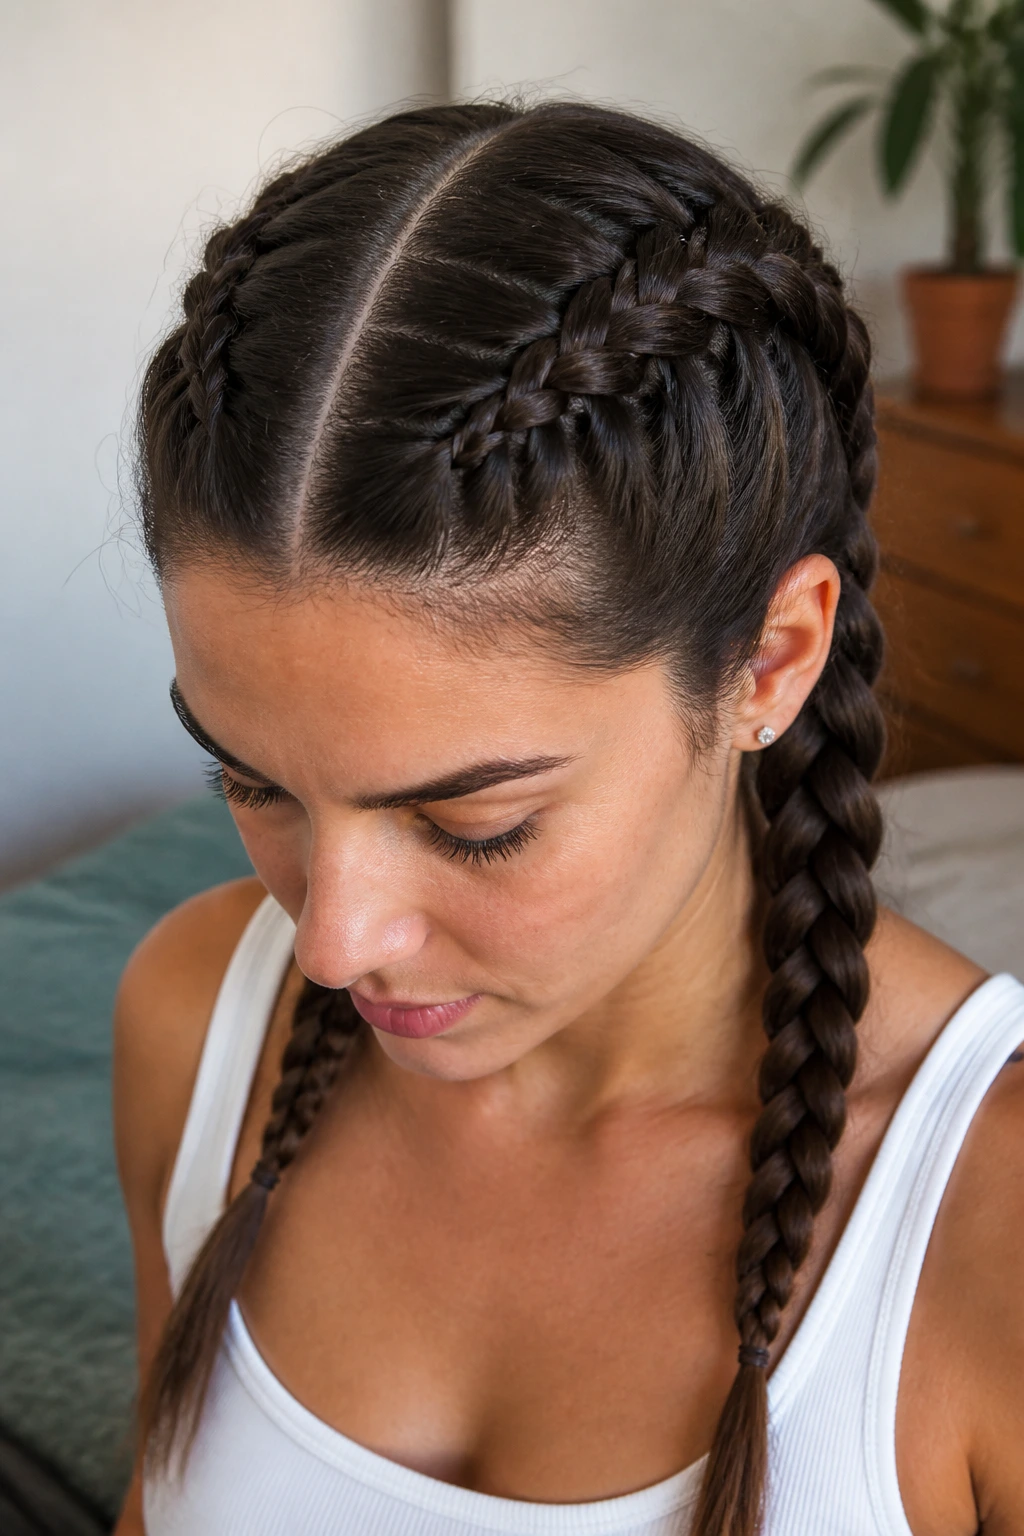
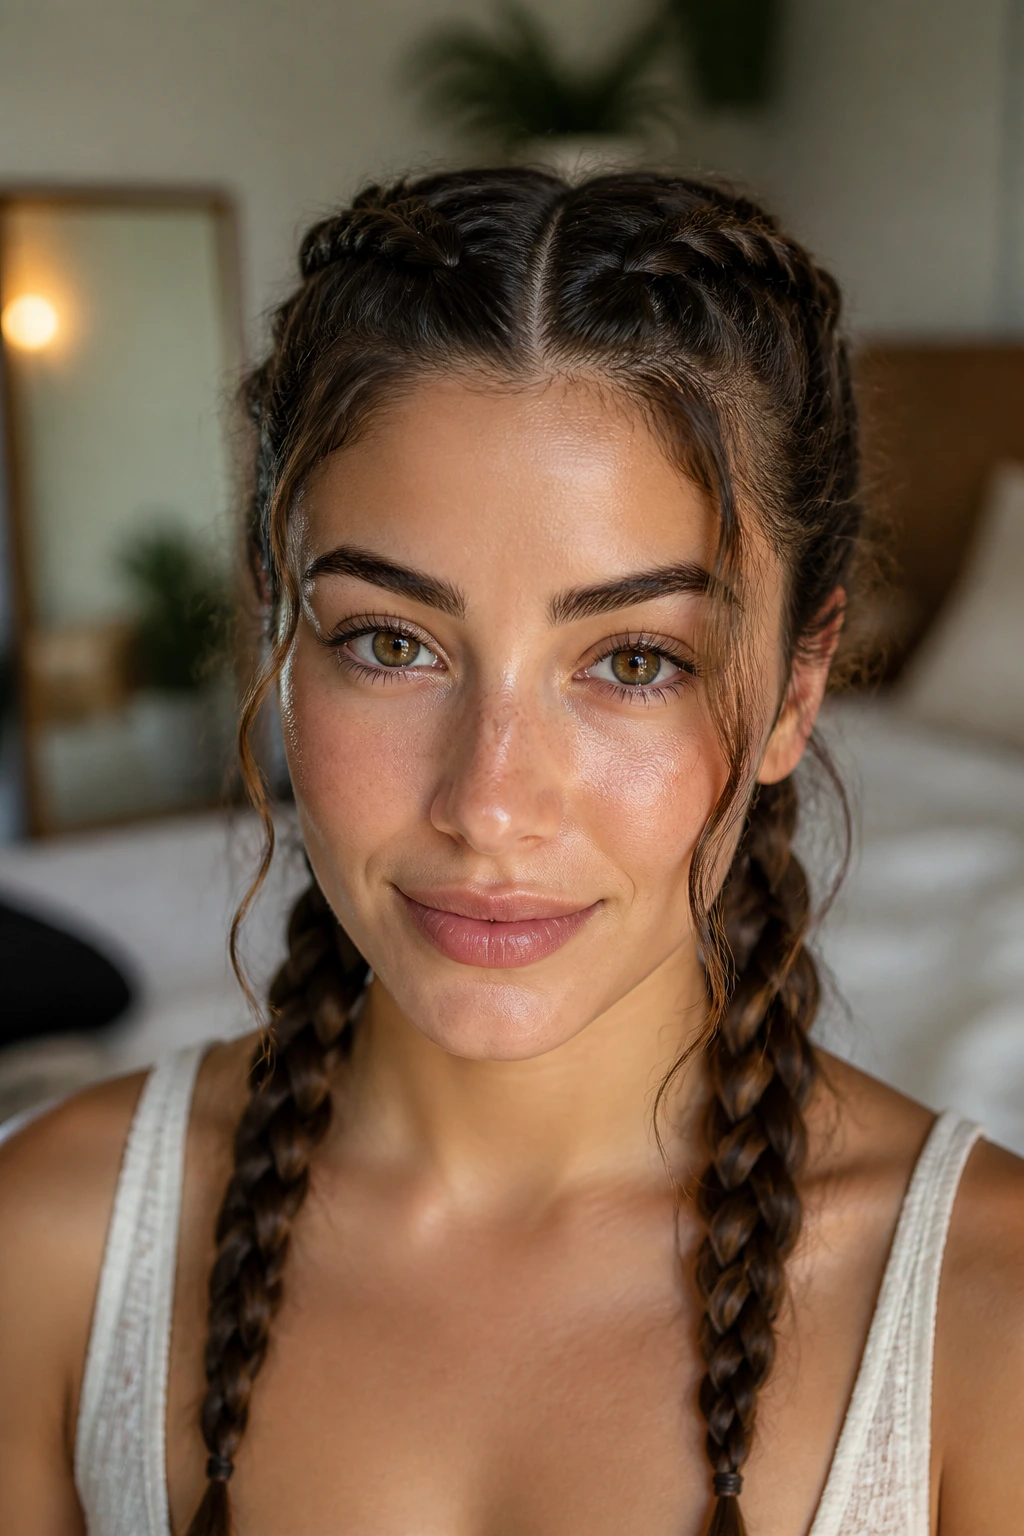
3. Twin French Braids
Twin French braids are classic for a reason. They divide the weight of the hair, keep the scalp flat, and stop the back sections from bunching into one heavy rope. On wavy hair, that matters. One braid can shift and lean. Two stay balanced.
The style lasts because the pressure is spread out evenly. That reduces the puff at the roots and gives you a neater outline around the face. If your waves are dense, braid the sections a little smaller than you think you need to. Bigger sections look soft at first, then spread out later.
Good move: Add a little mousse before you part. It helps the sections stay separate and keeps the flyaways from migrating into the braid.
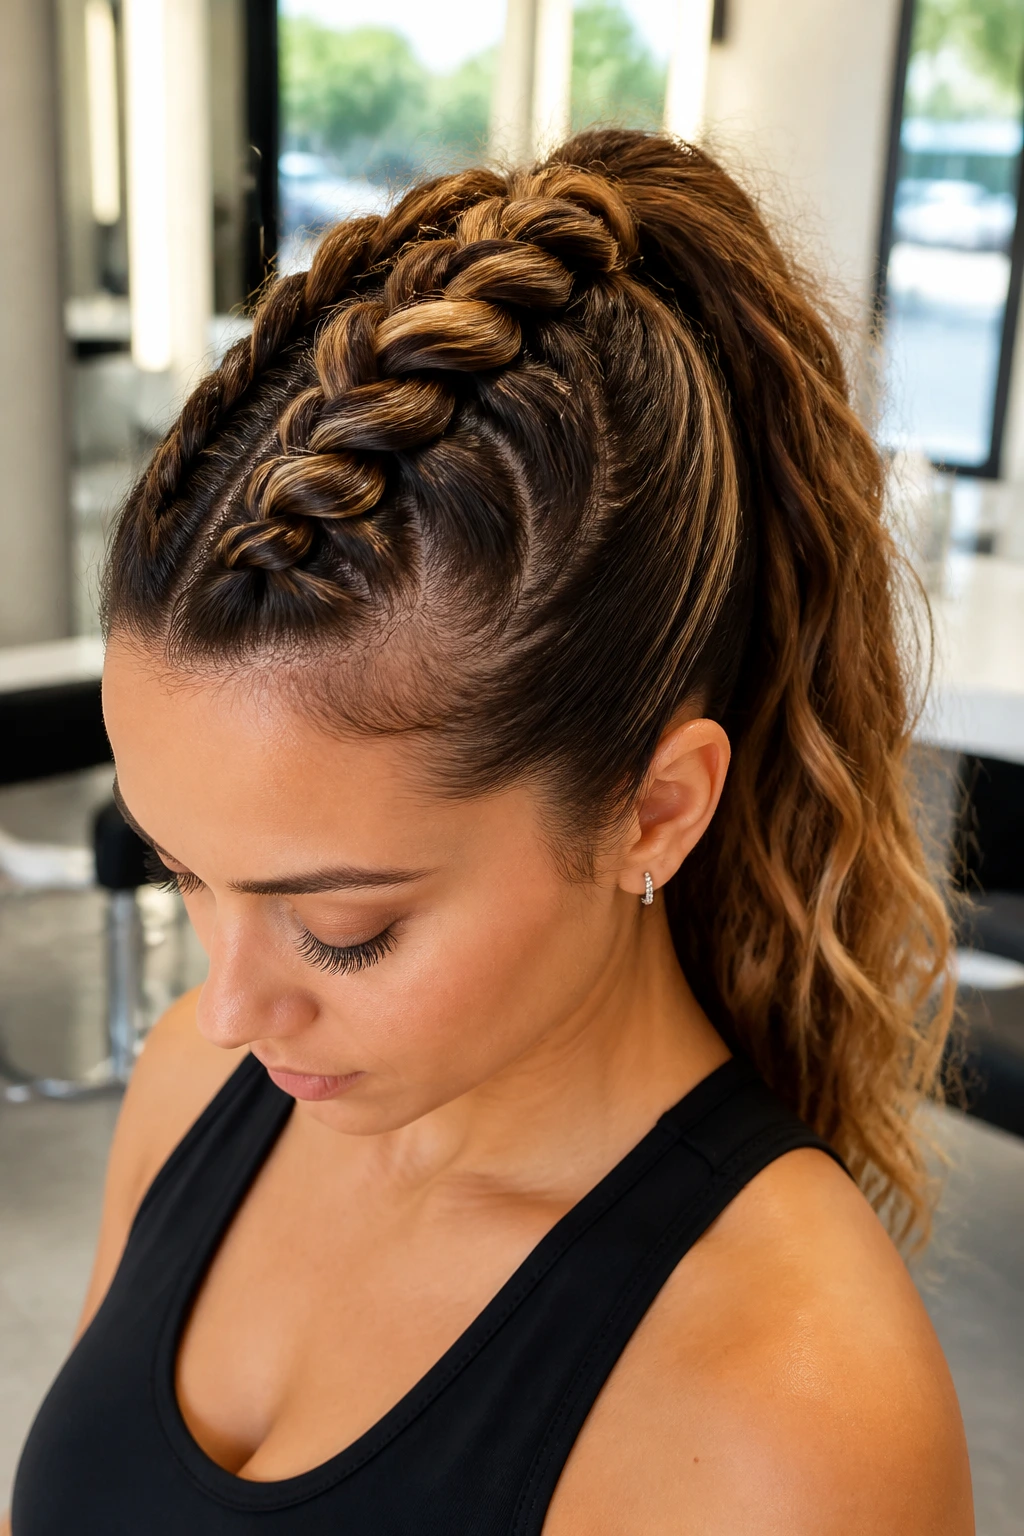
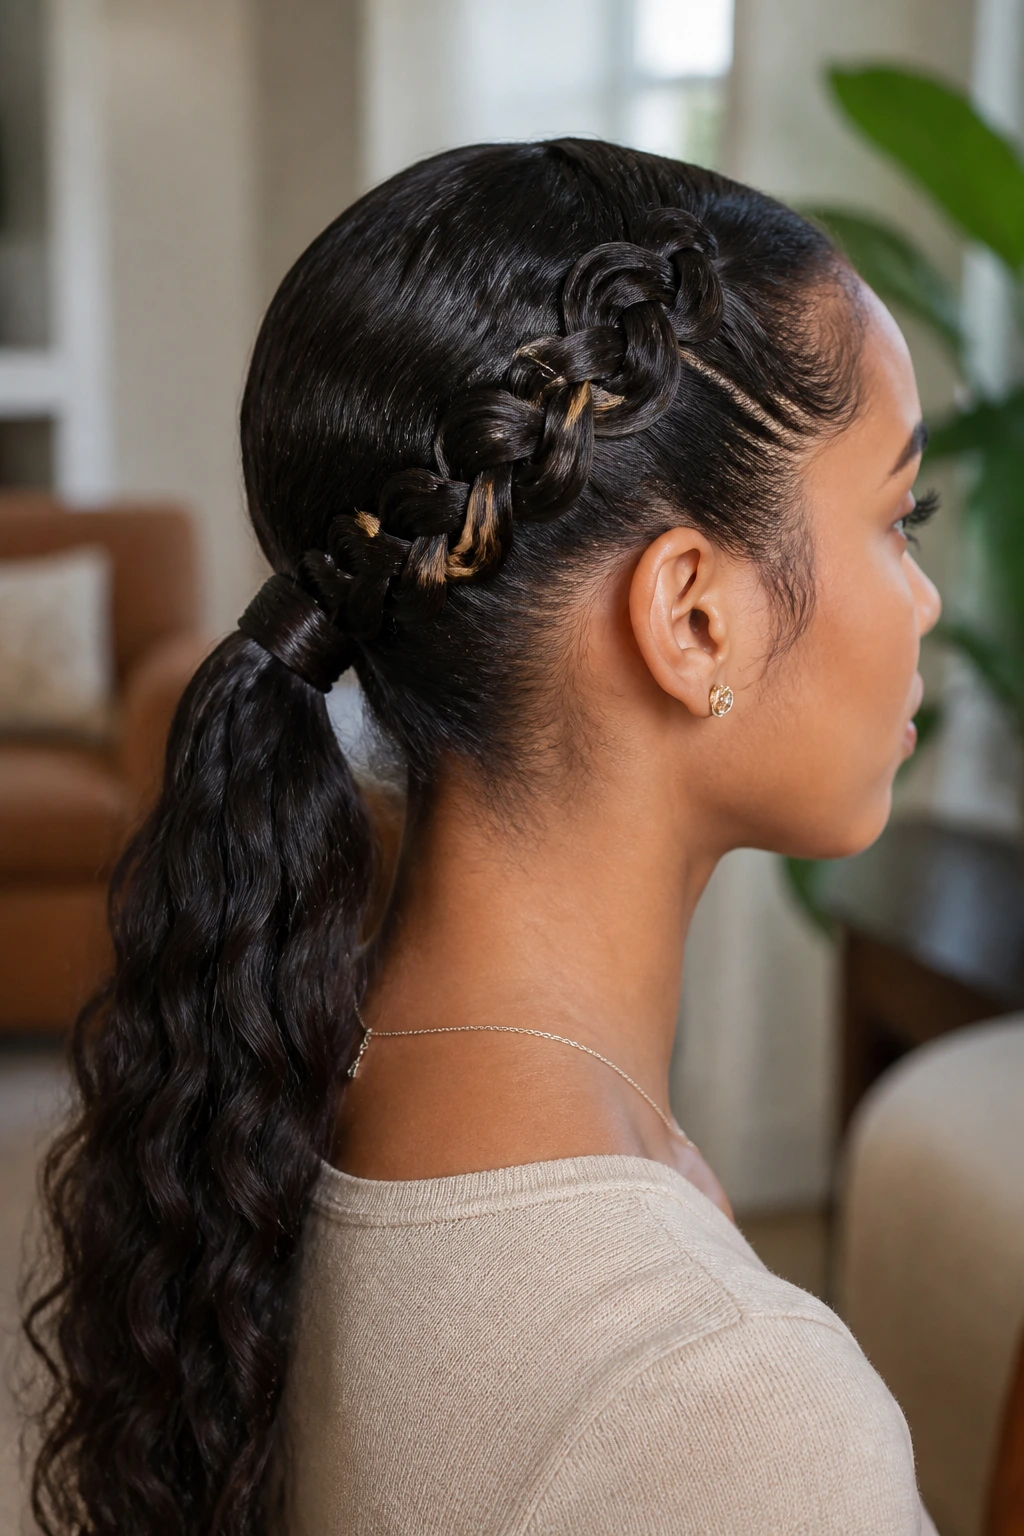
4. Rope-Braid Low Ponytail
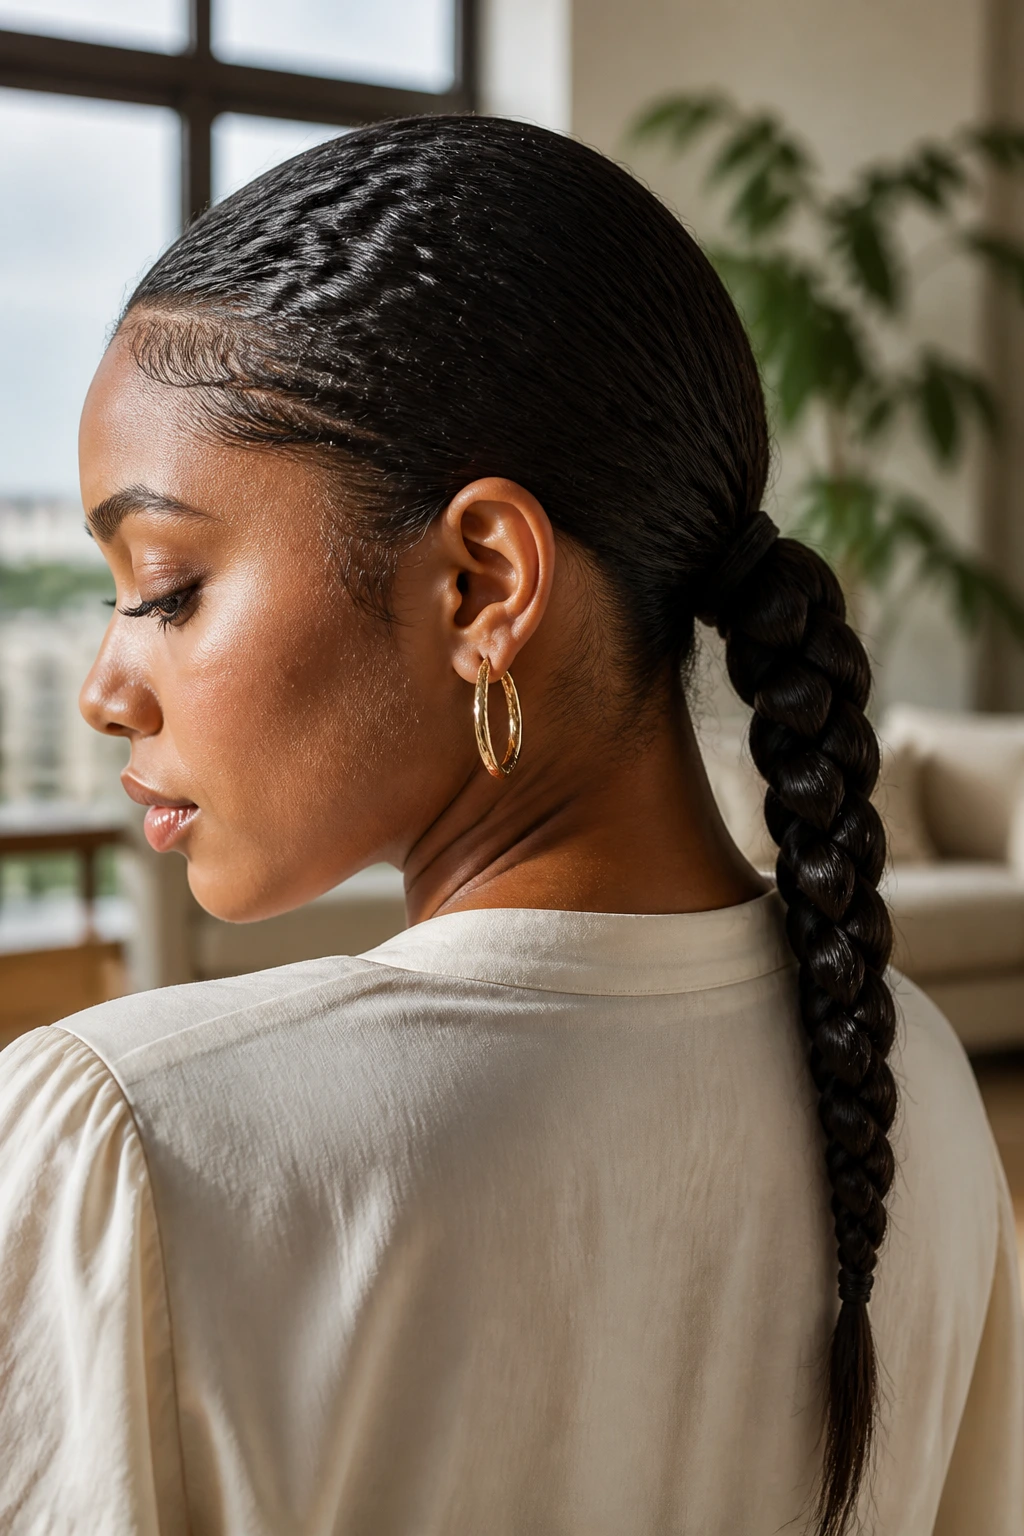
A rope braid is a smart option when you want something sleek but don’t want to spend forever crossing strands. It twists hair into a tight spiral that stays orderly on wavy textures, especially when the ponytail starts low and snug at the nape.
The low placement helps because it tucks the style away from wind, collars, and the friction that happens when you move your shoulders. That makes it a better long-wear choice than a high ponytail rope braid, which tends to loosen faster.
How I’d wear it: Smooth the crown with a brush and gel, gather the hair low, and twist the ponytail tightly before securing the ends. If your hair is layered, secure the last inch with a tiny clear elastic so the ends don’t unravel.
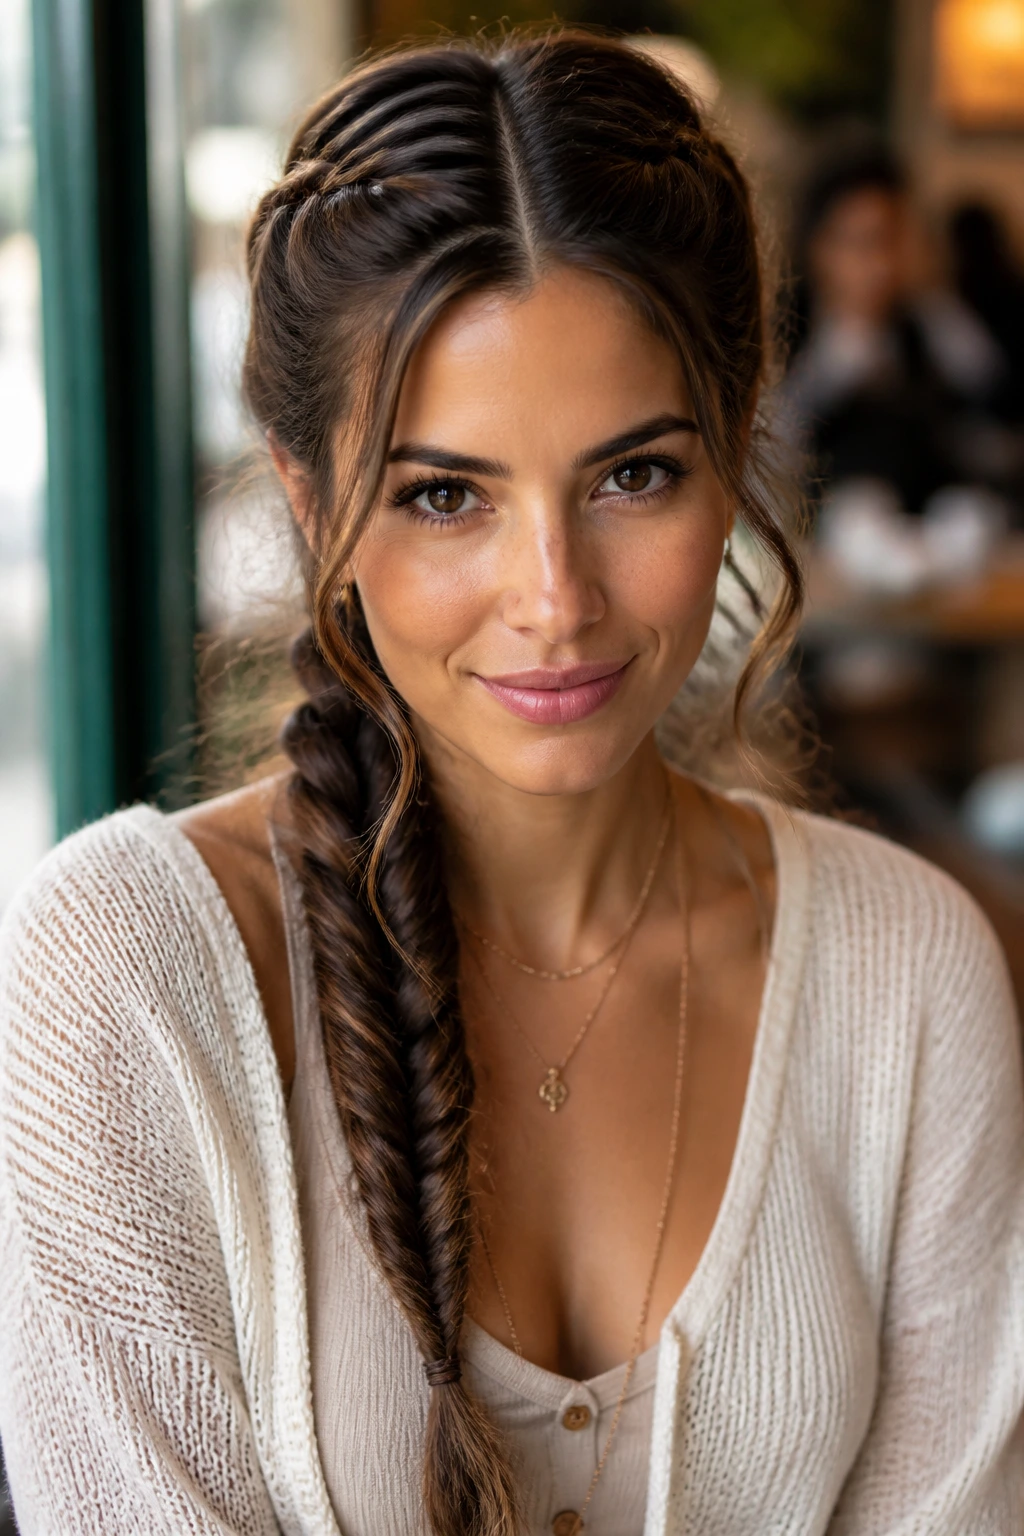
5. Fishtail Braid Down the Back
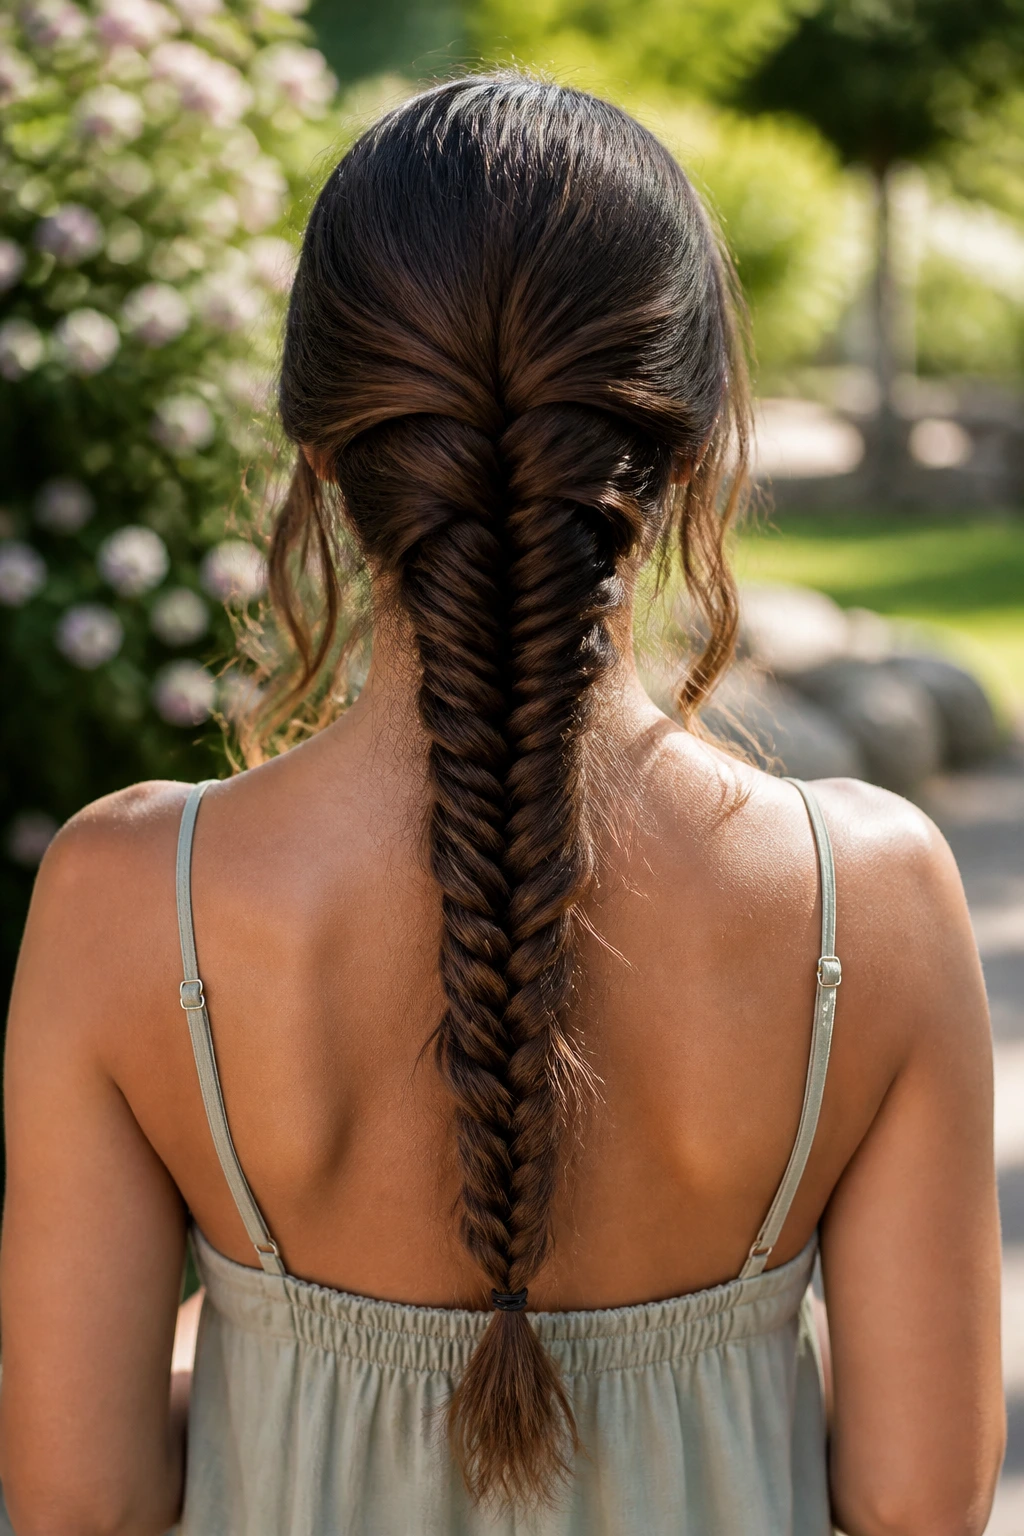
A fishtail braid is a little more fussy to make, but it pays you back with a compact, detailed finish that looks good on wavy hair because the texture of the braid echoes the texture of the hair itself. It’s not bulky. It’s almost rope-like, which helps it sit neatly down the back.
The trick is tension. Keep both sides evenly pulled, and don’t let the sections puff too much while you work. Wavy hair can make a fishtail look dreamy or messy; the difference is usually just how tightly you pinch the braid at each pass.
What to Watch For
- Braiding on hair that’s too slippery.
- Pulling unevenly and ending up with one side thicker.
- Forgetting to secure the tail with a strong elastic.
Best use: When you want a braid that still looks intentional on day two, not just on the first hour.
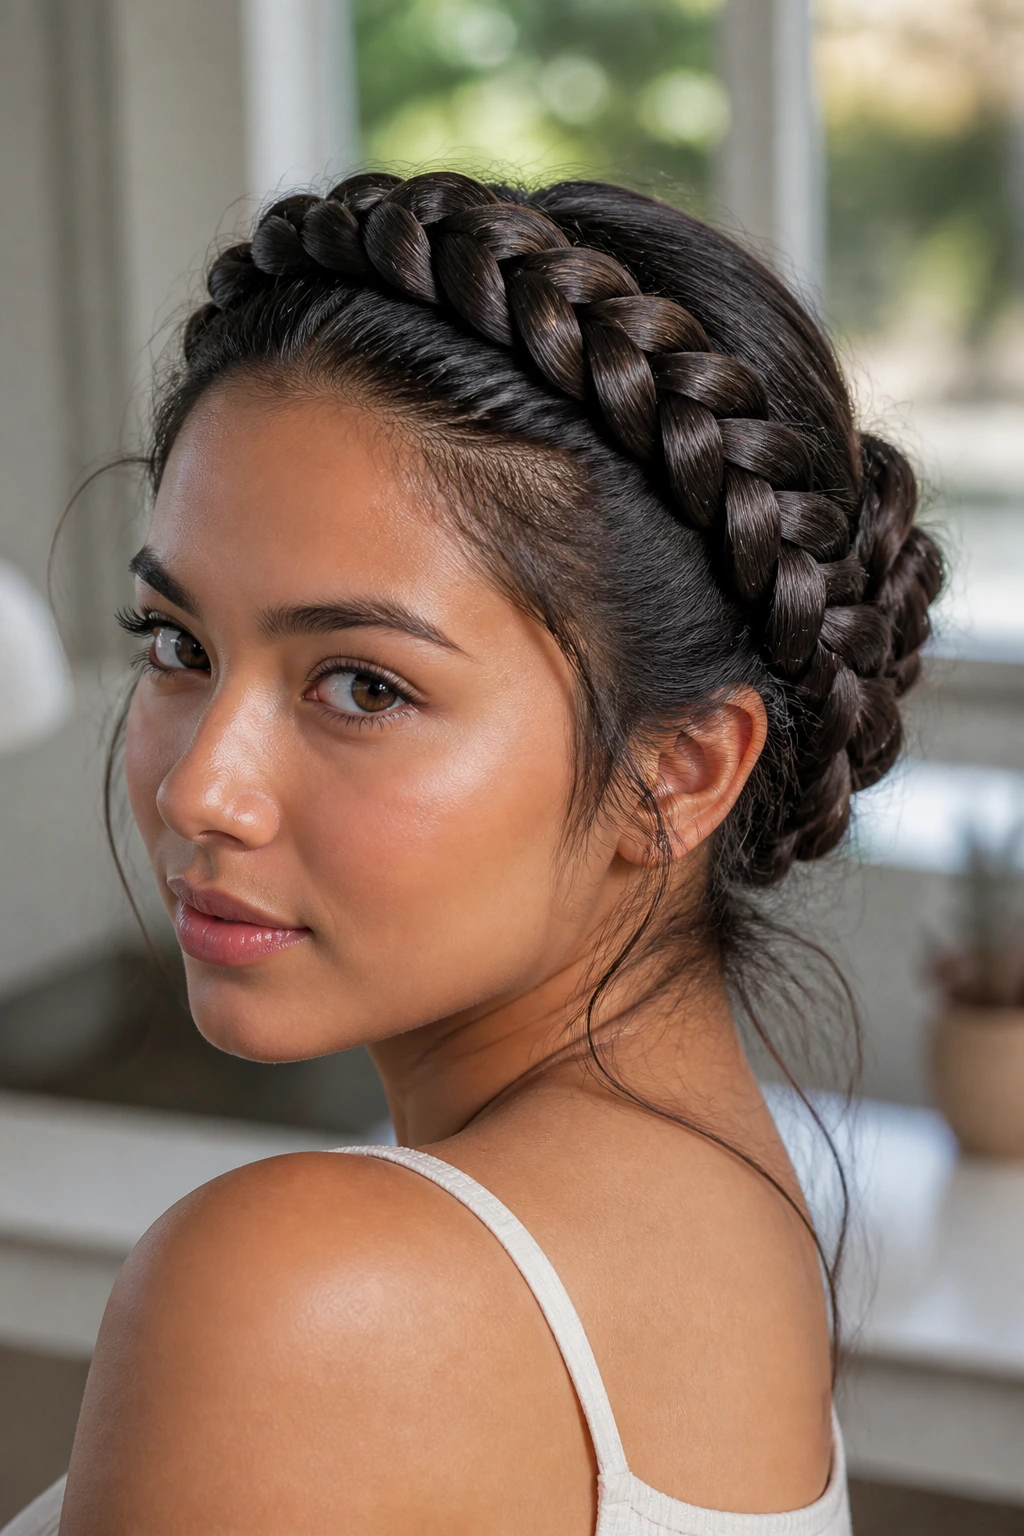
6. Halo Braid Wrapped Close to the Head
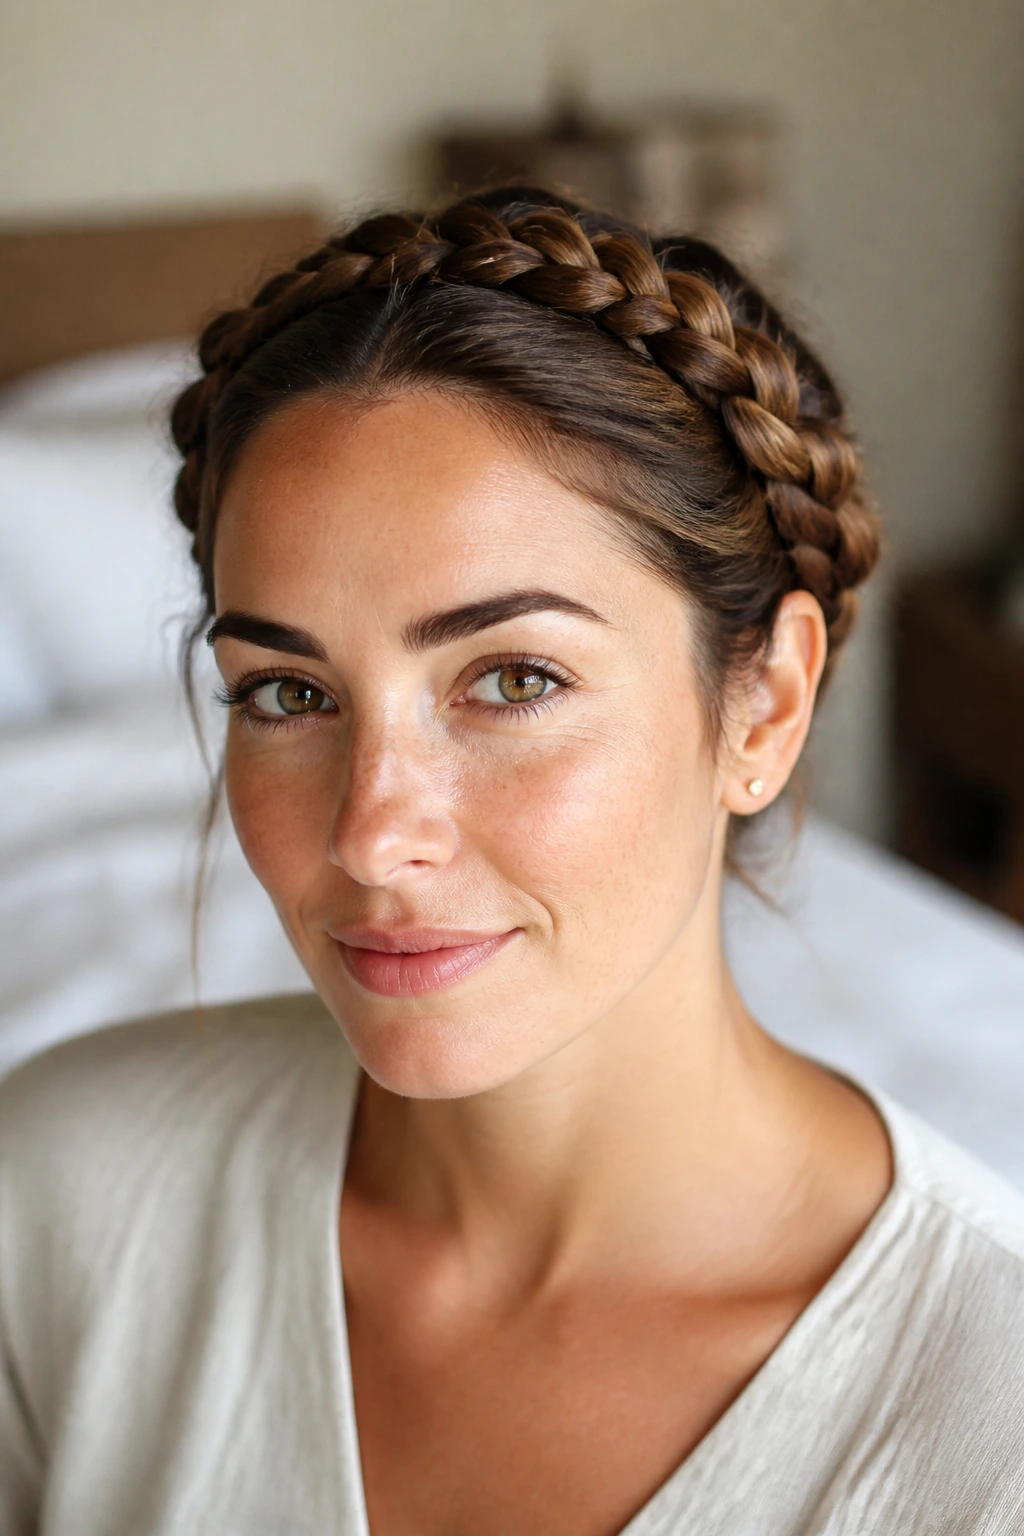
A halo braid is one of the best styles for long wear because it keeps the hair pinned down all the way around the perimeter. That means less escaping at the temples and fewer pieces rubbing against your clothes. On wavy hair, that control is everything.
This style looks especially clean when you braid close to the scalp and tuck the ends underneath instead of leaving them loose. It’s the difference between a romantic halo and a halo that actually lasts through dinner, a commute, and a nap on the couch.
Why It’s Reliable
Because the braid circles the head, the shape doesn’t depend on one weak point. If one section loosens a little, the rest still holds the style together. It’s also one of the nicest ways to show off a clean parting without needing perfect stick-straight hair.
7. Braided Low Bun

A braided low bun is a practical answer for wavy hair that gets fuzzy at the ends. The braid keeps the hair organized, and the bun tucks the ends into a compact shape that doesn’t catch on anything. Simple. Very effective.
Start with a low braid or a braid that begins at the nape, then coil it into a bun and pin it flat. The flatter the bun sits, the longer it tends to last. If you let it perch high or loose, the weight of the braid will pull it down by the end of the day.
Pro move: Use one pin to anchor the center first, then cross the others over the edges. That locks the bun better than shoving a bunch of pins in at once.
8. Deep Side Braid
A deep side braid changes the balance of the whole look. Instead of splitting the weight evenly, it lets the hair fall over one shoulder, which can actually help wavy hair stay smooth because there’s less movement across the back.
This braid feels slightly softer than a center-back style, but it still wears well if you keep the top section polished and the braid itself tight. I like this one for hair that’s thicker around the back of the head and a little flatter near the temples. The side part gives the shape some lift where it needs it.
Good pairing: A side braid looks especially clean when you tuck the front section behind one ear and pin it under the braid base. That keeps the side from fraying out by lunchtime.
9. Four-Strand Shine Braid
A four-strand braid looks intricate, but the real appeal is how compact it stays. The extra strand keeps the braid dense and smooth, which is useful on wavy hair that tends to loosen a simpler pattern too fast.
The finish has a flatter, ribbon-like look. That’s part of the appeal. It doesn’t balloon out as much as some three-strand braids, so it can hold a neater shape for longer. Just make sure the sections are even. If one strand starts thinner than the others, the braid will twist oddly and set unevenly.
Quick note
A light serum on the mids and ends helps the pattern read cleanly, but don’t drench the roots. Too much slip and the whole thing slides.
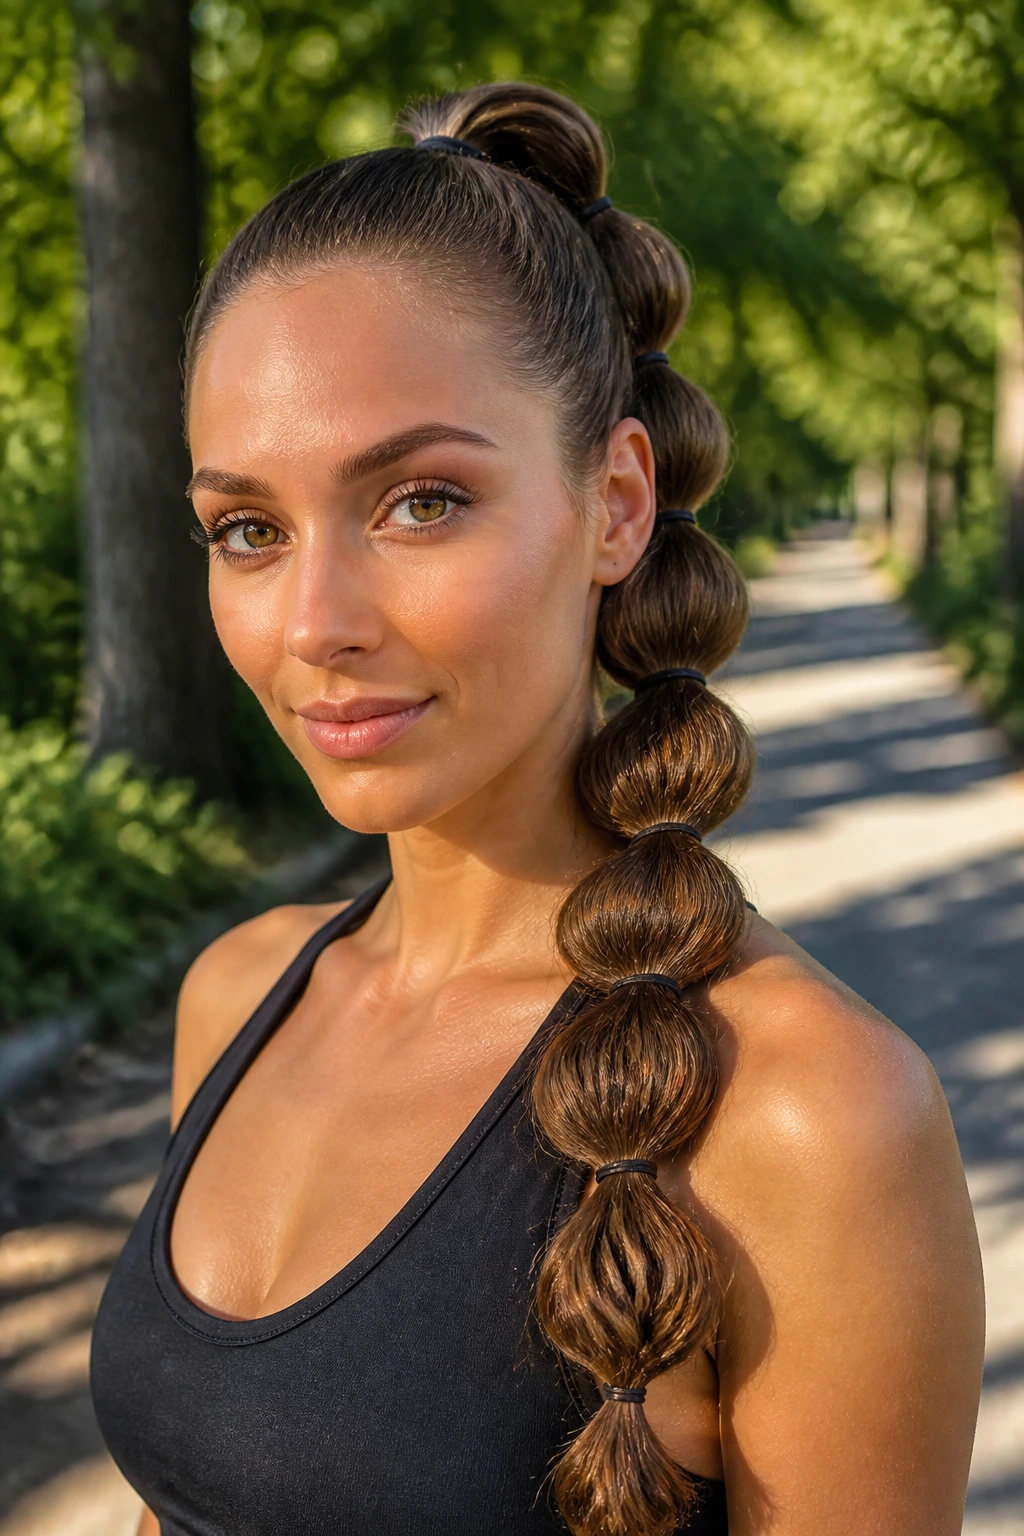
10. Bubble Braid with a Braided Base
This is the style for someone who wants a sleek look with a little shape change halfway through. Start with a tight braid at the crown or a braided ponytail base, then switch into bubble sections down the length. The braid does the grip work; the bubbles handle the visual finish.
Wavy hair benefits from this because the top stays controlled, even if the tail has a bit of texture. You’re not asking the entire head to behave the same way. Smart, honestly. The braid gives structure, and the bubbles keep the style from looking too severe.
Best for long wear: If you use clear elastics every 2 to 3 inches and gently pull each bubble to even it out, the style keeps its shape better than a loose ponytail ever will.
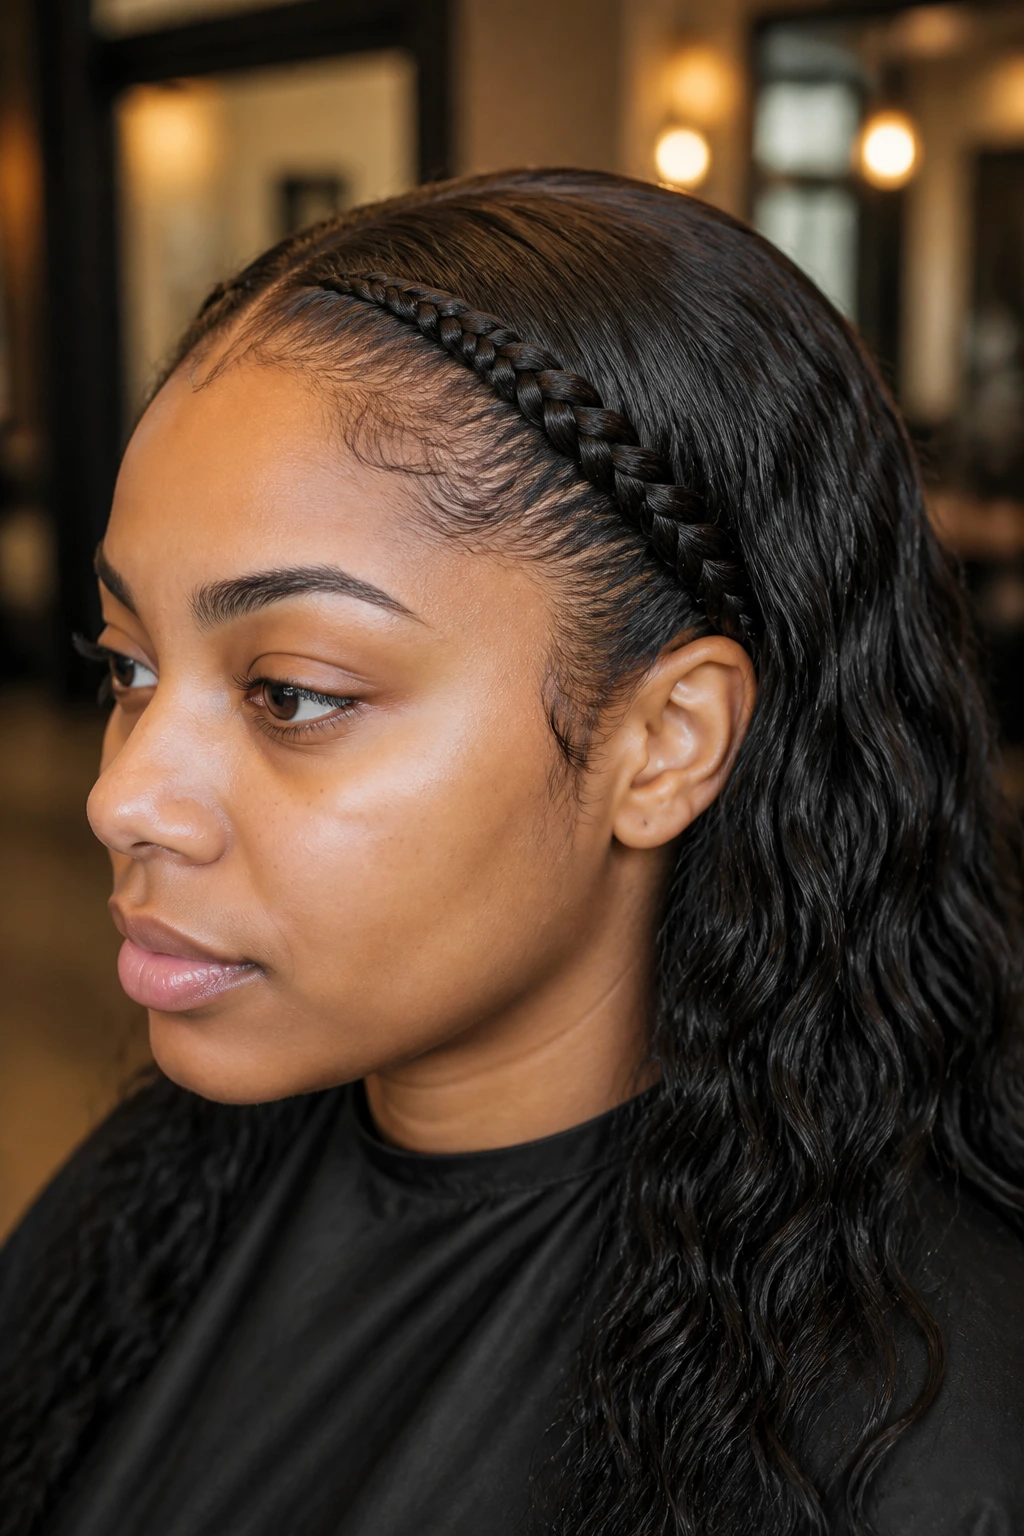
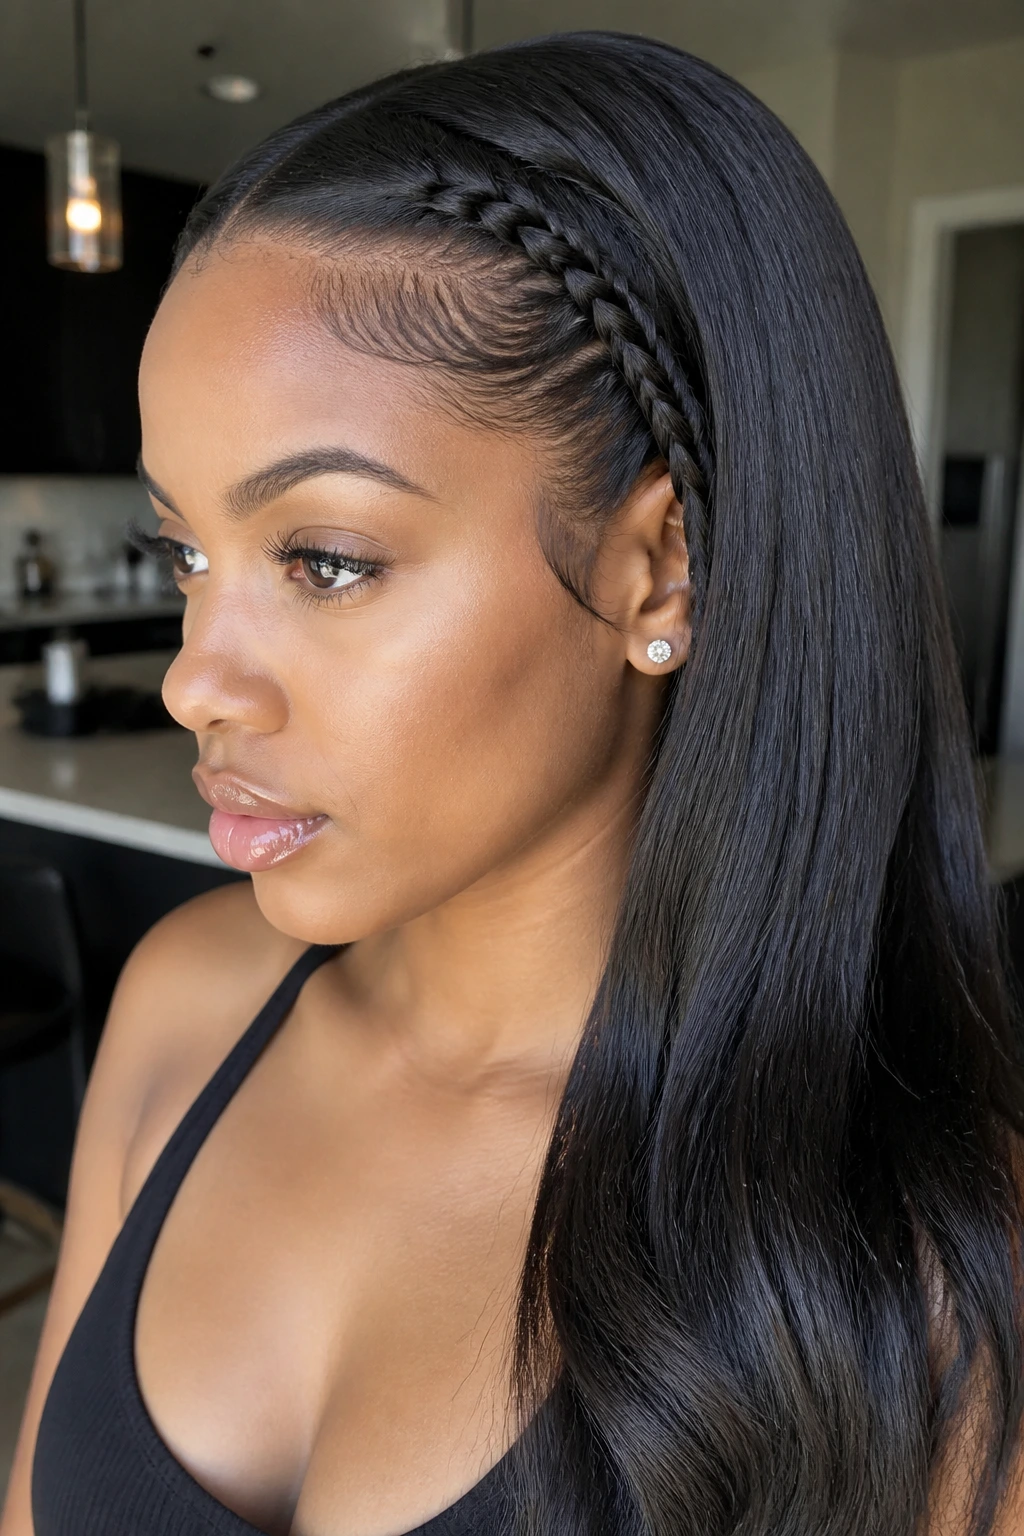
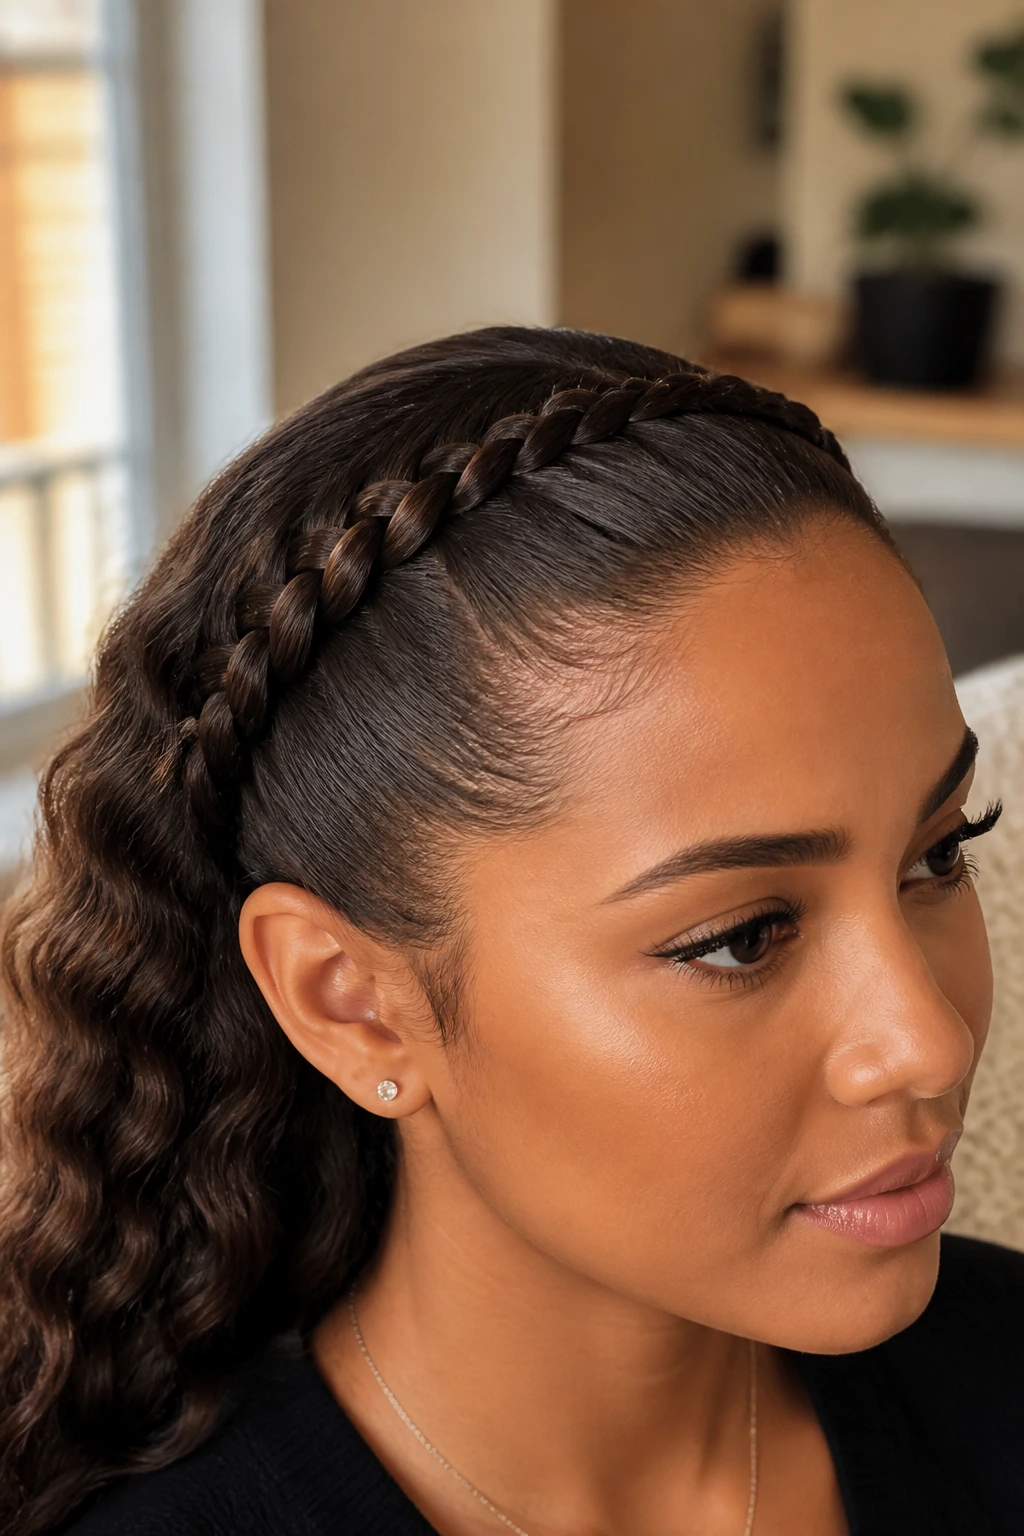
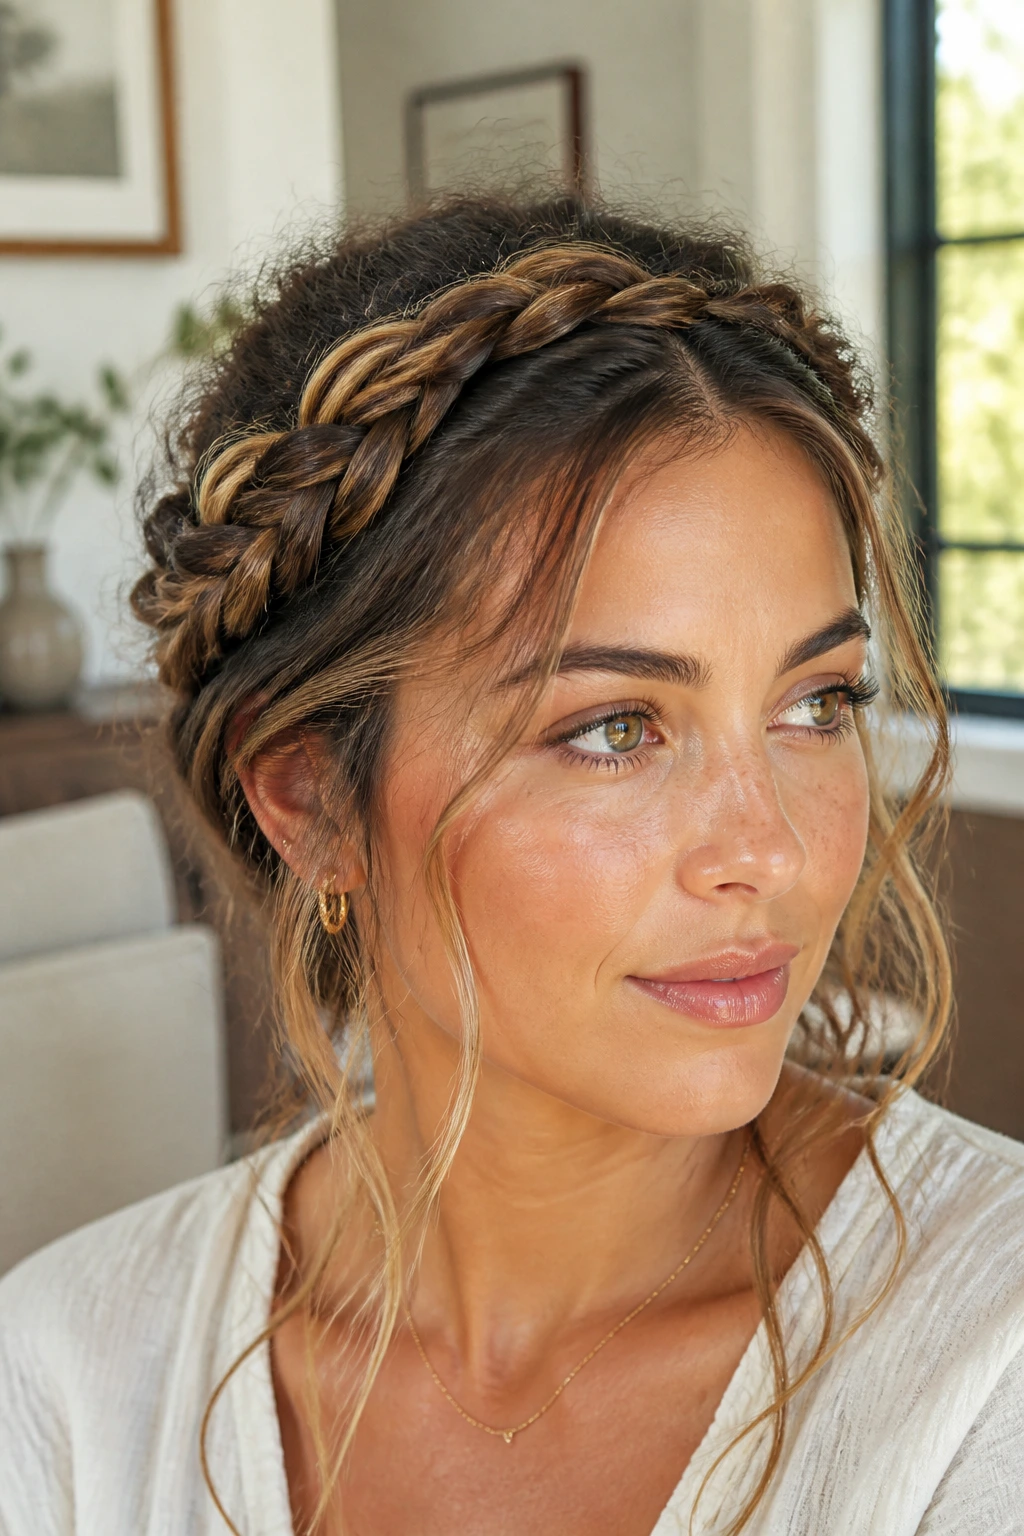
11. Braided Headband Style

A braided headband is one of the best fixes for waves that puff at the hairline. The braid crosses the front like a built-in accessory and keeps the fringe area from doing its own thing. That matters if you’re trying to wear the rest of your hair down.
The braid can come from one side and sit like a band across the forehead or crown. Either way, it’s the front section that does the work. Once it’s pinned in place, the rest of the hair can be left sleek, loosely waved, or tucked back.
Why it’s useful
It gives you the look of a styled front without needing every strand to behave. For wavy hair, that’s a relief.
12. Boxer Braids into a Knot
Boxer braids are just tight twin Dutch braids, but once you bring the ends together into a low knot, they become a sturdier, more polished style. The braids sit close to the scalp, which is where wavy hair needs help most, and the knot finishes the look without a lot of loose tail to frizz out.
This is a good choice if you want the kind of style that stays neat through movement. The braid structure holds while the knot keeps the ends safe. If you make the knot too big, it starts to sag, so keep it compact and pin it right at the base.
My take: This works better on wavy hair than a pair of loose boxer braids left hanging. The knot gives the whole look a point to land on.
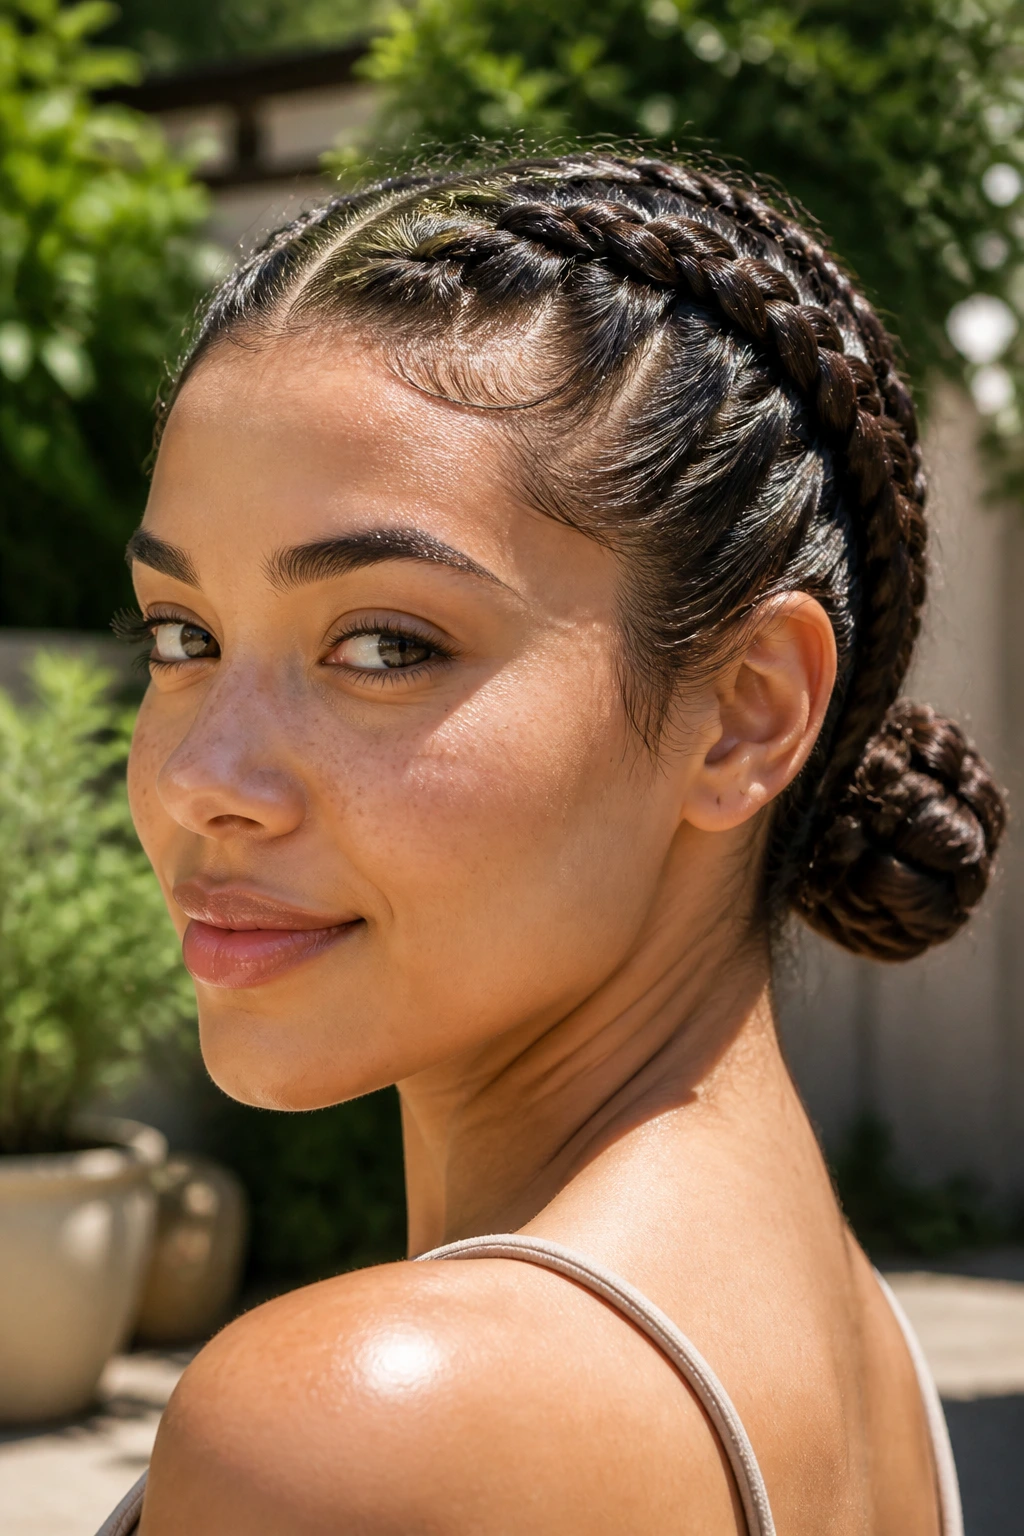
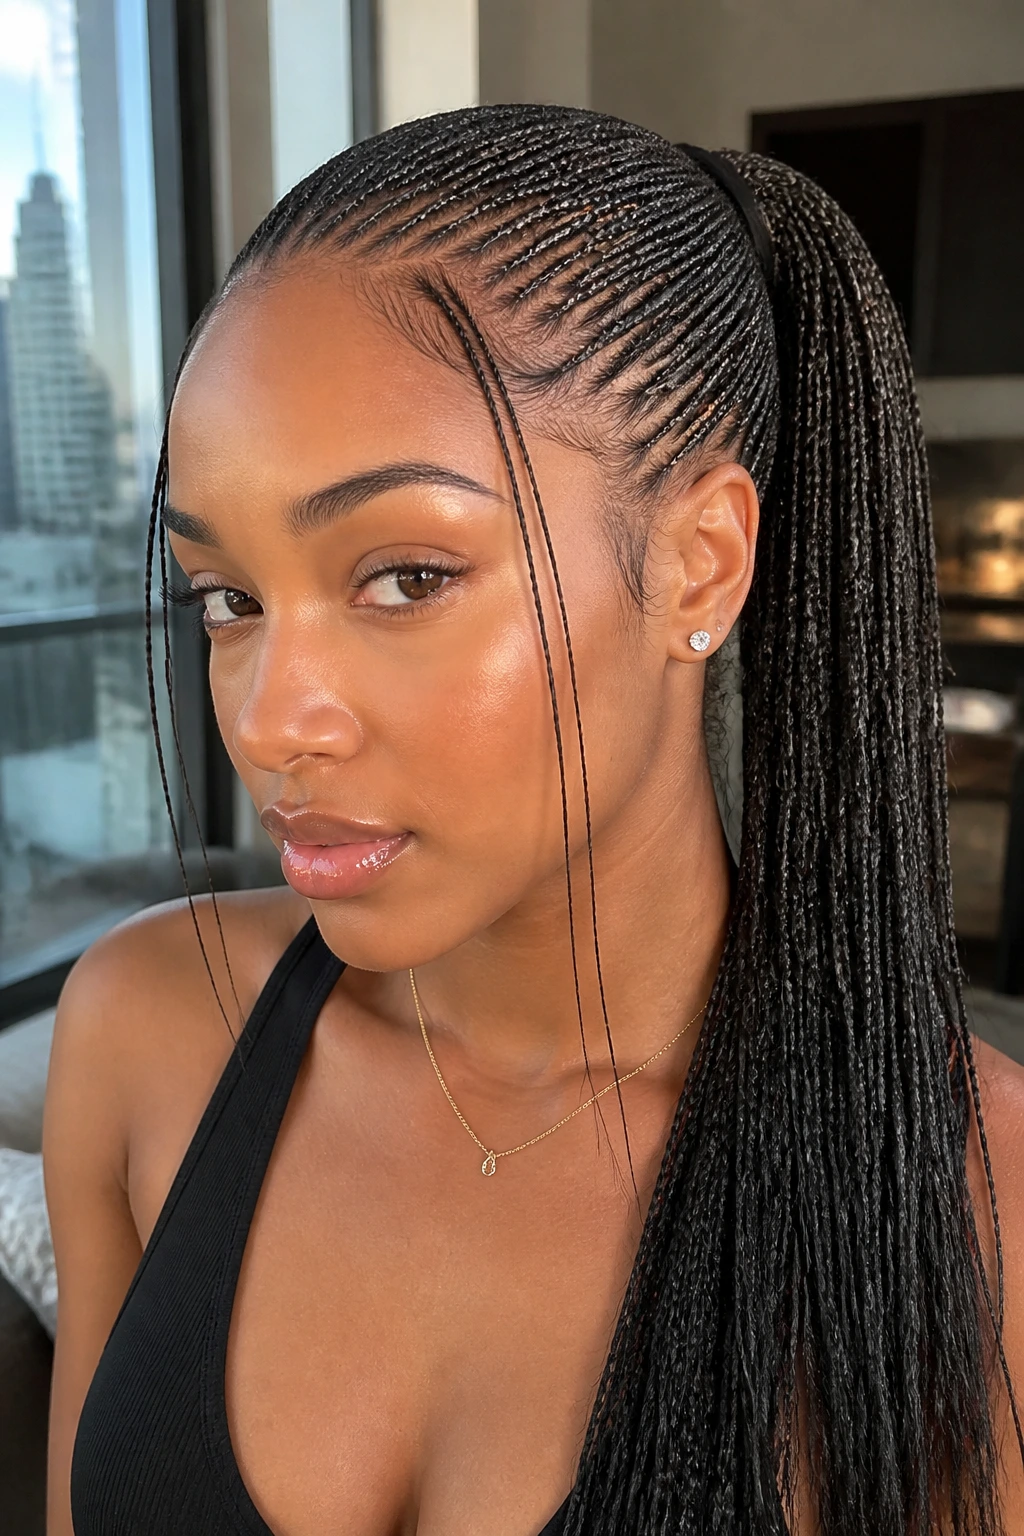
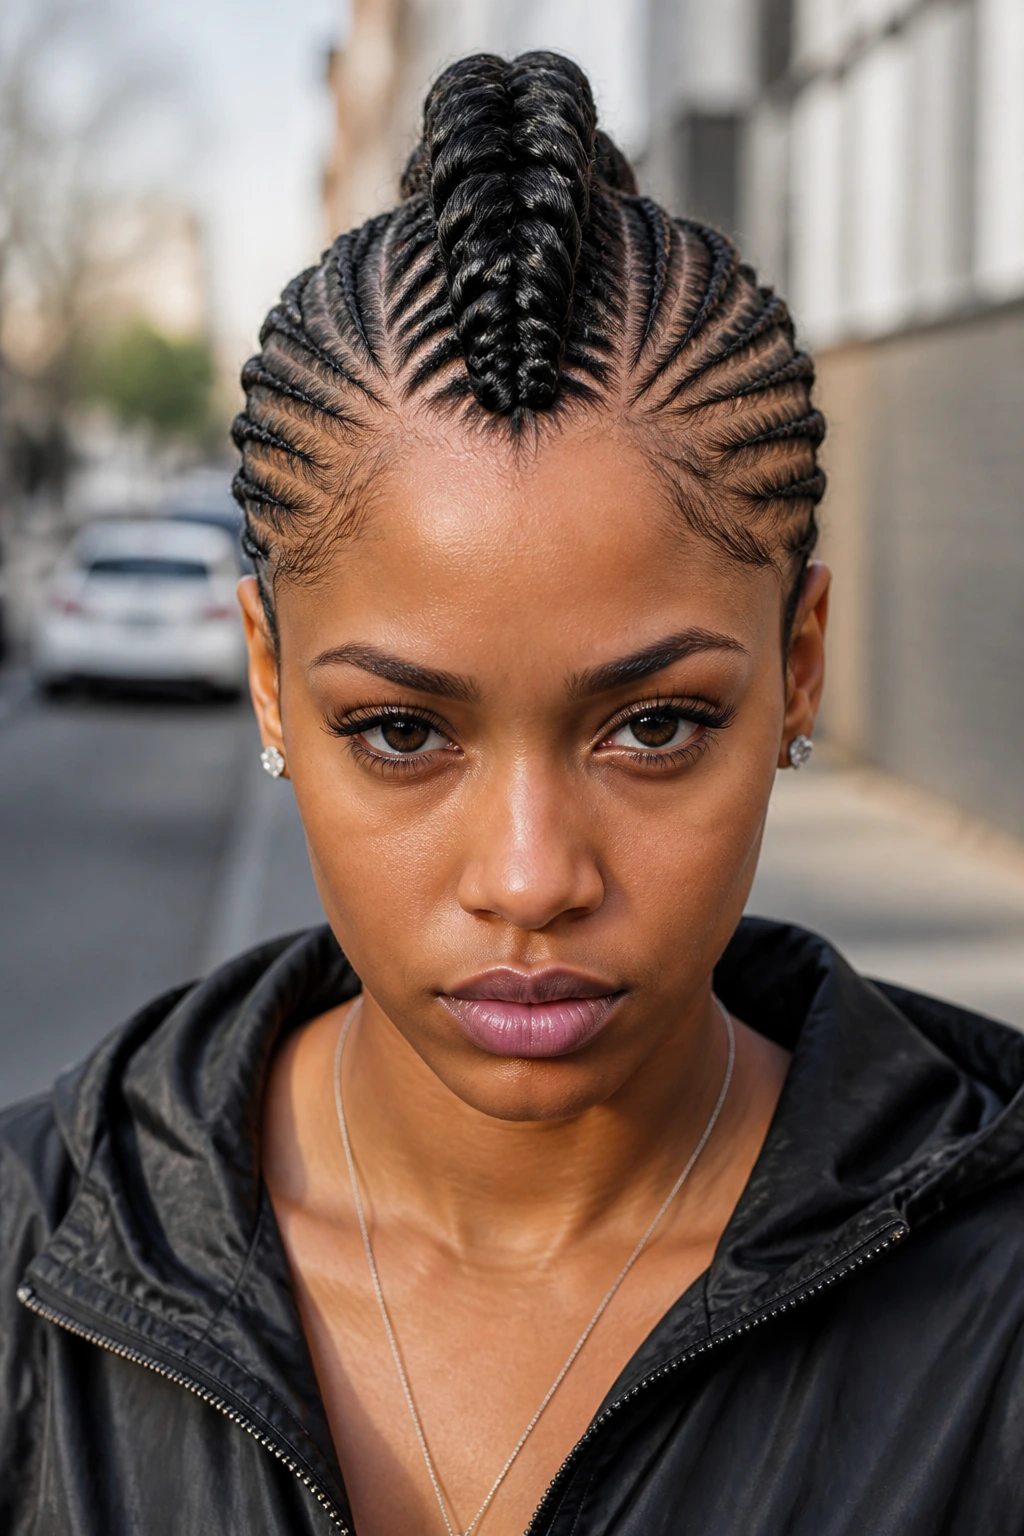
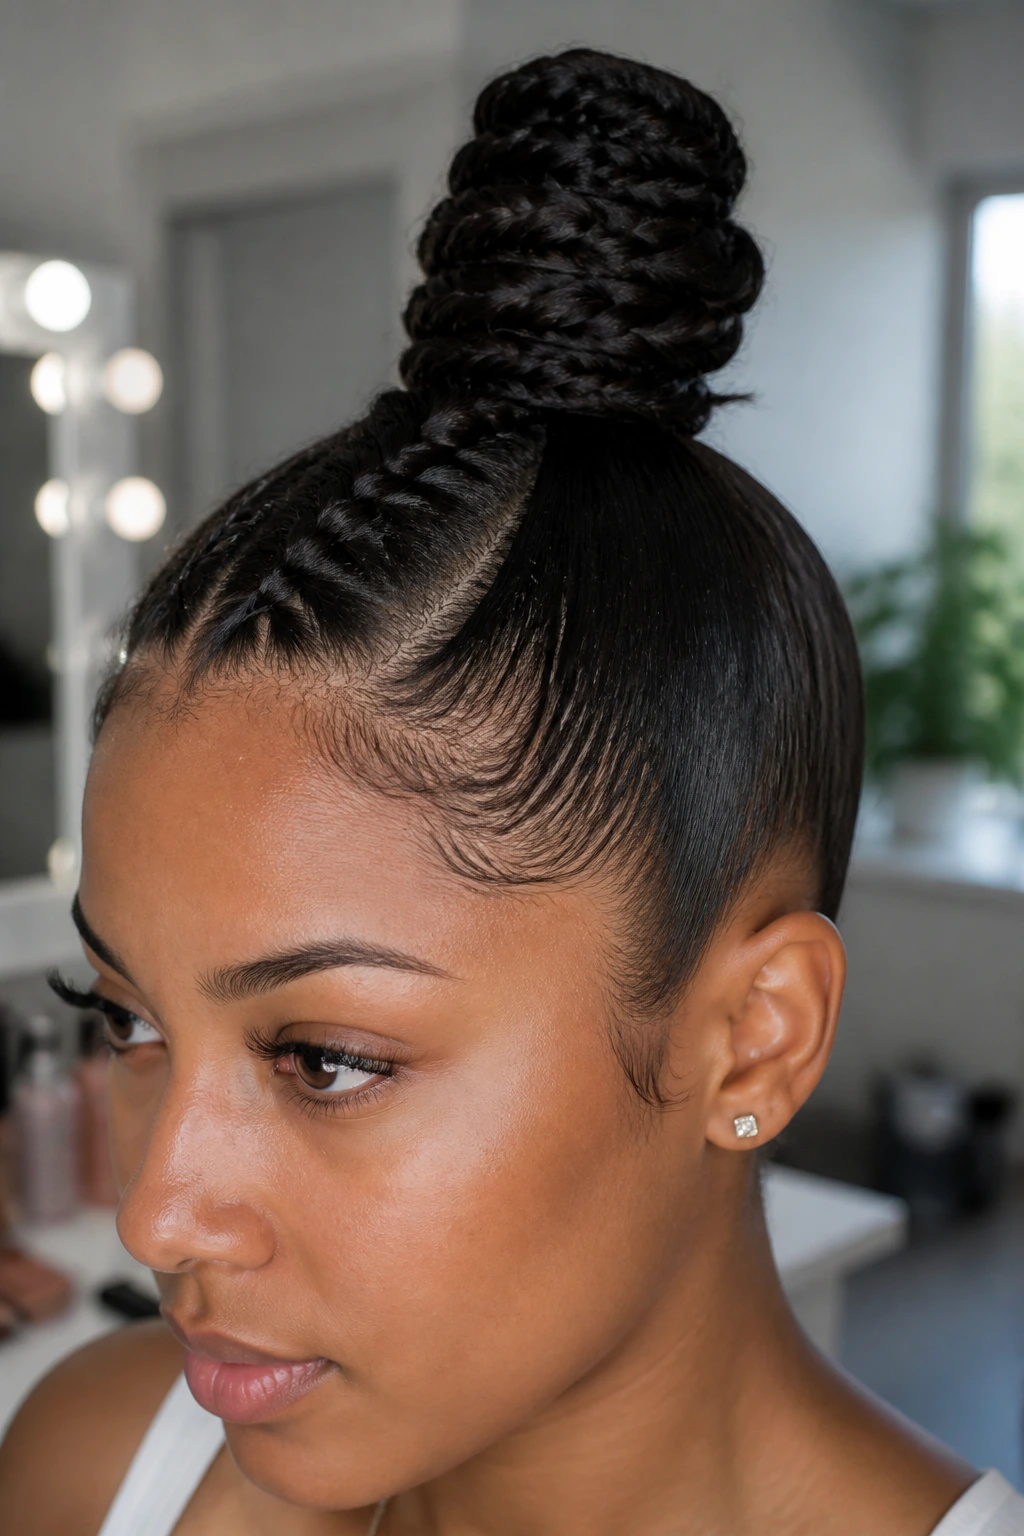
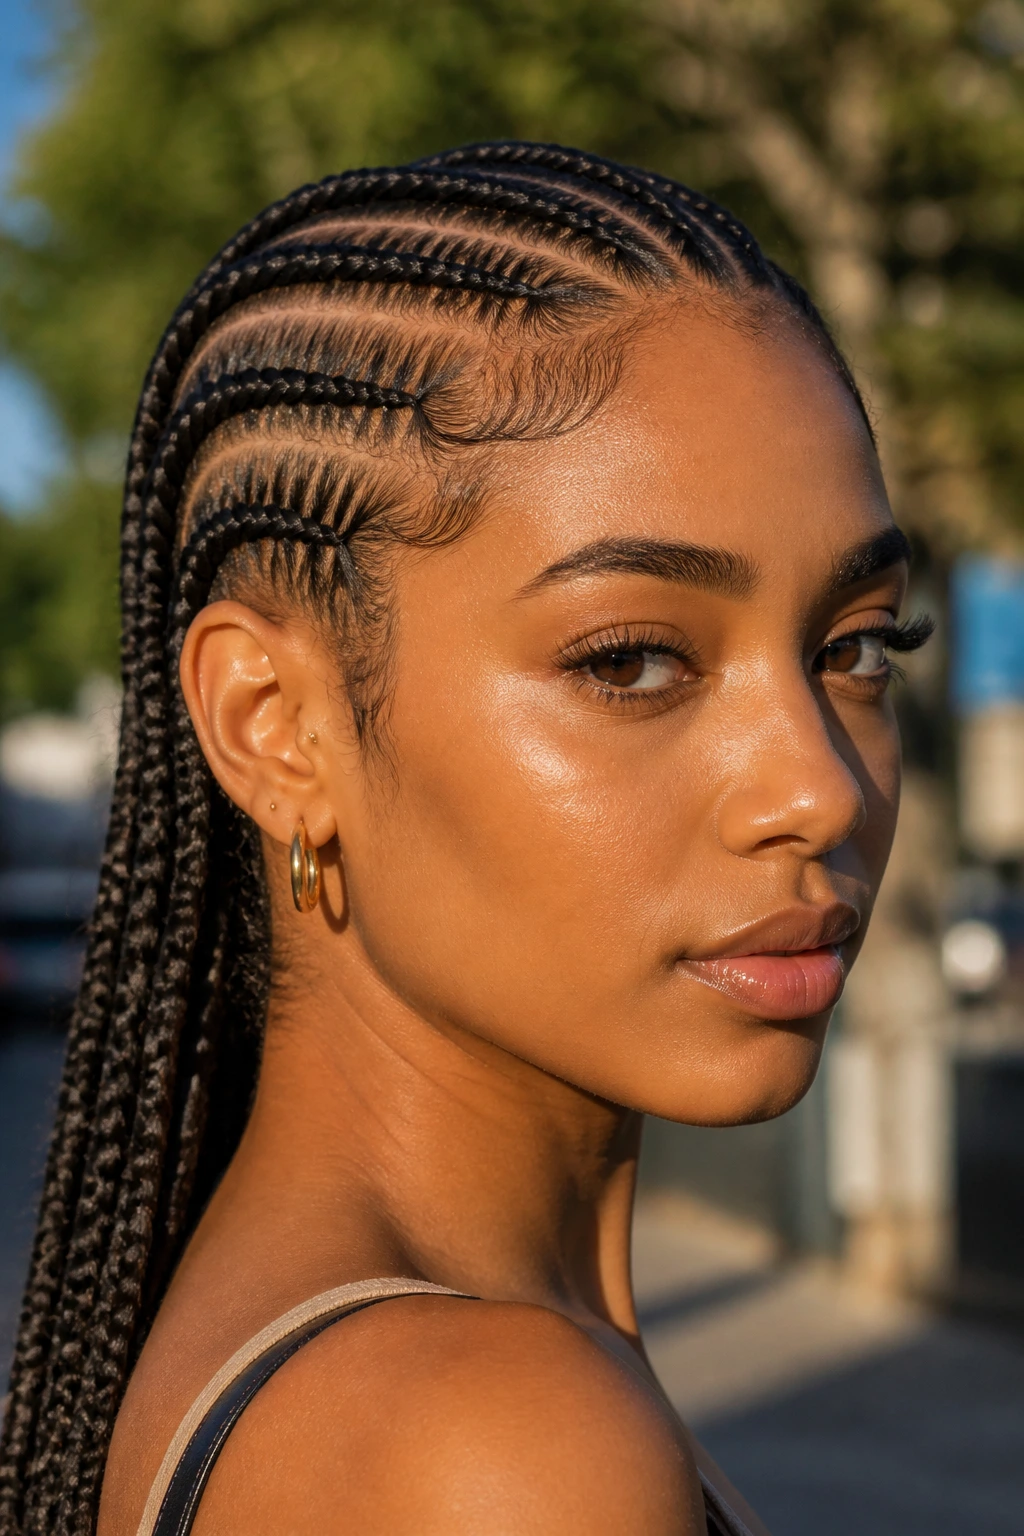
13. Feed-In Cornrow Ponytail
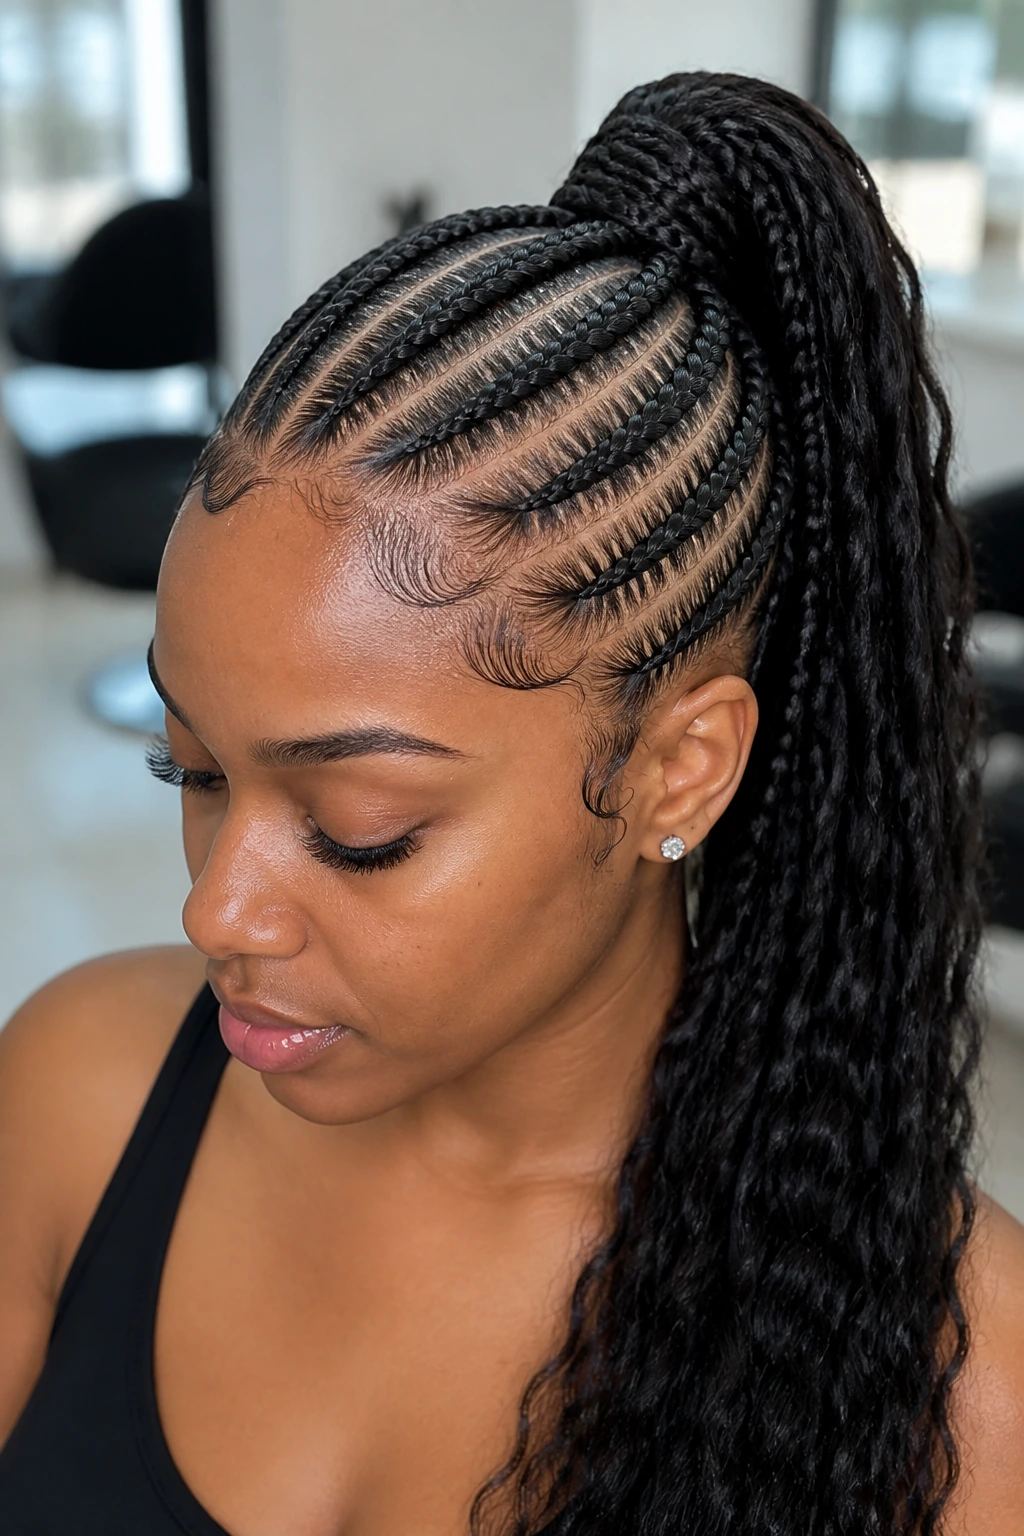
Feed-in cornrows are one of the strongest long-wear choices on this list. They keep the braid very close to the scalp and build thickness gradually, which gives wavy hair a smooth, controlled look from front to back. Then the ponytail section adds length without sacrificing the neat base.
The feed-in technique matters here because it creates a flatter braid line. That reduces bulk at the roots and keeps the style from feeling heavy too early. If your waves puff when packed into one big braid, this is the style to try next.
A practical note
Ask for, or create, clean parting lines. Cornrows look best when the parting is deliberate. Sloppy parts show immediately.
14. Goddess Braids with Tucked Ends
Goddess braids are thicker, broader braids that sit close to the scalp and often use added hair for length or fullness. On wavy hair, they offer a clean, sculpted look that can last far longer than a loose braid because there’s less surface area for frizz to sneak in.
Tucked ends make the style last even longer. Instead of leaving the hair out where it can curl, bend, and puff, you fold it under and pin it. That makes the whole thing feel finished. It also keeps the ends from rubbing on collars and seats.
Best for: People who want a bolder braid with less daily upkeep.
15. Micro-Braids Pulled into a Sleek Ponytail
Micro-braids are not quick, and I’m not going to pretend they are. But if you want a style that can hold for days or longer, they are hard to beat. On wavy hair, the small sections let you control every bit of the texture instead of wrestling one big wave pattern into submission.
Pulled back into a ponytail, micro-braids give you an extremely neat base and a tail that still moves. The ponytail is the payoff. It’s clean at the scalp, and because the braids are tiny, the style doesn’t balloon out the way thicker sections sometimes do.
Worth knowing: This is a time-heavy style, but once it’s in, the maintenance is easier than with softer braided looks.
16. Half-Up Crown Braid
A half-up crown braid is a smart middle ground when you want polish but still want length showing. The braid controls the top half of the hair, which is where wavy hair usually starts to swell first, while the lower section can stay loose.
The trick is to keep the braid snug enough that it doesn’t slide backward. If it’s too loose, the crown starts to separate and the look loses shape fast. Pin the braid under itself at the back of the head so it doesn’t creep upward during wear.
Best use
This works well for days when you want the hair off your face but don’t want a full updo. It’s one of the least fussy ways to keep the front neat.
17. Waterfall Braid with Controlled Waves
A waterfall braid isn’t the longest-lasting style on this list if you leave it loose, but with the right pins and a controlled base, it can hold for a full day beautifully. The braid keeps moving pieces from the front under control while the dropped strands add a soft wave frame around the face.
The key is not to overdo the looseness. Wavy hair already brings motion to the style, so the braid itself should be crisp. If the braid gaps too much, it starts looking accidental rather than finished. Pin the braid at the hidden points, not just at the ends.
Best for: Events, photos, and days when you want movement without chaos.
18. Infinity Braid Low Ponytail
The infinity braid has a looped look that feels ornate without being bulky. On wavy hair, it works especially well in a low ponytail because the tail stays out of the wind and the braid line holds close enough to the head to keep things tidy.
It takes a little practice to get the loop uniform, but once you do, the braid has a locked-in quality. That’s what makes it last. The pattern itself resists looking fuzzy too quickly because the sections overlap in a way that disguises minor texture changes.
Good detail
Use a small elastic at the base before you start the infinity pattern. It keeps the tail from shifting as you work.
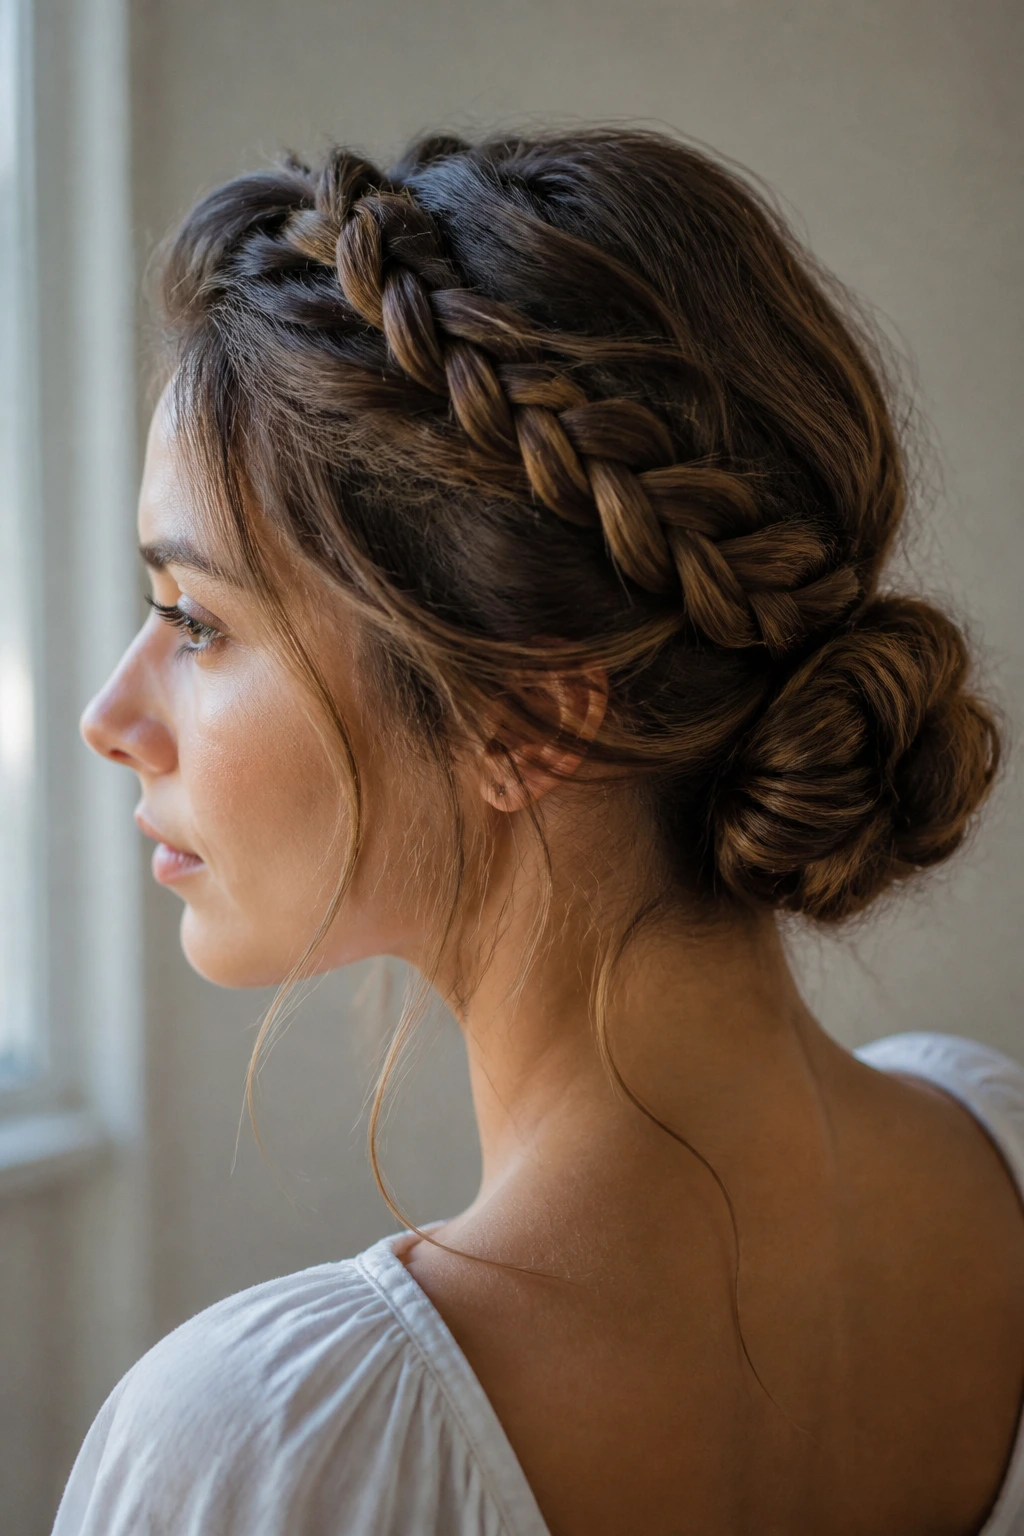
19. Braided Chignon
A braided chignon is a low, wrapped braid bun that looks polished in a way that never feels overdone. It’s one of the strongest long-lasting options because the braid is both the structure and the finish. Wavy hair is tucked away, pinned, and held in a small footprint.
The best versions are the ones that sit low and slightly off-center, with the ends hidden underneath. That keeps the style from unraveling at the back. If you have layers, pin each loose piece as you go instead of hoping the bun will hold them later. It won’t. Not on a busy day.
20. Flat Twists into a Bun
Flat twists are underrated. They look clean, lie close to the scalp, and are often easier to make neat on wavy hair than a full braid because they don’t require three strands per section. That can be a relief when your texture starts to puff the moment you touch it.
Once the twists reach the nape, gather them into a bun and pin the bun flat. The twist pattern gives the style enough visual detail that it doesn’t look plain, but the low bun keeps the ends safe. This is one of the better options if you want a protective feel without a lot of braid bulk.
Tip: Twist on hair that has a little hold product, not just water. Water alone won’t keep the sections crisp.
21. Zig-Zag Part Braids
A zig-zag part changes the mood of a braid without changing the wear time much, which is a nice trick when the basic style already works for your hair. The part gives the look a sharper edge and helps disguise any tiny parting imperfections, because the eye is busy following the angle.
This is especially useful on wavy hair that doesn’t want to stay perfectly separated. A zig-zag line looks intentional even when the texture underneath has some movement. Pair it with Dutch or cornrow-style braids for the cleanest result.
Why I like it
A sharp part can make an ordinary braid look custom. You don’t need more product. You need a better line.
22. Crown Braid into a Bun
A crown braid into a bun gives you the control of a halo style and the compact finish of an updo. It’s a nice answer for wavy hair that gets frizzy around the ears and nape, because both areas end up wrapped up and pinned away.
The braid travels around the head first, then folds into the bun instead of hanging free. That extra step helps the style last. You’re not asking one braid to do all the work on its own. The bun catches the slack and keeps the shape from shifting.
Best move: Pin the bun low and tight enough that the crown doesn’t drift. Loose pins turn this into a half-braided mess by dinner.
23. Twin Rope Braids
Twin rope braids are fast, clean, and a little sporty. They twist instead of crossing, which makes them easier to keep even if your hands are not in the mood for a full braid session. On wavy hair, that matters because the twist pattern can stay neat without pulling too hard.
They hold best when the sections are smoothed first and secured at both the crown and the ends. If you leave them too loose at the root, the twists start spinning apart. Keep the tension steady, especially near the temples, where waves like to spring outward.
Short answer: If French braids feel too fiddly that day, rope braids can still give you a clean, long-wear look.
24. French Braid into Fishtail Combo
This combo braid starts with a French braid for scalp control and ends with a fishtail for a tighter finish. It’s one of my favorite ways to handle wavy hair because it solves two problems at once: the crown stays flat, and the length finishes in a compact pattern that doesn’t puff as fast.
The transition from French to fishtail should happen low enough that the braid doesn’t look chopped in half. Once you switch, keep the fishtail tight and even. If you let the sections fan out too much, the benefit disappears.
What makes it different
The top does the controlling. The bottom does the holding. That split makes sense on hair that moves a lot.
25. Braided Space Buns
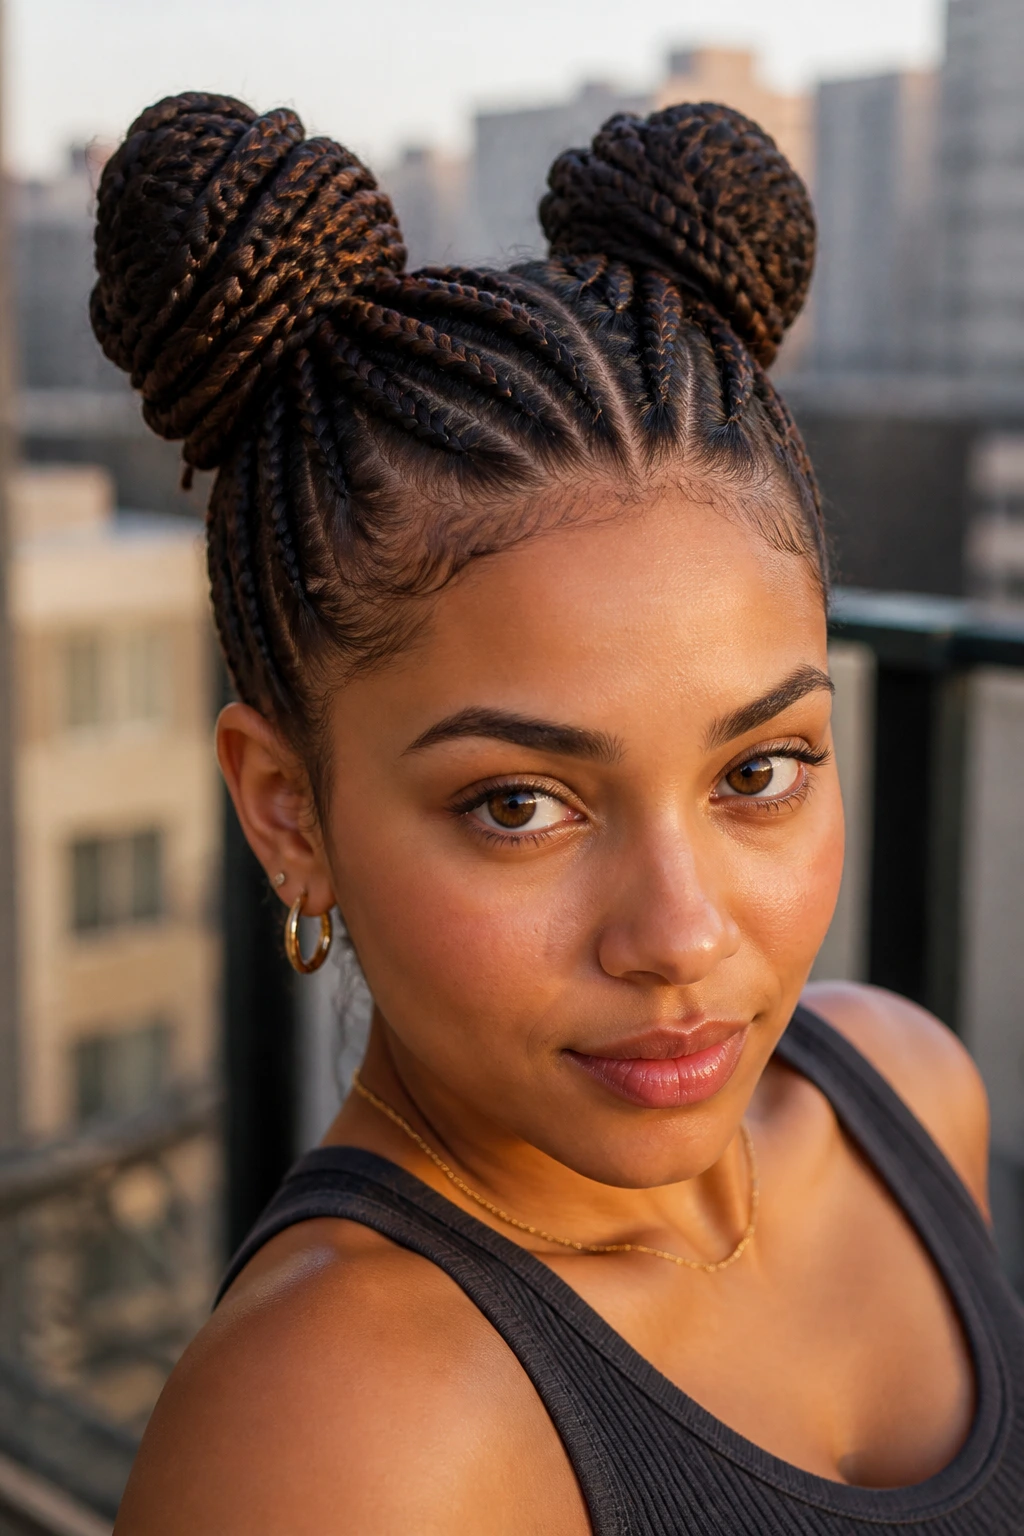
Braided space buns are playful, but they can still be surprisingly durable if you build them from tight braids and keep the buns compact. Wavy hair does well here because the braid base controls the root swell, and the buns keep the length tucked away.
The style works best when the buns sit high and symmetrical. If one side is tighter than the other, the whole look tilts. Use clear elastics before you coil the buns, then pin them down once they’re shaped. That extra anchor helps a lot.
Good fit: Best for weekends, concerts, or any day you want the style to feel deliberate instead of formal.
26. Hidden Underbraid
A hidden underbraid sits underneath the top layer of hair and gives you control without making the braid the main event. It’s an underrated option for wavy hair because it keeps the underside tidy, which is where frizz often starts first when you wear hair down.
You braid the lower section close to the scalp, then leave the top layer to fall over it. The result is neatness where you need it and softness where you want it. If your waves are thick, this can stop the underneath section from puffing into a bulky triangle by evening.
My opinion
This is one of the most useful braid ideas in the whole list. It looks simple, but the wear time is better than people expect.
27. Wrapped Braid Ponytail
A wrapped braid ponytail uses one braid as the base and another strand, section, or braid wrap to conceal the elastic. That little wrap does more than decorate. It tightens the whole look and makes the ponytail read as finished instead of improvised.
The base braid should be snug, and the ponytail should sit low or mid-height if you want it to stay sleek for hours. High versions move too much and loosen at the crown. Wavy hair usually behaves better when the weight hangs downward instead of lifting off the scalp.
Best for: Days when you want a polished ponytail without the hairline looking soft by noon.
28. Pull-Through Braid
Pull-through braids have a full, segmented look that can stay tidy for a long time because each section is secured with an elastic. That makes them especially friendly for wavy hair, where loose tension often turns into frizz.
The style does use more elastics than a standard braid, so you need to place them evenly and keep the segments smooth. The payoff is a braid that keeps its shape even if the hair itself has a little natural lift. It’s a good option when you want a bigger-looking style that still feels controlled.
Tiny detail, big difference
Stretch each section outward gently after securing it. Not enough to flatten it. Just enough to round it.
29. Cornrow Mohawk Braid
A cornrow mohawk braid keeps the sides tight and puts the drama in the center strip. On wavy hair, that can be a smart way to control the areas that usually frizz first while letting the middle braid carry the style.
The style lasts because the sides are held close and the center braid has a strong base. If your waves are thick, this is often easier to maintain than several loose braids because there’s less surface area exposed. It also sits nicely under hats or hoods without breaking apart.
Good use: Great when you want a braid that feels a little bolder but still holds up on a long day.
30. Side Crown Braid
A side crown braid gives you the neatness of a halo braid with a slightly softer, less formal shape. It starts at one temple and wraps around the head, which makes it easier to wear if you don’t want the braid to sit perfectly centered.
Wavy hair benefits from the off-center line because it hides little uneven spots better than a dead-straight middle part. The braid can feed into a low tuck, a bun, or even a tucked tail. If you want the style to last, keep the crown portion tight and the pinning hidden.
Best look
A few face-framing pieces can work, but only if they’re smooth. Letting too many loose pieces escape tends to spoil the clean line.
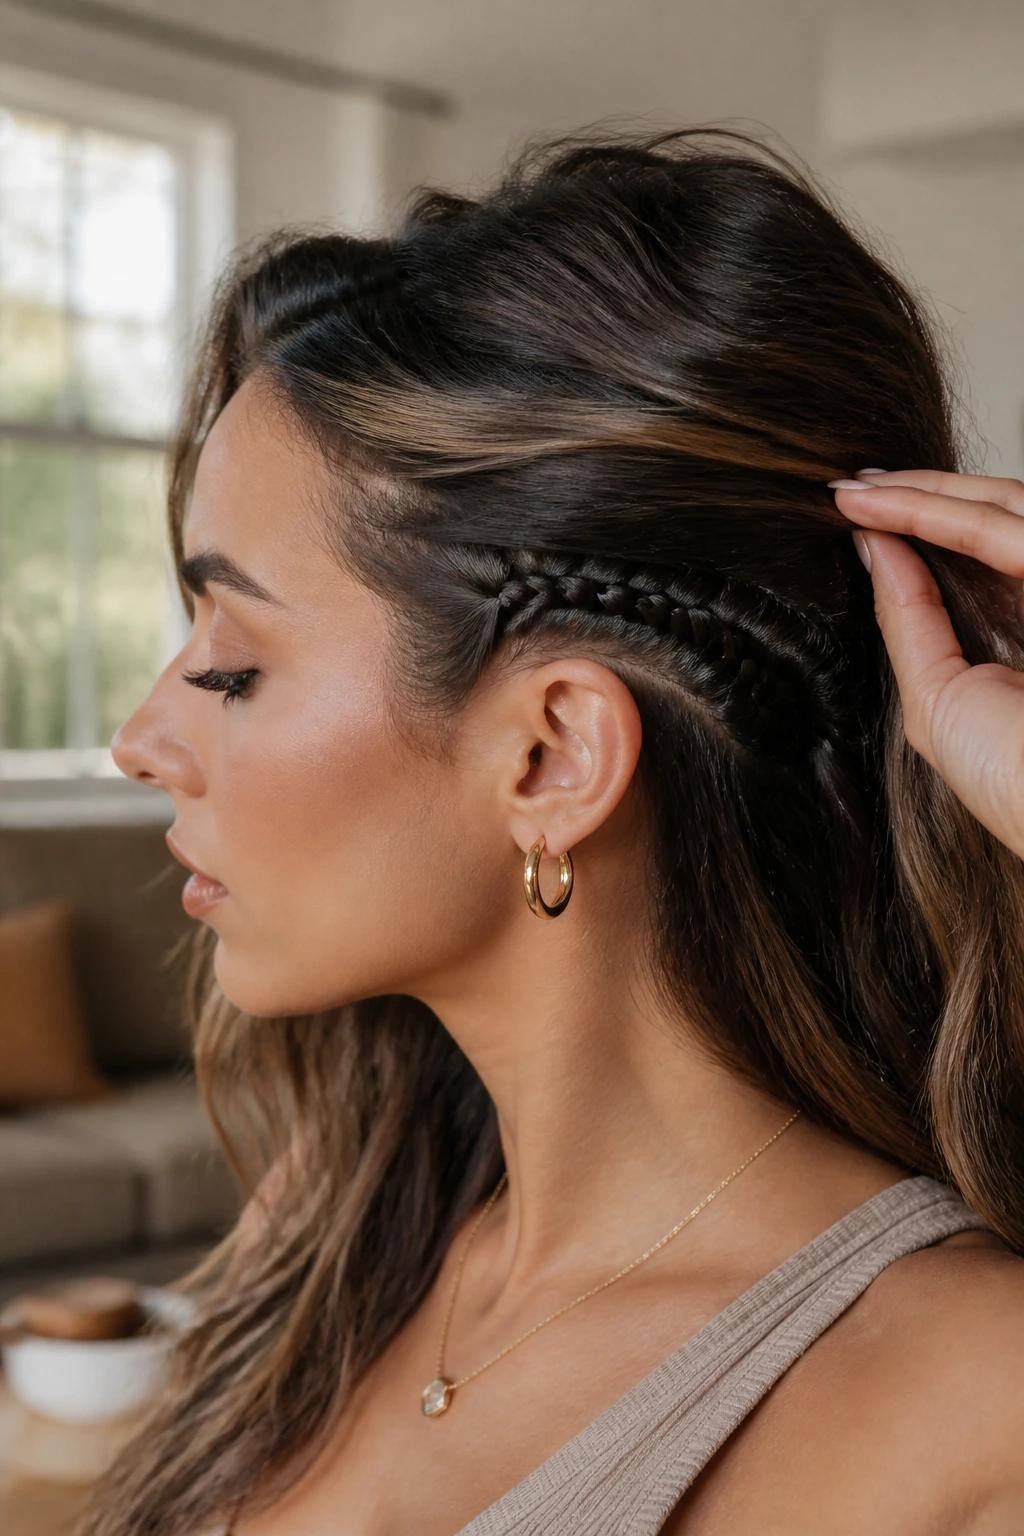
31. Lace Braid Along the Hairline
A lace braid tracks along the hairline and leaves part of the hair down, which makes it a useful hybrid when you want softness without losing control at the front. On wavy hair, that front control is the hard part. The lace braid does it without forcing the rest of the hair into a full updo.
The braid stays cleaner when it follows the hairline closely and doesn’t wander upward. Pin the tail under the back section or let it disappear into a low style. If you leave the ends loose and unpinned, the braid tends to look unfinished by the end of the day.
Best for: People who want a neat front and a softer back. That’s the whole trick.
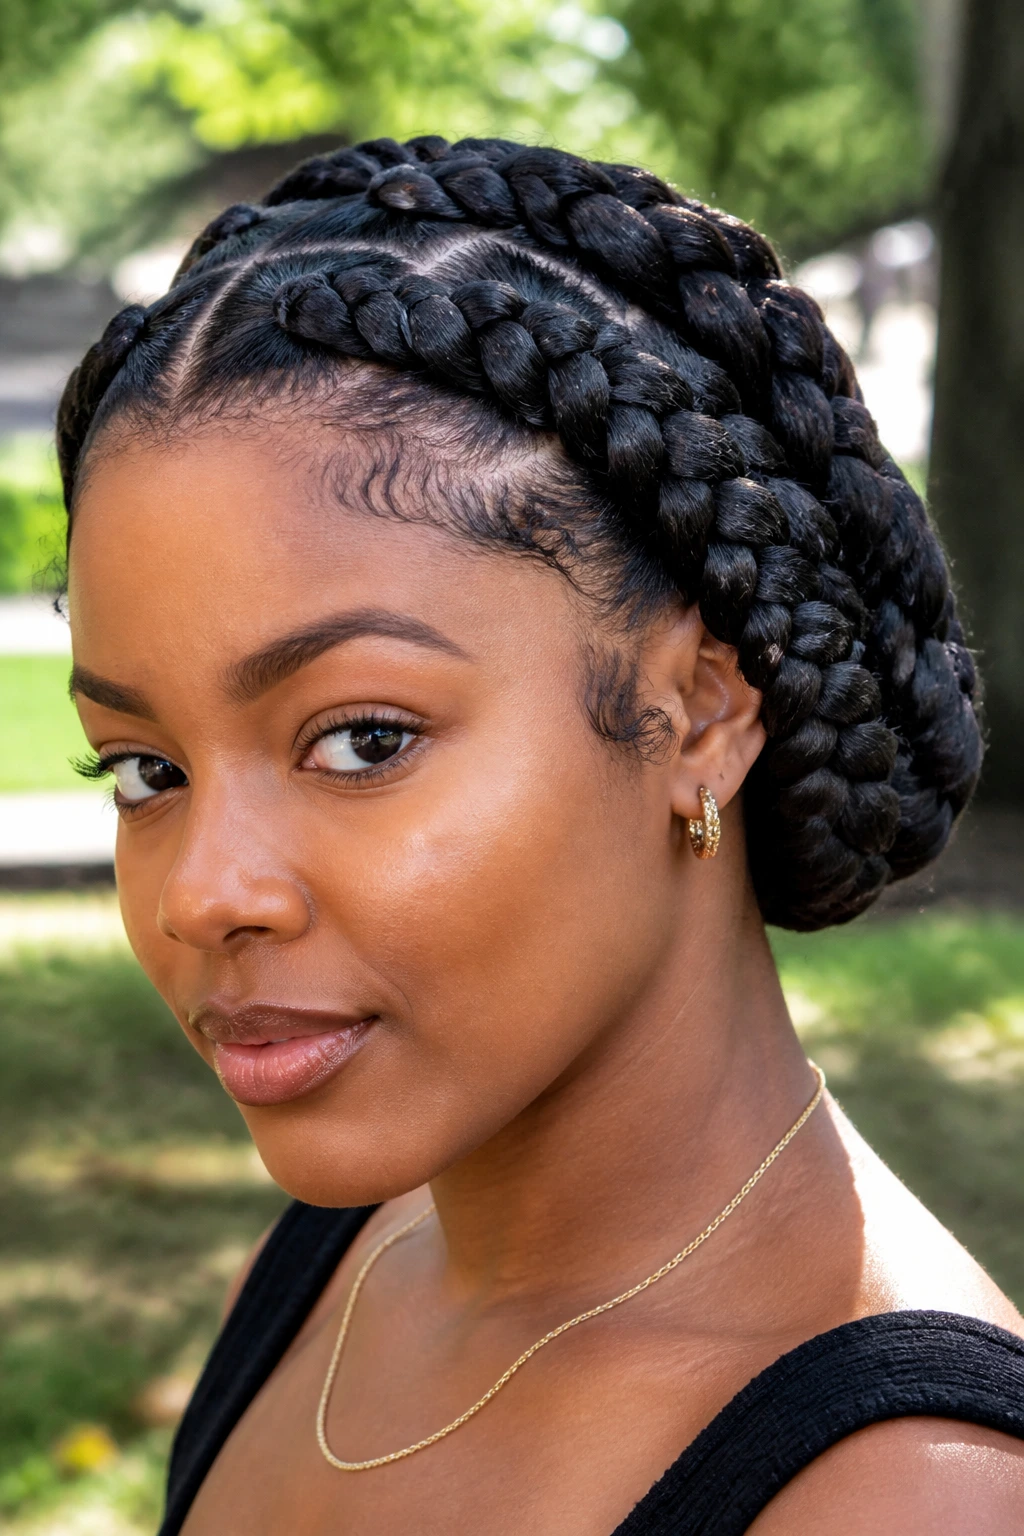
32. Double Halo Braids
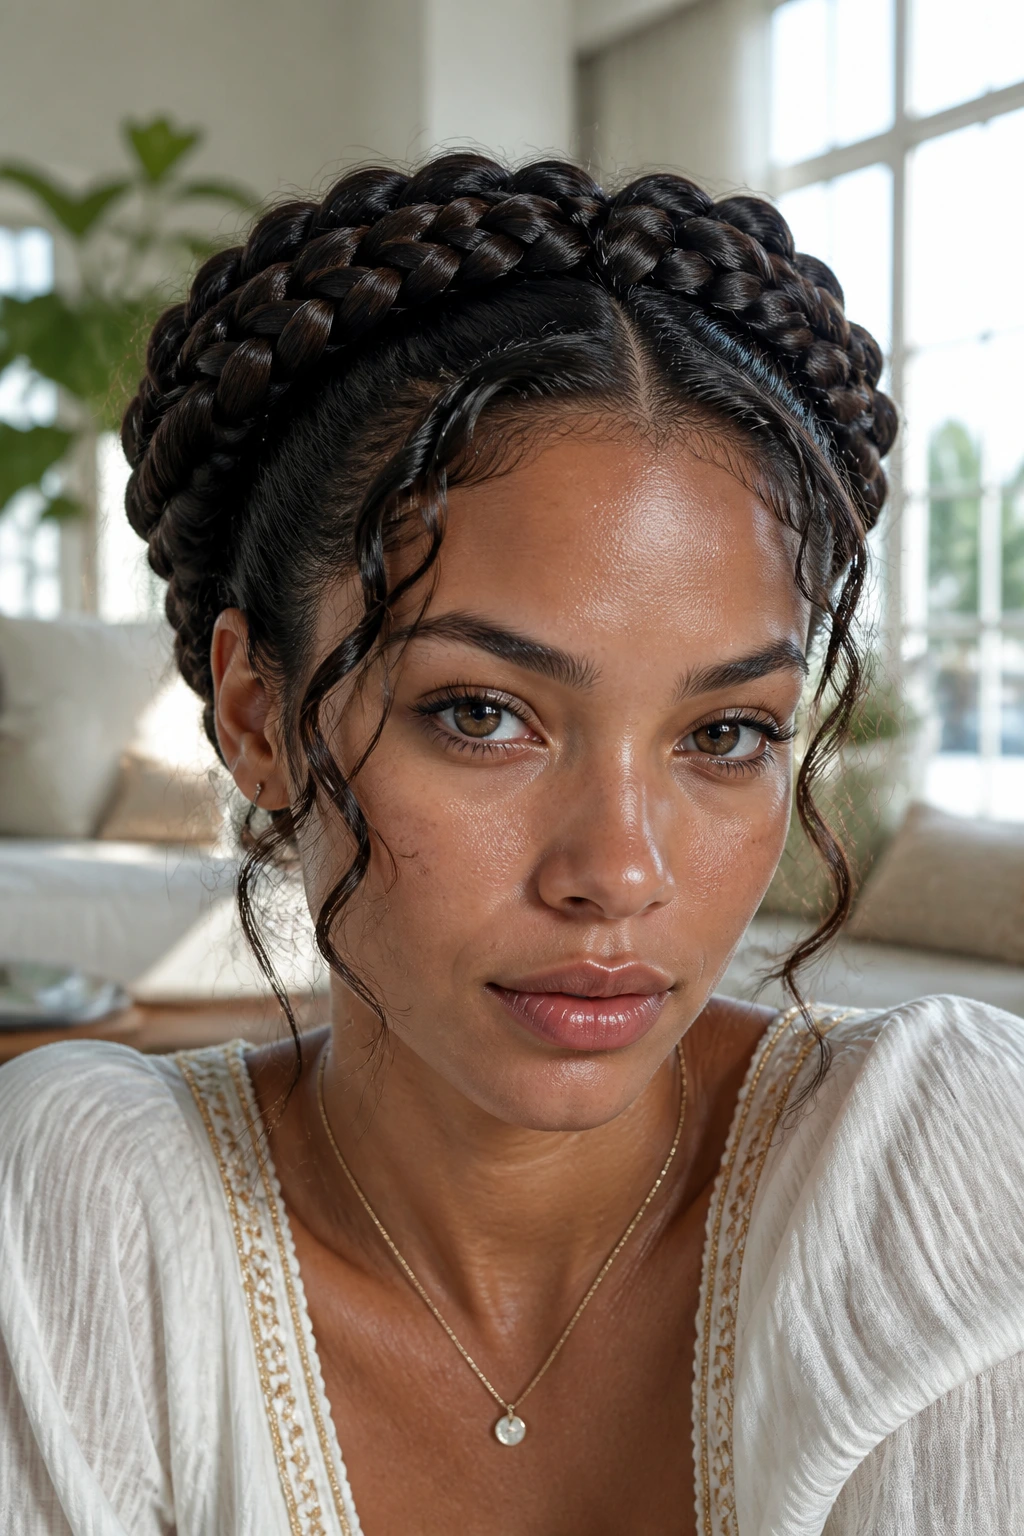
Double halo braids give the head a wrapped, structured look that lasts because the style is locked in from both sides. Instead of one braid doing all the work, two braids meet and reinforce the crown. That makes them especially useful for wavy hair that likes to loosen at the temples.
The style feels secure without needing a massive amount of product. What it does need is symmetry. Keep both braids at the same height and pin the meeting point flat. If one side sits higher, the whole thing starts to look off-balance.
Practical note
This style is excellent for day two wear if you sleep well, because the perimeter stays tucked better than with a single loose braid.
33. Accent Braid on a Sleek Blowout
An accent braid is small, but it can hold a style together when the rest of the hair is long, loose, and waved. Think of it as the anchor line across smoother hair. It keeps the front controlled and gives the whole look a point of focus.
The best version starts near the temple or part and disappears into the length. That makes the style feel intentional instead of decorative for decoration’s sake. If the hair is too freshly curled or too soft from conditioner, the accent braid can slip, so give the roots a little grip first.
Best move: Use the accent braid to pin back one side only. It’s cleaner than trying to over-style the whole head.
34. Sleek Braided Top Knot
A sleek braided top knot works because the braid tightens the base before the bun ever goes up. On wavy hair, that base is often what keeps the whole look from spreading out by midafternoon. Once the braid is gathered into a knot, the shape feels compact and controlled.
Keep the braid vertical or slightly diagonal into the bun. If it sits too loosely, the knot gets bulky and starts to tilt. The top knot should feel close to the crown, not like it’s balancing on top of the head.
Good sign
If the bun feels firm and the part line still looks clean after pinning, you’re in the right place. If the braid is sliding, start over. It’s worth the five minutes.
35. Low Braided Pigtails
Low braided pigtails are softer than boxer braids, but they can still be very durable when they’re started low and kept tight. Wavy hair tends to relax into this shape in a good way. The style stays neat because each side has its own small job and neither one has to support the whole head.
The low placement helps the braids tuck under scarves and jackets, which cuts down on friction. If you want them to last longer, braid the hair while it’s dry enough to hold but not so dry that it starts snapping apart in your hands. There’s a middle ground. Use it.
Final tip: A small wrap of hair around each elastic gives this style a cleaner finish than two obvious bands.
Why Sleek Braids Last Better When the Roots Are Controlled
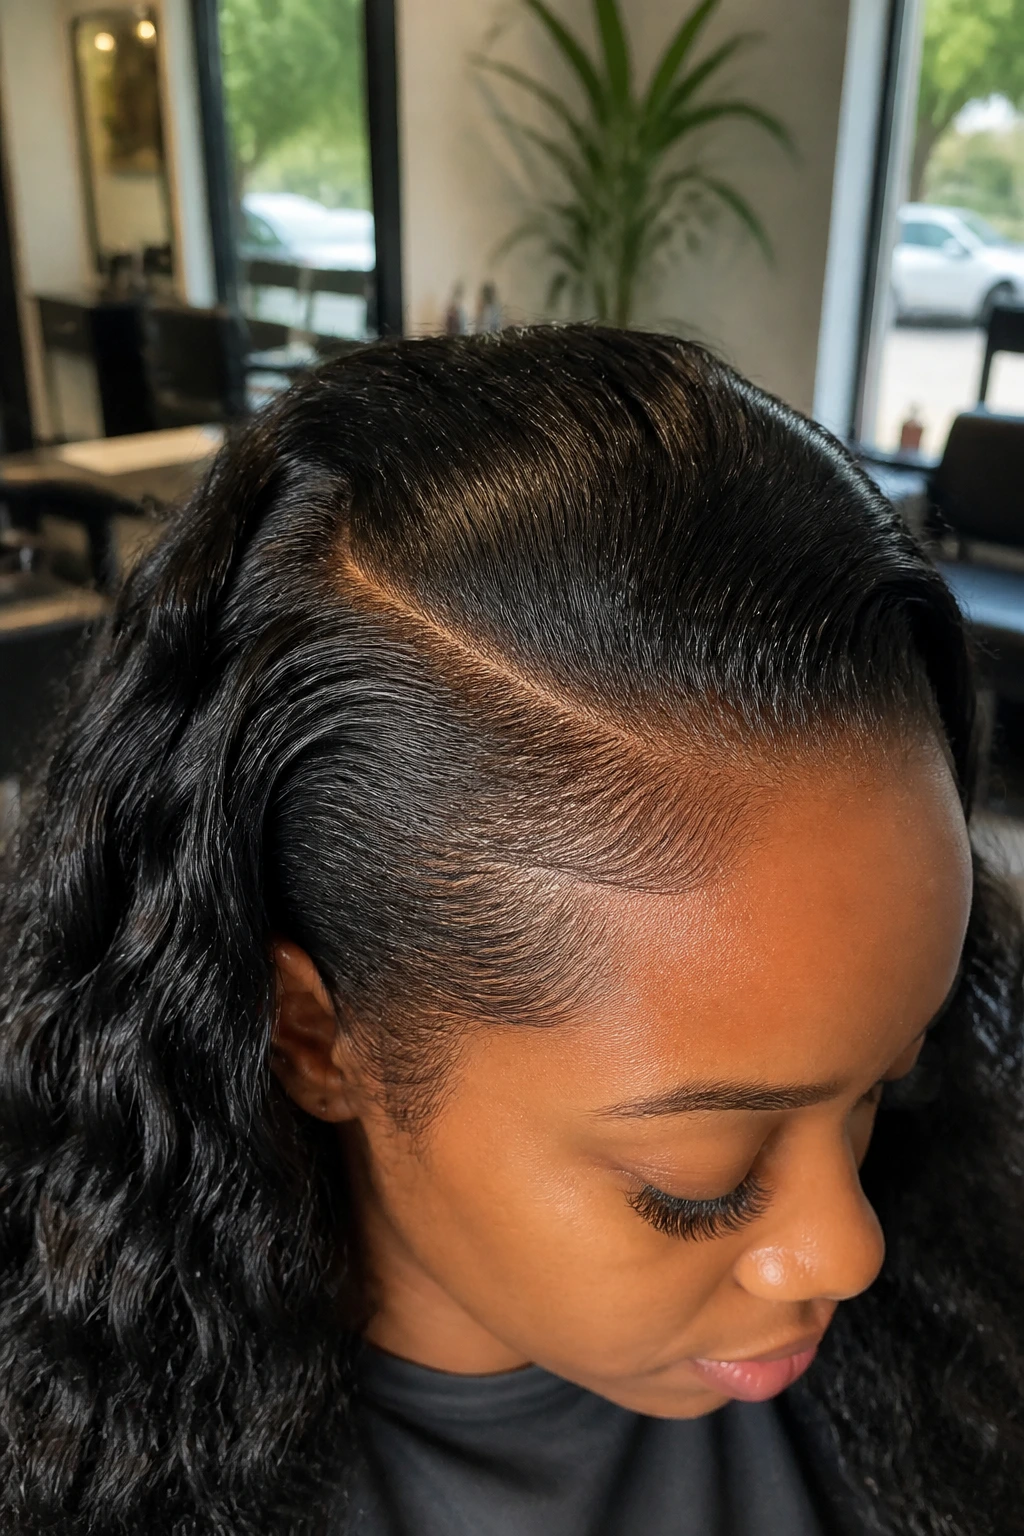
The braid that survives the longest usually isn’t the one with the fanciest pattern. It’s the one that starts with the cleanest root work. Wavy hair opens up at the scalp first. That’s where the texture has the most freedom, and that freedom turns into puffing, slipping, and little pieces sticking up once the day starts moving.
So the first job is control, not decoration. Smooth the roots with a brush, add a light layer of mousse or gel, and decide where the braid needs tension. A style that’s tight near the crown and calmer through the ends usually wears better than a braid that starts loose and only gets serious halfway down. That’s backwards on purpose. The braid should do the hard work first.
Root grip matters more than shine
A shiny braid can still fall apart. A slightly less glossy braid with solid tension will last longer and look better by evening. I’d choose durability over mirror shine every time.
Tension should be firm, not painful
There’s a difference between controlled and tight enough to give you a headache. If the scalp feels pinched or your temples start aching within an hour, the braid is too tense and it won’t wear well. It will just hurt.
Essential Tools for Sleek Braids
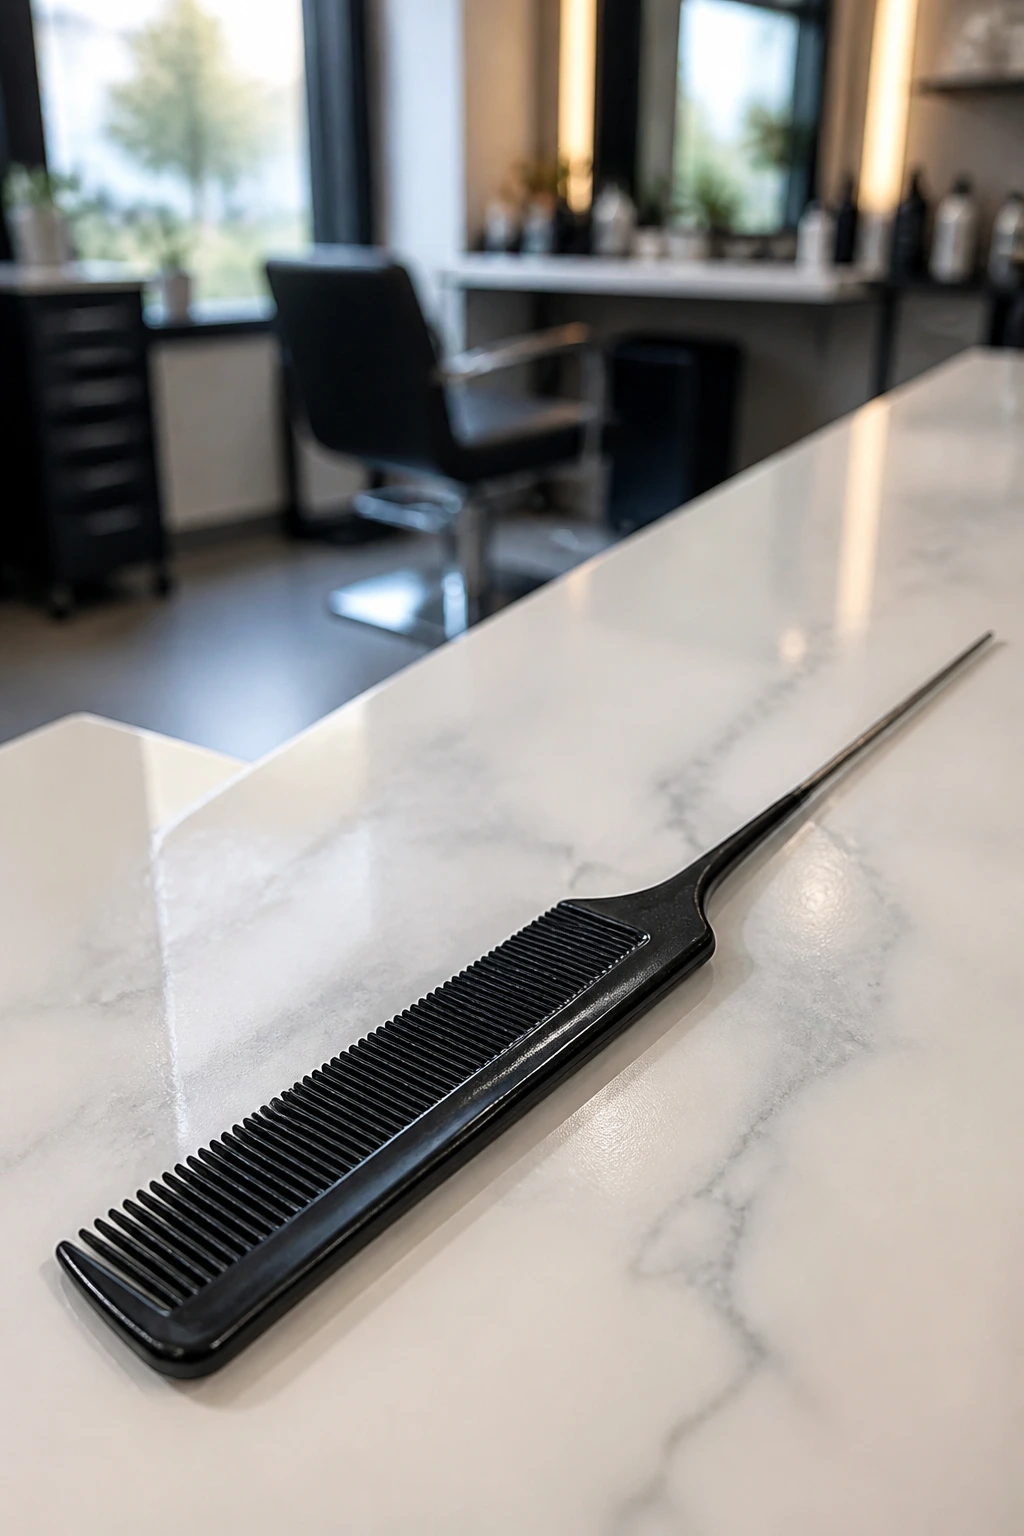
- Rat-tail comb: Best for drawing clean parts and sectioning without making the line ragged.
- Boar-bristle or smoothing brush: Helps press the crown flat before you start braiding.
- Sectioning clips: Keep the loose hair out of the way while you work one side at a time.
- Strong-hold mousse: Adds grip without making the hair feel heavy or greasy.
- Non-flaky gel or edge control: Useful at the hairline and part, especially on wavy roots that puff easily.
- Clear elastics: Small, discreet, and better than bulky bands for sleek finishes.
- Bobby pins and U-pins: Essential for buns, halos, crowns, and tucked styles.
- Satin scarf or bonnet: Keeps friction down overnight so the braid line doesn’t swell.
- Fine mist spray bottle: Lets you dampen specific sections without soaking the whole head.
- Blow dryer with a nozzle attachment: Helpful for smoothing the root area before braiding.
- Optional braid hair or extensions: Useful for feed-ins, goddess braids, and fuller buns when your natural length is short.
Product and Parting Choices That Make the Difference
For wavy hair, product choice is not about making the hair stiff. It’s about giving the braid something to hold onto. A mousse at the roots gives lift control without making the part greasy. A thin layer of gel or edge control keeps the front from sprouting little flyaways the minute you finish the style. Heavy oil is the one thing I’d keep light until the braid is done, because too much slip at the start can make every section slide around.
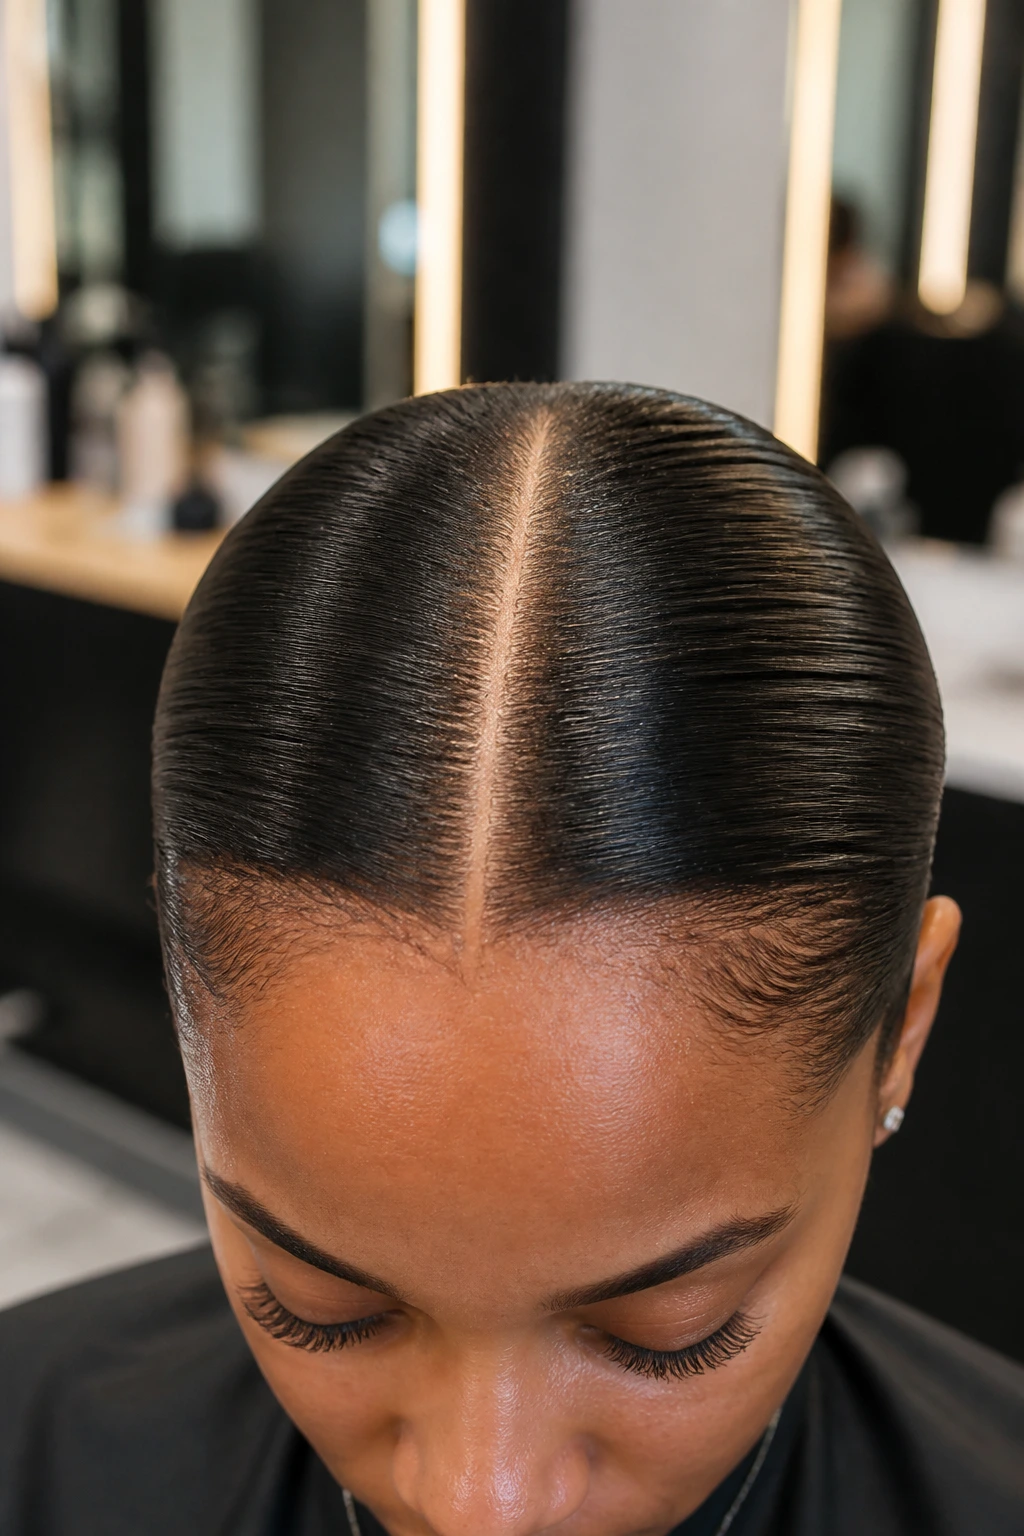
Parting matters just as much. Clean lines make the style last longer because the sections stay separate. If the part is fuzzy, the braid starts with confusion baked in. I like to draw the part with a rat-tail comb, then press both sides flat with a brush before I touch the first strand. That tiny bit of prep saves you from redoing the crown three times.
Dryness level
Braiding on damp hair can help with grip, but it also means the style may swell as it dries. For most wavy hair, I prefer hair that’s mostly dry and already smoothed. It behaves better over the long run.
Section size
Smaller sections usually hold better than oversized ones. They let you control the wave pattern before it spills out.
How to Wear These Braids Without Losing the Polished Finish
Presentation: Keep the braid line tidy at the crown and smooth the first inch near the hairline before you leave the house. That first inch is what people see before they notice the pattern.
Accompaniments: Small hoops, a satin scarf, a crisp collar, or a simple neckline all make these braids look finished. Big fuzzy textures around the neck can fight the clean shape.
Portions: On fine wavy hair, one strong braid or two medium braids usually wear longer than a pile of tiny ones. On dense waves, smaller sections can keep the shape from puffing out too soon. Match the braid size to the hair’s actual bulk, not the photo you had in mind.
Beverage Pairing: Keep a water bottle or iced tea nearby while you braid so you’re not tilting your head and disturbing the part every two minutes. It’s a small thing, but it keeps the setup calm.
Extra Tips for Shine, Grip, and Longevity
Shine Enhancement: Run a pea-size serum over the mids and ends after the braid is finished, not at the roots. The braid will look smoother, and the scalp won’t get slippery.
Customization: Add braid cuffs, a ribbon at the end, or a single accent braid near the part if you want the style to feel less severe. Small details are better than piling on five extras at once.
Texture Match: If your waves are loose, a tighter braid with fewer flyaways usually looks better than a fluffy, over-pulled version. If your waves are thick and springy, slightly wider sections can keep the braid from looking tiny and overworked.
Pro Move: After braiding, press the surface with the flat of your hand and a touch of mousse. Don’t rub. Just smooth. That keeps the flyaways from waking back up.
Common Mistakes That Shorten Wear Time
The most common mistake is braiding hair that’s too soft and too freshly conditioned. It feels nice in your hands. It also slips. If your waves are coated in leave-in and oil before you start, the braid base won’t hold, and the first few hours will do more damage than good. Use less product at the roots and save the slip for the mids and ends.
Another problem is making the braid too loose at the scalp because you’re afraid of tension. Loose braids on wavy hair look pretty for about ten minutes, then the crown starts to flare. The fix is simple: keep the first few crossings firm, then ease up a little once the base is locked in.
Overloading the hairline with edge control is a different trap. It can look sleek at first, then turn stiff, flaky, or shiny in the wrong way. A thin layer is enough. If you need more, stop and smooth again instead of piling it on all at once.
Sleeping without protection ruins a lot of good work. A satin scarf, bonnet, or pillowcase cuts down friction so the braid line stays neat. Cotton eats braids for breakfast.
Variations and Adaptations to Try
Softer Day-Out Version: Leave one or two thin face-framing pieces out of a crown or side braid, then smooth them with a small brush. This works when you want the braid to look polished but not severe.
Extension-Added Version: For goddess braids, feed-in cornrows, or a fuller braided bun, add braiding hair for length and weight. Keep the added hair light enough that it doesn’t pull on the scalp.
Short-Hair Version: Choose halo braids, side braids, or braided headbands if your waves don’t reach past the shoulders. These styles use scalp control more than length.
High-Control Office Version: Pick a center French braid, low braided bun, or wrapped braid ponytail. They stay close to the head and don’t need much mid-day fixing.
Weekend-Version with More Texture: Try a pull-through braid or a bubble braid with a braided base. You still get structure, but the style feels looser and a little more playful.
Keeping Braids Fresh Overnight and Through the Week
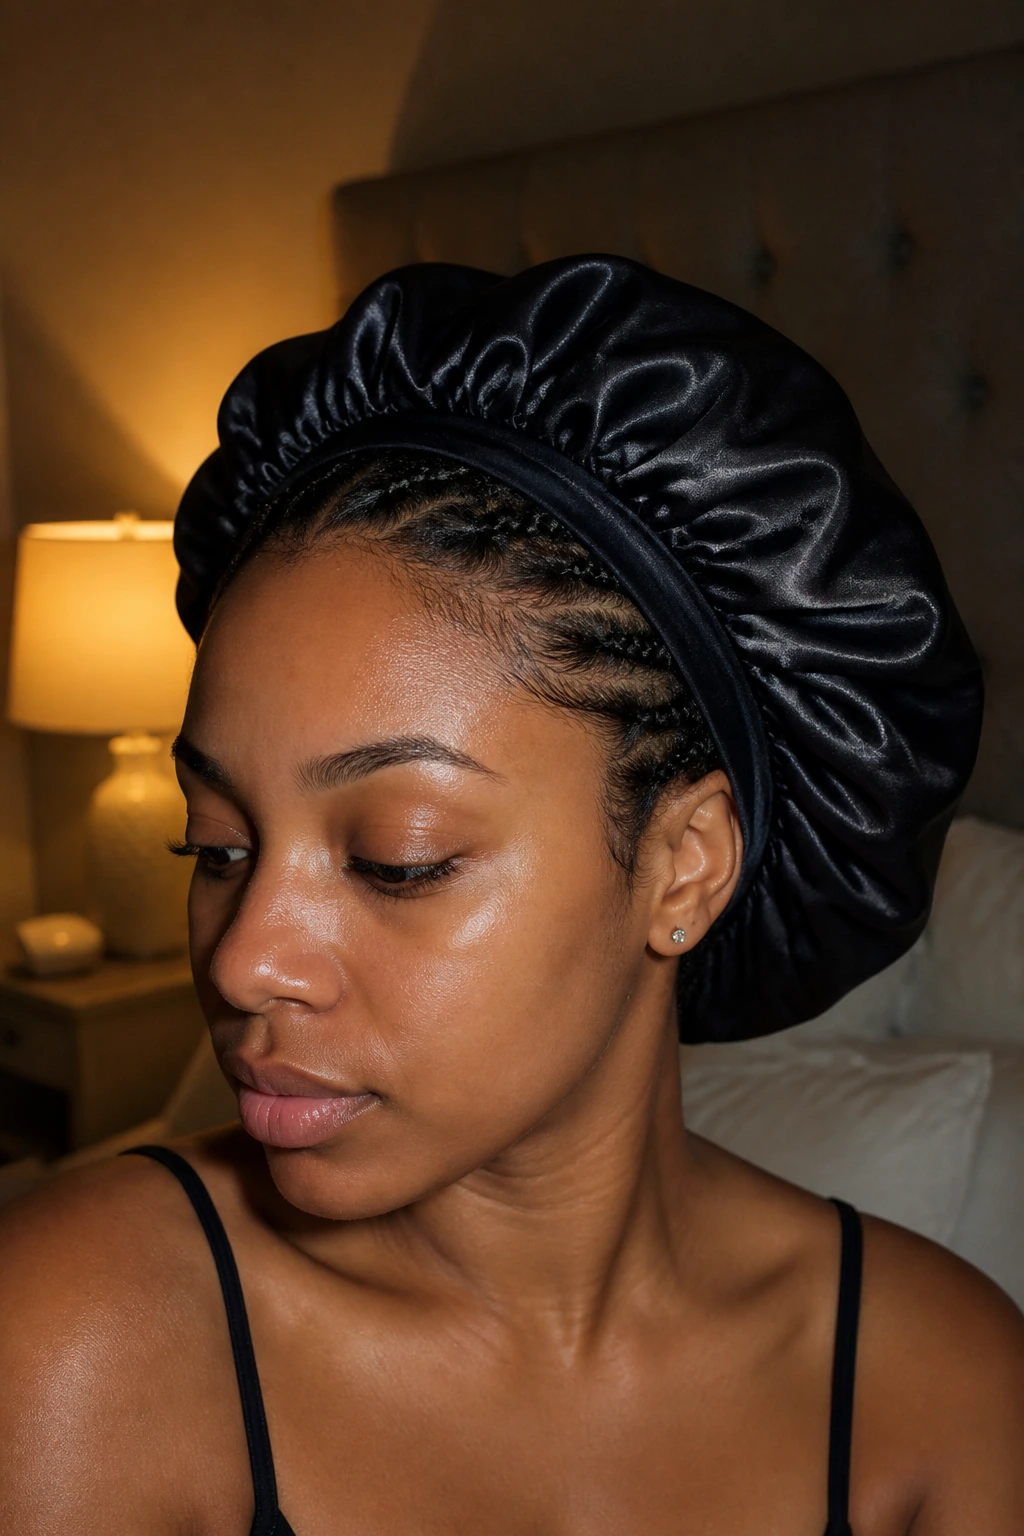
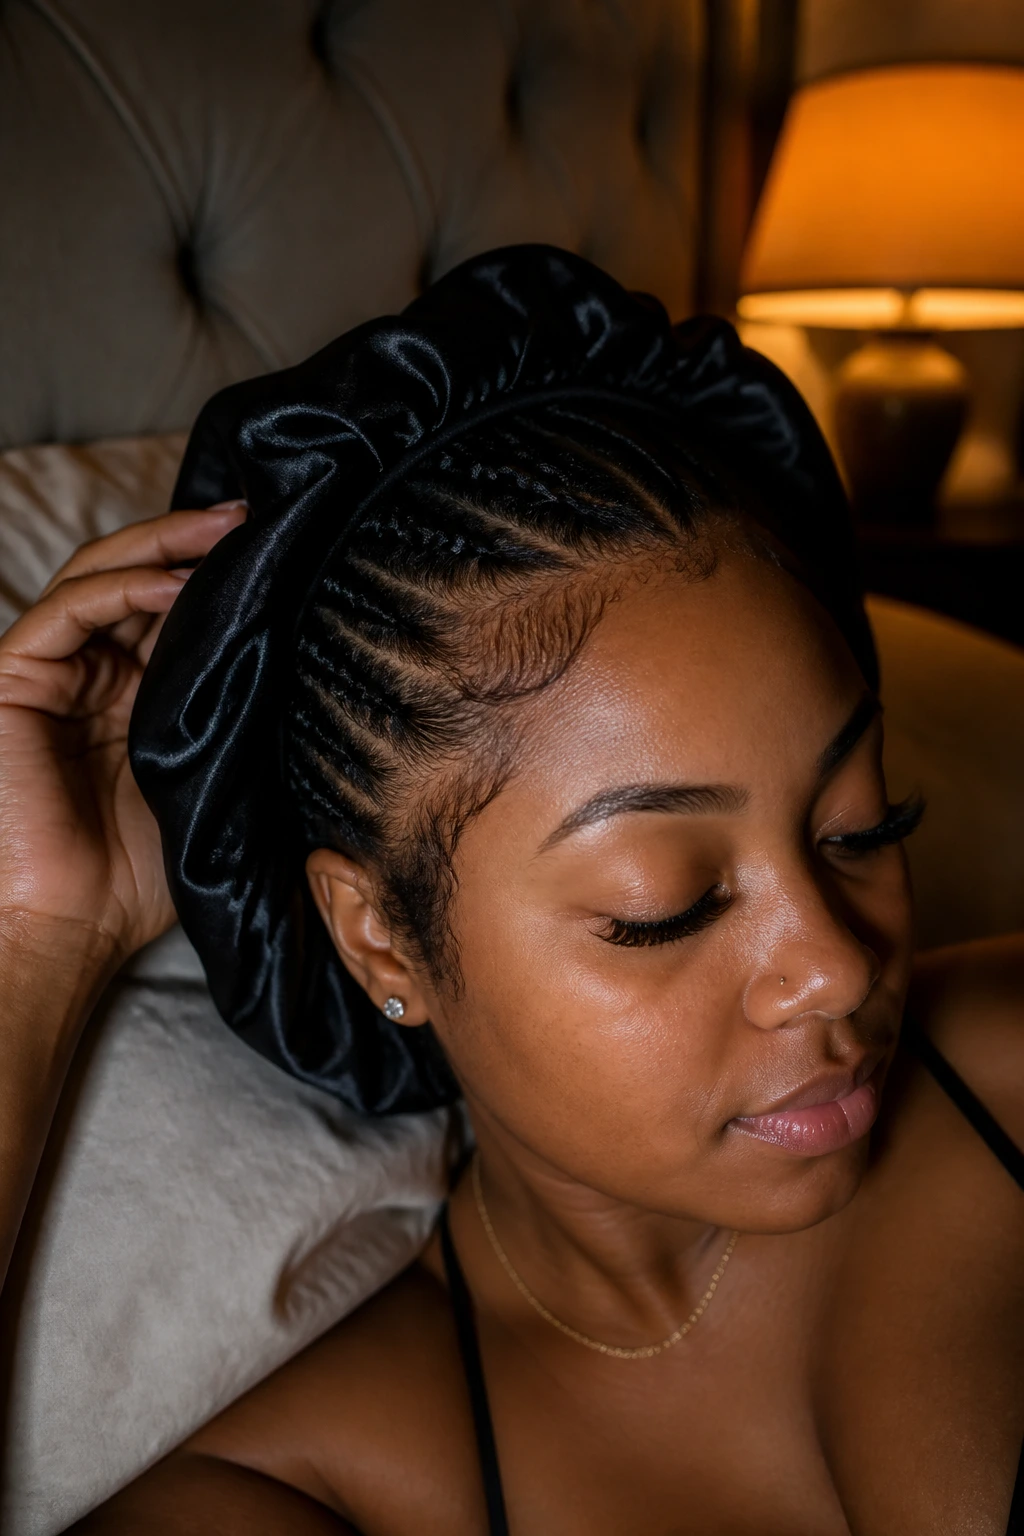
Most sleek braids on wavy hair last best when you treat the night before as part of the style, not an afterthought. A satin scarf or bonnet keeps the cuticle from rubbing open, and a silk pillowcase is the backup when the scarf slides off. If you wake up with a little lift at the crown, smooth it with a mist bottle and a small amount of mousse, then press it back into shape with your hands.
Different styles have different wear windows. A Dutch braid ponytail or low rope braid often holds for 1 to 3 days. Cornrows, feed-ins, and goddess braids can last much longer, often 1 to 2 weeks or more if the scalp is comfortable and you keep buildup under control. Braided buns and halo styles sit somewhere in the middle, usually 2 to 4 days before they need a real refresh.
Refresh schedule
- Nightly: wrap the hair or protect it with a bonnet.
- Every 1 to 2 days: smooth the crown and touch up the part.
- When the scalp feels coated: stop adding product and cleanse or reset.
Braiding Questions Wavy Hair Wearers Ask
Can I braid wavy hair when it’s damp?
Yes, but be careful. Damp hair gives you grip while you work, yet it can swell as it dries and loosen the braid later. For long wear, I usually prefer hair that’s mostly dry and lightly styled first.
What braid lasts the longest on wavy hair?
Feed-in cornrows, goddess braids, and braided buns usually hold the best because they sit close to the scalp and tuck the ends away. The exact winner depends on how much tension your hair likes and whether you sleep with a scarf.
Do I need gel for every braid?
No. Some styles only need mousse or a smoothing cream. Use gel where the hairline needs extra hold, not all over the head unless your texture really calls for it.
How do I stop the braid from puffing at the crown?
Start with clean parting, smooth the roots first, and keep the opening section firm. Crown puff usually starts because the braid was too loose at the base or the product was too slippery.
Can I wear the same braid for several days?
Usually, yes, if the style is secure and your scalp is comfortable. If it starts to itch, pull, or feel heavy, take it down sooner. A braid that hurts is not staying cute for long.
Are tighter braids better?
Tighter is not the same as better. You want enough tension to keep wavy hair in line, but not so much that the scalp feels stretched. Comfort matters because pain makes you fidget, and fidgeting ruins the style.
What if my ends look frizzy after braiding?
Seal them with a tiny bit of serum or wrap them into a bun or tucked finish. Leaving the ends exposed is usually what makes the style look old too fast.
Braids That Stay Neat
The styles here work because they respect the way wavy hair moves. They don’t pretend the texture is straight. They don’t ask every strand to behave the same way. They give you a clean root, a controlled line, and a finish that can actually survive a real day.
If you pick the braid that matches your hair density, keep the part clean, and protect it at night, the style lasts longer than most people expect. That’s the real payoff: less fuss, fewer mid-day fixes, and a braid that still looks like it meant business after the first round of wear and tear.
The next time your waves start acting like they have plans of their own, choose the braid that pins them down first and pretties them up second. That order makes a difference.