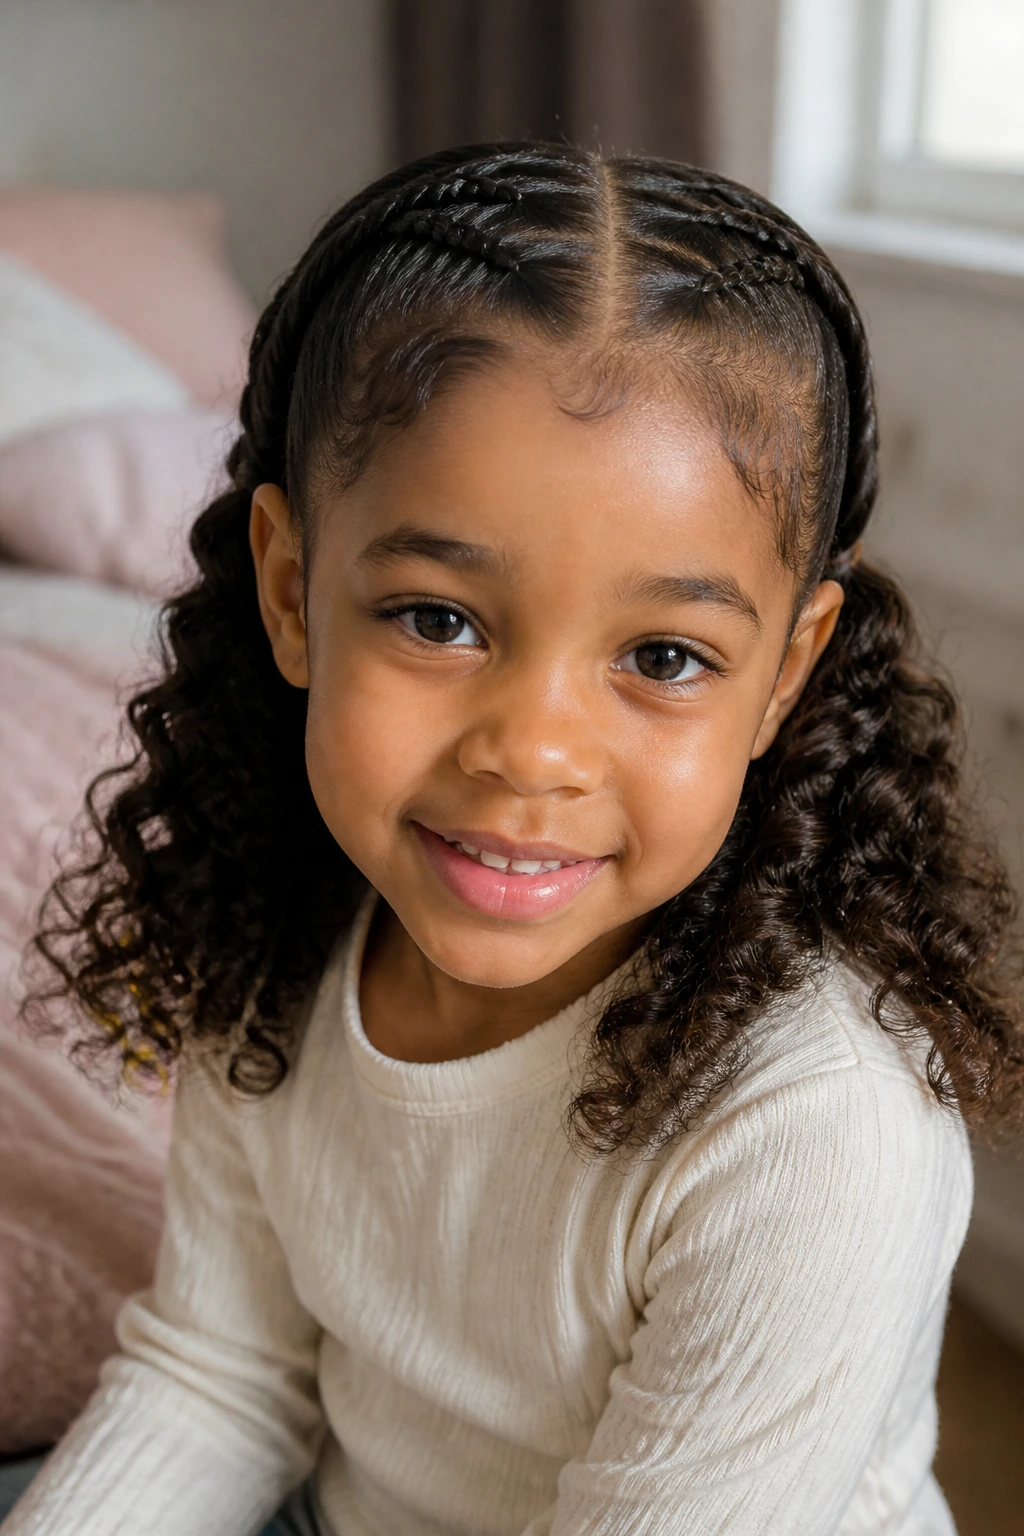
If you’ve ever tried to get a little girl with curly hair out the door with both peace and dignity intact, you already know the real issue: the hairstyle has to survive the whole day and feel good at the scalp. Cute isn’t enough. Not when there’s school, a car seat, a nap, a playground, and a child who will absolutely tell you if one braid is tugging behind her ear.
Braids for little girls with curly hair work best when they respect the curl pattern instead of flattening it into submission. Clean parts, soft tension, and ends that still let the curls spring up a little — that’s the sweet spot. I have very little patience for styles that look neat for ten minutes and then start hurting by lunchtime. The best braids are the ones a child forgets about after a while.
What makes this topic fun is the range. Some styles are quick and practical. Some are elaborate enough for photos, church, birthdays, or a family event where somebody’s auntie will definitely ask who did her hair. Others sit in that perfect middle ground: detailed enough to feel special, sturdy enough to handle real life. There’s a braid in here for short curls, dense curls, stretched curls, thick coils, and those mornings when you need the hair off the face now.
Why This Collection Feels Worth the Detangling Session
-
Less daily brushing: Once the parts are set and the braids are in, you stop fighting the same knots every morning with a spray bottle and a prayer.
-
Curly ends do half the styling work: A little puff at the tail, a few curls left free, or a beaded end gives the braid shape without needing fancy manipulation.
-
The scalp stays calmer when the tension is right: These styles are built around neat parting and controlled pulling, not that tight, shiny, painful look that makes kids flinch.
-
Accessories change the whole mood: A ribbon, a bow, clear beads, or gold cuffs can make the same braid pattern feel playful, polished, or dressy.
-
They fit real schedules: Some of these styles are fast enough for a school morning. Others are the kind you save for a weekend when you’ve got an extra half hour and a good playlist.
-
Curly hair gives the braids character: The texture adds grip, softness, and shape at the edges. That slight puffiness isn’t a flaw — it’s part of the charm.
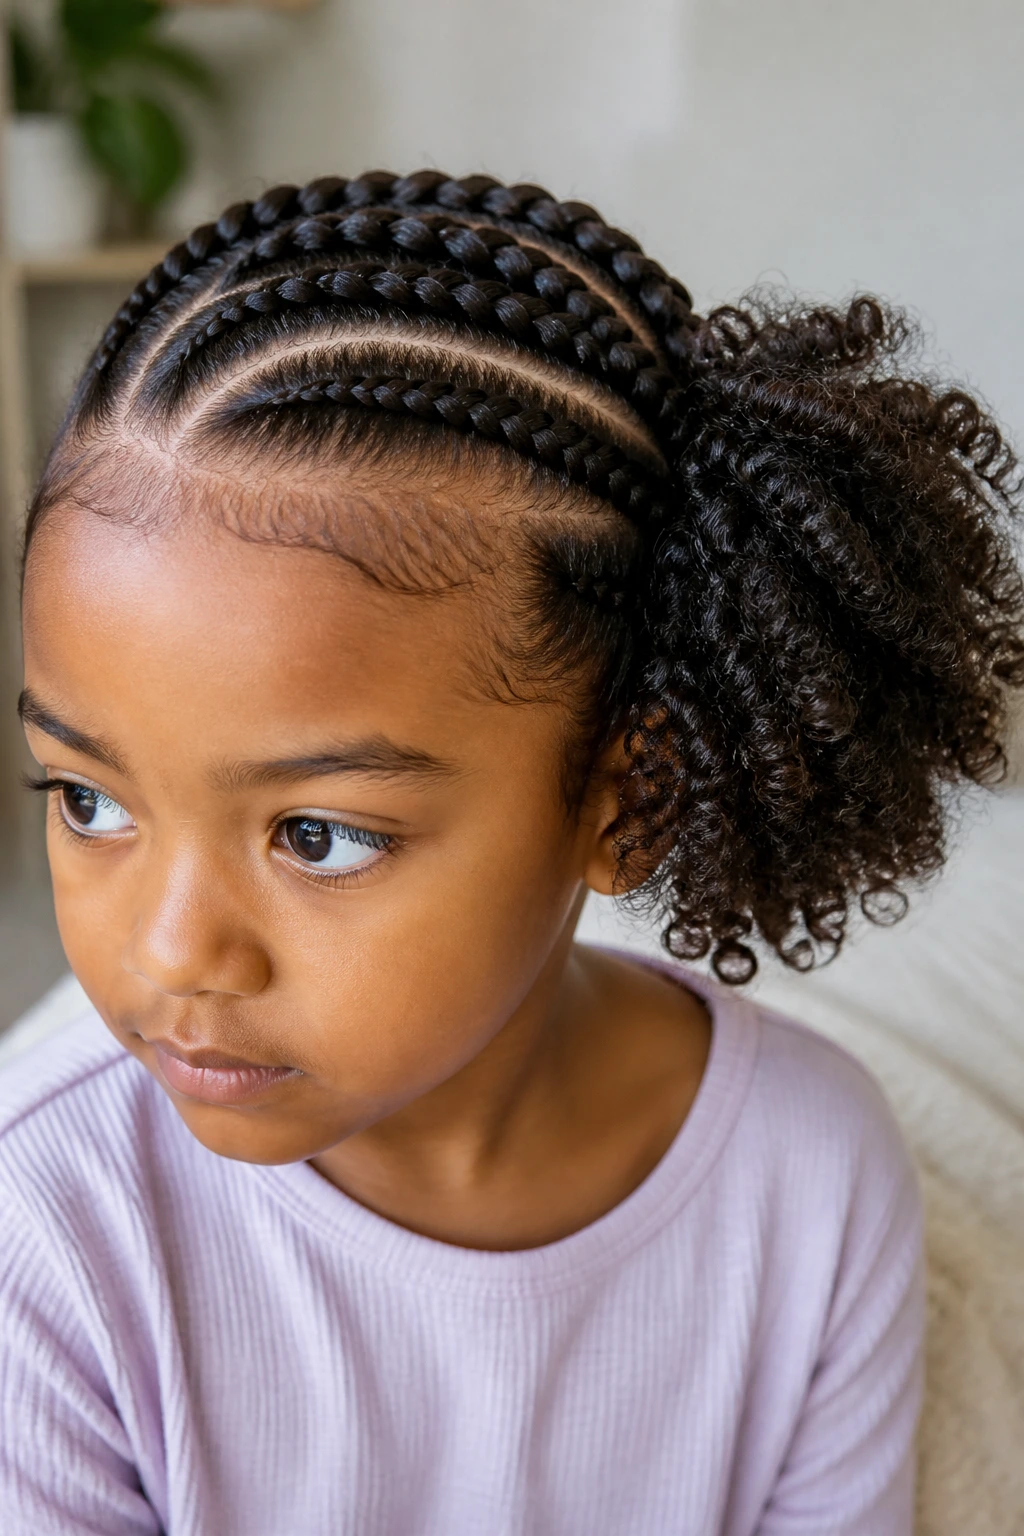
1. Classic Cornrow Pigtails with Curly Ends
There’s a reason this style never gets old. Two clean rows, a straight middle part, and the curly ends left out just enough to bounce around at the shoulders — it’s neat without looking stiff. On little girls with curly hair, this one has a calm, tidy look that still lets the texture show through.
What makes it work is the balance. The cornrows keep the front smooth, while the loose ends stop the style from feeling too severe. If the child has dense curls, keep the parts a little wider and braid with steady hands, not a death grip. A tiny dab of mousse on the ends helps the curls stay defined instead of puffing into a frizz halo by recess.
2. Zigzag Part Double Braids
A zigzag part changes everything. The braid itself may be simple, but that sharp little part line turns the whole style into something more interesting without adding a ton of time. It’s the kind of detail kids notice in the mirror right away.
This style is especially good when you want structure but not too much bulk. The zigzag also helps disguise small grow-out at the roots, which is useful if you’re stretching a style for several days. Keep the sections crisp with the tail of a comb, then braid each side low and even. It’s neat, playful, and a little bit fancy without trying too hard.
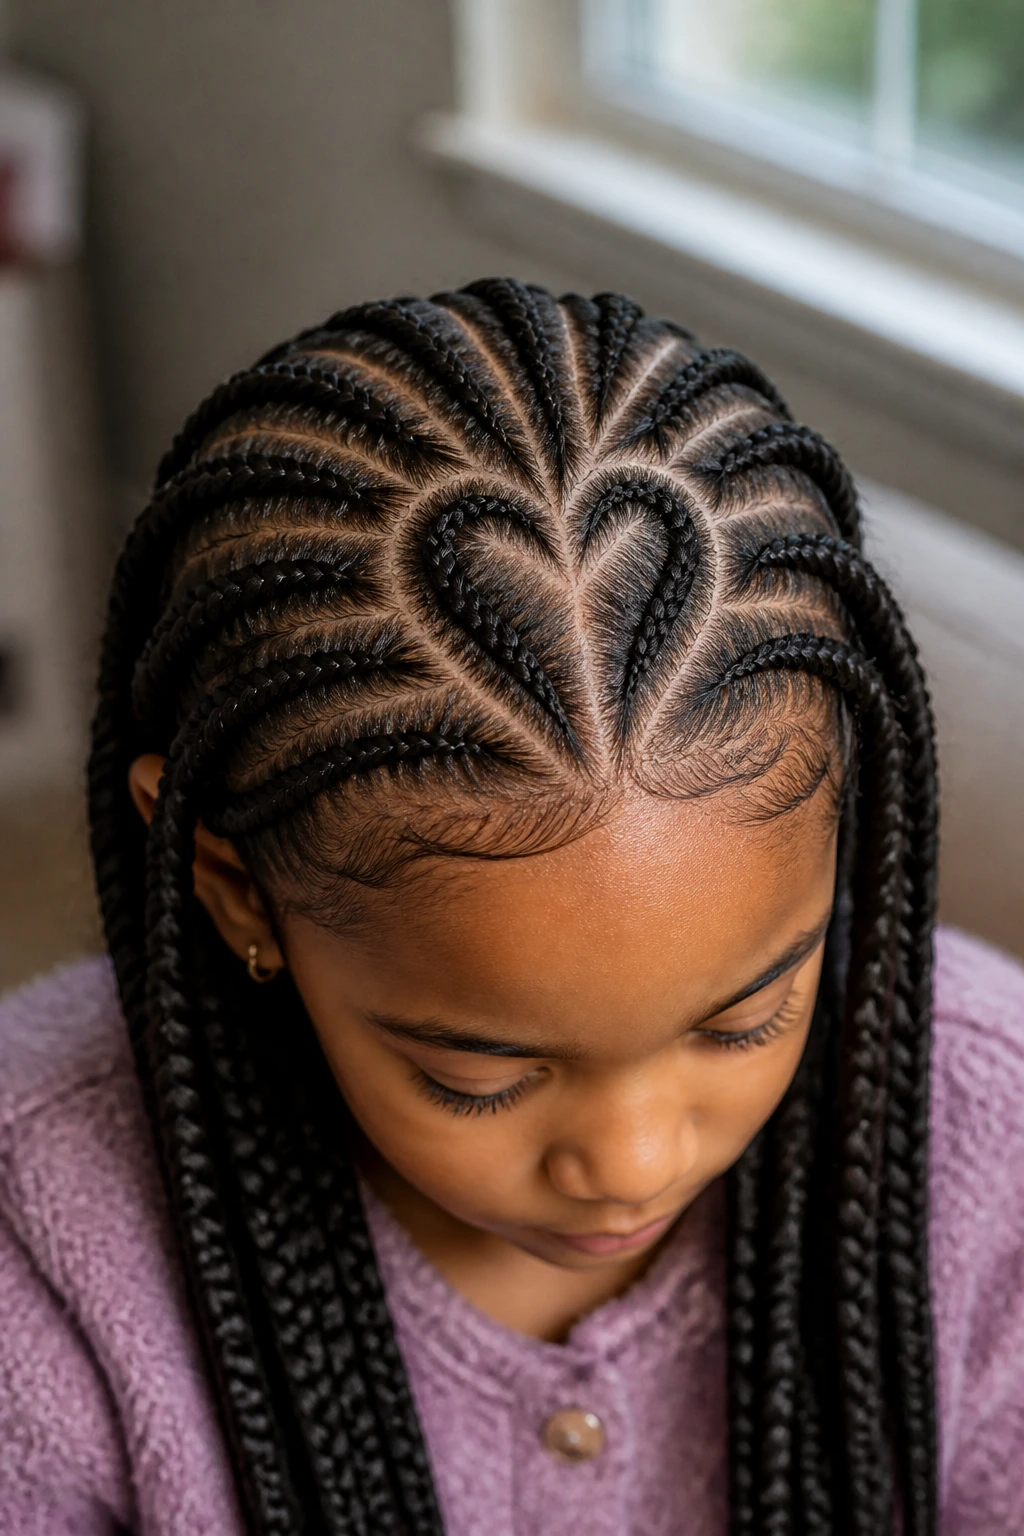
3. Heart-Part Feed-In Braids
Heart parts look like you spent forever on the hair, even when you didn’t. That’s the magic here. The heart shape sits at the crown or along one side, and the feed-in braids build out from it with a smooth, raised look that feels special enough for birthdays and photo days.
I like this style for children who want something pretty but still practical. The heart part gives you the visual drama, while the feed-ins keep the braids close to the scalp so they don’t feel bulky. If you use added hair, keep it light. Heavy braid hair on a small head is not a cute tradeoff. Finish with a few beads or a satin bow, and let the parting do the talking.
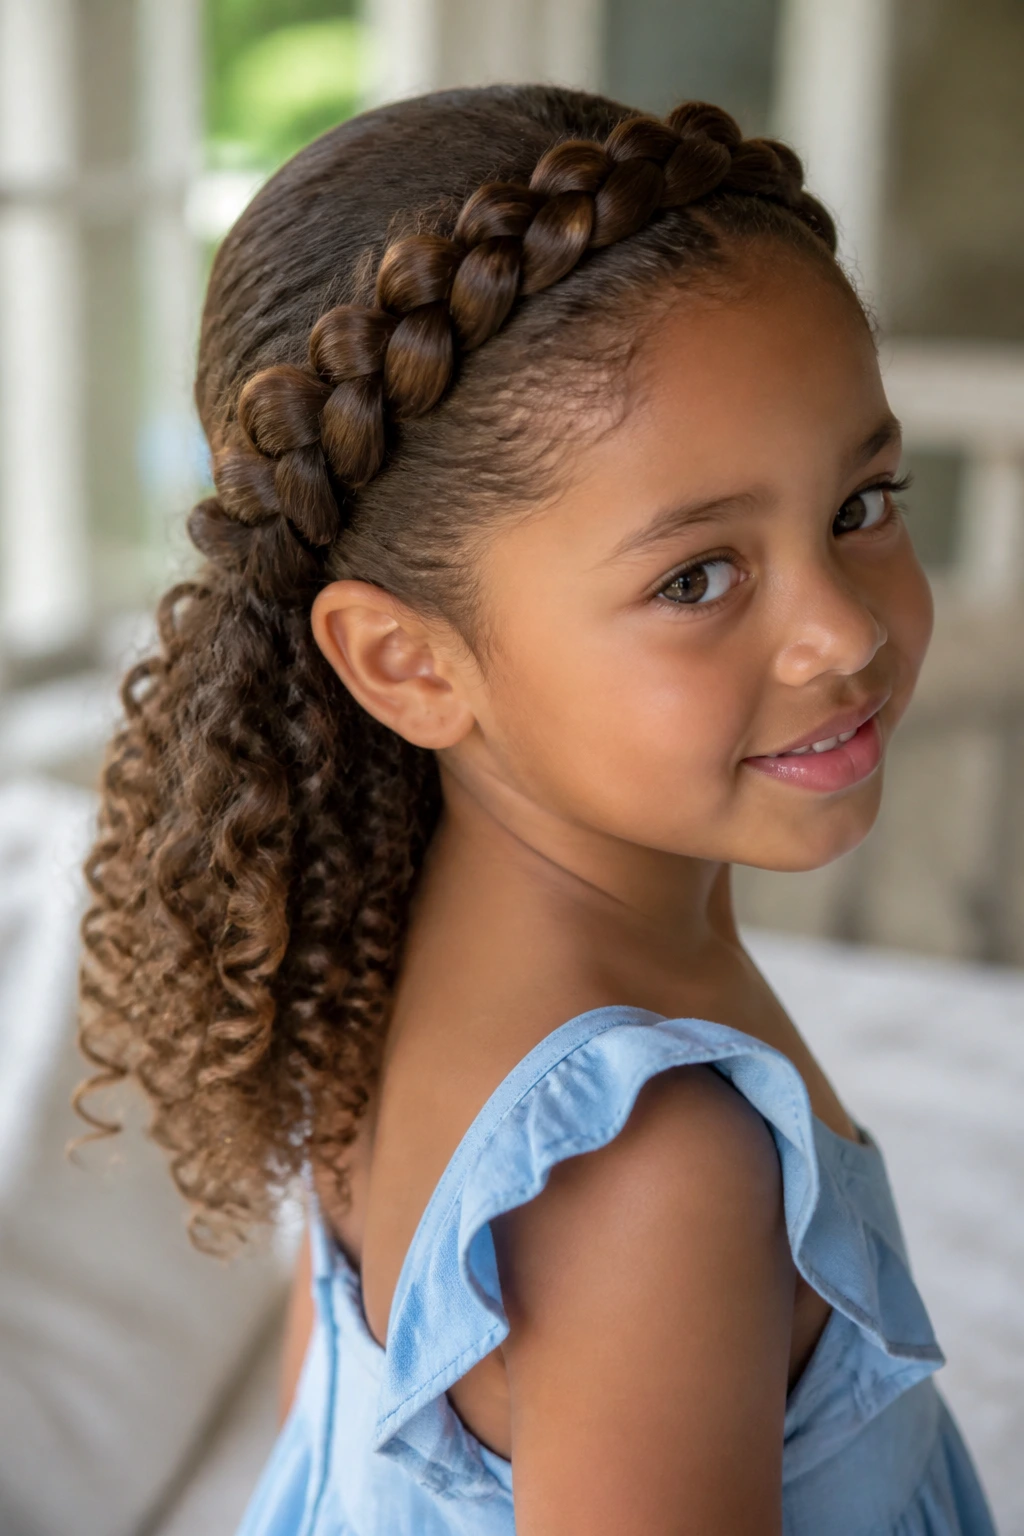
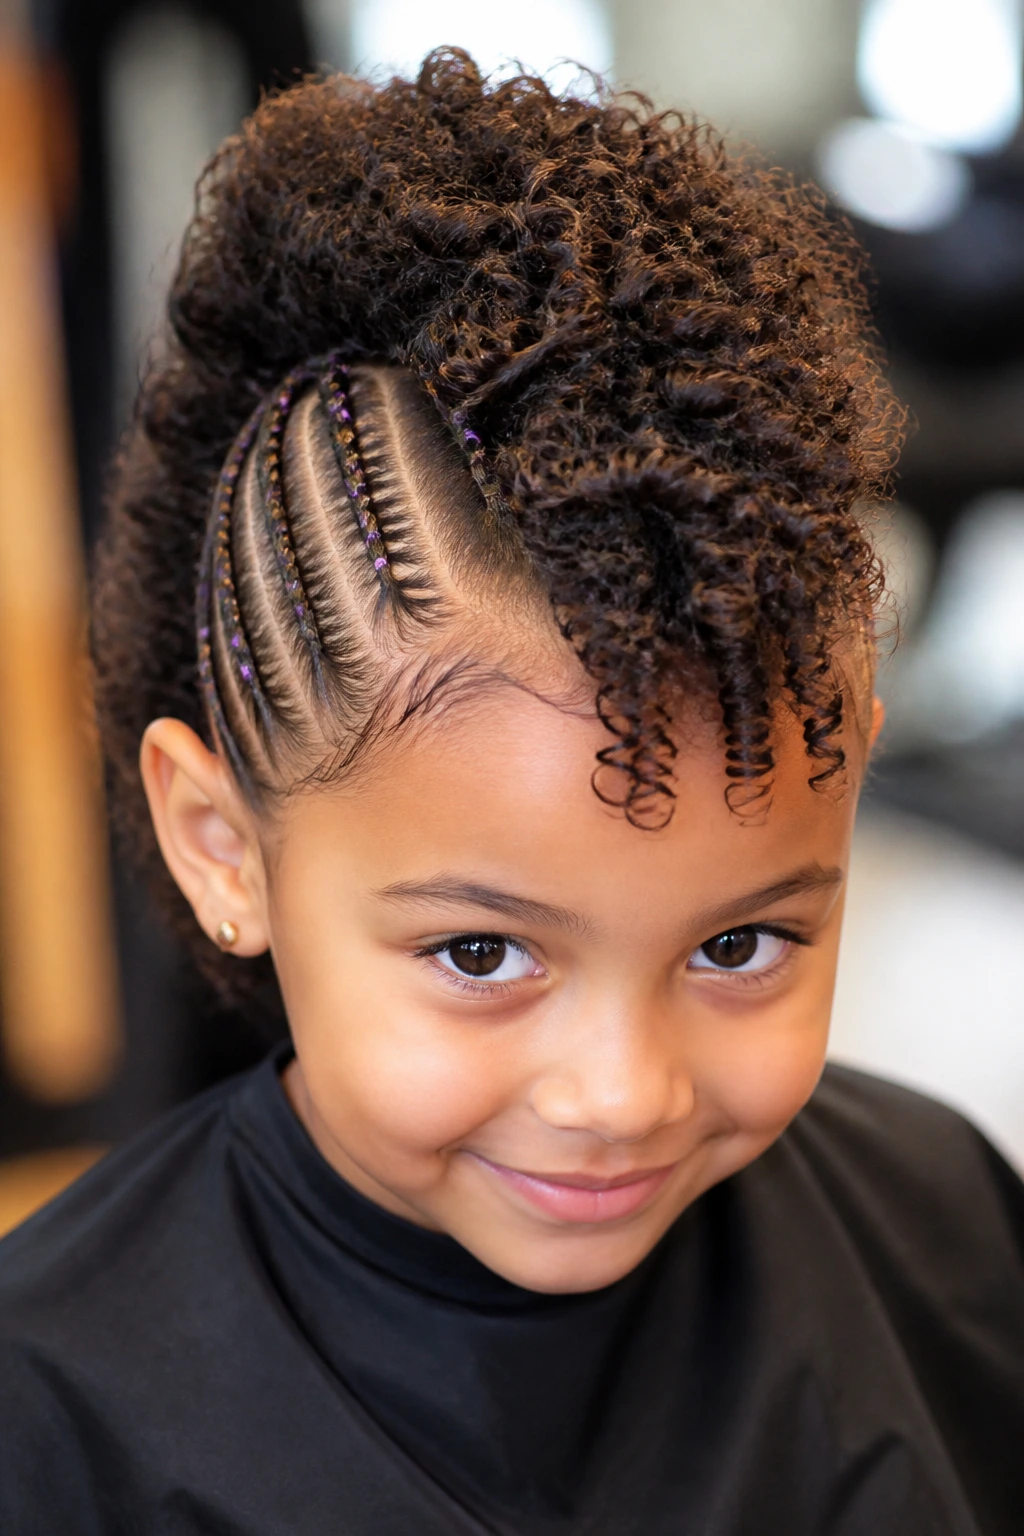
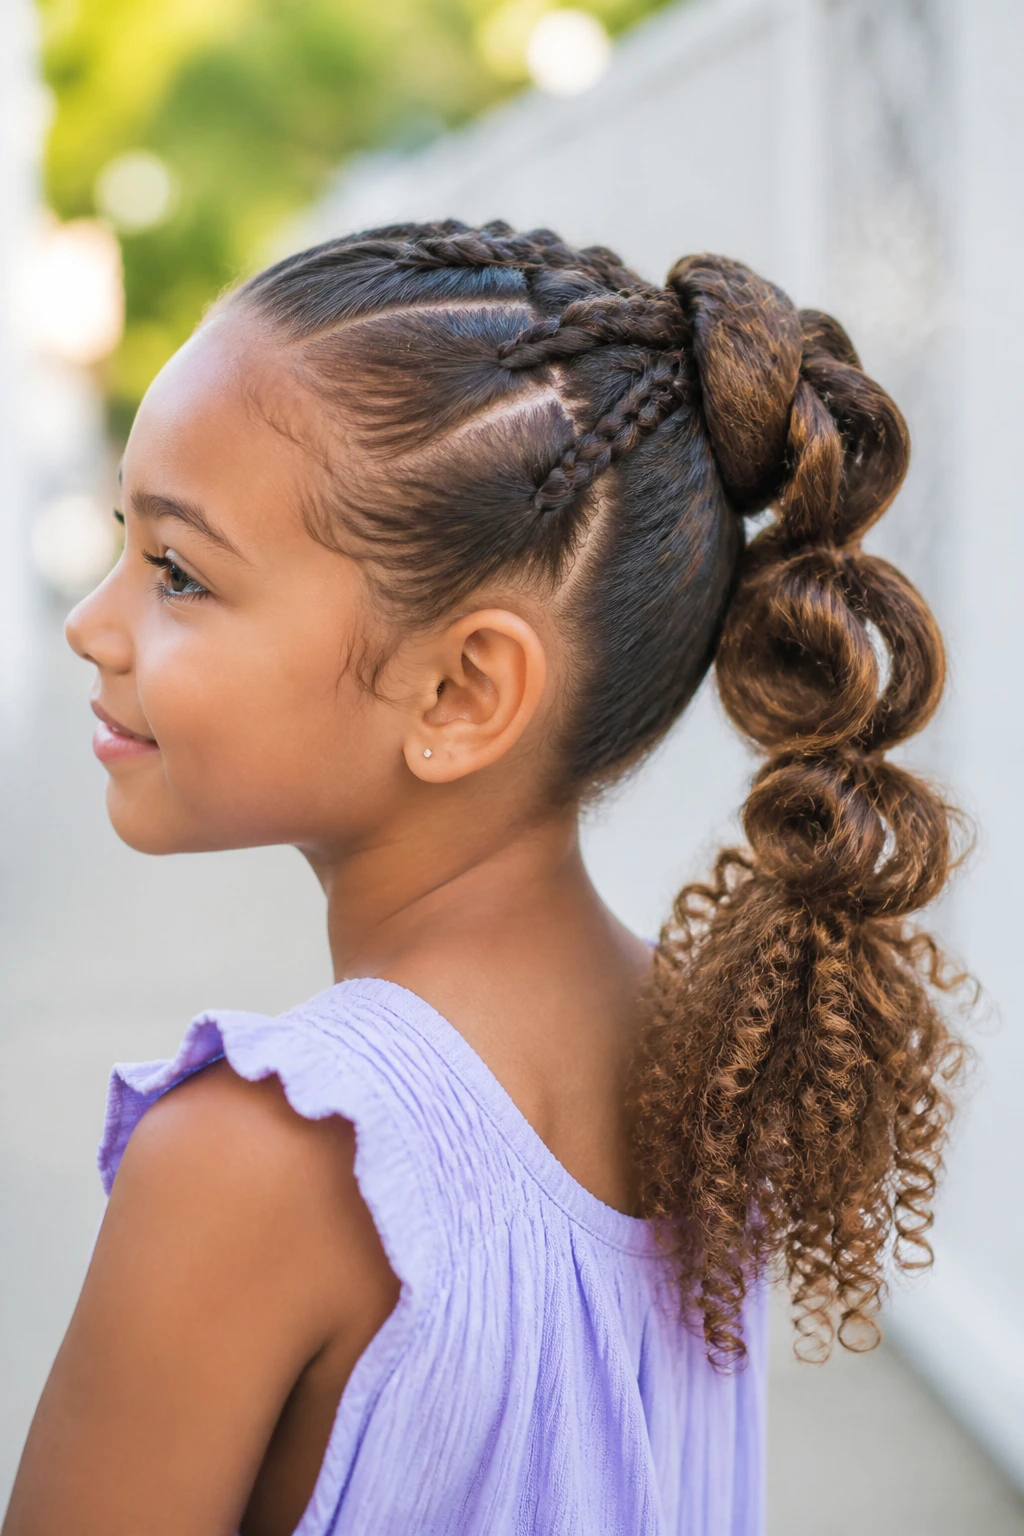
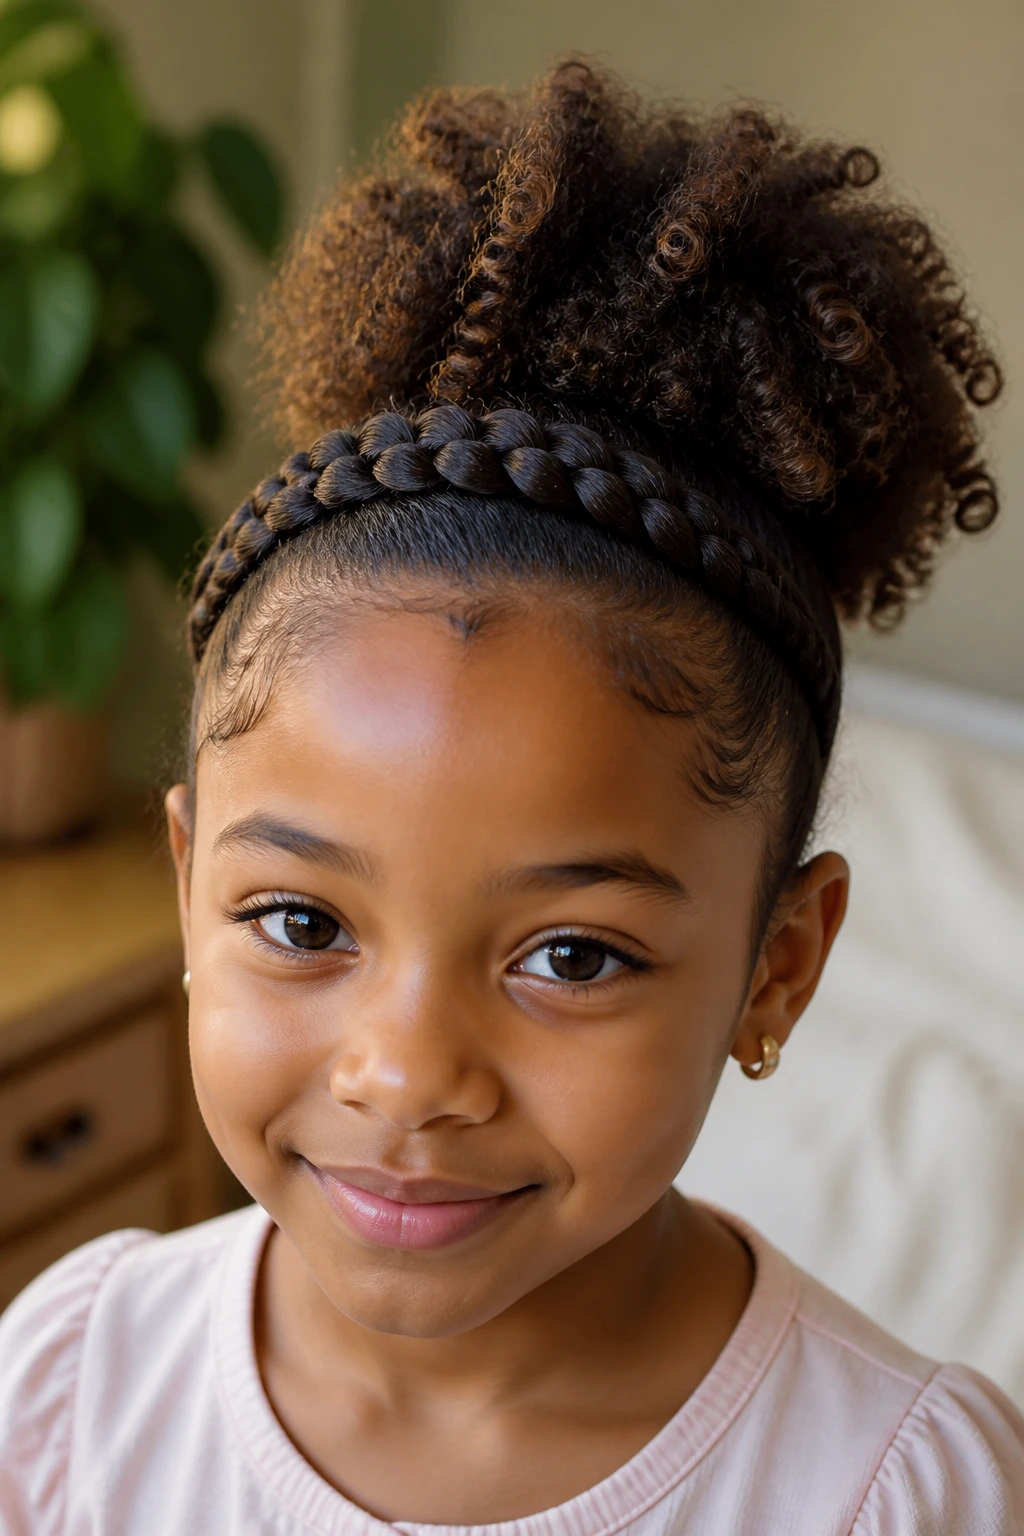
4. Braided Crown into a High Puff
This one has a little drama in the best way. Braids wrap around the front and sides like a crown, then the back gathers into a high puff that shows off the curls. It’s a good answer for hair that needs to stay away from the face but still deserves volume.
The crown keeps the style tidy at the hairline, while the puff gives the whole look movement. That contrast is what makes it work. If the child has very thick curls, don’t try to over-flatten the puff; a round, full shape looks better than a pressed-down knot. A little curl cream on the puff and a soft bristle brush at the roots are enough. No need to overcomplicate it.
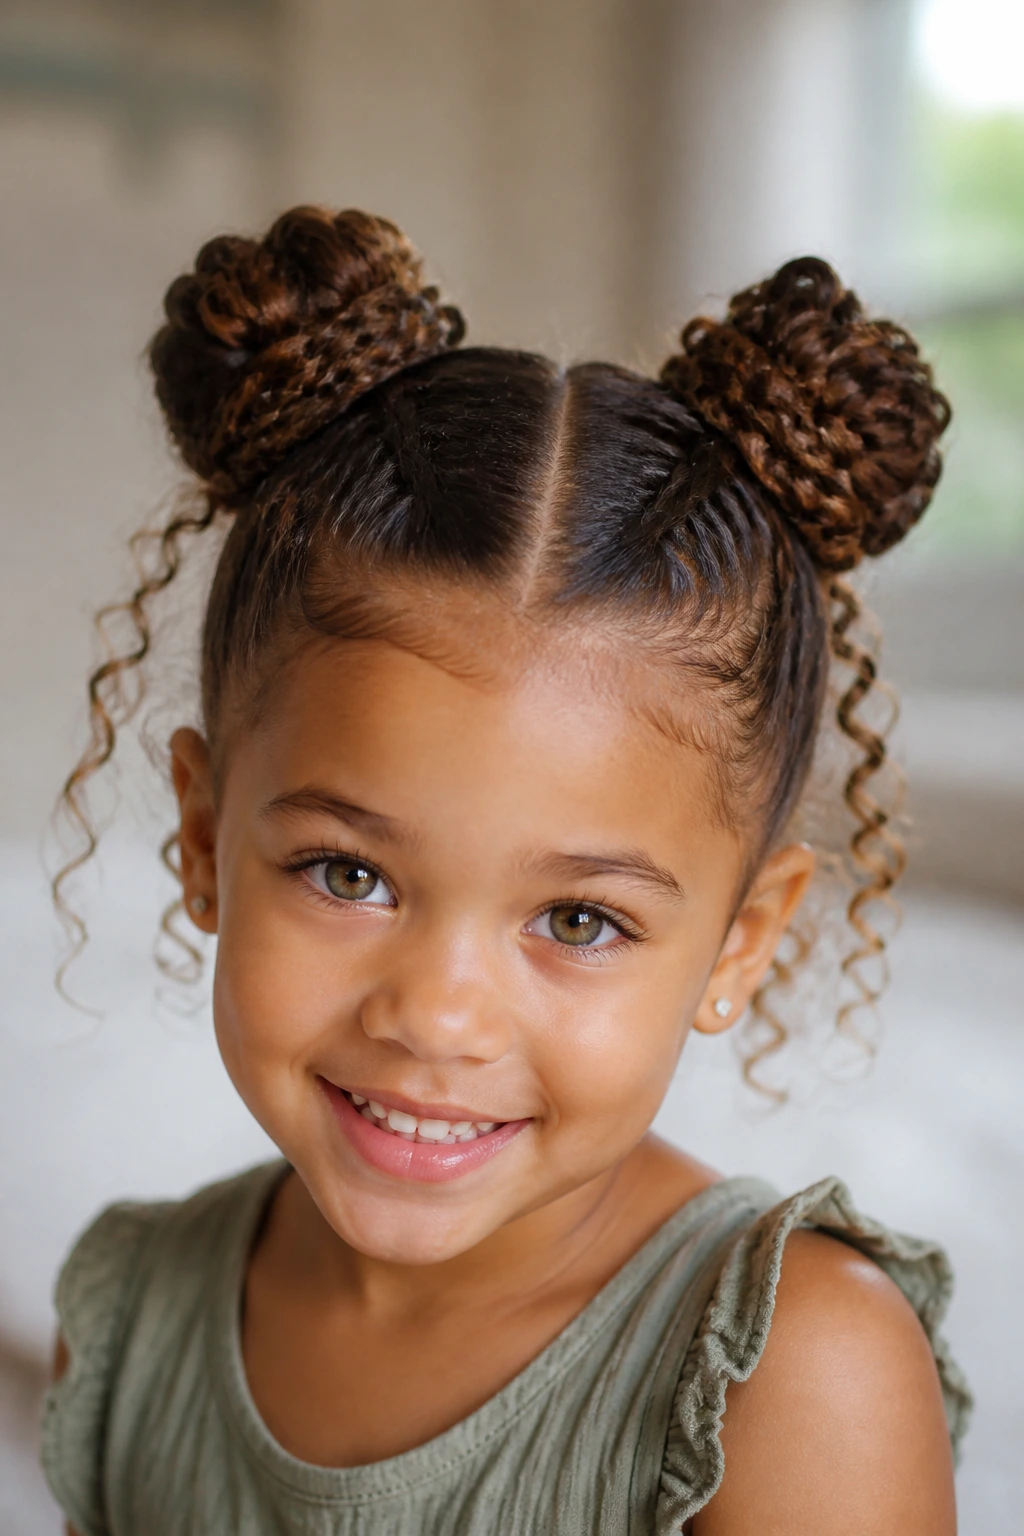
5. Dutch Braid Space Buns
Space buns are already fun. Dutch braids leading into them make the whole style look more structured and intentional. The braid starts at the front, feeds back into two buns, and gives the head a neat, lifted shape that holds up well on active days.
This style is especially handy for kids who keep their hands in their hair. The buns sit high enough to stay out of the way, and the braid base keeps everything anchored. If the child has very curly hair, stretch it lightly first so the buns don’t end up too small or too bulky. I’d keep the buns soft rather than perfectly tight. A little texture around the edges makes the style look better anyway.
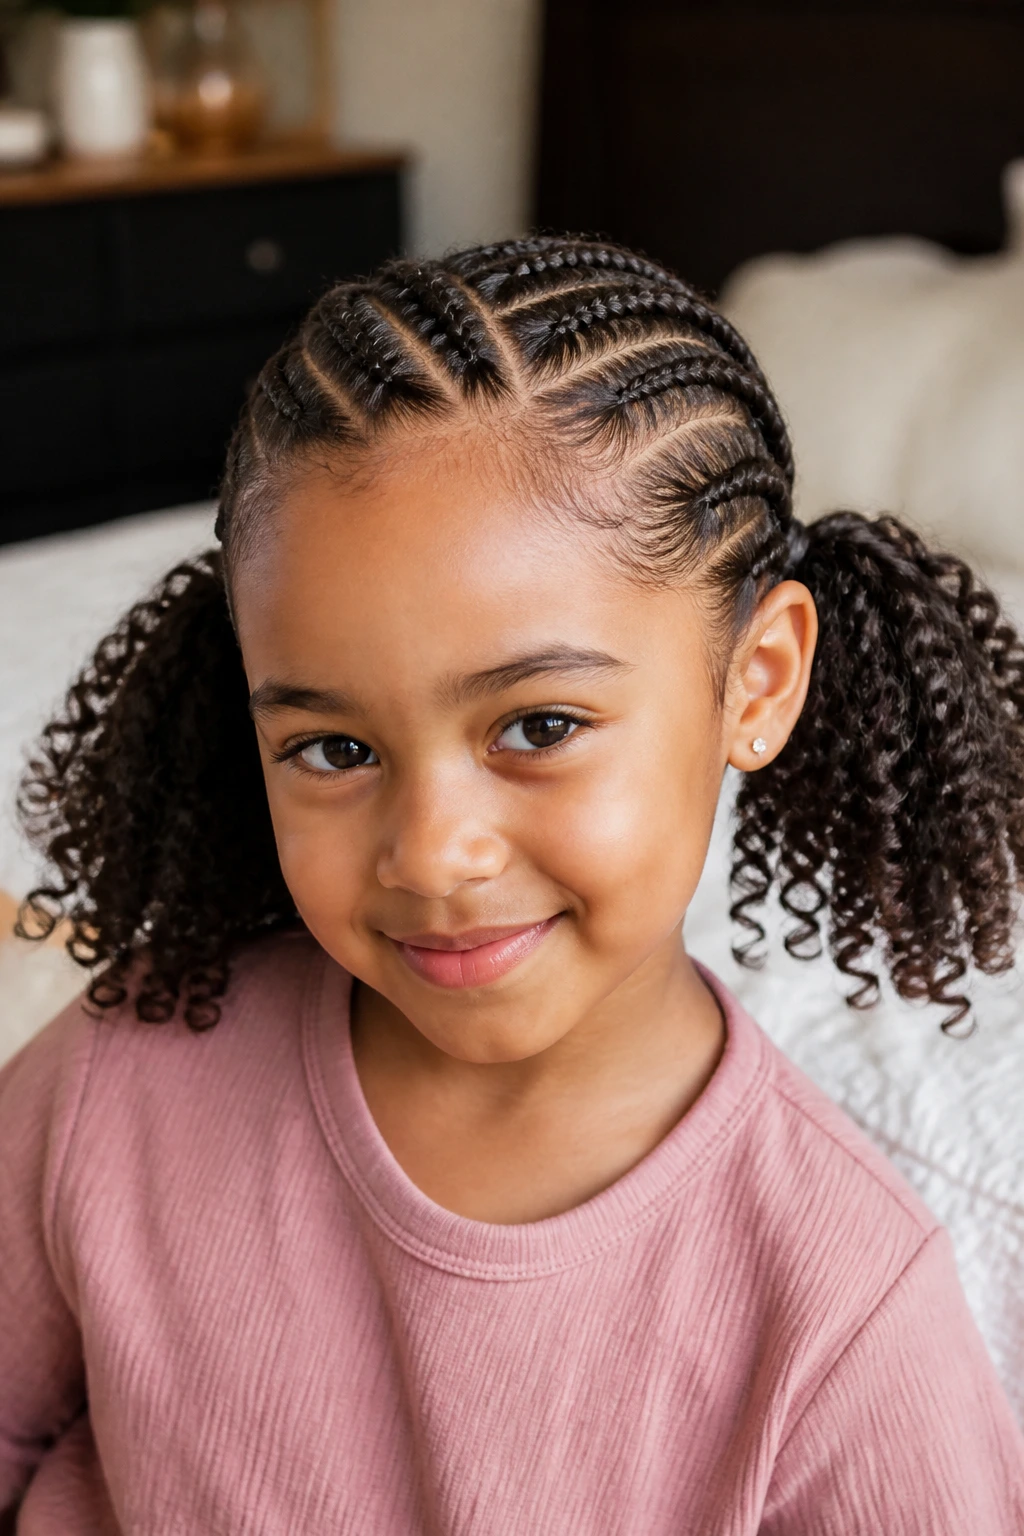
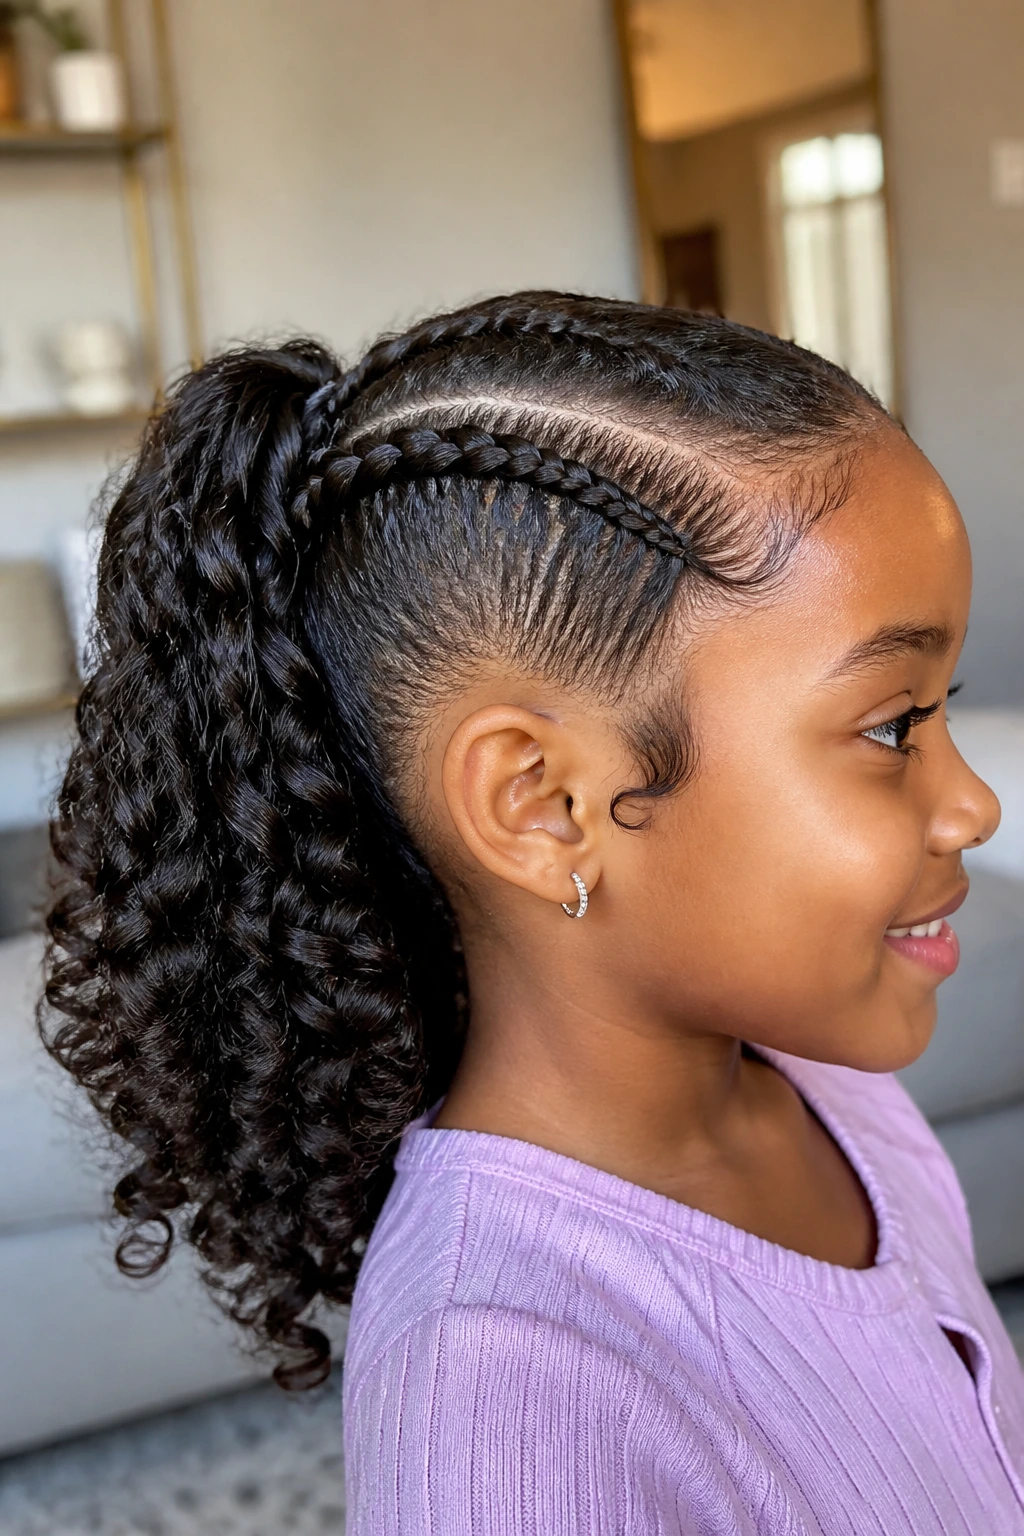
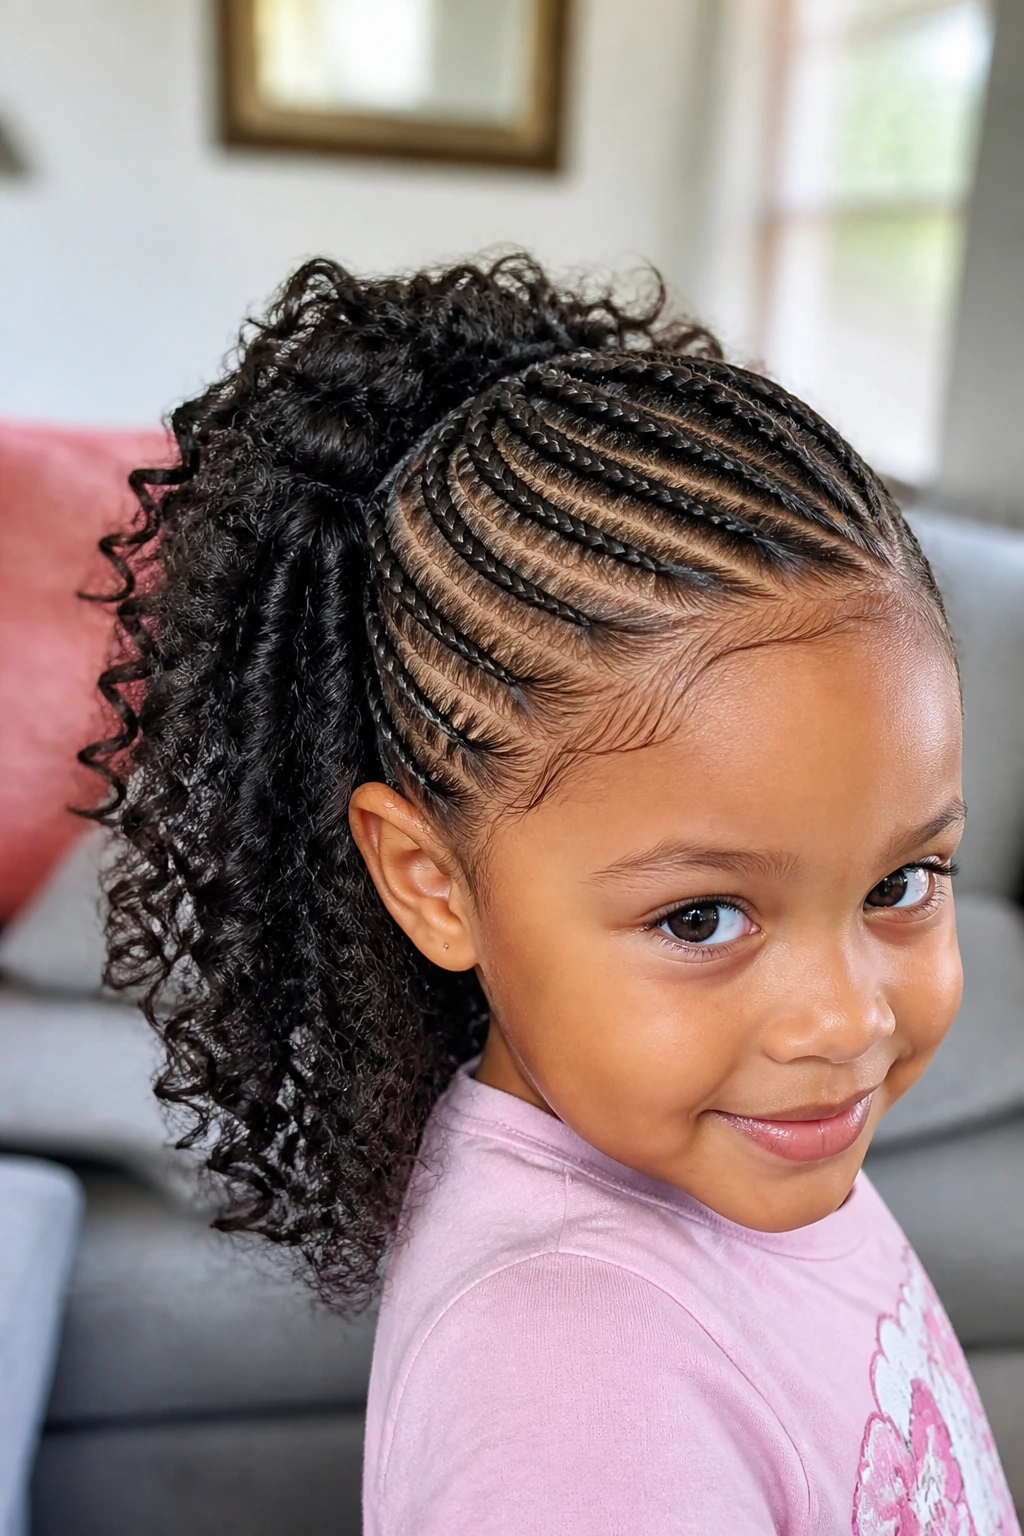
6. Side-Swept Cornrows into a Curly Ponytail
Side-swept braids have a softer feel than a straight-back set. The cornrows move across the head in one direction and collect into a curly ponytail, which gives the style a bit of swing and a lot of personality. It’s a good choice when the hairline on one side needs more control than the other.
This one works nicely on growing-out hair, too. The side part makes uneven lengths less obvious, and the ponytail keeps the ends lively instead of tucked away. I like a low ponytail for younger kids because it’s easier on car seats and naps. Keep the elastic snug but not biting, then wrap one braid around the base to hide it if you want a cleaner finish.
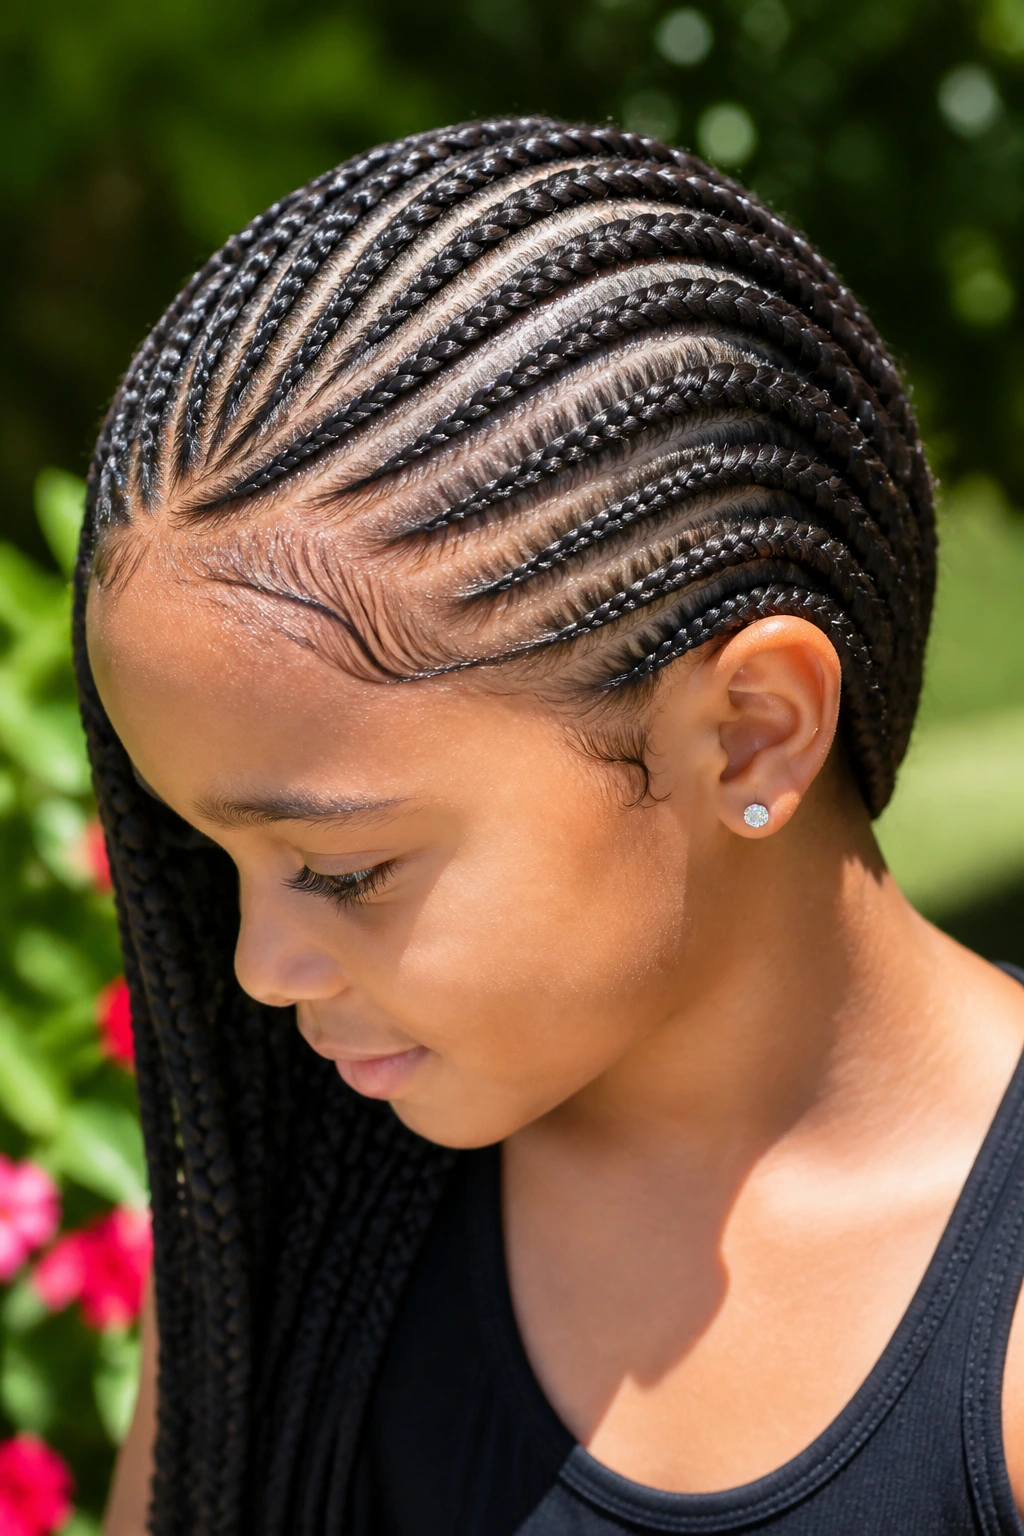
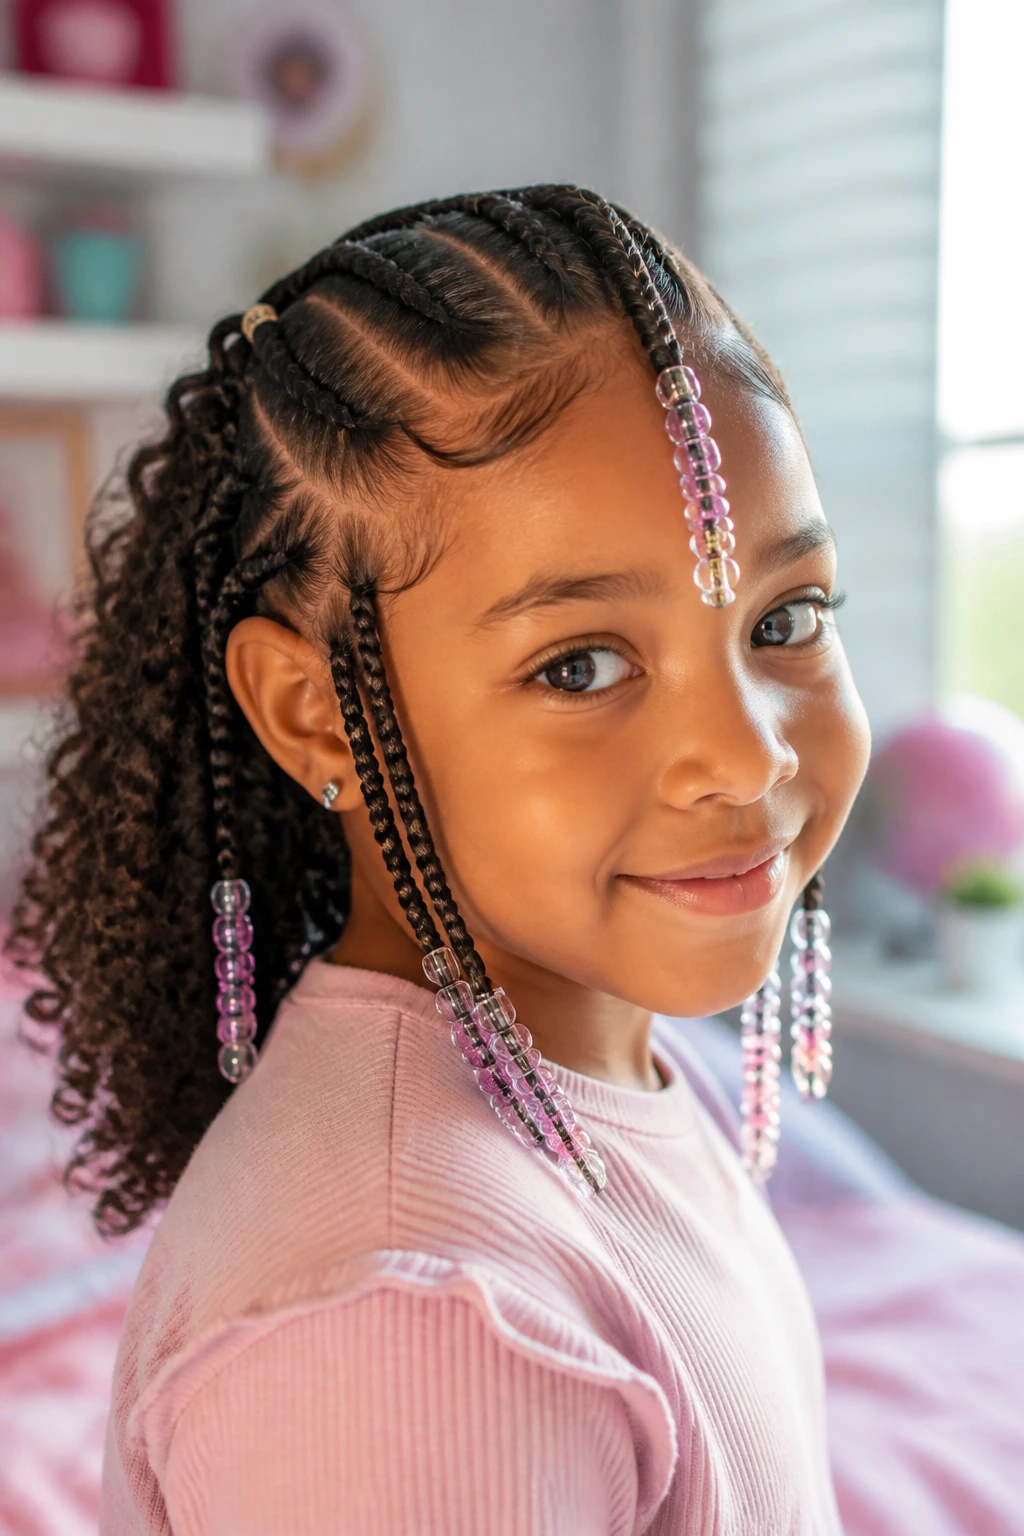
7. Fulani Braids with Beads
Fulani braids have that lovely, detailed look that makes people ask who did the hair. A center braid, side braids, and a row or two of beads can turn a regular wash-day style into something with real shape. On curly hair, the contrast between the smooth braids and the natural texture at the ends looks especially good.
Beads are the point here, but they should be chosen with some restraint. Lightweight beads are easier on little heads, and they make less noise when the child moves. I’d keep the number of beads smaller for very young kids and place them at the ends, not stacked all the way up the braid. The style should look decorated, not weighed down.
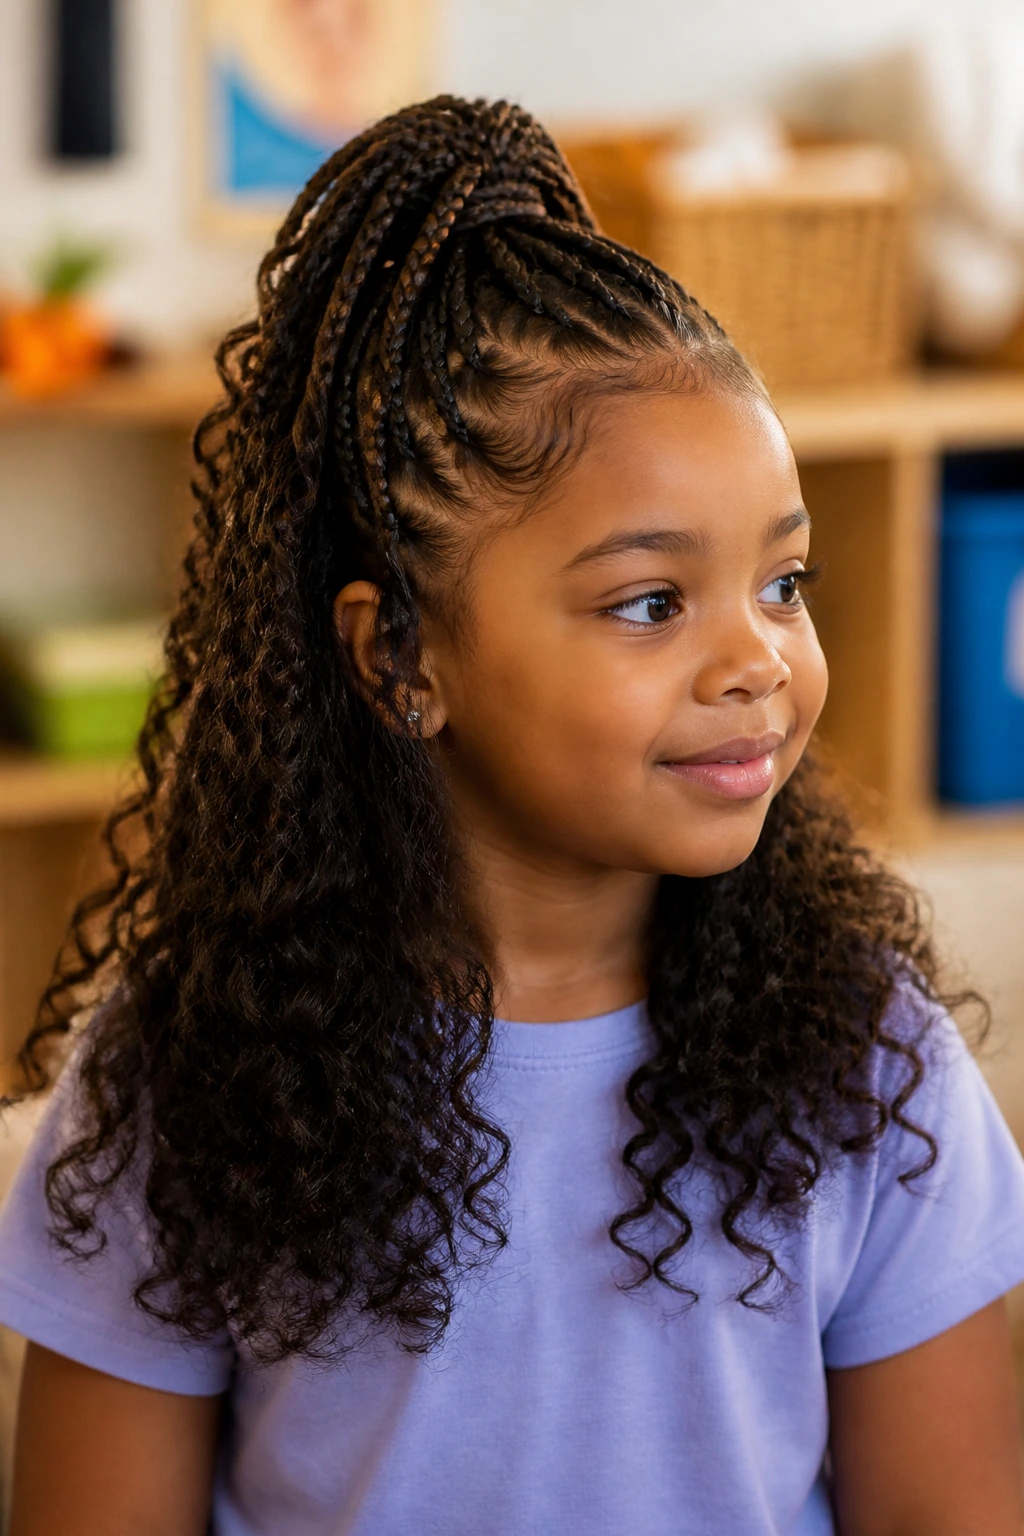
8. Half-Up Box Braids with Loose Curls
Half-up styles are a gift when you want both control and softness. The top section is braided neatly into box braids or small plaits, while the lower curls stay loose and full. That mix of textures gives the style depth without making it feel overworked.
This is one of my favorite options for children with shoulder-length or longer hair. The top half stays tidy through the school day, and the loose curls keep the style looking playful. If the curls at the bottom tend to frizz quickly, refresh them with a little water and leave-in before styling. The trick is not to smooth the curls flat. Let them have shape.
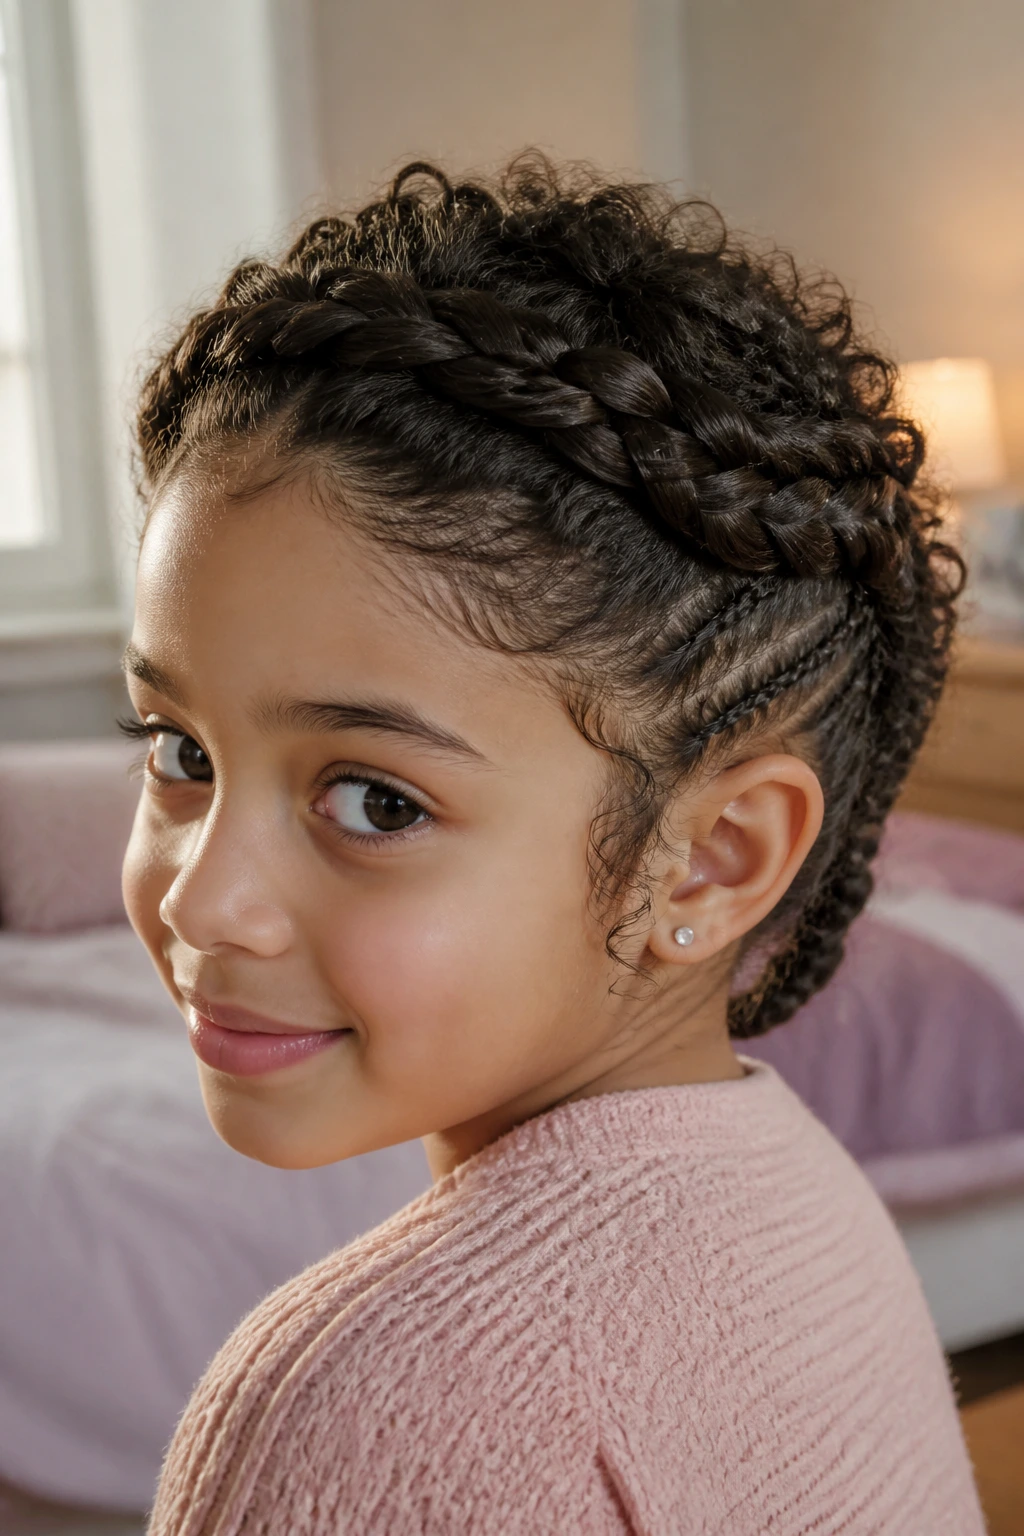
9. Halo Braid with an Open Curly Back
A halo braid circles the head like a soft frame, and the loose hair at the back keeps it from looking too formal. It’s a pretty combination: the front is controlled, the back is full, and the whole style feels balanced. If the child likes having her hair off her forehead but still wants volume, this is a strong pick.
The halo works best when the braid follows the natural curve of the head without being yanked tight. That line should look smooth, not strained. Leave the back curls open and lightly defined so they sit softly against the neck. A small bow at one side is enough if you want to dress it up. No need to crowd it with extras.
10. Lemonade Braids for Kids
Lemonade braids have that sweeping side angle that looks sleek even on younger heads. They run diagonally across the scalp and frame the face in a way that feels stylish without being too grown-up. On curly hair, the side movement plays nicely with the texture.
What I like most is the shape. The braids pull the hair away from the face and create a neat line that stays visible even after a long day. For little girls, keep the braids moderate in size and avoid excessive length if the ends will get caught under jackets or seat belts. A few small cuffs near the ends can brighten the style without making it heavy.
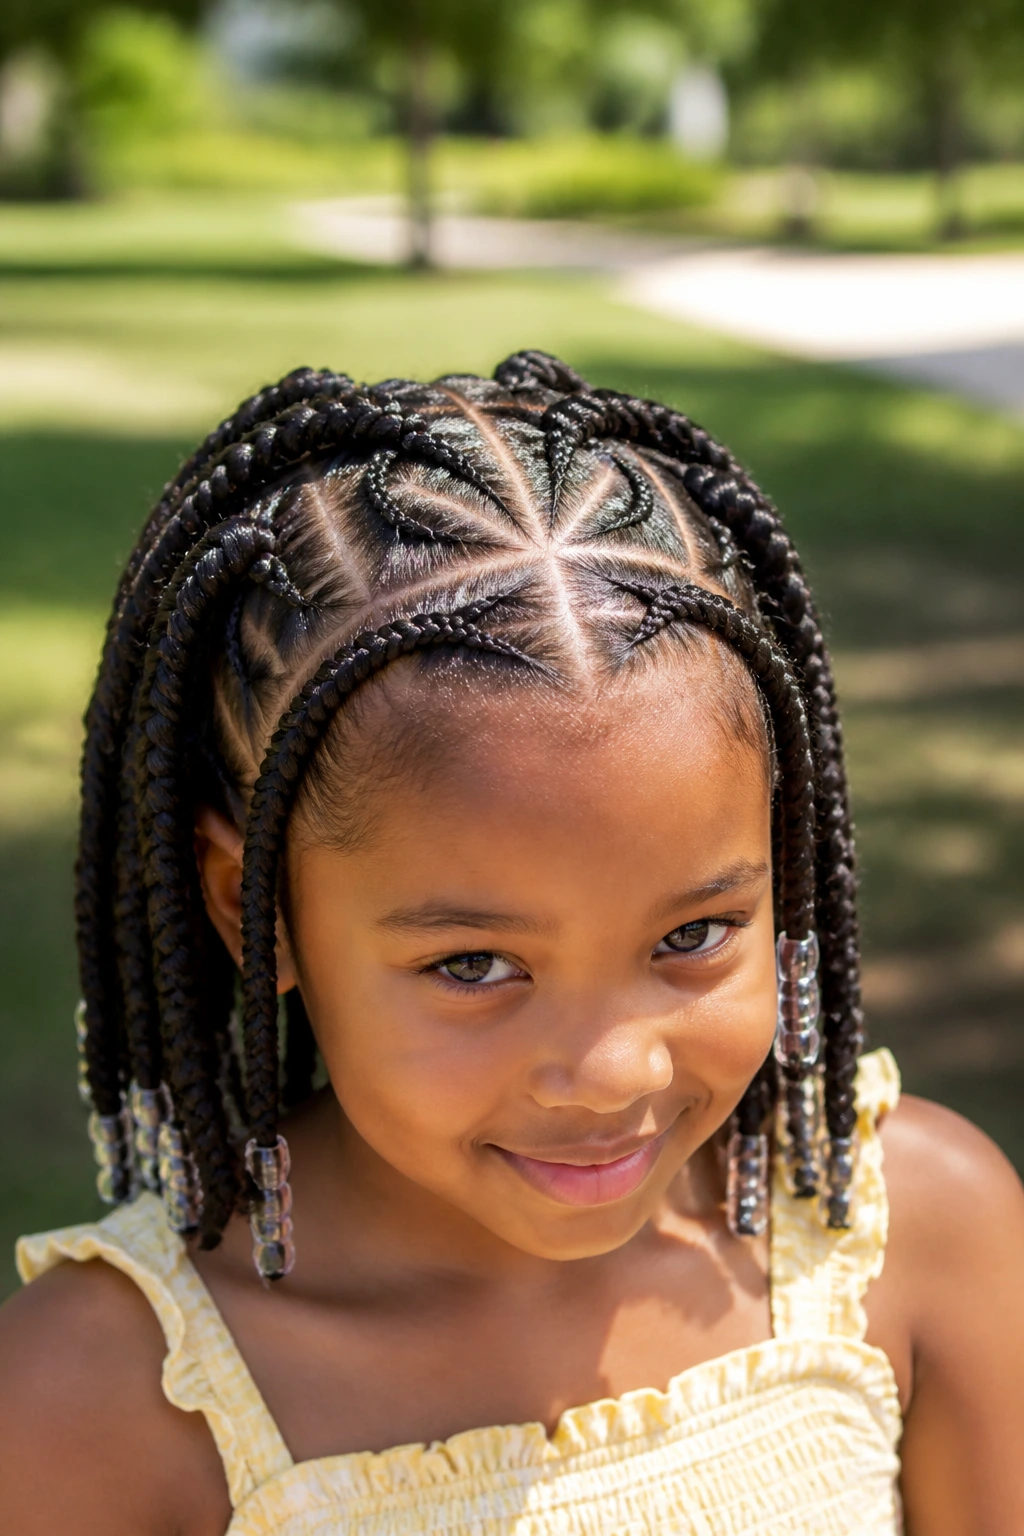
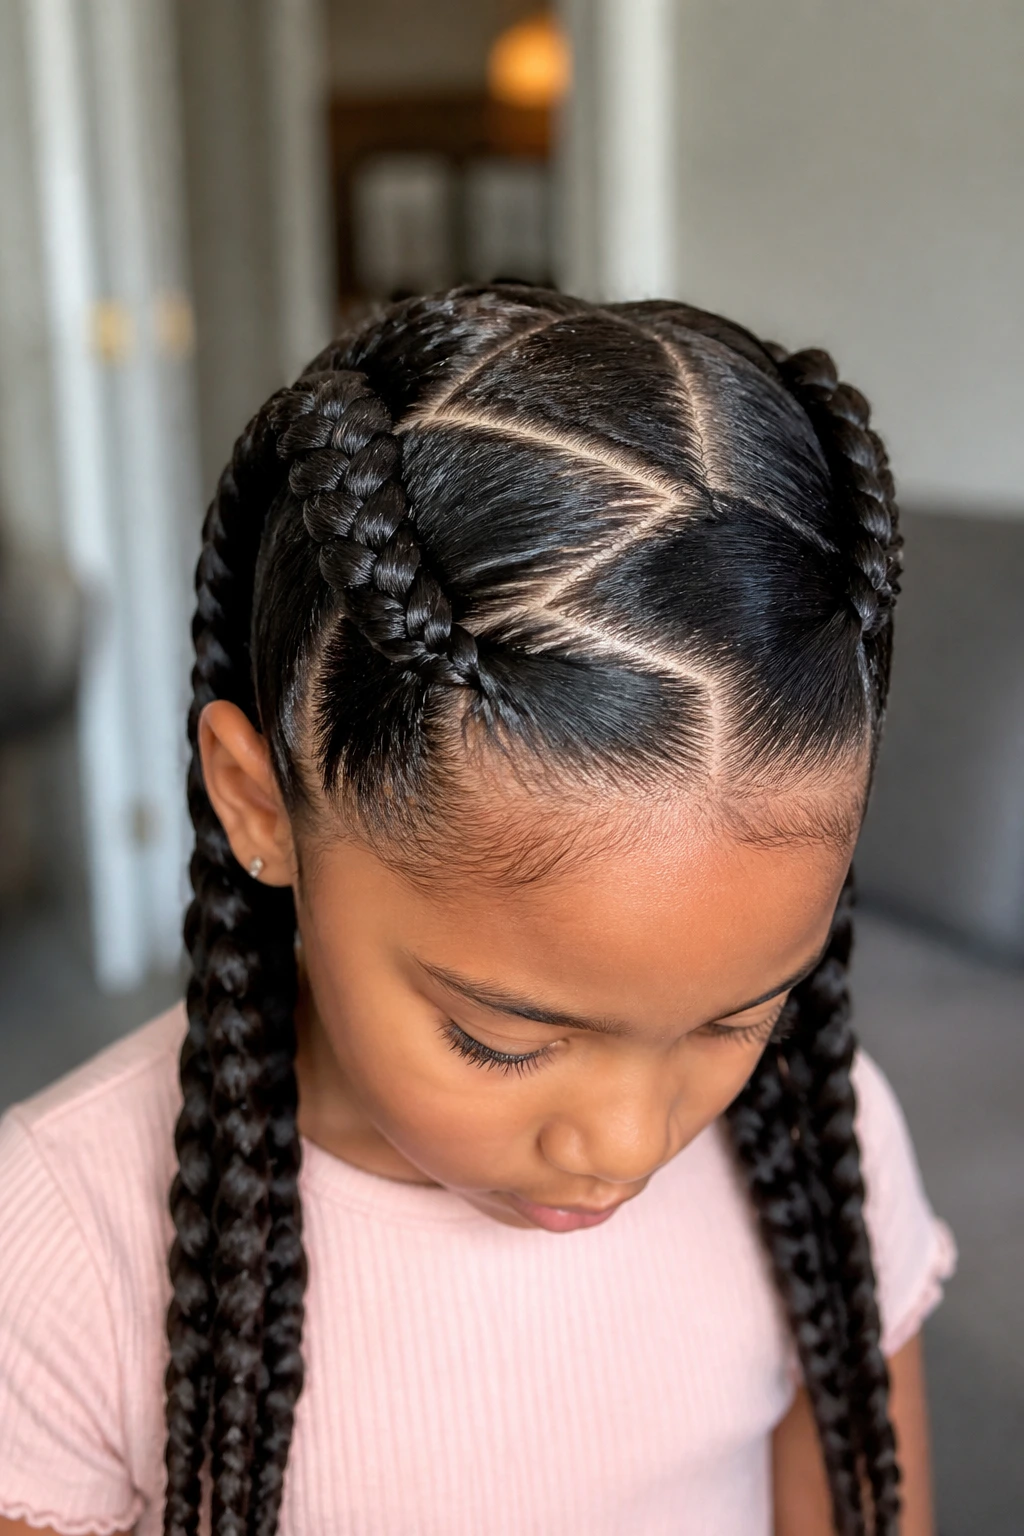
11. Triangle-Part Mini Braids
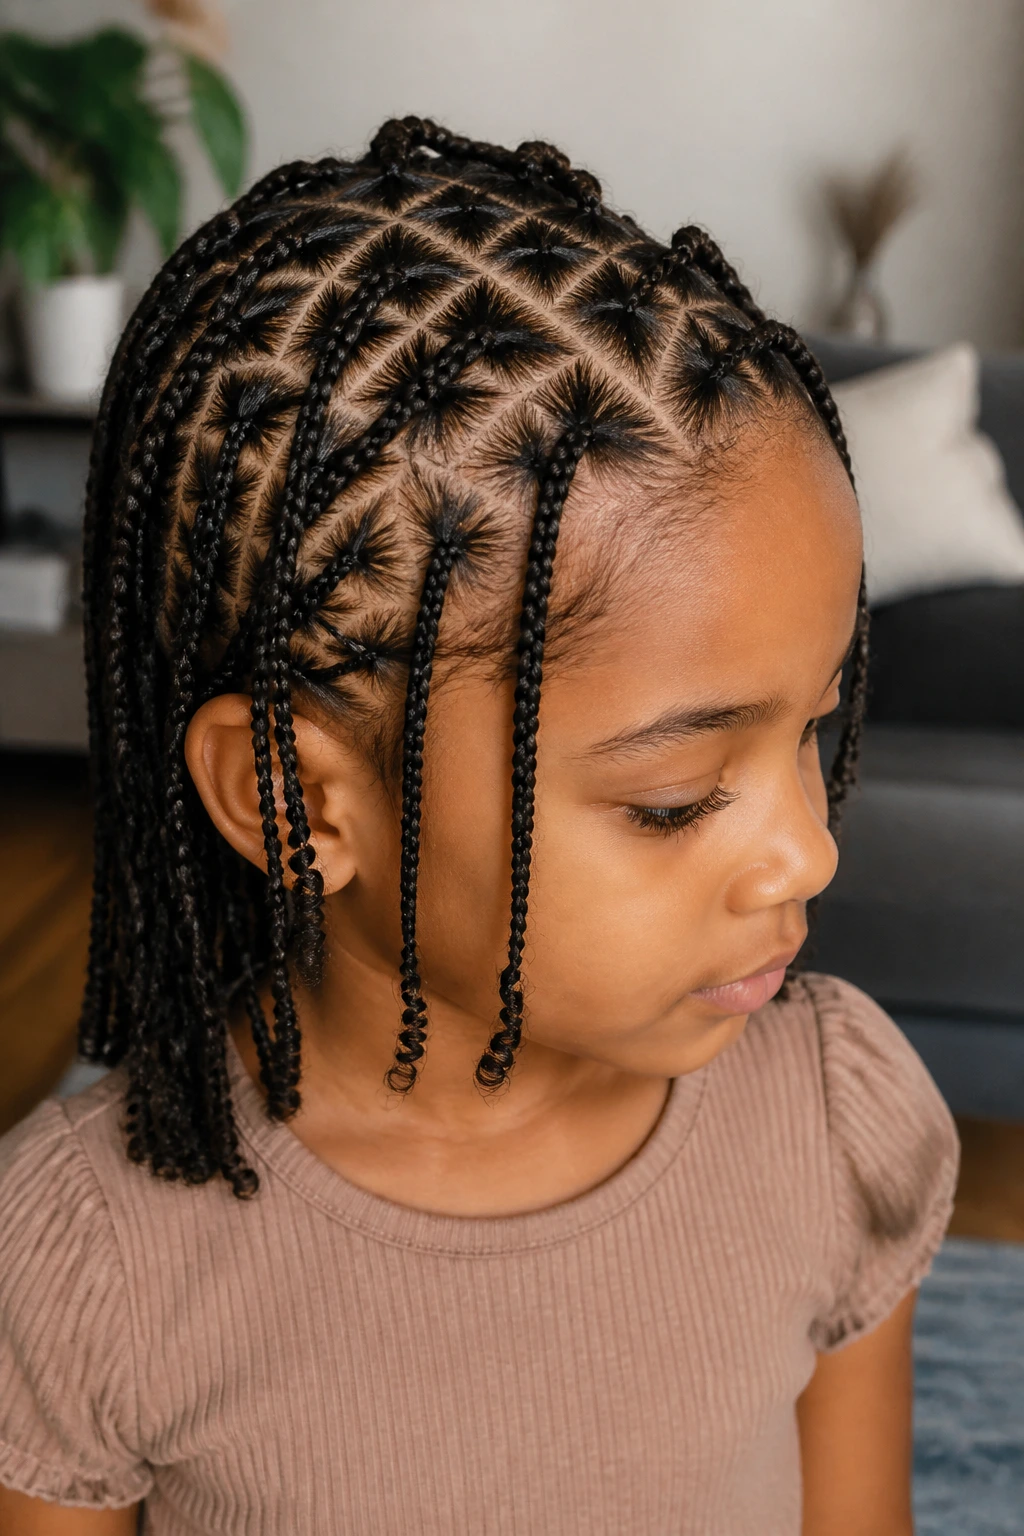
Triangle parts are one of those details that seem small until you see the finished head. They break up the scalp pattern into clean little shapes, and that gives the braids a more designed, intentional look. Mini braids suit kids with denser curls especially well because they distribute the hair in smaller sections.
This style feels neat and artistic at the same time. The triangle parting also makes it easier to add beads or leave the ends curly, depending on what the child likes. If you’re braiding fine hair, don’t make the sections too tiny; that can take too long and put unnecessary tension on the scalp. Larger triangles still look polished.
12. Stitched Cornrows with Ribbon Ends
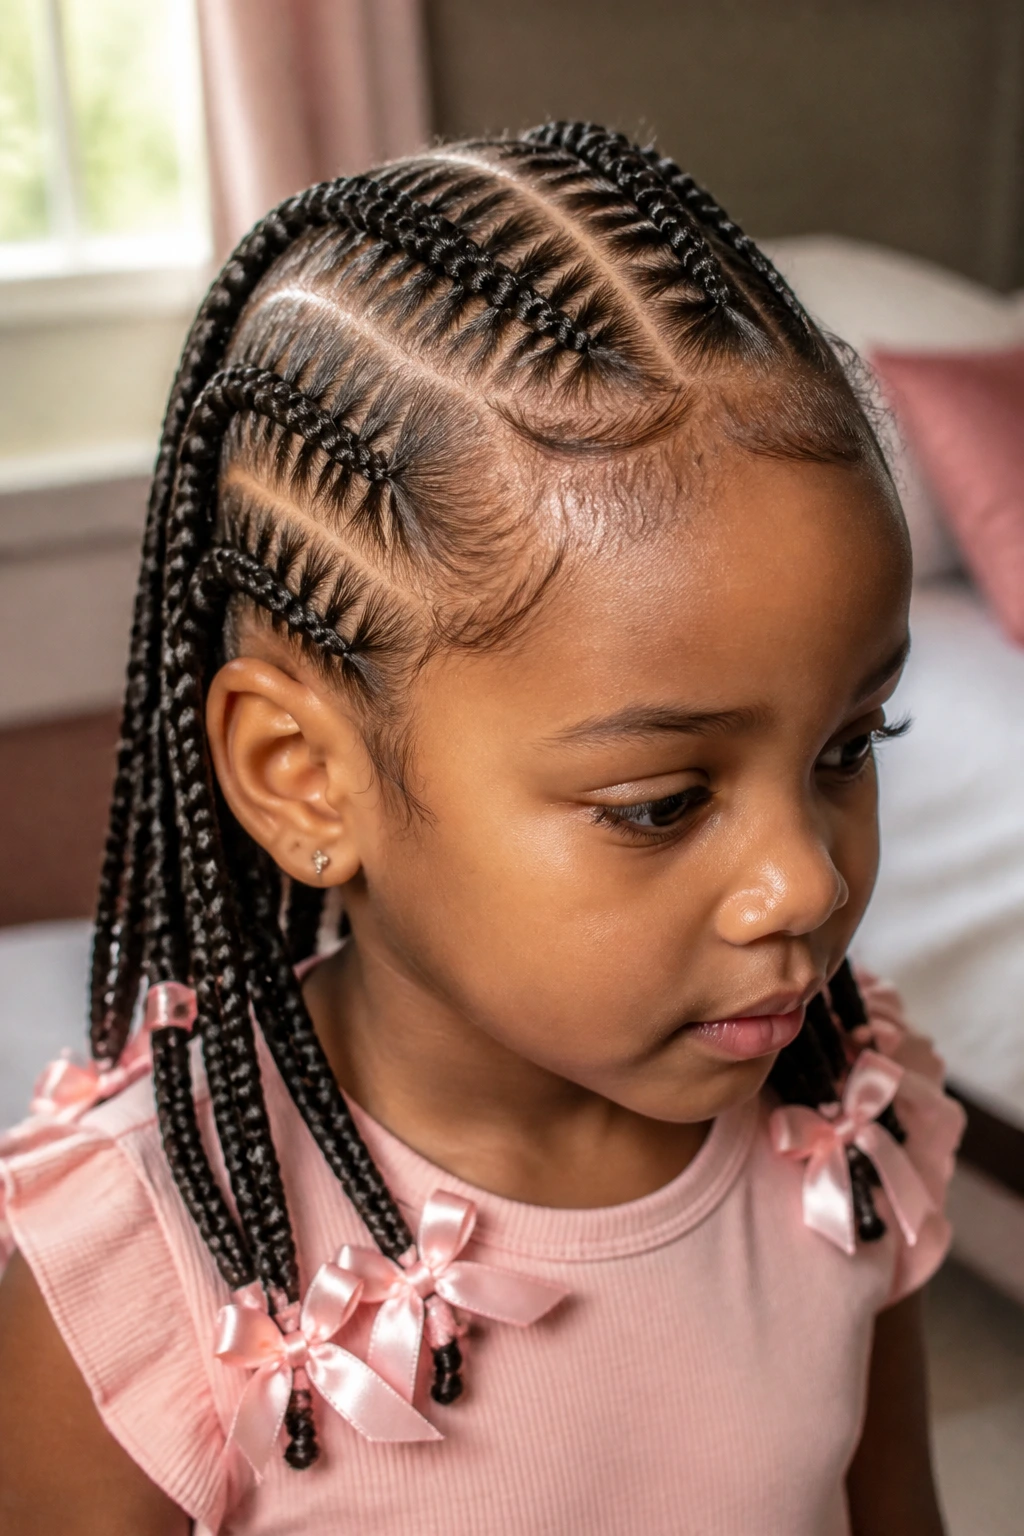
Stitched cornrows have that crisp, raised pattern along the scalp that gives the braid a more tailored look. Add ribbon at the ends, and the whole style suddenly feels dressed for something. It’s one of those braids that can be playful in one color and formal in another.
The ribbon gives you flexibility without changing the braid base. Thin satin ribbon works well because it’s soft and doesn’t pull. I’d tie it near the ends rather than weaving it too far up the braid, especially on younger children. The hairline should stay the star. The ribbon is just the accent, not the whole show.
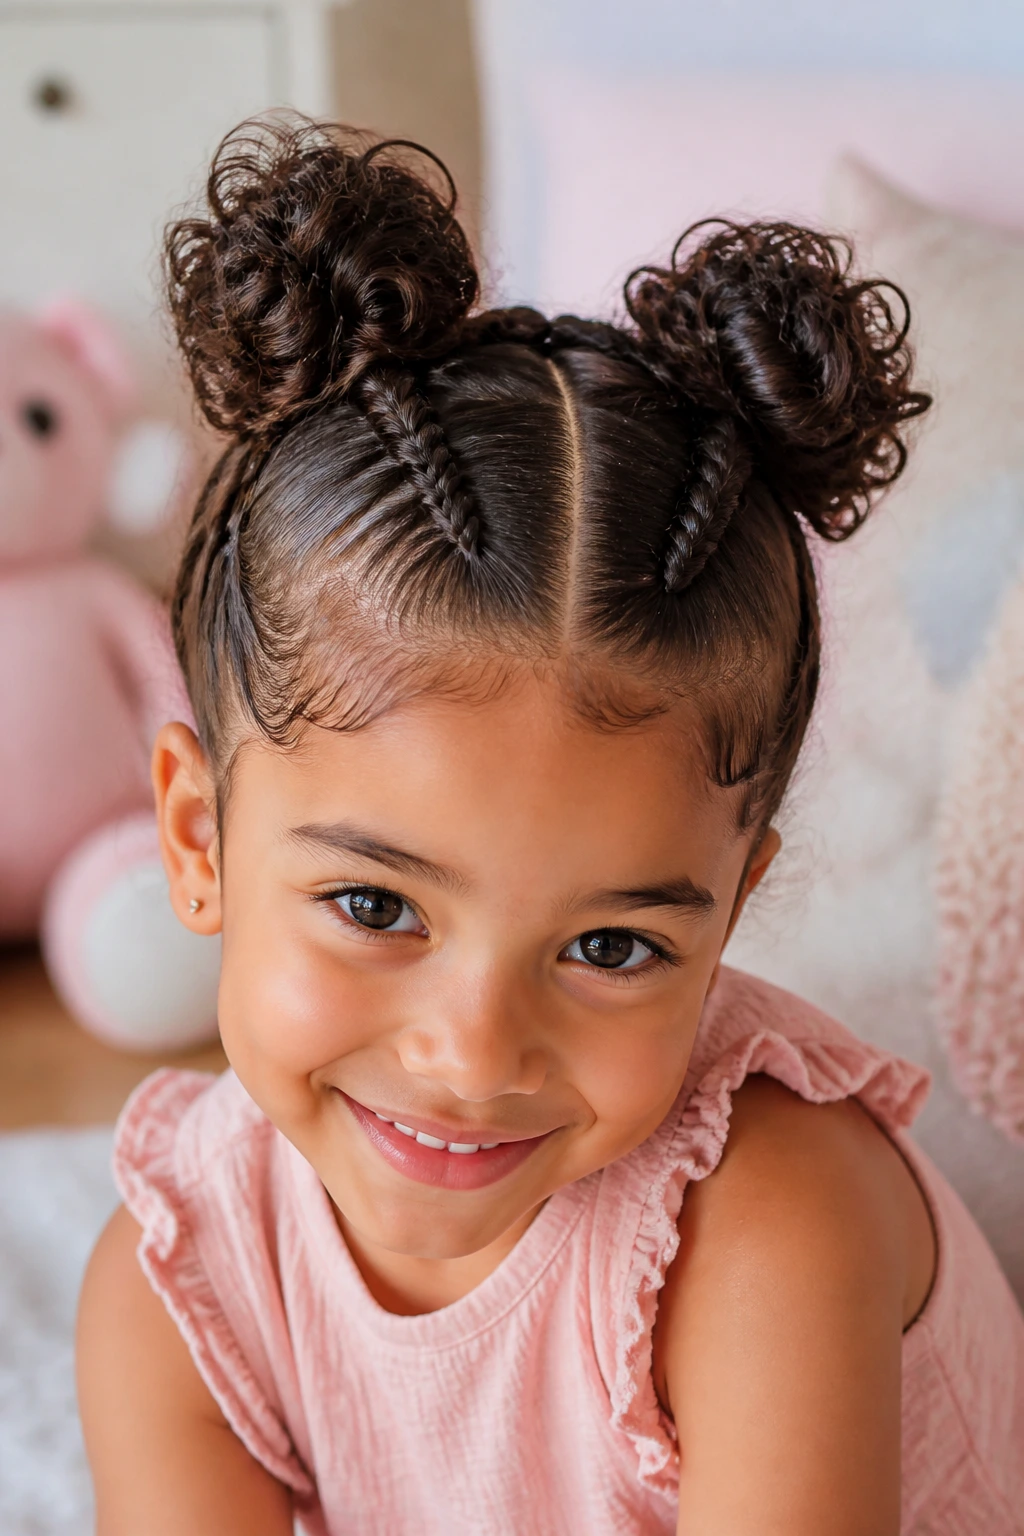
13. Braided Space Buns with Center Part
This style is pure childlike fun. A center part divides the hair into two neat halves, then the braids gather into two buns perched high on the head. There’s a little symmetry, a little bounce, and a lot of energy.
It’s a strong choice for active days because the buns sit secure and don’t swing around much. On curly hair, the braid base helps tame the root area before the buns go up, which keeps the overall shape cleaner. If the child’s curls are very thick, leave the buns soft and rounded rather than forcing them into tiny knots. The style looks better when the buns feel full.
14. French Braid Mohawk with Loose Curls
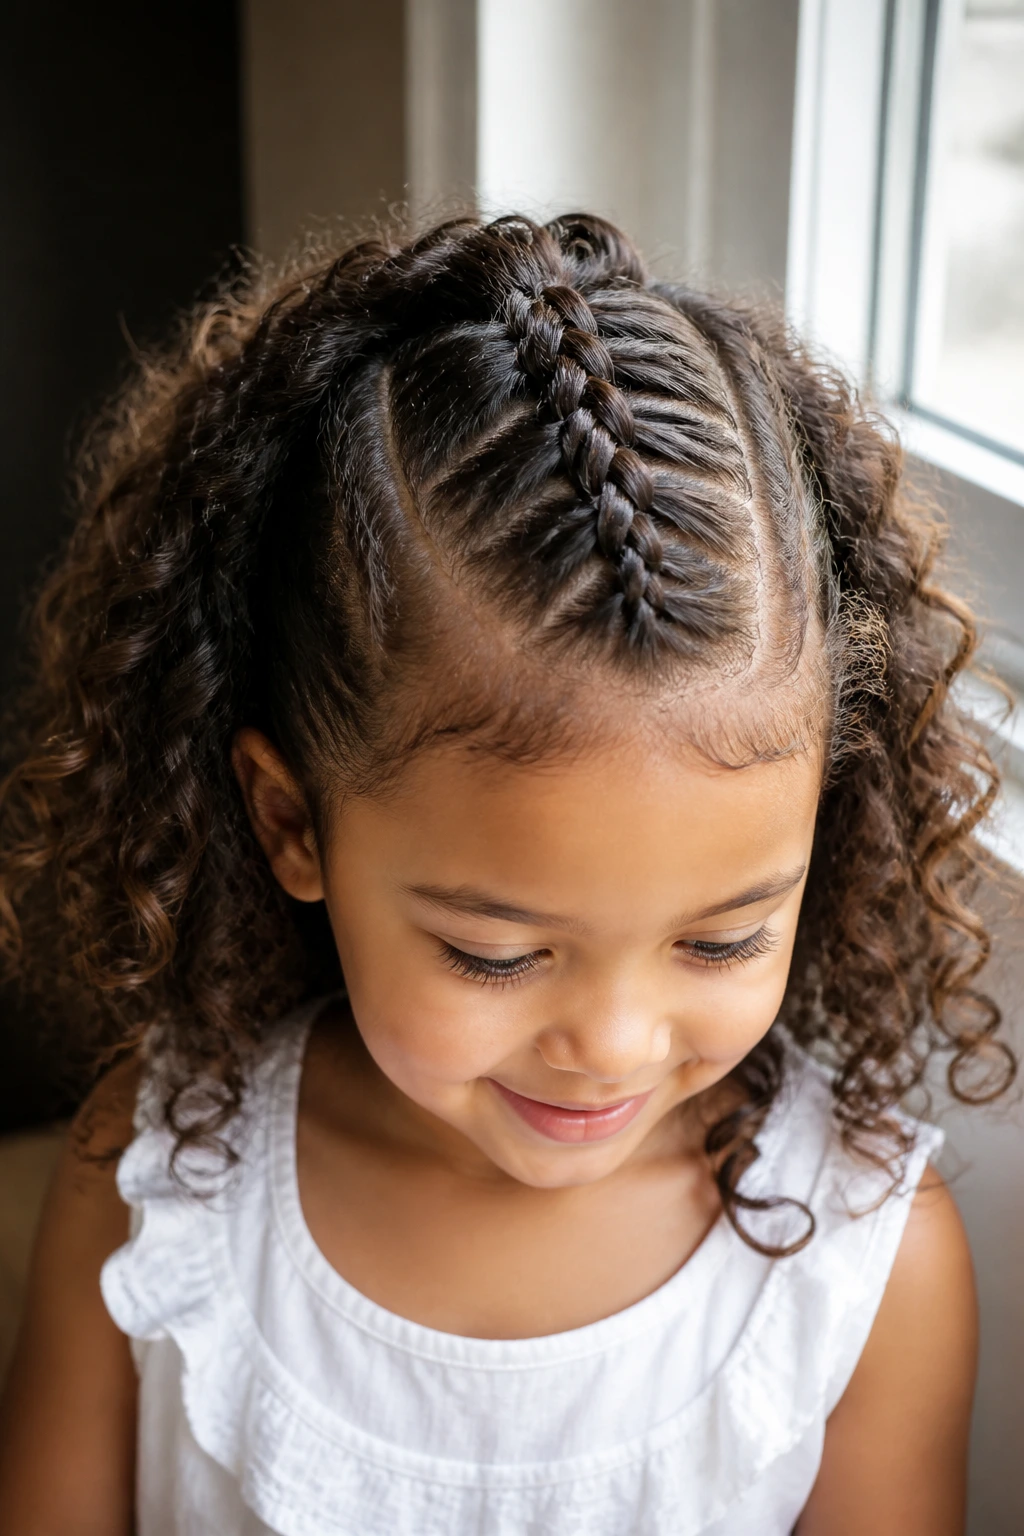
A French braid down the middle gives this style structure, but the loose curls on the sides keep it from feeling too severe. That middle braid creates a little ridge of detail that works well on medium to long curly hair. It has a sporty look without leaning plain.
I like it because it gives the child a lot of movement around the face and shoulders while still keeping the center controlled. It’s also a good style when the child wants her hair visible instead of pulled back completely. Leave the side curls soft and defined, and don’t overbrush them. The contrast between the braided center and the fluffy sides is the whole point.
15. Two Jumbo Braids with Scattered Beads
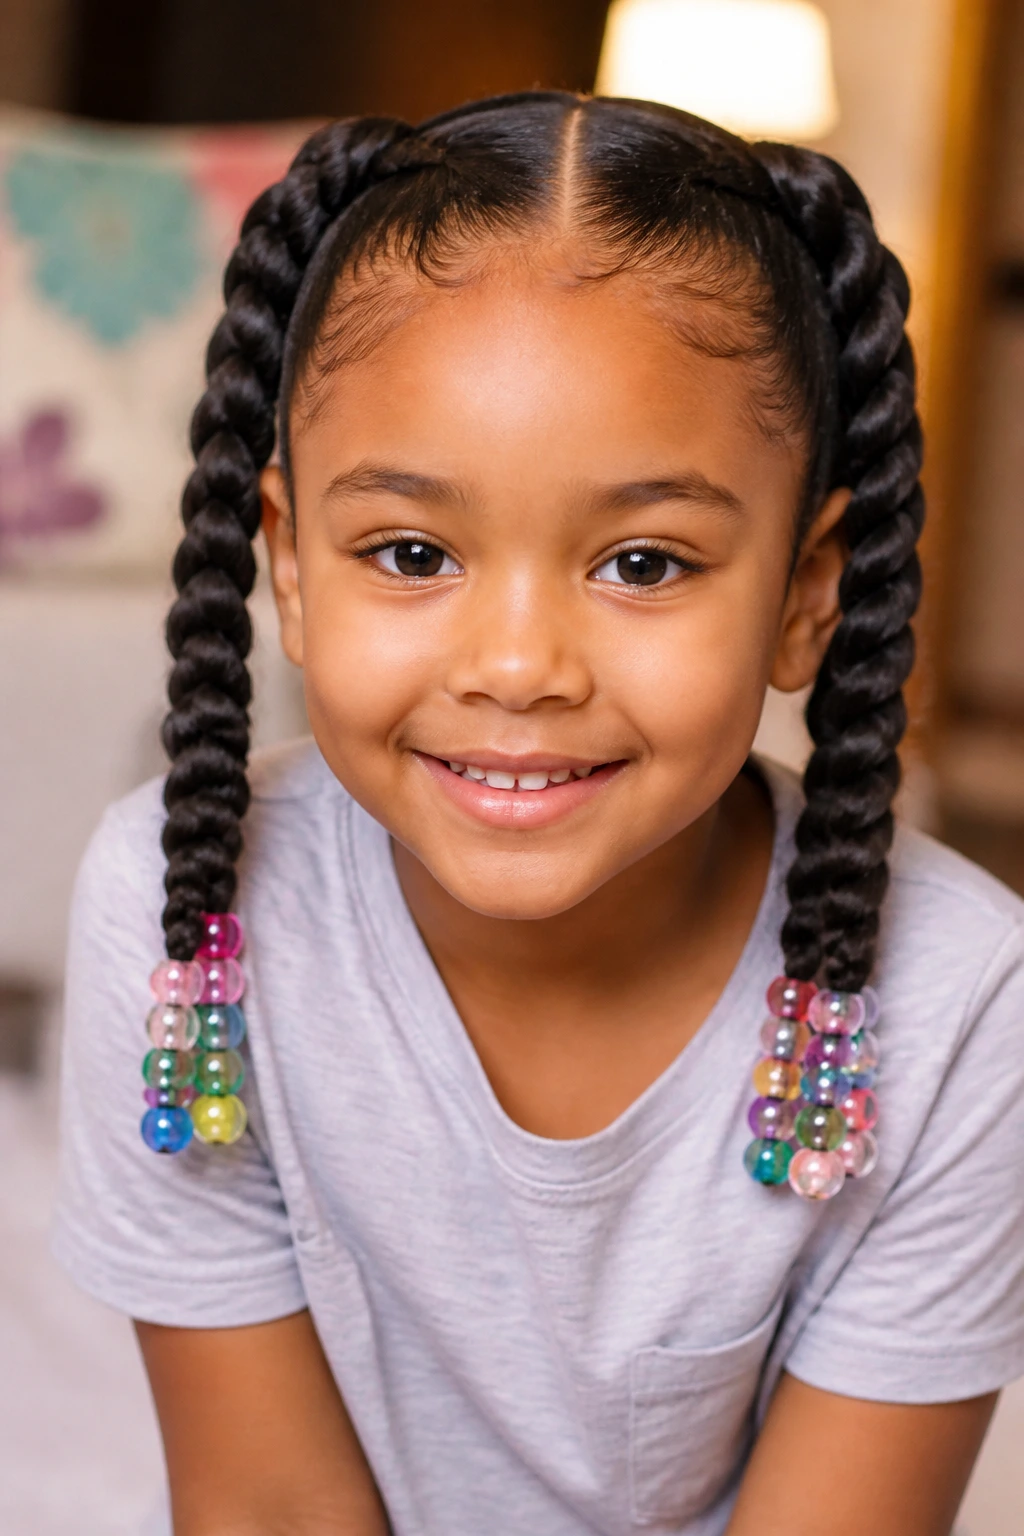
Sometimes bigger is better. Two jumbo braids keep the hair neatly contained, and the wider sections make them easier to do on a busy morning. Scattered beads at the ends give the style some sparkle without turning it into a full accessory project.
This is a good pick for younger kids who don’t like sitting still for long. Fewer braids mean less time in the chair, and jumbo sections still look intentional on curly hair. If you add beads, place them mostly toward the lower half so the roots stay light. A braid this size should feel sturdy, not heavy.
16. Ladder Braid Pigtails
Ladder braids have a cross-over rhythm that looks much more complicated than it is. The braids move in little horizontal connections, like rungs on a ladder, then finish in two pigtails. It’s a neat style for a child who wants something different from the usual straight-back look.
The repeated pattern makes this one especially good for photo days and family events. It reads as detailed even from across the room. I’d keep the pigtails medium height so the braid pattern stays visible at the back of the head. If the curls at the ends are tight, leave them natural rather than trying to smooth them out completely. That little puff adds charm.
17. Crown Cornrows into a Side Puff
This style starts with cornrows that trace the crown and then shift everything into a puff on one side. The result feels soft and a little unexpected. It keeps the front tidy while letting one side carry the volume, which is a nice change from the usual centered styles.
The side puff works especially well when you want movement but still need the hair held out of the face. It also suits kids whose hair grows in different lengths, because the puff can absorb a lot of variation at the ends. Leave enough fullness at the crown so the braids don’t look thin. The whole style depends on that curved shape up top.
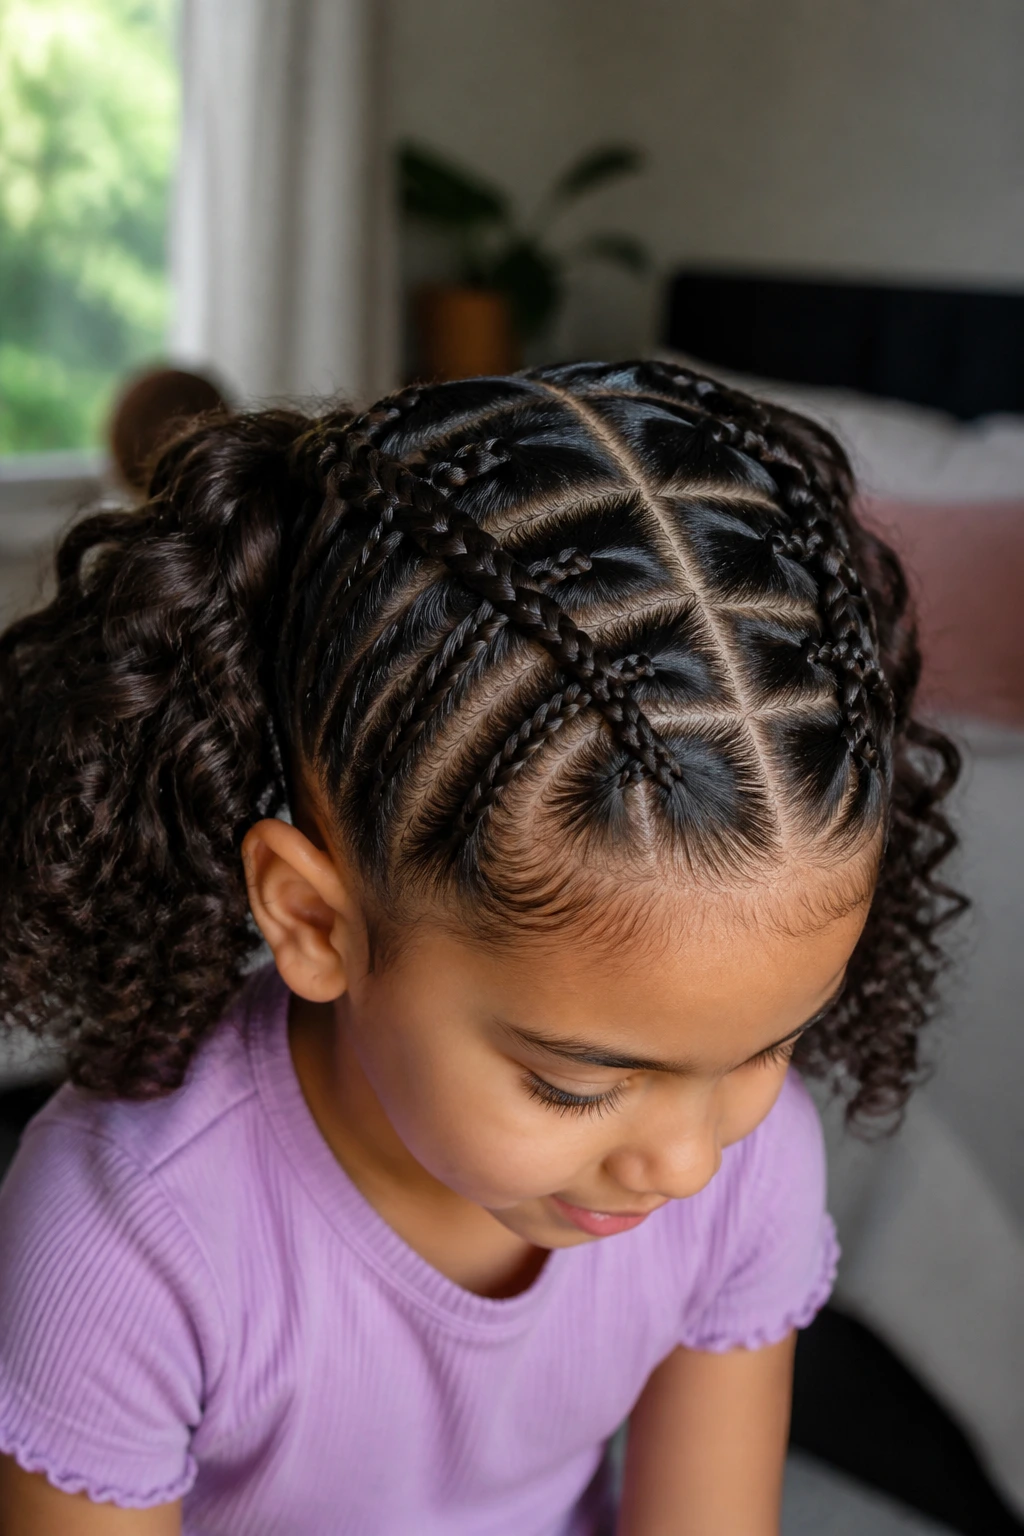
18. Crisscross Braids with a Bow Base
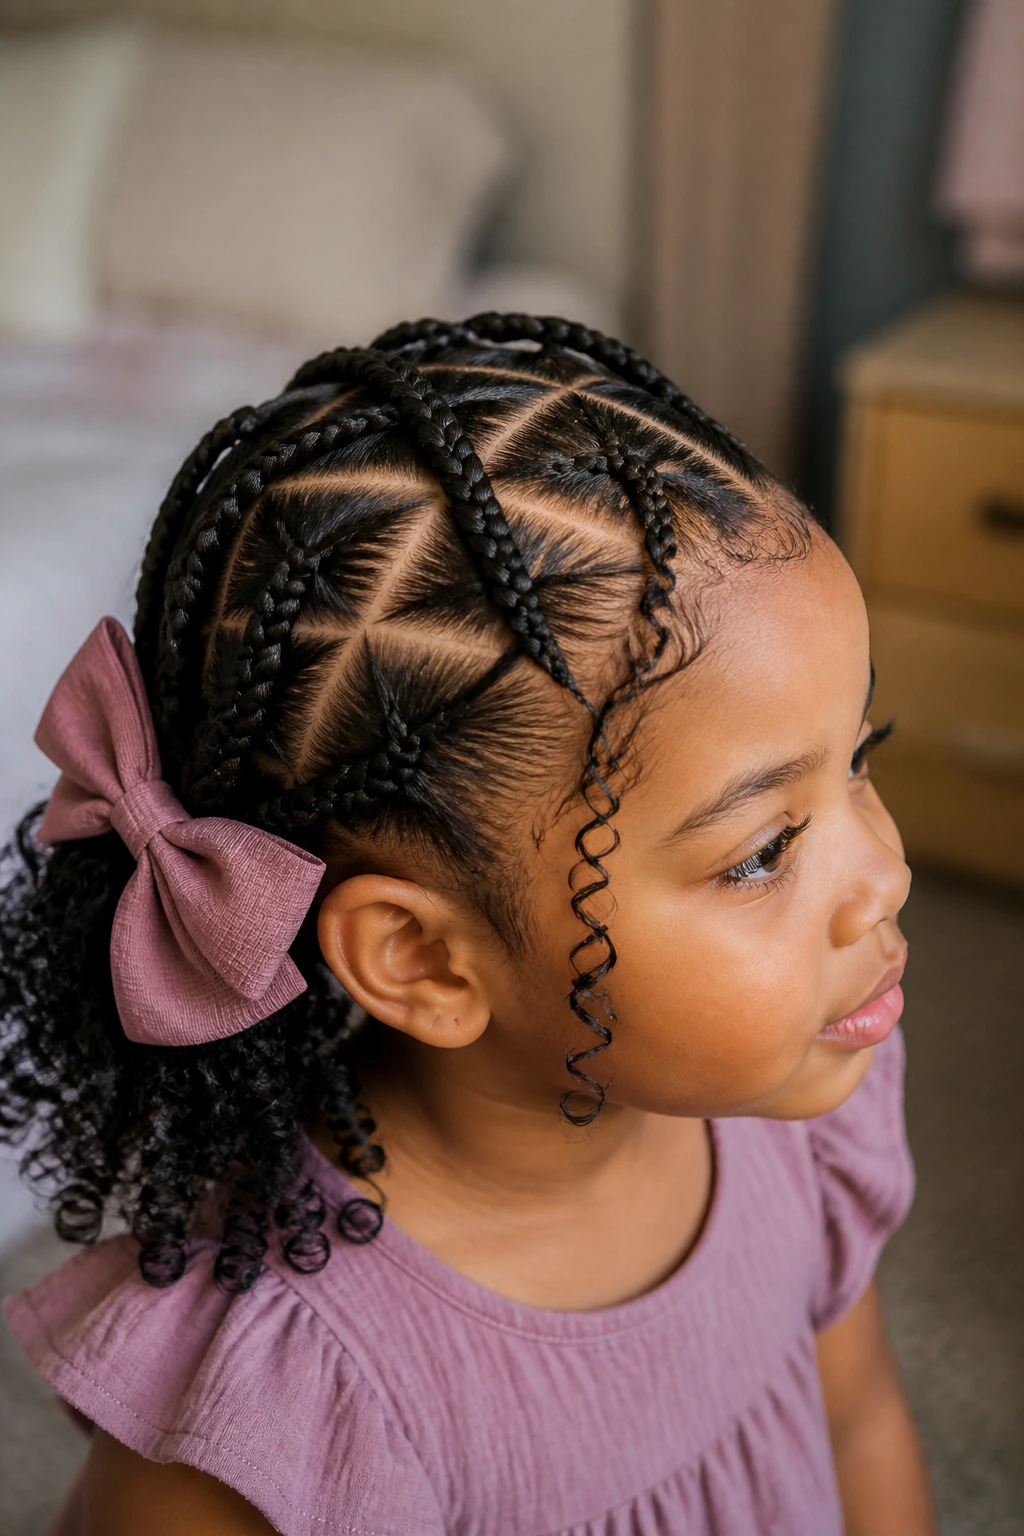
Crisscross braids make the scalp pattern the feature. The sections overlap in a way that looks almost geometric, and then a bow at the base softens the whole thing. It’s a style that feels playful first and polished second.
The bow is the perfect finish because it breaks up the sharp lines and gives the style a child-friendly touch. I like this one for school pictures or a dress-up day because it looks decorative without needing a pile of accessories. Keep the crisscrossing neat and the braid sizes similar so the design doesn’t wobble visually. A mismatched crisscross pattern looks messy fast.
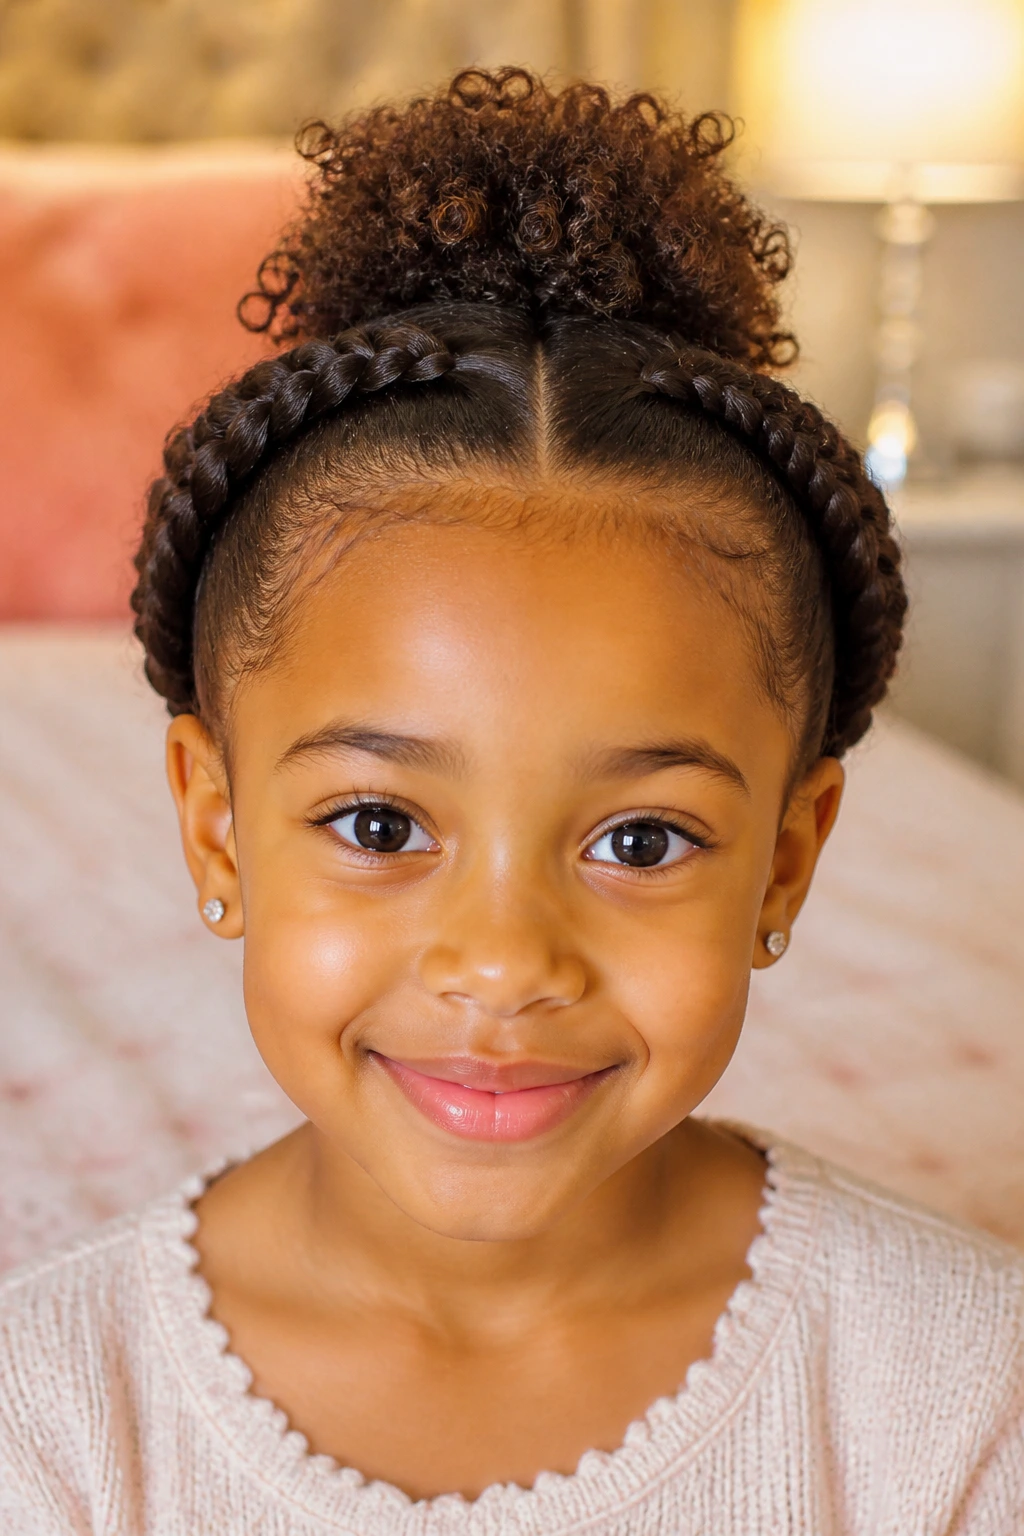
19. Braided Bun with Curly Fringe
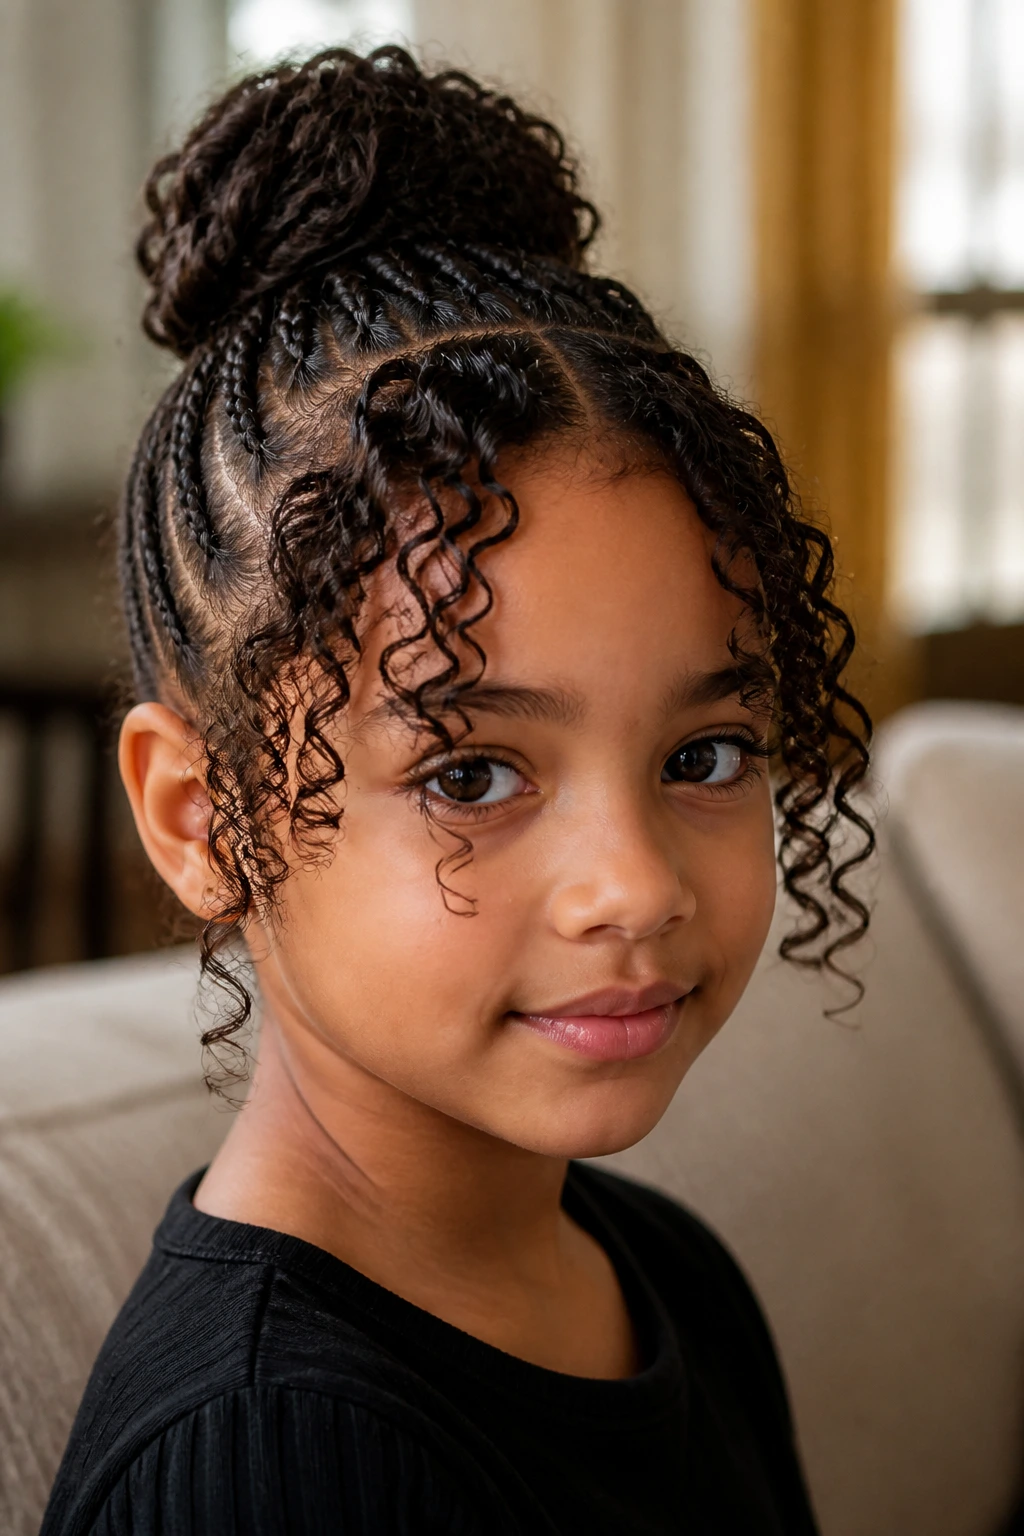
A braided bun is one of those styles that looks calm and controlled from the front, then gets softer when you notice the curly fringe left out around the face. That little fringe keeps the hairstyle from looking too severe on a young child.
It’s a good option when the hair needs to stay up and away from the neck. The bun gives you hold, and the curls in front make the style feel approachable. I’d keep the fringe pieces small and lightly defined so they don’t grow into a fuzzy curtain by noon. A bit of leave-in on the fringe goes a long way.
20. Feed-In Braids into Low Pigtails
Feed-in braids create a smooth, gradual start at the scalp, which gives the style a clean, polished look. Ending them in low pigtails keeps the braids secure and easy to manage. This is one of the most practical styles in the whole bunch.
The low placement matters. It makes the style friendlier for naps, car rides, and lying down on a pillow without a braid stabbing the back of the head. On curly hair, the feed-in method also helps the roots stay flatter without needing a lot of product. Keep the pigtails soft and even, and don’t pull them too tight at the nape.
21. Curly Mohawk with Mini Accent Braids
If your child likes hair with a little personality, this one has it. Small accent braids run along the sides while the middle section stays full and curly, forming a soft mohawk shape. It’s playful without being wild.
This style works well when you want to show off the curls instead of hiding them. The side braids keep the shape controlled, while the center section keeps the texture visible and lively. I’d use this for thicker curls that need room to bloom. If the middle section is too stretched down, the whole effect gets flattened. Let it stay round and full.
22. Butterfly Part Braids
Butterfly parting is decorative right from the start. The sections curve and open like little wings, so even before the braids are finished, the style already looks designed. It’s a smart choice for a child who likes seeing the “pretty part” as much as the actual braid.
This one is more about the scalp pattern than the braid length, which makes it good for medium-length hair. You can keep the braids simple and still have a detailed finish because the parting does the heavy lifting. A little color clip at the wing tip is enough if you want to emphasize the shape. Don’t crowd the design with too many extras. It doesn’t need them.
23. Side Cornrow to Curly Ponytail
A single side cornrow feeding into a curly ponytail has a clean, easy rhythm. The braid sweeps the hair back from one side of the face, and the ponytail keeps the finish soft and lively. It’s a useful style when you want something that looks thoughtful but doesn’t take forever.
I like this for kids whose curls fluff up fast around the temples. The side cornrow takes care of that area, while the ponytail lets the rest of the hair move. If you want a little more polish, wrap a small strand around the elastic. That one detail makes the ponytail look finished instead of improvised.
24. Four Cornrows into Twin Twists
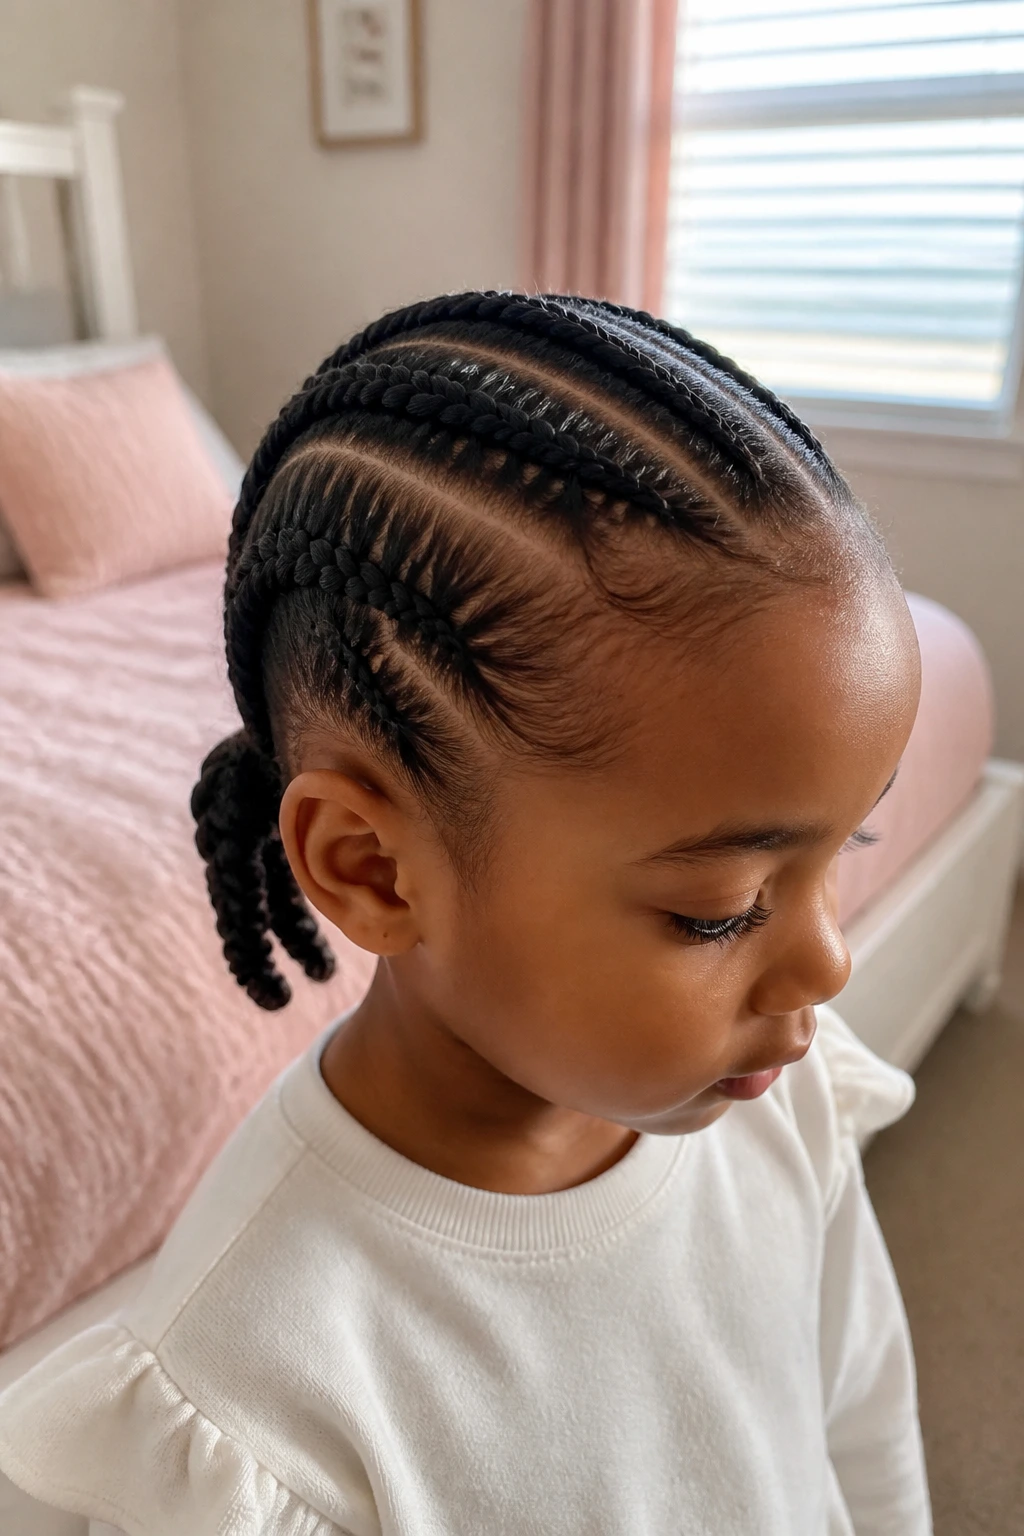
This style starts with four neat cornrows, then those rows gather into two twists at the back. It’s a nice middle ground between a fully braided head and a softer, looser style. The twist finish gives the look a little bounce.
It’s especially useful on hair that’s thick enough to support structure but not so long that you want a heavy set of braids hanging down. The two twists sit flatter than pigtails and are easier to rest against a car seat or hooded jacket. If the hair is very curly, a light stretch before braiding helps the twists sit cleaner. The final shape should look tidy, not squeezed.
25. Topsy-Tail Braided Pony
The topsy-tail trick gives an ordinary ponytail more shape. Add braid sections before the flip, and suddenly the style has loops, movement, and a bit of surprise when viewed from the side. It’s one of those styles that looks more involved than the steps suggest.
This works well for little girls who like ponytails but need them to look less plain. The braid sections add grip, and the topsy-tail flip keeps the pony from lying flat against the head. Keep the elastic soft and the loops even. Uneven flips can make the style look accidental, which is not the goal here.
26. Braided Headband with Open Curls
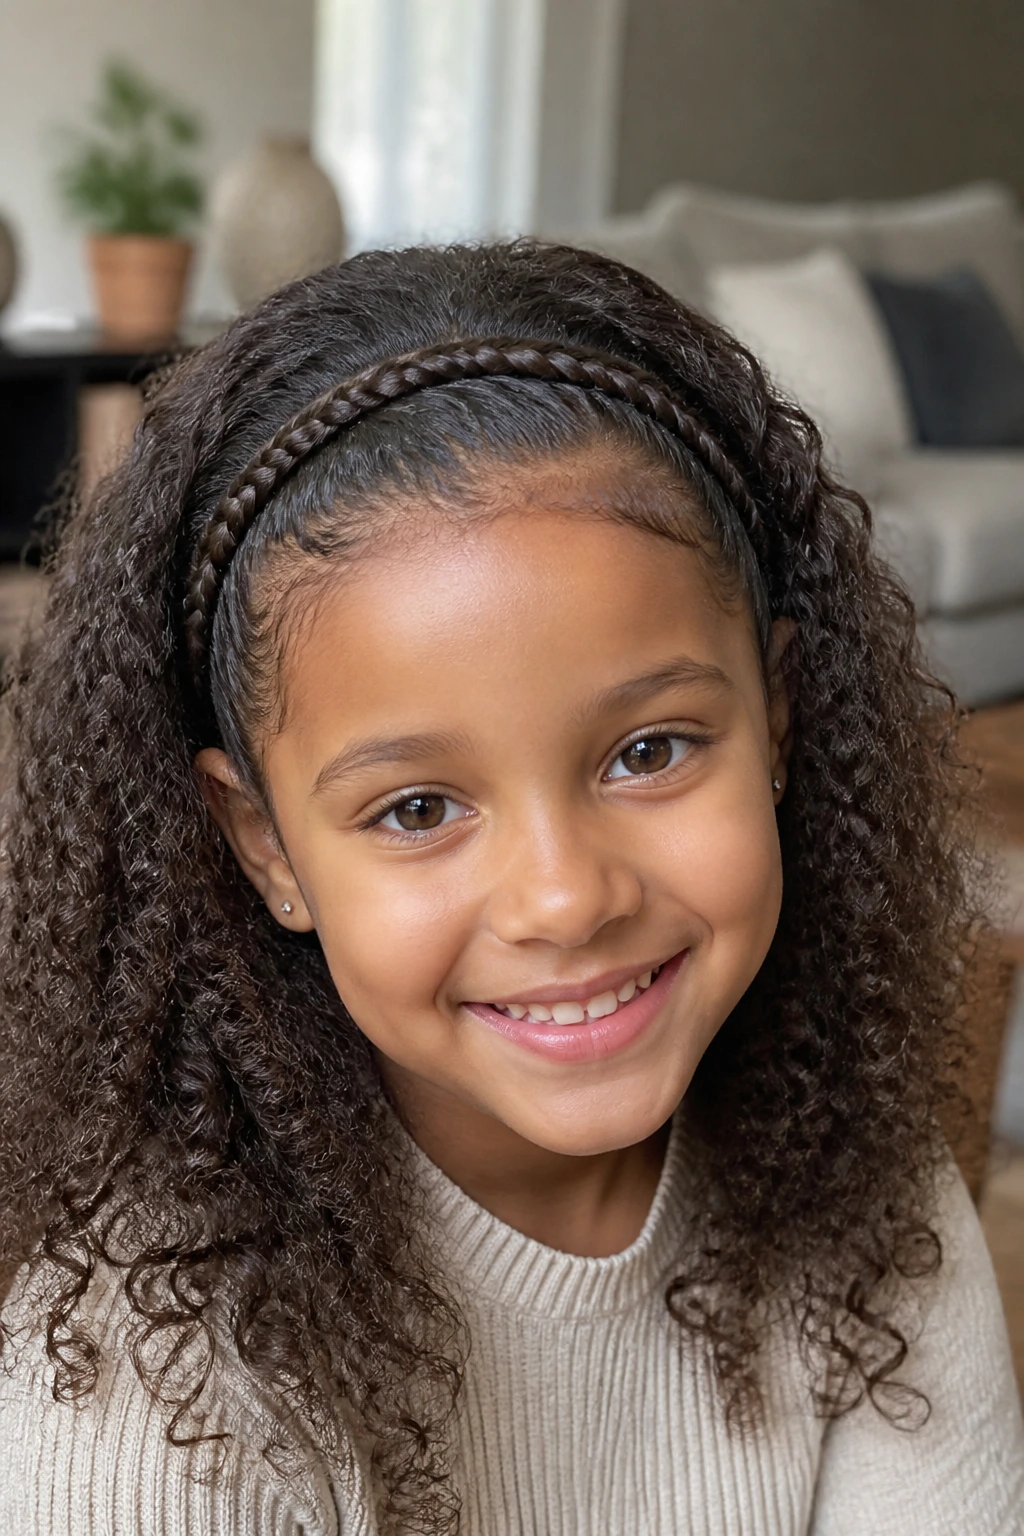
A braided headband is exactly what it sounds like: one braid curving across the front like a soft band, while the rest of the curls stay open. It keeps hair out of the eyes and still lets the child wear her natural texture proudly.
This one is a favorite of mine because it feels gentle. The braid acts like an accessory built from hair, and the open curls keep the style from feeling too constrained. It’s good for children who don’t like all their hair pulled back. A tiny bow near the ear or a single clip is enough if you want to dress it up. The curls should stay the focus.
27. Triangle Box Braids with Curly Ends

Triangle box braids are a neat twist on a classic shape. Instead of square parts, the hair is sectioned into triangles, which makes the whole scalp pattern look more modern and deliberate. Leaving the ends curly softens the geometric look.
The triangle parting is especially nice on thick curls because it creates clear sections without making the scalp pattern feel too busy. If you add beads, place them on just a few braids so the triangles stay visible. The curls at the ends should stay defined but not stiff. That contrast between sharp parts and soft ends is what gives the style its edge.
28. Waterfall Braid on Curly Hair

Waterfall braids always have a bit of motion in them. Pieces drop through the braid as you go, which makes the style look light and flowing even though it’s anchored in place. On curly hair, the loose strands pick up texture and make the braid feel richer.
This is a style I’d save for a child who likes her hair down but still wants something special on top. The braid sits best when the curls are detangled enough to slide through, but not so smooth that they lose grip. A little frizz at the loose pieces is fine. In fact, on curly hair, it helps the braid look fuller.
29. Double Halo Braids with a Center Puff
Two halo braids can frame the face in a way that feels almost storybook-like, especially when a center puff sits between them. The braids create a neat border, and the puff gives the style height and softness. It’s a more detailed version of the single halo, and it shows.
This style works best when the center puff is rounded and full, not squeezed flat. The braids around the edges should curve smoothly so the whole shape feels balanced. If the child has dense curls, the puff can handle the volume better than a tightly packed bun. I’d keep the accessories minimal here; the structure is already doing a lot.
30. Braided Top Knot with Beaded Ends
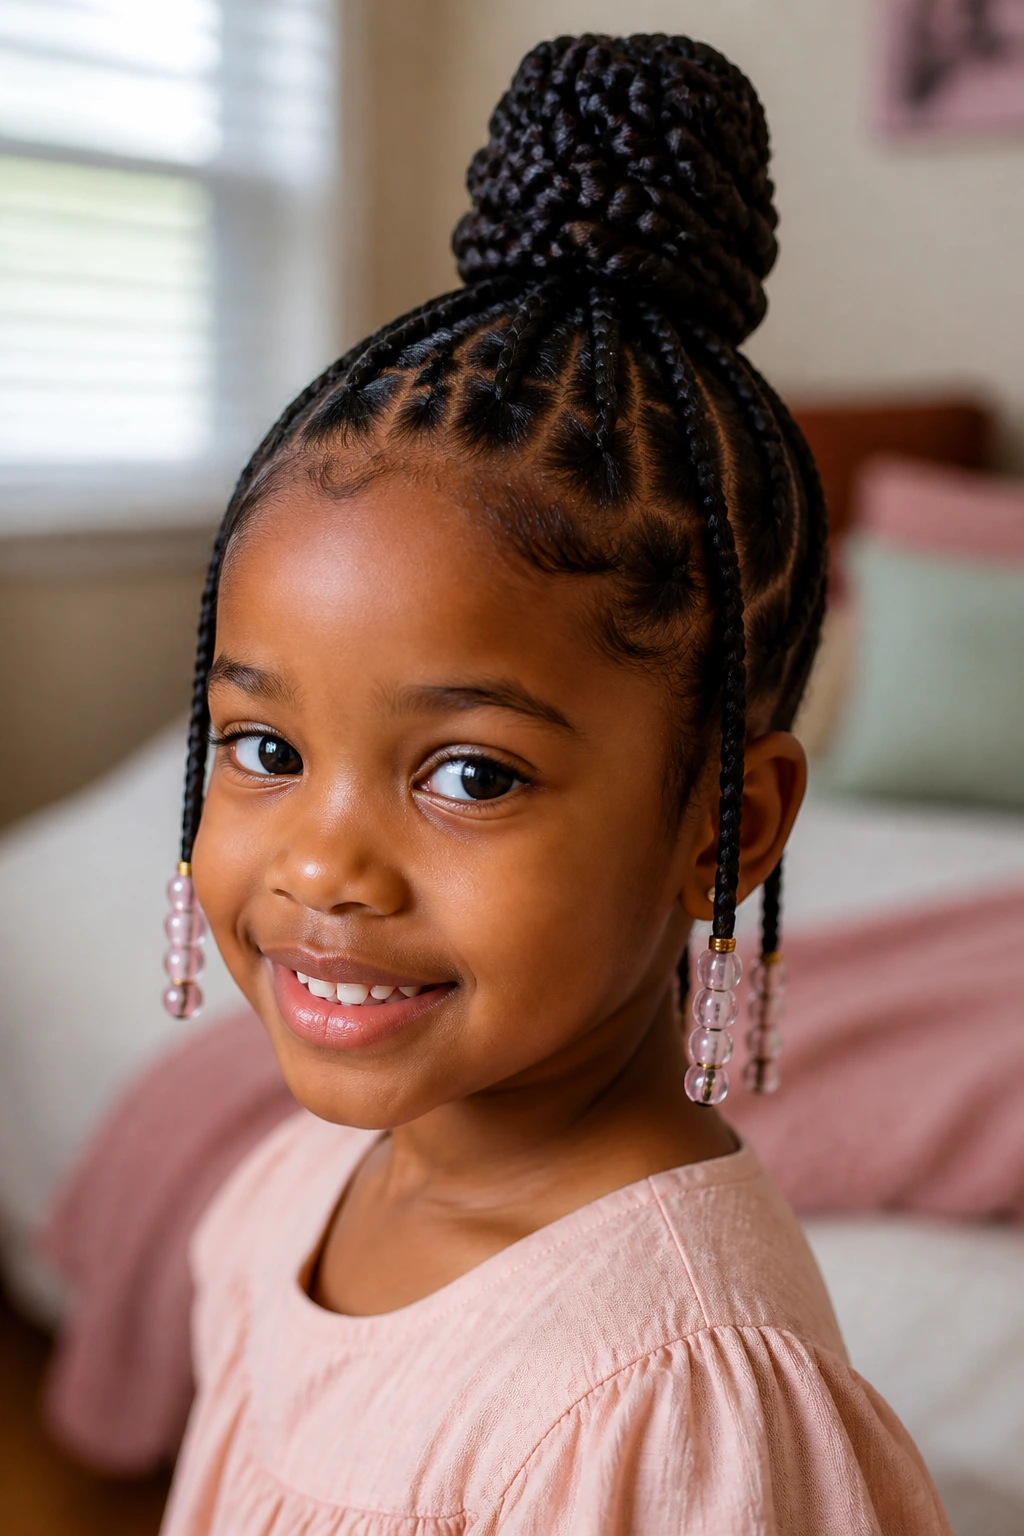
A top knot feels practical. Add braided sections and beaded ends, and it suddenly has more polish. The hair stays up high and secure, while the ends bring in a little movement and texture.
This is a strong choice for warm days or long event days when the neck needs to stay clear. The knot should sit high enough to look intentional but not so high that it throws off the balance of the head. Beads at the ends make the style feel finished, but keep them light. A child should be able to lean back without feeling like she’s carrying a small hardware store on her head.
31. Snake Braids with a Low Puff
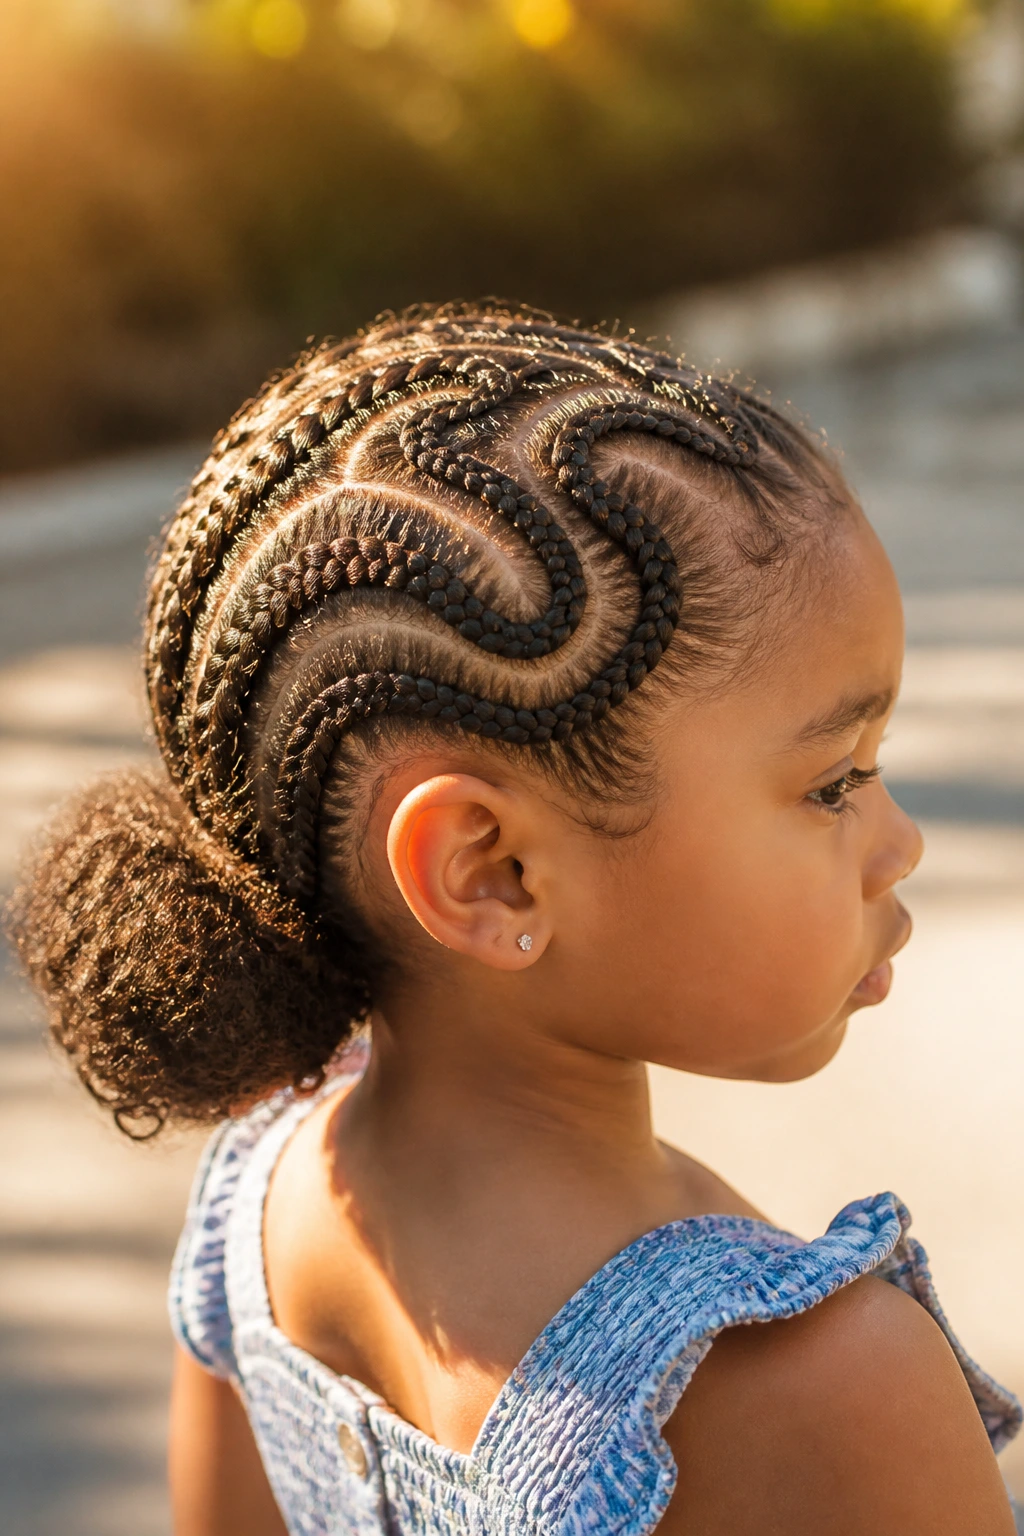
Snake braids have that winding, side-to-side path that makes people stare a second longer. They curve along the scalp instead of running straight back, and that little change gives the style real personality. The low puff at the end keeps it soft.
This works nicely when you want detail but not a heavy finish. The low puff keeps everything grounded and easy to wear, especially for children who don’t want hair high on the head. The snake pattern is the part that needs patience, so keep the braid size consistent and don’t rush the turns. A sloppy snake braid looks more like a mistake than a design.
32. Side-Part Cornrows into a Bubble Ponytail
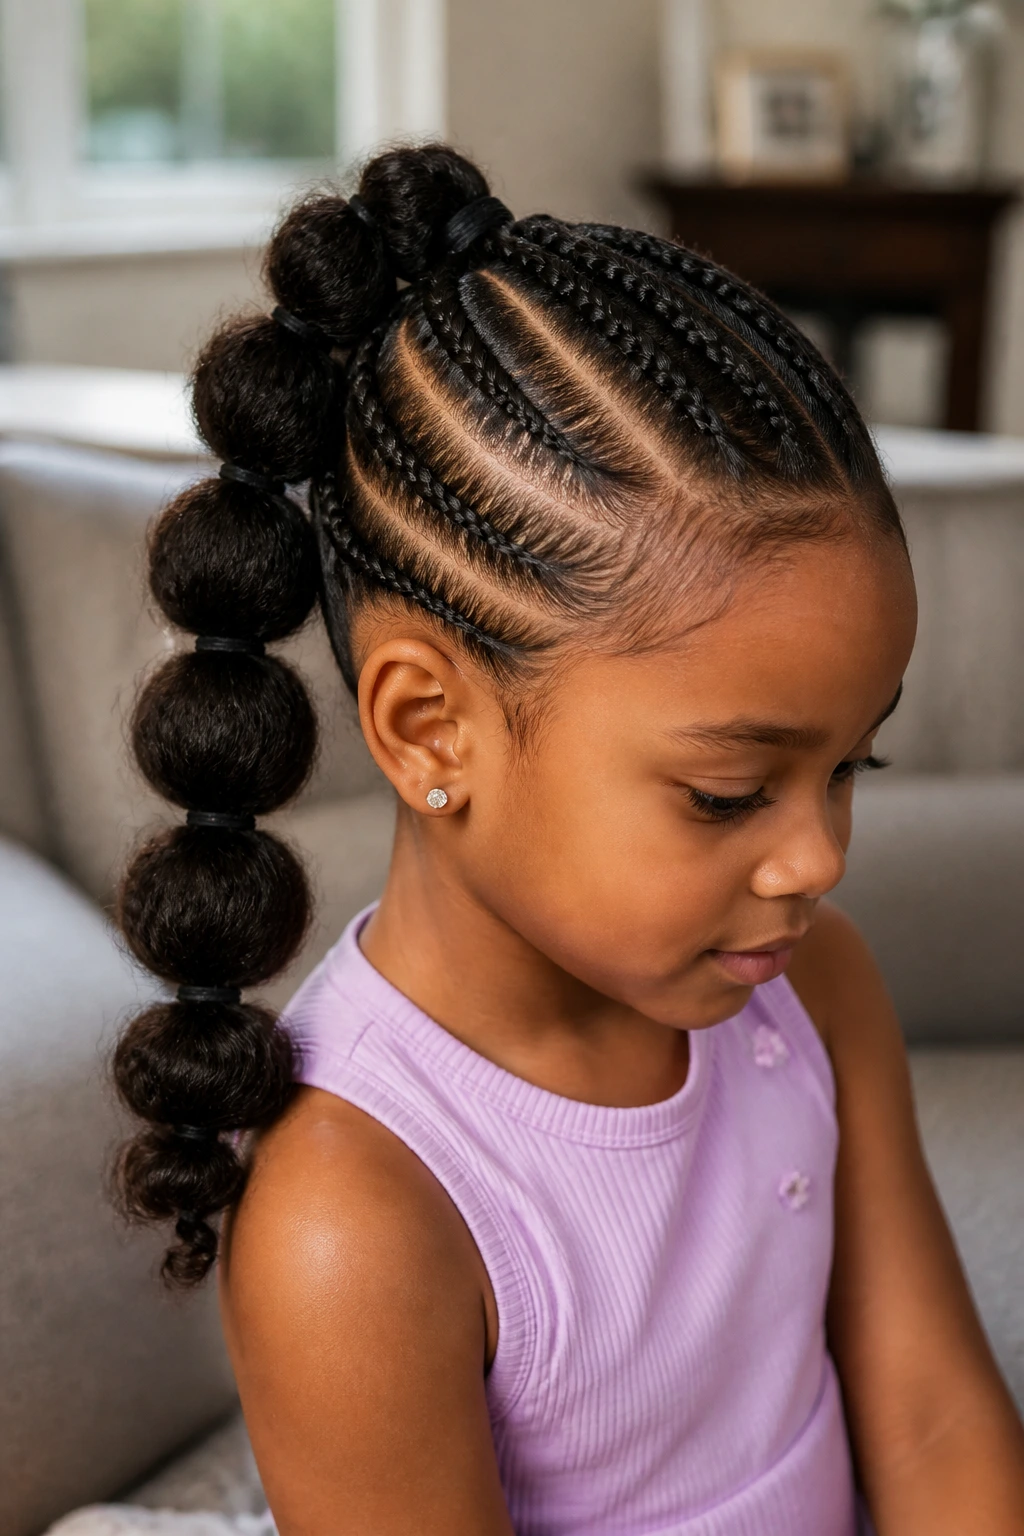
A side part gives the whole style direction before the braiding even starts. The cornrows sweep back from that part and end in a bubble ponytail, which gives the style segments, shape, and a little fun. It’s structured, but not severe.
The bubbles help keep the ponytail from collapsing into one flat rope. That matters on curly hair, which likes to swell and separate anyway. I’d use soft elastics spaced evenly down the length, then fluff each section lightly so the bubbles are rounded. If you want one style that feels both practical and playful, this is a very good one.
33. Rope-Braid Pigtails with Curly Ends
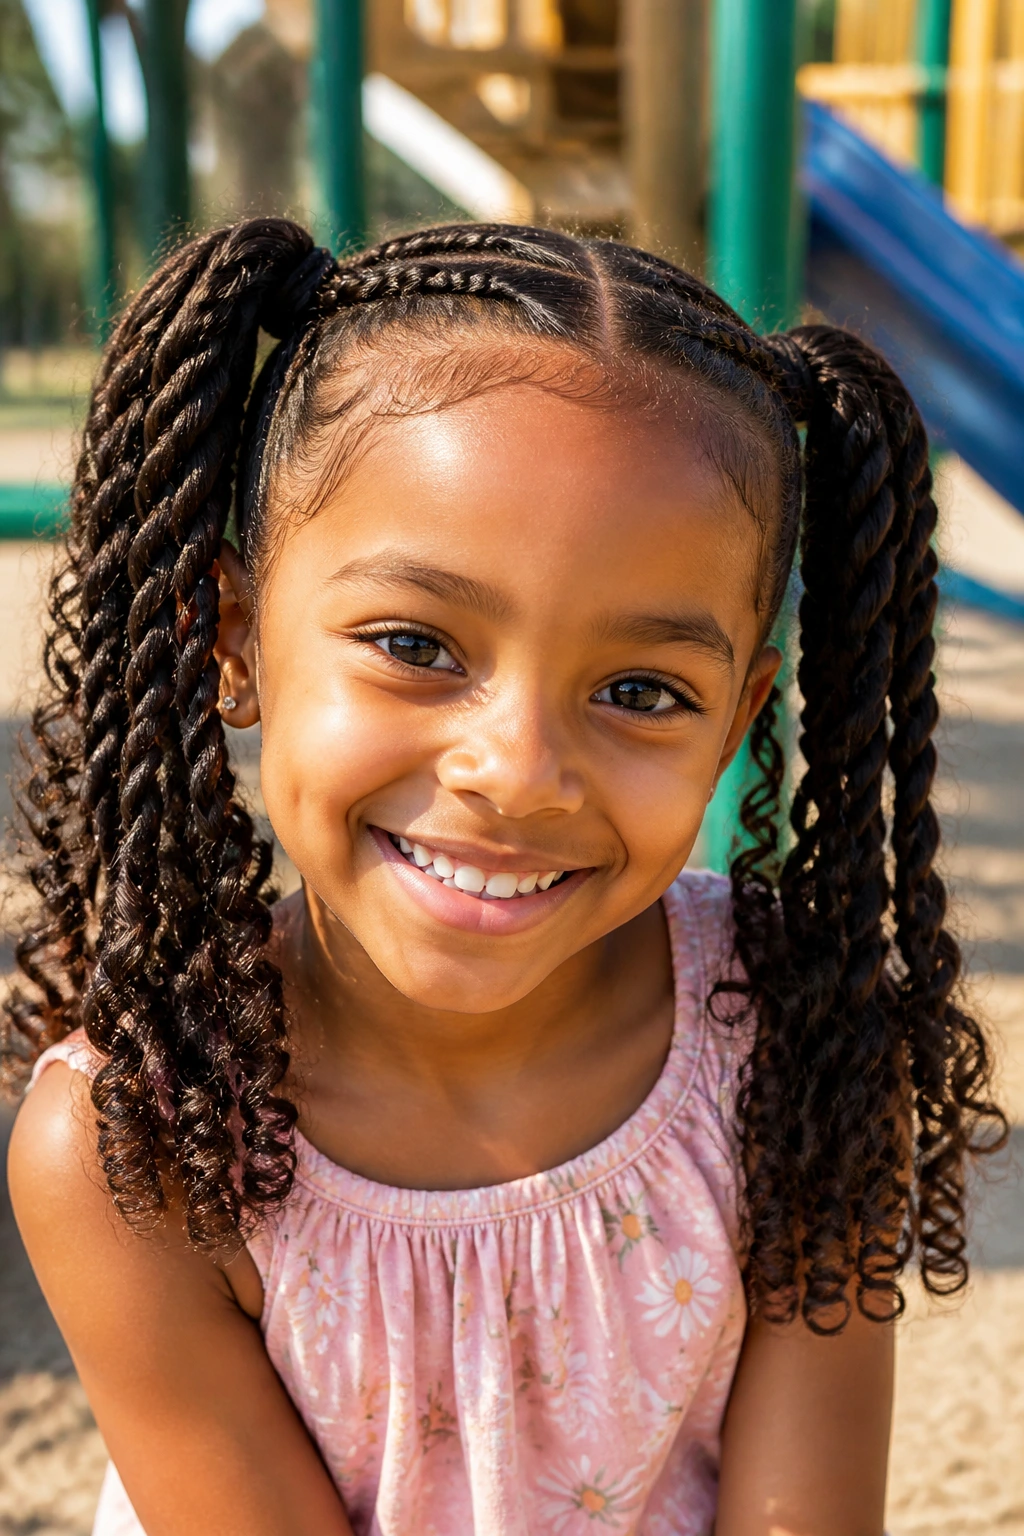
Rope braids have a twisty, textured look that sits somewhere between a braid and a twist. Done in pigtails, they feel lively and easy to wear. Leaving the ends curly keeps the style from looking too uniform, which is the part I like best.
This is a nice option for thick curls because rope braids hold shape well without needing tiny sections. They also finish faster than some of the more intricate braid patterns. If the curls at the ends are especially springy, don’t force them straight before braiding. The contrast between the rope texture and the curls is part of the appeal.
34. Mixed Braid-and-Twist Pigtails
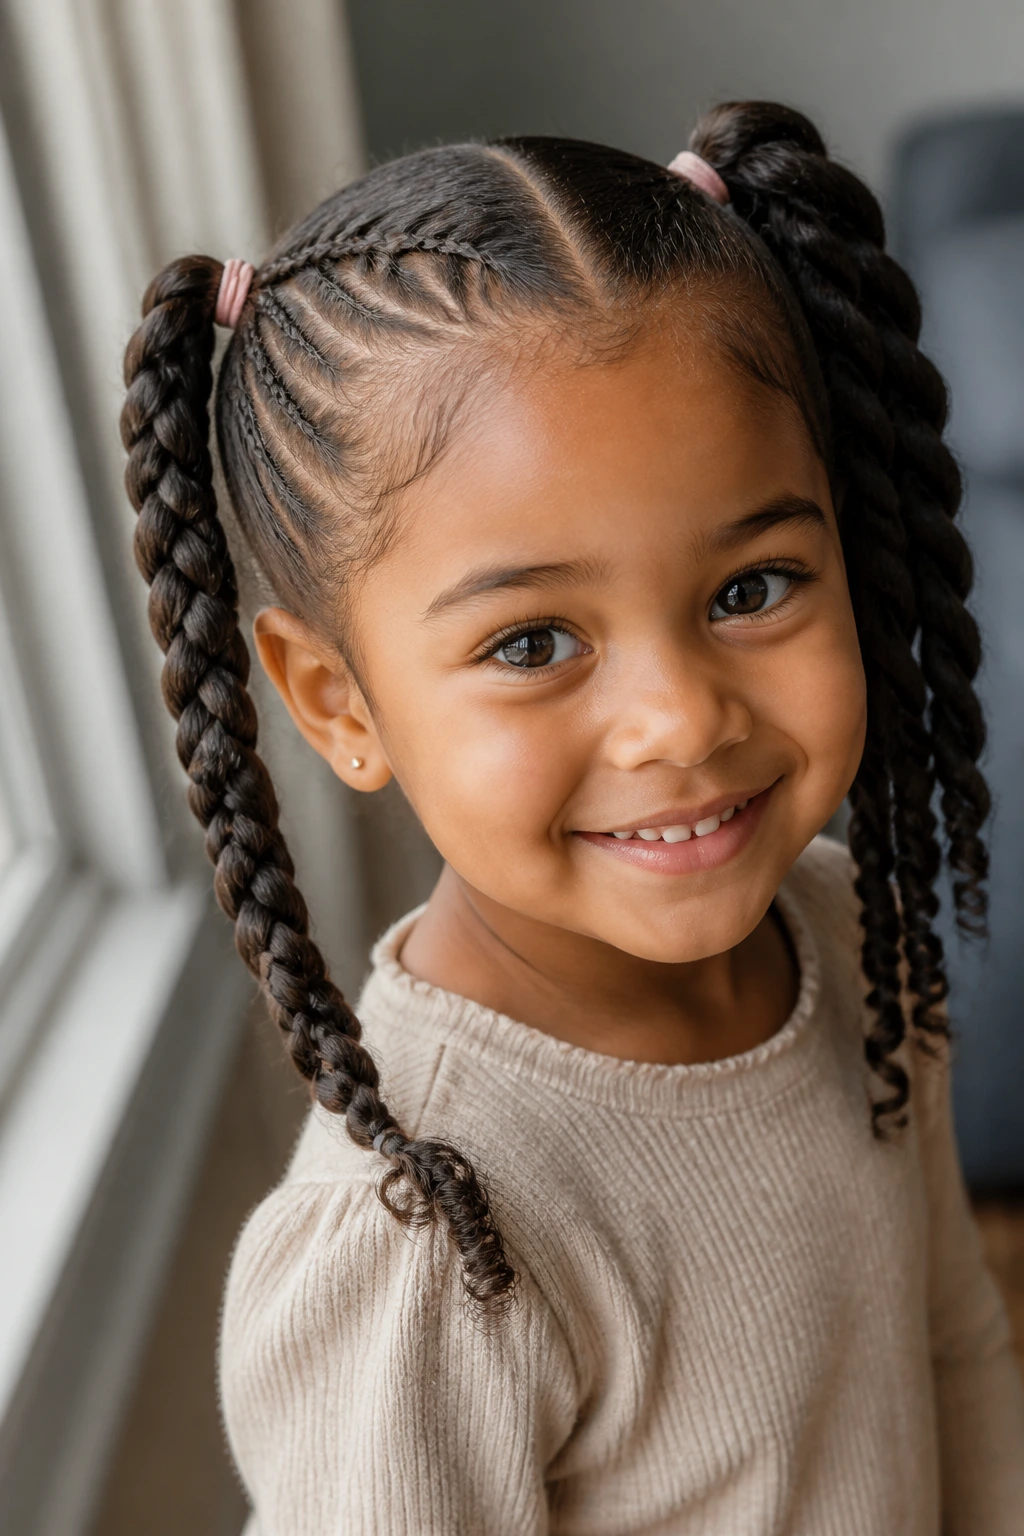
Some children’s hair looks best when you don’t make every side identical. Mixed braid-and-twist pigtails do exactly that: one section may be braided, another twisted, and the whole set ends in matching pigtails. It feels handmade in a good way.
This style is useful when the hair texture varies across the head or when some sections need a little extra control. The braid gives grip; the twist gives softness. Together, they balance each other out. I’d use this style for kids with medium to thick curls because the mix of textures helps the hair sit naturally. It’s forgiving, which is underrated.
35. Festival Braids with Colorful Clips

Festival braids are the style you pull out when the child wants the hair to feel a little more playful. The braid pattern can be simple or intricate, but the clips bring the color. Think bright snaps, little stars, pastel bows, or tiny flowers placed along the part.
What makes this one work is restraint. Too many clips and the style gets noisy. A few well-placed ones can make the braids pop without turning the head into a craft box. I’d keep the base braid clean and let the accessories do the decorating. On curly hair, that contrast between neat parting and bright clips looks especially lively.
What Makes Braids for Little Girls with Curly Hair Hold So Well
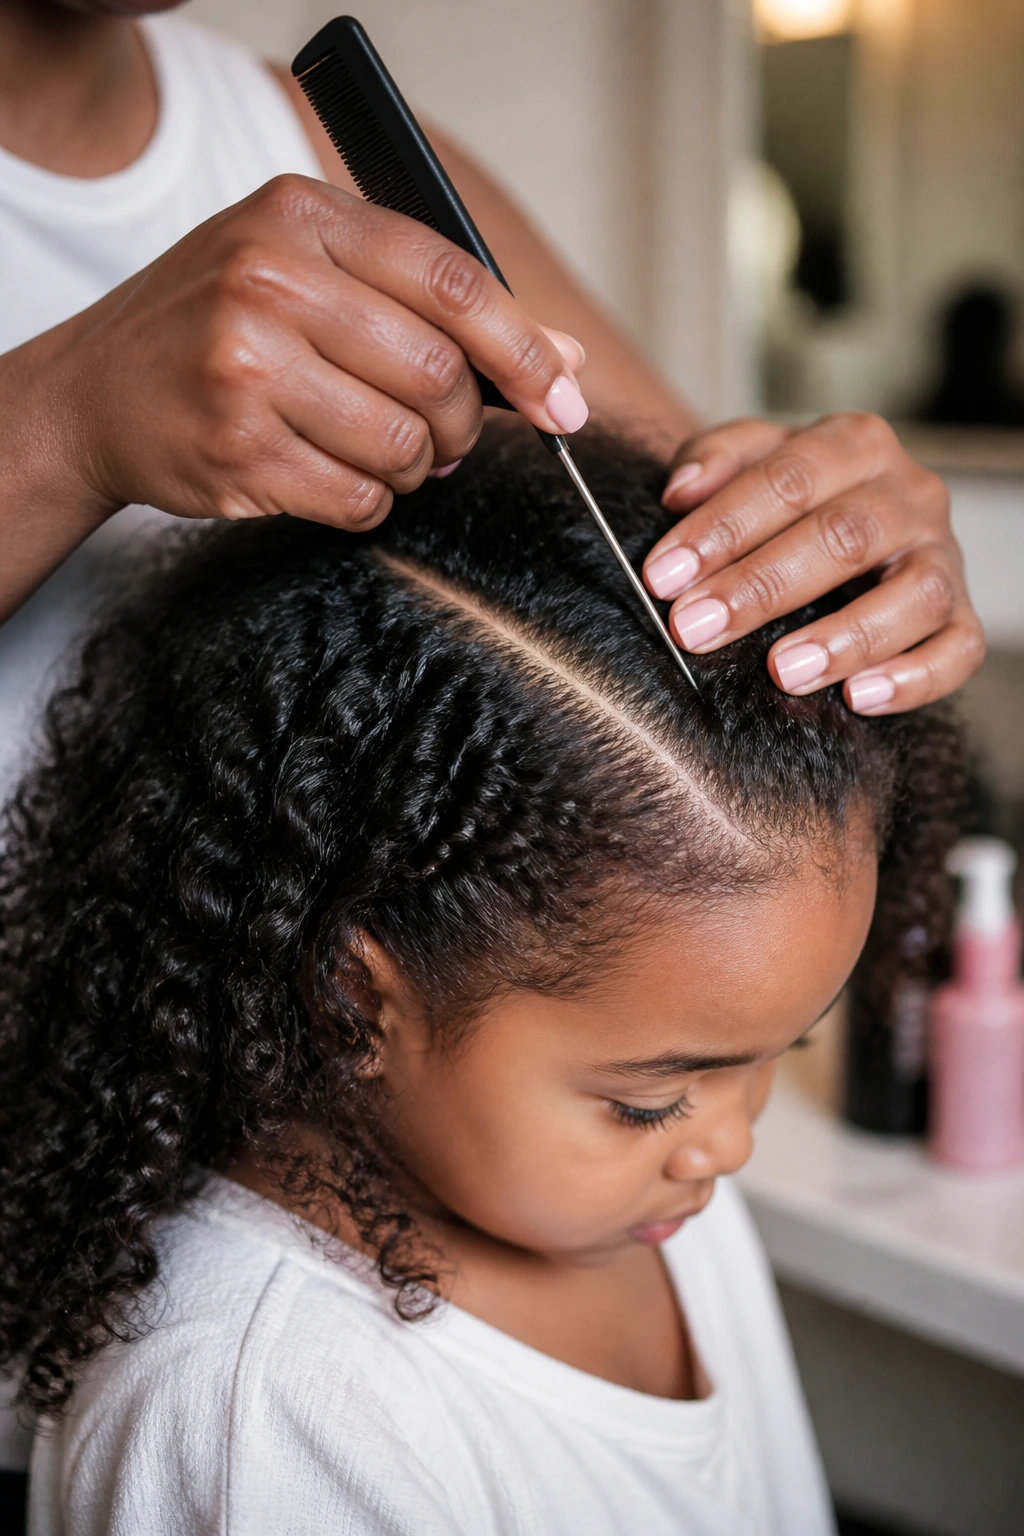
Curly hair has more grip than people give it credit for. Once the hair is detangled, lightly stretched, and parted cleanly, it gives braid work something to anchor to. That’s why these styles can look tidy for days without needing a lot of product. The curl pattern helps the braid settle in.
The mistake most people make is trying to smooth curly hair into submission before braiding. You do not need a glassy, flat base. You need clean, manageable hair that can move without snagging. A light leave-in, a bit of moisture, and careful sectioning matter more than piling on gel. Too much product makes the roots slippery and the scalp sticky.
Another thing that helps is choosing a style that matches the child’s hair length and temperament. Shorter, denser curls do well with crown styles, low puffs, and two-braid looks. Longer hair can handle buns, feeders, halos, and pigtails with more detail. If the child is tender-headed, bigger sections and fewer braids will make the whole process less of a battle.
Essential Tools for These Styles
-
Rat-tail comb: The pointed end gives you the clean parts these styles depend on, especially for zigzags, hearts, and crisscross sections.
-
Wide-tooth comb: Use this first on detangled hair so you don’t yank through knots with a fine comb.
-
Detangling brush: A soft brush helps smooth the roots without scraping the scalp.
-
Spray bottle: A light mist of water or water plus leave-in keeps curls workable without soaking them.
-
Leave-in conditioner: This helps the curls stay soft and easier to separate, especially on thick or dry hair.
-
Sectioning clips: These keep the rest of the hair out of the way while you braid one part at a time.
-
Small, snag-free elastics: Clear or fabric-covered bands are better than the stiff ones that snap and pull.
-
Lightweight beads and cuffs: Good for decoration, but keep them small so they don’t drag on the hair.
-
Satin bonnet or scarf: Essential for keeping the style neat overnight and reducing frizz at the roots.
-
Mousse or braid spray: A small amount can tame flyaways, but use enough to smooth, not enough to stiffen.
Smart Product and Accessory Tips
Start with products that stay light on curly hair. A water-based leave-in is usually a better first layer than a thick cream, especially if you’re planning intricate parts. Thick products can make the hair too slick to grip while braiding, and then the style starts slipping near the roots. That’s annoying for you and uncomfortable for the child.
Accessories should match the child’s age and the style’s weight. Beads look lovely, but small, lightweight ones are easier on the scalp than heavy acrylic pieces. If you want color, ribbons and clips often do the job without adding drag. I’d also skip sharp-edged cuffs or anything that can catch on curls during sleep.
If you’re choosing added hair for feed-ins or longer braids, go light. On little heads, bulk can feel like a lot before the day is even over. Synthetic braid hair should be soft enough to handle without scratchiness, and you should never feel like you need a second set of hands just to keep the braid from pulling. If a style looks good but feels heavy in the first five minutes, that is already a bad sign.
How to Wear These Braids So They Stay Comfortable
Presentation: Let the braid pattern be the main event. If the parts are crisp and the sections are even, you do not need ten accessories fighting for attention. One bow, a few beads, or a single ribbon line is often enough.
Comfort: Check the front hairline and behind the ears before you call the style finished. The scalp should feel snug, not pinched, and the child should be able to move her eyebrows and forehead without complaint. If the style makes her wince when she smiles, it’s too tight.
Outfit Match: High buns, crown braids, and festival clips fit dressier clothes. Low puffs, pigtails, and side-swept styles hold up better under sweaters, jackets, and seat belts because they sit flatter against the head.
Wear Time: Most of these styles can handle a school day plus playtime if they’re protected at night. That said, if beads start clacking loudly or a braid starts loosening near the temple, fix it instead of pretending it will sort itself out.
Additional Tips and Style Boosters
Parting Trick: Part on slightly stretched hair, not hair that’s freshly tangled and shrinking in every direction. You’ll get cleaner lines and less fighting at the root. A damp towel or a light mist helps, but the hair should not be wet enough to drip.
Accessory Boost: Place beads or cuffs at the ends of the most visible braids, not every single braid. That keeps the look focused and stops the style from feeling heavy. One or two bright colors usually read better than a whole rainbow.
Time-Saver: Do the sections first, then braid. It sounds obvious, but people skip this and lose time later trying to part and braid at the same time. Clips make the whole process calmer.
Make-It-Yours: For a child who hates a lot of pull, choose the halo braid, headband braid, or side cornrow ponytail. For a child who loves drama, go with heart parts, butterfly parts, or crisscross braids. For thick curls, larger braids and puffs look better than dozens of tiny ones.
Make-Ahead, Storage, and Ongoing Care
If you want the styles to last, start with clean, detangled hair. A wash and conditioning session the day before braiding is ideal because the hair is soft, stretched, and easier to section. Braiding on hair that still has tangles hidden in the back is a fast track to puffed-up roots and sore combing later.
Most of these styles are happiest in a 5 to 10 day window for little girls. Some will last longer, but I wouldn’t push too far on a child’s head if the roots are puffing, itching, or starting to lock together at the nape. Once the style starts looking rough at the root, it’s done being practical.
At night, use a satin bonnet, scarf, or pillowcase. If the braids are in pigtails or buns, tie them lightly so they don’t flatten oddly while sleeping. Refresh the edges and flyaways every 2 to 3 days with a little water and leave-in, and use a tiny bit of braid spray or oil on the scalp if it looks dry. Don’t soak it. Damp, not drenched.
If the style includes beads, check them every night for loose ends or snagged hair. And if a braid starts loosening near the front after a few days, redoing just that section is smarter than pretending the whole style is fine.
Variations and Adaptations to Try
Tender-Headed Trim: Keep the sections larger, the braids fewer, and the accessories light. A two-braid or halo style will usually go over better than a tiny parting pattern with lots of pulls.
Birthday Brights: Add ribbon, color beads, or a few snap clips to a clean braid base. This version works best when the braid itself stays simple and the decoration carries the fun.
Short-Curl Rescue: Use headband braids, crown braids, side cornrows, or half-up styles if the hair is too short for long pigtails. These keep shorter curls controlled without trying to force length that isn’t there.
Big Volume Version: Choose jumbo braids, braided buns, or a braided crown with a full puff. Thick curls look best when the style gives them room instead of trying to squeeze them into tiny sections.
Minimal-Accessory School Version: Skip beads and clip-ons and keep the finish plain with a soft bow or nothing at all. This is the version for busy weeks when you want the hair neat, fast, and easy to keep overnight.
Weekend Photo Version: Use heart parts, zigzags, crisscross sections, or butterfly parting. These styles take a little longer, but the part design is what makes them worth the time.
Common Mistakes to Avoid
The first mistake is braiding too tight at the hairline. If the child complains right away, or if the skin between the braids puckers, the style is already too tight. Redo it. Tight braids are not a sign of good work; they’re a sign someone was in a hurry.
Another problem is starting with tangled, dry hair. The braid may look neat on top, but hidden knots underneath will swell into frizz and pain later. Detangle gently with leave-in and a wide-tooth comb first. The prep takes time, yes. It also saves time later.
Too much product is another common trap. Thick grease and heavy gel can make the roots slippery, leave flakes, and make the style collapse faster than you’d expect. Use just enough to smooth and define. You want the hair workable, not coated.
Heavy beads and accessories can also drag the braid down, especially on small heads. If the child keeps tugging at the style or tilting her head back, the finish is too heavy. Use lighter pieces and fewer of them.
Finally, don’t leave the style in until the roots lock up. Once the nape starts tangling and the parts blur, the removal process gets messy. Better to take it down on time than to turn one braid style into a half-hour detangling rescue mission.
Frequently Asked Questions
How long do braids usually last on little girls with curly hair?
Most styles stay neat for about 5 to 10 days if they’re protected at night and not overloaded with product. Styles with smaller parts or added beads may need attention sooner, especially around the hairline.
Should curly hair be braided wet or dry?
Lightly damp is better than soaking wet. Wet hair is harder to grip and can shrink unpredictably as it dries, which makes the parts uneven. Dry hair is easier to part, but a little moisture and leave-in usually give the best control.
What if my child is tender-headed?
Go with larger sections, fewer braids, and lower-tension styles like crown braids, side cornrows, or a braided headband. Work slowly, keep the scalp calm, and stop if she’s flinching. Comfort matters more than symmetry.
Are beads safe for toddlers?
They can be, but keep them lightweight and secure. For very young children, I’d use fewer beads and place them at the ends so they don’t drag on the scalp. If the child pulls accessories out often, skip them.
Do these styles work on short curly hair?
Yes, but not every one. Headband braids, side cornrows, crown styles, and half-up looks work better on shorter hair than long pigtail styles. If the length is limited, use the braid pattern to create detail rather than chasing size.
How do I keep the parts from fuzzing up so fast?
Start with clean, detangled hair and make the sections firm but not tiny. A satin bonnet at night helps a lot. If the roots are frizzing by day two, the braid may be too tight, too dry, or too overloaded with product.
Can I wash braids without ruining them?
Yes, if you do it carefully. Focus on the scalp, use diluted shampoo or a gentle cleanser, and rinse with low pressure. Pat the braids dry with a towel and let them air-dry fully so they don’t stay damp at the roots.
Do I need to use added hair for these styles?
No. Plenty of these styles look better with the child’s own curls. Added hair is optional and should stay light if you use it at all. For little heads, natural texture often looks cleaner and feels better.
What should I do if a braid starts coming loose early?
Fix the loose section right away instead of waiting for the whole style to unravel. Small repairs at the front or nape are easy. Once one braid starts slipping, the others often follow.
Braids That Make the Morning Less of a Fight
The best braids for little girls with curly hair do more than look polished in a photo. They keep the hair off the face, respect the scalp, and still leave room for curls, beads, ribbons, and a little personality. That’s the sweet spot — not perfect stiffness, not a tangled mess, but something in between that feels wearable.
I’d take a clean, comfortable braid over an overworked style any day. A child who can run, nap, lean back in the car, and forget about her hair for a while is wearing the right one. And once you find the braid patterns that fit her head and her habits, the morning routine stops feeling like a battle and starts feeling like a rhythm.