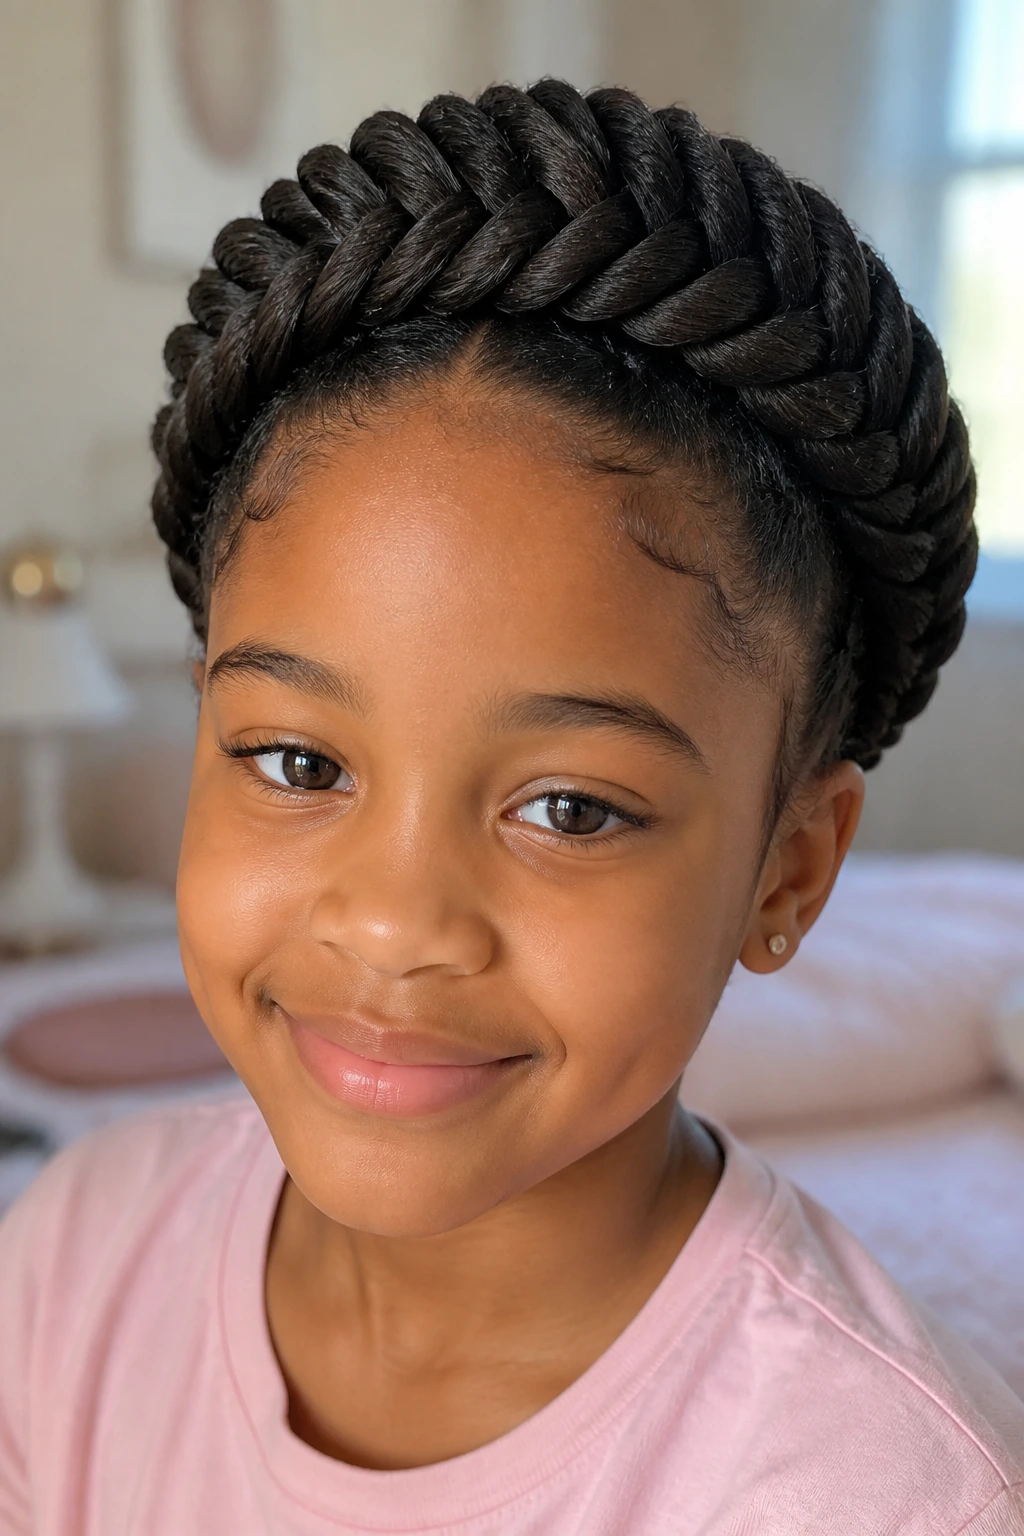
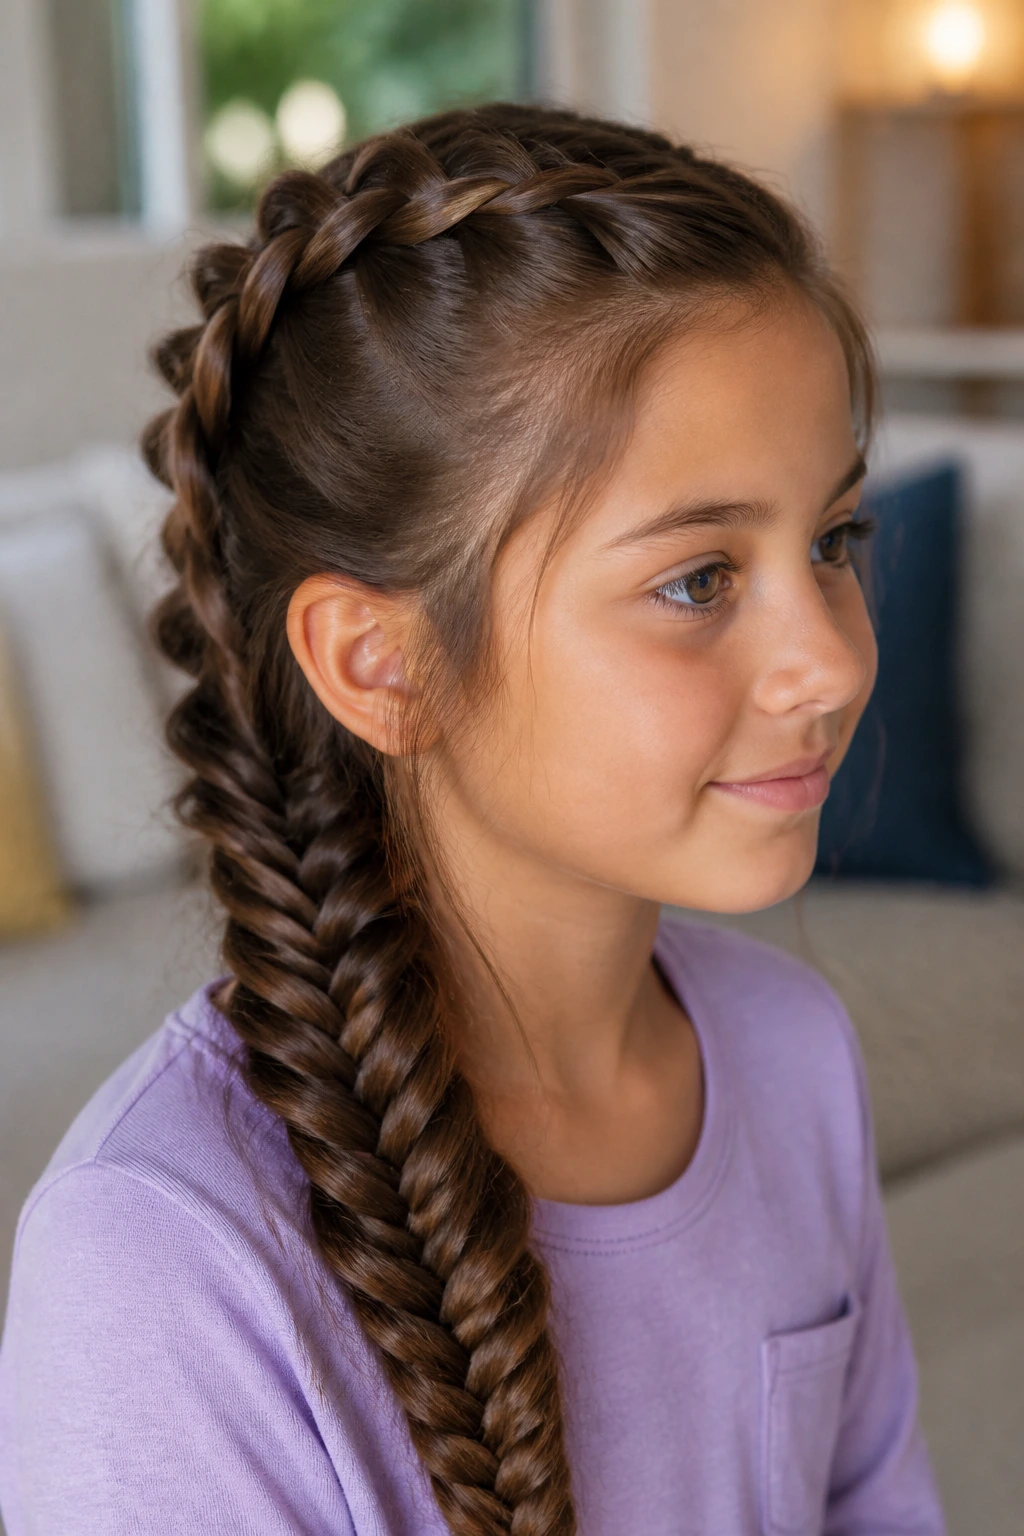
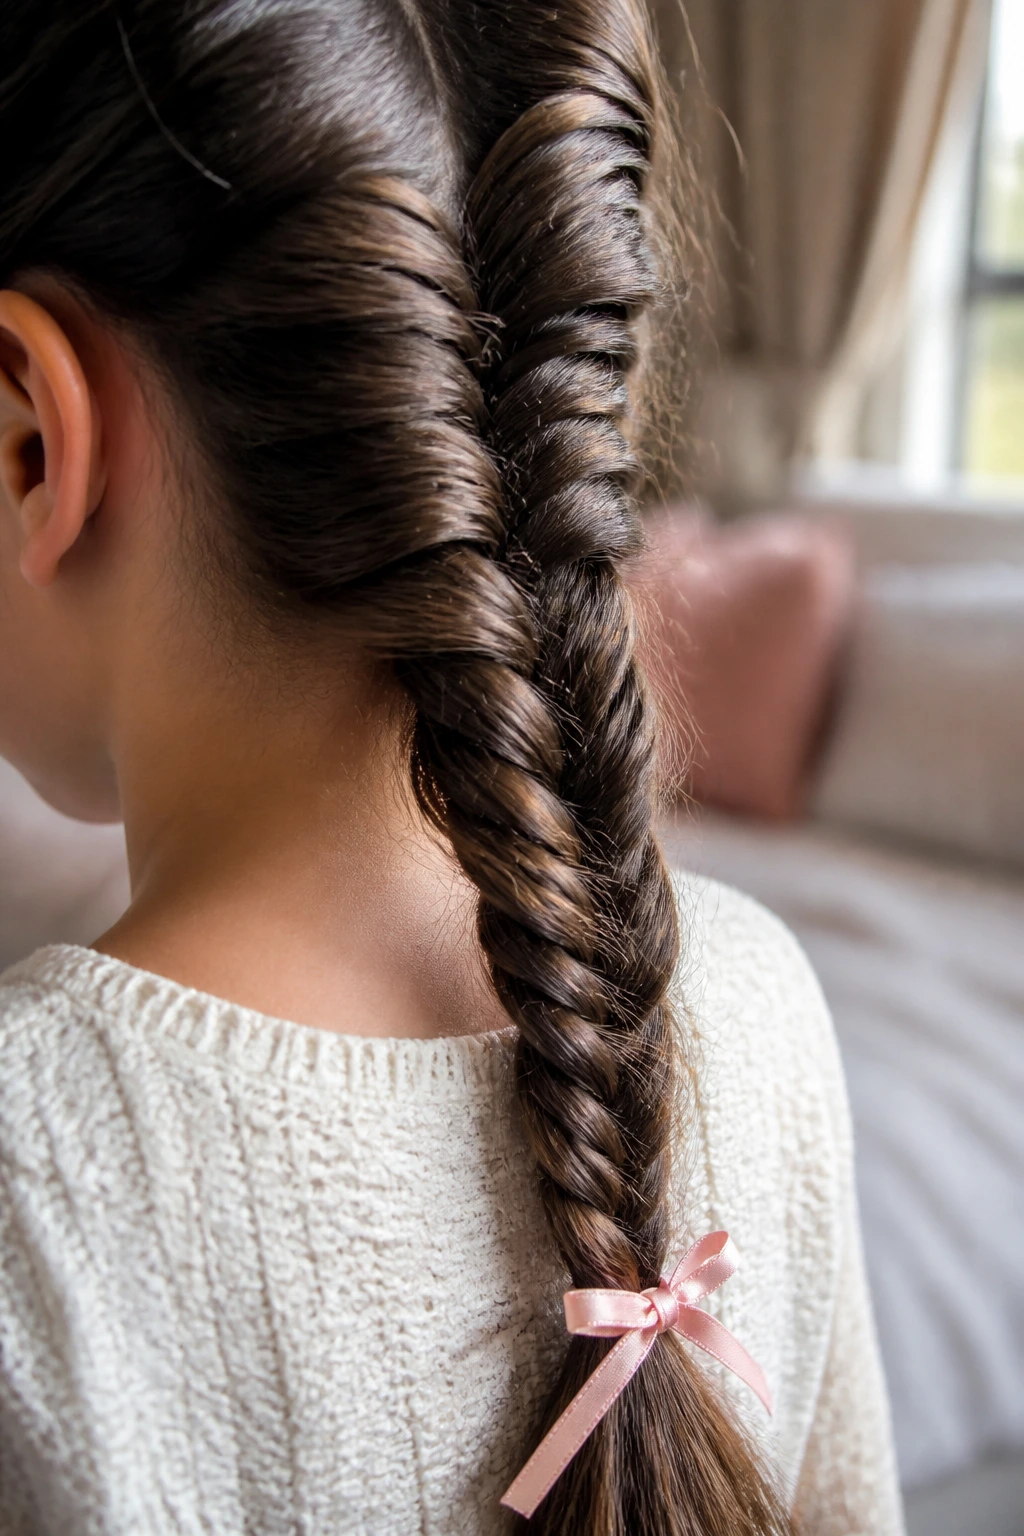
Thick hair makes a fishtail braid look rich and full fast — if you treat the hair like something worth preparing, not something to wrestle into submission. Skip the detangling and the pattern swells into a fuzzy rope before you’ve even crossed the first few strands. Do the prep right, though, and fish tail braids for kids with thick hair hold their shape, sit neatly at the crown or nape, and stay cute through recess, snack time, and whatever else the day throws at them.
The part people miss is that thick hair does half the work for you. It gives the braid body. It also punishes sloppy sectioning with little lumps, uneven edges, and a braid that looks bulkier on one side than the other. So the trick isn’t to pull harder. It’s to make cleaner sections, choose the right grip, and decide where you want the weight to sit before your hands ever start crossing pieces.
A good fishtail on thick hair should feel controlled, not tight. That difference matters. A braid that’s too tight at the temples gives you a fussy, headache-prone kid by lunch. One that’s too loose around the hairline turns frizzy and slides apart at the back. There’s a sweet spot, and once you find it, these styles become some of the most useful braids in the whole rotation.
Why These Braids Earn Their Keep
- The braid shows up fast: Thick hair gives a fishtail pattern enough density to look deliberate even when you use small, neat sections.
- The weight works for you: Heavier hair helps the braid lie flatter, which is useful when you want a style that stays put instead of puffing off the scalp.
- They handle layers better than expected: A few short pieces near the face usually disappear into the texture instead of ruining the whole look.
- You can scale the tension: Tight for sports, softer for school pictures, and somewhere in between for ordinary days.
- They buy you time: Once the braid is secured, thick hair is far less likely to wind itself into a tangle by the back of the neck.
- They give you options: One braid, two braids, half-up, side-swept, wrapped into a bun — the same basic technique can behave in a dozen different ways.
The Prep That Stops Thick Hair From Puffing Out
Thick hair braids usually fail before the first cross-over. That sounds harsh, but it’s true. If the detangling is rushed, if the hair is slippery in the wrong places, or if the sections are chopped up without a plan, the braid starts fighting back immediately.
Dry Hair vs Slightly Damp Hair
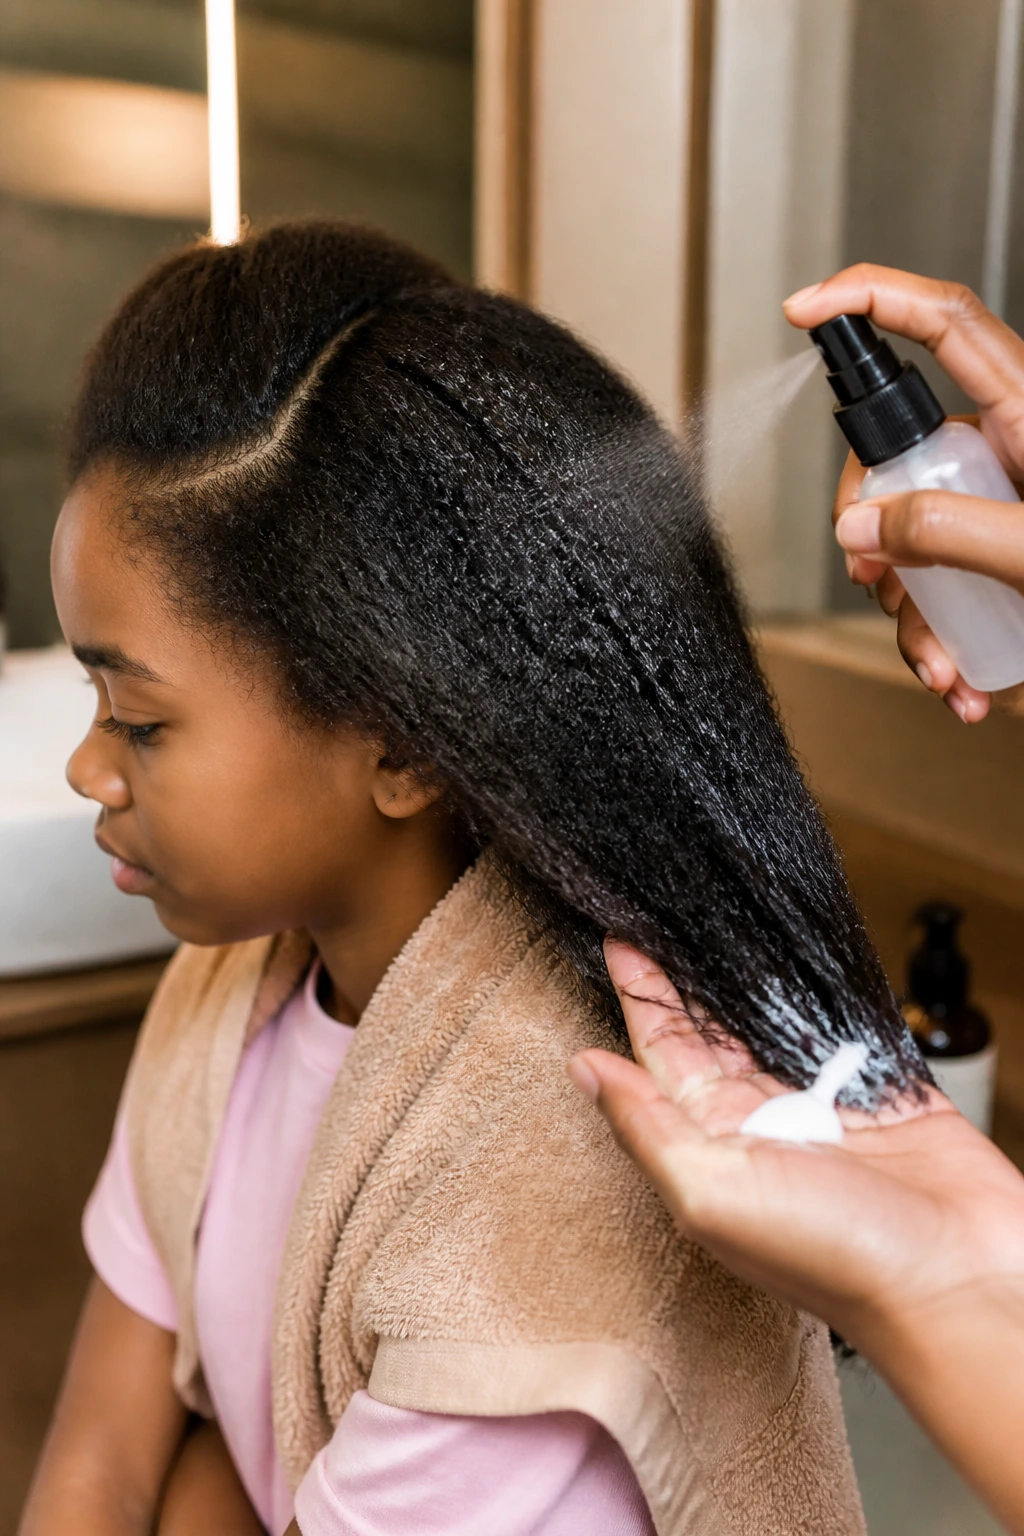
Dry hair is usually the safer bet for kids with thick hair, especially if the hair is fine-textured and prone to frizz. Slightly damp hair can help if the strands are coarse or puff up the second you touch them, but “slightly” matters here. Wet hair in a kids’ braid turns cold, slippery, and heavy, and it takes forever to dry inside a dense style.
I usually mist just the section I’m handling instead of soaking the whole head. That gives enough slip to separate strands cleanly without turning the scalp into a wet blanket.
Product Placement Matters
A pea-size amount of leave-in conditioner or light braid cream belongs on the mids and ends, not right at the roots. Put too much near the scalp and the braid goes slick in exactly the place you need grip. Put a tiny bit on the lengths, though, and you’ll feel the strands slide through your fingers with less snatching.
If the hair is clean and a little too soft, a dusting of dry shampoo at the roots can help. It sounds backwards, but it gives the braid something to hold on to. That matters more on thick hair than people think.
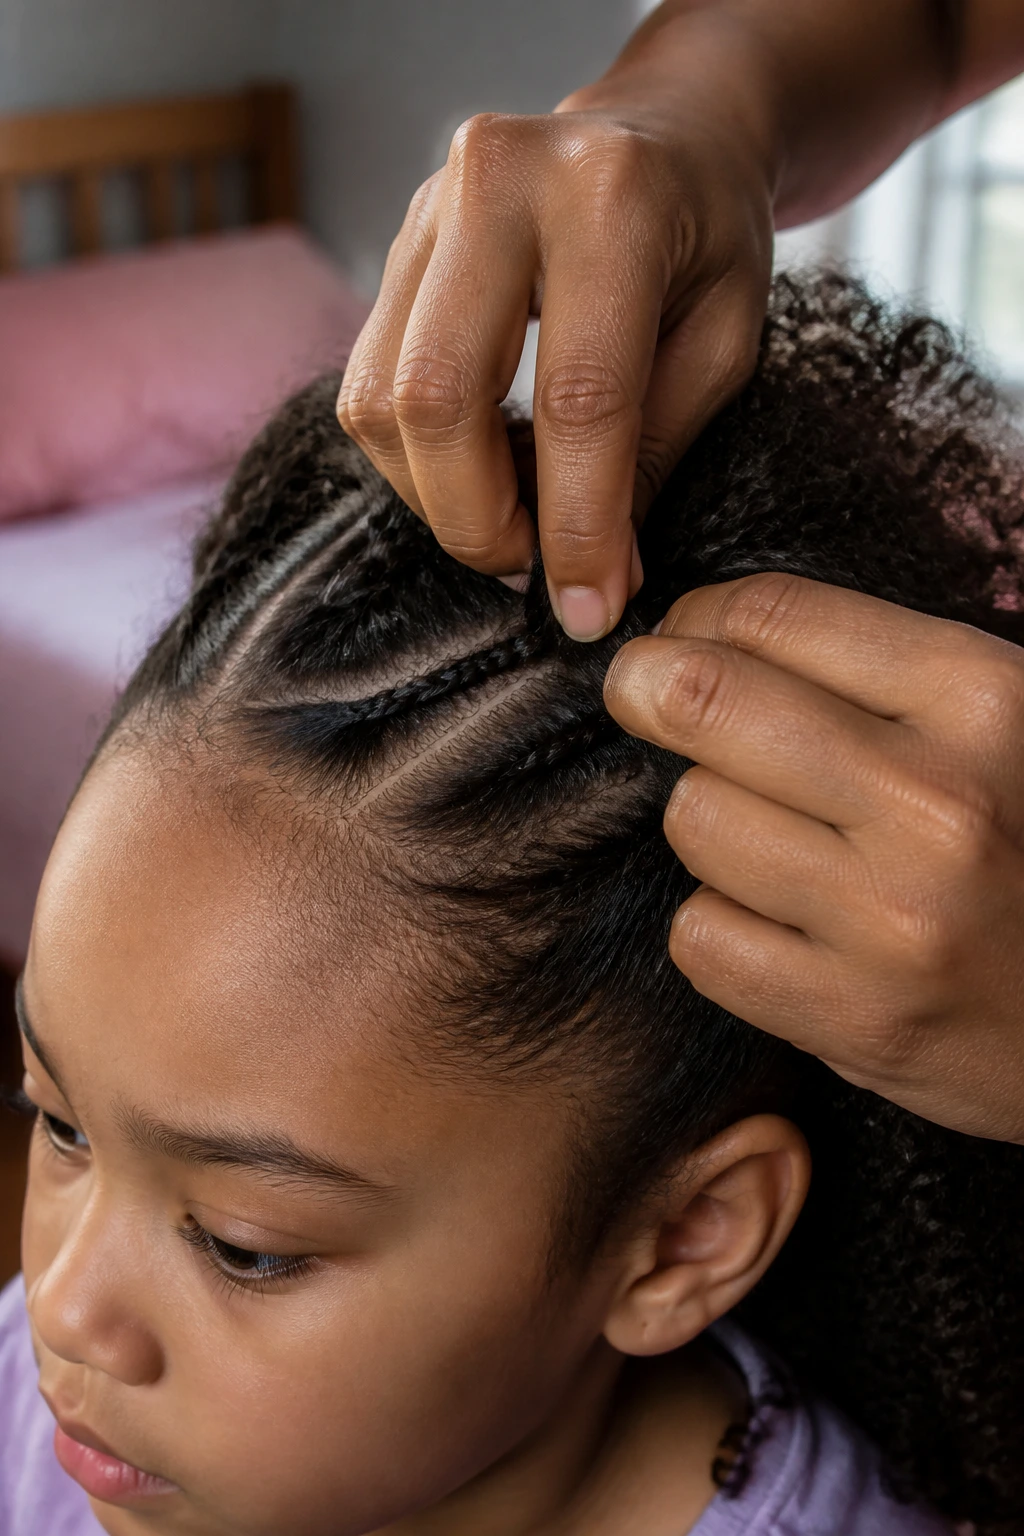
Section Before You Start
Don’t improvise the parting while one hand is already busy. Use a rat-tail comb, clip away the hair you’re not braiding yet, and decide whether the style needs one center part, a deep side part, or a curved section around the crown. Thick hair makes loose part lines obvious. Clean lines make the whole style look calmer.
Choosing the Brush, Elastics, and Styling Products
The wrong tools make thick hair feel twice as heavy. The right ones trim the fight down to something manageable.
A rat-tail comb is non-negotiable in my book. It gives you part lines that stay where you put them and lets you lift small sections without tearing across the scalp. A wide-tooth detangling comb is also useful after washing, because thick hair often needs a first pass that respects the knots before you start polishing the part.
For elastics, go snag-free and small. Clear mini elastics or soft-coated ties work better than chunky ones that leave dents in the hair. Metal joints are a bad deal here. They catch, they tug, and they make a clean braid feel clumsy. If you’re doing buns or wrap-around styles, keep a few U-shaped pins or regular bobby pins nearby.
Styling product depends on texture. Fine thick hair usually needs a light cream or mist, while coarse thick hair can handle a little more hold — a dab of wax stick or edge control near the hairline, not slathered everywhere. If the hair is curly, a moisturizing leave-in helps the braid look smoother without turning it stiff.
And one small thing that saves headaches: a spray bottle with plain water. Not a soaking bottle. Just enough to calm one section at a time when it starts to fray in your hands.
Tools I’d Put on the Counter First
- Rat-tail comb — clean parts and neat sectioning start here.
- Detangling brush — use it first, before you try to braid through knots.
- Spray bottle — a light mist helps control flyaways without drenching the hair.
- Leave-in conditioner or braid cream — a small amount on the mids and ends smooths the braid.
- Snag-free mini elastics — best for securing ends, halves, and small accent braids.
- Bobby pins and U-pins — useful for halo braids, buns, and wrapped styles.
- Sectioning clips — they keep heavy hair from slipping back into the part while you work.
- Edge brush or soft toothbrush — handy for smoothing the hairline without forcing it flat.
- Light-hold hairspray or styling mist — optional, but useful when the hair is extra puffy.
- Satin scarf or bonnet — not for the braid itself, but for preserving it overnight.
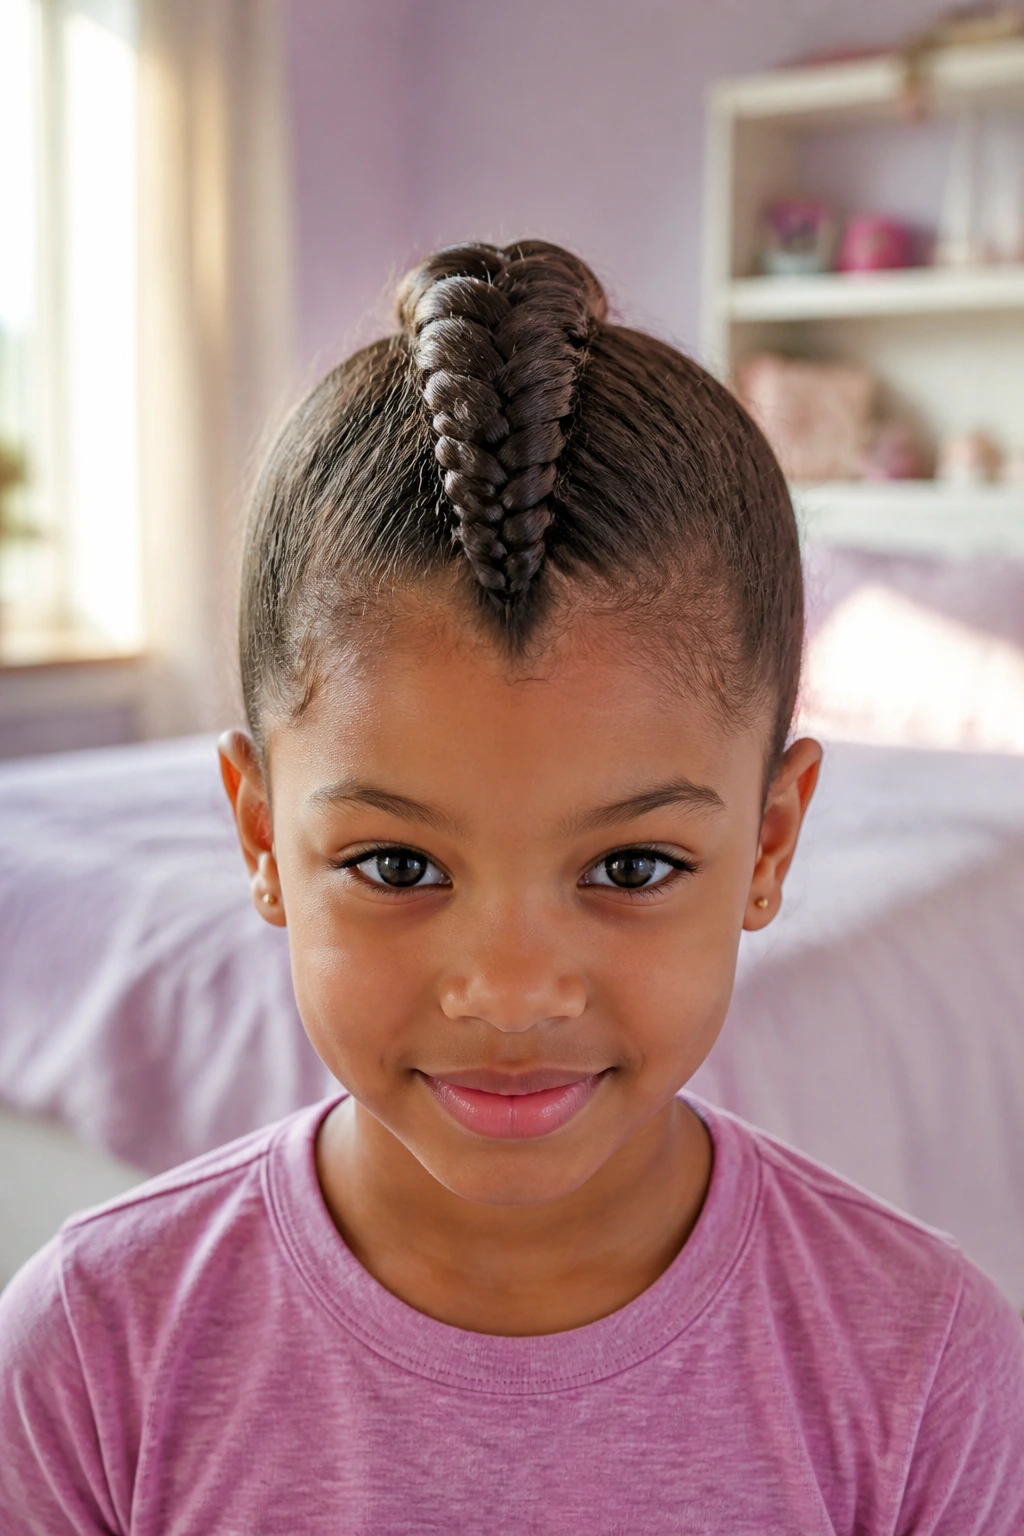
1. Half-Up Fishtail Crown for School Mornings
This is the braid I reach for when the top half of the hair keeps falling into the eyes and the rest of it still deserves to show off. The braid starts around one temple, crosses along the back of the head, and leaves the lower half free, so the whole style feels tidy without swallowing the child’s hair under one massive plait.
Why It Works on Thick Hair
Half-up styles use thick hair’s volume instead of fighting it. The crown section stays controlled, and the loose length keeps the braid from looking cramped. Because the braid only carries part of the hair, it sits flatter at the scalp and doesn’t drag on the nape by mid-afternoon.
- Keep the top section no wider than ear to ear.
- Start the fishtail with small crosses so the braid hugs the head.
- Secure the braid just behind the opposite ear with two crossed pins.
Best move: leave the bottom hair soft and brushed; if it’s too teased or frizzy, the top braid looks disconnected.
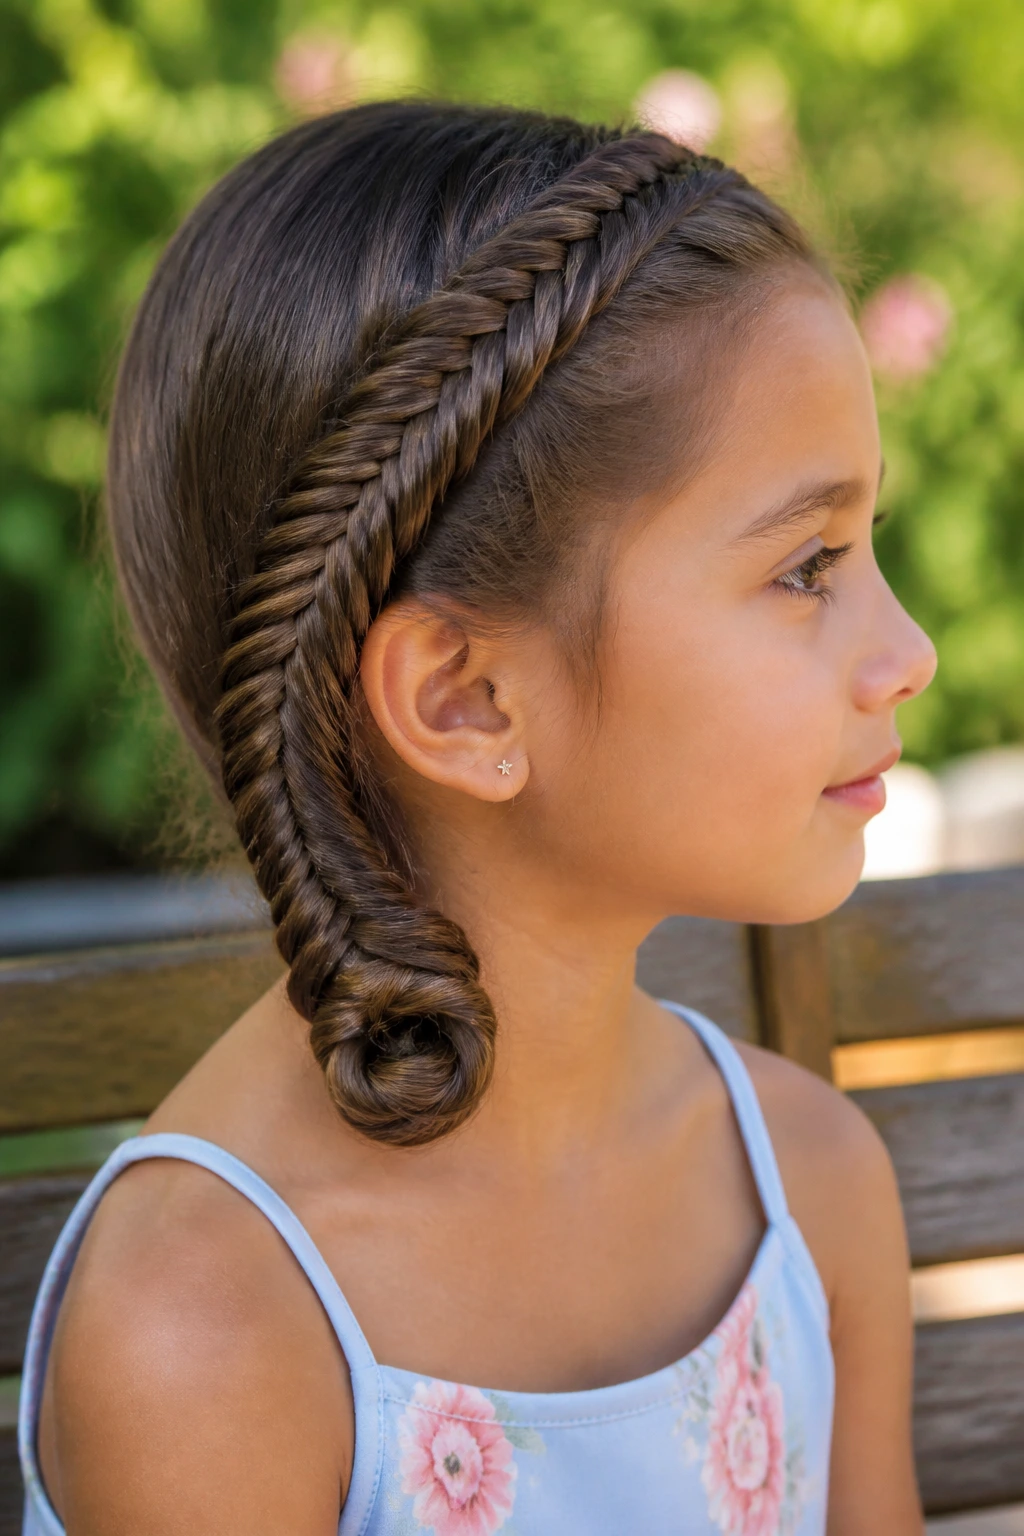
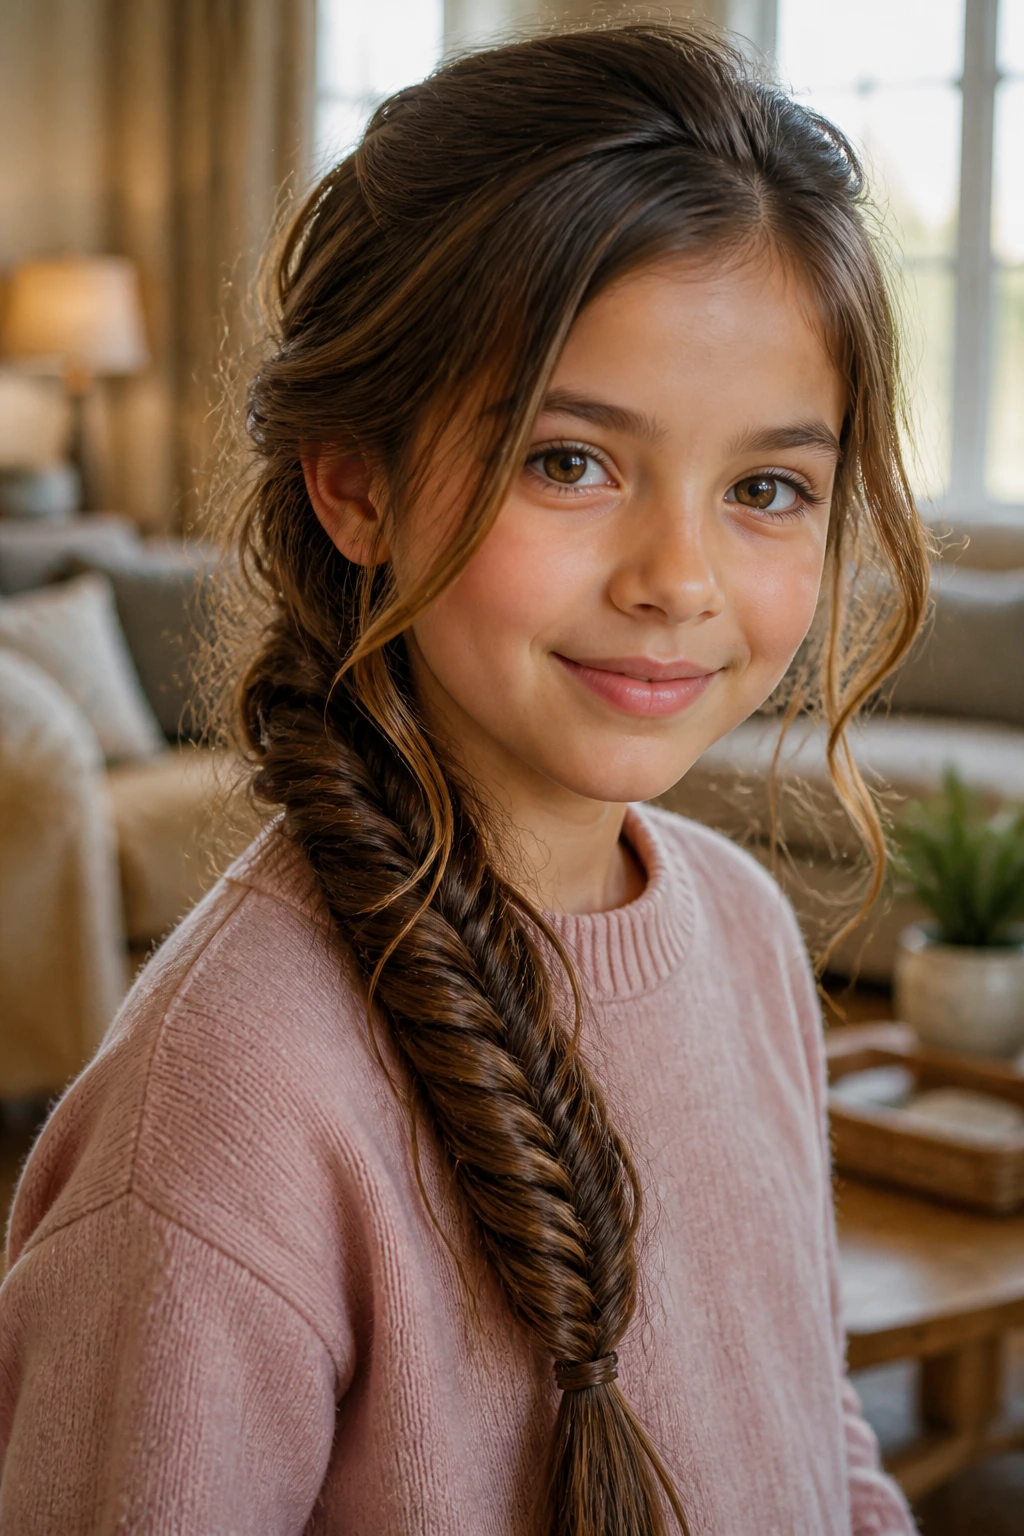
2. Low Side Fishtail That Hides the Heavy Bulk
The low side fishtail is the braid I reach for when I want the hair to look polished without making the child feel like the style is trying too hard. One deep side part, one shoulder-side braid, and suddenly all that thick hair has somewhere to go instead of ballooning straight down the back.
The side placement matters. Thick hair often looks widest through the middle of the head and at the nape, so shifting the braid to one side breaks up that blocky shape and makes the style feel lighter. It also gives you a better view of the braid while you work, which is helpful if the child’s hair keeps slipping through your fingers.
Braid the whole length, secure it low with a clear elastic, then gently tug only the outer edges of the finished plait. Not the center. The outer edges. If you puff the whole thing, it starts to look messy instead of full, and thick hair can cross that line fast.
I like this one for layered hair, especially when the face-framing pieces are short enough to misbehave but long enough to braid in. A little smoothing cream at the part and a soft brush over the ear line go a long way.
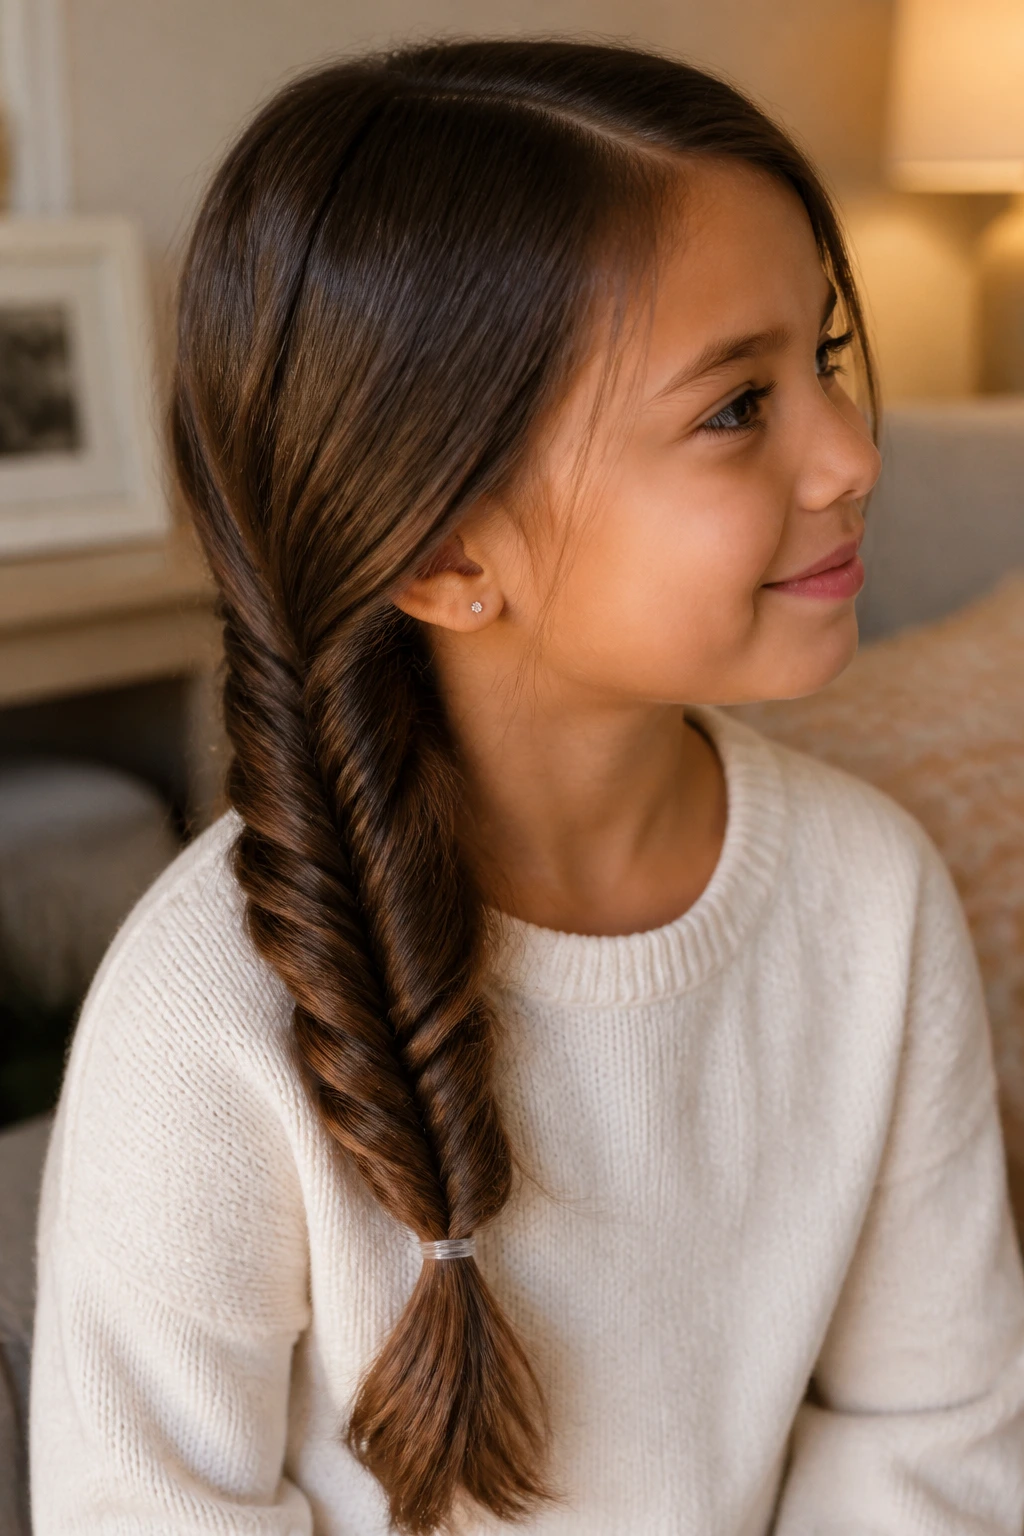
3. Twin Fishtail Pigtails with Clean Parts

Why split thick hair into two braids instead of one giant one? Because sometimes the weight alone is the problem. Two fishtail pigtails spread it out, make the style easier to keep neat, and keep the back of the neck from feeling stuffed with hair.
How to Make the Parts Behave
Start with a center part from forehead to nape and check it in a mirror before you braid anything. Thick hair makes crooked parts painfully obvious, and once the braids are in, you’ll notice every wobble. Clip one side away, braid the first pigtail from just behind the ear or slightly above it, then repeat on the other side.
- Use the same amount of hair on both sides, or the braids will sit at different heights.
- Keep the tension even so one pigtail doesn’t pull tighter than the other.
- Finish with matching elastics; mismatched ends look accidental.
A middle-part pigtail set is especially useful for kids who hate hair touching their neck. It also makes bedtime easier if you plan to leave the braids in overnight, because the bulk gets distributed instead of jammed into one heavy rope.
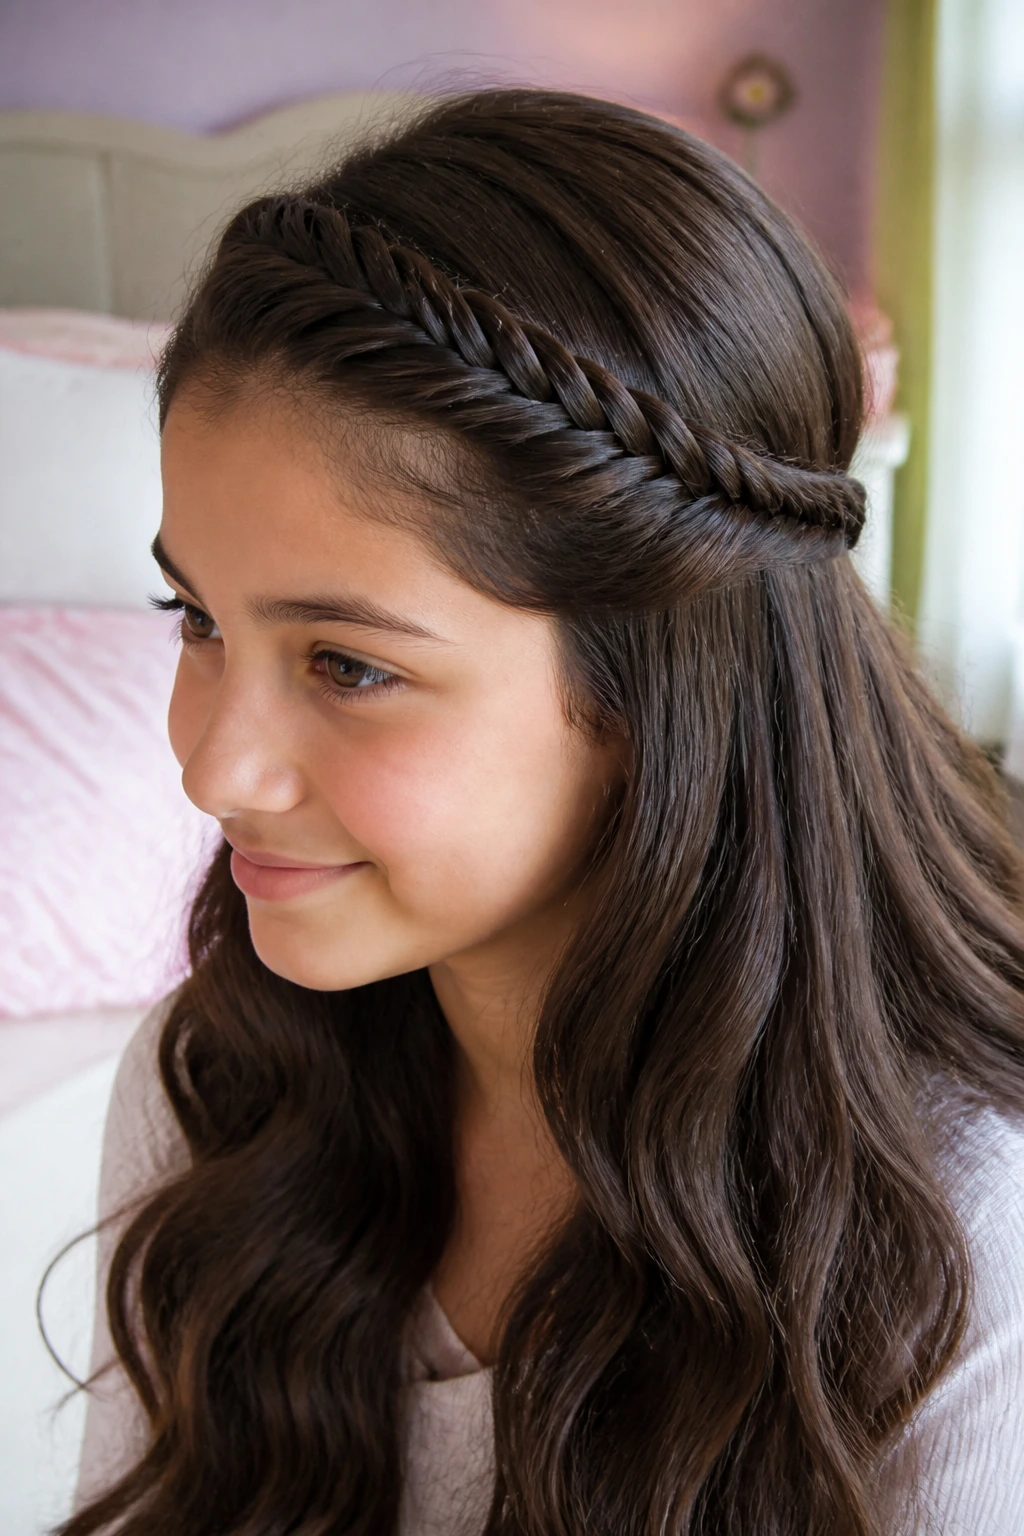
4. Fishtail Halo Across the Hairline
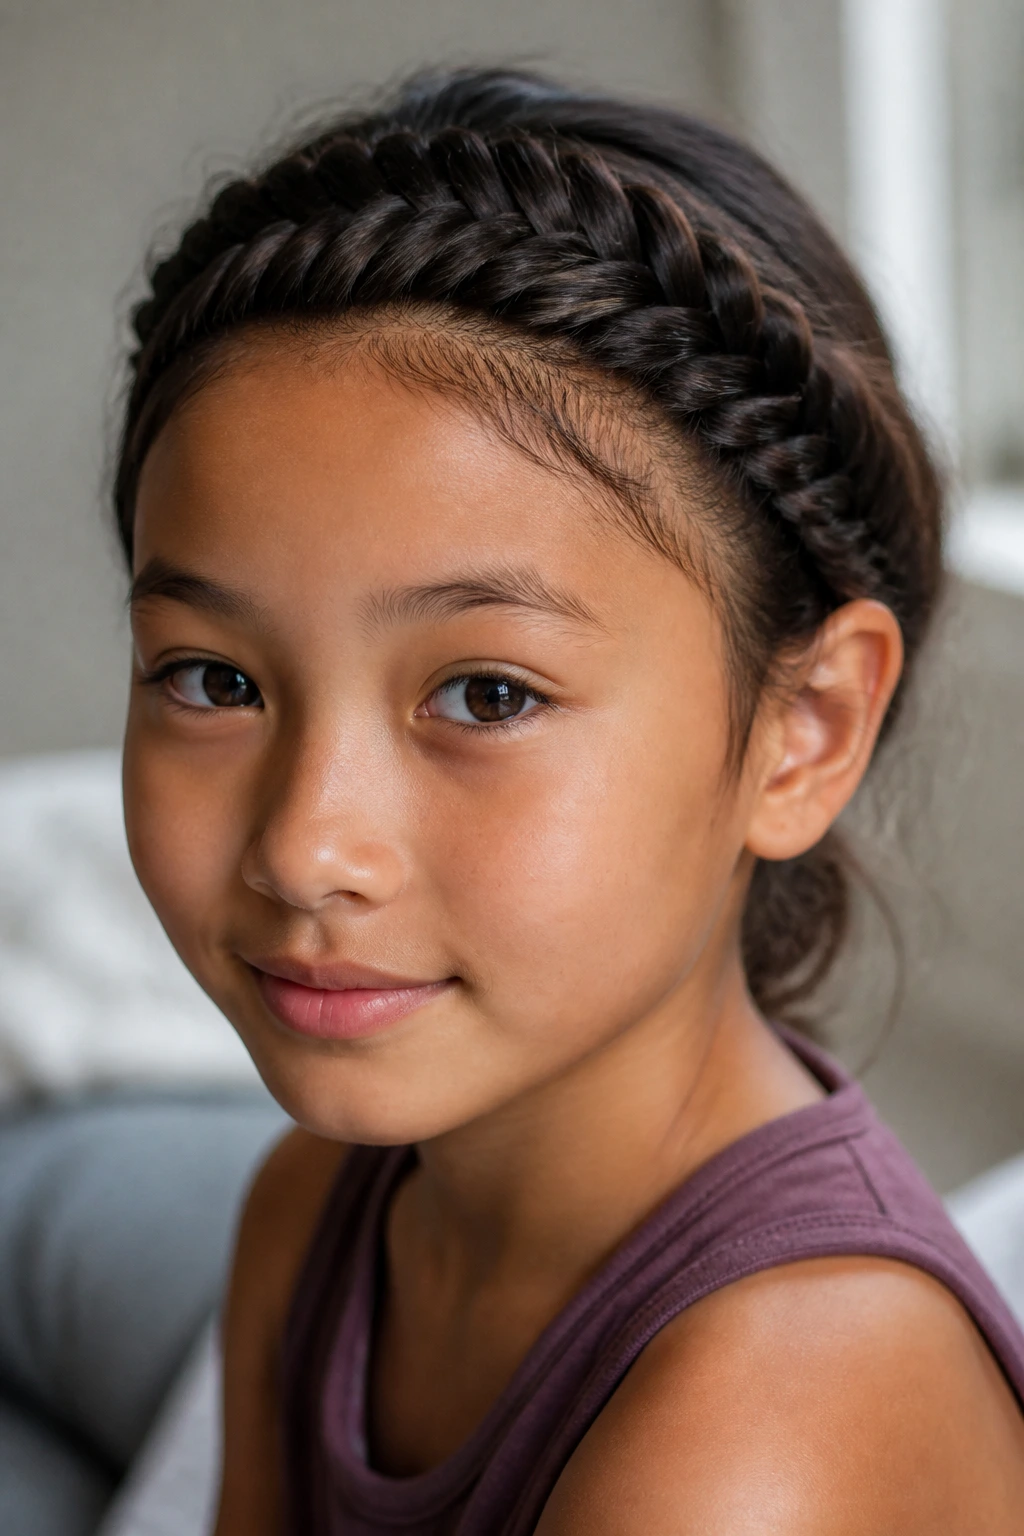
A halo braid sounds fussy until you actually do one on thick hair. Then it makes sense. The density of the hair helps the braid look substantial, and the braided circle keeps everything tucked away without needing a dozen pins doing invisible gymnastics.
Picture a birthday party, a school recital, or a day when the child wants her hair off her face but not all the way up. That’s the halo moment. The braid follows the hairline, curves behind the ears, and wraps around the head like a built-in headband.
It works best when the braid is anchored with low-tension pins behind each ear and at the back of the head. Don’t yank it tight around the temples. Thick hair already has enough body; pulling too hard only gives you a headache and a halo that looks strained.
I prefer this style with slightly textured hair rather than freshly shampooed silk. A little grip helps. If the ends are short, tuck them under the braid and pin them flat. Nobody needs to see your struggle.
5. Wrapped Ponytail with a Fishtail Tail
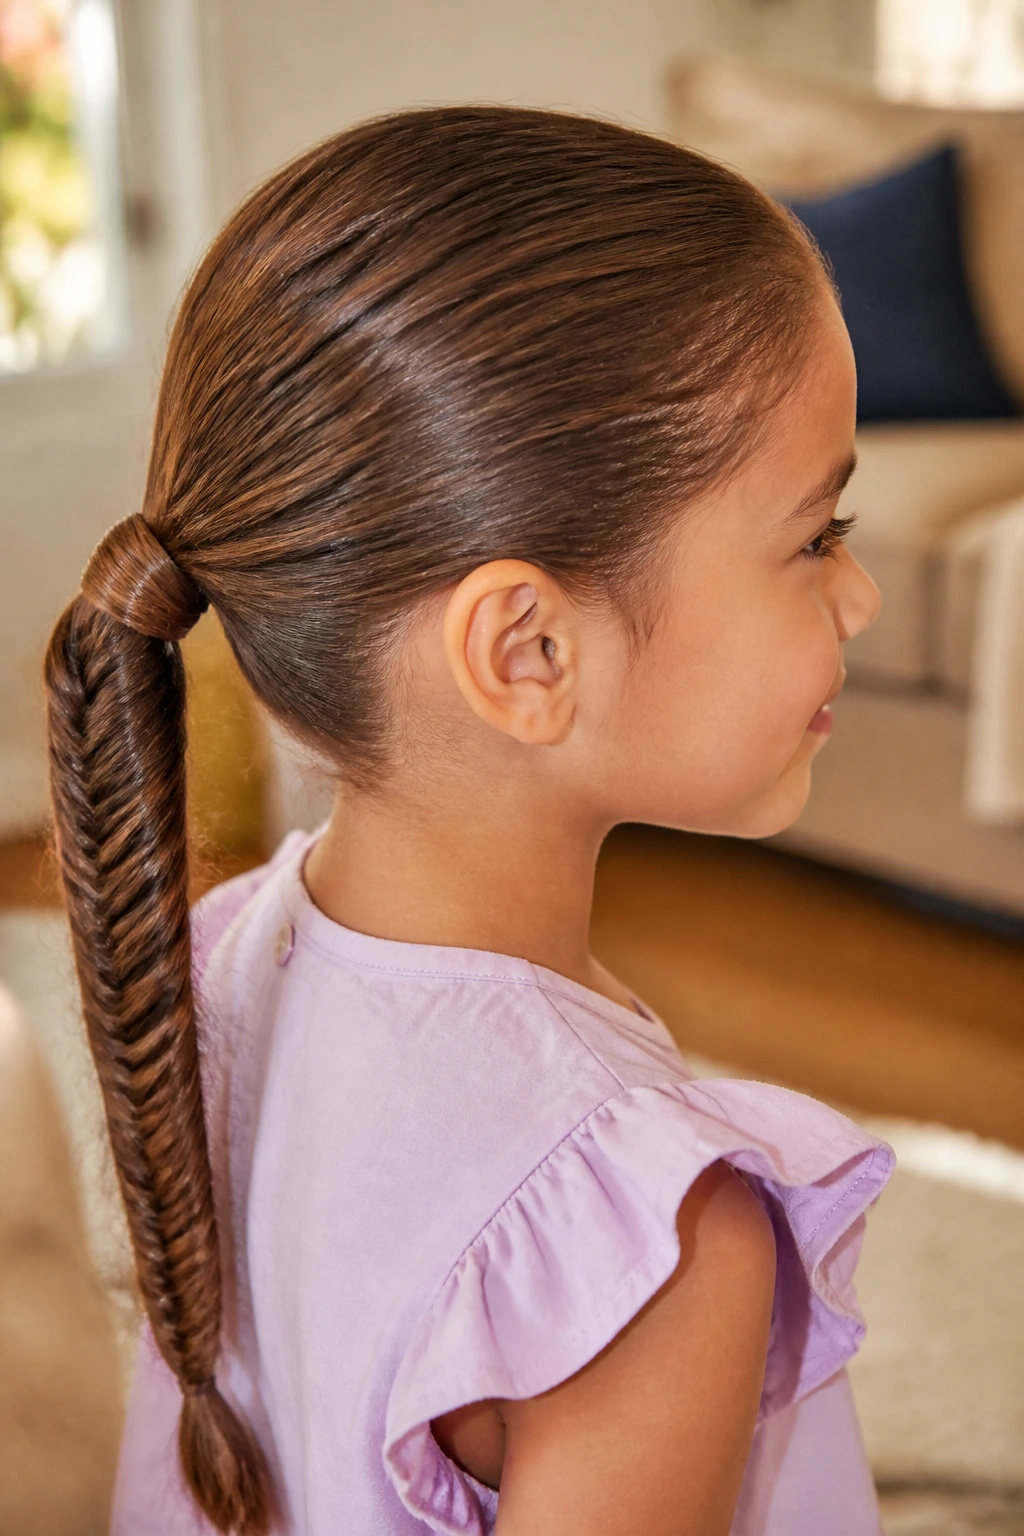
This is the braid that looks more complicated than it is. You gather the hair into a low or mid ponytail, wrap a small strand around the elastic so the base disappears, and then fishtail the tail itself. The result is neat at the crown and textured where it counts.
Thick hair benefits from the ponytail base because it controls the weight before the braid starts. Without that anchor, the whole thing can feel like it’s pulling at the scalp by the end of the day. With it, the braid sits in one clean line and the ends stay easy to manage.
I like this one when the morning is moving too fast for a full head braid. It gives you a tidy look in less time, and the tail still has enough length to show off the fishtail pattern. If the child has lots of layers, smooth the ponytail with a soft brush first so the shorter pieces don’t poke out before the braid starts.
A clear elastic at the tail and a second one underneath the wrap strand usually keep the whole style stable. Cheap little trick. Works every time.
6. Dutch-to-Fishtail Combo for Hair That Slips
Unlike a straight fishtail from the scalp, this combo starts with a Dutch braid at the crown and switches into a fishtail once you’ve built a firm base. That makes it a smart choice for thick hair that’s silky, layered, or impossible to hold on the first few passes.
The Dutch section gives you grip. The fishtail section gives you texture. Together, they solve the two problems thick hair likes to throw at braids: slippery roots and bulky ends.
When to Choose It
Use this style when the hair keeps sliding free before you can get past the ear line. Start with three strands, braid under instead of over for three or four stitches, then split into two sections and switch to the fishtail pattern. That transition isn’t fussy if you keep the sections even.
It’s a good pick for kids who want a braid that stays visible all day but don’t want the feeling of hair tugged tightly across the crown. The braid reads a little more athletic than delicate. I like that. It looks honest.
7. Braided Bun with a Fishtail Finish
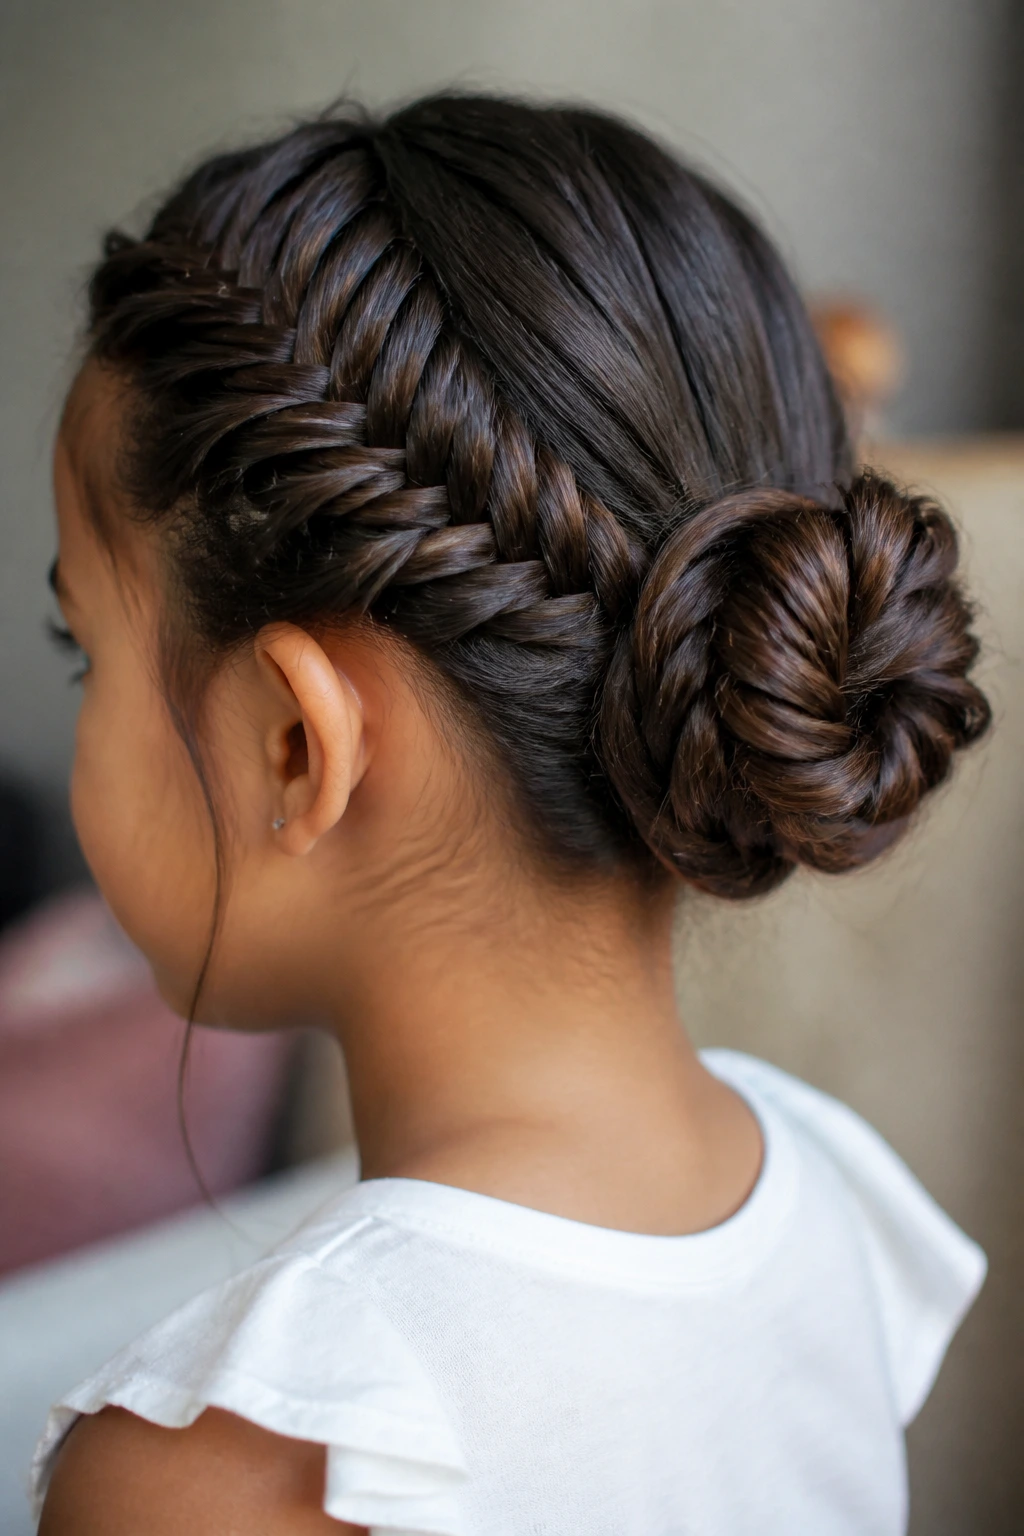
If the day calls for hair completely off the neck, this one pulls its weight. First you braid the hair into a fishtail, then coil the length into a bun and pin it flat. Thick hair makes a satisfying bun here because there’s enough material to fill the shape without stuffing it full of pins.
The trick is to secure the braid before you wrap it. If you try to build the bun directly from loose, dense hair, it feels like tying a towel in the wind. A clean fishtail length gives you a rope you can actually manage.
I usually start with a low ponytail, fishtail it to the end, and then twist it around the base. For heavy hair, three to five bobby pins crossed in different directions hold better than a single heroic pin shoved at one angle and hoped for. Hope is not a strategy.
This style is good for concerts, church, family photos, or any day when the kid needs her hair to stay put from breakfast to bedtime.
8. Pull-Through Fishtail for Very Thick Hair
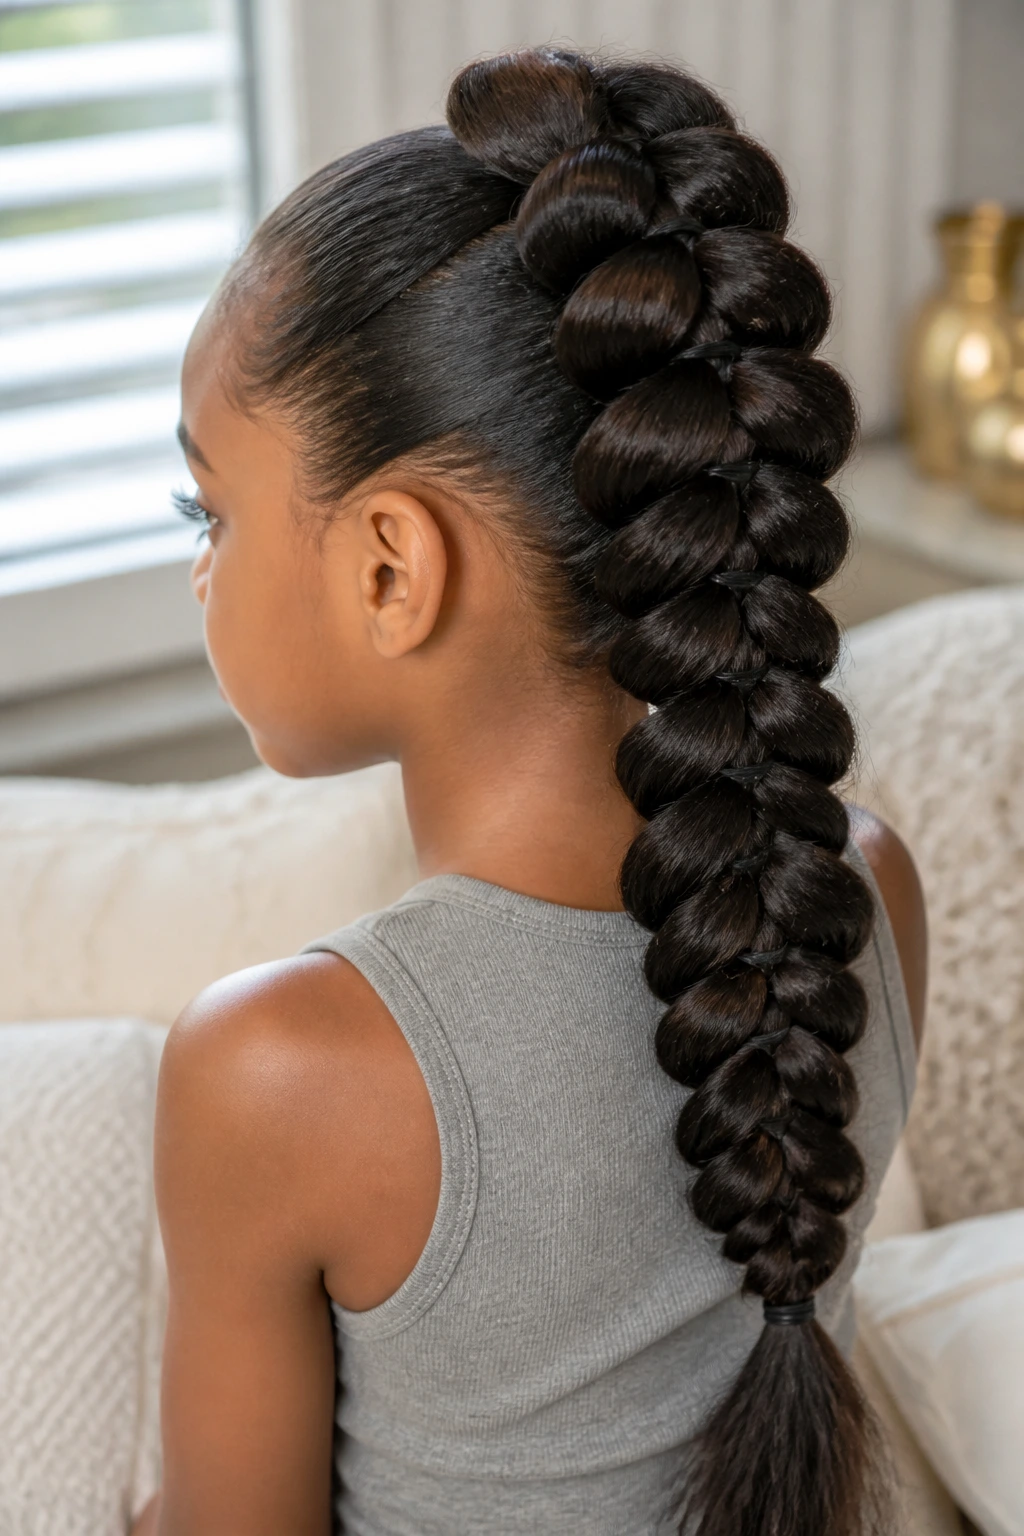
Here’s the honest version: this is not the classic fingertip fishtail, and I’m fine with that. The pull-through version gives you the same woven look, but it uses small elastics instead of endless strand crossings, which makes it a lifesaver for very thick hair and for kids who won’t sit still long enough for a traditional braid.
You make a series of ponytails down the center or along the back, split and pull the sections through one another, then gently fan each bubble into a braided look. On dense hair, the shape reads big and controlled instead of messy. That’s the appeal.
The method is also friendlier on hands. Your fingers do less fine work, which matters when you’re braiding a lot of hair and the child has already eaten half a granola bar while you’re standing there. We’ve all been there.
If the goal is neatness with less battle, this style is an excellent trade. Use small clear elastics every 1 to 1½ inches, keep the sections even, and smooth each top layer before you move to the next.
9. Tiny Accent Fishtails into a High Pony
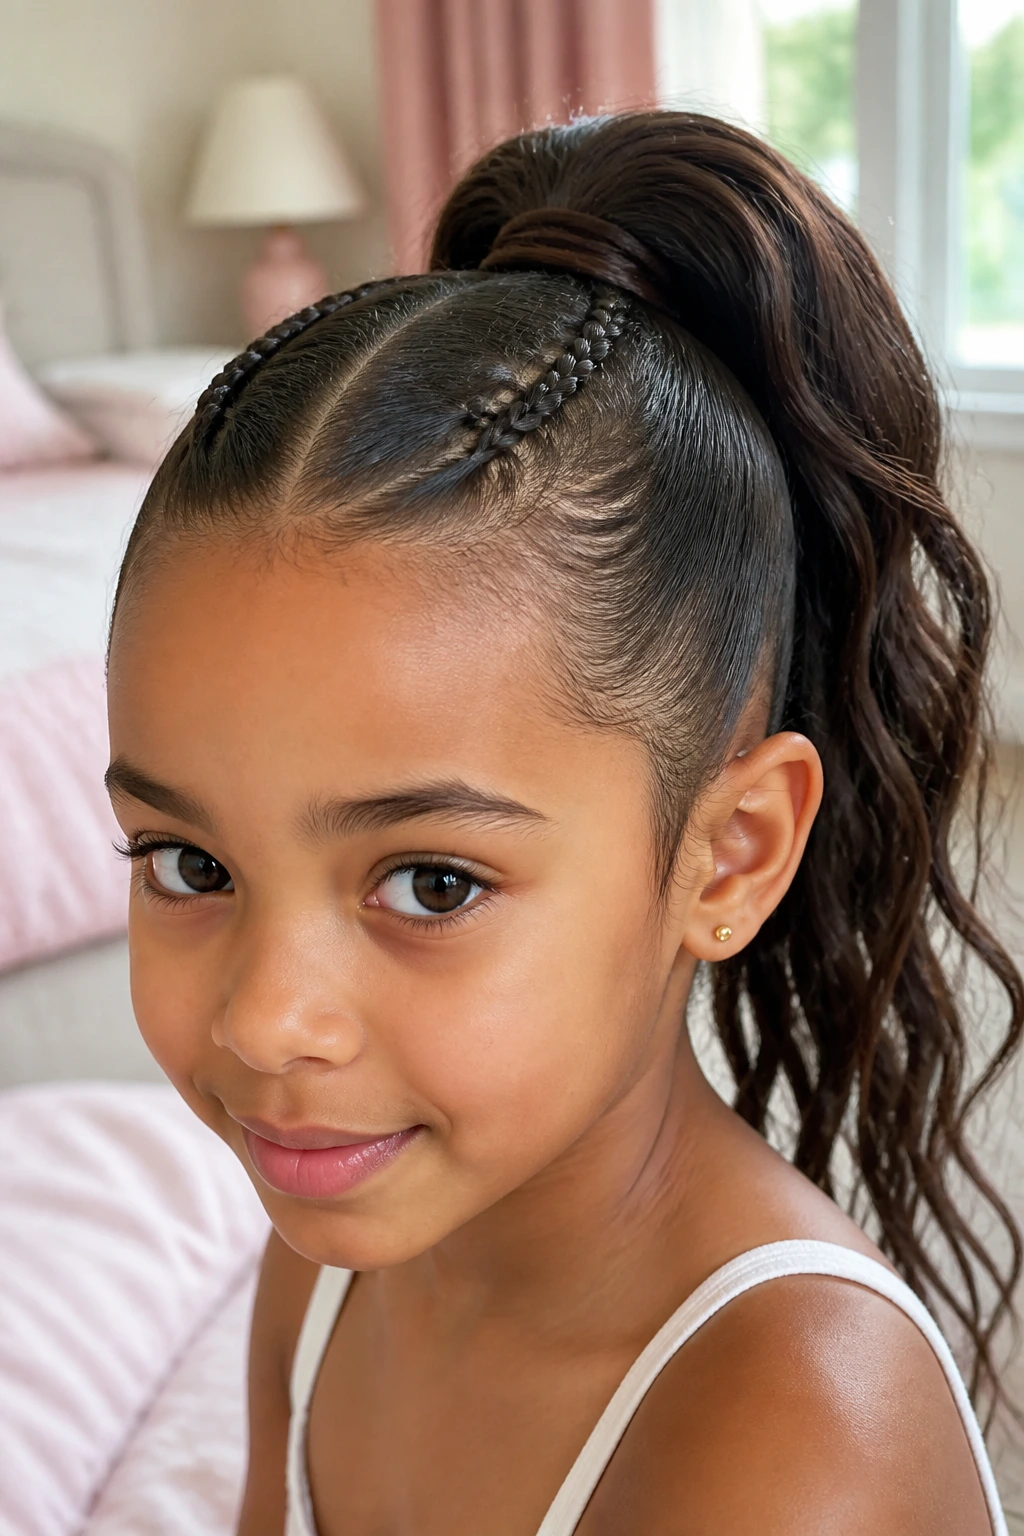
Sometimes the whole head doesn’t need a braid. A pair of small fishtail accents at the temples or above the ears can pull thick hair back into a high ponytail and still give you that woven look at the front where it matters most.
This is the style I like when the child wants her hair up high, off the face, but not plain. The little braids add structure at the hairline and keep the front layers from collapsing into the pony by lunchtime.
How to Keep It Clean
Take two narrow front sections, fishtail each one down a few inches, then join them into a ponytail at the crown. After that, gather the rest of the hair and secure everything together with a strong elastic. A bit of smoothing cream on the front pieces helps them stay sleek before the braid starts.
The beauty of this one is that it doesn’t ask you to braid every single strand. Thick hair can stay full and loose in the pony while the front carries the detail.
10. Mohawk Fishtail Down the Center
This one has a little attitude, and kids usually know it the second they see it. A center strip of hair gets braided from the hairline down the middle of the head, while the sides stay sleek, puffed, or softly brushed back. Thick hair gives the center braid a strong ridge, which is exactly what makes it work.
The shape is bold without being fussy. It keeps the middle section controlled and leaves the side volume where it can do its own thing. If the hair is very thick at the crown, this style helps you focus the weight instead of trying to contain all of it in one giant plait.
You can keep the sides smooth with a little styling cream, or let them stay natural if the texture looks good that way. I’d avoid over-flattening them unless the child wants a more polished finish. Too much product on thick hair makes the scalp look slick in a way that never photographs the way you think it will.
The key here is symmetry. A clean center section and a neat braid path make the style look intentional. A crooked center line turns the whole thing into a wrestling match.
11. Waterfall Fishtail for Dress-Up Days
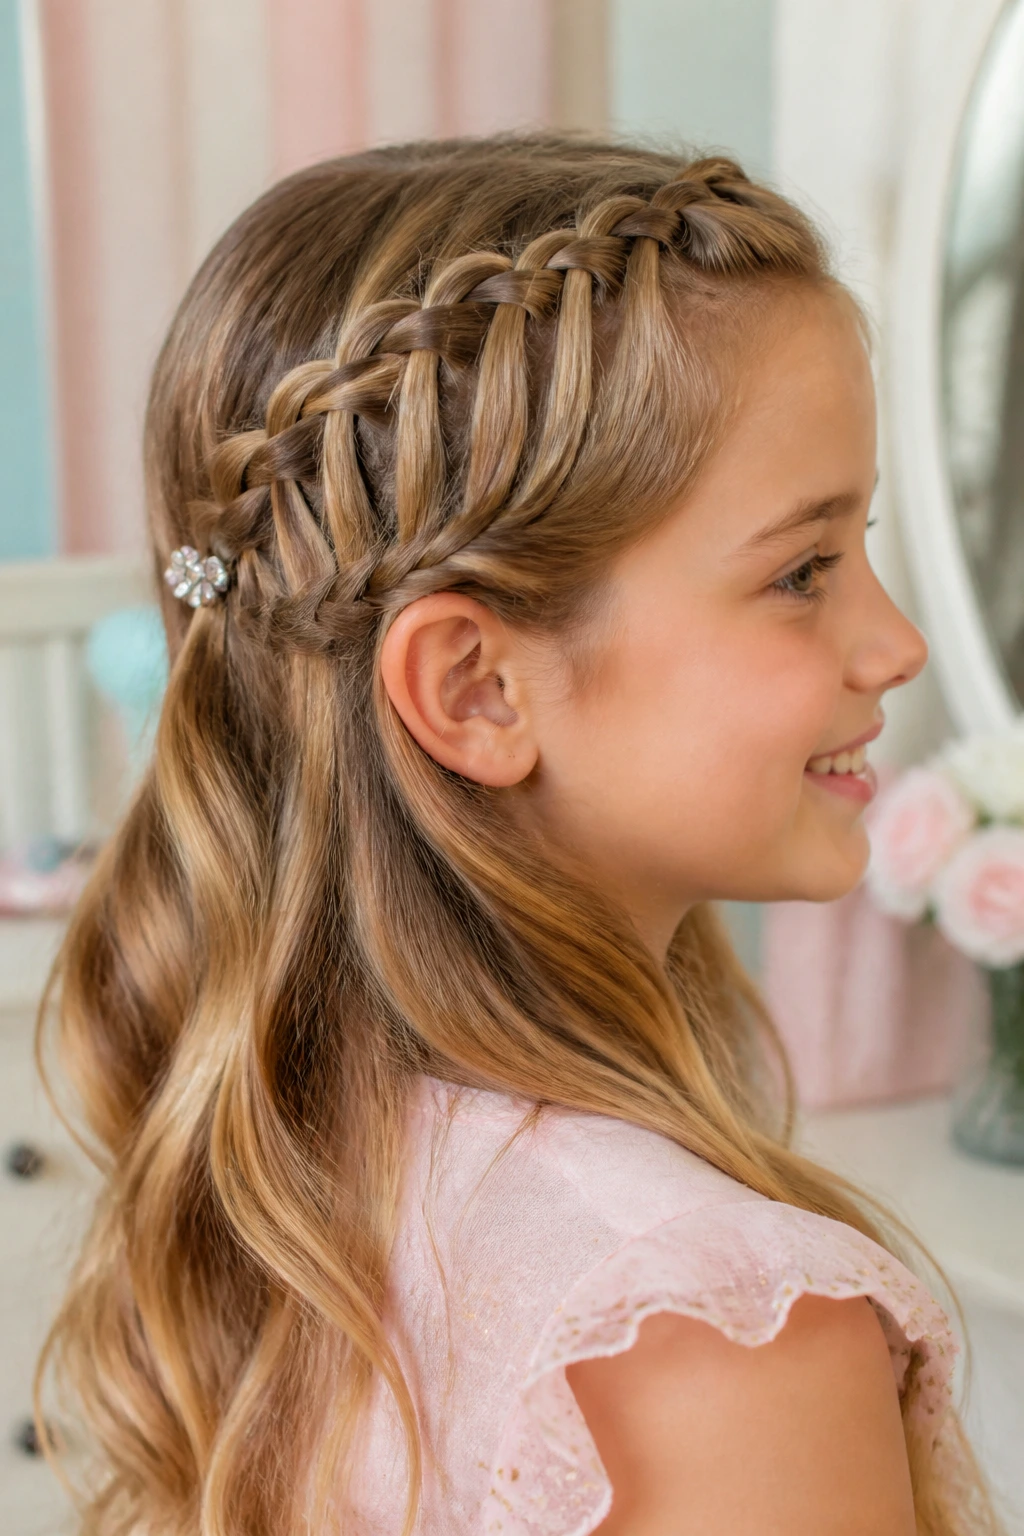
Why does this style feel softer than a full braid? Because it lets pieces drop through instead of trapping every strand into one rope. The waterfall fishtail keeps some hair flowing while the braid itself runs across the head like a ribbon.
That makes it pretty useful for special events, but it does need a steady hand. Thick hair can swallow the detail if the dropped pieces are too large, so the sections need to be small and even. If the pieces are chunky, the whole style loses its shape and starts looking like the braid gave up halfway through.
What Makes It Hold
Use a small top section, take tiny drops, and pin the braid securely behind the ear or toward the back. A little texture spray helps if the hair is freshly washed and too smooth. If the child has very thick layers, keep the drop pieces narrow so the braid doesn’t collapse under its own weight.
This is one of those styles that looks delicate but isn’t fragile if you build it right. A careful braid path and a few smart pins make the difference.
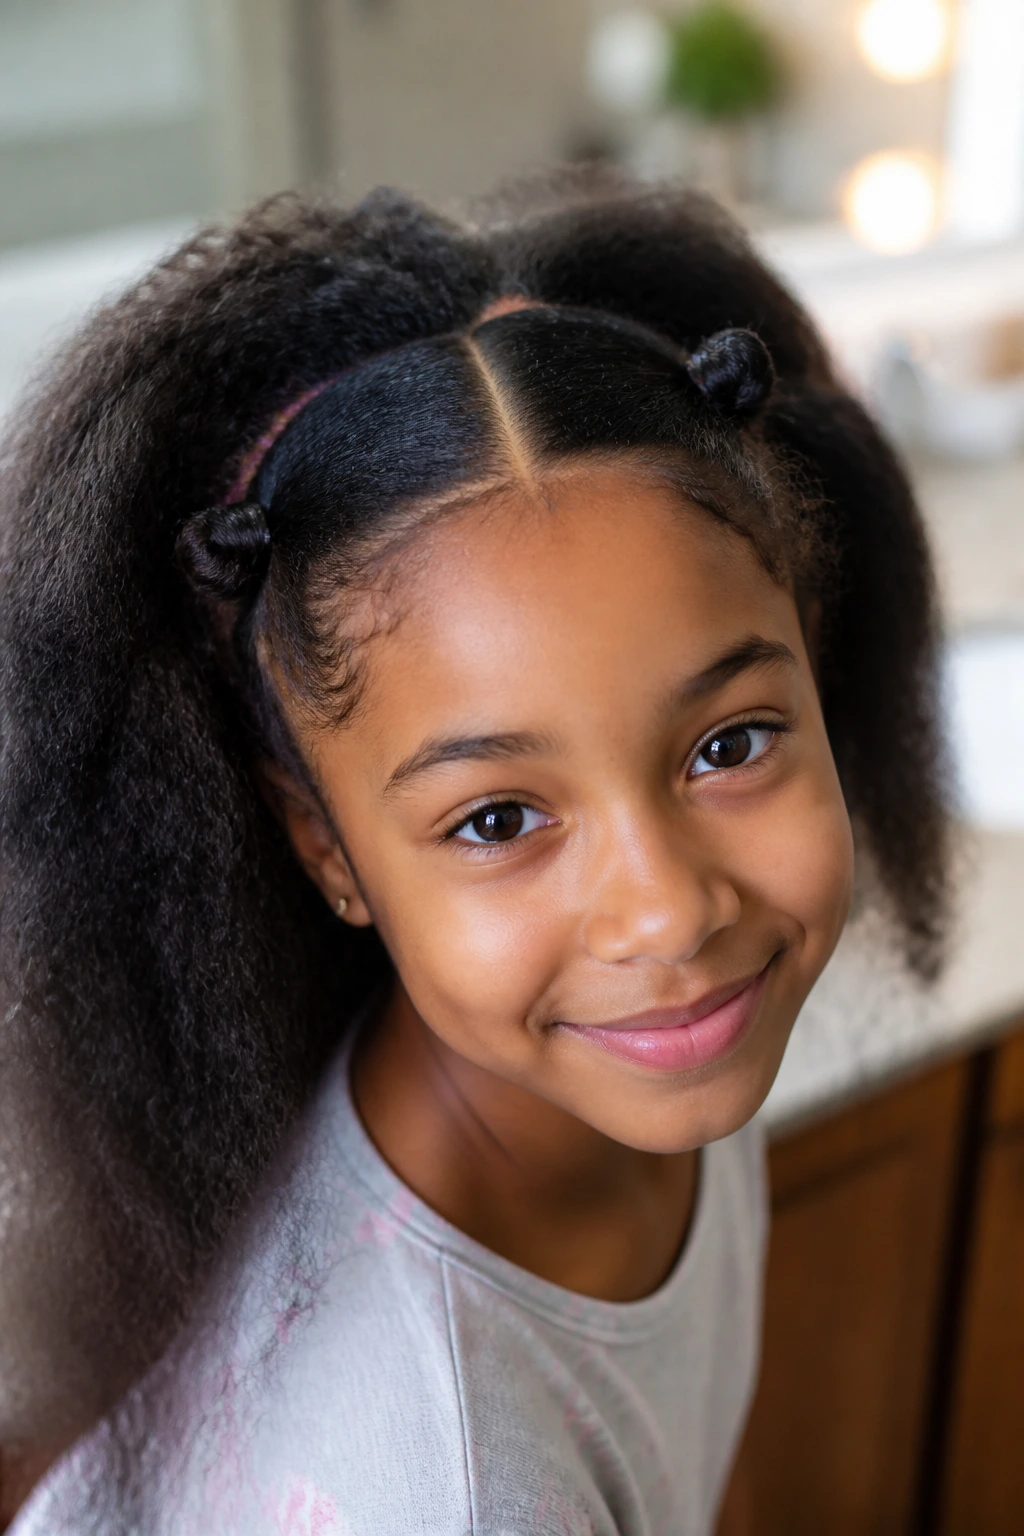
12. Space Buns with Fishtail Ends

There’s a playful side to fishtails, and space buns are proof. Split the hair into two high sections, braid each one into a fishtail, and either wrap the braid into a bun or leave the ends peeking out for a little extra texture. Thick hair gives the buns more shape, which is useful when you don’t want them to look flat from the side.
This style is a lifesaver on days when the hair needs to stay off the neck but the kid still wants something fun. It keeps the weight distributed, and the symmetry helps thick hair look organized instead of massive.
I like to braid the ponytail first, then twist the braid into the bun, because it gives the bun a built-in grain. That little twist texture matters. It keeps the buns from looking like two smooth knots with no personality.
If the hair is very dense, don’t try to squeeze every strand into one tiny bun. Make the buns a little larger and let the fishtail texture do the showing off.
13. Center-Back Fishtail with a Ribbon Woven In
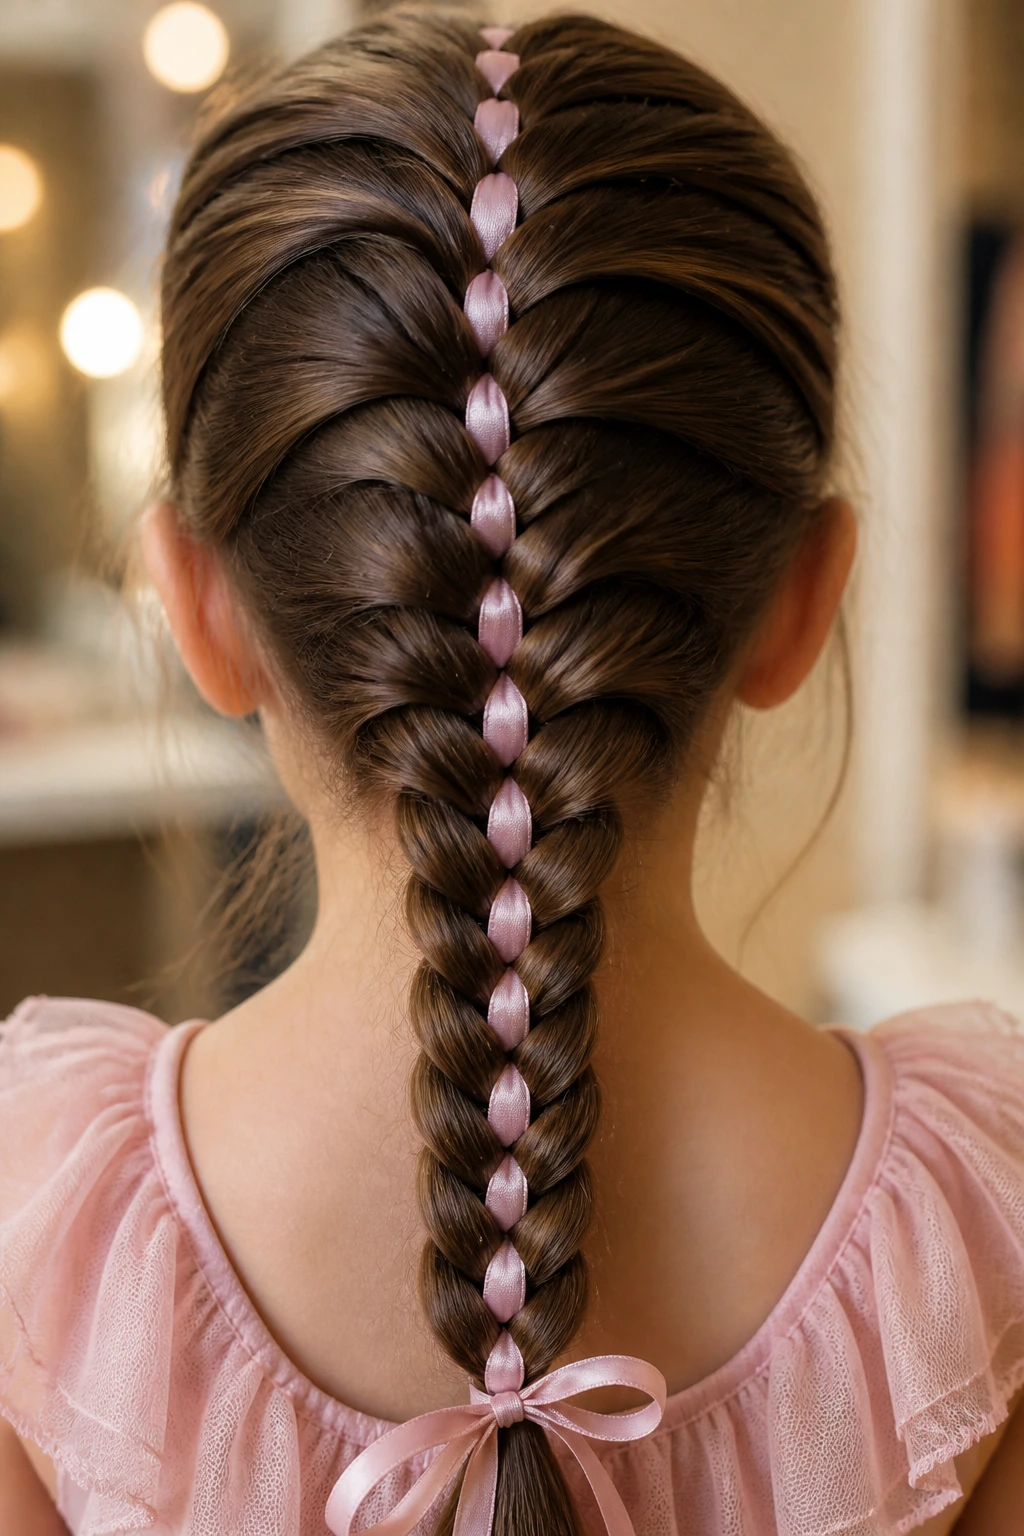
A ribbon can make a fishtail braid look finished in a second, but the wrong ribbon choice turns the whole thing slippery. For thick hair, I prefer a narrow grosgrain ribbon — about ¼ to ⅜ inch wide — because it has enough body to stay visible without sliding around like satin tends to do.
Start the braid at the crown or the mid-back of the head, tuck the ribbon into the first section, and braid it through one side at a time so the color shows in the pattern. The effect is clean and easy to read, even in very dense hair, because the ribbon breaks up the bulk in a nice visual line.
This is the style I’d use for a dressy day, a holiday event, or a photo morning where the child wants “something special” but does not want six glitter clips involved. Been there. Ribbon is easier.
One note: tie off the ribbon securely at the end before securing the elastic. A loose ribbon tail looks charming for about five minutes and then starts slipping out like it has a better place to be.
14. Side-Swept Fishtail into a Low Twist
This braid is all about direction. Instead of running straight down the back, it sweeps from one side and gathers into a low twist or knot near the shoulder blade. Thick hair loves the diagonal because it breaks the visual bulk into a softer line.
Compared with a straight-back braid, the side sweep gives the face a little breathing room. It also makes the braid easier to see from the front, which matters if the child likes to admire her own hair in the mirror every five minutes. Fair enough.
To make it work, part the hair deeply on one side, smooth the top, and fishtail the length over one shoulder. At the end, either tuck the tail into a low twist or leave it hanging if the hair is long enough to show off the full braid.
The shape is useful when you want something pretty but not stiff. It still stays controlled. It just moves a bit more.
15. Loose Weekend Fishtail with Face-Framing Pieces
Not every braid needs to behave like it’s reporting for duty. This one is softer, more relaxed, and a little less exact on purpose. Pull a couple of face-framing pieces free at the temples, braid the rest loosely, and let the outer edges puff just enough to show texture without turning into fuzz.
Thick hair makes this style easier than you might expect because the braid already has enough body to look full. You don’t need to work hard to fake volume. You just need to stop before the braid gets too tight.
I’d use this for weekends, family outings, or any day when the child wants her hair down but still wants it out of the way. The loose pieces at the front keep it from feeling severe, especially if the braid sits low and over one shoulder.
A good trick is to flatten only the top of the braid a little after it’s secured. Leave the center firm. Leave the bottom controlled. That keeps the style soft without making it look undone.
16. Sporty Fishtail Pony for Active Days
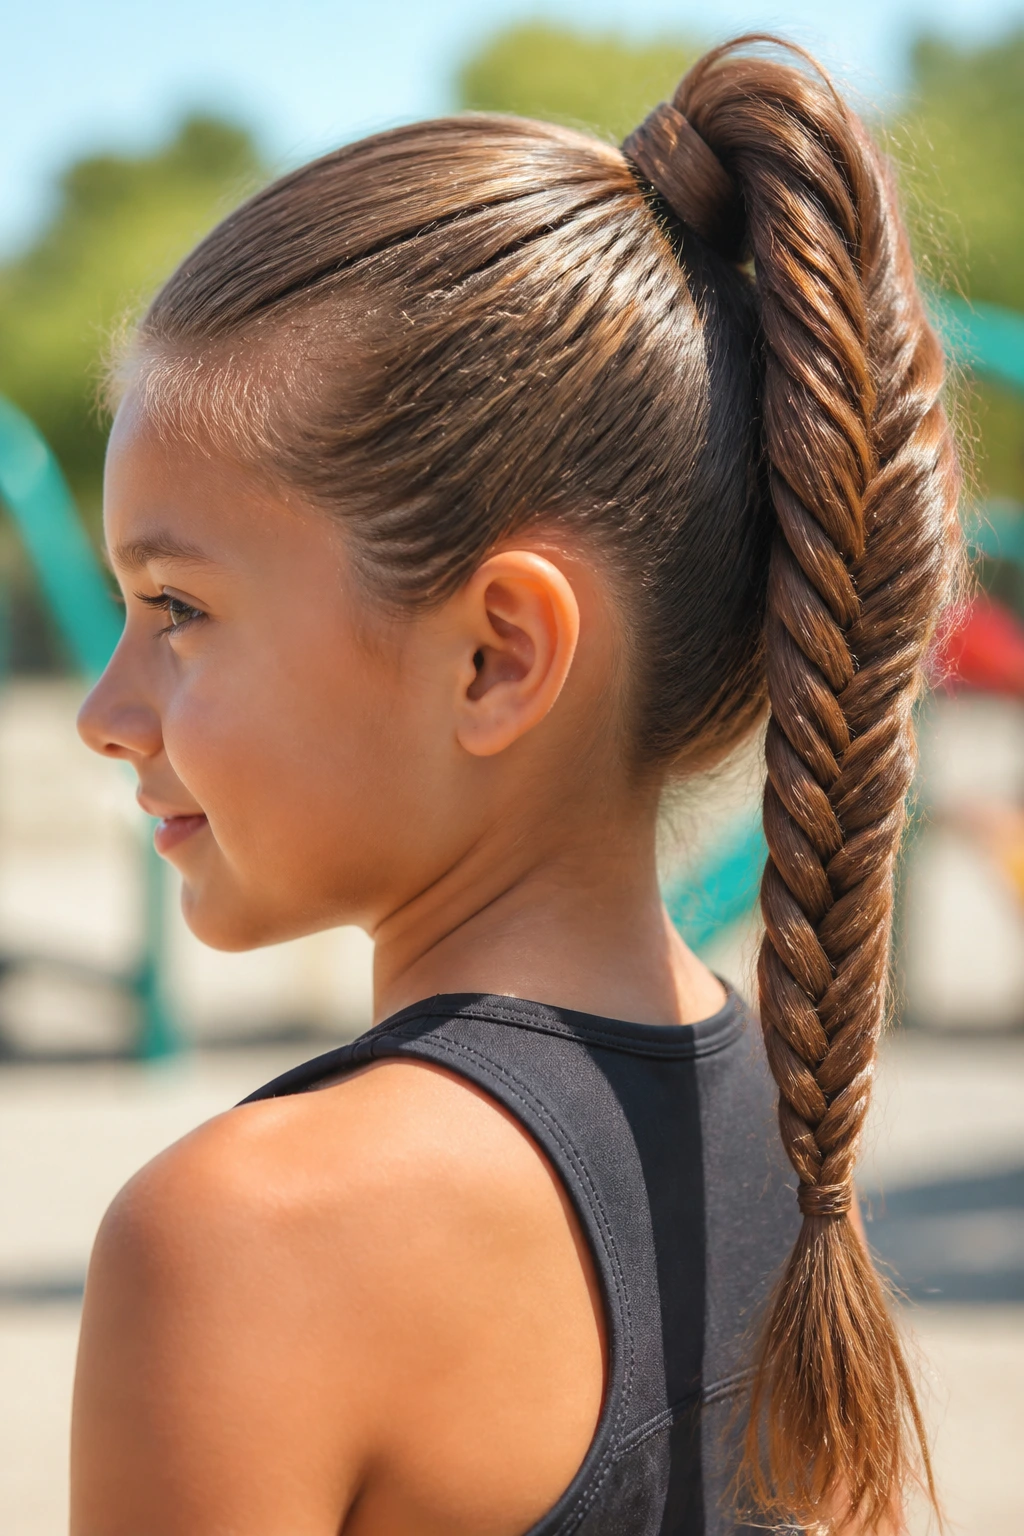
If the day includes running, climbing, or a backpack that gets yanked on every ten minutes, the sporty fishtail pony is the one I’d trust first. It starts with a high or mid ponytail, which keeps the hair off the neck, and then the tail gets braided into a fishtail so the length doesn’t unravel into a tangle.
Unlike a loose braid, this style begins with a secure anchor at the crown. That matters on thick hair because the weight of the length can drag a weak ponytail down by lunchtime. A second elastic under the first one helps if the hair is especially heavy.
This is not the braid I’d make ultra-soft. A little firmness is the point. Still, don’t yank the hairline tight enough to leave a headache. You want secure, not angry.
If the child is the kind who touches her hair all day, a sporty fishtail pony is one of the few styles that usually survives the habit without falling apart completely.
17. Beaded Fishtail with a Clean End Finish

A few beads at the end of a fishtail can make thick hair look finished in a way that feels playful instead of precious. The trick is restraint. One or two small beads per tail is plenty. Too many and the end starts swinging around like a craft project.
I like this on a dry braid, never a damp one. Wet hair plus beads equals slip, and slip means you’ll be redoing the whole thing while someone asks where their socks went. Keep the braid secure first, then thread the bead or use a snap-on braid cuff if the child doesn’t like tiny loose parts.
Thick hair supports the weight of the beads better than fine hair does. That’s part of the appeal. The braid stays sturdy, and the accessory doesn’t look like it’s dragging the style down.
This one works nicely for birthdays, themed dress-up days, or any moment when the child wants her hair to feel a little different without changing the whole shape.
18. Two-Lane Fishtail Combo with a Middle Part
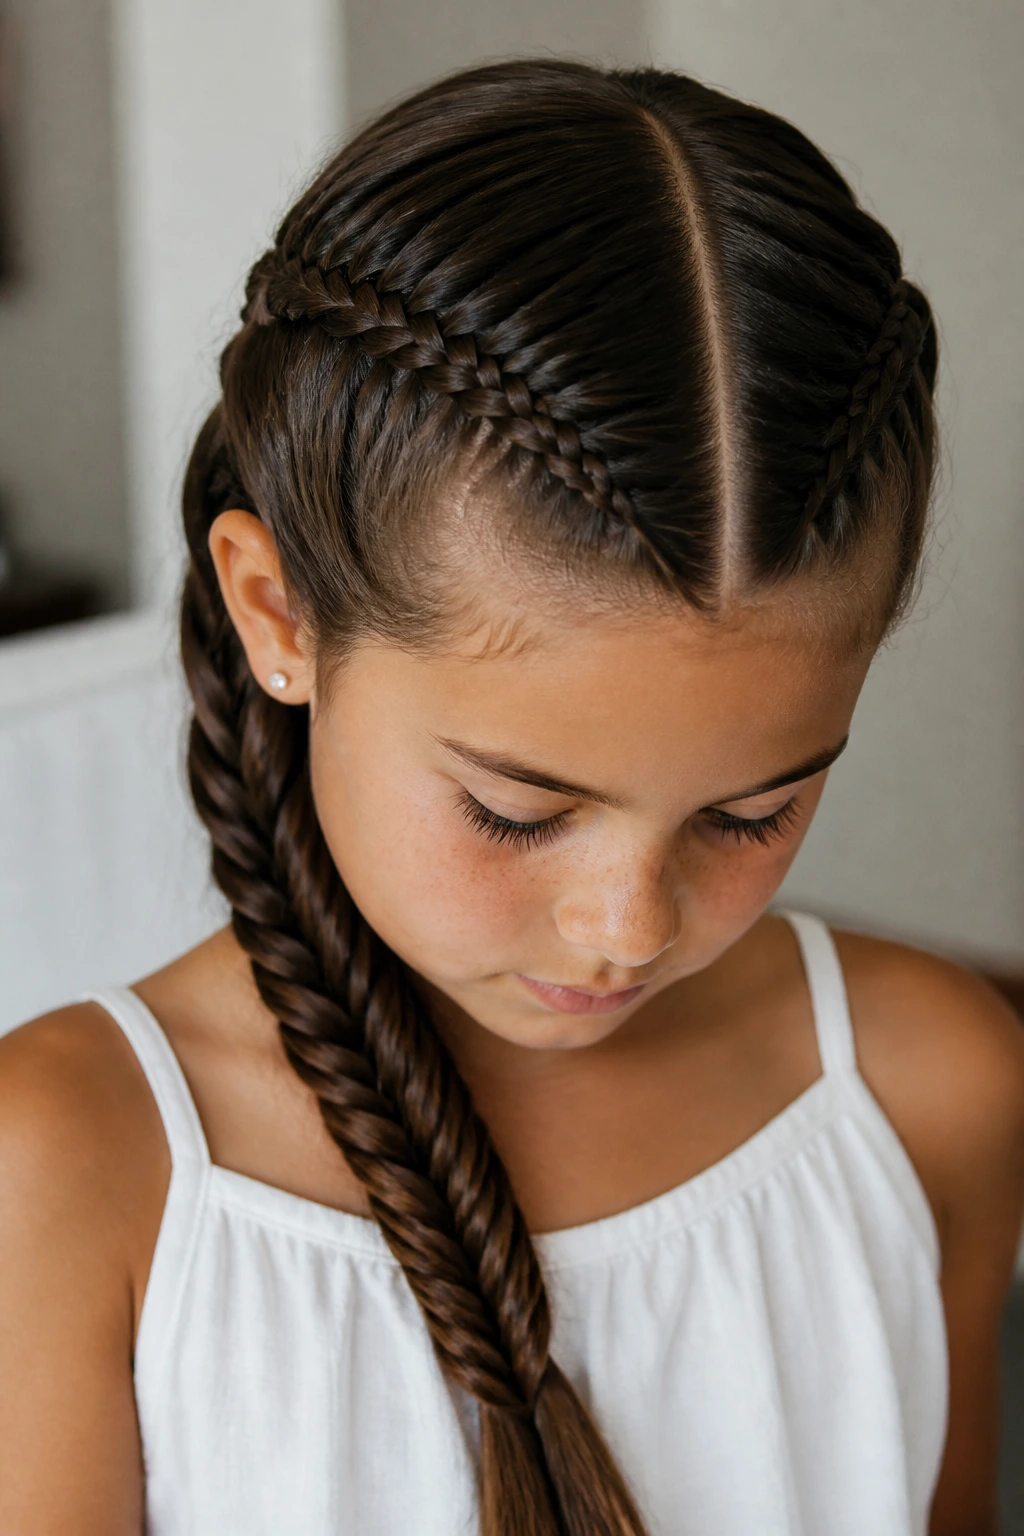
This style uses a middle part, but instead of stopping there, each side gets its own narrow fishtail before the sections are brought together into one low braid or twist. It spreads out the thickness and keeps the crown from feeling like one giant block of hair.
I like it because it solves the problem of very thick hair at the root without making the whole style heavy. The two lanes create movement and give the braid a cleaner shape from the front. It’s a nice compromise when one braid feels too much and two full braids feel too busy.
Use a neat center part, braid each side just enough to control the front sections, then merge them low at the back. Secure everything with a clear elastic and smooth the join with your fingers so it doesn’t feel bulky under the braid.
This is a quiet style, but not a boring one. It’s the sort of braid that works when you want the hair to behave and still look like someone spent time on it.
Braiding Tricks That Save Time and Nerves
Grip Boost: If thick hair keeps slipping, rub a tiny bit of braid cream or a wax stick only on the first few inches of the section you’re holding. It gives your fingers something to catch without making the braid greasy.
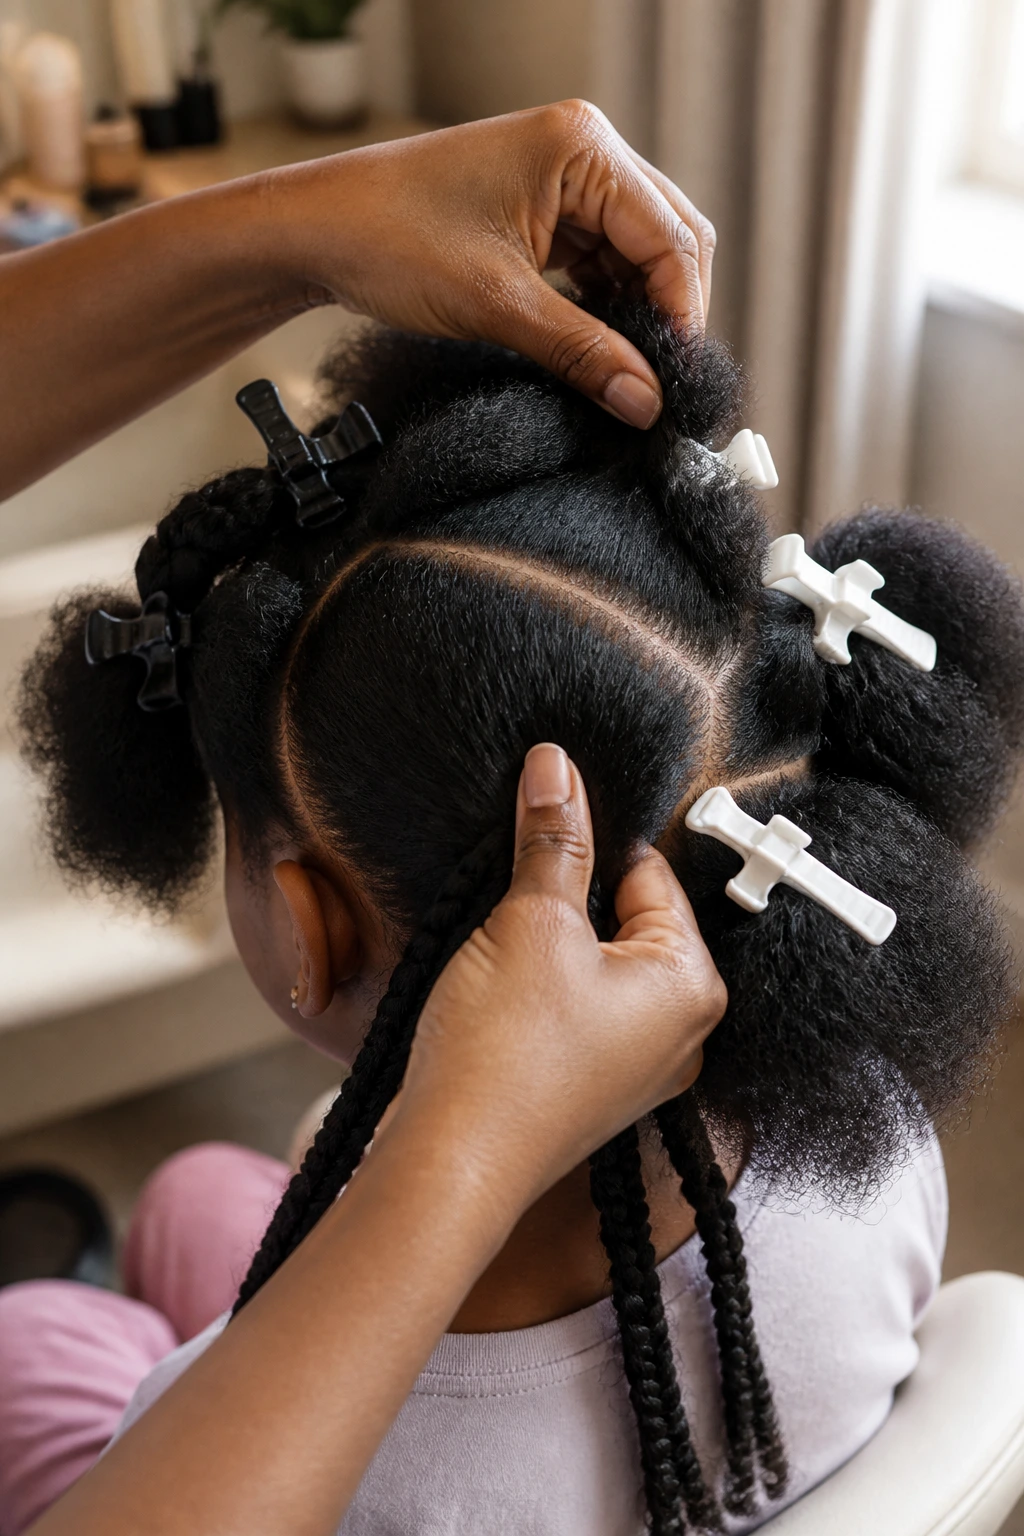
Time-Saver: Pre-section the hair with clips before you start braiding. Thick hair likes to slide back into the wrong pile the second you turn your head, and a few extra clips save a lot of backtracking.
Soft Finish: If you want the braid to look fuller, loosen only the outer loops after you secure the end. Pulling every side of the braid is how you end up with a frizzy puff instead of a shaped plait.
Kid Comfort: Let the child choose the accessory — ribbon, bow, bead, or plain elastic. When they like the finishing piece, they sit still longer. Strange but true.
Pro Move: Braids look cleaner on thick hair when the sectioning is done first and the smoothing is done second. If you try to smooth as you braid, the loose hair keeps escaping between your fingers.
Mistakes That Make Thick Hair Fight Back
- Starting on tangled hair: The braid gets lumpy, the sections keep catching, and the child starts wincing. Detangle first with a brush or wide-tooth comb, then braid.
- Taking sections that are too big: On thick hair, giant sections make the fishtail pattern disappear. Use smaller grabs at the start, then widen them a little once the braid is established.
- Pulling the hairline too tight: The braid may look neat for an hour, but by lunch it’s a headache waiting to happen. Keep one finger’s worth of looseness at the scalp.
- Using too much product near the roots: Slick roots make strands slide out while you work. Put cream or oil on the mids and ends, not across the part line.
- Braiding wet hair all the way through: It can stay damp in the middle for ages, especially in a dense style. If you must braid damp hair, keep it only slightly misted and let it dry partially before bedtime.
- Skipping the final anchor: Thick hair can pull a small elastic loose fast. Double up the end with a second elastic or a pin if the style is heavy.
Small Tweaks That Make the Look Better
Flavor Enhancement: A little shine mist on the finished braid can calm the outer fuzz on thick hair, but keep it light. Too much and the style starts looking wet instead of polished.
Customization: Add a ribbon, one braid cuff, or two matching bows near the ends. Kids usually care less about symmetry than adults do, but one balanced accessory gives the style a finished feel.
Serving Suggestions: Pair half-up styles with headbands, side braids with a low clip behind the ear, and ponytail braids with a wrapped elastic so the base looks intentional. The little details matter more than people think.
Make-It-Yours: For curly thick hair, keep the braid looser and preserve more of the curl pattern at the ends. For straighter hair, a touch more product at the crown helps the braid hold its shape longer.
How to Wear Them All Day Without Fussing

Presentation: Clean parts and smooth hairlines make thick-hair fishtails look deliberate fast. If the braid itself is textured, let the braid be textured; don’t fight every flyaway into submission.
Accompaniments: Ribbons, snap clips, small bows, braid cuffs, and even a plain satin scrunchie can change the feel of the style without adding weight. Thick hair usually handles accessories better than fine hair, so you can get a little playful here.
Portions: One full fishtail works well when the hair is long and dense. Two smaller braids are smarter when the hair is so heavy that one braid becomes a lump at the back. Half-up versions are the easiest way to keep length while reducing neck bulk.
Beverage Pairing: A spill-proof water bottle is the only real pairing I care about. Open cups and syrupy drinks near a fresh part line are an invitation to start over, and nobody wants that before the school bell.
Picking the Brush, Elastics, and Styling Products
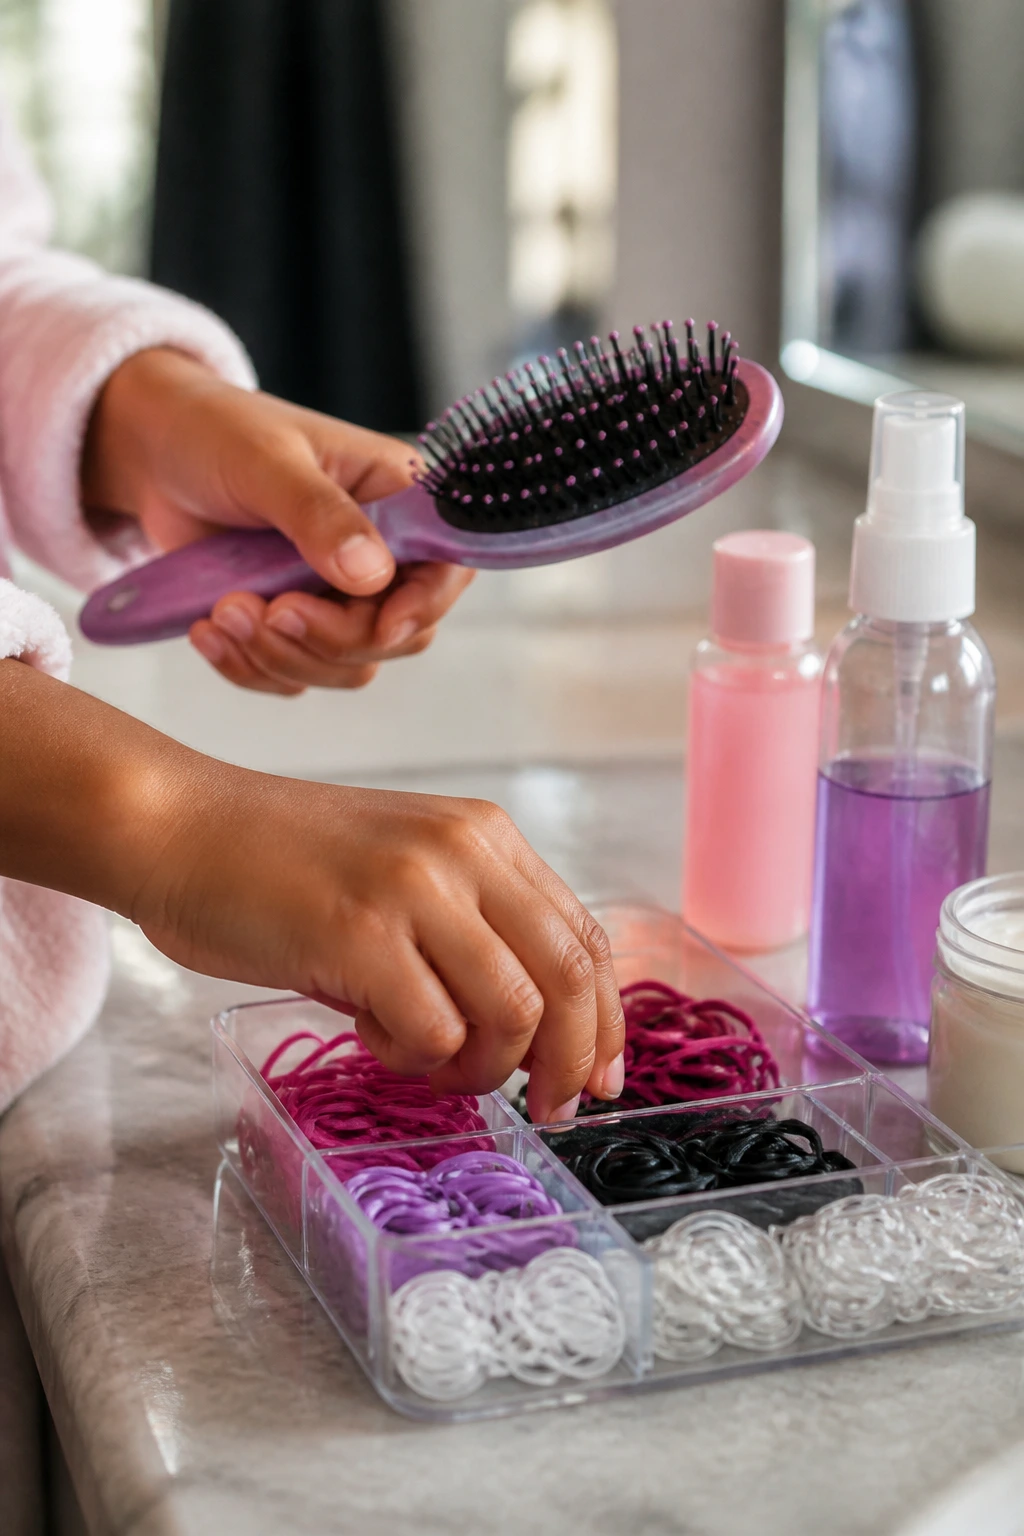
The cheapest tool in the drawer can be the most expensive mistake if it pulls hair or snaps mid-braid. For thick hair, I’d spend first on a decent detangling brush and snag-free elastics, then worry about the extras.
A rat-tail comb matters because the part line is half the braid. Thick hair hides sloppy sectioning for about thirty seconds and then makes the mistake obvious. A clean part keeps the style looking calm. A bendy or dull comb doesn’t.
For product, the goal is control, not stiffness. A light leave-in conditioner, braid cream, or soft styling gel can help the hair slide through your fingers. Avoid heavy oils at the roots unless the hair is extremely dry. Oil on thick hair can feel nice and still ruin your grip.
If you want a smoother finish, a wax stick or edge brush is worth having, but use it sparingly. You are not shellacking the scalp. You’re calming the flyaways near the part and the hairline.
Satin or silk accessories are a nice bonus, especially for kids who hate friction. They keep the braid from getting rough overnight and reduce the fuzzy look by morning.
Keeping the Style Fresh Overnight and Between Washes
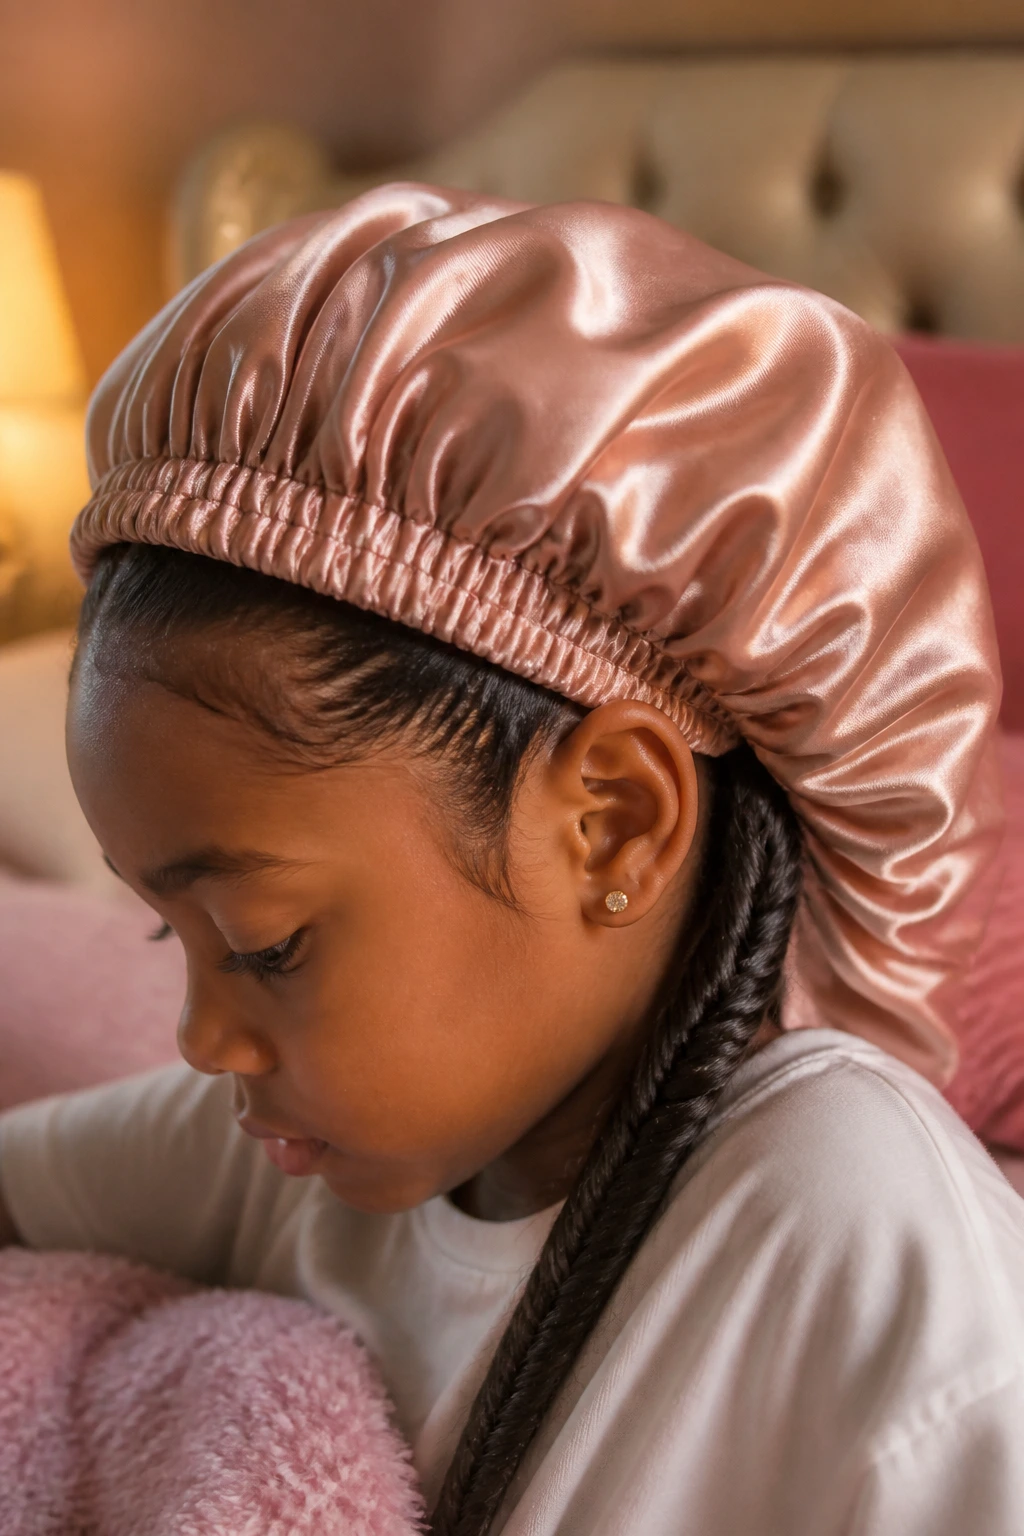
Most fishtails look best on day one, but thick hair can stretch a style farther than people expect if you protect it right. At bedtime, the first job is to keep the braid from getting crushed flat under a pillow.
A satin bonnet or scarf works well for a single braid or a wrapped ponytail. For pigtails or buns, a satin pillowcase is often enough. If the style sits low, you may want to pin the loose end under itself so it doesn’t rub at the collar.
In the morning, a light mist of water on your fingertips can tame the top layer. Don’t spray the whole braid unless you want the ends to swell up. If the crown has puffed, smooth only the first inch or two and leave the rest alone.
A fishtail in thick hair usually lasts 1 to 3 days if the child sleeps carefully. After that, the scalp parts start loosening, and the braid shifts. That’s the point where a refresh or full re-braid makes more sense than trying to rescue every section.
If the hair has product buildup or the roots feel coated, wash it out. A style that’s carrying too much cream becomes limp and catches lint, which is not the look anybody asked for.
Questions Parents Ask About Fishtail Braids

Is a fishtail braid harder than a French braid on thick hair?
Sometimes, yes, because the finger work is more precise. But thick hair also gives you something to hold on to, so once the sections are organized, the braid pattern is easier to read and fix if you lose your place.
Can you do fishtail braids on curly thick hair?
Absolutely. Keep the braid looser and decide whether you want to preserve the curl texture or stretch it out first. If you braid curly hair dry, the finished look stays fuller and more textured.
How do I keep the braid from puffing up by lunch?
Start with clean sectioning, use a little product at the mids and ends, and don’t pancake the braid until the very end. Puff happens when the braid is built loosely from the start and then handled too much afterward.
What if my child won’t sit still long enough?
Use a wrapped ponytail, a pull-through version, or twin fishtail pigtails. Those styles are faster to anchor and easier to finish in sections, which matters when the sitting time is measured in snacks and sighs.
Can I braid thick hair when it’s wet?
You can, but I wouldn’t soak it. Slightly damp hair is fine if you’re doing a style meant to set overnight, yet thick hair holds moisture longer than people expect. That can leave the middle of the braid damp by morning.
How tight should the braid be at the scalp?
Tighter than loose enough to fall apart, but never so tight that the skin looks pulled or shiny. If you can slide a fingertip under the braid line without fighting it, you’re usually in the safe zone.
What if the fishtail looks lopsided halfway down?
Stop and correct the section sizes before you finish the length. Thick hair makes uneven grabs easier to hide, which is useful — but it also means the braid can drift without you noticing until the ends are already secured.
Do I need special beads or accessories for these styles?
No. A clean elastic and a smooth part will do the job. Accessories are there to change the mood of the braid, not to rescue a bad braid.
Braids That Hold Their Shape

Thick hair gives a fishtail braid something most braids would kill for: body. The trick is deciding where that body should sit. At the crown, at the nape, down one shoulder, or broken into two smaller braids that feel lighter on the head.
Pick the version that matches the day, not the fantasy version of the day. Some mornings need a halo. Some need a ponytail that won’t slide out of a sweatshirt hood. Some need a braid that looks special without taking twenty-five minutes and a silent prayer.
Once you get the sectioning right, these styles become repeatable in the best way. Not identical. Repeatable. That’s the sweet spot. Thick hair can look polished, fun, and controlled without turning into a battle, and after you’ve done a few of these, you’ll know which braid belongs to which kind of morning.