Low bun braids for kids with wavy hair solve a very ordinary headache: the style has to survive a school chair, a car seat, a hoodie, and a kid who goes from still to feral in about twelve seconds. Wavy hair gives you grip, but it also likes to kick out little frizz sprigs the moment the air dries it out. A bun sitting at the nape keeps that texture contained where it belongs.
The nicest part is that you do not have to fight the wave pattern into a smooth, shiny helmet. That usually backfires. A little bend in the hair helps the braid hold, and the braid helps the bun keep its shape, which means you can keep the hairline soft and still finish with something that looks tidy from every angle.
I keep coming back to low braided buns for kids because they sit in a sweet spot between fussy and forgettable. They can look polished enough for a family photo, but they can also be loose enough to survive recess without turning into a puffed-up mess. Some are five-minute styles. Some need a steadier hand. All of them make sense on wavy hair, which is already doing half the work for you.
Why These Braided Buns Earn Their Place in the Rotation
Wave-friendly grip: Wavy strands hold onto braid sections better than slippery straight hair, so you can get shape without loading the roots with product.
Low tension: A bun at the nape keeps pressure off the hairline and ears, which matters when a child wears a style for hours.
Frizz gets tucked away: The ends that usually puff out first get folded into the bun instead of floating loose by lunchtime.
Flexible for different lengths: Layers, shoulder-length cuts, and thicker waves all behave better when the style stays low and anchored.
Easy to refresh: A quick mist of water, a smooth pass with the palms, and one extra pin usually bring the whole style back.
Photo-ready without being stiff: The braid pattern gives enough detail that the hair still looks intentional, even if the finish is soft and a little airy.
How to Prep Wavy Hair Without Flattening the Shape
Wavy hair is easiest to braid when it is clean enough to separate, but not so slippery that your hands keep sliding off it. That’s the sweet spot. If the hair was washed that morning, let it dry until it’s just barely cool and damp, then mist it lightly if needed. If it’s second-day hair, a little water and a pea-sized dab of leave-in conditioner will usually bring the strands back into line.
Start at the Ends, Not the Crown
Detangle from the bottom up with a wide-tooth comb or a detangling brush. If you attack the top first, you just pack the knots tighter. Hold the mid-lengths in one hand, work through the last few inches, then move up in small sections until the hair feels smooth from ear level down.
Choose a Hold Level, Not a Heavy Coat
Kids with wavy hair usually do better with light hold at the roots and a little more control at the ends. A spray leave-in or light curl cream is enough for most styles here. Heavy gel at the scalp can make the hair look greasy before the day even starts, and it can make the braid feel stiff instead of bendy.
Map the Parts Before You Braid
A rat-tail comb and two clips save time. Make the parting first, clip the sections out of the way, and braid in clean lanes. That small pause matters. It keeps the braid line neat, and it stops you from having to unpick a crooked section after you’ve already finished the bun.
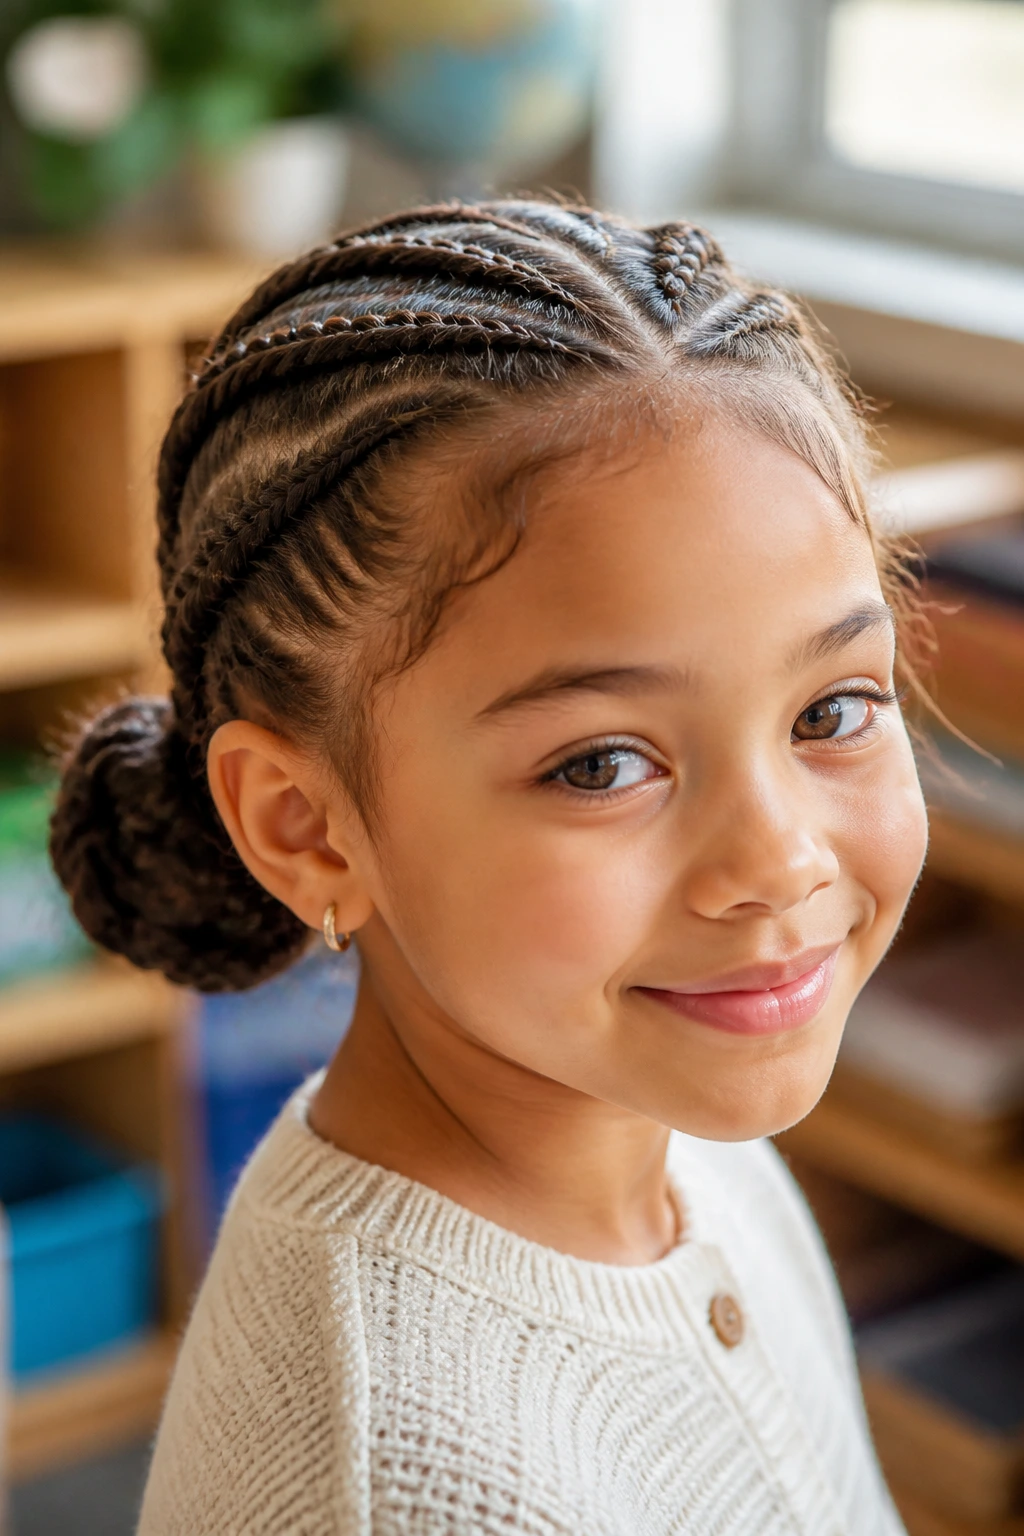
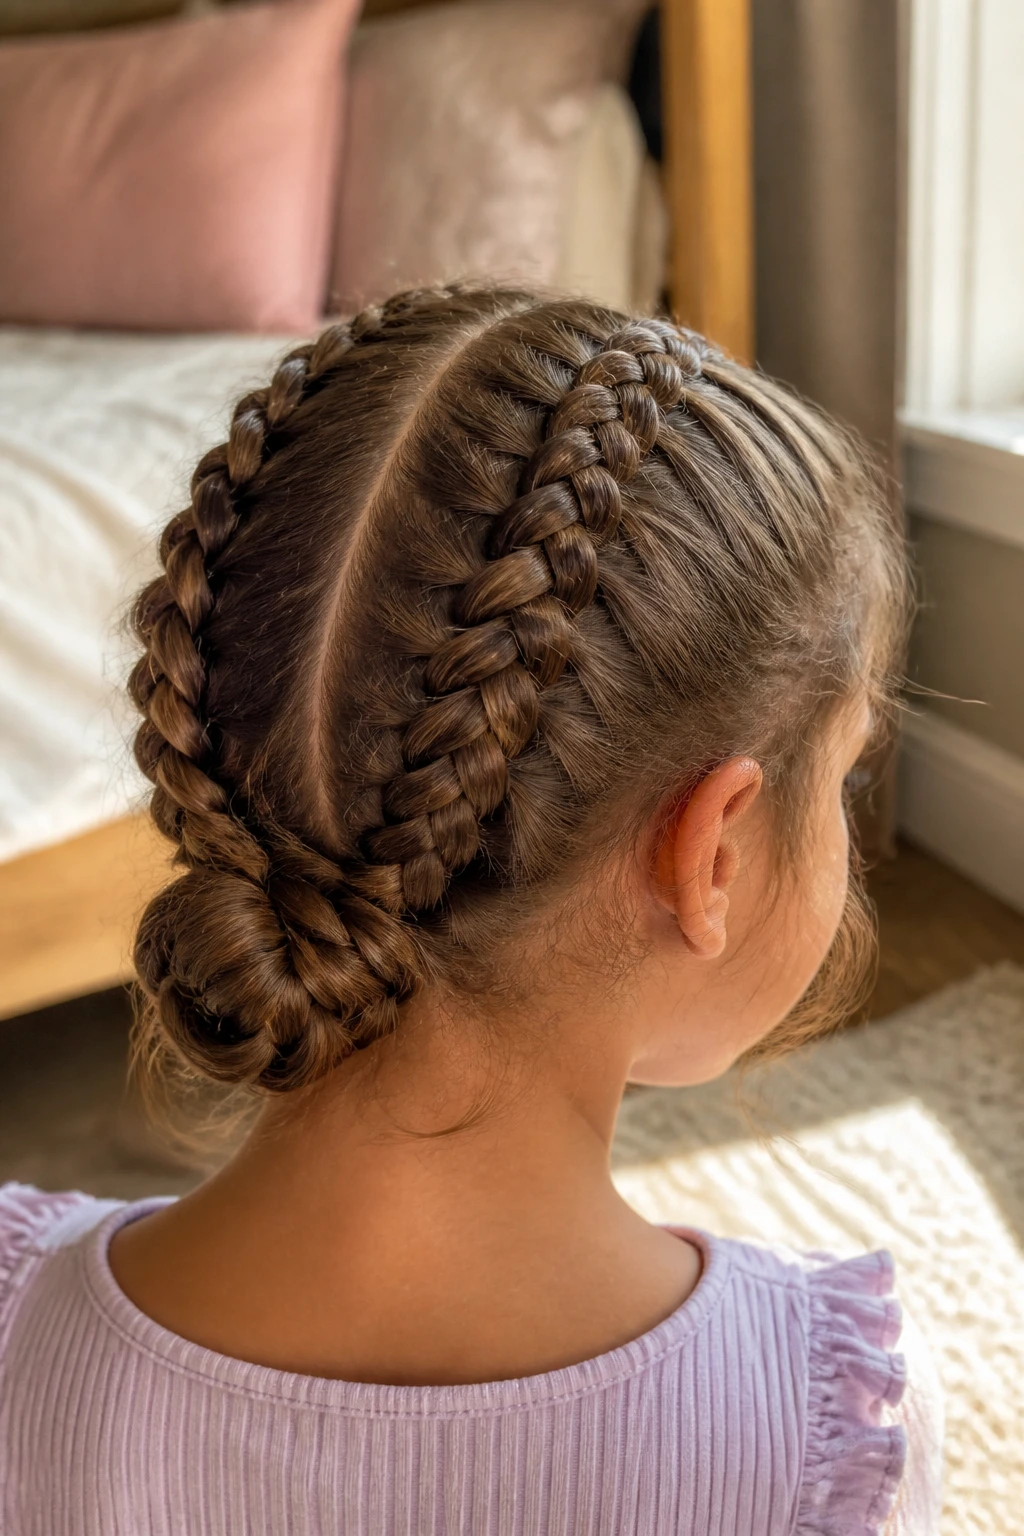
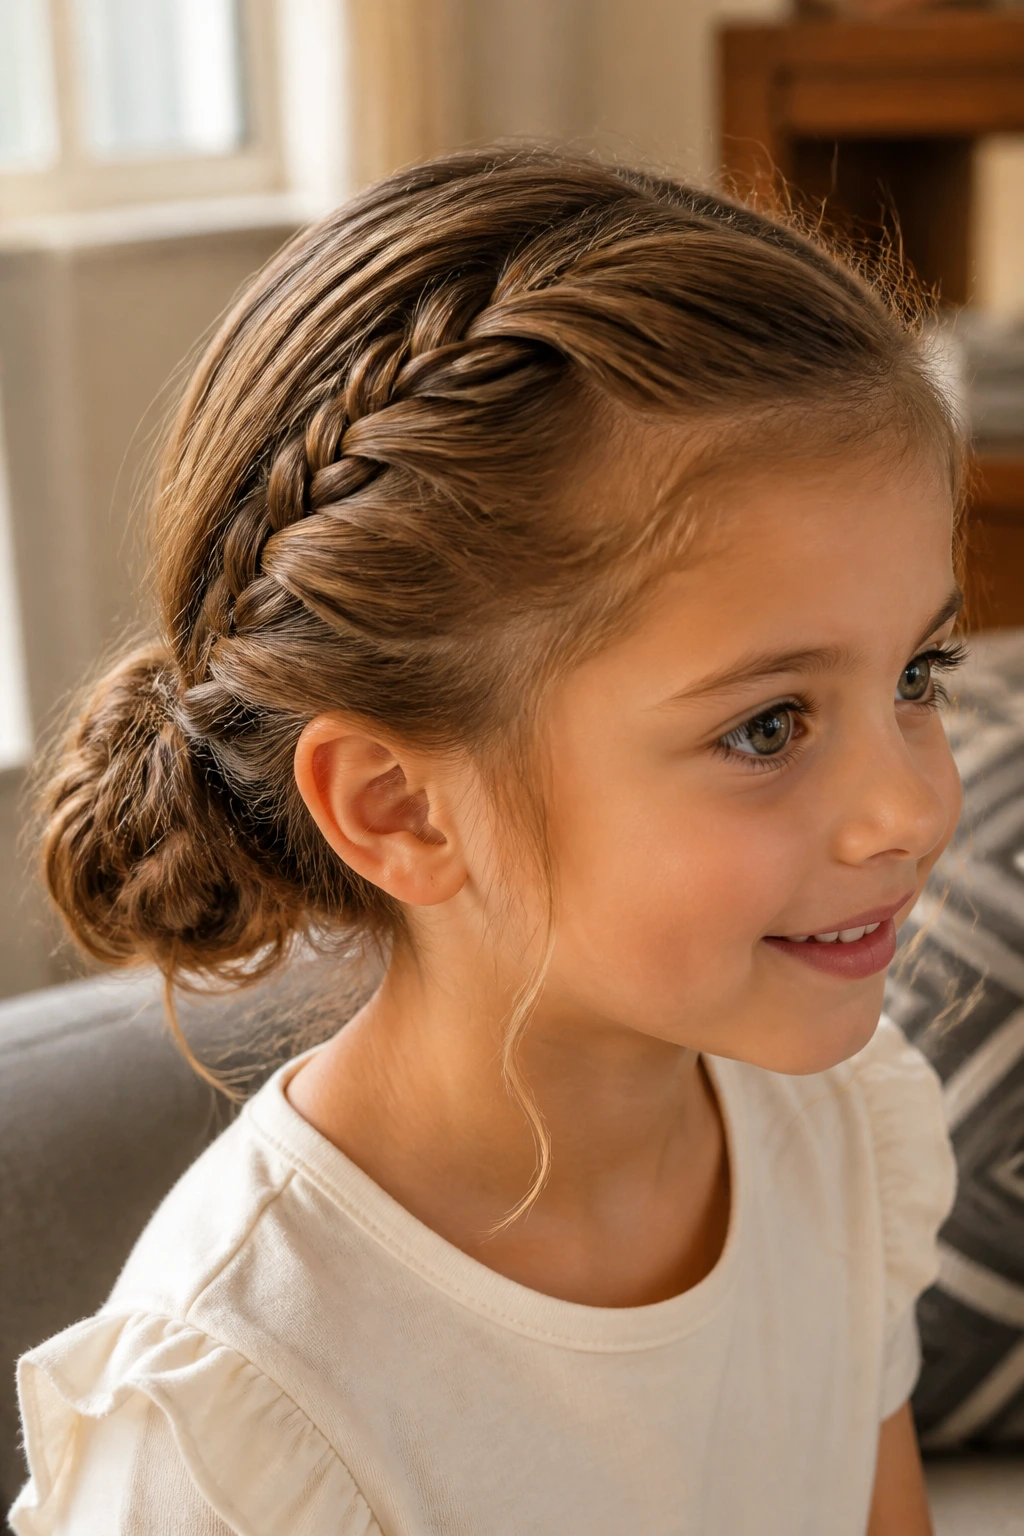
1. Center-Part Dutch Braids into a Low Nape Knot
This is the one I reach for when I want the hair to look tidy without acting stiff. Two Dutch braids run down the scalp, meet at the nape, and disappear into a compact bun that sits flat against the neck. On wavy hair, the braid pattern catches the bend in the strands so the style has body without needing a lot of product.
Why it holds so well: Dutch braids sit on top of the hair instead of sinking into it, which gives the style a little depth and helps the waves show through. That’s useful on kids’ hair because the braid doesn’t need to be pulled tight to look full.
If your child has shorter layers around the face, leave a thin front piece out on each side before you start. Tuck those pieces behind the ears once the bun is pinned. It softens the look and keeps the style from feeling severe, which is the last thing most kids want.
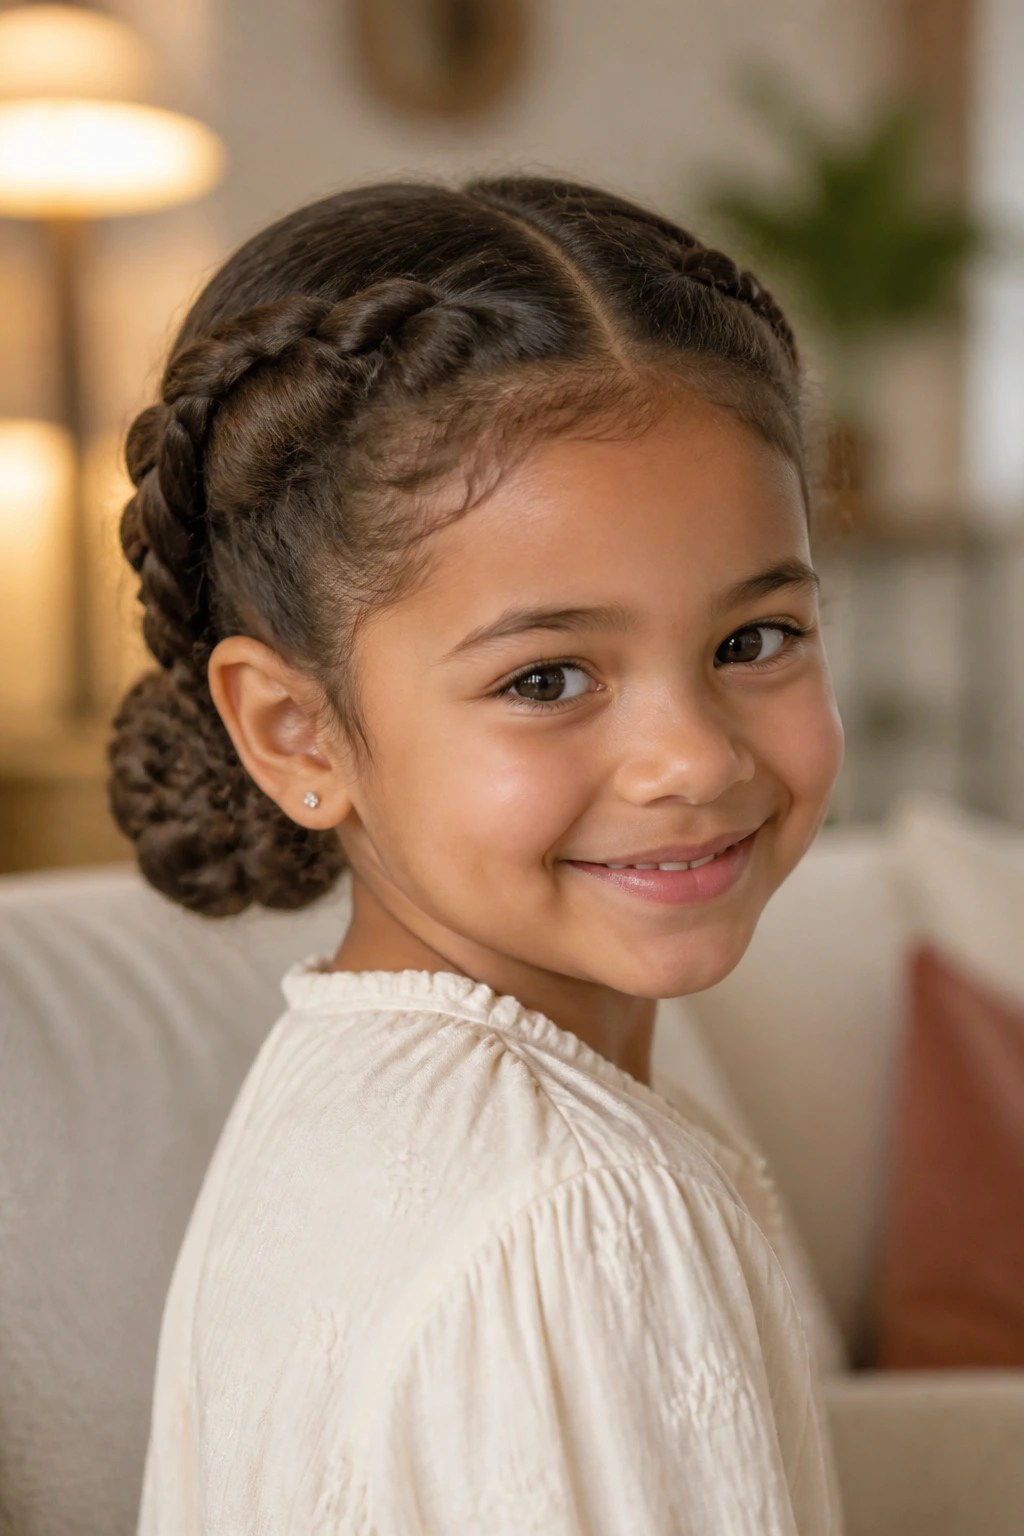
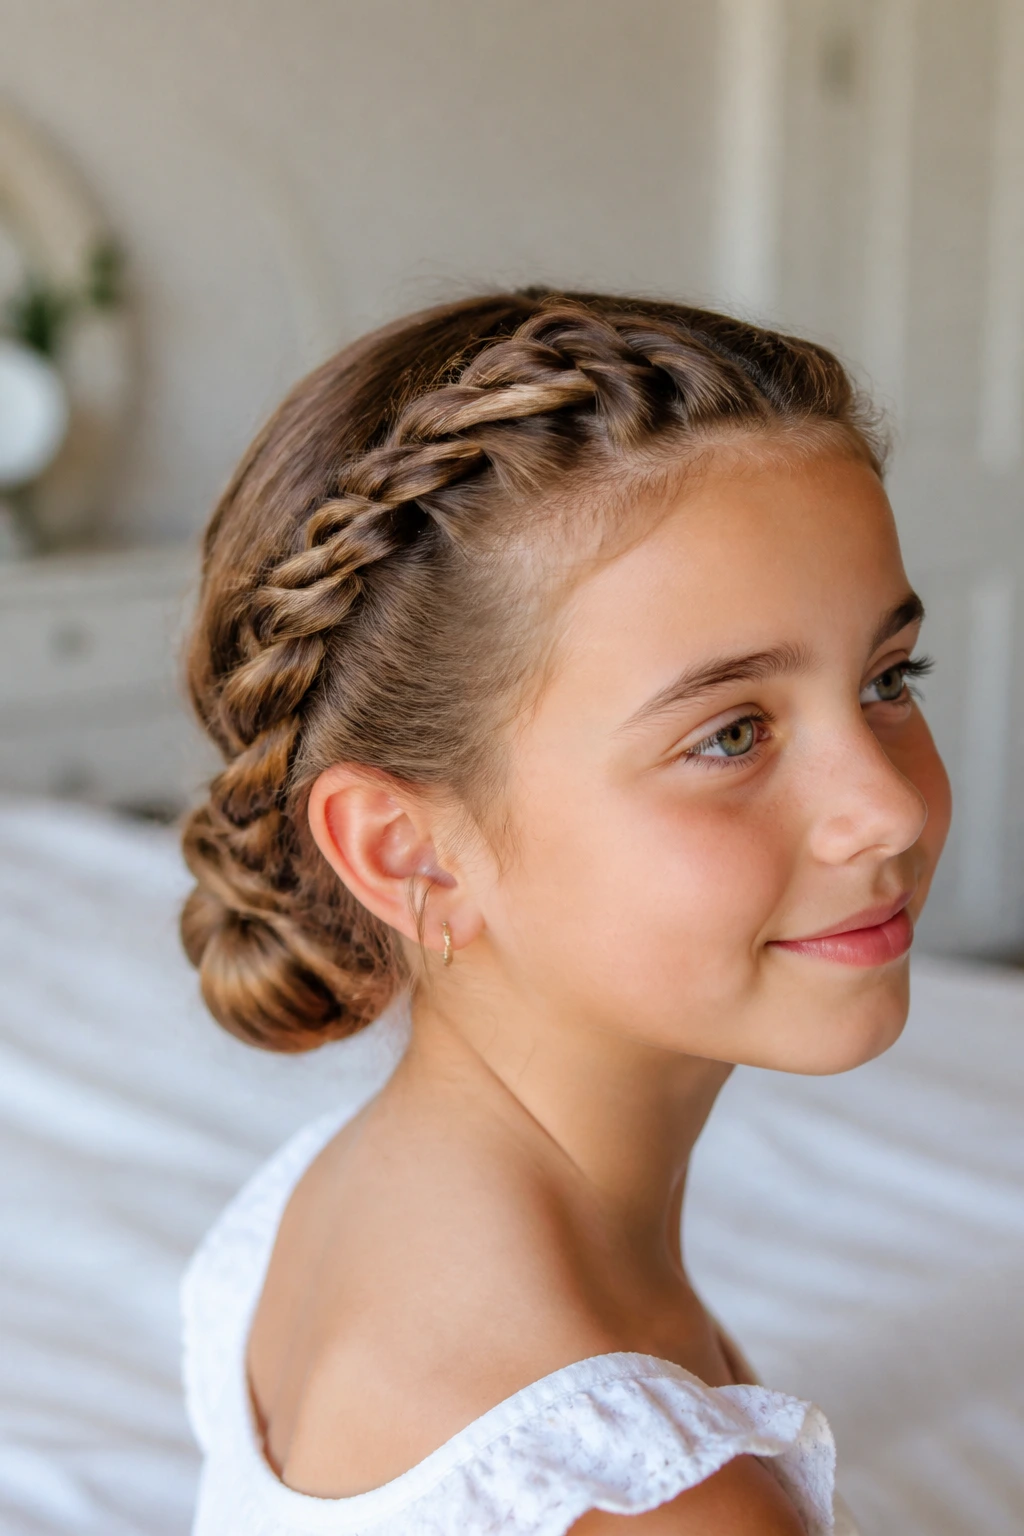
2. Side-Swept French Braid Low Bun
Can a side part make a low bun feel calmer? Yes, and this version proves it. One deep side braid starts near the temple, follows the hairline, and slides into a low bun just behind one ear or at the center of the nape. The braid line looks a little softer than a center part, which is useful if your kid hates anything that feels too neat.
A side-swept braid works especially well when the wave pattern is loose and fluffy around the crown. The braid gathers the top section before it has a chance to puff out, then the bun keeps the ends from fraying. If the hair slips, use one small clear elastic at the end of the braid before you wrap the bun. Tiny detail. Big difference.
Best for
- Fine-to-medium wavy hair that needs a little lift at the top.
- Kids who wear one side tucked behind the ear anyway.
- Days when you want a softer front without loose hair falling into the eyes.
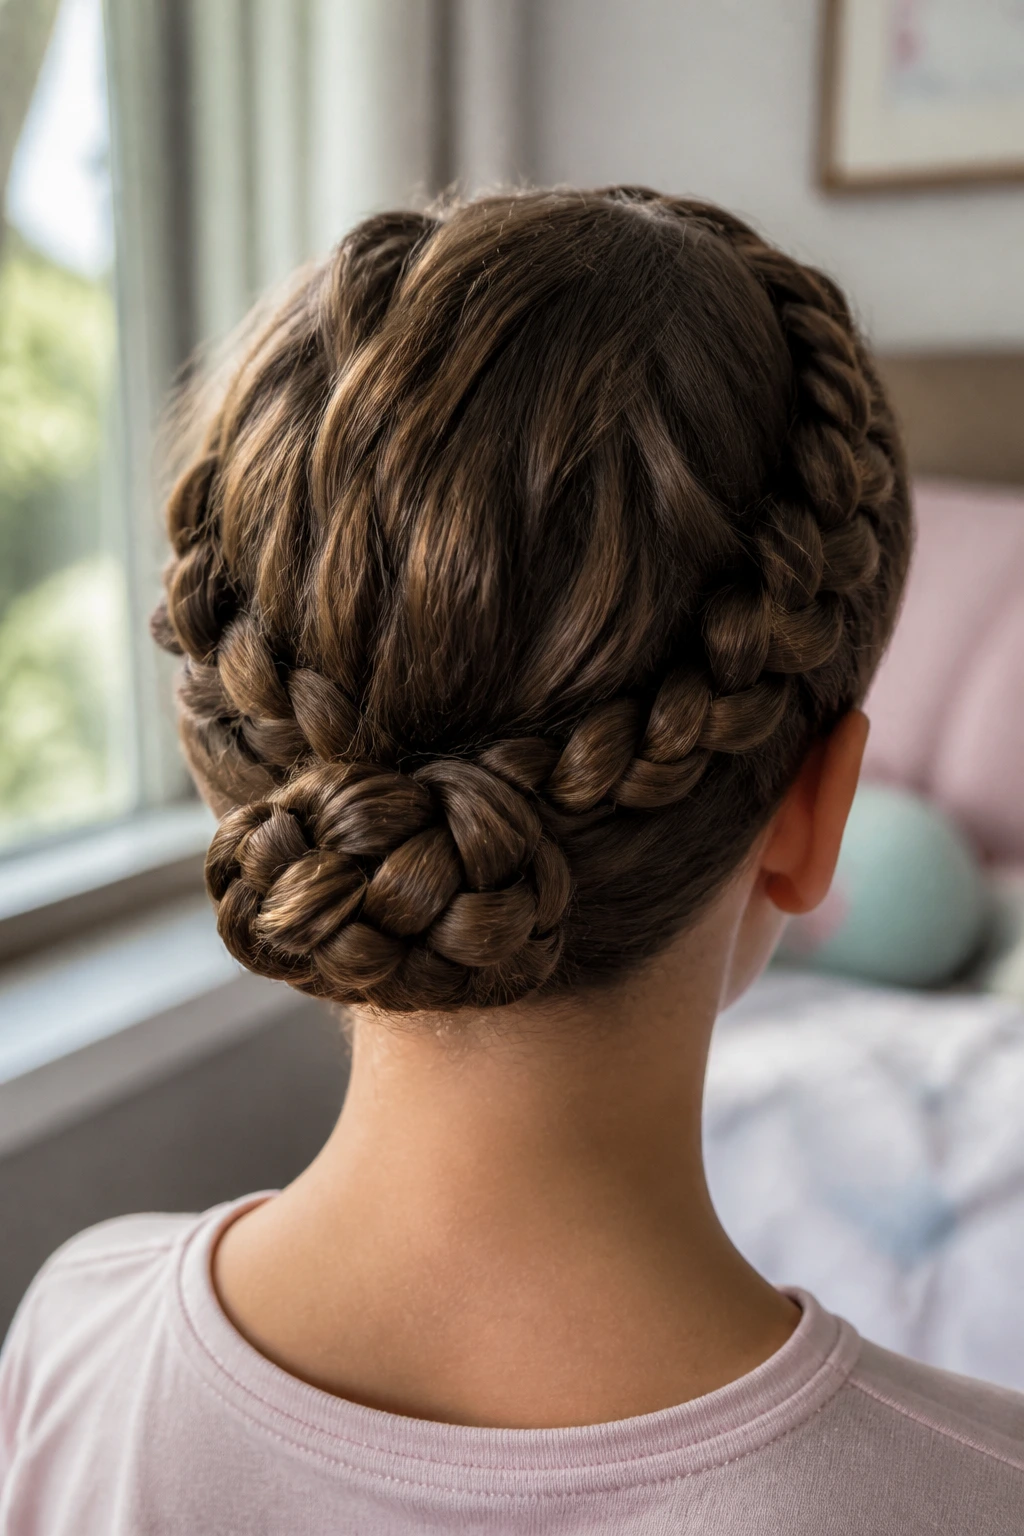
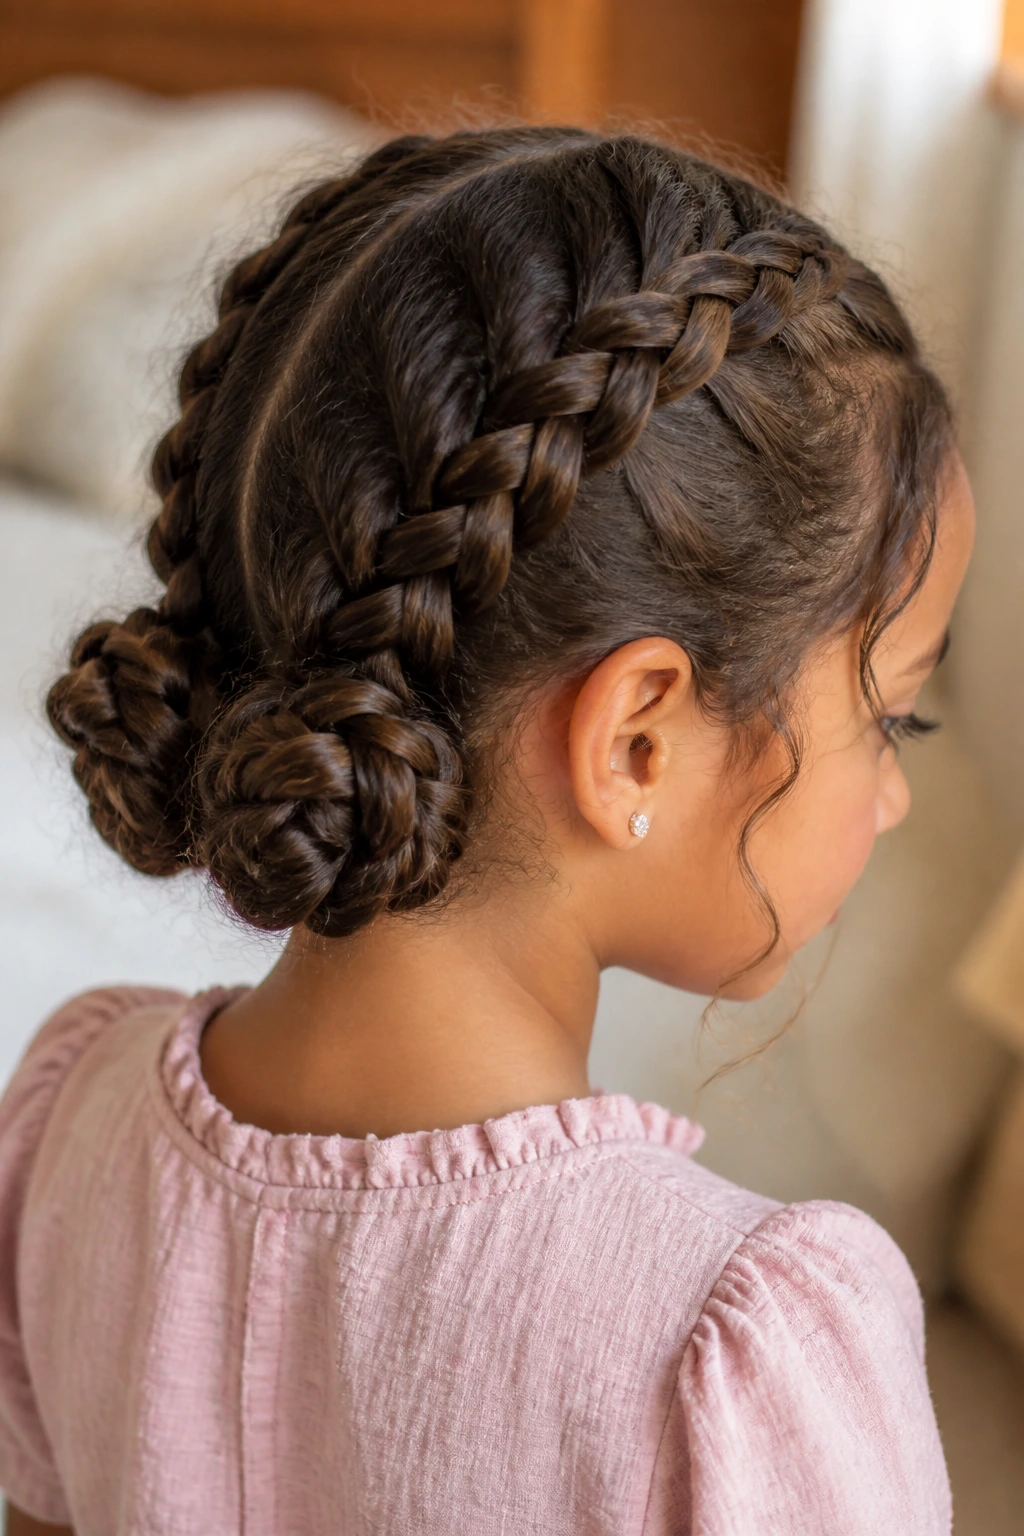
3. Twin Braids Wrapped into a Rounded Bun
Two low pigtail braids folded together make a bun with a little more shape and a lot less fuss. It’s one of the easiest styles here because the sections are simple, the braid paths are obvious, and the bun can look neat even if the braids are not perfectly symmetrical. That’s a mercy on wavy hair, where one side often behaves better than the other.
This style works when you want the hair to stay centered and balanced. The two braids give the bun enough structure that you can pin it wide or compact, depending on how much hair you’re working with. On thicker waves, the bun ends up looking fuller. On finer hair, it sits flatter and cleaner.
If your kid has a blunt cut with layers underneath, this one hides the shorter pieces better than a single braid wrapped around itself. A few crossed bobby pins under the bun keep the shape from sliding down the neck.
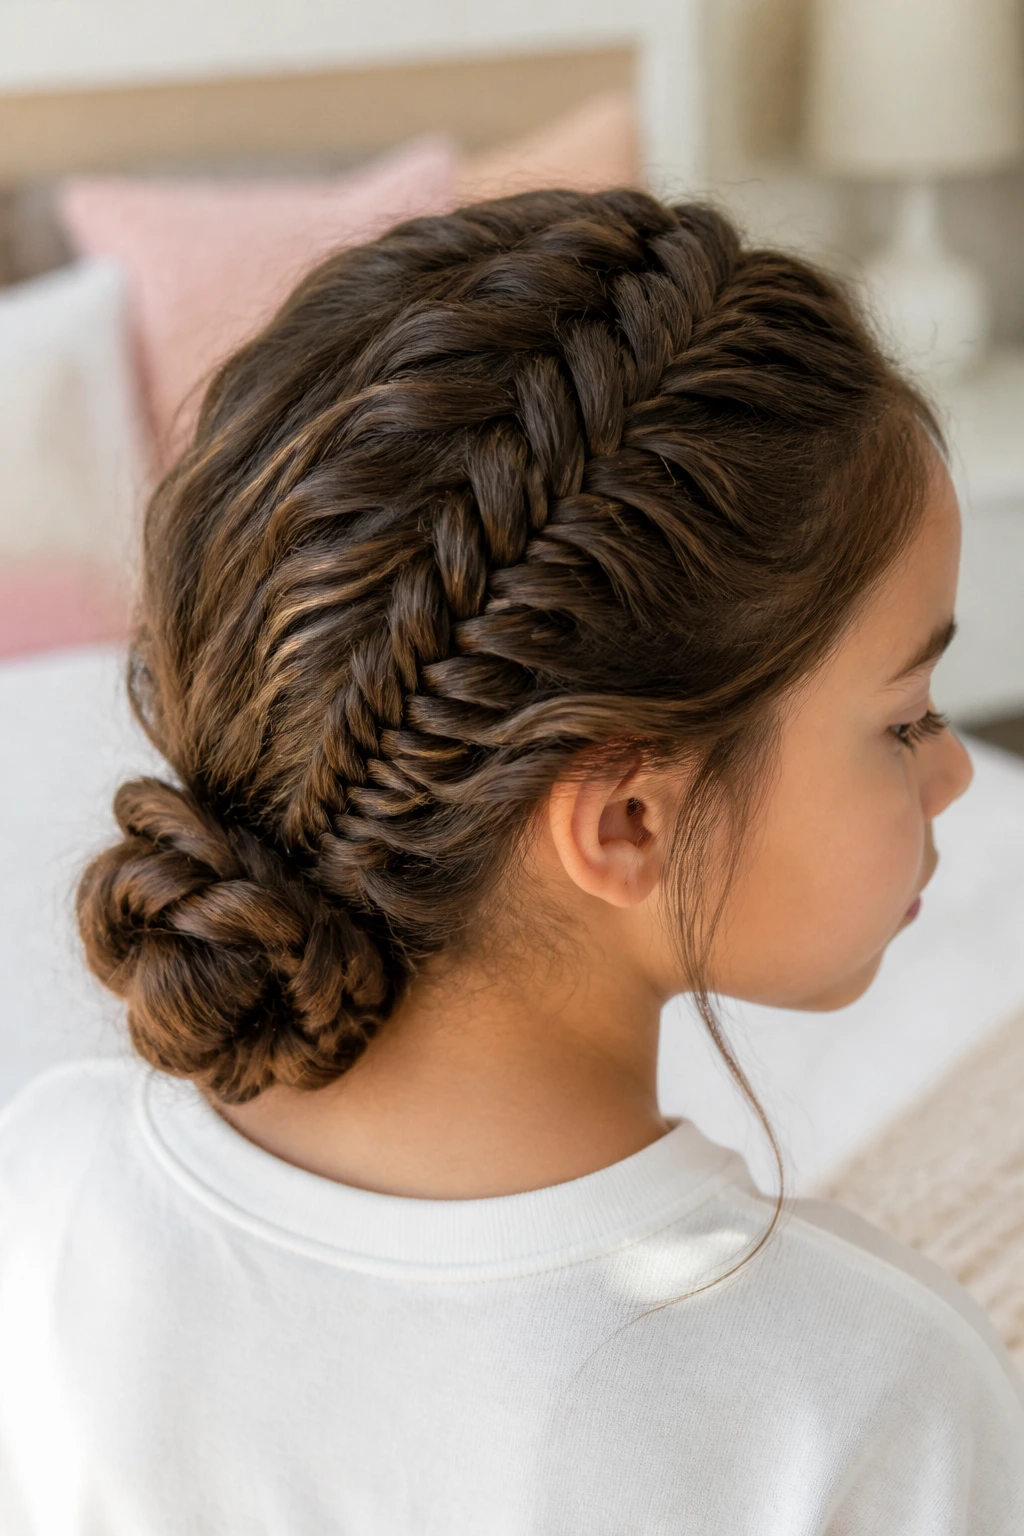
4. Fishtail Braid Low Knot for Thicker Waves
A fishtail braid brings a different texture. It looks tighter and more detailed than a regular three-strand braid, but on wavy hair it stays soft enough to feel wearable. The pattern gives the bun a woven, rope-like look that reads as deliberate without turning the style rigid.
The best thing about fishtail braids on wavy hair is the grip. The small sections catch the waves and hold them in place, which means the braid doesn’t unravel into puffs as fast as a sleek braid might. That makes it a smart option for kids with medium-to-thick hair, especially if the hair has a little frizz around the outer layer.
Keep the braid slightly loose as you work down the length. If you pull every section tight, the fishtail can look ropey in a way that feels too severe for a child. A softer pull gives you a rounder bun and a much nicer finish.
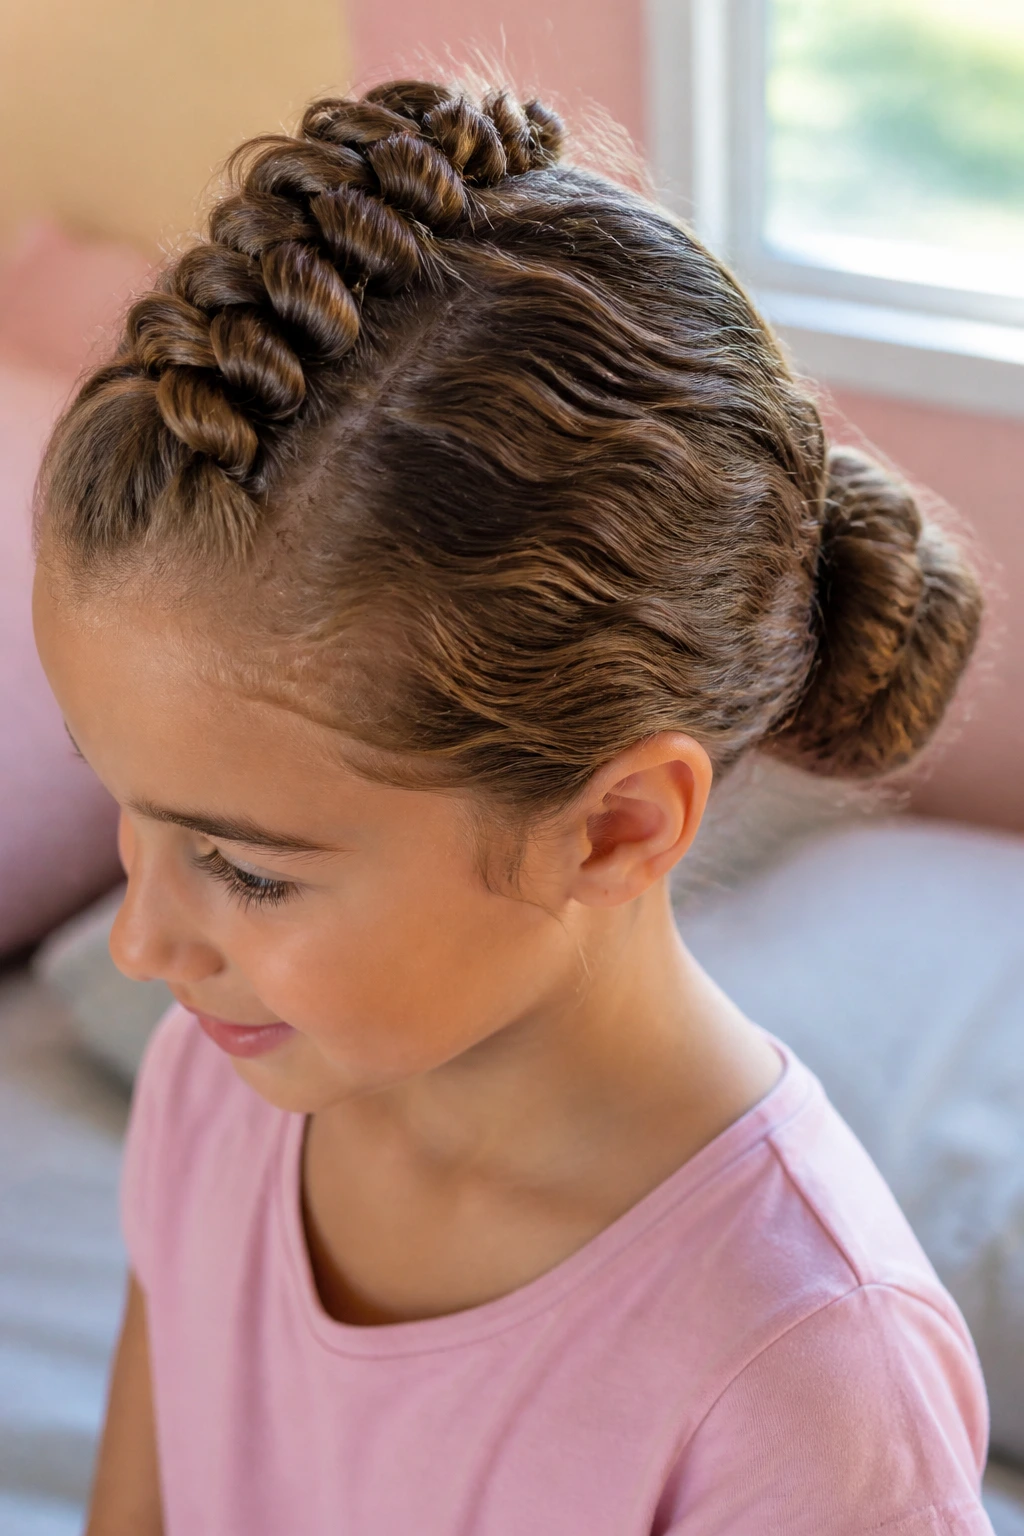
5. Rope Twist Braids into a Tucked Low Bun
The rope-twist version feels easy on the hands and kind to the scalp. Two sections twist around each other, then wrap into a low bun that sits like a knot at the nape. The style has a smooth, spiral look that pairs nicely with wavy hair because the texture in the strands keeps the twists from slipping apart.
This is one of the fastest low bun braid options if your child has patience for sections but not for a long braiding session. Twists also work well when the hair is a little damp and the ends need to be tucked away quickly. Use a light cream on the mid-lengths, then twist from root to tip and secure with a soft elastic before wrapping the bun.
The result is neat, but not flat. That matters. Kids’ styles look better when they still move a little.
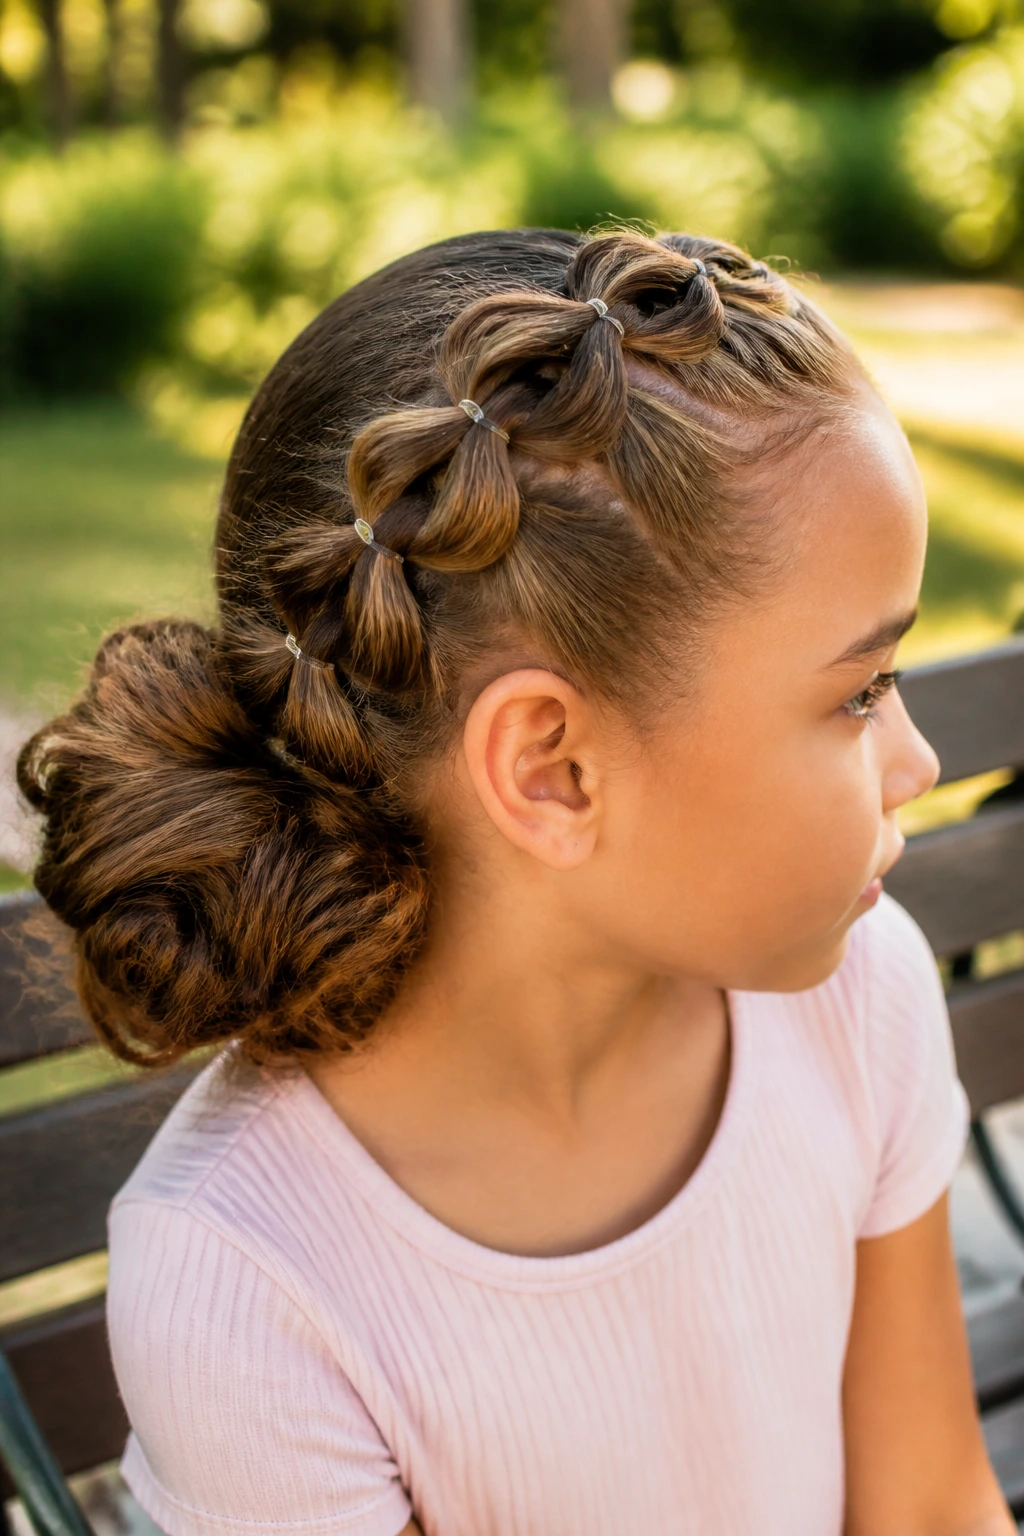
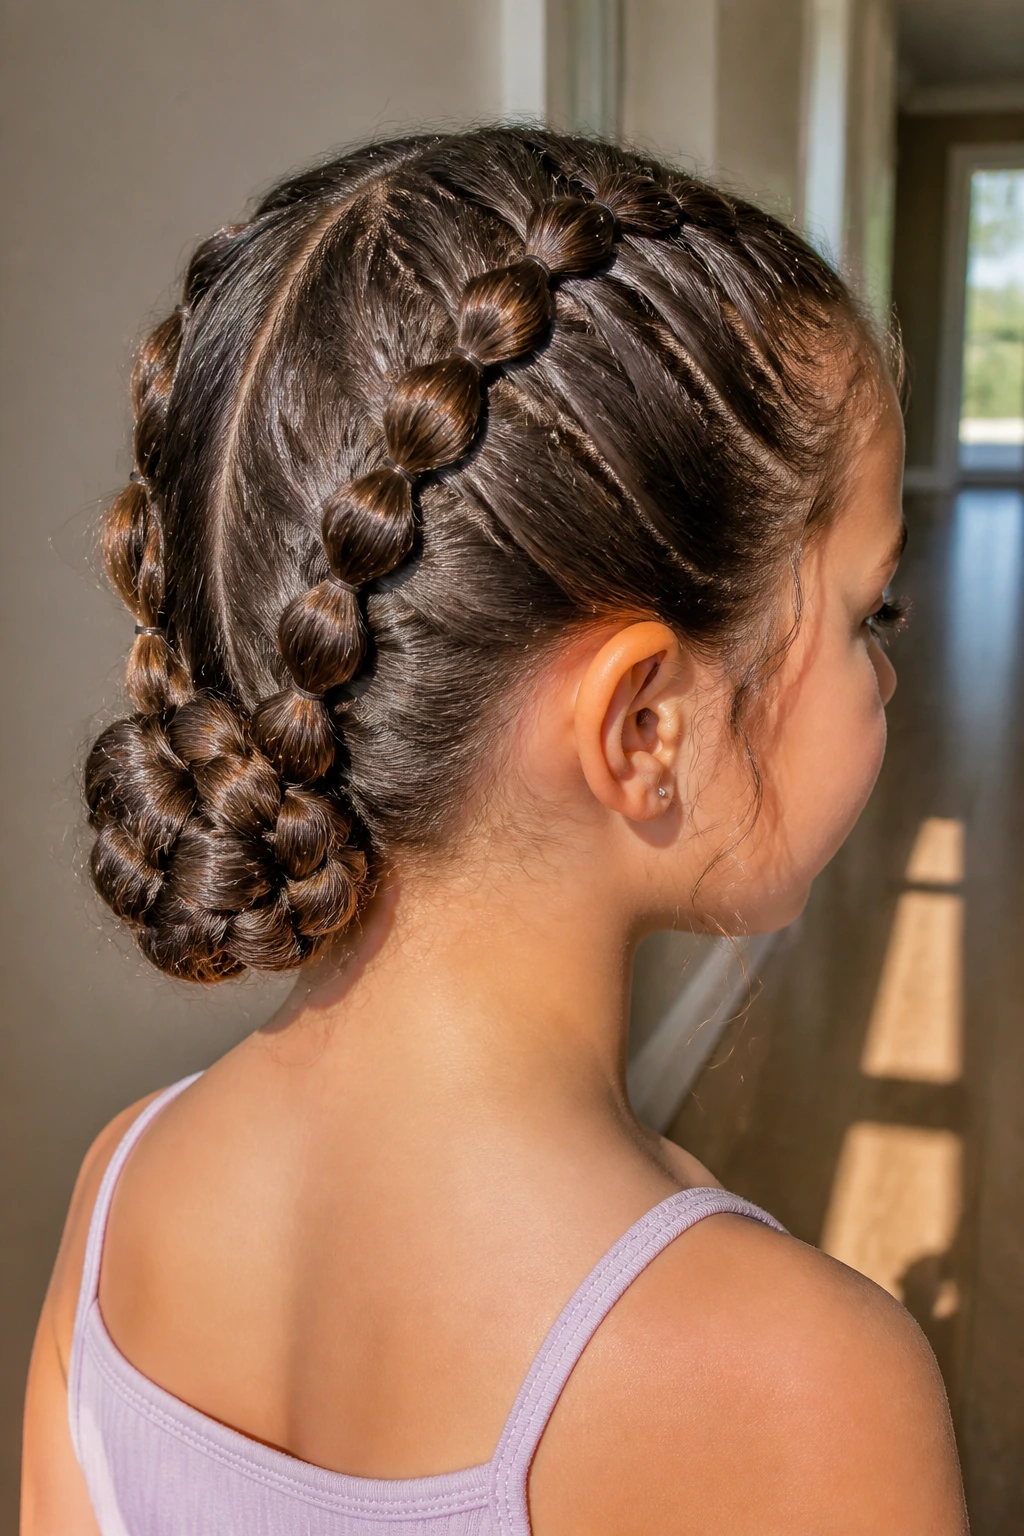
6. Bubble Braid Path into a Braided Chignon
Bubble braids sound playful for a reason. They give you round, spaced-out sections instead of a tight braid pattern, and that makes them a good fit for kids who like texture but don’t want a fussy finish. Once the bubbles are set, the length gets folded into a chignon-style bun near the nape.
I like this one on wavy hair because the wave pattern makes the bubbles look fuller without any extra teasing. A few evenly spaced elastics down the tail create the shape, then you gently tug each section outward until the bubbles feel round and balanced. Don’t yank. Just coax.
This style is also forgiving if the hair isn’t all one length. Layers can slip out of a traditional braid; in a bubble path, they often disappear into the sectioning instead. That means less re-doing in the middle of the morning, which is always the goal.
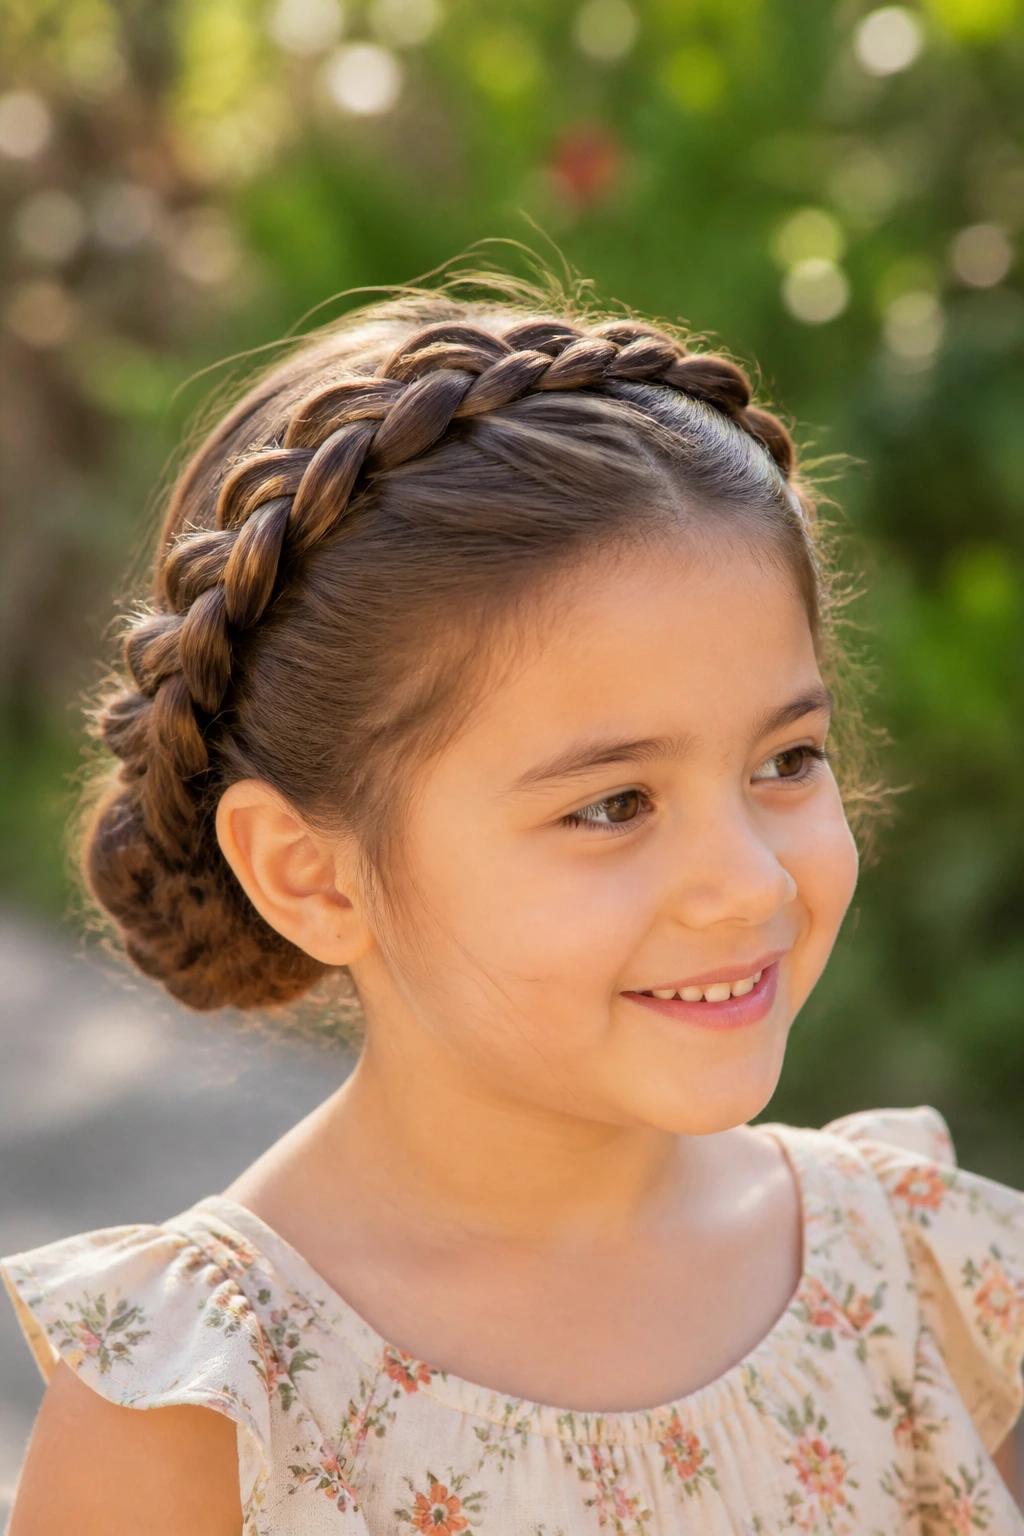
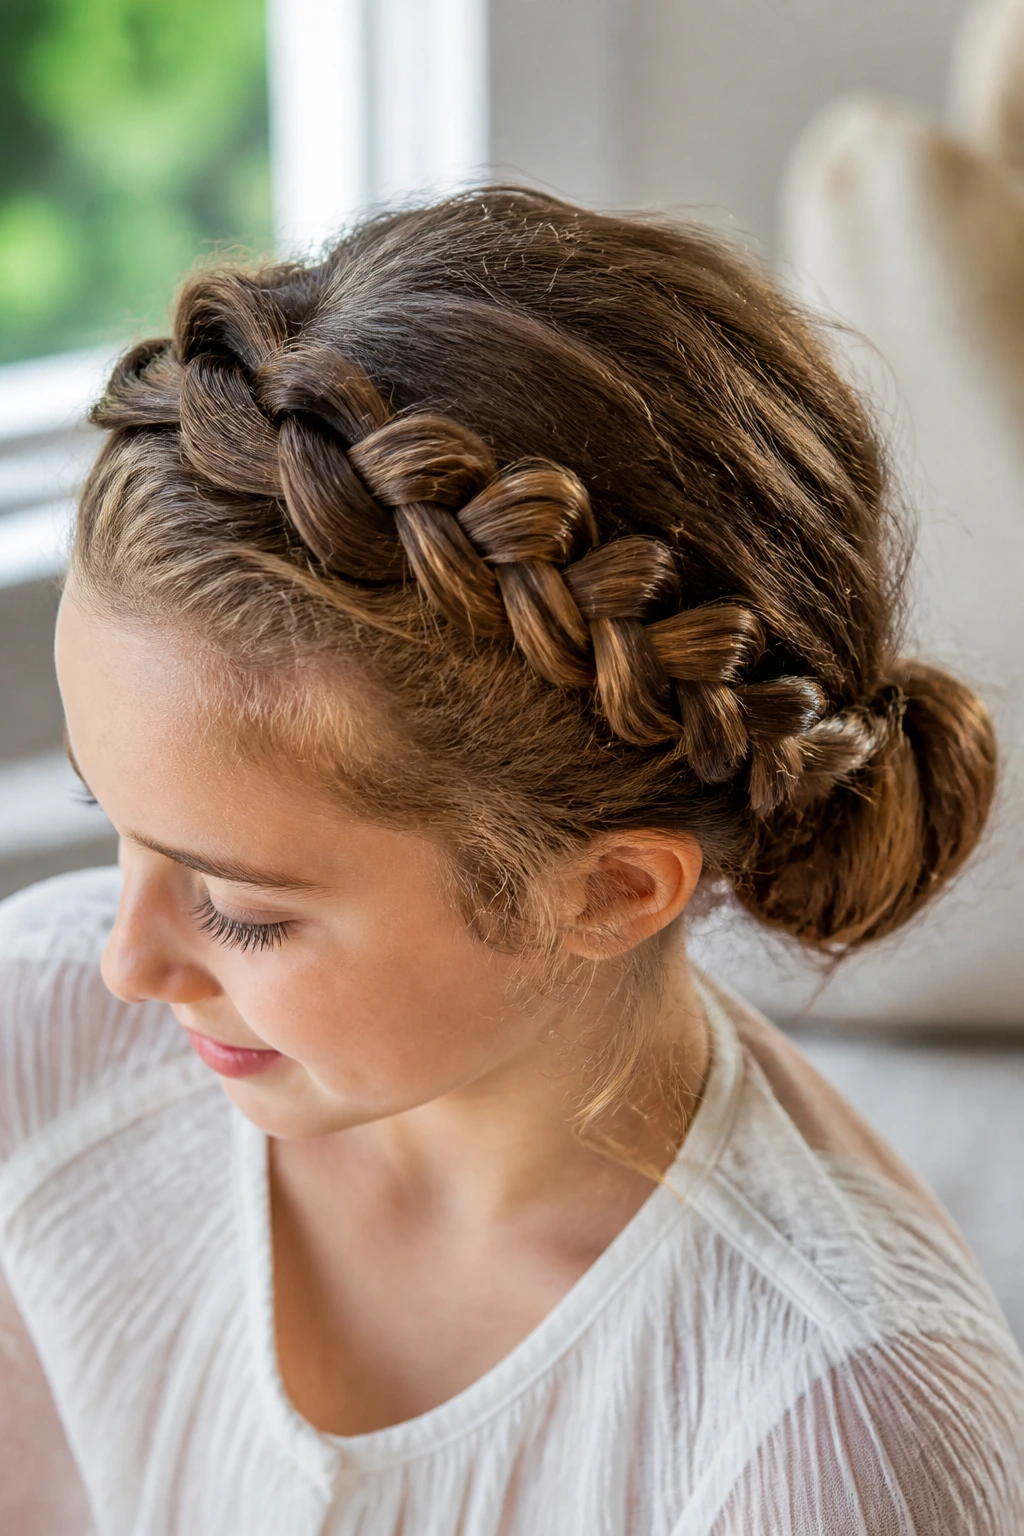
7. Crown Braid Feeding a Low Bun
A crown braid looks like you put more thought into the style than you actually did. That’s part of its charm. The braid travels along the front and side of the head, then drops into a low bun at the back, so the finished shape looks wrapped and complete from every angle.
On wavy hair, the crown section helps tame the area around the part, which tends to puff first. Once that top section is anchored, the rest of the style behaves. If your child has a cowlick near the front hairline, this is one of the better options because the braid can move around it instead of fighting it.
Why it feels practical
- It keeps hair off the face without needing a hard, tight pull.
- The front braid acts like a built-in headband.
- The low bun keeps the weight balanced instead of tugging at one side.
8. Zigzag Part Braids with a Side-Sitting Bun
Zigzag parts are for the kid who wants something a little less ordinary. The part itself does most of the visual work, breaking up the crown in a way that makes the braids feel more playful. After that, you can braid two sections down to one side and pin the bun just behind the ear or slightly lower at the nape.
This style is useful when the hair has a lot of soft waves that get lost in a straight center part. The zigzag line gives you shape before the braiding even starts. It also hides tiny parting mistakes better than a neat straight line would. That’s a real-world advantage, not a design flourish.
If you need the bun to stay comfortable under a hat or helmet, keep the side-sitting bun compact and flat. A wide bun can press against the skull in a way that bugs kids halfway through the day.
9. Braided Pigtails Folded into a Wide Bun
Braided pigtails are one of the easiest ways to control thicker wavy hair. The braids begin low and separate, then fold together into a wide bun that spreads the volume out instead of stacking it high on the head. That low, broad shape is easier on the neck and usually stays put better than a top-heavy bun.
This style is worth keeping in your back pocket for school days and travel days. It uses the natural fullness of wavy hair instead of trying to flatten it. That means you can skip most of the smoothing work and still end up with a style that looks finished.
A little tip I use all the time: wrap one braid around the other before you pin, instead of laying them side by side. The bun feels tighter in a good way, and the pins disappear under the twist.
10. Waterfall Accent Braid with a Low Bun

Can a waterfall braid stay neat on a child’s wavy hair? It can, if you keep the accent section small and the bun low. The waterfall detail gives you a soft, pretty line across the top, while the rest of the hair gets pulled into a bun at the back so the loose pieces never get a chance to turn wild.
This style is a smart pick for parties, concerts, or any day when you want one part of the hair to stand out. The waterfall section gives movement near the face, which works nicely with wavy texture because the dropped pieces already have a bit of bend. Keep the braid shallow, not deep, or you’ll spend too long pulling sections through.
The bun itself should be simple. A low tucked bun under the accent braid keeps the look from getting crowded. Too many moving parts and the style starts looking busy. One braid line and one clean bun are enough.
11. Mohawk Dutch Braid into a Compact Bun
This one has edge, but it’s still kid-friendly. A Dutch braid runs from the front hairline down the center strip of the head, like a soft mohawk, then finishes in a compact bun at the nape. The sides stay smooth or lightly tucked, so the braid line becomes the main feature.
I like this style for active kids because the center braid holds the crown in place where waves usually start to lift. The bun at the back makes the whole style feel controlled without pulling everything away from the face. If your child has a long head shape or a lot of volume at the crown, this style balances it nicely.
Use a fingertip, not a brush, to smooth the sides before you start. Brushes can flatten the wave pattern too much and make the style feel hard. Fingers leave just enough texture for the braid to grip.
12. Lace Braids Slept-Over into a Soft Bun
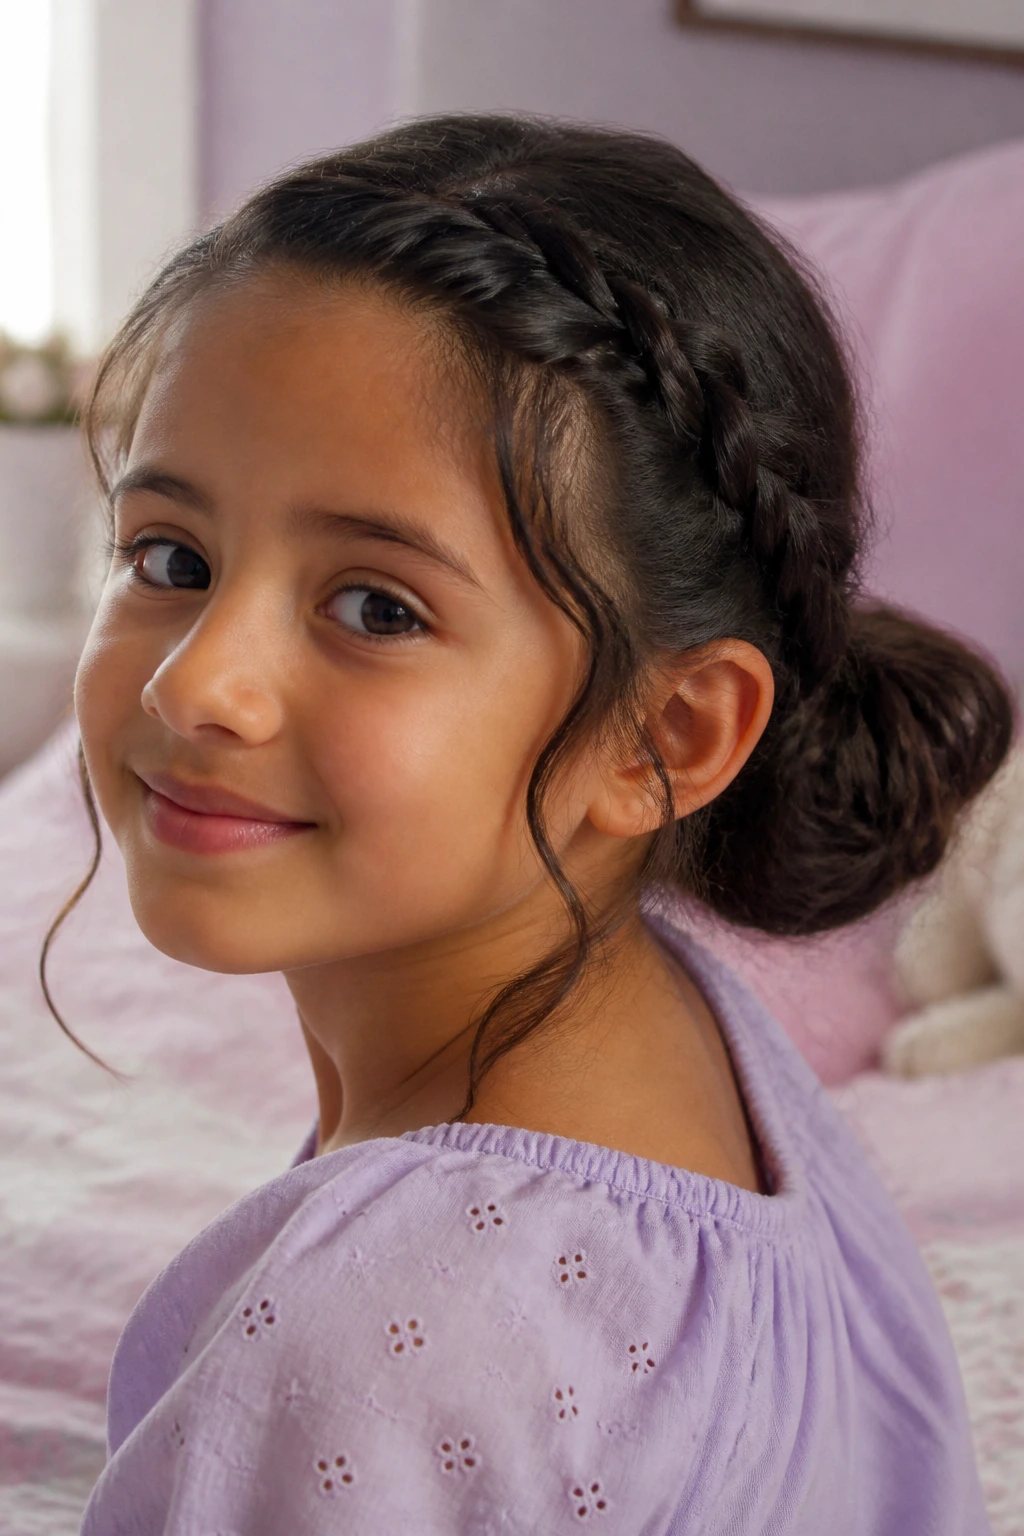
Lace braids are the gentler cousin of a full braid. Instead of feeding in hair from both sides every time, you keep one edge sleek and only add strands from the other side. That creates a soft, curved line that sits beautifully on wavy hair, especially when you want the front to stay airy instead of tight.
This style is useful after a night wash or on hair that wants to puff at the temples. The lace braid lets you smooth just the outer edge while keeping the inner wave pattern intact. When you gather the ends into a low bun, the whole style looks tender and slightly undone in the best possible way.
It’s also a good choice for kids with sensitive scalps. Less pulling, fewer sections, less drama. That alone makes it worth learning.
13. Pull-Through Braids into a Puffy Bun
Pull-through braids are not technically braids in the classic sense, which is part of why they work so well here. They use elastic bands to build a braided look section by section, and that makes them ideal for wavy hair that needs structure without a lot of tight weaving. The resulting length can then be folded into a puffier low bun.
This style gives a fuller finish than a regular three-strand braid. If your child has fine waves and you want the bun to look bigger than it really is, pull-through braids are a smart move. The repeated sectioning also helps shorter layers hide better, because each little segment has its own place to stay.
Use small clear elastics and keep the spacing even. Uneven gaps make the style look patchy. Even spacing gives you that long, stacked look that reads neatly in photos and still feels playful.
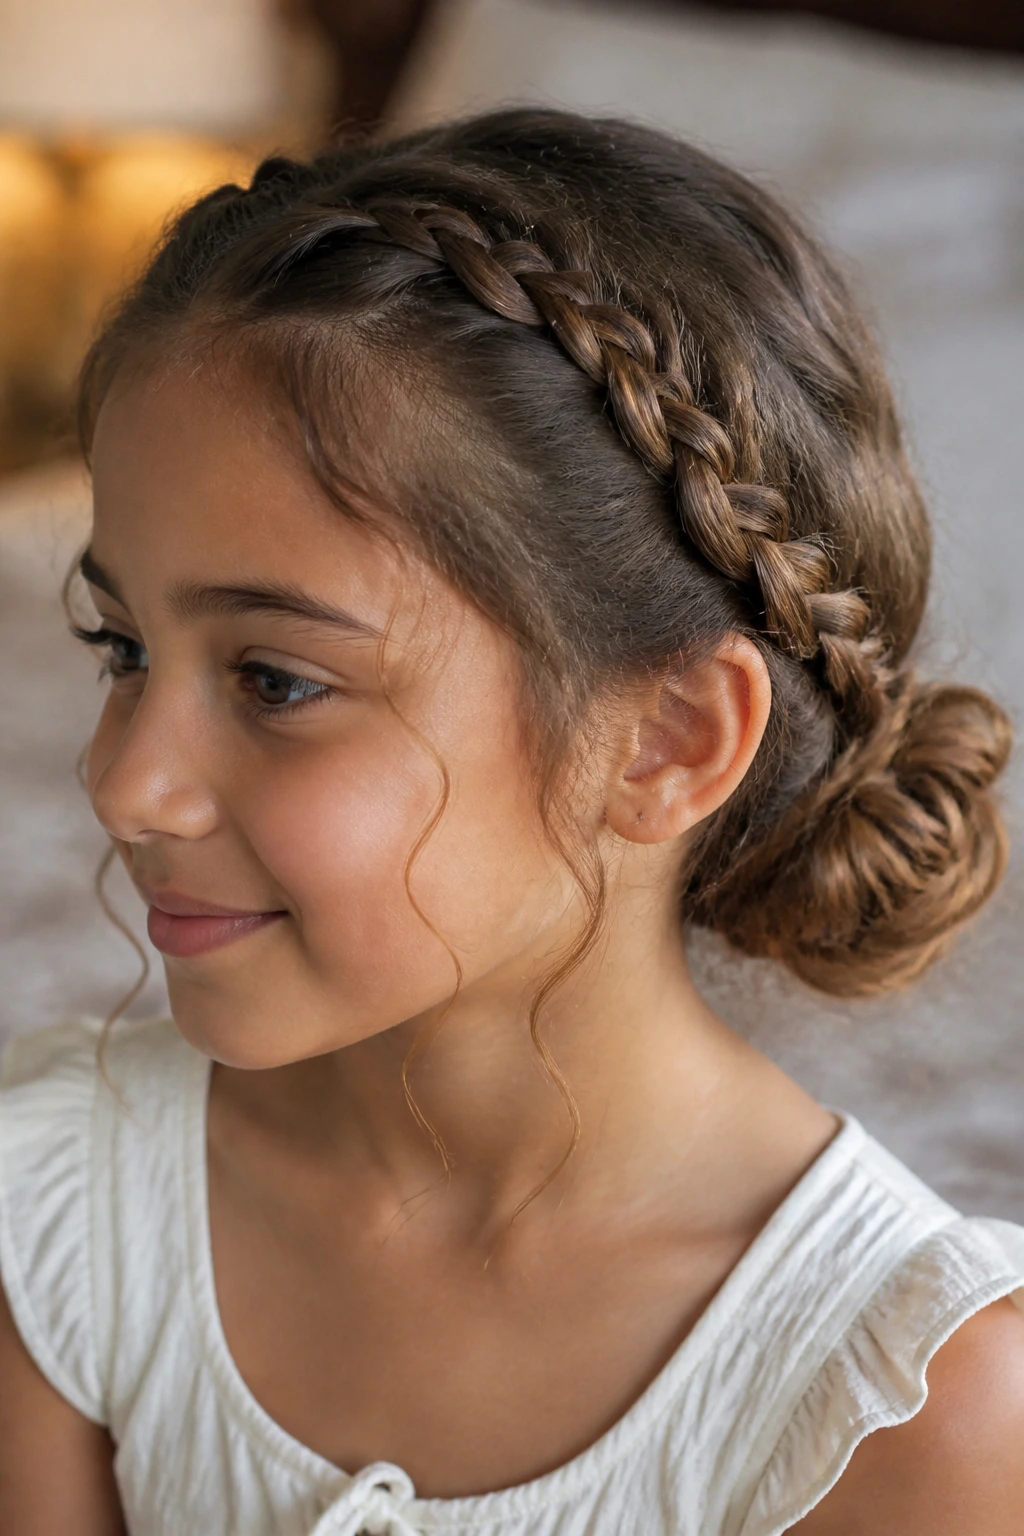
14. Milkmaid Braids with a Hidden Low Bun
Milkmaid braids sit across the crown like a soft band, then tuck into a hidden bun low at the back. The style has a calm, wrapped look that works well on wavy hair because the front braid keeps the top from puffing, while the bun hides the ends that would otherwise fray.
This is one of the prettiest options when you want hair off the face but still want some shape around the head. It suits medium-length waves especially well, since the braids have enough length to reach around without stretching too hard. Pin the bun underneath the braid line so it disappears from the front.
A small ribbon or bow at the back can be enough. You do not need to crowd this style with extra clips. The braid itself already gives it enough detail.
15. Ribbon-Woven Low Bun Braids
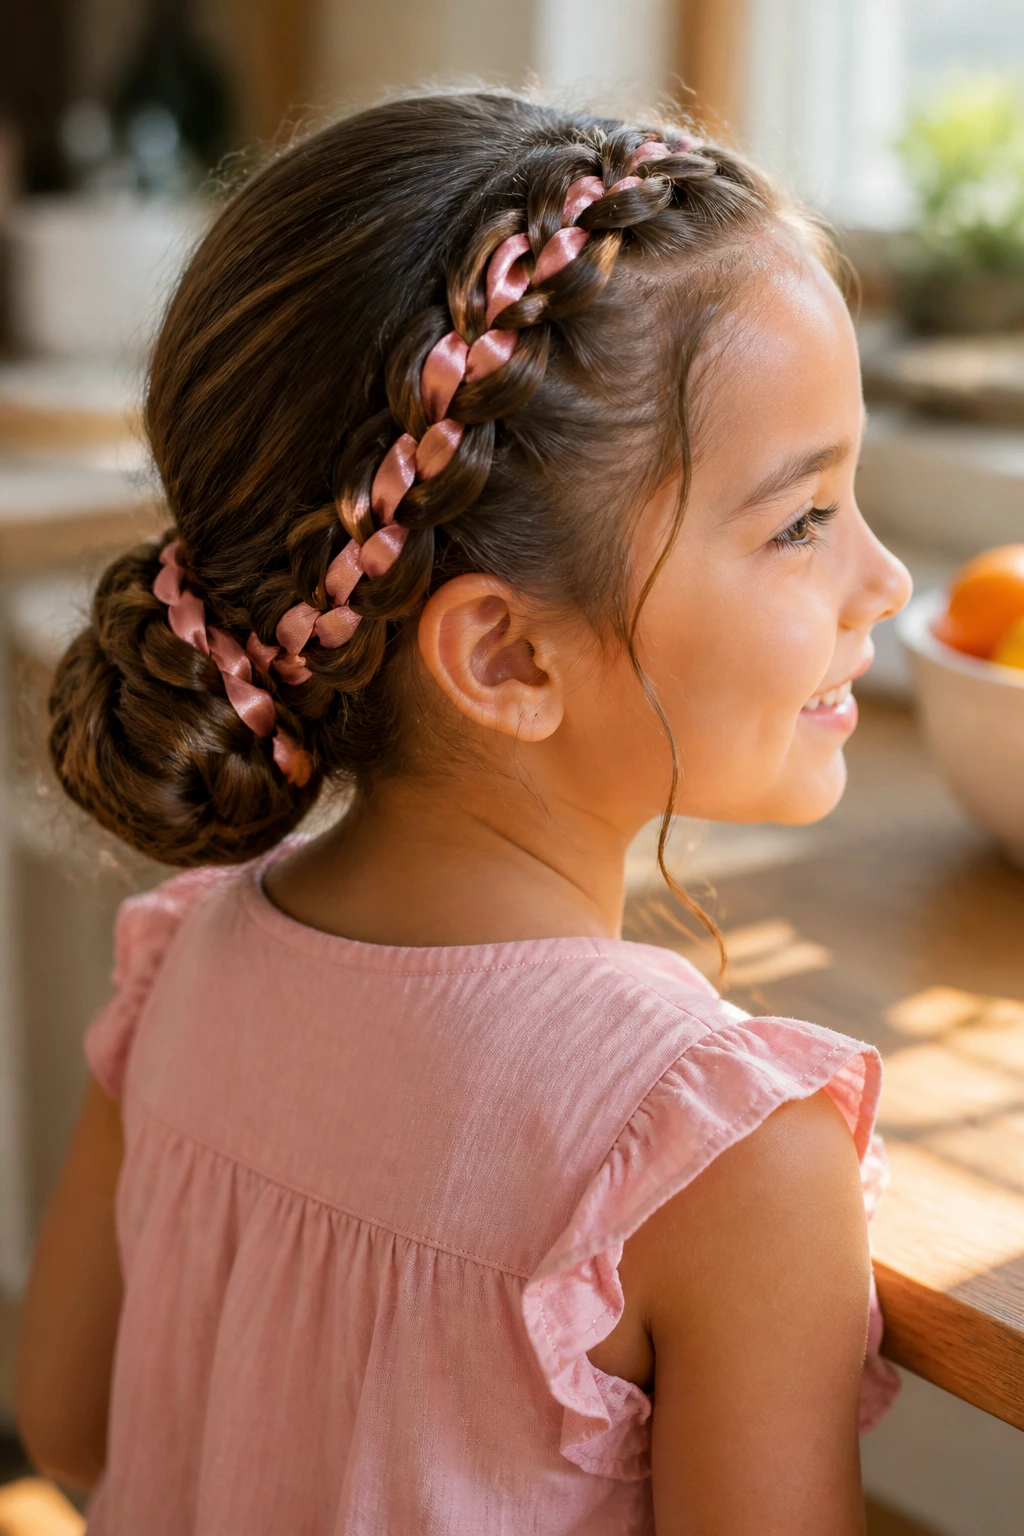
A ribbon-woven braid changes the whole mood of the style with one narrow strip of color. Thread a ribbon through one or both braids, then wrap the ends into a low bun and tuck the ribbon tails underneath. The hair still does the work; the ribbon just gives it a clean finish that feels special without turning stiff.
This style is a favorite for birthdays, school events, and family gatherings because it reads as dressed up with almost no extra construction. On wavy hair, the ribbon also helps break up the texture visually, which can be handy if the braid is a little puffy. A satin ribbon slides easily. A grosgrain ribbon stays put better.
Keep the color contrast simple if you want the braid pattern to show. A pale ribbon on darker hair, or a deep color on light hair, makes the braid line easier to see without overdoing it.
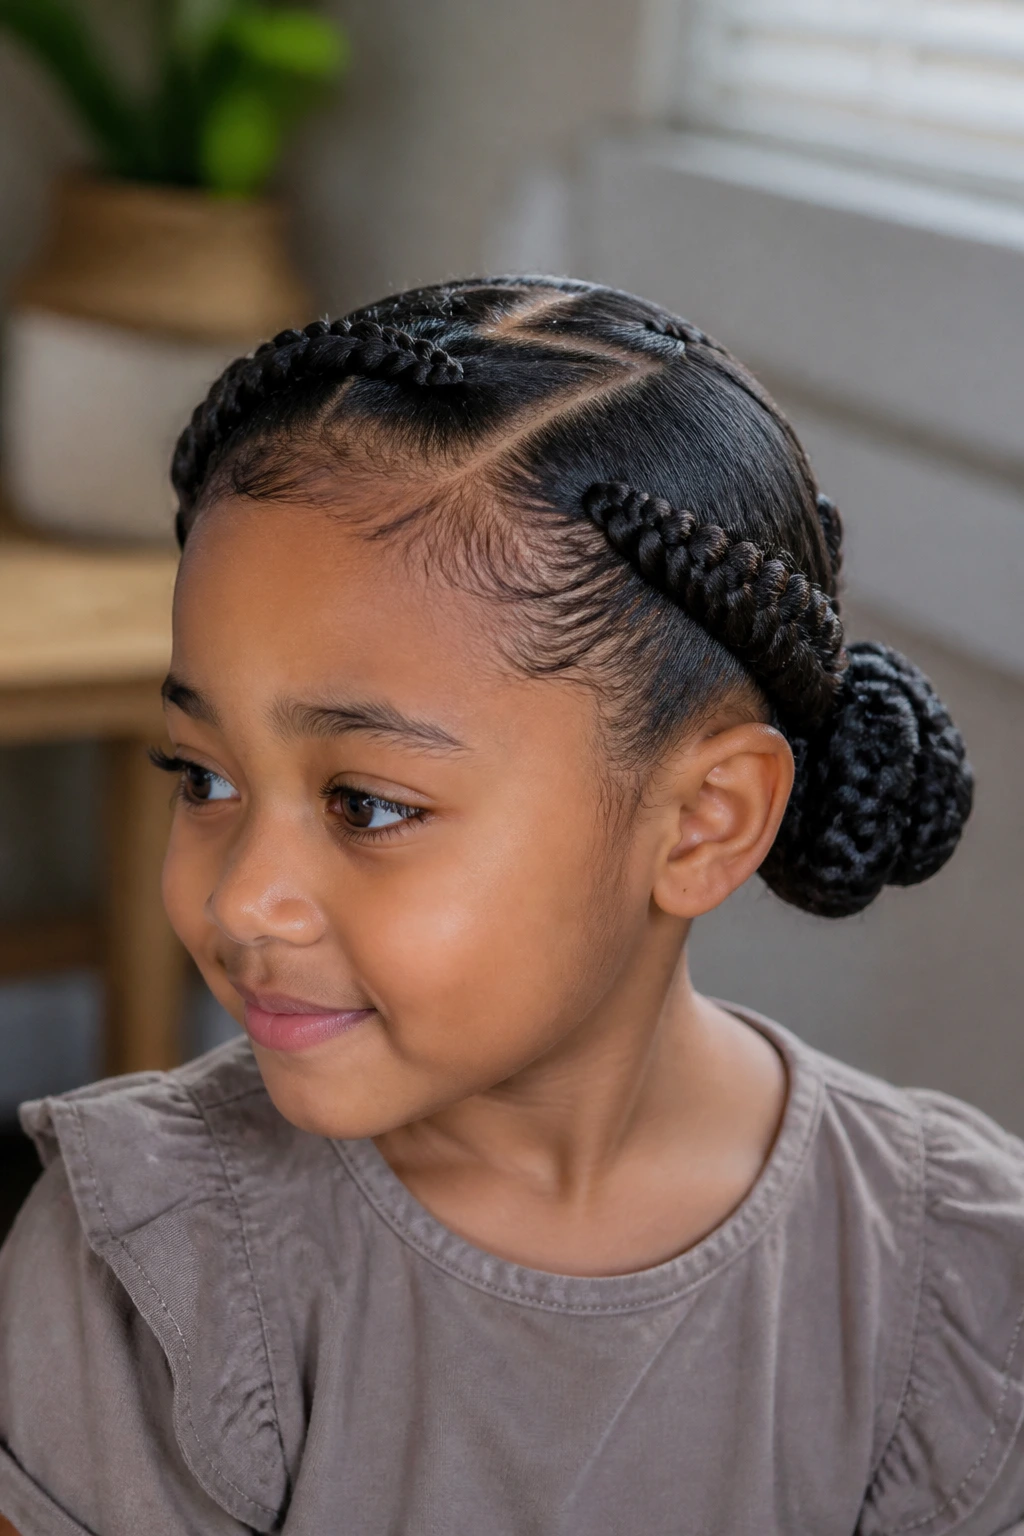
16. Cornrow-Inspired Front Braids into a Puff Bun
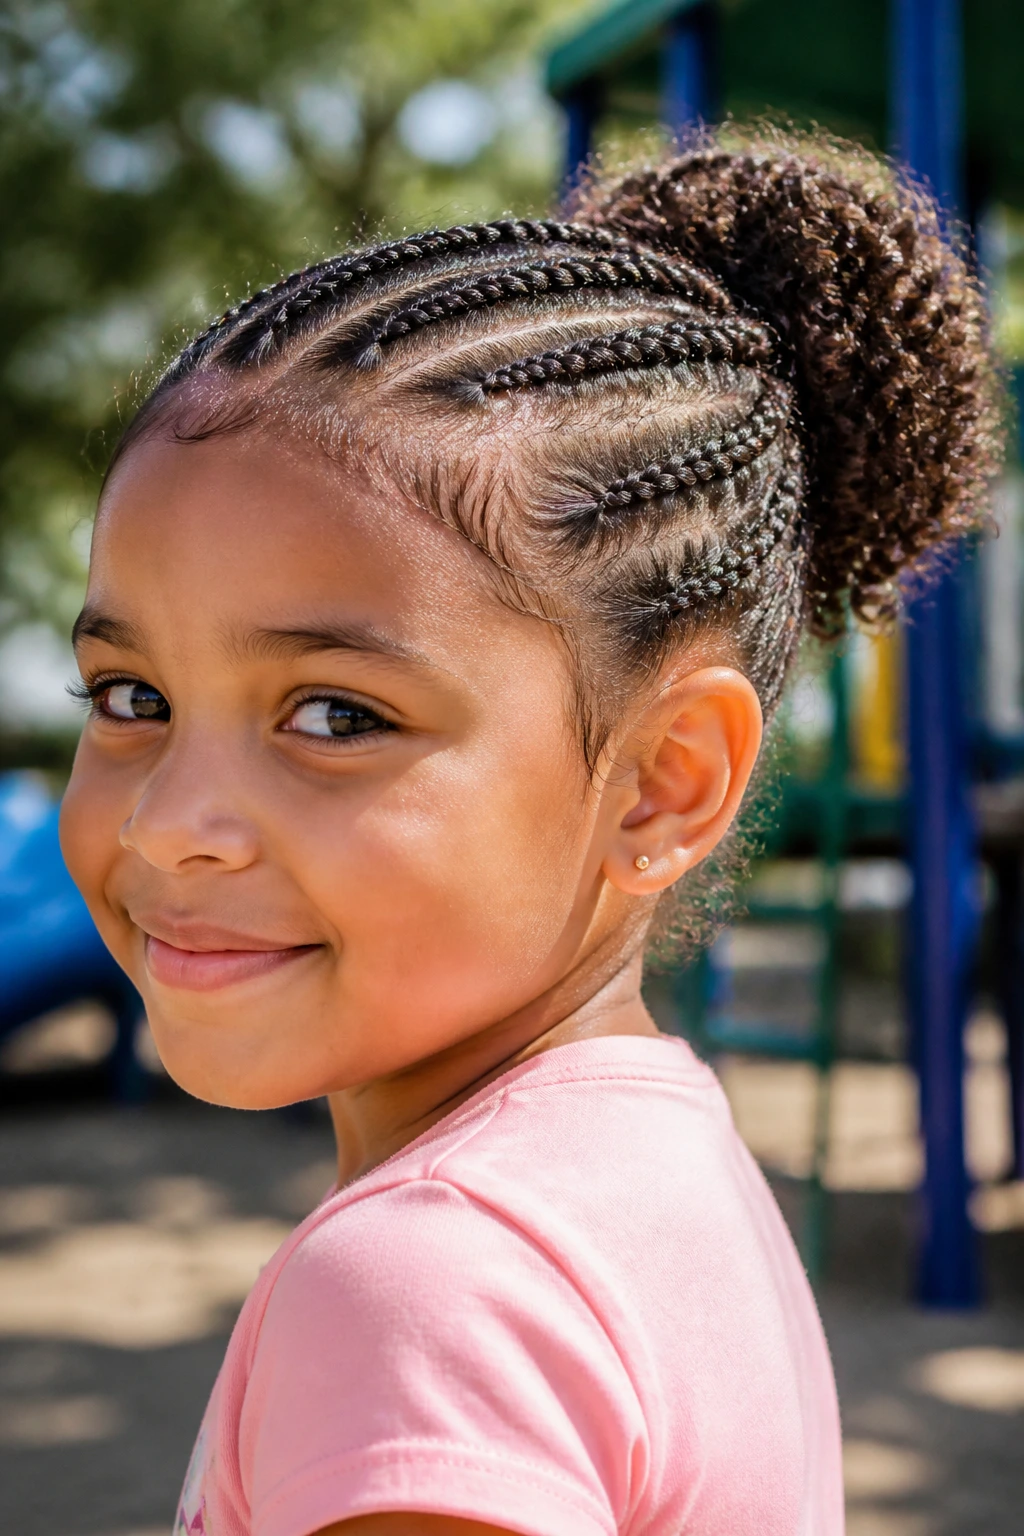
Not every braid has to be full-on cornrowed to borrow that look. Small, tight front braids along the hairline can feed into a low puff bun at the nape, and that gives you strong control in the spots that usually need it most. The front stays tidy, the back stays soft, and the wave pattern still gets to show in the bun.
This style works well when the hairline needs help staying smooth. If your child has a lot of little flyaways around the temples, the front braids can contain them before they start lifting. The bun can then stay puffier and more textured, which suits wavy hair better than a slick finish would.
Be gentle here. The braids should guide the hair, not clamp it down. If the scalp starts looking indented or the child says it feels tight, back off and loosen the sections a touch.
17. Crisscross Braids and a Twisted Bun
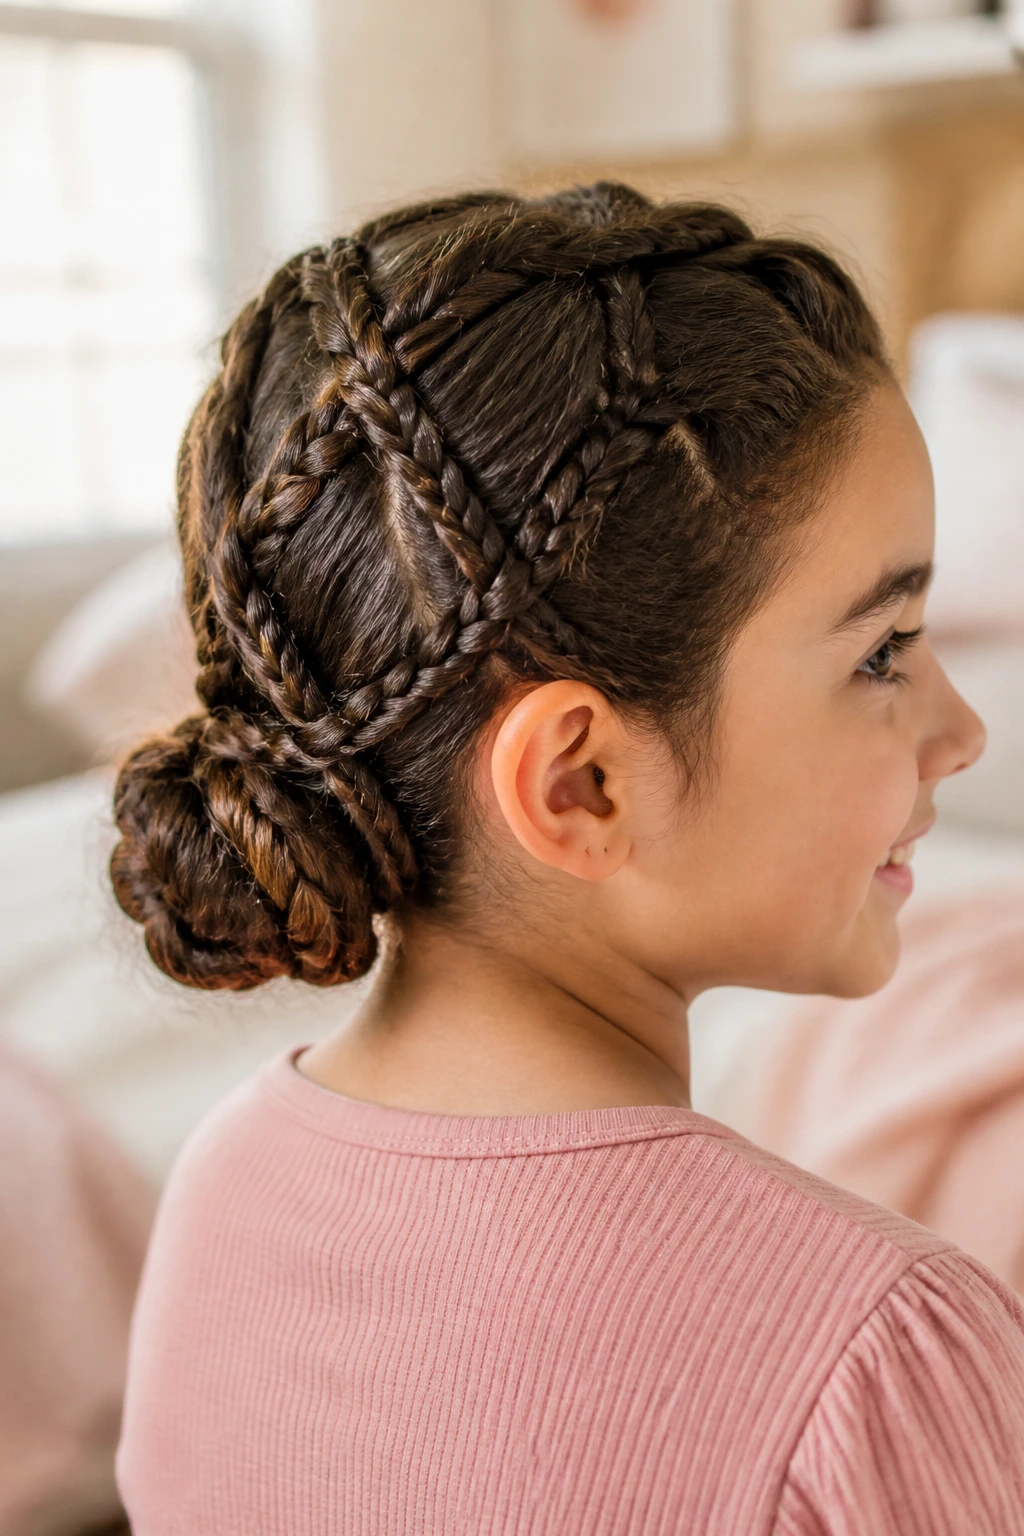
Crisscross braids give you shape without asking for perfect symmetry. Two or more braid paths overlap at the back, then twist into a bun that sits low and secure. The crossing pattern makes the style feel a little more detailed than a standard two-braid finish, but it still works on wavy hair because the waves soften the lines.
I like this style when the hair is thick enough to need more than one anchor point. The crisscross lines help distribute the tension, so the bun doesn’t feel like it’s all hanging from one spot. That matters on a child who moves a lot or complains about styles pulling behind the ears.
A bobby pin hidden at each crossing point keeps the pattern from loosening. It’s a tiny step, but it keeps the shape intact through the whole day.
18. Four-Strand Braid Wrap into a Polished Nape Bun
A four-strand braid gives the most woven look in this group. It has a little more detail than a standard braid and a little more polish than a twist. Wrapped into a low bun, it creates a tidy finish that works for dressy days when you still want the hair to feel childlike, not overworked.
This version is best when the waves are medium to thick and the hair has enough length to make a fuller braid line. The extra strand helps the braid hold its shape, especially around the nape where shorter layers tend to slip. If the braid feels too firm, pull the outer edges just a little after it’s secured. That softens the line and makes the bun look rounder.
This is the style I’d pick for a ceremony, a portrait session, or a family dinner where you want the hair to stay put but not look overly styled. It has structure. It also has a little bounce.
What Makes Low Bun Braids So Kind to Wavy Hair
Wavy hair tends to have two personalities in one head of hair. The top layer wants to spread out, and the underside usually behaves better. Low bun braids work because they meet the hair where it’s strongest: at the bend. The braid catches that bend, locks it into place, and the bun hides the ends that would otherwise get fuzzy.
The wave pattern gives the braid grip
Straight hair can slip while you braid. Very curly hair can spring up and fight the part. Wavy hair sits right between those two, which makes it easier to gather and easier to keep in place. You still need sectioning, but you usually do not need half a jar of product.
The nape is the best place for the bun
High buns can feel top-heavy on kids, especially if the hair is thick. A low bun sits against the neck, so the weight settles lower and the style stays more comfortable under a backpack, hoodie, or jacket. That lower placement also keeps the braid from pulling at the crown all day.
The ends disappear where they should
The part that breaks down first is usually the ends. They dry out, puff up, and poke loose from the braid. When those ends are tucked into a low bun, you stop the whole style from unraveling at the weakest point.
Tools That Save Your Morning
You do not need a drawer full of fancy gear. You do need a few things that make wavy hair behave without a fight.
- Rat-tail comb: Clean parts and neat sections start here, especially for center parts and zigzags.
- Detangling brush or wide-tooth comb: Use this to remove knots from the ends upward without roughing up the wave pattern.
- Spray bottle with water: A few misted sections are easier to braid than dry, puffy hair.
- Leave-in conditioner or light detangler: Keep it light; heavy cream makes the roots too soft and slippery.
- Snag-free elastics: Small clear or hair-colored bands hold better and don’t catch the ends.
- Bobby pins: You’ll need these for buns, crossings, and any layer that wants to slip.
- Duckbill clips or section clips: They keep the unbraided hair out of the way while you work.
- Satin scrunchie: Useful for the bun itself, especially if the hair is thick or frays easily.
- Edge brush or soft toothbrush: Helps smooth the hairline without flattening the whole style.
- Ribbon or bow, optional: Best saved for school events, photos, or days when the braid needs a little finish.
Smart Prep and Product Choices for Kids’ Wavy Hair
The best product choice is usually the one you can barely feel. That sounds almost too plain, but it’s true. Wavy hair on kids often looks best when the prep adds control without stealing softness from the hair.
Keep the roots light: A dime-size amount of leave-in on the crown is usually too much. Start at the mid-lengths and work down. If the top needs help, use the residue on your palms after you smooth the ends.
Use water as a reset button: A spray bottle is better than starting over with more product. One or two mists can wake up second-day hair, and they make the strands easier to part without turning them wet and floppy.
Choose hold based on texture: Fine waves do better with a little mousse or lightweight cream. Thicker waves can handle a touch more control, especially near the nape where the bun needs to stay anchored.
Avoid sticky gels unless you really need them: Heavy gels can make the braid crusty or leave the hairline looking hard. If you want extra control, use just a tiny amount on the flyaway areas and keep it off the whole head.
Match the prep to the day: For school, simpler and softer is better. For a party or picture day, you can smooth a little more and add a ribbon or clip. The style should fit the day, not the other way around.
How to Wear These Styles for School, Play, and Dressier Days
School days: Pick the styles that stay flat and do not need constant fixing — the center-part Dutch braids, twin braids into a bun, or the compact mohawk bun are strong choices. Keep accessories minimal so nothing gets tugged in a backpack or stuck on a sweatshirt hood.
Playground and sports: Choose styles with fewer loose pieces and a tighter anchor at the nape. The rope twist bun, braids folded into a wide bun, and crisscross styles hold up well when a child is running, climbing, or flipping hair out of the way.
Parties and family photos: This is where ribbon-woven braids, waterfall accents, crown braids, and four-strand wraps shine. Add one bow, one ribbon, or one neat clip. More than that starts to crowd the shape.
For shorter or layered cuts: Favor styles that trap the ends early — twin braids, bubble braids, pull-through braids, and lace braids tend to hold layers better than a single long braid. If the front pieces are short, sweep them into the braid instead of fighting for perfection.
If a child is tender-headed: Keep the braid pattern looser at the scalp and rely on pins and a snug bun for the final hold. A style that feels good on the head lasts longer than one that only looks neat for the first ten minutes.
Additional Tips and Little Custom Touches
Texture Boost: If the braid looks too flat, gently tug the outer edges after tying off the sections. That tiny pull gives the braid more width and helps the waves show through instead of disappearing into the pattern.
Accessory Switch: Swap the plain elastic for a velvet tie, satin ribbon, or a slim bow when you want the style to feel dressed up. Keep the accessory near the bun or at the braid end so it does not pull at the crown.
Make-It-Gentler: Smooth the hairline with your fingers first, then use the edge brush only on the tiny flyaway bits. A hard-bristle brush can make the top look overdone, and kids notice that feeling fast.
Make-It-Faster: Pre-section the hair before you sit the child down. Two clips and a quick part before the first braid save a surprising amount of time, especially if the kid wriggles.
Make-It-Their-Own: Let them choose between a center part, side part, or zigzag part. That small choice makes the style feel personal, even when the actual braid is simple.
Nighttime Care and Next-Day Refresh
These styles usually hold best for one full day, and many of them can stretch into a second day if you protect the bun overnight. A satin pillowcase helps more than people expect. It cuts down on friction at the braid line and keeps the bun from getting fuzzy at the back of the head.
If your child wears a bonnet comfortably, use one. If not, a loose satin scrunchie around the bun and a pillowcase are enough. Do not flatten the bun with a tight wrap at night; that only leaves dents and odd bends in the morning.
For the refresh, mist the braid lightly, smooth the sides with damp palms, and tighten only the top layer of the bun if it has loosened. If one braid starts to puff, pin it back before it turns into a full re-do. A tiny bit of leave-in on the fingers can calm the frizz without soaking the hair.
If the style was done cleanly the first time, it often still looks decent on day two. By day three, most kids need at least a small touch-up around the hairline and bun.
Common Mistakes That Make the Style Fall Apart
Starting on tangled hair: If the ends are rough, the braid will snag and the bun will look lumpy. Detangle from the bottom up before you even part the hair.
Pulling the braid too tight at the scalp: You’ll see tiny stress lines, and the child will probably complain within minutes. Keep the first inch snug, not painful, then ease up as you braid downward.
Using too much product: Heavy cream or gel can make wavy hair droop and turn the roots shiny in a not-so-good way. Use a light touch and add more only where the flyaways actually live.
Placing the bun too high: A high bun throws off the balance and can dig into a car seat or hoodie. Low styles stay more comfortable and usually last longer.
Skipping extra pins in thick hair: If the bun feels heavy, one elastic is not enough. Cross two bobby pins under the bun so it stays anchored.
Ignoring the layer pattern: Shorter layers near the face and crown need their own plan. If you don’t tuck or braid them early, they’ll escape first and make the whole style look unfinished.
Frequently Asked Questions
How long do low bun braids usually last on wavy hair?
A cleanly done style often looks good for one full day, and many hold into the next morning with satin pillowcase care. Thick waves and well-pinned buns can stretch a little longer, but fine hair usually needs a refresh sooner.
Should I braid damp hair or dry hair?
Slightly damp hair is easier to control, especially if the waves are fluffy or the ends keep separating. Wet hair is a bad idea because it stretches and takes too long to dry; bone-dry hair can be too frizzy and harder to part cleanly.
What if my child has fine wavy hair and the bun keeps sliding?
Use smaller sections, a snag-free elastic, and two crossed bobby pins under the bun. Fine hair often needs a bit more anchoring at the nape than thicker hair does.
Are these styles okay for school and sports?
Yes, as long as the braid isn’t tight enough to hurt and the bun sits low enough to stay comfortable. For active days, pick the versions with fewer loose pieces and a flatter bun shape.
Can I do these styles on layered hair?
You can, and some of them are better for layers than others. Pull-through braids, twin braids, and lace braids tend to trap shorter pieces more easily than a single smooth braid.
How much product should I use?
Less than you think. Start with a light mist of water and a small amount of leave-in on the mids and ends, then add a tiny bit more only if the hairline is sticking up. Heavy product can make wavy hair collapse.
What if the braid looks messy halfway through the day?
Do not start over unless you have to. Smooth the braid with damp hands, pin the bun back into shape, and tame the front with a little leave-in on your fingertips. Most of the time, that’s enough.
Can I add ribbons or bows without making the style slip?
Yes, if you attach them near the bun or weave them into the braid after the main structure is secure. Big clips at the crown can pull the braid off balance, so keep the decoration low and light.
Soft, Secure, and Easy to Wear
The best low bun braids are the ones a kid forgets about by recess. That’s the real win. They stay low, they keep the hair off the face, and they let wavy texture do some of the heavy lifting instead of fighting it every step of the way.
If you start with clean sectioning, a gentle amount of product, and a bun that sits at the nape instead of the crown, most of these styles become easier than they look. A braid does not have to be perfect to hold. It just has to be anchored in the right place.
Pick the version that matches the hair’s length, thickness, and the day you’re trying to survive. The waves will take care of the rest.