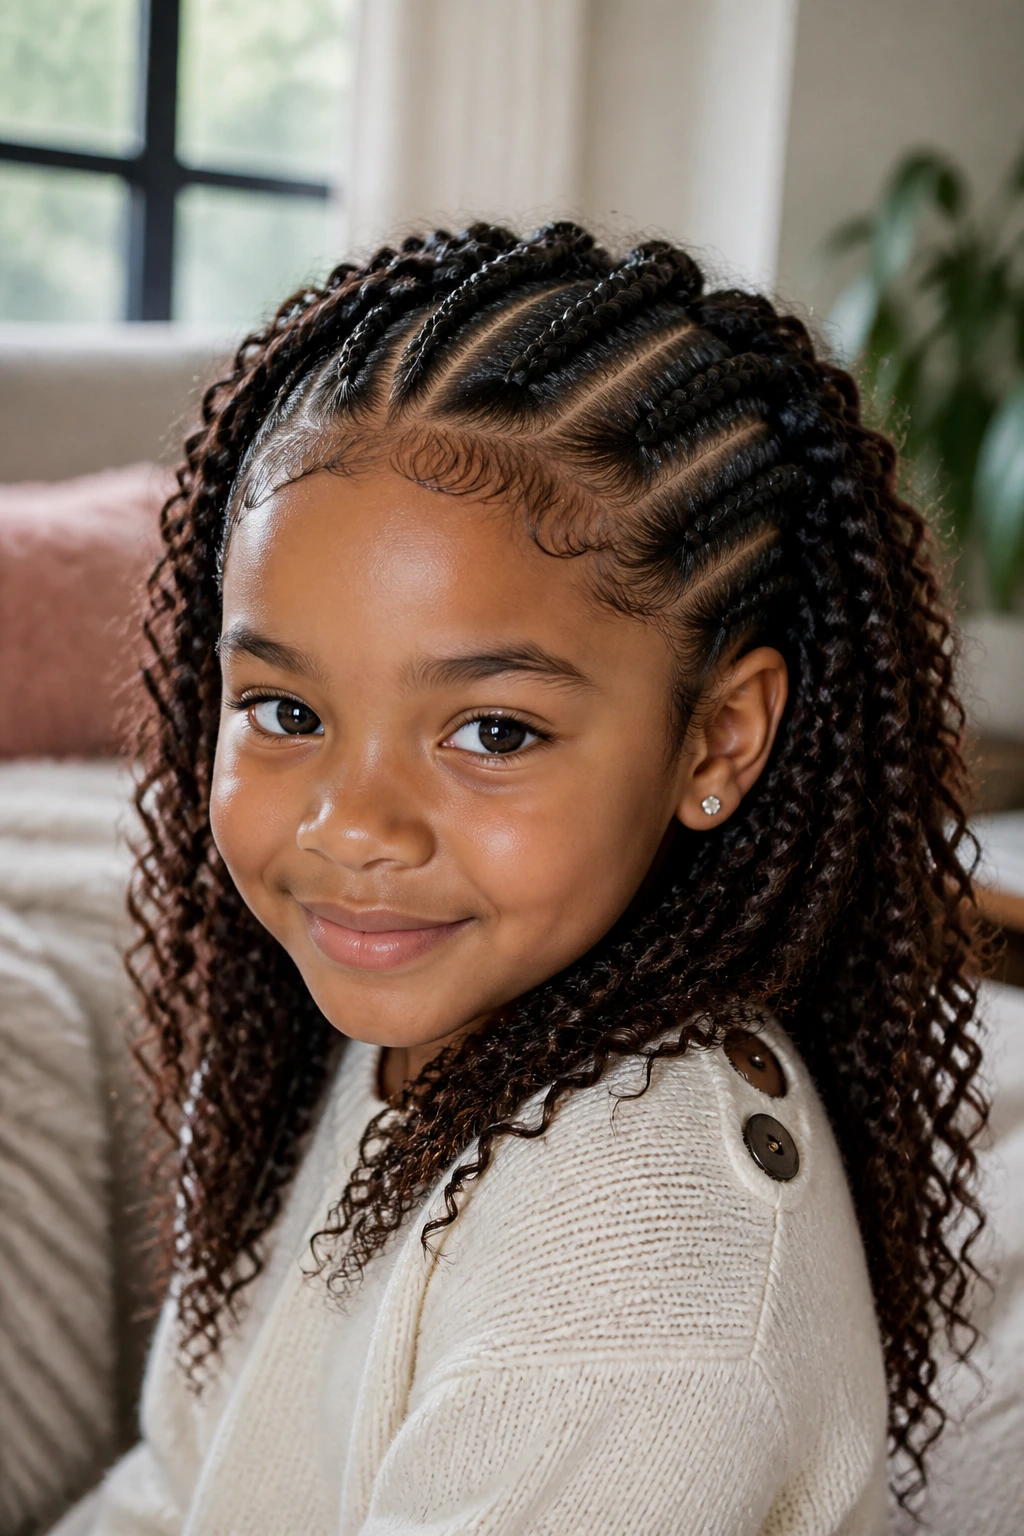
Chunky cornrows for kids with curly hair solve a very specific problem: the style needs to survive school drop-off, snack time, cartwheels, a hoodie pulled on too fast, and a pillow that never stays where it should at night. Tiny braids can look neat, but they often ask for more patience, more sitting still, and more maintenance than a child wants to give. Wide rows change the equation.
The best part is that chunky cornrows let curly texture stay part of the story. The roots can be tidy without flattening the whole head into something stiff or overworked. On springy curls, a wider braid line holds shape with less fuss. On denser coils, the same braid can be fed in a little more generously so the style sits balanced instead of pinched at the temples.
That balance matters. A child’s hair style has to do a job, not just pose for a photo. It should keep the face clear, keep the scalp calm, and still leave room for beads, ribbons, swirls, puffs, and a little personality. The 18 looks below lean into that practical side without getting boring.
Why These Styles Feel Easier to Live With
- Less Chair Time: Fewer, wider rows usually mean a shorter install, which helps a lot when a child is done sitting long before the braider is done.
- Kinder on Tender Edges: When the parts are roomy and the tension stays light, the hairline is less likely to feel sore or look stressed.
- Easy to Refresh: A quick mist, a little leave-in, and a scarf can keep the roots in shape without taking everything apart.
- Works With Curly Texture: The style keeps the curls organized while the natural bend and puff of the hair still show through.
- Dress It Up or Keep It Plain: Beads, cuffs, ribbons, and bows fit these styles, but the rows still look finished if you skip the extras.
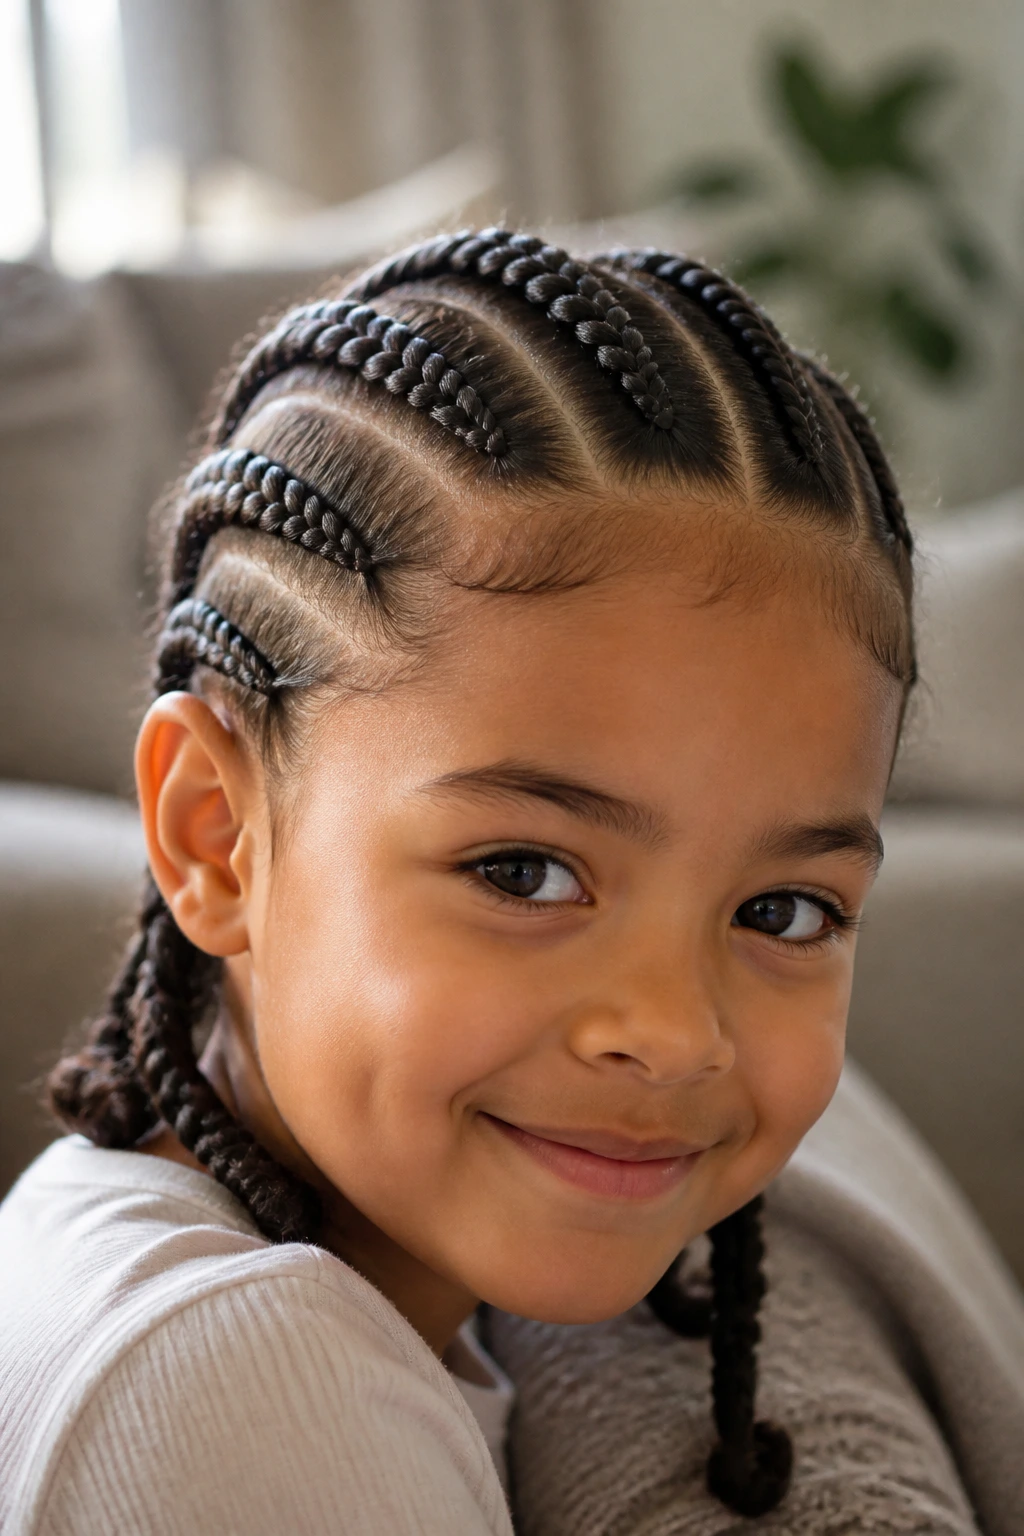
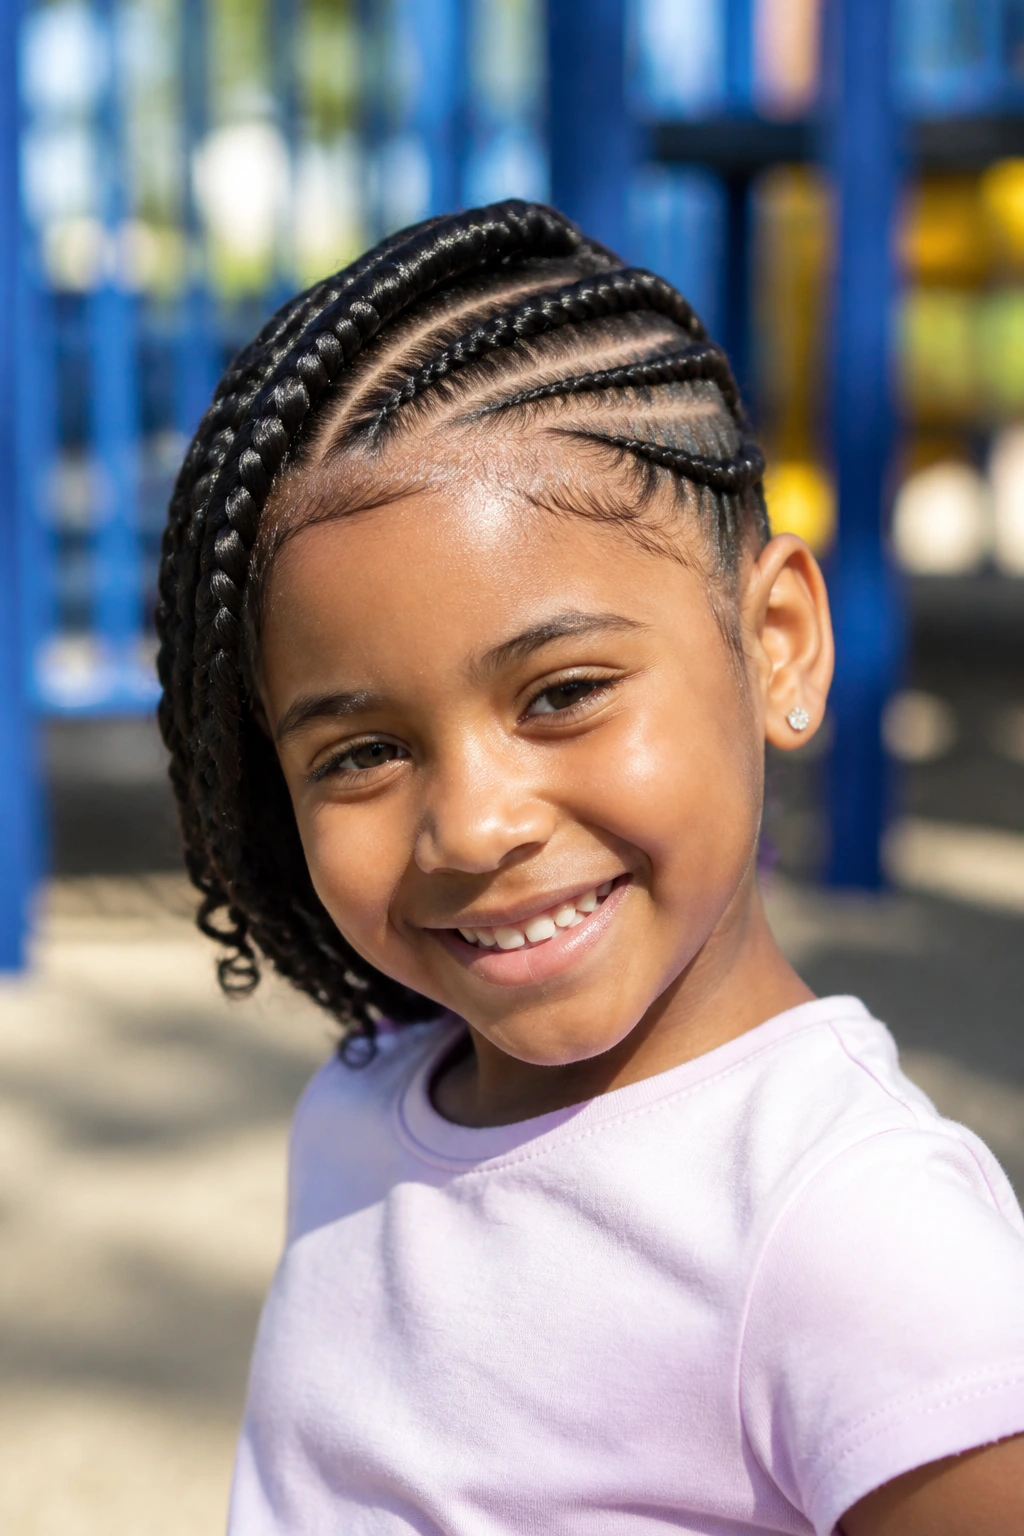
1. Straight-Back Jumbo Cornrows
Straight-back rows are the no-nonsense version of chunky cornrows for kids with curly hair. The parts run cleanly from the forehead to the nape, which gives the whole style a calm, orderly look even when the child’s curls are springy and full. It’s the braid pattern I’d pick when a morning needs to stay simple.
Why the Straight Line Works
Straight-back rows keep the face open and the hair out of the eyes, which is useful for glasses, helmets, and children who touch their bangs every five minutes. The clean path also makes it easier to keep the sections even, because you’re not chasing curves or angles across the scalp.
- Best for: school days, sports, and kids who hate hair in their face.
- Part count: 4 to 8 rows usually reads chunky without looking crowded.
- Finish: beads at the ends or small clear elastics, nothing heavy at the front.
- Texture note: dense curls often sit better with slightly wider front sections.
Quick tip: if the first row feels tight, it is too tight. The front hairline should not need to be “pushed through” to look neat.
2. Two Oversized Braids with a Clean Middle Part
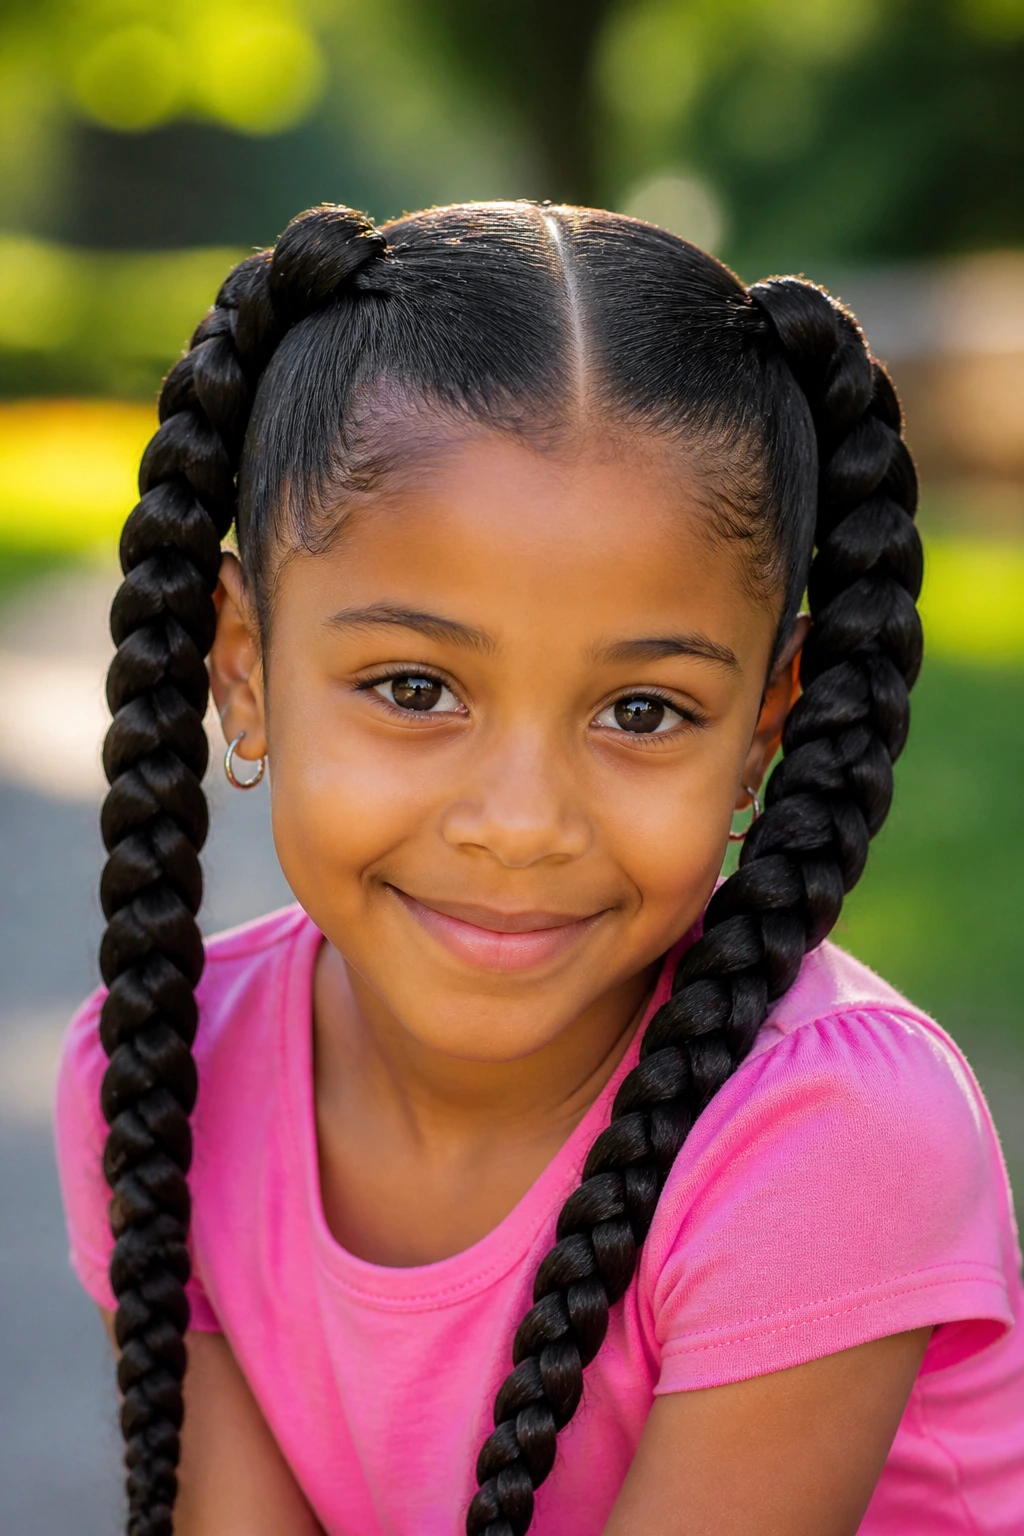
Two big braids solve a lot of problems with almost rude efficiency. They’re symmetrical, they sit flat under hats, and they keep the whole head looking tidy without turning the styling chair into a marathon. On curly hair, the middle part gives the style a crisp spine, then the thick braids do the rest.
The reason I like this one for kids is simple: it looks polished even when the child has been running around for hours. The braids can end in beads, bows, or just a simple curl tucked at the bottom. If the hair is thick, a little feed-in at the top helps the base look smooth instead of bulky.
This style also ages well across the week. Day one is clean and sleek. Day three has a little softness near the part, which honestly makes it look better on many kids than it did fresh from the chair. You can pull one braid into a low ponytail, cross the ends with ribbon, or leave them hanging if the child likes movement.
3. Curved Feed-In Rows That Hug the Head
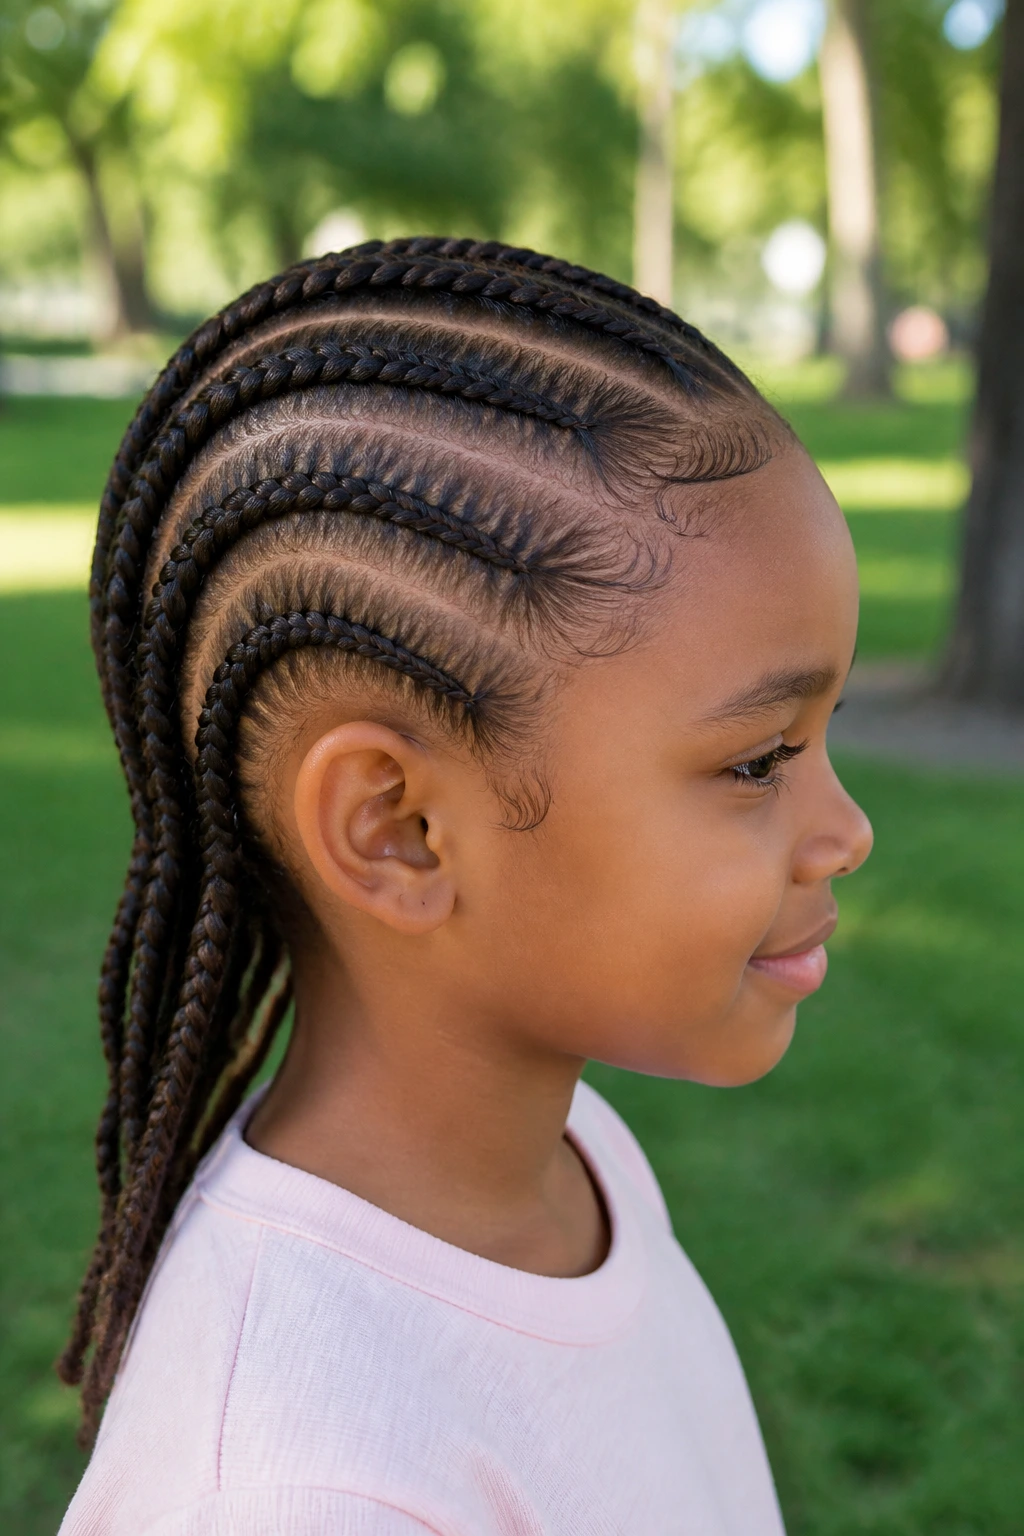
Why do curved feed-in rows look so polished on curly hair? Because they follow the shape of the head instead of fighting it. The braid line can sweep around the crown, dip behind the ear, and come back toward the nape with almost no hard corners. That movement softens the whole style.
On curly hair, the curve also helps the style feel less boxy. The roots stay neat, but the rows have enough bend to work with the child’s natural head shape. If the hairline is a little uneven, the curve can hide it better than a rigid straight line ever will.
How to Wear It
- Keep the curve shallow near the front so it doesn’t crowd the temples.
- Use 4 to 6 rows if you want the pattern to stay visible from the side.
- Add one or two cuffs near the ends, not all over the head.
- This style works well for picture day because the curve catches the eye without needing a lot of extras.
A clean feed-in matters here. Start small at the root, then feed in more hair as the row travels back. The braid should look smooth, not swollen.
4. Crown Cornrows Collected into a Puff
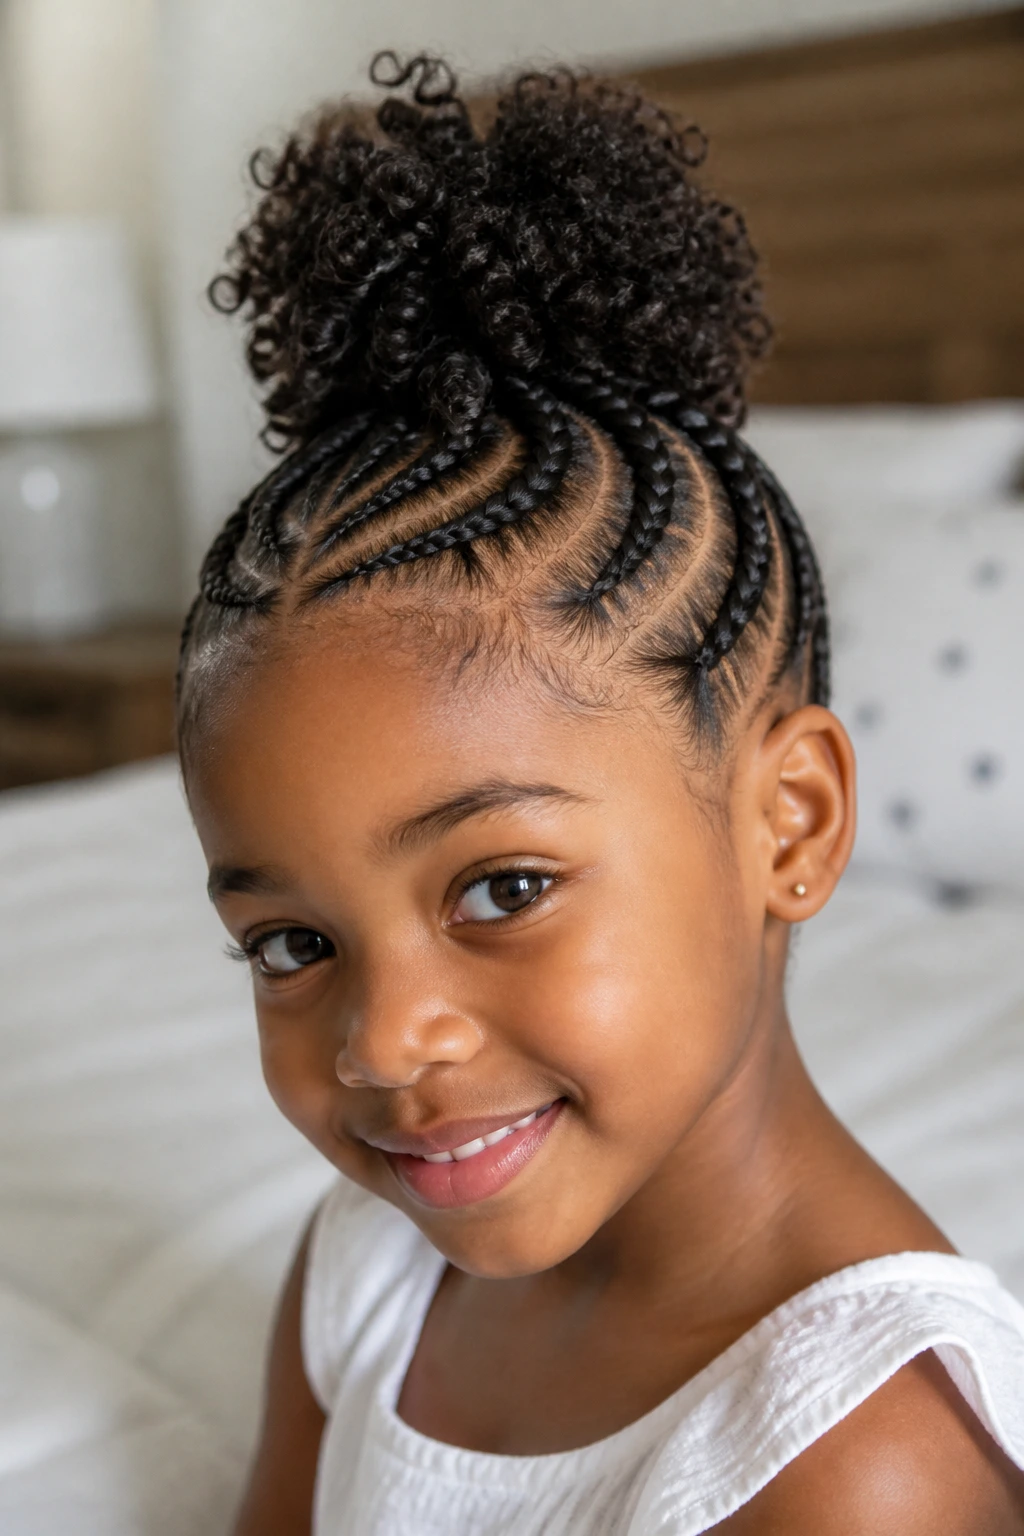
Picture a child who needs their hair out of the way for class but still wants a little softness at the top. Crown cornrows into a puff handle that beautifully. The rows wrap around the perimeter of the head, leaving the crown or back section gathered into a puff that keeps the style playful instead of severe.
The mechanism is simple. The cornrows do the job of controlling the hairline and sides, while the puff keeps the curly texture visible where it can breathe. That makes this one especially nice for kids whose hair looks best when it is not flattened everywhere. You get structure and volume in the same style.
- Best for: medium to thick curly hair.
- Shape note: keep the crown puff high for a bouncy look, or lower for a calmer profile.
- Add-on: a satin bow at the puff base keeps it from feeling too plain.
- Wearability: useful when you want the front neat but don’t want the whole head braided down.
One little detail matters. Leave enough hair in the puff so it still moves. If it looks like a tight knot, it’s too small.
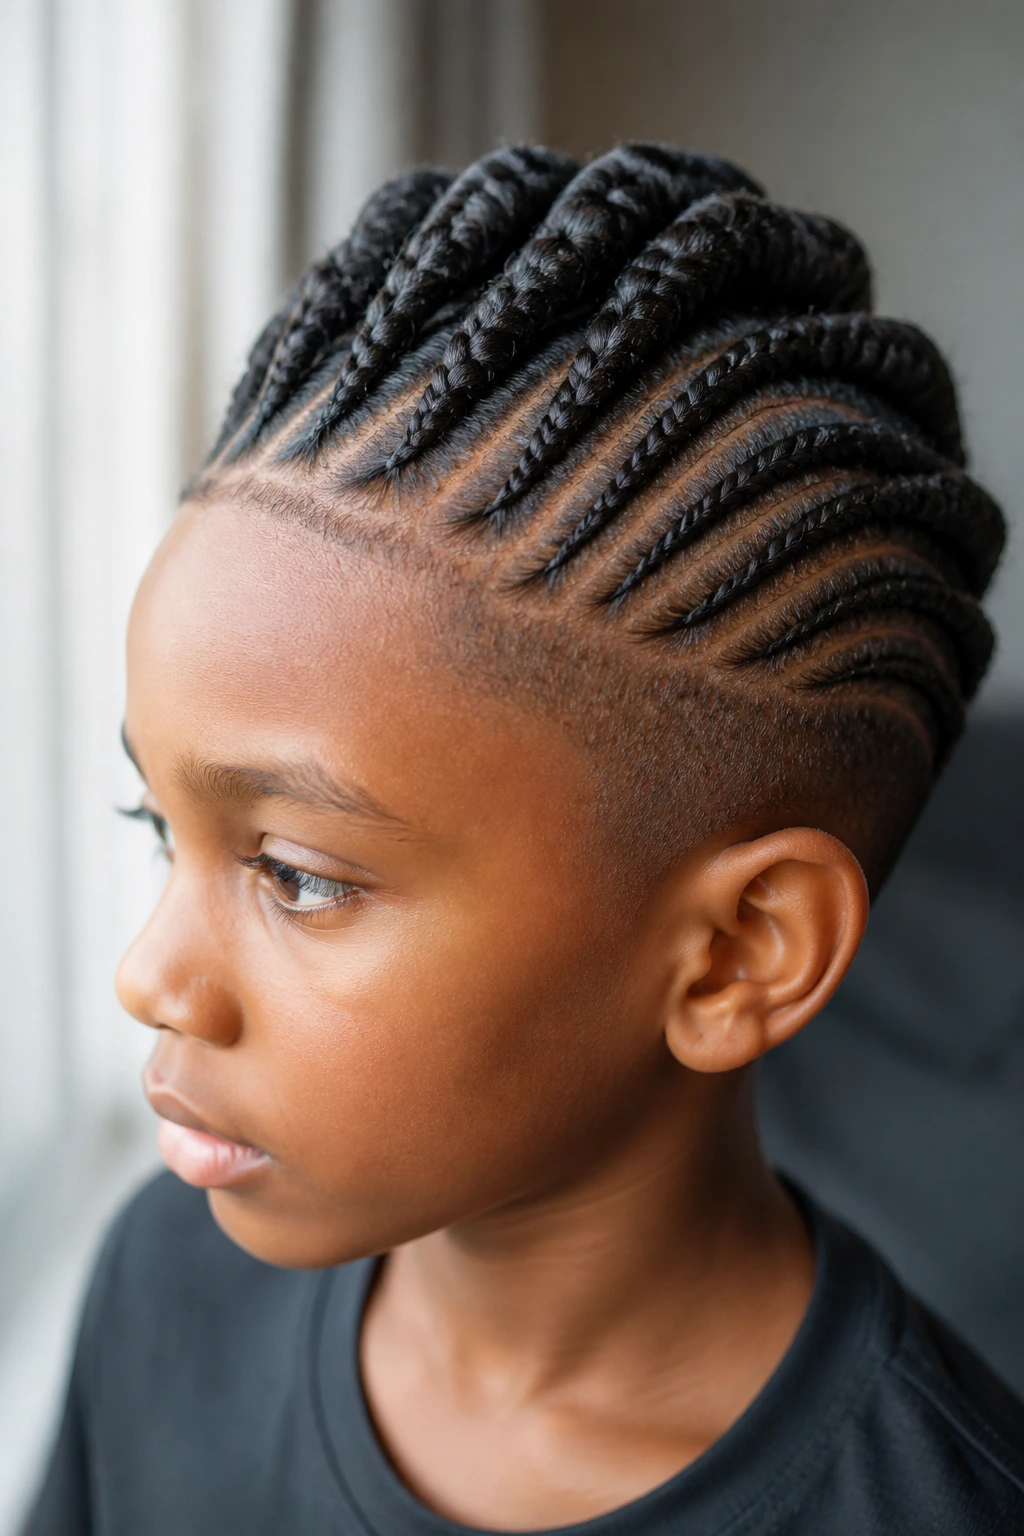
5. Side-Swept Chunky Cornrows
Side-swept cornrows are the style I reach for when I want motion without mess. The rows start near one side of the forehead and travel diagonally across the head, which gives the look a little swing. On curly hair, that diagonal line can be a lifesaver when the child likes to tuck hair behind one ear or keep one side open.
This style also works when the hairline isn’t perfectly even. A side part softens a lot. You don’t have to force every section into symmetry, and that takes pressure off the styling process. The result feels relaxed, but not sloppy.
The best version keeps the rows chunky enough to see the pattern from a few feet away. Too many small rows and the whole point disappears. Too few, and the diagonal sweep looks accidental. Somewhere in the middle is where it sings.
I also like this one for kids who wear hair accessories. A single clip at the heavy side, or a ribbon where the braids end, gives it a finished edge without making it fussy.
6. Four Jumbo Braids with Beads
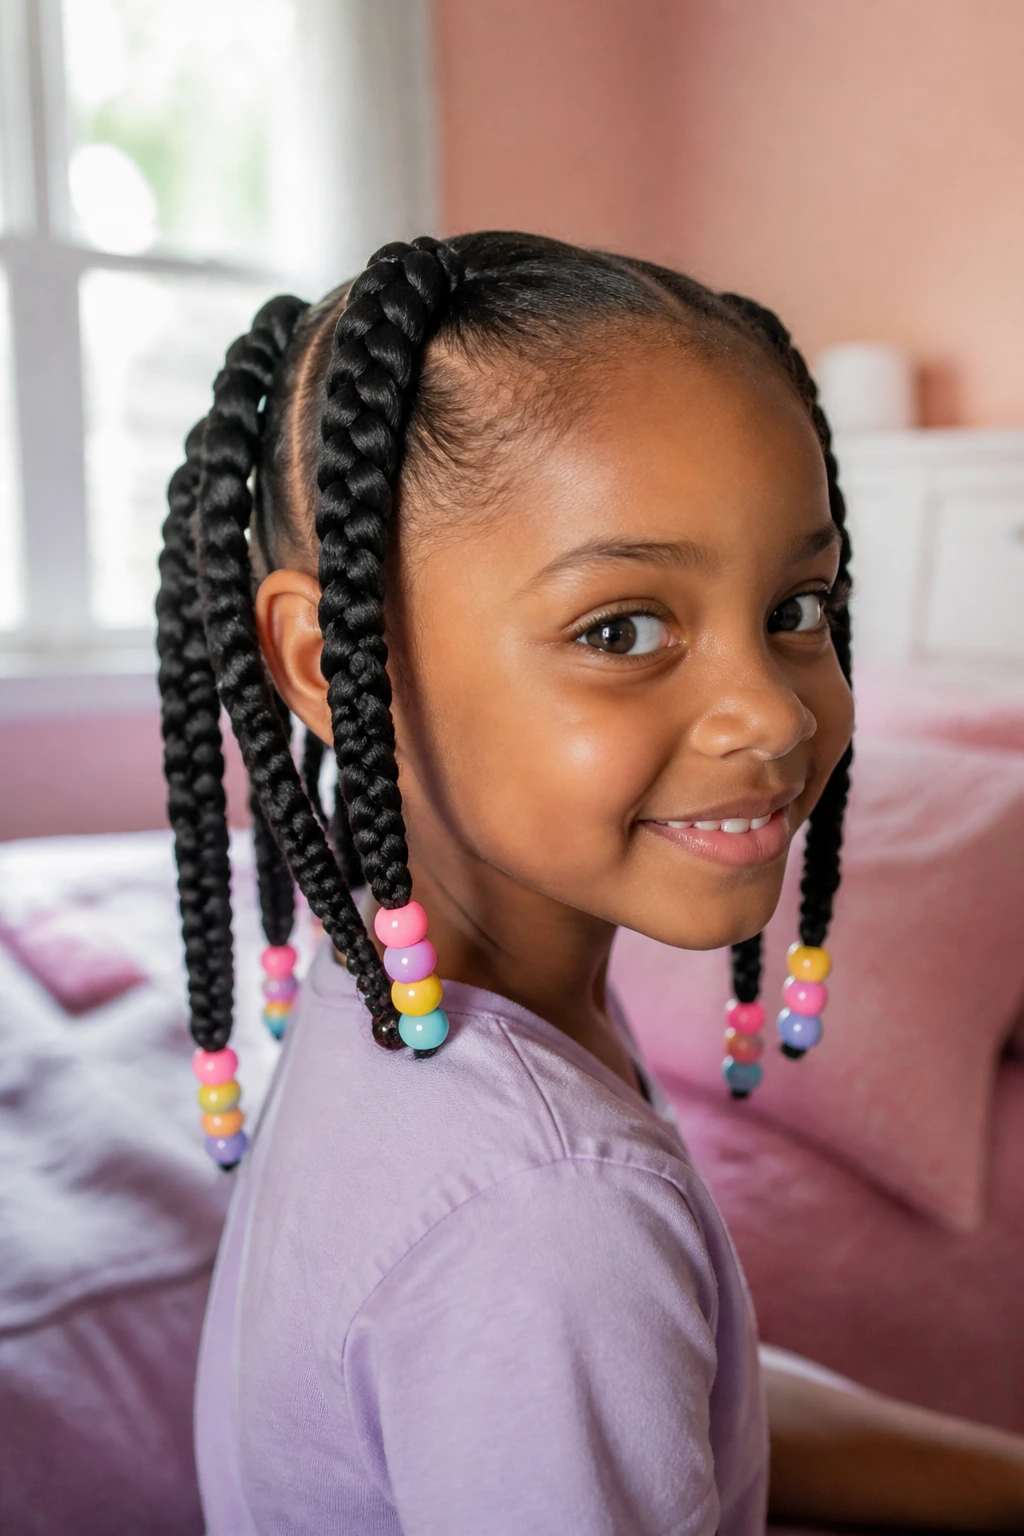
Four jumbo braids are a strong choice when you want the hair to look finished without crowding the scalp with too many parts. Compared with smaller feed-ins, this version keeps the head lighter and the install calmer. The beads add motion, but the braids themselves stay bold and easy to read.
The thing to watch is weight. Beads are fun, and kids love the sound they make, but too many beads stacked near the roots can tug. Keep the heavier pieces toward the ends. A neat row of 3 to 5 beads per braid is usually plenty unless the child specifically wants more sparkle.
This style is especially good for thick curly hair because the braid size matches the volume of the hair itself. A tiny braid on a dense head can look busy in a bad way. Four chunky braids look intentional. They also make it easier to wrap the hair at night, which matters more than most people admit.
If the child likes a little movement at the ends, leave the braids long and finish with clear elastics before adding beads. It keeps the ends from fraying and makes the beads sit better.
7. Low-Bun Cornrows That Stay Out of the Way
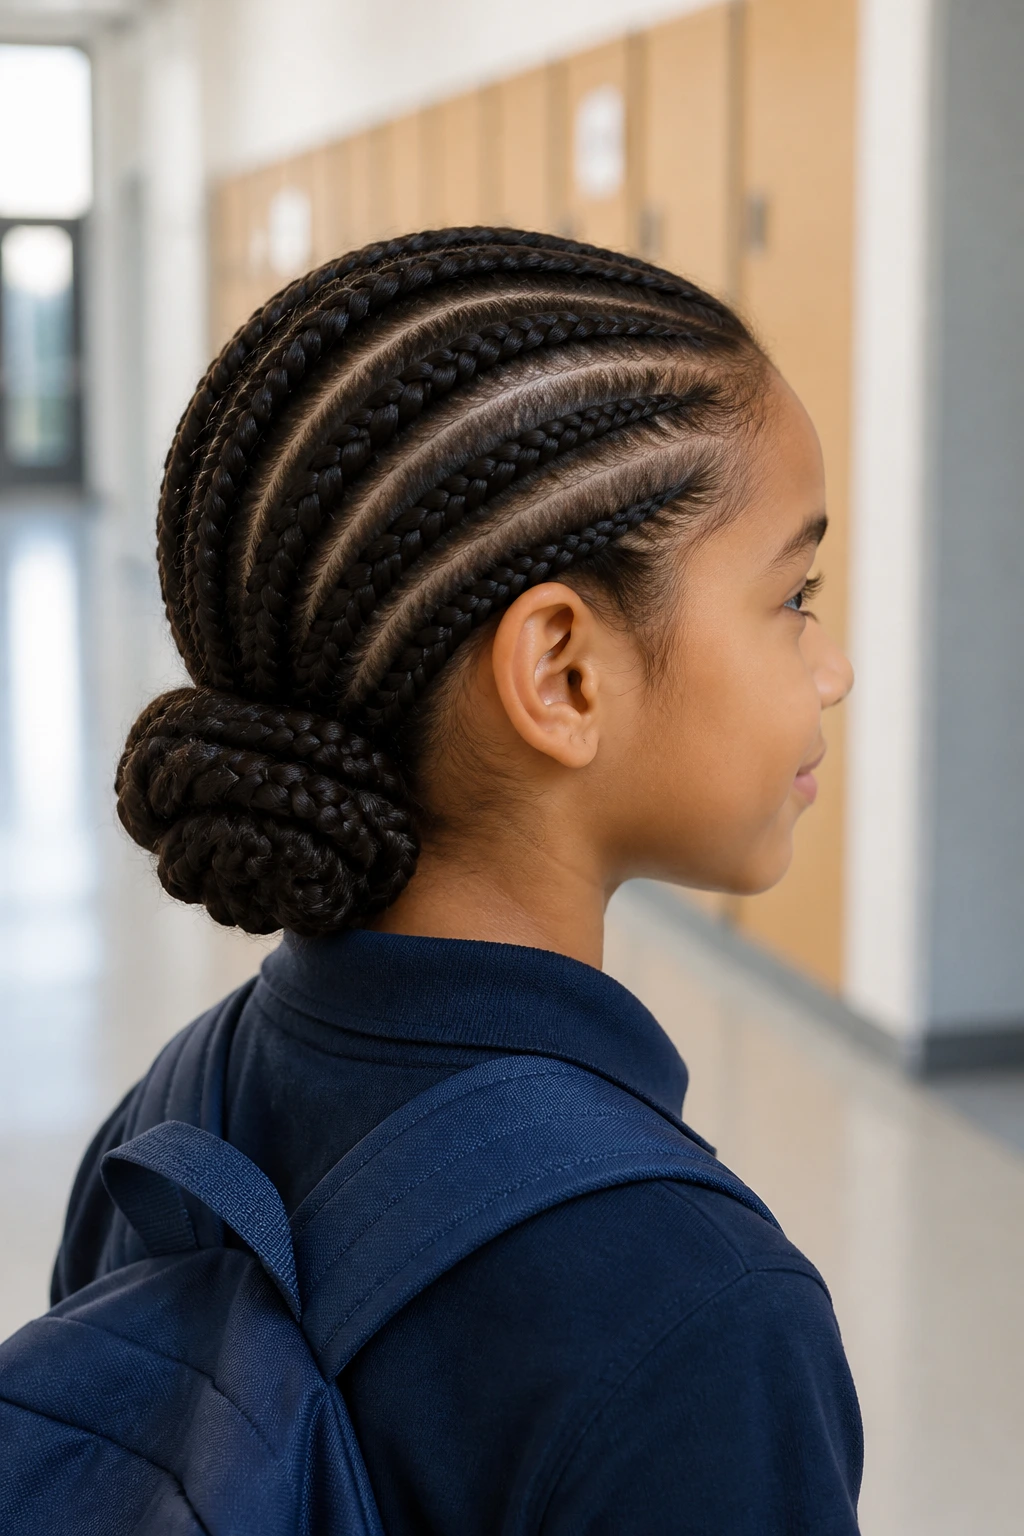
Low-bun cornrows are the sensible answer for a child who uses her head like it’s a moving target. The rows head toward the nape, then gather into a low bun that keeps the style tucked and compact. On curly hair, this works well because it leaves less loose ends to frizz up during the week.
The Shape Matters
The bun should sit low enough to be comfortable against a car seat or classroom chair. If it rides high, the back of the head starts doing the complaining. Keep the rows soft at the base, then wrap the bun without pulling it hard into a knot.
- Great for: school uniforms, choir, family events, and helmet days.
- Finish option: wrap the bun with a braided strand or a satin ribbon.
- Texture note: hair that puffs quickly benefits from a light mousse at the roots.
- Comfort check: the child should be able to nod without feeling the bun tug.
A low bun is not flashy. That’s the point. It just stays put.
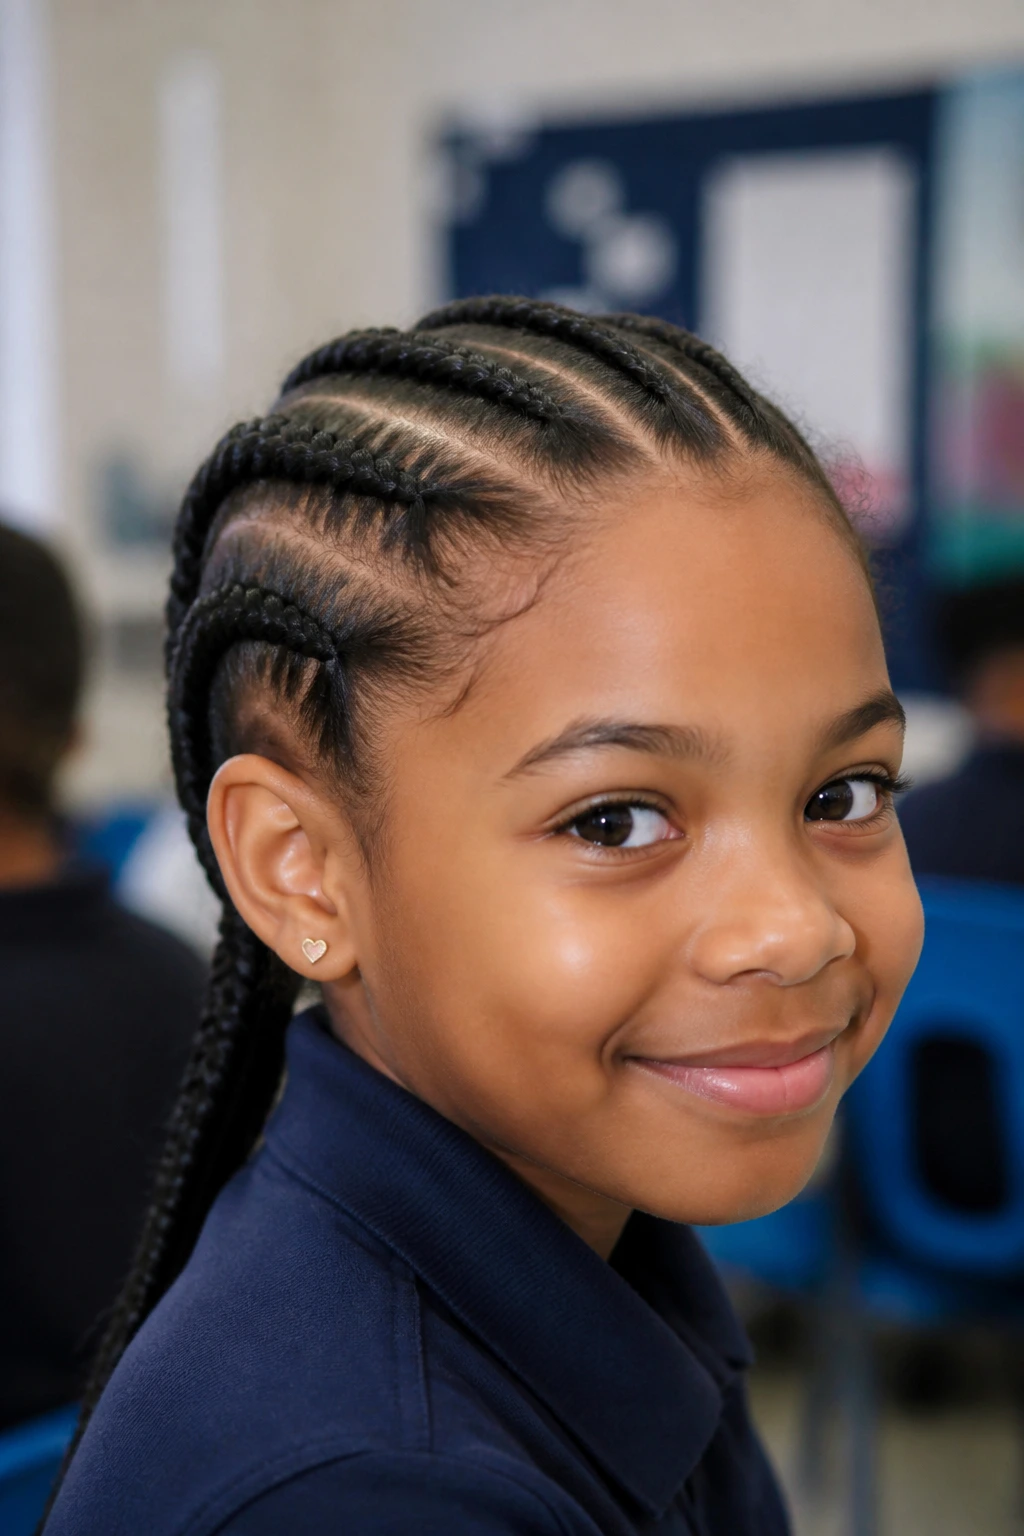
8. Zigzag-Part Cornrows with a Bold Pattern
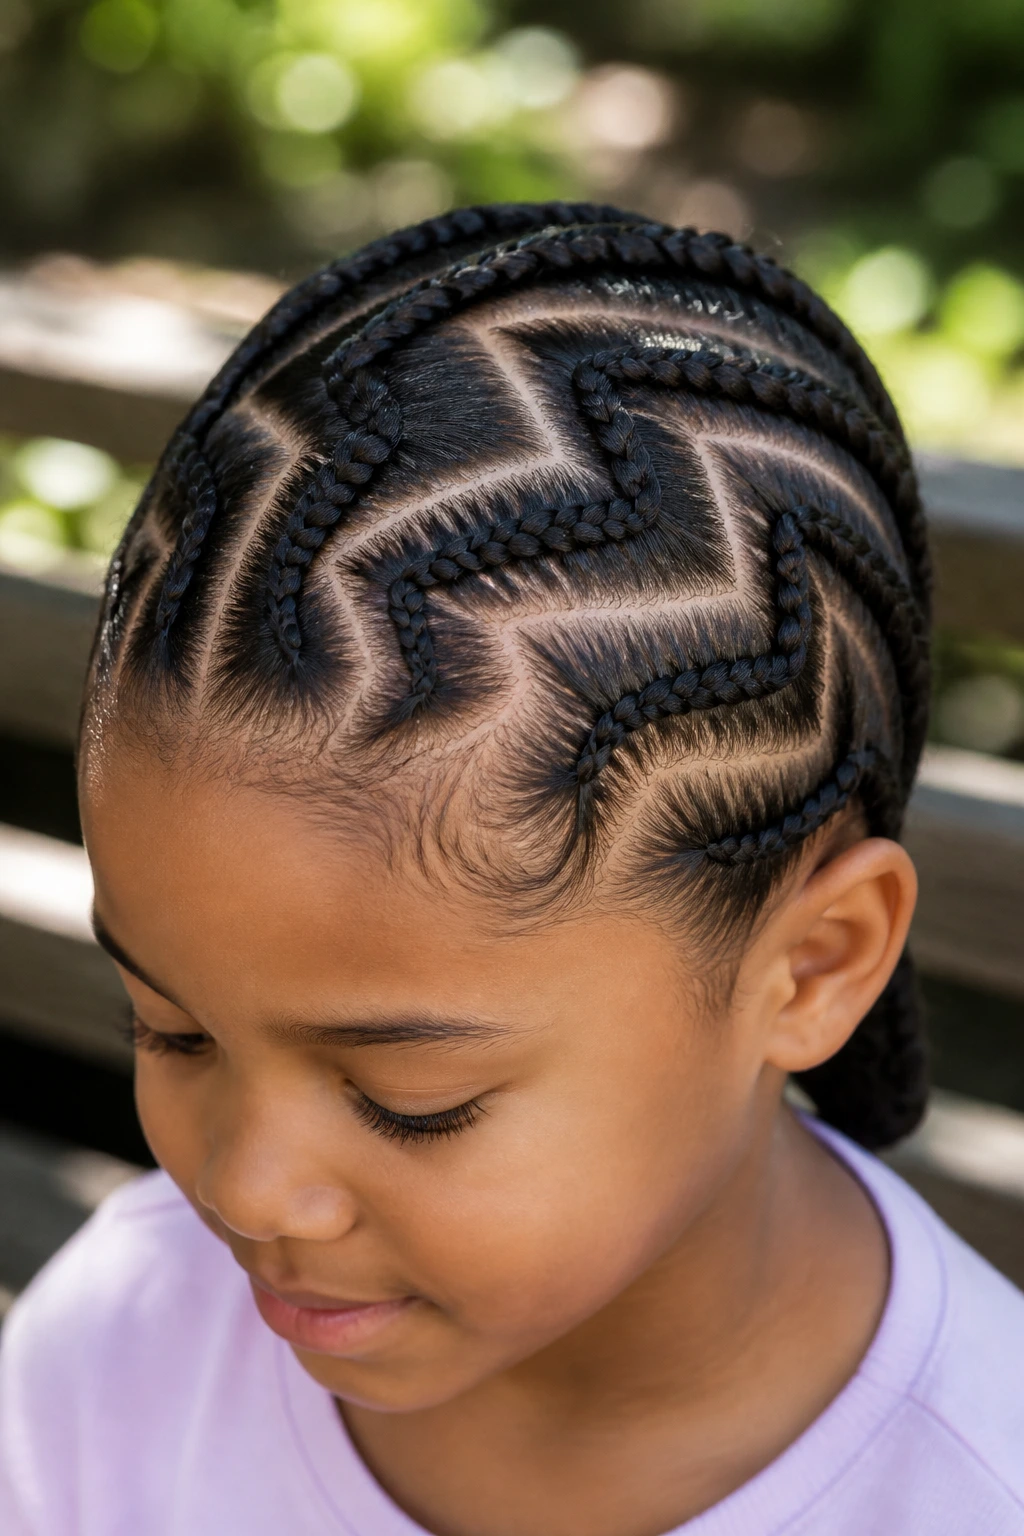
Zigzag parts make chunky cornrows look playful before you even touch the braid. The pattern is what catches the eye first. Then the thick rows follow the lines and turn the whole style into something with a little edge. Kids who like a more expressive look usually go straight for this one.
The trick is to trace the zigzag before you braid anything. Use the tail of the comb, clip the sections, and check the shape from both sides. If the parts are too sharp, they can look choppy. If they’re too soft, the pattern disappears once the braids go in.
This is one of those styles that rewards patience at the beginning. The parts do the heavy lifting. Once they’re right, the braids themselves are straightforward. Curly hair actually helps here because the texture adds contrast against the clean lines, so the zigzag reads more clearly than it would on very flat hair.
I’d keep the accessories simple. The parting already has personality. A few cuffs or one color accent is enough.
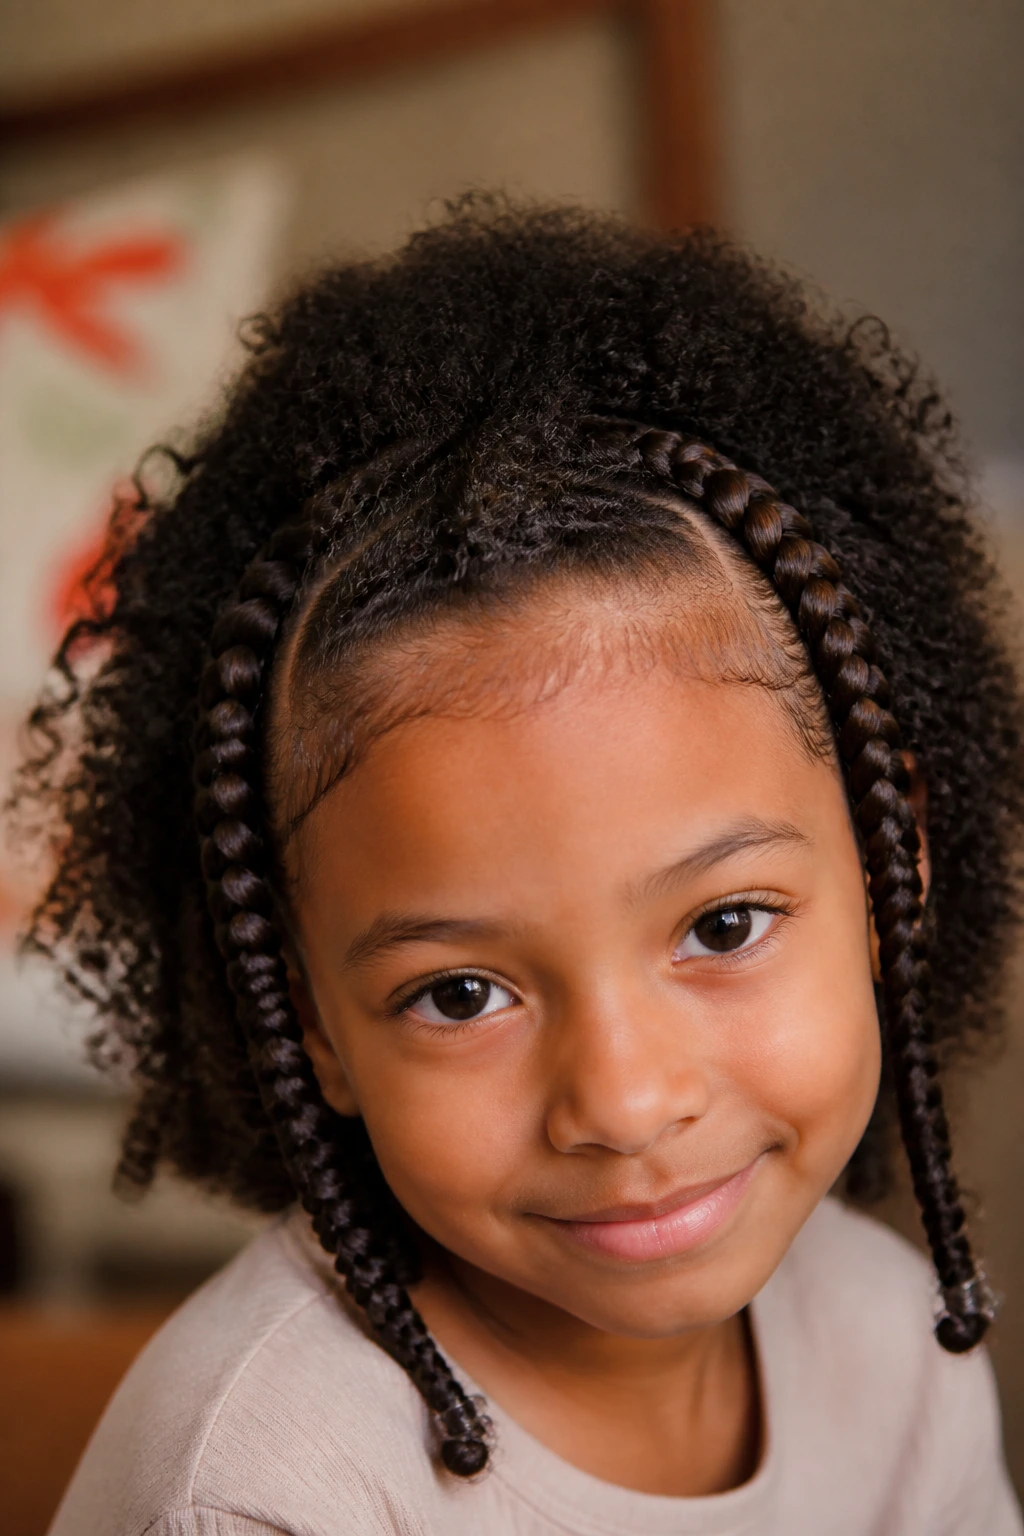
9. Half Cornrows, Half Curly Ends
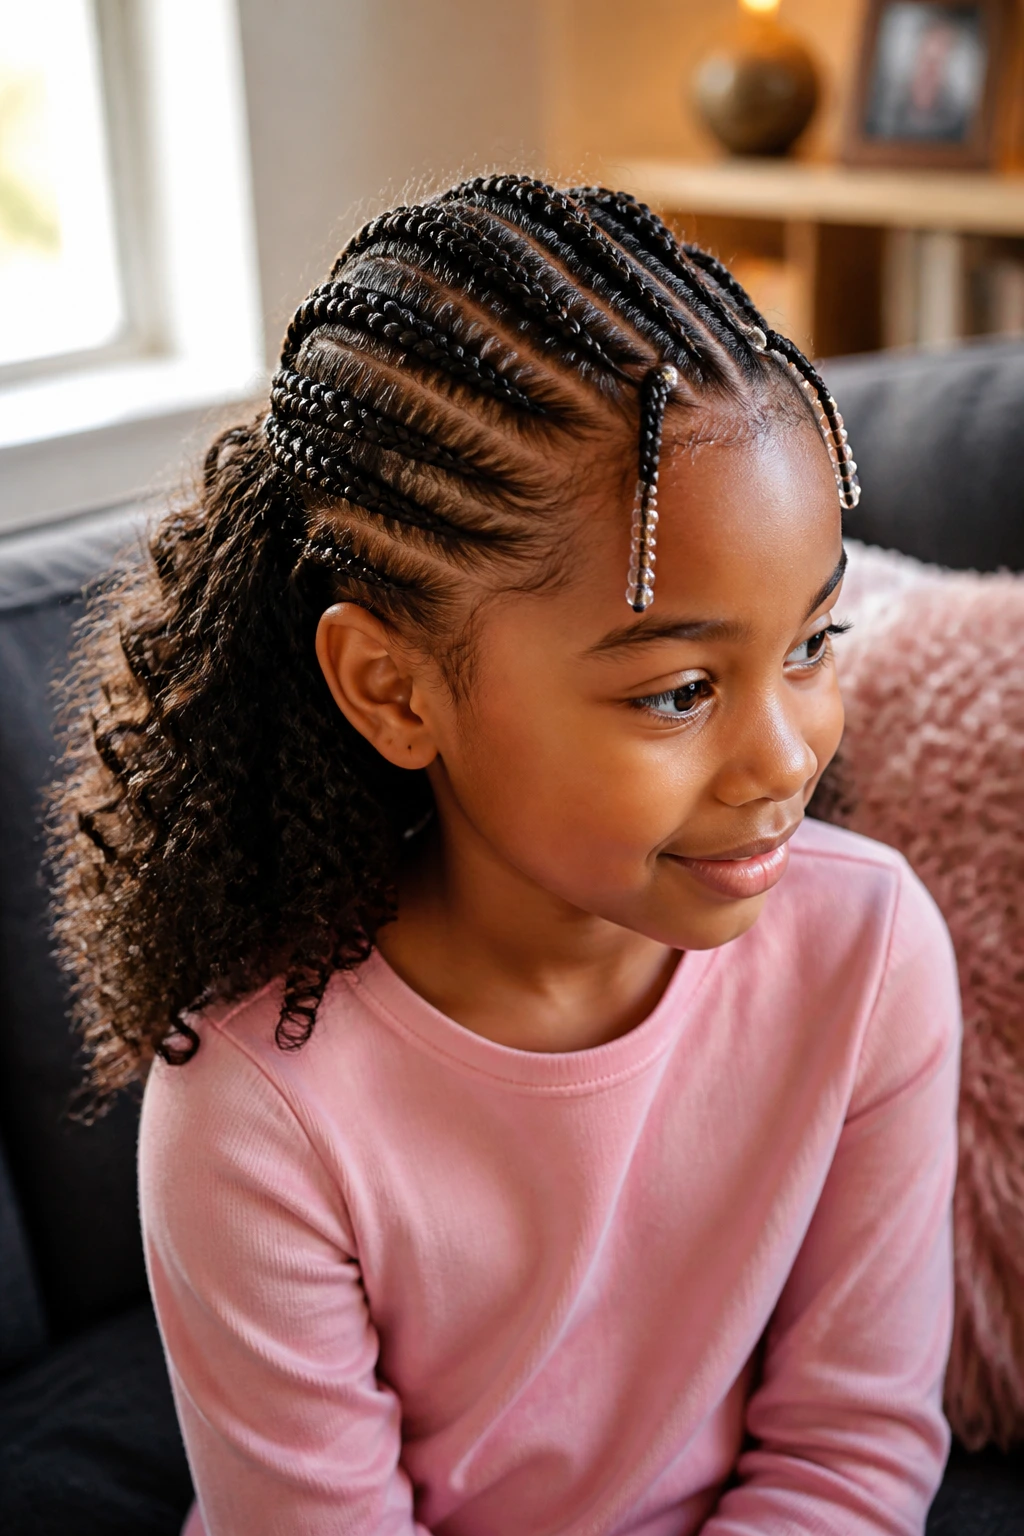
Why braid the whole head if you want some of the curl to stay visible? Half cornrows, half curly ends give you both. The front or top section is braided into chunky rows, then the back is left loose, stretched, or lightly defined so the curls still bounce.
This style is useful when a child likes the feeling of hair down but still needs the front controlled. It keeps the eyes clear and the crown neat, while the ends stay soft. On curlier hair, that contrast can look especially good because the texture difference is part of the appeal.
How to Wear It
- Use 3 to 5 rows at the front, depending on head size.
- Leave the back in twists, wash-and-go curls, or a puffed-out finish.
- A small side clip can separate the braided section from the loose section.
- This style suits kids who want movement more than polish.
The main thing to avoid is over-bracing the front. You want the braid area clean, not rigid. The loose section should feel like a choice, not an afterthought.
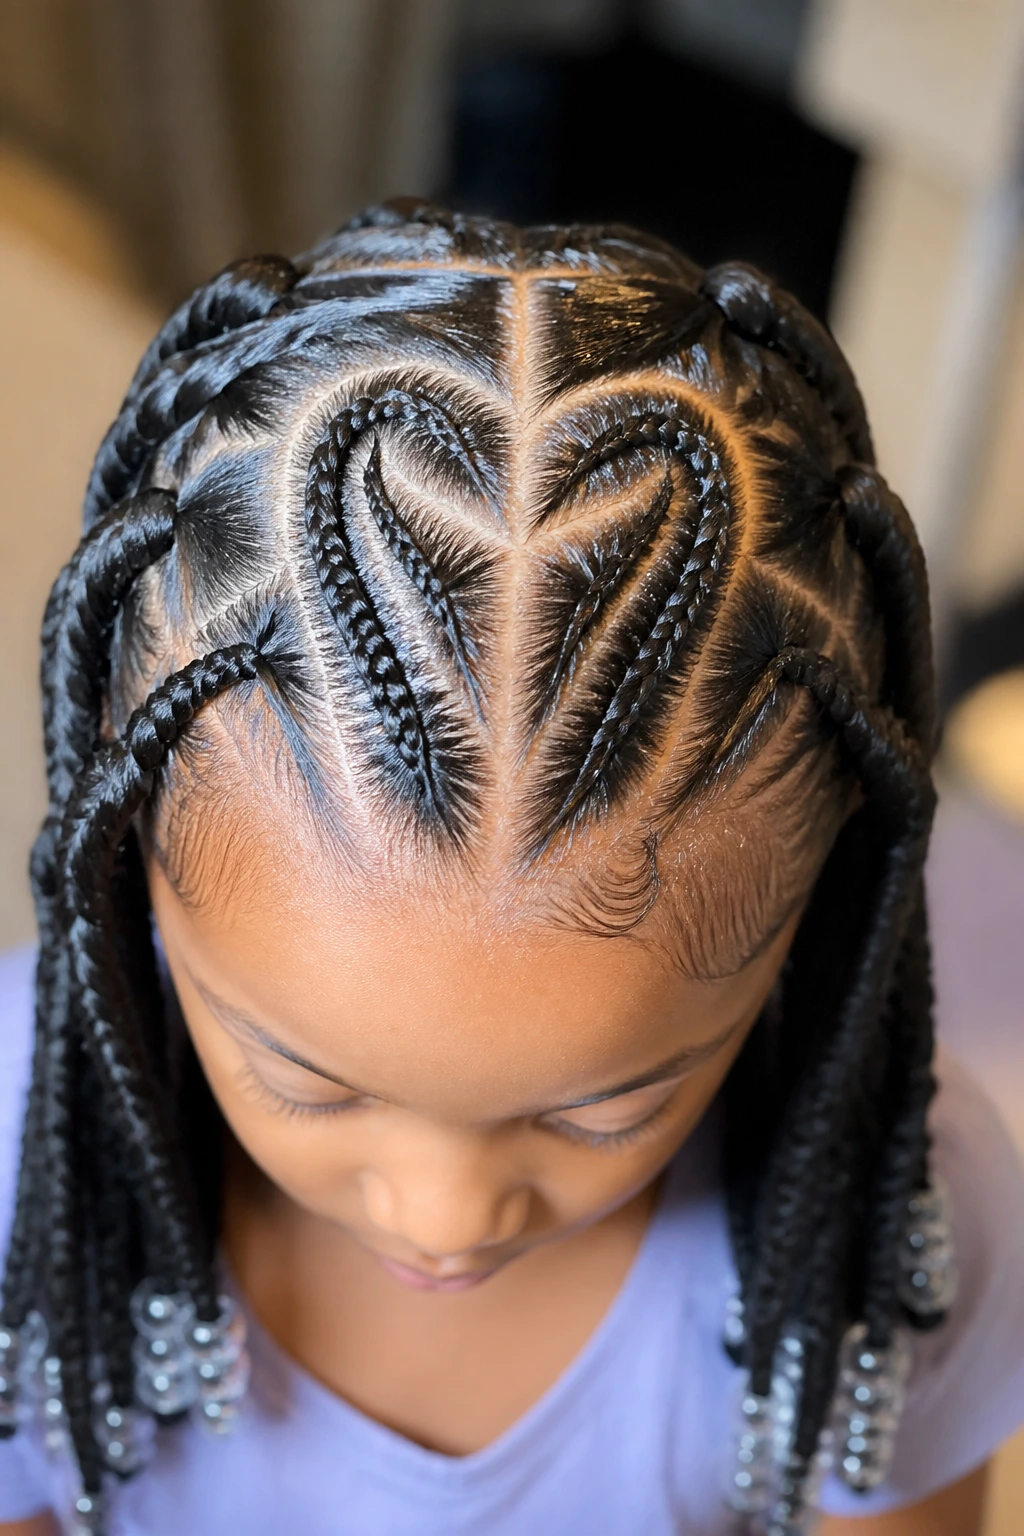
10. Heart-Part Cornrows for a Fun Finish
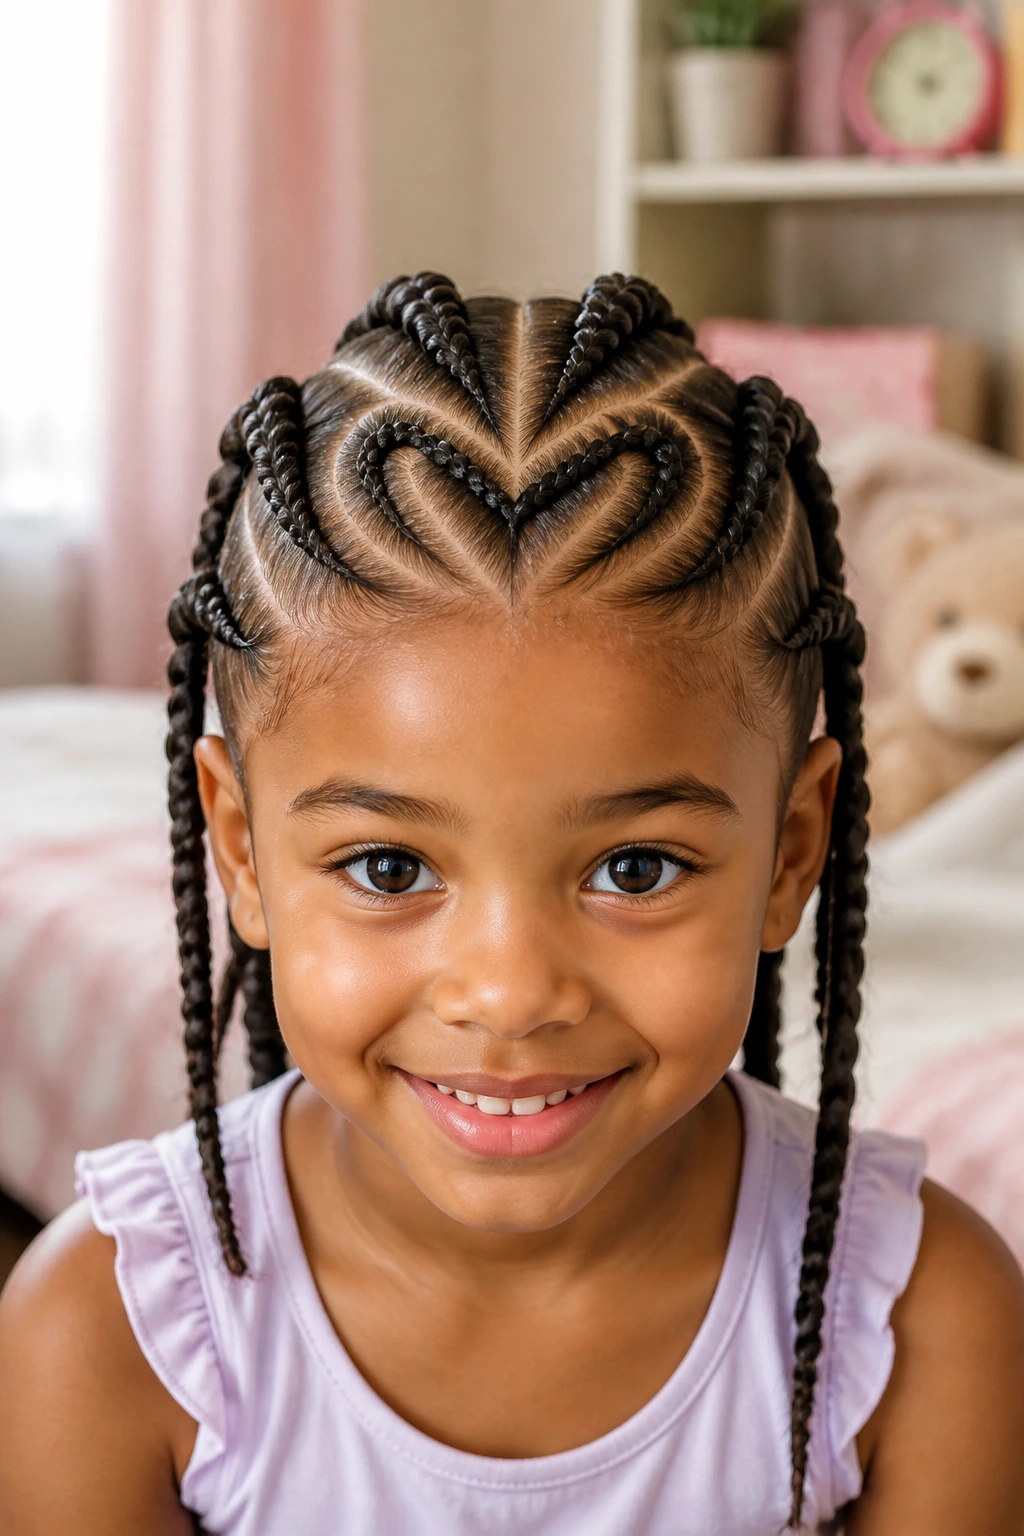
Heart parts look cute, but they are not the style I’d force onto a child who hates sitting still. The part itself needs attention. Once it lands, though, the result has a lot of charm. A heart shape near one side or across the crown adds just enough personality without turning the whole head into a costume.
The reason this works on curly hair is that the texture gives the design some softness. A heart part on very fine hair can look thin or sharp. On curls, the braid lines have more body, so the shape reads better from a distance. The rows can be chunky and still sit around the part neatly.
If you’re doing this for a birthday, photo day, or a special outing, keep the rest of the style simple. One shape is enough. A heart part plus four thick rows is elegant in the plainest sense of the word. It doesn’t need more.
I like this one best when the child wants “something different” but not something fussy. That line is thinner than people think.
11. Side Cornrows Feeding into a High Puff
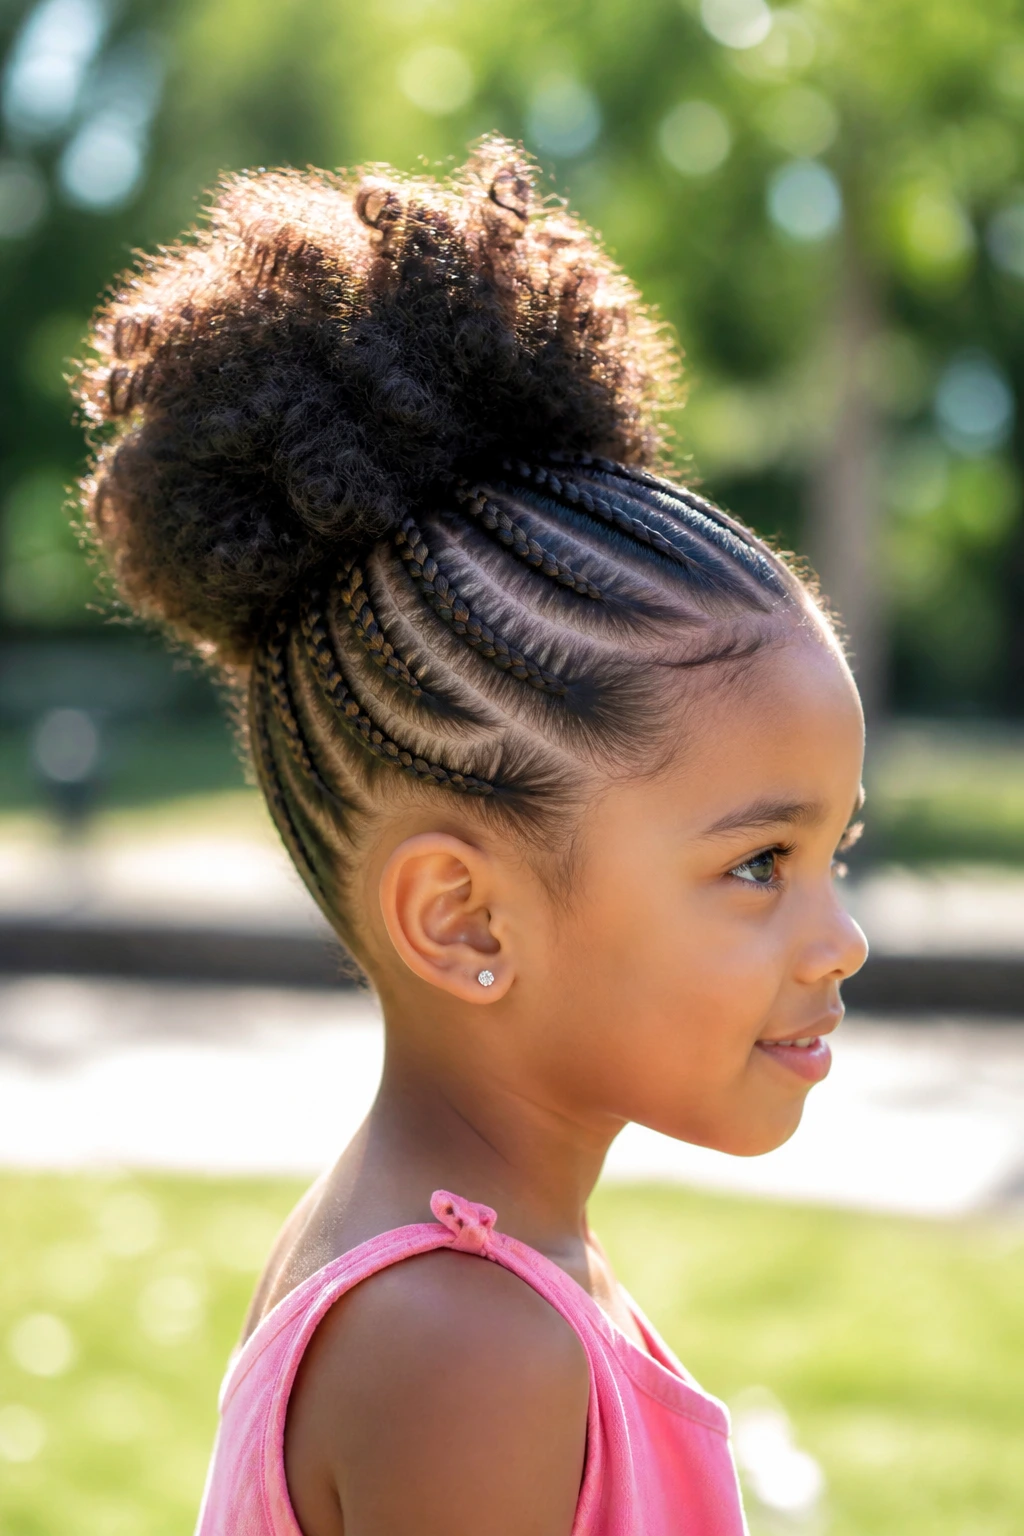
Side cornrows that feed into a high puff bring a little lift to the crown and a lot of freedom to the rest of the hair. The braids sweep from one side toward the top, then gather into a puff that sits high and proud. It’s one of the better options when a child likes volume.
The high puff keeps the style from feeling heavy. That matters with curly hair, because dense texture can drag if everything is braided straight down. Here, the puff gives the curls room to show off, while the side rows keep the front and temples controlled.
This one is especially handy for active kids. The front stays neat. The back moves. The style also plays well with sports uniforms and hoodies because the braids don’t create a big lump at the nape.
A small scrunchie at the base is better than a tight band. If the puff looks stretched or the braid base is pulling, loosen it. The shape should feel buoyant, not packed.
12. Cornrow Ponytail with a Wrapped Base
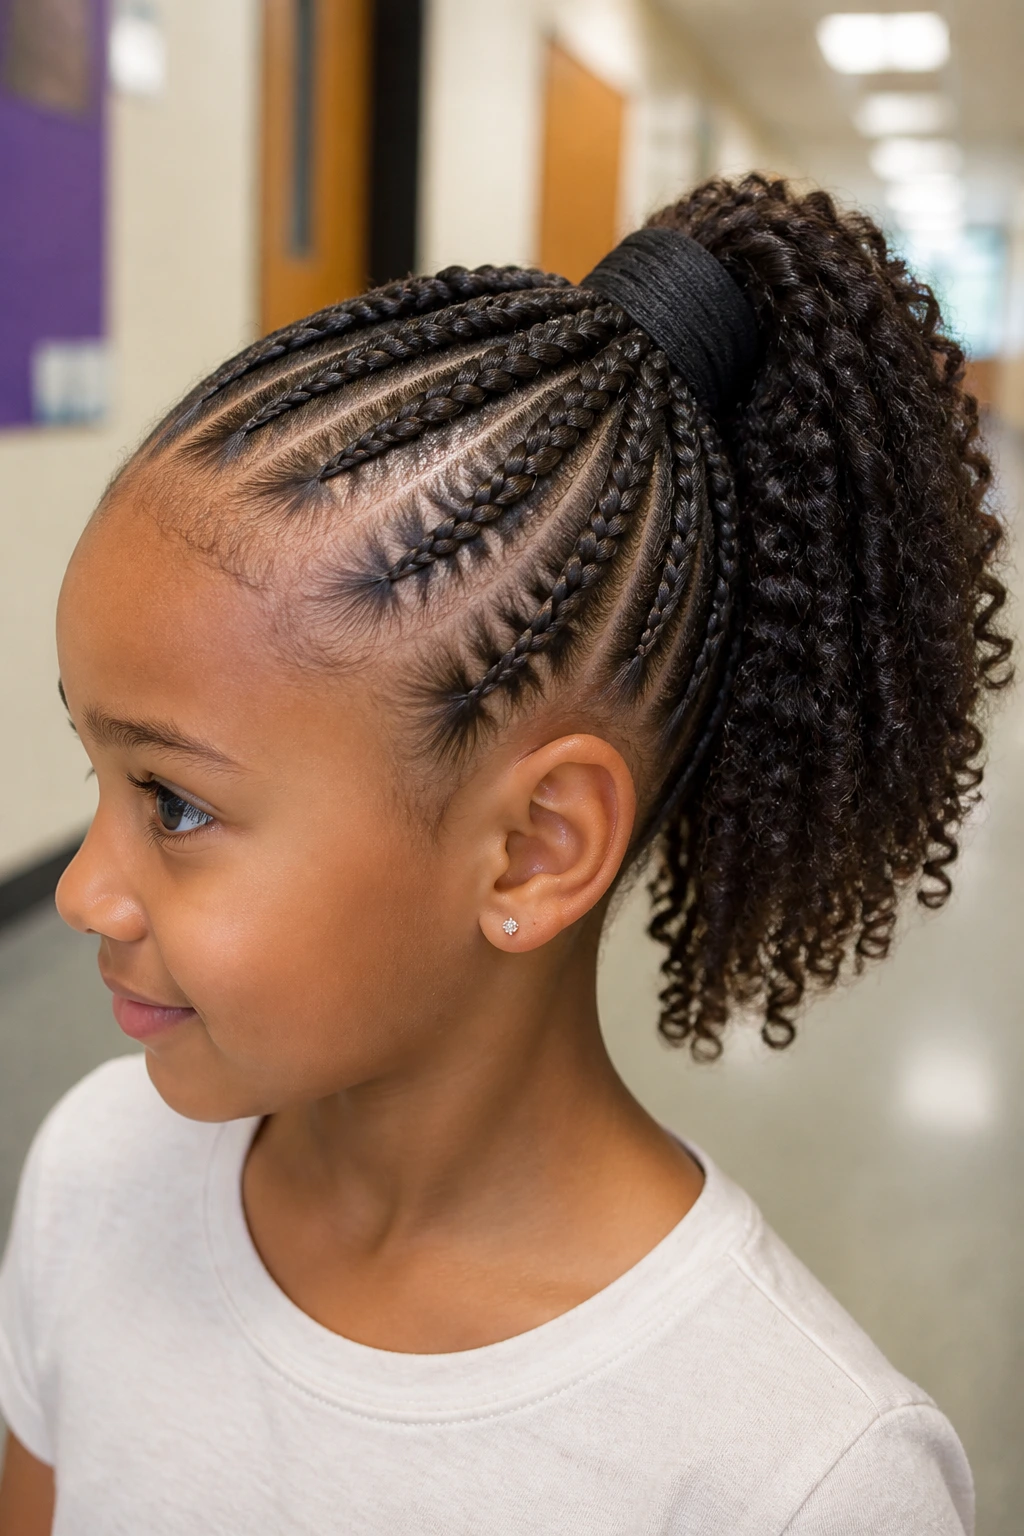
A cornrow ponytail with a wrapped base is clean, quick, and a little sporty. The rows head toward the back and gather into a ponytail that can sit mid-height or high, depending on how much movement you want. Wrapping the base with a braid strand or ribbon hides the elastic and gives the style a neat finish.
This works well on curly hair because the ponytail can still show off the texture without letting it take over the face. The crown stays controlled, the ponytail swings, and the whole style makes sense from every angle. That’s hard to beat for school and weekend plans.
Unlike loose ponytails, this version doesn’t slip as fast if the hair is silky at the roots. The braid pattern helps anchor the tie. If the child tends to tug at their ponytail, this style holds up better because the pressure is spread across the rows.
I’d keep the ponytail base snug, not sharp. The ponytail should move when the child moves. If it bounces, good. If it pulls, redo it.
13. Accent Cornrows Framing a Big Middle Section
Accent cornrows are the braid version of a frame around a picture. Instead of braiding the whole head, you use a few chunky rows along the sides or front, then leave a larger middle section to stand on its own. On curly hair, that middle section can be puffed, twisted, or left in a natural curl pattern.
Why It Feels Different
The look gives you structure without taking away too much of the child’s texture. It also keeps the styling time down. A few braids around the edges can tame the face-framing hair while the center stays full and soft.
- Works well for kids who dislike having every strand braided.
- Good for thick crowns that need a little control at the edges.
- Easy to add a bow, clip, or small bead set just where the rows end.
- Nice middle ground between fully braided and fully loose.
This is the style I’d choose when a child wants to feel “done” but not overdone. And that is a real category, by the way. The hair is managed, not muffled.
14. Mohawk-Style Cornrows with Lift at the Center
Mohawk-style cornrows give a little drama without asking for a full punk moment. The sides are braided down tight enough to stay neat, while the center section rises with more height or texture. On curly hair, that center lift can be a puff, a braided ridge, or a series of chunky rows that stand a bit proud.
The shape matters more than the size of the braids here. Keep the side rows snug and the middle wide enough to read as a separate panel. If the center is too narrow, the style starts looking accidental. If it’s too wide, you lose the point.
This is one of the more expressive options on the list, which makes it a strong pick for birthdays, dance class, or a kid who likes bold hair. Still, it stays practical because the sides are controlled. That’s the trick. It looks lively while staying wearable.
If you add accessories, put them in the center rather than crowding the sides. The mohawk line already does enough work on its own.
15. Beaded Feed-In Rows That Move as They Walk

Beaded feed-in rows are for kids who like a little sound with their style. The feed-in part keeps the roots smooth, while the beads add motion at the ends. The rows can be chunky and still look refined if the beads are placed with some restraint.
The thing I like here is the rhythm. The braids move, the beads tap lightly, and the style feels alive. That can be fun for kids without turning into a tangled mess, as long as you choose beads that are smooth and not too heavy. Wide-hole beads are easier to slide on and less likely to snag curly ends.
What Makes It Different
Unlike full beaded styles that can feel crowded fast, these rows leave breathing room between the braids and the accessories. That keeps the silhouette cleaner. A few beads per row is usually enough.
I’d choose this version for a child who likes to touch their hair. The beads give the ends enough weight to stay organized. They also make it easy to know when one braid has slipped, because the shape changes fast.
16. Bob-Length Cornrows That Stop at the Chin

Bob-length cornrows are a smart compromise for kids who want a shorter look without losing the braid pattern. The rows are done in a way that the ends stop around the chin or jawline, which gives the style a neat little frame around the face. On curly hair, it can look sharp and soft at the same time.
This is a good option when long braids get in the way of eating, reading, or riding in a booster seat. The shorter length also means less rubbing on jackets and less tangling at the ends. That’s not glamorous, but it is useful.
The style works best when the rows are even and the ends are sealed cleanly. If one braid ends much higher than the rest, the whole bob shape gets thrown off. Keep the line smooth. A slight curve at the bottom can make the shape feel softer.
I like this one for kids who want something polished without the weight of long braids. It feels neat the minute it’s done.
17. Swirl-Part Cornrows That Curve Around the Head

Swirl parts are the kind of detail that make people look twice. The parting curves around the scalp in a loose spiral or circular route, and the chunky braids follow that shape. On curly hair, the pattern stands out because the texture gives the clean lines more contrast.
This style takes a steadier hand than straight-back rows, but the payoff is real. The swirl creates movement before the braids even start. It’s a good way to make the style feel special without adding a mountain of accessories.
How to Get the Most From It
- Sketch the swirl with the comb before braiding.
- Keep the rows chunky so the pattern stays readable.
- Limit accessories to one or two points so the parting remains visible.
- Best for kids who like styles that look different from the usual straight lines.
A swirl part can be playful or elegant, depending on how wide you make the turns. Narrow curves feel more graphic. Wider curves feel softer. Both work. The child usually picks the one they’ll tolerate longer.
18. Space Buns with Chunky Cornrows Leading In
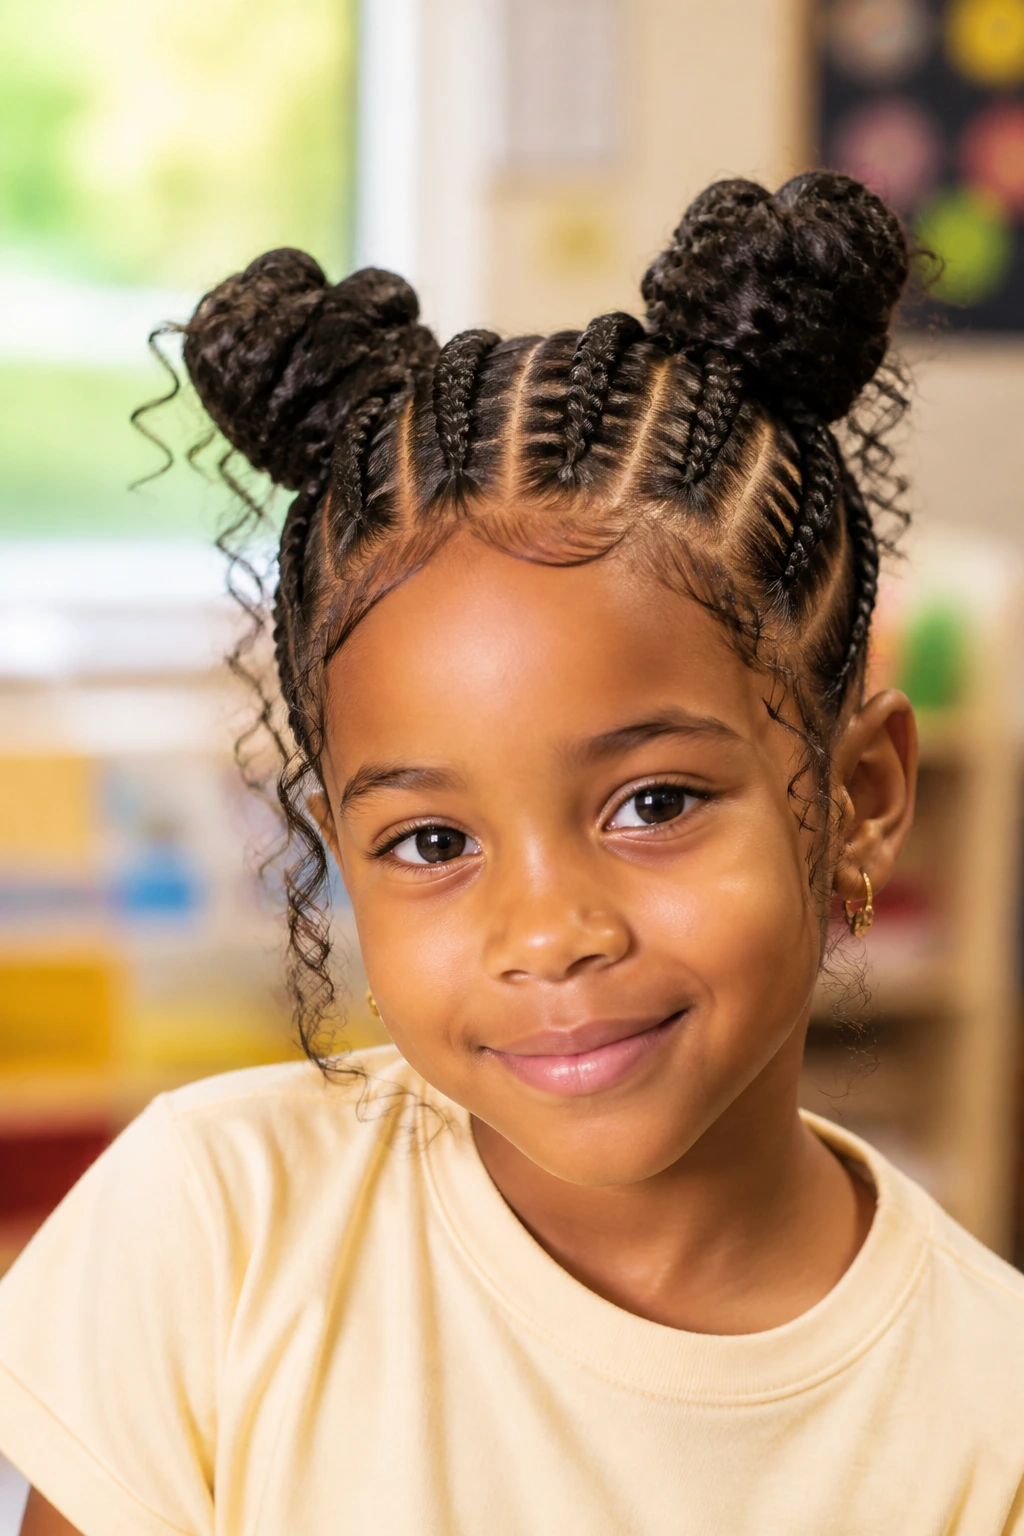
Space buns with chunky cornrows are what happens when practical hair gets to have some fun. The rows feed upward or backward into two buns, and the whole style ends up looking playful but still controlled. On curly hair, the buns give the curls a place to live instead of leaving them flattened at the back.
This is a strong choice for parties, school spirit days, or any time a child wants their hair to feel a little extra. The buns can be high and perky or smaller and neater. Either way, the cornrows keep the front calm while the buns do the talking.
What makes it work is balance. Too many rows and the buns get crowded. Too few and the shape loses its point. Two to four chunky rows on each side is often enough, depending on head size and hair density.
I’d keep the accessory count low. One bow, two cuffs, or nothing at all. The buns already carry the style.
Why Chunky Cornrows Work So Well on Curly Hair
Chunky cornrows are not just a bigger version of small braids. They solve different problems. The wider sections put less strain on the braider’s hands and often less strain on the child’s scalp, provided the tension stays gentle. That matters more than people like to admit. A style that looks neat but hurts by lunchtime is not doing its job.
Curly hair also tends to benefit from bigger visual shapes. Tight, tiny rows can disappear into dense texture unless the parting is razor-clean. Chunky rows hold their own. They let the curl pattern frame the braids instead of swallowing them. On a head with a lot of volume, that keeps the style from looking overworked.
There’s a practical piece here, too. Bigger rows are easier to check and refresh. You can oil a part, re-smooth a fringe, or tidy one braid without unraveling the whole head. That is a real advantage when the style needs to last through school, sports, and whatever happened in the backseat on the way home.
Dermatology advice around protective styles stays pretty consistent: tightness is the enemy, not braids themselves. If the edges sting, the scalp feels hot, or the child keeps reaching up to scratch one exact spot, the style needs to be loosened or redone. Simple. No braid is worth a sore hairline.
The Tools That Make Parting Easier
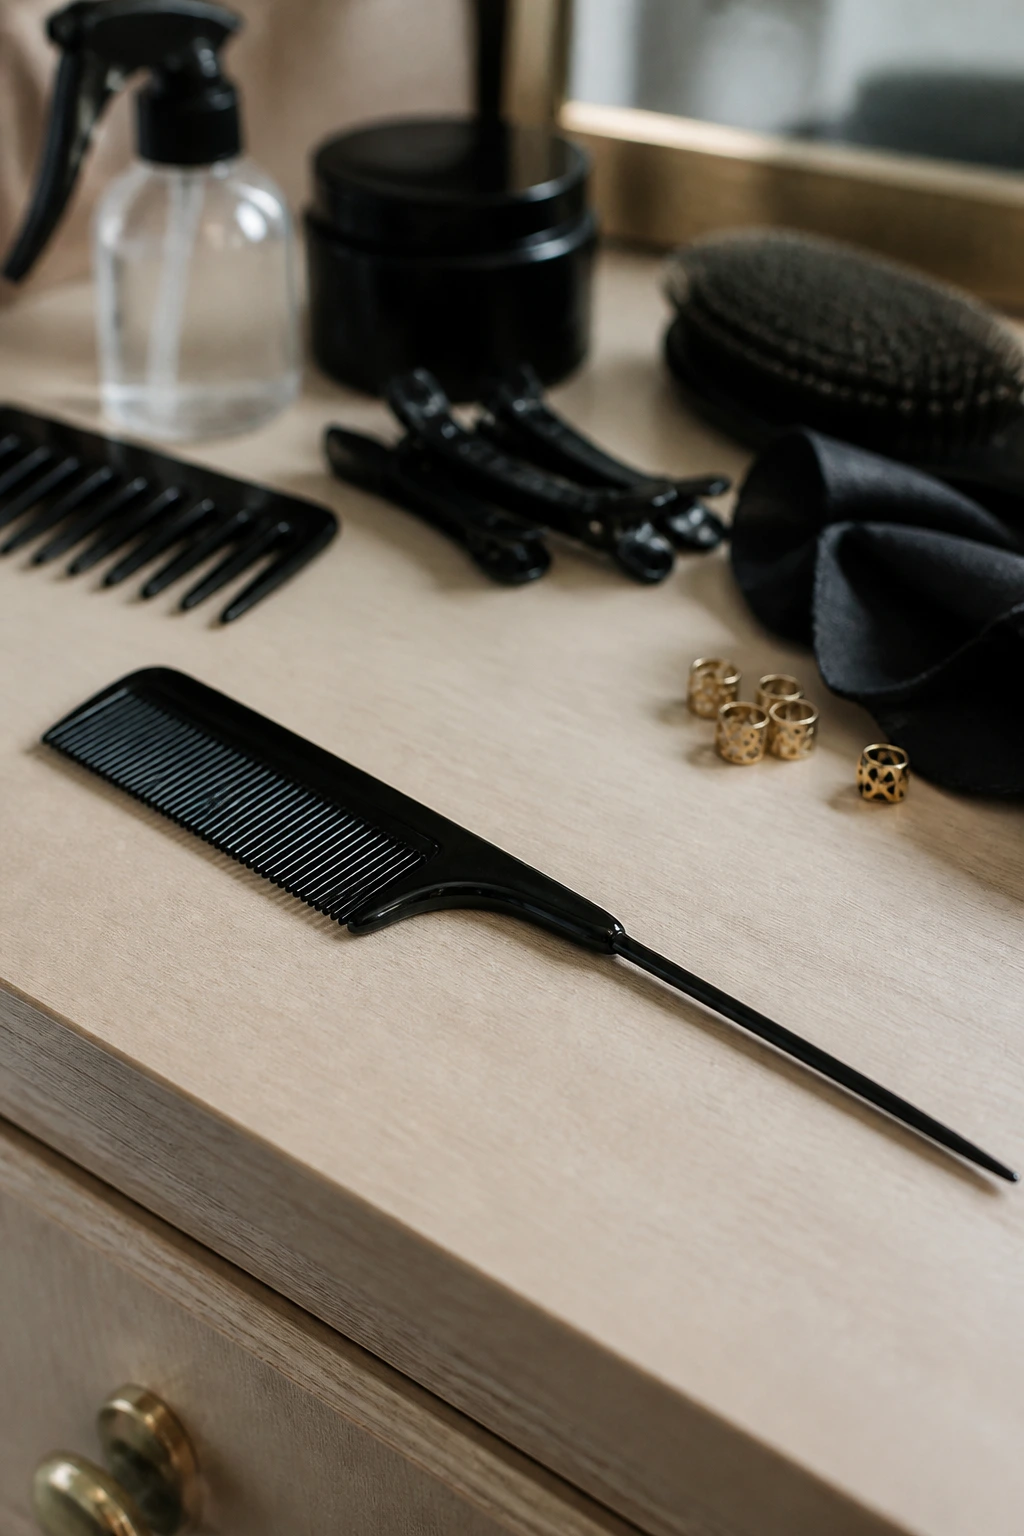
- Rat-tail comb: the long tail helps draw clean sections and zigzags without digging into the scalp.
- Wide-tooth comb: useful for detangling curly hair before parting so you don’t start with knots.
- Spray bottle: a light mist of water or water-plus-leave-in gives the hair enough slip to part cleanly.
- Sectioning clips: these keep the hair out of the way while you braid one row at a time.
- Light styling cream or braid gel: use a small amount to smooth the roots; too much gets gummy fast.
- Soft bristle brush: helpful for laying down flyaways at the hairline without pressing too hard.
- Satin scarf or bonnet: keeps the style from rubbing apart overnight.
- Braid cuffs, beads, or ribbons: optional, but they help a child feel like the style belongs to them.
Picking Products That Behave on Kids’ Curls
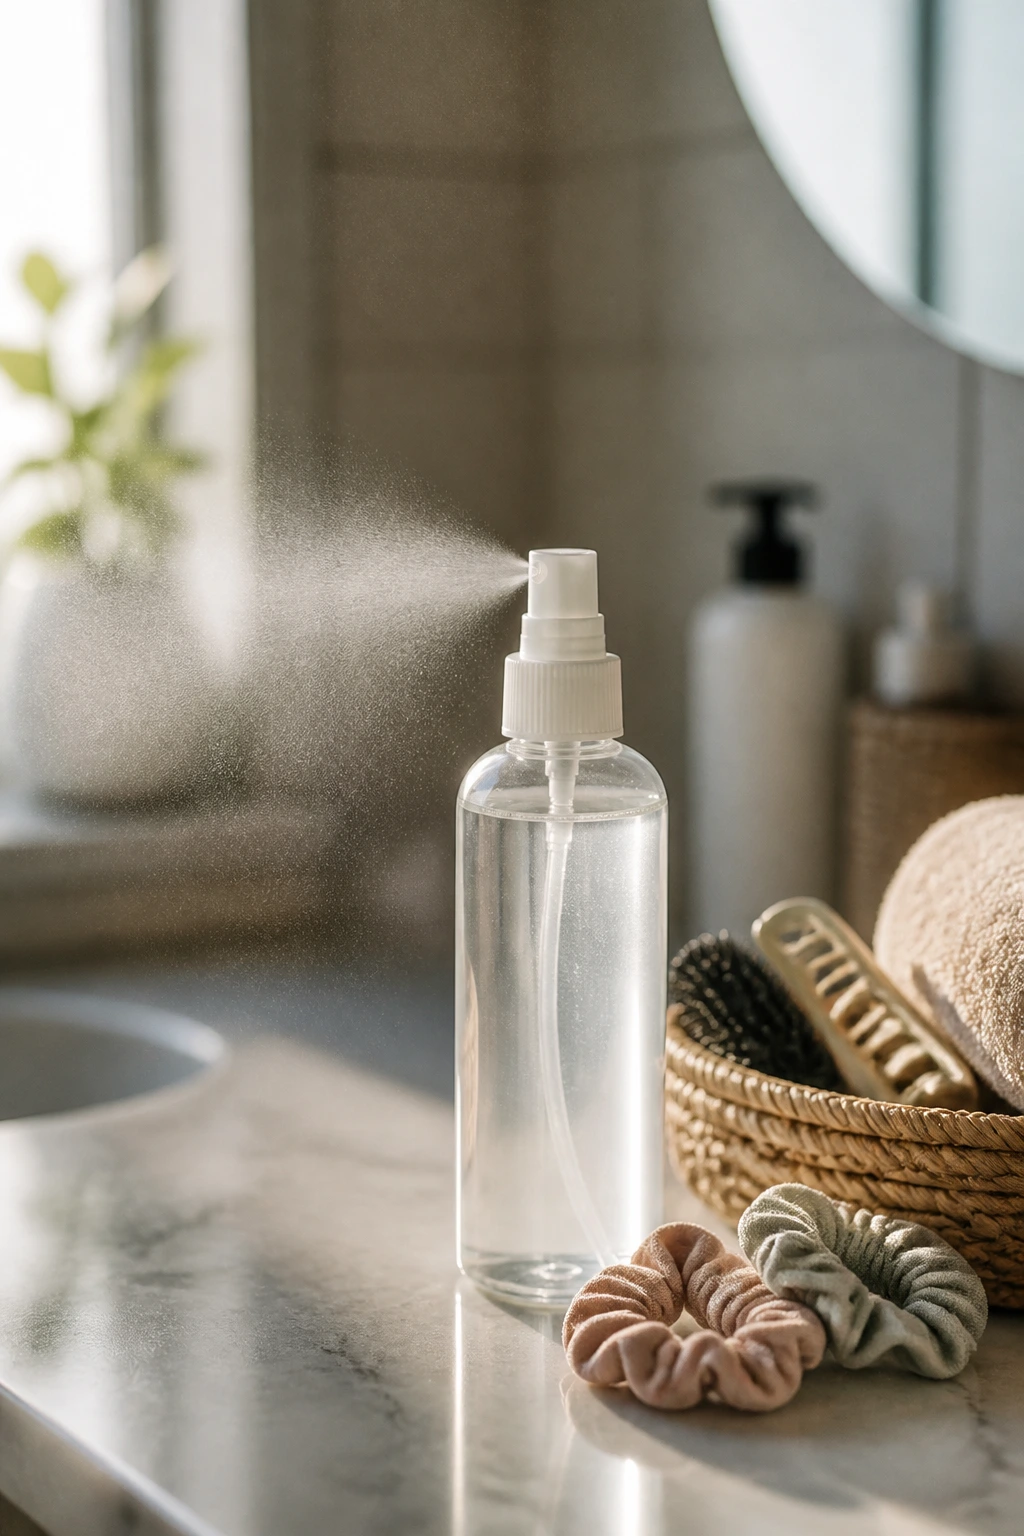
The best products for this kind of style are the ones that help without leaving a film. A water-based leave-in is usually better than a heavy butter when you’re prepping curly hair for cornrows. It gives slip, softens the strands, and keeps the braider from fighting the hair. Thick waxes and greasy pomades can make the parts look slick for one afternoon and dusty by dinner.
For hold, look for a braid cream or gel that dries clear and does not flake when you touch it. A tiny amount at the roots is enough. If the gel turns white when you smooth it, that’s a warning sign. It may look tidy for a minute, then leave little dry crumbs on dark hair.
Accessories need the same kind of common sense. Beads should have smooth edges and openings large enough to slide on without yanking the ends. Elastics should be soft and snag-free. Ribbon should be narrow enough not to bulk up the braid. All of that matters more on kids, because their hair is often finer at the edges and more sensitive at the scalp.
If the child’s hair is dry, a light mist before braiding helps. If it is very fluffy, a little stretch—banding, a loose twist-out, or a cool blow-dry—can make the parts cleaner. The goal is not to flatten the curls into submission. It is to make them cooperative for a few hours.
How to Wear These Styles for School, Sports, and Photos

Presentation: Keep the parting consistent and the front rows neat, then let the style do the talking. For school days, the cleanest looks are usually straight-back rows, side-swept rows, or a low bun. For photos, a curved part or a heart detail adds just enough shape to make the style look special without making it fussy.
Accessories: One strong accessory beats five small ones. A satin bow at the end of a ponytail, a line of cuffs on one side, or a few beads at the tips can carry the whole look. If you use bright ribbons, let the braid pattern stay simple so the eye has somewhere to land.
Fit: Match the number of rows to the child’s head size and patience. A smaller head often looks better with fewer, wider rows; too many braids crowd the scalp and shorten the life of the style. If the child has dense curly hair, wider sections can still feel full without turning into a helmet.
Best moments: These styles work for regular school weeks, picture day, sports practice, family events, and travel. They hold up under movement, which is half the point. A hairstyle for kids should be able to get a little messy and still look like it belongs.
Small Technique Tweaks That Keep the Braids Soft
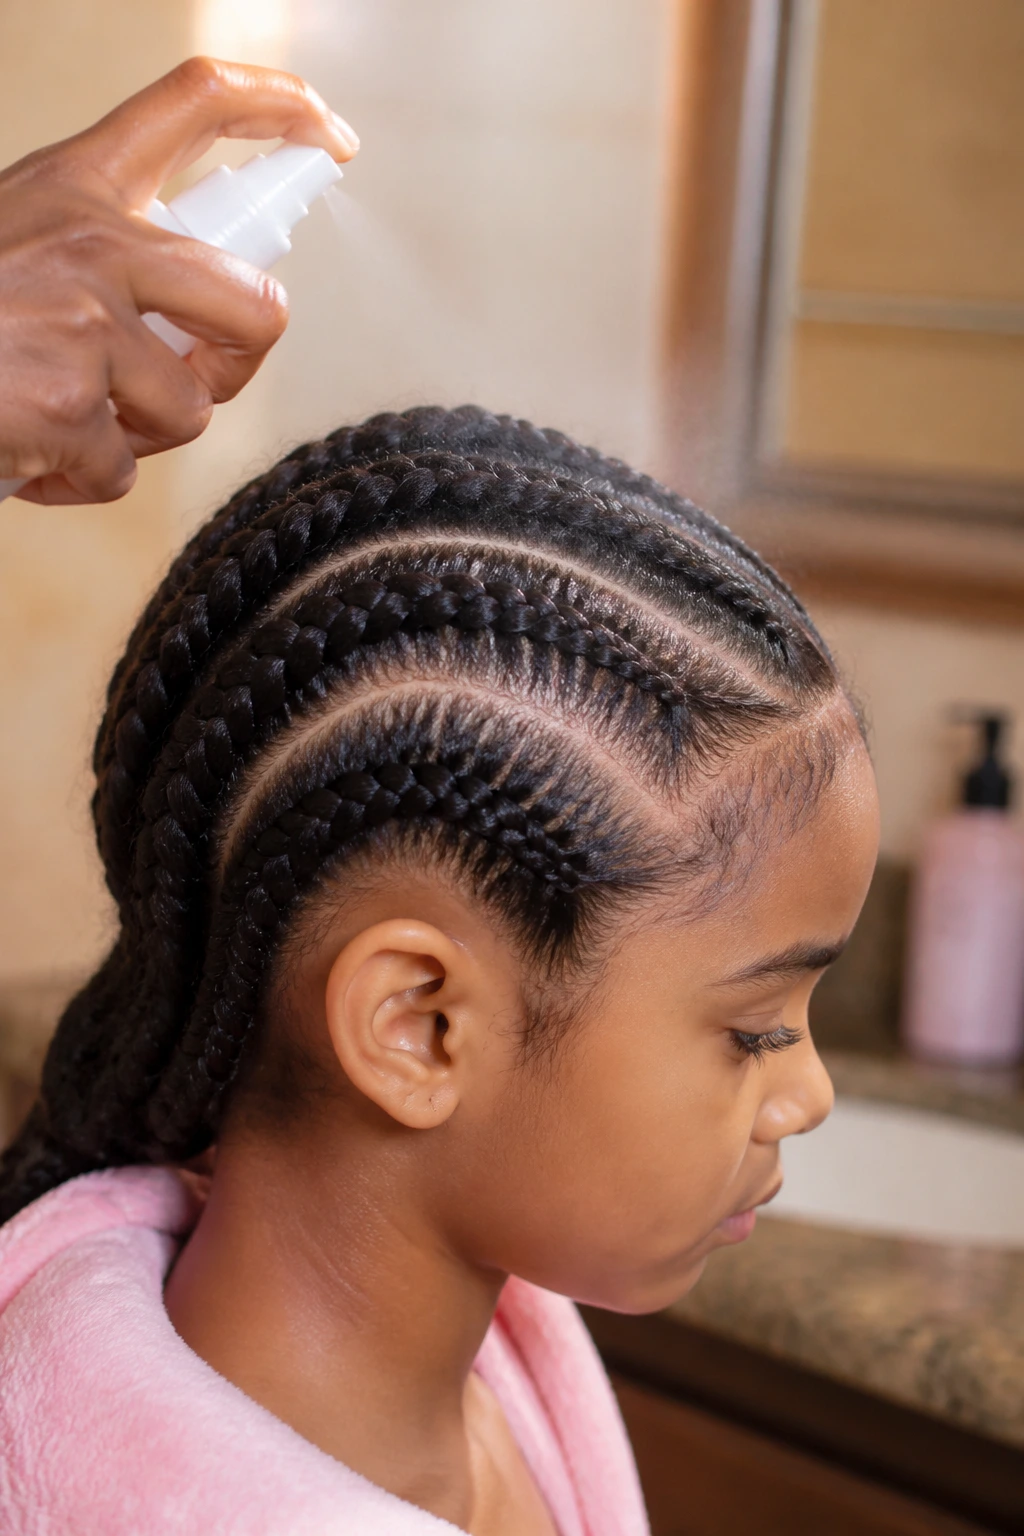
Moisture Reset: Mist the hair lightly before braiding, but do not soak it. Damp curls part more neatly, and a small amount of leave-in helps the sections slide under the braid instead of puffing out at the root.
Parting Trick: Clip each finished section out of the way before you move on. It sounds basic. It saves time, keeps the pattern honest, and stops you from accidentally stealing hair from the next row when the child shifts in the chair.
Finish: After the style is done, wrap the head with a satin scarf for 10 to 15 minutes. That little pause helps the roots settle and smooths down the fuzzy halo that always shows up right after braiding.
Make-It-Theirs: Pick one thing to personalize and stop there. A bow, a bead color, a swirl part, or a shape at the crown is enough. When everything is decorated, nothing stands out.
Little pro move: if the hairline is fragile, widen the front sections and avoid tight edge control. A soft finish beats a slick one that pulls by noon.
Common Mistakes That Make the Style Feel Tight
- Pulling the hairline too hard: the first sign is a child flinching when you touch the front rows. Loosen the part at the edge and give the scalp room.
- Starting on tangled hair: you get frizz, uneven rows, and a braid that feels bumpy from the root down. Detangle first with slip.
- Using too much gel: the roots turn stiff, then flake. Use a small amount, smooth it once, and move on.
- Making the accessories too heavy: big beads near the front can tug on delicate edges. Keep weight near the ends.
- Leaving the style in too long: new growth, matting, and itchy scalp show up fast on kids. Remove or refresh before the roots lock up.
- Braiding over pain: if the child says it hurts, believe them. That is not drama. That is information.
A braid can look neat and still be wrong. The comfort check matters more than the mirror.
Variations and Adaptations to Try
Ribbon-Tied School Rows: Swap beads for narrow ribbon on the ends. It keeps the style quieter, lighter, and easier for a child who gets distracted by the clicking sound of beads against a desk.
Sensitive-Scalp Soft Parts: Use fewer rows, wider sections, and very little tension at the hairline. This version is useful for kids who have fine edges or have worn tight styles before and need a calmer reset.
Party-Ready Heart Cornrows: Add one heart-shaped part near the front and keep the rest of the head simple. The shape gives the style personality without making it hard to maintain.
Vacation Cornrows with Curly Ends: Braid the front and sides, then leave the ends curly or twisted. The loose texture helps the style feel softer and gives the child more movement for the back half of the head.
Sports-Day Ponytail Cornrows: Feed the rows into a high or mid ponytail and wrap the base with a braid strand. It stays off the neck, which helps on hot days or during practice.
Toddler-Friendly Four-Row Set: Keep the braid count low and the parts wide. Fewer rows mean less chair time and less stress if the child gets antsy halfway through.
Wash-Day, Sleep-Time, and Rebraiding Rhythm
Chunky cornrows usually hold their shape for about 2 to 4 weeks on kids, depending on curl pattern, activity level, and how fast the roots puff up. Fine curls may need a refresh sooner. Dense coils can often go a little longer if the scalp is comfortable and the part lines stay clean.
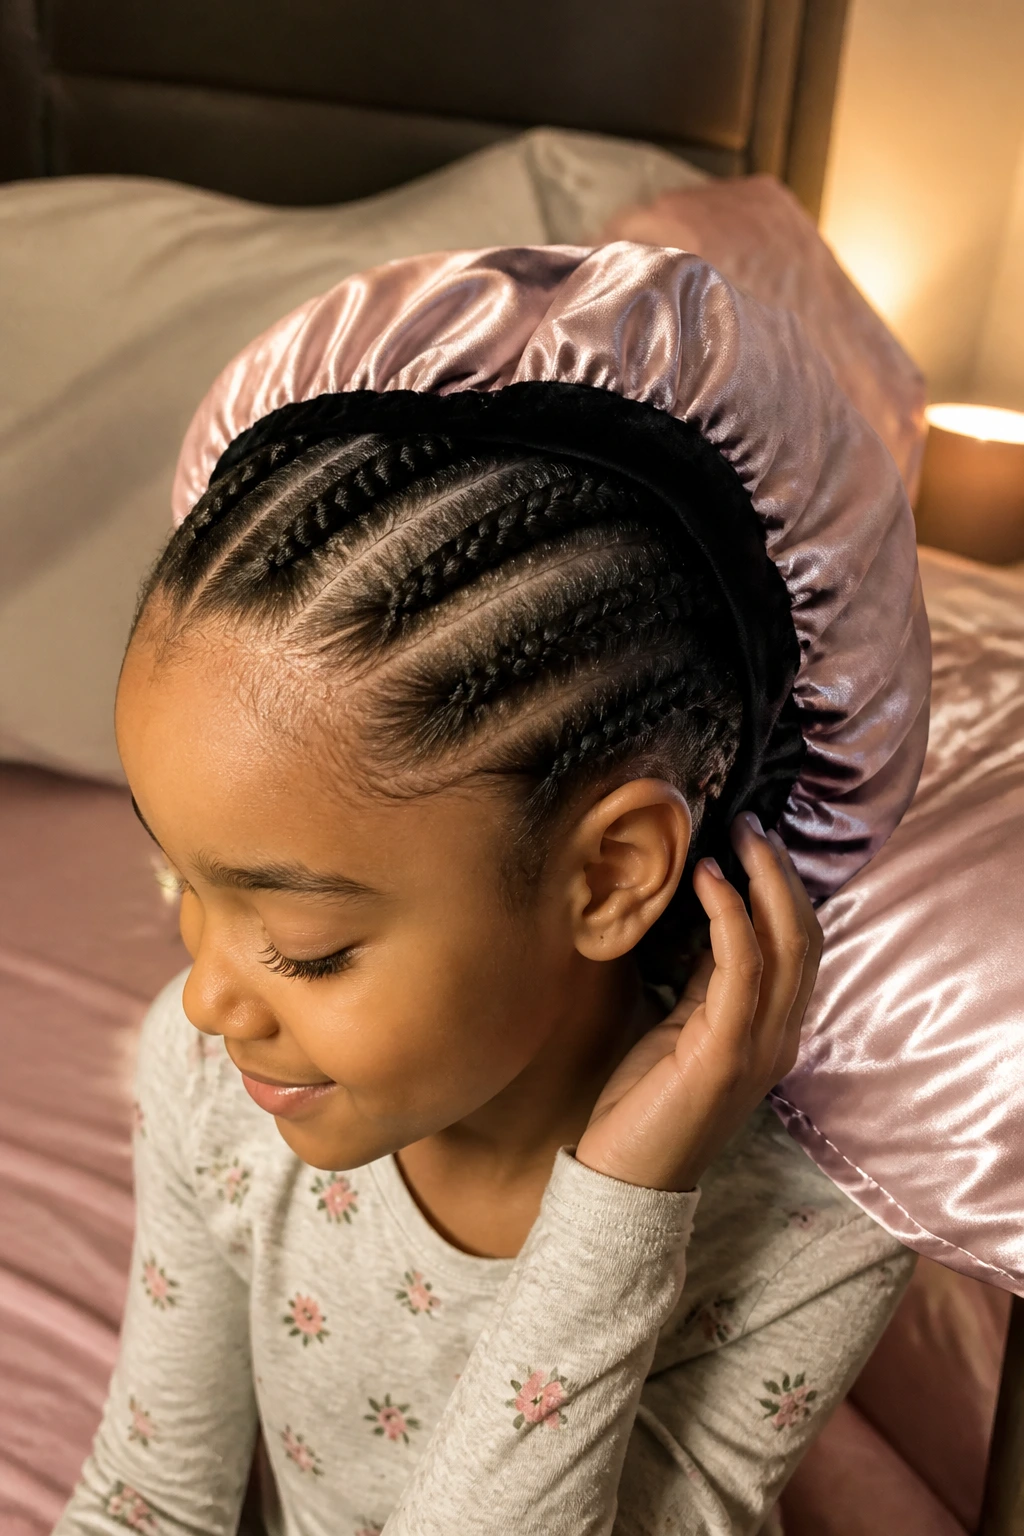
Night care makes the biggest difference. A satin bonnet is best, but a satin pillowcase is a fine backup if the child refuses to keep the bonnet on. If the style has beads, make sure the ends are not snagging inside the scarf. That tiny detail saves a lot of trouble in the morning.
For cleansing, a gentle shampoo on the scalp every 7 to 10 days is usually enough if the child sweats a lot or uses product. Use the pads of your fingers or a nozzle bottle to work the shampoo into the parts, then rinse well and dry the roots fully. Damp braids tucked under a scarf can hold that musty smell nobody wants.
If the front starts frizzing, don’t panic. Smooth the roots with a little leave-in or braid mousse, then wrap the head for 10 minutes. If the braids themselves are still neat and the scalp is calm, you do not need to start over.
To remove the style, take your time. A little conditioner or oil at the ends helps the strands slide apart. Pulling fast is how breakage happens. No shortcut is worth that.
Frequently Asked Questions
How tight should chunky cornrows feel on a child?
They should feel secure, not pinchy. If the child complains about a headache, red bumps, or pain when turning their head, the style is too tight and needs to be loosened.
Can you do chunky cornrows on very short curly hair?
Yes, as long as the sections are large enough to grip. Shorter hair often does better with fewer rows and a little extra product at the roots for control.
Do you need extensions for these styles?
No. Most kids’ chunky cornrows look better without added hair, especially when you want a lighter feel and easier maintenance. Extensions can add length, but they also add weight.
How do you stop frizz at the roots?
Start with clean, lightly damp hair and use a small amount of braid cream or foam. Wrapping the style for 10 to 15 minutes after braiding also helps the roots settle.
Can chunky cornrows be washed?
Yes. Use a gentle shampoo on the scalp, rinse carefully, and dry the roots well. The key is not to soak the braids and leave them damp for hours.
What if my child can’t sit still for a full braid session?
Split the style into smaller sessions or choose a simpler pattern like straight-back rows or two oversized braids. Fewer parts mean a shorter chair time and less drama.
Are beads safe for little kids?
They can be, if they’re smooth, lightweight, and secured well. Keep heavier beads away from the front and check that nothing is sharp or too small to be a choking risk.
How do I know when it’s time to take the style out?
Watch for itchy scalp, matting at the roots, or braids that no longer lie flat. If the child is scratching the same spot every day, don’t wait around for the style to “settle down.”
Braids That Can Keep Up

The nicest thing about chunky cornrows is that they make room for real life. The style can be neat without being strict, playful without falling apart, and low-maintenance without looking lazy. That is a harder balance than it sounds, especially on curly hair that wants to move, puff, spring, and frizz in all the places children actually live.
If you keep the tension light, the parts clean, and the accessories sensible, these styles do their job with very little fuss. Straight-back rows, swirls, puffs, buns, beads, and side-swept shapes all come from the same idea: use a bigger braid to make the hair easier to live in. That’s the sweet spot.
The best version is the one the child can wear comfortably for days, not the one that looks most dramatic in the chair. Choose the pattern that fits their head, their schedule, and their patience. The style will take care of the rest.