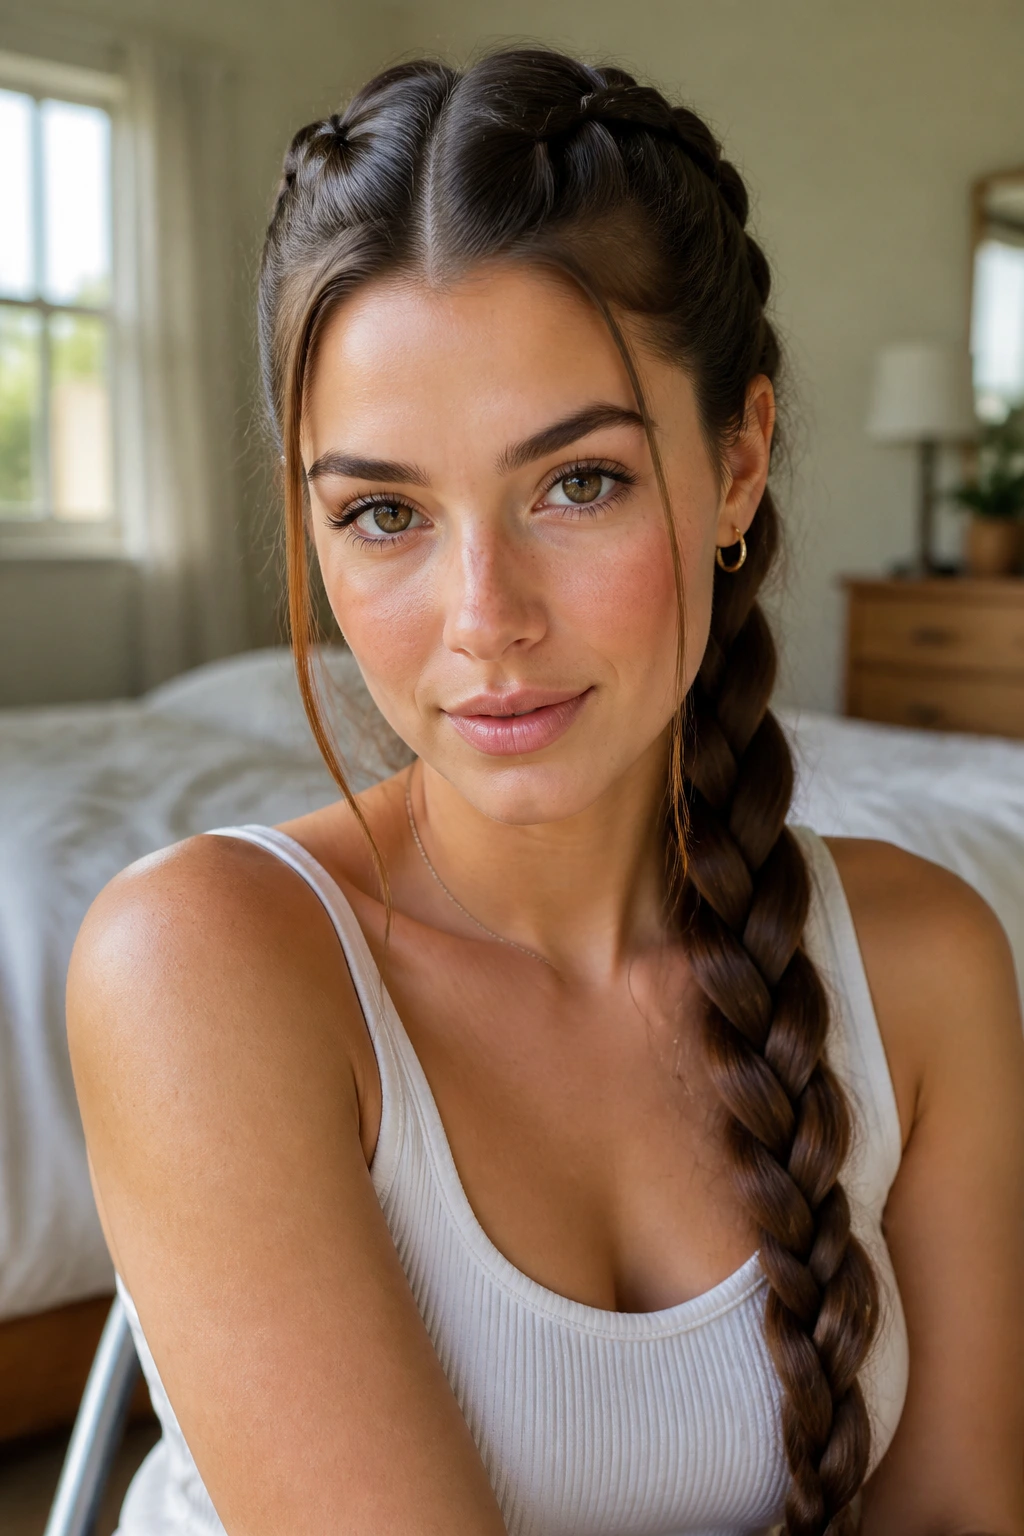
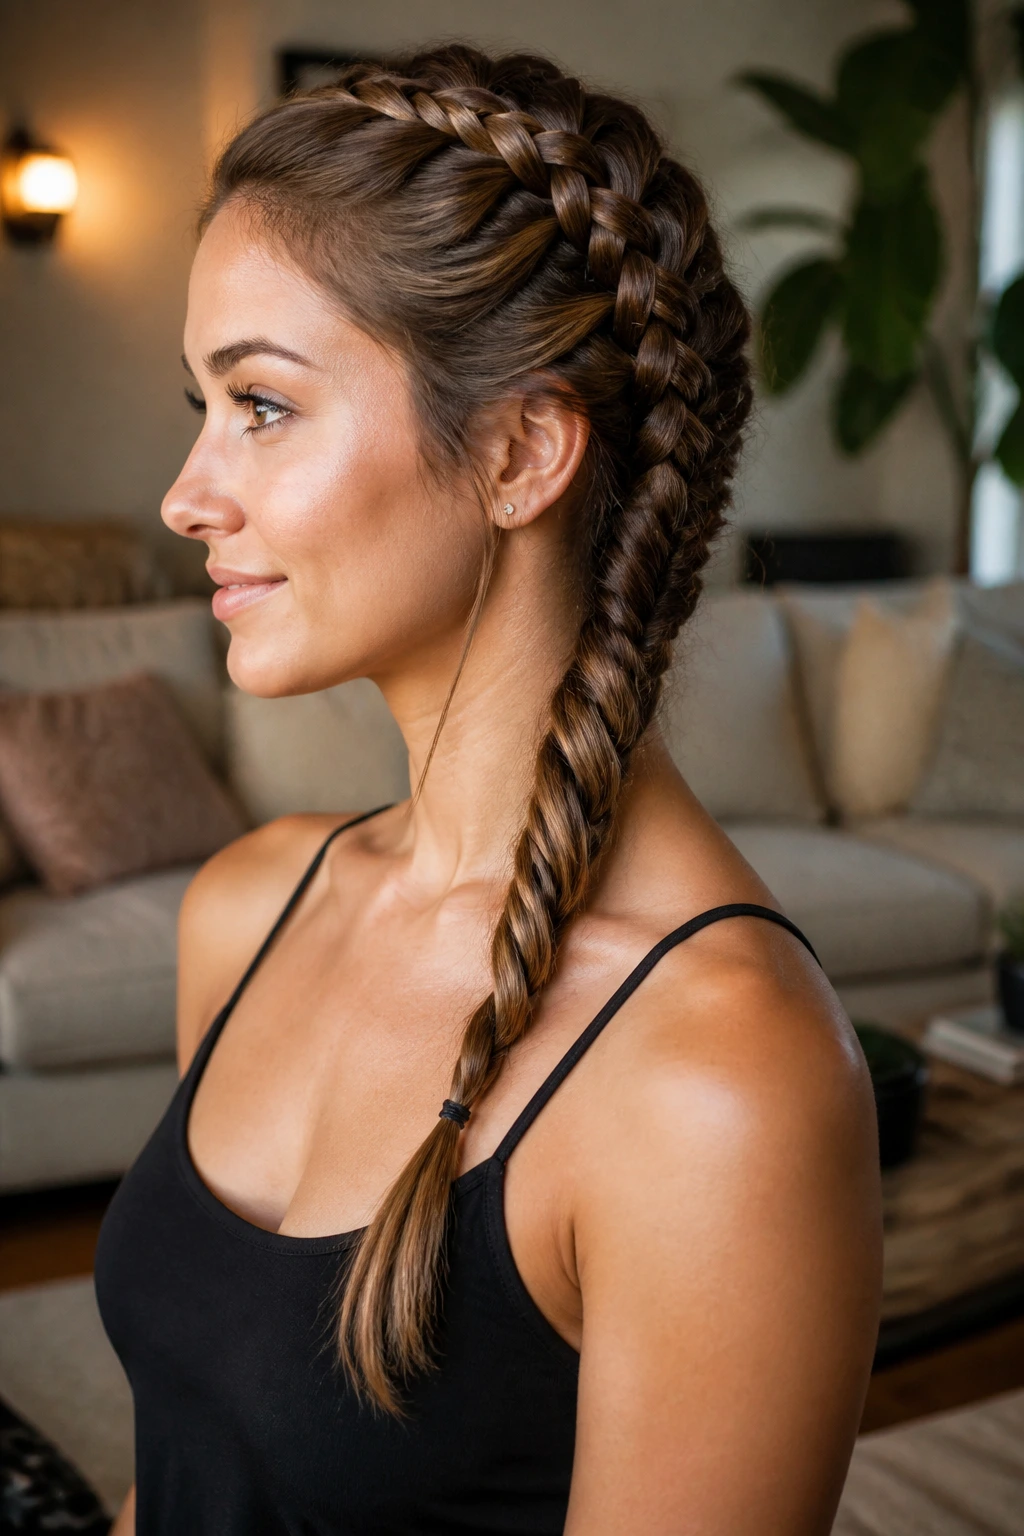
French braids on long hair have a useful trick: they look deliberate before the tail even reaches the shoulders, and that matters even more when you’re styling an oval face. The braid can sharpen the profile, soften it, or make it feel a little more lifted, all with a half-inch change in placement.
Long length gives the braid weight. It also gives you room to play with the finish — low ponytails, buns, scarf wraps, loose waves, all of it. Shorter hair can make the feed-in sections disappear, but long hair shows the pattern, the tension, and the shape cleanly.
The styles below focus on those details: where the braid starts, how much room you leave at the hairline, and what you do with the last twelve inches. Get those right and a French braid stops being one basic look and starts acting like a whole wardrobe.
Why French Braids Suit Long Hair and Oval Faces
- Symmetry Control: Oval faces can handle a center braid, a side braid, or a diagonal braid; the placement changes the mood more than the shape of your face.
- Length Pays Off: Long hair lets the braid get fuller as it travels, so the finished tail looks thick instead of stringy.
- Low-Friction Styling: A French braid keeps the hair contained from root to tip, which cuts down on knotting at the nape and behind the ears.
- Easy Shape Shifts: You can add crown lift, side pieces, or a bun at the end without starting over.
- Day-Two Wear: A braid that begins clean at the scalp and ends securely can survive sleep, errands, and a coat collar better than loose hair.
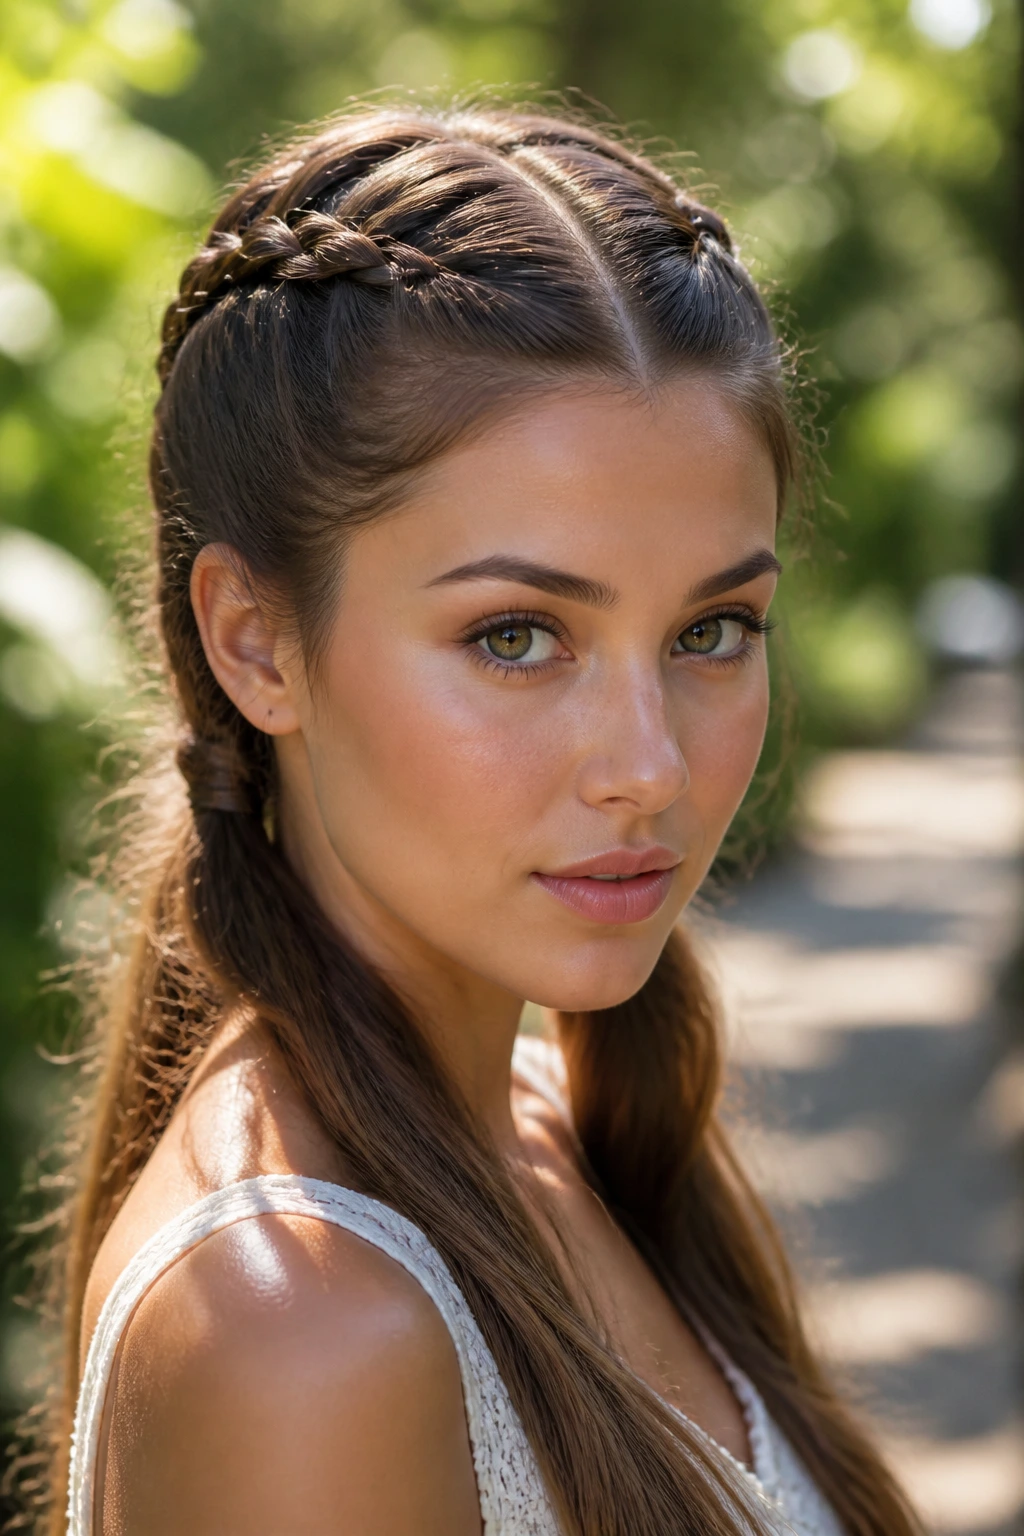
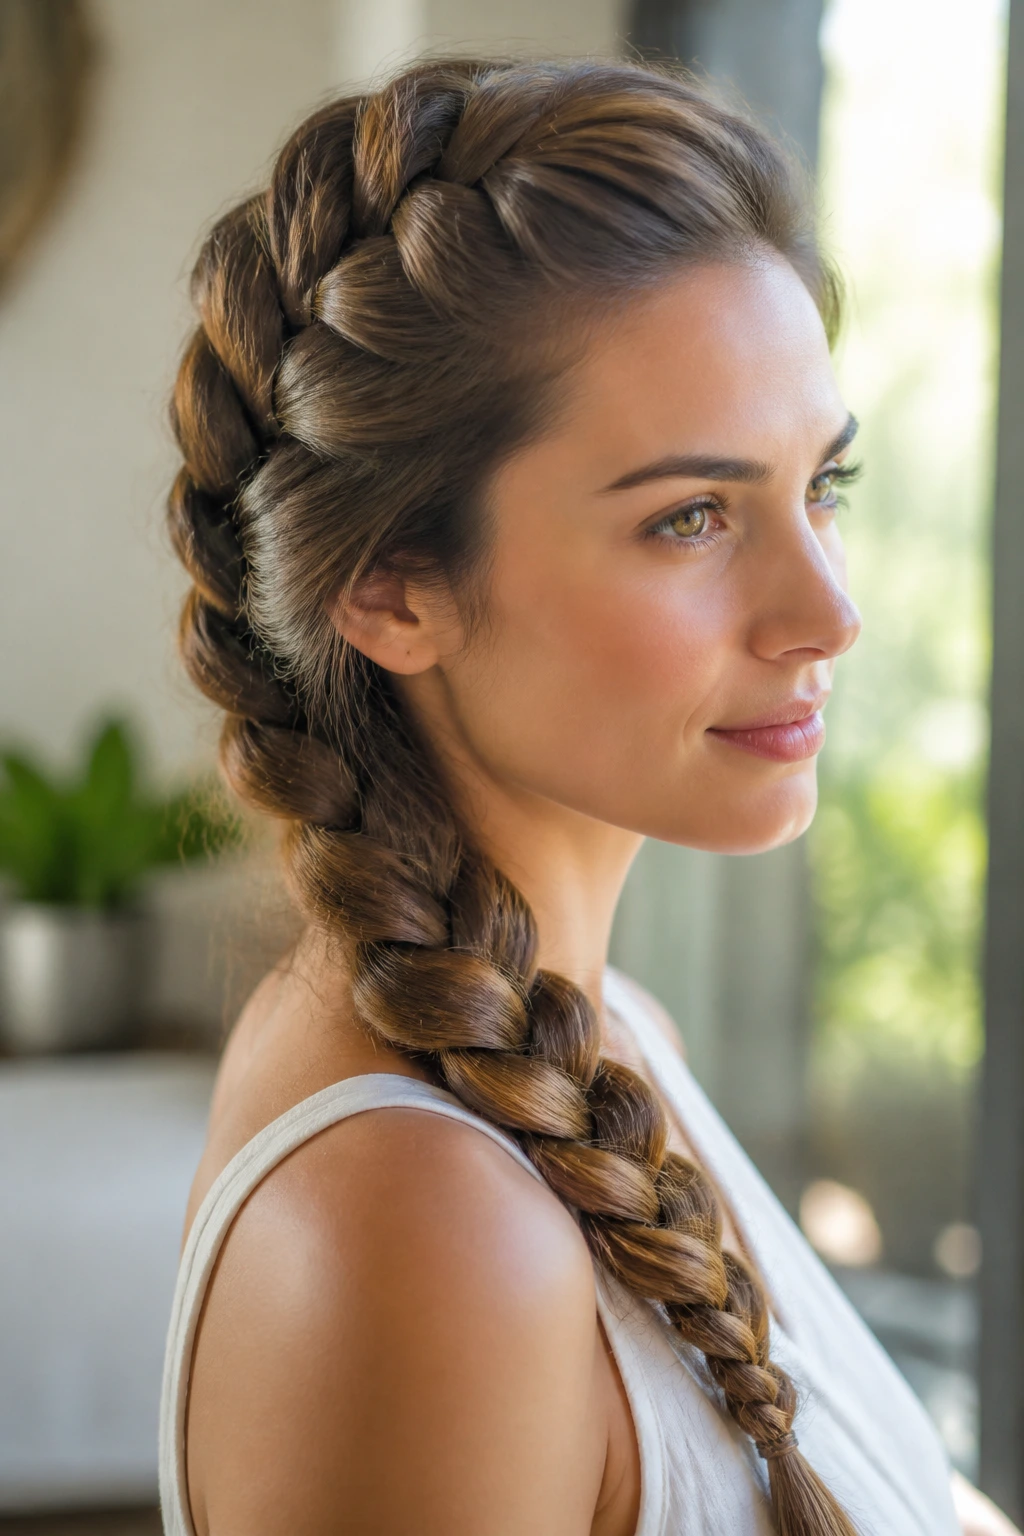
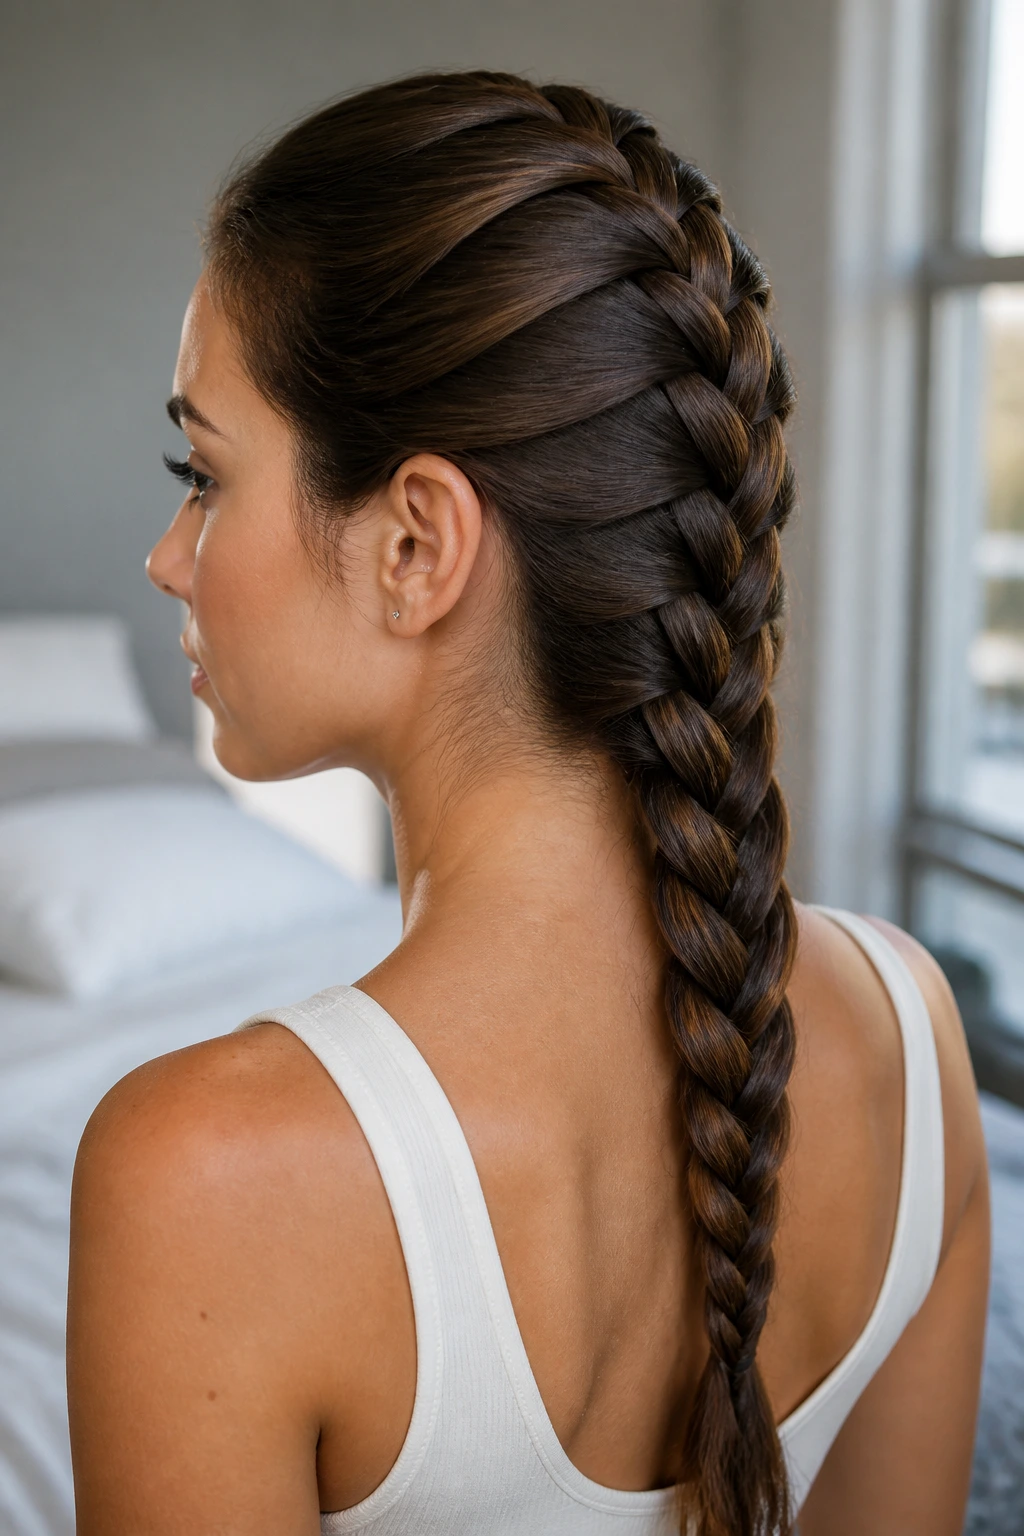
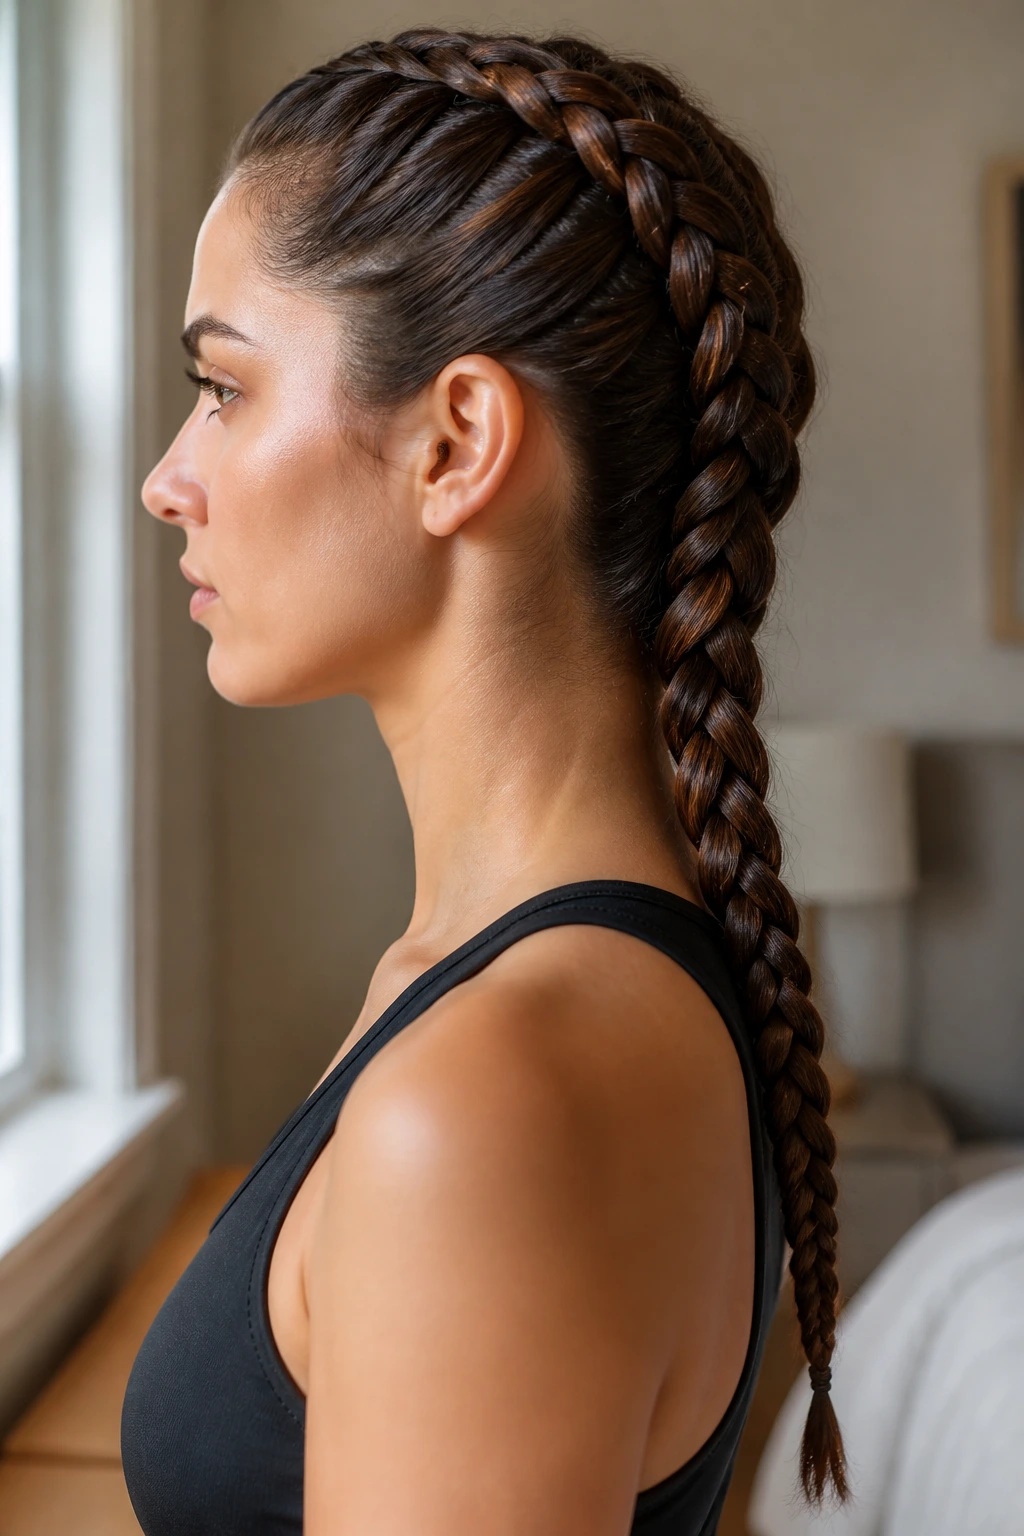
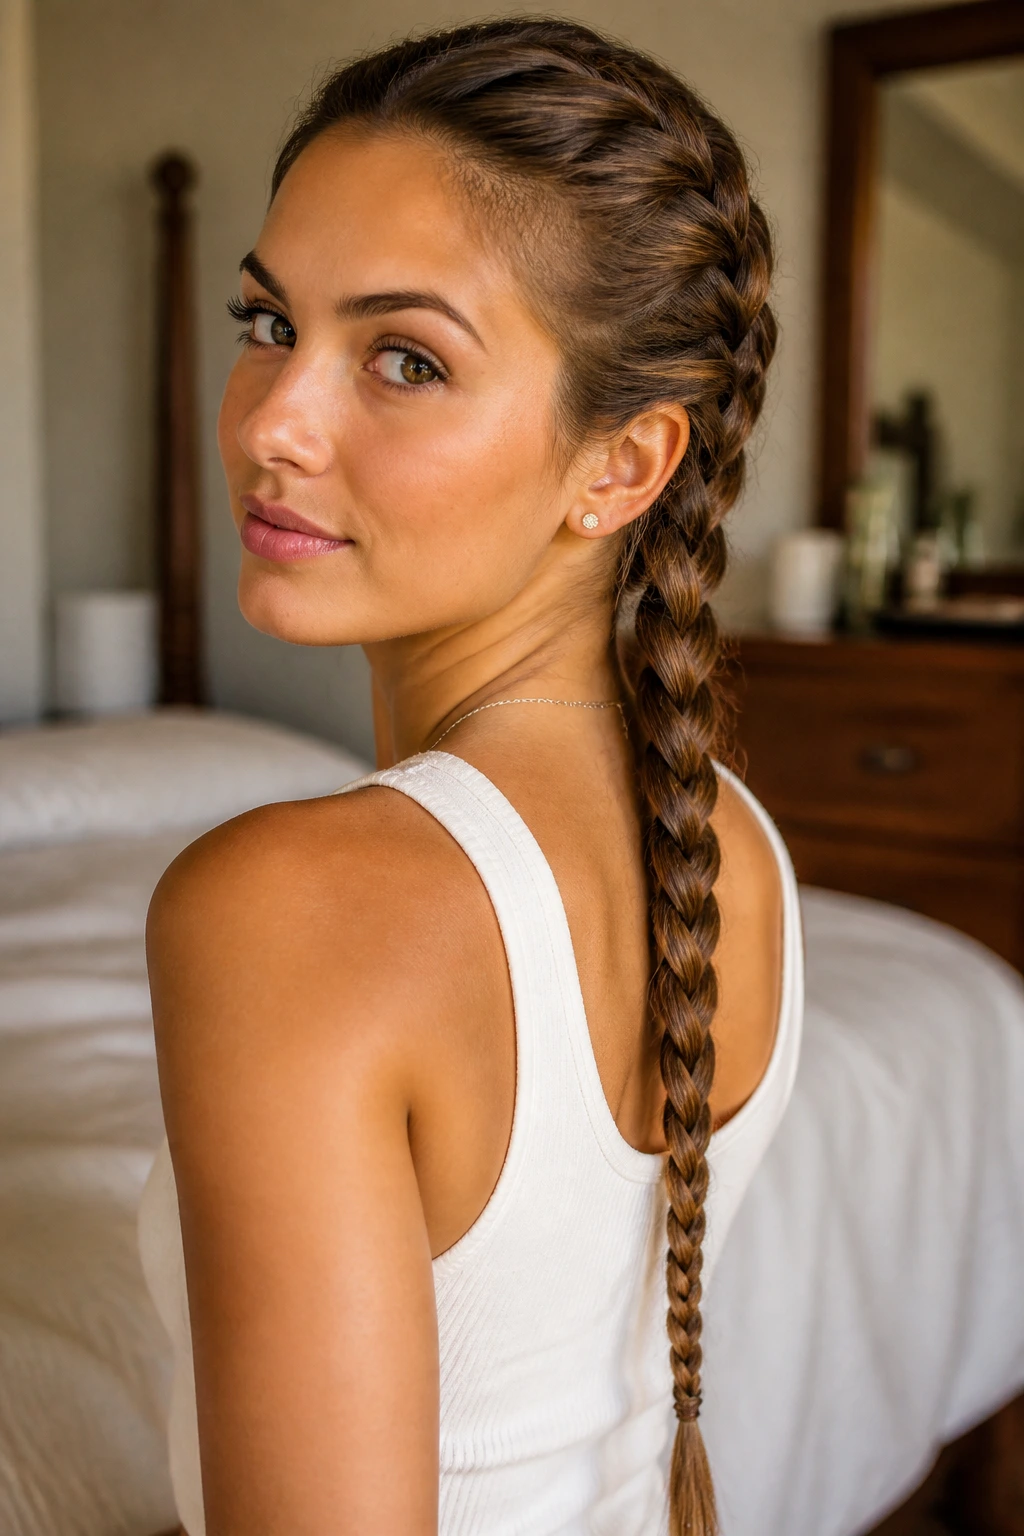
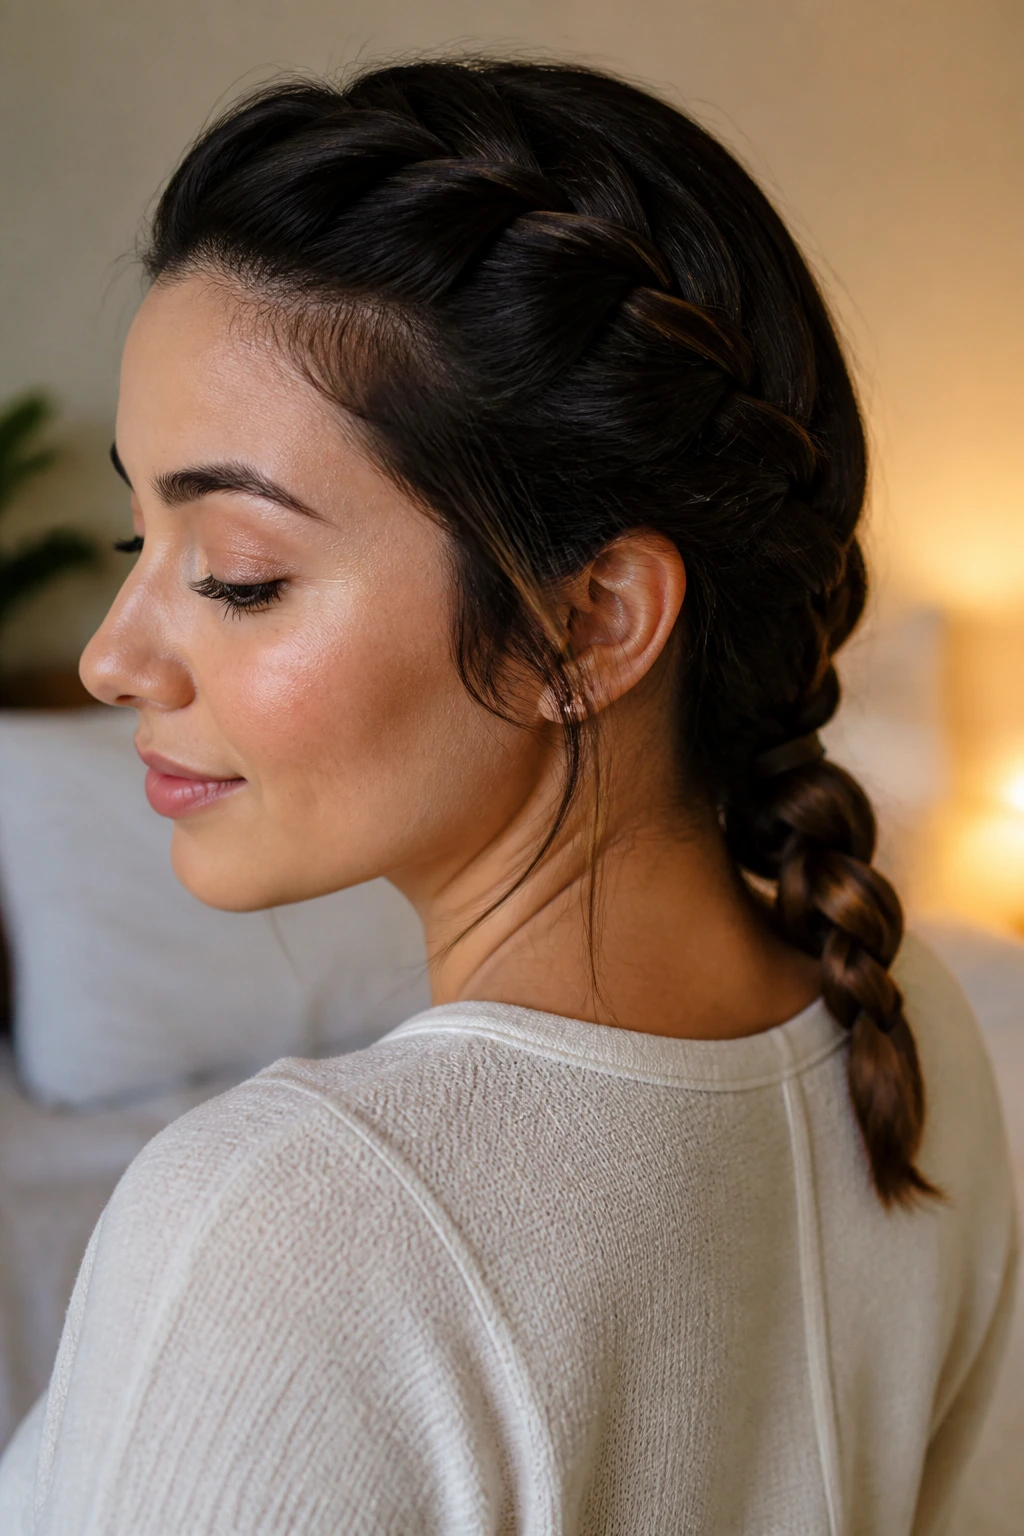
1. Classic Center-Back French Braid
Start with the cleanest version. A center-back French braid gives long hair a straight, visible line that shows off the crossing pattern instead of hiding it in the bulk. On an oval face, that centered path keeps everything balanced and tidy without pulling the eye too far to either side.
I like this version when the hair has a little natural bend. Straight hair can look almost architectural here, which is fine, but a soft wave gives the braid some body. If the roots slip, a mist of dry shampoo at the crown makes the first few sections hold better.
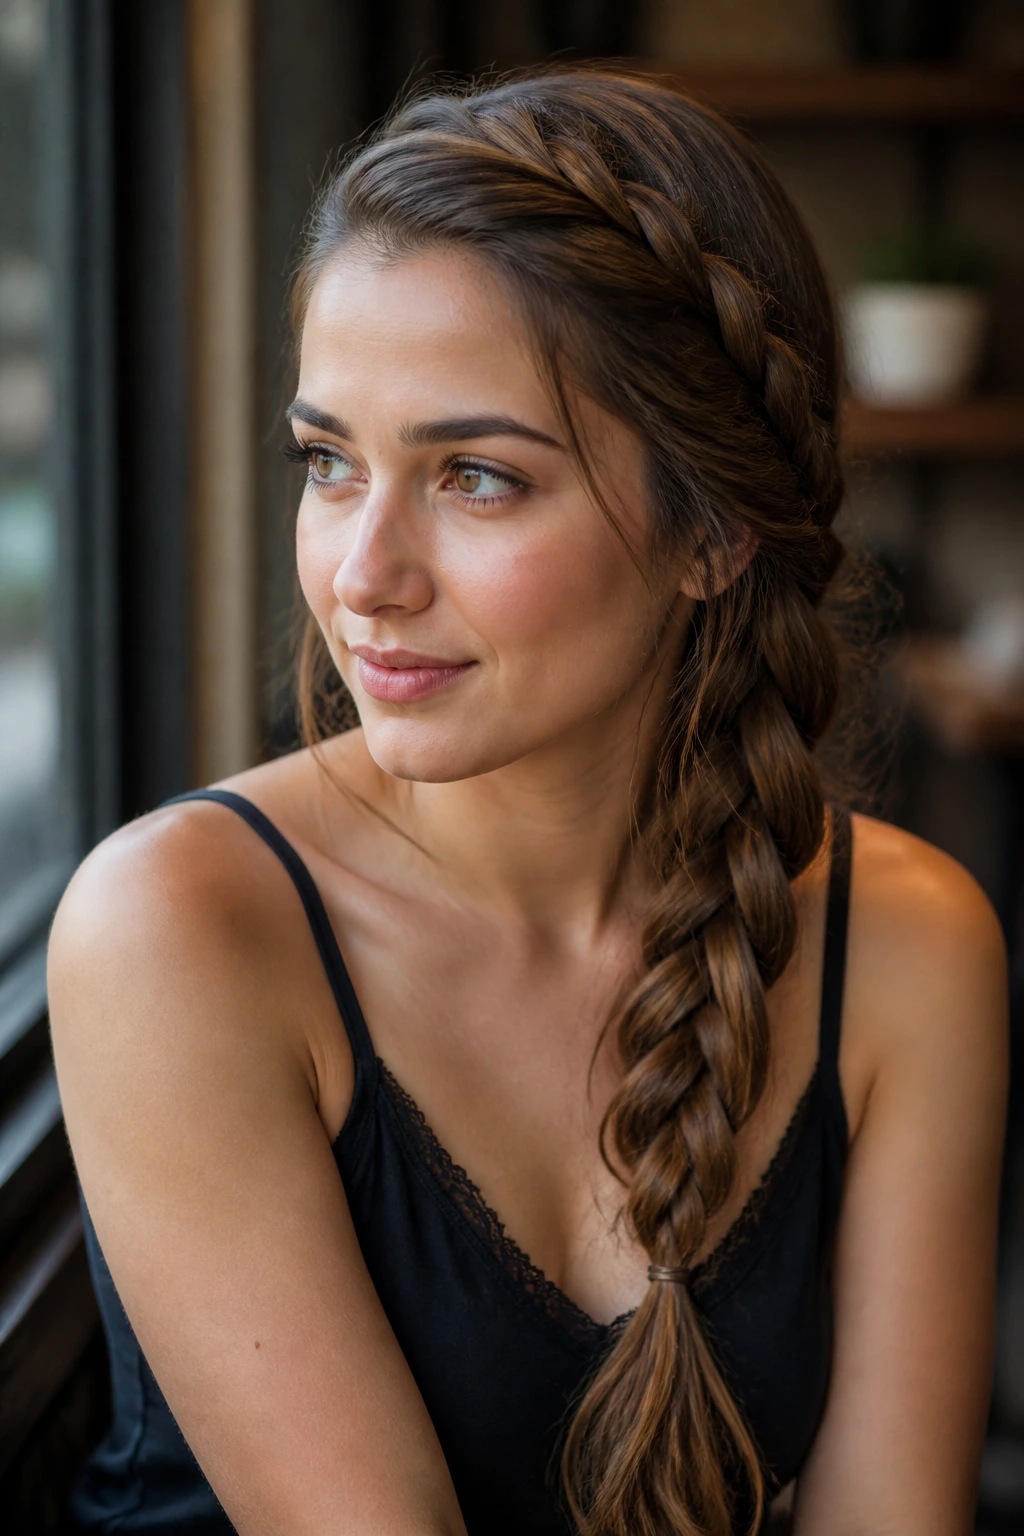
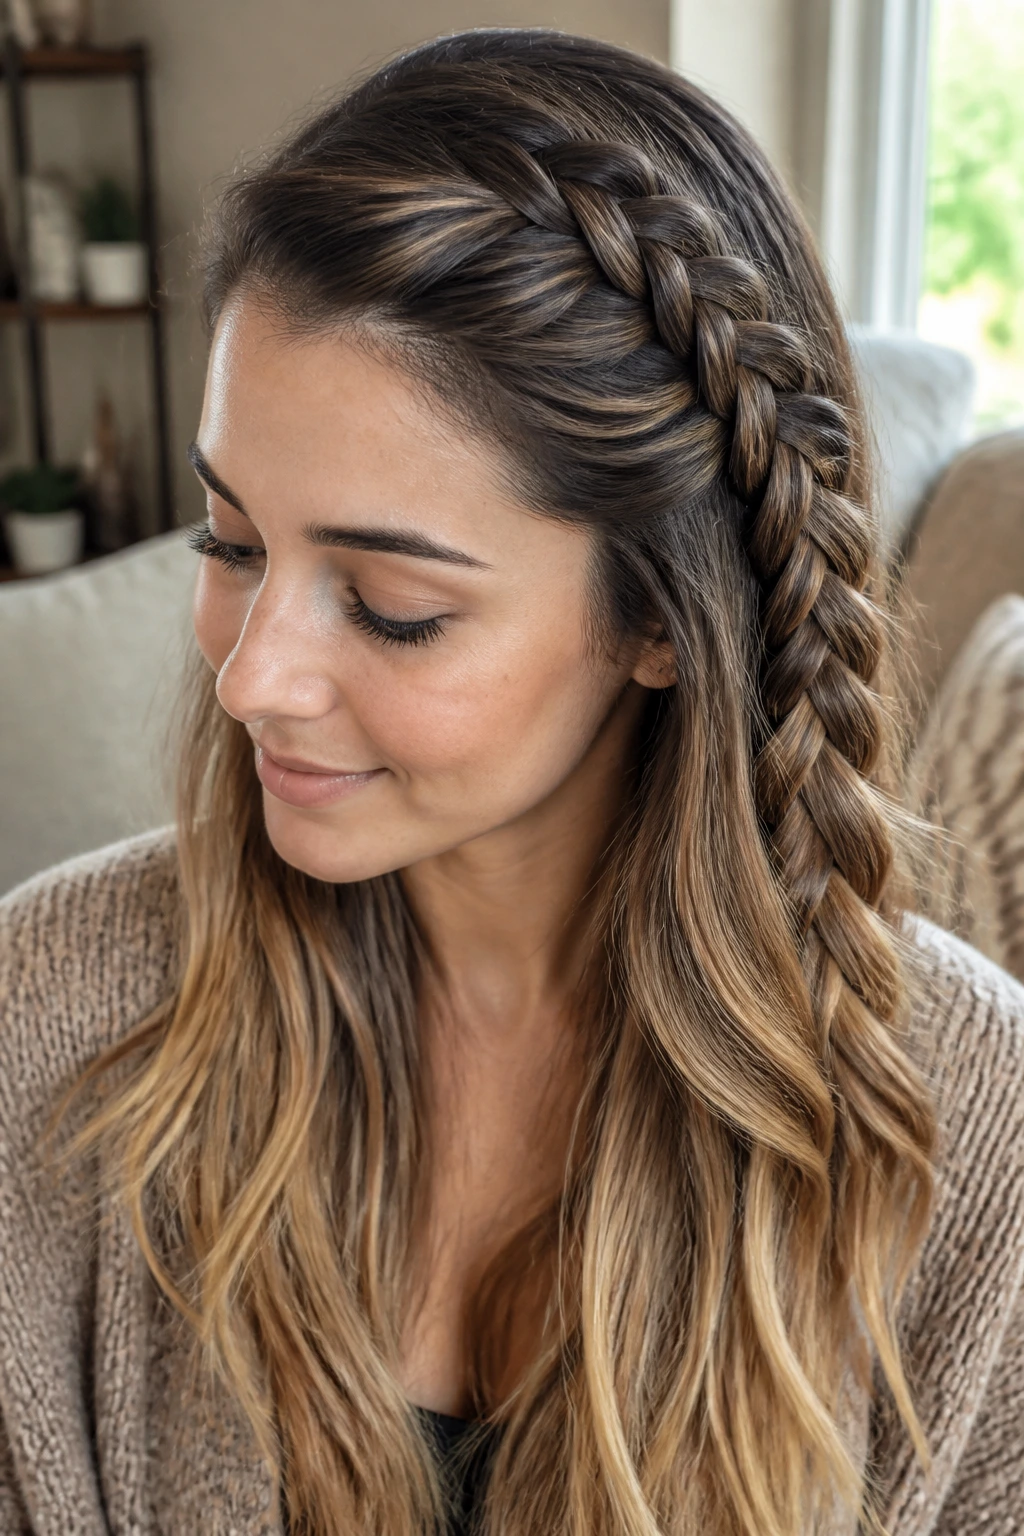
2. Deep Side-Part French Braid
A deep side part changes the braid before you even start feeding sections. That off-center line softens the look, and on an oval face it keeps the style from feeling too symmetrical or severe. The braid drops with a little more movement, which is exactly why this one works so well with long hair.
If one side of your cut is layered shorter, use smaller feed-ins on that side so the braid stays even. One good anchor near the temple matters more than forcing every section to be identical. This is a braid that looks polished, but not stiff.
3. Low Nape French Braid
Why do low braids look so calm? Because the braid sits where the head narrows, so the shape settles instead of shouting. A French braid that begins at the crown and ends at the nape shortens the visual line a little, which is useful if your oval face leans long.
Where to place it
Keep the first sections smooth and controlled, then relax your hands once you pass the ears. That little shift keeps the braid from puffing out at the top and collapsing at the bottom. Long hair gives the tail enough weight to hang neatly, which is part of why this style feels cleaner than a short braid ever does.
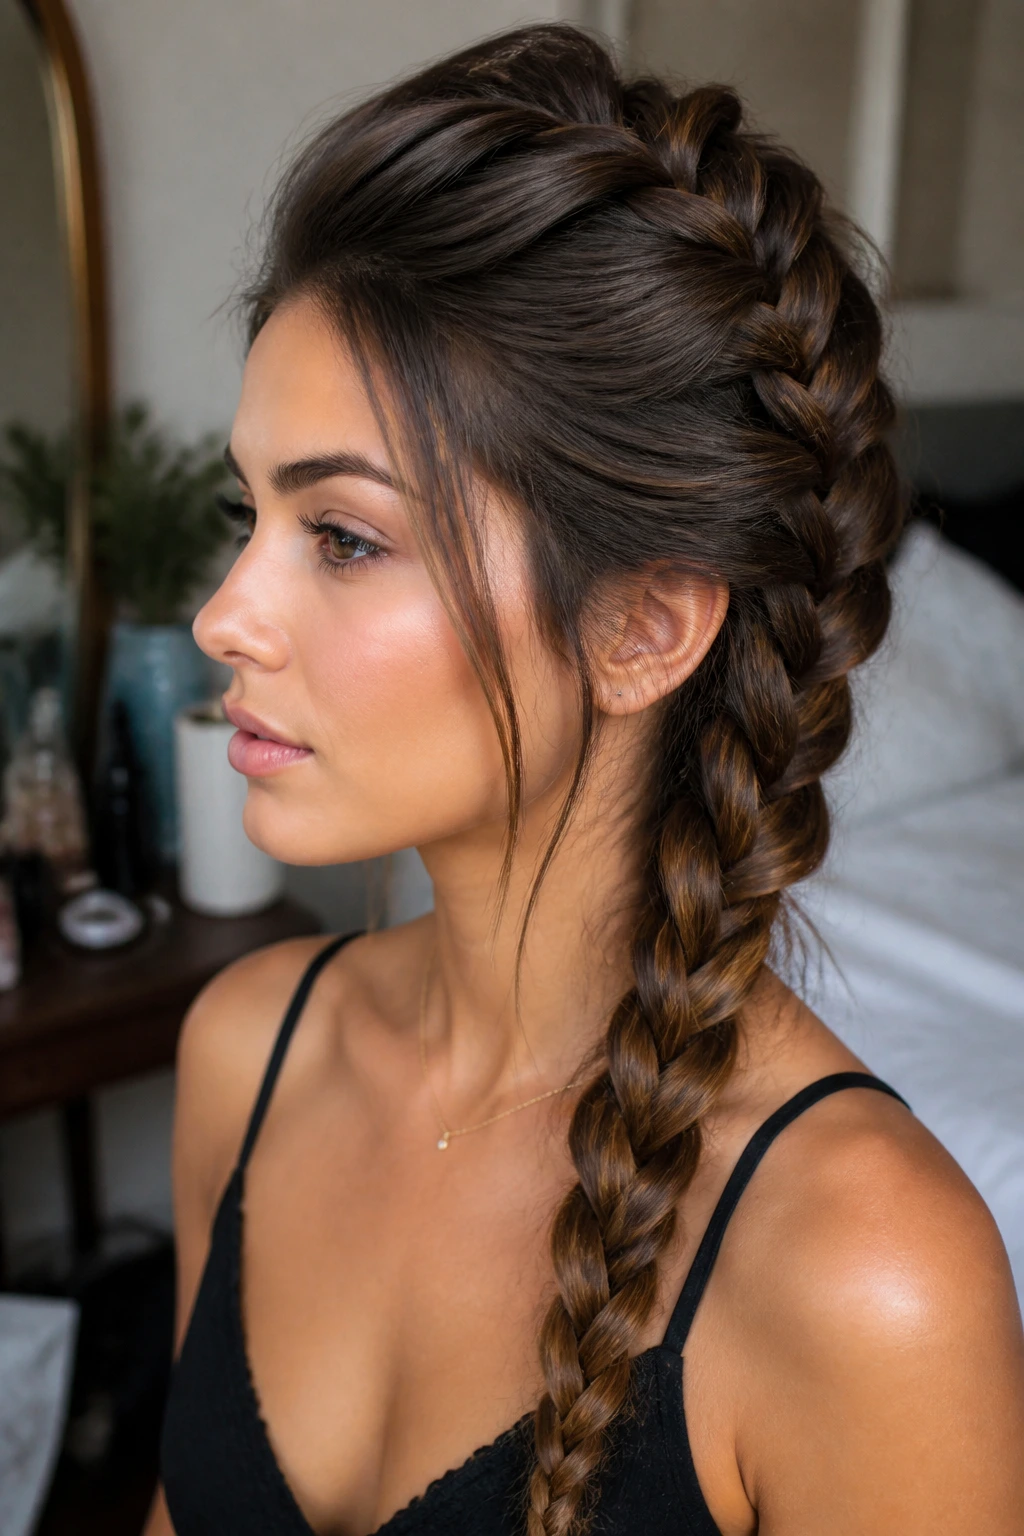
4. Crown-Lift French Braid
A little lift at the crown changes everything. This braid starts with volume near the top of the head, then feeds down into a long braid that keeps the scalp from looking flat. On an oval face, that extra height gives the style some presence without making the face look stretched.
The trick is restraint. You want the crown to rise, not balloon. Tease the roots lightly or push up the top section with your fingers before crossing the first strands. One or two hidden pins under the first inch can save the whole shape if your hair is silky.
5. French Braid into a Low Ponytail
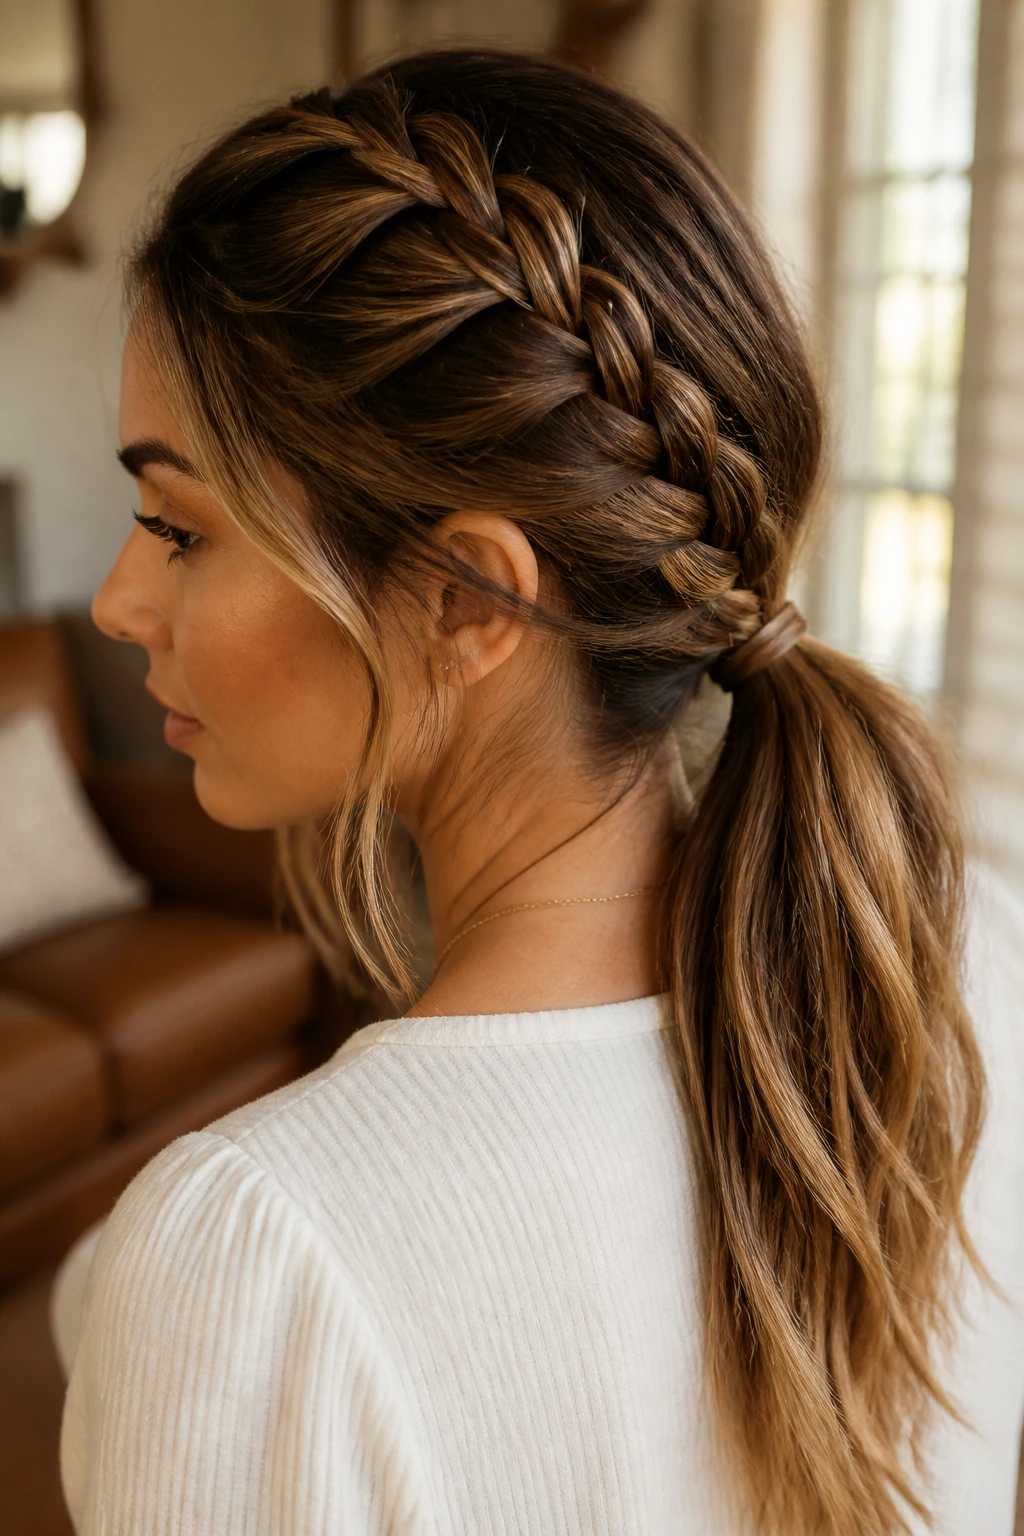
Unlike a braid that ends tight against the neck, this one keeps motion in the tail. You braid down the back, stop a few inches before the ends, and tie the remaining hair into a low ponytail. Long hair makes the transition feel intentional instead of choppy.
On an oval face, the low ponytail keeps the front open and the silhouette long, but not too long. I like this finish when the braid itself is the detail and the ponytail is the release valve. Wrap a small strand around the elastic and the whole thing looks more finished in one move.
6. French Braid into a Sleek Bun
There’s a quiet logic to this style. The braid builds control, then the bun at the nape seals the shape and keeps the ends tucked away. It’s a strong option for long hair because there’s enough length to make the bun full instead of tiny and pinched.
Oval faces tend to look good with the forehead and cheekbones left open, and a low bun does exactly that. Keep the braid snug through the top, then coil the tail into a knot and pin it with U-pins or two crossed bobby pins. A giant claw clip can work in a pinch, but pins hold the shape better.
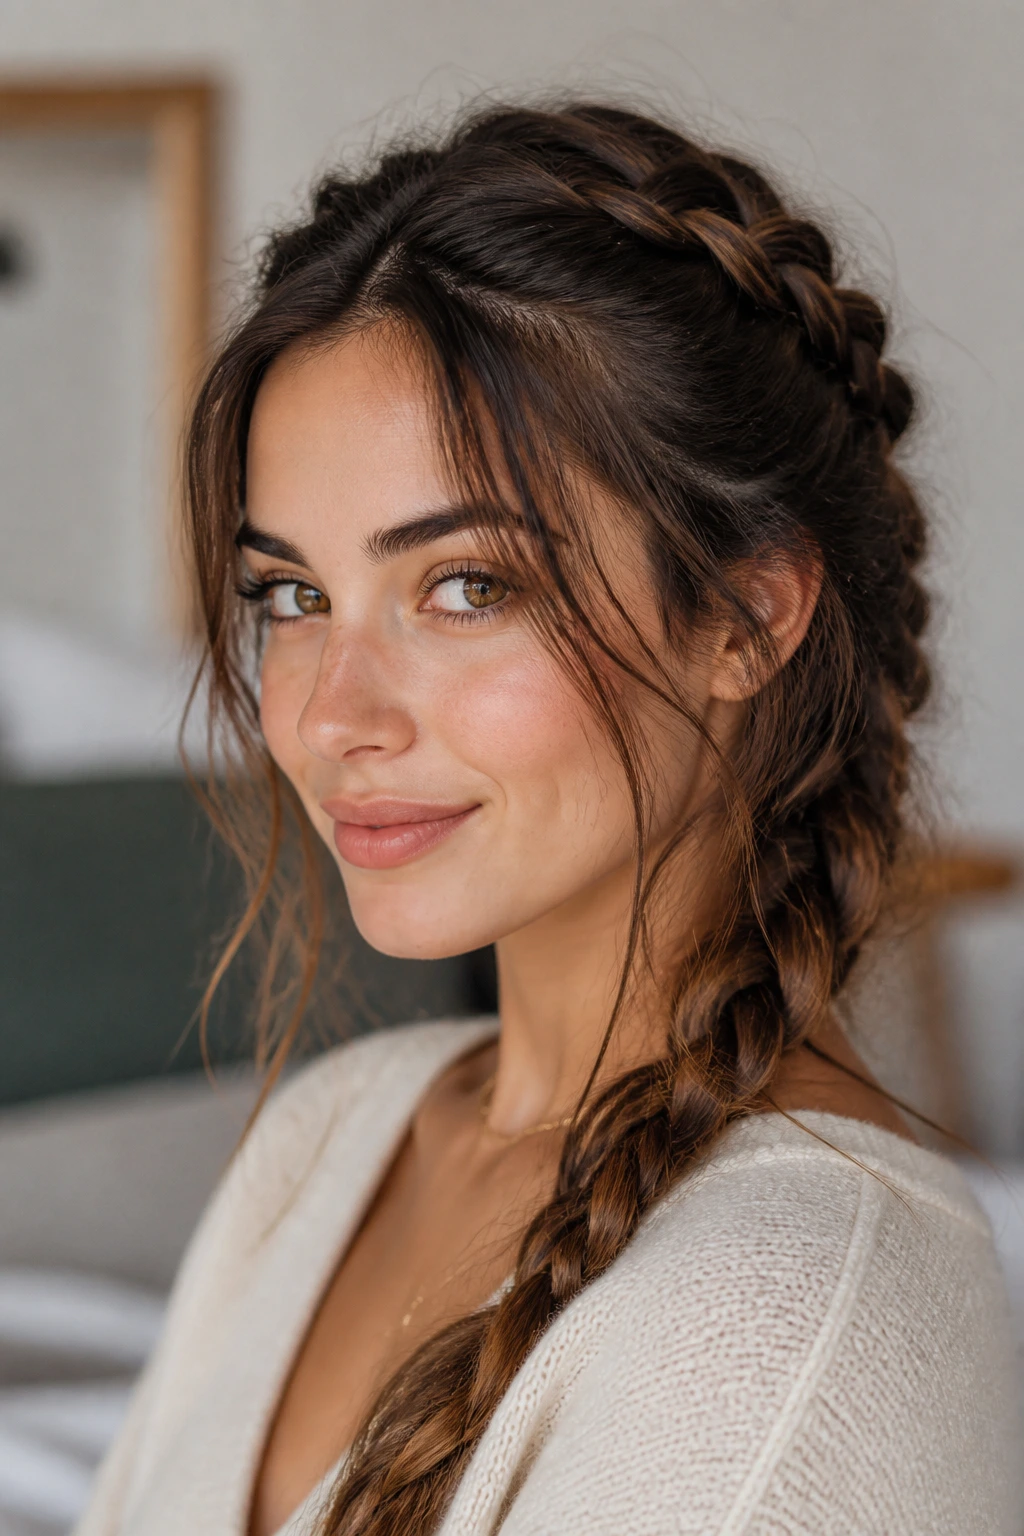
7. Half-Up French Braid Cascade
Want the braid detail without pulling all your hair back? This is the version. The braid starts at the hairline or crown, feeds into the upper half only, and leaves the rest loose so the length still moves. On long hair, that contrast is the whole point.
An oval face benefits from the control up top and the softness below. You get the braid framing the upper face while the lower lengths stay free around the shoulders. If the loose section has a wave in it, even better — the braid reads crisp, and the rest reads relaxed.
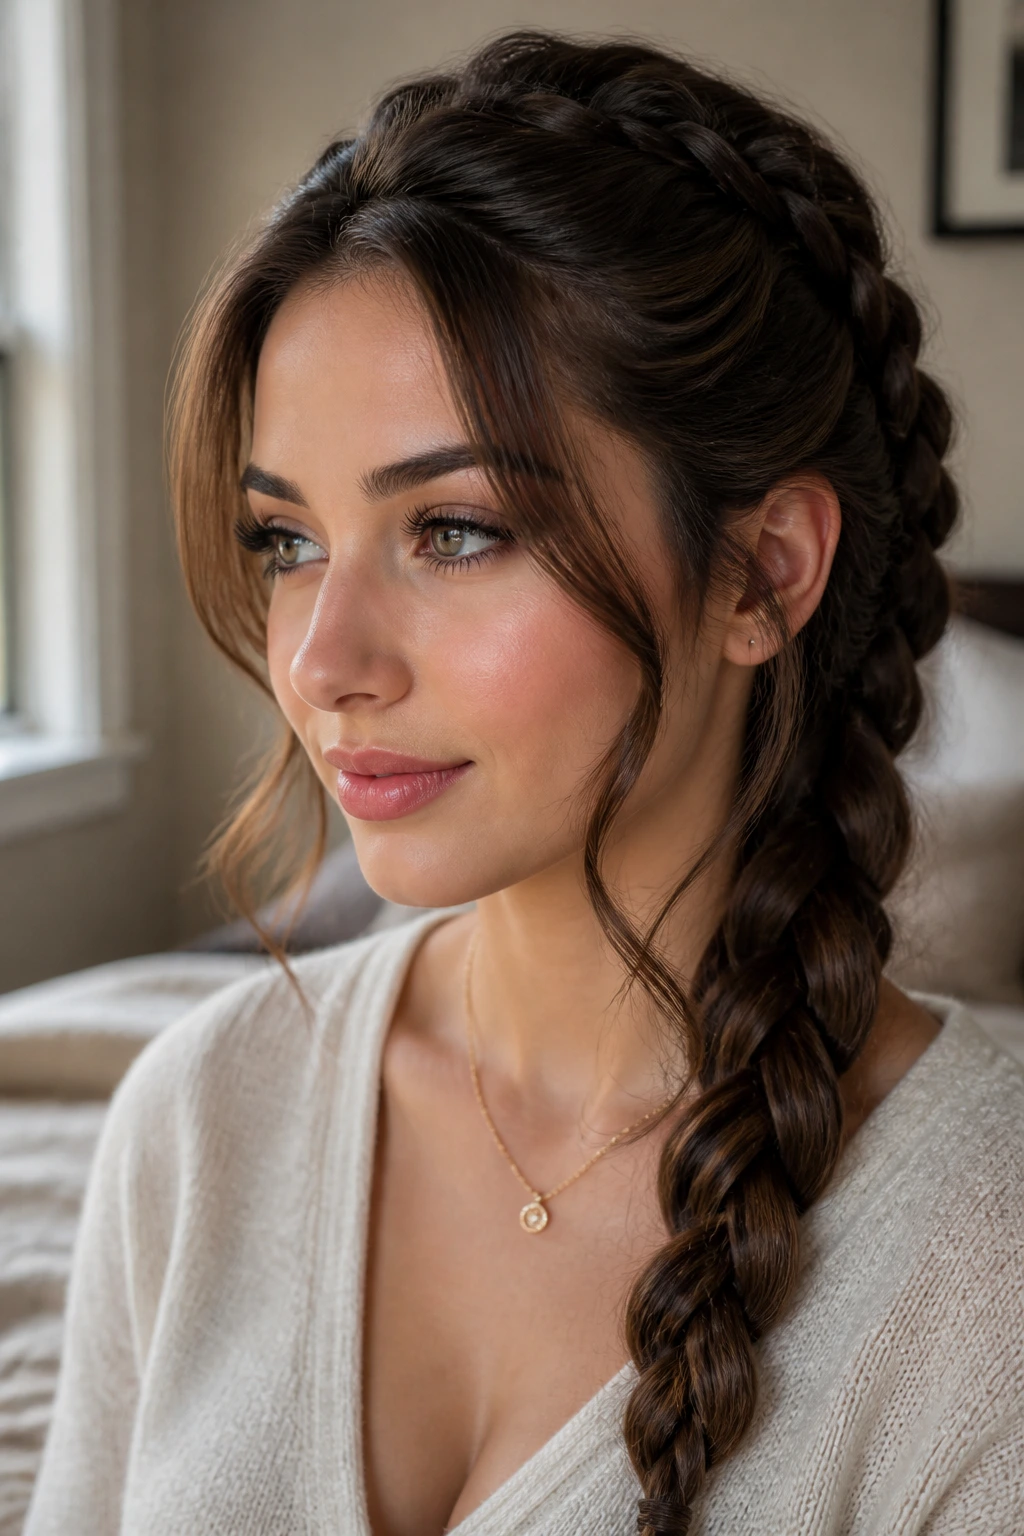
8. Twin Temple French Braids
This is the style I reach for when I want the front controlled but don’t want one heavy braid sitting down the back. Start near each temple, braid back toward the crown, and let the two braids meet, tie, or simply stop where you like. Long hair gives the twin braids enough mass to look deliberate rather than skimpy.
On an oval face, the two lines add width at the sides without crowding the cheeks. That matters. If you have thick hair, keep the parts clean and the tension even so one braid doesn’t swell bigger than the other.
9. Diagonal Sweep French Braid

A diagonal braid breaks the straight-down habit that makes some styles feel flat. Beginning near one temple and traveling toward the opposite shoulder, it cuts across the head at an angle, which gives long hair some motion before the braid even gets past the collarbone.
An oval face can take that diagonal line nicely because the shape already has room for movement. I especially like this when one side of the hair is fuller or when you want to show off earrings on the open side. The braid feels less formal than a center-back version, but still controlled.
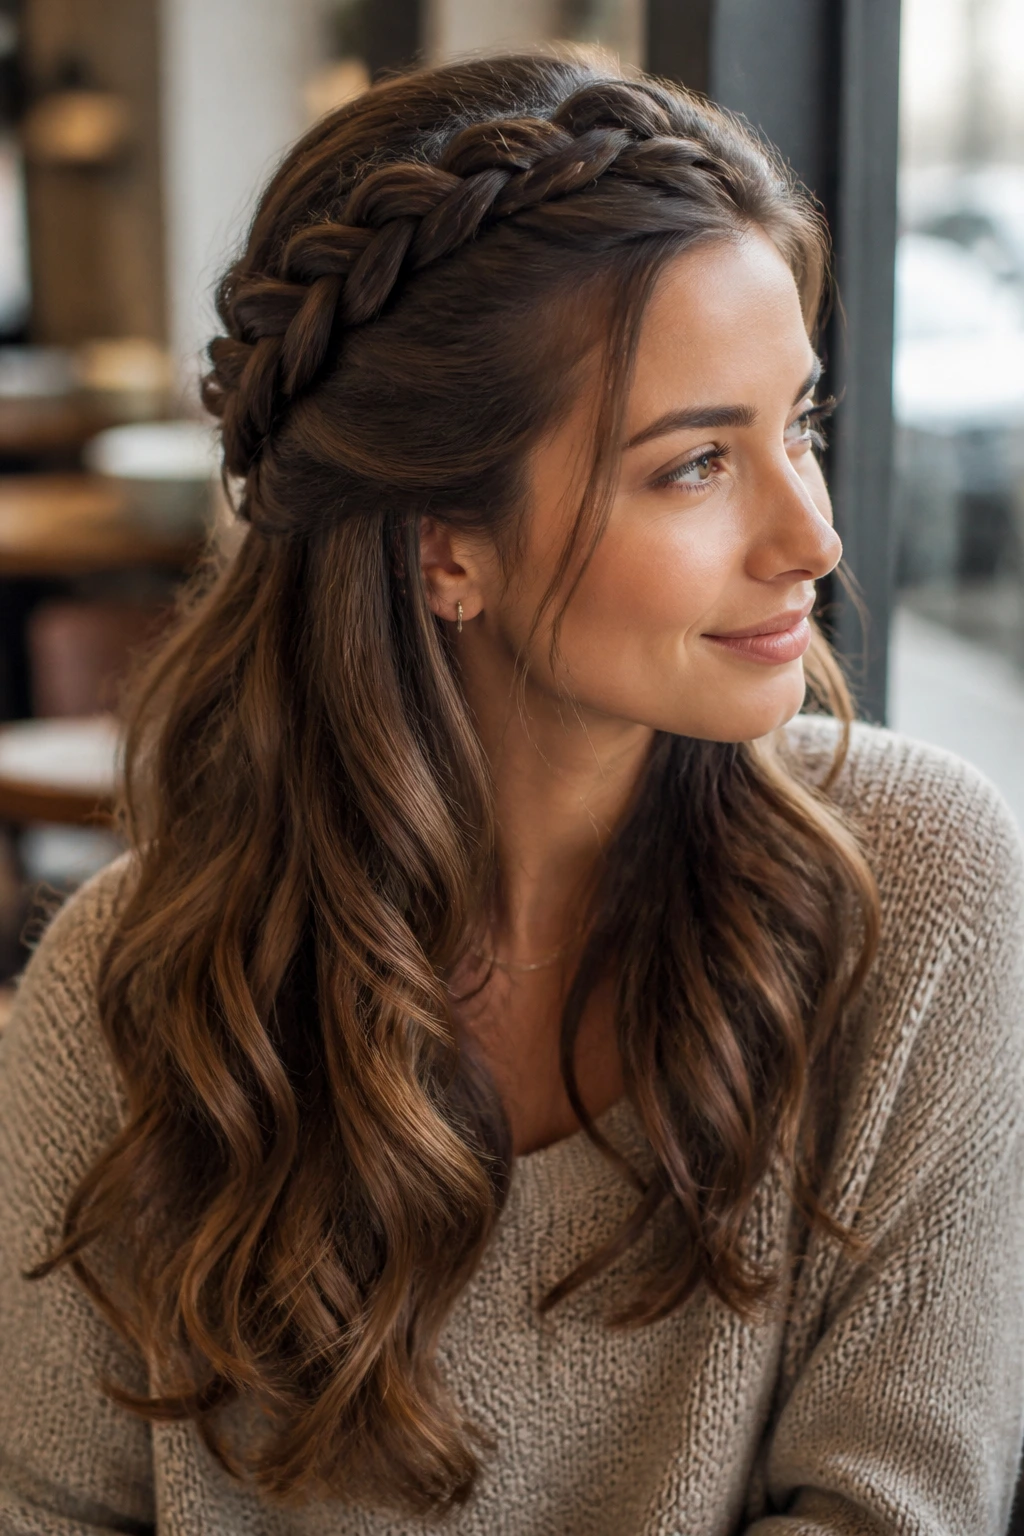
10. French Braid Headband
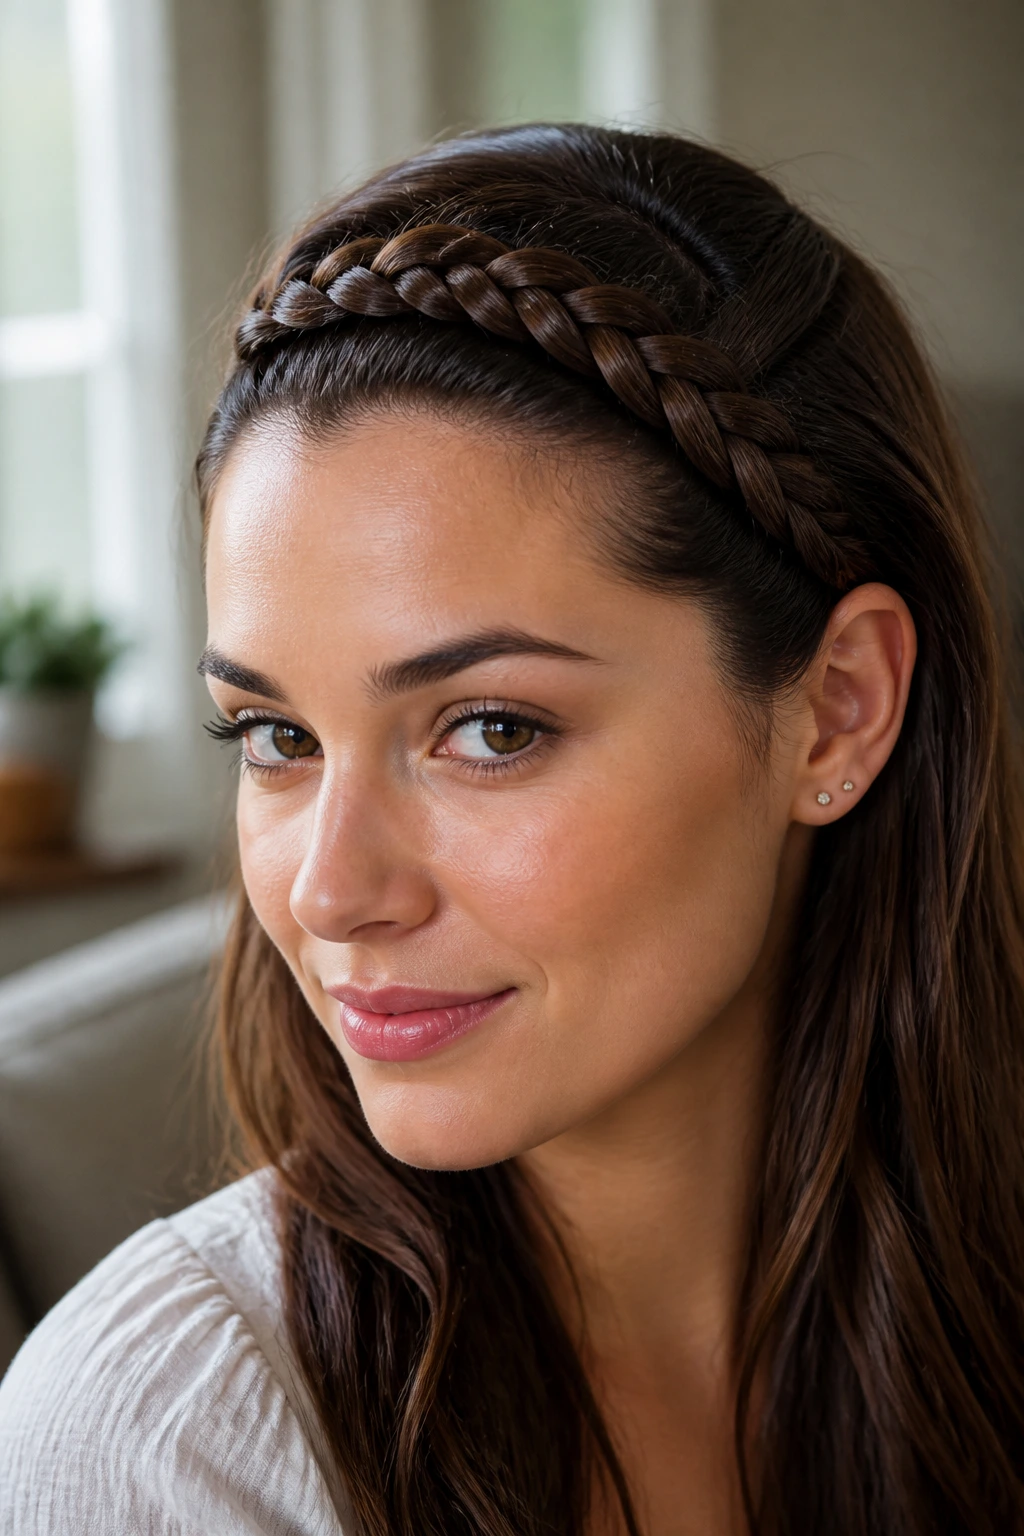
A braid across the hairline does more face-shape work than a middle part ever will. The braid starts near one ear, crosses the forehead like a band, and tucks behind the opposite ear so the rest of the hair can stay loose. Long hair helps because the back section still has weight and shine.
On an oval face, the headband placement opens the features and keeps the front from going too bare. It’s a good style when you want hair off the face without losing the length. Use a couple of hidden bobby pins behind the ear if the braid wants to slide forward.
11. Halo Crown French Braid
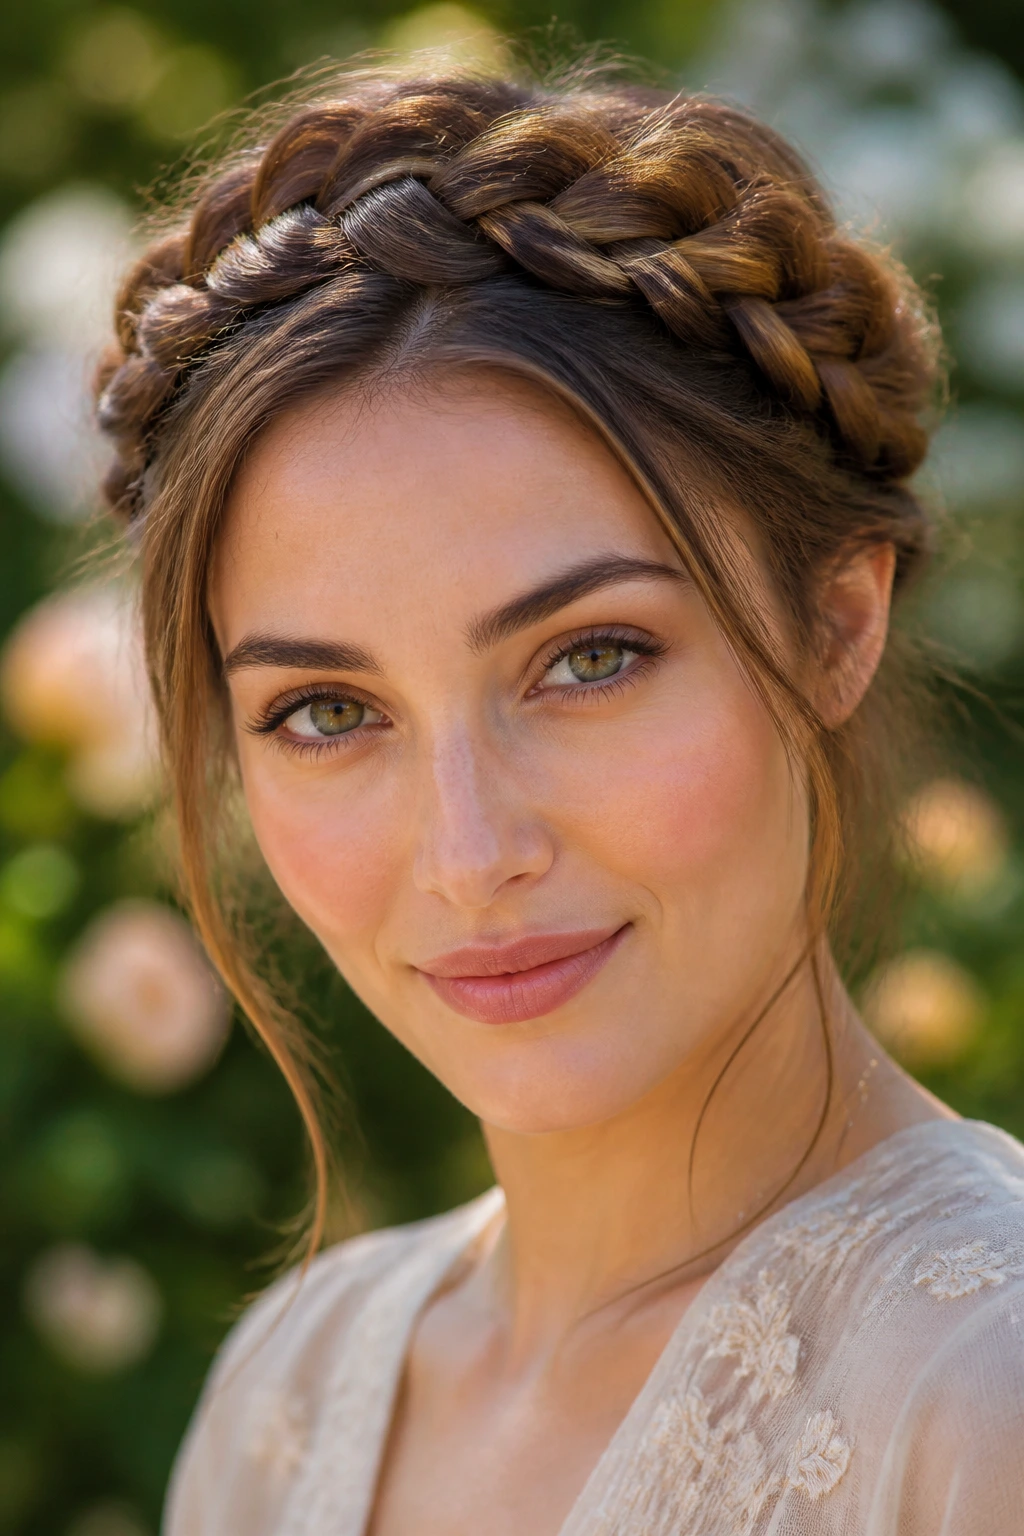
What makes a halo braid different from a headband braid? The path. A halo wraps around the entire head, usually following the hairline and circling back to where it started, which gives the style a softer, more finished ring. On long hair, the braid itself becomes the frame.
Lock the ends underneath
Pin the ends under the braid’s path rather than leaving them loose. That keeps the halo from poking out at odd angles by noon. Oval faces can wear this look well because the braid adds width around the crown and temples, which shortens the vertical line just enough to feel balanced.
12. French Braid with Curtain Pieces
If you like your braid to feel softer, leave two narrow sections out at the front. Those pieces can sit at the cheekbones or brush the jaw, and the braid handles the rest. Long hair keeps the overall shape full so the face-framing bits don’t make the style look sparse.
A lot of people overdo this and leave too much hair out. Don’t. One inch on each side is enough for most faces. Curl the pieces slightly or bend them with a flat iron if you want them to curve instead of hanging straight.
13. Pancaked French Braid
A tight braid is neat. A pancaked braid has presence. After the braid is finished, you pull gently on the outer loops to widen them, and long hair gives you room to do that without losing the pattern. The braid looks fuller, almost like a woven ribbon.
On an oval face, that added width keeps the style from becoming one long vertical strip. It softens the overall shape in a way that feels easy to wear. Go slowly, though. If you yank too hard, the braid turns lumpy and the sections show through.
14. French Braid with a Rope-Twist Tail
The tail matters more than people think. In this version, the French braid runs down the head as usual, then the loose length is split into two sections and twisted into a rope finish. That last step gives long hair movement at the bottom without letting the ends fray.
I like this for people who get bored once the braid reaches the shoulders. The rope twist keeps the style going. On an oval face, the clean upper braid opens the features, while the twist at the end gives the eye somewhere to land lower down.
15. French Braid Mohawk
This one has edge. The braid runs straight through the center of the head, while the sides stay sleek, pinned, or brushed close to the scalp. Long hair helps because the central braid can be wide enough to look intentional, not tiny and nervous.
An oval face can carry a strong center line, especially if you leave a little softness around the temples. The trick is not to flatten the sides so hard that the whole head looks narrow. Keep the braid itself a touch full — not loose, just full enough to stand up on its own.
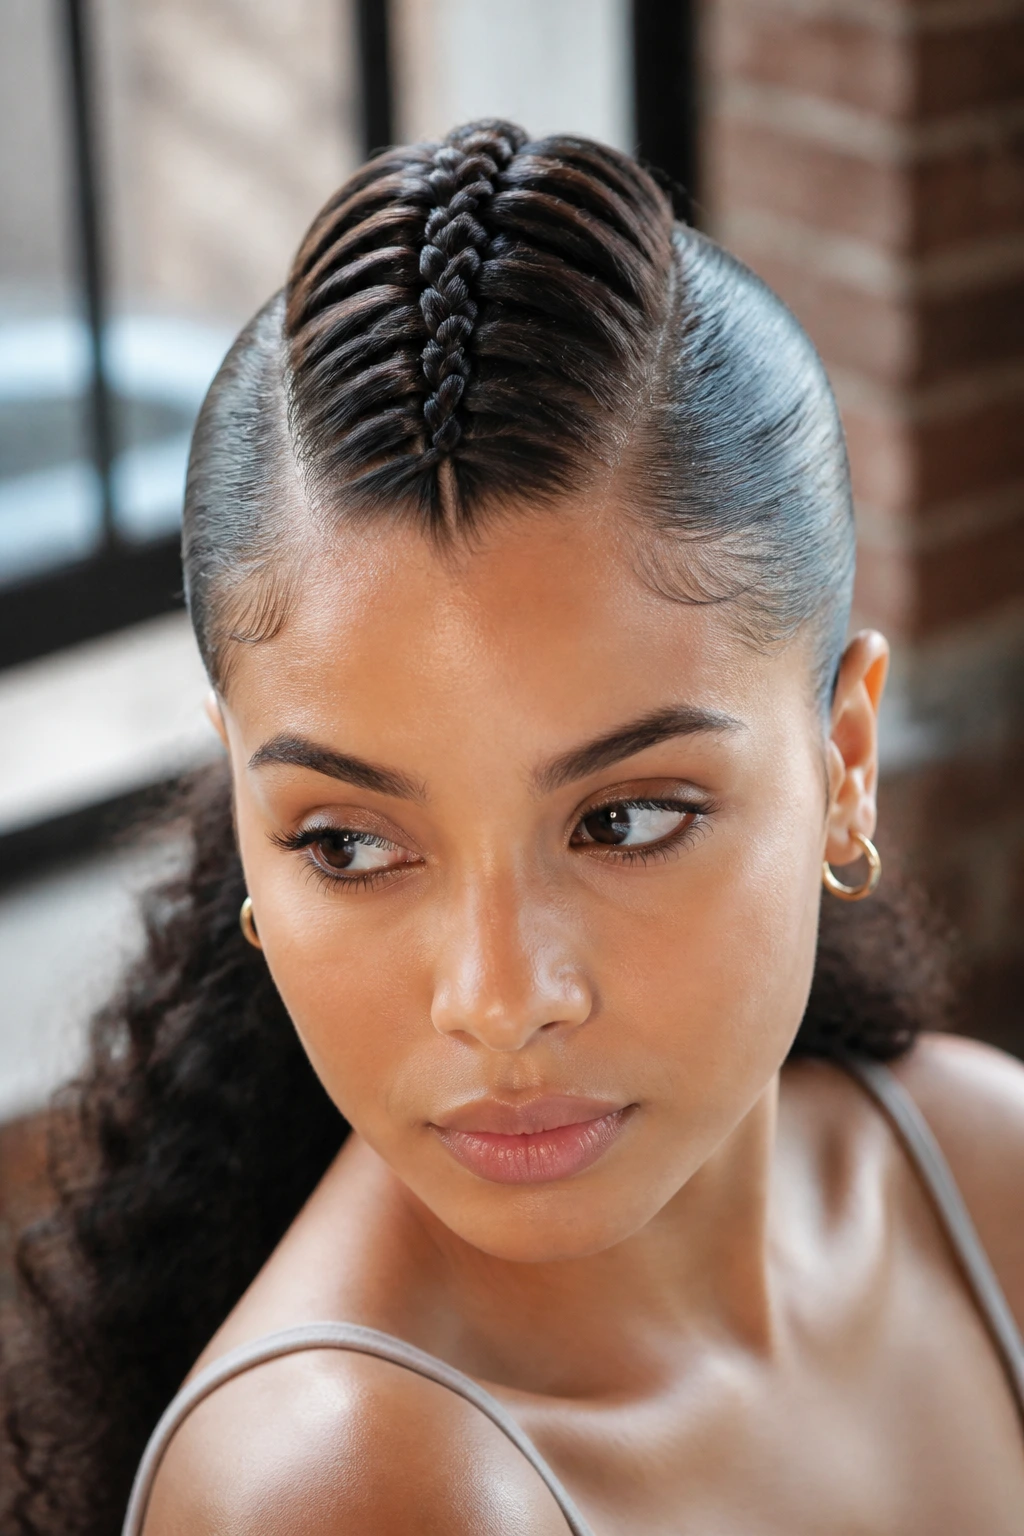
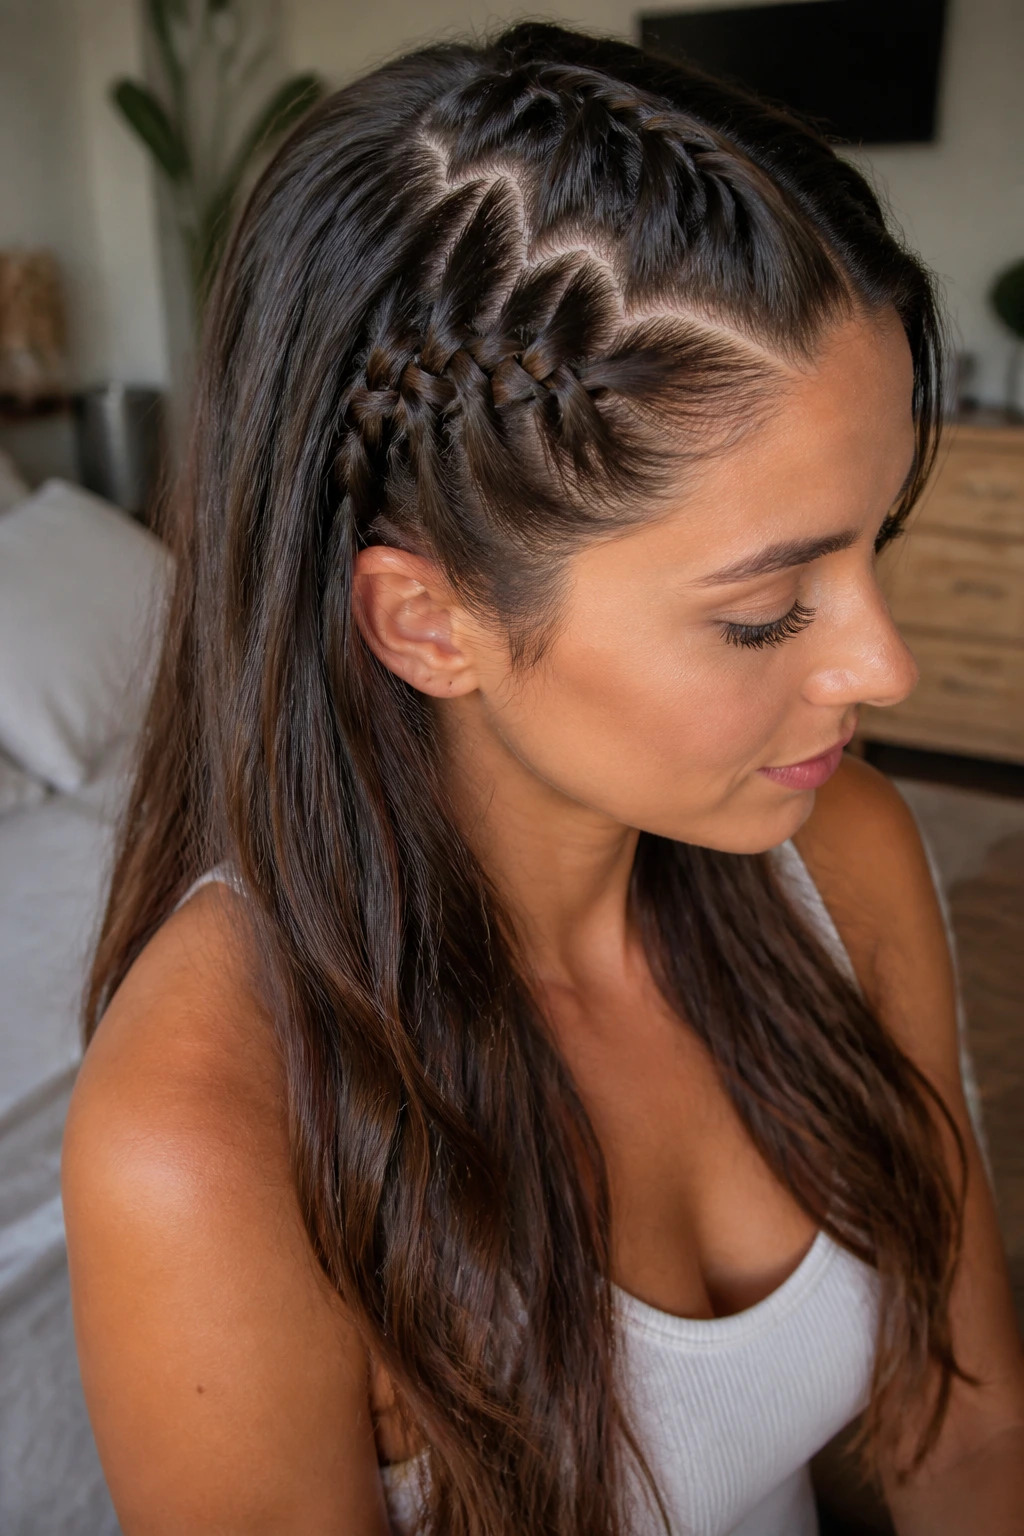
16. Zigzag-Part French Braid
A zigzag part is not subtle. That’s the point. The parting line zigzags from the forehead back toward the crown, and the braid follows right behind it, so the scalp detail becomes part of the style instead of something to hide.
Long hair shows the zigzag especially well because there’s enough length for the pattern to stay visible after the braid starts feeding in. On an oval face, the broken line keeps the look from becoming too smooth or expected. A rat-tail comb helps here; fingers alone will not give you a clean zigzag.
17. French Braid Pigtails
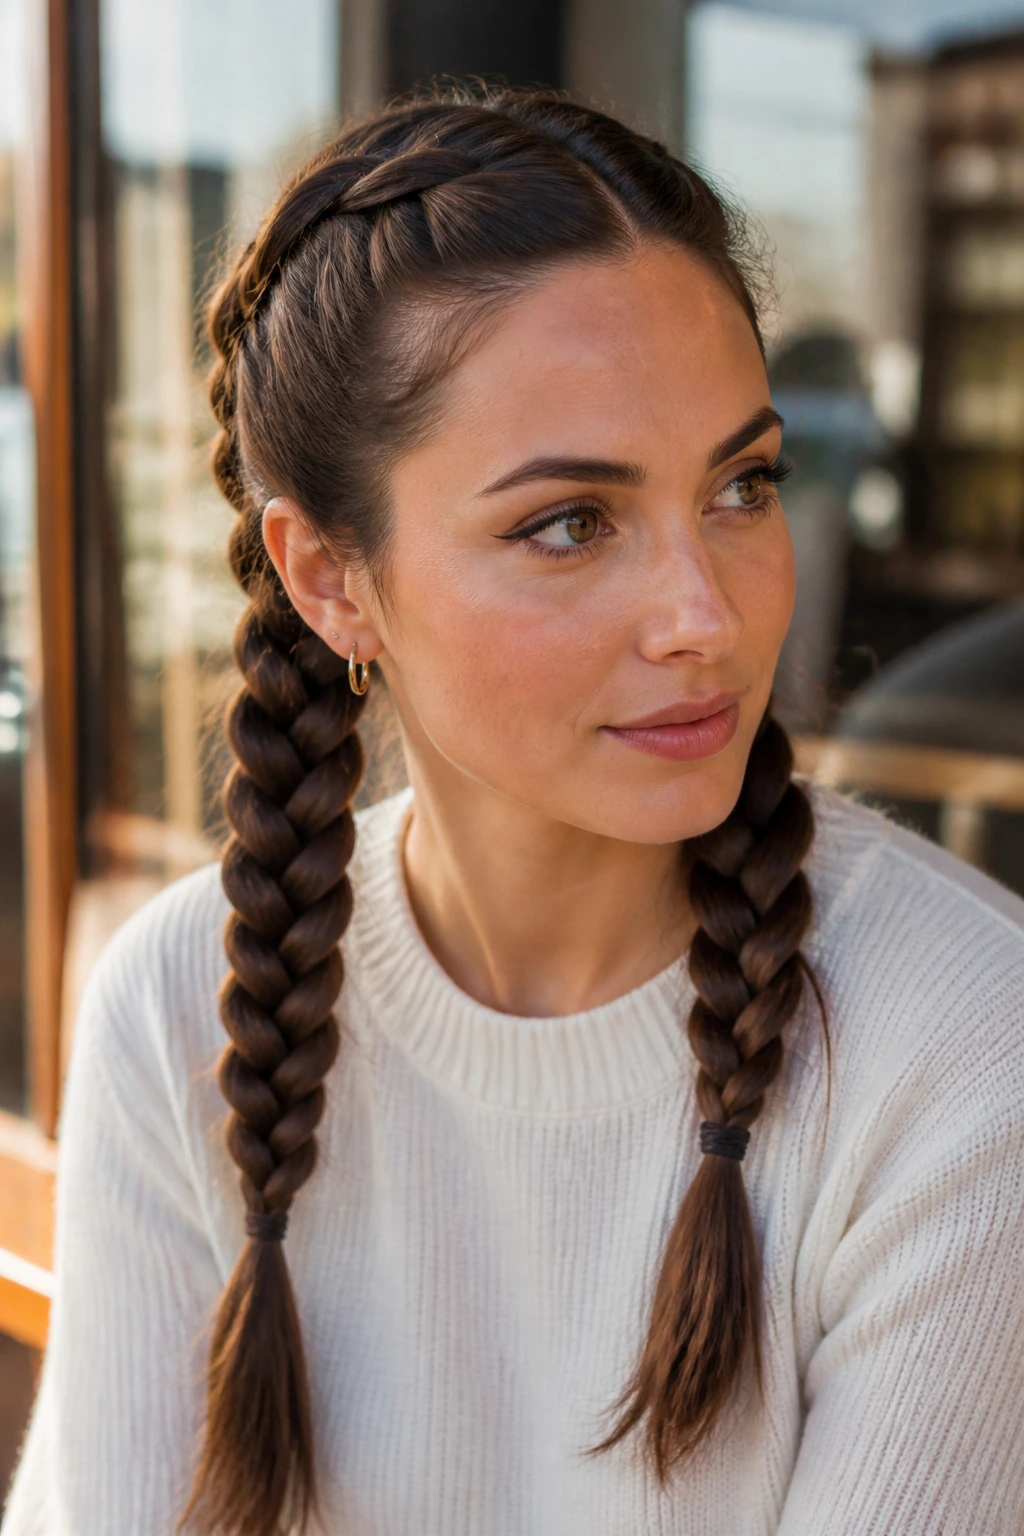
Two braids can feel playful without looking childish if they start low and stay broad. Part the hair in the middle, braid each side from near the temples or just behind the ears, and let the lengths fall evenly. Long hair gives the pigtails enough weight to look grown-up.
On an oval face, pigtails add width where the face can use it. I like them best when the braids sit low rather than high, because low placement keeps the look calmer. If you want a slightly sharper finish, wrap a small strand around each elastic and pin it underneath.
18. Lace French Braid
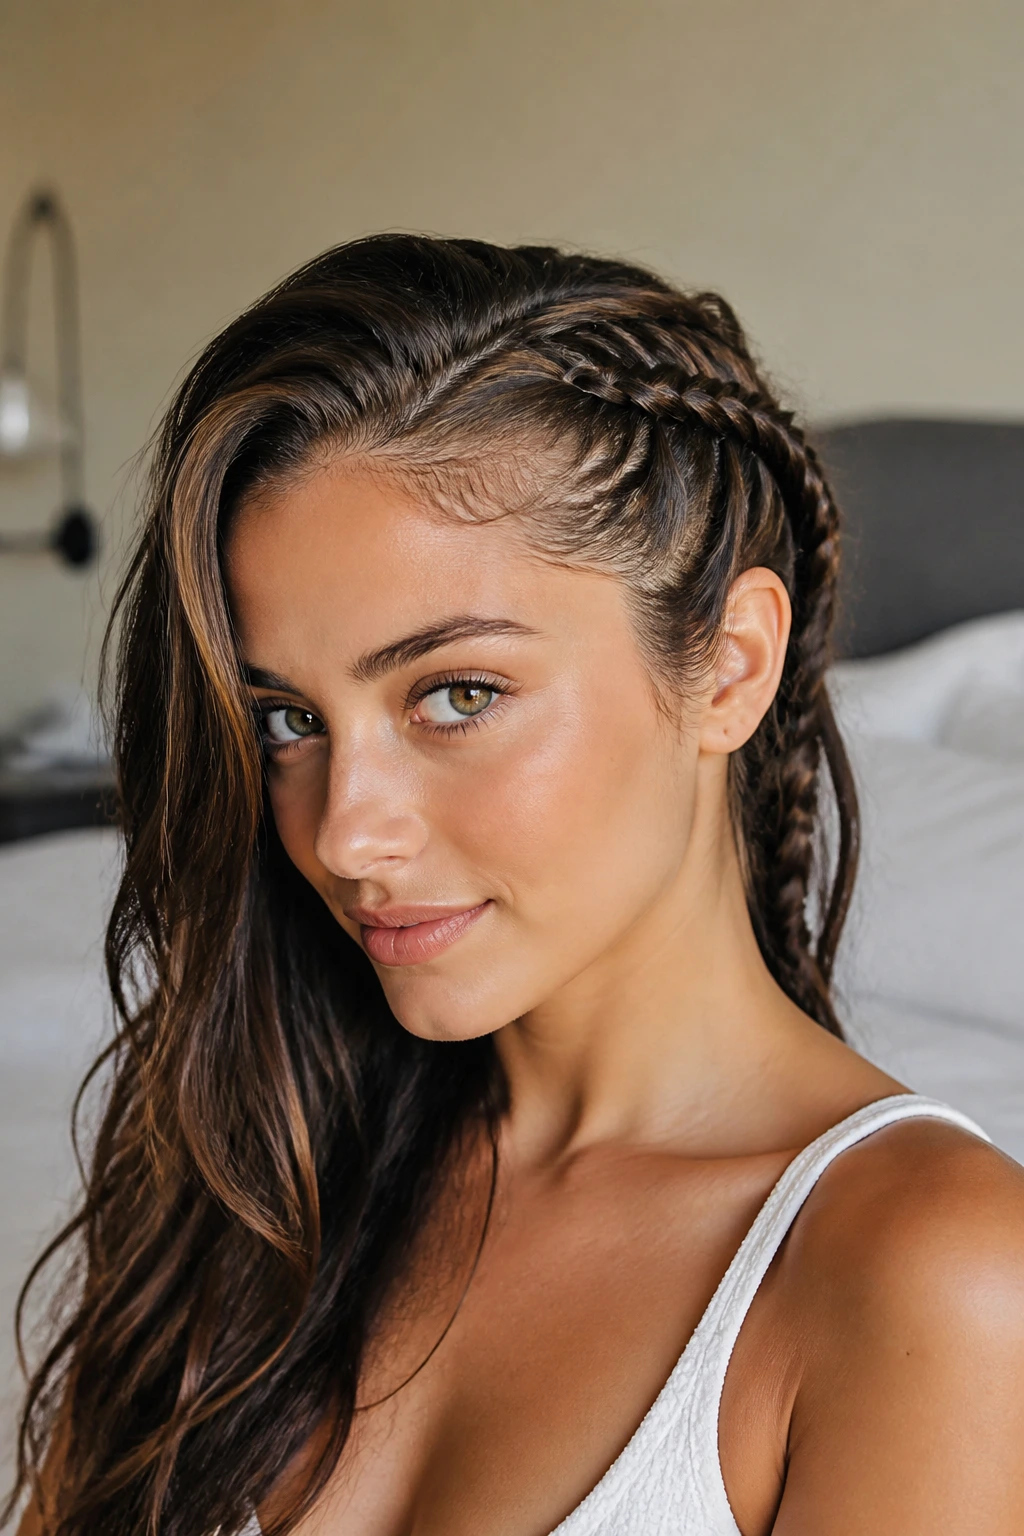
A lace braid is the French braid’s one-sided cousin. You keep adding hair from only one side while the other side stays loose, which lets the braid hug the scalp without sealing the face in. It’s a smart choice for long hair because the loose side still has enough length to feel rich.
On an oval face, the lace braid gives structure without crowding the features. One side stays open, one side gets detail, and the result feels lighter than a full braid. If your hair is slippery, a dab of styling cream on the feed-in side keeps the loose pieces from escaping.
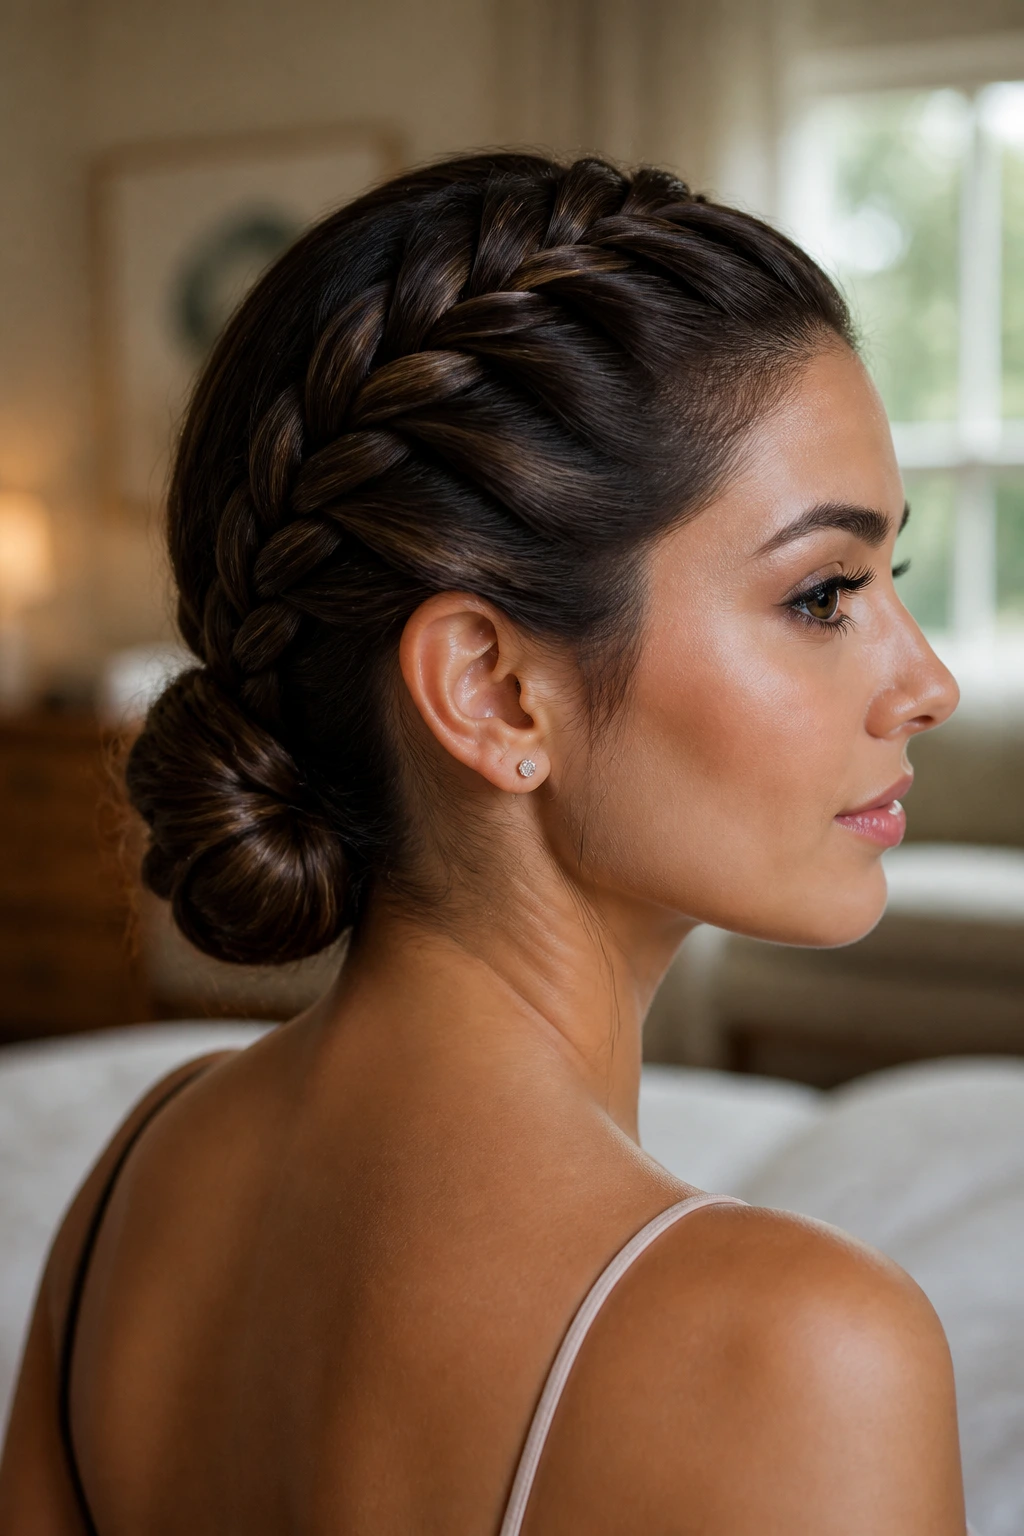
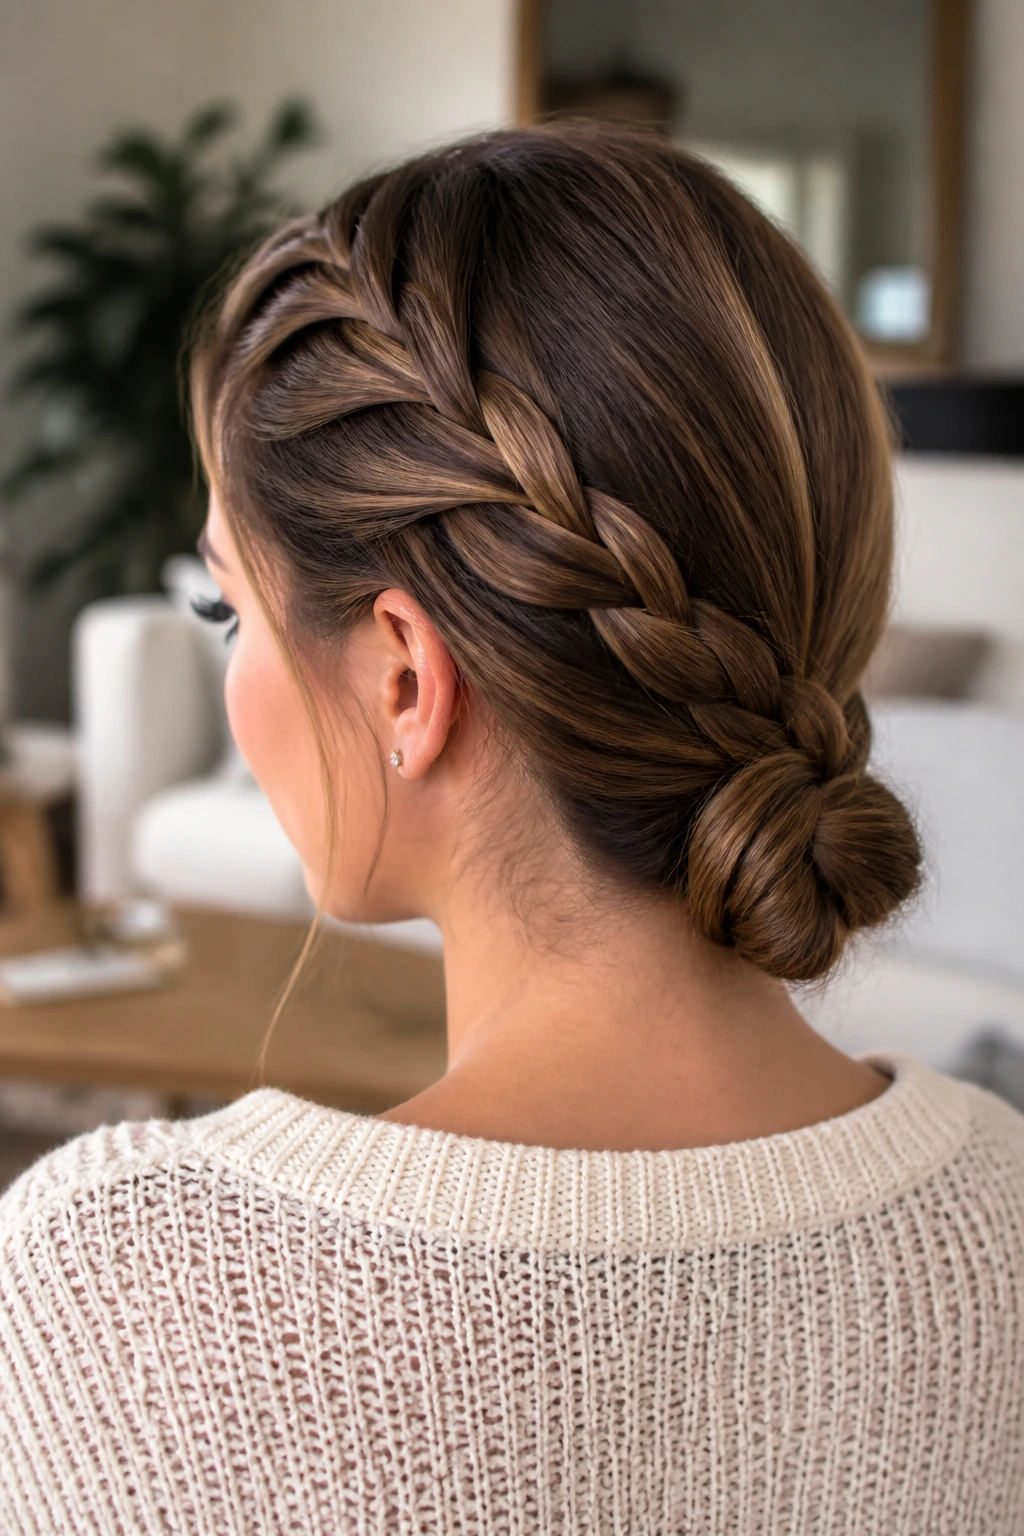
19. French Braid into a Low Chignon
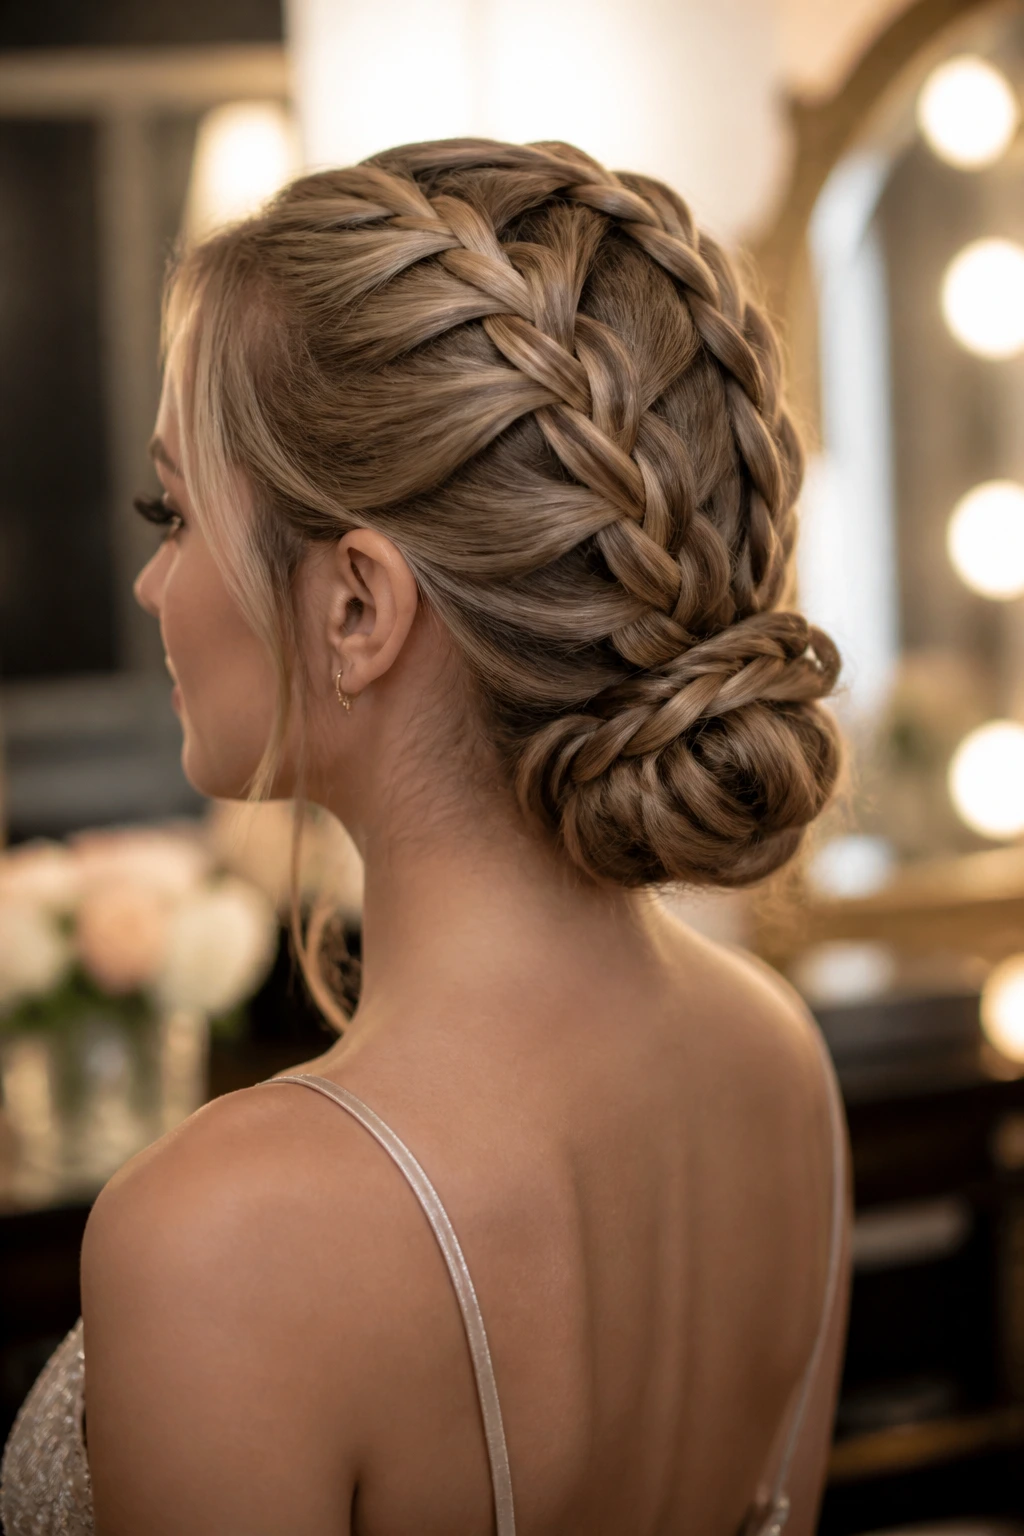
If a low ponytail feels plain, a chignon fixes that. The braid feeds down the back, then coils into a knot at the nape that sits flatter and neater than a bun. Long hair makes the chignon look full, not pinched.
Oval faces tend to do well with this because the shape keeps the top open and the silhouette low. I’d use this for a dressier setting or any day when you want the braid to look composed from every angle. Pin the knot in an X pattern, and it will stay put longer than a single clip.
20. French Braid with Braided Ends
There is a case for braiding all the way to the ends. It gives the hairstyle one unbroken line from root to tip, which can look especially clean on long hair. You don’t lose the pattern at the bottom, and the ends stay contained instead of fraying out.
On an oval face, that uninterrupted line keeps the eye moving downward in a smooth way. If your hair is thick, this version can look almost rope-like. Finish with a tiny elastic about an inch from the tips so the last section doesn’t unravel in your pocket or bag.
21. Side-Swept French Braid
Want the braid to soften the face without hiding it? Sweep it to one side. This version starts high on one side of the head and travels across or behind the shoulder, which gives long hair a softer fall than a straight-down braid.
Keep the shoulder side loose
Let the braid rest over one shoulder without pinning it to your collarbone. That keeps the style from feeling stiff when you move. On an oval face, the side-swept line interrupts the vertical shape in a good way, and it leaves room for earrings, a collar, or a scarf without crowding the front.
22. French Braid with a Scarf Woven In
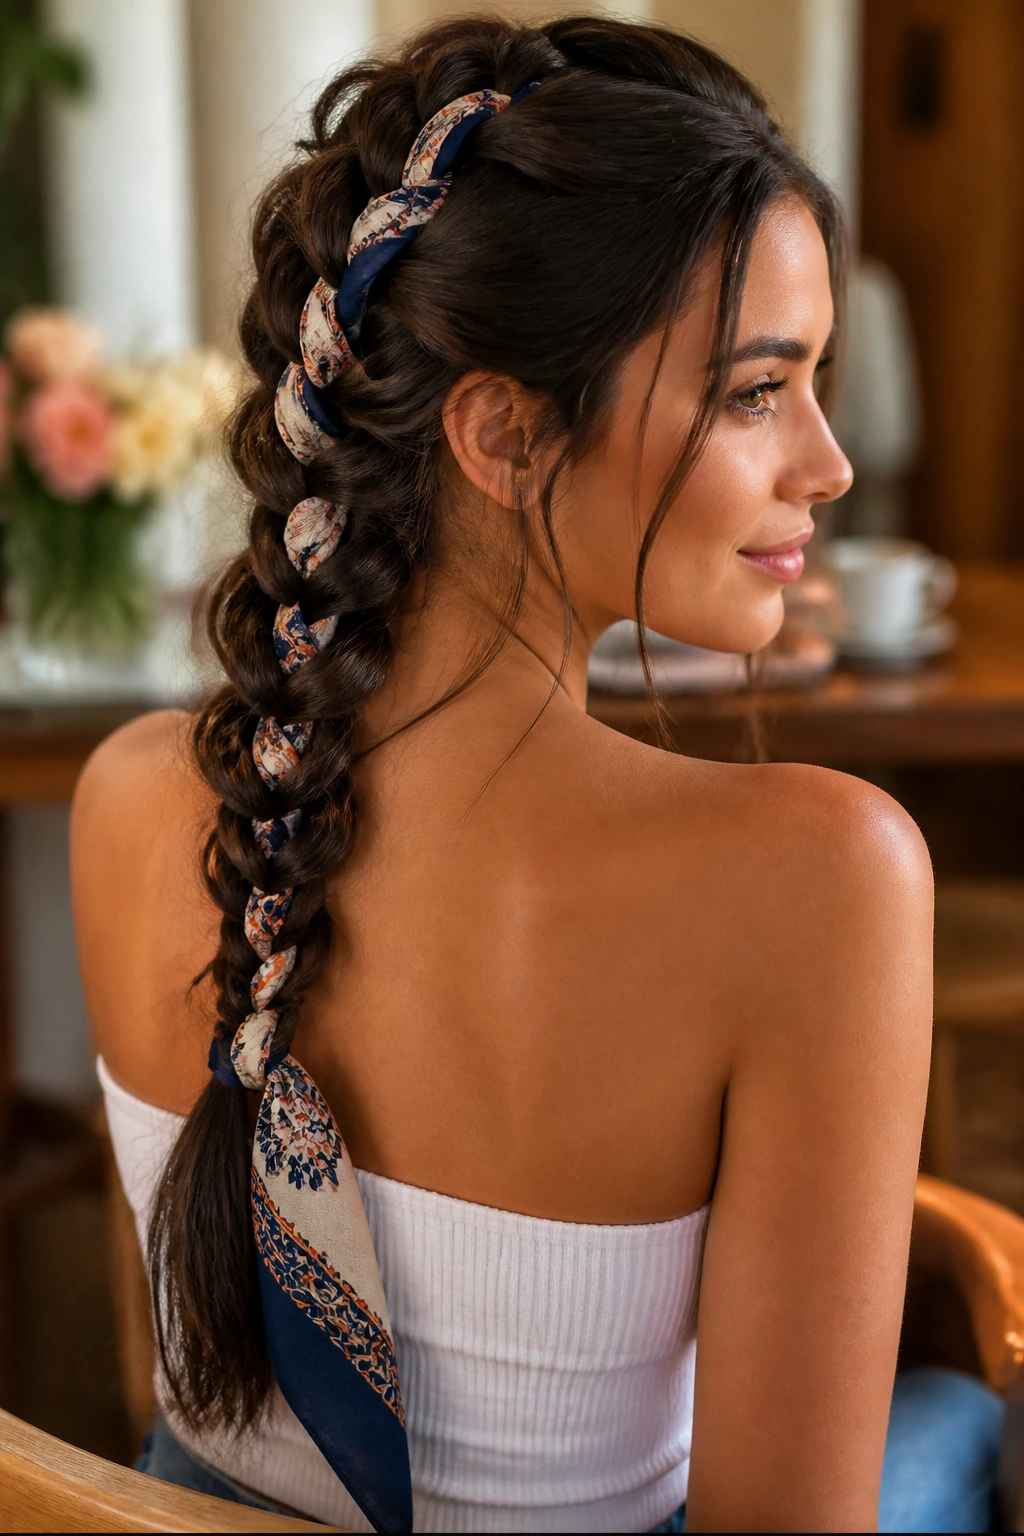
This is the quickest way to make a plain braid feel dressed up. Start the braid with a narrow scarf folded into one of the three sections, then keep feeding hair as usual. Long hair gives the scarf enough length to show, so the color or print becomes part of the braid instead of a loose afterthought.
- Choose a narrow scarf: Wide fabric gets bulky fast and can pull the braid apart.
- Keep tension even: A slippery scarf shifts if you stop and start.
- Tie it under the tail: That keeps the end from slipping out during the day.
On an oval face, the scarf adds width and visual interest near the crown, which keeps the braid from reading too severe.
23. French Braid with Beaded Ends
The best place for beading is the bottom, not the top. Once the French braid reaches the back of the head, you can secure the tail with lightweight beads, cuffs, or small clips that slide over the end section. Long hair gives the accessories enough room to sit without looking cramped.
On an oval face, this keeps all the detail low, which lets the forehead and cheekbones stay open. I prefer lighter metal or resin pieces here; heavy beads drag fine hair down and can make the end look sad by midday. Secure the tail first, then add the hardware.
24. French Braid Pulled Back with a Clip
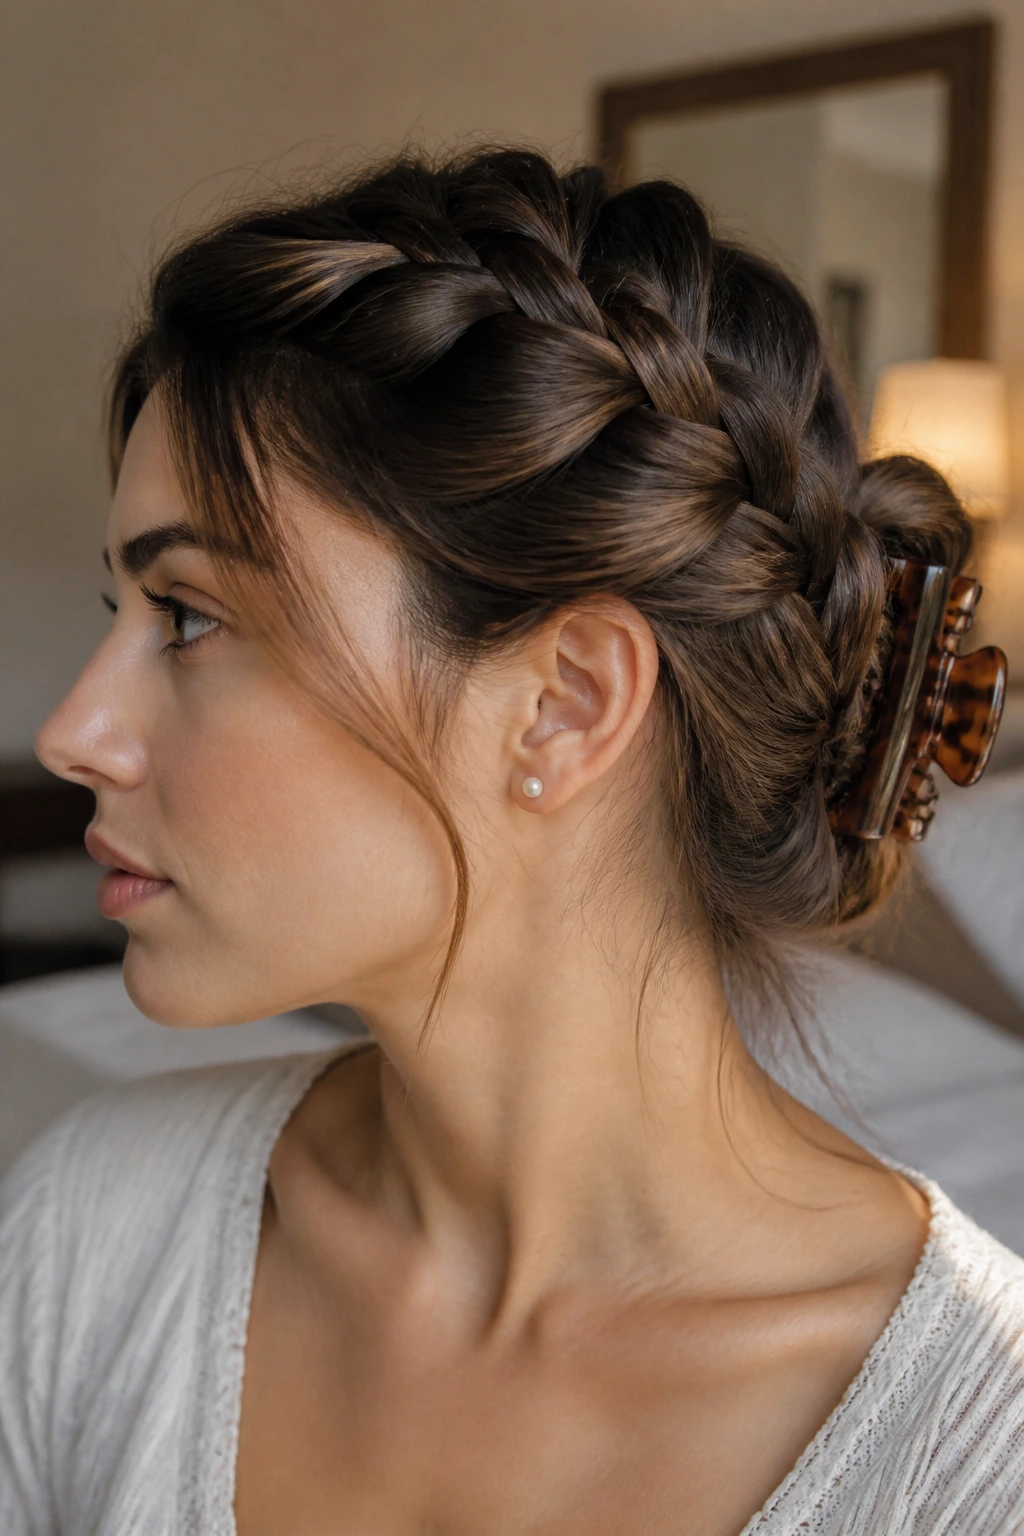
Unlike a braid that ends in a tie, this one folds the tail up and locks it with a claw clip. It feels casual but not sloppy, and it’s especially handy if your hair is long enough to create a small loop or twist under the clip. The braid itself gives the style structure; the clip gives it speed.
On an oval face, the pulled-back shape keeps the front open and the lines clean. I like this for second-day hair, when the roots have a little grip but the lengths need controlling. Use a medium clip, not a giant one — giant clips can overpower the braid and slide when the hair is very smooth.
25. French Braid with Loose Waves

A French braid can be the top half of a soft wave pattern. Braid from the front to mid-length, then leave the rest loose in natural waves or add a gentle bend with a curling wand at the ends. Long hair gives the bottom half enough weight to drop neatly instead of puffing into a triangle.
On an oval face, the braid keeps the front tidy while the loose length prevents the silhouette from feeling too strict. This is one of those styles that looks easy because the contrast does the work. The braid is the frame; the waves are the release.
How to Choose the Right French Braid Placement for an Oval Face

An oval face can carry almost any braid path. The real question is what you want the braid to do: shorten a long-leaning face, widen a narrow one, or keep the features open and easy to see. That choice starts before the first crossover.
If your face reads a little longer
Move the braid slightly off center or give the crown a touch of lift. That shifts the eye outward instead of straight down. A low nape braid can help here too, because it shortens the line from forehead to chin without hiding your face.
If you want more softness around the cheeks
Leave small face-framing pieces out, or choose a side-swept or lace braid. The extra hair at the temples breaks up a strong vertical line and keeps the front from looking stripped back. If your layers are short, use a dab of cream or a pin to control the pieces instead of letting them frizz loose.
If your hair is dense or heavy
Use a braid that can carry weight, like a center-back braid, twin temple braids, or a braid into a bun. Thin feed-in sections on very thick hair can look fussy and collapse by lunch. Bigger sections, even tension, and a clean part usually win here.
If you wear glasses or big earrings
Don’t crowd the front with both a severe center braid and a tight side tuck. Move the braid a little off center or leave one side softer. The braid should leave room for the rest of your face and neck, not fight for space.
Tools That Make Braiding Long Hair Easier
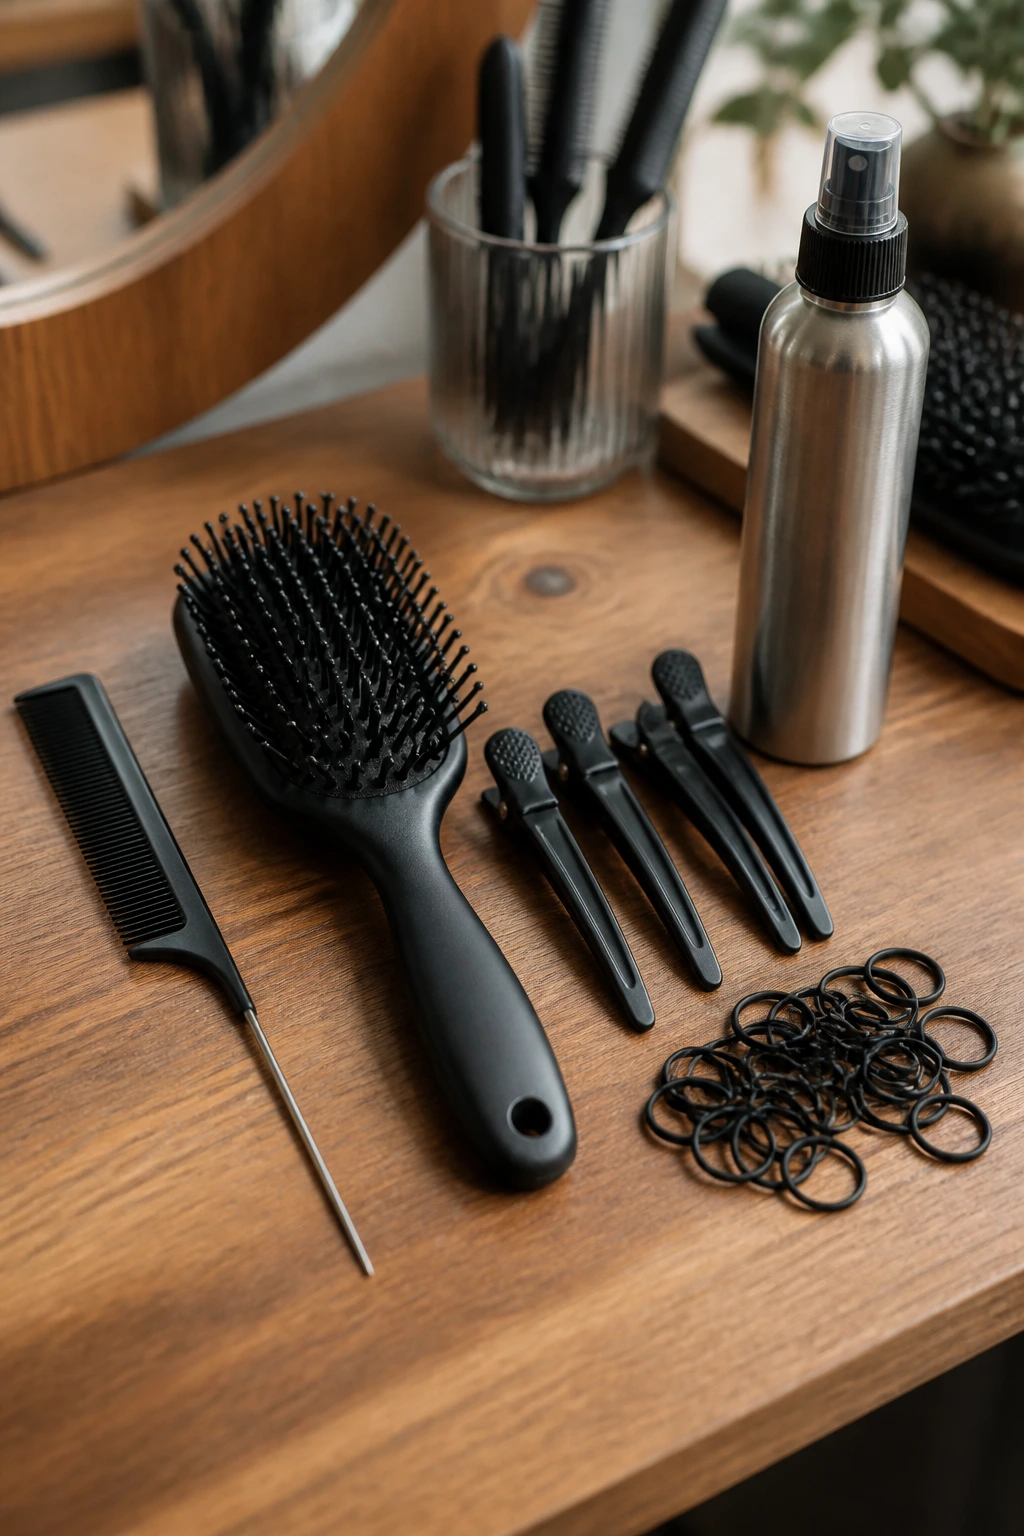
- Rat-tail comb: Clean parts are half the battle, especially for center, zigzag, and halo braids.
- Paddle brush or detangling brush: Smooths long lengths before you start feeding sections in.
- Sectioning clips: Keep the loose hair out of the way while you work through the braid.
- Small snag-free elastics: Use these for the tail; they grip without chewing up the ends.
- Texturizing spray or dry shampoo: Gives silky roots a little grip so the braid doesn’t slide.
- Light hold mousse or styling cream: Helpful if your layers keep slipping or your flyaways are loud.
- Bobby pins and U-pins: Better than a single large clip for buns, halos, and tucked ends.
- Spray bottle with water: Good for taming face-framing pieces or resetting a braid that’s gone fuzzy.
- Hand mirror or two mirrors: Essential if you’re checking the back and trying to keep the braid centered.
- Satin scarf or bonnet: Useful for overnight wear so the braid doesn’t get crushed.
French Braid Mistakes That Flatten the Shape
- Pulling the first inch too tight: The braid sits flat at the crown and can leave a headache line. Start with firm but not strained tension, then keep the rest even.
- Using uneven feed-ins: One side looks thick, the other side sags, and the braid starts to lean. Take similar slices from both sides of the head, especially around the temples.
- Skipping grip on slippery hair: Freshly smoothed roots slip and the braid loosens halfway down. Dry shampoo, texture spray, or a little mousse at the roots gives the braid something to hold.
- Ignoring layers near the face: Short pieces escape and stick out, especially at the temples and around the ears. Mist them lightly, tuck them in, or pin them after the braid is done.
- Letting the braid get too low too soon: On an oval face, a braid that drops too quickly can pull the eye downward and make the face feel longer. Start a little higher or add crown lift.
- Leaving the end unsecured: Long hair twists itself loose fast. A tiny elastic at the ends, plus a wrap of hair around it if you like, keeps the style from unraveling in a jacket pocket or during sleep.
Ways to Change the Mood Without Rebraiding From Scratch

Soft Frame Version: Keep the braid slightly off center and leave one-inch face pieces loose on both sides. This softens the front without changing the braid itself, and it works well when you want a calmer shape around an oval face.
Sleek Root, Loose Length: Smooth the top with a little styling cream or gel, then stop fussing once you reach the ears. The braid reads neat at the scalp and less rigid through the tail, which makes long hair feel controlled without looking overworked.
Ribbon-Threaded Finish: Add a narrow ribbon as one of the braid sections. The braid gets width and color without needing more hair, and the ribbon can be tied off under the end elastic for a clean finish.
Protective Low-Sleep Braid: Choose a low nape braid, keep the tension soft, and wrap the finished style in a satin scarf overnight. This is the version I’d pick when the goal is to contain the ends, not to make the braid look runway-tight.
Big Pancake Finish: Braid normally, then widen the outer loops with your fingertips. Use this when the hair is thick enough to hold shape, because fine hair can look sparse if you over-pull it.
Keeping French Braids Neat Overnight and Into the Next Day
French braids usually look crisp for one day, then softer on the second day, and that softening is not a disaster. It’s the braid loosening in a way that can actually look good on long hair. The question is whether you want crisp, soft, or somewhere in between.
If you want the braid to last overnight, start with a dry scalp and secure the ends well. A satin bonnet or silk pillowcase cuts down on friction, and a low braid survives sleep better than a high crown braid that gets crushed against the pillow. I would not sleep on a braid that was still damp; the shape gets frizzy, and the scalp never really settles.
For the next-day refresh, mist the outer layer lightly with water or leave-in conditioner, then smooth it with flat hands. Don’t soak the braid. That just turns flyaways into puffy sections. If the top has gone flat, lift the roots with your fingers and add a touch of dry shampoo at the part.
Long hair can usually handle a rebraid every one to two days if you’re wearing a sleek version. Softer versions can stretch to day three, but only if the scalp feels fine and the braid isn’t starting to tug. If you feel pulling at the hairline, take it down. Tight braids are not worth the headache.
French Braid Questions People Ask All the Time
Will a French braid flatter an oval face, or does it make the face look longer?
It can do either, depending on placement. A center-back braid with a little crown lift usually looks balanced, while a braid that sits too tight and too low can drag the eye down.
Should I braid long hair when it’s damp or completely dry?
Dry gives you cleaner sections and less swelling later. Damp hair can work if you’re going for waves or you know the hair will dry fully before bed, but don’t sleep on a braid that’s still wet underneath.
How do I keep layers from slipping out of the braid?
Use smaller feed-ins near the temples and a little styling cream or mousse at the front. Very short pieces can be pinned after the braid is finished instead of forced into the plait.
What’s the easiest French braid style for a beginner with long hair?
A classic center-back braid or a low nape braid is the easiest place to start. Both give you a straight line to follow, and long hair gives you enough length to recover if the tension goes uneven.
How do I make the braid look thicker?
Pancake the outer loops after the braid is finished, and don’t over-comb the roots before you start. Clean parts are good; scraped-flat roots are not.
Can French braids count as a protective style?
Yes, if the tension is modest and the ends are secured. They help contain tangles and reduce daily friction, but a braid that pulls at the hairline is doing the opposite.
What if my braid keeps loosening by midday?
The usual fix is grip, not more force. Add dry shampoo or texture spray at the roots, keep the feed-ins even, and secure the end with a small elastic before you decorate it or tuck it away.
Are French braids good for thick hair?
Very good, as long as you work in controlled sections. Thick hair gives the braid a full, rope-like look that fine hair often can’t fake, but it also means you need clips and a rat-tail comb to keep the sections sane.
Braids That Let the Face Breathe
The best thing about French braids on long hair is that they’re not locked into one read. A tiny shift at the crown, the part, or the nape can make the style sharper, softer, more formal, or more relaxed. On an oval face, that flexibility is the whole payoff.
Keep one version neat enough for a long day and one version loose enough to feel lived in. Long hair gives you the room to do both, and once you get used to that, plain braids stop being plain at all.