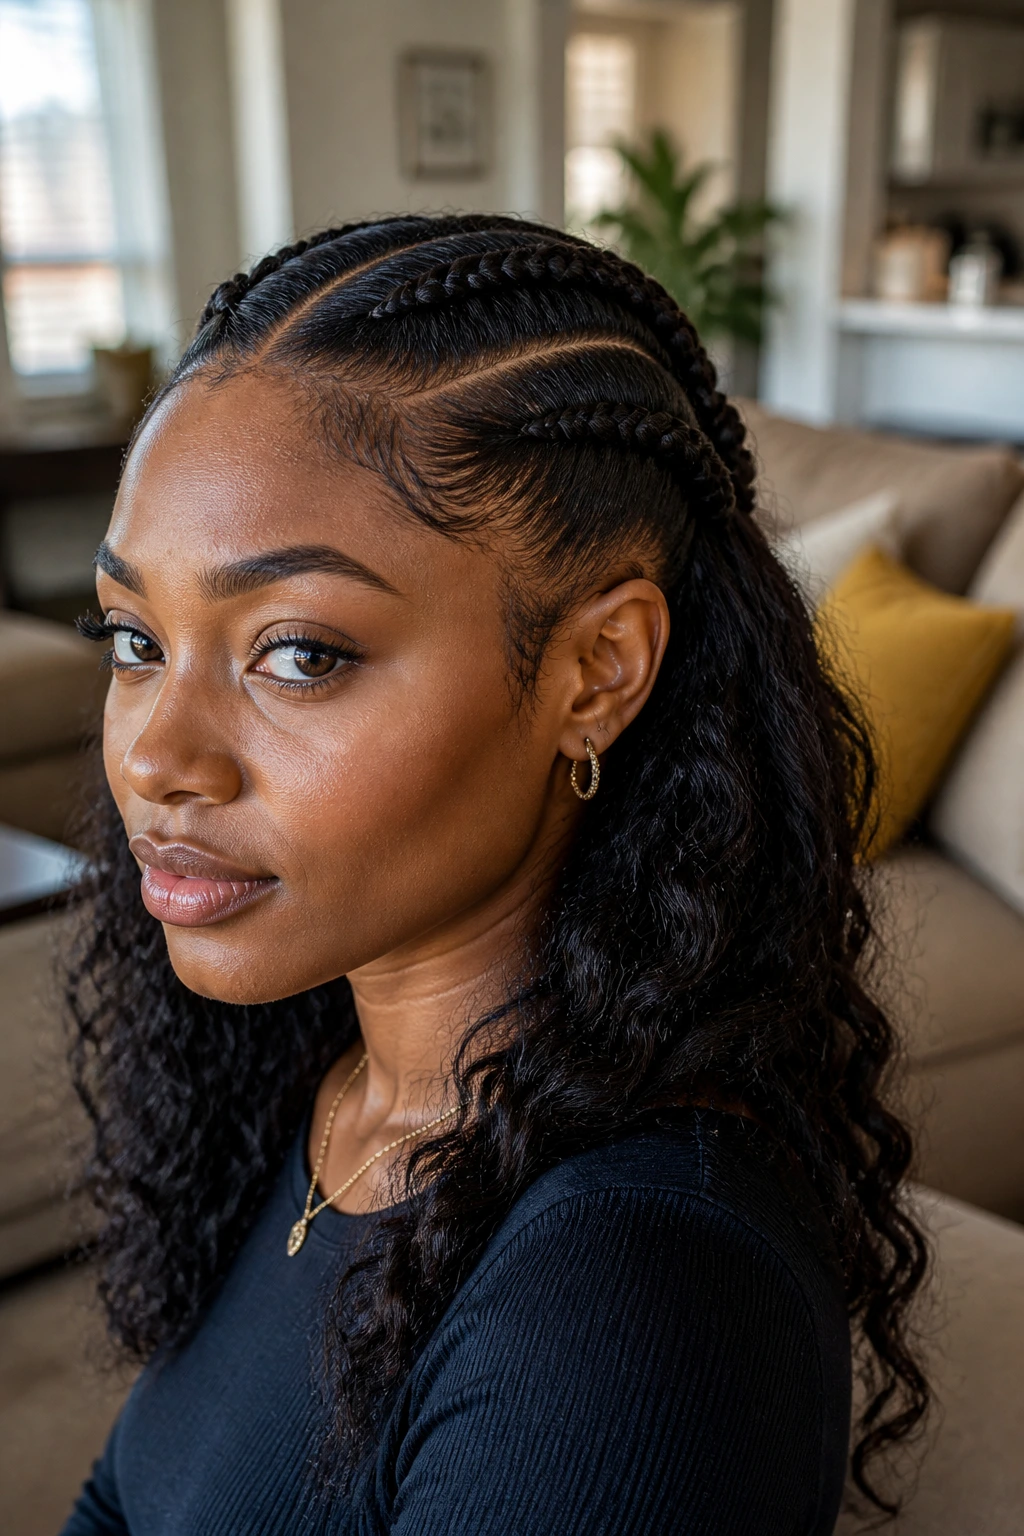
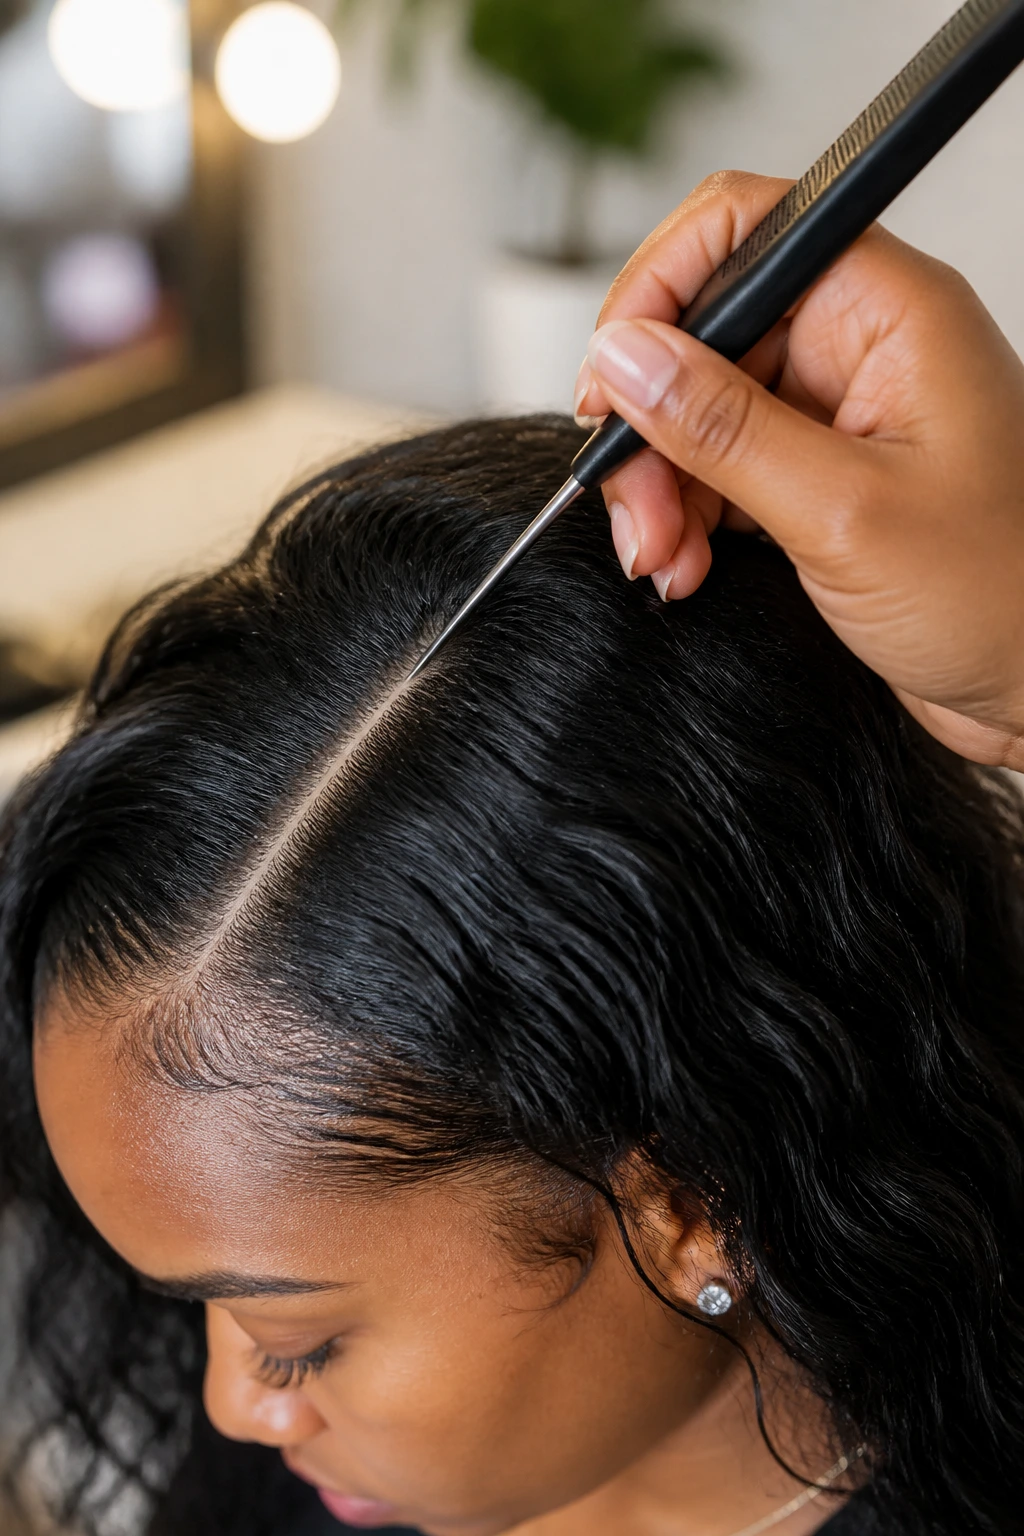
The slickest part of double Dutch braids on Black women with wavy hair is not the braid itself. It’s the scalp line. A crisp part, a clean braid path, and that first inch of hair laid down without strain can make the whole style look finished before you even get to the ends.
That matters more on wavy texture than people admit. Wavy hair gives you grip. It also gives you a little attitude at the temples and a little puff at the crown if you use too much cream or pull too hard. The sweet spot is somewhere between sleek and soft: neat enough that the braid pattern reads clearly, loose enough that your edges do not feel like they’ve been drafted into military service.
The best double Dutch braids for Black women with wavy hair lean into that balance. Some are sharp and center-parted. Some sweep to one side. Some keep the ends loose and bendy so the wave pattern still shows. A few bring in cuffs, beads, or curved parting because sometimes the part itself is the whole story. The trick is knowing which version suits your face, your hairline, and the amount of time you want to spend redoing the front section before you leave the house.
Why These Braids Deserve a Spot in Your Rotation
-
Wavy Texture Gives the Braid Something to Hold: Hair with a bend in it usually grips the braid pattern better than very slippery, freshly heat-straightened hair, so the style can stay neat longer with less product.
-
The Parting Does More Work Than People Think: A center part, side part, zigzag, or heart shape changes the mood fast, which means you can get a different look without learning a whole new braid technique.
-
They Can Be Protective Without Looking Severe: The right tension keeps the roots clean while giving the hairline a break from daily brushing, slicking, and tugging.
-
They Move Easily from Casual to Dressy: Add cuffs, beads, a bun, or a swooped edge, and the same braid base suddenly reads very different.
-
They Play Well with Length: Shorter hair, stretched hair, or added braiding hair all work here, which makes the style flexible instead of fussy.
-
The Ends Give You Options: You can tuck them, twist them, bead them, curl them, or leave them loose and wavy. That last part is my favorite when the texture is good and the ends still have life in them.
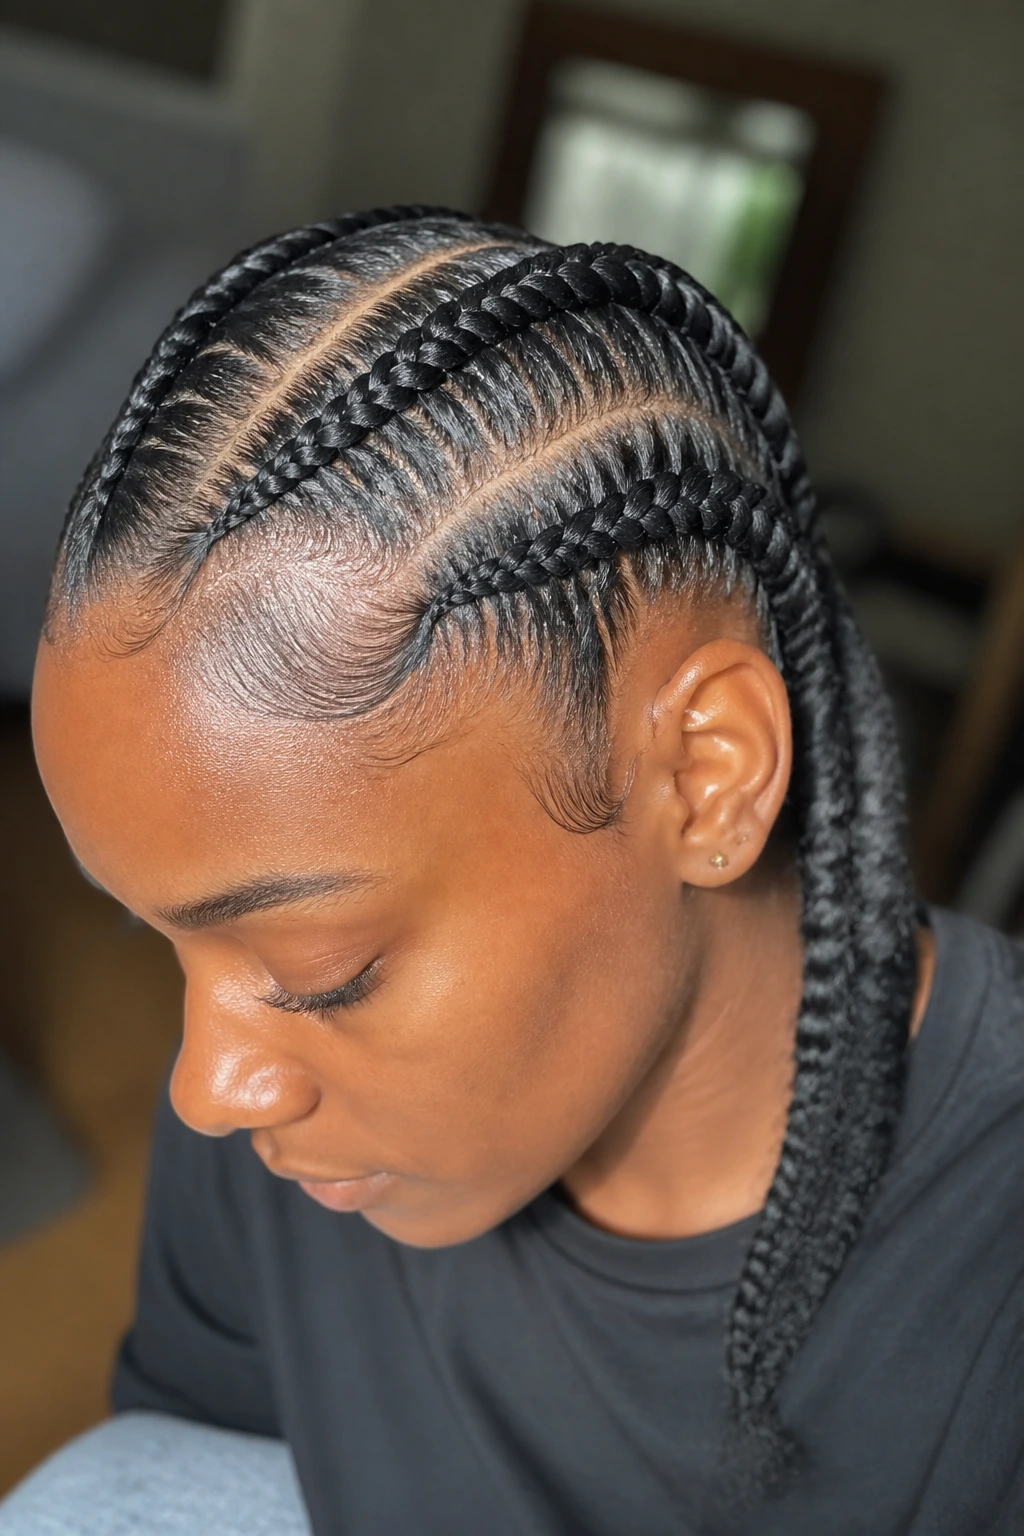
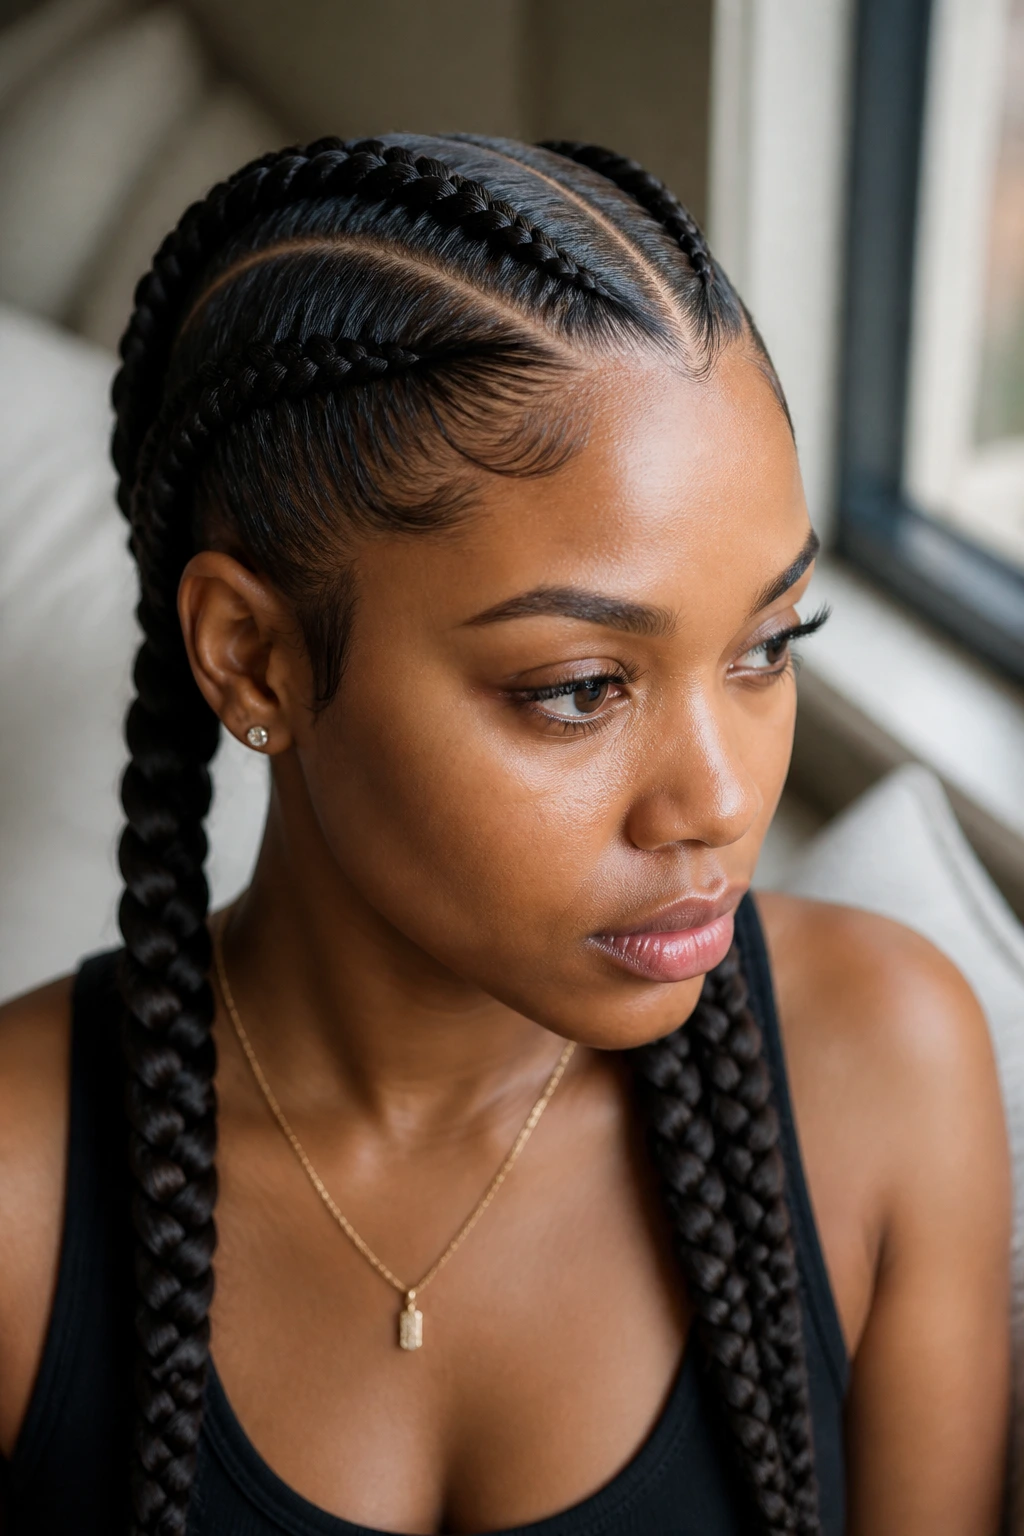
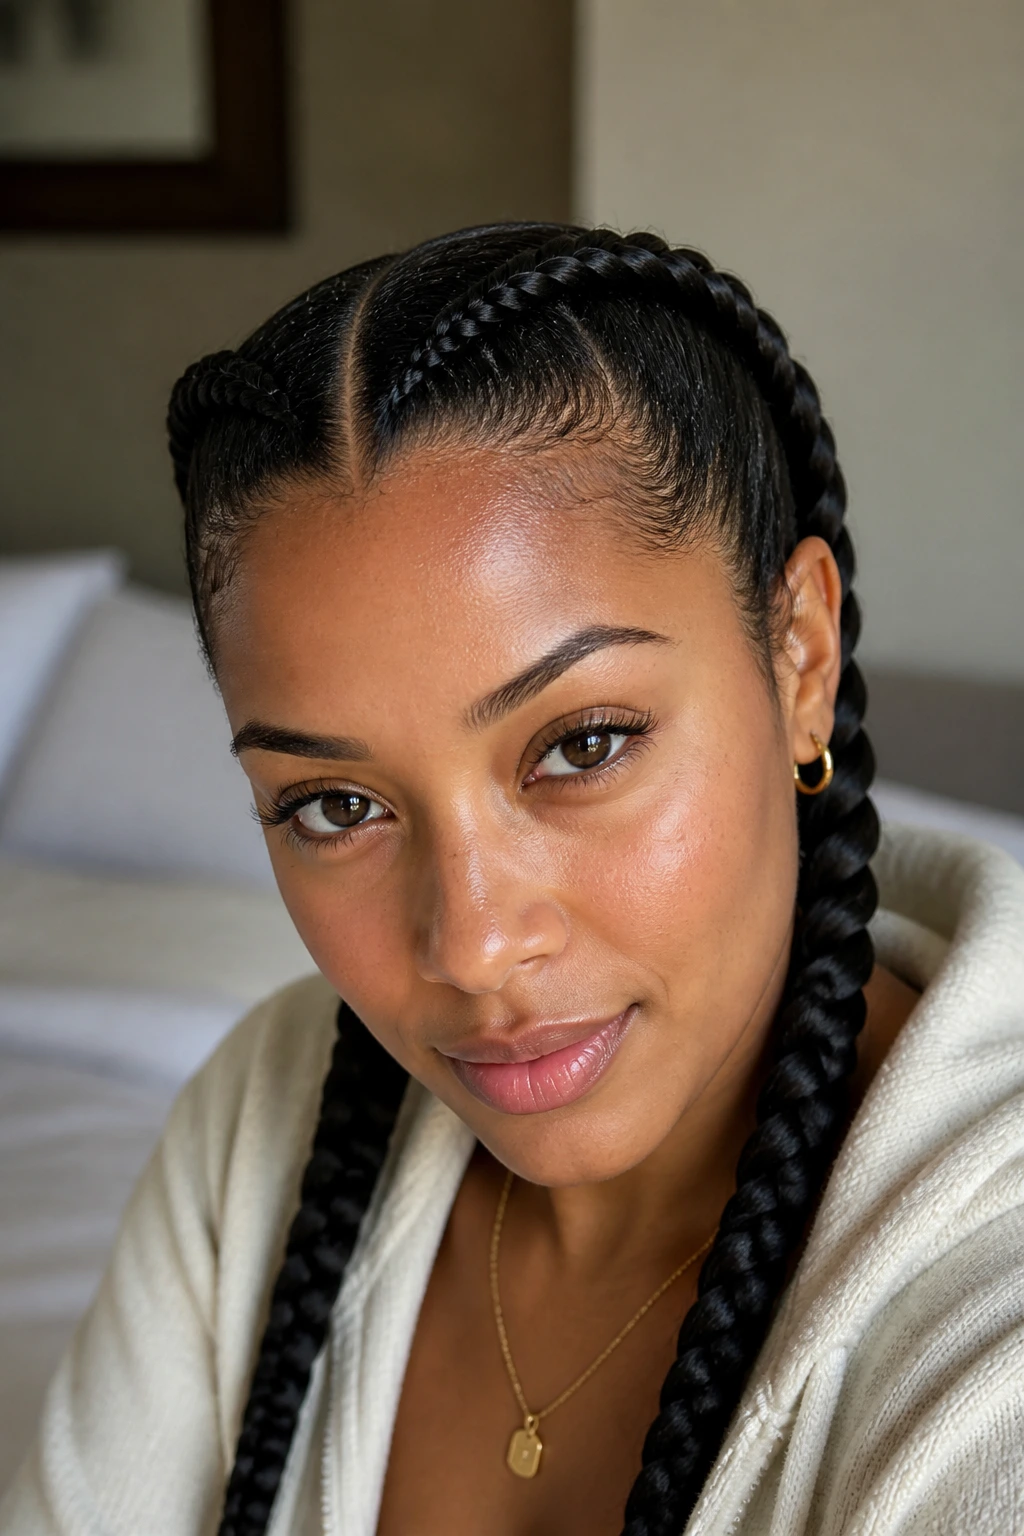
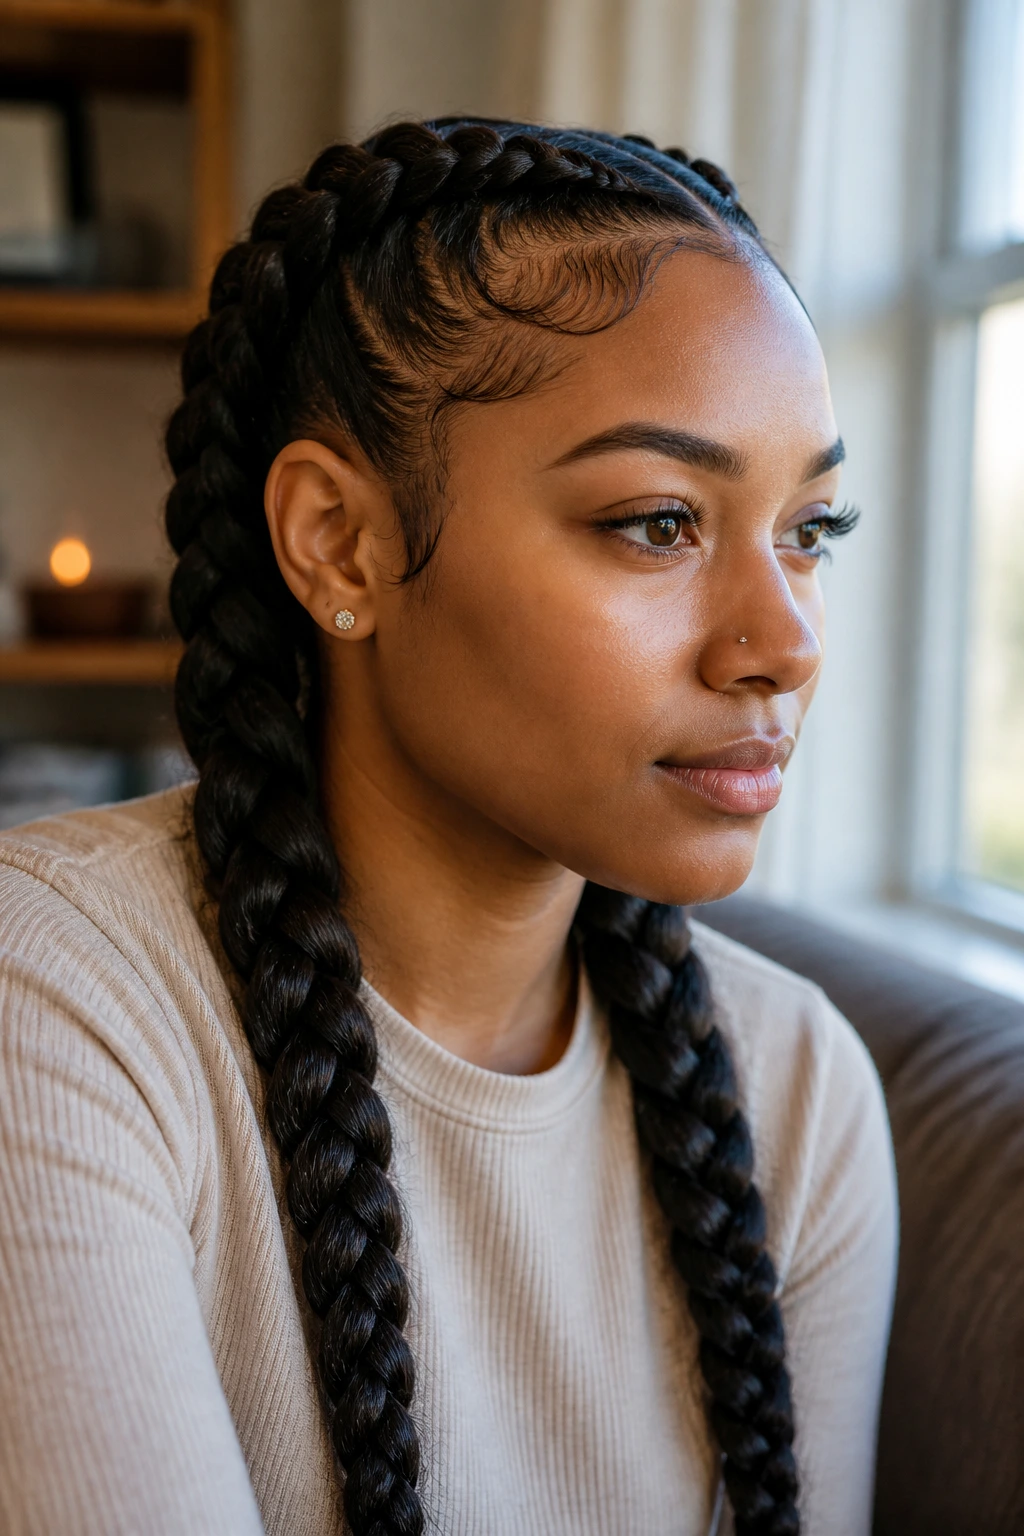
1. Sleek Center-Part Double Dutch Braids
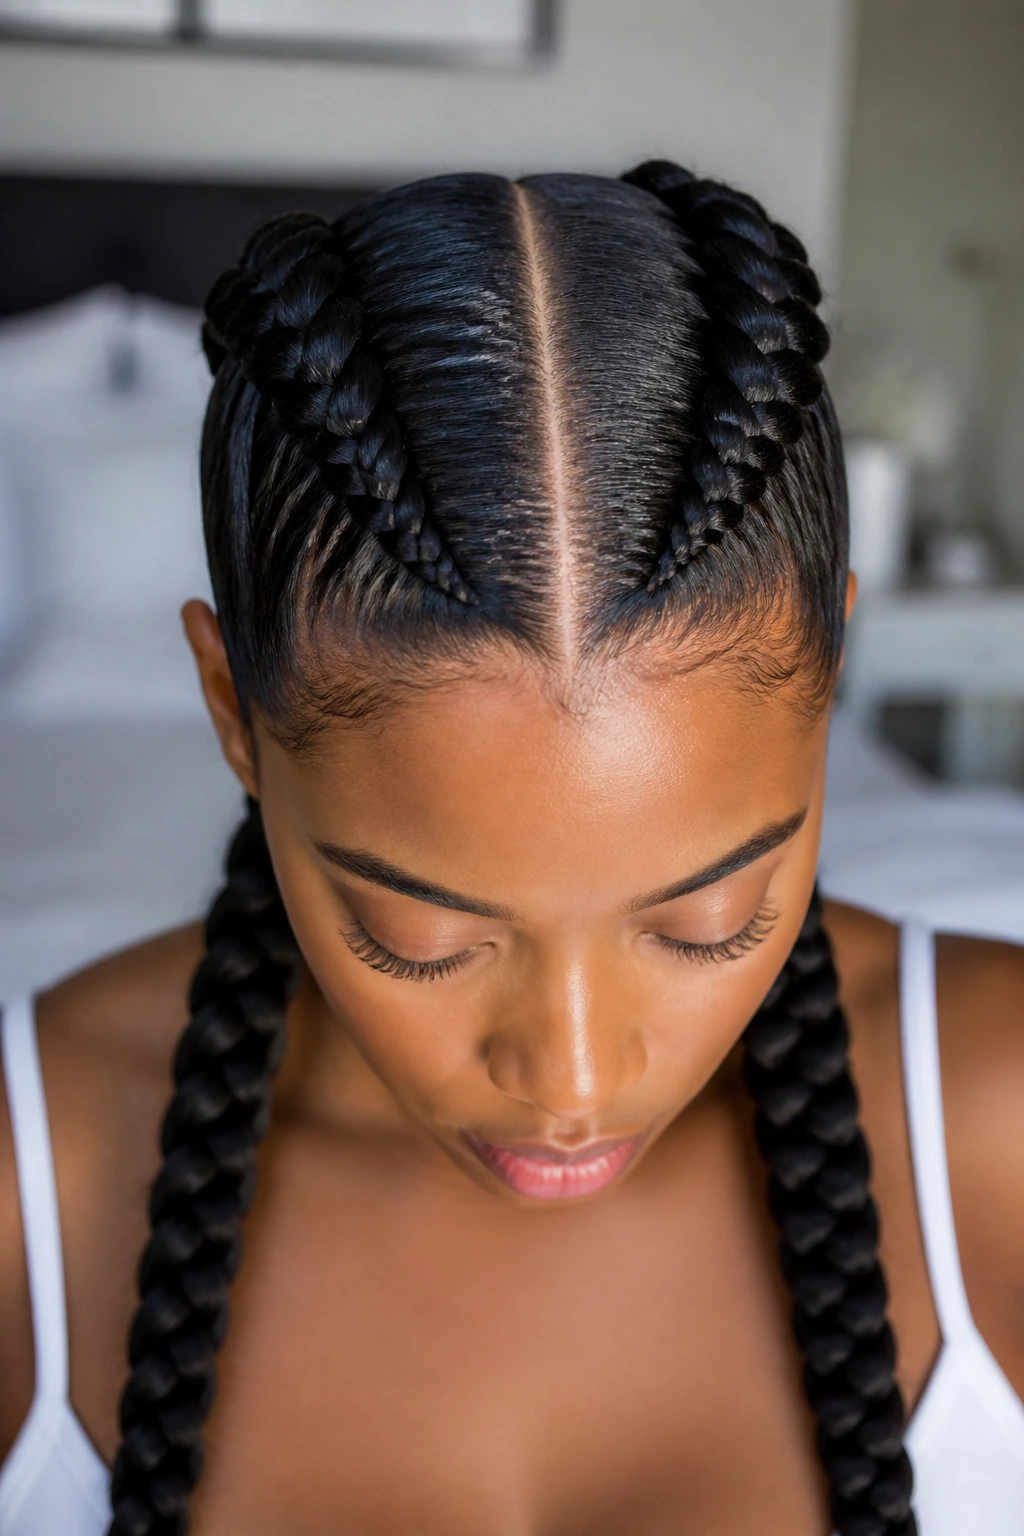
A center part is the cleanest place to start because it makes the braid symmetry do all the talking. On wavy hair, that straight line through the middle gives the style a sharp frame, and the texture around it keeps the braids from looking flat or stiff. It’s the version I reach for when I want the face opened up and the hairline kept calm.
Why it works: The even split lets both braids sit at the same height, which makes the style look intentional even if the braid lengths aren’t identical to the inch. If your wave pattern tends to puff at the crown, this layout keeps everything anchored in one place. It also hides a little frizz better than you’d expect because the eye follows the symmetry first.
A few things make this one sing. Use a rat-tail comb for the part, keep the roots lightly damp—not drenched—and smooth the first section with a dab of mousse before braiding. That’s the difference between “clean” and “I did this in the car.”
Best for: school, errands, office days, or any week when you want low drama and a neat line across the middle.
2. Deep Side-Part Double Dutch Braids
A deep side part changes the entire feel of the style. It gives one braid a little more visual weight, softens the forehead, and works especially well if your waves naturally fall to one side anyway. There’s a quieter elegance to it, but not the fussy kind. More like, “yes, I paid attention.”
The key is keeping the heavier side from swallowing the braid line. Start the part well above the arch of the eyebrow, then keep the first Dutch braid snug enough to hold its shape while the second braid sits a touch lower. That slight imbalance is what makes it interesting.
If your hairline is more delicate on one side, this version can be kinder than a dead-center part because the tension isn’t distributed in the same way. I like it best when the side part is clean and the braid lengths are left a little full so the style doesn’t collapse into the scalp.
3. Zigzag-Part Double Dutch Braids
Why settle for a straight part when a zigzag can make the whole head look more deliberate? This version has a little edge to it, and on wavy hair the sharp parting pattern cuts through the softness in a good way. It’s playful without turning childish, which is a harder balance than it looks.
What Makes It Stand Out
The zigzag part gives the scalp pattern its own personality before the braids even begin. That helps if your waves are loose and the hair wants to drift out of line while you’re sectioning it. The part itself becomes the feature, so you don’t have to rely on heavy accessories.
Keep the points of the zigzag small and even. Big, chunky angles can look messy fast, especially if the hair is medium-length and the first few sections start slipping. A lightweight gel at the part line helps, but don’t coat the whole head. That’s how you end up with roots that feel crunchy and ends that frizz by lunch.
This is one of those styles that looks better when the scalp work is crisp and the braid tension is medium, not aggressive.
4. Feed-In Double Dutch Braids
Feed-in braids give the roots a flatter, cleaner start because you add hair gradually instead of dropping in a big chunk at once. On wavy hair, that matters. The texture already has some lift, so you do not need the root area to bulge on top of it.
This style is a smart pick if you want a longer, fuller braid without the heavy “helmet” feeling at the front. The feed-in method also helps the braids sit closer to the scalp for the first few inches, which is useful when you want the finish to look polished rather than bulky.
What to ask for: small starter sections, even feed-ins, and medium tension at the temples.
What to avoid: stuffing too much extension hair into the first pass. That’s how you get a braid that feels thick in the wrong place and skimps out where it should be full.
If you like a very neat front with a little drama in the lengths, this is the version to keep in your back pocket.
5. Double Dutch Braids into a Low Bun
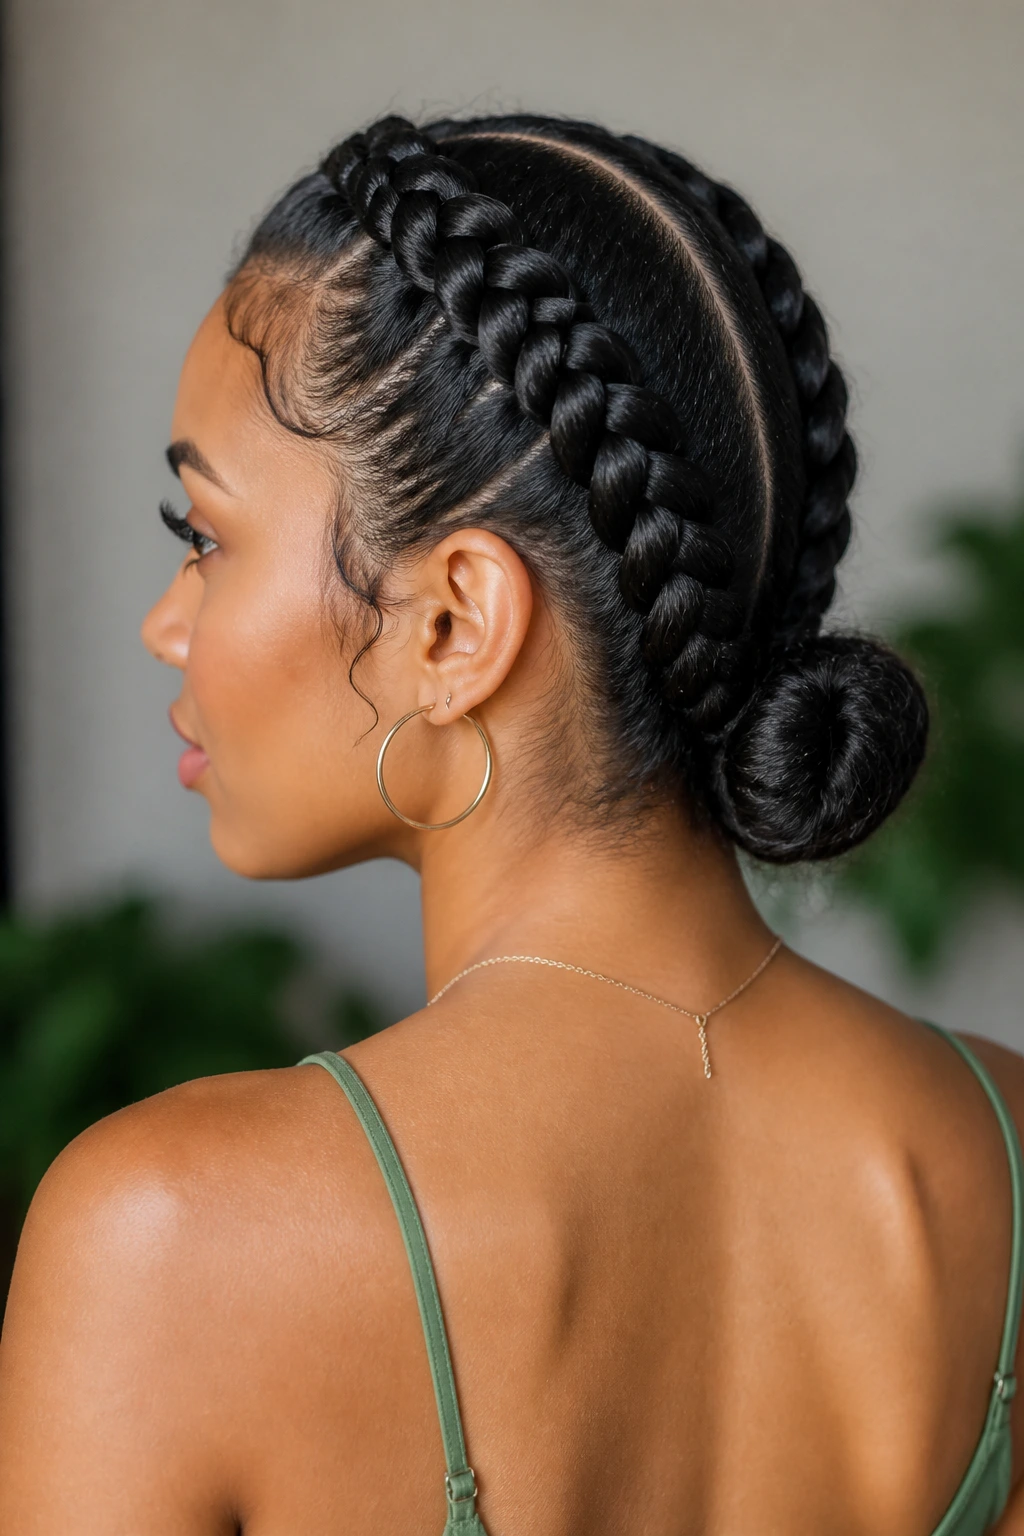
This is the style for days when you want the braids to disappear into something tucked and tidy at the nape. It starts as classic double Dutch braids, then pulls the ends into a low bun that sits close to the neck. The result feels neat, practical, and a little more dressed up than leaving the braids loose.
I especially like this one on wavy hair because the texture in the lengths helps the bun hold shape without needing a pile of pins. If your hair frizzes at the ends faster than at the roots, this finish also hides that nicely.
The bun should sit low and compact, not oversized. If it gets too big, the braid-to-bun transition looks clunky. A few bobby pins crossed under the bun usually keep it secure, and a satin scarf at night helps the bun keep its shape instead of flattening into a sad knot by morning.
6. High Ponytail Double Dutch Braids
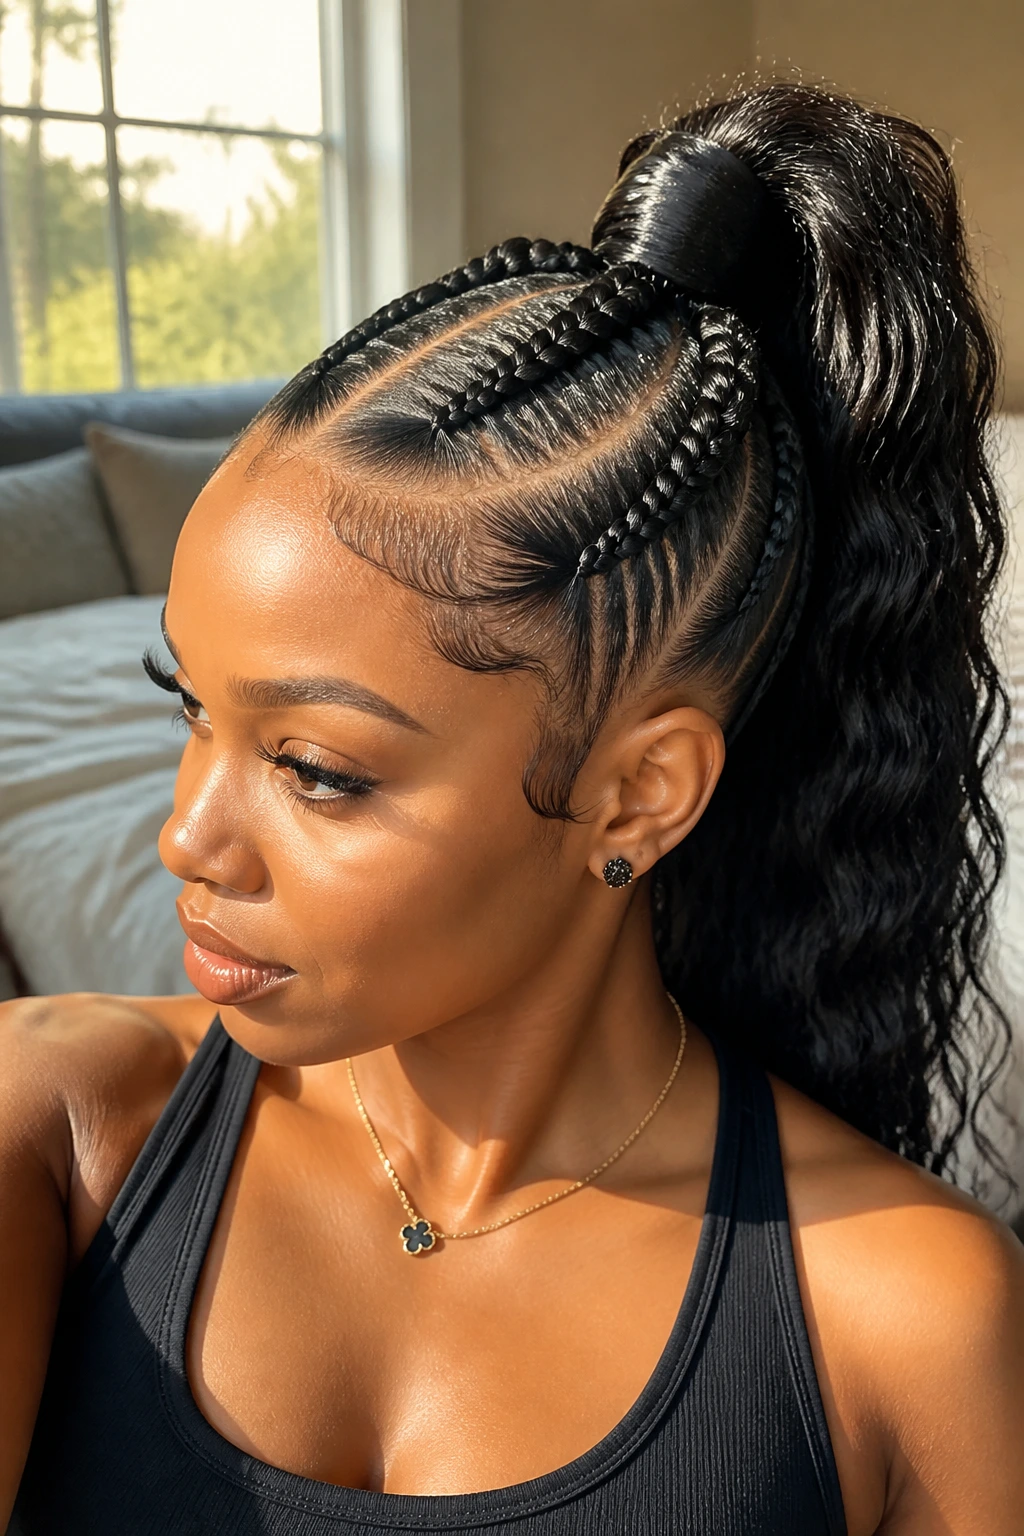
A high ponytail finish changes the whole energy of the braids. Instead of sitting low and calm, the braids climb up toward the crown, then gather into a ponytail that swings a little when you walk. It’s one of the few braid styles that can read sporty and formal at the same time.
This works best when the top section is smooth but not shellacked. Wavy hair can go stiff if you overload it with gel, and that makes the ponytail area look hard instead of lifted. Keep the front sleek, then let the lengths have some movement.
I’d use this when you want the face fully open and the style to feel more animated. It’s also a good choice if your neckline gets hot easily, because the hair stays off the back and the ends don’t sit on your shoulders all day.
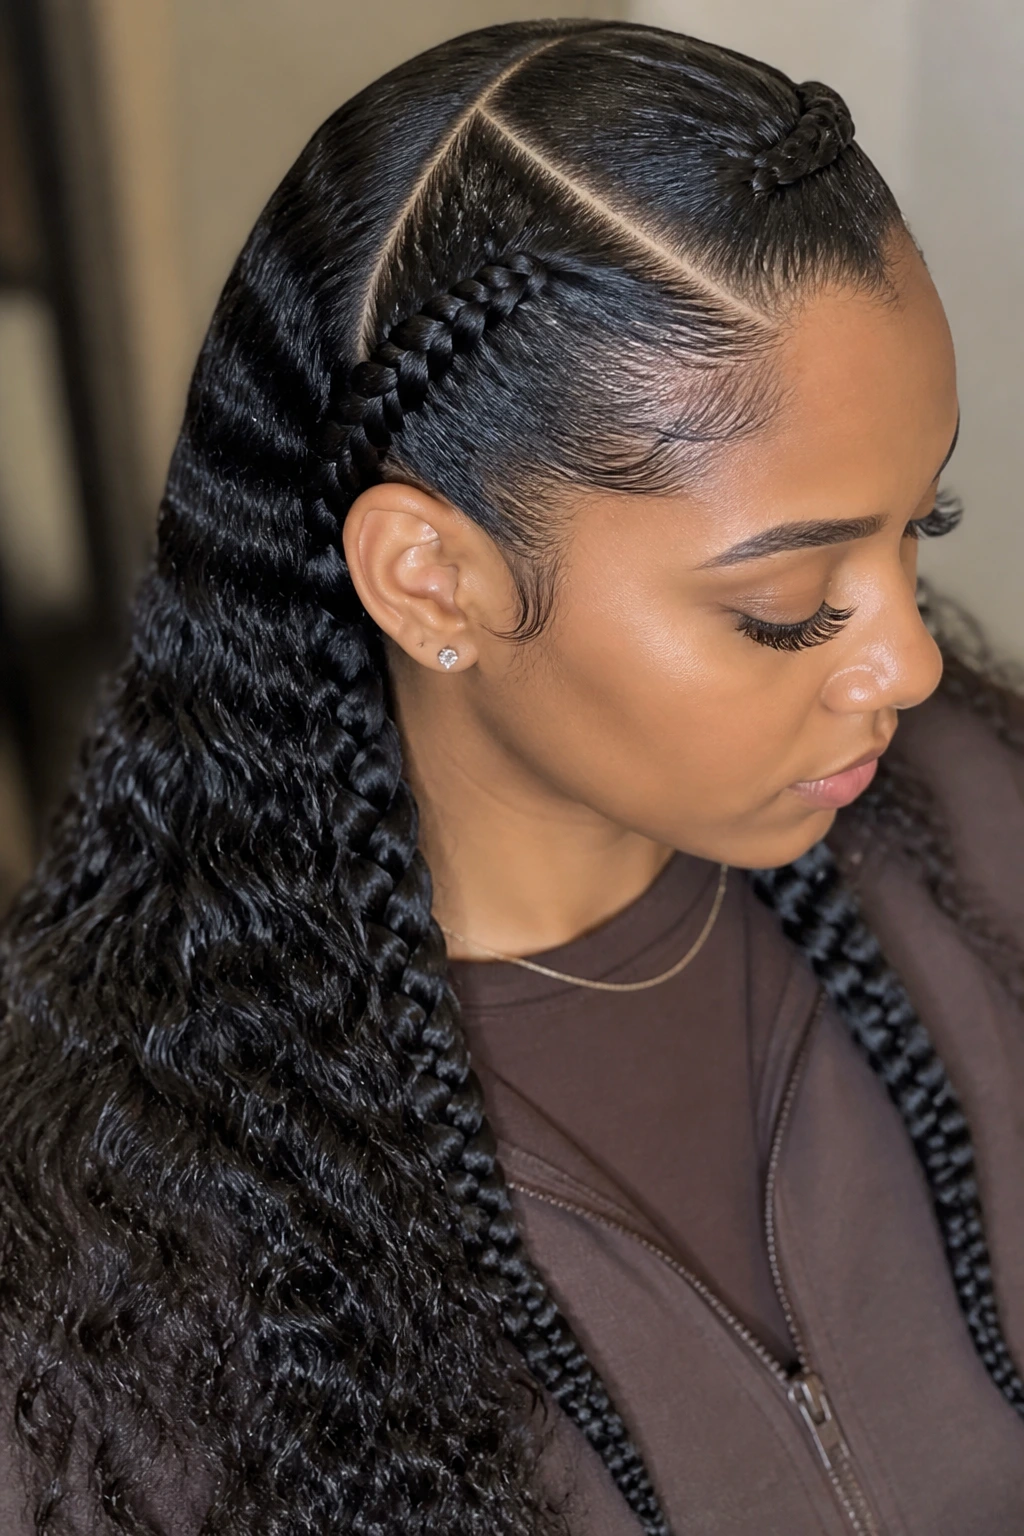
7. Half-Up, Half-Down Double Dutch Braids
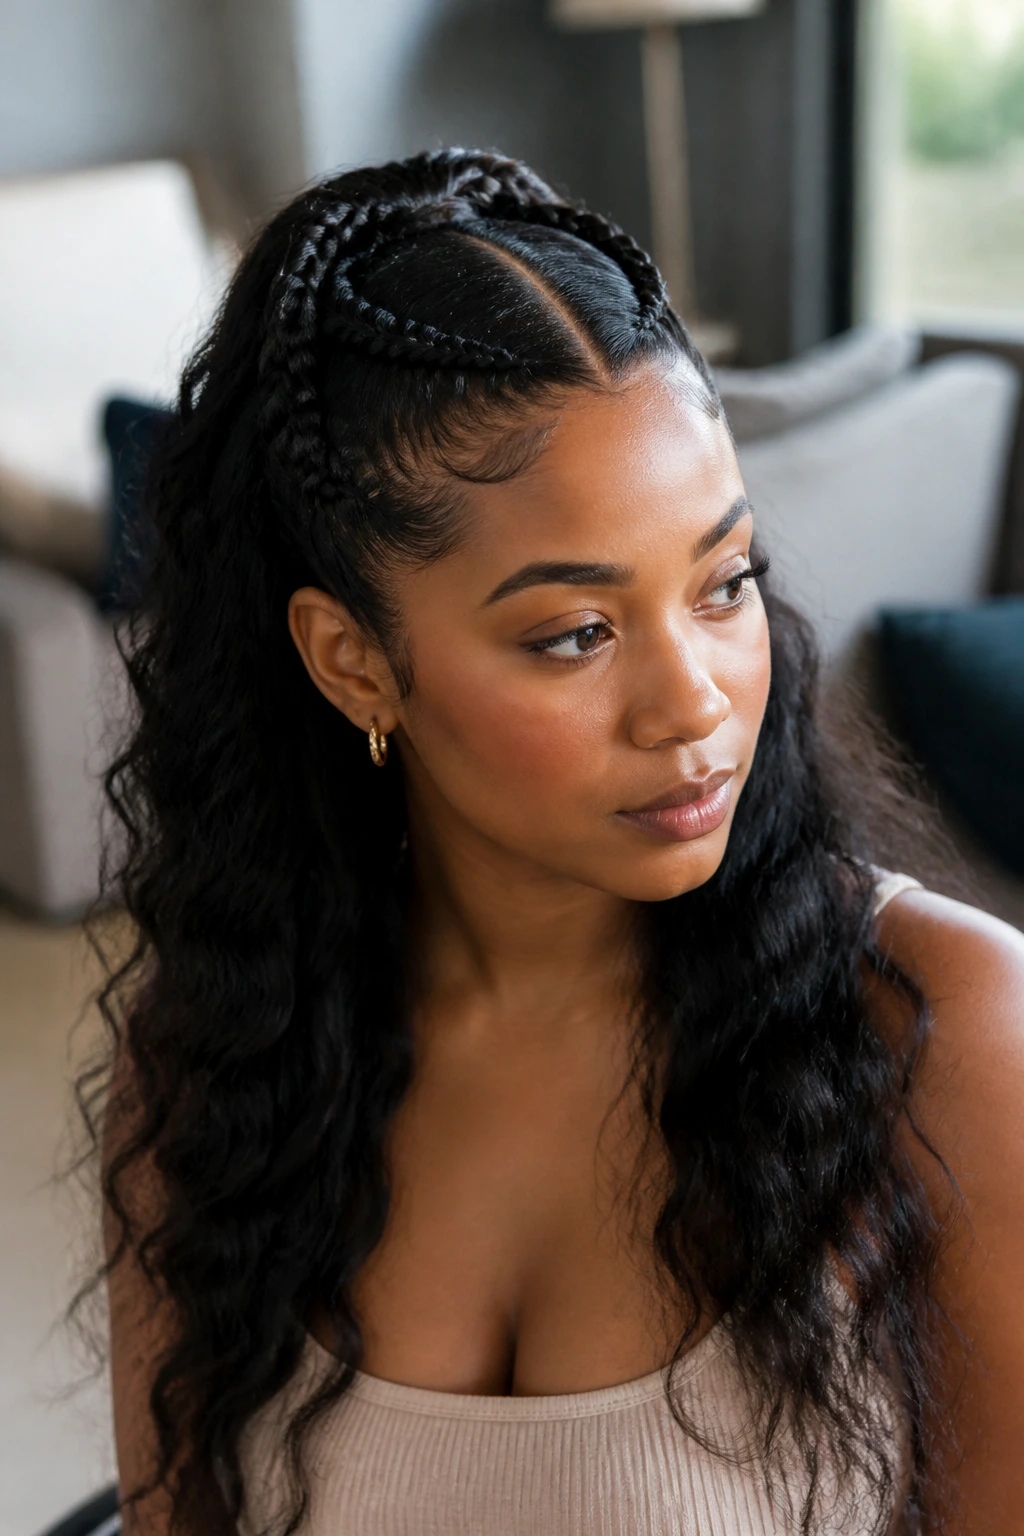
Half-up, half-down braids are a nice middle ground when you want to show off the braid work but still keep some hair loose. The top half is braided into two Dutch rows, and the lower half stays out, so the natural bend in the hair gets to stay visible. On wavy hair, that contrast is the whole point.
This version is useful if you’re not ready for a fully tucked protective style. It gives the scalp a break up top while leaving enough movement around the shoulders to keep the style from feeling too serious. The lower section can be left in its own wave pattern, lightly curled, or stretched with a soft blowout.
If your hair is layered or has shorter pieces around the neckline, this style can be forgiving. The loose section helps blend those pieces instead of forcing everything into a tight braid path.
8. Beaded-End Double Dutch Braids
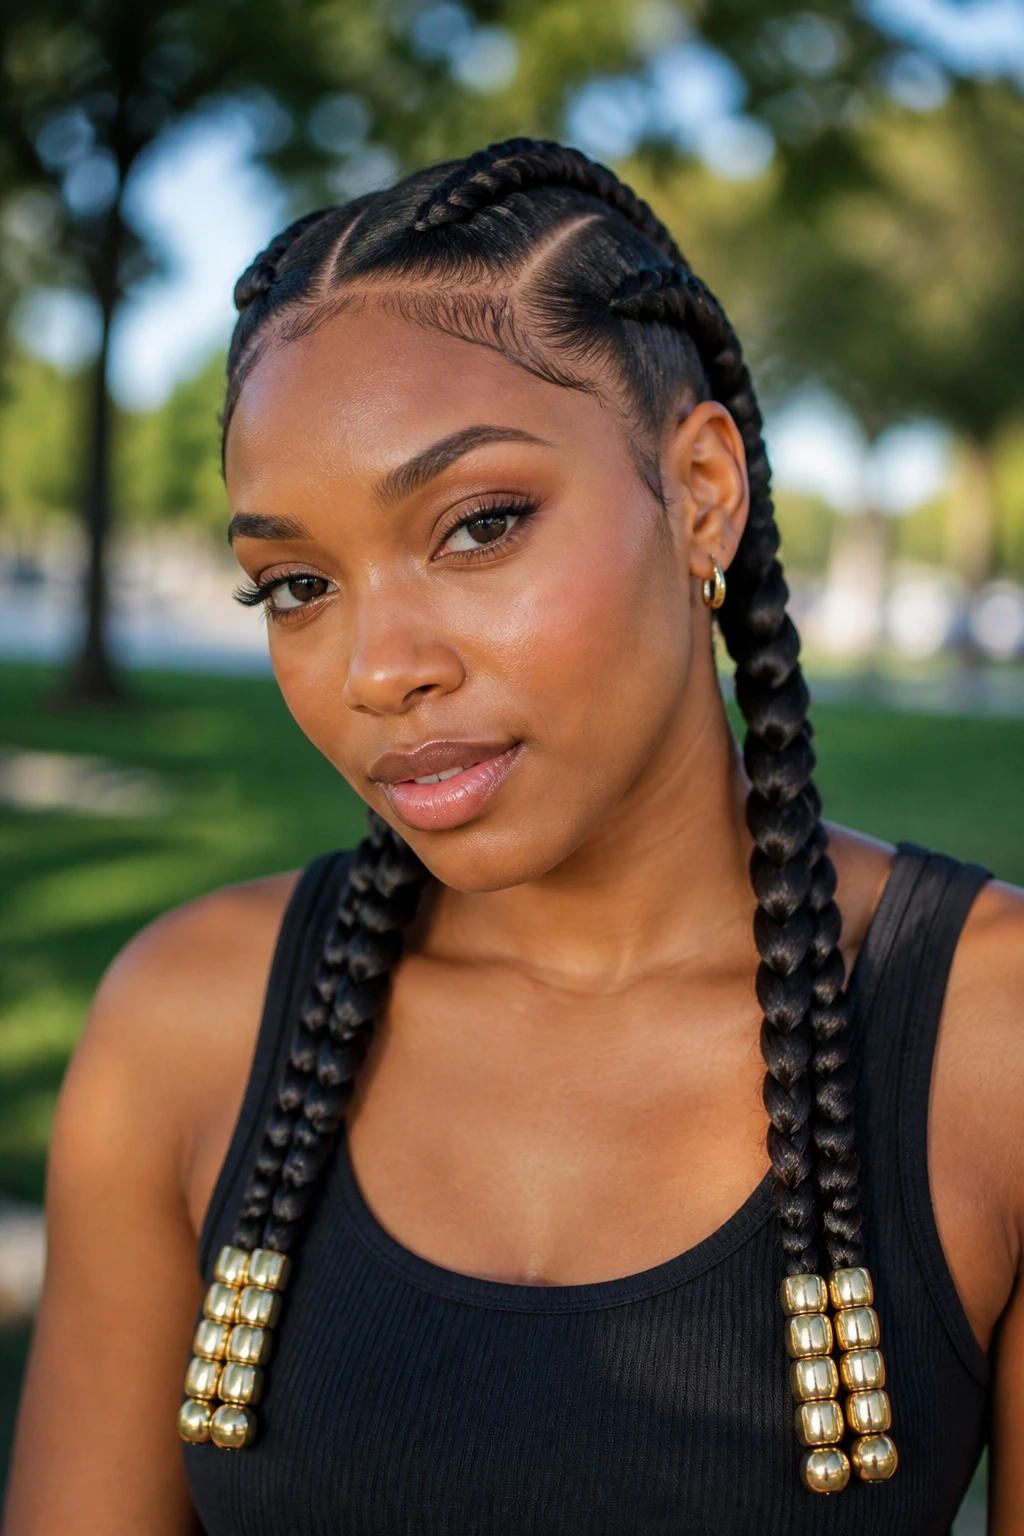
Beads at the ends add a little weight, a little sound, and a little personality. That tiny extra detail changes how the braids move; instead of floating lightly, they click softly and hang with more presence. The look feels rooted in craft, which is why it suits double Dutch braids so well.
Keep the beads in proportion to the braid thickness. Slim braids need smaller beads, or the ends get swallowed and look awkward. Bigger braids can carry chunkier beads, but even then, I’d keep the palette tight—black, clear, gold, or brown tends to look cleaner than a rainbow of random extras.
If you want the style to feel finished without adding more braids or more complexity, beads do the job fast. They also help weigh down loose ends on hair that tends to spring back at the tips.
9. Gold-Cuff Double Dutch Braids
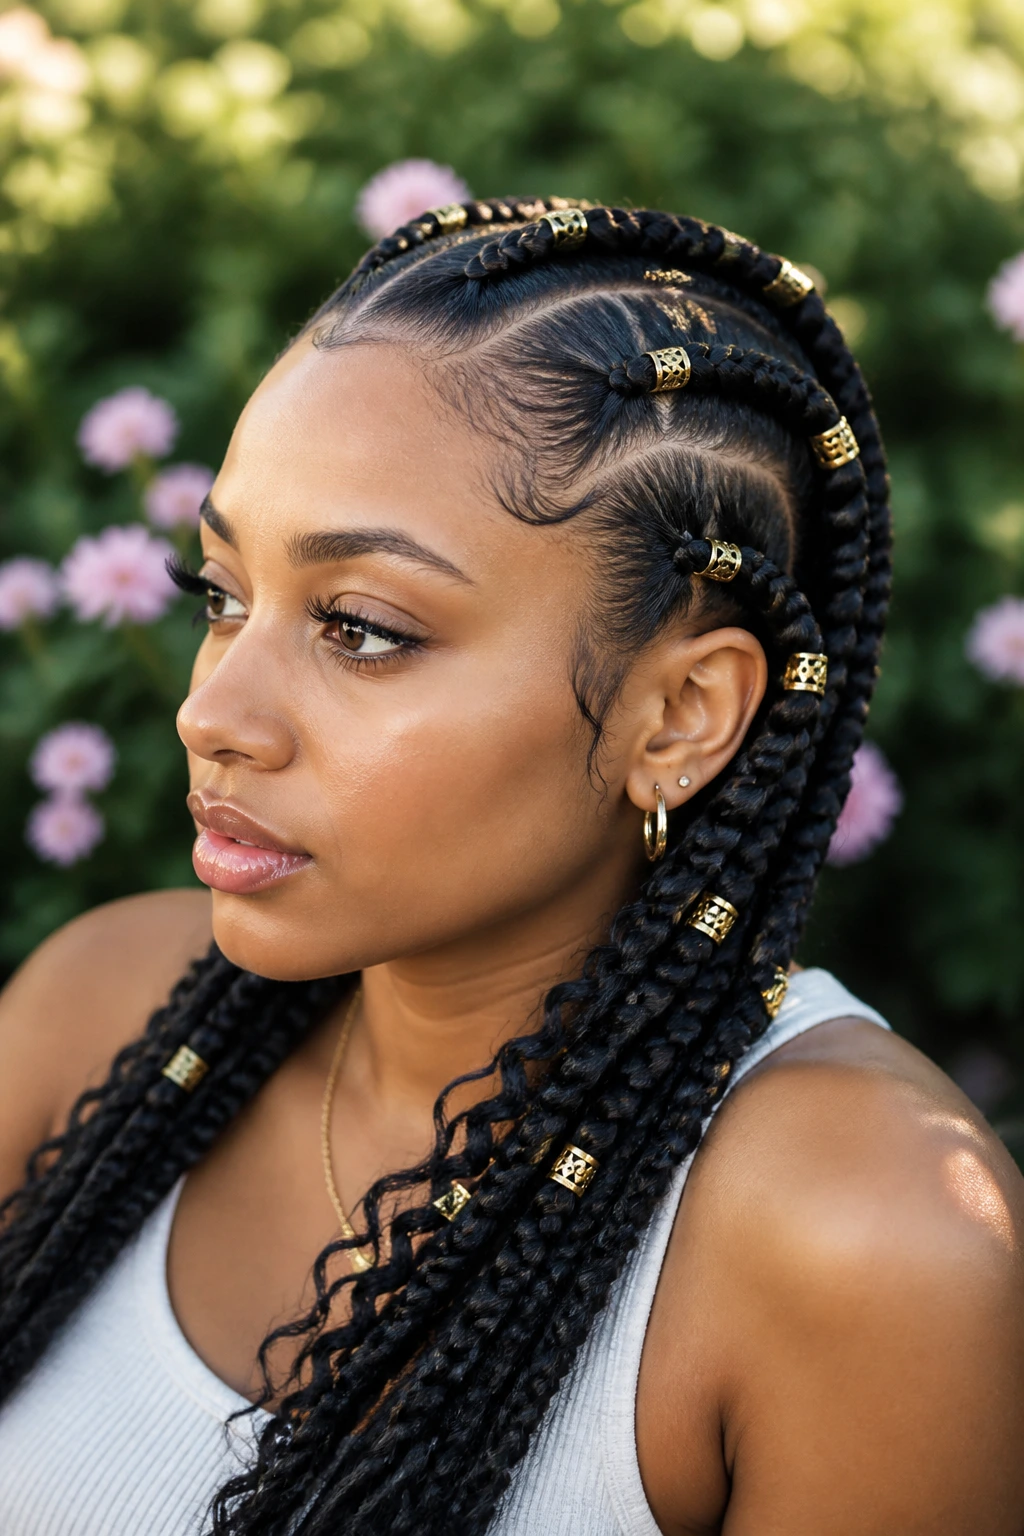
Gold cuffs are the easiest way to make a simple braid look intentional. They catch the eye without pulling the whole style away from the braid pattern, which is exactly what you want when the braids themselves are already doing the hard work. On wavy hair, the cuffs look especially good because the slight texture keeps the shine from looking too shiny.
I prefer cuffs spaced sparingly along the braid, not packed from root to tip. Three or four on each side is enough for most styles. Too many, and the braids start looking busy. Too few, and the accessory feels like an afterthought.
This version is ideal when you want polish without ceremony. A single cuff near the end of each braid can be enough for daytime. Add a few more closer to the middle if you’re dressing the look up for evening.
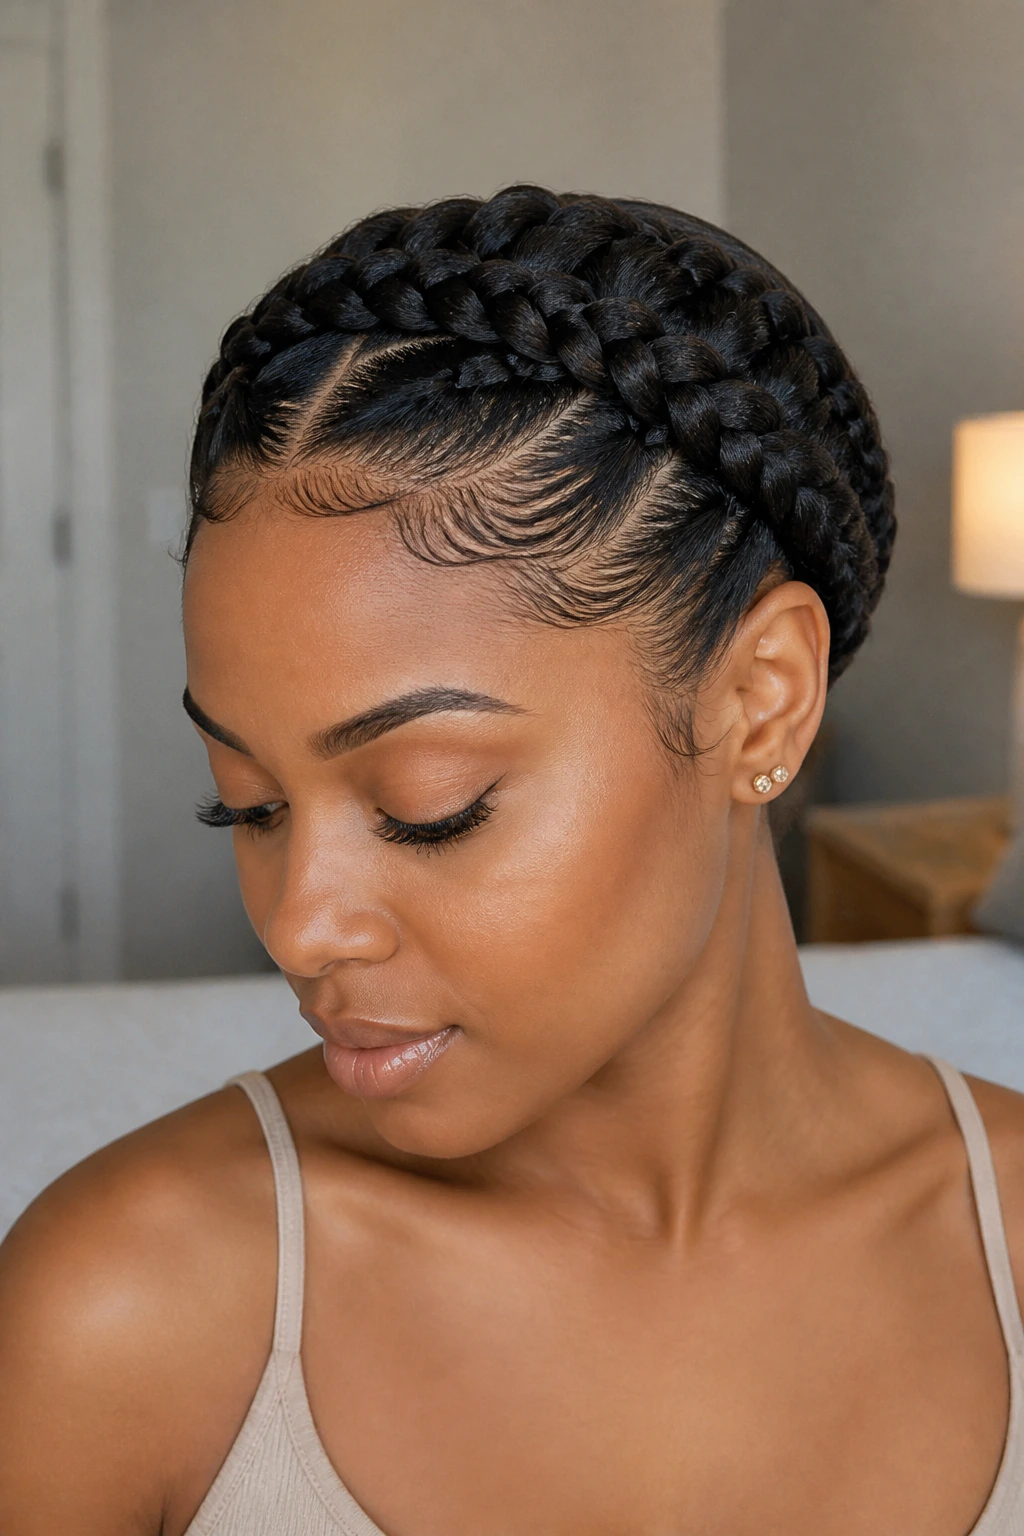
10. Curved-Part Double Dutch Braids
A curved part softens the whole look before the braid even begins. Instead of a straight line running down the middle, the part arcs around the head, which gives the style movement from the scalp outward. It’s a subtle thing, but on wavy hair, subtle changes matter because the texture already has some motion built in.
The braid line should follow the curve cleanly. If the part and the braid directions fight each other, the style looks accidental. Use a tail comb and take your time. This is not the style to rush while standing in bad bathroom light.
I like curved parts when someone wants the clean structure of double Dutch braids but doesn’t love the severity of a straight center. It has a softer frame, especially around the face and temple area, where many women prefer a little less tension and a little more breathing room.
11. Crisscross Front Double Dutch Braids
The crisscross front version is for days when you want the front section to do something a little smarter than just start braiding. Instead of simple straight-back parts, the front pieces cross over each other before feeding into the braids, which gives the hairline more visual detail. It’s a small design move, but it changes the whole read of the style.
Why It Feels Different
The crisscross pattern works because it breaks up the straight lines that can make double Dutch braids feel too expected. On wavy hair, that extra detail keeps the roots from looking flat or repetitive. It also draws attention upward, which can be useful if you want the braids to frame the face a little more intentionally.
Keep the crisscross sections fairly small. Big panels turn the look into a puzzle, and not the good kind. The charm here is in the neat overlap, not in making the front look overdesigned.
This is one of the better picks for special occasions when you want the braids to feel styled, not merely done.
12. Halo-Crown Double Dutch Braids
Halo braids have a softness that plain back-facing braids don’t. The Dutch braid wraps around the head like a crown, which means the shape itself becomes the statement. On wavy hair, that circular path gives the texture a chance to sit close and neat without losing all its body.
The parting and braid path need to be planned before the first inch is braided. If you wing it, the crown can sit lopsided or leave a thick lump near one ear. That’s not the vibe. A smooth arc around the head looks best when the braid is kept even and the ends are tucked discreetly.
I like this style for events where you want the hair off the shoulders and the neckline visible. It reads polished in photos and comfortable in real life, which is a rare combination. The only catch is that it rewards patience. You cannot rush a halo braid and expect it to look intentional.
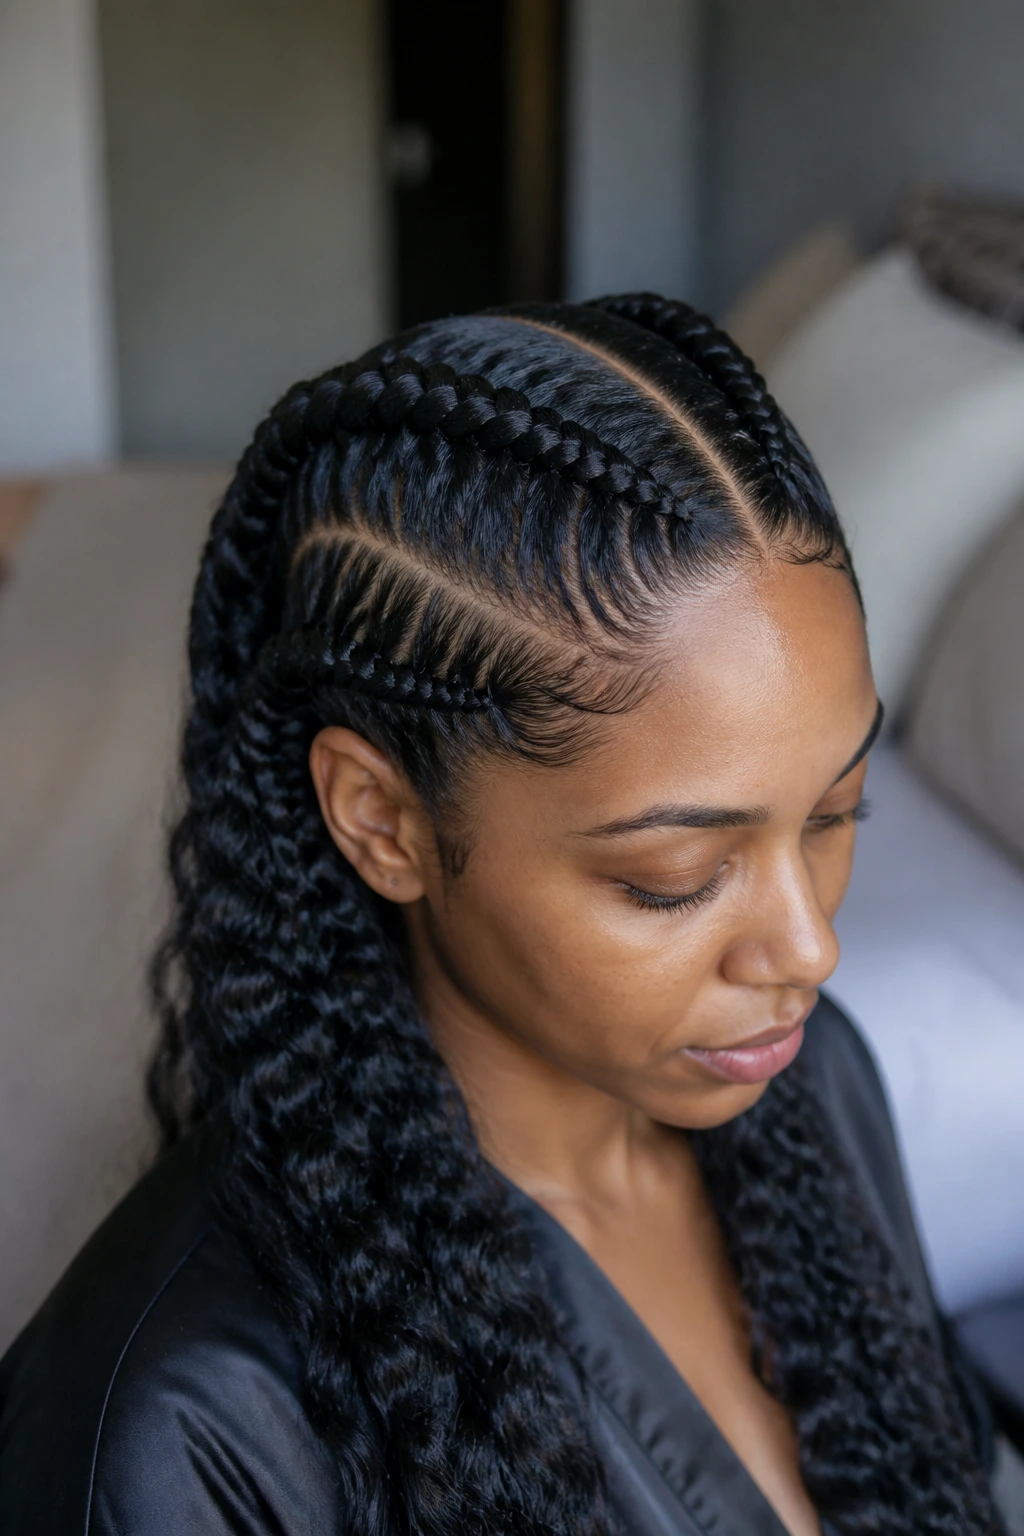
13. Double Dutch Braids with Loose Wavy Ends
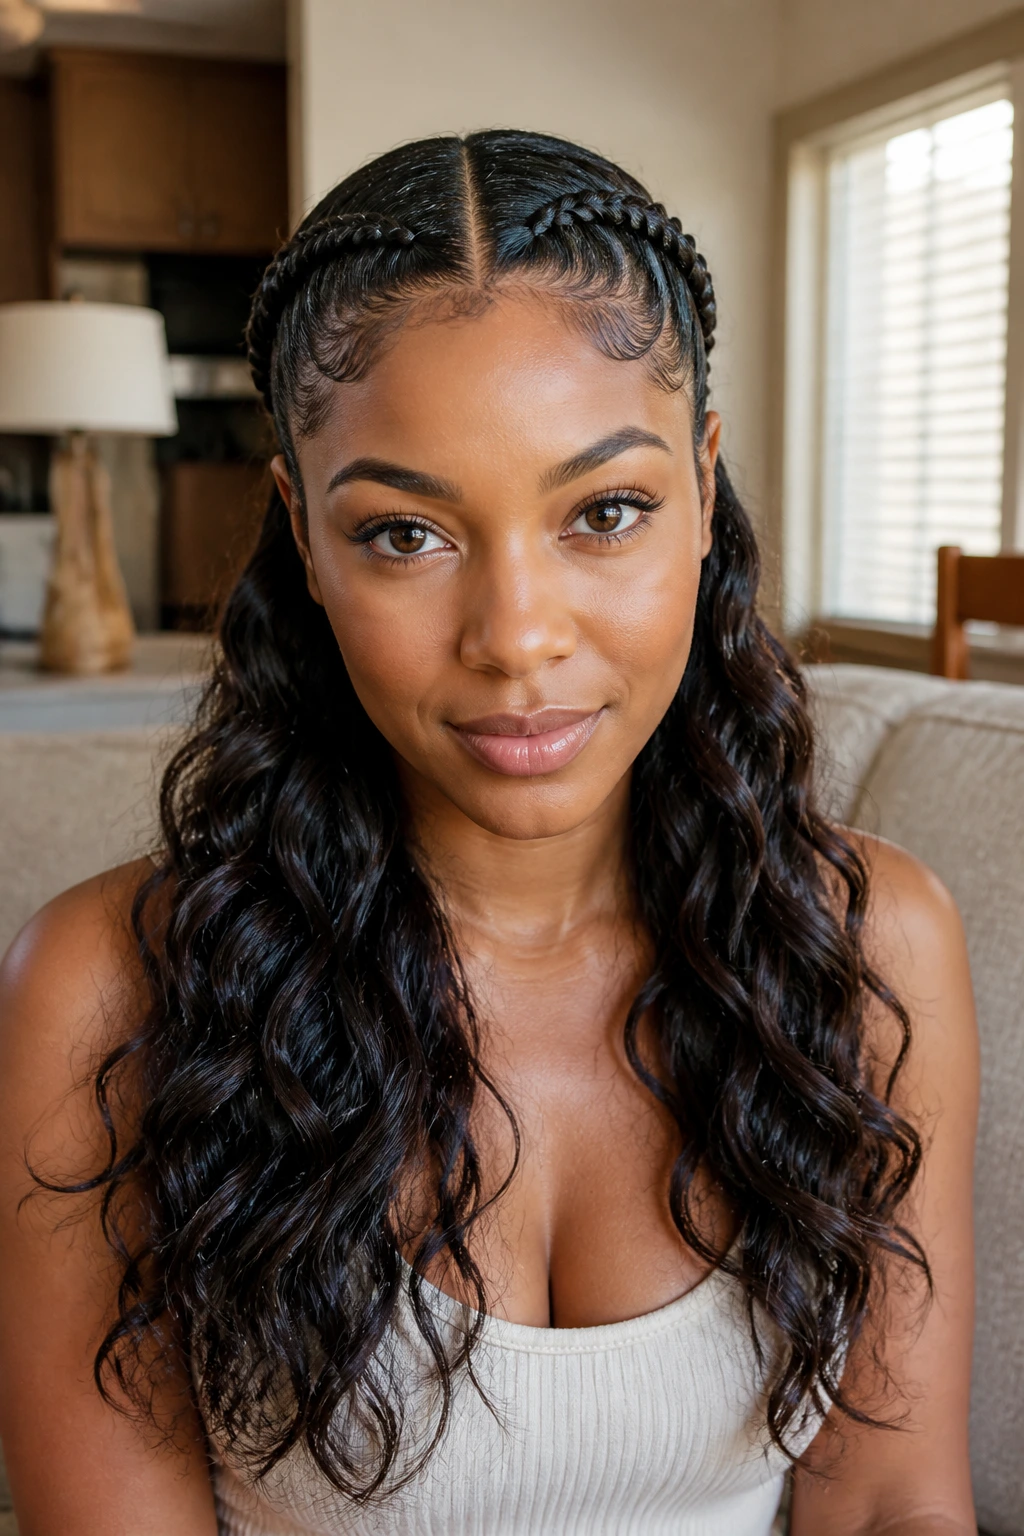
This is the style for anyone who wants the braid to stop before the ends lose their personality. The scalp section stays Dutch and neat, then the lengths are left loose so the wave pattern can show through. That contrast—tight at the roots, soft at the ends—looks especially good on Black women with wavy hair because it keeps the texture honest.
What makes it work is restraint. Don’t braid all the way to the very bottom if the hair has a nice bend. Stop early enough that the ends still move. A tiny clear elastic or a few wraps of thread can keep the loose sections from unraveling while still leaving them airy.
This one feels less formal than a fully tucked braid, but more styled than leaving the hair completely down. If your natural pattern is one of the main reasons you like your hair, this version lets you keep it in the picture.
14. Space-Braid Pigtails
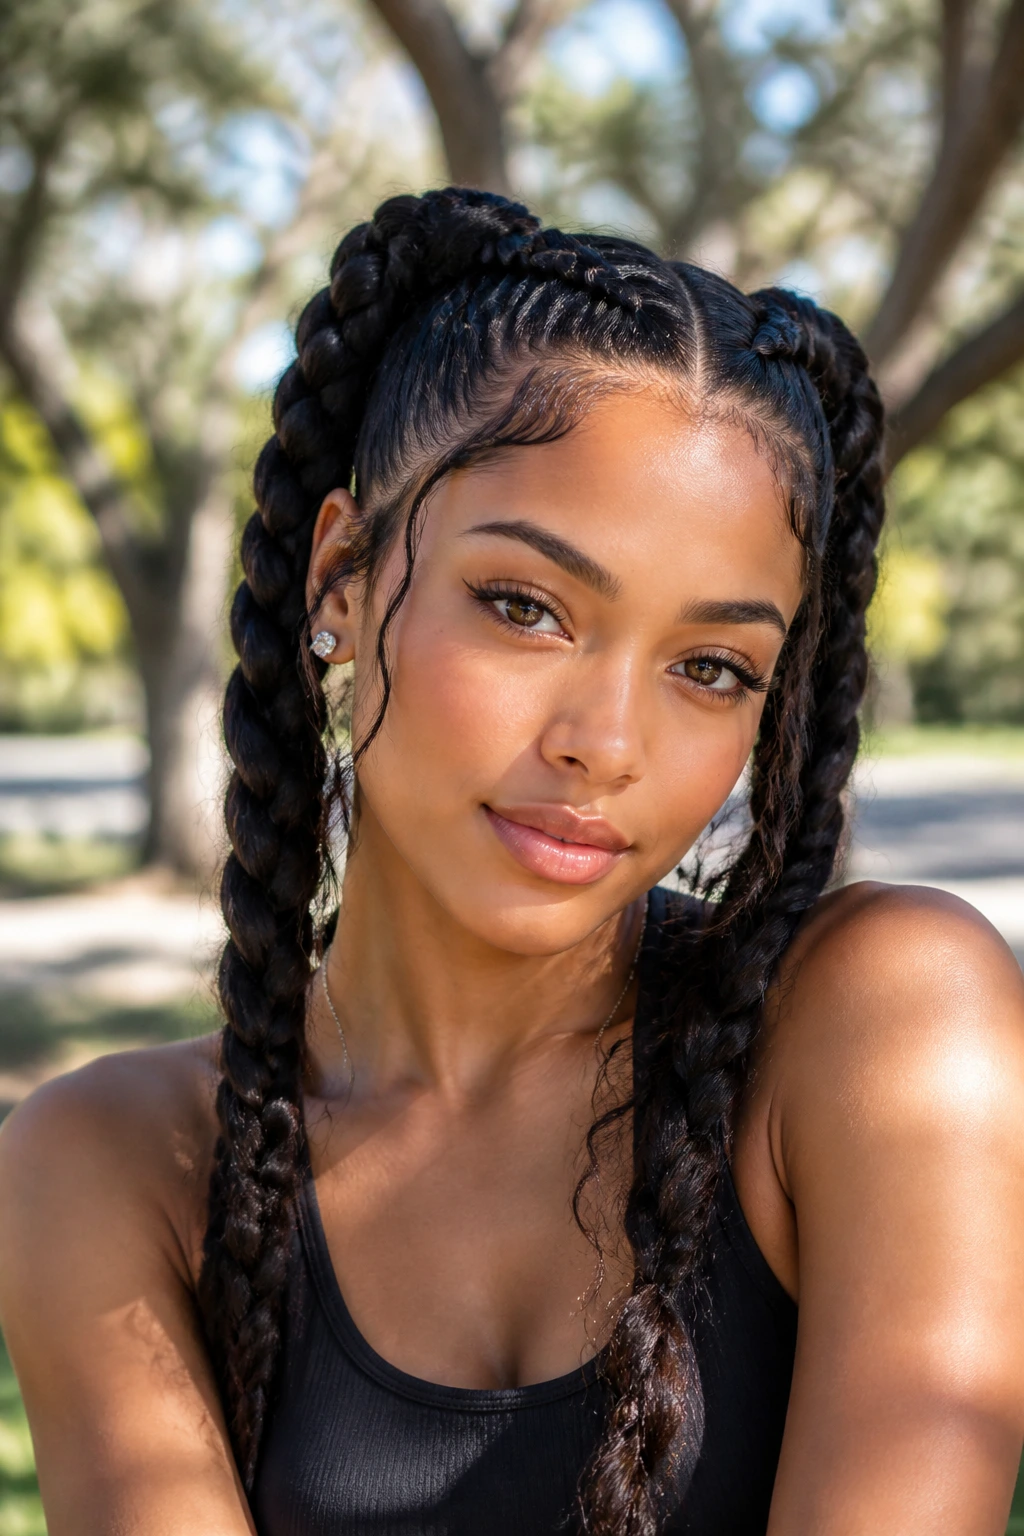
Space-braid pigtails lean playful, but not childish if the parting is clean and the braids sit balanced. They’re basically double Dutch braids placed a little higher and farther apart, which gives the head a lifted shape. On wavy hair, that lift keeps the roots from flattening out too quickly.
This is one of the easiest ways to make a familiar style feel fresher. The higher placement opens up the face, especially if you like a little volume around the crown. Keep the center part straight or make it slightly angled, depending on whether you want the look to feel sporty or cute.
I’d wear this when the day calls for movement. It stays put better than loose styles, and it’s one of the more forgiving looks when you’re running around, exercising, or just want your hair out of your face without losing shape.
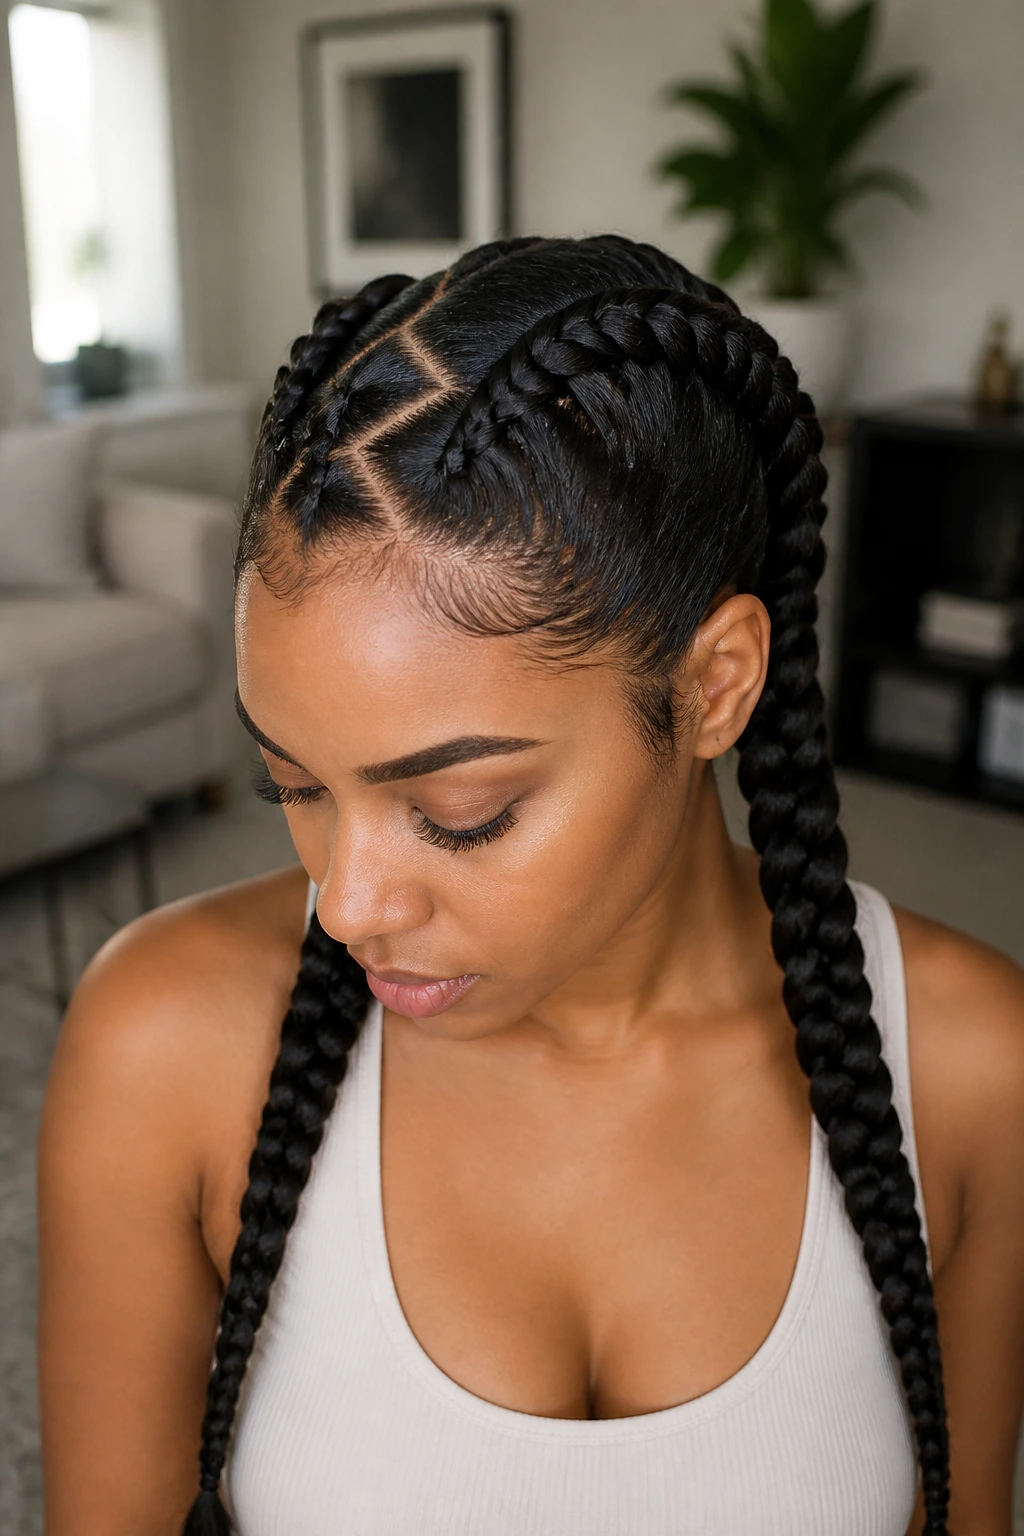
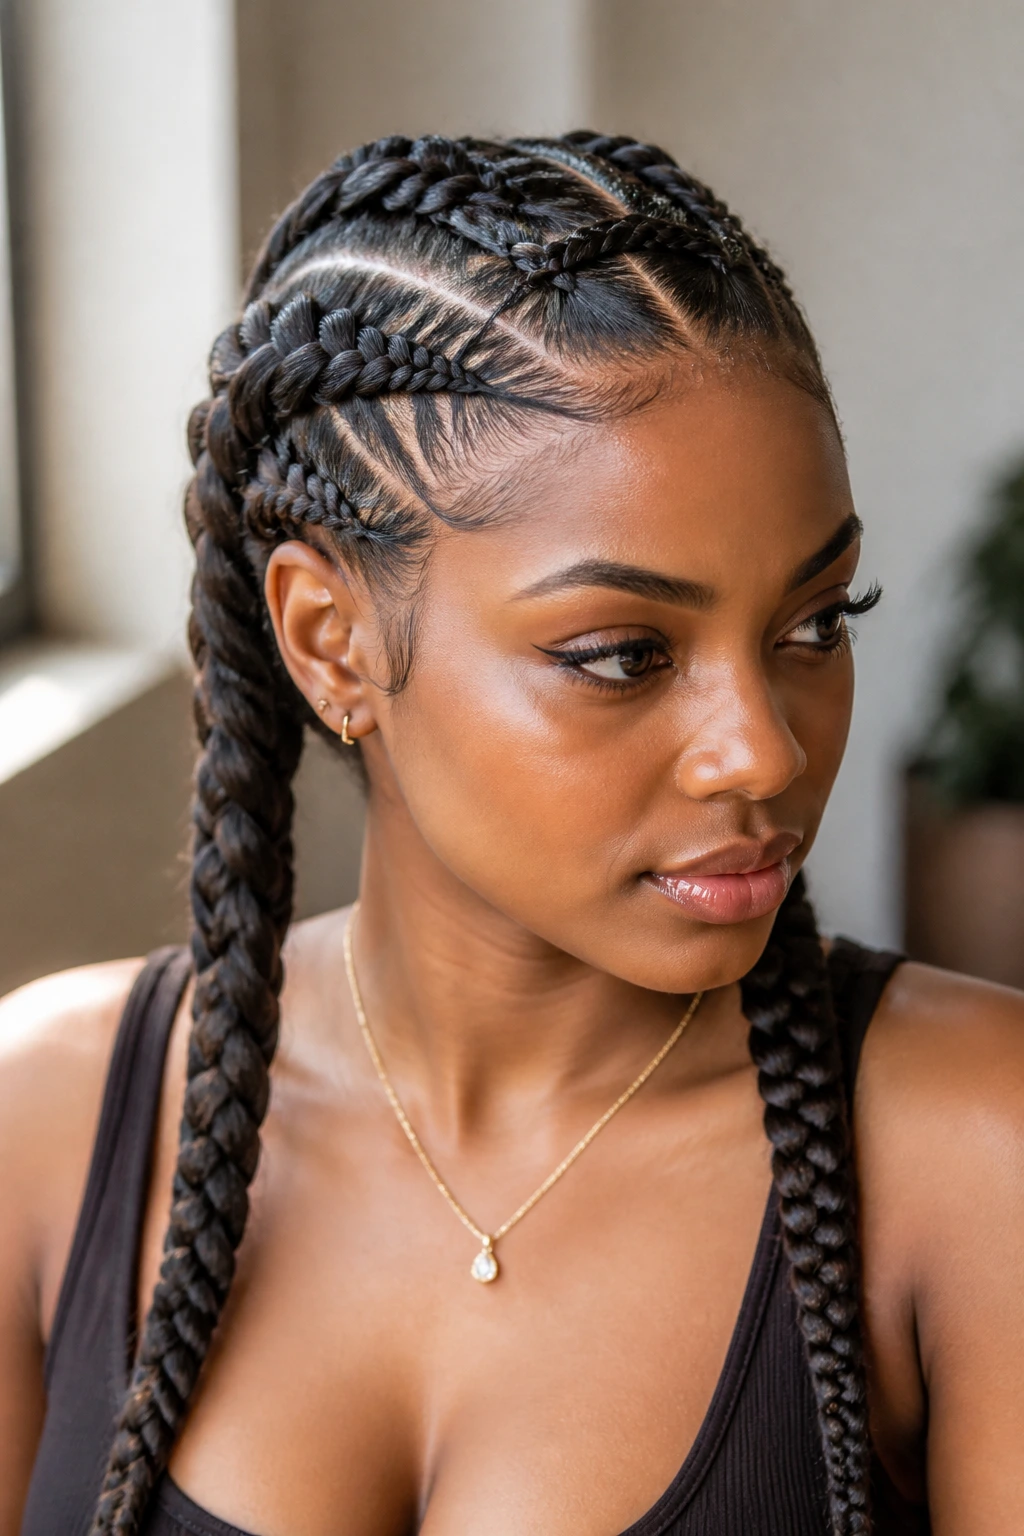
15. Triangle-Part Double Dutch Braids
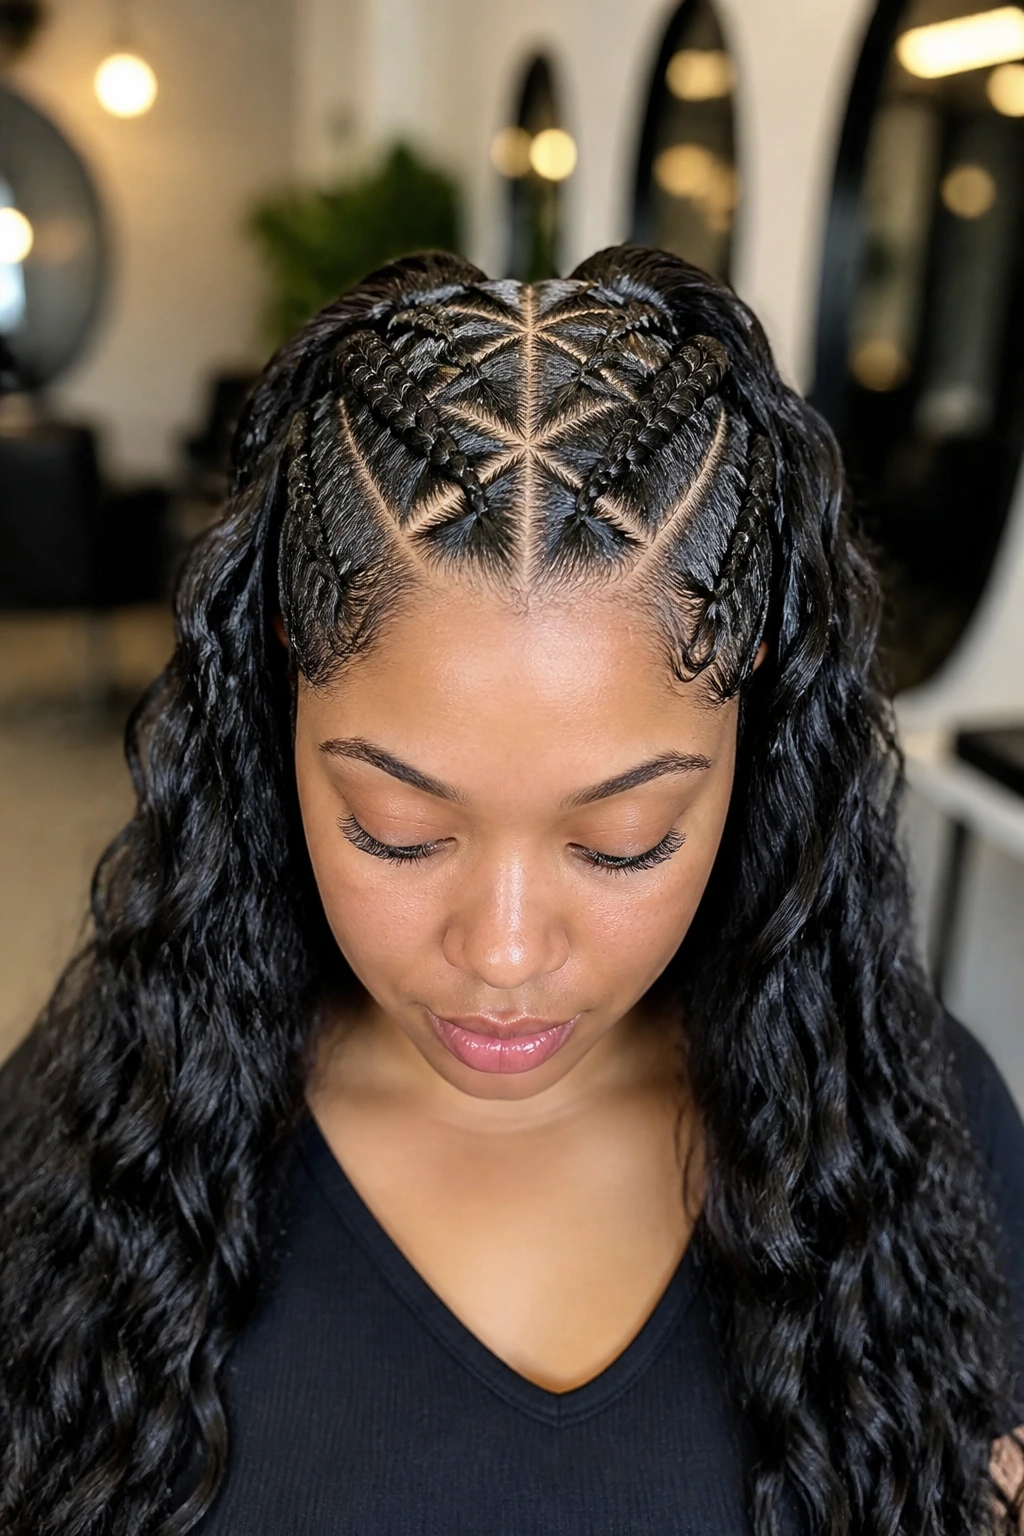
Triangle parts give the scalp a cleaner, more modern grid than simple rectangles do. The shape matters because it changes how the braids rise out of the root and how the lines are seen from above. On wavy hair, triangle sections help the style feel crisp even if the texture itself is a little soft or unruly.
The parting takes more time, no question. Still, it pays off because the scalp map looks deliberate from every angle. If you like neat sectioning, this one scratches that itch in a satisfying way. If you don’t enjoy detail work, hand this one to a braider with a steady eye and good lighting.
Triangle parts are especially good when you want the style to feel more styled than casual. The pattern reads clearly even before the braids are finished, which is one reason people who love braid art tend to gravitate to it.
16. Braid-Into-Twist Double Dutch Braids

Why let the braid end when the hair can keep going in a twist? That’s the appeal here. The roots stay double Dutch, but the ends switch into two-strand twists, which creates a softer finish and can be easier on hair that doesn’t need extra weight at the bottom.
Why It Holds Up Well
The twist finish is lighter than a fully braided tail, so the ends don’t pull quite as much. That matters if your hair is fine at the tips or if you want a style that has movement without unraveling by the second day. It also lets the wave pattern show in a different way, because twists tend to have a looser, rope-like feel.
Use a small amount of setting mousse on the twist section and twist it until it stays together without looking tight. If you want a cleaner finish, seal the end with a tiny elastic. I like this version when the goal is longevity without a stiff ending.
17. Side-Swept Low-Nape Double Dutch Braids
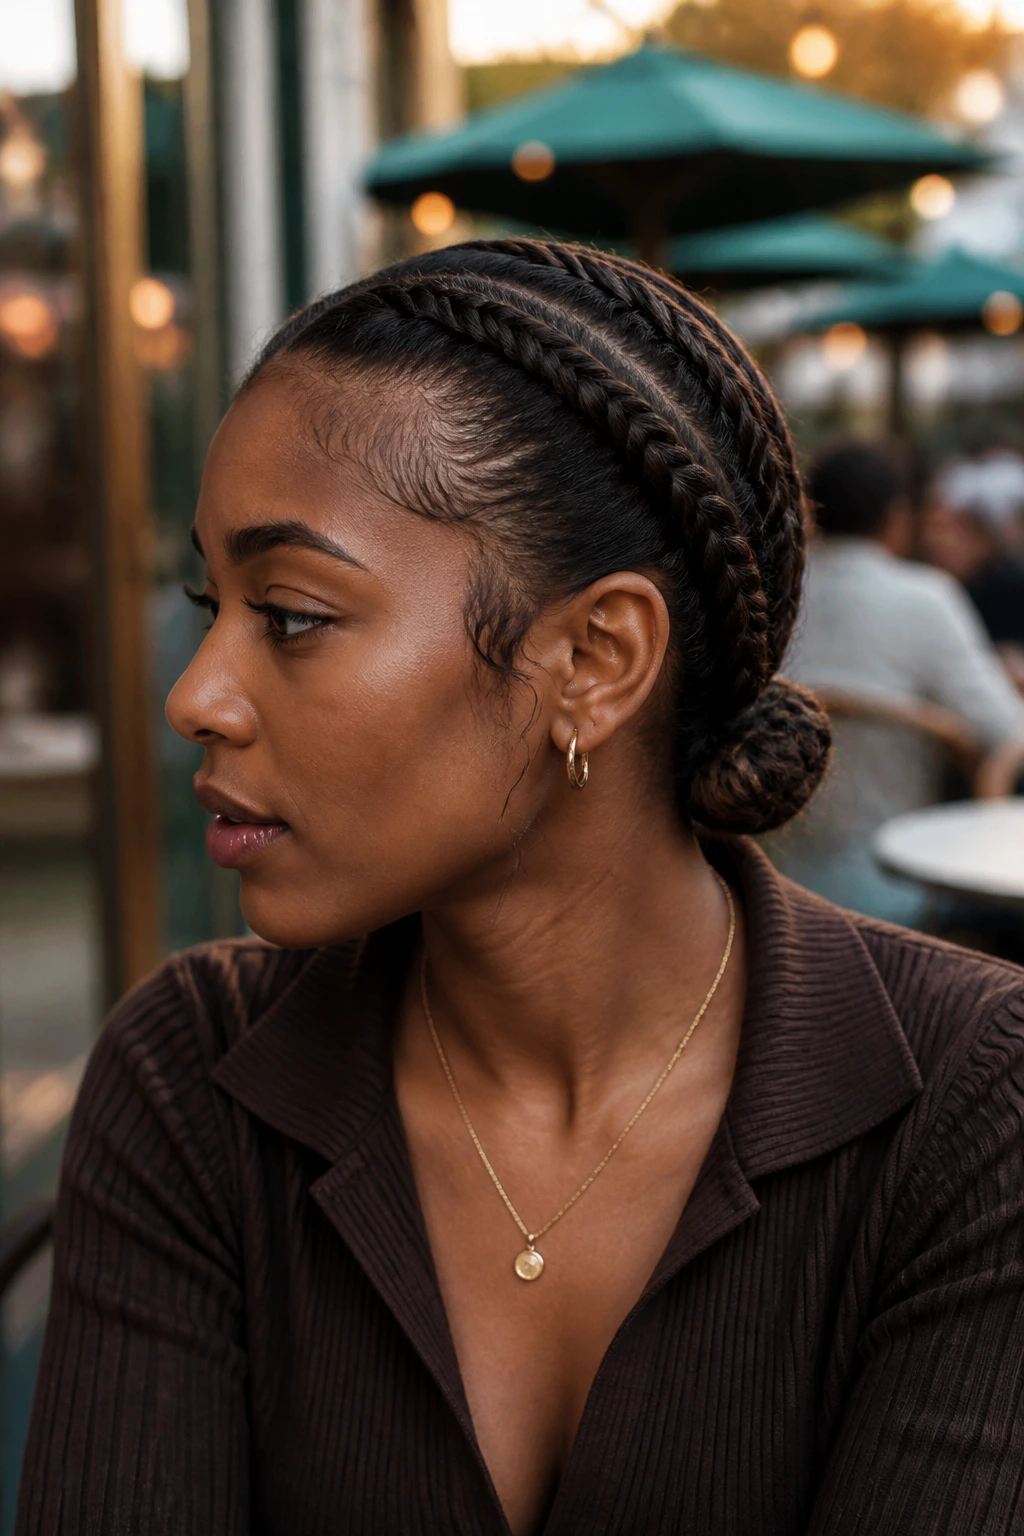
A side-swept low-nape braid arrangement gives the style a more relaxed posture. The braids start a little off-center and settle lower on the neck, which feels softer than a high or symmetrical layout. On wavy hair, that lower placement is useful because the texture can breathe a little instead of being pulled too tightly upward.
This one is also kind to collars and scarves. The braids sit low enough that they don’t fight with coats, hoodies, or jacket necklines as much. That sounds minor, but if you’ve ever had a braid puff up at the back because of friction, you know it matters.
If the hair around your nape tends to frizz first, this style helps hide that. The side sweep draws the eye away from the exact center of the head, and that asymmetry makes the whole look feel less formal and more lived-in.
18. Heart-Part Double Dutch Braids
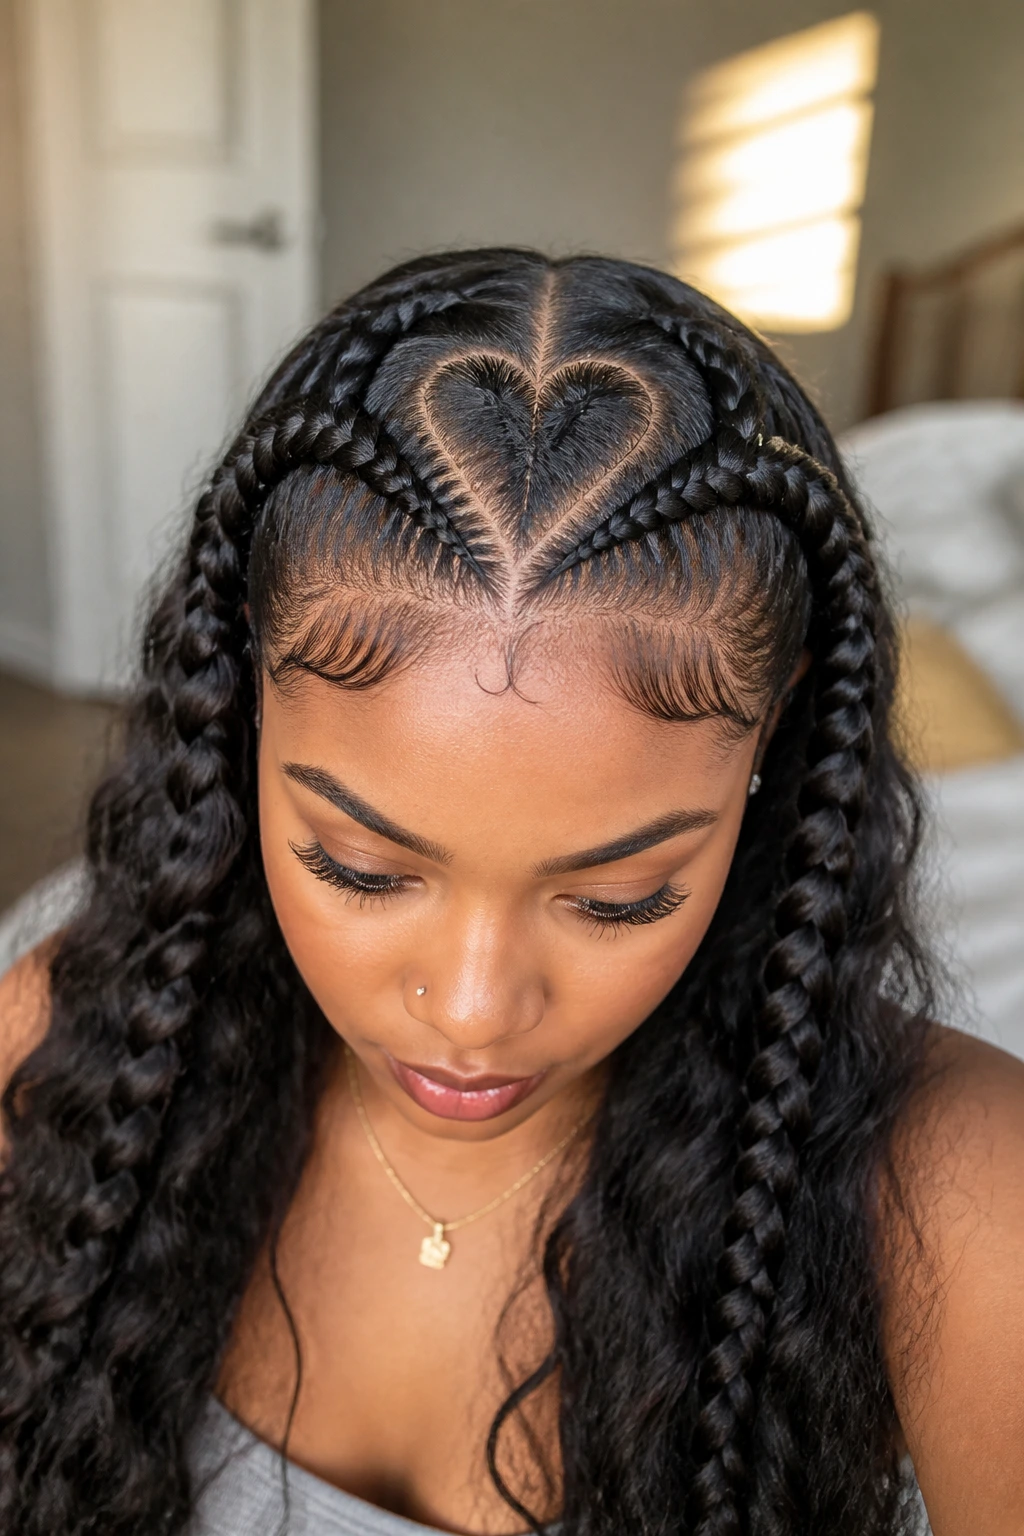
A heart part is pure detail work, and that’s what makes it fun. The shape is visible before the braids even start, which means the scalp itself becomes part of the style. On wavy hair, the contrast between the soft texture and the crisp heart shape can look surprisingly polished.
This is not a style to do in a hurry. The two sides of the heart need to mirror each other enough that the shape reads cleanly from the front. If one loop is larger than the other, the effect gets muddy fast. A good tail comb and a little patience are the entire game here.
I like heart parts for birthday looks, pictures, or any day when the braid should feel a little playful. It’s one of those details that seems small until you catch it in the mirror and realize it changes the whole mood.
19. Boho Double Dutch Braids with Face-Framing Pieces

Face-framing pieces soften double Dutch braids in a way that can be very flattering on Black women with wavy hair. Instead of pulling every front strand back, you leave a few thin pieces out near the temples and jawline so the style has motion around the face. That little bit of softness stops the braids from feeling too severe.
The loose pieces should be intentional, not accidental. Pick them before the braid starts and keep them clean with a touch of styling cream or mousse. If you leave random bits out, the style can look unfinished. If you leave too much out, the whole point of the braid gets lost.
This is the version I’d choose when you want a braid style that still shows personality. The front pieces catch the light, the waves stay visible, and the overall shape feels less rigid. It’s a good compromise between polished and relaxed.
20. Ombre-Blend Double Dutch Braids
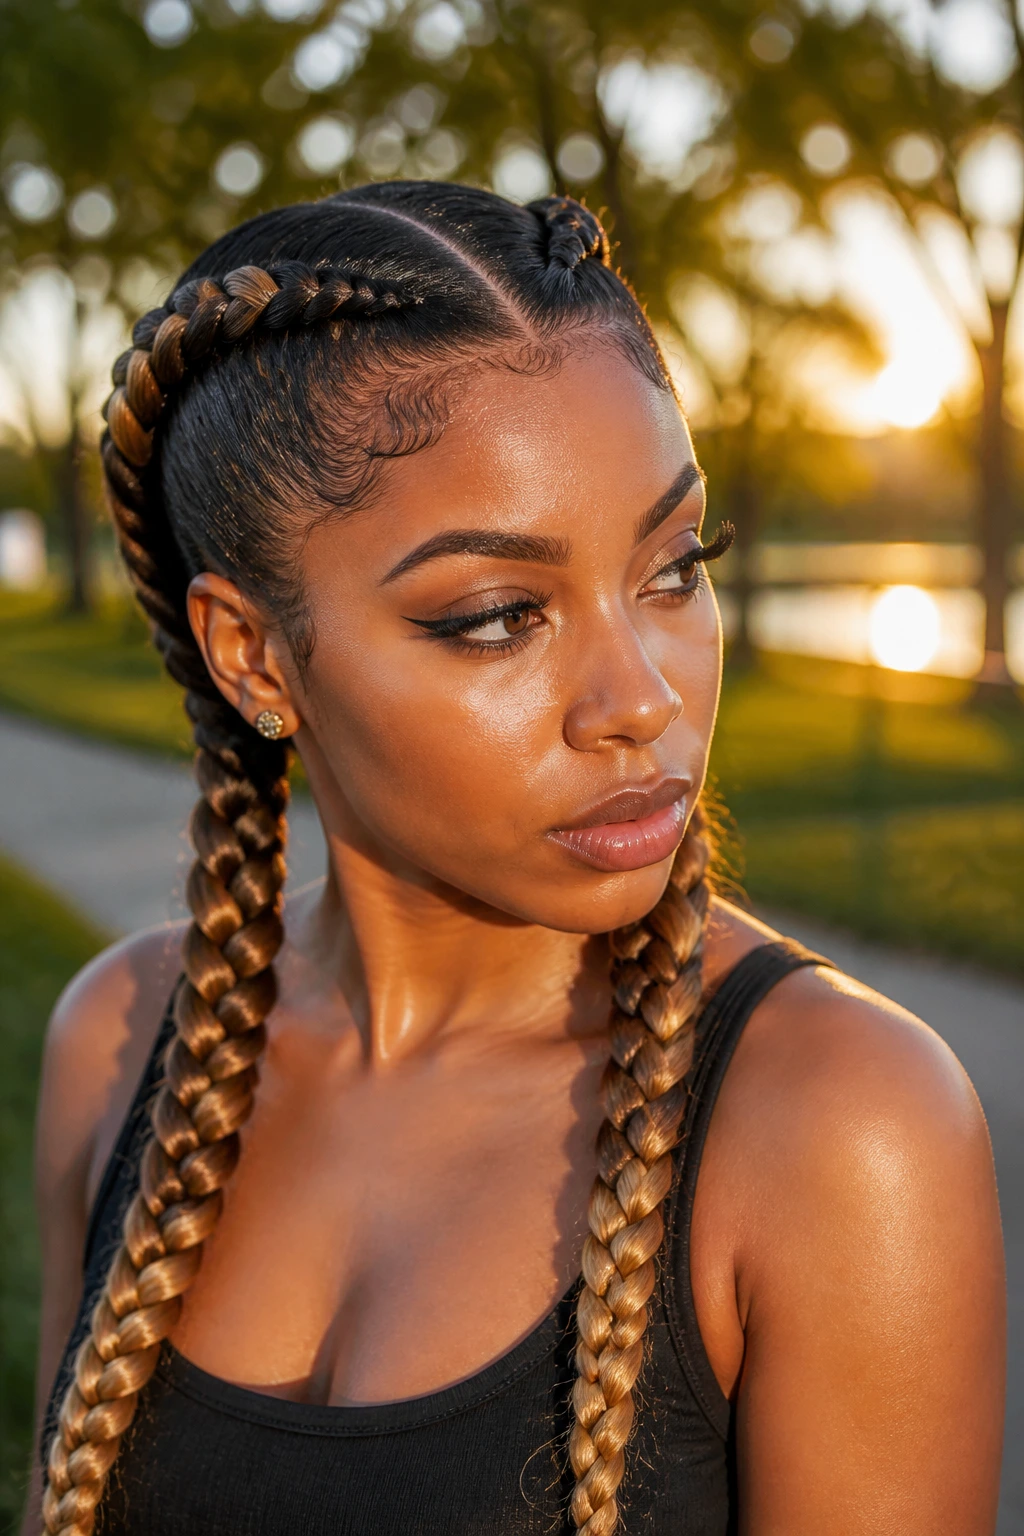
When the braid length carries a color shift, the whole style becomes easier to read from across the room. Ombre braiding hair, or even a natural color fade in your own hair, makes the Dutch pattern stand out because the darker roots and lighter ends move differently in the braid. That contrast is especially noticeable on wavy hair.
The trick is choosing a color blend that doesn’t fight your undertones. Warm browns, honey, burgundy, and soft caramel tones usually look smoother than a jumpy, high-contrast mix that stops the eye instead of guiding it. If you’re using added hair, the transition should look gradual enough that the braid line still feels natural.
This style works best when the color is the accent, not the whole performance. Let the braid structure stay clean and let the ombre do the visual lifting. Too many other details—too many cuffs, too many part shapes—can muddy the effect.
21. Workout-Ready Tension-Lite Double Dutch Braids

This is the practical version, and I mean that as a compliment. The roots are secure, the parting is clean, and the tension stays light enough that you can wear the style through a long day without thinking about your scalp every five minutes. On wavy hair, that matters because the texture already gives you some natural hold.
The look should not feel perfect in a glassy, museum way. It should feel safe, sturdy, and easy to live in. Keep the first inch near the hairline relaxed, especially around the temples and behind the ears. If the braid hurts before you leave the mirror, it is too tight. Full stop.
I like this style for gym days, travel days, and long errands. It stays put, the braids don’t swing into your face, and the whole thing looks better the longer it settles. There’s nothing glamorous about needing to adjust your hair three times before lunch.
22. Event-Ready Swooped-Edge Double Dutch Braids
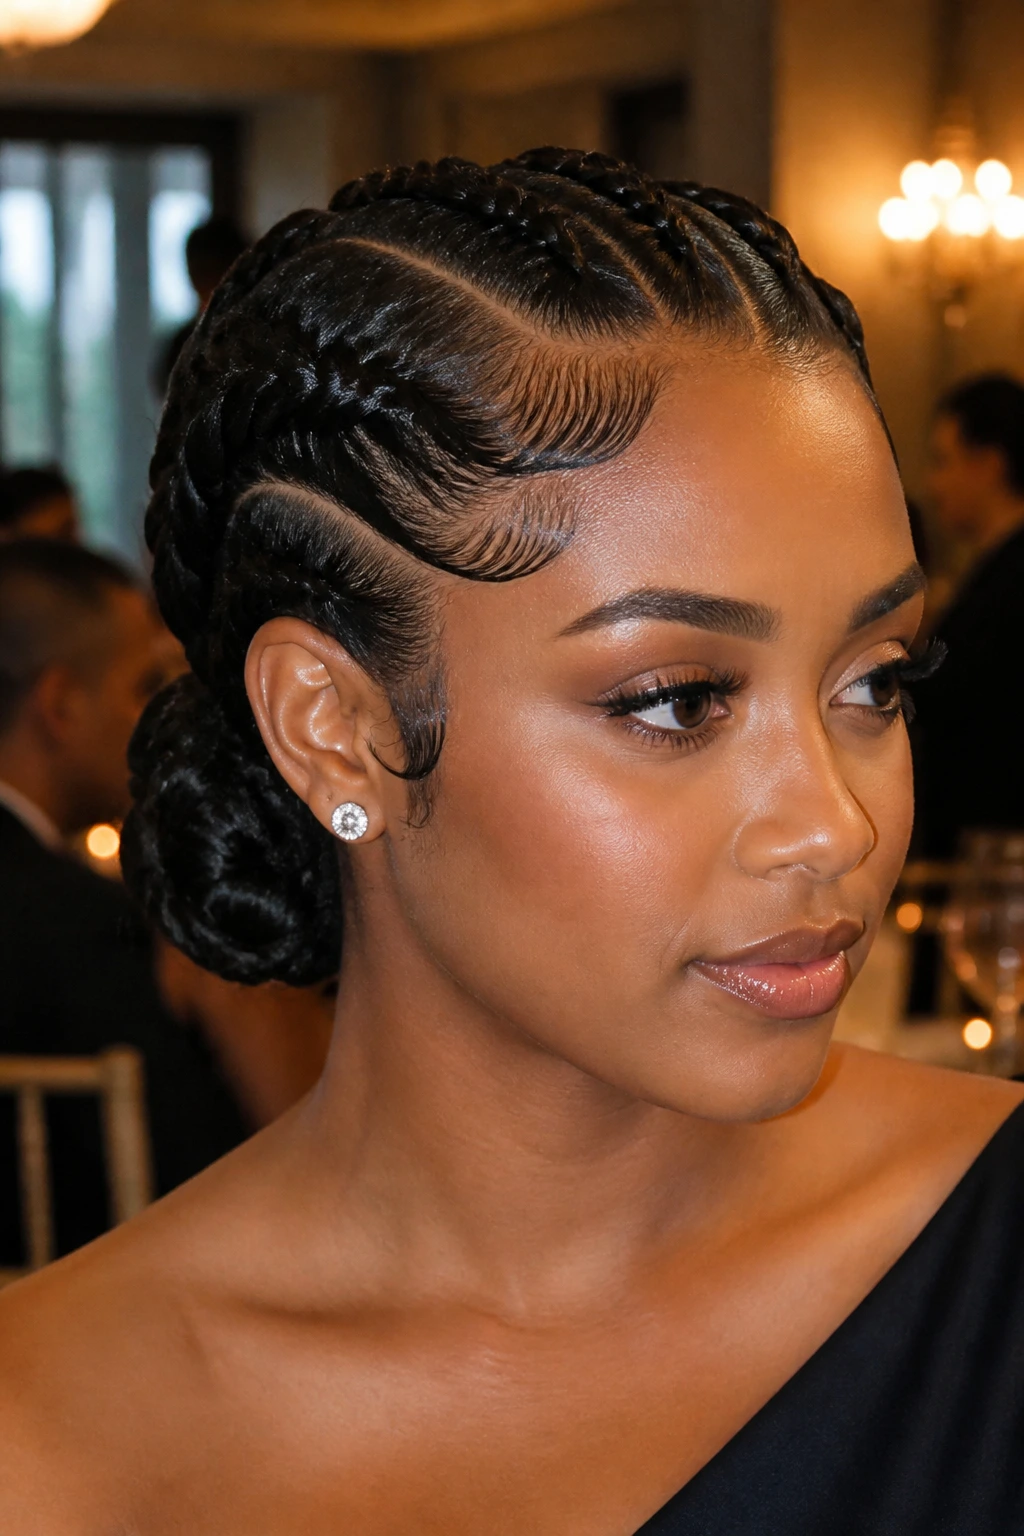
When you want double Dutch braids to show up for a dinner, a party, or a formal look, this is the version that earns its keep. The braids are smooth, the edges are softly swooped, and the finish can be tucked into a low chignon, wrapped bun, or polished tail. It’s the braid style that says you planned ahead, but not in a stiff way.
The edges should be controlled, not plastered. A soft swoop near the hairline keeps the look feminine and polished without making the front heavy. If your wavy hair tends to frizz in humidity, this is the style that benefits the most from a light mist of setting foam before you start and a satin wrap while it sets.
This is the braid I’d pick when the outfit has structure and the hair needs to match it. It reads elegant in person, holds up in photographs, and still feels comfortable enough to wear all night.
Why Double Dutch Braids Hold Their Shape on Wavy Hair
Wavy hair has a useful middle ground: enough bend to grip the braid pattern, enough softness to make the finish feel less rigid than very straight hair. That combination is why double Dutch braids can look especially neat on Black women with wavy hair, provided the prep is clean and the roots are not overloaded with product. The braid has something to hold onto, but it still needs space to move.
The scalp line matters because the braid sits higher than a standard cornrow. That means the parting and the first few passes decide whether the style lays flat or starts puffing out early. A medium-hold mousse, a clear part, and even tension do more for the final look than a pile of gels ever will.
There’s also a practical upside. The braid pattern gives you structure, while the wave pattern keeps the style from looking overly severe. That balance is why these braids can work for school, work, workouts, and dressier settings without feeling like four different hairstyles trying to live in one head.
Essential Tools for Cleaner Parts and Softer Edges
-
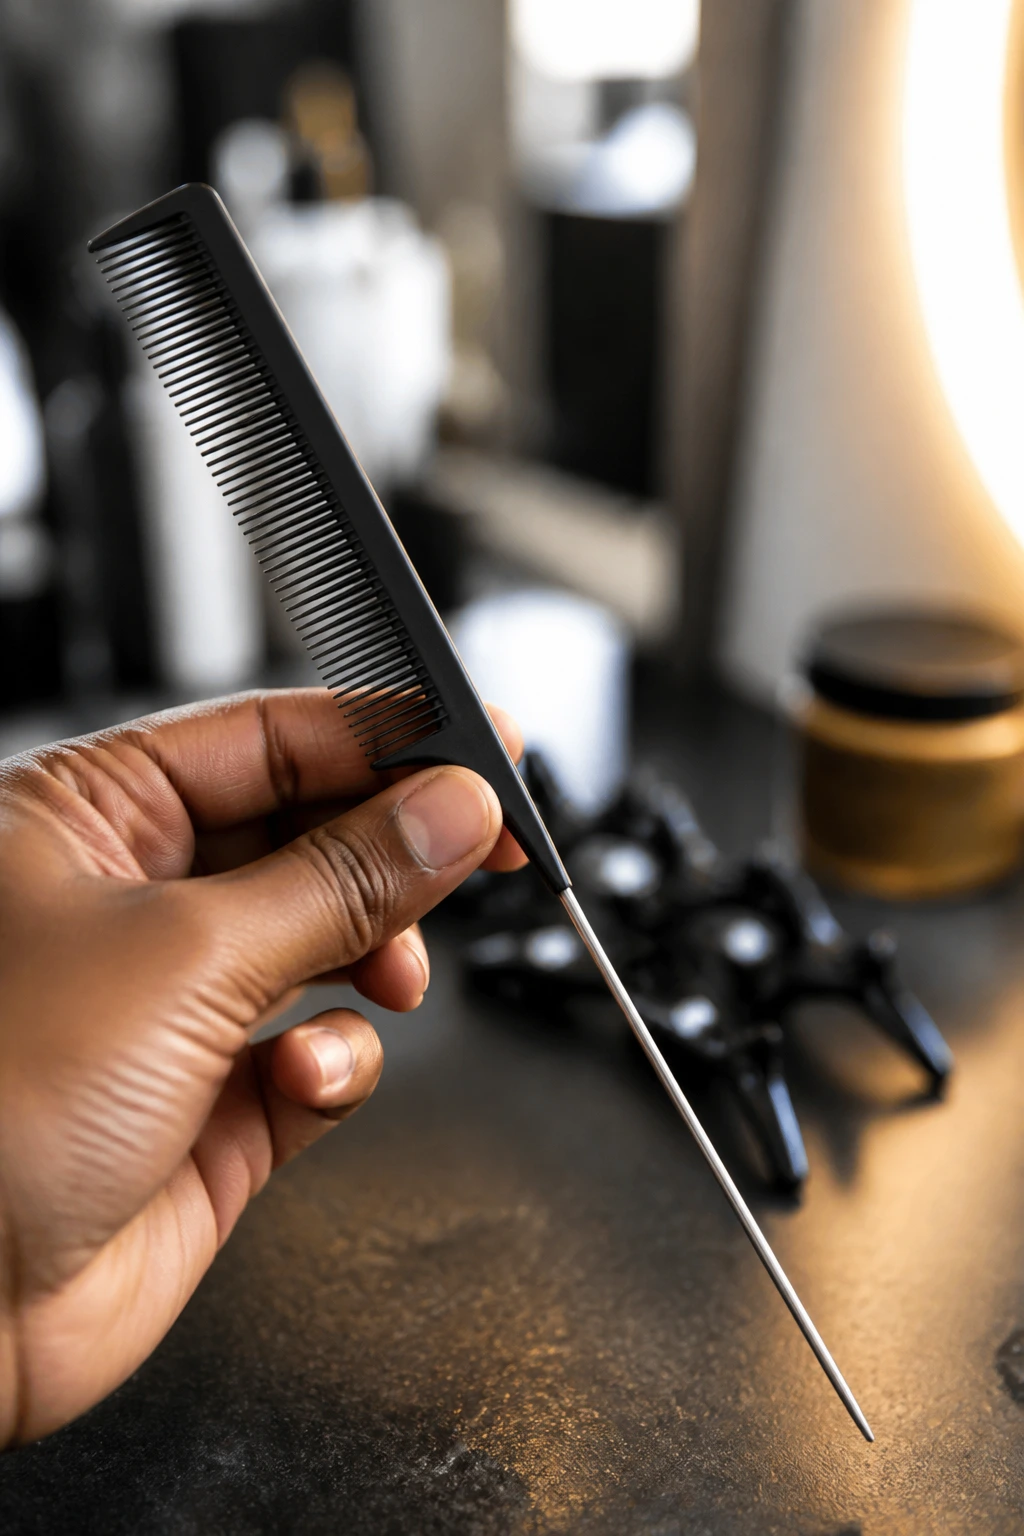
Rat-tail comb: The tail gives you control over parts, especially for center lines, zigzags, and heart shapes.
-
Wide-tooth comb: Use this before sectioning so you’re not dragging knots into the braid line.
-
Spray bottle with water: A light mist helps wavy hair behave. Do not soak the scalp; damp is enough.
-
Leave-in conditioner: Keep it light. Too much cream makes the roots slippery and can flatten the braid start.
-
Mousse or foam wrap lotion: This helps tame flyaways and gives the braid line a smoother finish without hardening the hair.
-
Edge brush: Useful for smoothing the hairline without pressing product into every strand.
-
Hair clips or duckbill clips: These keep the unused section out of the way while you braid.
-
Small elastics: Handy for securing braid ends, especially if you’re leaving them loose or twisting them.
-
Braiding hair, optional: Good for fuller or longer styles, but not required for every look. Match the texture and color carefully if you use it.
-
Satin scarf or bonnet: Night care starts here. Skip this, and the front of the style will announce that you skipped it.
Smart Prep Before You Start Braiding
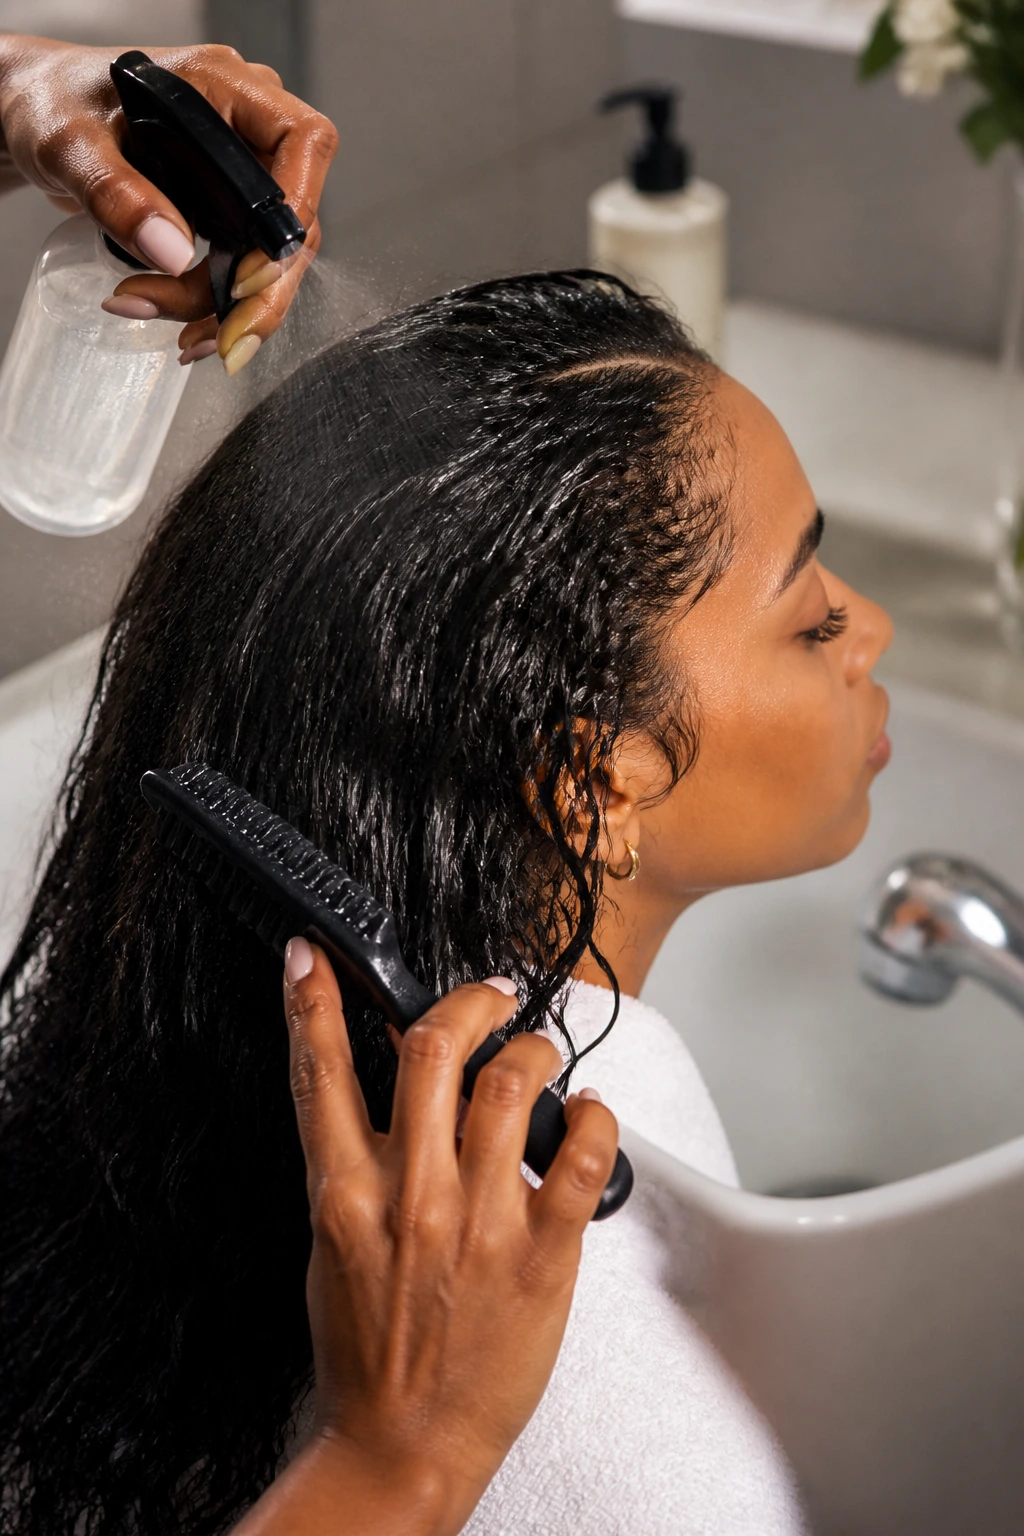
The biggest mistake is loading the hair with heavy product and calling it prep. Wavy hair does not need to be drowned to look neat. It needs to be detangled, lightly conditioned, and sectioned while it still has enough grip to hold the braid pattern.
A clean wash or a thorough refresh works best if the hair has scalp buildup. If you’re braiding on day-old hair, a quick mist and a little foam at the roots can be enough. The goal is control, not saturation. A watery base lets the braid slide; a greasy base lets it collapse.
If you’re using braiding hair, match the finish to your own texture instead of fighting it. Very silky synthetic hair can look out of place against soft waves unless you rough it up slightly with a little mousse. And if you want the braid to sit flatter, blow-dry the roots on low tension before parting. That one move makes the section lines easier to see and keeps the braid from looking puffy at the base.
How to Wear the Styles Without Making Them Hard to Live In
Everyday Wear: Choose the center-part, side-part, or low-nape versions when you want the style to sit neatly under a scarf, jacket, or headset. These are the least fussy versions once they’re set.
For the Gym or Long Days: The workout-ready braid and the high ponytail finish keep hair off the neck and out of the face. They also handle movement better because the ends are anchored instead of hanging loose.
For Events: Reach for the halo crown, swooped-edge bun, or gold-cuff versions. Those styles read more finished without needing a full re-braid or major extra length.
For Softer Texture Days: Pick the half-up, loose-end, boho, or braid-into-twist versions. They let the natural wave show and keep the style from feeling too stiff or formal.
If you’re not sure which way to go, start with the braid shape you can maintain on a tired Tuesday. A style that fits your real life usually looks better than one that only works in a mirror for ten minutes.
Tips That Make the Braids Look Cleaner for Longer
Parting Trick: Part the hair on stretched or thoroughly detangled strands. A rat-tail comb on tangled wavy hair will fight you the whole way and leave rough, fuzzy lines.
Moisture Balance: Use a light leave-in at the mid-lengths and a foam or mousse near the roots. Heavy butter near the scalp tends to loosen the braid start and make the front puff early.
Edge Care: Leave a little slack at the temples. The braid can still look neat without the hairline feeling pinched, and that extra breathing room matters if you’ll wear the style for several days.
Night Care: Wrap the braids with a satin scarf and tuck the loose lengths inside a bonnet if they’re long enough to snag on pillows. The front sections are always the first to fray.
Time-Saver: Section both sides before you braid either one. It sounds obvious. It saves a weird amount of time once your hands are already moving.
Common Mistakes That Make Double Dutch Braids Look Tired Fast
Braiding Too Tight at the Hairline: Pain, redness, and little bumps at the temples are the giveaway. The fix is simple: loosen the first inch and braid with tension, not force.
Using Too Much Cream or Gel: The braid may look shiny at first, then puff and separate once the product sinks in. Keep product light, especially on wavy hair that already has some slip.
Uneven Section Sizes: One braid ends up thick and the other looks thin. That imbalance shows more clearly on double Dutch braids because the style is supposed to read symmetrical.
Ignoring the Ends: Loose ends that aren’t secured will fray, knot, or flip strangely. Seal them with an elastic, a twist, or a planned tucked finish.
Skipping Night Wraps: By morning, the front has frizz, the braid lines soften, and the style looks older than it is. A satin scarf is not optional if you want the braids to hold their shape.
Leaving the Style in Too Long: If the scalp starts itching, the parts look dull, or the roots are matted, it’s time to take them down. Stretching a style because it still “kind of” looks okay is how breakage sneaks in.
Variations and Alternatives to Try Next

Soft-Edge School-Day Braids: Keep the parts simple, leave the edges lightly smoothed, and skip accessories. This version is easy to wear and fast to refresh.
Full-Drama Accessory Braids: Add cuffs, beads, or wrapped thread in one color family. The trick is choosing one accent and sticking to it so the style looks intentional.
Short-Hair Mini Dutchs: If the hair doesn’t reach far, stop the braid earlier and secure the ends with small elastics or twists. Shorter lengths can still look sharp when the parts are clean.
Natural-Texture Finish: Leave the ends loose and let the wave pattern show all the way down. This is the version I’d pick when I want the braid to frame the texture instead of hiding it.
Formal Tuck-Under Braids: Feed the lengths into a bun, chignon, or tucked knot. Good for events, low fuss, and any day when loose ends would get in the way.
Keeping the Style Fresh Between Wash Days

A little maintenance goes a long way here. If the scalp starts feeling dry, use a light applicator bottle with a diluted cleanser or scalp mist once every few days, then pat the roots dry with a towel. Don’t flood the parts. Water sitting under the braid base can make the scalp feel soggy and itchy.
At night, wrap the hair before you touch the pillow. Every single time. If the ends are loose, tuck them into the bonnet so they don’t rough up against cotton or snag on seams. For braids with extensions, a light foam on the outer surface every few days can calm frizz without making the hair sticky.
Most braided styles benefit from a quick front refresh before they need a full redo. Smooth the perimeter, rewrap the scarf for 10 to 15 minutes, and the style usually settles back into place. If the parts are still clean but the front looks fuzzy, that quick reset is enough to buy you another day or two.
Questions People Ask Before Getting Double Dutch Braids
How long do double Dutch braids last on wavy hair?
Usually about 4 to 10 days, depending on tension, product use, and whether you sleep with a scarf or bonnet. Styles with extensions or tucked ends often last longer than loose-end versions because there’s less fraying at the tips.
Can I braid damp hair, or should it be dry?
Lightly damp is fine, especially if your waves need a little control. Soaking wet hair is a bad idea because it stretches the sectioning, makes the braid slippery, and can leave the scalp damp for too long under the style.
Do I need braiding hair for these looks?
No. Plenty of the styles here work on natural length alone. Braiding hair just gives you more length, more fullness, or a flatter root-to-braid transition if your own hair is shorter or finer at the ends.
What if my hairline is sensitive?
Choose the looser, tension-lite versions and keep the braid start soft around the temples. Pain on day one is not a sign that it’s “done right”; it usually means the front is too tight and will itch or pull by the next morning.
How do I stop the roots from puffing up so fast?
Use less product, braid on well-detangled hair, and wrap the style at night. Puff usually starts at the first inch near the scalp, so that’s where your prep and your scarf matter most.
Can I wear these styles if my parts are not perfect?
Yes. Clean parts help, but tiny wobbles are not the end of the world. On wavy hair, a little softness in the part can still look polished if the braid line itself is neat.
How should I take them out without causing breakage?
Undo the ends first, then work upward slowly with your fingers before reaching for a comb. Pulling from the roots down is how tangles tighten and hair snaps, especially if product has dried inside the braid.
Are these styles okay for active days or workouts?
Very. The high ponytail, workout-ready tension-lite version, and low-nape braids are especially good when you’re moving a lot. Just keep the front secure without making it tight enough to throb.
Braids That Still Look Good When the Day Gets Long
Double Dutch braids have staying power because they give shape to hair that already wants to move. On Black women with wavy hair, that shape can look crisp, soft, playful, or dressed up with only a few changes: a part line, a cuff, a bun, a twist, a little looseness at the ends.
The best versions respect the hairline and make peace with texture instead of trying to flatten it into submission. That’s the whole point. When the roots are neat, the tension is sensible, and the finish matches the day you’re actually having, the braids stop feeling like a style and start behaving like a reliable staple.