Thick hair can turn a decent haircut into a helmet fast. One blunt line at the bottom, and suddenly the whole head reads as one heavy block. Shag haircuts for thick hair solve that problem by redistributing weight into layers that move, bend, and breathe instead of sitting there like a shelf.
The trick is that “shag” is not one haircut. A shoulder-skimming version with curtain bangs behaves nothing like a wolf-inspired cut with a tight crown, and a curly shag needs a very different hand than a straight-hair one. With dense hair, the difference between a good shag and a frizzy accident is often only a few inches in layer placement, which is why the best inspiration board is a collection, not a single photo.
I’ve always liked this cut family because it respects what thick hair actually does in real life. It holds shape. It swells when the air gets damp. It punishes bad layering. A shag gives you shape without trying to erase density, and that’s why the right version can look deliberate even when it’s a little messy.
Why These 30 Shag Variations Earn Their Keep
- Bulk Gets Redirected, Not Wiped Out: The best versions take weight out of the middle and lower lengths, which keeps thick hair from ballooning out at the sides.
- Bangs Change the Whole Read in Two Inches: A curtain fringe, full fringe, or micro-bang can shift the face frame faster than another two inches of length ever will.
- The Grow-Out Is Easier to Live With: Layers that start at the cheekbone or chin tend to soften into a wearable shape instead of turning into a blunt hump.
- They Work With Heat or No Heat: A shag can be blown smooth, scrunched, diffused, or left to air-dry, and each path still makes sense.
- You Can Keep More Length Than You Think: A lot of these cuts remove bulk without sacrificing the perimeter, which matters when you like the feel of thick hair but not the weight of it.
- They Suit More Than One Mood: The same haircut can look soft, edgy, polished, or undone depending on where the fringe lands and how much disconnection is built in.
1. The Shoulder-Skimming Starter Shag
This is the safest place to begin if you want movement without handing your hair over to a full wolf-cut moment. The perimeter lands around the shoulders, the shortest layers sit near the chin, and the whole shape keeps enough weight at the bottom that thick hair does not puff out into a cloud by noon.
Why It Works on Dense Hair
The magic here is restraint. Ask for point-cutting through the front and soft internal layers through the back, but do not let the stylist carve the crown too high. On thick hair, the crown can go from airy to mushroom-shaped in a hurry if the shortest layer sits above the cheekbone.
- Best for: first-time shag wearers with a lot of hair and no interest in daily styling battles
- Layer start: chin to cheekbone
- Maintenance: trim every 8 to 10 weeks
- Styling note: a 1.25-inch round brush is enough to tuck the ends under or flip them out
My blunt opinion: if you are nervous, start here before you go full mullet.
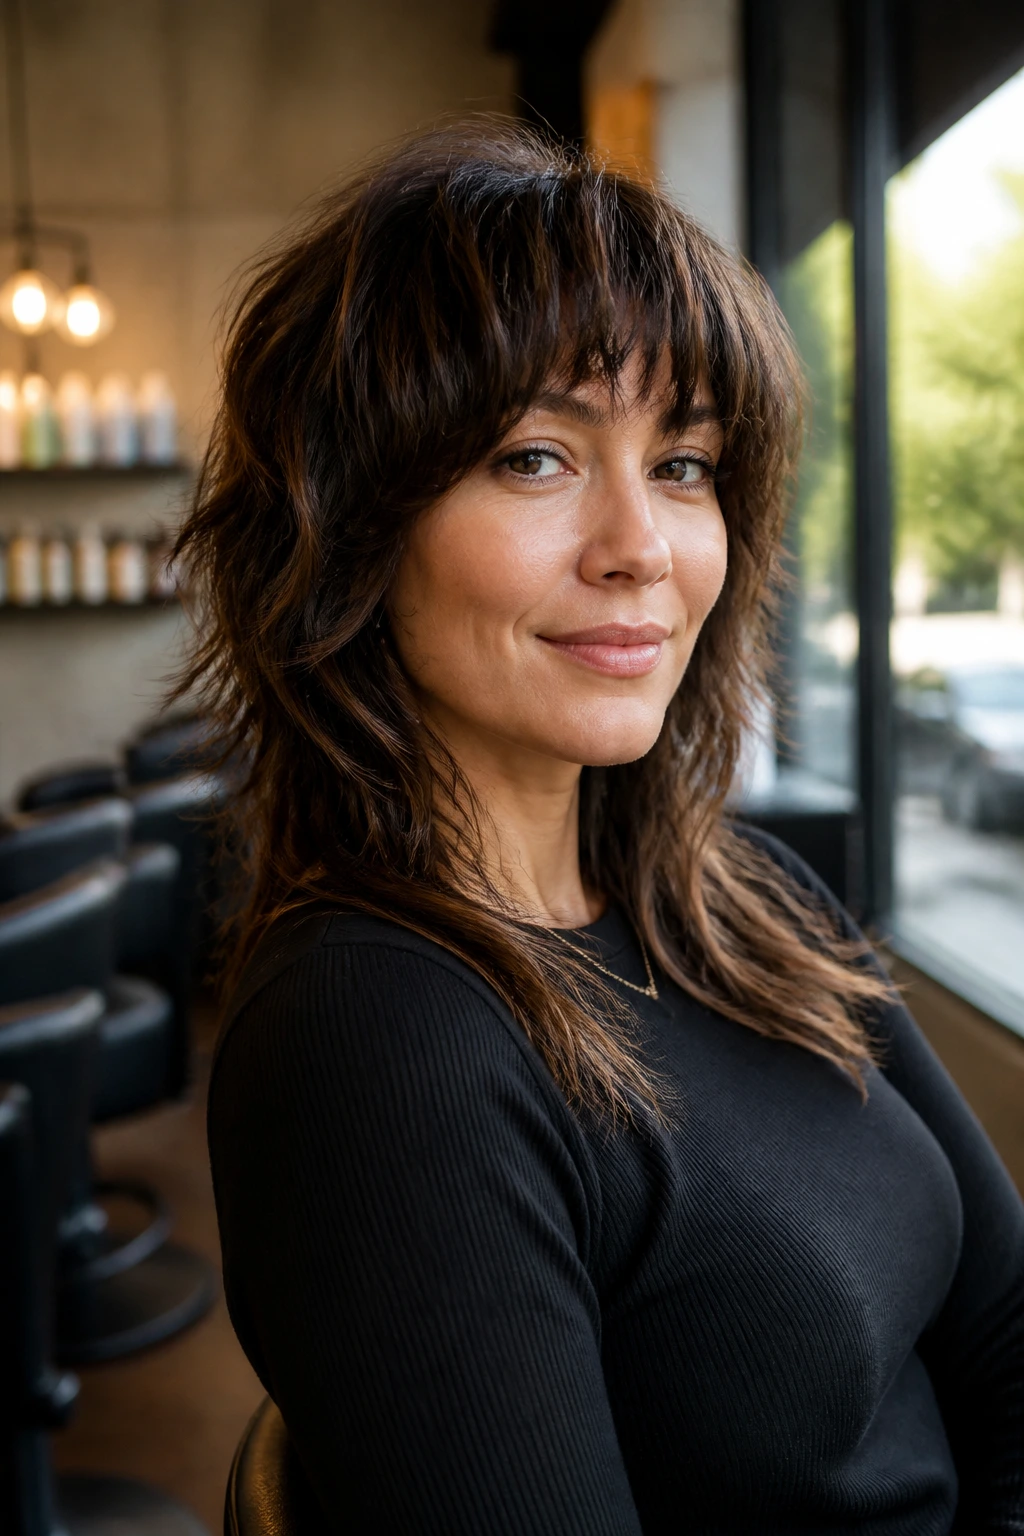
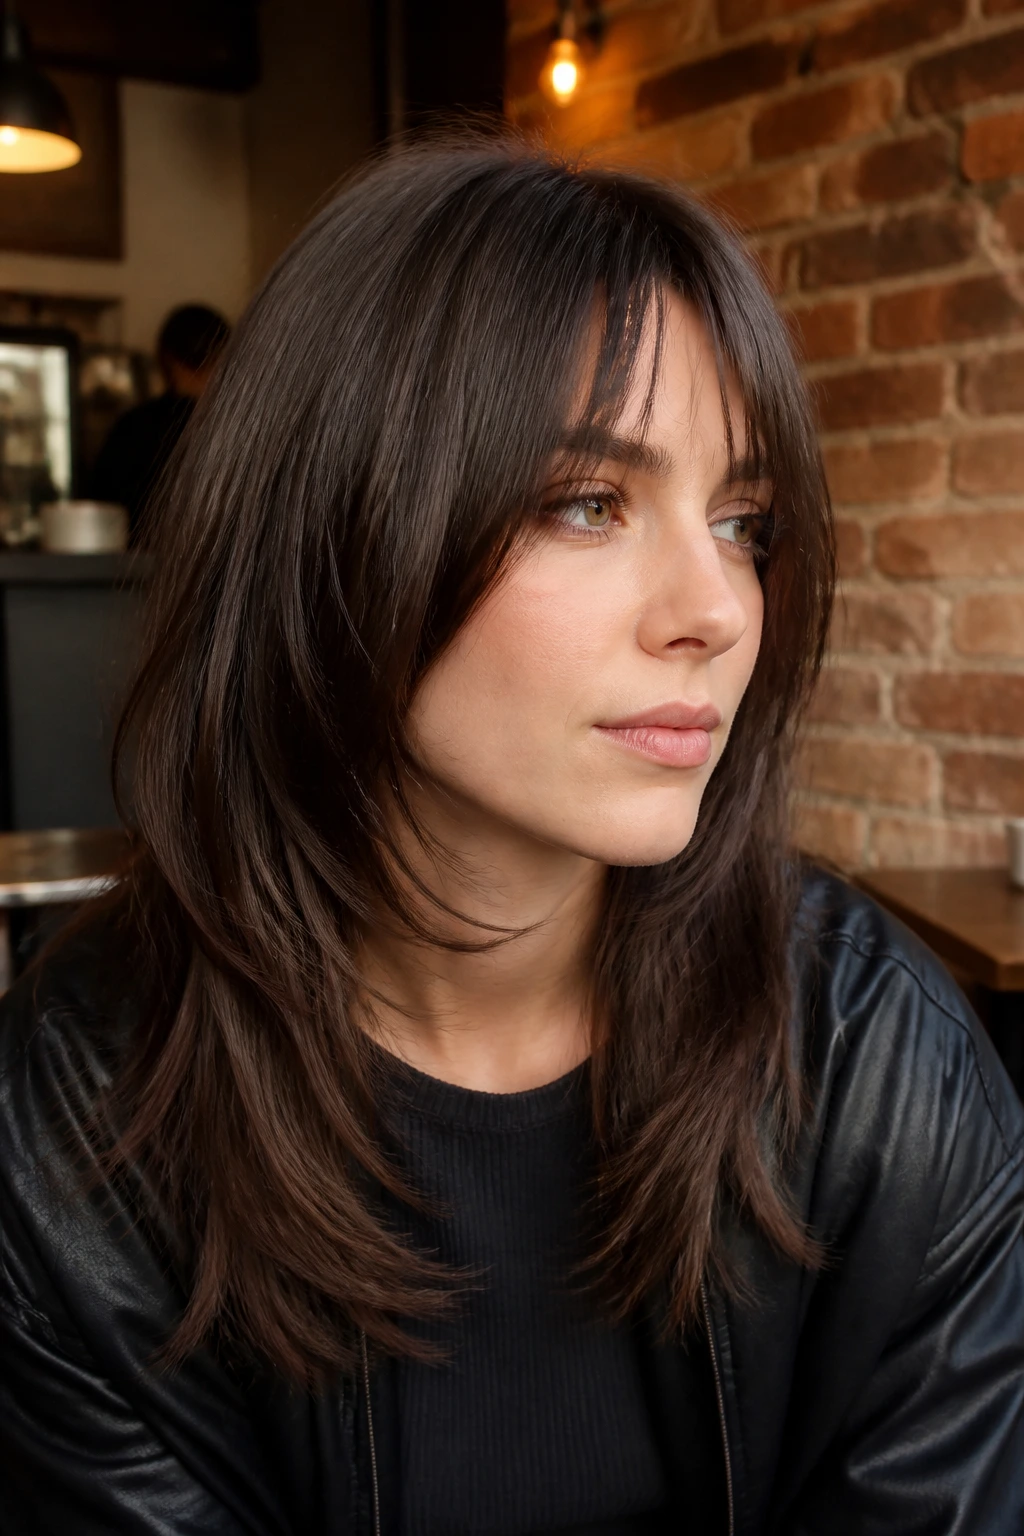
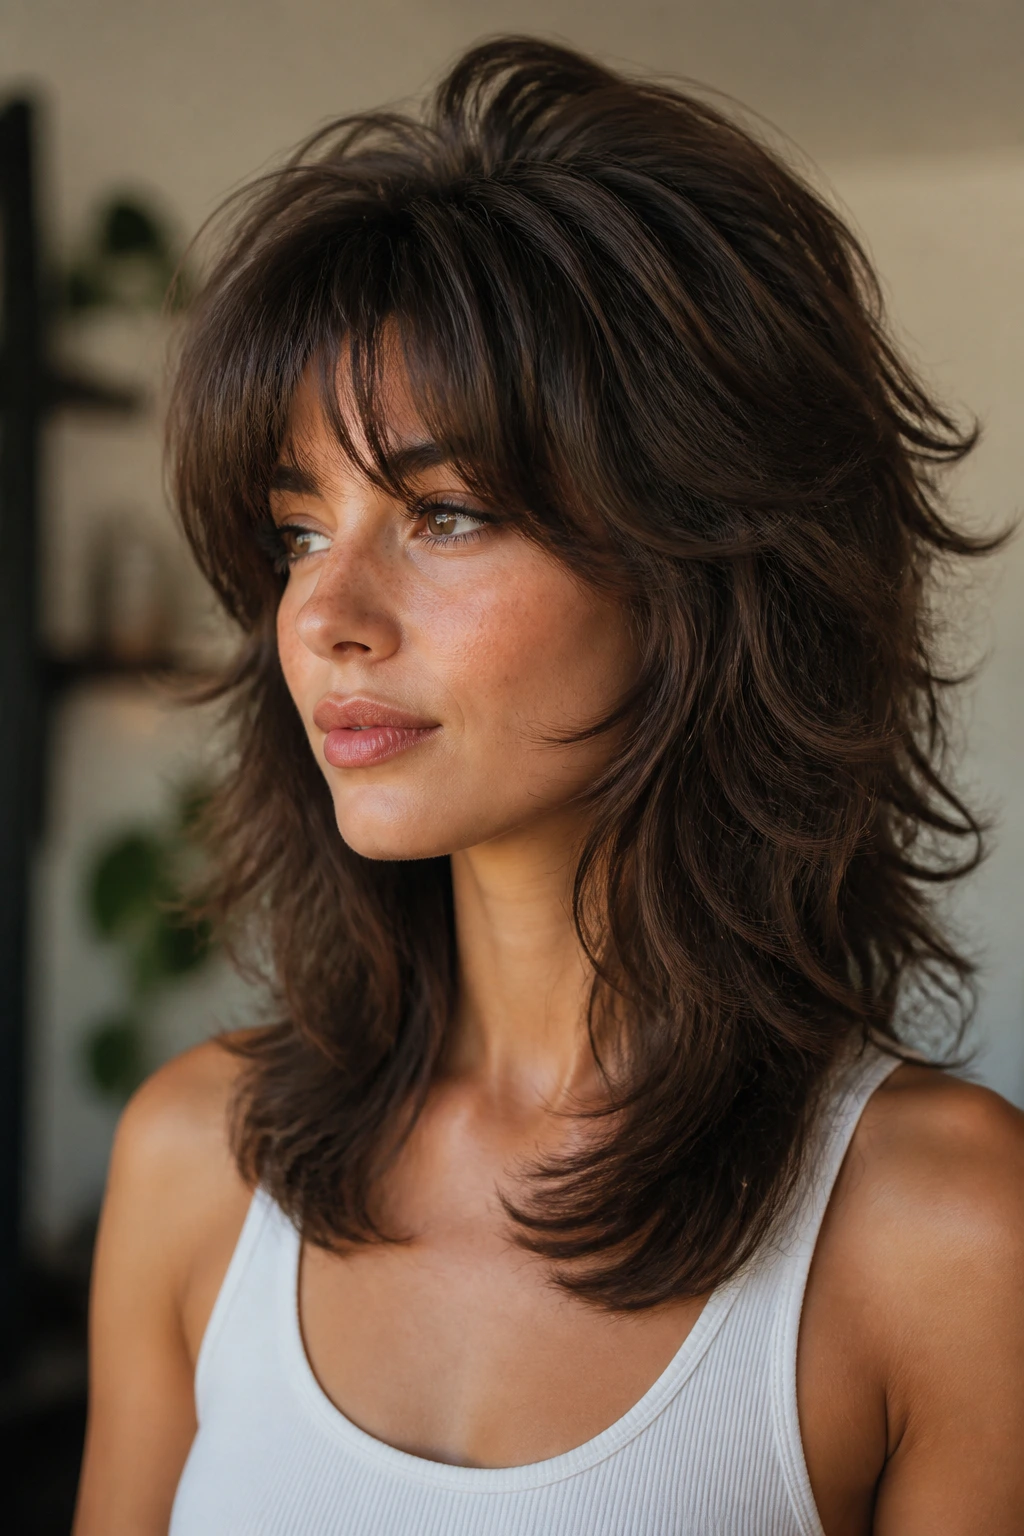
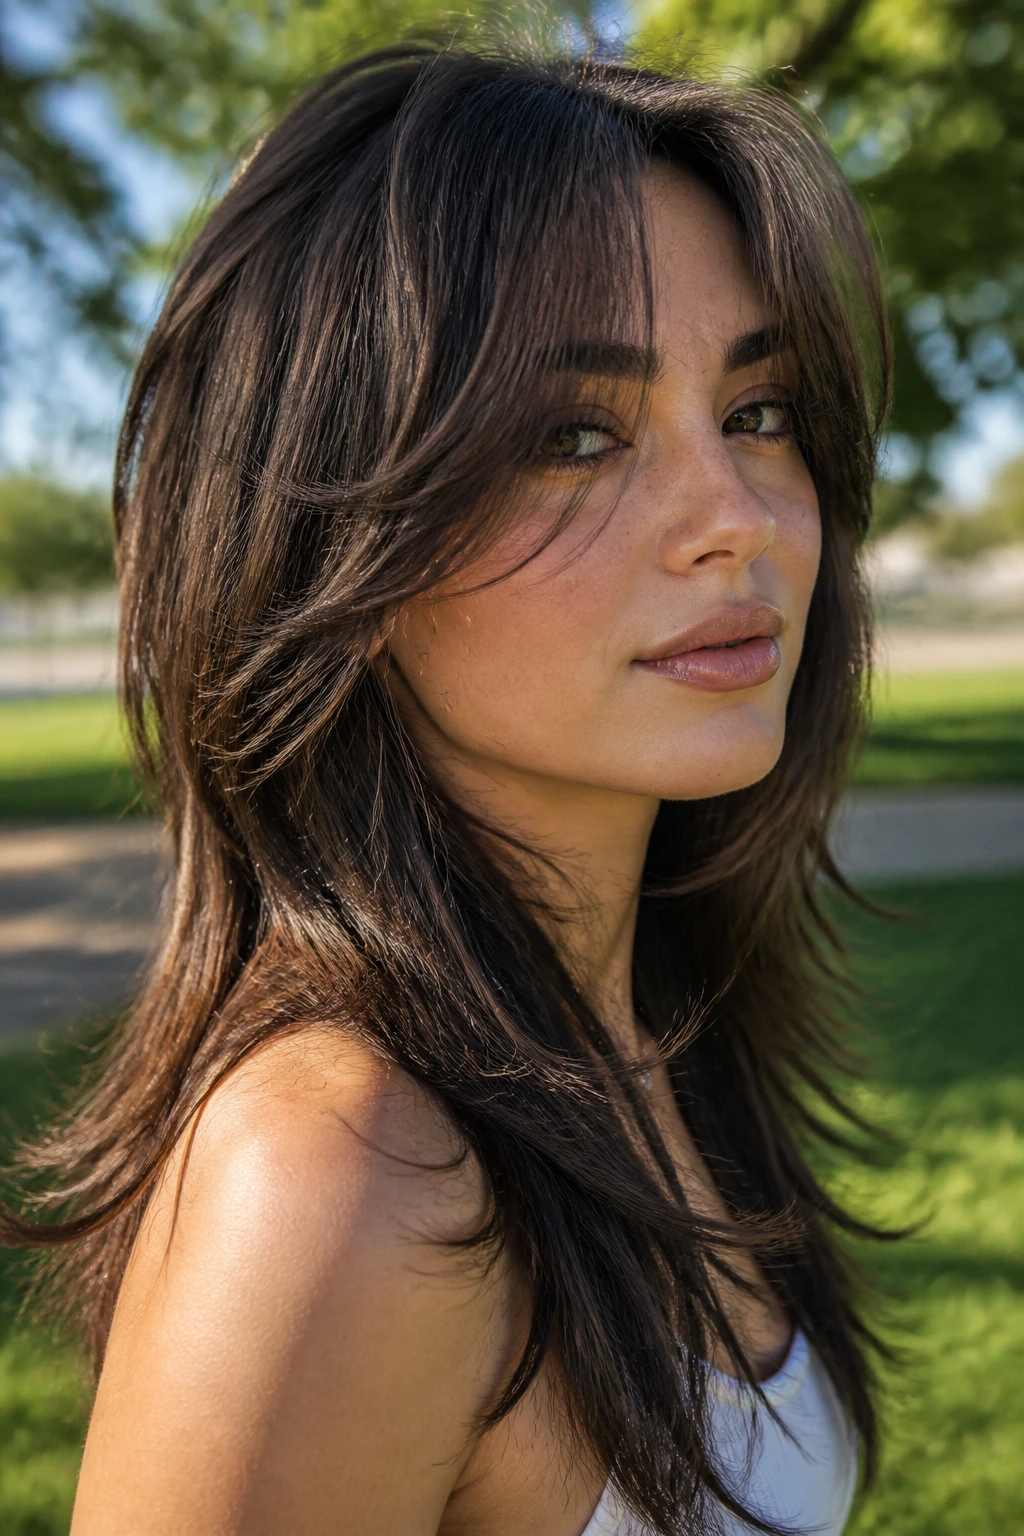
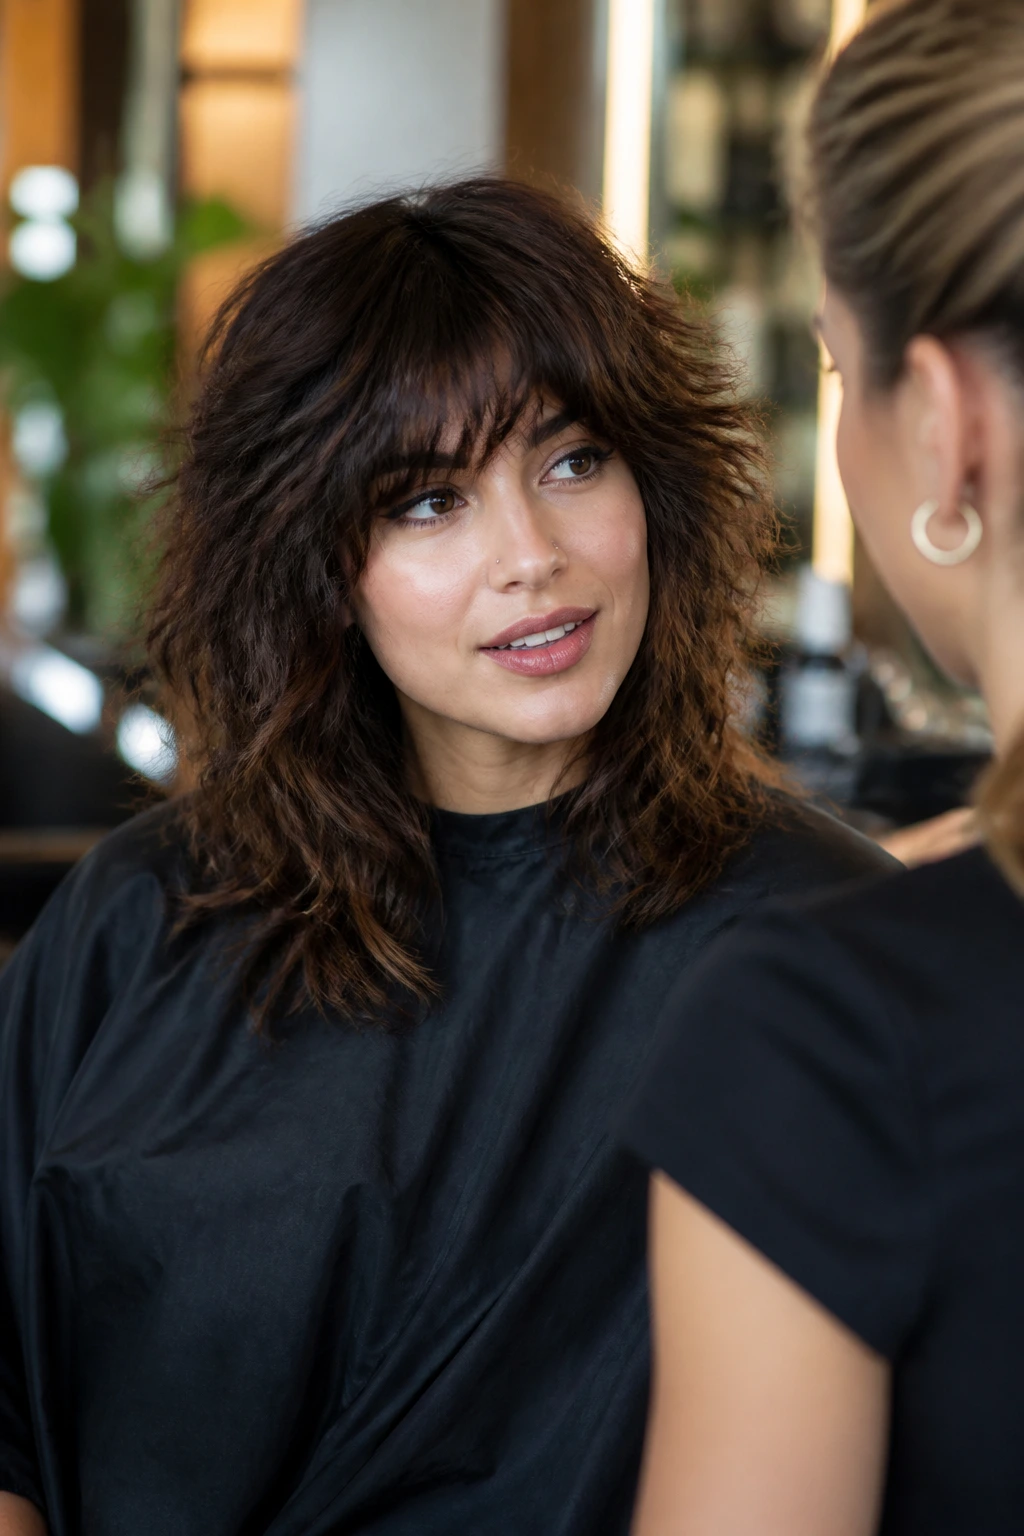
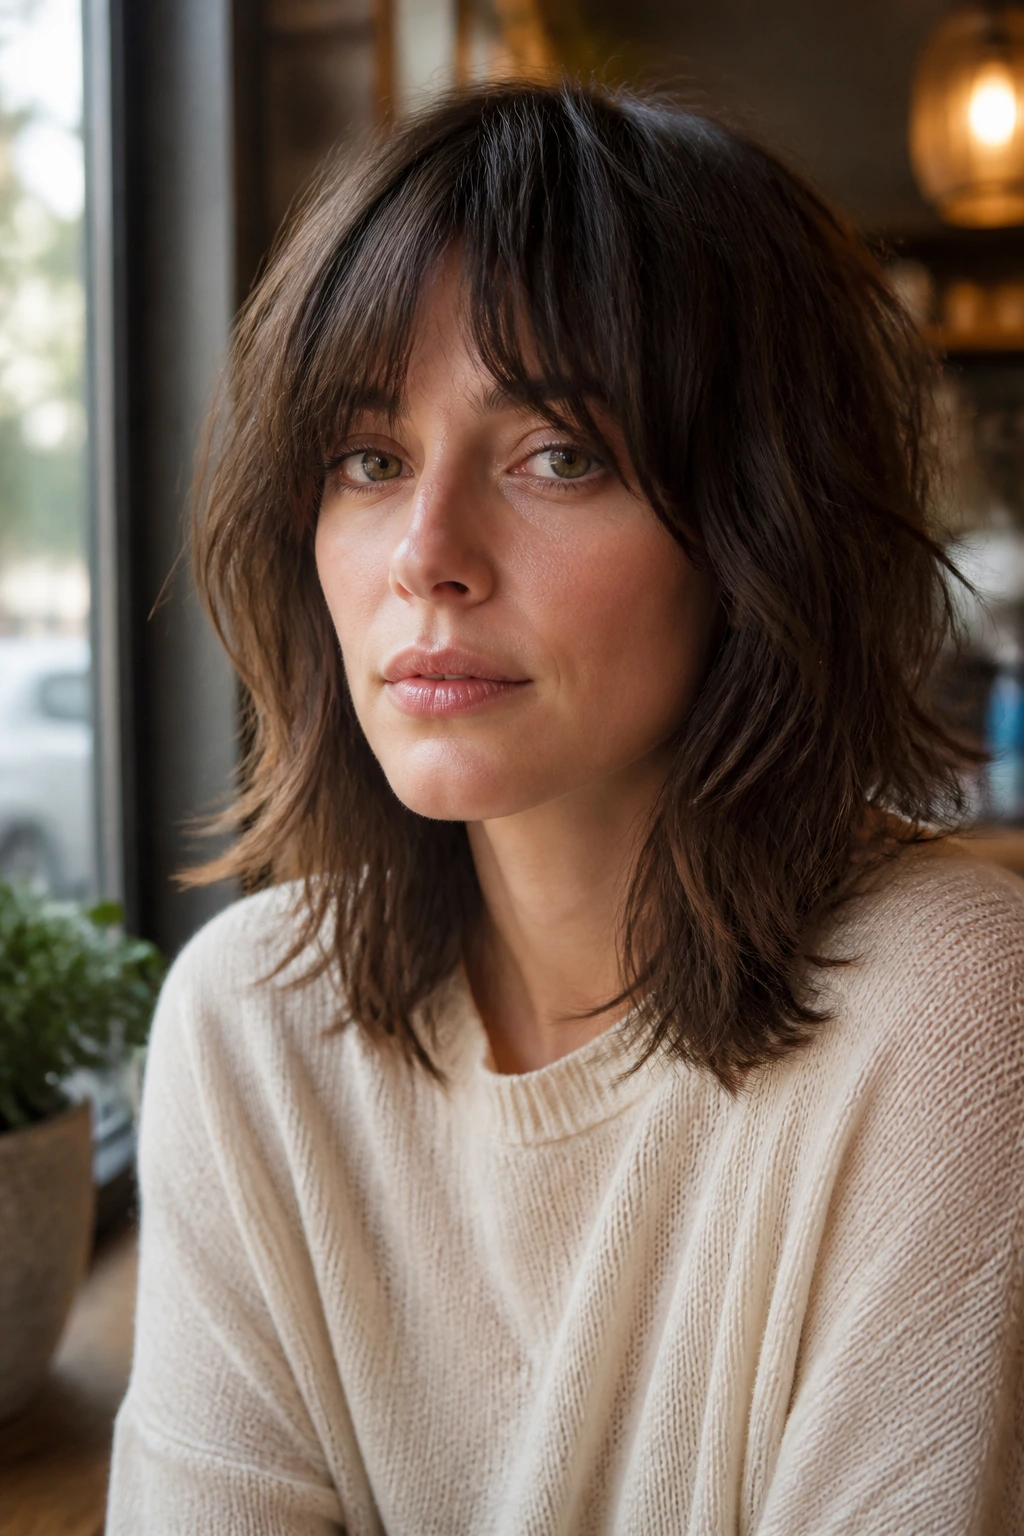
2. The Long Curtain-Bang Shag
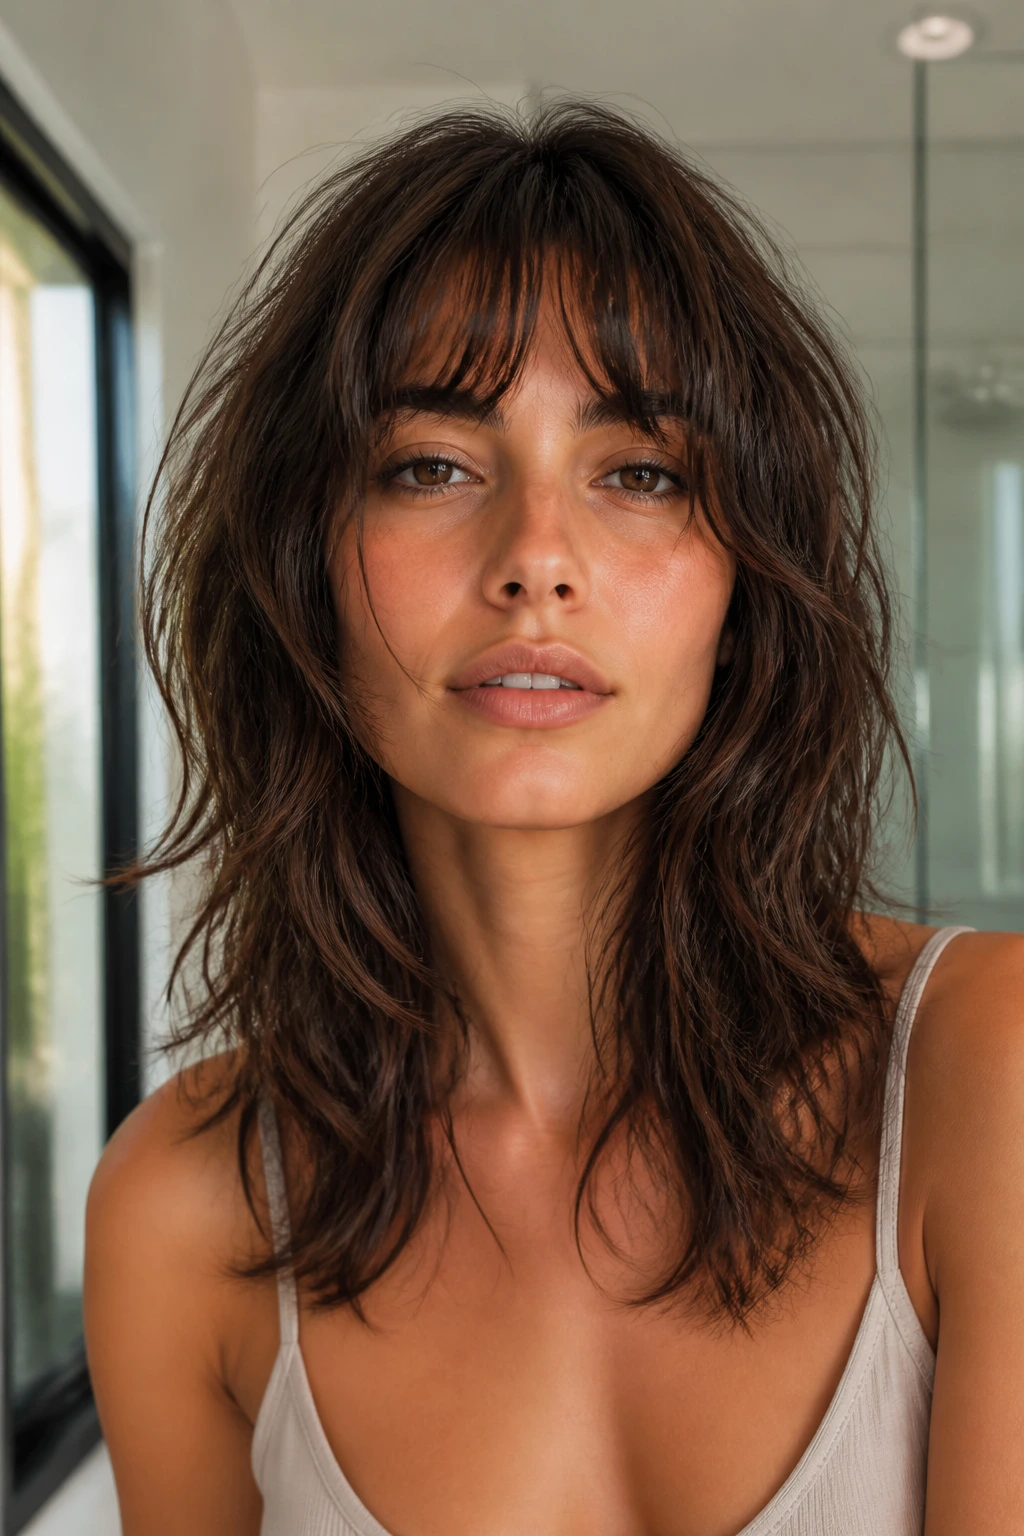
This is the shag I recommend when you want movement but refuse to give up length. Curtain bangs split the forehead cleanly, and the longest layers can fall to the collarbone or even lower, which gives thick hair a lighter read without making it look chopped to bits.
The front is what sells this cut. If the curtain pieces are cut to skim the cheekbone, they soften a square jaw and keep dense hair from dragging the whole face downward. I like this version on hair that lives below the shoulders because it gives shape where people actually notice it first — around the face, not buried in the back.
It also behaves well with a round brush or a large blowout brush. Blow the fringe away from the face for 10 to 15 seconds, then let it cool in place. That little pause matters more than people think.
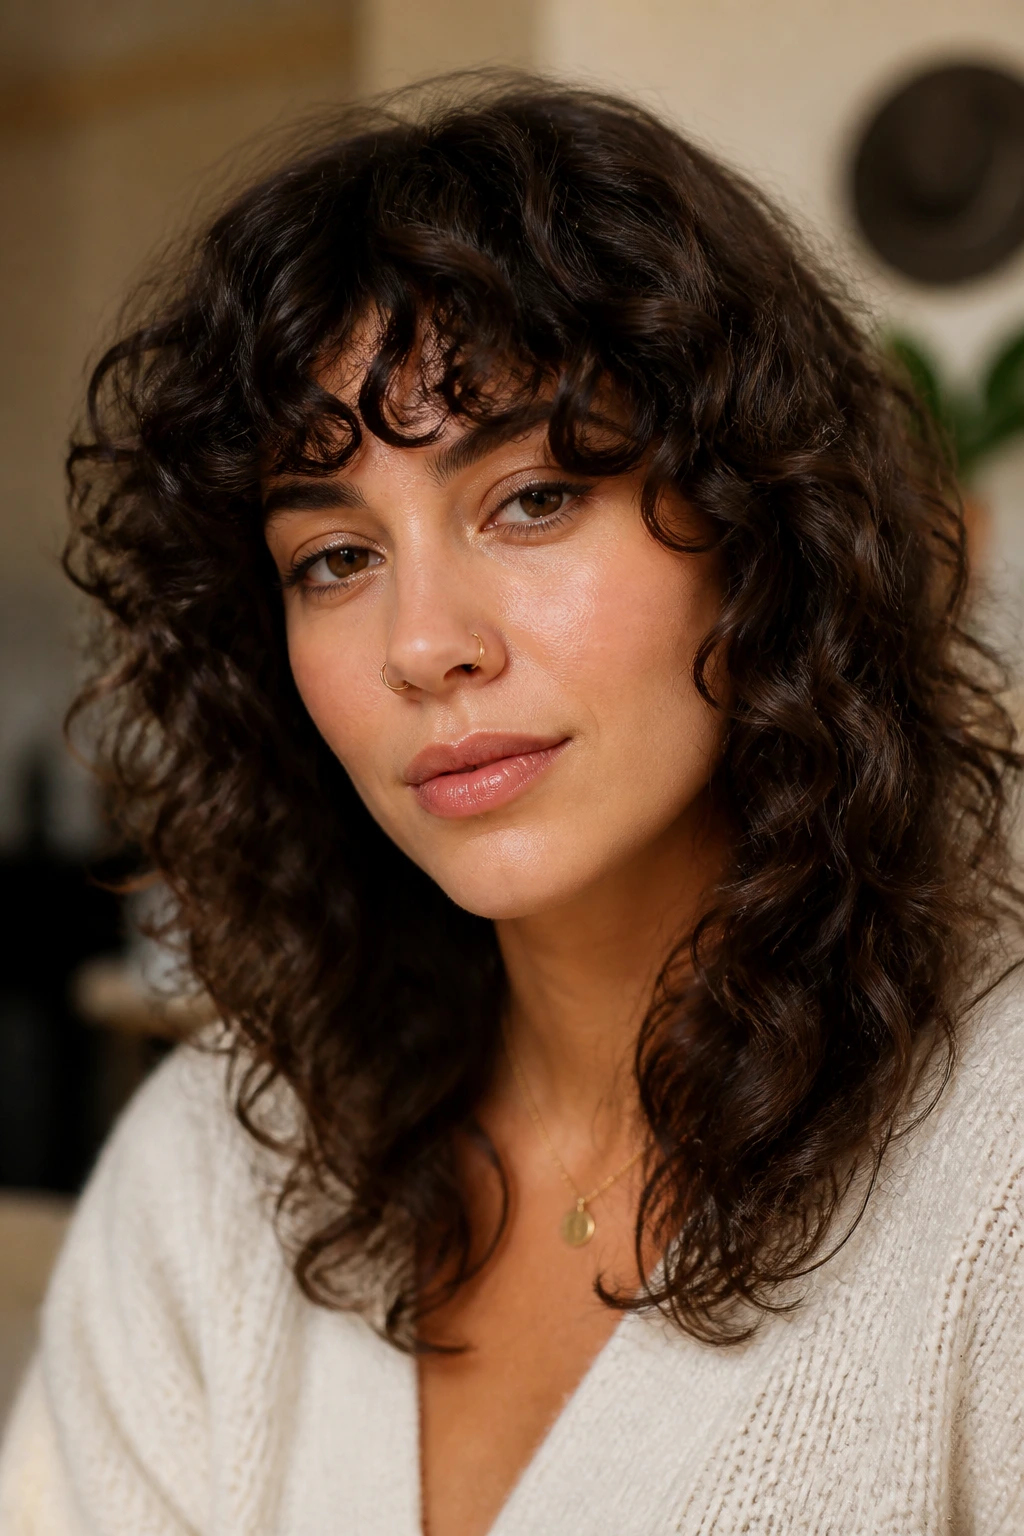
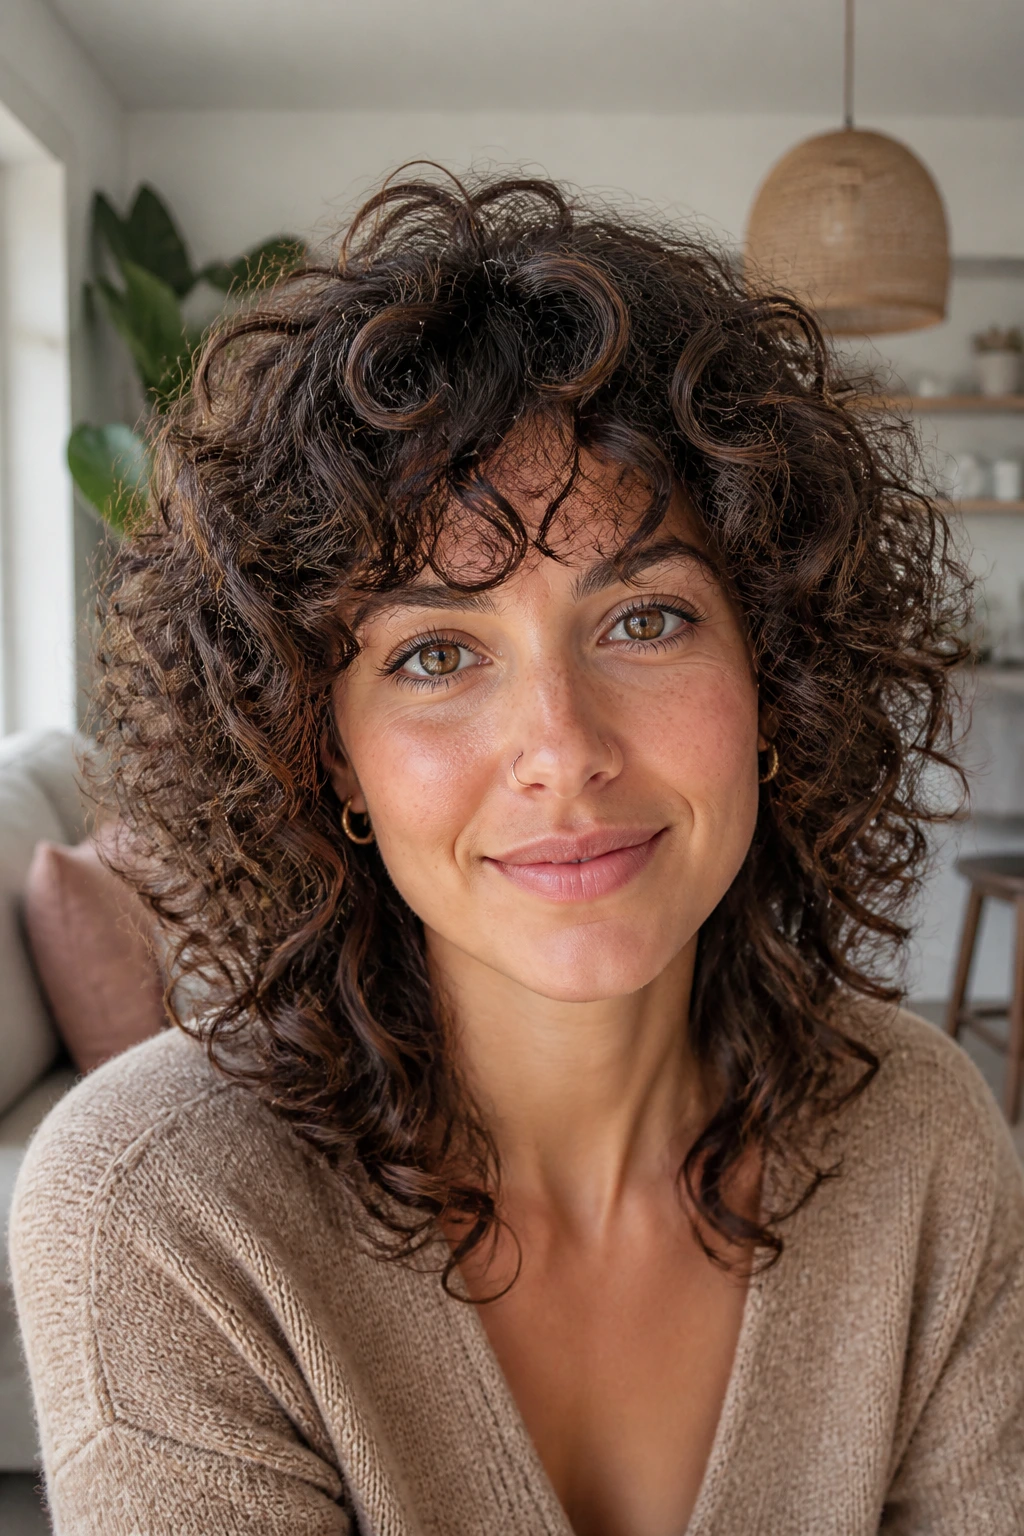
3. The Curly Halo Shag
Why does this version look softer than most layered cuts? Because curls need room to spring, and a halo-shaped shag gives them that room without hacking away at the crown. If the hair is cut dry, the stylist can see exactly where the curls land, which matters a lot when thick texture shrinks up an inch or two.
How to Wear It
Diffuse on low heat until the roots are set but the ends still feel a little damp. Then stop touching it. Seriously. Thick curls frizz when they get combed and recombed, and this cut already has enough movement built in.
A curl cream with a pea-sized amount of gel usually beats anything heavy or buttery here. The goal is separation, not slickness. You want the layers to stack like little waves, not fuse into one dense puff.
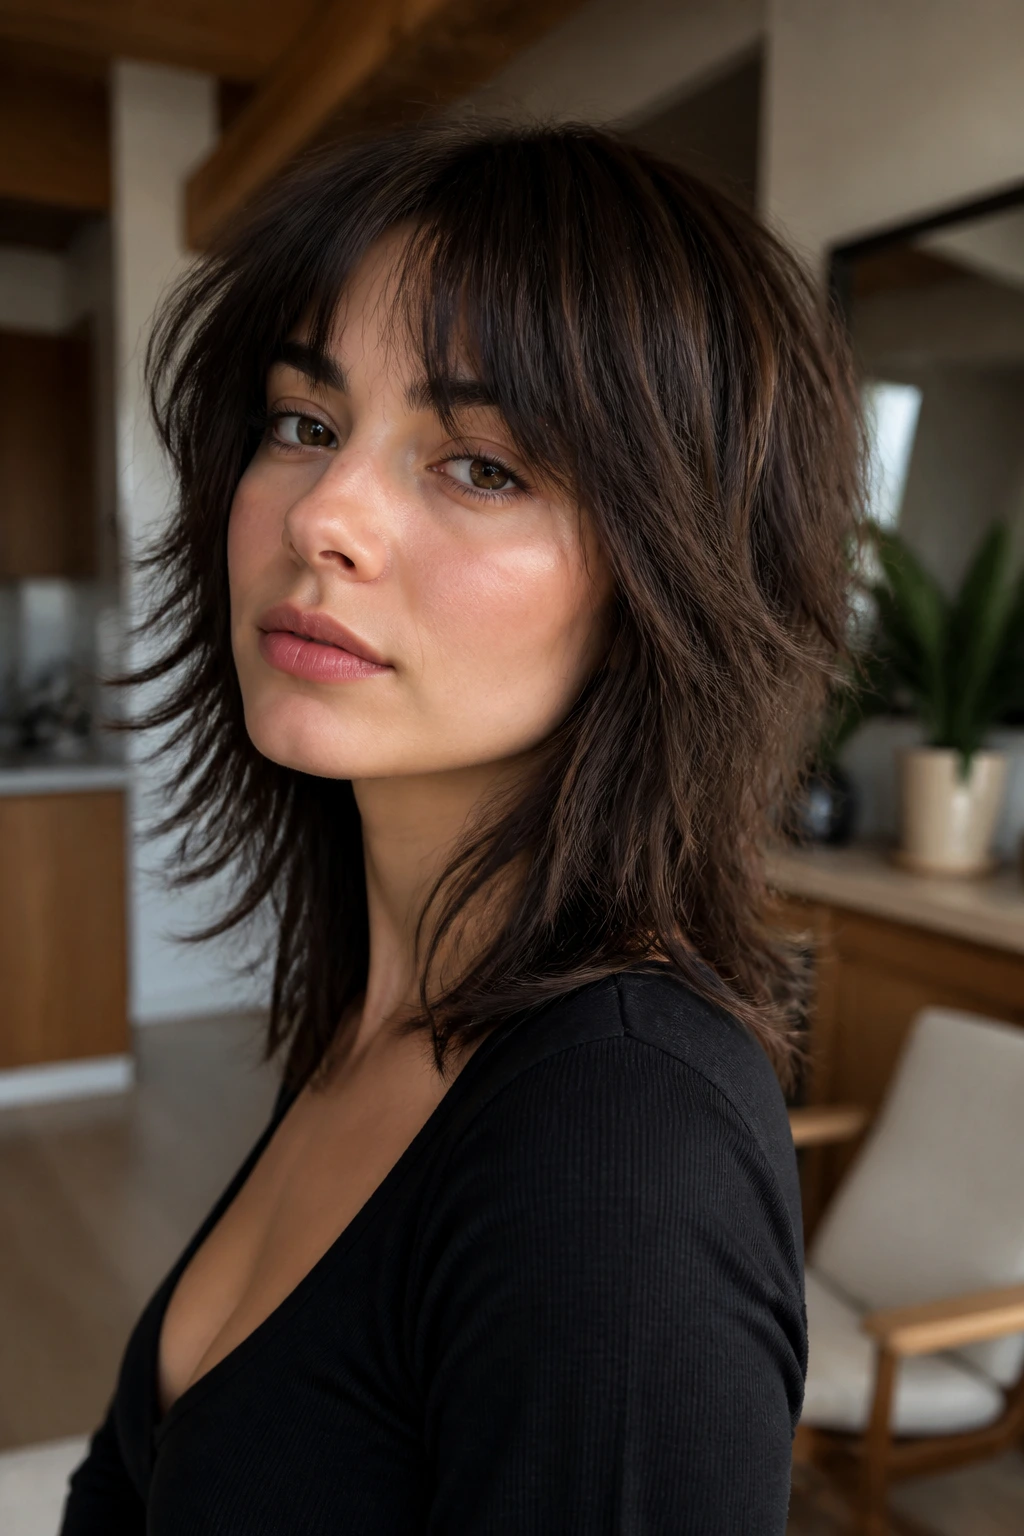
4. The Razor-Cut Mid-Length Shag
If your hair feels heavy even when it’s freshly washed, this is the version that starts to breathe. A razor-cut shag takes bulk out with sliced edges, so the ends look piecey instead of blunt. It works especially well when the length sits somewhere between the jaw and the shoulders.
A razor can be a mess in the wrong hands, so the note here is practical: the cut should look feathered, not shredded. Thick straight hair can take this treatment better than most textures because it has enough body to hold the shape. The finish should move when you shake your head, not fray when you look at it close.
I’d ask for a little more length through the back than you think you need. The razor removes a lot of visual weight, and thick hair can lose its nice heavy swing if the perimeter gets too thin.
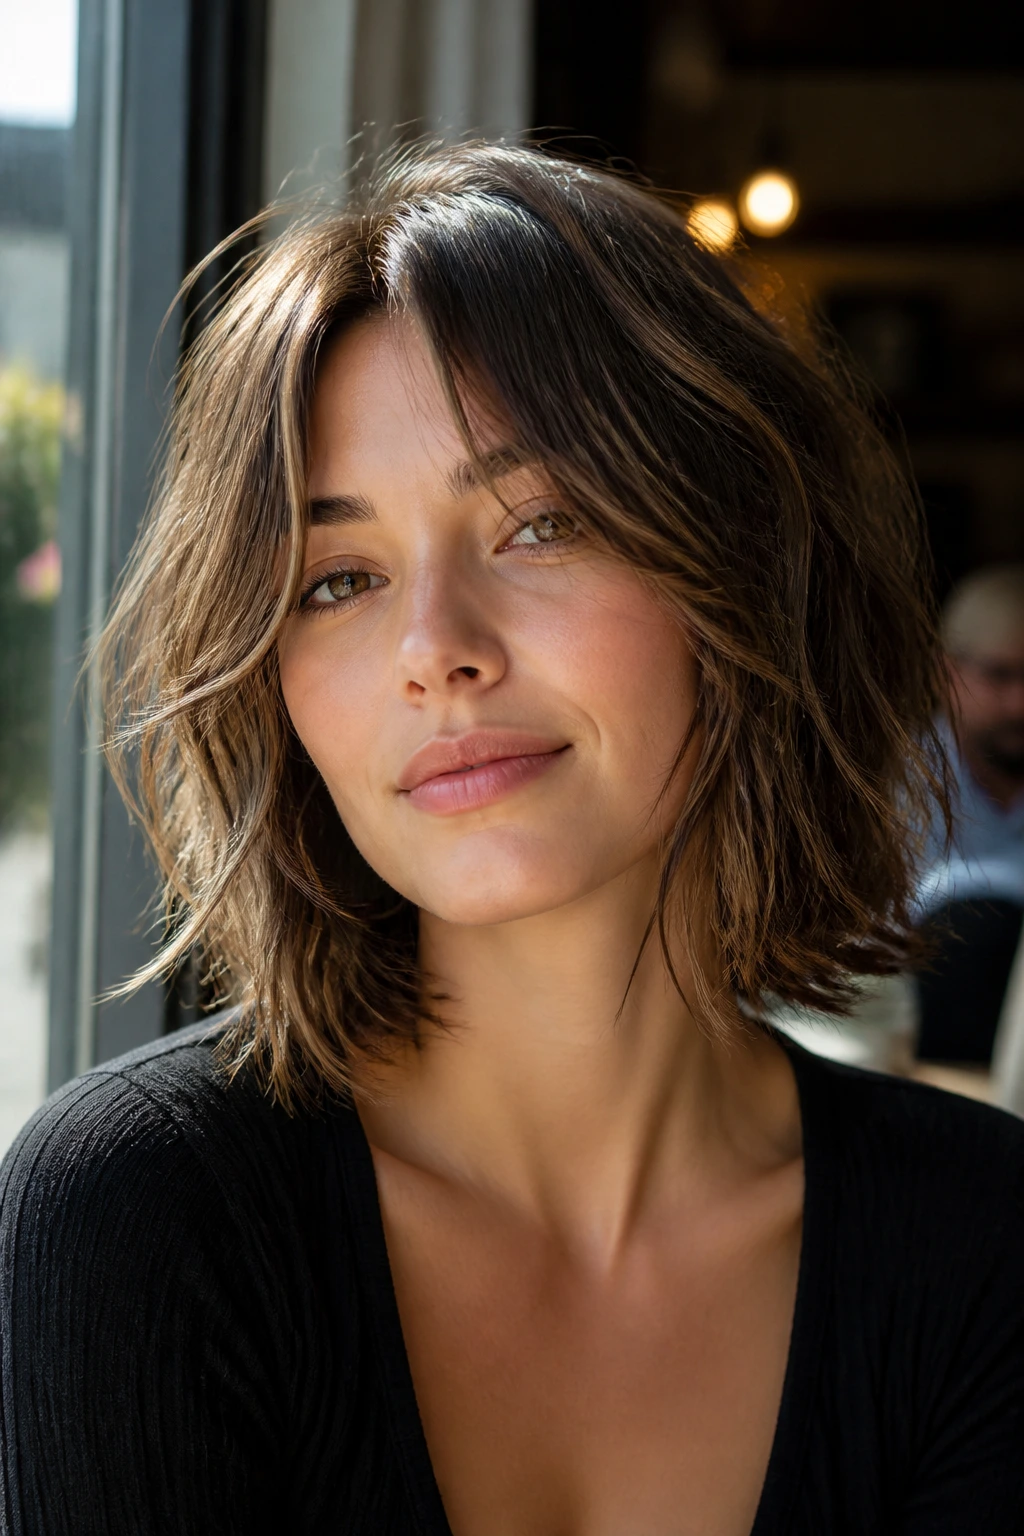
5. The Jaw-Length Shag Bob
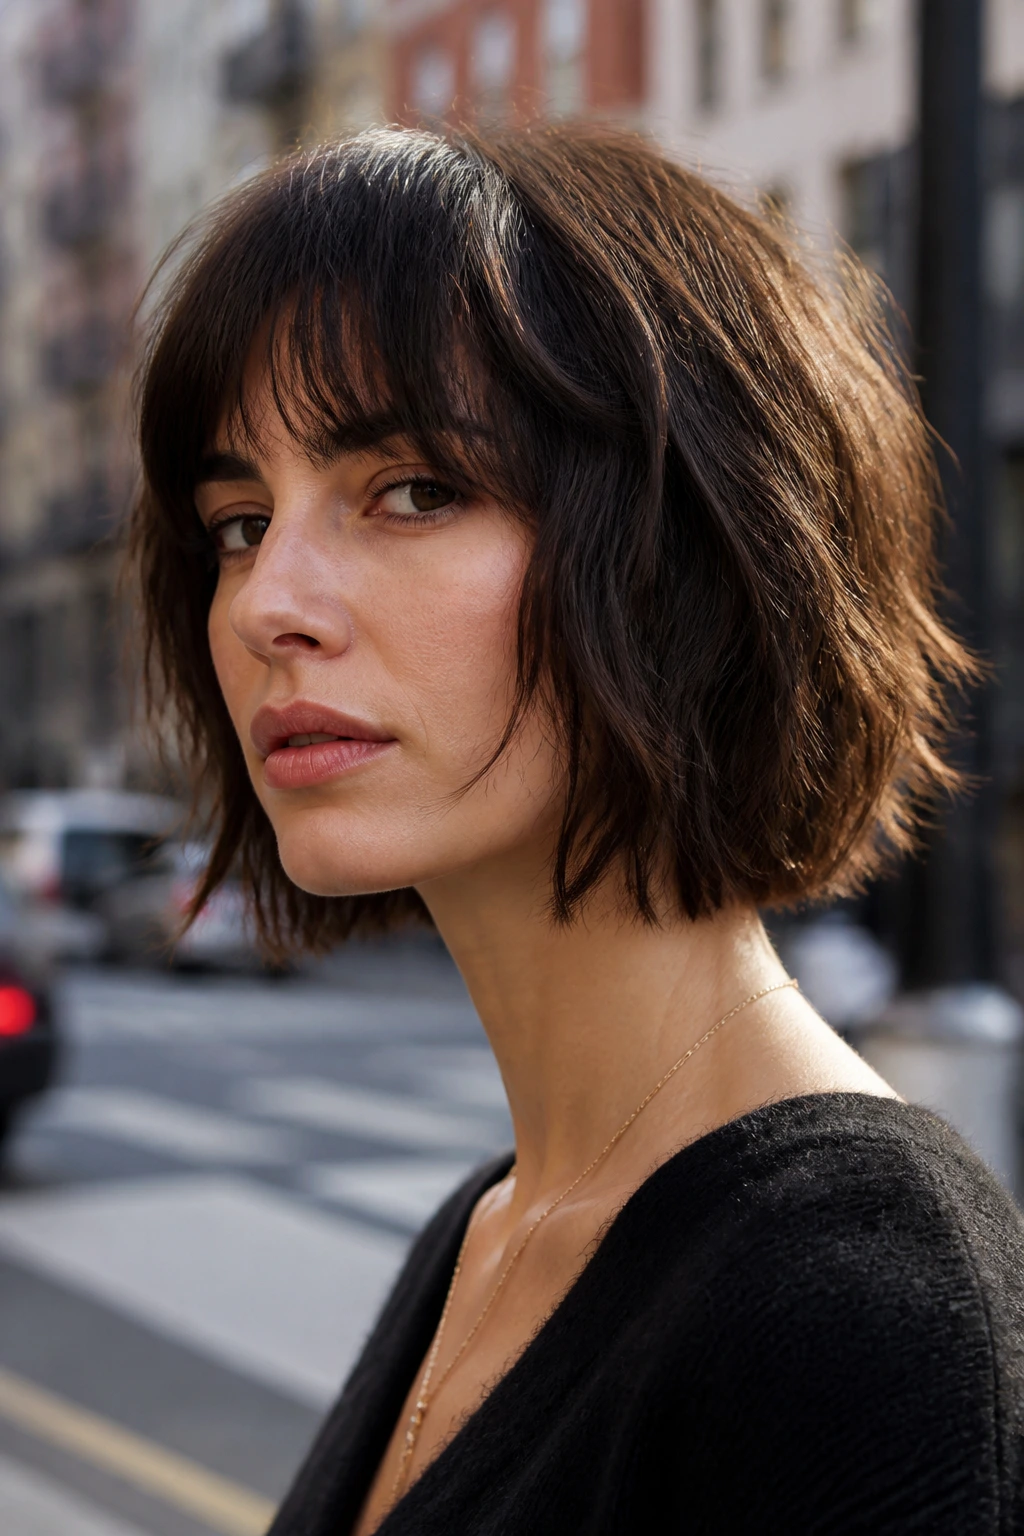
This one is for people who want short hair without losing the shag’s edge. The bob shape gives you a neat line around the jaw, then the layers break that line just enough to keep it from feeling stiff. Thick hair loves the structure, but it needs the layers or the cut turns boxy.
The best version keeps the nape slightly shorter and the front pieces just under the jaw, so the whole cut bends inward instead of kicking out at the sides. That tiny difference matters. A jaw-length shag bob can look sculpted or puffy depending on whether the ends are sliced softly or left too square.
If your hair has a strong wave, this cut can look especially good with a quick bend from a round brush or a flat iron at the ends only. No need to curl the whole head. That often makes short thick hair look overworked.
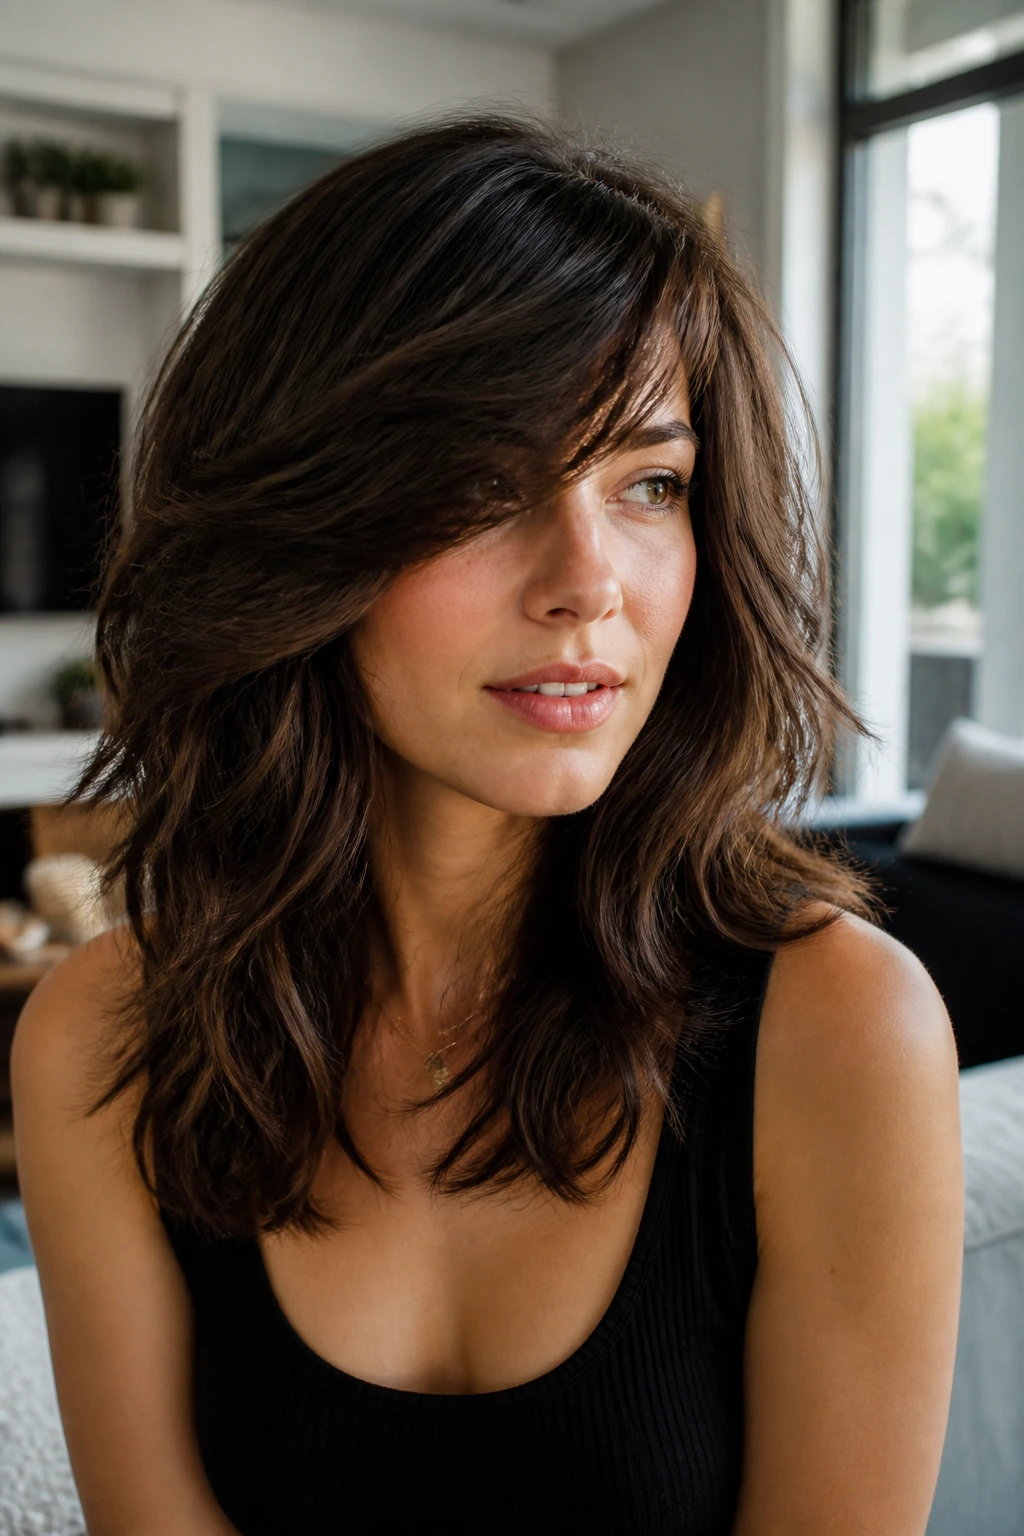
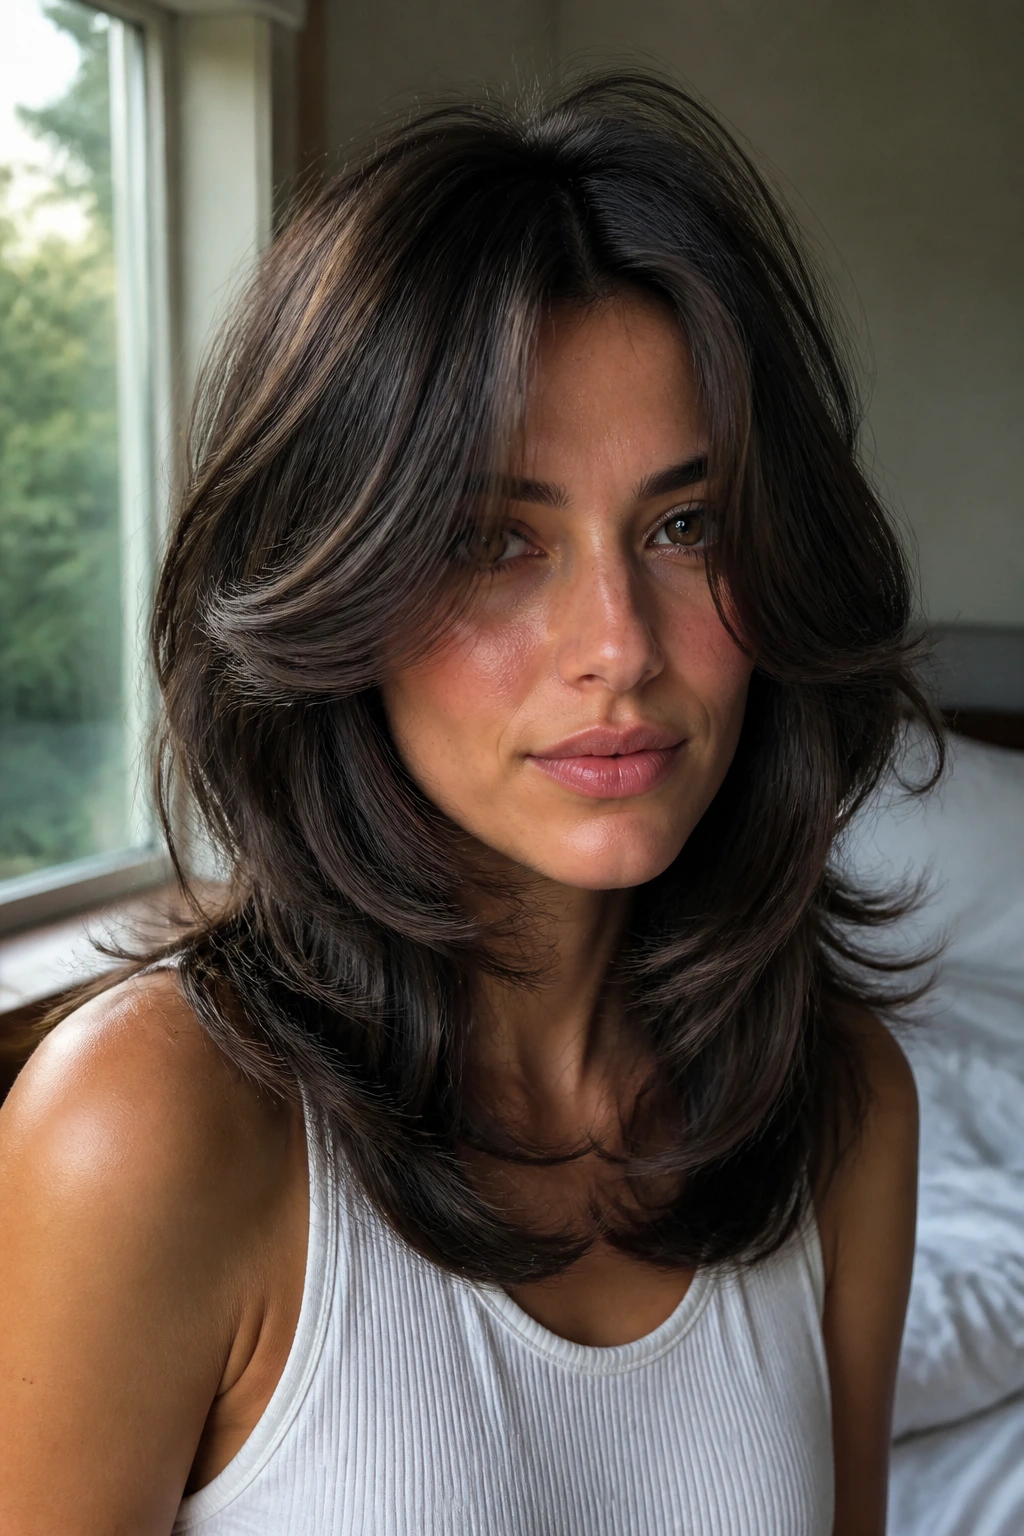
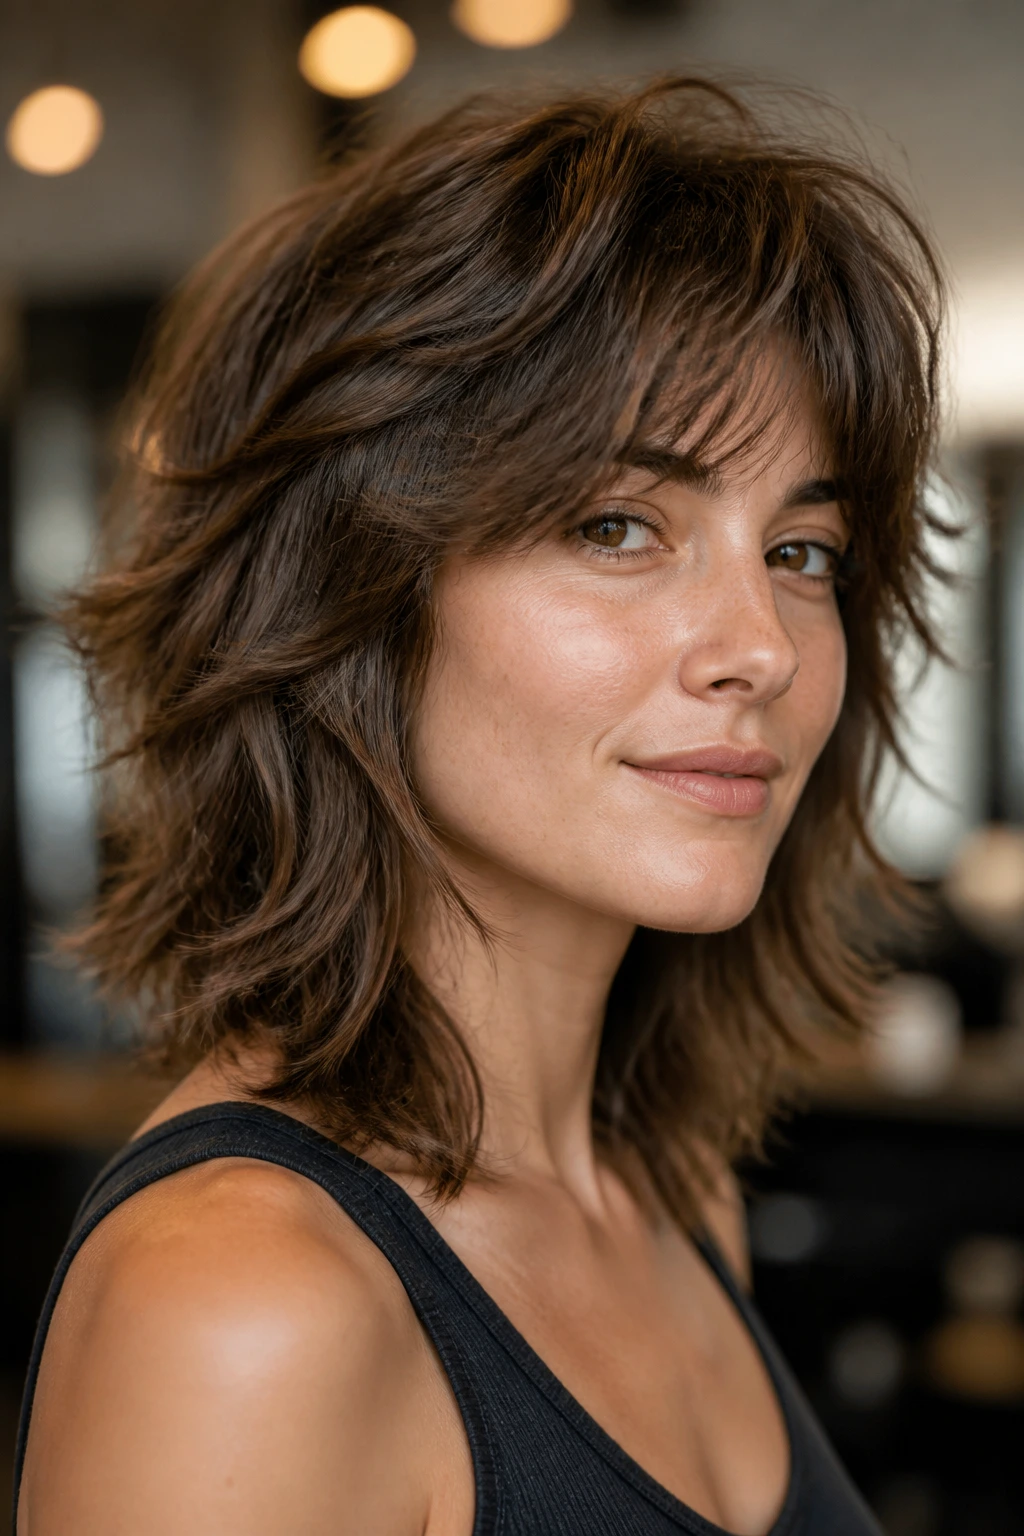
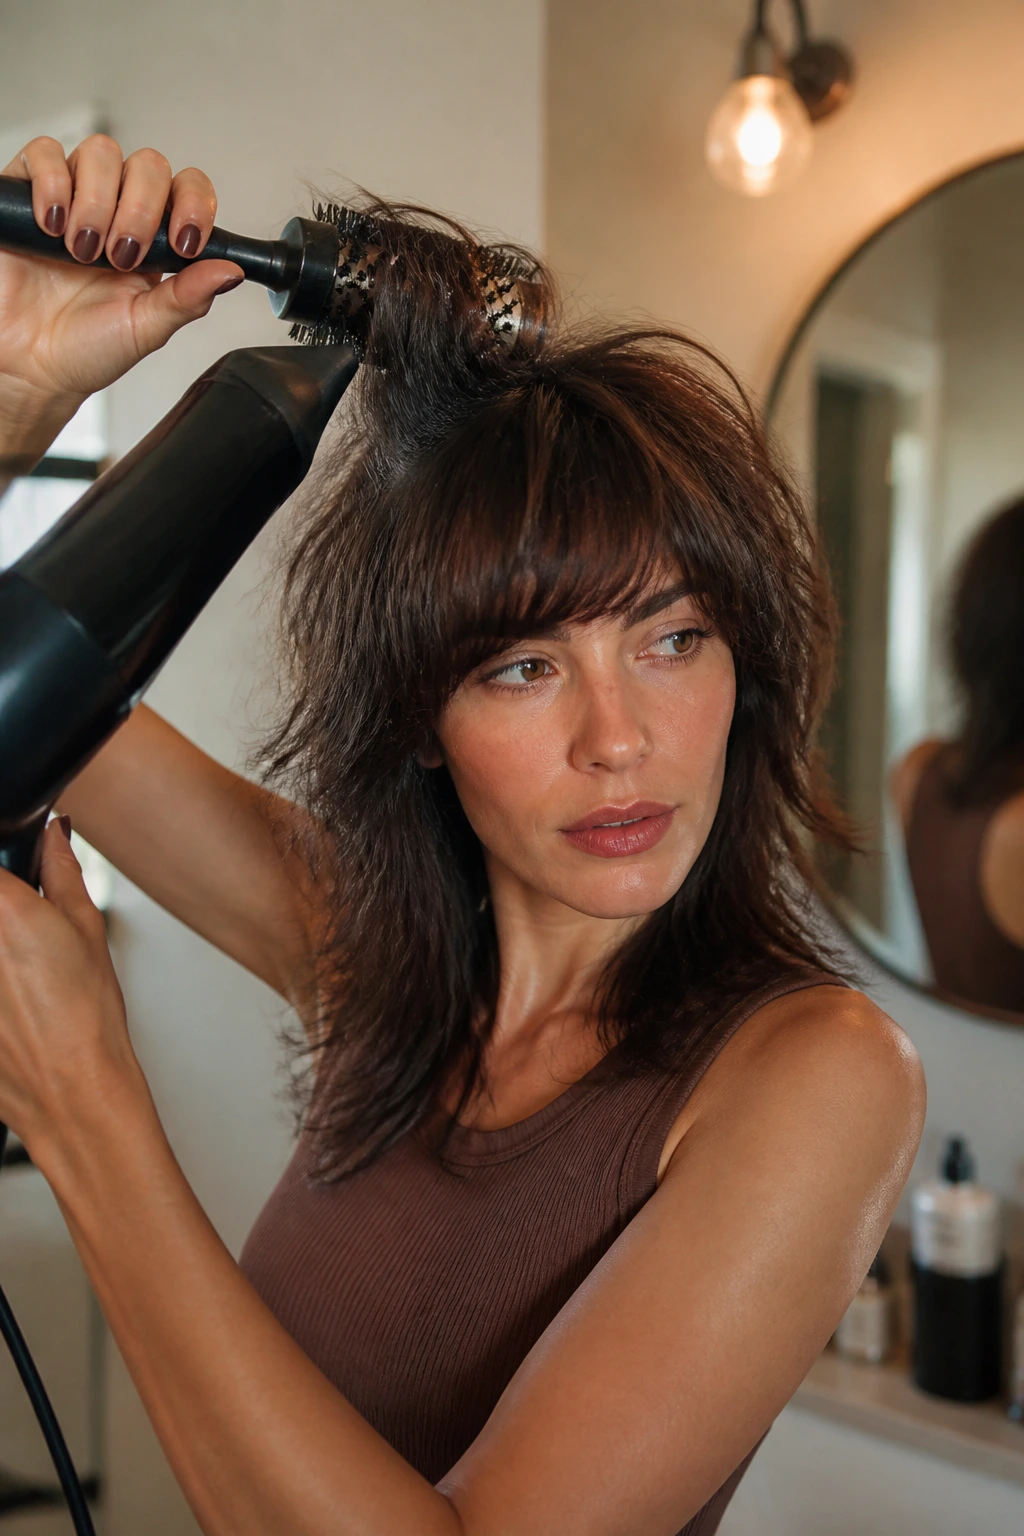
6. The Feathered Retro Shag
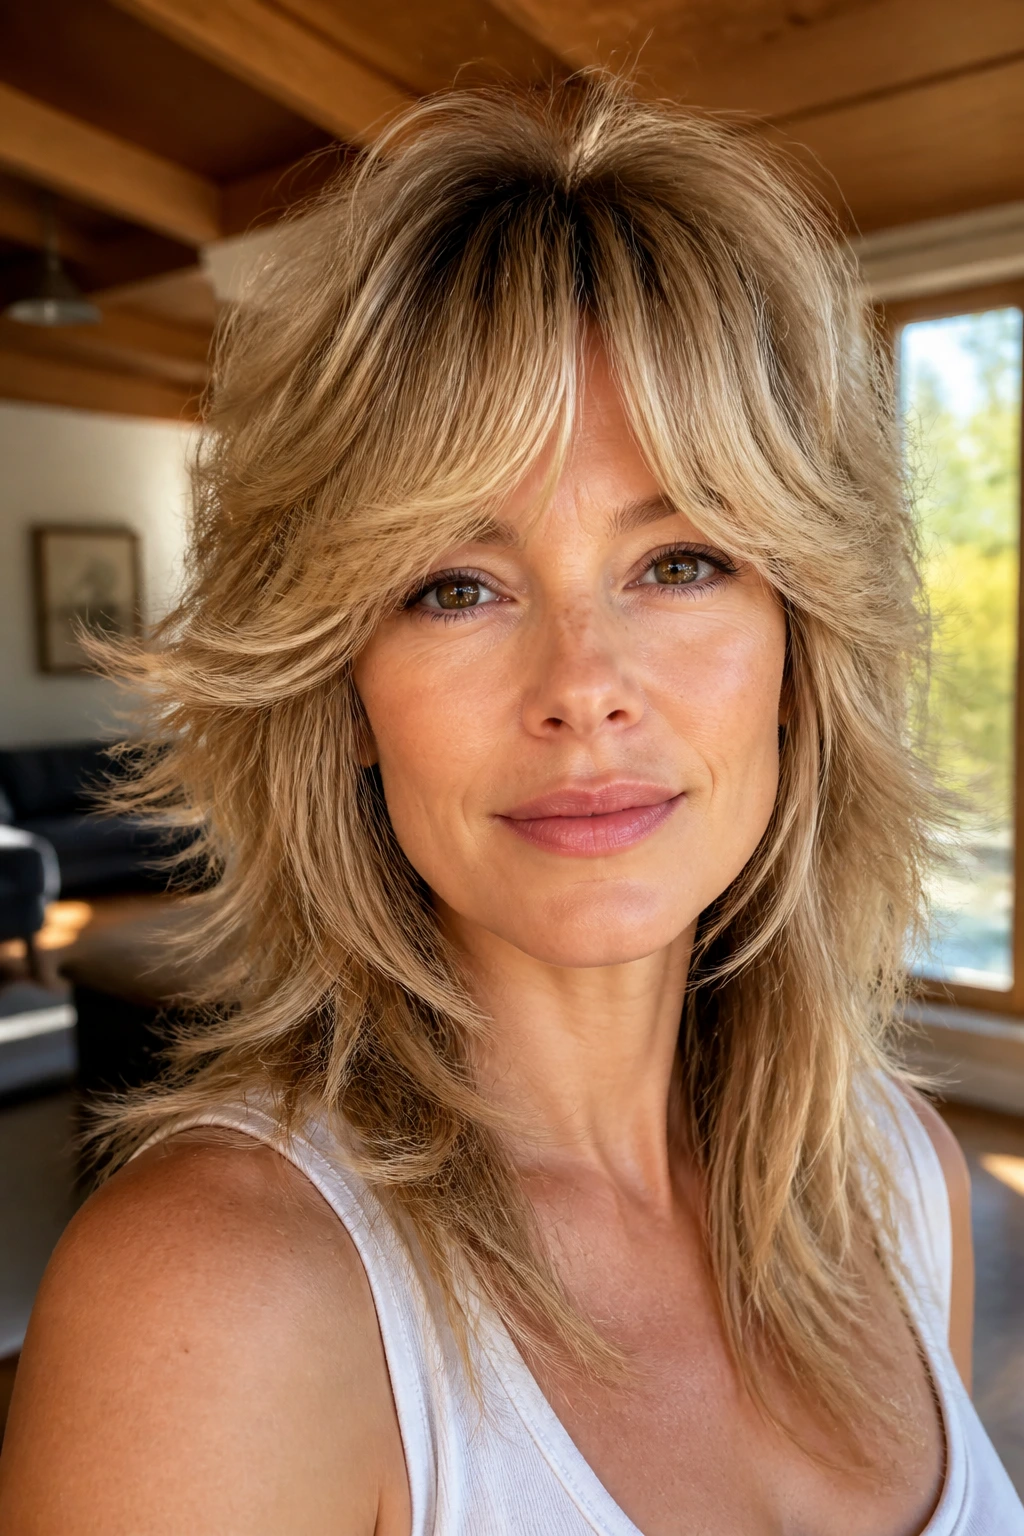
This is the cut that makes thick hair look lighter without making it look thin. Feathering around the face and through the top creates that 70s swing where the layers flick away from the cheeks instead of sitting flat against them. It feels a little glamorous, a little lived-in, and not remotely boring.
The styling piece matters here. A medium round brush and a blow-dryer nozzle can turn the top layers into soft bends, especially if the hair is dried with the crown lifted first. If you let the roots collapse while they’re wet, the whole thing loses that feathered shape and gets heavy fast.
I like this cut on people who enjoy hair with personality. It doesn’t whisper. It moves.
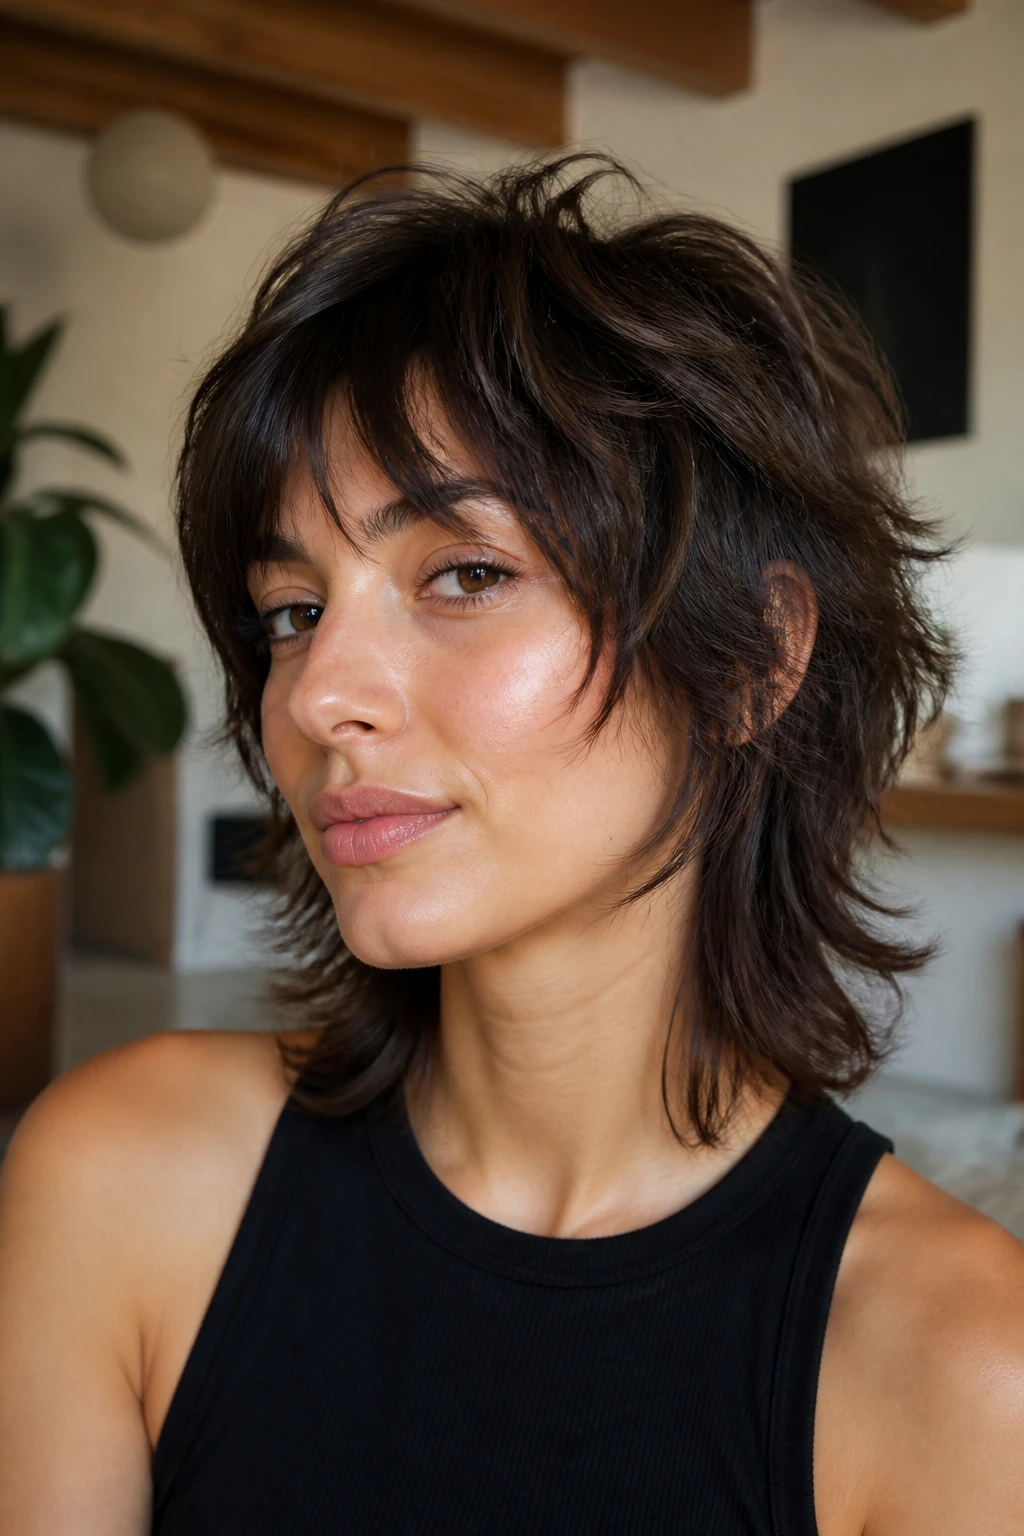
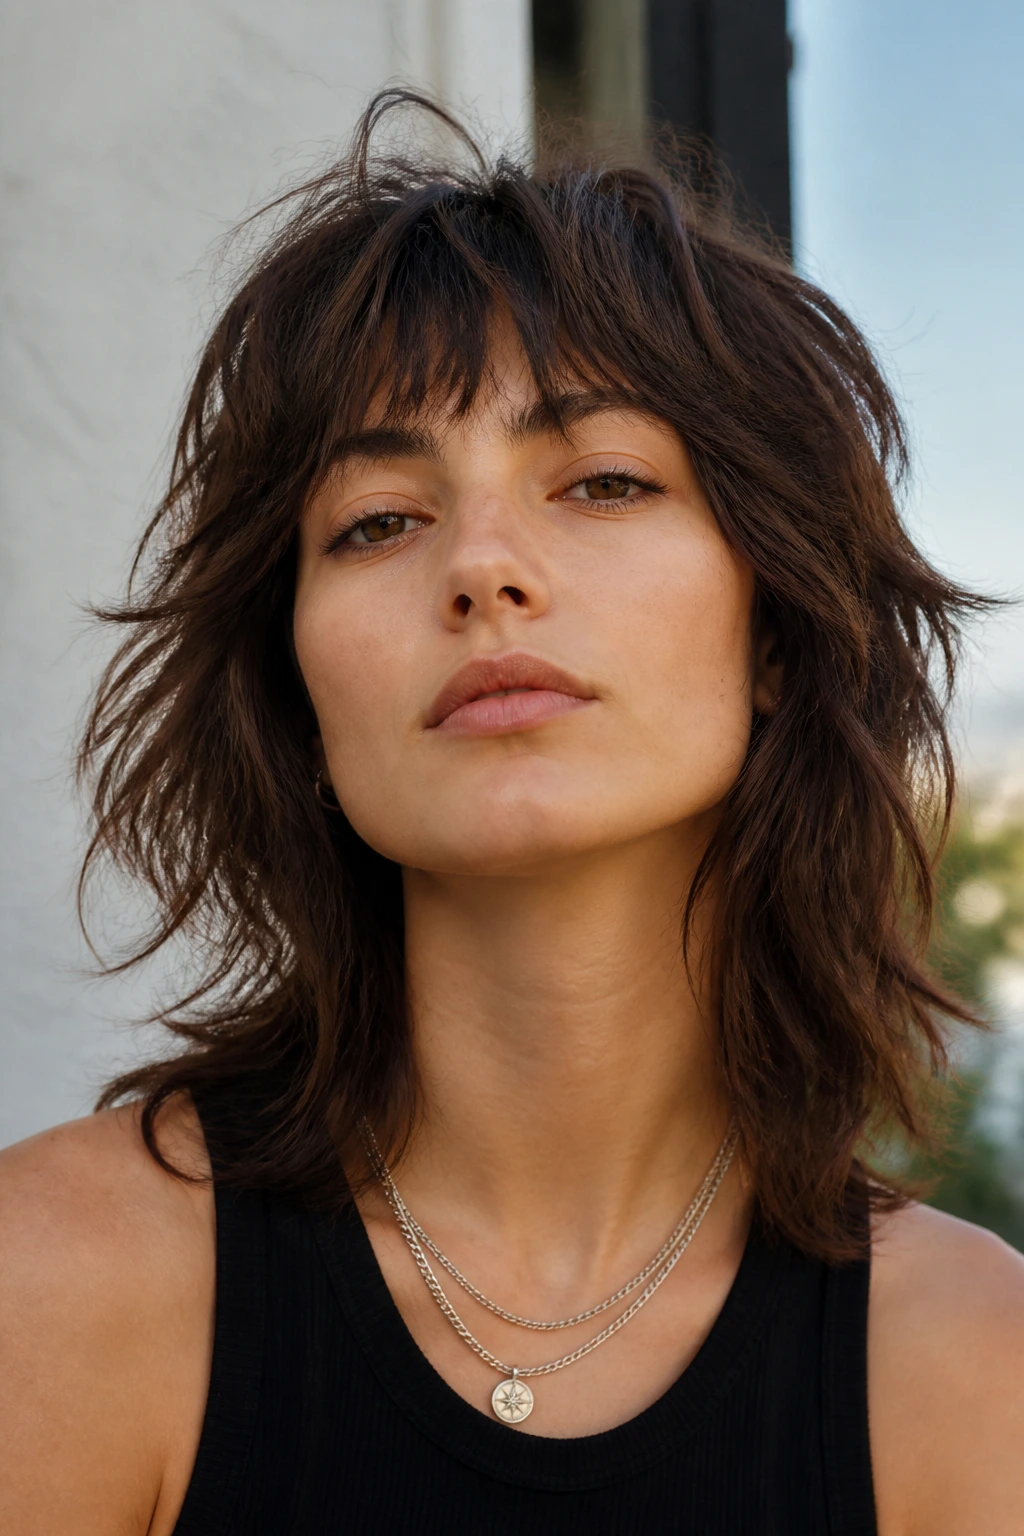
7. The Tapered Wolf Shag
The wolf-shag hybrid goes farther into disconnection, which is why it suits thick hair so well when the goal is drama. The crown is shorter, the sides stay longer, and the nape gets tapered so the back does not pile up like a heavy curtain.
This is the version I’d point to if you want the mullet energy without the full commitment to a sharp mullet line. Thick hair can handle that contrast because there’s enough density to show the difference between short and long sections. The shape lands best when the shortest layers are cut with intent — not just hacked in.
It does need a little styling. A dab of texture cream through the mids and ends is usually enough to keep the separation visible. Skip heavy oils. They collapse the whole point.
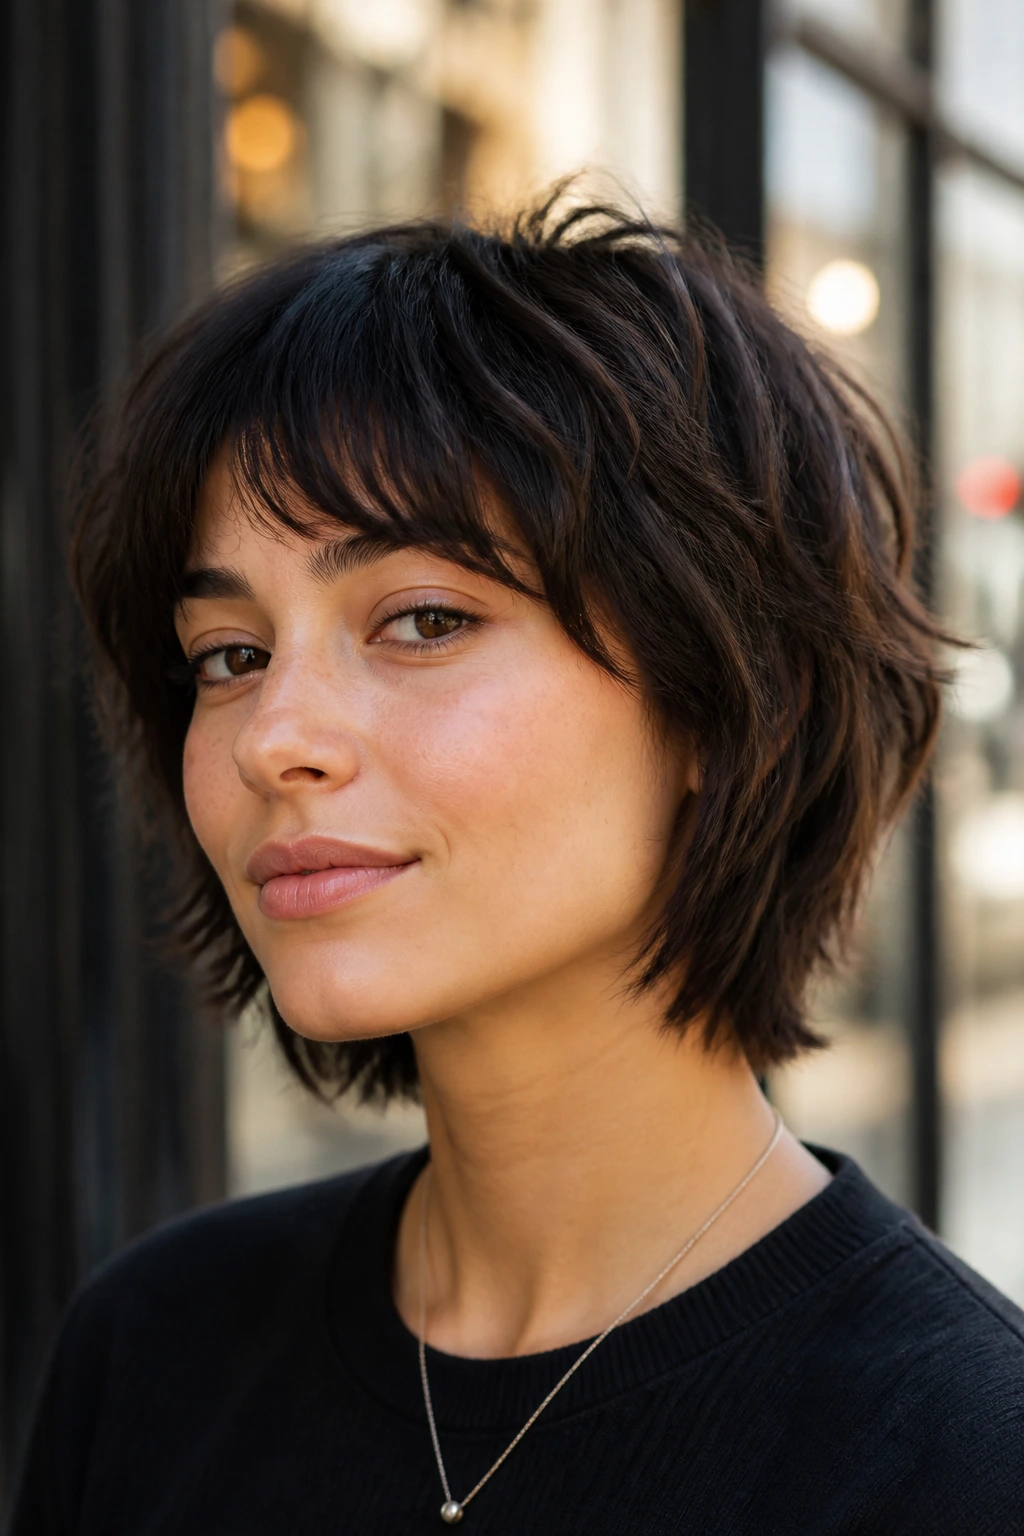
8. The Bixie Shag
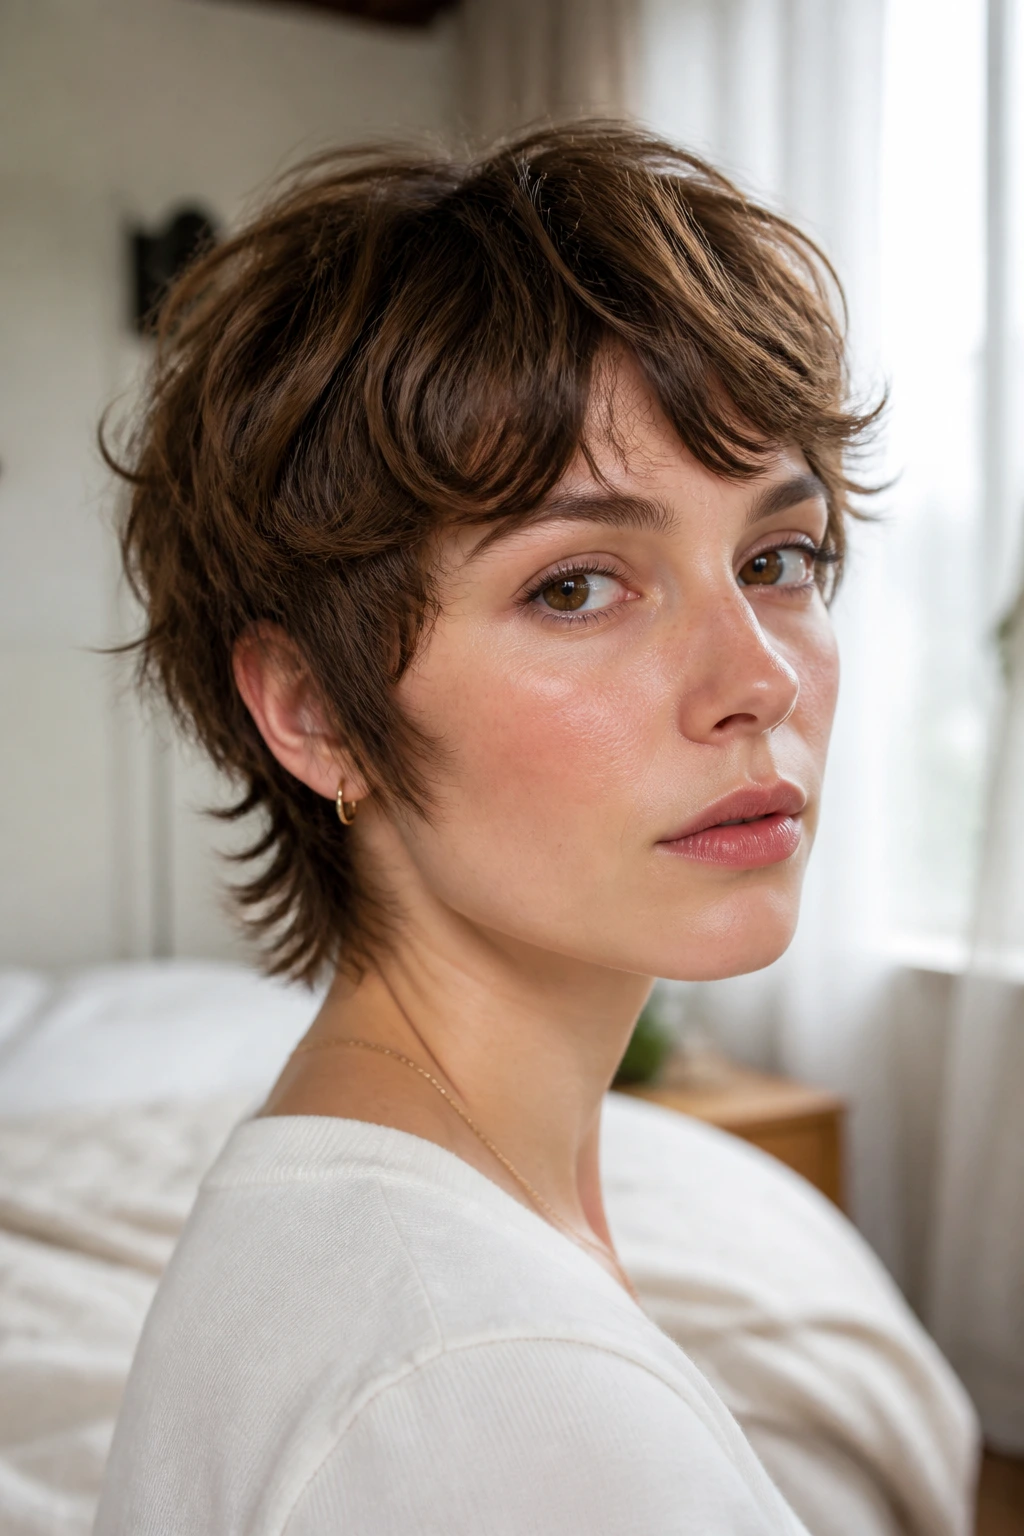
Short, choppy, and a little cheeky. The bixie shag sits between a bob and a pixie, with enough length around the ears and nape to keep thick hair from turning into a helmet. The shag influence comes through in the piecey crown layers and soft fringe, which keeps the cut from looking too tidy.
This is one of my favorite options for dense hair that feels hot and heavy at the neck. Once the hair is above the collarbone, every extra ounce shows up. The bixie shag takes that weight off fast, but it still leaves enough hair to shape with a finger-dry or a quick pass of a round brush.
The one caveat: if your hair grows fast or your cowlicks are strong, book trims a little more often. Short shag cuts lose their shape sooner than the shoulder-length versions.
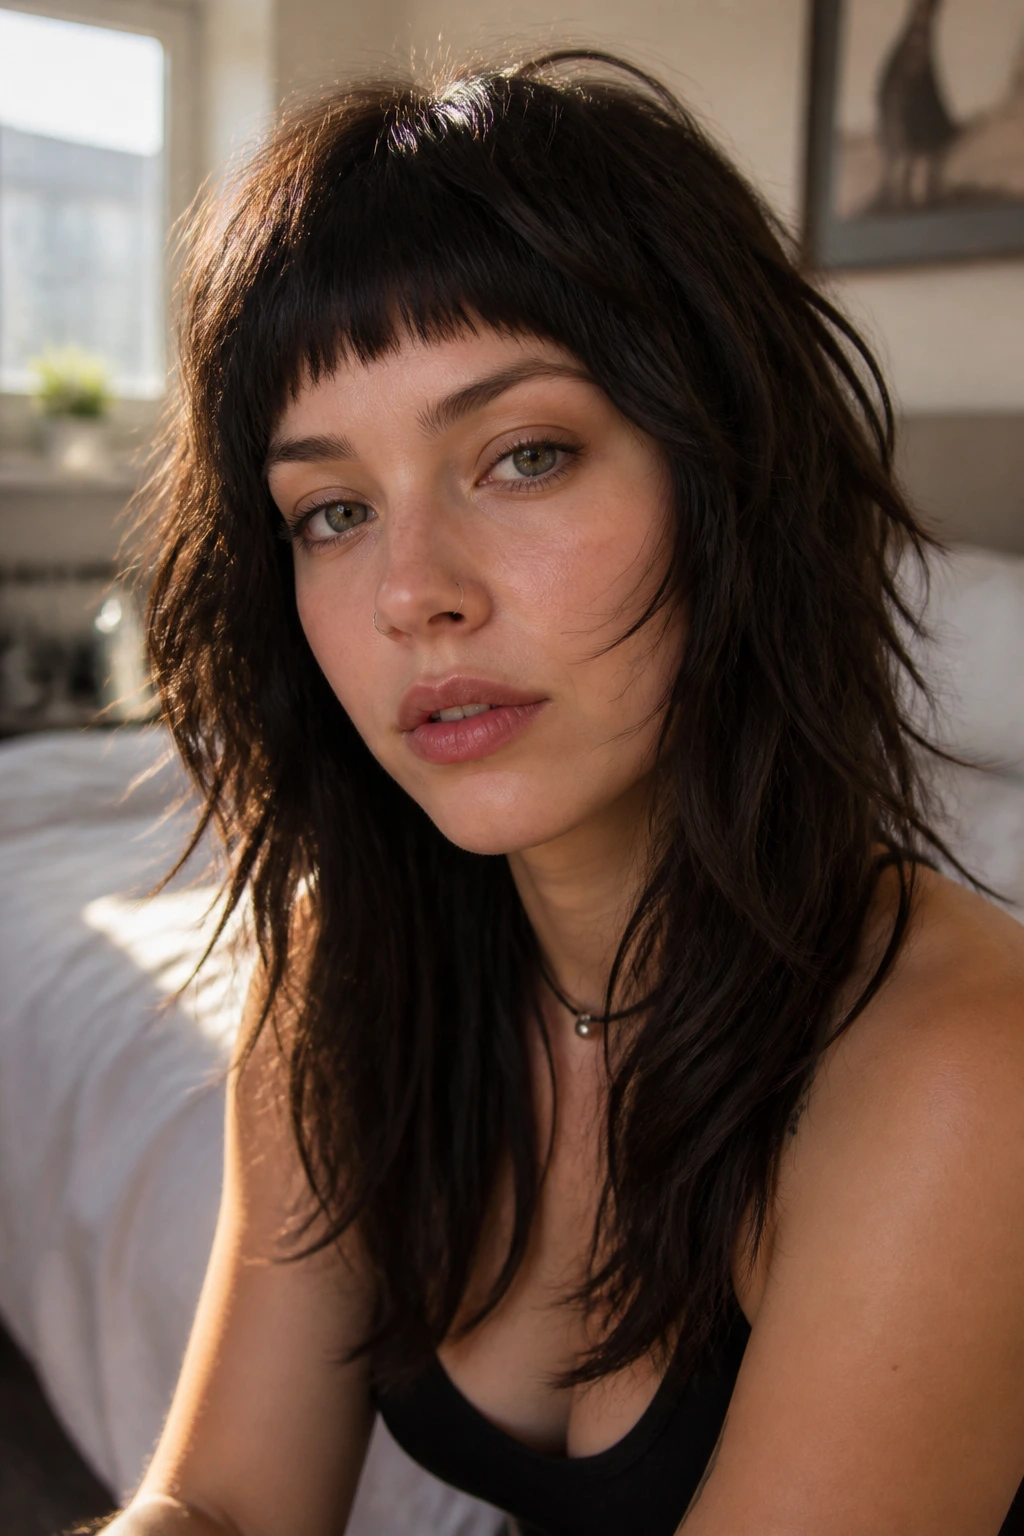
9. The Full Fringe Shag
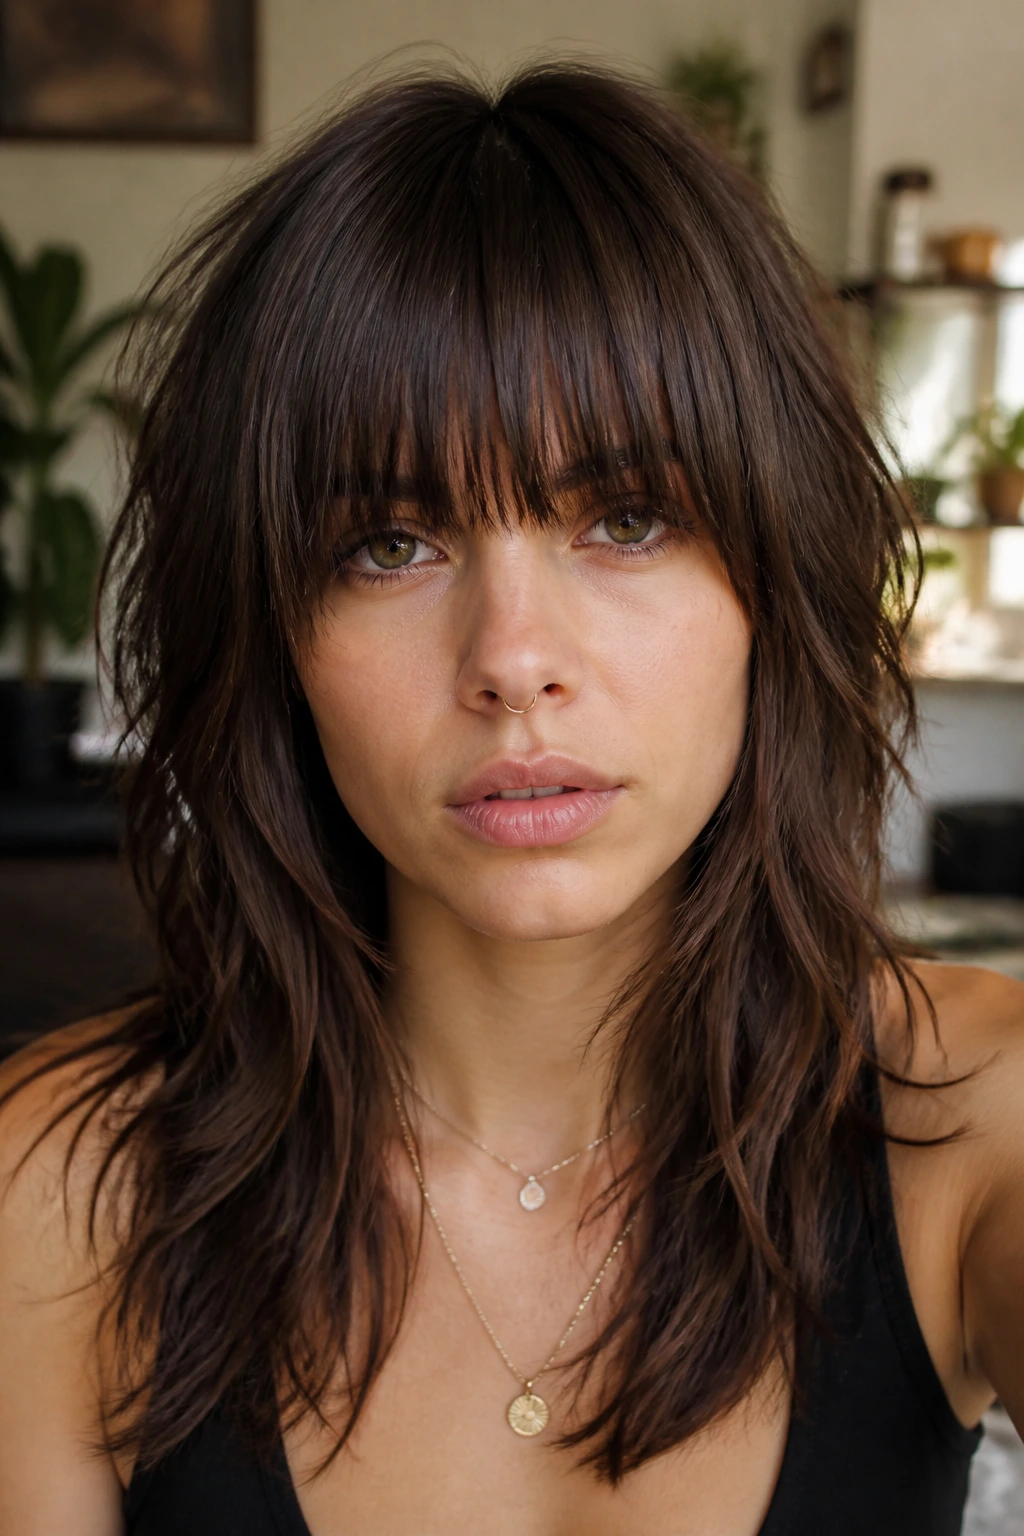
A blunt fringe changes the whole haircut. On thick hair, it gives the face a frame that feels deliberate, and the layers underneath keep the rest of the style from going flat and heavy. The fringe itself should be dense enough to sit cleanly, but not so thick that it forms a hard wall.
The real trick is balance. A full fringe wants body behind it, which is why the layers should start around the cheekbones and not much higher. If the top gets over-thinned, the bangs start looking disconnected from the rest of the cut. That’s a bad look. Crisp at the front, ragged everywhere else feels accidental.
I’d only do this if you are willing to style the fringe most days. A quick blow-dry with a flat brush keeps it from splitting into separate chunks.
10. The Collarbone Shag with Face Ribbons
This version feels graceful on thick hair because it uses the collarbone as an anchor point. The face-framing ribbons start around the cheekbone and graze down toward the collarbone, which keeps the weight low enough to move but high enough to show shape around the face.
A cut like this can save you if you love long hair but hate how heavy it sits against the shoulders. The front pieces do the visual work; the back just needs to carry the length without looking blocky. Ask for soft vertical layering, not a shaggy mess across the entire head.
The finish can go either polished or messy. Blow it out with a medium round brush if you want the face pieces to curve inward, or let it dry naturally and add a few bends with a 1-inch iron.
11. The U-Shaped Long Shag
A blunt perimeter is not the enemy. Sometimes thick hair needs a solid base to keep from feeling ragged, and a U-shaped long shag does that while still using layers to remove weight from the interior. The back stays longer in the center and slightly shorter at the sides, which creates a softer edge than a straight line.
This cut is nice when you wear your hair down a lot. The U shape keeps the length looking full, while the internal layers stop the sides from flaring out. On dense straight hair, that difference is huge. A flat, heavy hemline can make the hair look wider than it is.
Ask your stylist to keep the shortest face frame around the cheekbone and leave enough bottom weight that the ends still swing. If the lower layer gets too wispy, the whole thing loses its balance.
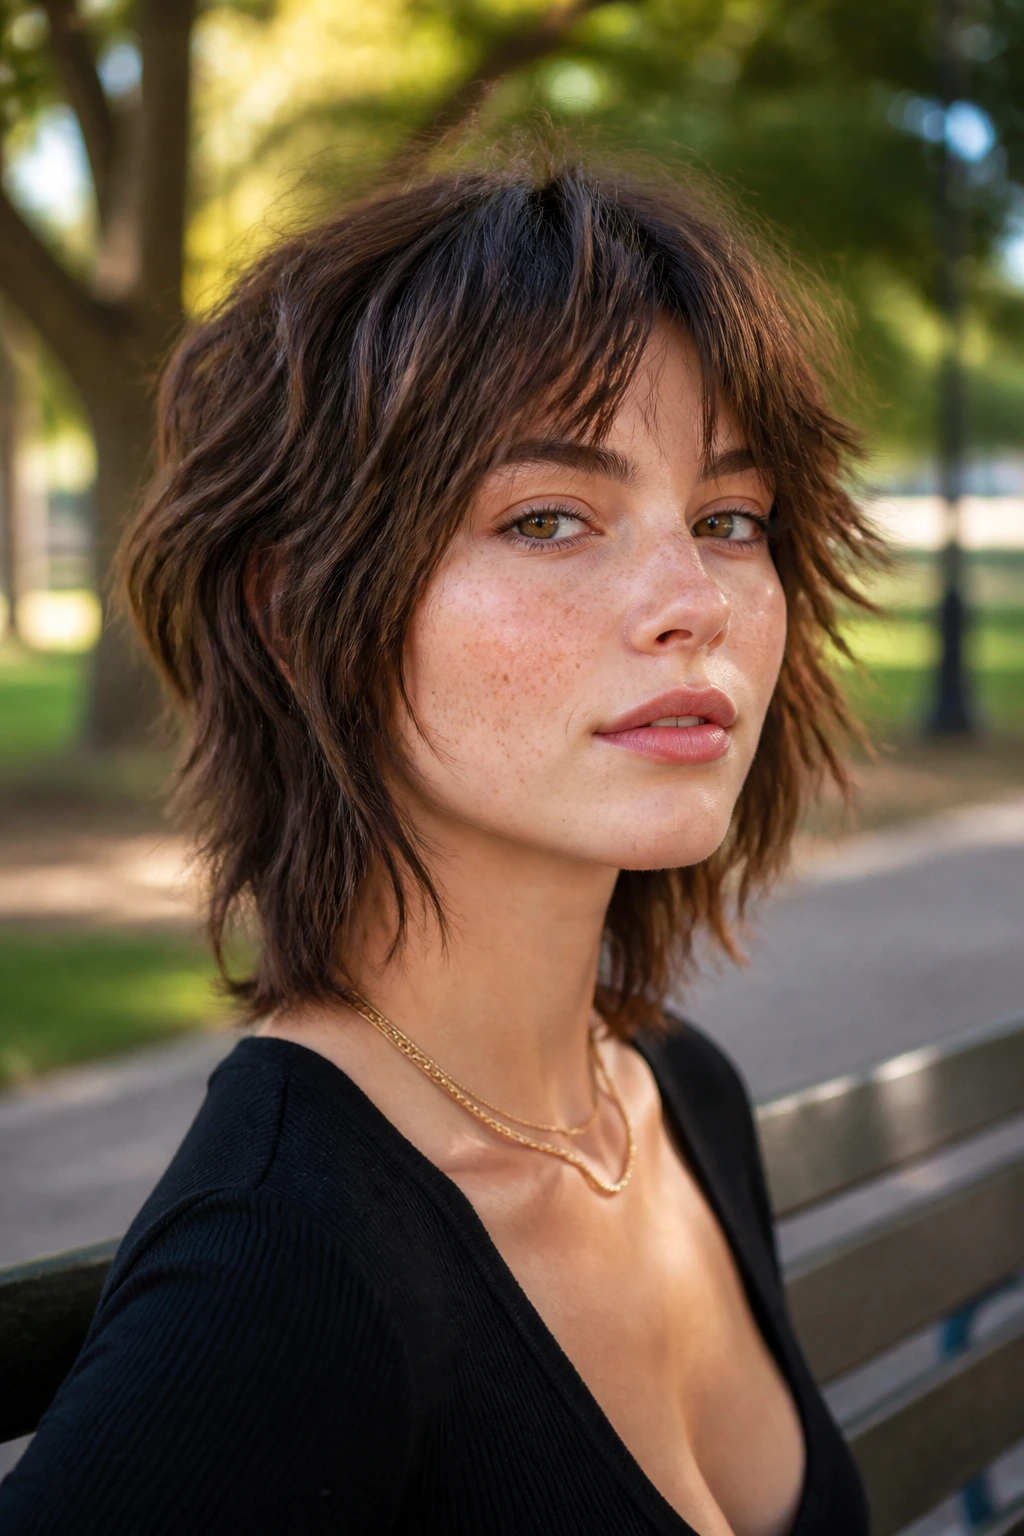
12. The Micro-Bang Shag
This one is not shy. A tiny fringe on thick hair brings a lot of attitude, and the shag layers below keep it from feeling too severe. The contrast between the short bangs and the longer, feathered sides is what makes the whole haircut interesting.
Micro bangs are easiest when the rest of the cut is built to support them. That means layers with movement, not a blunt shoulder line that makes the bangs look like they belong to another haircut. On dense hair, the fringe should be cut with room to shrink; thick bangs always look shorter after the first wash.
If you want this look, be honest about styling. Tiny bangs ask for a quick daily trim around the forehead with a small round brush or a flat iron, and they do not forgive bad sleep as well as longer fringe.
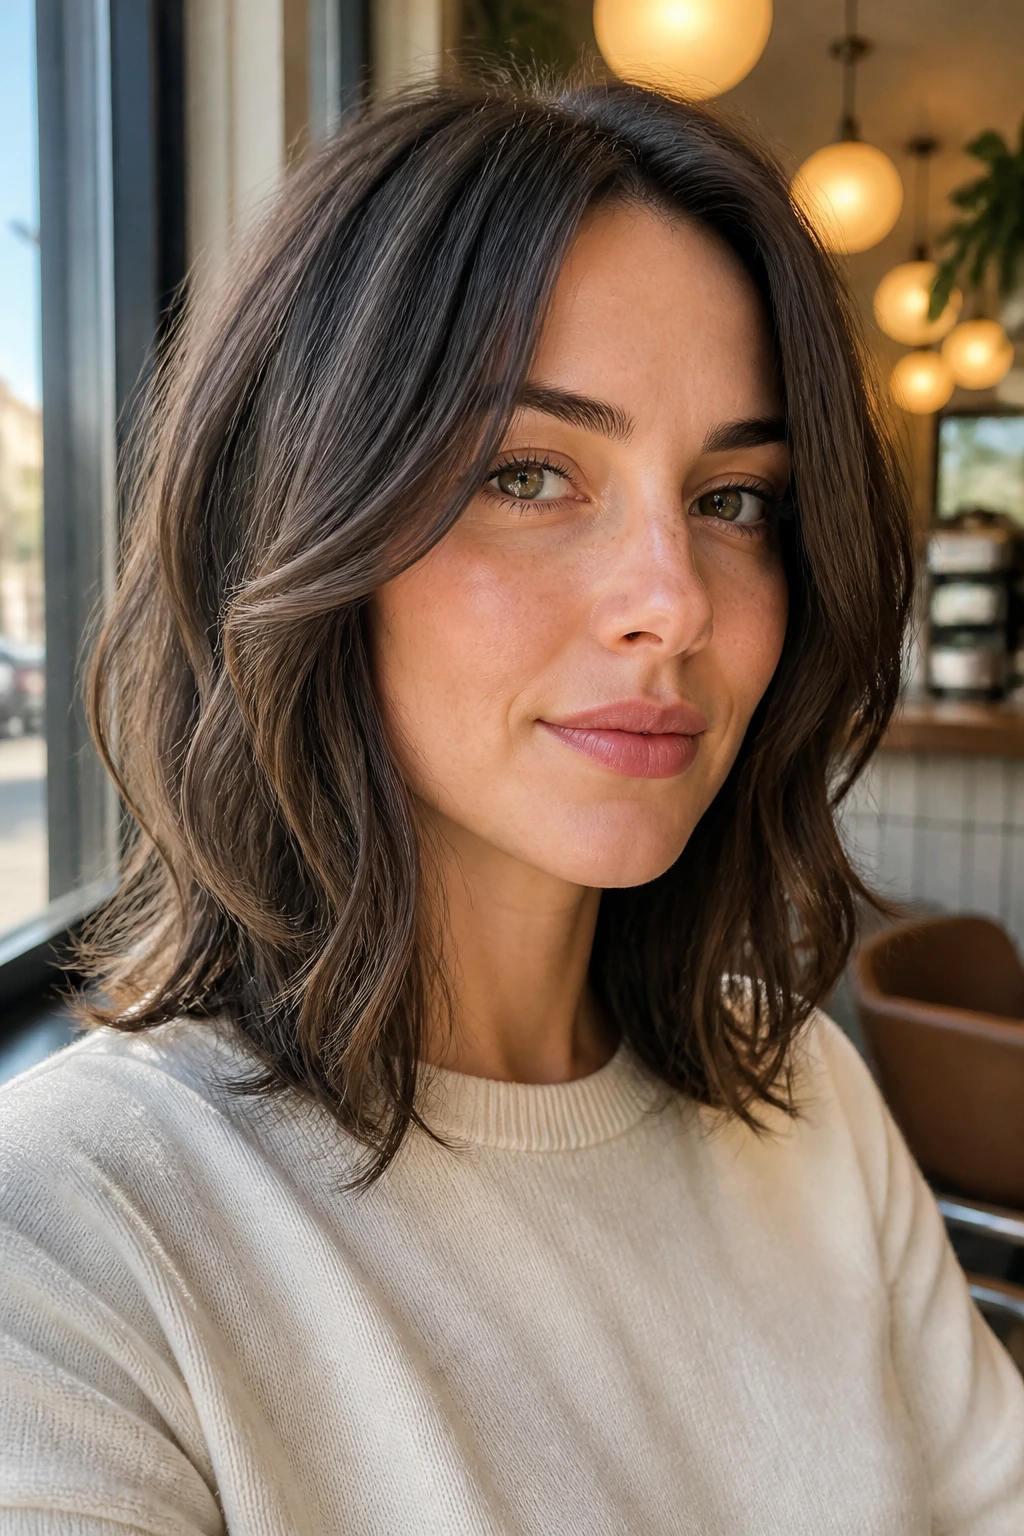
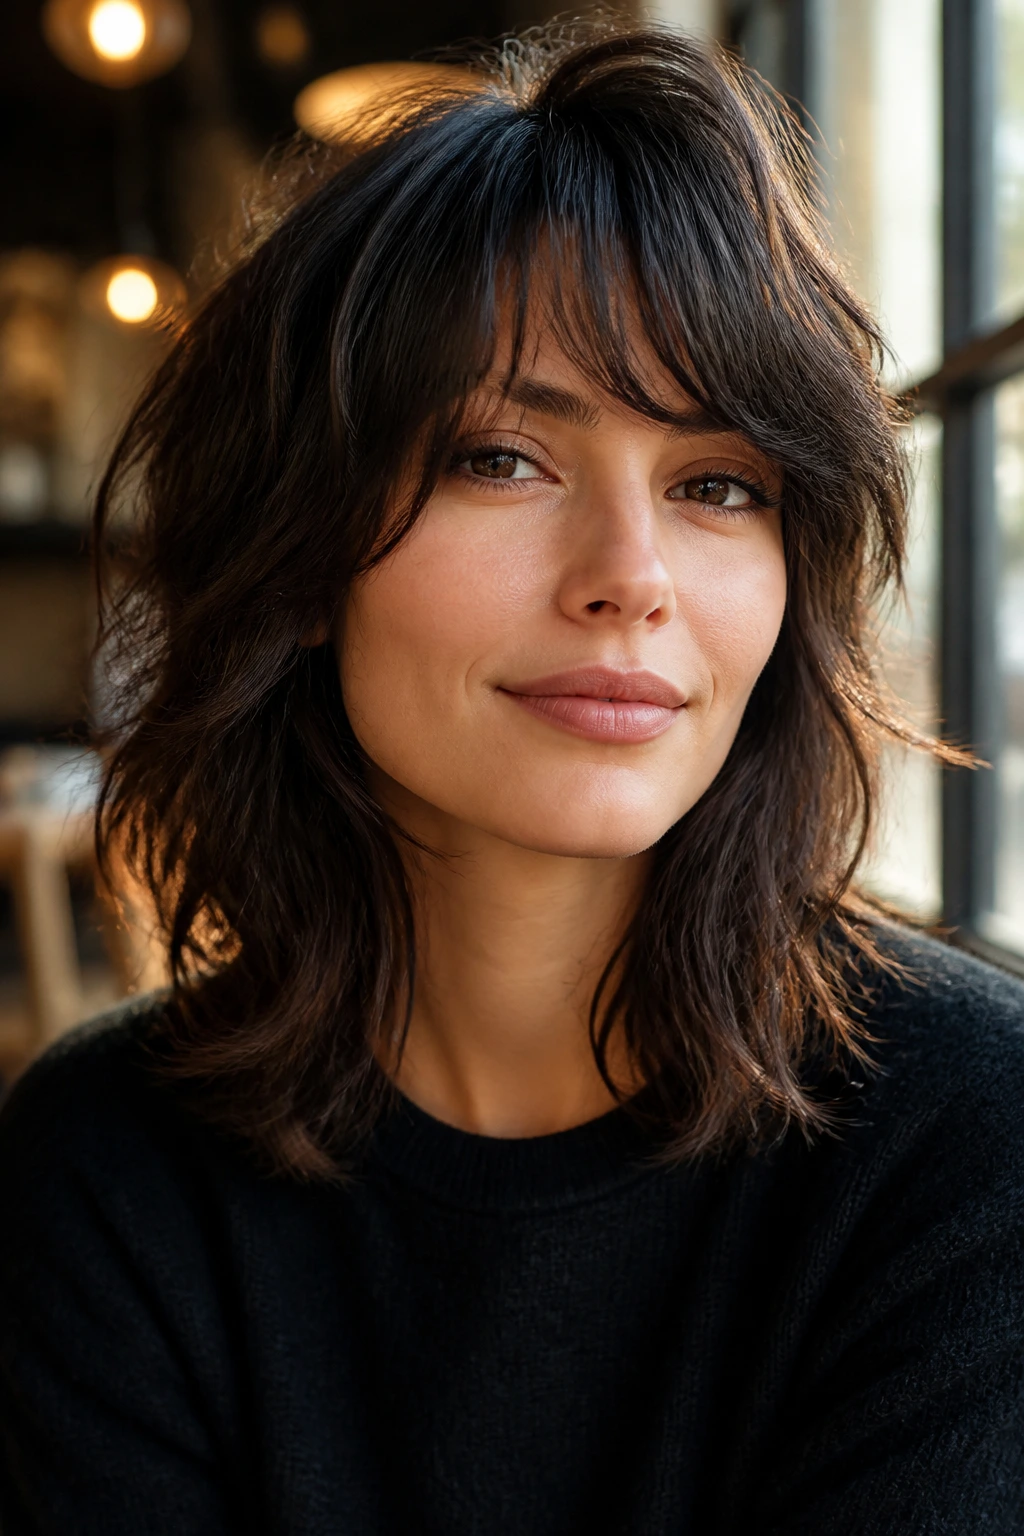
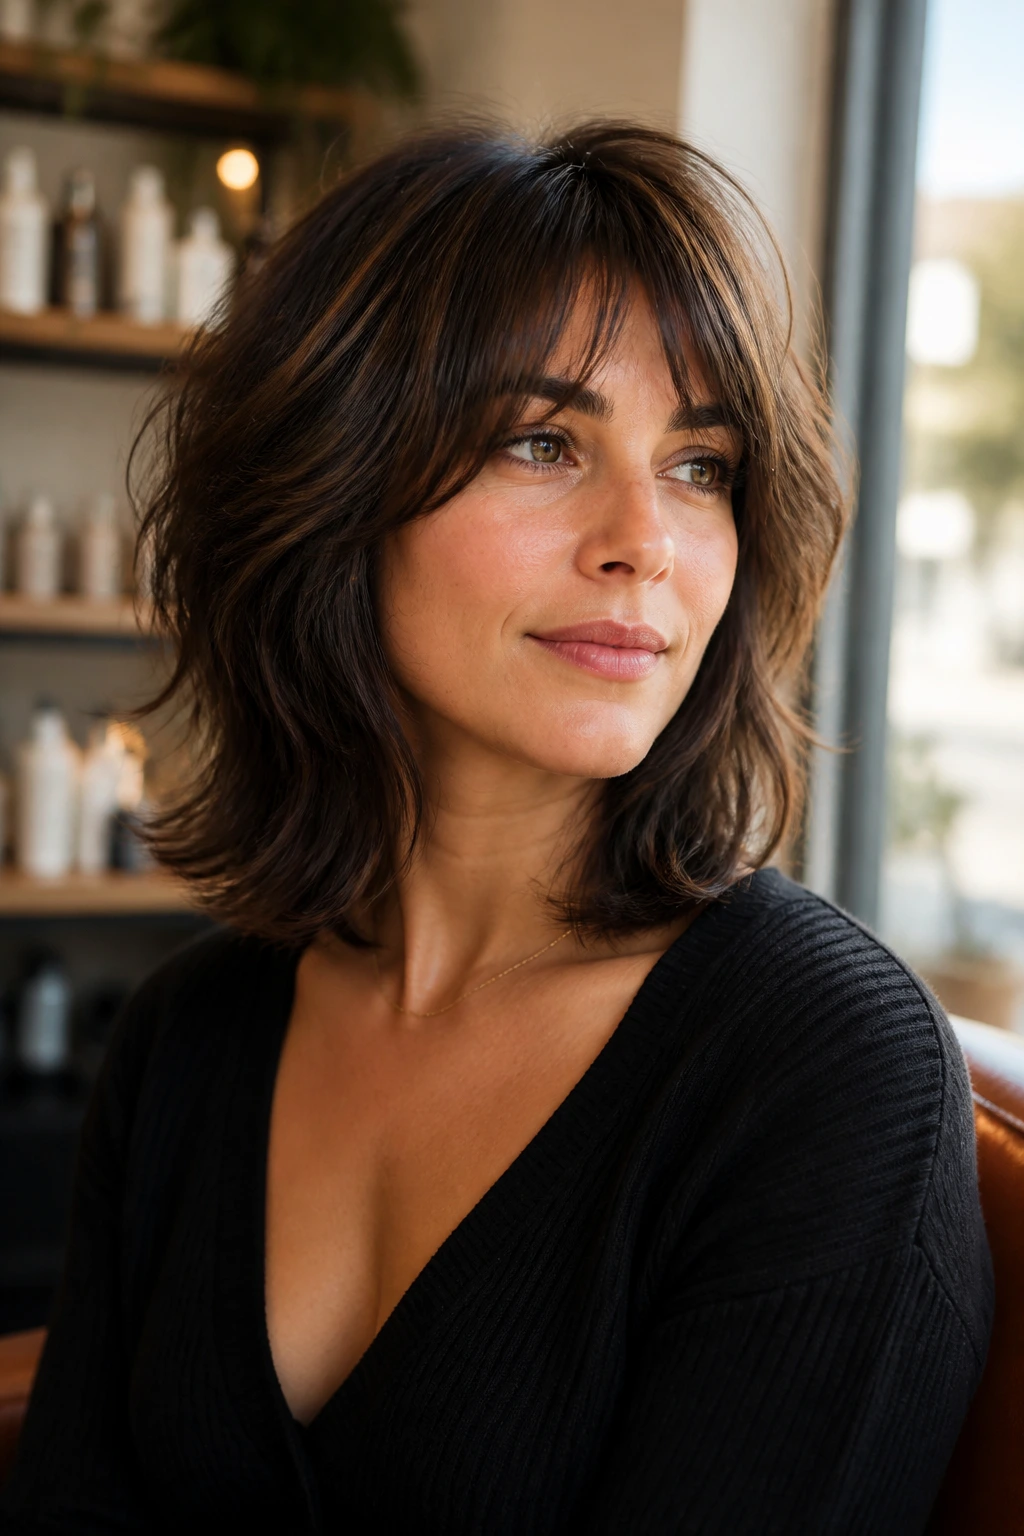
13. The Airy Lob Shag
The lob gives thick hair a clean outer shape, and the shag layers give it breath. Put those together and you get a cut that looks lighter without turning all the weight into frizz. The length usually sits between the chin and shoulders, which is a sweet spot for hair that wants to expand.
What Makes It Work
The interior layers should be soft enough to keep the lob from puffing at the sides, but not so aggressive that the ends get stringy. I like this for people who want movement without losing the sense of a bob. There’s a practical reason, too: the lob length is easy to dry faster than longer hair, which matters when thick hair holds water like a sponge.
A little bend through the mid-lengths is enough. You do not need curls. Thick hair often looks better with a half-wave and some separation than with a full barrel-rolled finish.
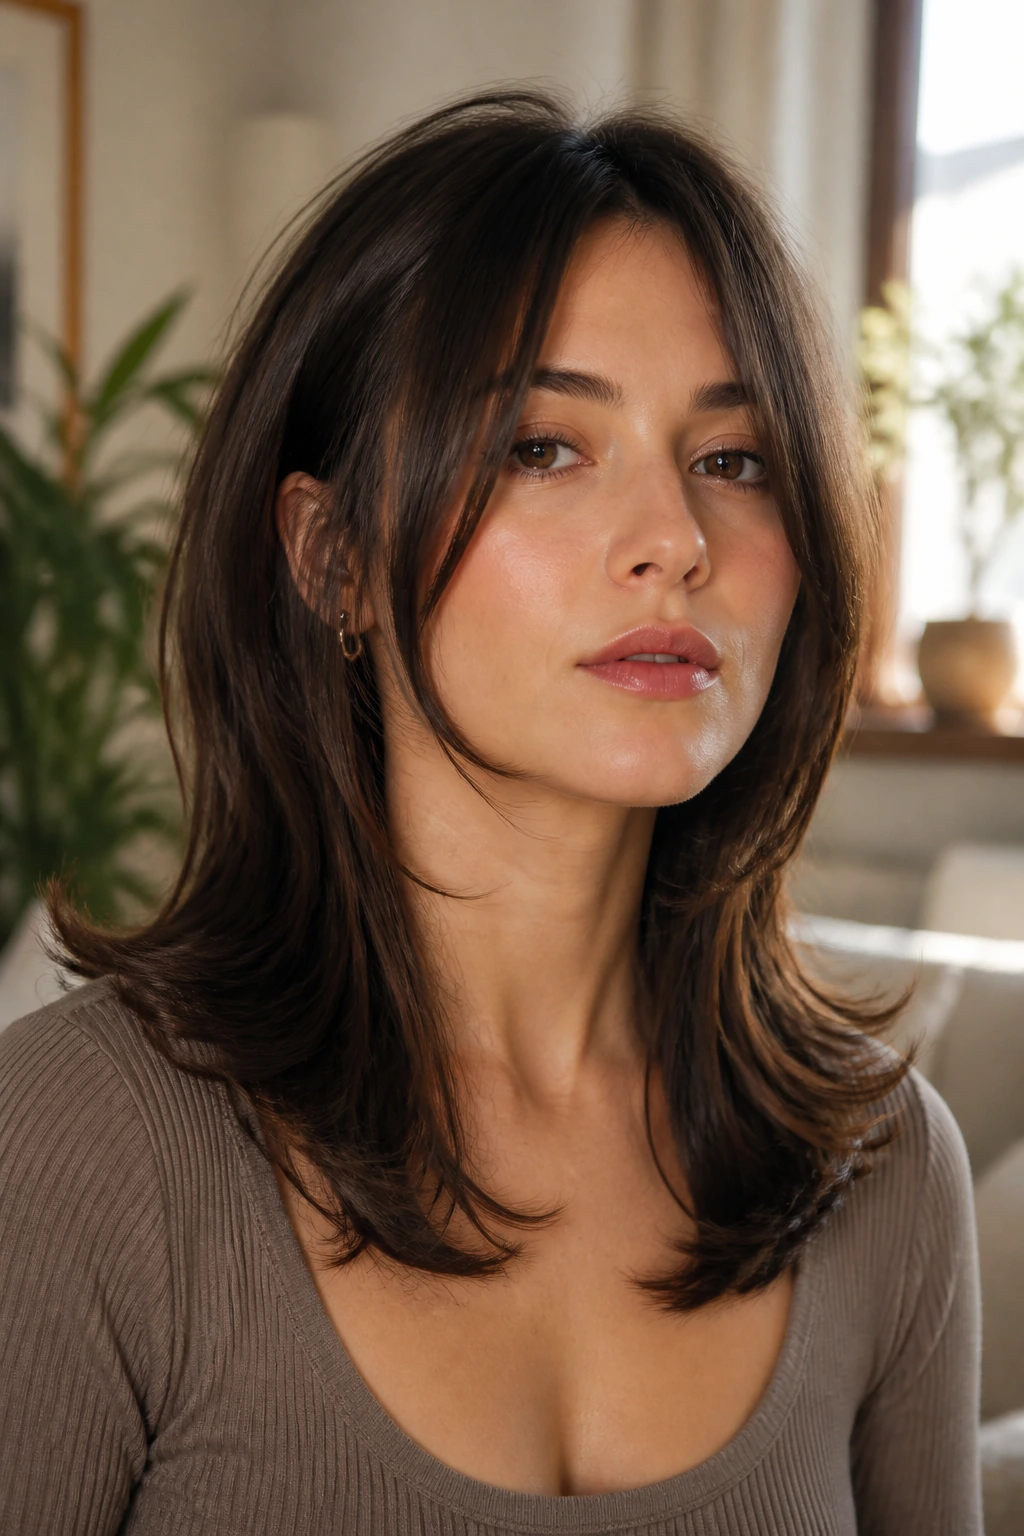
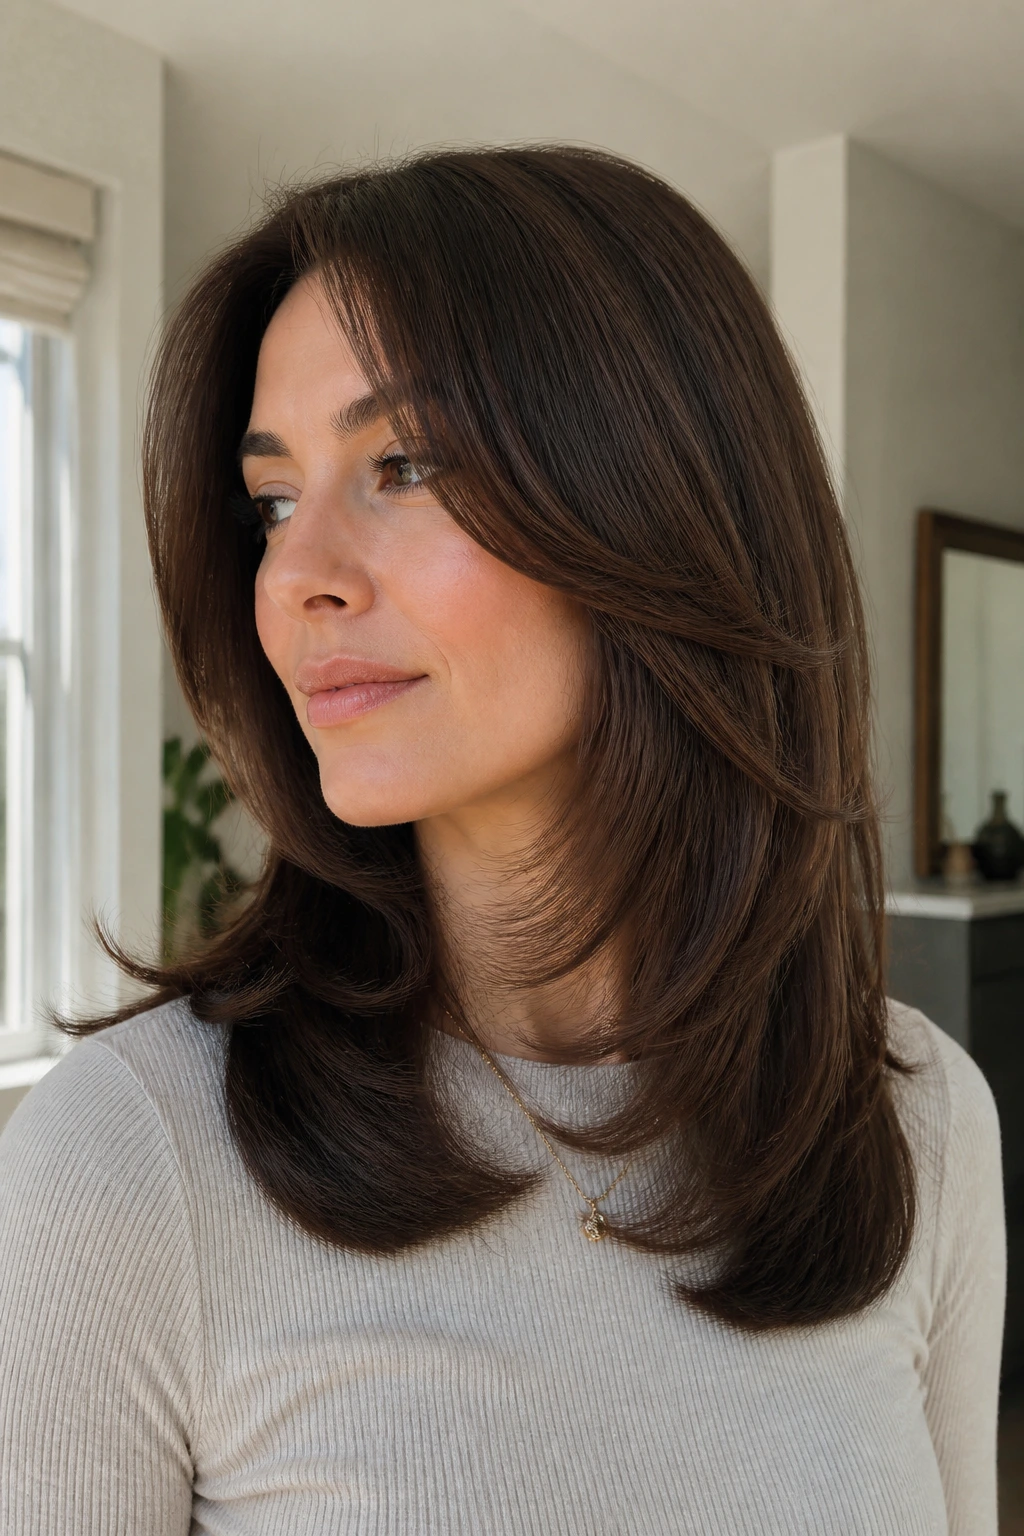
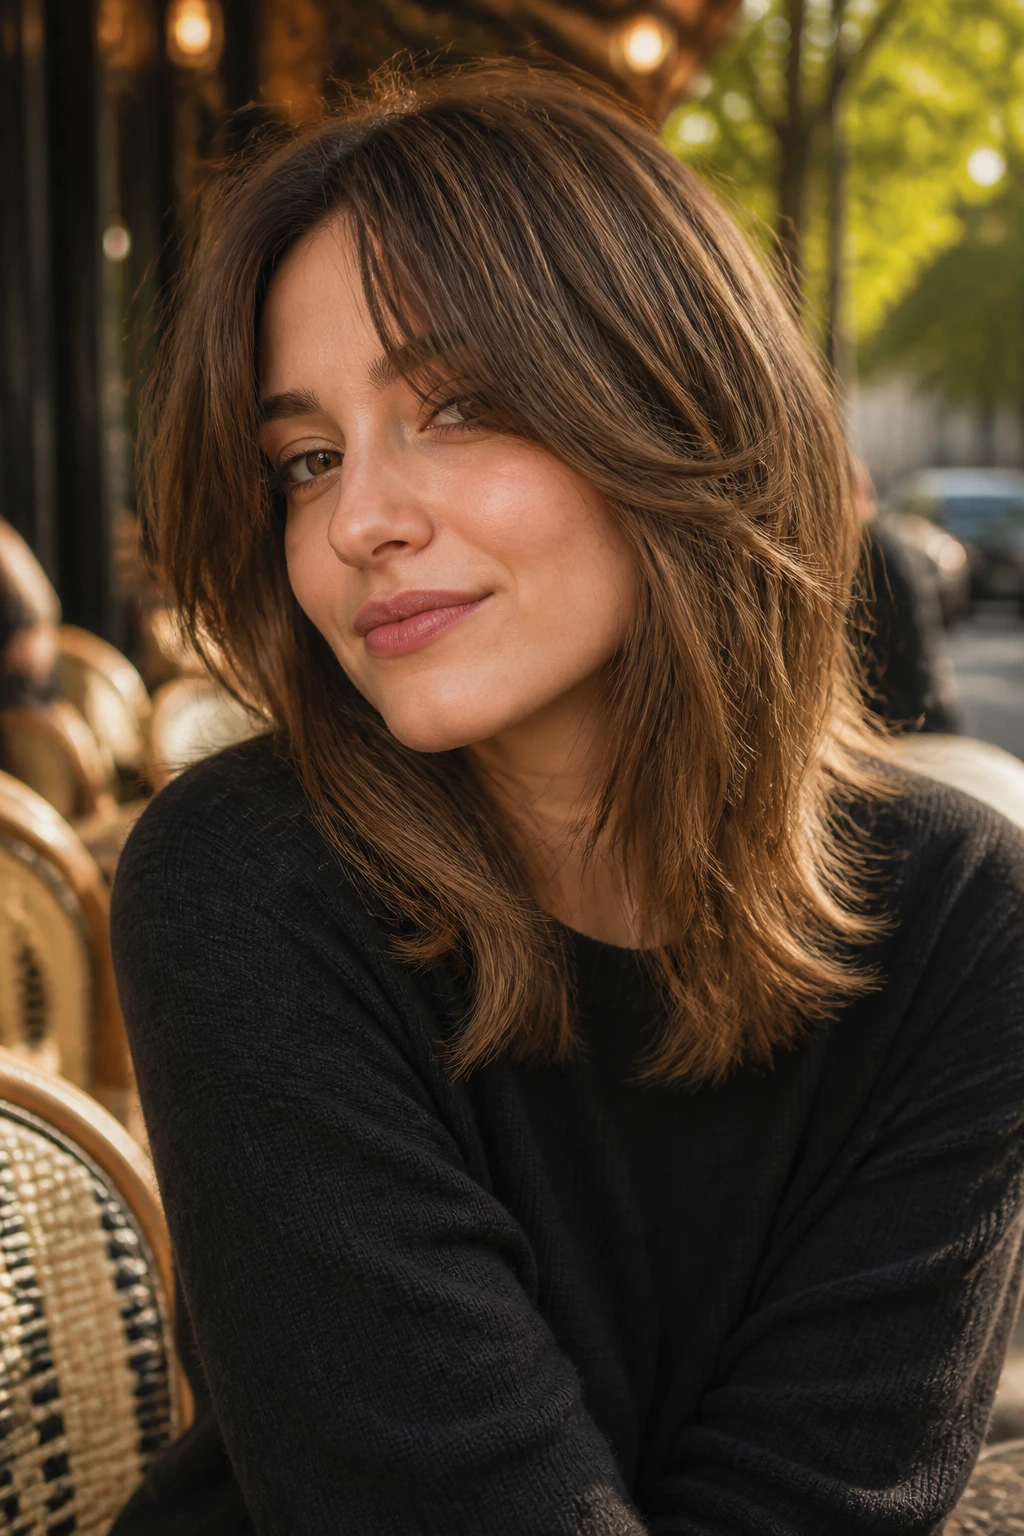
14. The Side-Swept Bang Shag
Side bangs are underrated on thick hair. They break up the forehead without the upkeep of a straight fringe, and they blend into layers that sweep across the cheek instead of stopping there like a curtain. The result is softer, especially if your face is long or angular.
This cut works best when the side fringe is long enough to tuck behind the ear on lazy days. If it’s too short, thick hair pushes it back and the whole section fights you. The rest of the haircut should keep the same relaxed angle, with layers that echo the sweep of the bangs.
I like this version for people who want the shag shape but not the “I have bangs now” level of commitment. It’s an easier sell, and on dense hair that can be a mercy.
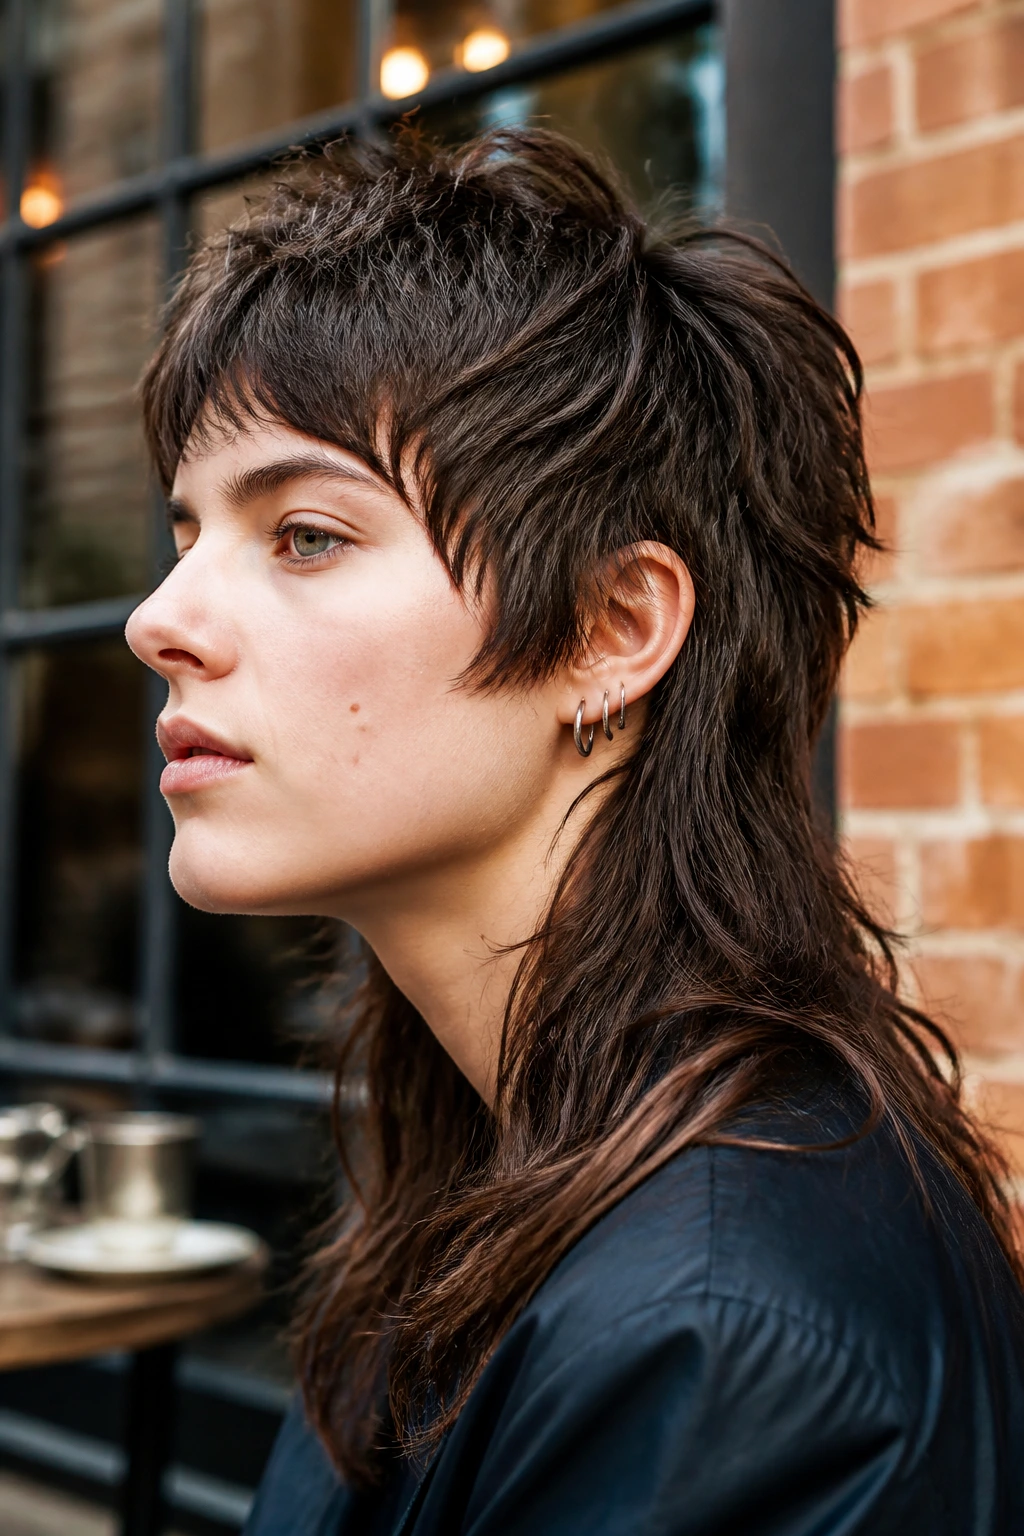
15. The Disconnected Mullet Shag
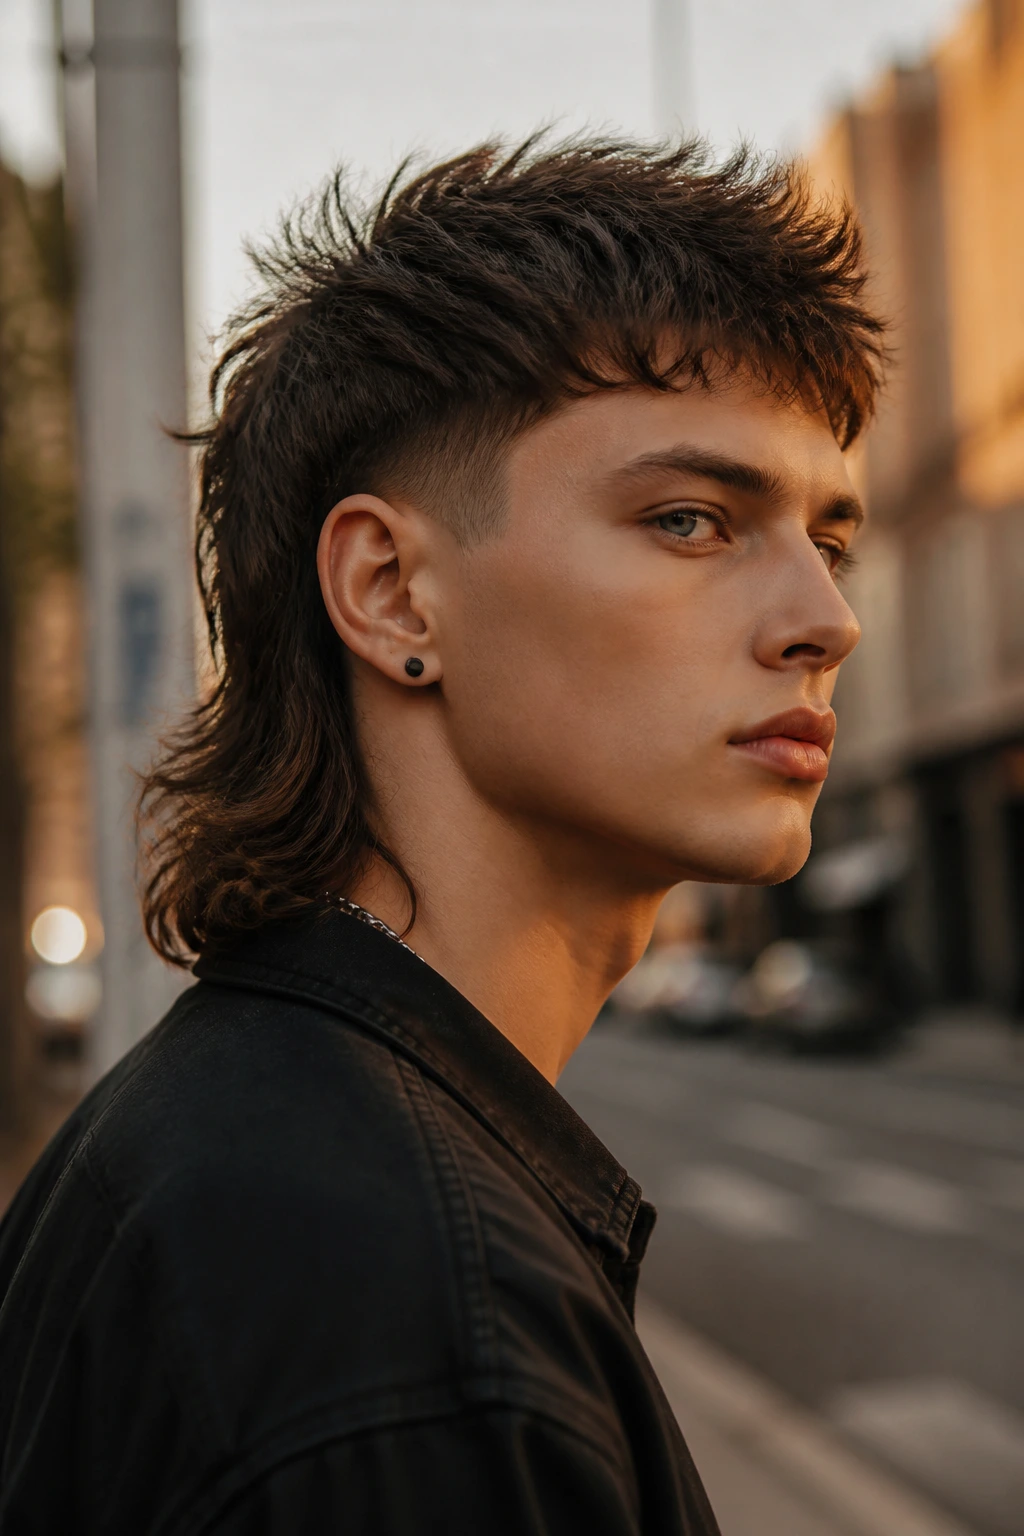
This is the boldest cut in the group. The top stays short and lively, the sides hang longer, and the back tapers into that intentional mullet line that makes thick hair look sharp instead of bulky. The disconnection is the point, so the cut has to be done cleanly or it reads as a mistake.
If you want this shape to work, the crown needs controlled lift and the nape needs a real taper. Thick hair can handle the contrast because the density keeps the back from looking sparse. What you do not want is an overly razored top with a heavy back; that just turns the cut into two unrelated ideas.
This is the version for someone who likes edge and does not mind being noticed from the side. It looks best with a little texture spray and a messy hand.
16. The Wavy Internal-Layer Shag

Waves and thick hair are a natural pairing, but only if the layers are hidden smartly. Internal layering removes the bulk that makes wavy hair puffy, while the outside perimeter stays calm enough to hold its shape. That balance keeps the haircut from looking split into shards.
A wavy shag should not be over-cut at the ends. I’d rather see the weight removed in the middle and crown, where the puff usually starts, than see the perimeter thinned into wisps. That keeps the waves looking soft instead of frayed.
Use mousse on damp hair, scrunch once, and stop touching it. The more you rake through thick waves while they’re drying, the more they expand sideways.
17. The Straight-Hair Sliced Shag
Why does straight thick hair need a different shag? Because straight strands show every blunt corner and every uneven layer line. A sliced shag cleans that up with soft, angled cuts that let the ends fall in separate pieces instead of forming one heavy sheet.
The best version keeps the top layers moderate and lets the front pieces frame the face without flying away. Too much texturizing on straight hair can make the cut look patched, which is the opposite of what you want. The goal is movement with control.
I’d recommend this if your straight hair feels stiff at the hemline and you are tired of fighting it into a bend with a flat iron. A few soft slices can change the whole read.
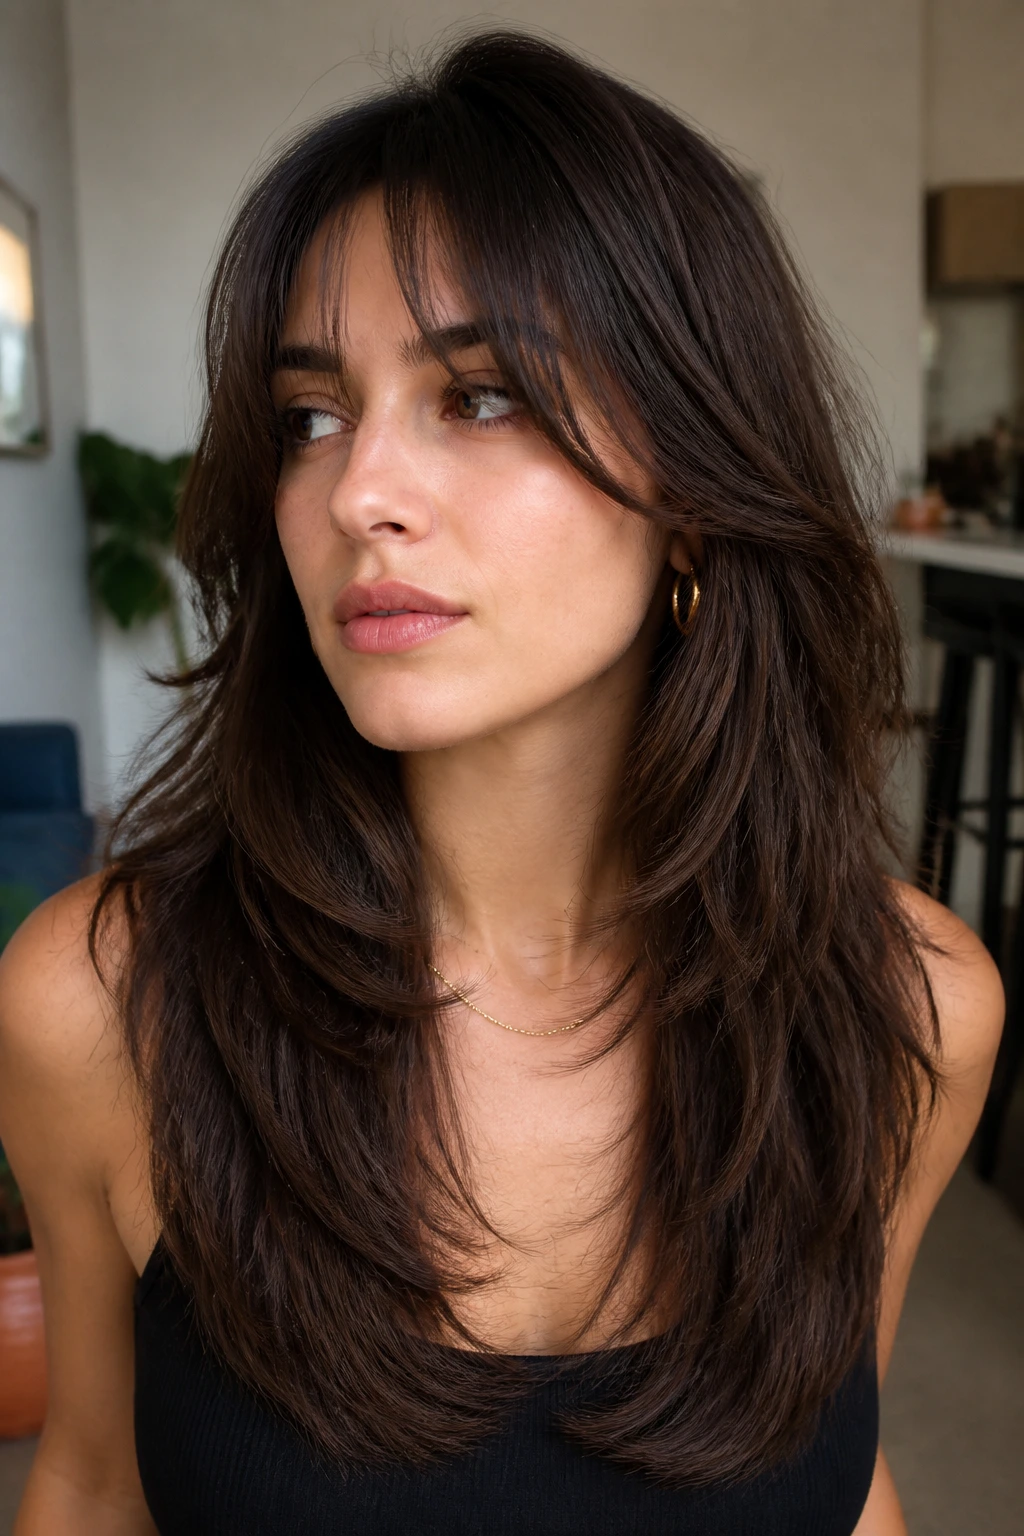
18. The Boho Long Shag
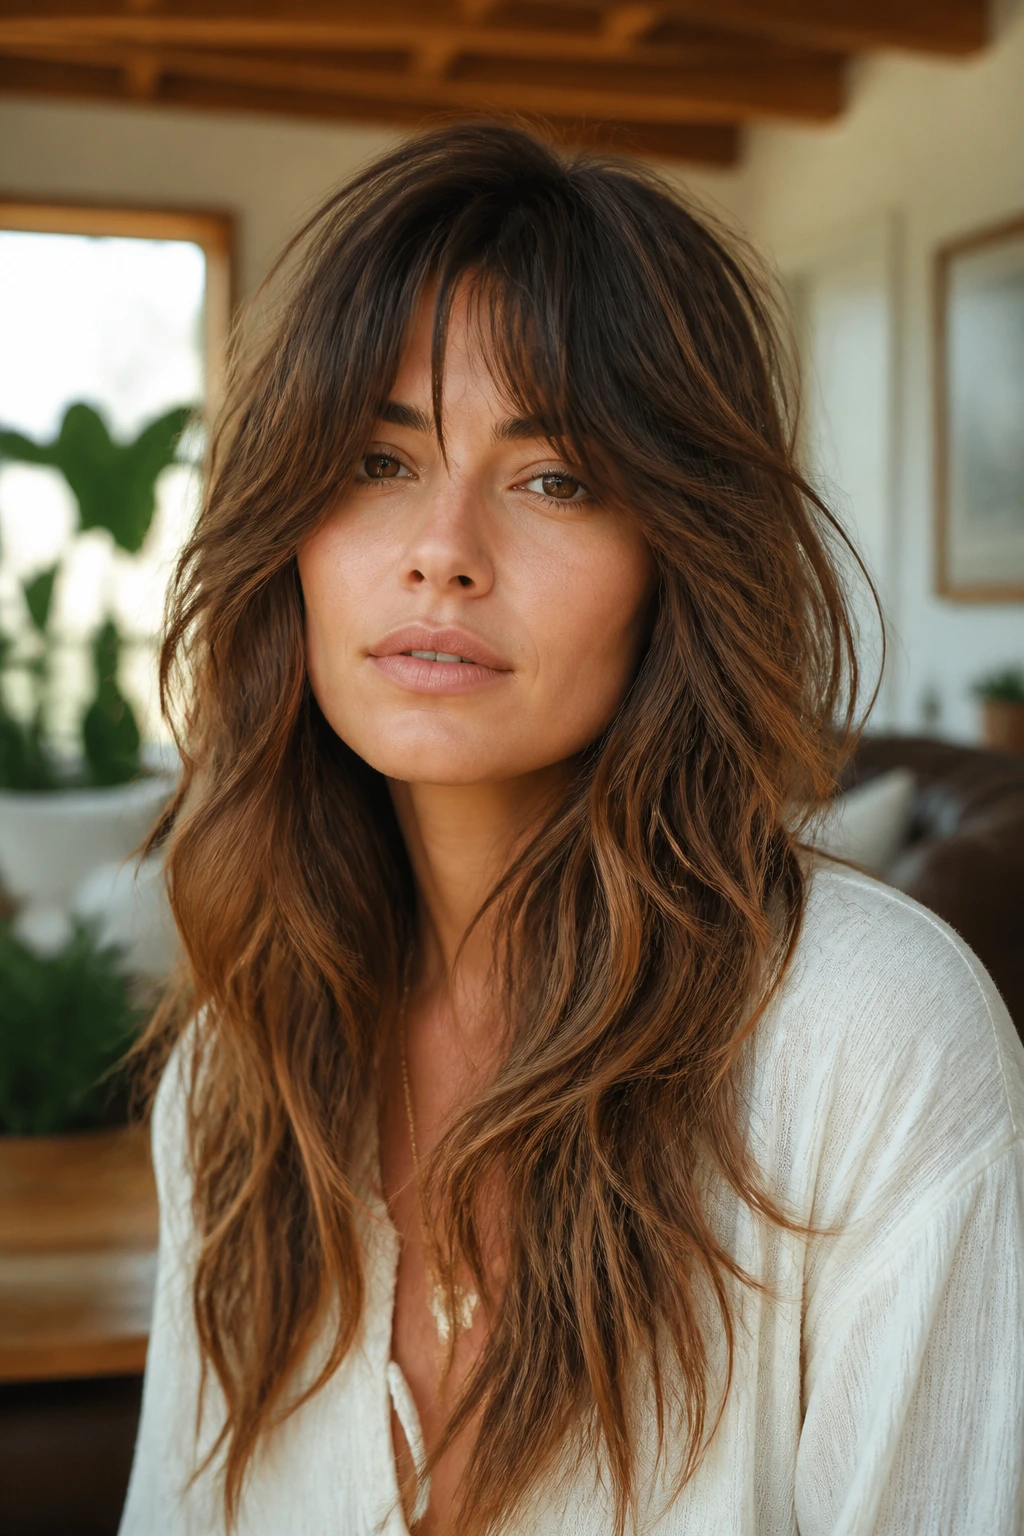
This is the relaxed one. Long layers, soft fringe, and enough disconnection to keep thick hair from looking formal. The silhouette is loose and slightly undone, which is useful if you wear your hair down most days and want it to look like it belongs there without much coaxing.
The key is not to take too much weight from the bottom. Thick hair with long layers can go wide fast if the interior gets too thin. Keep the perimeter intact, then make the face frame and mids do the work.
It suits anyone who wants that laid-back, slightly windswept shape without committing to a severe cut. A wide-tooth comb and a little leave-in cream are usually enough.
19. The Rounded Curly Fringe Shag
A curly fringe can be brilliant on thick hair when it’s cut with enough room. This version keeps the outline rounded, so the curls stack into a halo instead of sitting as one heavy cap. The fringe softens the forehead and joins the side layers instead of hanging there alone.
The best part is how it grows out. Curly bangs can be tricky, but when the rest of the cut is rounded and layered properly, the fringe blends instead of abruptly changing shape every two weeks. That makes the upkeep feel less punishing.
Dry cutting helps here. Curls lie to you when they’re wet, and thick curls lie with confidence.
20. The Polished Blowout Shag
This is the neat version for people who love movement but still want their hair to look finished. The layers are there, but they are hidden under a smooth blowout that bends the ends inward or outward in a controlled way. Thick hair takes to this better than fine hair because it holds the shape for more than an hour.
The cut itself should be soft enough to avoid a chunky line at the shoulders. If the layers are too aggressive, the blowout starts looking uneven the second humidity shows up. Keep the crown moderate and the face frame gentle, then use a medium round brush and a nozzle when drying.
I like this on hair that needs to look put together for work but still wants some edge after the brush comes out. It is the most “done” version in the group.
21. The Crown-Volume Shag
A flat top on thick hair can make the whole head feel heavy. This cut fixes that by building lift at the crown while leaving enough weight through the sides and ends to keep it from puffing outward. The effect is taller, lighter, and more balanced from the front.
This is one of those shags that sounds simple until you sit in the chair. The layering has to be measured. If the crown is taken too short, the hair sticks up; if it is left too heavy, the whole head collapses. Somewhere between those two is the sweet spot.
Use root clips while the hair cools if you want the crown to stay lifted. It sounds fussy. It works.
22. The Short Tapered Shag
This cut is all about the neck and jawline. The sides and back are tapered enough to clear bulk, while the top keeps a rough shag texture that stops the cut from reading like a plain cropped bob. Thick hair looks especially good in this shape when you want less daily drying time and more neck breathing room.
The danger with short thick hair is triangular volume. A tapered shag avoids that by keeping the outline slightly narrower at the bottom and softening the top with small, choppy layers. You need enough structure to avoid puff, but enough looseness that the cut still feels like a shag.
This one usually suits active people or anyone who hates long-dry mornings. It also grows out cleanly, which is a small mercy.
23. The Piecey Razor Shag
A piecey shag is for hair that you want to move in visible sections. The razor work splits thick strands into lighter ribbons, so the ends separate instead of fusing into one heavy curtain. It looks easy, but there’s a lot of control in it.
The haircut lives or dies by restraint. Overdo the razor, and the hair gets fuzzy. Keep the layers soft, and the texture looks deliberate, almost hand-combed. Thick hair is perfect for this because it gives the pieces something to sit on.
A little texture spray at the mids is usually enough. You do not need to drench it. Too much product kills the separation you just paid for.
24. The Curved-Frame Shag
This version is all about the face frame. The front layers curve inward around the cheekbones and jaw, which makes thick hair feel lighter around the face without stripping the length in back. It’s a nice middle road if you want softness but not a big fringe.
I’d point to this for round faces, square jaws, or anyone who likes hair that falls in a controlled arc rather than one straight wall. The rest of the cut should support the curve with moderate layers and a calm perimeter. Too much disconnection in the back can fight the front shape.
Blow-dry the front pieces with a brush directed toward the jaw, then turn the ends slightly away. That tiny curve matters more than a lot of people think.
25. The Butterfly-Shag Hybrid
The butterfly cut and the shag are cousins with different manners, and this hybrid borrows from both. Long layers sweep away from the face, while the rest of the hair keeps enough shaggy movement to stop thick hair from sitting too flat. The result is airy around the face and still heavy enough through the back to feel full.
This one is useful if you want a dramatic front shape without giving up length. The shortest face pieces can start near the cheekbone, then drift into longer layers that blend into the rest of the cut. Thick hair can carry that contrast better than most hair types because the density keeps the shape visible.
It needs some styling to shine. A round brush gives it that lifted front section; air-drying keeps it softer. Both work.
26. The Soft Wolf Shag
Think of this as the wolf cut with the sharp edges turned down a notch. The crown still has lift, the nape still tapers, and the sides still carry that slightly rebellious line, but the transitions are softer. Thick hair benefits from that because it keeps the style edgy without making every layer obvious.
The soft wolf shag is the version I’d suggest if you like the idea of a mullet-adjacent shape but do not want anything severe. It keeps the back from getting too heavy and gives the face a bit of swing. The key is blending. Too much blending and you lose the point; too little and it looks chopped by accident.
This one works best with matte texture spray or a little dry shampoo at the root. Shine can make it read flatter than it really is.
27. The Fringe-Free Shag
No bangs. No forehead commitment. Just layers. That makes this version the easiest sell for people who like thick hair down but do not want anything sitting on the skin. The shape still has shag movement through the mids and ends, so it never turns into a plain long cut.
A fringe-free shag depends on face framing. Without bangs, the front layers need to start around the chin or collarbone so the cut has something to do visually. Keep the crown soft and the perimeter slightly textured, or the whole style can look too long and too straight.
I like this one for people who wear glasses, work with hair off the face, or simply hate sweating through a fringe. That last reason is more valid than many salons admit.
28. The Mermaid-Length Shag
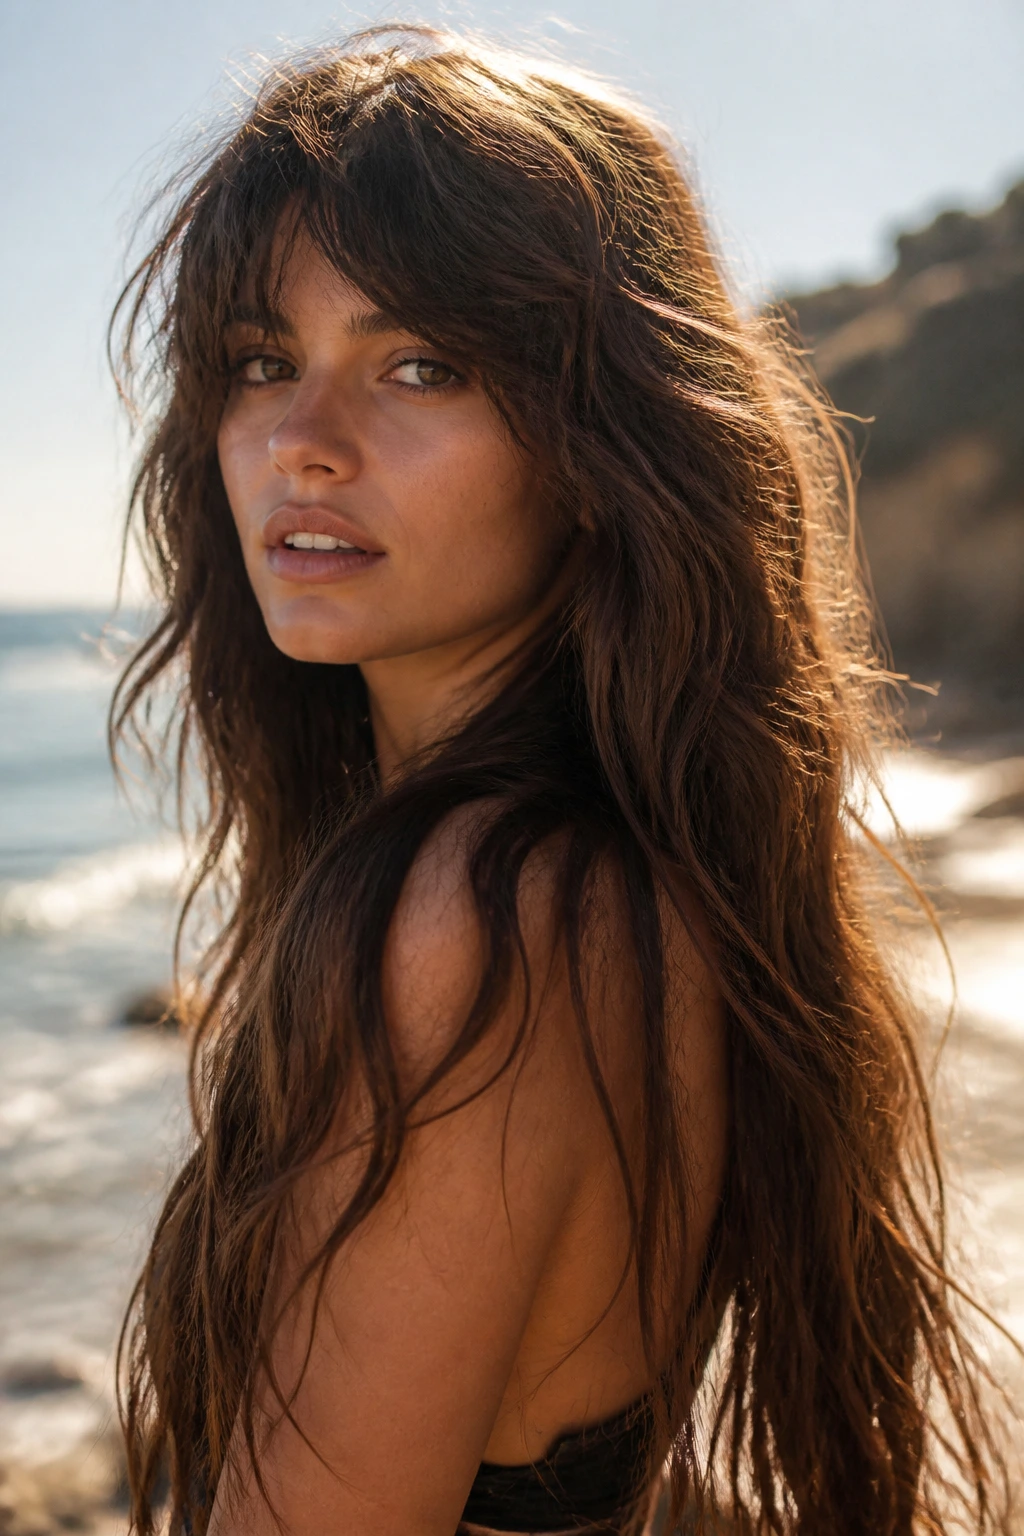
Long hair can still be a shag, and thick hair is exactly the place to prove it. The layers stay long enough to keep the length feeling dramatic, but the interior is cut to remove the dense, blanket-like weight that makes mermaid-length hair hard to wear.
The risk here is going too short with the top layers. Once the hair reaches very long length, thick strands need enough perimeter weight to keep the ends from looking transparent. Ask for long face-framing pieces and softer internal layering through the back, not a chopped ladder from top to bottom.
This cut is for people who love length but hate the stiffness that comes with it. It moves more than a one-length style ever can.
29. The Air-Dry Shag
This is the least fussy version in the group, and that is not an accident. The layers are cut so they fall into shape with water, a little leave-in, and a bit of scrunching. Thick hair still gets structure, but it does not need a full blowout to look intentional.
The cut should keep the ends slightly heavier than you think. Air-dried thick hair expands as it dries, and if the haircut is too airy at the start, it can puff out in all the wrong places. A calmer perimeter keeps the shape grounded.
If you want a haircut that can survive a rushed morning, this is the one I’d steer you toward. It is not lazy. It is practical.
30. The Shag-Bob Hybrid with Sweepy Bangs
This is the neatest closing note in the set. The bob outline gives the haircut a clean perimeter, the shag layers stop it from feeling boxy, and the sweepy bangs make thick hair look softer across the forehead. It sits in that useful middle zone where you can wear it polished or a little messy and still look like the shape was meant to do that.
The best version lands somewhere between the jaw and collarbone, with bangs long enough to brush sideways rather than sitting bluntly across the face. That keeps the whole cut from becoming too rigid. Thick hair likes the structure, but it needs a little air in the middle.
If you want one cut that can move from school-run hair to dinner hair with only a brush and a little spray, this is probably the friendliest one here.
Why Thick Hair Loves a Shag’s Built-In Weight Removal
Thick hair does not need to be fought into submission. It needs a map. A shag gives it one by breaking the mass into layers that can sit on top of each other without forming a single heavy sheet, and that changes the way the head reads from every angle.
The important part is where the weight comes out. Remove it too high, and the crown gets puffy. Remove it too low, and the bottom gets wispy while the top still feels dense. The sweet spot is usually somewhere around the cheekbone, chin, and upper shoulder line, where the hair can move without losing its backbone.
There’s also a texture issue people miss. Thick straight hair needs soft slicing and point cutting so the ends do not feel blunt and blocky. Thick curly or wavy hair usually needs more room in the shape and less aggressive thinning, because the curl pattern already does half the work.
That is why the best shag for dense hair is rarely the most extreme one. A good cut keeps enough perimeter weight to stop the hair from ballooning, but it still lifts the mids and front pieces so you can feel the air between the strands. That balance is the whole point.
Tools That Make the Cut Easier to Wear
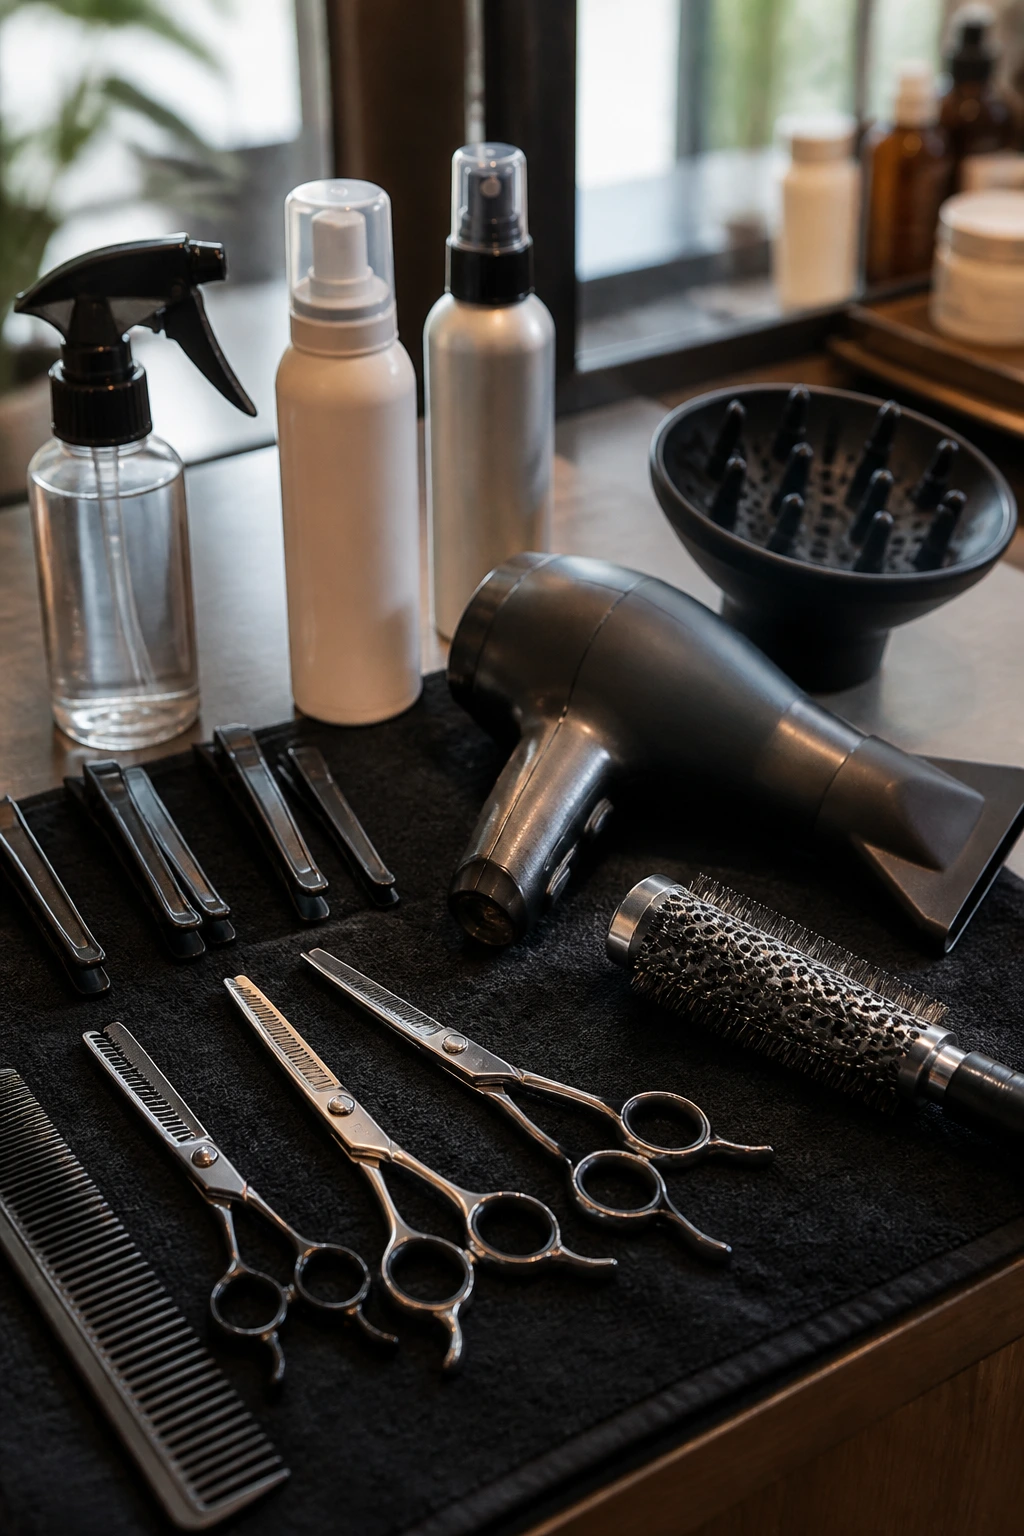
- Sharp haircutting shears: dull scissors crush thick ends and make the finish look rough, not textured.
- Texturizing shears: useful for removing bulk in the right hands, but they should be used sparingly on dense hair.
- A salon-grade blow-dryer with a concentrator nozzle: the nozzle helps direct airflow so the cut bends instead of frizzing.
- A 1.25-inch to 2-inch round brush: smaller for shorter shags, larger for longer layers and curtain bangs.
- A diffuser: essential if your thick hair has wave or curl and you want the layers to keep their shape.
- Sectioning clips: they keep the top, sides, and crown separate so the layers do not get blown into each other.
- Wide-tooth comb: better than a brush for detangling wet thick hair without stretching the pattern.
- Heat protectant spray: thick hair often takes more heat sessions, and the ends need the buffer.
- Lightweight mousse or foam: gives the root a little lift without the sticky collapse heavy creams can cause.
- Texture spray or dry shampoo: useful on day two when the crown starts to flatten and the layers need separation again.
- Hand mirror: not glamorous, but it helps you check the back shape instead of guessing.
- Satin pillowcase: the cut lasts longer when the layers do not get rubbed into a fuzzy knot every night.
What to Tell Your Stylist Before the First Snip
Bring photos, but bring the right ones. One picture for the silhouette, one for the fringe, and one for the length will help more than ten random screenshots of unrelated hair. Thick hair can look completely different depending on how much weight is left at the perimeter, so point out the parts you care about, not just the overall vibe.
Say where your hair gets heavy. Is it the crown? The sides? The back at the nape? Those details matter because a shag is really a weight-distribution haircut. If your crown is flat, your stylist needs to leave a touch more structure there. If your sides flare, they need to remove bulk lower in the shape.
Your styling routine matters too. If you air-dry 90 percent of the time, ask for a cut that behaves that way. If you blow it out with a brush, say so. If you barely touch a hot tool, that changes how sharp the layers should be. The best shag on thick hair is the one that fits your mornings, not the one that only works in a salon chair.
Styling Moves That Keep the Shape from Puffing Up
Air-Dry Shortcut: Work a light mousse through damp roots, scrunch the mids once, and leave the ends alone. Thick hair grows wider as it dries, so the less you rake through it, the cleaner the layer separation stays.
Blowout Finish: Rough-dry the roots until they’re about 70 percent dry, then switch to a round brush and focus on the face frame and crown. You do not need to curl every section. A soft bend in the last 2 inches is enough to make the shape read as finished.
Curl Definition: If your hair is wavy or curly, diffuse with your head tilted to the side so the layers do not collapse straight down. Stop before the hair is bone-dry; that last bit of air-drying helps the pattern settle without getting brittle.
Second-Day Reset: Mist the roots lightly with water, pinch a pea-sized amount of cream through the ends, and revive the front pieces with a quick blast of heat. Thick hair often looks better on day two anyway — the layers separate a little more, and the cut starts to show its structure.
Small Tweaks That Change the Finish Fast
Root Lift: A few clips at the crown while the hair cools can change the whole silhouette. Use them only after the blow-dry or diffuser pass, not while the hair is soaking wet.
Fringe Control: If bangs puff or split, dry them first and pin them flat against the forehead for a minute before they cool. That tiny reset keeps them from floating off to the side.
Gloss, Not Grease: Thick hair usually needs shine on the mids and ends, but only in a light layer. One pea-sized serum spread across the palms is enough for most shag cuts.
Piece Separation: A small amount of texture spray at the ends can keep the layers visible without making the hair crunchy. Spray from underneath, then scrunch once and stop.
Common Mistakes That Turn a Good Shag into a Triangle
- Starting the shortest layers too high: the crown gets poofy and the silhouette widens at the top. Ask for the shortest layers to begin lower — usually around the cheekbone or chin — unless you want serious height.
- Over-thinning the ends: the haircut starts looking see-through at the bottom while the middle still feels heavy. The fix is to remove weight inside the shape, not from the perimeter until it frays.
- Cutting bangs too short on dense hair: thick fringe springs up after the first wash and can feel like a helmet. Leave more length than you think you need, especially with curly or wavy hair.
- Using heavy styling cream everywhere: the layers clump together and lose the piecey movement that makes a shag work. Use lighter mousse at the roots and save the cream for the ends.
- Ignoring the cowlicks and crown swirl: the hair will split where it wants to split, and the shag will look uneven. A good stylist cuts with the growth pattern, not against it.
- Choosing a reference photo with a different hair density: a fine-hair shag and a thick-hair shag are not the same haircut. The same layer line can sit beautifully on one head and turn into a pyramid on another.
Other Directions to Try If You Like One of These
The Soft Office Version: keep the perimeter at collarbone length, use curtain bangs, and leave the crown layers moderate. It keeps the shag shape but reads calmer and more polished.
The Curly-First Version: ask for longer layers and a rounded outline, then let the fringe stay a touch heavier. This version gives curls room to spring without looking over-cut.
The Flat-Crown Fix: if the top of your head lies flat, keep the crown lifted and remove more weight through the lower sides. It gives you height without making the cut look narrow at the neck.
The Grow-Out-Friendly Version: choose longer face framing and avoid a hard disconnect in the back. When the trim window stretches, this one still falls into a decent shape.
The Low-Heat Version: ask for a shag that can air-dry cleanly, with softer ends and less razor work. It is the easiest path if you do not want to heat-style every time you wash.
Keeping the Cut in Shape Between Haircuts
Thick hair grows out with opinions. A shag can keep its shape for a while, but the bangs, face frame, and crown usually start changing first. Shorter versions often need a clean-up every 6 to 8 weeks. Longer shag cuts can usually stretch to 10 or 12 weeks if the layers are soft and the perimeter is still balanced.
Bang trims are their own thing. Curtain bangs may behave for a little longer, while micro-bangs and full fringes usually need attention sooner. If the fringe starts touching your eyelashes when dry, it’s time. Waiting until it annoys you in every mirror only makes styling worse.
At home, dry shampoo helps more than people admit. Thick hair can hold oil at the roots while the mids stay dry, so a light spray at the crown keeps the layers from collapsing. Sleep on satin if you can, and flip the hair into a loose topknot or low braid before bed if the ends tangle easily. That one move saves a lot of morning brushing.
If the cut starts to puff at the sides, do not panic and do not re-wet the whole head. Mist only the outer layer, hit the roots with a blow-dryer for 30 seconds, and let the ends keep their shape. Thick hair responds better to small corrections than to a full restart.
Questions People Ask Before They Book the Cut
Will a shag make thick hair look thinner?
It can make thick hair look lighter, but that is not the same thing as thin. The density is still there; the layers just stop it from sitting in one heavy mass. If you want to keep fullness, ask your stylist to leave more perimeter weight.
What’s the difference between a shag and a wolf cut?
A wolf cut usually pushes the crown shorter and the nape more tapered, with a stronger disconnect between top and bottom. A shag is softer and more blended. If you want the edge without the severity, ask for a shag with a little wolf energy, not the other way around.
Do shag haircuts work on straight thick hair?
Yes, but straight thick hair shows bad layering faster than wave or curl. Soft slicing, point cutting, and a little bend with a brush or iron help the layers show up instead of sitting as blunt shelves.
Should thick hair get bangs with a shag?
Bangs can be excellent on thick hair because they break up the front and keep the style from feeling heavy. Curtain bangs are the easiest place to start. Full fringe and micro-bangs need more styling and more honesty about shrinkage.
How often should I trim a thick-hair shag?
Short shags usually need a trim every 6 to 8 weeks. Shoulder-length and longer versions can often go 8 to 12 weeks if the layers are soft and the fringe is not too short. Bangs may need cleanup sooner than the rest of the cut.
What if my shag looks puffy after styling?
Check the root product first. Too much cream or too much brushing can make the layers swell. Dry the roots first, keep the mids light, and ask for more weight left in the lower perimeter next time.
Can I air-dry a shag and still make it look intentional?
Yes, if the cut was shaped with that in mind. Use a light mousse, scrunch once, and avoid brushing while it dries. Thick hair usually needs a touch of separation at the ends, not a full round-brush finish.
What should I bring to the salon?
Bring 2 or 3 reference photos, plus a short note about how you wear your hair most days. Tell the stylist whether you want to keep length, reduce bulk, or change the fringe. That small bit of context changes the cut more than the photo alone.
The Shape That Lets Thick Hair Breathe
Thick hair does not need to be flattened, stripped, or talked into behaving. It needs a cut that respects the weight and gives it places to move. That is why the best shag variations work so well: they keep the body, cut the bulk, and leave enough edge that the shape still has a point.
If you look back through the thirty options, the real difference is not whether the hair is short or long. It is where the weight sits, how the fringe changes the front, and how much softness you want at the ends. Get those three things right, and thick hair stops fighting the haircut and starts carrying it.
One good reference photo can help, but a clear idea of your daily routine helps more. Bring both, ask for the layer placement in plain words, and let the cut breathe a little. That is where the shag starts to make sense.