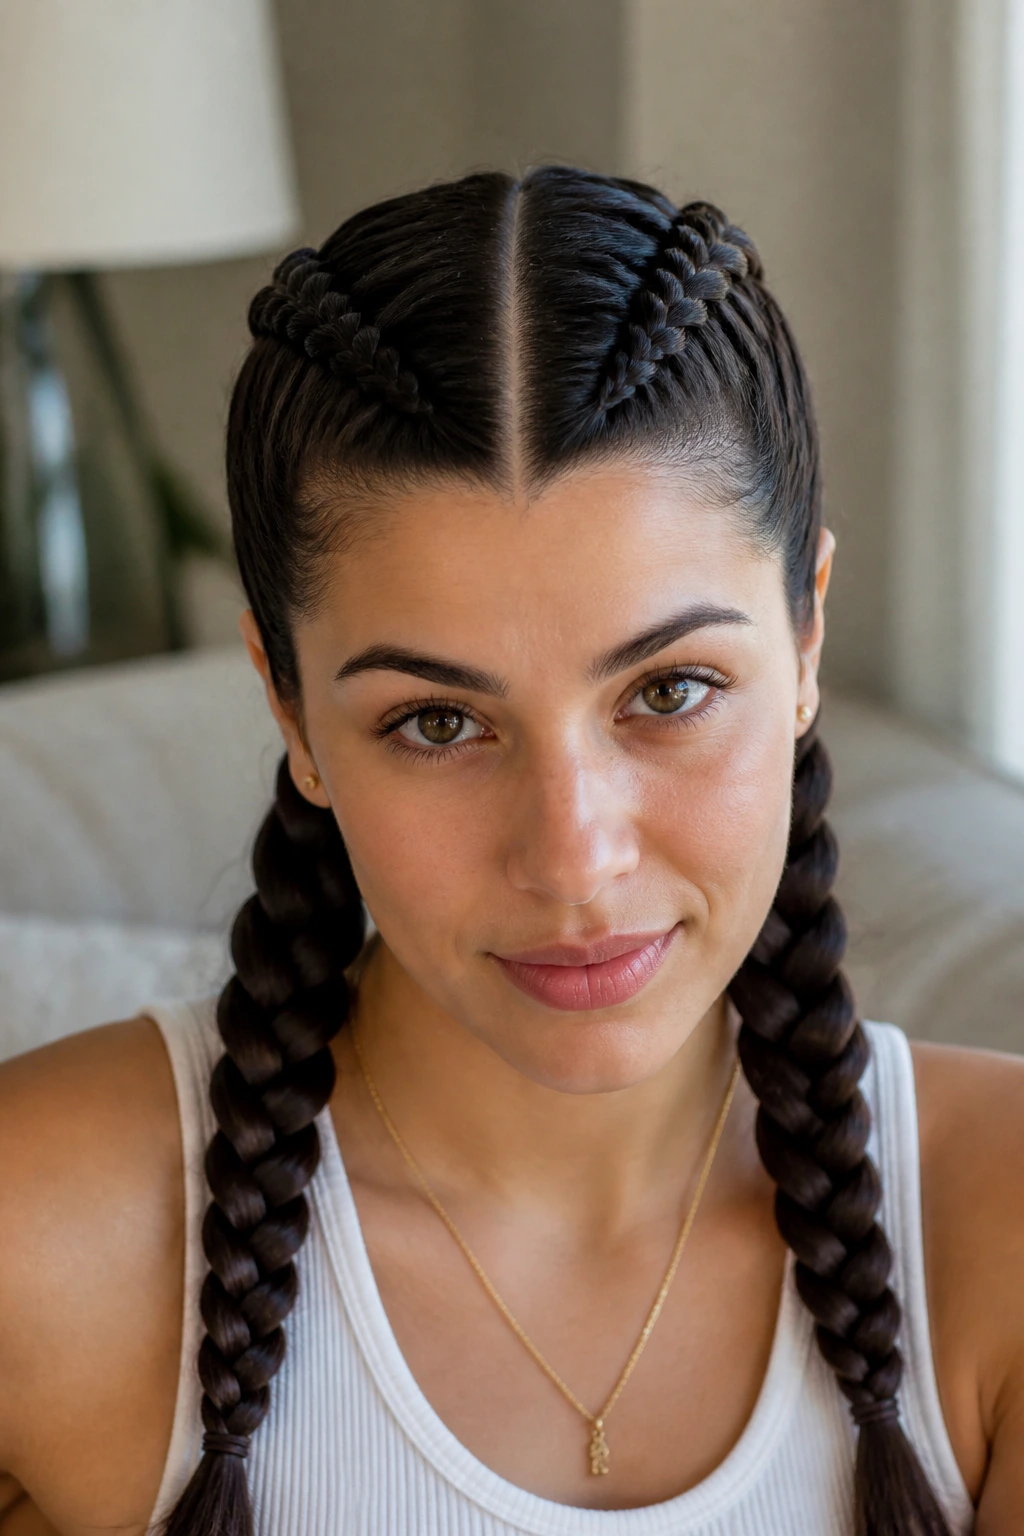
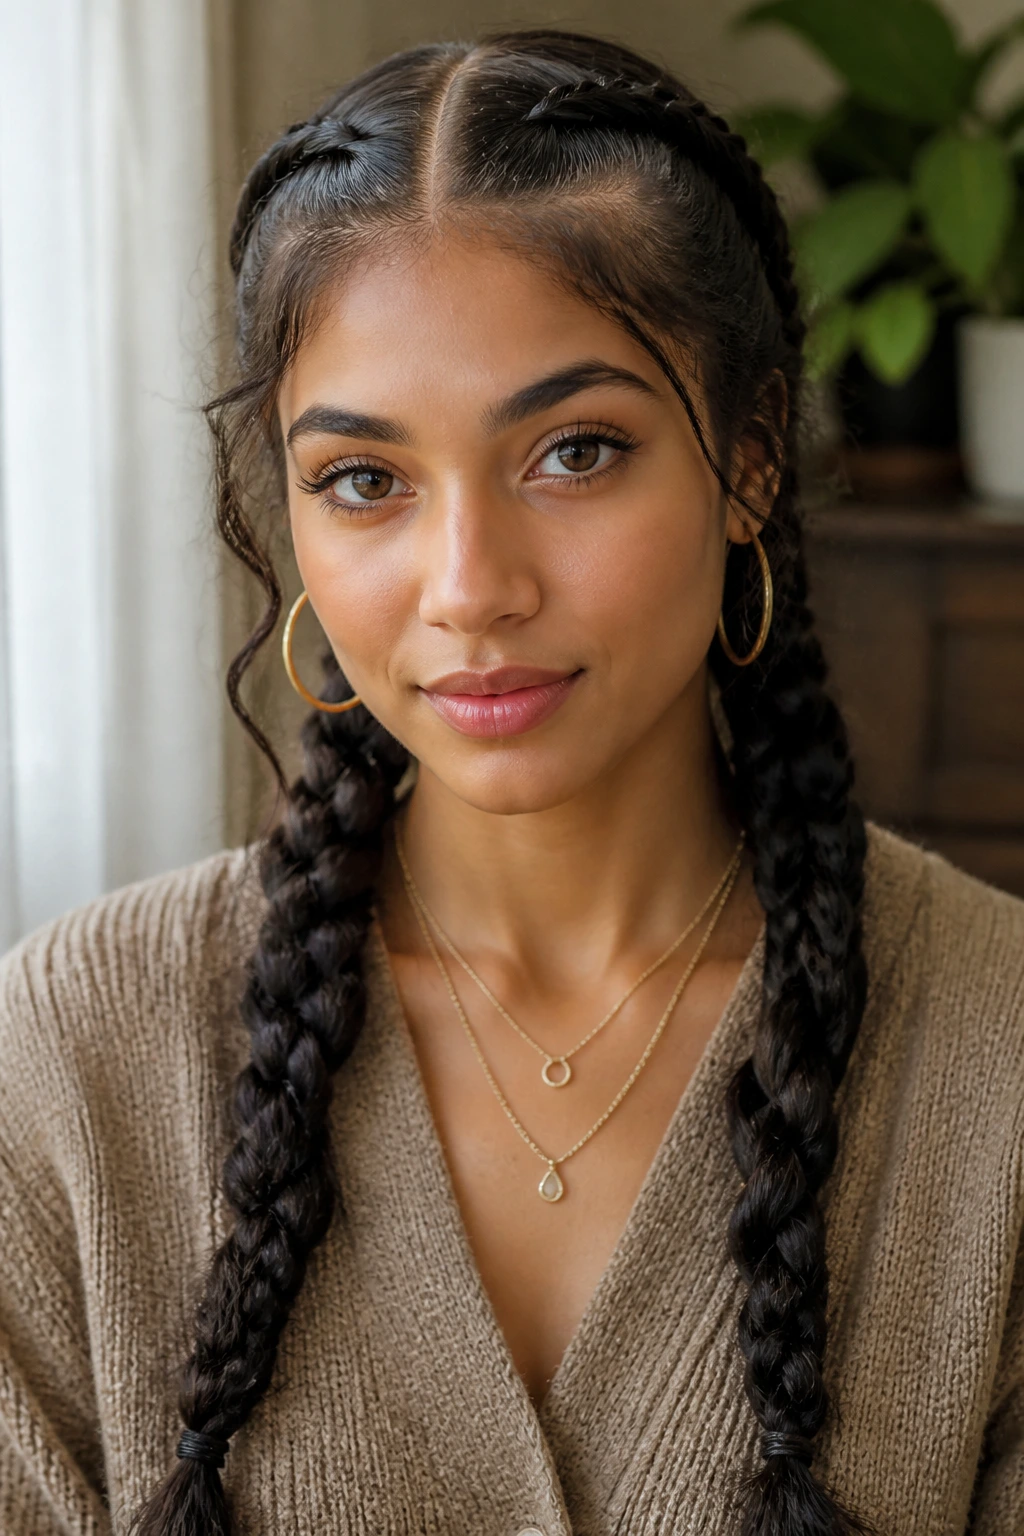
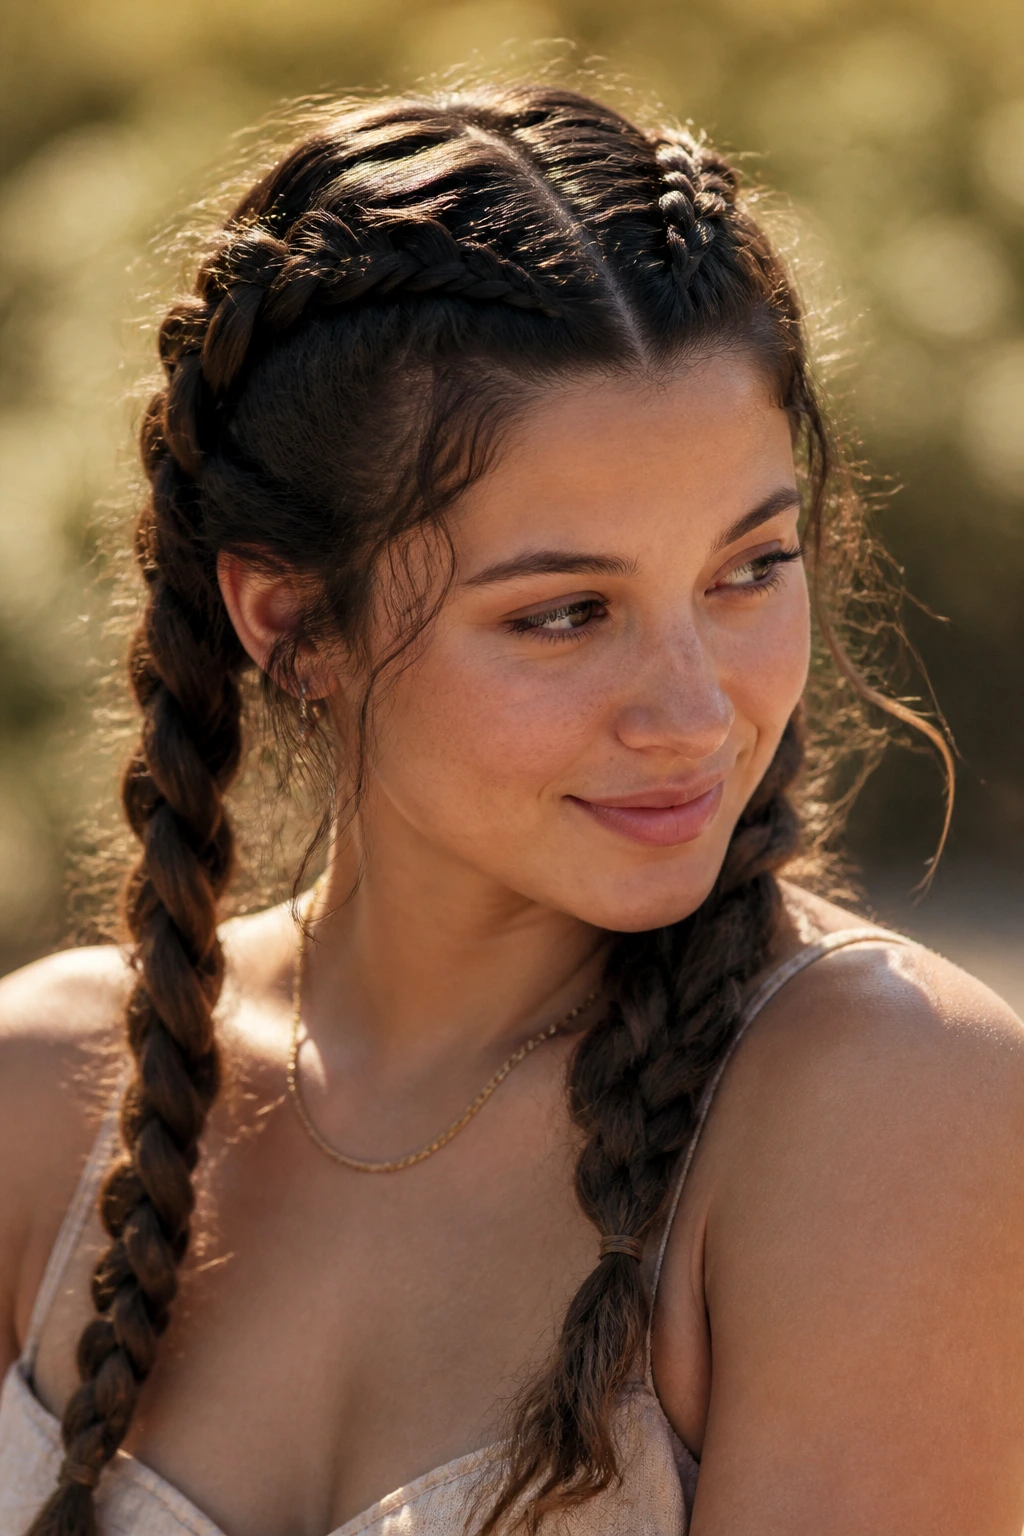
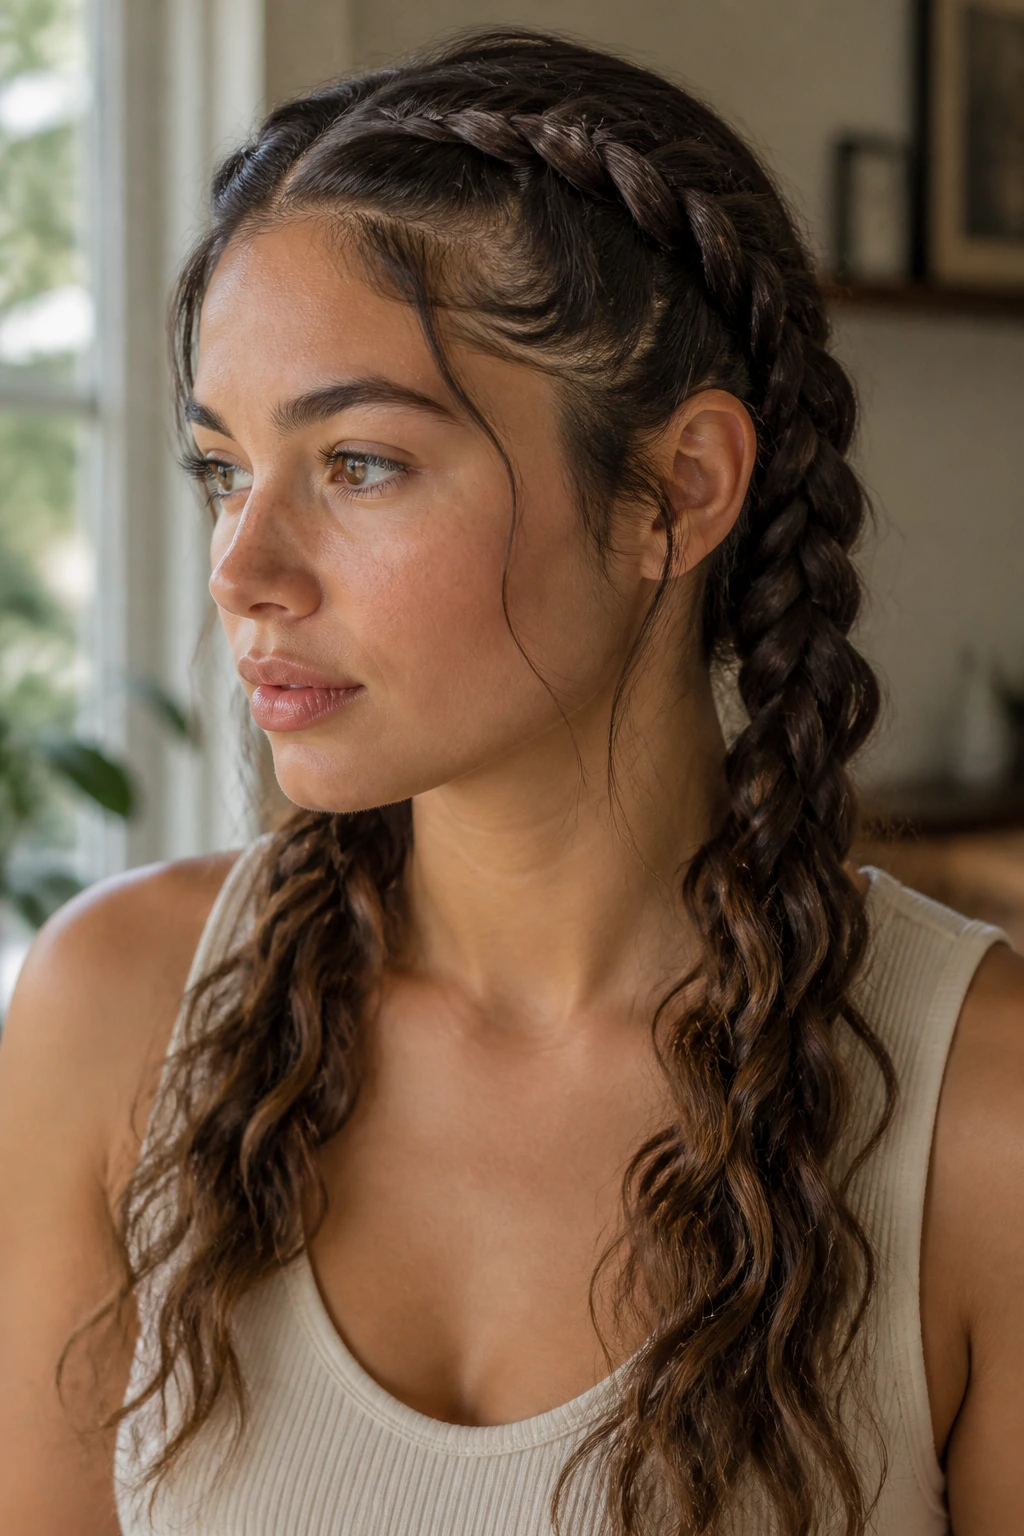
Twin braids can do a lot for wavy hair when you want the style to stay put without turning your head into a helmet. They keep the mid-lengths from rubbing into collars, keep the ends from snagging on straps and zips, and let the wave pattern settle into something neater for a day or two without flattening every bend into a board-straight sheet.
For wavy hair, that middle ground matters. A loose braid lets the texture breathe; a tight braid can leave you with a sore scalp and flat roots that look smaller than they really are. The sweet spot sits between those two, with enough grip at the part to hold and enough slack in the lengths that the braid doesn’t fight the wave.
What makes twin braids work is not the braid count. It’s the prep. A clean part, a little slip in the mids, and ends secured so they don’t fray all make the difference between braids that last through sleep and braids that puff up halfway to lunch.
Why These Twin Braids Earn a Spot in Your Braiding Routine
-
Less daily friction: Two braids keep wavy lengths from brushing sweaters, hoodies, and jacket collars, which is where a lot of the fuzz starts.
-
Wave pattern stays visible: If you braid wavy hair with a little slack, the braid still shows the bend and movement instead of sanding everything flat.
-
Scalp access stays easy: A center part, side part, or zigzag part gives you a clean line for oiling or refreshing the roots without taking the whole style apart.
-
Ends are easier to control: Clear elastics, satin ties, or tucked finishes stop the last few inches from turning into a dry little puff by the end of the day.
-
The style can be soft or sharp: Twin braids can look polished enough for a blazer or loose enough for a sweatshirt, which is a big part of why they keep working for so many people.
-
They handle sleep better than loose waves: If you want your texture to survive one more night without a full detangling session, twin braids usually win.
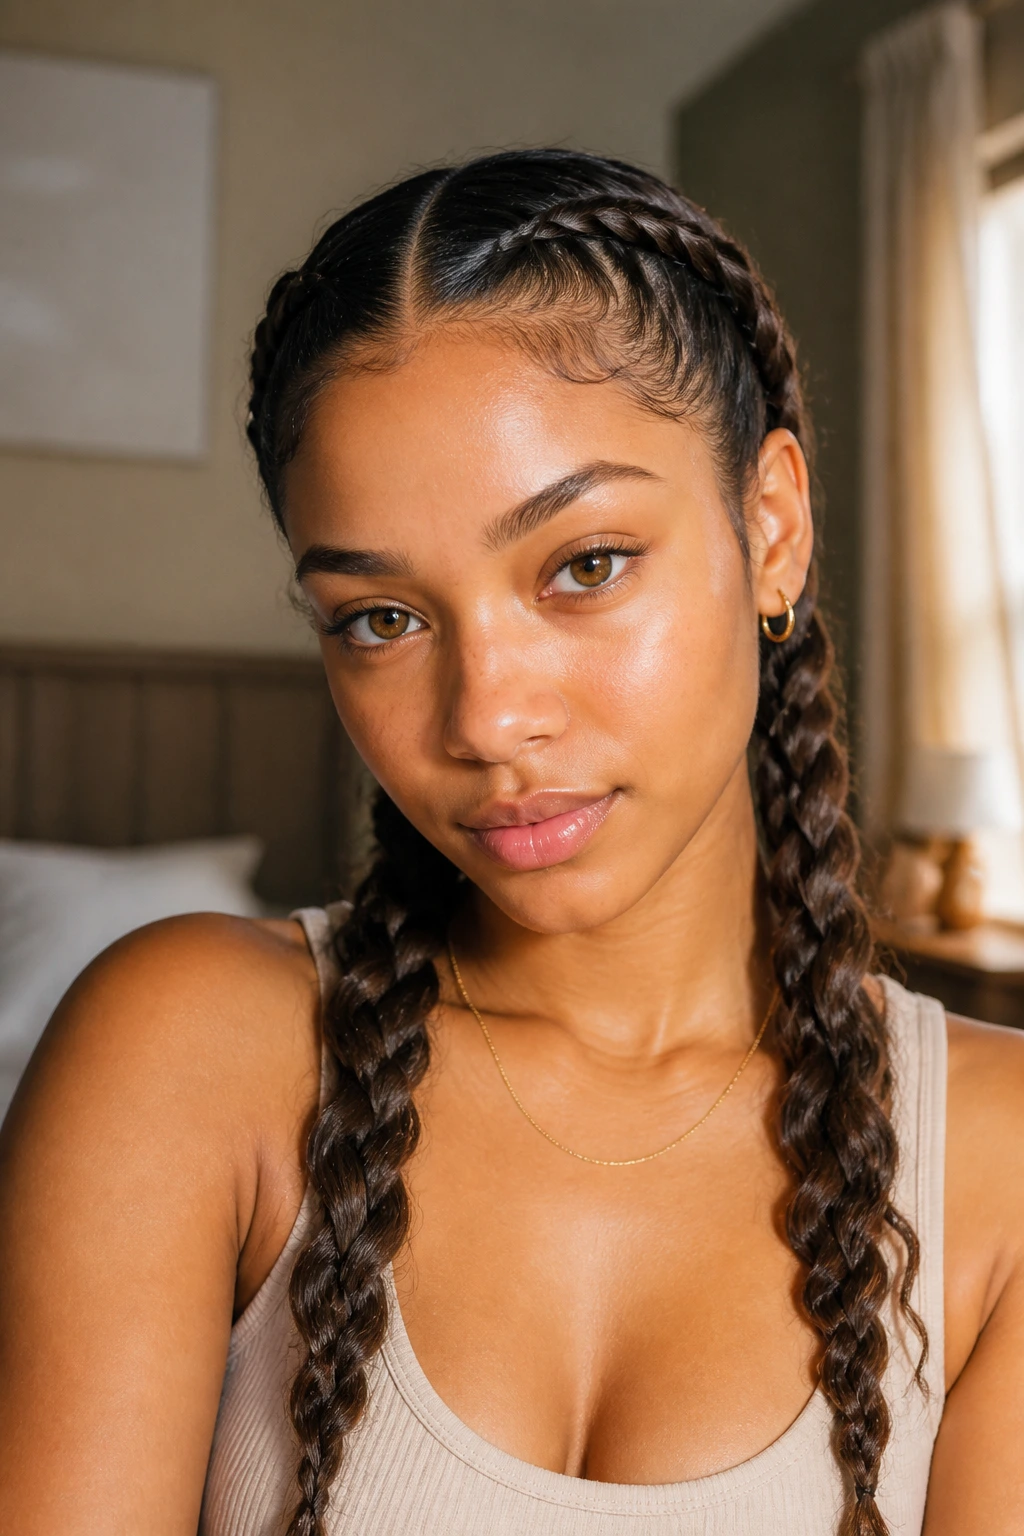
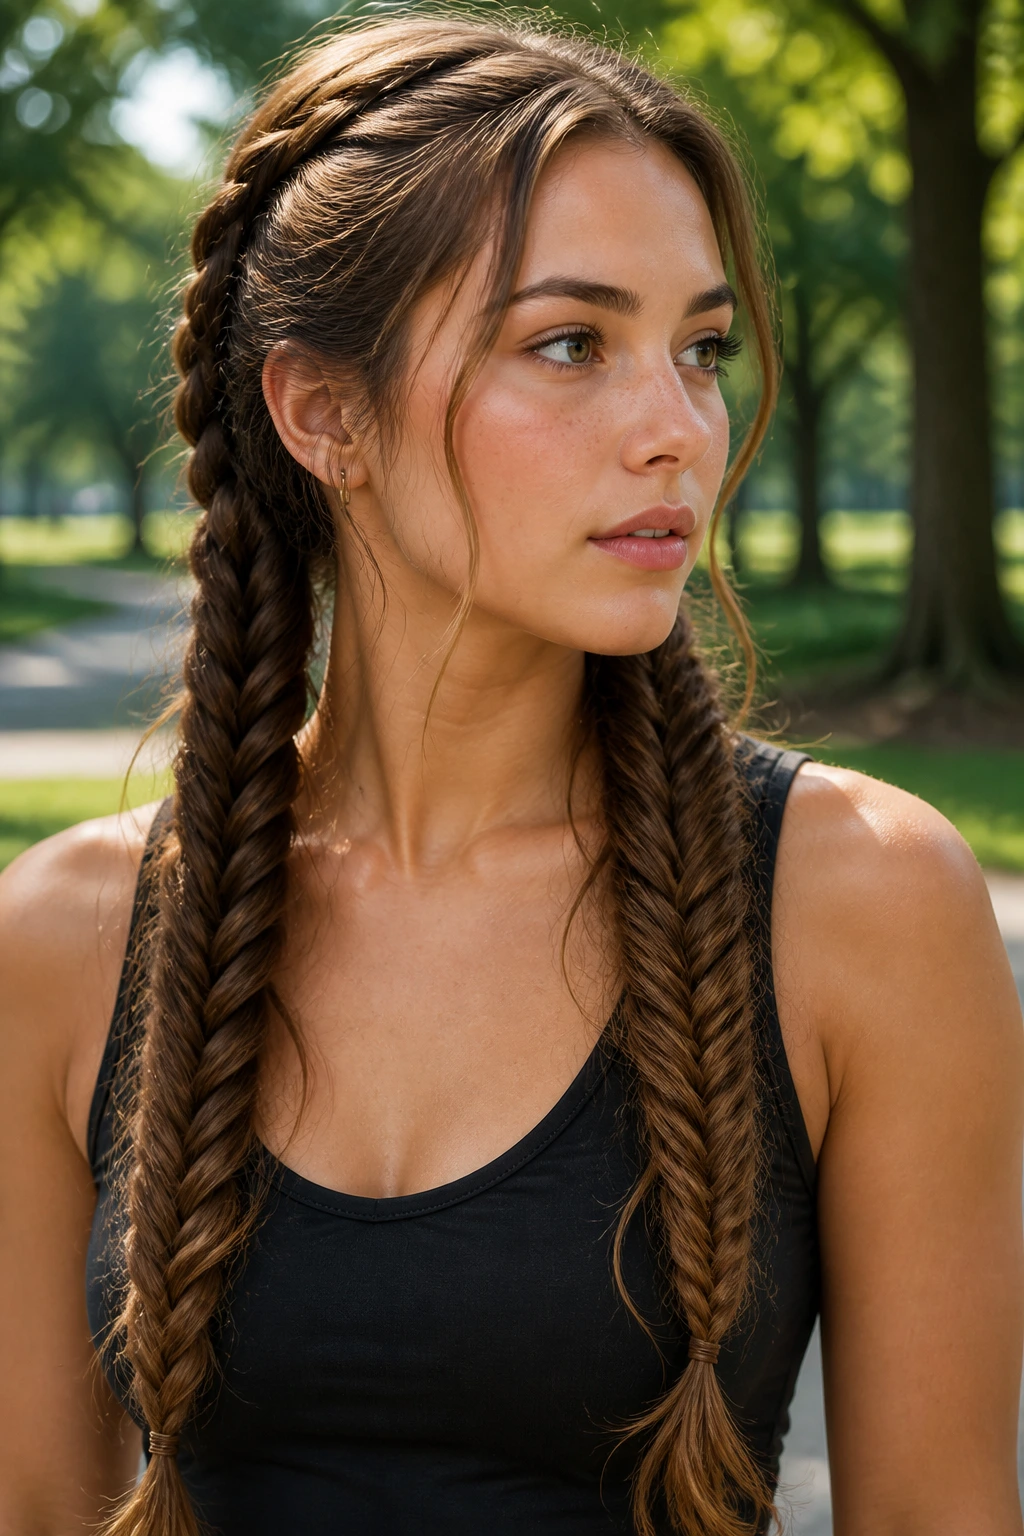
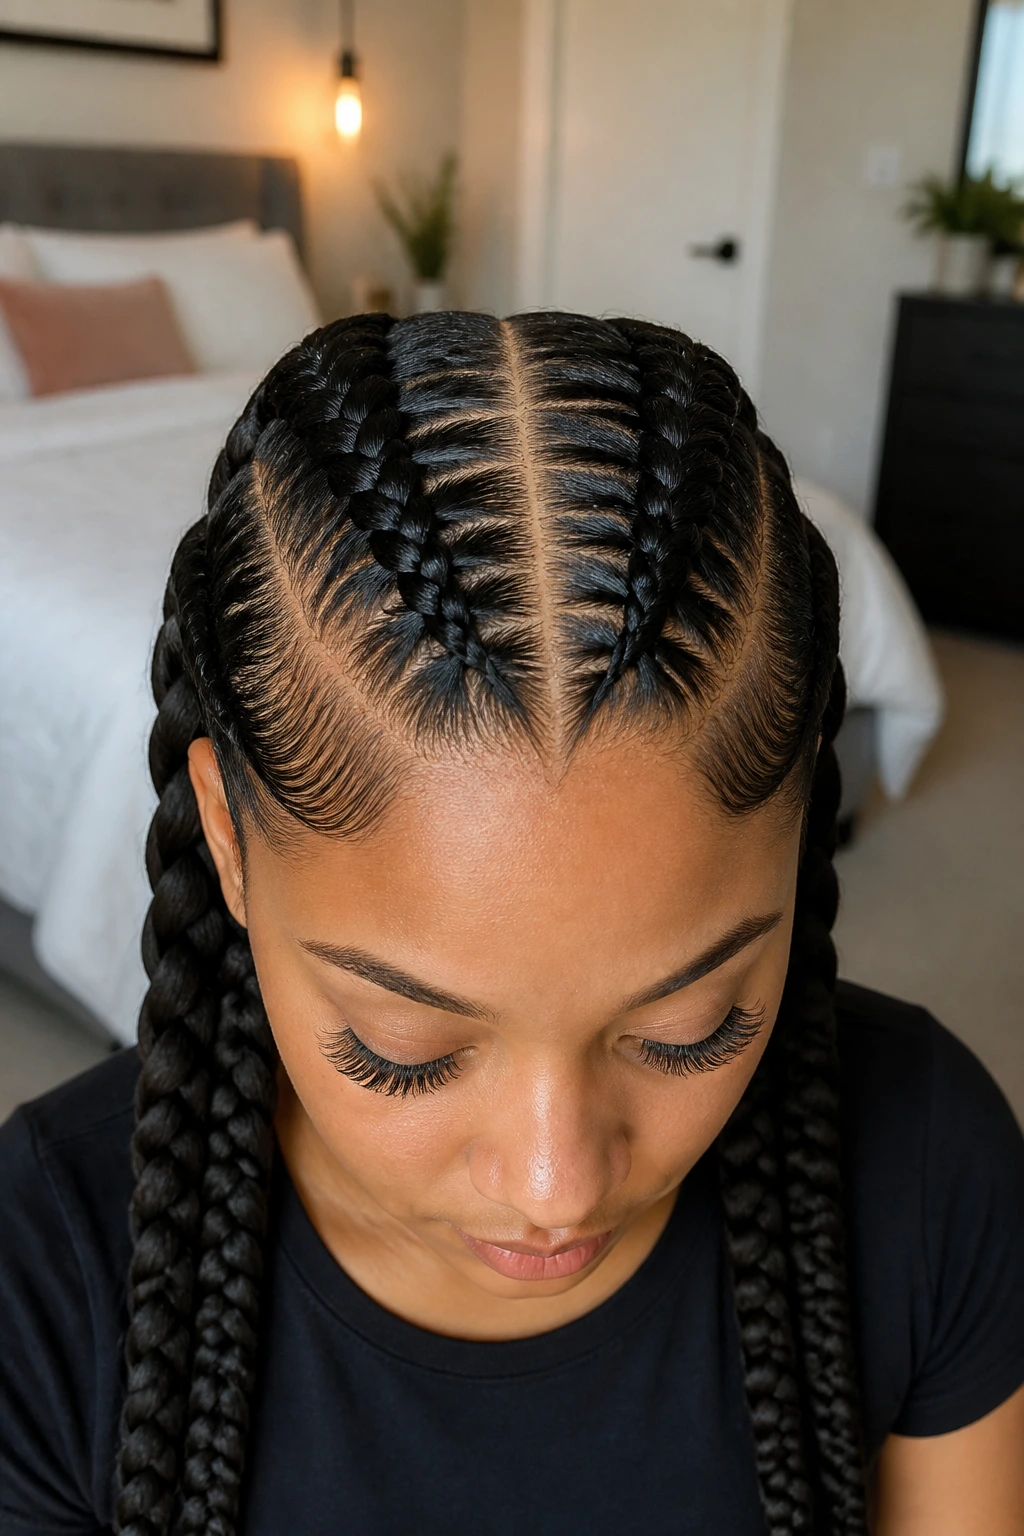
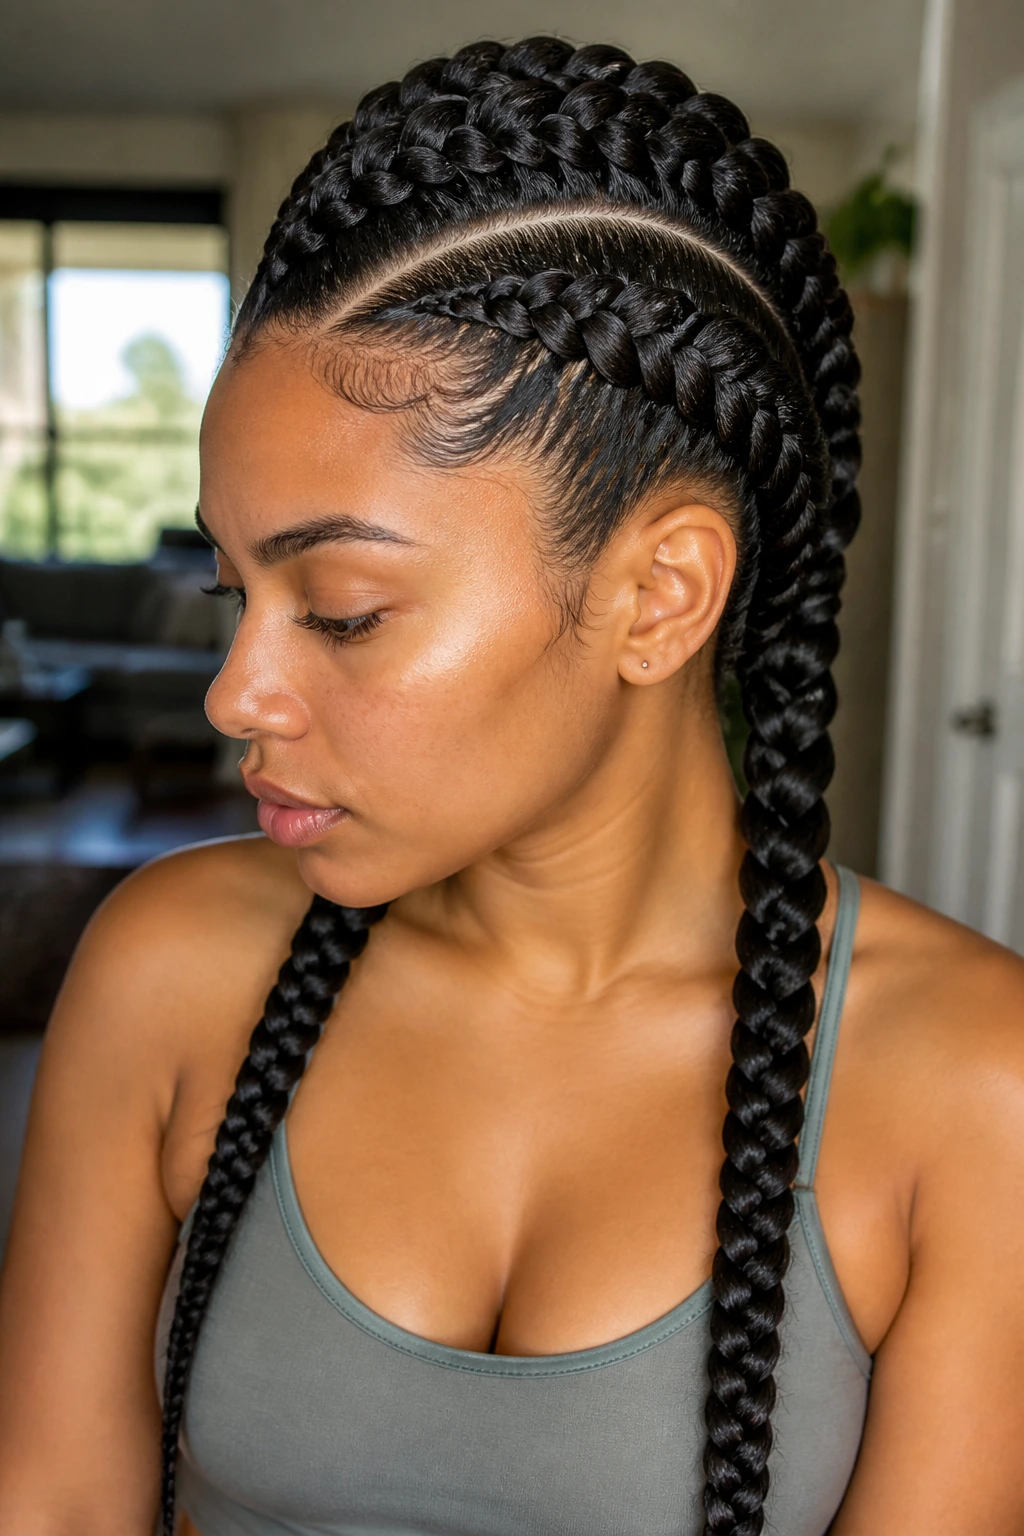
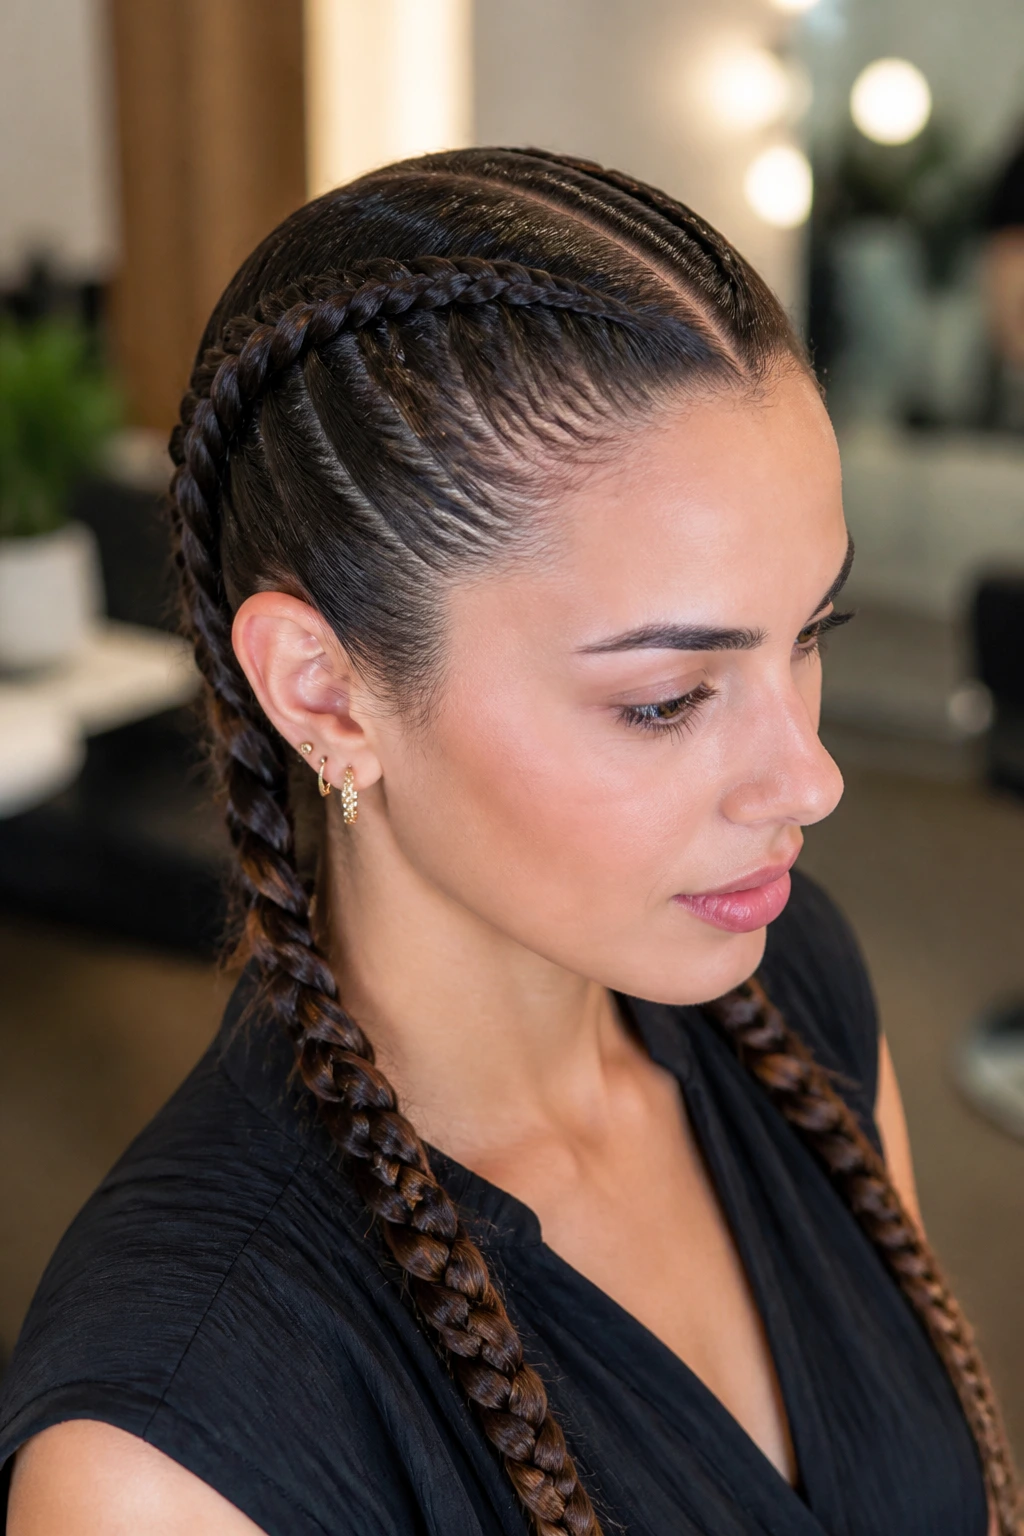
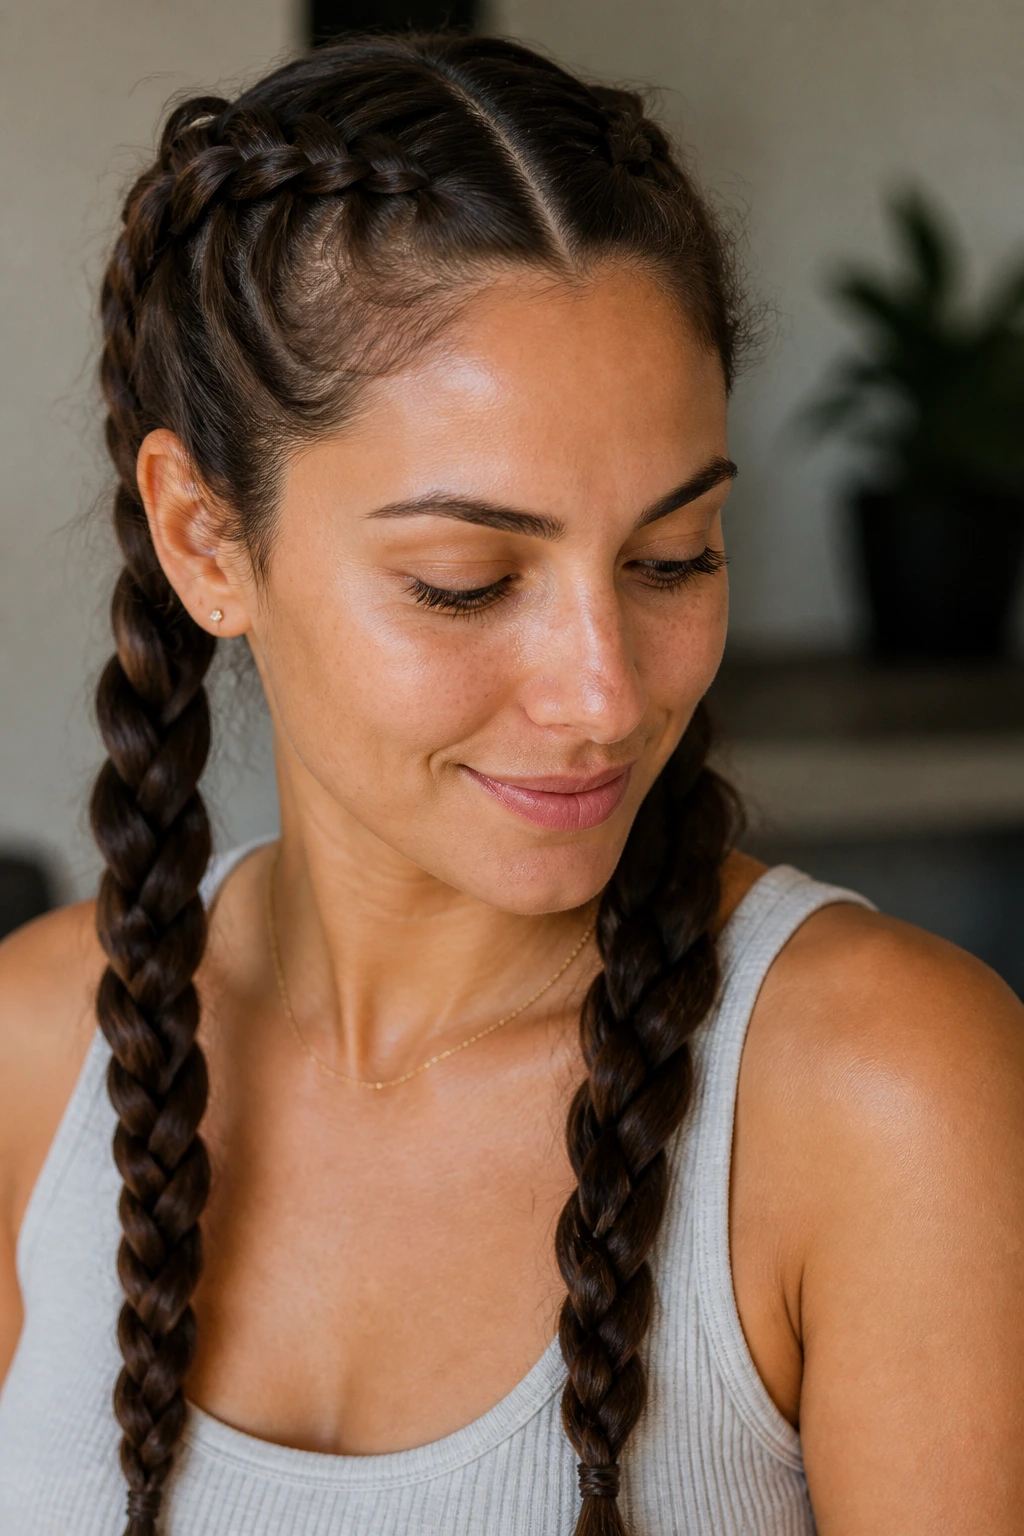
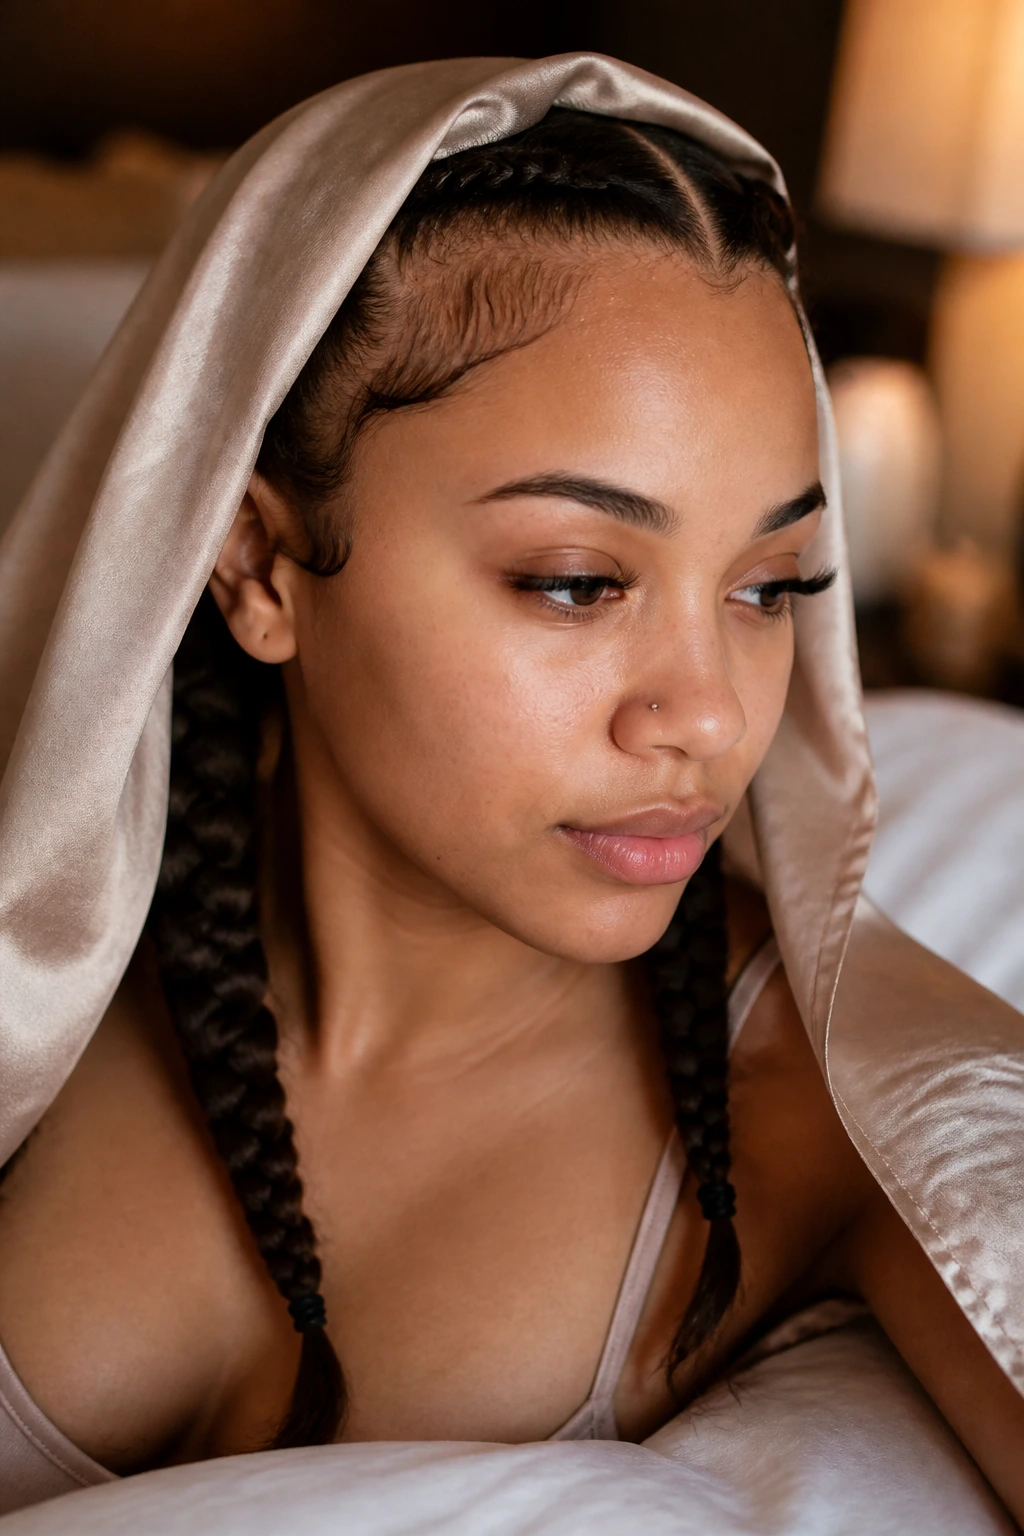
1. Sleek Middle-Part Dutch Twin Braids
A clean middle part and two Dutch braids give wavy hair a sharper outline without erasing the texture underneath. I like this version when the hair is puffing at the crown but the lengths still have enough bend to look alive. The braid sits on top of the head, so you get a visible rope effect instead of a braid that disappears into the scalp.
Why It Fits Wavy Hair
Dutch braids hold a wave pattern better than a tight slick-back because they leave a little body along the braid itself. Start with a rat-tail comb, make the part straight, and smooth a pea-sized amount of gel or cream along each side before you begin. Once you reach the nape, switch to a regular three-strand braid for the last few inches and seal with snag-free elastics.
A tiny bit of tension at the first inch helps short layers stay inside the braid. Too much tension at the temples, though, and the whole style stops being protective.
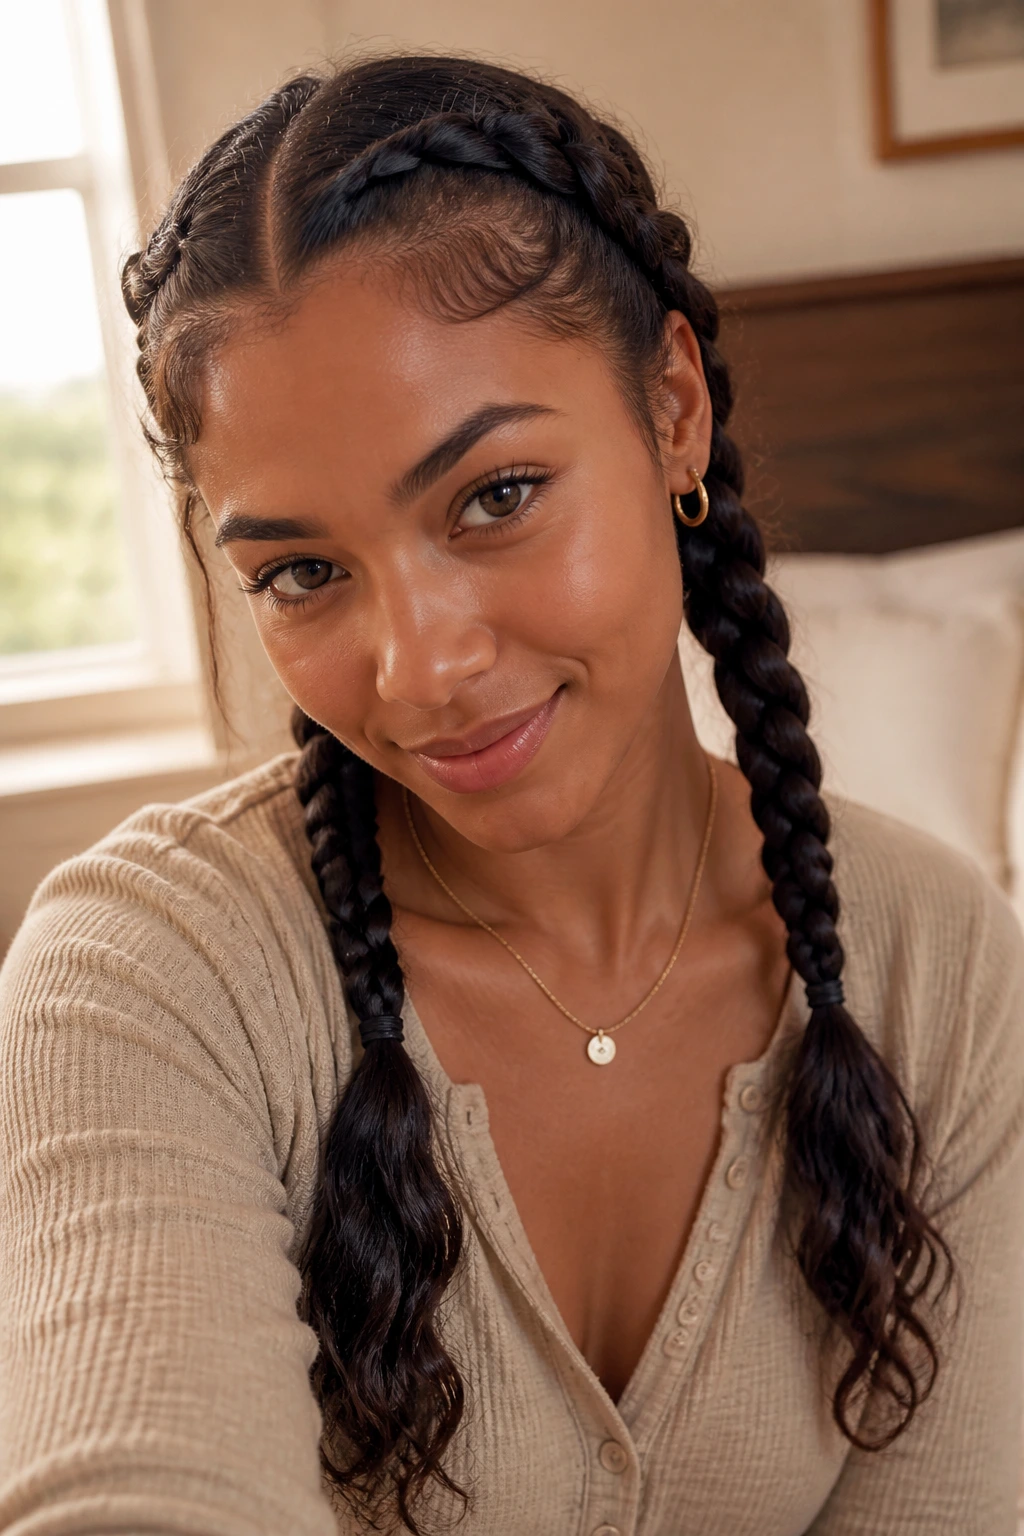
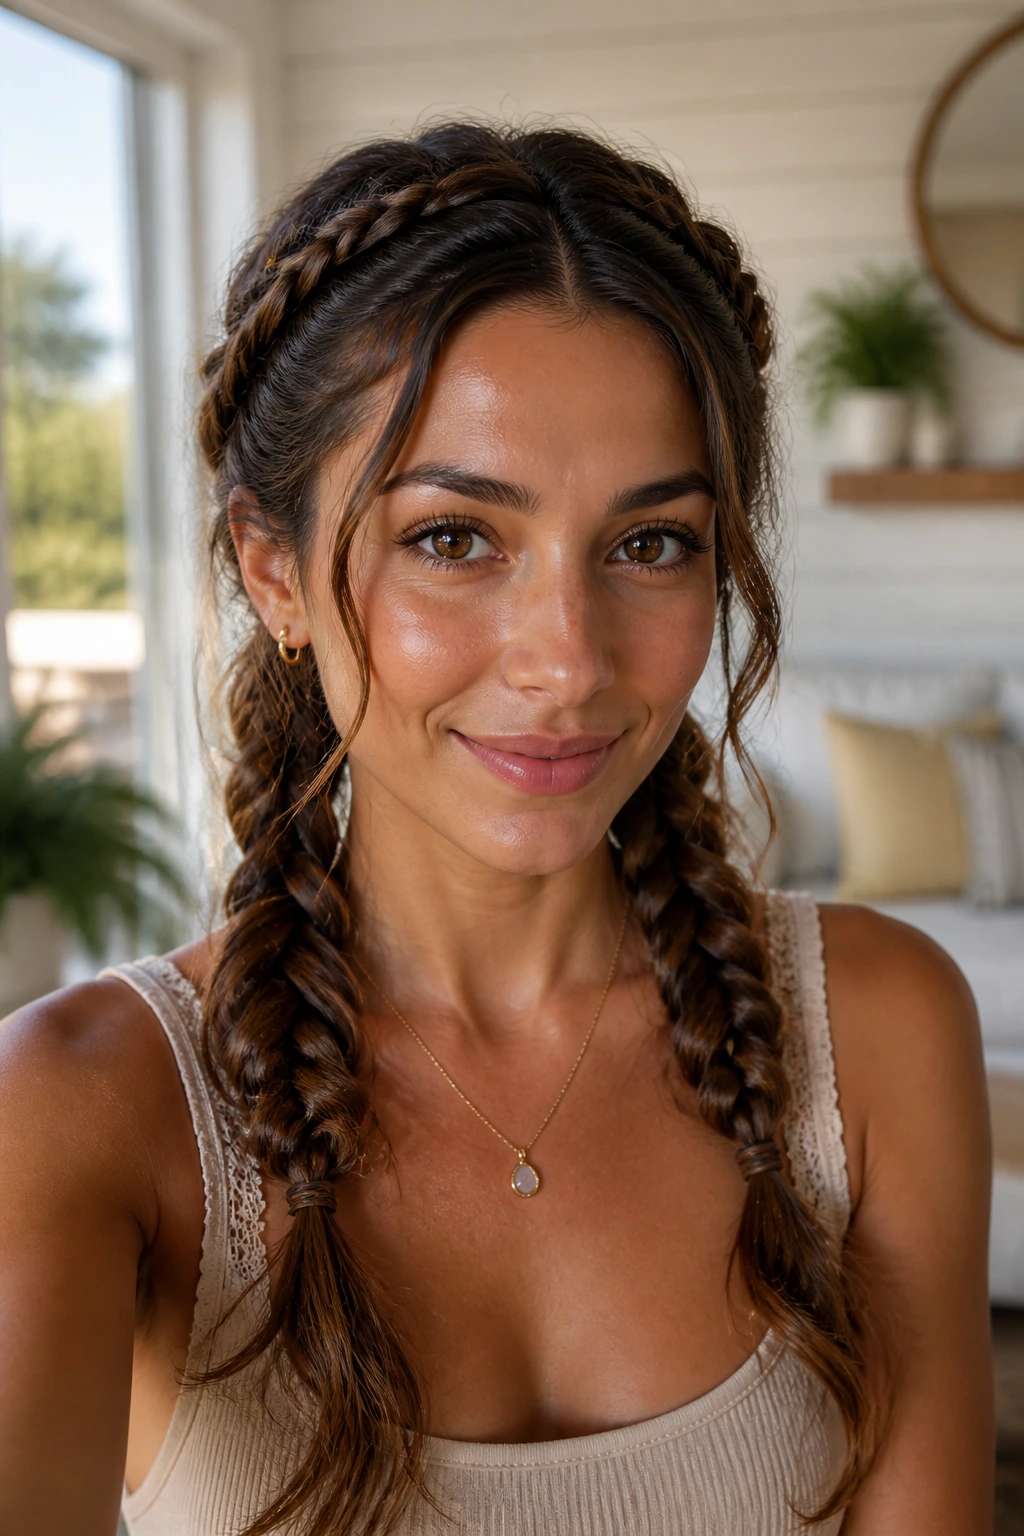
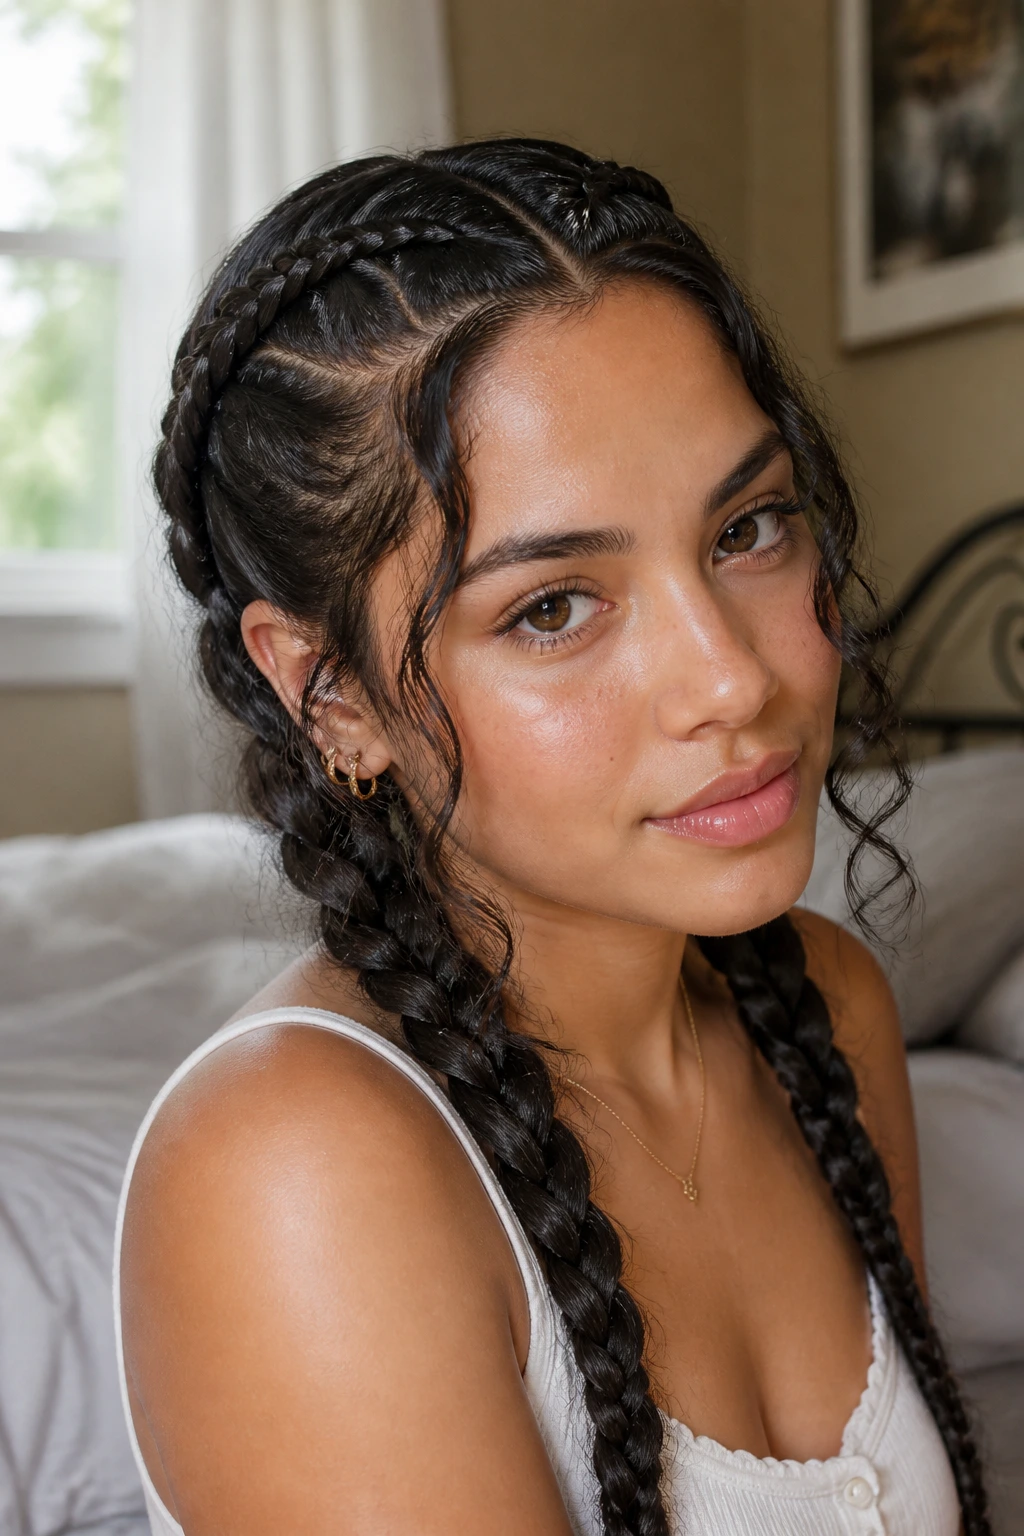
2. Loose French Twin Braids with Face-Framing Waves
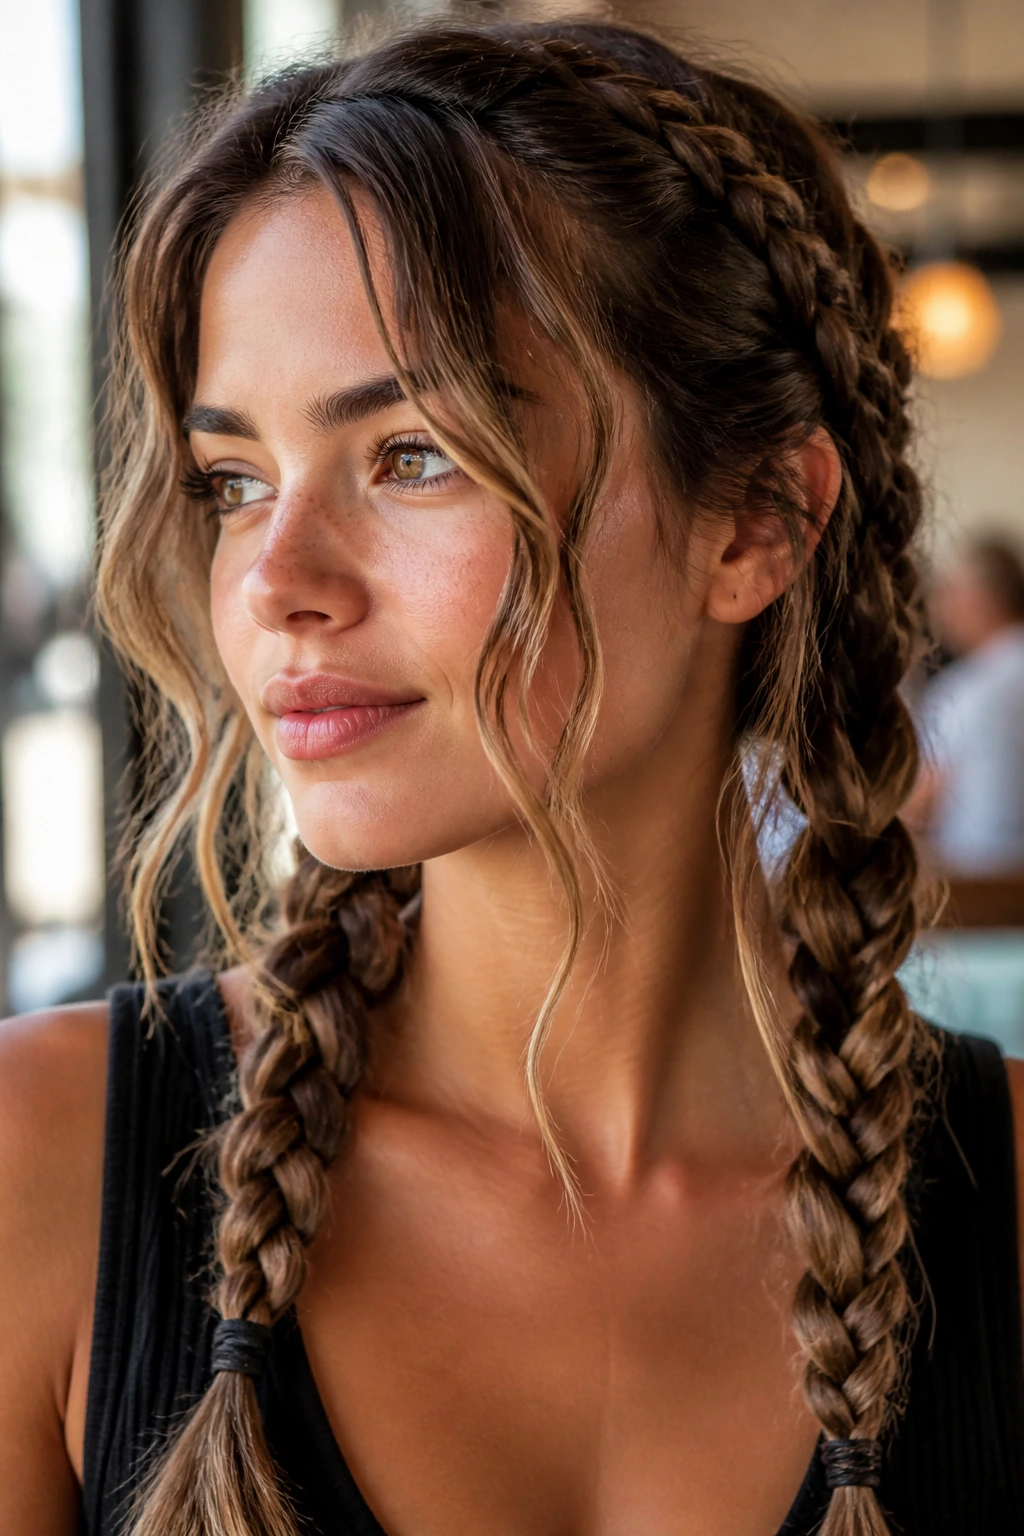
This is the version I reach for when I want the braid to look soft, not severe. The French pattern starts at the hairline and gathers hair slowly, which keeps the braid close enough to the head to last but loose enough that the wave texture still shows through the body of the braid.
If your hair is collarbone length or longer, leave a pair of face-framing pieces out before you start. They don’t need to be curled into perfect spirals. A natural bend is better. The trick is to keep the braid loose enough that those front pieces don’t look like they were borrowed from a different hairstyle.
This style sits nicely on wavy hair that gets puffy at the ends. The braid reins in the bulk near the scalp, while the lengths keep a little movement. Good combination. Not fussy. Not flat.
3. Low Nape Twin Braids Tucked Under the Collar

Want the least annoying version for windy days or coat weather? Start the braids behind the ears and keep them low at the nape. The whole point is to keep the braid line away from the top of the head so your waves don’t get crushed where you part them.
That low placement also makes the ends easier to tuck. You can braid all the way down, fold the tails under, and pin them flat with two or three small bobby pins. It’s the kind of finish that stays quiet under a scarf and doesn’t shout for attention.
I like this style most on medium to thick wavy hair, because the low starting point lets the roots stay smooth while the lengths do their own thing. If your hair is fine, keep the braid a little looser so it doesn’t look stringy at the bottom.
4. Bubble-Ended Twin Braids
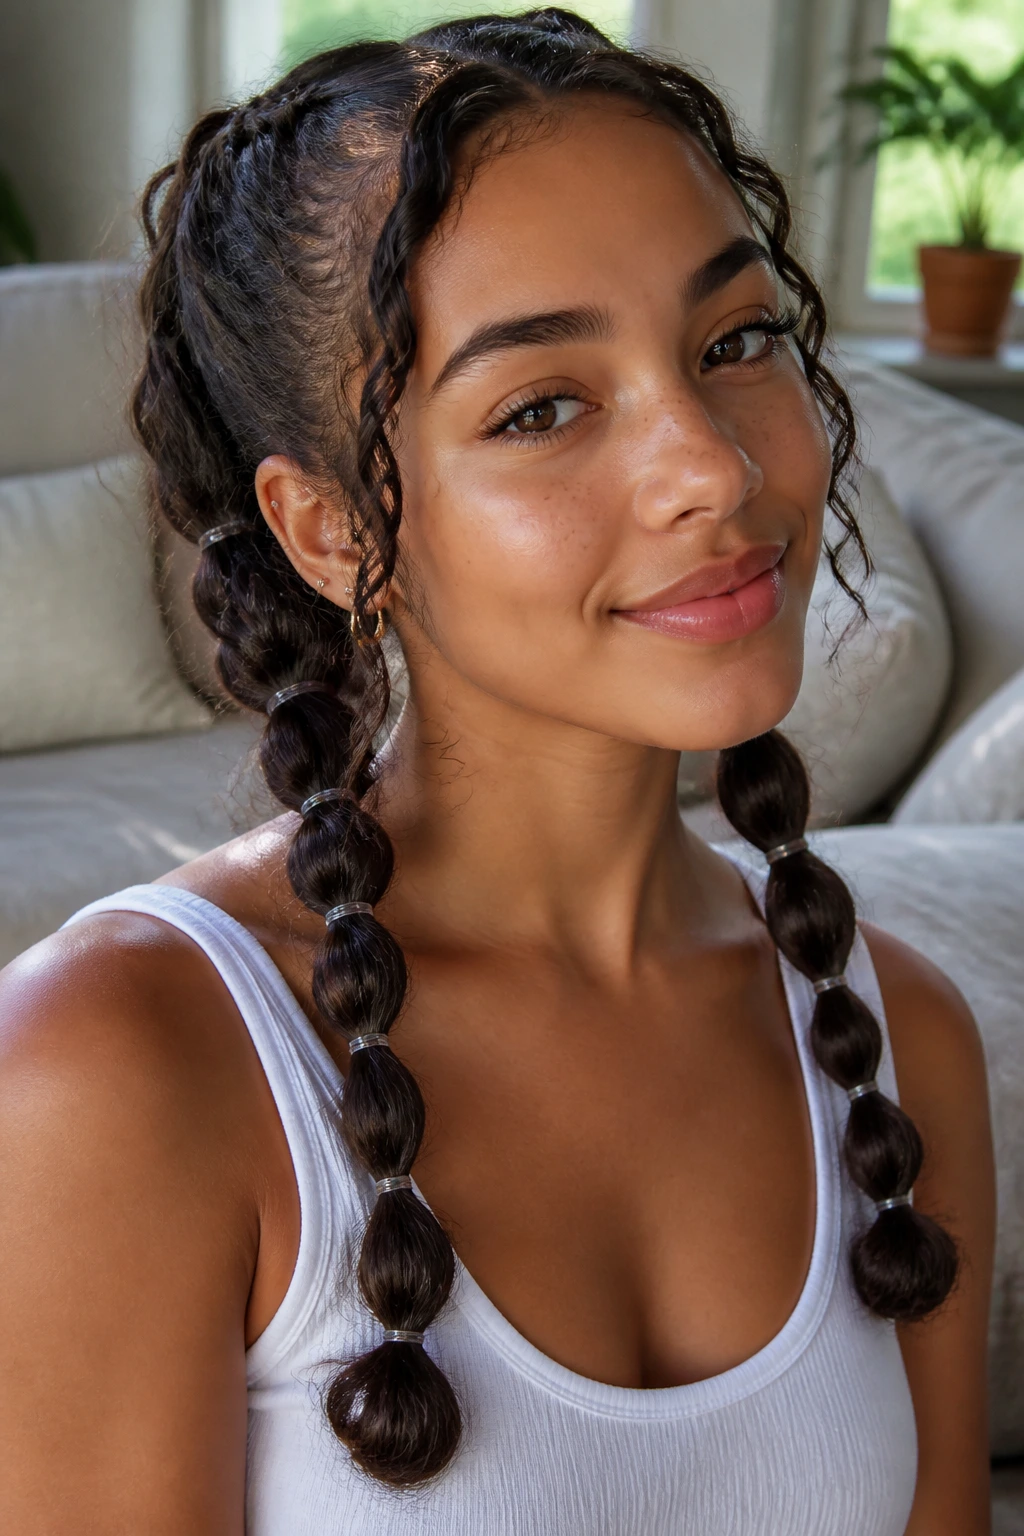
The braid itself does the work; the bubbles at the ends keep the whole thing from looking too plain. After you finish each braid, add small clear elastics every 1½ to 2 inches down the tail, then gently tug each section outward until it rounds out. That gives wavy hair a playful, segmented finish without needing heat or extra teasing.
This version is smart when your lengths are longer than your layers. A normal braid can make long wavy hair look heavy at the bottom. The bubble sections break that line up and keep the style from dragging.
Use smooth elastics, not anything rubbery. Sticky bands snag wavey ends fast, and the damage shows first on the last inch or two. That’s always where the friction catches up.
5. Fishtail Twin Braids for Wavy Texture
A fishtail braid is tighter in appearance than a standard three-strand braid, which makes it a good match for wavy hair that already has some natural body. The pattern looks detailed even when the braid itself is loose, and that’s the part I like most. It reads as polished without needing a lot of product.
Keep the fishtail soft rather than perfectly flat. Pull tiny sections from the outer edges and cross them over with even spacing. Once the braid is secured, pancake it only a little. Too much tugging and the whole thing goes from textured to frayed in a hurry.
This version works best when your waves are long enough to show off the fishtail pattern. Shoulder-length hair can do it, but the braid will look shorter and denser. That’s not a flaw. It just changes the mood.
6. Rope-Twist Twin Braids
Rope braids are fast, which is enough reason to keep them in the rotation. They twist two sections around each other instead of weaving three strands, so the finished look is clean and lightweight. On wavy hair, that twist can either look sleek or slightly tousled depending on how firmly you twist.
The Detail That Matters
If your hair slips easily, anchor each side with a tiny elastic first. That sounds fussy, but it saves the braid from unraveling at the crown when the texture is extra smooth. A little cream on the mids helps the twist hold together without turning greasy.
I like rope braids for medium-length waves that need a quick protective style and don’t want a heavy braid pressing into the scalp all day. They’re especially nice if you’re keeping the style under a hat or hood, because the flat twist doesn’t build a big bump at the back of the head.
7. Halo-to-Pigtail Twin Braids
This one starts with a crown section that looks almost halo-like, then splits into two lower braids. It’s a good pick when you want the top of the head to stay smooth and controlled, but you don’t want both braids starting right at the temples.
The crown section helps gather shorter layers that usually escape a regular twin braid. From there, the two plaits can drop into a softer pigtail shape, which keeps the look from feeling too severe. On wavy hair, that transition also gives you a bit of lift where the hair usually wants to collapse.
If you want this style to last, keep the transition point at the back of the head clean and secure. A single hidden pin there does more than people expect.
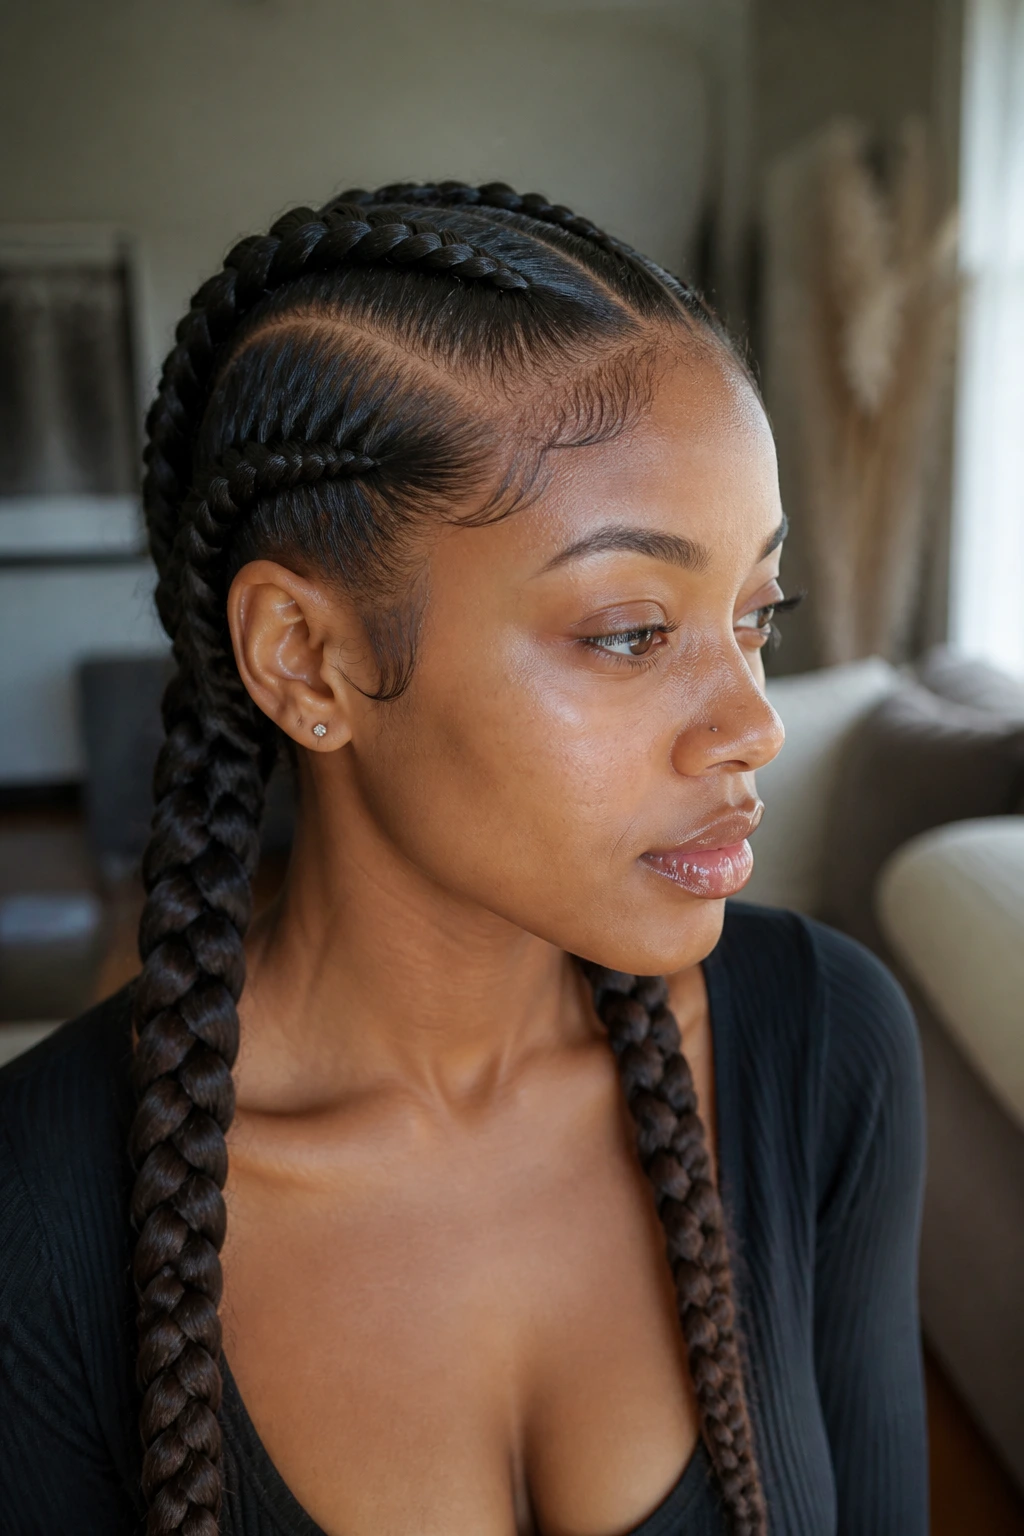
8. Zigzag Part Twin Braids
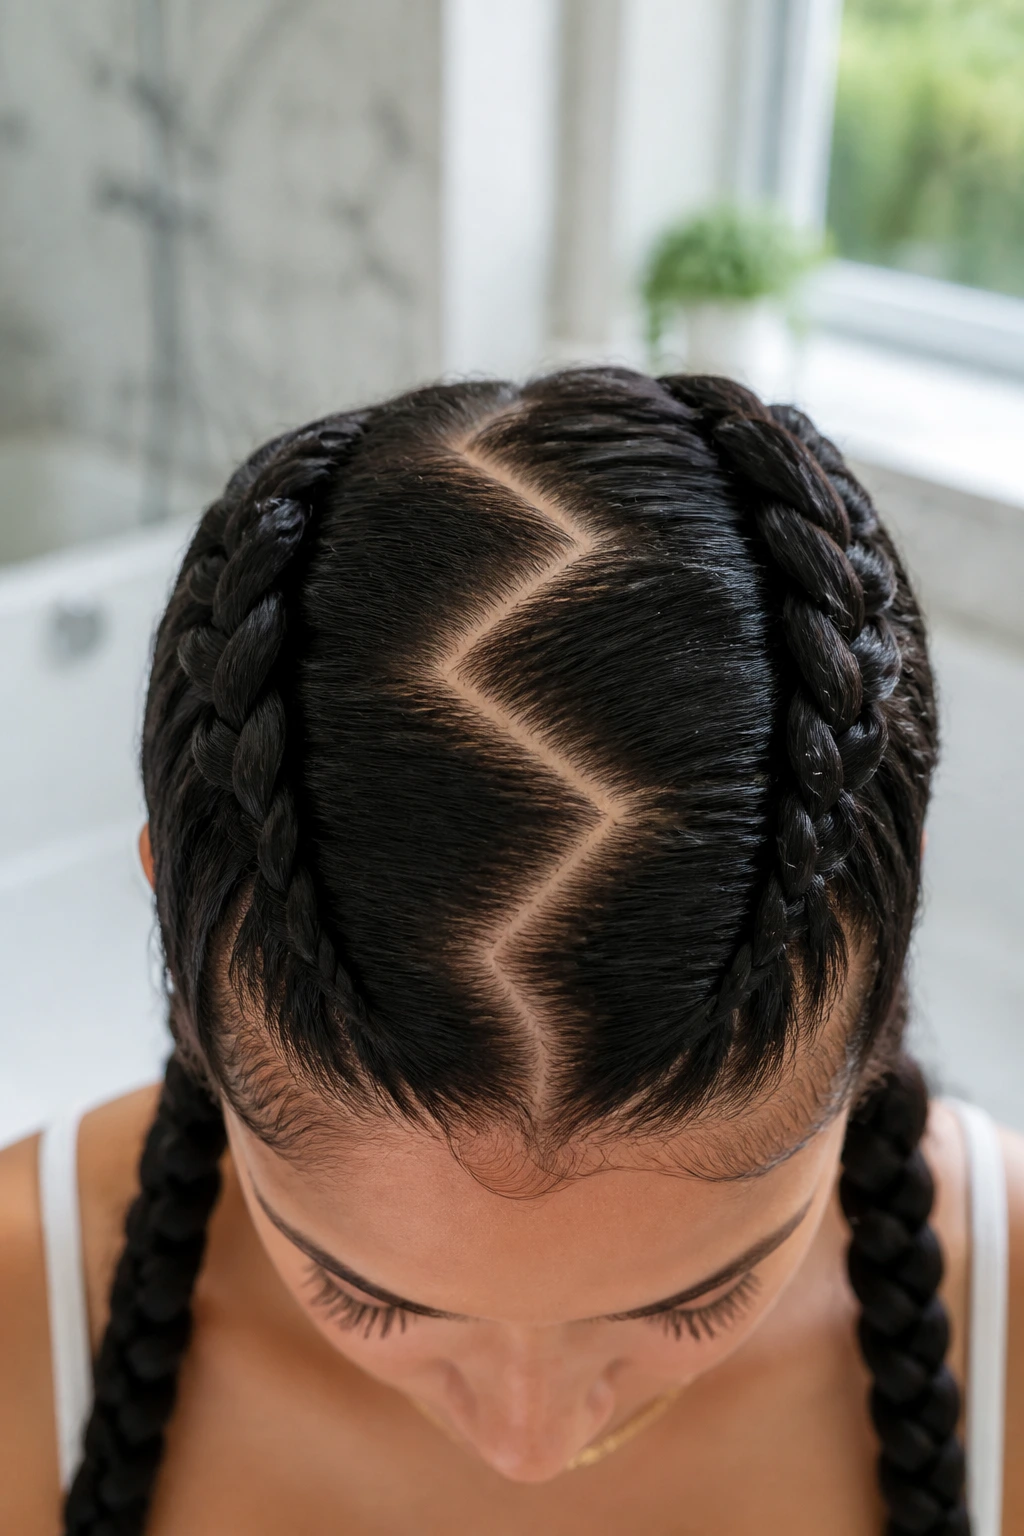
A zigzag part adds more than decoration. It interrupts the straight line that wavy hair often fights against, which can be handy if your crown likes to separate in odd places. I use a tail comb and make short angled sections, not dramatic lightning bolts. Subtle is usually better.
The zigzag part gives the style a little height at the roots, too. A dead-straight part can flatten wavy hair fast, especially on day-two texture. The broken line helps the top look fuller while the braids do the actual holding.
Keep the angles even on both sides if you want the style to feel balanced. If one side zigzags harder than the other, the whole thing can look accidental instead of intentional.
9. Half-Up Twin Braids

Not every protective style has to grab the whole head. Half-up twin braids pull the top section back while leaving the lower waves free, which is useful when you want a break from hair on your face but still want the ends to move.
The top sections should start just above the temples and meet at the crown or mid-back of the head. Leave the bottom half loose, then add a light cream or foam so those waves don’t puff out by midday. This style is good when your wave pattern looks best once it’s had a little air.
I like this version on fine wavy hair. A full braid can sometimes make fine strands look sparse, while a half-up pattern gives shape up top and keeps the lengths soft.
10. Feed-In Twin Braids
Feed-in braids give the root a smoother look because you build the sections gradually instead of starting with one thick chunk of hair. On wavy hair, that matters. A big start can sit awkwardly on the crown and make the first inch look bulky.
The feed-in approach spreads tension more evenly and keeps the root line flatter. If you’re adding extension hair, match the texture lightly rather than forcing a perfect color or curl match. The braid should still look like it belongs to your hair, not like it arrived from another head.
Keep the hand movement slow on the first few passes. Fast feed-ins tend to bunch, and bunching shows up fast on wavy hair because the texture already has a little lift.
11. Boho Twin Braids with Soft Tendrils

A few soft tendrils near the face can keep twin braids from feeling too buttoned-up. On wavy hair, the tendrils often fall into a natural bend on their own, which is a nice shortcut. No curling iron needed if the hair already wants to wave.
Pull out the front pieces before braiding, not after. That keeps the sections cleaner and avoids weird gaps near the hairline. The braid itself can stay medium-tight while the loose pieces keep the shape from looking severe.
I wouldn’t overdo the loose bits. Two pieces around the face are usually enough. Too many and the style starts to lose the protective part of the equation.
12. Lace-Braid Twin Braids
Lace braids work well when you want a flatter profile along the head. Instead of pulling from both sides every time, you keep adding hair from one side only. That makes the braid hug the scalp while leaving the other side cleaner and a touch more open.
For wavy hair with short layers or face-framing pieces, lace braids are useful because they help trap the loose pieces without yanking them tight. The braid looks polished, but it doesn’t have the same heavy feel as a full Dutch braid.
This is one of those styles that looks harder than it is. The trick is to keep the added hair sections small and even. Big chunks make the braid lumpy, and wavy hair will happily show every bump.
13. Boxer Twin Braids
Boxer braids are the firmer, more athletic cousin in this group. They sit close to the scalp, stay put, and handle movement better than a looser braid. If you’re going to wear twin braids for a workout or a long day with a backpack, this is the version that tends to survive the most abuse.
The price of that security is tension. You do not need a skin-tight braid to get the look. A braid that feels snug at the root and relaxed through the lengths is enough. If the temples start throbbing, it’s too tight.
On wavy hair, boxer braids are best when the hair has a little grip from day two or a light styling cream. Freshly washed, super-slippery hair can slide out of the sections before you finish the second side.
14. Deep Side-Part Twin Braids
A deep side part can change the whole mood of twin braids. It gives the style a little lift over one brow and a softer fall on the other side, which helps wavy hair look fuller at the root. If your hair naturally flops one way, this is the braiding version that works with it instead of fighting it.
I like this when the face shape needs a bit more length at the top. The off-center part breaks up symmetry just enough to keep the style from looking flat. It also makes the braids themselves feel slightly more relaxed, even when the braid pattern is neat.
Keep the heavier side well controlled, though. More hair on one side means more weight, and wavy hair can puff unevenly if you don’t smooth the part line first.
15. Ribbon-Woven Twin Braids
A narrow ribbon woven into each braid is a small change that does a lot of visual work. It also helps the braid hold its shape because the ribbon adds a bit of structure between the strands. Choose a flat ribbon, not a thick one, or the braid starts to look bulky fast.
I like grosgrain or satin ribbon about ¼ to ⅜ inch wide. Anything wider tends to twist inside the braid instead of lying cleanly. Tie it at the base, then weave it through one strand as you braid down. Keep the tension even so the ribbon doesn’t bunch into odd folds.
This version is nice when you want twin braids to feel a little dressed up without adding heat or extra accessories everywhere. The ribbon does the talking. The hair can stay calm.
16. Micro-Front Twin Braids with Long Lengths
Short layers near the front can be the annoying part of wavy hair. They slip, they fluff, and they refuse to stay inside a clean braid. Micro-front braids solve that by giving those small pieces their own tiny lanes near the hairline before the longer lengths continue down into fuller plaits.
That setup works especially well if your hair is medium-long and the front layers are the main problem. You can braid a narrow section at each temple first, then combine it with the larger braid behind it. The result feels more controlled without losing the wave movement in the lengths.
I’d keep the micro sections narrow and close to the part. If they get too wide, they start looking busy instead of useful.
17. Braided Mohawk Twin Braids
This is the louder option, and I mean that in a good way. The top center section runs in a raised line while the sides stay smoother and tucked. Wavy hair gets a little height at the crown, which is useful if the sides tend to puff out while the top goes limp.
The braid line usually starts near the hairline and moves straight back. You can leave the side lengths loose, pin them down, or braid them into smaller side pieces that meet at the back. The exact finish changes the mood a lot, but the mohawk shape stays.
This style asks for careful edge control. The raised center is eye-catching, which means any messy parting shows. A tail comb and a steady hand matter more here than fancy product.
18. French-to-Three-Strand Hybrid Twin Braids
If you like a polished root but don’t want to keep feeding sections all the way down, this hybrid is a smart compromise. Start each side as a French braid, then switch to a classic three-strand braid once you pass the ear or collarbone. It keeps the scalp neat where wavy hair tends to frizz first and gives the lengths a softer finish.
The transition point is the part that matters. Make it at the same height on both sides so the braids feel balanced. If one side changes over early and the other waits too long, the look gets lopsided in a way that the eye notices immediately.
I like this style for people who want something that lasts but don’t need the braid to be perfect all the way down. The hybrid finish feels a little more relaxed than a fully tight braid.
19. Heart-Part Twin Braids
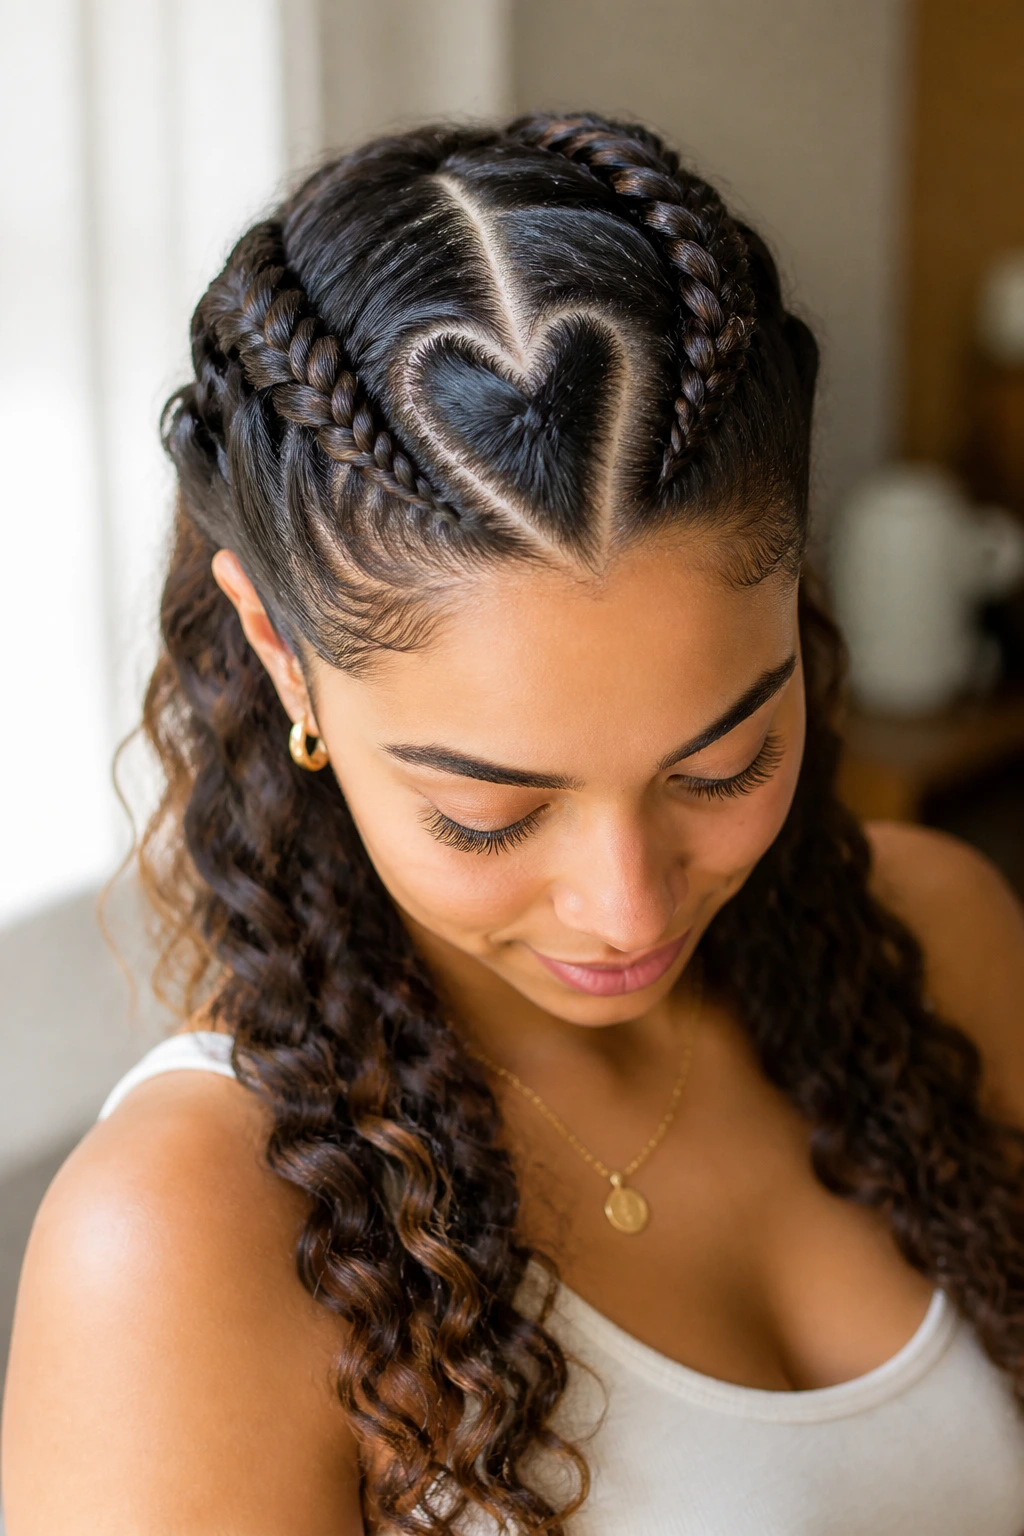
A heart part sounds playful, and it is, but it can still be clean and grown-up if the braid lines stay neat. The heart shape sits at the crown or hairline and feeds into twin braids on each side. On wavy hair, the curved part keeps the style from feeling too rigid.
The parting is the hardest part, so don’t rush it. Outline the heart lightly first, then sharpen the lines once you know both halves match. A tiny dab of gel on the part helps the shape stay visible instead of fuzzing out before you finish the braids.
This one is best when you want the protective style to feel personal. It doesn’t need extra sparkle or volume to read well. The parting does the heavy lifting.
20. Scalp-Hugging Twin Braids
Scalp-hugging braids keep close to the head from the first pass. They’re neat, flat, and practical, which is why I like them under hats, helmets, or anything else that rubs. Wavy hair benefits because the braid pattern controls frizz before it has room to rise.
You do need to watch tension here. The style can slide into “too tight” faster than the looser versions, especially around the temples and behind the ears. If the braid feels tight on the first braid pass, it will probably feel worse by lunchtime.
Keep a mirror handy when you braid the back. Flat styles show back-of-head mistakes faster than loose styles do.
21. Crisscross Twin Braids

Crisscross sections add structure when your hair has a lot of little layers or wants to separate into stray pieces. Instead of going straight into a standard braid, you cross the first few sections over each other in a shaped pattern, then continue the braid down. The front looks deliberate, and wavy hair tends to sit better when the parting has a little architecture.
This style is useful when you want twin braids that feel more handmade than uniform. It has a bit of movement at the top before settling into the braid length. That can be flattering if your waves need lift around the crown.
Use small, even sections at the front. Big crisscrosses look clumsy. Tiny ones stay elegant and hold the shape longer.
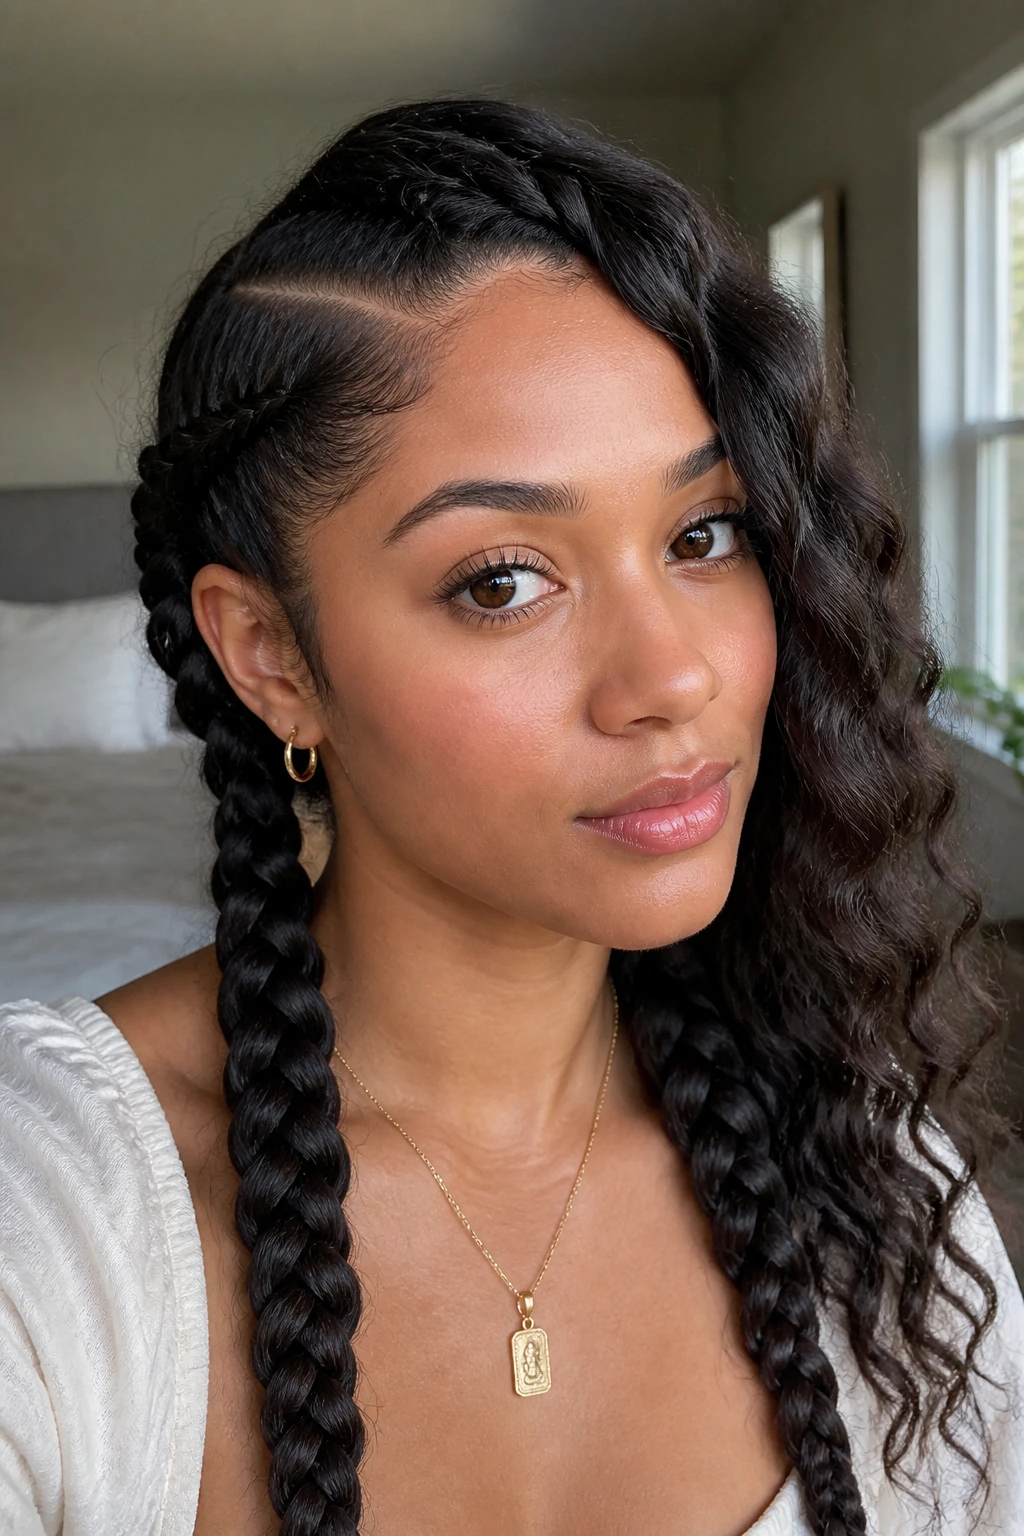
22. Mermaid Twin Braids
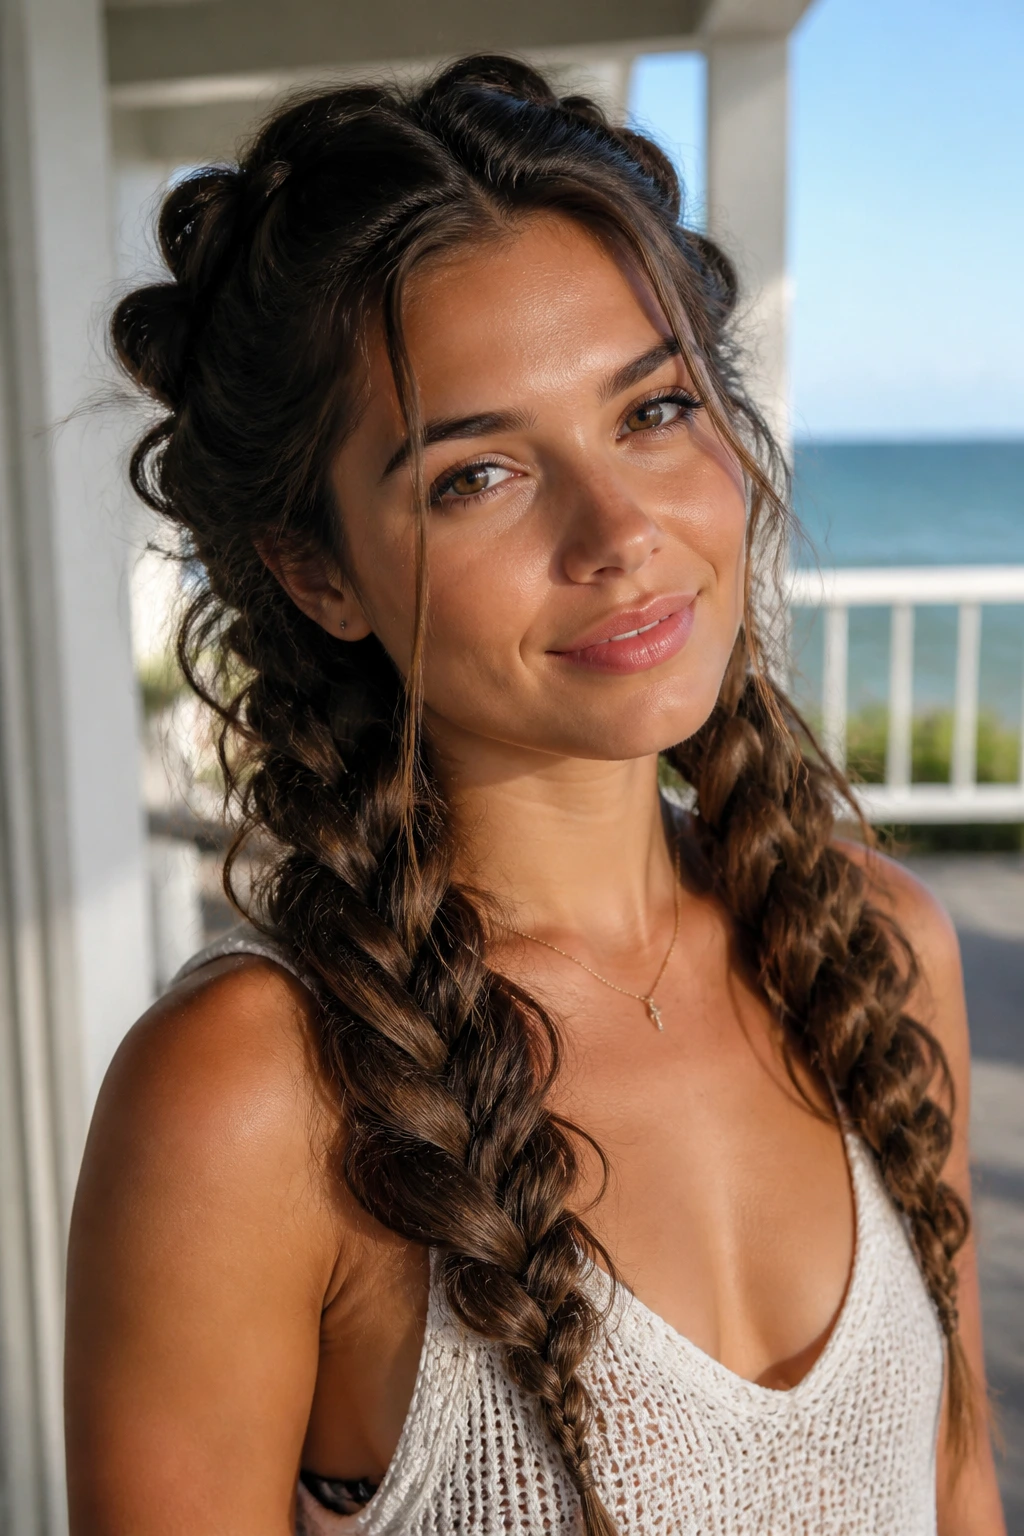
Mermaid braids are loose, thick, and pancaked enough to look almost braided velvet. On wavy hair, that fullness makes sense. The wave texture already gives the braid body, so you don’t need to force volume with teasing or backcombing.
The main trick is to braid with a relaxed hand, then tug the outer loops very gently once the braid is secured. That spreads the braid out and shows off the texture. If your hair is fine, go easy. Too much pancaking will leave the braid looking wispy instead of full.
I prefer mermaid twin braids when the hair is long enough to show a soft drape over the shoulders. They look less severe than a tight braid and keep the wave pattern in the conversation.
23. Knotless Root Twin Braids
Knotless root braids are easier on the scalp because they don’t start with a hard knot at the base. Instead, the hair builds gradually from the root, which spreads the tension. That matters if your scalp gets sore fast or if your hairline is sensitive.
On wavy hair, the knotless start also helps the root line stay smooth without a lump right at the front. You can still finish with a firm braid down the lengths, but the first inch should feel soft and controlled, not pinched.
This version is worth learning if you wear twin braids often. The finish looks cleaner, the scalp feels better, and the style usually sits flatter under scarves or collars.
24. Rope-Braid Pigtails
Rope-braid pigtails are quick, lightweight, and less fussy than three-strand braids. Two sections twist down the head and keep the wave pattern contained without eating up a lot of styling time. If your mornings are short and your hair slips through your fingers while you braid, this is a solid fallback.
Use snag-free elastics at the ends and, if needed, at the base. That small anchor helps wavy hair hold the twist longer, especially if the strands are silky. You can also twist each rope slightly looser for a softer finish, which keeps the braid from looking ropey in a harsh way.
These are the braids I’d pick for a quick run out the door. They do the job without asking for perfect parting or a long mirror session.
25. Twin Braids Tucked Into Low Buns

This one is quietly one of the most protective styles here because the ends disappear. Braid each side down, coil the tails into low buns, and pin them flat. Wavy hair benefits from the tucked finish because the delicate ends are not rubbing against coats, bags, or pillowcases.
The buns don’t need to be huge. Small, tidy coils usually work better and sit more comfortably. Use enough pins to anchor the shape, but not so many that the buns feel heavy.
I like this style when the goal is to keep the hair out of the way for more than a few hours. It’s the version that feels most settled at the end of the day, and your ends stay much happier.
26. Crowned Twin Braids into a Ponytail
A crowned braid shape opens the face first, then drops the lengths into one ponytail at the back. It’s a nice answer when you want the front of your hair completely out of the way but don’t want a rigid pulled-back look. Wavy hair keeps some life in the ponytail, which helps the whole style feel less stiff.
The braids should meet at a secure back point before you tie the ponytail. A hidden elastic at the join keeps everything from sliding apart. If the hair is long, the ponytail can stay loose and soft. If it’s medium length, keep the tail tighter so it doesn’t separate into a frizzy cloud.
This is one of the cleaner looks for days when you need the hair to behave and still want a bit of movement at the back.
27. Asymmetric Twin Braids

Not every braid pair needs to match perfectly. One side can sit a little higher, start a little earlier, or hold a touch more volume than the other. On wavy hair, that asymmetry can look intentional instead of messy, especially when the natural growth pattern already leans one way.
The trick is to make the difference obvious enough to look designed, not accidental. If one braid is looser, make the other cleaner. If one starts at the temple, let the other start slightly behind the ear. The contrast should feel like a choice.
I like this for people who hate the too-perfect look. Symmetry can be nice. It can also feel a little stiff. This version loosens the whole mood.
28. Accessory-Pinned Twin Braids
Small cuffs, flat pins, or lightweight clips can change twin braids without changing the braid pattern itself. They’re useful when you want the style to look finished fast. On wavy hair, accessories also help anchor the ends so they don’t unravel into fuzzy tips.
The main rule is simple: keep the hardware light. Heavy beads or oversized clips tug at the braid and pull the wave pattern downward. A few small cuffs spaced along the lower third of the braid usually do more than a handful of chunky pieces.
This is the style I’d use when the braid shape is good but the finish needs a little polish. One pin in the right place fixes a lot.
29. Stretch-and-Braid Twin Braids

If your waves shrink up and puff when left loose, stretching first can make twin braids sit neater and look longer. You can stretch with banding, a low-heat blow-dry on cool or low, or by letting the hair dry in sections before braiding. The braid then starts from a smoother base and keeps the overall shape cleaner.
This is especially helpful on medium-length wavy hair that tends to disappear into itself once braided. A stretched base gives the plaits more drape and helps the ends stay visible. Keep the heat low if you use it. Protective style should not come with heat damage baked in.
I like this when the goal is length without flatness. Stretching gives the braid room to show.
30. Wrapped-End Twin Braids
Wrapped ends are a soft landing for the whole list. Braid down as usual, then secure the ends with satin ties, silk ribbon, or smooth elastics that won’t chew up the last inch of hair. If you want extra hold, wrap the tie once or twice more and leave the rest loose.
This finish matters more than it looks like it should. Wavy hair frays at the end first, and the wrap keeps that from becoming a little puffball by the next day. It also makes the braid feel gentler at bedtime because there’s less rough hardware hanging off the tail.
I like this version when the braid itself is already doing enough. The wrapped end is the quiet part that keeps the style honest.
Why Twin Braids Hold Better Than a Loose Style
A loose wave is beautiful, but it’s also exposed. It rubs on collars, picks up static from sweaters, and tangles with itself the moment you lean back on a seat. Twin braids solve that by bundling the lengths into two controlled ropes, which spreads friction out instead of letting it hit the same few ends all day.
The shape matters, too. Two braids balance the weight better than one heavy braid down the back. That helps wavy hair sit on both sides of the head without pulling everything to one shoulder. Less one-sided drag means fewer dents at the crown and fewer weird flips under the ends.
The protective part comes from the braid’s grip and the finish. A braid that starts with a clean part, uses only a little product near the root, and ends with a secure tie or tuck has a much easier time surviving sleep, wind, and a commute. Leave the ends hanging loose, and the braid stops being protective pretty quickly. That last detail is the one people skip.
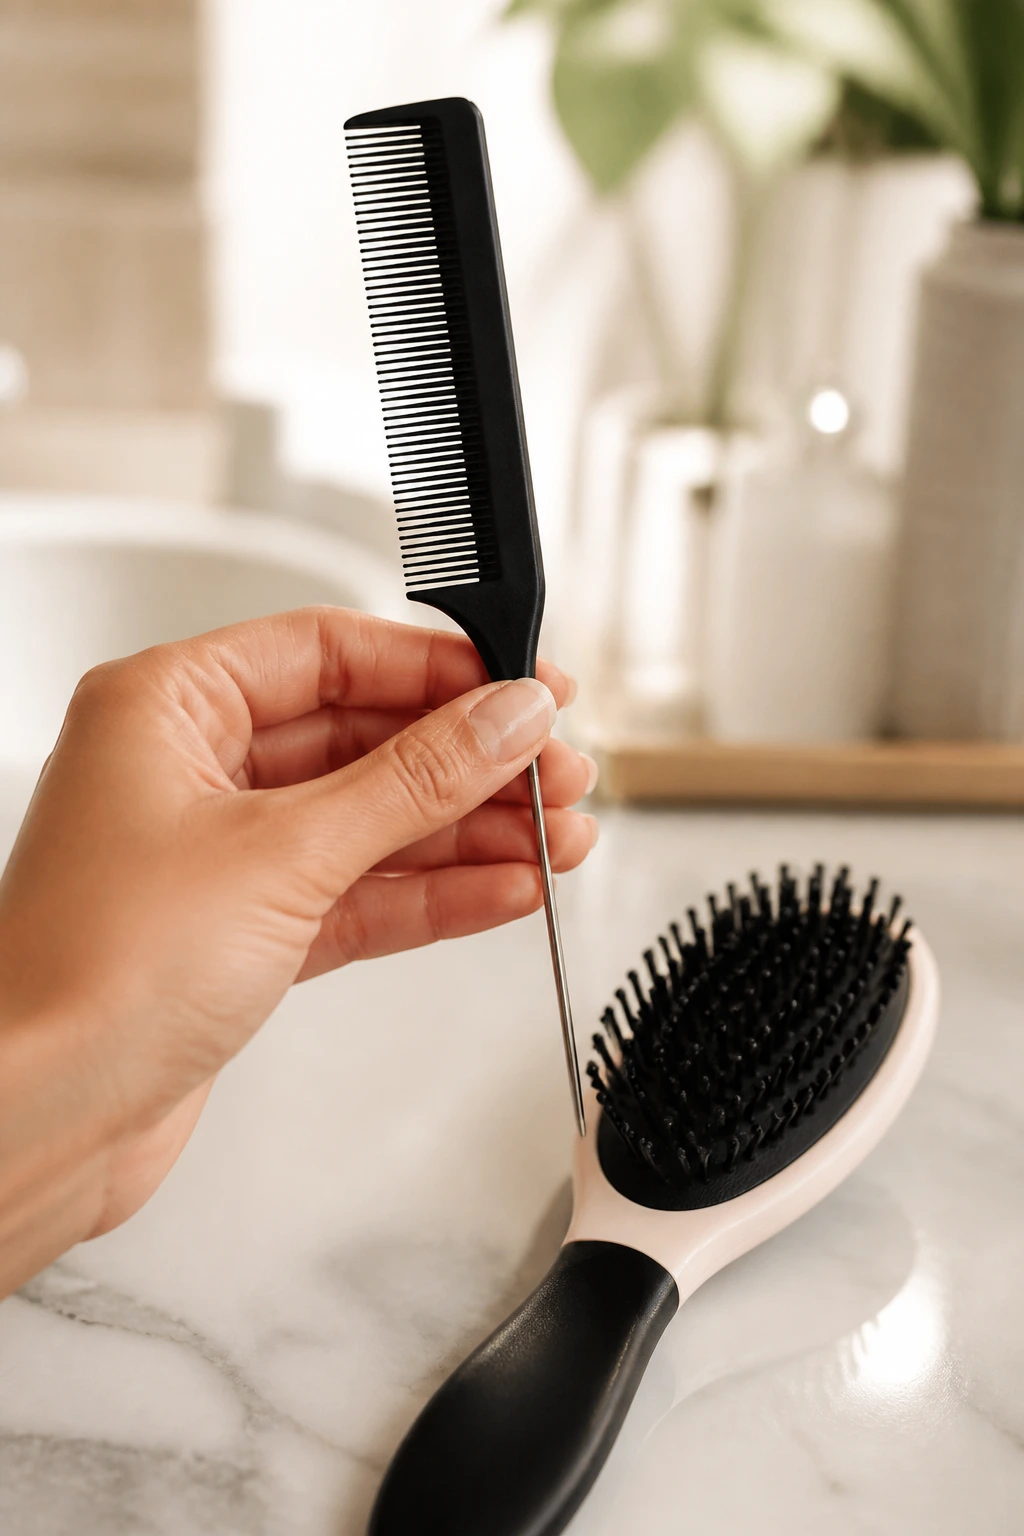
Essential Tools for Twin Braids on Wavy Hair
-
Rat-tail comb: The cleanest way to part wavy hair, especially if you want a center line or zigzag shape.
-
Detangling brush: Use this before you braid so the sections stay smooth and don’t catch halfway down.
-
Spray bottle with water: A light mist helps tame flyaways without soaking the hair.
-
Leave-in conditioner: A small amount on the mids and ends keeps wavy hair from feeling dry once it’s braided.
-
Mousse or styling foam: Useful when your waves need grip and a little memory without heaviness.
-
Light gel or edge control: Best near the hairline, not all over the lengths.
-
Sectioning clips: These keep one side out of the way while you braid the other side.
-
Clear elastics: Small, snag-free ties are better than thick bands for securing the ends.
-
Bobby pins: Handy for tucked ends, buns, or flat finishes.
-
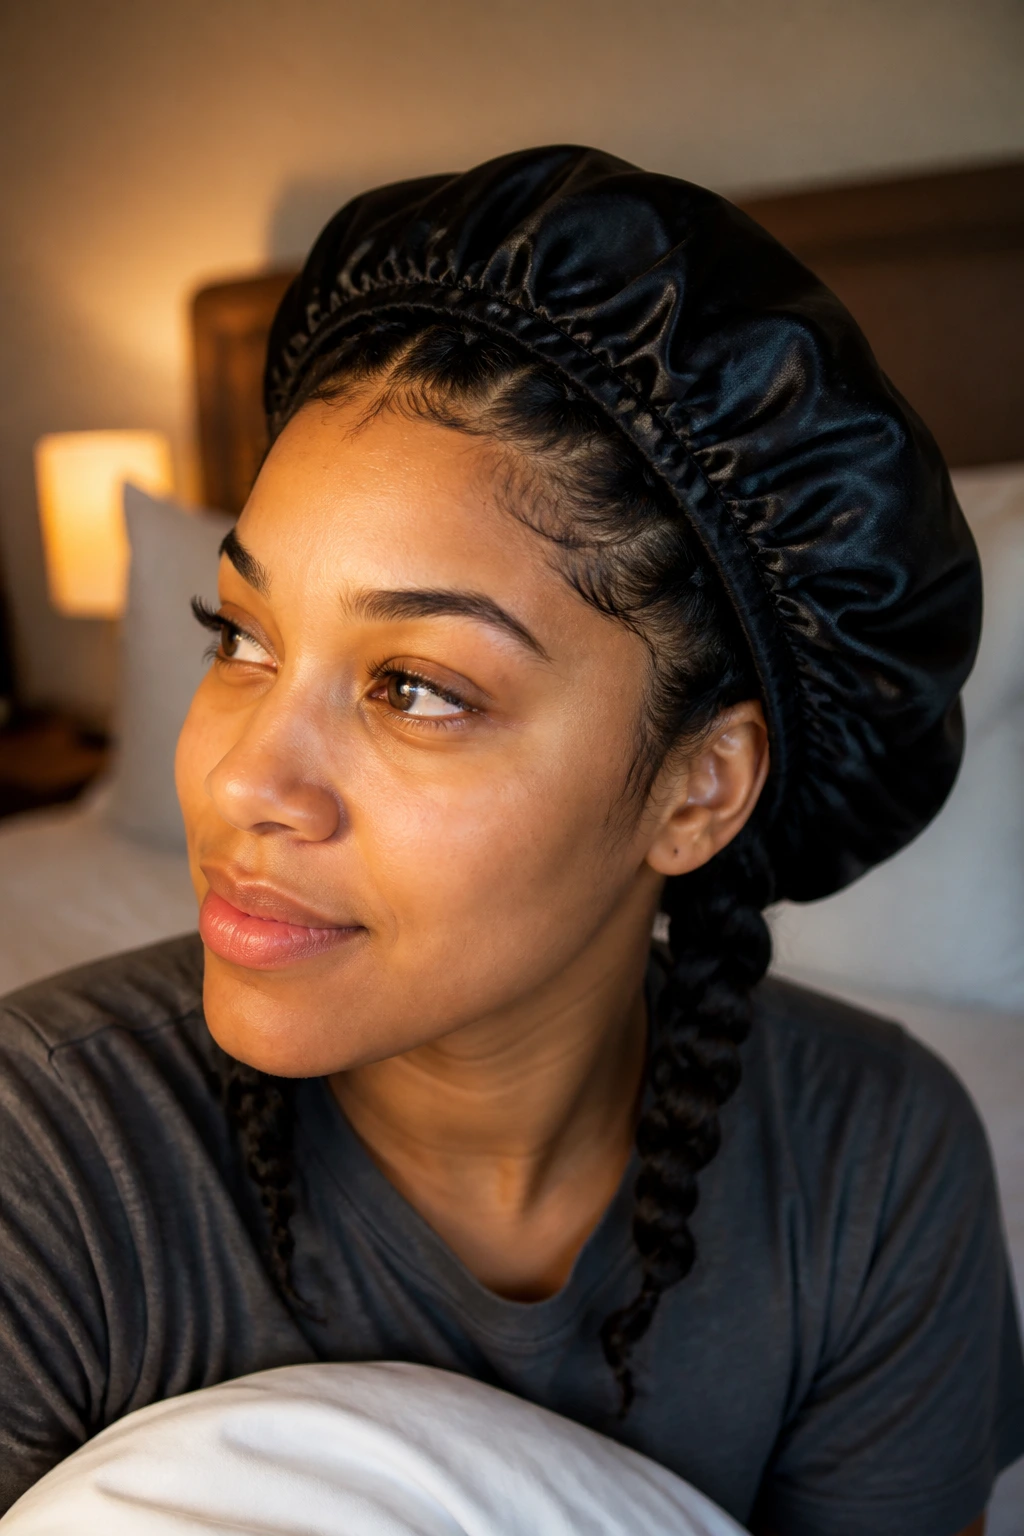
Satin scarf or bonnet: Keeps the braid smoother overnight and cuts down on fuzz.
Smart Prep and Product Tips for Wavy Hair
Start with hair that is clean enough to move but not so slippery that every section slides apart. For many wavy textures, that means braiding when the hair is fully dry or almost dry, not soaking. If you braid damp hair, let the roots dry a little first. Wet roots under a tight braid can feel clammy, and they can puff up oddly once they dry.
Use products with a light hand. Wavy hair usually likes slip at the mids and ends, not a heavy layer at the root. A cream, foam, or mousse gives the braid hold without making it greasy. Gel belongs mostly along the part and hairline where the fuzz tends to appear first.
Parting matters more than a lot of people think. A crooked part throws the whole braid off, and wavy hair will expose that mistake from across the room. If your hair is layered, comb the sections straight before you braid so the shorter pieces stay inside the plait instead of poking out at the temples.
How to Wear and Style the Finished Braids
Presentation: A clean middle part makes twin braids look sharper and more symmetrical, while a side part softens the face and gives the roots more lift. If the braids are thick, pancake them a little for fullness; if the hair is fine, keep them tighter so they don’t turn wispy.
Pairings: Small hoops, a smooth scarf, or a collar that sits flat all work well because they don’t fight the braid line. I also like this style with a hood or jacket that has a soft inner lining, since rough seams are what rough up the ends first.
Fit: For all-day wear, the braid should feel snug but not pulled. If you can feel your temples straining, loosen the first inch and start again. That tiny reset can save the style and your scalp.
Finish: Seal the ends with a clear elastic or satin tie, then smooth the hairline with a pea-sized amount of gel on your fingertips. The braid should look held together, not painted on.
Small Upgrades That Make the Braids Last
Texture Boost: A little mousse at the roots gives wavy hair enough grip to stay braided without turning crunchy. I like foam better than heavy cream when the hair is fine, because it adds structure without dragging the braid down.
Edge Control: Use the smallest amount possible at the part and temples. A thin layer settles the flyaways; a thick layer turns slick and slippery, which is the opposite of what you want.
Night Protection: A satin scarf tied over the braids or a bonnet with enough room to avoid crushing the ends does more than people expect. Cotton pillowcases pull moisture out and rough up the tails, so the scarf earns its keep fast.
Accessory Choice: Smooth elastics, ribbon, or flat cuffs are better than rough rubber bands. Anything with a grabby surface will catch the last inch of hair first, and that is where the wear starts to show.
Common Braiding Mistakes to Avoid
-
Braiding soaking-wet hair: The style can feel set on the outside while the roots stay damp underneath. That often leads to a puffy crown later and a scalp that feels stuffy. Let the hair dry almost all the way first.
-
Pulling too tight at the temples: If the braid hurts within an hour, it is too tight. The fix is a looser first pass and a calmer hand at the hairline. Protective style should protect the hair, not punish the scalp.
-
Skipping detangling before parting: Wavy hair hides knots until the braid bumps right into them. Detangle first, then part, then braid. That order saves time and keeps the braid line smoother.
-
Using heavy product at the root: Oils and thick creams near the scalp can make the braid slide apart. Keep those products on the mids and ends where the hair actually needs the moisture.
-
Leaving the ends loose: Bare ends fray fast, especially on collar-length or longer wavy hair. A clear elastic, satin tie, or tucked bun keeps the last section from unraveling by lunch.
Variations and Texture Tweaks to Try
The Soft-Dutch Switch: Start with a Dutch braid at the root, then loosen the tension as you move down. It keeps the crown neat but lets the lengths feel softer and more wavy.
The Gym-Ready Edit: Make both braids tighter, keep them flat at the sides, and tuck the ends into small buns. That version stays in place through movement and keeps the ends from catching on gear.
The Sensitive-Scalp Version: Use larger sections, a knotless root, and less tension around the hairline. It looks calmer and feels much better if your scalp objects to firm braiding.
The Dress-Up Version: Thread in a satin ribbon or add a pair of lightweight cuffs near the ends. The braid stays the same, but the finish gets cleaner and more deliberate.
The Length-Saving Version: Stretch the hair first with banding or a low-heat cool blow-dry, then braid. This helps medium-length wavy hair look longer and keeps shrinkage from swallowing the braid shape.
Keeping Twin Braids Fresh Overnight and Beyond
If you want twin braids to last past one night, start with the ends. Secure them cleanly, then wrap the whole style in a satin scarf or bonnet before bed. That does more for frizz than a lot of people expect, especially on wavy hair that gets fuzzy just from rubbing on a pillow.
For day two or day three, refresh the hairline first. A light mist of water mixed with a little leave-in on your palms is usually enough. Smooth the part, press down the fuzz with your fingertips, and leave the braid itself alone unless it has actually come apart. Constant rebraiding is how the style gets rough.
How long you can keep the braids in depends on the scalp and the finish. Many wavy textures do well for two to four days if the braids are not tight and the ends stay sealed. If the scalp starts itching, the roots look oily, or the braid line gets fuzzy enough to stop reading as a braid, take them out and start fresh. Protective style works best when it stays neat enough to protect.
Frequently Asked Questions About Twin Braids and Wavy Hair
Should I braid wavy hair wet or dry?
Usually dry or almost dry is safer. Fully wet hair can stay damp at the root under a tight braid, and that often leads to puffiness once it dries. If you braid damp hair for wave-setting, keep the braid loose and make sure the scalp is dry before you sleep on it.
Will twin braids flatten my waves?
They can flatten the roots a little, but that is not always a bad thing. A clean part and a loose enough braid keep the body in the lengths while cutting down on frizz and tangling. If you want more wave at the end, leave the braid a touch looser and avoid heavy product.
How tight should twin braids feel?
Snug, not sharp. You should feel the braid holding, not pulling at the temples or behind the ears. If the first inch already hurts, redo it with less tension.
Can fine wavy hair wear twin braids without looking thin?
Yes, but the braid pattern should be adjusted. A deep side part, a loose French start, or a little pancaking can give fine hair more presence. Tight boxer braids can make fine waves look smaller than they are, so keep the braid softer.
How do I stop frizz at the ends?
Secure the ends with smooth elastics or satin ties, then keep them off rough fabric. If the ends are extra dry, a tiny drop of leave-in on your hands before braiding down the last few inches helps a lot. Do not overload the tails with oil.
Can I add extensions to twin braids?
Yes, especially for feed-in or knotless styles. Match the added hair to your texture and weight, not just the color. Too much extension hair can pull on the root and make wavy hair feel heavier than it should.
What if one braid turns out thicker than the other?
That usually means the part is off, not that your hair is impossible. Use the tail comb to check the starting sections before you braid down. A small difference can look intentional, but a big one is worth fixing before the ends are tied.
How long can I keep twin braids in?
For most wavy hair, a few days is the sweet spot if you want the style to stay neat and the scalp to stay comfortable. If the hairline starts to frizz badly or the roots look oily and flat, take them out sooner. Protective styles are supposed to make maintenance easier, not hide buildup.
The Braids That Let Waves Breathe
Twin braids work because they give wavy hair somewhere to go besides the collar, the pillowcase, and the wind. They don’t erase texture. They frame it. That is the part I keep coming back to, because it’s what makes the style feel useful instead of stiff.
Pick the braid that matches your day, your length, and how much patience you actually have. A polished Dutch braid, a loose French braid, a tucked low finish — they each solve a slightly different problem. Try one with a clean part and a light hand, and the rest gets easier from there.