Thick hair can make a simple bun feel like a small engineering project, and bun twists are one of the few protective styles that make the job easier instead of louder. They give dense hair a direction to follow. That matters more than people think. A plain gathered bun on heavy hair can turn into a soft lump by lunch, while twists create little lanes of tension that help the style keep its shape.
The best bun twists for thick hair do two things at once: they control bulk and they keep the scalp from taking all the strain. That balance is the whole trick. If the sections are too small, you spend forever styling. If they’re too big, the bun balloons outward and starts leaning like it’s tired. Somewhere in the middle is the sweet spot, and that’s where thick hair usually looks most composed.
Some of these styles are polished enough for a meeting, some are loose enough for a wash-day errand run, and a few are the kind you pin up when you want your neck free and your edges left alone. The point isn’t to chase one “right” bun. It’s to have a few shapes in your pocket that understand density instead of fighting it.
Why These Bun Twists Earn a Spot in a Thick-Hair Routine
- Less bulk at the nape: Twists break heavy hair into manageable sections, so the bun sits closer to the head instead of flaring outward.
- More grip for pins: Texture gives bobby pins and U-pins something to hold onto, which means fewer surprise collapses by midday.
- Better tension control: Low, offset, or tucked styles spread the pull away from the hairline, which matters when your hair already has plenty of weight.
- Lower manipulation: Once the twist pattern is in place, you can leave the comb alone for days and still look put together.
- Easy to dress up or down: Change the part, add a scarf, or smooth the front, and the whole mood shifts without rebuilding the style.
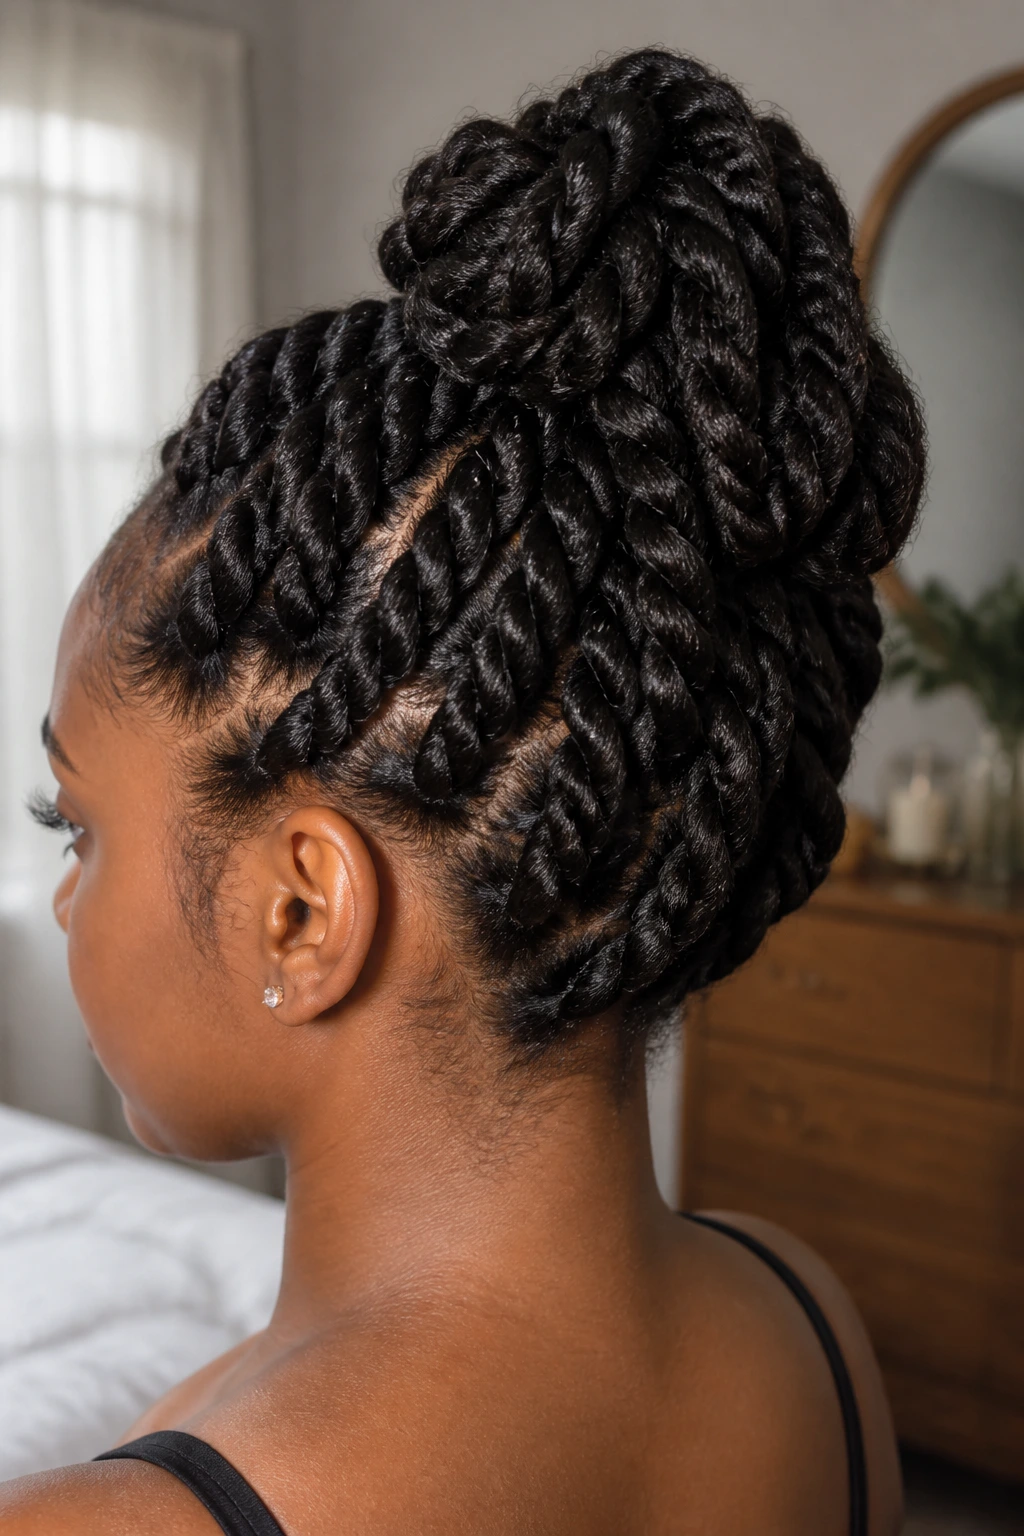
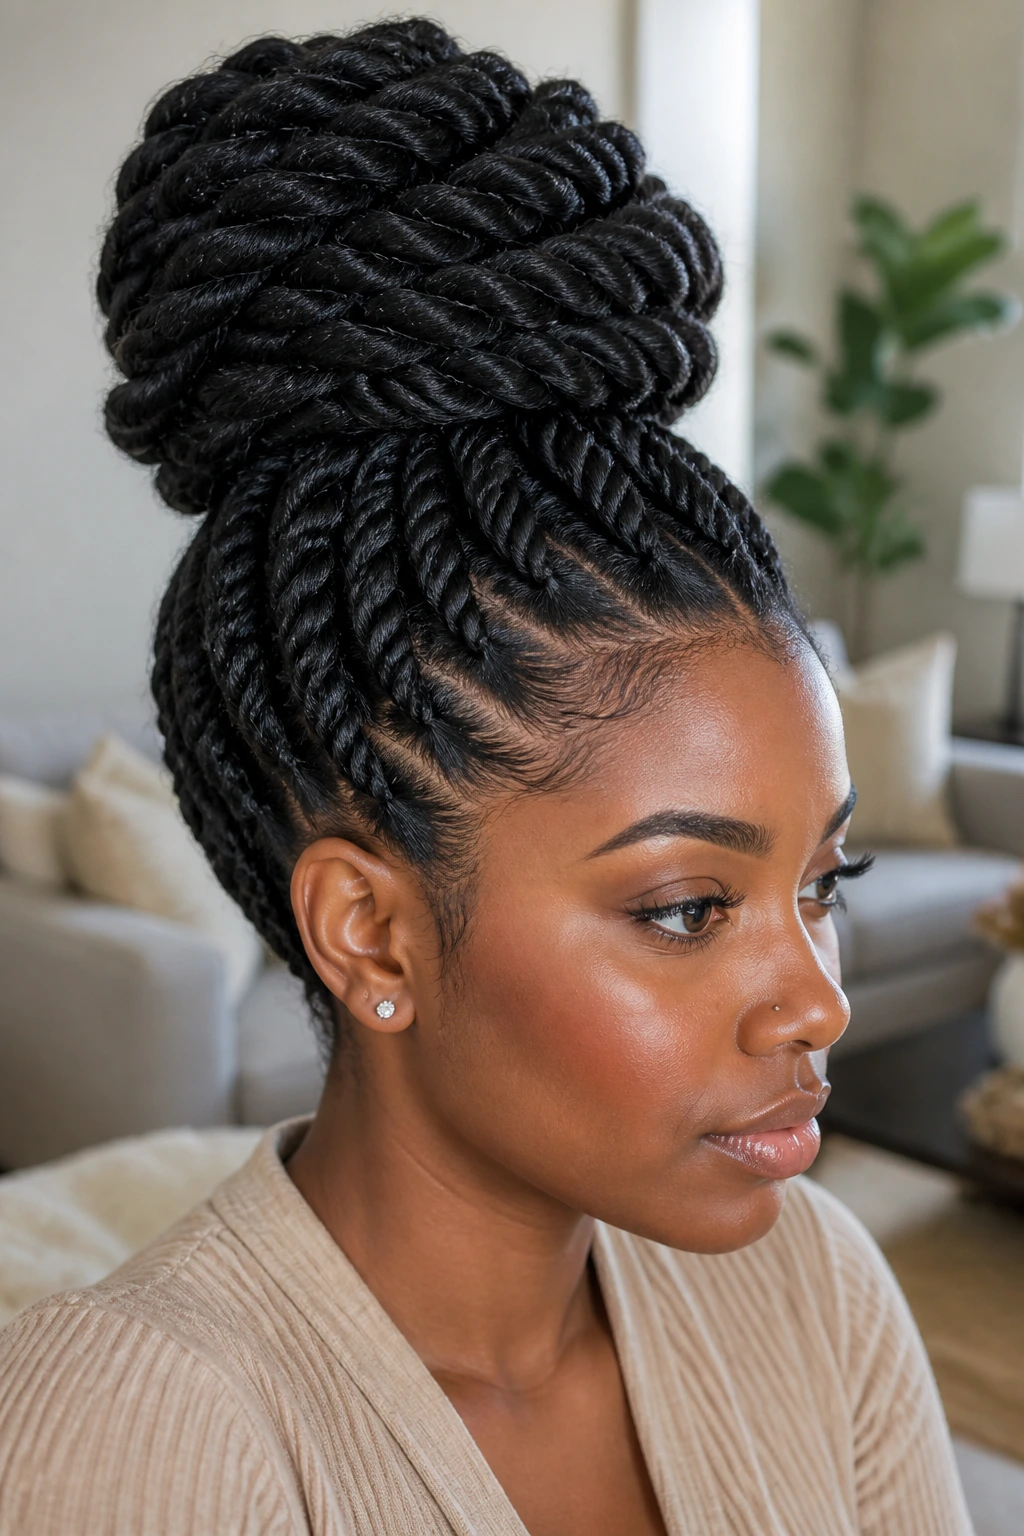
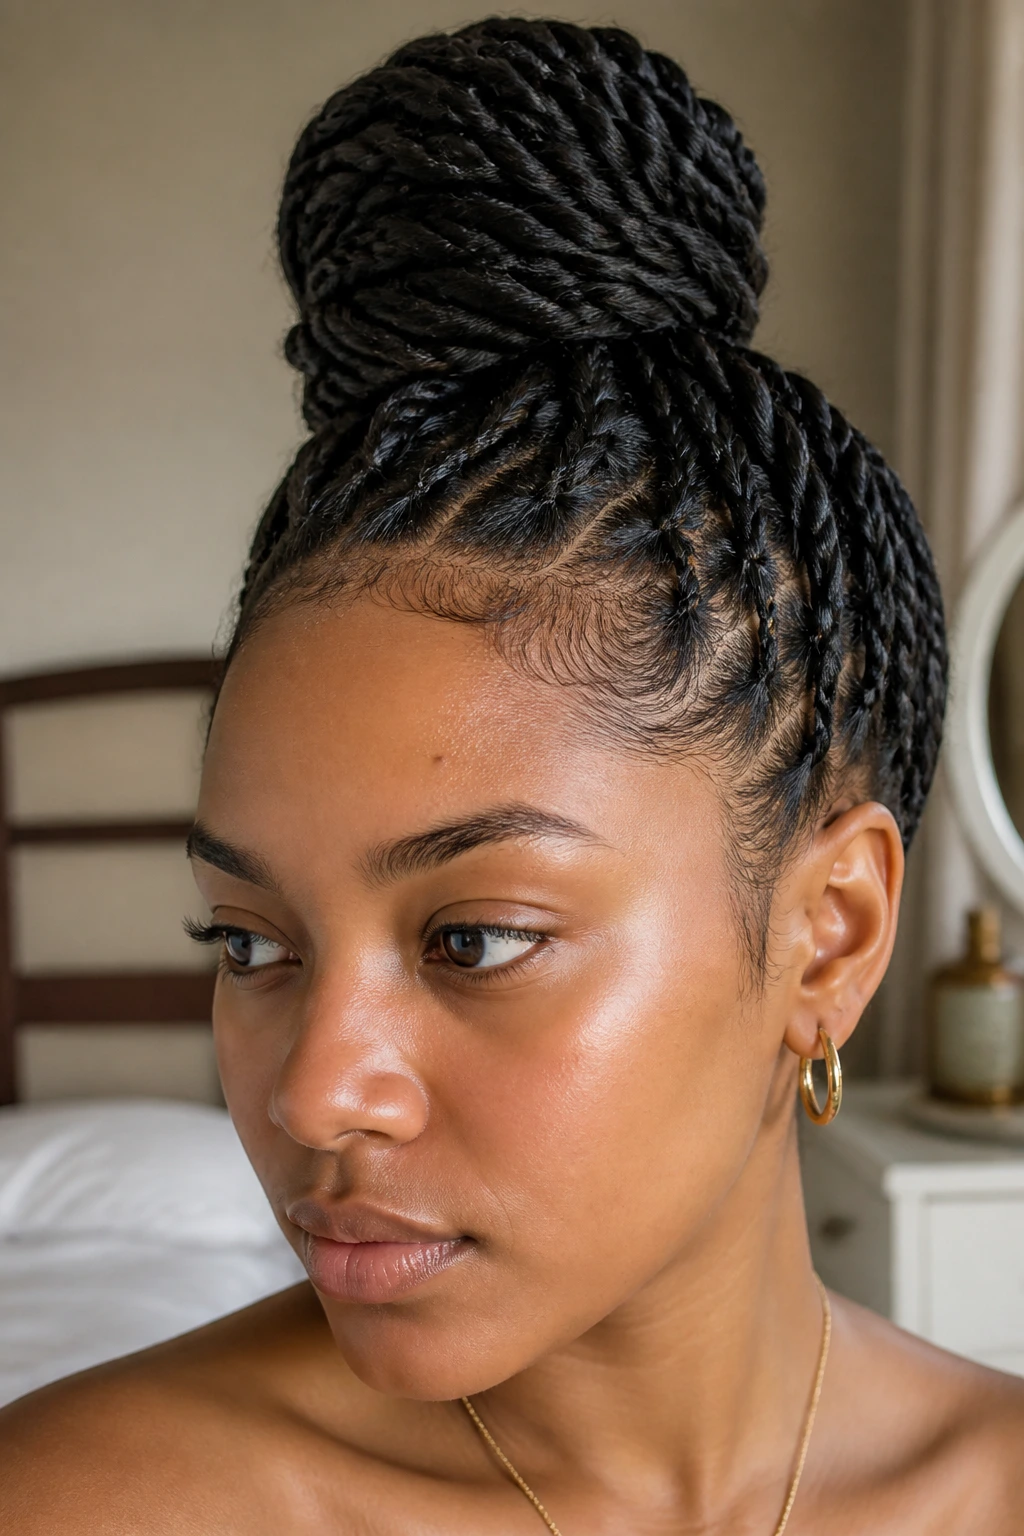
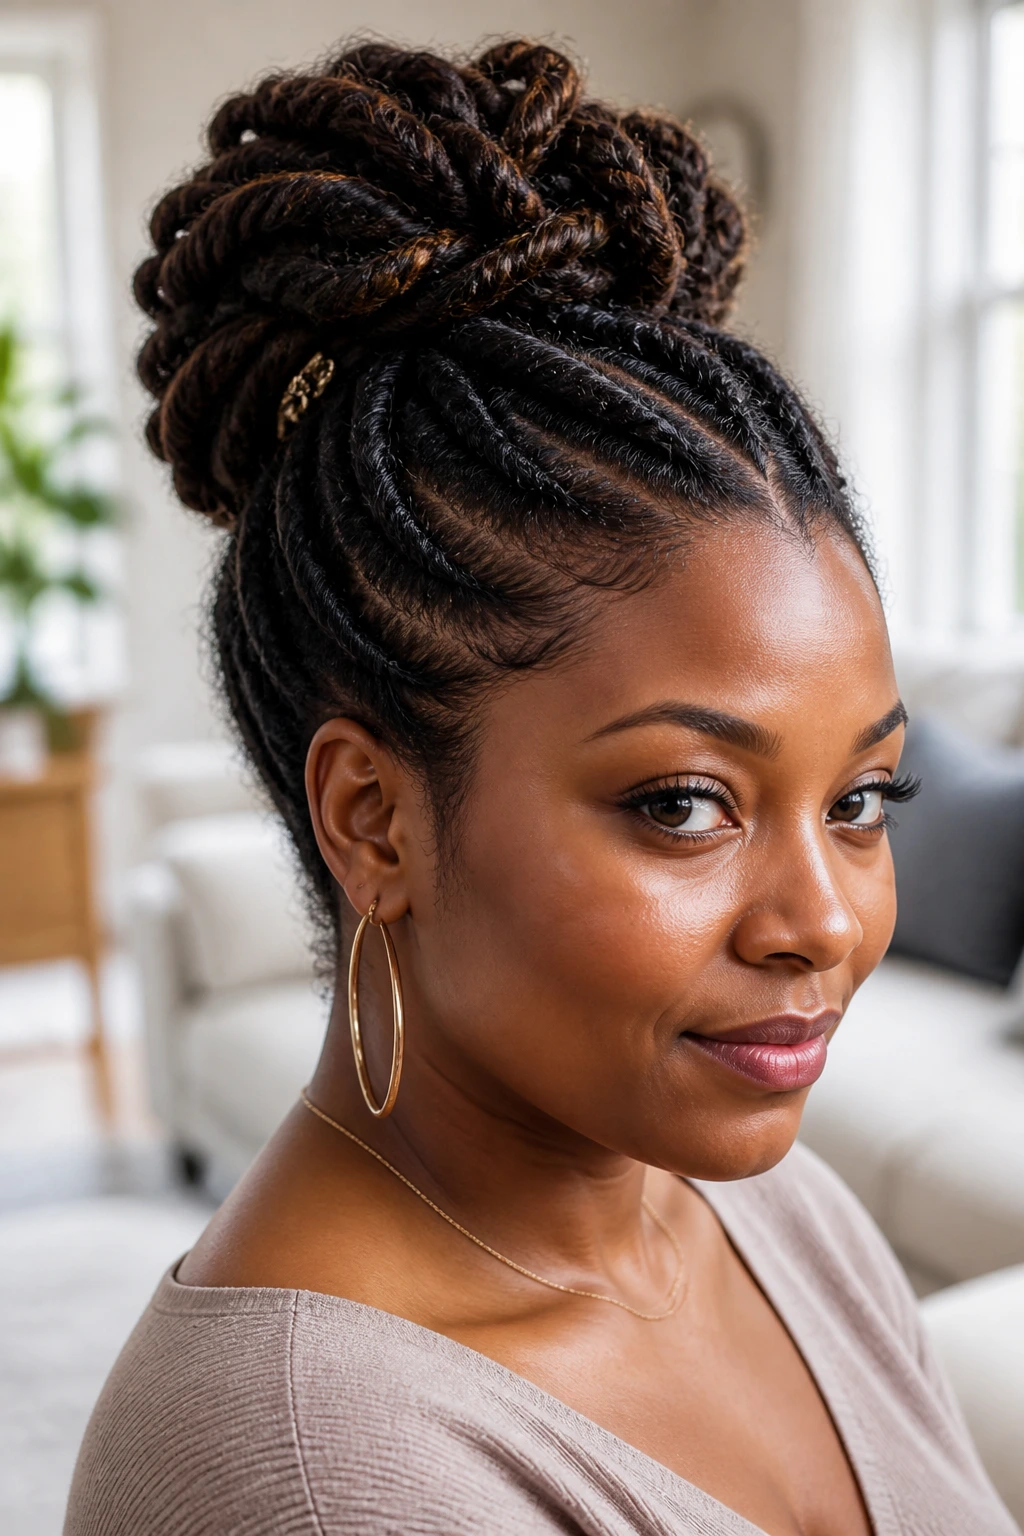
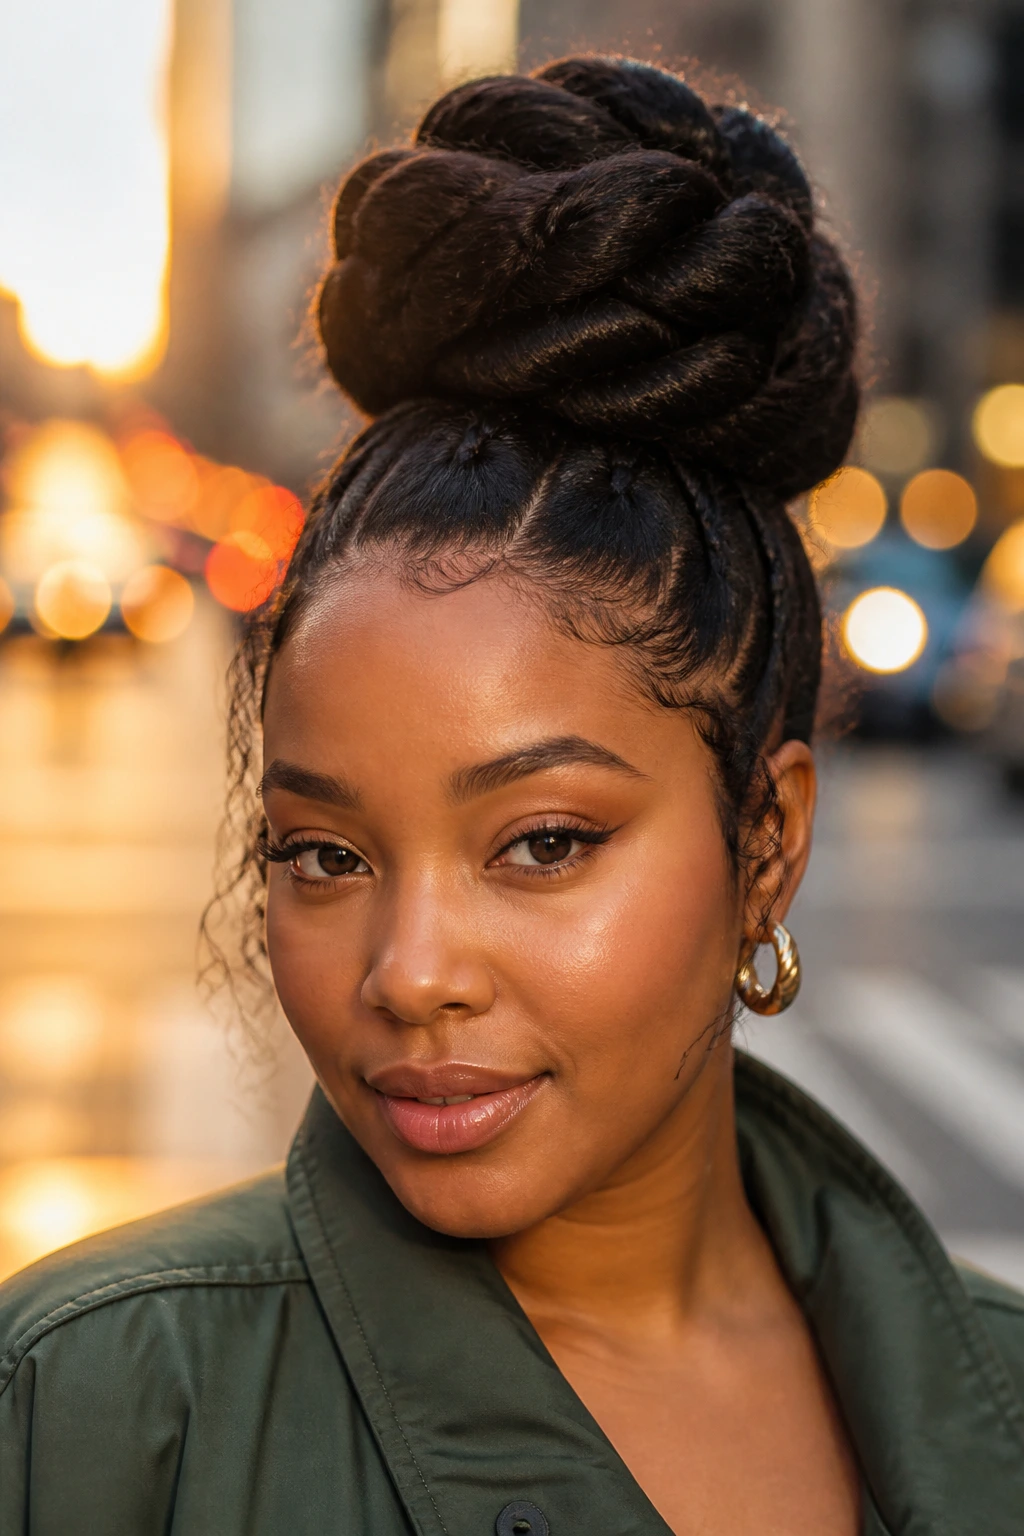
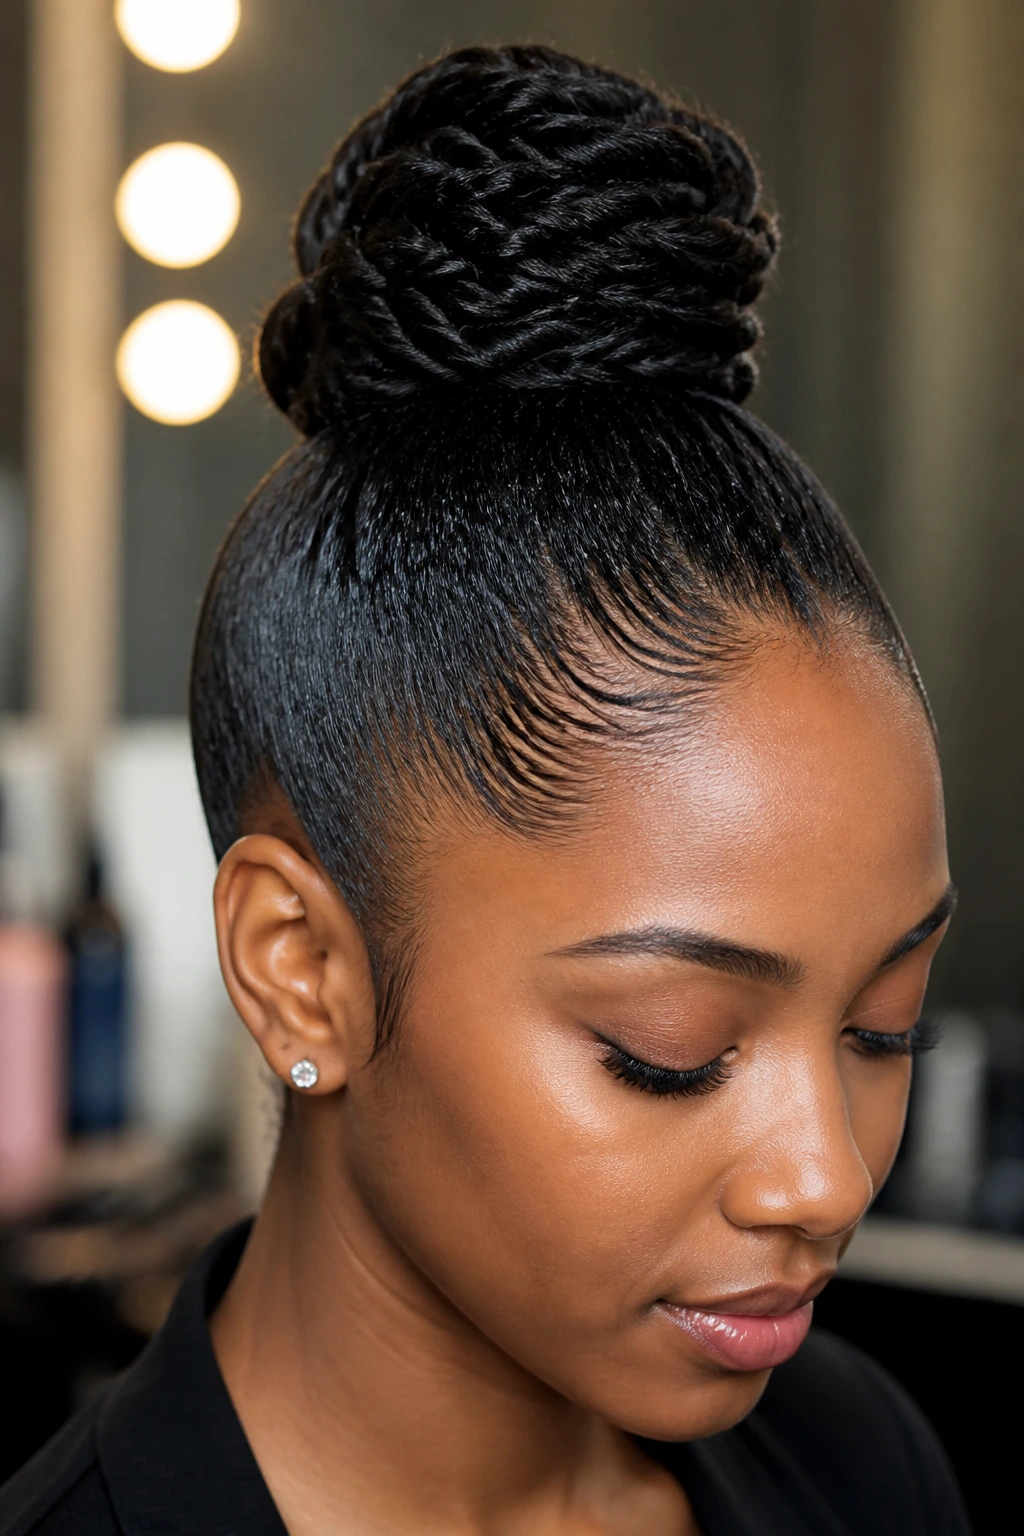
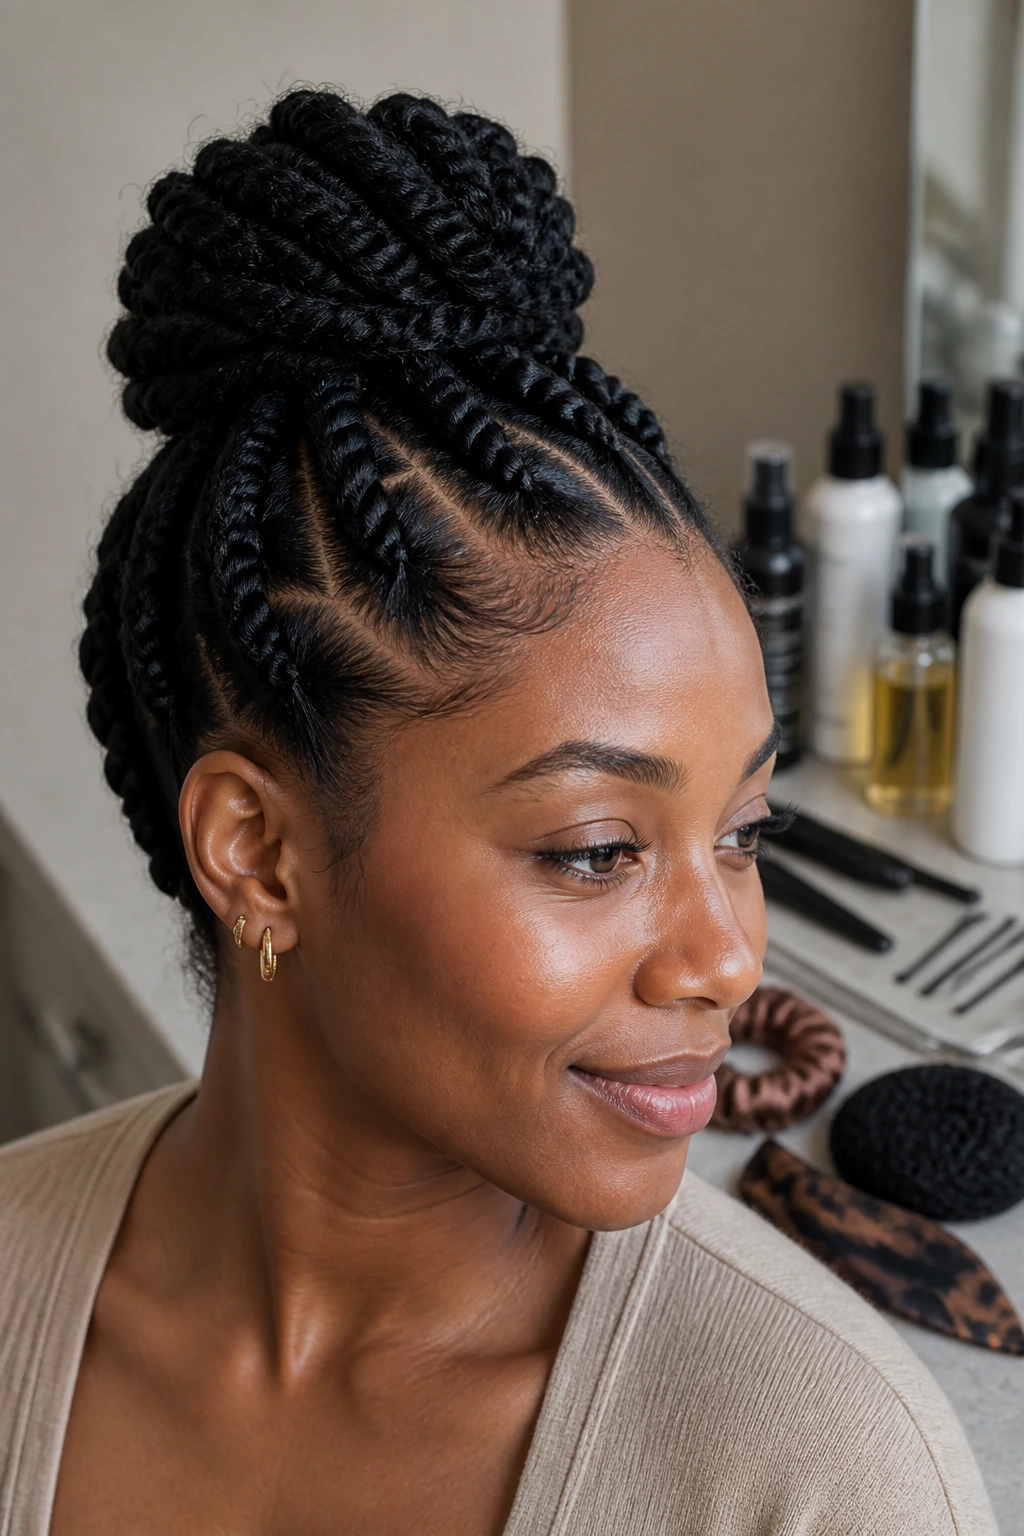
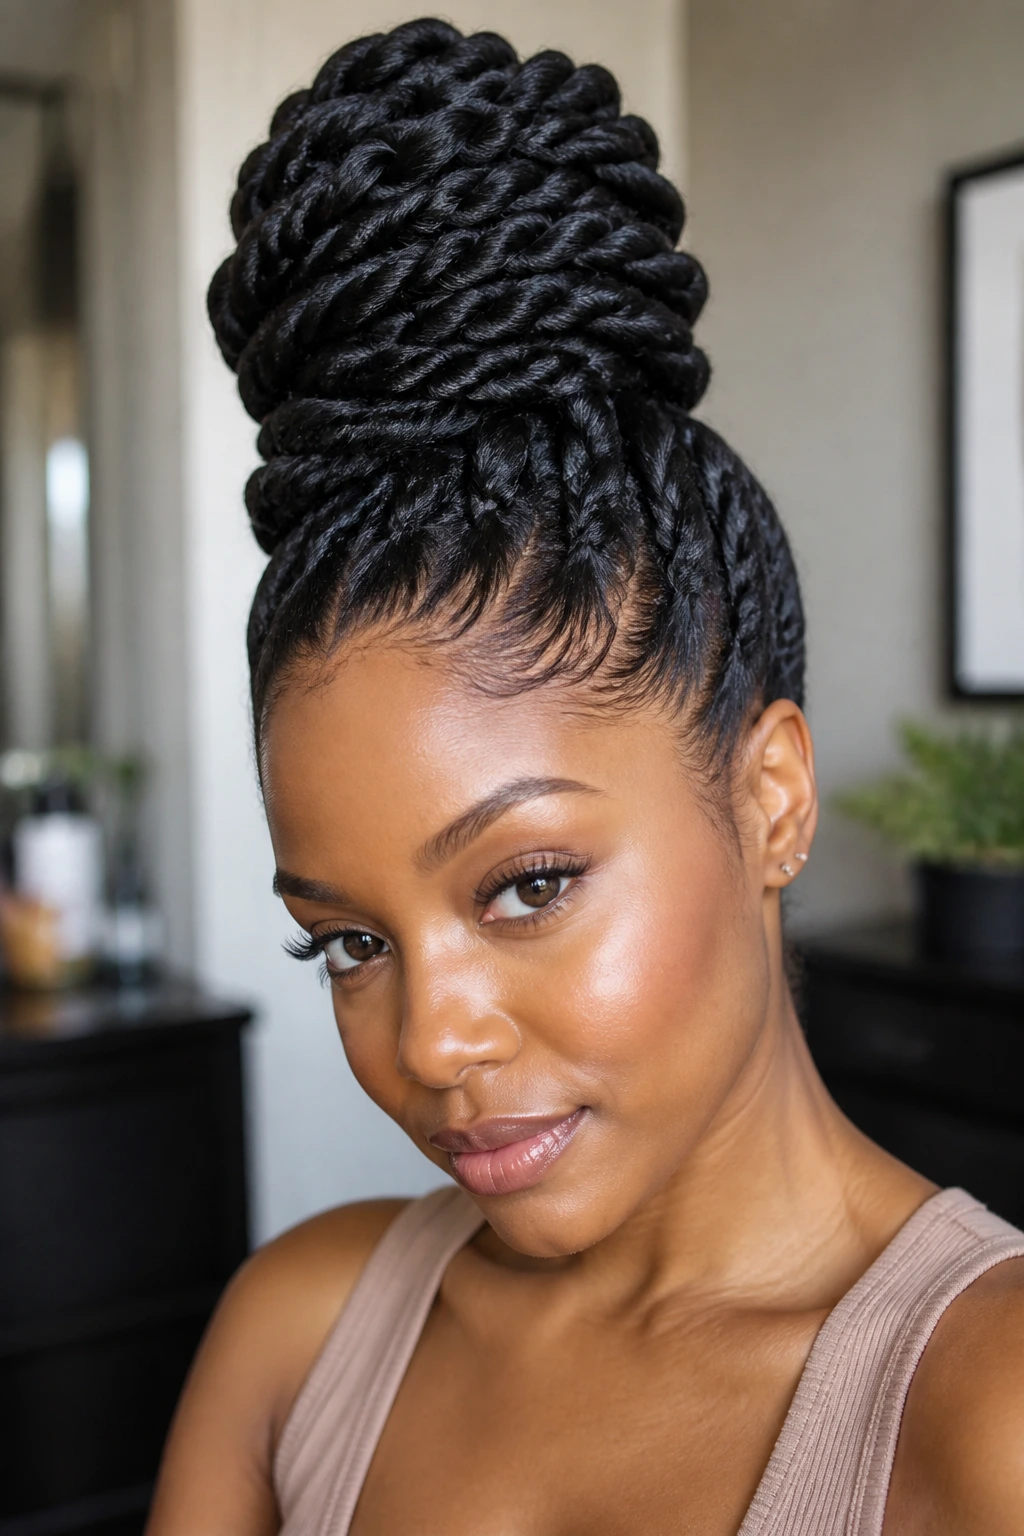
1. The Low Crown Twist Bun for Heavy Hair
Thick hair settles down beautifully when the bun stays low. This version keeps the weight near the nape, which means your head doesn’t feel top-heavy by noon, and the style looks calmer from the side. It’s one of those buns that feels honest. No fake height, no wobble, just a clean shape that understands density.
Use two to four medium twists, depending on how full your hair is, and gather them just below the crown before tucking the ends under. A satin scrunchie gives you a soft base, and a couple of U-pins can lock the underside in place without digging into the scalp.
2. The Middle-Part Rope Twist Bun That Keeps the Front Clean
Need something that looks intentional from the front even when the back is doing the heavy lifting? A center part plus rope twists does the job. The middle part creates a sharp line, and the twists add enough texture for the style to hold without turning stiff or crunchy.
I like a firm gel on the part and a creamy leave-in on the lengths. That mix keeps the front neat while the rest of the hair stays flexible enough to coil into the bun. If your roots puff up fast, twist the front sections while the hair is still slightly damp. Dry roots can get frizzy before you’ve even finished one side.
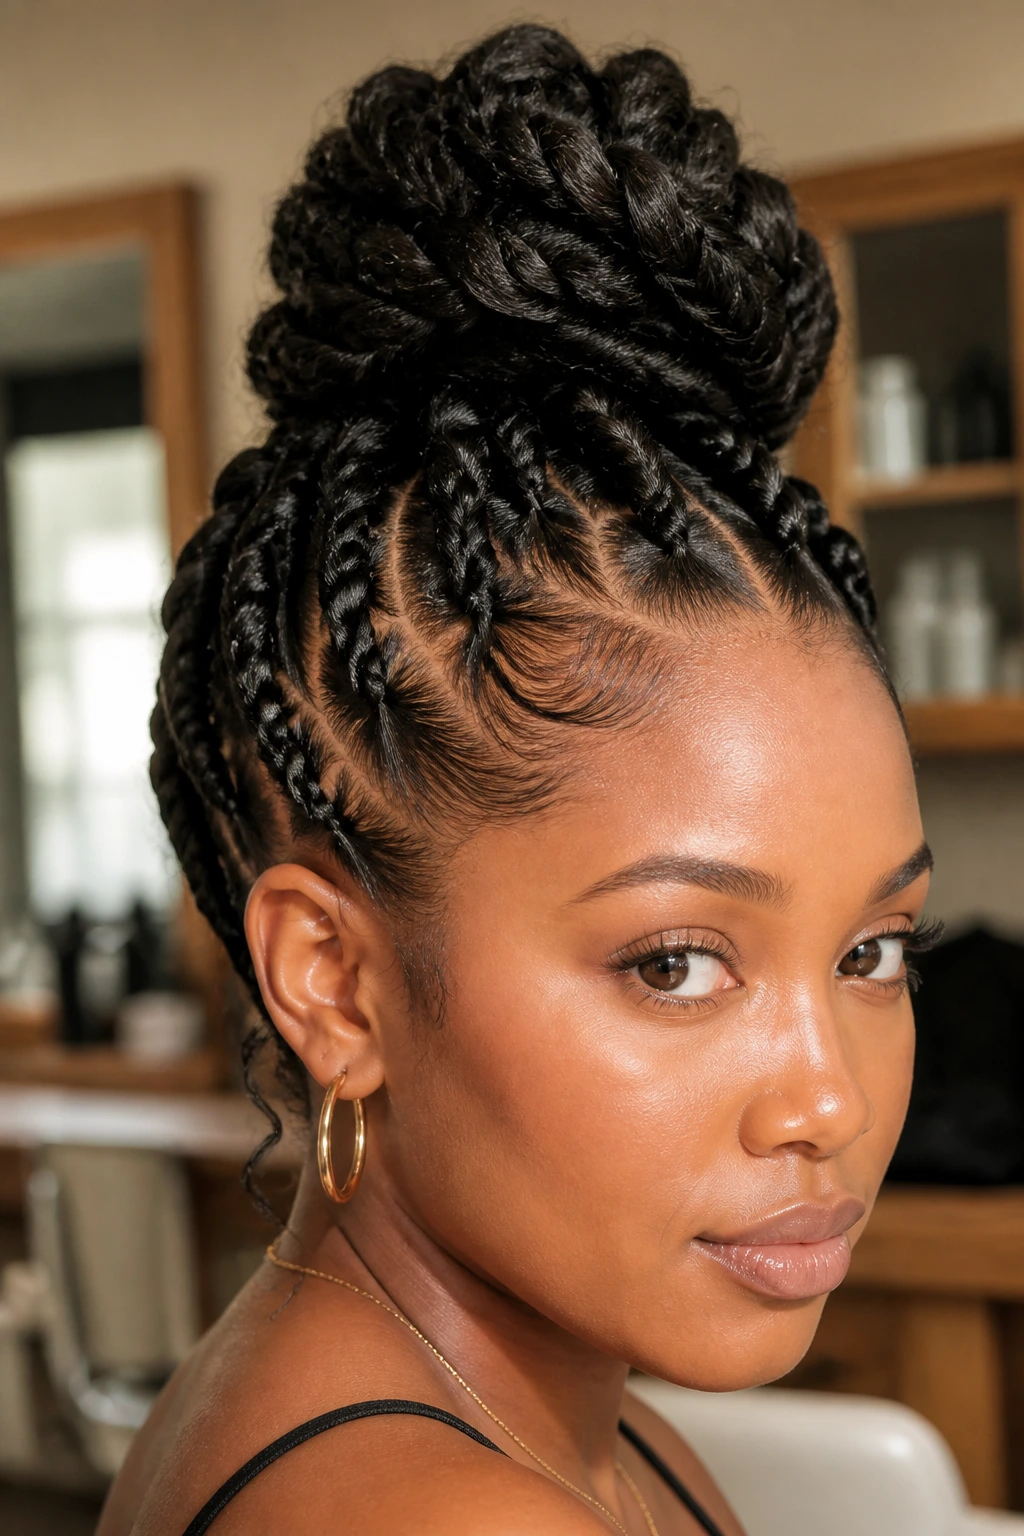
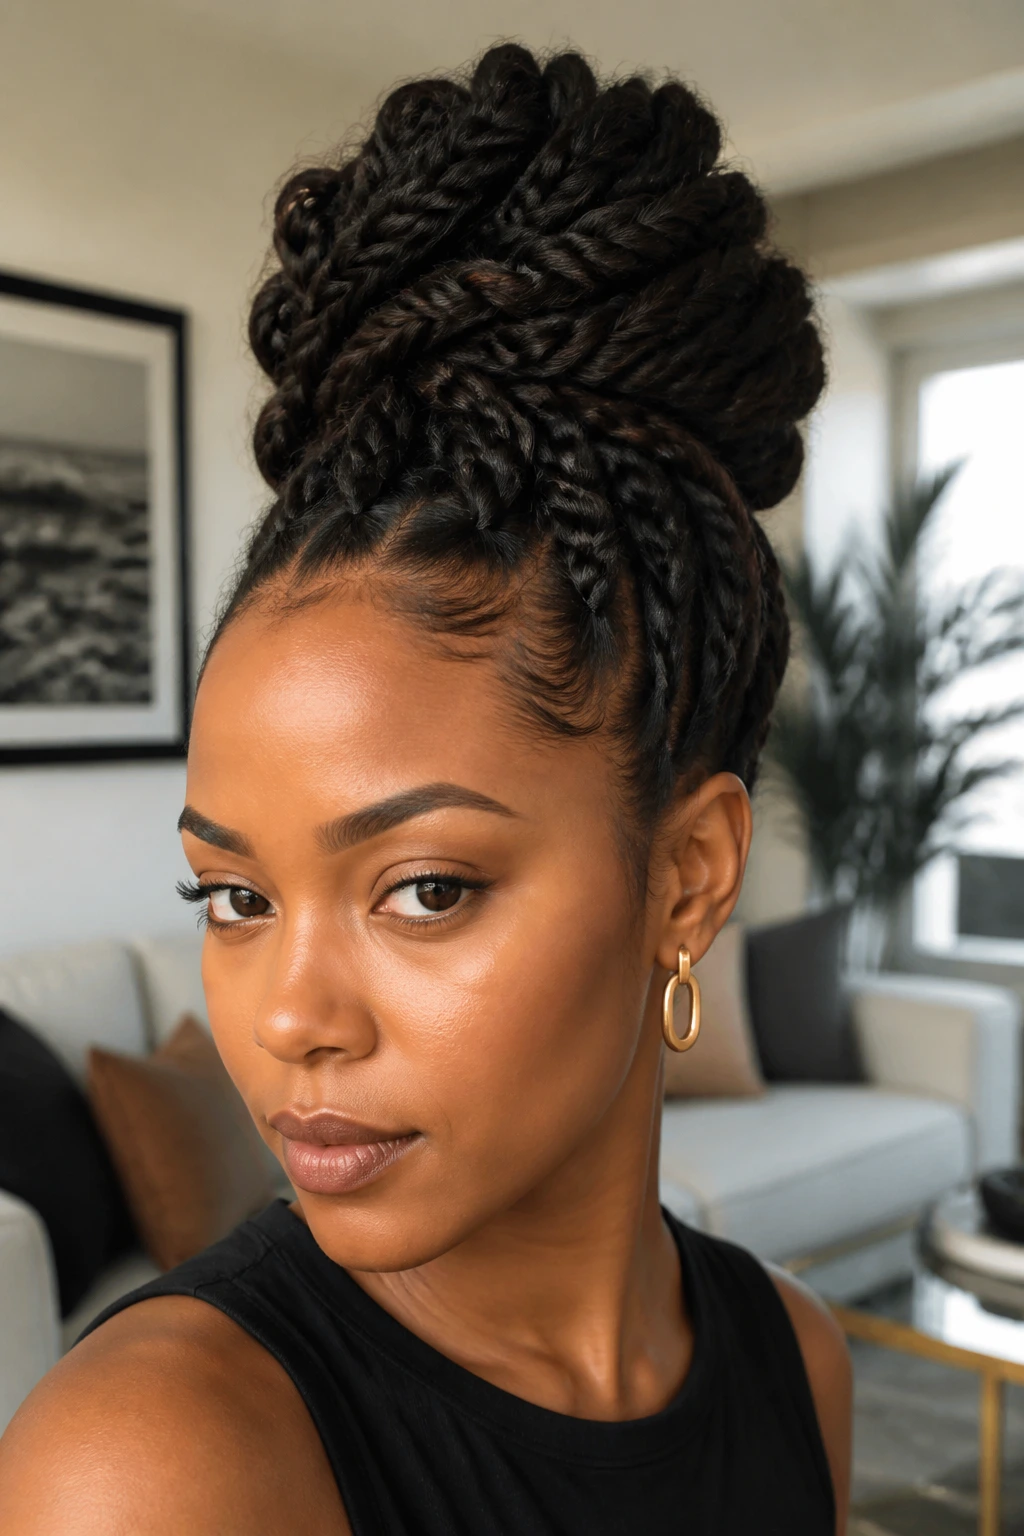
3. The High Coil Twist Topknot for Off-the-Neck Days
When your shoulders want the hair gone, the high coil twist topknot is the move. It lifts the bulk upward instead of letting it sit wide at the back, which is a real gift if your hair is dense and expands as it dries. The shape looks cleaner on stretched hair than on freshly washed coils.
Why the high coil works
Build it from four to six sections, twist each one tightly enough to hold, then wrap them around the base in the same direction so the bun stacks instead of slumping. Finish with pins placed under the bun, not on top of it. That tiny shift keeps the top smooth and the bun from leaning backward.
- Use stretched hair if possible.
- Pin the underside first.
- Keep the base small and the coil compact.
4. The Side-Swept Twist Chignon for a Softer Profile
A centered bun can make thick hair look wider than you planned. Sweep it to one side, and the whole shape changes. The side-swept twist chignon breaks up the bulk and gives the style a longer, leaner line, especially if your hair is thick at the roots and full through the ends.
This one works well when you want the bun to look polished without feeling severe. Tuck the twists behind one ear, then fold the bun low and slightly off-center. Six to eight pins usually do the job, though dense hair may ask for more. It’s not needy. It’s just heavy.
5. The Double Twist Chignon That Stays Elegant Without Feeling Stiff
This is the style I reach for when the goal is neat, not formal-for-the-sake-of-it. Two thick twists cross at the nape, then fold under into a chignon that sits close to the head and keeps the bulk from spreading out across your back. The result is clean, but not fussy.
Use a smoothing cream on the lengths and a touch of gel near the hairline if your edges need help. The twists should feel secure before you tuck them into the bun. If they’re still loose, the whole style starts to loosen in the wrong places. Thick hair is generous like that. It gives you a little warning before it lets go.
6. The Halo Twist Bun That Hugs the Hairline
The halo version sits close to the scalp and keeps the front line neat, which is a nice change when thick hair wants to puff from every angle. The twists wrap around the crown like a soft frame, then the ends disappear into a bun at the back or slightly to one side.
This style feels especially good when you want the hairline tucked away and the crown smooth. Work in small sections at the front — about one inch wide — so the halo sits flat. Bigger sections can make the top look lumpy, and that defeats the point. Use mousse, not heavy grease, if you want the front to stay light.
7. The Flat-Twist Bun With a Smooth Front
Flat twists are the quiet workhorse here. They hold thick hair against the scalp, so the front stays flatter and the bun has less puff fighting its way out of the top. If your hairline grows dense or your roots stand up on their own, this is one of the smartest bases you can build.
The best part is how controlled it looks without needing a lot of extra product. Make the twists feed directly into a low bun, then tuck the ends inward before pinning. You don’t need to flatten the whole head into submission. Just keep the front neat and let the bun carry the shape.
8. The Chunky Rope Bun for Big, Dense Hair
Big hair can take big twists. In fact, chunky rope twists often look better on thick hair than tiny ones because they match the scale of the density instead of fighting it. The bun ends up sculpted and solid, with a shape that reads clearly from across the room.
Best section sizes
- Use sections around 1.5 to 2 inches wide if your hair is very dense.
- Twist each section tightly enough to hold, but not so tight that the roots feel hot.
- Pin the bun with long bobby pins or U-pins; short pins disappear too easily.
This version is quick when you don’t want to spend an hour parting microscopic sections. It also feels sturdier, which is a real advantage if your hair tends to swell in humidity.
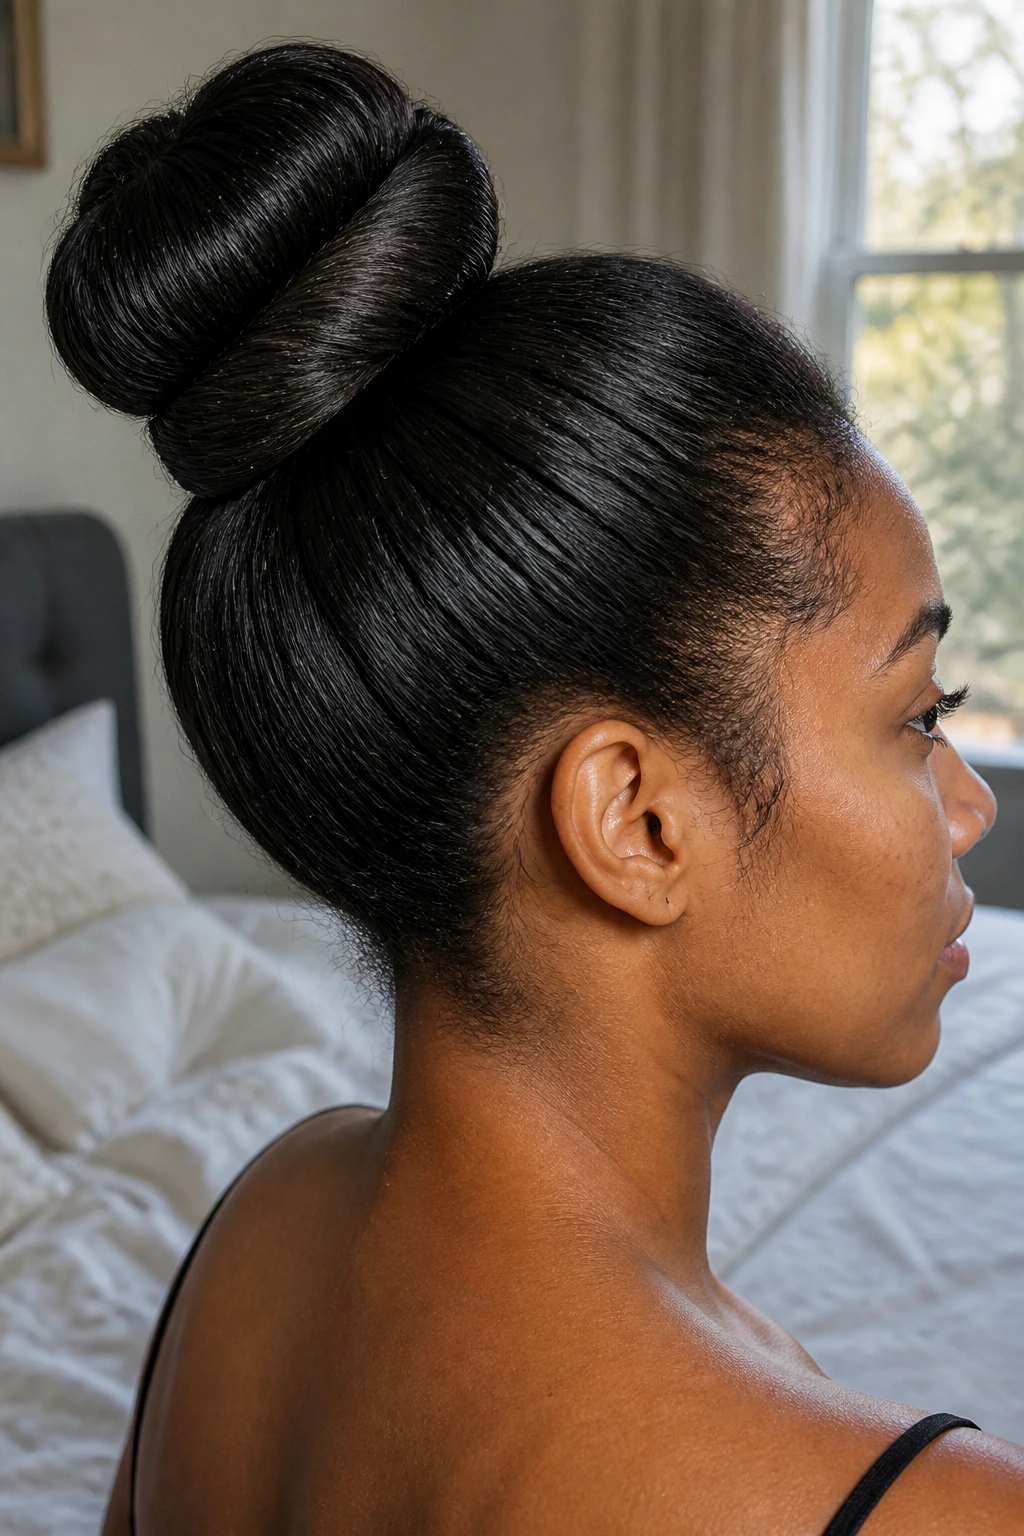
9. The Sleek Ballerina Twist Bun for a Clean Finish
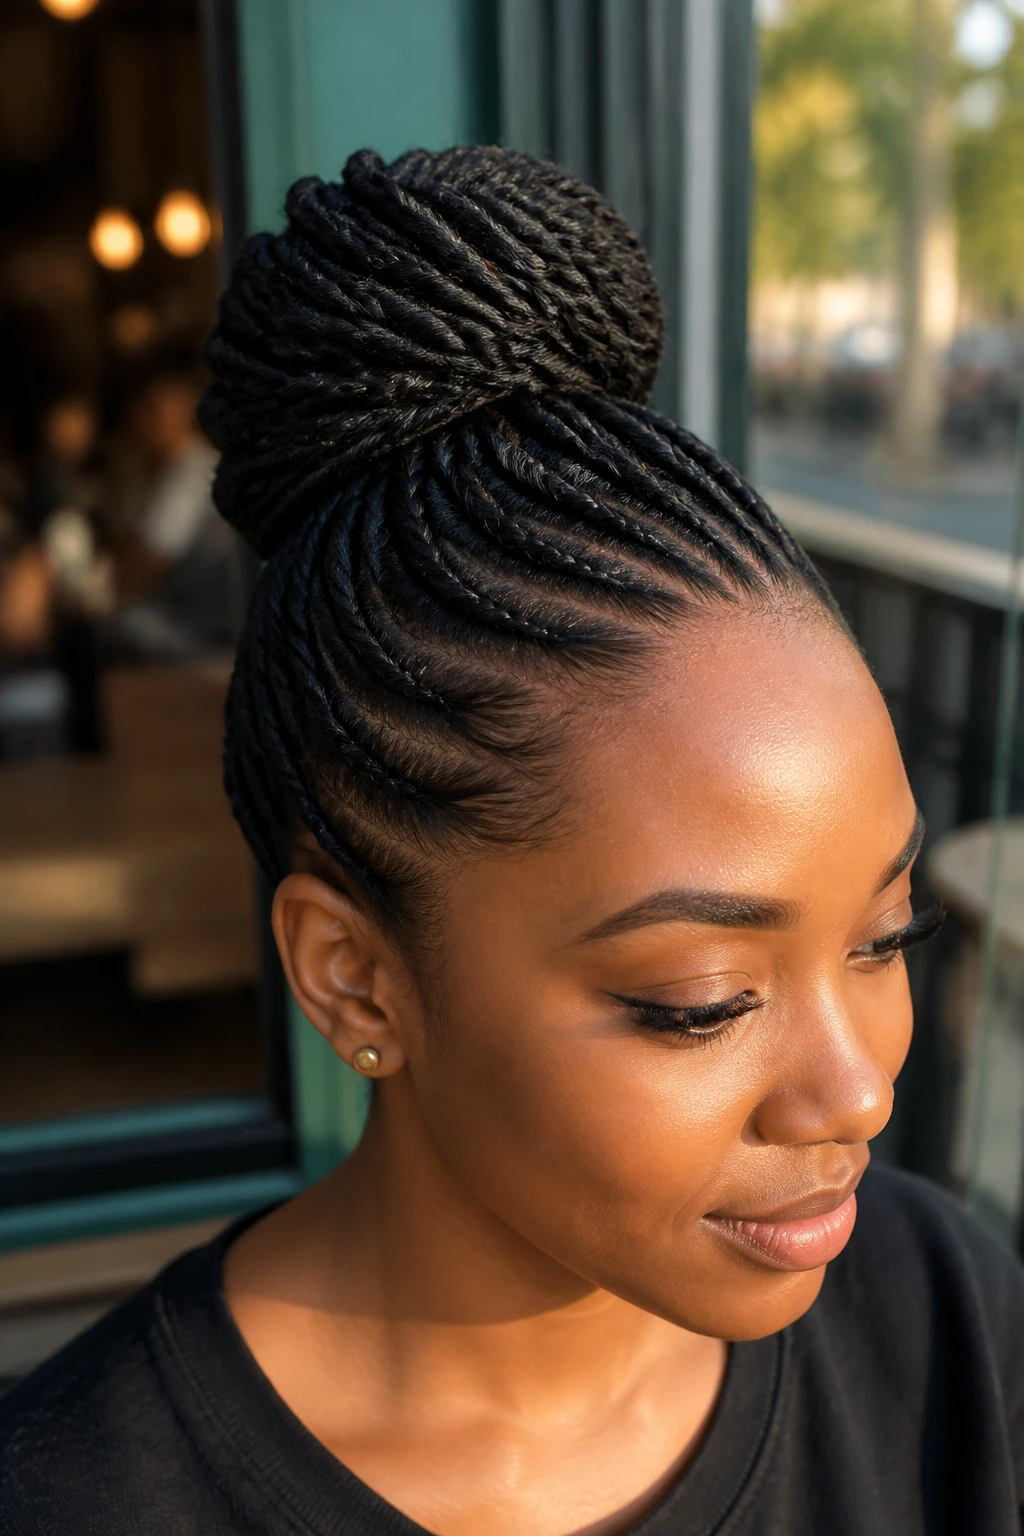
Unlike a plain ballerina bun, this one has enough texture to stay put. The twist pattern gives the bun some bite, while the smooth top keeps the silhouette narrow and tidy. It’s a good choice when you need thick hair to look controlled instead of fluffy.
Brush the front flat, add a thin layer of gel, and twist the back sections toward the crown before coiling them into a bun. The trick is to keep the base compact. If the bun grows too large, the sleek effect disappears fast. A scarf pressed over the front for ten minutes can help the line settle before you head out.
10. The Braid-Ended Twist Bun That Keeps the Tail Quiet
This one is for anyone who hates loose ends poking out from a bun. Twist the lengths first, then braid the final few inches before wrapping everything into place. The braid gives the tail more control, so the end doesn’t fluff itself loose after a few hours.
It’s a useful move for thick hair because the ends often need more discipline than the roots do. I like this style for long days, because once the braided tail is tucked under, it behaves. Use one or two pins across the braid seam, not just one at the end. That seam is the part that likes to open.
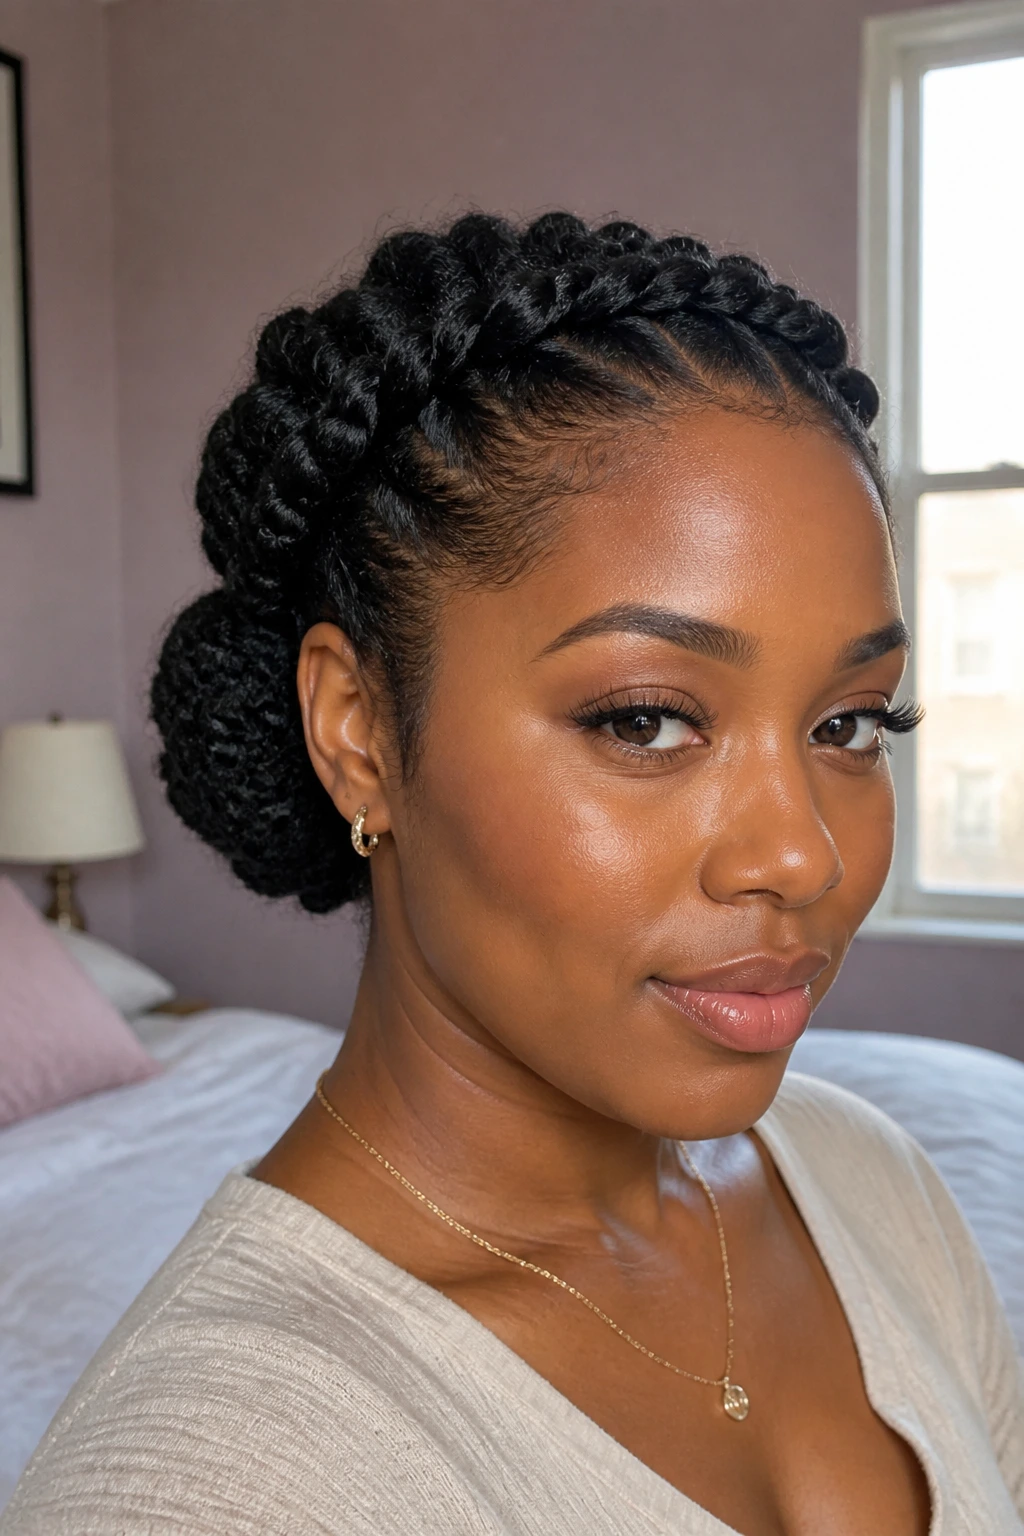
11. The Loose Puff Twist Bun for Wash-Day Texture
Not every protective style has to be tight and polished. The loose puff twist bun works when your hair still has some softness left after washing and you want to keep that airy feel. It sits a little fuller at the crown and a little softer around the bun, which looks relaxed without turning sloppy.
This style is friendliest on hair that has been stretched overnight or dried in chunky twists. If you try to force it on soaking-wet hair, the bun gets too bulky and takes forever to set. Let a little texture show. That’s part of the appeal.
12. The Knotless Twist Bun for Sensitive Edges
Sensitive edges need less drama, not more. The knotless twist bun starts with a softer base, so the tension doesn’t hit the hairline all at once. That’s useful if your temples are already tired from styles that pulled too hard.
Where the tension should sit
Keep the first inch of each front section loose, then gradually tighten the twist as you move back. The bun should feel anchored by the mid-lengths, not strangling the roots. That shift makes a bigger difference than most people expect.
A knotless base also looks smoother under the twist pattern, which gives thick hair a cleaner finish. If your scalp feels hot or your part tingles, the style is too tight. Fix that early. Your hair will tell you.
13. The Banana-Style Tucked Twist Bun for a Long, Lean Shape
The banana shape is one of those old-school silhouettes that still works because it handles bulk well. Instead of building the bun outward, you tuck the twists upward along the back of the head and hide the ends inside a vertical roll. Thick hair suddenly looks narrower. It’s a useful illusion.
Long pins are your friend here. Slide them in along the curve of the roll, not straight through the middle, and the style locks in cleaner. This is a nice option when you want something elegant but not formal in a stiff way. It has a little movement, but the hair stays tucked away.
14. The Twisted Space Buns That Split the Weight
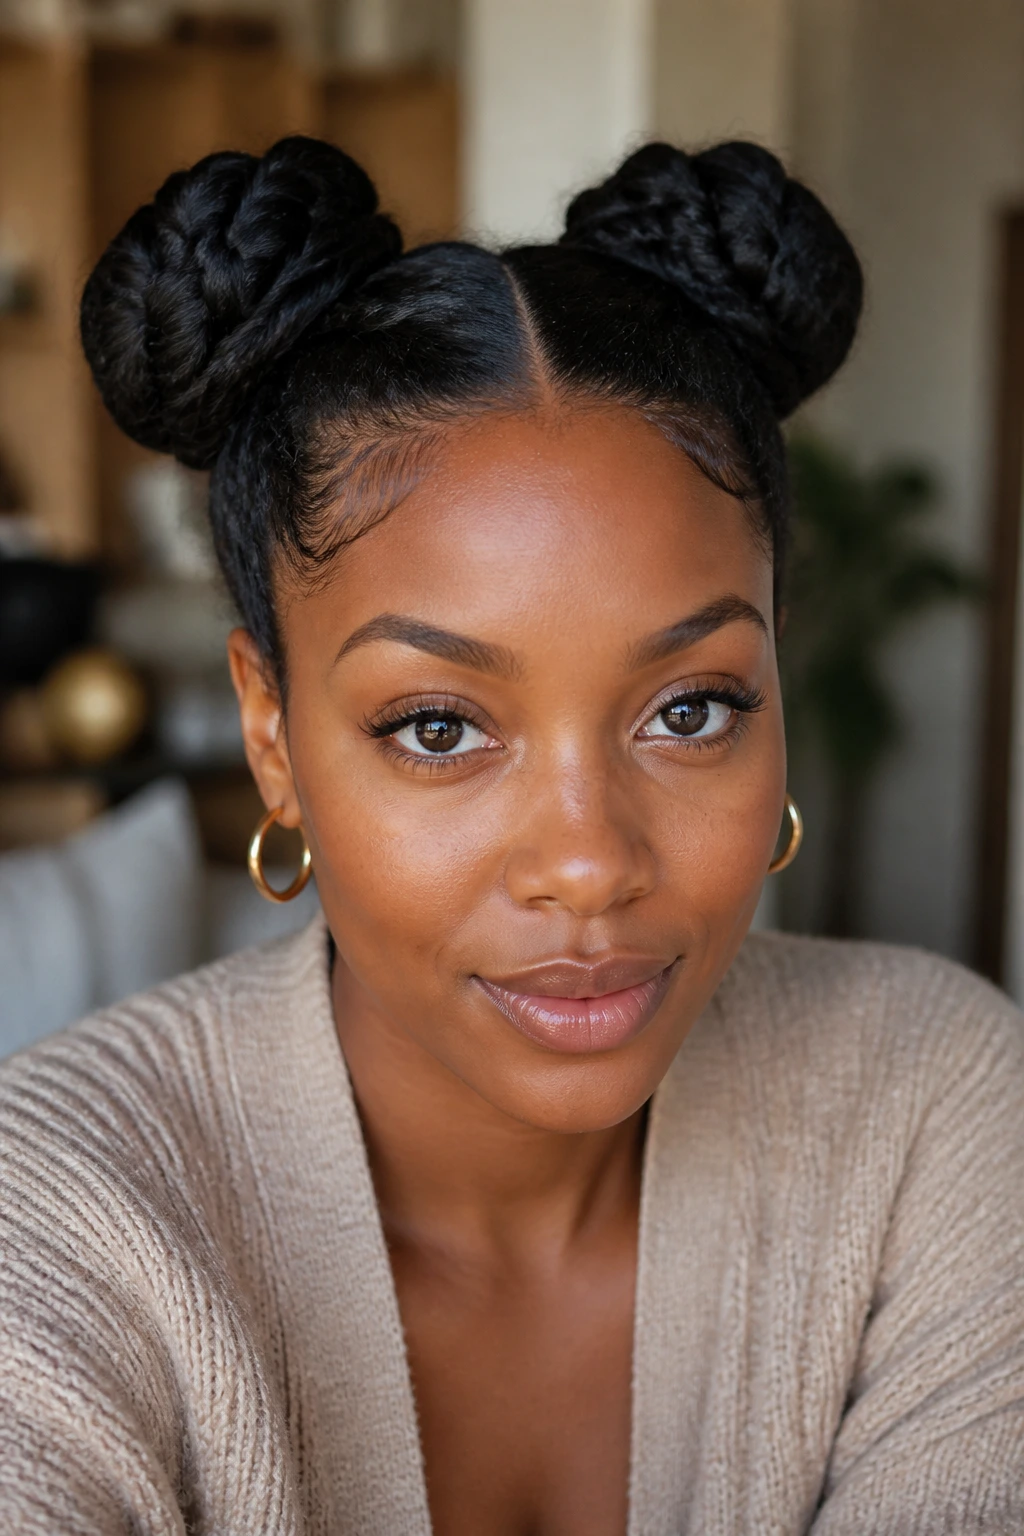
Two buns are kinder to thick hair than one giant knot. The weight gets split, and the scalp doesn’t have to carry everything in a single spot. That alone makes the twisted space bun worth keeping around.
Keep the part clean and the sections even so one side doesn’t sag lower than the other. You can make the buns small and tight or larger and softer, depending on how much hair you want to show. If your hair is long and dense, don’t overcrowd the crown. Let the buns breathe a little.
15. The Angled Nape Twist Bun With a Smaller Footprint

A diagonal bun is a small trick that changes the whole profile. Instead of sitting straight across the nape, the bun angles from one side to the other, which reduces the wide, boxy look thick hair can create at the back.
This shape works especially well when your hair has a lot of body at the lower crown. Pull the twists slightly toward one side before you pin, then tuck the ends inward so the bun reads as one piece. It feels a touch unexpected without becoming complicated. Sometimes that’s all a style needs.
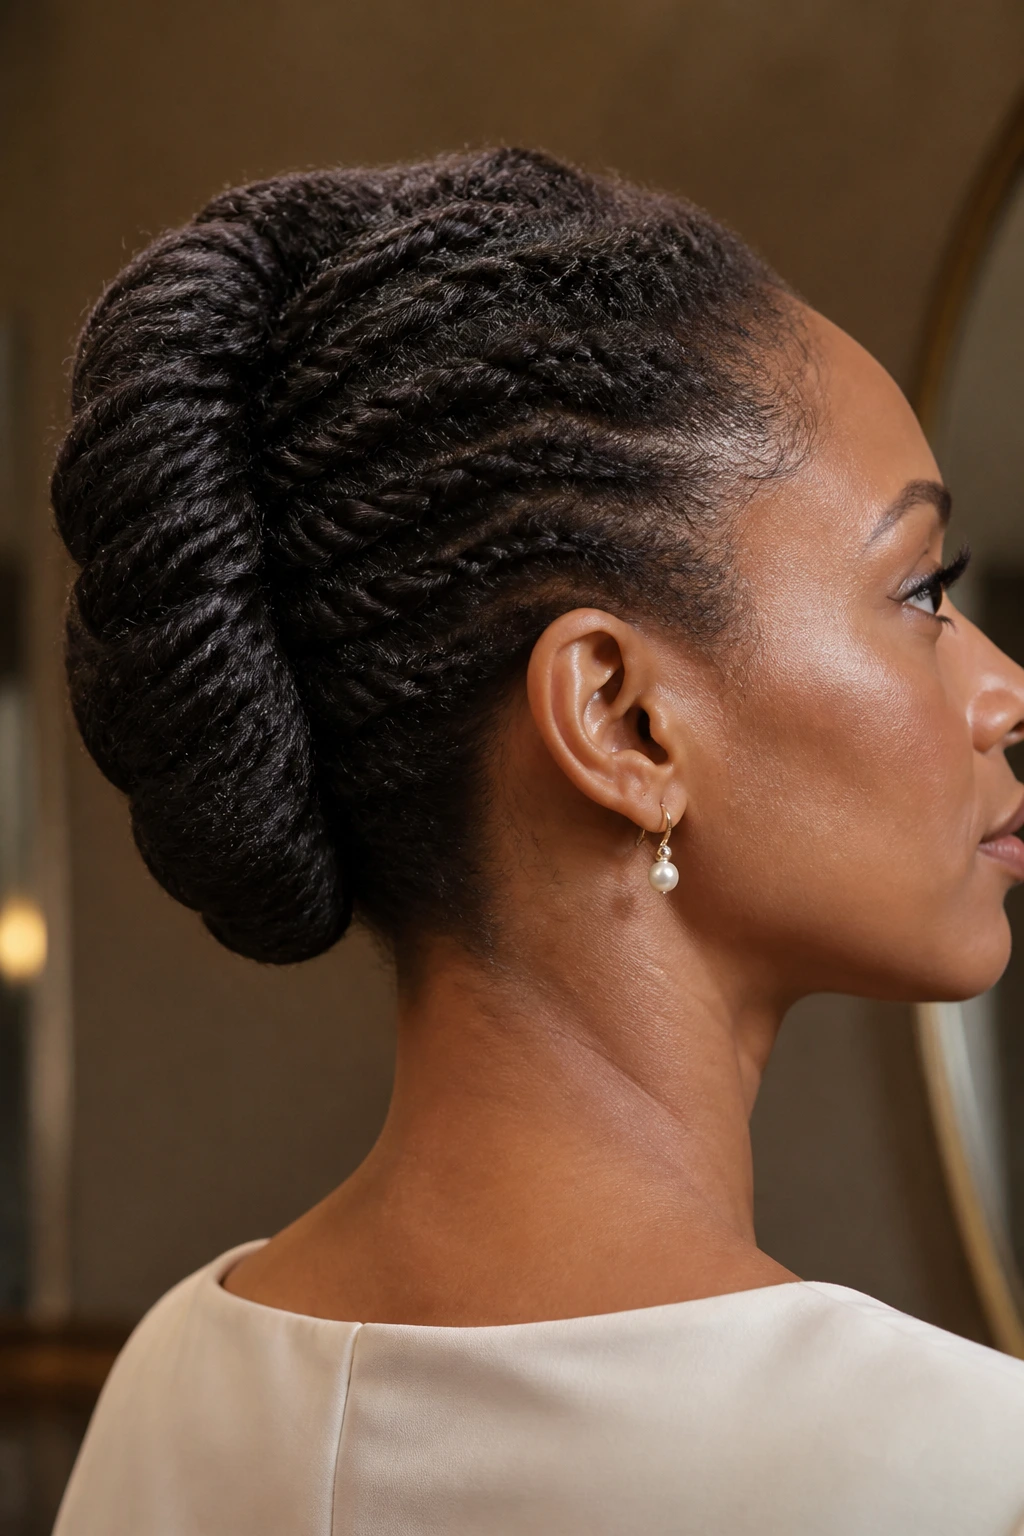
16. The French Twist Bun Adapted for Thick Hair

A classic French twist can look gorgeous on dense hair, but it needs a sturdier base than people usually give it. The twist bun version keeps the same vertical roll, only with more texture and more pinning. That extra grip helps thick hair stay inside the shape instead of slipping out of it.
Work the hair upward in sections, tucking the ends as you go rather than trying to force the whole mass into one push. That approach is slower, but it saves you from the lumpy seam that happens when thick hair refuses to cooperate. A smooth top and hidden ends are the goal here.
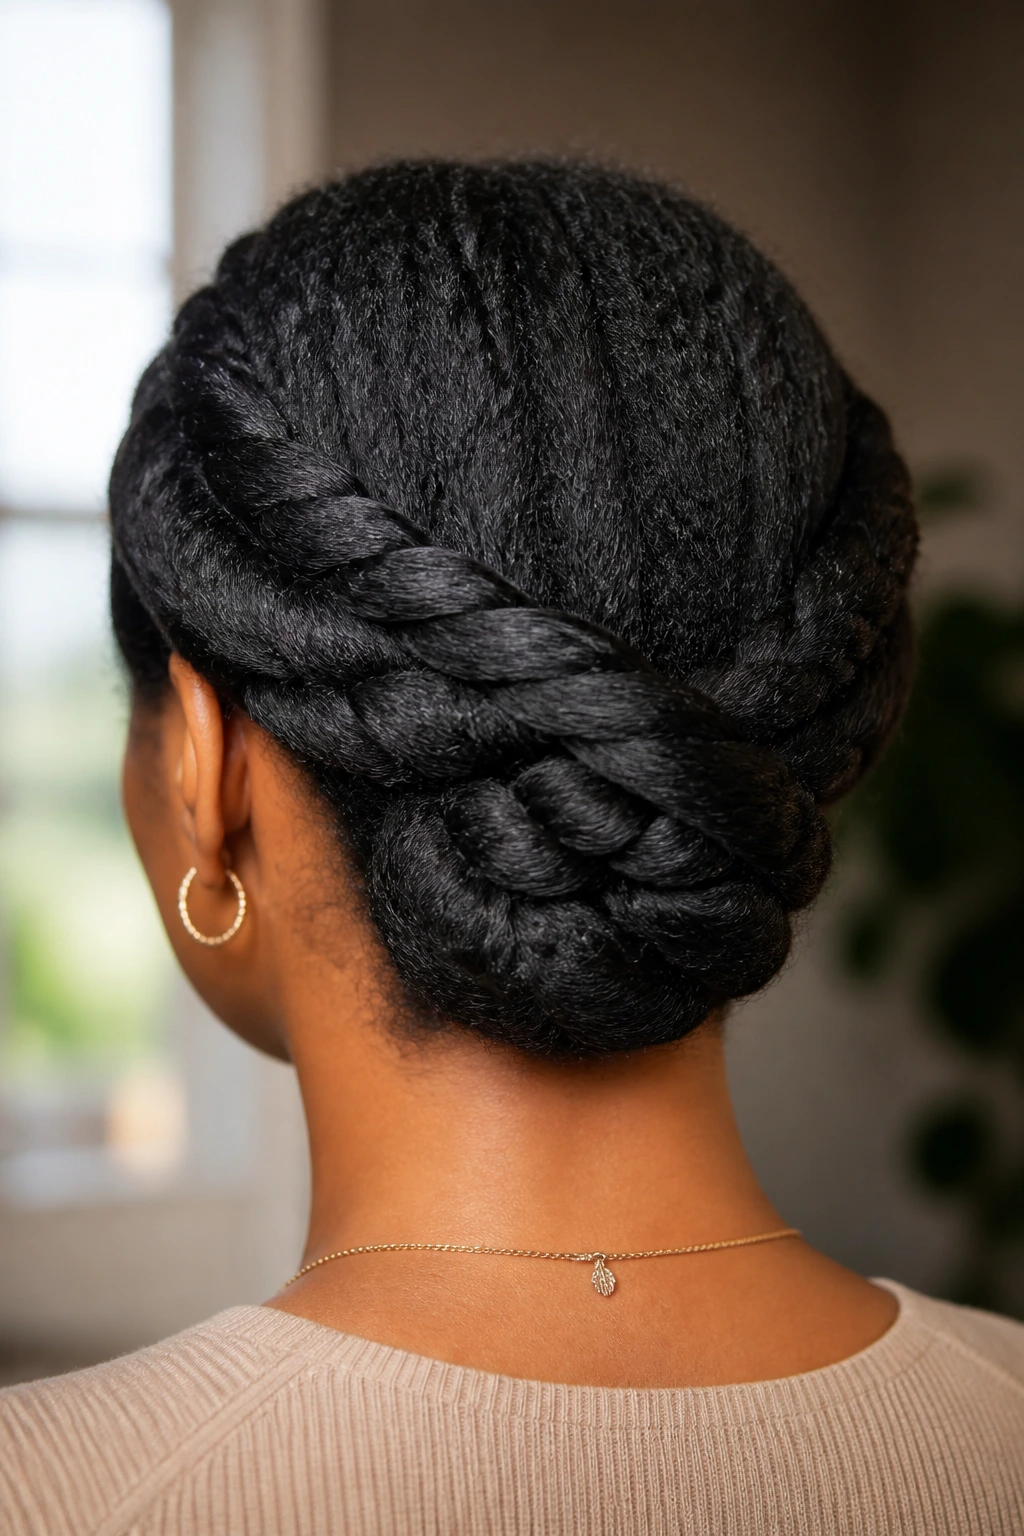
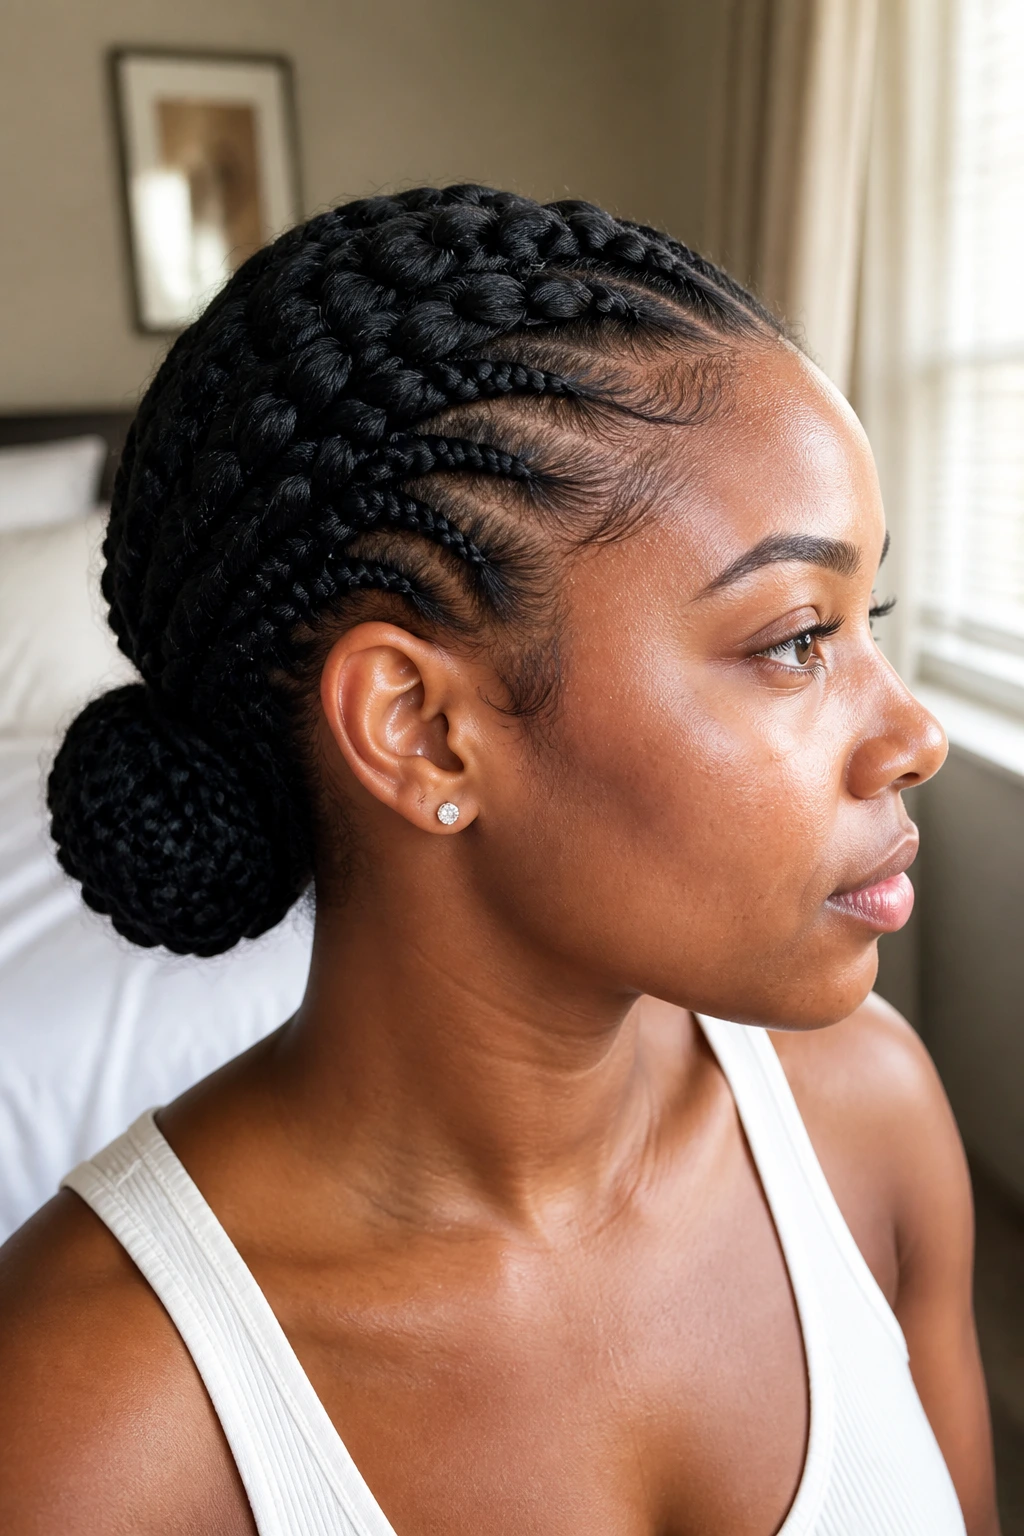
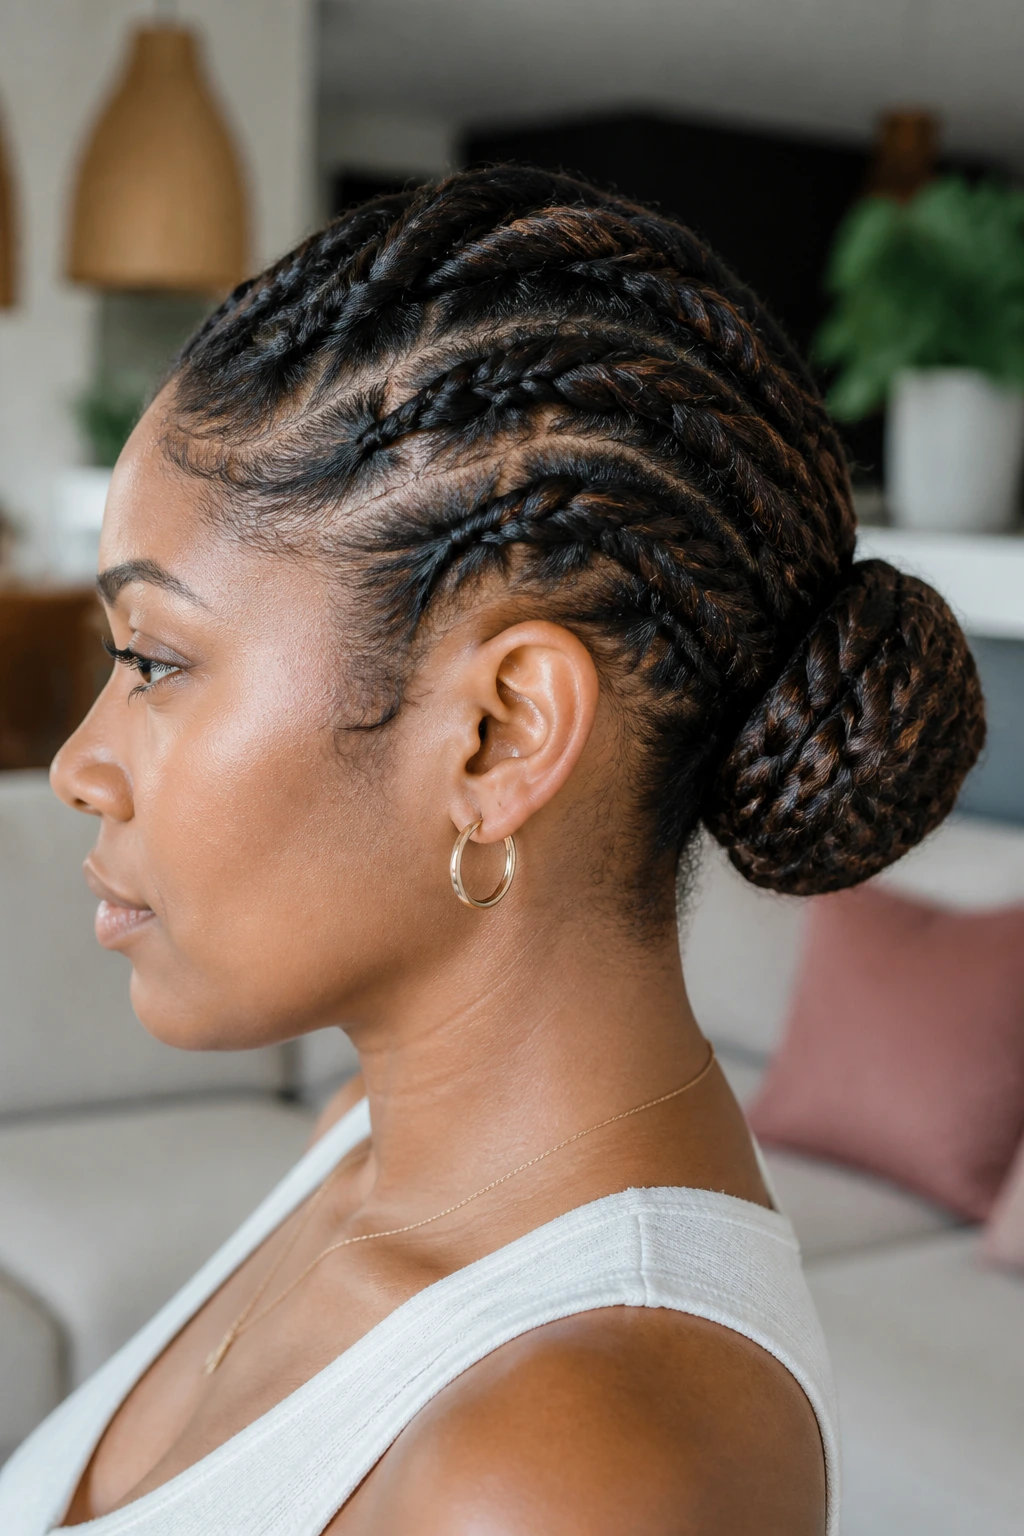
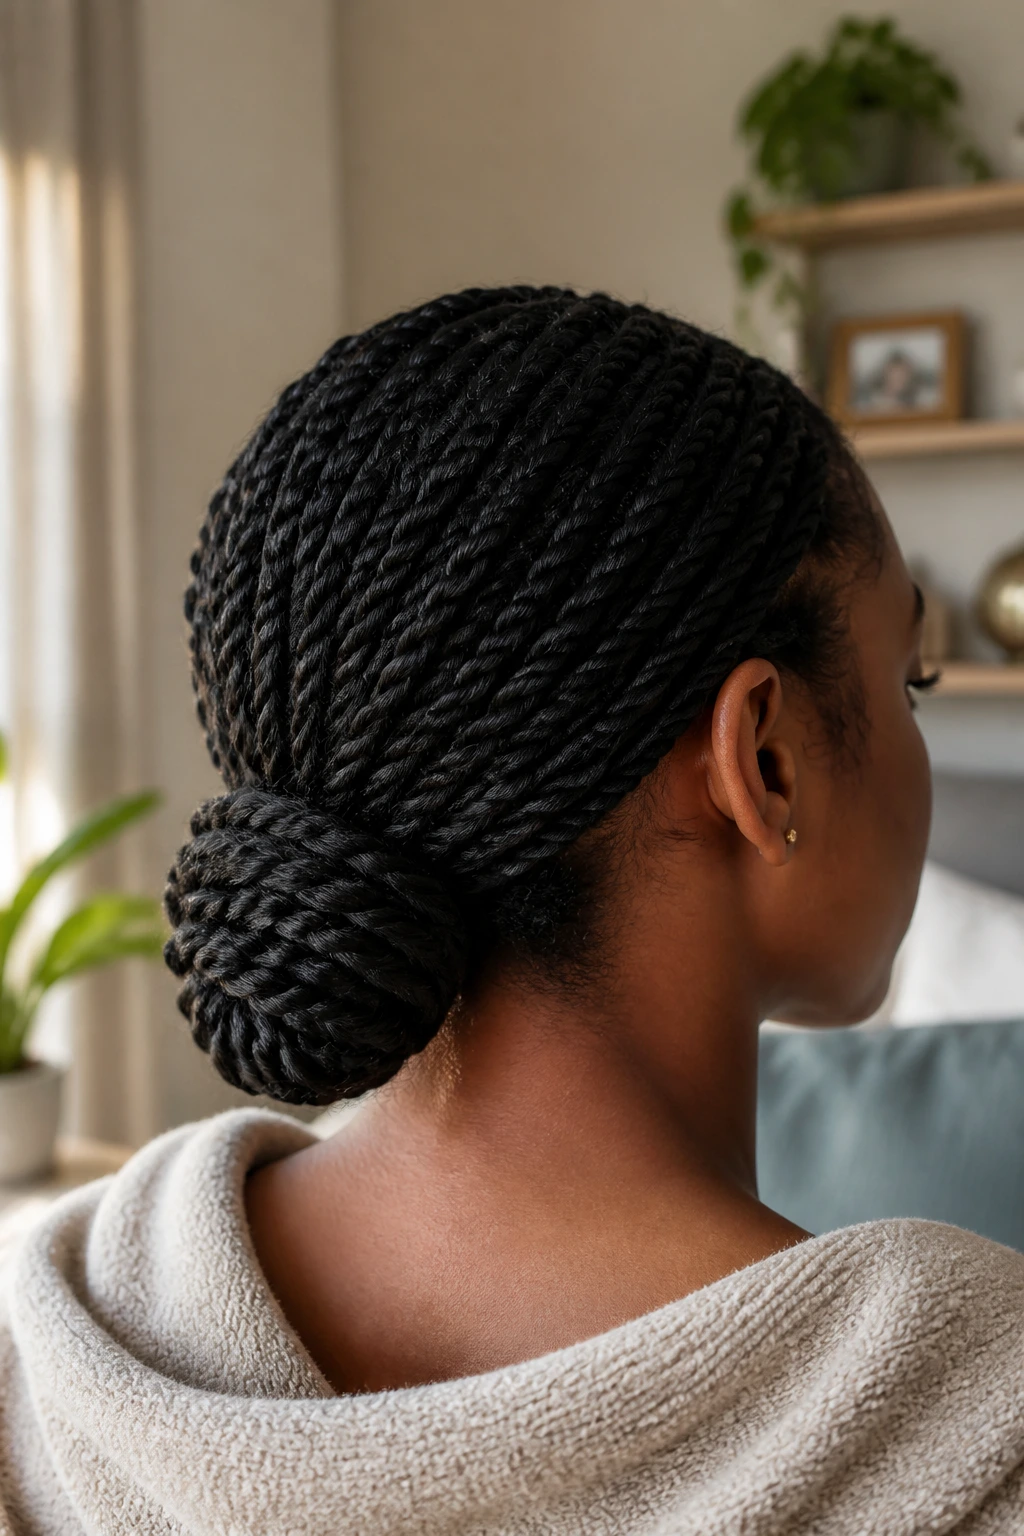
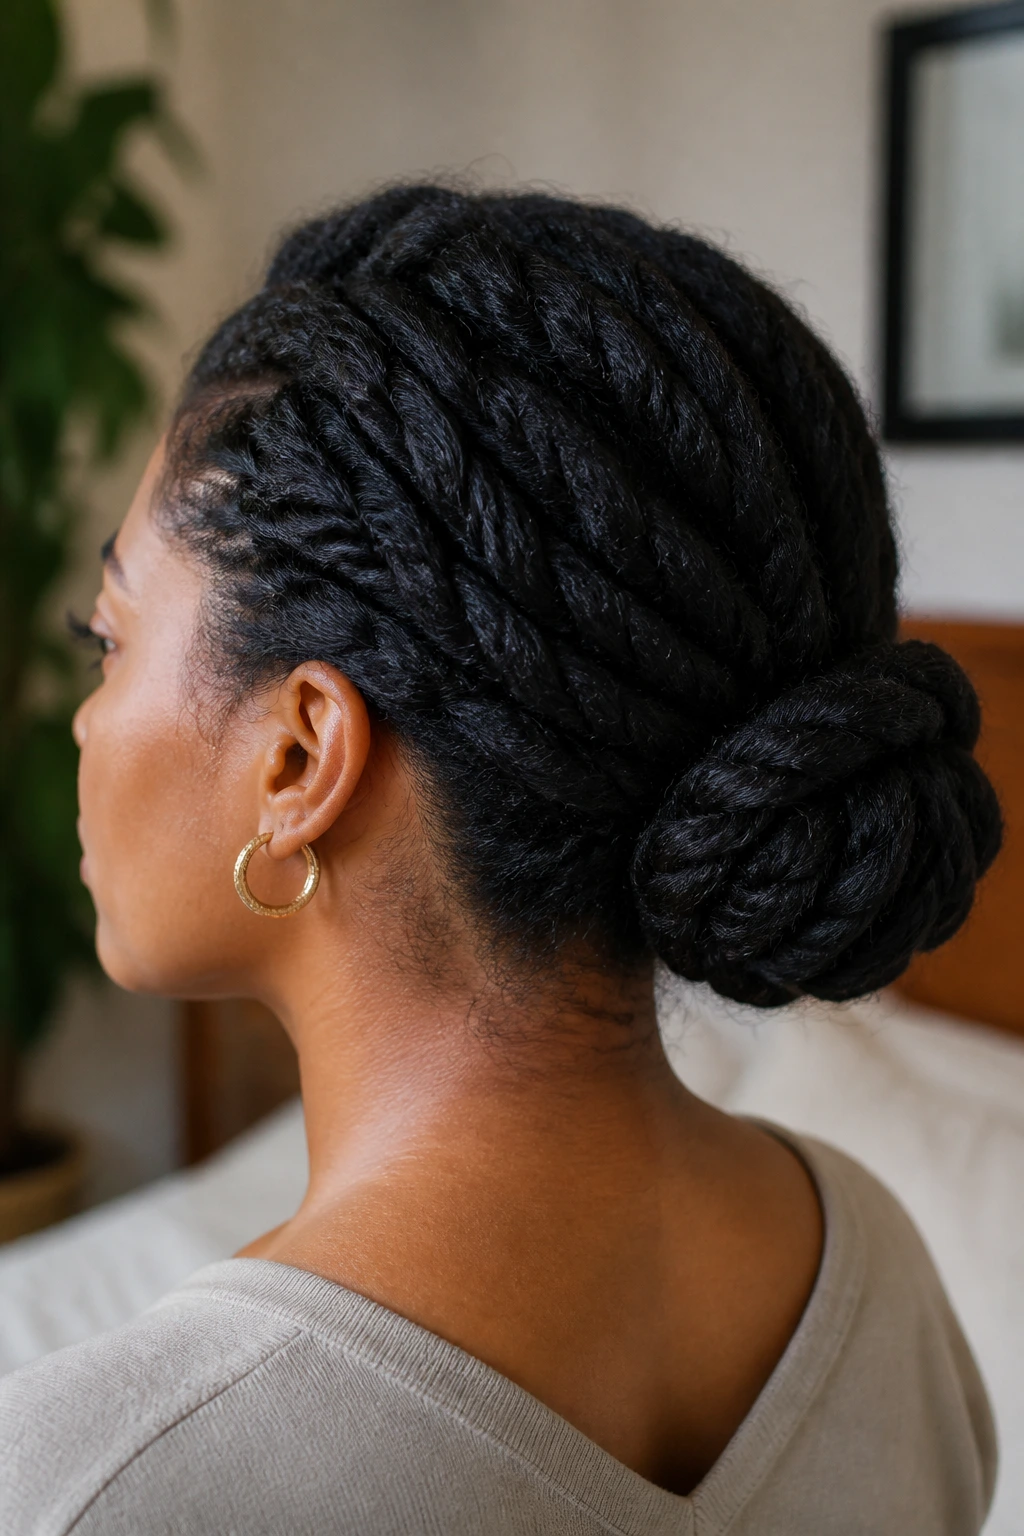
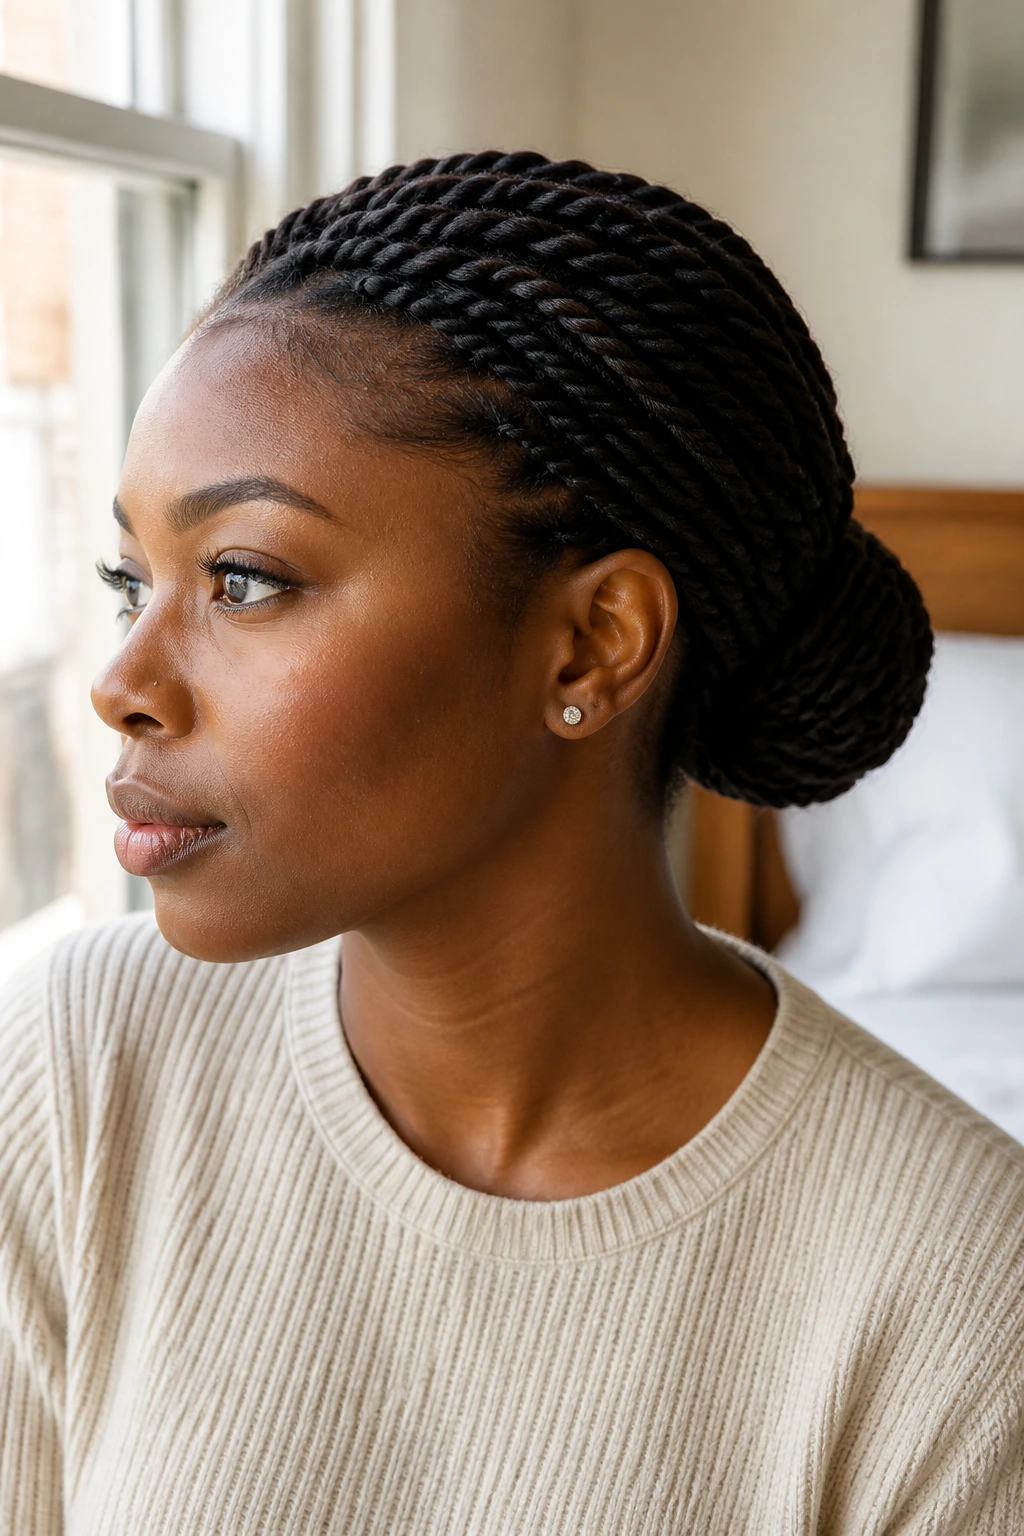
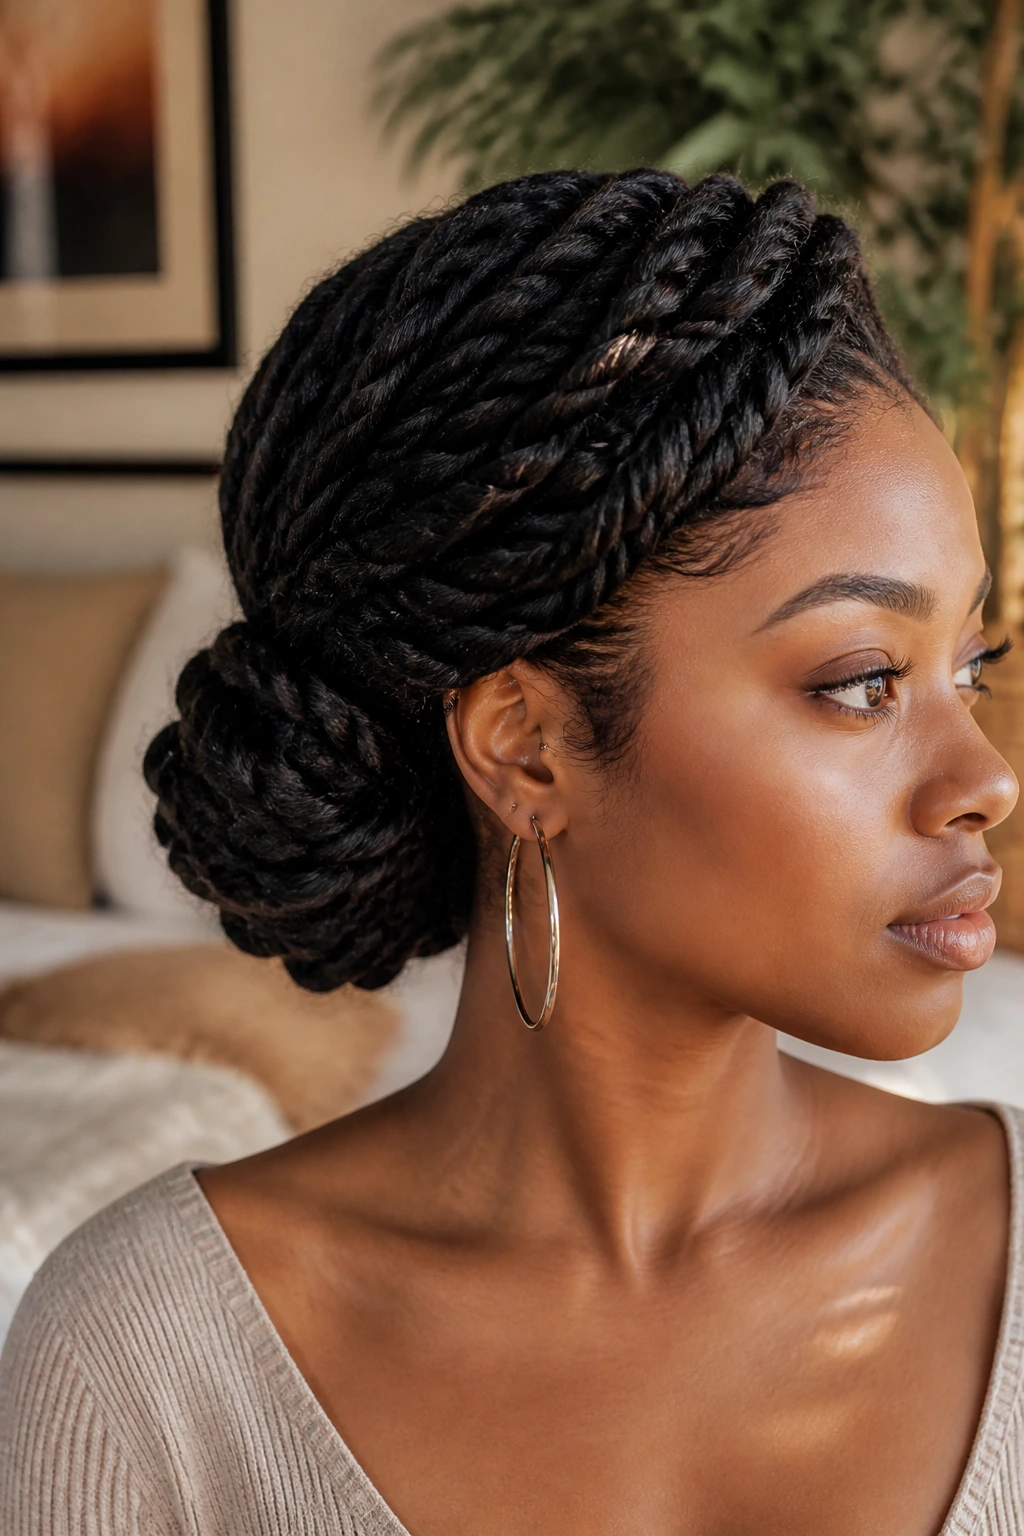
17. The Rope-Span Low Bun That Feels Rock-Solid

Think of this one as a bridge across the back. Two rope twists span over the bun, cross at the center, and help hold the whole shape down. It’s a nice option when your hair is so dense that a normal low bun starts drifting out of place.
How to keep the bridge from slipping
Pin the crossing point first, then secure the ends under the bun. If you pin only the outer edge, the whole thing can shift when you move your head. Dense hair likes a strong center. Give it one.
The rope-span style works well for long hair because the twists create a little architecture without making the bun massive. That’s the sweet spot.
18. The Crown Twist Low Bun That Protects the Front First
When the front line matters more than the back, crown twists earn their keep. They start at the hairline, follow the curve of the head, and feed neatly into a low bun, which keeps the most fragile area of the style tucked away.
This is a good pick if your thick hair tends to puff around the temples or if you want a style that feels secure but not severe. Keep the crown sections neat and close to the scalp, then let the bun stay simple. The front does the visual work. The bun just behaves.
19. The Textured Messy Twist Bun That Still Means Business
Messy does not mean sloppy. The textured messy twist bun is deliberately pulled apart, with a few soft pieces and a little height, but the base is still pinned well enough to survive a full day. Thick hair can wear this look without it falling apart, which is half the charm.
I like this one on second-day hair. The strands have a bit of grip already, so the pulled-apart twists look lived-in instead of frizzy by accident. Use mousse before pinning, and resist the urge to keep adjusting the top. Every extra tug makes the shape looser than it needs to be.
20. The Scarf-Wrapped Twist Bun That Handles Frizz
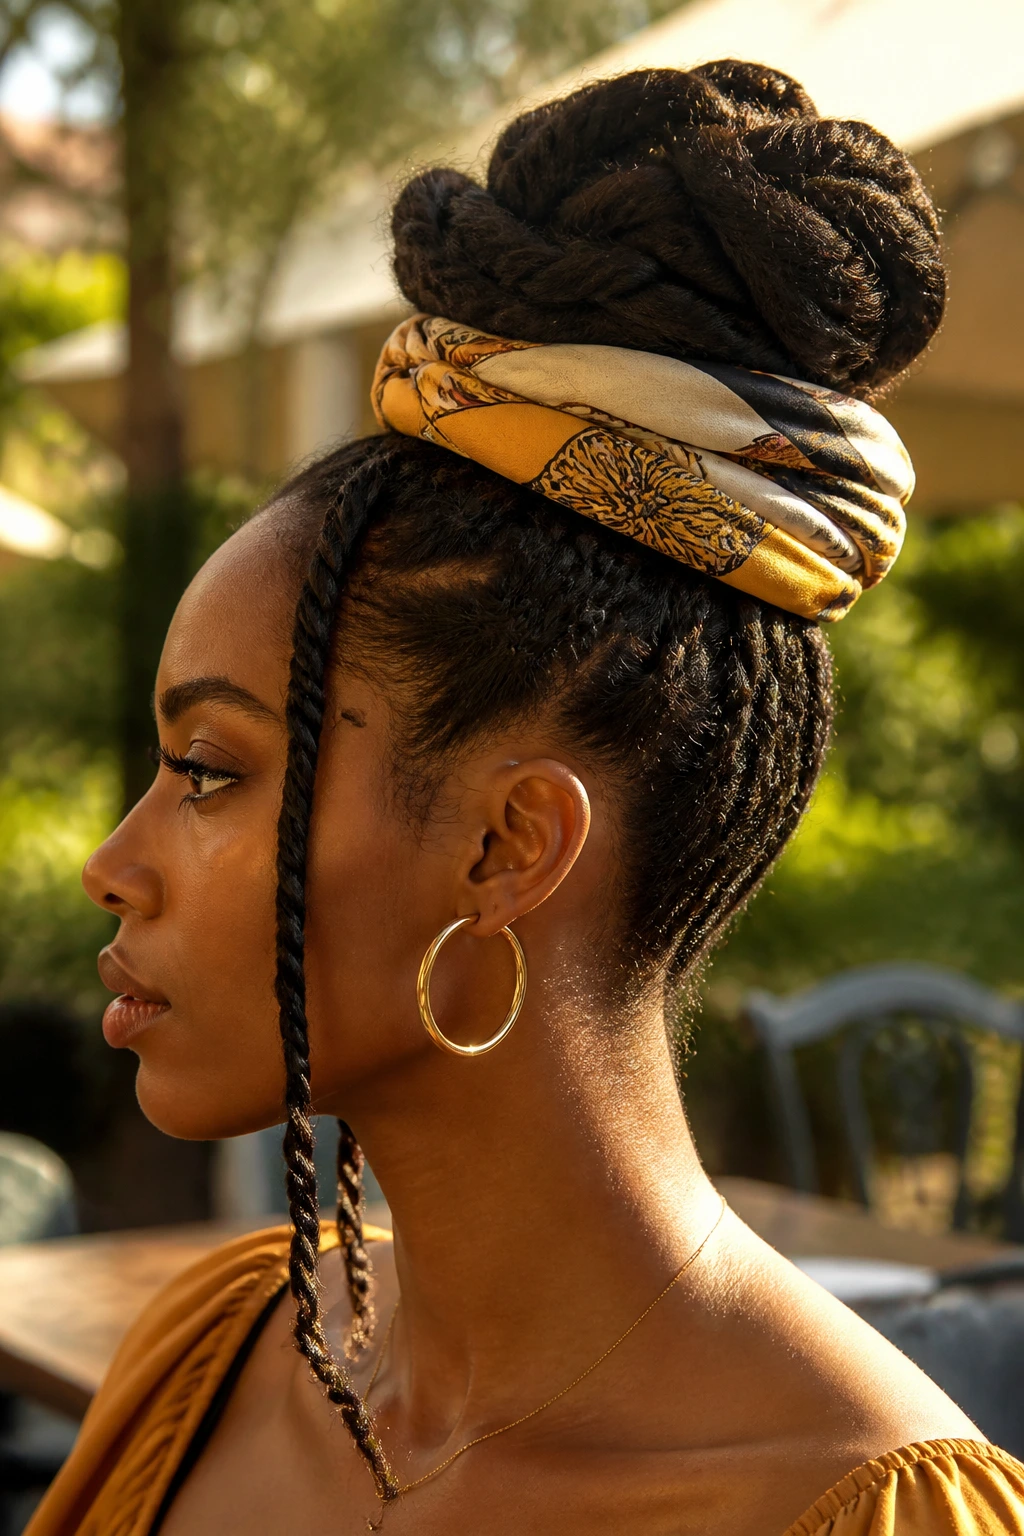
A scarf changes the whole finish. It can hide a rough seam, soften frizz, and even reduce the number of pins you need because the fabric helps hold the shape together. On thick hair, that’s not a small thing.
Wrap the scarf around the base of the bun or weave it through the twists before tucking the ends. Satin or silk feels easiest against the hair, but a soft cotton scarf can work if you’re careful with tension. This style is practical when the hair is drying unevenly and the front needs a little help staying calm.
21. The Coiled Pin-Set Bun That Lasts
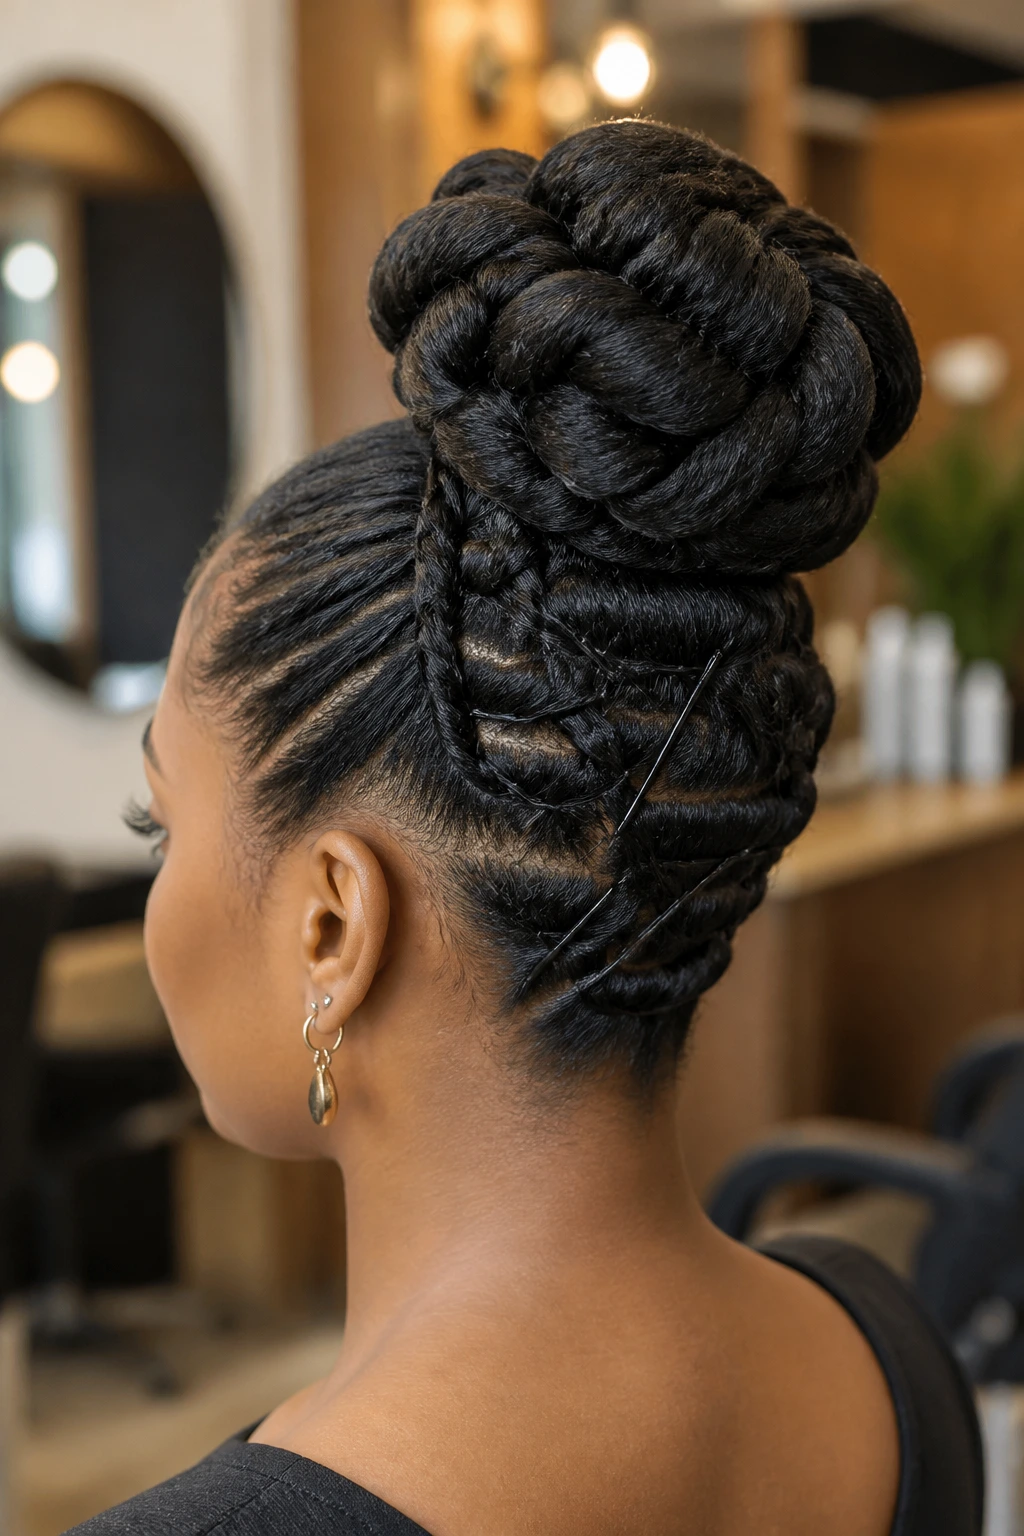
This is the one that survives a long day. Instead of relying on one big twist, the coiled pin-set bun uses several smaller coils, each locked down with U-pins so the style has more than one anchor point. Thick hair needs that kind of support when the bun has to stay put for hours.
Use the pins in a crisscross pattern under the bun, not just through the surface. That hidden support keeps the style from sagging when the weight settles. It’s a slightly more technical bun, but the payoff is a style that still looks solid when you catch it in the mirror later.
22. The Mini Twist Roll-Up Bun for Low Manipulation
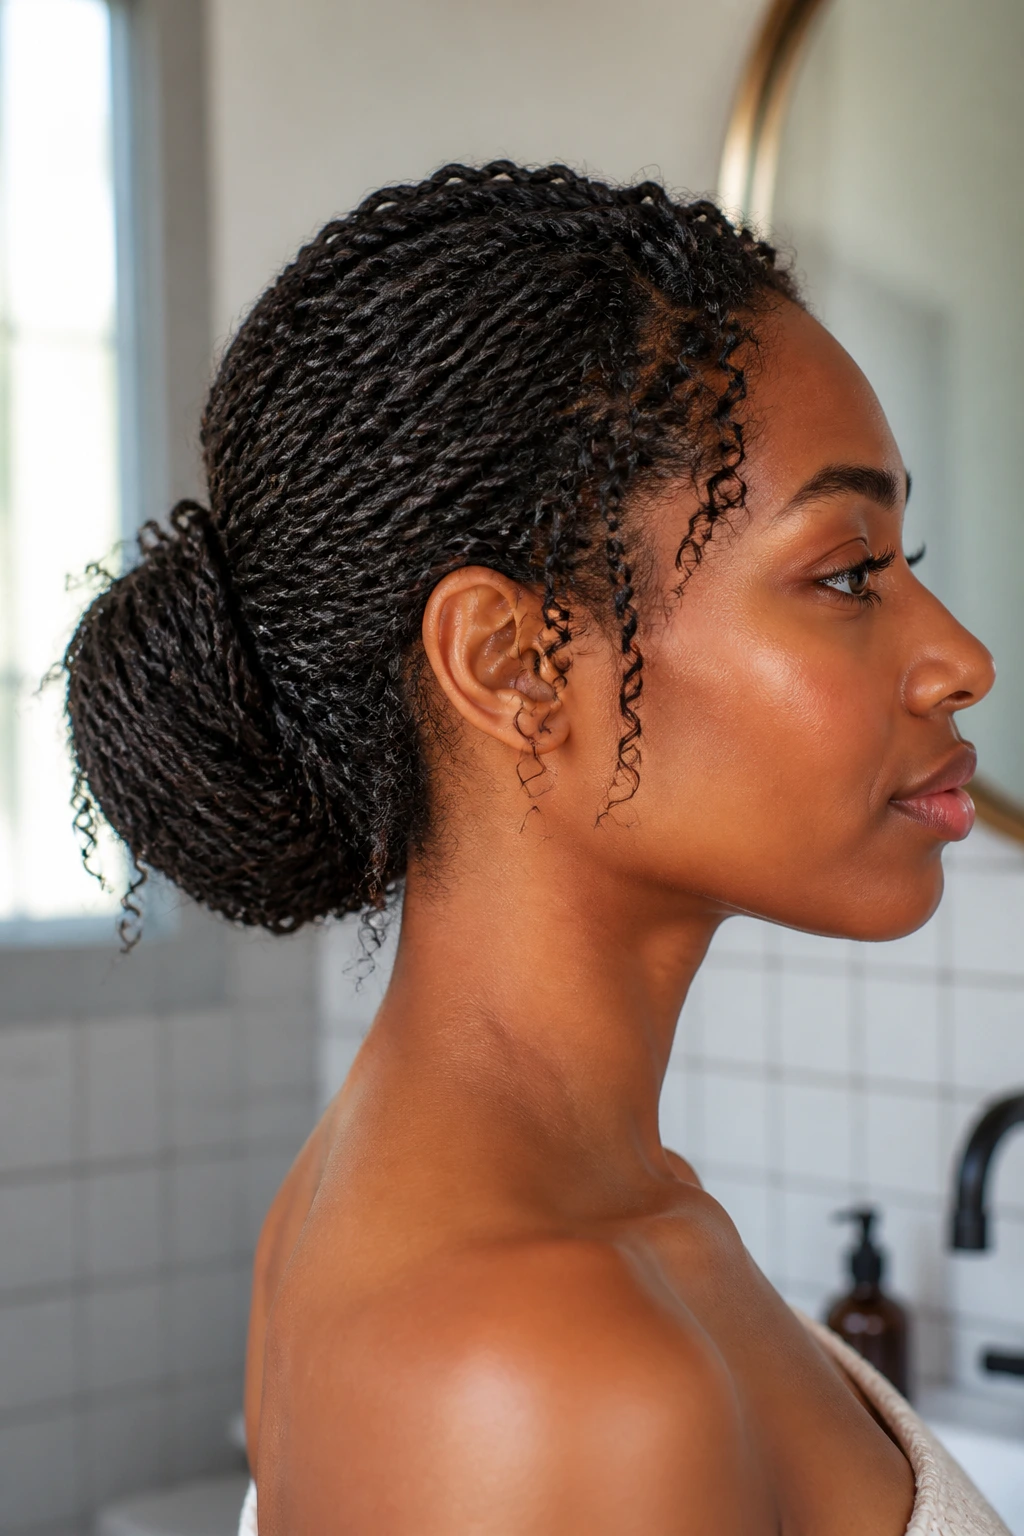
Mini twists already do half the work. When they’re rolled into a bun, the result is gentle, detailed, and easy to keep for several days with very little touching. If your thick hair gets tired from constant restyling, this is a nice place to land.
The bun looks best when the mini twists are rolled loosely at the ends and then pinned into a compact circle. Don’t pack them so tight that the texture disappears. The point is to keep the hair organized, not flattened into one hard ball.
23. The Jumbo Two-Strand Bun That Saves Time
Three to five large twists are enough here. That’s the beauty of it. Jumbo sections work because thick hair already gives the bun enough body, so you do not need a dozen tiny parts to create shape.
This style is quick, bold, and better than it sounds on very dense hair. The larger twists stack cleanly and keep the bun from looking overworked. If your hair is coarse or tightly coiled, use a little leave-in first so the twists don’t feel rough while you’re wrapping them.
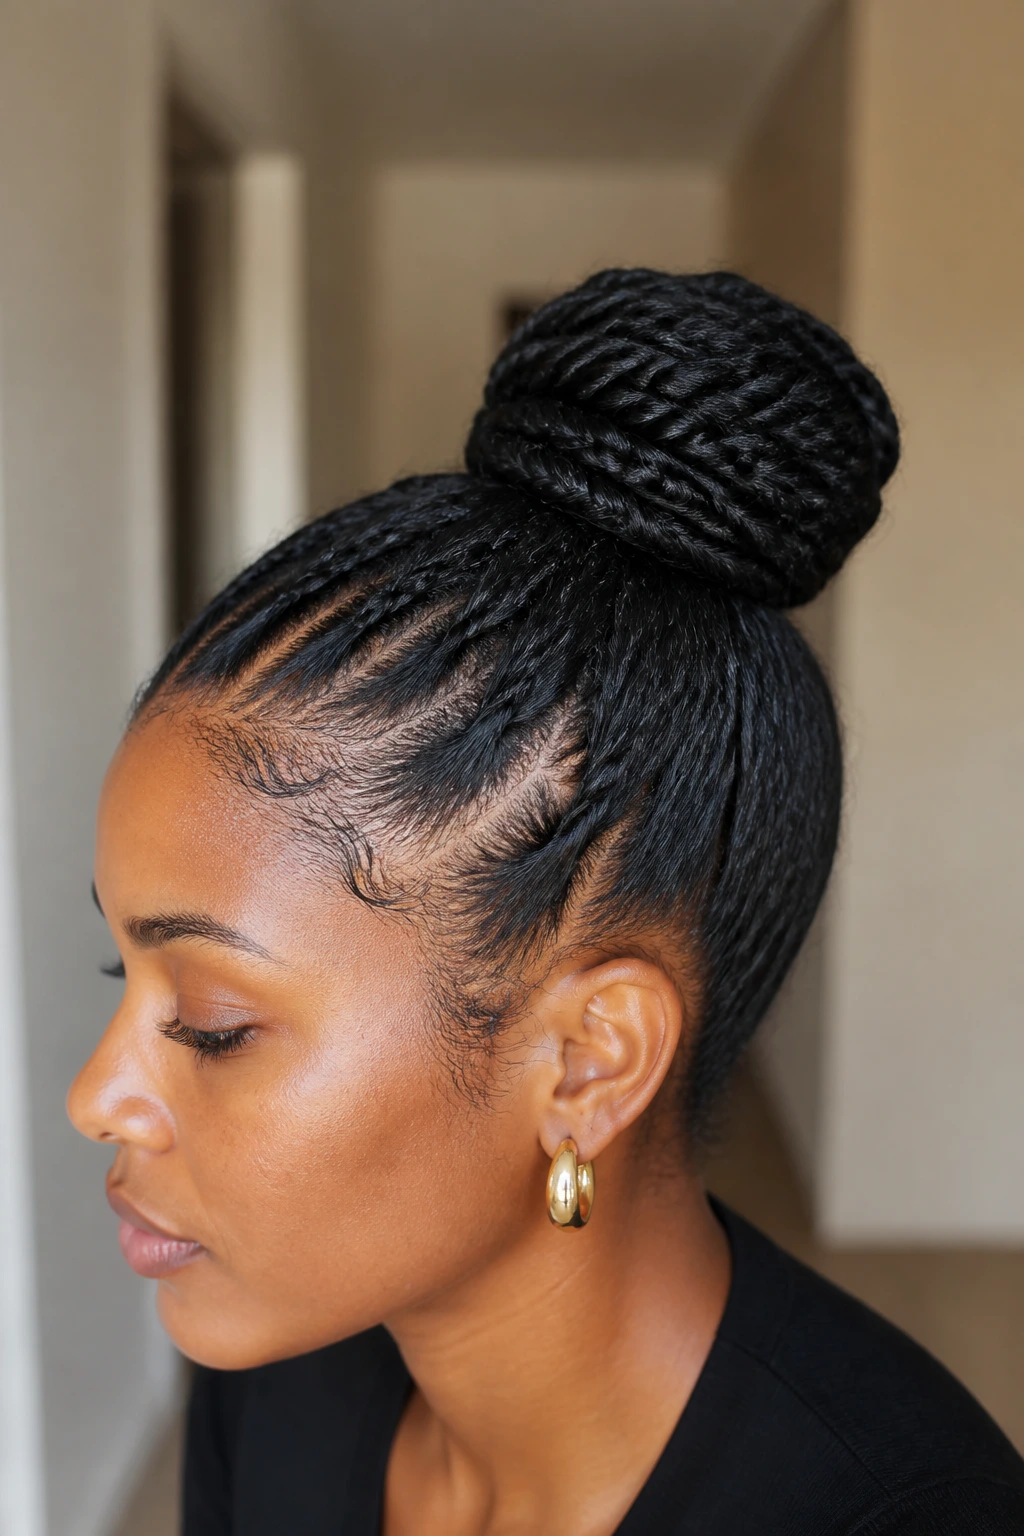
24. The Wrapped-Base Twist Bun That Hides the Elastic
If you hate seeing an elastic at the base, wrap it. That small detail makes the whole bun look cleaner, especially on thick hair where the tie can get buried awkwardly under layers. A wrapped base gives the style a finished edge.
Hiding the elastic
Make the bun first, then take one twist and circle it around the base until the band disappears. Pin the tail under the wrapping strand instead of pinning it on top. The finish looks neater, and the bun feels less lumpy.
It’s one of the easiest ways to make a simple style look more deliberate without adding work you can actually feel.
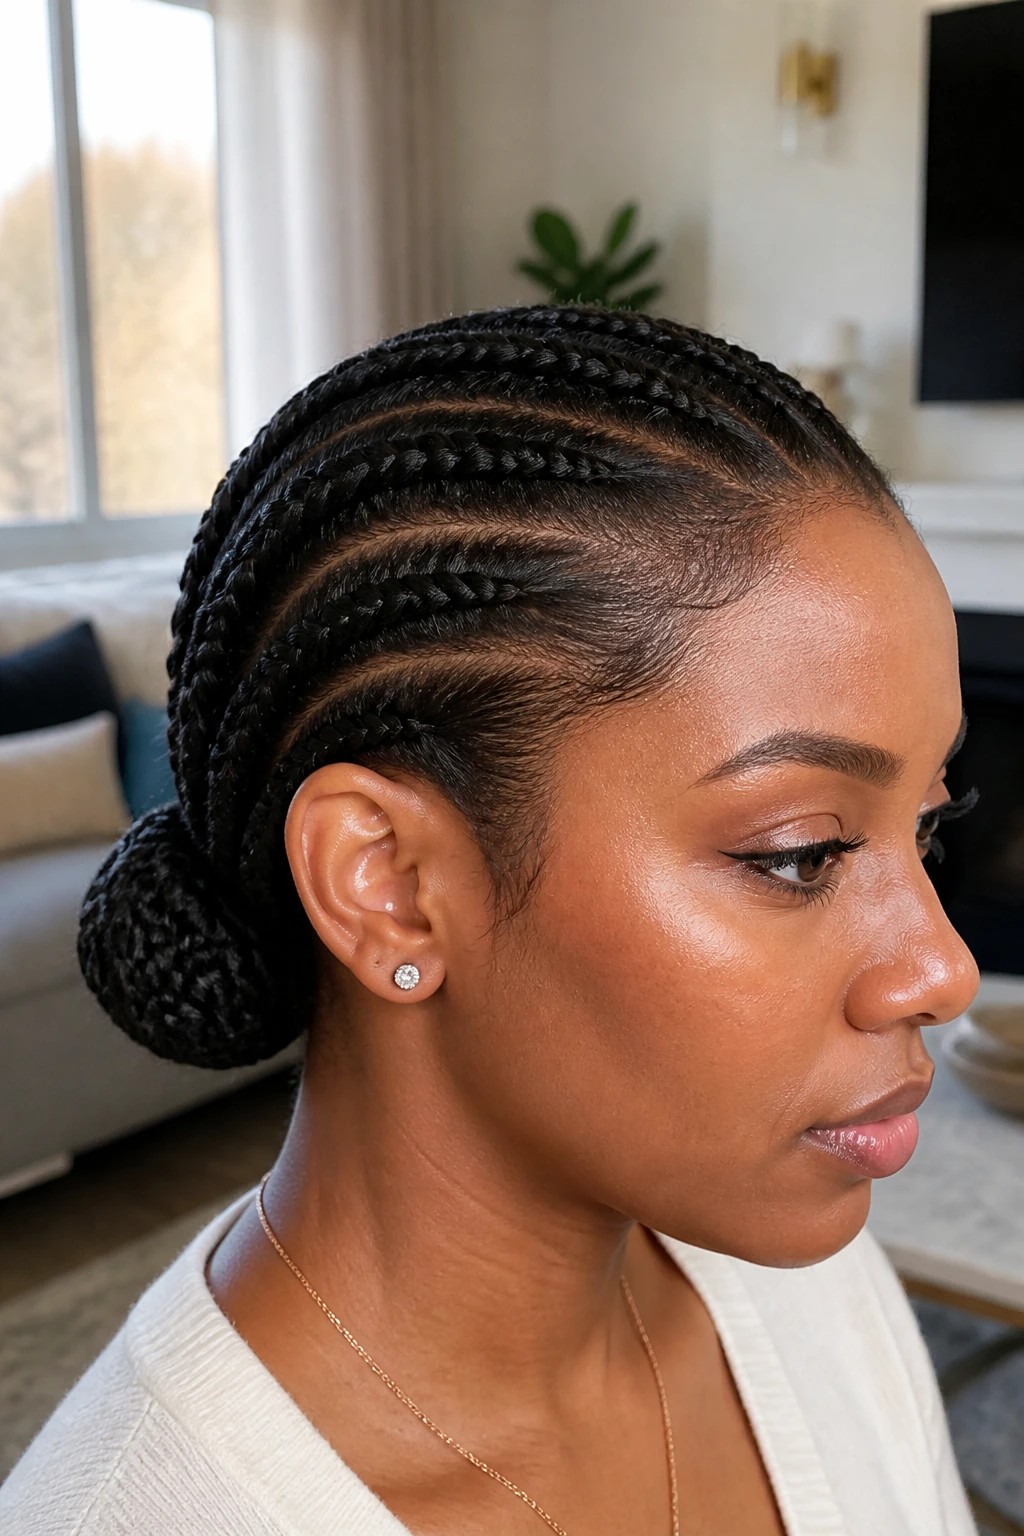
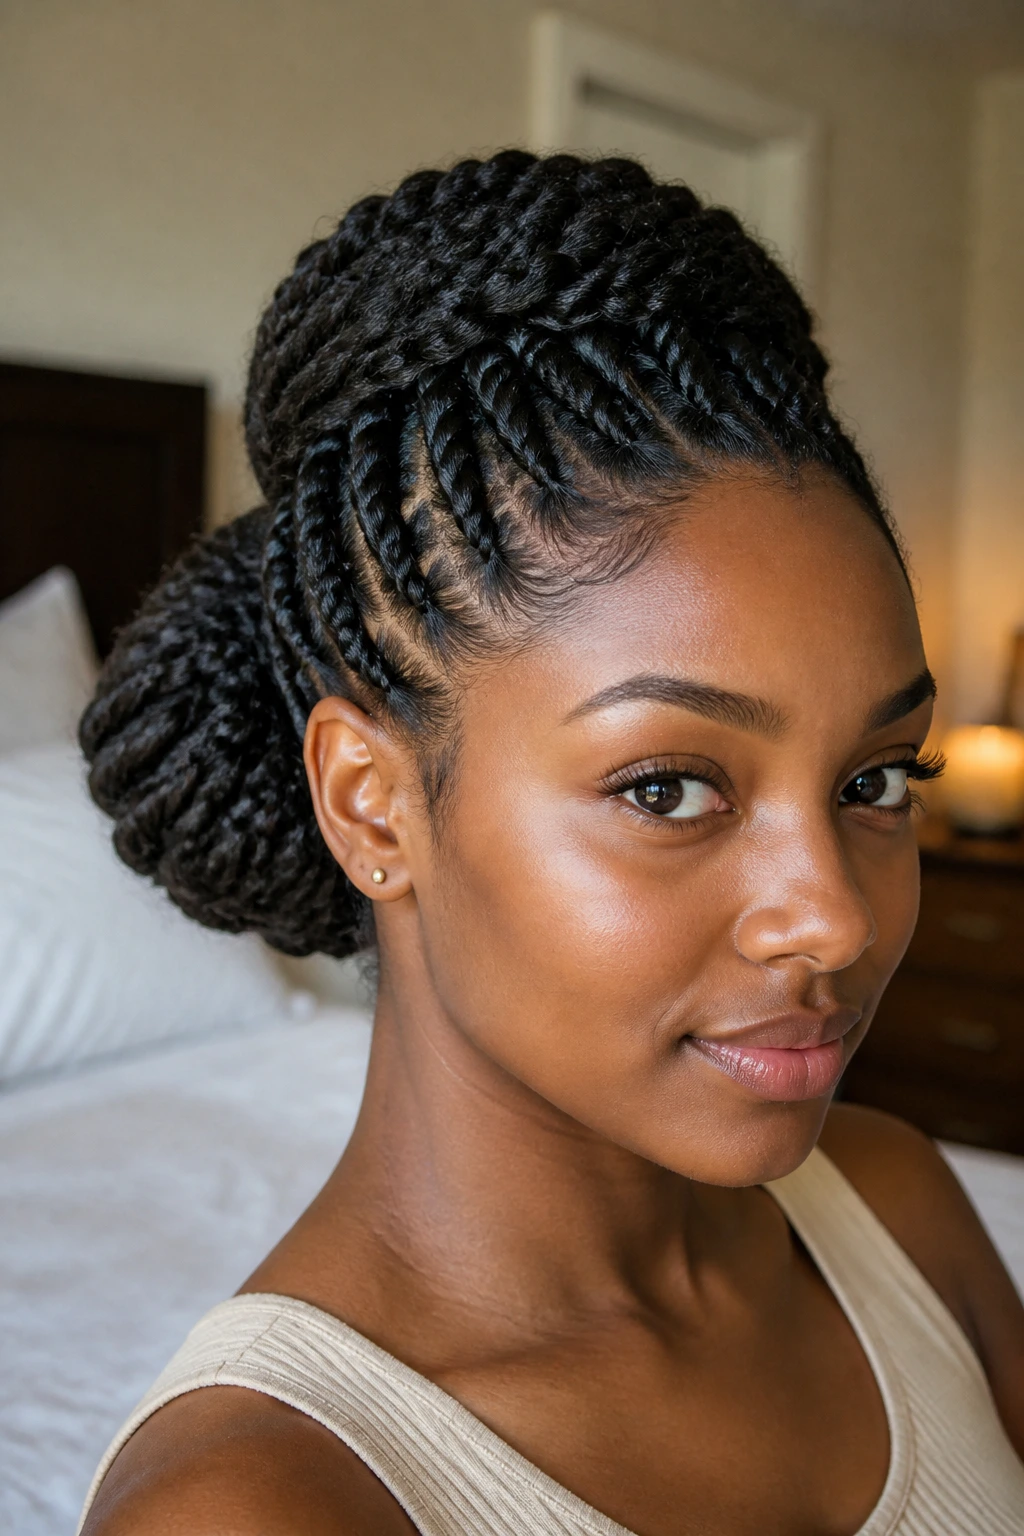
25. The Braids-to-Twist Bun for Grown-Out Hair
Grown-out braids do not have to be a problem. Twist the lengths into a bun, and suddenly the style looks intentional again. This is especially useful if you’re stretching a style between wash days and the roots have a little texture of their own.
The trick is to keep the braided roots from fighting the twisted ends. Work gently, use a bit of moisture on the new growth, and don’t yank the hair into a single tight knot. Thick hair can handle a lot, but it still likes smooth handling at the transition points.
26. The Crown Puff Twist Bun That Balances the Head Shape
A little lift at the crown keeps the bun from swallowing your whole head shape. Thick hair can flatten your profile if everything gets pulled straight back, so a crown puff gives the style a softer balance up top.
Keep the puff controlled, not teased into a cloud. A small lift is enough to change the silhouette. Then let the bun sit low enough to keep the bulk from stacking too high. It’s a simple adjustment, but it changes how the whole style reads.
27. The Gel-Sleek Twist Bun That Stays Sharp
This is the tightest-looking version in the set. The gel-sleek twist bun keeps the front clean, the twists smooth, and the bun compact. If your hairline frizzes fast or your roots refuse to sit still, this style can hold the line better than a soft bun.
Use a brush, a pea-sized amount of gel at a time, and a scarf to set the front before you finish the back. Too much product turns thick hair sticky and heavy. Too little leaves it fuzzy. The line between the two is narrow, and you’ll feel it pretty quickly.
28. The Drop-Low Protective Bun for Maximum Comfort
Need a bun that barely touches your shoulders? This is it. The drop-low protective bun sits below the occipital bone, where the head rounds into the neck, and that lower placement takes pressure off the top of the scalp.
It’s a good choice when you plan to wear the style for a few days and want it to feel calm, not tight. Because the bun stays low, it also plays nicely with scarves and hoodies. The shape may look understated, but on thick hair that kind of restraint is a strength.
29. The Side-Part Twist Bun That Softens the Whole Look

A side part changes the mood fast. It shifts the weight of thick hair off the center line and gives the bun a little asymmetry, which keeps the style from feeling too heavy or too formal. It’s one of the easiest ways to soften a dense head of hair.
What the part changes
A deep side part makes the front frame the face instead of closing it in, and the bun can sit slightly behind the heavier side for balance. That small adjustment helps the style look shaped instead of simply gathered. If your hair tends to puff at the root, smooth the part first and twist away from the part so the line stays visible.
30. The Spiral Pin Bun That Turns Thick Hair Into a Sculpted Shape
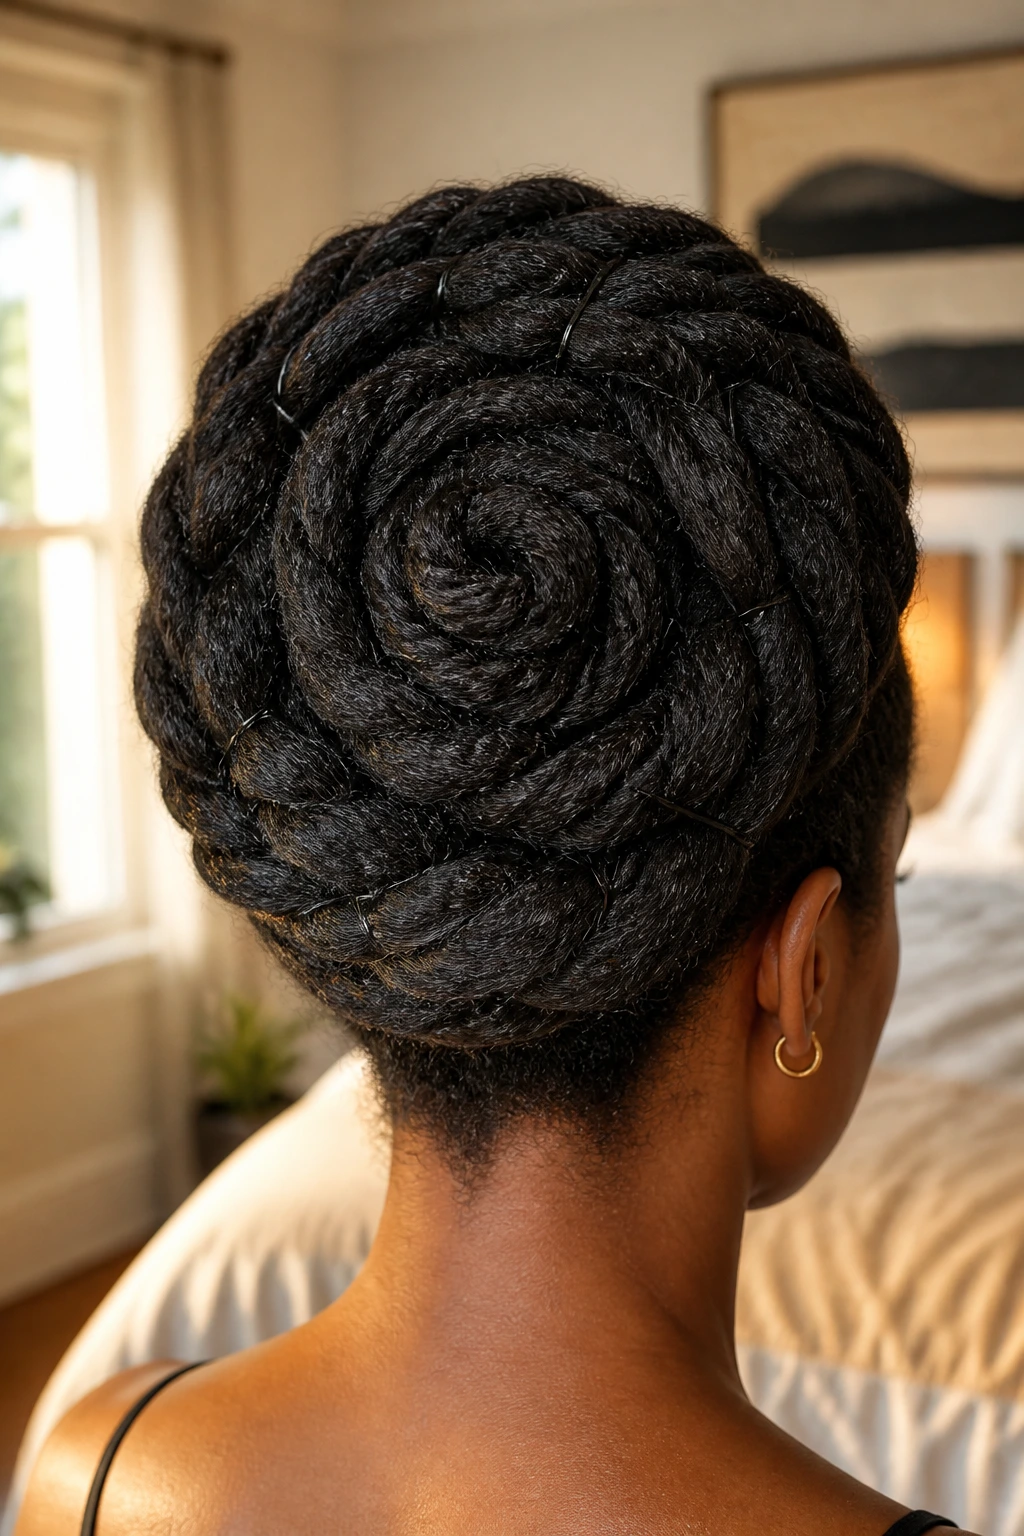
The spiral pin bun is the most decorative finish in the set. The twists coil around a center point in visible rings, so the bun looks sculpted instead of hidden. Thick hair is good at this style because the density gives the spiral real substance.
Take your time with the pinning. A spiral wants support at several points, not just one spot in the middle. The result feels a little dressed up, a little architectural, and still protective enough to keep the hair out of your face while you go about your day.
Why Bun Twists Work So Well on Thick Hair
Thick hair needs structure more than it needs force. That’s the part people miss when they keep trying to smash dense hair into the same slick bun they see on finer textures. A twist gives the hair a path, and once the path is there, the bun has a shape it can actually hold.
The other advantage is tension distribution. A single bun pulls from one point; a twist bun spreads the load across several sections, which is gentler on the scalp and usually more secure. That matters if your hair is dense at the crown, full through the lengths, or both. Dense hair can take more weight, but it does not always like all that weight sitting in one place.
There’s also the matter of texture. Twists create grip. Grip matters. Pins slide less, elastics stay tucked in better, and the style tends to look lived-in in a good way rather than collapsing into a flat knot. If your hair has a lot of shrinkage, the twist pattern also helps you keep some visual length instead of losing everything inside the bun.
One more thing. Thick hair often looks better when it’s guided, not overmanaged. That’s the real charm of bun twists. They let the hair be full, but in a shape that makes sense.
The Tools That Make Thick-Hair Bun Twists Easier
- Rat-tail comb: Clean parts matter here, and the long tail helps you draw straight lines through dense roots.
- Duckbill clips: Clip sections out of the way while you work; thick hair gets tangled fast when everything is loose at once.
- Satin scrunchies: Softer than tight elastics, and they’re easier on a bun that already carries a lot of weight.
- Long bobby pins: Short pins can vanish into thick hair and still do nothing; long ones hold better.
- U-pins: These are worth learning if your buns sag by lunch, because they anchor under the shape instead of on top of it.
- Spray bottle: A light mist gives you control without soaking the whole head.
- Leave-in conditioner: Add slip before twisting so the sections don’t snag and swell.
- Mousse or light foam: Good for smoothing frizz without making the bun greasy.
- Gel or edge control: Use sparingly at the hairline if you want a cleaner finish.
- Silk or satin scarf: This is the difference between a neat bun and a puffy one the next morning.
- Hair net: Optional, but useful when you want extra hold around a big, heavy bun.
- Hand mirror: Sounds obvious, but the back of a twist bun lies more than the front does.
Smart Product Picks and Hair Prep Notes
Thick hair behaves best when it’s clean enough to move, but not so slippery that nothing grips. That’s why I usually skip heavy oil at the roots before styling. A small amount on the ends is fine. Piling it on the scalp makes the twists slide, and then the bun starts loosening from the base instead of the finish.
Stretching helps too. You do not need a straight blowout unless that’s your preference, but a little stretch from braids, banding, or a low-heat blow-dry gives the bun cleaner lines. Dense coils shrink up fast, and if you build the style on hair that is too compact, the bun gets larger than you planned. Bigger is not always better here.
Pick hold products by finish, not by hype. A firm gel helps with sleek styles and clean parts. A mousse or foam is kinder when you want soft texture and less crunch. If your scalp runs dry, use the lighter product and let the bun look a little softer. That is usually better than forcing a hard shell over thirsty hair.
Section size matters more than most people think. On very thick hair, a front section may need to be an inch wide while the back can be closer to two inches. That keeps the silhouette even. Tiny front sections with huge back sections make the bun lopsided, and the asymmetry shows more than you’d expect.
How to Wear These Styles Without Fighting the Bulk
Presentation: Keep the bun low and compact if your hair is especially dense; a smaller shape usually lasts longer and feels better at the neck. If you want more drama, add height at the crown instead of making the bun wider at the back.
Pairings: Hoops, simple studs, or a clean neckline let the bun do the talking. Busy necklaces and crowded collars can make thick-hair buns look even heavier than they are.
Scale: Use fewer, larger twists when you want a soft, quick style. Use more, smaller twists when you need a sharper outline and more hold. The hair length will matter, but density matters more.
Accessories: Satin scarves, matte clips, and slim barrettes work better than oversized claw clips on thick hair. A chunky accessory can tilt the whole bun sideways if the base is already carrying a lot of weight.
Additional Tips and Style Boosters

Hold Boost: Mist each twist lightly with mousse before you coil it into the bun. It dries with a little memory, which helps dense hair keep its shape without getting hard.
Texture Control: If the bun starts widening, press the base flat with your palm and pin the underside first. That keeps the visible top smooth and stops the shape from ballooning.
Time-Saver: Build the style on stretched hair from the night before. The parts are cleaner, the twists go in faster, and the bun holds better than it does on freshly washed coils.
Make-It-Yours: Leave a narrow face-framing section out only if your hairline handles it well. Protective styles should protect first. Softness is fine, but not at the cost of tension on the edges.
Make-Ahead, Night Care, and How Long They Last
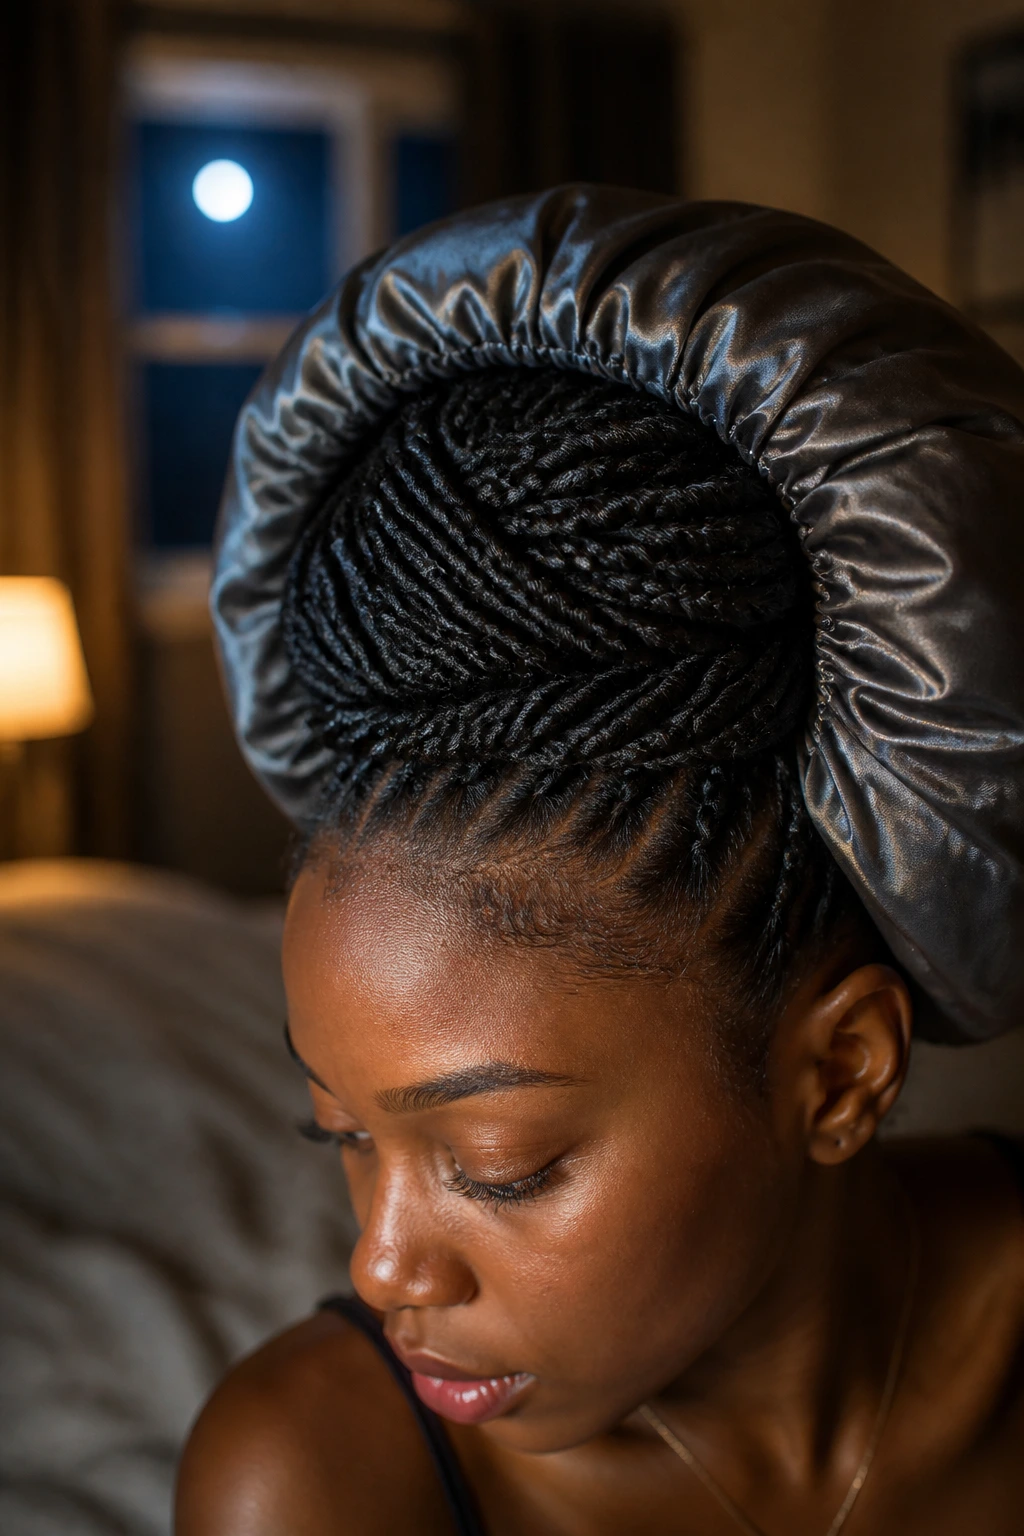
A sleek twist bun usually holds best for 3 to 5 days if you sleep in a satin scarf or bonnet and keep your hands out of it. Looser, softer styles may look best for 1 to 3 days before the twist pattern starts to swell. Mini twists and knotless bases can stretch longer — sometimes close to a week — if the scalp stays comfortable and the hair is not getting overhandled.
Night care is not complicated, but it does need to be consistent. Smooth the edges with a soft brush if you use one, wrap the bun with a scarf, and keep the bun from rubbing directly against rough cotton pillowcases. A satin pillowcase helps too, especially if the scarf slips off in your sleep. If the bun lives low at the nape, check that it isn’t being flattened awkwardly by your neck pillow or hoodie seam.
Refreshing the style should be light, not dramatic. A small mist of water, a touch of mousse on the frizziest sections, and a quick re-pin at the base are usually enough. If you start adding more gel every day, the roots get sticky and the bun starts flaking. That’s the point where the style needs a reset, not a rescue.
If your scalp feels sore, the bun is too tight or it has simply been worn too long. Take it down. Dense hair can carry a style for a while, but it still needs relief.
Common Mistakes to Avoid
- Pulling the hairline too tight: If the temples hurt or you see tiny raised bumps at the edge, the base is too strong for the scalp. Shift the tension lower and give the front a looser start.
- Starting on hair that is too wet: Wet thick hair takes forever to dry inside a bun, and the style can puff unevenly as it dries. Aim for damp or stretched hair instead.
- Using too much product at once: Heavy gel and oil can make the bun slippery and leave white residue. Start with a little and add only where the frizz actually shows.
- Under-pinning a heavy bun: If the style sags by midday, the problem is usually support, not shape. Use pins under the base and cross them instead of sticking them in randomly.
- Ignoring section balance: Huge back sections and tiny front sections make the bun lopsided. Keep the parts proportional so the weight sits evenly.
- Leaving it in past comfort: A style can still look fine while the scalp quietly gets tired. If it stops feeling good, it’s time to redo it.
Frequently Asked Questions
Which bun twist style works best for very thick hair?
The low crown twist bun and the coiled pin-set bun usually handle the most density because they keep the weight close to the head and give the style more anchor points. If your hair is long as well as thick, the rope-span low bun is another solid choice.
Can I do these styles on short thick hair?
Yes, but you’ll want the flatter styles first: the flat-twist bun, the knotless twist bun, and the drop-low protective bun. Short thick hair usually needs fewer sections and more careful pin placement so the bun doesn’t stick straight out.
Do twist buns help protect edges?
They can, if the base is not tight and the front sections are handled gently. A style that sits lower and uses a knotless or flat-twist start is usually kinder than one that yanks all the weight into the hairline.
How long should I wear one of these styles?
Most people get the best results somewhere between 2 and 5 days, depending on the style and how much product was used. Mini twists and very neat low buns can go longer, but comfort should decide the timeline, not stubbornness.
Do I need gel for every bun twist?
No. Sleek styles need more hold, but looser or textured buns often work better with mousse or a light cream. Too much gel on thick hair can make the style stiff and flaky.
Can I add extension hair or Marley hair?
You can, and it can help if your hair is shorter or you want a fuller bun. Keep the added hair lighter than you think, though. Heavy synthetic hair turns a protective style into a weightlifting session.
What if my bun keeps sagging by lunch?
The base probably needs more support. Add U-pins under the bun, keep the elastic closer to the nape, and make the sections more even. A bun that sags is usually asking for structure, not more product.
Is a twist bun better than a plain bun for thick hair?
Usually, yes. Twists give the hair texture and direction, which makes the bun hold shape longer and sit closer to the head. A plain bun can still work, but thick hair tends to behave better when the style has a little scaffolding.
The Styles That Stay Put
Thick hair does best when the style respects its weight instead of pretending it isn’t there. That’s why bun twists work so well: they spread the load, give the pins something to grab, and let you choose between sleek, soft, high, low, or off-center without rebuilding from scratch every time.
Pick the version that matches your density, your length, and your patience. Some days call for a polished twist bun with a sharp part. Other days want a looser coil that sits low and disappears under a scarf. Either way, the hair is the same. The difference is whether the style knows how to carry it.