Thick hair changes the math. A braid that looks sleek on fine hair can puff up, pull at the front, or start to wobble at the nape when there’s real density underneath it. That’s why single braids for thick hair need a different kind of planning: cleaner parts, smarter section sizes, and a finish that respects weight instead of fighting it.
The good news is that thick hair gives you something a lot of braid styles quietly envy: grip. Once the roots are set cleanly, the style can hold its shape for weeks without looking limp. The catch is bulk. Too much hair at the hairline, too much extension weight at the ends, or a parting pattern that ignores how your head is actually shaped, and the whole look starts to feel busy in a bad way.
The styles below lean into longevity first. Some are low-tension and soft around the edges. Some are bolder and more sculpted. A few are all about length, while others keep the hair short enough to stay tidy longer and dry faster after a wash. If your goal is a set of braids that still looks deliberate when the new growth starts showing, the details matter. A lot.
Why These Single Braids Hold Up on Thick Hair
Dense roots help the style anchor. Thick hair gives each braid more to grab, so once the sections are clean, the roots usually sit steadier than they do on sparse hair.
The parting does half the work. Triangle parts, zigzags, and curved rows age more gracefully because they don’t look like a rigid grid the minute a few millimeters of growth appear.
Weight needs to be distributed on purpose. Long braids are fine on thick hair, but the nape and crown should not carry the same load as the sides. That’s where people get tugging, fuzz, and sore edges.
Sealed ends stay neat longer. Curled tips, tucked ends, and well-finished braid ends slow down the fuzzy, shredded look that makes styles appear older than they are.
Low tension buys you more wear. Knotless starts and feed-in roots keep the front line comfortable, and comfort matters if you want to wear the style long enough for the shape to settle in.
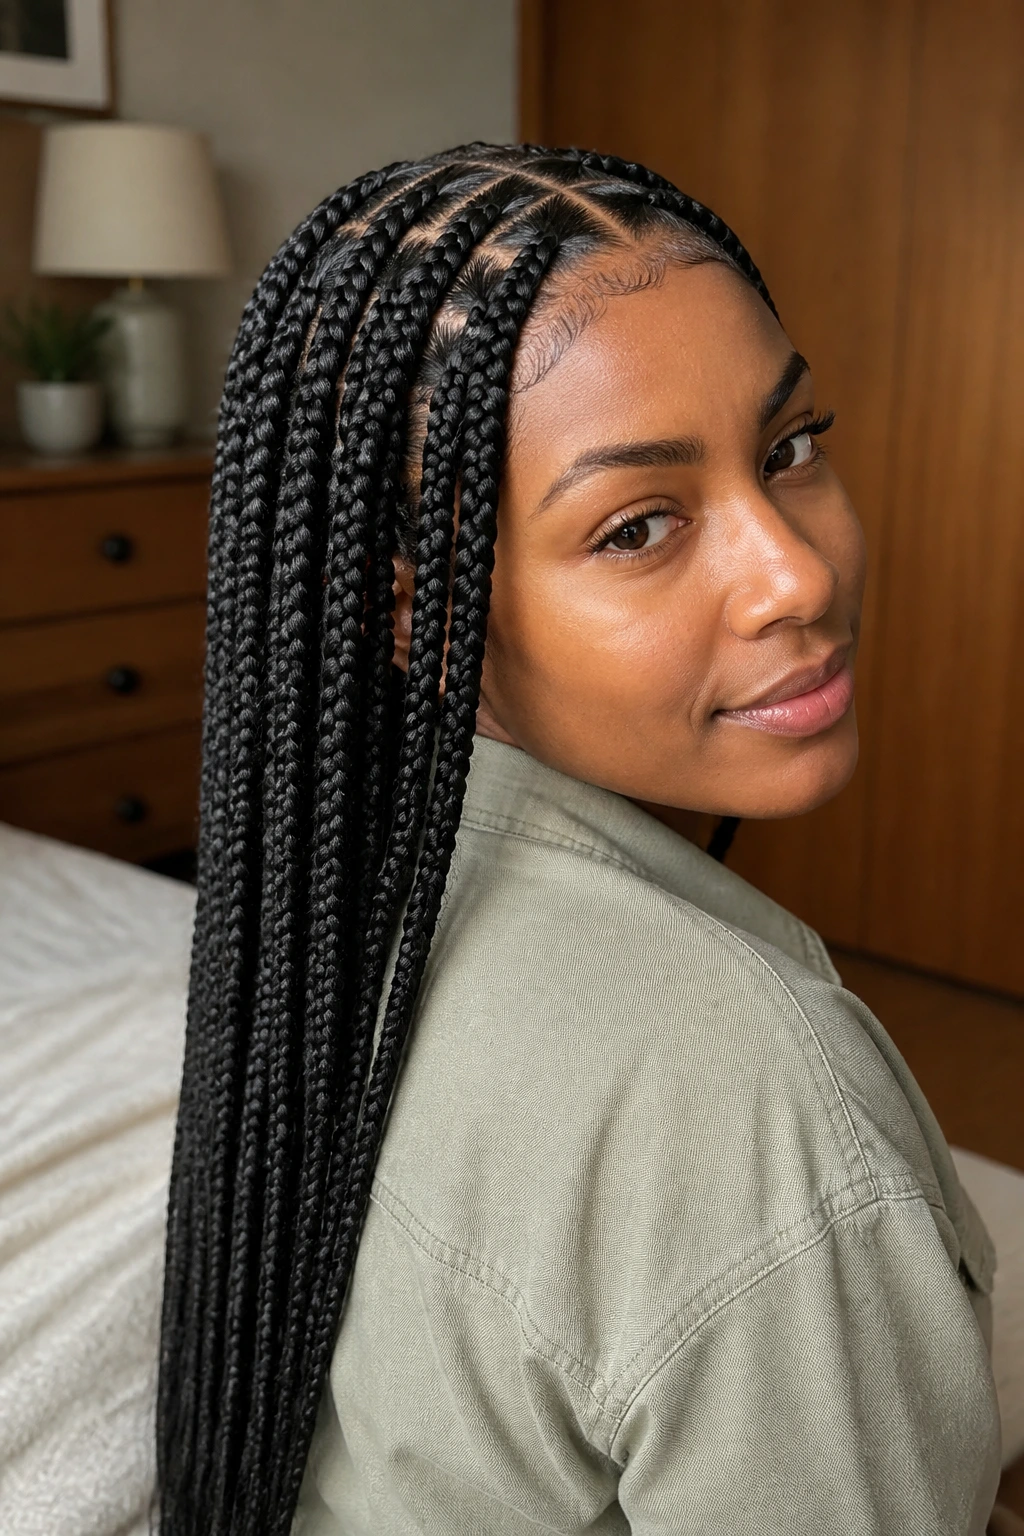
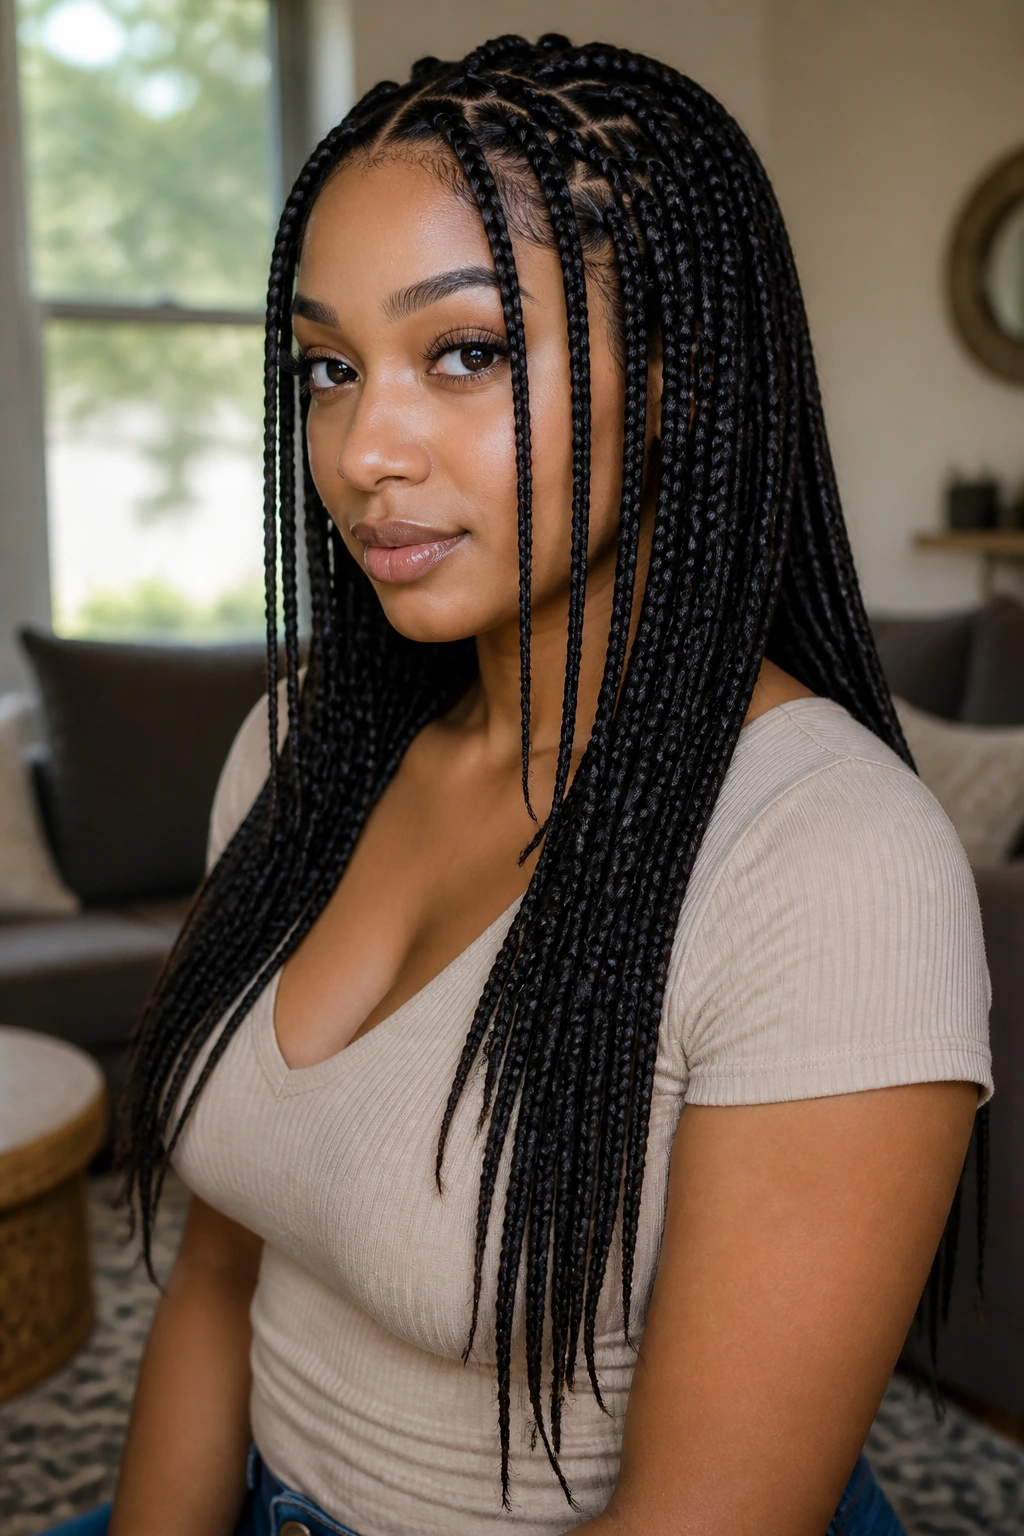
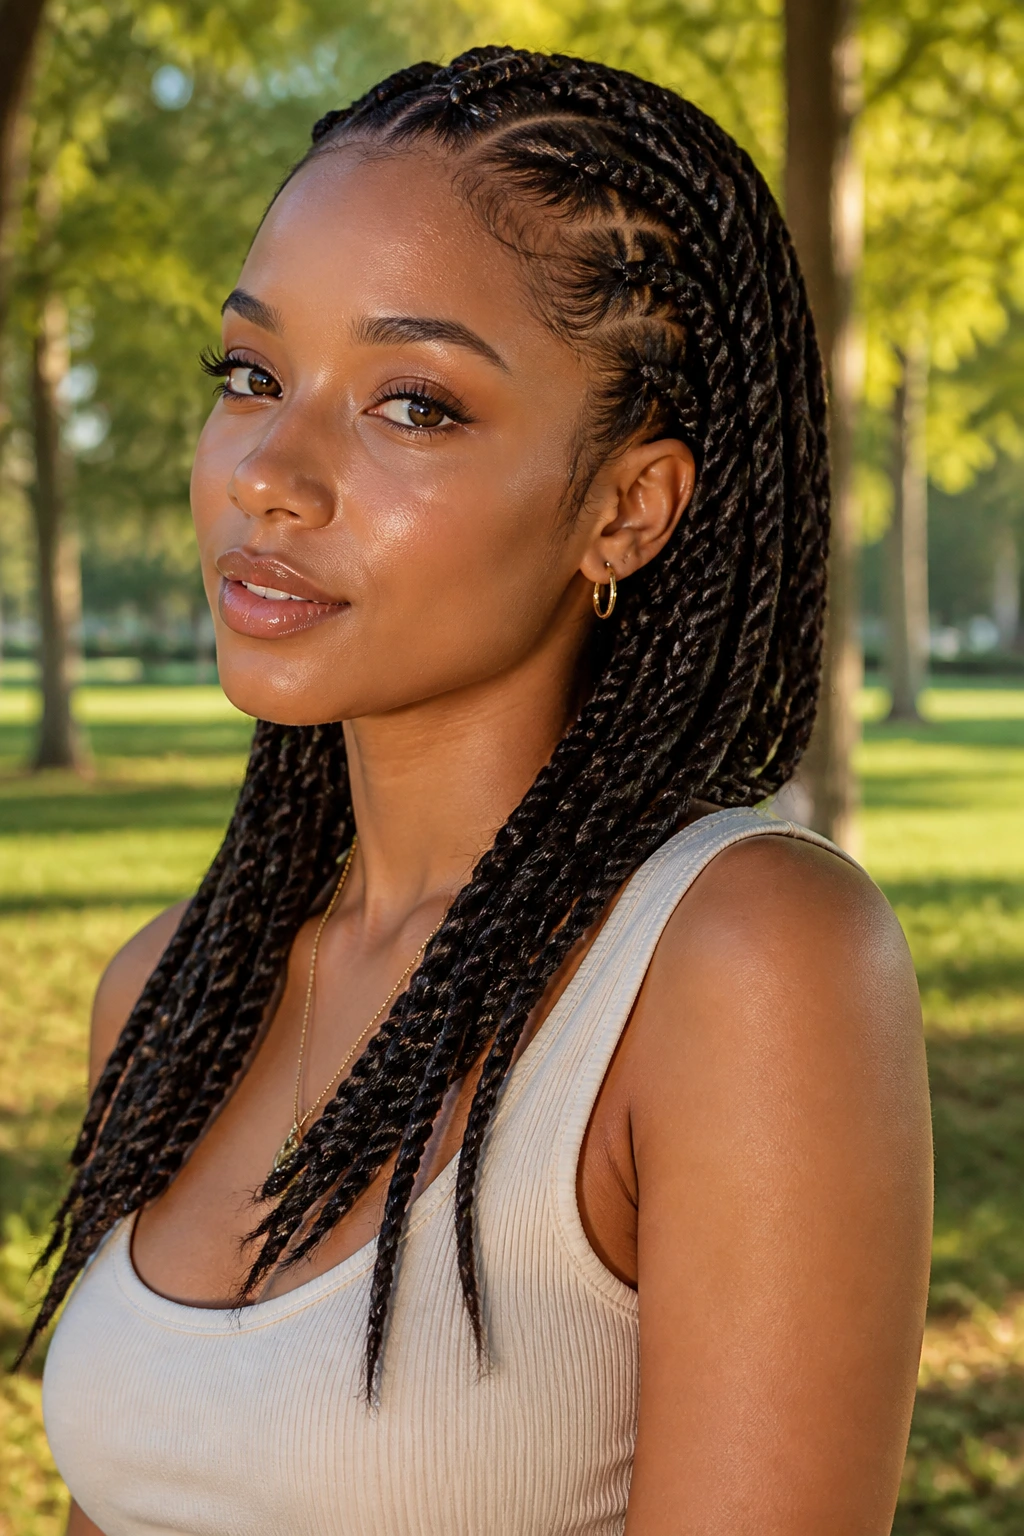
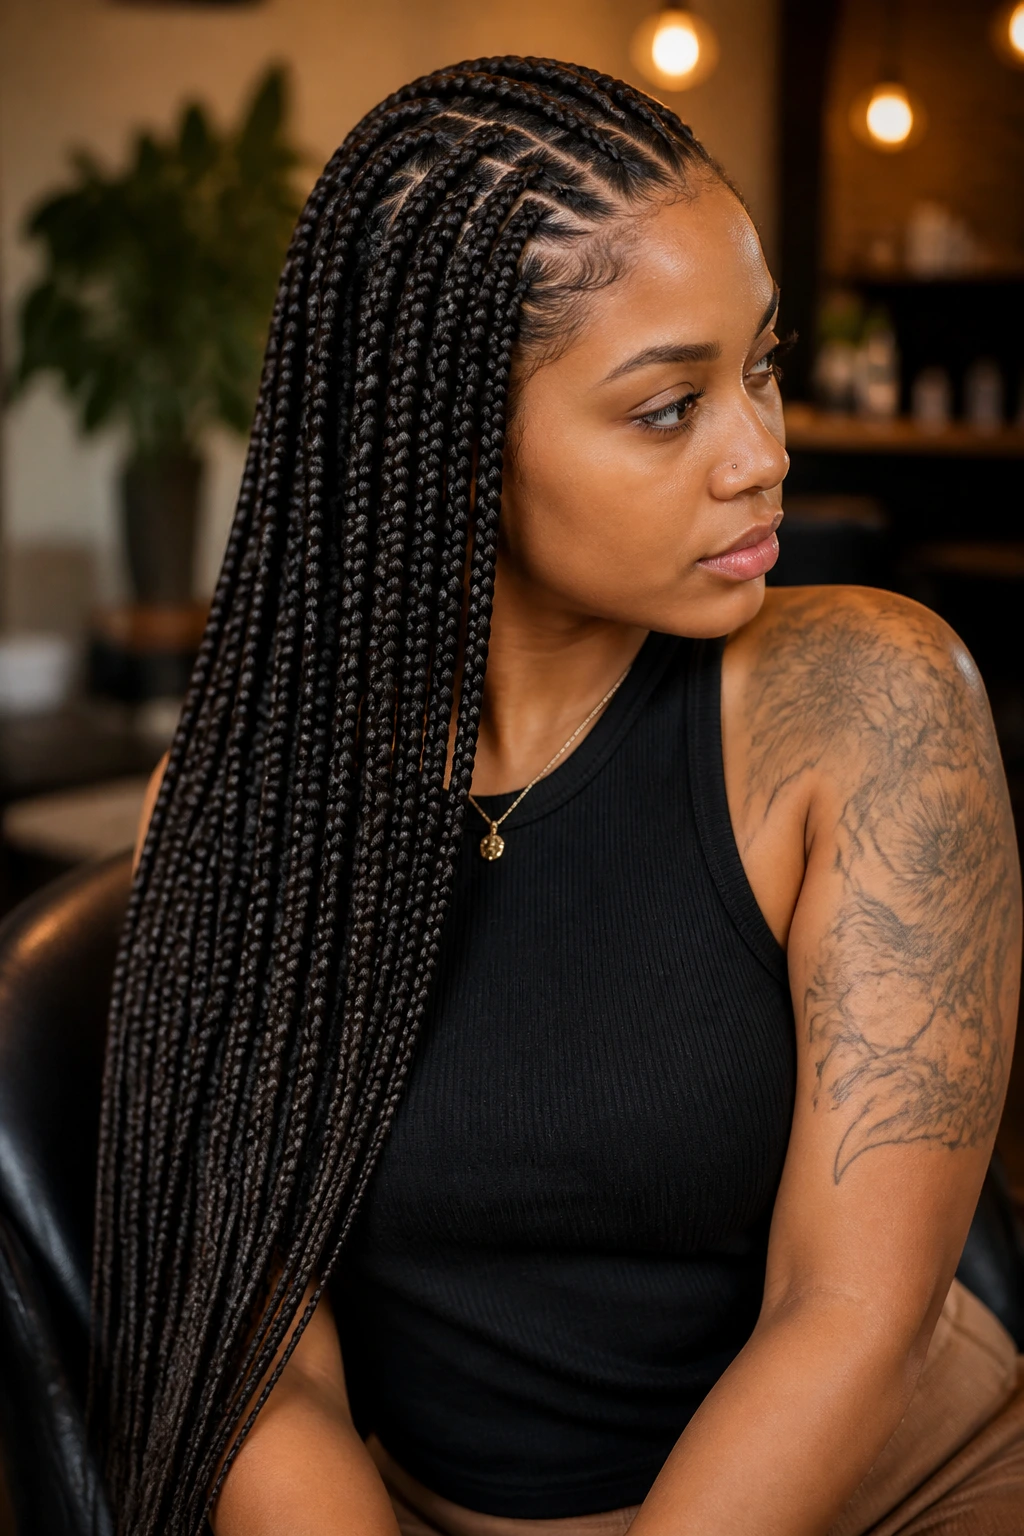
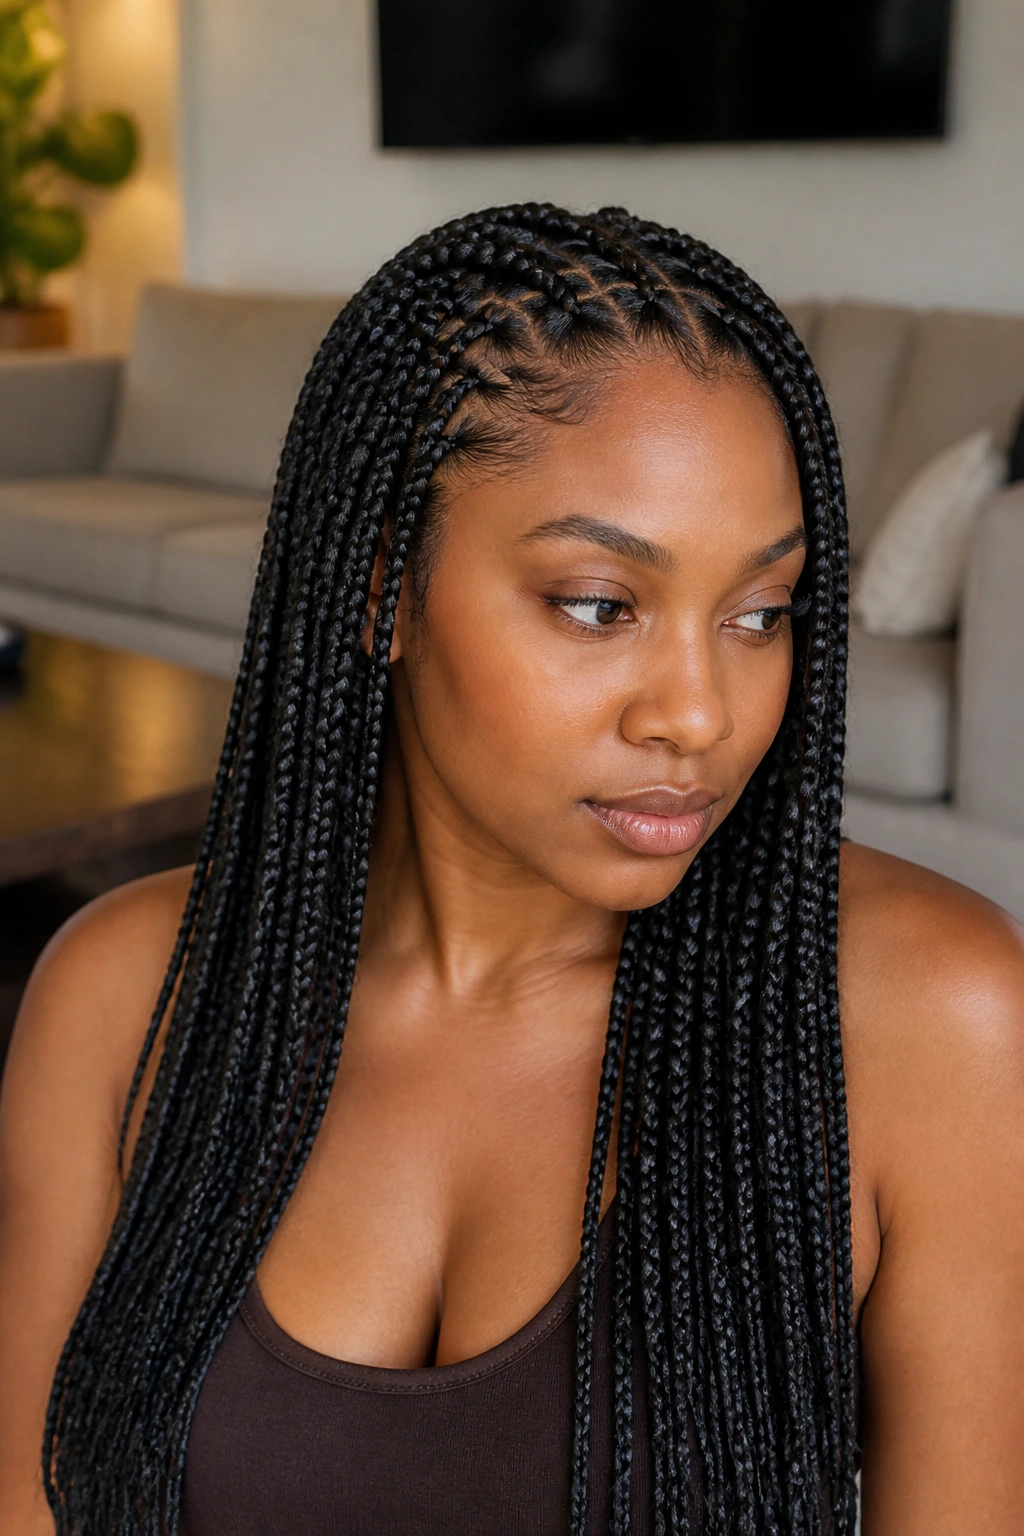
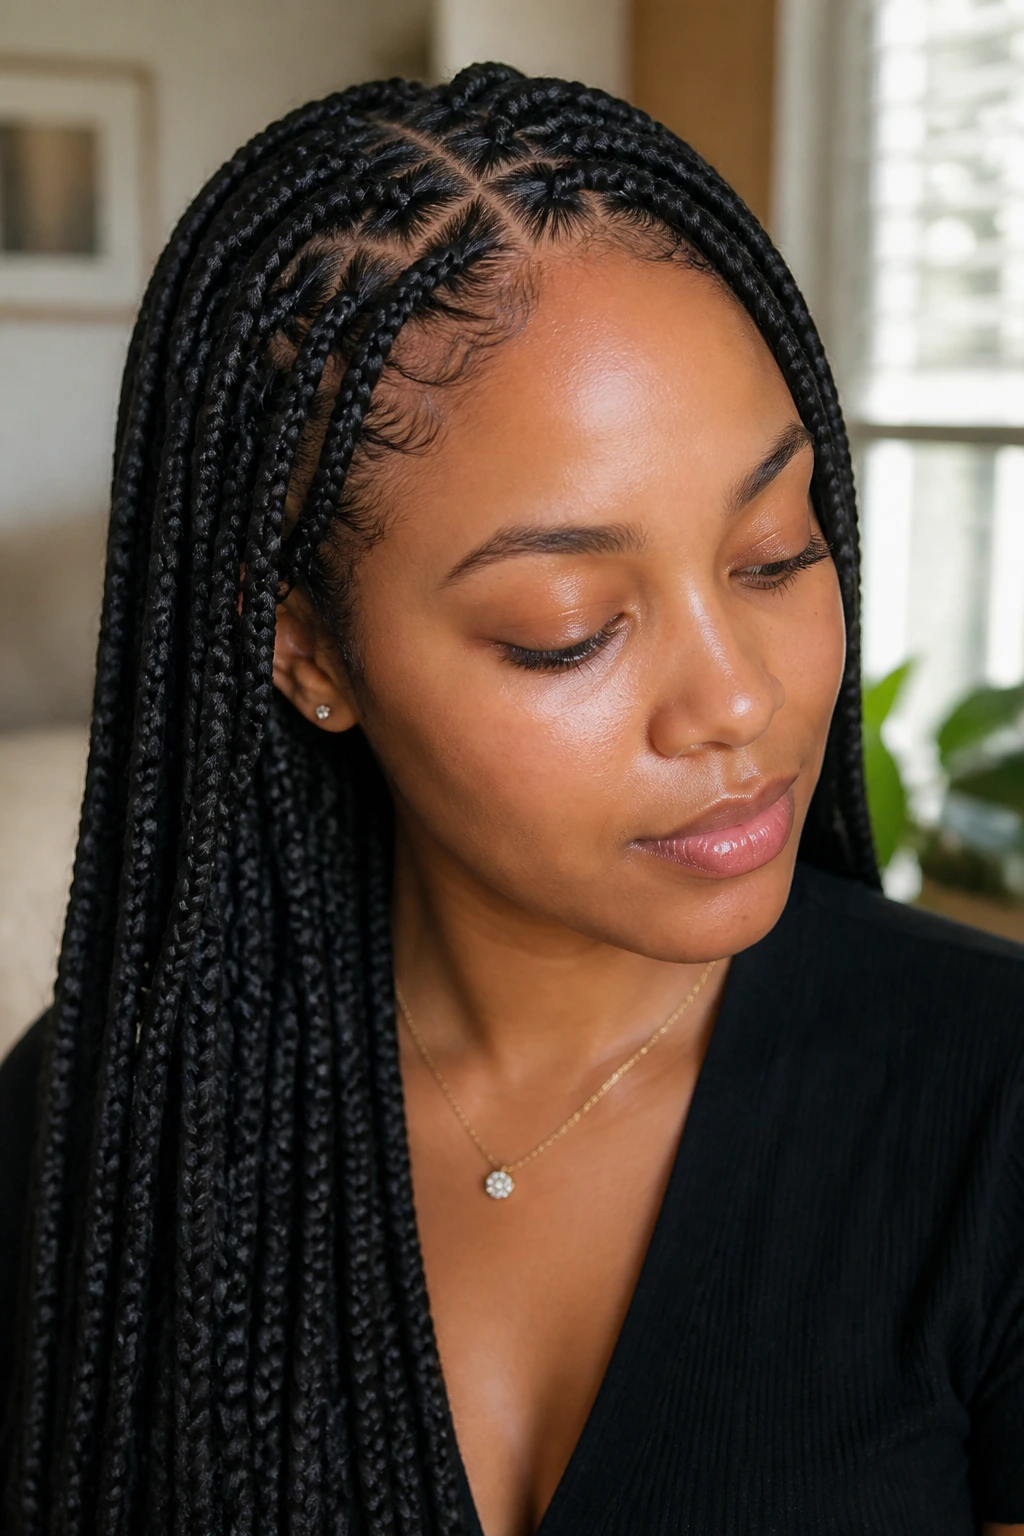
1. Classic Waist-Length Singles
The classic waist-length set is the backbone of the whole category. On thick hair, it gives the roots room to breathe while the length pulls the eye downward, which makes the bulk feel intentional instead of crowded. It’s the style I reach for when someone wants something simple, but not boring.
Ask for medium sections, not giant chunks. A part that’s too wide on thick hair can leave the braid looking swollen near the scalp, especially if the hair is coily or very dense at the crown. Clean parting matters more than decorative part shapes here.
Why It Lasts
Waist length keeps the braid weight spread out, which helps the roots sit flatter for longer. If the ends are sealed cleanly, the style usually stays polished even after a few weeks of wear.
2. Knotless Singles With Soft Tension
Knotless singles are the polite version of braids. The root starts light, the added hair is fed in gradually, and that soft start is a gift if your hairline tends to get cranky. On thick hair, they look especially nice because the extra density underneath lets the braid feel full without having to begin with a hard knot.
This style is the one to pick when comfort matters as much as appearance. The scalp doesn’t have to fight a bulky anchor point, and the front hairline stays calmer when you sleep, sweat, or wear sunglasses.
For long wear, keep the feed-in pieces small and even. If the added hair is shoved in too fast, the braid gets lumpy near the root and loses the very thing that makes knotless braids worth the trouble.
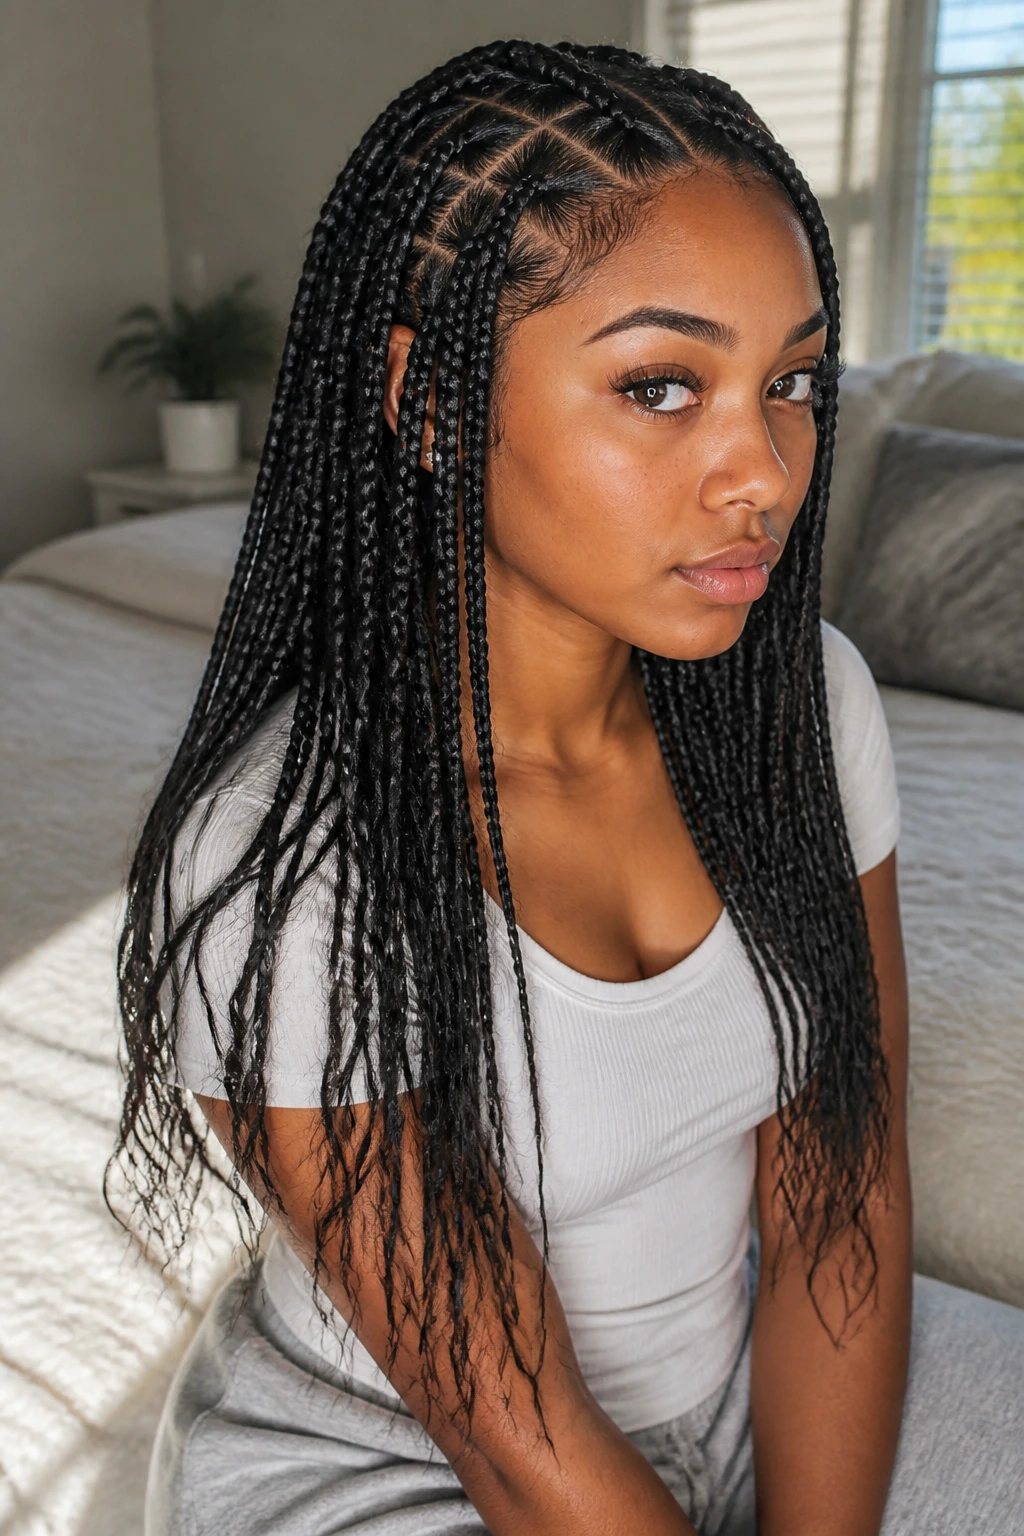
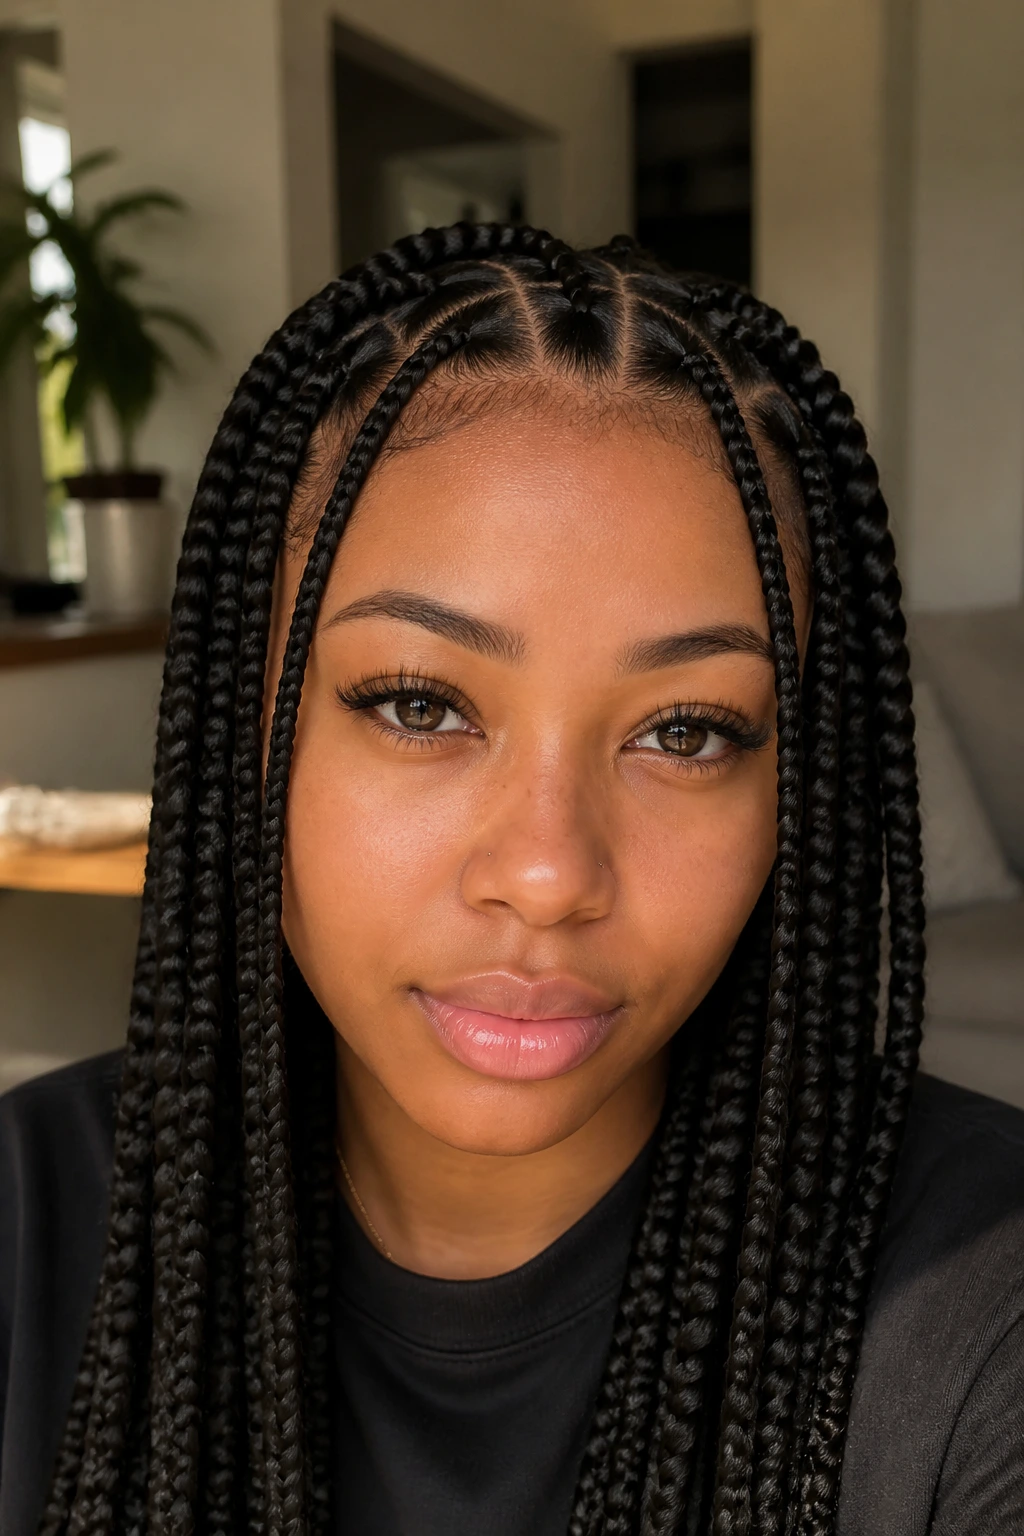
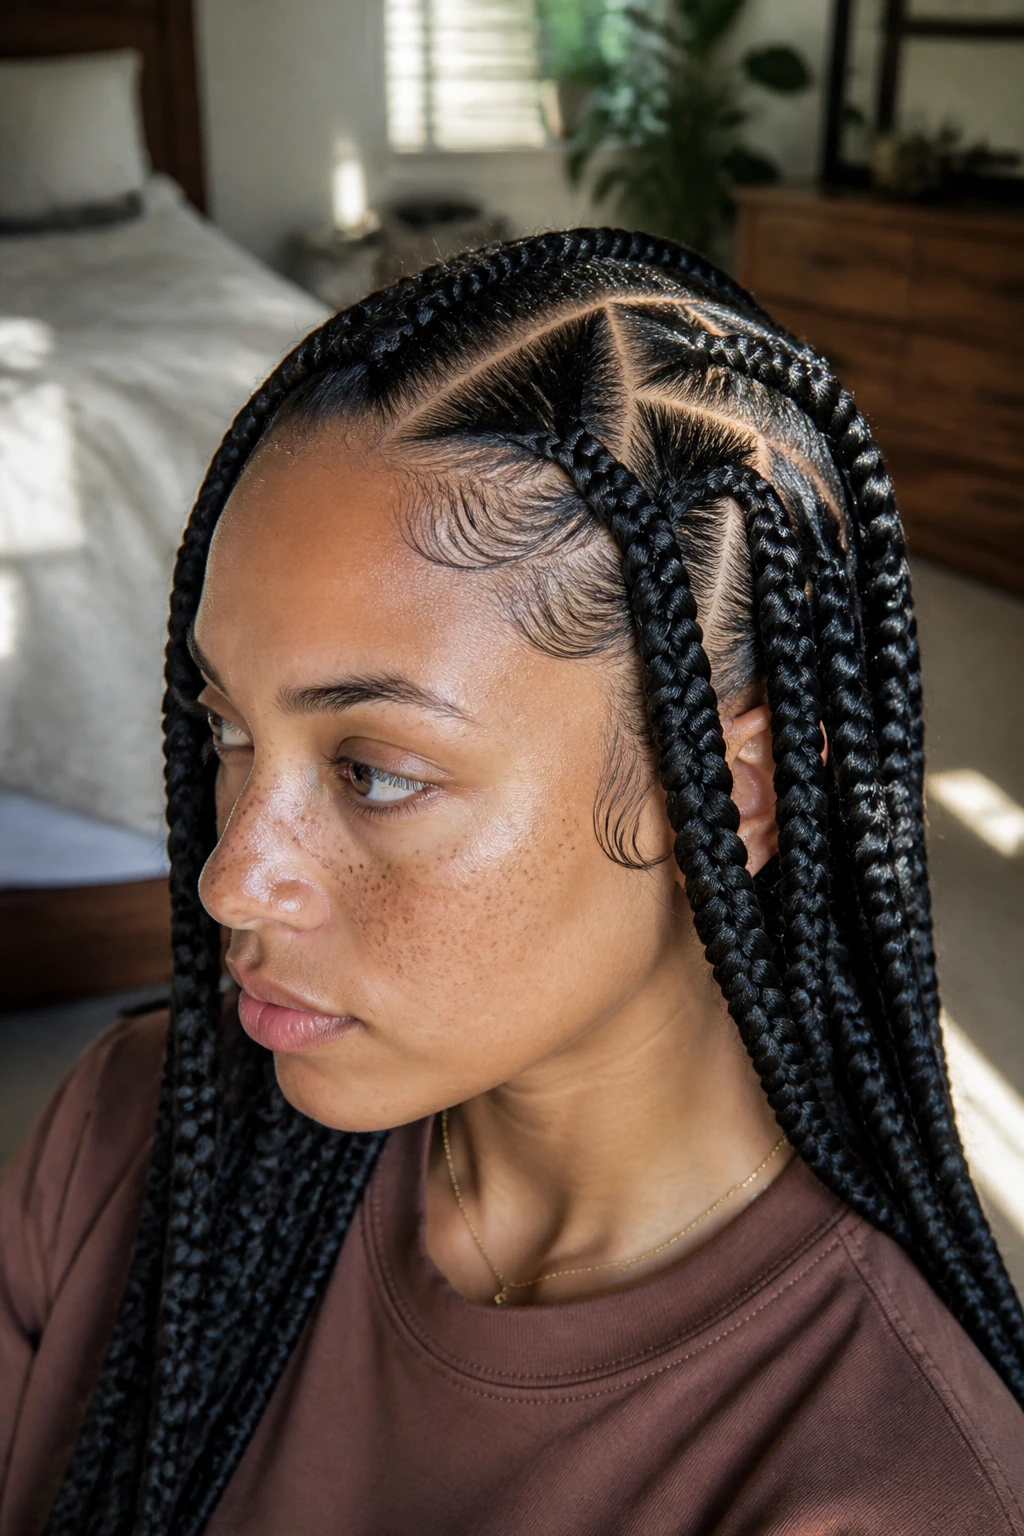
3. Triangle-Part Singles
Triangle parts change the whole mood of singles. Instead of the straight-up grid you see on box parts, the sections angle across the scalp and catch light differently, which gives thick hair a little movement before a braid even starts.
They’re especially useful when your hair grows fast and new growth shows early. A triangle pattern hides the grow-out better than a plain square part because the eye reads the shape, not just the root line.
The trick is keeping the triangles even enough to look deliberate. They do not need to be tiny. In fact, on dense hair, a medium triangle often sits better and takes less time to install without losing the visual payoff.
4. Side-Swept Singles
A deep side part can make thick braids feel softer and less heavy around the face. The whole set falls over one shoulder with a little drama, and the asymmetry helps if one side of your head is denser than the other — which is more common than people admit.
This is a good option when you want your braids to frame your face instead of sitting like a curtain. Thick hair gives the side sweep enough body to look full without needing extra accessories.
Keep the front sections a touch smaller near the temple. That keeps the part from feeling like it’s straining to cross the scalp, especially if you tuck one side behind the ear during the day.
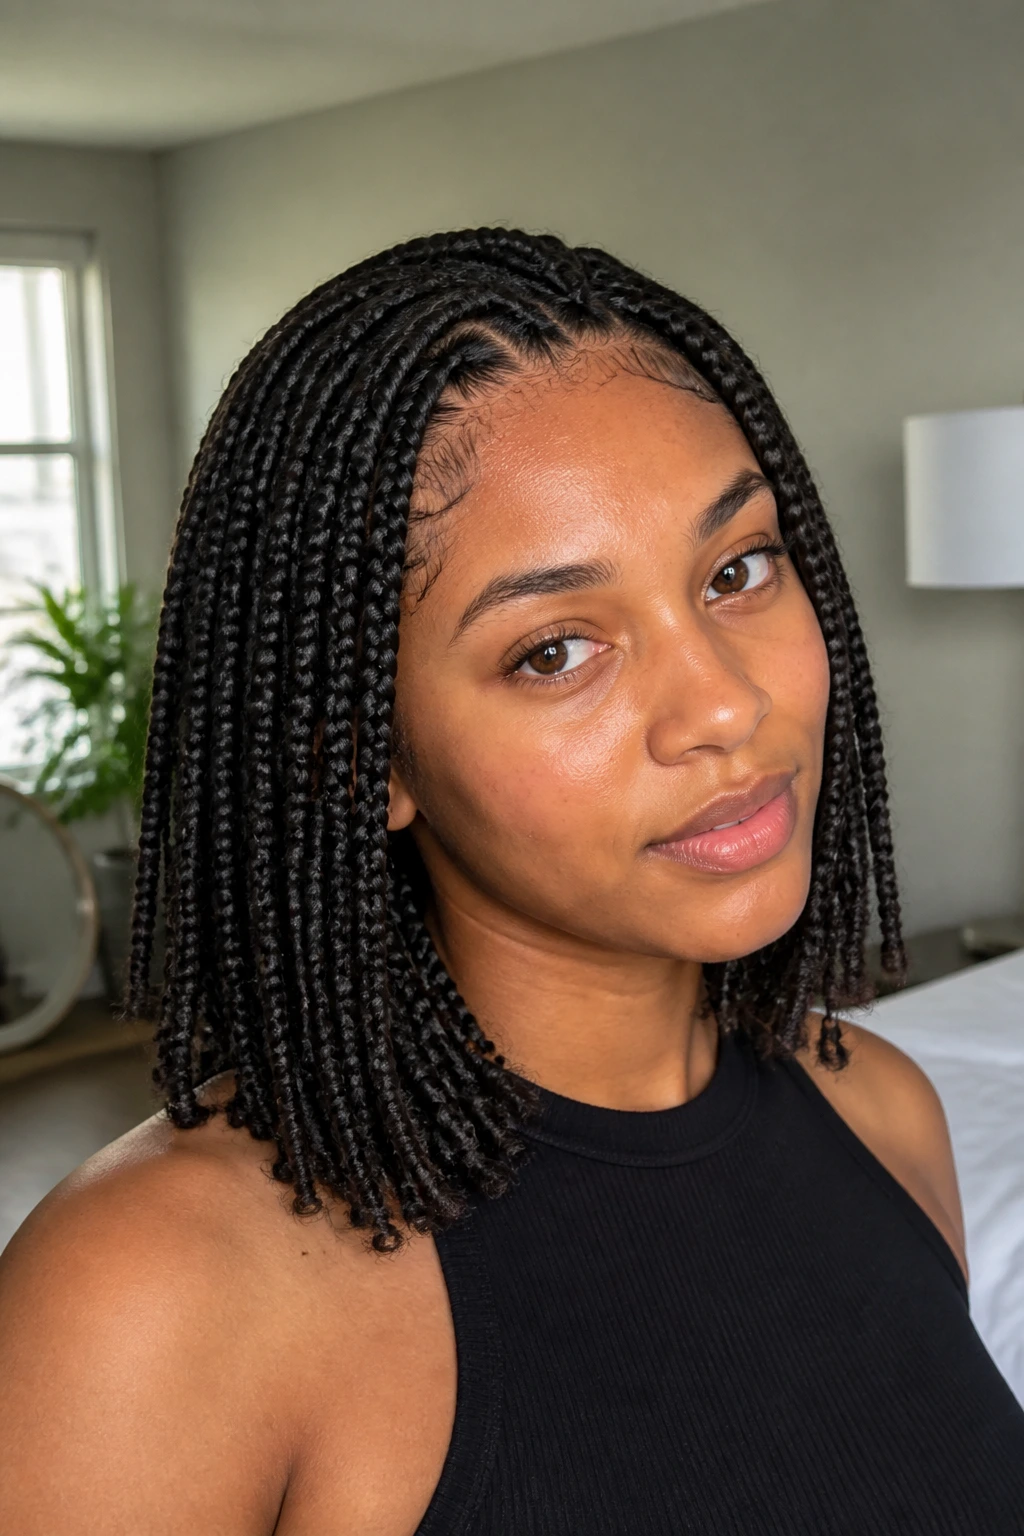
5. Shoulder-Grazing Singles
Shorter singles are underrated. Shoulder length reduces the drag that long braids can put on thick hair, and that matters at the end of a long day when your roots are the first thing to complain. The style also dries faster after a wash, which is a real bonus if you’re not interested in sitting around with damp braids for hours.
It’s a practical choice, but not a dull one. Shoulder-grazing braids swing a little more freely and make thick hair look tidy instead of overloaded.
If your hair is dense at the crown, ask for slightly smaller sections there and a touch more length through the back. That keeps the shape balanced instead of boxy.
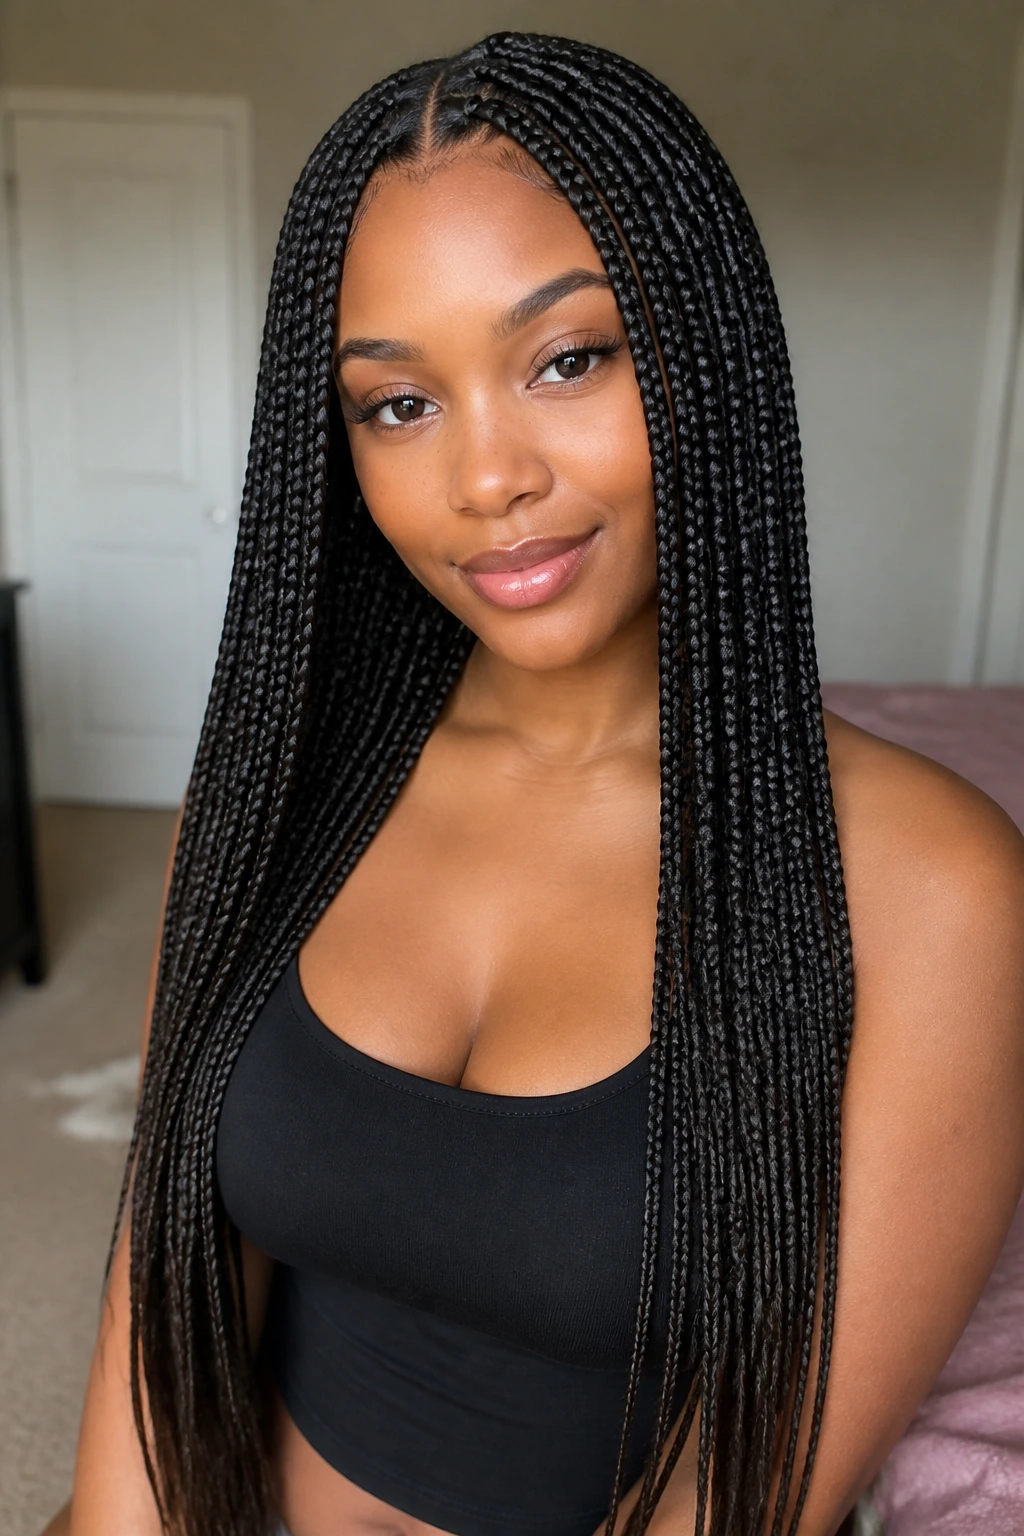
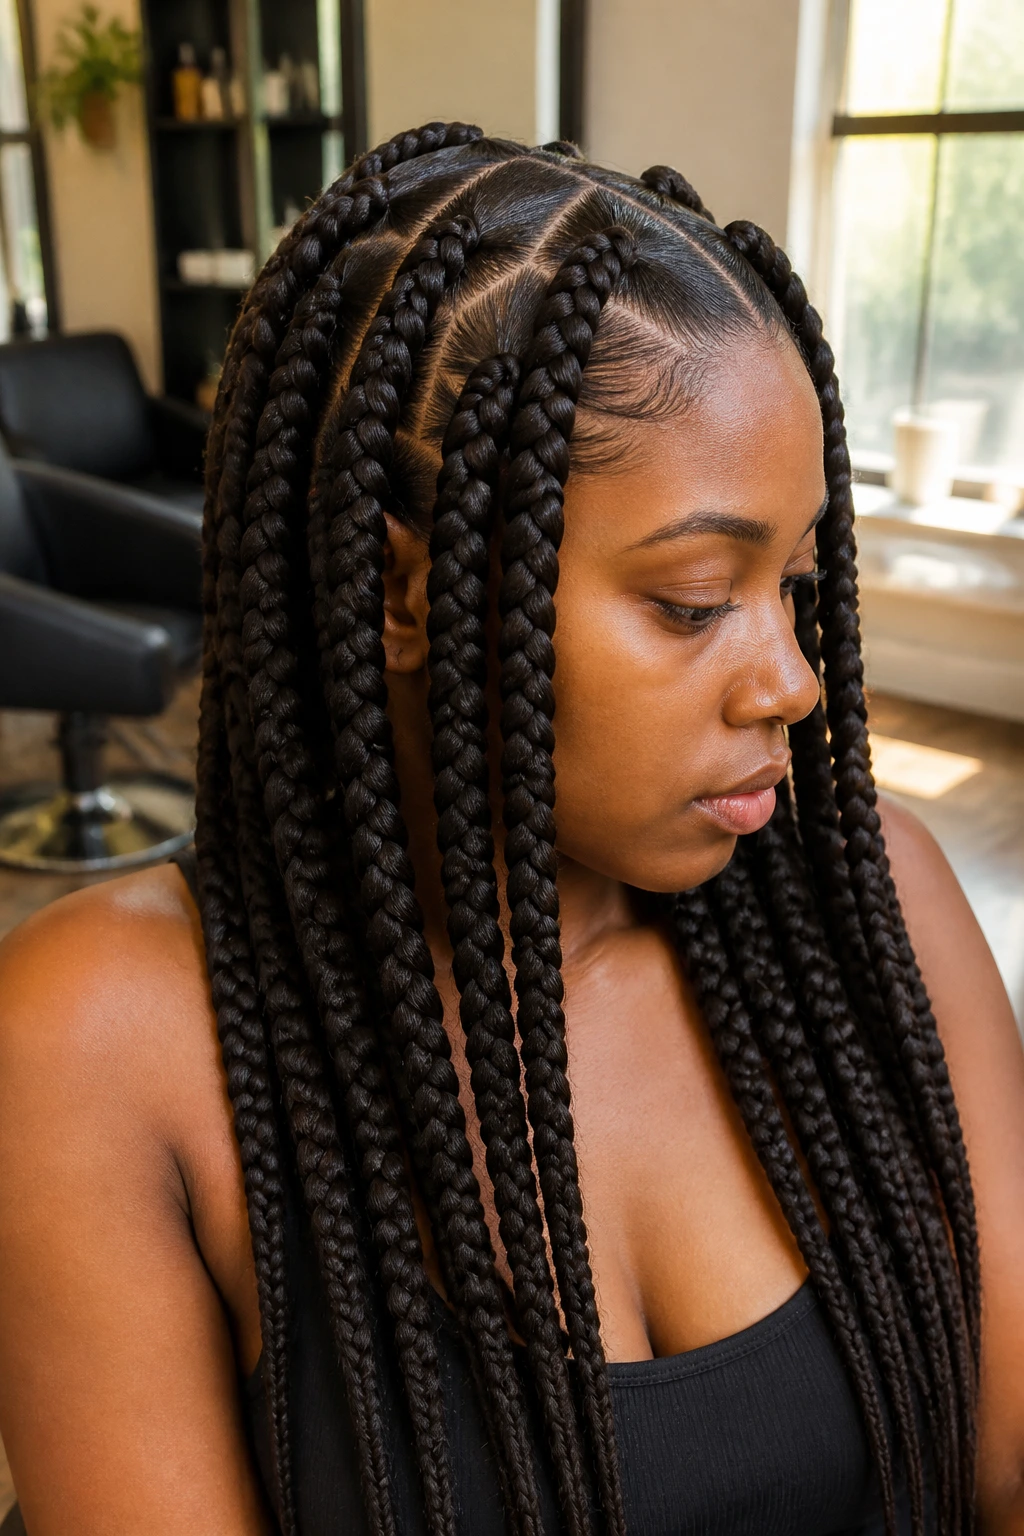
6. Jumbo Singles
Jumbo singles are the blunt instrument of this list, and I mean that as a compliment. Thick hair can support the bigger sections without looking sparse, which is why this version works better on dense hair than it does on fine hair.
The install is faster, the shape is bold, and the style has a chunky rhythm that reads well from a distance. But it needs clean parting, because bigger braids show mistakes fast. A crooked line or uneven root stands out more when the braid itself is thick.
If you’re choosing this style for longevity, keep the nape sections a little smaller than the crown. That helps prevent one area from feeling heavier than the rest.
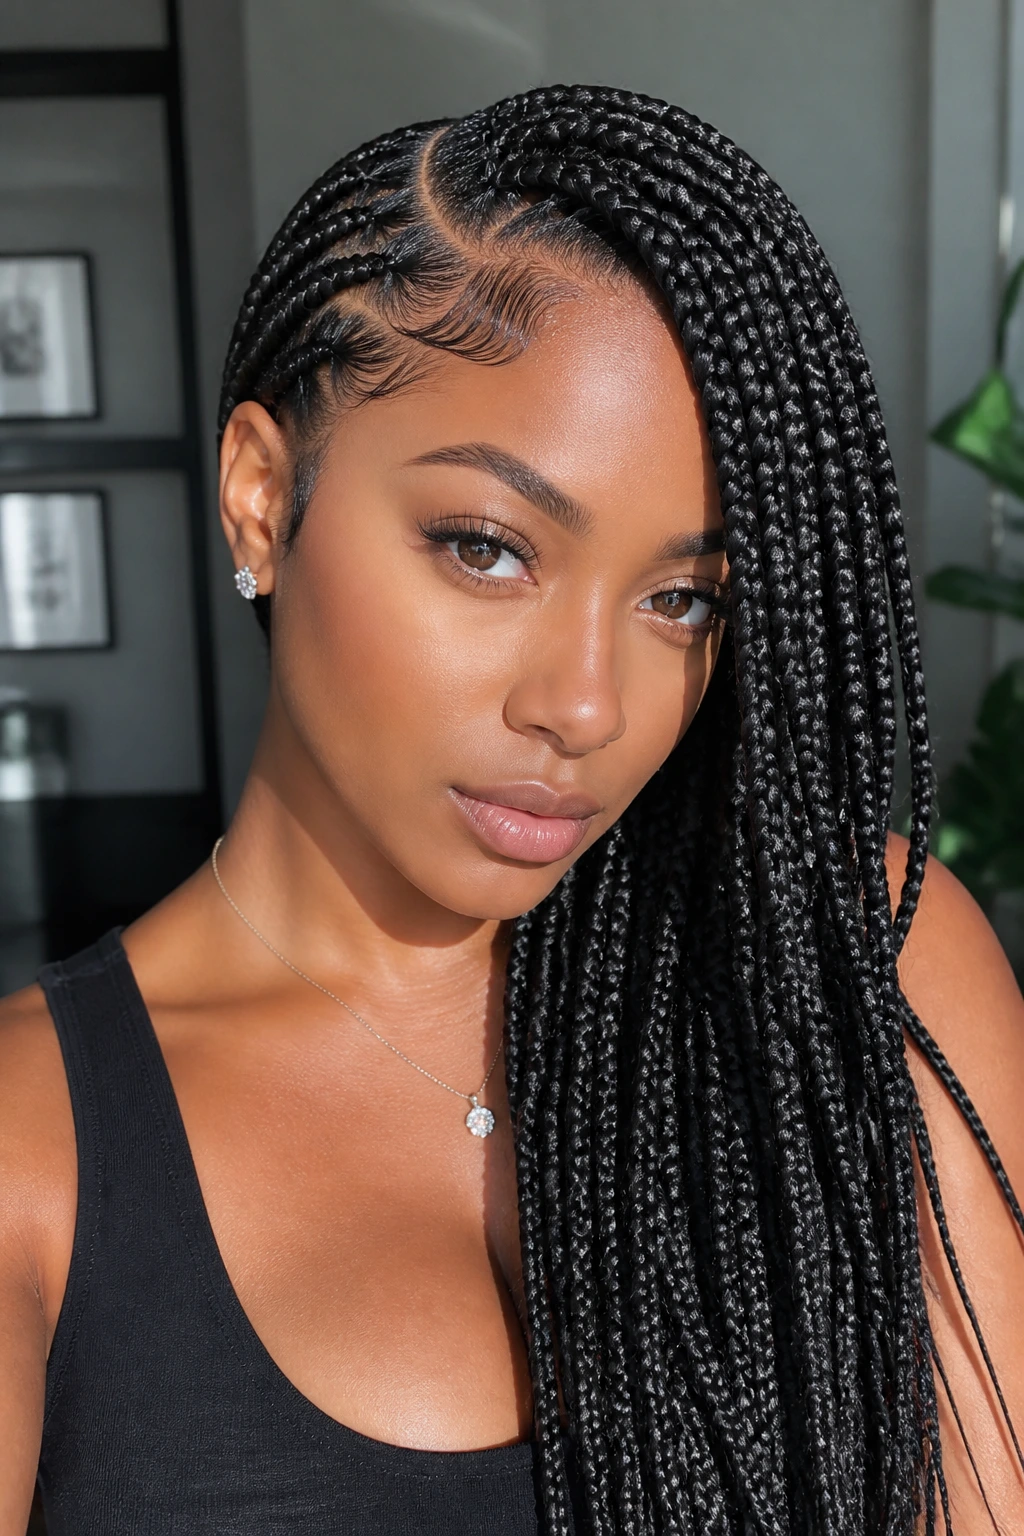
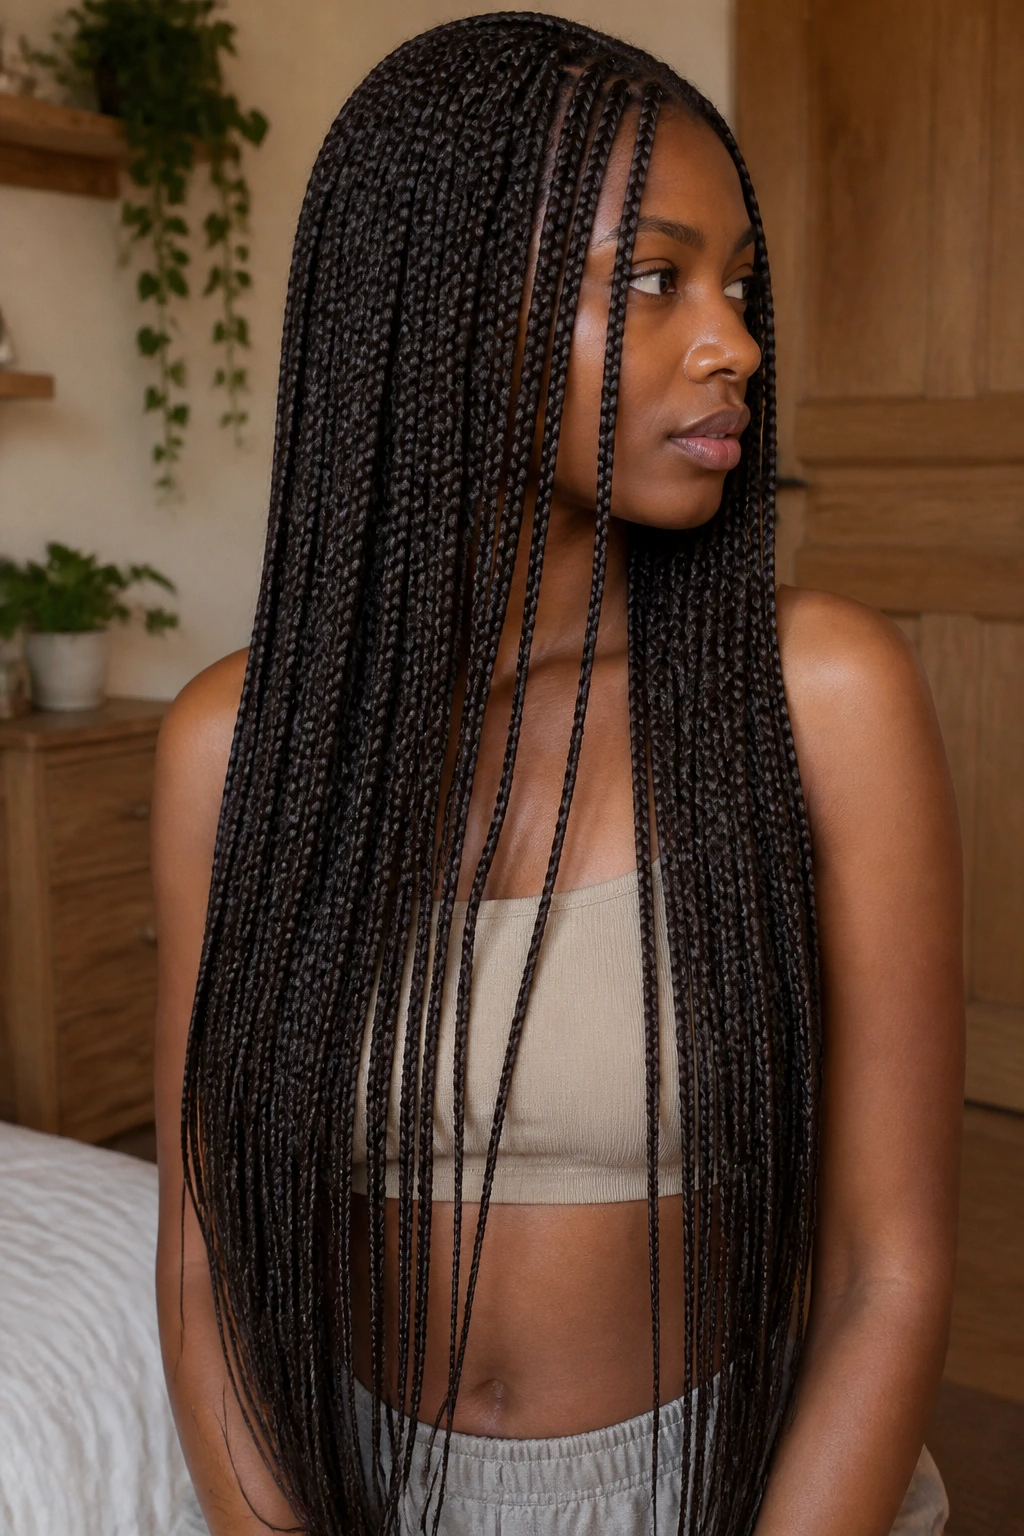
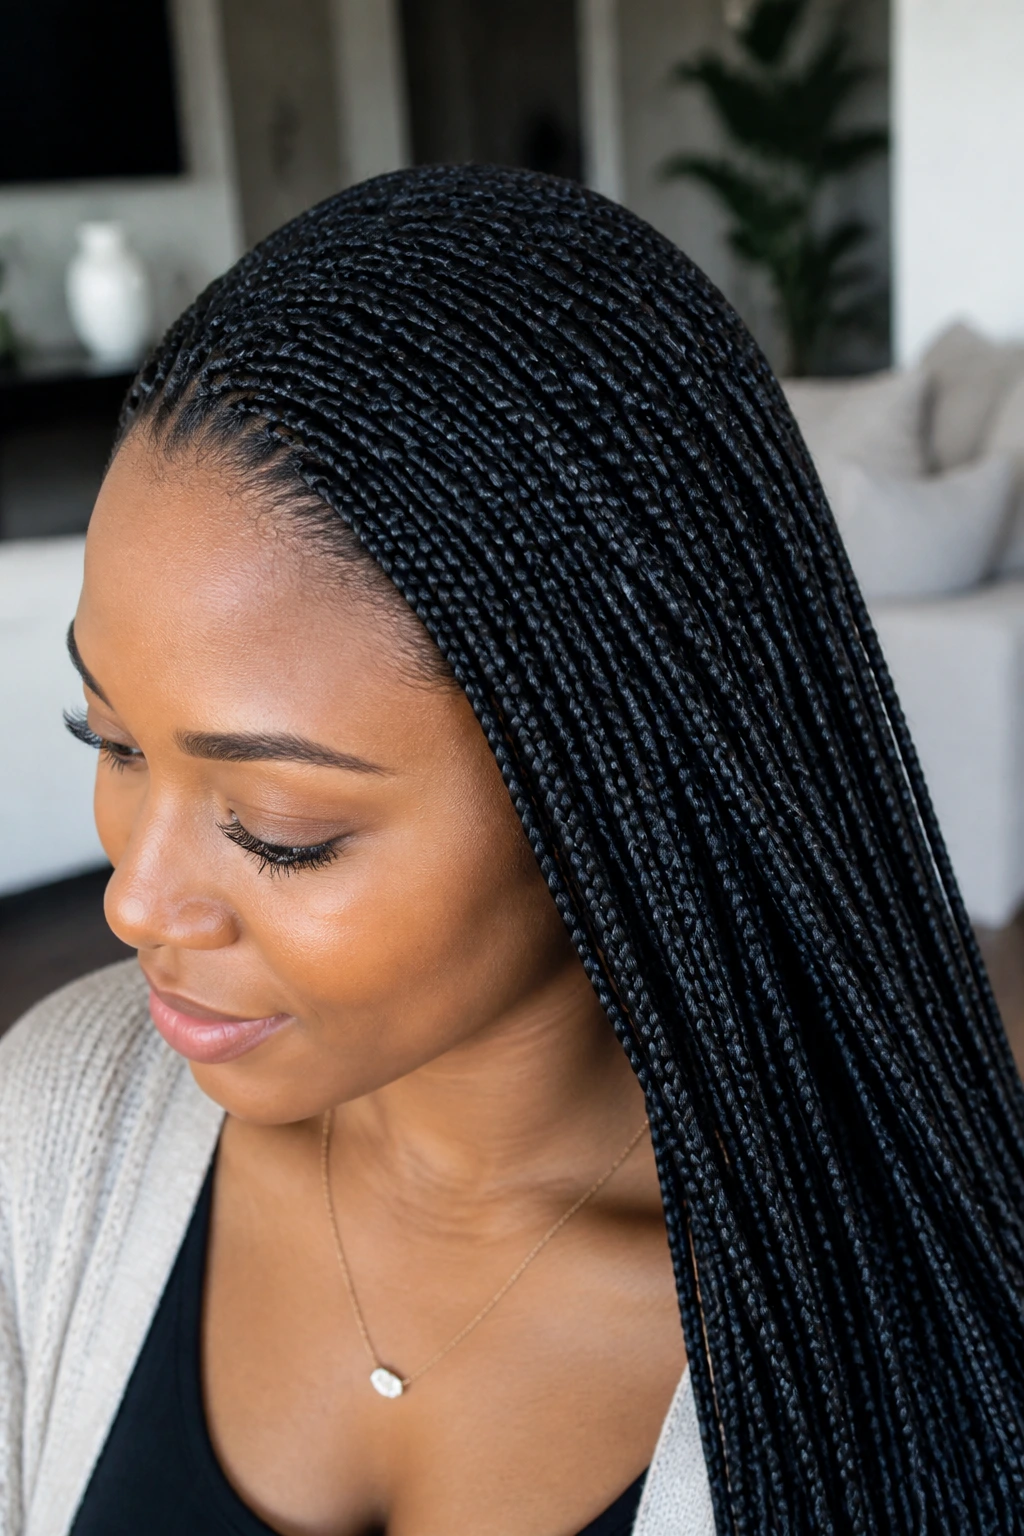
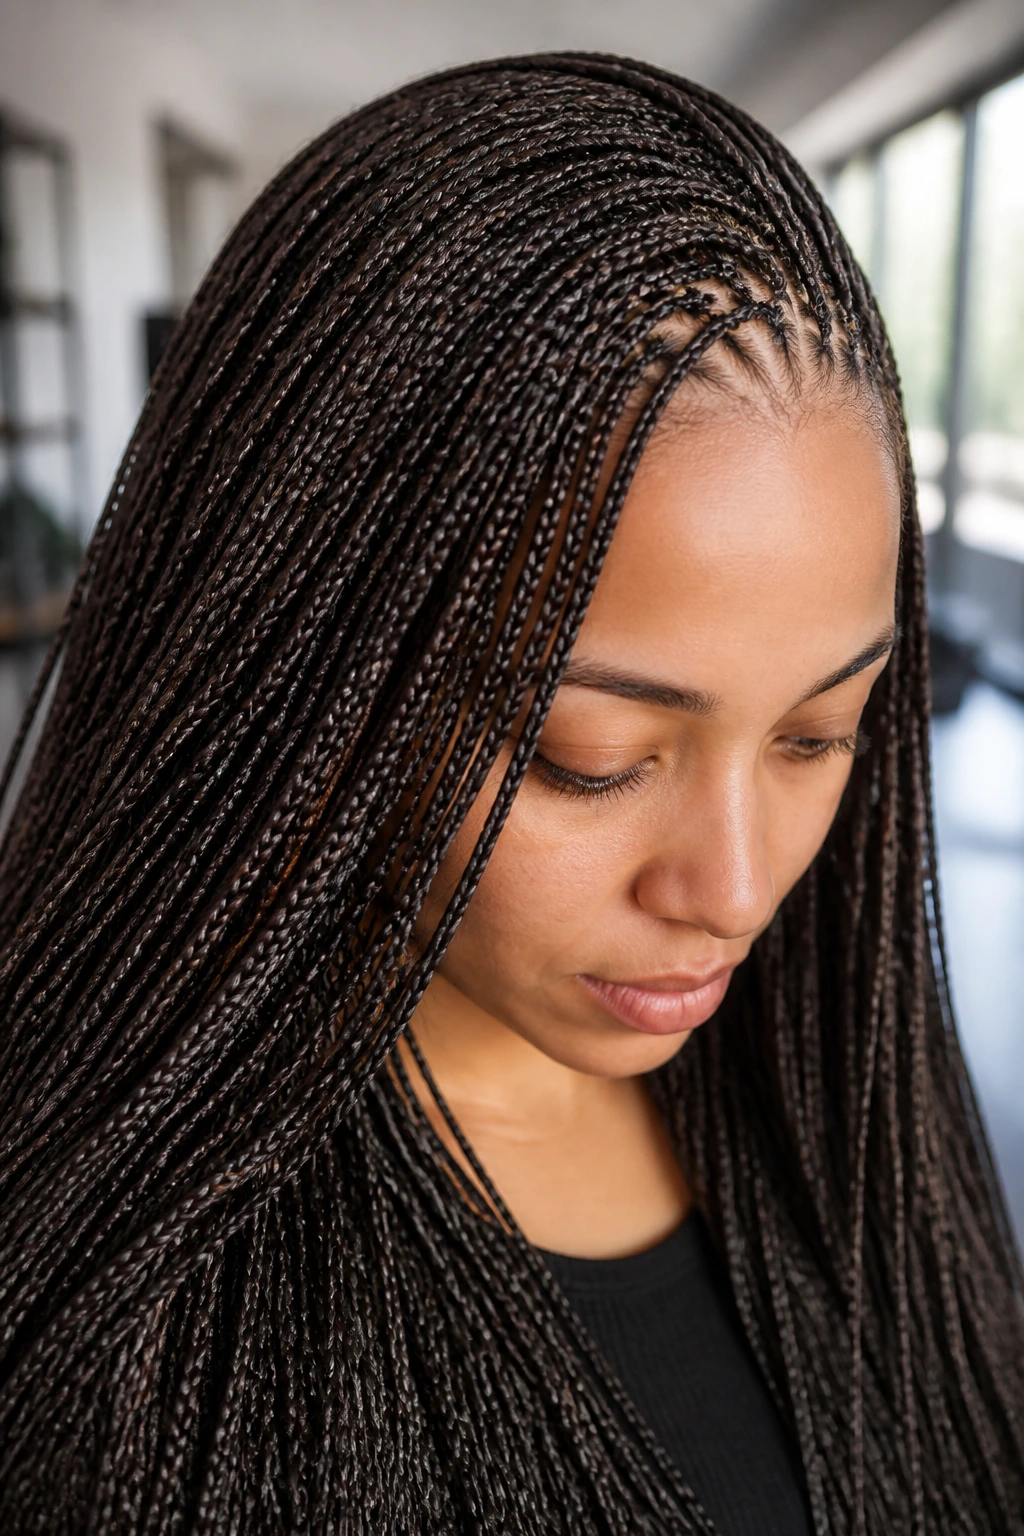
7. Micro Singles
Micro singles are the marathon version. Tiny sections, lots of braids, and a finish that stays neat longer because each braid has less bulk to puff up. On thick hair, the density fills the style beautifully, so the result looks crisp instead of thin.
They’re not for anyone who wants a quick install. They take time, and your scalp will know it. But if you care most about a very clean look with slower visible grow-out, micro singles earn their place.
What to Expect
- A longer install, usually split into more than one sitting if your hair is very dense.
- Less visible puff at the root.
- Better movement and a lighter swing at the ends.
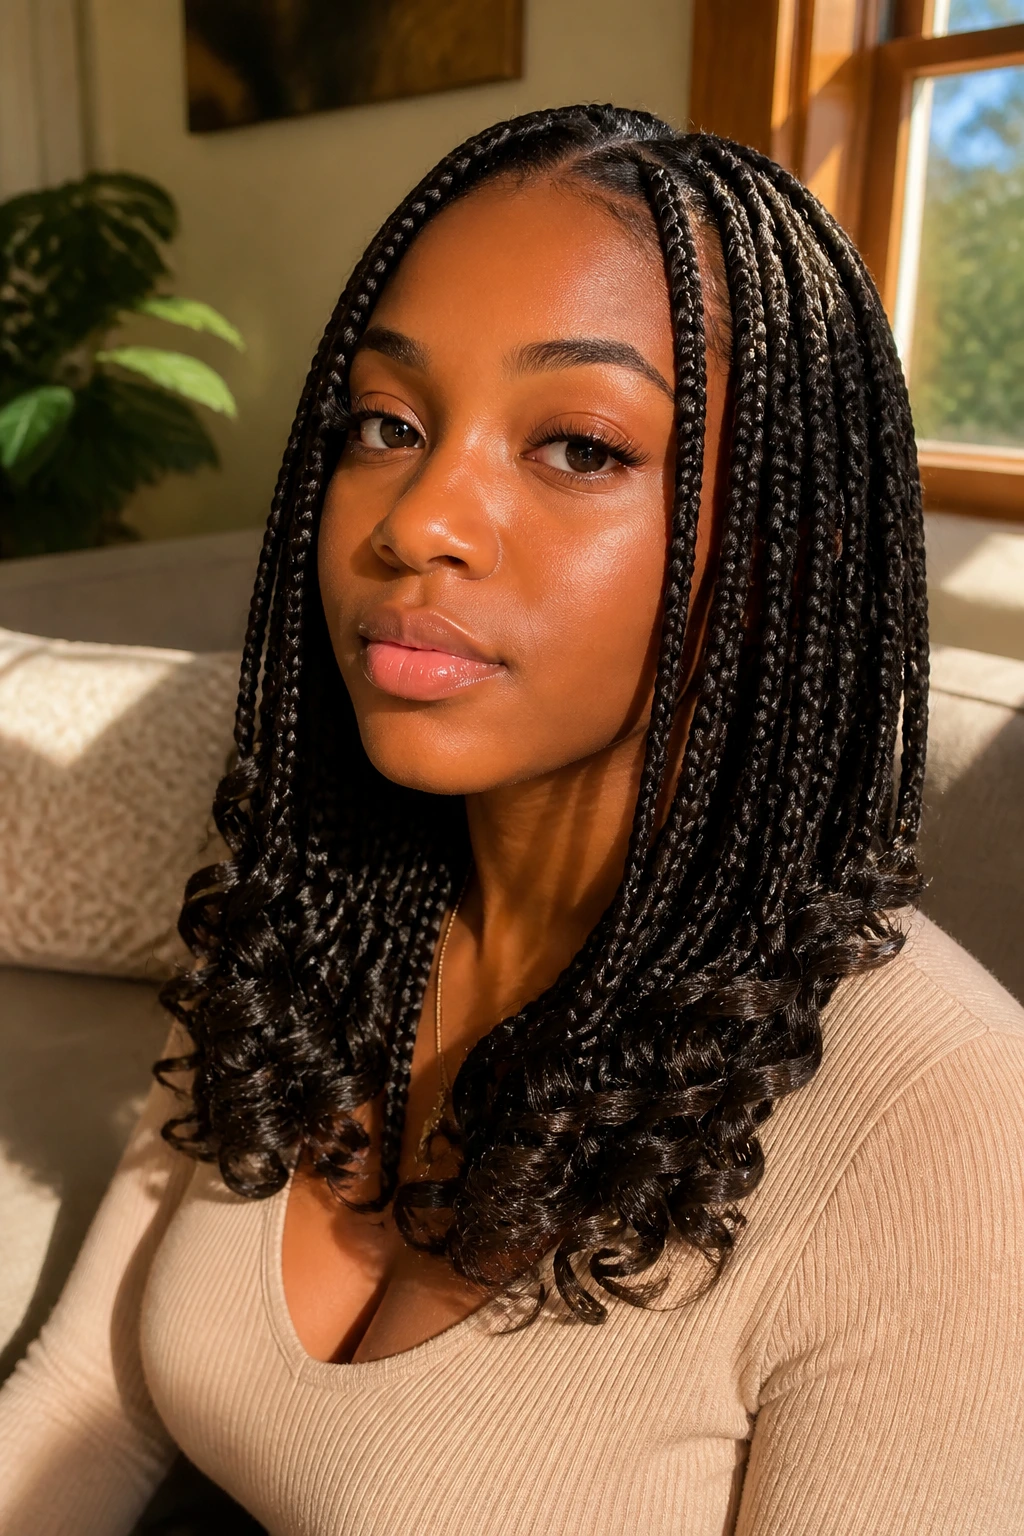
8. Curled-Ends Singles
Curled ends soften the whole braid in a way that plain straight ends never quite do. On thick hair, that little bend at the bottom keeps the style from looking too severe, and it also makes the ends look fuller instead of stringy.
If you’re using extension hair, flexi rods or perm rods can give you a neat curl before a hot water dip, depending on the fiber. If the braids are natural-hair only, a roller set on the ends works just as well, though it needs a little patience.
This style lasts because the curl hides frizz better than a blunt, straight tail. When the ends start to age, they still look intentional.
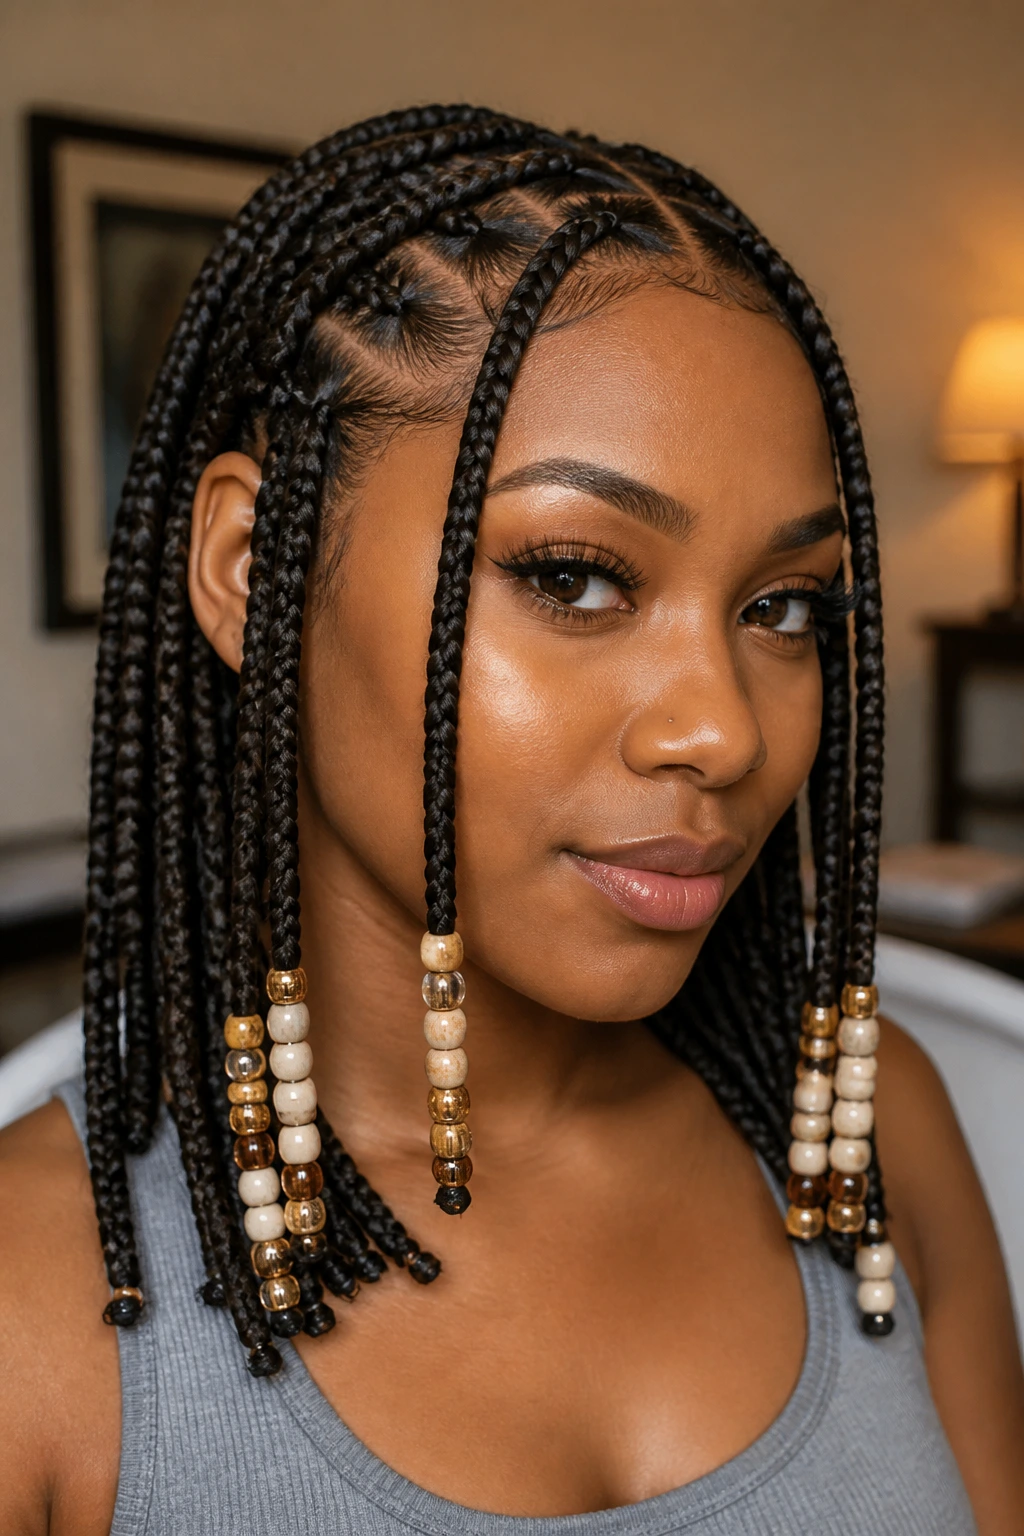
9. Beaded Singles
Beads on thick braids need balance. Too many, and the ends drag. Too few, and the style can feel unfinished. The sweet spot is usually a few beads near the tips or a small cluster on a front braid where you want the eye to land first.
Thick hair handles bead weight better than fine hair, which makes this a forgiving choice if you like movement and sound. The gentle click of beads is part of the charm, though maybe not if you’re trying to stay invisible in a quiet room.
Wood, resin, or lightweight acrylic beads work best for long wear. Heavy glass can pull more than it should, especially on the front pieces.
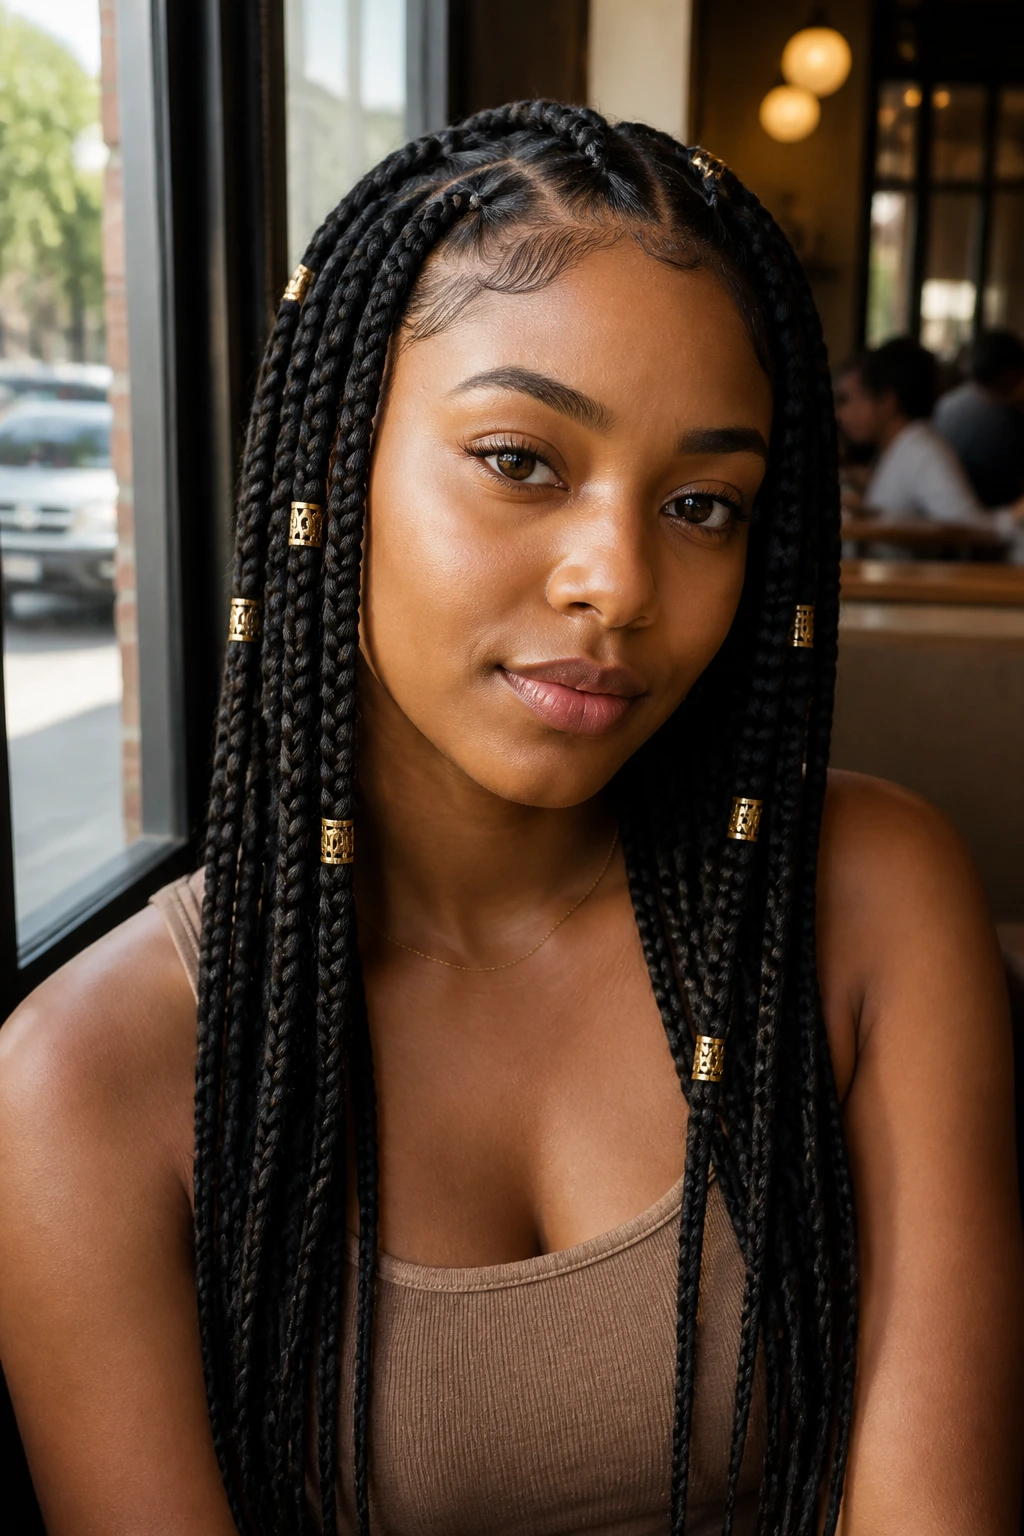
10. Gold-Cuff Singles
Gold cuffs are the low-effort jewelry of braid styling. Slip a few onto the mid-length of a few braids, and the whole set looks more finished without adding much weight. Thick hair carries this detail well because the braids have enough substance to support the shine.
I like cuffs better than random heavy accessories for long wear. They don’t snag as badly, and they’re easy to move if one section starts to feel annoying at night.
Use them sparingly. Three or four cuffs placed with intention usually looks better than loading every braid with metal and calling it done.
11. Boho Singles With Loose Curly Pieces
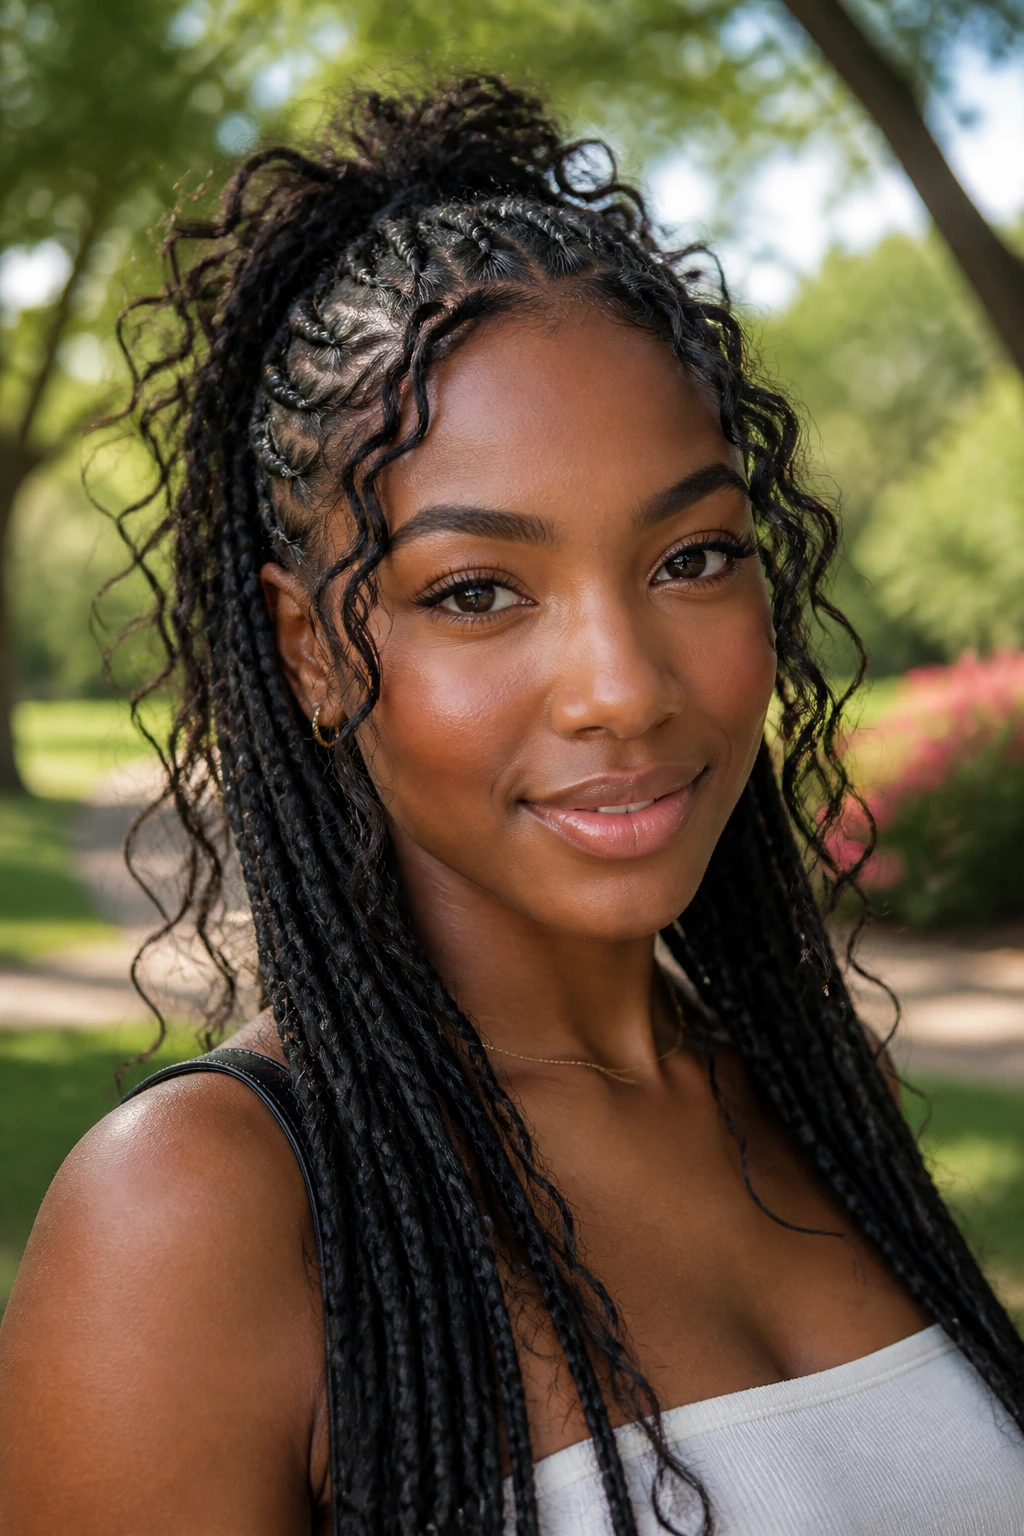
Boho singles are for people who want the order of braids with a little movement breaking through the structure. The loose curly pieces soften thick hair beautifully, especially when the base braid is full enough that the tendrils don’t disappear into the background.
The style does ask for more upkeep. The curls need mousse or a light foam wrap to stay from turning fuzzy on day two, and you’ll want to refresh them gently after sleep.
If your hair is very dense, keep the curly pieces in the front and around the crown. Too many loose tendrils everywhere can make the style read messy instead of relaxed.
12. Feed-In Singles
Feed-in singles are one of the cleanest ways to manage thick hair at the root. Instead of starting with a big knot, the braider adds hair gradually, which keeps the front flatter and lets the braid grow in smooth from the scalp.
That gradual build is especially useful if your natural hair is thick enough to create a hard bump at the start of a standard braid. Feed-in roots solve that without making the set look thin.
Ask for the added hair to be divided in small, even pieces. If the additions are too chunky, the braid gets ridges, and the whole point of a feed-in start disappears.
13. Layered Singles at Two Lengths
Layering the braids gives thick hair some breathing room. Shorter pieces around the face and longer ones through the back keep the whole style from feeling like one giant curtain hanging off the head.
This is one of my favorite ways to make dense hair look lighter without cutting anything. The eye moves across the different lengths, and the braid set feels shaped instead of simply long.
A layered set also holds up nicely as it ages. The shorter front braids tend to stay neat enough to frame the face, even after the back starts to get a little fuzzy.
14. Two-Tone Color-Block Singles
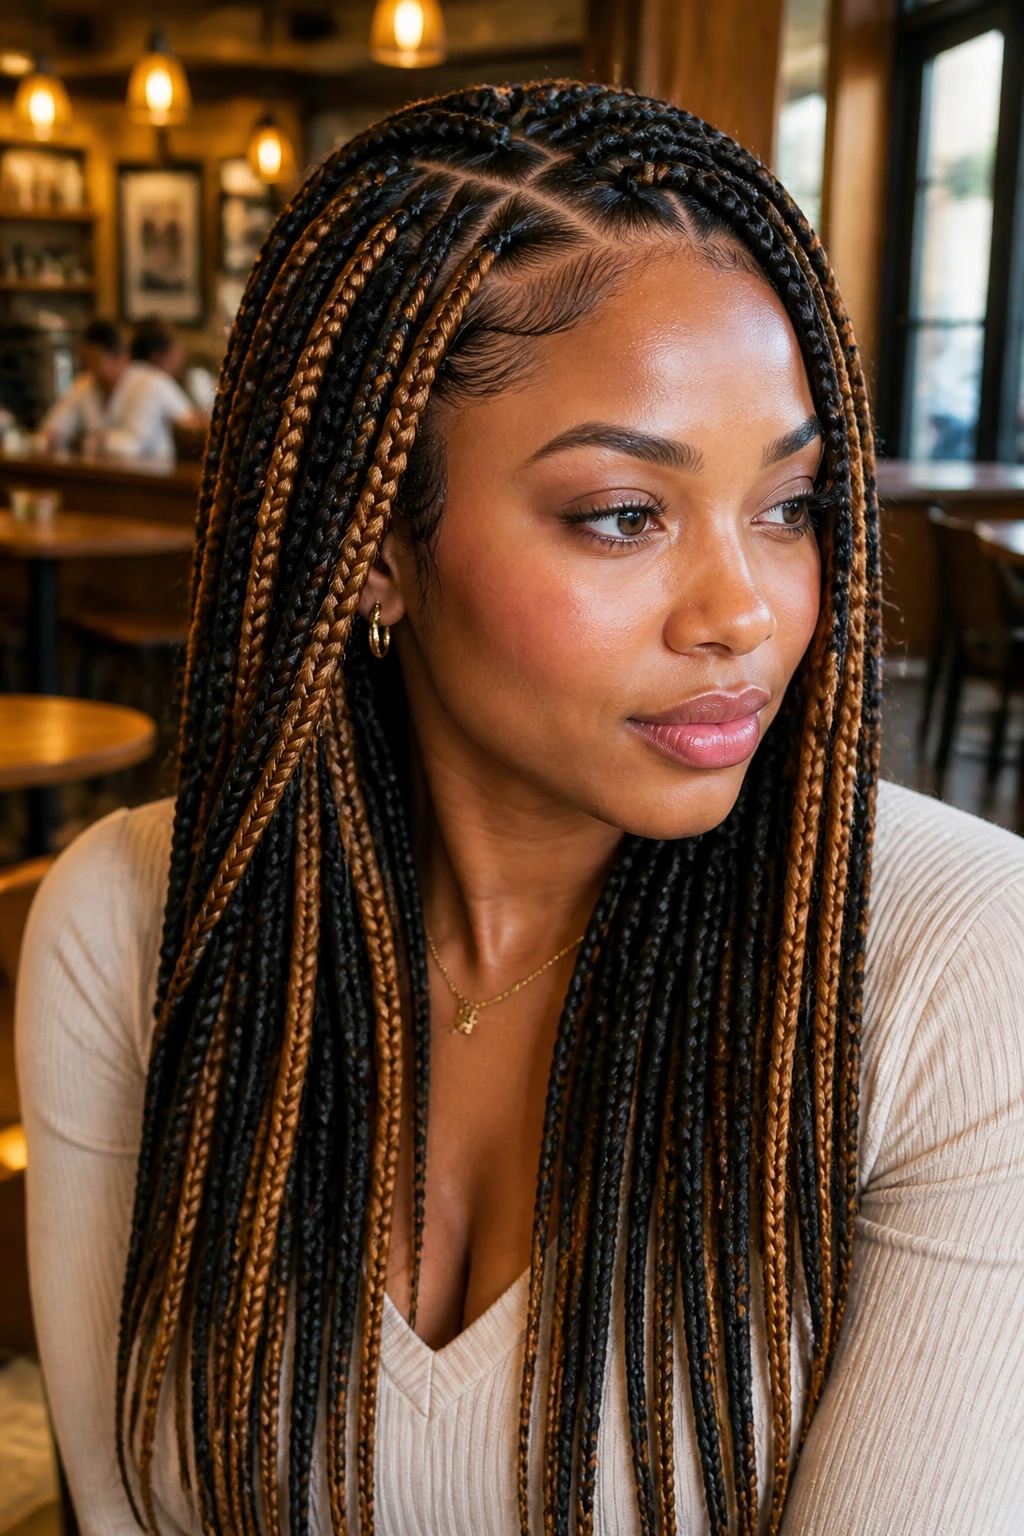
A two-tone braid set can be sharp or soft, depending on the colors. Thick hair makes the contrast easy to read, so a dark base with honey pieces, or black with a muted copper, shows up cleanly instead of getting lost in the bulk.
The key is letting the color do the talking and keeping the sections simple. Fancy parting plus loud color can start to feel busy. One strong visual idea is usually enough.
If you want the style to last, choose shades that still look good when they fade into each other a little. High-contrast colors can be fun, but the grow-out will show faster.
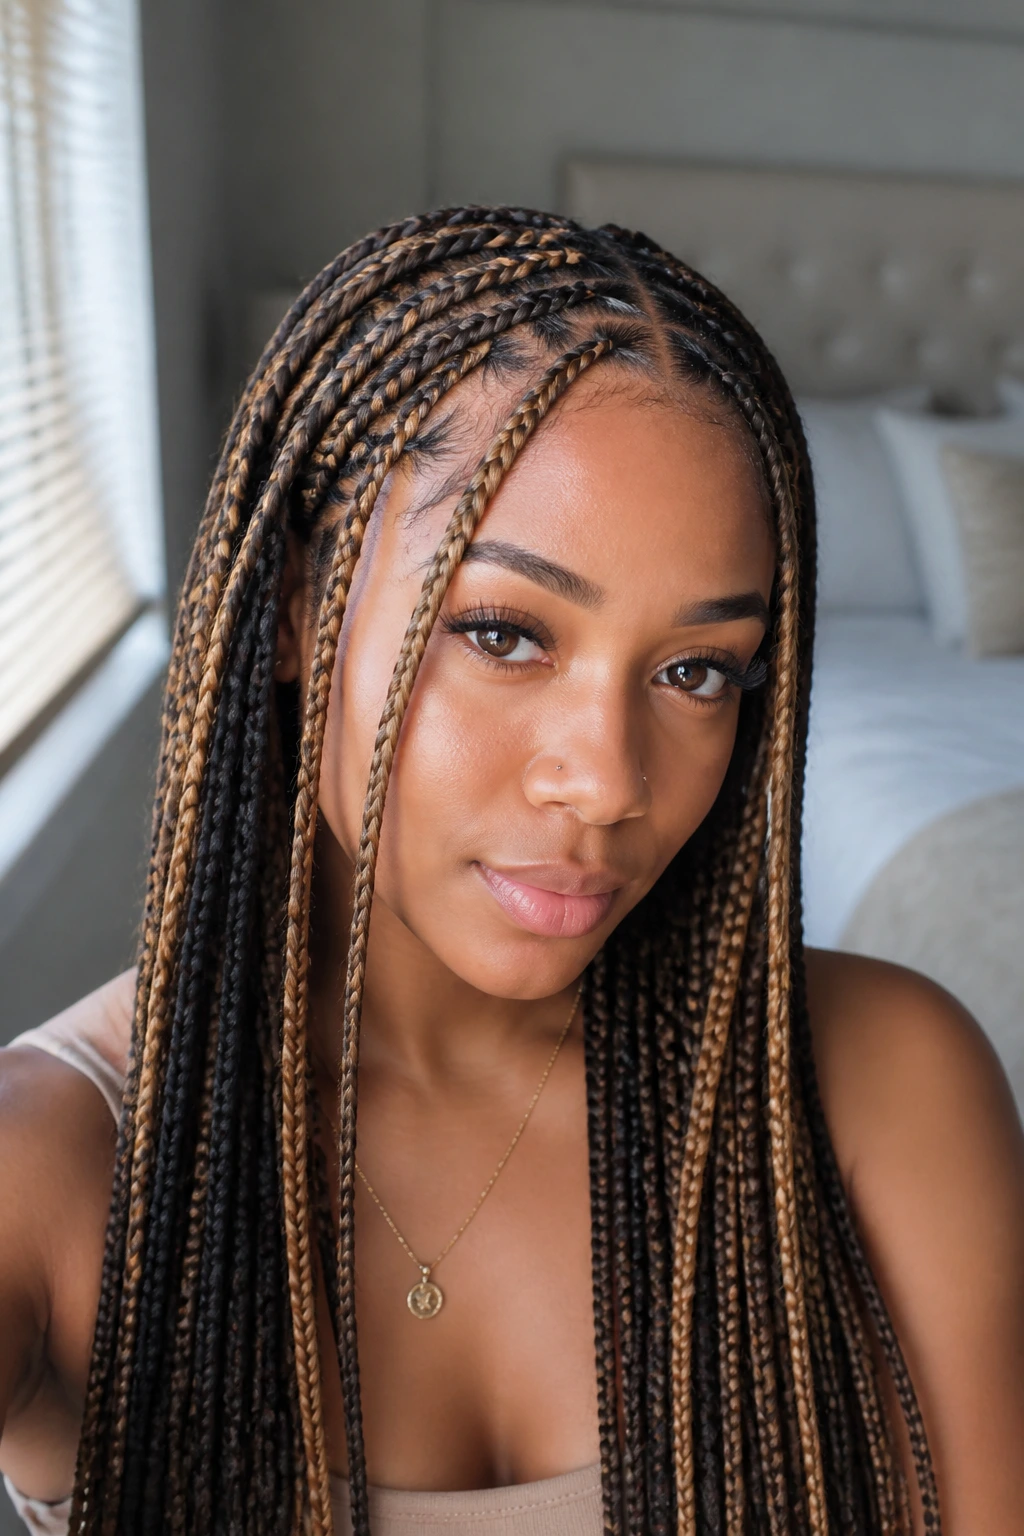
15. Face-Framing Highlight Singles
Face-framing highlights do what a good pair of earrings does: they pull attention where you want it. On thick hair, the brighter front pieces keep the set from feeling too heavy around the cheeks and temples.
This is a good choice if you want dimension without committing to a full color story. A few lighter braids near the front can lift the whole look, especially when the rest of the set is a deeper brown or black.
Keep the highlights balanced on both sides unless you want a deliberate asymmetrical look. Uneven placement tends to read like a mistake once the braids settle.
16. Half-Up Singles

Half-up singles are practical and flattering. The crown gets lifted off the neck, which matters when thick hair starts to feel warm or heavy, and the loose length still gives you the full braided look.
This style is especially useful once the braids have been in long enough that you want a change without taking them down. Pulling the top half up can hide a little root fuzz while giving the style a fresh shape.
Use a soft elastic or a wrapped section instead of yanking the hair tight into a tiny ponytail. The goal is lift, not a headache.
17. Low Bun Singles
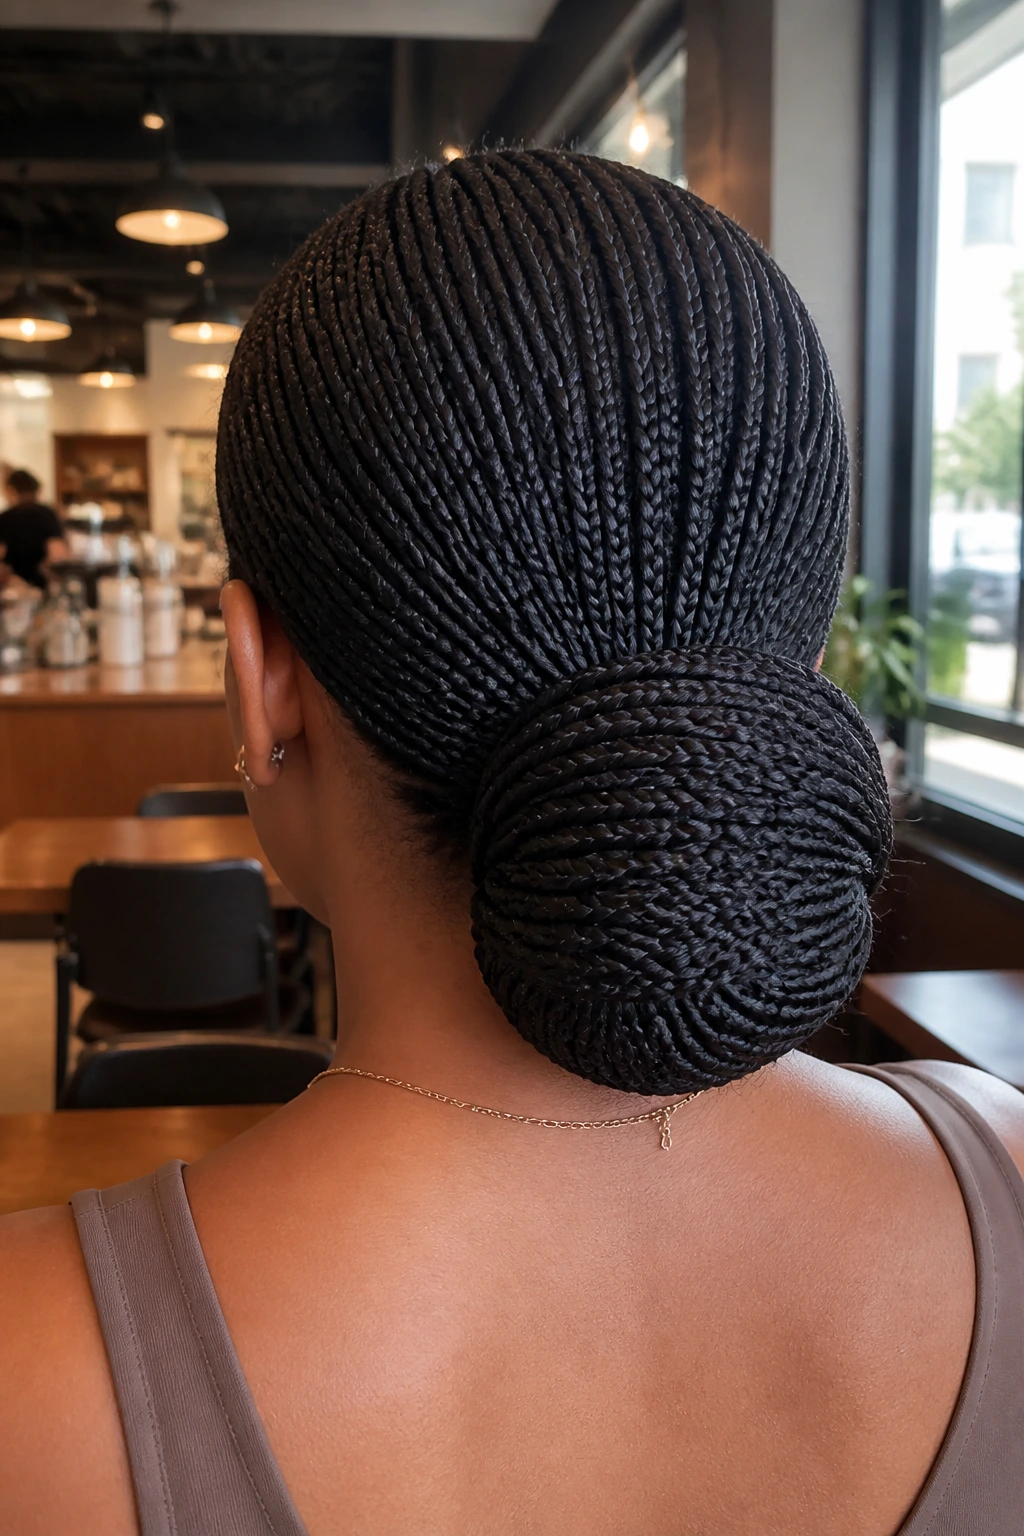
A low bun made from single braids is one of the cleanest ways to wear thick hair when you want the ends out of the way. It’s neat at the nape, easy on the shoulders, and less likely to snag on coats, seats, or bag straps.
The style is also kind to long-wear braids because it reduces friction at the ends. If your ends start to look dry before the rest of the set, tucking them into a bun slows that down.
Leave the bun a little loose. A tight knot on thick braid lengths can create a heavy pull at the back of the head, and that gets old fast.
18. High Ponytail Singles
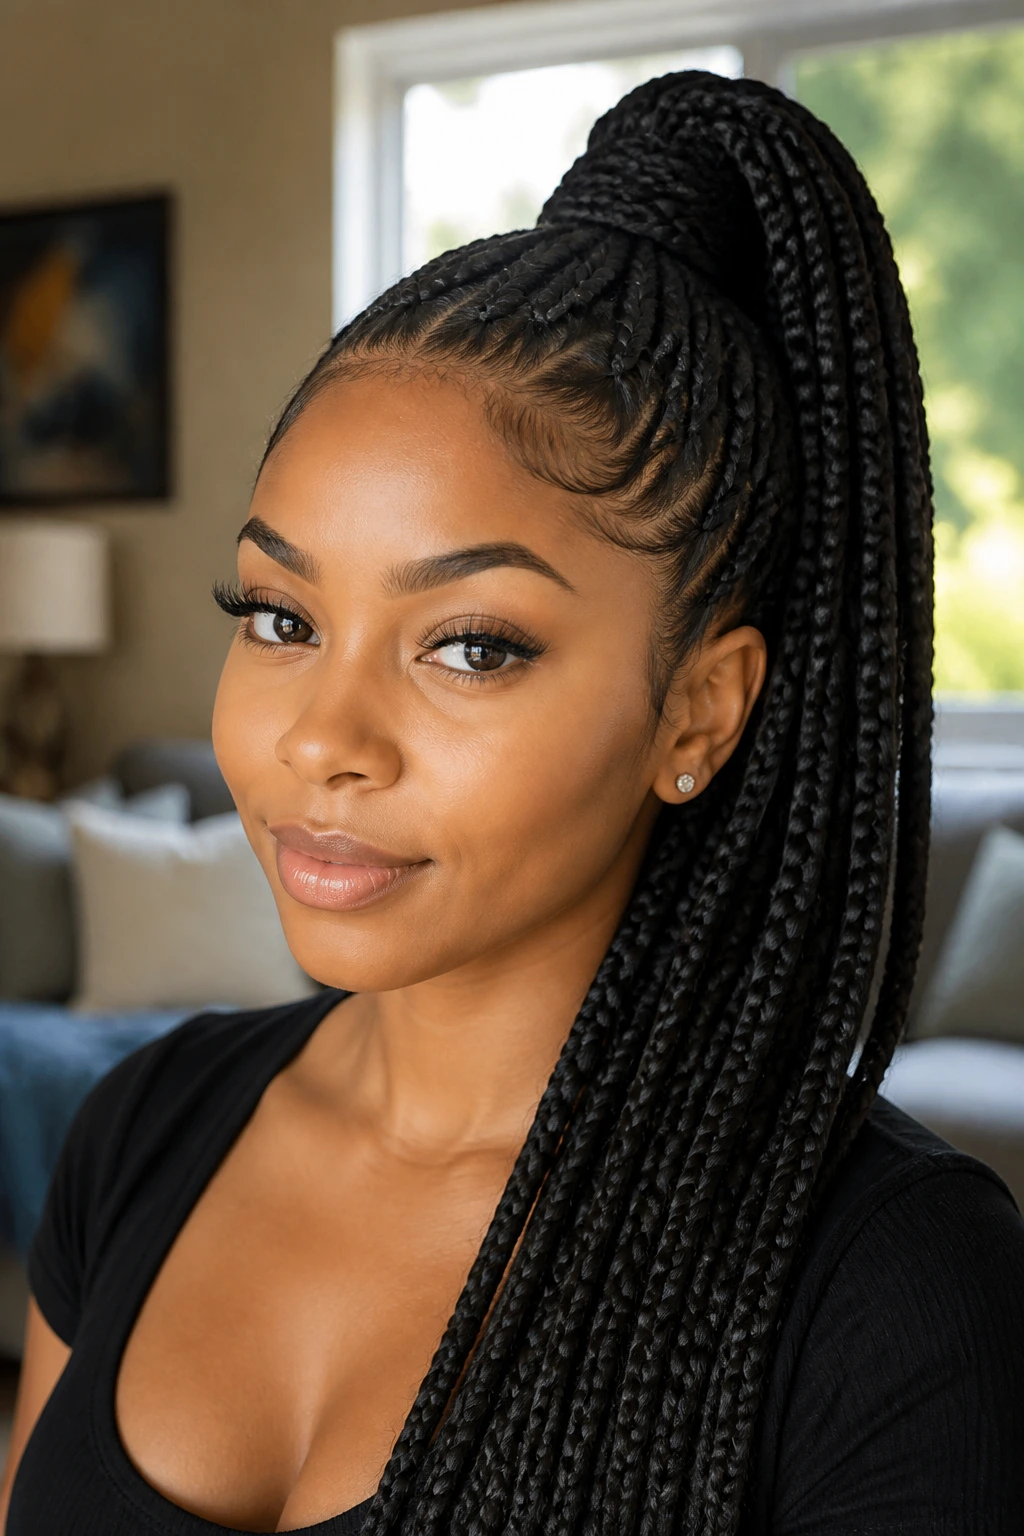
High ponytails look bold on thick braids because the hair already has the body to hold the shape. Once the braids are gathered up, the ponytail reads full instead of skimpy.
This style asks for a careful base. If the roots are pulled too hard, the front line will let you know. I’d keep the front sections smaller and the tension moderate, then let the ponytail sit high enough to lift the face without dragging on the edges.
It’s a good going-out style, but it can also be a good workday style if you want the braids off your neck. Just do not over-tighten it for the sake of height.
19. Zigzag-Part Singles
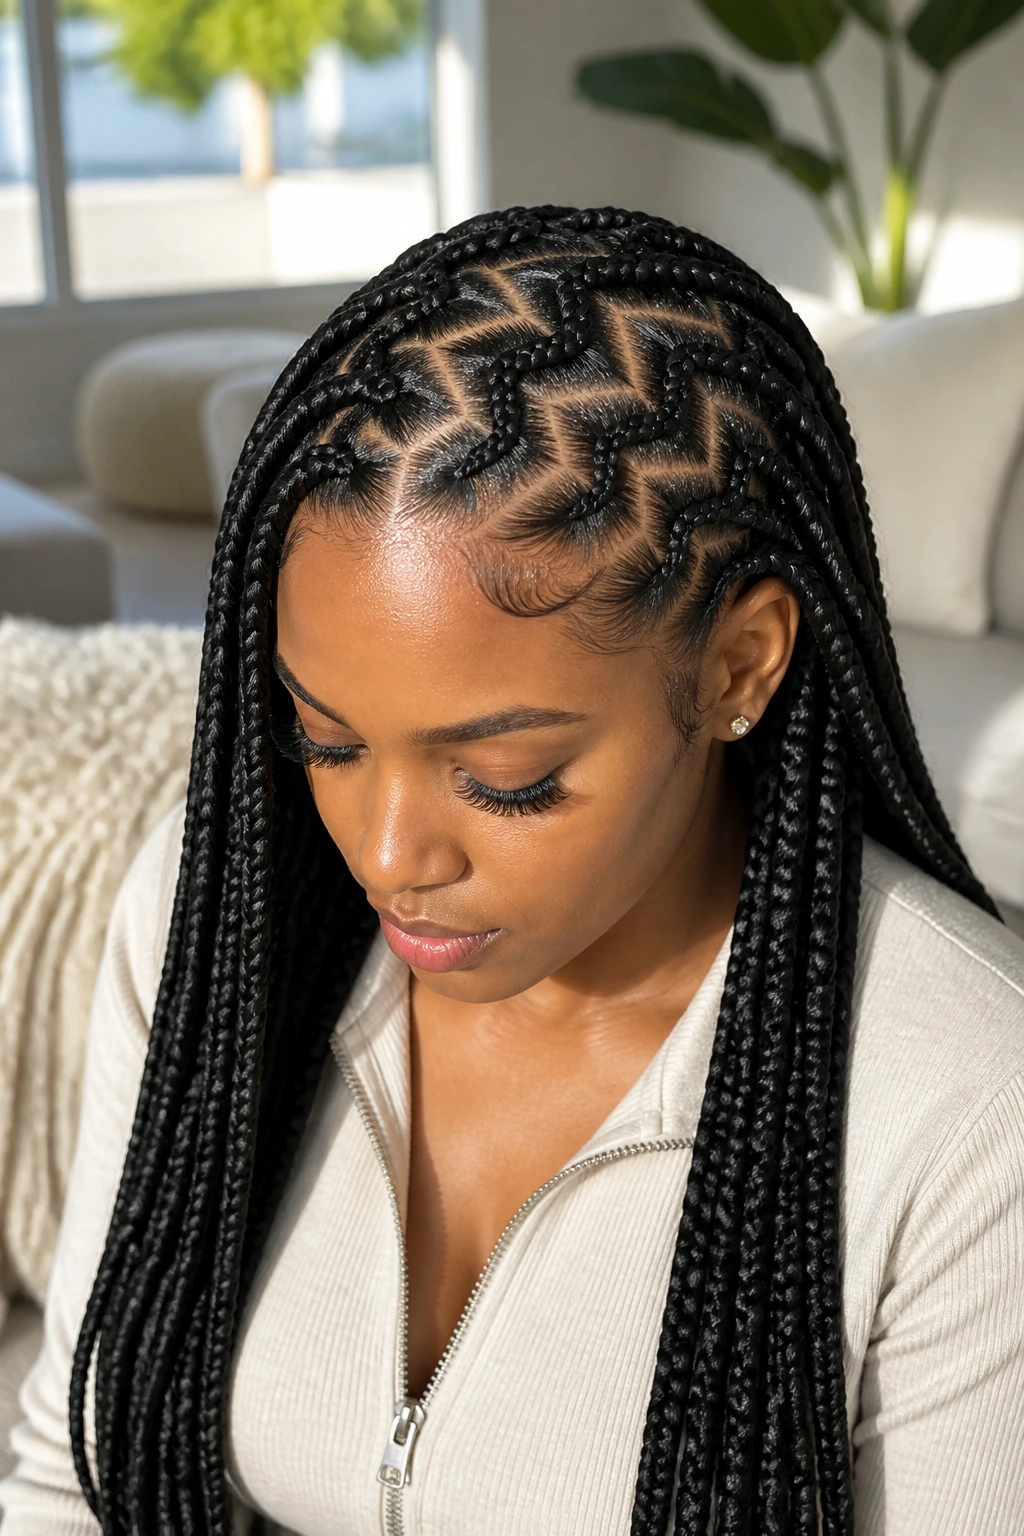
Zigzag parts give thick hair a little edge without needing accessories. The shape breaks up the scalp pattern, so the style keeps looking interesting even when the roots start to grow in.
It also helps if you don’t love the look of a straight part on dense hair. A zigzag softens the grid and makes the set feel more alive from the start.
Keep the angles broad enough to be readable. Tiny zigzags can get lost once the braids are installed, and then you’ve done extra work for no visual payoff.
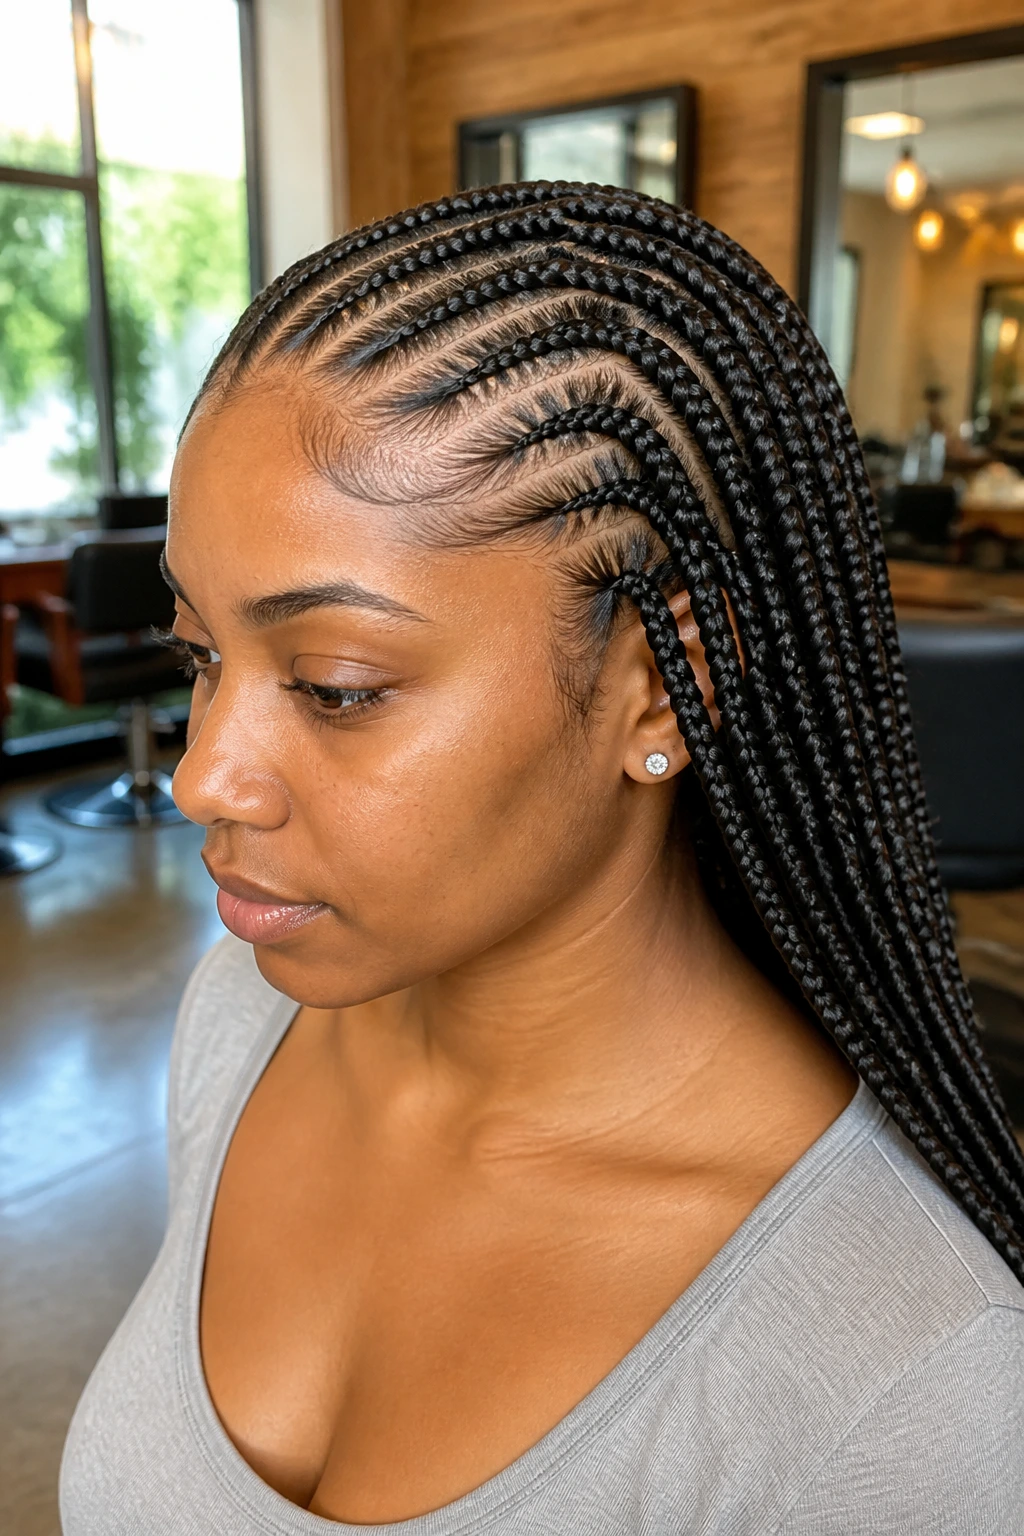
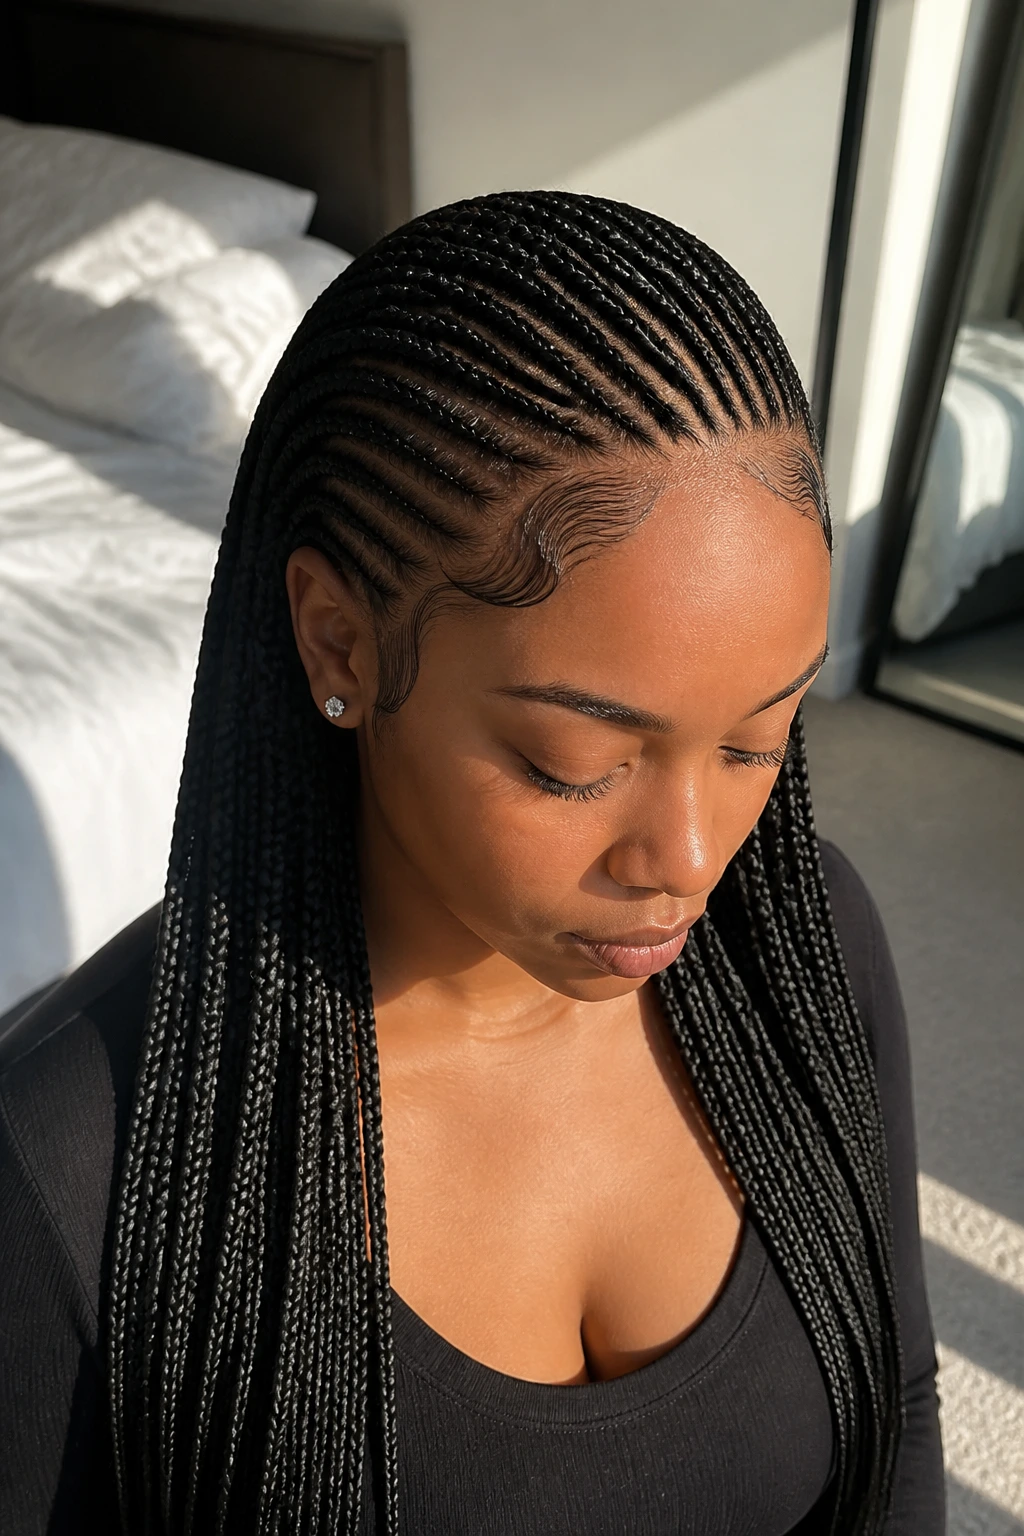
20. Stitch-Root Singles
Stitch-root singles are for people who love a very clean scalp finish. The root sections are laid with visible, crisp lines before the braid drops down, and thick hair gives those lines enough body to look intentional instead of bulky.
This is one of the best options if you want the braid set to look polished for a long stretch. The stitch effect keeps the roots tidy and gives the style a sharp edge that hides new growth longer than softer parting sometimes does.
It does take a steady hand. If the root rows are uneven, the whole style will show it immediately.
21. Rope-Twist Ends Singles
When the ends shift into a rope twist instead of staying braided all the way down, the finish gets lighter and less rigid. Thick hair benefits from that because the lower half stops feeling blocky.
I like this version for people who want a little movement at the bottom without going full boho. It looks deliberate, not fussy, and the twist keeps the tail from fraying the way some straight braid ends do.
A clean transition point matters. If the switch from braid to twist is messy, the eye lands there instead of on the overall shape.
22. Scalp-Start, Loose-End Singles
This style starts snug at the scalp and loosens slightly toward the ends. That small shift makes the braids easier to wear for long hours, especially if your head tends to get sensitive after a few days in a style.
On thick hair, the loose ends take a little of the visual weight off the set. The look still feels grounded at the root, but the tail moves more easily and doesn’t drag the style down.
It’s a good compromise if you want a neat top and a less formal finish. Not every braid has to end in the same exact way.
23. Stretched Natural-Hair Singles

Stretched natural-hair singles skip the added extension drama and lean on your own length, stretched out first so the braid lays smoother. Banding, twists, or a gentle blow-dry can all help reduce shrinkage before installation.
This is a smart choice when you want a lower-buildup style. Thick hair often has enough body on its own, so the braid doesn’t need much help to look full.
The biggest win here is comfort. Less added hair means less weight, and less weight usually means easier nights and fewer sore spots around the crown.
24. Blow-Dried Maximum-Length Singles
If you want your braids to hang longer and sit flatter, a pre-install blow-dry can make a big difference. Thick hair tends to shrink up and bulk out the braid if it’s braided too damp or too tightly coiled at the root.
A smooth blow-dry doesn’t mean flat-iron straight. It just means stretched enough to reduce puff and help the braid slide cleanly from the scalp.
This version lasts well because the roots start calmer. The tradeoff is heat, so keep it controlled and don’t chase bone-straight hair if all you need is stretch.
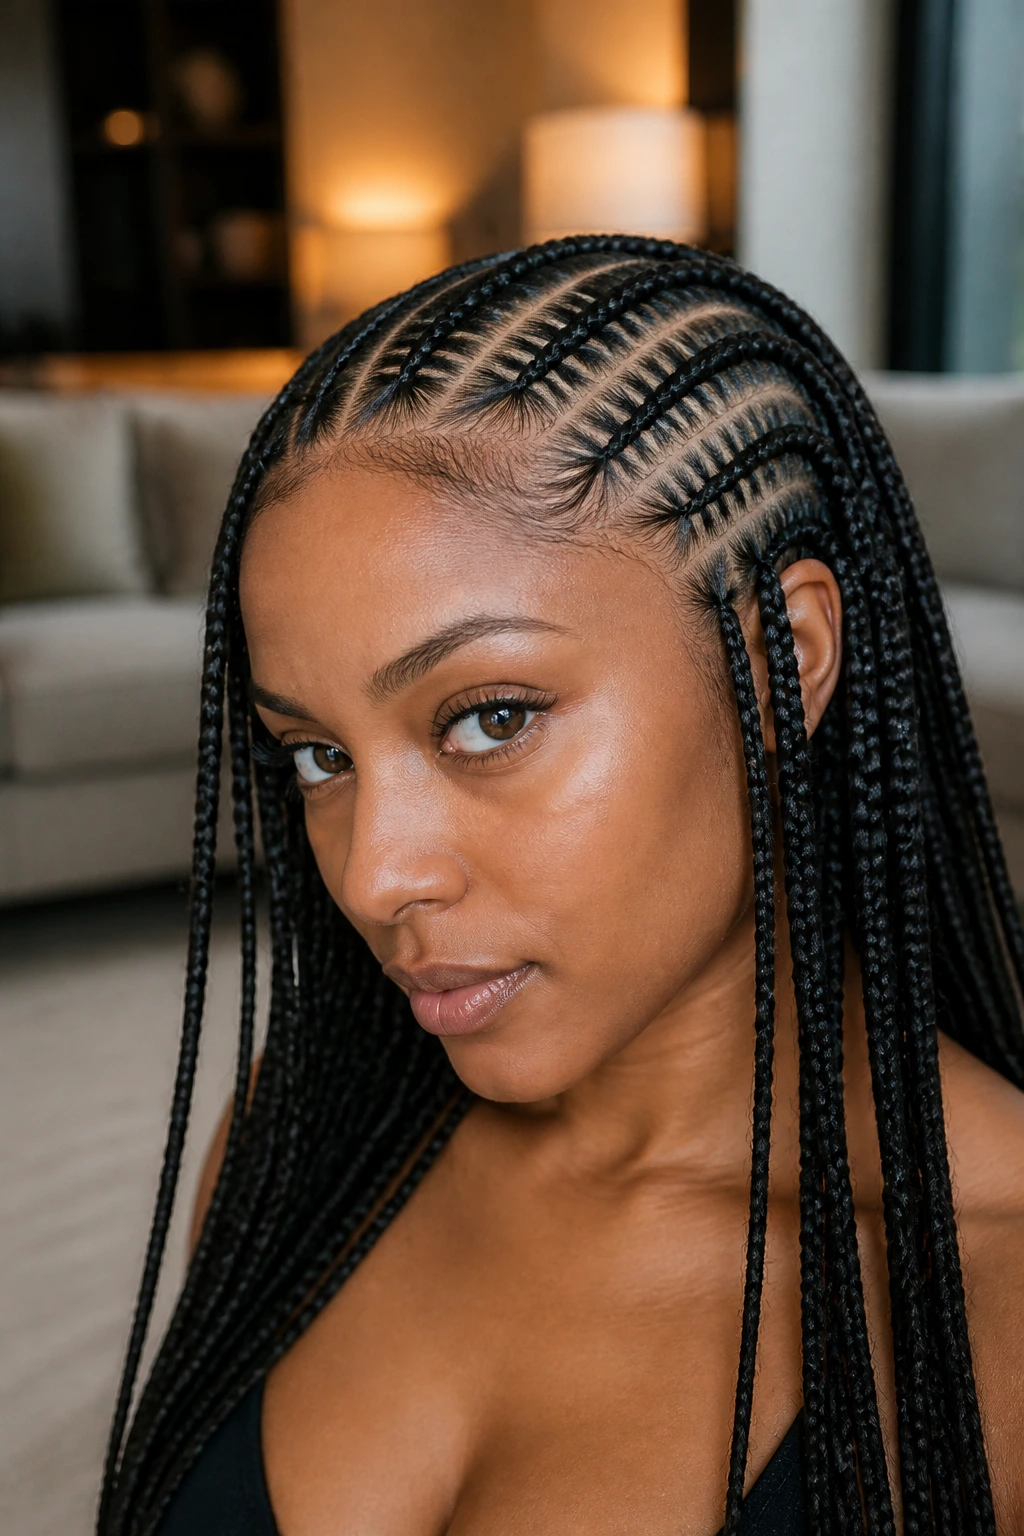
25. Invisible-Part Singles
Invisible-part singles are for people who do not want a hard scalp grid calling attention to itself. The part lines are kept narrow, concealed, or staggered so the braids read more like a flowing set than a map.
Thick hair works nicely here because there’s enough density to hide the transitions. The style looks softer and more natural from the front, which is useful if you wear braids in professional settings or simply hate looking at a busy part pattern.
The clean-up matters. If the parts are too soft at the root, the style can blur too fast, so there’s a line between invisible and sloppy.
26. Crown-Arc Singles
Crown-arc singles curve around the head instead of running straight back in rigid rows. That arc follows the shape of the skull more naturally, and on thick hair it keeps the top from feeling like a hard block.
The style is especially nice if the crown is your densest area. A curved pattern spreads the hair more evenly and helps the middle of the head sit flatter.
It looks subtle from a distance, but up close it has a lot of character. The geometry is doing the work, which is exactly what a long-wear style should do.
27. Tapered-End Singles
Tapered ends solve one of the oldest braid complaints: the blocky tail. By gradually narrowing the braid near the bottom, the style keeps thick hair from looking like it stops all at once.
That taper can happen through the way the extension hair is added, or through the way the braid itself is finished. Either way, the eye gets a smoother line, and the ends look lighter.
This is a good option if you like braids to feel polished without looking stiff. A tapered end makes even a very full braid set look better after several weeks.
28. Accent-Braid Singles Between Larger Rows
A few thinner accent braids tucked between larger singles can change the whole texture of the style. Thick hair gives you enough body to make that contrast obvious, which keeps the set from feeling one-note.
This works especially well when the main braids are medium or jumbo and you want a little visual break. The smaller braids can run through the front, the crown, or just one side if you don’t want symmetry.
Do not overdo it. Too many accent rows can clutter the scalp, and then the style starts competing with itself.
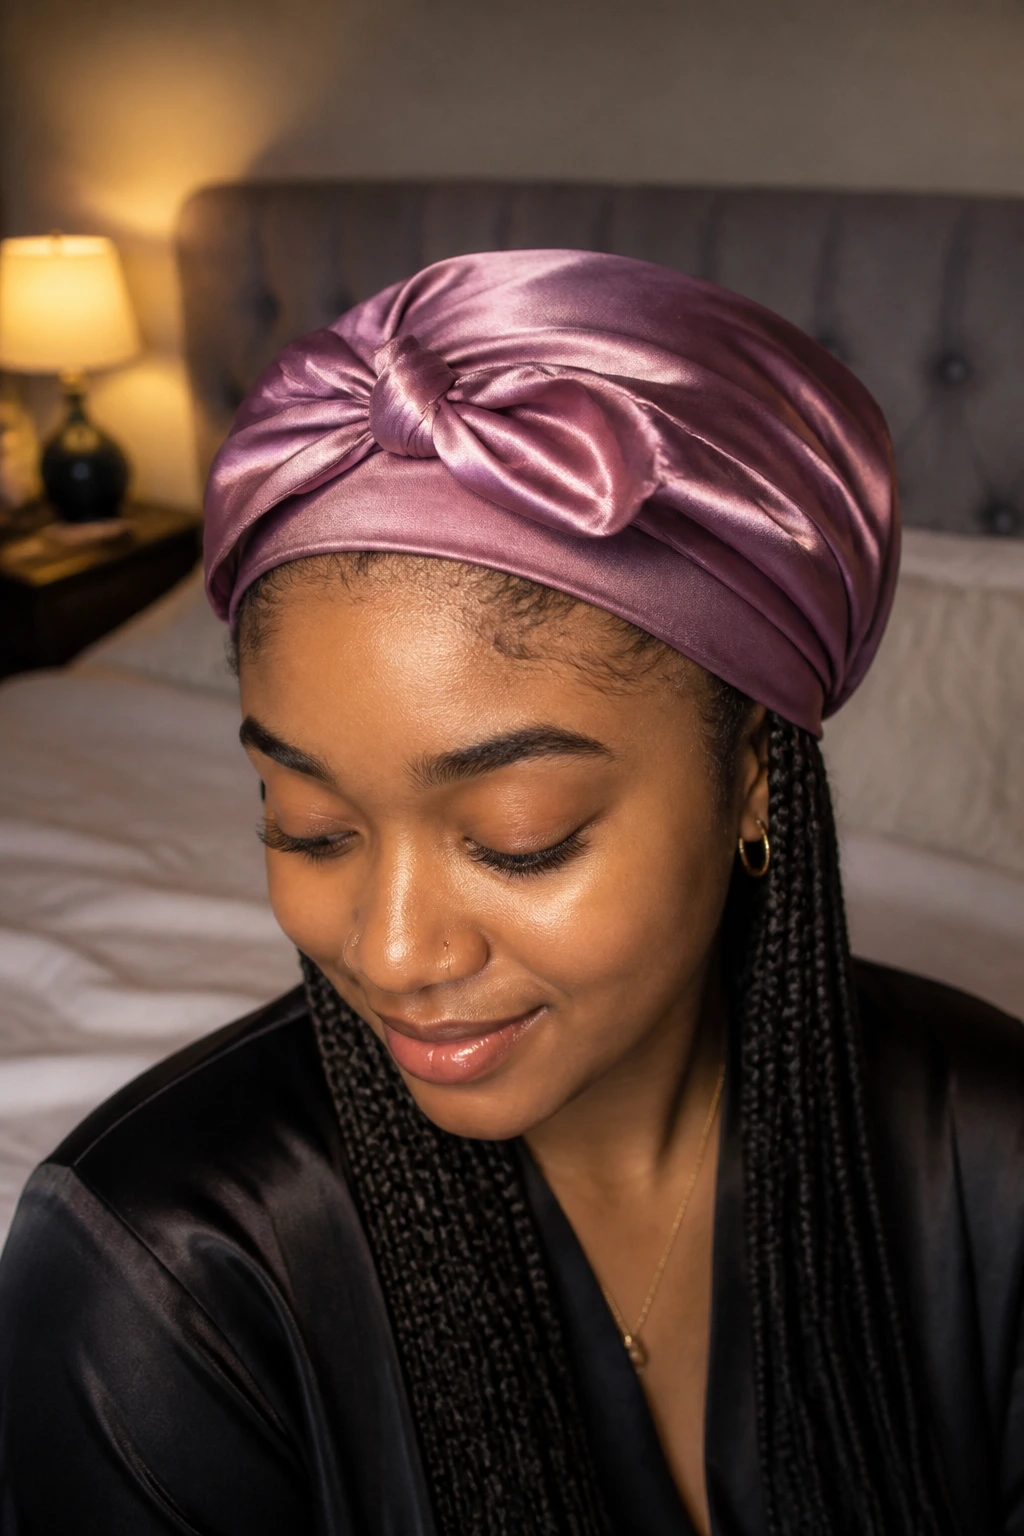
29. Headwrap Singles
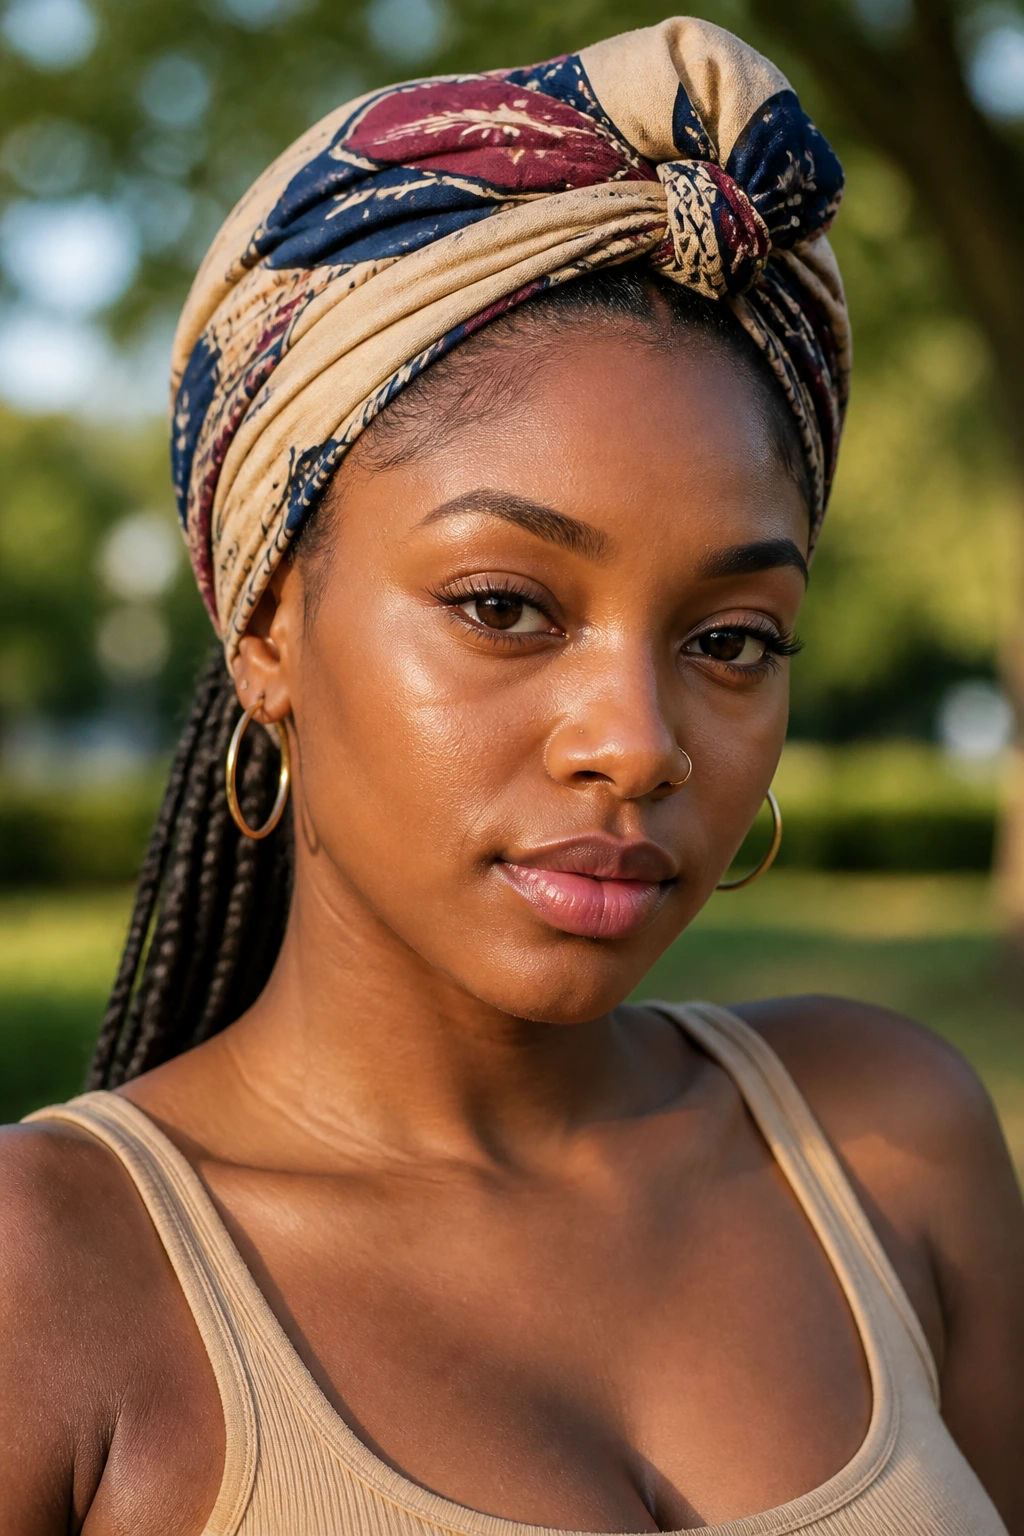
A headwrap changes the whole braid story. You can protect the front, hide a tired hairline, and still keep the braids visible at the back or sides, which is useful when you want the style to last beyond the point where the roots are pristine.
Thick hair handles wraps well because the base volume keeps the silhouette strong. A silk or cotton wrap can also help reduce friction around the edges and keep the front line from getting rubbed raw by collars or pillowcases.
This is the style I’d choose for travel days, lazy weekends, or any stretch when you want the braids to stay tucked and calm. Easy. No drama.
30. Radial-Part Singles From the Crown
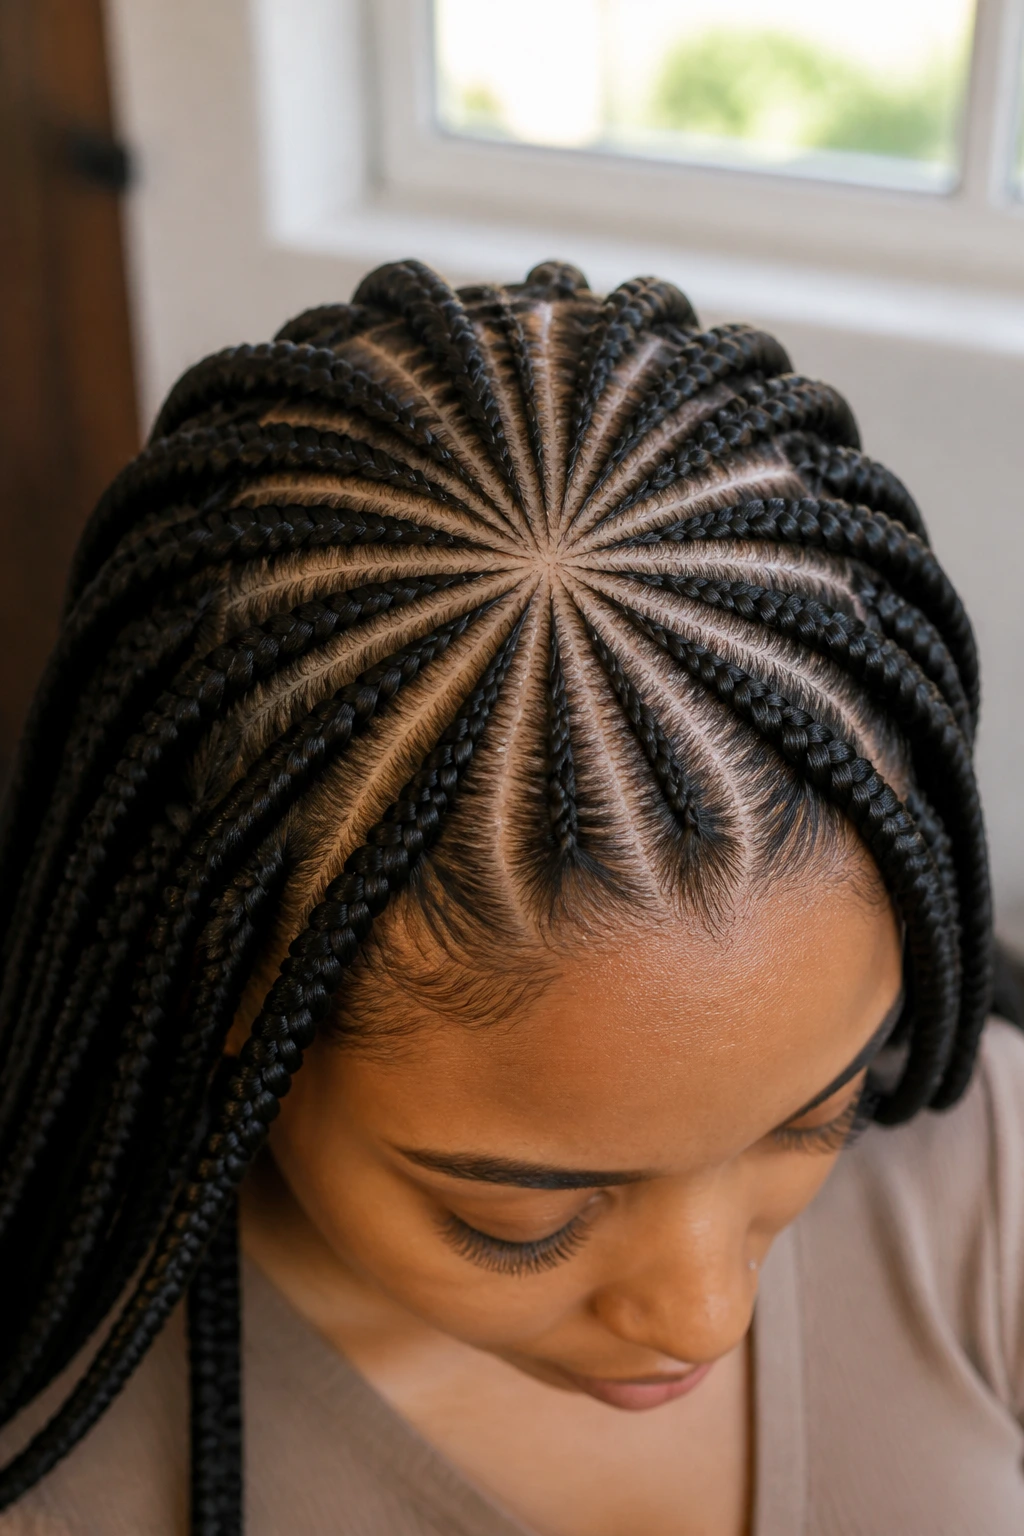
Radial parts fan out from the crown like spokes on a wheel, and thick hair makes that pattern look bold instead of sparse. It’s a smart choice if you want the scalp design to do something a straight-back set cannot.
The layout also spreads density in a way that feels balanced. Instead of loading all the visual weight into one grid, the crown becomes the center point and the braids fall outward more naturally.
It’s not the fastest sectioning pattern, and it does ask for careful parting. But once it’s in place, the shape is memorable in a quiet, grown-up way. Not flashy. Just sharp.
Why the Install Pattern Matters More Than You Think
A single braid is never just a braid on thick hair. It is the parting, the tension, the root size, the finish, and the way the weight lands at the end of the day. Ignore one of those pieces and the style starts to age before it should.
I’ve always thought thick hair deserves more respect in braid planning than it gets. People act as if density means you can simply stuff more hair into a section and call it a day. Nope. The smartest styles are the ones that let the hair behave, then shape it from there.
The upside is that once you get the pattern right, thick hair holds a braid beautifully. The style has structure. It has presence. And it tends to keep that shape longer than lighter, finer hair ever could.
Essential Tools for Clean Parts and Comfortable Roots
- Rat-tail comb: The long tail is what gives you clean sections, especially if your hair is dense enough to blur a part in seconds.
- Sectioning clips: Thick hair tangles back on itself fast, so clips keep each working section separated while you braid.
- Light braiding gel or edge control: Use a small amount at the part line for grip; too much turns flaky and hard.
- Styling mousse or foam wrap: This helps smooth flyaways at the end and keeps the surface from puffing up too early.
- Spray bottle with water and leave-in mist: Helpful for refreshing the scalp and softening a section before retightening or rebraiding.
- Blow dryer with comb attachment or a stretching method: Not required, but very useful if your hair shrinks hard and you want a flatter root.
- Braid hair or extension hair, if needed: Pick a texture that matches your natural finish after stretching; overly silky hair can look disconnected on thick natural hair.
- Satin scarf or bonnet: Night protection matters. Thick hair under braids still rubs, and that friction is where fuzz starts.
- Scalp oil dropper: A little oil goes a long way; the tip lets you target the part line without soaking the whole head.
- Mirror you can angle behind your head: Sounds basic, but the nape is where sloppy sections hide.
Smart Hair Prep and Product Picks
Thick hair needs less drama and more preparation. Start with a clean scalp, then condition the length well enough to detangle without leaving the hair greasy. If the hair is coated in heavy cream or wax before braiding, the roots can slip and the parts can feel crusty after a few days.
Stretching the hair before installation helps more than people expect. That can mean a gentle blow-dry on low heat, banding, twists, or a good old-fashioned stretch method with no heat at all. The point is to reduce shrinkage enough that the braid lies flat without fighting the hair underneath.
For added hair, choose the finish on purpose. A silkier braid hair gives a polished look, but very thick natural hair often looks better with extension hair that has a touch of texture. Too much shine can make the braid look like it belongs to someone else’s head. And nobody wants that.
If your scalp is sensitive, skip heavy gels at the root. A small amount of braiding gel for the part line is enough. Heavy buildup does not make braids last longer; it just makes them feel harder and look dirtier once dust and lint catch in them.
How to Wear Single Braids So They Sit Naturally
Presentation: Keep the front line clean and let the part shape do some of the talking. On thick hair, a soft curve, triangle grid, or side part usually frames the face better than a rigid straight line that fights the head shape.
Accessories: Hoops, cuffs, beads, and a silk scarf can all work here, but pick one lane at a time. Thick braids can handle statement earrings or a bold headwrap without looking crowded, yet too many extras will bury the shape of the braid itself.
Scale: The best braid size is the one that matches your density. Very thick hair usually looks better with medium or medium-large sections than with a crowd of tiny ones, unless you want the micro look on purpose.
Best Setting: These styles do well at work, on travel days, in the gym, and at dinner afterward. The real advantage is that a good set doesn’t need much retouching to look deliberate again after a long day.
Additional Tips and Style Boosters
Finish: A light mousse pass and a cool-air blast can flatten flyaways without soaking the braids. Do it after the style is complete, not after every minor fuzz sighting.
Customization: If the front feels too heavy, ask for smaller pieces near the temples and a slightly larger size through the back. That one change can make a dense set sit much better.
Protection: Sleep with a satin scarf that covers the hairline, not just the crown. That’s the spot that frays first, and it shows before anything else.
Time-Saver: Pre-section the hair before you sit down if you’re doing the style at home. It sounds fussy, but it keeps the parting consistent and trims a surprising amount of time off the install.
Make-It-Yours: Beads, cuffs, a side part, or a few curled ends can change the whole tone of the style without changing the braid structure underneath.
Common Mistakes to Avoid
The first mistake is starting with sections that are too large at the hairline. Thick hair can hide a lot, but it cannot hide a swollen root forever. If the front feels heavy or sits like a bump, the section was probably too big or the tension too high.
Another one is using too much gel or wax at the part. The scalp gets stiff, flakes show up in the braid, and the roots can feel crusted after a few days. A thin line of product is enough; the braid should hold because of the sectioning, not because it was glued into place.
Skipping stretch prep is a classic problem. Braiding very shrunken hair can make the roots puff out fast, especially on thick textures. Even a light stretch before install makes the braid sit flatter and helps the style age more slowly.
And then there’s overloading the ends with heavy beads or oversized extensions. Dense hair can carry more weight than fine hair, sure, but the nape still has limits. If the style starts to feel like a tug by the second day, it will only get worse.
Variations and Adaptations to Try
Low-Tension Daily Wear: Keep the parts medium, the root starts soft, and the lengths shoulder to waist. This is the version for people who want the style on their head, not on their nerves.
Statement Finish: Add cuffs, beads, or a two-tone braid hair color to a simple base. One visual change is usually enough; the rest should stay calm.
Heat-Free Stretch Set: Prep the hair with banding or twists instead of a blow-dry. This works well if you want the braid to feel a little softer and less processed.
Workout-Friendly Singles: Keep the length shorter, the nape sections slightly tighter, and the ends tucked when needed. Less swing means less friction.
Soft Glam Singles: Curled ends, a deep side part, and a few highlighted front pieces. It’s polished without being stiff.
Vacation-Ready Wrap Set: Wear the braids with a headwrap or silk scarf in rotation, especially when you want to protect the front line and reduce daily styling.
Keeping Single Braids Fresh Week After Week
A good braid set does not stay neat by accident. Wrap it at night with a satin scarf or bonnet, and if the front tends to fray fast, use a second scarf around the hairline so the edges do not rub loose while you sleep. Thick hair can hide some fuzz, but the front line still tells on you.
For the scalp, a light mist every few days is plenty. Use a spray bottle with a little water and leave-in, or a braid spray if that feels better on your head. Do not soak the roots. Wet braids take forever to dry, and damp braids hold onto smell and buildup.
Wash the scalp when it starts to feel coated, usually every two to three weeks for many people. A diluted shampoo, applied with a nozzle or your fingertips directly at the parts, keeps the scalp fresh without wrecking the braid structure. Let the water run down the length gently; don’t scrub the braid itself like a washcloth.
If the ends start to look dry, a tiny bit of oil on the last few inches is enough. The goal is sheen and softness, not saturation. When the roots have grown out enough that the parting no longer sits cleanly, or the nape begins to mat, it’s time to take the style down. Pushing too far just creates more work later.
Frequently Asked Questions
How long do single braids usually last on thick hair?
A well-installed set often lasts four to six weeks, sometimes a little longer if the roots are clean and the night routine is consistent. Once the parting gets fuzzy and the nape starts to lock up, the style stops looking intentional.
Are knotless singles better than standard singles for thick hair?
For most people, yes, especially if the scalp is sensitive or the front hairline is delicate. Knotless starts distribute the tension more gently, which matters when thick hair already brings enough weight to the table.
Should thick hair be blow-dried before braiding?
Not always, but it helps if your hair shrinks tightly or puffs out fast. A stretched base makes the braid flatter and usually gives you a cleaner finish, though heat-free stretch methods work well too.
Can I do single braids without adding extension hair?
Absolutely. If your own hair is long enough, stretched natural-hair singles can look beautiful and feel lighter. They also avoid the extra weight that comes with added hair, which some people love.
What braid size works best for thick hair?
Medium sections are the sweet spot for a lot of dense hair. Micro sections can last longer, and jumbo sections can save time, but medium braids usually balance comfort, part visibility, and wear time best.
How do I keep the roots from puffing up too fast?
Start with clean sectioning, not heavy product. A light wrap at night, a small amount of mousse after installation, and avoiding too much water at the roots all help the style stay flatter longer.
Can I wash my scalp while the braids are in?
Yes, and you probably should if the scalp starts to feel coated. Use diluted shampoo or a scalp nozzle, focus on the part lines, and dry the braids fully afterward so moisture does not linger at the root.
What if the braids feel too heavy after a few days?
That usually means the sections are too large, the added hair is too heavy, or the front was braided too tightly. If the heaviness is serious, take the style down and adjust the next install rather than trying to “push through” it.
Braids That Earn Their Keep
Thick hair rewards a braid style that respects its shape. Clean parts, balanced weight, and a finish that knows when to stay simple — that’s what keeps a set looking good after the first mirror check is long gone.
The strongest braid choices on this list are the ones that look calm at the root and deliberate at the ends. Whether you go for knotless softness, triangle parts, curled tips, or a full radial pattern, the style should feel like it belongs to the head it’s on. That sounds obvious. It isn’t, not when heavy hair is involved.
Pick one version that matches your daily life, not just your first-day mood, and it will wear better than the flashiest option in the chair.