Short natural hair can look almost too small for a bun until you push the braid to one side and let the shape do the work. Then all at once, the style has direction. The eye follows the sweep, the braid line gives you structure, and the bun stops reading as “I ran out of length” and starts reading as intention.
That’s why side-swept bun braids keep showing up on coils, curls, and cropped textures. They let short hair do something bigger than its length. A few inches of stretched hair, a steady hand, and a good part can create a shape that sits close to the head, stays neat for days, and doesn’t need waist-length extensions to look finished.
I like these styles because they solve a real problem: short natural hair can be stubborn at the nape, fluffy at the crown, and too soft around the edges to build much height without slipping. Side-swept buns fix that by moving the focal point off-center. It’s a small trick. It changes everything.
Why These Styles Earn Their Spot
-
They work with short length, not against it: A side-swept bun uses the braid pattern to create shape, so 2 to 4 inches of stretched hair can still look deliberate instead of underdone.
-
They protect the oldest part of the hair first: The ends are tucked, pinned, or braided into the bun, which keeps them from rubbing on collars, scarves, and jacket zippers.
-
They give you more control over tension: A side part lets you spread the pulling away from the exact center of the scalp, which is kinder than yanking everything straight back.
-
They can be styled with or without added hair: If your own hair holds a braid well, keep it all-natural. If you want a fuller knot, a few pieces of braiding hair add size fast.
-
They look finished with almost no extra work: A clean part, a wrap of mousse, and one pair of gold cuffs can make a simple shape look polished enough for a meeting or a dinner out.
-
They last better than loose styles on short coils: Once the braid pattern is set, the style usually stays neater than a puff or twist-out because there’s less free movement at the ends.
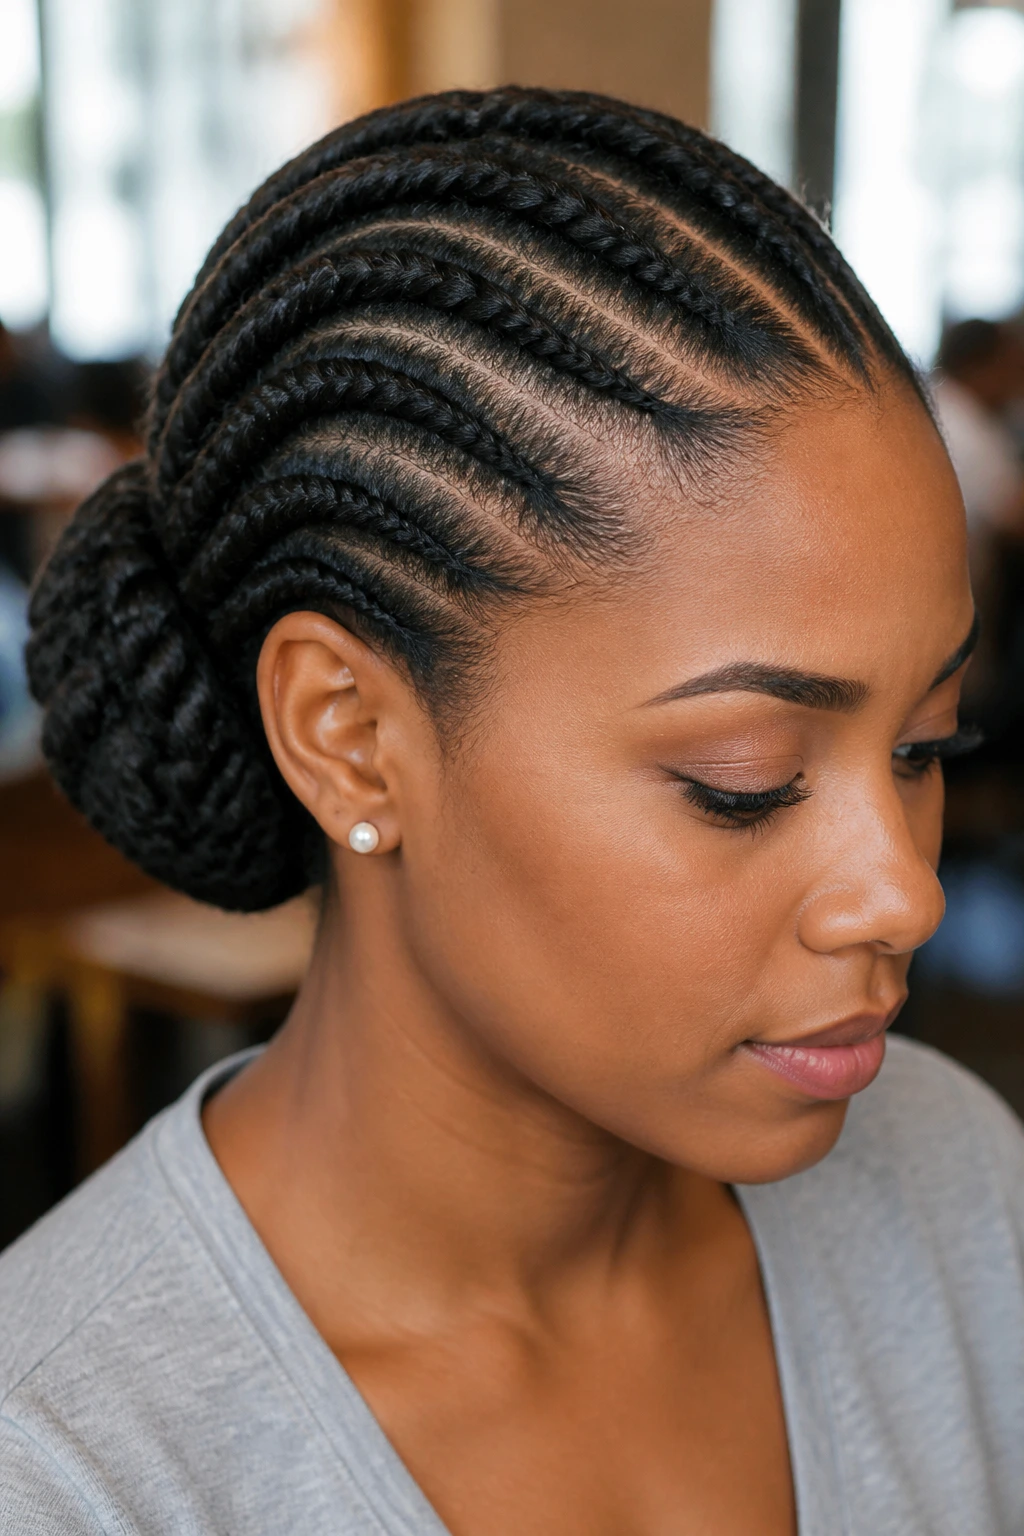
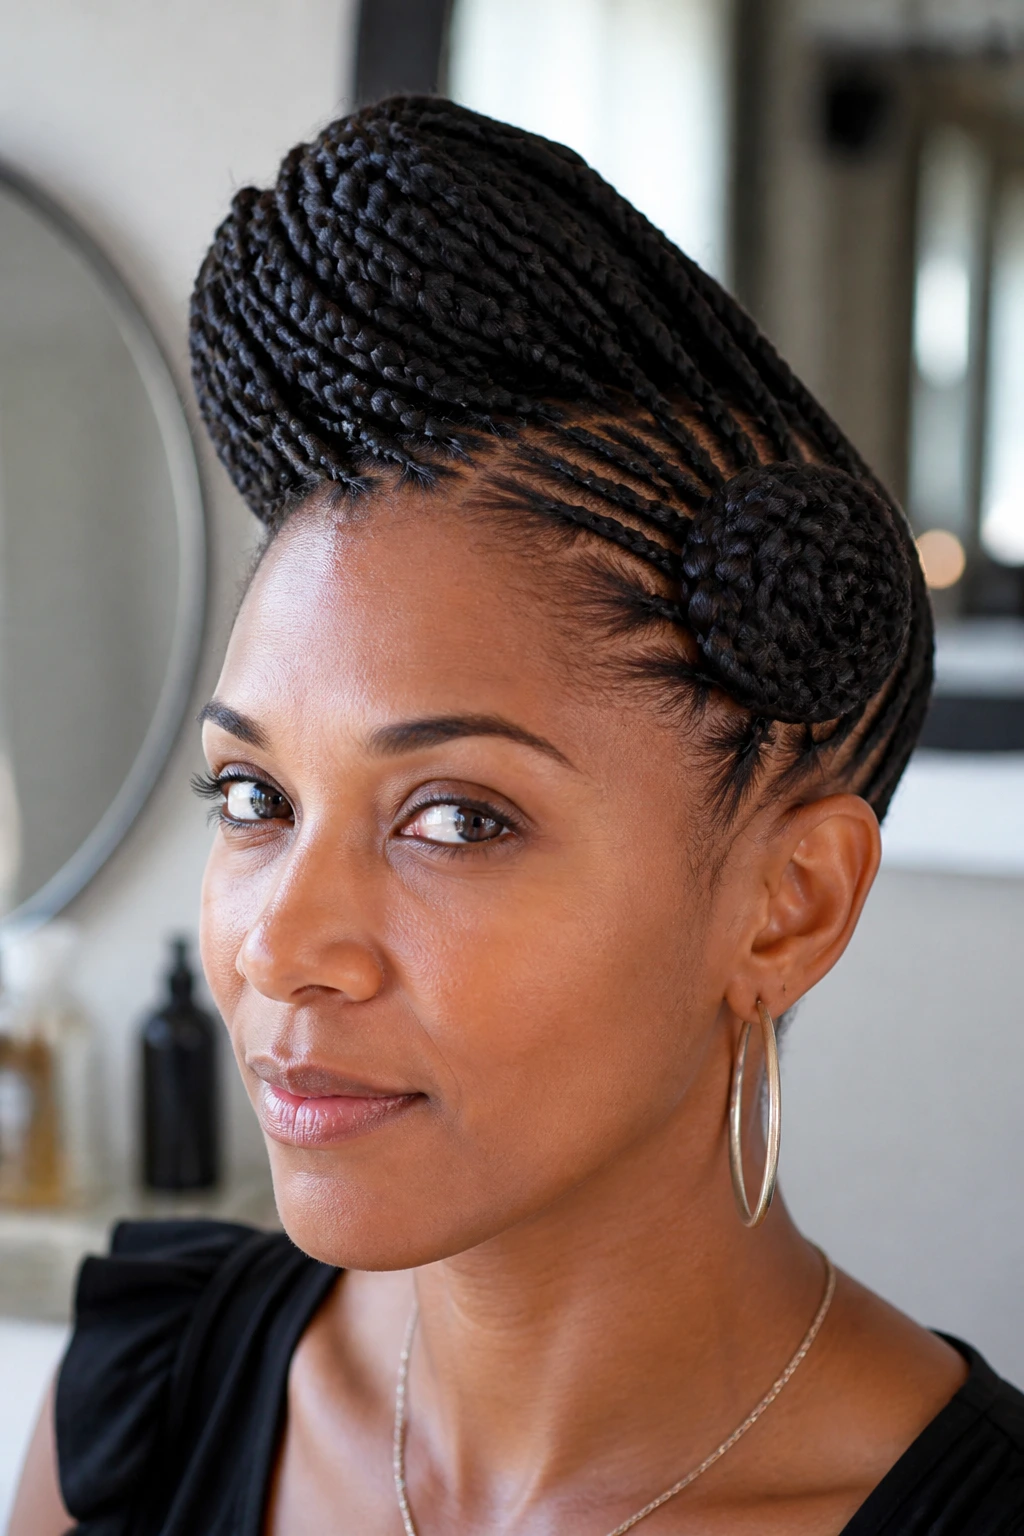
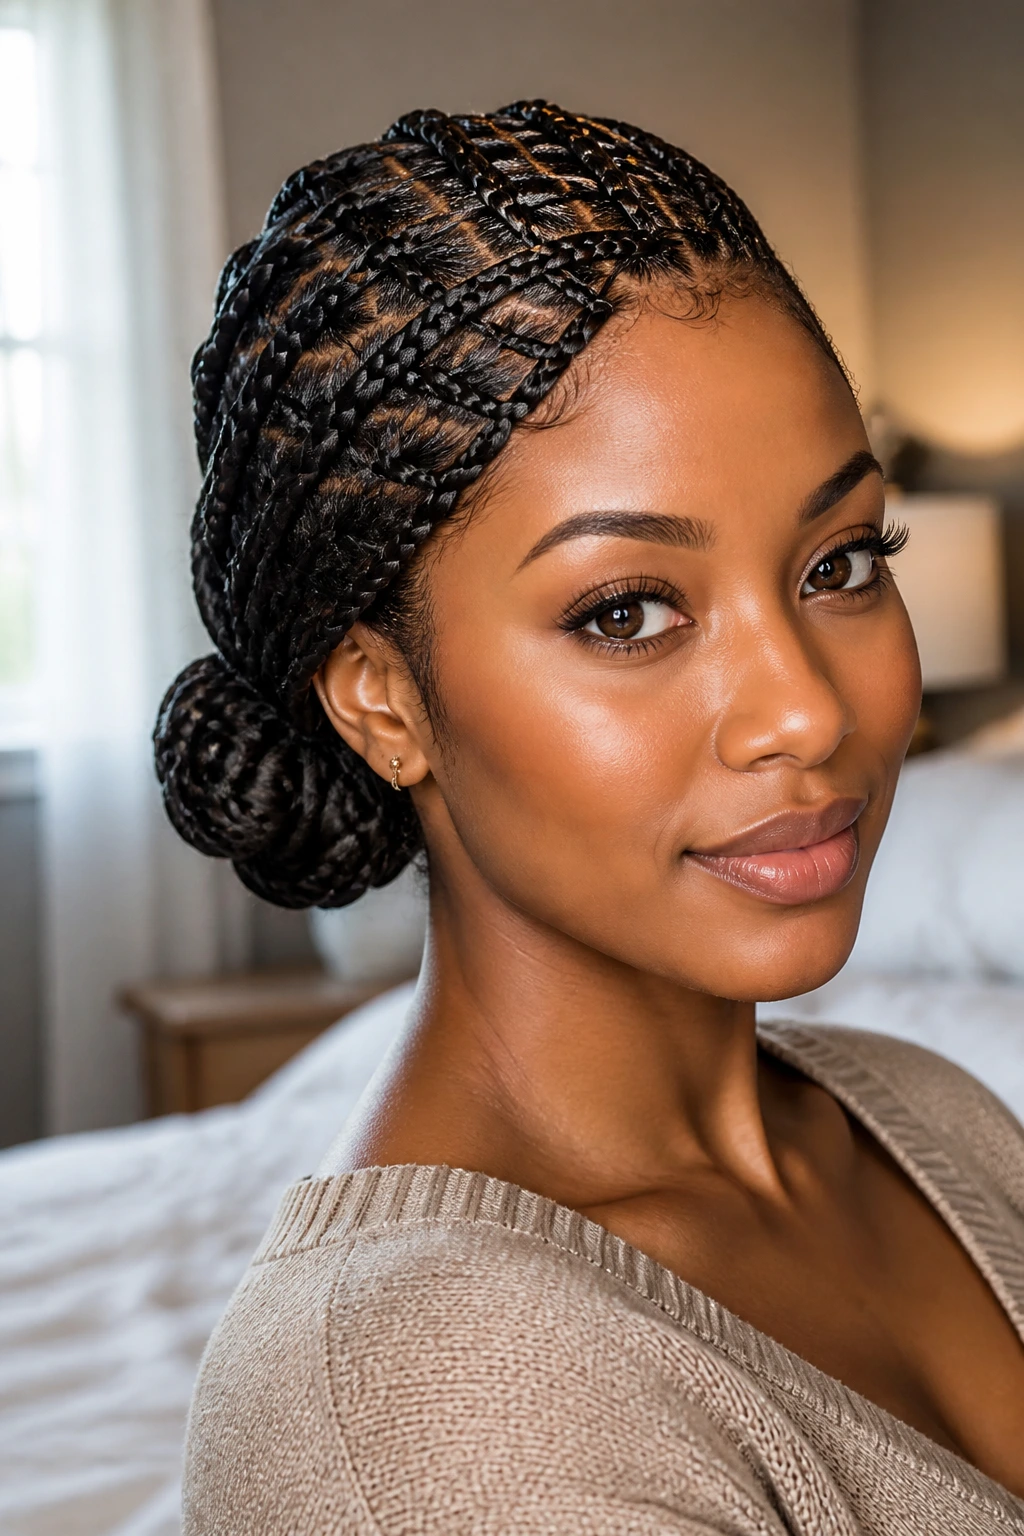
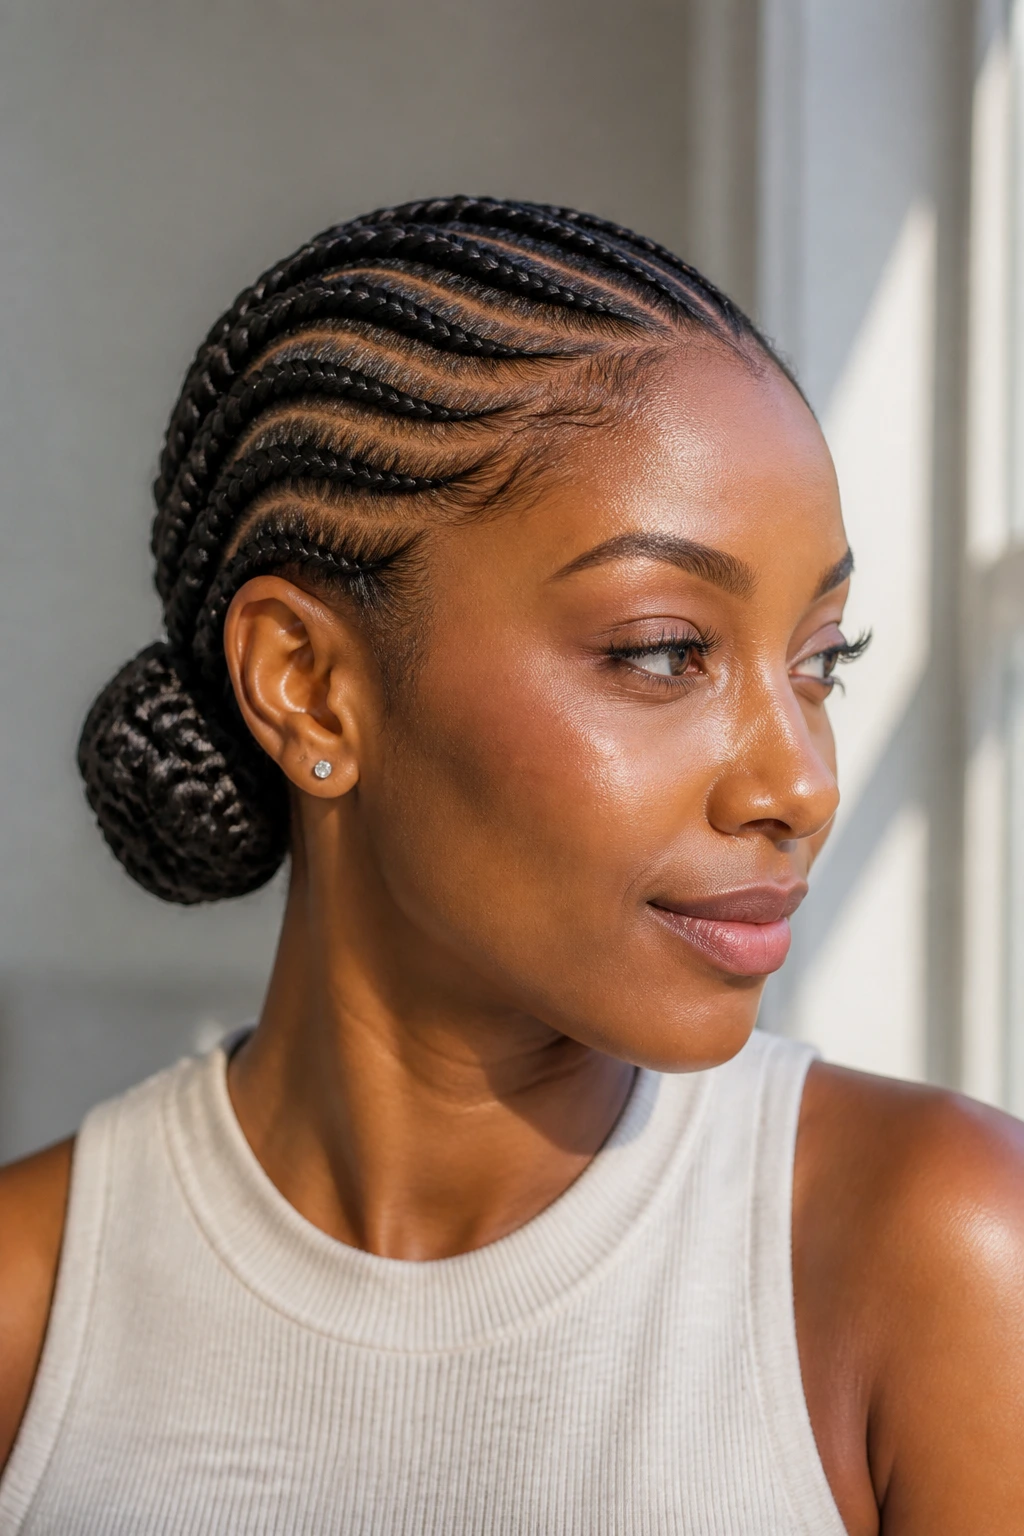
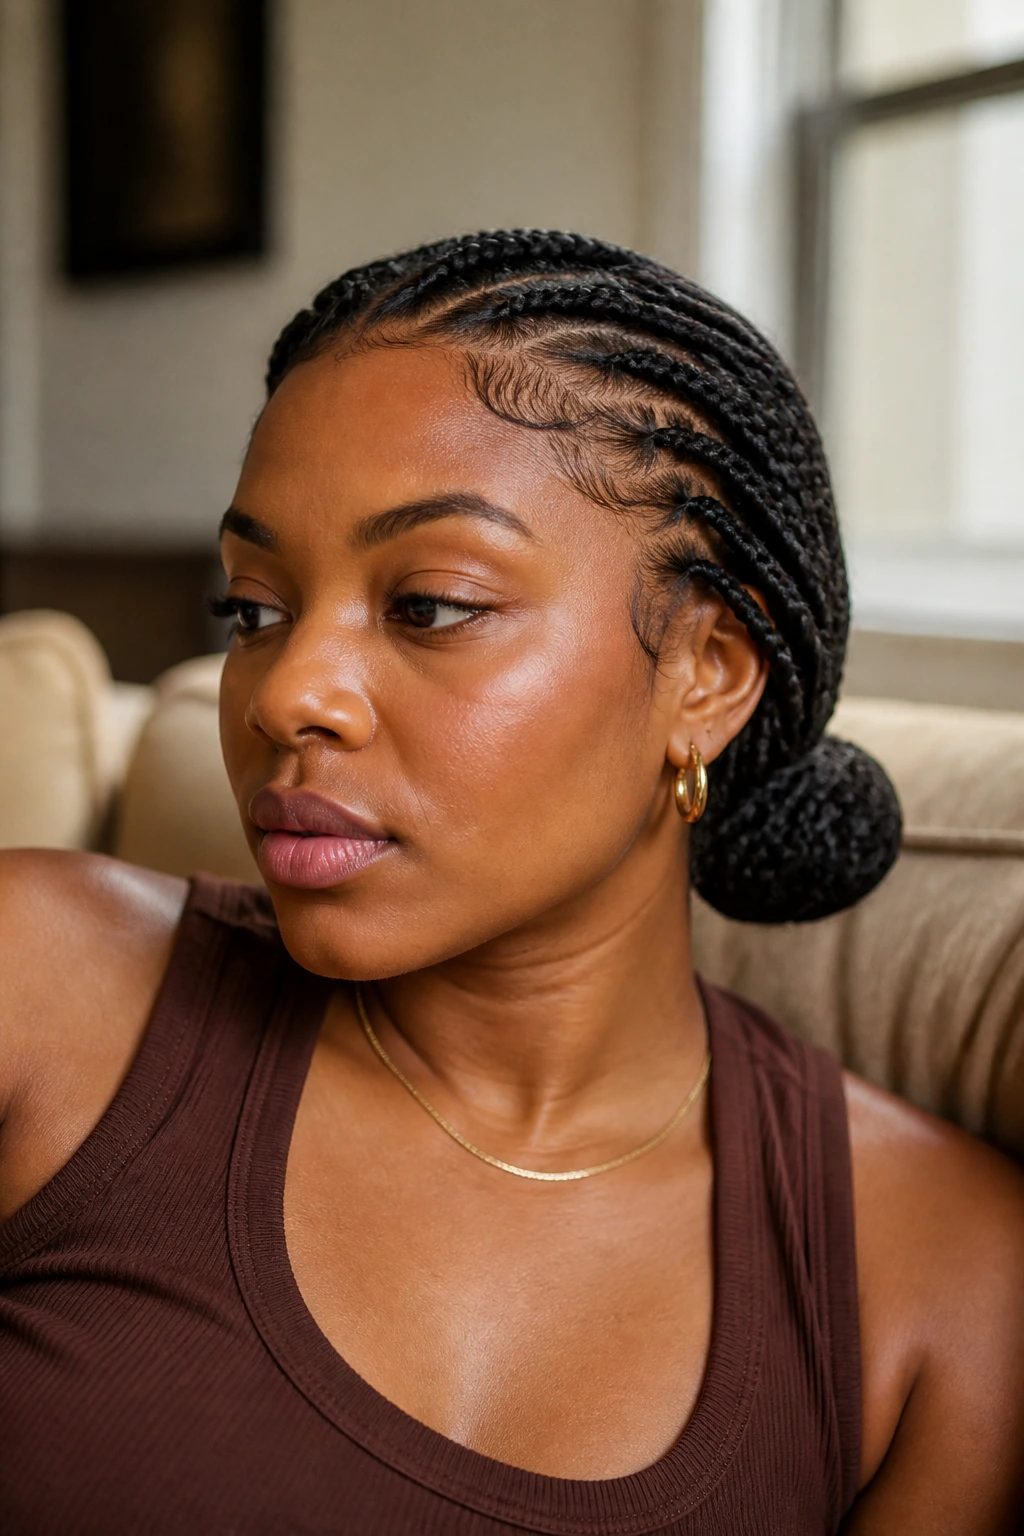
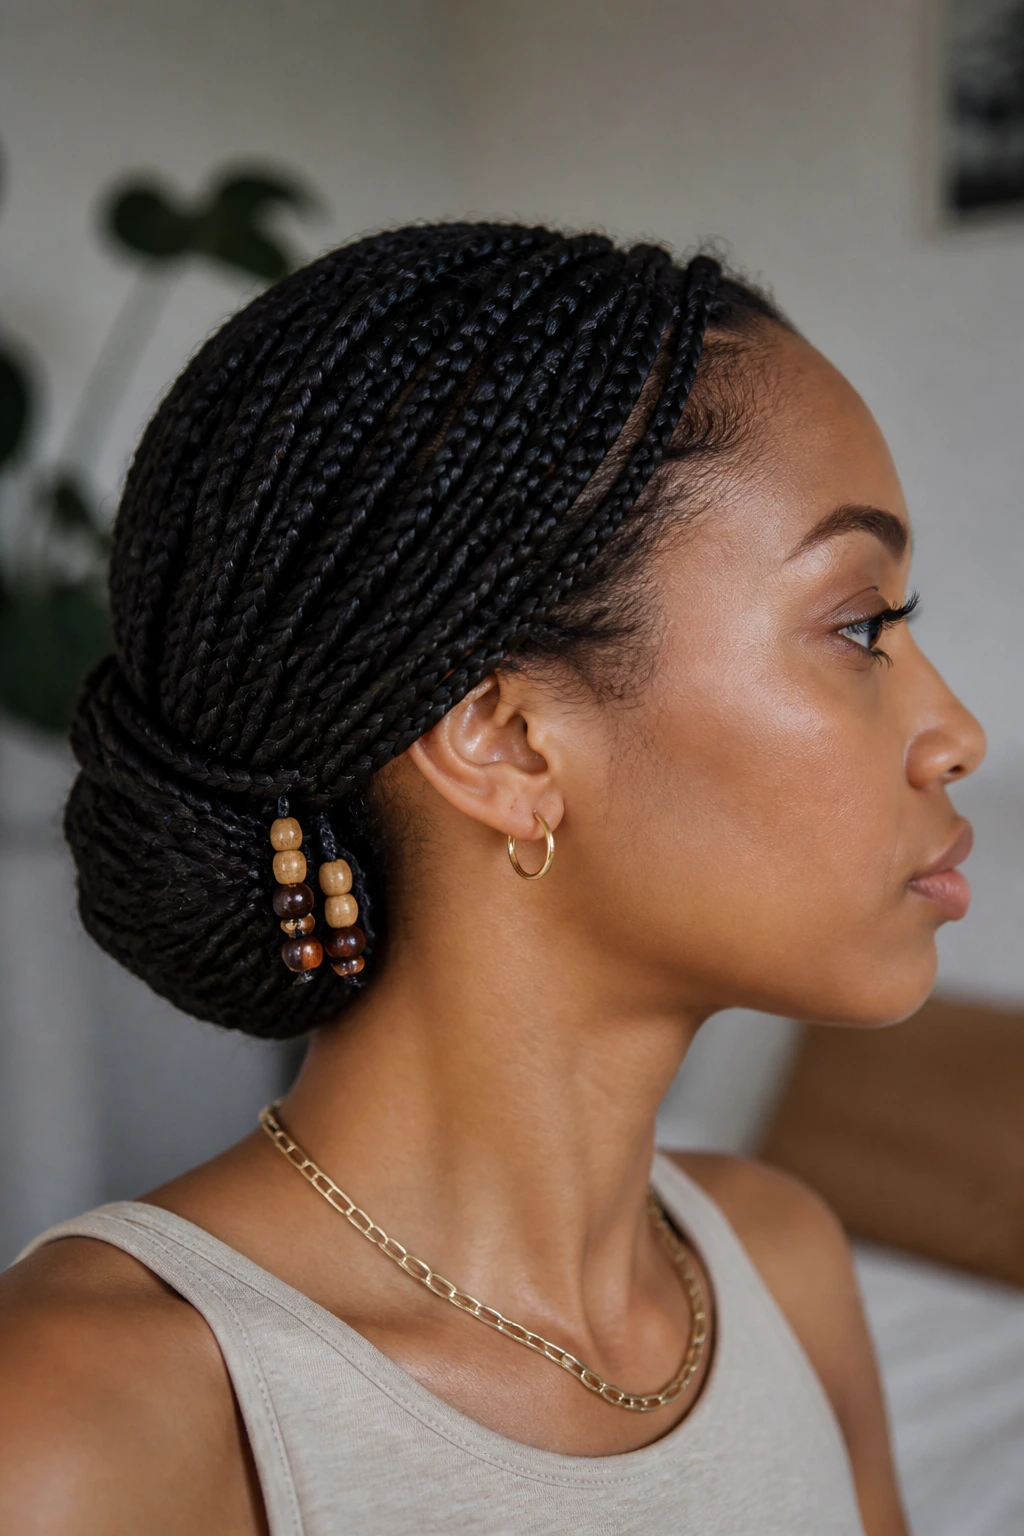
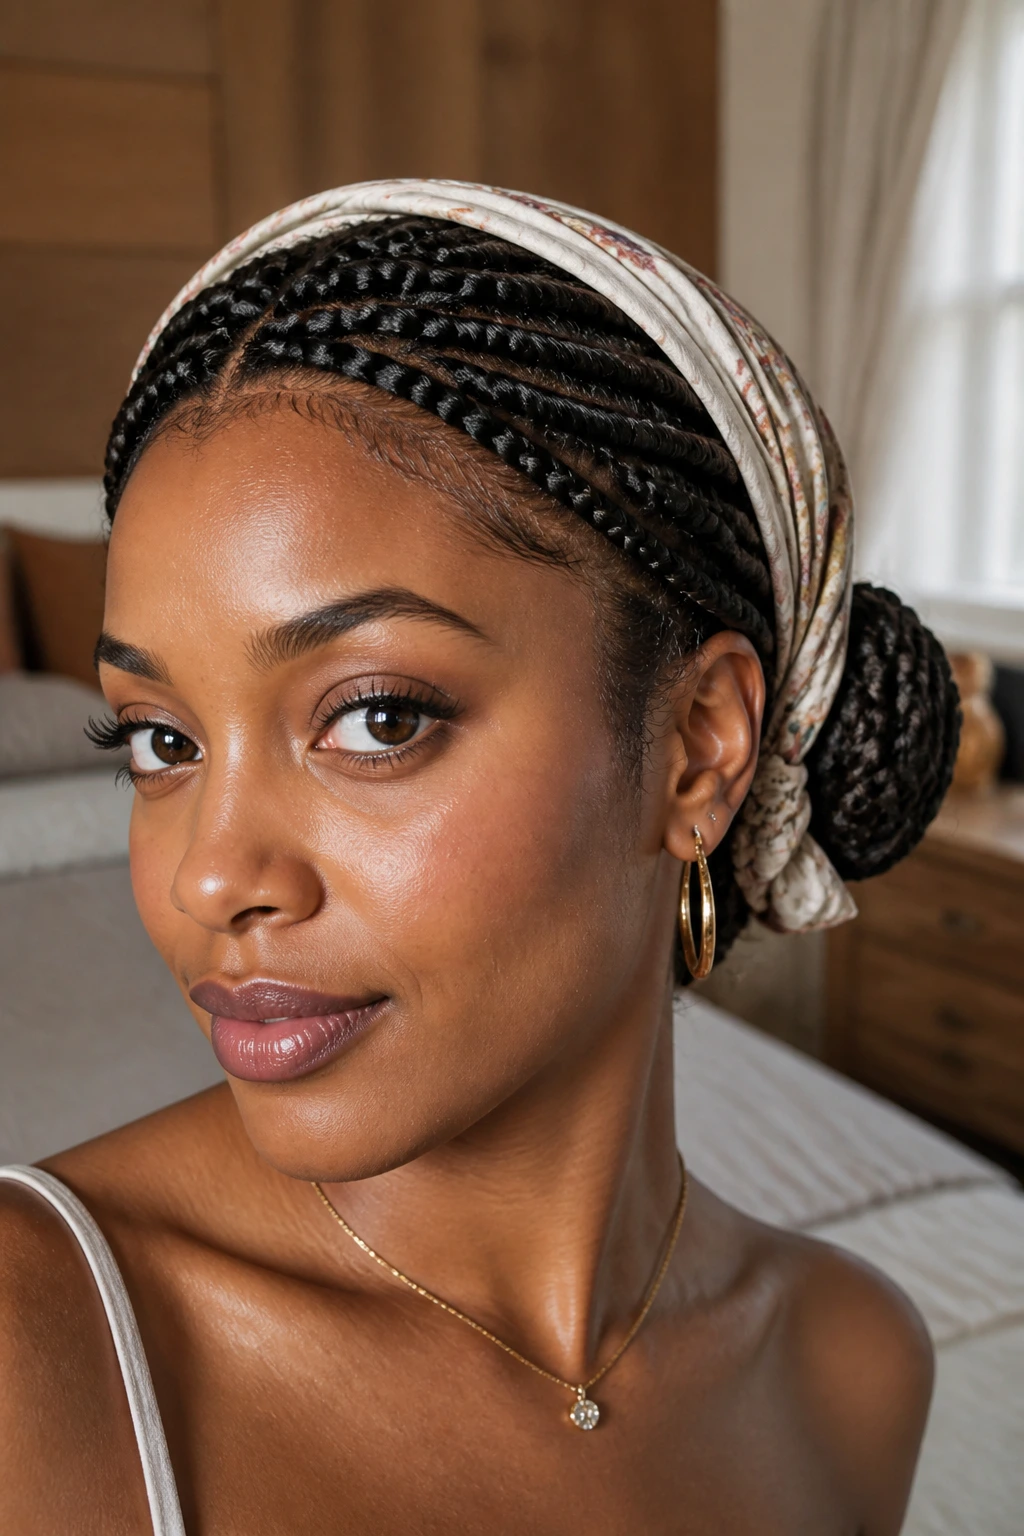
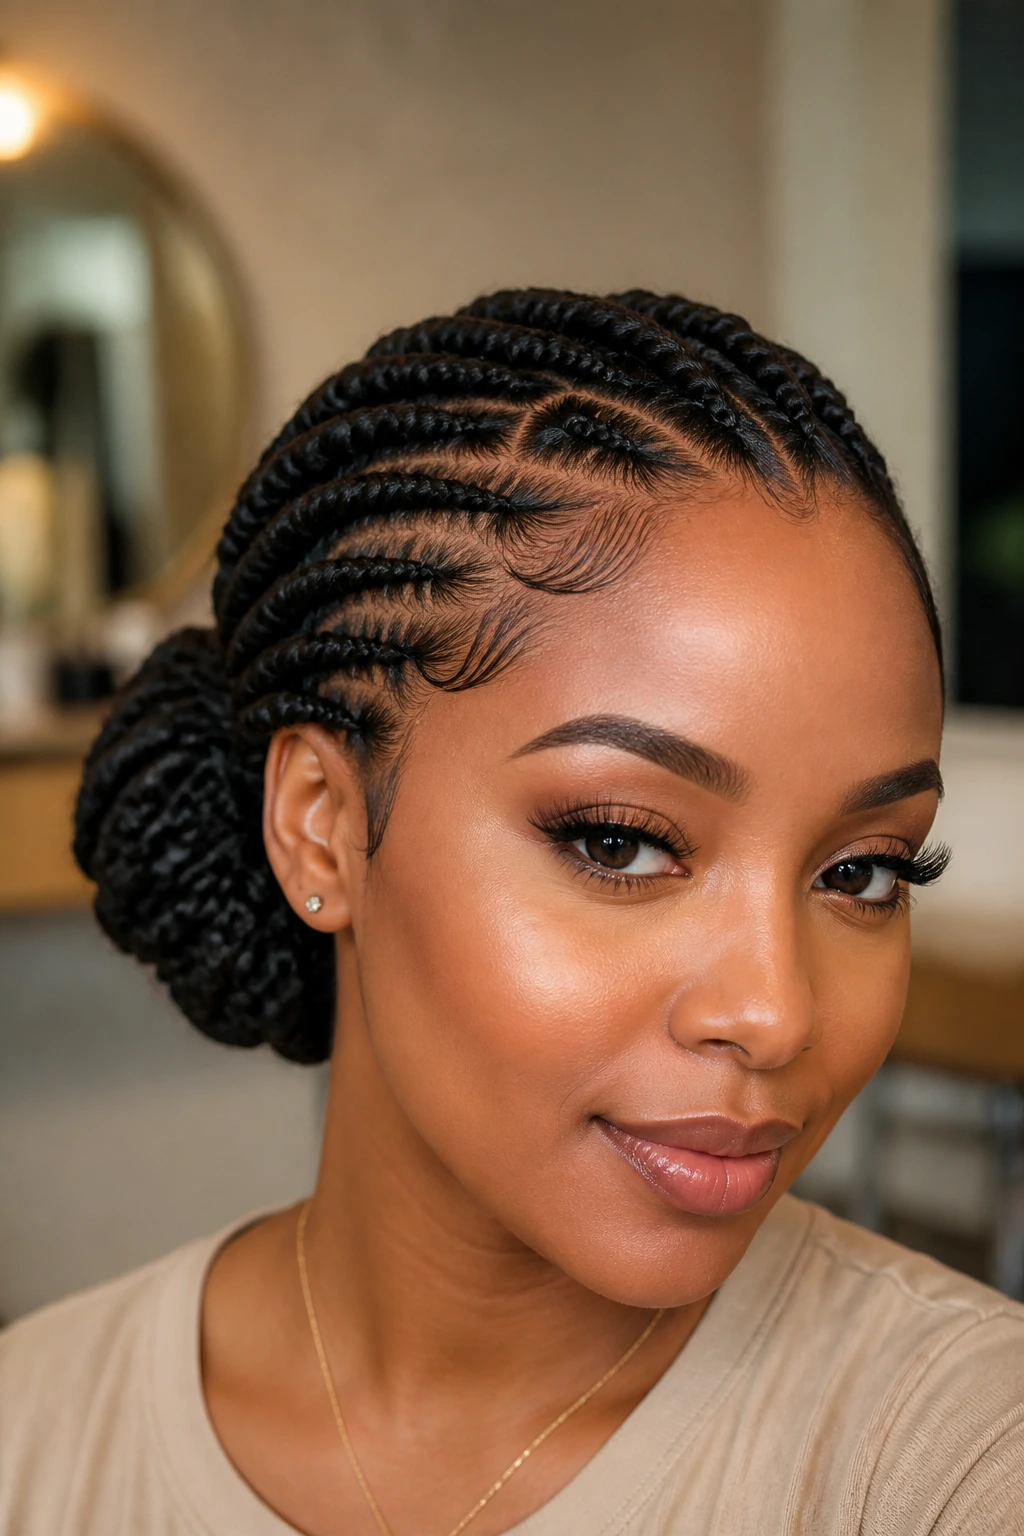
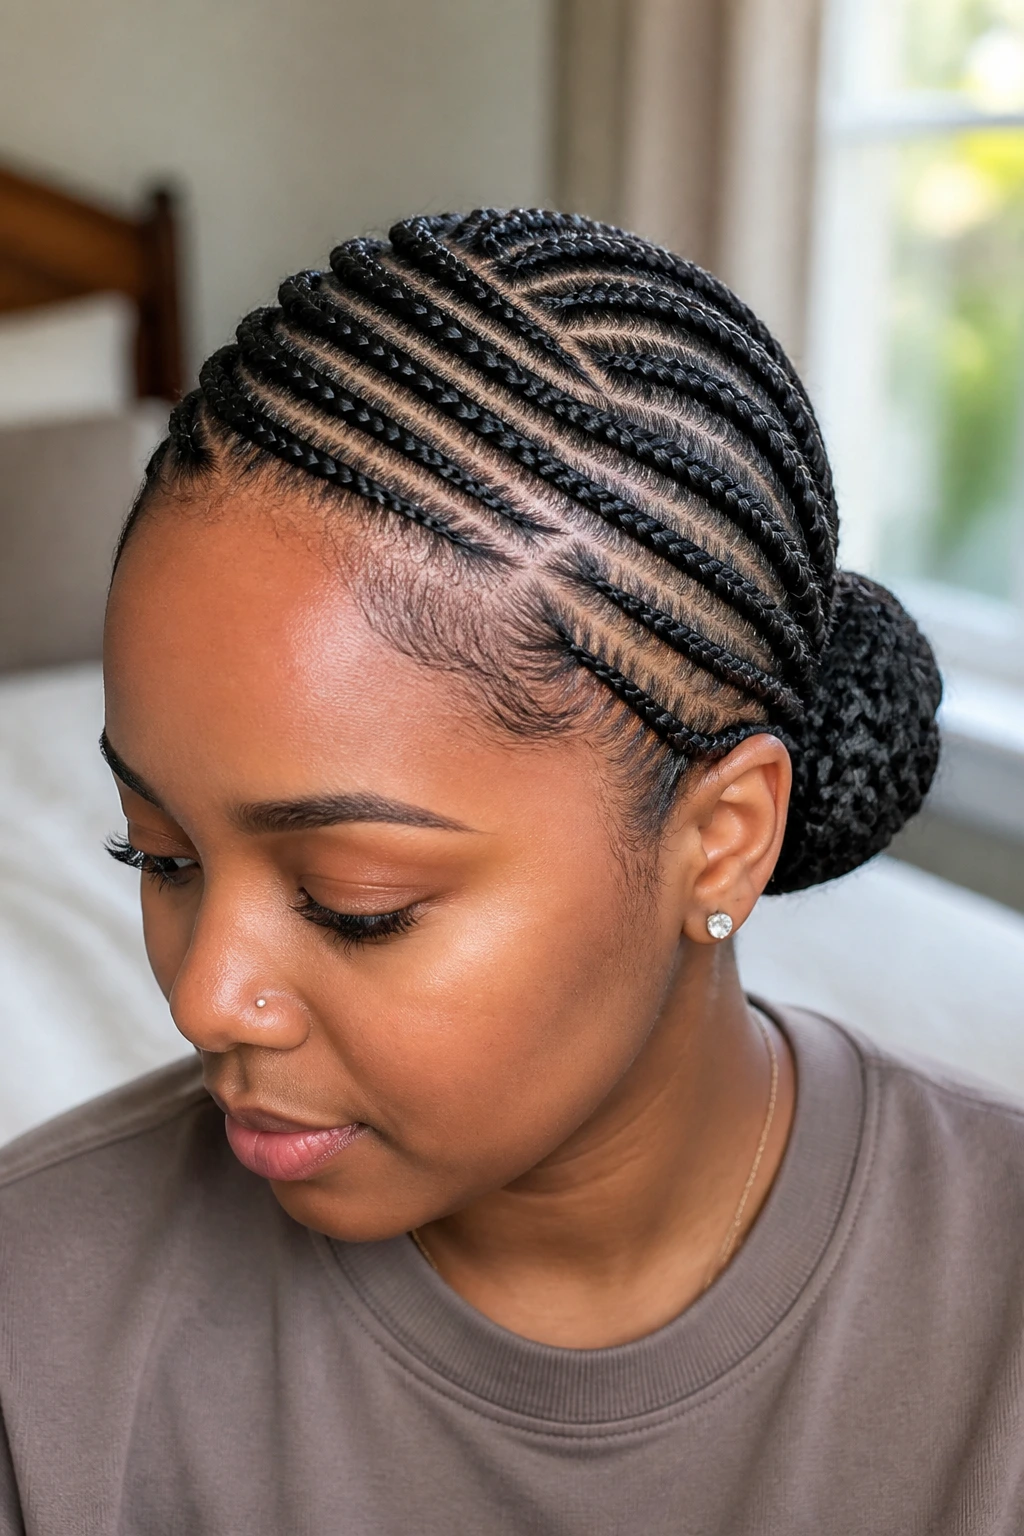
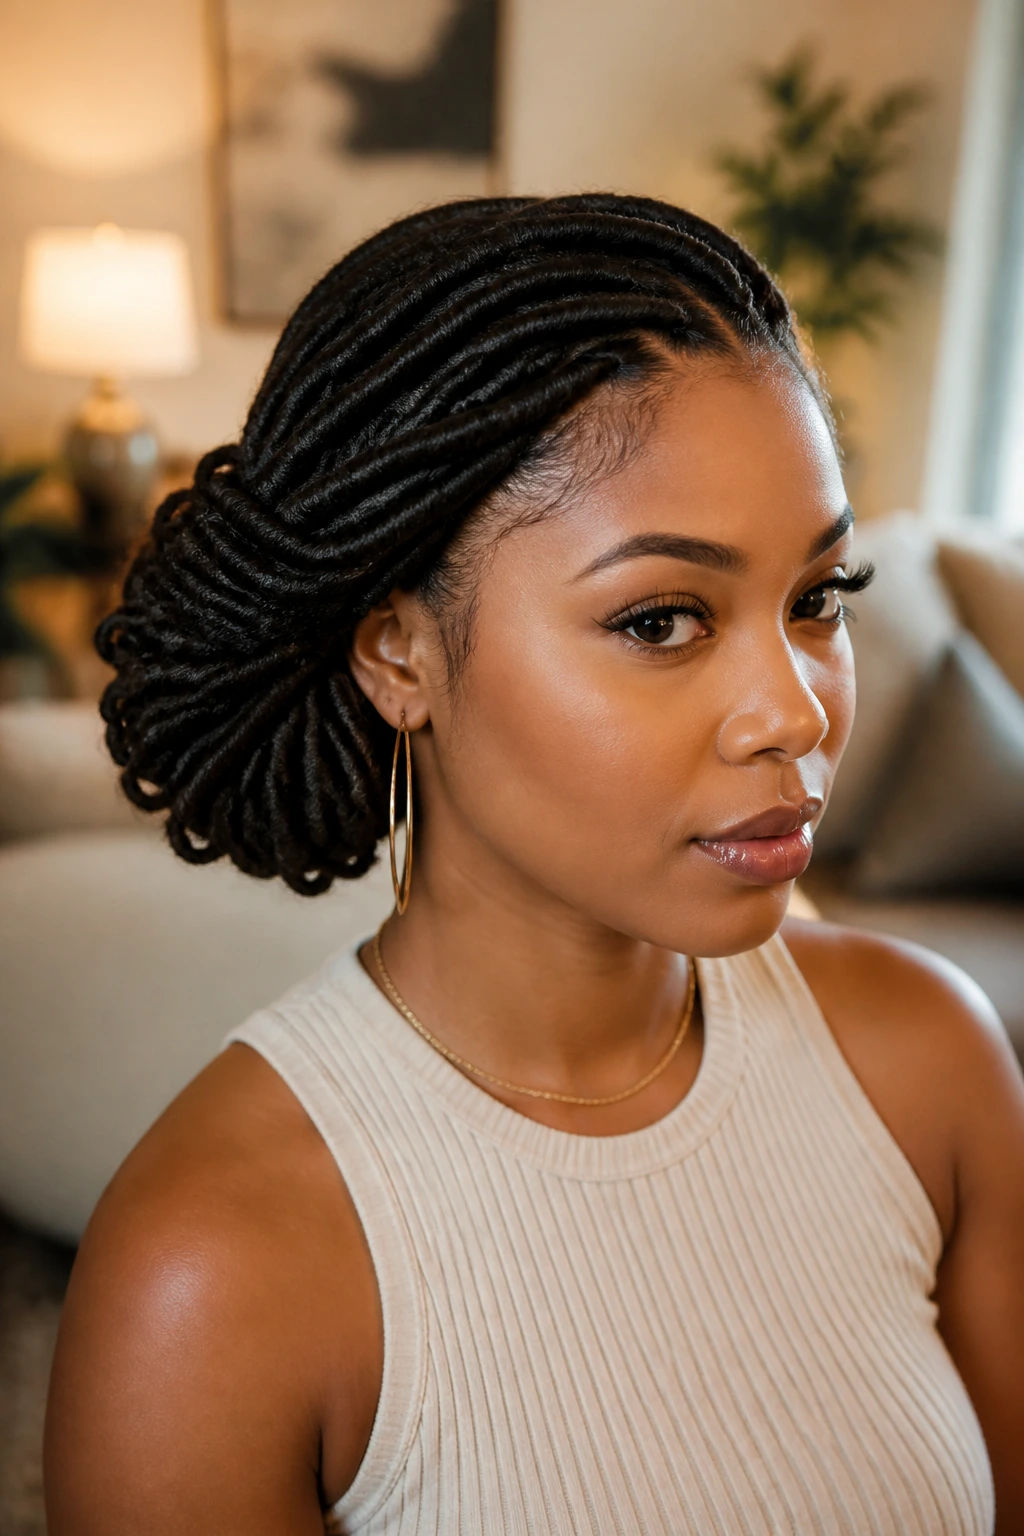
1. Low Side Cornrow Knot on Short Coils
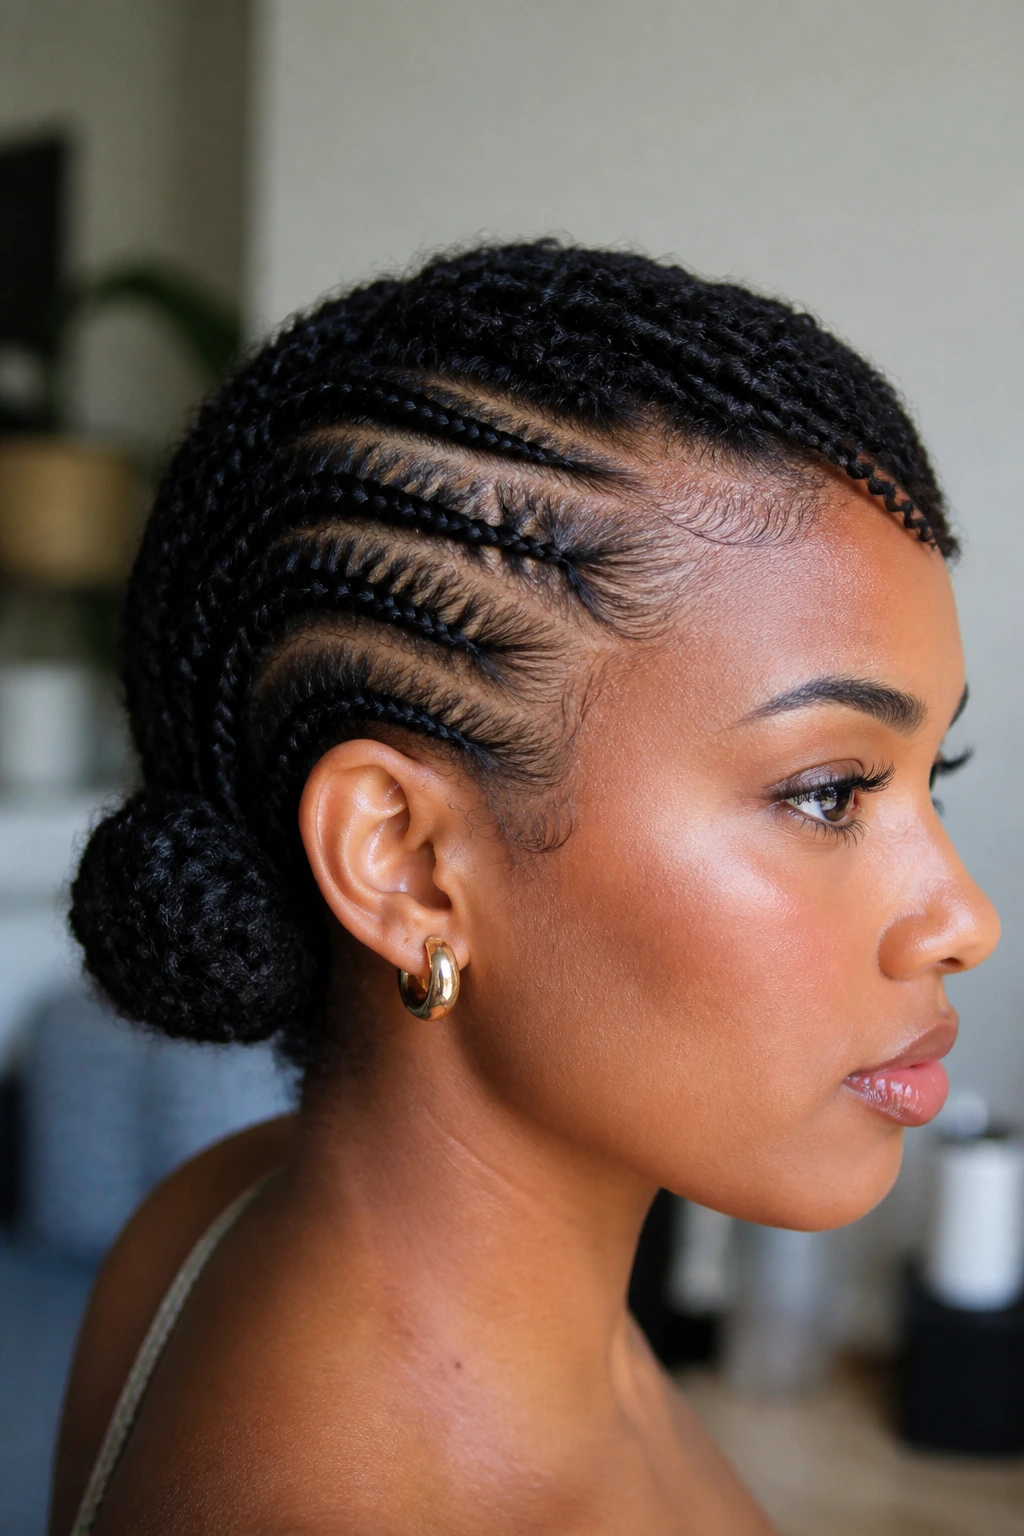
A low side cornrow knot is the style I’d hand to someone who wants their short natural hair to stay close and tidy without looking stiff. The braids start near one temple, travel along the side of the head, and gather into a small knot just behind the ear. On short hair, that low placement is the whole trick. It gives the braids somewhere to land.
If your hair is around 2 to 3 inches stretched, keep the cornrows narrow and pin the bun with crossed bobby pins instead of forcing a bulky knot. A little edge gel at the part and a soft bristle brush on the front hairline make the finish look cleaner than trying to slick everything flat in one pass.
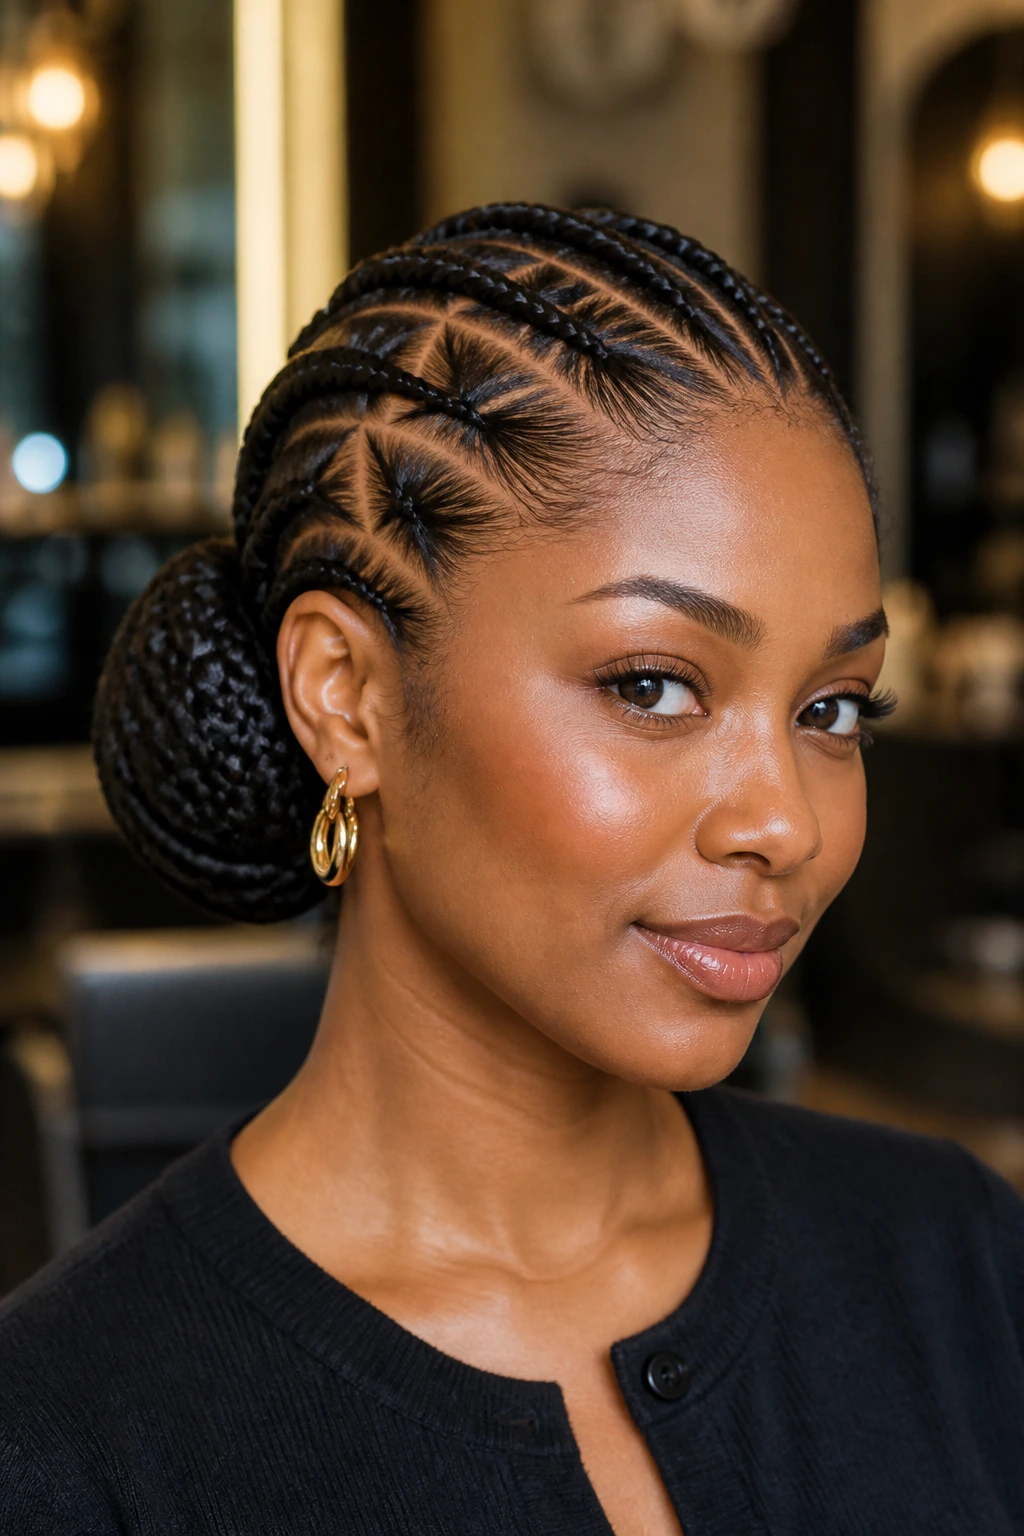
2. Swept Stitch Braids With a Tucked Bun
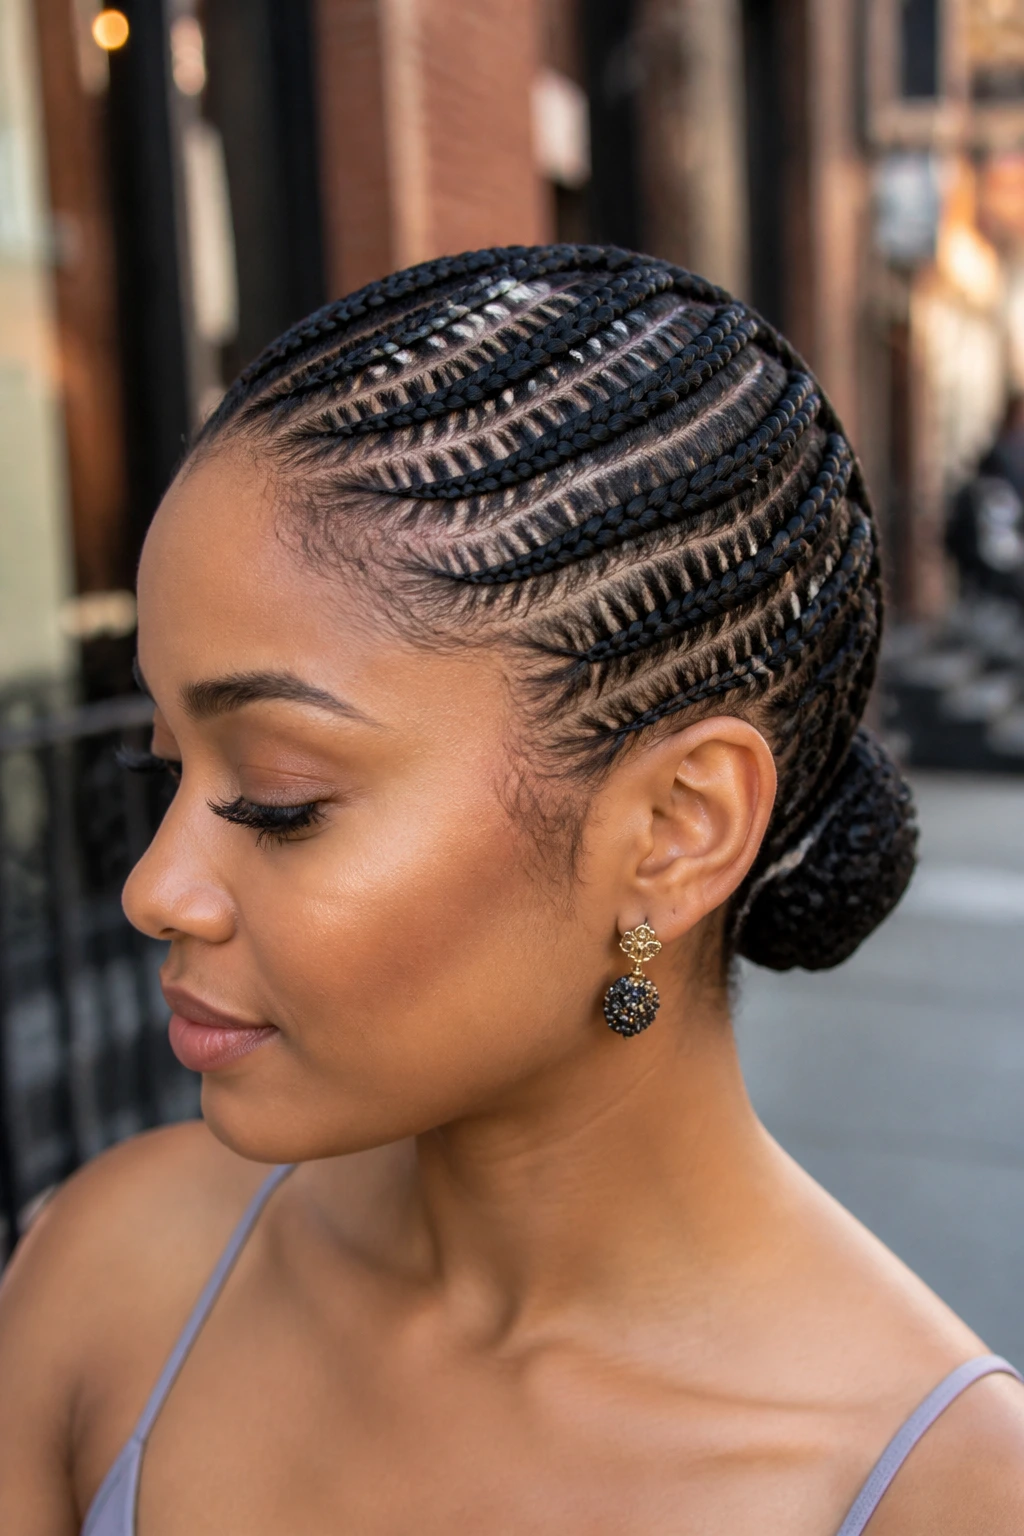
Ever notice how stitch braids look more expensive than plain straight-back cornrows? That’s because the parting is doing half the work. In this version, the braids run diagonally across the head with sharp, visible sections, then fold into a tucked bun at one side of the nape.
This one needs a neat base. Use a rat-tail comb and clip each section before you braid so the lines stay crisp. It’s a good match for short natural hair that has been stretched with banding or a cool blow-dry, because the braid pattern shows up better when the coils aren’t springing everywhere. The finished style has a clean, graphic look that holds up well for several days.
3. Flat Twists That Fall Into a Side Roll
Flat twists are one of those styles I keep coming back to when someone says their scalp is tender. They’re gentler than tight braids, they sit low, and they still give you that braided look around the hairline. Sweep them toward one side, then tuck the ends into a rolled bun behind the ear.
Best for a softer finish
If you’re working with hair that frizzes fast, use mousse on each section before you twist. It keeps the twist lines smooth and helps the ends cooperate when you roll them under. This style is especially good on a fresh twist-out or stretched TWA because the texture gives the twist something to grip. It does not need fancy parts. It needs neat sections and a calm hand.
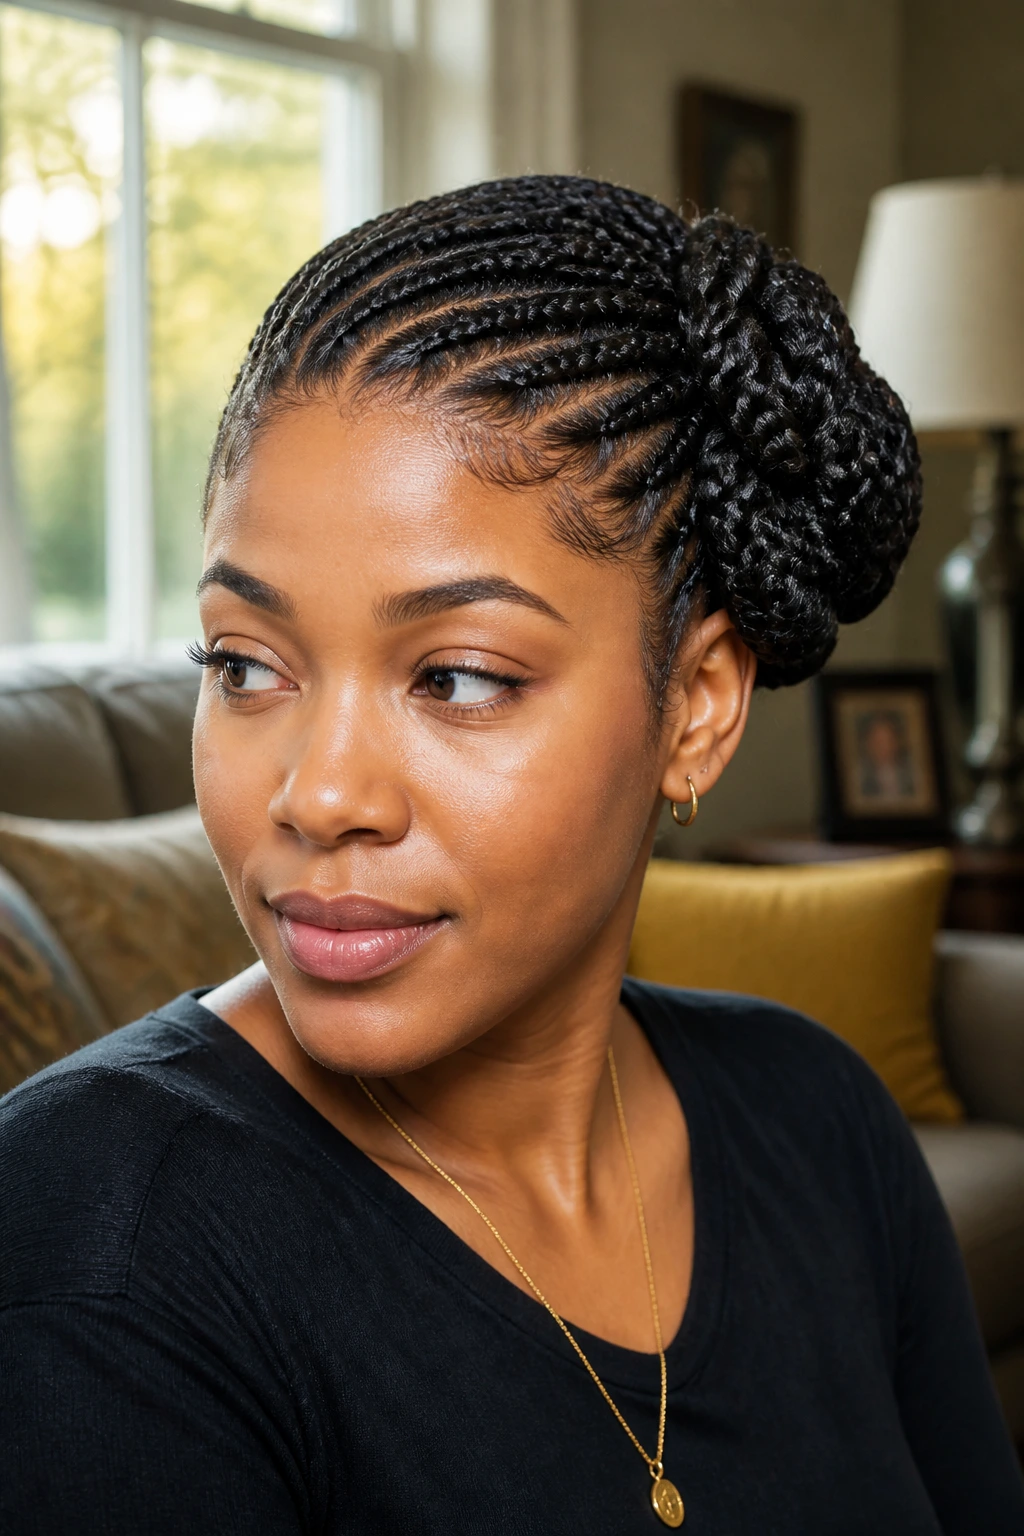
4. Mini Box Braids Piled at One Ear
Mini box braids are the slow-build option, and yes, they take time. But on short natural hair, they solve a problem that bigger braids can’t: they give you enough length and flexibility to gather a side bun without exposing every tiny end. Once the braids are in, the bun almost makes itself.
I like this look when the hair is 3 to 5 inches and the wearer wants something that stays put for more than a weekend. Keep the boxes small and even, about the width of a pencil eraser, so the bun doesn’t turn lumpy. A few curved pins around the base keep the whole shape from sagging toward the back.
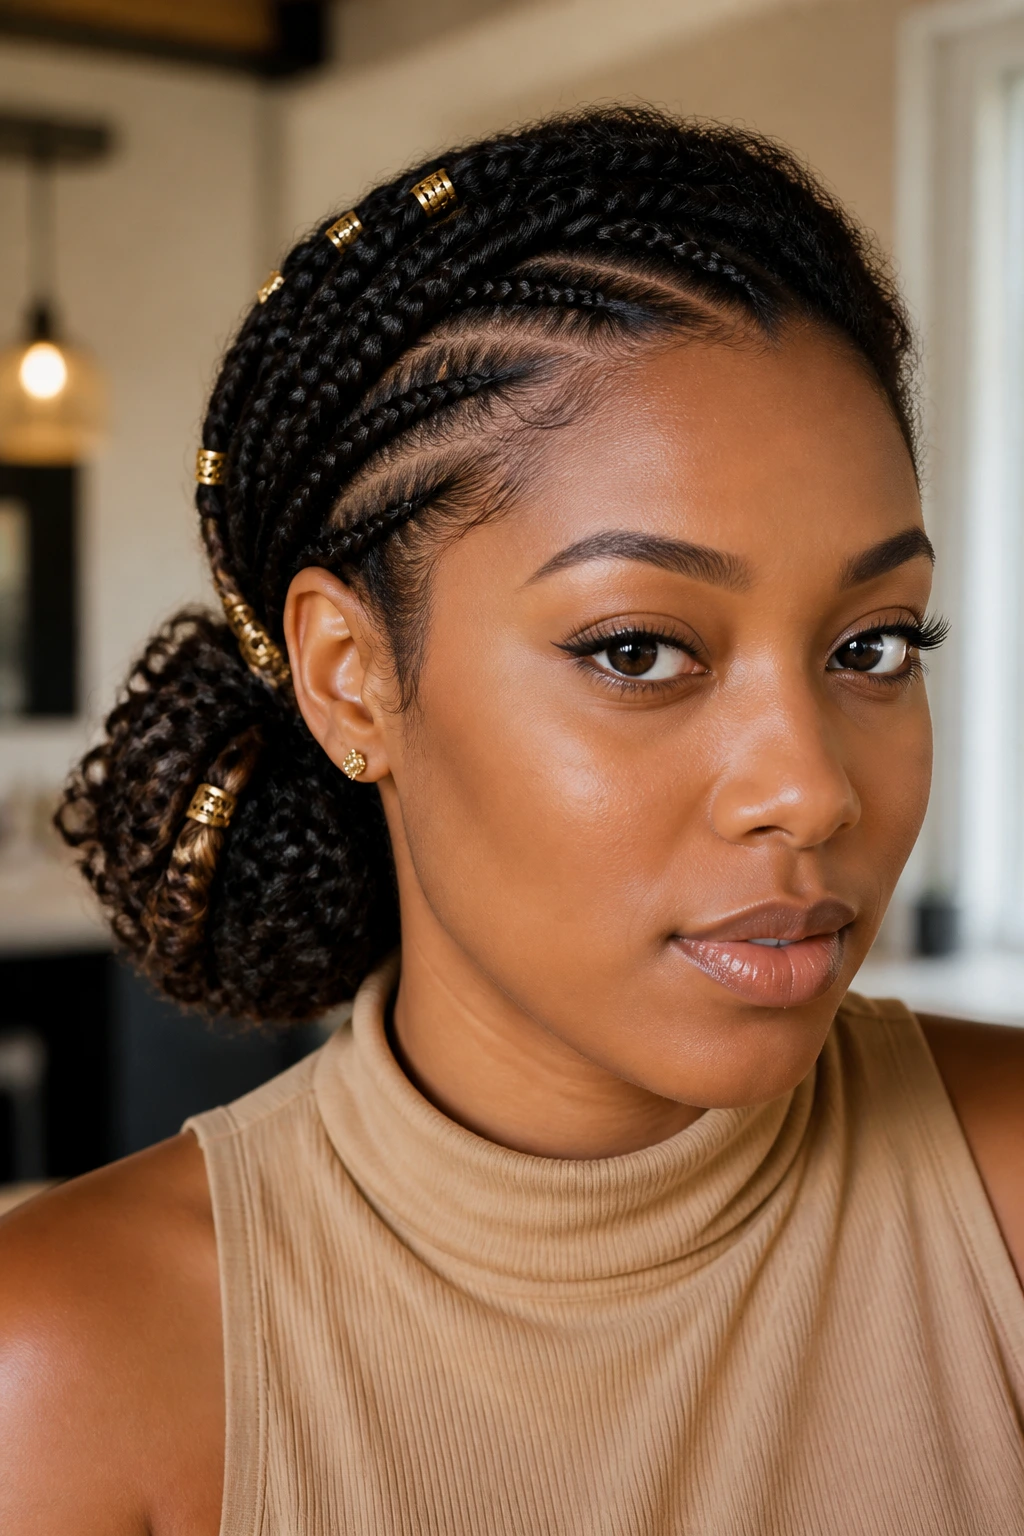
5. Feed-In Braids With a Soft Side Chignon
Feed-in braids are the friend you call when your own hair is short but you want the bun to have more weight. Start small at the root, add a little braiding hair as you move down, then sweep everything to one side and wrap the ends into a soft chignon. Not a hard little ball. Soft. Slightly rounded. That shape matters.
This version is good for nights out, weddings, or any day you want your hair to read polished without looking frozen in place. Use braiding hair that matches your texture, not shiny plastic-looking stuff. The goal is to blend, not announce itself. A tiny dab of oil on the scalp after styling keeps the parts from looking dusty.
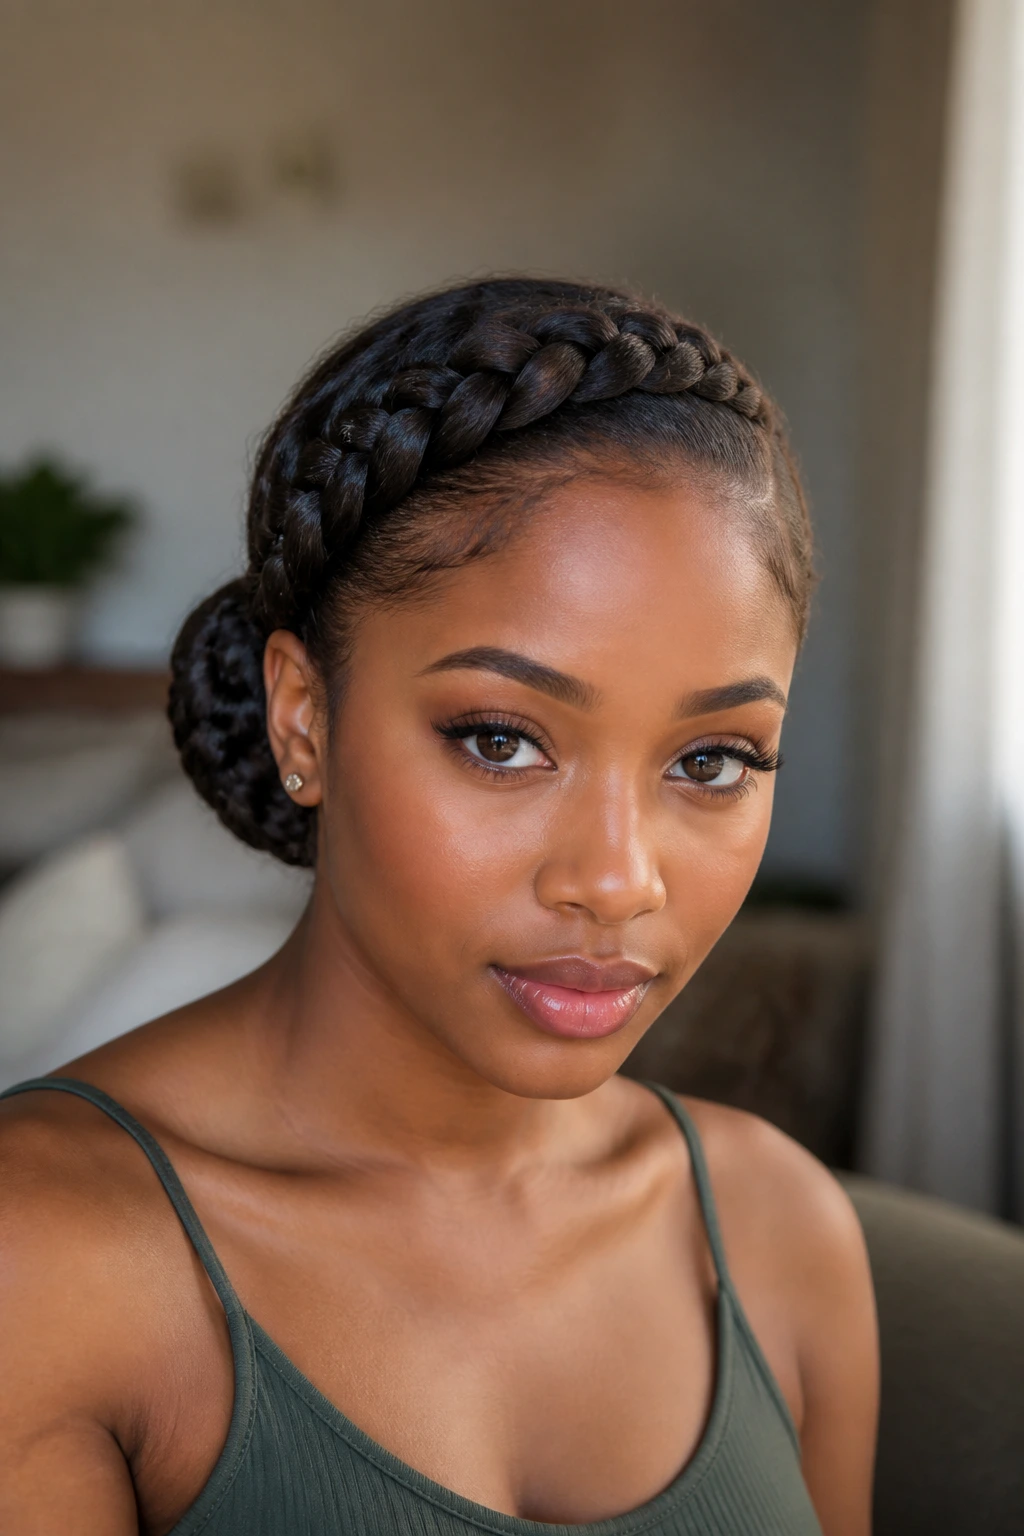
6. Asymmetrical Halo Braids and a Low Bun
An asymmetrical halo braid gives you a headband-like sweep, but it keeps the side bun from feeling too plain. One braid curves across the front, another follows the hairline, and the ends collect low at one side. It’s the kind of shape that flatters short hair because it creates a line to follow from the forehead down to the knot.
If you’re working with a soft curl pattern, stretch the hair first with twists or banding. That makes the halo sit neater and cuts down on flyaways near the temples. I’d skip heavy accessories here. The braid path is already doing enough. A single cuff near the tuck is plenty.
7. Braided Pompadour With a Side Knot
A braided pompadour sounds dramatic because it is. The front section is lifted slightly, braided back with some height at the crown, then swept to one side and secured into a knot. Short natural hair can absolutely handle this if the top has been stretched and the roots are not soaked with product.
The best part is the shape. It gives the illusion of more length at the front without pulling the hair flat against the scalp. Use mousse and a touch of gel at the front, but do not drown the hair. Too much product makes the pompadour collapse by lunchtime. A few bobby pins hidden under the braid base do more than a mountain of gel ever will.
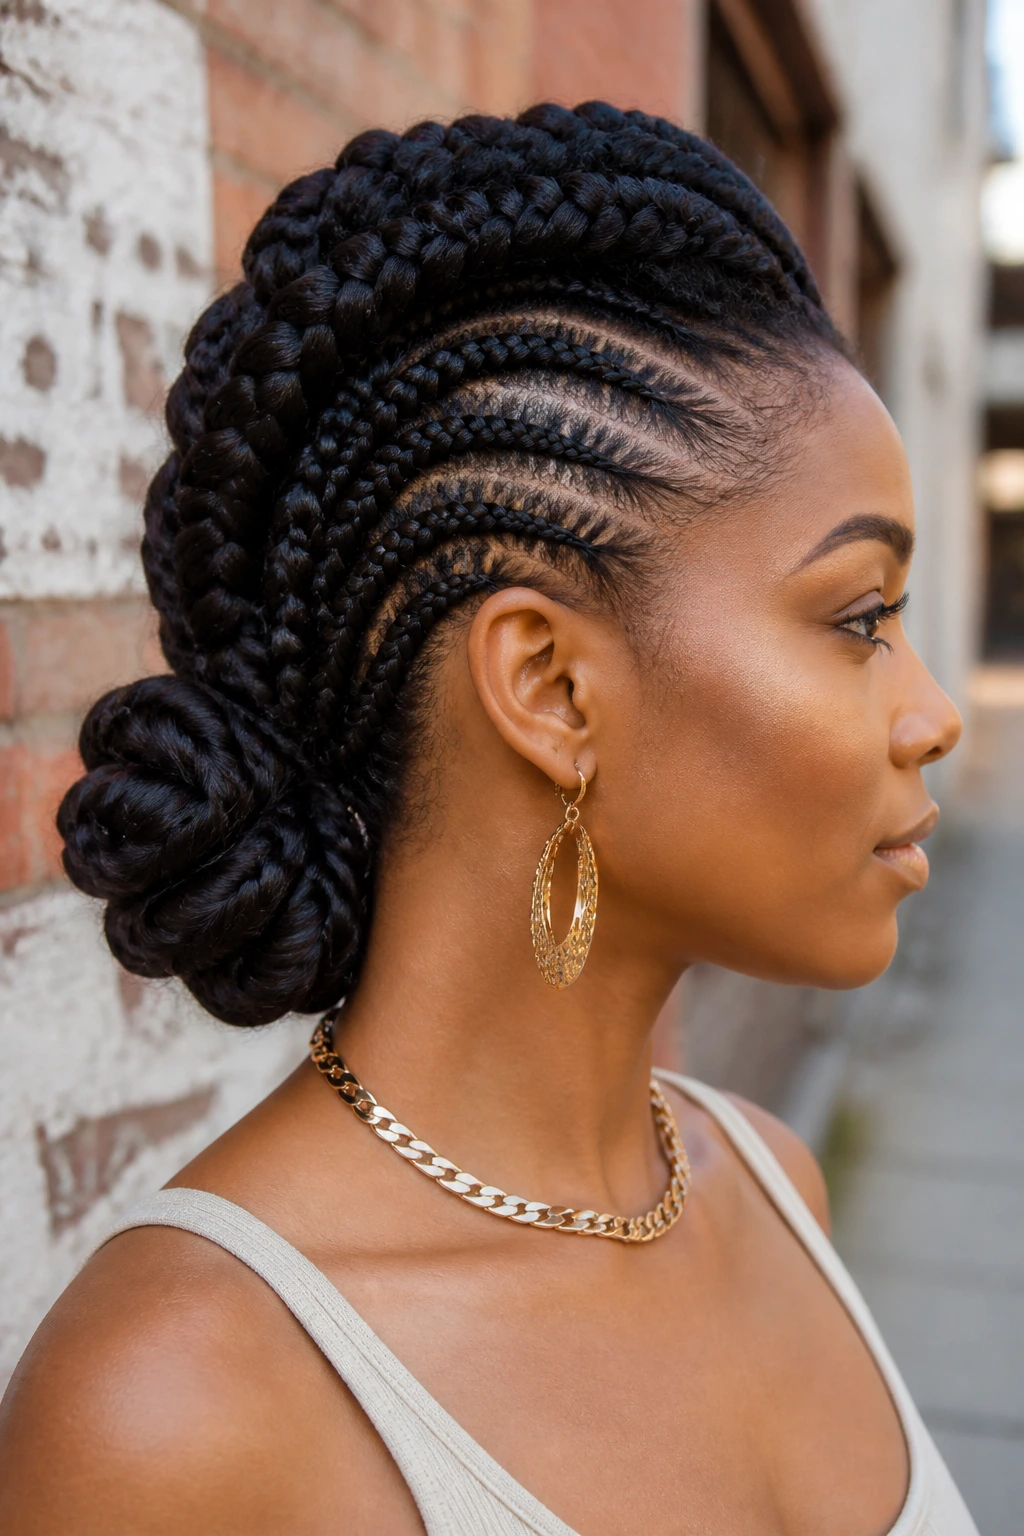
8. Two Thick Dutch Braids Wrapped to One Side
Two thick Dutch braids are a plain-spoken style, and I mean that as a compliment. They’re easy to read, easy to wear, and they give short hair enough structure to survive a full day without fussing. Start at the front, braid under rather than over, and guide both braids toward one side until the ends can be wrapped into a low knot.
This is a good “I need my hair off my neck” style. It stays put, especially on hair that has been lightly blown out or band-stretched. If your hair is very short at the nape, braid the last inch with added hair so the bun has something to grip. Otherwise the ends can poke out and make the knot look unfinished.
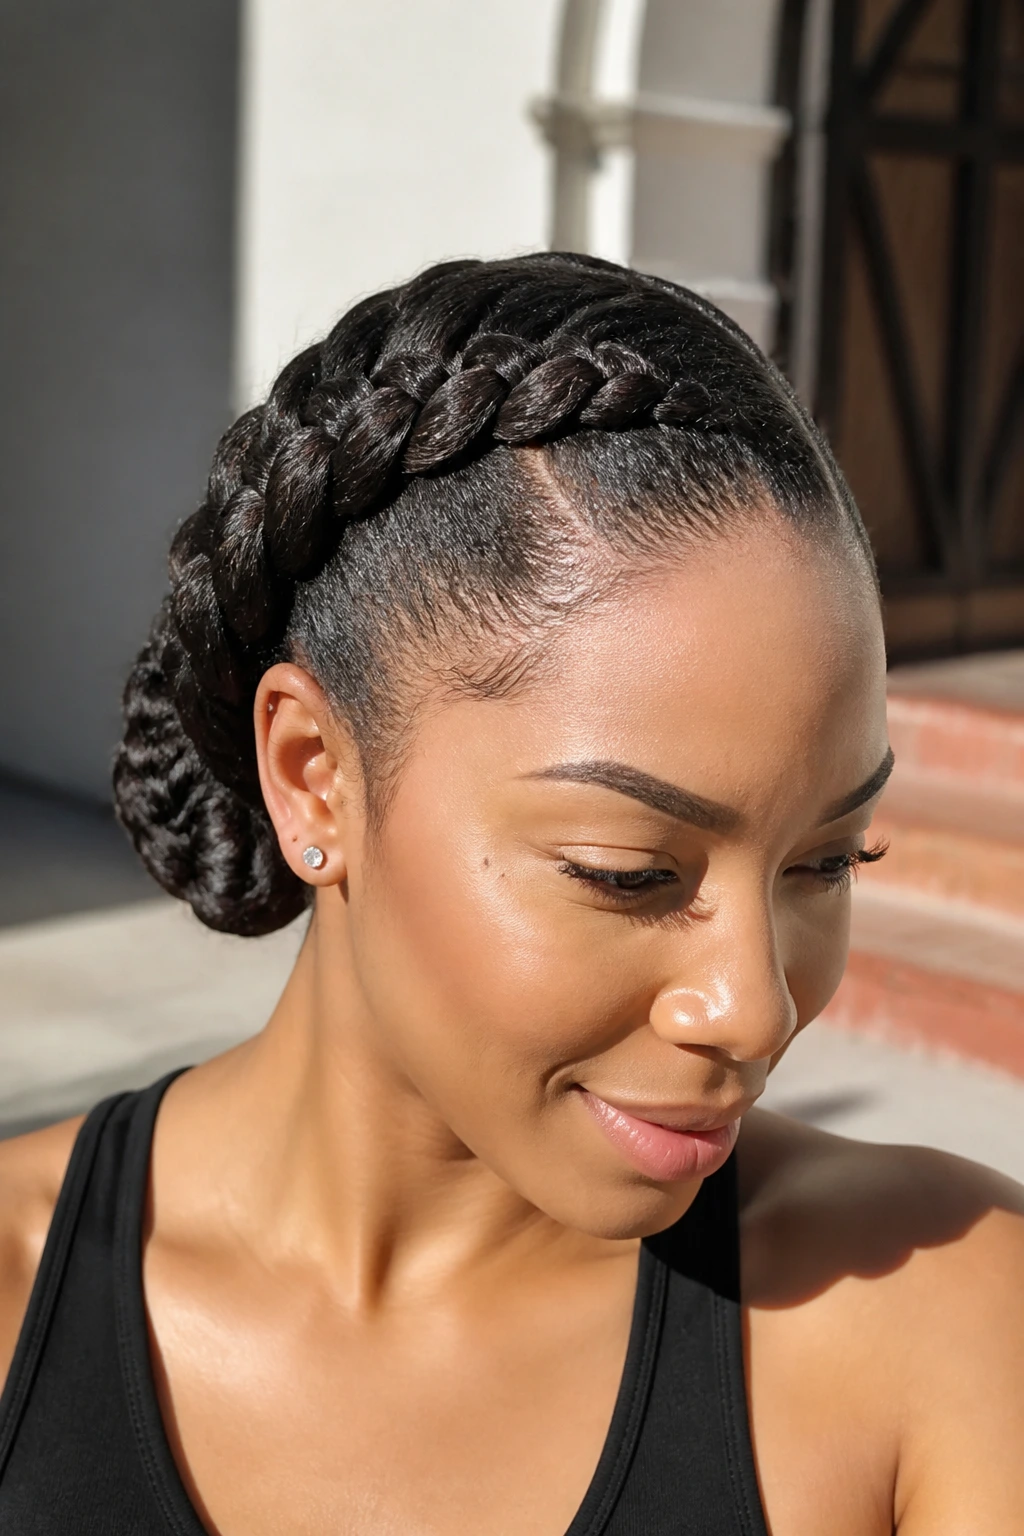
9. Rope Braid Side Bun With Smooth Edges
Rope braids are underrated. They’re quicker than a lot of three-strand styles, they look crisp on short hair, and they hold a side bun without making the head look crowded. Twist two sections over each other, keep the tension even, then coil the ends near the ear.
Why it works on cropped coils
The rope pattern doesn’t need much length to show. Even 2 inches of stretched hair can give you enough twist to define the shape. Smooth the hairline with a light gel and brush it once, not six times. Over-brushing short natural hair makes the front puff up in the wrong spots. A single satin scarf for 10 minutes after styling usually gives a cleaner finish than another round of product.
10. Side-Part Goddess Braids With Curled Ends
Goddess braids add a little softness because of the loose curly ends. On short hair, that matters. The braid structure gives you control, and the curls at the end keep the side bun from feeling too severe. Sweep the braids to one side, tuck the base low, and let the curly pieces spill out just enough to frame the knot.
This style works best with a side part that is deep enough to create a visible direction across the head. Use water-wave hair if you want the curled ends to move a bit; it’s lighter and easier to blend than dense synthetic curls. I’d keep the bun low and loose here. If you cinch it too tight, the goddess effect disappears and the style turns boxy.
11. Braided Mohawk Swept Into a Low Knot
If you like a little edge in your protective style, this one has it. The sides are braided tighter and flatter, the center section rises like a soft ridge, and everything gets swept into a low knot to one side. It gives short natural hair a stronger profile without needing a lot of length.
The key is balance. Keep the side braids neat, but leave the top braid slightly fuller so the mohawk shape reads from the front. This style can look sharp with a gold ear cuff or a few plain rings on the braids, but I’d skip heavy beading. You want the silhouette to carry the look. Too much decoration steals the shape’s clean line.
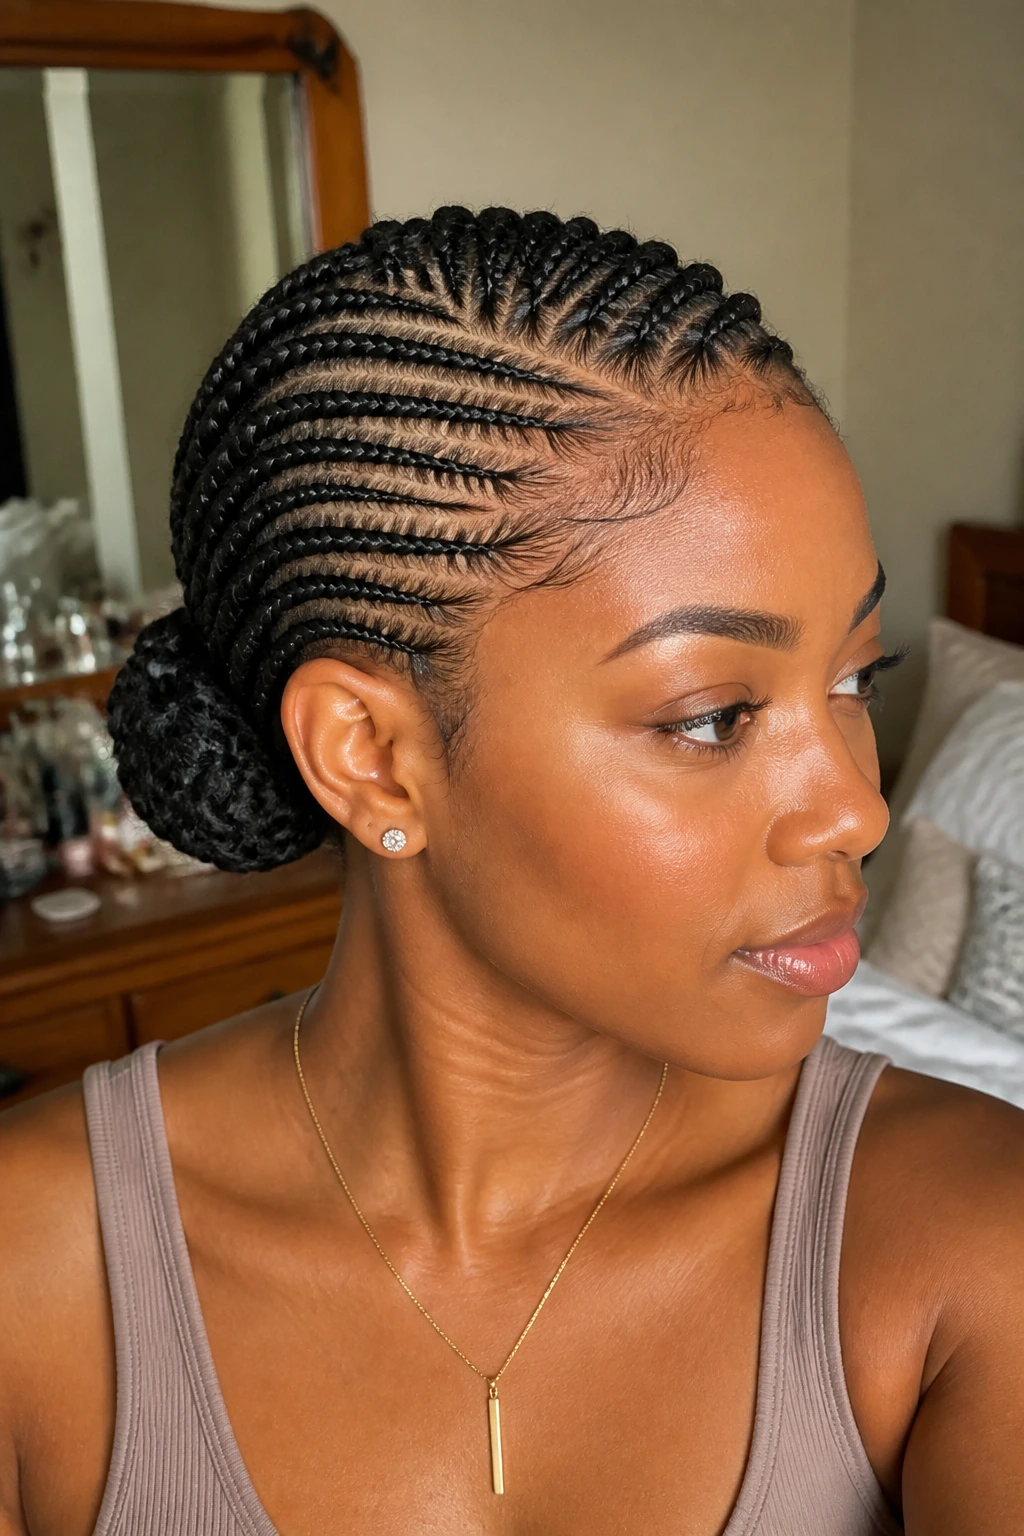
12. Tension-Light Flat Braids for a TWA
A TWA can absolutely handle braids, but the braid has to respect the length. That means smaller sections, less pulling, and a side bun that’s more tuck-and-pin than true wrap. Flat braids laid close to the scalp give the hair direction, then the tiny ends disappear into a neat knot.
This is the style I’d choose for very short natural hair that still needs a protective option. If your edges are tender, ask yourself one blunt question while styling: does this feel snug or does it feel tight? Snug is fine. Pain is not. A style that hurts right away will usually swell up and look worse by the next day anyway.
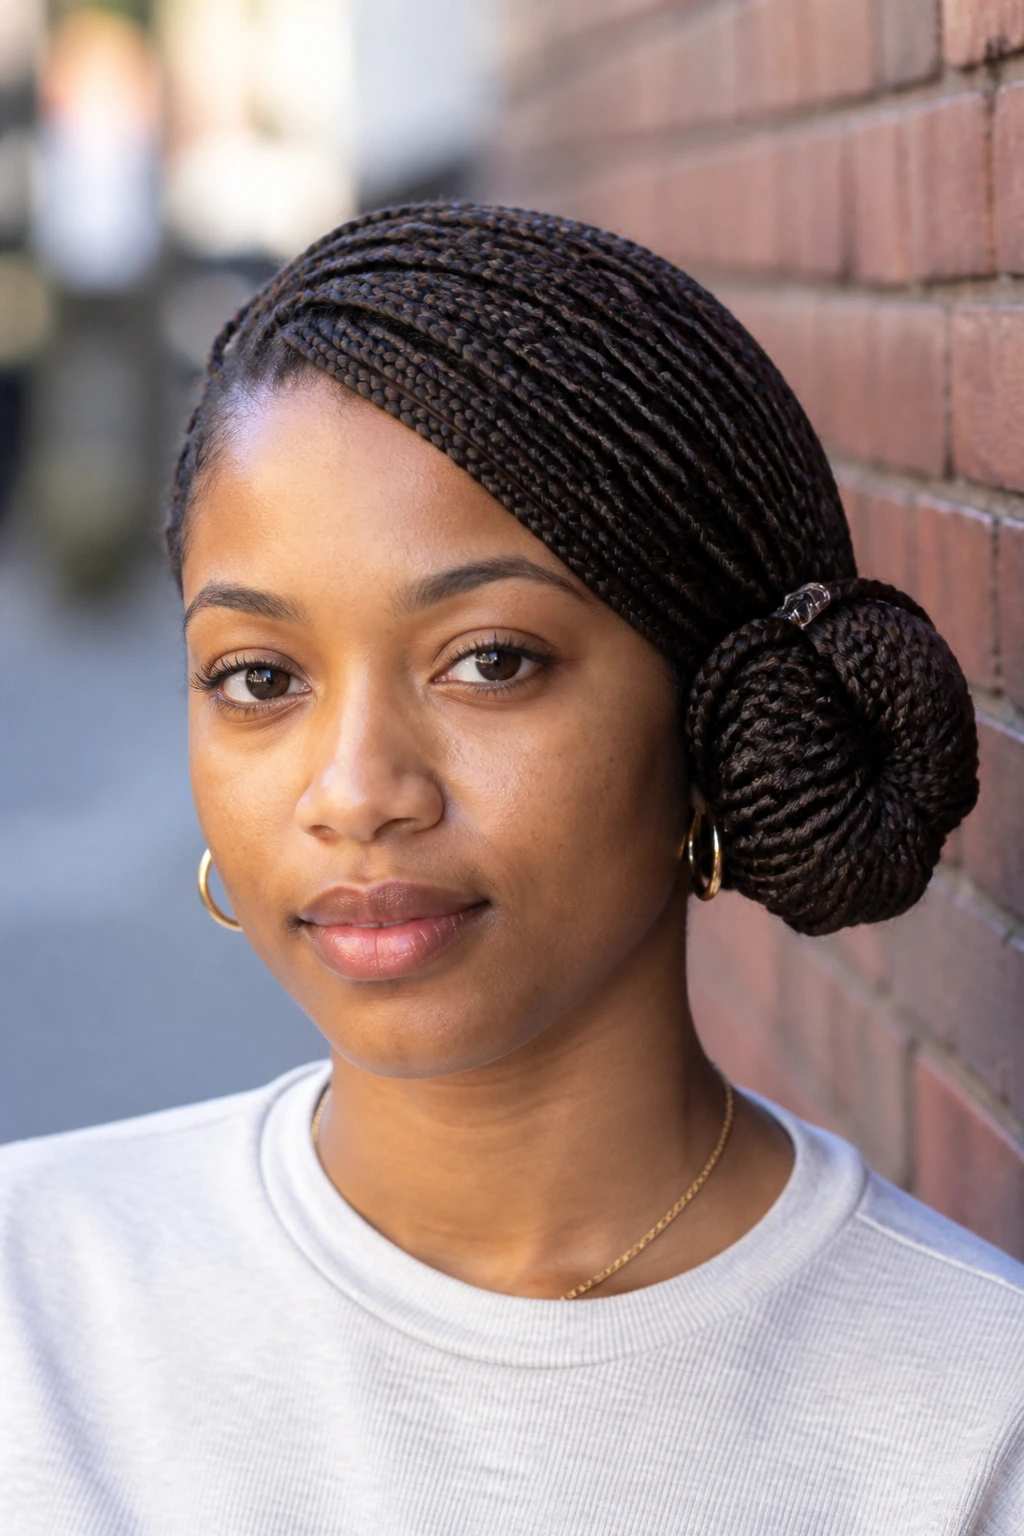
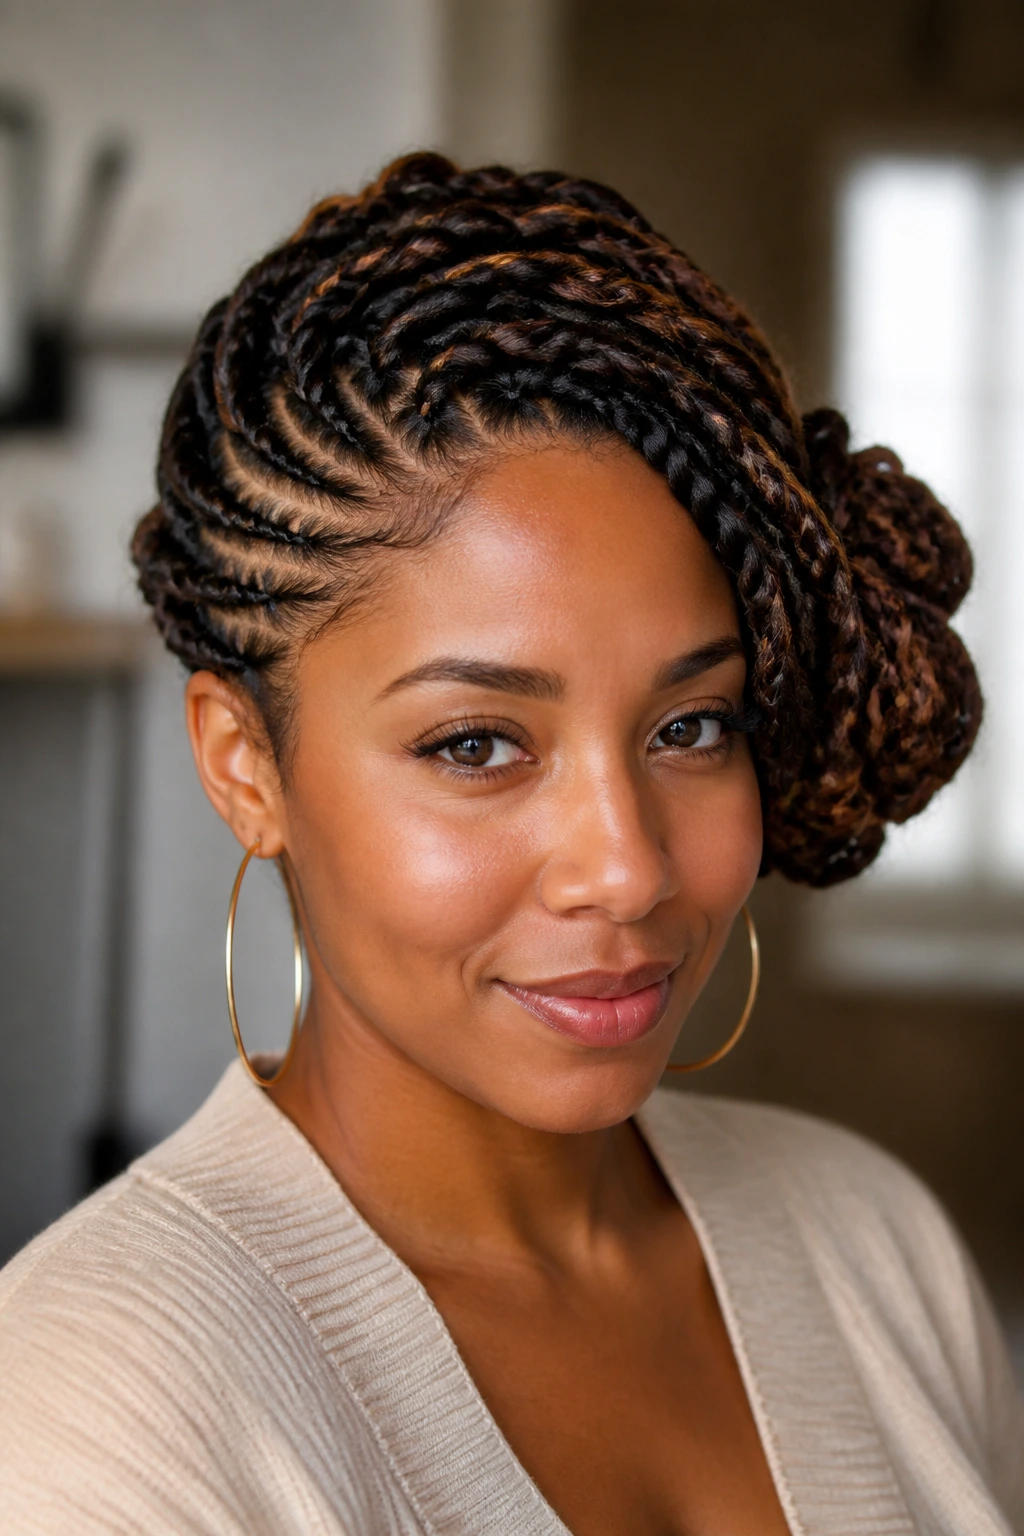
13. Faux Loc Side Bun With Hidden Pins
Faux locs change the whole mood. They make a side bun look fuller fast, and on short hair they solve the volume problem without making the style feel overbuilt. Wrap the locs close to the root, sweep them to one side, and pin the ends so the bun sits low and dense.
This one needs patience at installation, but the payoff is good. The texture hides a lot of tiny imperfections, which is helpful on short natural hair because every section doesn’t have to be identical. Use a few hidden U-pins under the bun instead of loading the outside with pins. That keeps the shape cleaner and avoids the little metal forest that ruins the finish.
14. Basket-Weave Braids Into a Side Tuck
Basket-weave braids always look more complicated than they are. You cross sections over and under in a pattern that gives the surface a woven look, then sweep the whole structure to one side and tuck the ends into a side knot. On short hair, the pattern itself does the heavy lifting.
This is a style for people who like detail. It shows up best when the parts are tidy and the hair is stretched enough to hold its shape. Use a bit of styling foam on each section before braiding so the weave lays flatter. If a section starts puffing up while you work, pause and smooth it before continuing. Don’t braid over a frizzy base and hope the bun will hide it. It won’t.
15. Triangle-Part Braids and a Sleek Side Roll
Triangle parts bring a little geometry into the style, and on short hair that can be the whole point. Instead of standard squares, the braids are sectioned into triangles that lean toward one side, then the ends are rolled under into a sleek bun. It looks sharper than a simple side knot.
The parting matters more than the bun
Triangle parts make even a small style feel thought through. They’re also useful when your hair density varies from front to back, because you can adjust each section to fit the scalp better. Keep the roll low and close to the ear so the parts stay visible. If you hide everything inside a giant bun, you lose the nicest part of the style.
16. Braided Bangs Feeding Into a Small Side Bun
Braided bangs are a practical little cheat. They frame the face, keep the front from puffing loose, and create a clear path into the side bun. The back doesn’t need much length because the front braids do the visual work first.
I like this one on short natural hair when you want something playful but not messy. The bangs can be three or four slim braids, or just two thicker ones if the hair is dense. Keep them close enough to the forehead to stay in place, but not so tight that the skin looks stressed. A soft side bun at the ear finishes the shape without making it look heavy.
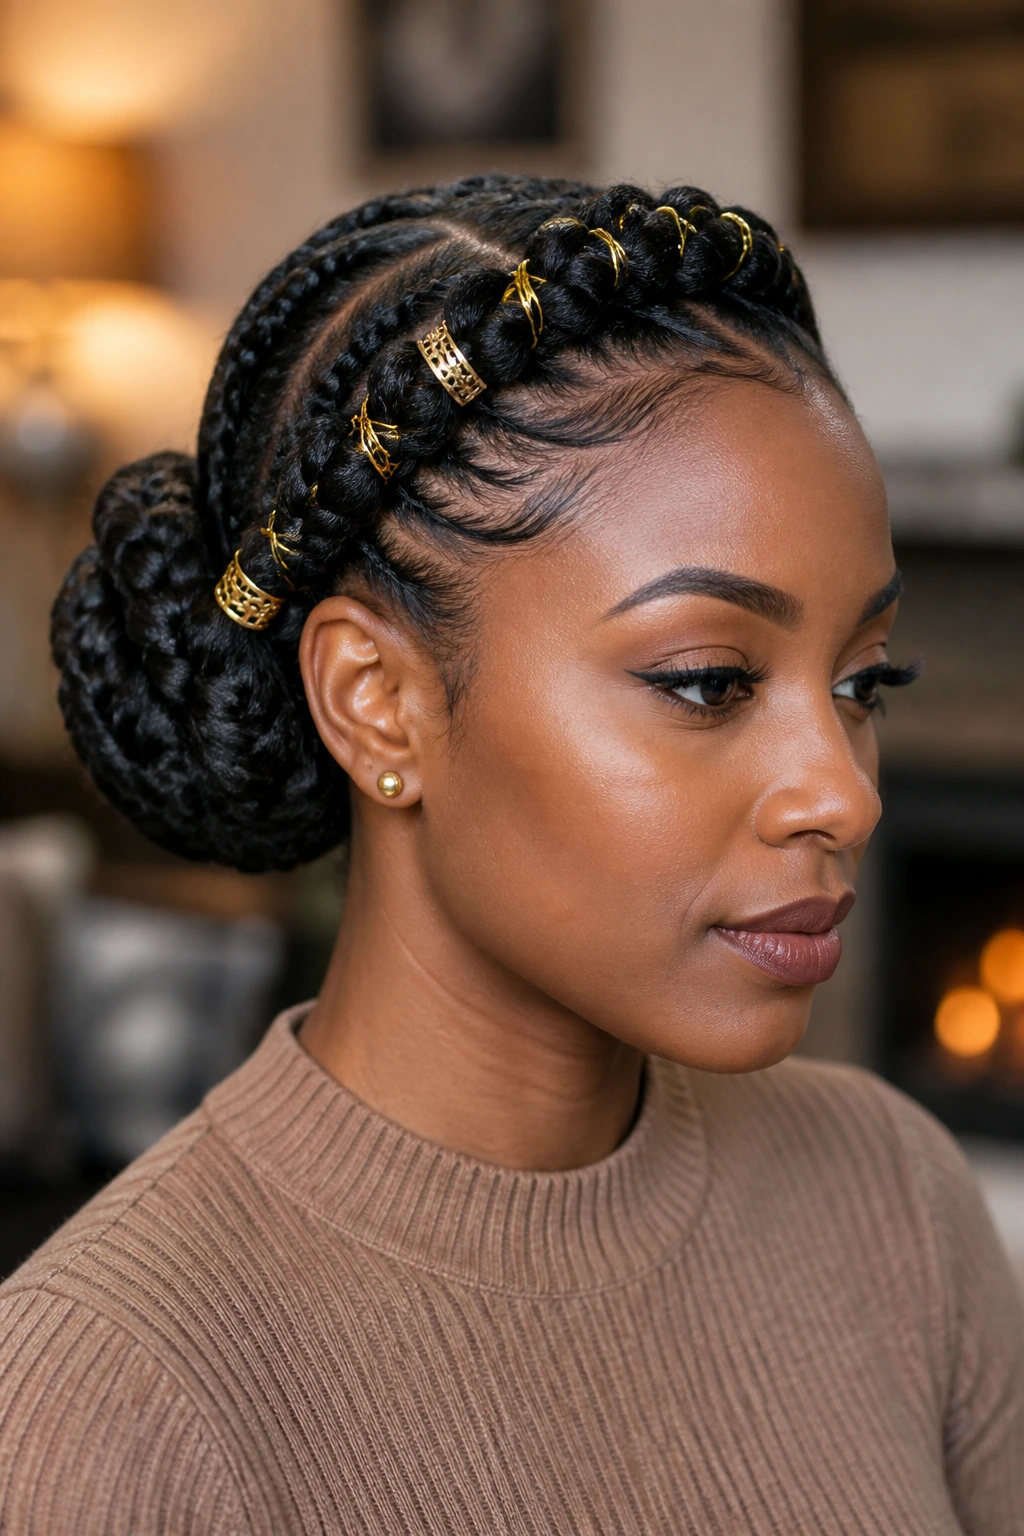
17. Jumbo Feed-In Braids With Gold Cuffs
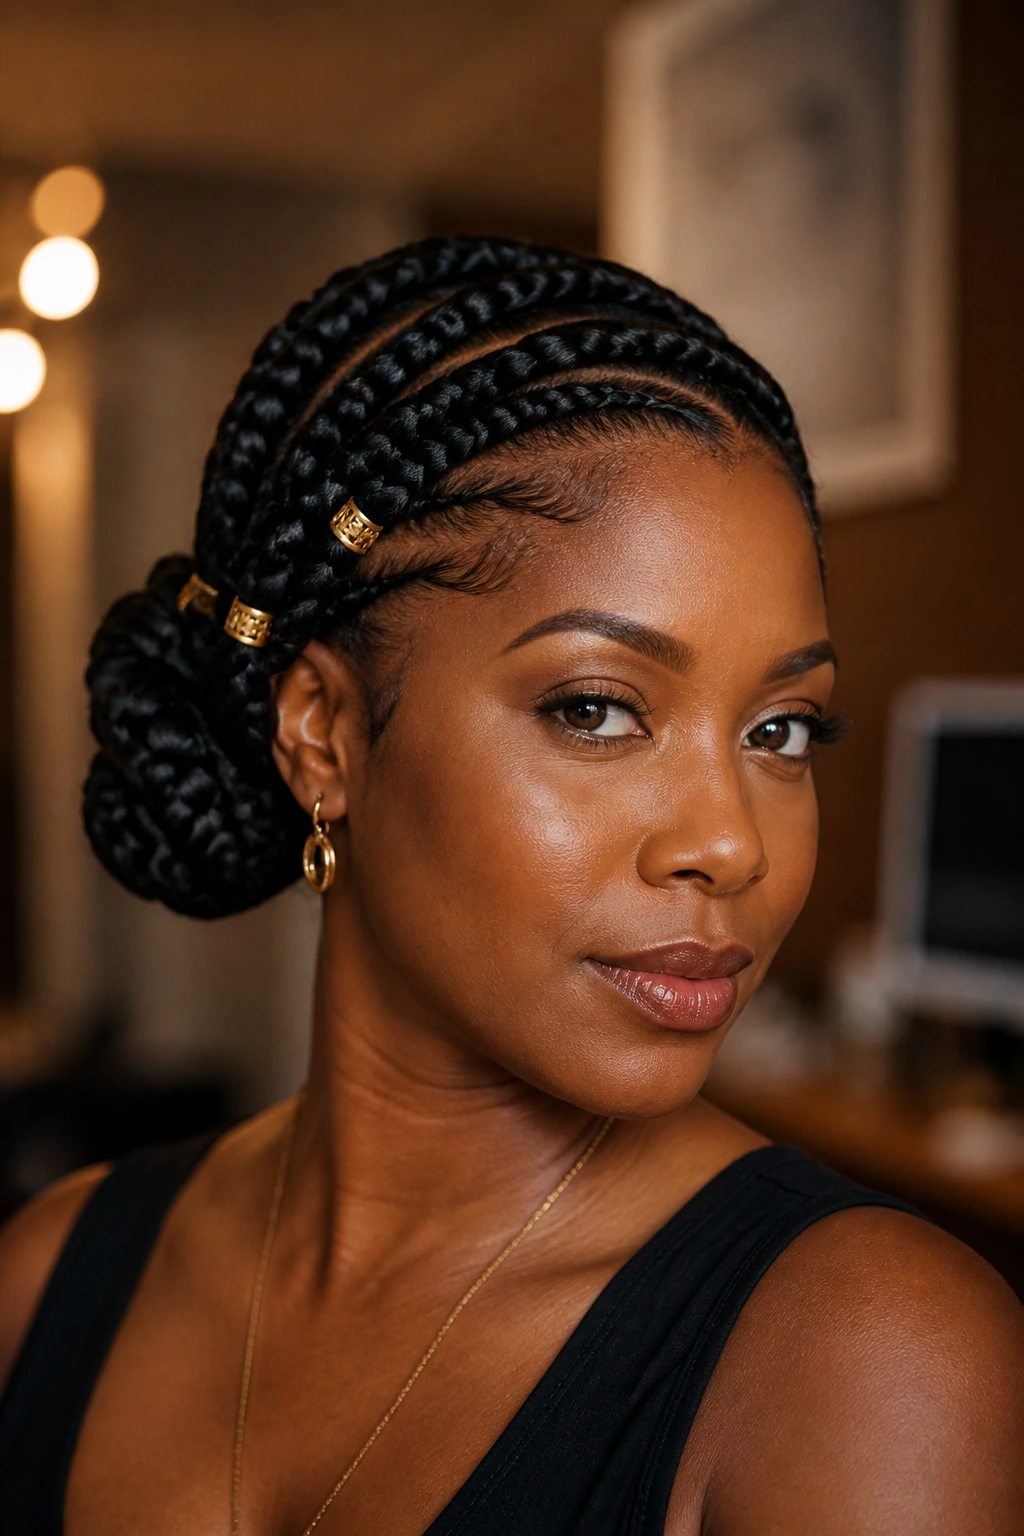
Jumbo feed-in braids are quick compared with micro styles, and that matters when the hair is short and you don’t want to spend half a day in the chair. Add hair gradually, keep the braid wide, and sweep the ends into a side knot that sits just above the jawline.
Gold cuffs change the tone fast. One or two near the front braid is enough; more than that starts to feel crowded. This style suits someone who wants visibility and speed. The bigger braid gives the illusion of fullness, while the side bun keeps it from looking like a basic straight-back set. It’s one of the easiest ways to make short hair read bold without needing extra fluff.
18. Curved Cornrows Into an Ear-Level Knot
Straight lines are fine. Curved lines are better when you want motion. These cornrows bend in a soft arc from the front toward one side, then gather into an ear-level knot that sits low and compact. On short natural hair, the curve makes the style look longer than it is.
That shape is also kinder to the eye. It pulls attention away from any one spot where the hair is shorter or fuller. Keep the curve smooth by mapping it with your rat-tail comb before you braid, not after. Once the line is set, the rest is mostly clean sectioning and steady tension.
19. Mixed Twist-and-Braid Side Updo
A mixed-texture updo gives you a little more room to work with short hair. Some sections are braided, some are twisted, and the two textures meet at a side bun that feels less rigid than an all-braid style. It’s useful when the hair has uneven lengths or different curl patterns in the same head.
I reach for this when I want the style to look intentional without being too neat. Use the braids where you need control, and the twists where the hair bends more easily. The contrast keeps the shape from looking flat. A light mousse on the twists and a firm gel on the braid base keeps the whole thing from fraying at the edges.
20. Half-Crown Braids With a Soft Side Bun
Half-crown braids are for the person who wants a little romance without spending forever in the mirror. The braids travel around the top half of the head like a crown, then the rest of the hair is swept down and gathered into a soft side bun. It’s a good compromise between open and tucked.
This style can work on shorter hair because the crown creates the drama. The bun can stay small. It doesn’t need to be huge to make sense. A few loose tendrils near the ears soften the look, but don’t overdo it. Too many flyaways and the braid pattern loses the crisp edge that makes this one so useful.
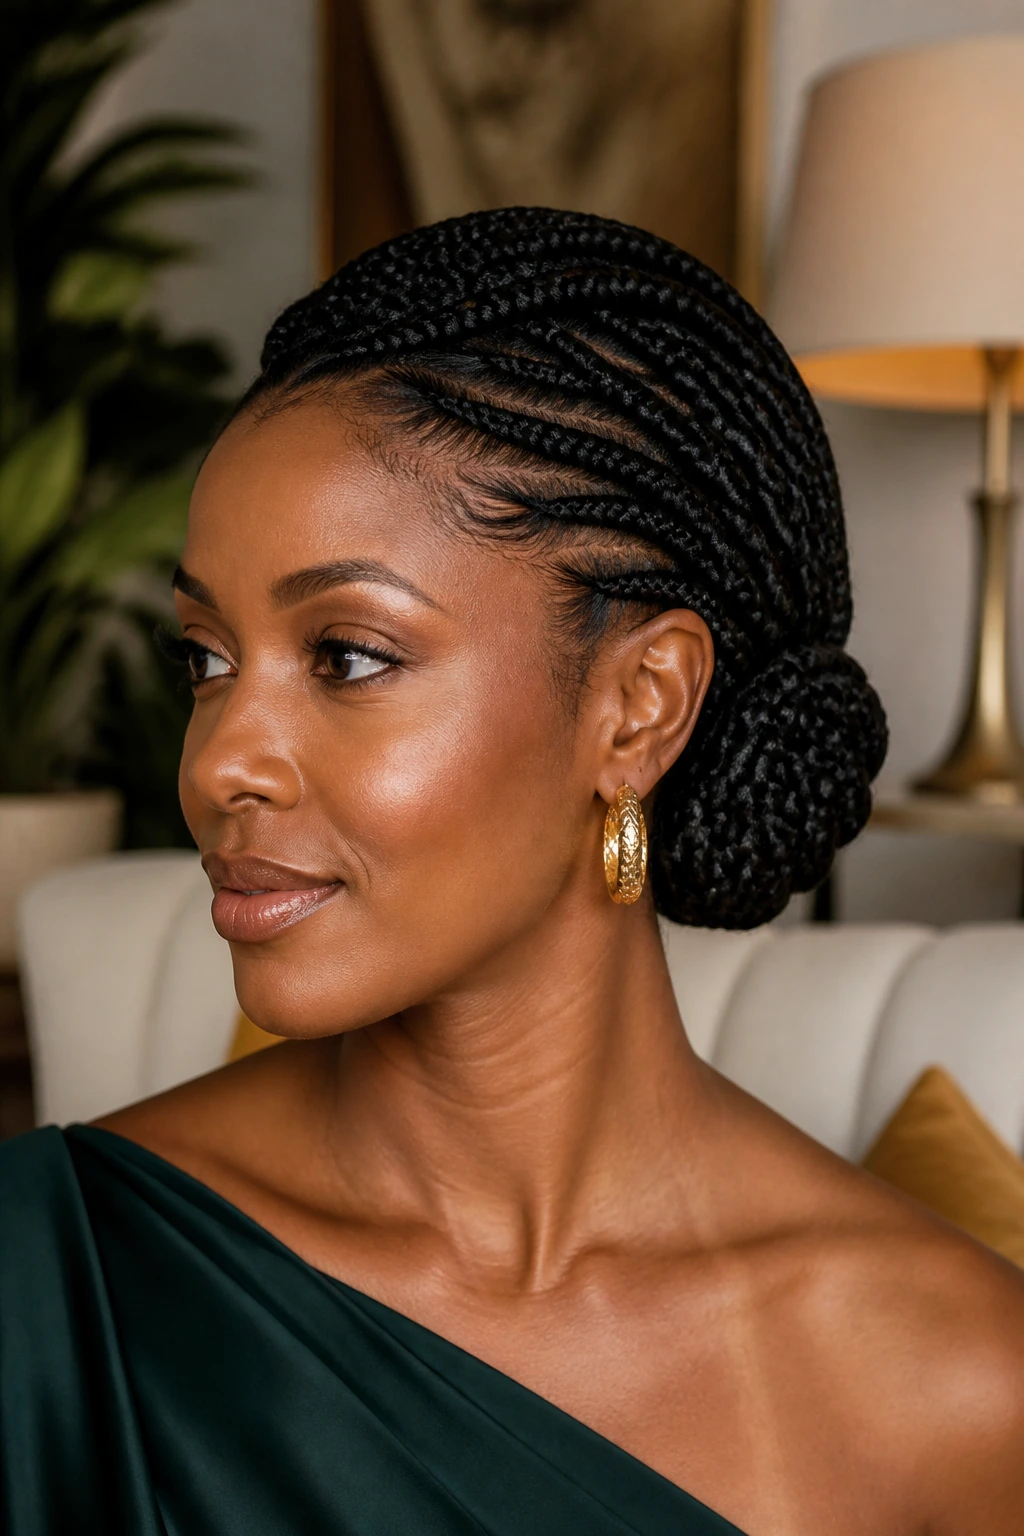
21. Short Knotless Braids Swept Low
Knotless braids are easier on the scalp than old-school knot braids, and on short natural hair that gentler start matters. The braid begins with your own hair and feeds in extensions gradually, which keeps the base flatter. Sweep those braids low and tuck them into a side knot that sits close to the neck.
If your scalp gets sore fast, this is a smart option. The weight spreads out more naturally, and the style tends to move better when you turn your head. Keep the braid size medium, not extra large, so the bun can still hold its shape. A knotless braid that’s too thick tends to sag at the side.
22. Beaded Braids Wrapped at the Nape and Side
A few beads can change the rhythm of a style. On short natural hair, I’d keep them limited and place them near the ends that are going to be tucked into the side bun. The sound and movement are part of the charm, but too many beads can make the style pull down in odd places.
This look works best when the braids are slim and the bun stays low. The beads should feel like punctuation, not decoration for its own sake. I’d choose wooden or matte beads over super-shiny plastic if you want the bun to stay grounded. A side knot with just a few beaded ends peeking out has more life than a crowded pile of accessories.
23. Side-Swept Braided Puff With a Tucked Base
Not every side bun has to be a hard knot. Sometimes the better move is a braided puff anchored at the base and swept to one side so the natural texture can stay visible. The braids at the front create the frame, and the puff holds the body.
This is a good fit when your short natural hair has enough softness to form volume but not enough length for a fully wrapped bun. The texture is part of the design here. Use your fingers, not just a brush, to shape the puff so it keeps a little air. If you brush it too flat, the style loses the whole point of letting the curls show.
24. Side Bun With Chunky Flat Twists
Chunky flat twists are fast. That’s the main reason I like them. They take less time than tiny braids, they’re gentle on the scalp, and they wrap into a side bun with enough body to look deliberate on short hair. Keep the twists wide and smooth, then pin them where they cross.
This is a style for regular wear, not just events. It gives you a tidy shape without the commitment of a long install. If your hair is thick at the roots, work in sections no wider than an inch so the twists lie flat. A little cream before twisting helps the strands stay together, but keep it light. Heavy cream turns the base gummy.
25. Soft Side Roll With Rolled-Under Braids
A side roll has a softer mood than a tight bun. The braids are tucked under and rolled inward so the final shape sits like a low coil along one side of the head. It’s neat, but not severe. Short natural hair handles this well because the roll doesn’t need much length to read clearly.
When you want the style to look polished
This is the kind of hairdo I’d pick for a formal event or a day when I want my hair out of the way but still worth looking at twice. Use a few long pins angled upward into the roll so it holds from the inside. Outside pins are lazy. You can always spot them. The roll looks better when the hardware disappears.
26. Scarf-Framed Braids and a Neat Side Knot
A scarf can rescue a style that feels a little too plain, and on short natural hair it can also help hold the front in place. Braid the base, sweep the ends to one side, then tie a narrow silk scarf around the head so it frames the bun rather than hiding it.
I’d use this when second-day hair needs a reset or when the front sections are too soft to stay smooth on their own. Choose a scarf that’s not too bulky; thick fabric can push the bun out of shape. A satin or silk scarf is easier to fold, and it keeps the line clean. The scarf should support the style, not steal it.
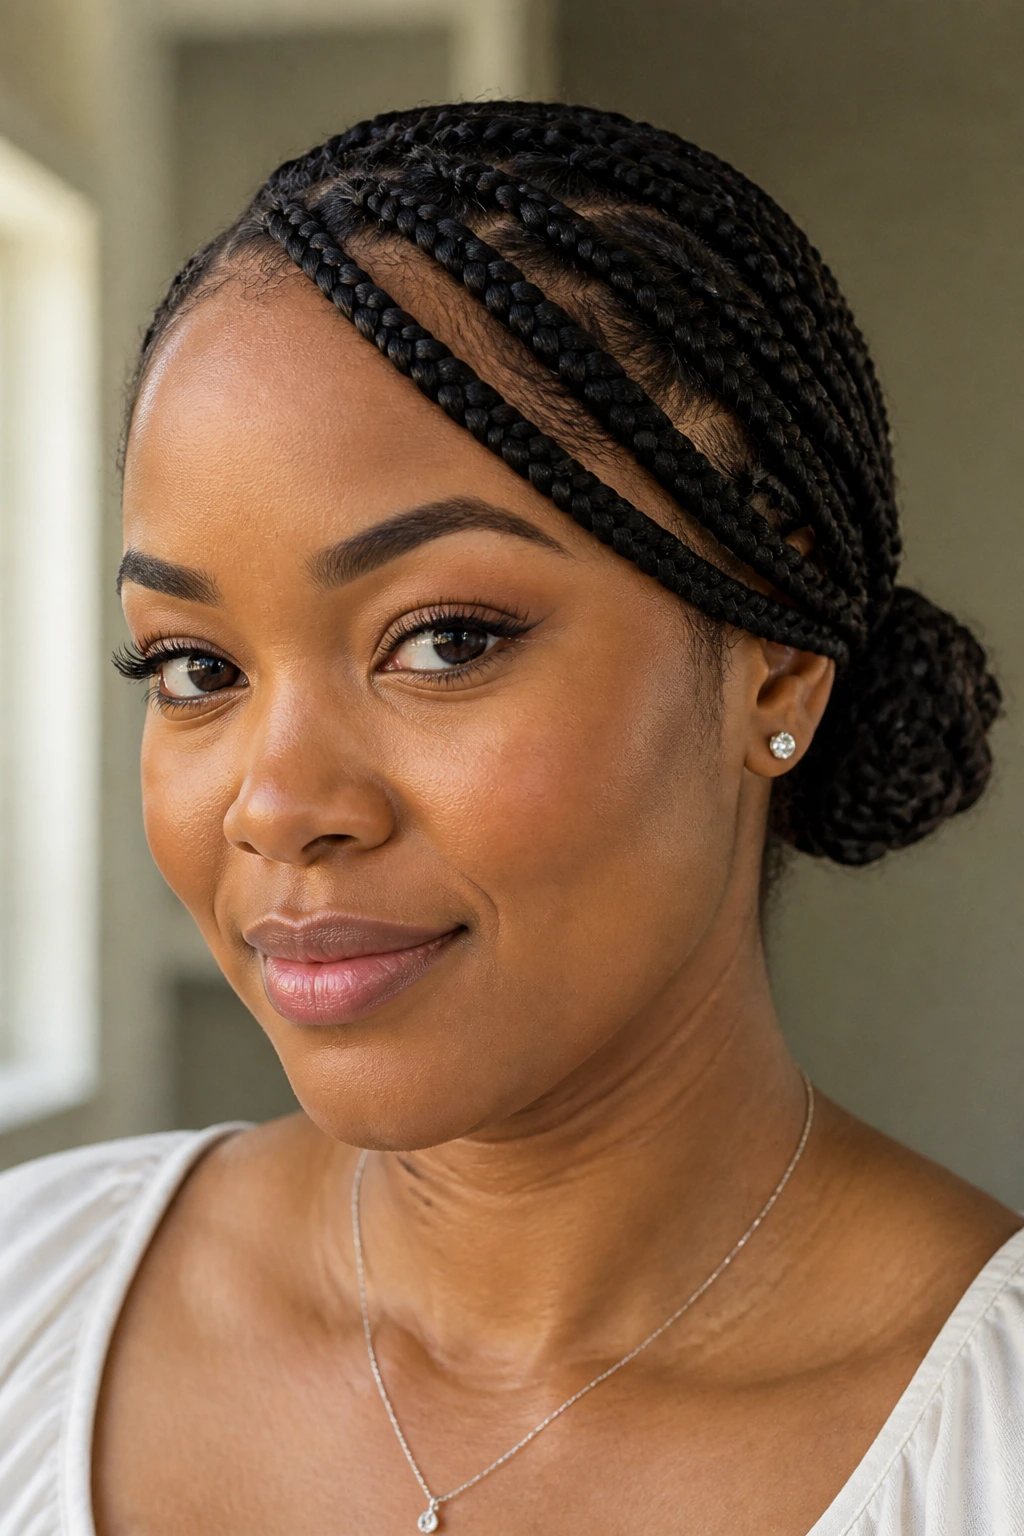
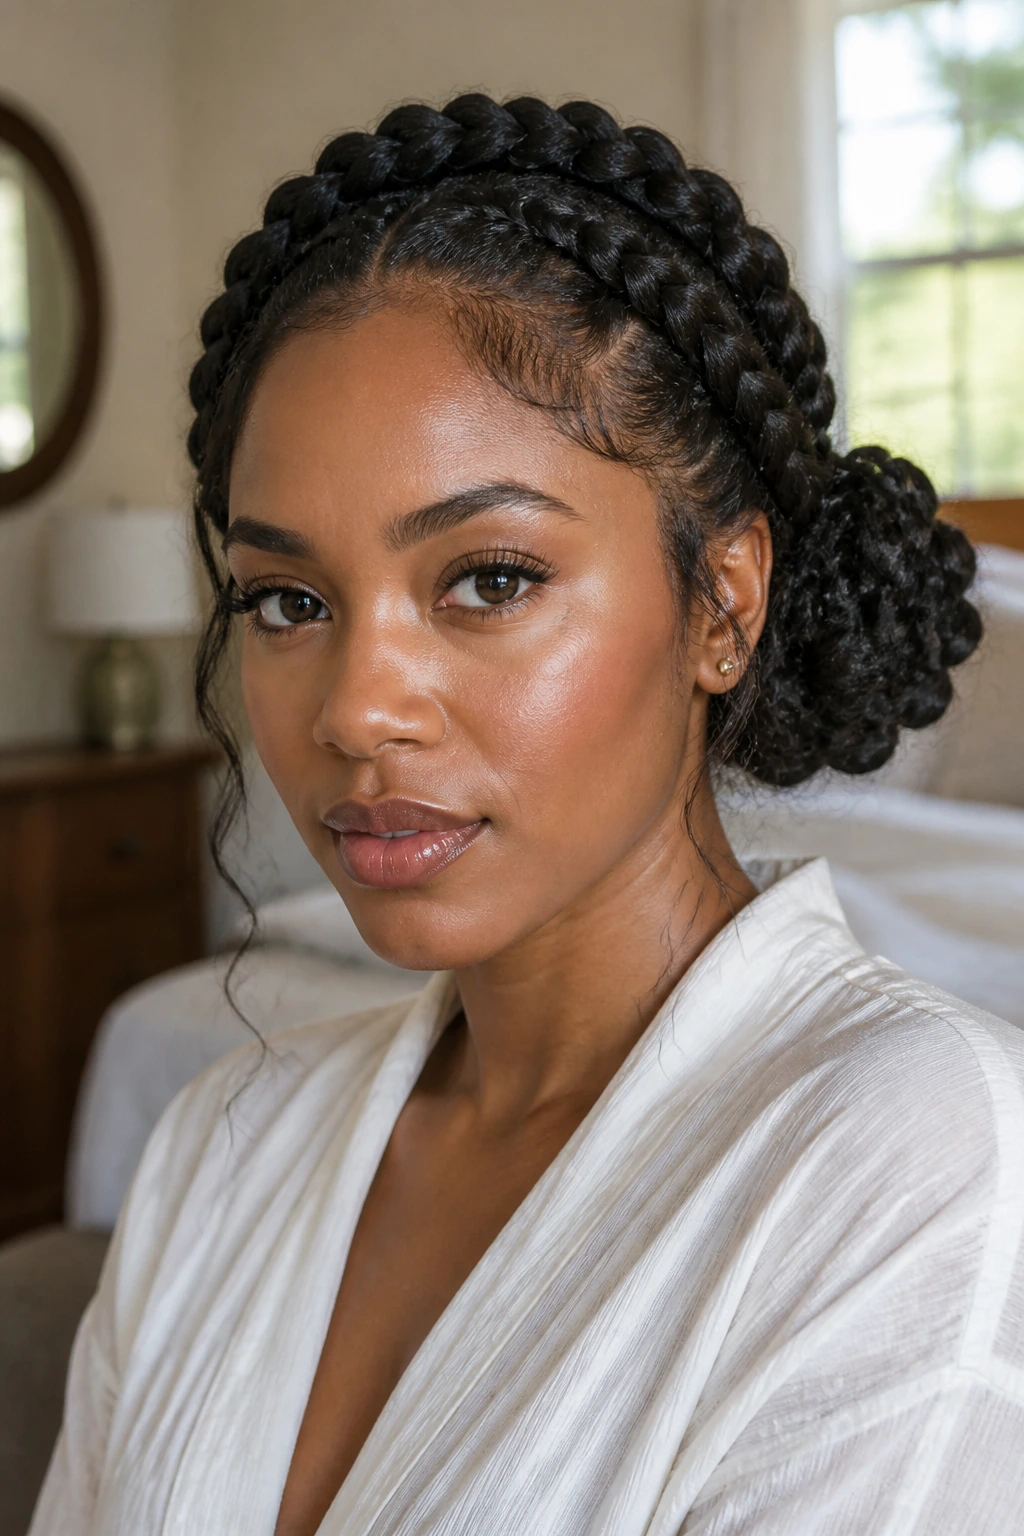
27. Side-Swept Crown Braid for Short Natural Hair
A crown braid that leans to one side gives short hair a more sculpted shape. The braid starts near the temple, circles the crown, and drops into a bun behind one ear. It frames the face in a way that feels controlled but not severe.
A good choice for the front-heavy head
Some short cuts are fuller in front and tighter at the nape. This style handles that imbalance well because the crown braid uses the volume where it already exists. Keep the braid close to the head and let the bun stay compact. If the front is especially short, tuck those ends with small pins rather than trying to braid every last hair into the crown. The style reads cleaner when you stop before it gets overworked.
28. Protective Side Bun With Clean Parts and Tiny Ends
This is the plain-clothes version, and I mean that as praise. Clean parts, tight sections, tiny ends tucked into a side bun. No extra drama. Just a style that does its job and stays put. For short natural hair, that’s often the smartest move of all.
The beauty is in the precision. If your parts are clean and the braid size is even, the bun can stay small and still look finished. A bit of mousse, a firm brush on the edges, and a satin tie for a few minutes after styling usually do more than a pile of product. When short hair is neat, the style doesn’t need to shout.
What Makes Side-Swept Bun Braids Work So Well on Short Natural Hair
Short hair has one annoying habit: it shows every decision you make. That sounds harsh, but it’s also useful. With a side-swept bun braid, the braid path gives the eye a clear direction, so the style looks intentional even when the actual bun is tiny. You’re not fighting the length. You’re using the angle.
The side placement matters more than people think. A bun in the center of the back has nowhere to hide, and on short natural hair that can leave the style feeling squat. Move it off-center and suddenly the head shape changes. The braid line adds length through illusion, while the tucked ends keep the style from unraveling when the day gets warm or humid.
I also like that this approach gives you options. You can go all-natural with flat twists or mini braids. You can add braiding hair for a fuller knot. You can keep it sleek or rough it up a little. The braid pattern is the structure; everything else is mood.
Tools That Make These Looks Easier
-
Rat-tail comb: The pointy tail gives you cleaner side parts and sharper triangle or curved sections.
-
Edge brush: Use it for the front hairline, not the whole head. A firm brush overworked for too long can make short coils frizz.
-
Styling mousse: This helps braid bases dry smoother and keeps flat twists from blooming out too fast.
-
Strong-hold gel or edge control: Use a small amount at the roots and hairline. Too much can flake, especially on dry hair.
-
Duckbill clips or sectioning clips: They keep each braid section out of the way while you work on the next one.
-
Bobby pins and U-pins: You’ll need more than you think for side buns on short hair, especially when the ends are too short to wrap fully.
-
Braiding hair, Marley hair, or knotless extensions: Optional, but useful when you want more length or bulk in the bun.
-
Satin scarf or bonnet: This is not optional if you want the parts to last past one night.
-
Light oil or scalp serum: A few drops on the scalp after styling keep the finish from looking dry and chalky.
Smart Prep for Cleaner Parts and Less Frizz

Stretch First: Short natural hair braids more neatly when the curl pattern is stretched a little. Banding overnight, twisting in sections, or a cool blow-dry on low heat can make the parts lie flatter without cooking the hair.
Use Less Product Than You Think: Heavy gel makes short coils clump in odd places and leaves flakes around the braid base. Start with a pea-sized amount on each section, smooth it once, and move on.
Map the Side Before You Braid: A side-swept bun looks better when the direction is planned from the start. Mark the sweep with the rat-tail comb before you touch the first braid. If you try to bend it at the end, the braid line usually looks forced.
Pin From the Inside: Hidden pins do the work. If the outside of the bun is lined with shiny metal, the style looks unfinished. Cross the pins under the braid base and let them disappear.
Treat the Hairline Like Fragile Fabric: The front edges need a gentler hand than the rest of the head. If your scalp starts to sting, loosen the section now. A style that feels fine for five minutes and then aches is already too tight.
The Mistakes That Ruin a Good Side Braid Bun
-
Pulling the front too tight: The symptom is an immediate sore scalp or a weird lifted look at the temples. Ease off the tension and re-braid if needed. Tight does not mean neat.
-
Using oversized sections on short hair: Big sections make the bun bulky on one side and leave the braid base looking sparse. Smaller, even sections give you a cleaner wrap.
-
Skipping stretch prep: If the hair is fresh, shrunken, and springy, the parts blur and the bun slides. Stretch the hair first so the braid can sit flat.
-
Forcing a full wrap when the length isn’t there: Short ends that won’t tuck will poke out and fray. Use pins, thread, or a small added-hair tail instead of muscling the braid into a shape it can’t hold.
-
Overloading the scalp with gel: Flakes, crunch, and dull-looking roots are the usual outcome. Use enough to smooth, not enough to plaster.
Variations and Adaptations to Try
Low-Tension Everyday Version: Keep the braids medium-sized, skip added hair, and build the bun with pins instead of wrapping. This suits short hair that needs a break from heavy styles.
Dressy Cuff-and-Thread Finish: Add gold cuffs, a few strands of hair thread, or matte beads near the front braid. The style still stays low, but the finish reads more deliberate.
Fuller Extension Version: Feed in a small amount of matching braiding hair to the braids before sweeping them into the bun. This is the move when your own hair is too short for the knot you want.
Soft Romantic Version: Leave one or two tiny braids loose near the face and use curled ends around the bun. It gives the style a gentler line and works well for events.
Sweat-Friendly Gym Version: Choose flat twists or thin cornrows, keep the bun low and tight enough to stay put, and skip heavy oils before a workout. Less product means less slipping.
How to Keep the Style Fresh Between Wash Days
Side-swept bun braids on short natural hair usually stay neater when the night routine is boring and consistent. Wrap the hair with a satin scarf or bonnet every night. If the bun is bulky, use the scarf to press the front and the side only; don’t flatten the knot itself into a dent.
A light mist of mousse on the braid surface can revive the look every two or three days, but don’t drench the hair. Wetting the braids too much can loosen the base and puff up the roots. If the scalp feels dry, use a few drops of oil along the parts, not all over the braid lengths.
Most of these styles wear best for about 5 to 10 days, depending on hair type, tension, and how much added hair you used. If the edges start to hurt, the bun starts shifting, or the parts are fuzzy enough that the pattern disappears, take the style down. Protective styles stop protecting the moment they start pulling.
Frequently Asked Questions
How short is too short for side-swept bun braids?
If your hair is still very close-cropped and won’t hold a section, you’ll need added hair or a style with more pinning than wrapping. Once you have enough length to grip a braid at the root, most short natural hair can be shaped into some version of a side bun.
Can I do these styles without braiding hair?
Yes. Flat twists, small cornrows, and tucked buns can all work on natural hair alone. Braiding hair only becomes useful when you want more size, longer ends, or a bun that sits fuller at the side.
Which styles are gentlest on tender edges?
Flat twists, knotless braids, and loose cornrows usually put less pressure on the hairline than tight feed-ins or jumbo braids. The real test is how the scalp feels once you finish; if it throbs, the style needs to be loosened.
How do I keep the bun from slipping on short hair?
Use a hidden base of crossed bobby pins and anchor the braid into itself before you tuck the ends. A small amount of mousse at the start also helps the sections hold better once they dry.
Will these styles work on very thick hair?
Yes, but the sections may need to be smaller so the bun doesn’t become too heavy. Thick short hair often benefits from a deeper side part and a slightly lower bun position to keep the shape balanced.
Can I sleep in these styles for a week?
Usually, yes, if the scalp stays comfortable and the parts remain neat. Wrap the hair every night, refresh the front if needed, and don’t keep the style so long that buildup starts collecting at the roots.
What if my hair frizzes up fast?
Use styling mousse during the braid process and keep the sections clean and dampened enough to lay flat. Frizz is usually a prep problem, not a hair problem.
Do these styles work for a formal event?
Absolutely. A crisp part, a tucked side knot, and one or two accessories can make short natural hair look deliberate enough for a wedding, interview, or dressy dinner without turning it into a helmet.
The Styles That Stay Interesting
Short natural hair doesn’t need to be pushed into a shape it can’t hold. It needs a braid pattern that gives it direction, a side sweep that creates length where there isn’t much, and a bun that respects the texture instead of fighting it. That’s the appeal here. These styles don’t pretend short hair is long. They make short hair look finished on its own terms.
The best part is how adaptable they are. You can go soft, sharp, glossy, beaded, tucked, or full. You can keep things close to the head for a workweek run, then add cuffs or curls when you want the style to feel dressed up. The basic idea stays the same, and the mood changes with almost no extra effort.
The next time your coils hit that awkward in-between length, try the side sweep instead of forcing a straight-back bun. It’s the shape that gives the hair room to look intentional, and that’s a trick worth keeping close.