Thin hair is not a sentence. It’s a prompt to build smarter.
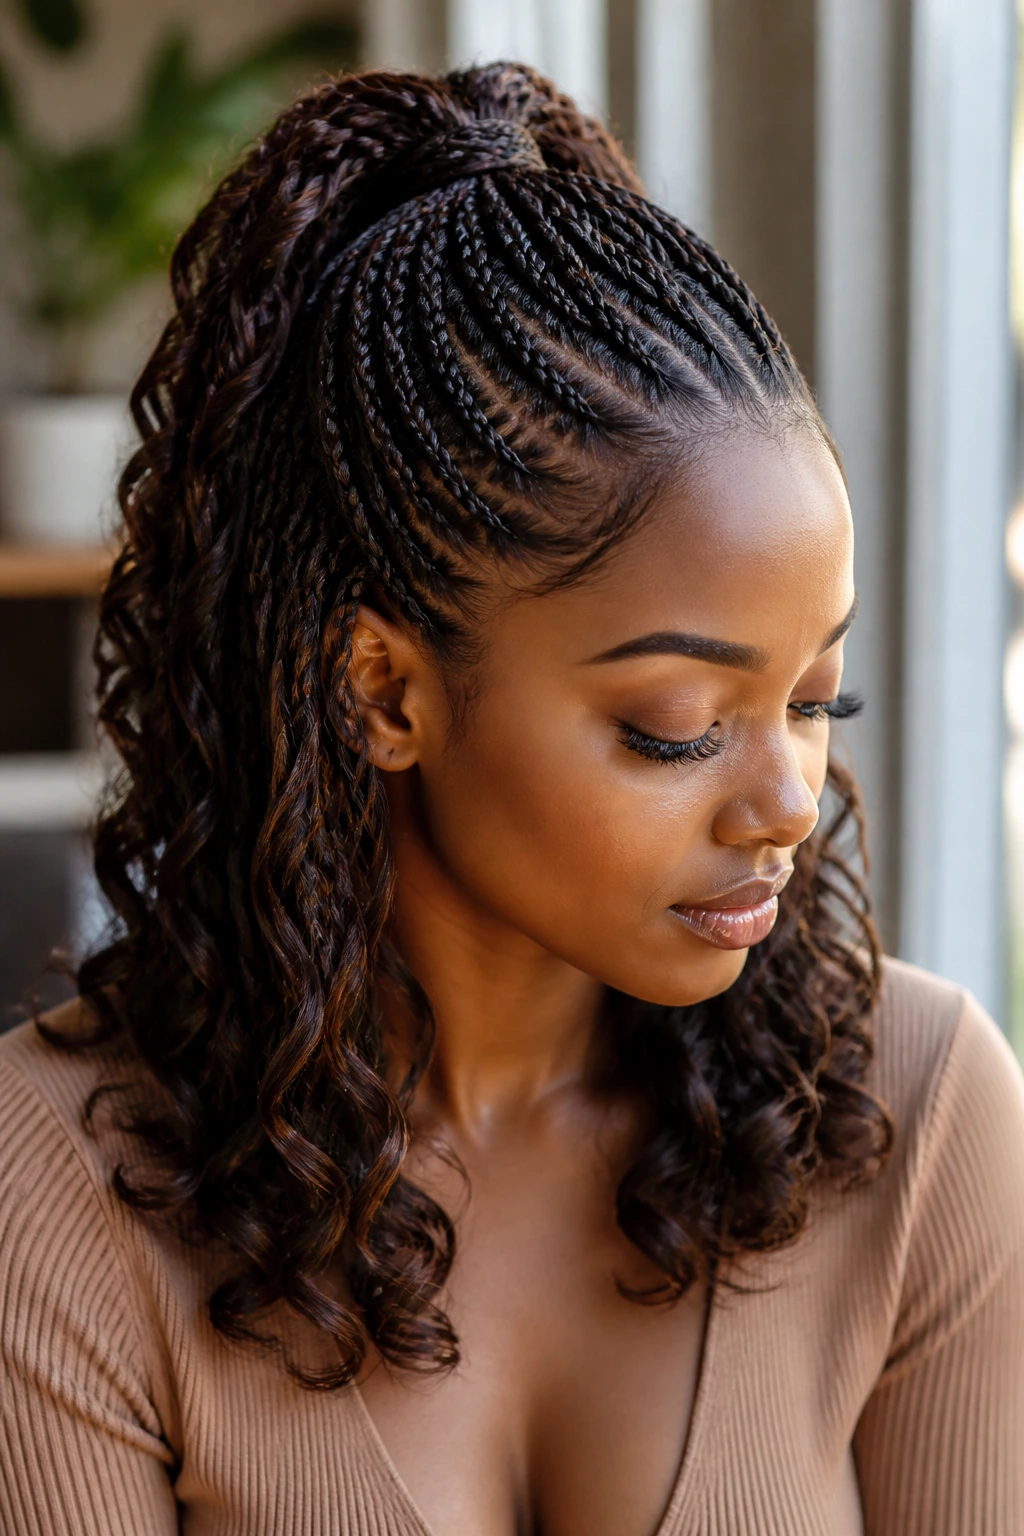
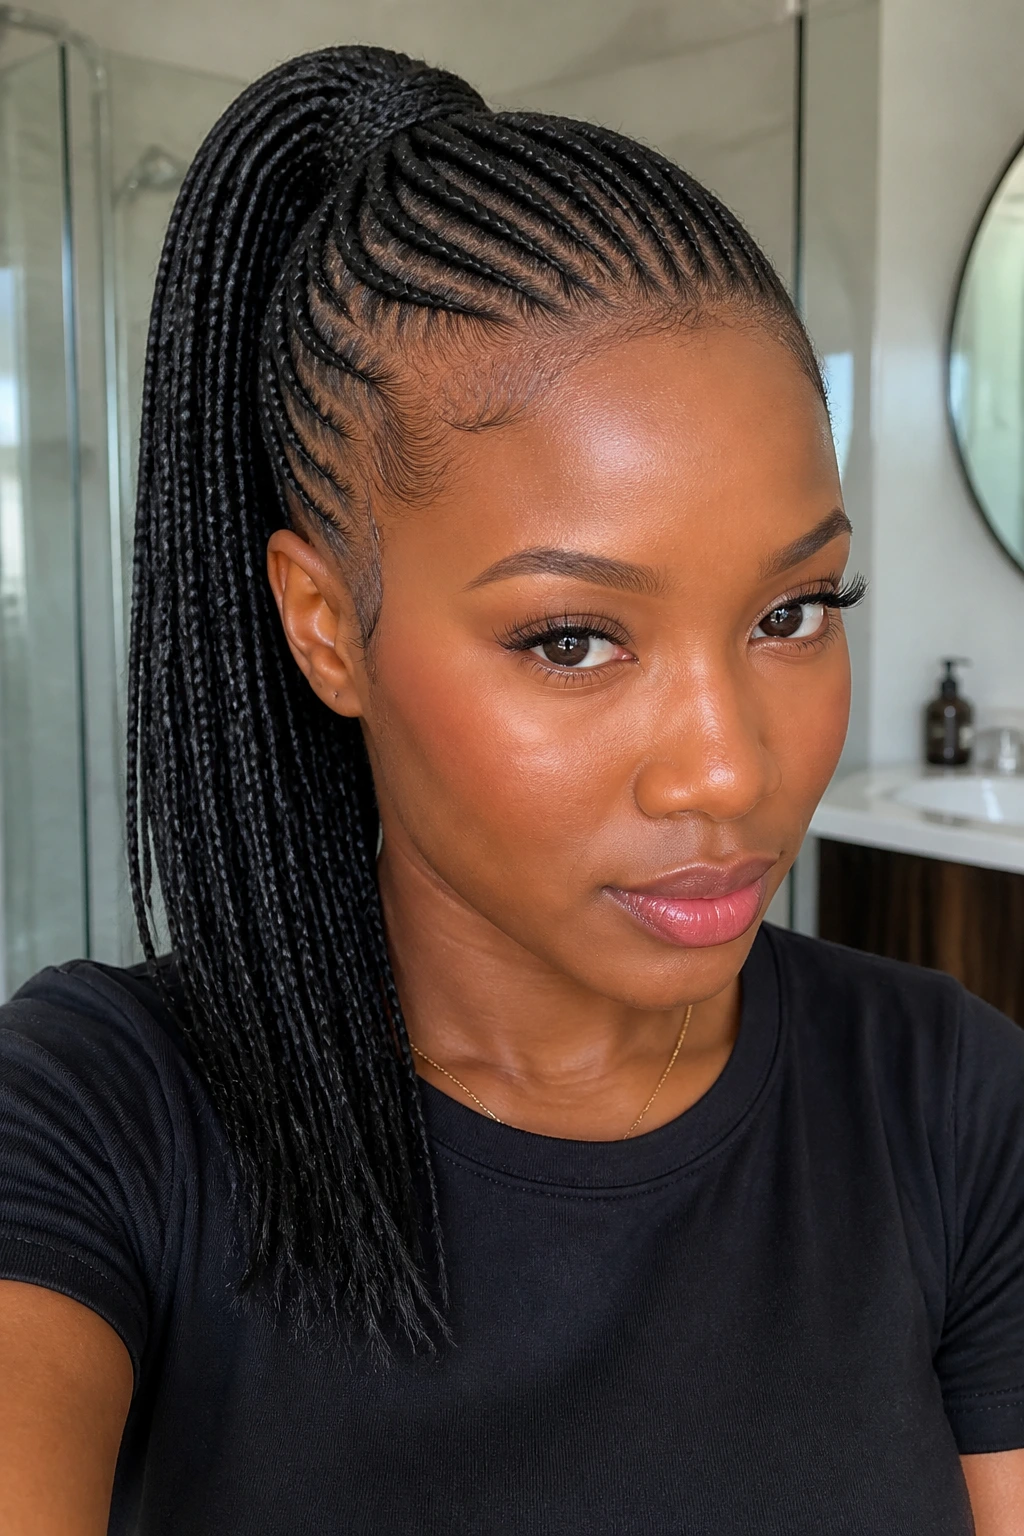
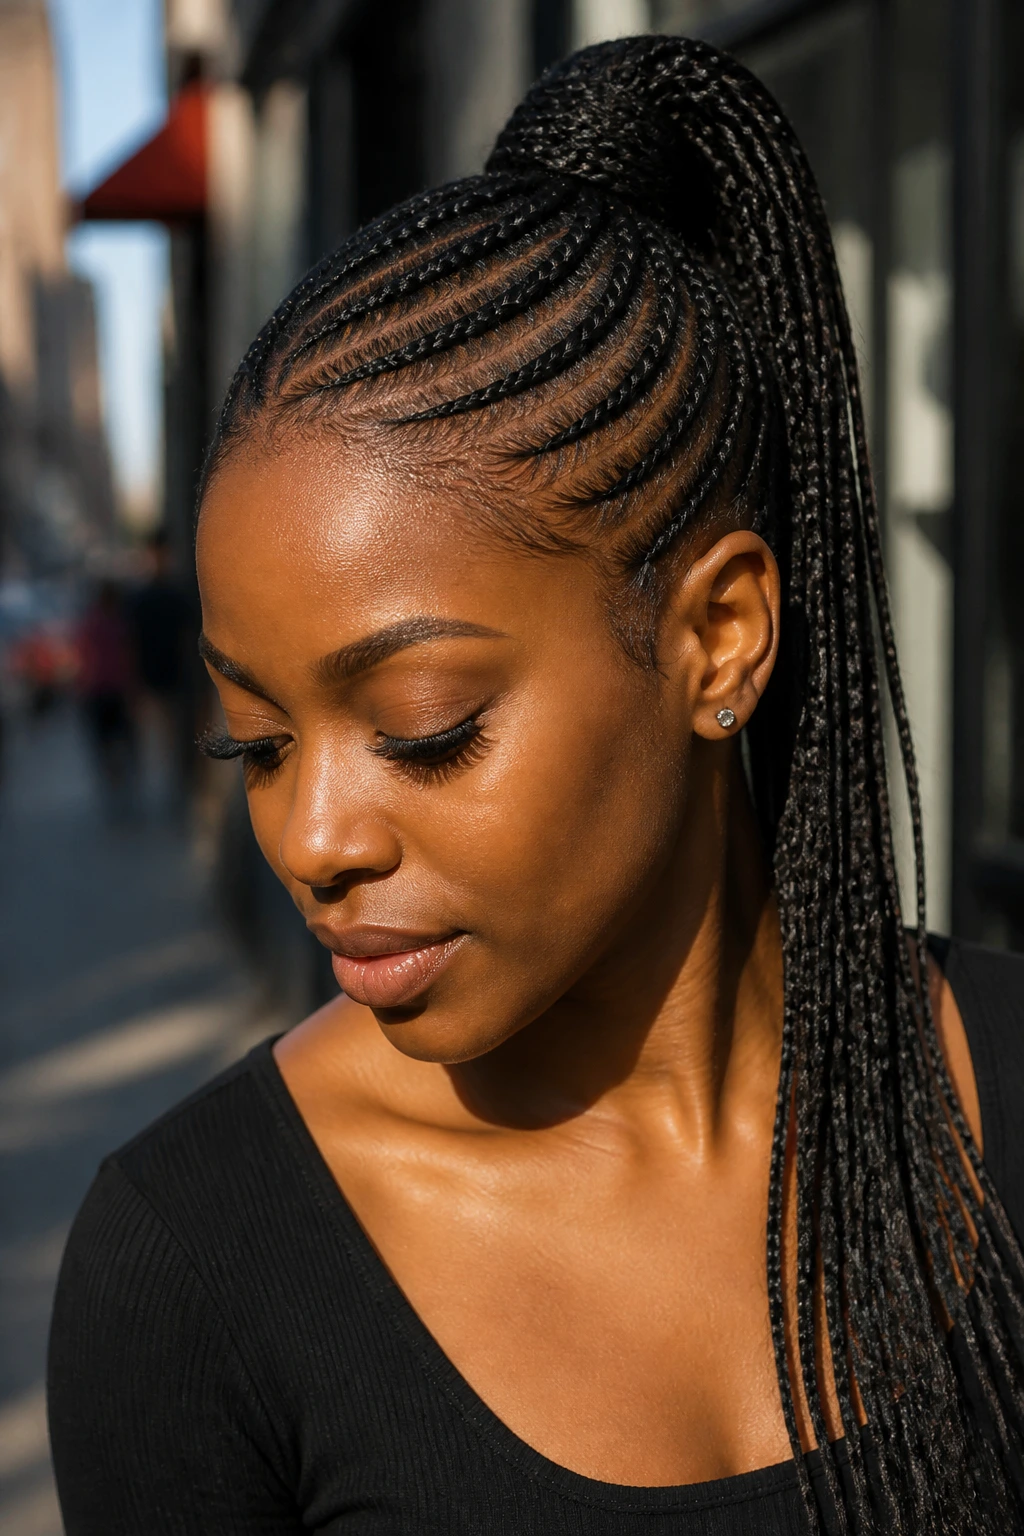
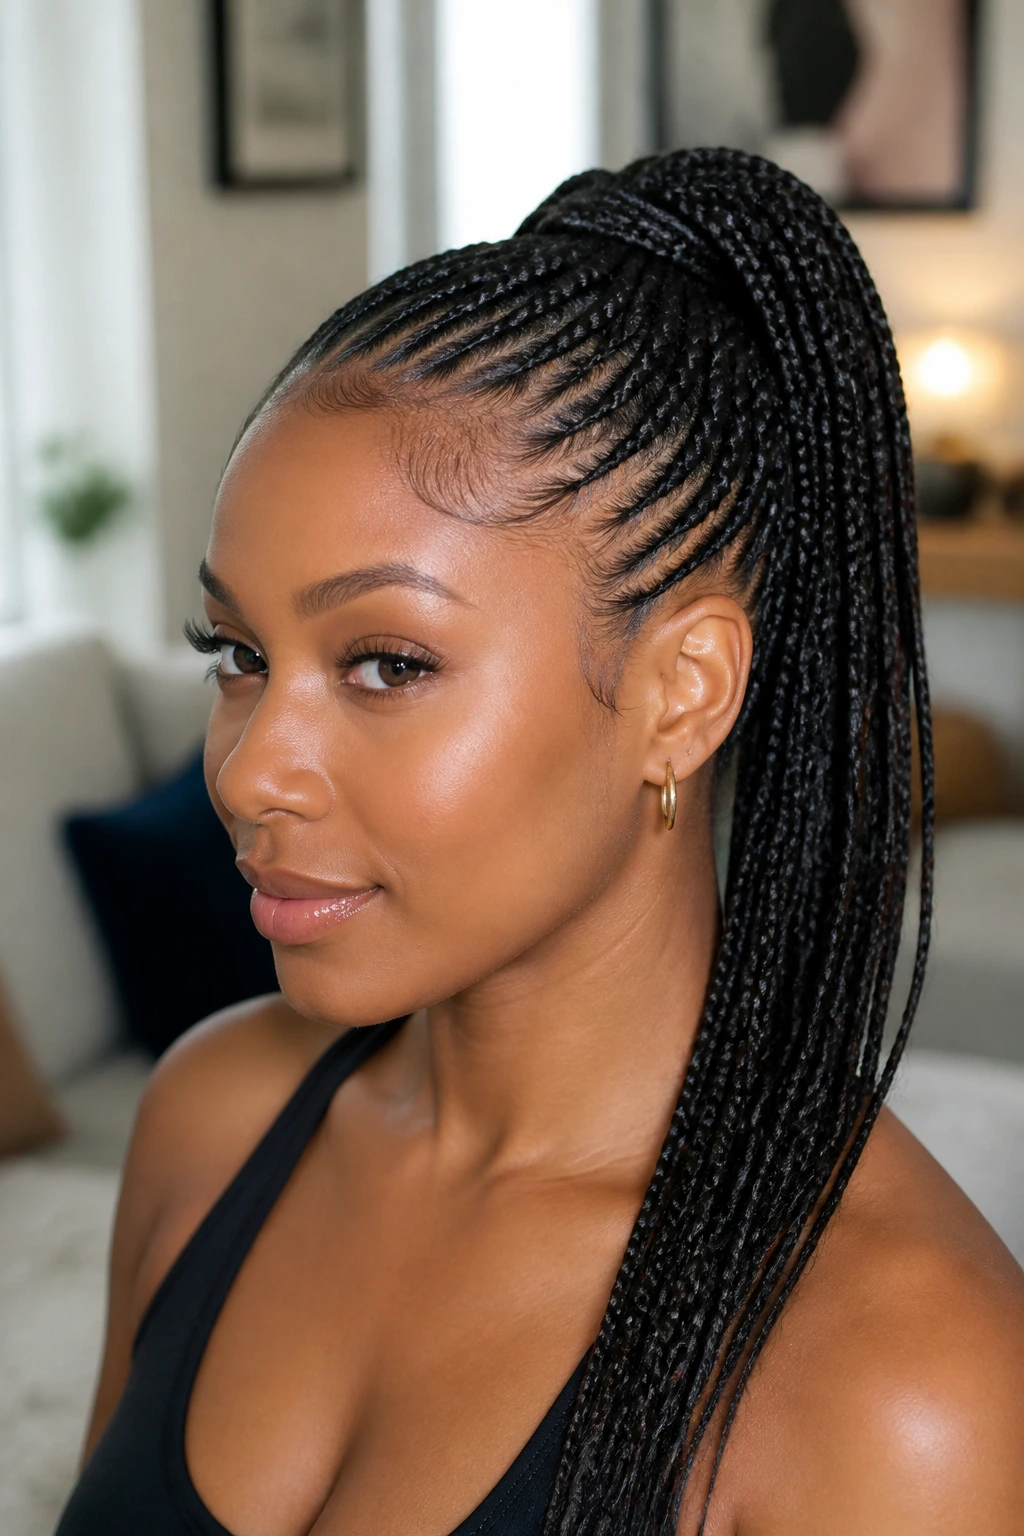
Braided ponytails for Black hair with thin hair work best when the braid pattern does the heavy lifting and the roots stay light. That means smaller sections, flatter parting, less bulk at the base, and a ponytail that sits where your hair can actually support it. A style that looks gorgeous on thick hair can feel clumsy on finer strands if you copy it exactly. The fix is scale.
I like braided ponytails on lower-density hair because they can fake fullness without asking your edges to do a wrestling match. A clean feed-in, a flat cornrow base, a wrapped elastic, and a tail that moves a little — that combination does more than a giant bundle ever will. And when the parting is crisp? The whole style reads polished, not overworked.
Why These Braided Ponytails Work So Well on Thin Hair
- Less tension at the base: Smaller sections and feed-in braids spread the weight across more points, so one spot near the hairline doesn’t take the whole pull.
- More shape, less bulk: The braid pattern gives the eye something to follow, which makes the ponytail look fuller without stuffing in extra hair.
- Easy to scale up or down: You can build these styles with one pack of braiding hair, two packs, or none at all, depending on how much density you want to fake.
- Better edge control: A flat nape ponytail or crown ponytail usually puts less strain on fragile edges than a high, heavy tail with a thick extension bundle.
- Cleaner growth-out: Fine or thin hair shows mess faster, so styles with neat parts and controlled wrap bases stay wearable longer.
- Plenty of range: You can keep it low and quiet, or go long, curly, beaded, or wrapped when you want the ponytail to read dressy instead of plain.
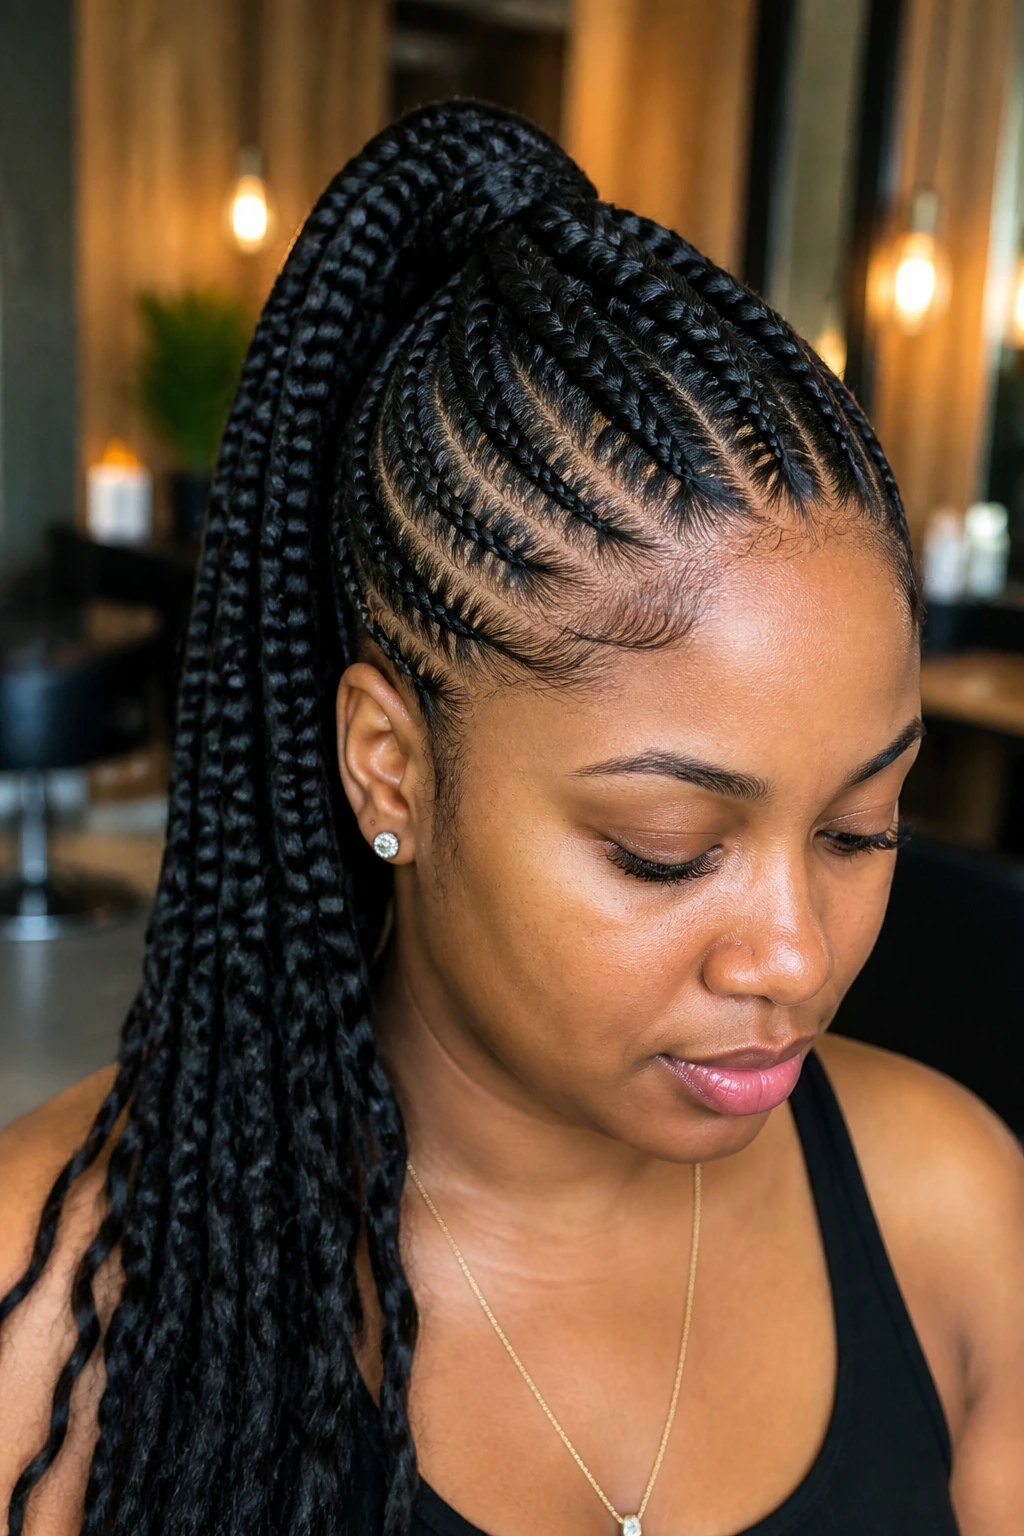
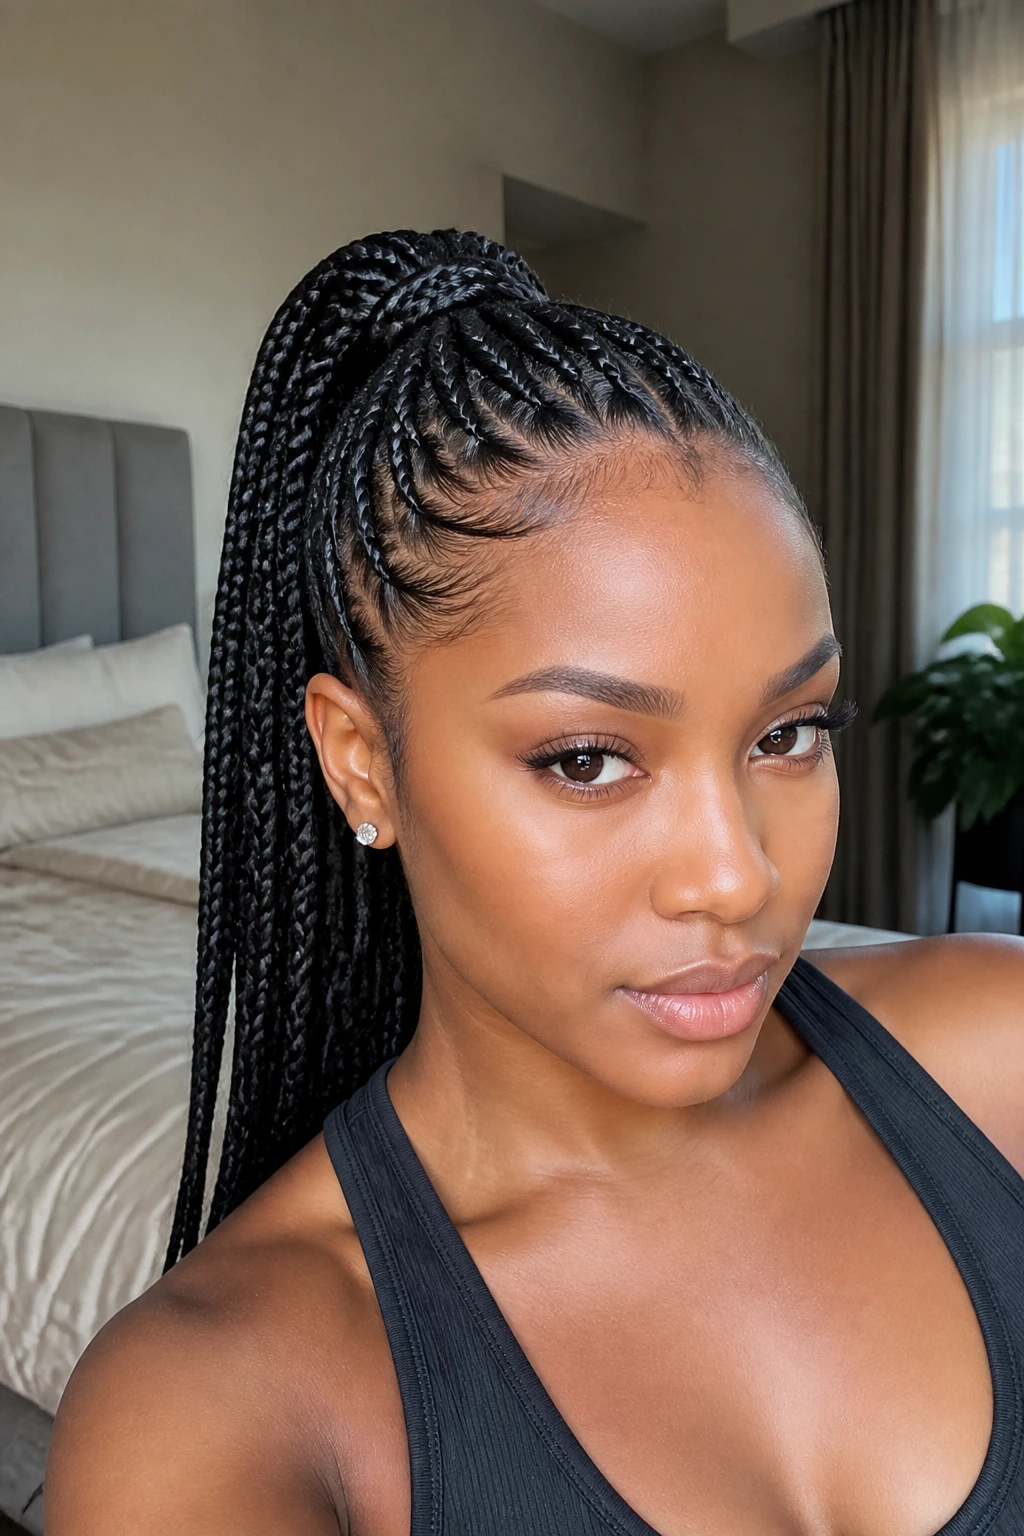
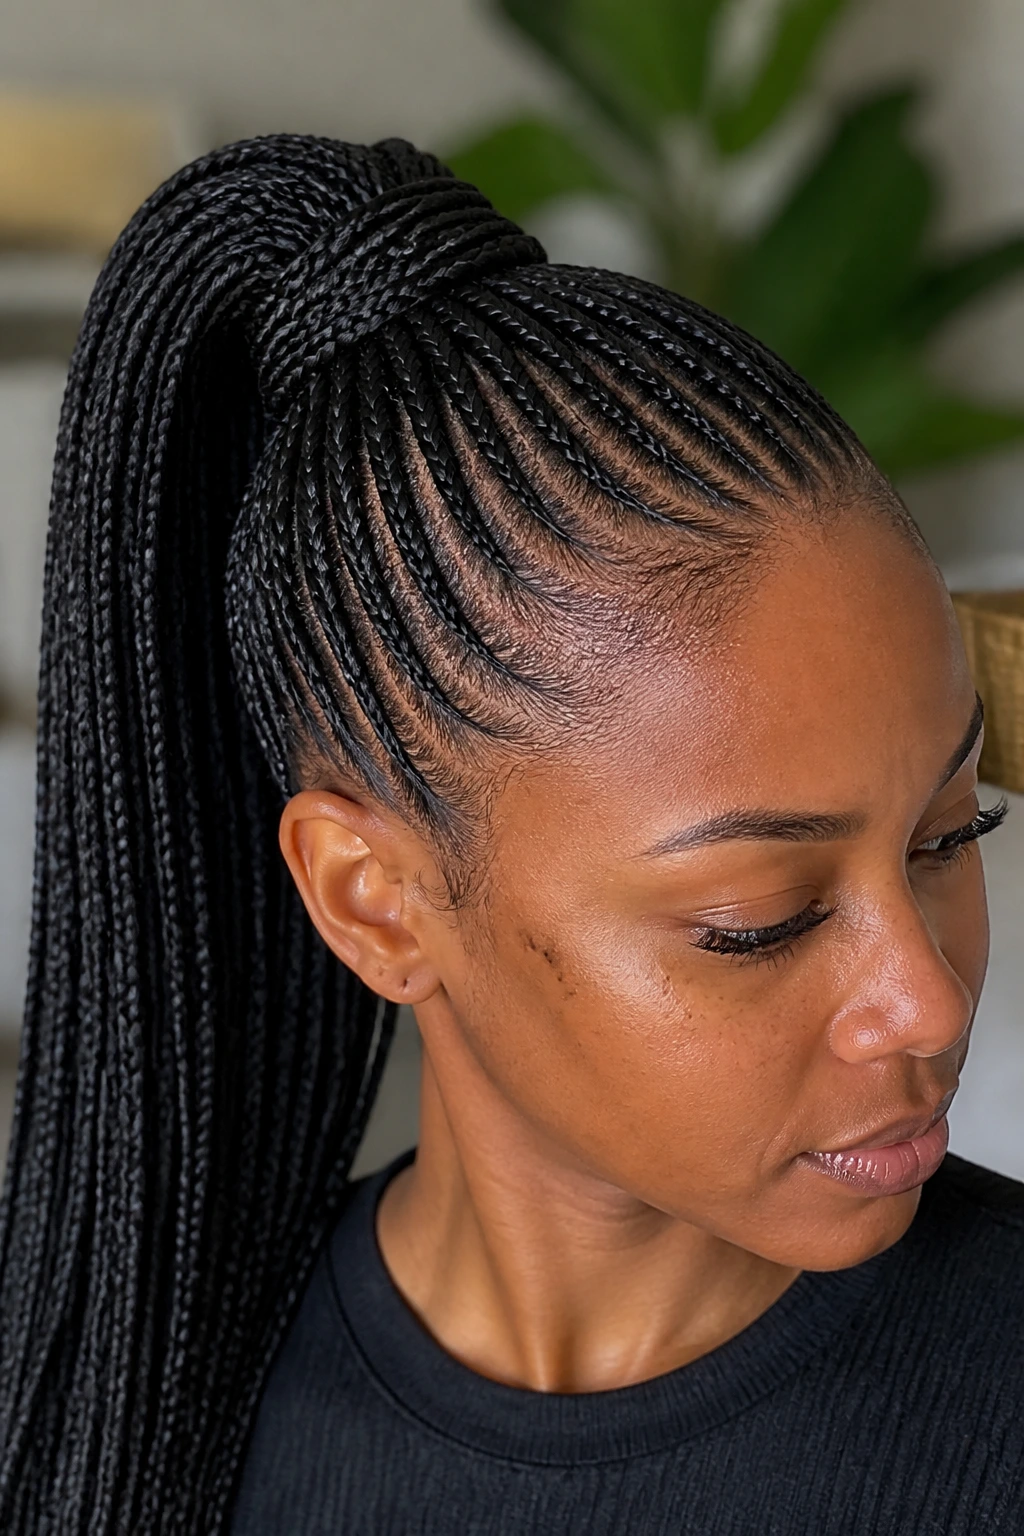
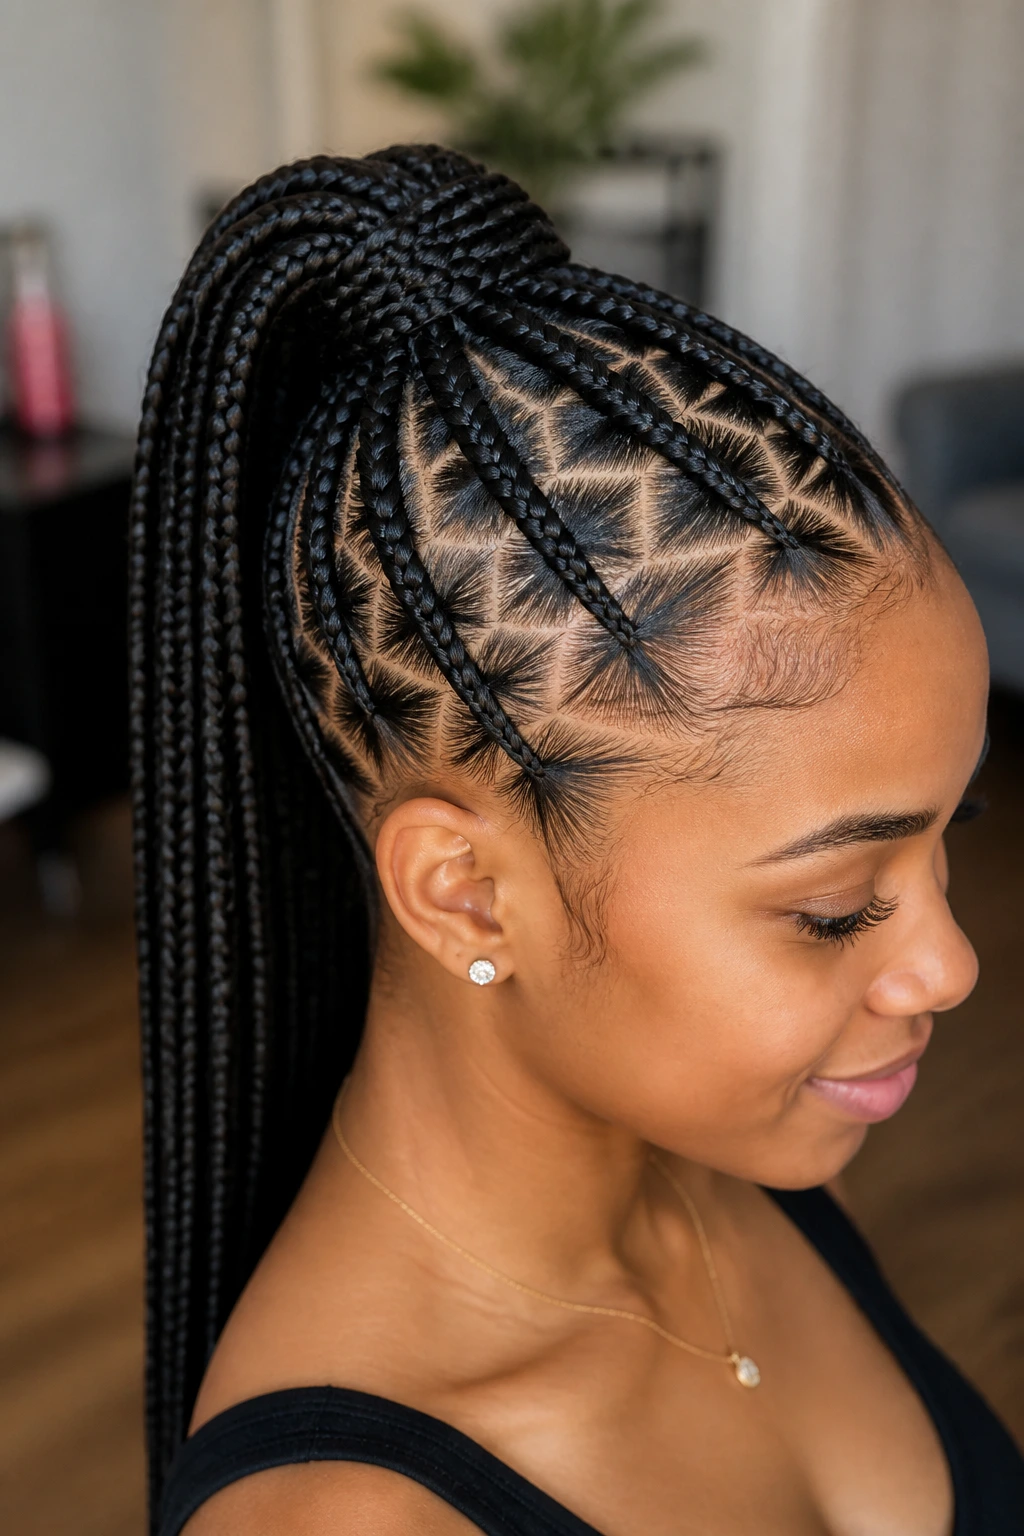
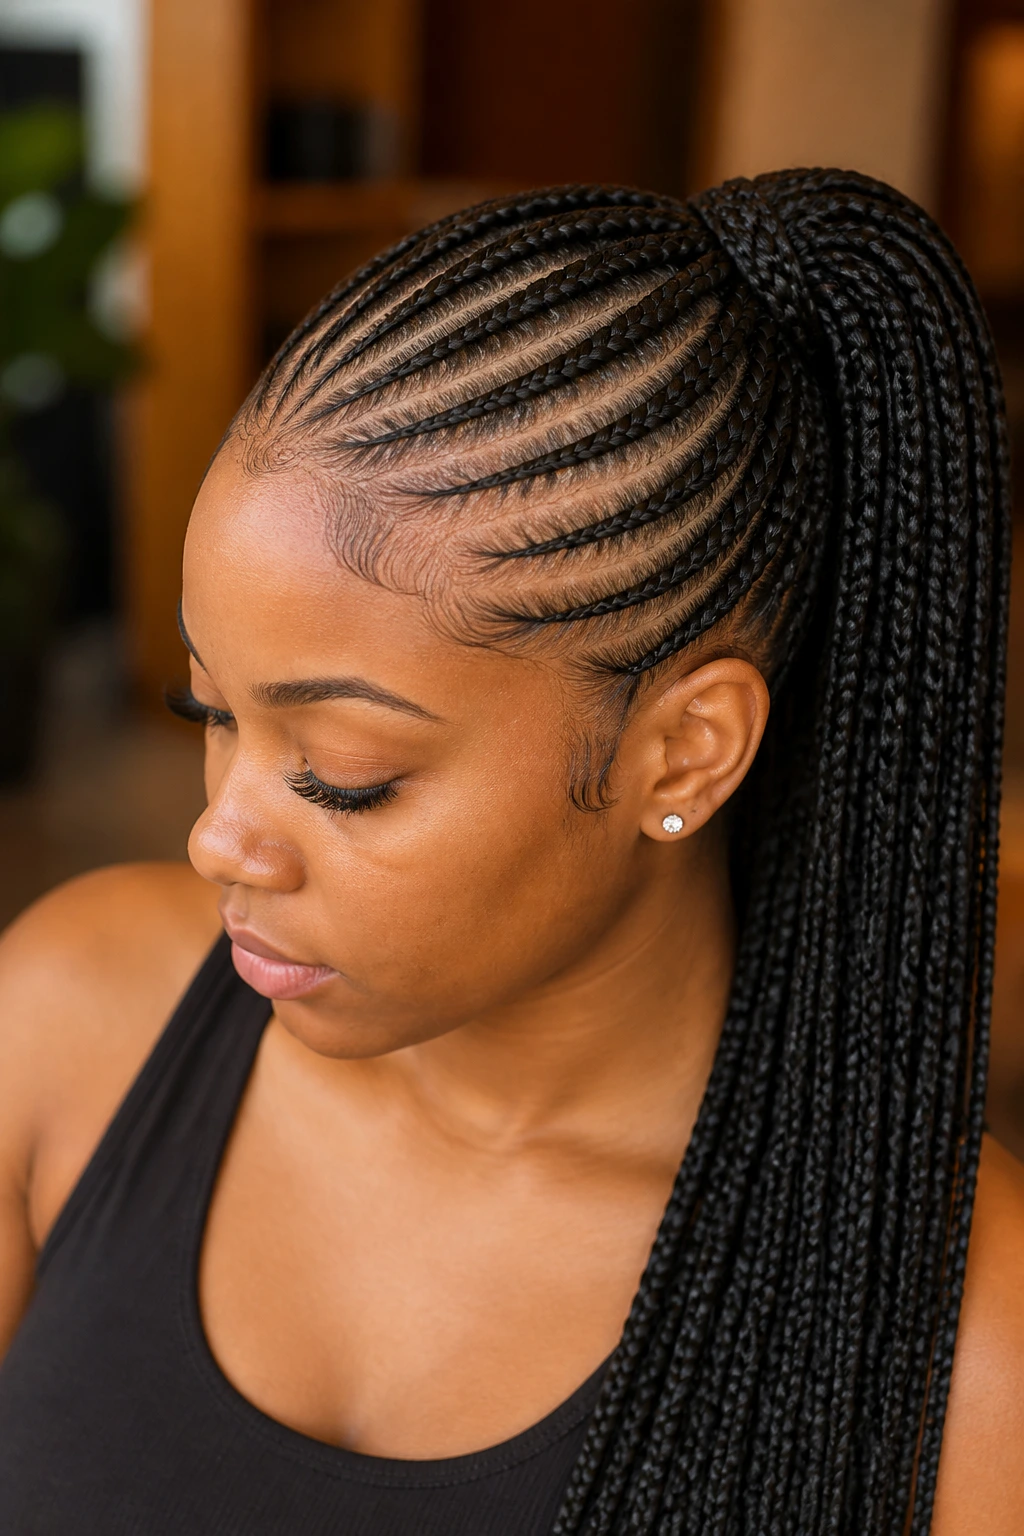
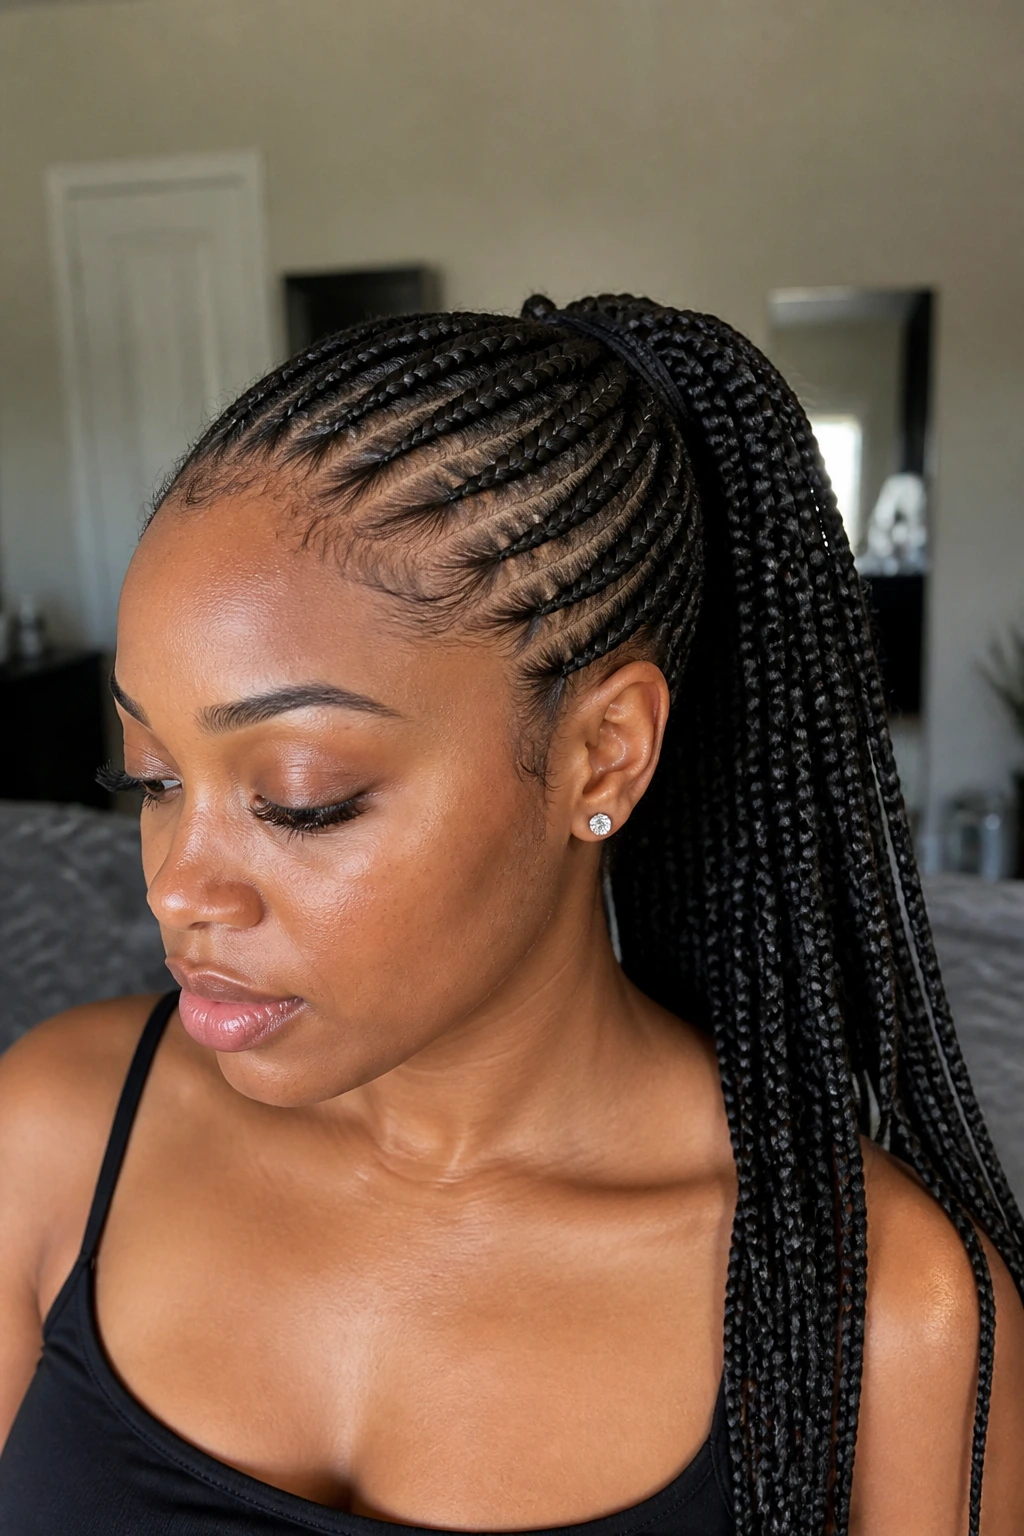
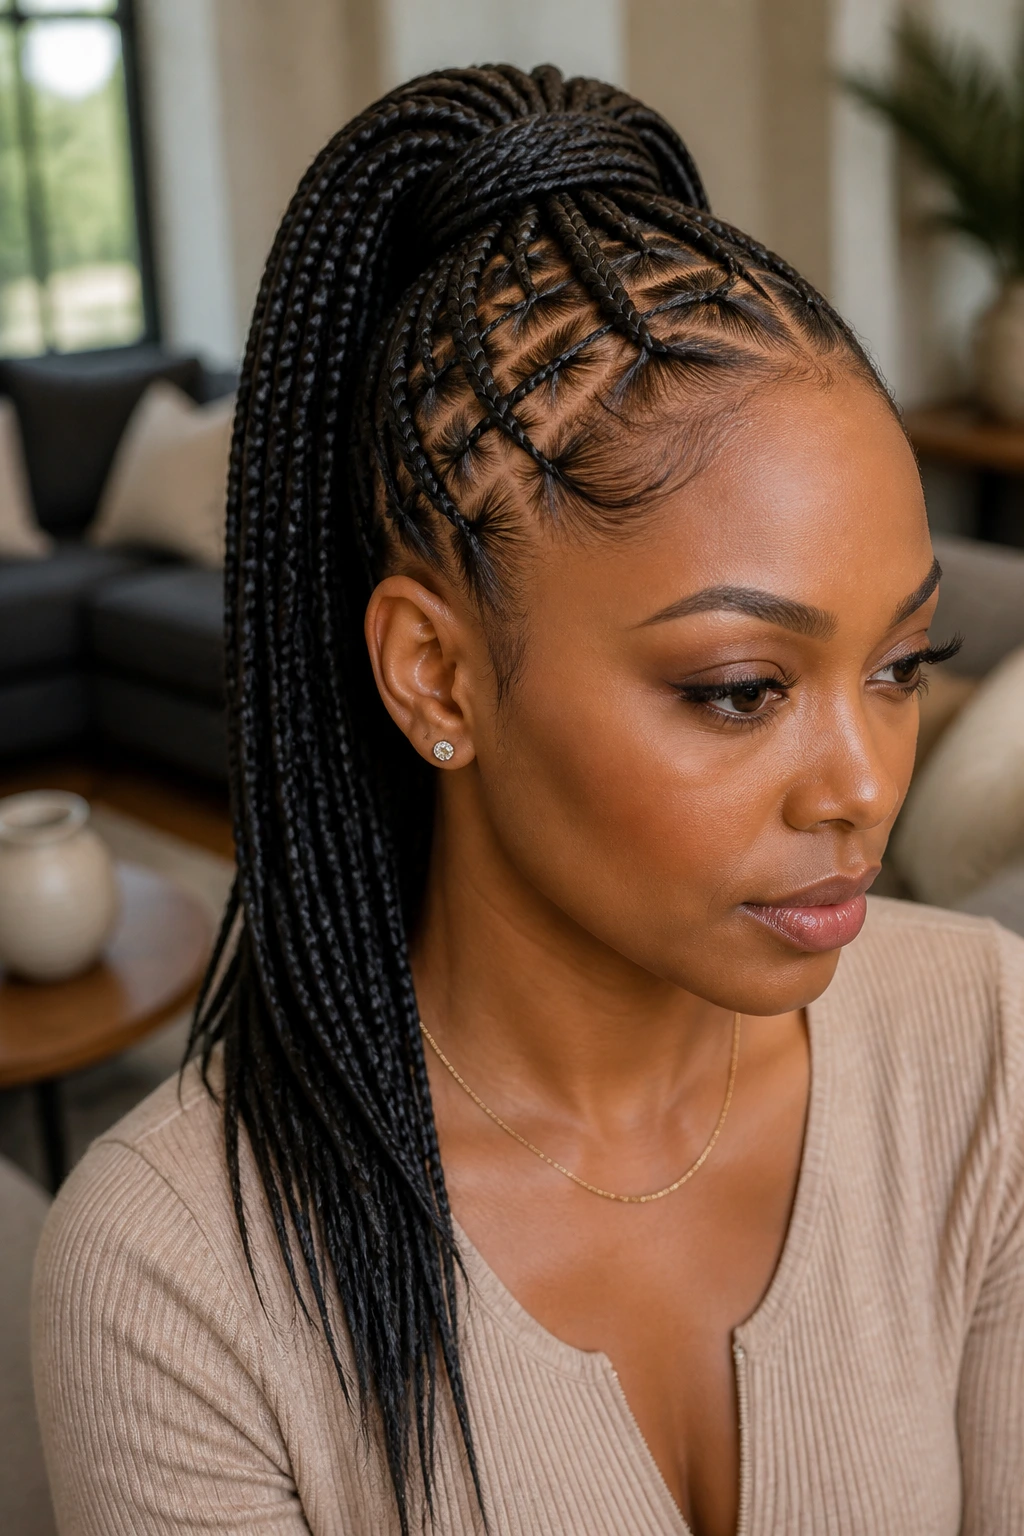
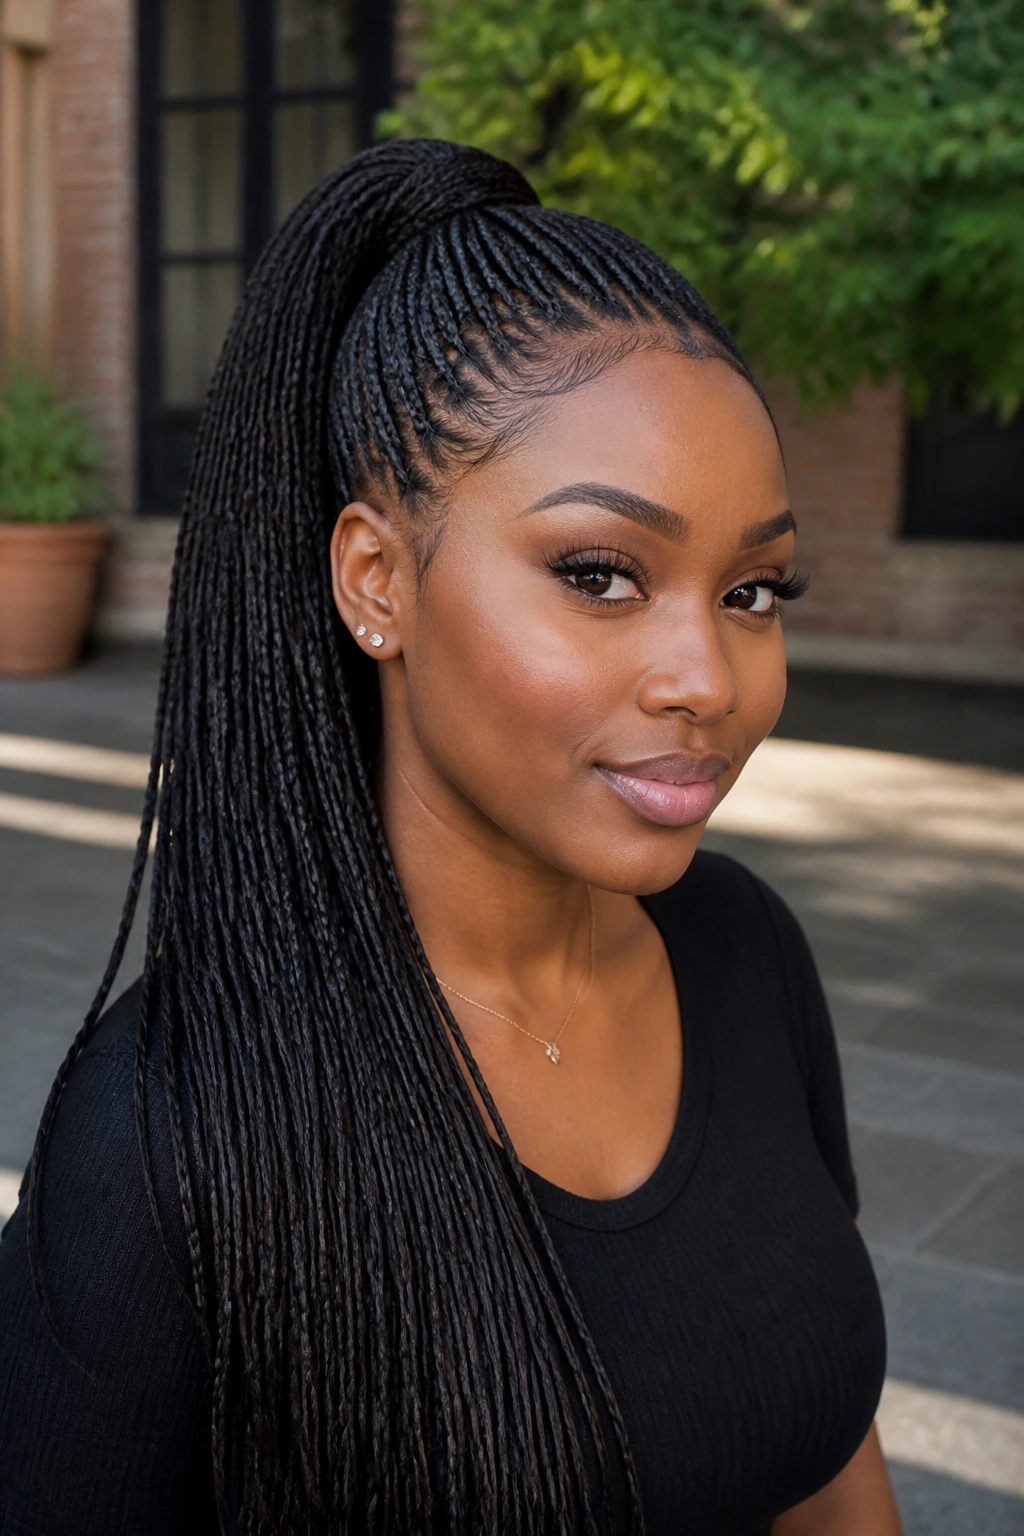
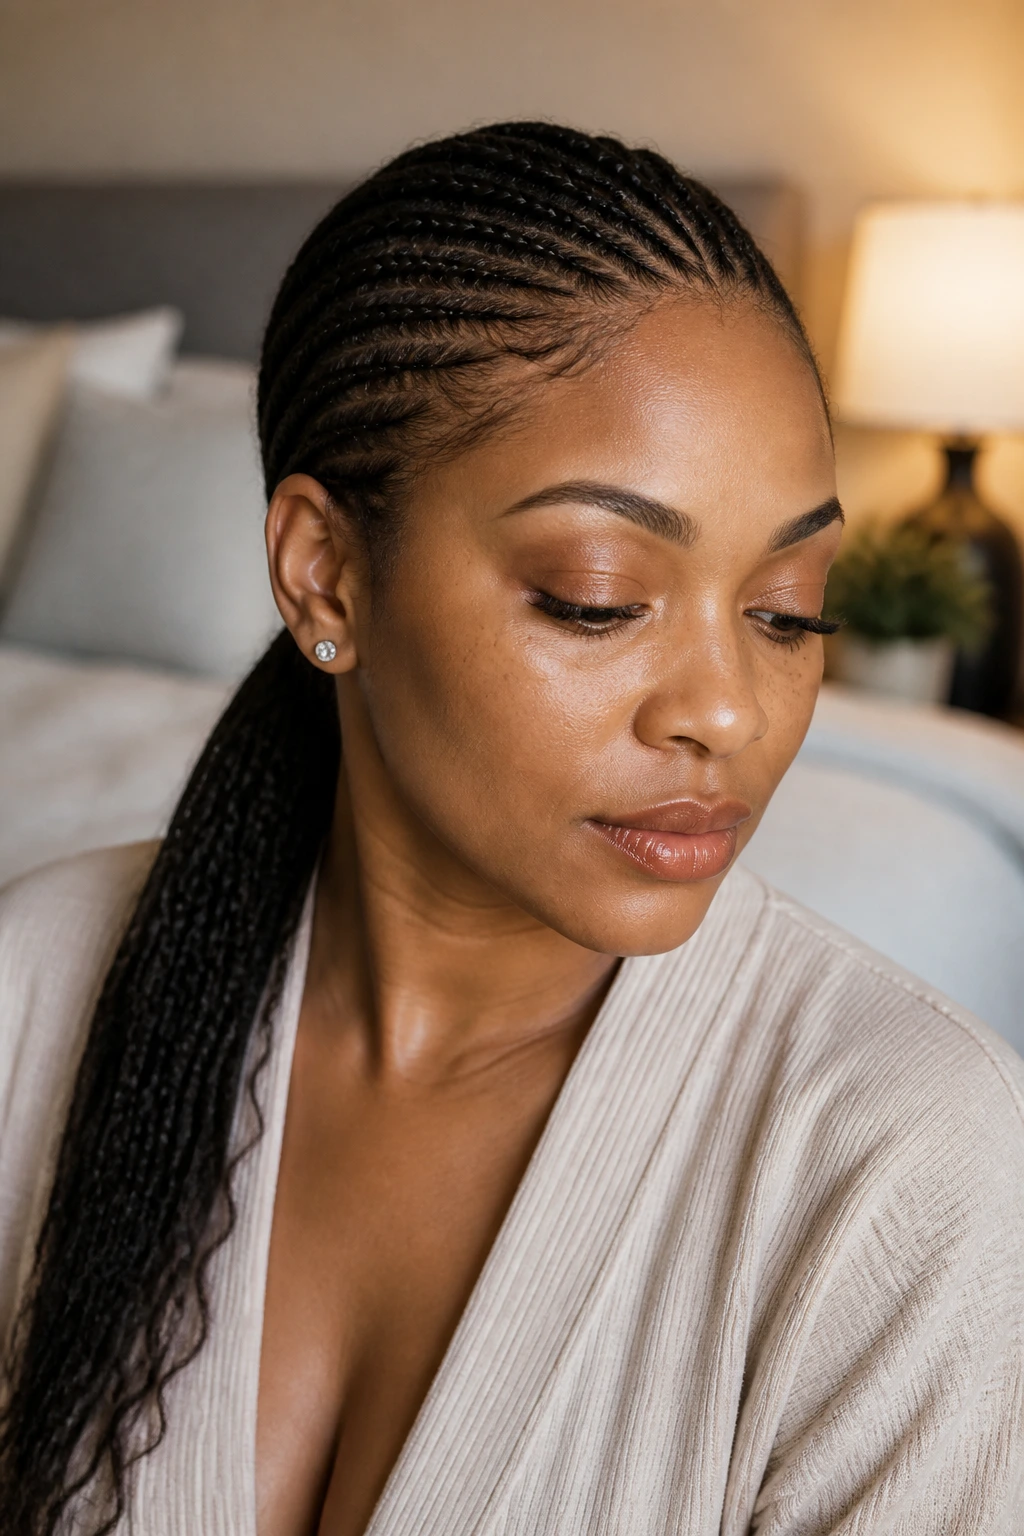
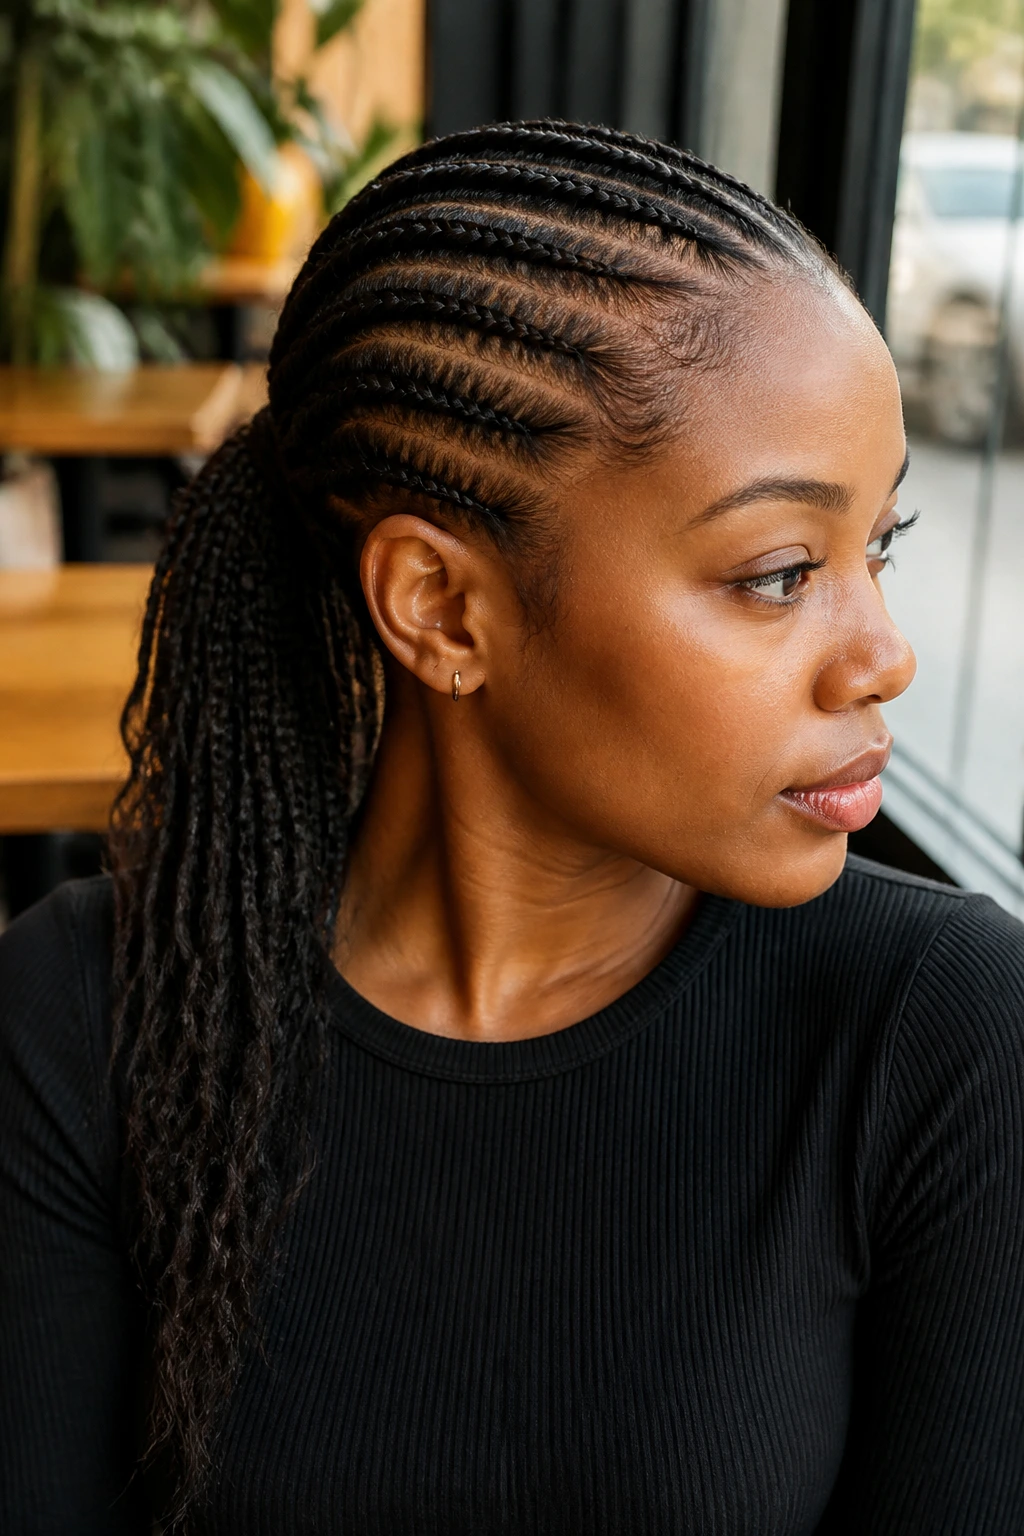
1. Sleek Feed-In Low Ponytail
This is the style I recommend first when someone wants a braided ponytail for Black hair with thin hair that won’t chew up the hairline. A center part or soft side part, 4 to 6 slim feed-in braids, and a low nape ponytail keep everything close to the scalp. The shape is neat, calm, and honest. No fluff needed.
What makes it work is the weight placement. A low ponytail lets the added hair sit on the back of the head instead of hanging off the crown, which means less tug where the hair is already delicate. Keep the first inch of each braid tight enough to look clean, but not so tight that the scalp feels hot or sore by lunchtime.
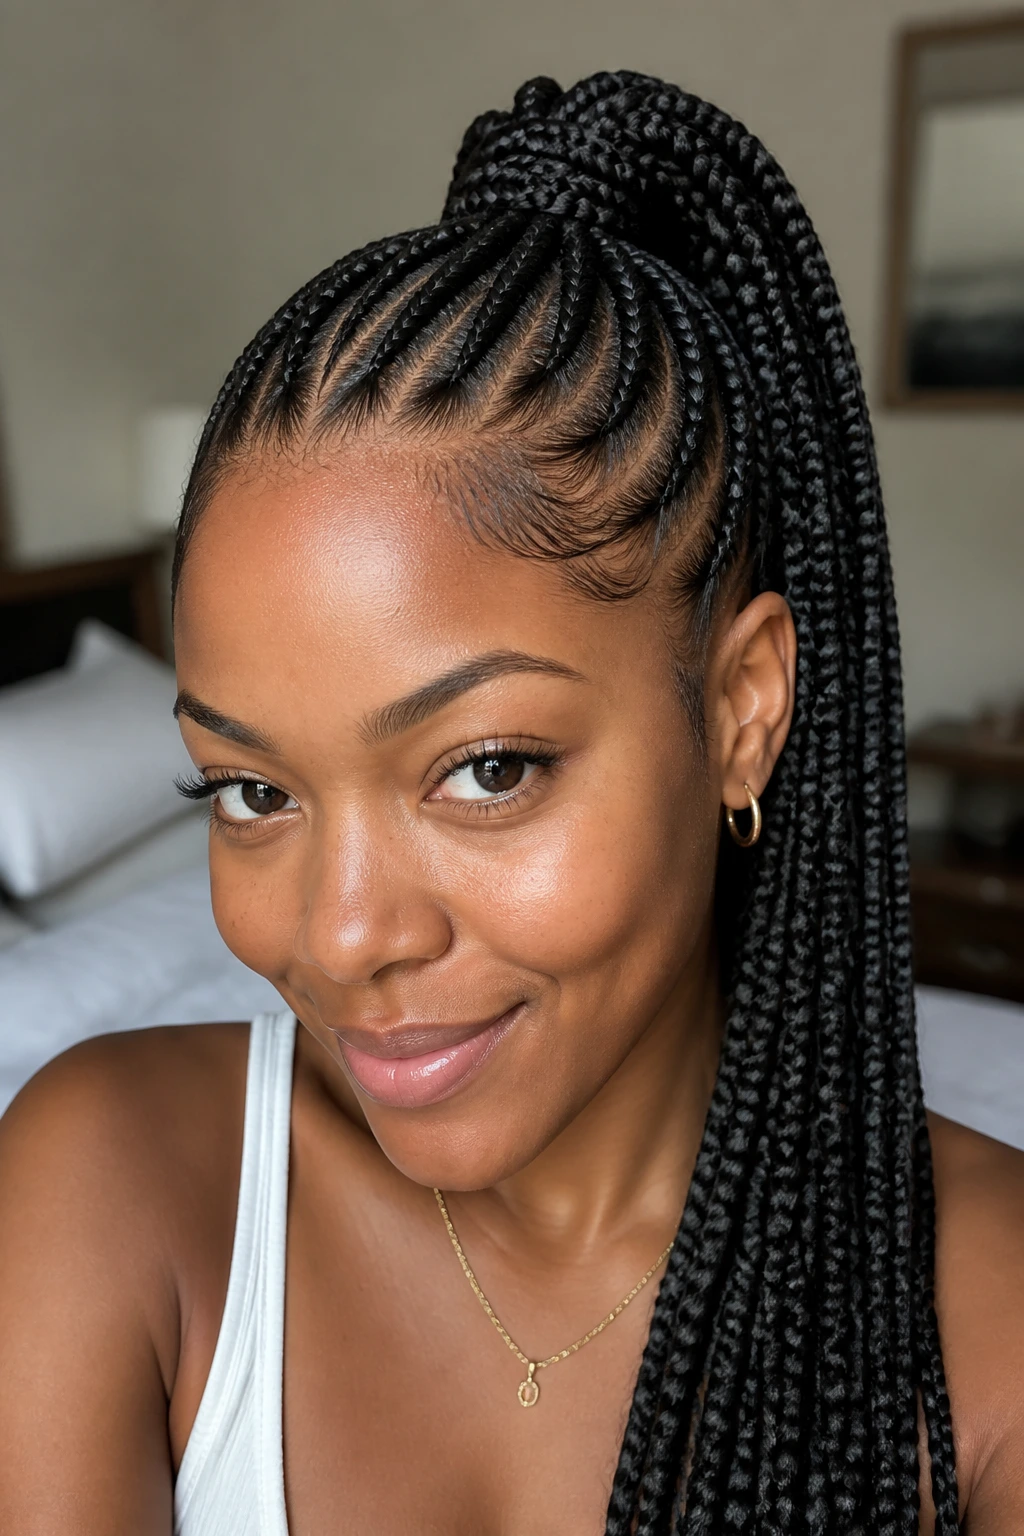
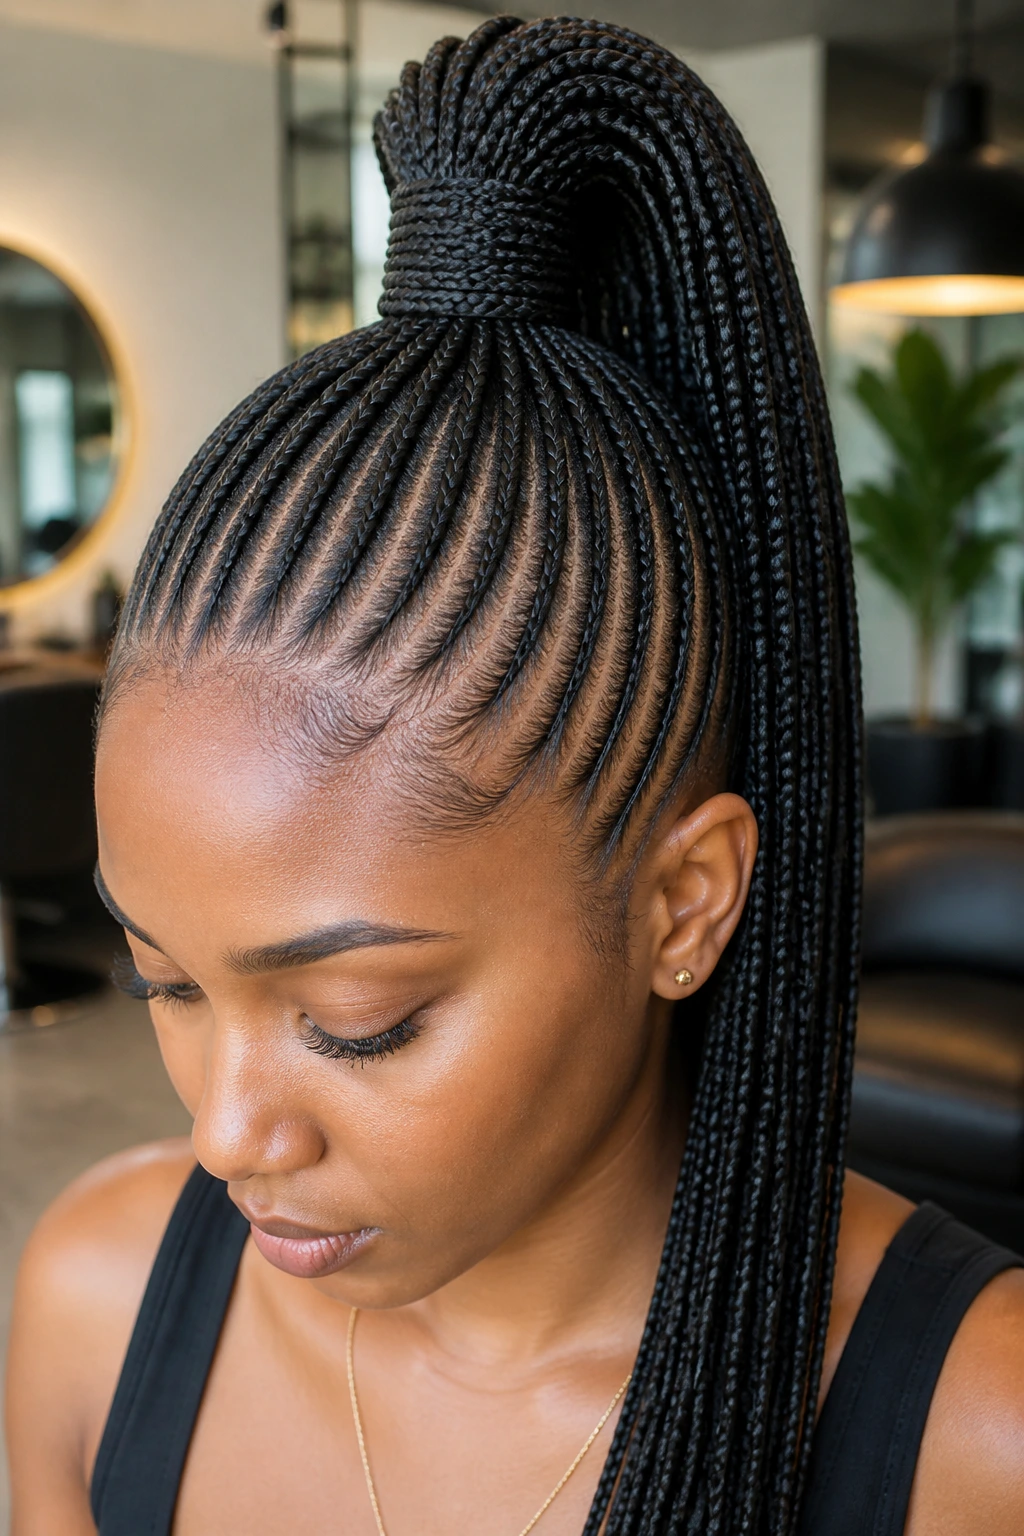
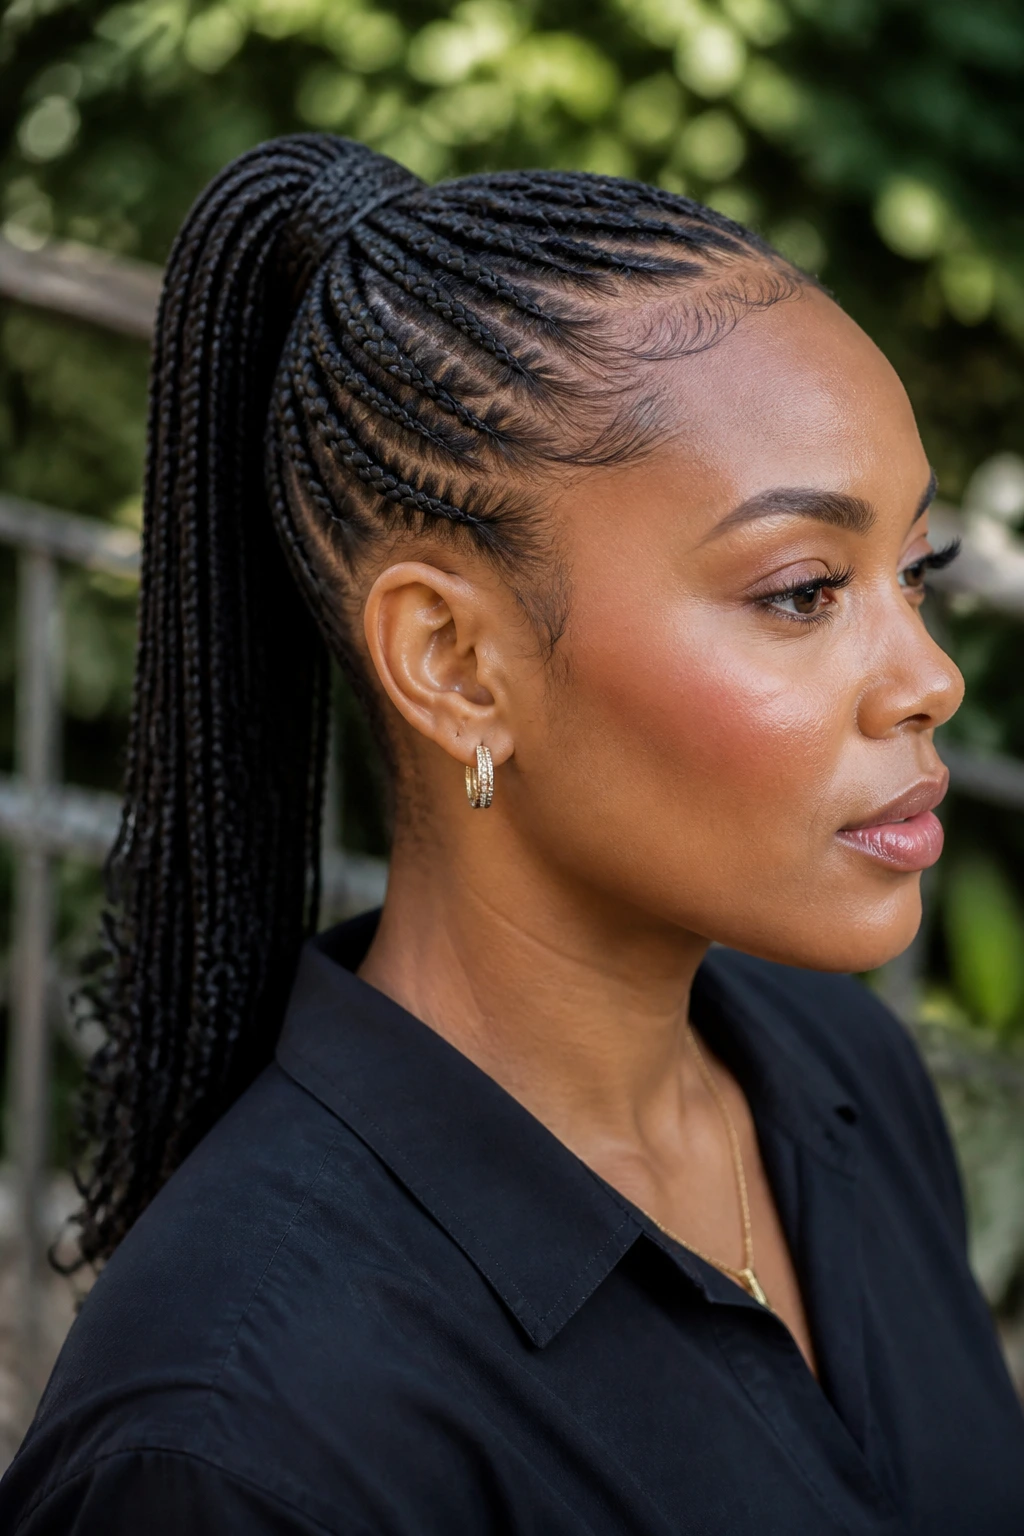
2. High Crown Braided Ponytail
A high crown ponytail changes the whole mood fast. The braids rise from the front of the scalp and gather at the top or just behind it, which makes fine hair look more lifted without piling on bulk everywhere else. It has a sharper profile than a low style, and that works beautifully when the braid count stays modest.
The key is to keep the base narrow and the ponytail piece controlled. If you make the tail too thick, the style starts tipping backward and the weight shows. Best move: ask for a high ponytail with slimmer feed-ins and a wrapped base so the front stays smooth and the top doesn’t look swollen.
3. Side-Swept Cornrow Ponytail
If your hairline is a little uneven or your density is lighter at the temples, a side-swept cornrow ponytail can be a lifesaver. The diagonal pattern pulls the eye across the head instead of straight back, which creates movement and distracts from sparse spots near the front.
I like this one when the goal is softness, not symmetry. The braids can start larger near the part and taper toward the ponytail, and the swept direction gives the style more personality than a straight-back set. It’s a good choice when you want the ponytail to feel styled, not just secured.
- Works well with 5 to 7 cornrows.
- Pairs nicely with a low or mid-height ponytail.
- Keeps the hairline from looking too exposed.
4. Bubble Braid Ponytail with Tiny Plaits
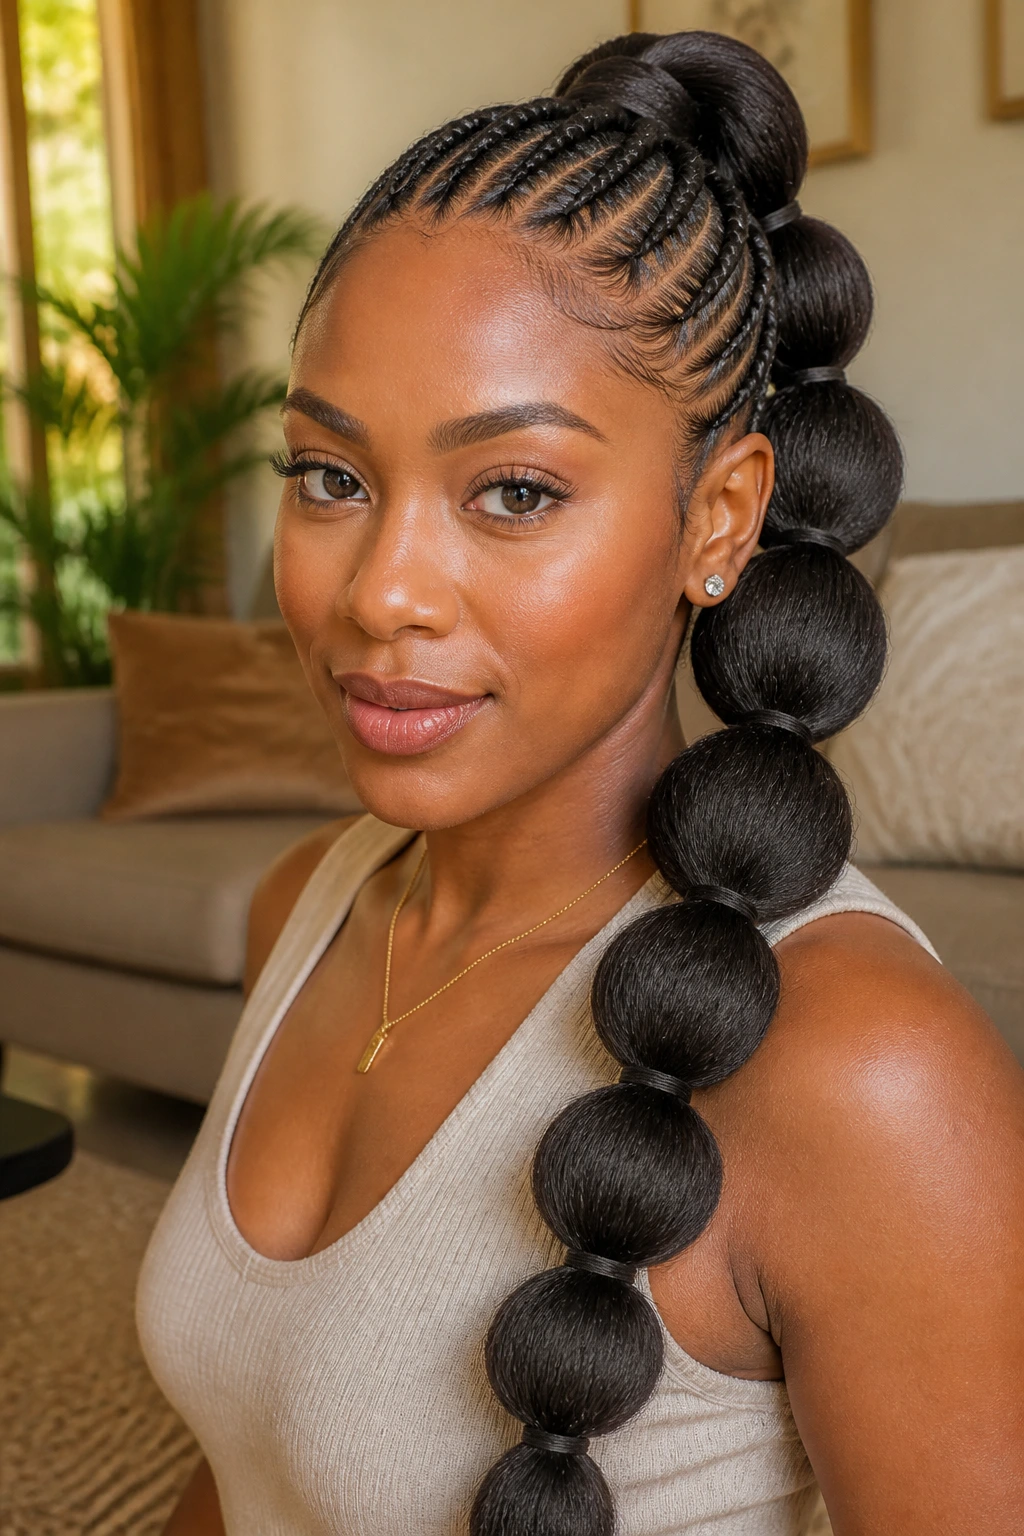
Why does this look so good on thinner hair? Because the “bubble” sections create fake fullness at regular intervals. Tiny plaits at the base keep the ponytail anchored, then soft wraps or elastics carve the tail into rounded puffs that read bigger than the actual amount of hair.
That shape is especially useful if your hair collapses easily when it’s pulled back. A bubble ponytail gives the tail architecture. Use a lightweight extension tail, then tug each section gently with your fingers until the bubbles look even. Don’t yank. That’s how the whole thing goes crooked.
What to keep in mind
- Use small, clear elastics or covered bands.
- Keep the bubbles about 2 to 3 inches apart.
- Add a tiny bit of mousse before sectioning so flyaways stay down.
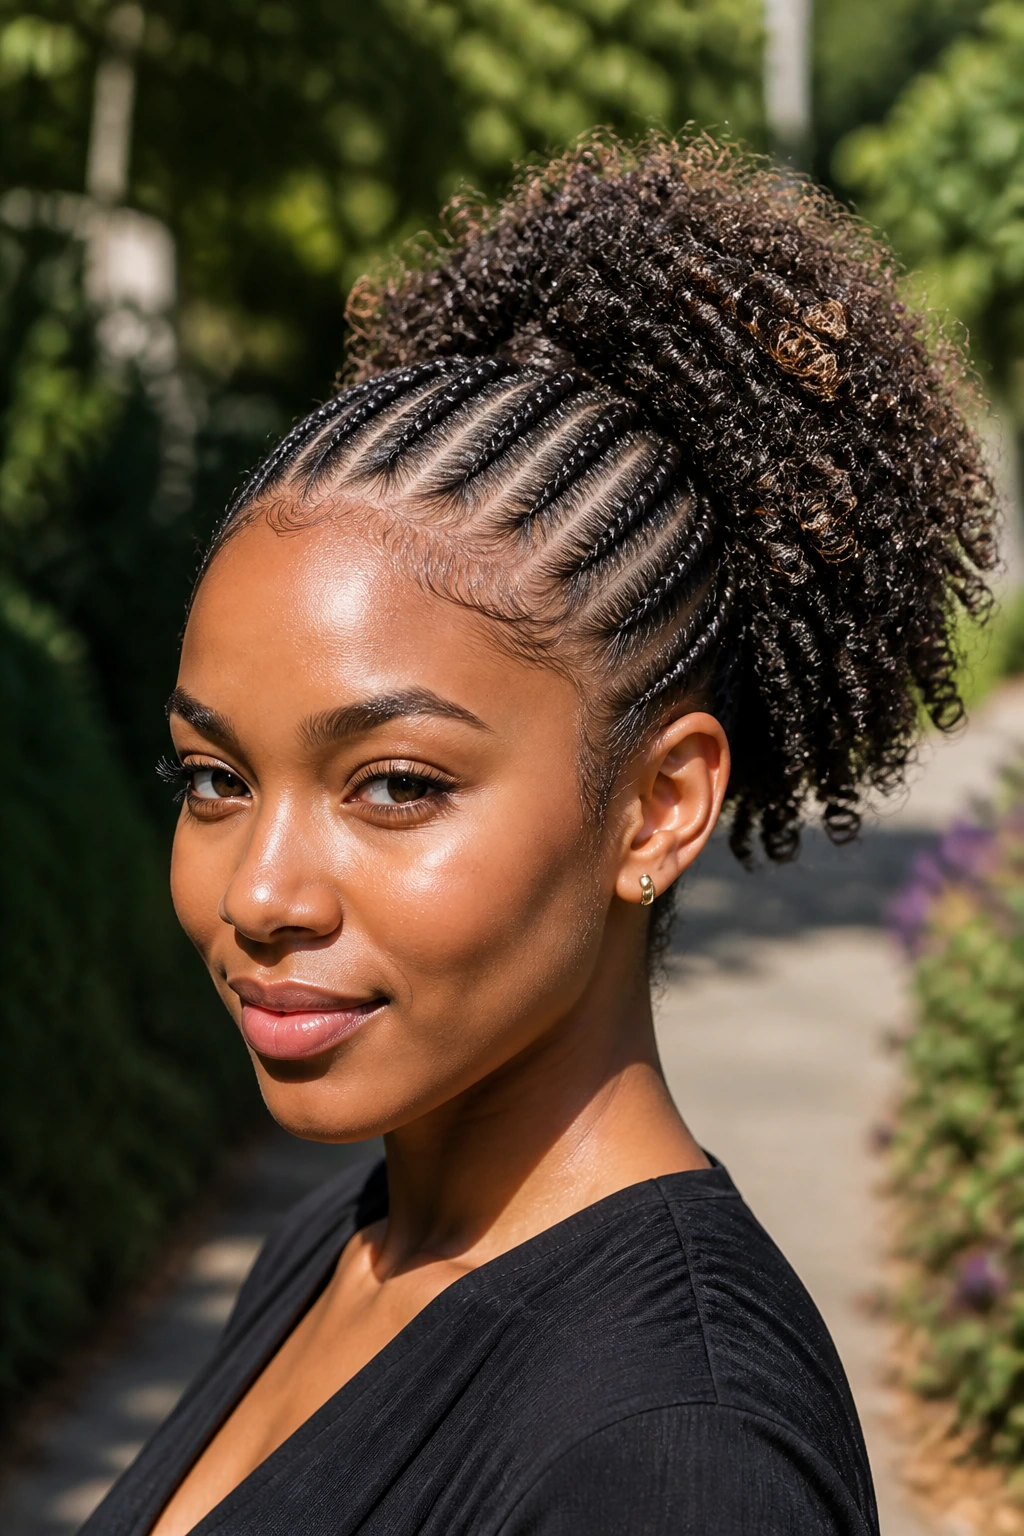
5. Stitch-Braid Ponytail with Curly Ends
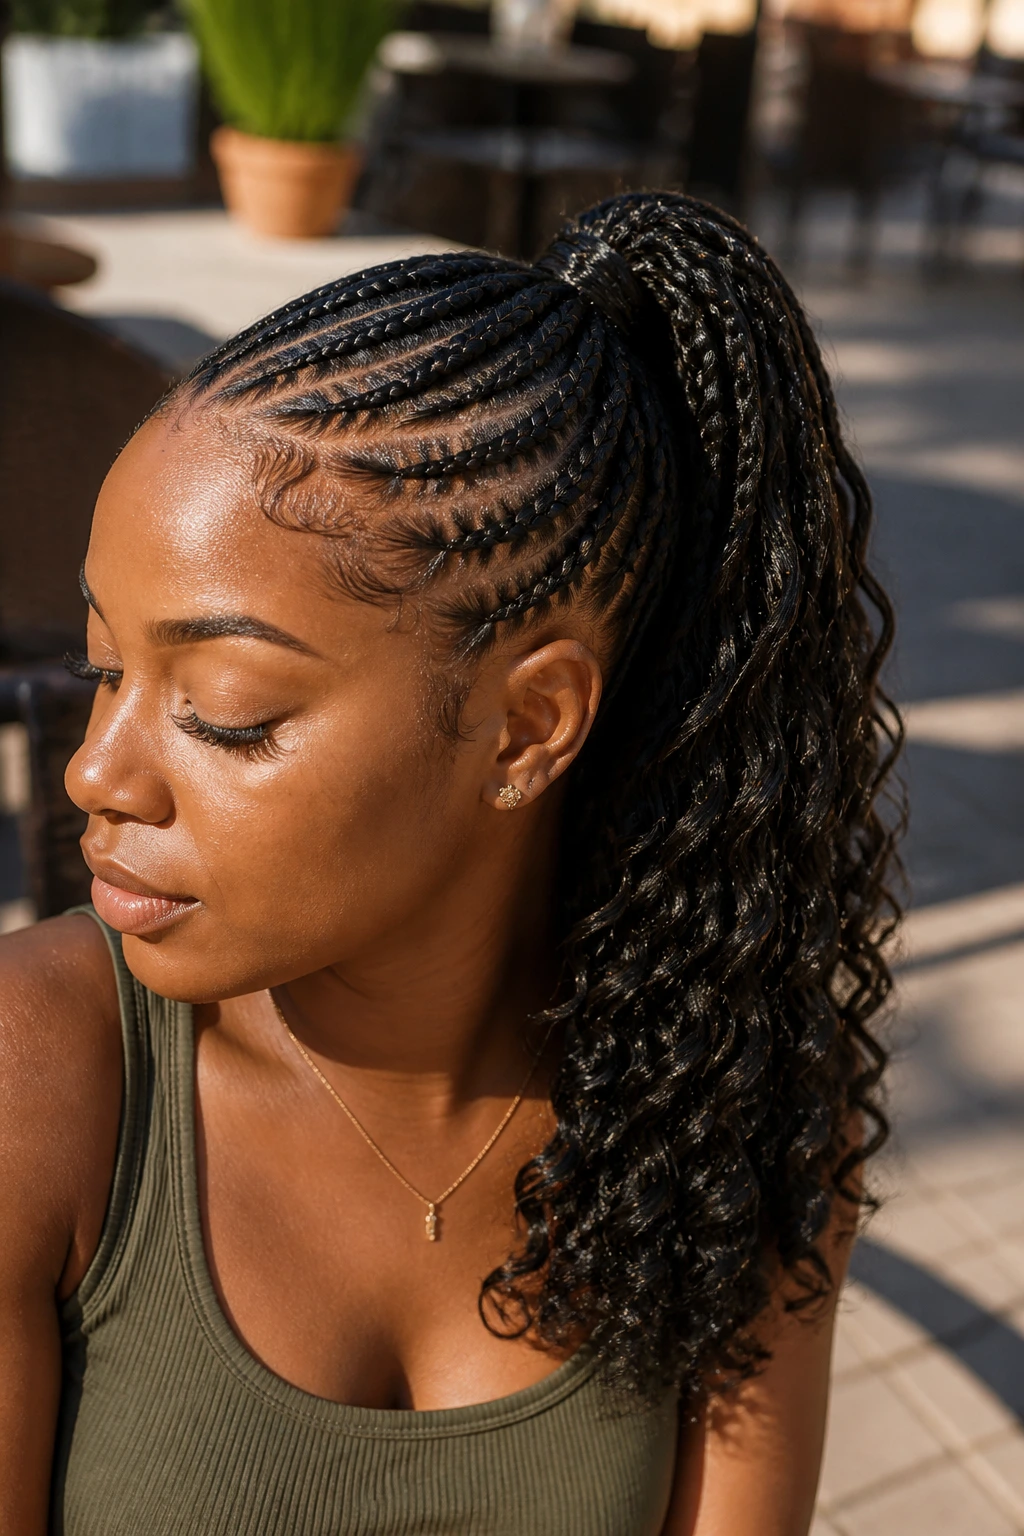
Stitch braids are one of my favorite answers for fine or low-density hair because the parting lines stay sharp. The “stitch” pattern lays flat, the rows are clean, and the ponytail itself can finish with loose curls instead of a heavy blunt end. That curled finish does a lot of visual work.
Unlike a thick, straight extension tail, curly ends move. They bounce a little, and that motion makes the whole style seem less weighty. If your hair is thin at the perimeter, keep the braids medium-slim and let the curls be the drama. The braids don’t need to shout.
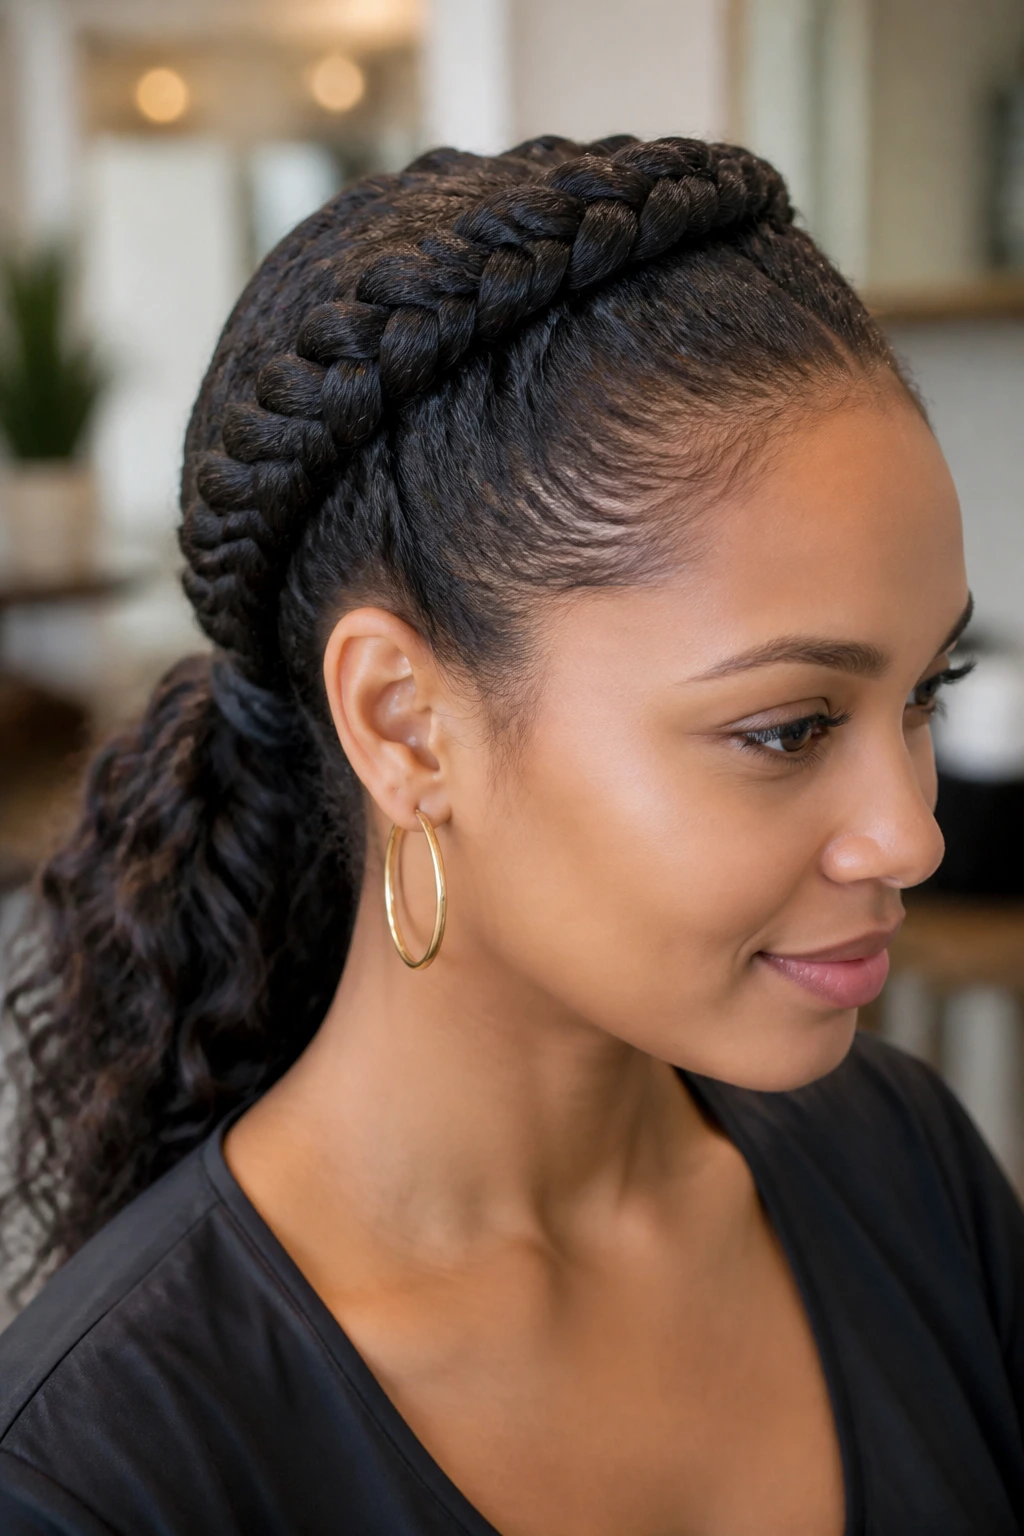
6. Jumbo Dutch-Braid Ponytail
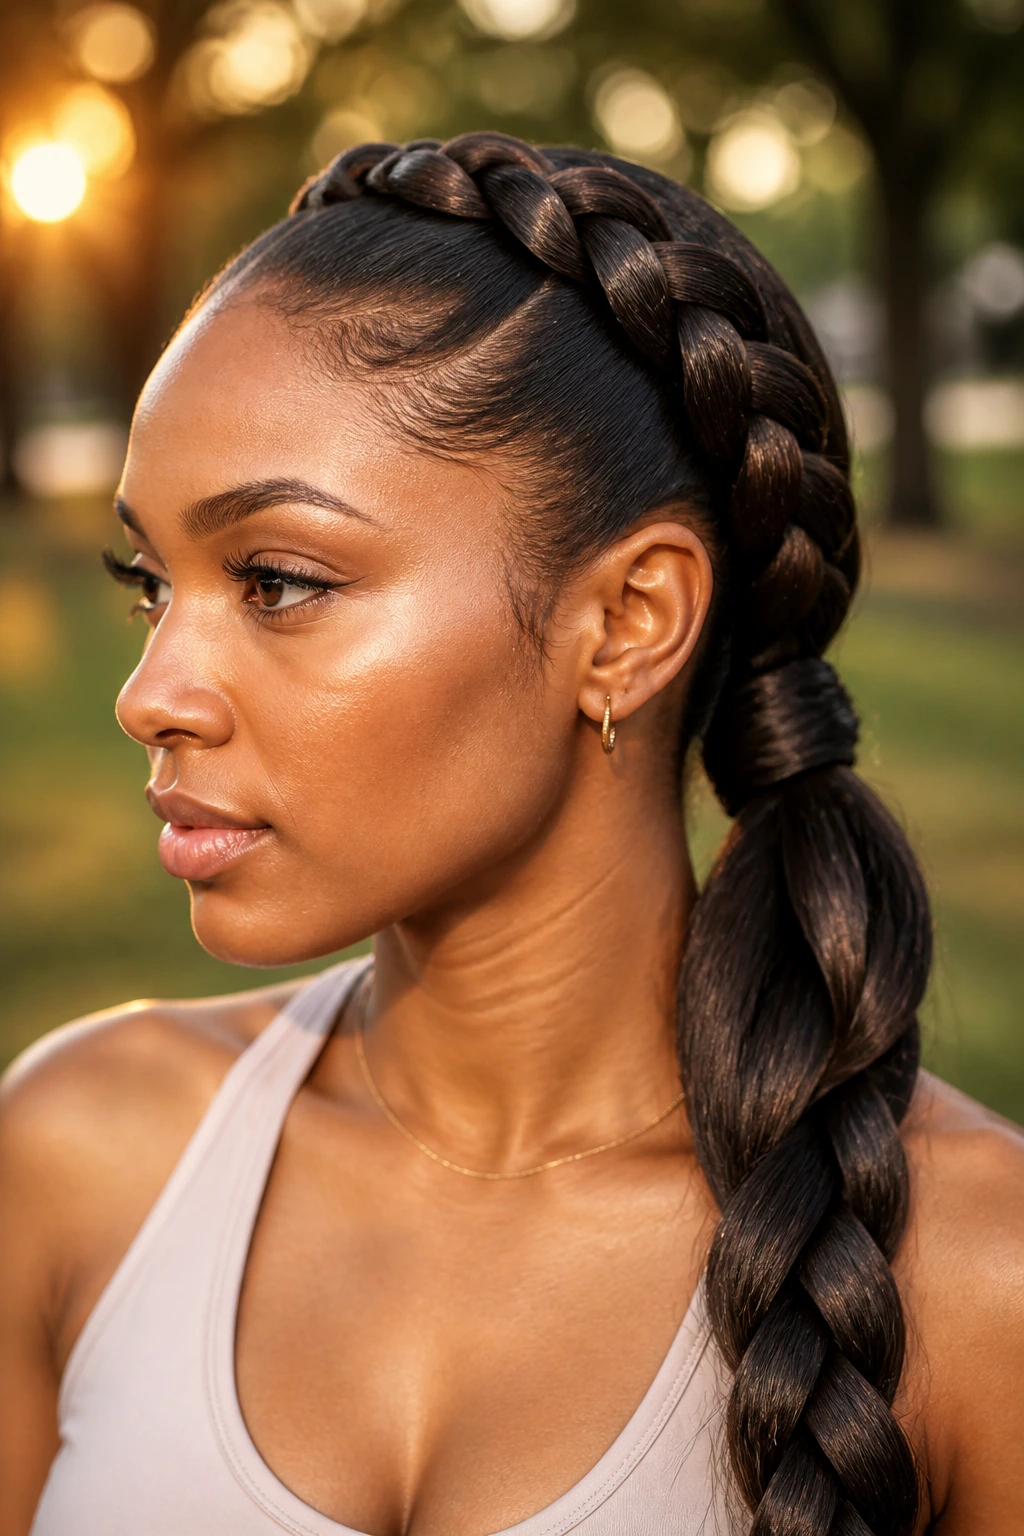
A jumbo Dutch braid is the loudest style in this set, so I only like it when the scalp can handle a little visual weight. One thick braid sweeping back into a ponytail is a smart option if you want the appearance of fullness without having to create many small sections on already fine hair.
The trick is not to overstuff the braid. A braid that starts too thick near the roots can feel heavy and look bulky around the crown. Keep the base flat, use pre-stretched hair if you’re adding length, and stop once the braid is substantial enough to read clearly from a few feet away.
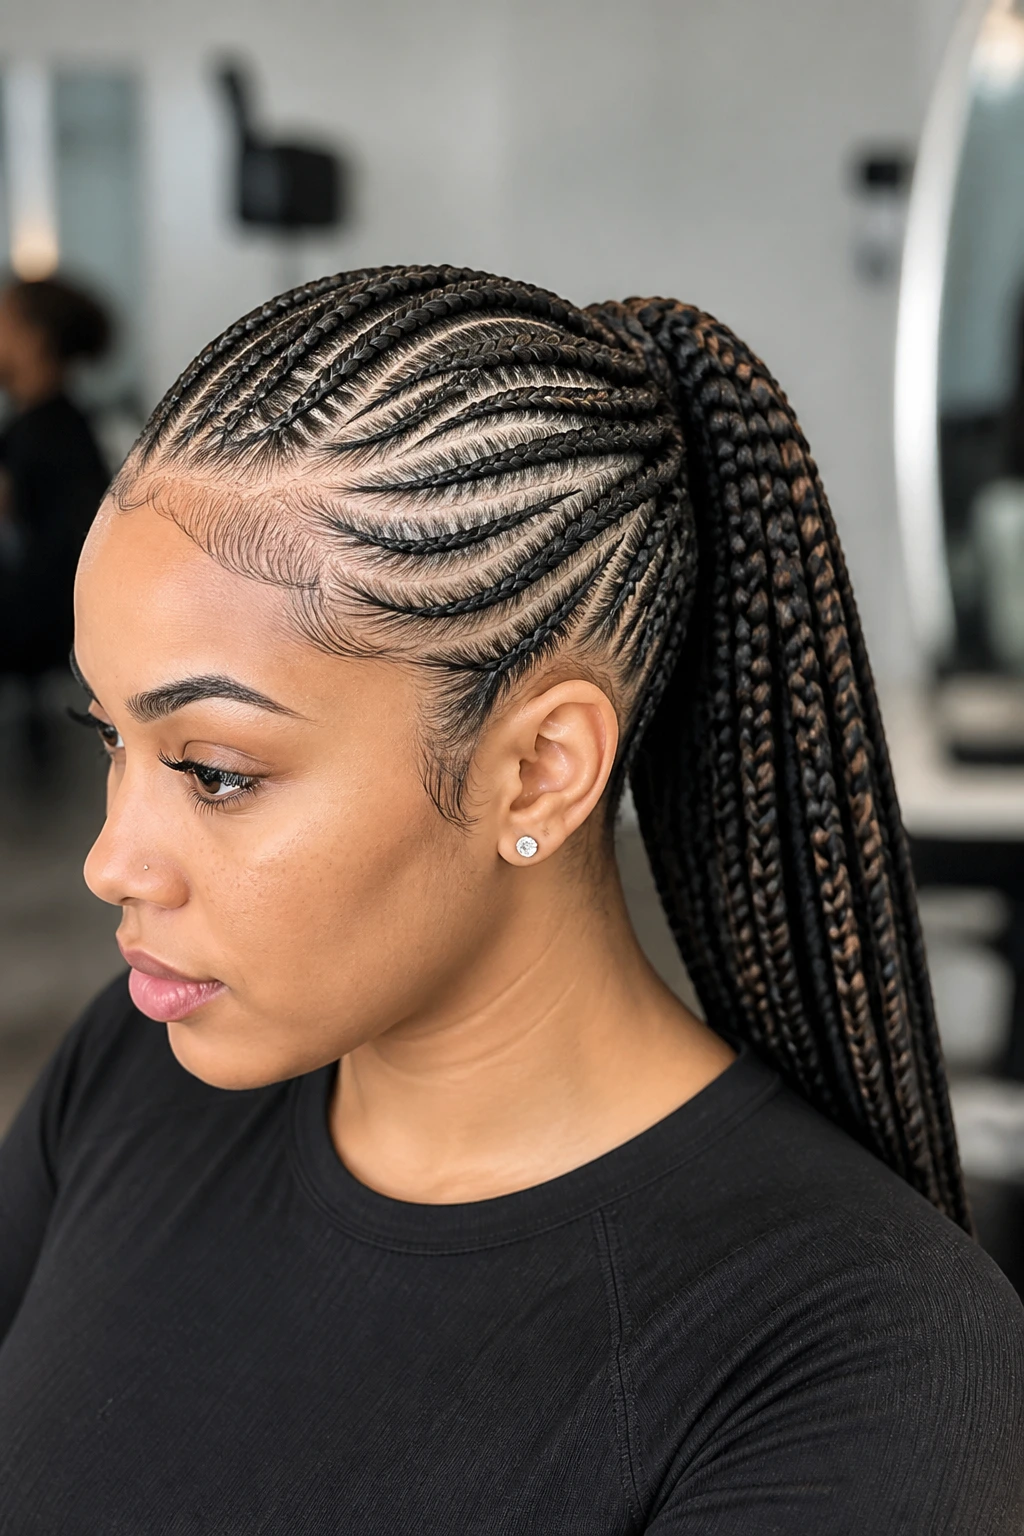
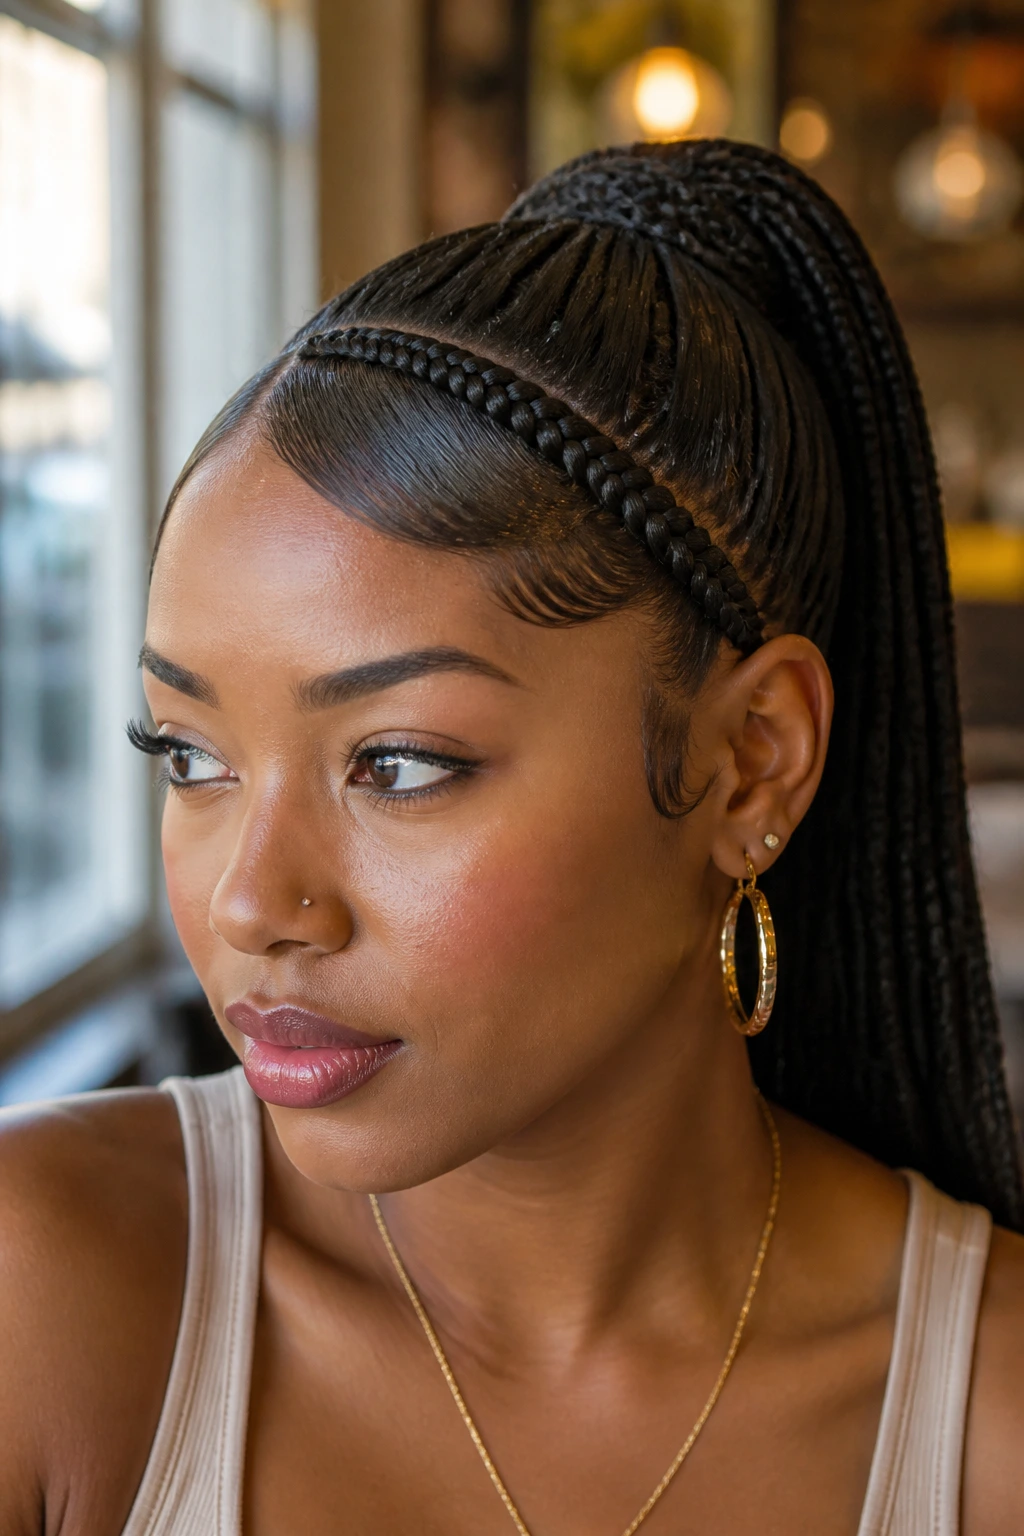
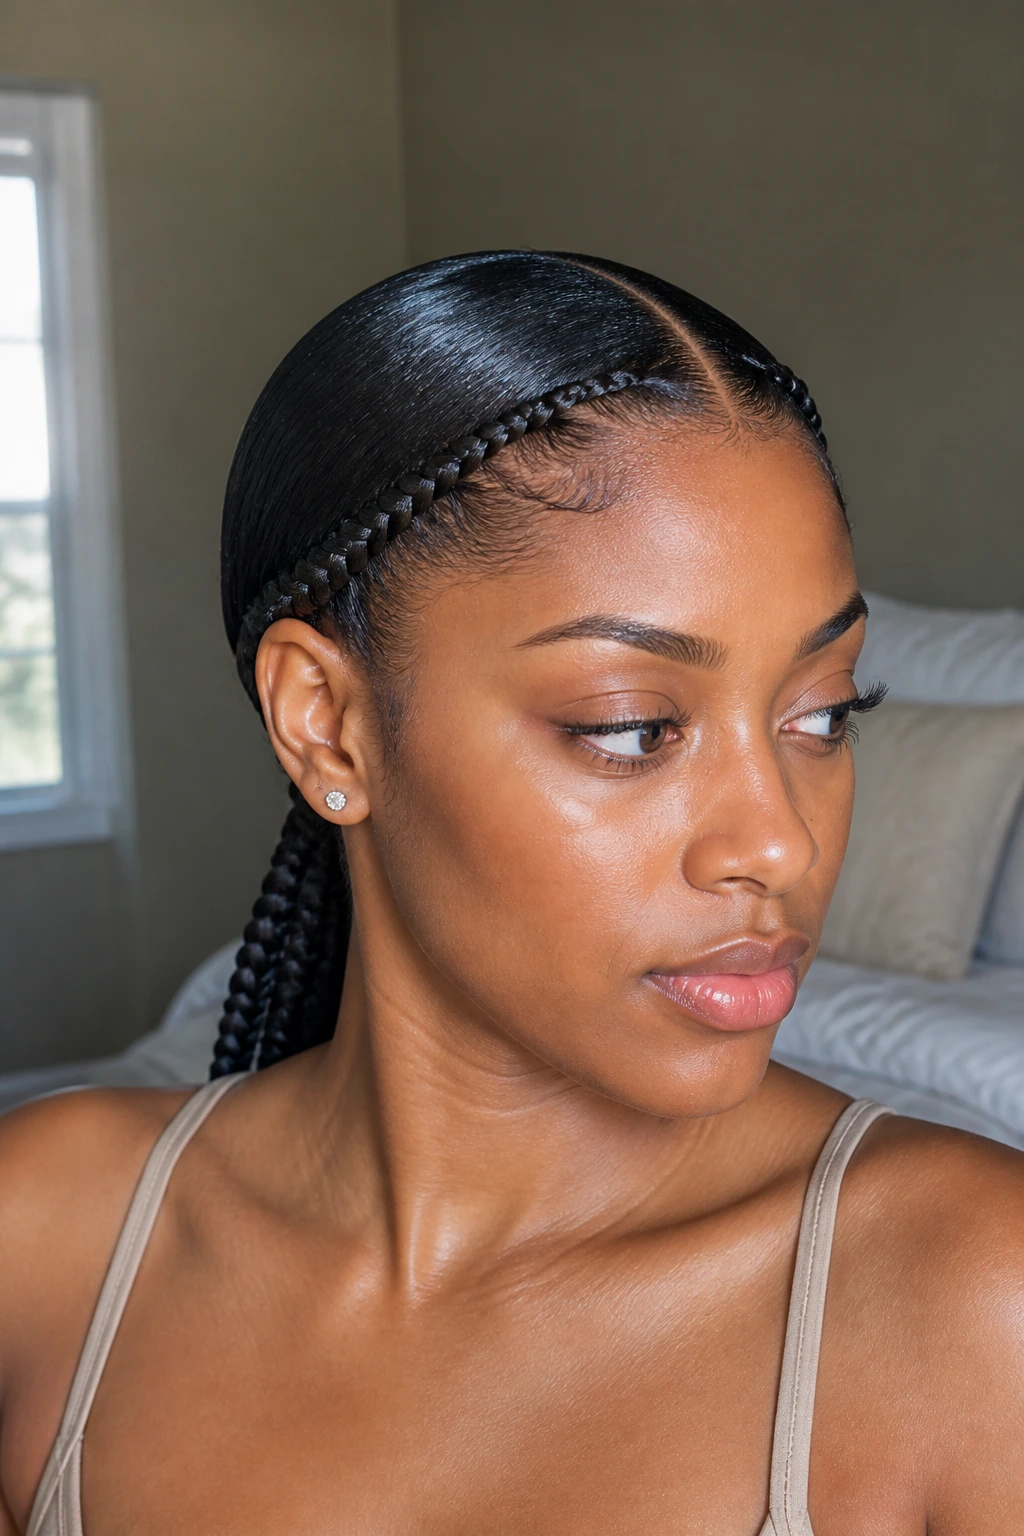
7. Center-Part Double Feed-In Ponytail
This one has a neat, balanced look that suits thin hair because it doesn’t depend on density to impress. Two mirror-image feed-in braids run from a center part toward a single ponytail, which gives the front structure and keeps the profile clean.
I like it when you want something sleek but not severe. The center part creates a clear line, and the ponytail can sit at the middle back of the head so the style doesn’t drag to one side. If your hair is finer at the temples, keep the front braids narrow and let the part do the visual work.
8. Zigzag-Part Ponytail
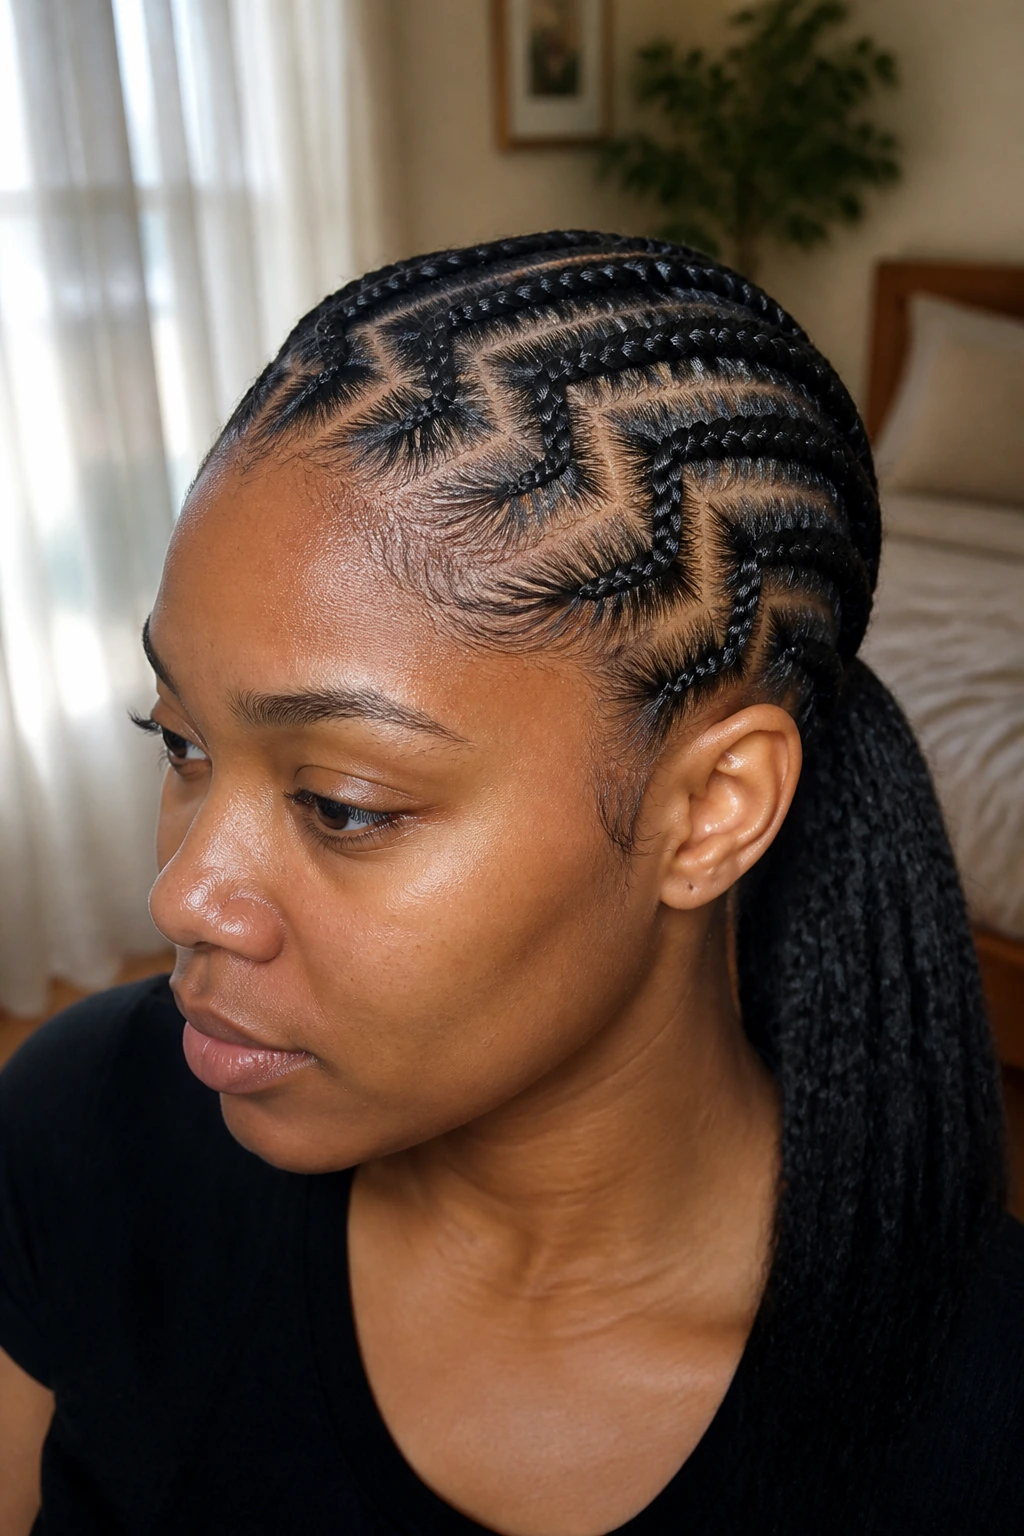
A zigzag part is one of those details that looks fussy in the best way. It instantly adds movement to the scalp, and thin hair benefits from that movement because the eye follows the parting instead of focusing on density. The ponytail can stay simple while the parting does the decorating.
Why it helps
The zigzag breaks up large flat areas. That matters if you don’t have a lot of hair to cover the scalp. Keep the zigzags shallow and even; if they’re too deep, the part can get messy fast and the style starts looking accidental instead of planned.
9. Braided Mohawk Ponytail
A braided mohawk ponytail is a strong style for thin hair because the sides are usually braided close and the volume is concentrated down the middle. That center ridge gives the illusion of height without needing a full, thick ponytail at the back.
It’s one of the best choices when you want drama but not width. Keep the side cornrows low and tight, then let the middle braids feed into a ponytail that sits at the crown or mid-back. The silhouette is the whole point here. Clean sides, lifted center, controlled tail.
10. Heart-Part Ponytail
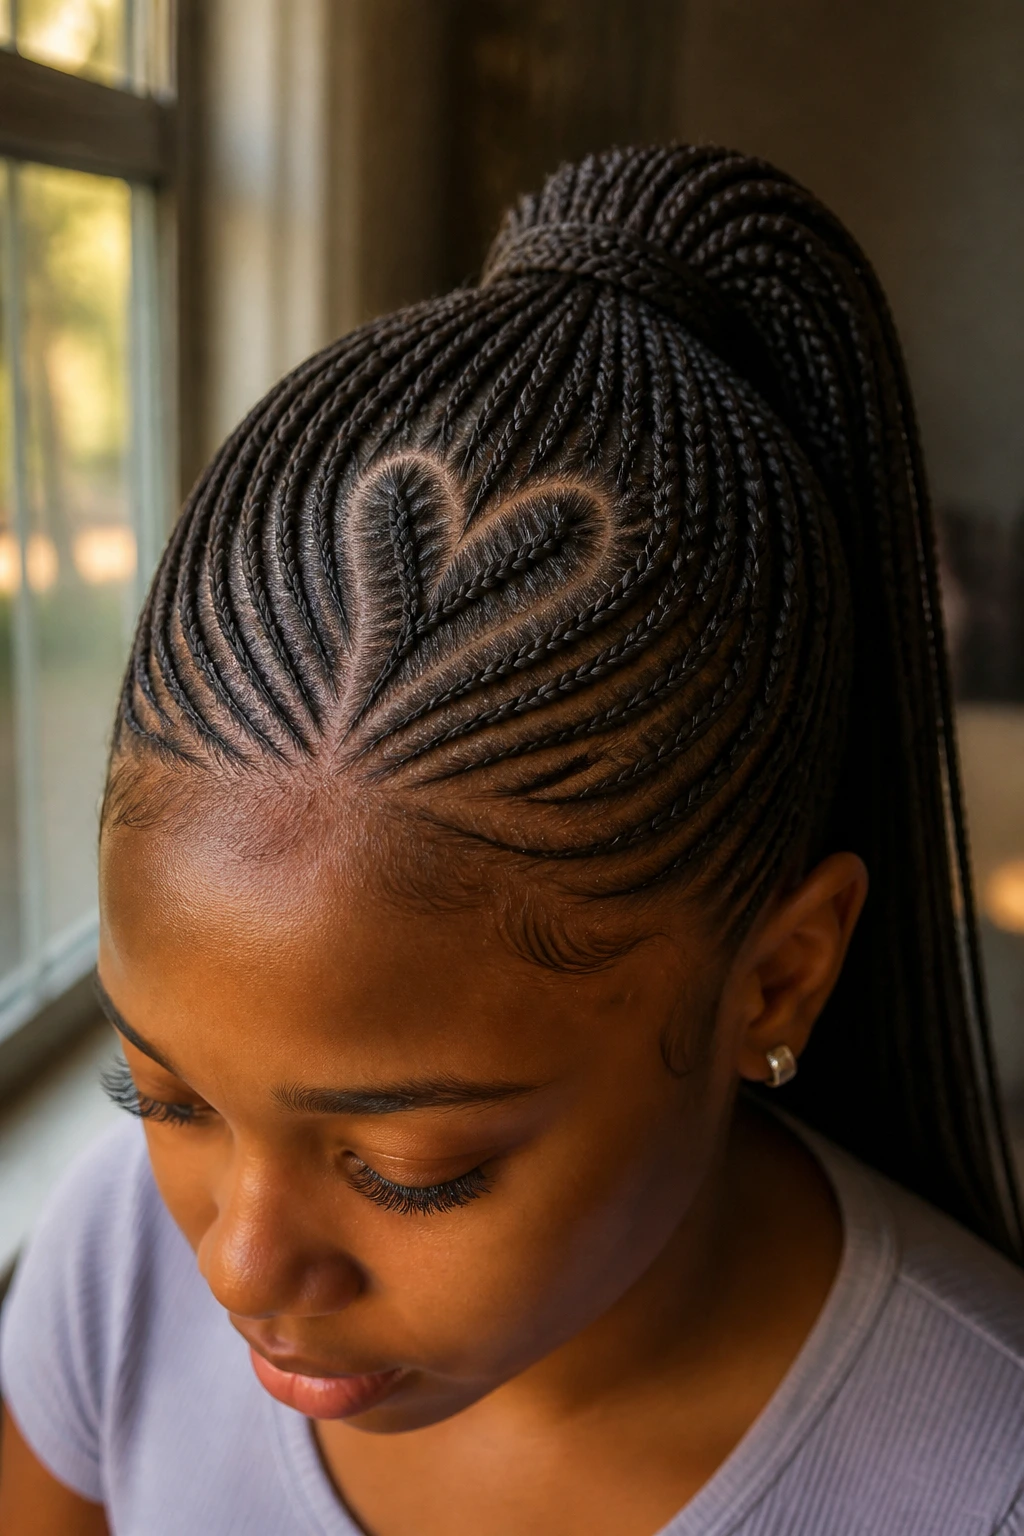
A heart part is playful, yes, but it’s also practical when you want the scalp design to carry more of the style than the amount of hair. On thinner hair, a decorative parting pattern can make a ponytail feel deliberate and special even if the actual braid count stays low.
This works best when the heart is placed where it won’t stretch out under tension — usually near the top half of the head. Keep the rest of the braids slim and feed them into a modest ponytail. Too much extension hair would steal attention from the part, and the whole point is to let the parting be the detail.
11. Tribal Feed-In Ponytail
Tribal feed-ins give you a lot of pattern with a small amount of hair. That’s the appeal. You can work in alternating braid widths, a couple of center accent braids, or a design that shifts direction before it reaches the ponytail. Thin hair tends to benefit from that kind of controlled complexity.
I prefer this style when the roots need to stay calm but the overall look needs movement. It gives a sculpted effect without requiring huge sections. If you’re using added hair, keep the texture close to your own so the style doesn’t look patchy where the natural hair ends and the extensions begin.
12. Knotless Braid Ponytail
Knotless braids are gentle at the start because the extension hair feeds in gradually instead of forming a hard knot right at the scalp. For fine or low-density hair, that matters a lot. The base looks flatter, and the tension usually feels more manageable.
What makes knotless different
The ponytail grows out with less visual bump at the roots, which is useful when the hairline is sparse. Ask for medium-small sections and a tail that isn’t overloaded. If the braids start feeling heavy before they even reach the elastic, there’s too much hair in the design.
13. Rope-Twist Ponytail with Braided Base
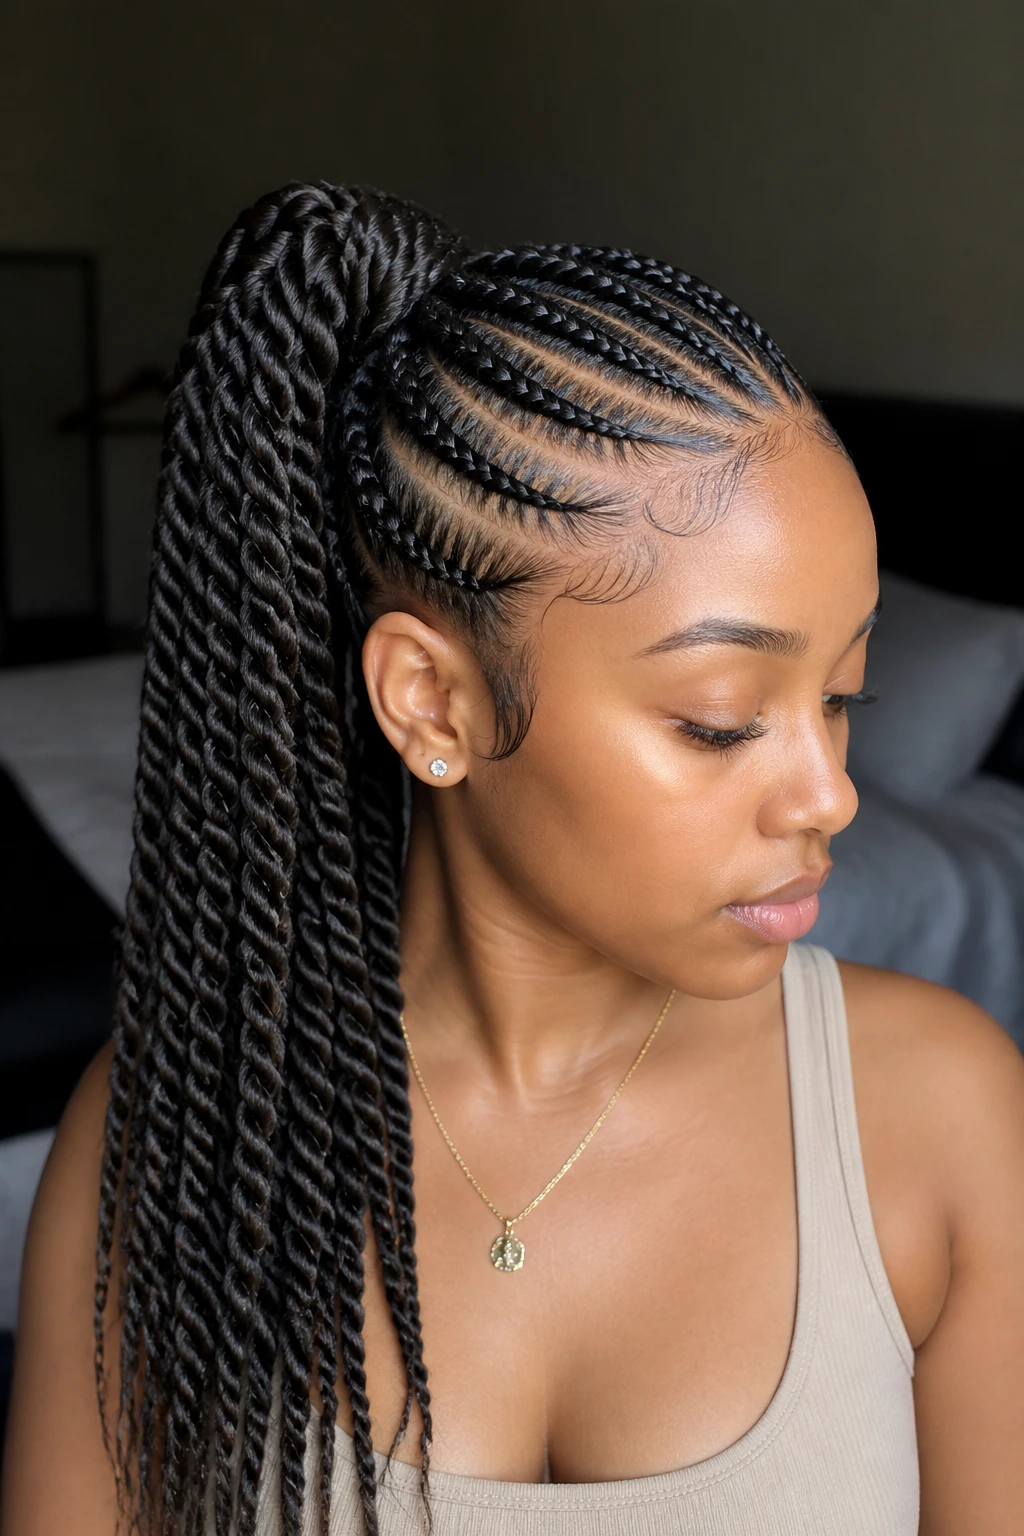
A rope-twist tail gives a softer finish than a standard braid. The base can be cornrowed or feed-in braided, then the ponytail itself is twisted into a rope pattern that feels lighter and a little more modern. It’s a smart route if your hair tends to look stiff in classic plaits.
The nice part is how the twist catches light without needing extra decoration. You can keep the base flat and clean, then let the tail be the texture piece. That balance works especially well on thin hair, because it avoids the “everything is big” problem. One bold element is enough.
14. Faux-Loc Ponytail with Cornrow Base
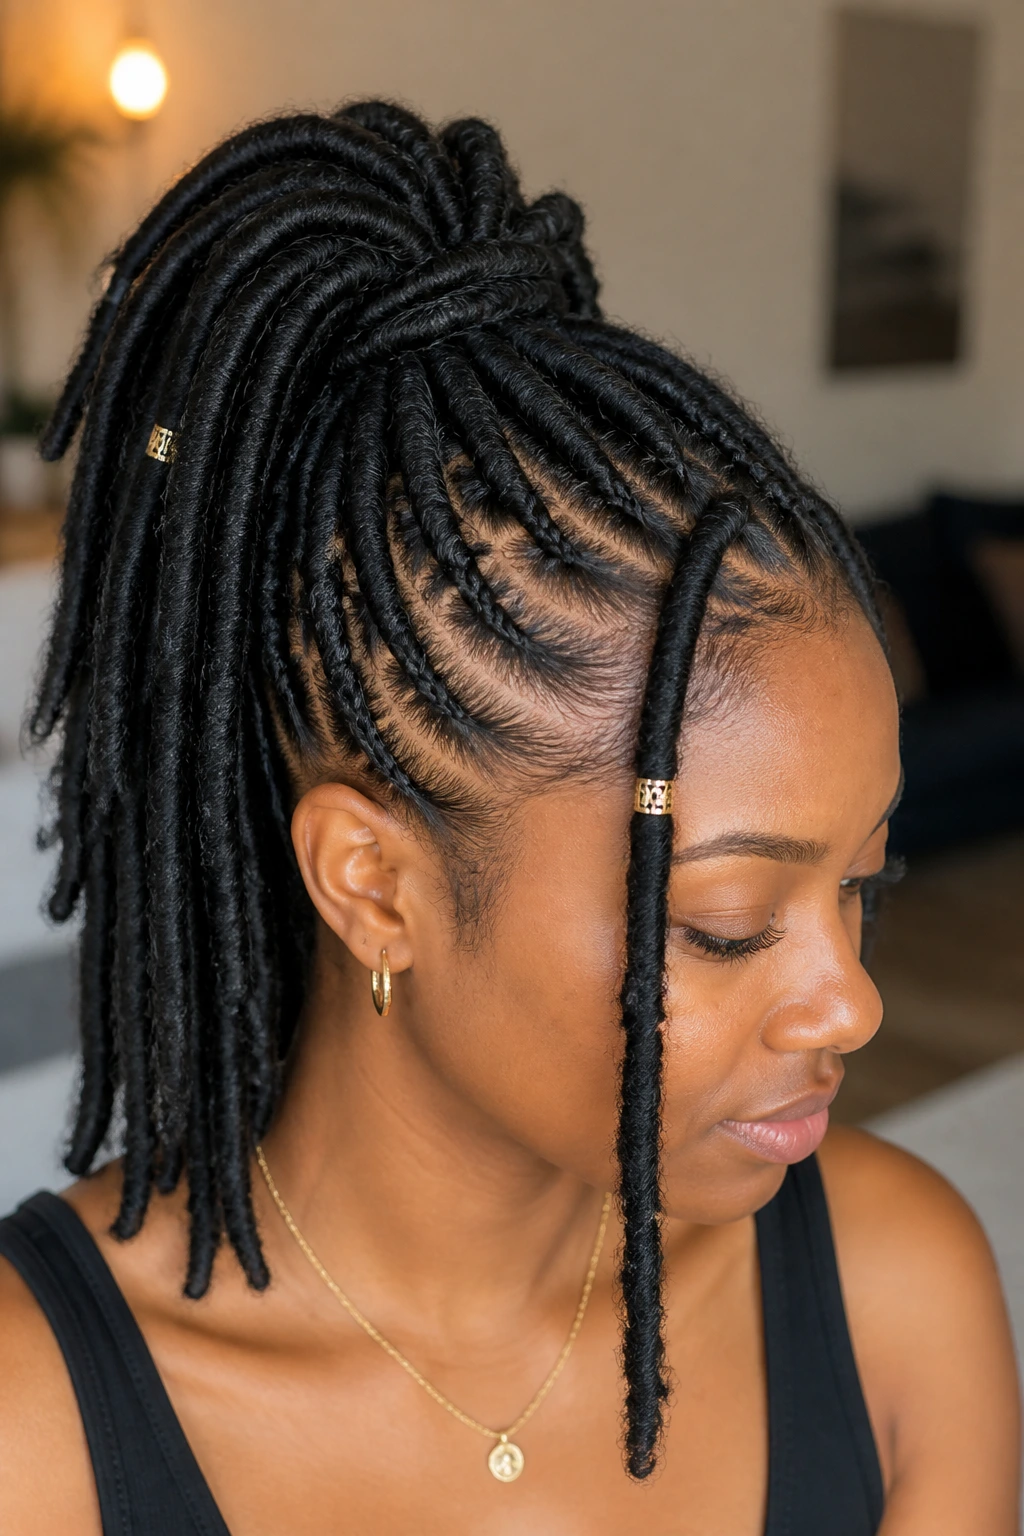
Faux locs in a ponytail can be gorgeous, but they need restraint on thinner hair. Start with a neat cornrow base, then keep the locs medium-length and light enough that the ponytail doesn’t feel like a weight belt. If the locs are too chunky, the style can pull at the nape fast.
I like this option when you want texture more than braids. The locs cover the ends and give the ponytail body, while the cornrow base keeps the top orderly. If your hair is delicate, choose a lighter loc style or fewer locs with more spacing.
15. Braided Wrap-Around Ponytail
A wrap-around braid at the base is one of those details that makes a simple ponytail look finished. For thin hair, it does double duty: it hides the elastic and adds the visual weight of an extra braid without piling too much onto the roots.
Keep the wrap slim. That’s the difference between polished and bulky. A thin wrap braid, secured with a pin or tucked under the base, gives the ponytail a clean seam. It’s the styling version of hemming your pants. Small fix, big difference.
16. Cornrow Ponytail with Curly Ends

Curly ends are one of the best tricks for making a braid ponytail feel fuller without stretching the roots. The cornrows keep the scalp smooth, and the curls at the bottom give movement and softness. On thin hair, that lower-half fullness often looks better than trying to cram volume near the crown.
Use a curling wand on extension ends if needed, or start with pre-curled hair. Either way, keep the curls loose enough to move. Tight ringlets can look pretty, but softer curls read wider and lighter, which is what this style needs.
17. Triangle-Part Ponytail
Triangle parts give the scalp a little geometry, and geometry is a friend when hair density is not generous. The shapes pull attention away from the amount of hair and toward the design itself. You can keep the ponytail simple and still have the style feel thoughtfully built.
This is the kind of detail I’d choose for someone who wants something clean but not plain. The parts should be crisp and similar in size. If one triangle gets too large, the rhythm breaks and the style starts looking unfinished.
18. Swoop-Bang Braided Ponytail
A swoop bang can soften the front of a braided ponytail in a way that thin hair often needs. It gives you a little coverage near the hairline while keeping the rest of the scalp open and neat. That balance matters when the front is finer than the back.
The swoop doesn’t need to be heavy. A single curved braid or a gently laid braided front section can do the job. Keep the ponytail behind it sleek and the whole style reads intentional, not overbuilt. It’s a nice option when you want softness around the face.
19. Low Nape Ponytail with Beaded Ends
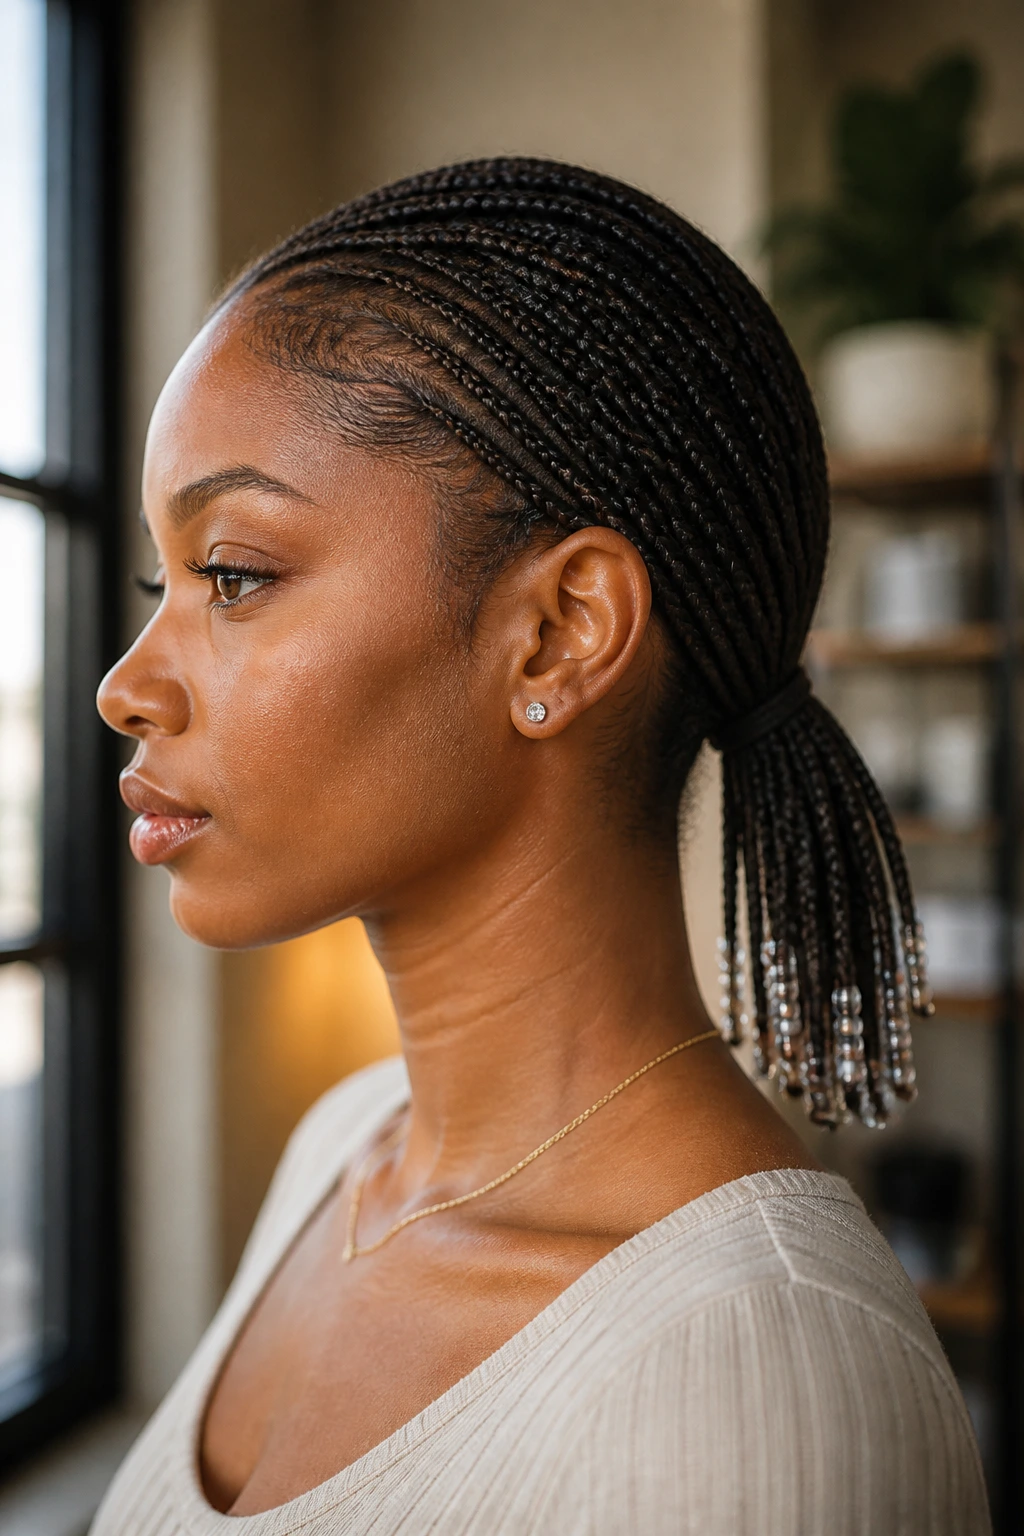
Beads are not for every thin-hair ponytail, and I mean that in a practical way, not a fashion one. A few light beads at the ends can add rhythm and movement, but too many will drag on the ponytail and make the style sag. Keep the count low.
A low nape base is the safest place for this style because it spreads the weight out. If the hairline is fragile, this is far kinder than a high ponytail with a loaded tail. Tiny beads, spaced out, can look sharp. A fistful of heavy ones will not.
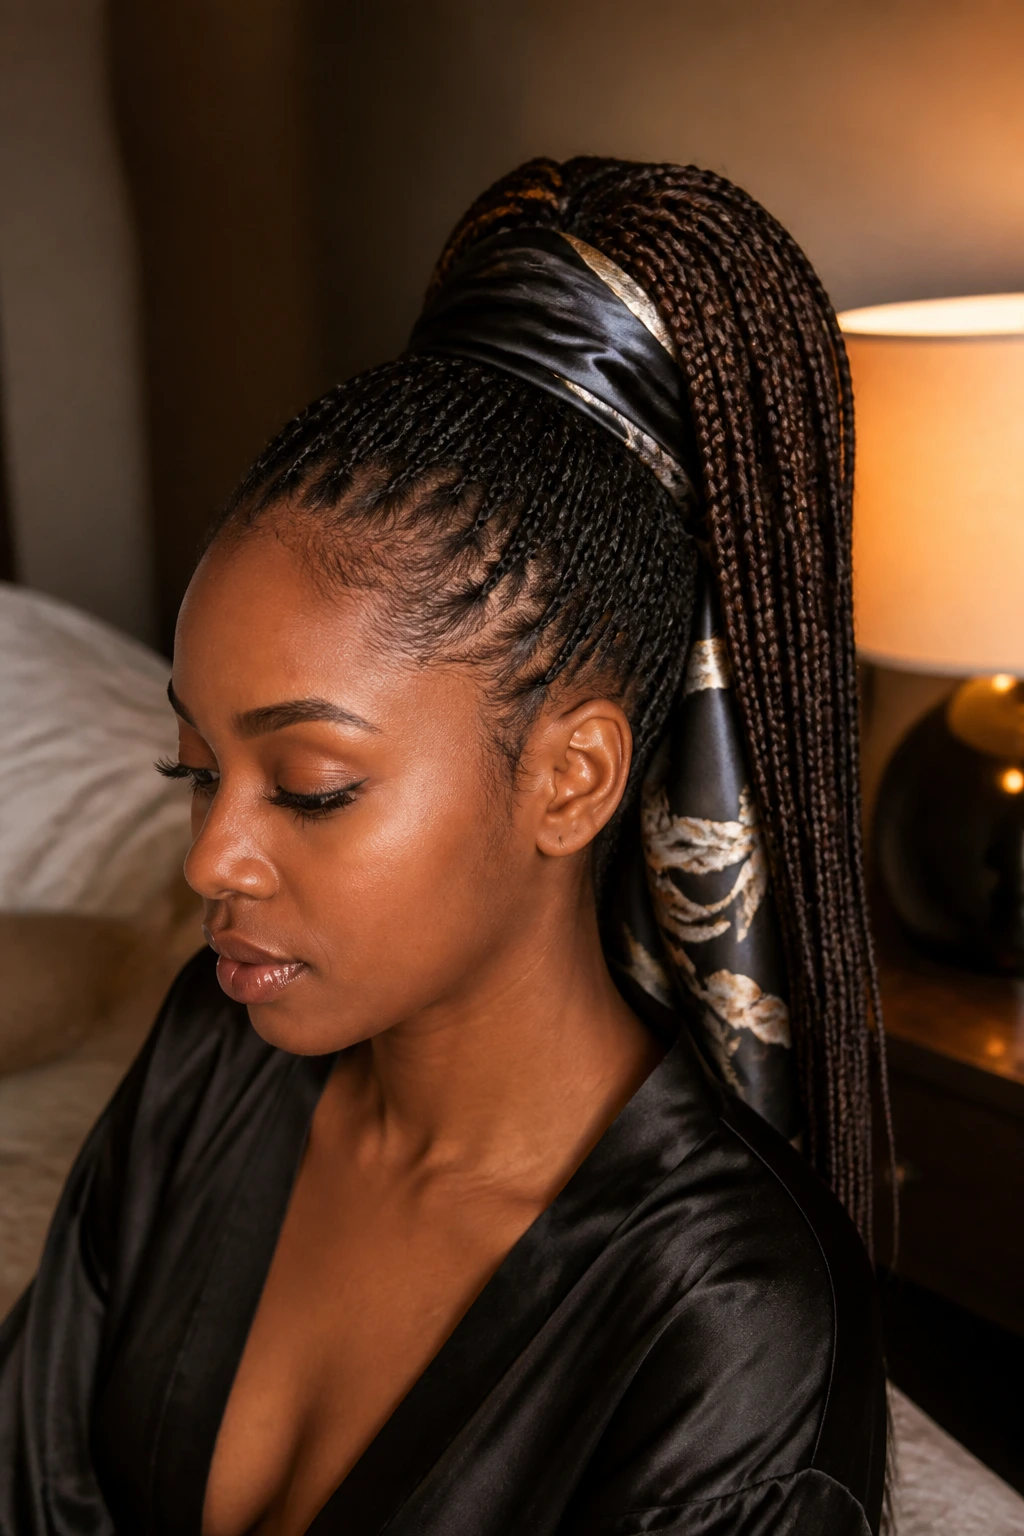
20. Scarf-Wrapped Braided Ponytail
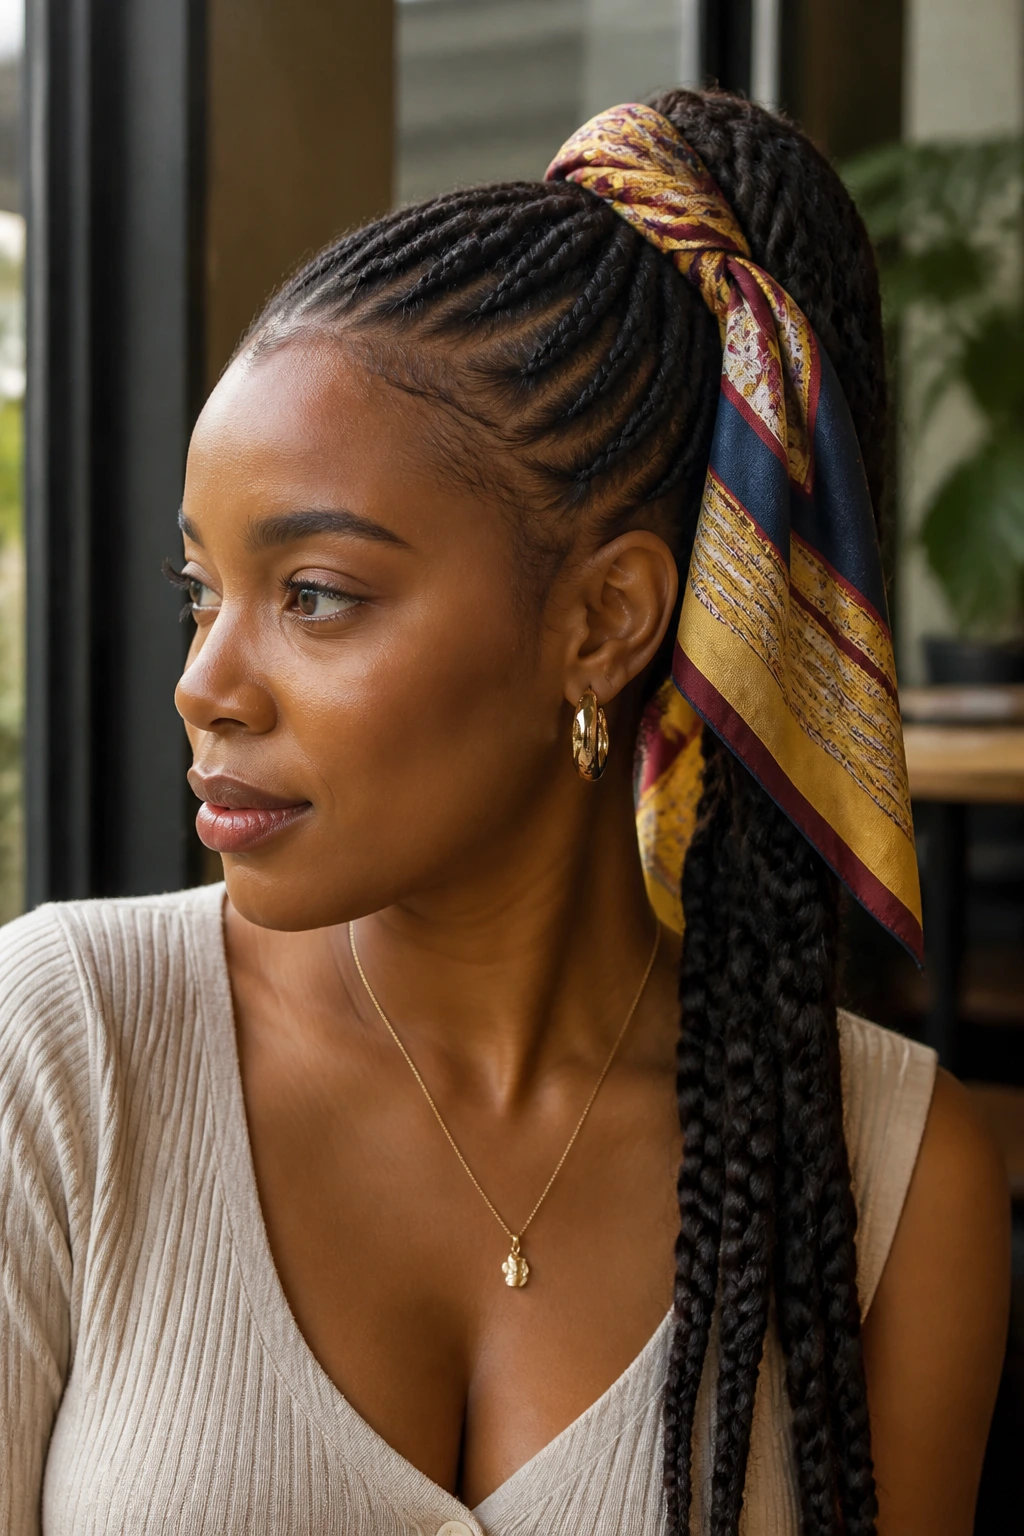
A scarf-wrapped ponytail is useful when you want the style to feel dressed up without adding much bulk. The scarf covers the base, protects the elastic area, and gives the eye a focal point right where thinner hair sometimes needs help. It also hides a base that might not be perfectly dense.
How to keep it balanced
Choose a lightweight scarf, not a stiff one. Wrap it once or twice, then knot it off to one side so the tail stays visible. If the scarf is too wide or too thick, it can overwhelm the braid. Keep the tail simple and let the wrap do the talking.
21. Half-Up Braided Ponytail
A half-up ponytail is a good compromise when you want lift without committing all your hair to one pull point. The top section gets braided into a ponytail, while the rest of the hair stays down or gets left in soft curls. On thin hair, that split can make the top look fuller.
I like this for shoulder-length hair, especially when the ends need a break from tension. The top section does the decorative work, and the lower half adds softness around the face and shoulders. It’s less severe than a full ponytail, and sometimes that’s the whole appeal.
22. Crown-Braid Into Ponytail
A crown braid that feeds into a ponytail looks more complex than it actually is. The braid circles or crosses the top of the head, then gathers into a tail at the back or side. Thin hair benefits because the crown braid creates the illusion of fullness across the widest part of the head.
This style is a smart pick when the top needs more coverage. Keep the braid medium and the tail light. If the crown braid gets too thick, the style starts to sit high and heavy, which is exactly what you don’t want with finer strands.
23. Layered Feed-In Ponytail
Layered feed-ins are about gradual change. You start slim near the front, build a little more through the midsection, and let the ponytail finish with a bit more fullness than the base. That progression makes thin hair look intentional because the braid sizes shift instead of staying flat and identical.
The trick is moderation. The first couple of inches should stay narrow and smooth, then the braid can widen a little as it moves back. Good layered braids should look like they belong to the head, not like they were pasted on top of it. That’s the difference.
24. Box-Braid Tail Ponytail
A box-braid tail ponytail gives you structure without forcing every braid to start from the hairline. The front can be cornrowed or braided back neatly, then the ponytail itself can be made of box braids attached at the back. That’s useful when the scalp needs to stay flat.
This style is especially helpful if your own hair is thin but you still want visible braid pieces in the tail. The box braids create the bulk and movement where you want it, while the base stays manageable. Keep the tail length realistic for your neck and shoulders; extra inches are cute until they’re dragging on your coat collar.
25. Crisscross Braided Ponytail
Crisscross patterns are the style equivalent of good architecture. They create interest right at the top, where thin hair often needs a distraction from exposed scalp. The ponytail can be modest because the front already has enough design to carry the look.
I’d choose this when the goal is polished, not huge. The crisscrossing should be snug enough to stay put but not so tight that the sections buckle. If one strand starts to flare out, smooth it down before moving on. Small errors in a crisscross show fast.
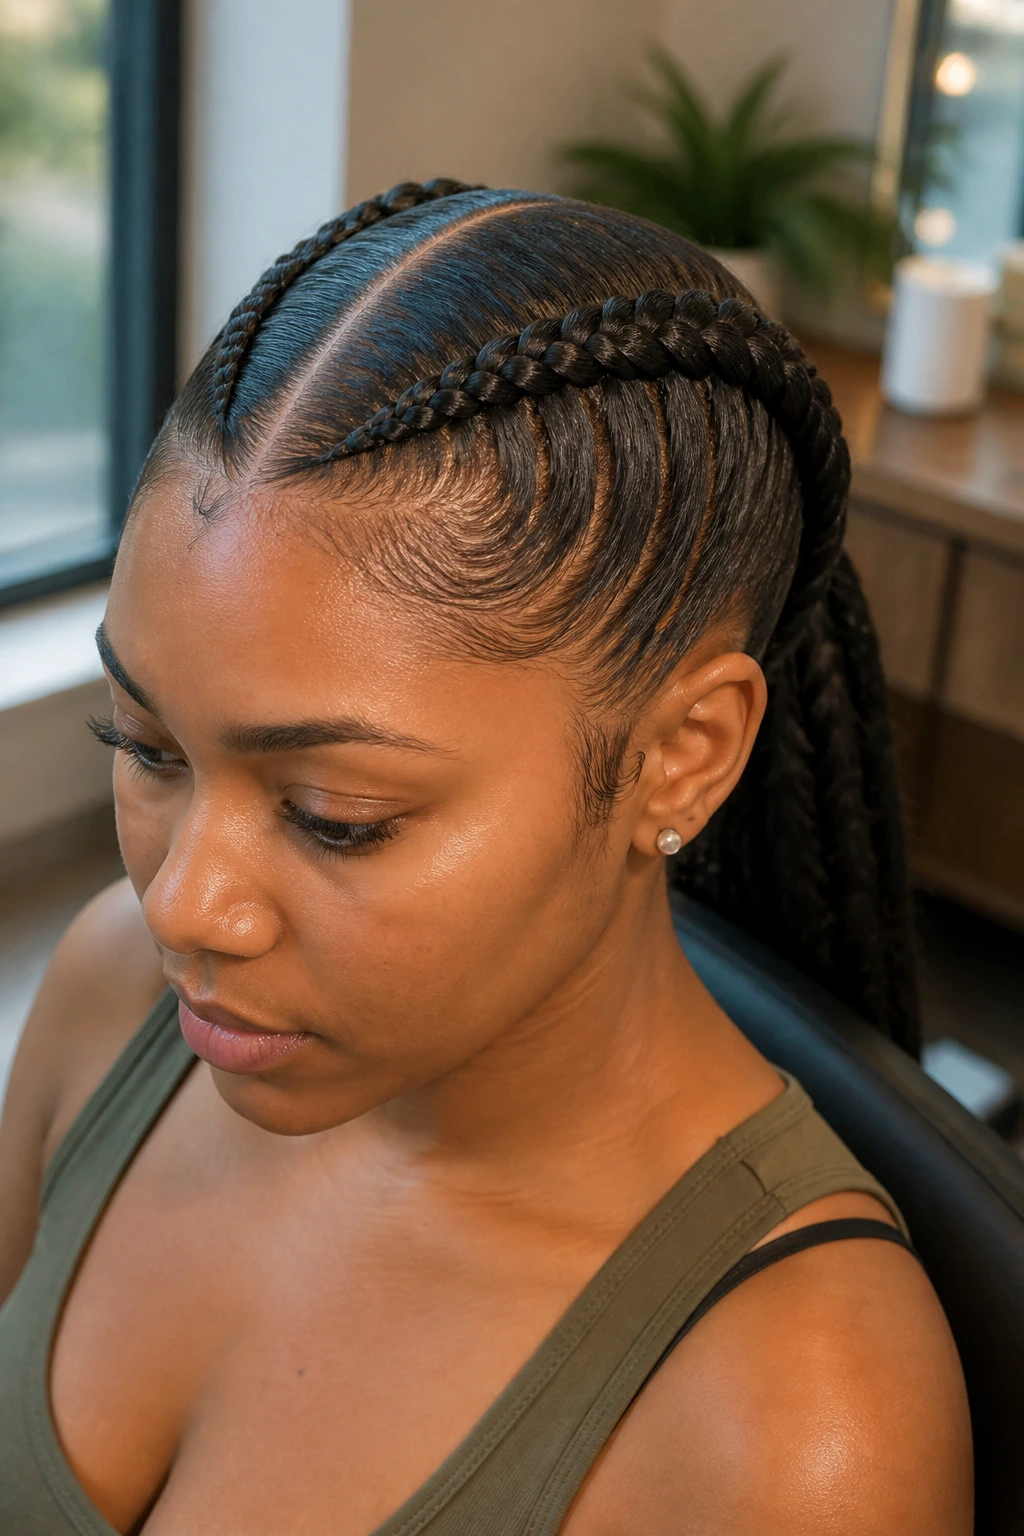
26. Thin-Stitch Ponytail
A thin-stitch ponytail is all about precision. Narrow stitch braids lie flatter than chunkier rows, and that flatness is useful when hair density is limited. The style looks sharp from the front and keeps the scalp lines neat without shouting for attention.
It’s also one of the easiest styles to keep refined over several days. Use a light holding mousse and a soft brush to keep the parting crisp. If you overapply gel, the roots can look shiny in a bad way — greasy instead of clean.
27. Curly-Puff Tail Braided Ponytail
This one is for anyone who wants movement without a long, heavy extension tail. A braided base feeds into a curly puff or loose curly tail, which makes the ponytail seem fuller near the ends and lighter at the scalp. Thin hair usually wears that better than a blunt, dense tail.
The curls should be soft, not stiff. A water-wave or body-wave texture works well, and you can separate the strands a little with your fingers to widen the shape. Keep the base tidy and the tail airy. That contrast is the whole point.
28. Diagonal Cornrow Ponytail
Diagonal cornrows do a lot for the face and the scalp. They break up the head shape in a way that makes a ponytail feel longer and less boxy. On thin hair, diagonal lines also help hide areas where a straight-back pattern would expose too much scalp.
This is a good style when you want motion without a lot of extras. The ponytail can be low or mid-height, and the diagonal lines will still carry the design. Keep the spacing even. Uneven diagonals show faster than people expect.
29. Side-Swoop Braided Tail

A side-swoop tail brings the whole style across the shoulder line, which is flattering when a straight-back ponytail feels too stark. The front section can be swept and braided toward one side, then gathered into a tail that falls over the shoulder instead of down the back.
I like this for thin hair because the side placement makes the ponytail feel fuller from the front. The eye sees length, line, and movement at once. Keep the base smooth and the tail light enough that it doesn’t pull the sweep flat by the end of the day.
30. Micro-Braid Ponytail
Micro-braid ponytails take patience, but they can pay off on fine or low-density hair because all those tiny braids create a dense visual texture. The style reads fuller than it actually is, especially once the braids are gathered into a ponytail and layered over each other.
Why this one looks fuller
Tiny braids create more surface area. More surface area means more texture. That is the whole trick.
Just don’t make the braids so tiny that the install becomes hard to manage or too tight at the root. Micro-braids should feel secure, not punishing. If the scalp is tender before the style even dries, the parts were too aggressive.
Why Braided Ponytails Sit Better on Thin Hair Than You’d Think
Braided ponytails can be kinder to fine or low-density hair than a lot of people assume, mostly because the style lets you choose where the weight lives. A ponytail doesn’t have to be huge to look full. Sometimes the smarter move is to make the base clean, keep the braid pattern visible, and let the tail be long without being thick.
The other advantage is shape control. A ponytail can sit low, mid, high, or off to one side, and each of those positions changes how much pressure lands on the roots. A low nape style spreads the strain. A crown ponytail adds lift. A side sweep hides thinner areas around the temples. That flexibility is the whole reason these styles work.
There’s also a visual trick at play. Braid texture makes the scalp look more designed, which means the eye notices the pattern before it notices density. On thin hair, that matters. A crisp part, a flat feed-in, and a tail that moves a little can make the style read fuller than the raw amount of hair would suggest.
Essential Tools for Clean Parts and Flat Roots
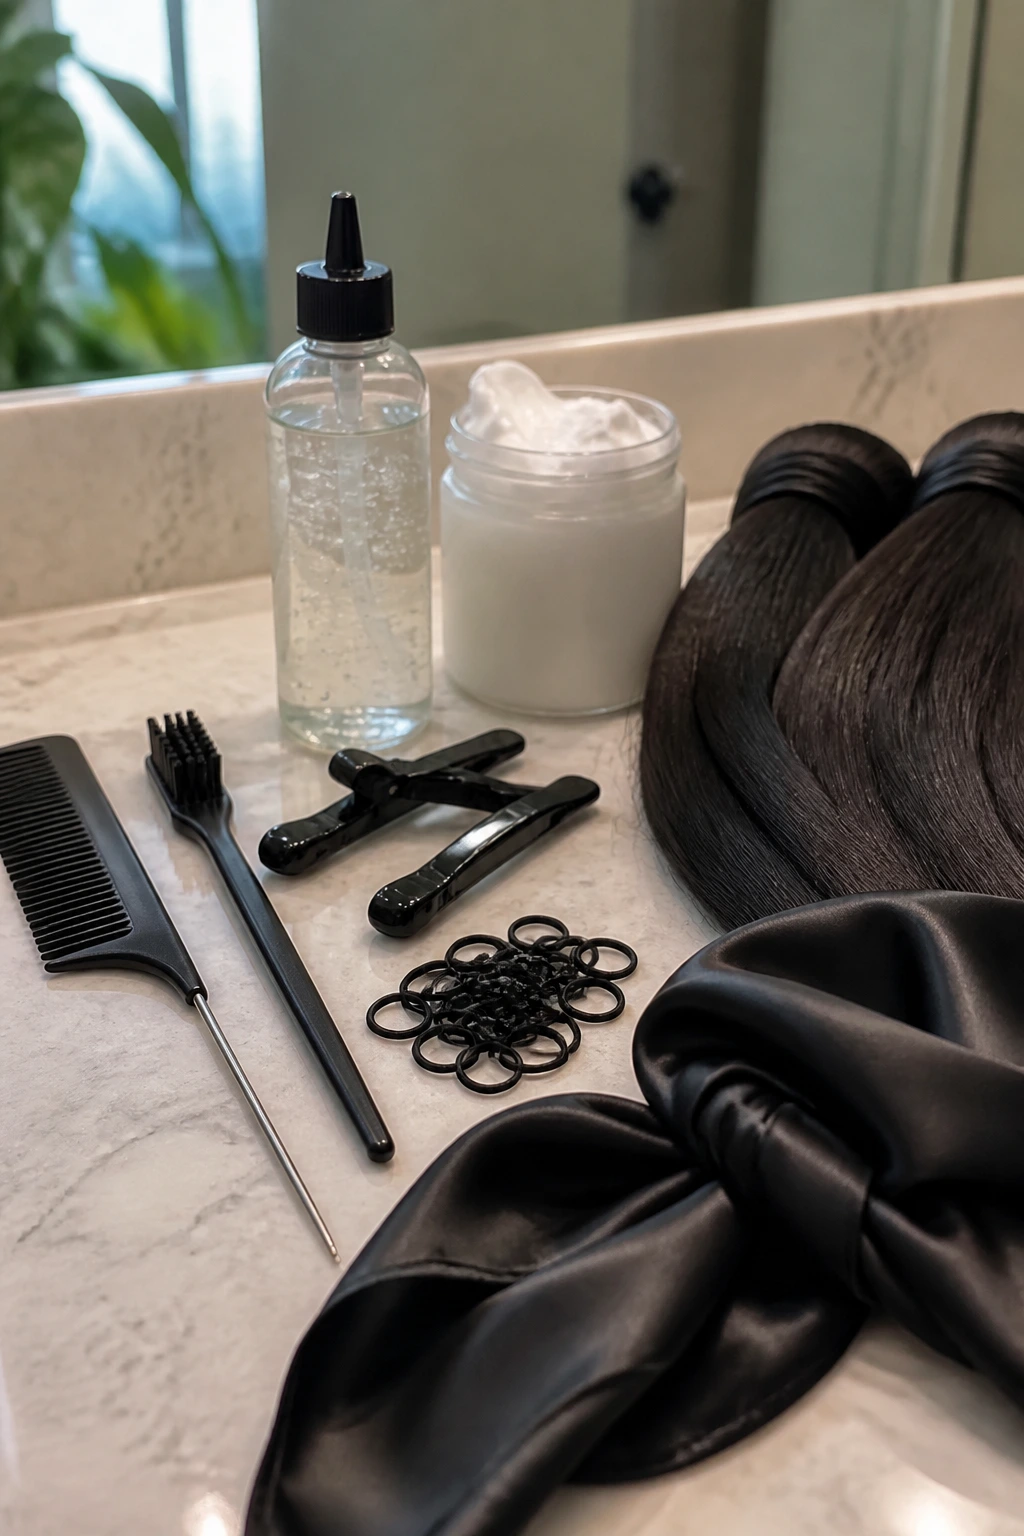
- Rat-tail comb: The pointed end gives you clean parts, and clean parts do half the styling work.
- Edge brush: Use it lightly. You want the perimeter smooth, not shellacked.
- Hair clips: Sectioning clips keep the rest of the hair out of the way while you braid.
- Braiding gel or styling cream: Pick a product that gives hold without turning the scalp into a sticky helmet.
- Mousse: A light foam helps calm flyaways and sets the braid pattern once the style is finished.
- Small elastics: Handy for bubble ponytails, half-up styles, and securing loose ends before wrapping.
- Braiding hair: Pre-stretched synthetic hair is usually easiest for feed-ins, knotless braids, and ponytail tails.
- Satin scarf or bonnet: This matters more than people think; it keeps the base from puffing up overnight.
- Optional blow-dryer with comb attachment: Useful if you need to stretch natural hair before braiding for a flatter finish.
Smart Shopping for Braiding Hair, Gel, and Hold
For thin hair, the shopping list should lean light, not huge. One to two packs of pre-stretched braiding hair is enough for many ponytail styles, especially if you’re doing feed-ins or knotless bases. Three packs can be too much unless the style is supposed to be chunky. Heavy extensions look dramatic for about five minutes, then the scalp starts complaining.
Texture matters more than people admit. If you want a sleek, matte braid, choose braiding hair that matches the texture of your own hair once it’s stretched or blown out. If you want a smoother, glossier finish, go with a more polished synthetic fiber. A mismatch shows in the transition from natural roots to added length, and thin hair exposes that seam faster.
Hold products should support the braid, not drown it. Look for gel or cream that gives slip during parting and enough hold to keep the roots neat once dry. If your scalp gets flaky, choose lighter formulas and use them sparingly. Thick buildup near the part will make the style look dusty before it even gets a chance to settle.
Small accessories deserve the same care. Pick lightweight cuffs, narrow scarves, and beads that won’t swing like dumbbells. On thin hair, accessory weight matters more than glamour points. A few neat pieces beat a pile of heavy ones every time.
How to Wear These Braided Ponytails So They Read Balanced
Presentation: Keep the front clean and the parting crisp. A braided ponytail on thin hair looks strongest when the edges are smooth, the base is compact, and the tail itself is neat rather than overstuffed. If there’s one place to spend your time, it’s the first inch near the hairline.
Accessories: Small hoops, a clean neckline, a sharp collar, or a simple scarf can help the ponytail feel finished. I would skip oversized accessories when the braid pattern is already doing a lot. Let one thing lead and the rest follow.
Scale: Match braid thickness to density. Fine hair rarely needs huge braid sizes, because the visual goal is coverage and shape, not bulk. If the base starts looking rounder than your head shape, you’ve probably added too much hair.
Occasion: Low ponytails feel calm and polished. High ponytails feel sharper and more dressed up. Side sweeps, heart parts, zigzags, and scarf wraps land somewhere in between. Pick the one that matches how much attention you want the style to get.
Practical Tips for Better Longevity and Less Pull
Root Prep: Stretch the hair before braiding if you can. A light blow-dry on low heat, or a stretched set from the day before, makes the parts flatter and the braids easier to control. Wet hair and braids do not mix well when the goal is a smooth ponytail.
Tension Check: After the first few braids, stop and feel the scalp. If the base already aches, loosen it. That little pause saves you from spending hours on a style that will be impossible to wear by evening.
Length Balance: Long tails are fine, but they should fit the body. If the ponytail is so long that it keeps catching on coats, chairs, and seatbelts, trim the length or choose a softer curl finish. Practical hair gets worn more.
Fresh Finish: A small amount of mousse and a quick scarf wrap for 15 to 20 minutes can smooth flyaways without making the roots sticky. I prefer that over piling on more gel halfway through the week.
Common Mistakes That Make the Style Look Heavy
The first mistake is overloading the roots with hair. The ponytail may look full in the chair, but it will sit heavy by the next day, especially if the hairline is already fine. The fix is simple: use fewer packs, feed the hair in gradually, and stop before the base turns round.
The second mistake is pulling the first braid too tight. You’ll know it happened if the scalp feels hot, the edges look shiny from strain, or the head starts throbbing when you lean back. Loosen the base and make the first inch flatter next time. Tight does not equal neat.
A third problem is choosing a ponytail position that your density cannot support. A high style on delicate roots can sag or expose too much scalp at the temples. If that keeps happening, move the ponytail lower or go side-swept so the weight sits better.
And then there’s heavy accessories. Beads, cuffs, and thick scarf wraps can drag a delicate ponytail down before lunch. Keep accessories light and place them near the lower half of the tail, where they add interest without pulling on the base.
Variations and Adaptations to Try

Soft Office Pony: Keep the braid count low, skip the beads, and use a low nape base with a clean wrap. This version reads neat in a meeting and doesn’t fight with glasses, collars, or headsets.
Weekend Curly Tail: Swap a blunt tail for water-wave or body-wave ends and separate the curls with your fingers once the style is set. The extra movement makes the ponytail look fuller without adding much root weight.
Color-Streak Accent: Add one or two packs of braiding hair in a deep brown, auburn, or burgundy shade instead of changing the whole head. A small color shift gives the style personality and still keeps the base believable.
Kid-Safe Light Build: Use fewer sections, lower tension, and a shorter tail. Thin hair on kids should never be pushed into a style that depends on endurance; the best version is the one they can sleep in without fuss.
Dress-Up Wrap Pony: Add a satin ribbon or narrow scarf around the base, then tuck the knot to one side. This is the fastest way to make a simple braided ponytail feel event-ready without changing the braid pattern.
Keeping the Style Fresh Between Wash Days
A braided ponytail on thin hair usually wears best when it’s not pushed too far. If the style was installed lightly, many versions stay neat for about 1 to 2 weeks. If the base is flatter and the scalp tends to stay calm, you may stretch that a little longer, but the moment the roots feel tender or the nape starts matting, it’s time to stop pretending.
Night care matters. Wrap the base with a satin scarf or sleep in a bonnet so the parts don’t puff up and the tail doesn’t frizz at the ends. If the ponytail is long, I like to braid the tail loosely or tuck it under the scarf so it doesn’t rub against the pillow all night.
For cleaning, a diluted shampoo or scalp cleanser works better than flooding the whole style. Focus on the parts and the scalp, then blot dry with a towel and let the rest air out. A little mousse every few days keeps flyaways under control, but product buildup at the roots will make thin hair look dull fast. Less is more here.
Braided Ponytail Questions People Actually Ask
Can you do braided ponytails on thin hair without adding hair?
Yes, and sometimes that’s the smartest choice. A natural-hair-only ponytail with small braids, flat parting, and a low or mid placement can look cleaner than a heavy extension style that strains the roots.
How much braiding hair do I need?
For many thin-hair styles, one to two packs of pre-stretched braiding hair is enough. If you’re only adding a tail or a wrap-around piece, you may need even less. Start light; you can always add more, but you can’t take away bulk once it’s braided in.
Are knotless braids better than cornrows for thin hair?
Knotless braids are often gentler because the base starts smaller and the tension can feel softer. Cornrows still work well, especially for ponytail bases, but they need careful parting and a light hand at the front.
What if my ponytail keeps looking flat?
First, check the part size and braid size. If everything is too wide, the style can collapse visually. A little mousse, a better ponytail height, or a curly tail finish usually helps more than adding a giant bundle of hair.
Can I wash my scalp while wearing the style?
Yes, but keep it controlled. Use diluted shampoo or a scalp cleanser, apply it to the parts, and rinse carefully so you’re not soaking the whole style. Let the braids dry all the way before tying them down again.
What if my edges are already fragile?
Choose a lower-tension style and skip anything that pulls hard at the temples. A low nape ponytail, side sweep, or half-up version is usually kinder than a high, tight ponytail with heavy extensions.
How long should I keep the style in?
For thin hair, shorter wear time is usually better. Many styles look their best for 1 to 2 weeks, and after that the roots can start to fuzz, tangle, or feel stiff. If the scalp is sore or itchy in a sharp way, take the style down sooner.
Can I wear accessories without making it too heavy?
Yes, but choose light pieces. Thin cuffs, a narrow scarf, or a few small beads near the end of the tail usually look cleaner than a stack of heavy decorations at the base.
A Ponytail That Knows Its Own Size
The smartest braided ponytails for Black hair with thin hair are the ones that respect the hair you actually have. Not the hair you wish you had for the sake of a giant style photo. Clean parts, lighter base weight, and a ponytail that sits in the right place will always beat a crowded install.
What I love about these looks is how forgiving they can be once you stop trying to make them bigger than the head. A flat base, a smart braid pattern, and one polished finish — that’s enough. Choose the version that fits your density, keep the tension honest, and the style will do what it’s supposed to do: look good without asking your scalp to pay for it.