A side-swept part does more than move hair off the face. On mid-length hair, it changes where the weight sits, which is why a shoulder-grazing cut can suddenly show cheekbones, soften a jaw, and look like it has better bones than it actually does.
That sounds dramatic because it is. Shift the part an inch or two and the whole front of the haircut starts behaving differently: the roots lift, the longer side curves inward, and the shorter side creates that sweep across the forehead that makes a lob feel deliberate instead of ordinary.
What makes side-swept part layers for mid length hair worth keeping around is that they do not demand a perfect blowout every morning. They can look smooth when brushed out, a little undone when air-dried, and polished when the face-framing pieces are cut to land at the cheekbone instead of the chin. The real trick is choosing the right version for your texture, face shape, and patience level.
Why These Side-Swept Layers Keep Getting Saved

-
They lift the crown without teasing: Moving the part off center gives one side a small built-in rise, which is the easiest way to make mid-length hair look fuller at the roots.
-
They soften the face without swallowing it: A front piece that lands at the cheekbone or mouth line can blur a hard angle, but it still lets your features show through.
-
They work with awkward grow-out: A good side sweep grows into longer layers, not a bad bang situation that sits there making everyone unhappy.
-
They play nicely with texture: Straight hair gets movement, wavy hair gets shape, and curly hair gets a better outline instead of that round “triangle” effect.
-
They look finished even on day two: Once the roots settle and the bend relaxes a little, the cut often looks better, not worse.
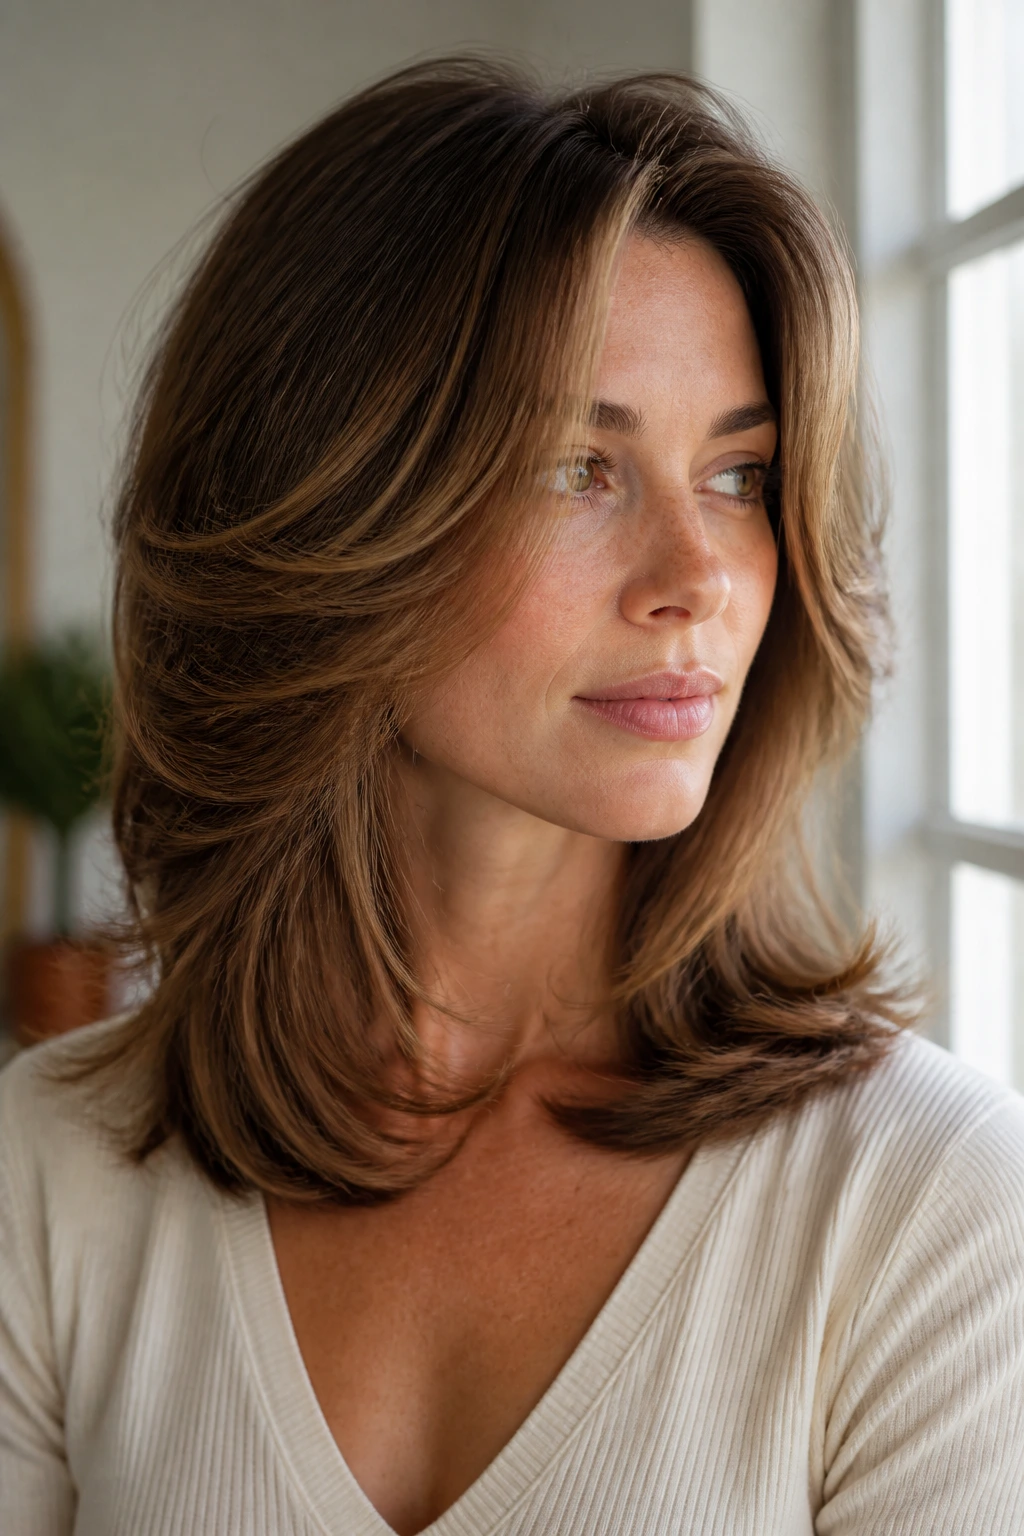
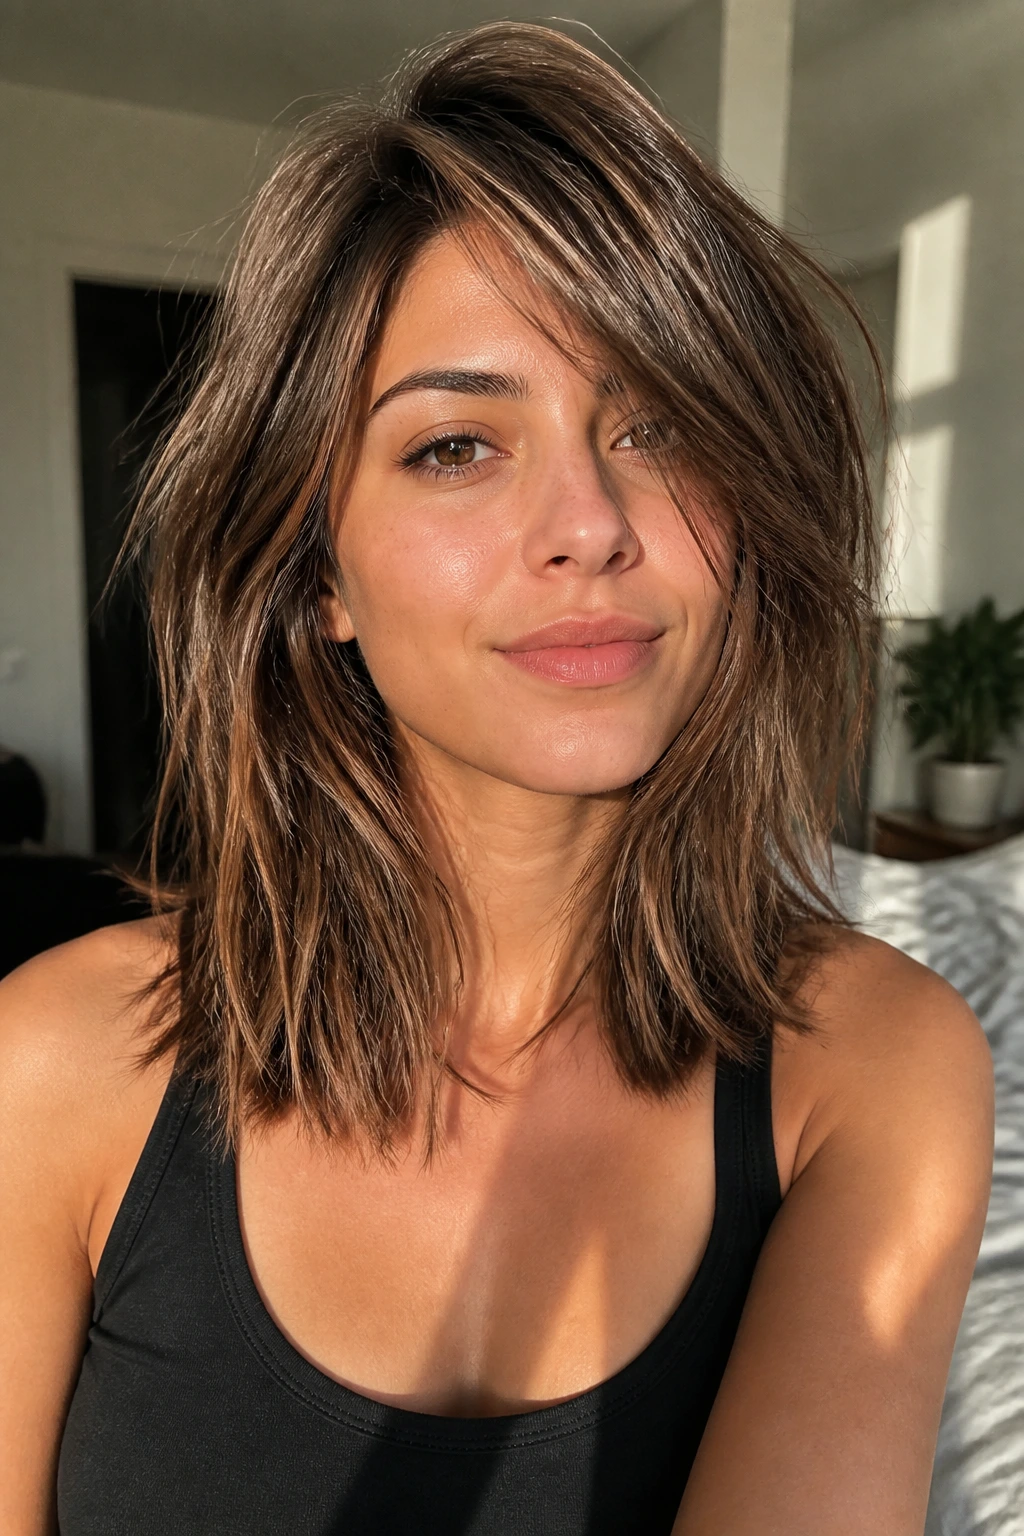
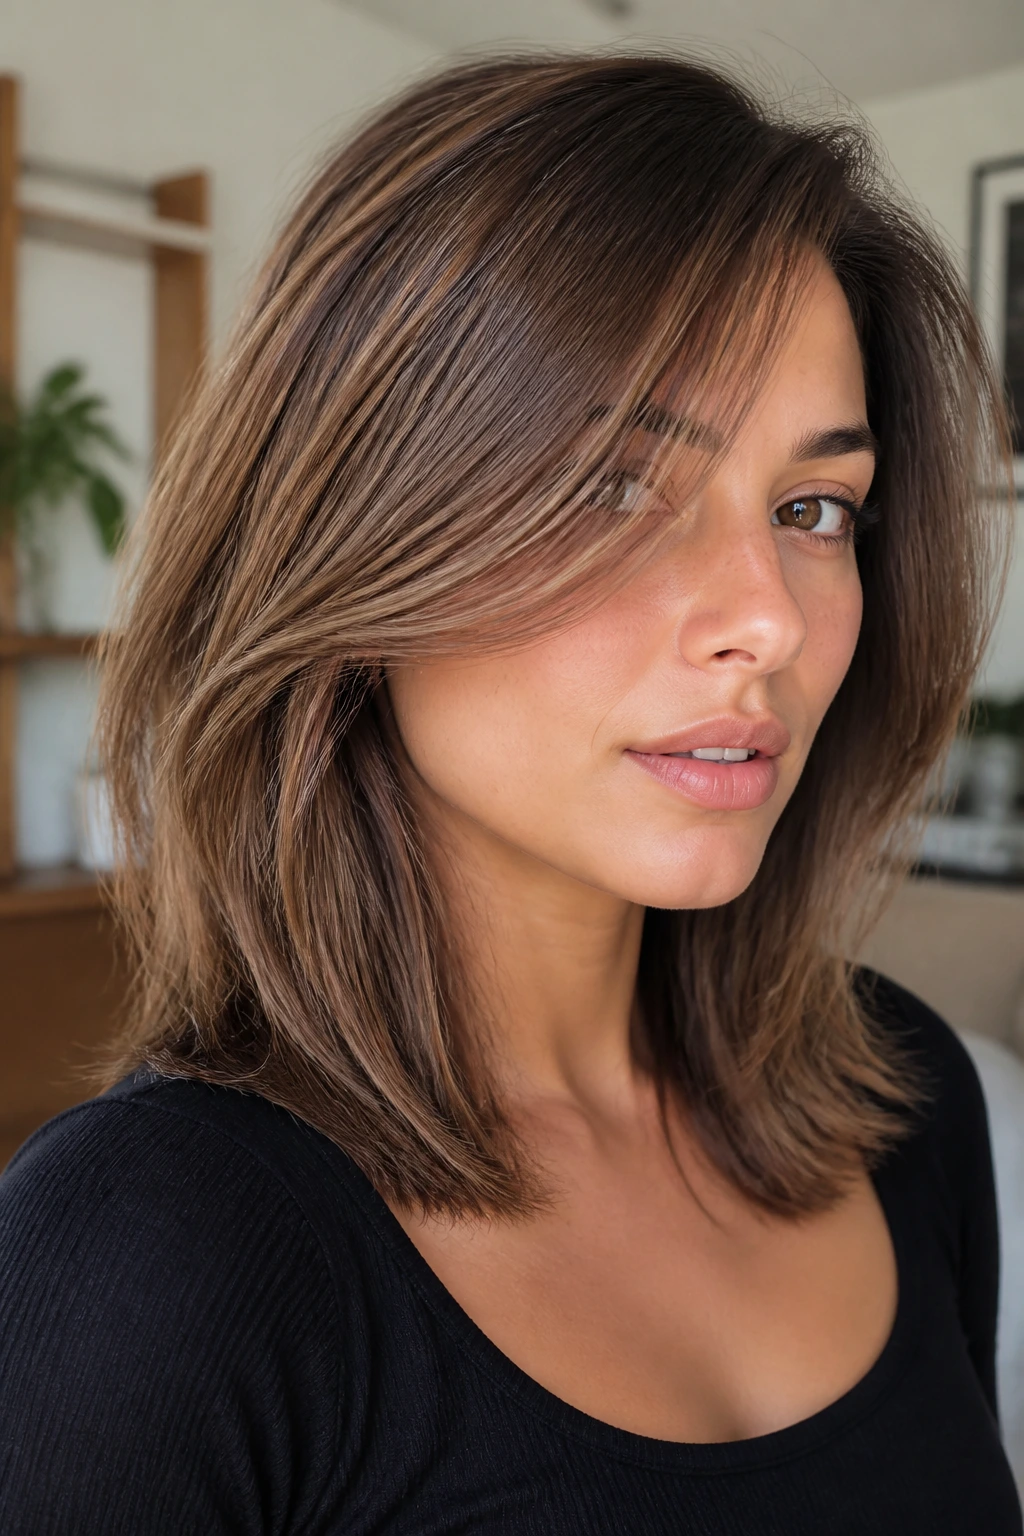
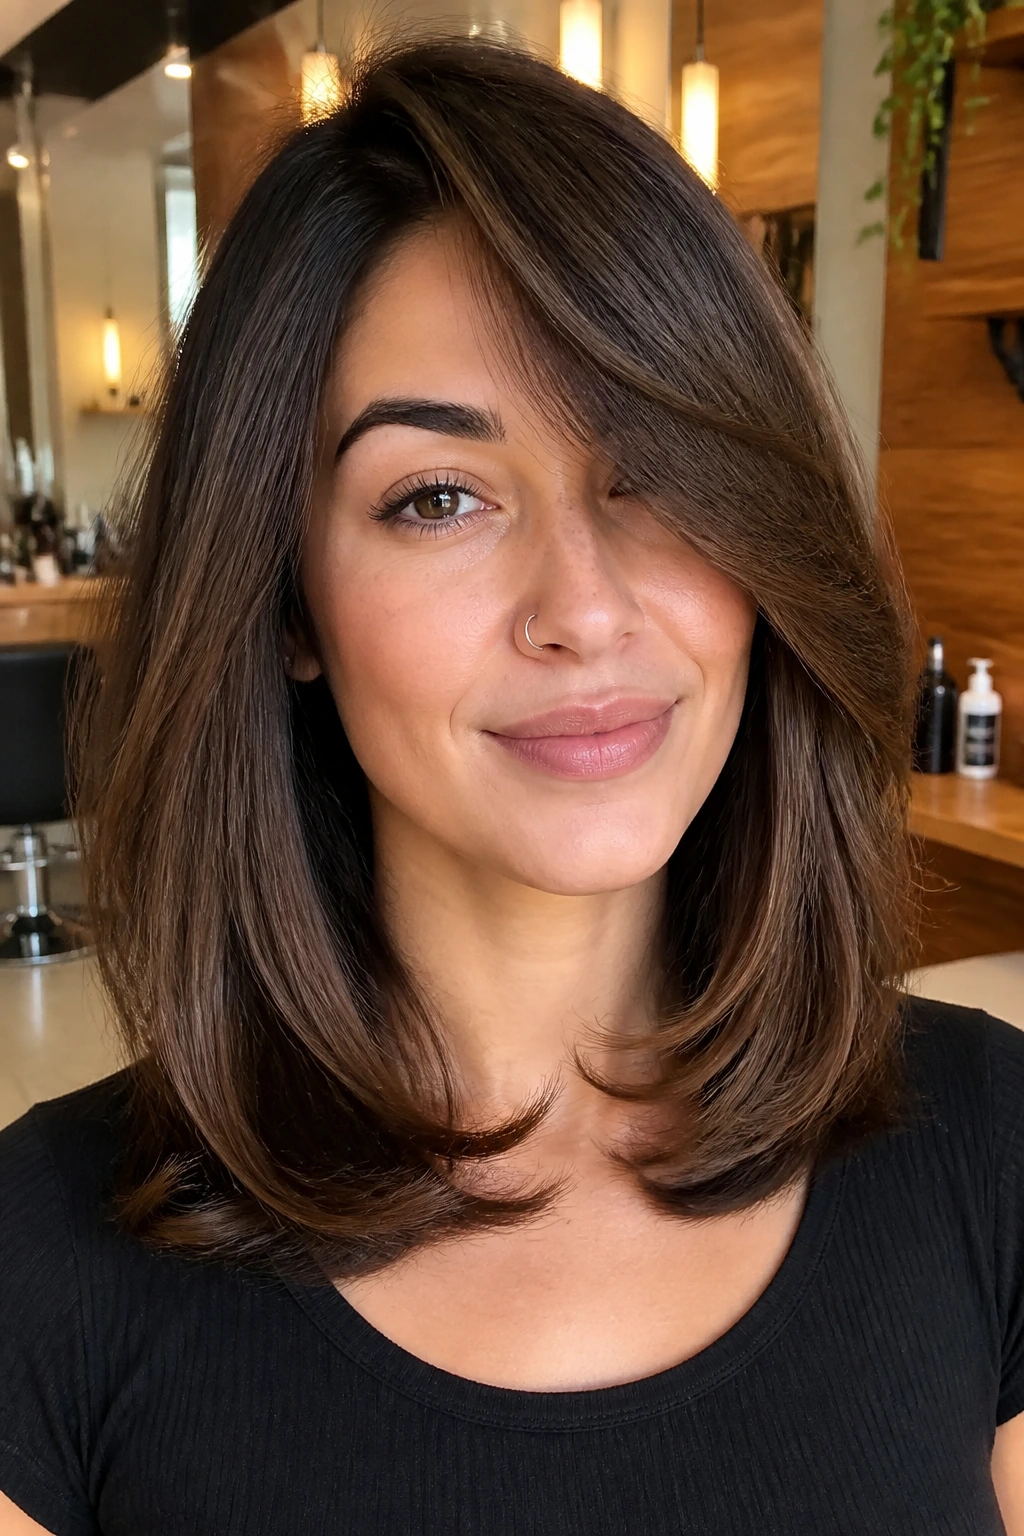
1. Collarbone Sweep with Airy Face-Framing Layers for Mid-Length Hair
This is the version I reach for when someone wants movement without losing the clean shoulder-grazing line. The longest pieces hit the collarbone, while the front layer starts around the lip or chin and falls on a soft diagonal. It gives the hair swing when you turn your head, which sounds minor until you see how much shape that one curve adds.
Why it works on mid-length hair
The collarbone is a useful stopping point because it keeps the length visible while letting the side-swept layers do the talking. Ask for point-cut ends instead of a blunt chop, or the front pieces can sit like shelves. A round brush and a 1.5-inch iron are enough here; you do not need a full curl, just a bend under the cheek and away from the face.
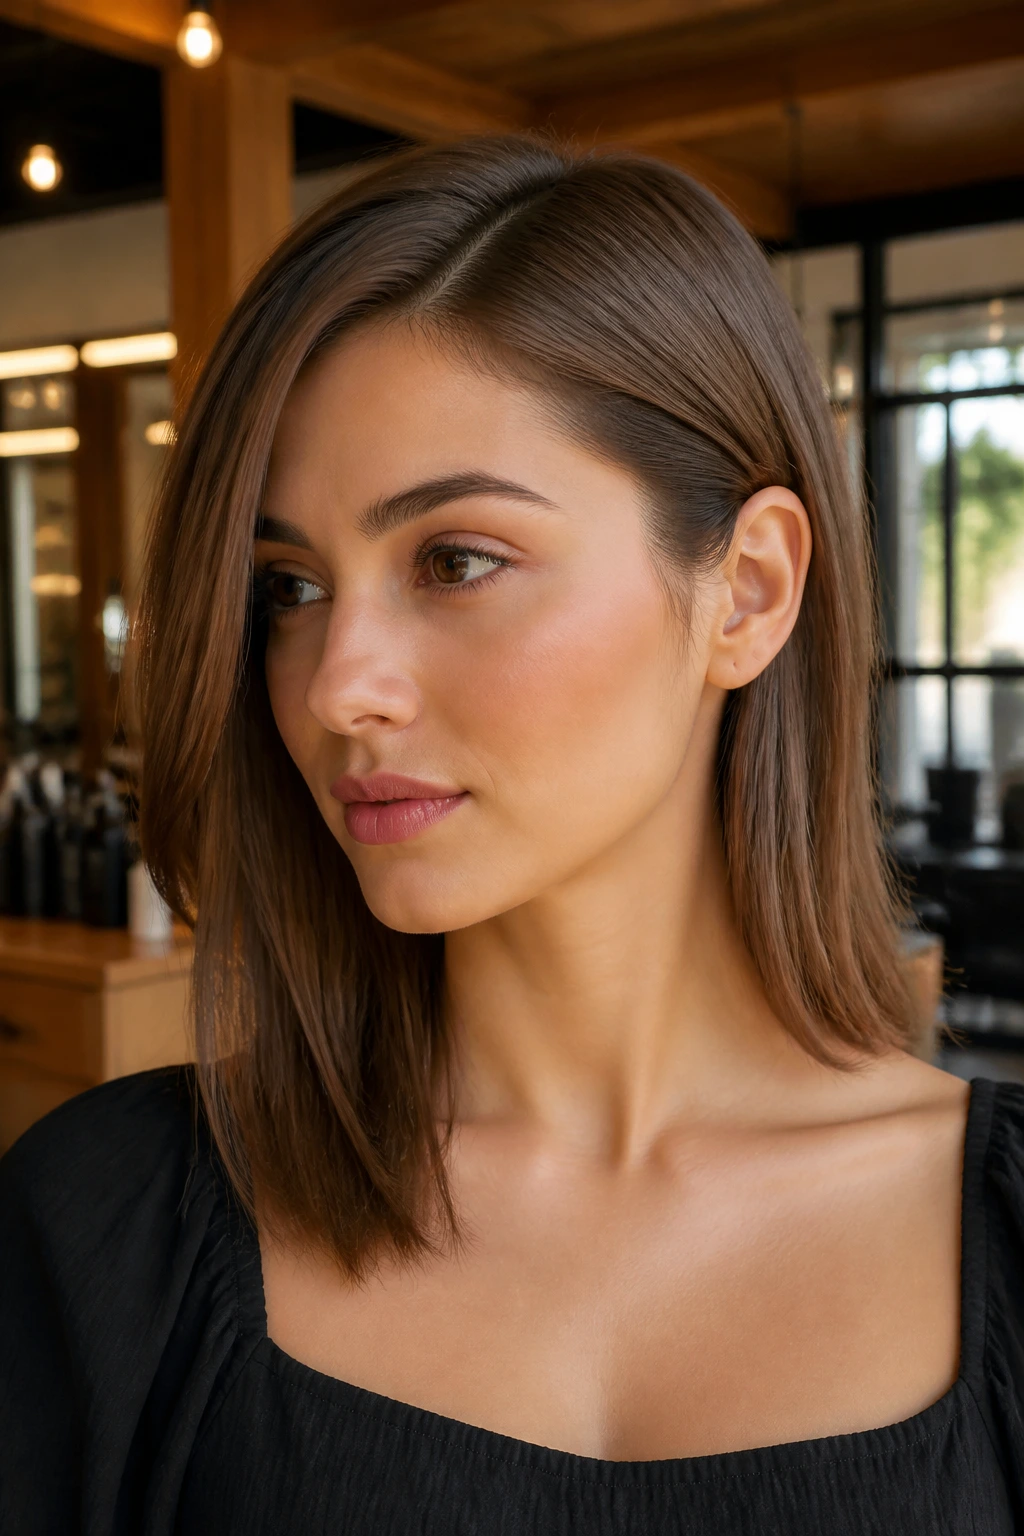
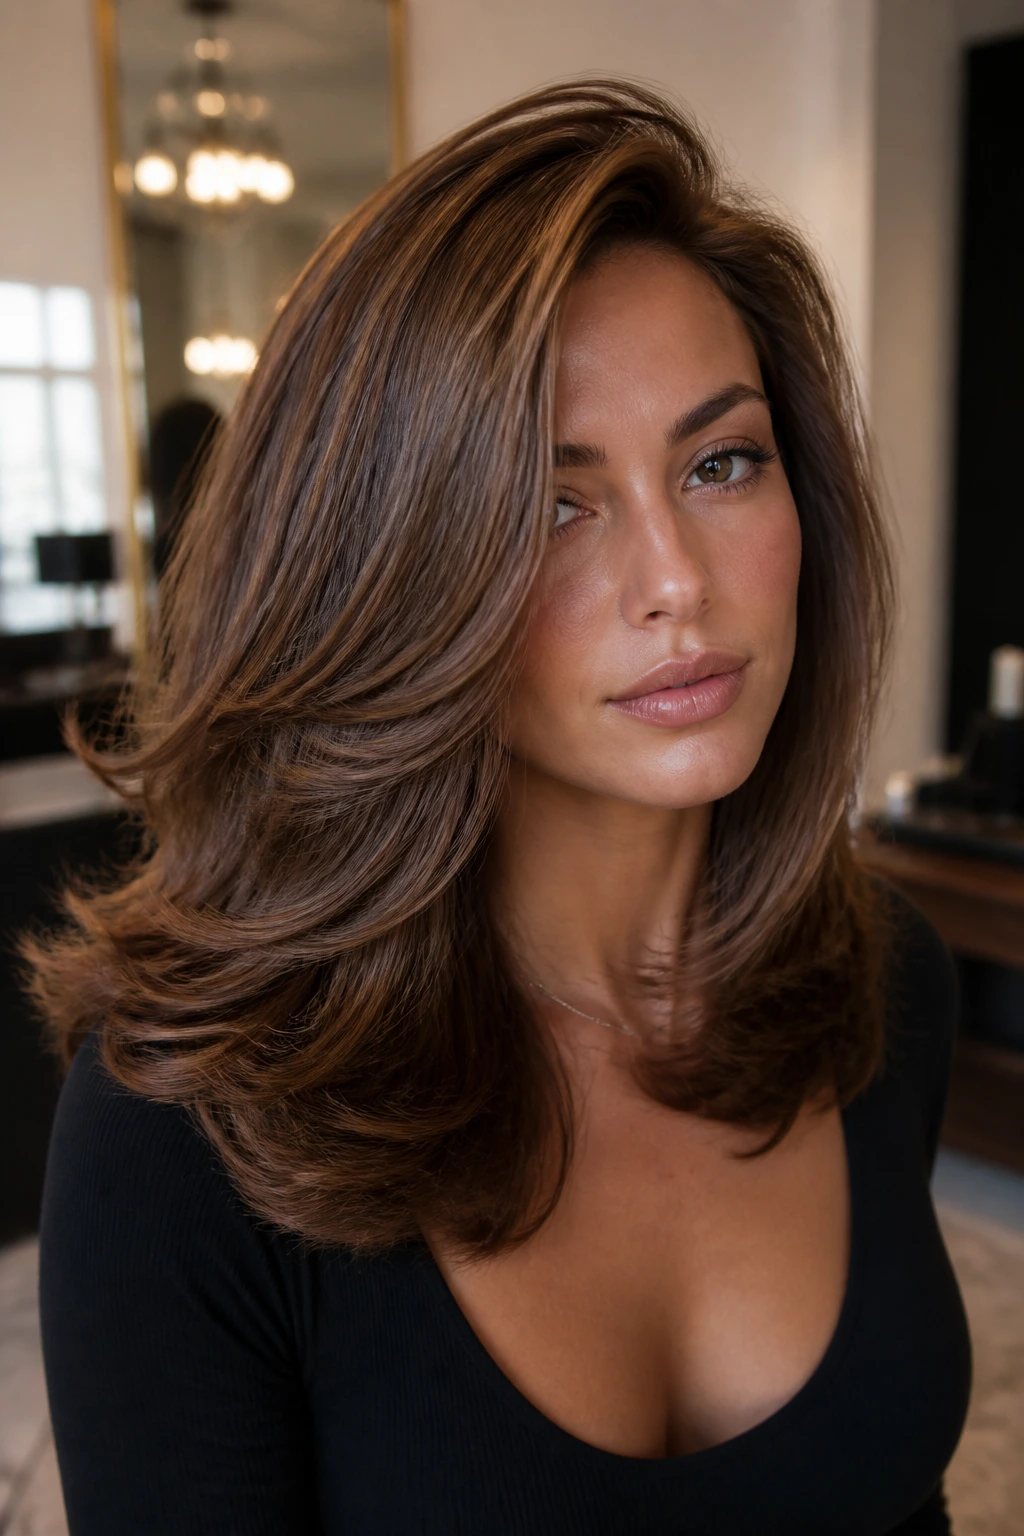
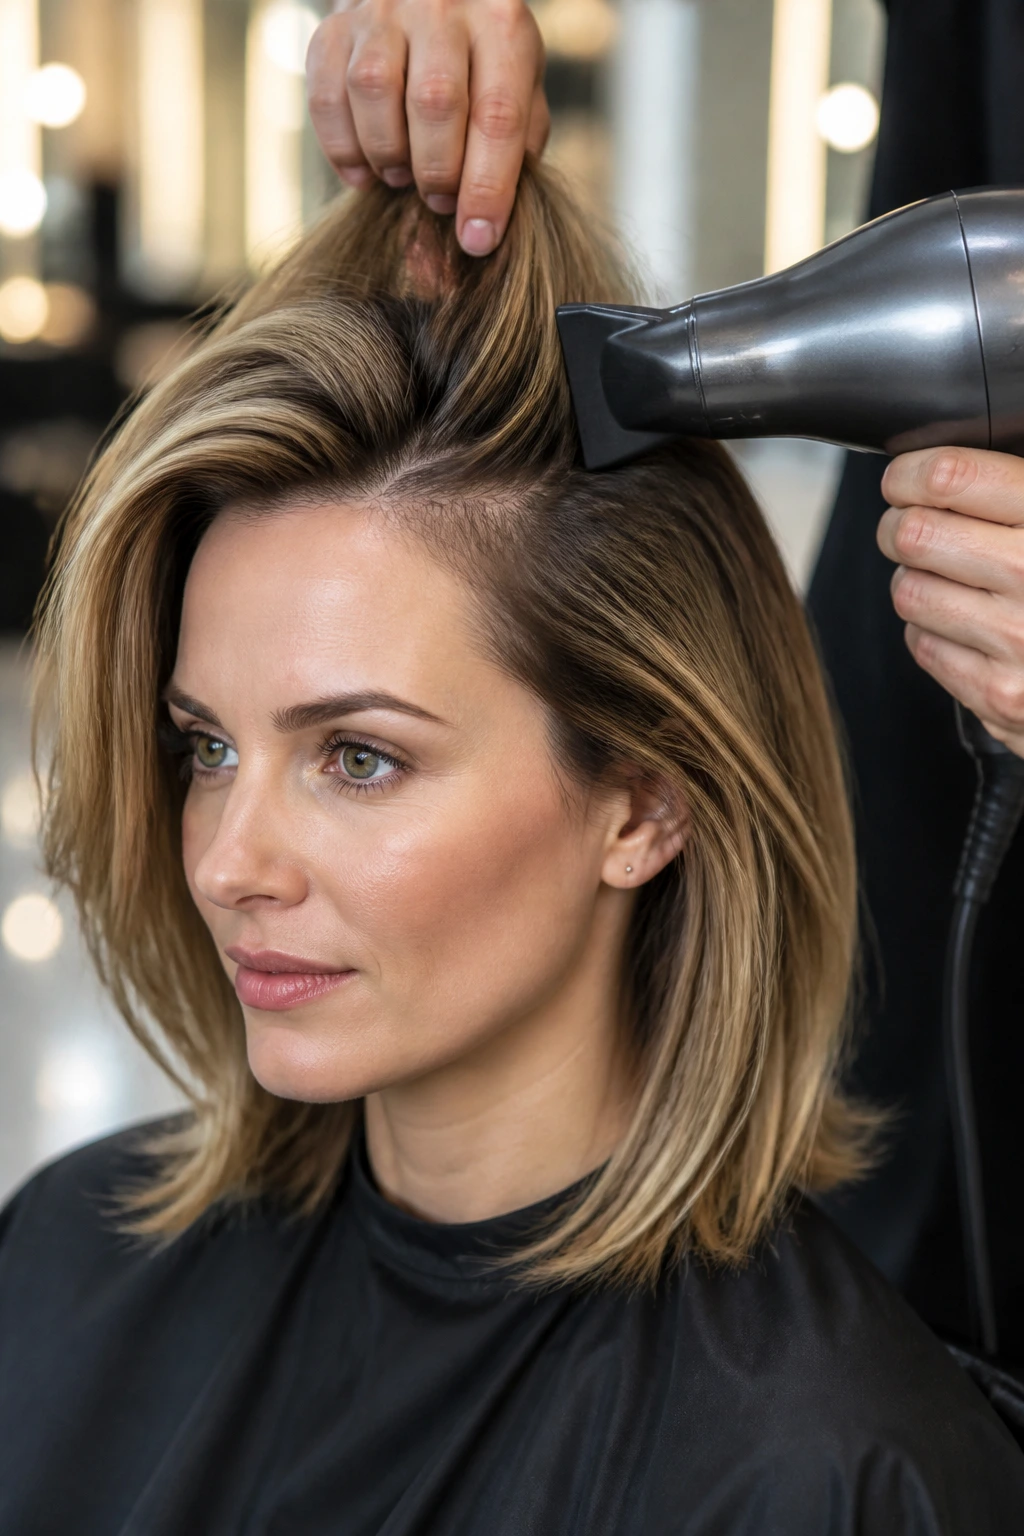
2. Deep Side Part with Polished Blowout Layers
If you want lift at the crown, move the part deeper than you normally would. Even a one-inch shift makes a difference, and a two-inch shift can give mid-length hair that airy, lifted look at the root line without adding any obvious tease or product pileup.
This version feels the most polished of the bunch. The deeper side part creates a cleaner slope over the forehead, while the longer side keeps the haircut from looking flat and boxy. I like it for people who wear their hair smooth, because the shape reads clearly even when the ends are only lightly bent with a brush.
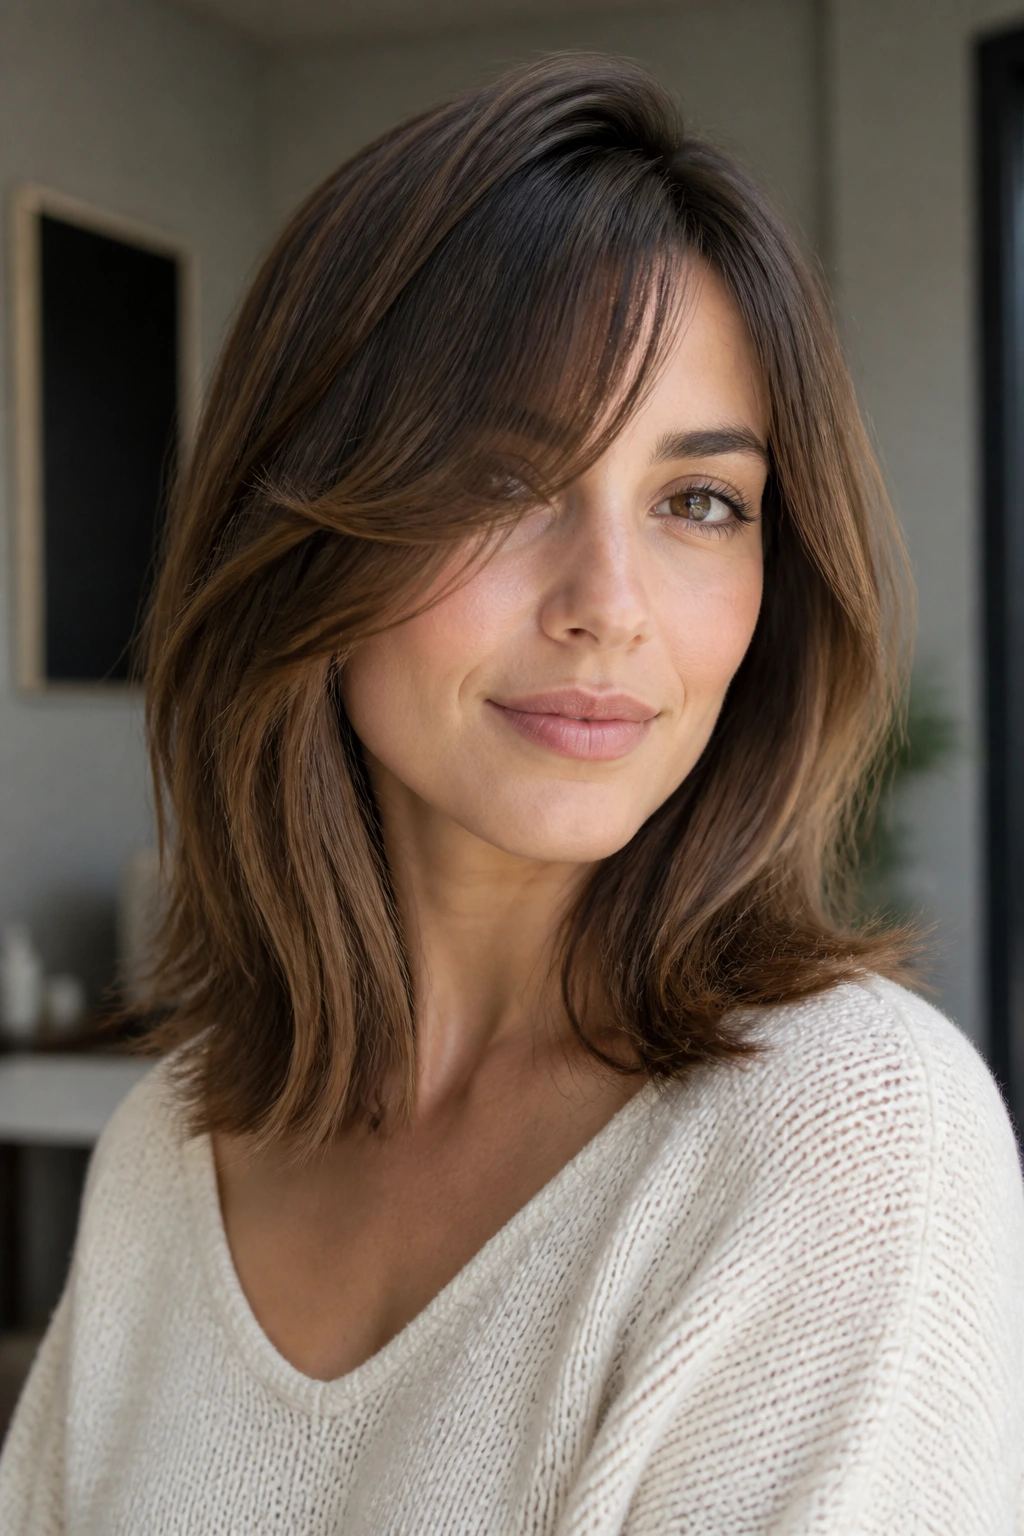
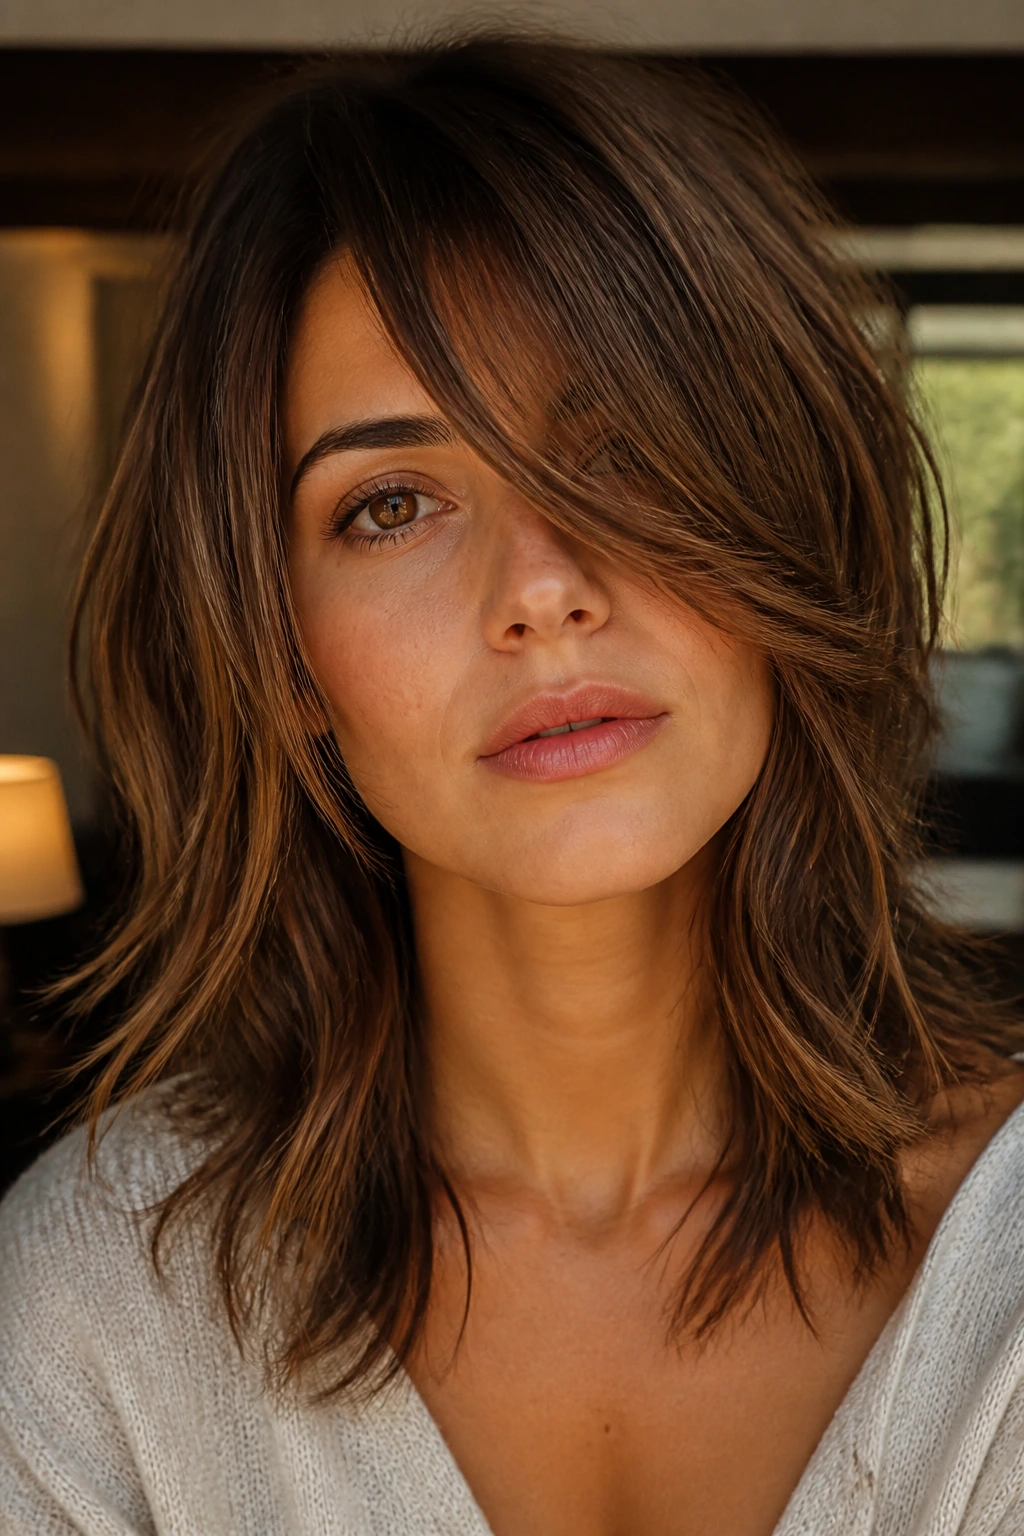
3. Soft Shag Sweep with Broken-Up Ends
Can a shag still look neat on mid-length hair? Yes, if you keep the layers longer and the ends soft. This is not a chopped-up, piecey mess. It is a gentler version, with a side sweep that pushes the front over one eye a little and lets the rest fall in broken, airy sections.
The key is restraint. Too many short layers near the crown and you lose the length that makes this cut feel wearable; too much razor cutting and the ends can fray out in humid weather. I like this shape with a bit of texture spray on dry hair and a quick twist around the fingers while the front is still warm from the dryer.
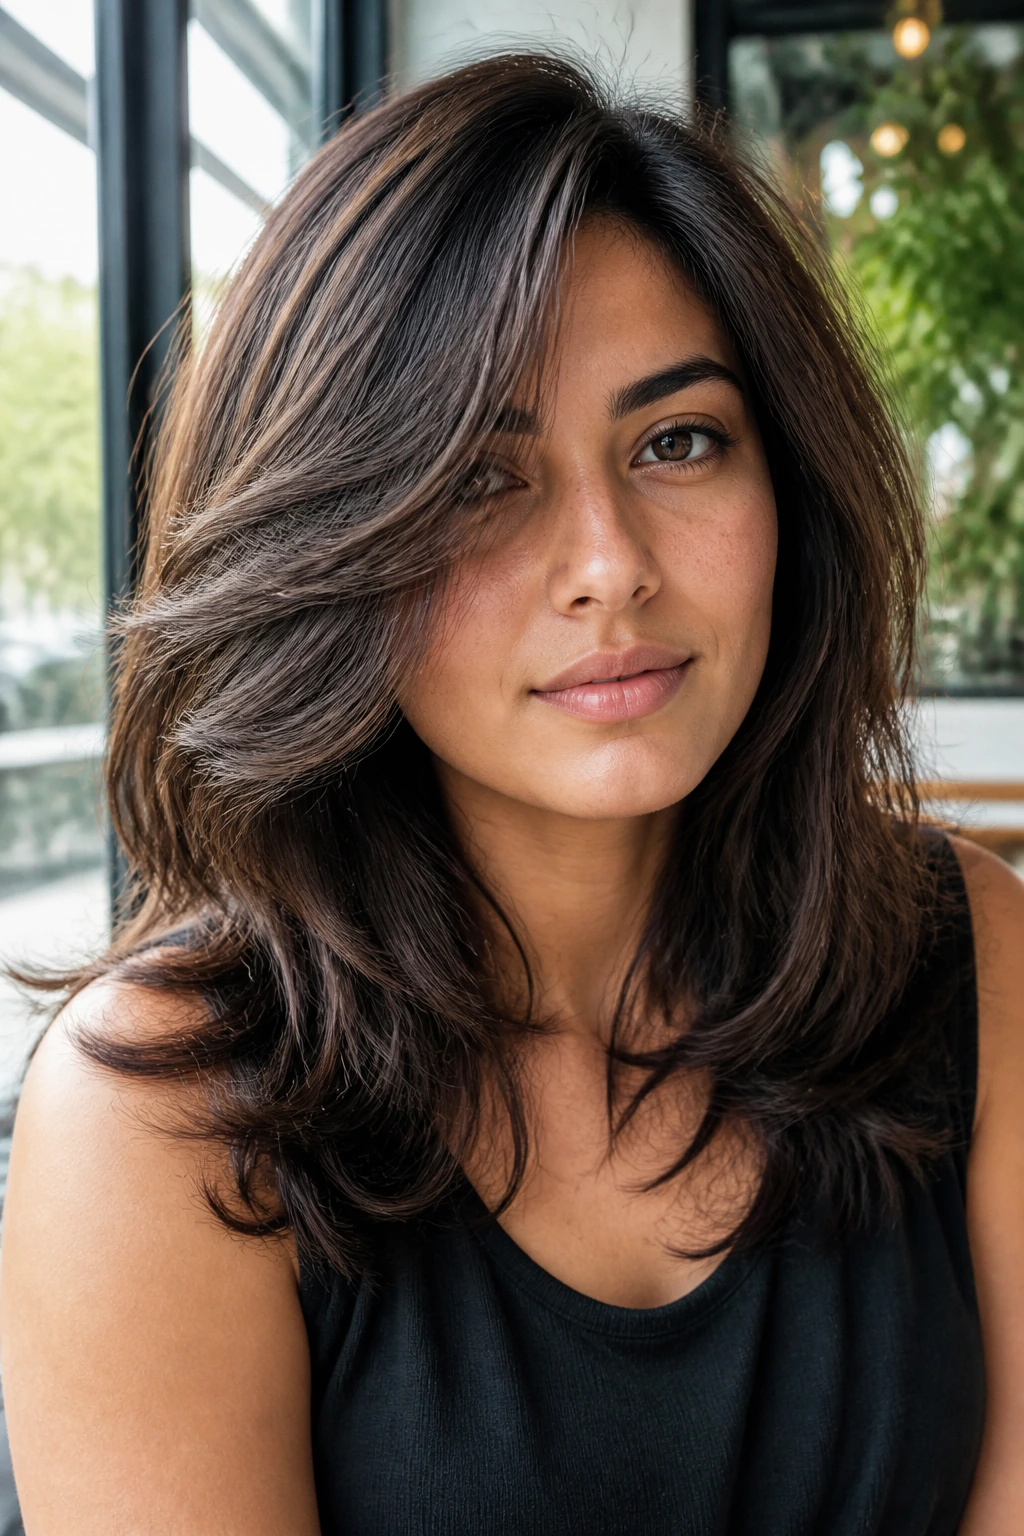
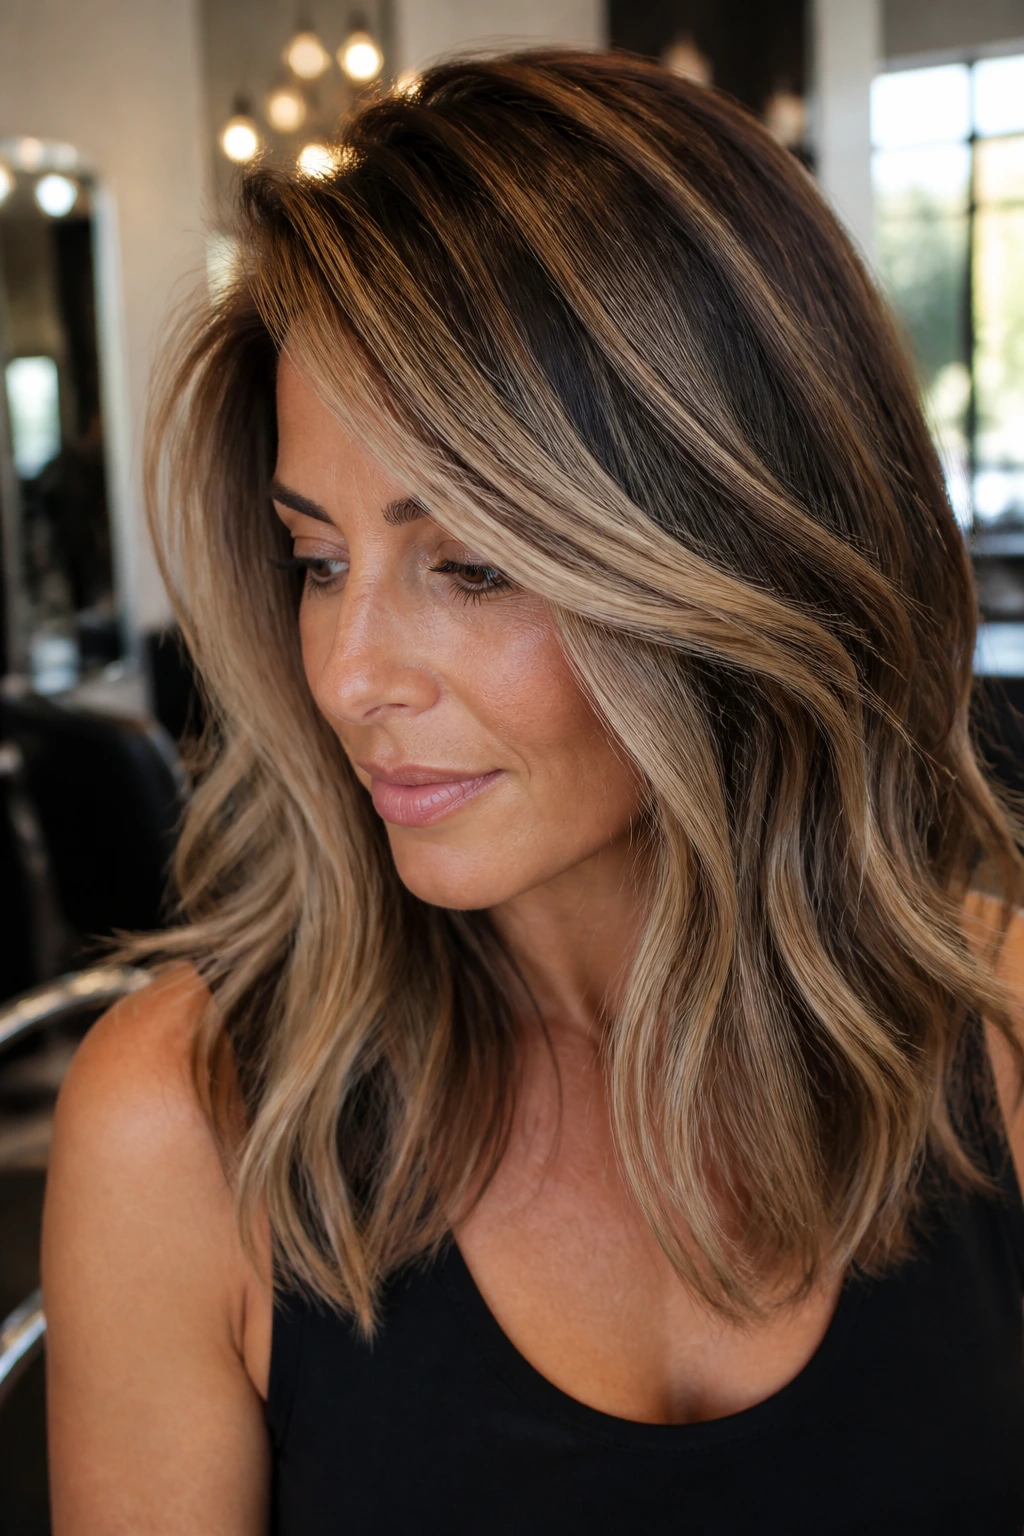
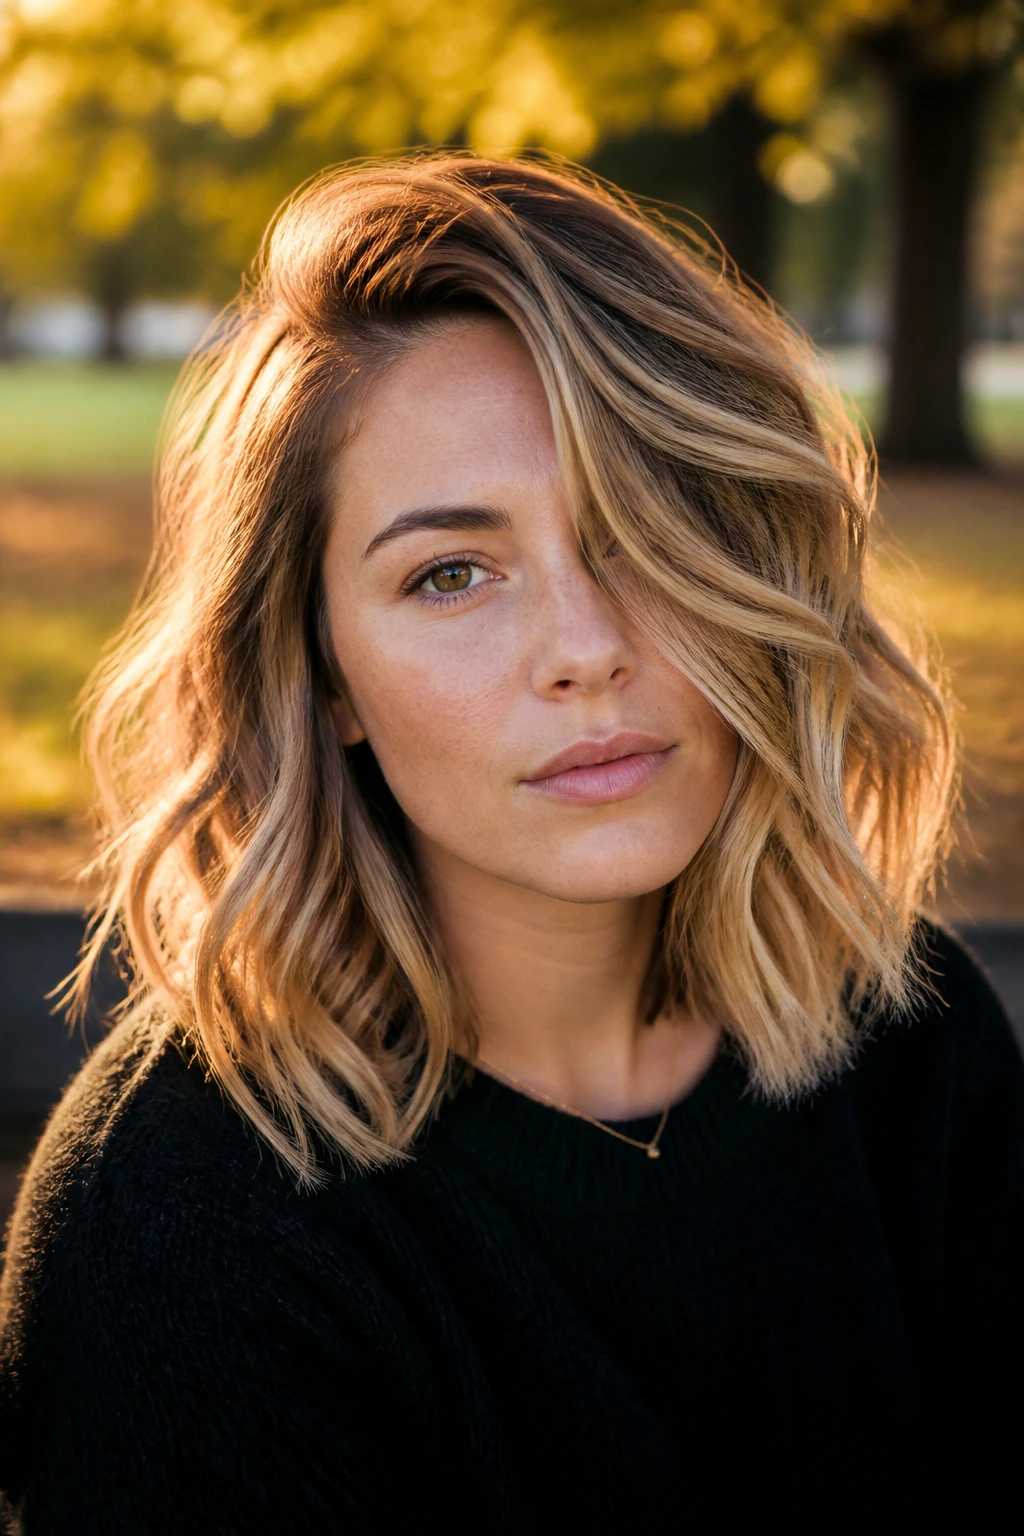
4. Wavy Lob with a Heavy Side Bend
A wavy lob loves a side part because waves already have their own idea of where they want to fall. Give them a part line to follow and the whole cut looks less random. One side can land just below the cheekbone while the other side tucks a little closer to the jaw, which is a nice way to make the face feel less square.
If your natural wave bends unevenly, this cut can calm that down without forcing every strand to behave. A 1.25-inch curling iron, used only on the front pieces and the top layer, is usually enough. Let the ends stay slightly straighter than the mids. That contrast is what keeps it from looking overdone.
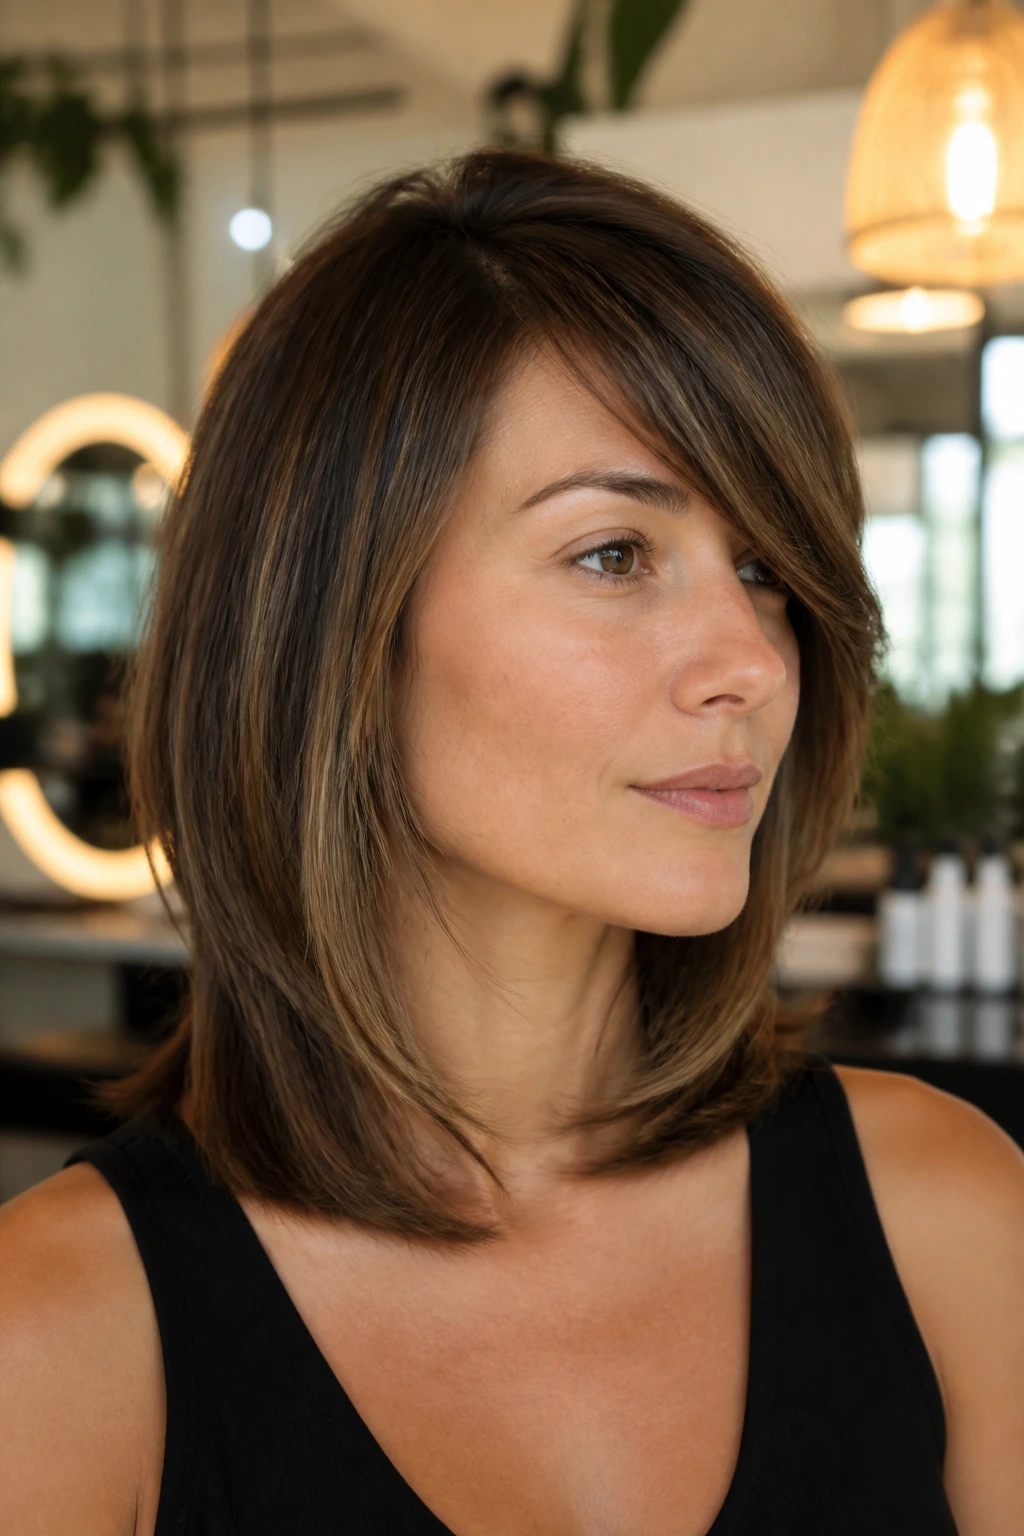
5. Feathered Layers That Curl Away from the Face
Feathering gets a bad reputation when it’s too choppy, but the right version on mid-length hair is clean and flattering. The front pieces should start around the cheekbone and be brushed away from the face as they dry, so they open up instead of clinging to it.
The move that makes it work
Use a round brush with a medium barrel and direct the hair up and away from the part at the root, then curve it down through the ends. That little flick matters. It keeps the layer from sitting flat against the cheek and gives the cut a soft lift that reads as shape, not fuss.
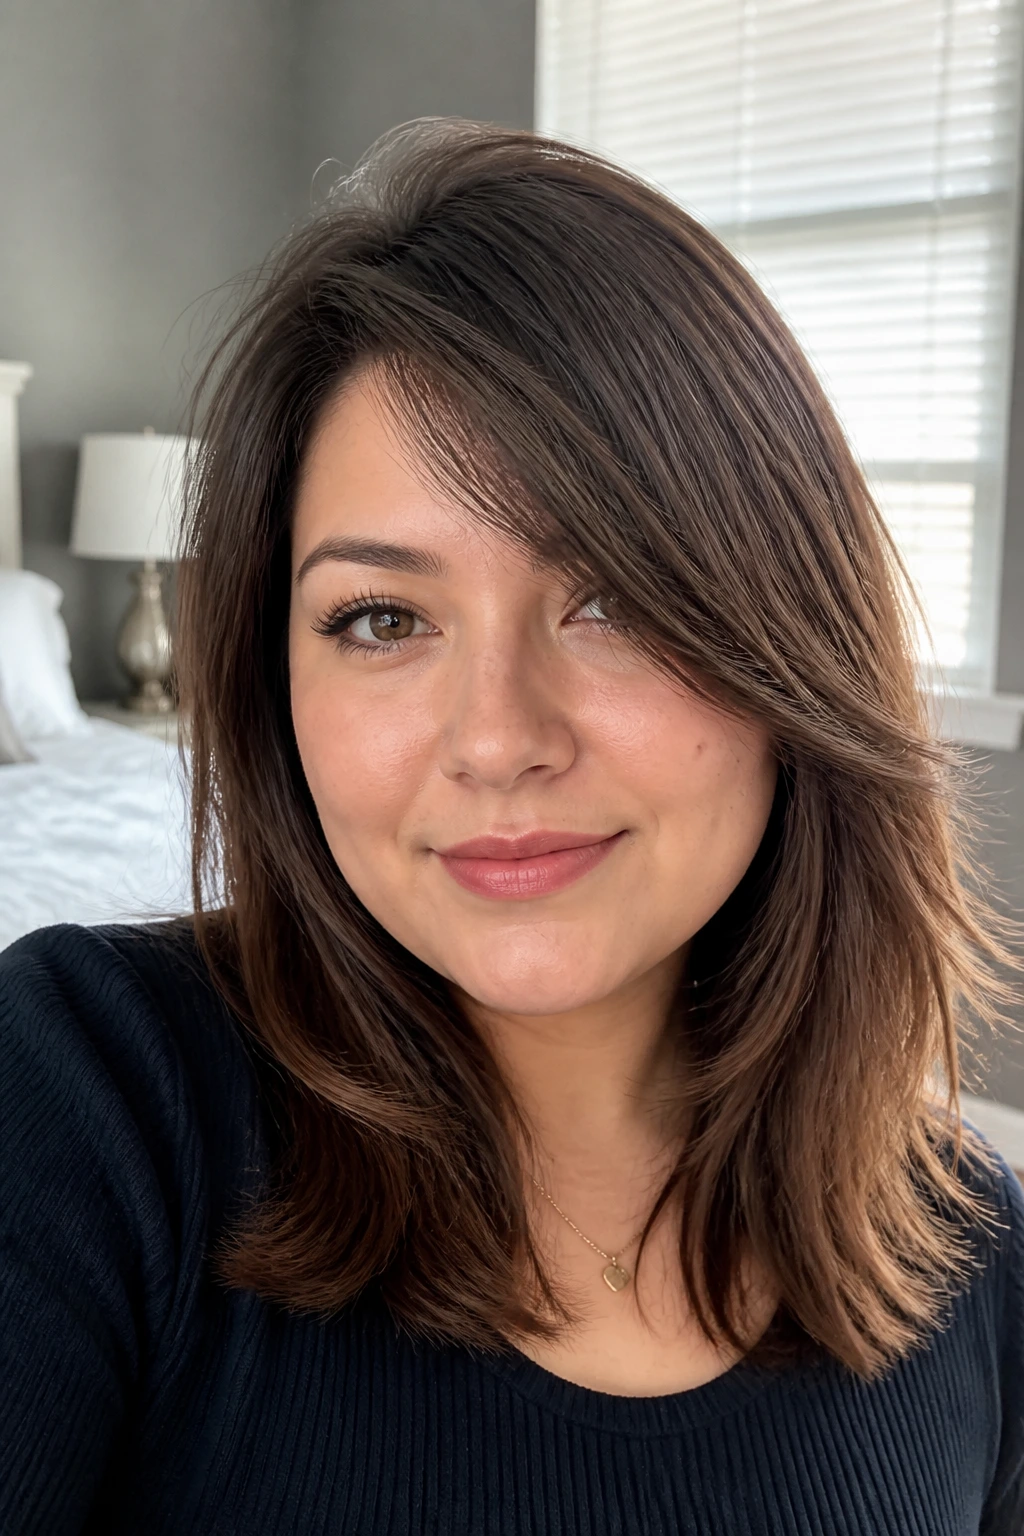
6. Tucked-Behind-Ear Side Sweep for Straight Hair
Straight hair can look stiff fast, which is why this version is such a useful fix. The side part creates a longer sweep on one side, while the other side gets tucked behind the ear to show off the jawline and the neck. Suddenly the cut has movement, even when the texture itself is smooth and glassy.
I like this one on hair that falls between the chin and collarbone because the tuck breaks up the rectangle effect. Keep a small amount of smoothing cream only from mid-lengths to ends. If you put it at the roots, the part loses its lift and the whole shape goes limp by lunchtime.
7. Jaw-Softening Layers for Strong Angles
If your jawline feels too sharp in a blunt cut, the answer is not more length everywhere. The answer is softer front pieces that begin below the jaw and angle down toward the collarbone. That leaves the strongest line of the face visible, but it keeps the cut from drawing a hard border right at the mouth or chin.
This version works because it uses curve, not coverage. A side part pushes the shorter side across the forehead and gives the longer side a place to fall past the jaw. Ask for the layer to be cut with a slight curve, not a hard diagonal. The difference shows up immediately in profile.
8. Long Internal Layers for Thick Hair

Thick hair needs subtraction, not aggression. That is the whole point here. Instead of shaving off length, the stylist takes weight out of the middle and underlayers so the perimeter stays strong while the shape moves more easily around the face.
This is the cut I trust most when someone says, “My hair feels like a blanket.” Internal layering lets the side sweep sit without puffing out at the ends. If you have dense hair, ask to avoid too much thinning near the face, because over-thinned front pieces can frizz and stick out in all the wrong places. Keep the line solid. Let the movement happen inside the haircut.
9. Barely-There Layers for Fine Hair

Fine hair can wear side-swept layers, but the cut has to be disciplined. Too many short layers and the ends start to look see-through. Too much point cutting and the whole thing loses its little bit of weight, which is the part fine hair depends on to look full.
What to ask for
Ask for long layers only, with the shortest face-framing piece no shorter than the chin if your hair is very fine. A side part gives the root some built-in lift, so you do not need a lot of extra carving. A root-lift spray at the crown and a light dry shampoo at the part line usually do more than heavy mousse ever will.
10. Chin-Skimming Face Frame for Oval Faces on Mid-Length Hair

Oval faces can wear almost anything, which is exactly why this shape is worth choosing on purpose. The side-swept part keeps the line from feeling too symmetrical, and the front pieces that skim the chin add just enough frame to keep the cut from disappearing into the face.
I like chin-length framing when the goal is softness without losing polish. It gives the front hair a job. The eye catches the curve at the cheek and then follows the length toward the collarbone, which is a tidy little piece of visual work for such a simple haircut.
11. Side-Swept Lob with Curtain-Bang Blend
Want face framing without signing up for full bangs? This is the move. The front pieces open at the side part and then blend into longer layers that behave like curtain bangs without becoming a separate feature you have to wrestle every morning.
That blend matters. If the shortest front section is too abrupt, the whole haircut starts reading as bangs-plus-lob, and that is a different animal. Keep the transition soft, especially near the temples. A round brush and a quick bend away from the face are enough to keep the part from collapsing forward.
12. Piecey Layers with a Rough-Dry Finish
Some mornings, a brush is one step too many. This cut is for those mornings. The layers are separated enough that a rough-dry with a diffuser or just a blow dryer and fingers creates a broken-up, lived-in shape that still follows the side part.
The trick is not to over-scrunch it into a puff. Use a lightweight texture spray on damp hair, then let the roots dry first so the part line sets where you want it. Once the hair is almost dry, pinch a few front pieces and push them toward the face on the longer side. That gives the cut a little attitude without turning it messy.
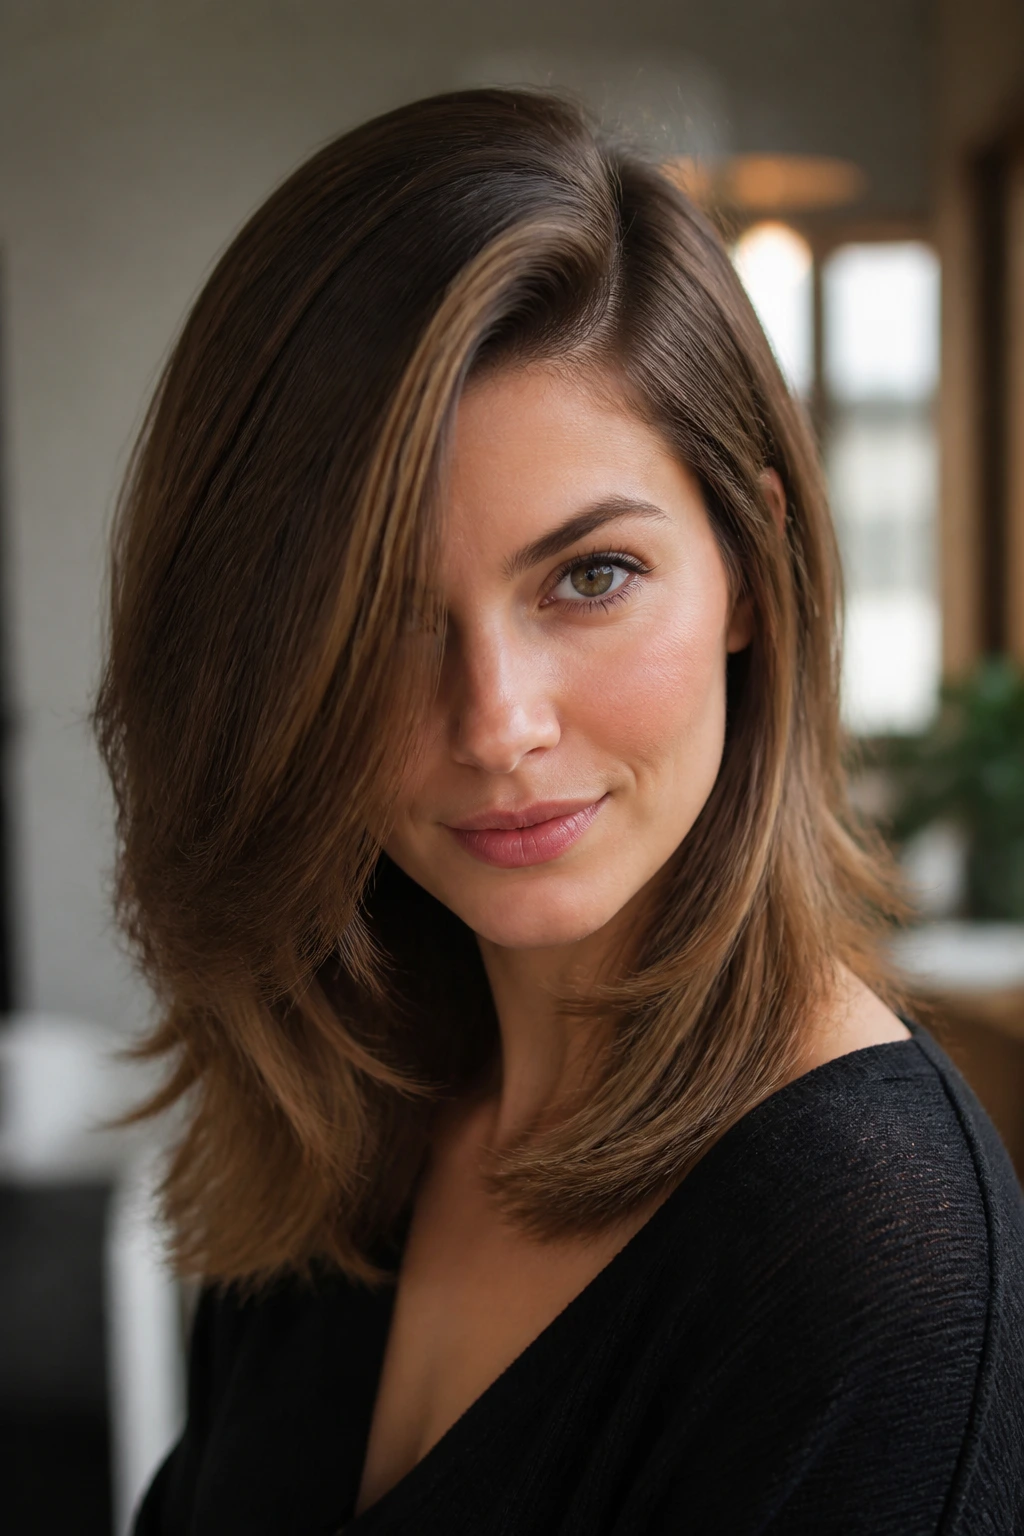
13. Sleek Side Part with Hidden Underlayers

A clean side part can look sharp on top while the movement stays hidden underneath. That is the appeal here. The perimeter looks neat and smooth, but the stylist removes weight inside the cut so the hair can bend and swing without announcing every layer from across the room.
The quiet detail that makes it good
Ask for hidden layers rather than obvious steps through the sides. Then blow-dry the top smooth and let the ends barely curve in. This shape is especially good if you wear tailored clothes or prefer hair that looks deliberate rather than tousled. It has a bit of discipline. I like that.
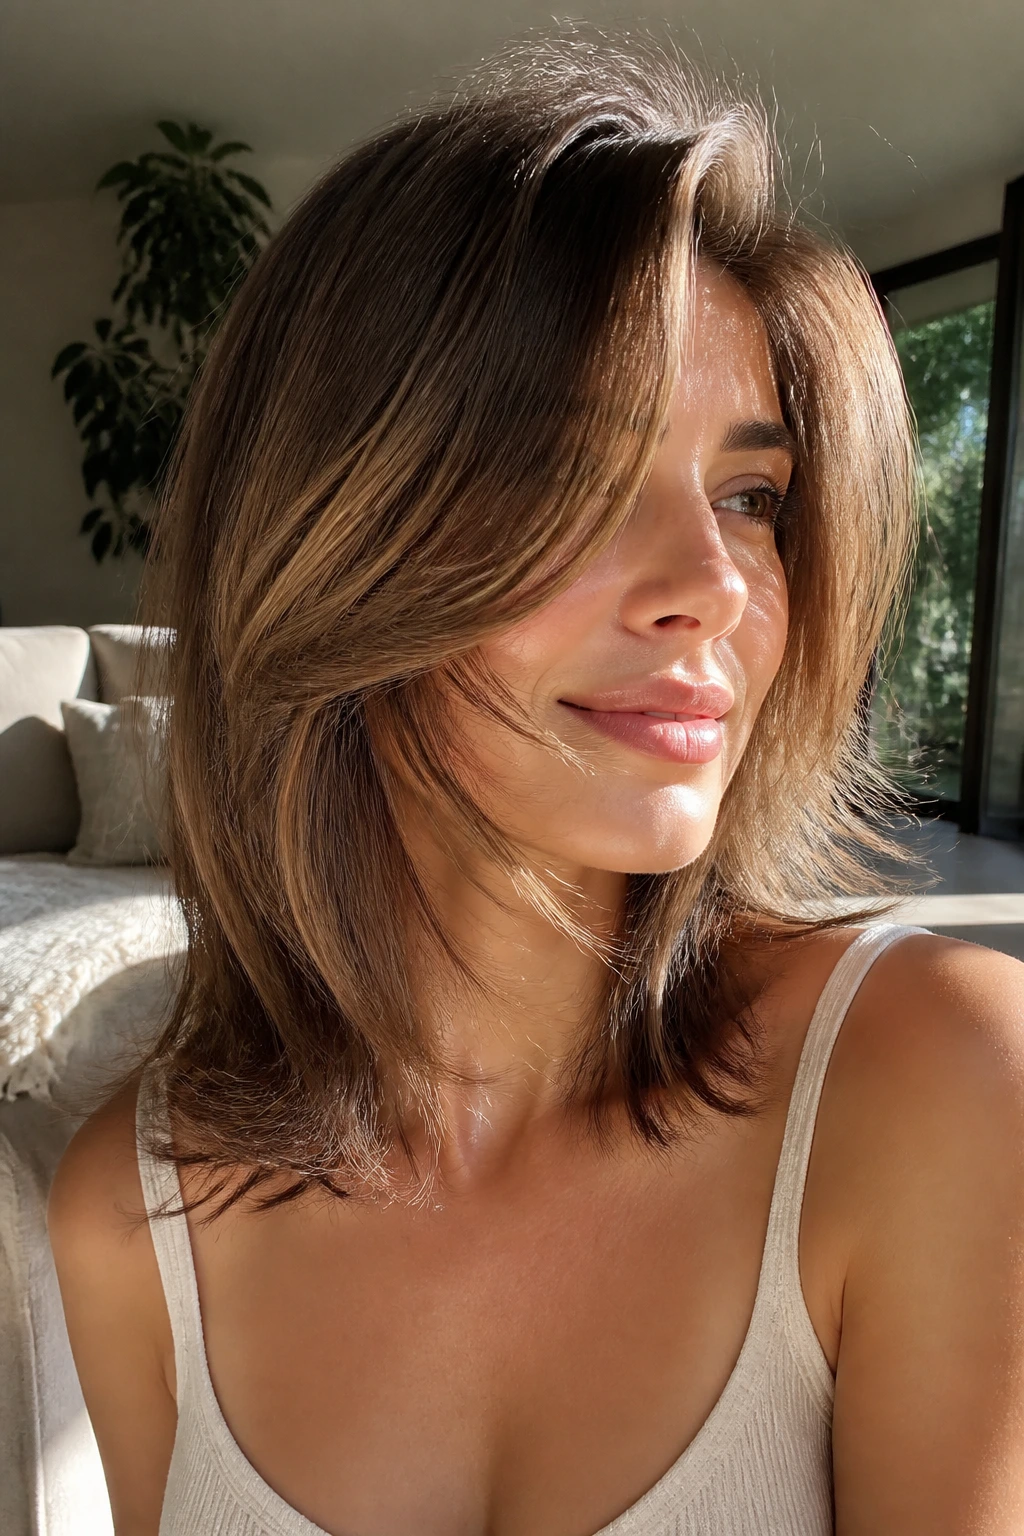
14. Air-Dried Layers for Natural Waves

Air-dried hair needs a cut that remembers where the bend wants to fall. If the layers are too short or the front pieces are clipped too high, the wave pattern can bunch up near the cheeks and give you that puffy middle with limp ends. Not cute. Not worth it.
This version keeps the shortest layers long enough to follow the natural bend. Scrunch in a cream that stays light once dry, then twist the front pieces once or twice while they are still damp so the side-swept line holds. The beauty of this shape is that it looks intentional even when you never touch a hot tool.
15. Flip-Out Ends with a Retro Side Part

If your ends already want to flick outward, stop fighting them. This cut works with that habit. The side part gives the top half of the hair a smooth direction, while the lower lengths flip out a little at the collarbone or jaw, which adds shape without piling on volume everywhere.
The important part is control. You want the flip at the ends, not a wild kick from the middle of the strand. Use a round brush or a 1.5-inch iron to bend just the last inch of hair out and away from the neck. It gives the cut a little retro polish, the kind that looks purposeful instead of accidental.
16. Razor-Soft Layers for Dense Hair
Dense hair can handle shape without losing its weight. That is why razor-soft layers work so well here, as long as they are cut by someone who knows how to keep the ends from fraying. The side sweep keeps the front from feeling blocky, and the softened layers let the hair move instead of sitting in one heavy curtain.
This is not the place for aggressive thinning. You want softness, not a fuzzy halo. If your hair is thick and prone to puffing in humidity, ask for the lowest layers to stay long and the ends to be touched lightly. The cut should release bulk, not break the outline.
17. Root-Lift Layers for Flat Hair

What if the problem is not the cut but the way it sits at the scalp? Then the root area needs as much thought as the ends. A side part can help, but it works best when the layers are placed so they do not drag the crown down with too much weight.
Use mousse at the roots, flip the hair from side to side while drying, and set the part only in the last minute of the blow-dry. That sequence matters. If you part it too early, the hair settles before it has a chance to lift. If you clip the crown while it cools, the shape lasts longer. Simple. Effective.
18. Side-Swept Layers for Curly Mid-Length Hair
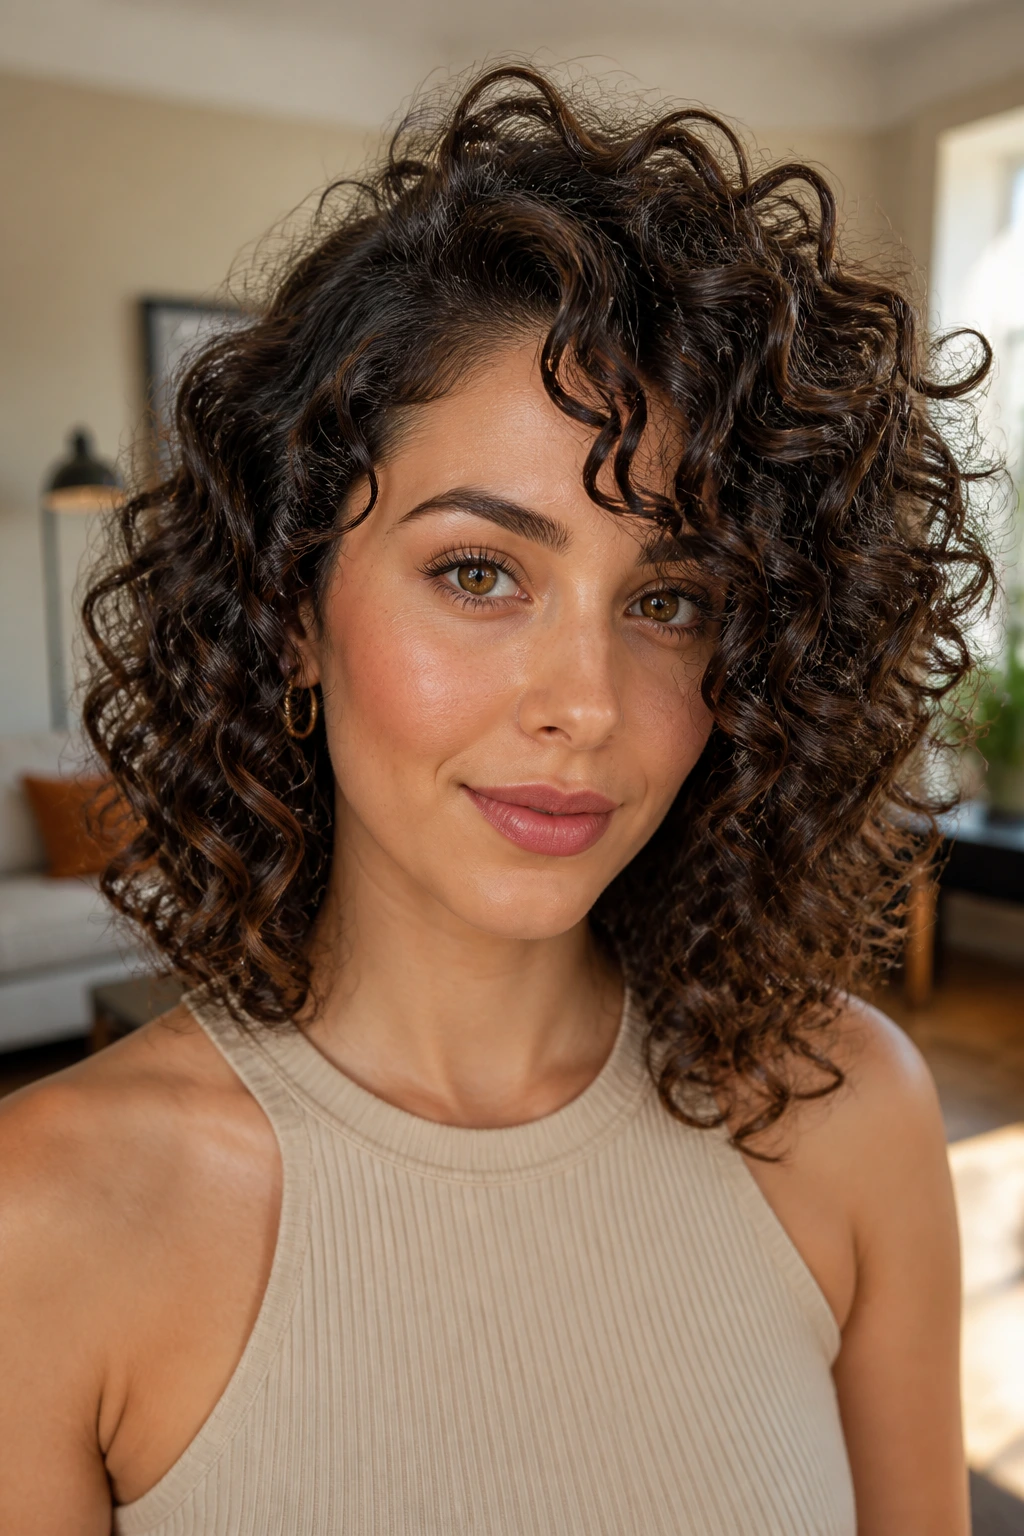
On curly hair, a side part changes where the volume lands, and that matters a lot. It can stop the cut from building up evenly on both sides and give the curls a more sculpted outline. The front pieces can land just below the cheekbone on one side and drift toward the chin on the other, which keeps the shape from ballooning out.
Dry-cutting or at least dry-checking the front shape helps here, because curls shrink in a way straight hair never will. Diffuse on low heat and keep the root area lifted with clips if the part keeps collapsing. The goal is a side-swept line that still lets the curl do its own thing.
19. Grow-Out Friendly Layers with Long Fronts
Some cuts are a month-long experiment. This one is not. If you want side-swept part layers that survive a delayed trim, keep the face-framing pieces long and the shortest layers soft enough to merge into the rest of the hair as they grow.
That means the cut can get a little shaggy without turning ugly. The part still falls across the face, the front still bends, and the shape still reads as intentional. I like this for people who hate constant maintenance or who want to stretch salon visits without looking like they gave up halfway.
20. Glam Side Sweep with Big Soft Ends
Big hair and side-swept layers belong together when the ends stay soft instead of crispy. The deeper side part gives the roots lift, then the longer lengths are blown out in a smooth curve that bends around the shoulders. It has a bit of old-school glamour, but the shape is still very wearable.
A large round brush or velcro roller at the front makes this one easier than it looks. You are not chasing tight curls. You are chasing body, movement, and that soft S-curve from root to end. Keep the finish loose. If the ends get too curled, the whole thing turns dated fast.
21. Minimalist Layers with a Clean Side Part

What if you like movement but hate fuss? Then this is your lane. The layers are subtle, almost invisible, and the side part does most of the work. The front pieces shift just enough to frame the face, but nothing is chopped up or over-textured.
Less really is more here
This cut depends on precision, not drama. Ask for one or two long face-framing pieces and a smooth perimeter that sits at the collarbone or just above it. It is especially good on hair that already has a little natural bend, because the shape can do its thing without product overload or a lot of styling time.
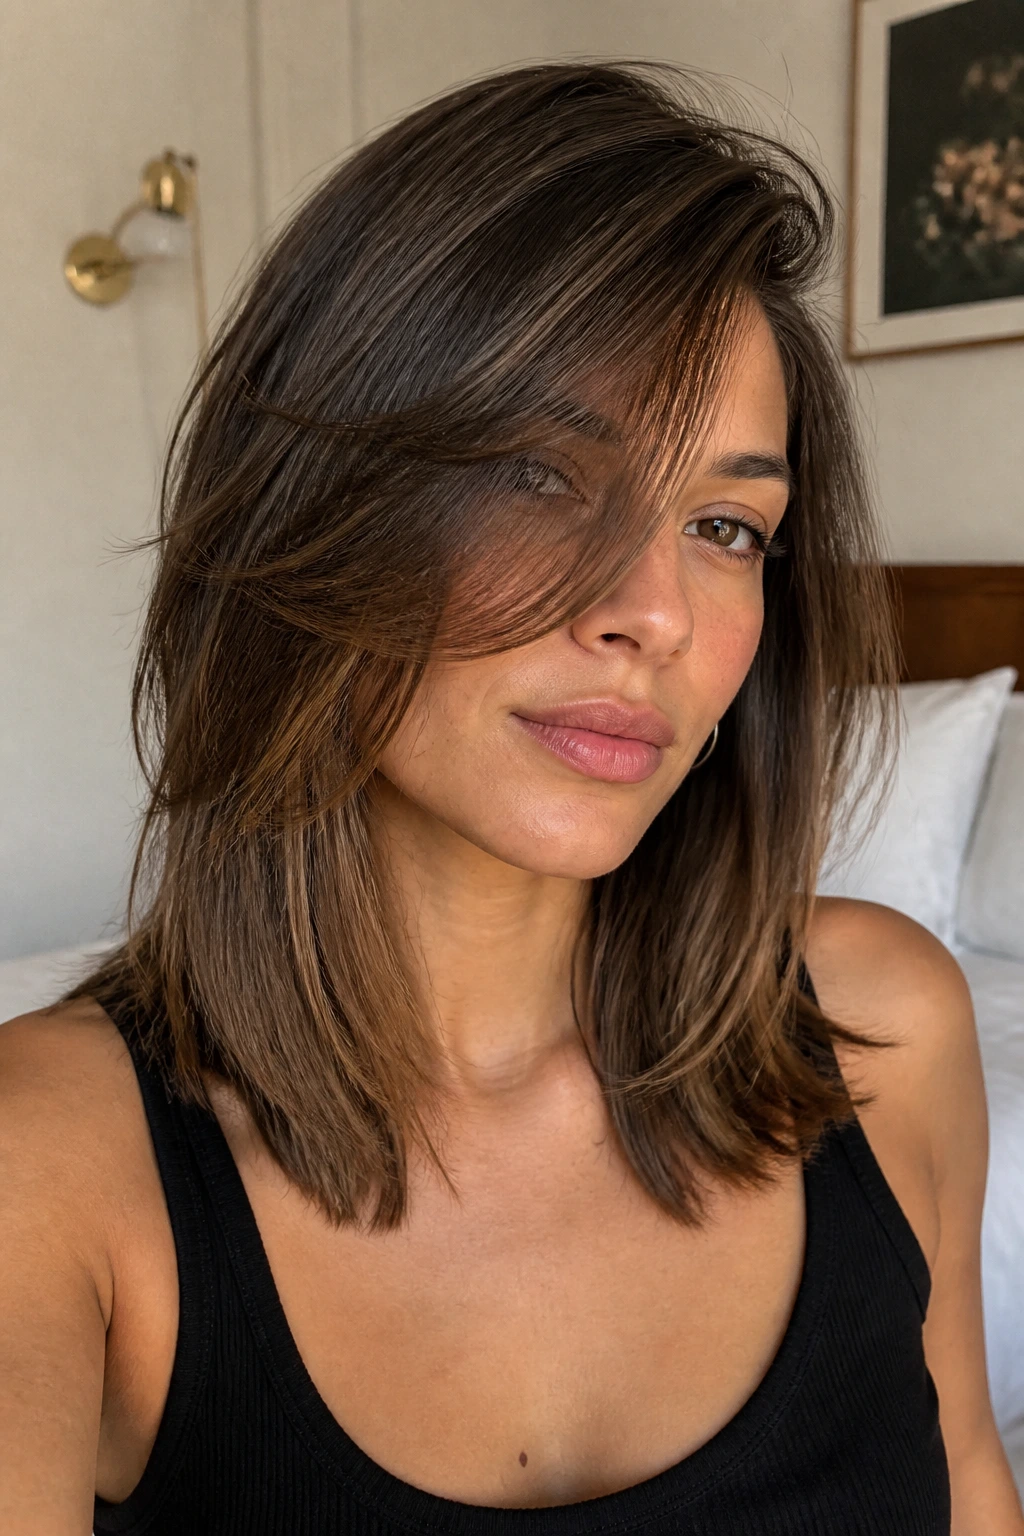
22. Cheekbone-Starting Face Frame
Starting the shortest front layer at the cheekbone can change the whole read of a haircut. It draws the eye upward, softens the temple area, and keeps the side-swept part from falling all the way into the mouth or jawline. That is a small detail, but small details are what make haircuts feel expensive in the practical sense.
This version works on almost every face shape, but it has a special talent for making mid-length hair feel lighter around the front without sacrificing the length at the back. If you wear glasses, this is a useful one to ask about, because it avoids fighting the frame line.
23. Tousled Shoulder-Length Layers with Depth

This is the cut that looks like you slept fine and still made an effort. The layers are deeper than a simple trim but softer than a shag, so the hair gets movement through the middle without losing the shoulder-length outline that keeps everything grounded.
I like it with a loose side sweep and a little texture at the ends. Not beachy in the overused sense. Just broken-up enough that the hair bends rather than hangs. If your mid-length hair tends to sit heavy around the shoulders, this shape takes some of that weight off without stripping the character out.
24. High-Volume Side Part for Limp Roots

If your roots lie flat by noon, the fix is part placement plus lift at the crown. This style leans into that. The side part is placed just off the natural center line, then the top layers are shaped so they can stand away from the scalp for a few minutes before settling into a softer curve.
Dry shampoo is useful here, but so is a little strategy. Blow-dry the roots in the opposite direction first, then switch the part and let the hair cool. A couple of root clips while the hair is warm can buy you an extra hour or two of volume, which, honestly, is the kind of thing that makes a difference on a long day.
25. Softly Inverted Lob with Longer Front Pieces

A tiny A-line does more than people expect. When the back sits a touch shorter and the front pieces stay longer, the side-swept part has a cleaner path to follow. The hair falls forward a little more gracefully, and mid-length hair can look sleeker without losing movement at the ends.
The angle that makes it flattering
Keep the difference subtle — maybe an inch or so from back to front, not a dramatic angle. Too much inversion and the cut starts to fight the side sweep. Too little and you lose the forward movement that makes the shape feel elegant. This one is best when you want polish with a bit of shape, not a loud haircut.
26. Round-Face Side-Swept Layers
Can a side part actually help a round face? Yes, if the layers are placed with some care. The shortest front piece should stay below the cheekbone, and the volume should sit higher on the head rather than bulking out at the widest part of the face.
That gives the eye a longer line to follow. It also keeps the haircut from widening the cheeks, which is the mistake I see most often with blunt, chin-length layers. A soft side-swept front with a little lift at the root creates length where you want it most. That is the whole game here.
27. Square-Face Side-Swept Layers

Square faces do not need to be hidden. They need a little curve. This version uses side-swept layers to soften the corners around the jaw and temples without smothering the shape under too much hair. The front pieces should move, not sit in a straight line.
A bend through the lengths helps more than a rigid blowout. I prefer soft, brushed-out waves or a slight inward curve at the ends so the haircut feels rounded at the edges. If the layers stop too sharply at the jaw, the shape turns boxy again. Let the front pieces drop lower and you get a much gentler read.
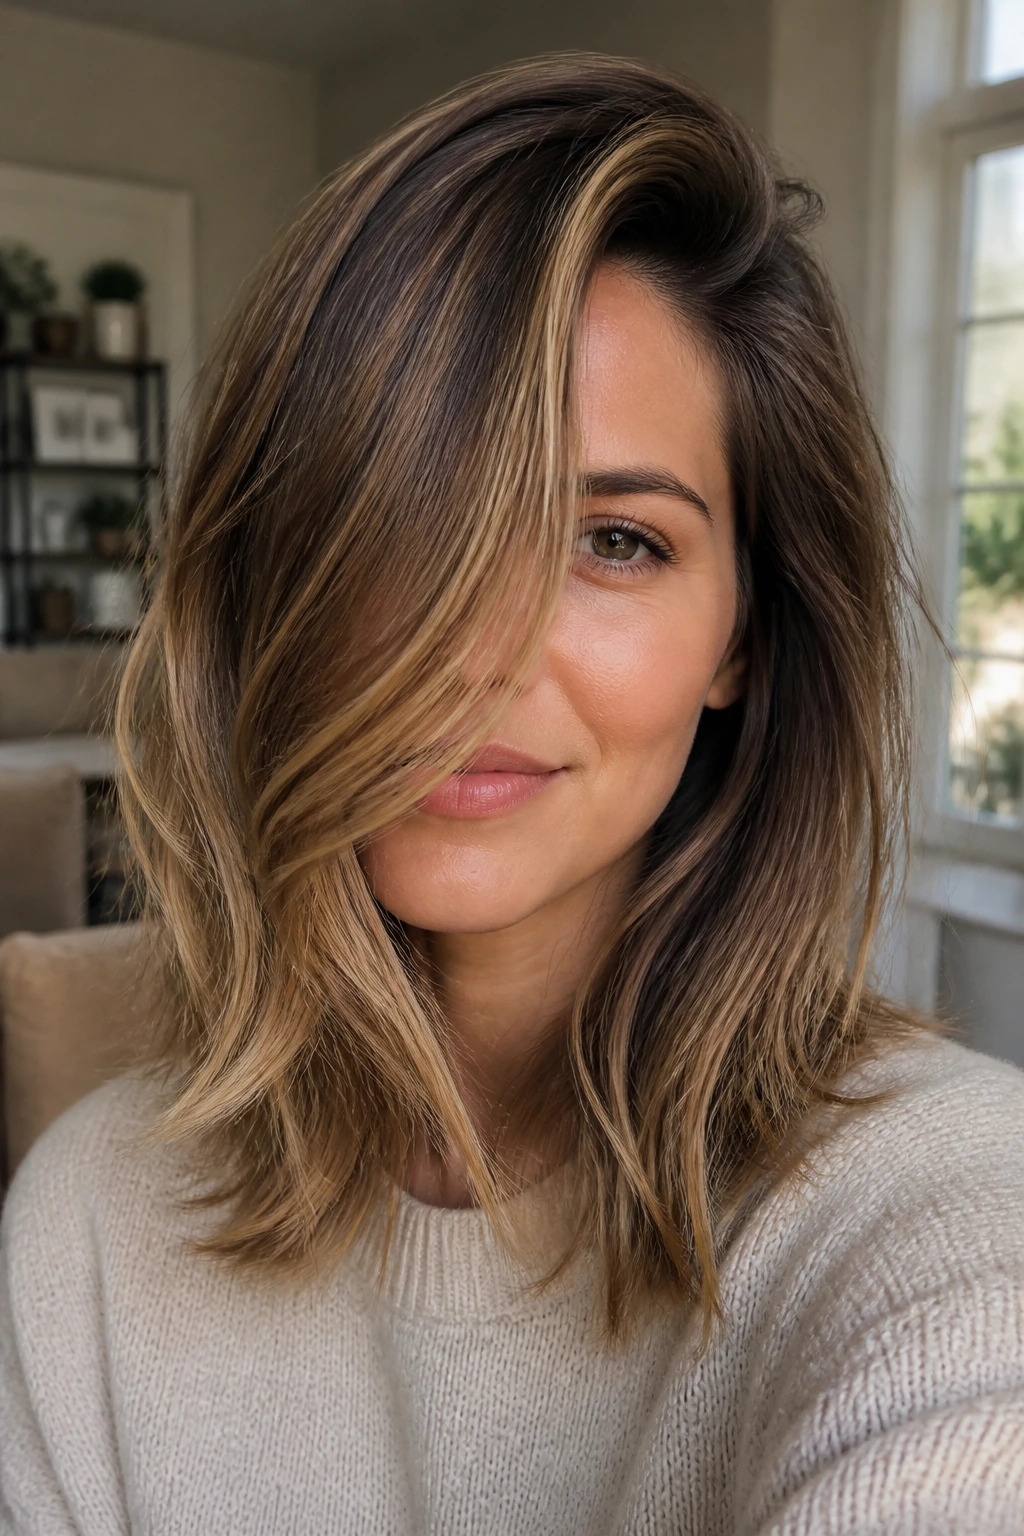
28. Color-Boosting Layers for Highlights and Balayage
Highlights look sharper when layers change the light. A side-swept part does exactly that. It moves the surface of the hair around just enough that ribbons of color show from one angle and hide from another, which makes balayage and dimension look richer without adding more product.
This is a good haircut choice if you already spend time and money on color, because the layers help the color work harder. Ask the stylist to place the face-framing pieces where the light naturally hits — cheekbone, mouth corner, collarbone — so the color has somewhere to land. The haircut becomes part of the color story.
29. Collarbone Blowout Cut with Movement for Mid-Length Hair
Why does a salon blowout look better on some cuts than others? Because some cuts are built to hold the bend. This is one of them. The collarbone length gives enough weight for the hair to swing, while the side-swept layers keep the front from collapsing into a flat sheet.
A clean finish matters here
Use a medium round brush and aim the dryer nozzle down the hair shaft so the cuticle stays smooth. Then let the front pieces cool over the brush for a few seconds before moving on. That cooling step is where the shape settles. Skip it, and the front can go limp faster than you want.
30. Everyday Side Sweep That Still Looks Intentional

Not every haircut needs a big personality. Some just need to look finished when you leave the house with five minutes and a mirror that is not being very helpful. This version keeps the layers long, the side part natural, and the front pieces soft enough to bend with a brush or even with fingers on a rough day.
It is the quietest cut in the set, which is why it works so often. The shape does not fight your texture, the part line keeps the hair moving forward, and the whole thing reads as deliberate even when you barely touched it. That is a good haircut. Full stop.
Why the Side Part Changes Mid-Length Hair So Fast
A side part shifts the balance of the whole cut. That sounds simple, but the effect is not. On mid-length hair, especially around lob length, the part decides where the bulk sits, where the eye lands, and how much lift you get at the root without needing a lot of teasing or product.
There’s also a shape issue that people miss. Center parts tend to split the face evenly, which can look clean but sometimes a little flat if the hair is collarbone length and the ends are heavy. A side sweep interrupts that symmetry, so the front layer can travel diagonally instead of dropping straight down. That diagonal line is what softens the jaw, narrows the middle of the face, and makes the haircut feel more alive.
The other reason this style works is movement. Hair does not fall in a vacuum; it falls against your cheek, your shoulder, your collar, and the way you turn your head all day long. A side-swept part gives the strands a direction to follow. The result is less “hair sitting on the head” and more “hair responding to the face.” That’s the part people usually feel before they can name it.
Essential Tools for Styling the Shape
-
Tail comb: Useful for placing the part cleanly and redirecting the roots before they set.
-
1.25- to 1.5-inch round brush: The sweet spot for bending face-framing layers without creating tight curls.
-
Blow dryer with nozzle attachment: The nozzle matters more than people think; it keeps the air moving in one direction and smooths the cuticle.
-
Heat protectant: Mid-length layers show damage fast, especially around the front pieces where heat gets used the most.
-
Volumizing mousse or root-lift spray: Best for fine or flat hair when you want the side part to hold instead of collapsing.
-
Lightweight smoothing cream: Good for straight or frizzy hair, but keep it off the scalp so the roots stay airy.
-
Dry texture spray: Handy for shaggy or piecey versions when you want separation without stiffness.
-
Velcro rollers or clips: Not mandatory, but they help the front cool in the right shape after a blowout.
What to Tell Your Stylist and What to Buy After the Cut
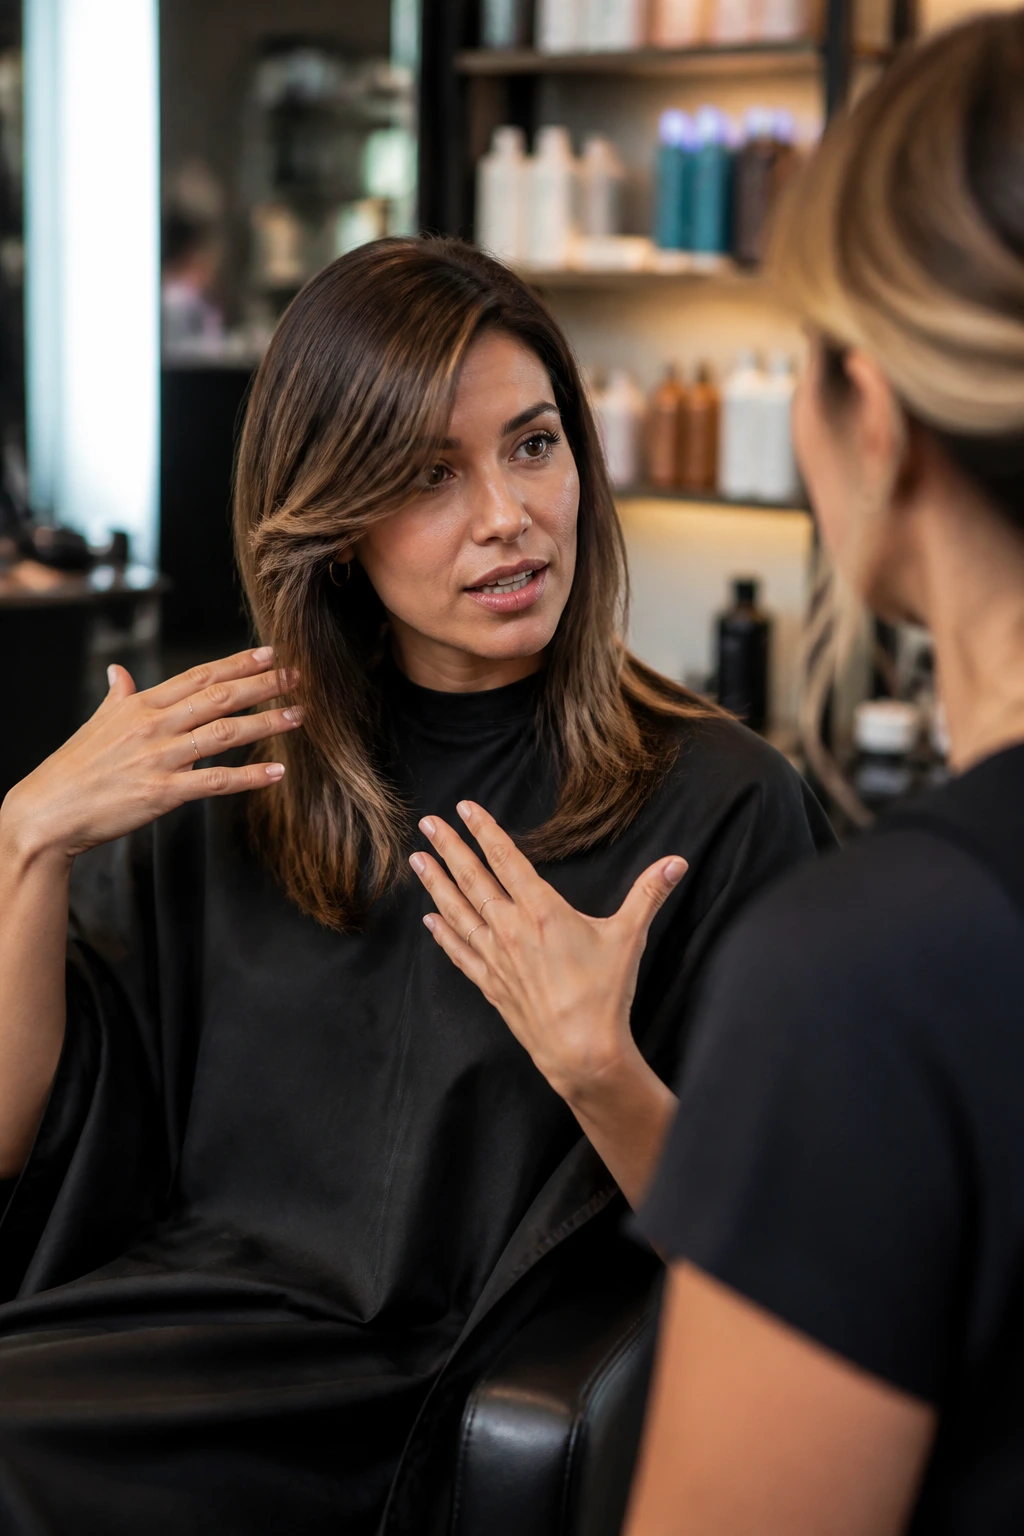
Bring pictures, but bring the right pictures. Show one photo of the overall cut, one photo of the side profile, and one photo that shows the front pieces near the face. A single front-facing image can hide the exact thing you need to explain: where the layers start and how far they drop before they angle away.
Tell the stylist where your hair naturally parts when it is wet and unforced. That tiny fact changes everything, especially if you have a cowlick near the front. If your hair is thick, ask for internal weight removal rather than a lot of short face layers. If your hair is fine, ask for long layers and minimal thinning so the ends do not look ragged by the second week.
After the cut, shop for product by behavior, not by hype. Fine hair usually likes a root-lift spray, a light mousse, and a flexible hairspray. Thick or coarse hair often needs a smoothing cream and a heat protectant that does not feel greasy. Wavy hair tends to behave best with a cream-gel or a lightweight wave lotion that keeps the side sweep from puffing up near the cheeks.
How to Style the Sweep So It Stays Put
Start with damp hair and place the part while the roots still have some give. If you wait until everything is almost dry, the hair has already chosen its own direction, and you end up fighting it for no reason.
Blow-dry the roots opposite the direction you want them to sit for the first few passes. Then switch the hair back to the side you want and finish with the nozzle pointed down the shaft. That little reset gives the root a cleaner lift. For extra hold, clip the front section over a round brush or tuck it into a large roller for five minutes while it cools.
A side-swept part usually looks best when it is not frozen into place. Let the front move a little. A soft bend at the ends and a bit of lift at the crown are enough. If you lacquer the whole thing into submission, the haircut loses the easy movement that makes it work in the first place.
Extra Tips for More Lift, Bend, and Shine
Volume boost: If the roots are stubborn, dry them in two directions before setting the final part. A quick blast on the opposite side, then a switch back, gives the front enough memory to stand up for a few hours.
Texture control: On wavy or curly mid-length hair, use less product than feels safe. Heavy creams can make the side sweep droop, especially around the cheek and temple area where the curl wants to bunch.
Shine without grease: Put a drop of lightweight oil only on the very ends after the hair is dry. Mid-length hair reflects shine best when the roots stay clean and the ends catch the light a little.
Shape rescue: If the front keeps falling into your eyes, pin the longer side back for ten minutes after styling, then remove the clip. That tiny set can reset the direction without making the cut stiff.
Maintenance, Trims, and Sleeping Without Flattening It

This kind of cut usually looks best with trims every 8 to 10 weeks if you want the face-framing pieces to stay crisp. If you like a softer grow-out, stretching to 12 weeks is fine, but the front layers will start blending into the rest of the hair and lose some of that cheekbone skimming shape.
Washing frequency matters too. If your roots get oily fast, the side part will collapse faster than the rest of the cut. Dry shampoo at the part line can buy you an extra day, but apply it early, not after the hair has already gone greasy and limp. That is when it works best.
At night, use a silk pillowcase or loosely clip the hair into a low twist that keeps the front from being crushed flat. If you sleep with the same side buried under your head every night, the part can get bent in the wrong direction. A quick mist of water at the roots the next morning, plus a blow-dry on the part line, usually brings the shape back fast.
Variations and Adaptations to Try

Fine-Hair Lift Version: Keep the layers long and the front pieces soft, then add a root-lift spray before blow-drying. This version gives the side part more staying power without making the ends see-through.
Thick-Hair Airiness Version: Ask for internal weight removal and a smooth perimeter. The goal is to release bulk inside the cut so the side sweep can move without puffing out.
Curly-Friendly Shape: Leave the front pieces long enough to shrink when dry, and let the part follow the curl pattern instead of forcing it straight. Diffuse with clips at the roots if the crown tends to fall flat.
Polished Blowout Version: Use a large round brush, a nozzle, and a cool shot at the end of each front section. This works best if you like the hair to curve in a controlled way rather than look piecey.
Low-Effort Air-Dry Version: Ask for soft face-framing layers and keep the shortest piece below the cheekbone. This makes the haircut look finished even when you never touch a hot tool.
Common Mistakes That Flatten the Shape
-
Cutting the front too short: If the shortest layer sits right at the widest part of the face, the side sweep can widen the cheeks instead of softening them. Keep the shortest point lower if you want a more flattering line.
-
Thinning too aggressively: Heavy thinning on fine or frizz-prone hair leaves the ends wispy and chaotic. The fix is to remove weight inside the haircut, not chop away the outline.
-
Using too much product at the roots: Creams, oils, and heavy leave-ins on the scalp flatten the side part and kill the lift. Put those products from mid-lengths down.
-
Setting the part too late: If you blow-dry the whole head and then carve the part in at the end, the roots may already have dried in the wrong direction. Place the part while the hair is still damp.
-
Forcing a deep side part on the wrong cowlick: Some fronts fight hard. If your hair springs back no matter what, work with a slightly off-center part and use clips during cooling instead of trying to overpower the cowlick.
Frequently Asked Questions
How deep should a side part be on mid-length hair?
Usually one to two inches off center is enough for lift without making the haircut look lopsided. If you go much deeper, the crown may get more height, but the style can start to feel theatrical instead of wearable.
Does a side-swept part work on fine hair?
Yes, but the layers need to stay long and light. Fine hair does better with subtle face framing, root-lift spray, and a clean blow-dry than with heavy thinning or too many short steps around the front.
Will side-swept layers make thick hair look bulky?
Not if the weight is removed inside the haircut instead of around the perimeter. Thick hair usually looks better when the outline stays solid and the bulk gets softened from within.
Can curly hair wear this shape without puffing up?
It can, as long as the front pieces are left long enough to shrink naturally and the part is placed where the curls already want to separate. Dry-cutting helps, or at least a careful dry check before the final trim.
Do I need a curling iron to style these cuts?
No. A brush blow-dry is enough for a lot of them, and some versions look better air-dried with a little product and finger shaping. A curling iron is helpful only when the front pieces need a clearer bend.
What if my hair flips the wrong way?
Dry the roots in the opposite direction first, then switch to the side you want. If the front still resists, clip it while it cools or set it with a large roller for a few minutes.
How often should the front layers be trimmed?
Every 8 to 10 weeks keeps the face frame crisp. If you like a softer, grown-in look, you can wait longer, but the front pieces will start to merge with the rest of the cut.
Can I wear this with bangs?
Yes, if the bangs are soft enough to blend into the side sweep. Heavy blunt bangs fight the whole idea; curtain bangs or a long fringe usually fit much better.
The Shape That Keeps Showing Up Well

Side-swept part layers work because they do a few useful things at once: they lift the roots, frame the face, and keep mid-length hair from sitting in one heavy block. That combination is hard to beat, and it is why the shape keeps showing up whether the hair is straight, wavy, curly, thick, or fine.
The best version is the one that follows your hair’s habits instead of arguing with them. Get the part where your scalp wants it, place the shortest front piece where it softens your features instead of fighting them, and keep the layers long enough to move. Do that, and the cut keeps earning its place every time you catch your reflection and realize the shape did the work for you.