Short sassy hairstyles for long hair with soft layers solve a very specific problem: you want the attitude of a cropped cut, but you do not want to part with the length that took forever to grow. Long hair can feel heavy, especially when it hangs in one blunt sheet. Soft layers change that immediately. They give you movement around the face, lift through the crown, and a little bend at the ends that makes everything look more deliberate.
The trick is not to fight the length. It’s to edit the silhouette.
A good short-looking style on layered long hair does one of three things: it tucks the ends so the hair reads shorter, it flips the edges so the eye stops at the jaw or collarbone, or it builds volume high enough that the length recedes into the background. That sounds simple, but the difference between “cute” and “why does this look flat?” is usually one pin, one section, or one wrong product. Hair is annoyingly honest that way.
Soft layers are forgiving, though. They already carry motion. They already have a little swing. And when you use that to your advantage, you get styles that feel fresh, a little cheeky, and far less heavy than a plain ponytail or a middle-part curtain of hair. The first few looks below show exactly how to make that happen without pretending long hair is something it isn’t.
Why This Collection Works on Long Layers
Soft layers do half the styling for you. The shorter pieces around the face and crown keep these looks from turning into one solid curtain, which means a bob tuck, a flipped end, or a half-up knot has something to cling to.
Shorter-looking styles need shape, not sacrifice. You are not cutting your hair; you are changing where the eye lands. A tuck at the nape, a bend at the collarbone, or a lift at the crown changes the whole read of the hair.
The front pieces matter more than people think. Face-framing layers, curtain bangs, and a few slim wisps around the cheekbones can make a ponytail or bun look intentional instead of severe.
Texture is the real secret ingredient. Sleek has its place, but most of these looks work best with a little grit — dry shampoo, texturizing spray, or day-two texture gives pins and elastics something to hold.
These styles are flexible with hair density. Fine hair gets more height from the layers. Thick hair gets shape from the tuck and the flip. Very long hair gets a break from its own weight.
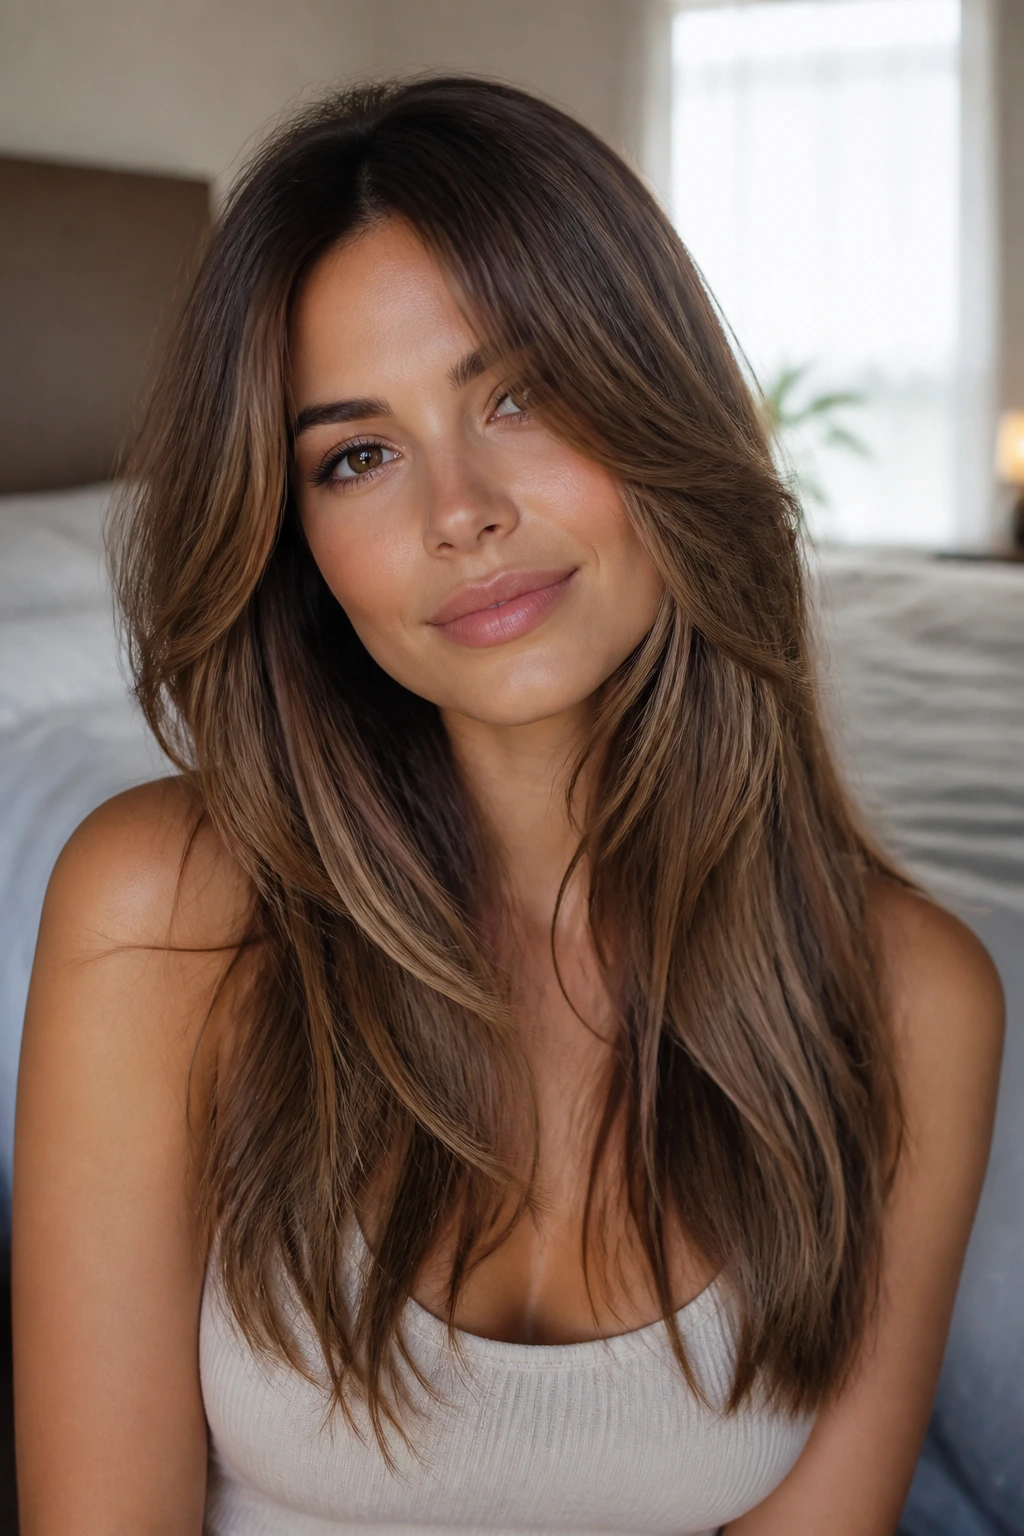
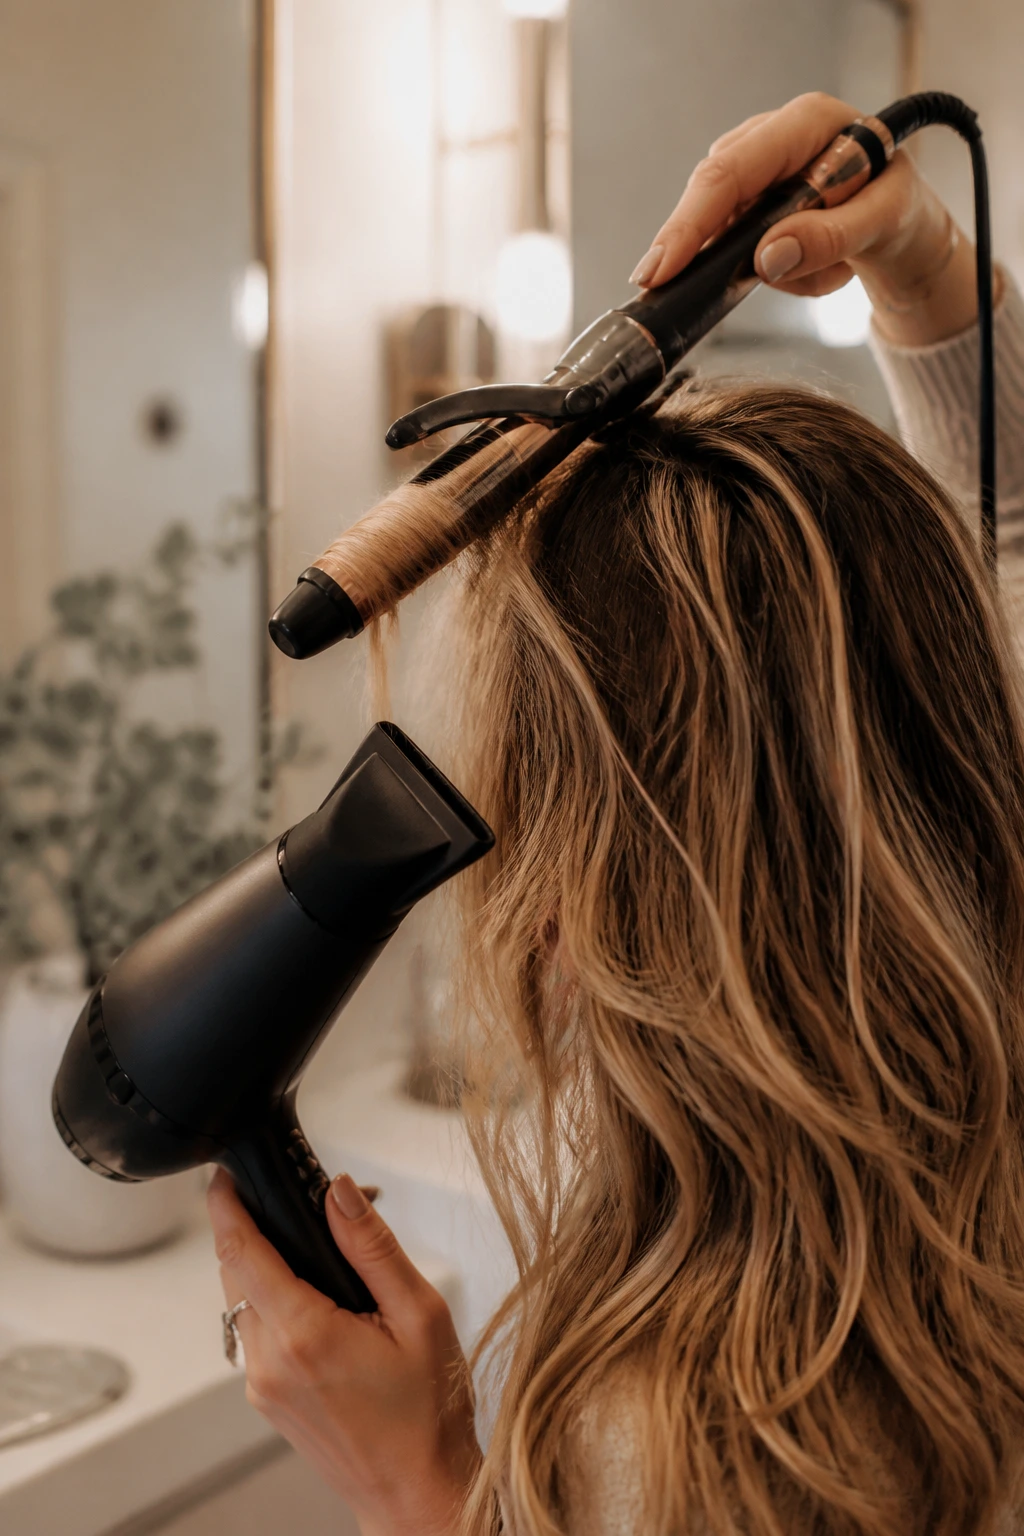
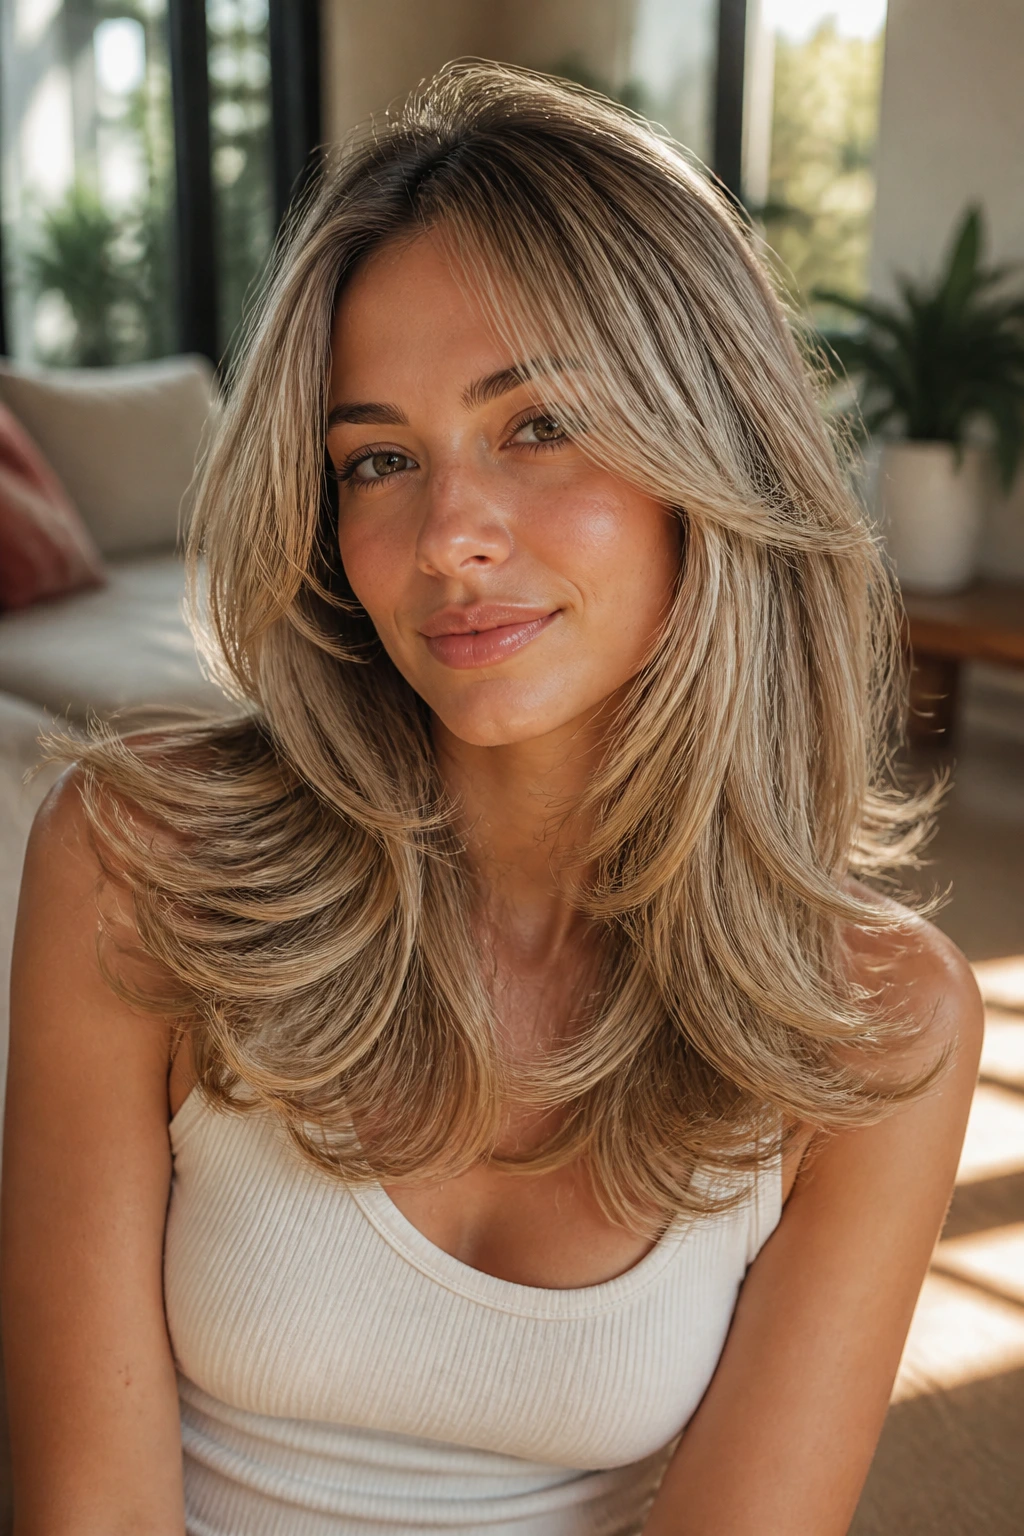
1. Butterfly Blowout with Flipped Ends
The butterfly blowout is the easiest way to make long hair look shorter without touching a pair of scissors. You keep the length, but the shape changes fast: the crown sits a little higher, the face pieces swing forward, and the ends kick out instead of hanging straight.
What Makes It Read Shorter
The key is where you stop the bend. Don’t curl the whole length into a barrel. Focus the round brush or 1.25-inch iron on the top half and the front pieces, then flip the last two or three inches outward. That little flip breaks up the long line, which is why this style reads more shoulder-length than waist-length.
If your layers start near the cheekbones, even better. They’ll float without much effort. If they start lower, give the crown a quick root lift with mousse and clip the top while it cools.
- Use a 1.25- to 1.5-inch round brush for the top sections.
- Blow the front pieces away from the face, then curve the ends out.
- Finish with a light mist of texturizing spray, not heavy oil.
Best move: set the front sections in Velcro rollers for 10 minutes. It sounds old-school because it is, and it works.
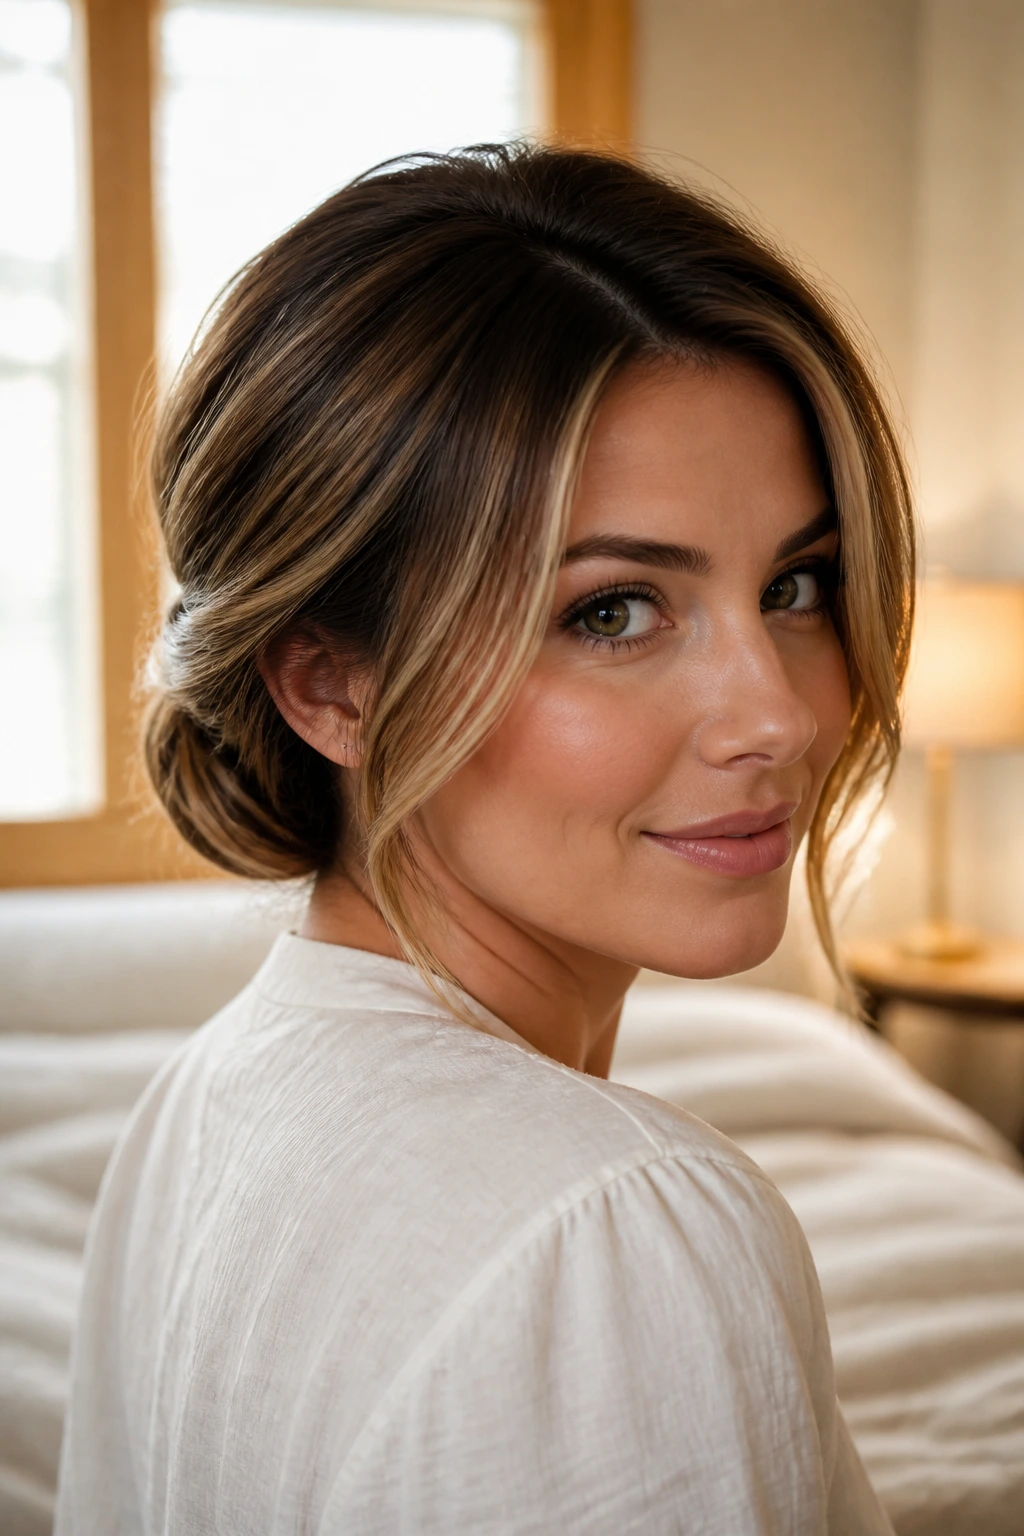
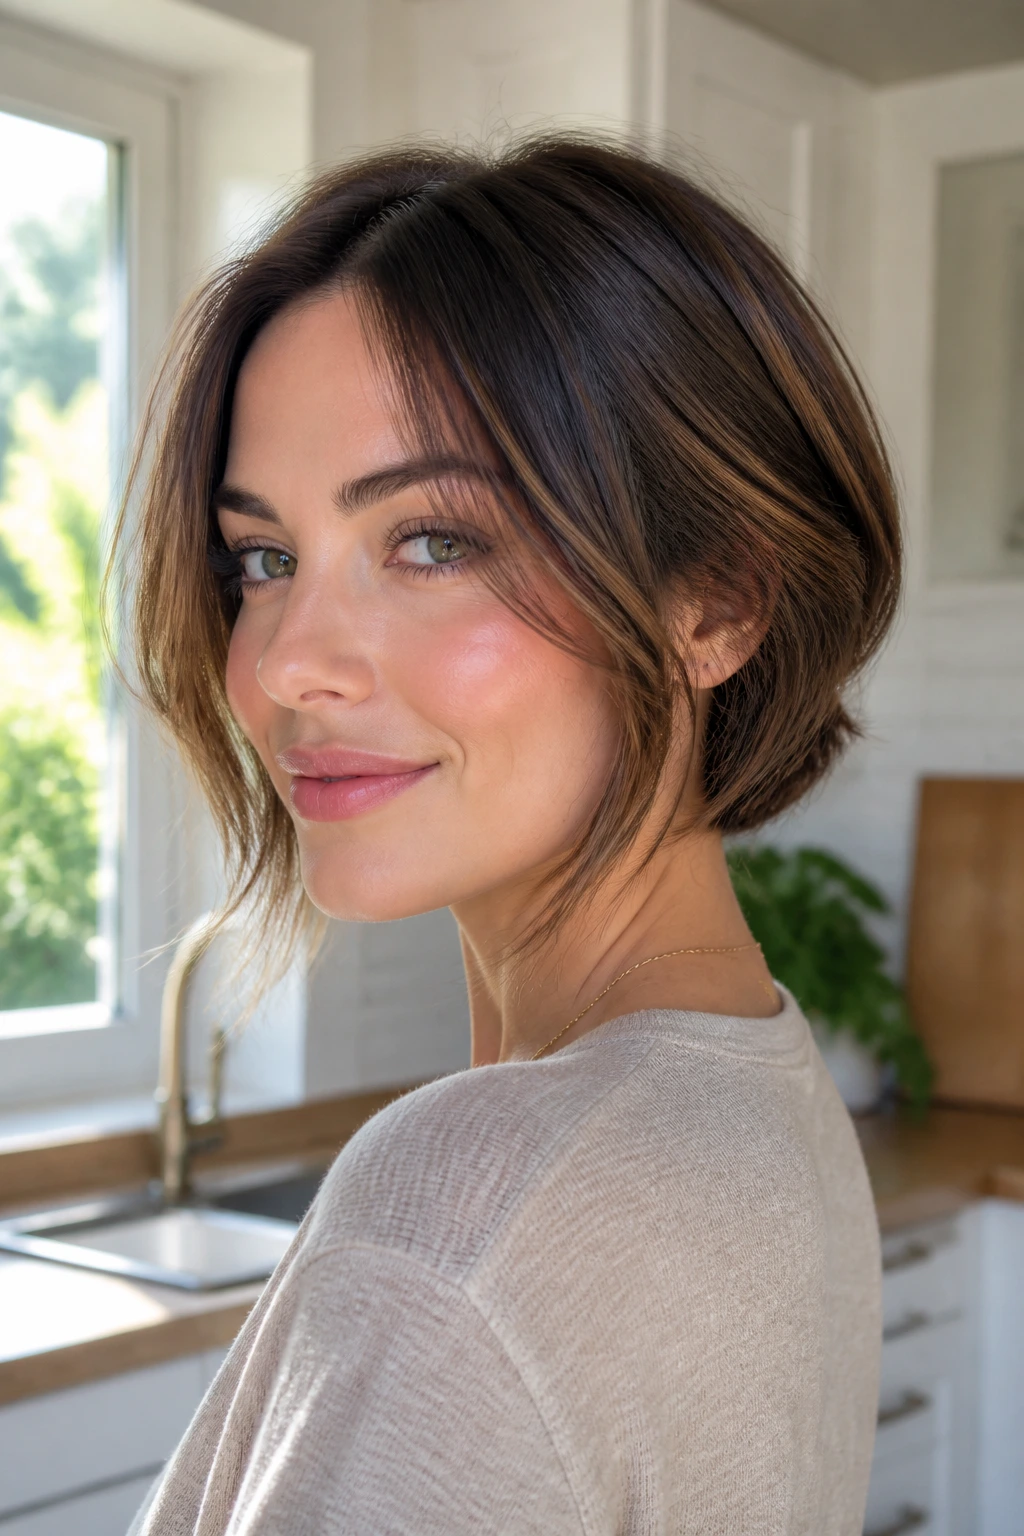
2. Chin-Length Faux Bob
Want the shortest visual result on the list? Start here. A chin-length faux bob works because the hair is folded under and pinned at the nape, so the overall outline shrinks right away.
The mistake people make is hiding too much. Leave the top layer soft and loose. Let a few face-framing strands fall forward. If the tuck is too tight, it starts looking like a school recital updo, and that is not the vibe.
How to Pin the Fold
Gather the lower half of the hair and fold it upward in one loose roll. Pin the roll flat against the back of the head with bobby pins crossed in an X. Then release the top layer over it so the seam disappears.
A fine-tooth comb helps, but don’t over-smooth the top. A little lift at the crown keeps the style from looking pasted down.
- Pin the fold at the nape, not the center of the head.
- Leave the ends hidden, but not crushed.
- Use color-matched pins so the structure vanishes.
This one is especially good for long layers that already have some movement. The layers hide the bulk of the tuck better than blunt ends do.
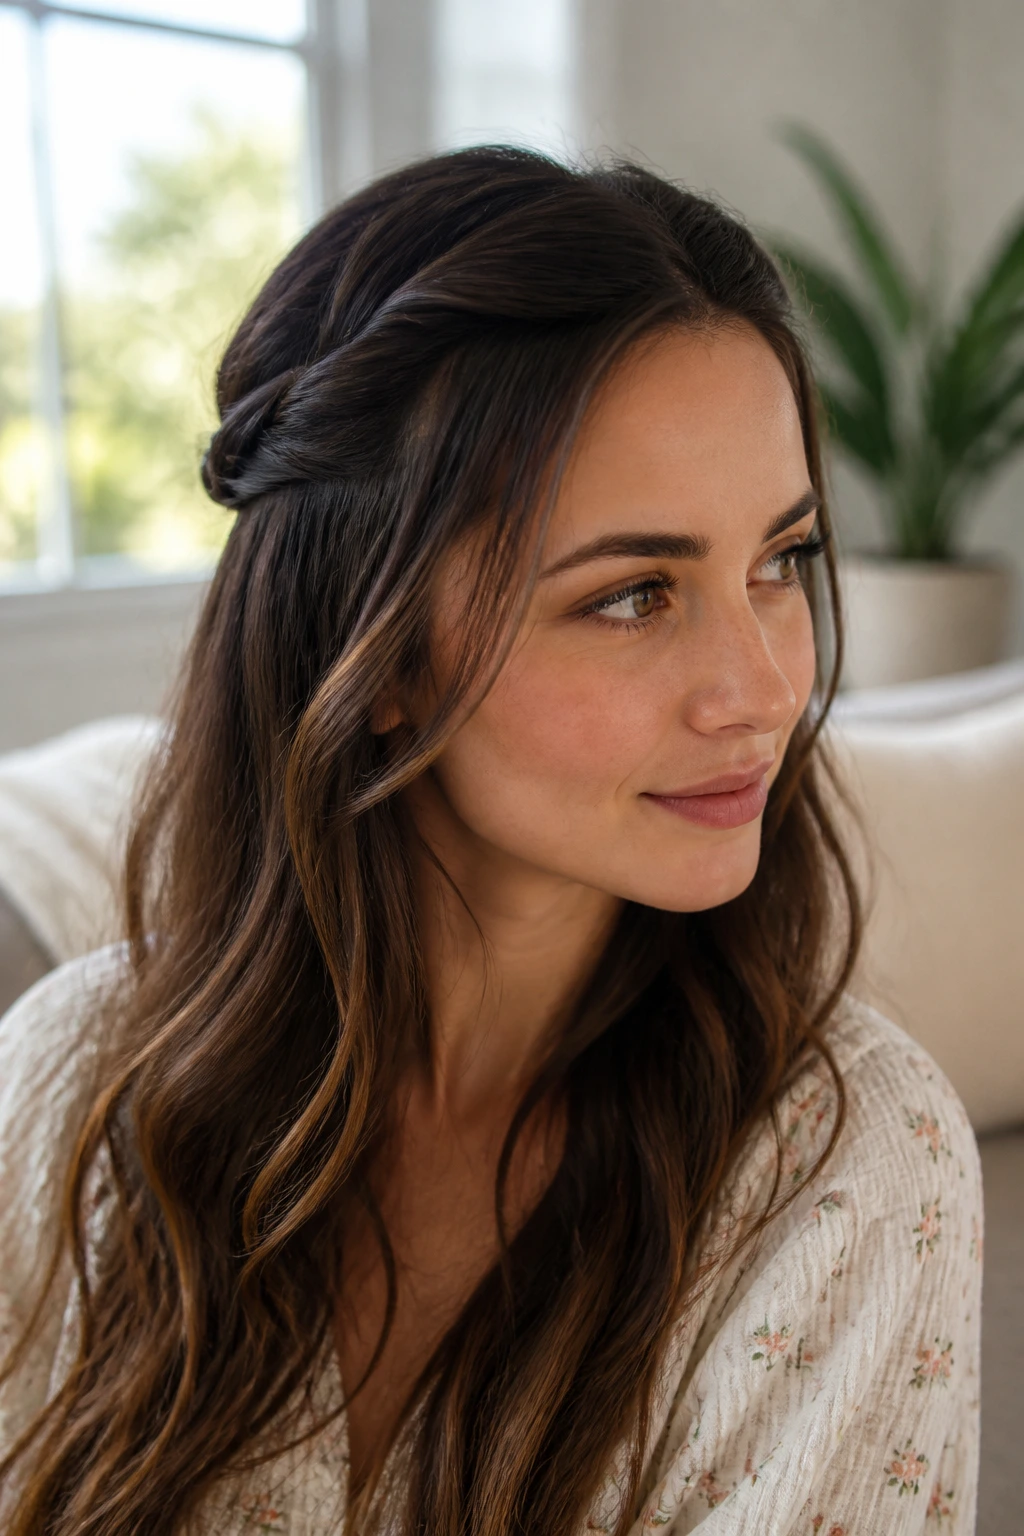
3. Curtain-Bang Half-Up Crown
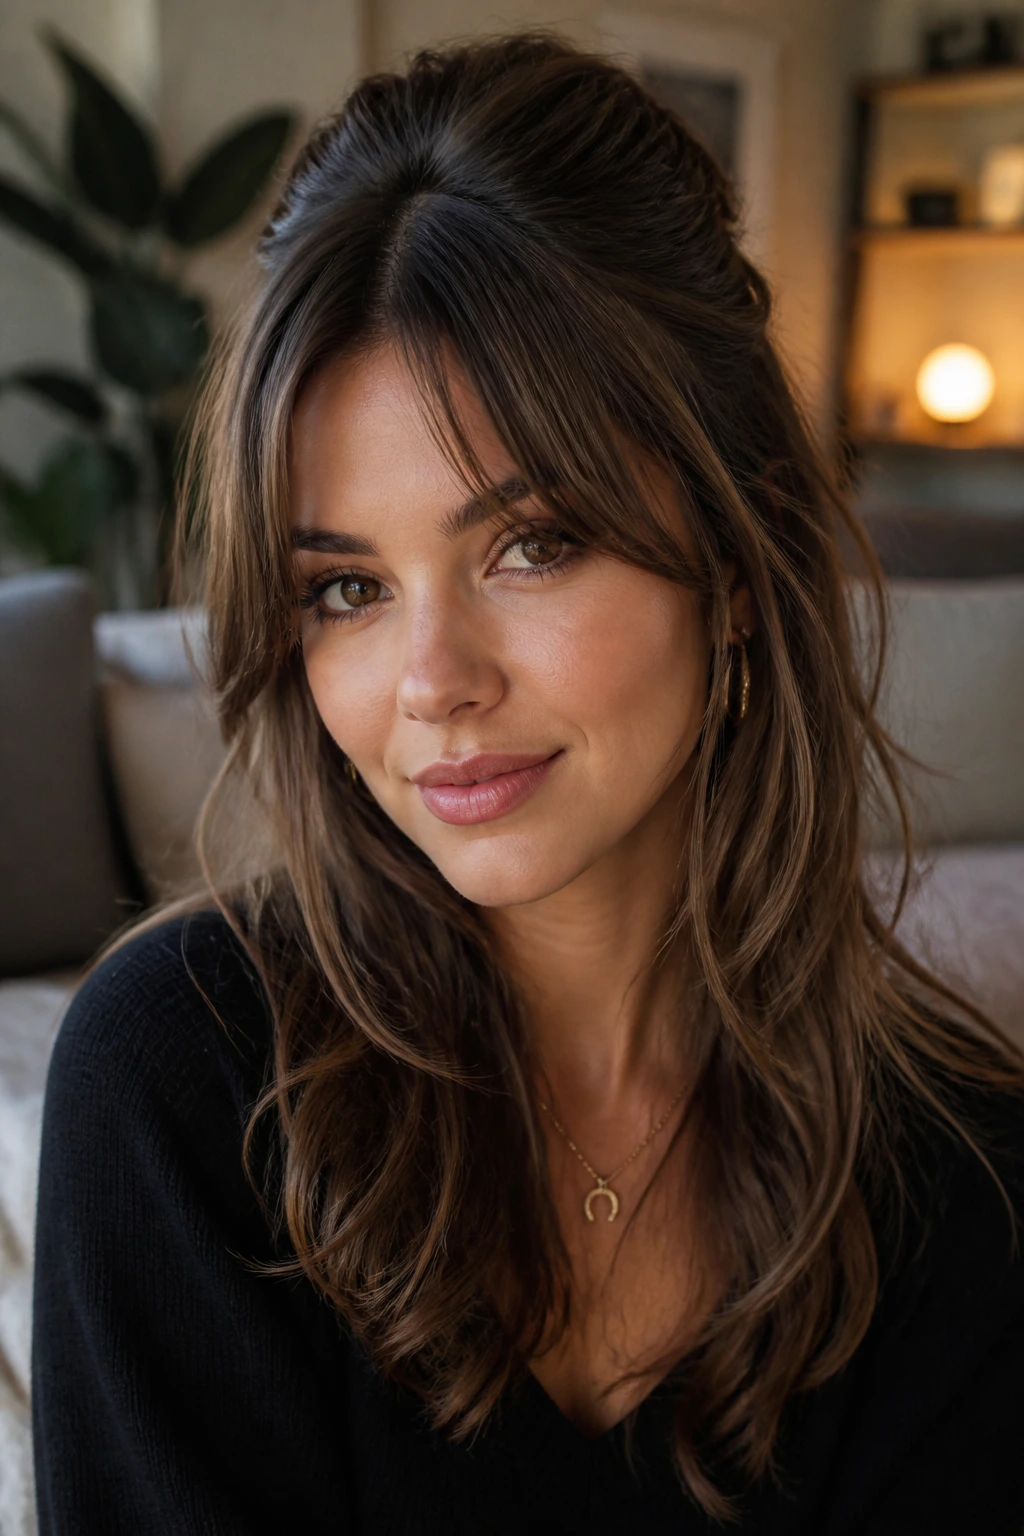
This style is all cheekbones and attitude. Pulling the top section back gives the hair height, while curtain bangs or soft face-framing pieces keep the look from going severe.
It’s a clever trick on long layered hair because the half-up section shortens the silhouette without burying the length. You still get to show off the movement in the lower half, but the top takes on a little lift and shape. That lift is the whole point.
Where to Place the Tie
Put the half-up pony or clip slightly higher than you think — around the upper crown, not the occipital bone. If it sits too low, the style drags. If it sits too high, it starts looking playful rather than sassy.
A small claw clip works well here. So does a wrapped elastic with a tiny bit of volume at the roots. Leave the front pieces loose and bend them away from the face with a flat iron or large barrel.
One sentence matters here: do not iron the front pieces pin-straight. They need a bend. Otherwise the style loses the whole “shorter, softer, cheekier” effect.
4. High Pony with Face-Framing Swoops
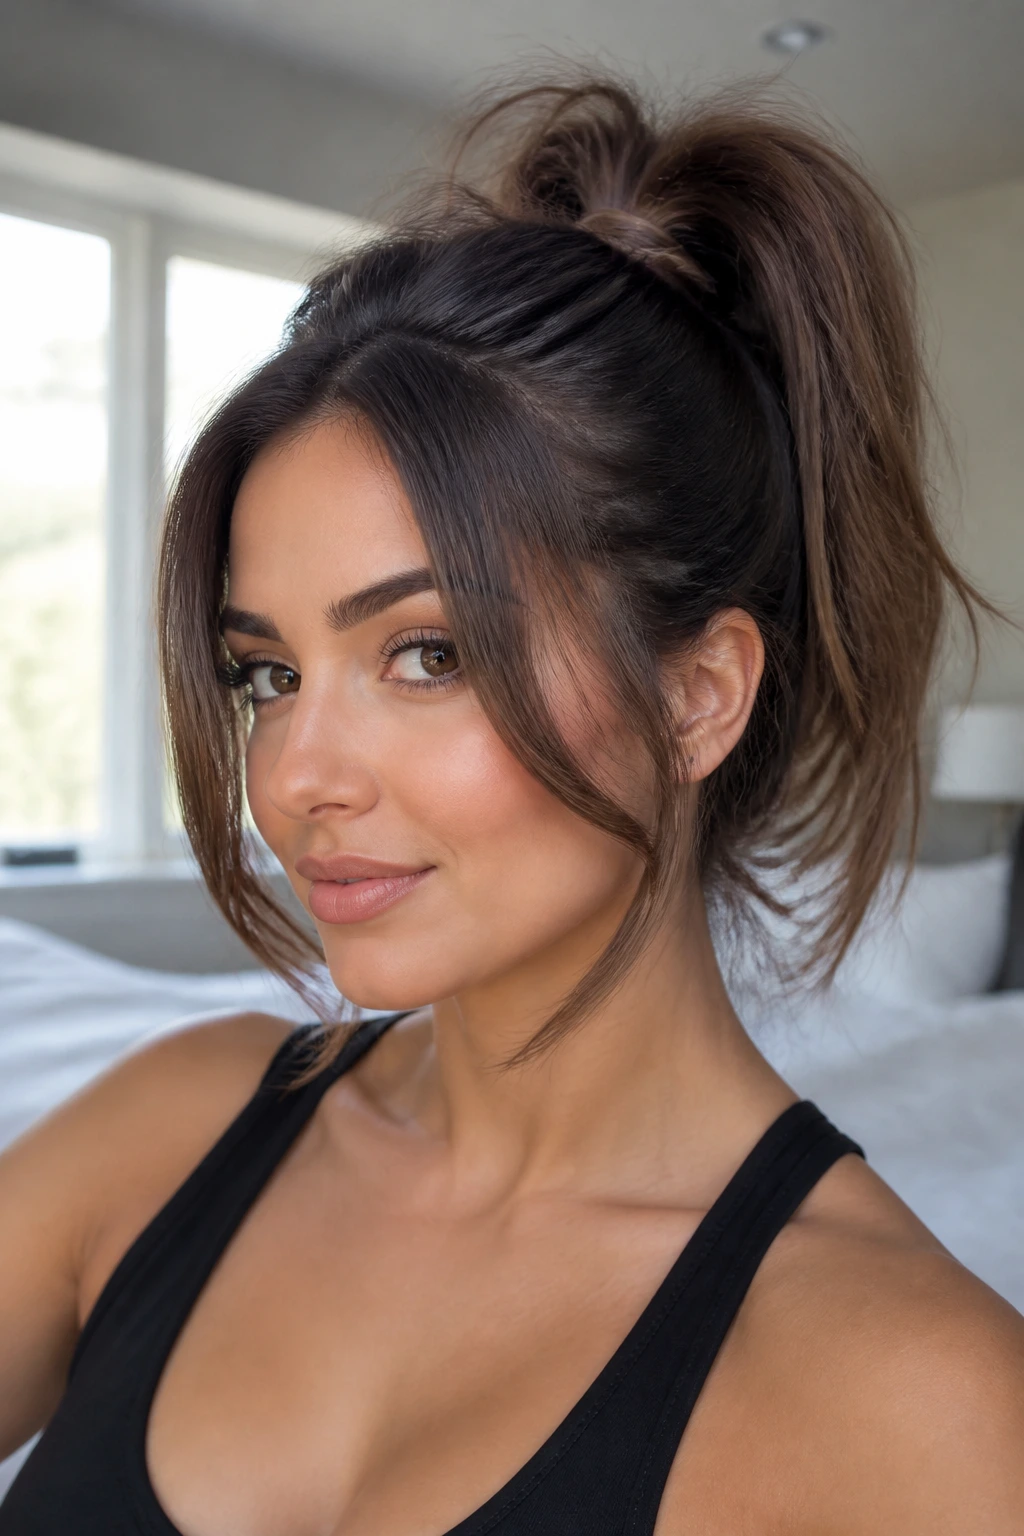
A high ponytail can look harsh on very long hair if you just yank everything up and call it done. Add soft layers, though, and suddenly it looks sharp in a good way — lifted, tidy, and a little bold.
The difference is in the front. Leave two narrow pieces out around the face and curve them under at the ends. Those swoops soften the forehead and pull attention upward, which makes the rest of the hair feel shorter.
The Lift That Changes Everything
Backcomb the crown lightly before you secure the pony. Nothing dramatic. You want a one-inch cushion at most. Then fasten the pony at the top of the head, wrap a small section of hair around the elastic, and pin it underneath.
For the tail, either curl the bottom third into loose bends or leave it straight if your hair already has a soft wave. Straight tail, high crown, face pieces — that combination reads modern, not gym-class.
- Secure with a snag-free elastic.
- Wrap the base with a 1-inch strand of hair.
- Finish the tail with a quick pass from a 1-inch iron if the ends need shape.
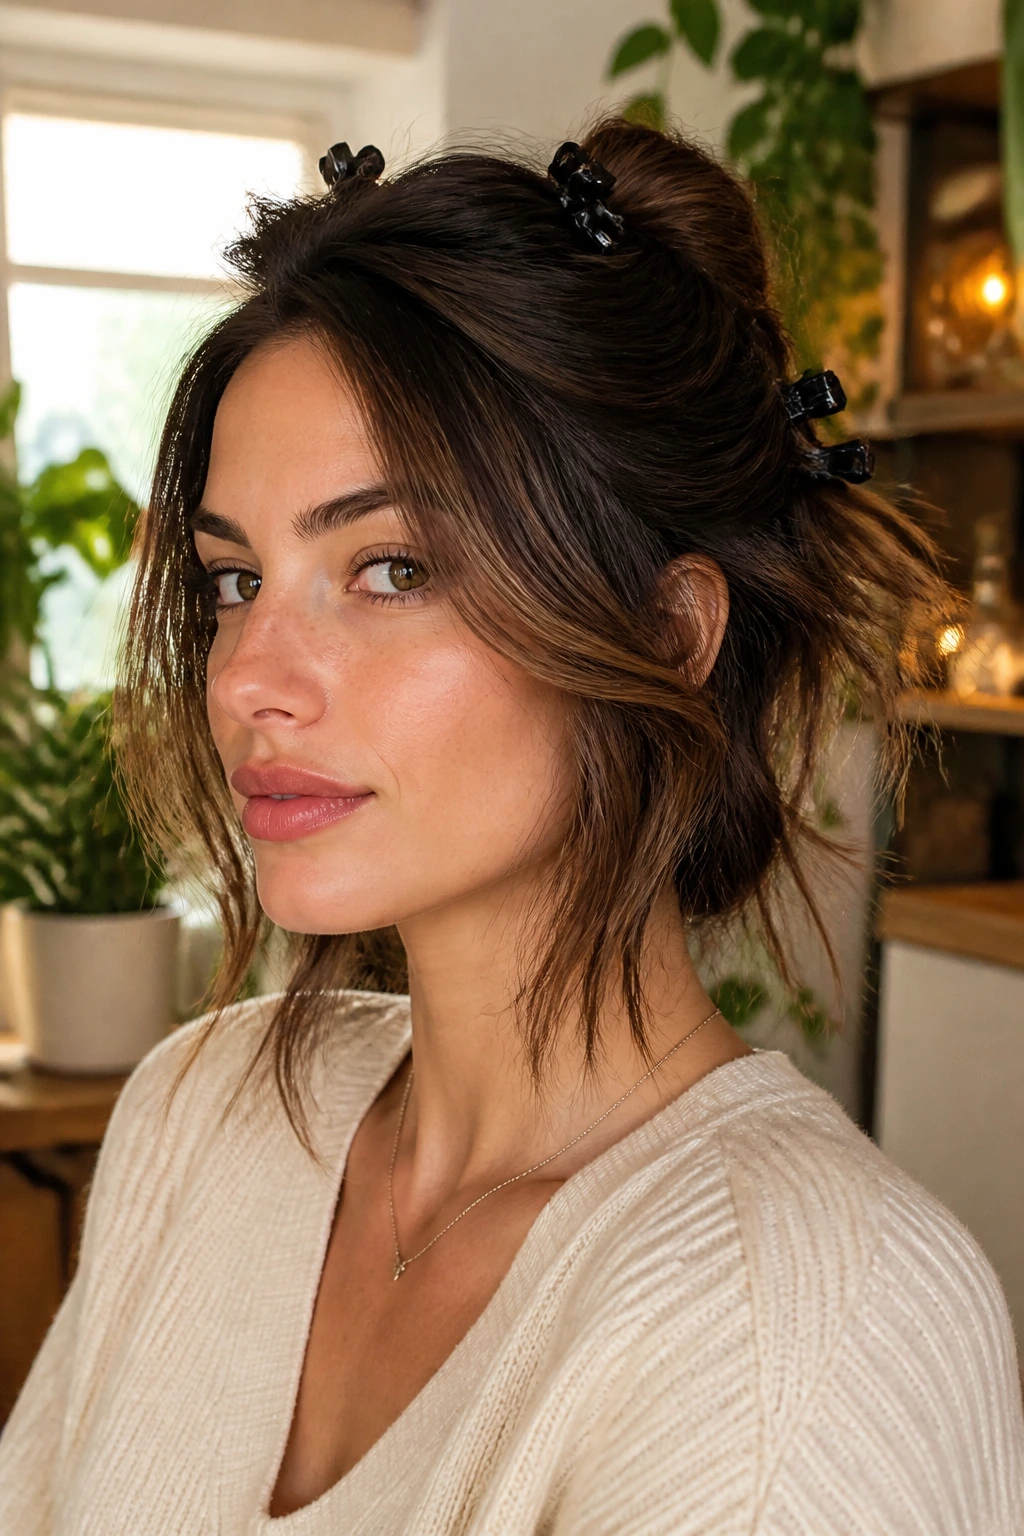
5. Claw-Clip French Twist
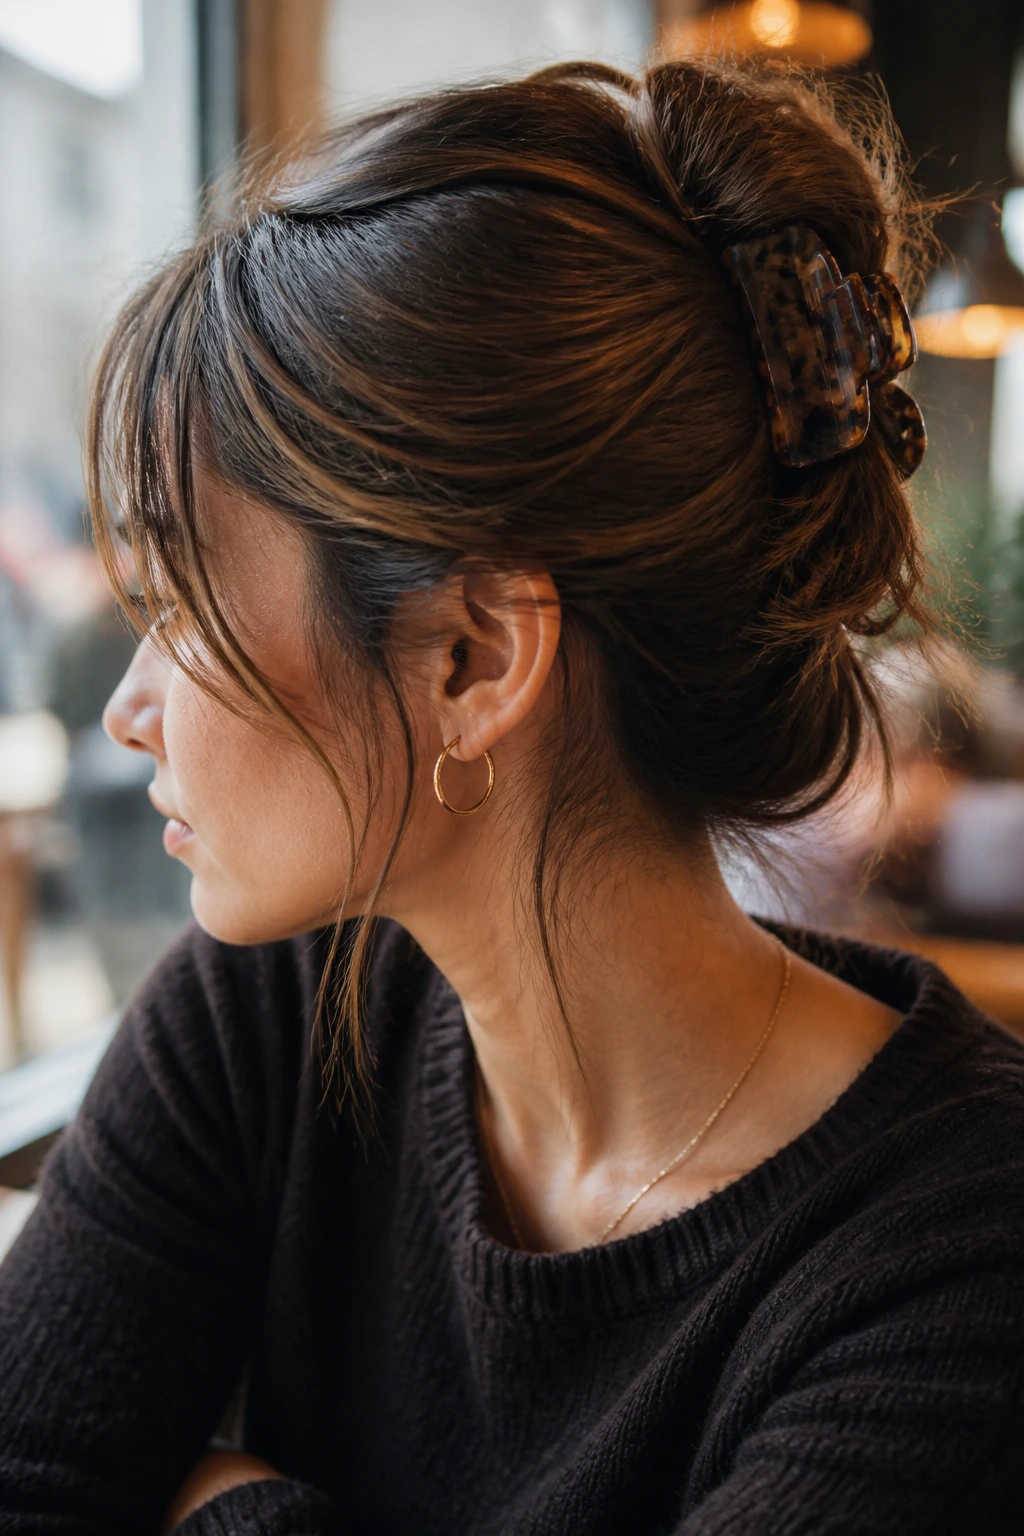
This is the kind of style that looks like you made a choice in under two minutes, which is the best compliment a hairdo can get. The long hair disappears upward in a twist, the clip becomes part of the style, and the softer layers escape around the temples and ears in the nicest possible way.
It’s not a tight French twist from a formal salon manual. Good. Those can look stiff on long layered hair. This version is looser, slightly messy, and far more flattering.
Why the Layers Help
Soft layers create those little escaped pieces that make the style feel lived-in instead of shellacked. Fold the length upward in two sections, twist each one toward the center, and clip both with a medium claw clip near the crown.
If your hair is very thick, split it into top and bottom halves before twisting. If it’s fine, lightly mist texturizing spray first so the clip doesn’t slide.
The clip should grip the twist, not flatten it. If the shape looks too wide, pinch the twist inward with two bobby pins under the clip. That tiny adjustment changes everything.
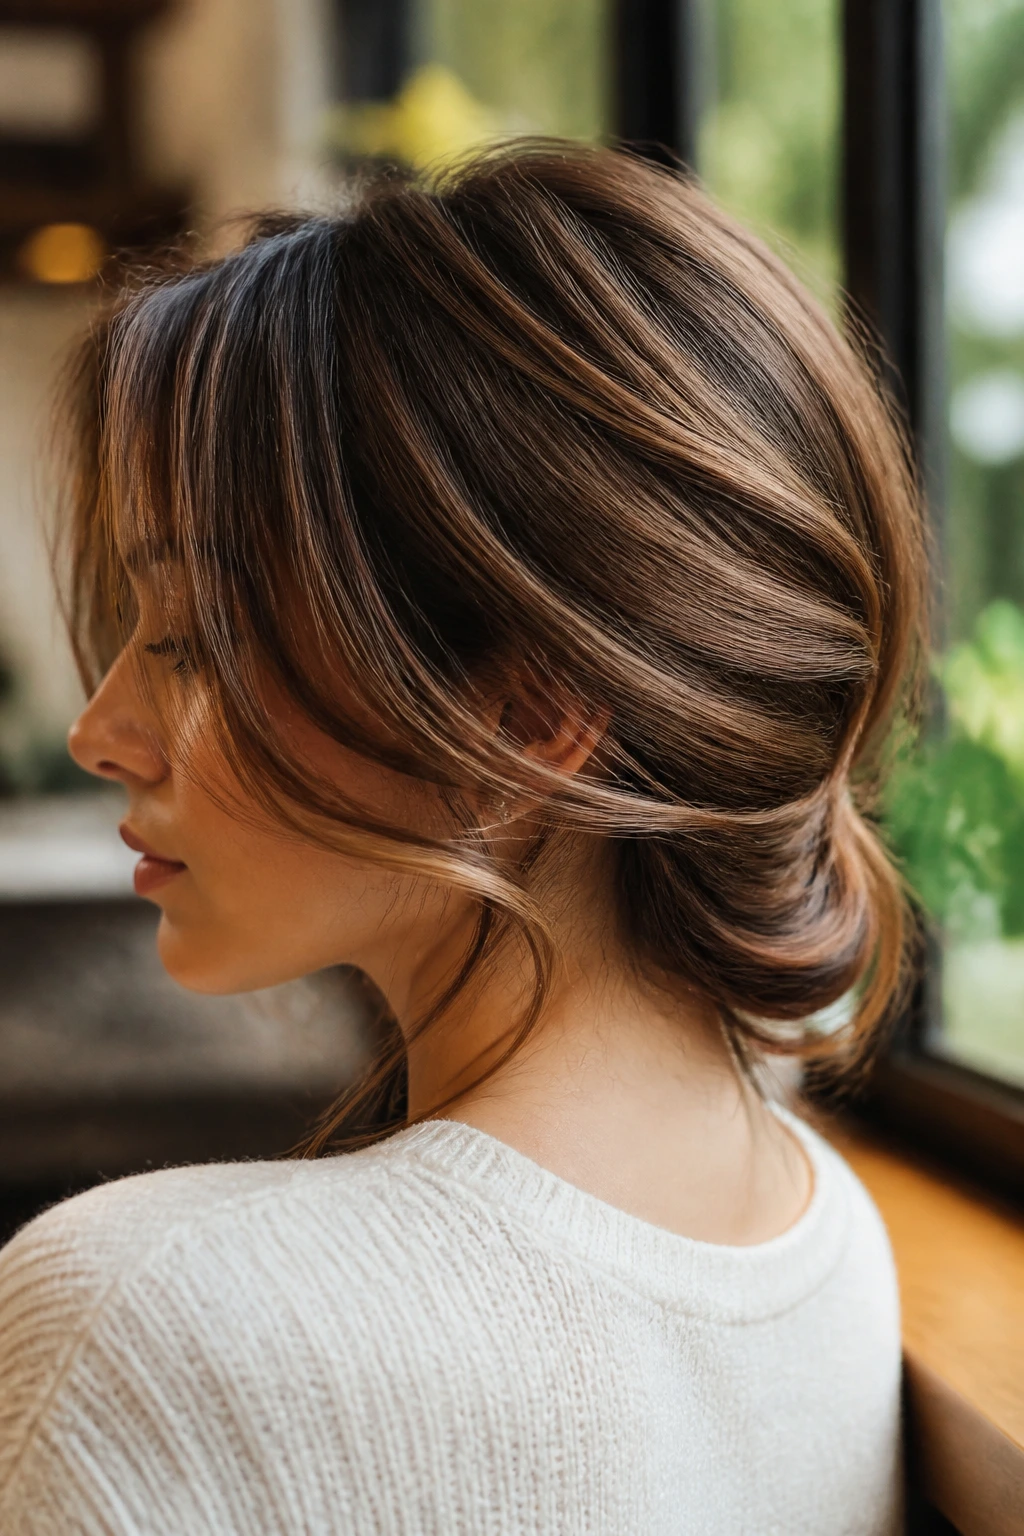
6. Loose Low Chignon
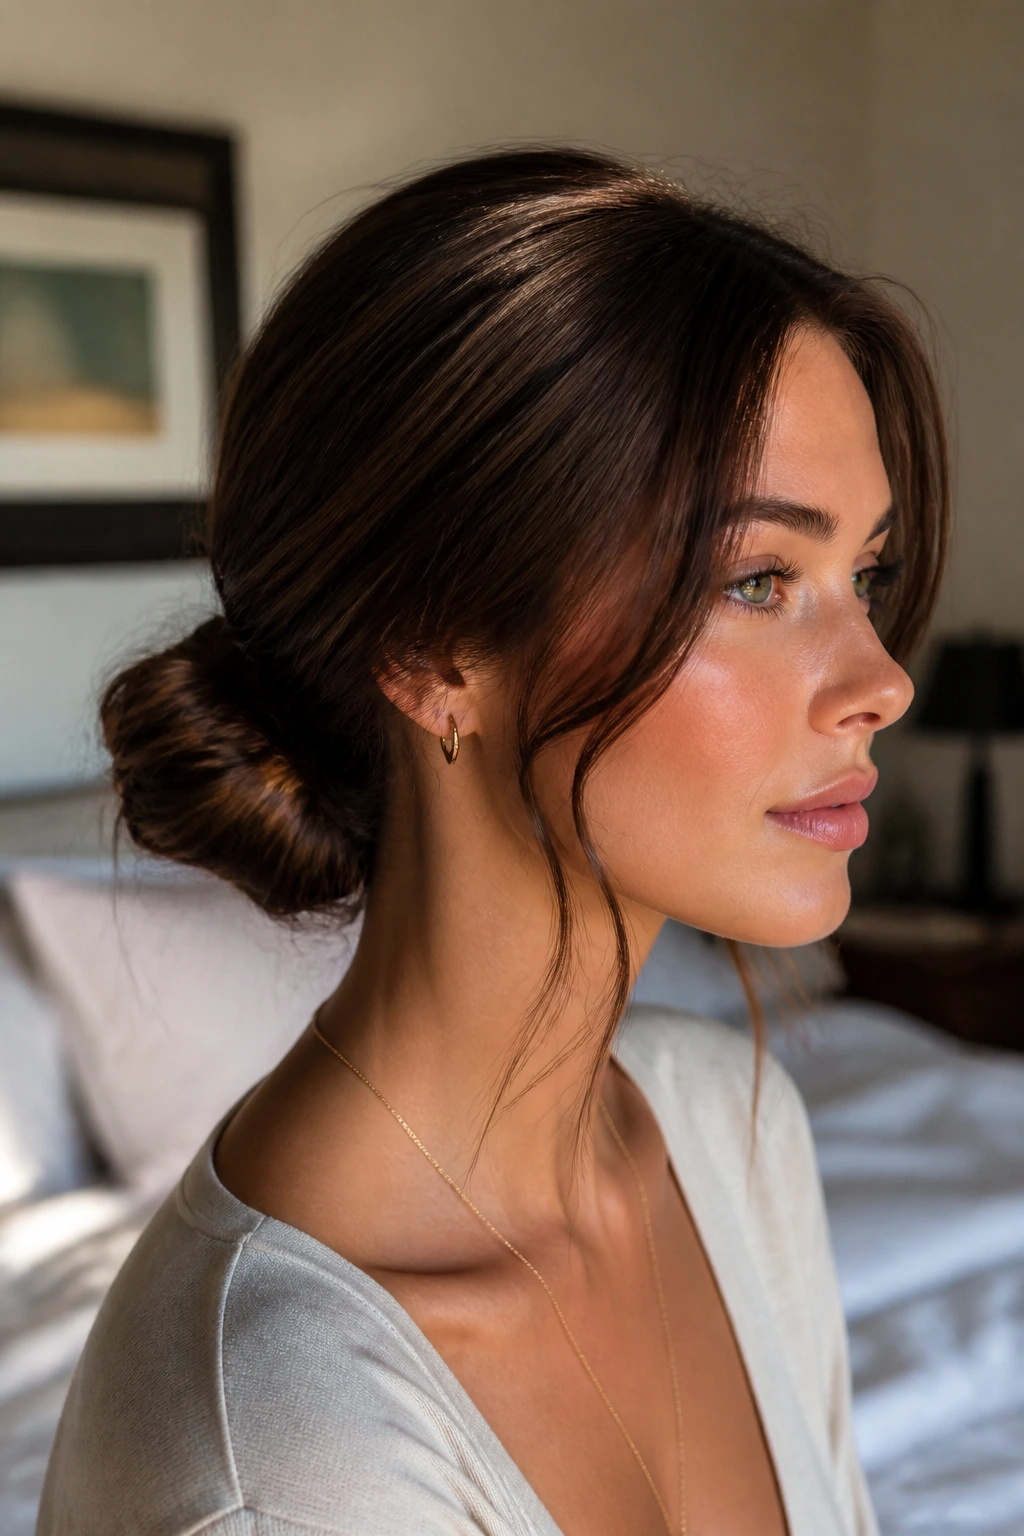
A low chignon is the most forgiving of the bunch, which is why I keep coming back to it. It’s polished enough for dinner or work, but loose enough to keep long hair from looking overly formal.
The trick is to keep the knot small and the edges soft. You want the length gathered low at the nape, then twisted into a compact bun with a few ends tucked loose on purpose. Those little irregular bits are what keep the style from feeling old-fashioned.
If you have face-framing layers, let them stay out. If you don’t, pull two slim pieces forward anyway and bend them under the jaw with a curling iron. It changes the whole mood.
A small amount of smoothing cream on the mids helps here, but keep it away from the roots. Too much and the chignon slips. Too little and the bun gets fuzzy in a way that reads more accidental than easy.
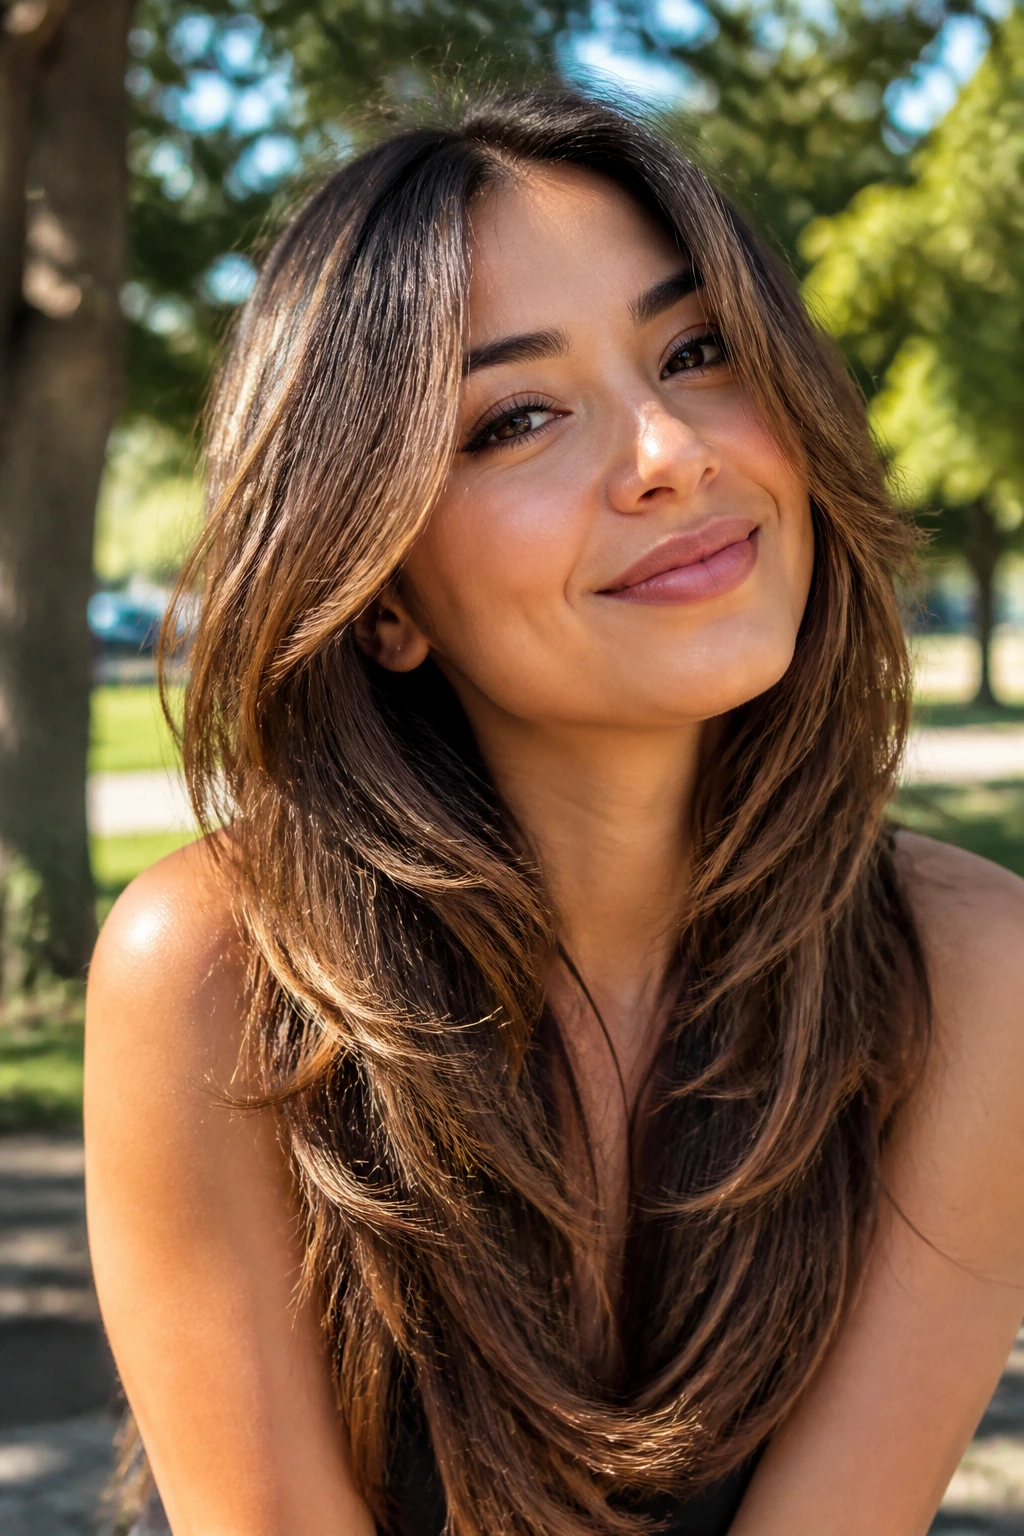
7. Side-Swept Bombshell Waves
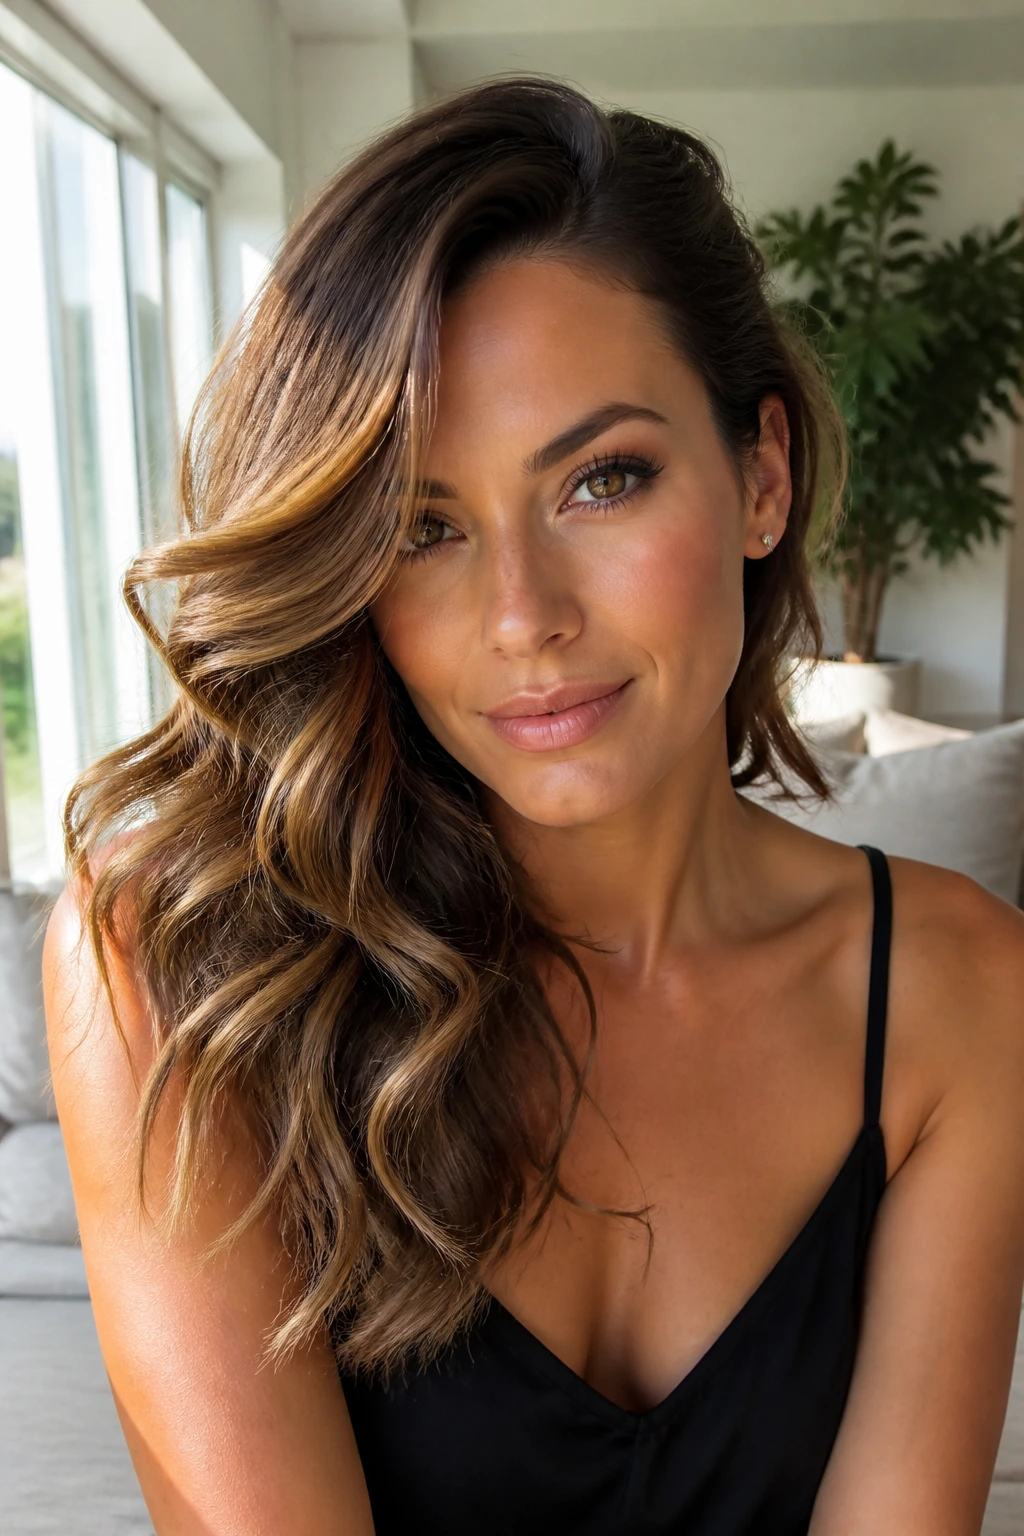
Side parts are underrated. They can make long hair feel lighter at once, and on soft layers they create a big sweep across the face that reads shorter than it is.
This look is all about asymmetry. One side gets tucked or pinned back. The other side falls in loose waves that hit around the cheekbone, the lip line, or the collarbone. Because the part is deep, the shape feels sharper and more edited.
Keep the Bend Loose
Do not curl every section in the same direction. That’s the fastest way to make the hair look heavy. Alternate the mid-lengths, leave the ends a little straighter, and brush the curls out once they’re fully cool.
That brushed-out finish is what gives you the soft, sassy feel. Not crunchy ringlets. Not pageant hair. Just movement.
A deep side part also helps if you want your layers to show. The shorter pieces are more visible on the heavier side, where they can sit against the cheek instead of vanishing behind the rest of the hair.
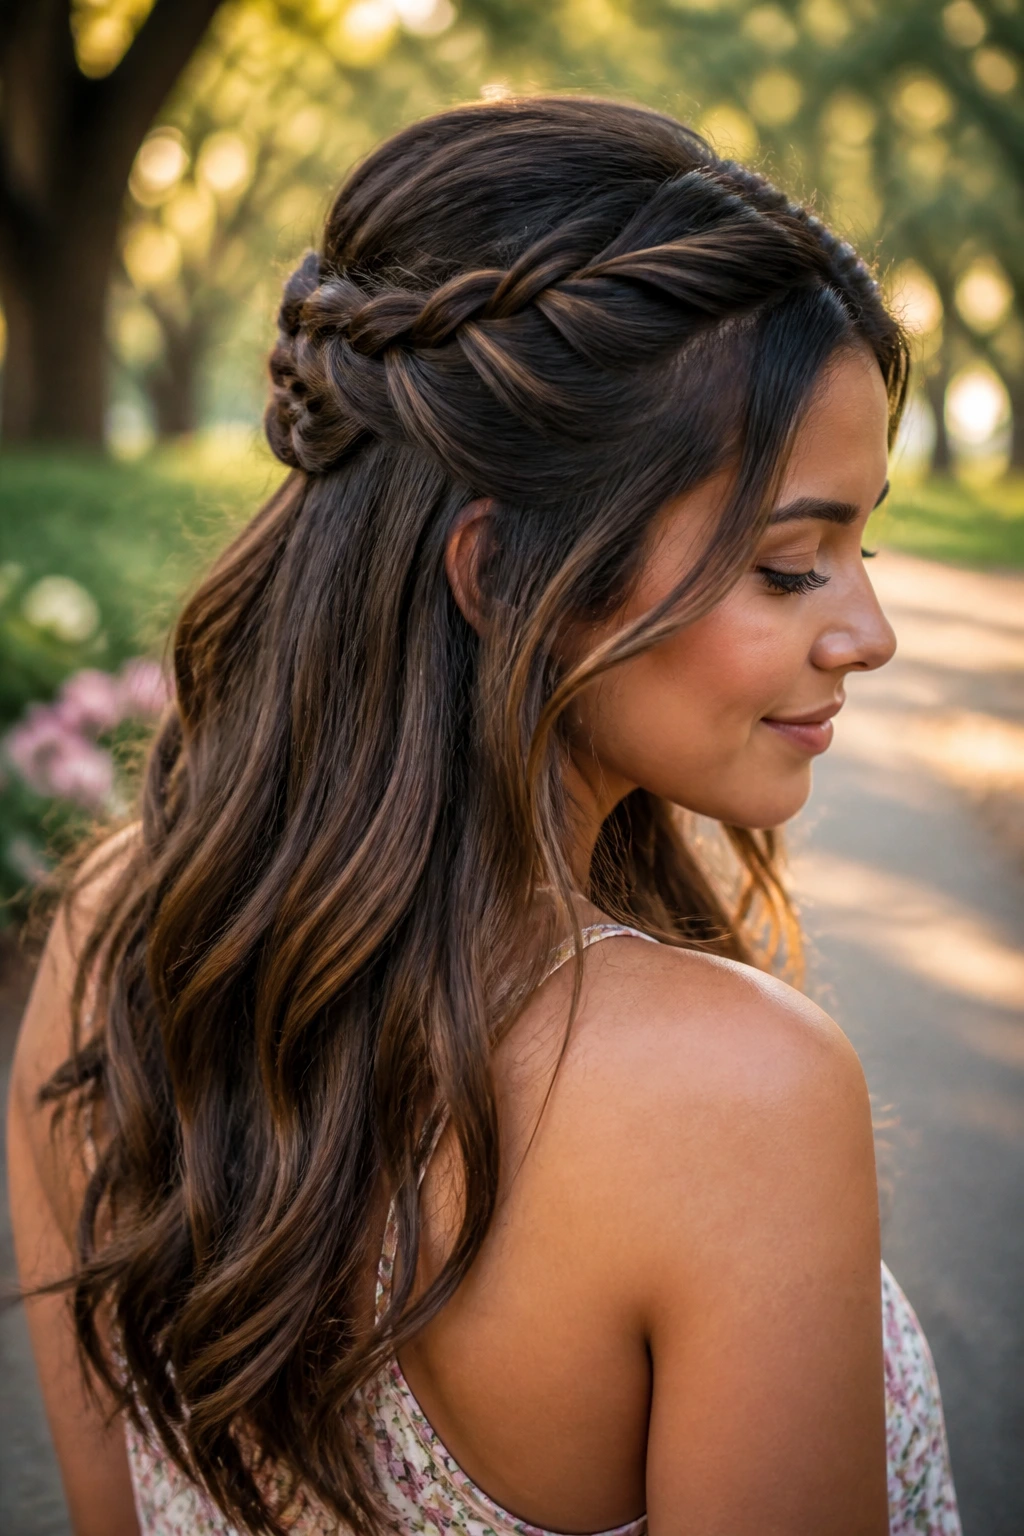
8. Braided Crown Half-Up
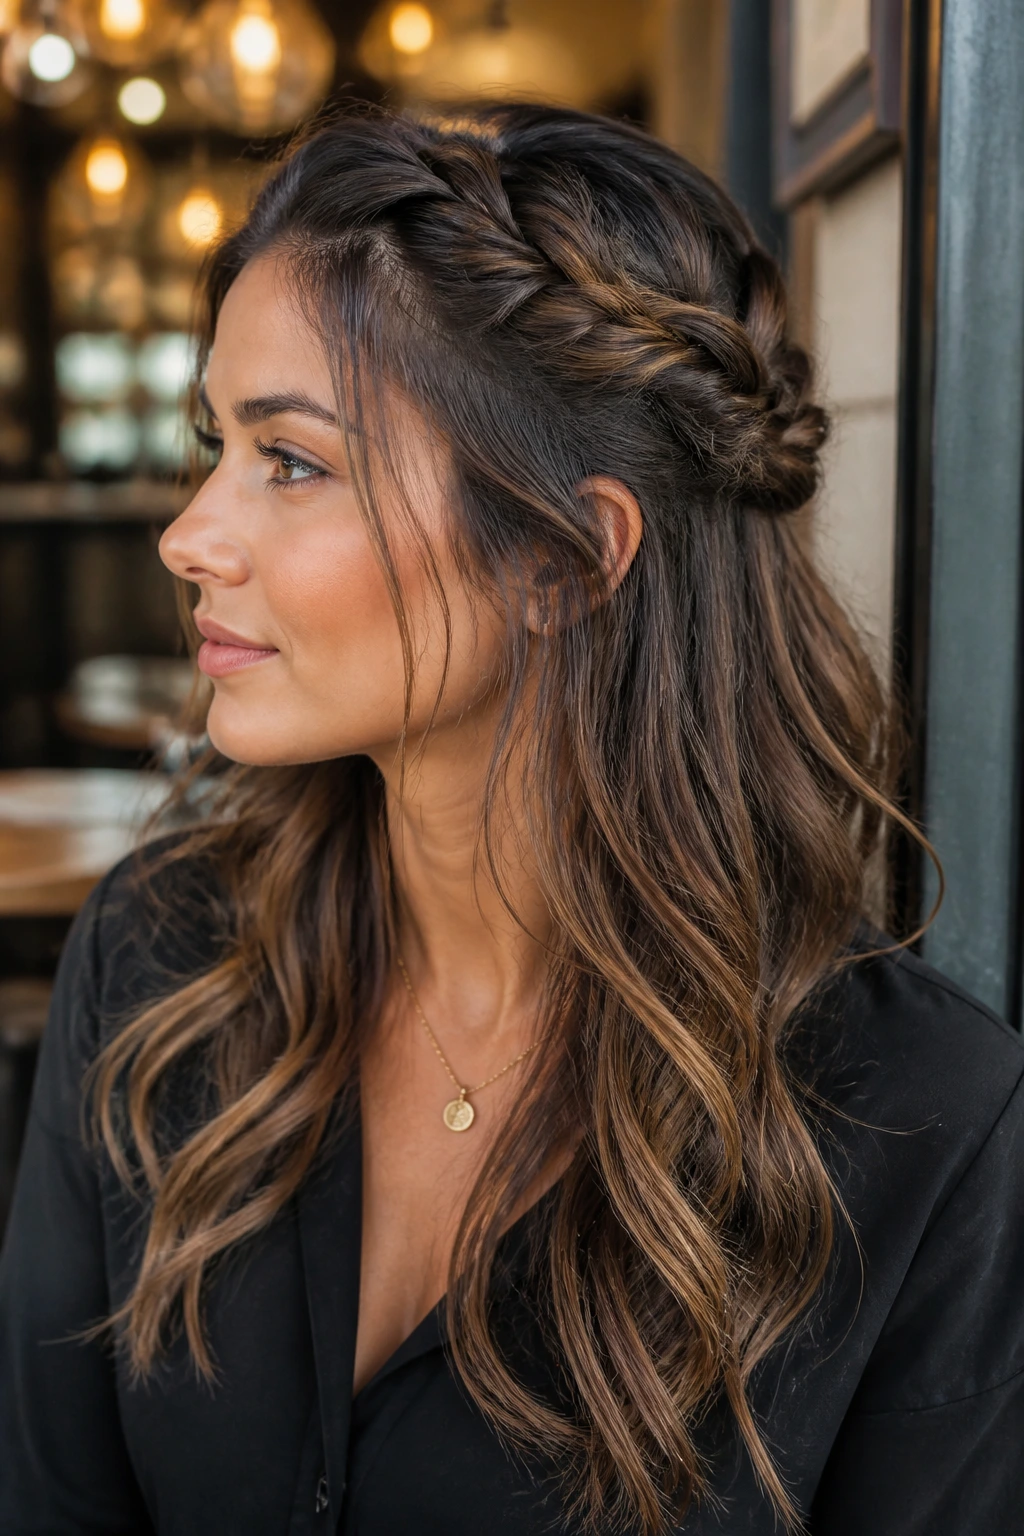
This one has a little romance in it, but the shape is still sharp enough to feel sassy. The braid pulls the hair back from the face, which makes the lower half look shorter and the layers more noticeable.
Braid two sections from the temples back toward the crown, then pin them together where they meet. Pancake the braid gently with your fingers so it widens. That width gives the look presence without adding bulk.
A braid that’s too tight can make the whole style feel severe. Keep it loose enough that the edges look soft. The layers around the face should stay free, and the bottom half should fall in waves or bends.
This style is especially good if your hair has medium-thick density. Fine hair may need a little dry shampoo first; thick hair may need a couple extra pins at the back where the braid meets the crown.
9. Bubble Ponytail with Soft Bends
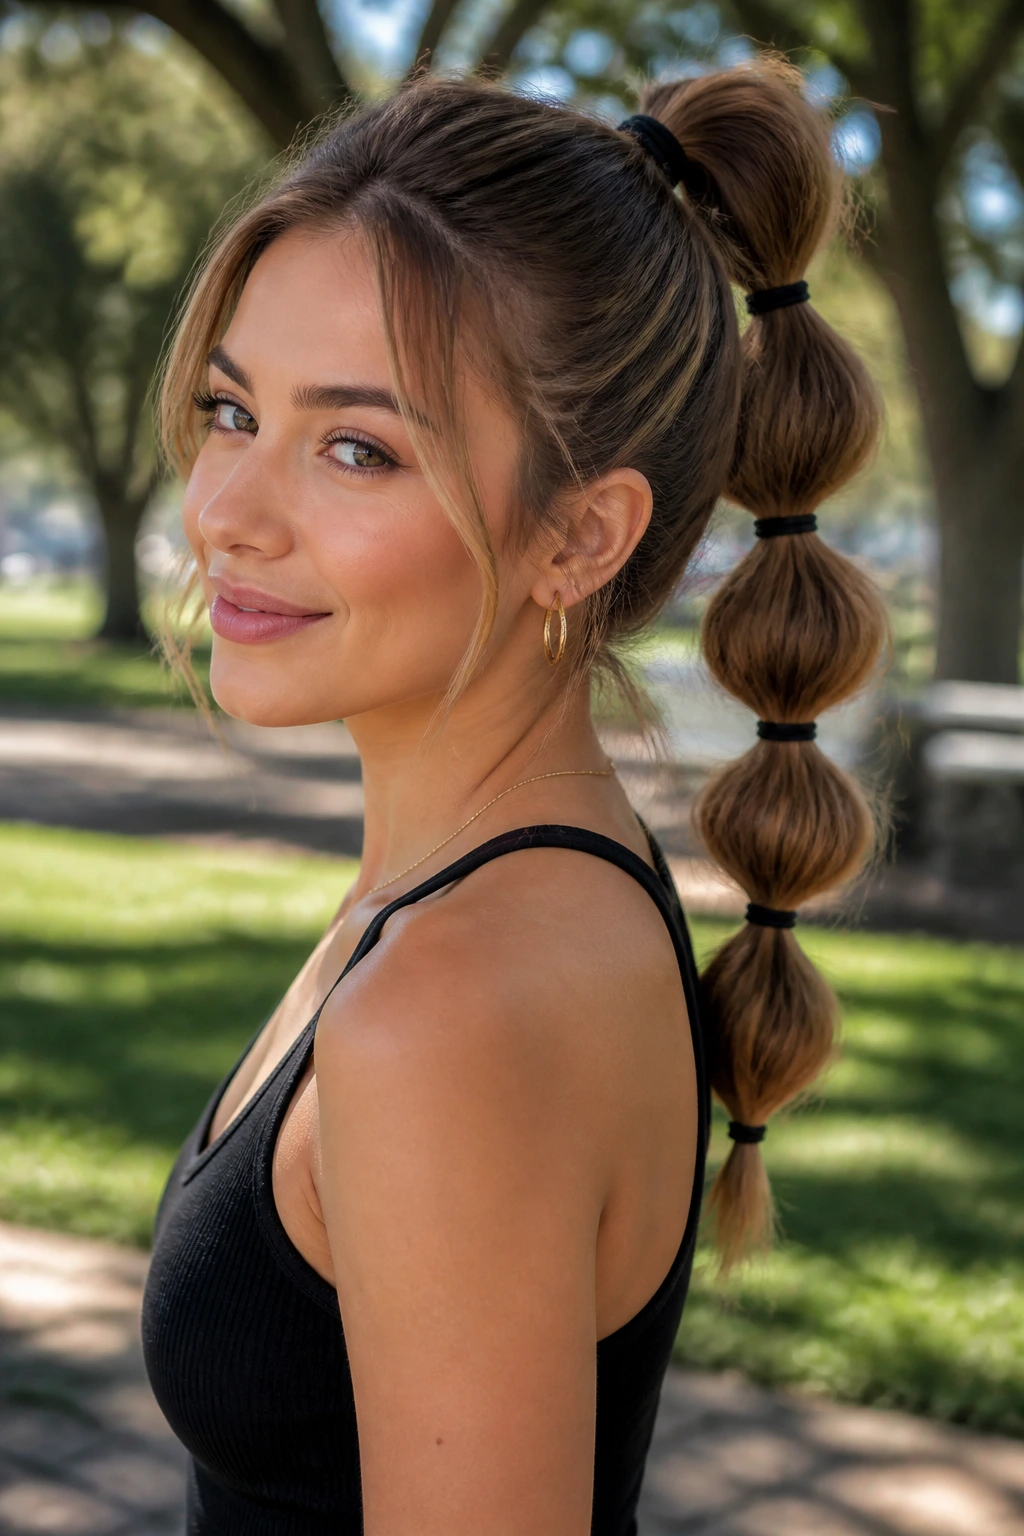
A bubble ponytail is one of those styles that looks playful even when the rest of the outfit is simple. It also happens to be excellent for long layered hair, because every elastic creates a new visual break in the length.
The bubbles shorten the look by dividing it into sections. That’s the whole trick. Instead of one long line, you get 4 or 5 soft rounds, each about 2 to 3 inches apart. If you gently tug the sides of each bubble, the shape gets fuller and less rigid.
What to Do at the Tail
Start with a pony at the mid-high or high crown. Add clear elastics down the length, then pull each section apart a little. If your ends are very long, tuck the final tail under the last bubble and pin it hidden.
That tucked tail is what keeps the style from looking draggy. It also makes long hair behave better in wind, which is a small but real victory.
Use a little texturizing spray before you divide the pony. The bubbles hold better when the hair has some grip.
10. Messy Top Knot with Long Pieces
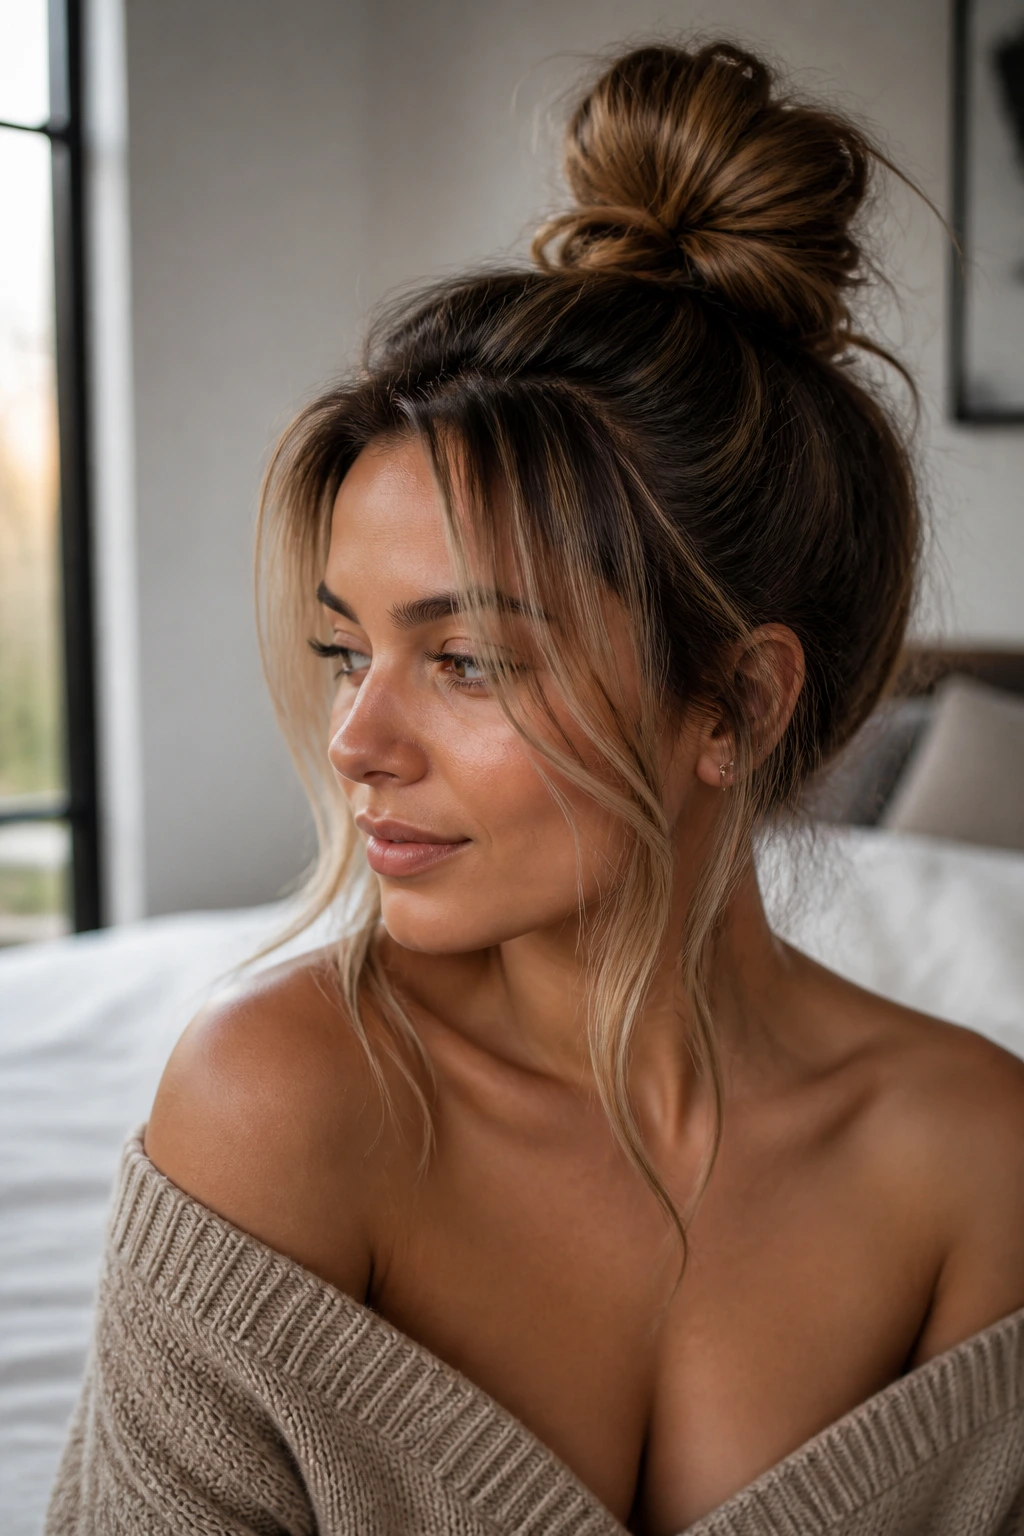
A top knot can either look chic or look like you ran out of time. The difference is the face-framing and the height. Put the knot high, but not so high that it becomes a tiny ball. Leave the front pieces and a couple of lower tendrils out, and the style gets a much better shape.
This is a good choice when your layers are soft because the shorter pieces near the face naturally break up the knot. They create the feeling of a shorter, more cropped style without actually losing any length.
The Best Height for the Knot
Aim for the top third of the head. That gives the crown lift and keeps the long hair from dragging the bun down. Twist the length once, wrap it, and secure it with two or three pins instead of one giant elastic lump.
If you want extra sass, pull the bun apart slightly after pinning so it looks bigger and less perfect. Then smooth only the front hairline. That contrast — polished front, messy knot — is what makes this style land.
11. Tucked-Under Lob Illusion
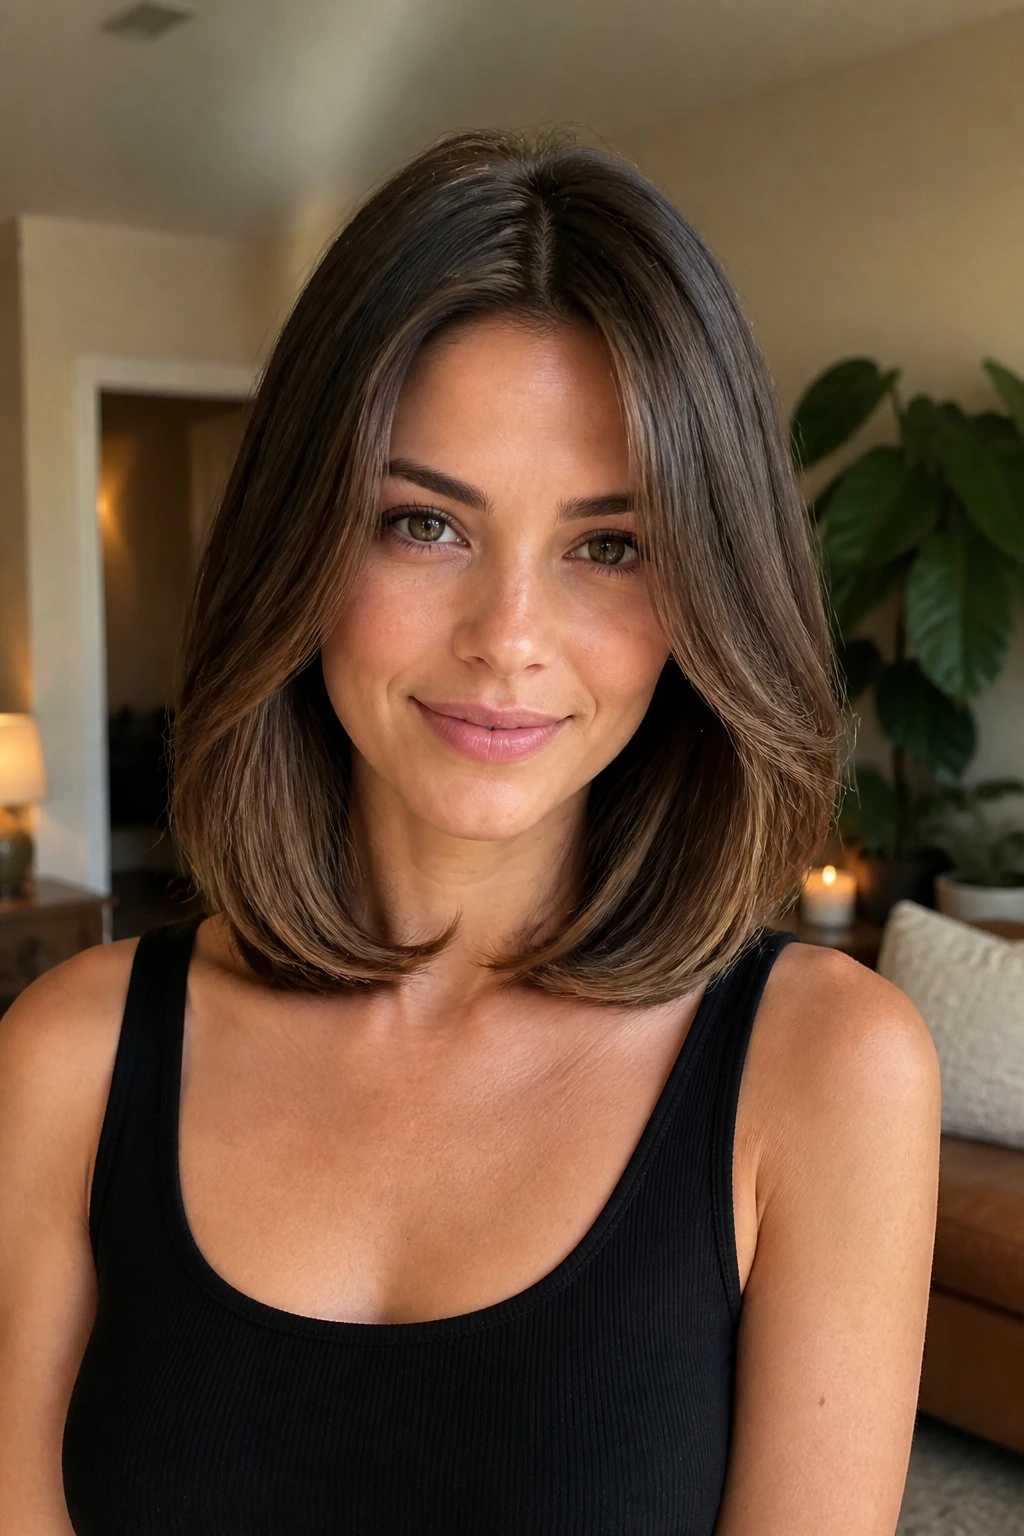
This is the quietest style on the list, and maybe the smartest. You keep the hair smooth and low, then tuck the ends under so the silhouette stops around the shoulders and collarbone.
The illusion works best on straight or lightly wavy hair. If your hair is curly, you’ll need a stronger blowout first, or the bulk will fight the tuck. A flat iron can help with the ends, but don’t flatten the whole head into a helmet. That’s not the goal.
Where the Shape Lives
Keep the volume at the crown soft and slightly rounded. Then bend the mid-lengths under with a brush or iron. Pin the underlayer where it folds, not where it hangs. That hides the long end and makes the whole shape feel like a long bob with a better attitude.
A little shine spray on the top layer gives this style its clean finish. Use only a mist, though. Too much product and the tuck starts sliding within an hour.
12. Retro Flip with Piecey Ends
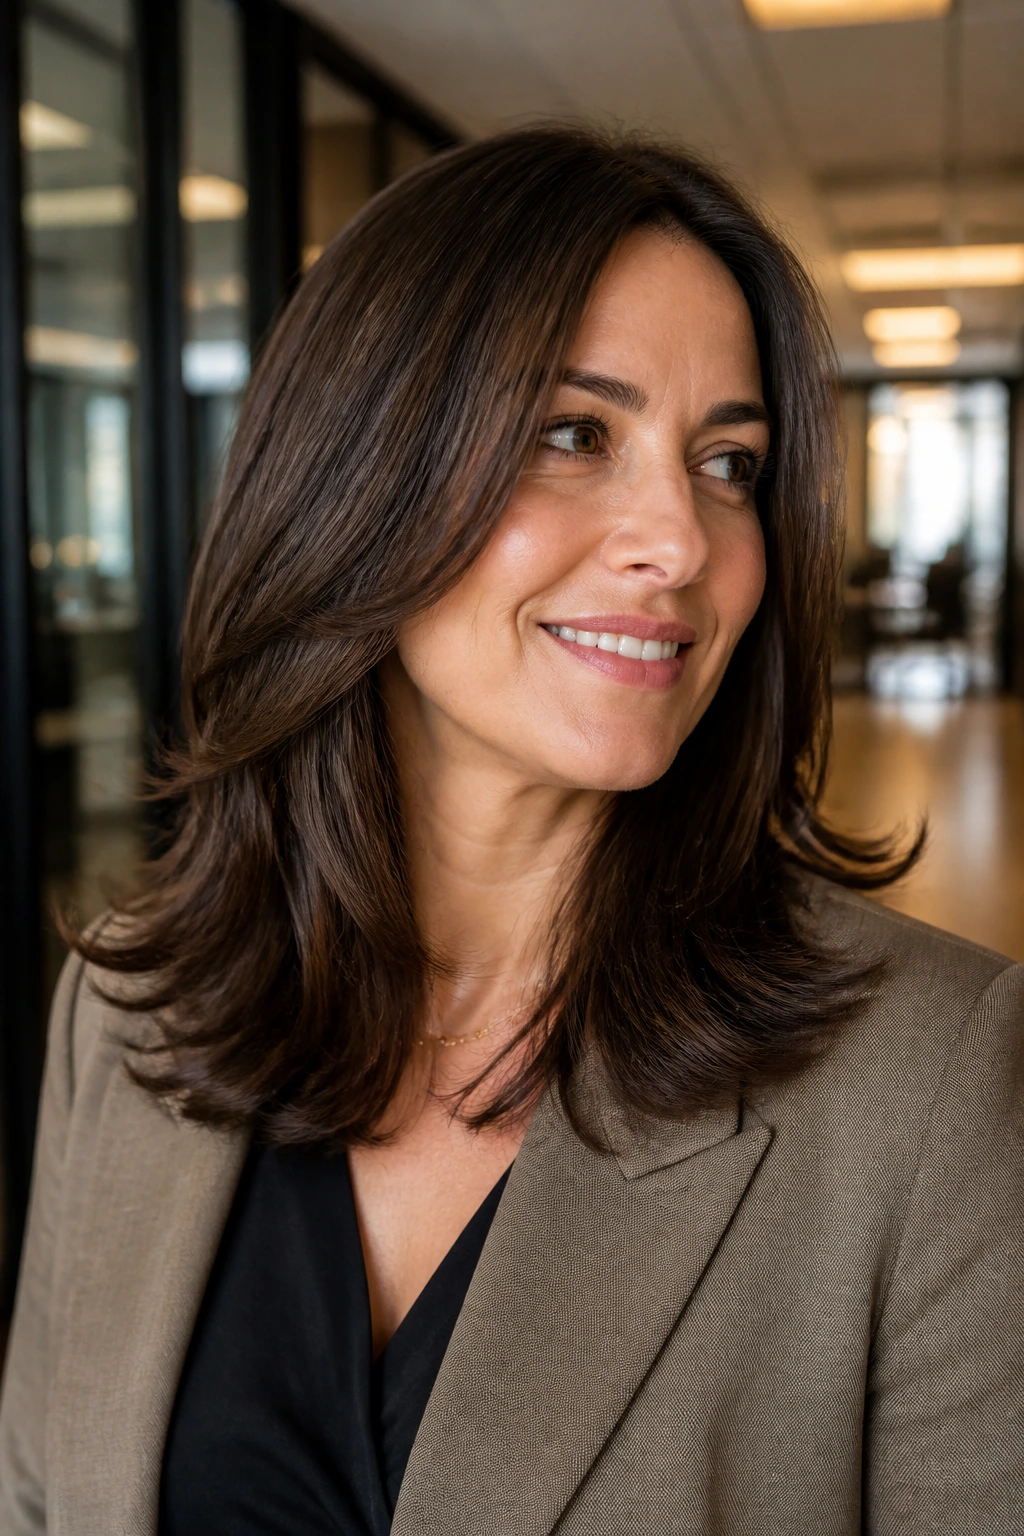
This one has real personality. It borrows the little outward kick from a retro blowout, but keeps the pieces separated enough that it doesn’t look costume-y.
The ends are the point. Flip them out, keep the top smooth, and let the layers around the face break into soft pieces. That combination gives you the short sassy effect without the giant barrel curl that can weigh everything down.
If your hair is very long, focus the flip on the bottom three to four inches. You do not need a full head of curls. The shape comes from the edge, not the center.
A flat brush at the roots and a round brush at the ends is a good combo here. It keeps the top tidy and the finish playful. I like this one with a blazer or a square neckline because the flip sits neatly against sharp clothes.
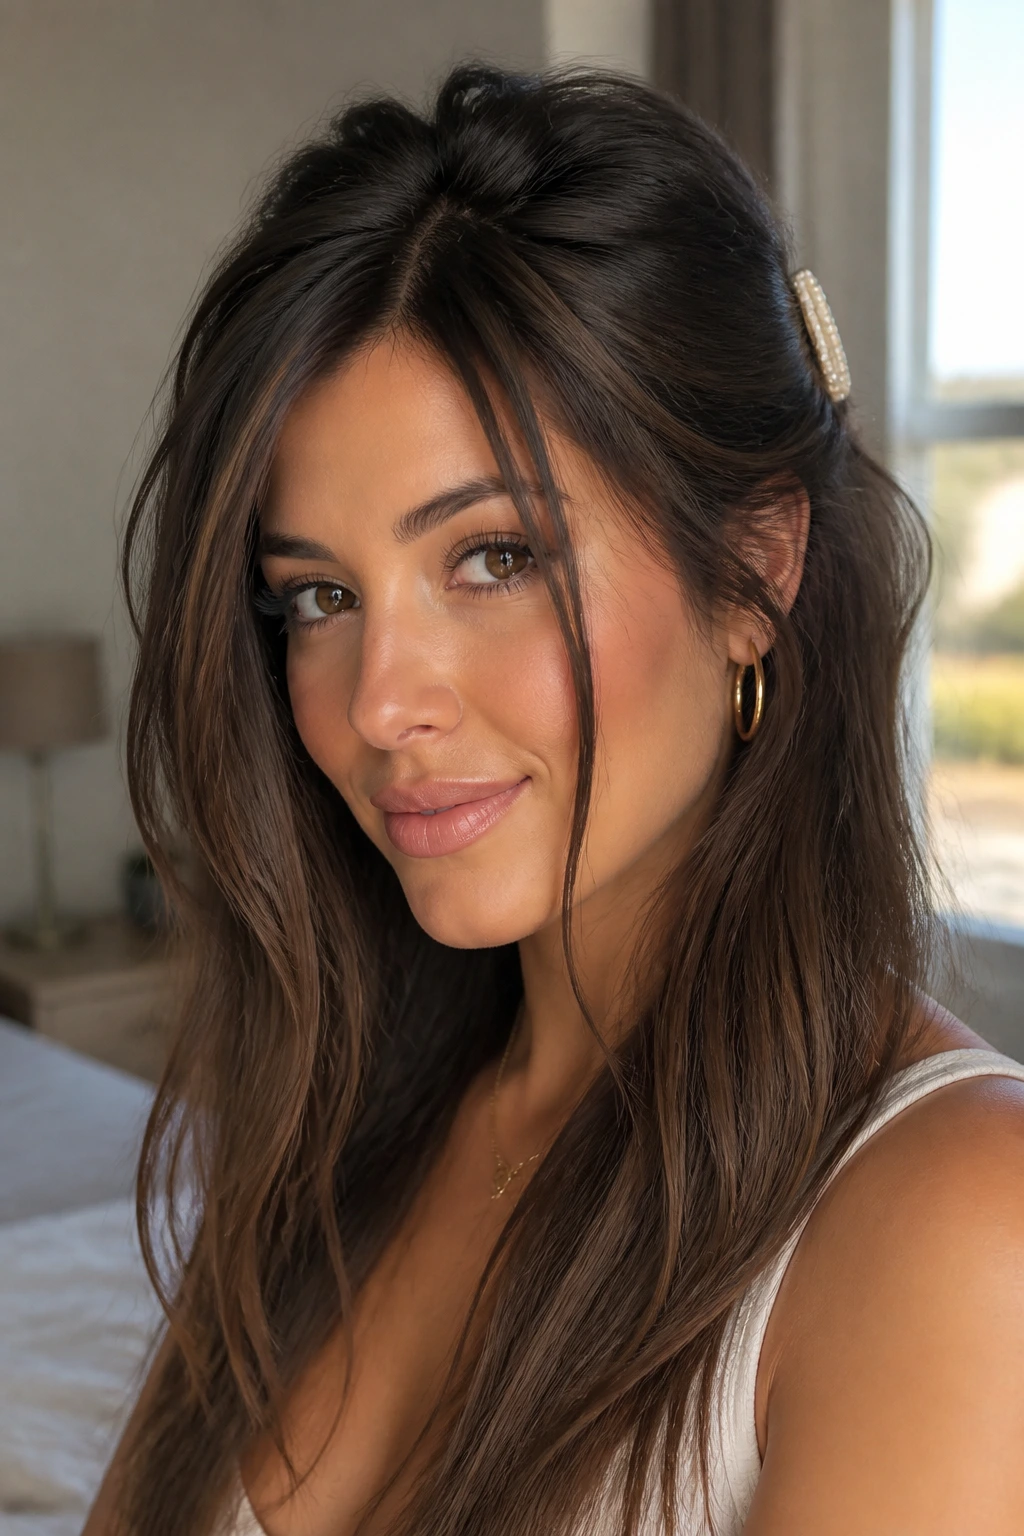
13. Half-Up Mini Bun
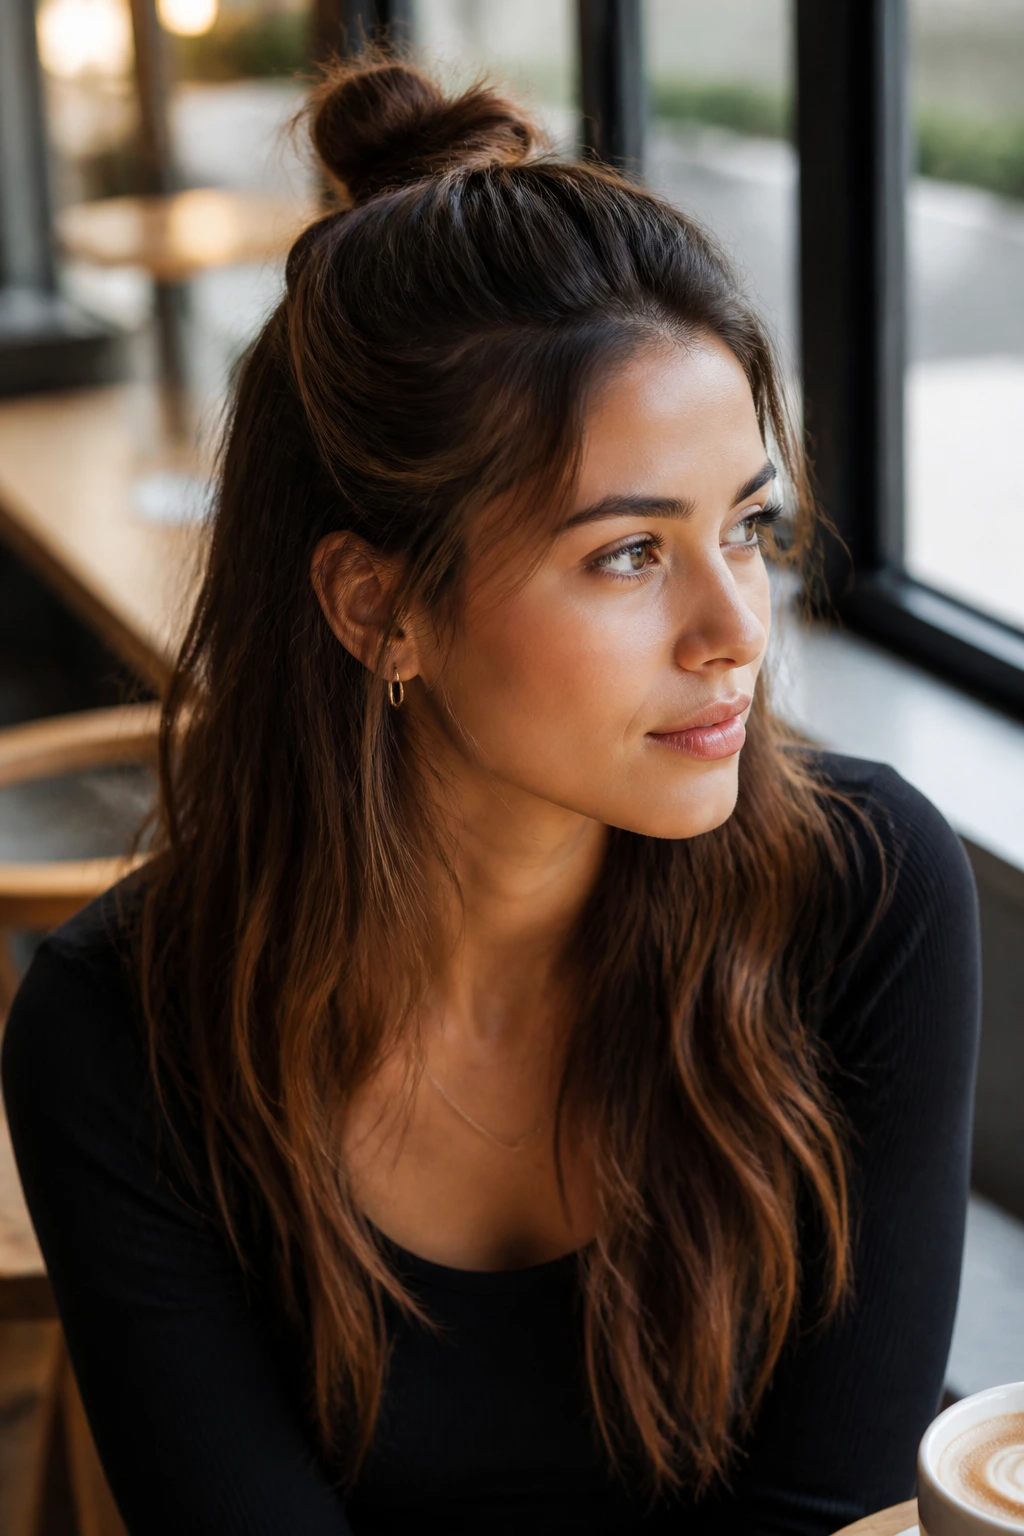
Small bun, big payoff. A half-up mini bun uses just enough top hair to create lift, then lets the rest fall so the overall shape feels shorter and lighter.
This style works because it splits the head visually in two. The bun draws the eye upward. The lengths below act as a softer frame. Soft layers make it especially good, since the shorter face pieces break up the line naturally.
Keep the bun compact — about the size of a plum, not a melon. If the bun gets too big, it starts competing with the rest of the hair. That’s when the look gets bulky.
You can twist the bun from a half-ponytail or create a tiny knot and pin it into shape. Either way, leave the ends a little loose on purpose. Tiny flyaways around the bun keep it from feeling too stiff.
14. Wrapped Low Pony
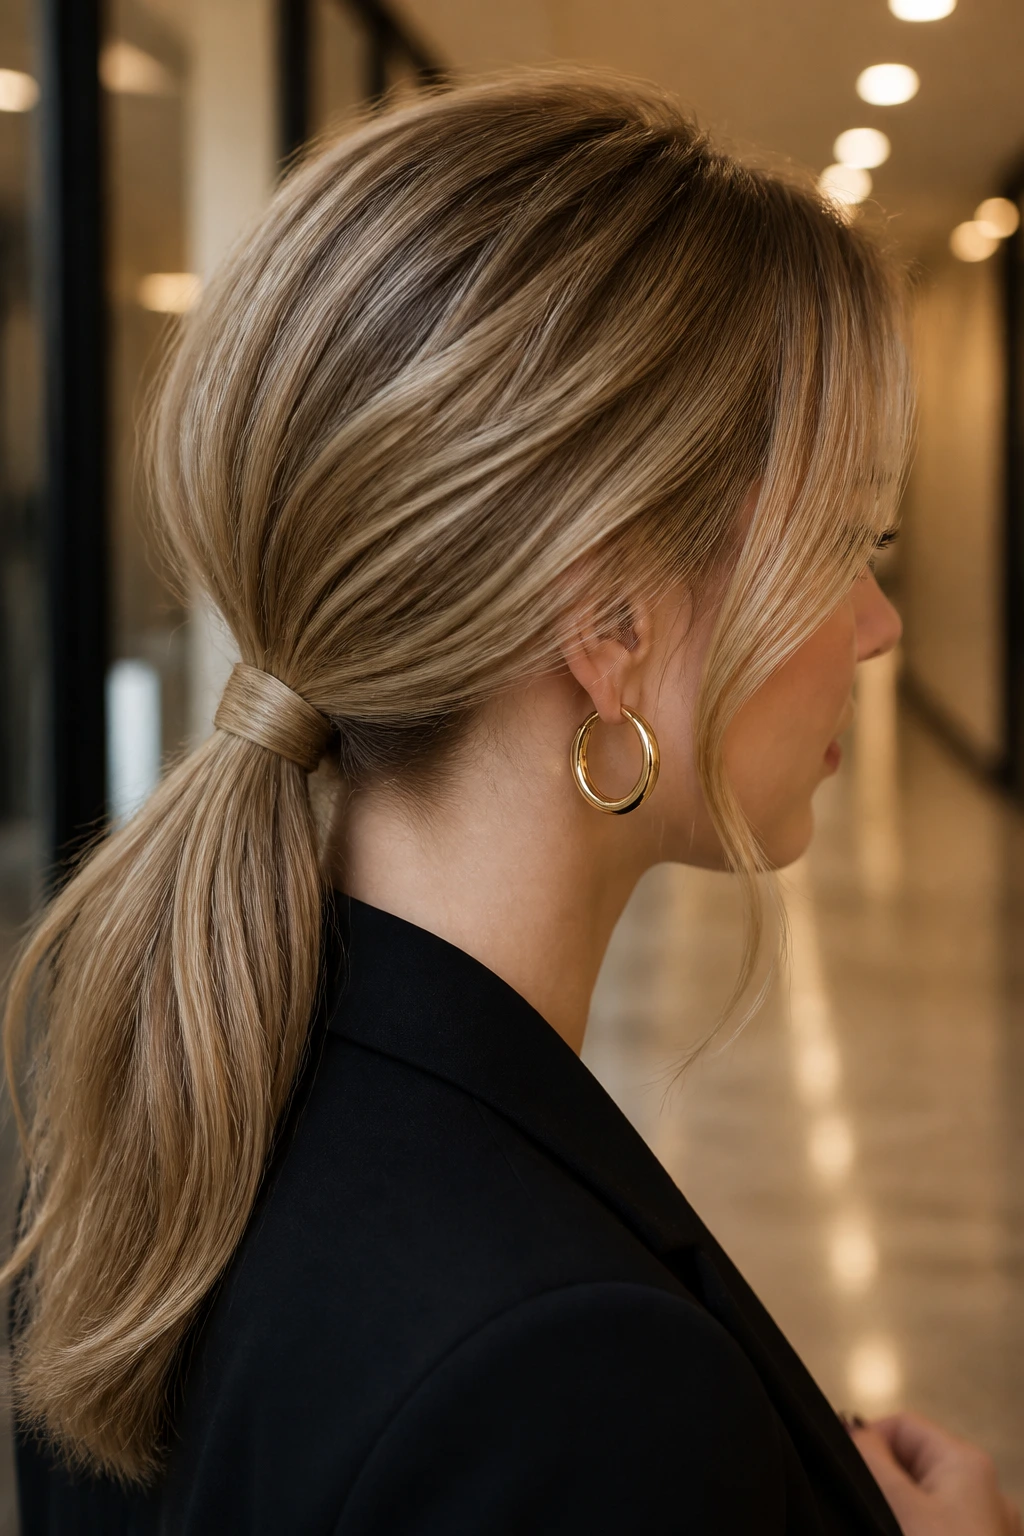
A low pony can look plain when long hair is heavy, but wrapping the base changes the whole story. One section of hair hides the elastic, the crown gets a tiny lift, and the tail can be bent or curled so it doesn’t just hang there.
The style reads shorter because the focus shifts to the shape at the back of the head. If the ponytail sits at the nape and the tail is softened into a loose bend, the look has more edge and less weight.
Tiny Changes, Big Difference
Tease the crown gently before you secure the pony. Then take a 1-inch strand from underneath, wrap it around the elastic, and pin it under the pony. That one move makes the style look finished.
If the tail is straight, bend the last third with a flat iron. If it’s wavy, let it be. The goal is not uniformity. The goal is a pony that doesn’t look like an afterthought.
15. Pinned-Back S-Waves
If you want something that feels pretty but not precious, this is a strong choice. S-waves give the hair movement, and pinning one side back shortens the visual line across the face.
The asymmetry does most of the work. One side stays open. The other side is tucked behind the ear or secured with two small pins. The face-framing layers stay visible, which matters more than most people admit.
A flat iron can create S-waves if you bend the hair in alternating curves, but a 1-inch iron works too. Let the waves cool, then brush them gently so they read soft instead of stiff. If the ends flip out a touch, even better.
This is one of the easiest styles to wear with earrings. Hoops, studs, a single drop earring — all of them work because the pinned side leaves space.
16. Wide-Headband Blowout
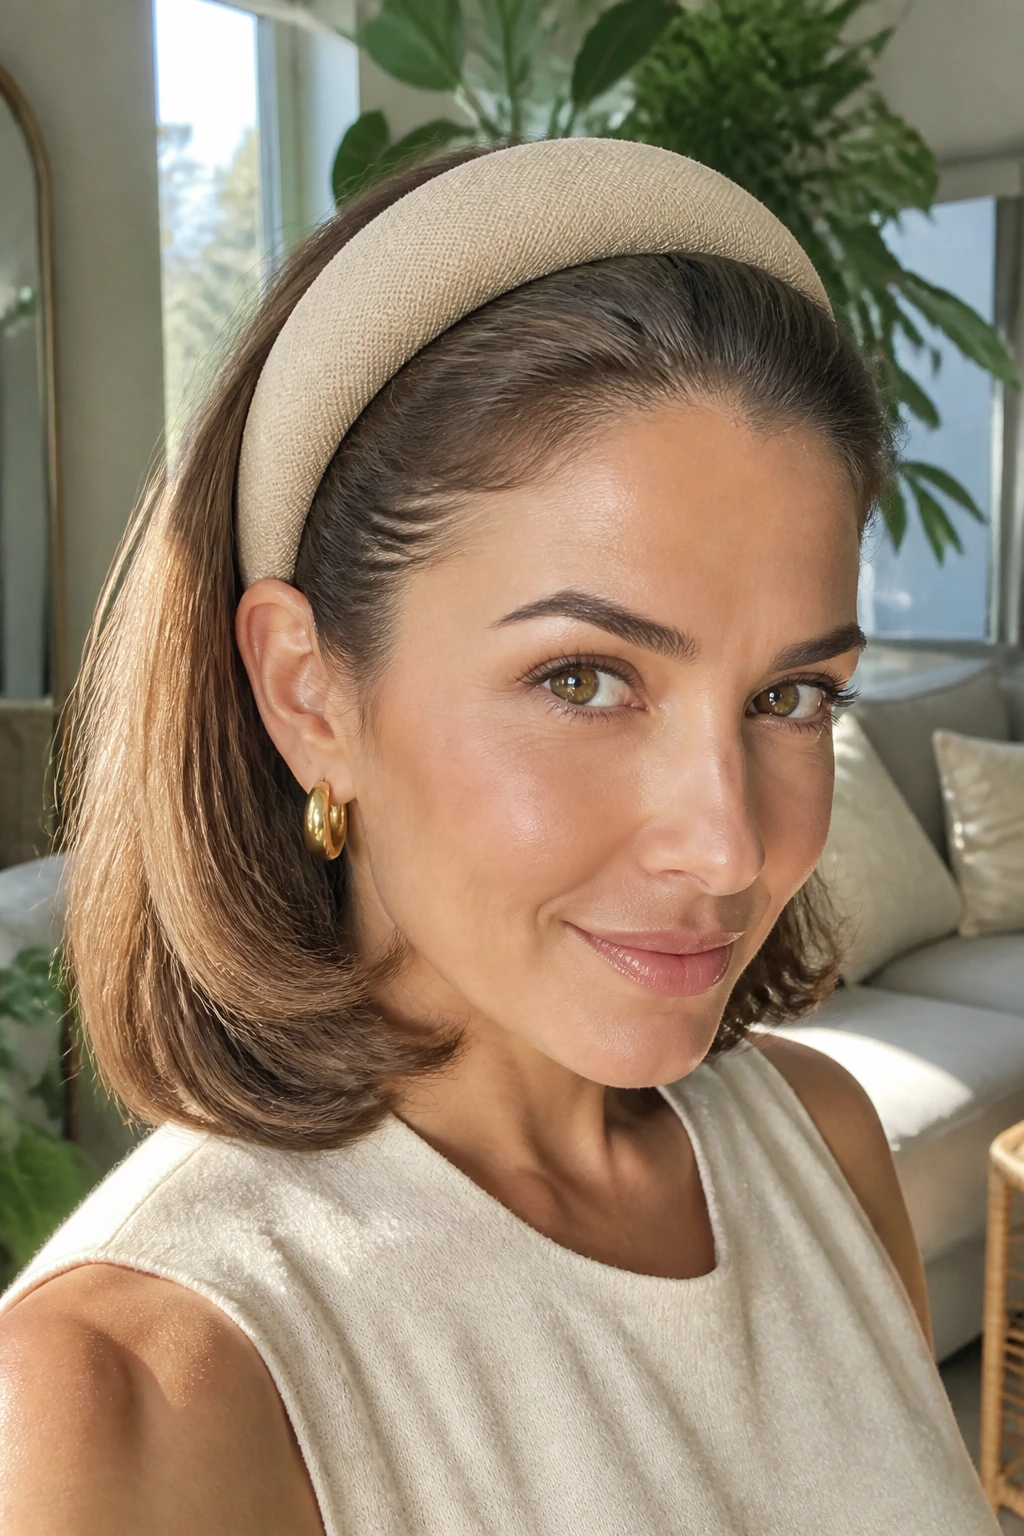
A wide headband can fake a shorter haircut faster than most pins. It compresses the top, breaks up the hairline, and leaves the lengths to fall in a controlled way behind it.
Use a padded or fabric headband, not a flimsy skinny one. The wider band gives you more shape around the crown and more room to tuck the hair. Blow out the lengths with a round brush first, then place the band so it sits just behind the hairline.
Push the top forward slightly before tucking the sides back. That tiny bit of lift keeps the style from going flat. If the ends need help, bend them under the band at the nape.
This style is good on days when you want to look put together with almost no pin work. It also survives a decent amount of wind, which is more useful than it sounds.
17. Rope-Braid Half-Up
A rope-braid half-up is a cleaner, faster cousin of the braided crown. It pulls sections away from the face, gives the crown a bit of structure, and still keeps the bottom length soft and loose.
Twist two sections from each side toward the back, then wrap them around each other and secure with a clear elastic or a small barrette. Once it’s in place, tug the twists wider. That little widening makes the style feel fuller and more intentional.
The best part is how it interacts with soft layers. The shorter front pieces soften the twist, and the rest of the hair falls like a curtain beneath it. The whole shape reads shorter because the top has its own miniature structure.
If your hair is fine, a spritz of dry shampoo first helps the twists hold. Thick hair may need one extra pin right under the join.
18. Pinned Roll-and-Tuck Bob
This is the style for anyone who wants the illusion of a bob without the commitment. The lower half rolls inward, the ends disappear under the top layer, and the shape hugs the head in a way that feels unexpectedly sharp.
It does take a few pins. Not a shameful amount, but enough to make the back disappear. Roll sections inward at the nape, pin them horizontally, then lay the top layer over the whole thing. The front stays soft; the back gets hidden.
The Pin Map Matters
Start at the nape and work upward in small sections. If you pin too much hair at once, the roll gets lumpy. Smaller folds lie flatter and look more like a real cut.
Use strong bobby pins, not the flimsy ones that slide after lunch. Once the roll is in place, mist with light hairspray and let it set before you move around too much.
This one looks especially good with a side part and a few slim pieces left out near the temples. It gives the roll some air.
19. Deep Side Part with One-Side Tuck
Some styles need almost nothing to feel different. A deep side part and a one-side tuck can make long hair look shorter because the line of the hair changes immediately.
The tucked side disappears behind the ear or into a pin. The loose side falls forward in a heavy, sweeping curtain. That imbalance shortens the face visually and gives the whole style a little attitude. It also makes soft layers show up more clearly, because the shorter pieces ride the curve of the face.
This is a good option when you want the hair to feel sleek but not severe. It works on straight hair, brushed waves, and blowouts. If the ends are too straight, curve them under slightly so the bottom edge doesn’t look flat.
One detail matters here: tuck the side with the most hair volume, not the least. That’s what makes the side part feel deliberate instead of accidental.
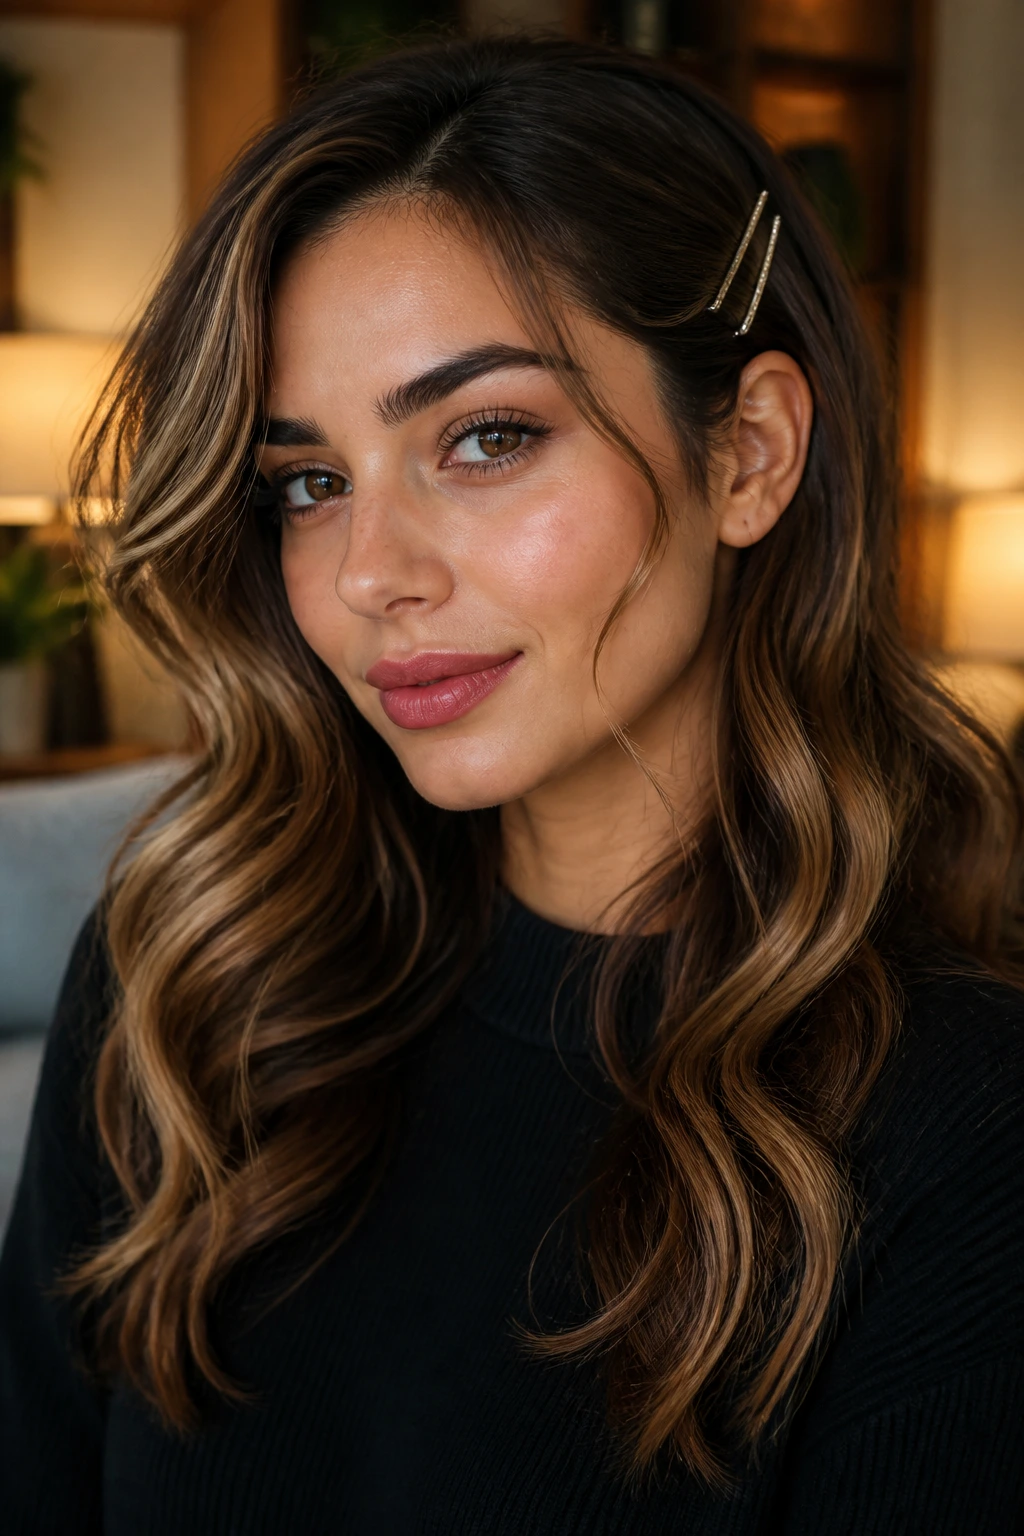
20. Pearl-Clip Volume Stack
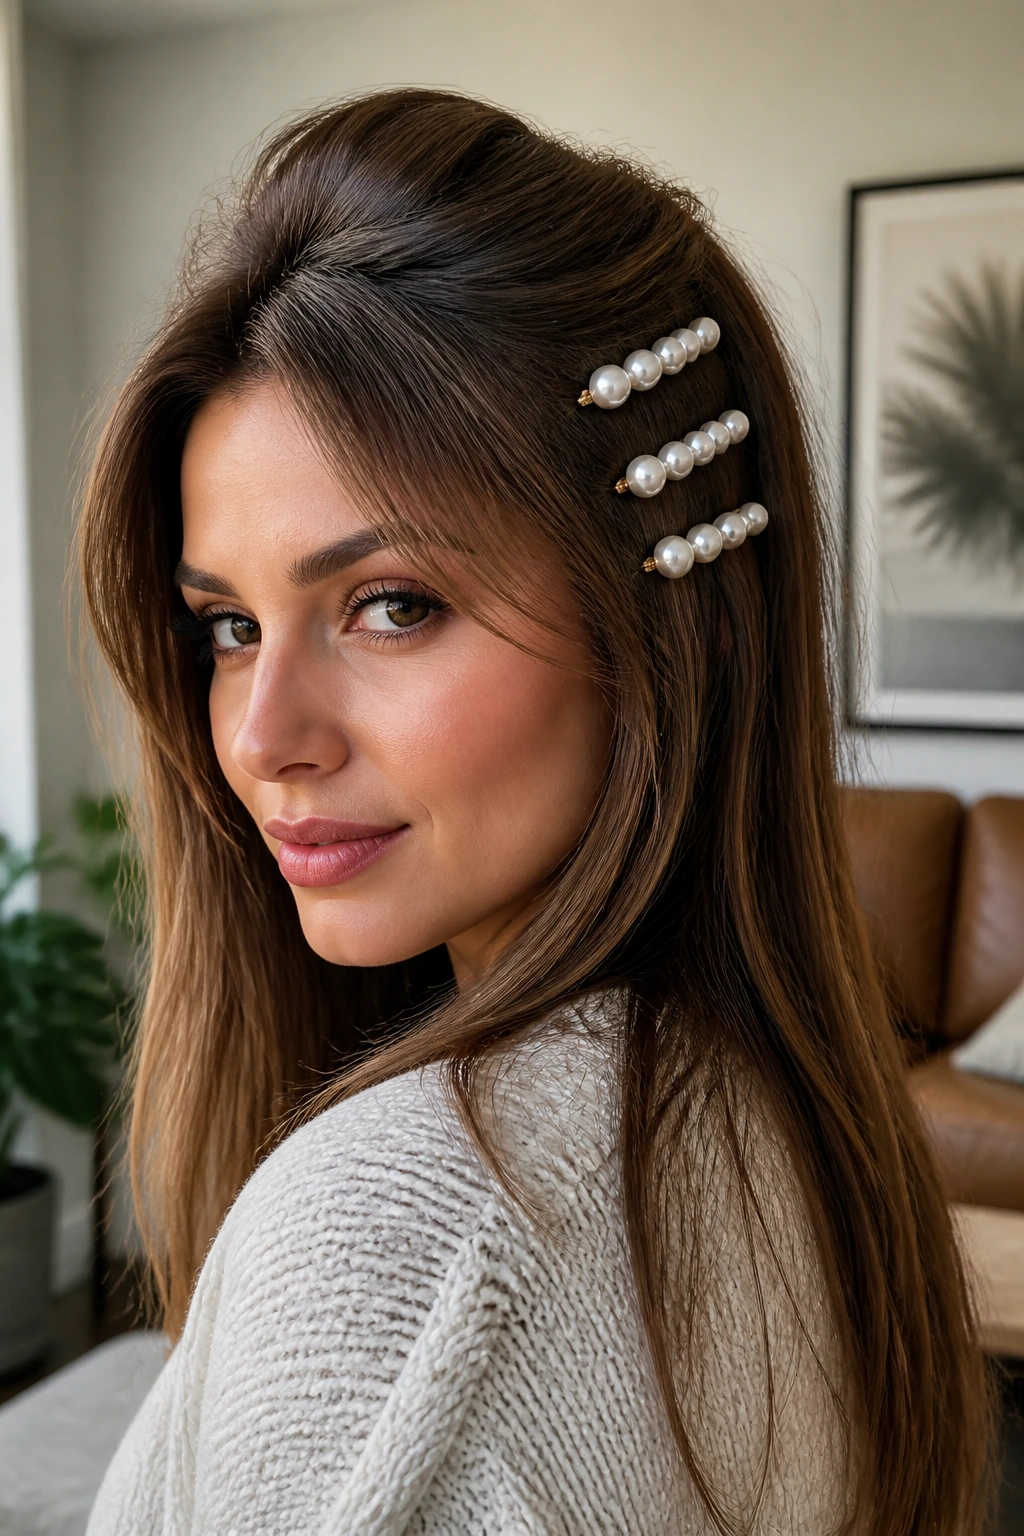
Pearl clips can be sweet, but stacked correctly they become sharp. Place two or three clips vertically on one side after giving the hair a little lift at the crown, and suddenly the whole style feels shorter and more styled.
The clips create a visual stop. The eye lands there instead of following the full length down the back. On long layered hair, that matters because the layers near the front break the line, while the clips add a little architectural shape.
Don’t overdo the size of the clips. Medium clips hold better and sit flatter. Giant ones can tilt the whole side outward and make the shape bulky.
This style is a nice way to dress up day-two waves without redoing the whole head. A quick side bend, a few clips, and you’re done.
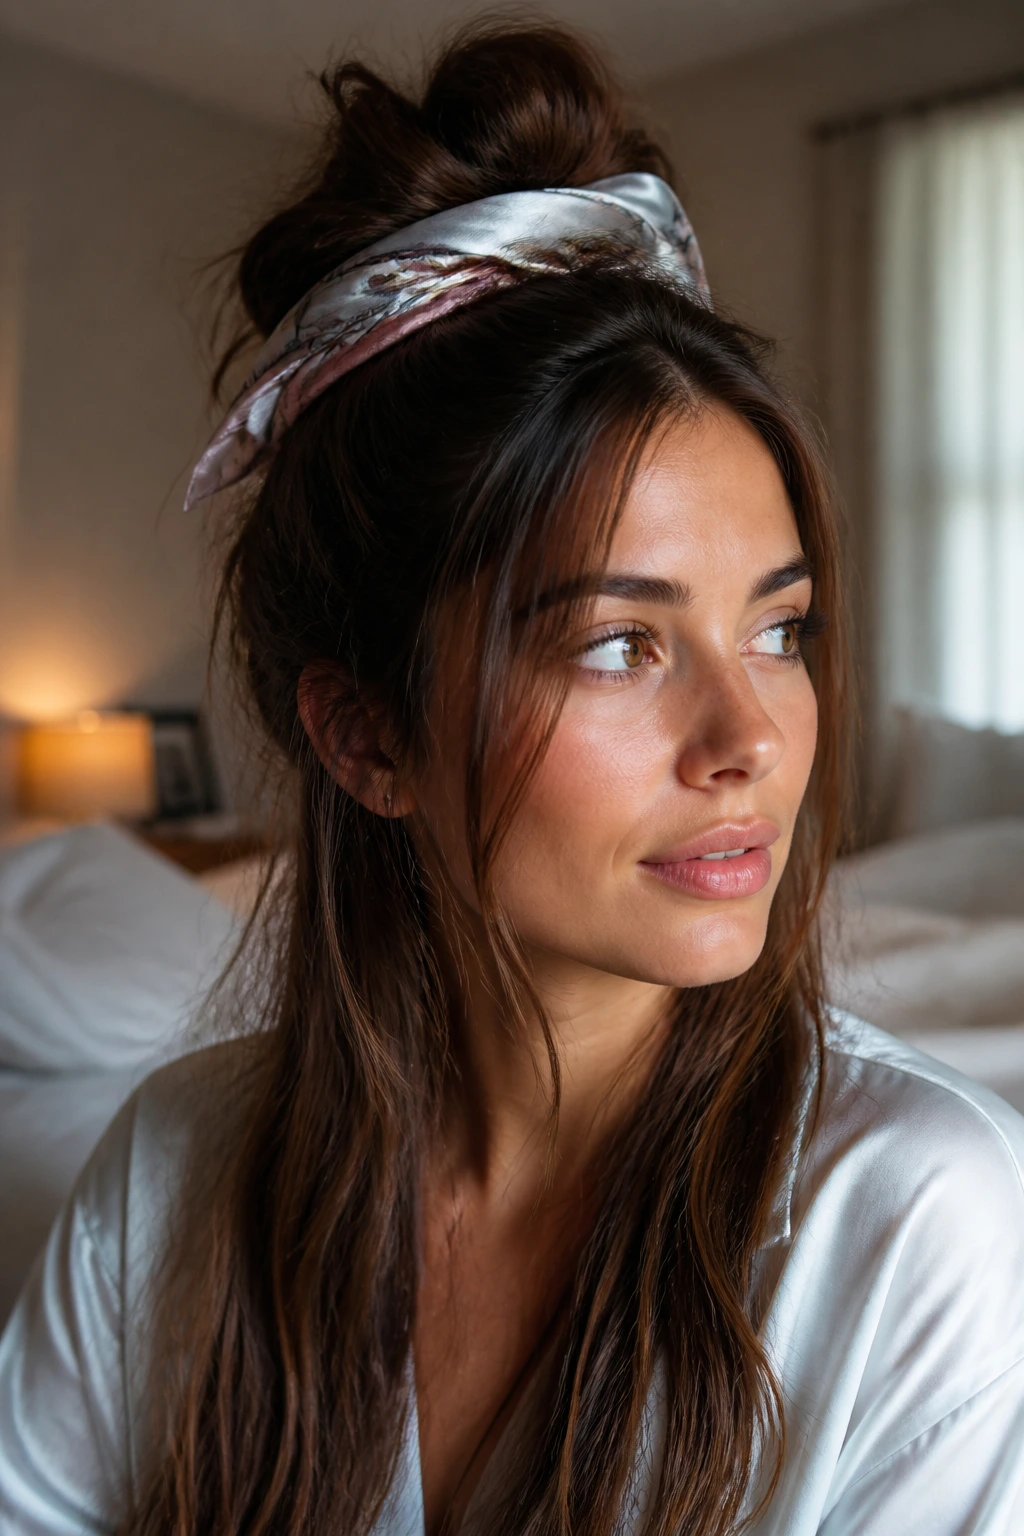
21. Silk-Scarf Shorter Illusion
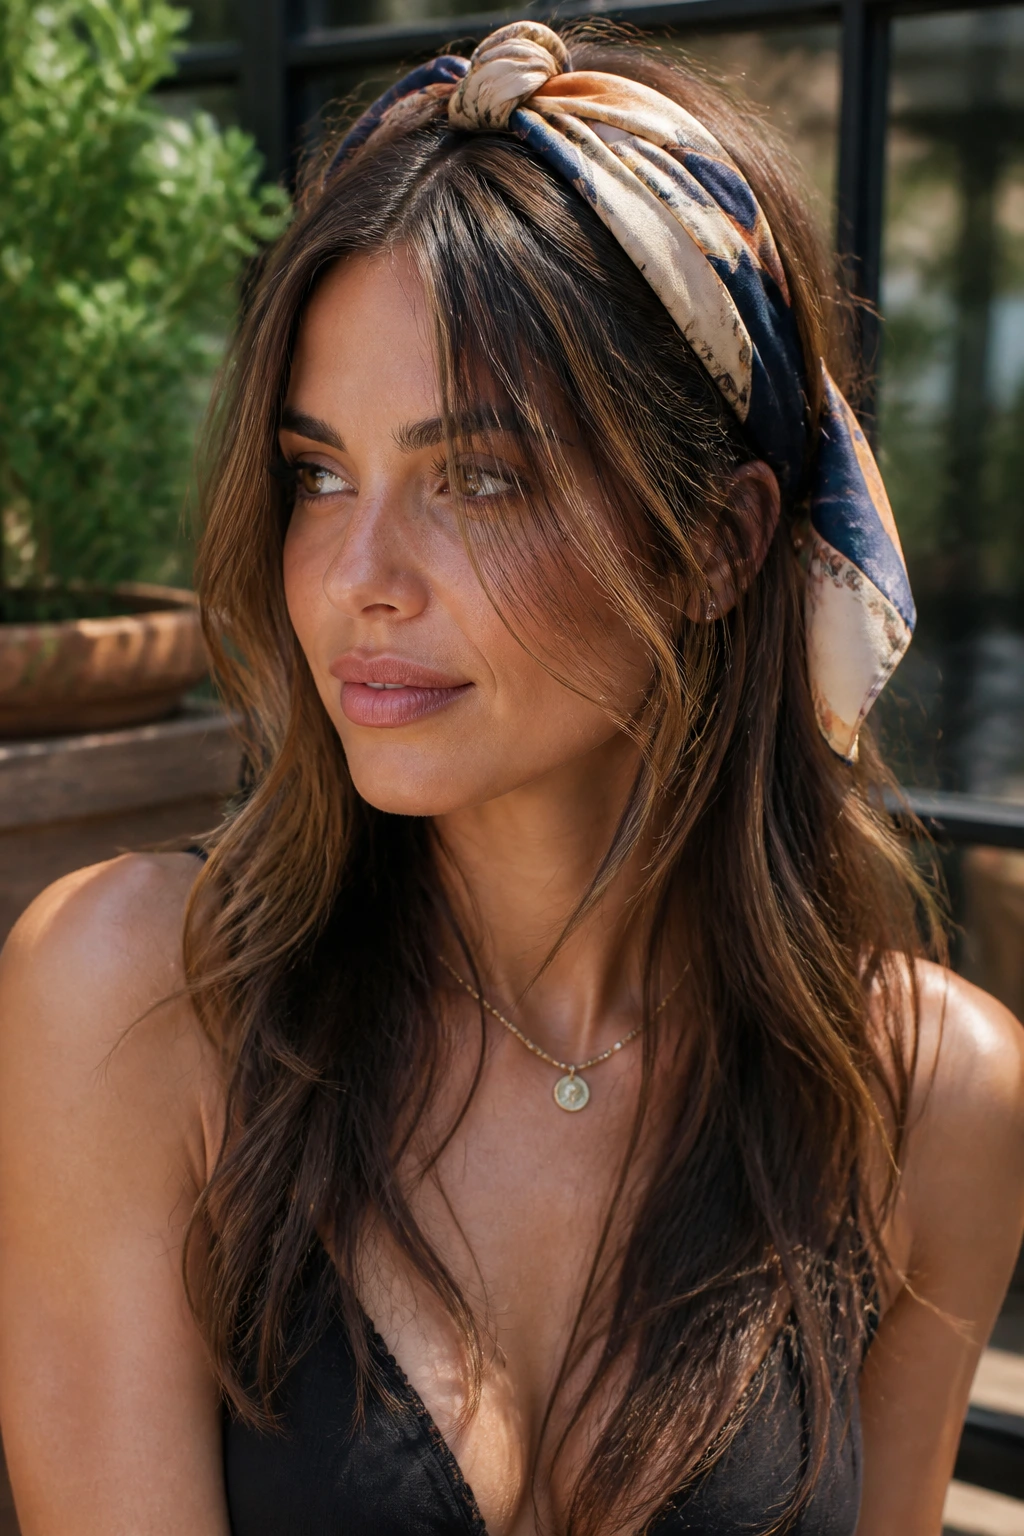
A scarf changes the whole geometry of the hairstyle. It interrupts the long line, frames the face, and gives the hair a little contained shape at the crown or nape.
Fold the scarf into a band, tie it at the crown or just above the nape, and tuck some of the lengths under it. If you leave a few layers out around the face, the style feels casual instead of costume-like. The scarf does the heavy lifting; the layers do the softening.
This is especially good on windy days or for hair that tends to puff at the roots. The fabric helps hold the shape in place. A cotton or silk scarf both work, depending on whether you want grip or slip.
The best part? You can change the whole mood with one swap. Plain scarf, polished look. Printed scarf, a little more cheek.
22. Twisted Crown
A twisted crown is a softer version of a braid, and on long hair it feels lighter around the head. The twists pull the front back just enough to shorten the visual length while leaving the rest of the hair loose.
Take small sections from each temple, twist them back, and pin them at the crown or behind the ears. Pull the twists a little wider so they sit softly instead of tightly against the scalp. The layers near the face will usually escape a bit. Good. That’s what makes the style look natural.
This one flatters layered hair because the twists can sit on top of the shorter pieces without fighting them. If your hair is very smooth, a spritz of texturizing spray before twisting makes life easier.
It works as a half-up style or as a base for a low pony. Either way, it gives the hair some lift where long hair usually wants to go flat.
23. Wet-Look Low Knot
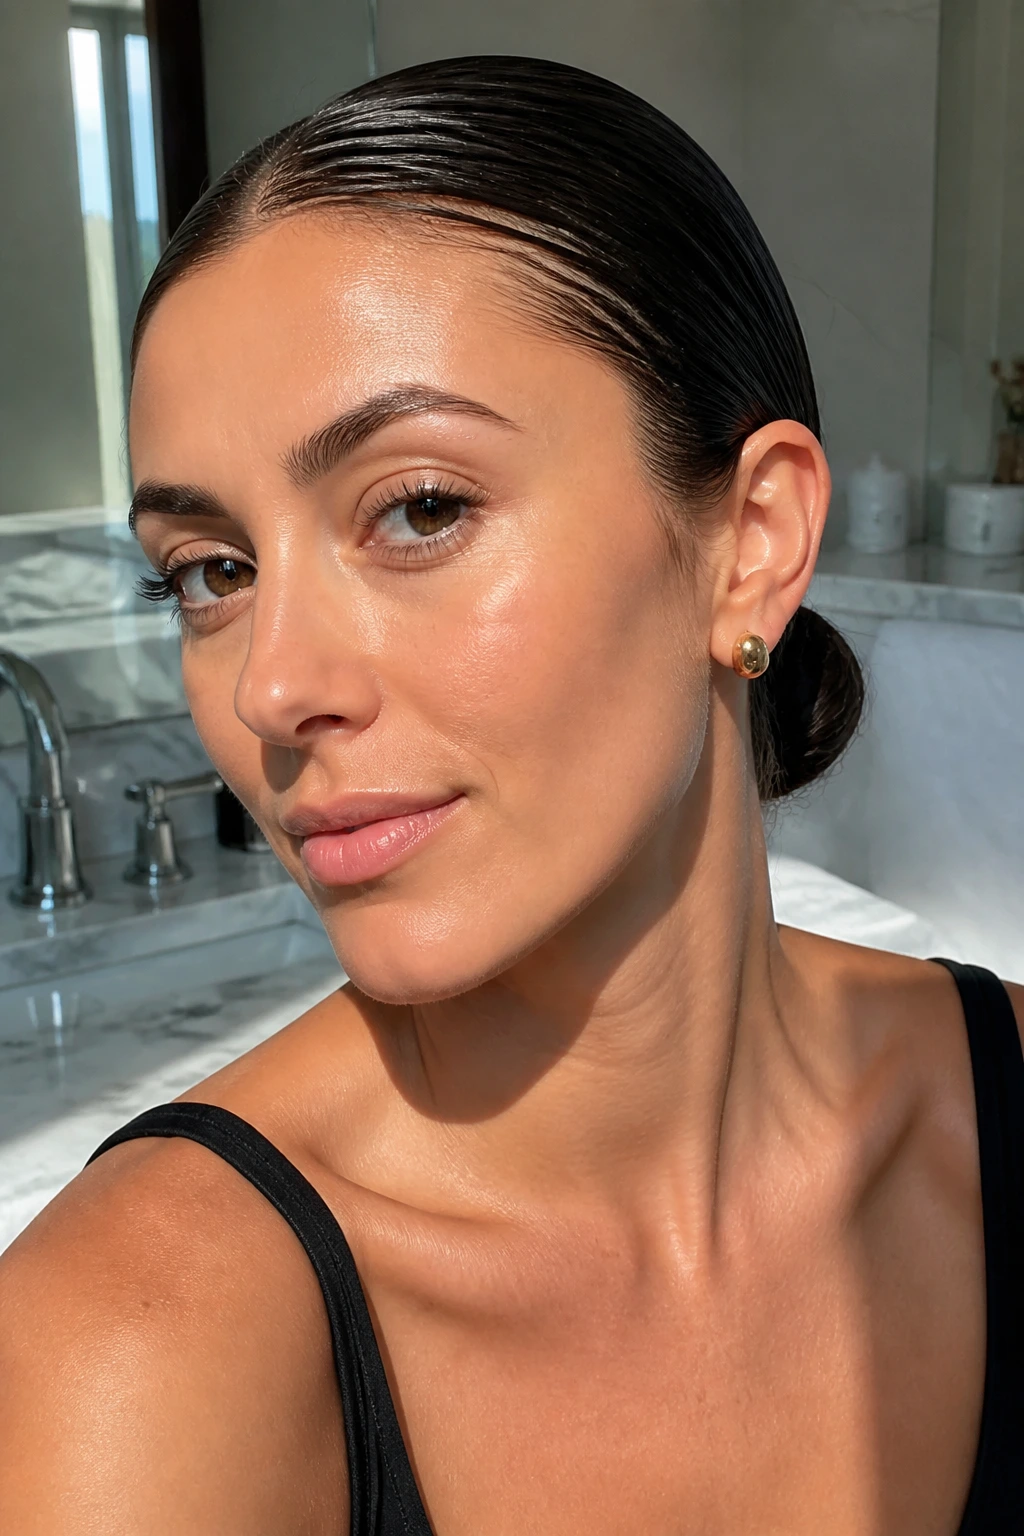
This is the sleekest option in the bunch, and maybe the shortest-looking one too. Wet-look styling removes fluff, compresses the hairline, and turns the whole shape into one clean knot at the nape.
The roots should be smooth and controlled. Use gel or a strong styling cream through the top section, comb the hair back, and knot it low. Keep the knot small. If it gets too large, the look loses that cropped feeling.
A shine spray on the surface gives the finish its polished edge, but don’t confuse shine with grease. Too much product can make layered hair split and sag. A little goes a long way.
This style is strong because it creates one uninterrupted line from the forehead to the knot. Long hair disappears into the shape instead of hanging off it.
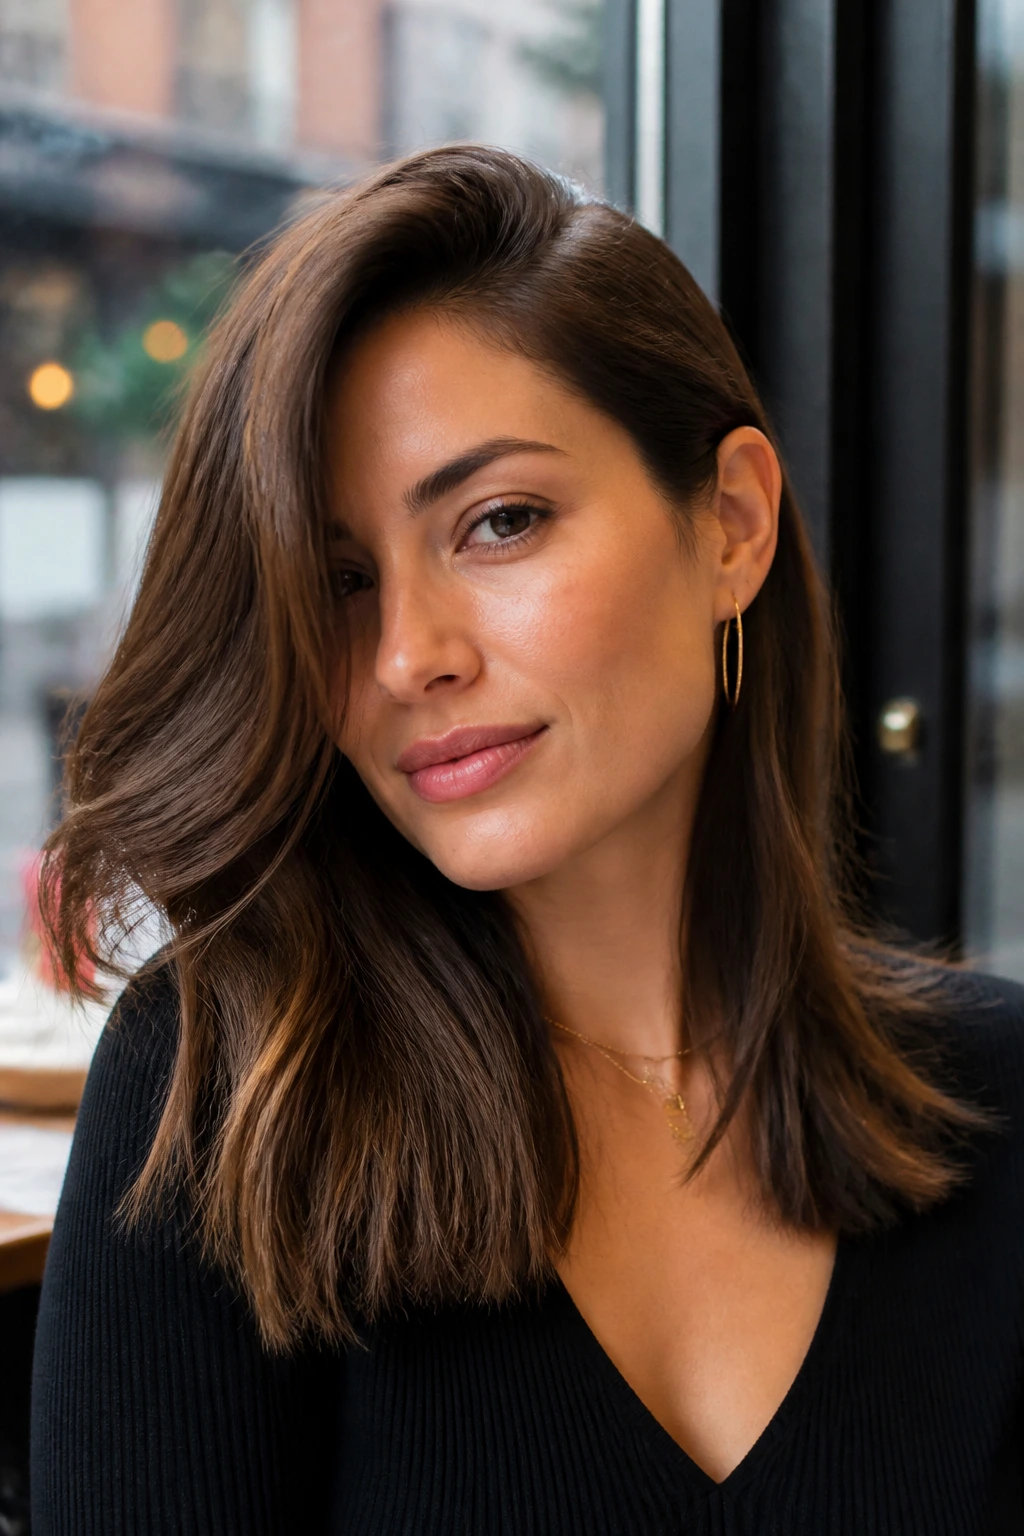
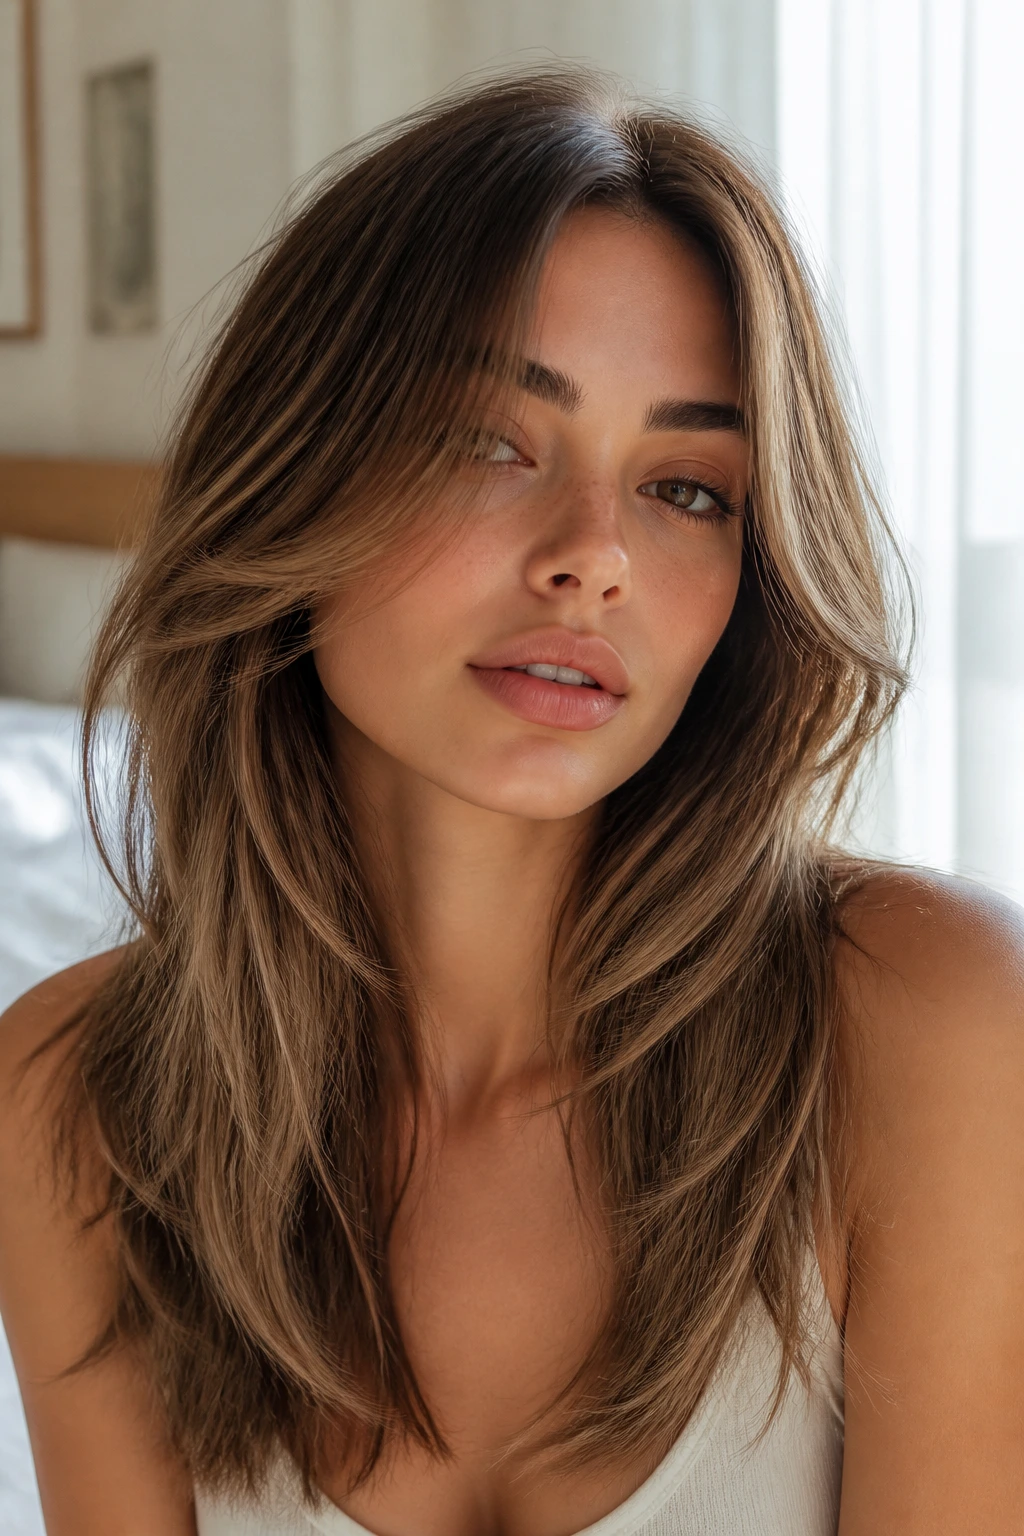
24. Airy Layered Blow-Dry

Not every short-feeling style needs pins or elastics. Sometimes all you need is a better blow-dry and the right bend through the layers.
This look keeps the length visible but changes the weight of it. Blow the roots upward, give the face-framing layers a soft outward curve, and flip the last few inches just enough to lift the edges. The result feels lighter, shorter, and much more alive than straight, collapsed hair.
Where the Movement Should Land
If the layers start at the cheekbone, let them curve there. If they start lower, work the lift at the collarbone and below. The eye needs a place to stop. That’s what makes the style feel deliberate.
A round brush and a concentrator nozzle are the most useful tools here. Finish with cool air to lock the shape, then brush it out gently once the hair is fully cool. If you rush that part, the style falls flat in twenty minutes.
25. Soft S-Curve Tuck
This is the most convertible style in the group. The hair bends in an S-shape, tucks in at the back, and leaves just enough softness around the face to keep it from feeling severe.
You can wear it polished or a little undone. If you want it sharper, smooth the crown and pin the tuck closer to the nape. If you want it softer, loosen the front layers and let the ends curve outward a touch. Either way, the long length stops dominating the silhouette.
The S-curve matters because it gives the hair motion without making it big. That is a trick worth keeping. Long hair often looks longest when it hangs straight, so the slight curve changes the whole read.
This one works well for evening plans, but I also like it for day events when you want your hair off your shoulders without giving up shape.
Why Soft Layers Make the Shorter Shapes Behave
Soft layers are doing a lot of background work here. They reduce the weight that usually drags long hair down, and they create built-in movement around the face, which is exactly what these shorter-looking styles need. A blunt, one-length cut can still be styled this way, but it takes more product and more pinning. Soft layers cooperate.
The other advantage is visual. Layers interrupt the long line, so the eye stops sooner. That matters when you want a bob illusion, a cropped ponytail, or a tucked knot that feels neat instead of bulky. If your shortest face frame sits around the cheekbone or jaw, the whole style reads sharper right away.
There is a catch, and it is worth saying out loud. Too many short layers near the crown can poke out in weird directions once you add pins or heat. That’s why the best versions of these styles use layers as support, not as the main event. Let the layers frame the face and break up the outline. Don’t try to make every piece behave the same way.
Essential Equipment for These Looks
- 1.25-inch curling iron or wand — Best for soft bends, face-framing swoops, and flipped ends.
- Blow dryer with a concentrator nozzle — Keeps the crown smooth while you direct lift where you want it.
- Round brush, 1.5 to 2 inches — The easiest way to shape blowouts and turn ends under or out.
- Paddle brush — Useful for slick ponies, low knots, and smoothing before you pin.
- Tail comb — Helps with clean parts, sectioning, and subtle crown lift.
- Duckbill clips — Great for setting a blowout or holding a section while you pin the rest.
- Bobby pins in your hair color — Choose sturdy ones; cheap pins slide and bend too easily.
- Clear elastics — Handy for half-ups, rope braids, bubble ponytails, and mini buns.
- Medium claw clip — Holds French twists and loose updos without crushing the shape.
- Texturizing spray — Gives layered hair the grip it needs for pins and braids.
- Dry shampoo — Adds grit at the roots and helps day-two hair hold the shape.
- Light hairspray — Flexible hold is enough for most of these looks; avoid helmet hair.
- Heat protectant — Non-negotiable if you’re using an iron or blow dryer.
- Silk scarf or wide headband — Useful when you want a faster cropped illusion or a polished front.
- Small finishing brush or toothbrush — Handy for smoothing the hairline and edges on sleeker styles.
Smart Product Picks for Layered Long Hair

Long, layered hair needs products that support shape without turning the ends greasy or stringy. That means lighter formulas usually win. A mousse at the roots, a texturizing spray through the mids, and a small amount of smoothing cream on the very ends is often enough. Heavy oils and thick creams can flatten soft layers so much that the whole style loses its lift.
Fine hair benefits from a foam or airy mousse because it gives the root some body before you blow-dry. Thick hair usually needs a stronger hold spray and a bit more prep at the crown so the style doesn’t sink by lunchtime. If your hair is naturally slippery, choose pins with a little extra grip and avoid overly silky finishing serums.
Look at the label on your hairspray. Flexible hold tends to work better for these styles than stiff, lacquer-style sprays. You want movement in the front pieces and enough control at the nape to keep the tuck in place. That balance matters.
One more thing: if your hair is freshly washed and too soft, styles often slide. Day-one hair can be too clean. Day-two hair, with a little dry shampoo at the roots, usually behaves better.
How to Wear These Looks With the Rest of Your Outfit

Presentation: Aim the shortest visual line at the jaw, collarbone, or nape. That is what makes the hairstyle read cropped, even when the length is still there. If the ends are visible, bend them. If they’re hidden, leave a few wisps out so the style doesn’t feel boxed in.
Accompaniments: Hoops, studs, open necklines, and structured collars all change how the hair reads. A side-swept style loves earrings. A faux bob looks sharper with a clean neckline. A messy top knot is happier with a simple T-shirt or a blazer that can handle a little contrast.
Portions: Thick hair usually needs smaller sections and more pins, or the style balloons. Fine hair needs fewer pins and less product, or the shape gets limp. If your hair is very long, do not try to tuck every strand away at once. Build the shape in layers so the finished look stays flat where it should and soft where it counts.
Beverage Pairing: The sleeker styles — the low knot, the faux bob, the wrapped pony — suit moments when you want your hair out of the way while you’re actually moving through a day. Coffee in one hand, phone in the other, hair still behaving. The looser blowouts and braided looks have more swing, which makes them better for dinner, brunch, or anything where you’ll be turning your head a lot.
Small Tweaks That Change the Whole Shape
Volume Boost: Lift the roots before you do anything else. A tiny bit of mousse at the crown, dried in with your fingers, makes ponytails and faux bobs sit higher and read shorter.
Face-Framing: Keep two slim front pieces out, even on styles that are mostly pinned up. Those pieces soften the line and stop the hair from feeling too tight against the head.
Texture Boost: Texturizing spray belongs in the mids and ends, not all over. If you spray too much near the roots, the hair can look dusty instead of airy.
Accessory Swap: One claw clip, one ribbon, or one headband can turn the same base style into three different looks. That’s useful when you want a quick shift from daytime to evening.
Heat-Free Shortcut: Braid damp hair the night before, sleep on it, then loosen the waves and pin them into shape in the morning. The result is softer than a hot-tool curl and usually easier to refresh later.
Keeping the Shape Fresh Overnight and Between Washes
These styles hold in different ways, and the maintenance changes with them. Sleek knots and faux bobs usually look best on the same day you wear them. Once the pins loosen or the roots puff up, the illusion starts to slip. Loose blowouts, half-ups, and braided styles can often make it to a second day with a quick refresh.
Sleep matters. If you want the shape to survive, pin long pieces into a loose top section or wrap them in a silk scarf before bed. A loose clip at the crown can help a blowout keep its lift. Don’t sleep with a tight elastic in the same spot if you can avoid it; that crease is annoying to fix in the morning.
For day-two refreshes, spray a little dry shampoo at the roots, then lift the hair with your fingertips instead of brushing hard. If the ends have gone flat, use a curling iron or blow dryer for 5 to 10 seconds per section, just enough to restore the bend. You’re not rebuilding the whole style. You’re nudging it back into place.
And yes, some looks are one-and-done. That’s fine. A wet-look knot or a precise faux bob may not need to last past the event. Don’t bully them into a second day.
Variations and Adaptations to Try
Heat-Free Weekend Version: Start with loose braids, twists, or a scarf set, then pin the texture into a half-up or faux bob shape. This keeps the style soft and avoids the crisp edges that hot tools can create on very long hair.
Fine-Hair Lift Version: Use mousse at the roots, dry upside down for a minute, and keep the pins closer together than you think. Fine hair benefits from tighter structural support and less product on the ends, or it collapses fast.
Thick-Hair Sculpted Version: Split the hair into more sections and pin each fold separately. Thick hair looks best when the shape is built in layers, not shoved into one giant bundle at the nape.
Curly-Texture Version: Stretch the curls first if you want a faux bob or low knot, then leave a few spirals loose around the face. If you like the texture, keep it and only smooth the top. The layers will still show shape, just in a different language.
Office-Polished Version: Favor low knots, wrapped ponies, deep side parts, and tucked-under ends. Keep the front pieces neat and the accessory quiet — a slim barrette or a single clip. The style should look finished, not flashy.
Night-Out Version: Add more root lift, a sharper part, or a little extra flip at the ends. This is where pearl clips, wet shine, or a high pony with face-framing pieces earns its keep.
Common Mistakes to Avoid
-
Smoothing the hair until it goes limp. The style looks longer, flatter, and older. Fix it with a little root lift, a softer brush-through, and less product at the crown.
-
Hiding every layer. If you pin all the face-framing pieces away, the style loses the soft edge that makes it flattering. Leave a few front strands out and bend them on purpose.
-
Using too much oil or cream. Long layered hair gets weighed down fast, especially at the ends. Keep heavy products off the roots and use only a small amount on the very ends.
-
Making the ponytail or bun sit too low. A low placement can drag the whole look downward and make the hair feel longer, not shorter. If you want a cropped read, move the anchor point up a little.
-
Skipping the cool-down. If you pin curls or bends while they’re still warm, they lose shape faster. Let the hair cool for a minute or two before brushing or pinning.
-
Curling every piece the same way. That creates a stiff, dated finish. Alternate directions or leave the ends straighter so the style stays soft and modern.
Frequently Asked Questions
Can these styles work if my layers are very long and only start below the shoulders?
Yes, but the styles that hide the ends — faux bobs, low knots, tucked ponies — usually work better than styles that depend on shorter face pieces. You may need to create extra movement with a bend at the ends so the long line breaks up a little.
What style makes long hair look the shortest?
The chin-length faux bob and the pinned roll-and-tuck bob are the strongest options. Both hide the ends and change the silhouette so the hair reads much shorter than it is.
Do I need heat tools for these looks?
No. You can do several of them with braids, twists, a scarf, or a clip. Heat tools just make the bend cleaner and help the shape hold longer.
How do I keep bobby pins from sliding out of layered hair?
Use texture first, then slide the pins in with the wavy side down against the scalp. Cross two pins in an X when you need extra grip, and avoid putting them into freshly conditioned, slippery hair.
Will these styles work on very thick hair?
Yes, but thick hair usually needs more sectioning and more pins. If you try to force everything into one twist or one clip, the shape bulks up and falls out faster.
What if my hair is naturally curly or wavy?
You can still wear these styles, but you may want to stretch the curls first for the sleeker looks. For the looser styles, keep the texture and pin only part of the hair back. That gives the style more life.
Which styles are best for work or formal events?
The wrapped low pony, low chignon, deep side part tuck, and wet-look low knot are the cleanest options. They stay neat, keep the face open, and do not fight with collars or earrings.
How do I keep the faux bob from looking lumpy at the back?
Use smaller folds and pin them flat in stages instead of stuffing all the hair under at once. The crown should glide over the tucked hair, not sit on top of a bulky lump.
Short Hair Energy, Long Hair Reality
Long hair does not have to behave like long hair every day. That’s the fun of it. A few bends, a smarter part, and one good tuck can change the whole read of the style without touching the length you’ve already got.
Soft layers are what make these looks feel alive instead of forced. They frame the face, break up the weight, and give you places to hide a pin or let a strand fall loose. Once you start thinking about shape instead of sheer length, the options open up fast.
Start with the style that matches your hair’s mood. If it’s slippery, pick something with grip. If it’s puffy, choose something that compresses the shape. If it’s clean and soft, use that texture and let it do the work. The best result is usually the one that makes the hair look a little shorter, a little sharper, and a lot more intentional.