Thin hair can make braids behave like they’ve got somewhere better to be. You tighten one section, and the next section slips. You pin the crown, and the ends slide out by lunch. The best quick braids for long-lasting wear with thin hair don’t try to brute-force the problem; they use smaller anchors, better grip, and just enough tension to hold without turning your scalp into a warning sign.
That distinction matters more than people think. Fine strands and low density are not the same thing, and plenty of heads have both. Fine hair is slippery. Low-density hair is sparse enough that every part line, every elastic, every awkward bump shows up fast. The styles below are built around those realities, not against them.
A braid that lasts on thin hair usually starts before the braid itself starts. Second-day hair helps. Dry shampoo helps. A little mousse at the roots helps. And a clear elastic at the finish helps more than a giant cloud of hairspray ever will. You want hold, not helmet.
Why These Braids Last on Fine Hair
- Small sections grip better: Thin hair can’t always support a big chunky braid without gaps, so these styles use tighter sections that hold their shape longer.
- Texture beats shine: Hair that’s a little lived-in sticks to itself better than freshly washed, silky hair that wants to slide apart.
- Anchor points matter: Braids that start at the hairline, crown, or nape stay put longer because they’re locked in from the first few passes.
- Finishings do the heavy lifting: Tiny elastics, a couple of bobby pins, and a light mist of flexible spray keep the braid from unraveling.
- Slightly narrower styles look fuller: A slim braid on thin hair often looks more deliberate than a huge braid that keeps splitting open.
- The fastest styles are often the most wearable: If a braid takes 12 minutes instead of 40, you’re more likely to redo it cleanly the next day instead of wrestling with a tired mess.
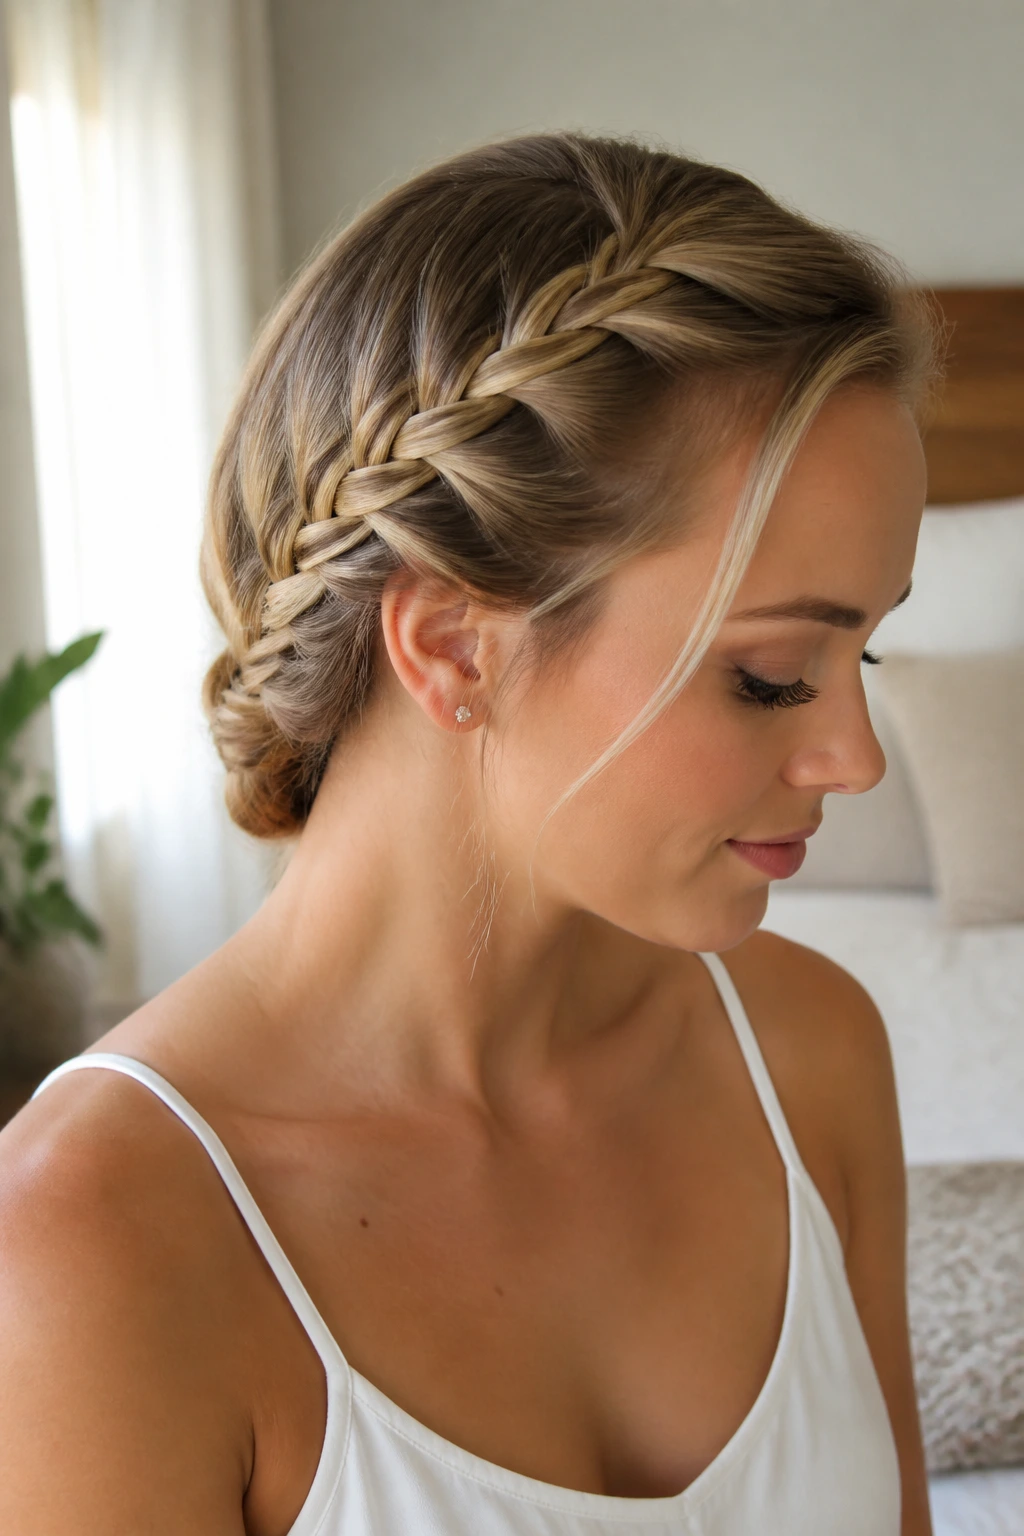
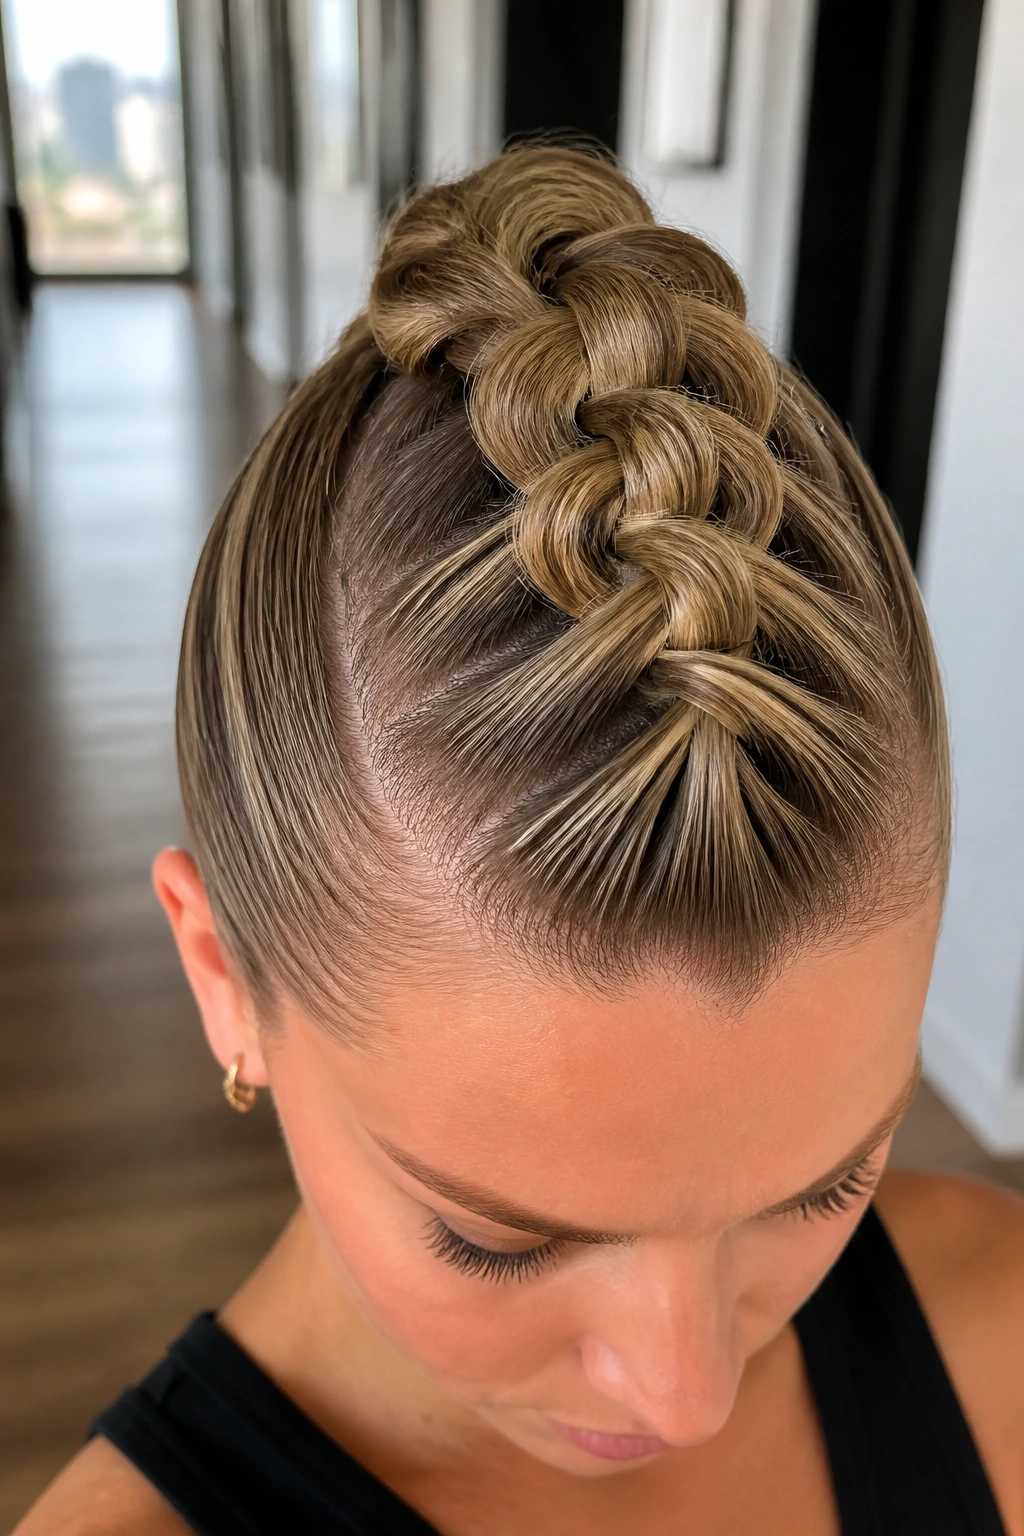
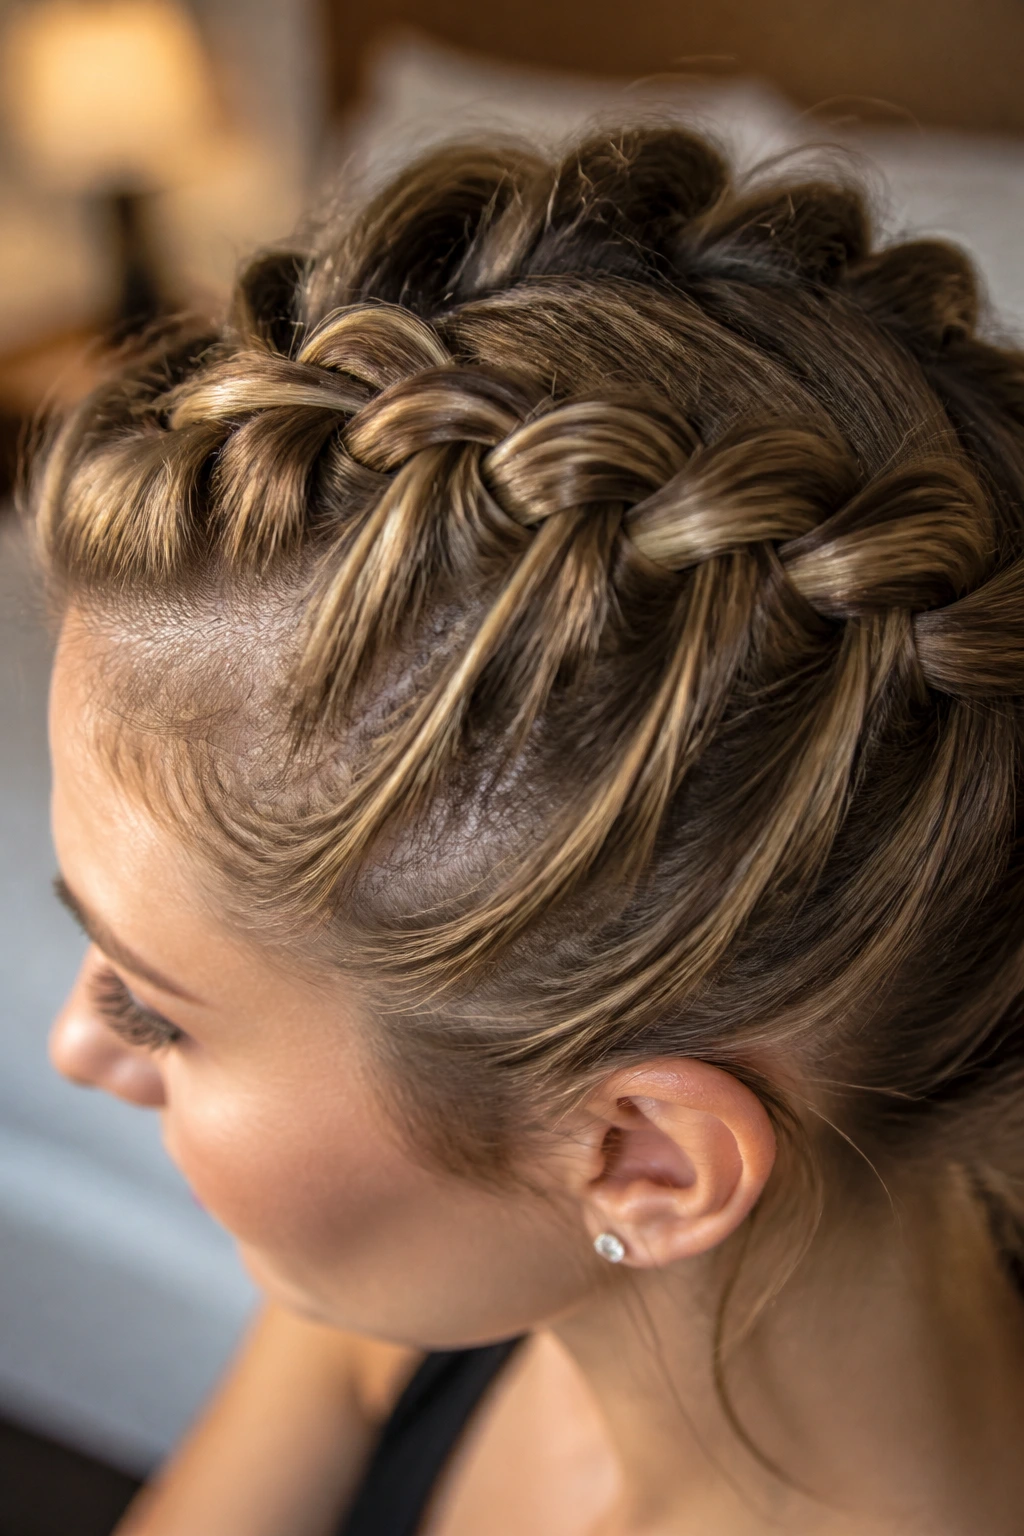
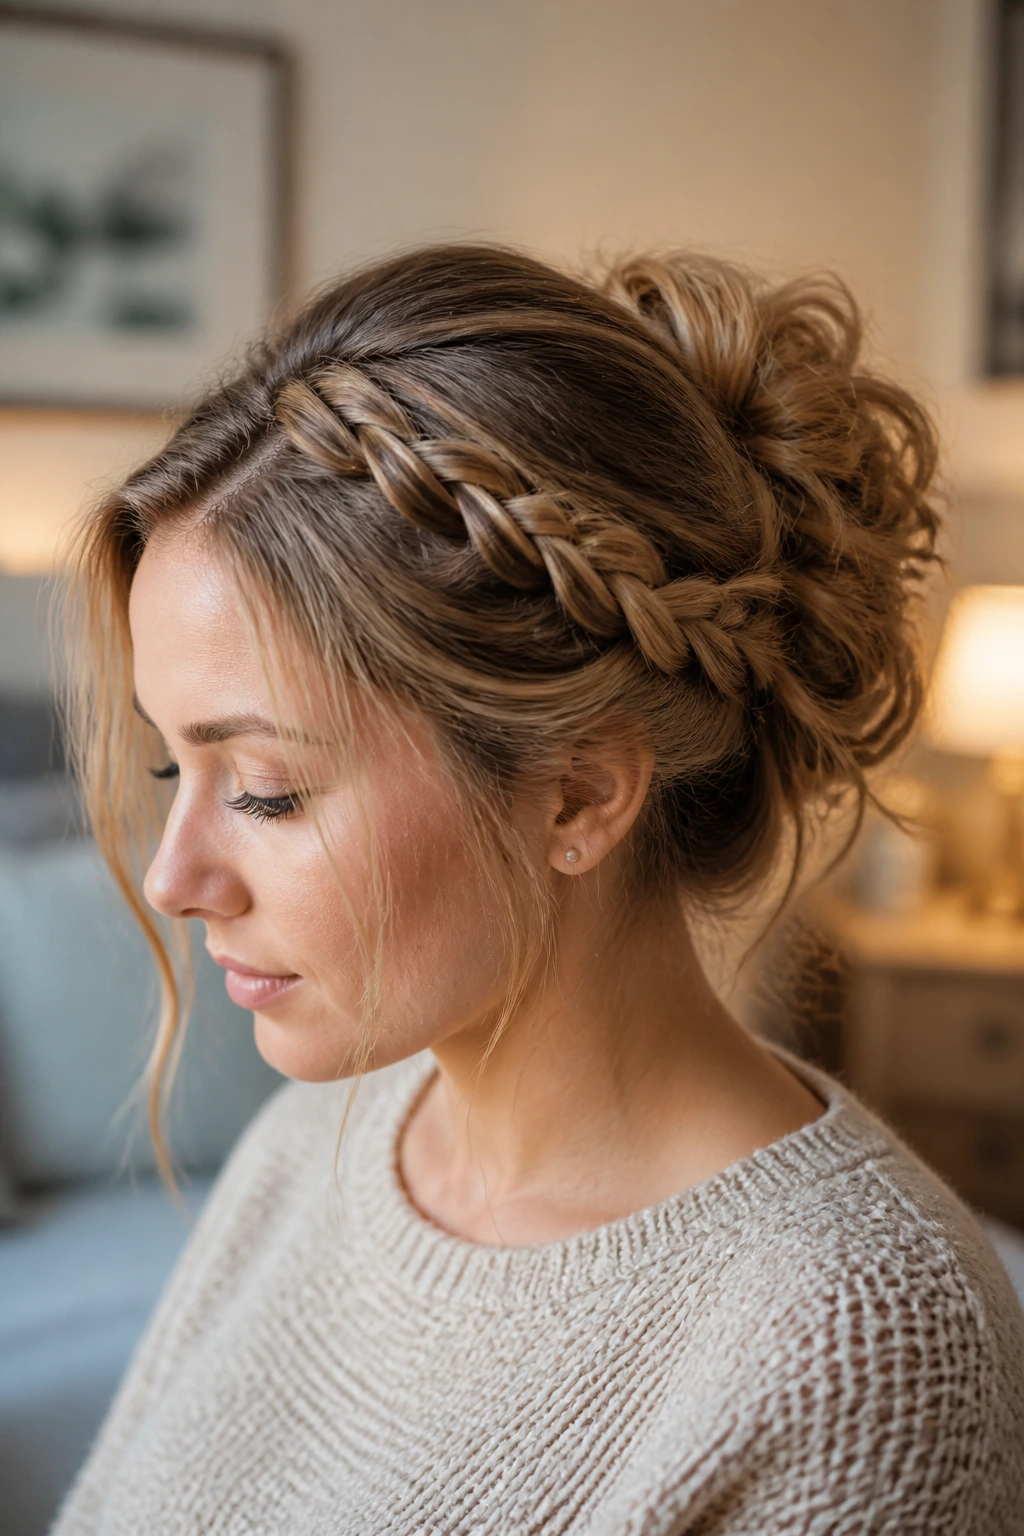
1. Tiny Dutch Crown Braid
A tiny Dutch crown braid is one of the few styles that makes fine hair look more intentional instead of more sparse. The braid sits close to the scalp, which means it has real anchor points instead of floating over the top layer like a decoration that’s trying too hard.
Start at one temple and work along the hairline with small underhand sections. Keep the braid narrow; on thin hair, a crown that’s too wide can expose gaps the second you loosen your fingers. Tuck the tail behind the ear and pin it under a section of hair so the finish disappears.
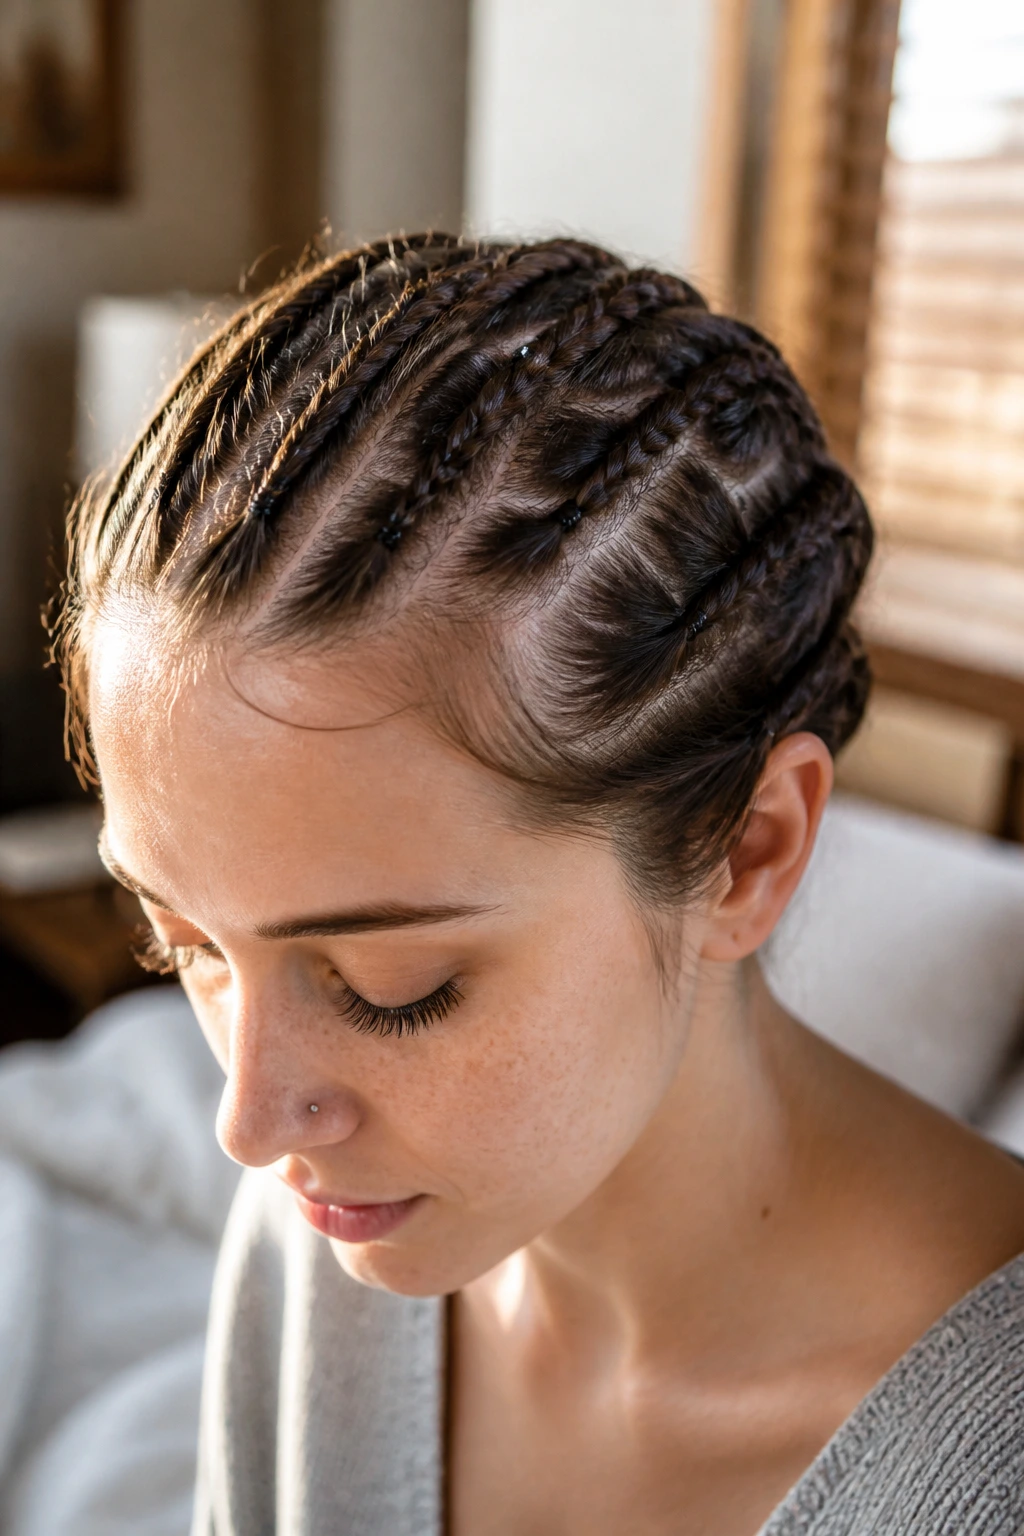
2. Two Mini Boxer Braids
Want a braid style that stays put through errands, a commute, or a long day of chasing your own schedule? Two mini boxer braids are hard to beat. They’re close to the scalp, they split the weight across both sides, and they don’t need much hair to look clean.
Why they hold so well
The trick is size. Keep each braid small and tight at the root, then stop once you reach the nape or the mid-back. Thin hair doesn’t need dramatic thickness here; it needs secure sections and neat parting.
If your hair is slippery, mist the roots with dry shampoo before you part it. That tiny bit of friction keeps the sections from collapsing. Finish with clear elastics and a very light spray. Heavy product at the ends only makes the braid droop.
- Best for workout days, travel days, and greasy roots
- Works on straight hair better than almost any loose style
- Ends can be tucked into a low bun if you want more hold
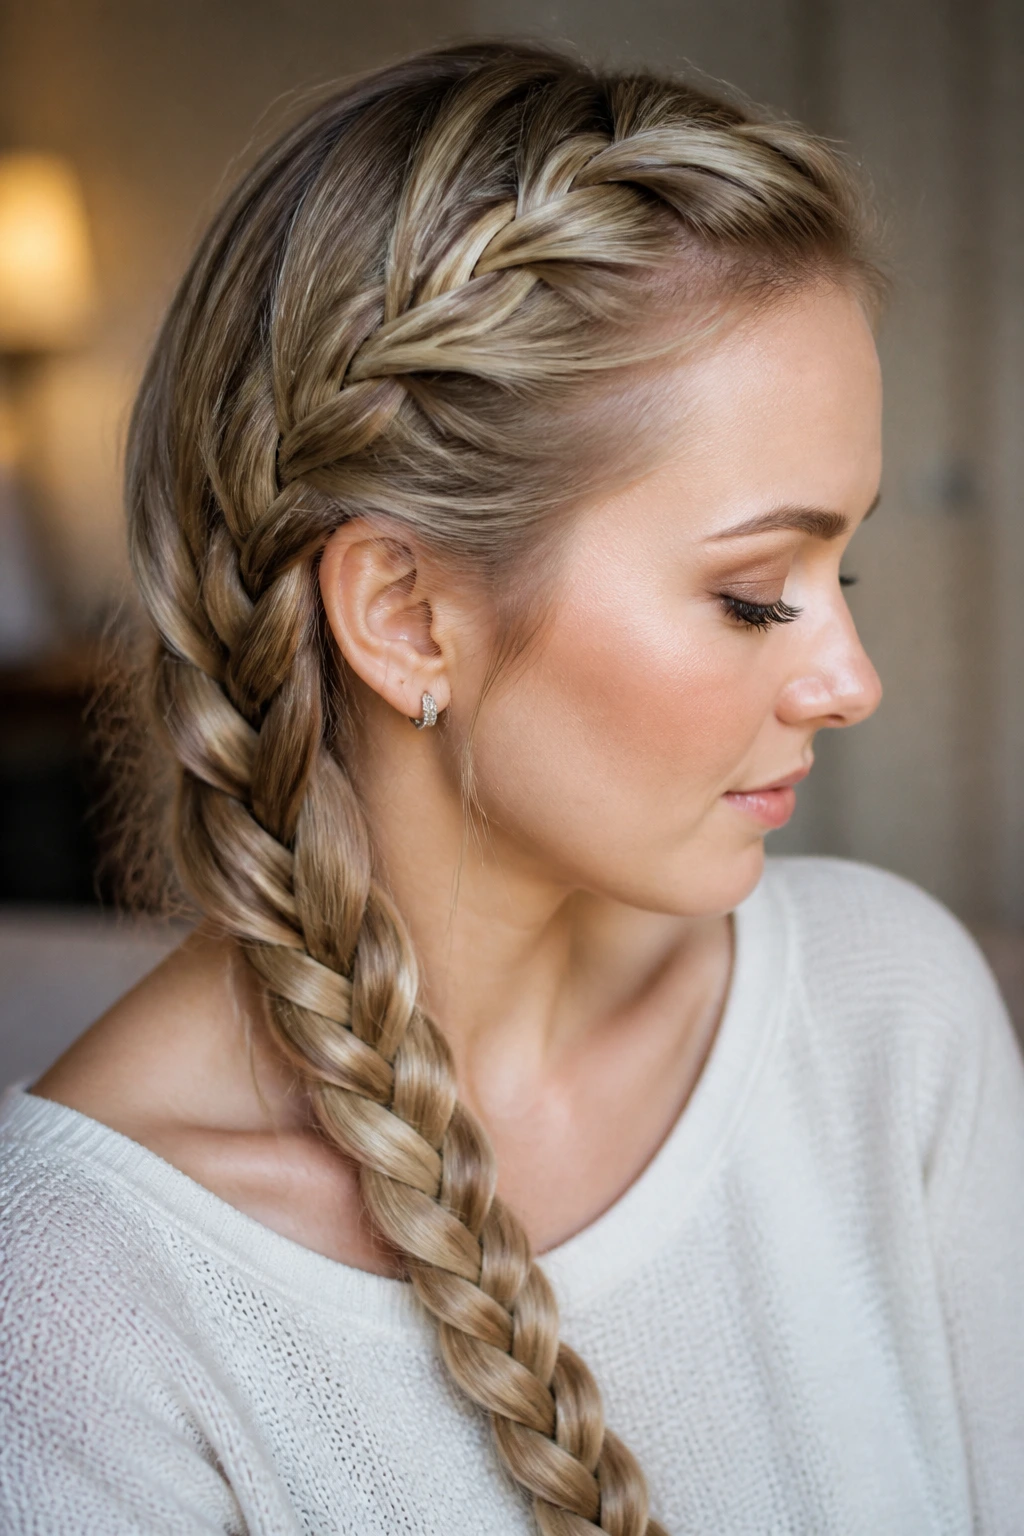
3. Side-Swept French Braid
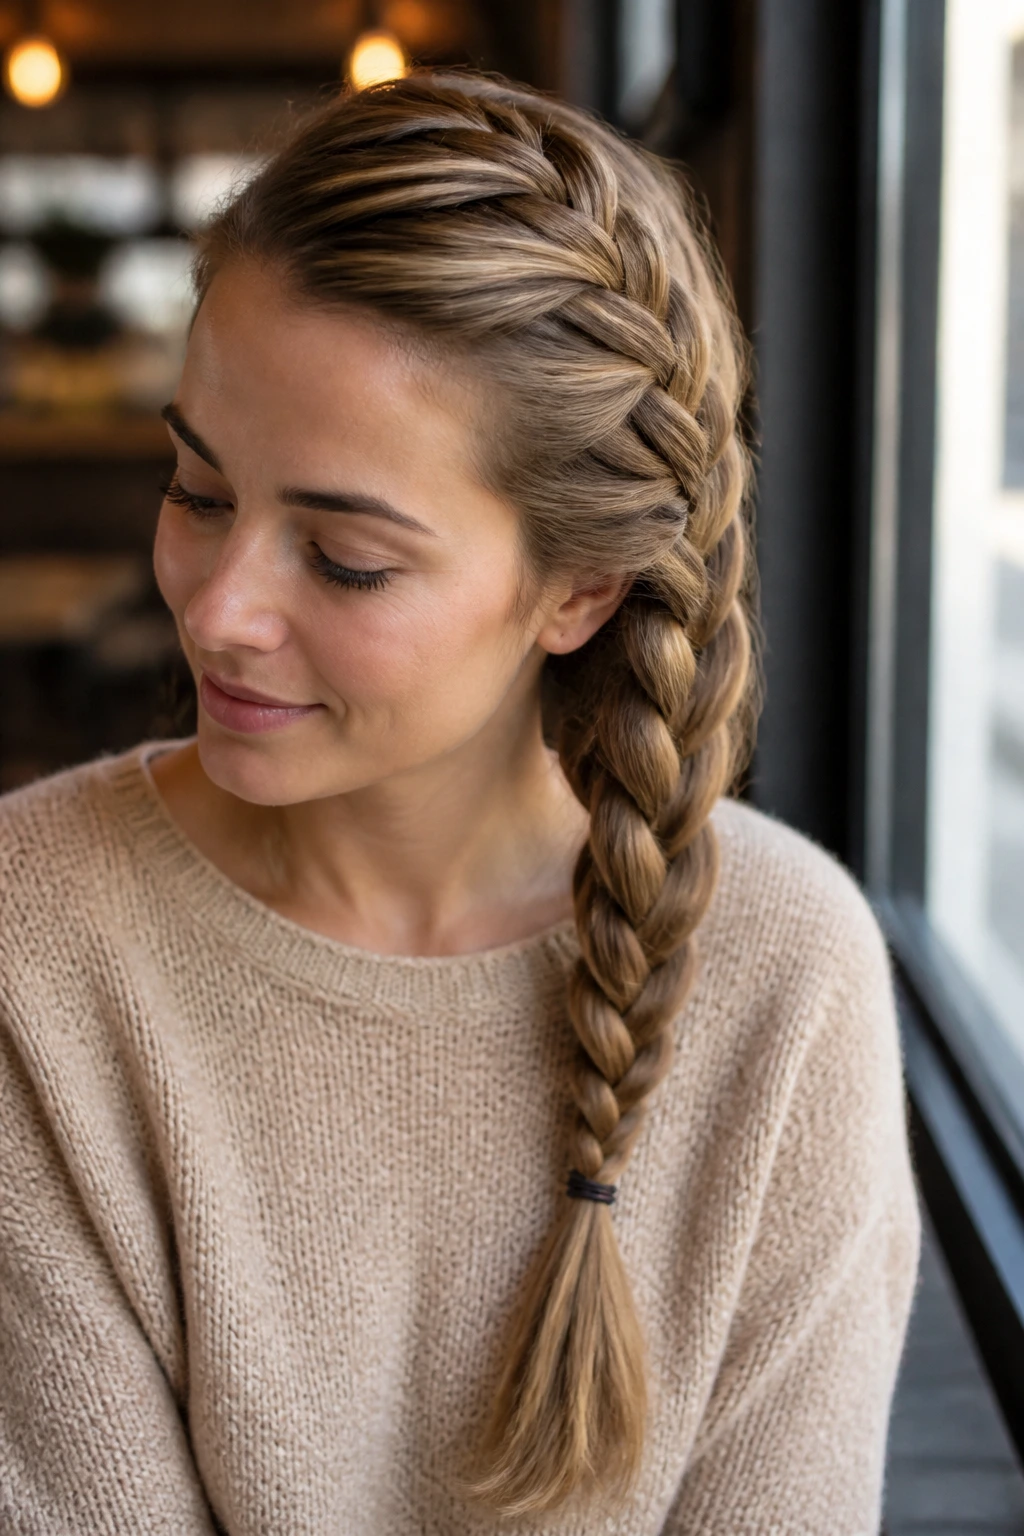
A side-swept French braid gives thin hair a soft, full-looking line without requiring much density. It pulls the eye diagonally, which is useful if your hairline is finer at the temples or if you want to hide a flat crown.
Braid from the heavier side of the part and keep adding only small sections. The moment you start grabbing too much hair, the braid looks ropey instead of smooth. Let the braid angle toward one shoulder and finish with a small elastic near the collarbone.
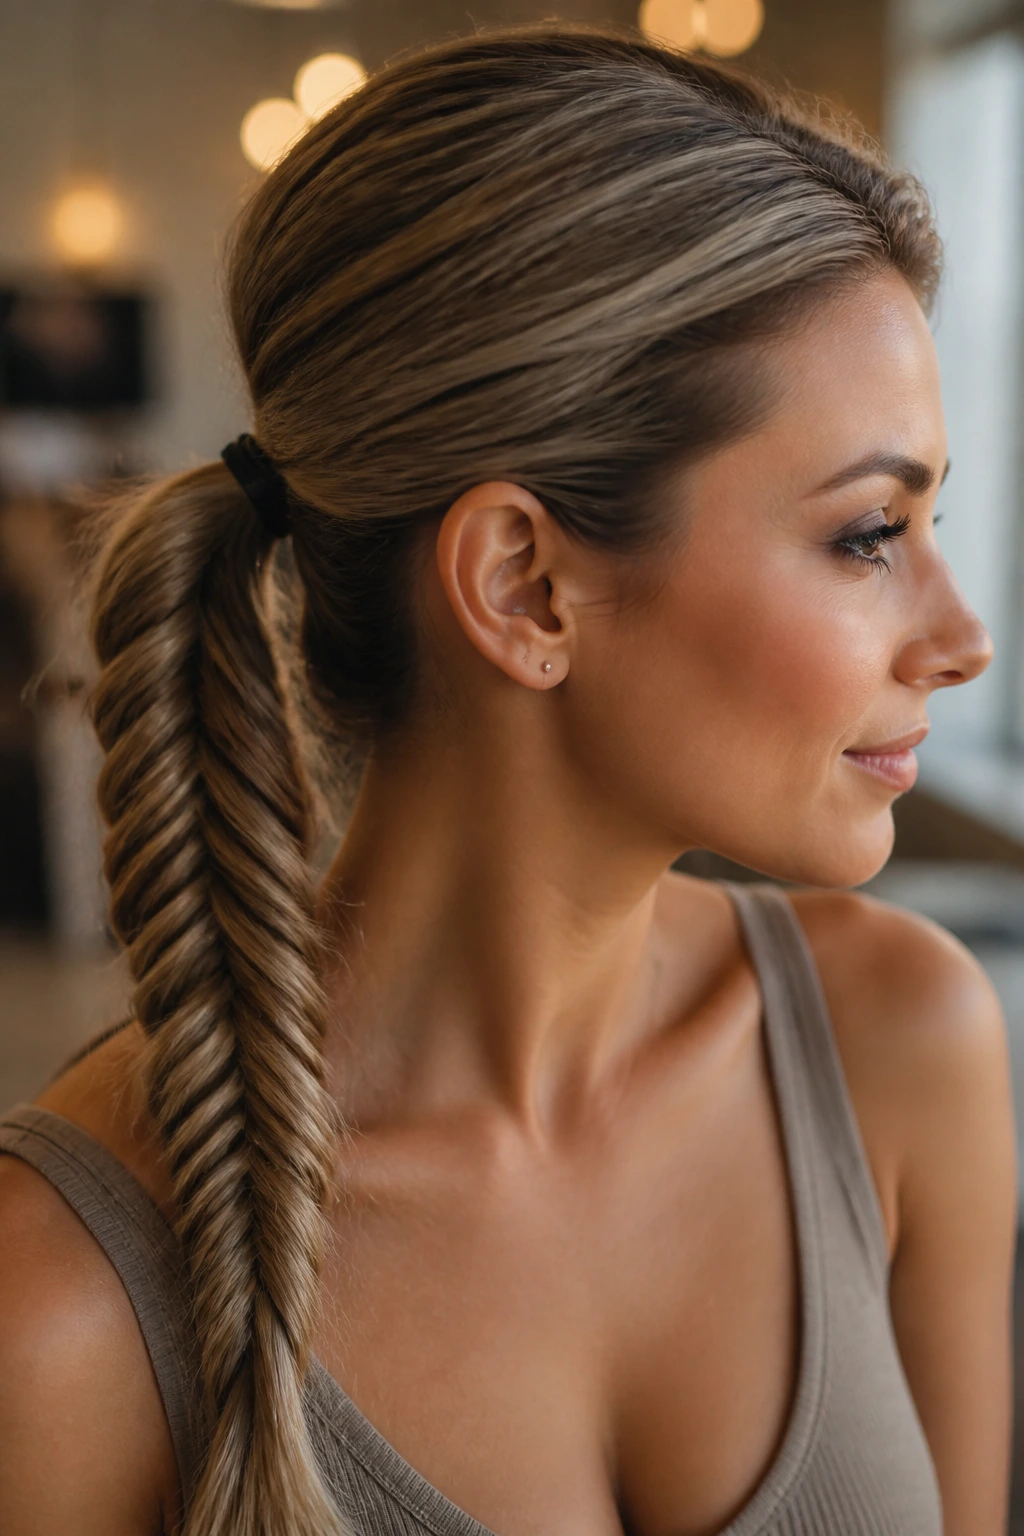
4. Low Fishtail Braid
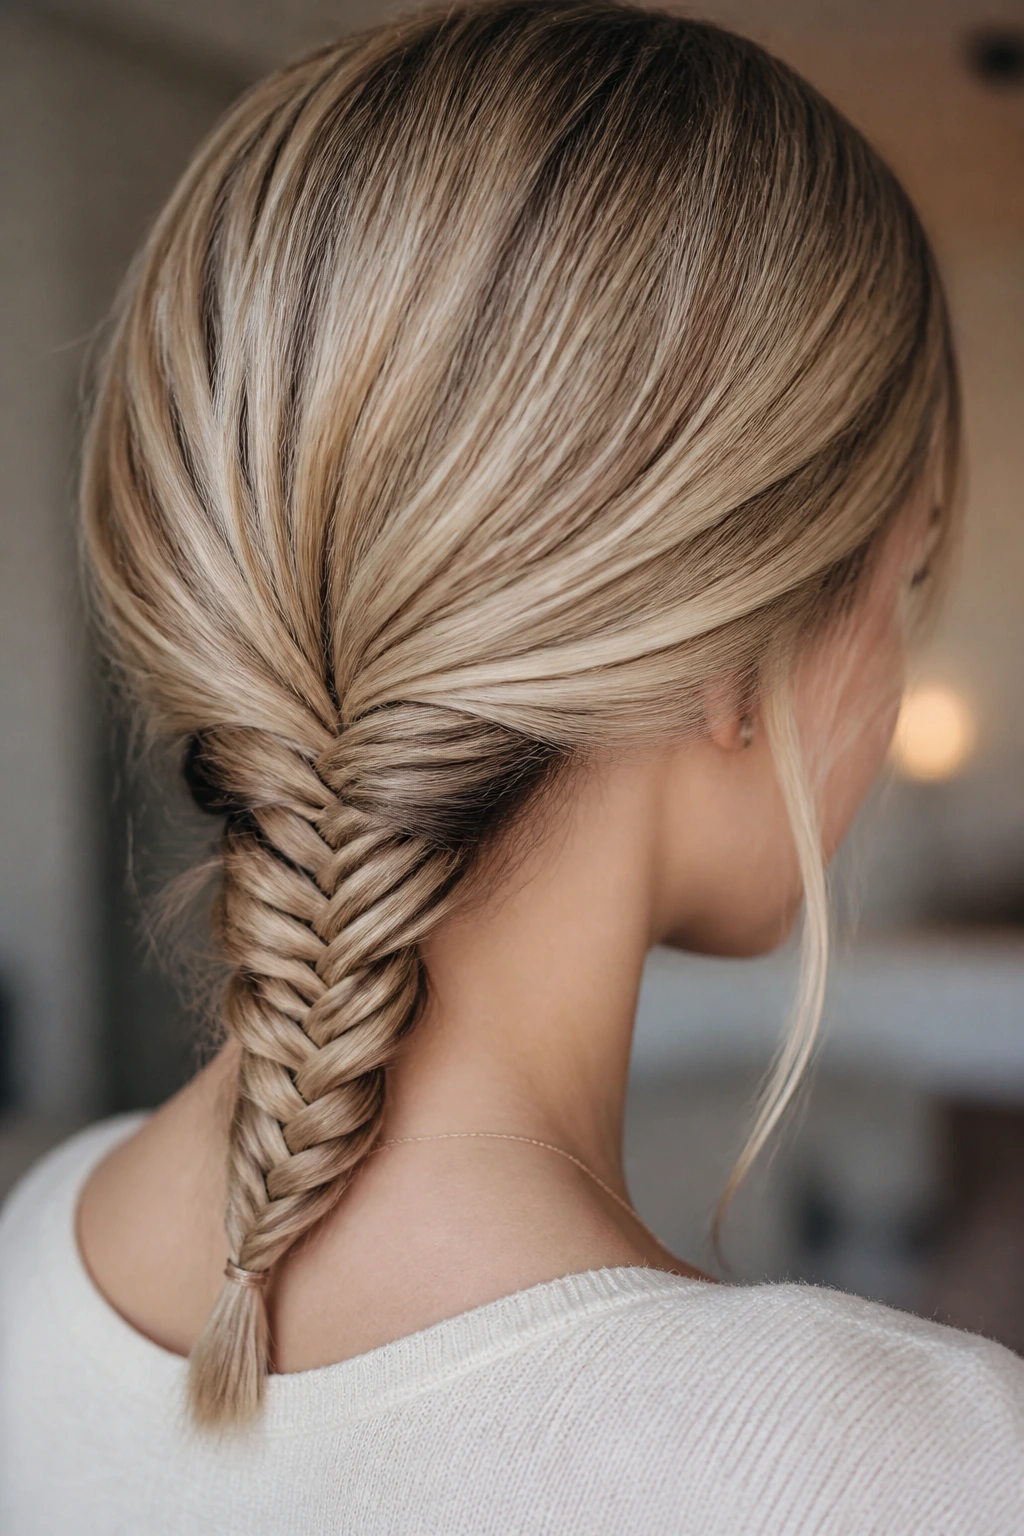
A low fishtail braid is one of my favorite choices for thin hair because the pattern itself adds visual texture. You do not need thick strands for it to look good. You just need clean sectioning and a little patience for the first two passes.
The braid starts looking fuller after you gently pull the edges apart. Not aggressively. Just enough to open the pattern so it reads as a real fishtail instead of a narrow tail. Keep the braid low and secure it with a tiny elastic so the weight of the hair doesn’t drag the top loose.
A little dry shampoo at the roots gives the fishtail more bite. Freshly washed hair can work, but it’s fussy. And fussy hair does not usually hold well.
5. Rope Twist Halo
A rope twist halo is the quiet overachiever of quick braids for thin hair. It’s fast, it sits flat, and it usually survives longer than a braid that relies on volume you don’t have to spare.
What makes it different
Instead of crossing three sections, you twist two sections in the same direction and wrap them around each other in the opposite direction. That twist pattern is easy to keep neat, and neat is what thin hair needs. Messy twists on fine hair tend to unravel early.
Use this one when your hair feels too silky for a standard braid. A tiny bit of texturizing spray at the lengths gives the twist something to cling to. Pin the ends underneath the halo so the finish stays hidden.
6. Pull-Through Braid
A pull-through braid is one of the best fake-full styles for low-density hair. It isn’t a true braid in the strictest sense, which is exactly why it works. You’re stacking ponytails and pulling sections through each other, so the finished braid looks much thicker than the amount of hair you started with.
That illusion is the point. Thin hair often looks better in this style than in a giant three-strand braid because the sections stay crisp. Make each ponytail small, then tug the loops outward gently once the braid is complete. If you pull too hard, the whole thing gets messy in a hurry.
This is a strong choice for long hair that needs body without teasing the scalp raw.
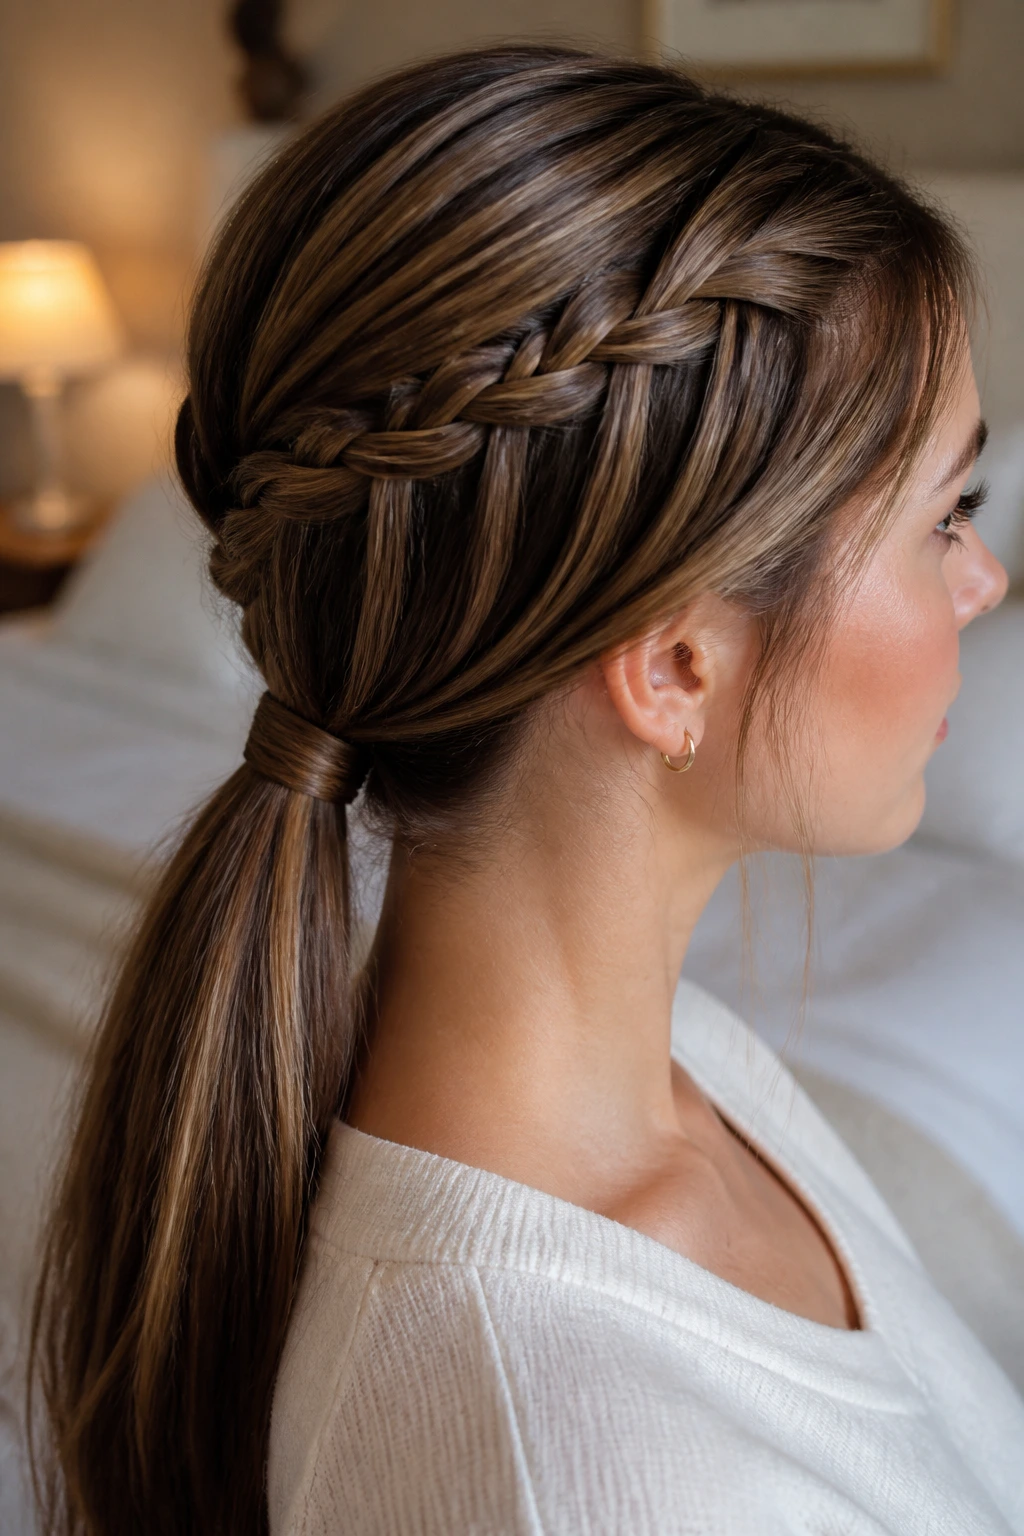
7. Braided Ponytail Wrap
If your ends are the part that gives you trouble, a braided ponytail wrap solves a lot of it in one move. You braid the front or side section, then wrap that braid around the base of a low ponytail to hide the elastic and add structure.
The good part is durability. The braid doesn’t need to carry all the hair, so it stays tighter. The ponytail does the heavy lifting, and the wrap gives the style a polished finish that thin hair often misses.
Use a small clear elastic at the ponytail base and secure the wrap with two crossed bobby pins. That little X-shaped pinning trick keeps the braid from sliding loose at the back of the head.
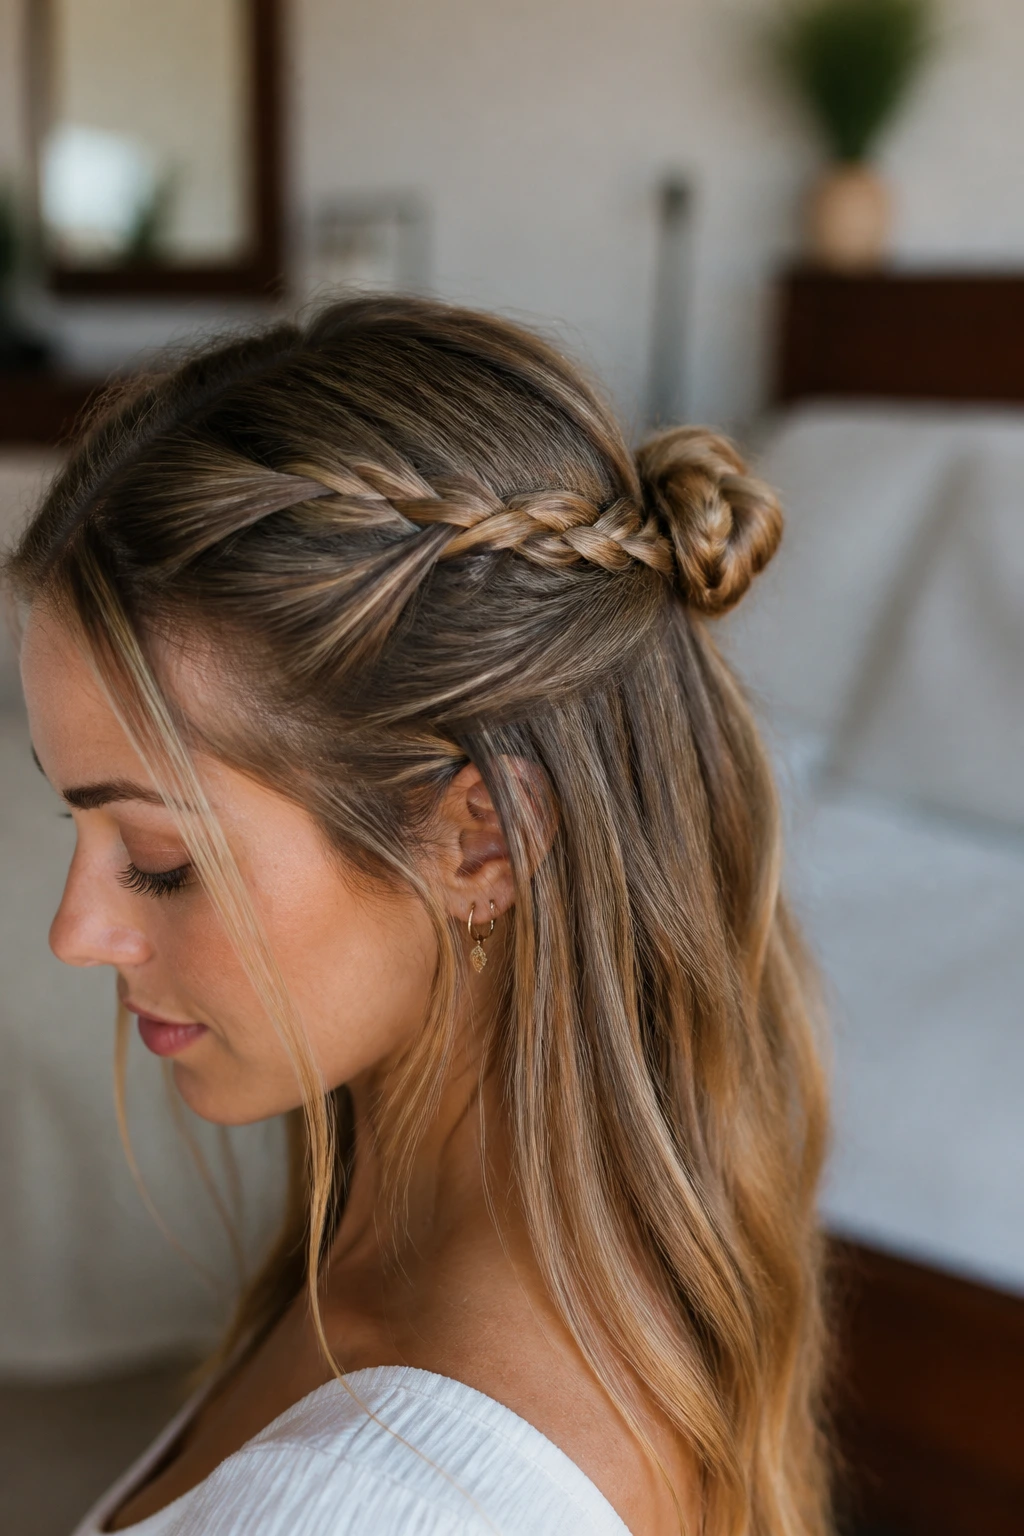
8. Half-Up Lace Braid
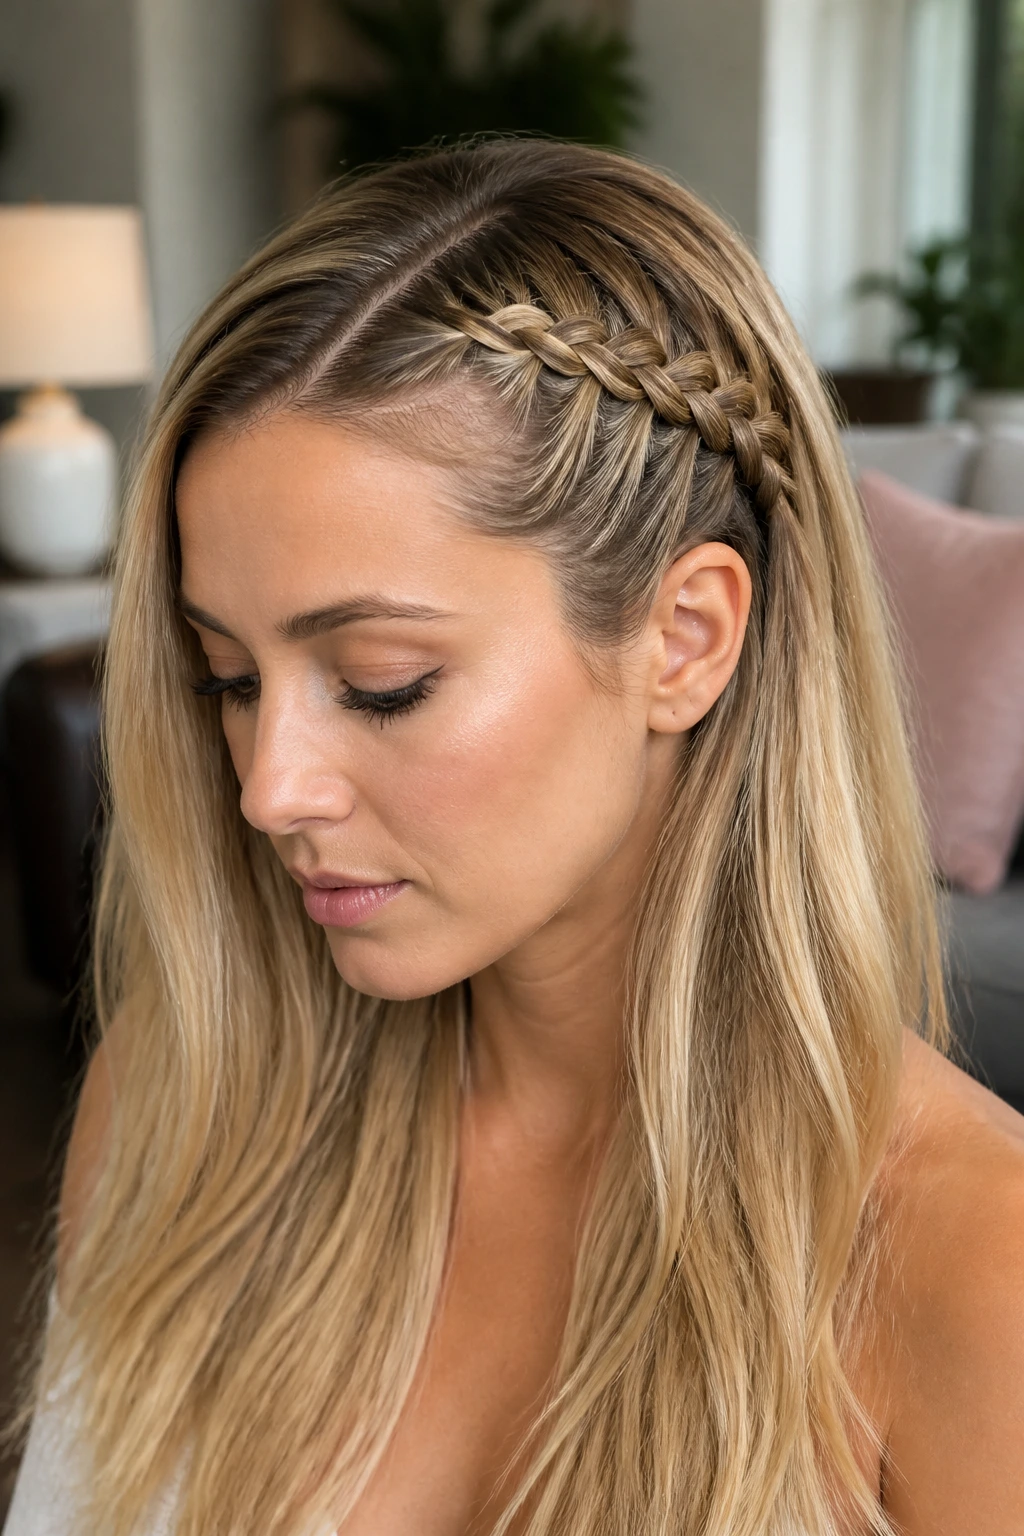
A half-up lace braid is a good answer when you want hair off your face but don’t want to expose every inch of a fine top layer. Only one side gets braided in, and the rest of the hair stays down, which gives the style a softer frame.
Why it works on thin hair
Because the braid only takes a slice of the hair, it doesn’t rob the rest of the style of density. That matters. If you braid all of fine hair upward, the finished look can go wispy fast.
Keep the braid close to the scalp and stop at the back of the crown. Let the loose hair cover the join point. That one trick makes the style look deliberate instead of half-finished.
9. Double French Braids into Low Ends
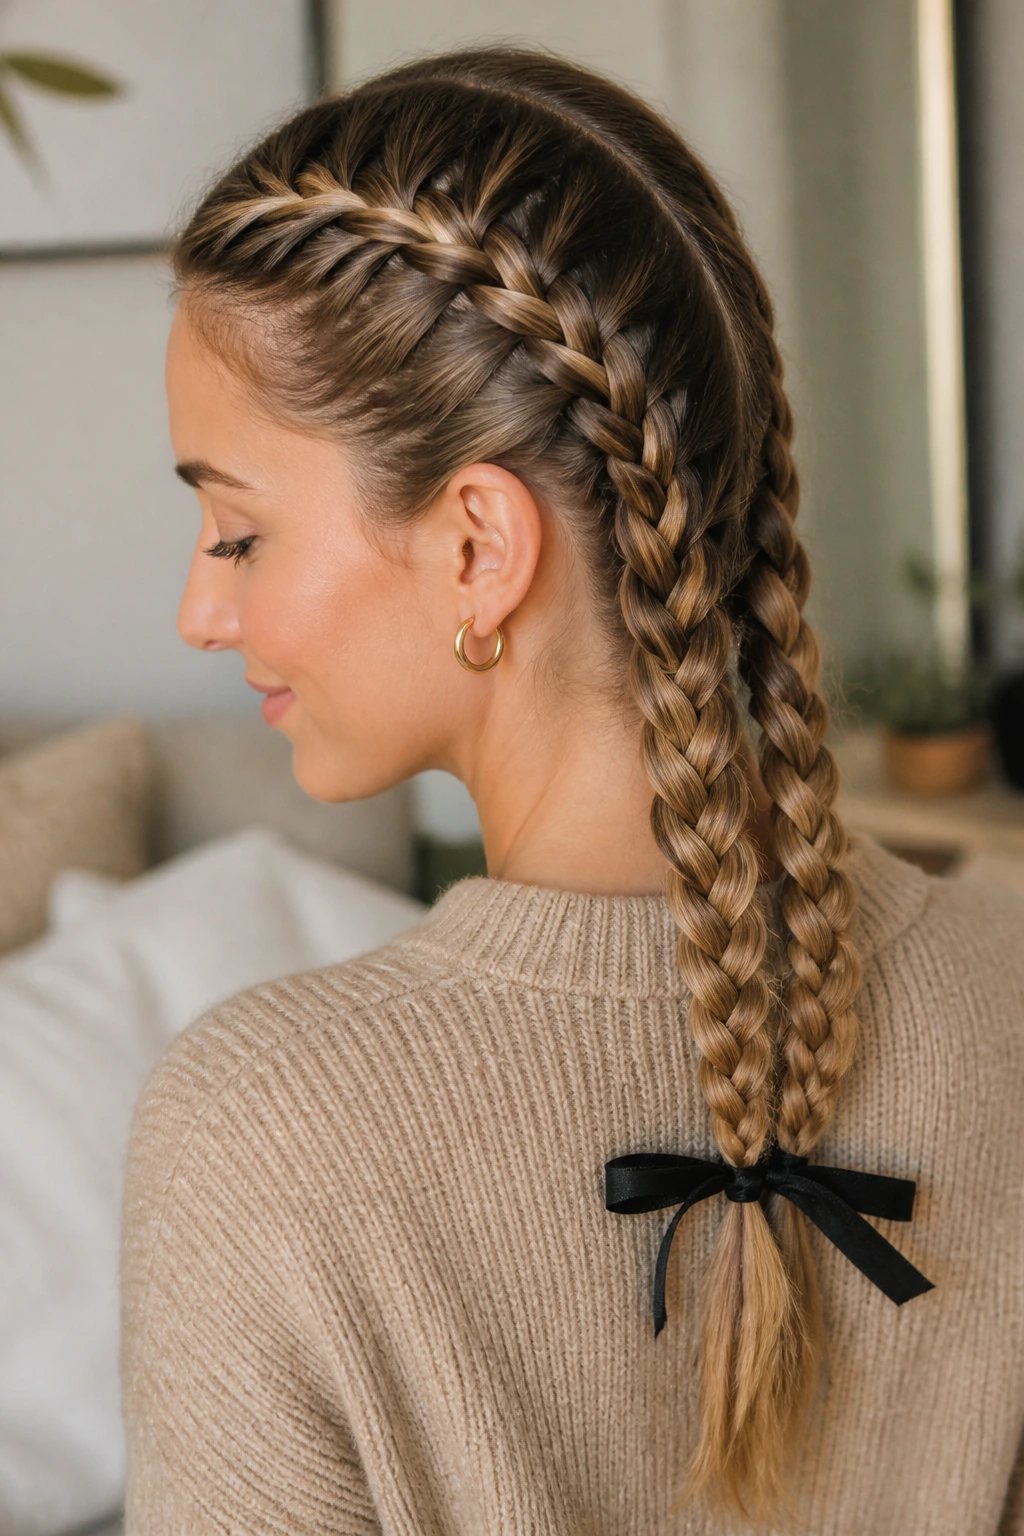
Two French braids that stop low and finish together are a dependable option when you need a style to stay put. They’re not glamorous in a dramatic way. They’re practical. And on thin hair, practical usually wins.
The split keeps each braid compact, which helps with grip. Thin hair tends to fall apart when too much width is asked of it too early. By dividing the hair in half and keeping the braids tight at the scalp, you get a style that lasts through movement without puffing out.
A small ribbon or clear elastic at the ends keeps the finish from looking bare. If your hair is extra slippery, braid the first two inches a little tighter than you think you should. Then relax your hands once the braid is anchored.
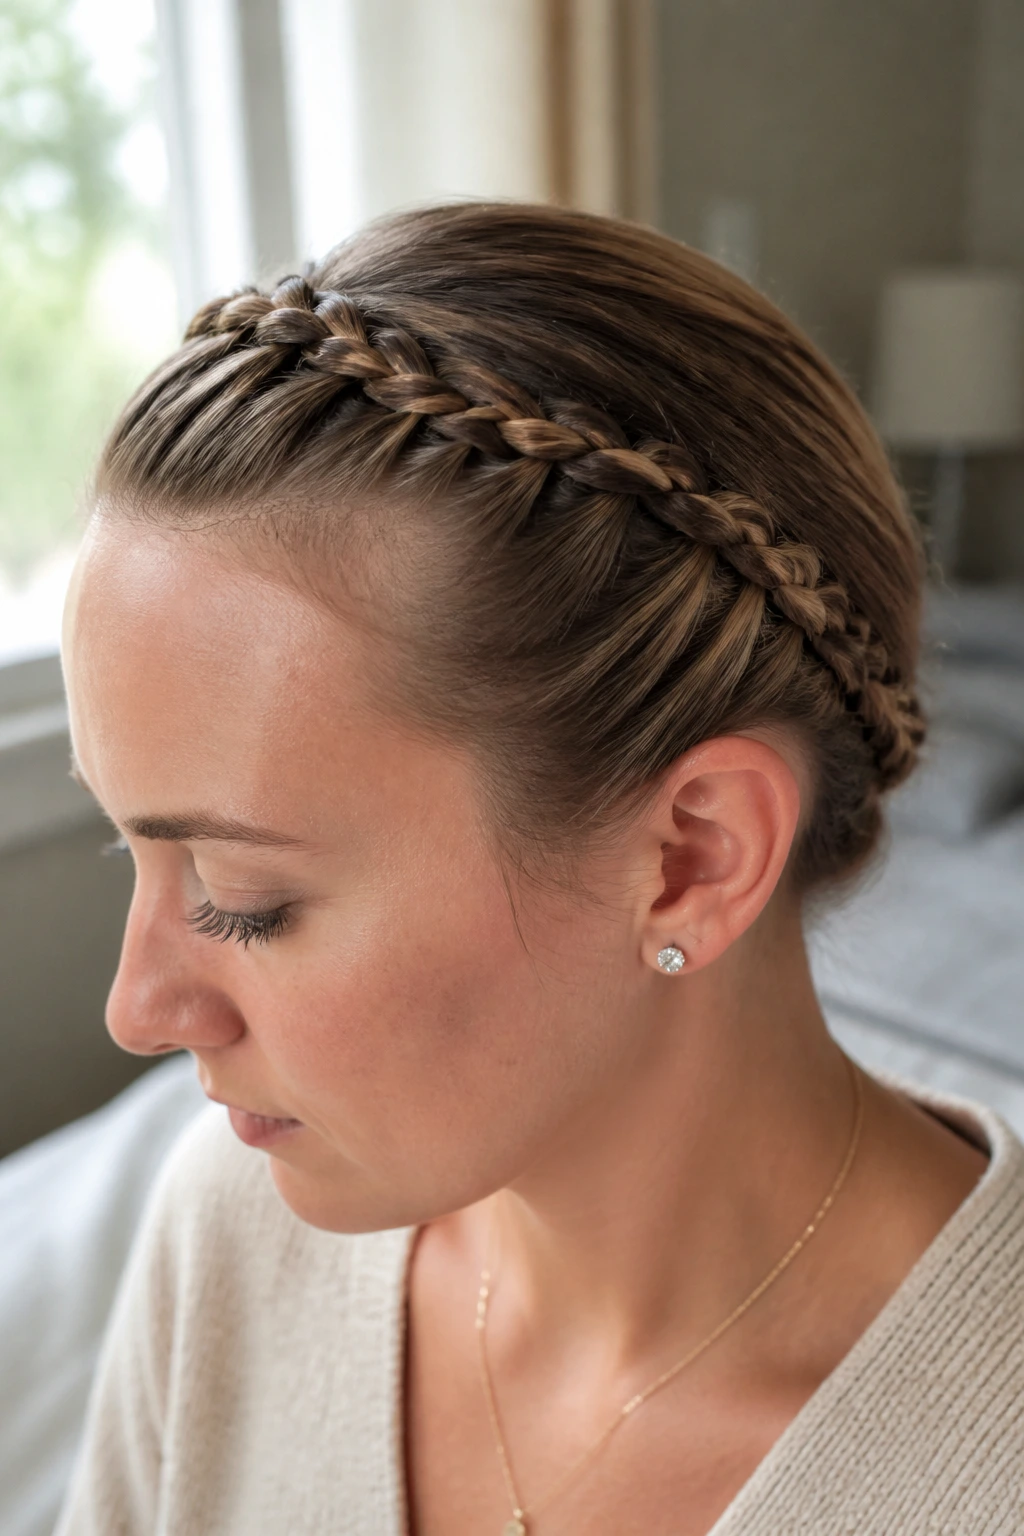
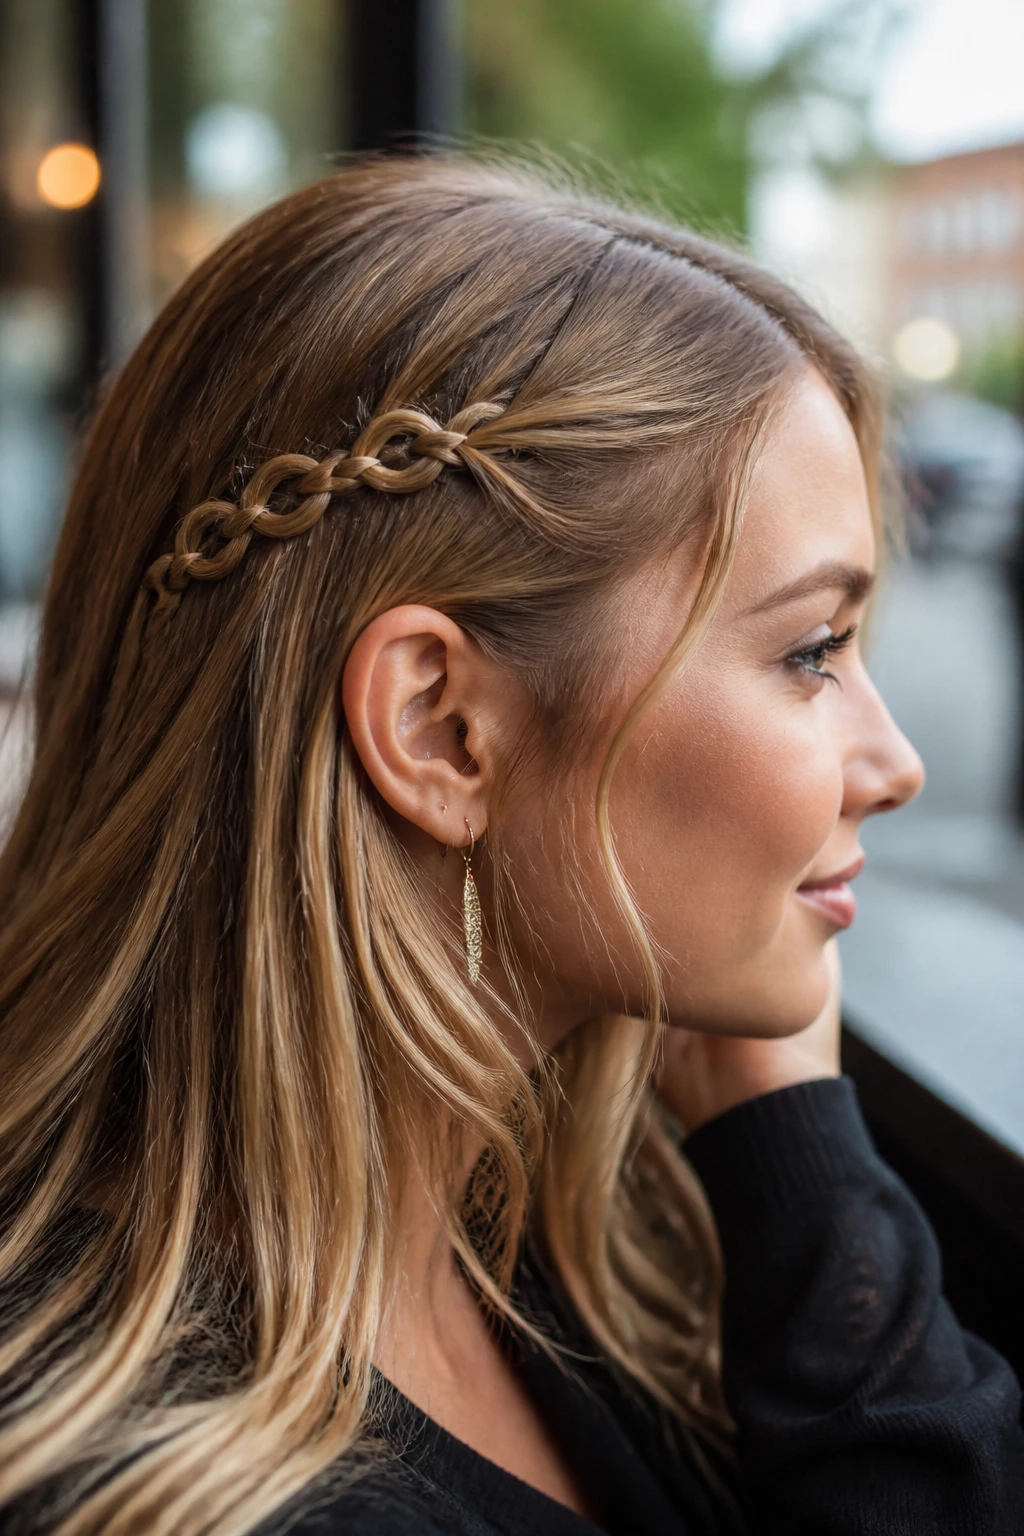
10. Braided Headband
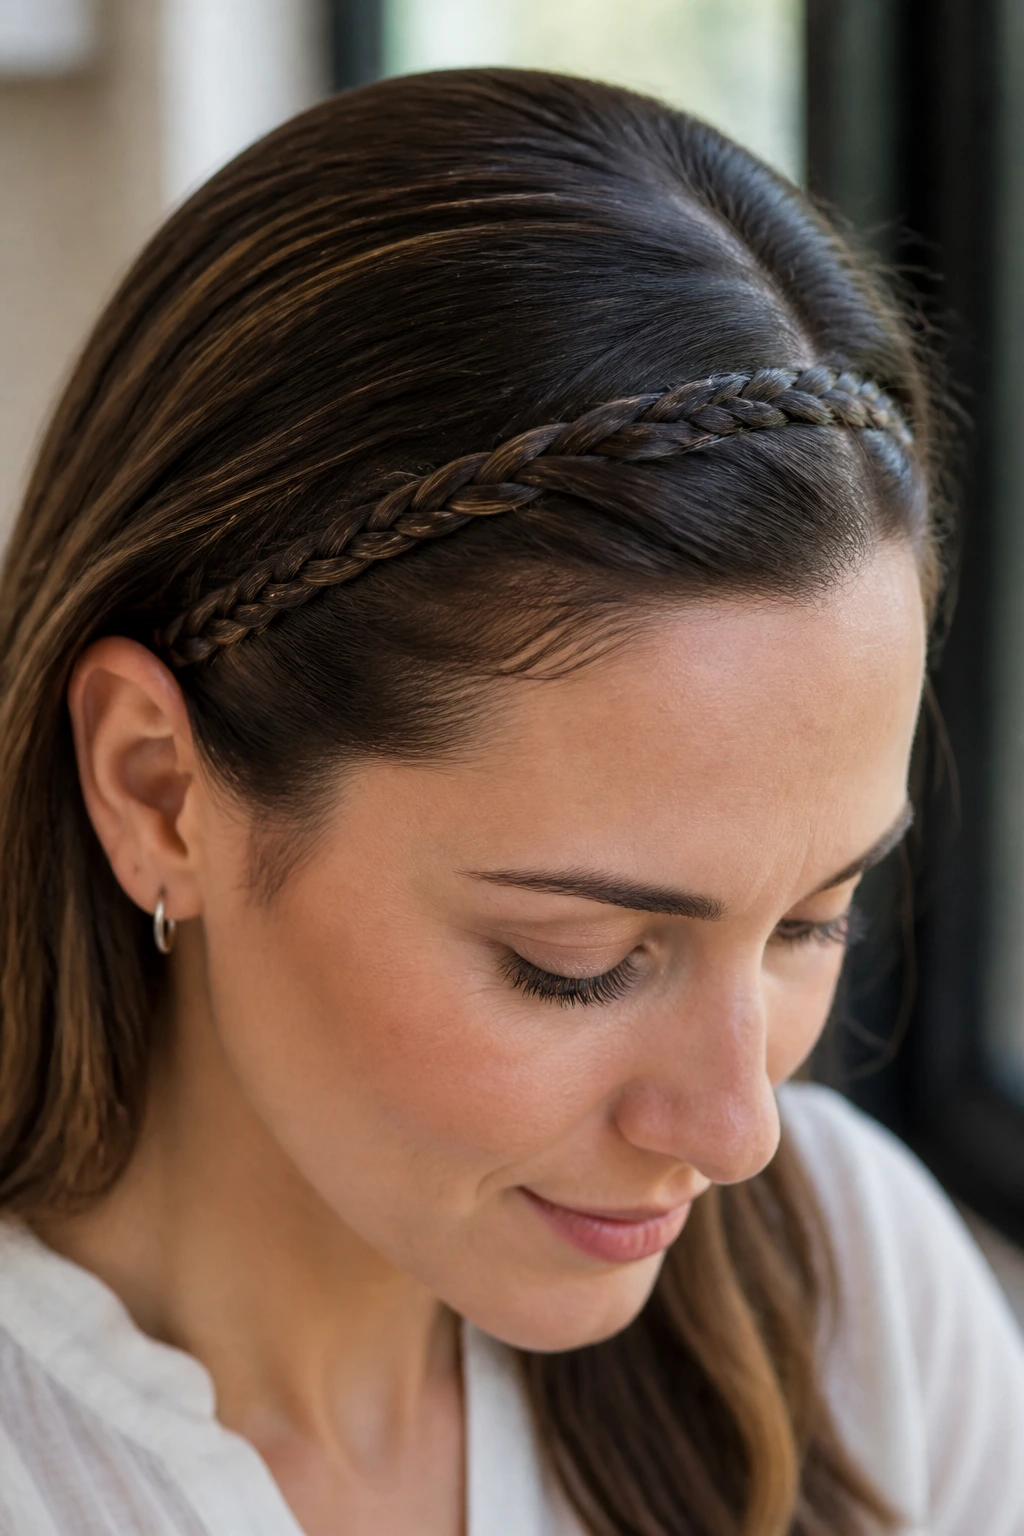
A braided headband is one of the cleanest ways to use fine hair without asking it to be something it isn’t. You braid a narrow section from ear to ear and pin it across the front like a built-in accessory.
The braid works because it’s short. Short braids stay neat. They don’t have time to loosen in five different places the way a long loose plait does. This also gives you a chance to keep the rest of the hair smooth or tucked back, which is often more flattering on thin hair than piling on volume.
If your hairline is delicate, keep the braid a finger-width away from the edges. That makes it easier to pin without tugging.
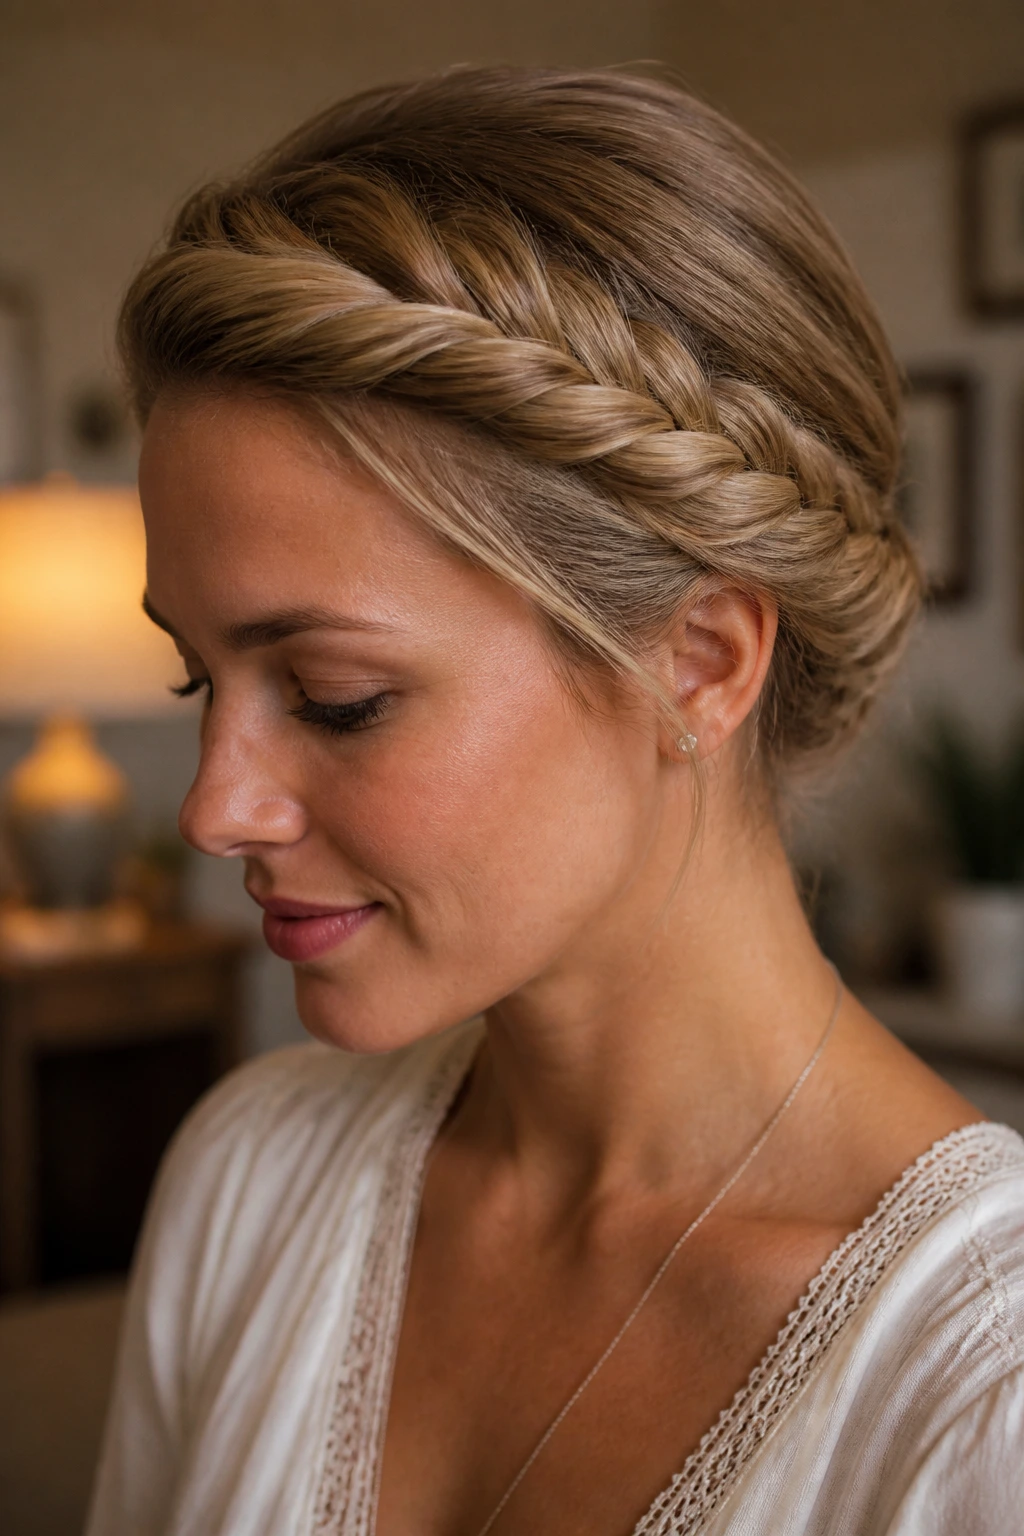
11. Milkmaid Braids
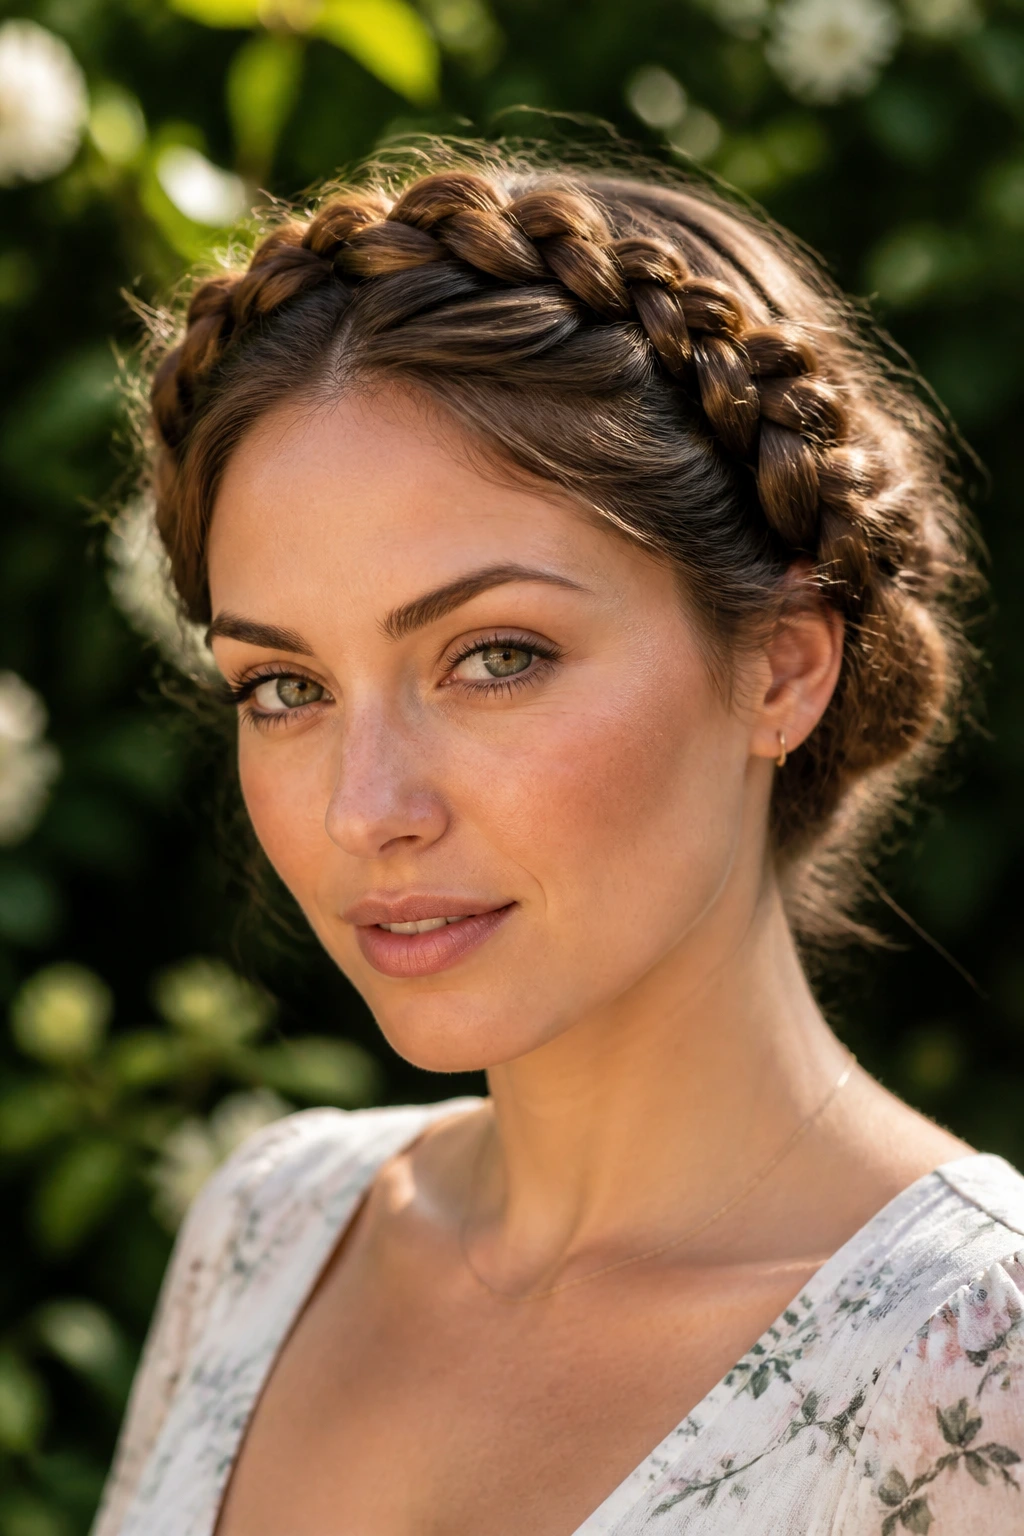
Milkmaid braids are old-school for a reason: they hold, they frame the face, and they don’t need a mountain of hair to work. Two braids wrap across the head and pin at the opposite sides, which gives thin hair more presence than a single loose braid drifting down the back.
Use smaller sections than you would on thick hair. Bigger sections make the braids look thin in the wrong way. If you want more body, gently widen only the outer edges after pinning. Don’t pancake the whole braid before you secure it, or the tension will vanish.
This is a smart style for second-day hair with a little dry shampoo. Clean, slippery strands tend to fight the wrap.
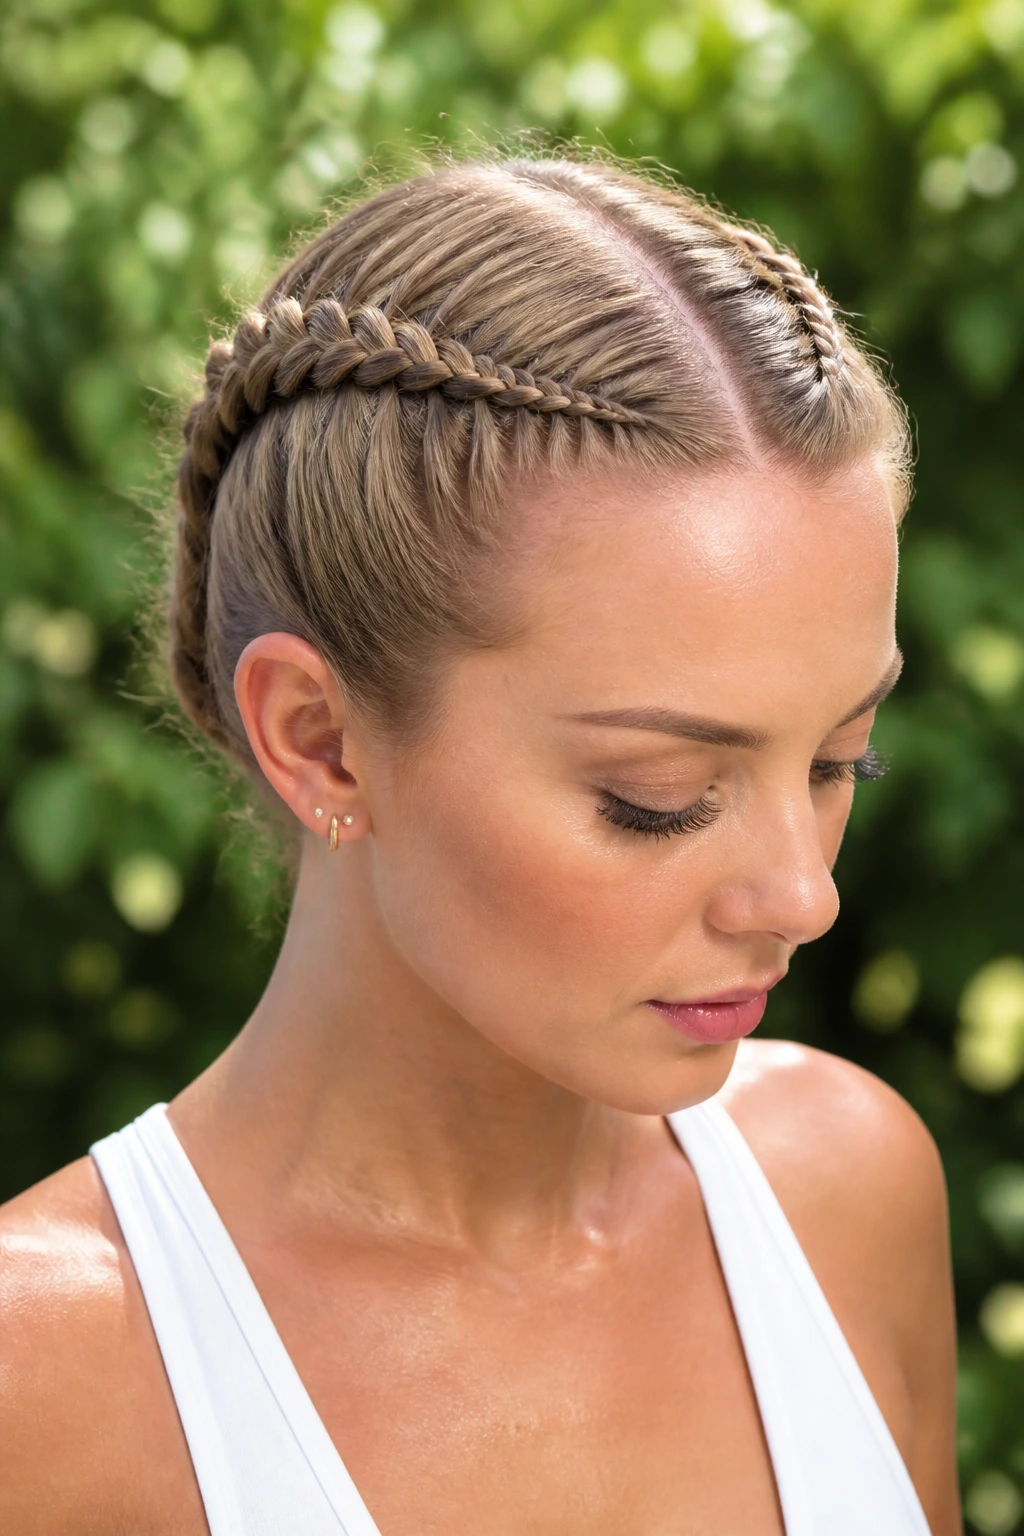
12. Diagonal Dutch Braid
A diagonal Dutch braid starts near one temple and tracks down toward the opposite nape. That diagonal line does a nice job of making sparse hair look more interesting, because it gives the eye a path to follow instead of a flat center line.
The pattern matters. By feeding in sections from only one side, you keep the braid compact and let the rest of the hair sweep naturally. Thin hair looks better when the braid isn’t trying to dominate the whole head. It should feel like a strong accent, not a heavy structure.
Pin the tail low and tuck it under the remaining hair if you want the finish to stay discreet. A little smoothing cream on the front section can help, but use a pea-sized amount at most.
13. Fishtail Ponytail
A fishtail ponytail is the kind of style that makes fine hair look more textured without pretending it’s thick. The ponytail base keeps everything contained, and the fishtail length gives you that woven look that reads fuller than a standard plait.
Keep the ponytail secure with a snug elastic first. Then build the fishtail from that anchor. If your hair is very smooth, a mist of texture spray through the lengths before you start helps the sections separate cleanly. When the braid is done, tug the sides just a touch so the pattern opens.
The braid sits best slightly lower on the head. High ponytails on thin hair can slide if the base is too slick.
14. Accent Braid into a Messy Bun
An accent braid into a messy bun is a good cheat code for thin hair. The braid gives structure. The bun hides the fact that there may not be much bulk to work with.
Braid a small front or side section, then wrap the rest into a low bun and pin the braid across the surface of it. That one extra braided line makes the bun look more finished, especially if the bun itself is built loosely. Thin hair in a tight bun can look too severe. A soft bun with one crisp braid is usually nicer.
Use two or three bobby pins in a crisscross pattern. If you only pin once, the braid can spring loose when you turn your head.
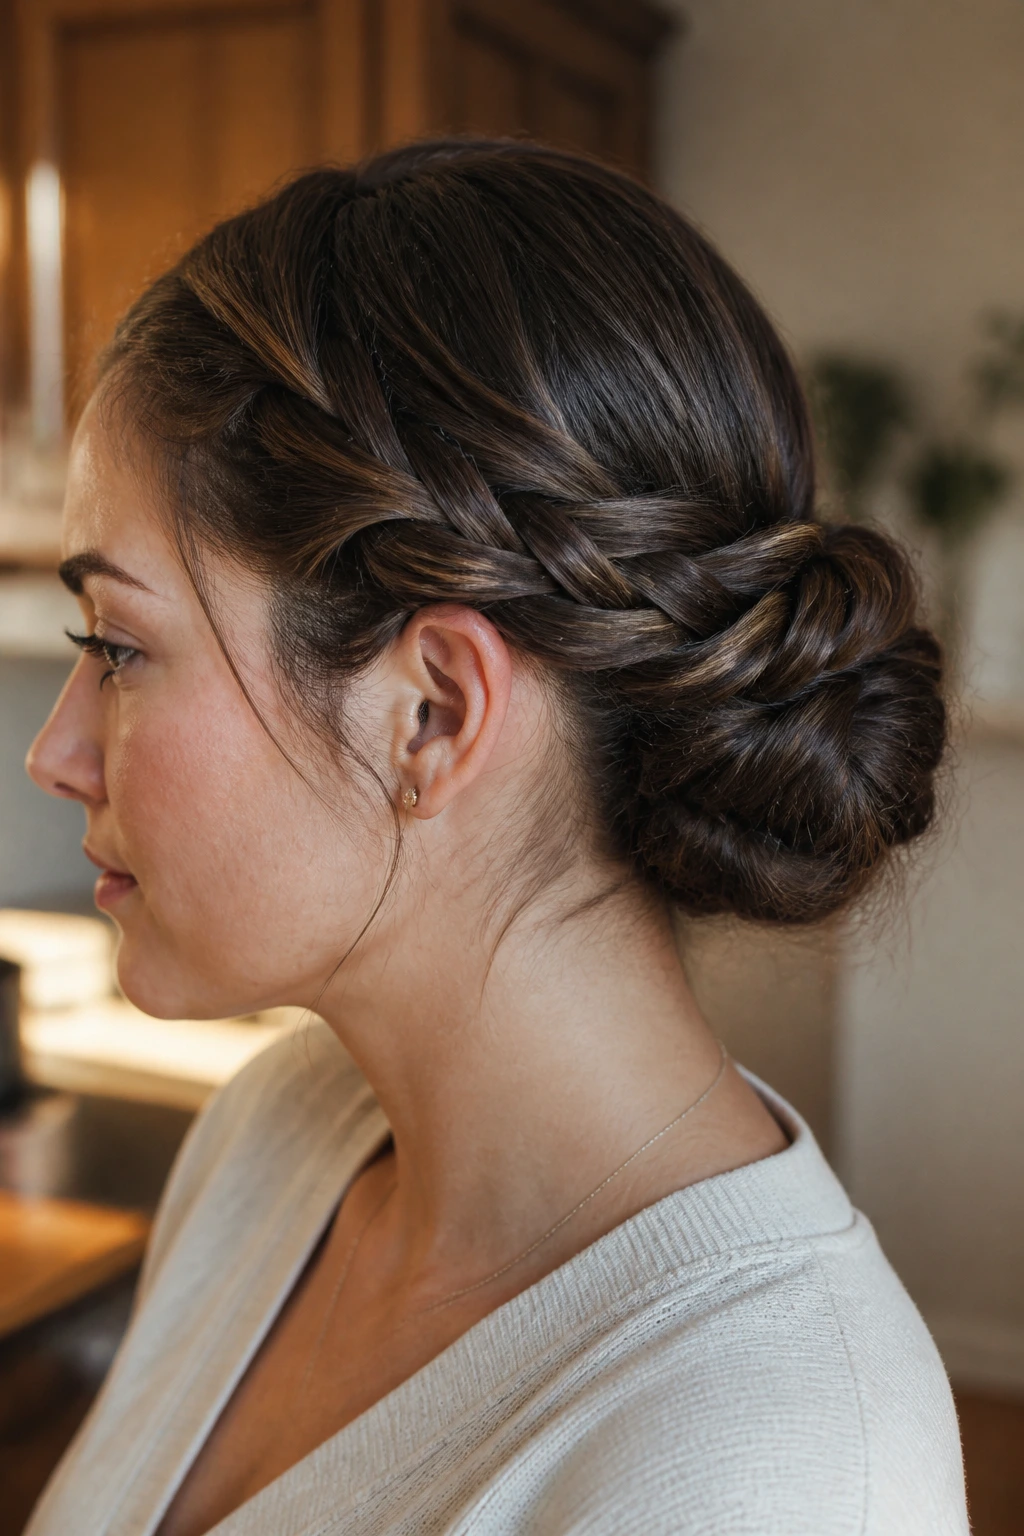
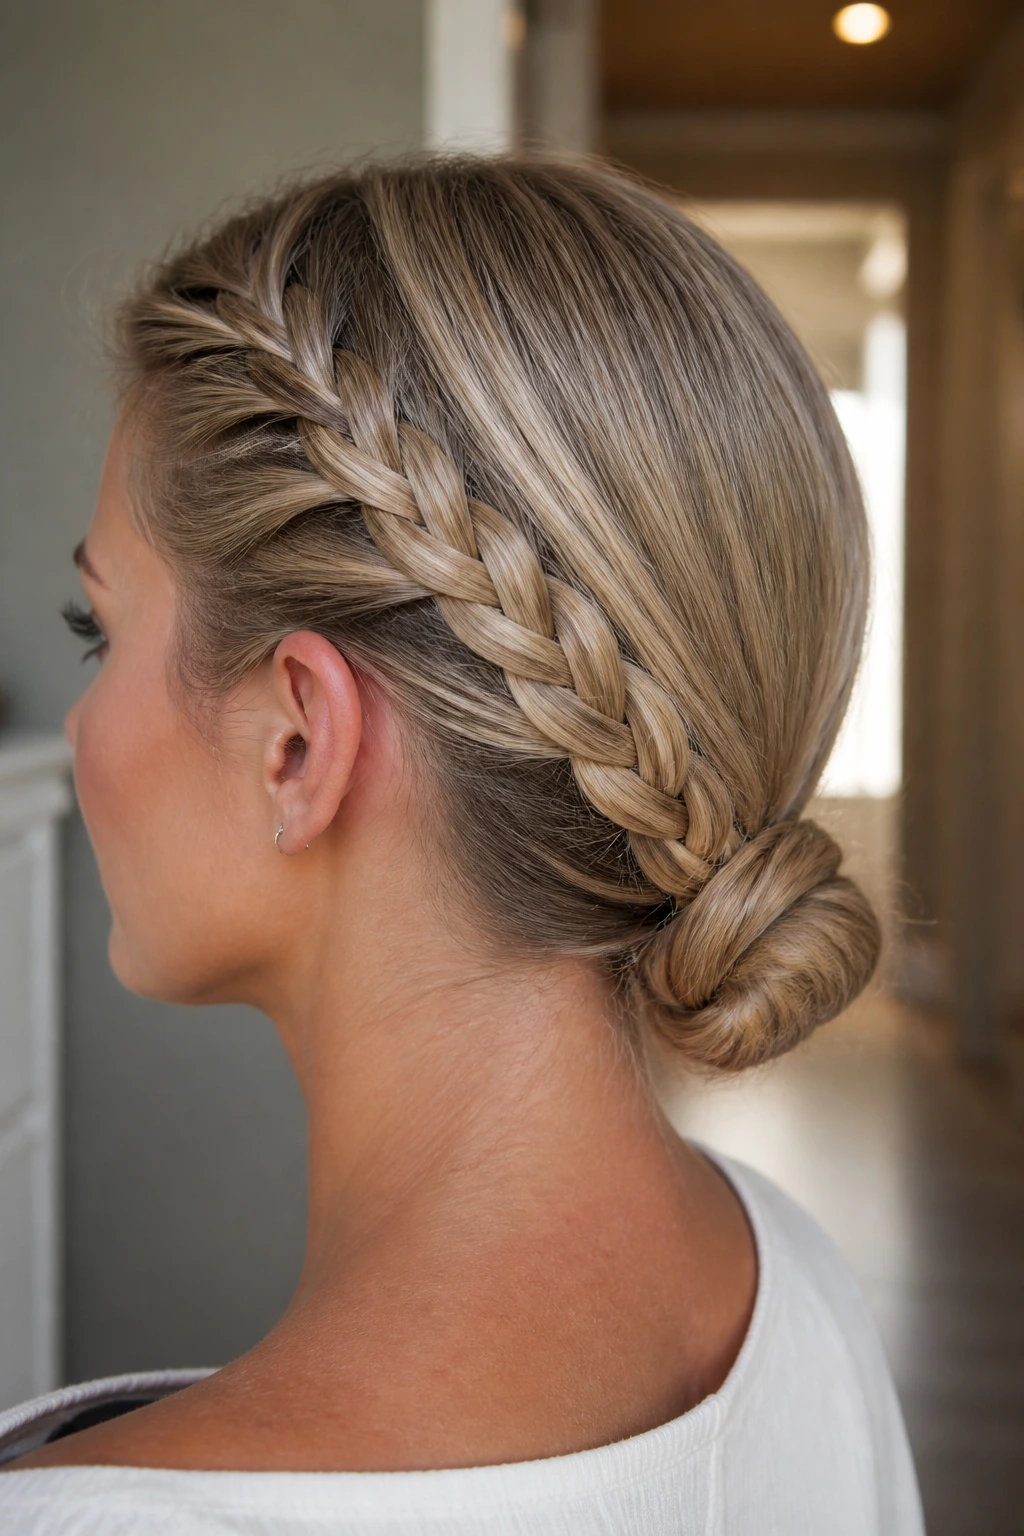
15. Braided Low Bun
A braided low bun is one of the most reliable long-wear styles in this whole group. It starts with a braid, so the structure is already there, and the bun traps the ends so they can’t escape.
Where it helps most
Thin hair often struggles to stay put at the nape. This style fixes that by keeping everything low and controlled. A narrow braid can be wrapped around itself once or twice, then pinned flat against the head. The result is tidy, and tidy tends to last.
If your ends are uneven, this is the style that forgives them. The bun hides the ends completely. That’s worth a lot when your hair has layers that won’t all behave at the same time.
16. Four-Strand Side Braid
A four-strand braid gives thin hair a little more visual density because the pattern is tighter and more interesting than a standard three-strand braid. It looks like you put in more work than you actually did. I’m not mad about that.
This braid does take a bit of practice, but it holds well once it’s done. Keep the braid to one side so you can see your hands better while you work. On very fine hair, a side placement also keeps the braid from sitting flat against the back of the head, where it can disappear.
Use a small elastic at the bottom and pancake only the outer edges. If you widen the whole braid, the center can look stringy.
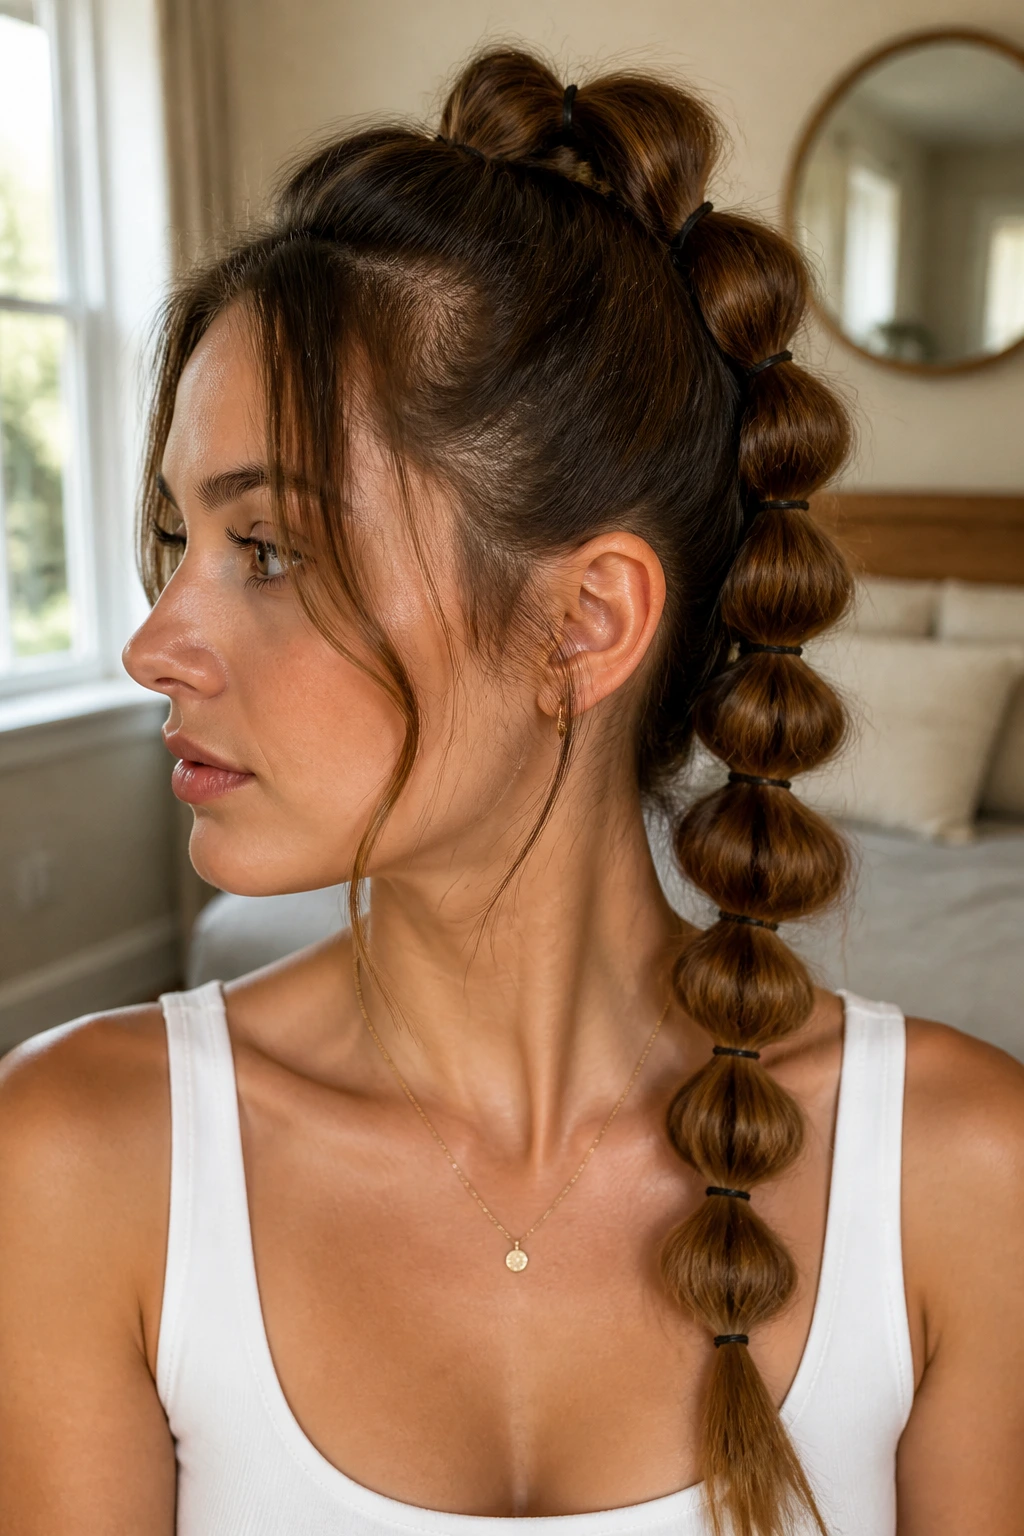
17. Bubble Braid with a Micro Braid
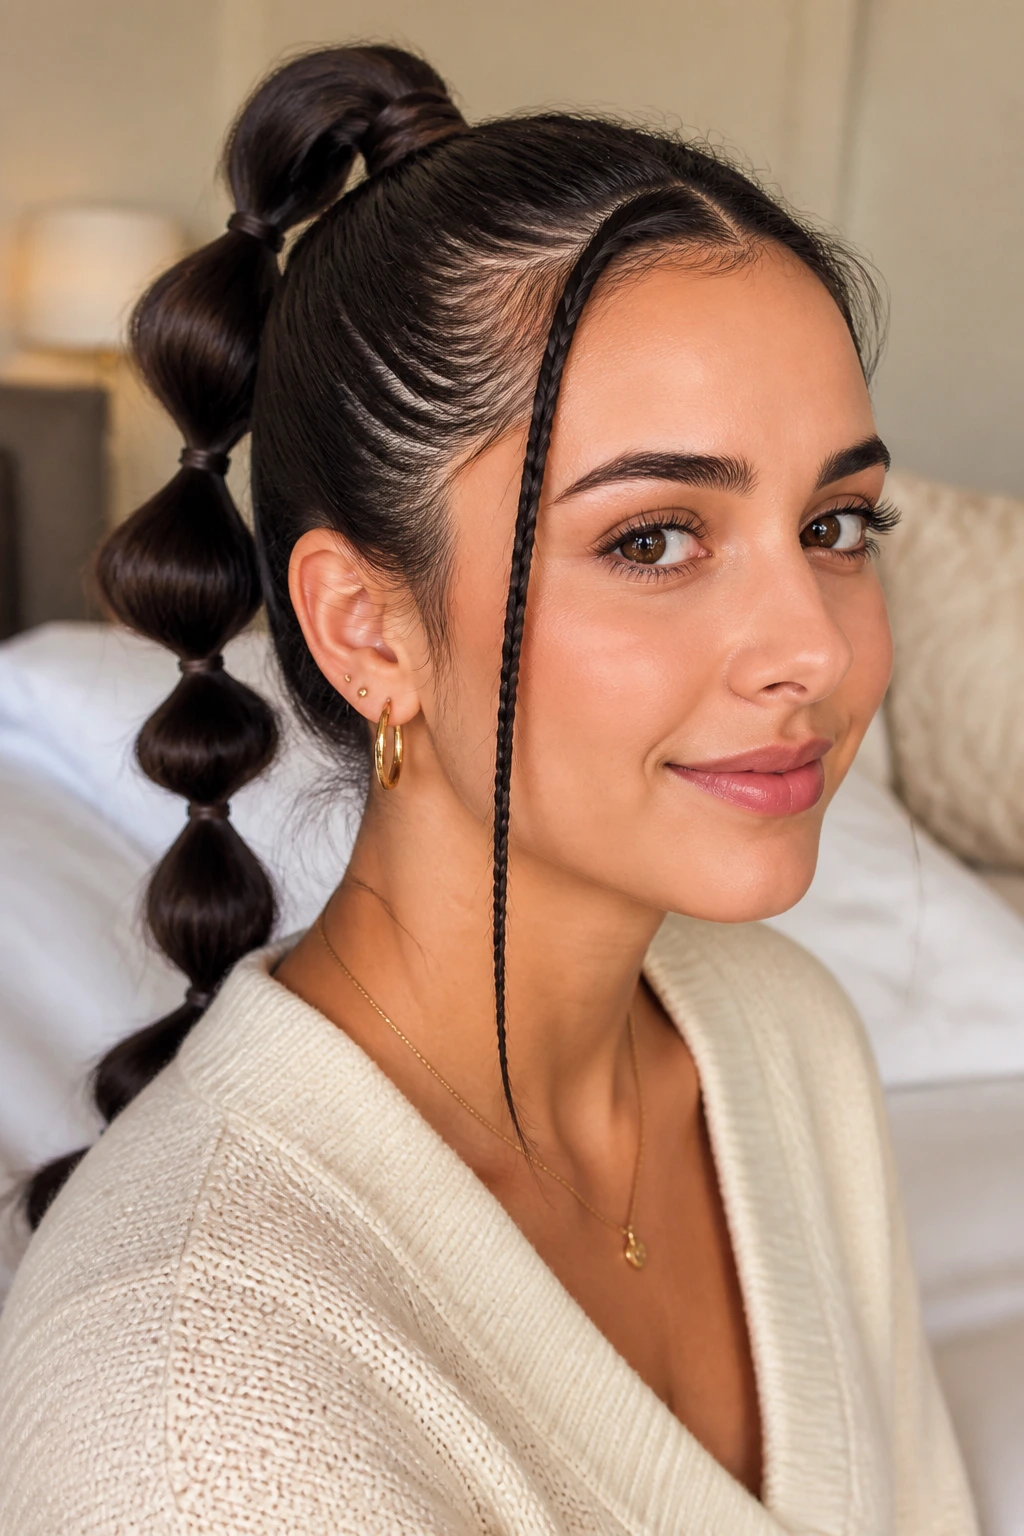
A bubble braid is a smart choice when your hair won’t cooperate with traditional plaiting all the way down. Add a tiny micro braid in front of it, and the style suddenly looks more layered and intentional.
The bubbles are made by placing elastics every few inches down a ponytail and gently tugging each section outward. That shape is forgiving on thin hair because it doesn’t rely on strand count. It relies on spacing and control. The micro braid gives the eye something detailed to read at the front.
This style lasts well because each elastic acts like a checkpoint. If one section loosens, the whole braid doesn’t collapse.
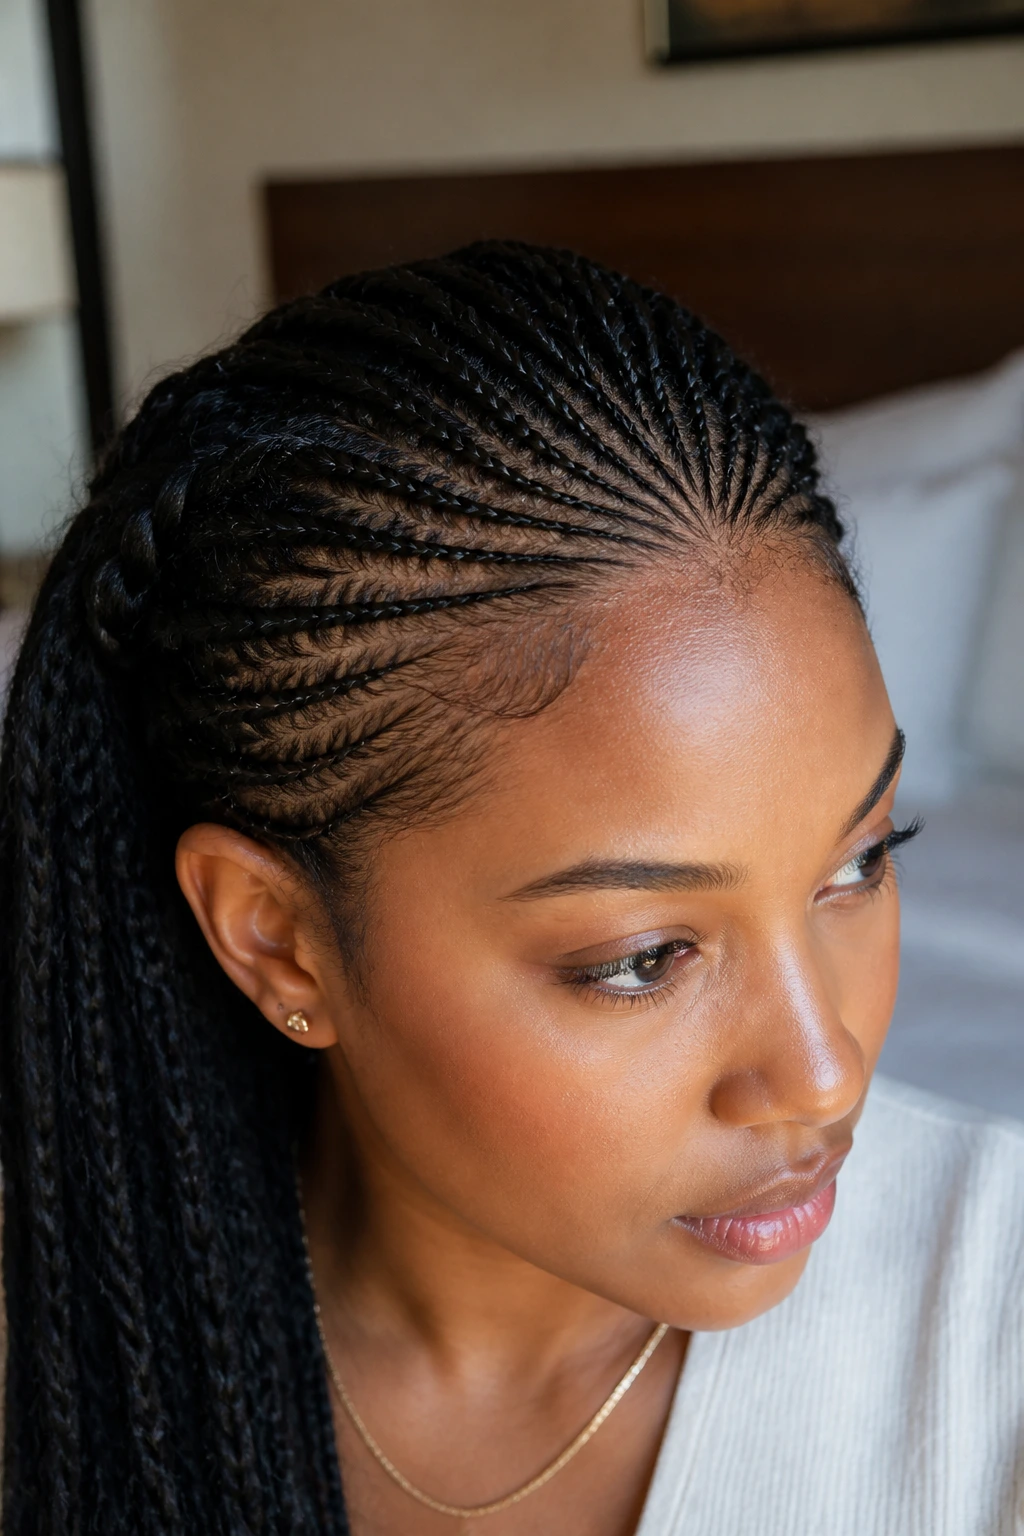
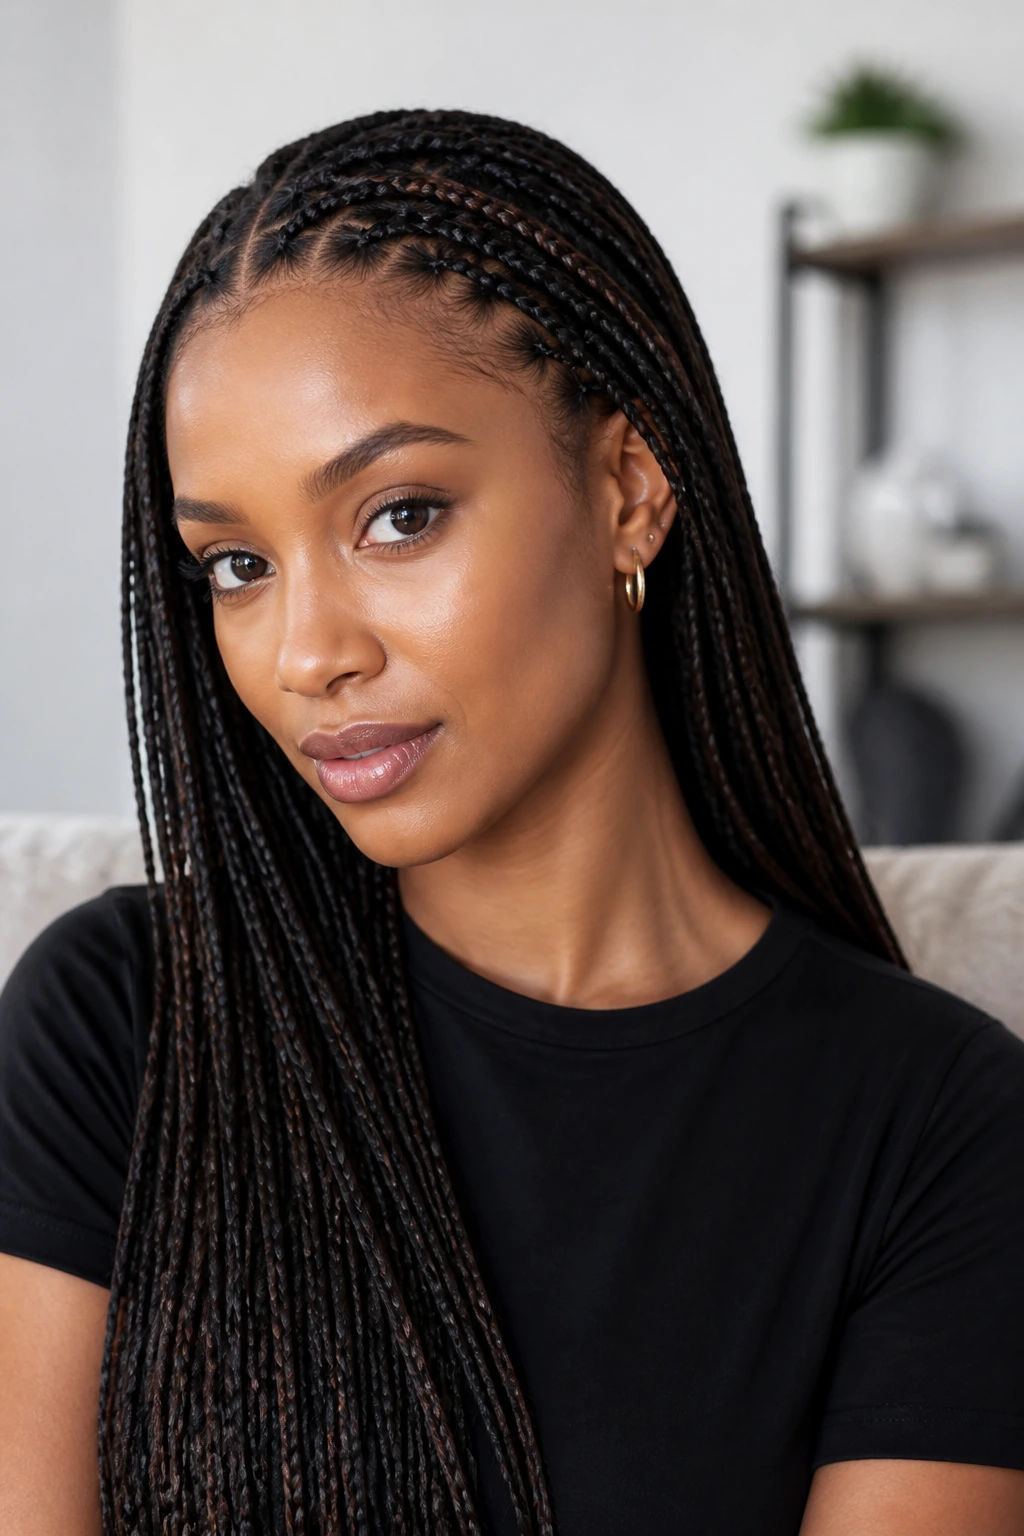
18. Slim Straight-Back Braids
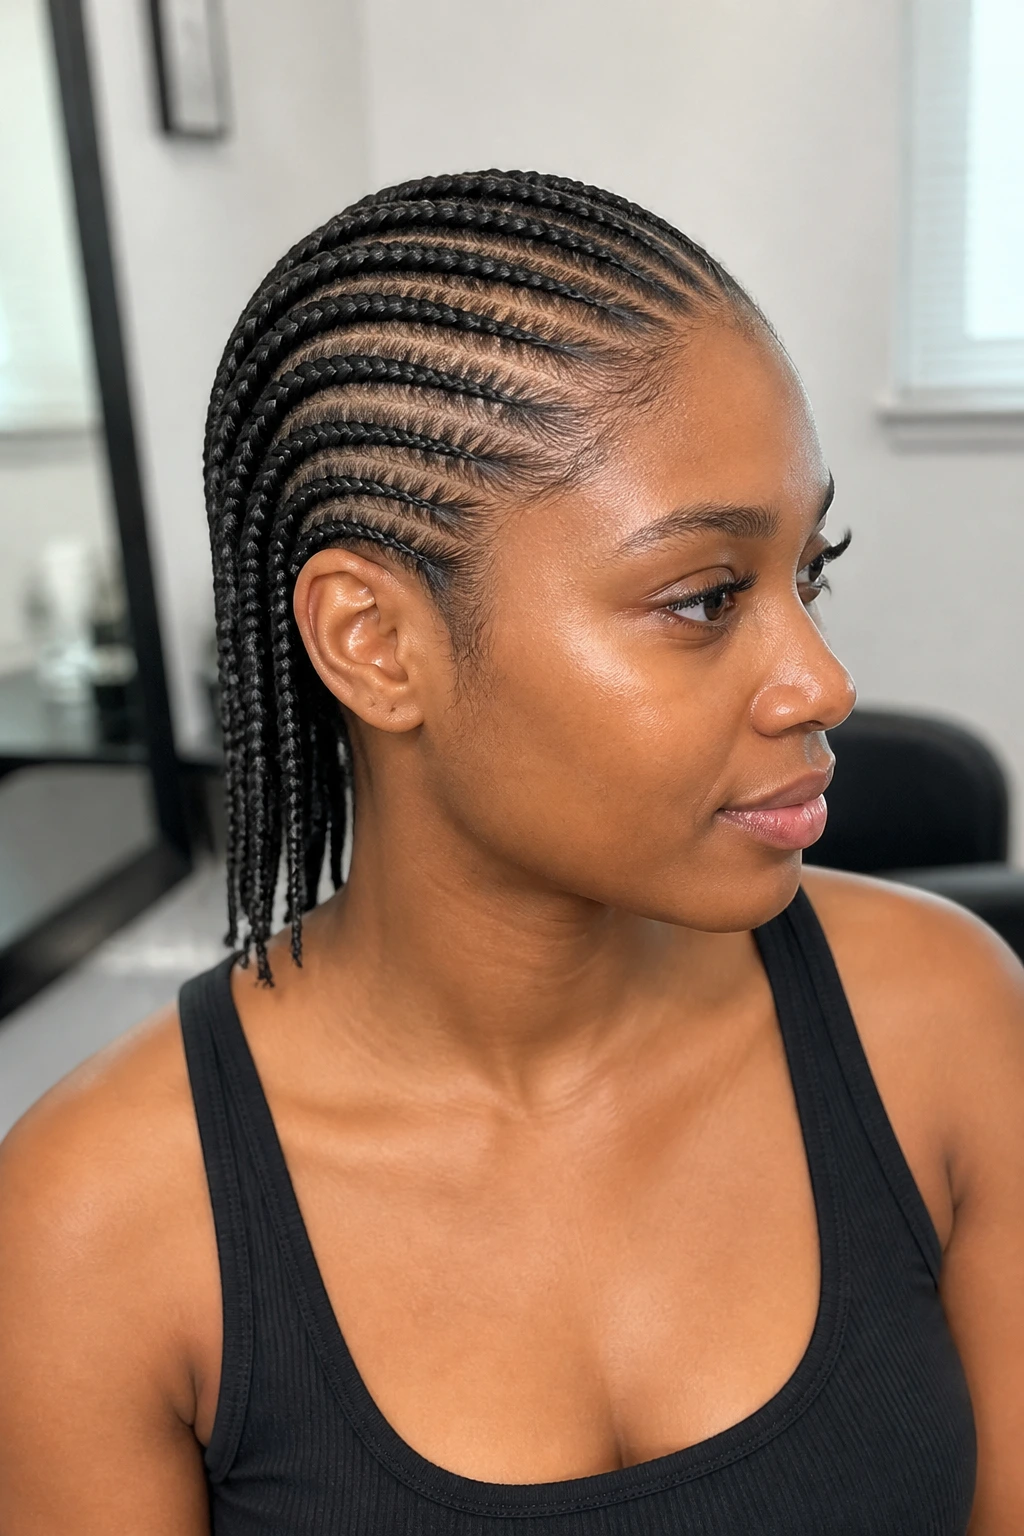
Slim straight-back braids are practical in the best way. They keep the hair anchored, protect the scalp from constant combing, and hold better than a loose center braid on slippery strands.
The key is size. Don’t try to cram too much hair into each section. Thin hair looks better with several narrow braids than with one overstuffed braid that keeps splitting open. Part cleanly from the front hairline to the nape, then braid straight back and secure each tail with a tiny elastic.
If your roots are especially smooth, a little dry shampoo at the base makes a real difference. The braid grabs better when the hair has some texture.
19. Braided Space Buns

Braided space buns are a fun option when you want hold and a bit of shape around the head. Each side gets its own small braid, then the ends coil into buns that sit high enough to be seen but low enough to pin securely.
Thin hair benefits from the split structure. One big bun often looks smaller than you hoped. Two small ones read as deliberate. Braid each side tightly, wrap the tail around the base, and pin underneath so the bun keeps its roundness.
This is one of the better styles for short-to-medium fine hair because the buns don’t need enormous length. They need balance.
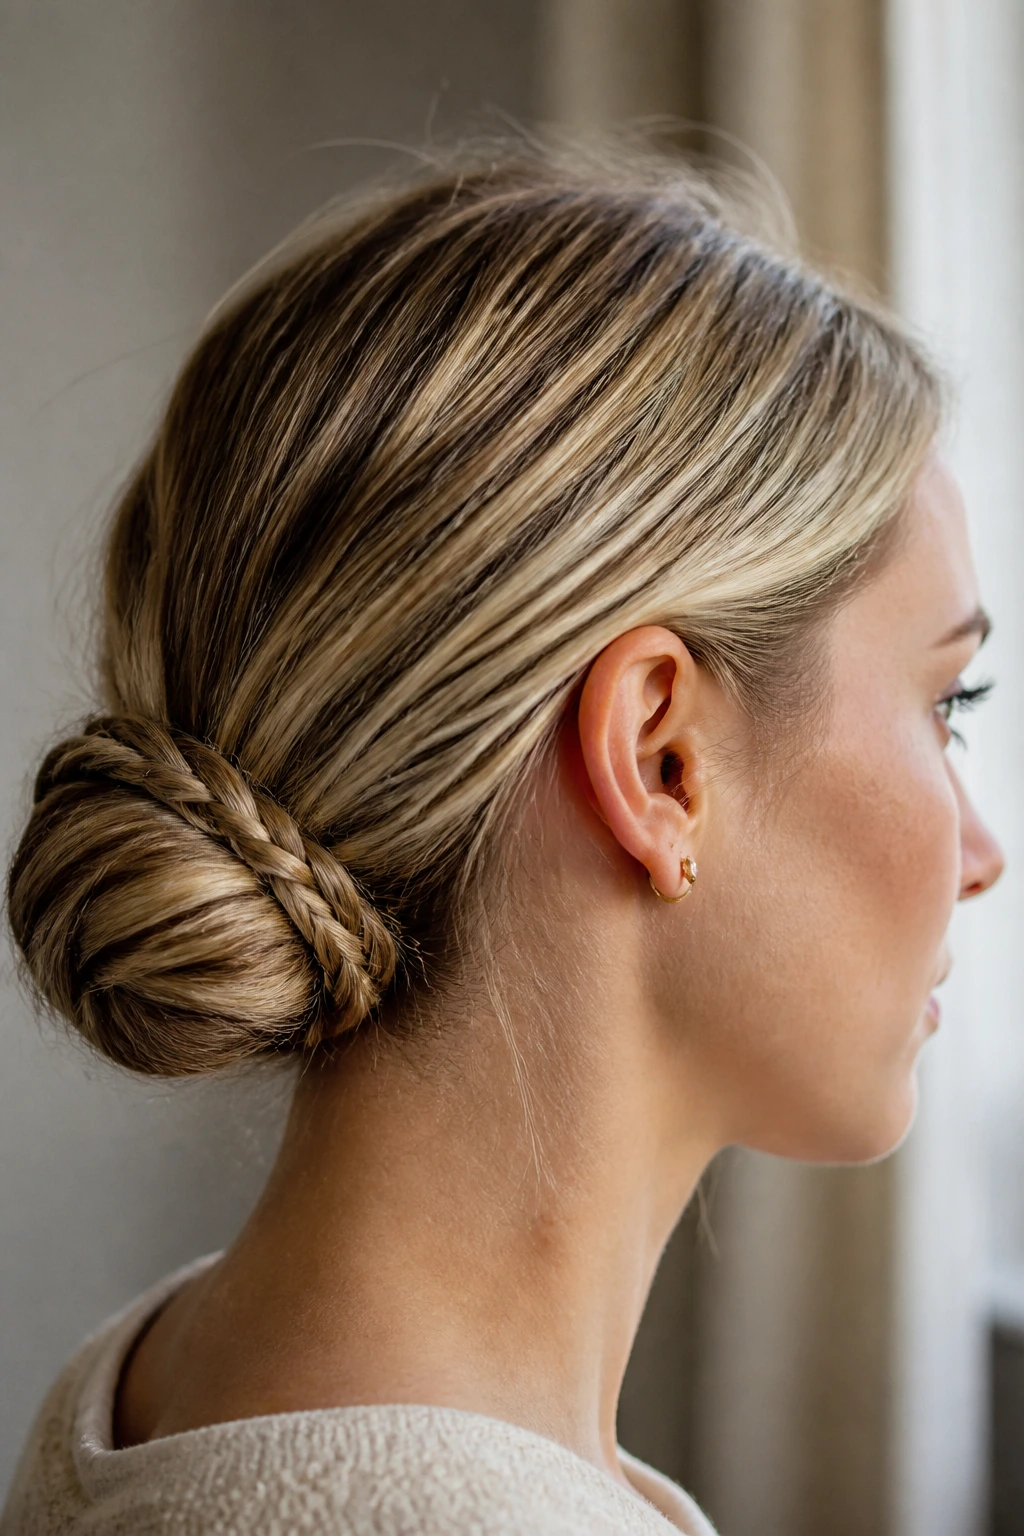
20. Tucked Rope Braid Bun
A tucked rope braid bun is one of those styles that looks more polished than it feels to do. You twist, coil, and pin. That’s the whole game.
Because rope twists don’t require the same strand volume as a wide braid, they’re friendly to thin hair. Once you twist the hair into a low rope braid, wrap it into a bun and tuck the ends beneath the coil. A few bobby pins placed at the perimeter keep the bun close to the head.
This style is especially useful when the hair is layered and the ends won’t stay braided cleanly. Tucking solves the problem before it starts.
21. Infinity Braid Accent
An infinity braid accent is a smaller, more controlled style that works well when you want detail without turning your whole head into a project. The looping pattern looks complicated, but the real benefit is how secure it feels once pinned.
Thin hair does well here because the braid is usually a medium-width accent instead of a full-head style. That means less weight pulling at the roots. Keep it along the side or just above the ear, where the braid can be seen but won’t need to hold the entire hair mass.
If you’ve never done one before, practice on a narrow section first. The motion becomes easy after a few passes.
22. Ladder Braid Half-Up
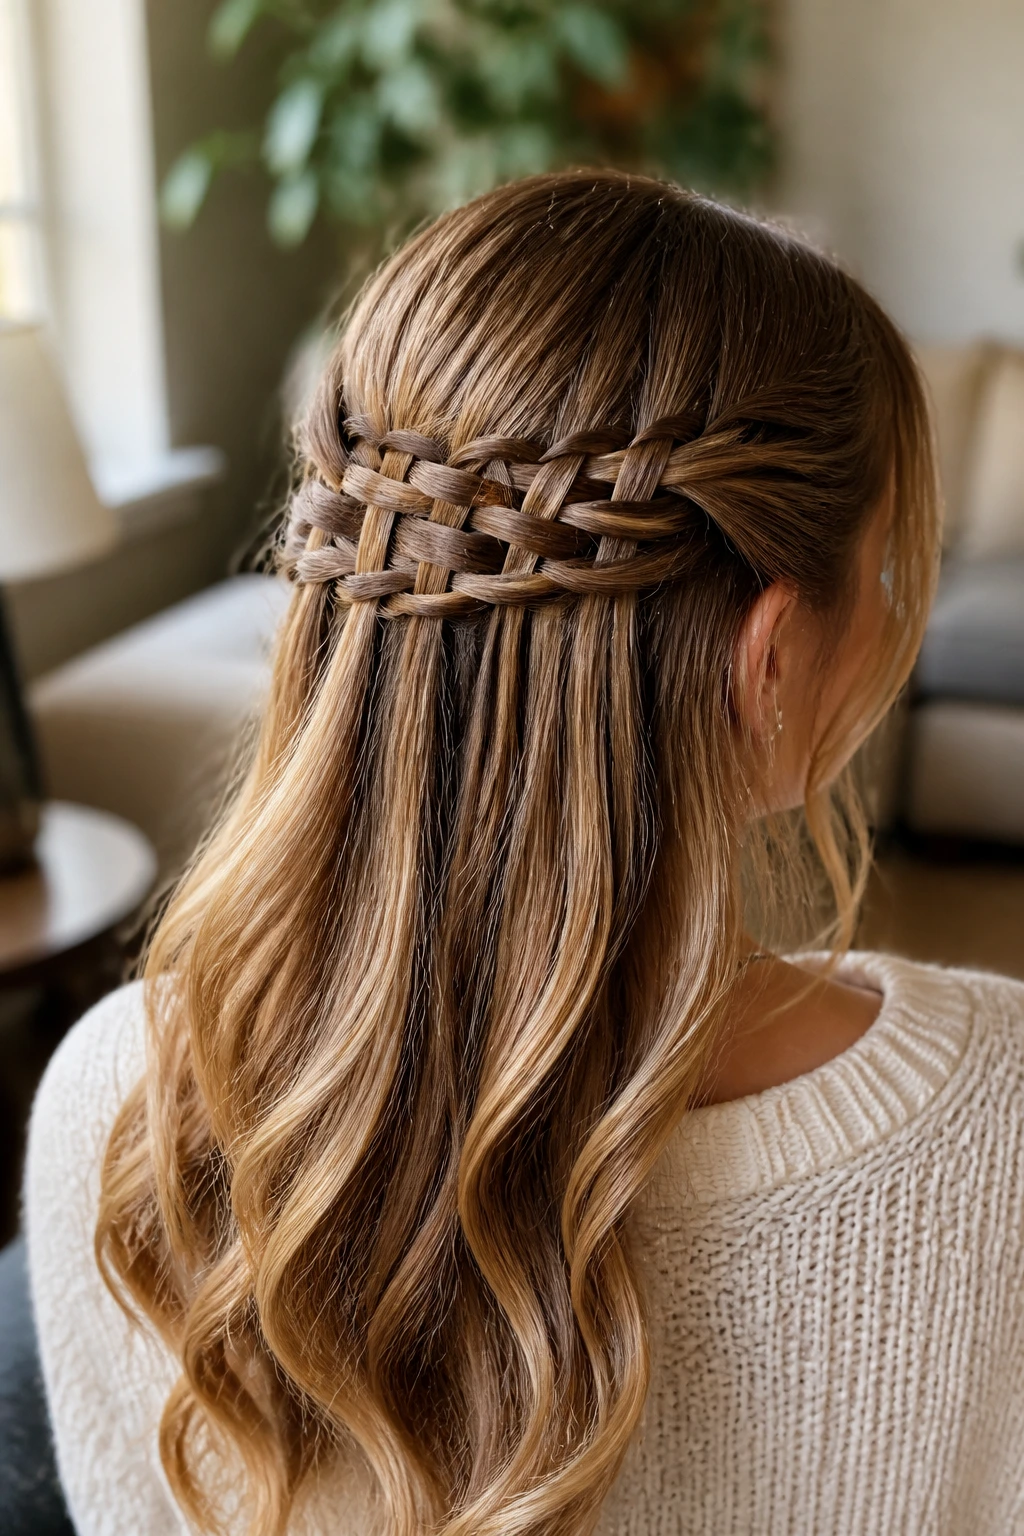
A ladder braid half-up style gives fine hair a little visual structure across the back without taking all the hair away from the face. It’s built from paired sections, so the style reads as detailed even when the individual strands are slim.
Why it works for long wear
The half-up layout keeps the weight down. That matters. Thin hair often droops when too much is pulled up, but a ladder braid spreads the strain out over a few anchor points. Pin each crossing as you go and the style stays cleaner than a loose half-up twist.
It also hides flatter areas at the crown. The staggered lines draw attention away from density and toward the shape of the braid itself. That’s a good trade.
23. Waterfall Braid into a Low Ponytail
A waterfall braid into a low ponytail is a nice middle ground between loose hair and full control. The braid creates movement at the top, while the ponytail takes over the job of staying put.
The waterfall part looks best when the dropped sections are small. On thin hair, big dropped pieces can make the braid look sparse fast. Keep the braid narrow, then gather the rest into a low ponytail with a clear elastic. That gives the whole style a cleaner base.
This is a strong choice if you want something softer than a full braid but more secure than letting everything hang loose.
24. Lace Braid into a Low Knot
A lace braid into a low knot is one of the neatest ways to keep thin hair under control without flattening it beyond recognition. The lace braid only picks up hair from one side, so the rest stays smoother and fuller.
Finish the braid near the nape, then twist the remaining length into a compact knot. The knot hides the ends and gives the braid a place to disappear into, which is excellent for shorter fine hair or layers that don’t want to cooperate. If a few strands escape, pin them under the knot instead of trying to lacquer them down.
That little bit of softness around the front keeps it from looking too severe.
25. Braided Pigtails

Braided pigtails are simple, but they’re not childish unless you style them that way. On thin hair, they split the workload evenly and stop one side from pulling everything flat.
You can braid them low for a neat finish or slightly higher for a more playful shape. Keep both braids the same size. Uneven sections show more on thin hair than people expect, and the mismatch can make the style look accidental. Finish with matching elastics, then tug the braid edges just enough to give them width.
If you want longer wear, wrap each elastic with a strand of hair and pin it underneath. That hides the hardware and keeps the ends from fraying.
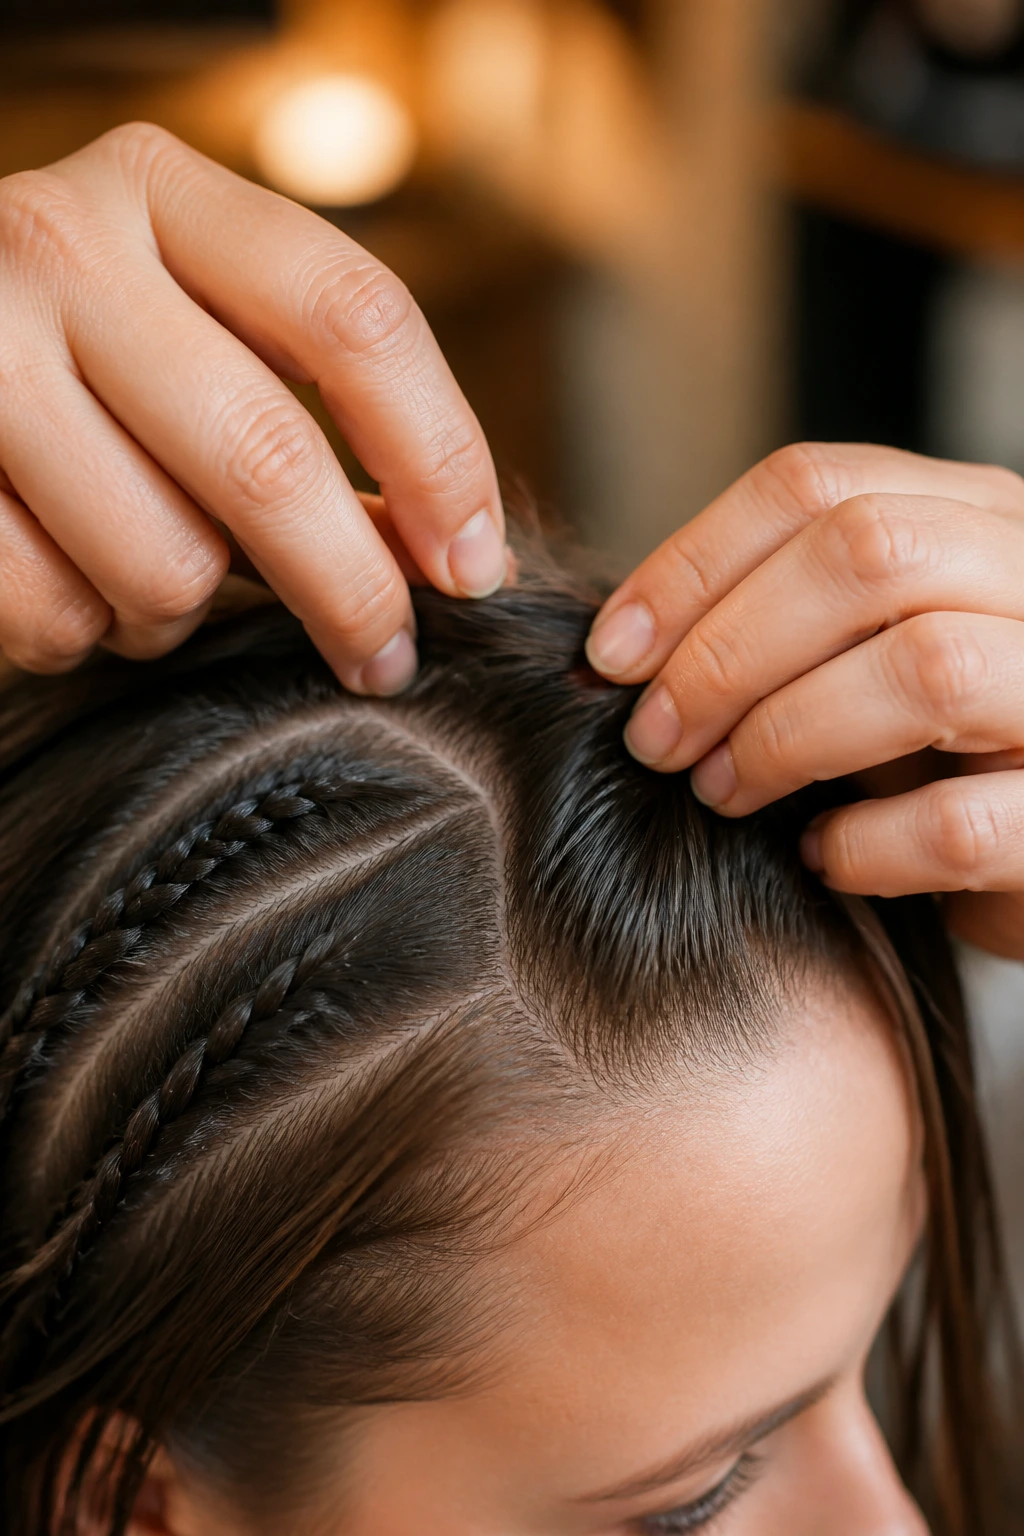
26. Micro Hairline Braids
Micro hairline braids are tiny, but they do a lot. They pull the front sections away from the face, disguise sparse edges if you have them, and add texture without removing much density from the rest of your hair.
These are best done on dry hair with a little product for grip. Work with tiny sections near the temples, braid them back, and pin or tuck them into the main style. They’re especially useful when the hairline needs a little help after a few days of wear.
A small warning
Don’t pull these too tight. Fine hair and delicate edges do not appreciate that. The braid should sit close, not clamp down.
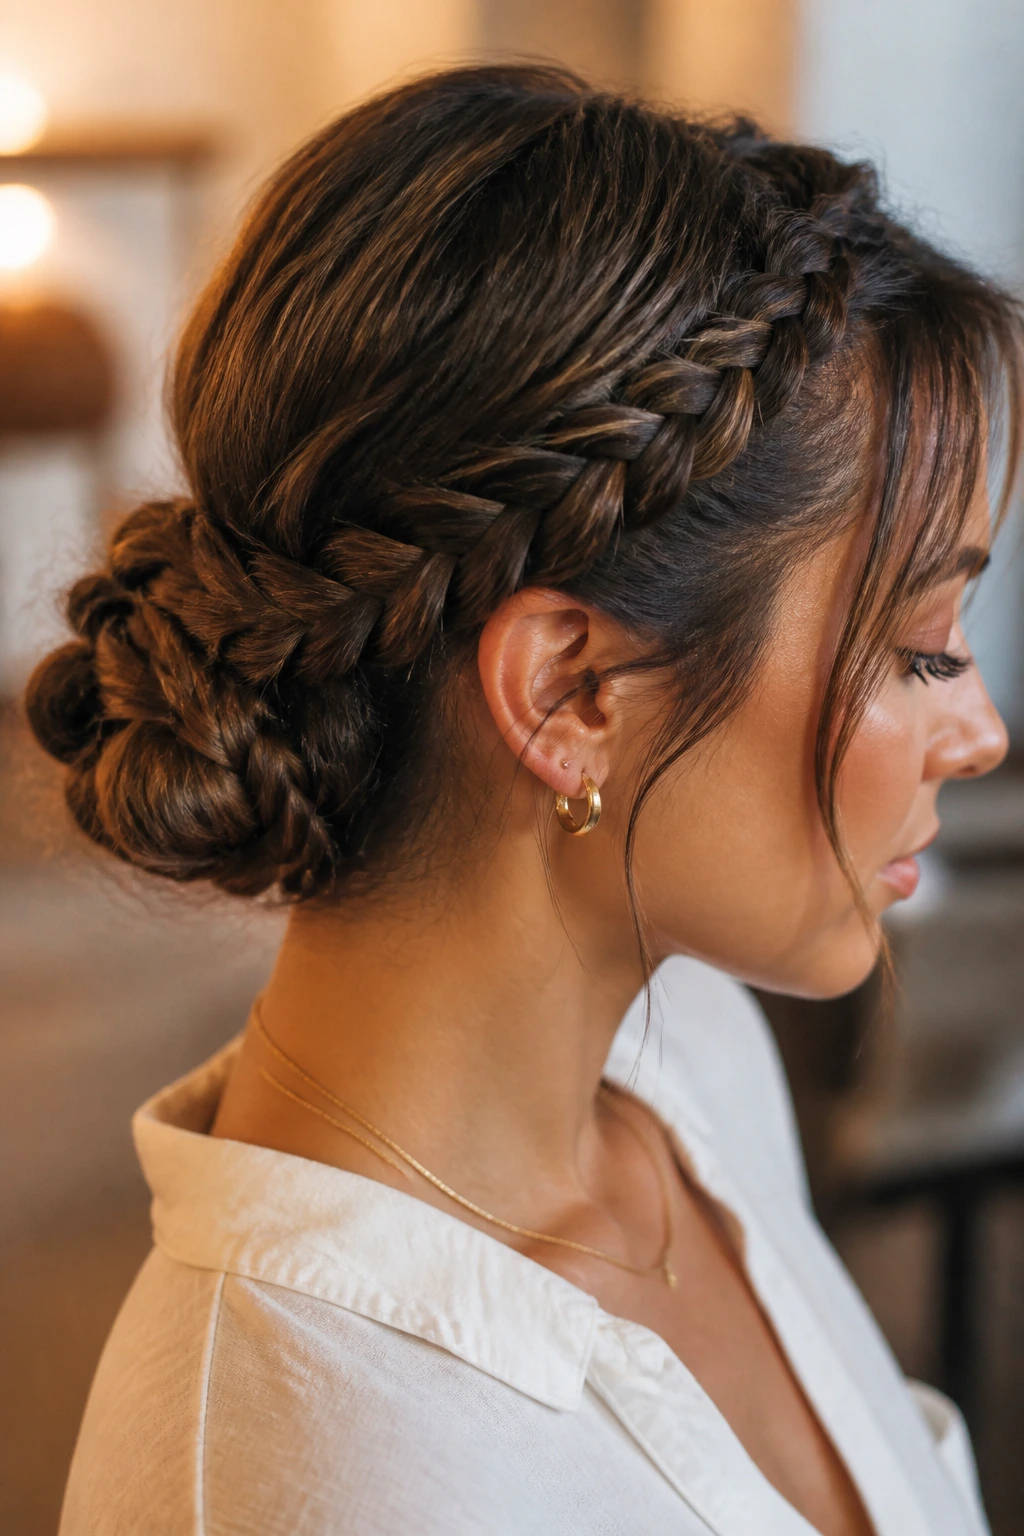
27. Twisted Braid Crown
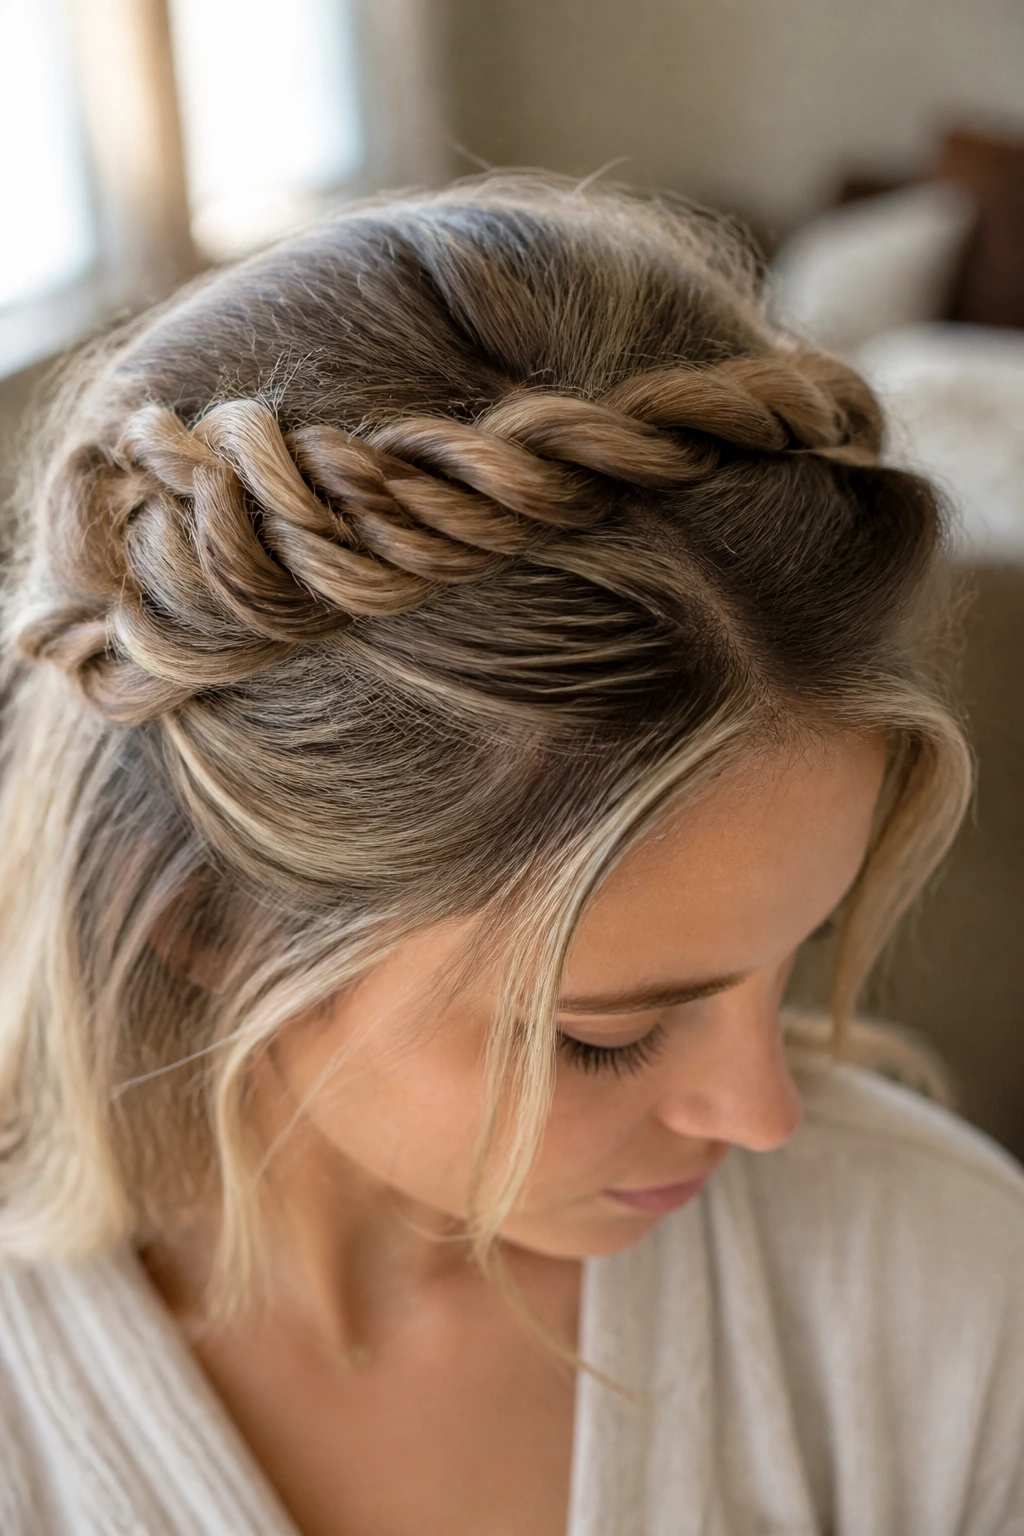
A twisted braid crown is a softer cousin to the full crown braid. Instead of filling the entire head with braids, you twist narrow sections along the top and connect them around the crown.
The lighter weight helps a lot on thin hair. Big braids can sag. Twists hold shape with less bulk. If your hair is fine but long, this style lets you wear the length without letting it hang loose and flat against your back.
Pin each twist close to the scalp so the crown stays in place. A couple of hidden bobby pins at the back of the head usually do the job.
28. Pull-Through Mohawk Braid
A pull-through mohawk braid is a bold option that still works on thin hair because it creates volume by stacking, not by pretending the hair is thicker than it is. The braid runs down the center, and the sides stay sleek.
That central ridge gives you height without requiring teasing all over the head. For fine hair, that’s a relief. Make each section tight, then gently spread the loops once the braid is built. The structure is much sturdier than a teased puff, and it tends to hold better over the course of a day.
If you want the sides to stay neat, a tiny bit of smoothing cream on a toothbrush-sized brush works well.
29. Half-Up Braided Knot
A half-up braided knot is one of the easiest ways to keep the front of the hair under control while leaving some length down. You braid two small sections or one narrow braid, then twist and knot them at the back of the crown.
The point is balance. Thin hair can look limp when everything is down, and it can look overworked when everything is pulled up. This sits in the middle. The braid gives texture; the knot gives lift. Pin the knot from underneath so the hardware disappears.
This style works especially well on hair that’s long enough to wrap around itself once but not so thick that the knot turns bulky.
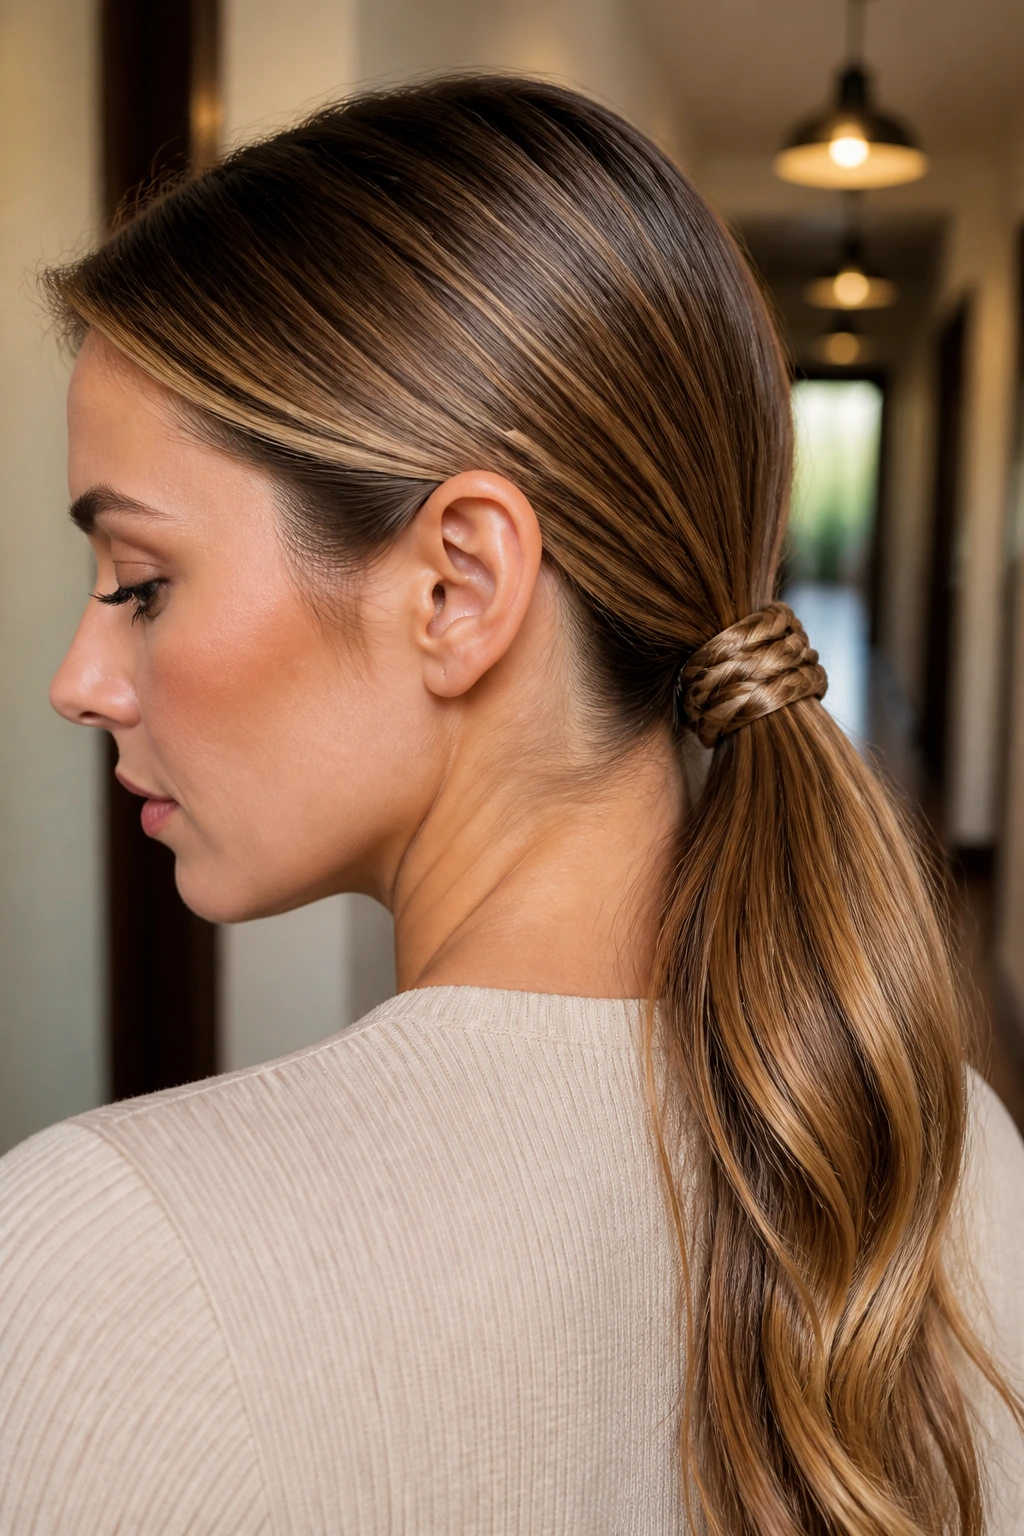
30. Side Rope Braid into a Low Pony
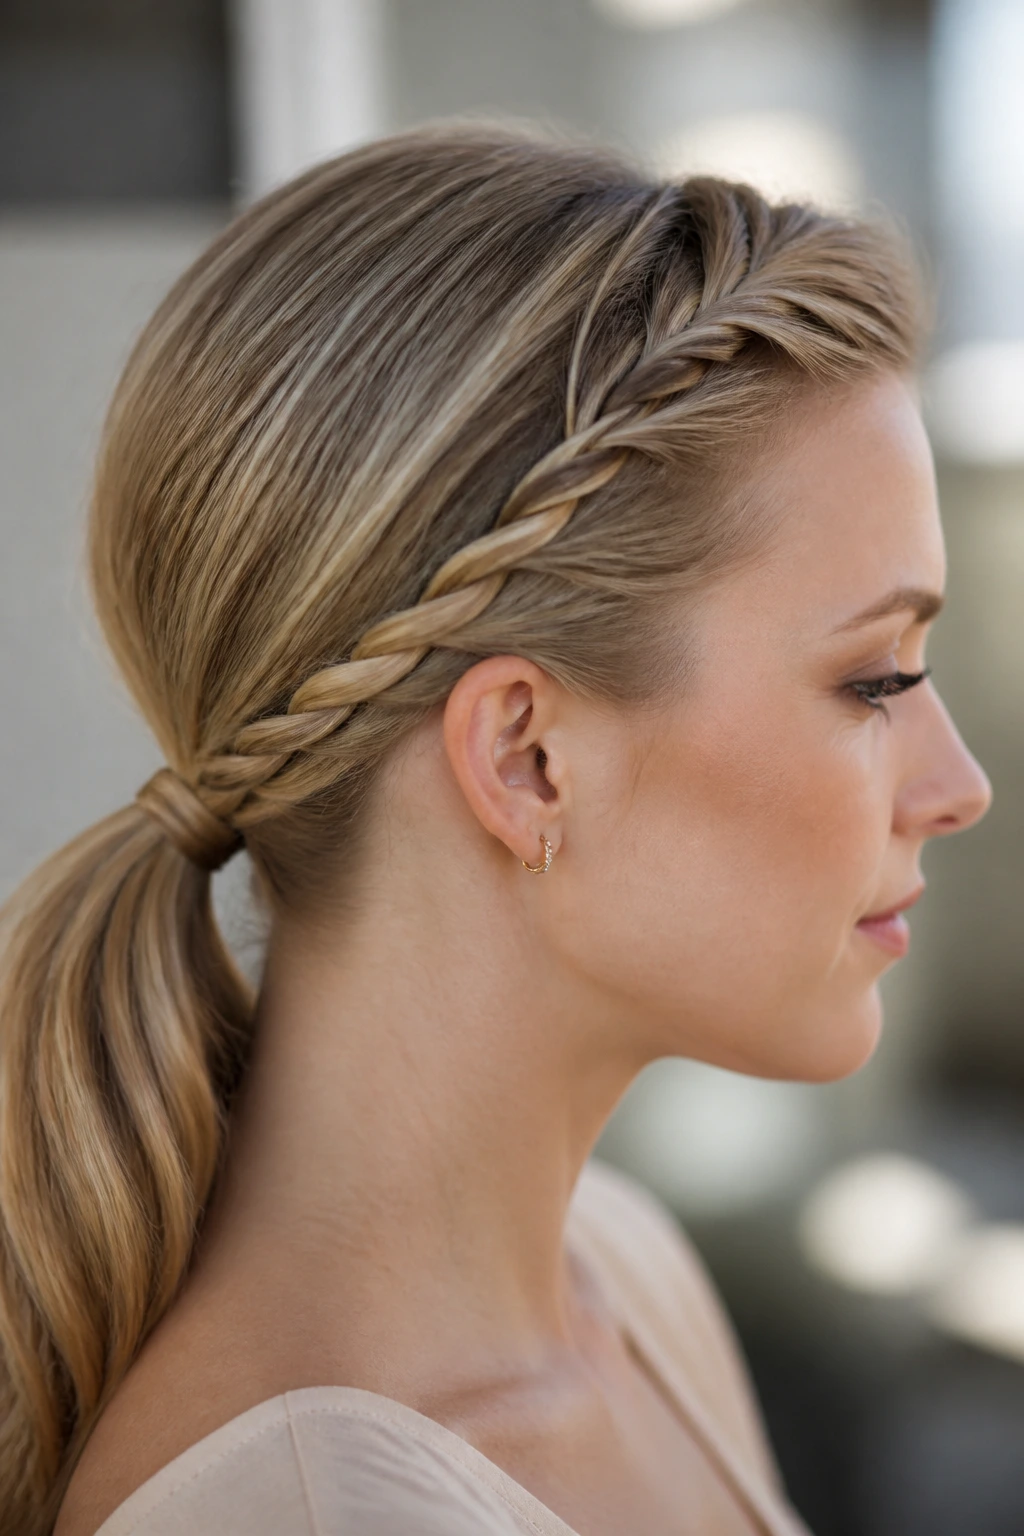
A side rope braid into a low pony is one of the cleanest quick braids for long-lasting wear with thin hair. The rope braid starts the style with a secure twist, and the low pony keeps the rest of the hair contained without adding a lot of stress at the roots.
Start at the temple, twist back toward the ear, and tie everything into a low pony at the nape. If the ponytail looks too small, wrap a tiny strand around the elastic and pin it underneath. That hides the join and gives the style a finished look.
It’s quick. It stays put. And on fine hair, those two things are often the whole point.
The Grip Tricks That Make Thin Hair Behave
Thin hair needs friction, not force. That’s the real pattern across every style above. If the strands are too silky, the braid slides. If the sections are too big, the braid gaps. If you pull too hard at the hairline, the style may last longer but your scalp will complain before the day is done.
Dry shampoo is the easy win. A light layer at the roots gives hair something to grip. Texturizing spray helps the mid-lengths, especially on clean hair that feels slick. Mousse works well if you blow-dry afterward and want a little shape without stiffness. Heavy oil, on the other hand, usually does the opposite of what you want. It makes fine strands feel soft in the mirror and slippery an hour later.
A sharp part matters more than people admit. A crooked part doesn’t just look messy; it makes each braid section uneven, which shows up faster on low-density hair. I’d rather see a simple clean part and a narrow braid than a wide fancy braid that starts falling apart at the edges. Tiny elastics beat bulky ones here. So do bobby pins with a slightly rough coating instead of the glassy, slippery kind.
One more thing. Don’t build every braid on freshly washed hair unless you absolutely have to. There’s a sweet spot between clean and grippy, and on thin hair it usually lives around day one or day two after washing.
Essential Tools for These Styles
- Rat-tail comb: Makes clean parts and small sections without tearing through fine strands.
- Fine mist water bottle: Useful for dampening stubborn flyaways, but keep it light so the hair doesn’t get puffy.
- Dry shampoo: Adds grip at the roots and gives the braid something to hold onto.
- Lightweight mousse: Good for roots and mid-lengths when you want shape without heaviness.
- Texturizing spray: Helps silky hair separate into cleaner sections.
- Clear elastics: Best for small braids and hidden finishes on thin hair.
- Bobby pins: Use the crisscross pin trick when you need hold at the nape or crown.
- Duckbill clips: Handy for sectioning while you braid.
- Edge brush or clean toothbrush: Great for smoothing the front hairline with a tiny bit of gel.
- Silk scarf or satin bonnet: Protects braids overnight and keeps the finish from frizzing up.
Smart Product Picks for Thin Hair

Thin hair gets weighed down fast, so the product aisle can turn into a trap if you’re not paying attention. The goal is grip, not grease. That means looking for formulas that dry down cleanly and leave a little texture behind rather than a slick film.
A good mousse should feel light in the hand and vanish once you blow-dry it in. If it leaves your hair crunchy before you even braid, it’s probably too heavy. Dry shampoo should make the roots feel rougher, not chalky. If it turns the scalp white, you’ve used too much or chosen a formula that needs more blending. Texturizing spray is most useful on the mid-lengths and ends, where fine hair tends to slide apart during braiding.
Heavy creams are usually a bad bet unless your hair is very dry. They can make the braid look smooth at first, then collapse. Gel can work near the hairline, but only in a small amount. A pea-sized dab smoothed over the front with an edge brush is enough for most styles. Anything more starts to look stiff.
If your hair is extremely fine, skip anything with a big silicone shine unless you know the braid style is pinned in place. Shine looks nice in a mirror. Hold is what matters on day three.
How to Wear These Braids So They Look Intentional
Presentation: Start with a part that suits your face and then keep the front hairline tidy. Thin hair often looks best when the roots are smooth and the braid itself gets the attention, not a cloud of flyaways.
Accompaniments: Small hoops, a silk scarf, or a jacket with a clean collar can make these styles look finished in a way a giant hair accessory can’t. Keep the extras simple. Fine hair gets swallowed by heavy accessories.
Portions: Narrow braids usually look fuller on low-density hair than thick ones that keep opening up. If your hair is long, let the length show. If it’s short, keep the braid close to the scalp and use pins to fake extra reach.
Occasion Match: The tighter styles work for workouts, travel, and hot weather. The softer crown and side styles read better for work, dinner, or anything where you want the braid to look deliberate instead of purely practical.
Extra Texture and Finish Moves
Texture Boost: If your hair is too silky, braid it after a dry shampoo pass or after sleeping in loose waves. That one shift can change how long the style holds.
Root Control: Tease only the underside of the crown if you need a little lift. Don’t backcomb the whole head. Thin hair breaks faster when you get aggressive with the comb.
Flyaway Fix: Warm a tiny bit of styling cream between your fingers and tap it over the surface, not into the braid itself. Too much product inside the braid makes the sections slip apart.
Shape Boost: Pancake the outer edges of Dutch braids, fishtails, and pull-through styles gently once they’re secure. That gives width without destroying the structure.
Nighttime Help: A satin bonnet or a loose silk scarf keeps the braid from roughing up overnight. If you wake up with flat roots, that’s easier to fix than a frizzy braid.
Night-Before Prep, Refreshing, and How Long They Last

A braid on thin hair usually lasts better when you stop treating the finish as the only job. The prep the night before can save you ten minutes the next morning. If your hair is too clean, add a touch of dry shampoo or mousse before bed and let it settle overnight. If you’ve already braided the hair, sleep on a silk pillowcase or cover it with a satin bonnet so the outer layer doesn’t fuzz up.
For next-day wear, most of these styles hold well for a workday or a full evening if the braid is pinned and anchored properly. Sleeker styles like the low fishtail, side rope braid, or braided low bun often last longer than loose halo styles because they sit closer to the scalp. If you sweat at the hairline, wipe the skin with a dry cloth and re-smooth only the front pieces. Don’t soak the whole braid.
To refresh, mist your hands lightly with water, rub a dab of mousse or cream between your palms, and smooth the flyaways instead of spraying product straight onto the braid. Direct spraying can make fine hair collapse. If a section near the nape loosens, a single hidden bobby pin usually fixes it faster than rebraiding the whole style.
Wet braids are a different story. If you braid damp hair for waves, let it dry completely before you sleep in it. Thin hair that stays damp too long can feel flat, limp, and not especially happy about it.
Variations and Adjustments for Different Hair Types
Ultra-Fine Texture Fix: Use smaller sections, tighter anchors, and a little dry shampoo before braiding. This keeps the braid from sliding open while still looking soft.
Low-Density, Long-Length Version: Choose styles that hide the ends, like the braided low bun, side rope braid into a pony, or pull-through braid. Long thin hair can drag itself flat if you leave too much of it loose.
Short-Length Workaround: Stick to half-up styles, crown braids, headband braids, and micro hairline braids. These need less length and let you pin the finish where your hair naturally wants to fall.
Workout-Ready Version: Go with boxer braids, straight-back braids, or a braided ponytail wrap. Close-to-scalp styles survive sweat and movement better than loose side braids.
Soft Office Finish: Try the side-swept French braid, half-up lace braid, or twisted braid crown. These styles read polished without looking overbuilt.
Protective-Style Version: Keep tension gentle at the edges and choose styles that don’t need constant tugging. Fine hair gets stressed fast when the roots are yanked too hard.
Mistakes That Make Braids Slip Out
- Using hair that’s too clean and too soft: Freshly washed hair can feel nice but act slippery. Add dry shampoo or wait a day if you want the braid to last.
- Taking sections that are too large: Big sections look impressive for about five minutes, then they split open. Smaller sections hold better and look neater.
- Pulling too hard at the roots: Tight braids might stay in place, but they can make the scalp sore and the edges frizzy. Secure the base, then ease up.
- Using heavy creams everywhere: Cream through the whole head can make thin hair collapse. Keep the product at the hairline or outer surface only.
- Skipping hidden pins: A braid that looks pinned “somewhere” often loosens as soon as you move. Cross the bobby pins or tuck the tail under another section.
- Pancaking before the braid is secure: If you tug the braid open too early, the whole structure can loosen. Pin first, widen second.
Questions People Ask Before They Start Braiding
What braid holds best on thin hair?
Tight scalp-based styles usually win: small Dutch braids, boxer braids, and braided low buns. They anchor better than loose braids because the sections are locked in from the start.
Should thin hair be clean or a little dirty for braids?
A little lived-in hair usually holds better. Day-one or day-two hair gives you more grip, while freshly washed hair tends to slide apart unless you add texture first.
How do I make braids look fuller without making them messy?
Pancake the outer edges gently after the braid is secured, and use a narrow sectioning pattern from the start. If you widen the braid before it’s pinned, it loses shape too fast.
Can I braid thin hair every day?
You can, but keep the tension sensible and change the placement around. Repeated tight braids in the same spot can stress the hairline. Rotating between crown, side, and nape styles helps.
What if my layers keep falling out of the braid?
Use a little styling cream on the surface and a few hidden pins where the shorter pieces escape. For very stubborn layers, a half-up style or headband braid hides them better than a full braid.
Do pull-through braids work on fine hair?
Yes, and they often work better than traditional big braids because they create fullness with ponytail sections instead of sheer density. Just keep each bubble even and don’t yank the loops too hard.
How long can these styles last?
Most of them will hold through a normal day if you prep properly. With dry shampoo, a bit of product, and a clean finish, some of the tighter styles can carry into the next day with only a quick refresh at the roots.
What if the braid starts loosening halfway through the day?
Tuck a bobby pin into the loosest anchor point before the whole style starts sagging. If the braid is slipping at the crown, fix the root; if it’s slipping at the end, tighten the elastic or tuck the tail underneath.
Braids I’d Reach for First

If thin hair has ever made you think braids just weren’t your thing, start smaller and closer to the scalp. That’s the real trick. The styles that last longest are usually the ones that respect the hair you actually have instead of asking it to perform like something else.
My first picks would be the tiny Dutch crown braid, the side-swept French braid, the pull-through braid, and the braided low bun. They each do a different job, but they all solve the same problem: keep the hair anchored, keep the sections neat, and stop the style from depending on volume that isn’t there.
Once you start thinking that way, thin hair becomes easier to braid, not harder. And the best part is that the styles stop feeling like compromises. They start looking like choices.