Hair that once dried with a little bend can start collapsing by lunchtime, especially around the crown and temples. That’s why layered volume hairstyles for older women matter so much: they don’t chase length for length’s sake. They give the hair a shape that works with gravity instead of fighting it.
A blunt one-length cut can look sleek on a hanger. On a real head, it often sits there like a curtain rod. Layers change the game. They lift the cheekbones, soften a jawline, and make gray, silver, or salt-and-pepper strands show off their texture instead of hanging in one heavy sheet.
The best volume haircut is not the one with the most texture sprayed into it. It’s the one that puts lift where the eye wants it: at the crown for height, around the face for softness, and through the mid-lengths for movement. Get that balance right and the style holds up through errands, dinner, wind, humidity, and the sort of day that usually sends hair flat before noon.
Why These Cuts Earn Their Keep
-
Built-in lift beats daily backcombing: A good layered cut creates height with shape, so you’re not teasing the same section every morning and breaking it off by the end of the month.
-
Face-framing layers do real work: The right pieces around the cheeks and jaw make a cut look intentional even when you air-dry it and run out the door.
-
Gray hair looks sharper with movement: Silver strands can go puffy or dull in a one-length shape, but layers give them edges, swing, and a cleaner outline.
-
They work with changing density: Fine hair needs a different layer pattern than thick hair, and the styles below cover both without pretending one haircut fits everyone.
-
They grow out more gracefully: Soft layering gives you a few extra weeks before the shape turns awkward, which matters if you’d rather not book a trim every three weeks.
-
Short, medium, and long options all show up here: If you love a pixie, want a lob, or refuse to give up your length, there’s a version here that will still give you lift.
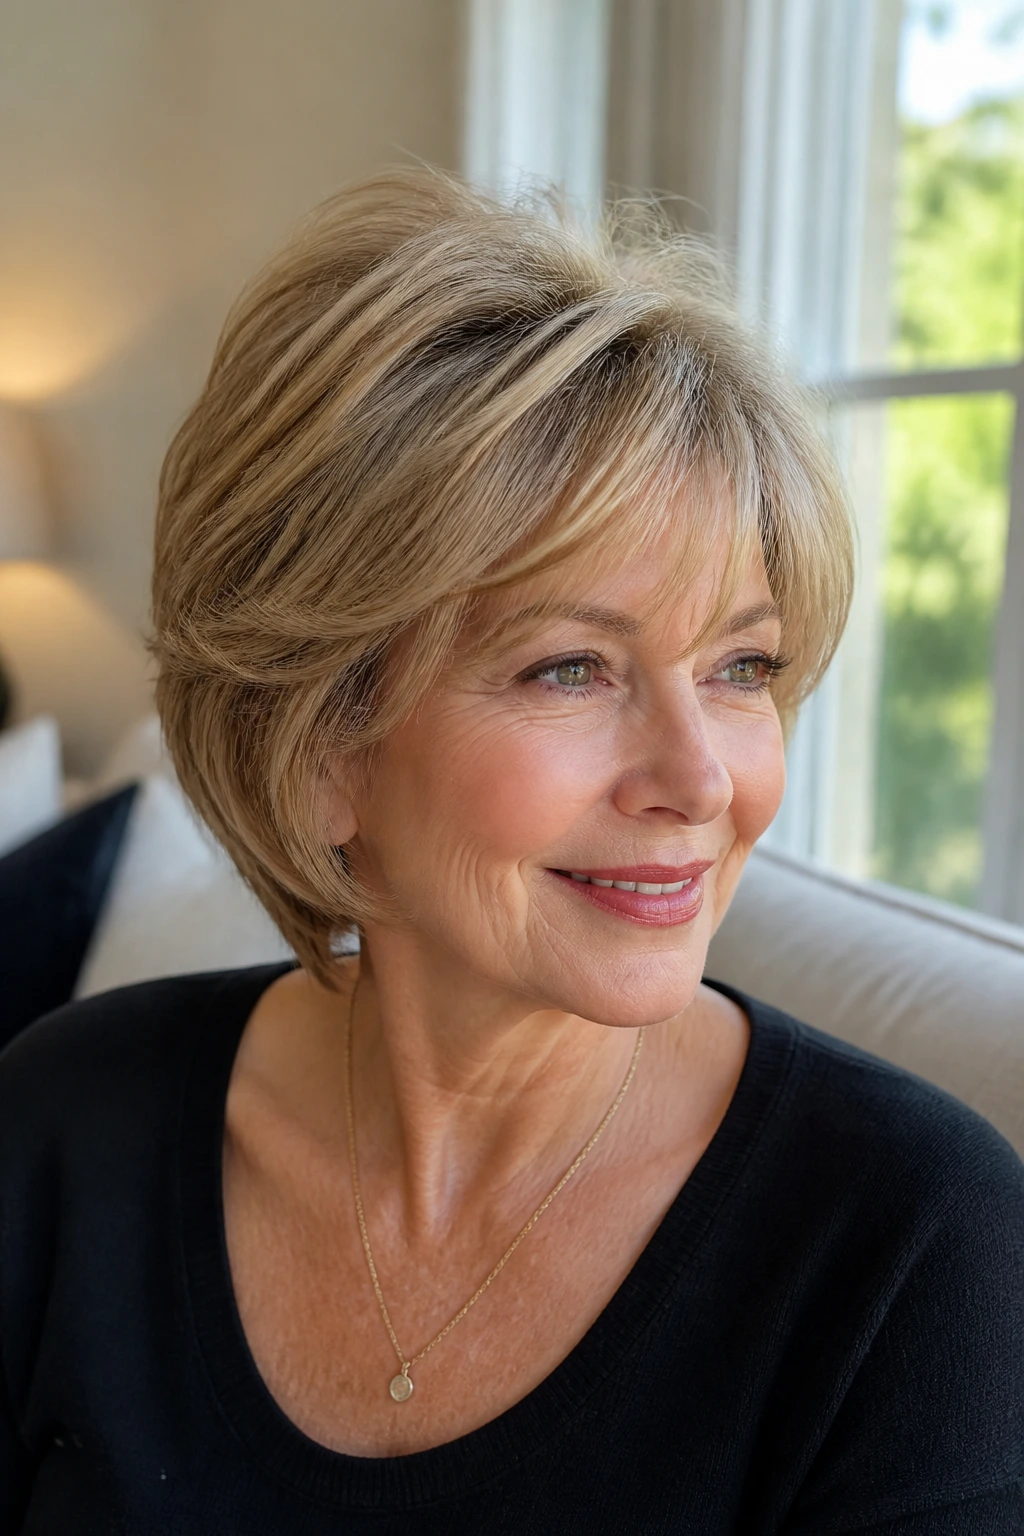
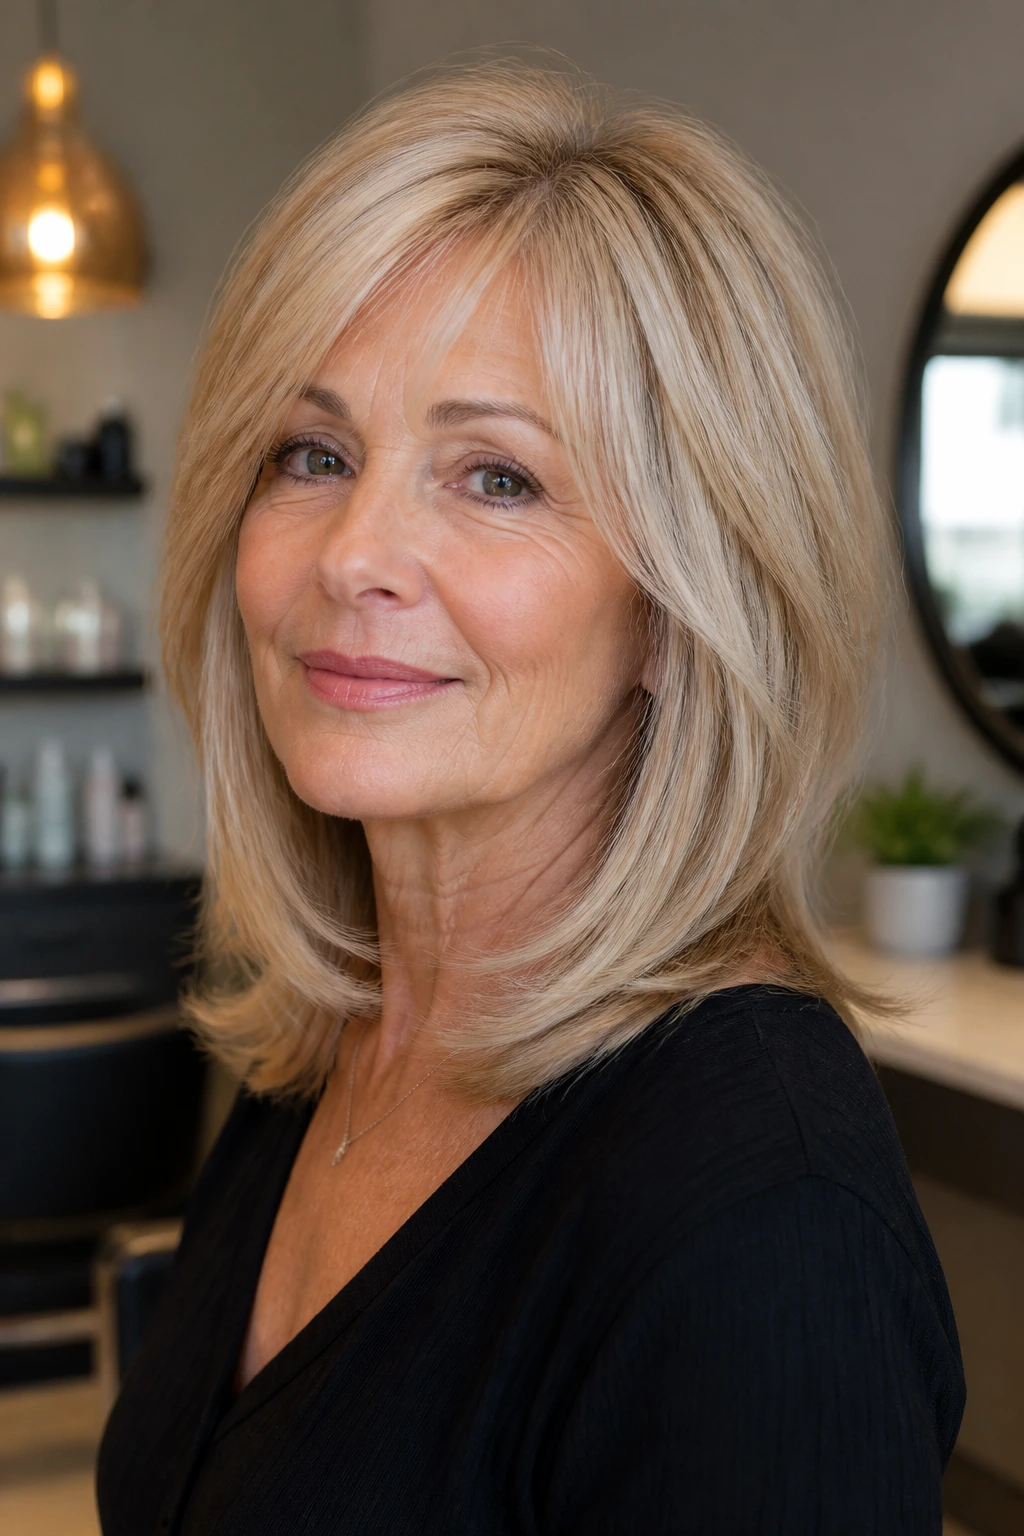
1. Feathered Collarbone Layers
Feathered collarbone layers sit in that sweet spot where the hair swings instead of sagging. The cut lands around the collarbone, then breaks up just enough near the front to keep the shape light. It’s one of those styles that makes the whole head look more awake without screaming for attention.
Why It Works:
The collarbone is a smart stopping point because the hair isn’t dragging down the face, but it still has enough length to tuck behind an ear or curl under with a round brush. Feathering around the front softens the jawline and keeps the ends from looking boxy. If your hair has gone finer near the temples, this shape gives the illusion of fullness where you want it most.
Key Styling Products:
- 1 golf-ball-size mound of volumizing mousse for damp roots
- A heat protectant spray with a light finish
- A flexible-hold hairspray that won’t freeze the ends
- A pea-size dab of smoothing cream for the front pieces only
Quick Steps:
- Apply mousse at the roots on towel-dried hair, especially at the crown and around the part.
- Blow-dry with a medium round brush, lifting the roots up and away from the scalp.
- Curve the ends inward for a clean finish, or flick them out slightly if you want more movement.
- Pinch the front pieces forward for a softer frame around the face.
- Mist lightly with hairspray only after the hair cools.
Equipment for This Style:
- Medium round brush
- Blow dryer with a nozzle
- Sectioning clips
- Paddle brush for smoothing the back
How to Wear It:
This cut looks sharp with glasses, a blazer, or a simple sweater with a higher neckline. It also sits well with a side part when you want more lift on one side and a little less on the other.
Pro Tips for This Style:
- Ask for internal layering, not just sliced-up ends.
- If your hair is fine, keep the feathering soft at the front and leave the perimeter fuller.
- Blow-dry the crown first while it’s still damp; that’s where the shape either lives or dies.
Variations on This Style:
- Softer Feather: Keep the ends blunt and only feather the front 2 inches for a calmer look.
- Bouncy Blowout Version: Set the lengths with Velcro rollers for 10 minutes after drying if you want more lift.
Common Mistakes to Avoid with This Style:
- Don’t over-layer the ends. They start to look wispy and tired fast.
- Don’t load the roots with heavy oil. The cut loses lift before you finish breakfast.
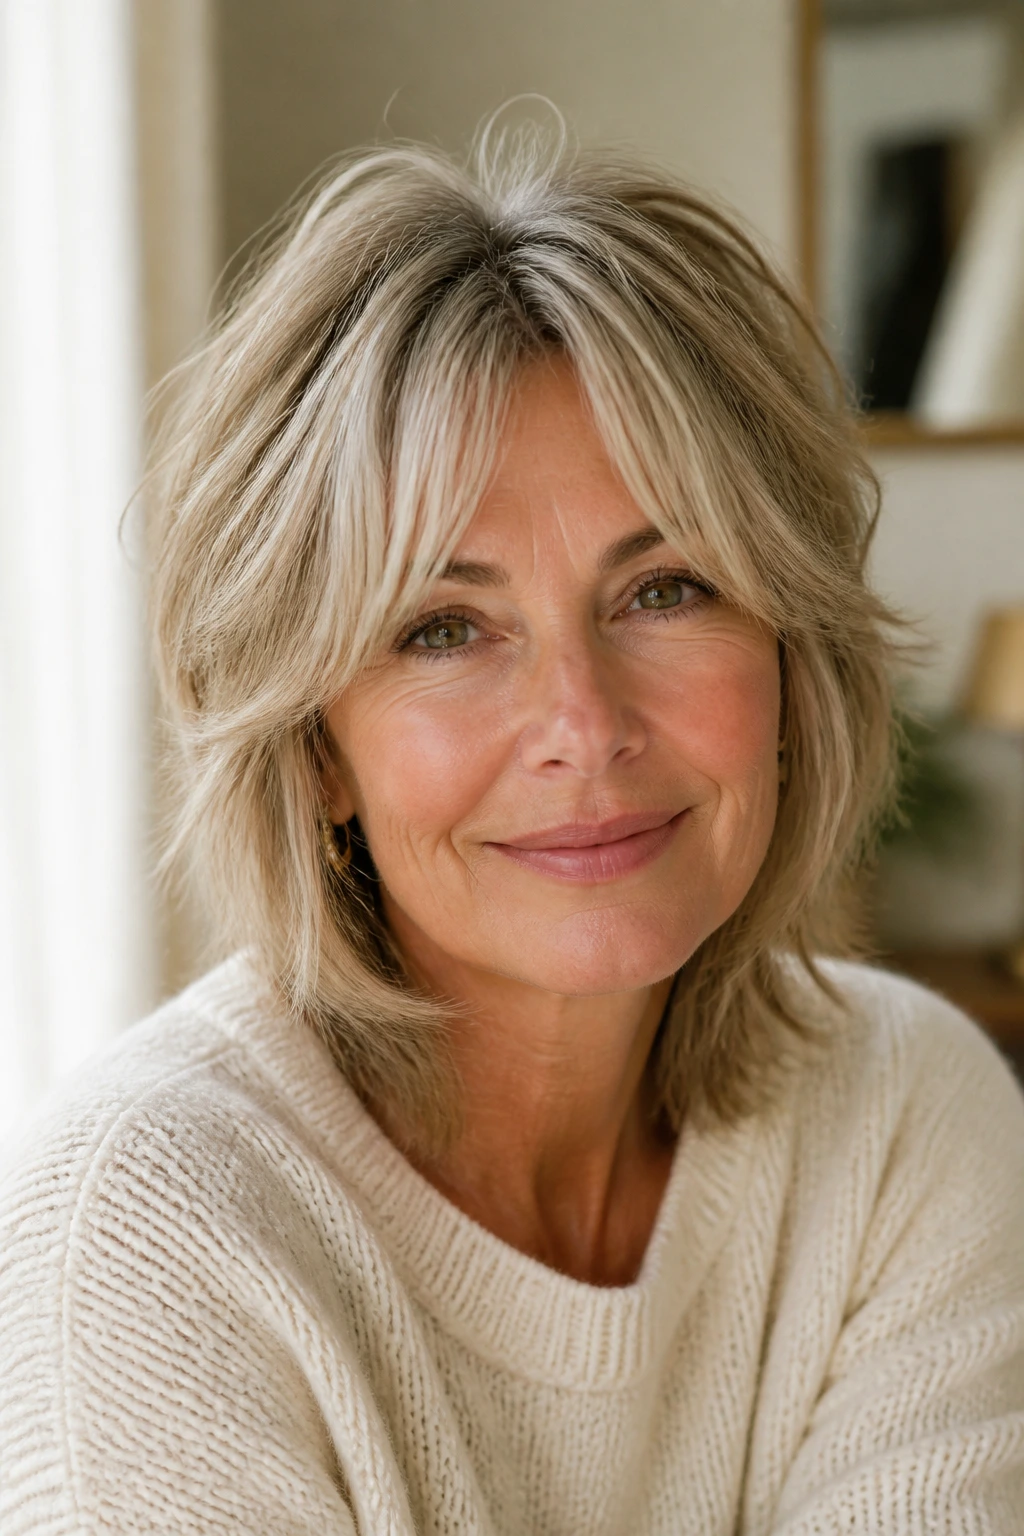
2. Soft Shag with Curtain Bangs
A soft shag with curtain bangs has a little edge, but not the crunchy, over-chopped version that scares people off. This one is airy at the crown, broken up through the sides, and gently split at the forehead so the fringe opens like a curtain instead of sitting like a shelf.
Why It Works:
The shag shape creates movement in every direction, which is exactly what flatter hair needs. Curtain bangs take attention upward and inward toward the eyes, then the shorter crown layers keep the top from collapsing. It’s a smart cut for hair that feels limp near the roots but still has enough body to hold a bend.
Key Styling Products:
- Lightweight mousse for the top half
- Heat protectant spray
- Texture spray for the mid-lengths
- A dab of styling cream for the bangs if they frizz
Quick Steps:
- Work mousse into the roots and comb it through the crown.
- Blow-dry the bangs first, sweeping them side to side with a round brush.
- Rough-dry the rest until it’s about 80% dry.
- Use a 1-inch iron to add a few loose bends, not tight curls.
- Shake out the hair with your fingers and finish with texture spray under the top layers.
Equipment for This Style:
- Small-to-medium round brush
- 1-inch curling iron or wand
- Blow dryer with a diffuser or nozzle
- Duckbill clips for holding sections
How to Wear It:
It works with earrings, scarves, and open necklines because the fringe already gives the face plenty of shape. If you wear glasses, keep the curtain bangs long enough to clear the frames when they split.
Pro Tips for This Style:
- Cut the bangs longer than you think at first; they shrink when you brush them down.
- Use more lift at the crown than at the ends. The top should do the talking.
- On day two, a little dry shampoo at the part brings the shag back to life fast.
Variations on This Style:
- Softer Salon Shag: Keep the layers less choppy and the bangs more blended.
- Piecey Fringe Version: Add a touch more texture at the front for a modern, undone finish.
Common Mistakes to Avoid with This Style:
- Don’t make the bangs too short. That’s where the cut starts looking harsh.
- Don’t curl every section the same way. The shag needs some irregularity or it goes flat and stiff.
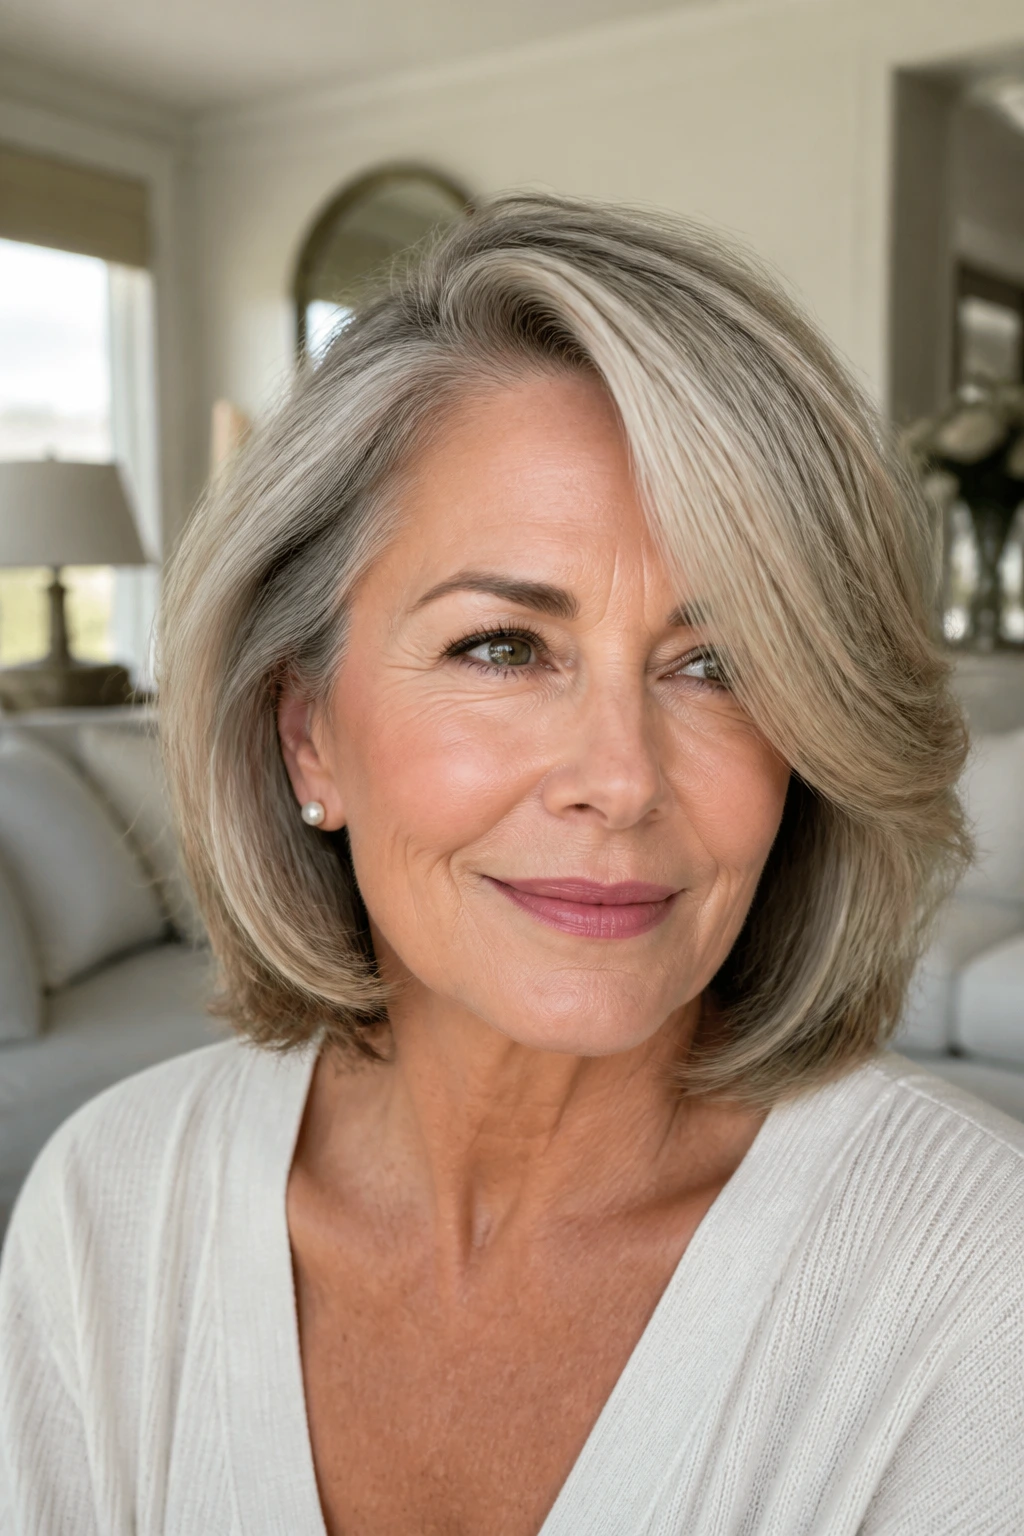
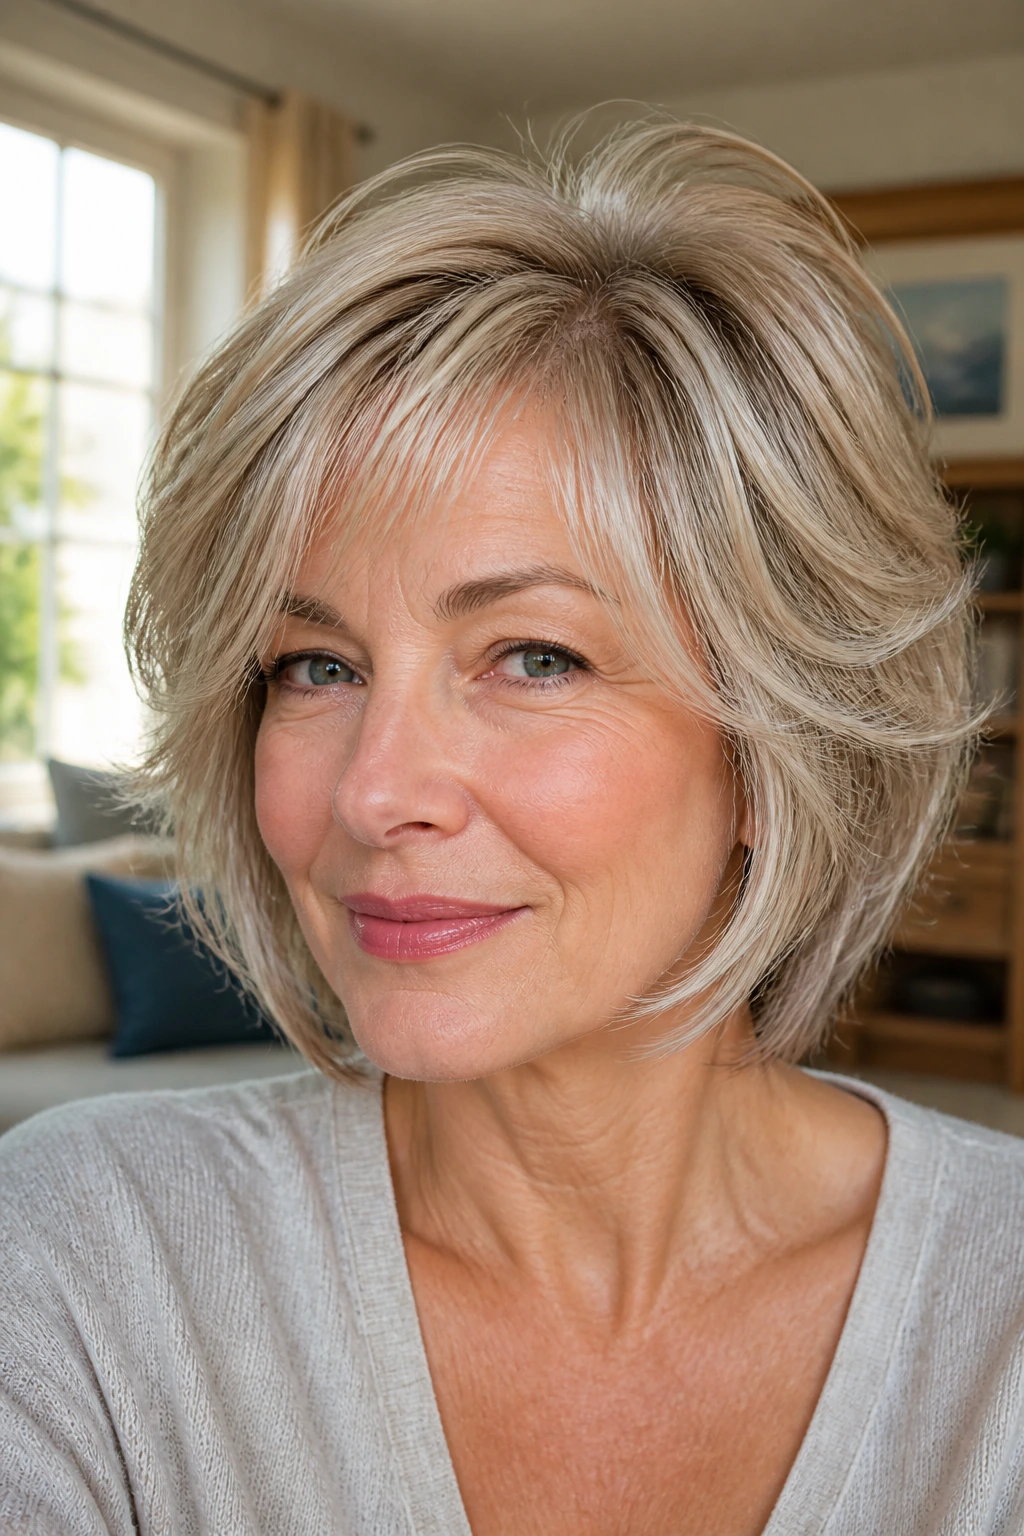
3. Chin-Length Layered Bob
A chin-length layered bob is a small cut with a big job. It lifts the jawline, opens the neck, and gives fine or medium hair a clean shape that doesn’t need much fuss. If you’ve ever wanted a bob that behaves instead of puffing out in the wrong places, this is the one to look at.
Why It Works:
The chin-length line pulls the eye upward, which is useful when hair starts feeling thin through the ends. A little layering around the interior keeps the bob from becoming a solid helmet. That extra movement helps the hair swing when you walk, which is a tiny thing that makes a big difference.
Key Styling Products:
- Root-lifting spray
- Lightweight blow-dry cream
- A small amount of shine spray for the ends
- Flexible hairspray
Quick Steps:
- Spray root lifter at the crown and along the side part.
- Blow-dry with a round brush, turning the ends slightly under.
- Direct the front pieces forward first, then sweep them back for shape.
- Tuck one side behind the ear if you want the jawline to show more.
- Finish with a light mist of hairspray from 10 inches away.
Equipment for This Style:
- Small round brush
- Blow dryer
- Flat iron for a slight bend if needed
- Fine-tooth comb for sectioning
How to Wear It:
This bob loves structured tops, turtlenecks, and earrings that move. It also looks neat enough for work but not so stiff that it feels formal at dinner.
Pro Tips for This Style:
- Keep the back slightly shorter than the front if you want more lift at the neck.
- A side part gives the bob more movement than a centered part.
- If the hair is dense, ask your stylist to remove weight underneath, not on top.
Variations on This Style:
- Stacked Nape Bob: Add a touch of graduation at the back for more crown lift.
- Sleeker Bob: Keep the layers minimal and smooth the ends under for a sharper line.
Common Mistakes to Avoid with This Style:
- Don’t cut it too blunt if your hair is already fine. It can sit flat and heavy.
- Don’t overload it with serum. A shiny bob is good; a slippery one is not.
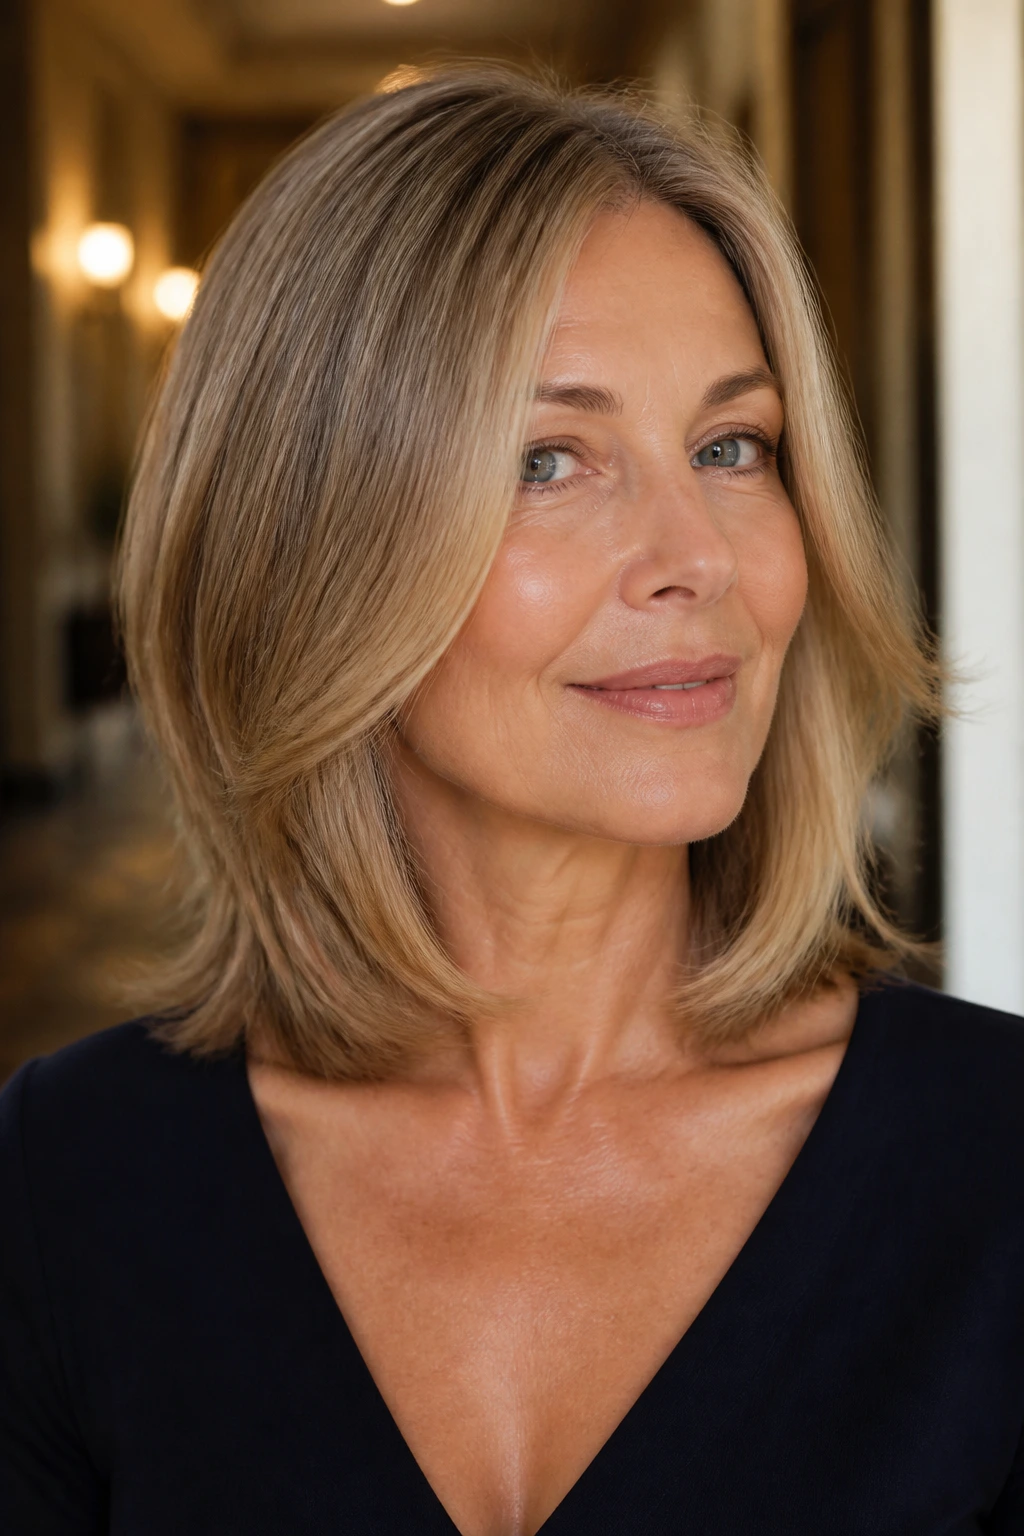
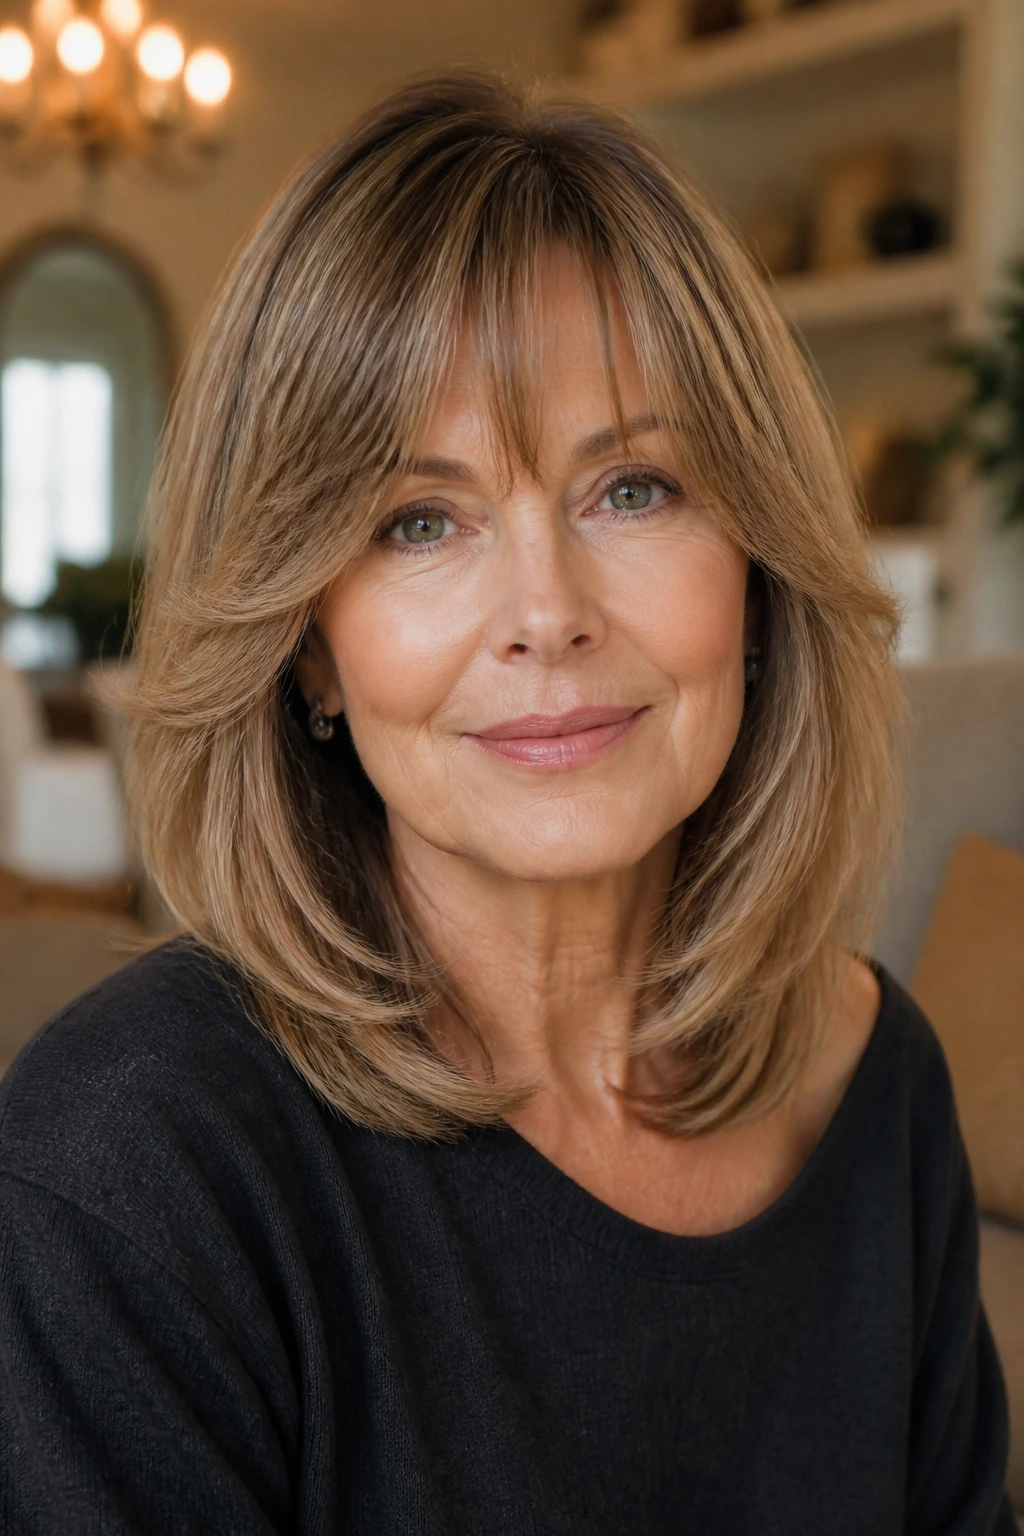
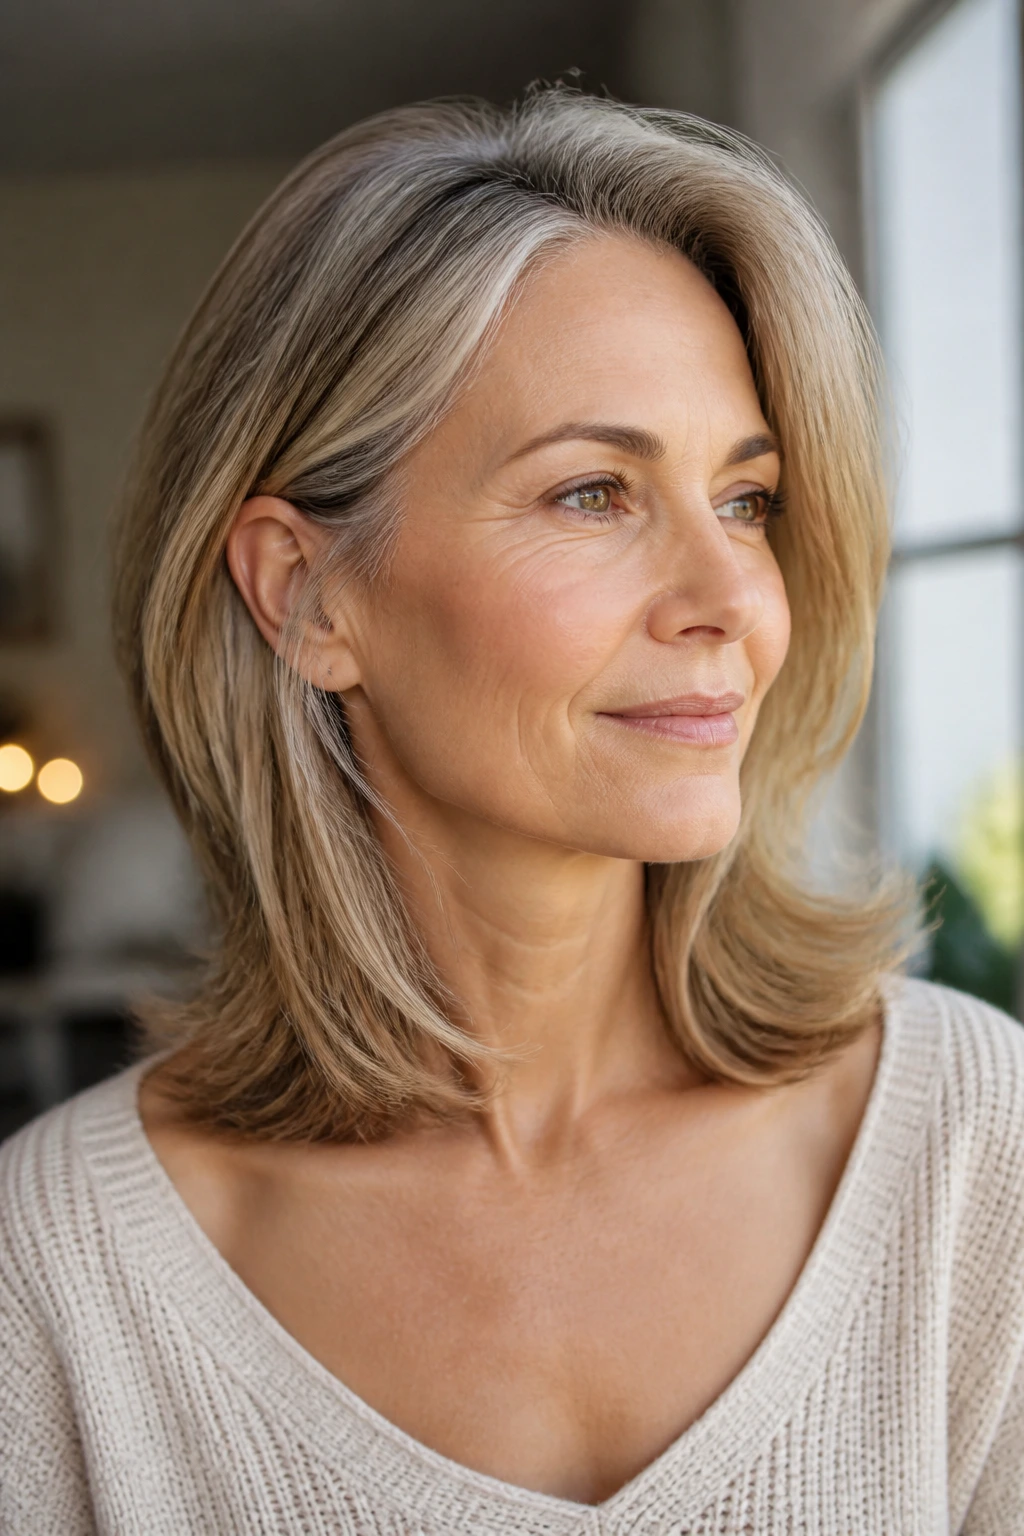
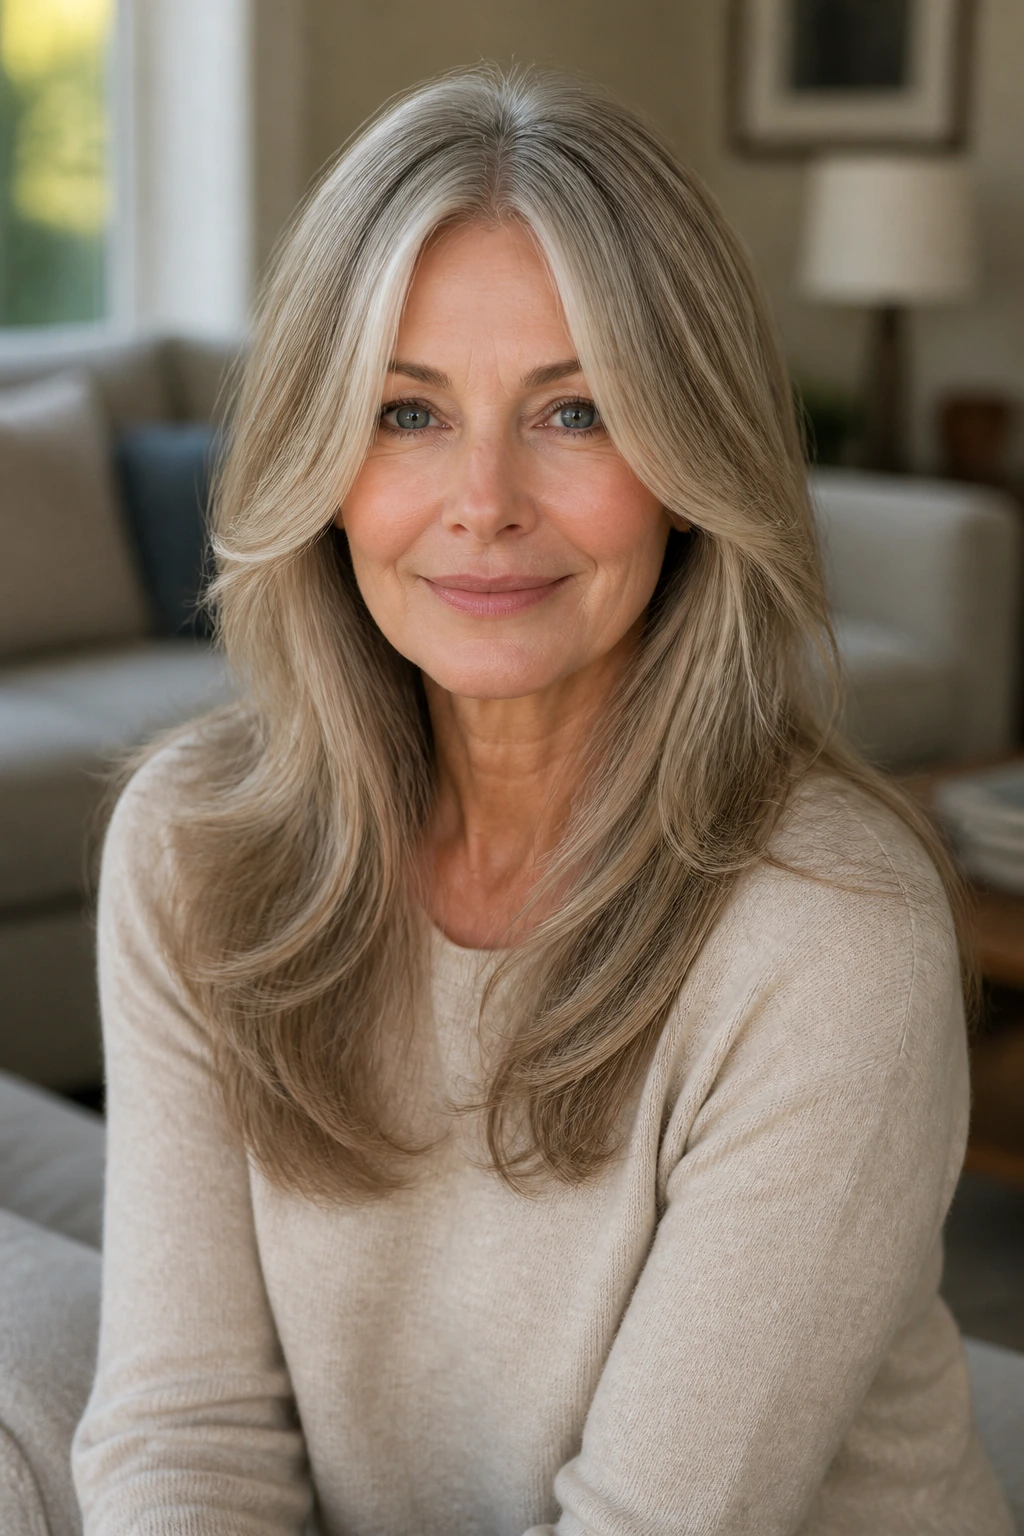
4. Long Layers with Face-Framing Pieces
Long layers are for the woman who likes length but is tired of hair that hangs like a heavy shawl. The trick is to keep the bottom long enough for movement while carving shape around the face so the style does not fall straight down and swallow your features.
Why It Works:
Length alone does not create fullness. Long layers do, because they break the sheet of hair into sections that can move separately. Face-framing pieces also help balance glasses, soften a strong jaw, and bring the eye up toward the cheekbones instead of straight to the ends.
Key Styling Products:
- Volumizing mousse at the roots
- Heat protectant cream
- Light-hold hairspray
- A few drops of serum for the very ends only
Quick Steps:
- Apply mousse to damp roots and comb through the lengths.
- Blow-dry with a large round brush, lifting at the crown and front.
- Curl the pieces nearest the face away from the cheeks.
- Leave the middle layers looser so the style doesn’t feel overworked.
- Finish by separating the front pieces with your fingers, not a comb.
Equipment for This Style:
- Large round brush
- 1.25-inch curling iron or wand
- Sectioning clips
- Paddle brush
How to Wear It:
This style looks good with a V-neck, a long pendant necklace, or anything that gives the neckline some space. If you wear your hair behind your shoulders, the layers still show instead of vanishing into a single line.
Pro Tips for This Style:
- Keep the shortest face-frame pieces around cheekbone level, not the chin, if you want more lift.
- Use less oil than you think on the ends. Long layers go flat quickly when they’re coated.
- Blow-dry the front away from the face first; that sets the movement early.
Variations on This Style:
- Soft Flow Version: Blend the face-framing pieces more gently for a quieter shape.
- Defined Face Frame: Bring the front layers up a bit higher for a stronger cheekbone effect.
Common Mistakes to Avoid with This Style:
- Don’t let the layers start too low. The hair keeps its length but loses the lift.
- Don’t keep curling the whole head in tight spirals. It fights the point of the cut.
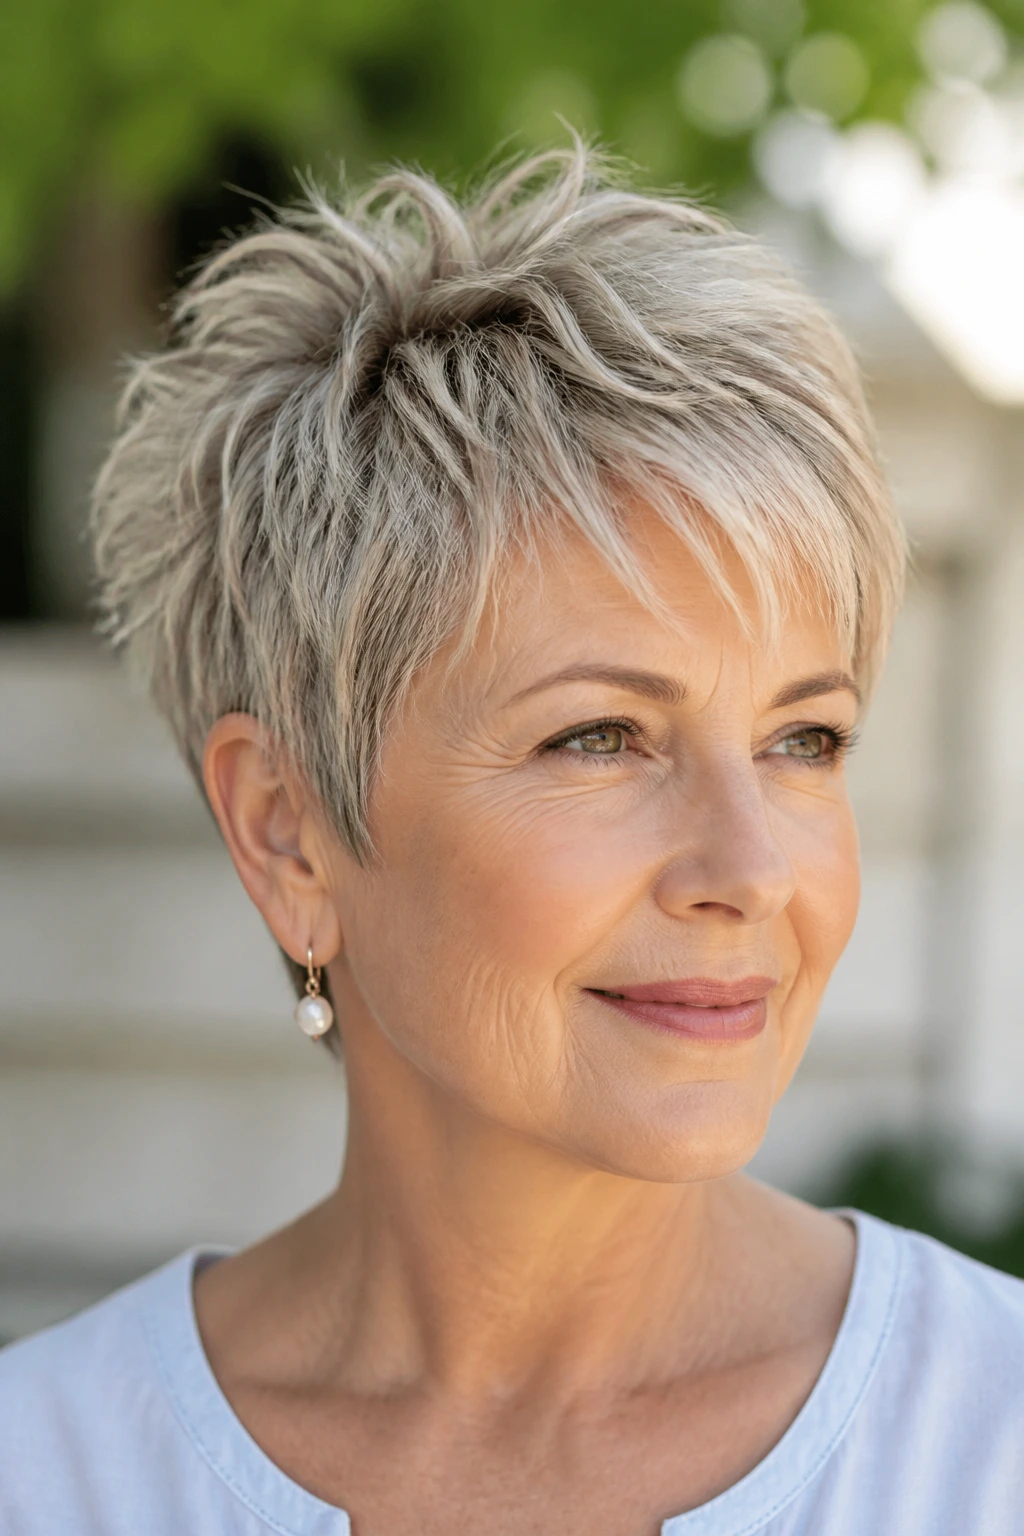
5. Pixie with Choppy Crown Layers
A pixie with choppy crown layers is short hair with a pulse. The crown gets the height, the sides stay neat, and the front can sweep a little longer if you want softness around the eyes. It’s one of the best cuts for hair that has lost density but still has enough texture to stand up on its own.
Why It Works:
Short hair only looks flat when the crown is cut too blunt or too long. Choppy layers break that up and give the top a little lift without making the whole head look fuzzy. The shape also draws attention to the eyes and cheekbones, which is useful when you want the haircut to do the framing.
Key Styling Products:
- Root spray or volumizing mist
- Small amount of styling paste
- Heat protectant
- Dry shampoo for day-two lift
Quick Steps:
- Spray the crown with root lifter on damp hair.
- Blow-dry in the opposite direction of your part to build lift.
- Use your fingers to rough-shape the top while drying.
- Pinch a tiny bit of paste into the ends once the hair is dry.
- Push the front slightly to one side for softness.
Equipment for This Style:
- Vent brush
- Blow dryer
- Small styling brush
- Fingers, honestly—they do half the job here
How to Wear It:
It pairs well with statement earrings, bold glasses, and clothes with a clean neckline. If you like a strong brow or lipstick, this cut gives you room to wear it without the hair competing.
Pro Tips for This Style:
- Keep the top slightly longer than the sides if you want actual lift, not a buzzed look.
- Use paste sparingly. A pea-size amount is often enough.
- Ask for texture, not thinning, if your hair is already fine.
Variations on This Style:
- Softer Pixie: Leave the fringe longer and reduce the choppiness around the crown.
- More Tousled Pixie: Add a little more separation on top for a piecey finish.
Common Mistakes to Avoid with This Style:
- Don’t over-cut the crown. The top needs enough length to push up.
- Don’t load it with heavy wax. Short hair shows buildup fast.
6. Wavy Lob with Invisible Layers
A wavy lob with invisible layers is the haircut for people who want movement without obvious chopping. The perimeter stays clean, but the inside has enough shaping to let waves stack softly instead of hanging in a single line. It’s one of my favorite options for hair that needs bounce but not drama.
Why It Works:
The hidden layers take weight out of the middle, which lets the waves sit on top of one another instead of pulling the shape down. Because the layers aren’t loudly visible, the cut still looks polished when it air-dries or gets a quick blowout. That’s the whole point: volume without visible fuss.
Key Styling Products:
- Lightweight mousse
- Heat protectant spray
- Flexible wave spray
- A tiny bit of anti-frizz cream for humid days
Quick Steps:
- Work mousse through damp roots and mid-lengths.
- Rough-dry until the hair is mostly dry.
- Wrap random 1- to 1.5-inch sections around a wand, leaving the ends out on a few pieces.
- Let the waves cool completely before touching them.
- Break them up with your fingers and mist lightly with wave spray.
Equipment for This Style:
- 1.25-inch wand
- Blow dryer
- Paddle brush
- Clips for sectioning
How to Wear It:
This shape looks easy with knit tops, denim jackets, or anything casual that benefits from hair with a little motion. If you wear it straight, the hidden layers still keep the ends from collapsing.
Pro Tips for This Style:
- Keep the cut around collarbone to upper chest if you want wave and lift.
- Alternate the direction of the curls so the look does not clump into one pattern.
- Don’t brush out the waves too hard; just loosen them.
Variations on This Style:
- Smoother Lob: Blow it straight and turn only the front pieces for a cleaner finish.
- More Texture Lob: Add a bit more wave spray and finger-shake the layers for extra separation.
Common Mistakes to Avoid with This Style:
- Don’t stack too many layers or the ends start to look thin.
- Don’t use thick curl creams unless the hair is coarse. They can weigh the lob down.
7. Side-Swept Layered Crop
A side-swept layered crop gives you the shortness of a crop without the hardness of one. The longer top is brushed across the forehead, the sides stay lighter, and the whole shape has enough movement to keep it from looking severe. It’s flattering on hairlines that have changed a little over the years.
Why It Works:
The side sweep creates a diagonal line, and diagonals are your friend when you want softness and lift. They break up width across the forehead and draw the eye to one side instead of dead center. The layers underneath keep the top from lying flat against the head.
Key Styling Products:
- Root-lift spray
- Light styling cream
- Flexible hairspray
- Dry shampoo for texture
Quick Steps:
- Spray root lift at the front and crown while the hair is damp.
- Blow-dry the top forward first, then sweep it to the side with a brush.
- Dry the sides smoothly so they don’t puff out.
- Use a small amount of cream on the sweep to keep it together.
- Finish with a light spray and a fingertip touch.
Equipment for This Style:
- Small round brush
- Blow dryer with nozzle
- Comb for setting the part
- Clips
How to Wear It:
This works especially well with glasses because the sweep gives the frames some balance. It also looks smart with collar-opening shirts and simple earrings.
Pro Tips for This Style:
- Keep the side-swept section long enough to move, not stiffly pinned in place.
- A deep side part gives more lift than a shallow one.
- If the hair cowlicks at the front, style it while it’s still warm.
Variations on This Style:
- Softer Sweep: Allow a few pieces to fall forward for a more relaxed look.
- Sharper Crop: Keep the sweep cleaner and the sides closer to the head for a crisp outline.
Common Mistakes to Avoid with This Style:
- Don’t cut the sweep too short or it loses the whole point.
- Don’t flatten the crown while forcing the side over. The top needs room to stand up.
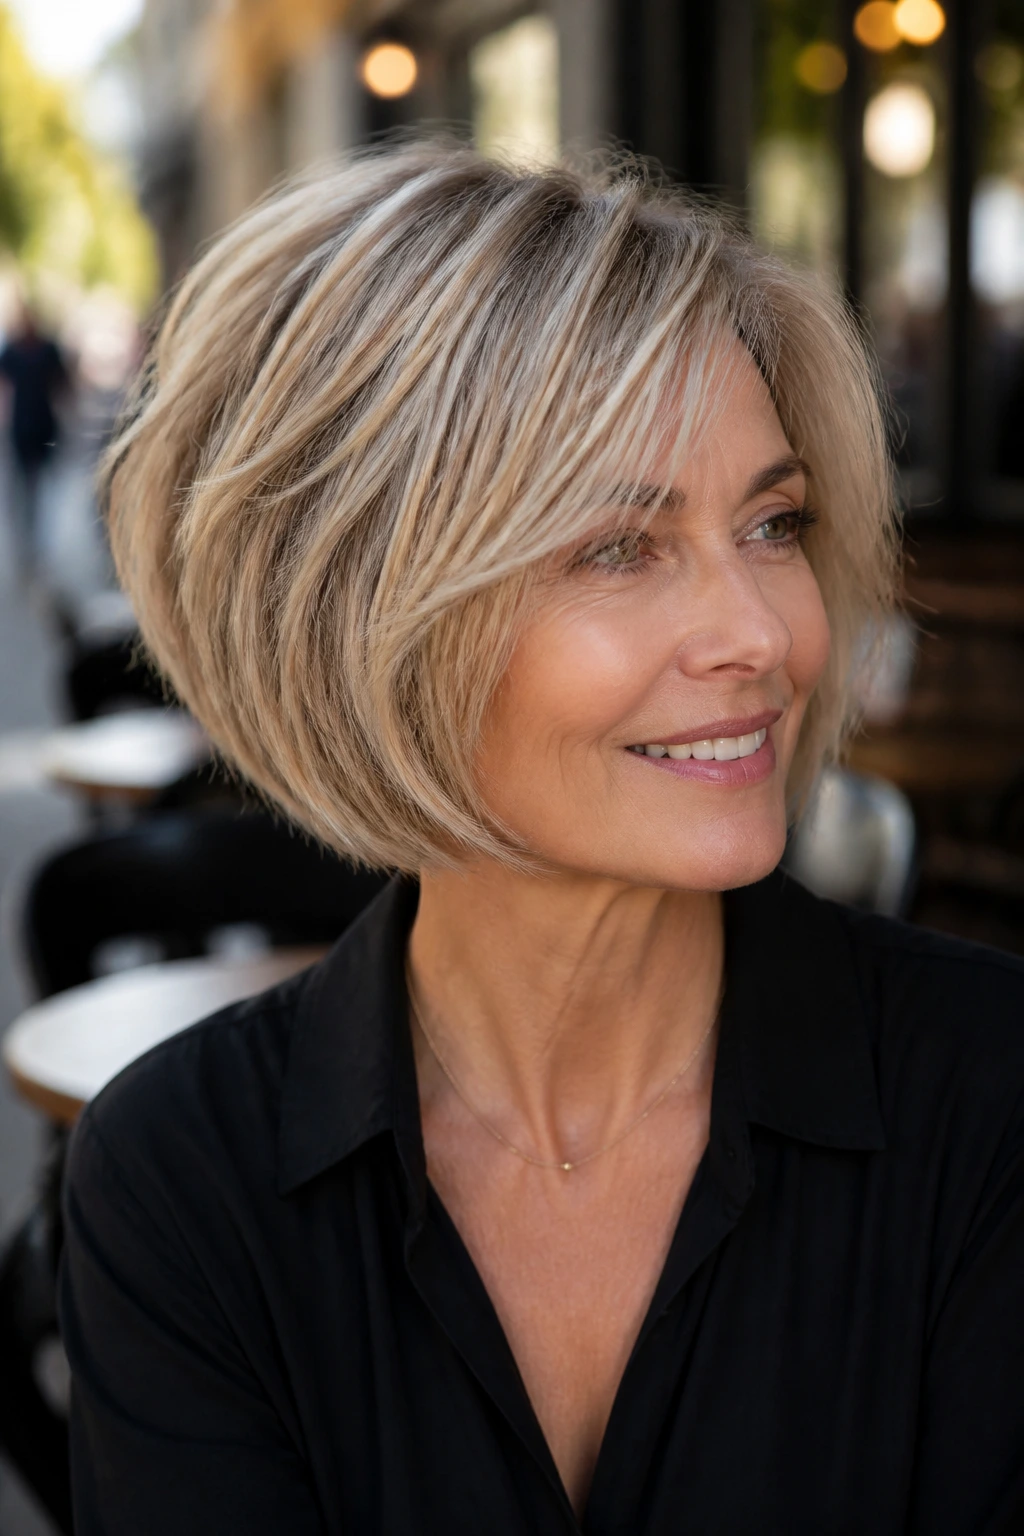
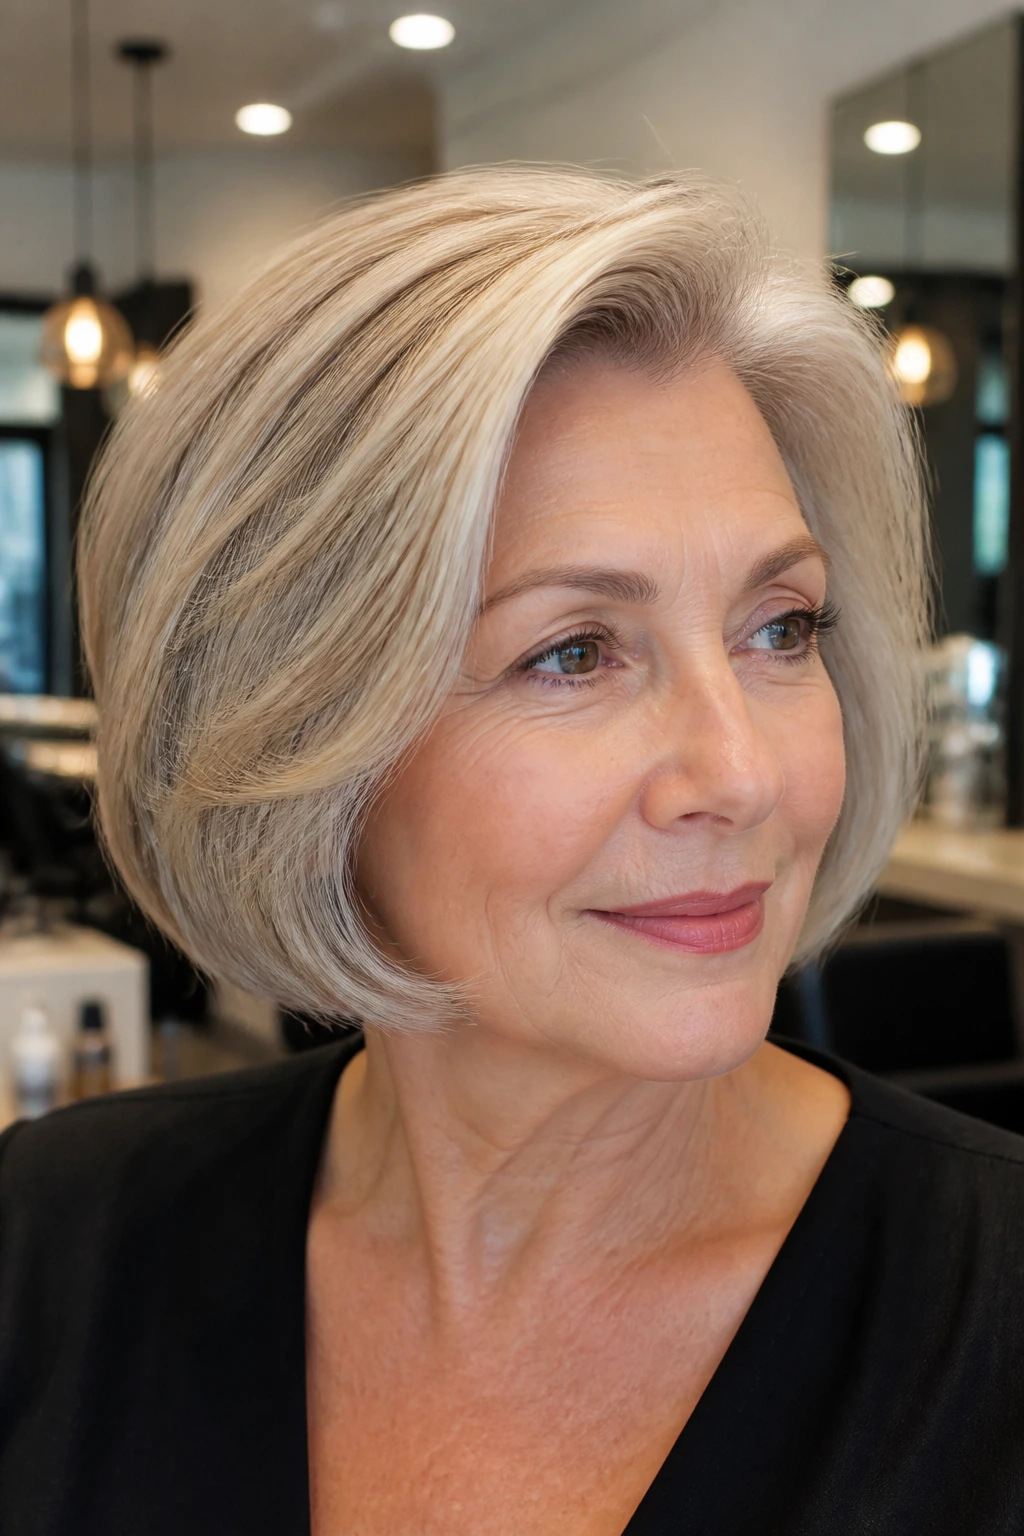
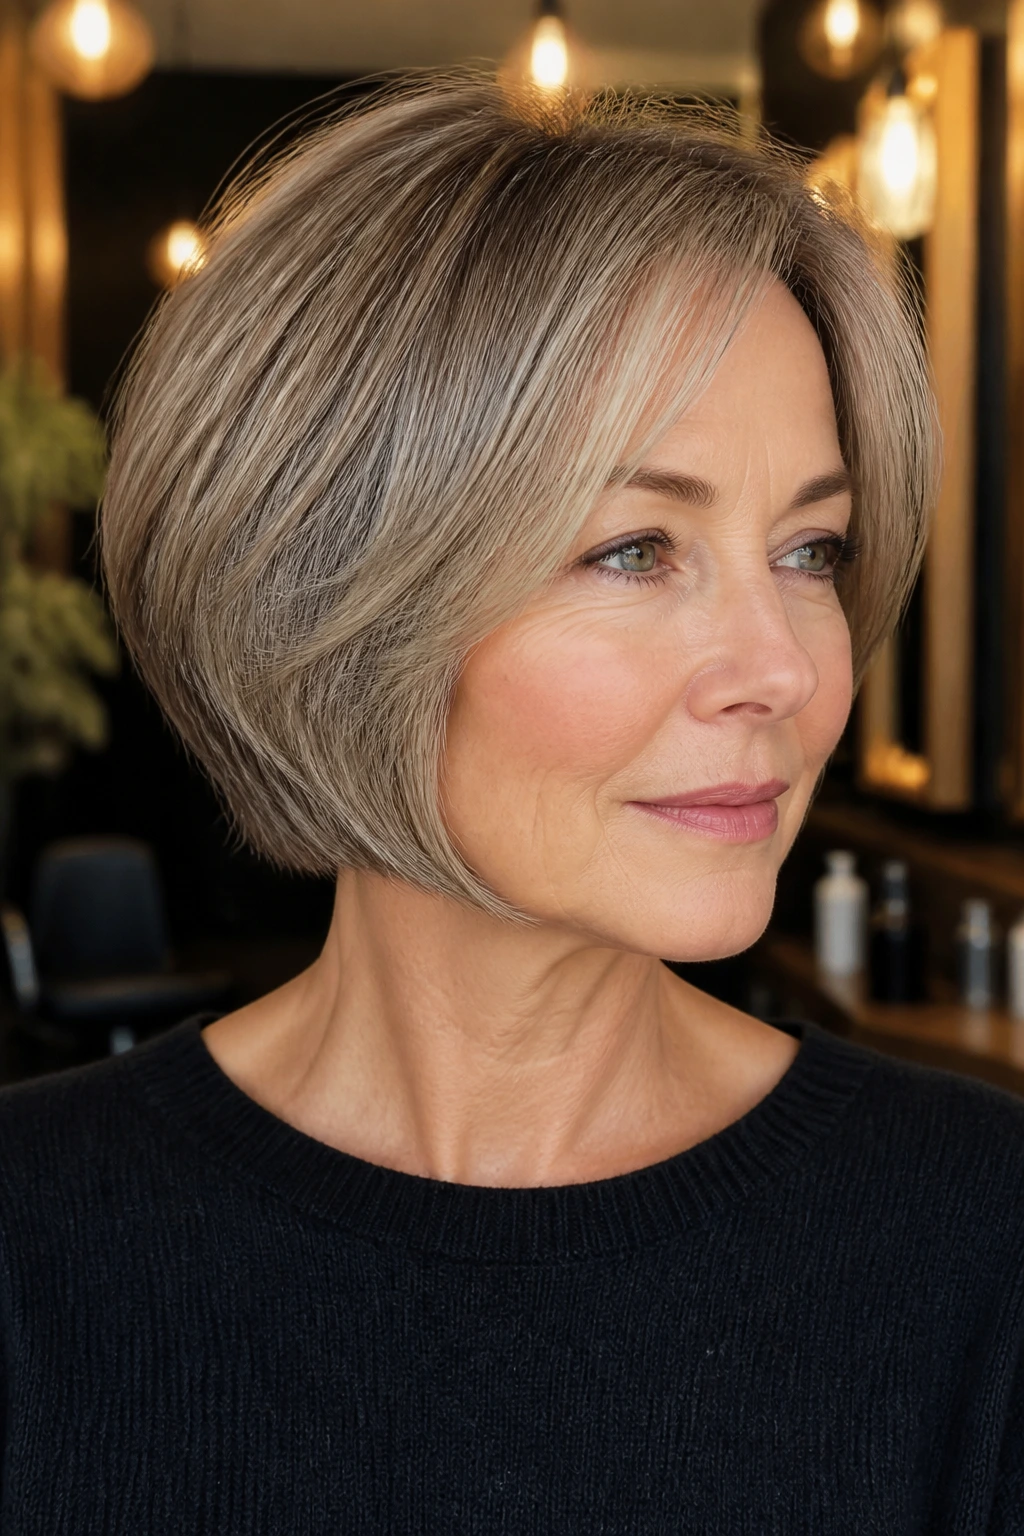
8. Graduated Bob with a Tapered Nape
A graduated bob with a tapered nape is all about structure. The back is slightly shorter, the line rises toward the crown, and the result is a bob that looks like it has a built-in lift at the back of the head. That shape matters more than people think.
Why It Works:
The graduated back creates a small stack that pushes the crown up visually. It also keeps the nape neat, which means the haircut looks intentional even when it grows out a little. For thicker hair, the taper removes the bulky triangle effect that a blunt bob can create.
Key Styling Products:
- Blow-dry cream
- Root volumizer
- Smoothing serum for the ends
- Hairspray with a flexible hold
Quick Steps:
- Apply root volumizer at the top and crown.
- Blow-dry the nape first, directing the hair under with a round brush.
- Work upward in sections, keeping the back smooth and the crown lifted.
- Bend the front pieces slightly forward or inward.
- Set the shape with a soft mist of hairspray.
Equipment for This Style:
- Round brush
- Tail comb
- Blow dryer
- Section clips
How to Wear It:
It looks clean with tailored clothing and even cleaner with a tucked-in blouse, because the neck area stays open. If you like earrings, this cut gives them space.
Pro Tips for This Style:
- The stack should be subtle. Too much and the bob looks dated.
- Ask your stylist to keep the crown rounded, not flat.
- Use a small amount of serum only on the bottom inch if the ends feel dry.
Variations on This Style:
- Soft Stack Bob: Keep the graduation gentle for a more relaxed finish.
- Sharper Angle Bob: Add more length in front if you want a clearer line along the jaw.
Common Mistakes to Avoid with This Style:
- Don’t let the nape get bulky. That turns the back into a helmet.
- Don’t smooth the crown down with too much cream. You’ll erase the lift.
9. Deep Side-Part Swoop Layers
A deep side-part swoop does something sneaky: it creates instant volume before you even add product. One side gets lifted at the root, the front falls in a soft sweep, and the whole style feels fuller because the hair is redistributed instead of centered on the head.
Why It Works:
A deep side part changes the shape of the scalp line, which gives the illusion of more root density. The swoop across the forehead also softens facial lines and brings motion to straight or slightly wavy hair. It’s a low-effort trick with a real payoff.
Key Styling Products:
- Mousse at the roots
- Heat protectant
- Light texturizing spray
- Flexible finish spray
Quick Steps:
- Create the part while the hair is still damp.
- Apply mousse near the roots on the heavier side.
- Blow-dry the part opposite its natural fall at first, then guide it into the swoop.
- Use your fingers to lift the crown before the hair cools.
- Spray lightly only after the shape has set.
Equipment for This Style:
- Tail comb
- Round brush
- Blow dryer
- Clips for holding the front in place
How to Wear It:
This style is strong with asymmetrical necklaces, bold earrings, or any neckline that benefits from a little movement around the face. It also pairs nicely with a softer makeup look because the hair already provides some structure.
Pro Tips for This Style:
- Move the part an inch or two deeper than your usual line. That’s where the lift starts.
- Let the roots cool up and away from the scalp before touching them.
- If the hair is very fine, keep the swoop smooth rather than overly teased.
Variations on This Style:
- Soft Sweep: Keep the front pieces longer and looser for a gentler frame.
- Big Side Lift: Add a roller at the crown for extra height before drying.
Common Mistakes to Avoid with This Style:
- Don’t set the part and immediately flatten it with a brush.
- Don’t overload the swoop with spray. It should move.
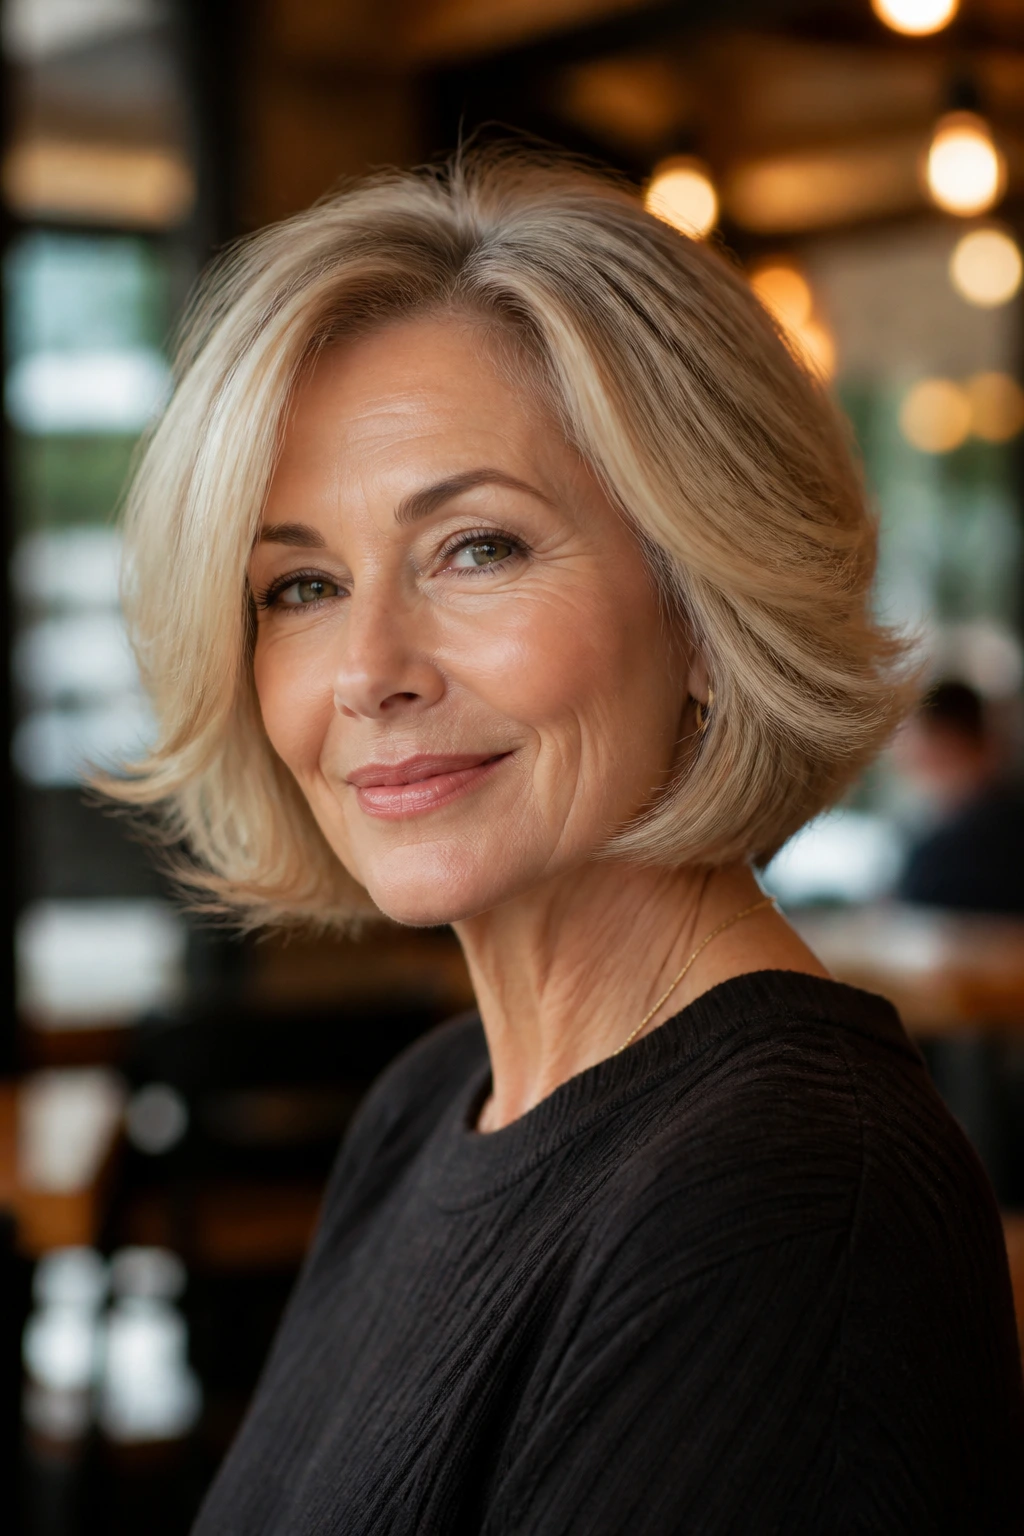
10. Beveled Collarbone Cut
A beveled collarbone cut lands just long enough to graze the shoulders, then curves in a way that keeps the ends clean and light. It’s elegant without being stiff, and the bevel gives the cut a sense of shape even on days when the hair is doing only half the work.
Why It Works:
The bevel keeps the perimeter from looking like a blunt block. That slight inward or outward curve gives the hair motion at the bottom, which is where longer cuts usually collapse. If your face needs a little softness, face-framing bevels can do it without a lot of layering.
Key Styling Products:
- Blowout cream
- Root-lifting spray
- Heat protectant
- A drop of serum for the last inch
Quick Steps:
- Spray root lift at the crown and side part.
- Blow-dry in sections with a large round brush.
- Turn the ends slightly under for a classic bevel, or outward for a lighter feel.
- Lift the front away from the face before setting it down.
- Cool the hair in place before brushing it out.
Equipment for This Style:
- Large round brush
- Blow dryer
- Paddle brush
- Clips
How to Wear It:
It looks especially good with sweaters, open collars, and anything that frames the neck. The cut has enough polish for a dressier setting but still reads easy.
Pro Tips for This Style:
- Keep the bevel subtle if your hair is fine. Too much curve can make it look overstyled.
- Blow-dry the front first so the face frame doesn’t go limp.
- If your ends split easily, ask for a dusting trim rather than losing length.
Variations on This Style:
- Inward Bevel: A softer bend under for a classic salon finish.
- Outward Flip: A lighter shape that feels less formal and a bit more playful.
Common Mistakes to Avoid with This Style:
- Don’t let the layers disappear into no shape at all.
- Don’t use too much oil at the ends. The bevel loses definition fast.
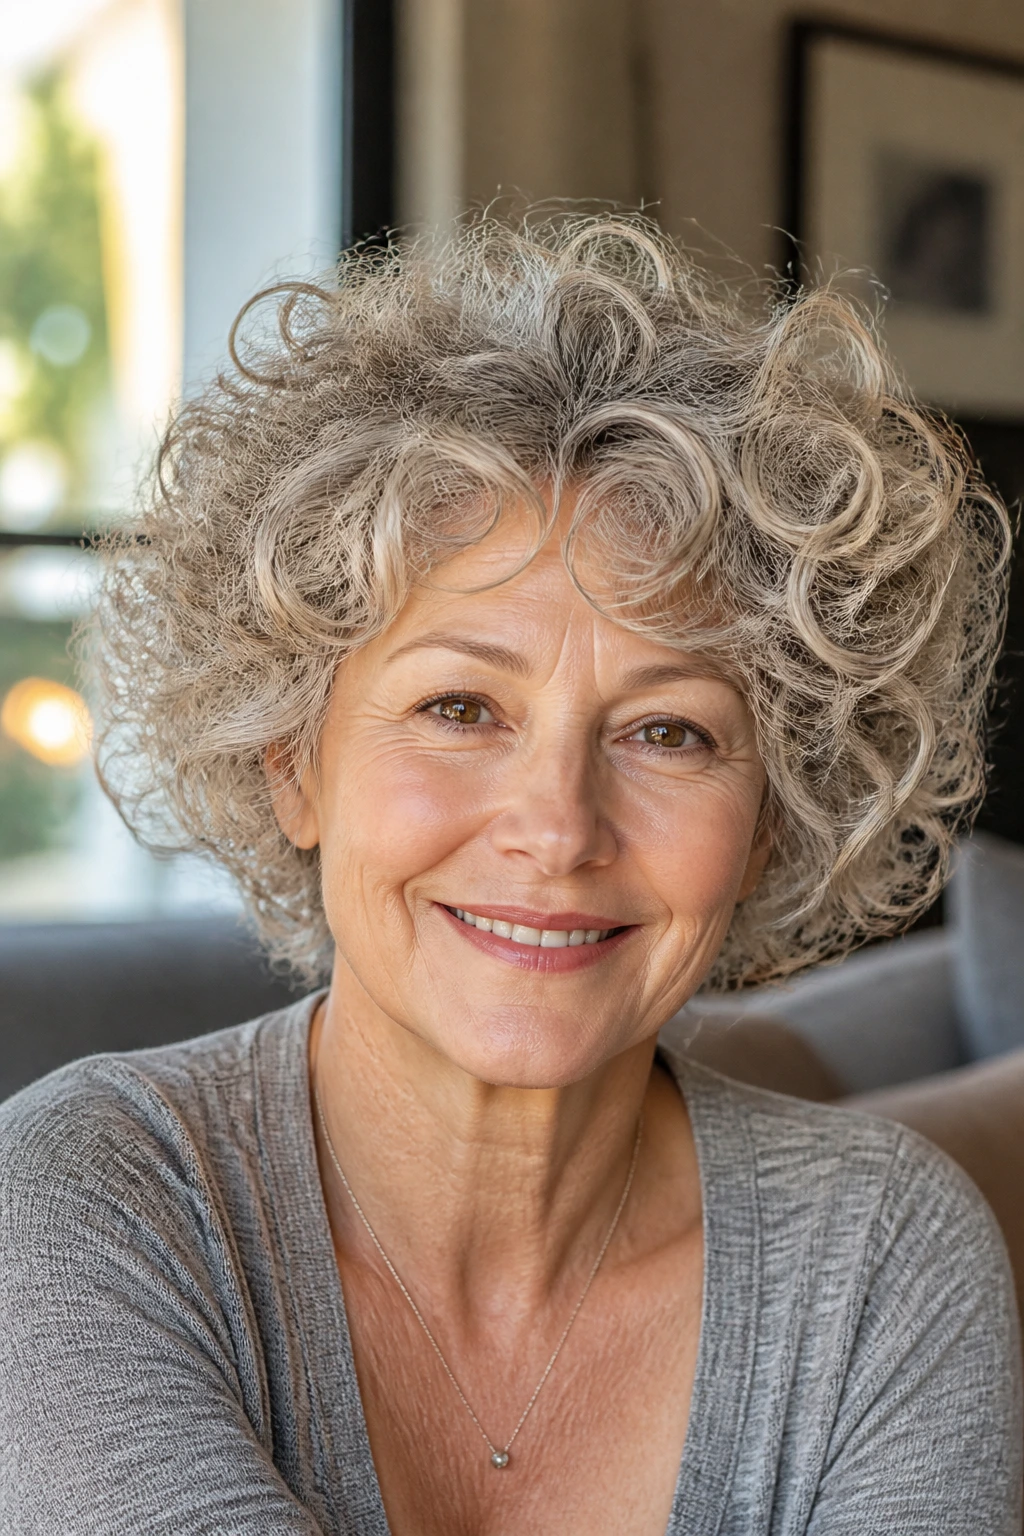
11. Curly Layered Cut That Releases Bulk
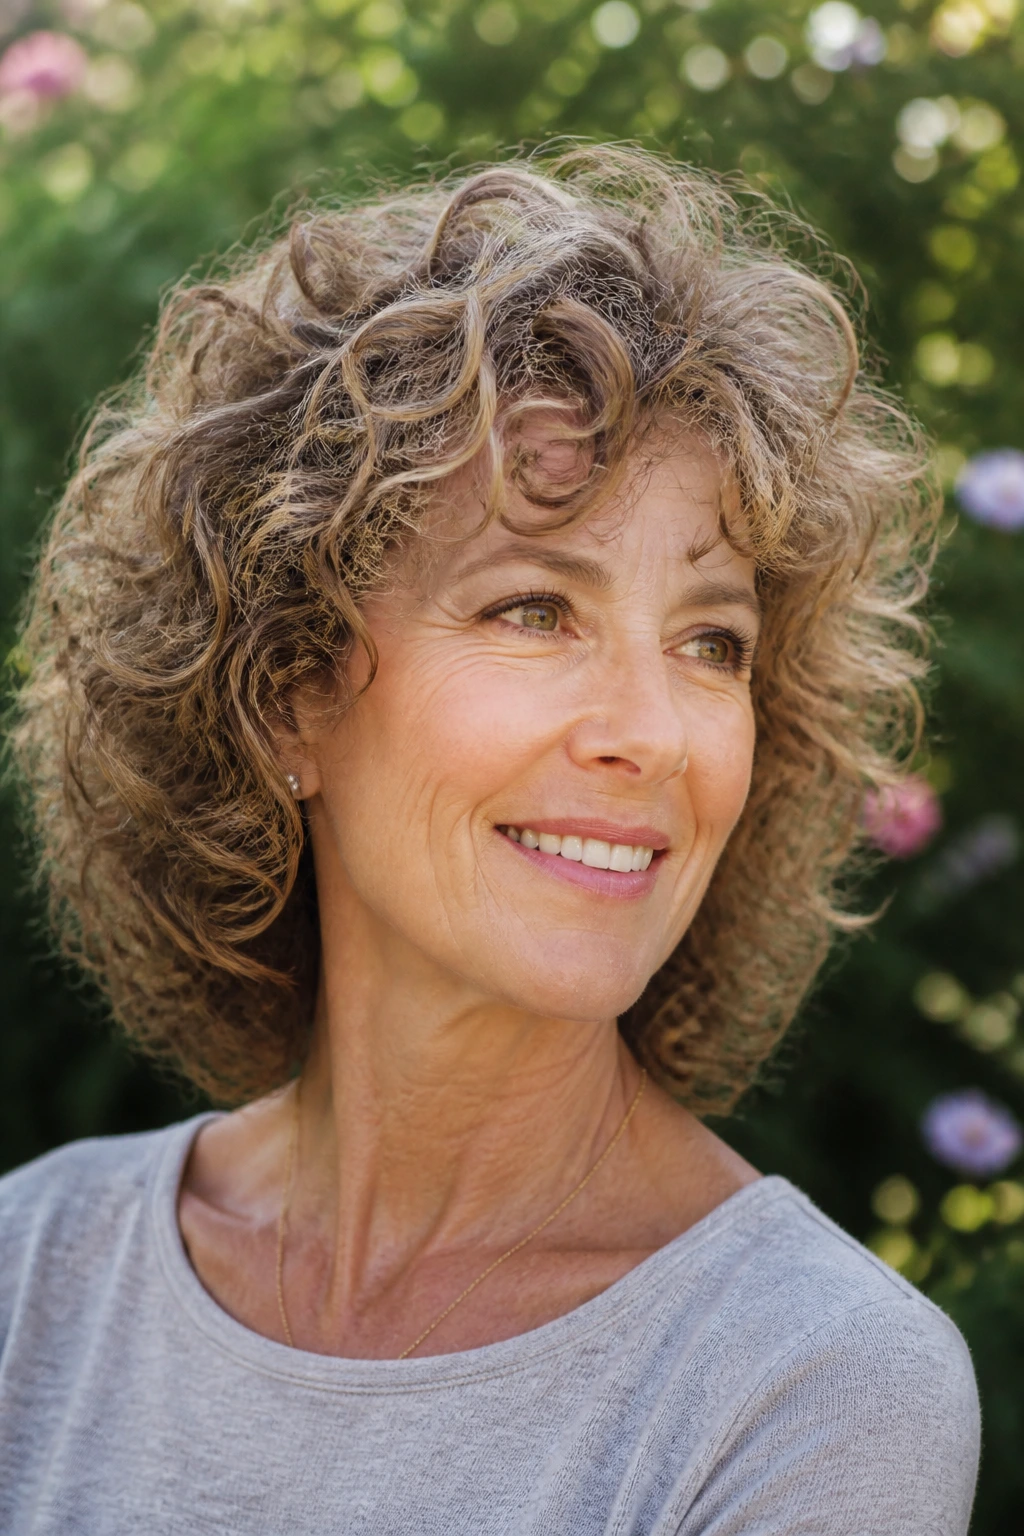
A curly layered cut is not about cutting curls short and hoping for the best. It’s about removing bulk in the right places so the curl can spring upward instead of building a heavy triangle on the sides. Done well, it gives curls shape, bounce, and air.
Why It Works:
Curls need room between the layers or they stack too hard and create bulk at the bottom. Strategic layering releases weight around the crown and sides while keeping the curl pattern intact. That means less puffiness in the wrong places and more lift where the eye wants it.
Key Styling Products:
- Curl cream
- Lightweight gel
- Leave-in conditioner
- Diffuser heat protectant
Quick Steps:
- Apply leave-in and curl cream to soaking-wet hair.
- Scrunch in a small amount of gel to lock in the shape.
- Diffuse on low heat until the roots are mostly dry.
- Avoid touching the curls until they cool.
- Break any cast with dry hands once the hair is fully set.
Equipment for This Style:
- Diffuser attachment
- Wide-tooth comb
- Microfiber towel or cotton T-shirt
- Clips if you want to section the hair
How to Wear It:
This style looks good with simple, uncluttered clothes because the hair already has enough life on its own. It also plays well with silver or salt-and-pepper curls, where the layer pattern shows clearly.
Pro Tips for This Style:
- Ask for curl-by-curl shaping if your hair has uneven texture.
- Keep the top a touch shorter than the lower curl layers to prevent collapse.
- Don’t brush curls after they dry unless you want frizz on purpose.
Variations on This Style:
- Round Halo Curls: Shape the cut a little more evenly all around the head.
- Looser Curl Layers: Keep the layers longer for waves that need less shrinkage.
Common Mistakes to Avoid with This Style:
- Don’t cut all the weight out of the bottom. Curls need some structure.
- Don’t use thick creams on fine curls; they droop before they dry.
12. Silver Fox Shag
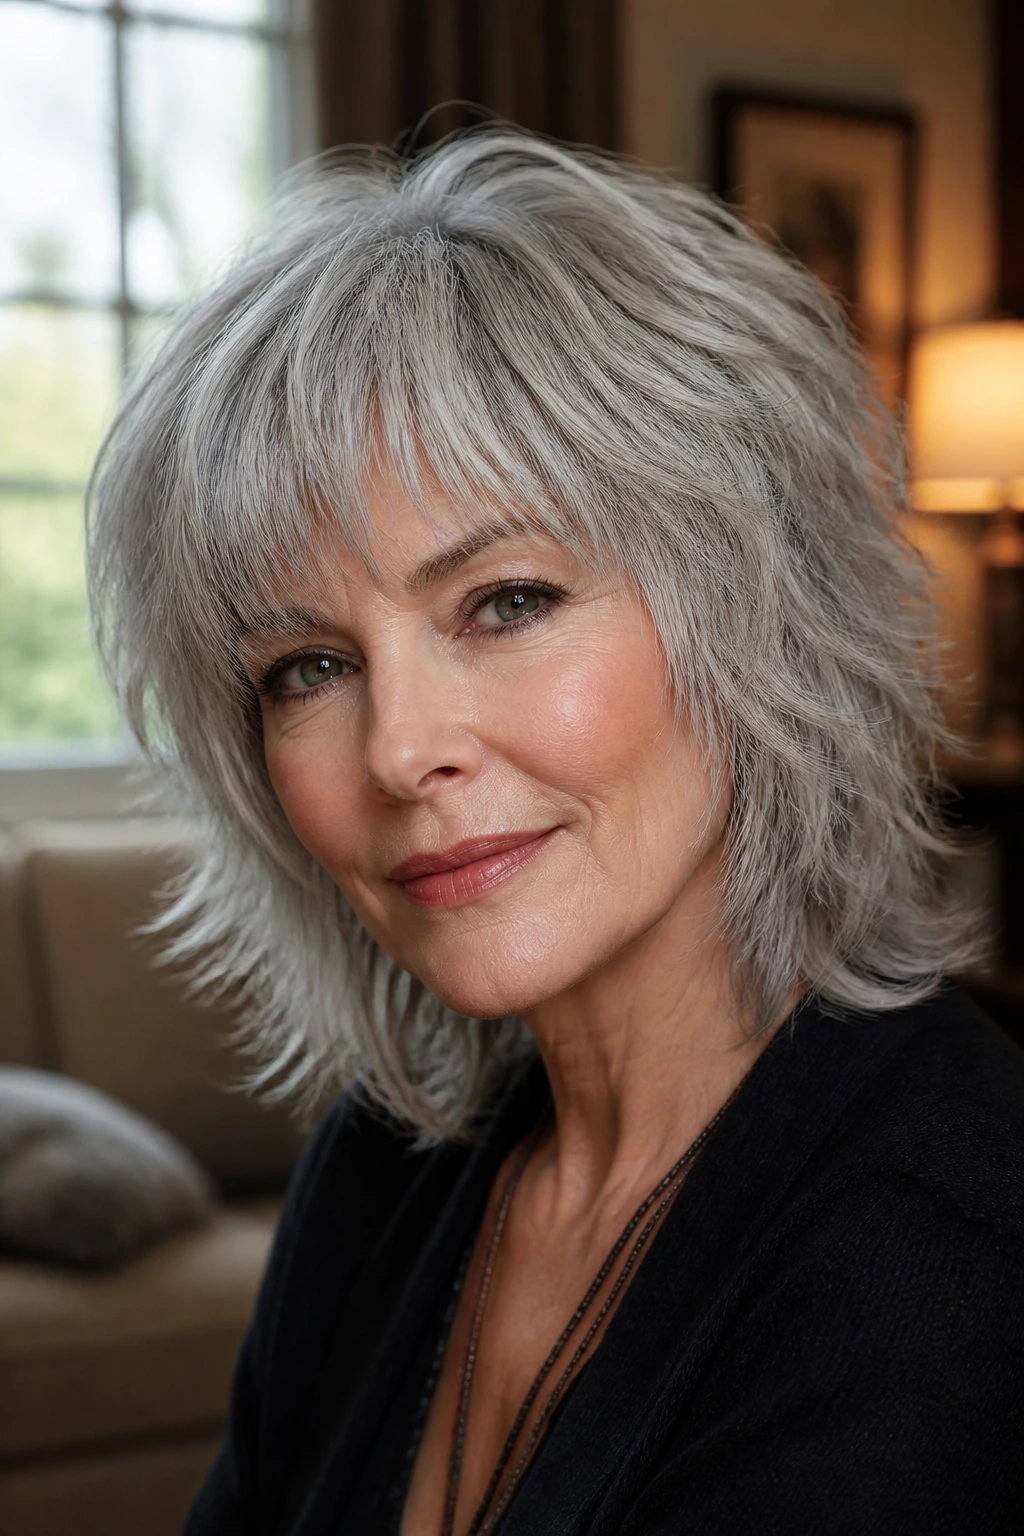
The silver fox shag is what happens when gray hair gets a little attitude. The layers are airy, the fringe is light, and the overall look is textured enough to show off the silver instead of muting it. It’s a strong cut for women who want their gray to look deliberate, not accidental.
Why It Works:
Gray hair often has a different feel than pigmented hair—coarser in some spots, softer in others, and sometimes drier at the ends. A shag plays into that texture instead of fighting it. The broken-up layers also keep silver hair from looking like one broad shape under indoor lighting.
Key Styling Products:
- Purple shampoo once or twice a week
- Lightweight leave-in conditioner
- Texture spray
- Heat protectant
Quick Steps:
- Wash with a gentle shampoo and condition only from mids to ends.
- Mist the roots with a bit of volumizer before drying.
- Rough-dry, then add a few bends with a medium barrel if needed.
- Scrunch in texture spray through the top layers.
- Separate the fringe with your fingers for a soft finish.
Equipment for This Style:
- Diffuser or blow dryer
- Medium round brush
- Curling iron or wand
- Wide-tooth comb
How to Wear It:
It looks sharp with modern glasses, a strong brow, or a simple black top that lets the hair do the talking. If your silver has streaks of white, this cut makes them look intentional.
Pro Tips for This Style:
- Keep the fringe soft, not heavy, or the shag loses its lift.
- Use purple shampoo sparingly so the hair doesn’t turn dull and flat.
- A tiny touch of oil on the ends is enough; too much makes silver hair go limp.
Variations on This Style:
- Short Silver Shag: Cut it a bit shorter around the ears for a livelier outline.
- Longer Silver Shag: Leave the layers below the chin for a softer, less edgy read.
Common Mistakes to Avoid with This Style:
- Don’t over-tone the gray until it looks matte and dry.
- Don’t carve the layers too uniform. That drains the shag of its movement.
13. Razored Layered Bob
A razored layered bob has a sharper, more piecey finish than a standard scissor-cut bob. It works best when you want the ends to feel light and the overall shape to look a little more modern. On the wrong hair type, though, it can get wispy fast—so this one needs a careful hand.
Why It Works:
The razor removes weight and creates softness at the perimeter, which gives movement to denser hair. That piecey edge stops the bob from looking square. It’s especially useful if your hair tends to puff out at the bottom and you want a cleaner line with less bulk.
Key Styling Products:
- Lightweight smoothing cream
- Texture spray
- Heat protectant
- A pea-size dab of paste for definition
Quick Steps:
- Apply heat protectant and a small amount of smoothing cream.
- Blow-dry with a brush, keeping the top lifted.
- Use a flat iron or round brush to bend the ends into small, separated pieces.
- Work a tiny bit of paste into random sections for definition.
- Finish with texture spray, not heavy hairspray.
Equipment for This Style:
- Flat brush or round brush
- Blow dryer
- Flat iron
- Clips for dividing the top and bottom
How to Wear It:
This bob pairs well with sharper collars, bold frames, and clothes with a little edge. It’s not the most conservative cut in the group, and that’s part of the appeal.
Pro Tips for This Style:
- Choose this if your hair is dense or coarse, not if it’s already wispy.
- Keep the layers controlled so the bob doesn’t fray at the ends.
- Ask for separation near the front, not all over. That keeps the shape cleaner.
Variations on This Style:
- Soft Razor Bob: Keep the edges less shattered for a calmer look.
- Bolder Piecey Bob: Add a little more texture at the front for a stronger outline.
Common Mistakes to Avoid with This Style:
- Don’t razor fine hair into submission. It can vanish at the ends.
- Don’t drown it in cream. The whole point is lightness.
14. French Bob with Soft Volume
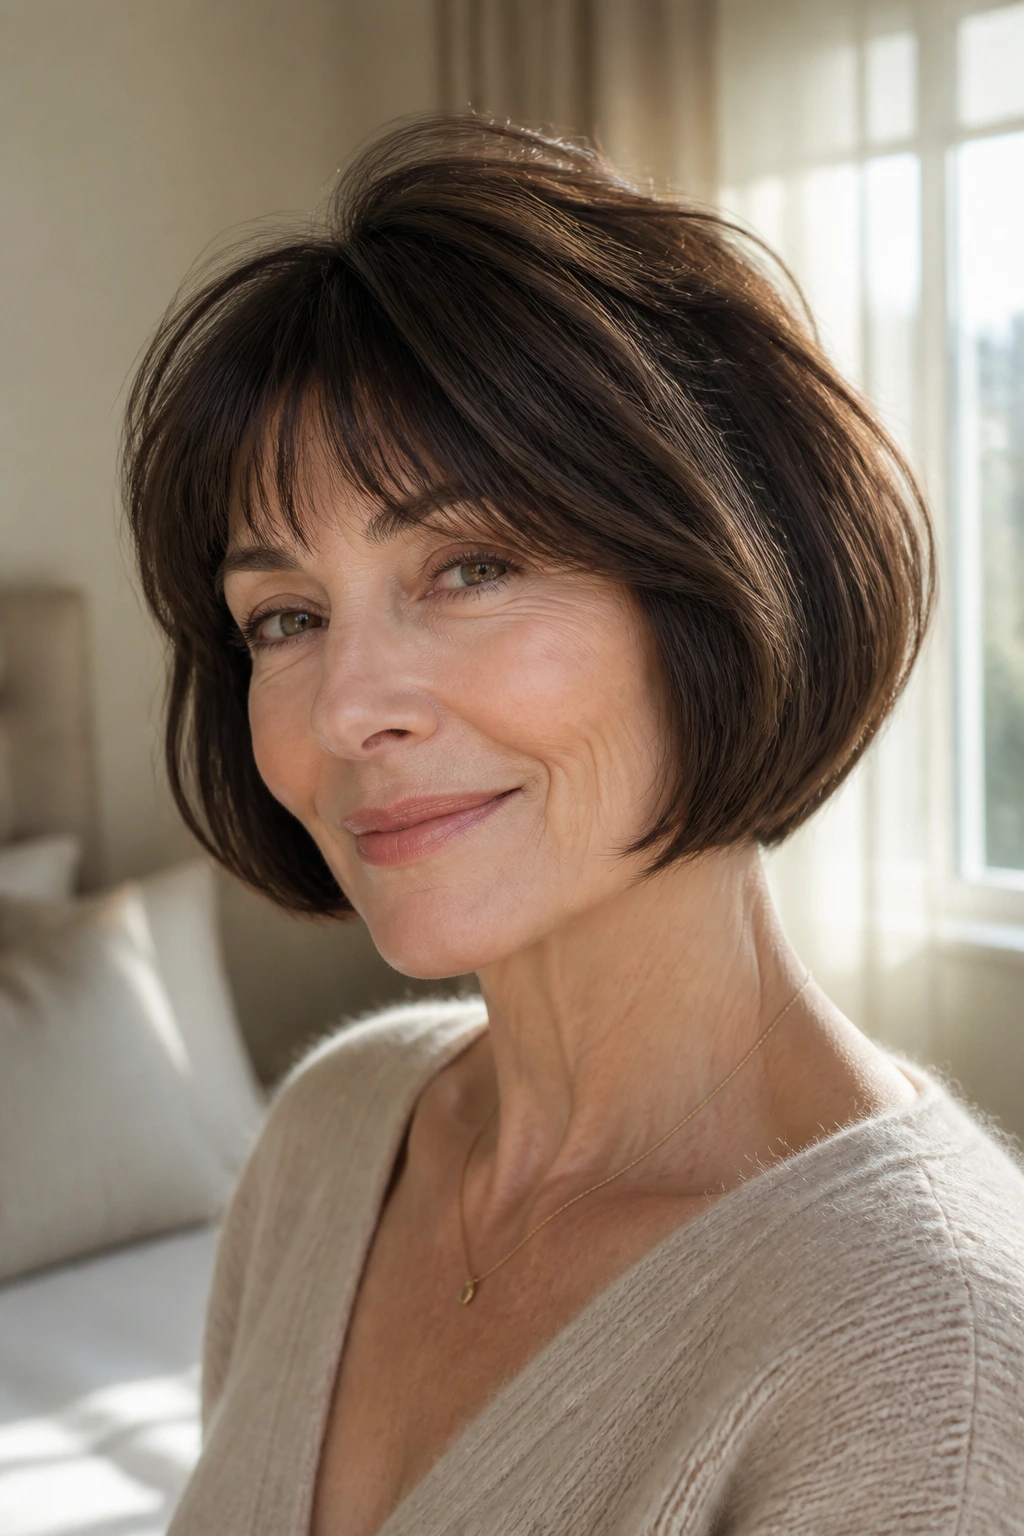
A French bob with soft volume lands around the jaw and keeps the line just loose enough to feel charming rather than severe. It usually has a little bend, a little air at the roots, and enough shape near the face to make the haircut feel finished even without a lot of styling time.
Why It Works:
The shorter length keeps the profile lifted, while the soft volume at the crown keeps the cut from looking flat against the head. It’s especially good if you want a shorter haircut that still has a bit of romance and movement. The face gets framed quickly, which is useful when the rest of the style is simple.
Key Styling Products:
- Root-lift mousse
- Blow-dry lotion
- Flexible hairspray
- Dry shampoo for second-day structure
Quick Steps:
- Work mousse through damp roots.
- Blow-dry the hair with your fingers first, then smooth the top with a small round brush.
- Give the ends a slight inward curve or leave them straighter for a modern read.
- Push the front slightly forward and then open it with your fingers.
- Mist the roots lightly once the shape is set.
Equipment for This Style:
- Small round brush
- Blow dryer
- Comb
- Clips if your hair is dense
How to Wear It:
It looks good with lipstick, a neat cardigan, or a simple black turtleneck. The haircut has enough shape that you can keep the rest of the outfit quiet.
Pro Tips for This Style:
- Don’t cut it too short above the jaw unless you want a very crisp line.
- Keep the crown a touch rounded so the bob doesn’t press flat.
- A soft side part usually feels less severe than the center part.
Variations on This Style:
- Slightly Longer French Bob: Let it brush the jaw for more versatility.
- Bangless Version: Keep the forehead open and let the face frame do the work.
Common Mistakes to Avoid with This Style:
- Don’t make it too perfect. A French bob needs a little air.
- Don’t use heavy finishing cream that kills the lift at the roots.
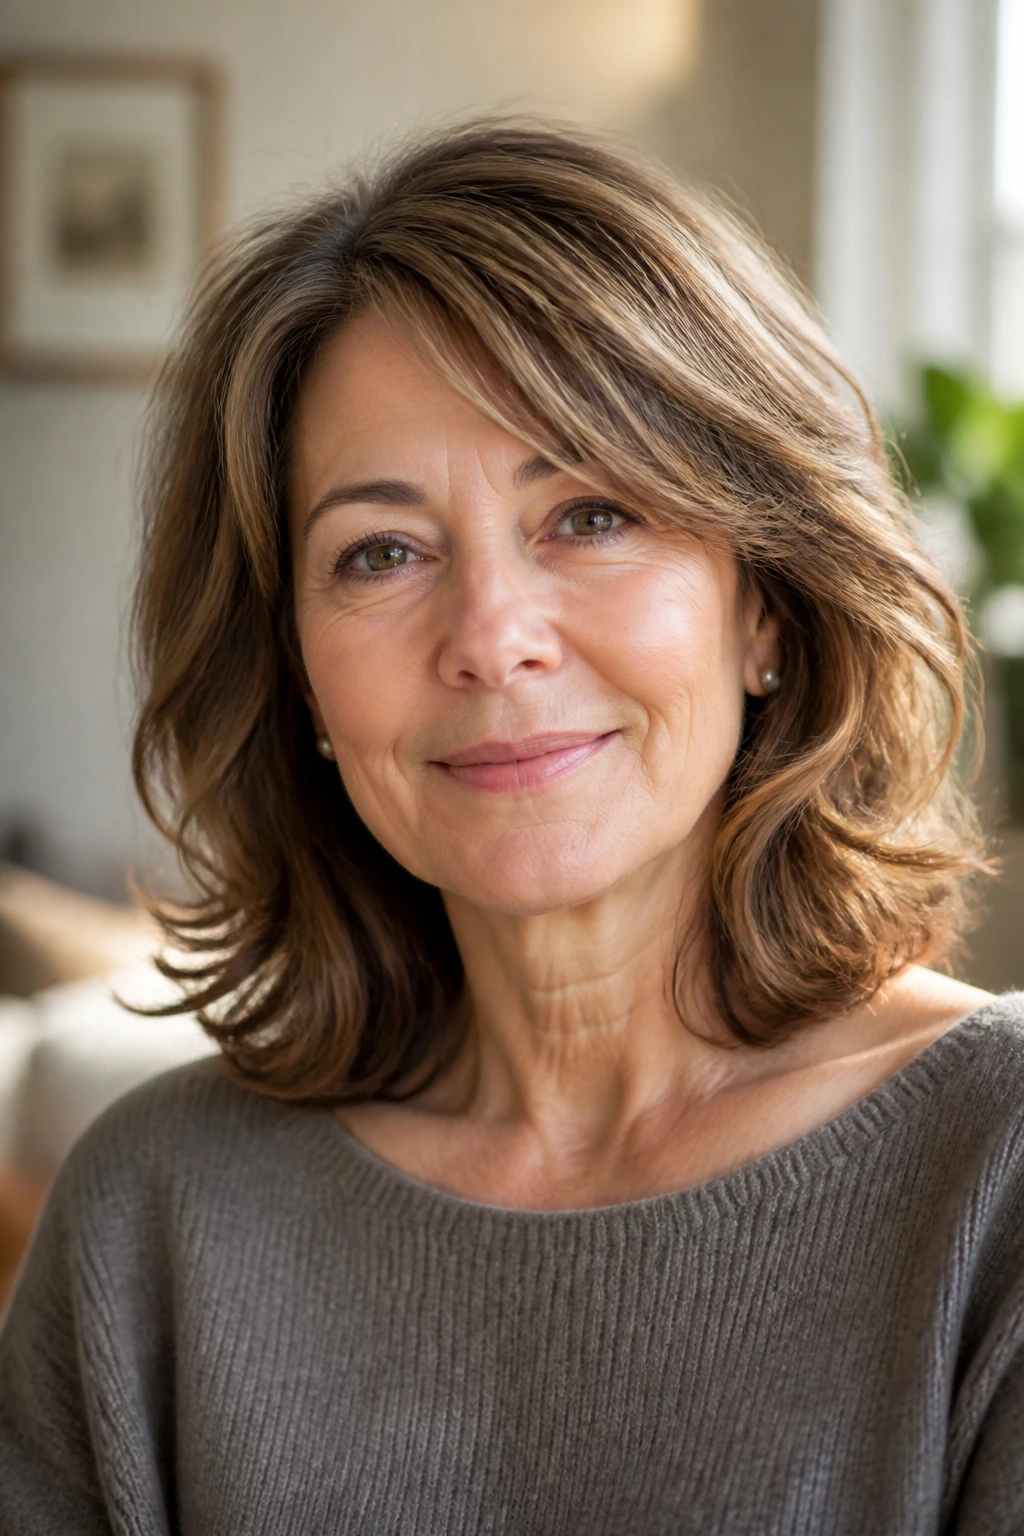
15. Flipped-Out Mid-Length Layers
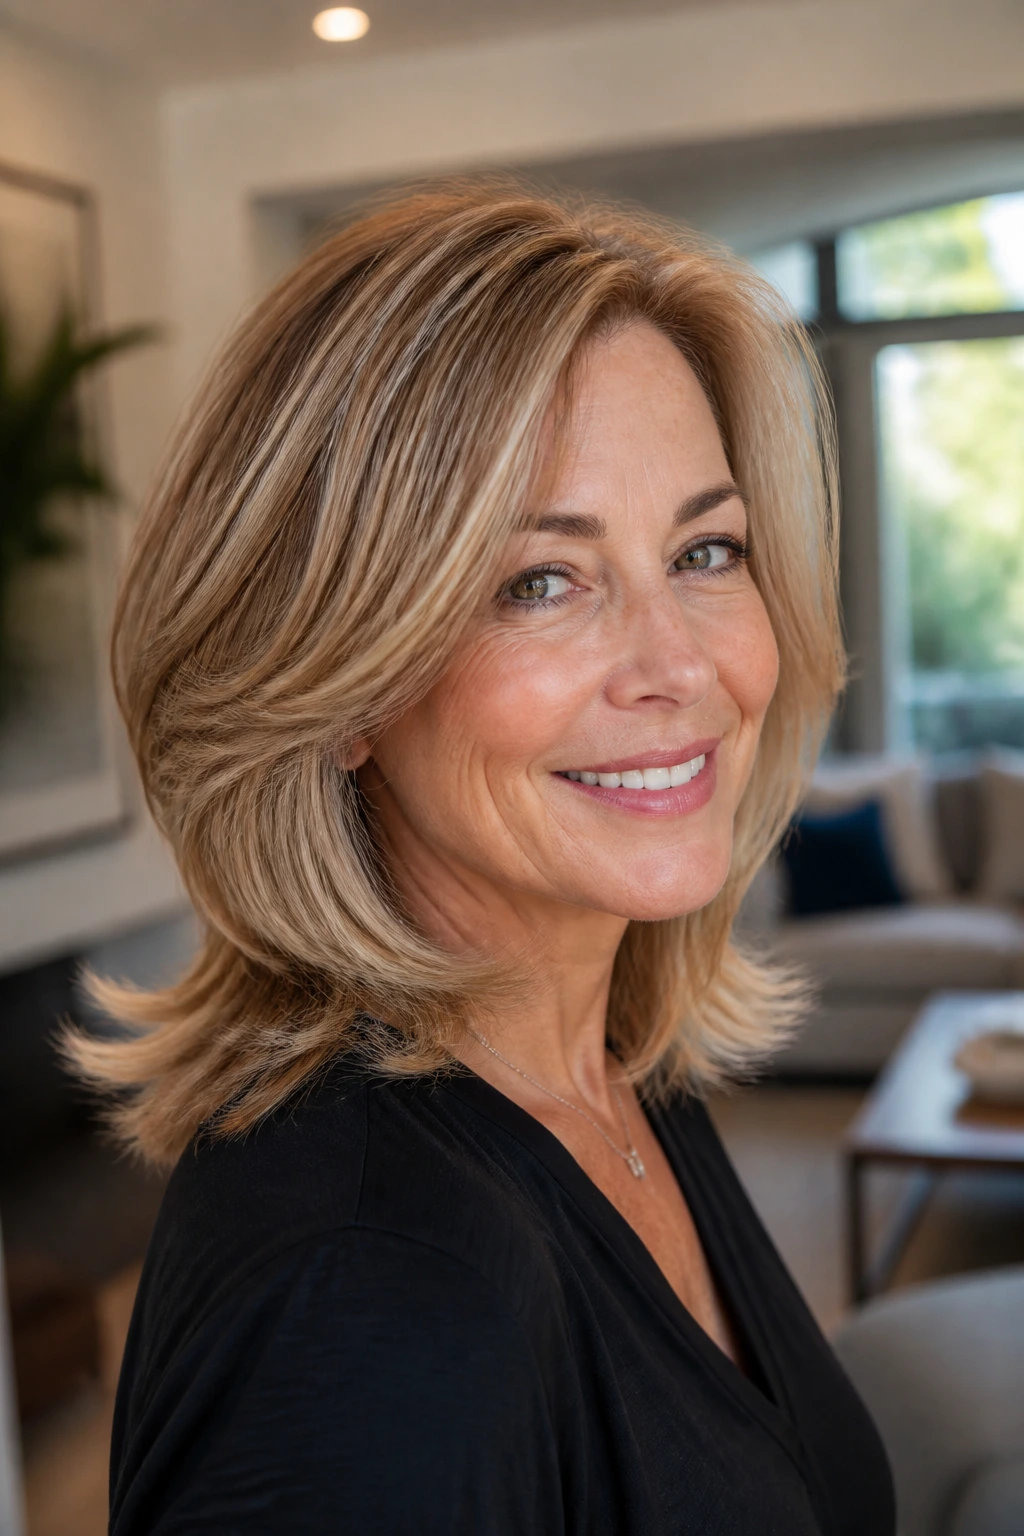
Flipped-out mid-length layers bring a little retro energy without turning into costume hair. The lengths sit around the shoulders, the ends kick outward, and the layers keep the whole style from dropping into one heavy shape. It’s cheerful, but it can still look polished.
Why It Works:
The outward flip opens the line of the cut and makes the hair feel lighter. Mid-length layers also give you enough length to style in several directions, which matters when you don’t want the haircut to look identical every day. The shape is especially kind to hair that has lost some spring at the ends.
Key Styling Products:
- Heat protectant spray
- Blowout cream
- Flexible setting spray
- A tiny bit of dry wax for the flipped ends
Quick Steps:
- Apply heat protectant and blowout cream on damp hair.
- Blow-dry with a medium round brush, lifting the roots and flipping the ends away from the face.
- Set the front pieces with extra bend at the cheekbone.
- Use a flat iron only if a section refuses to flip cleanly.
- Let the hair cool before you touch it much.
Equipment for This Style:
- Medium round brush
- Blow dryer
- Flat iron
- Clips for dividing the ends into sections
How to Wear It:
This style looks good with casual tailoring, a blouse with a collar, or a knit top that needs some movement around the neckline. It works especially well when you want the haircut to feel lively but not messy.
Pro Tips for This Style:
- The flip should start low, near the bottom inch or so, not halfway up the strand.
- Keep the top smooth so the shape doesn’t feel cartoonish.
- A little texture spray at the ends helps the flip hold without stiffness.
Variations on This Style:
- Gentle Flip: Bend only the front and leave the back smoother.
- Full Retro Flip: Turn more of the ends outward for a stronger vintage feel.
Common Mistakes to Avoid with This Style:
- Don’t flip every piece in the same direction if you want movement.
- Don’t use a huge barrel iron; the ends can lose definition.
16. Bottleneck Bangs on Shoulder-Length Hair
Bottleneck bangs are one of the better fringe choices for older women because they start narrower in the center and open out toward the cheeks. On shoulder-length hair, they give you softness at the front without burying the face in too much fringe.
Why It Works:
The shape narrows at the forehead, which keeps the bangs from looking blunt or thick. Then the longer side pieces blend into shoulder-length layers and pull the eye outward. That combination gives the haircut lift and keeps the front from feeling heavy.
Key Styling Products:
- Blow-dry cream for the fringe
- Root lifter
- Light texture spray
- A touch of smoothing serum for the side pieces
Quick Steps:
- Style the bangs first while they’re damp.
- Use a small round brush to sweep the center down and the sides outward.
- Blow-dry the shoulder-length pieces with lift at the roots.
- Add loose bends through the rest of the hair.
- Shake the fringe loose with your fingers once it cools.
Equipment for This Style:
- Small round brush
- Blow dryer
- Clips
- 1-inch iron if you want a softer bend
How to Wear It:
This cut is good with glasses because the fringe opens around them instead of crashing into the frames. It also plays nicely with open necklines and longer earrings.
Pro Tips for This Style:
- Keep the bang area longer at first; bottleneck bangs are easier to shorten than to grow out.
- Style the fringe before the rest of the hair so it doesn’t dry in a weird shape.
- Ask for face-framing pieces that blend, not a hard divide.
Variations on This Style:
- Long Bottleneck Fringe: Keep the center pieces closer to the brows for extra coverage.
- Soft Curtain Blend: Let the bangs open even more into the layers.
Common Mistakes to Avoid with This Style:
- Don’t make the fringe too dense. It turns the cut heavy fast.
- Don’t let the side pieces stop abruptly at the jaw. They need to melt into the length.
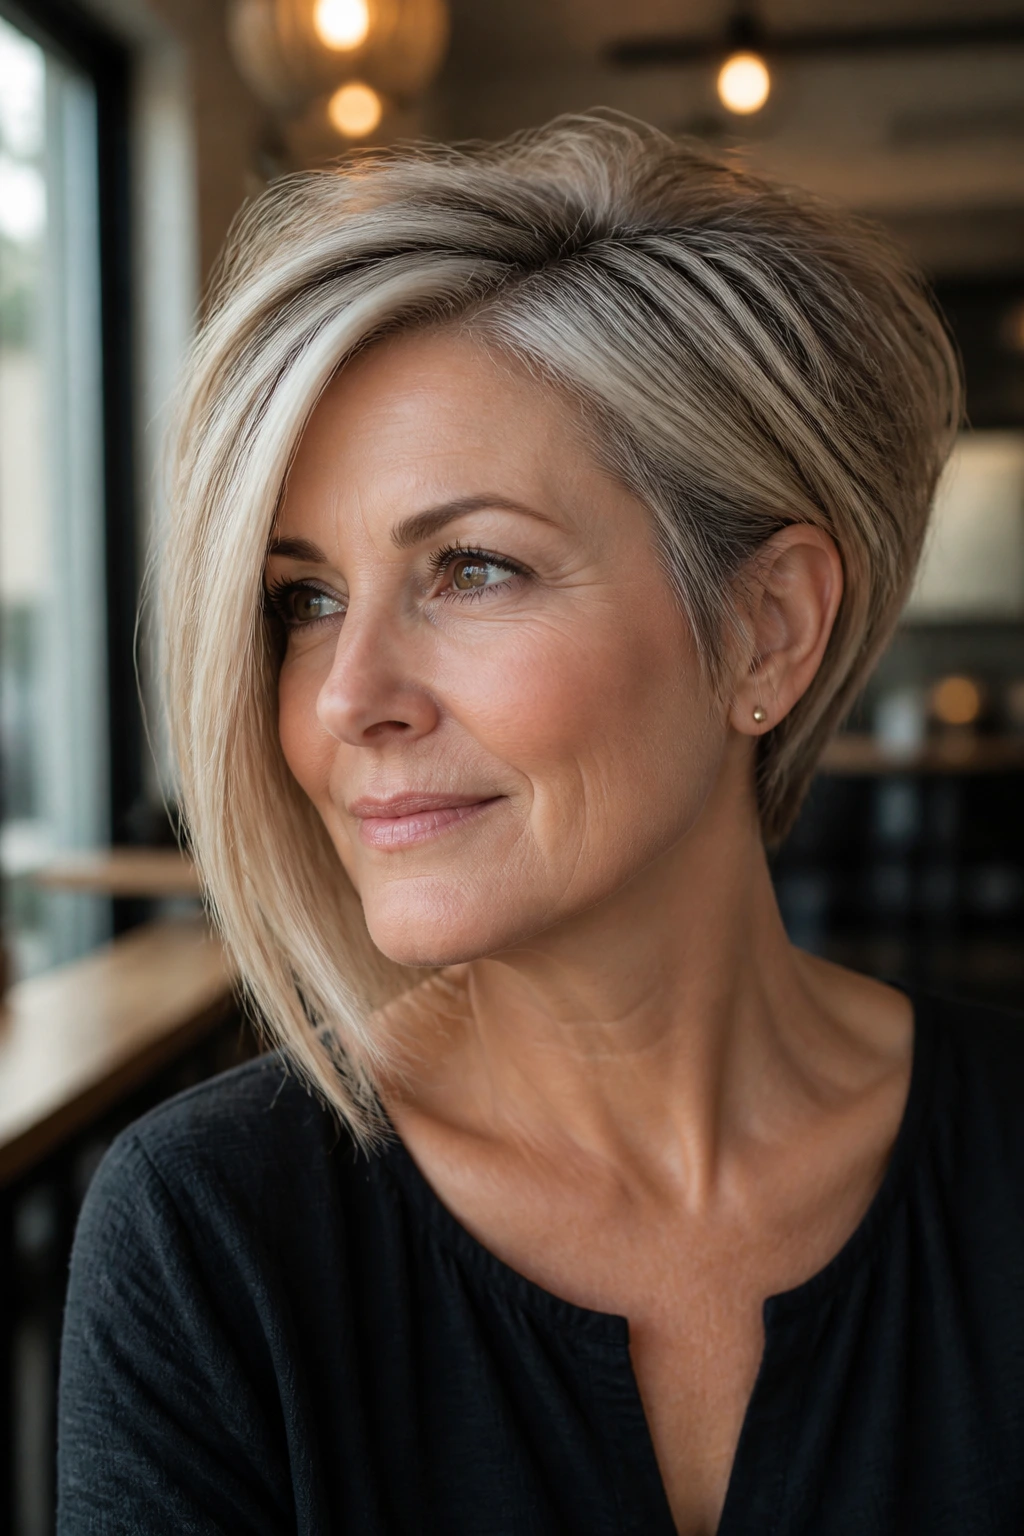
17. Tapered Pixie Bob
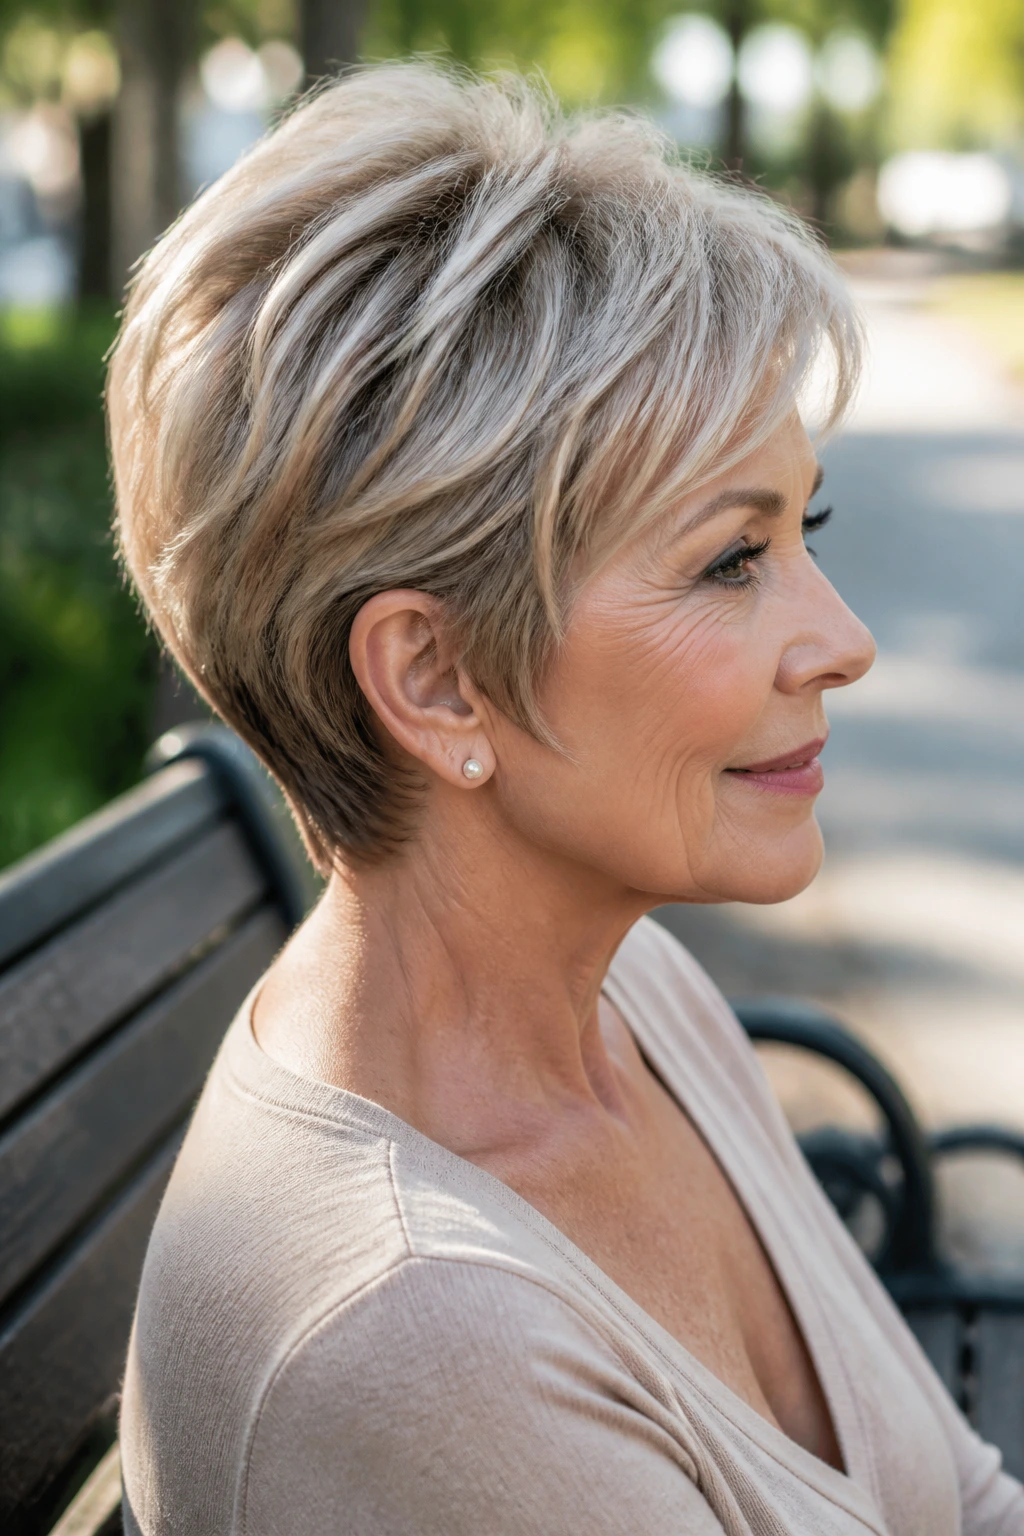
A tapered pixie bob sits between a short bob and a long pixie, which is exactly why it works. The nape is neat, the crown has height, and the top carries enough length to move without getting floppy. It’s a strong choice if you want short hair but still want some softness.
Why It Works:
The tapered shape removes bulk from the back while keeping the top fuller. That creates a lifted silhouette, which is flattering when hair starts to lose density through the sides. The cut also gives you styling flexibility—sleek one day, piecey the next.
Key Styling Products:
- Volumizing mousse
- Styling paste
- Heat protectant
- Dry shampoo for lift between washes
Quick Steps:
- Add mousse at the crown and top sections.
- Blow-dry the hair forward, then back, to set volume in different directions.
- Smooth the nape close to the head for a tapered finish.
- Work a little paste into the top to separate the pieces.
- Push the front slightly sideways or forward, depending on the mood.
Equipment for This Style:
- Vent brush
- Blow dryer
- Small styling brush
- Fingers for detail work
How to Wear It:
This cut is neat with strong earrings, square necklines, and even very simple clothes because the shape itself carries the style. It also looks clean from the back, which matters more than people admit.
Pro Tips for This Style:
- Keep the top long enough to sweep, or the “bob” part disappears.
- Ask for tapering at the nape, not a hard shave, unless you want a sharper look.
- Use the smallest amount of paste possible and build if needed.
Variations on This Style:
- Sleek Pixie Bob: Smooth the top and keep the separation subtle.
- Tousled Pixie Bob: Add more piecey texture at the crown for extra lift.
Common Mistakes to Avoid with This Style:
- Don’t flatten the crown while trying to smooth the sides.
- Don’t let the top get so short that it loses the bob feeling.
18. Blunt Perimeter with Hidden Layers
A blunt perimeter with hidden layers gives you the best of both worlds: the ends still look full, but the inside has enough shape to create movement. If you like the idea of thicker-looking hair and hate the idea of choppy ends, this is a useful compromise.
Why It Works:
A blunt outline creates the illusion of density because the bottom edge looks solid. Hidden layers inside the cut remove weight where needed, so the hair doesn’t fall in one limp sheet. It’s a very good answer for fine hair that still needs a little life.
Key Styling Products:
- Root-lifting spray
- Blow-dry cream
- Lightweight smoothing balm
- Flexible hold spray
Quick Steps:
- Apply root lift at the crown and around the part.
- Blow-dry the hair smooth, using a round brush at the top only.
- Keep the perimeter straight and full, then bend the front lightly if desired.
- Do not over-texturize the ends.
- Finish with a soft mist of hold spray.
Equipment for This Style:
- Paddle brush
- Round brush
- Blow dryer
- Flat iron if needed for smoothing
How to Wear It:
This shape works well with clean, simple clothing because the haircut already looks polished. It’s especially useful if you want fullness around the face without obvious layering.
Pro Tips for This Style:
- Keep the blunt line crisp. That’s the entire trick.
- Ask your stylist to remove weight underneath only if your hair is dense.
- Blow-dry the top up, not flat, or the shape loses its point.
Variations on This Style:
- Long Blunt Bob with Hidden Lift: Stretch the length a little lower for more versatility.
- Shorter Full Bob: Bring the line up to the jaw for a bolder effect.
Common Mistakes to Avoid with This Style:
- Don’t carve too many visible layers into the perimeter.
- Don’t use thick creams through the whole head. They collapse the volume.
19. Layered Cut for Fine Straight Hair
Fine straight hair needs a different kind of layer. Too much chopping and the ends go see-through. Too little and the whole style falls flat. The sweet spot is a cut that lifts the crown, keeps the ends fuller, and lets the hair move without looking sparse.
Why It Works:
Straight hair shows every line, which is why the balance matters so much here. A little crown layering gives root support, while controlled face-framing pieces keep the style from reading flat and boxy. The right shape makes fine hair look deliberate instead of fragile.
Key Styling Products:
- Root volumizer
- Lightweight mousse
- Dry shampoo for texture
- A small amount of anti-static spray in dry weather
Quick Steps:
- Spray volumizer at the roots on damp hair.
- Blow-dry the crown in sections, lifting each one before it cools.
- Keep the ends smooth but not flat.
- Add a soft bend around the face if you want more shape.
- Use dry shampoo at the roots the next day for grip.
Equipment for This Style:
- Round brush
- Blow dryer with nozzle
- Section clips
- Fine-tooth comb
How to Wear It:
This is a clean, easy style for everyday wear, especially if you want your hair to sit neatly under a coat, scarf, or cardigan. It also behaves well with jewelry because it doesn’t swallow the neckline.
Pro Tips for This Style:
- Avoid super-long layers; they drag fine hair down.
- Keep product light. Fine hair tells on you fast.
- A slight off-center part often looks fuller than a straight one.
Variations on This Style:
- Shorter Lift Cut: Bring the layers up a little more around the crown.
- Smoother Everyday Version: Leave most of the hair straight and just curve the front.
Common Mistakes to Avoid with This Style:
- Don’t thin fine hair with a razor all over. It can vanish.
- Don’t drown the roots in conditioner or styling cream.
20. Voluminous Round Layers on Curls
Round layers on curls are about shape, not volume for volume’s sake. The goal is to create a soft halo, not a triangle. That means the layers follow the natural curve of the head so curls can stack in a full, rounded silhouette.
Why It Works:
Curly hair needs room to expand. A round shape gives the curls that space while keeping the overall outline balanced. When the top and sides are cut with the same general curve, the hair reads as full all over instead of bulky in one area and flat in another.
Key Styling Products:
- Leave-in conditioner
- Curl cream
- Light gel
- Diffuser-friendly heat protectant
Quick Steps:
- Apply leave-in and curl cream to wet hair.
- Scrunch in gel and let the curls clump naturally.
- Diffuse on low heat, moving section by section.
- Stop before the hair is bone dry if you want softer volume.
- Separate a few curls by hand once everything cools.
Equipment for This Style:
- Diffuser
- Wide-tooth comb
- Microfiber towel
- Clips for sectioning
How to Wear It:
This shape looks great with open collars and plain tops, because the hair itself gives the silhouette. It also works well with earrings that have a little length.
Pro Tips for This Style:
- Keep the top rounded, not flat, or the cut loses its shape.
- Dry curls in place; don’t blast them from the side with hot air.
- Ask for curl-specific layering if your curl pattern is uneven.
Variations on This Style:
- Soft Halo Curls: Keep the layering gentle for a more romantic outline.
- Defined Round Curls: Make the curl pattern tighter and more uniform for a stronger shape.
Common Mistakes to Avoid with This Style:
- Don’t cut too much off the top. The crown needs support.
- Don’t brush curls after they dry unless you want puffiness.
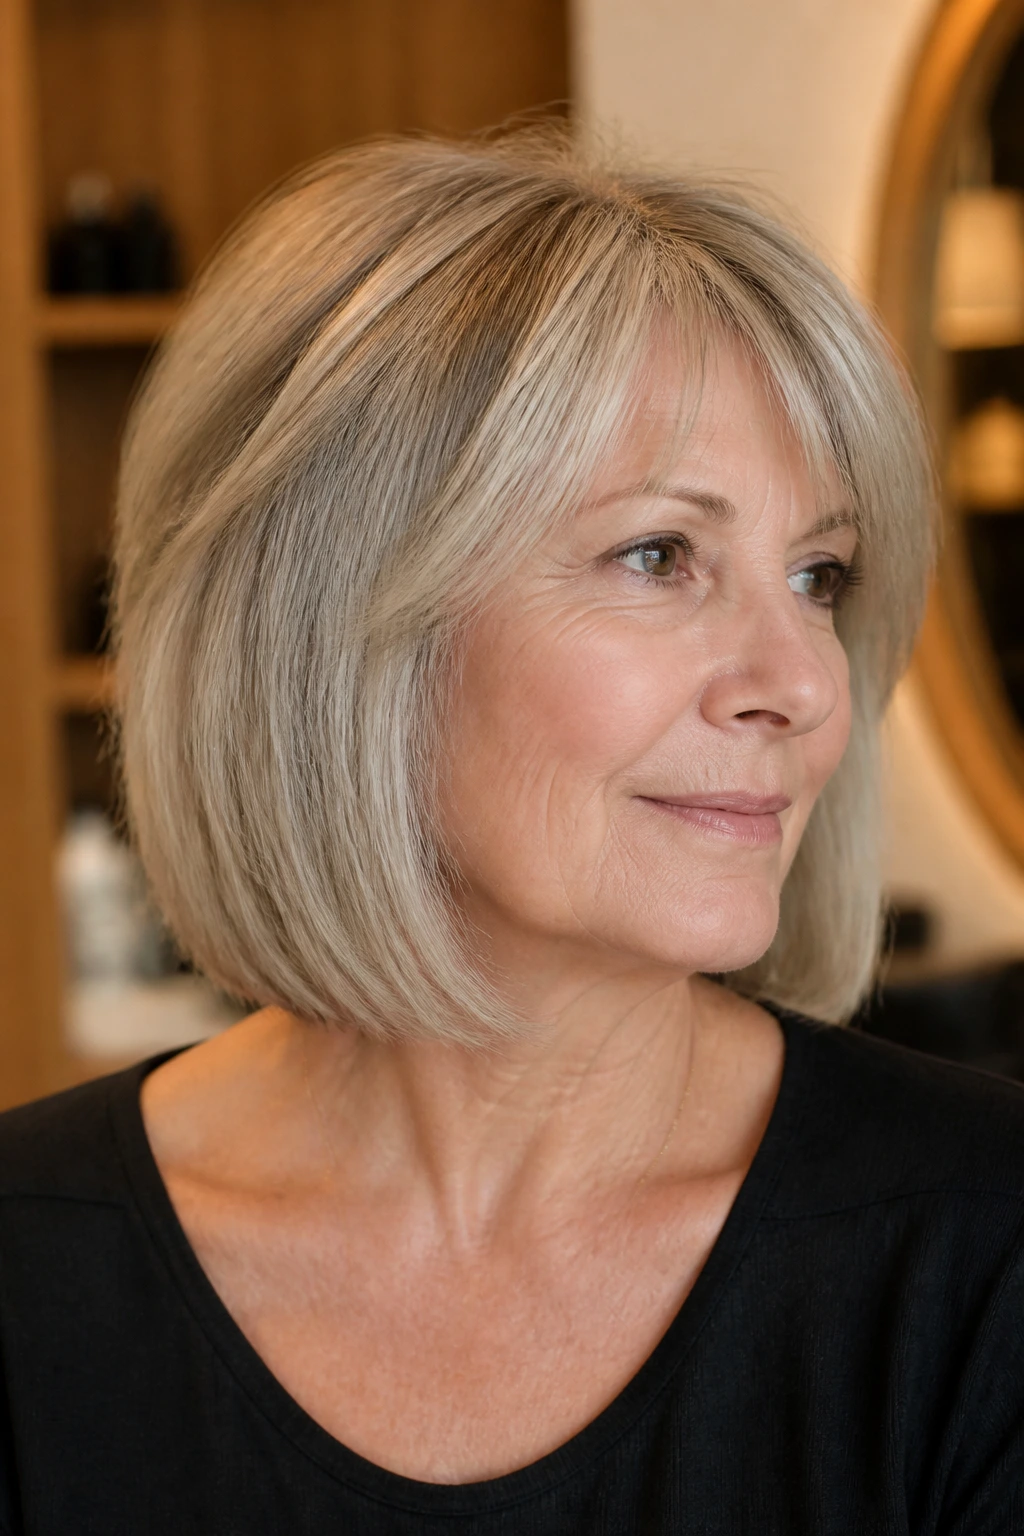
21. Side-Parted Pageboy Revival
The pageboy is back in a quieter, softer form, and the side-parted version is the one I’d actually recommend. It curves under around the jaw, keeps the top slightly lifted, and gives the face a neat frame without turning hard or old-fashioned.
Why It Works:
The curved-under shape adds volume at the sides while keeping the ends contained. A side part makes the cut feel less rigid than the classic version and gives the crown a little boost. It’s tidy, but not stiff.
Key Styling Products:
- Blow-dry cream
- Root-lift spray
- Smoothing serum for the ends
- Light-hold hairspray
Quick Steps:
- Create a deep side part while the hair is damp.
- Apply root lift near the top and sides.
- Blow-dry with a round brush, turning the ends under toward the face.
- Keep the crown raised and the nape smooth.
- Spray lightly once the shape cools.
Equipment for This Style:
- Round brush
- Blow dryer
- Comb
- Clips
How to Wear It:
This cut works with crisp collars and simple makeup because the shape is already doing plenty. It’s a tidy haircut for days when you want polish without a lot of styling steps.
Pro Tips for This Style:
- Keep the curve soft, not stuffed under.
- The side part should be the thing that relaxes the style.
- Ask for enough length at the front to avoid a hard shelf around the cheeks.
Variations on This Style:
- Softer Pageboy: Let the sides skim the jaw more loosely.
- Sharper Pageboy: Increase the under-curve for a more defined outline.
Common Mistakes to Avoid with This Style:
- Don’t make it too helmet-like with too much curve everywhere.
- Don’t flatten the crown while trying to smooth the sides.
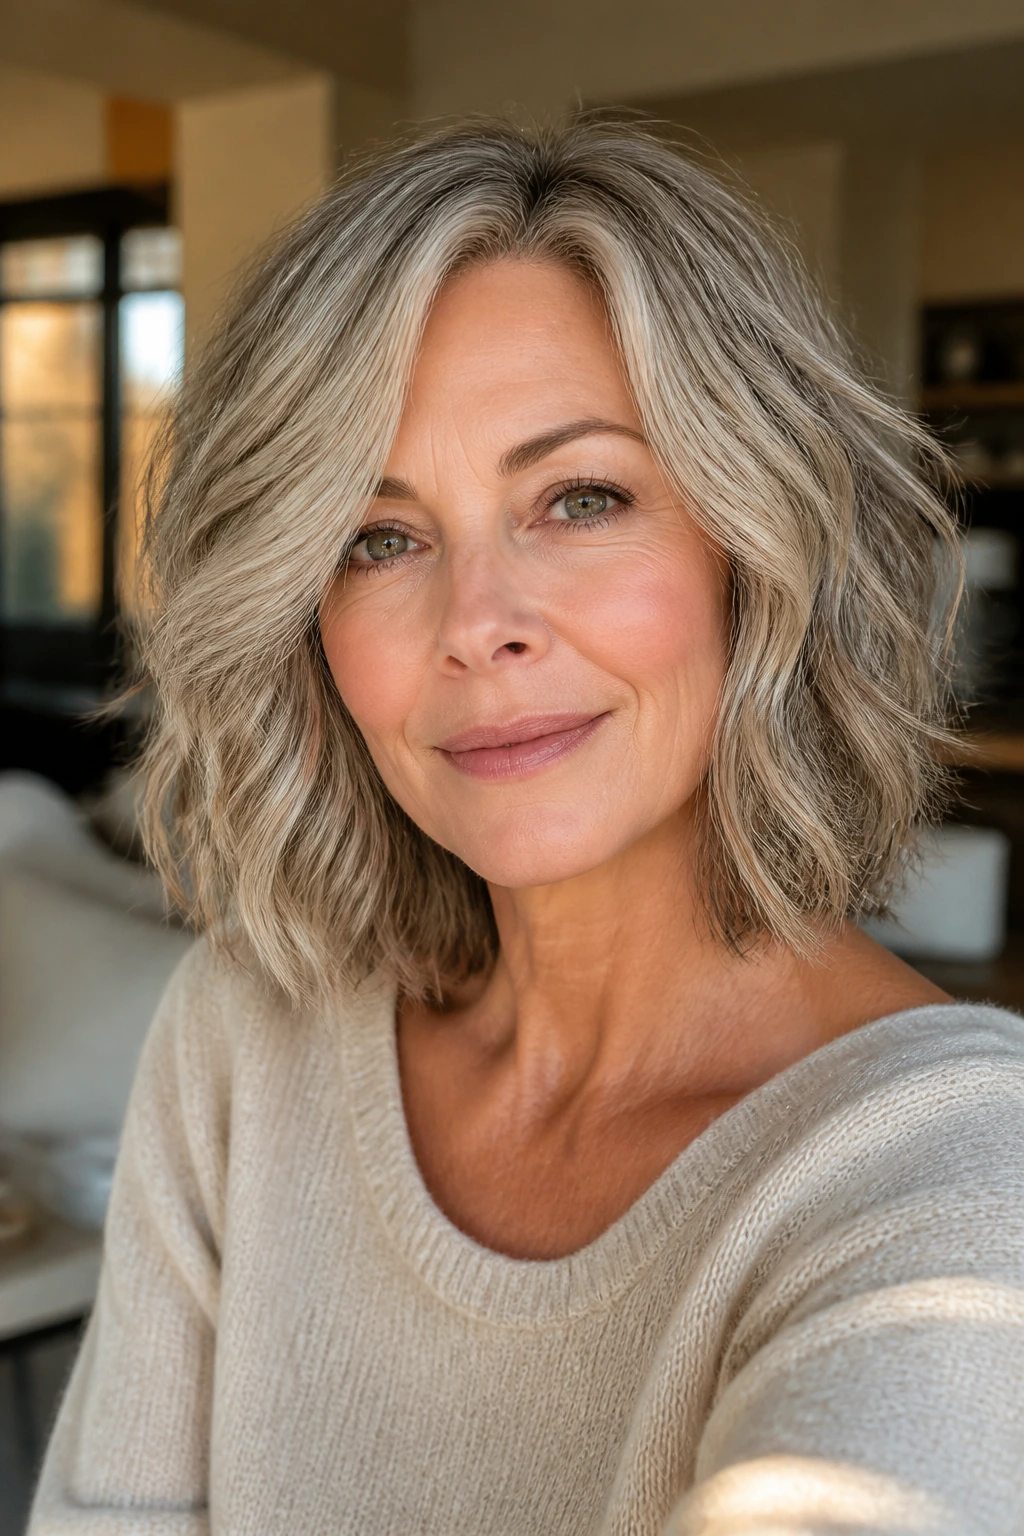
22. Layered Lob with Loose Waves

A layered lob with loose waves is the haircut I’d call the safe bet if you want movement without a lot of drama. It keeps enough length to feel familiar, but the layers and waves keep it from turning heavy or dull. That matters more than people think.
Why It Works:
The lob gives you length, but the waves stop the shape from hanging straight. Soft layering through the interior lets the hair move in pieces, which adds body without obvious chopping. It’s the sort of cut that can look styled even when it’s only half-styled.
Key Styling Products:
- Heat protectant
- Wave spray
- Lightweight mousse
- A drop of serum for the ends
Quick Steps:
- Apply mousse to damp roots and mid-lengths.
- Blow-dry the top first to build lift.
- Wrap random sections around a wand, leaving out the ends on some pieces.
- Let everything cool before shaking it out.
- Finish with wave spray and a touch of serum at the bottom inch.
Equipment for This Style:
- 1.25-inch wand
- Blow dryer
- Paddle brush
- Sectioning clips
How to Wear It:
It works for almost everything—jeans, a suit jacket, a dress, a plain tee. That’s part of the reason people keep returning to it. The shape doesn’t fight the outfit.
Pro Tips for This Style:
- Keep the waves soft and irregular. Uniform curls feel too formal.
- Place the part a bit off-center for more lift.
- Do not overload the ends with oil or the lob loses swing.
Variations on This Style:
- Softer Lob: Blow it mostly straight with a few bends at the front.
- More Textured Lob: Add extra wave spray and finger separation for a beachier finish.
Common Mistakes to Avoid with This Style:
- Don’t layer the ends so much that they look thin.
- Don’t curl each section in the exact same direction.
23. Soft Undercut Pixie

A soft undercut pixie keeps bulk off the sides and nape while leaving the top long enough to move. It is not a shaved-and-shocked haircut; it’s a smart short cut that uses hidden reduction to create lift where it counts.
Why It Works:
The undercut removes weight that would otherwise push the hair down. By keeping the top longer, you still get styling options: sweep it, spike it, smooth it, or leave it piecey. That mix of ease and shape is why the cut works so well on heavier or thicker hair.
Key Styling Products:
- Root-lift spray
- Styling paste or cream-wax
- Heat protectant
- Dry shampoo for texture
Quick Steps:
- Spray root lift through the top after washing.
- Blow-dry the top upward and slightly forward.
- Smooth the undercut area close to the head.
- Work a small amount of paste through the ends for separation.
- Push the front in the direction that flatters your face.
Equipment for This Style:
- Blow dryer
- Vent brush
- Small comb
- Fingers for shaping
How to Wear It:
It pairs well with bold earrings, clean-lined tops, and glasses that have some presence. The haircut opens up the face, so you don’t need much else.
Pro Tips for This Style:
- Keep the undercut subtle if you want the cut to grow out gracefully.
- Ask for enough top length to cover the undercut when needed.
- A little more lift at the crown makes the cut look intentional, not accidental.
Variations on This Style:
- Hidden Undercut: Leave the underside covered unless you tuck the hair up.
- Long-Top Pixie: Stretch the top longer for a softer, less sharp silhouette.
Common Mistakes to Avoid with This Style:
- Don’t take the sides too high unless you’re ready for a stronger look.
- Don’t use too much paste; the short top can get crunchy fast.
24. Airy Midi Cut with Feathered Ends

An airy midi cut sits right in the middle: longer than a lob, shorter than long hair, and feathered enough to avoid looking heavy. If you want a medium length that still has movement, this is a nice middle path.
Why It Works:
The feathered ends prevent the cut from sinking into a blunt block. At this length, the hair can start to drag itself down, so the internal shaping matters a lot. Feathering keeps the outline soft and lets the mid-lengths move when you turn your head.
Key Styling Products:
- Blow-dry cream
- Heat protectant
- Flexible texture spray
- Light serum for the ends
Quick Steps:
- Apply heat protectant and blow-dry cream to damp hair.
- Blow-dry with a medium round brush, lifting the roots.
- Turn the ends slightly under or out depending on the mood.
- Scrunch texture spray through the lower half once dry.
- Separate the front pieces with your fingers.
Equipment for This Style:
- Medium round brush
- Blow dryer
- Section clips
- Flat iron if the front pieces need smoothing
How to Wear It:
This style works with almost any neckline and doesn’t fight with jewelry or scarves. It’s a calm, adaptable cut, which is useful if you want one style to do a lot of jobs.
Pro Tips for This Style:
- Keep feathering around the face a little stronger than in the back.
- Do not make the ends too airy if your hair is fine.
- A side part gives the midi cut more lift than a centered part.
Variations on This Style:
- Softer Midi: Keep more weight at the bottom for a fuller feel.
- Bouncier Midi: Use a larger brush and more bend at the ends.
Common Mistakes to Avoid with This Style:
- Don’t make the cut too thin at the tips.
- Don’t ignore the crown; medium length hair still needs lift up top.
25. Natural Gray Texture Cut
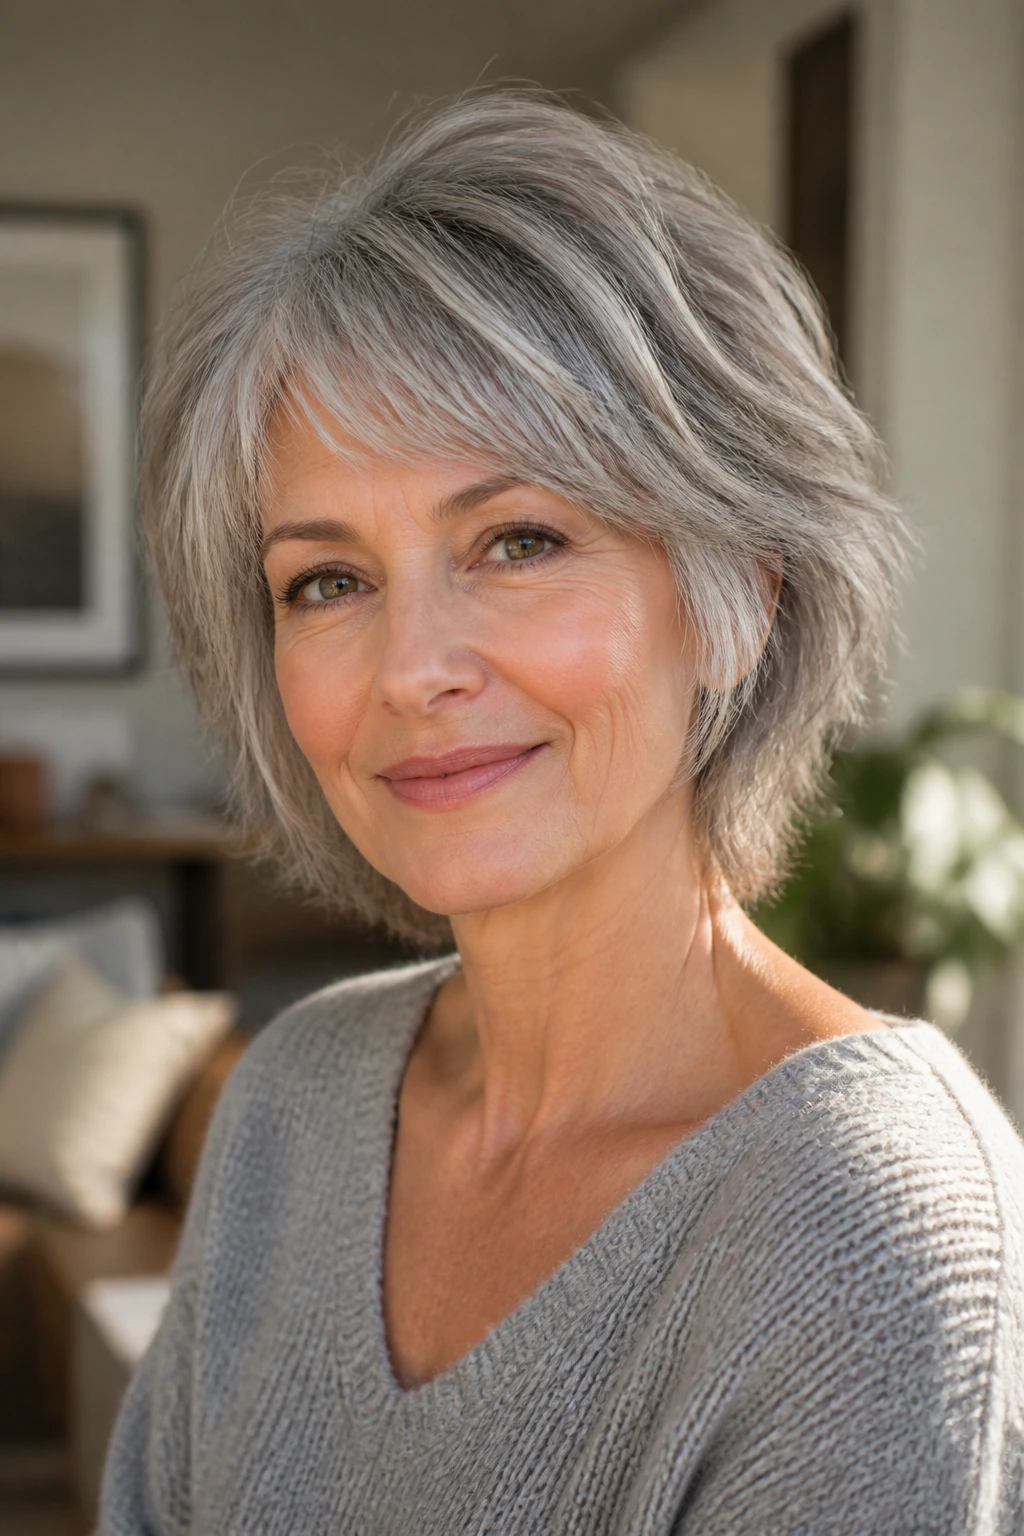
A natural gray texture cut is less about hiding the gray and more about making it look crisp. The shape can be short, medium, or layered, but the real trick is letting the texture read clearly so the silver has contrast and movement.
Why It Works:
Gray hair often has a slightly different feel than pigmented hair, and a texture-forward cut shows that off instead of forcing it into submission. Layers help silver strands catch the eye in separate sections, which keeps the style from looking flat or washed out. A good texture cut also removes the old “helmet” effect.
Key Styling Products:
- Purple shampoo used sparingly
- Lightweight leave-in conditioner
- Texture cream or spray
- Heat protectant if you use hot tools
Quick Steps:
- Wash with a gentle shampoo and follow with light conditioner.
- Towel-blot, then add leave-in only where needed.
- Let the hair air-dry or diffuse with minimal touching.
- Add texture cream or spray once dry to define the shape.
- Smooth any rough ends with the smallest amount of serum.
Equipment for This Style:
- Diffuser or blow dryer
- Wide-tooth comb
- Soft brush for finishing
- Microfiber towel
How to Wear It:
This cut looks best when the rest of the styling stays simple. Let the texture show. It’s also good for women who like a clean, honest finish rather than something overly polished.
Pro Tips for This Style:
- Use purple shampoo only enough to cancel brass, not so much that the hair goes dull.
- Keep the cut shape fresh with trims, because gray hair can fray at the ends faster than you’d expect.
- A little separation around the face goes a long way.
Variations on This Style:
- Sleek Gray Texture: Smooth the top and leave the ends lightly textured.
- Tousled Silver Cut: Add more lift and separation for a freer feel.
Common Mistakes to Avoid with This Style:
- Don’t flatten gray hair with heavy creams.
- Don’t overheat it; silver hair shows dryness fast.
26. Tousled Chin-Length Crop
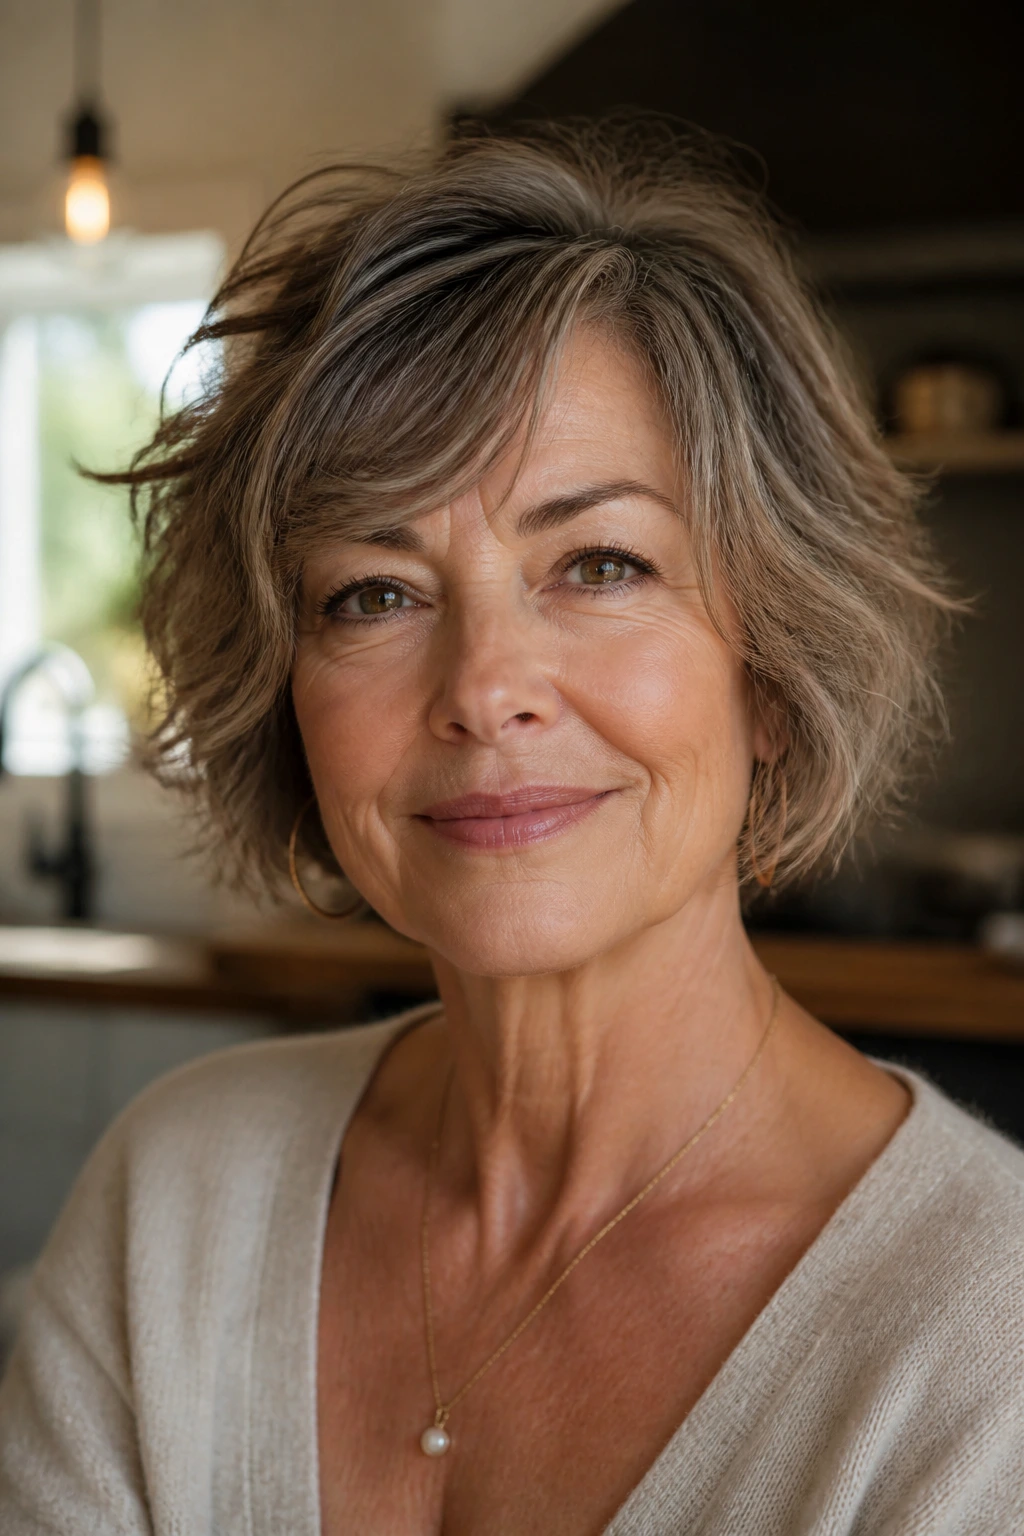
A tousled chin-length crop is short enough to feel light and long enough to play with. The shape sits around the jaw, but the texture keeps it from looking too neat. It’s an easy cut for women who want movement without spending half the morning on styling.
Why It Works:
The length gives you cheekbone framing, while the tousle adds lift and keeps the edges from sitting too close to the face. Because the crop is short, the hair doesn’t have much weight to pull down the volume. That makes the style feel fuller than it really is.
Key Styling Products:
- Mousse
- Texture paste
- Heat protectant
- Dry shampoo
Quick Steps:
- Add mousse to damp roots and comb it through.
- Blow-dry until the roots are lifted and the ends are mostly dry.
- Scrunch a tiny amount of paste into random sections.
- Push a few pieces behind the ear for contrast.
- Finish with dry shampoo at the root if needed.
Equipment for This Style:
- Small round brush
- Blow dryer
- Comb
- Fingers for shaping
How to Wear It:
This crop is casual enough for every day but still tidy enough for dinner or a meeting. It looks especially good with small earrings and a softly open neckline.
Pro Tips for This Style:
- Keep the texture controlled, not messy.
- The crown should stay a little lifted or the crop turns flat fast.
- If the ends frizz, use less product, not more.
Variations on This Style:
- Polished Crop: Smooth the top and keep the texture at the ends only.
- Messier Crop: Use your fingers to break the pieces up more for a looser look.
Common Mistakes to Avoid with This Style:
- Don’t over-scrunch. The style can turn puffy.
- Don’t cut the length too high unless you want a sharper jawline effect.
27. Retro Flipped Bob
A retro flipped bob brings the ends out and the crown up, which gives the haircut a little swing. It’s a cheerful shape, and if you like a bob that feels finished but not severe, this is a solid route.
Why It Works:
The outward flip opens the silhouette and keeps the ends from hugging the jaw too hard. That’s useful when you want lightness around the face. A bob like this also gives the impression of fuller hair because the edges move in space instead of sitting flat.
Key Styling Products:
- Blow-dry lotion
- Heat protectant
- Flexible hairspray
- Light texture spray for the flipped ends
Quick Steps:
- Apply blow-dry lotion to damp hair.
- Lift the roots while drying, especially at the crown.
- Flip the ends outward with a round brush or flat iron.
- Focus extra attention on the pieces near the face.
- Let the hair cool before brushing it through.
Equipment for This Style:
- Medium round brush
- Flat iron if needed
- Blow dryer
- Section clips
How to Wear It:
This bob has enough personality to stand on its own, so pair it with simple clothing and let the shape be the main feature. It looks especially neat with earrings that sit close to the ear.
Pro Tips for This Style:
- Keep the flip at the bottom edge only.
- Make the crown smooth and lifted so the shape doesn’t read cartoonish.
- A bit of side parting softens the retro feel.
Variations on This Style:
- Subtle Flip: Keep the outward bend mild and modern.
- Playful Flip: Turn the ends out a little more for a stronger vintage note.
Common Mistakes to Avoid with This Style:
- Don’t over-flip every section in the same way.
- Don’t flatten the top while chasing the ends.
28. Shoulder-Length Cut with Loose Bends
A shoulder-length cut with loose bends is one of the easiest ways to keep hair looking full without overstyling it. The hair is long enough to feel familiar, but the bends keep it from hanging straight and tired. It’s a workhorse style, and I mean that as praise.
Why It Works:
Loose bends interrupt the long vertical line of the hair, which creates movement and body. The shoulder length also gives you a natural shelf where the hair can rest without stretching itself out. Add a few layers and the shape stays softer around the face.
Key Styling Products:
- Heat protectant
- Light mousse or volumizing foam
- Flexible hold spray
- A touch of anti-frizz serum
Quick Steps:
- Apply mousse through the roots and mid-lengths.
- Blow-dry with a round brush for lift at the crown.
- Add loose bends with a wand, leaving the ends a little straighter if you want a softer finish.
- Finger-comb the waves apart.
- Mist lightly with flexible hold spray.
Equipment for This Style:
- 1.25-inch wand
- Round brush
- Blow dryer
- Clips
How to Wear It:
It’s easy to wear with almost anything, from denim to dresses. If you want a style that doesn’t argue with your wardrobe, this is a good bet.
Pro Tips for This Style:
- Keep the bends irregular; that keeps the style from looking dated.
- Lift the roots before you add the waves.
- If your hair is fine, use fewer bends, not more product.
Variations on This Style:
- Polished Bends: Smooth the top and keep the wave pattern relaxed.
- More Undone Bends: Add extra texture spray for a looser, lived-in finish.
Common Mistakes to Avoid with This Style:
- Don’t curl every inch. The style needs gaps.
- Don’t forget root lift; loose waves alone won’t save flat roots.
29. Asymmetrical Layered Cut
An asymmetrical layered cut gives you a little swing on one side and a little restraint on the other. It’s a good choice if you want the haircut to feel modern but not extreme. The difference in length keeps the eye moving, which helps volume read more clearly.
Why It Works:
Asymmetry changes how the hair falls around the face, which can make one side appear fuller and the crown seem lifted. The layers prevent the longer side from dragging the whole cut down. It’s a shape that works well when straight symmetry feels too static.
Key Styling Products:
- Root-lift spray
- Lightweight texturizing spray
- Heat protectant
- A small amount of smoothing cream
Quick Steps:
- Set your part in the direction that supports the longer side.
- Spray root lift near the crown and blow-dry upward.
- Smooth the longer section so it lies cleanly.
- Add a soft bend to the shorter side for contrast.
- Finish with a light spray to keep the lines visible.
Equipment for This Style:
- Blow dryer
- Round brush
- Comb
- Clips
How to Wear It:
This cut likes angular earrings, sharp collars, and simple clothes that let the shape show. It can look surprisingly elegant with a very plain outfit, because the haircut gives it enough energy.
Pro Tips for This Style:
- Keep the asymmetry subtle unless you want a stronger statement.
- Don’t hide the longer side completely behind your shoulder.
- A clean part line matters a lot here.
Variations on This Style:
- Mild Asymmetry: Just a small difference in length for a softer read.
- Bold Asymmetry: Increase the contrast for a more graphic shape.
Common Mistakes to Avoid with This Style:
- Don’t make both sides so different that the cut feels uneven rather than intentional.
- Don’t flatten the crown while chasing one side’s shape.
30. Long Layered Waves with Curtain Fringe
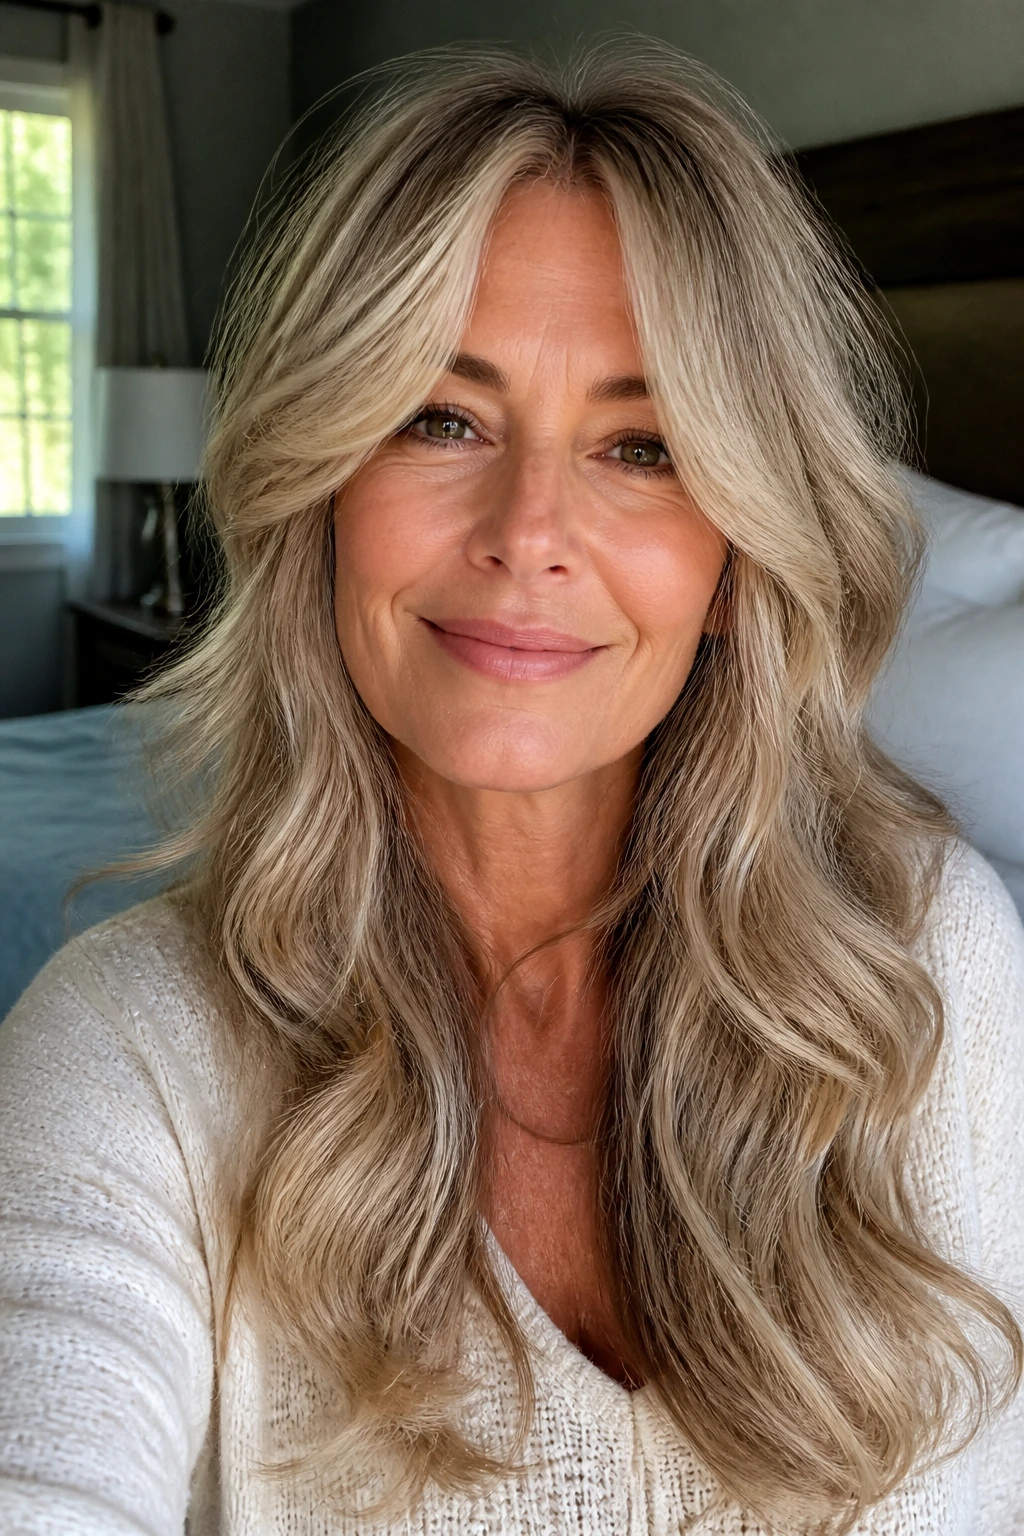
Long layered waves with curtain fringe are for women who want to keep their length and still get some lift. The waves keep the hair from hanging in one sheet, the layers create movement, and the curtain fringe keeps the face from disappearing behind all that length.
Why It Works:
This cut is doing three jobs at once: preserving length, opening up the face, and breaking weight with layers. That makes it especially useful for hair that feels heavy through the ends but still has enough density to hold shape. The fringe also gives you a front edge, which long hair often lacks.
Key Styling Products:
- Volumizing mousse
- Heat protectant
- Flexible wave spray
- A tiny bit of serum for the fringe ends
Quick Steps:
- Apply mousse to damp roots and comb it through the lengths.
- Blow-dry the fringe first, opening it away from the center.
- Add loose waves through the mid-lengths with a wand or large iron.
- Let the waves cool fully before separating them.
- Finish with wave spray and finger-shape the fringe.
Equipment for This Style:
- Large curling iron or wand
- Round brush for the fringe
- Blow dryer
- Sectioning clips
How to Wear It:
This style looks good with long necklaces, soft knits, and anything that gives the neckline space to breathe. It also stays flattering if you tuck one side behind the ear.
Pro Tips for This Style:
- Keep the fringe feathered, not heavy, or the cut loses air.
- Use enough root lift at the crown, or the length will pull everything down.
- The waves should look loose and varied, not set in one repeated pattern.
Variations on This Style:
- Softer Fringe Version: Let the curtain pieces blend more gradually into the side layers.
- Bigger Wave Version: Add more bend through the mid-lengths for a fuller finish.
Common Mistakes to Avoid with This Style:
- Don’t keep the curtain fringe too thick. It closes the face up.
- Don’t let the long layers start too low. The hair gets heavy fast.
Why Layering Helps Hair Look Fuller, Not Thinner
A lot of people hear “layers” and think “less hair.” That’s not really how it works when the cut is done well. The point is not to remove volume from the head; it’s to move volume into the right places. A blunt line can look dense, sure, but it can also sit flat and swallow the face. Layers give the hair places to bend, tuck, and lift.
The crown is the big one. If that area is too heavy, the whole style droops. If it’s too short, it can puff up in a weird little cap. Good layering finds the middle and lets the top stand up without screaming for help from three different products.
Face-framing matters just as much. A piece that starts around the cheekbone can soften the whole haircut. A piece that starts too low just hangs there. A piece that starts too high can feel choppy. The little adjustments add up, and that’s what separates a flattering layered cut from one that just looks chopped.
Gray and silver hair benefit even more from shape because the texture often changes from strand to strand. A layered cut shows off the variation instead of hiding it. That’s a gift, honestly.
Tools That Actually Help These Styles Hold Their Shape
- Blow dryer with a nozzle: Directs air to the roots instead of blasting the whole head apart.
- Round brush in two sizes: Use a small one for bangs and short layers, a medium or large one for bob and lob lengths.
- Velcro rollers: Handy for setting the crown while you do your makeup.
- 1-inch and 1.25-inch irons or wands: Good for bends, waves, and the occasional flip.
- Root-lift spray or mousse: The difference between hair that rises and hair that sighs back down.
- Flexible-hold hairspray: Gives shape without turning the hair into a shell.
- Dry shampoo: Not just for oil—also for grip at the root.
- Sectioning clips: A boring tool, yes, but the boring ones are the ones that save the blowout.
- Wide-tooth comb: Useful for curls and for keeping wave patterns from turning into frizz.
- Satin pillowcase or wrap: Helps preserve the shape overnight instead of starting from zero every morning.
How to Choose the Right Cut for Your Hair, Face, and Routine
If your hair is fine, don’t ask for a lot of short layers everywhere. That usually leaves the ends looking thin and stringy. Ask for internal volume, a little crown support, and a perimeter that still looks full. If your hair is thick, you can handle more shaping, but you still want the ends to keep enough weight to sit well.
Face shape matters, but not in the rigid way people like to pretend. A round face usually likes some height and longer front pieces. A long face usually looks better with width around the sides and bangs or fringe that break up vertical length. A square jaw often softens nicely with layers that start around the cheekbones instead of the chin.
Routine matters more than any salon theory. If you blow-dry every morning, you can take on a more structured bob, shag, or stacked shape. If you air-dry most days, choose softer layering and a cut that still has a decent outline when it dries on its own. If you wear glasses, keep the fringe or face-framing pieces long enough to move around the frames instead of sitting on them.
Color also changes the way layers read. Highlights make layers pop. Solid dark color can hide the shape a little more, so you may want more visible face-framing or a stronger silhouette in that case.
Extra Lift and Personal Touches That Make These Cuts Better
- Volume Enhancement: A small root clip at the crown for 10 to 15 minutes while the hair cools can give you a better lift than another round of hairspray.
- Customization: If you like softer hair around the face, keep the front pieces longer than the rest by a half inch or so; that tiny difference changes the whole cut.
- Texture Boost: A little dry shampoo on freshly styled hair gives grip, especially if your hair is clean and slippery.
- Gray-Hair Move: Use a blue or purple toning shampoo only often enough to keep brass away. Too much and the hair loses warmth and looks flat.
- Finish: On short or medium cuts, a fingertip amount of paste on the ends is enough. Anything more starts to look greasy.
- Make-It-Yours: If you love a polished look, choose smoother layers and round-brush the ends. If you prefer softer movement, let the pieces separate a little and stop before the style gets too perfect.
Keeping the Shape Fresh Without Starting Over Every Morning
Most of these layered volume hairstyles for older women do not need a full reset every day. They need a short refresh. A quick lift at the roots, a few minutes with a brush or fingers, and maybe a touch of dry shampoo is often enough to wake the shape back up.
Short cuts like pixies and pixie bobs usually need a trim every 4 to 6 weeks if you want the lift to stay clean. Bobs and lobs can stretch to about 6 to 8 weeks before the shape starts softening in the wrong places. Longer layered cuts are more forgiving and can usually go 8 to 12 weeks, but the face-framing pieces still need regular attention if they’re the part doing the heavy lifting.
At night, the goal is not to crush the shape. A satin pillowcase helps, and a loose clip at the crown can keep volume alive overnight. For waves and curls, pineappling or loosely gathering the hair on top of the head keeps the pattern from being flattened. In the morning, a little water at the roots or a quick hit with a round brush is often enough.
If the ends start looking dry, do not drown them in oil. A tiny amount is fine. Too much turns the hair limp, and then you’re right back where you started.
Variations and Adaptations to Try
- For Fine Hair: Choose cuts with hidden internal layers, blunt edges, and crown lift. Keep products light, and skip anything that makes the hair feel coated.
- For Thick Hair: Ask for weight removal under the surface and a shape that narrows slightly toward the ends. Thick hair can handle more movement, but it still needs a clear outline.
- For Curly Hair: Go for curl-specific layering that respects the pattern. Let the curls form the shape instead of forcing them into a straight-hair silhouette.
- For Gray or Silver Hair: Lean into texture and soft separation. The silver reads best when the cut gives it space to move.
- For Glasses Wearers: Keep fringe, sweeps, and side pieces just long enough to clear the frames. The haircut should work around the glasses, not fight them.
- For Low-Maintenance Mornings: Pick a style that looks good air-dried, like the layered lob, long layers, or a soft shag. The less a cut depends on perfect blow-drying, the more likely you’ll actually wear it well.
Common Mistakes That Flatten Volume Fast
The first mistake is asking for layers without saying where you want the volume. That leads to random thinning instead of shape. If you want lift at the crown, say so. If you want softness around the jaw, say that too. A vague haircut request usually becomes a vague haircut.
Heavy product is the second trap. Thick creams, rich oils, and too much serum can make beautiful layers go limp in less than an hour. Fine hair feels this fastest, but even dense hair can get dragged down. Start with less than you think you need.
Another one: cutting the fringe too short. Bangs and face-framing pieces shrink once they’re dry and styled. If they start too short, they can look abrupt or fussy. Longer is safer. You can always trim more.
Over-layering the ends is a classic problem, especially on hair that is already fine. The cut may look airy in the chair and thin in real life. A good stylist keeps the bottom line strong enough to support the shape.
Changing the part after the hair is dry can also wreck the lift. The roots set where they dry. If you want a deeper side part or more volume, commit while the hair is damp.
Questions People Ask Before Choosing a Layered Volume Cut

Will layers make fine hair look thinner?
Not if they’re placed well. Fine hair usually does better with internal layering, crown lift, and a fuller perimeter than with lots of choppy ends. The wrong layers can thin it out; the right ones make it look more alive.
Are bangs a bad idea for older women?
No. Bad bangs are a bad idea. Soft curtain bangs, bottleneck bangs, and side-swept fringe can all work beautifully because they break up the forehead and add shape around the eyes. The key is keeping them light enough to move.
What if my hair is gray and coarse?
Then texture matters even more. Gray hair often needs moisture at the ends and a cut that respects its bend and density. Soft shags, layered lobs, and feathered crops usually behave better than one heavy, solid shape.
How often should I trim layered hair?
Short styles usually need trimming more often than longer ones. Pixies and short bobs often want shape maintenance every 4 to 6 weeks. Medium and longer layered cuts can usually stretch to 6 to 12 weeks depending on how fast the front pieces grow.
Can I air-dry these styles?
Some of them, yes. Soft shags, layered lobs, and long layers can air-dry well if they’re cut to support your natural pattern. Shorter styles usually need at least a little blow-drying at the crown to keep the volume from collapsing.
What if my hair flips out where I don’t want it to?
That usually means the cut is fighting your natural growth pattern. A stylist can adjust the angle of the layers or the direction of the bevel. At home, a round brush or a quick flat-iron bend usually fixes the stray ends.
Which style is easiest if I hate styling tools?
A wavy lob with invisible layers, a layered shoulder-length cut, or a soft shag is usually the least demanding. Those shapes still look purposeful when they air-dry with a little leave-in and texture spray.
Do these cuts work with glasses?
Yes, and some work better than others. Side-swept crops, curtain bangs, and longer face-framing layers tend to sit nicely around frames, while very short fringe can fight them. The trick is to leave enough length at the front to move.
A Shape That Keeps Hair Lively

The best layered volume hairstyles for older women do one simple thing well: they keep the hair from going stiff, flat, or overly heavy. That’s the real win. Not youth. Not drama. Shape.
A good layered cut makes the crown lift, the face look softer, and the ends behave in a way that feels intentional. Some versions are short and sharp. Others stay long and relaxed. Either way, the haircut should make your morning easier, not turn it into a wrestling match with a round brush.
Pick the shape that fits your hair density, your routine, and the amount of styling you’ll actually do. Then keep it trimmed, keep the products light, and let the layers do their job.