Braids behave differently on wavy hair. On Black women, that texture can be a gift and a nuisance at the same time: it gives a braid enough bend to hold shape, but it can also slip at the root if you pile on too much oil or rush the parting.
That’s why everyday braids for Black women with wavy hair deserve a little more thought than the usual “just braid it back” advice. The styles that last are the ones that respect the hair’s movement. Clean sections. Light tension. A product that gives grip without turning the roots into a waxy helmet. That’s the sweet spot.
I’ve always preferred braids that look finished from across a room but still feel wearable in a car, at work, at church, at a cookout, or while running errands with your tote bag half-zipped. Not every braid needs to be dramatic. Some of the best ones are the quiet styles that keep your hair off your face, sit flat under a hat, and still look good after a long day.
Why These Braids Earn Their Keep
-
Built for real mornings: These styles can be done with a rat-tail comb, a couple of clips, and one good mirror, not a drawer full of gadgets.
-
Kind to wavy texture: Wavy hair gives braids a soft, full look without needing a lot of teasing or extra hair.
-
Flexible on length: Several of these work on shoulder-length cuts, stretched hair, or longer lengths with layers.
-
Easy to dress up or down: A braid can stay plain for errands or pick up cuffs, pins, or a scarf for dinner.
-
Better than a loose ponytail on windy days: Braids hold the shape, keep the ends together, and stop that constant hand-in-hair fixing.
-
Not all tight, not all fussy: Some are protective, some are quick, and some are just a good way to make hair look intentional without spending the whole afternoon on it.
1. Low Side Braid That Falls Forward
A low side braid is the kind of style that looks soft without looking unfinished. On wavy hair, the braid gets a little natural puff between the sections, which I like a lot more than the pin-straight, over-slicked version some people chase. Bring everything over one shoulder, braid loosely, and let the length sit forward where you can actually see it.
Why It Works on Wavy Hair
Wavy strands grab each other more easily than silky straight hair, so the braid does not need much help to stay together. A little mousse at the roots and a light cream through the mid-lengths is usually enough. If the front pieces are layered, leave a few narrow face-framing strands out and tuck the rest back with a pin.
Best for: medium to long hair, second-day hair, casual days.
Watch for: over-smoothing the crown until it goes flat and slips.
Tiny trick: once the braid is finished, pinch the outer loops gently to make it look fuller without pulling it apart.
2. Center French Braid With Soft Ends
If you want something that looks neat from the front and stays put through a full day, this is one of the most dependable choices. The center French braid starts at the hairline and gathers hair as it moves back, which keeps the style anchored close to the scalp. On wavy hair, the finish has a little softness that keeps it from looking stiff.
The part has to be clean. That matters here more than almost anywhere else. I’d use a rat-tail comb and a touch of gel or mousse, then braid with firm fingers but not a hard grip. Once you reach the nape, stop before the ends start to look stringy and tie them off with a small elastic.
How to Keep the Front from Puffing
Smooth the first inch of hair on each side of the part before you begin. If you start with loose roots, the braid will frizz there first, and that’s what gives the whole style a tired look by midday. Keep your hand pressure even all the way down.
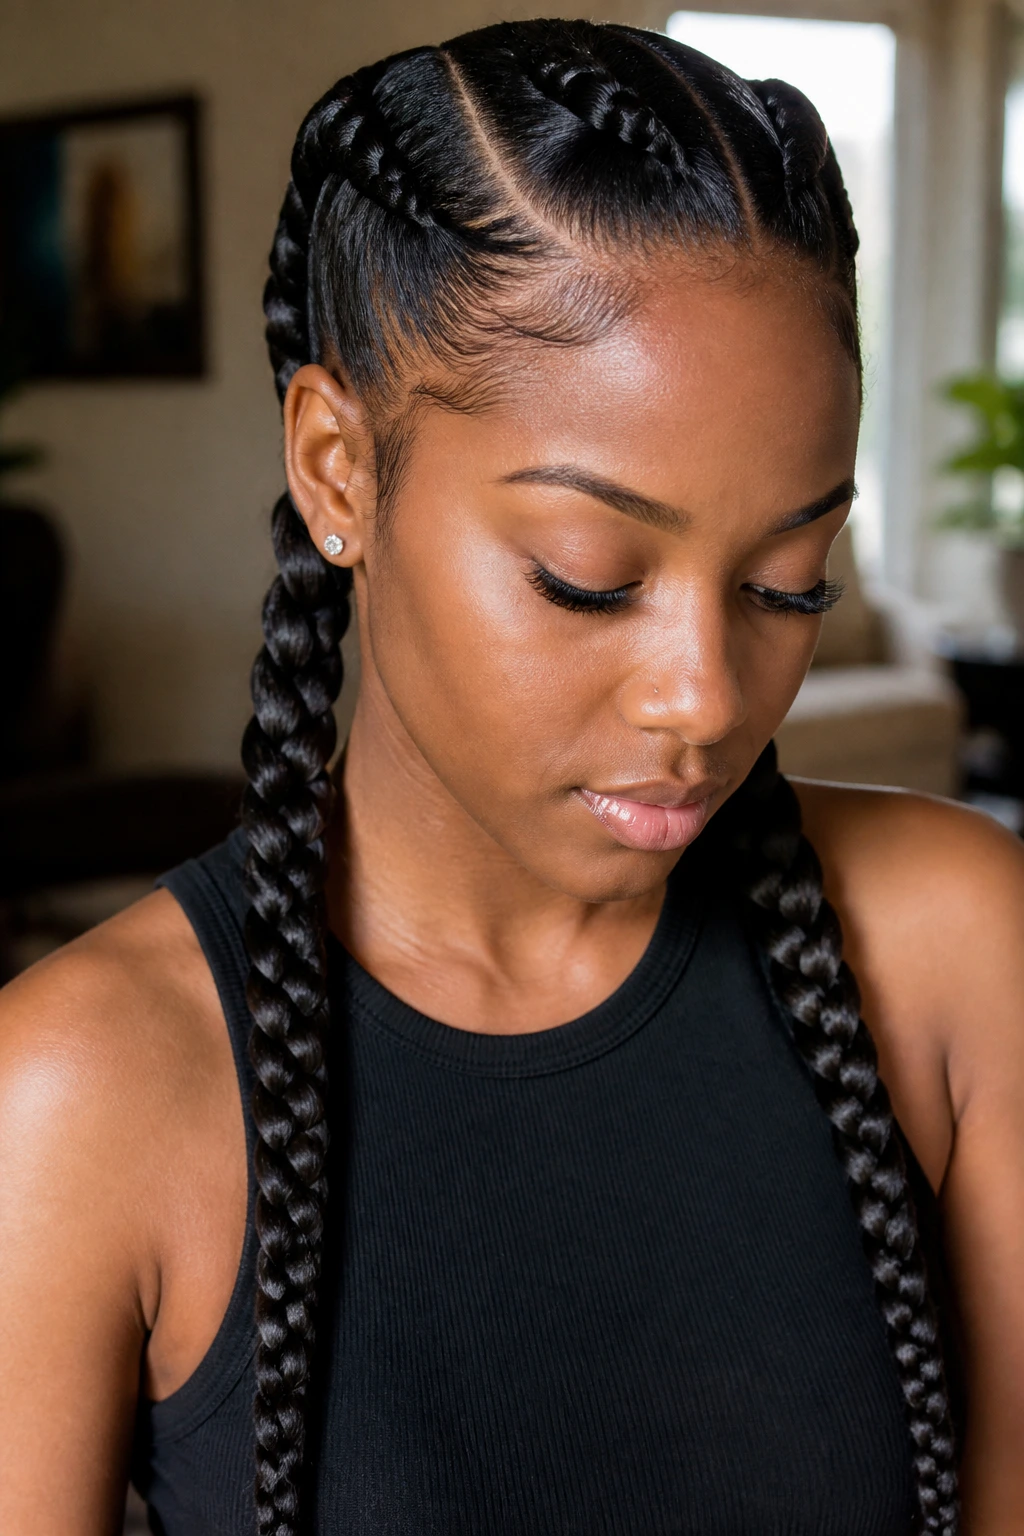
3. Twin Dutch Braids With Clean Parts
Twin Dutch braids are sporty, practical, and a little more structured than French braids because the sections cross under instead of over. That one change gives the braid a raised look that sits well on wavy hair, especially if you want a style that feels locked in from the scalp.
The trick is to braid close enough to the head that the roots stay tidy, but not so tight that your temples feel pulled. Wavy hair can puff at the edges if the braid is too loose, so a light styling foam at the part helps more than a heavy gel layer. I’d keep the ends either loose, tucked into tiny buns, or wrapped into a low pony.
- Good for workouts, errands, or long days out.
- Works best when the hair is detangled all the way to the ends first.
- If your hair is layered, start the braid a little farther back from the hairline.
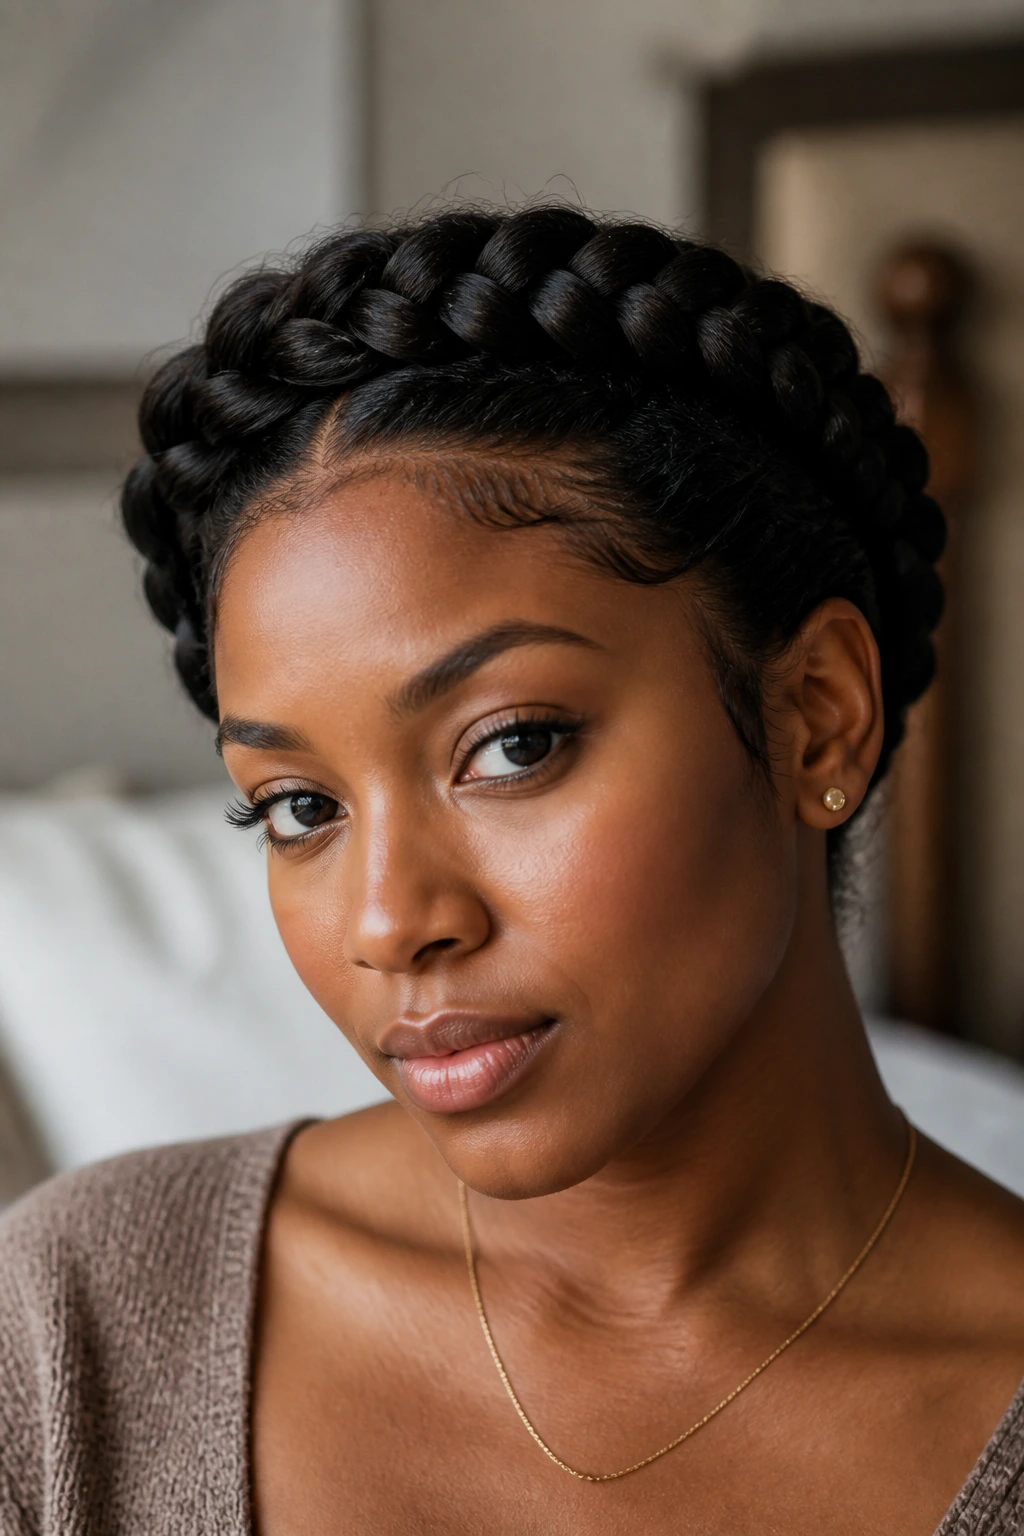
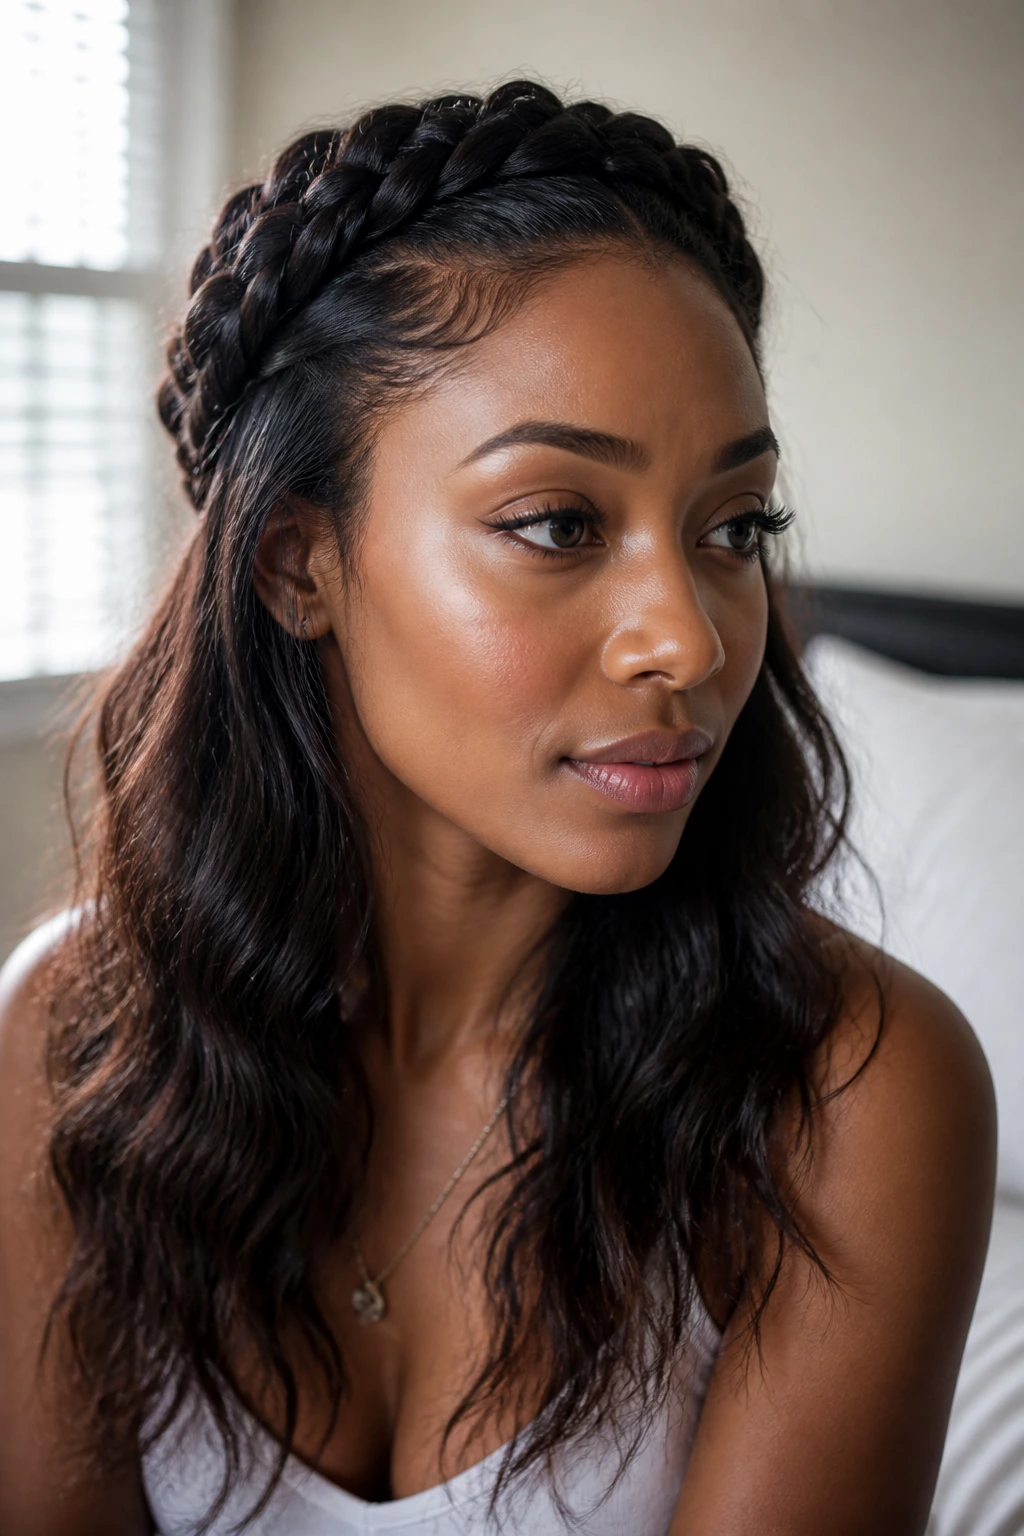
4. Halo Crown Braid
A halo braid wraps around the head like a soft frame, and that shape does a lot of work on its own. It keeps the hair off the neck, opens up the face, and gives wavy hair a fuller outline because the braid sits up instead of hanging straight down. I reach for this when I want something that looks polished without feeling severe.
The braid can be made with one long braid wrapped around the crown, or with two braids pinned together at the back. Either way, use bobby pins every few inches where the braid touches the scalp. Those hidden pins are doing more work than people think.
The style works especially well if your hair has some natural bend in it already. Loose wave means the braid has body. That’s the whole appeal. It doesn’t need to be sleek to look deliberate.
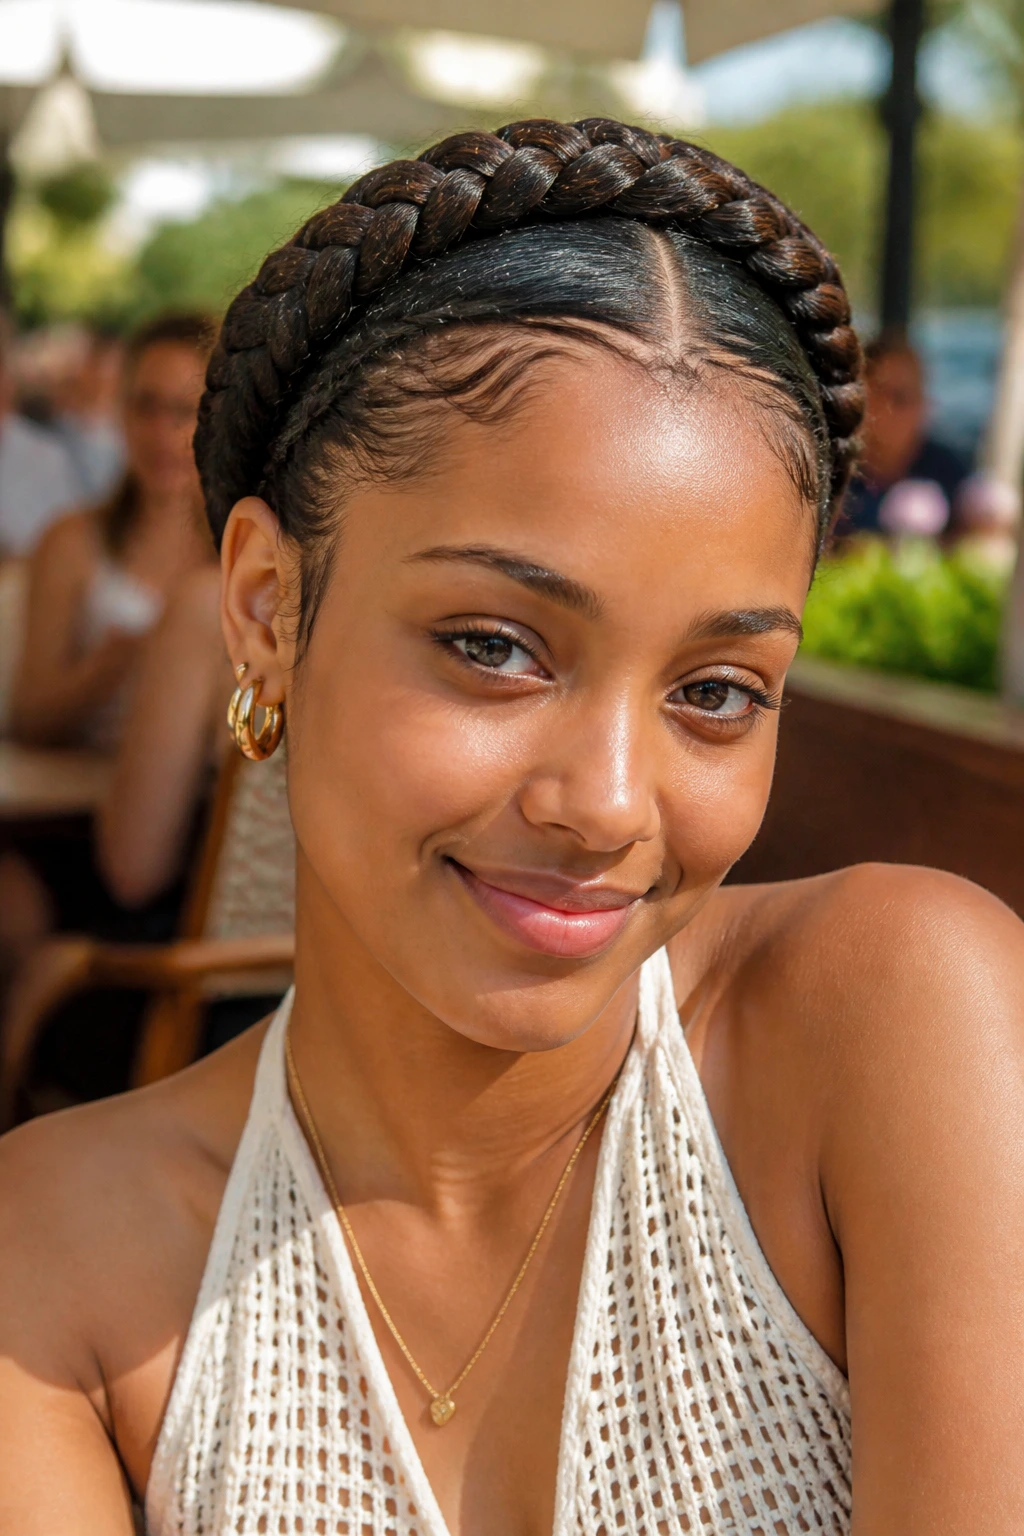
5. Milkmaid Braids With a Soft Part
Milkmaid braids have a little old-school charm, but they’re not fussy if you keep them soft. Part the hair slightly off center, braid two sections, and cross them over the top of the head. On wavy hair, the plumpness of the braid makes the style look richer than it would on very straight hair.
The cleanest version comes from braiding both sides first, then pinning the left braid to the right and the right braid to the left so the ends hide under each other. If you have shorter layers at the temples, let them peek out a little. It keeps the style from looking too severe.
This is one of those styles that can read casual or dressy depending on the finish. Leave the texture soft and it feels relaxed. Smooth the roots and pin it tightly, and it starts leaning formal.
6. Rope-Braid Low Ponytail
A rope braid is faster than a standard braid, and that speed matters on busy mornings. Split the ponytail into two sections, twist each one in the same direction, then wrap them around each other in the opposite direction. That twist-on-twist motion gives a clean spiral that shows off the wave pattern in your hair.
I like rope braids on wavy hair because they hold without needing a lot of product. Too much gel can make the twist look sticky. A small amount of smoothing cream at the crown and a clear elastic at the base usually do the job.
If your hair has layers, the rope braid will still behave better than a classic three-strand braid, which can shed short pieces all over the place. This one keeps the shape tight and neat.
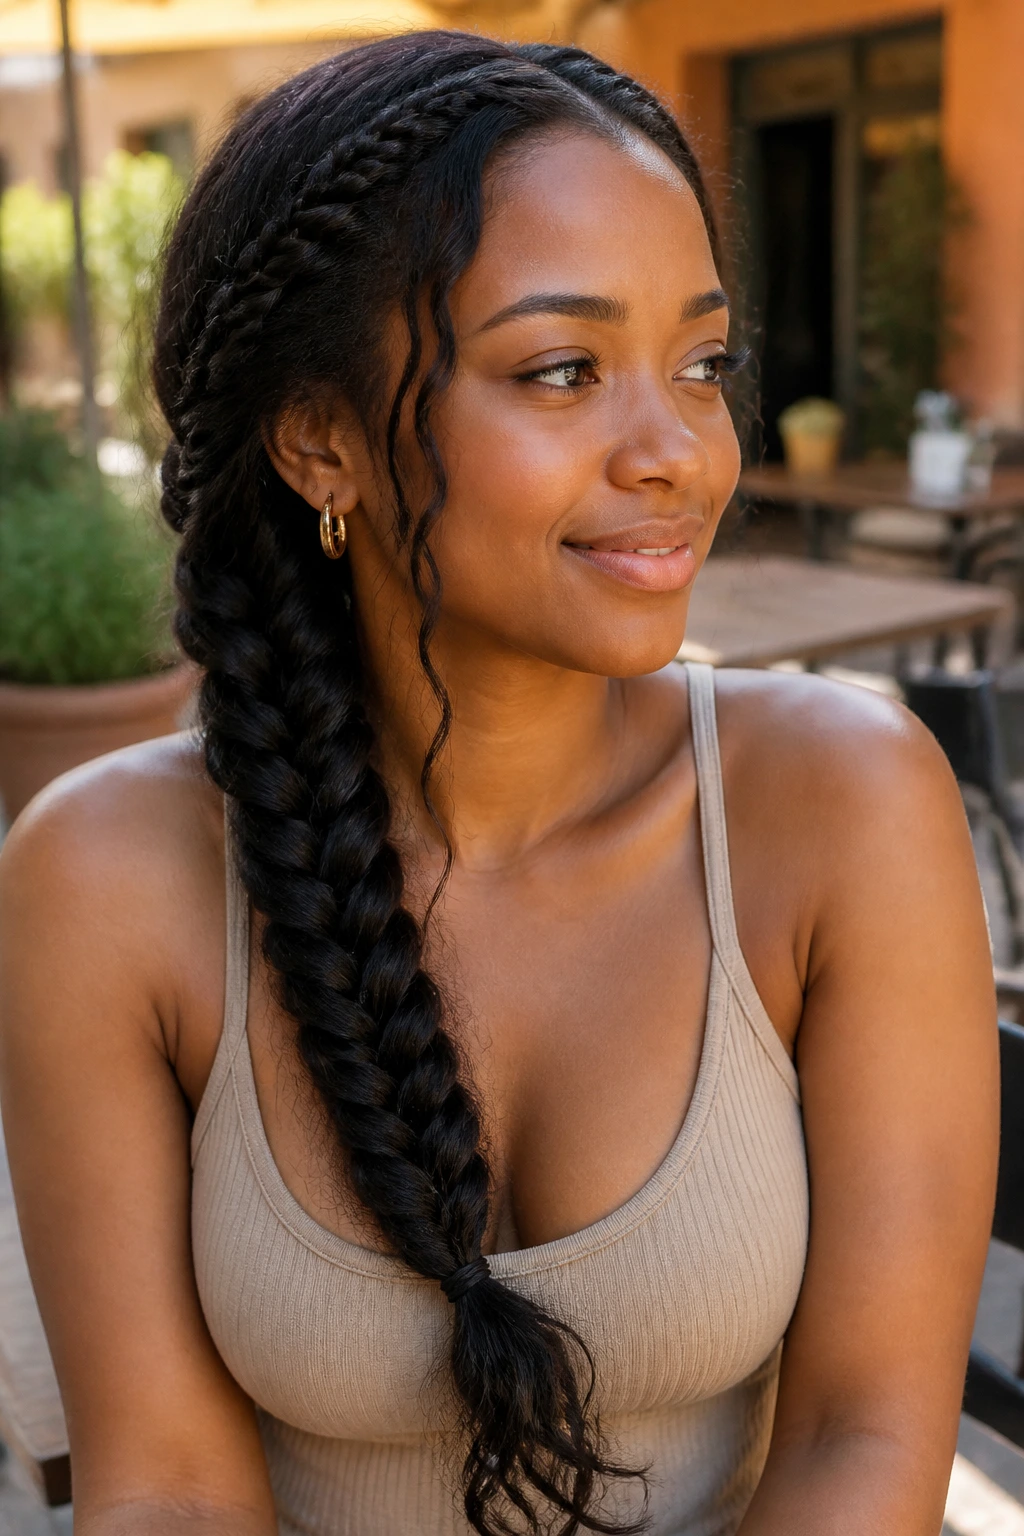
7. Fishtail Braid Over One Shoulder
A fishtail braid looks complicated from a distance, which is half the fun. Up close, it’s mostly patience and small sections. On wavy hair, the texture breaks up the braid pattern in a nice way, so the finished style doesn’t go flat the way it can on very silky hair.
Start with two sections, pull a small piece from the outside of one side across to the other, and repeat. Tiny sections make the braid look more detailed; bigger sections make it looser and faster. I prefer the loose version for everyday wear because it has movement, not stiffness.
What Makes It Wearable
The braid sits well over a shoulder, doesn’t demand perfect smoothness, and can survive a light bump of humidity better than people expect. Once it’s done, tug the edges a little with your fingertips. Not too much. Just enough to soften the line.
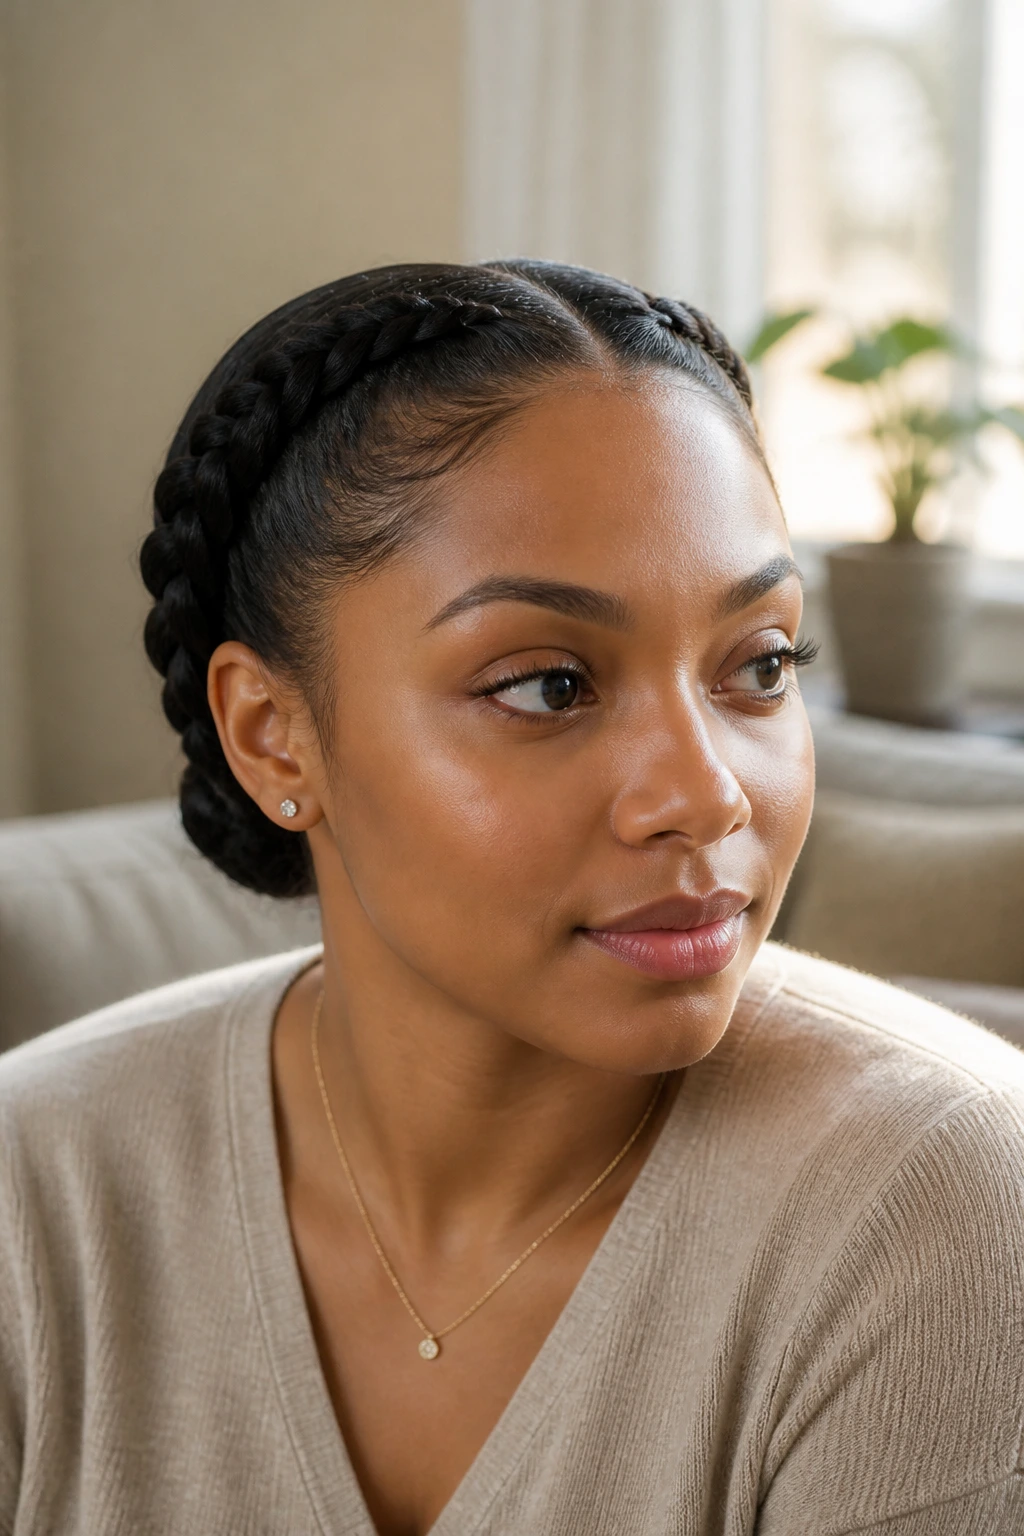
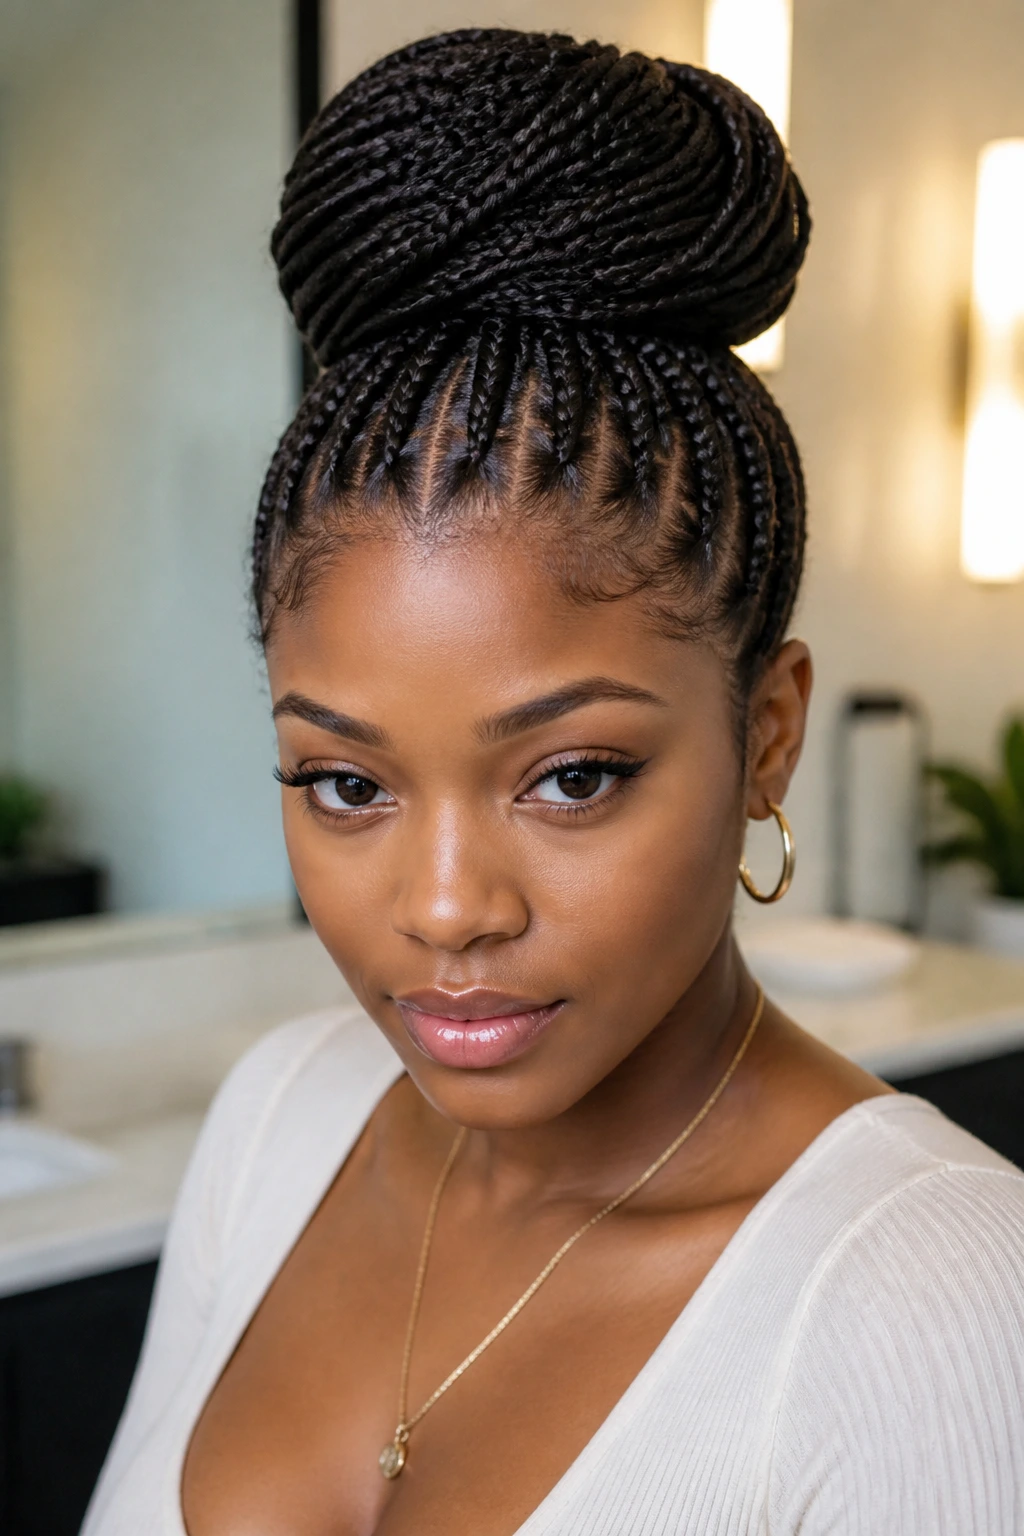
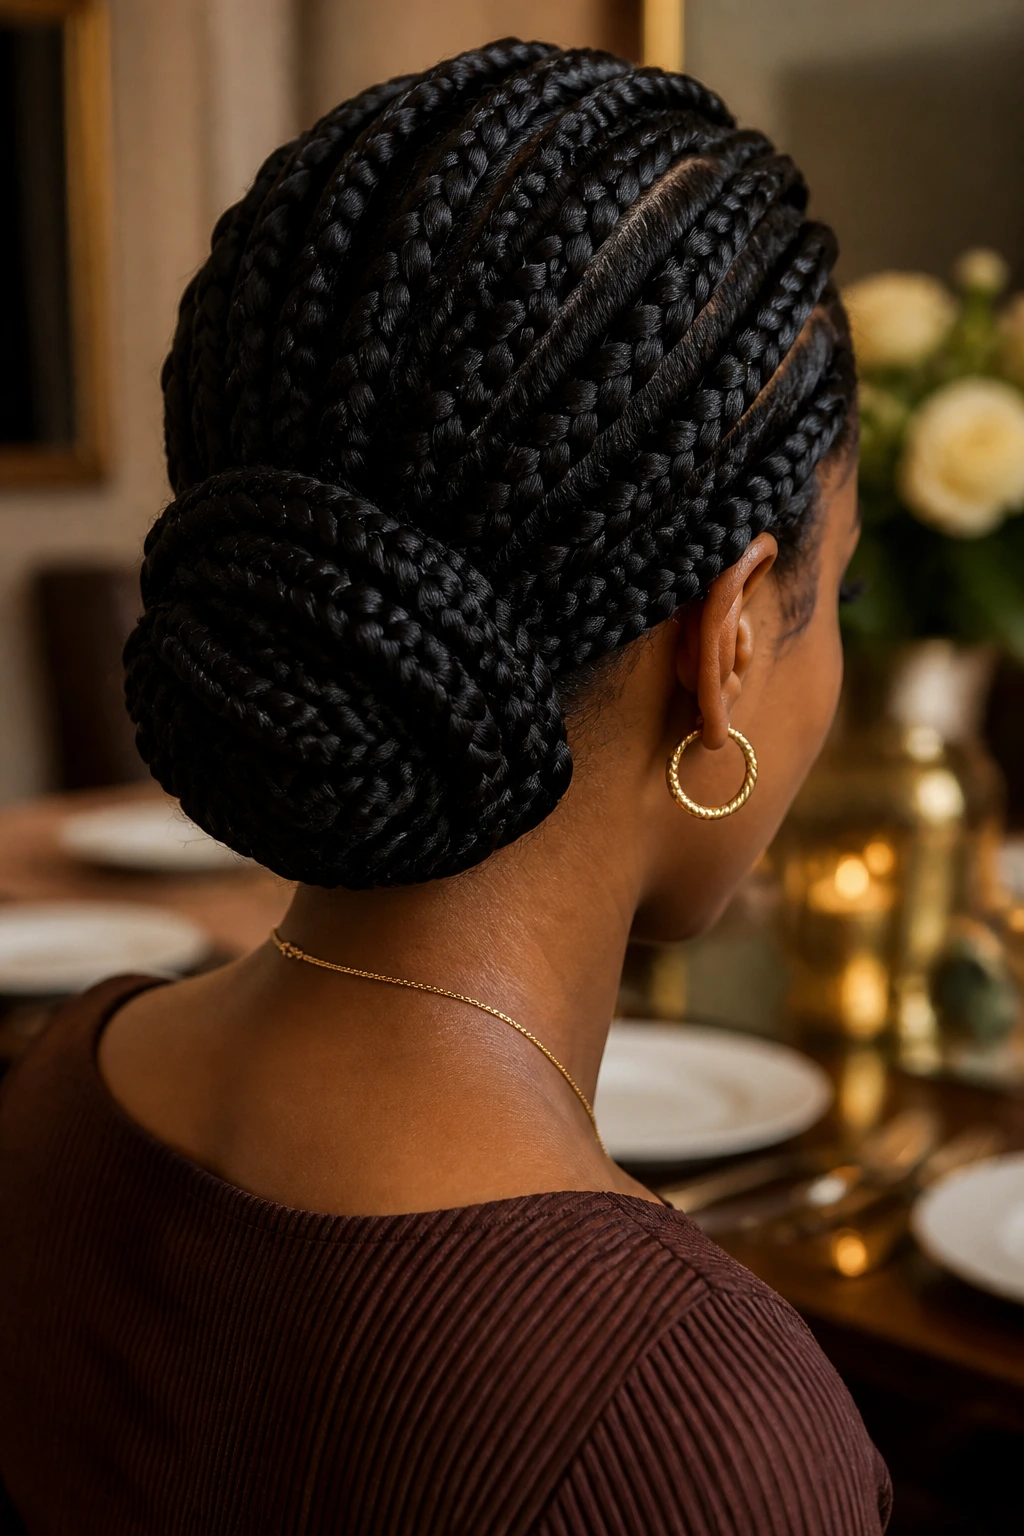
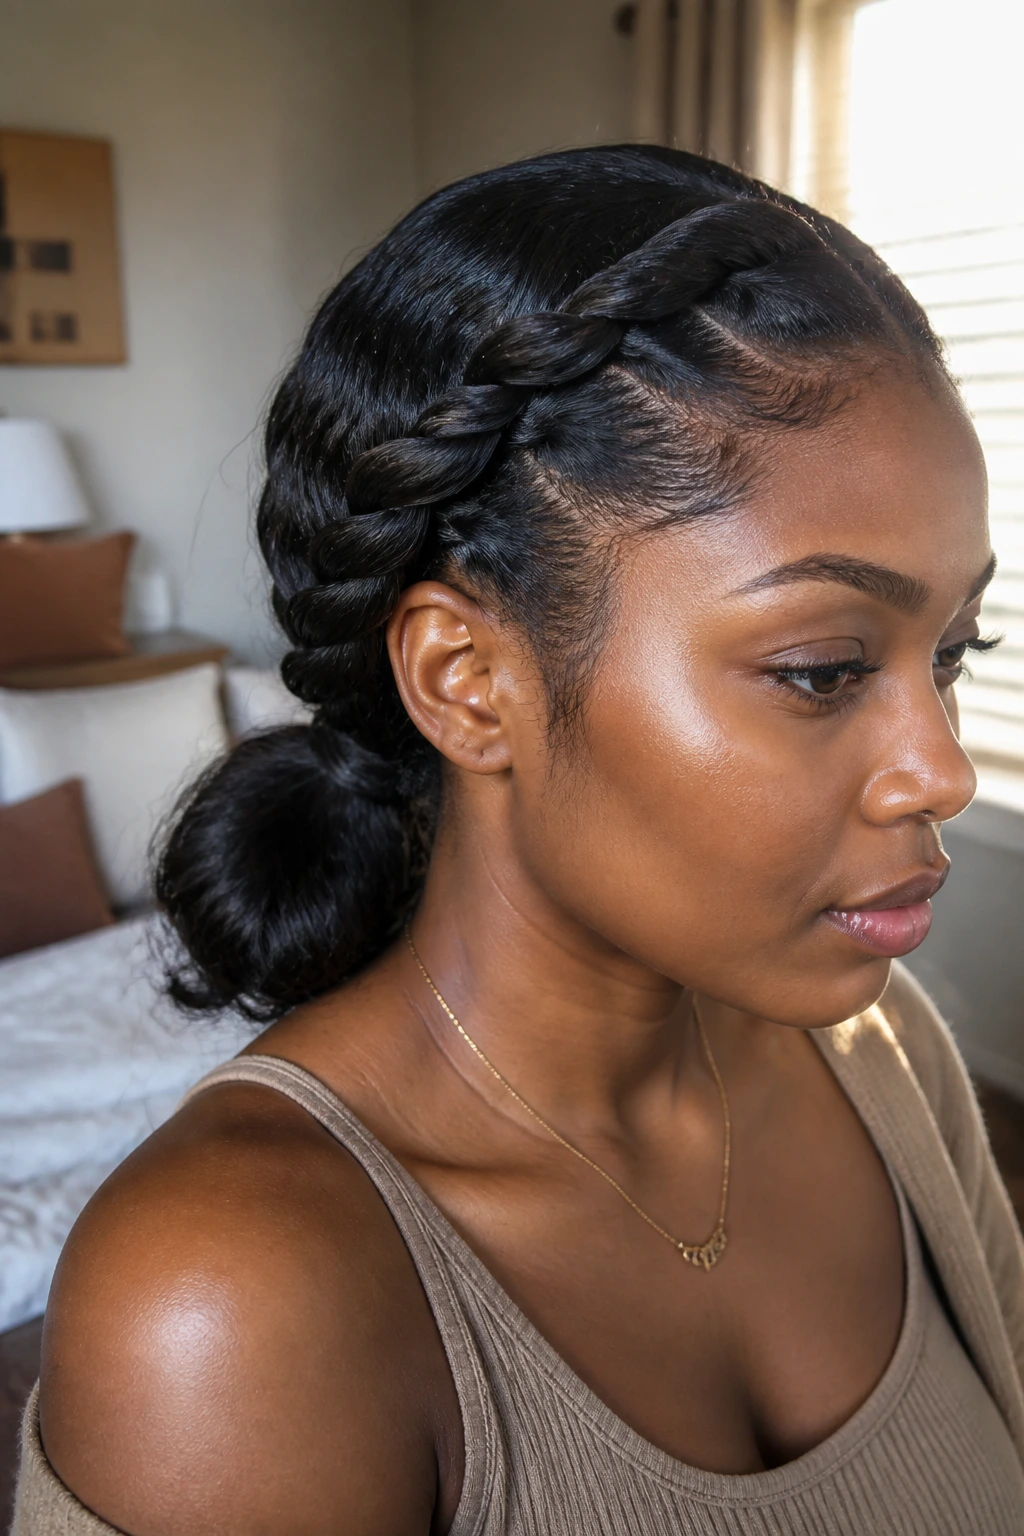
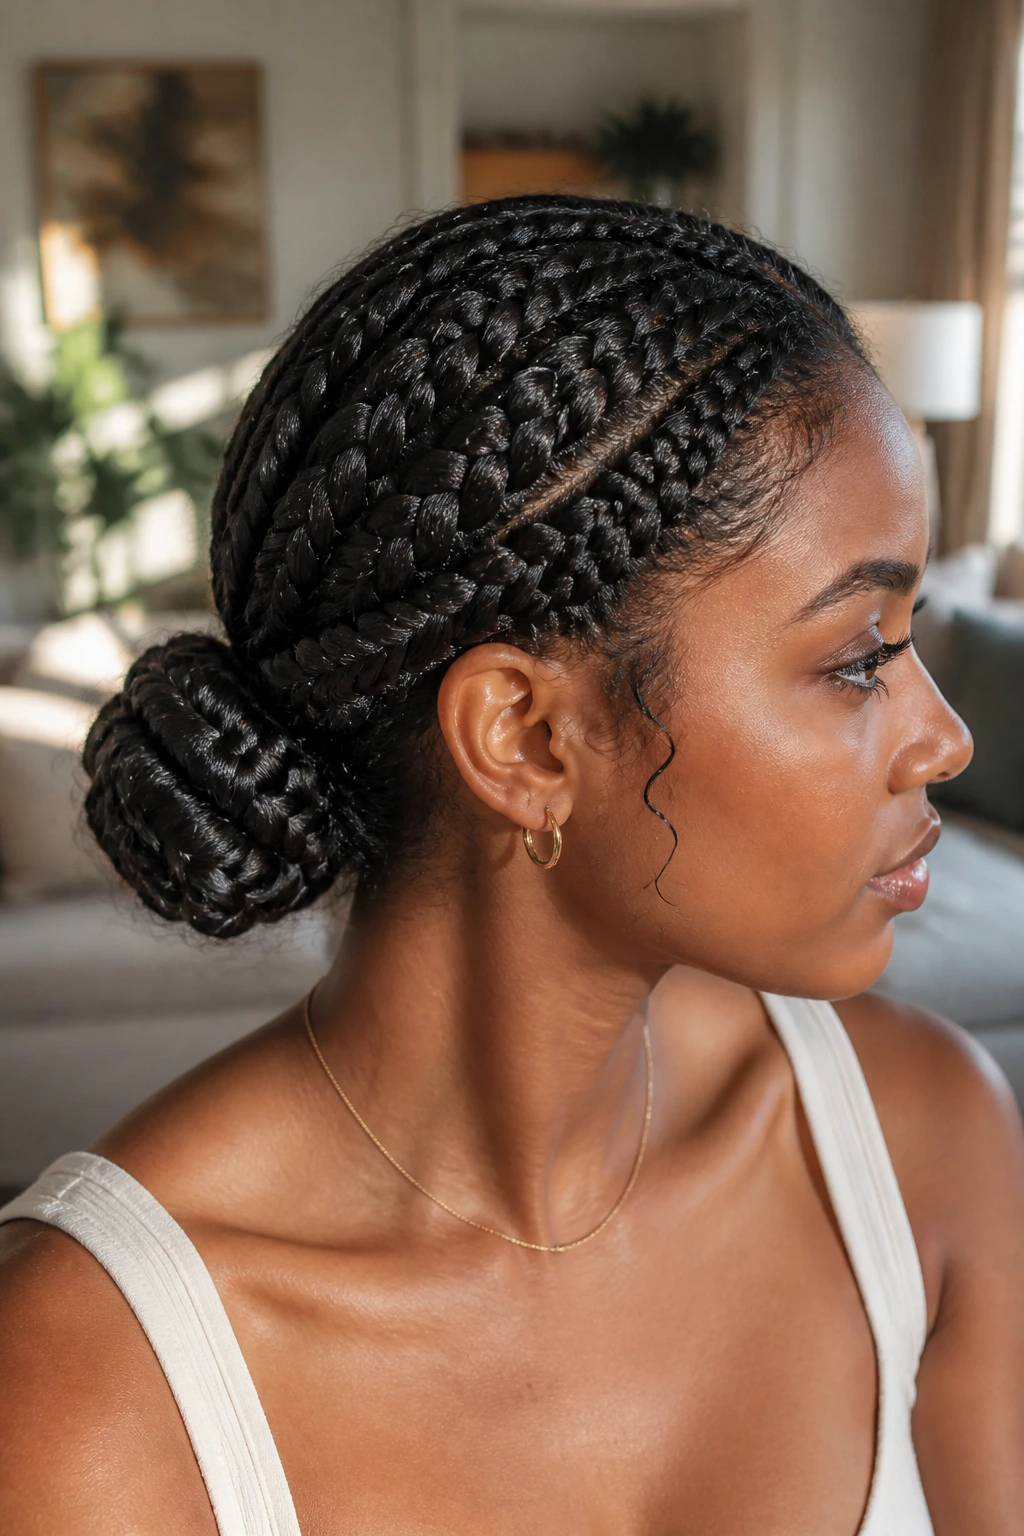
8. Braided Low Bun
A low bun feels practical, but braiding the hair first gives it more shape and grip. Make one braid, coil it at the nape, and pin it in place. On wavy hair, the braid keeps the bun from slipping the way a plain twisted bun sometimes does.
This style is a quiet winner on hot days. It keeps the neck clear and still looks polished enough for work or a dinner that doesn’t call for a full glam moment. I’d use U-pins or long bobby pins and crisscross them through the bun so it stays flat.
If your ends are layered or frizzy, tuck them under the coil instead of fighting them. That little mess is part of the charm.
9. Half-Up Crown Braid
Half-up crown braids are a smart answer when you want to show off your wave pattern and keep hair away from your face at the same time. Braid a section from one side to the other across the back of the head, then pin it so the rest of the hair falls loose beneath it.
This works especially well on shoulder-length or longer hair with soft bends. The waves underneath keep the style from looking too stiff, and the braid itself gives enough structure that you do not need much else. A little foam on the top section before braiding helps the braid sit flat without turning crunchy.
If your crown area tends to puff, smooth it with the palms of your hands after the braid is pinned. That is one of those tiny steps that changes the whole look.
10. Feed-In Cornrow Ponytail
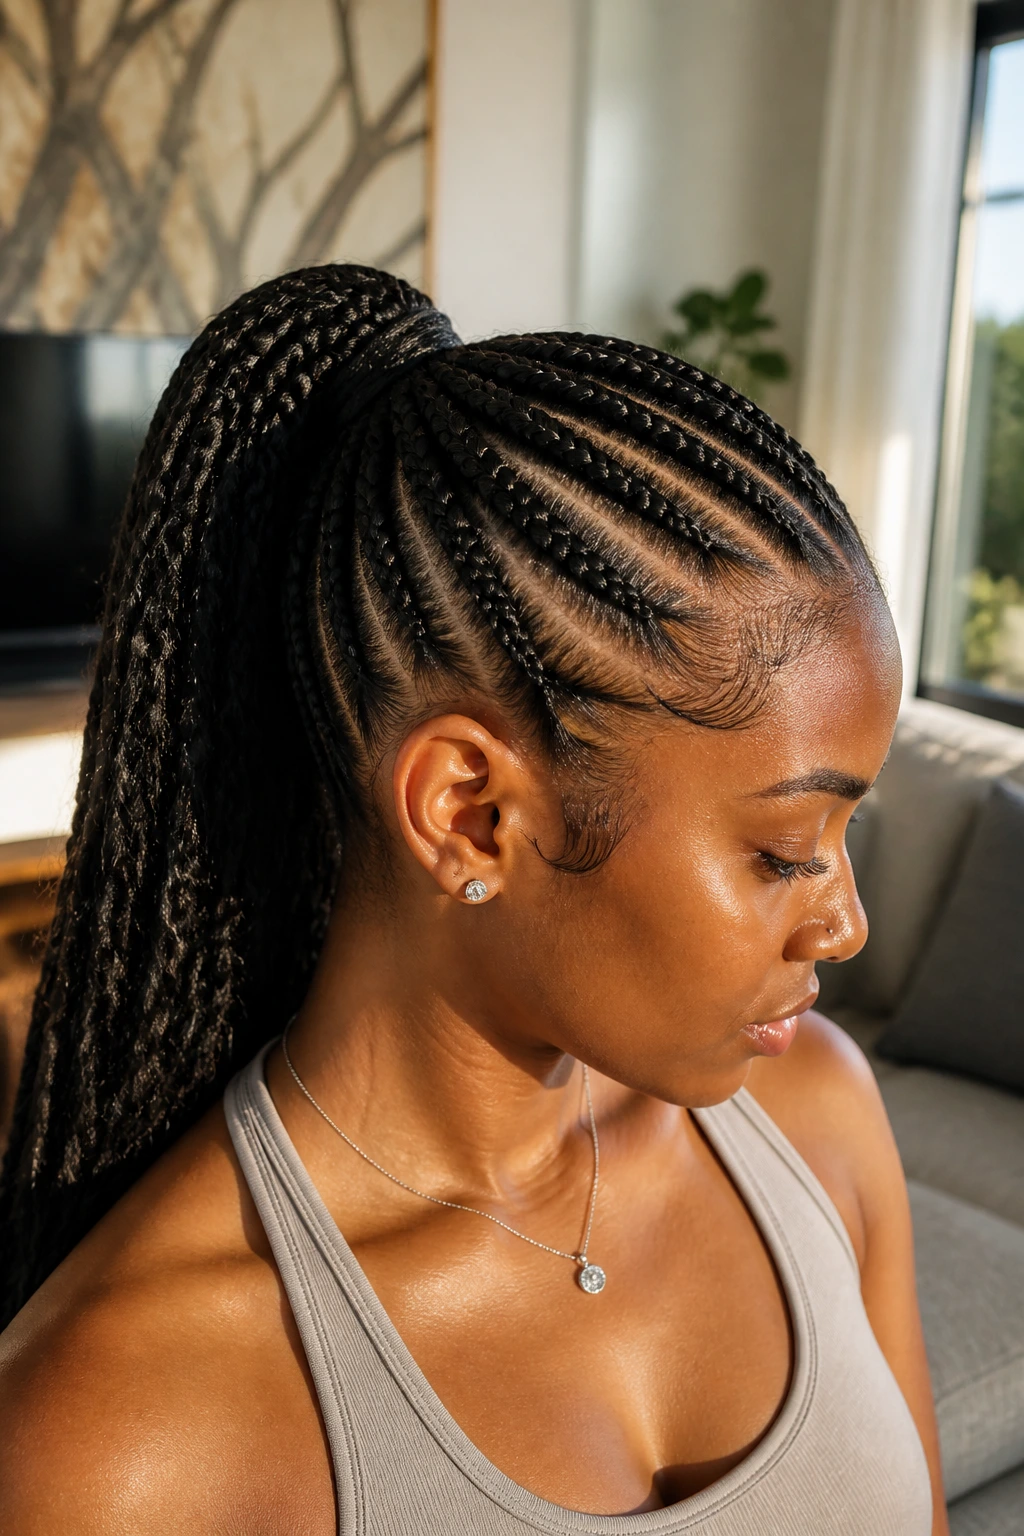
A feed-in cornrow ponytail is one of the stronger choices if you want a style that stays neat for more than a day or two. The braids start small at the hairline and get a little fuller as hair is added, which keeps the roots looking clean and gives the ponytail a smooth base.
This style can be done with your own hair or with added braiding hair if you want more length and fullness. On wavy hair, the parting and feed-in process matters more than the final ponytail itself. The scalp sections have to be crisp. If they’re crooked, the whole style shows it.
I like this one when I want a style that can handle a scarf, a hat, a sweat session, and still look decent afterward. It is not the fastest style on the list, but it earns its spot.
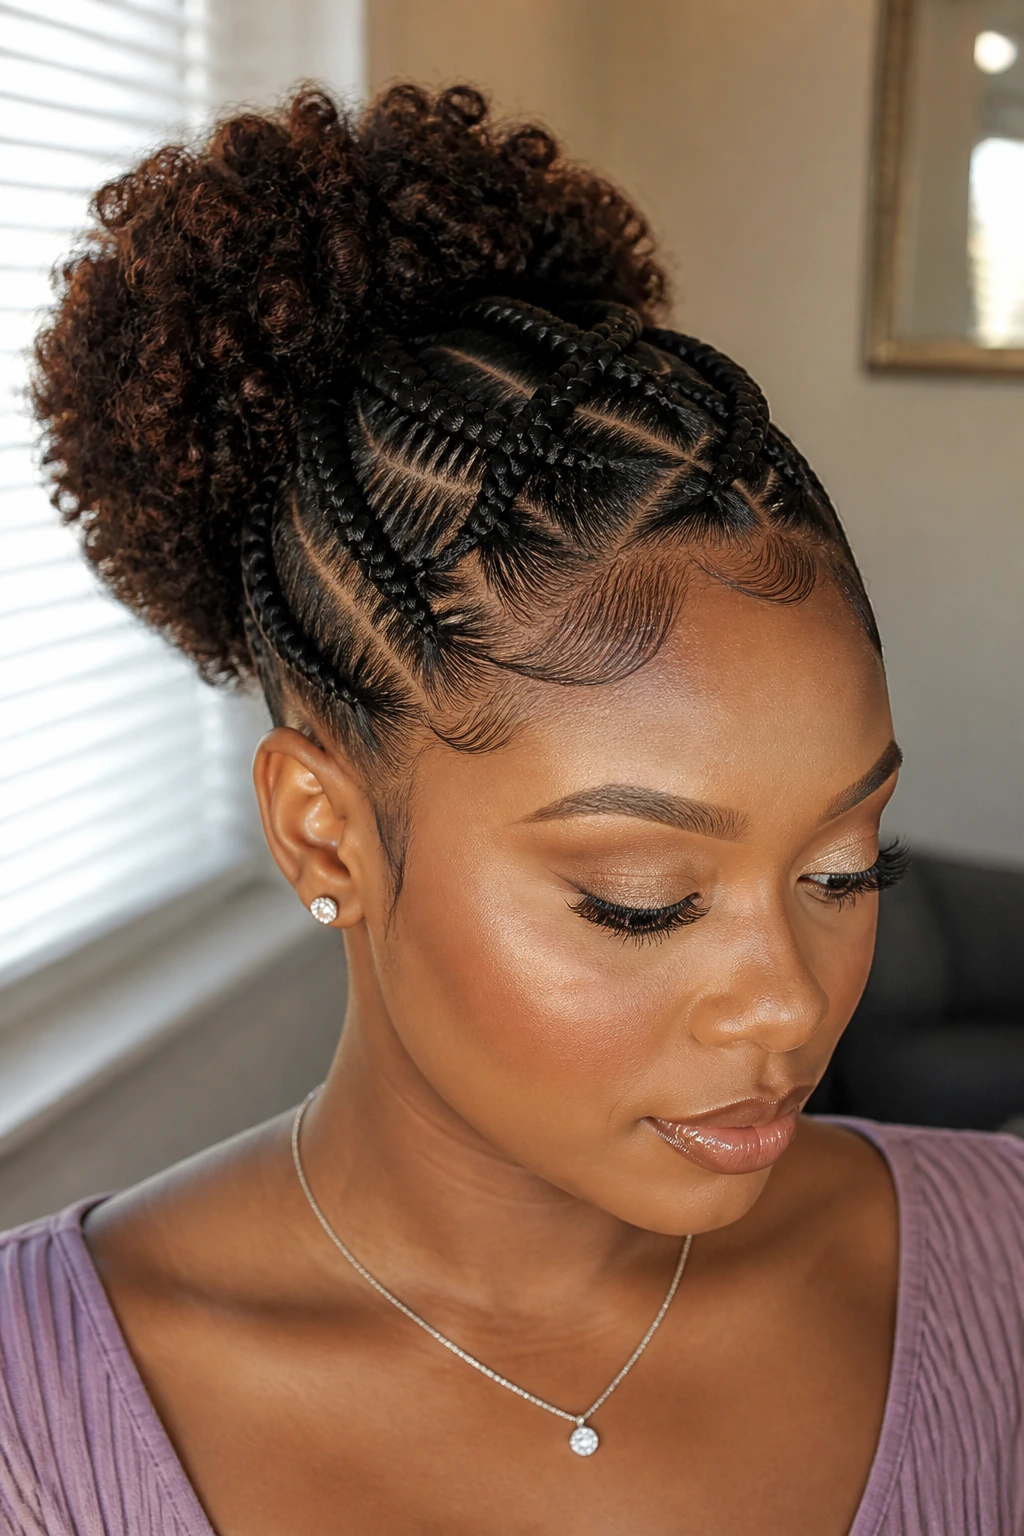
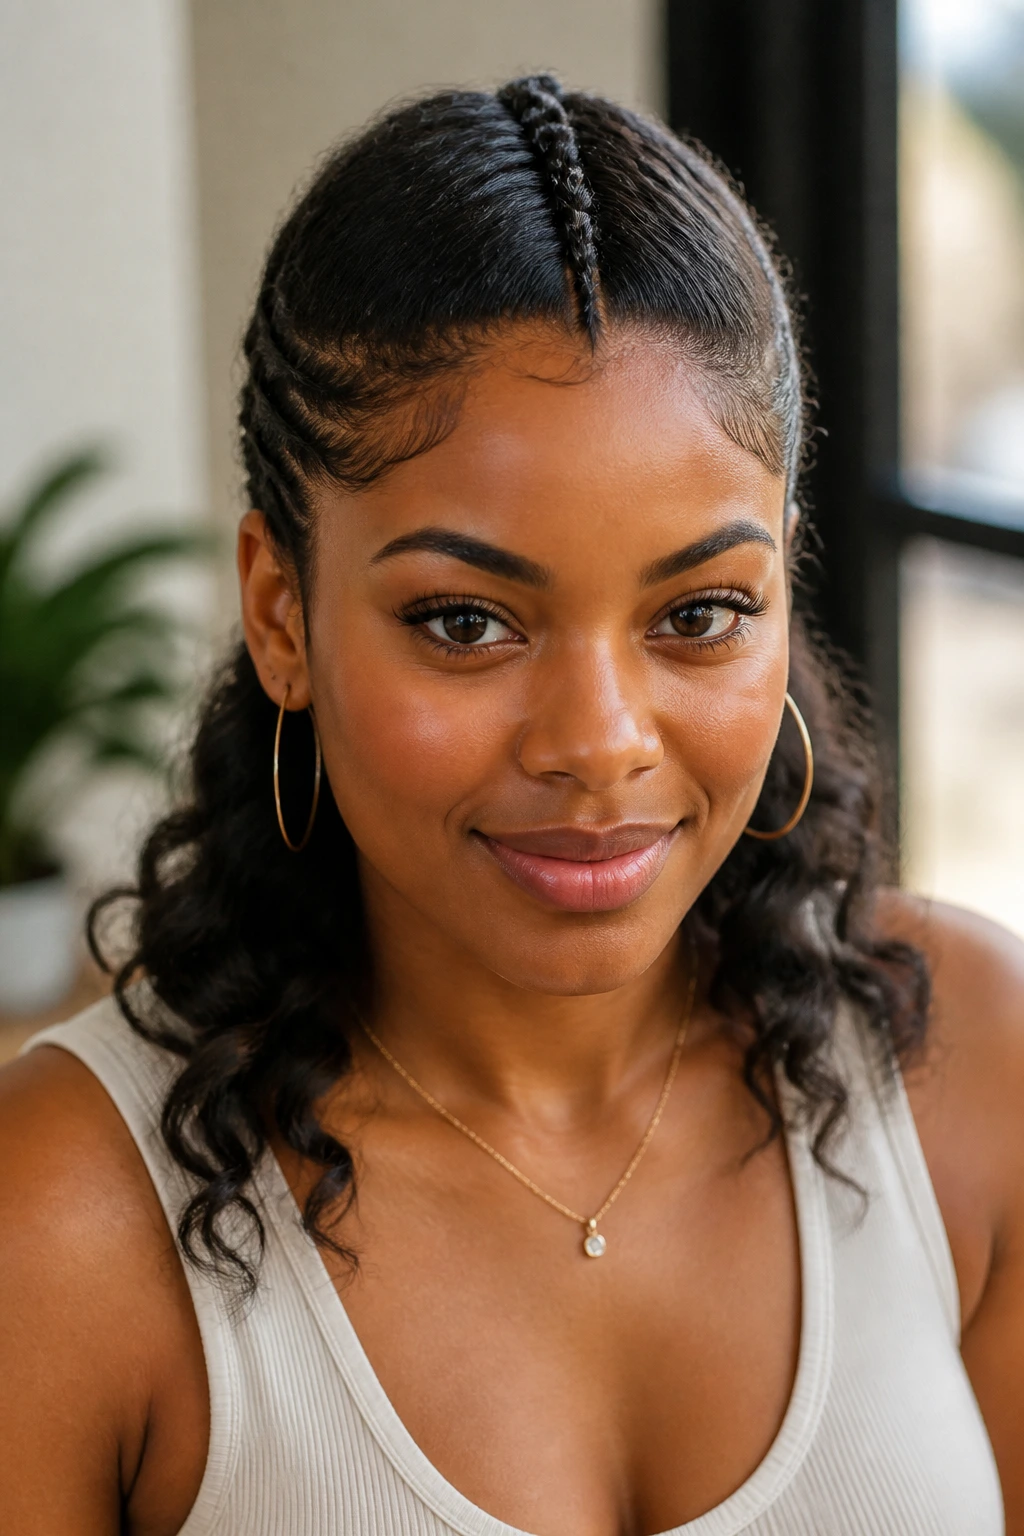
11. Side Cornrows Into a Puff
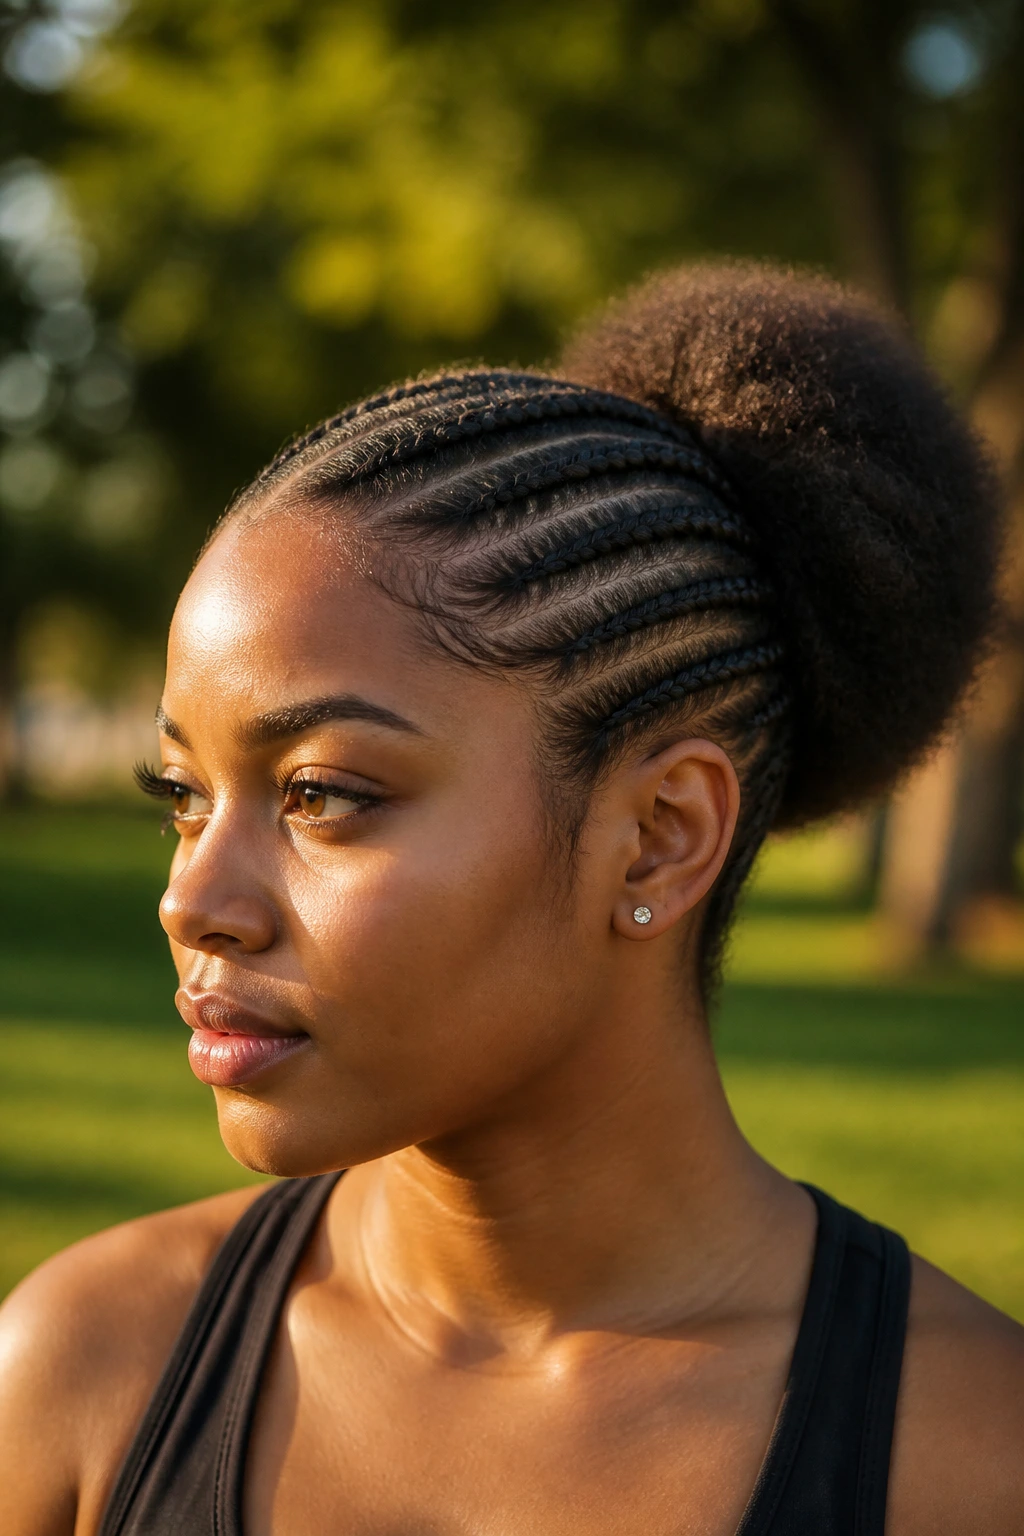
Side cornrows with the rest of the hair gathered into a puff strike a nice balance between sleek and natural. The braids on one side keep the face open and give the style shape, while the puff holds onto the wavy texture in the back. That mix is the reason this style looks alive instead of flat.
You can do one braid, two braids, or a small row of narrow cornrows depending on how much of the hairline you want pulled back. The puff can be high or low. High feels playful. Low feels calmer and a little more mature.
If your hair has a lot of shrinkage, stretch the puff with your hands after you tie it. A satin scrunchie helps keep the base from snagging.
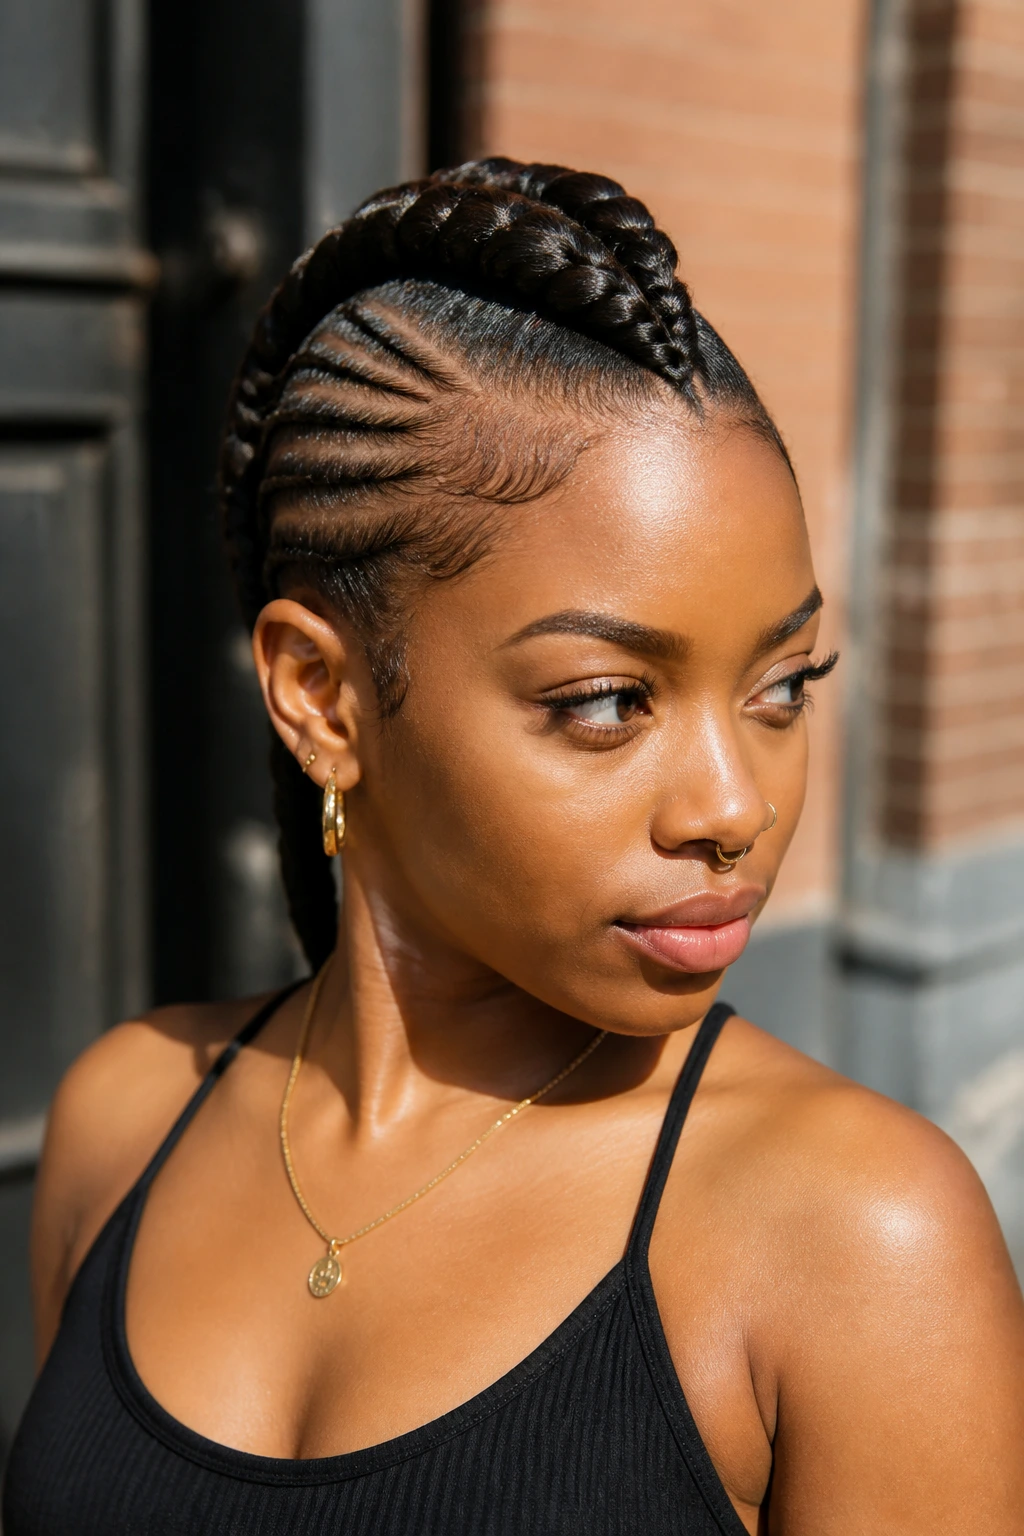
12. Two Sleek Braids With Tucked Ends
Two sleek braids are an easy answer when you want symmetry and very little hair in your way. Part the hair down the middle, braid both sides, and tuck the ends under with pins or into small wrapped knots at the nape. On wavy hair, the braid texture keeps the style from looking too severe, which is a good thing.
This works well for shoulder-length hair because the tucked ends keep the look neat even if the last few inches are uneven. If you tend to get frizz around the temples, smooth that area first and braid before it dries completely.
Short-Hair Note
If the ends are a little too short to tuck cleanly, use a small elastic and pin the tail under the braid. Nobody sees the trick. They only see the finished shape.
13. Braided Bang Accent
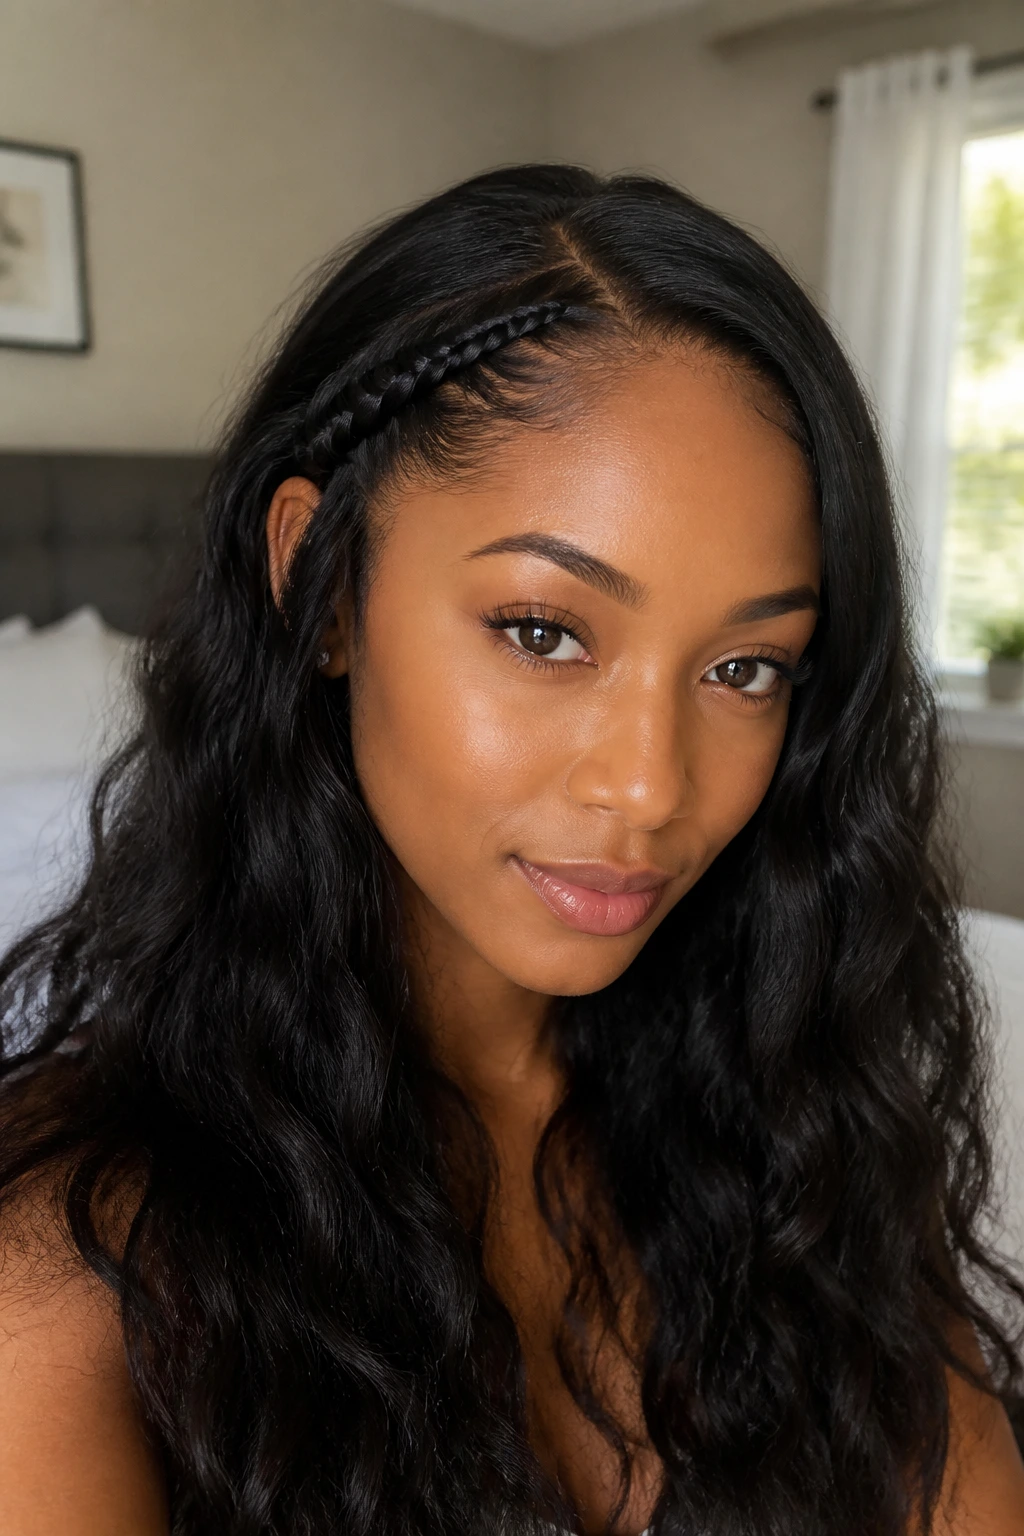
A braided bang accent is the quickest style in the bunch, and sometimes that’s exactly what a real day requires. Braid a thin front section along the hairline or just at the temple, then pin it back so the rest of the hair stays loose. It keeps hair out of your eyes without flattening the whole head.
Wavy hair makes this look softer, which I prefer. The braid doesn’t have to be microscopic or polished to the point of boredom. A little texture in the loose lengths makes the accent braid look intentional.
This is a good choice when you want something in between “hair down” and “full updo.” It takes less time than most people spend deciding whether they need lip gloss.
14. Knotless Braids in a High Bun
Knotless braids are a longer-wear style, but they still belong in an everyday braid lineup because they’re easy to live in once they’re done. The knotless method starts without that blunt knot at the root, so the braid feels lighter and sits flatter against the scalp. That matters when you’re wearing it every day.
Pull the braids into a high bun for a clean, lifted shape. The bun keeps the braids off the neck and gives the style a bit of height. I like this one for people who want a protective look that doesn’t need daily restyling.
Why Knotless Feels Better
The scalp area usually feels less crowded than a traditional box braid install. Less bulk at the root, less tension on the edges, less headache by the end of the day. You still need good parting and a steady hand, though. That part does not change.
15. Ladder Braid Along the Hairline
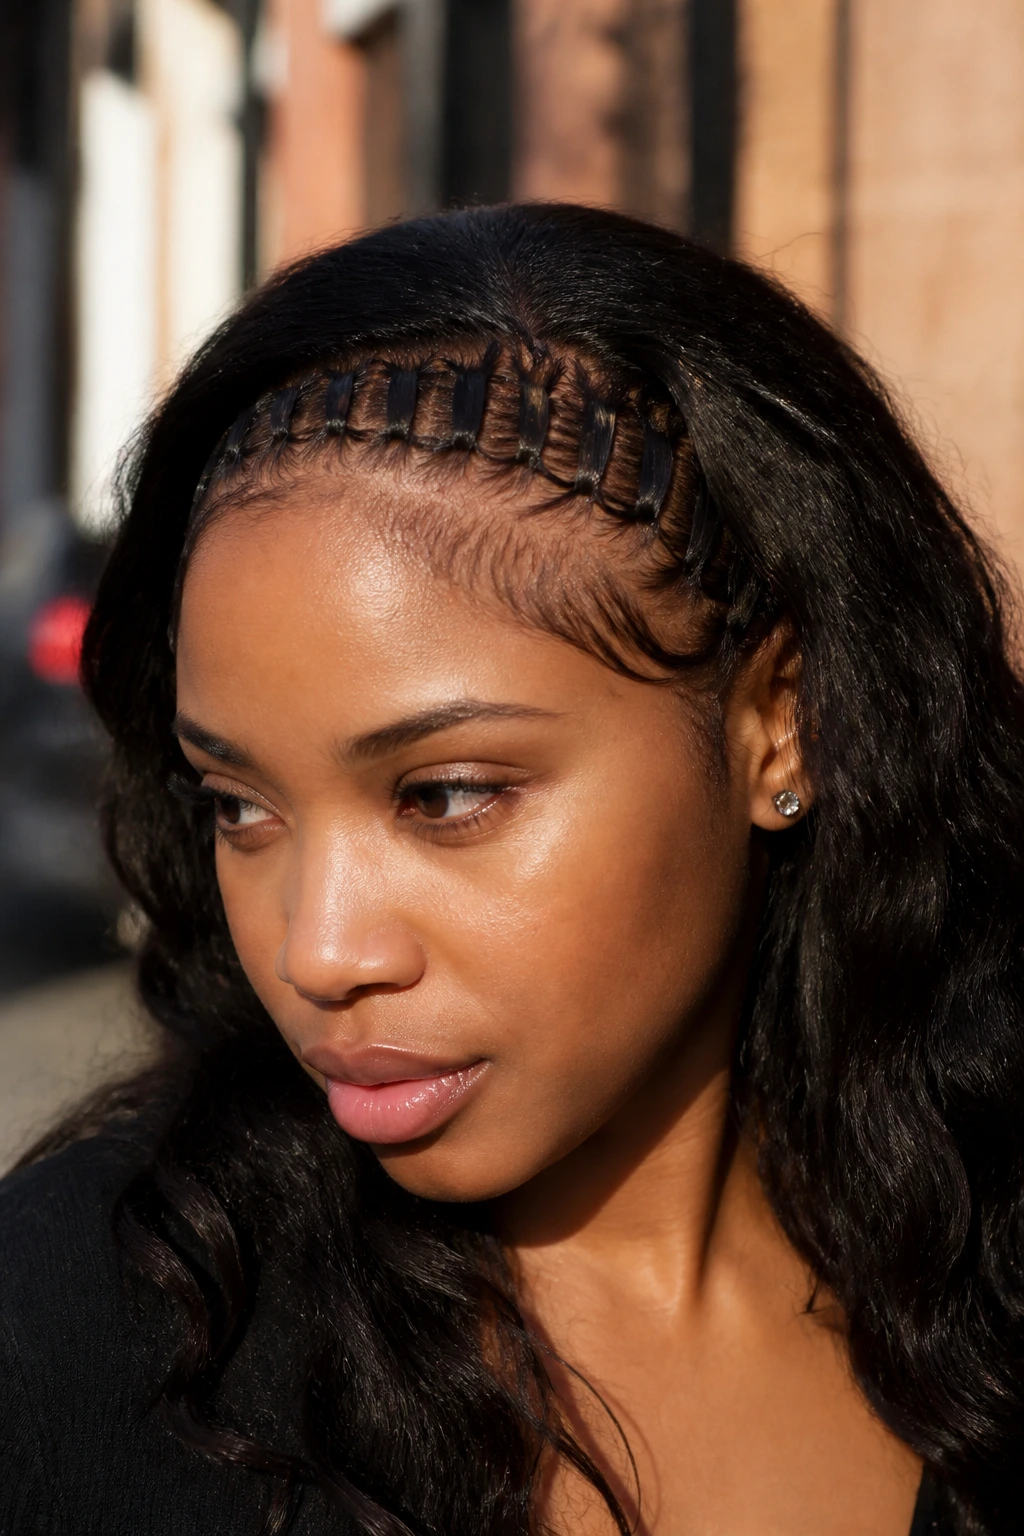
A ladder braid has a little visual detail without asking for a full elaborate style. It runs along the hairline in a side-to-side pattern, almost like a braid that’s been stitched into the front section. On wavy hair, that braided edge keeps the front from puffing while letting the rest of the hair stay loose.
This is a good option when you want your hair back but not all the way back. The braid can stop at the ear and blend into the rest of the hair, or it can continue into a low bun or ponytail. Use small clips while you section. Trying to hold this one in your hand while you braid is a fast path to crooked parts.
If you wear glasses, this braid also clears the temples nicely. Small win. Useful one.
16. Waterfall Half-Up Braid
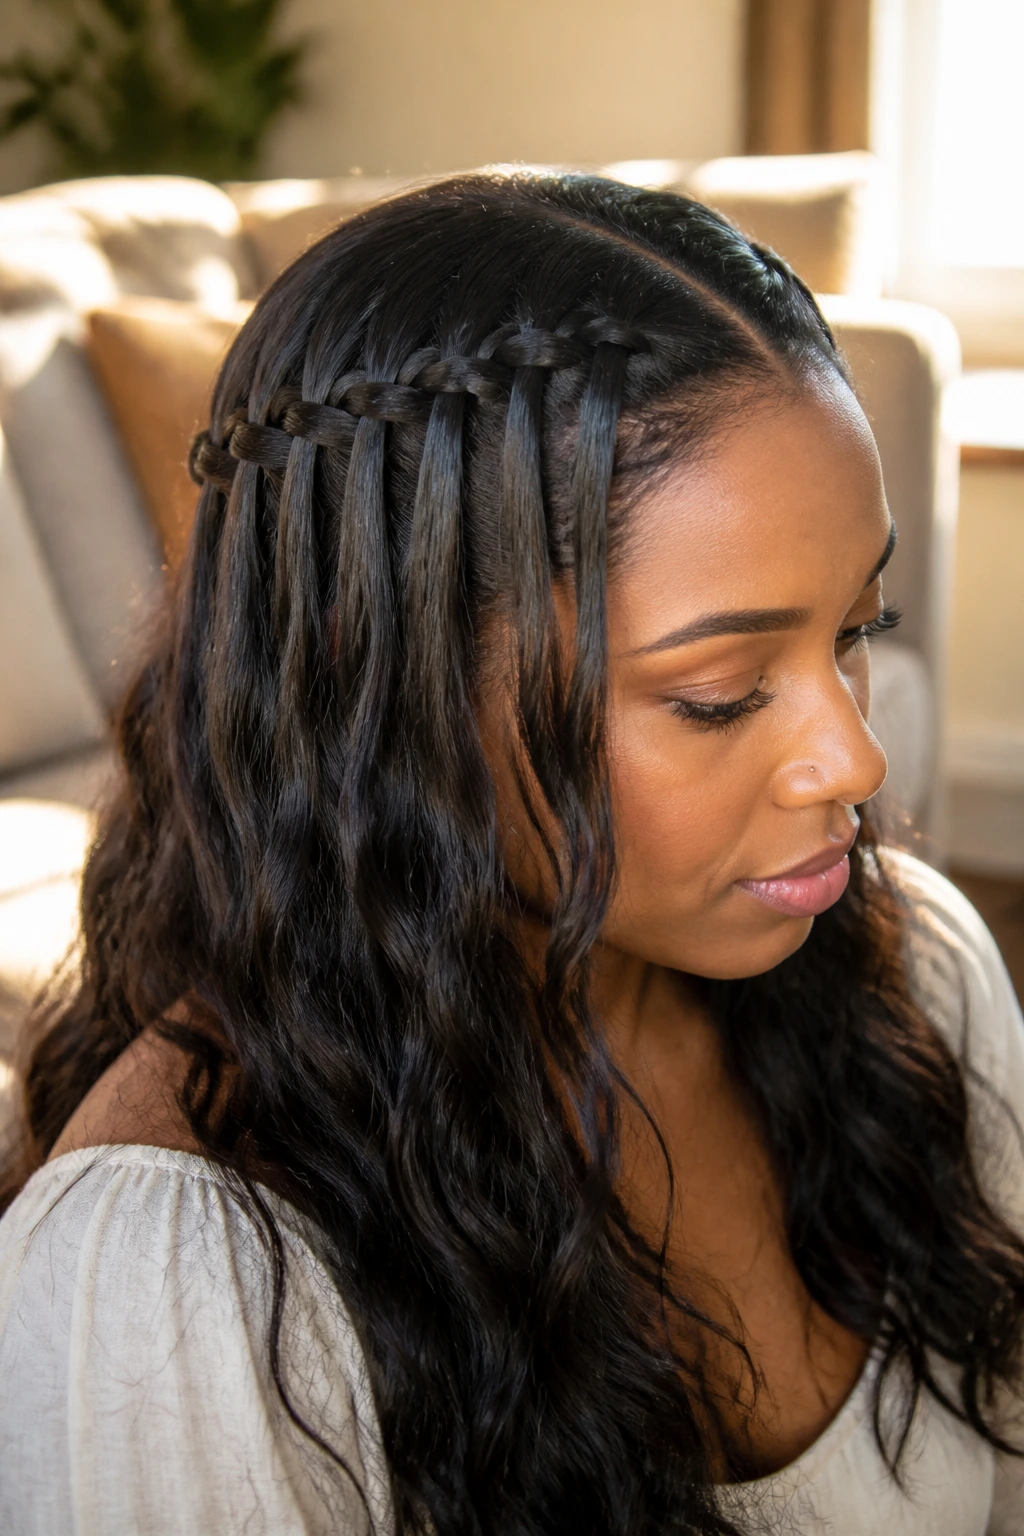
A waterfall braid is one of those styles that looks like it took more work than it really did. Sections drop through the braid instead of being woven all the way across, which creates that open, flowing pattern. On wavy hair, the loose lengths that fall through the braid make the whole style softer and more relaxed.
I like this for hair that already has some bend or texture because the loose pieces catch the light and move a little when you walk. It is not the longest-lasting style on the list, so I’d save it for a day when you actually want to enjoy the shape. It is prettier than practical. That’s fine.
If you want the braid to last longer, pin the ends beneath the back section instead of leaving them loose. It looks cleaner and stops the braid from sagging by afternoon.
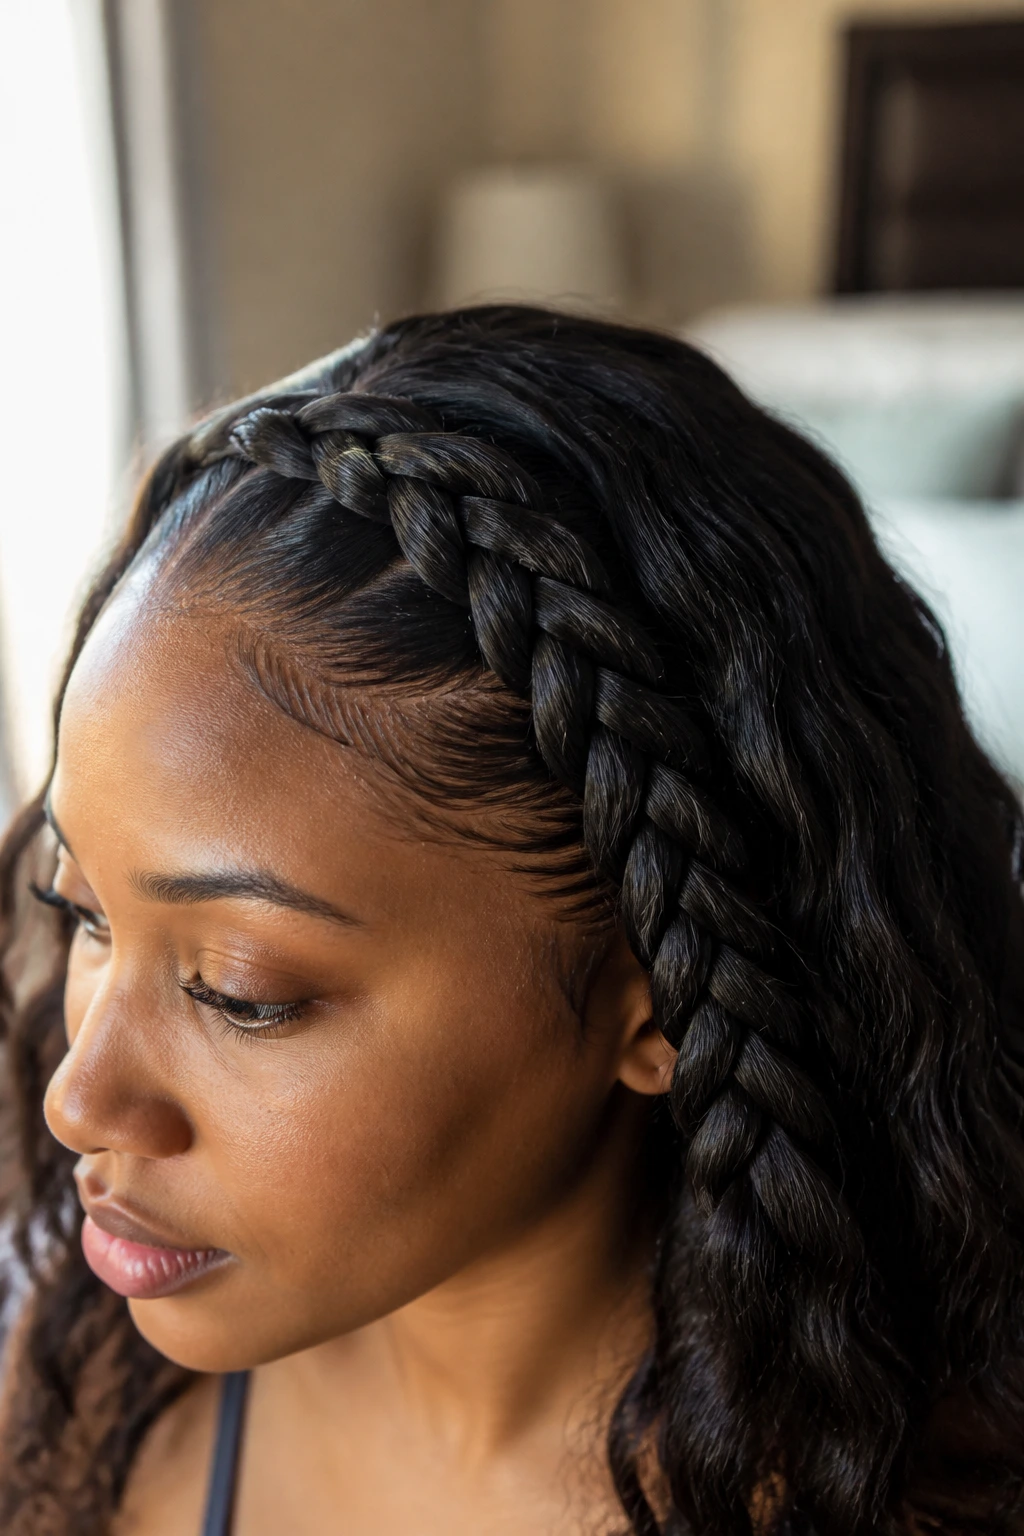
17. Braided Headband Style
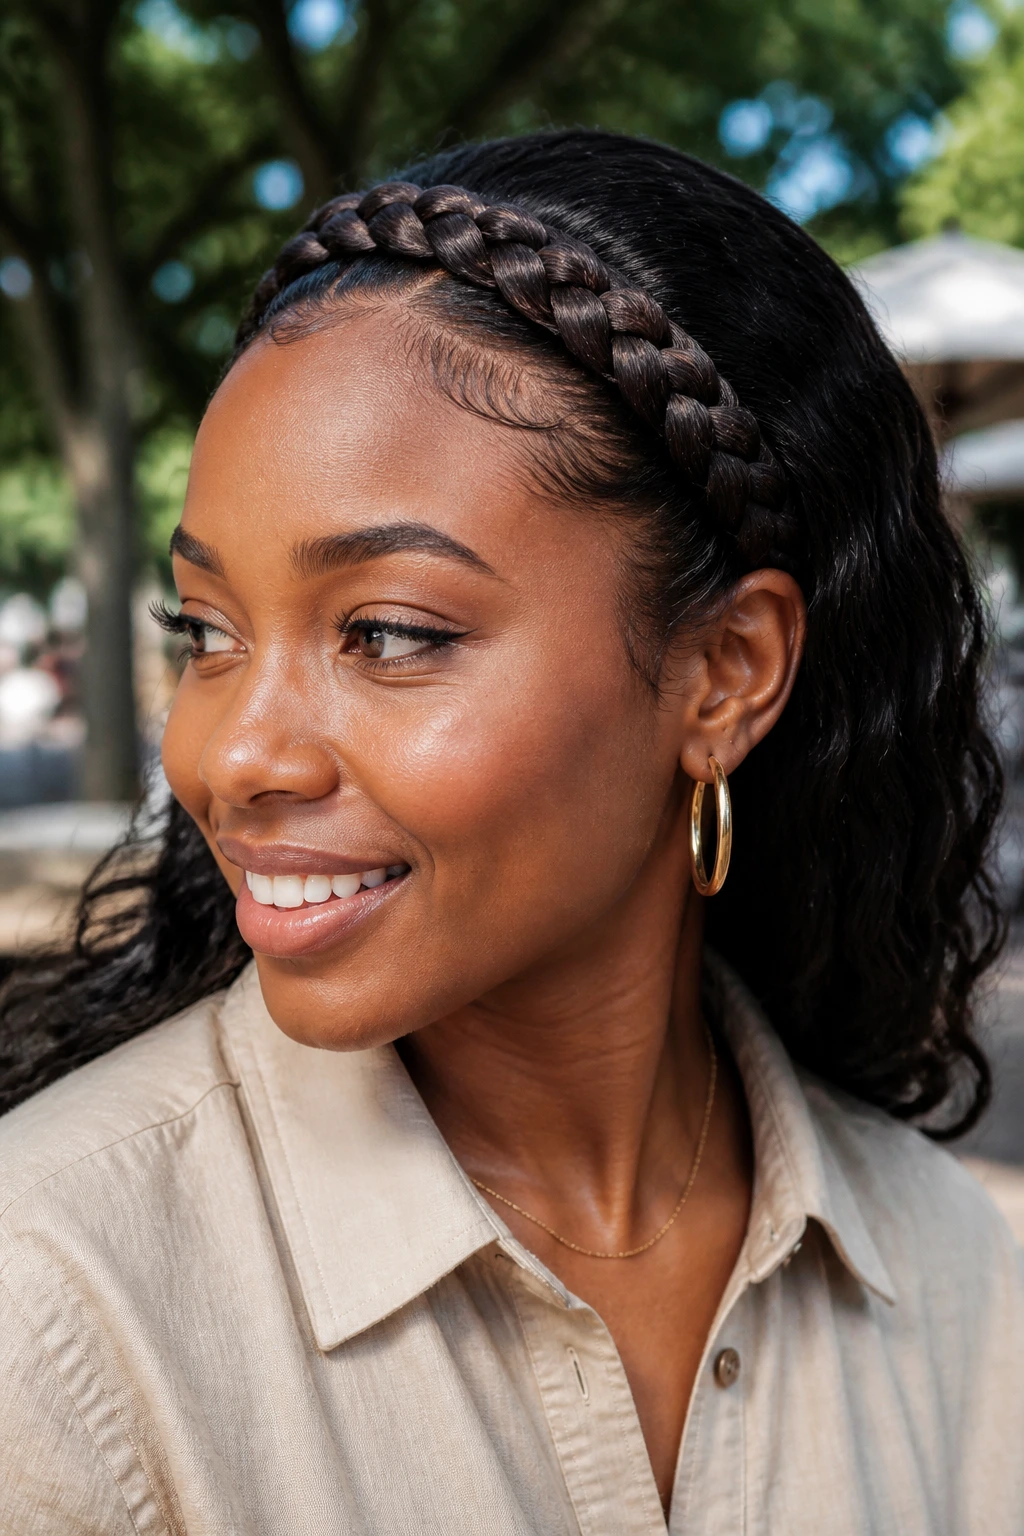
A braided headband is one of the easiest ways to get hair off the face without giving up length. Braid a front section from temple to temple, then pin it behind the ear so it sits like a built-in accessory. On wavy hair, the braid blends nicely with the loose texture and doesn’t look too formal.
This style works especially well on medium hair because it gives structure without demanding a lot of length. If your hair is layered, a few shorter pieces can stay loose around the face. That softness actually helps.
I reach for this when I want earrings to show, or when I need hair to behave but don’t want the full weight of an updo. It’s one of those “nothing fancy, but it works” styles.
18. Braided Space Buns
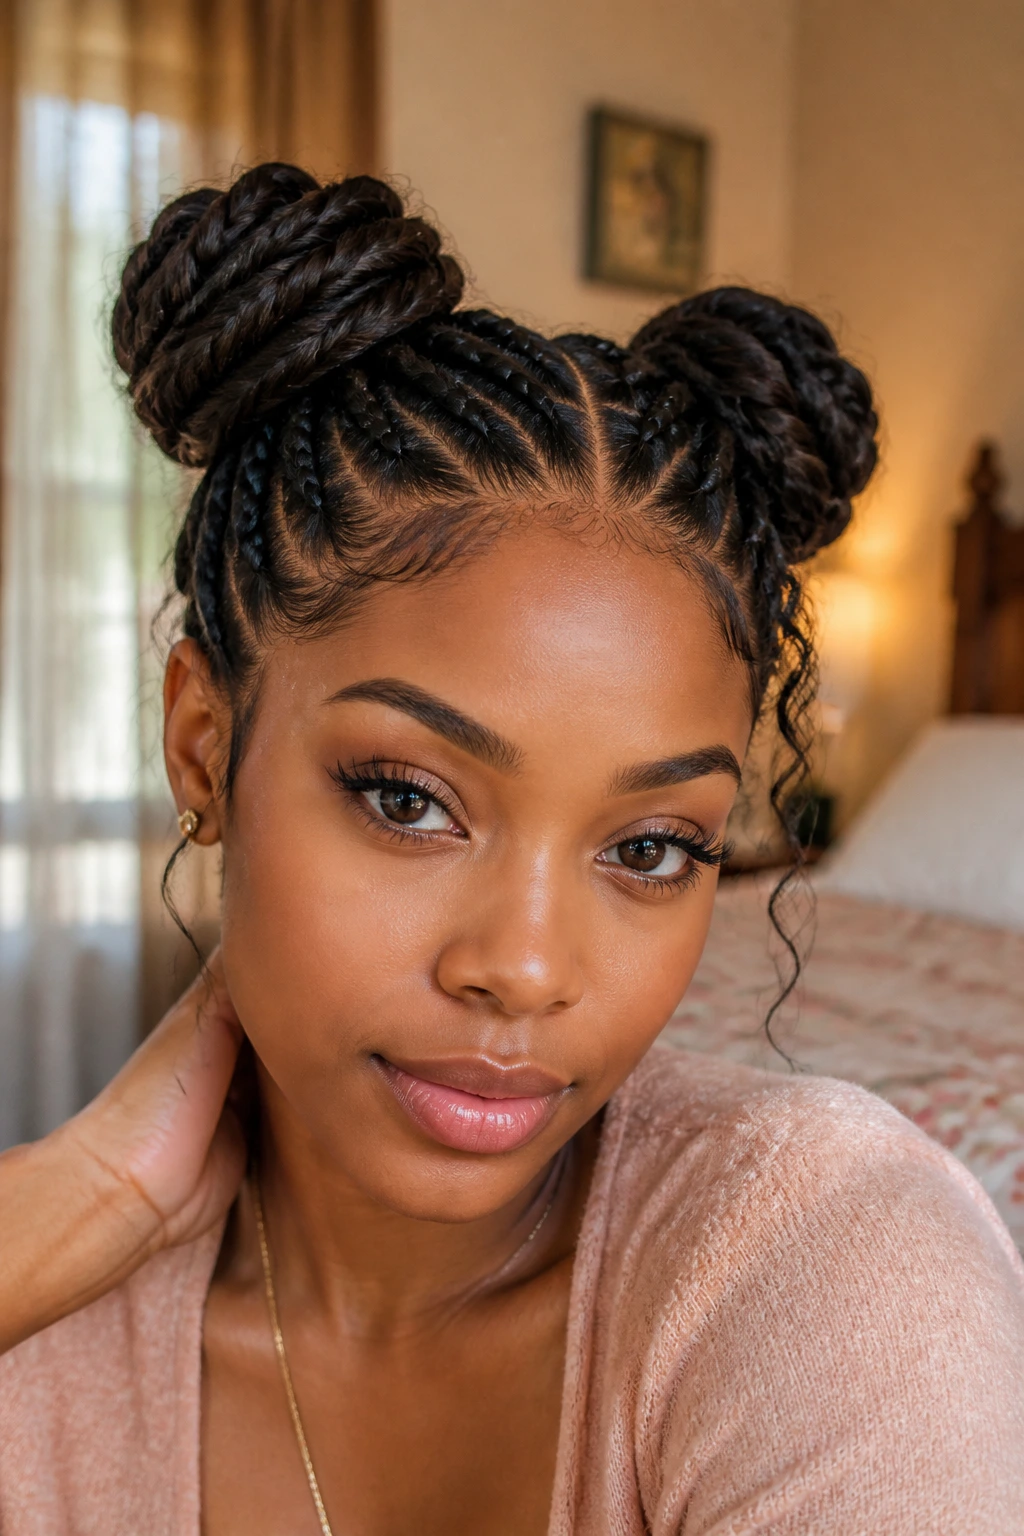
Braided space buns are playful, but they don’t have to look childish. Keep the braids neat, make the buns small and close to the head, and the whole style reads as deliberate instead of cartoonish. Wavy hair gives the buns a little fullness, which helps if your hair isn’t extremely thick.
You can braid the hair first and then wrap each braid into a bun, or make the buns with small braided bases. Either way, the goal is balance. If one bun sits too high or too wide, the style starts to feel off-center fast.
This is a good choice for humid days or weekends when you want your hair out of your way but still want a style with shape. It’s fun without being precious.
19. Crisscross Braids Into a Puff
Crisscross braids give the front or top section a woven look that adds interest before the hair is pulled into a puff. The crisscross pattern creates movement across the head, while the puff keeps the rest of the texture visible. On wavy hair, that contrast looks especially good because you get smooth lines and soft volume in one style.
The sections need to be clean, and the crossing points need pins that sit flat. If the braid intersections sit too high, they poke and lift. That’s the thing to watch here.
Best Use
This style is nice when you want something more detailed than a plain puff but less committed than a full protective install. It’s also good when you want to show the line of the parting. That small detail does more than people expect.
20. Mohawk Braid Down the Middle
A mohawk braid gives the whole head shape. The central braid runs from front to back, while the sides stay smooth, twisted, or braided into smaller sections. On wavy hair, the contrast between the sleek sides and the raised braid makes the style stand out even if the braid itself is simple.
This one can look edgy or clean depending on how you finish it. Tight sides and a thicker central braid lean bolder. Softer sides and a looser braid lean everyday. I like the second version because it feels less costume-y and more wearable.
If your hairline is sensitive, don’t yank the sides flat. Smooth them with a brush and a light gel pass, then stop. Pain is not a style choice.
21. Scarf-Woven Braid
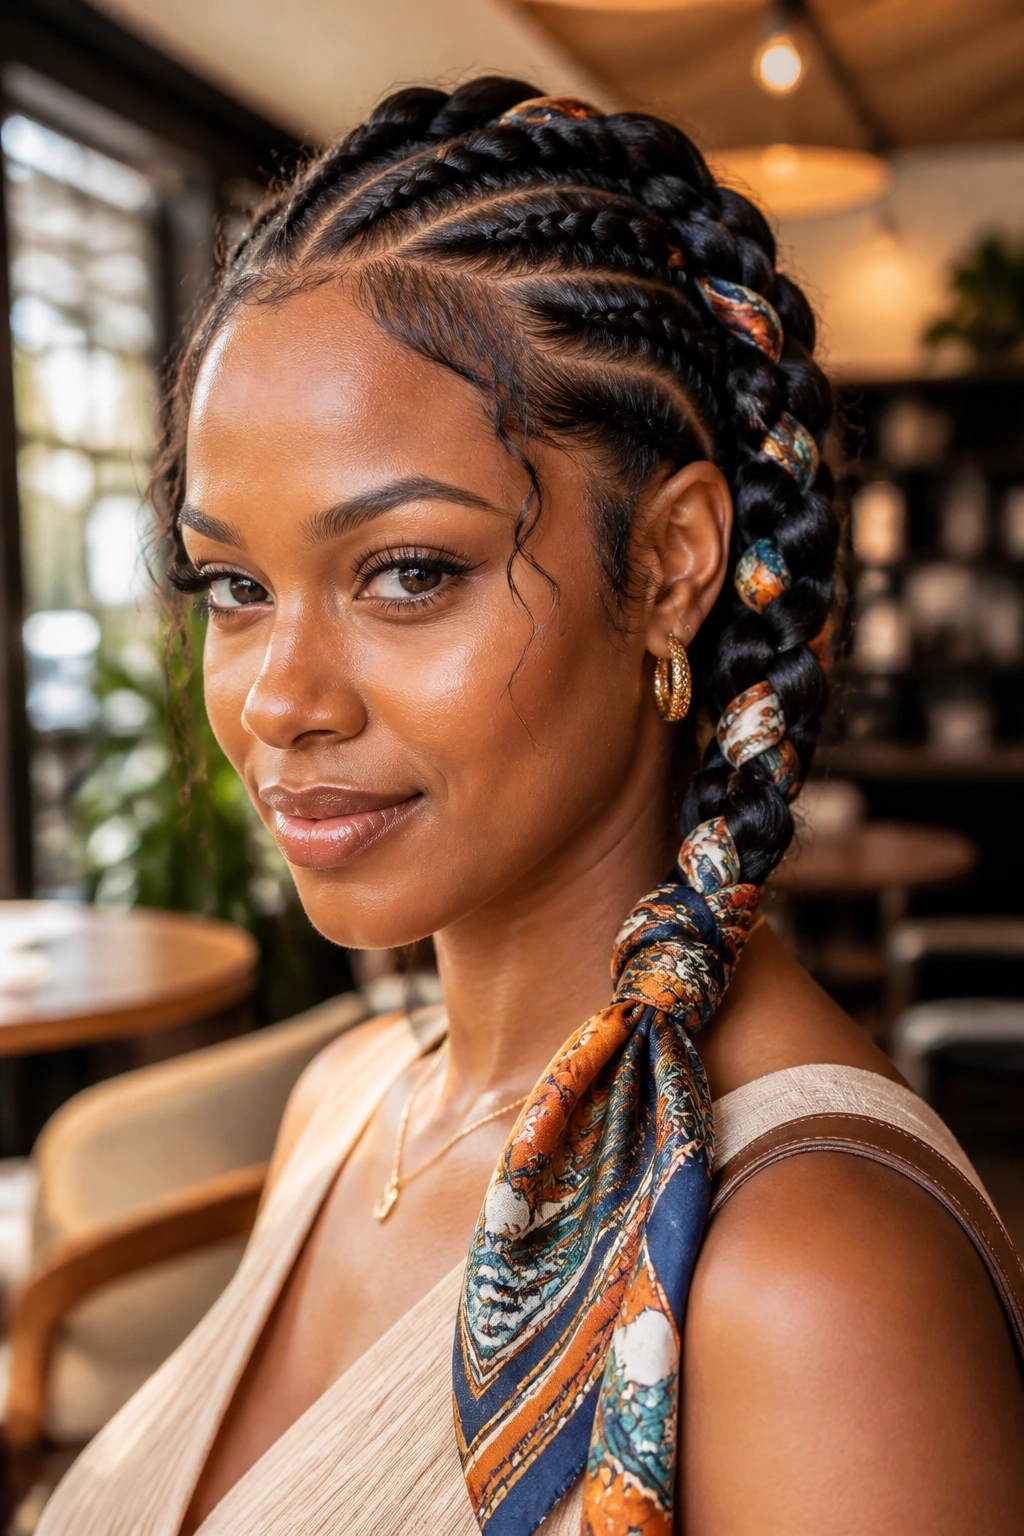
A scarf-woven braid is one of the easiest ways to make a simple braid feel finished. Tie a silk or satin scarf at the base or weave it into the strands, then braid as usual. The scarf adds color, helps grip, and gives the braid a softer finish that suits wavy hair nicely.
This style is especially useful when your hair is a little frizzy and you don’t feel like fighting it. The scarf distracts from tiny rough spots and turns the braid into part hairstyle, part accessory. I’d choose a scarf with enough length to show at the end, not one that disappears into the braid.
If you wear lots of neutral clothes, this is an easy way to bring in color without changing anything else.
22. Jumbo Feed-In Side Braid

A jumbo feed-in side braid gives you one big, clean shape over one shoulder. It’s fast once you know how to build the braid, and it carries a lot of visual weight without needing a dozen small sections. On wavy hair, the size works in your favor because the texture keeps the braid from looking flat or stringy.
This is one of my favorite styles when I want low manipulation with a strong finish. It keeps the hair together, protects the ends, and looks like effort even when the morning was messy. You can add braiding hair for length, but you do not need a lot of extra bulk to make it work.
If the braid starts close to the scalp, smooth the root area first. Jumbo styles show the parting more than people think.
23. Tucked Braided Chignon
A tucked braided chignon sits at the nape and feels quietly put together. Braid the hair, wrap it into a low knot, and tuck the ends beneath the coil so nothing pokes out. On wavy hair, the braid gives the chignon enough grip to stay in place without a mountain of pins.
This style can go to work, a dinner, a wedding guest outfit, or just a day when you want your hair off your shoulders and under control. It is one of the few braided styles that looks formal without being stiff.
Use U-pins instead of loading the bun with too many short bobby pins. The shape holds better, and the bun sits flatter.
24. Four-Strand Everyday Braid
A four-strand braid gives you a little more texture than the basic three-strand version without becoming too fussy. The pattern creates a tighter, more interesting braid line that looks good on wavy hair because the sections bend and separate in a soft way. If you already know how to braid, this is a nice step up.
It works best on hair with some stretch or length, because the extra strand needs room to move. If your hair is short or layered, the braid can still work, but the finish will be more compact. That is not a problem. It just changes the shape.
I like this braid when I want something familiar but not boring. That’s a fair reason to wear a style, by the way. Not every braid needs a dramatic backstory.
25. Pull-Through Pony Braid
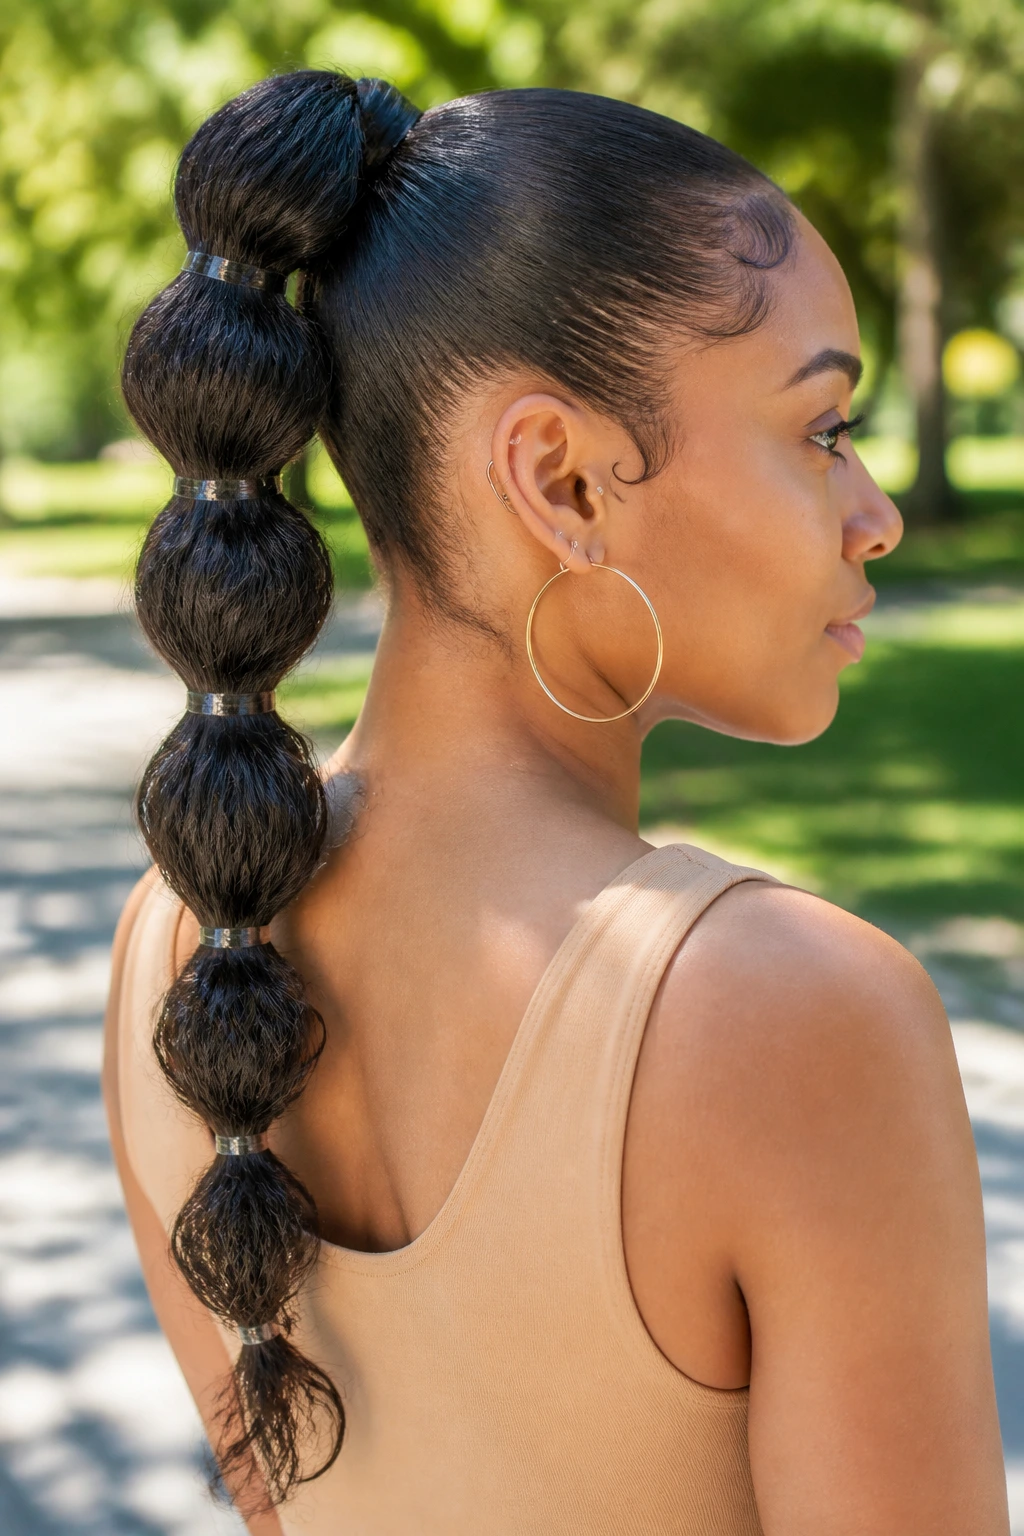
A pull-through braid is not a traditional braid, and I’m fine with that. It uses small elastics to build a full, bubble-like braid down the ponytail, which makes it forgiving on wavy hair that wants to slip out of a classic braid. If your layers are shorter or your hair is very soft, this style can save the day.
Start with a ponytail, split the first section, pull the next section through, and keep repeating with clear elastics every few inches. The result looks fuller than it really is. That’s the appeal. You get shape, length, and a braid-like effect without needing the hair to cooperate perfectly.
It’s one of the easiest ways to make a plain ponytail look styled instead of accidental.
Why Wavy Hair Changes the Braiding Equation

Wavy hair gives you a head start in some places and a small headache in others. The texture has enough bend to hold a braid pattern, which is why these styles often look full and soft without much teasing. But that same movement can make the roots slip if you use too much oil or start on hair that’s already too smooth.
A braid on wavy hair usually holds best when the hair has a little grip. That can come from second-day texture, a light mousse, or a quick blow-dry on low heat if you prefer a stretched base. What I would not do is load the scalp with heavy butter and hope for the best. That tends to make the braid look greasy before lunch.
The other thing wavy hair gives you is visual texture. Even a plain braid looks richer because the wave bends the sections slightly. You can work with that. You do not need to smooth every strand into obedience.
Essential Equipment for These Styles
-
Rat-tail comb: Best for clean parts, sharp sections, and those tiny front pieces that make or break a braid.
-
Wide-tooth comb or detangling brush: Use it before styling so the braid starts on smooth, separated hair instead of knots.
-
Edge brush: Handy for smoothing the hairline without piling on product.
-
Light mousse or foam wrap: Gives wavy hair grip and helps the braid hold shape without getting stiff.
-
Gel or edge control: Use sparingly along the part and hairline if you want a sleek finish.
-
Small clear elastics: Good for securing ends, ponytails, and pull-through sections.
-
Bobby pins and U-pins: Necessary for buns, crowns, and tucked styles that need hidden support.
-
Duckbill clips: Keep sections out of the way while you braid.
-
Satin scarf or bonnet: Protects the style overnight and cuts down on frizz.
-
Optional braiding hair: Useful for feed-ins, jumbo braids, or adding length where your own hair is shorter.
Smart Prep and Product Choices for Wavy Textures
The product choices matter more than the braid pattern, at least in the first few hours. Wavy hair usually does better with a light hand: a leave-in for slip, a foam or mousse for grip, and a small amount of gel where the part needs to stay clean. Heavy creams can make the braid feel soft at first and limp by the end of the day.
If your hair is freshly washed, let it dry partway before you braid unless the style specifically calls for damp setting. Soaking hair stretches differently, and the braid can feel loose once it dries. If your hair is already dry and a little fluffy, mist it lightly with water and add just enough product to make it manageable. Drenched hair is more work than it’s worth.
For extensions, look for hair that matches the density of your own braid. Too bulky, and the style sits like a helmet. Too thin, and the braid looks tired from the start. That middle ground is where the cleanest styles live.
How to Wear These Braids in Real Life
Presentation: Choose the braid based on the shape you want at the front. Low side braids and rope ponytails read relaxed, while crown braids, feed-ins, and tucked buns give a cleaner outline around the face and neck.
Outfit Pairings: Open necklines show off a braided bun or halo braid nicely. Hoop earrings work well with side braids, headband braids, and half-up styles because they don’t fight for attention. Scarves, blazers, simple tees, and knit tops all sit well with braids that land low or forward.
Portions: For everyday wear, pick one style that can last through your actual schedule, not the version you only wear for pictures. If you need to cook, commute, and answer ten messages, the low bun, twin braids, or side cornrows into a puff usually make more sense than a braid that falls apart by lunch.
Beverage Pairing: Water. Tea. Fine. That sounds too simple, but it fits the mood. Braids are often the no-drama part of the day, so the rest of the routine can stay equally calm.
The Small Habits That Keep Braids Looking Fresh
Grip: Use product where the braid needs hold, not everywhere. The scalp and the first inch of hair usually need the most help. The ends usually need the least.
Parting: Spend the extra minute on the part. A clean part does more for a braid than an extra ounce of gel ever will. Crooked parts show up in photos and in mirrors, which is annoying because you can’t unsee them once they’re there.
Tension: Keep the roots firm, not painful. If your temples ache, the style is too tight. That is not a “break it in” issue. It’s a redo issue.
Finish: After braiding, smooth the surface with a tiny bit of mousse on your palms. Don’t soak the hair. Just tame the fuzz around the braid line and let the shape stay soft.
Speed-Saver: If you know you’re short on time, stretch your hair the night before with a banding method or a loose twist. Morning braiding goes faster when the hair is already detangled and prepped.
Common Mistakes That Make Braids Puff Up or Slip
Starting on tangled hair: The braid will snag, puff, and look uneven from the first turn. Detangle section by section before you begin, even if the rest of the hair is already brushed.
Using too much heavy product: Thick butter and wax can make the roots slide and the braid feel greasy before you leave the house. Use a lighter styler and keep the heaviest product off the crown unless the style really needs it.
Pulling the hairline too tight: This shows up as soreness, bumps, and flattened edges that look sharp instead of neat. Keep the front firm but comfortable, and stop if the scalp starts to feel strained.
Skipping the secure end: A pretty braid with a sloppy finish looks half-done. Tie it off with a small elastic, tuck it into a bun, or pin it under if the style calls for it.
Braiding over frizz instead of smoothing it first: Once the braid is built, the fluffy spots are harder to tame. Brush or smooth the section before you start, not after.
Sleeping on cotton: The braid fuzzes up overnight and the parts lose their clean line. Satin is cheaper than doing your hair twice.
Easy Variations and Alternatives to Try
Sleek and Sharp: Use a stronger gel at the part, keep the braid close to the scalp, and finish with a smooth bun or tucked end. This version works when you want the style to look crisp from the front.
Soft and Full: Leave a few face-framing pieces out, loosen the outer loops of the braid, and use mousse instead of a hard gel. This gives wavy hair the soft, airy finish it naturally wants.
Protective and Tucked: Hide the ends in buns, chignons, or feed-in ponytails. This is the version I’d pick when the goal is less manipulation and fewer chances for frizz.
Accessory-Heavy: Add cuffs, a scarf, pins, or a silk ribbon. One accessory is usually enough. More than that and the braid starts competing with itself.
Short-Hair Friendly: Use headband braids, braided bangs, side cornrows, or tucked low braids. These styles don’t demand a lot of length and they hide uneven ends well.
Low-Maintenance Week: Choose rope braids, low side braids, twin braids, or a pull-through pony. They’re the styles you can touch up fast instead of rebuilding from scratch.
Frequently Asked Questions
Can I braid wavy hair without blowing it out first?
Yes. Many of these styles work well on air-dried or stretched wavy hair, especially if you want a softer, fuller braid. The tradeoff is that the braid may look puffier and need a little more smoothing at the roots.
Which braid styles last the longest on wavy hair?
Feed-in cornrows, knotless braids, tucked braided buns, and twin Dutch braids usually hold up the longest. They stay anchored close to the scalp and give the hair less room to slip out.
How do I keep my braid from getting fuzzy at the crown?
Start with a clean part, smooth the first inch of hair before you braid, and use a light mousse or gel at the roots. Fuzz usually shows up where the braid starts, so that first section deserves the most attention.
Are these styles okay for short layers?
Yes, but choose the right shape. Braided headbands, braided bangs, crown braids, and tucked styles handle layers much better than a very long side braid that expects every strand to behave.
Do I need braiding hair for everyday braids?
Not for most of them. Braiding hair helps with feed-ins, jumbo side braids, knotless installs, and any style where you want extra length or fullness. For the rest, your own hair is enough.
How tight should a braid feel?
Secure, not painful. If you feel pulling at the temples, soreness behind the ears, or a headache starting up, the braid is too tight. Rework it before the tension becomes a problem.
What if my braid keeps unraveling at the end?
Use a small elastic, then tuck the tail under with a pin or wrap it into a bun. Wavy hair can have more slip than people expect, so the end usually needs a little extra help.
Can I sleep in these styles?
Yes, and you should if you want them to last. A satin scarf or bonnet keeps the braid line cleaner and stops the loose waves from rubbing into a frizzy halo overnight.
Braids That Stay Useful
The best everyday braid is the one you can wear without babysitting it. That’s the real test. If it looks good for twenty minutes but falls apart by noon, it doesn’t belong in your regular rotation.
Wavy hair gives Black women a lot to work with: softness, movement, grip, and enough texture to make even a plain braid look finished. Pick the styles that match your schedule, your length, and how much time you actually want to spend at the mirror. The rest is just repetition, and a good comb.