Thick hair can make double braids look luxurious in a way finer hair can’t fake, but it also means every shortcut shows up fast. A braid that looks tidy for ten minutes and then starts puffing at the temples is not a braid problem. It’s usually a parting problem, a tension problem, or a finish problem.
The upside is that thick hair gives you real structure to work with. The braid ridges stay visible. The plaits feel substantial in the hand. And if you anchor the roots well, the style tends to stay put through work, errands, a long commute, or a sweaty afternoon that would flatten softer hair in a heartbeat.
The styles that last longest are the ones that respect the weight of thick hair instead of fighting it. Tight enough at the scalp to hold shape. Not so tight that your head throbs by lunch. That balance is the whole game, and once you know which double braid pattern suits your density, you stop wrestling with your hair and start using its heft to your advantage.
Why These Double Braids Work So Well on Thick Hair
-
The weight helps the braid stay defined: Thick hair gives each plait enough body that the braid pattern doesn’t disappear after an hour, which is why Dutch and fishtail versions keep their shape so well.
-
The scalp anchor matters more than the tail: A firm, even start at the roots prevents the style from sliding lower as the day goes on, especially around the crown and temples.
-
They handle movement better than single braids: Two braids distribute weight more evenly across the head, so you get less pulling at the nape and fewer rogue flyaways at the sides.
-
They’re easier to refresh than loose styles: If one side loosens, you can usually tighten just that braid, mist the roots, and keep going without taking the whole thing down.
-
They play nicely with a little grit: Thick hair often holds mousse, cream, or light gel better than silky hair does, which means these styles can last through a long day without turning crisp or greasy.
-
They tuck away the ends cleanly: That matters. Ends are where thick hair usually starts to fray, snag on jackets, and swell up with humidity.
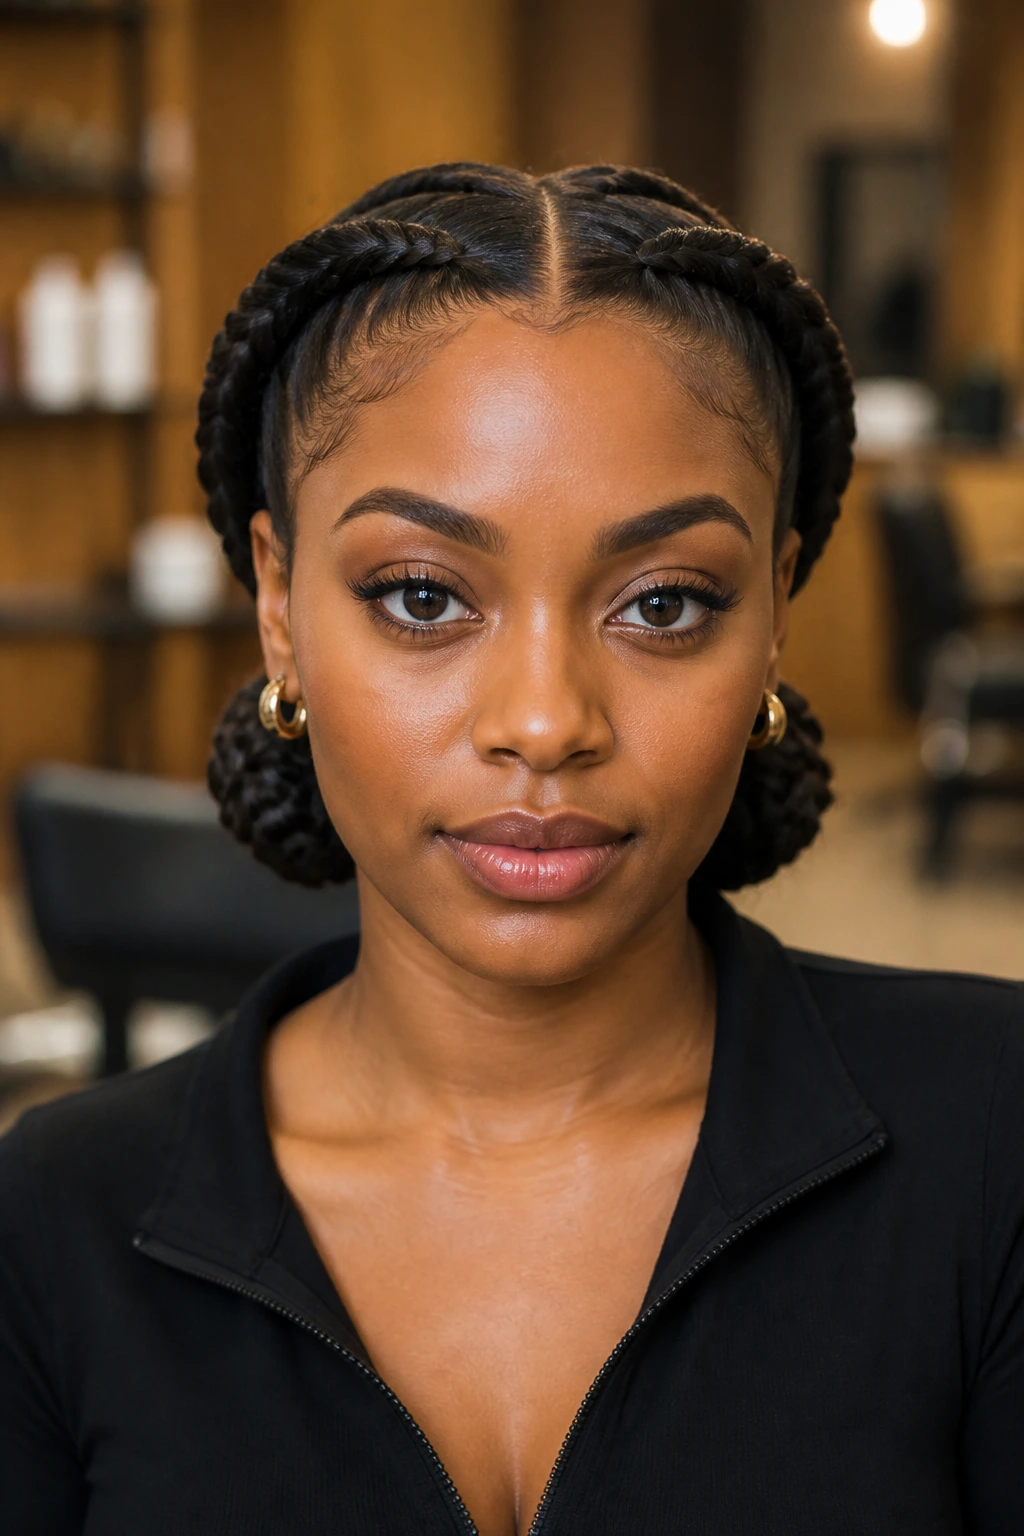
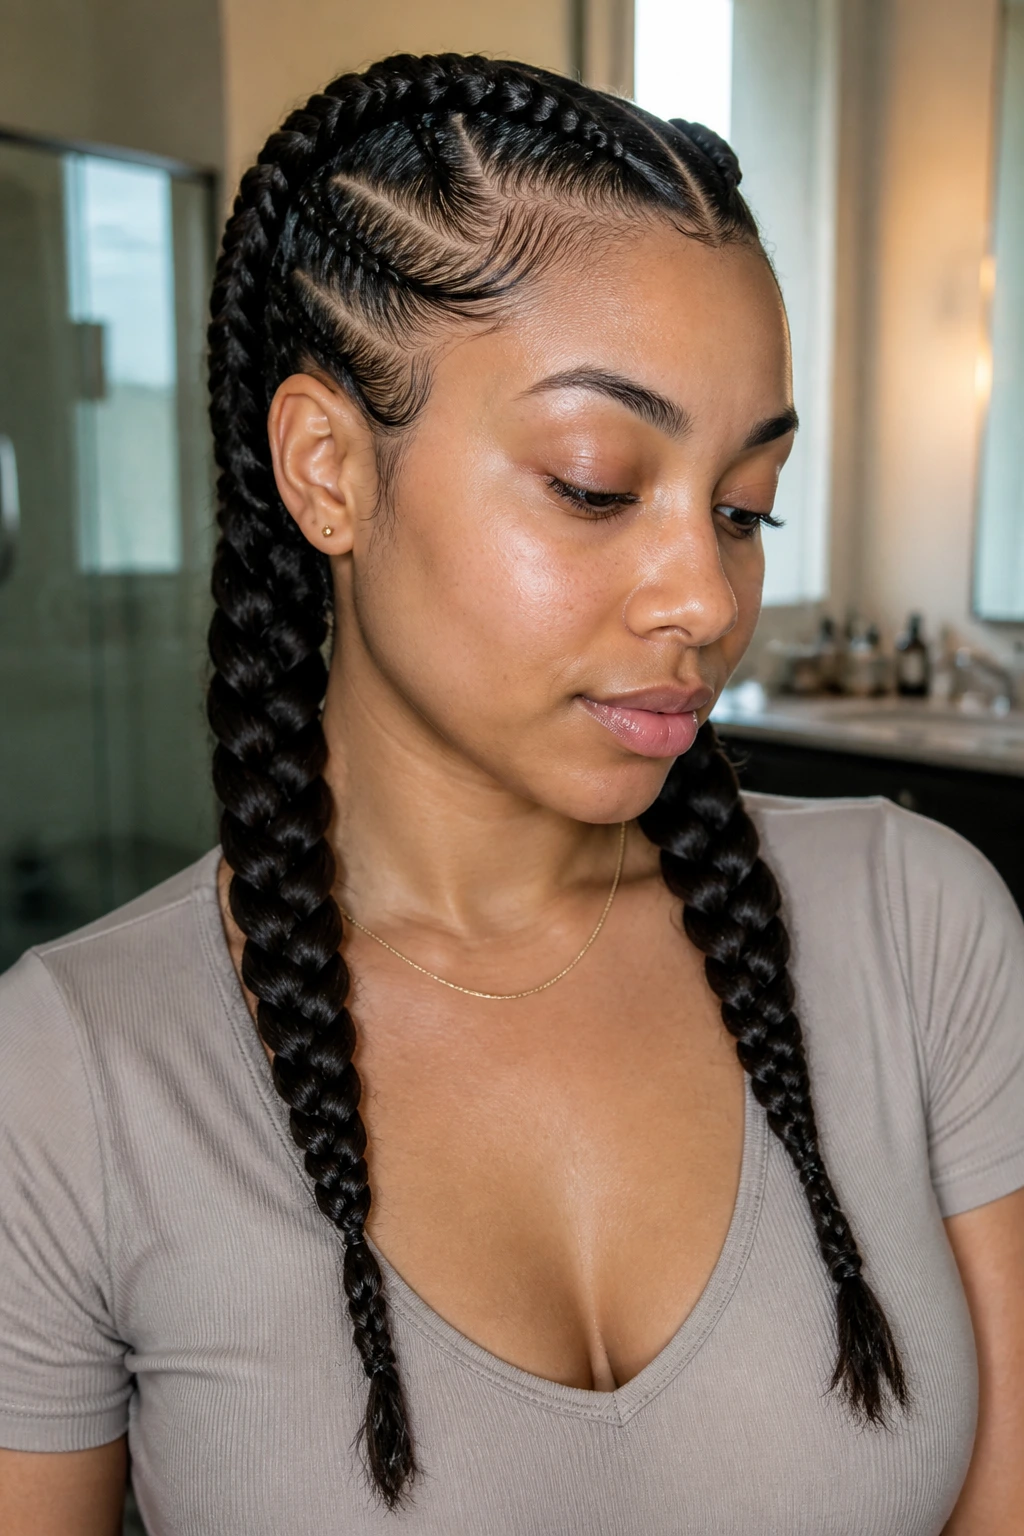
1. Classic Dutch Pigtail Braids

A pair of classic Dutch braids is the straight-up workhorse here. The braid sits proud on the scalp, which gives thick hair a clean, raised pattern instead of letting it melt into the head the way a loose three-strand braid can.
What makes this version last is the structure at the roots. If you keep the sections even and braid with steady tension for the first 2 to 3 inches, the style usually holds through a full day without falling apart at the crown. Thick hair gives the braid enough depth that it looks intentional even when a few shorter layers poke out.
Why It Holds Up
Dutch braids are basically the braid pattern you choose when you want the braid to stay visible. The under-crossing motion creates that raised ridge, and on dense hair the ridge has a nice, rounded shape instead of a skinny rope look.
If your hair is heavy, braid the first few passes a little tighter than you think you need, then ease off slightly through the lengths. That keeps the scalp neat without turning the ends into a hard, skinny tail.
Best for: school runs, gym days, long shifts, or any day you want the hair off your face and stays off your face.
Watch for: uneven section sizes. If one side grabs more hair than the other, the braid will drift and one pigtail will sit lower.
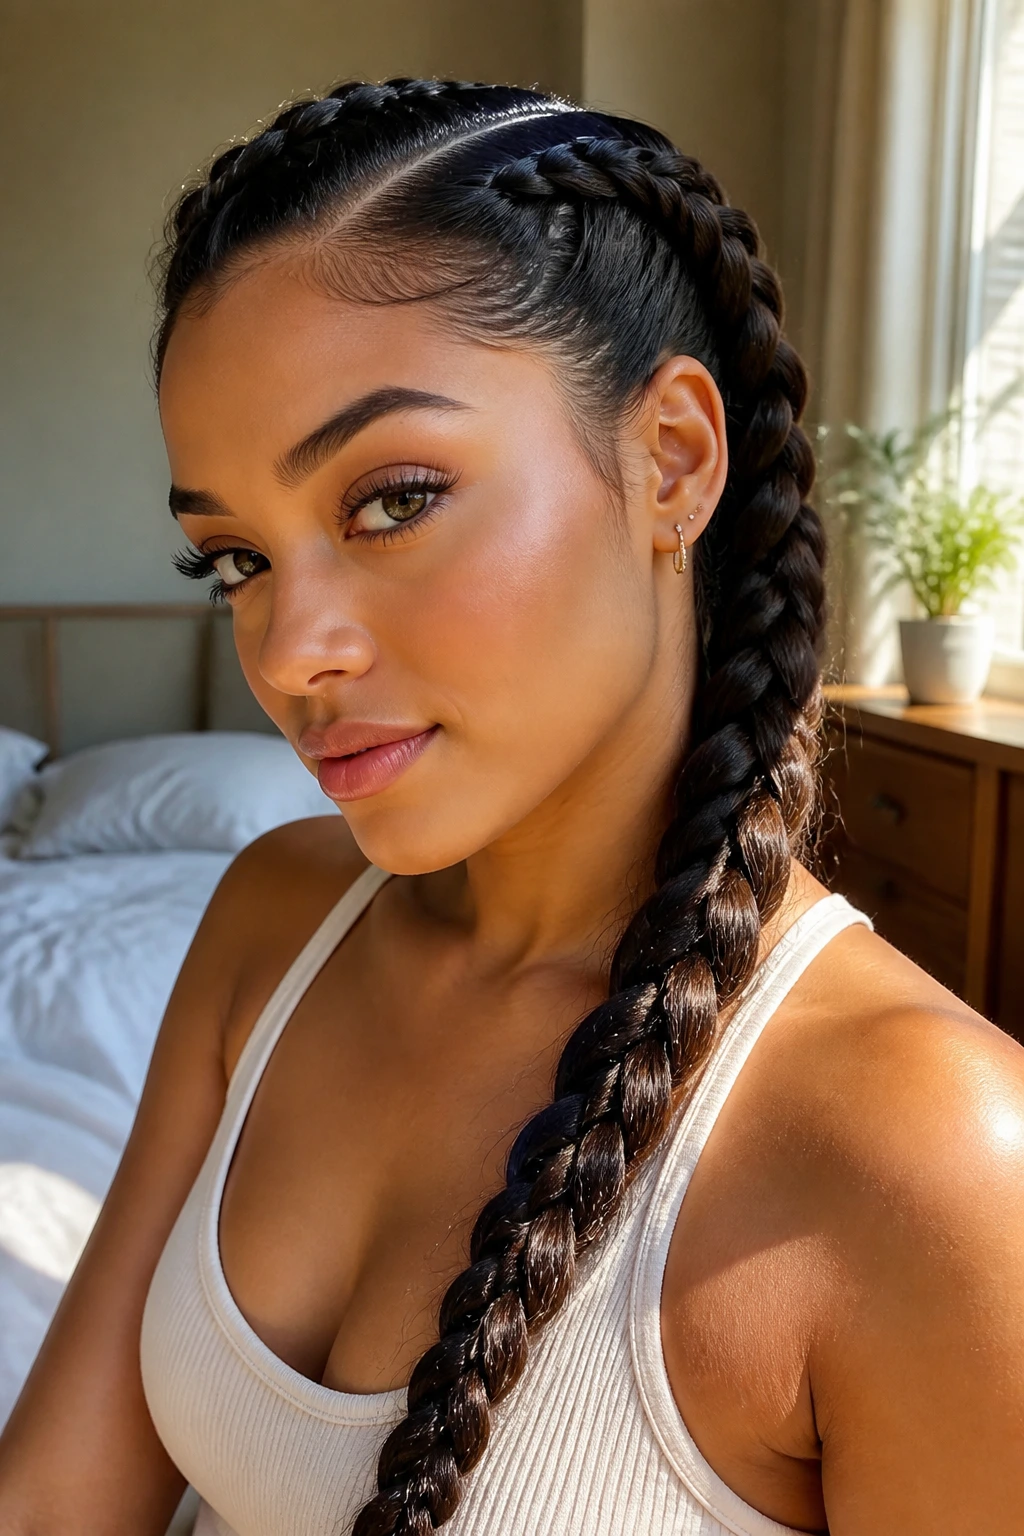
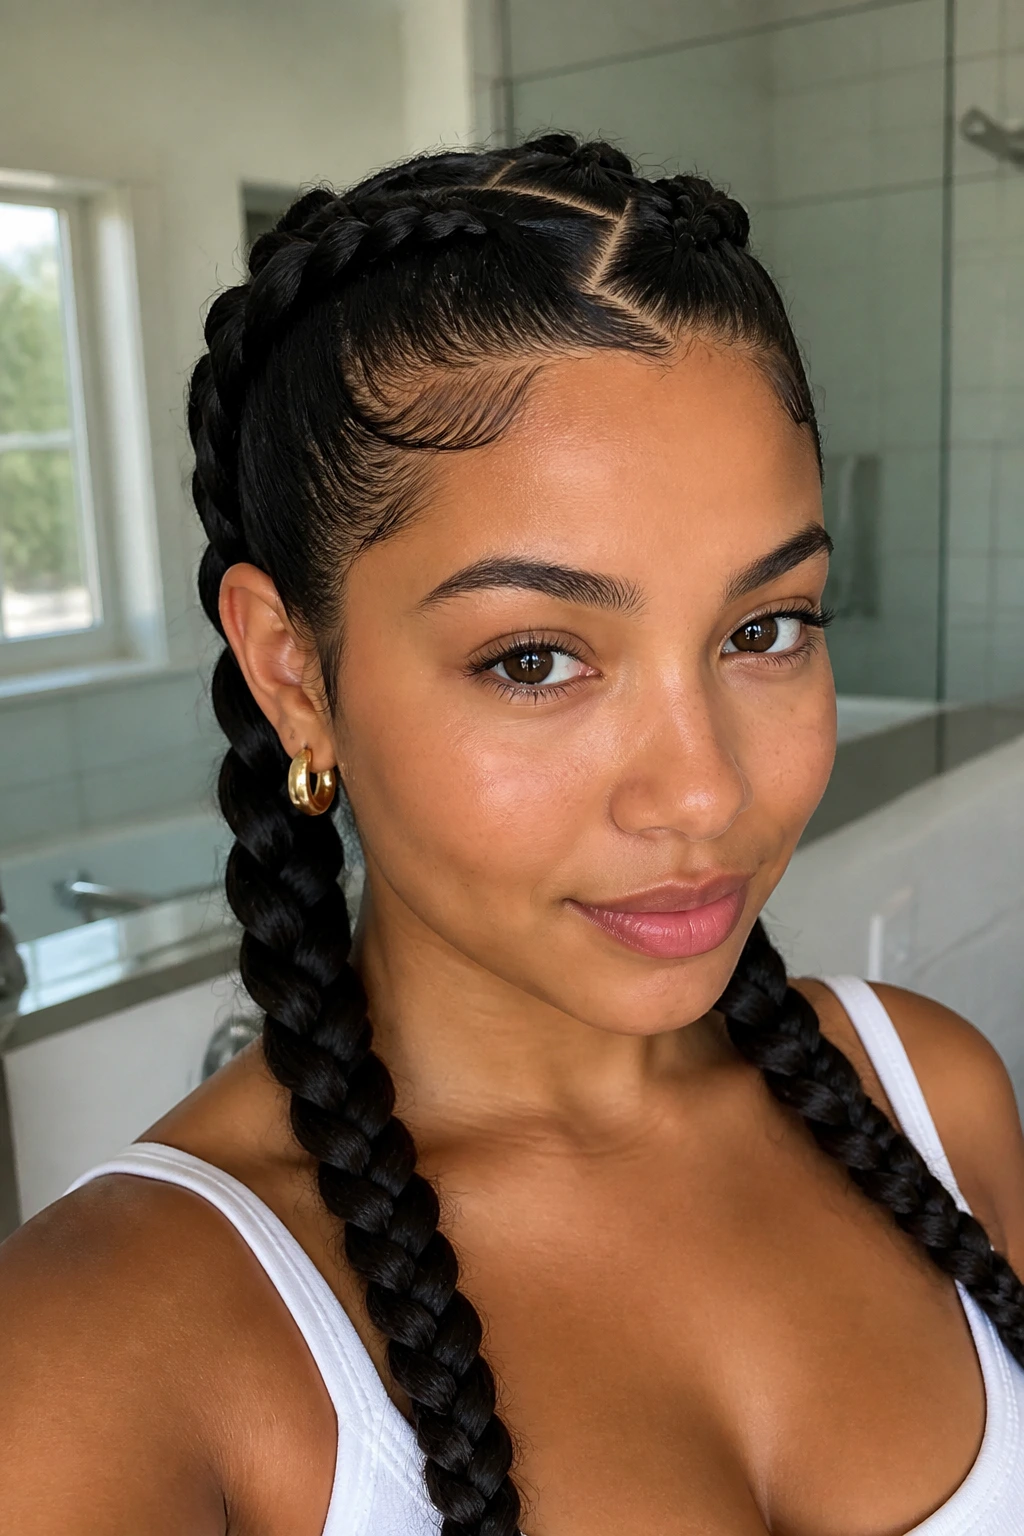
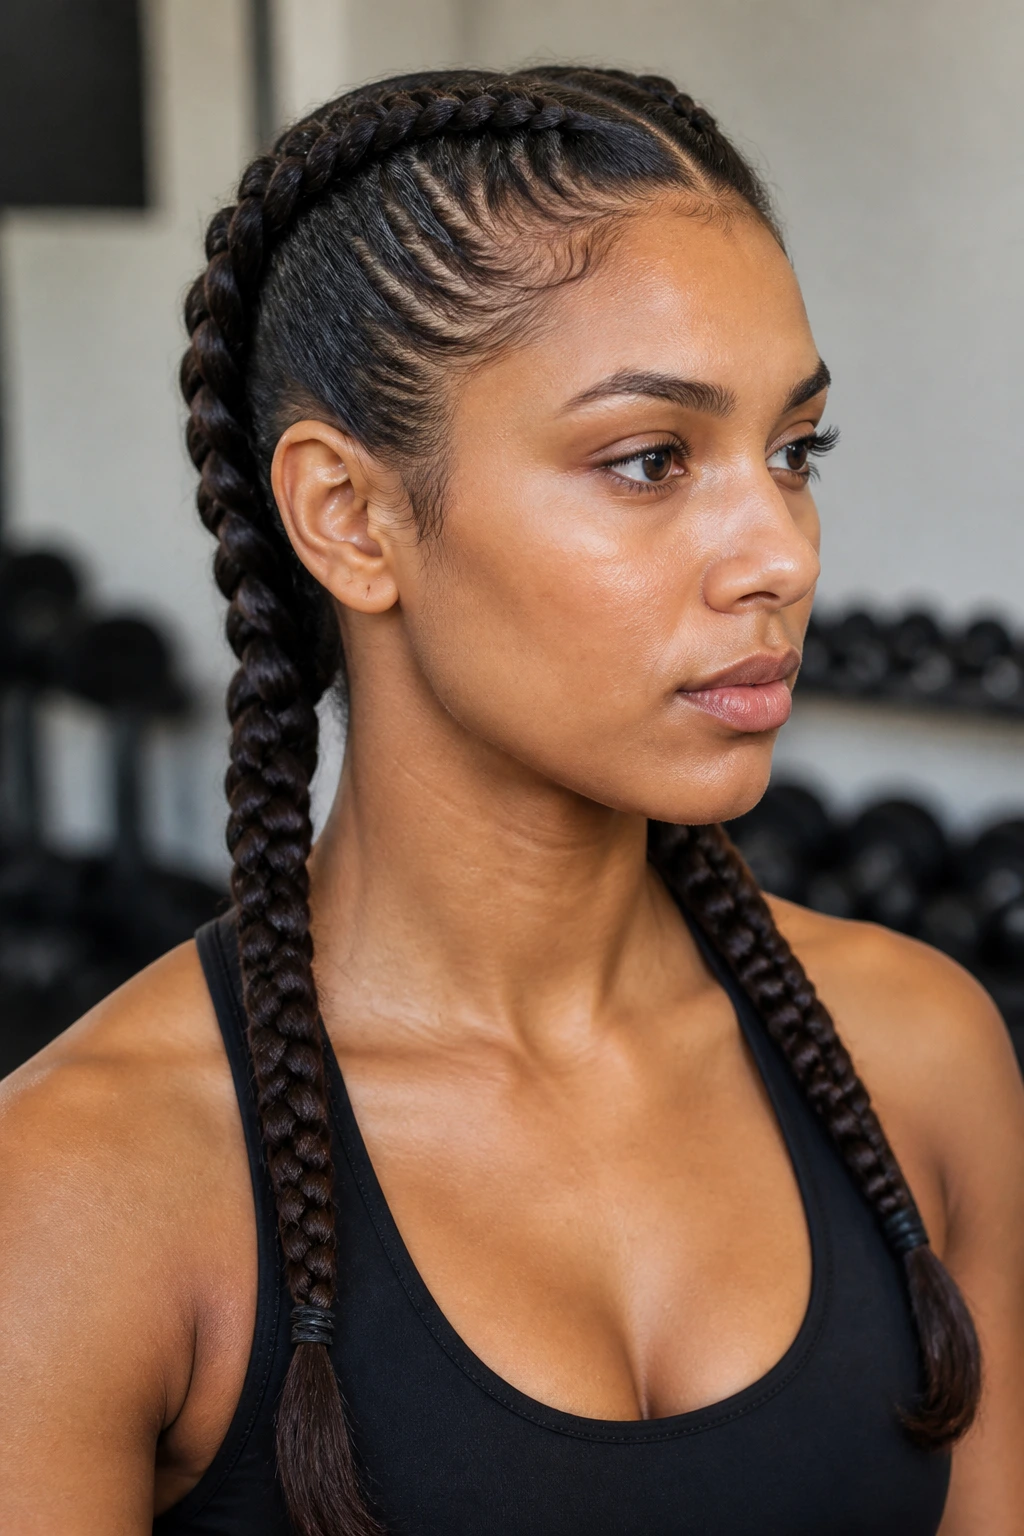
2. Sleek Boxer Braids with a Clean Center Part
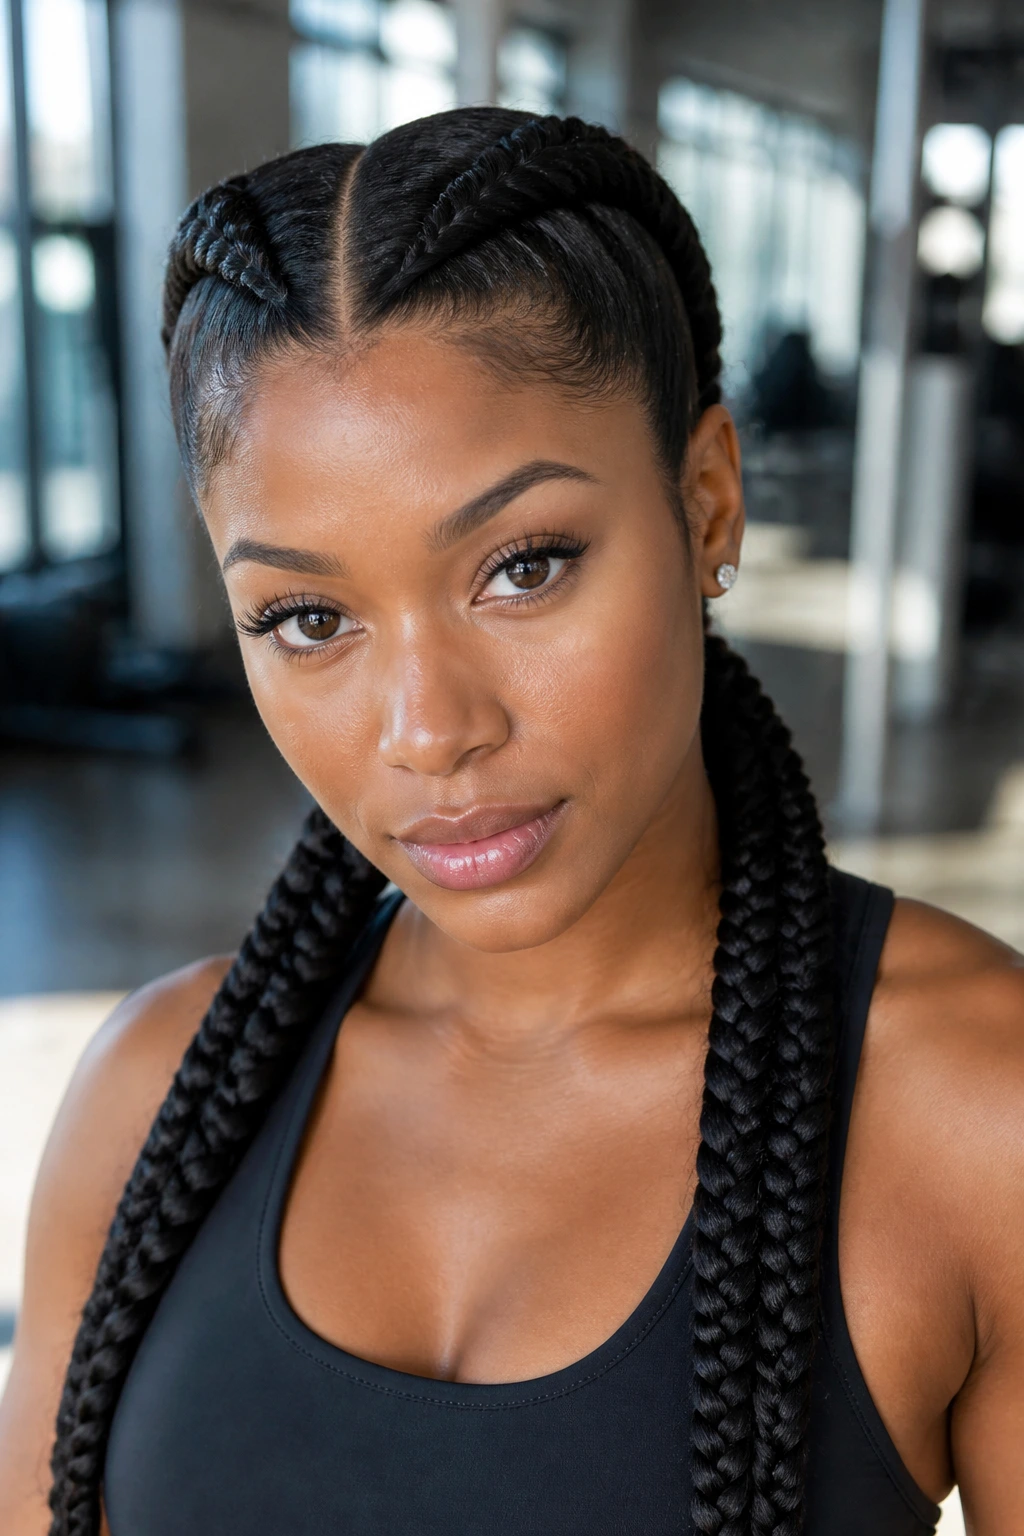
Boxer braids are the polished cousin of Dutch pigtails. The center part is sharp, the braid starts close to the hairline, and the whole style sits flat enough to slide under a hood or a helmet without turning into chaos.
This version is especially good for thick hair because the tight root work keeps bulk under control. If your hair tends to balloon at the crown, boxer braids can keep it anchored for hours. A pea-sized amount of gel along the part and a little mousse at the roots make a bigger difference than another round of hairspray ever will.
The trick is not to over-tighten every section. The braid should feel snug, not pinched. If your scalp starts to ache before the first coffee refill, it’s too tight.
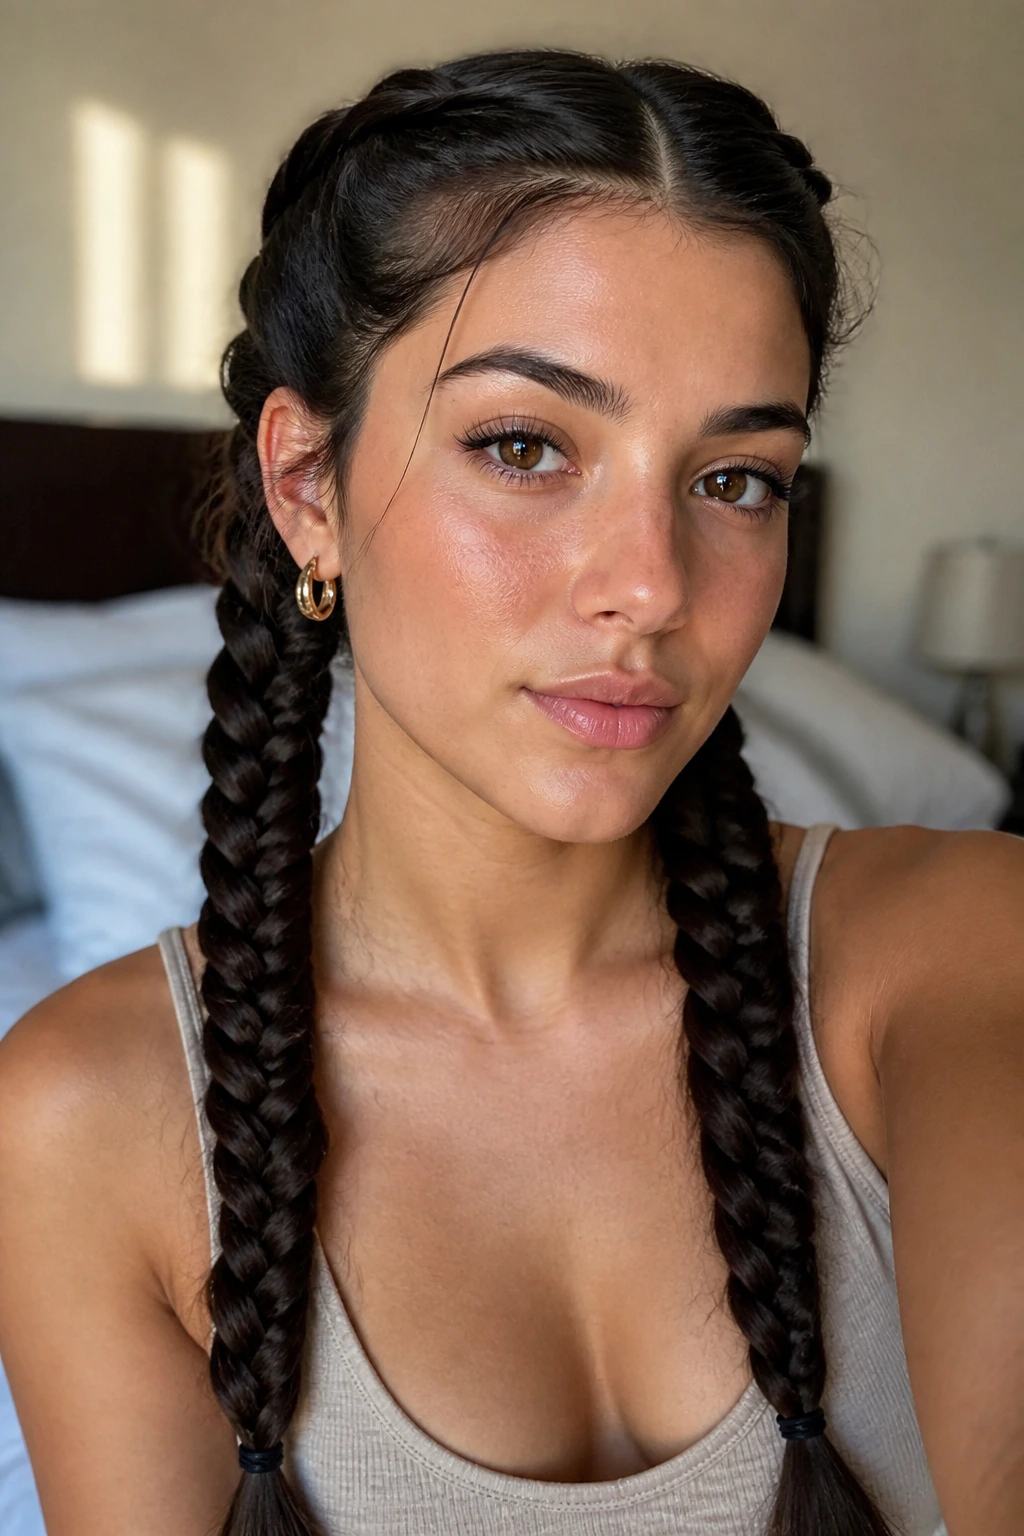
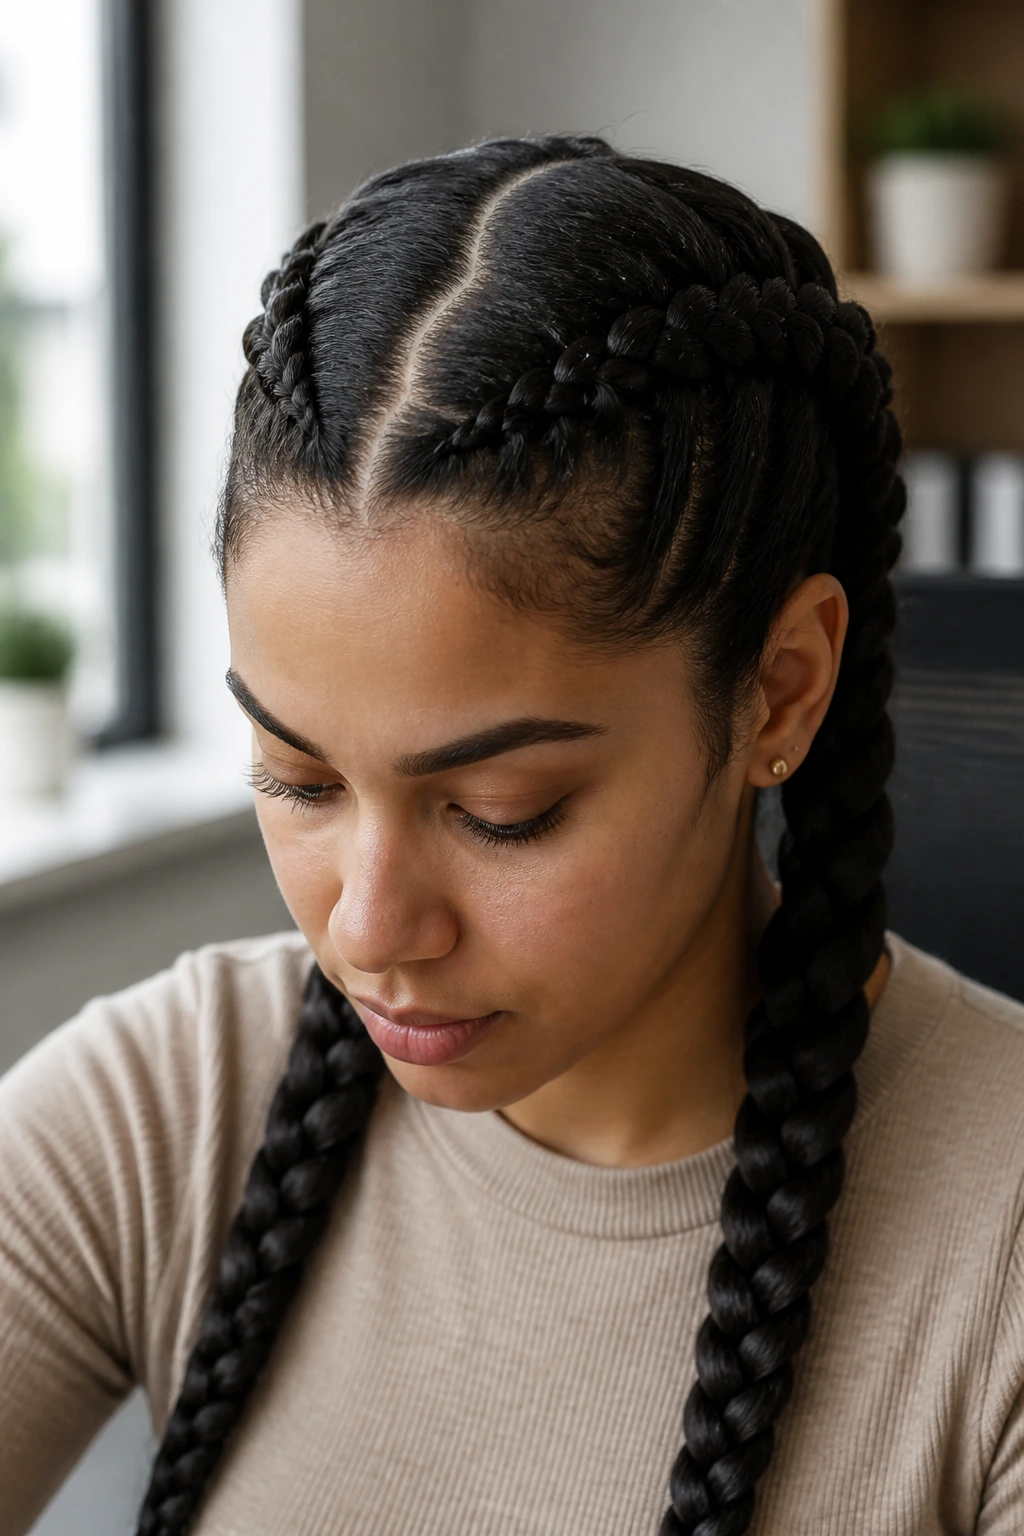
3. Soft French Pigtails
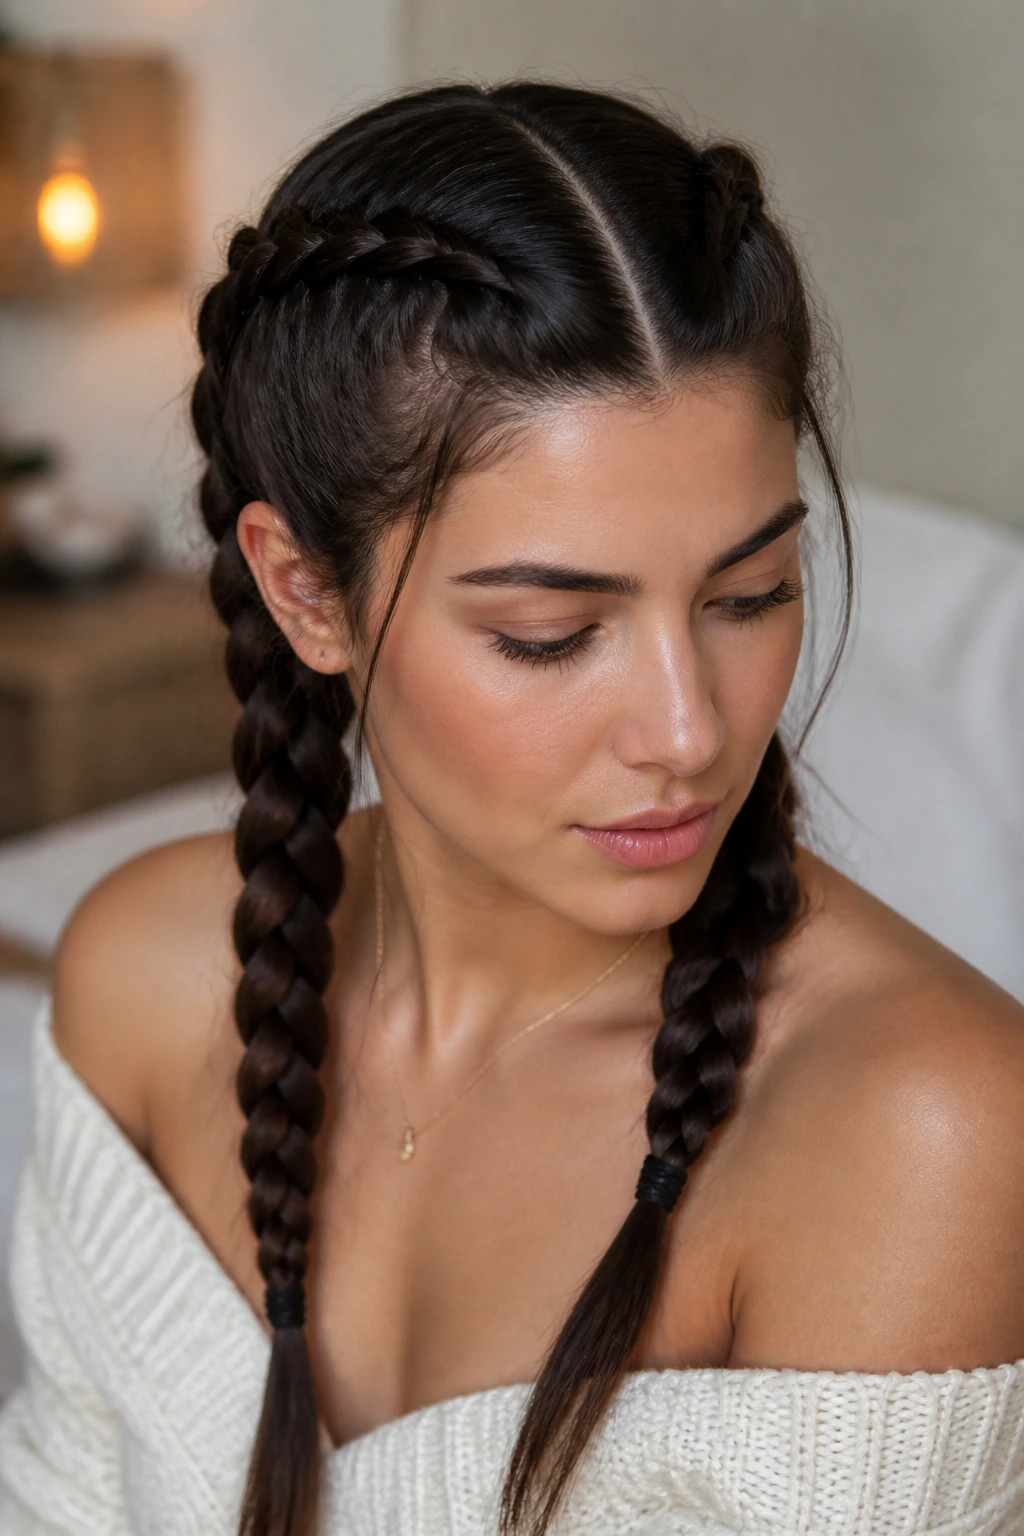
French braids are less dramatic than Dutch braids, but on thick hair they can look rich and smooth in a way that feels almost tailored. The braid lies into the head instead of sitting on top of it, which gives the style a calmer, lower profile.
They also hide growing-out layers well. If your hair is cut in long layers and tends to kick out at the cheekbones, French pigtails keep those shorter pieces tucked into the braid line where they belong. The look is neat without being severe.
How to Wear It
Pull the first three passes very close to the scalp, then keep the tension even all the way down. Thick hair can make French braids feel bulky if you grab too much hair at once, so smaller additions work better than giant sections.
A center part gives symmetry. A side part gives the whole style a little more softness around the face. Both last. Both work.
4. Feed-In Braids from the Hairline Down
Feed-in braids are the style I reach for when thick hair needs a more graduated start. Instead of shoving a huge section into the first pass, you add hair in small increments from the hairline down. The braid starts lean and builds width as it moves.
That gradual build is kinder to heavy hair because it keeps the roots from looking bulky. It also helps the style last longer, since the braid’s base is locked in cleanly before the lengths kick in. If you’ve ever had a braid puff out at the temples by lunchtime, feed-in sections solve a lot of that.
5. Rope-Twist Pigtails

Rope twists are underrated on thick hair. They look simple, but they hold because the twist compresses the hair into a dense, springy shape. When you divide each side into two sections and twist them around each other, the result is firm without needing the same hand fatigue as a tight three-strand braid.
They’re also faster than a lot of people expect. Once the sections are detangled and lightly coated with cream, the twist moves quickly, and thick hair gives the rope a nice, rounded body. It looks especially good if your ends are blunt and heavy, because the twist makes the whole shape feel intentional.
The Little Detail That Matters
Secure the twist with a snag-free elastic, then wrap a tiny strand of hair around the band if you want a cleaner finish. That one move keeps the bottom from looking like an afterthought.
6. Fishtail Pigtails
Fishtails are slower than standard braids, but the texture is worth the extra minute. On thick hair, the pattern comes out crisp and almost woven, with tiny sections crossing over each other in a way that makes the braid look more intricate than it is.
The real advantage is how well fishtails stay together once they’re set. The many small crossings grip the hair tightly, which means the braid tends to hold shape through wind and movement. If your thick hair is wavy or coarse, the texture actually helps the fishtail stay put instead of slipping apart.
What to Watch For
Keep the sections small. Huge fishtail pieces turn chunky and the texture gets muddy. Small picks of hair make the braid look cleaner, especially near the nape where thick hair can bunch fast.
7. Double Braids Tucked into Low Knots
This is a smart one for heavy hair that needs to stay contained all day. Braid each side down the length, then coil the ends into low knots near the nape and pin them flat. The look is neat, and the weight sits close to the head instead of swinging around.
It’s a good answer for long hair that tangles at the back of a coat collar. The tucked ends keep friction down, which matters more than people think. Thick ends rub, snag, and loosen the style faster than the roots do.
Use a few bobby pins crossed in an X rather than one pin forced straight across. The knot stays flatter, and the braid doesn’t creep loose after an hour.
8. Side-Swept Double Braids
Side-swept double braids give thick hair a little movement without letting the style fall apart. Both braids start off-center and travel diagonally toward one shoulder or toward the nape, which softens the symmetry and makes the whole look feel less rigid.
This works well when your hair is very dense around the crown but finer at the ends. The diagonal line keeps the bulk distributed instead of stacking it right on top of the head. It also creates a good frame for earrings, which is not nothing.
A side sweep is one of those styles that looks casual but still feels controlled. Not sloppy. Not precious. Just solid.
9. Double Halo Braids with Tucked Ends
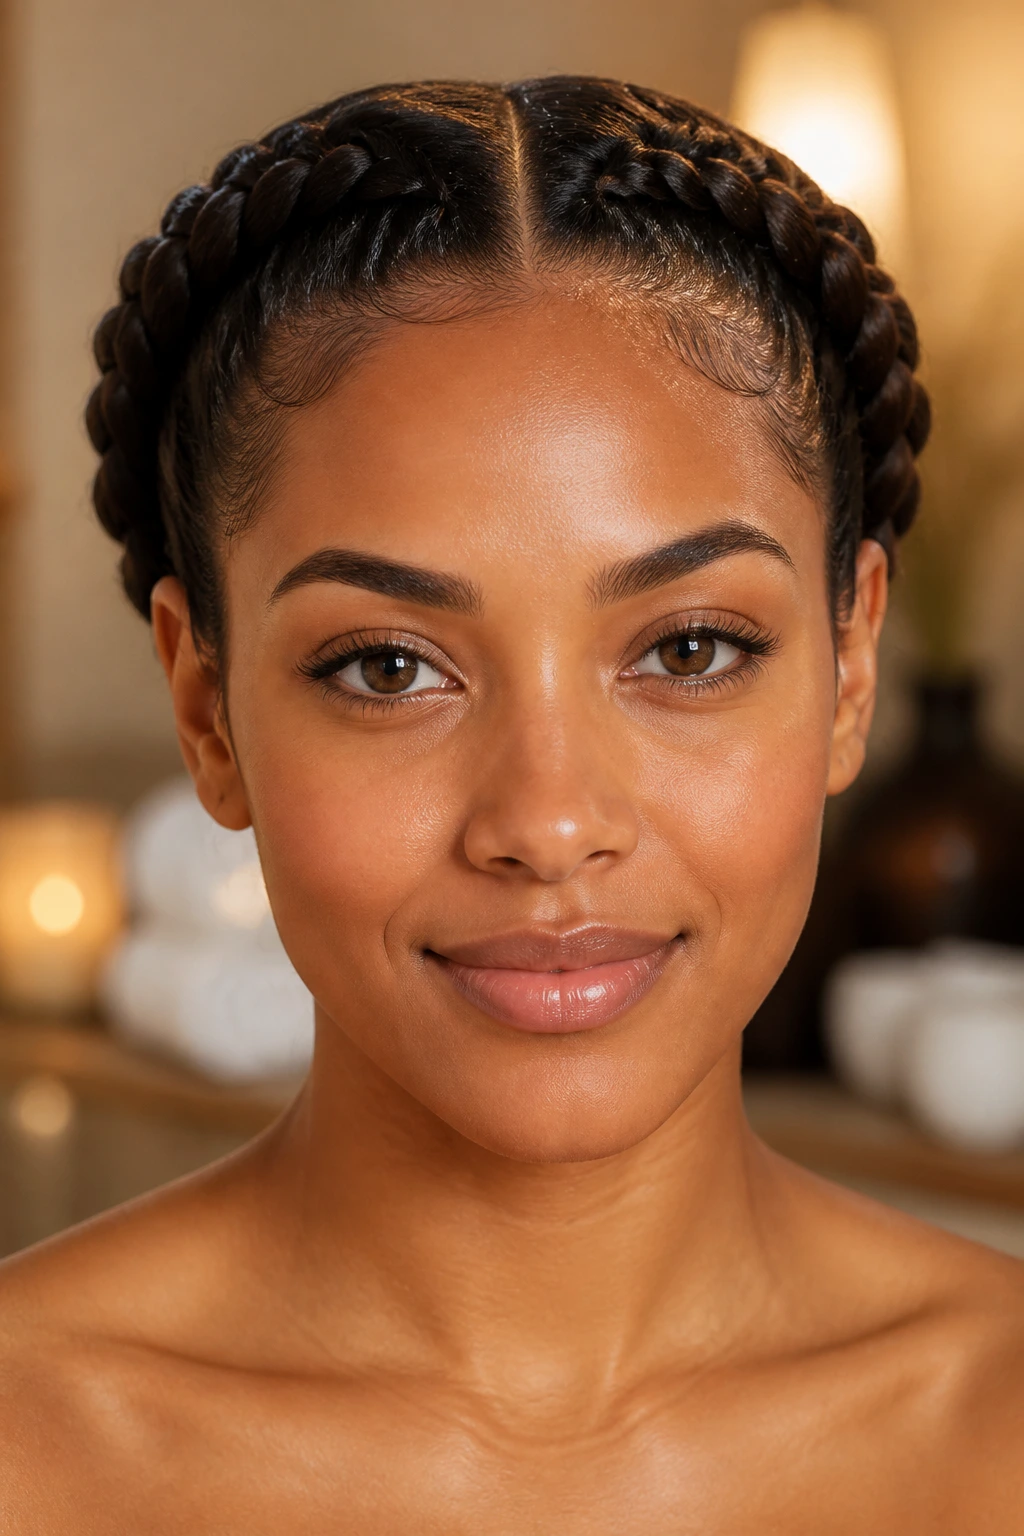
Halo braids can be tricky on hair that’s both thick and long, but splitting the braid into two sides makes them easier to manage. Each braid travels around the head like a curved band, then the ends are tucked underneath and pinned at the back.
The reason this wears so well is that the braid path follows the shape of the head. No long tails swinging around. No heavy ends pulling the braid downward. It sits close, and close usually lasts longer.
H3: Best When You Want the Hair Off Your Neck
If you’re dealing with warm rooms, collar friction, or just a lot of touching your own hair, this is a strong choice. Keep the pins hidden under the braid line, not jammed through the center, so the surface stays smooth.
10. Zigzag-Part Double Braids
A zigzag part changes the whole mood. It breaks up the center line, adds a little edge, and keeps thick hair from looking too severe at the scalp. The braid itself can be Dutch, French, or feed-in; the part is what does the styling work here.
On dense hair, a zigzag part also helps if you have a cowlick or a stubborn crown that refuses to lie flat. The irregular parting disguises the fight. Smart move.
Use the tip of a rat-tail comb and keep the zigzag shallow. Too many sharp angles look fussy and can make the braid feel overworked. A medium zigzag gives enough detail without turning the head into a geometry test.
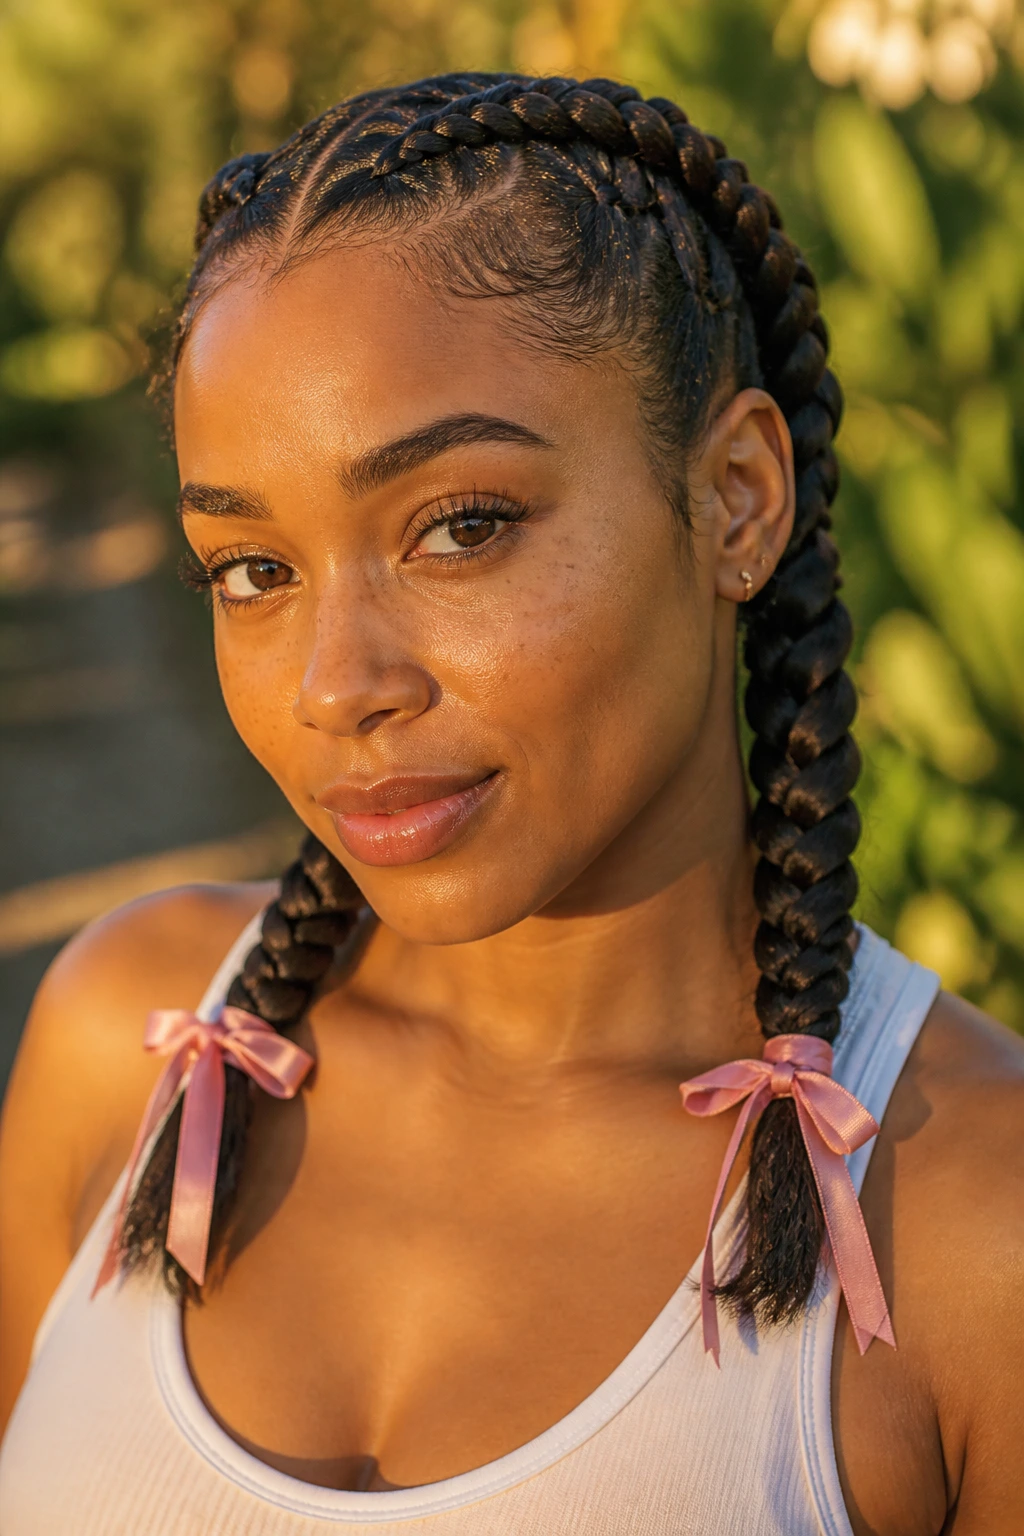
11. Double Braids Woven with Ribbon
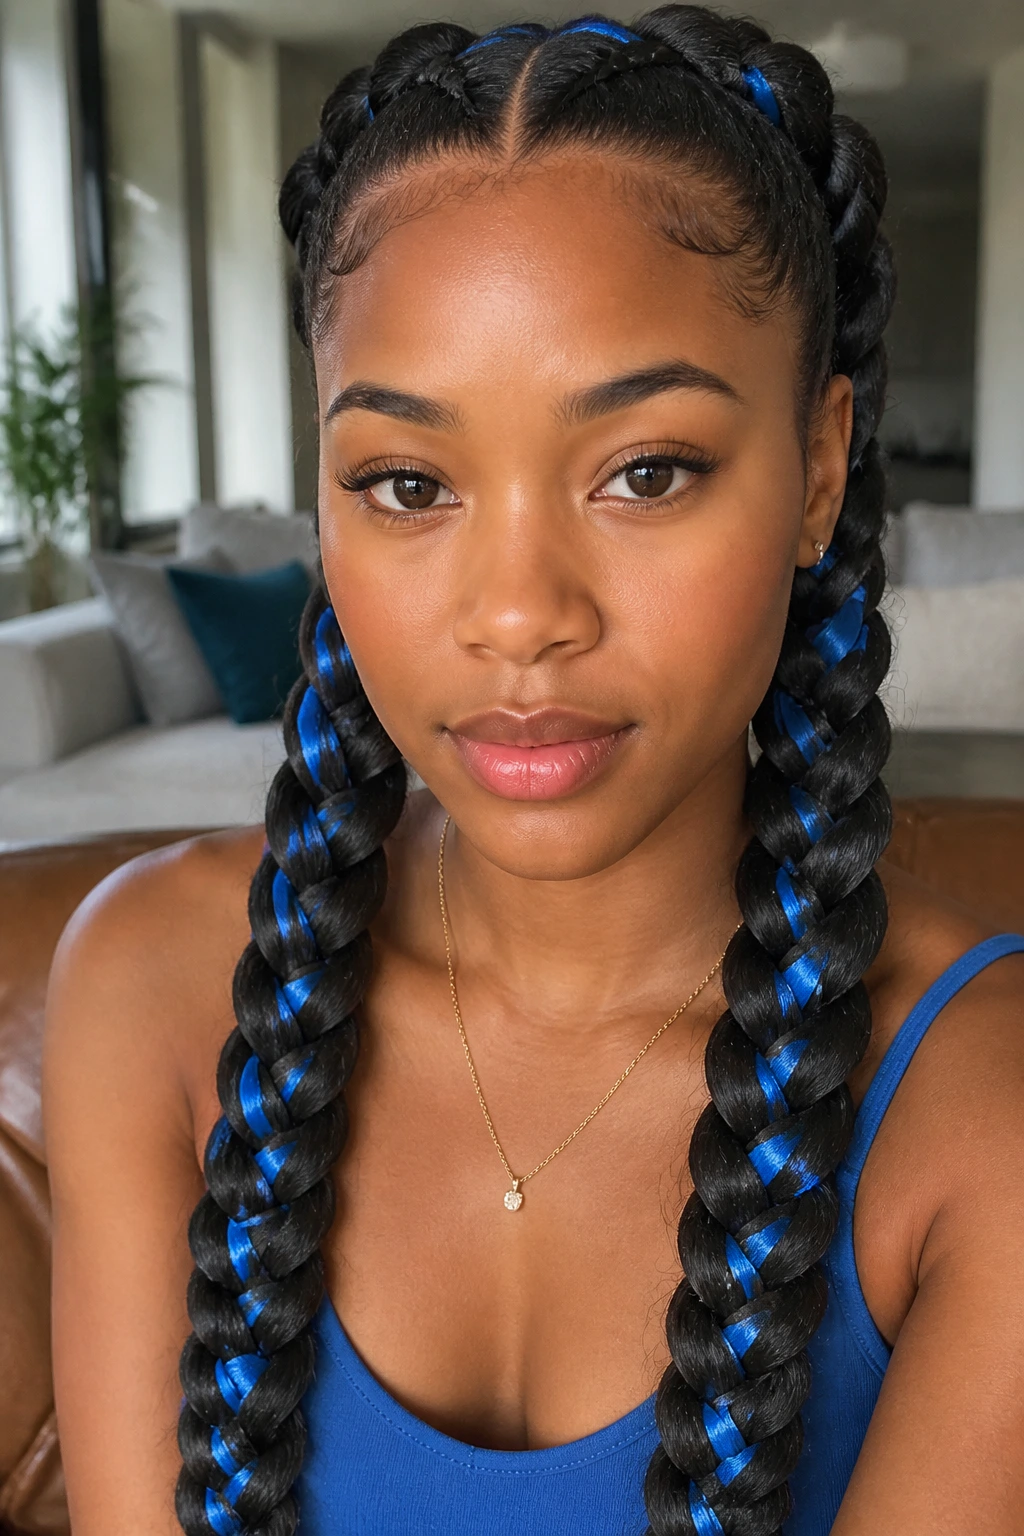
Ribbon-woven braids are practical when you want the style to hold and look finished without relying only on hair texture. The ribbon gives the braid more grip and a little visual weight, which works especially well on thick hair because the braid can carry the added material without collapsing.
Choose a narrow satin or grosgrain ribbon, not something stiff and thick. A ribbon that’s about 1/4 to 1/2 inch wide usually weaves in cleanly and doesn’t make the braid bulky. Thick hair has enough body already; the ribbon should sit inside the braid, not sit on top like gift wrap.
Best for: weekends, events, or days when you want the braids to look deliberate without adding heat tools or a lot of product.
12. Bubble-Ended Double Braids

Bubble ends give you a different kind of hold. After braiding the root and mid-lengths, you secure the tail with several small elastics every 2 to 3 inches, then gently pull at each section to puff it into a bubble.
That puff matters on thick hair because it uses the hair’s own body to create shape. The braid doesn’t need to stay ultra-tight all the way down, which can be a relief if your ends are heavy or textured. You get a playful finish without sacrificing wear time.
Keep the bubbles even. Uneven spacing makes the ends look accidental, and thick hair will show that mistake immediately.
13. Double Braids into a Braided Ponytail
This style starts as two braids and ends as one. Braid both sides back, secure them near the crown or nape, then join the lengths into a single ponytail or a wrapped tail. It’s a clean way to keep the front detail of double braids while removing some of the weight from the sides.
Thick hair benefits from that weight shift. Instead of two heavy tails pulling on the head, the style consolidates the bulk into one secured length. It’s especially handy if your hair is long enough to start feeling cumbersome by midday.
A small elastic at the join point keeps the ponytail from sagging. If the tail is very dense, pin the join under a thin braid wrap so the transition looks smooth.
14. Lace-Braid Pigtails
Lace braids are French-braid cousins, but you only add hair from one side. That makes the braid look slightly more open and directional, which can be gorgeous on thick hair if you want the front to frame the face instead of disappearing into the plait.
They’re also useful if one side of your head has more layers or more bulk than the other. The one-sided add-in lets you control exactly how much hair gets pulled into the braid line. Less guesswork. More control.
What Makes Them Hold
The root line is still snug, but the open side creates a little breathing room. That matters when thick hair tends to swell around the temples. The style feels lighter without being loose.
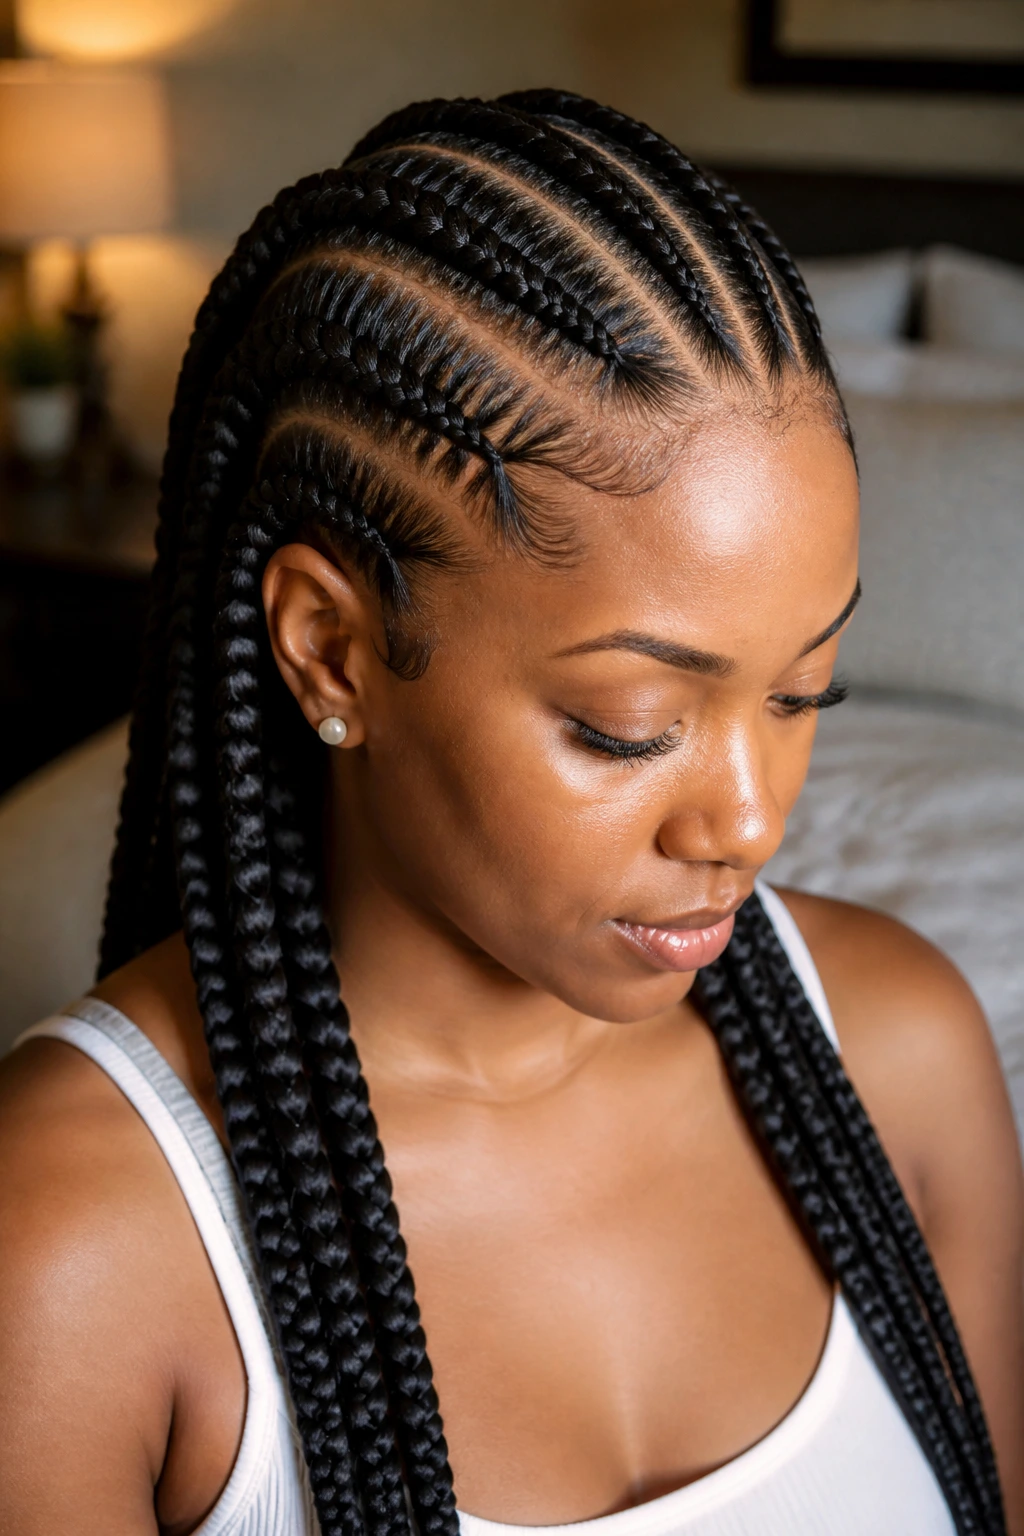
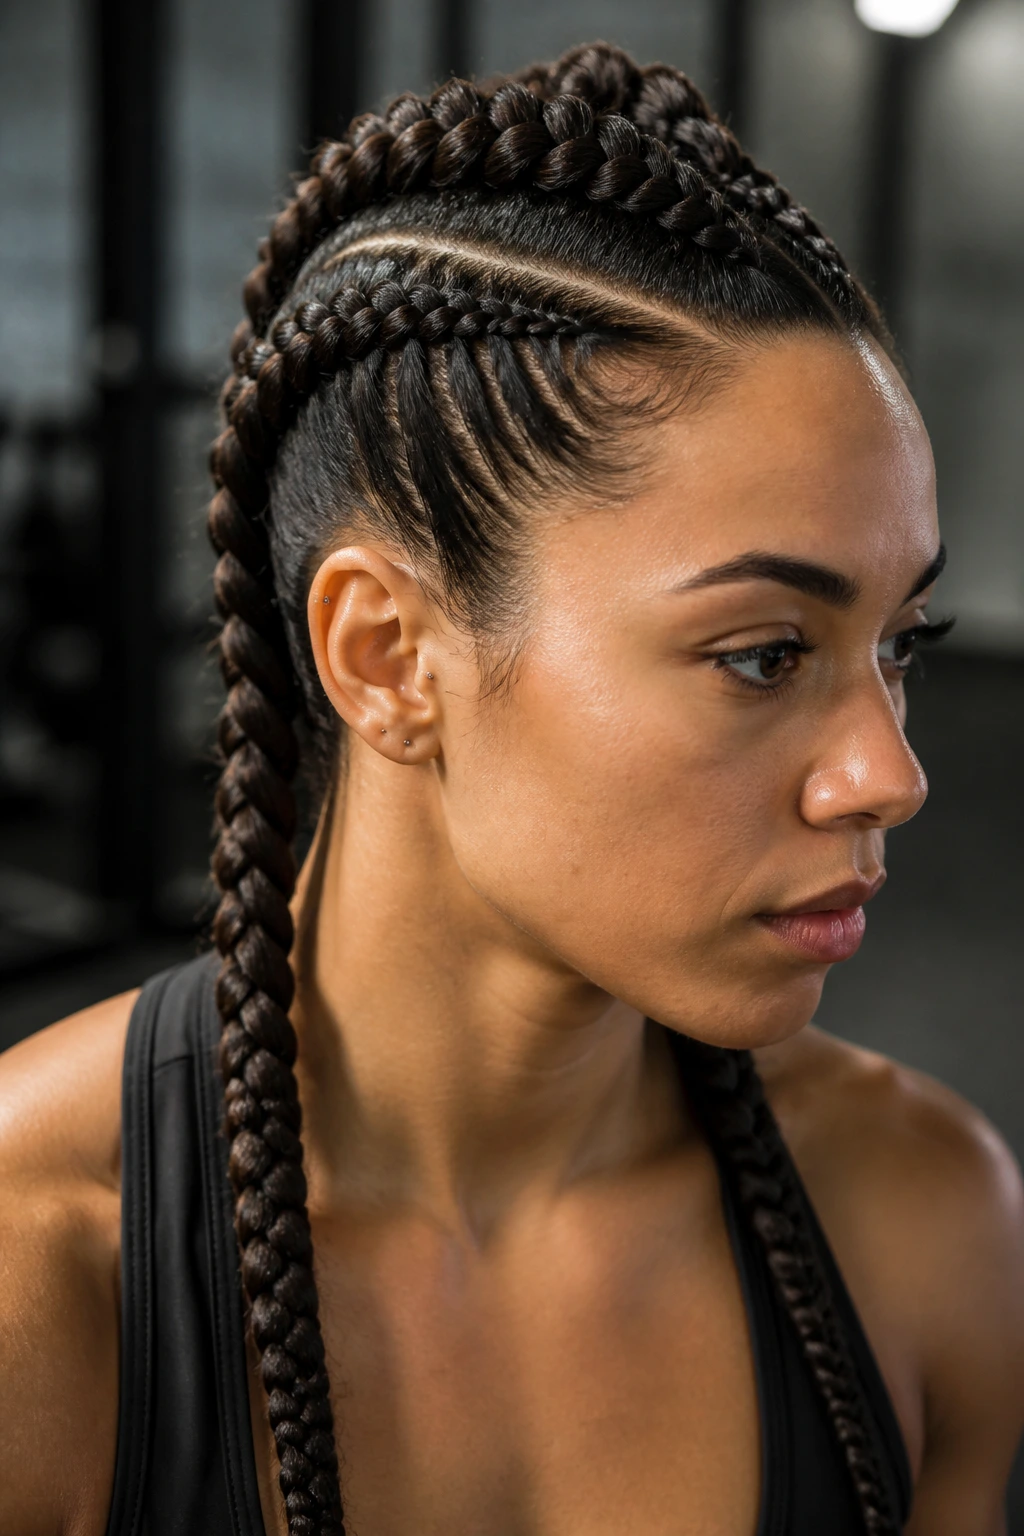
15. Cornrow-Front Double Braids
Cornrow-style front sections make thick hair behave. The front gets braided close to the scalp in narrow, firm lines, then the braid can continue as a fuller pigtail or feed into loose lengths behind the ear.
This is a strong choice if your edges puff up fast. The front is usually the first place thick hair starts to frizz, and cornrowing those inches keeps the line smooth for longer. It also helps shorter layers stay tucked in where they belong.
If you’re new to this type of braid, don’t try to pack too much hair into the front rows. Thin, clean rows are what give you the hold. Crowding them only makes the braid harder to grip.
16. Pull-Through Double Braids
Pull-through braids create that chunky, stacked look without requiring a precise plait. You build the braid from small ponytail sections, pulling one through the other until the pattern stacks down the length like a series of joined loops.
They’re excellent on thick hair because the style already has a lot of body, so the pull-through structure looks full instead of flimsy. If your hair is long and dense, this can be one of the most impressive-looking options in the whole set. It reads bold. It wears well. It doesn’t collapse the way a loosely woven braid might.
Quick Reality Check
You’ll need more elastics than you think. And the first time, it’s worth using clear ones so you can see how the sections fall before you switch to decorative bands.
17. Mohawk Double Braids
Mohawk double braids leave a thicker strip of hair down the middle and braid the sides tighter or more controlled. The result has more height and more attitude, which thick hair can support beautifully because there’s enough mass to keep the center ridge standing up.
This is one of the better choices if you don’t want everything pulled straight back from the hairline. The style keeps some lift around the crown while still controlling the sides. It can look polished or athletic, depending on how neat the center strip is left.
Use a light gel on the side sections and a touch of cream through the center. Too much product and the height flops. Too little and the ridge frizzes apart.
18. Twisted-Ends Double Braids
Braiding all the way to the ends is not always the best move for thick hair. Sometimes the tail looks too bulky. Twisted ends solve that by shifting from braid to twist a few inches before the finish, which slims the end without making it look thin.
The change in texture is subtle, but it’s useful. The twist allows thick, heavy ends to sit closer and slip less under elastic bands. It also keeps the finish from feeling too stiff.
If your hair is coarse, twist the last 4 to 6 inches and secure with a small band. If it’s softer, twist a little longer so the end has enough grip to stay put.
19. Gym-Proof Double Braids
Some styles are pretty. This one is stubborn.
Gym-proof double braids rely on a tight, tidy base, slightly drier hair, and minimal loose ends. Thick hair behaves best here when it has a little grip from day-two texture or a light dusting of dry shampoo at the roots. Braiding clean, silky hair fresh from the wash can look neat, but it often slips the fastest.
Keep the braids close to the scalp, and finish the ends with small elastics or folded tuck-ins. If you’re going straight from workout to errands, this is the version that won’t make you think about your hair every ten minutes.
20. Double Braids into Space Buns
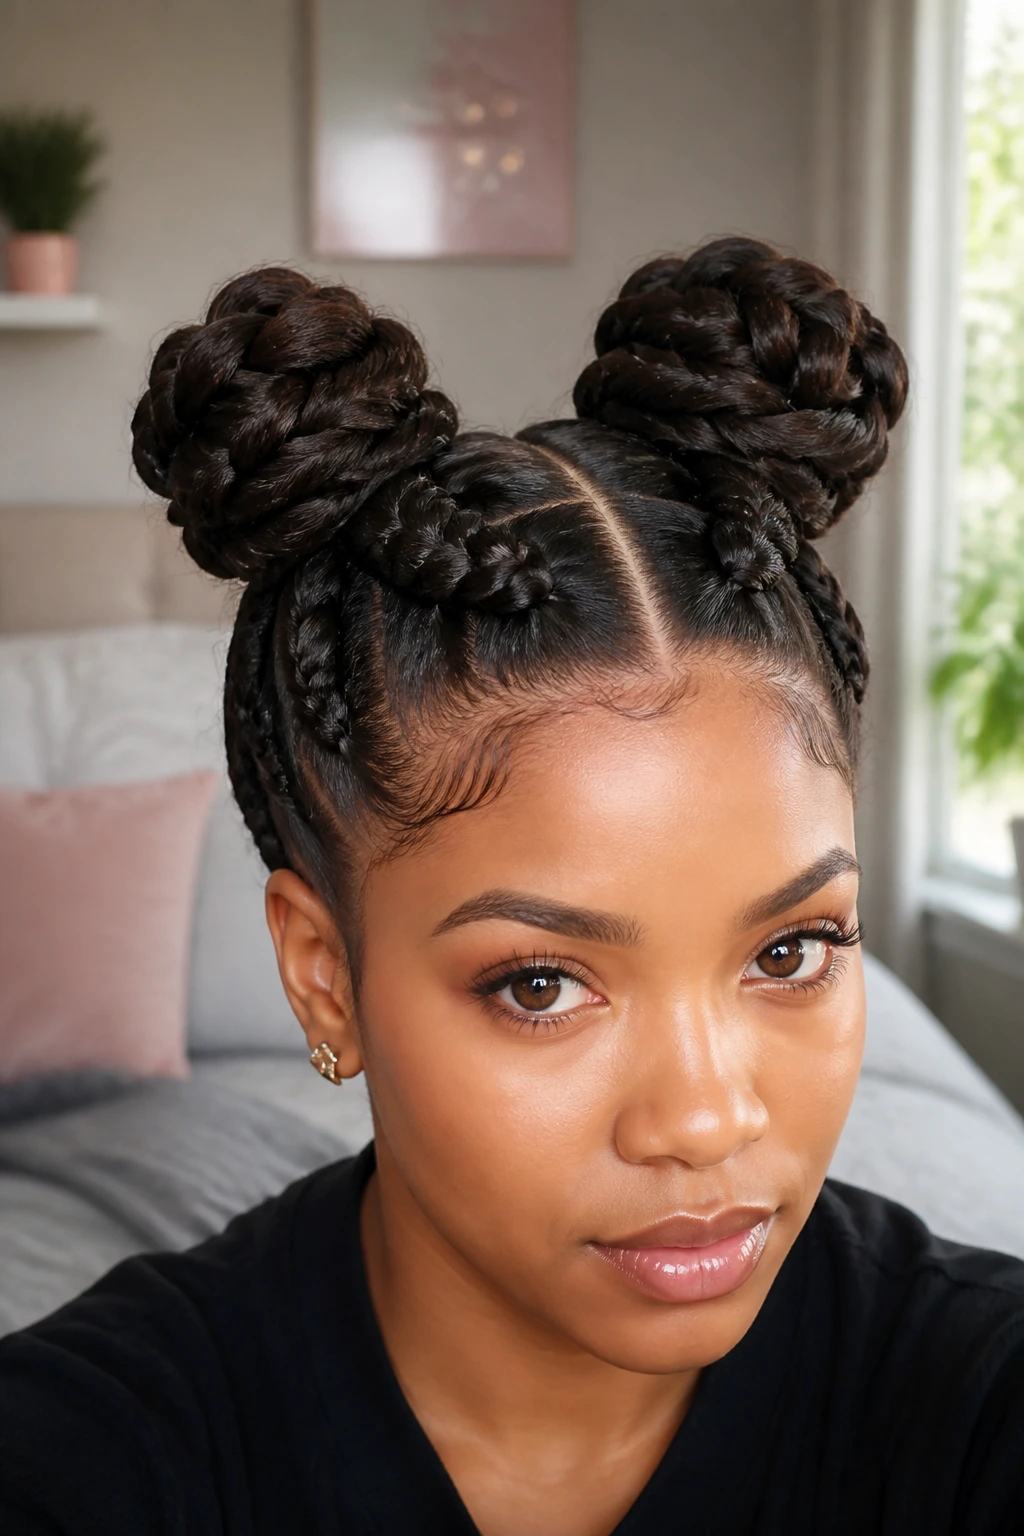
Space buns turn double braids into something more secure and more playful at the same time. Braid each side down, then coil the lengths into two buns near the crown or just above the ears.
On thick hair, this works because the braid removes some of the surface puff before the bun takes over. The buns stay round and full instead of collapsing into little knots. That fullness is the point. Thin hair can’t fake it.
Use pins that grab well, and don’t twist the buns too tightly. Thick hair already wants to sit big; forcing it into tiny spirals only creates pressure and loose ends.
21. Beaded Double Braids
Beads change the sound, the weight, and the finish. They’re not just decoration. A few beads at the ends can help the braid hang more neatly, especially if thick hair tends to spring outward once it’s banded.
Pick beads with a hole wide enough for your braid thickness. That sounds obvious, but it’s the step people skip and then spend ten minutes fighting plastic that won’t go over the tail. Wood beads, matte acrylic, and metal cuffs all behave differently, and thick hair usually needs something a little wider and a little sturdier.
A few beads go farther than a pile of them. Too many can drag at the ends and make the braid pull strangely.
22. Curved-Part Double Braids
A curved part gives double braids a softer start and a more custom feel. Instead of drawing a straight line down the middle, the part bends slightly around the crown before splitting into the two braids. The shape can flatter a strong cowlick, offset facial symmetry, or just make the style look a little less expected.
This is one of my favorites for thick hair because the curve helps direct bulk where you want it. If one side of your hair is denser, the arc can balance the visual weight instead of exposing it.
A Small Detail, A Big Difference
Use the tip of the comb and follow the natural fall of your hair. Fighting the growth pattern usually means the part will drift later anyway.
Why Double Braids Stay Put Better Than Loose Styles
Thick hair is both a gift and a handful. Loose waves look good for an hour and then need rescuing. Double braids behave differently because they compress the bulk into two controlled lines, and that compression is the whole trick. The hair has less room to expand, so frizz shows up later and movement looks intentional rather than messy.
The style also spreads weight more evenly. A single braid can feel like one long anchor dragging from the crown. Two braids split that load. Less tugging at the scalp. Less sag at the nape. Less of that weird half-loose, half-tight feeling that thick hair gets when it’s been gathered into one heavy tail.
The best versions here are the ones that use the hair’s density instead of trying to erase it. That means clean parting, modest product, and ends that are secured with something better than hope.
The Tools That Make Thick-Hair Braiding Easier
-
Rat-tail comb: Clean parting matters more on thick hair because a crooked part turns into a lopsided braid fast.
-
Detangling brush or wide-tooth comb: Work through knots before you braid. Thick hair hides tangles under the surface, and they’ll show up as bumps later.
-
Sectioning clips: Clip one side away while you work the other. It keeps the mass from swallowing your hands.
-
Water spray bottle: A light mist helps control flyaways. Don’t soak the hair unless you want the style to dry forever.
-
Styling cream or leave-in conditioner: Use a small amount for slip and softness, especially through mids and ends.
-
Non-flaking gel or edge control: Good for the hairline and part. Bad if you use half a palm of it.
-
Snag-free elastics: Thick hair snaps weak bands all day long. Buy the stretchy, coated ones.
-
Satin scarf or bonnet: Not optional if you want the style to last past sleep.
Prep Products and Sectioning Tricks That Pay Off
Thick hair usually needs less product than people think at the lengths and more at the roots. That sounds backward until you’ve watched a braid turn gummy because someone coated the ends like they were frosting a cake. The roots need grip. The mids need slip. The ends need restraint.
A lightweight cream or leave-in through damp hair helps the sections behave, but stop before the hair feels slippery. If your hands slide straight off the strands, you’ve gone too far. A mousse at the roots can also help the braid hold shape without adding stiffness that flakes later.
Sectioning is where the whole style gets won or lost. Work with smaller subsections at the front than you think you need, especially around the temples and the crown. Thick hair makes everything look fuller than it is, so tiny adjustments there matter. If one braid starts stealing too much mass from the other, stop and reset. The fix takes one minute at the beginning and saves twenty at the end.
A good comb is worth more than a second mirror. Clean lines make thick hair look intentional. Messy lines make it look like you rushed.
How to Wear Double Braids Without Fighting Your Hair
Best for: days when you need the hair secured but still want some shape at the sides. Thick hair looks especially good in braids that keep the crown tight and the ends tucked.
Pair with: hoop earrings, a denim jacket, a hooded sweatshirt, or a scarf tied low at the neck. The braids leave the neckline open, which makes simple accessories stand out without much effort.
Fit for length: shoulder-length layered hair does well with French and lace versions; waist-length hair usually looks better in Dutch, feed-in, or tucked low-knot finishes because the ends need control.
Wear it where: school, work, travel, the gym, or any place where you’d rather not keep pushing hair off your face. The styles here hold up best when they’re allowed to stay a little snug at the root.
A detail people miss: double braids can look dressed up just by changing the part. Center parts read cleaner. Side parts feel softer. Curved parts and zigzags make the same braid look like a different style entirely.
Additional Tips and Style Boosters
Texture Boost: If your hair is freshly washed and too slippery, mist the roots with a light texturizing spray or dry shampoo before you start. Thick hair often needs a little grip, not more oil.
Edge Detail: A neat hairline makes these styles look sharper, but you do not need to shellac the edges flat. A toothbrush-sized edge brush and a touch of gel are enough.
Accessory Swap: Change the feel of the same braid with one ribbon, a handful of cuffs, or a few small beads at the ends. You don’t need a full redesign to make the style feel fresh.
Volume Control: If the braid is getting too wide, pull the outer edges gently after you finish. That gives a fuller look without making the root tension worse.
Time Saver: Do the part and first section on one side, then mirror it on the other. Trying to fully braid one side before touching the second side usually makes the finish uneven.
Common Mistakes That Make Thick Hair Braids Fall Apart
The first mistake is overloading the roots with product. Thick hair does need control, but a heavy layer of cream or oil at the crown turns the braid slippery and makes it slide. Use enough to calm frizz, not enough to coat the scalp.
Another problem is starting with sections that are too big. That sounds efficient. It isn’t. Huge sections make the braid bulky at the top and leave less structure to hold the style later. Smaller, even additions give a cleaner line and better hold.
Pulling too hard is another one. A tight braid is not the same thing as a good braid. If your scalp hurts before the braid is finished, it will probably loosen in odd places because the tension is uneven. Firm hands, not brute force.
Skipping the ends causes trouble too. Thick hair ends puff, snag, and dry out fast. If you leave them loose or rely on one tiny elastic, the whole style starts looking unfinished by midafternoon. Tuck, twist, wrap, or band them with intention.
Sleeping on rough cotton while the braids are still damp is a quiet disaster. The moisture lingers at the roots, the surface frizzes, and the style can smell a little stale by morning. Dry the hair first. Then cover it.
Ways to Change the Look Without Starting Over
The Sleek Switch: Keep the roots polished with gel and leave the braid tails matte and soft. That contrast looks sharper than coating the whole head in product.
The Loose-Weekend Version: Start the braid tightly at the scalp, then gently widen the plaits through the lower lengths. Good when you want body but not helmet hair.
The Decorated Finish: Add ribbon, cuffs, or beads only to the last third of the braid. That keeps the style wearable instead of turning it into a costume.
The Tucked Finish: Coil the ends into knots, low buns, or a wrapped ponytail if your hair is very long or if collar friction tends to wreck the shape.
The Protective Version: Braids that stay close to the scalp and end in a tucked tail are the ones I’d pick when the goal is less rubbing, fewer tangles, and easier sleep.
How to Keep Double Braids Looking Fresh for Days
Thick hair usually gives you a little more room here. If the style is clean at the roots and set with modest product, double braids can often hold 2 to 4 days before they start looking fuzzy enough to bother you. Satin matters. A bonnet or scarf keeps the parts from rubbing flat and slows down the halo of frizz around the hairline.
If the scalp gets oily, a puff of dry shampoo at the roots works better than wetting the whole style and starting over. Lift the braid slightly, aim the spray at the part, wait a minute, then massage it in with your fingertips. That keeps the ends from turning soggy.
For sleep, tuck the lengths forward if they’re long enough to press under your neck, or pin them low and loose so they don’t get kinked. If a braid loosens near the temple, re-braid just that section rather than taking the whole style down. Most of the time, the front is the first part to slip.
Wash the style out sooner if the scalp feels tender, the roots smell musty, or the product starts building up around the hairline. Thick hair can hide those warning signs longer than fine hair can. Don’t let that fool you.
Adaptations to Try When You Want a Different Finish
Low-Drama Office Braids: Stick with French pigtails or soft Dutch braids, keep the tension medium, and skip heavy accessories. They read neat without looking too styled.
High-Impact Weekend Braids: Try boxer braids, zigzag parts, or pulled-out fishtails. The extra texture and parting detail give the style more personality.
Protective Tucked Braids: Use feed-in or cornrow-front starts, then tuck the ends into buns or low knots. That keeps friction down and helps thick ends stay contained.
Accessory-Heavy Braids: Add ribbon, cuffs, or beads only after the braid is fully secure. Thick hair can carry the extra weight, but the extras should never pull at the root line.
Stretch-Friendly Braids: If your hair is layered or a little shorter than you’d like, start with tight roots and finish with a looser braid or twist. It buys you length without making the style look forced.
Questions People Ask Before Trying These Braids
Can thick hair really hold double braids all day?
Yes, and often better than finer hair. The braid ridges have enough body to stay defined, but the roots need a clean start so the style doesn’t sag by midday.
Should I braid thick hair wet or dry?
Dry or lightly damp is safer for longevity. Soaking wet hair takes forever to dry in the middle of a braid, and the style can feel swollen or stale before you even take it out.
What if one side has more hair than the other?
That happens all the time with thick hair. Use the side with more density as the heavier anchor and keep the braid tension slightly lighter on that side so the style doesn’t twist off-center.
Do these styles work with layers?
Yes, but the shorter pieces need help. French braids, feed-in braids, and cornrow-front starts are the most forgiving because they catch the layers earlier.
How do I keep the part straight?
Use the tail of a rat-tail comb and trace the line before you start braiding. If your hair wants to shift, clip both sides away and check the line in a second mirror before you commit.
Can I add extensions or braid hair for more length?
Absolutely. Extensions can help if your natural hair is very dense but not quite long enough for a long tail, and they can make the ends look smoother. Match the added hair’s texture as closely as you can.
How tight should the braid be at the roots?
Firm, not painful. You want the braid anchored close to the scalp, but if you feel pulling at the temples or behind the ears, loosen it and start that section again.
What if the braid keeps puffing up?
You probably need more root grip and better end security. Add a light mousse or texturizing spray before braiding, then finish with tucked ends, a small elastic, or a wrapped tail so the last inches don’t unravel.
Braids Worth Repeating
Double braids earn their keep on thick hair because they do what loose styles usually fail to do: they respect the weight, hold the shape, and keep the whole head looking controlled without flattening it into nothing. That matters more than perfect symmetry, and more than a glossy finish that falls apart an hour later.
The best version is the one that matches your density and your day. Tight roots for the gym. Tucked ends for long commutes. Ribbon or beads when you want the style to look deliberate. Once you get the parting right and stop fighting the bulk, thick hair starts working for you instead of against you.
Pick one braid this week and wear it long enough to see how your hair behaves by hour six. That tells you more than any photo ever will.