Photoshoot hairstyles for women over 50 live or die on one thing: shape. Not trendiness. Not a mountain of hairspray. Shape. A camera flattens hair fast, especially around the crown and temples, so the styles that work best are the ones with a clean silhouette, a little lift, and enough movement to catch light without turning frizzy or stiff.
That’s why a style that looks “nice” in the mirror can fall apart the second a lens gets involved. The flash finds flat roots. Side parts can go limp. Over-curling can make the whole look read old-fashioned in the worst way. The good news: a flattering photo hairstyle does not have to be complicated, and it doesn’t have to hide silver, texture, or age lines to look polished.
The best looks here do a few simple jobs well. They open the face, keep the neck from disappearing into the hair, and hold their outline for an hour or more without constant fussing. Some are sleek, some are soft, and some lean into natural texture. All of them can look elegant in a portrait, flattering in a headshot, and believable in real life.
Why These 18 Styles Work So Well on Camera
-
Crown lift changes everything: Even an inch of volume at the top keeps the head from looking wide or heavy in a front-facing shot.
-
Soft edges beat hard lines: Loose tendrils, face-framing pieces, and brushed-out waves soften the jaw and cheeks without hiding them.
-
Movement reads better than stiffness: Hair that bends a little when you turn your head catches light in a way that sprayed-tight styles never do.
-
Neckline matters as much as the haircut: A bun, chignon, or tucked style keeps the eye on your face and earrings instead of letting hair swallow the collar.
-
Texture is your ally: Silver strands, natural curls, and layered cuts can look richer on camera than perfectly smooth hair, as long as the finish is intentional.
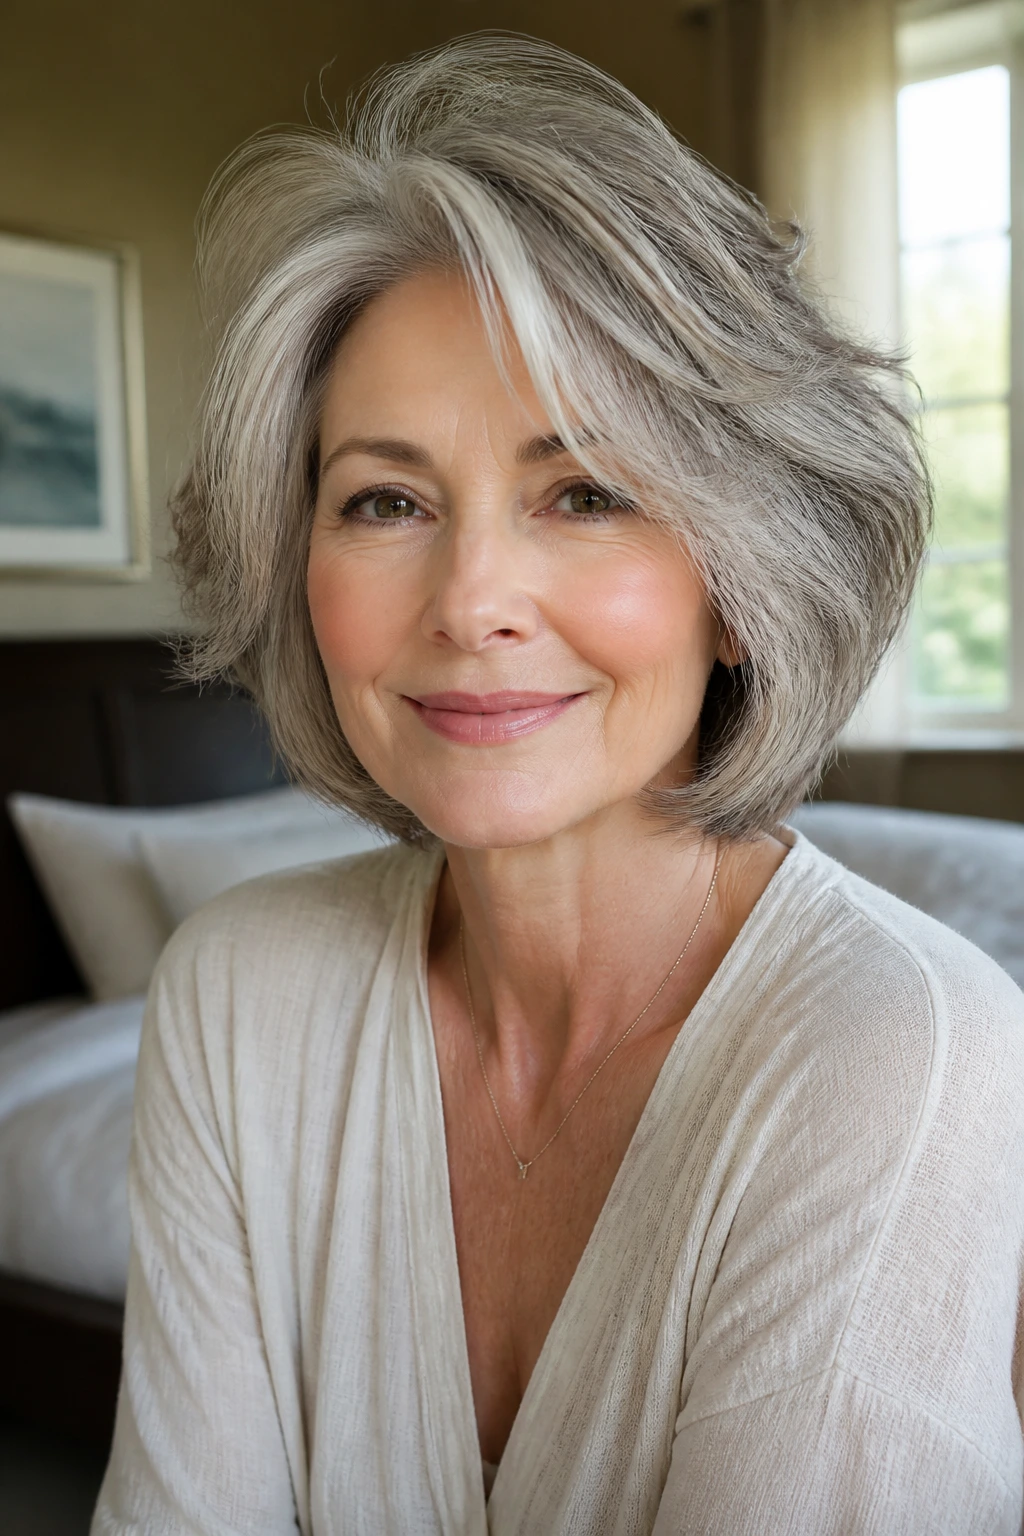
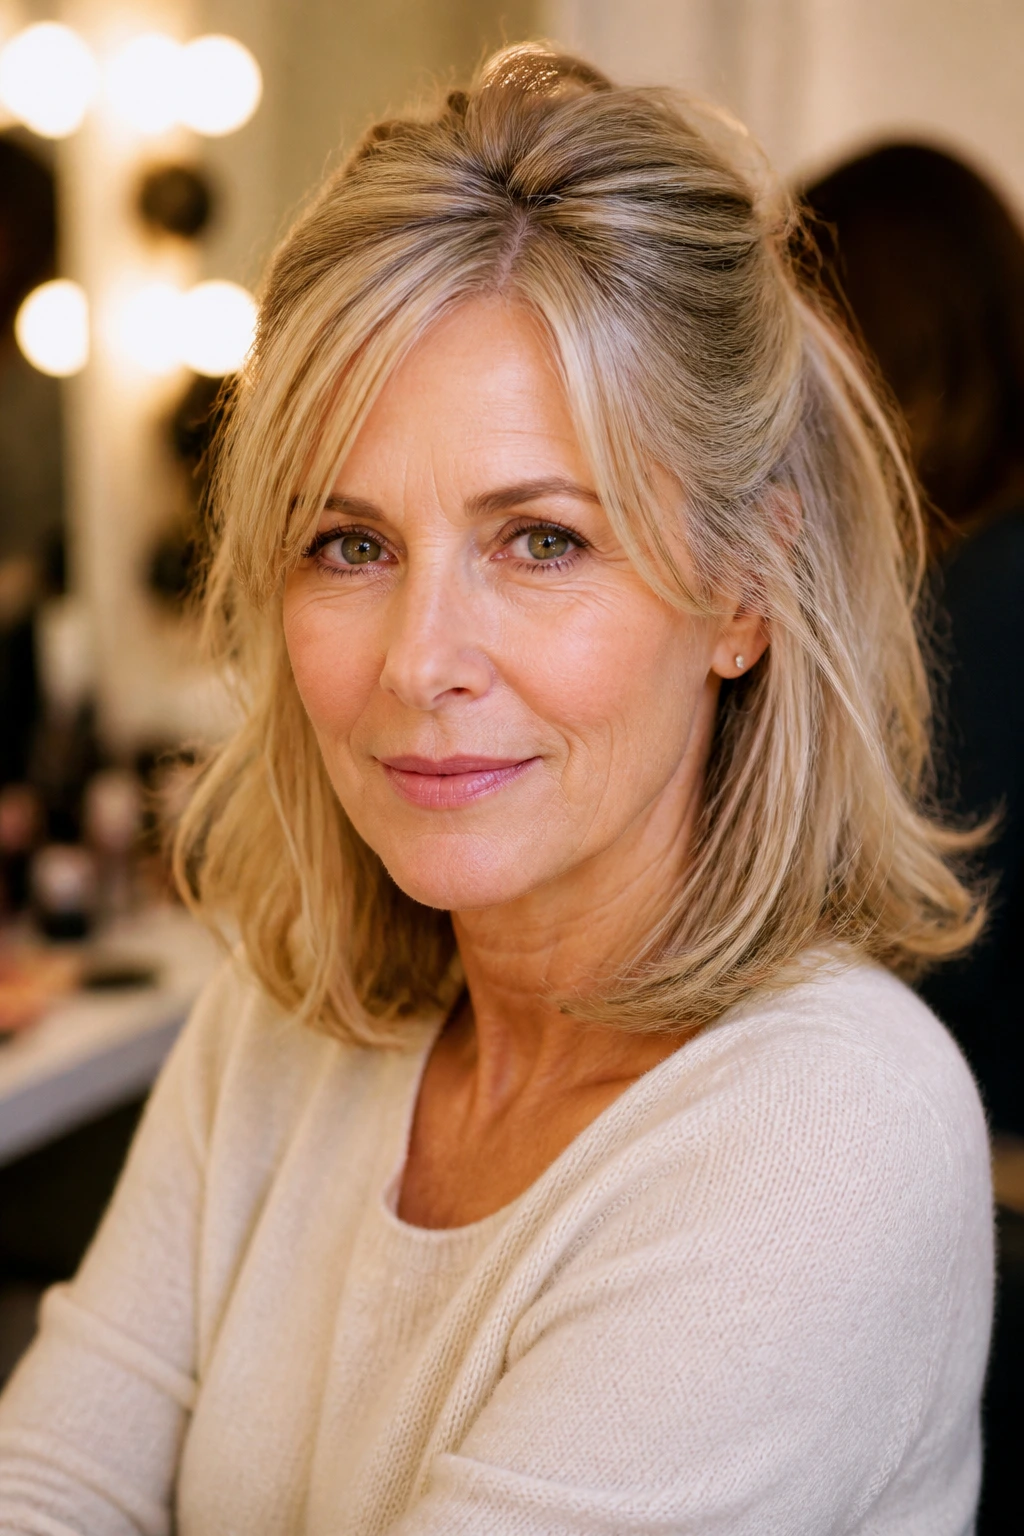
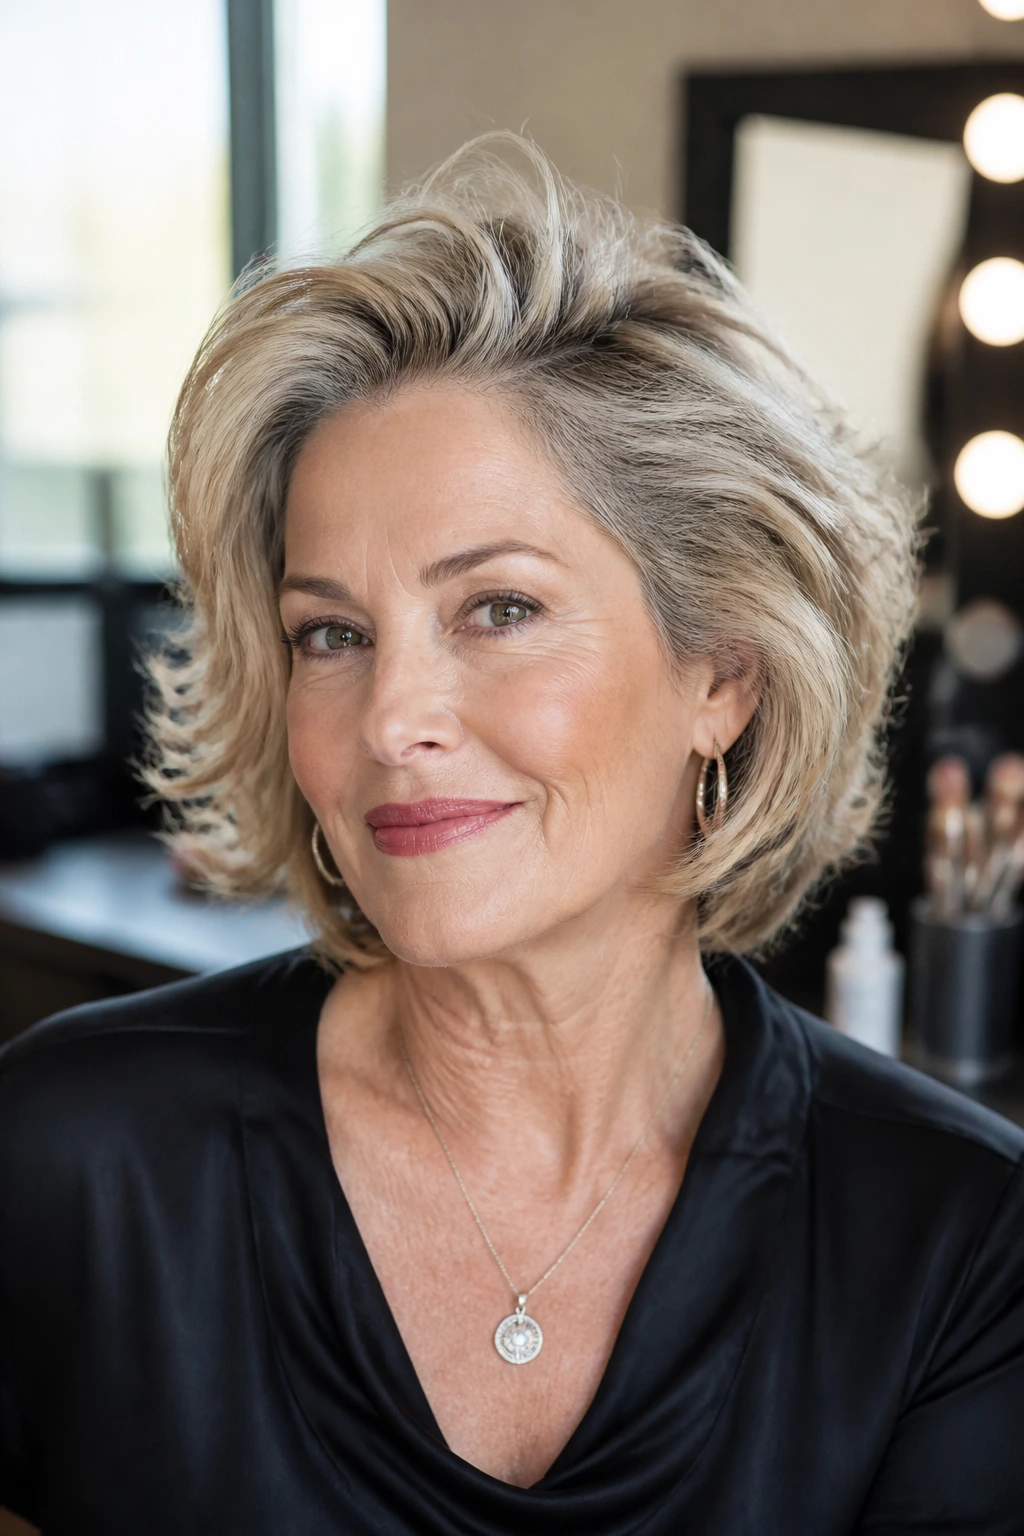
1. Soft Shoulder-Grazing Blowout
This is the style I reach for when the goal is “expensive but not fussy.” The ends skim the shoulders, the top has just enough lift to avoid a flat helmet shape, and the whole thing moves when you turn your head. It works especially well on medium-length hair with layers because the layers keep the blowout from looking heavy in front-facing shots.
Why It Reads Cleanly on Camera
A shoulder-grazing blowout gives the camera a clear outline without turning your hair into a stiff shape. The trick is to keep the root lift subtle and the ends soft, not curled into little sausages. Use a medium round brush, dry each section until it’s fully smooth, then bend the ends under just a touch.
A 1½-inch barrel or a round brush the same size is usually enough. Bigger than that and the wave disappears into the background. Smaller than that and the style starts to look too busy. For portraits, I like a side part that’s not severe and a few pieces around the cheekbones.
Quick Styling Notes
- Blow-dry in 2-inch sections for smoother results.
- Finish with a light serum only on the mids and ends.
- Flip the head once, mist, then flip back so the crown doesn’t go limp.
Best for: Shoulder-length hair, fine-to-medium texture, and anyone who wants polish without an updo.
2. Low Chignon With a Side Sweep
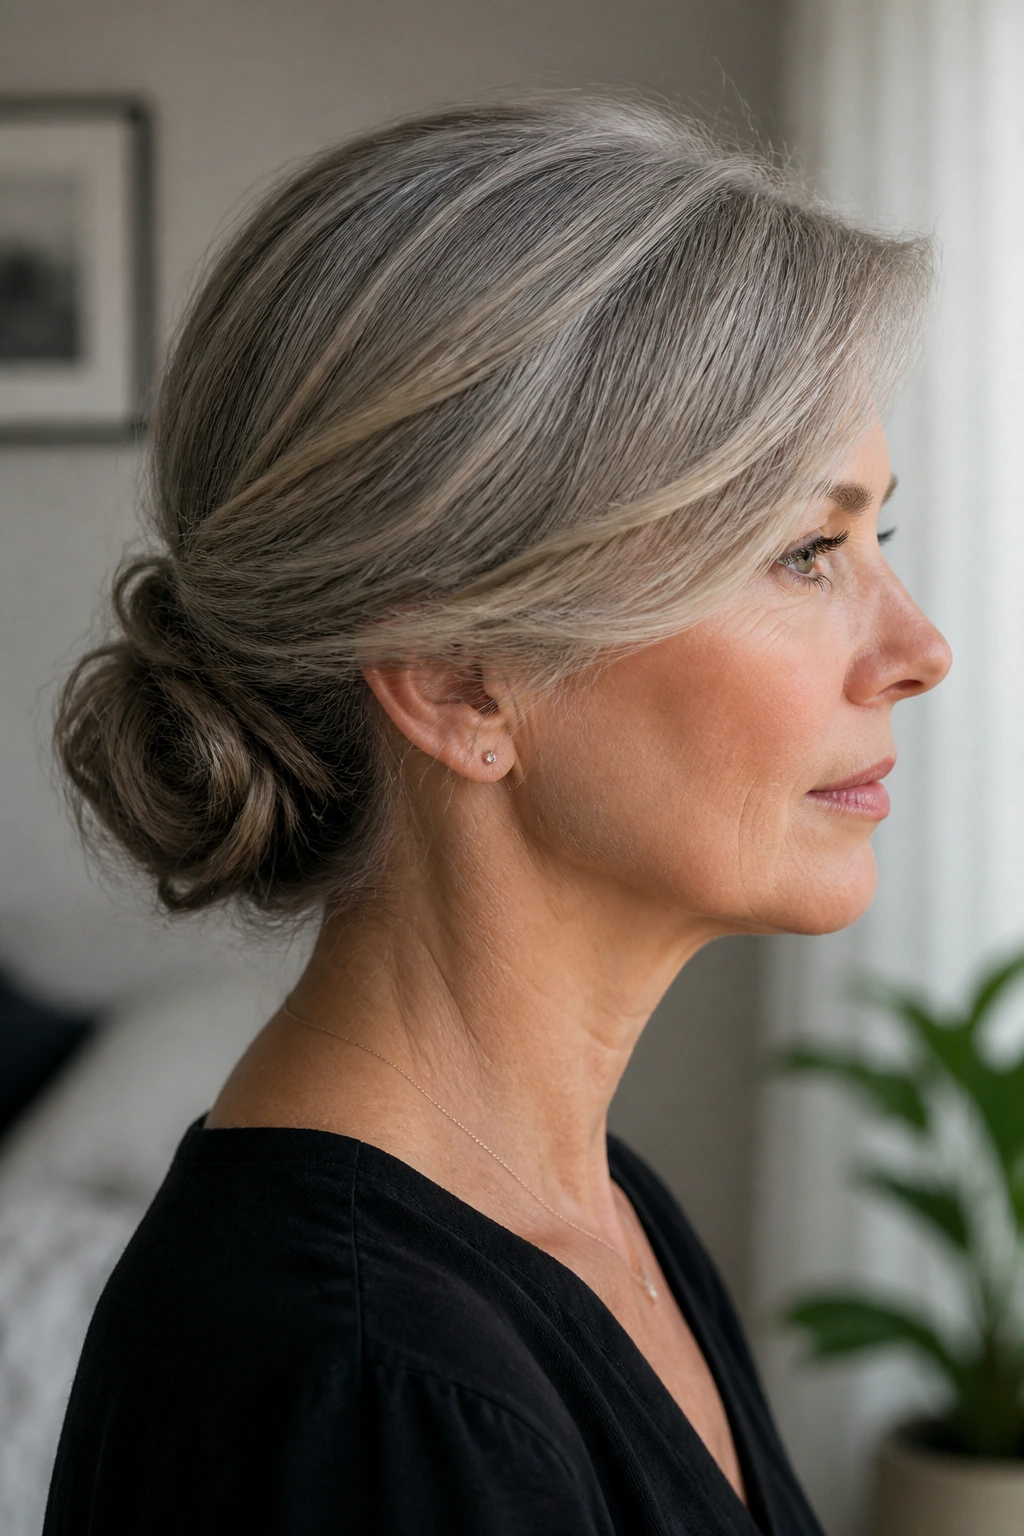
A low chignon is one of those styles that quietly does the most work. It clears the face, keeps the neck open, and gives earrings room to matter. Add a side sweep across the forehead and it softens the whole look so it doesn’t feel too strict or bridal.
The best version sits at the nape, not high on the head. High chignons can look too formal for a casual portrait, while a lower knot feels grounded and a little more modern. I prefer a chignon with texture through the twist rather than a super-smooth bun, because a tiny bit of looseness stops it from reading severe.
If your hair is layered, prep with texture spray and pin the shortest pieces underneath the twist. If it’s finer, tease the crown lightly before gathering the hair back. The goal is not height for the sake of height. The goal is shape.
3. Textured Lob With Loose Movement
Why does the lob show up in so many flattering portraits? Because it sits in that sweet spot between short and long. It gives you enough length to curl, wave, or tuck, but it doesn’t drag the face down the way very long hair sometimes can in close-up shots.
This version works best when the bends are soft and uneven in a good way. A few pieces can brush the collarbone, a few can flip out a little, and the ends should never look frozen into one line. Use a 1-inch curling iron, wrap away from the face, then comb through with your fingers. That “slightly imperfect” finish is the whole point.
What to Ask Your Stylist for
- Collarbone length with invisible layering.
- A bit of movement around the front.
- Ends that can be curled or flipped without puffing out.
Best for: Women who want something modern, versatile, and easy to refresh between outfit changes.
4. Polished Straight Hair With Tucked Ends
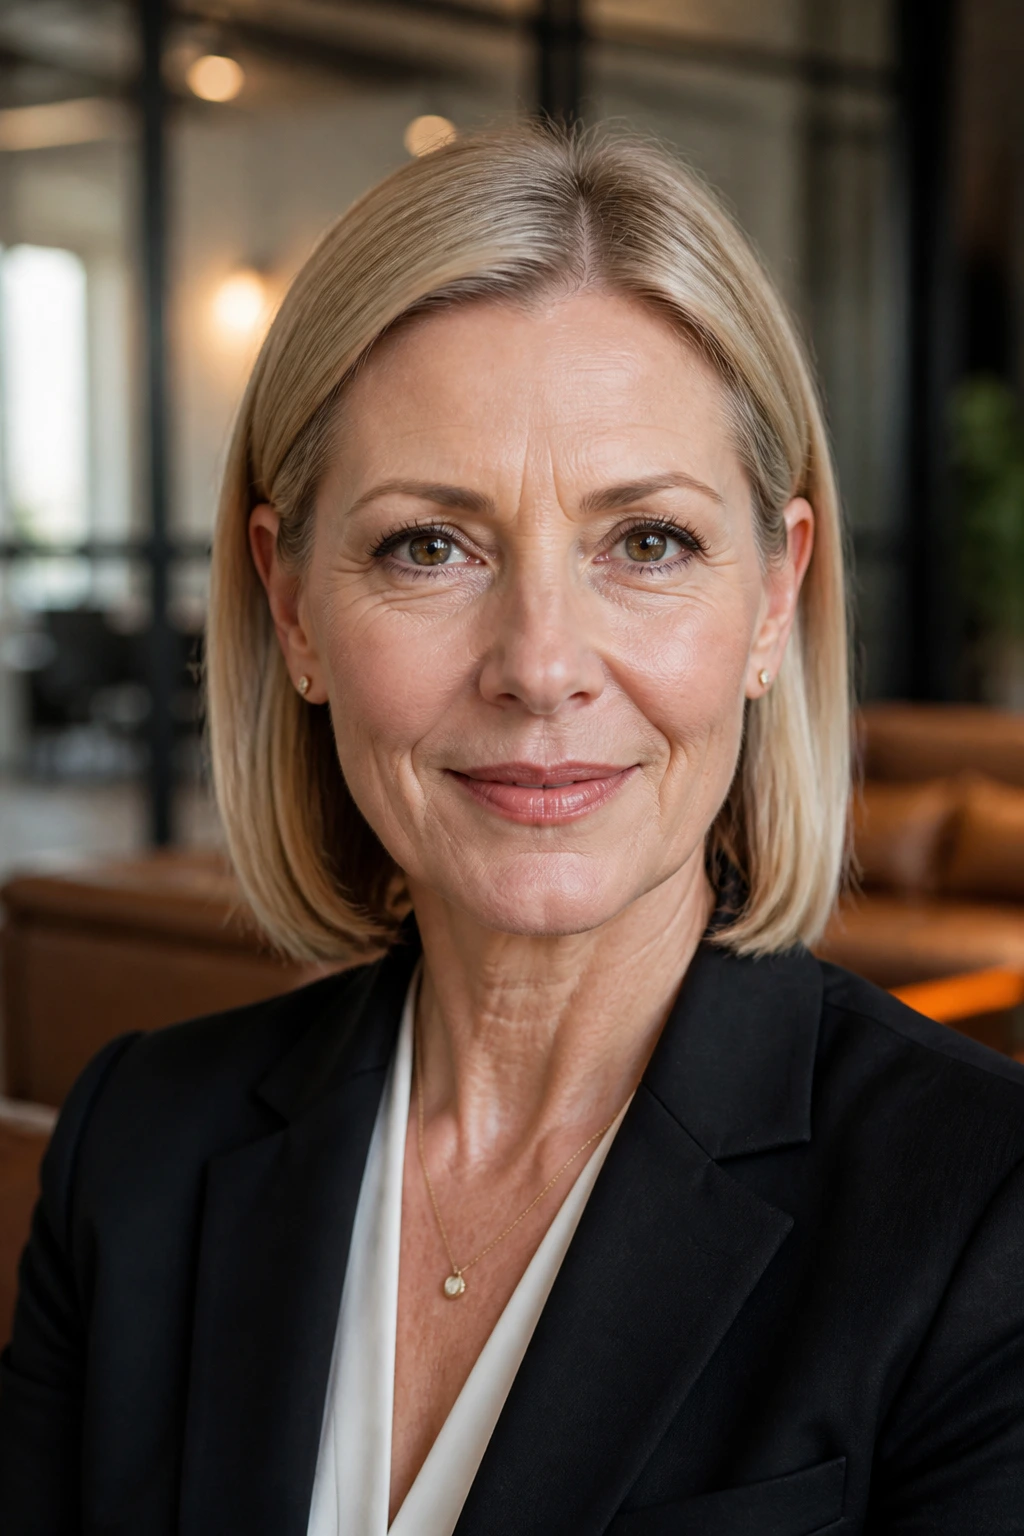
Straight hair has a reputation for being plain, but in photos it can look sharp and expensive when it’s done with intention. The key is not pin-straight flatness; it’s clean lines, a smooth crown, and ends that curve inward just enough to frame the jaw.
This is the style that works when the outfit is structured — a blazer, a boatneck, a crisp blouse, anything with a clean line at the shoulders. The hair should echo that shape instead of fighting it. Use a heat protectant, a paddle brush, and a flat iron in small sections. Then tuck one side behind the ear or both sides if you want the face to carry the frame.
It’s a calm look. Almost severe, if you want it to be. That can be a strength.
5. Hollywood Waves With a Deep Side Part

Hollywood waves bring drama, but not the heavy, shellacked kind. The good version is brushed out, glossy, and sculpted enough to catch the light without hard edges. A deep side part gives the face a little asymmetry, which is handy in portraits because it keeps the image from feeling too centered and static.
Start with a 1¼-inch curling iron and create uniform curls away from the face. Let them cool completely before brushing them into a wave pattern. If you skip the cooling step, the style collapses into a vague bend that looks tired instead of elegant. A shine spray at the end helps silver or highlighted hair look rich, not dull.
This style loves side-swept earrings and open necklines. It also has a slightly old-movie mood that can be stunning for formal portraits.
6. Half-Up Crown Lift
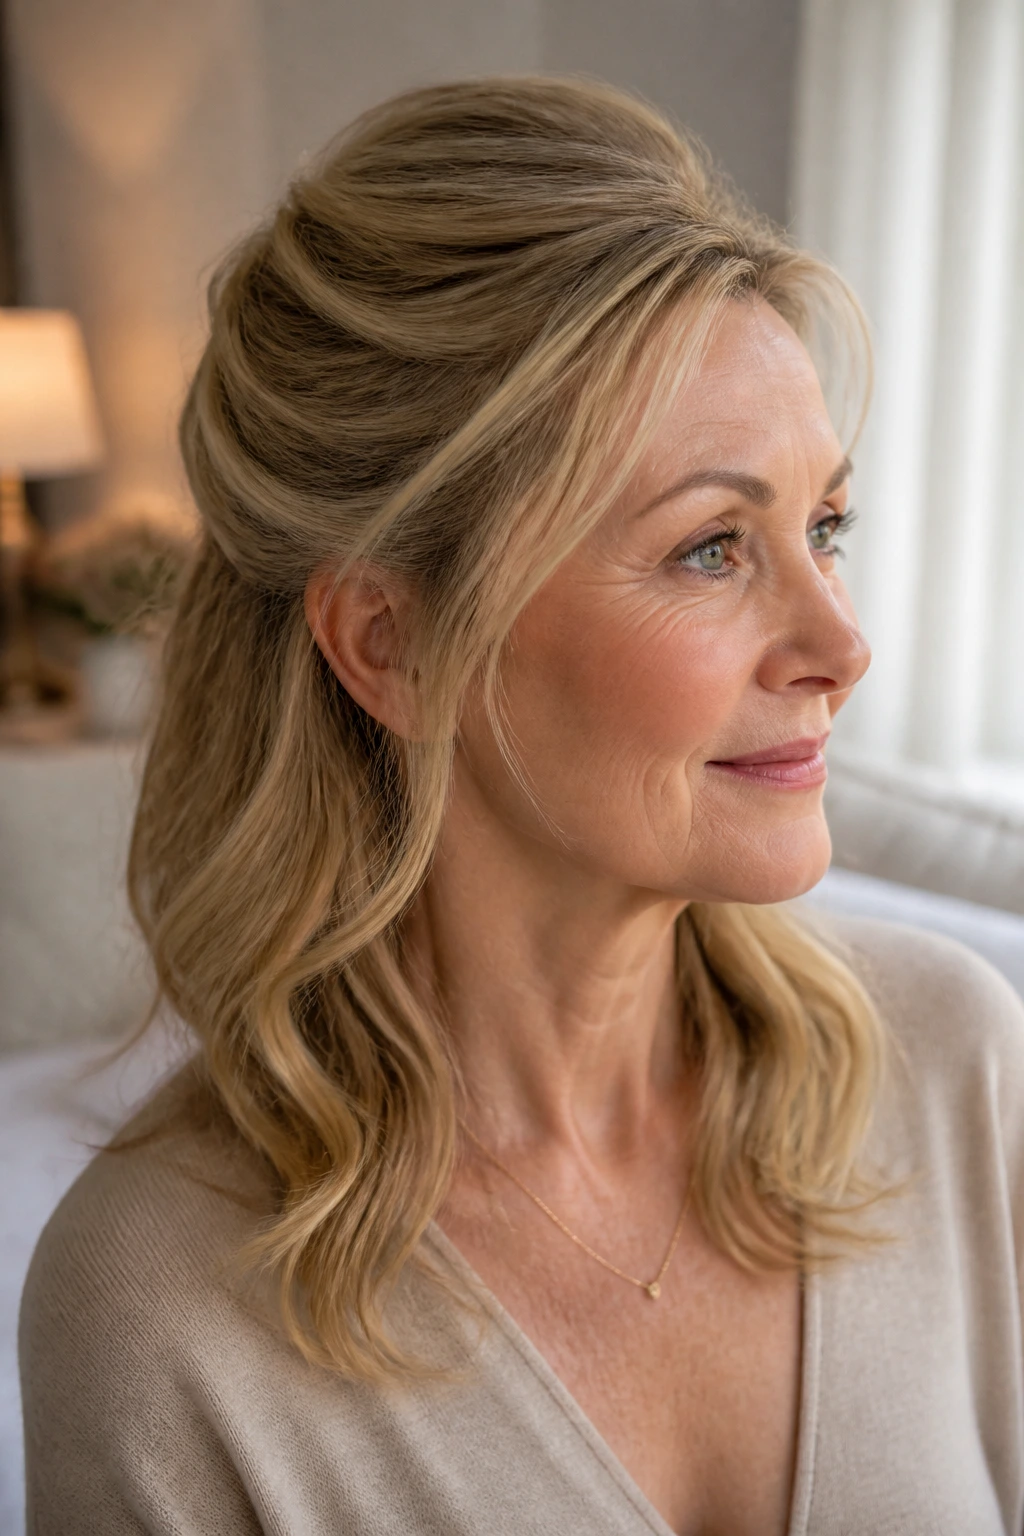
Half-up styles are underrated for photos, and I think that’s partly because people go too cute with them. The strong version is cleaner: lift the crown, pull back just enough hair to open the face, and leave the lower half soft, brushed, or lightly waved. You keep the length, but you gain height where the camera wants it most.
The crown lift matters. A lot. Even a small tease at the roots, covered by the top layer, can stop the head from looking flat in front. Use a small claw clip or a few hidden pins, then smooth the top with a tail comb. The lower half can be curled with a loose barrel or left naturally straight if it has enough body.
A Simple Way to Make It Better
- Curl only the bottom half of the hair.
- Pull the top section back at the temples, not too far.
- Leave a few face-framing pieces if your features benefit from softness.
7. Cropped Pixie With a Side-Swept Fringe
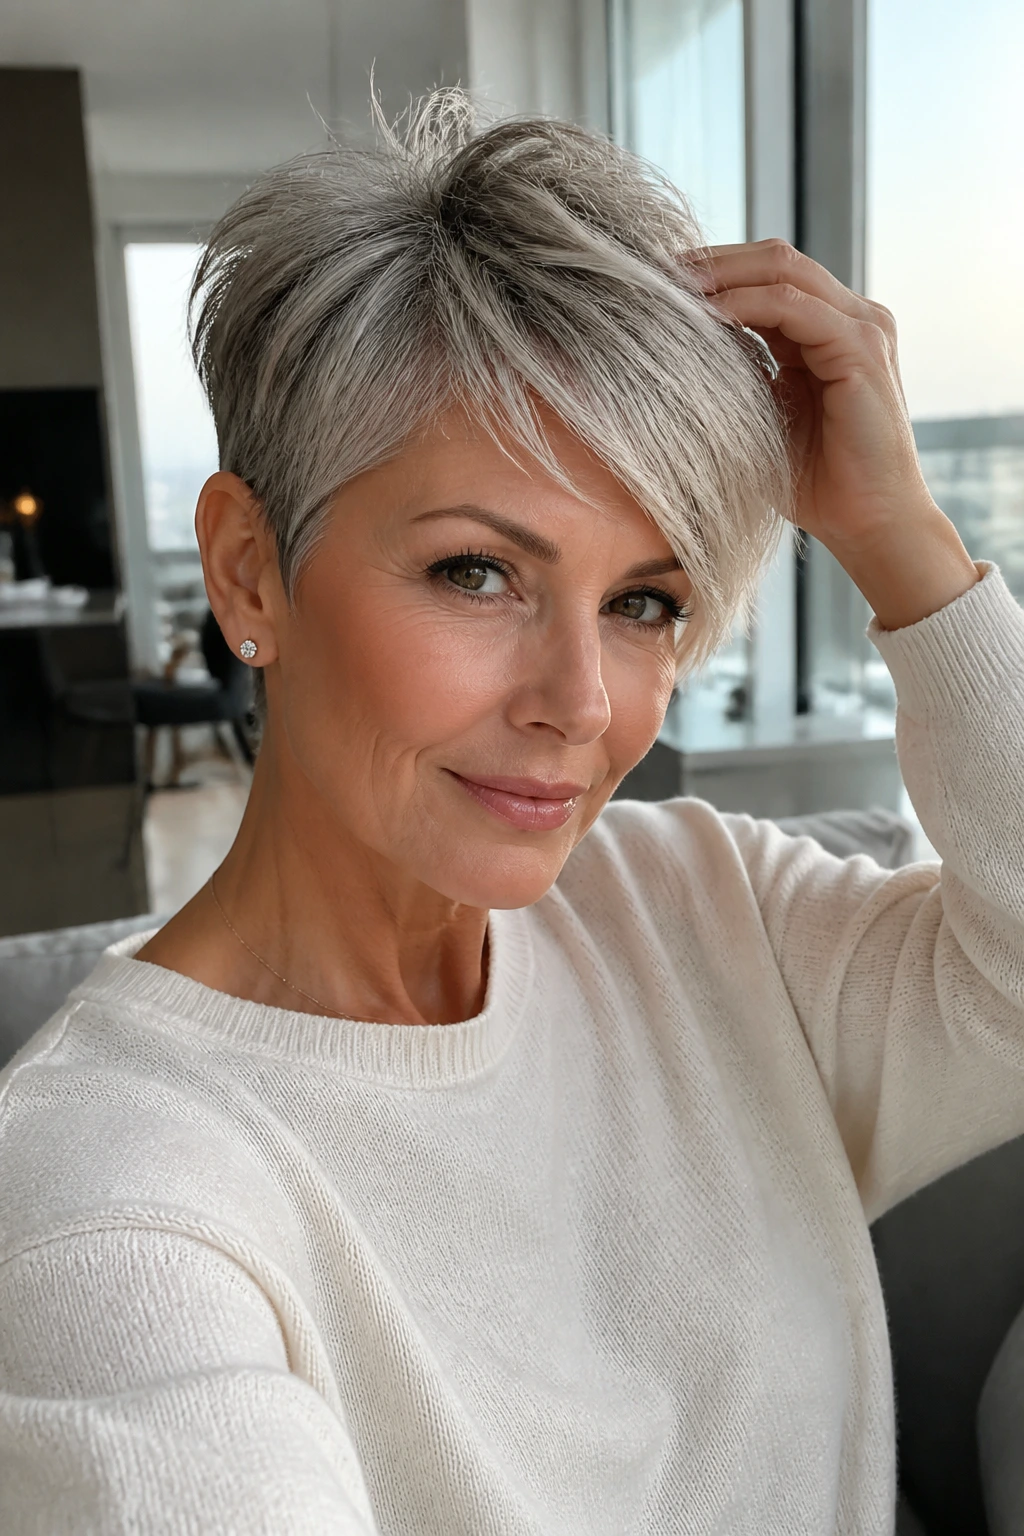
A pixie can be one of the most flattering photo hairstyles of all, mainly because there’s nowhere for the shape to hide. The cut puts the attention exactly where you want it: the eyes, the cheekbones, the mouth. Add a side-swept fringe and you get movement without losing the clean line of the crop.
The mistake people make with pixies is over-styling the top until it looks crunchy. Use a pea-sized amount of styling cream or matte paste, warm it in your palms, and work it through the fringe first. Then push the front slightly to one side and lift the crown with your fingers, not a brush. A little separation is better than a smooth cap.
This style is strong in black-and-white portraits because the shape stays crisp. It also makes earrings and collars easier to read.
8. Braided Crown Into a Low Knot
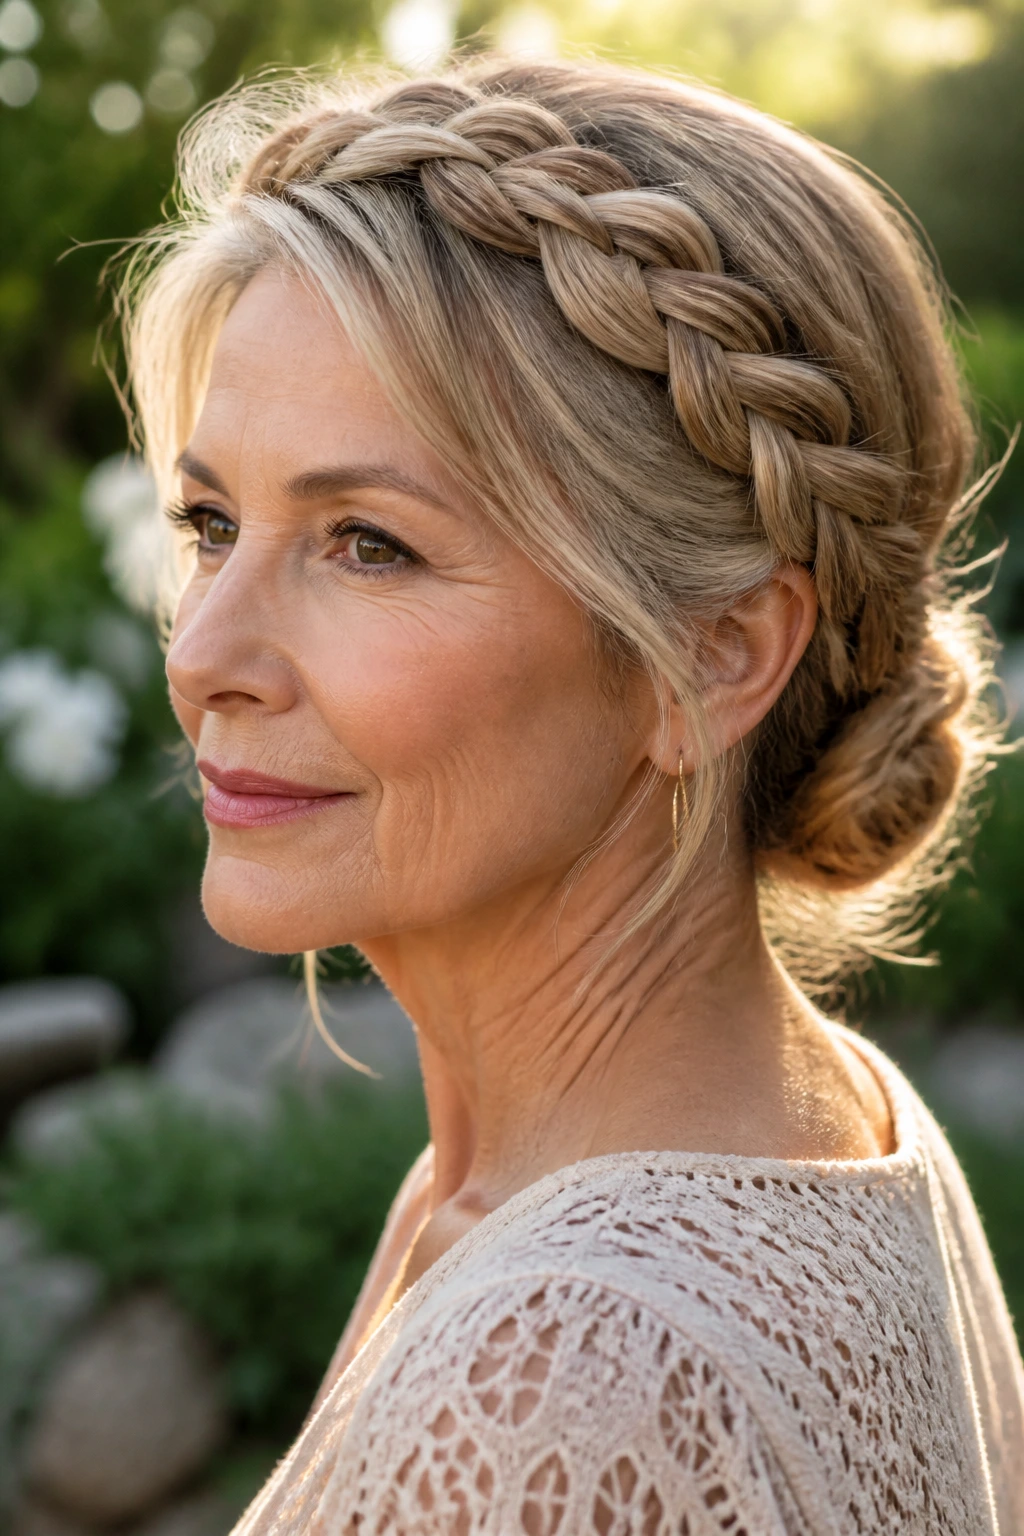
If you want something with a little romance but not a lot of fuss, a braided crown into a low knot does the job. The braid adds detail around the face, while the knot at the nape keeps the style controlled. It’s especially good for outdoor shoots, garden settings, and anything with a softer wardrobe palette.
The braid does not need to be perfect. In fact, a braid that’s pulled apart slightly tends to photograph better because the texture shows up more clearly. Once the braid is pinned into the knot, tug the crown very gently with your fingertips to create a bit of lift. Not much. Just enough to stop the head from going flat against the background.
This style loves earrings, soft sleeves, and natural light. It can go too sweet if you tighten every strand, so leave a little air in it.
9. Wrapped Low Ponytail
A low ponytail can look plain if it’s done lazily. Wrapped correctly, though, it becomes one of the cleanest photo-ready styles around. The wrapped section hides the elastic, the crown stays smooth, and the tail can hang straight, wave softly, or curve at the ends depending on the mood you want.
I like this look when the outfit already has texture — silk, lace, knit, anything that needs a simpler hair shape. Keep the ponytail low and just off-center or directly at the nape. If the hair is thick, secure it with a strong elastic first, then wrap a small section of hair around the base and pin it underneath.
The finish should not be stiff. A gentle bend through the tail keeps the style alive. Flat ponytails can look tired in portraits, and that’s not the goal here.
10. Collarbone Layers With Flipped Ends
This one has a little swing to it. Collarbone layers with flipped ends give you a shape that reads from across the room and up close, which is useful in shoots where you move between posed shots and candid ones. The flipped ends feel playful without becoming dated, especially when the rest of the hair is smooth and controlled.
Use a round brush or a flat iron to turn the ends away from the face. The flip should be soft, almost casual, not a dramatic 1960s kick. A side part works well here, though a soft center part can also look good if the face is naturally symmetrical and the layers are balanced.
This style is a good reminder that motion matters. Hair that changes shape as you turn looks more alive in photos than hair that never moves.
11. Curly Halo With Defined Shape
Natural curls deserve their own lane here, not a watered-down version of straight hair. A curly halo works because it honors the curl pattern while giving the face a cleaner edge. The shape should be round but controlled, with enough lift at the crown to keep the hair from collapsing into the cheeks.
The prep is everything. Use a curl cream or gel while the hair is damp, then diffuse or air-dry until the curls are fully set. Once dry, separate only the larger clumps with oiled fingertips. If you rake through too much, you lose the definition that makes the style photograph well.
I like this look for portraits because it brings texture into the frame in a way that feels deliberate. Silver curls, especially, can look striking when the ringlets are defined and the edges around the face are cleaned up a little.
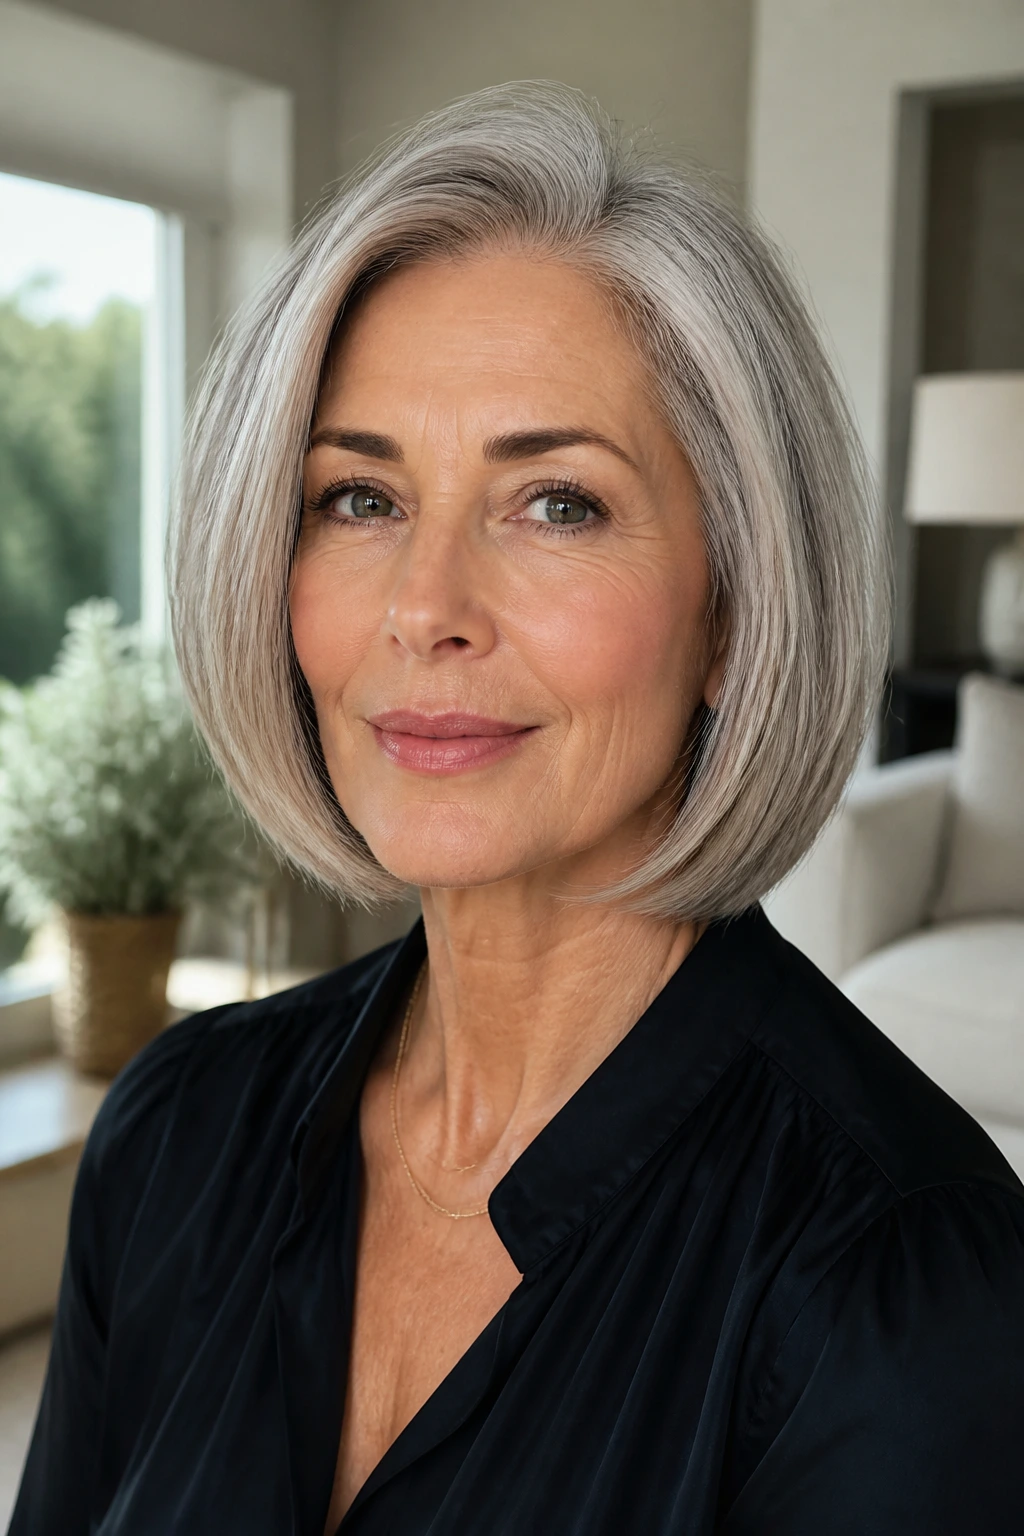
12. Sleek Bob With a Sharp Line
A sleek bob is blunt in the best sense of the word. It gives the camera a strong perimeter, which can be beautiful when everything else in the image is softer — skin, fabric, light, expression. The line at the jaw or just below it creates a clean graphic shape that feels modern without trying too hard.
Keep the bob smooth from roots to ends, then decide whether one side should tuck behind the ear. That little move changes the whole face. It opens one cheekbone, shows off jewelry, and makes the style feel less rigid. If the hair is naturally wavy, the point is not to fight every strand into submission. It’s to keep the line tidy enough that the shape still reads.
This is a style with opinions. It either looks sharp or it doesn’t. When it’s right, it’s excellent.
13. Tousled French Twist
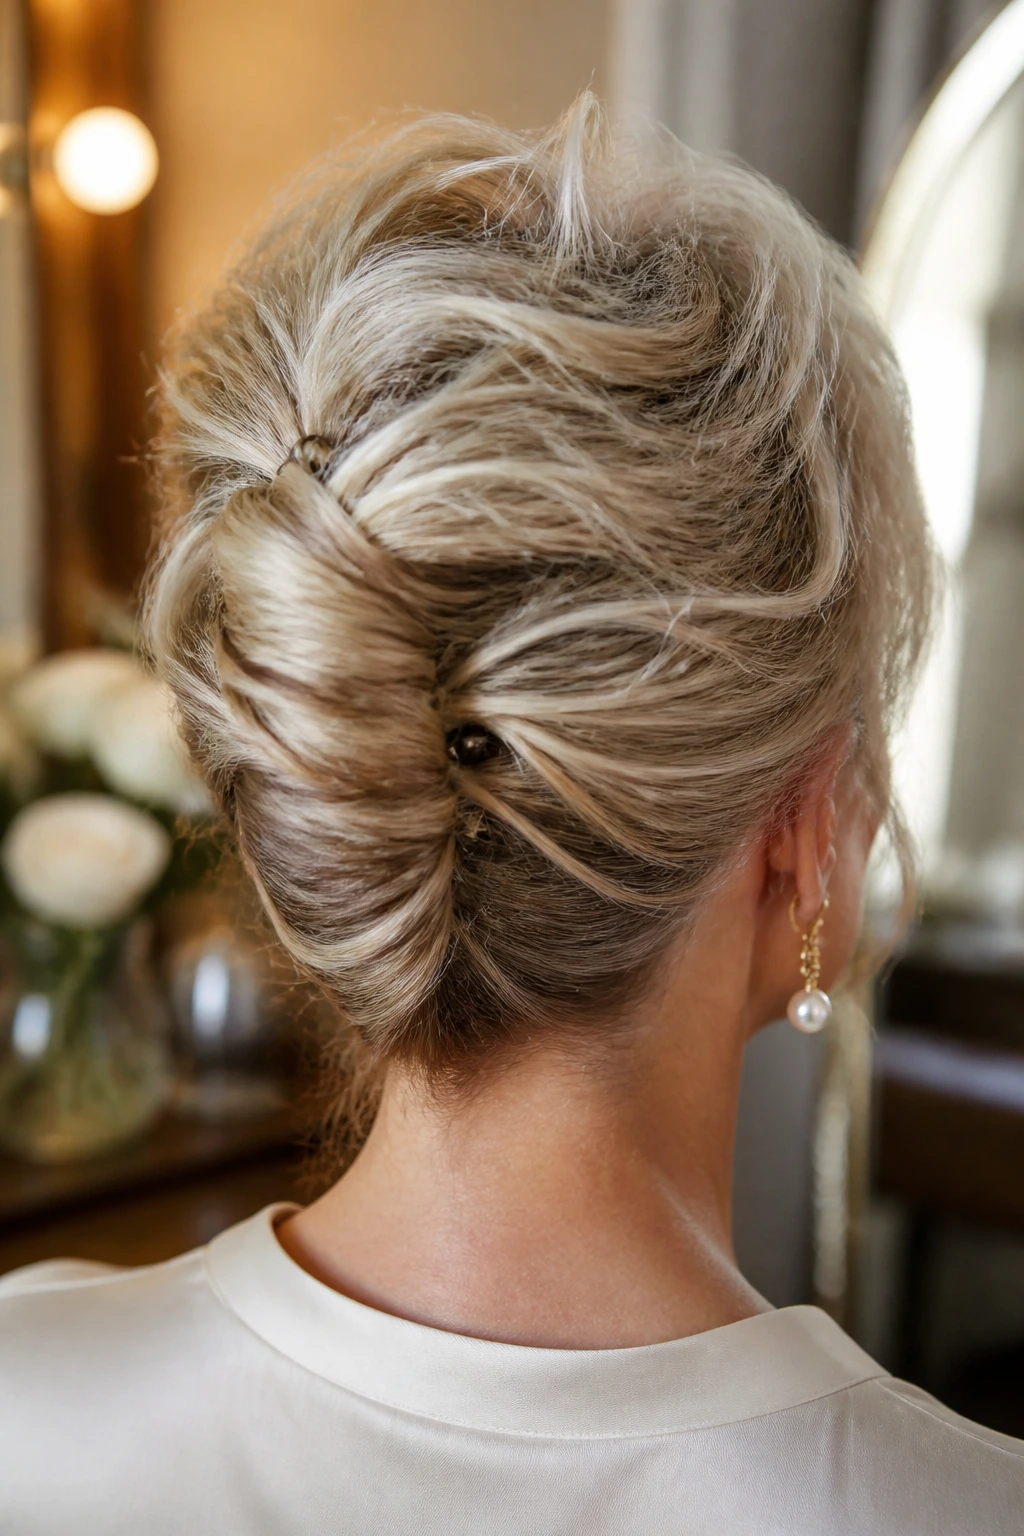
The French twist gets a bad reputation because too many versions are overdone and too tight. The tousled version is better for photos. It keeps the vertical shape at the back of the head, which lengthens the neck, but it leaves enough softness at the top and around the hairline to avoid that formal, lacquered look.
Think of it as an edited twist, not a stiff shell. The hair is gathered upward, twisted, and pinned, but not every piece needs to be invisible. A few airy ends and a little crown lift make the whole thing feel less severe. It works especially well with strong earrings and open collars.
Why It Works Better Than a Tight Updo
- It shows the shape of the head without crushing it.
- It keeps the neck open in a flattering way.
- It looks good from the side, which matters more than people think in shoot-day movement.
14. Silk-Scarf Accent Style
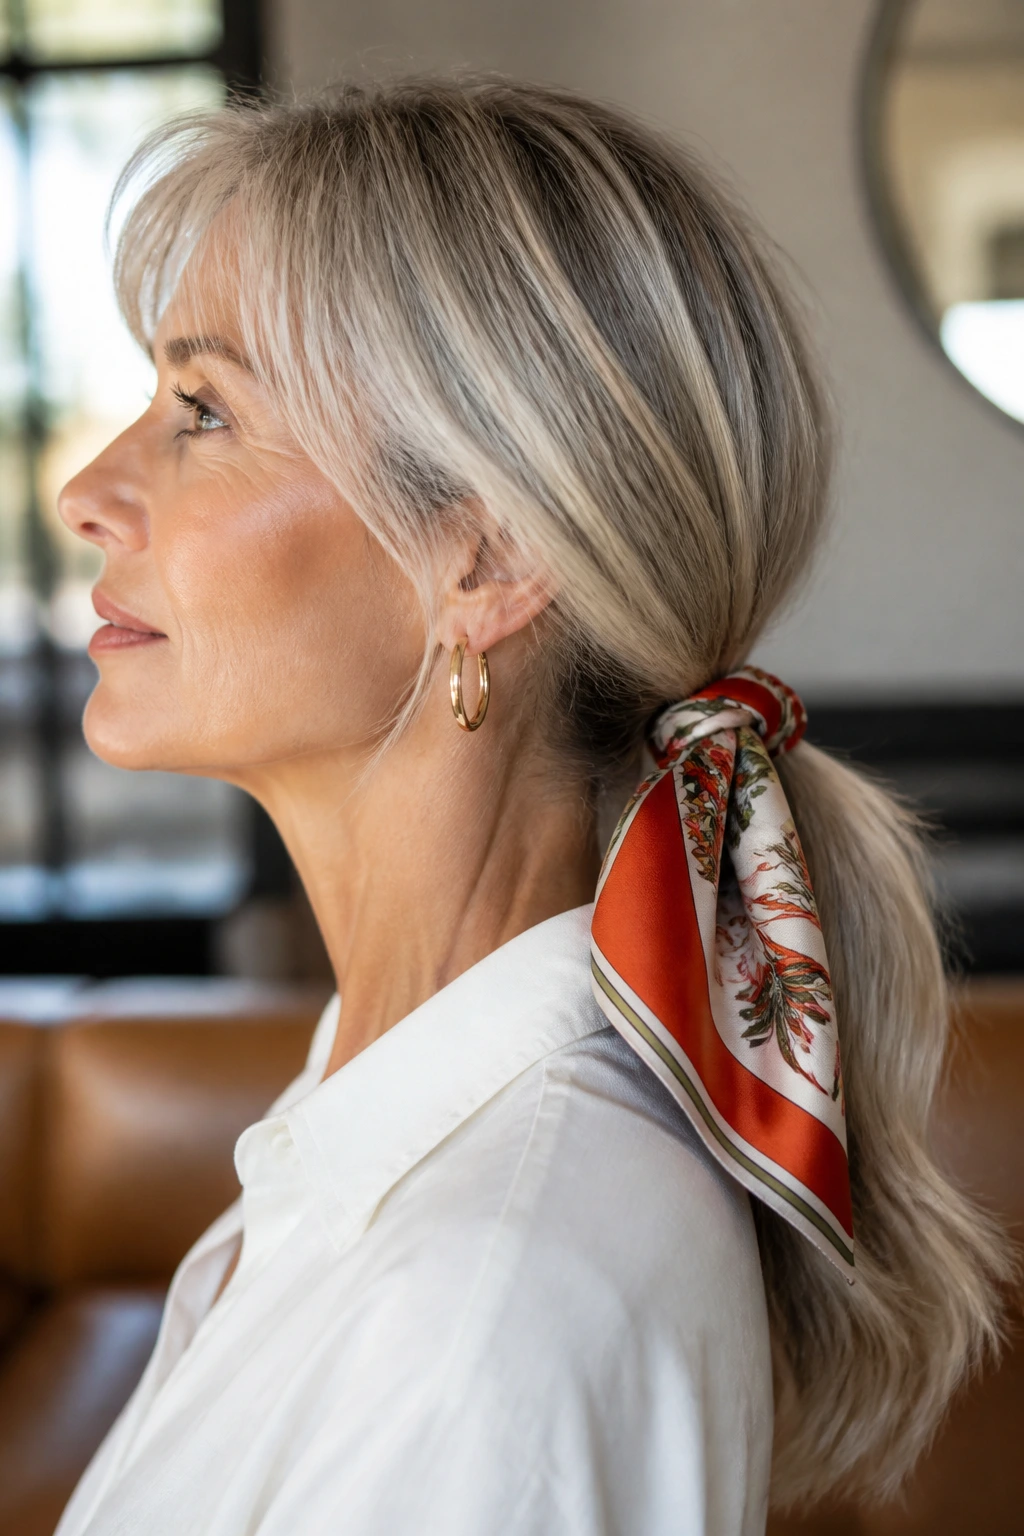
A silk scarf can rescue a style that’s otherwise too plain. It also adds a little color near the face, which is useful if the outfit is monochrome or the hair color blends into the background. Wrap it around a low ponytail, tie it at the base of a bun, or use it to dress up a half-up style that needs a bit more personality.
The important thing is scale. A scarf that’s too wide can swallow the hair, while one that’s too thin can vanish in a photo. Fold a square scarf into a band, or use a narrow silk strip with enough length to tie securely. If the scarf slips, pin it underneath the knot where the camera won’t see it.
I like this option for women who want a touch of softness without overstyling the hair itself. It’s especially nice with silver, white, or highlighted hair because the fabric gives the image a little contrast.
15. Side-Parted Waves With Face-Framing Pieces
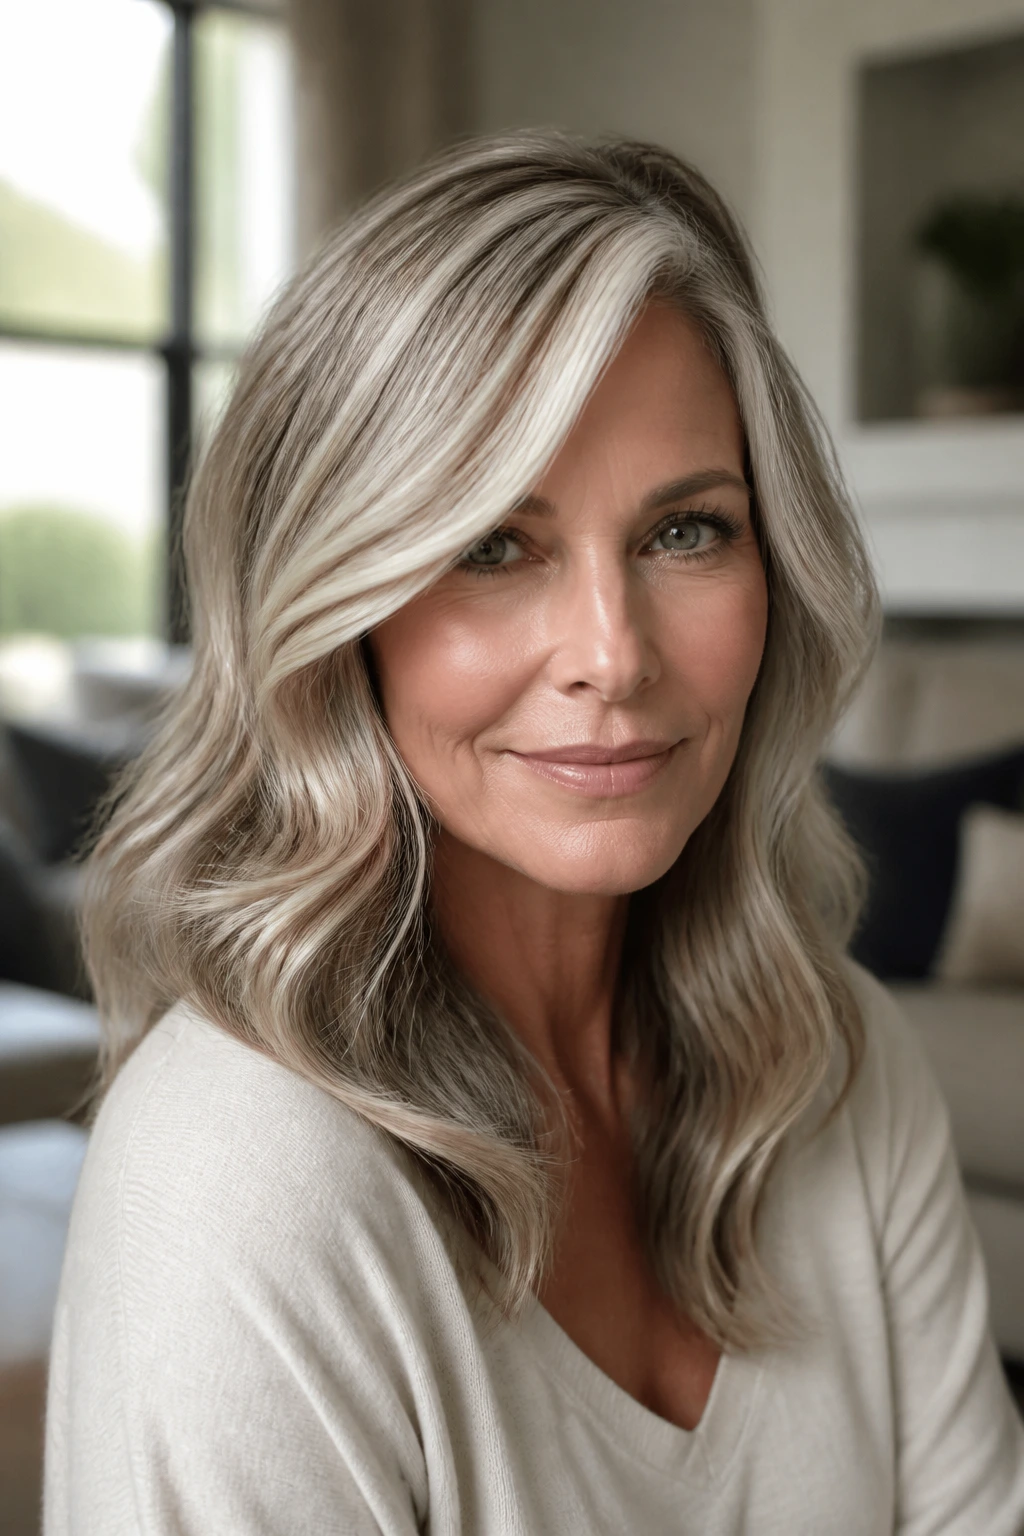
Sometimes the best answer is the one that looks the least forced. Side-parted waves with face-framing pieces are softer than Hollywood waves and less structured than a blowout, which makes them useful for portraits where you want polish but not ceremony.
The side part should be deep enough to create lift but not so deep that it throws the face off balance. Curl the hair in loose sections, then brush only the ends and mid-lengths so the front pieces stay visible. I like to keep the face-framing sections a touch longer than the rest because they soften the jaw and catch light right where the camera can use it.
This style works on a lot of hair types, which is why stylists keep returning to it. It doesn’t try to do too much. That’s the charm.
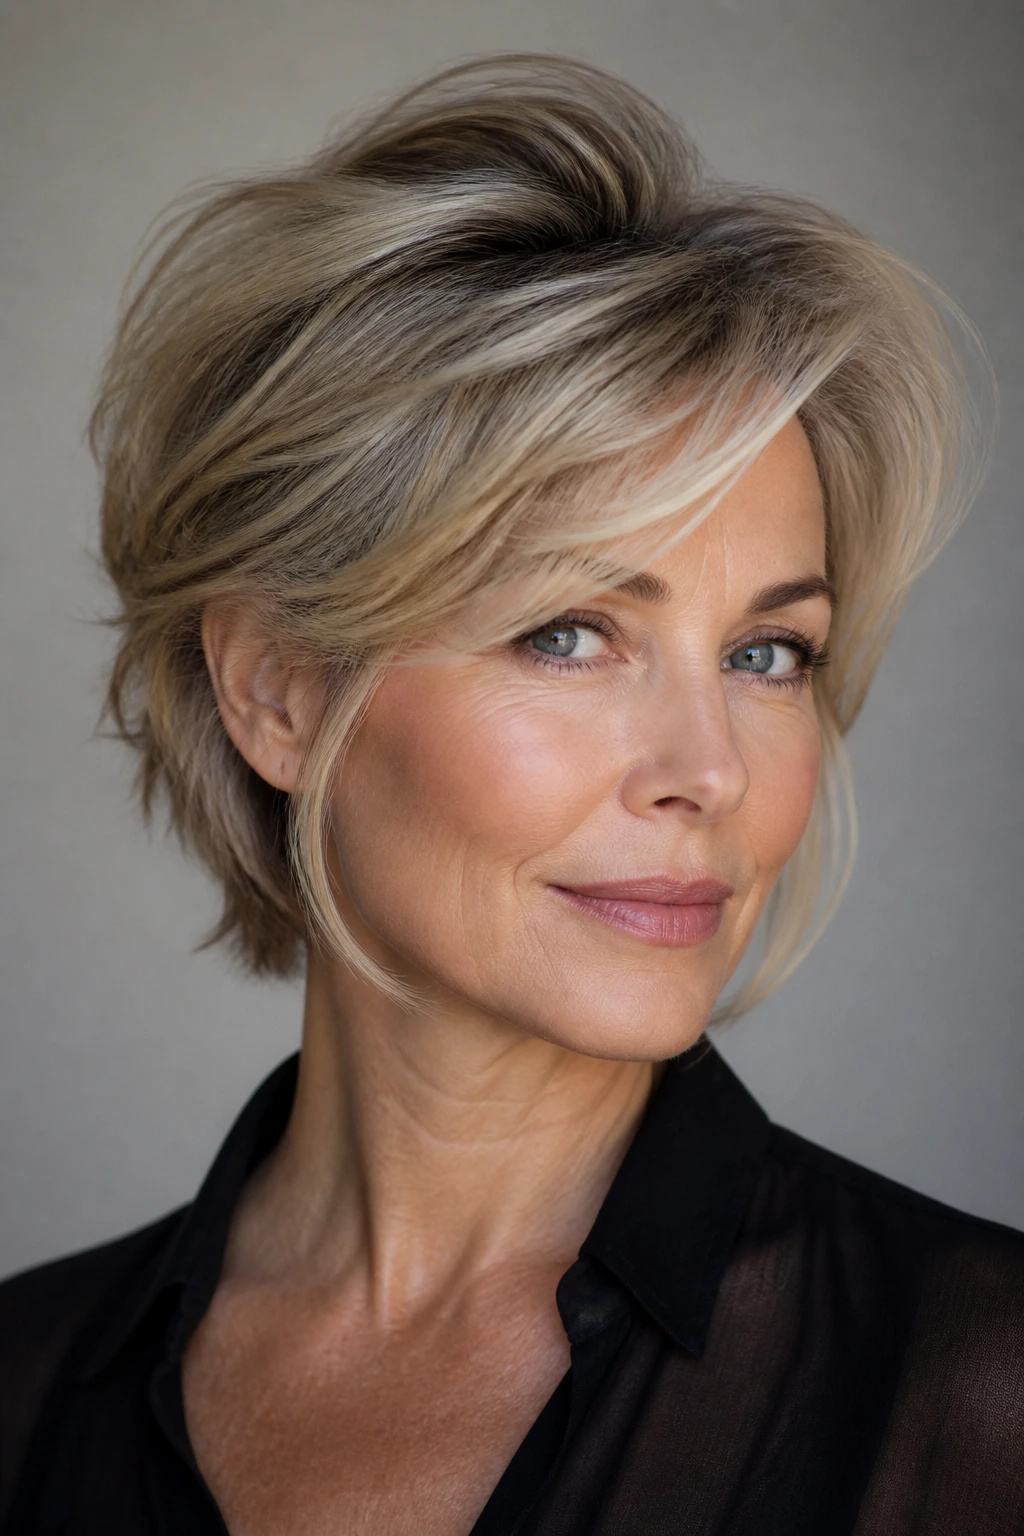
16. Layered Shag With Airy Texture
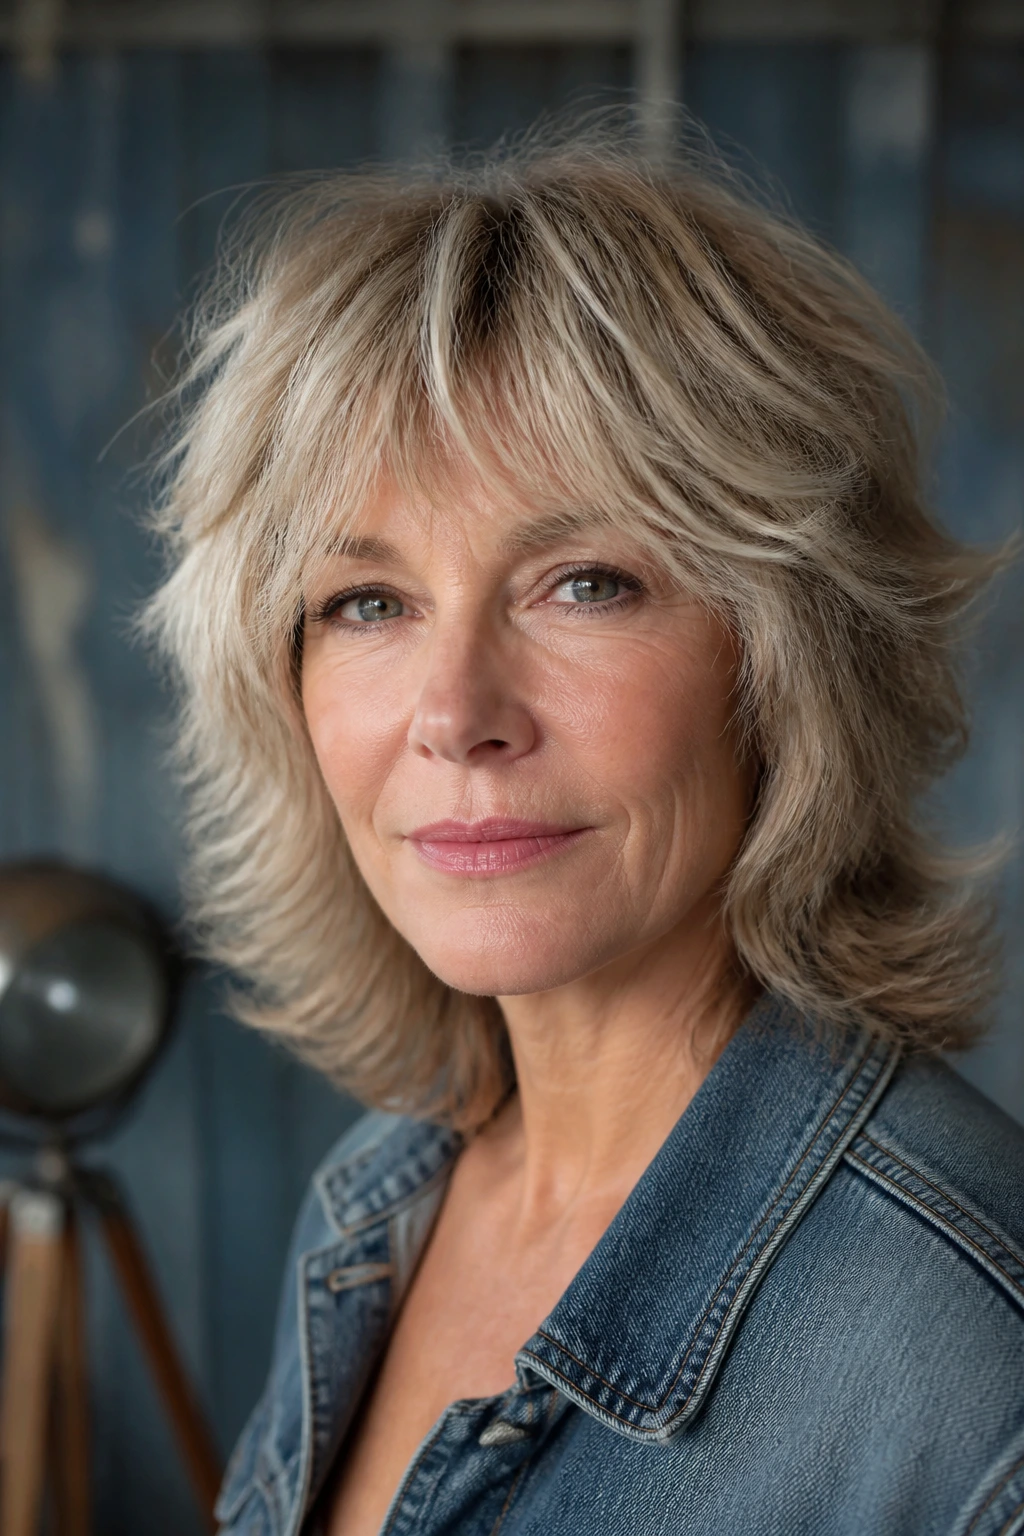
A layered shag can look brilliant on camera when it’s styled with control. The danger is letting it go puffy or overly scrunched. The better version keeps the top airy, the layers separated, and the fringe loose enough to show movement without covering the eyes.
This is one of the few styles here that really benefits from a bit of edge. If your wardrobe is denim, leather, linen, or anything a little relaxed, the shag gives the whole portrait some attitude. Use a diffuser for curl, or a round brush and texturizing spray for straighter hair. Either way, the shape should feel light rather than bulky.
It’s a good choice for women with naturally layered cuts who do not want to fight their hair into a rigid shape. Let the layers do the work.
17. Twisted Half-Up Style
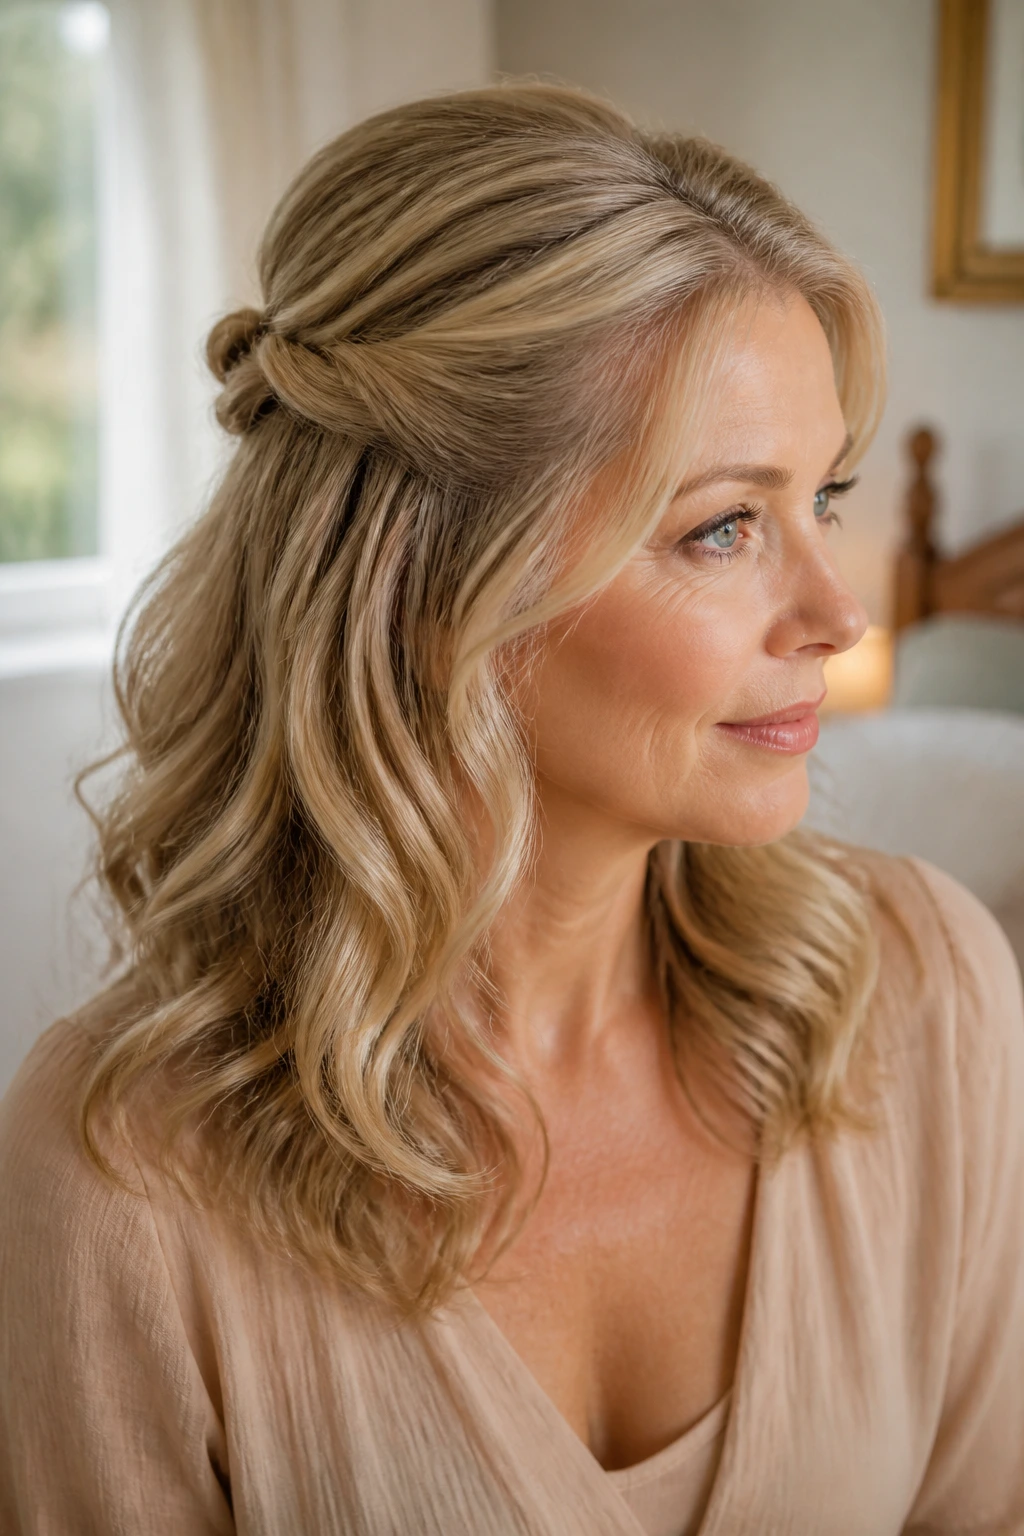
A twisted half-up style gives you the best part of an updo without committing to one. Two sections from the temples are twisted back, pinned, and left a little loose at the crown. The rest of the hair hangs down in waves, bends, or straight lengths depending on the texture.
I like this one because it opens the face and adds just enough detail near the top of the head. It also keeps shorter layers out of the eyes without pinning every strand back. If the hair is fine, tease the section before pinning. If it’s thick, twist in smaller sections so the pins don’t fight the bulk.
This is a smart choice for long or medium hair that still needs movement in the photo. It’s softer than a full ponytail and less formal than a bun. Good middle ground. Very useful.
18. Elegant Bun With Soft Tendrils
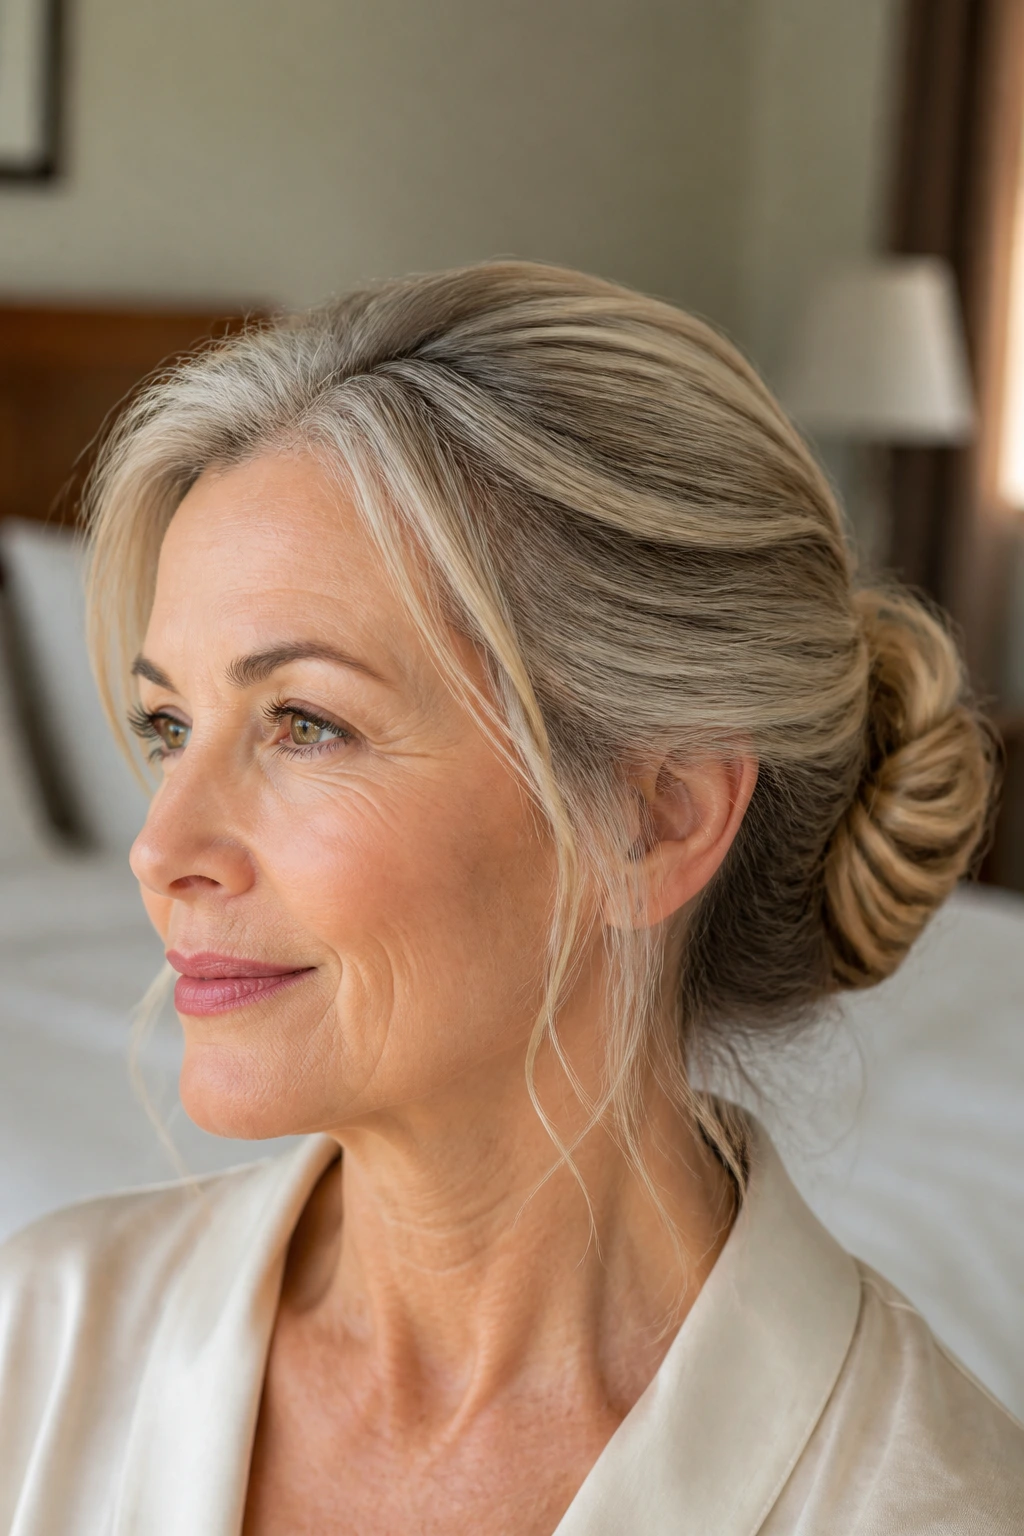
A bun can go wrong fast if it’s too tight or too high, but an elegant bun with soft tendrils gives you the clean line of an updo and the warmth of a few pieces around the face. The bun should sit low to mid-level, not perched on the crown like a topknot, and the tendrils should be thin enough to move, not thick enough to take over the frame.
This style is excellent for formal portraits because it keeps the neckline open and lets makeup, earrings, and clothing do some talking. Smooth the top first, gather the hair, then pin the bun with a few hidden grips. Pull out only a couple of tendrils at the temples and jawline. No more. Too many loose pieces can make the style look unfinished.
The whole thing should feel intentional, not fussy. That balance is the hard part.
What Makes a Hairstyle Read Cleanly Under Studio Lights
Hair looks different when a light sits six feet away from your face and a camera is pointing straight at you. Texture collapses. Shine gets louder. Flat roots become obvious. That’s why the best photoshoot styles are built around a strong silhouette first and prettiness second.
Crown lift is the first thing I check. If the top is flat, the whole face can look wider and lower in the frame. Even a little lift near the part line helps the head keep its shape. A soft side part, a bit of teasing at the roots, or a hidden roller at the crown can change the whole portrait.
The second piece is edge control. A few loose pieces around the face can soften hard lines, but if every strand is escaping, the style stops reading as deliberate. The sweet spot is controlled softness. You want the viewer to notice your expression first, then your hair.
Movement matters too. Brushed-out waves, tucked ends, and loose twists all keep the image from feeling frozen. A completely stiff style can look dated fast, while a little motion keeps the hair alive in still photos.
Choosing the Right Photoshoot Hairstyles for Women Over 50 by Hair Texture and Neckline

The smartest hairstyle is the one that matches what your hair already wants to do. Fighting texture is a waste of time on shoot day. Fine hair needs lift and support. Thick hair needs shape without bulk. Curly hair needs definition and moisture. Straight hair needs a line that doesn’t fall limp by the third frame.
If Your Hair Is Fine
Choose styles with crown volume, pinned sections, or waves made with a 1-inch iron. Fine hair can vanish in photos if it’s worn too flat, so root lift matters more than elaborate styling. A half-up crown lift, wrapped low ponytail, or soft lob tends to help.
If Your Hair Is Thick
Aim for styles that remove weight without removing movement. A low chignon, tousled French twist, or layered shag can keep the bulk under control. Strong hold pins are non-negotiable here. Thin bobby pins tend to give up halfway through the shoot.
If Your Hair Is Curly or Coily
Choose shapes that respect the pattern. A curly halo, braided crown, or textured half-up style usually photographs better than a blow-dried style that loses its personality by noon. Moisture and definition are the workhorses. Frizz control is useful, but flattening the curl is not.
Neckline and Earrings Matter
Open necklines work well with buns, twists, and tucked styles. High collars and turtlenecks often look better with waves, lobs, or side-swept shapes so the hair doesn’t disappear into the fabric. Big earrings usually need the hair to move away from the ears, at least on one side. Little things. Big difference.
The Tools and Products Worth Having on Hand
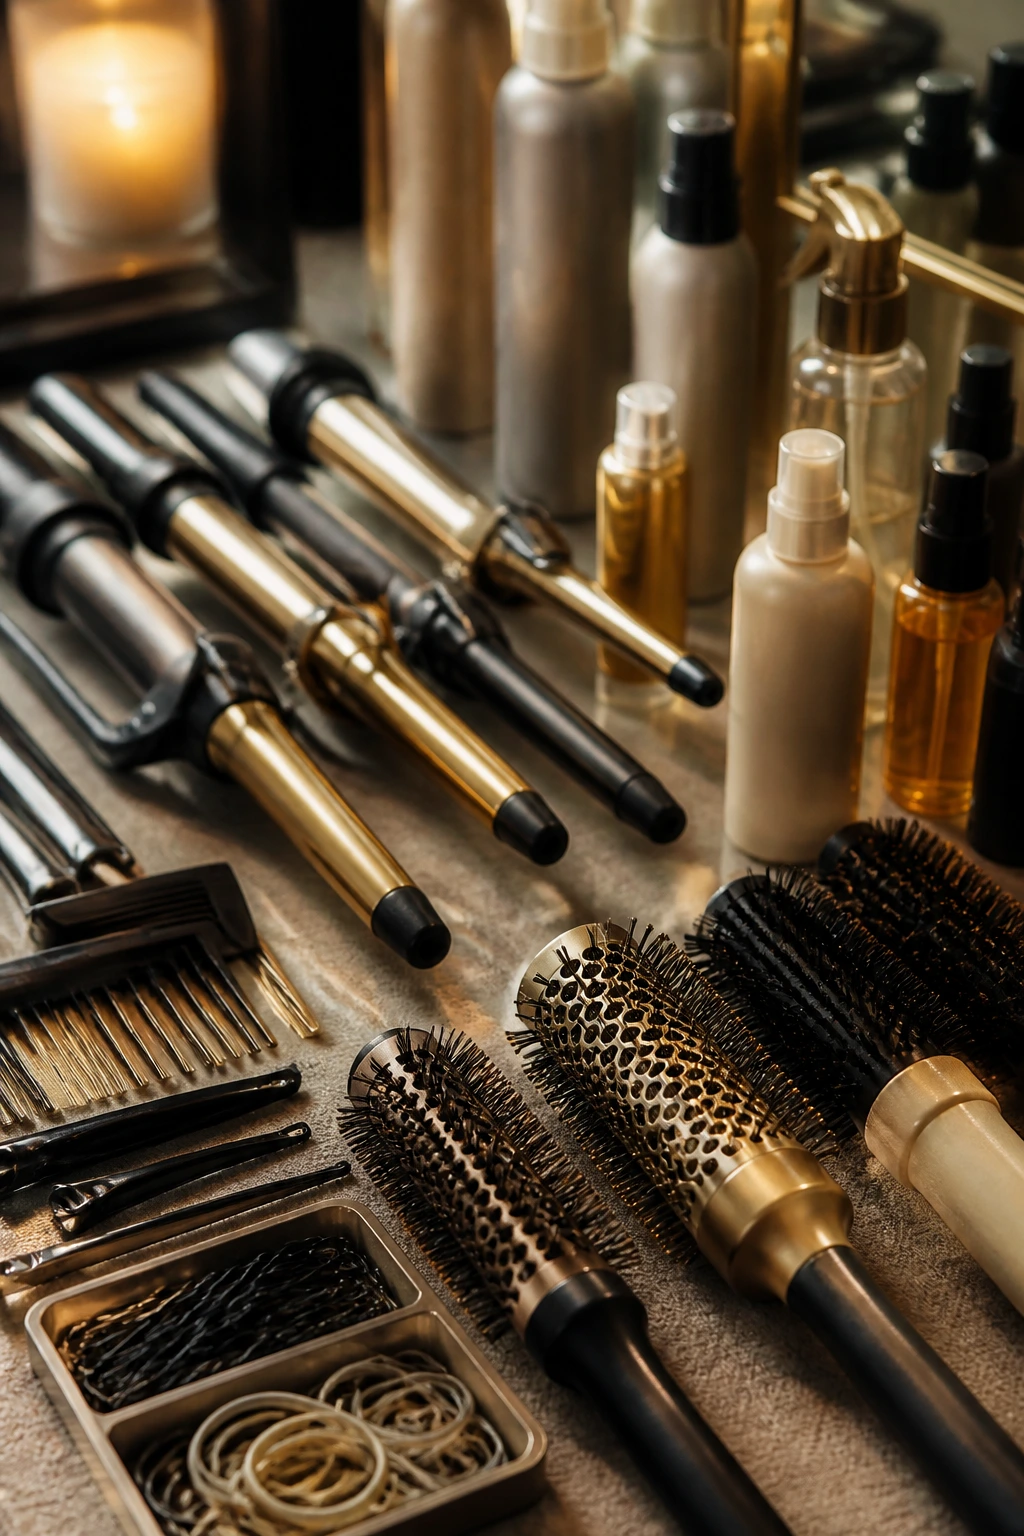
- 1-inch curling iron: Best for controlled waves, bends, and face-framing movement without giant curls.
- 1¼-inch curling iron or wand: Useful for softer, brushed-out waves and longer hair.
- Round brush, 1½ to 2 inches: Gives the crown lift and smooth bends at the ends.
- Paddle brush: Good for sleek bobs, blowouts, and smoothing the top before photos.
- Tail comb: Handy for clean parts, sectioning, and lifting the crown without creating a mess.
- Duckbill clips: Keep sections out of the way while you set waves or blow-dry.
- Bobby pins in hair-matching colors: Hidden support for buns, twists, and half-up styles.
- Small clear elastics: Best for low ponytails and sectioning without bulky hardware.
- Flexible-hold hairspray: Holds the shape without turning the hair into a shell.
- Texturizing spray: Gives grip and a little grit to styles that need body.
- Smoothing cream or serum: Keeps flyaways under control on polished styles.
- Heat protectant: Non-negotiable if you’re using hot tools.
- Compact hand mirror: Useful for checking the back of the head before the shoot starts.
How to Prep Hair the Day Before and the Morning Of
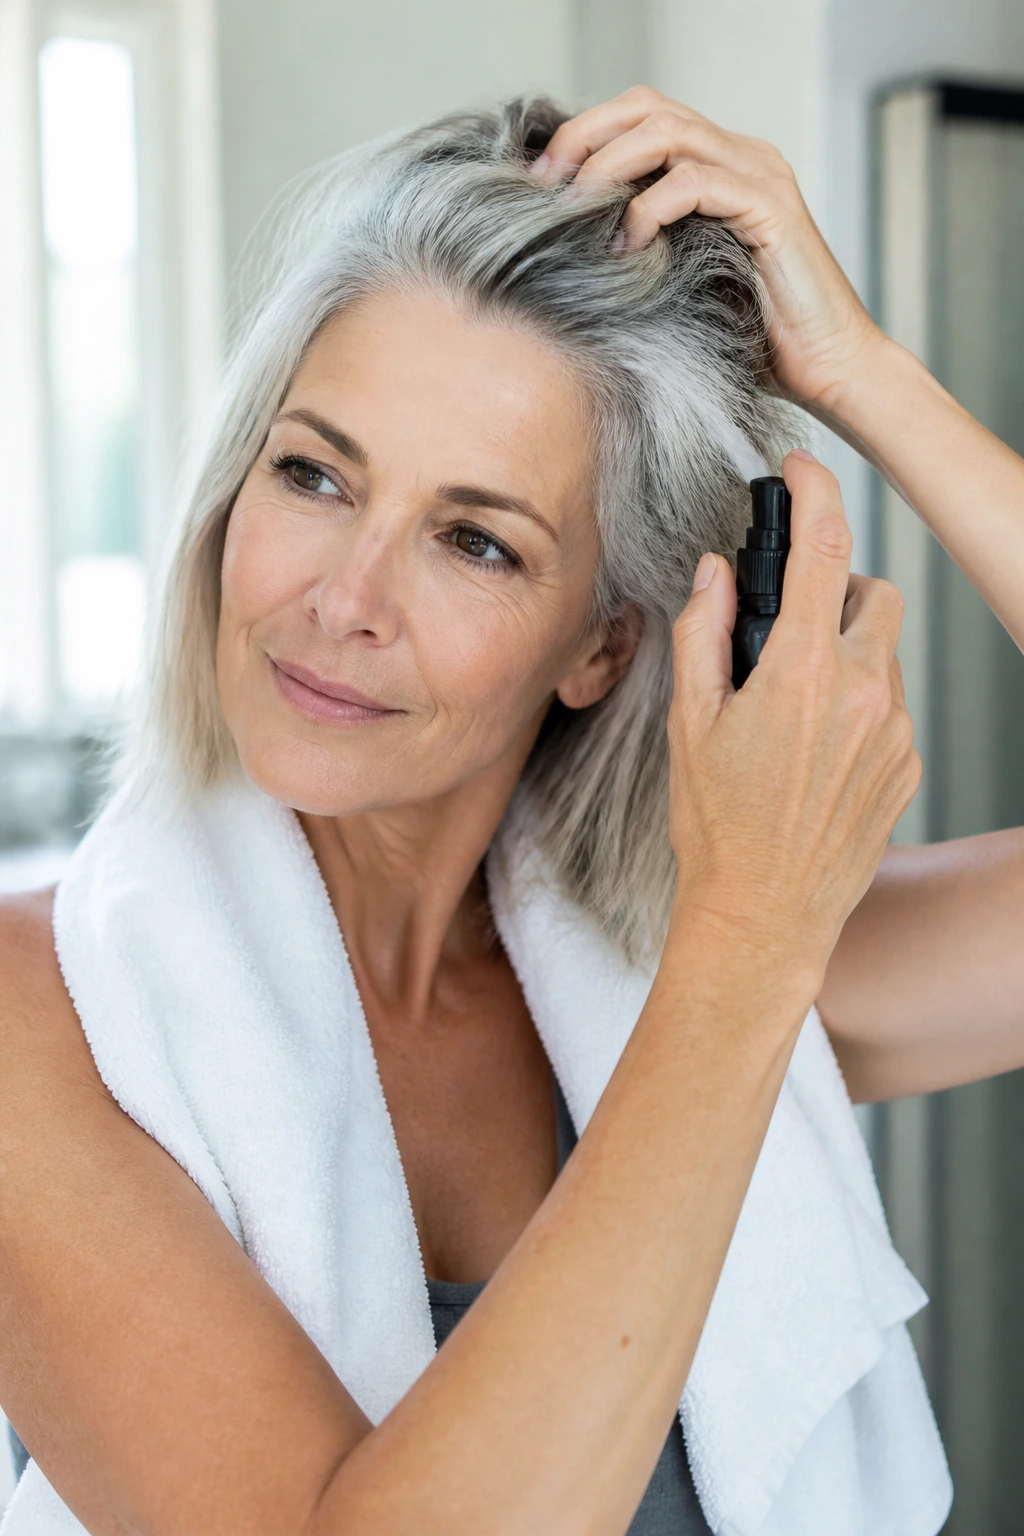
The best shoot-day hair usually starts before the shoot day. If your hair tends to go limp, wash it the day before and let a little natural oil show up at the roots by morning. If your hair is coarse or curly, starting with clean, damp hair may give you more control. There is no single rule here, and anyone who says there is probably doesn’t deal with different textures.
Time-Saver: Set the rough shape the night before. Loose braids, large rollers, or a low twist can save you twenty minutes in the morning and give the hair a memory of movement.
Volume Boost: A little dry shampoo at the roots can help, but don’t pile it on. If the crown starts to look chalky, you’ve gone too far. Shake it through with your fingers instead of brushing it hard into one spot.
Last-Minute Fix: Keep a mini flat iron or small curling iron nearby for face-framing pieces. Those front sections are what people notice first in a portrait, and they are also the first to go weird after a car ride or a wind gust.
Photo Check: Before you leave, take one picture on your phone in the same light you’ll probably face on set. It tells the truth faster than a bathroom mirror.
Common Mistakes That Make Hair Fall Flat on Camera
The most common mistake is over-smoothing the crown. Hair that’s pressed too flat near the roots can look wider in photos, especially from the front. The fix is simple: keep a little lift at the top and smooth only the surface.
Another trap is using too much product. Heavy cream, thick oil, or a full can of hairspray can make the hair look sticky under studio lights. If your hair starts reflecting light in big shiny patches instead of having a soft glow, it needs less product, not more.
People also over-curl for photos. Tiny ringlets can look busy and old-fashioned unless that’s the exact mood you want. Brushing waves out a little, or using a larger barrel to start, usually gives a cleaner result.
Then there’s the “one style fits all” mistake. A tight updo on hair that wants to be soft can look strained. Loose waves on very thick hair can look puffy instead of polished. The right style works with the hair’s weight, not against it.
And yes, ignoring the back of the head is a problem. Photoshoot hairstyles are not only front-facing, and a sagging twist or lopsided bun will show up the moment you turn.
Smart Variations and Adaptations to Try
Fine-Hair Lift Version: Swap heavy cream for mousse at the roots and set the crown with a velcro roller while you do makeup. This gives finer hair more shape without dragging it down.
Curly-Hair Definition Version: Keep the chosen style but use curl cream plus gel on damp hair, then diffuse until dry before styling the updo or half-up shape. The curl pattern will look clearer and photograph with more depth.
Short-Hair Camera Edit: If your hair is pixie-short or bob-length, focus on fringe direction, side parts, and ear tuck rather than trying to fake length. A clean outline matters more than volume you do not actually have.
Humidity-Proof Version: Choose a lower, more controlled shape like a chignon, wrapped ponytail, or sleek bob. A light anti-humidity spray over finished hair keeps the style from puffing up between shots.
Glasses-Friendly Version: Keep volume away from the temples and avoid thick side pieces that crowd the frames. A side-swept fringe or tucked bob usually works better than heavy waves right beside the lenses.
The Kit That Saves Time on Shoot Day
- Wide-tooth comb: Best for working through damp curls without breaking them up too soon.
- Sectioning clips: Keep the back and sides under control while you build the style.
- Mini brush or edge brush: Useful for smoothing flyaways around the hairline.
- Travel-size hairspray: Easy to toss in a bag for touch-ups between outfit changes.
- Tiny elastics: Better than large bands when you need to hide a tie in a half-up or ponytail.
- Hair pins in two lengths: Short pins for detail work, longer ones for buns and twists.
- Heat glove: Helpful if you use a curling wand and don’t want to burn your fingers.
- Mirror with decent light: Not glamorous, but it keeps surprises to a minimum.
Keeping the Style Fresh Through a Long Shoot Day
A photoshoot can run longer than you expect. Hair that looks perfect at 9 a.m. can sag by lunch if it’s pinned too tightly or sprayed too hard. The best defense is small touch-ups, not a full restyle every hour.
For waves and blowouts, keep a medium brush or wide comb nearby and lift the roots with your fingers every so often. For updos, check the pins at the nape and behind the ears after outfit changes. Those are the spots that loosen first. If you use a side part, recut it with a tail comb instead of trying to push the hair back into place with your hand.
Touch-Up Rule: Fix the crown, the front pieces, and the back of the nape before you worry about the ends. Those three spots affect the whole shape.
If you need the style to last into the evening, let the hair cool fully before touching it again. Heat that is still trapped in the hair can ruin the set. A silk scarf or loose clip while you travel helps too, especially for waves and curled styles. It’s boring advice. It also works.
Frequently Asked Questions
Which hairstyle photographs best for women over 50?
There isn’t one winner, but styles with crown lift and soft structure usually read best. A low chignon, shoulder-grazing blowout, or side-parted waves tend to flatter a lot of face shapes because they keep the face open without making the hair feel severe.
Should I wear my hair up or down for a photoshoot?
If you want to show off your neckline, earrings, or a structured outfit, an updo or half-up style is smart. If your hair has good body and you want a softer look, wear it down with movement around the face. The outfit usually decides this faster than the hair does.
What if my hair is very fine and flat?
Use root lift, a lightweight mousse, and a style that gives the hair a shape it can hold. A half-up crown lift, wrapped ponytail, or textured lob usually works better than a very smooth style that leaves the roots exposed.
Can I wear natural curls in photos and still look polished?
Absolutely. The trick is definition. Use curl cream or gel, dry fully, and shape the crown so the silhouette feels deliberate. A curly halo or braided crown can look sharper on camera than a blowout that fights the texture.
How far ahead should I wash my hair before the shoot?
It depends on texture. Fine hair often behaves better the day after washing, when it has a little grip. Coarse, curly, or dry hair may look better freshly washed and conditioned. Choose the day that gives your hair the most control, not the one that sounds nicest in theory.
What should I avoid if I’m wearing glasses?
Skip bulky side pieces that sit right under the frames. A tucked bob, side-swept fringe, or low updo keeps the temples open and stops the hair from fighting the glasses. You want a clean line around the eyes.
How do I keep flyaways from showing in close-ups?
Use a tiny bit of smoothing cream on your fingertips and press it over the surface of the hair, then mist a flexible spray from about 10 inches away. Don’t pile product directly onto the flyaways or they’ll turn shiny and stand out more.
Can these styles work on gray or silver hair?
Yes, and some of them look even better on silver hair because the light catches the sheen. Soft waves, sleek bobs, and polished buns can make gray hair look rich and intentional, especially if the ends are trimmed cleanly.
A Style That Holds Its Shape
The strongest photo hairstyle is the one that keeps its outline when you laugh, turn, and move under bright light. That’s the real test. Not whether it looked good in the mirror for thirty seconds. Whether it still looks like you after the first flash and the first adjustment of your collar.
Pick the shape that suits your hair’s actual texture, not the one you wish it had. That single decision saves time, saves product, and usually gives a much better portrait. The camera likes hair with a clear idea of itself. So do the rest of us.