Summer does strange things to curly hair. The neck gets hot, the crown starts puffing the second you step outside, and a style that looked neat at the mirror can turn into a frizz cloud by lunchtime. That’s why braided easy hairstyles for summer with curly hair make so much sense: they give the curls a job, keep them off your skin, and still let the texture do the talking.
I’ve always liked braids on curly hair more than I like them on straight hair, honestly. Curly strands have grip. They hold shape. They also make small braids look fuller than they have any right to, which is a nice little cheat. The trick is not to fight the curl pattern into submission. Work with it. Let the braid sit on top of the texture instead of smearing it flat.
A good warm-weather braid on curly hair should do three things at once: stay put, stay comfortable, and still look like your hair—not a helmet, not a waxed sculpture, not a style that took half the morning and two headaches to survive. The styles below lean into that sweet spot, from quick face-framing accents to more protective updos that keep the nape clear when the air turns sticky.
Why These Braids Hold Up When Curly Hair Meets Heat
-
They cool the neck down fast: Any style that pulls hair off the nape earns its keep once the temperature climbs, because that sweaty strip under your hairline is usually the first place to get miserable.
-
They make curl shrinkage work for you: Curly hair can shrink up after styling, but a braid uses that movement as texture instead of treating it like a problem.
-
They don’t need pin-straight parts to look polished: A clean section helps, sure, but a slightly imperfect part on curly hair can look softer and more natural than a razor-sharp line.
-
They stretch a wash day longer: A braid, especially one that ends in a bun or tucked twist, can buy you another day or two before you need a full refresh.
-
They’re easier on your arms than a full blowout routine: If your curls already have volume, you do not need to wrestle them into submission. A rat-tail comb, a few elastics, and a little patience go a long way.
-
They let accessories do some work: Clips, cuffs, scarves, and ribbons look better on braided texture than they do on a plain ponytail. The braid gives them a place to sit.
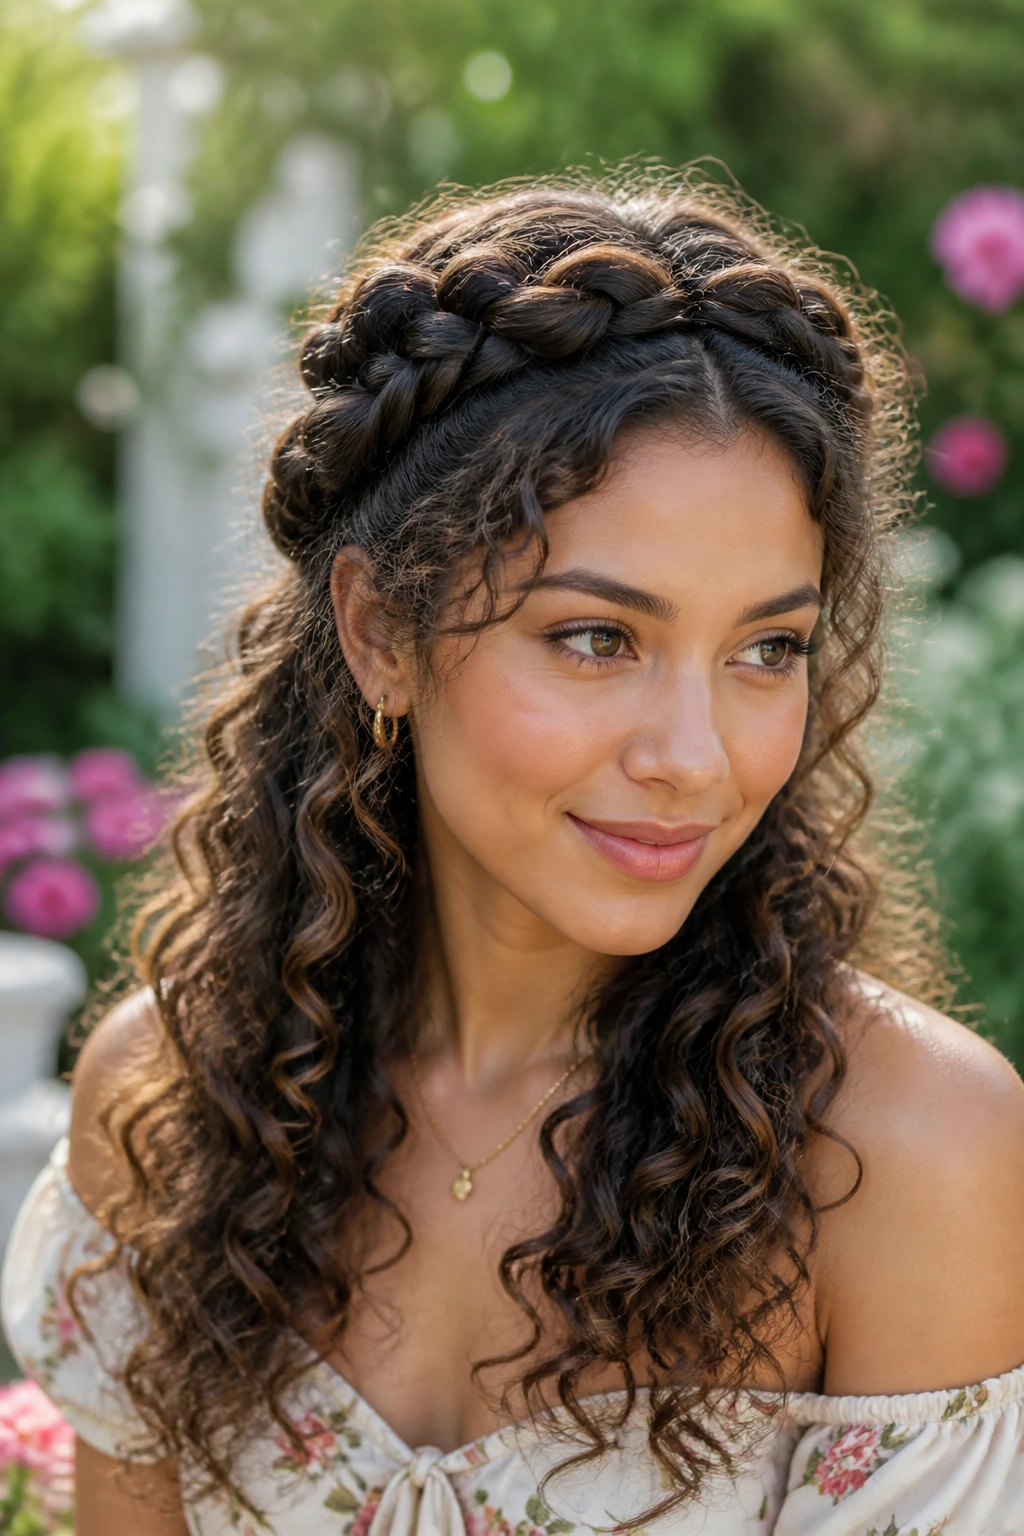
1. Loose Crown Braid With Free Curls
A loose crown braid is one of those styles that looks more complicated than it is. You braid along the front hairline like you’re building a soft frame, then let the rest of the curls stay loose and bouncy. The contrast is the whole point: tidy at the top, full and springy underneath.
What I like most here is that it doesn’t flatten the curl pattern across the whole head. If your curls have good volume but the front keeps falling into your eyes, this solves the problem without draining all the life out of the style. Leave a few baby curls out around the temples if you want it to feel softer.
This one works especially well when the front sections are a little stretched from a twist-out, braid-out, or air-drying overnight. Wet, slippery curls make the braid harder to hold. A little grip helps.
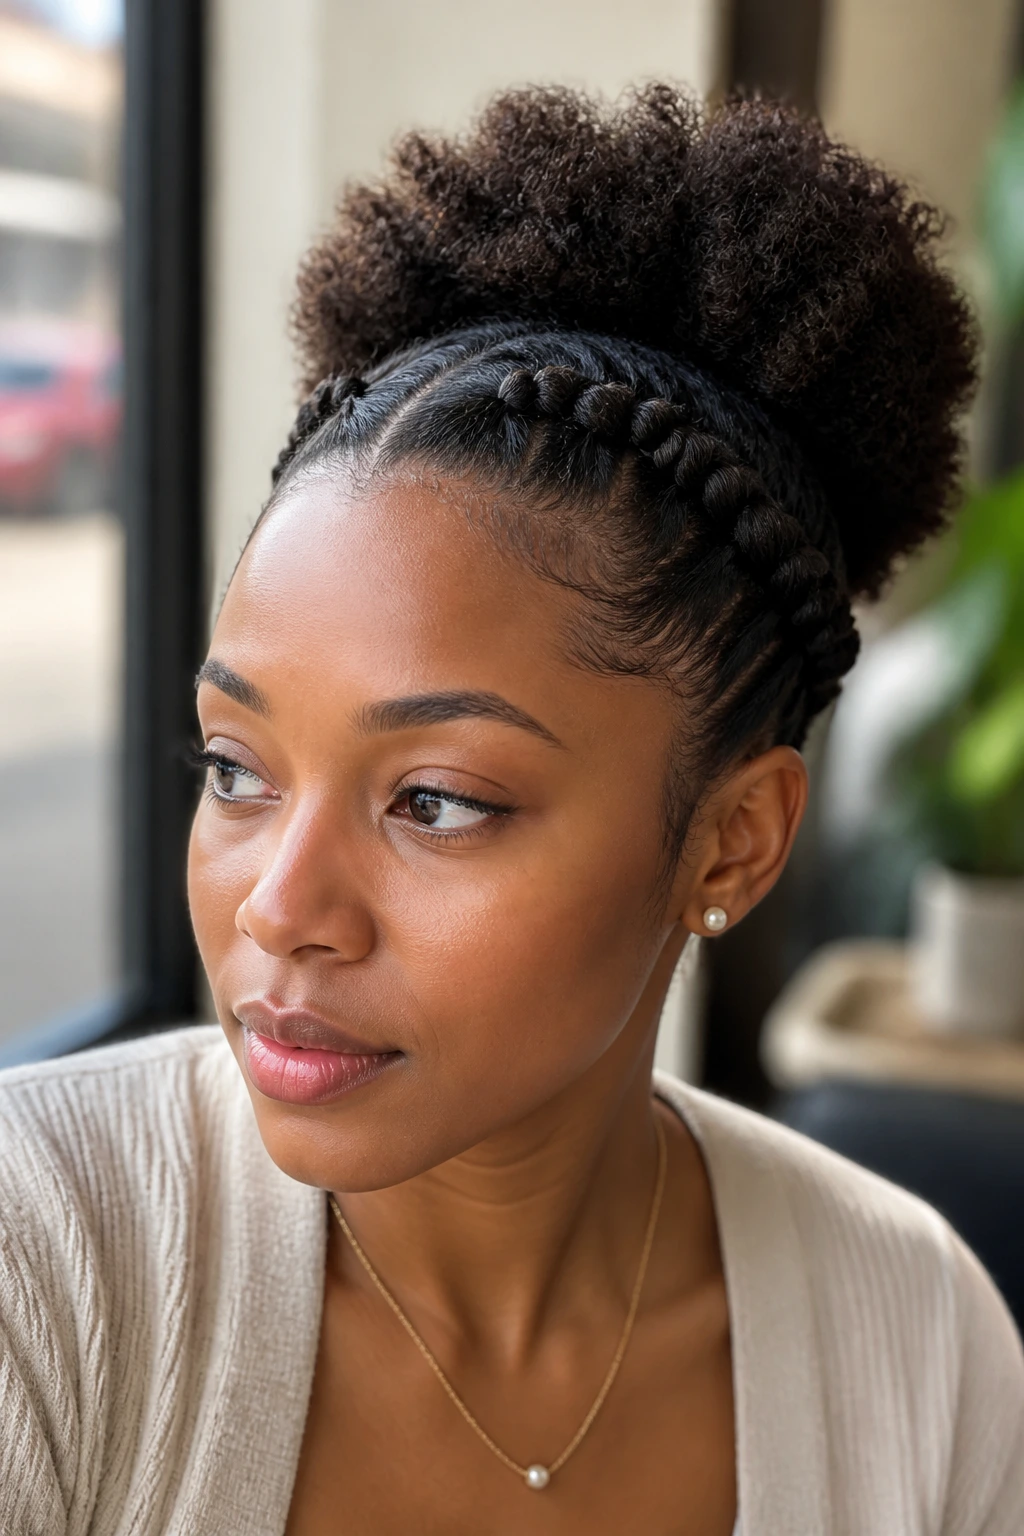
2. Two Side Braids Into A Low Puff
Two side braids feeding into a low puff are a smart move when the crown gets hot but you still want the puff’s shape to stay big and rounded. The braids keep the front controlled, and the puff gives you that curly silhouette at the back without piling everything on top of your head.
This style has a nice balance to it. It feels intentional without being stiff. That matters on curly hair, because curls look best when they still move a little. You can braid both sides tightly enough to stay in place, then gather the rest with a soft elastic and fluff the puff by hand once it’s secure.
If your hair is denser at the crown, this also spreads the weight out better than a single high ponytail. Less tugging. Less temple ache. Better for long days.
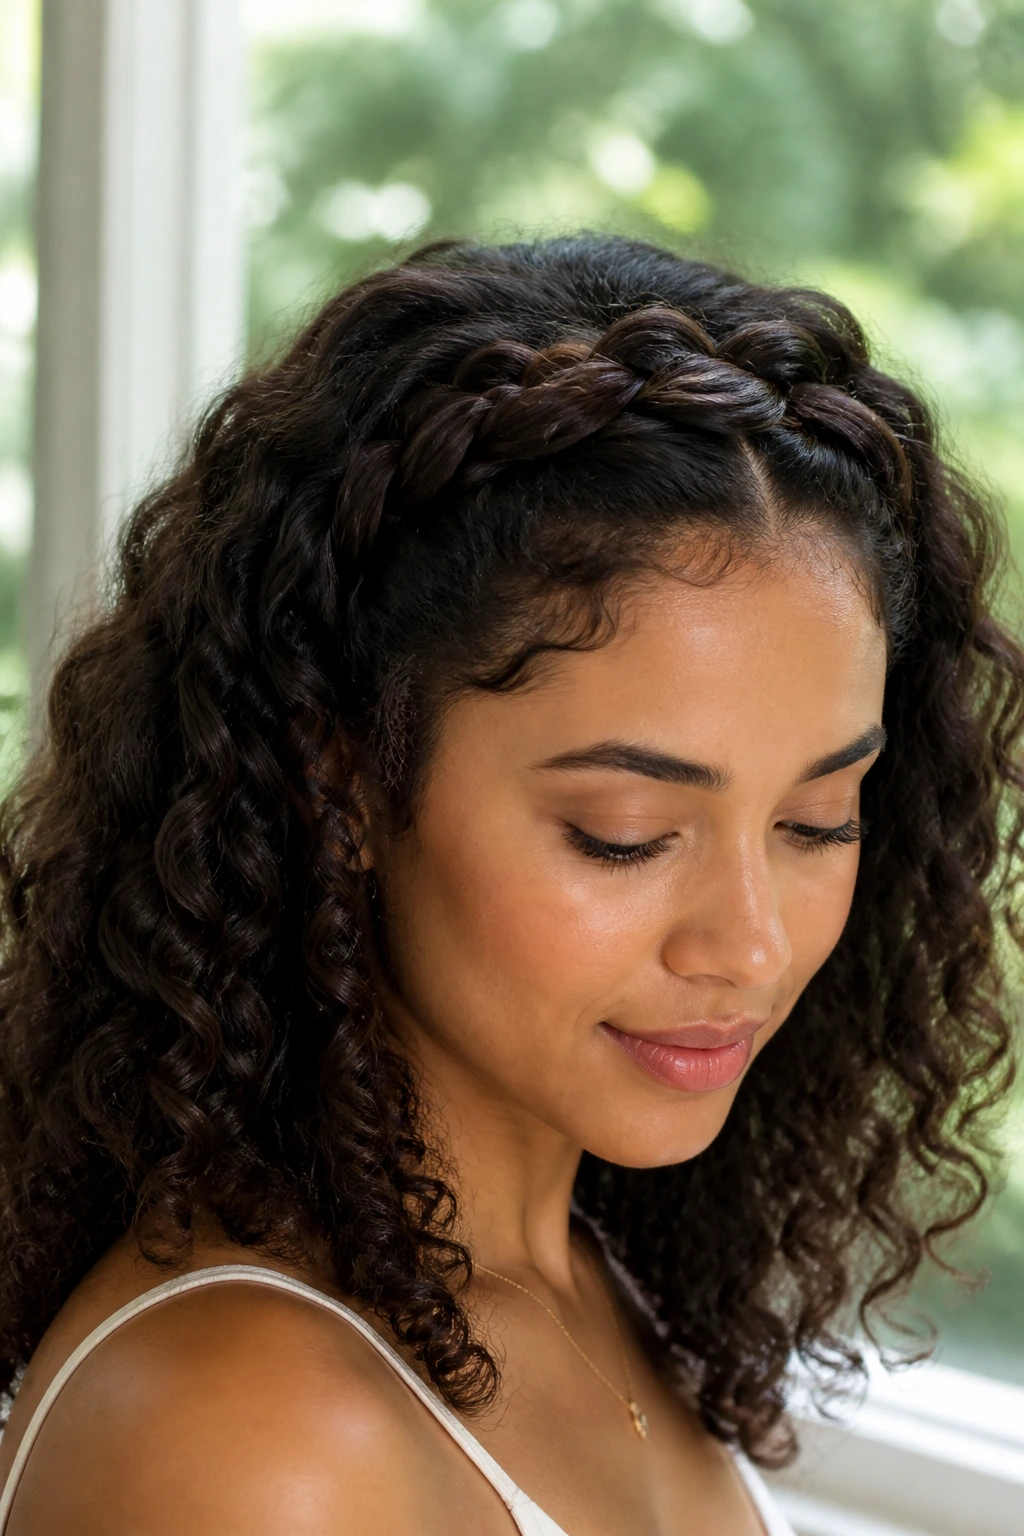
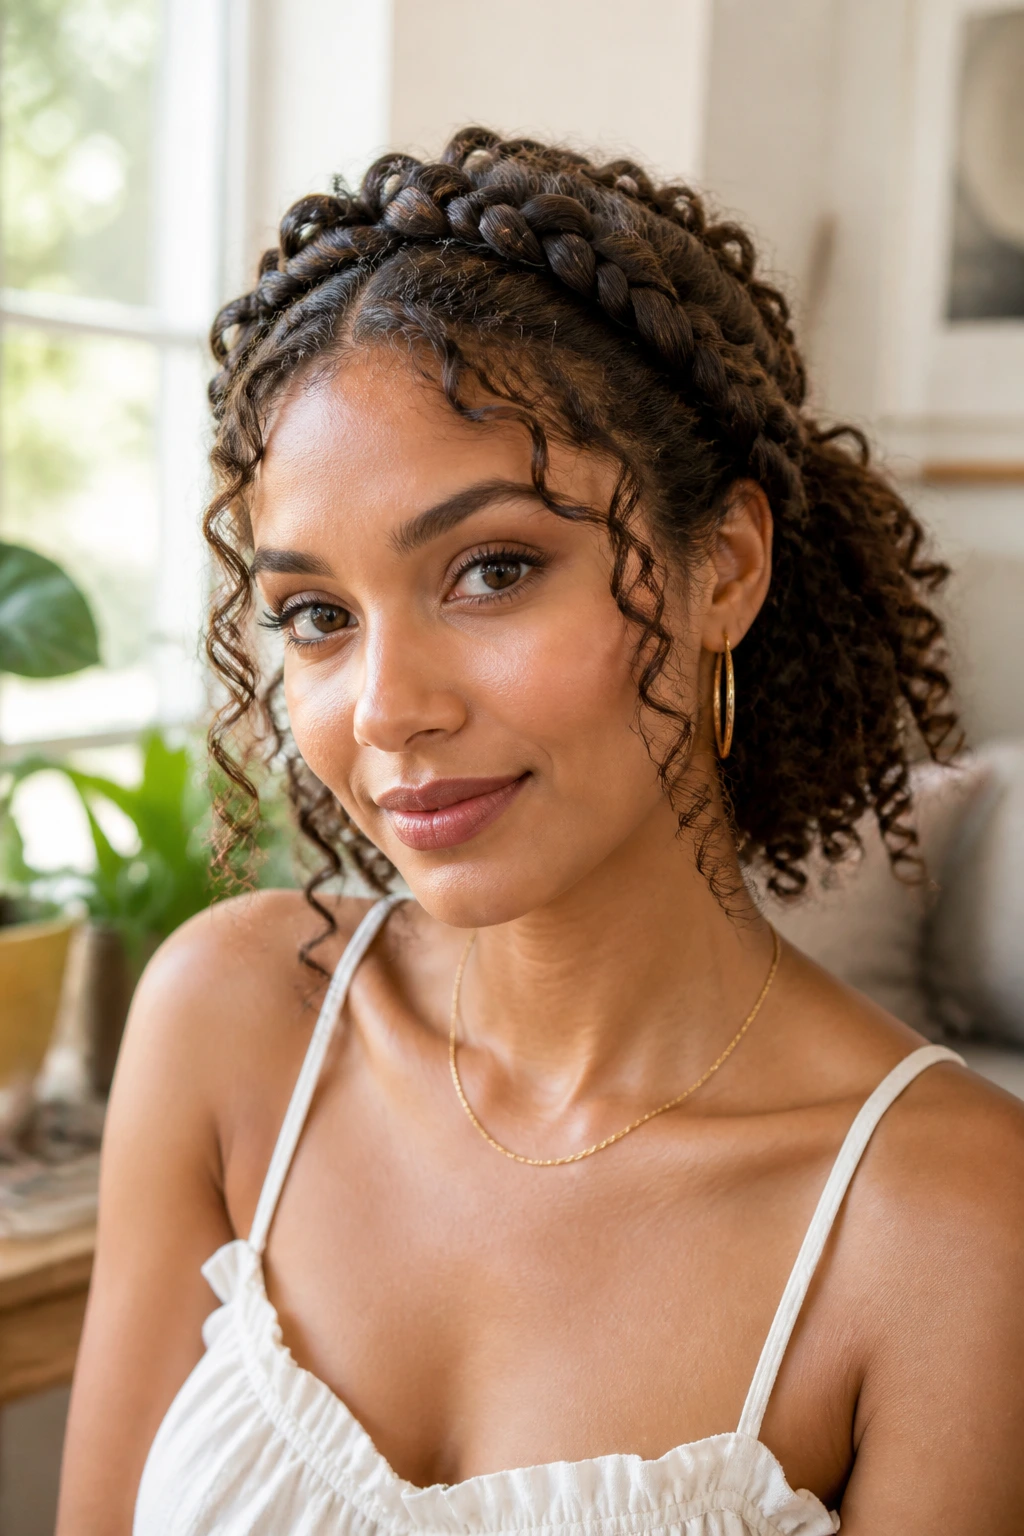
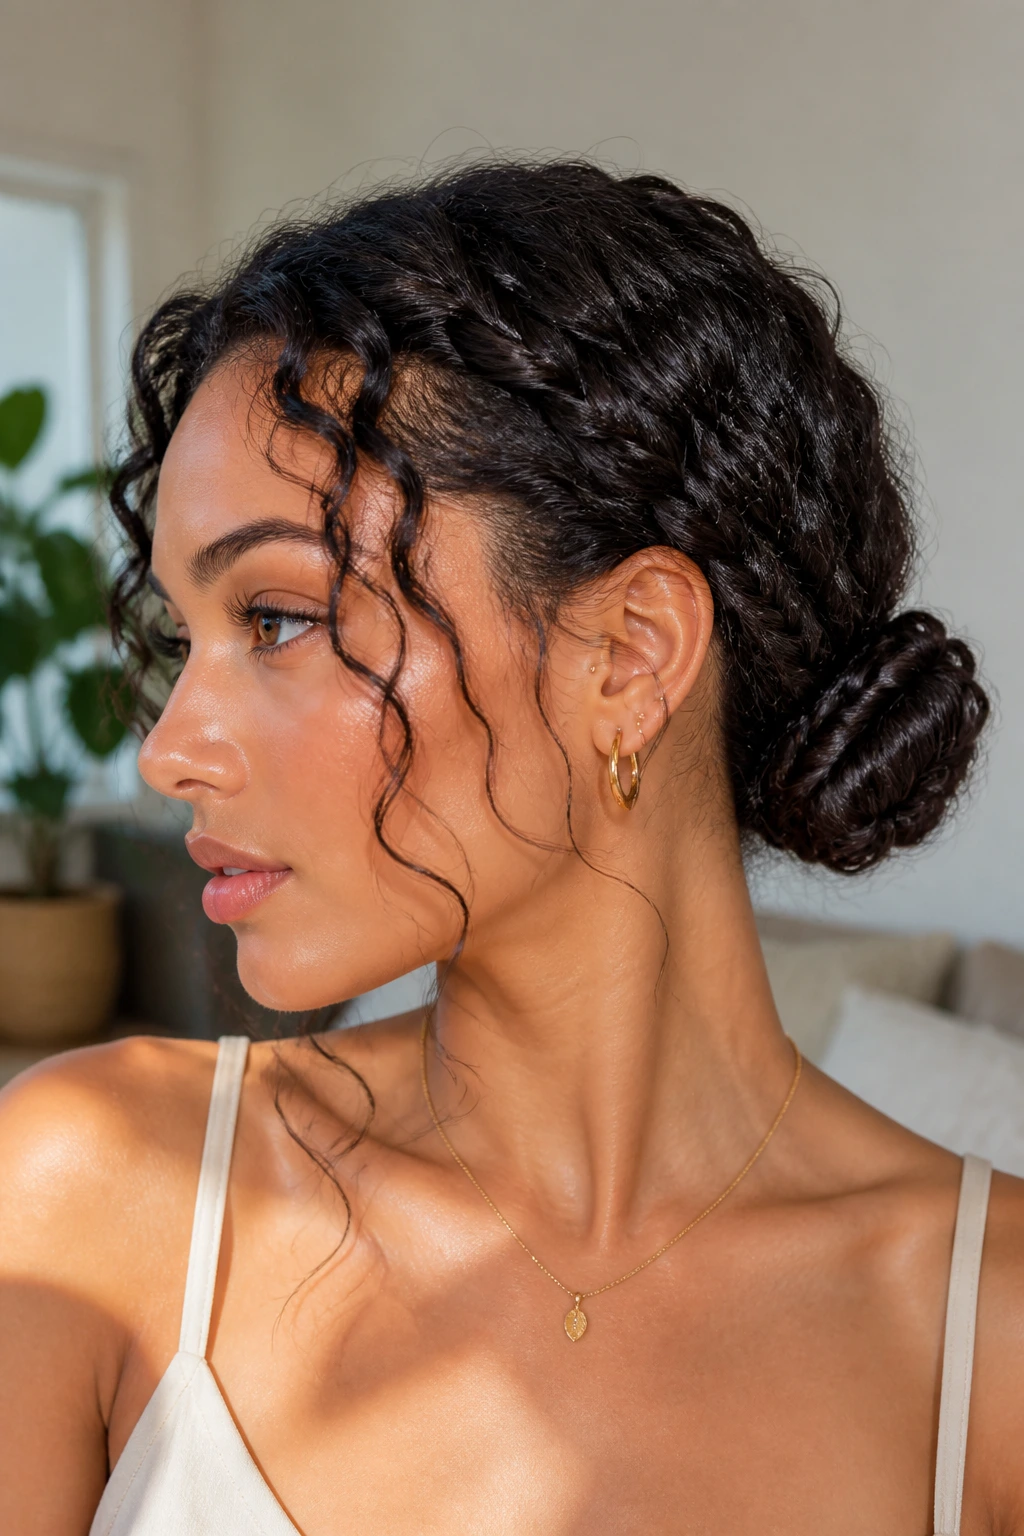
3. Half-Up Halo Braid
Why does the half-up halo braid keep showing up in warm-weather hair rounds? Because it does a lot with very little effort. You braid one section along each side of the head, bring them around the crown, and pin them back so the top half feels contained while the ends still fall free.
The halo shape works well on curly hair because the braid gets extra visual thickness from the texture. A thin braid on straight hair can disappear. On curls, it reads as full and soft. That makes this style useful even when the sections you start with aren’t large.
It’s a good choice for days when you want your hair off your face but don’t want a full updo. Keep the braid low and loose around the hairline. Too tight, and the whole thing starts to feel formal in a bad way.
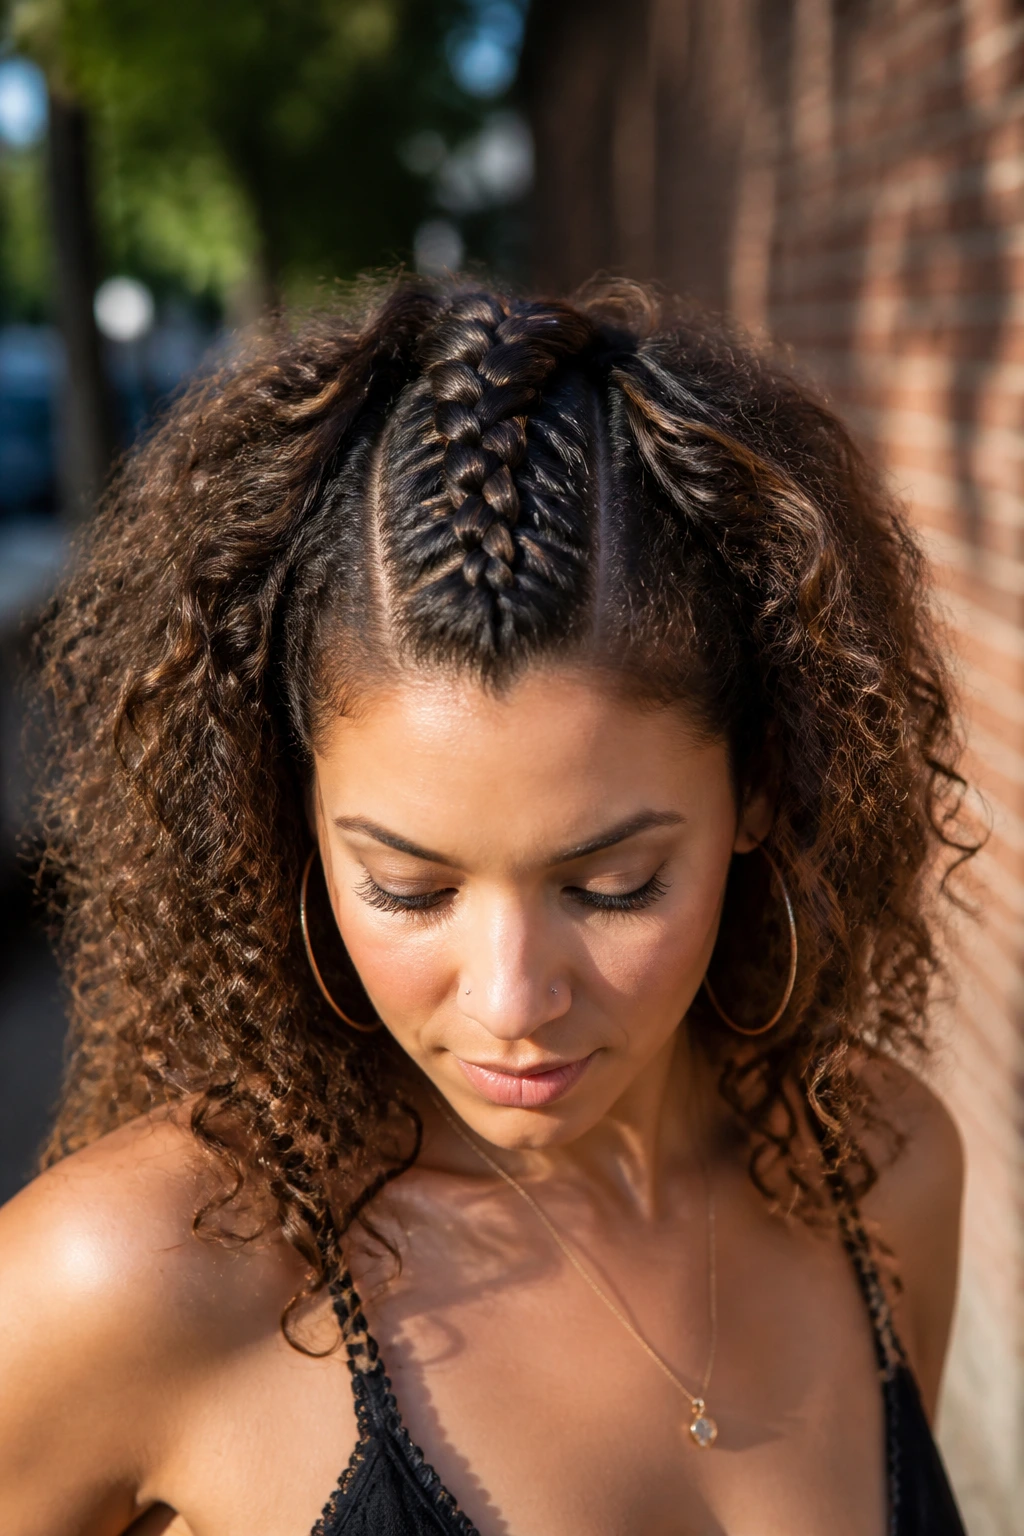
4. Face-Framing Accent Braids
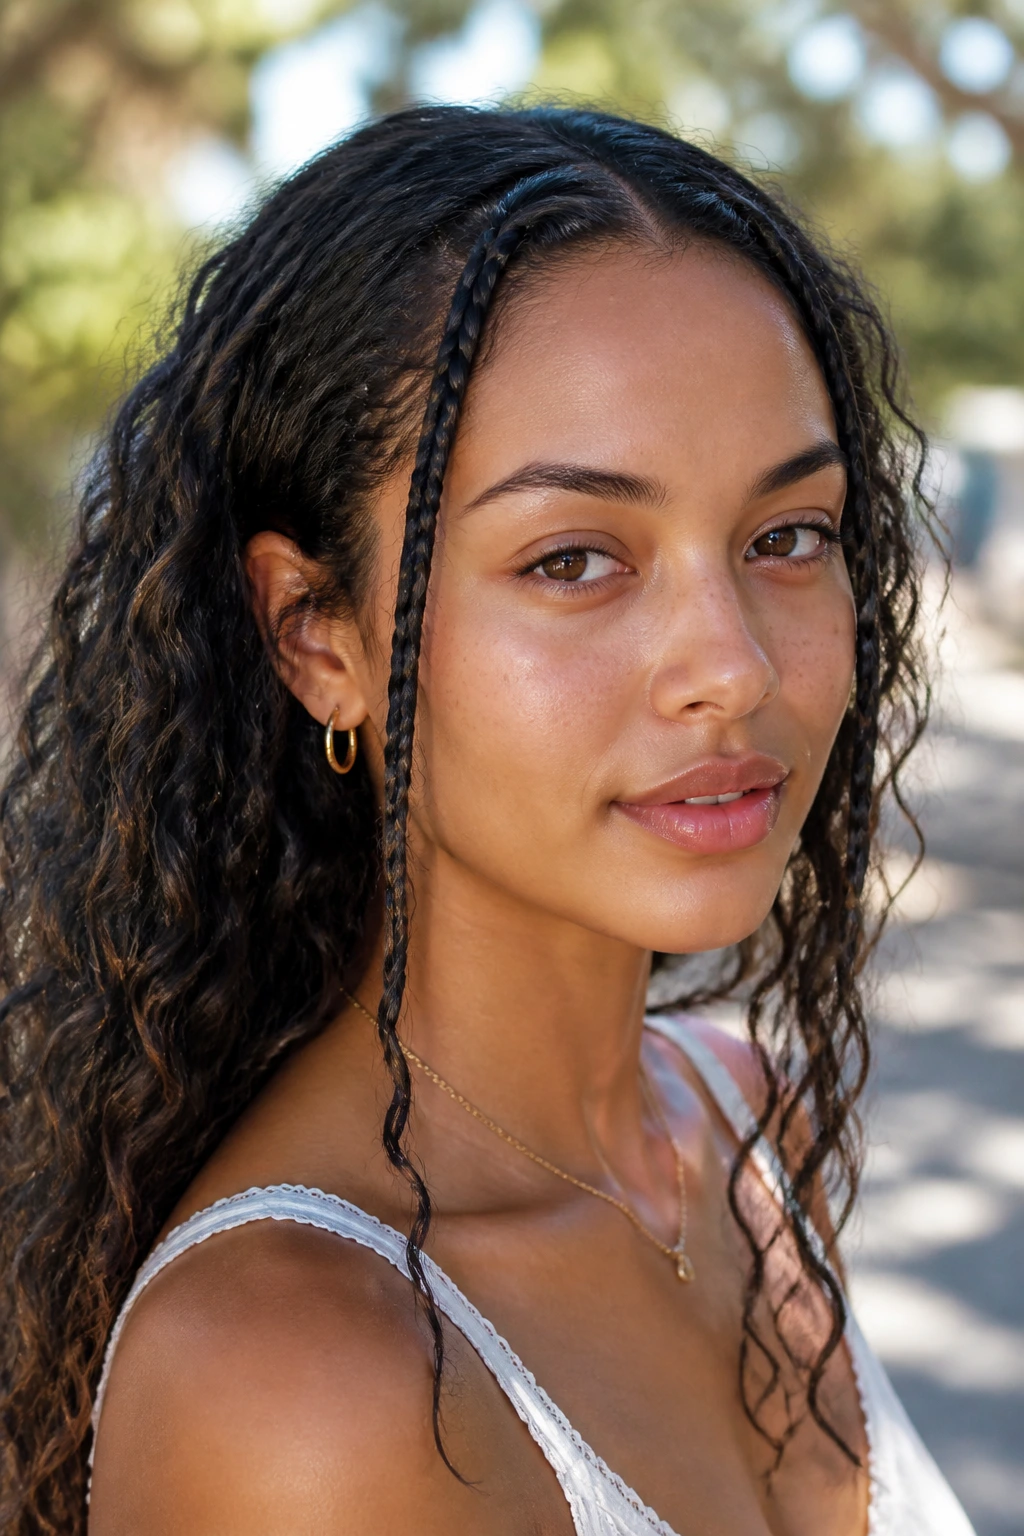
Face-framing accent braids are the easiest style in the bunch, and I mean that in the nicest way. Two small braids at the front, the rest of the hair left curly. That’s it. No drama. No overthinking. Just a little structure near the cheeks and a lot of texture everywhere else.
They’re especially useful when your hair is in that in-between state—not fresh, not dirty, just a little too puffy to leave fully out. The braids break up the front shape and make the whole style look deliberate. Add a small curl cream to the loose lengths if they need a bit of refresh, and you’re done.
A tiny detail matters here: braid the sections slightly behind the hairline, not right on top of it. That leaves the front softer and keeps the style from looking too severe.
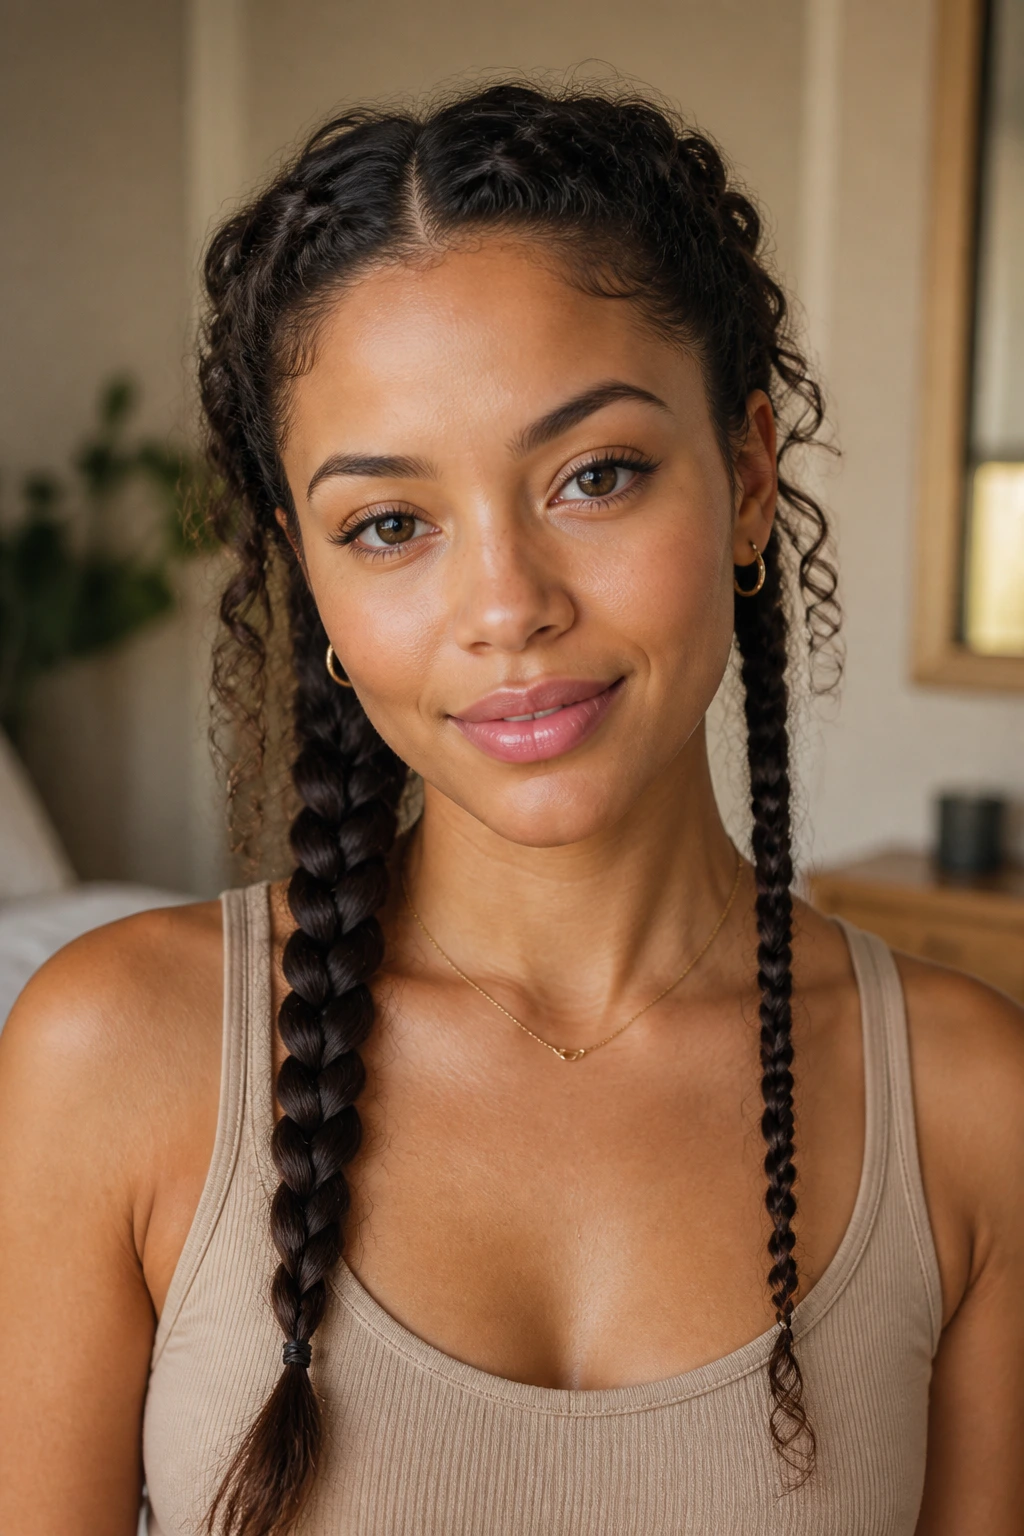
5. Dutch Braids Into Curly Pigtails
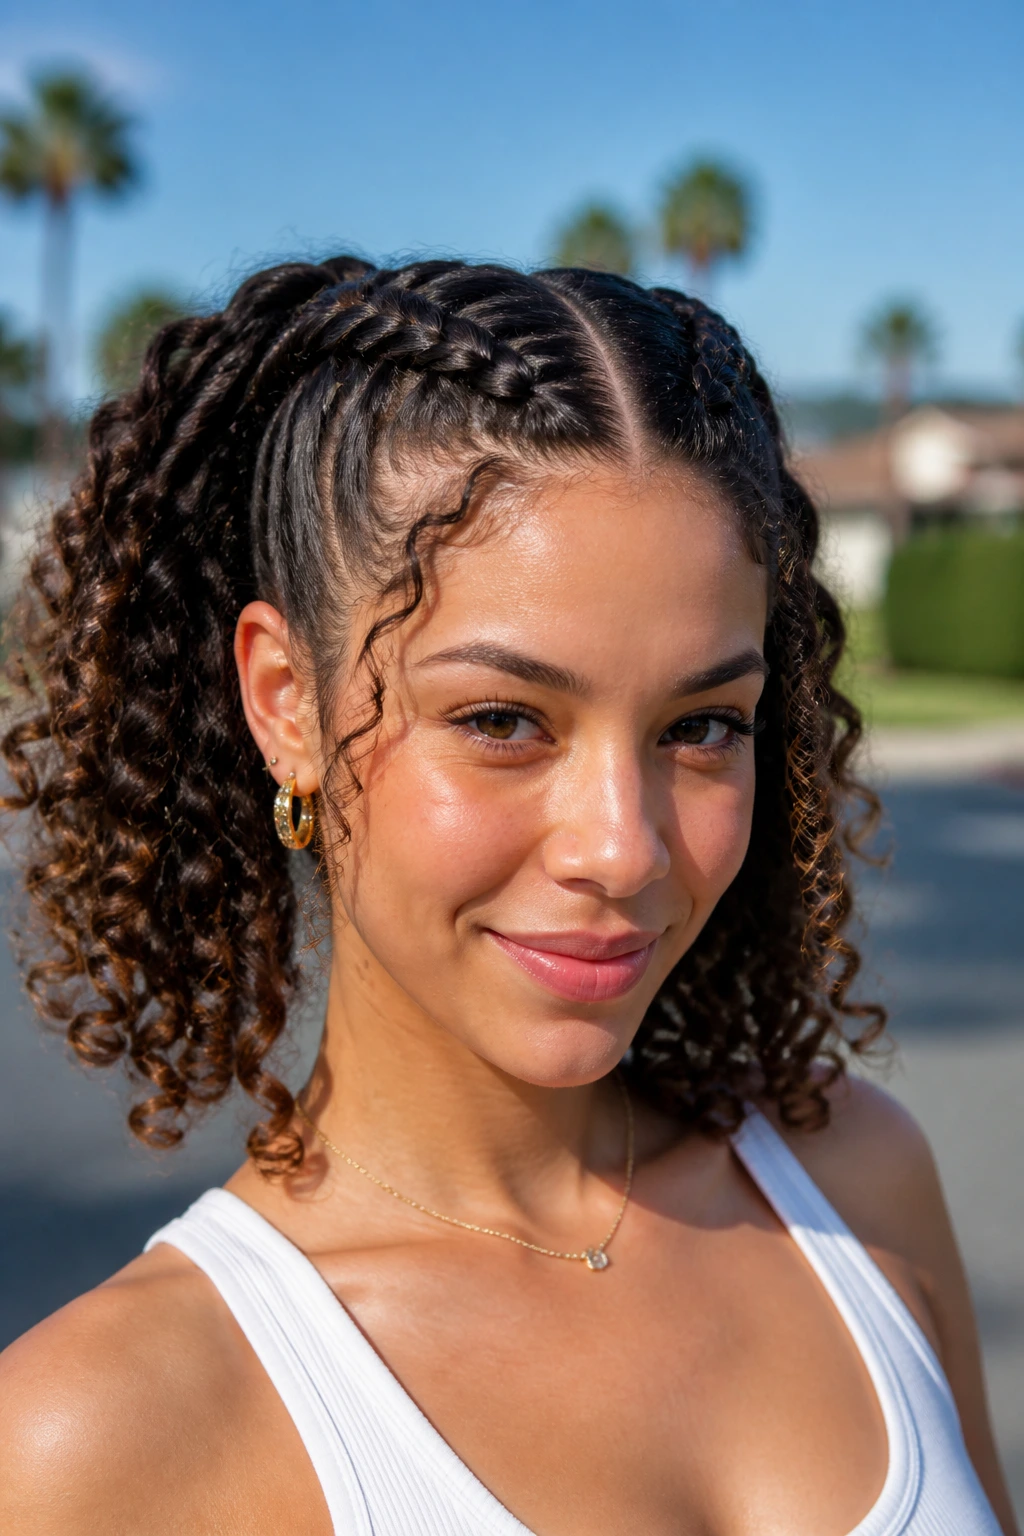
Dutch braids into curly pigtails are one of my favorite summer styles because they stay put. The braid sits raised on the head, which means it keeps its shape even when the air is humid. Then the pigtail ends stay curly and light, so the style doesn’t feel heavy.
This is a good one for active days. Running errands. Outdoor fairs. Long walks. It holds better than loose side braids, and it gives you a strong line at the scalp without flattening everything into a slick finish. If your curls are thick, parting down the center and clipping one side at a time makes the process less chaotic.
The ends can be left curly, wrapped with clear elastics, or lightly scrunched with mousse. I’d skip heavy oil at the roots. It makes the braid too slippery and the Dutch ridges lose their shape.
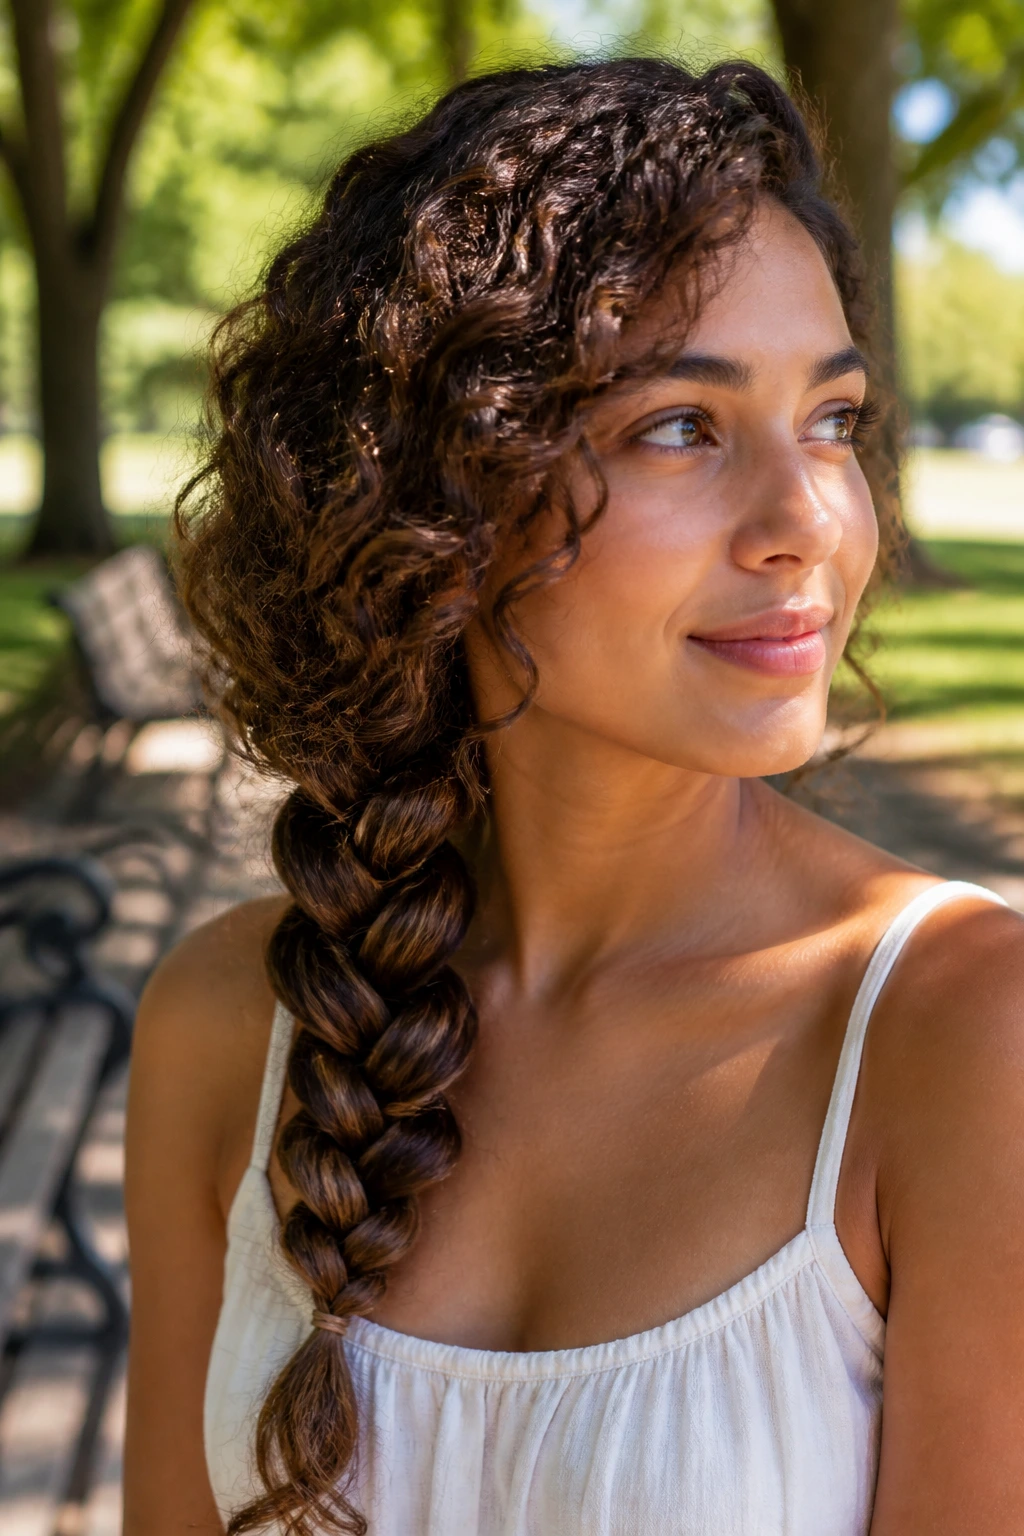
6. Side Braid With A Deep Part

A side braid with a deep part is the style I reach for when I want something quick but still polished enough to look like I tried. The deep part gives the braid direction, and the side placement makes the style sit nicely over one shoulder, where curly ends can fan out in a full, soft shape.
The braid itself can be loose or tight, depending on how much control you want. Loose braids look softer and give the curls a little room to puff. Tighter braids hold better if your hair is layered or prone to unraveling. Either way, keep the front smooth with your fingers first, then braid while the hair still has a bit of product hold.
This one is good on medium to long curls, especially if the ends are defined. A twist cream or foam helps the braid finish look cleaner. No need for a crunchy finish. That just makes the shoulder line awkward.
7. Braided Space Buns
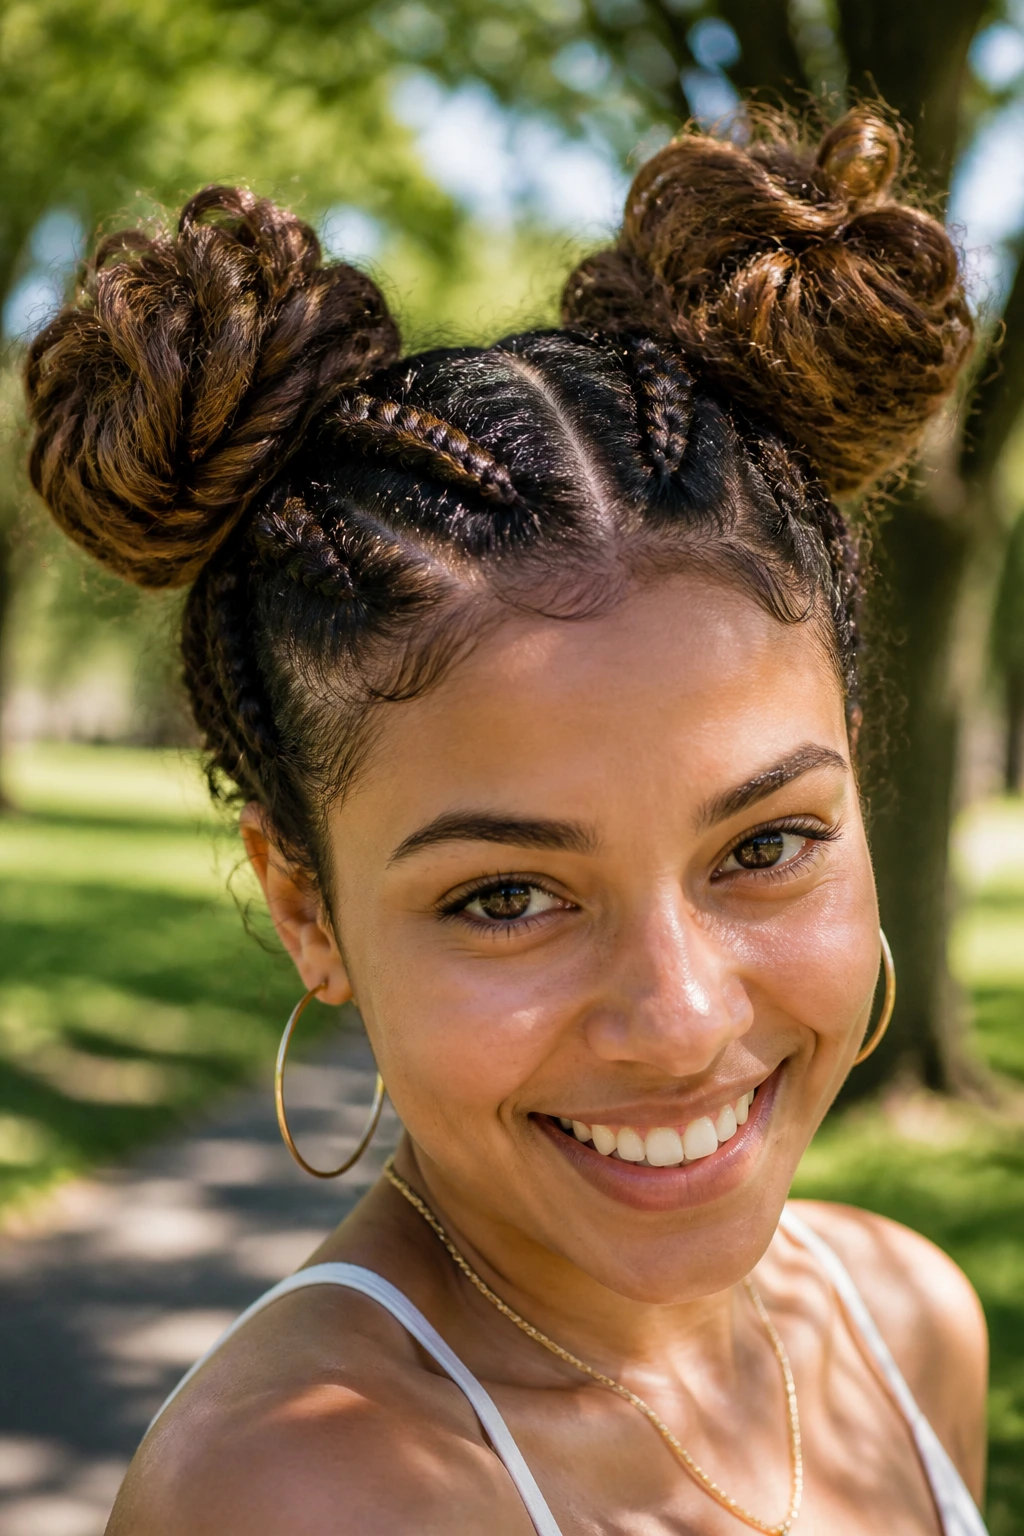
Braided space buns are playful, but they’re also practical when the heat gets serious. You split the hair into two sections, braid each side, then coil them into buns high enough to keep the neck clear. The result is youthful, yes, but also extremely functional.
Curly hair gives this style extra lift. The buns don’t need to be tiny and tight. In fact, they look better when they’re a little full. That fullness softens the shape and keeps the style from looking too severe. If your curls are thick, braid the lengths first so the buns don’t become giant knots of hair.
The part matters here. A clean center part keeps the style balanced. If one side sits higher than the other, the whole look starts to feel off, and you’ll notice it in every mirror after that.
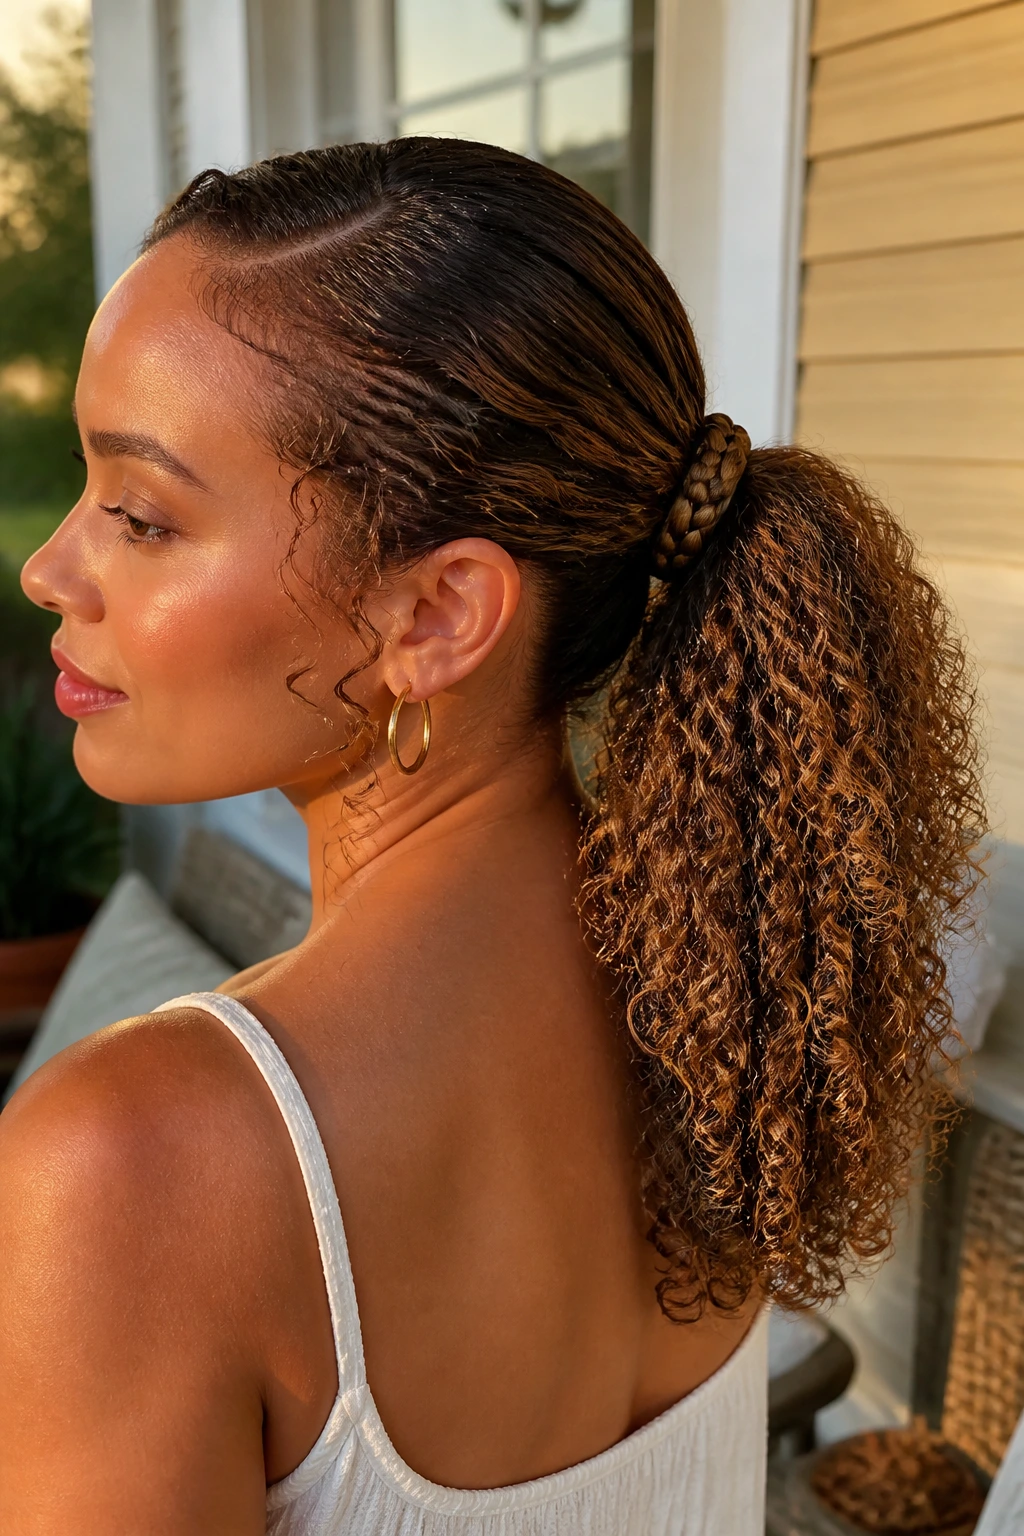
8. Rope Twist Ponytail
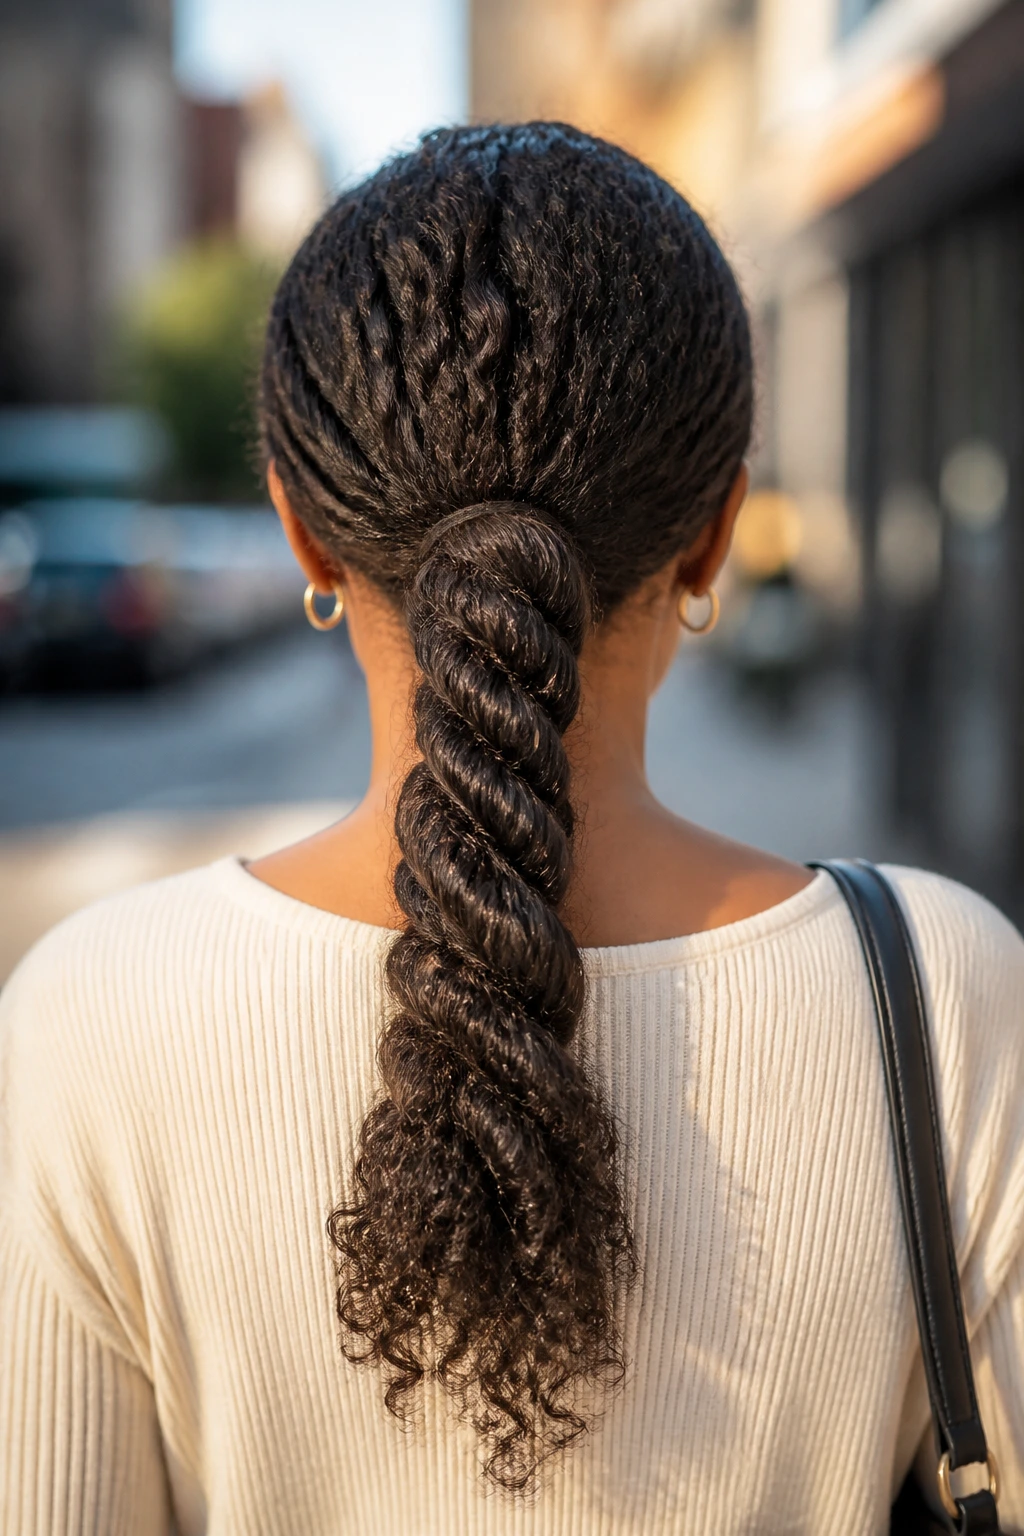
A rope twist ponytail is one of the easiest braid-adjacent styles to do on curly hair, and that’s a real advantage on mornings when you don’t want to wrestle with three sections and twenty clips. You divide the ponytail into two strands, twist both in the same direction, then wrap them around each other in the opposite direction. Simple. Fast. Neat.
The twist pattern shows up more clearly on stretched curls, but it still looks good on natural texture because the volume keeps the rope from looking thin. I like this style when the hair is shoulder length or longer, because the weight of the ponytail helps the twist settle instead of bouncing apart.
Use a strong elastic at the base. If the base slips, the whole rope starts to unwind. That’s the part most people underestimate.
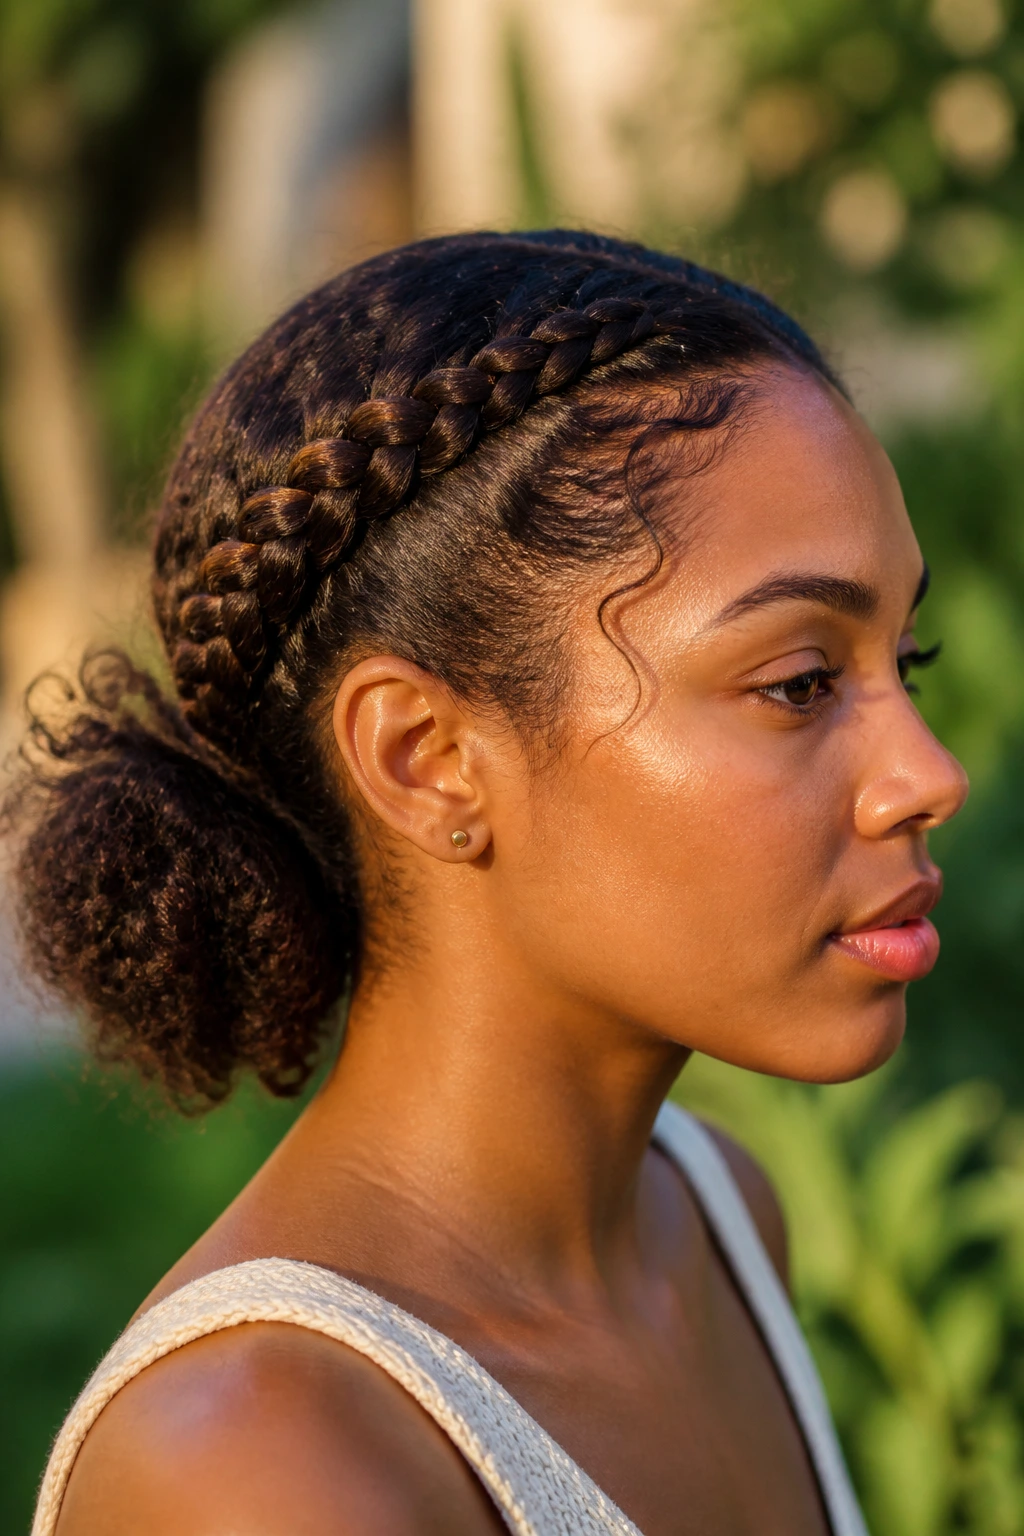
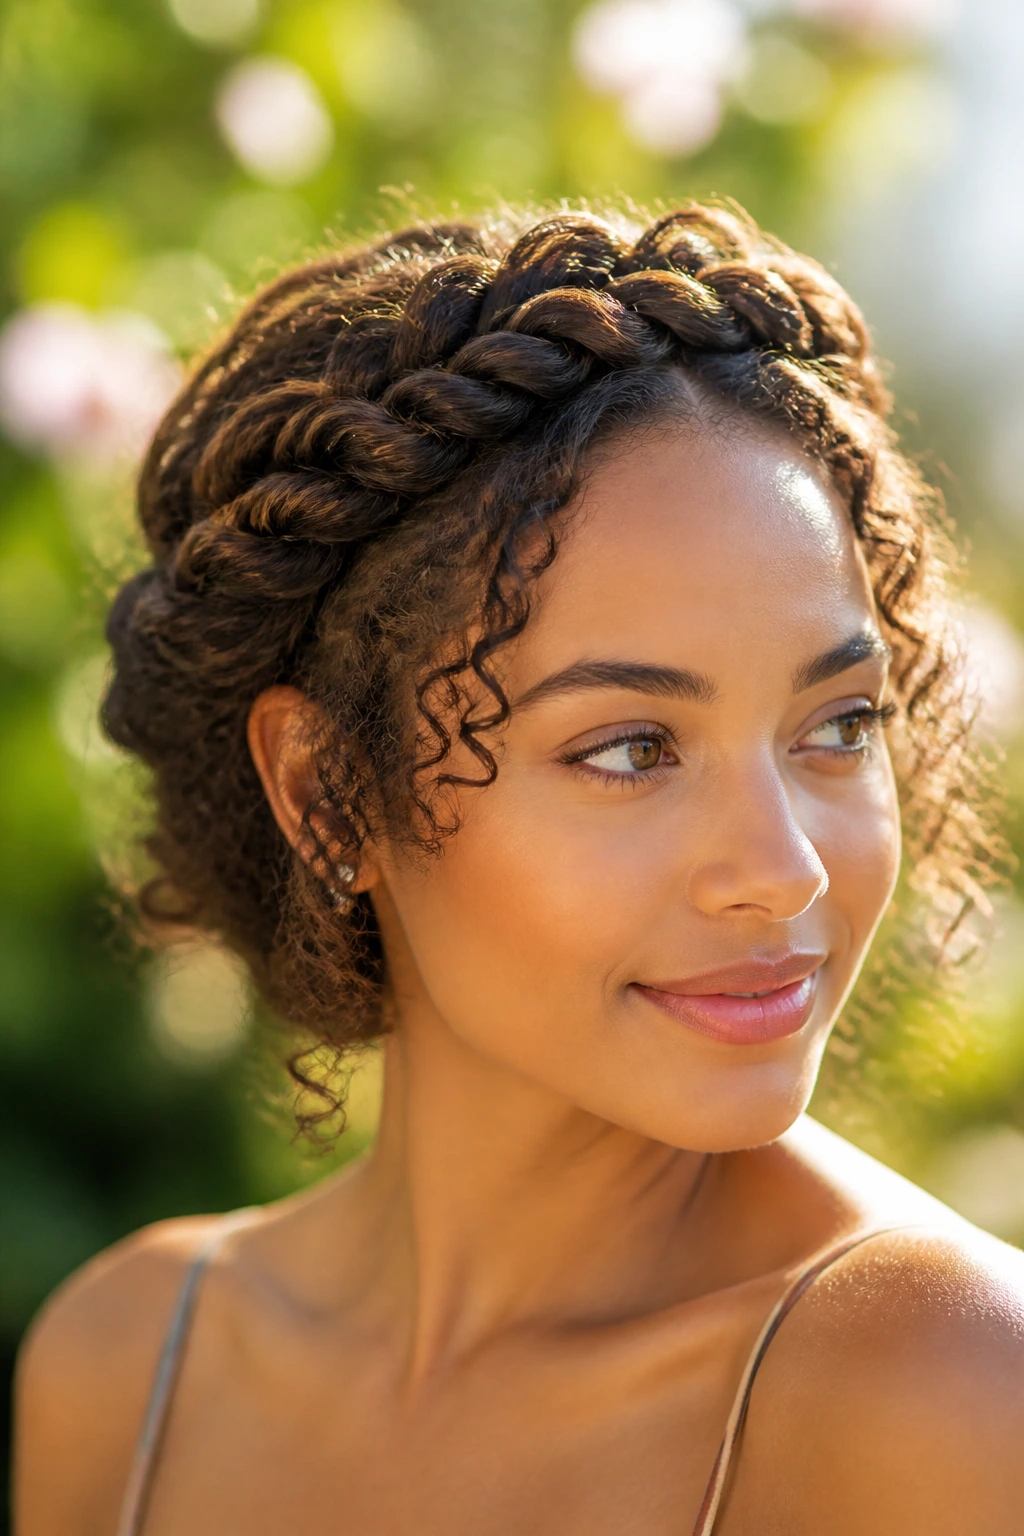
9. Milkmaid Braids
Milkmaid braids have a soft, old-fashioned shape that somehow looks even better on curly hair than on smoother textures. You braid two sections, wrap them across the top of the head, and pin them into place so they form a braided crown. The leftover texture at the back can stay loose or be tucked under, depending on how polished you want it.
This style is especially good when you want the hair completely off your neck without going full ballerina bun. The crown effect is pretty, but not fragile-looking. Curly hair gives it body, which keeps the braids from sitting flat and narrow.
Use bobby pins that match your hair color, and slide them in with the wavy side facing down. That tiny detail makes the whole thing hold better. Cheap pins work fine. Bad placement does not.
10. French Braid Into A Curly Bun
A French braid into a curly bun gives you structure at the top and softness at the bottom, which is a very useful combination on hot, humid days. The braid pulls hair back from the face, then the bun at the end keeps the style contained and off the shoulders.
The best version of this style starts with medium tension at the roots, not a hard yank. Pull too tight and you’ll feel it by midday. Leave a few curls near the ears if you want the braid-to-bun transition to feel less severe. That also softens the profile when you’re looking at the style from the side.
If your hair is layered, pinning the bun first and then tucking the shorter pieces under keeps it cleaner. A little mousse on the braid before you wrap the bun helps the flyaways behave.
11. Waterfall Braid
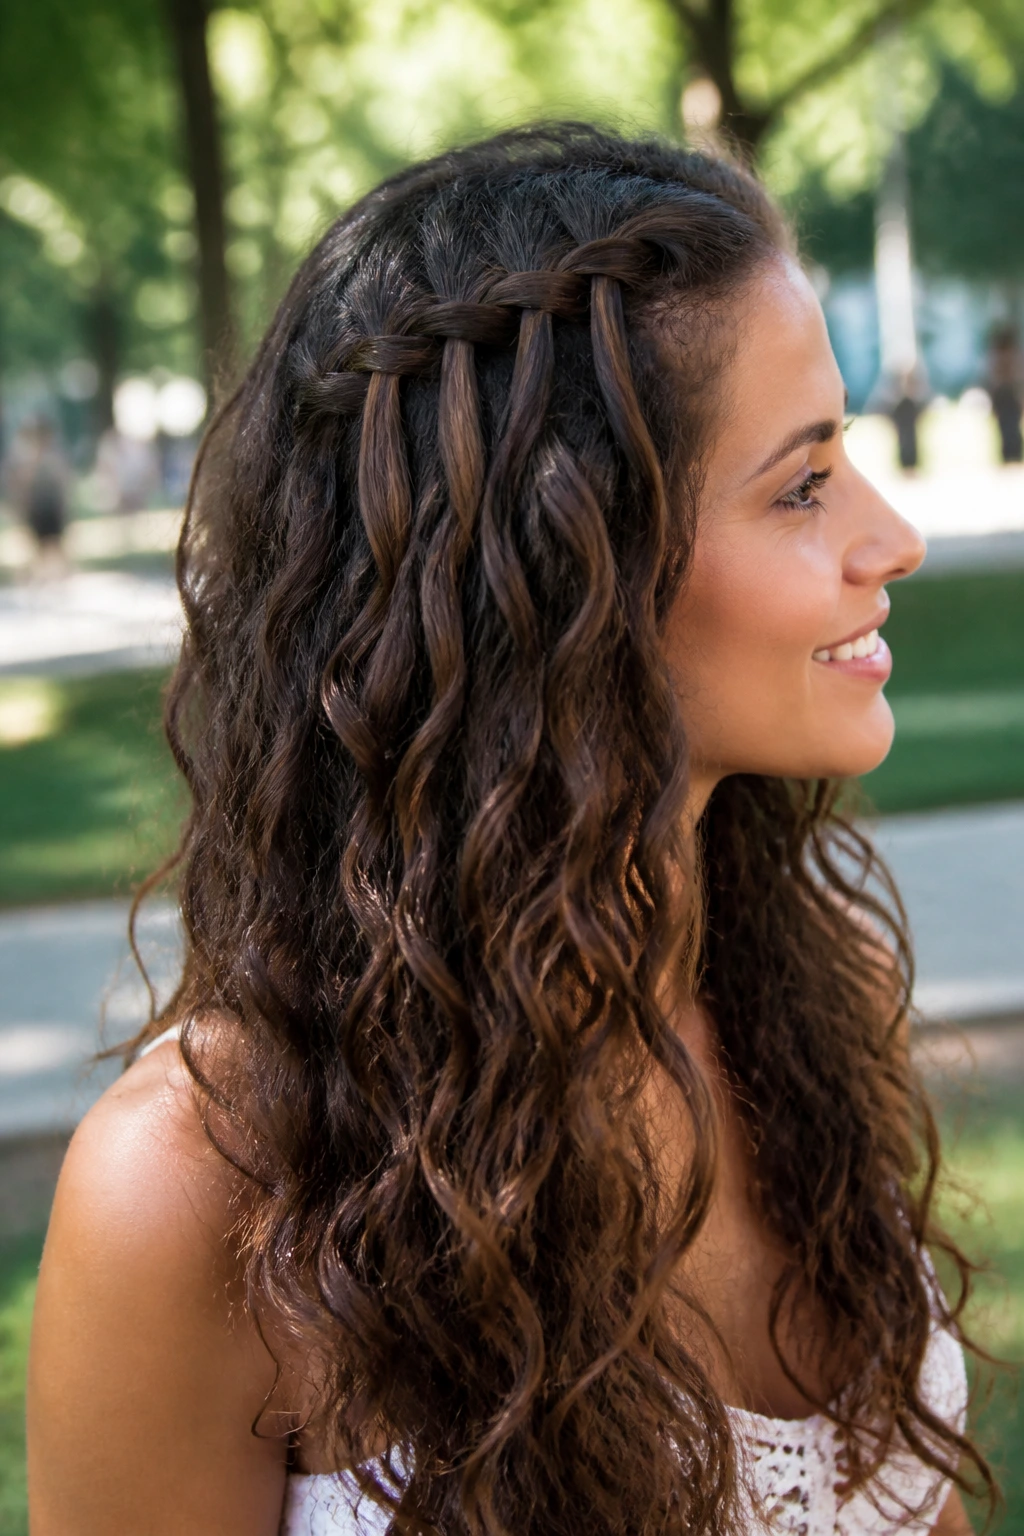
A waterfall braid is one of the prettiest ways to keep some curl volume visible while still controlling the front of the hair. Strands drop through the braid instead of being tucked in, so the style has that cascading effect without taking away all the movement.
On curly hair, that dropping motion makes the braid look fuller. Each released piece keeps its own spiral or wave, which gives the whole style a softer edge. It’s a strong choice for longer curls and for hair that has a bit of frizz, because the looseness of the design hides small imperfections.
Do not try to make this one too perfect. If the braid line is a little irregular, it still reads well. Actually, it usually reads better. The charm is in the looseness.
12. Braided Headband
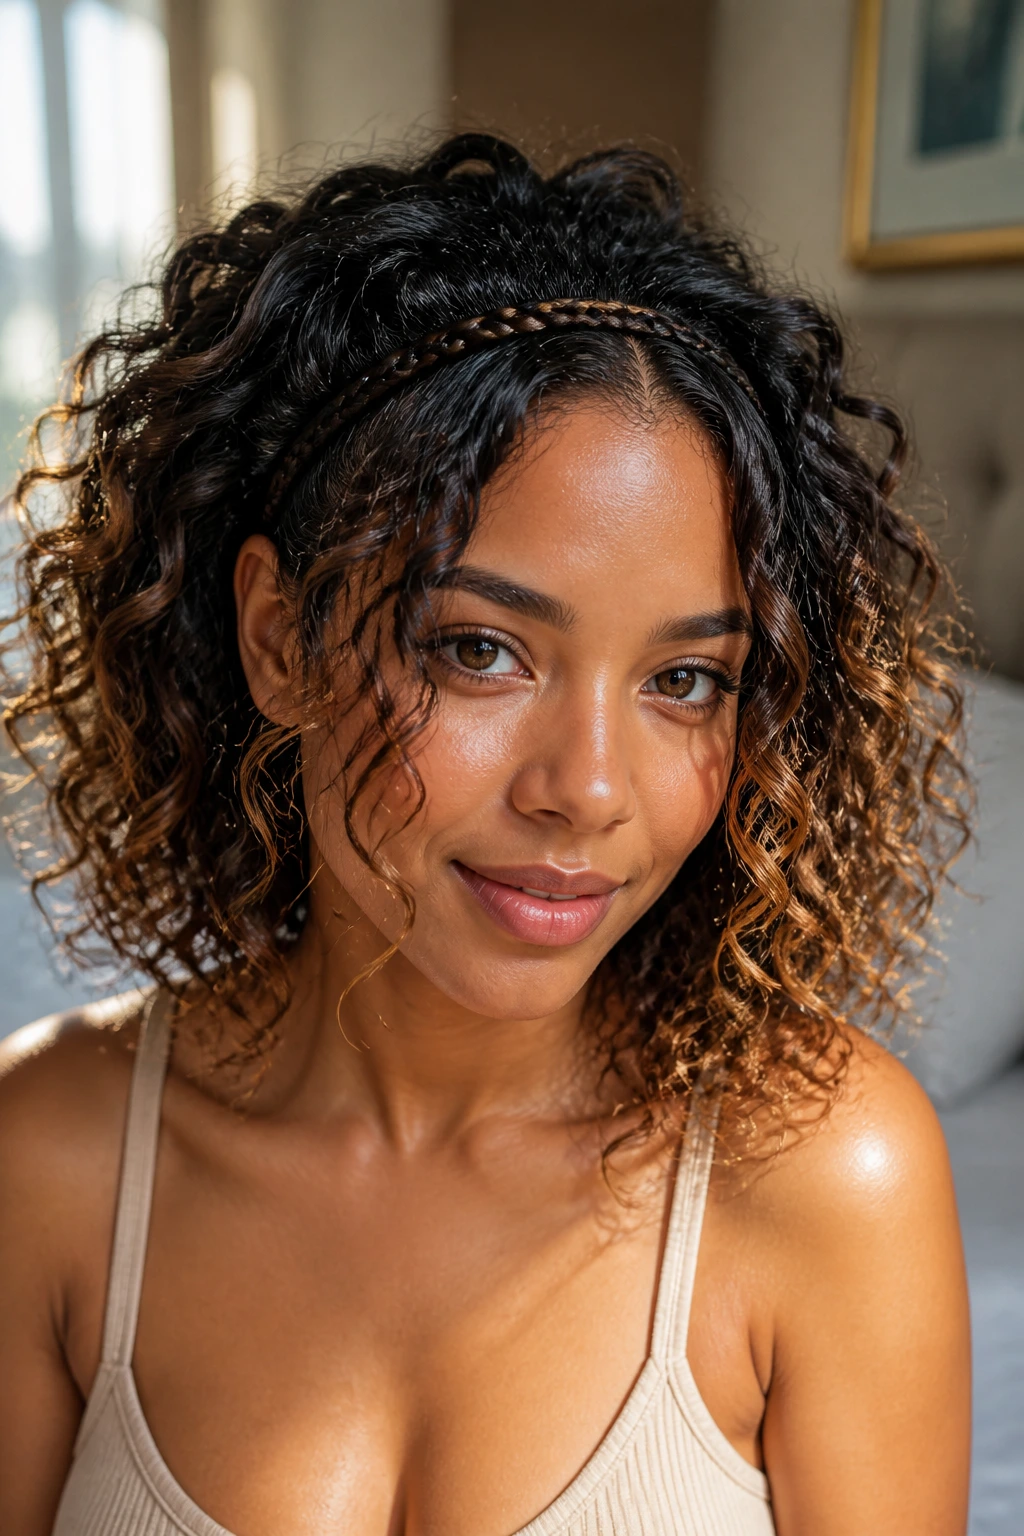
A braided headband is one of those styles that feels tiny until you do it, then it changes the entire face shape. You braid a narrow section from one side, bring it across the top like a band, and pin it near the opposite temple. The rest of the curls stay free.
This is a strong choice when your curls are at that stage where they want to expand around the forehead. The braid acts like a soft restraint. Not a hard one. Just enough to stop the front from taking over. It also works well with glasses, which is a small but useful thing to think about because a lot of headbands and clips fight with frames.
Keep the braid narrow and the pins hidden under nearby curls. If you go too wide, the headband effect becomes clunky and starts stealing attention from the curls themselves.
13. Fishtail Shoulder Braid
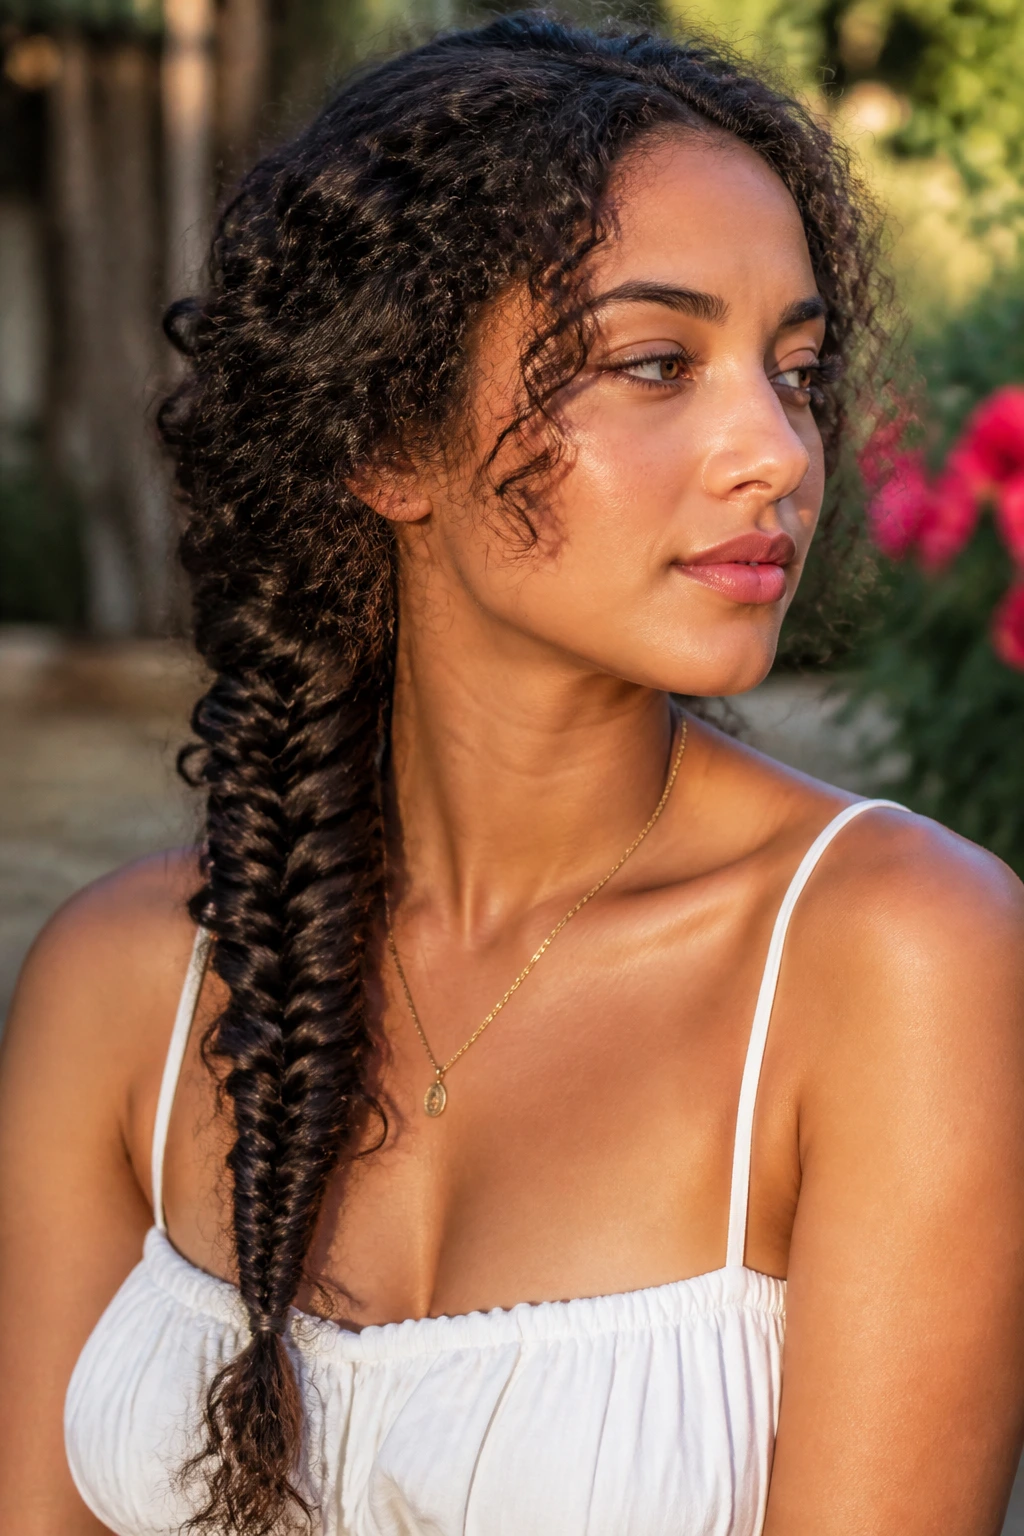
A fishtail braid sitting over one shoulder has a different feel from a regular three-strand braid. It looks more woven, more textured, and on curly hair it turns into a very full, rope-like shape that catches the eye without needing extra styling tricks.
The braid holds best when the hair has some stretch. A braid-out or a day-two curl pattern is easier to manage than a just-washed cloud. I also prefer this style when the ends are defined, because the fishtail shape gives the hair a nice taper instead of an abrupt stop.
If your hair is thick, split the braid into larger sections than you think you need. Tiny fishtail sections take forever and don’t necessarily look better. Bigger sections create a chunkier braid that feels more relaxed.
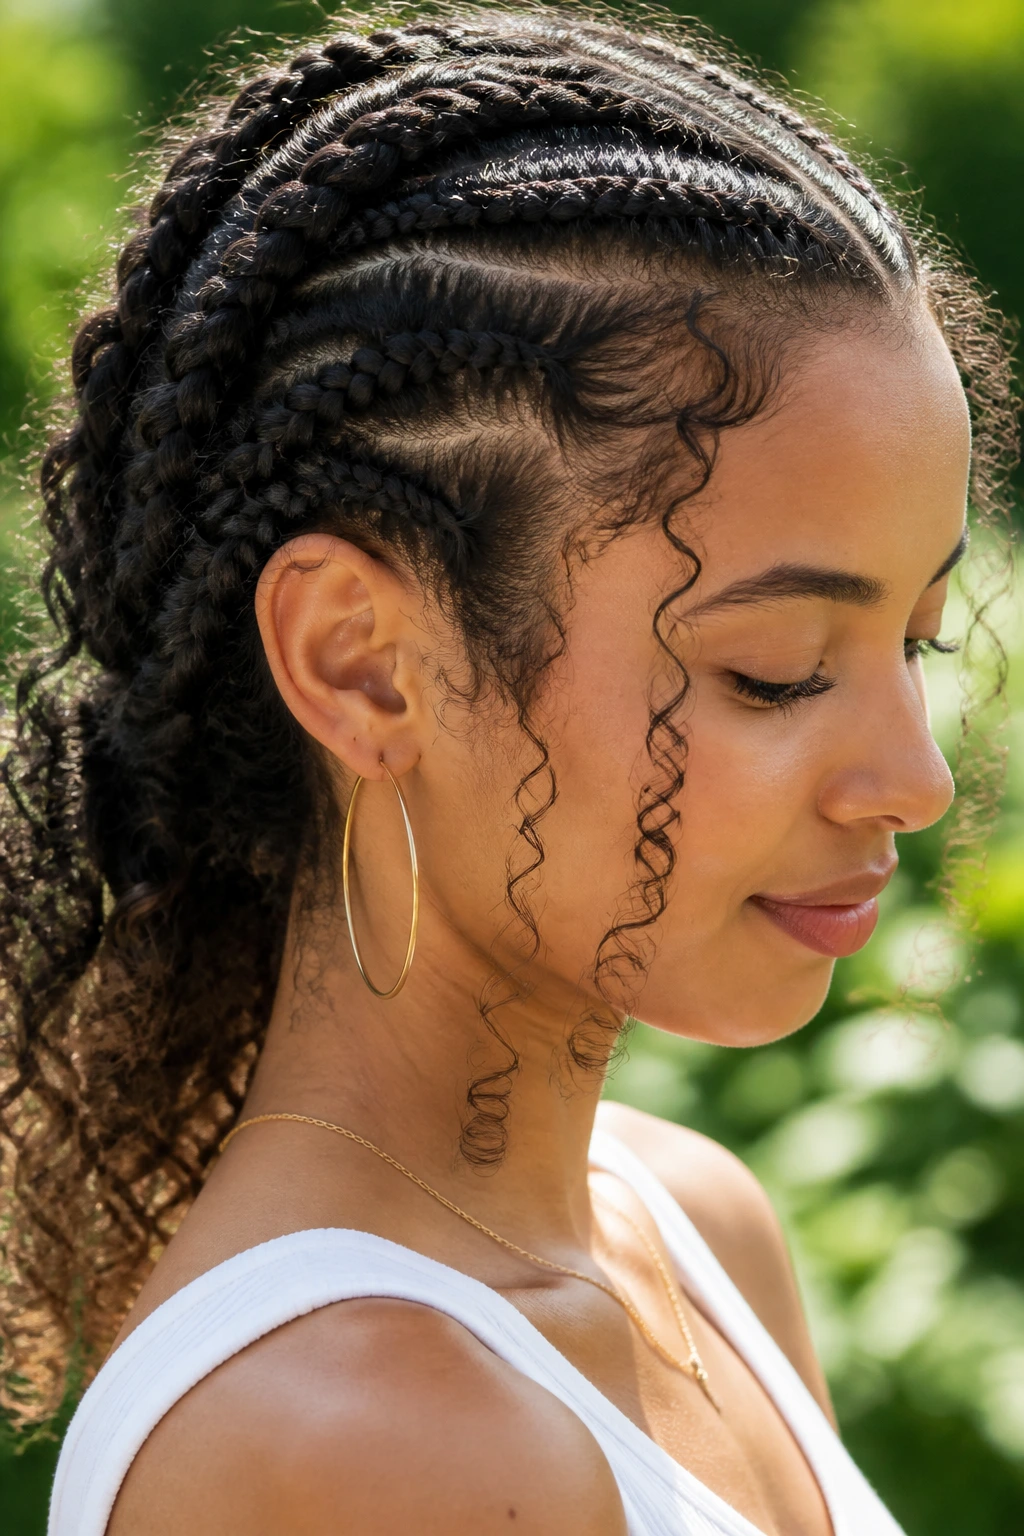
14. Front Cornrow Tuck
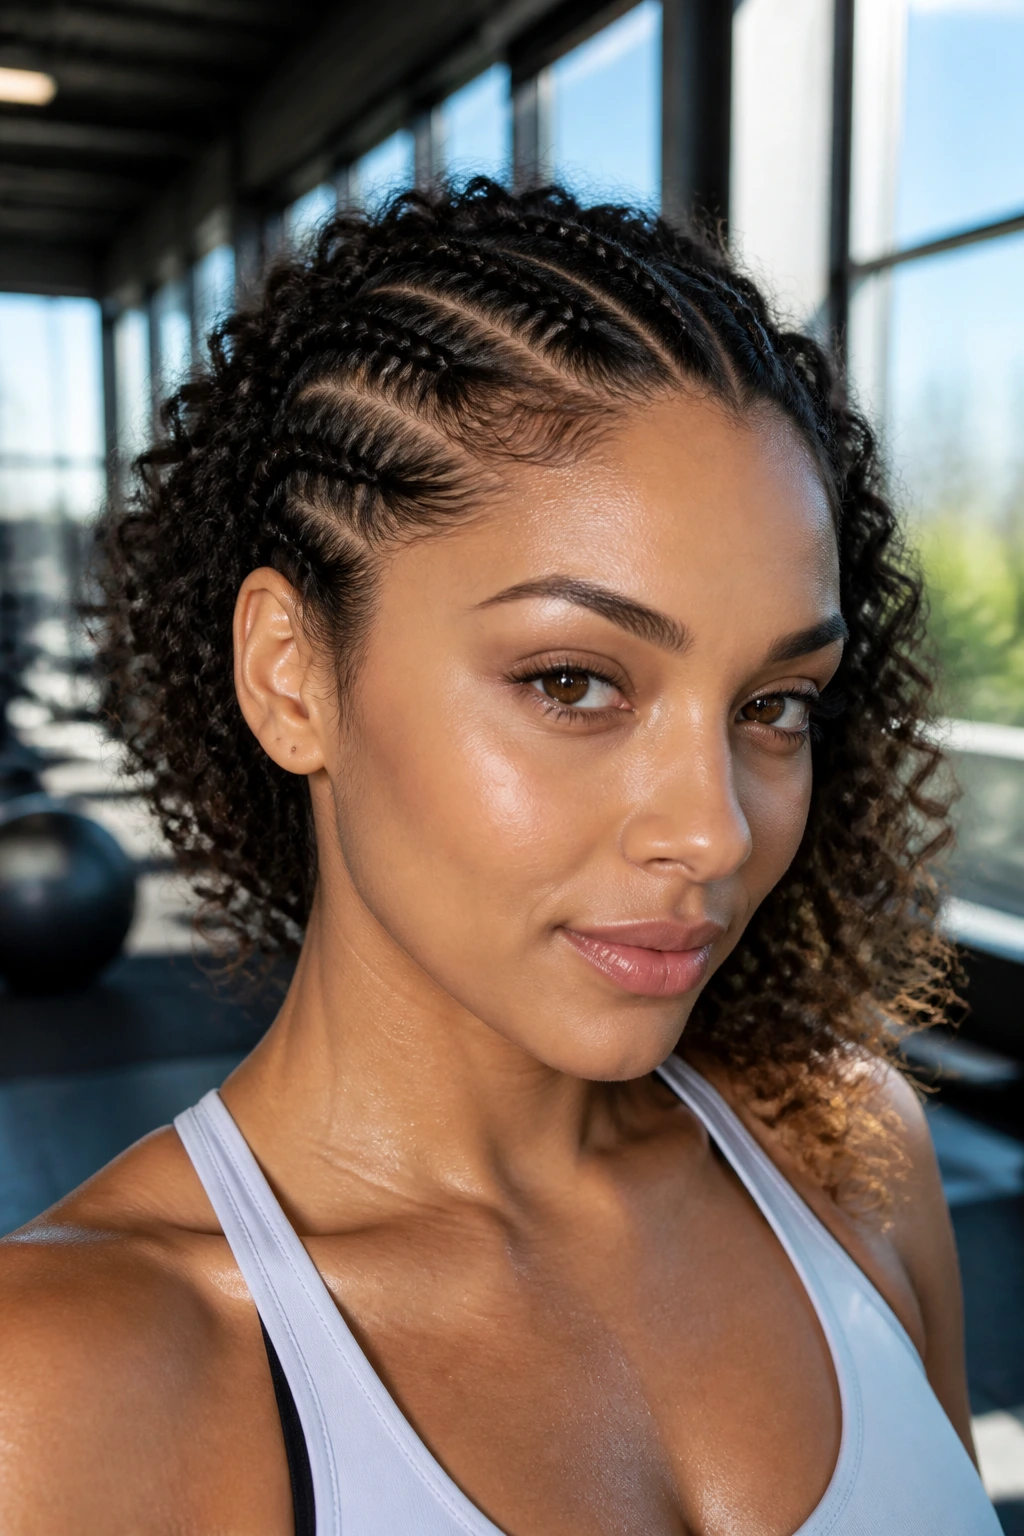
A front cornrow tuck is a clean, practical style for anyone who wants the hairline controlled without hiding the rest of the texture. You braid the front rows close to the scalp, then tuck or pin the ends into the curly length behind them. It keeps the forehead open and gives the style a sporty, protective feel.
This works well for gym days, beach days, or any day you know the wind is going to misbehave. The scalp stays calmer because the front hair is anchored, and the curls in back still move. That mix matters. A style that’s too flat at the crown can look harsh on curly hair, while this one keeps some softness.
If you are new to cornrows, keep them short and wide. Tiny sections are harder to control and more likely to pull. Shorter rows are easier to wear and easier to remove.
15. Pull-Through Braid Ponytail
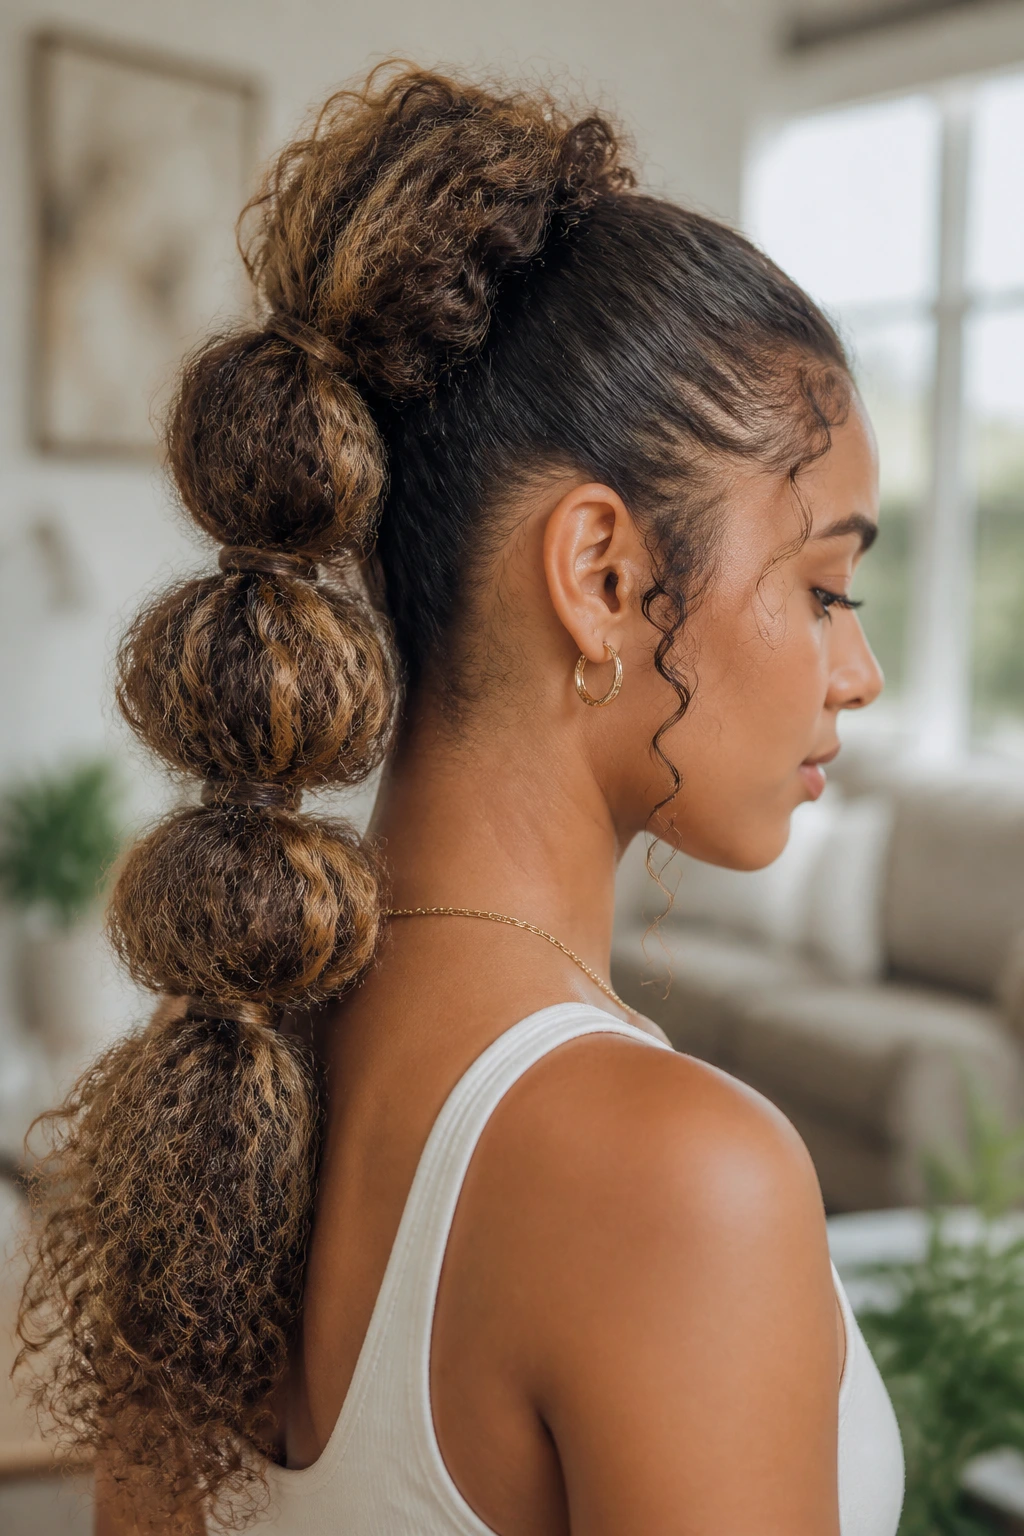
A pull-through braid ponytail gives you the drama of a large braid without needing the hand skills of a true braid artist. You build the shape with a series of small ponytails layered down the length, then fluff the sections so it reads as a chunky braid. On curly hair, that fluffy finish looks right at home.
This is one of my favorites when the hair is dense and you want volume on purpose. It also works well when you want something a little more styled than a regular ponytail but don’t want to spend twenty minutes braiding. The sections can be wrapped with small clear elastics, and each loop should be gently pulled apart until the braid looks full.
Don’t rush the fluffing. That’s the whole point of the style. If you skip it, the braid looks thin and a little sad.
16. Braided Top Knot
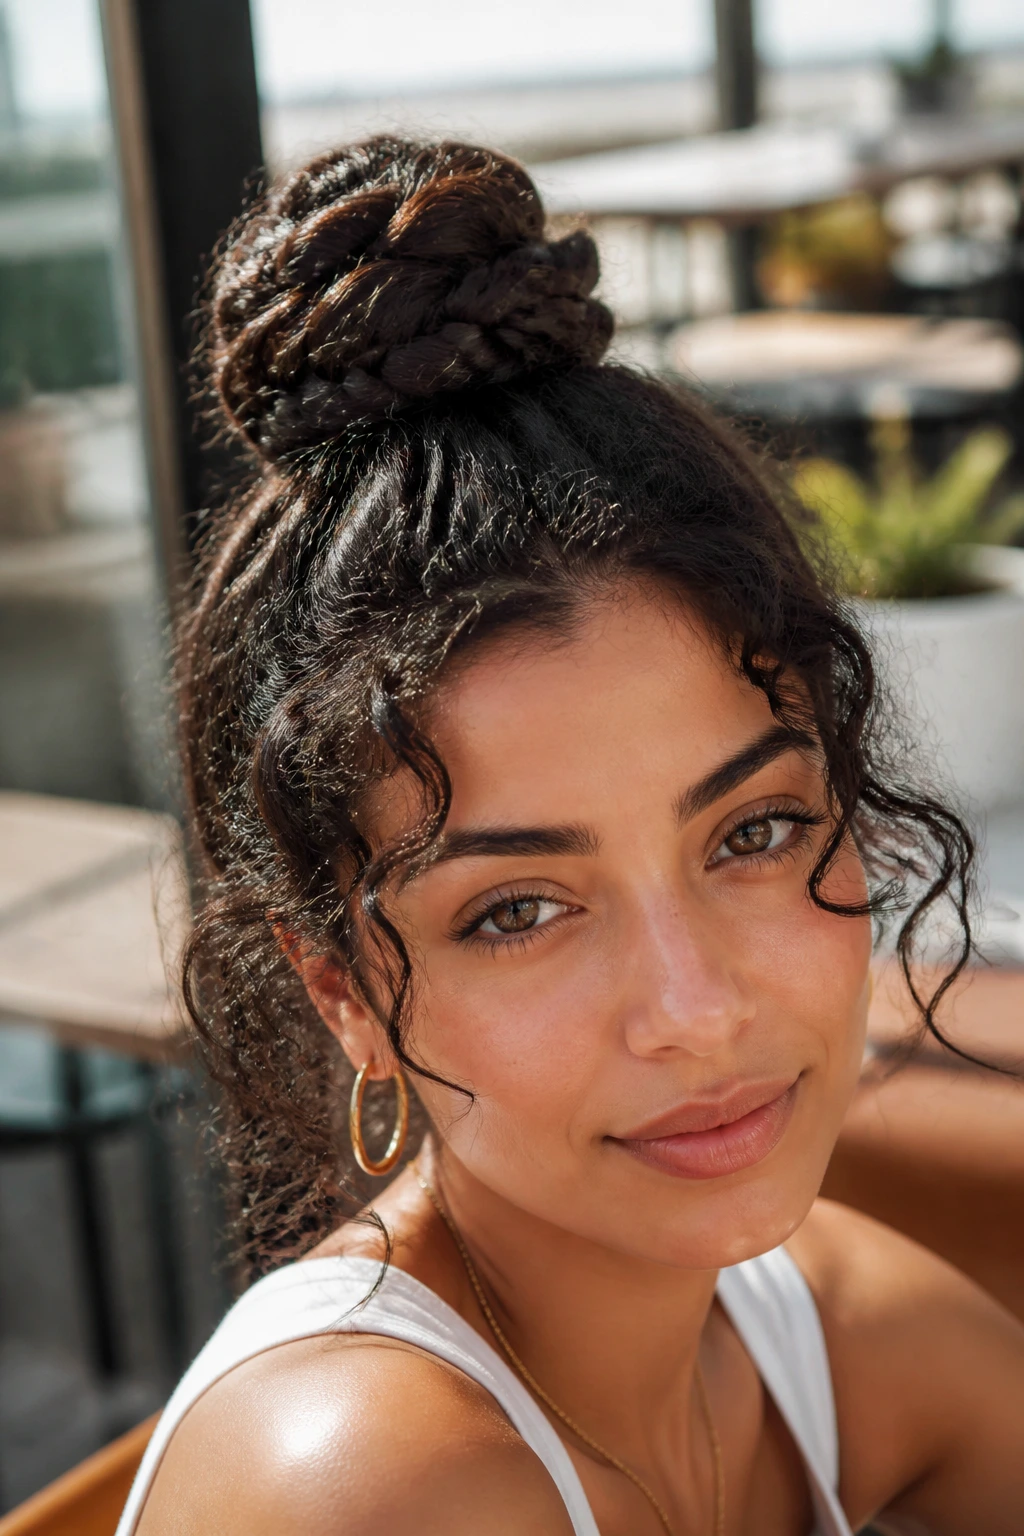
A braided top knot is the antidote to a sweaty neck and a flat crown. You braid the hair first, then twist or coil the braid into a knot high on the head. Curly hair makes the knot look fuller, and the braid gives the style enough structure that it doesn’t collapse halfway through the day.
The higher placement lifts the face and keeps the shoulders clear. I like it when I want something practical but not plain. A plain bun can look severe on curls; the braid adds a bit of texture and stops the style from feeling too slick.
Use two pins crossed in an X if the knot feels loose. One pin usually isn’t enough for dense curls. Dense curls have opinions. They push back.
17. Four-Strand Side Braid
A four-strand braid looks more intricate than a standard braid, but the payoff on curly hair is worth it if you want a textured, slightly sculptural finish. Because the braid uses four sections instead of three, the pattern reads wider and fuller, which curly texture handles beautifully.
This style is best when you want something a little different without drifting into fussy territory. The extra strand gives the braid more visual movement, especially on layered curls. It also looks good with a side part, because the braid can sit heavy over one shoulder and show off the shape.
If you’ve never done a four-strand braid before, practice on damp hair or a ponytail first. The pattern is easy to lose when the curls are springy and your hands are moving fast.
18. Wrapped Ponytail Braid
A wrapped ponytail braid gives a regular ponytail more finish. You braid one small section, then wrap it around the base to hide the elastic. It’s a small change, but on curly hair it makes the whole style feel deliberate instead of thrown together.
The body of the ponytail can stay curly, puffed, or lightly stretched. That flexibility is useful. If your hair is dense, the wrap helps anchor the base and keeps the ponytail from looking like it was tied with a shoelace and left at that. If your hair is finer, the wrap adds enough visual weight to make the style look fuller.
I like this one with a deep side part and a few soft curls pulled out around the ears. It keeps the ponytail from looking too strict.
19. Two Flat Twists Into A Puff
Two flat twists into a puff are one of the easiest protective looks in the set, and they sit beautifully on curly hair because the twists keep the front controlled while the puff gives you lift at the back. If braiding feels a little too firm on your hairline, twists are a kinder option.
This style is useful when your roots need a break from full manipulation. The twists can start at the temples or just above the ears and move backward into a puff secured at the crown or mid-back of the head. The puff can be finger-fluffed for volume, then lightly shaped with a wide-tooth comb if you want more roundness.
The look is neat without being stiff. That’s the sweet spot. Keep the twists medium-sized so they don’t disappear into the puff, and keep the elastic soft enough to avoid a dent at the base.
20. Mohawk Braid With Loose Sides
A mohawk braid with loose sides has attitude, but it’s also practical because it channels the bulk of the hair straight back and away from the face. You braid the center strip from front to nape, then let the sides stay curly and loose. The contrast is what makes the style work.
On curly hair, the sides bring a lot of softness, which keeps the mohawk shape from looking too rigid. It’s a good style for thick hair because the center braid helps compress the volume without flattening everything. If your curls are shorter, a braid-and-puff version does the same job with less length.
This one can read casual or sharp depending on how tight you braid the center. Loose and fluffy feels weekend-ready. Tighter and neater feels more polished.
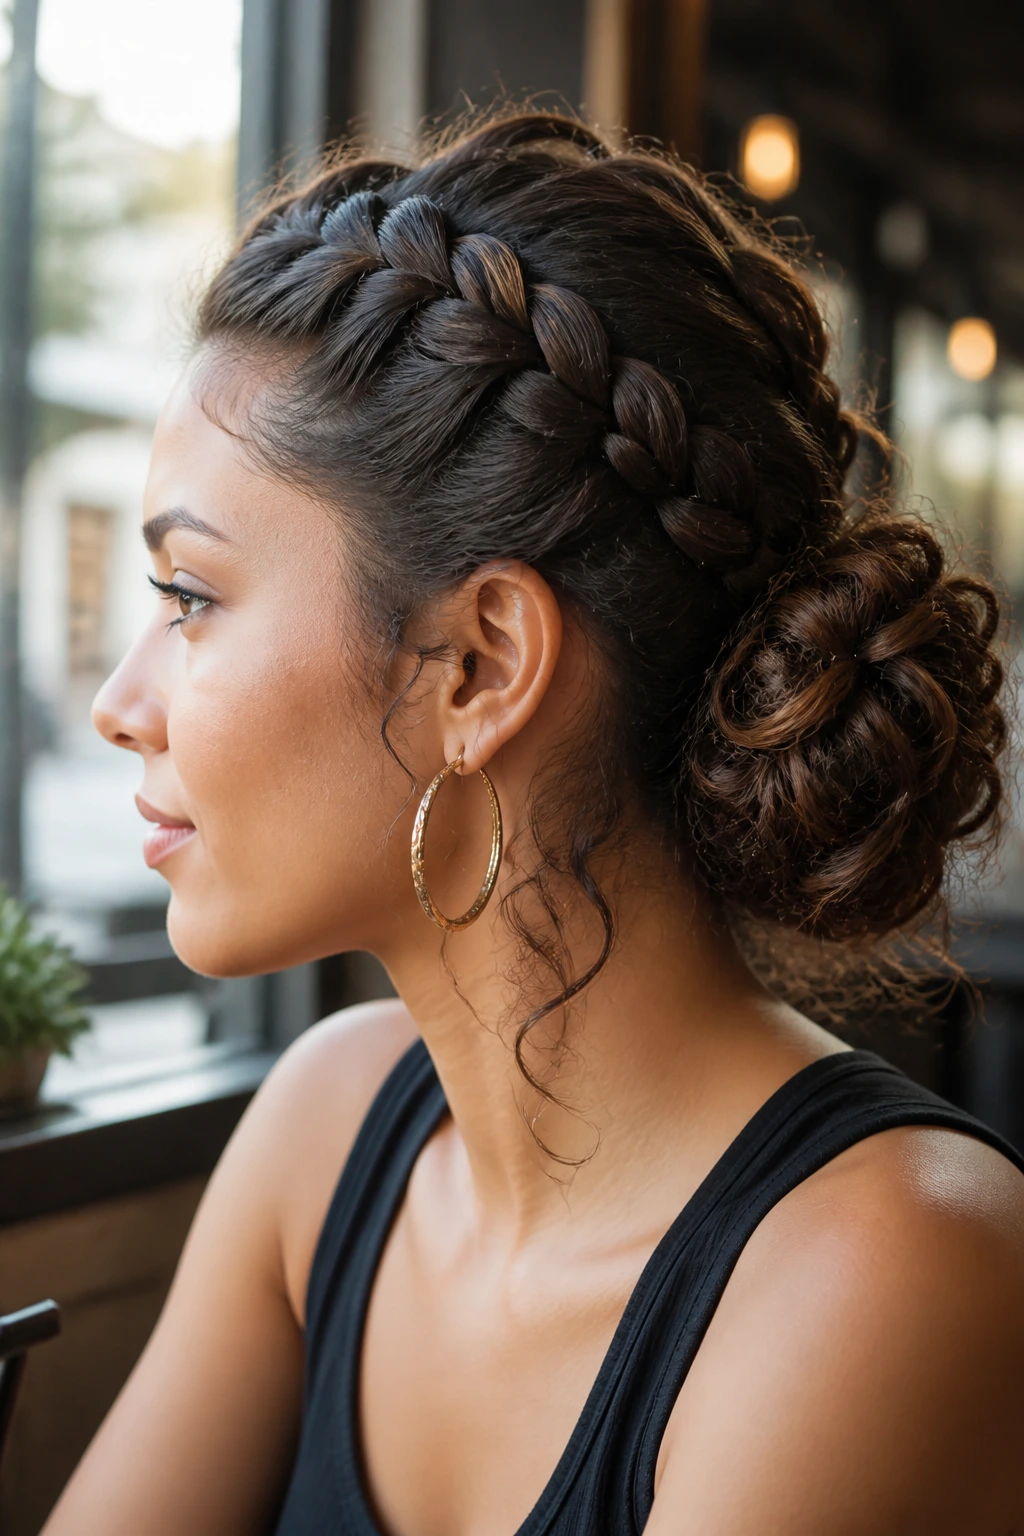
21. Low Braided Bun With Tendrils
A low braided bun with tendrils is the kind of style that quietly does everything right. It stays off the neck, keeps the bulk low, and leaves just enough curl around the face to stop it from feeling severe. The tendrils soften the whole shape.
I like this one when I need a braided style that can handle a long day without looking overworked. The braid usually starts from one side or from a small section at the nape, then wraps into a bun low at the back of the head. A few loose pieces near the temples keep the style from feeling too formal.
Don’t pull those tendrils out too early. Set the bun first, then release a few curls by hand. That keeps the shape balanced and avoids the “I fought with this for forty minutes” look.
22. Halo Twist
A halo twist is cousin to the halo braid, but softer in texture and usually a little faster if your hands prefer twisting over braiding. Two twisted sections travel around the head and meet at the back or side, forming a crown shape that feels light and airy on curly hair.
This style is especially nice when the curls already have definition. The twists sit cleanly against the texture, and the loose lengths can stay curly underneath or be tucked in depending on how protected you want the style to feel. It works beautifully on medium density hair because the crown shape doesn’t rely on a lot of bulk.
If the hairline is slippery, a tiny bit of foam or gel at the root makes the twists stay where they should. Use a light hand. Heavy product at the roots can make the halo look wet in a way that doesn’t age well.
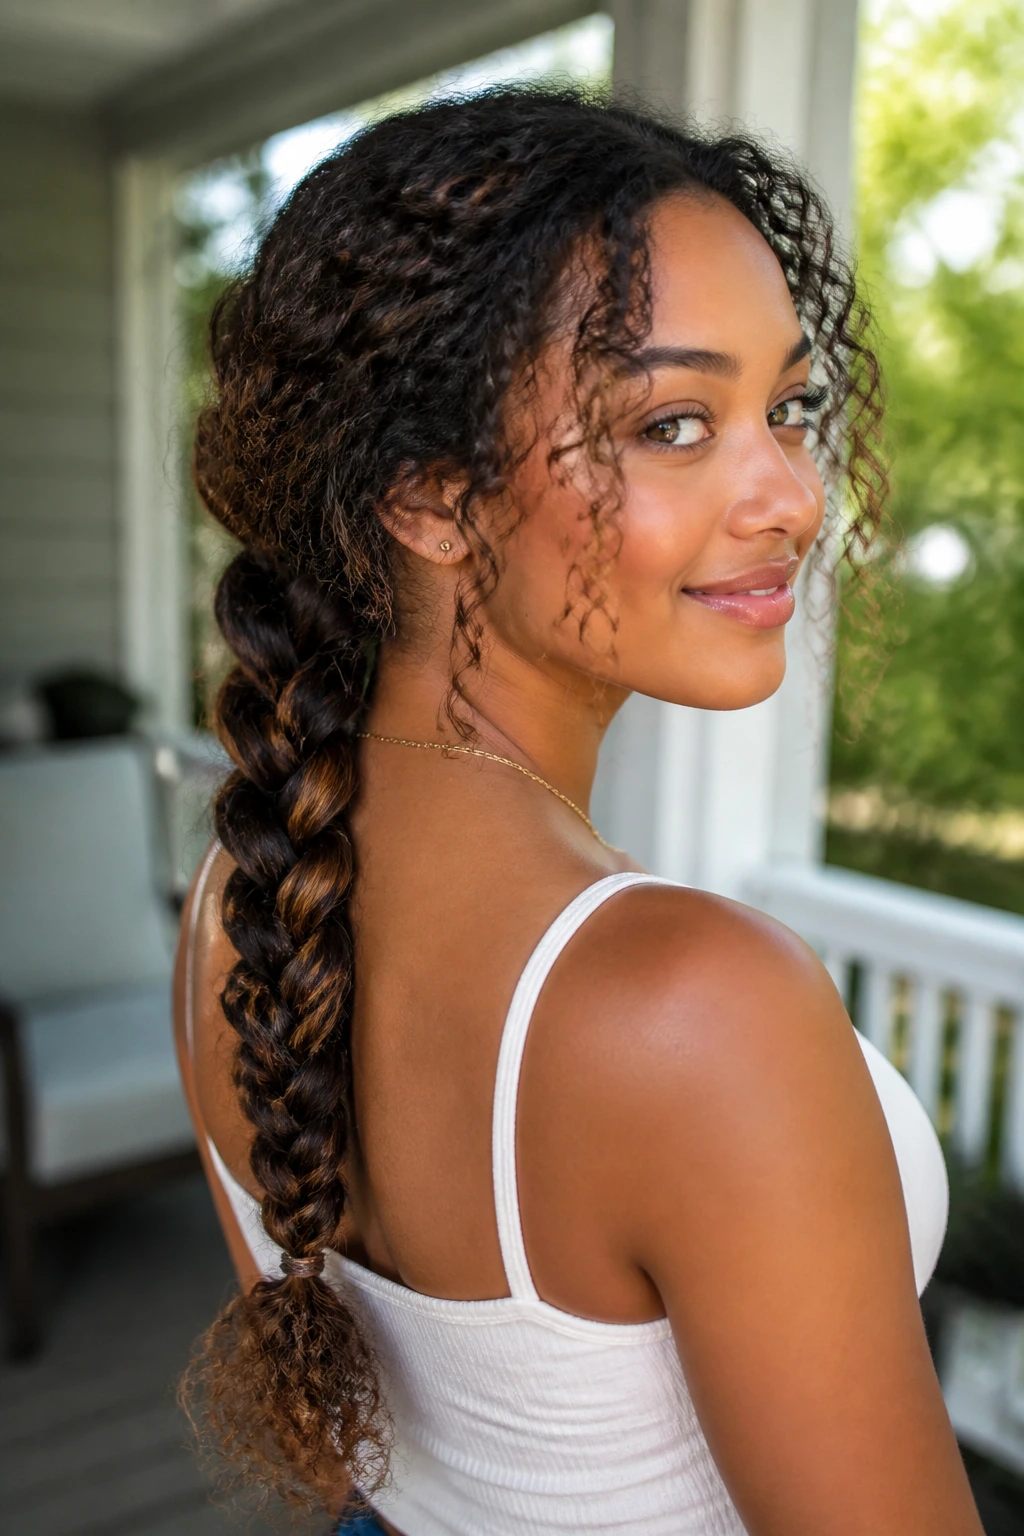
23. Jumbo Single Braid With Curls Left Out
A jumbo single braid is the shortcut style I keep coming back to when I want one braid and done. You sweep the hair into a large braid down the back or over one shoulder, but leave a few curly pieces out near the crown or ends so the style doesn’t feel too locked down.
This works especially well on thick curly hair because the braid looks substantial without requiring tiny sectioning. It also helps keep the length contained. If you have long curls, this is one of the easiest ways to stop them from getting snagged on bag straps, chair backs, or damp shirt collars.
The braid looks best when the sections are pulled evenly and then gently loosened with your fingers. Too much tugging makes the braid collapse. Too little and it can look thin. Somewhere in the middle is the sweet spot.
24. Braided Bangs Ponytail
Braided bangs into a ponytail are a practical fix for curls that fall straight into the forehead and refuse to stay where they’re told. You braid or twist the front fringe area back from the face, then gather the rest into a ponytail. The style keeps the front tidy without flattening the entire head.
What makes this one useful is the speed. You can do it in minutes, and it still looks like you made a choice. Curly bangs or shorter front pieces behave especially well here because the braid gives them a path to follow instead of letting them spring in every direction.
A small detail helps: stop the braid a little before it reaches the crown, then pin it into the ponytail base. That keeps the front softer and avoids a hard line across the head.
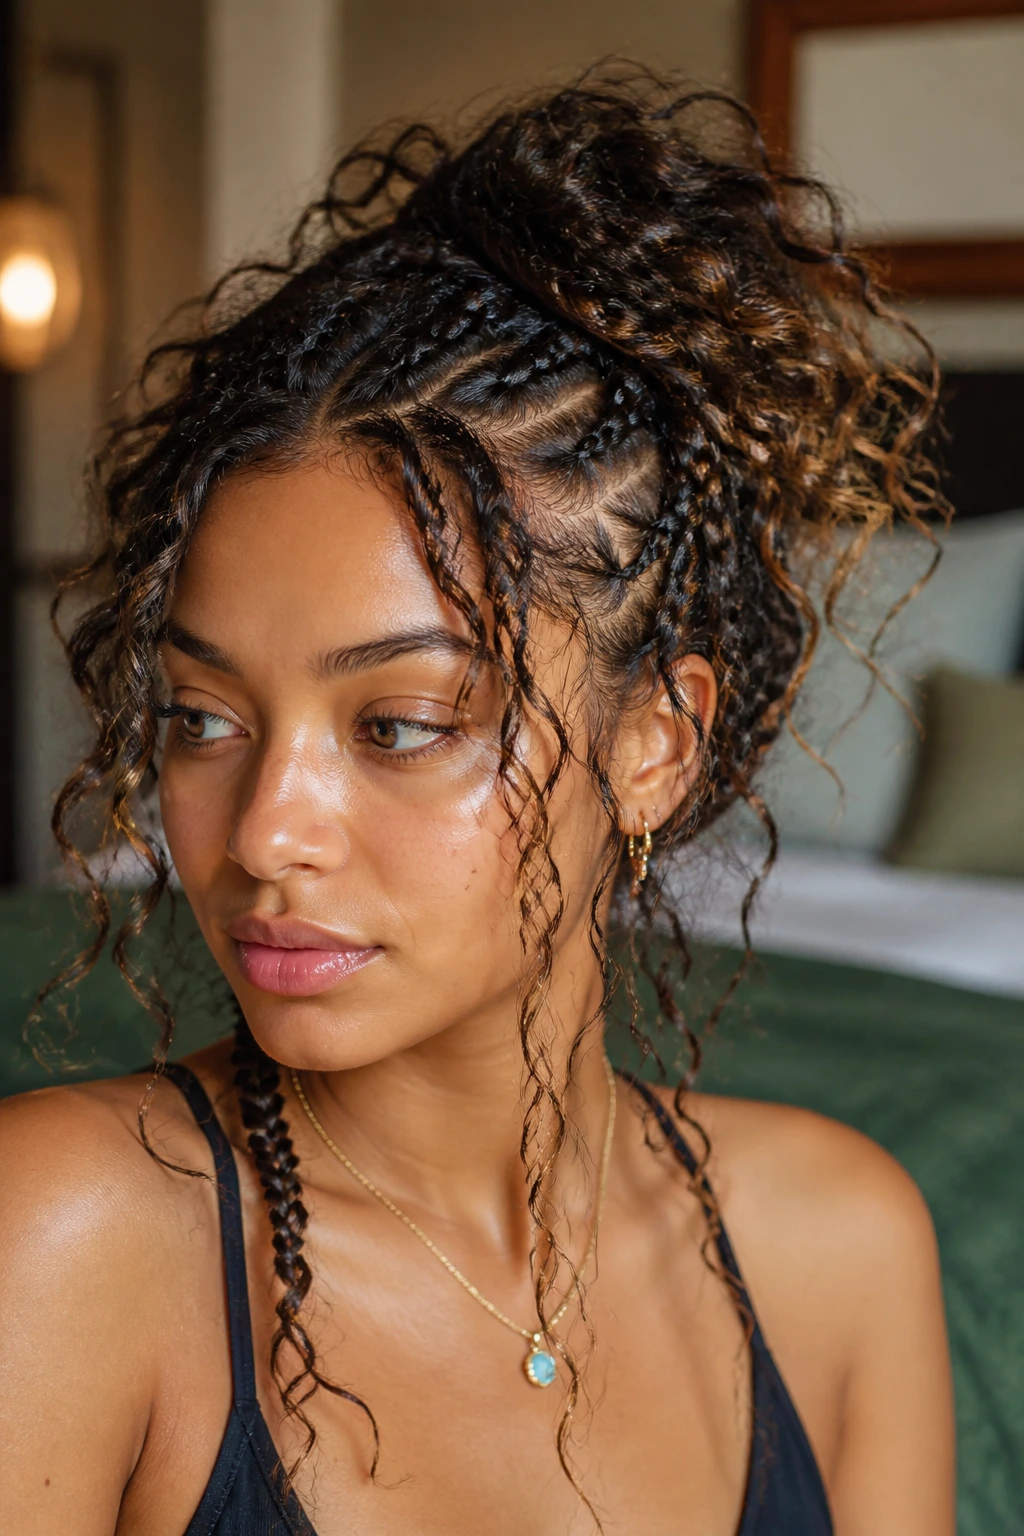
25. Twisted Crown With A Curly Knot

A twisted crown with a curly knot is the last style I’d put in the “easy but looks finished” category. You twist sections from each side, bring them back into a knot or tucked bun, and let the crown read like a soft border around the head. It’s neat, but not severe.
This is one of the best choices when your curls have a little frizz and you don’t want to spend time smoothing every strand. The twist pattern disguises texture in the best way. It uses it. If the ends are left curly inside the knot, the style gets even more volume and feels less formal.
I’d wear this one for dinners, long errands, or any day you want the front off your face without losing the shape of your curls. It has enough polish to work, but it doesn’t try too hard.
The Curl-Friendly Prep That Makes Every Braid Easier
Curly hair braids better when the texture has a little grip, not when it’s squeaky clean and slippery. That’s the part a lot of people miss. A braid needs some hold, and warm air makes soft product breaks down faster than you’d expect.
My favorite prep is simple: mist the hair lightly with water, work in a leave-in conditioner from mid-length to ends, then add a small amount of foam or curl cream near the root if you want control. Not a heavy butter. Not a greasy layer. You want enough slip to detangle, but enough body that the braid doesn’t slide apart in your hands.
Sectioning matters more than people think. Use a rat-tail comb for the part, then clip the rest out of the way. If you try to braid a whole head of curly hair at once, the loose sections start tangling into the one you’re working on, and the style gets messy before you finish the second side. Slow down there. It saves time later.
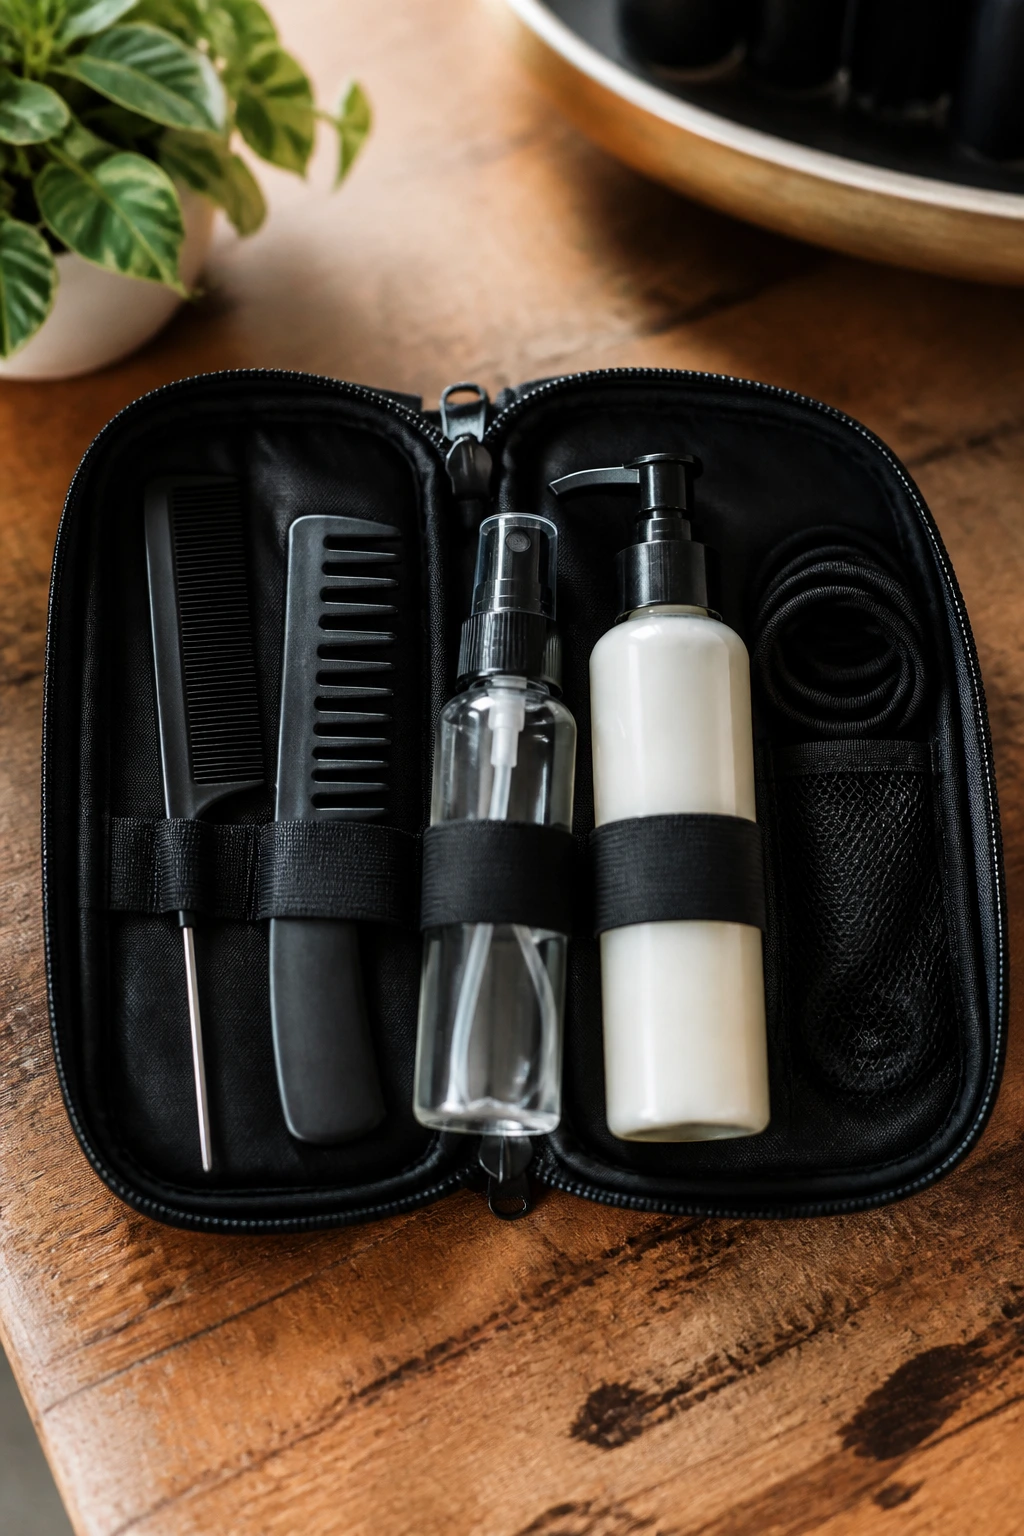
The Small Tool Kit That Makes Curly Braids Easier
-
Rat-tail comb: Clean parts make every braid look calmer, even when the texture itself is full.
-
Wide-tooth comb: Use this first to detangle before you touch a fine-tooth comb.
-
Spray bottle with water: A light mist softens dry curls and helps the braid grip without soaking the hair.
-
Leave-in conditioner: Keeps the strands pliable and cuts down on snagging while you work.
-
Curl foam or mousse: Gives the braid a little hold without making it stiff or crunchy.
-
Edge brush: Useful for smoothing the front or refining the hairline on sleeker looks.
-
Small clear elastics: Best for ponytail-based braids, pull-through styles, and wrapped ends.
-
Bobby pins: Keep a handful nearby; bobby pins are what save loose crown styles when one side starts to slip.
-
Duckbill clips or sectioning clips: These stop the rest of the hair from eating your work while you braid.
-
Satin scarf or bonnet: Not for styling, but for protecting the finished look overnight.
How To Choose A Braid That Fits Your Curl Pattern And Density
The braid should match the hair you actually have on your head, not the braid you saw on someone with a different texture and three extra inches of length. Fine curls, thick curls, short curls, stretched curls—they all behave differently. Respect that and the style gets easier.
Fine Or Low-Density Curls
Go for accent braids, halo styles, or a single side braid. Smaller braids can disappear on fine hair unless you add volume by gently loosening the braid once it’s set. A pull-through braid also works nicely because it creates the feeling of thickness without forcing the hair into tiny sections.
Thick Or High-Density Curls
Chunky braids, Dutch braids, mohawk braids, and braided buns tend to behave better here. Very small braids can take forever and create too much tension. Bigger sections are easier to manage, and they look balanced with dense curls.
Shorter Curly Hair
Choose front braids, braided bangs, halo twists, and half-up styles. Anything that needs a very long tail may turn into a fight with your own layers. Short curls are better when the braid uses the hairline and crown, not the full length.
Stretched Versus Freshly Shrunken Curls
Stretched hair usually braids cleaner. Fresh wash-day curls can be too springy and slippery, especially if the pattern is tight. If you want a braid to hold shape, braid on day-two hair or stretch the roots lightly before you start.
A Smarter Way To Wear Braids When Heat And Humidity Show Up
Hot weather does not mean you need to slick your curls into submission. It means you need a style that works with movement. That is a very different thing.
For daytime errands, I like styles that keep the front controlled and the back loose: face-framing accent braids, a braided headband, or a side braid over one shoulder. They’re quick to fix in a mirror, and if a few curls frizz up, the whole style still looks intentional.
For outdoor plans or long wear, go lower and tighter in the structure, not in the tension. A low braided bun, Dutch braids, or a cornrow tuck will hold better than a loose braid that keeps slipping off the shoulder. Comfort matters more than precision. If your scalp starts to ache, the style is too tight.
For evenings, add something small. A ribbon through the base of a ponytail. Hair cuffs along one braid. A gold pin at the temple. Tiny changes do more than people think.
Practical Tips For Getting More Wear Out Of Every Style
Hold the braid with one hand, not your whole arm. That sounds obvious until you’ve watched someone fight their own hairline for ten minutes. Curly hair responds better when you keep tension even and gentle. Tugging harder doesn’t make the braid cleaner; it just makes the scalp mad.
Use foam near the roots, not heavy oil. A light mousse or styling foam keeps the braid pattern intact without turning the front of the head greasy. Save heavier oils for the ends if they need sealing.
Braid after the hair is detangled but before it gets fluffy again. That narrow window is your friend. If the hair sits too long after combing, it starts puffing up and tangling again, which makes sectioning annoying.
Leave a little air around the hairline. A braid should sit on the hair, not clamp down on it. If your temples feel sore by the second hour, loosen the front next time. The braid will still hold.
Match the accessory to the braid size. Tiny cuffs get swallowed by thick braids. Oversized clips can overwhelm fine accent braids. Scale matters.
Mistakes That Make Braided Styles Feel Tight, Puffy, Or Flat
The first mistake is braiding hair that’s too dry. Dry curls snag, frizz, and fight back while you section them. The braid ends up lumpy, and the flyaways show up before you’ve even left the house. A light mist and a small amount of leave-in conditioner fix that fast.
Another one: pulling the braid too tight at the hairline. That can give you a crisp look for about an hour, and then the scalp starts complaining. If you see little dents around the temples or feel a tension headache coming on, the style is too snug. Ease up and leave a finger’s width of give.
Skipping sectioning is a mess too. If one side has more hair than the other, the braid drifts off-center and stays that way. Use a comb. Clip the loose hair out. It takes thirty seconds and saves the whole shape.
Heavy product near the roots can flatten the braid line. Curly hair needs control, but not grease. If the sections slide through your fingers like butter, the braid won’t hold. Try foam or a lighter cream instead.
The last mistake is leaving the ends exposed without checking the weather. Damp air, pool water, or even a windy walk can make loose ends tangle fast. Wrap them, pin them, or at least secure them with an elastic that actually grips.
Variations And Alternatives To Try When You Want A Different Feel
The Soft-Edge Version: Keep every braid looser, pull a few curls out at the temples, and skip the hard gel finish. This works when you want the style to feel airy and relaxed instead of crisp.
The Sleek-Root Version: Smooth just the front and crown with a little gel or foam, then leave the lengths textured. That gives you a neater outline without flattening the entire curl pattern.
The Protective-Ends Version: Tuck the braided ends into a bun or pin them under the base. This is the one to choose when you want less rubbing against clothes or seatbacks.
The Accessory-Heavy Version: Add ribbon, cuffs, or small clips to one braid rather than all of them. One accent point usually looks cleaner than scattering decorations everywhere.
The Day-Two Rescue Version: Start with hair that’s already a little stretched and use accent braids or a half-up shape. This is the easiest way to make a style last when the curls are past their freshest point.
How To Keep Braids Fresh Overnight And Between Wash Days
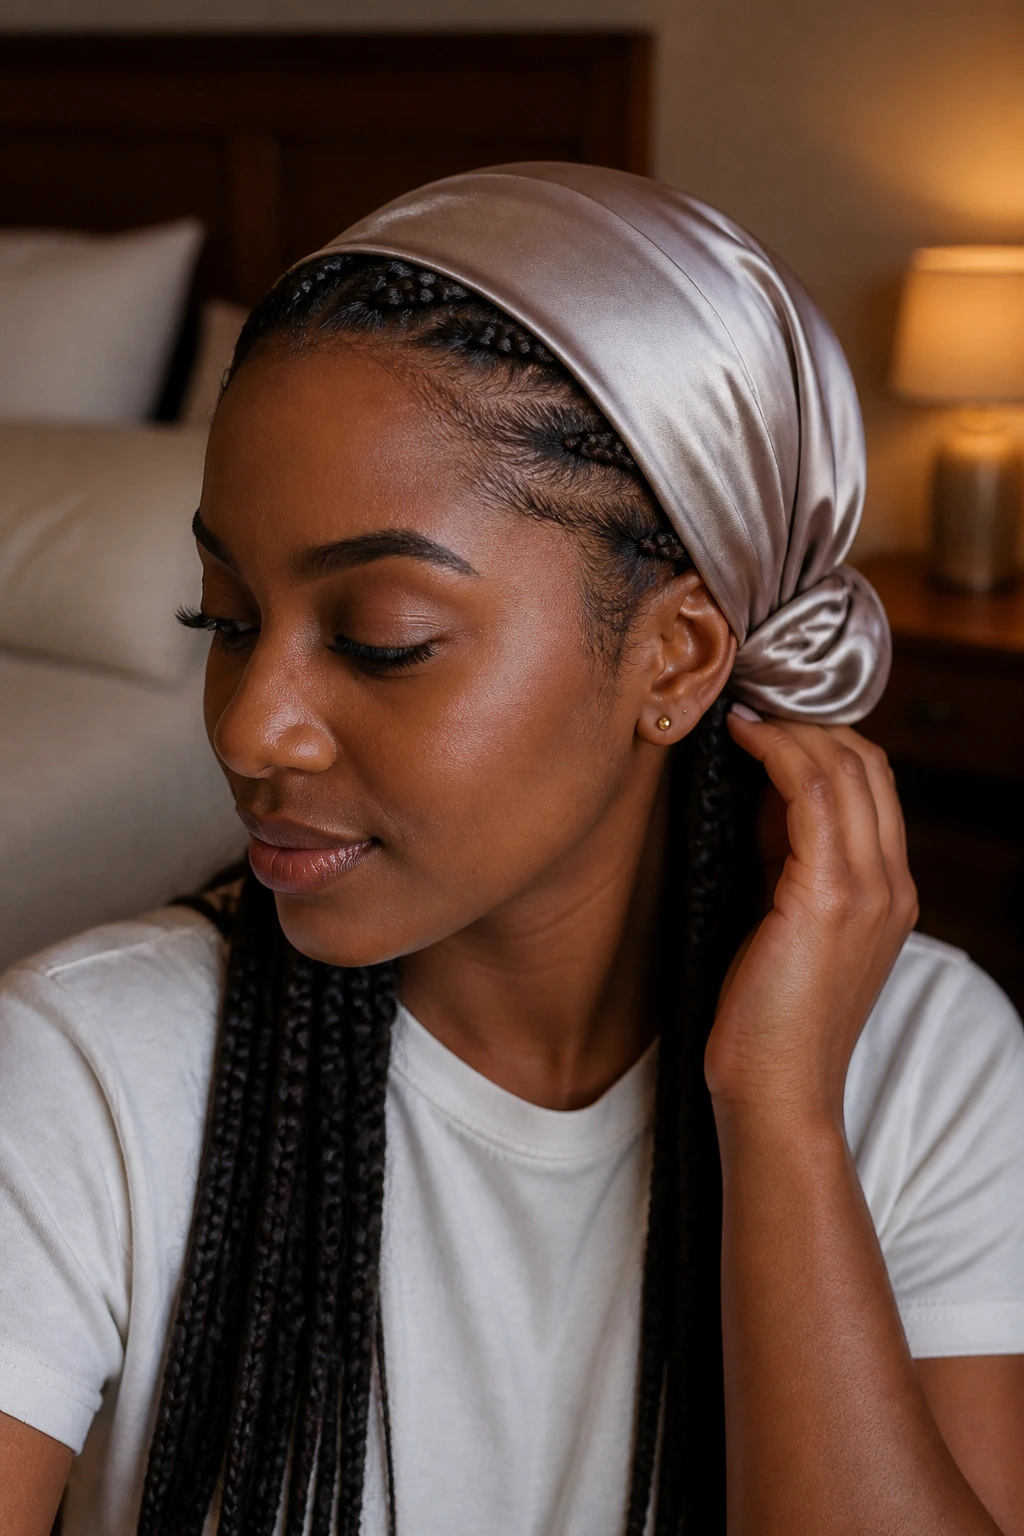
Curly braids stay nicer when you protect them from friction. A satin scarf or bonnet is the easiest fix. If the style is bulky at the back, use the scarf over the hairline and let the lengths rest freely rather than smashing everything flat inside a tight bonnet.
Morning refreshes should be light. A few spritzes of water on the outer layer is enough for most styles. If the front looks fuzzy, smooth a pea-sized amount of foam over the braid surface and let it dry for a few minutes before you touch it again. More product is not better here. It just makes curls dull and sticky.
For styles with loose ends, re-twist the ends loosely at night if they’ve started to separate. For buns, re-pin the base instead of remaking the whole style. If a braid feels dry by day three or four, that usually means the product is fading, not that the style failed.
As a rule, styles with heavy product or a tight scalp feel need to come down sooner—about 3 to 4 days. Looser looks with low tension can often stretch to a week if the scalp stays comfortable and the hairline isn’t fraying.
Frequently Asked Questions About Braided Easy Hairstyles For Summer With Curly Hair

Can I braid curly hair without straightening it first?
Yes, and I’d usually rather you didn’t straighten it first. Curly hair gives braids more grip, more body, and a softer finish. If the hair is too shrunken to manage, stretch it lightly with a twist-out, braid-out, or gentle blow-dry on low heat.
Should I braid my hair wet, damp, or dry?
Damp is the sweet spot for most styles. Wet hair can slip and take forever to dry inside the braid, while bone-dry curls snag and puff up as you work. Slightly damp hair with a leave-in and a little foam gives you the best control.
How do I stop braids from frizzing in humidity?
Start with a clean section, add a small amount of hold product, and don’t keep touching the braid after it’s set. Frizz loves friction. A satin scarf overnight and a light foam refresh in the morning help more than another layer of oil.
What braid works best for short curly hair?
Braided bangs, face-framing accents, halo twists, and front cornrow tucks usually fit short curls better than long shoulder braid styles. They use the hairline and crown, where the length is easier to control. Long hanging braids can look heavy if the hair doesn’t reach far enough.
Will braids damage my edges?
They can if the style is pulled too tight or worn too long without a break. A good braid should feel secure, not sharp. If your temples hurt or the front is lifting after a night of sleep, the tension is too much.
How long can I wear these styles?
It depends on the style and how much product you use, but many of these look good for 2 to 5 days with light maintenance. Protective versions like low buns, halo twists, and tucked braids can often go longer. Once the scalp feels itchy or the roots start matting, it’s time to refresh.
What if my braid keeps slipping apart?
That usually means the hair is too slippery or the sections are too big for the amount of grip you have. Start with a little mousse, use a more secure elastic at the base, and braid on hair that’s not freshly washed. If needed, make the braid slightly tighter at the start and looser at the ends.
Can I sleep in these styles without ruining them?
Yes, if you protect them. A satin scarf, satin pillowcase, or both will keep the braid from rubbing flat. Loose braids and buns hold up better than styles that sit right on the pillow seam.
The Styles Worth Reaching For Again

Braids on curly hair work because they don’t ask the texture to disappear. They let it show up with shape, volume, and a little attitude. That’s a much better deal than chasing a style that falls apart the second the air turns damp.
The best part is how forgiving these looks can be. A braid can be neat or loose, soft or structured, low-key or dressed up with one clip. Once you know which styles suit your curl pattern and how much tension your scalp will tolerate, the whole category gets easier to use on purpose.
The next time the heat creeps up and your curls start asking for a break, pick one braid that gives the neck a rest and leaves the texture doing what it does best.