Wavy hair gives mohawk braids a built-in grip that pin-straight hair often has to fake with more product. The bend in the strands helps sections hold shape instead of sliding away, which means you can get that lifted center ridge without turning a child’s scalp into a helmet.
That matters on little girls. These styles have to survive school drop-off, cartwheels, playground wind, and the quick head toss that happens the second someone says, “Let me see your hair.” The best versions feel light at the hairline, show off the wave instead of burying it, and stay put long enough to make the morning effort feel worth it.
I like mohawk braids on wavy hair because they sit in a sweet spot between tidy and soft. You can go sleek, fluffy, ribboned, sporty, or party-ready, and the wave changes the finish in a good way. Some styles need tiny elastics and a little patience. Others are almost suspiciously fast. The trick is matching the braid to the child, the hair texture, and how much standing still she’s willing to do.
Why These Mohawk Styles Work on Wavy Hair
Built-in texture: Wavy strands give the braid something to grab, so the style usually needs less product than straight hair.
Soft edges: The natural bend keeps the mohawk from looking too severe, which matters when the goal is playful, not stiff.
Flexible hold: Some styles can be sleek at the roots and loose through the lengths, which keeps the shape while letting the wave show.
Kid comfort: The better versions keep tension off the temples and nape, where little heads tend to complain first.
Accessory-friendly: Bows, ribbons, clips, and beads slide into these styles without fighting the texture.
Photo-day range: You can go polished enough for portraits or loose enough for the school run without changing the whole setup.
1. Classic Center Dutch Mohawk
A single Dutch braid running straight down the middle is the cleanest place to start. It gives you that raised mohawk ridge without a lot of complicated parting, and on wavy hair the braid tends to sit with a little lift instead of sinking flat.
What I like about this one is that it looks neat even when the waves at the sides are doing their own thing. The contrast works. Keep the braid centered, then let the loose sections stay a little soft near the ears so the style doesn’t feel too tight or formal.
If the child has medium-length waves, this is the style that most reliably stays in place through the day. A light mist of water on the top section helps the braid hold, but don’t soak it. Damp, not wet. Wet hair shrinks and makes the part harder to keep straight.
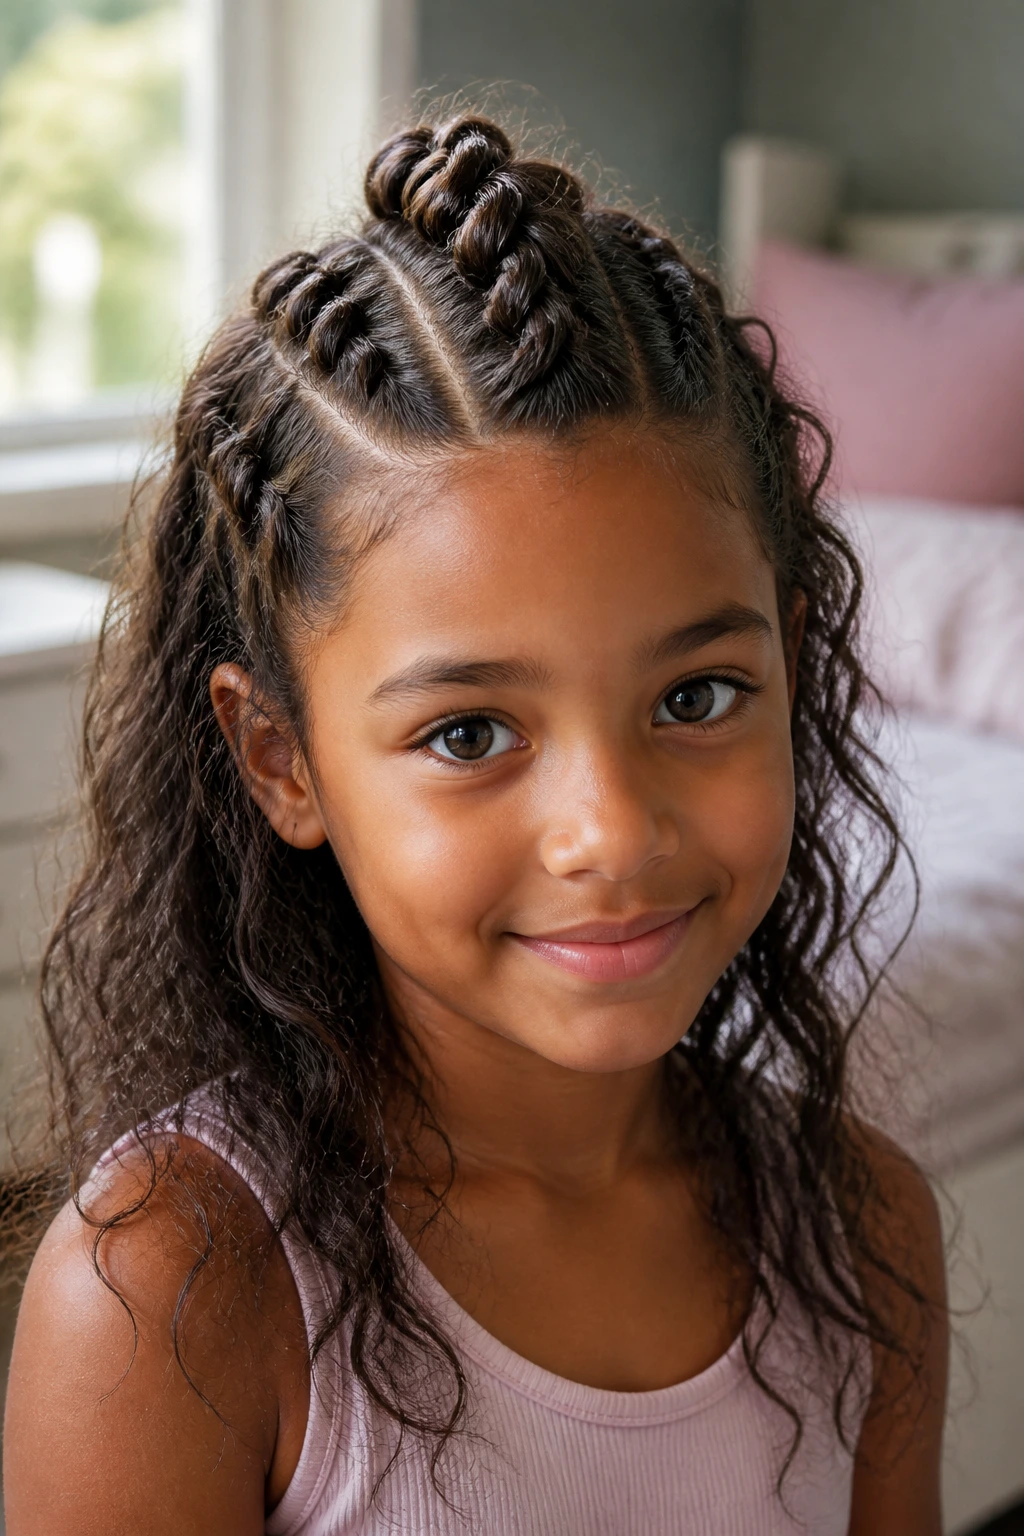
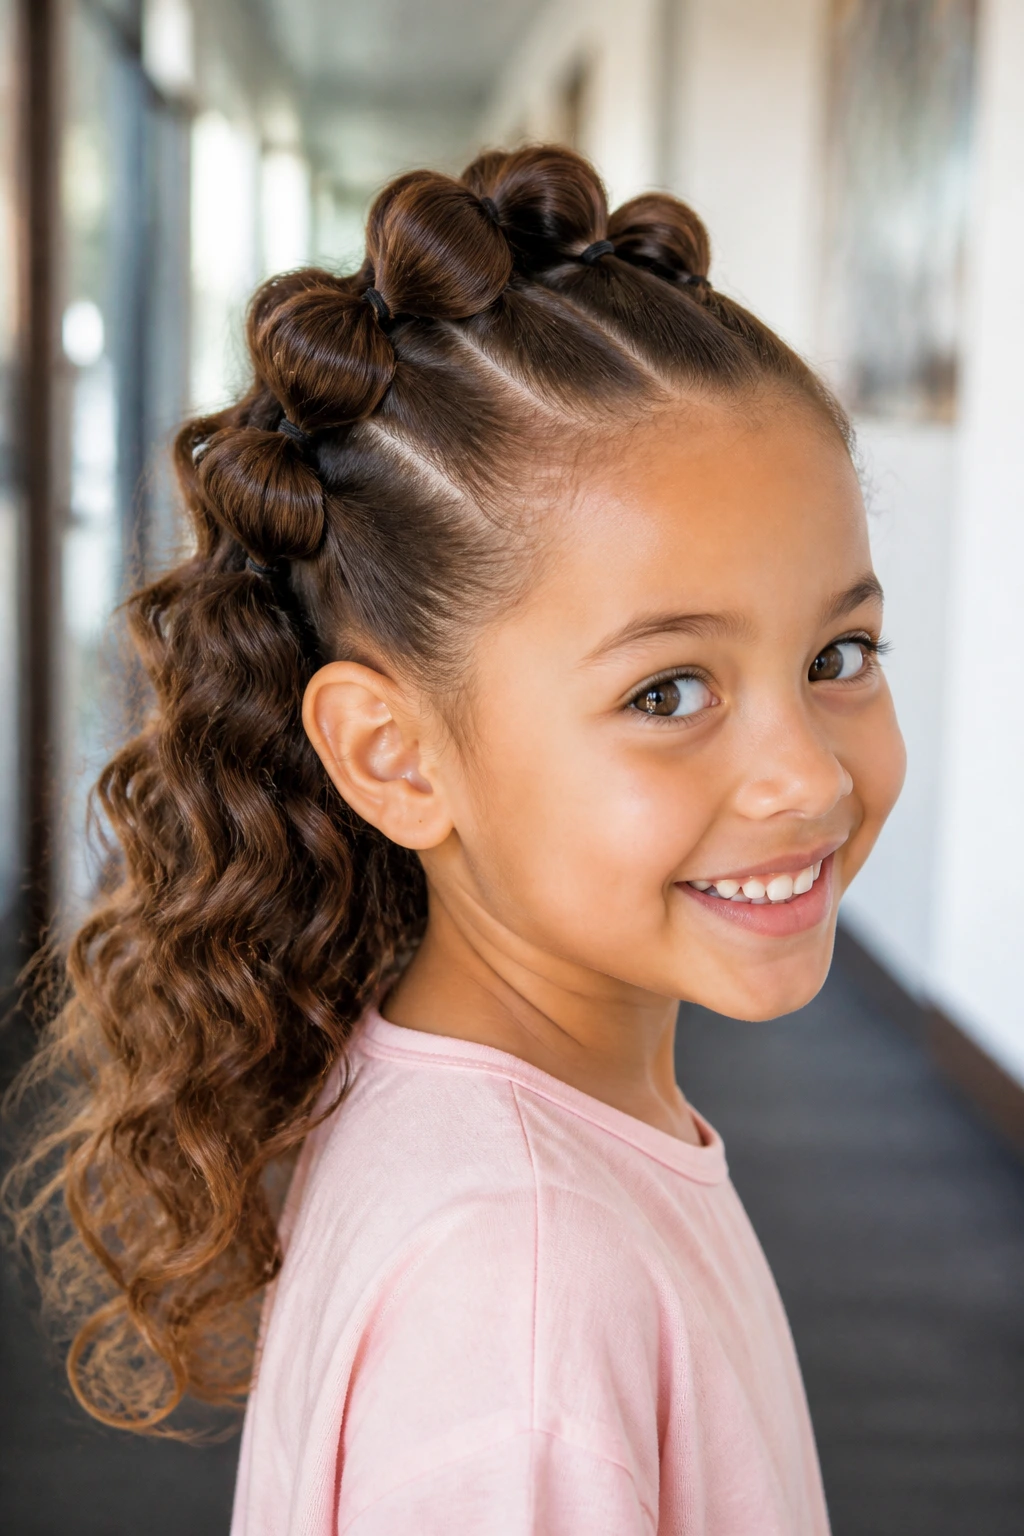
2. Pull-Through Bubble Mohawk
Want the mohawk shape without wrestling with a three-strand braid? This is the one. Pull-through sections make a chunky ridge that reads as playful and full, and wavy hair makes the bubbles look even bigger.
Why it’s easy on wavy hair
The texture helps each elastic section puff up instead of collapsing. That means less work with pancaking and fewer flyaways fighting you at the crown.
This style is especially good for fine or medium hair that needs visual volume. It also works on kids who cannot sit still for long, because the sections are built one by one and you can pause between them. Use clear elastics or little colored ones if you want the braid line to feel more cheerful.
The catch is tension. Keep the elastics snug, not yanking. If you can see the scalp getting pulled into tiny ridges around the part, loosen and start that section again.
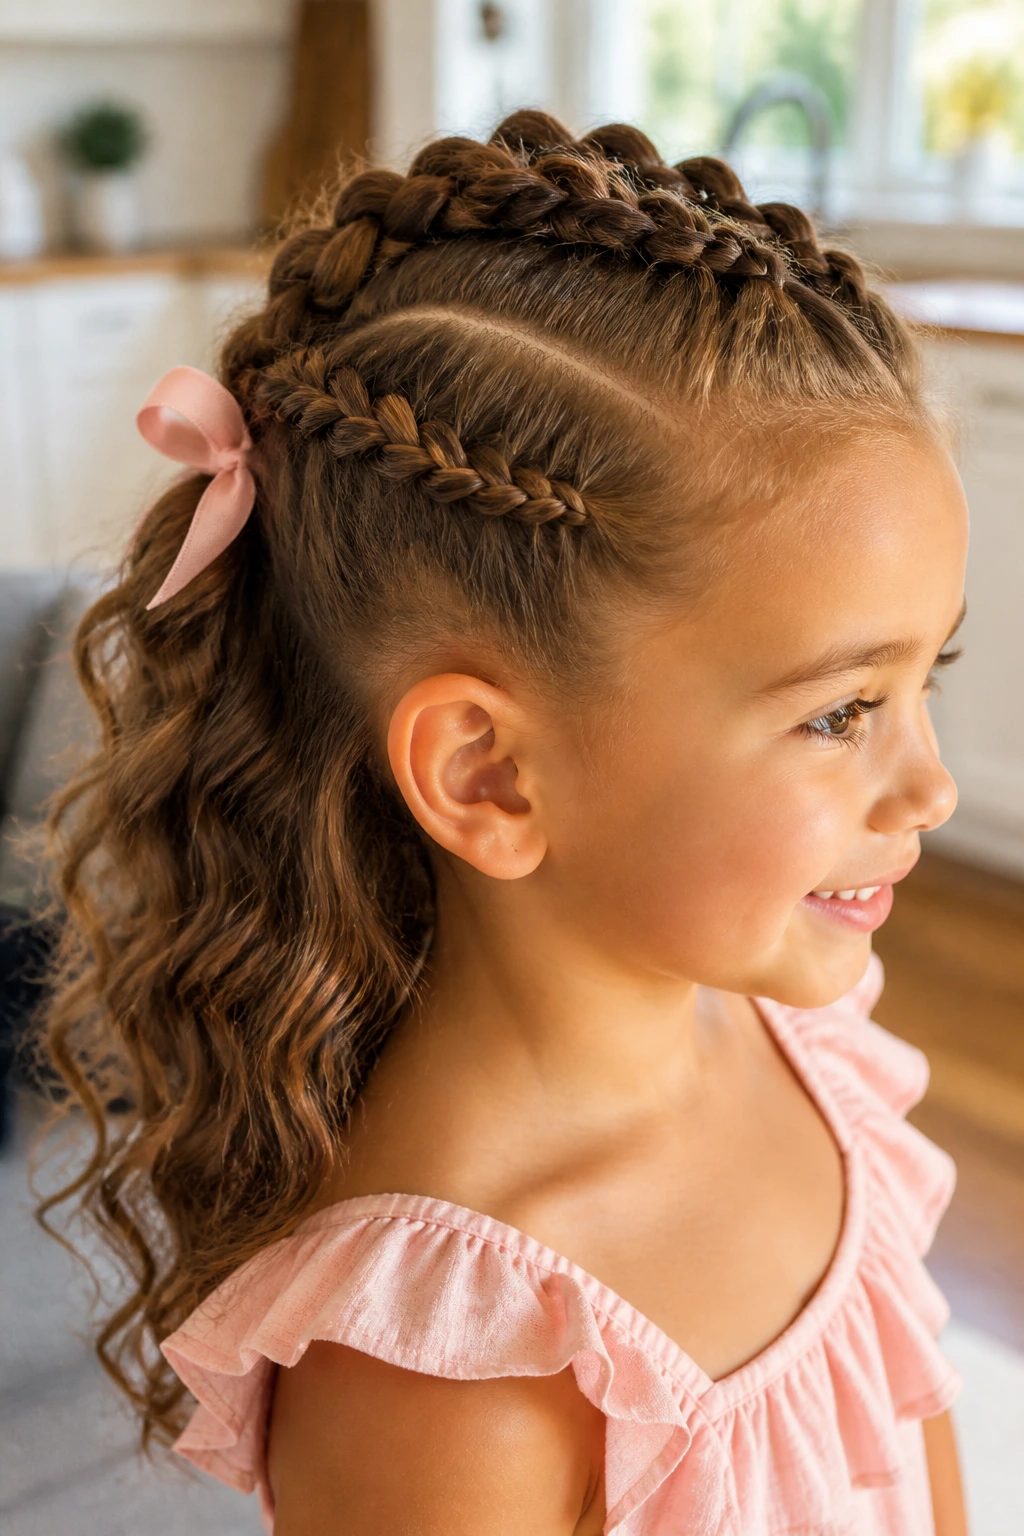
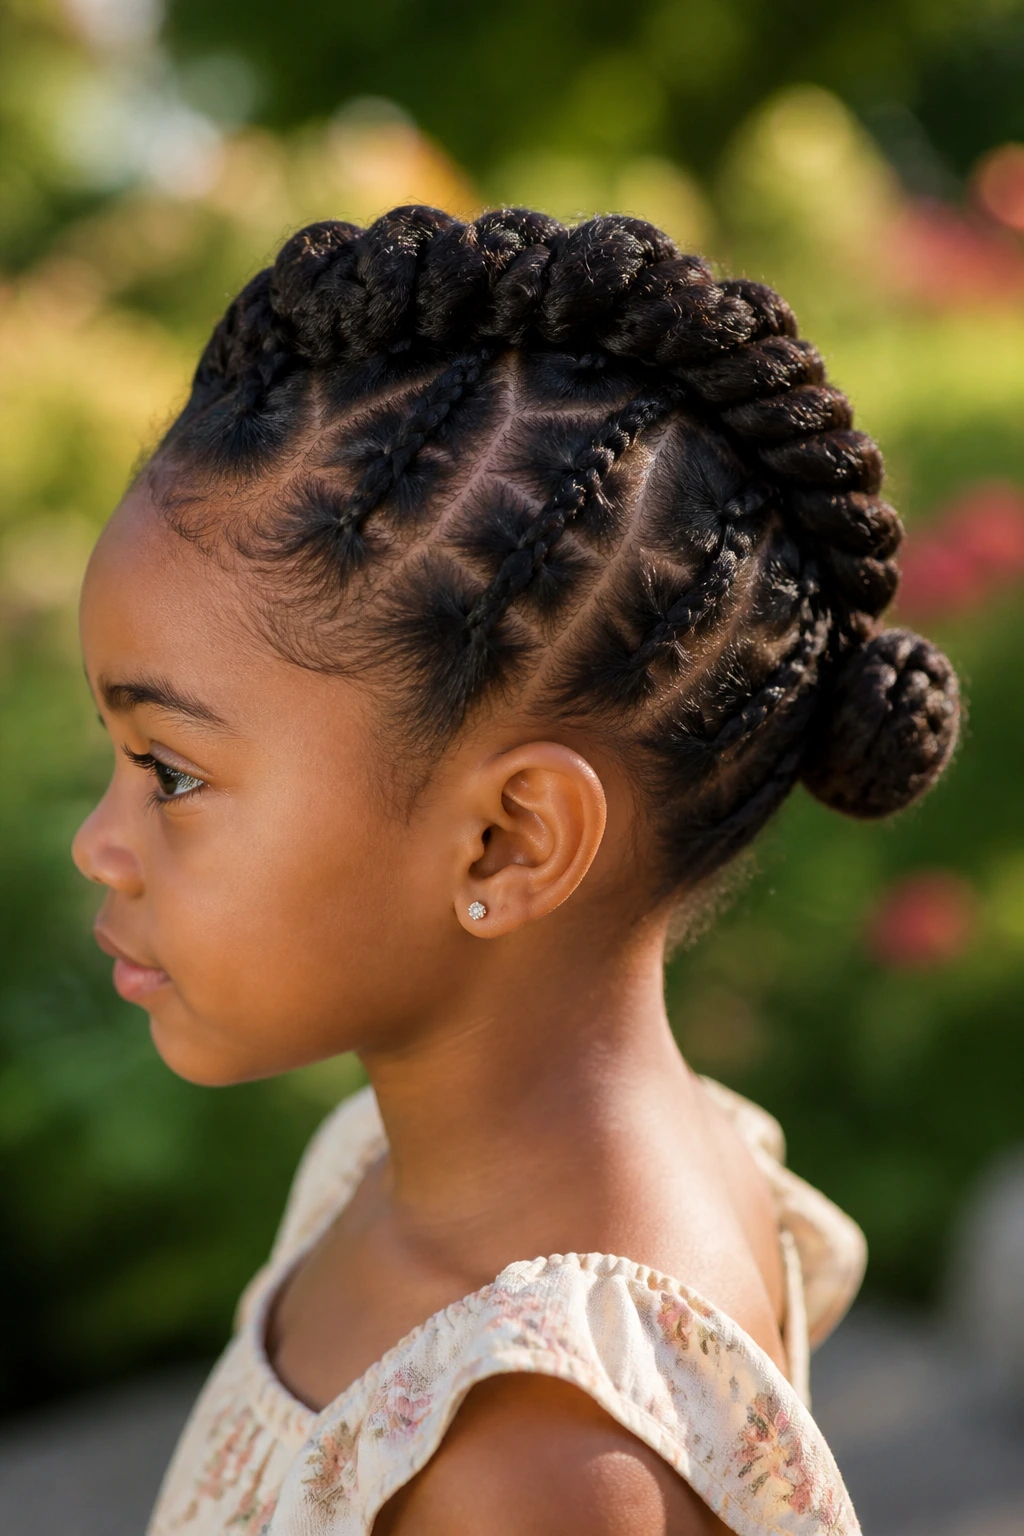
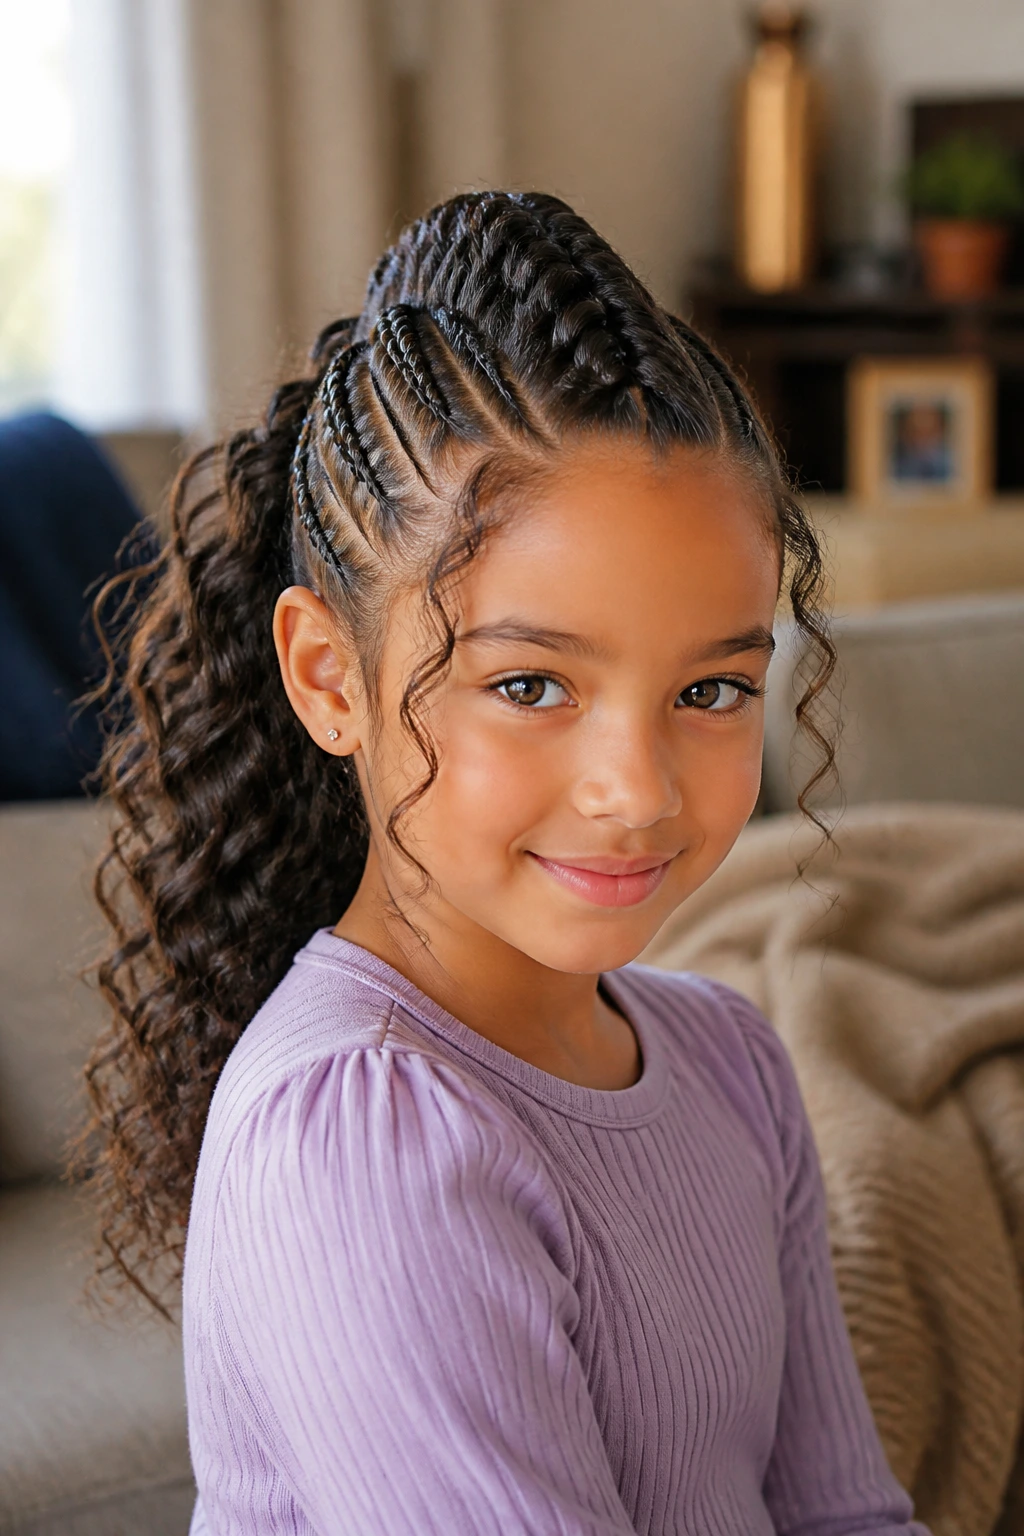
3. Double Side Dutch Braids into a Center Ridge
This one gives you a more structured mohawk by feeding two side braids toward a center line. The result looks tidy from the front and a little dramatic from the top, which is a nice balance for little girls who like something bolder.
The style works because the sides are controlled without being flattened. On wavy hair, the braid lines catch the natural bends and make the whole shape look fuller than it really is. It’s also a good choice when hair at the temples has a mind of its own.
I reach for this style on school days when I want staying power. It holds better than loose accent braids, and it keeps the front sections off the face. If the hairline is sensitive, braid a touch farther back and use your fingers to smooth the first inch instead of brushing it hard.
4. Fishtail Mohawk with Soft Pancaked Edges
A fishtail braid gives the center ridge a tighter, more detailed look. On wavy hair, the texture keeps it from feeling too formal, and the tiny woven pattern shows up nicely once you gently pull the edges apart.
The best part is the shape. Fishtails usually look slimmer at first and wider after a little pancaking, which makes them useful if you want the mohawk to look bigger without adding extensions or teasing. Keep the bottom of the braid a little loose so the wave can show through at the tail.
Best for
- Shoulder-length to long wavy hair
- Dressy school events
- Hair that needs a bit of width at the crown
A wide fishtail can snag if you rush it. Take smaller pieces than you think you need, and keep one hand at the top to stop the braid from drifting off-center.
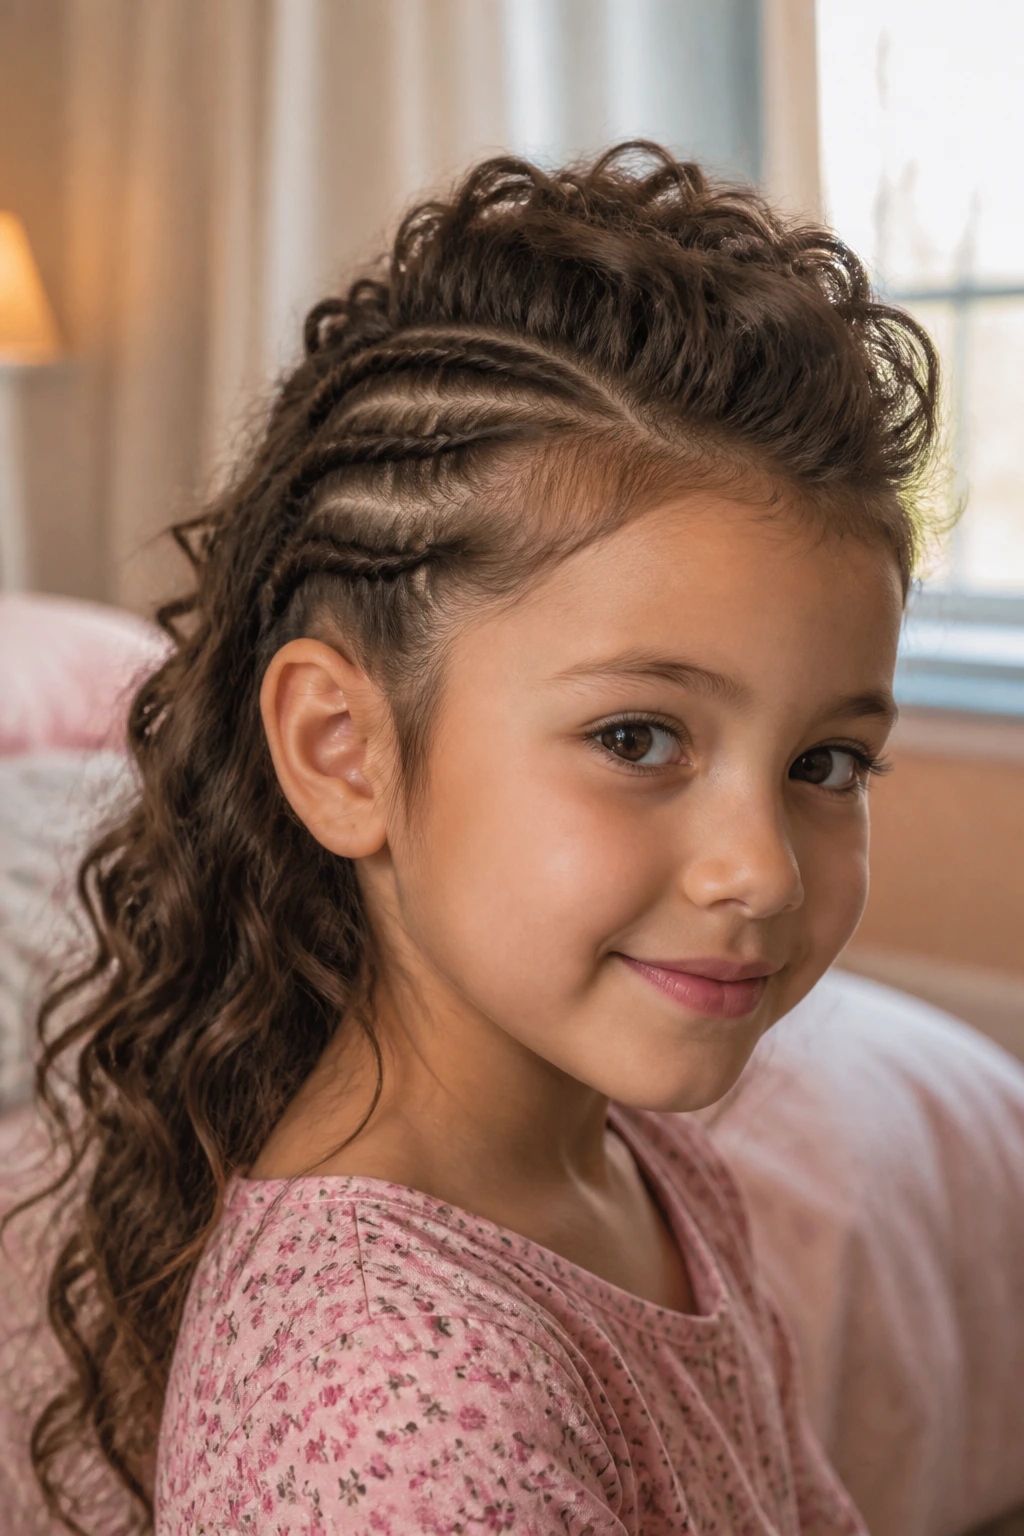
5. Triple Mini Dutch Hawk
This is the style I’d pick for thicker waves or layered hair that refuses to behave in one big braid. Three small Dutch braids down the middle create a faux-hawk ridge with more grip and more texture than a single braid.
It looks busy in the best way. The separate braids give you movement, and the wave pattern helps the little sections keep their shape even when the child is tossing her head around. If you want the style to feel less formal, leave the ends loose instead of tucking everything away.
Use this one when you want the mohawk shape to last through a full day. It’s also a good option for kids who like the feel of multiple small sections because the style spreads the tension out. That matters more than people think.
6. Rope-Twist Mohawk with Loose Ends
Rope twists are a gift when you need speed. Two strands twisted around each other make a clean center ridge, and wavy hair gives the twist enough texture that it doesn’t look flat or stringy.
I like this style for mornings when there’s no room for drama. It’s softer than a tight braid, lighter on the scalp, and easier to redo if one section slips. Leave the ends loose and a little fluffy, and it reads as intentionally casual instead of unfinished.
The trick is to keep both strands evenly tensioned. If one side is twisted too tightly, the rope starts to lean. That’s the one thing that makes this style look messy in a bad way. A dab of leave-in on the mids and ends helps the twist glide without turning slippery at the roots.
7. Heart-Part Mohawk
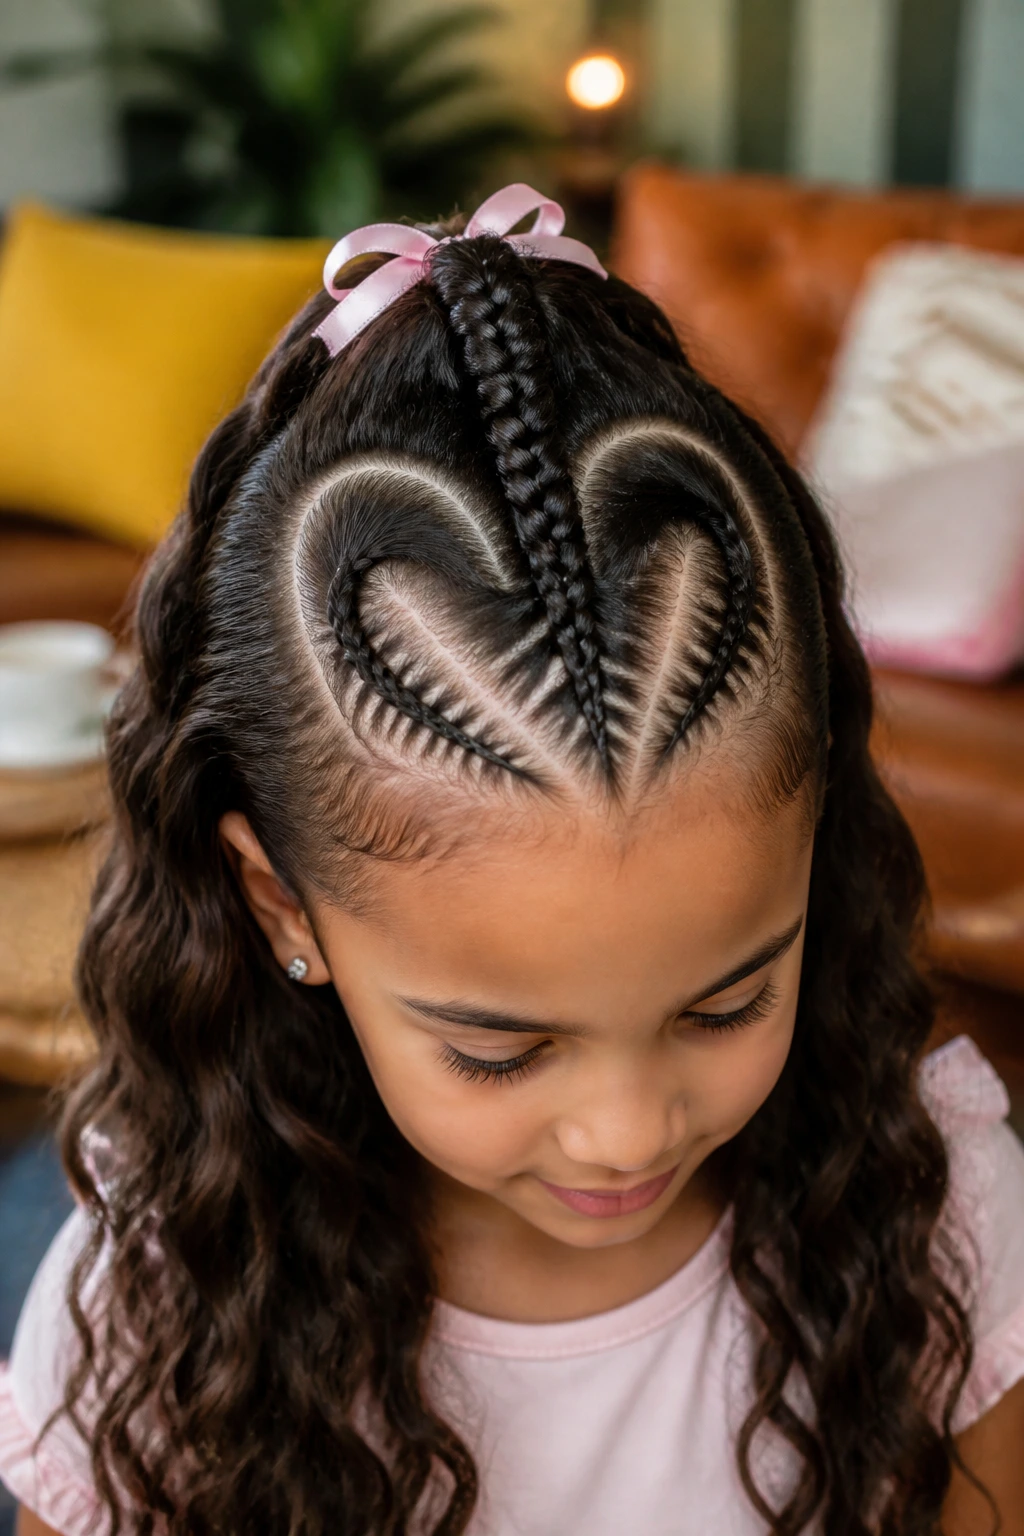
A heart-shaped part turns a basic mohawk into something the child will probably brag about at least once. The braid still runs through the center, but the curved parting gives the top a sweet, playful shape that works beautifully on soft waves.
This style is more about presentation than speed. Use a tail comb and map the heart before you start braiding so the lines stay even. On wavy hair, the curved parting tends to hide small imperfections better than a sharp straight part, which is nice when you’re braiding a moving target.
It’s a birthday favorite for a reason. Add a ribbon at the end or a tiny bow at the point where the heart meets the braid, and the whole thing feels deliberate. If your child has a cowlick at the front, work with it instead of fighting it; the heart shape can absorb that natural bend without looking crooked.
8. Zigzag Part Mohawk
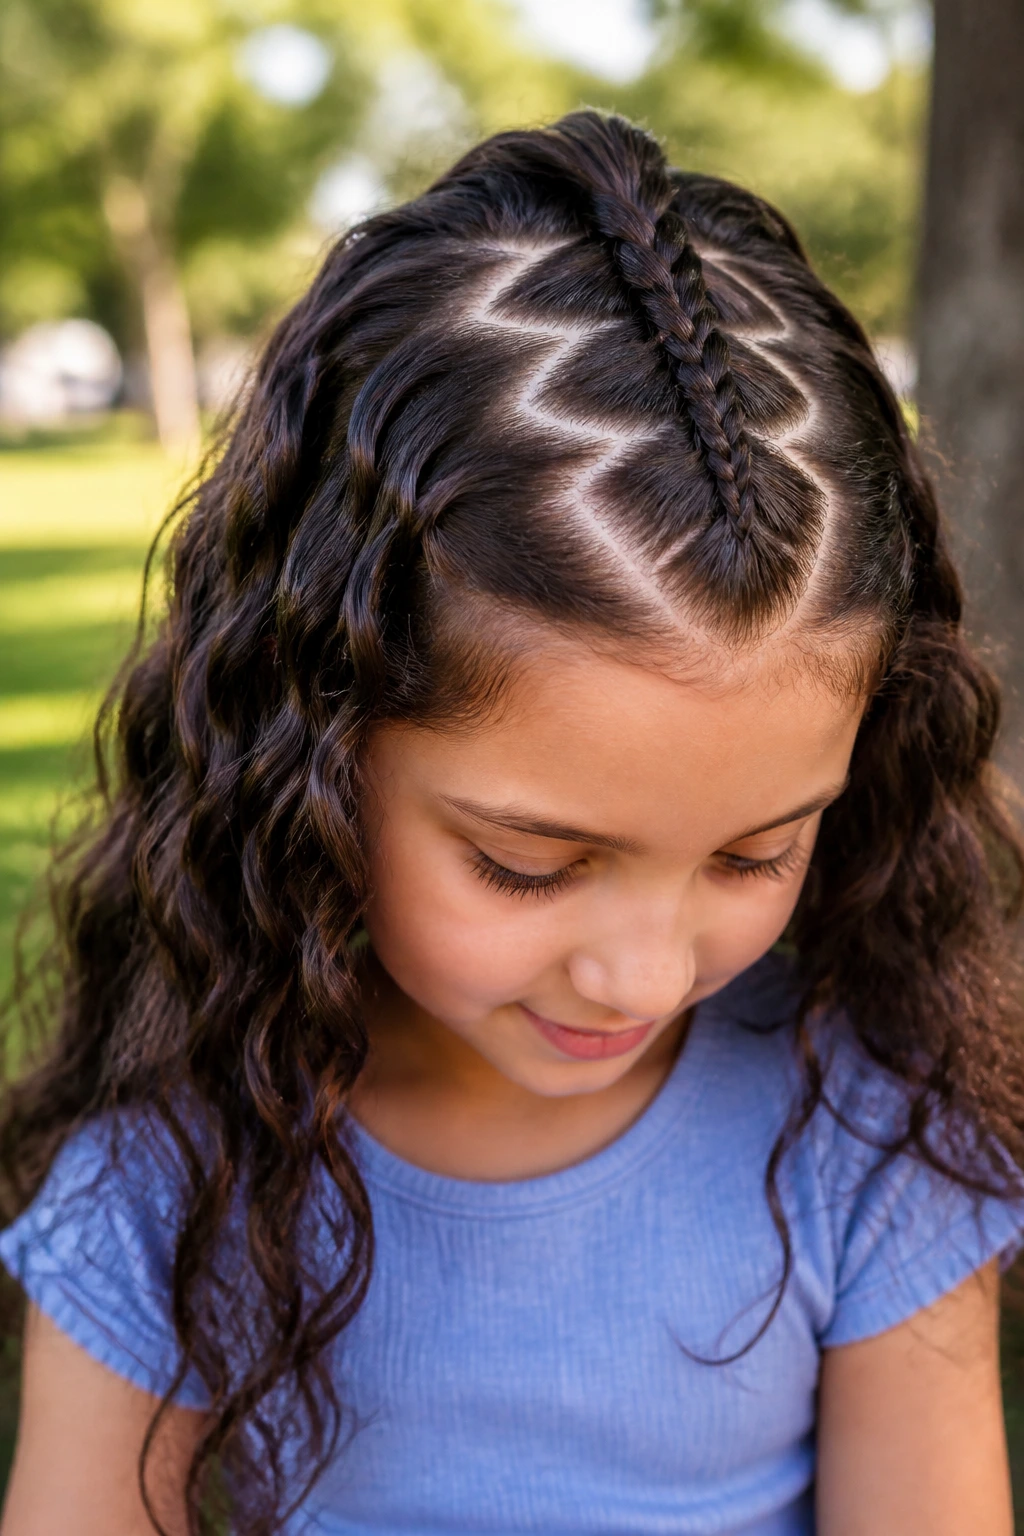
A zigzag part changes the whole mood. It gives the braid a sporty edge, and wavy hair makes the angles look softer than they would on very straight hair.
This is one of those styles that looks more complicated than it really is. The parting does most of the visual work. Once the zigzag is clean, the braid down the center can stay simple. That makes it a smart pick for parents who want a little flair without a long braid session.
A fine tail comb is your best friend here. Press the comb tip firmly into the scalp, then shift direction in short, crisp lines. If the wave pattern starts to puff up around the points, smooth only the root area with a tiny bit of styling cream. Don’t drag product through the whole braid or it will lose its shape.
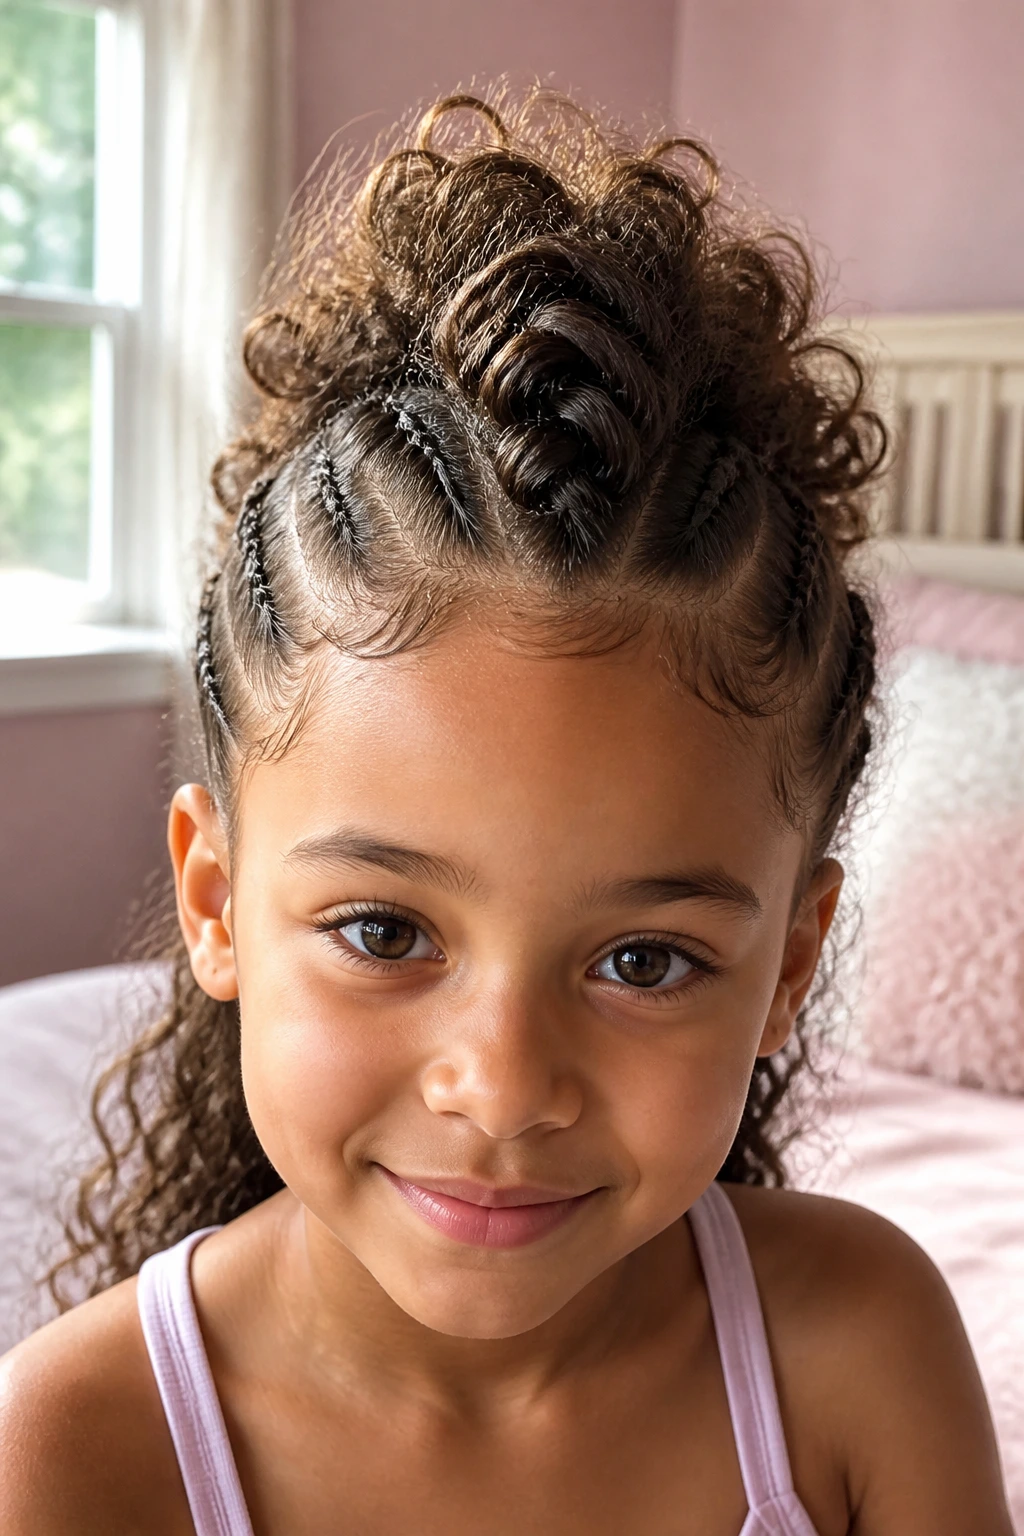
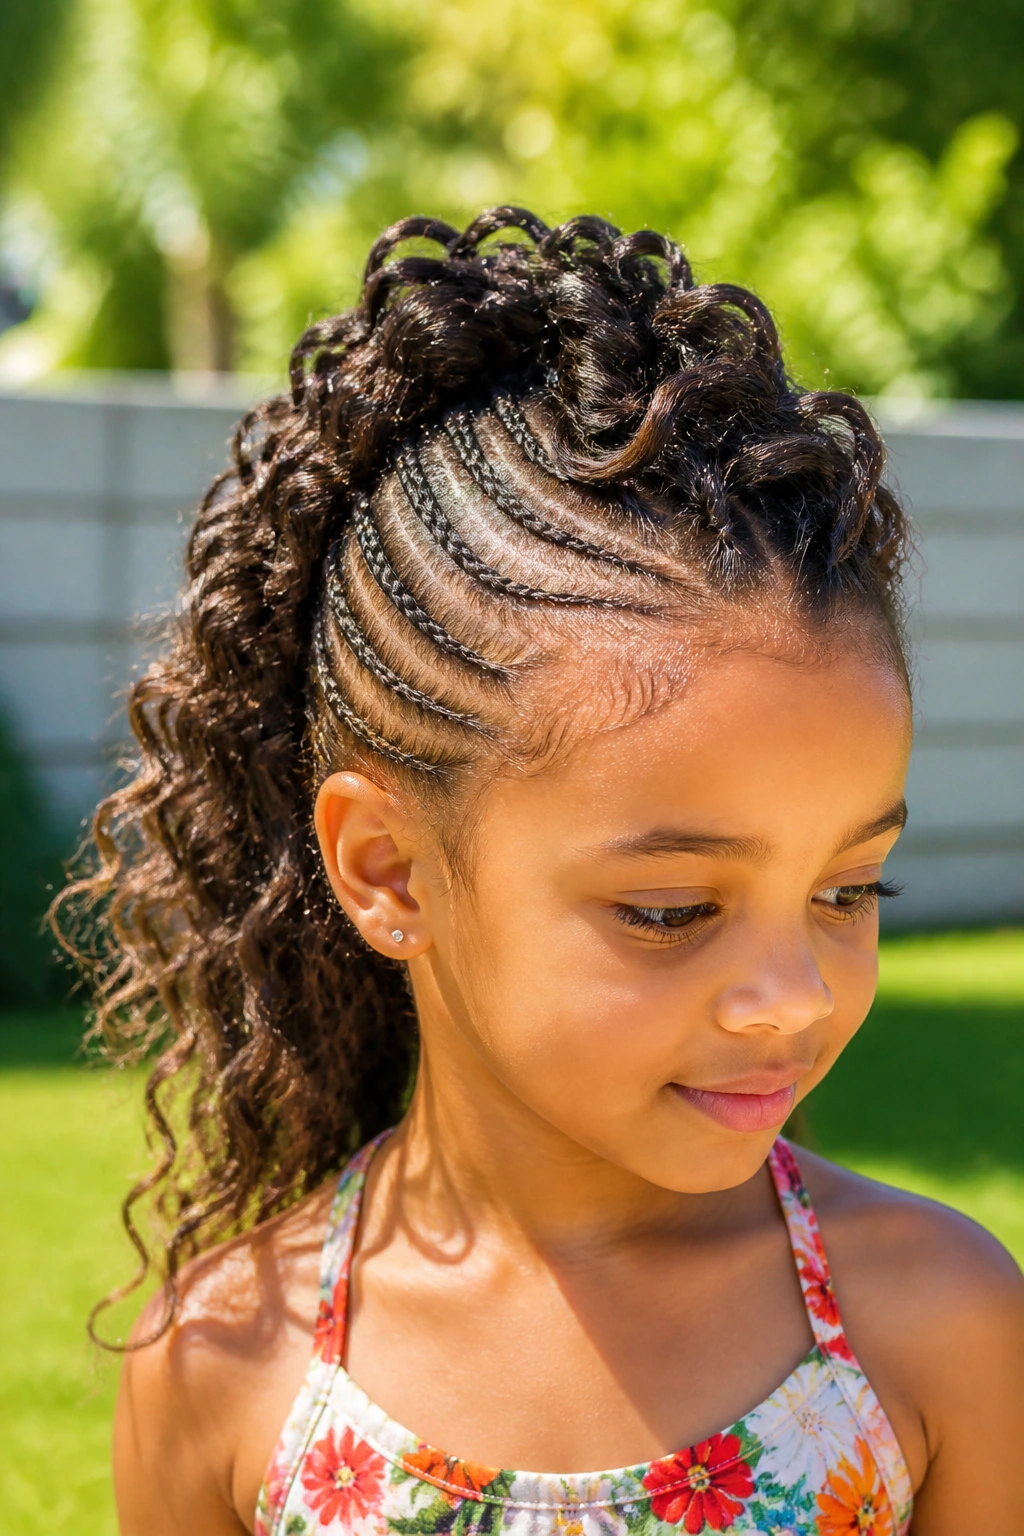
9. Braided Puff Hawk
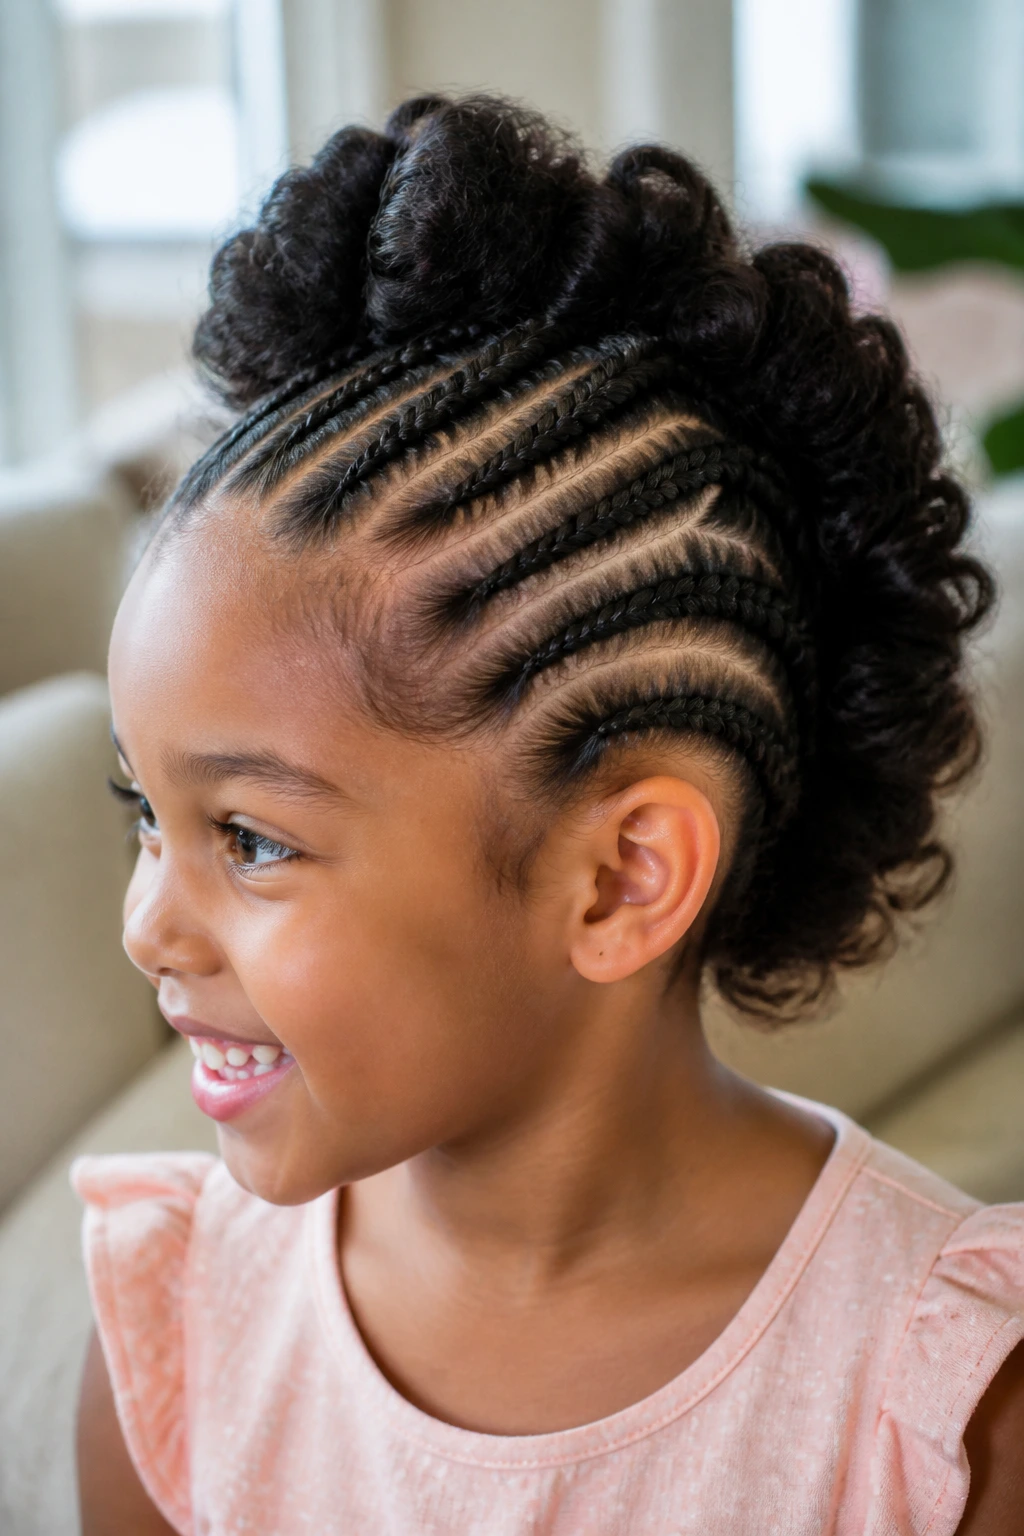
If you like volume, this one delivers it. Small braids or twists feed into puffed sections along the center, so the mohawk looks full and springy instead of tight and narrow.
Wavy hair makes the puffs easy. The natural bend creates soft roundness between each tie-off point, which means you don’t have to tease the hair or fluff it into submission. That’s a win for little scalps.
This style is especially good on medium-length hair with a little thickness. You get shape, movement, and enough hold that the braid line doesn’t disappear halfway through the day. Keep each puff equal in size if you want the style to look balanced. If one section ends up bigger, let it be the last one near the nape; it reads as intentional there.
10. Lace-Braid Side Sweep Hawk
A lace braid sweeping from the temple into the center creates a pretty curve that flatters wavy hair instead of flattening it. The side sections stay controlled, and the braid line gives the mohawk a little asymmetry that feels modern without trying too hard.
This is a good choice when one side of the hair is shorter or layers keep falling out around the face. A lace braid catches those pieces and tucks them in as you go. It also helps if your child doesn’t like hair touching her cheeks.
The finished style looks best when the loose side stays soft. Resist the urge to slick everything back. That hard edge can make the braid look too severe on a young face. A softer sweep at the temple gives the whole style room to breathe.
11. Waterfall Accent Mohawk
A waterfall braid doesn’t try to do all the work. It decorates the sides and lets the center mohawk carry the shape, which is why it feels so pretty on wavy hair.
The loose dropped strands echo the wave pattern, so the style looks deliberate even when it’s slightly messy. That’s the charm. If you’re styling for a party or photo day, this is one of the easiest ways to make the braid look elaborate without building a heavy structure all over the head.
Keep the braid line narrow and the drop sections even. If the child has layered hair, the waterfall pieces will fall at different lengths anyway, and that’s fine. Don’t over-fix it. Waterfall braids get fussy when you try to make every strand behave exactly the same.
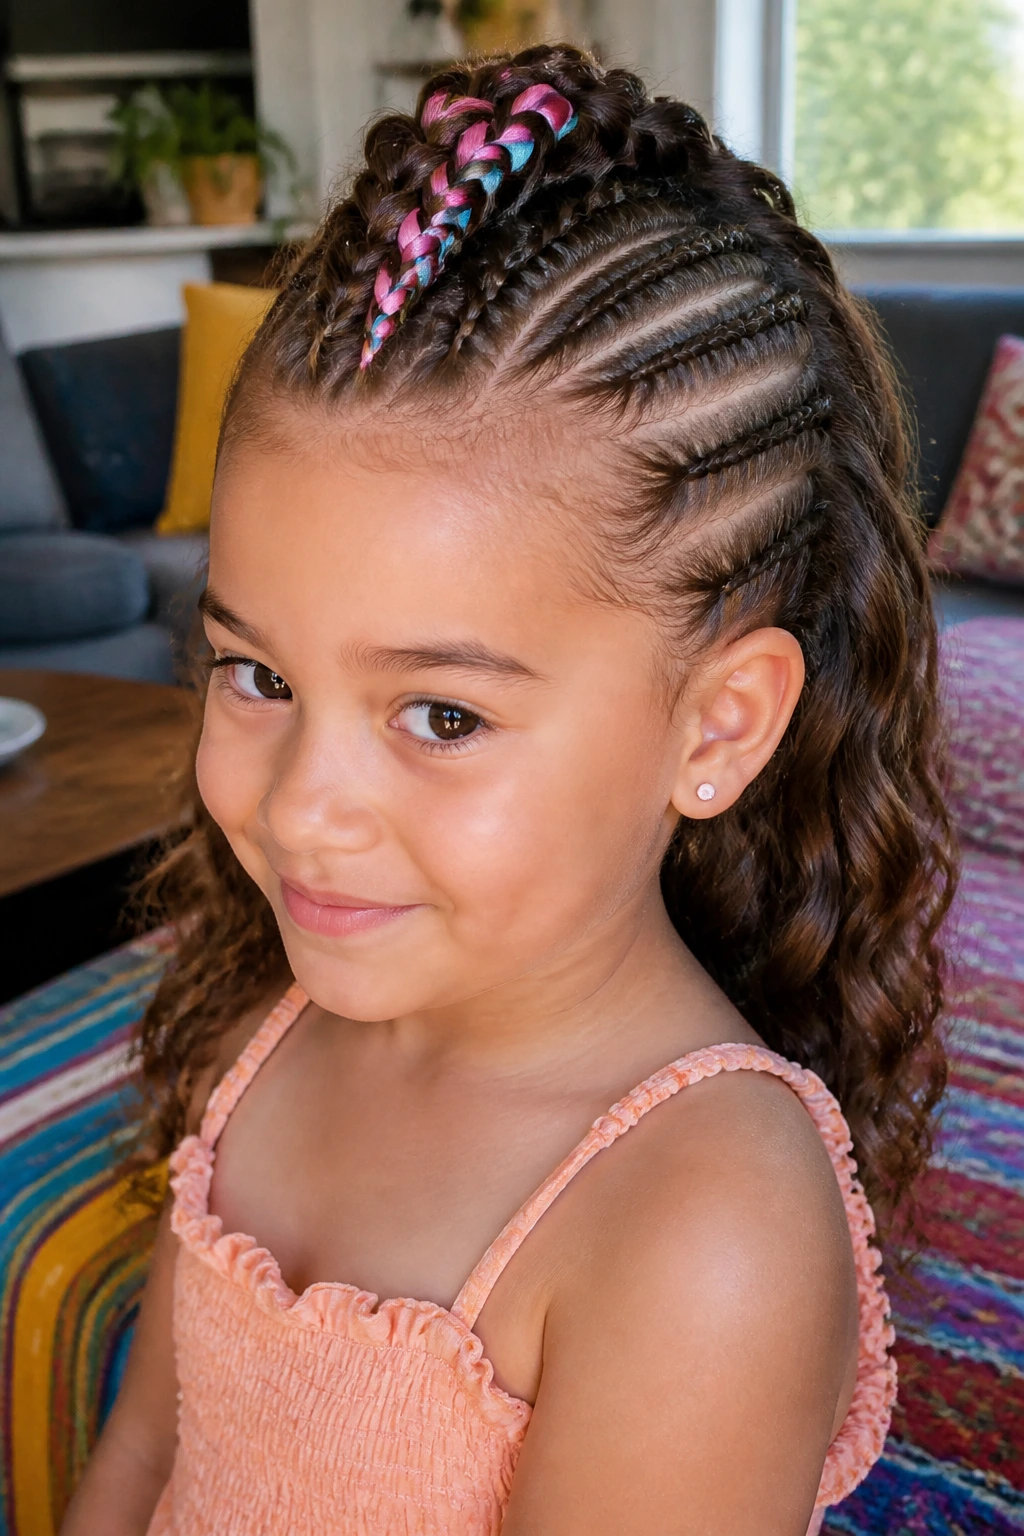
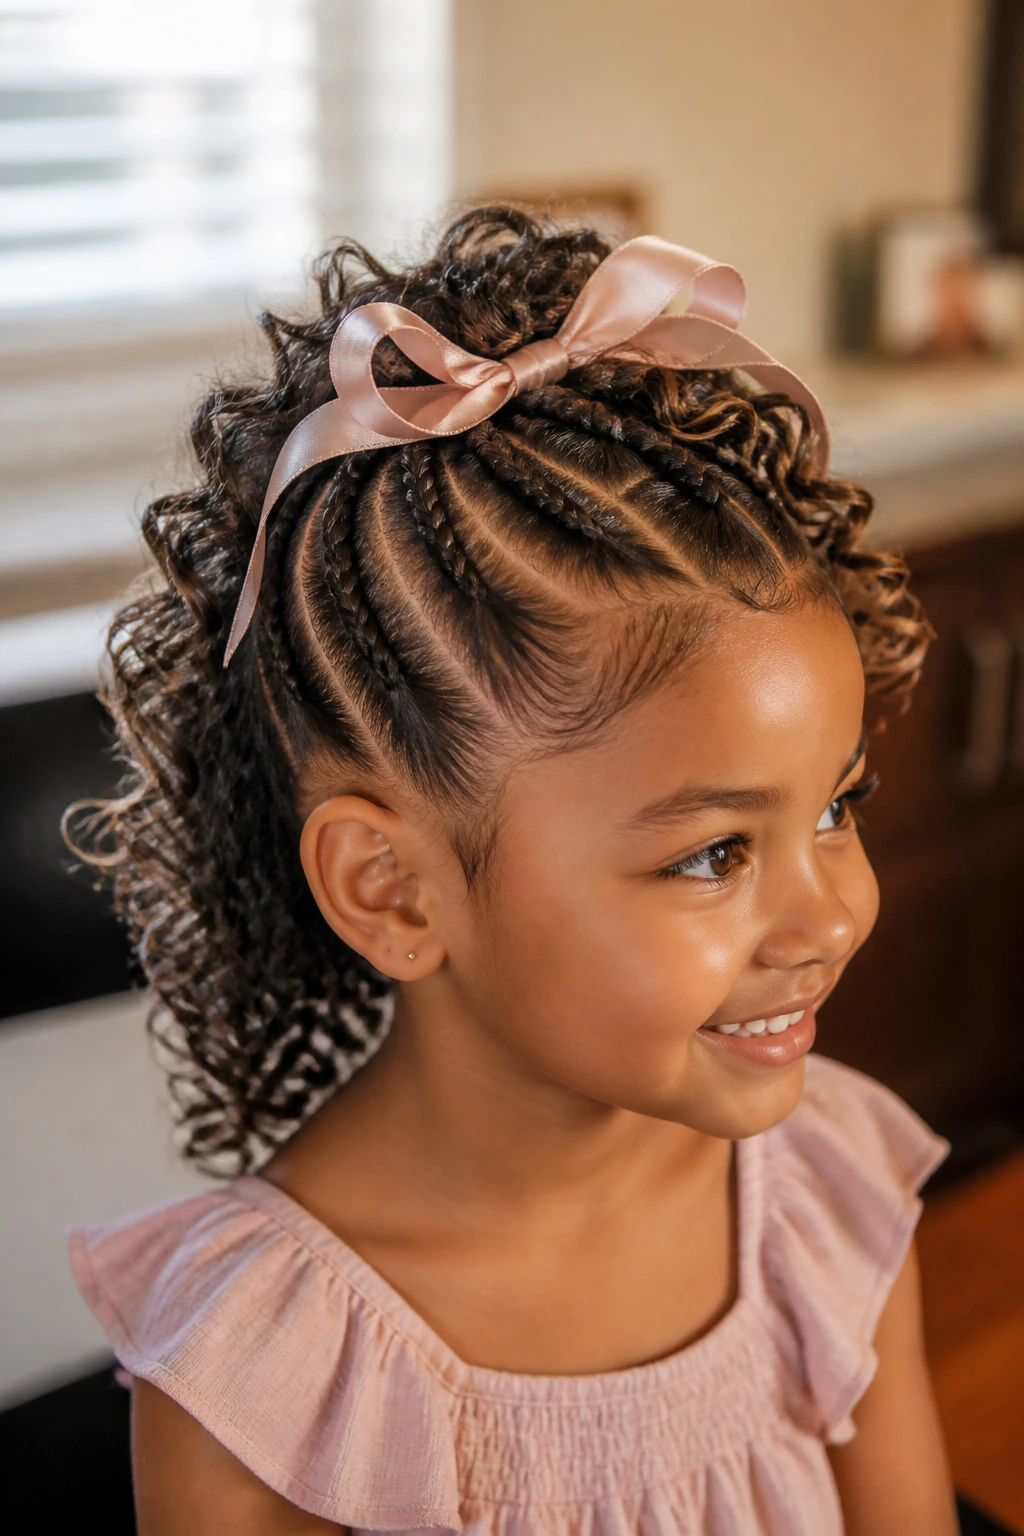
12. Ribbon-Woven Mohawk
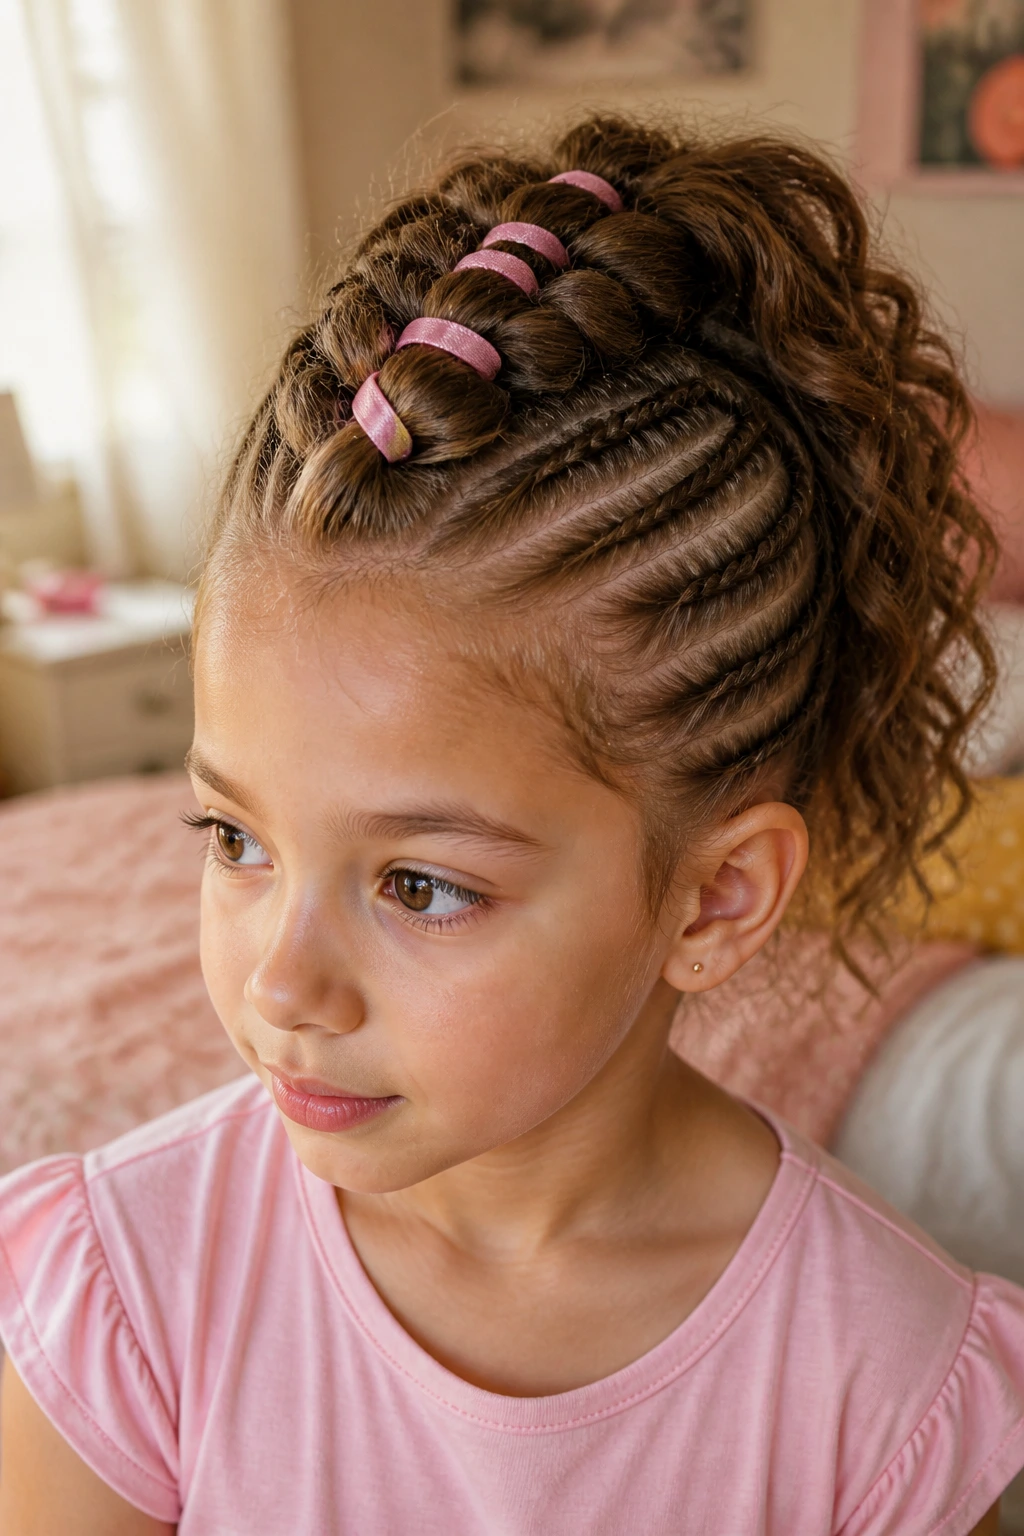
A ribbon woven through the braid turns a simple mohawk into something with a little movement and color. Wavy hair helps the ribbon sit softly against the braid instead of looking stiff.
This is the style I’d pick when the outfit needs a match. School colors, birthday colors, holiday colors — the ribbon does the talking. Keep the ribbon narrow so it doesn’t bulk up the braid or make the center ridge feel heavy.
Use a ribbon with a smooth finish rather than a stiff one. Rough ribbon catches on the hair and tugs, which is the last thing you want on a child’s head. And if you are tying a bow at the end, keep it small enough that it doesn’t tip the braid backward.
13. Beaded Mohawk with Center Braid
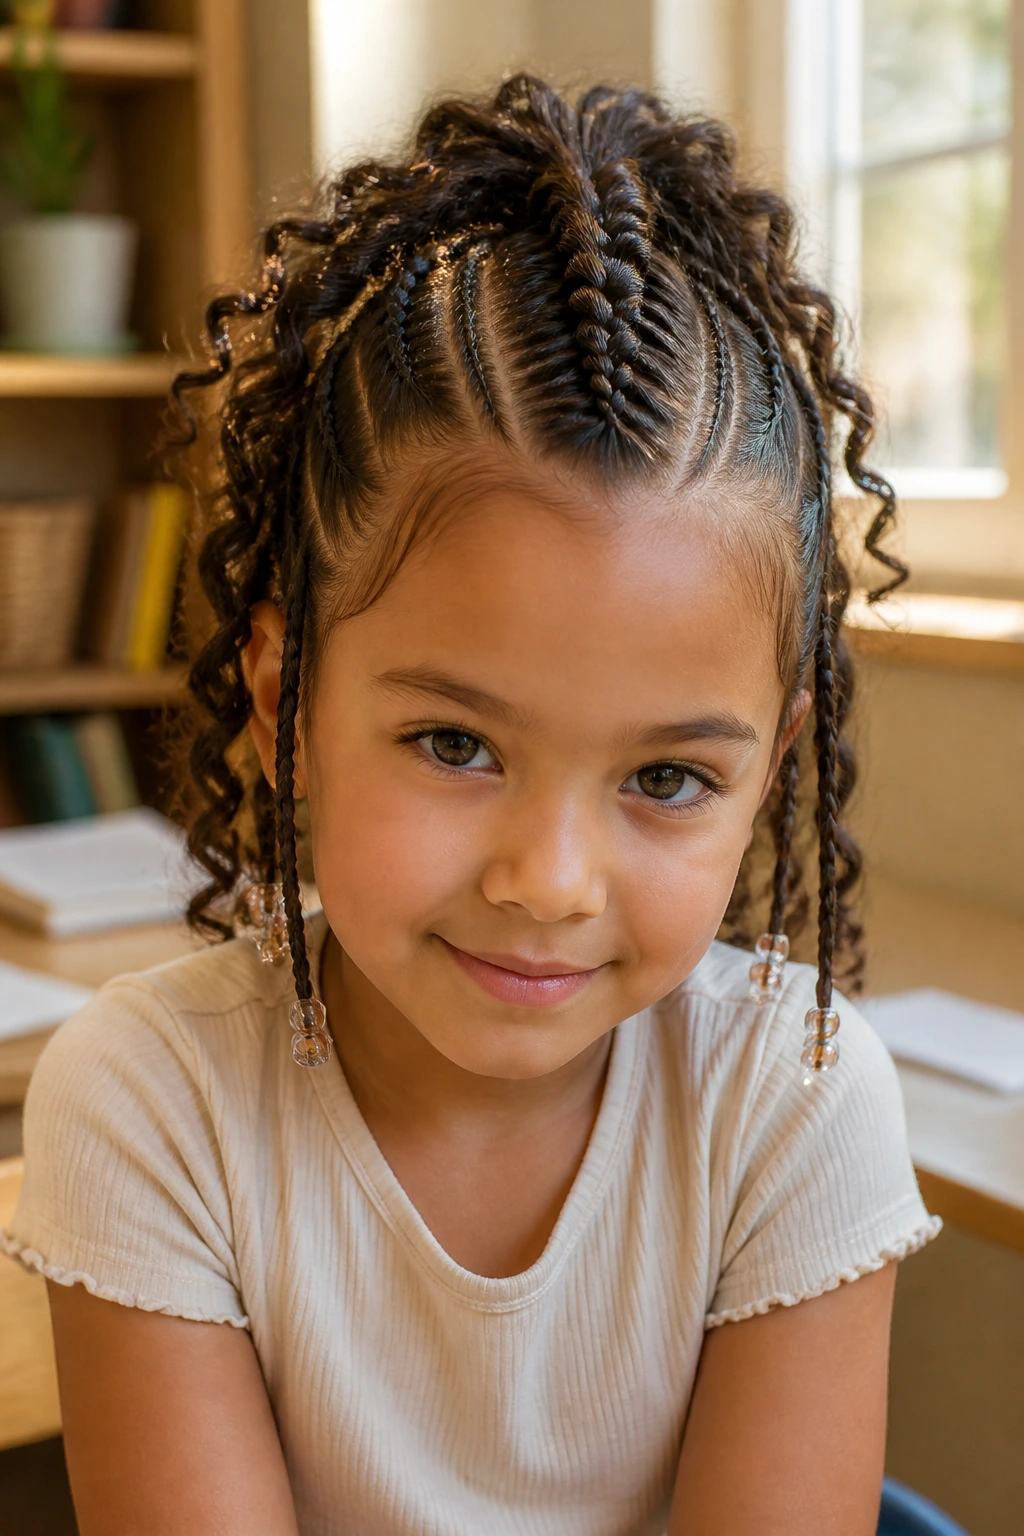
Beads change the sound and the feel of the style. A center braid with a few light beads at the ends gives wavy hair a little swing, and kids usually love the small click of movement.
The main thing is weight. Use light beads, not chunky ones that drag the braid down. On little girls, especially, a bead-heavy style can pull at the scalp by the end of the day. A few small beads at the tail are enough.
This is a good option when the braid itself is simple but you want the finish to feel special. A center Dutch braid, a couple of clear elastics, and a few beads can carry the whole style. Keep the beads far enough from the face that they don’t tap the cheeks when she turns her head.
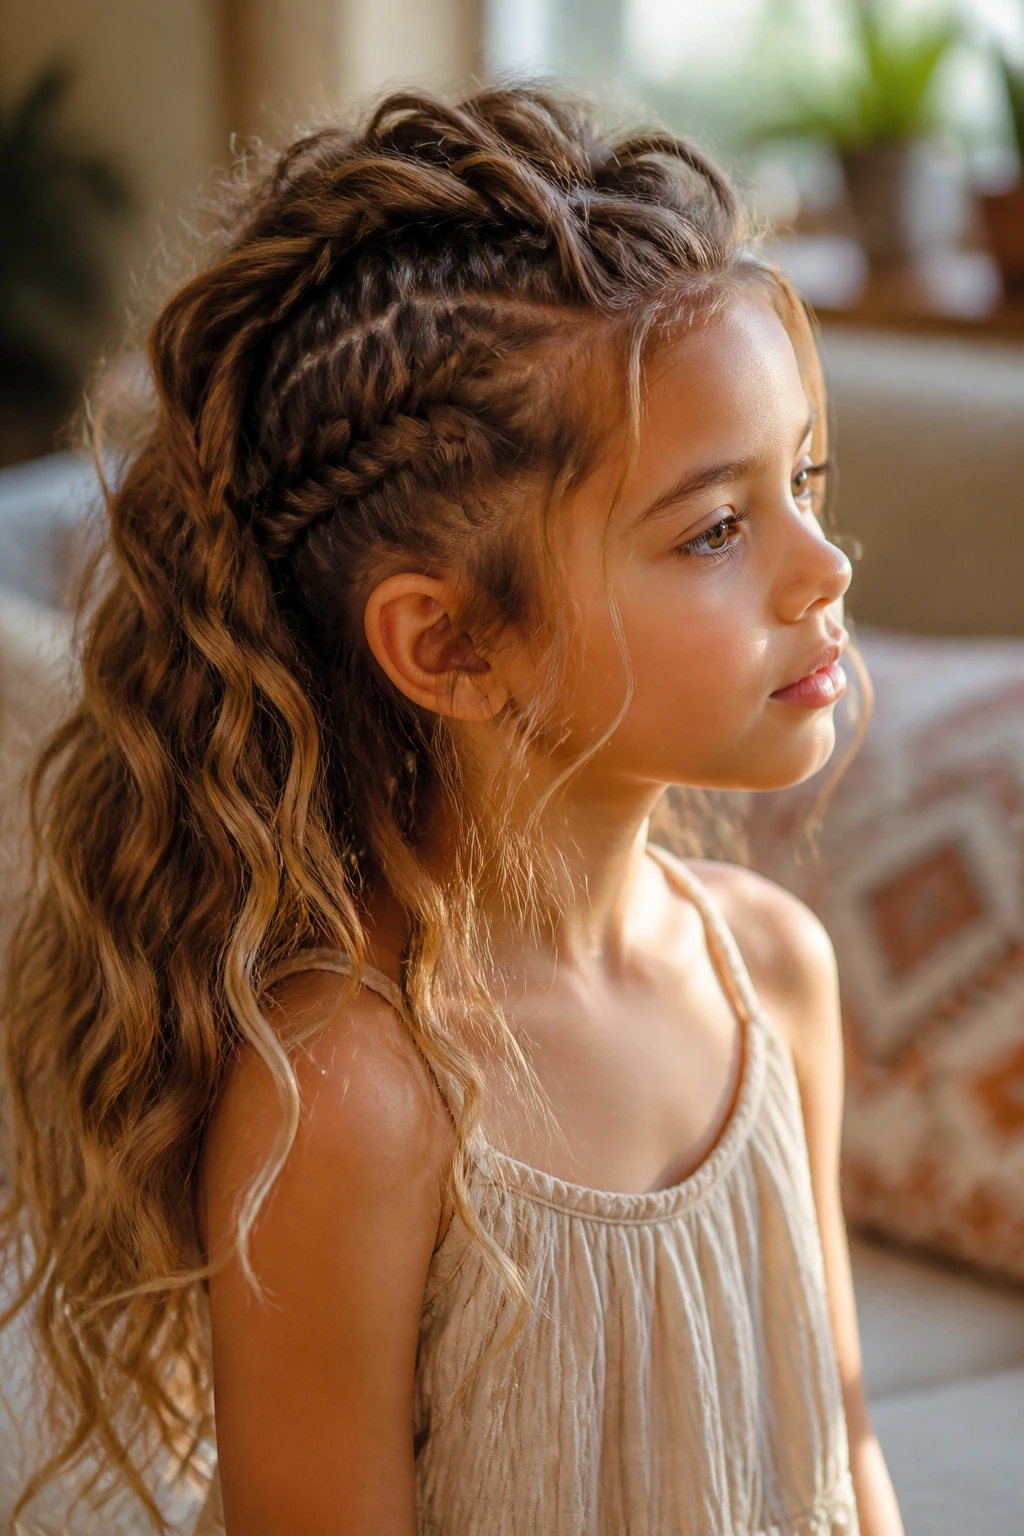
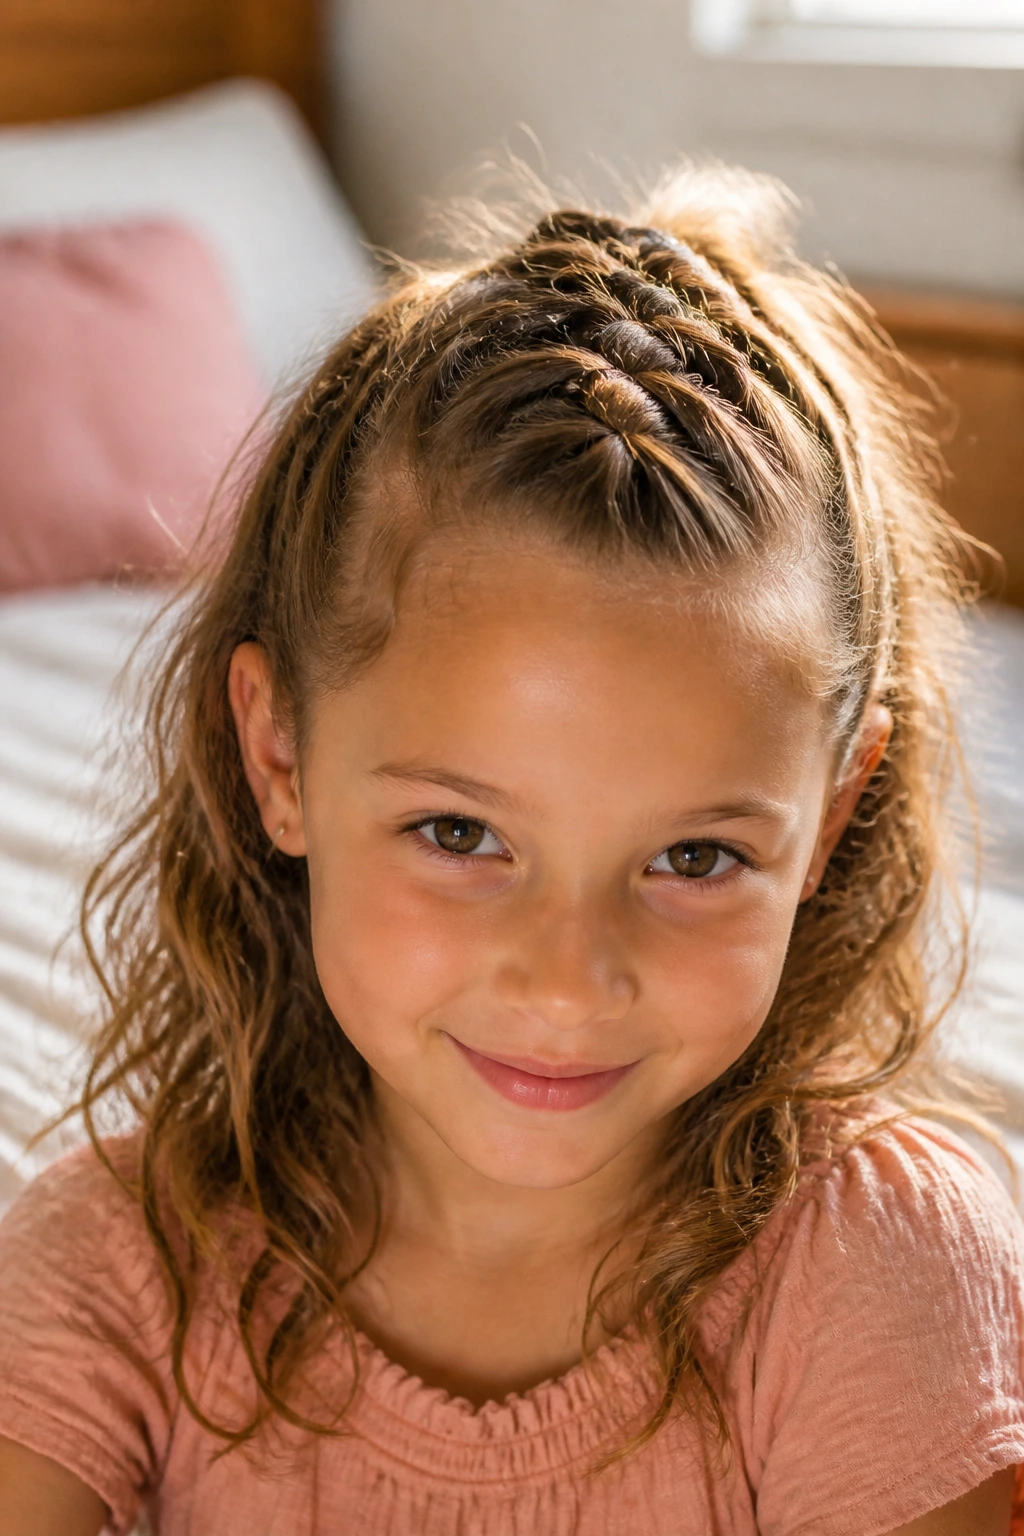
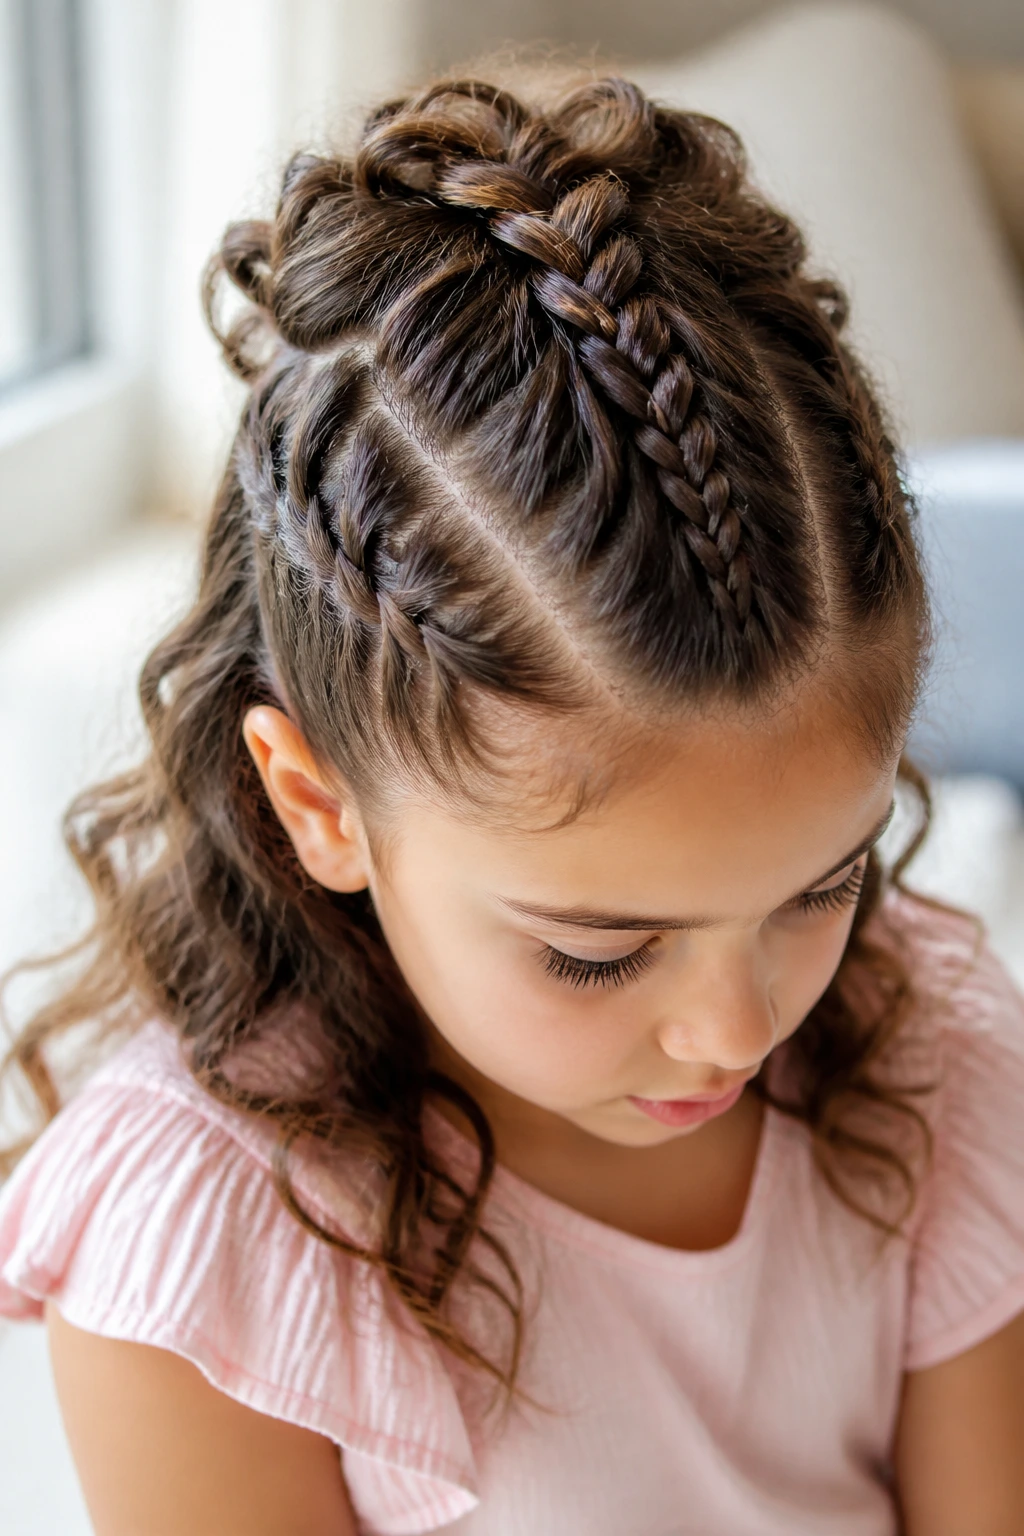
14. Half-Up Braided Hawk
A half-up mohawk braid is one of the easiest ways to keep the wave visible while controlling the front. The braid runs through the crown, but the back stays loose and bouncy.
That balance is why it works so well on wavy hair. You get the neatness at the top and the movement at the bottom. The style feels lighter too, which matters on days when your child does not want “a lot of hair stuff” touching her neck.
If the waves are strong, leave the loose half with only a light detangling cream. Too much product will weigh the back down and make the whole look limp. A small bow right where the braid ends can also mark the transition cleanly.
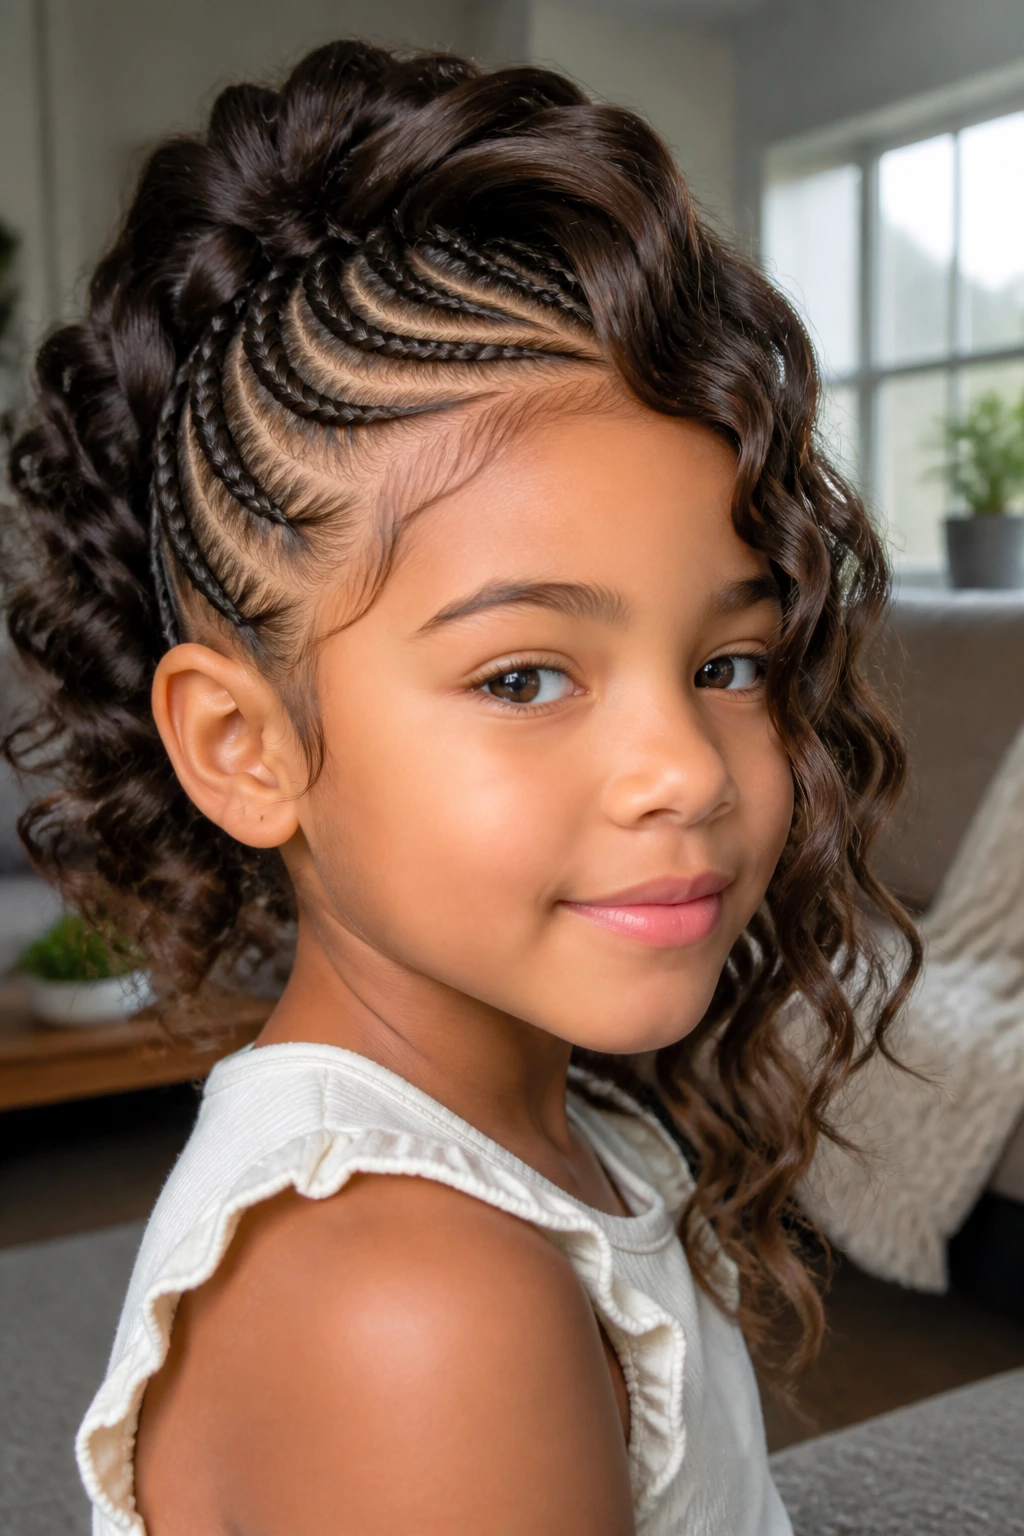
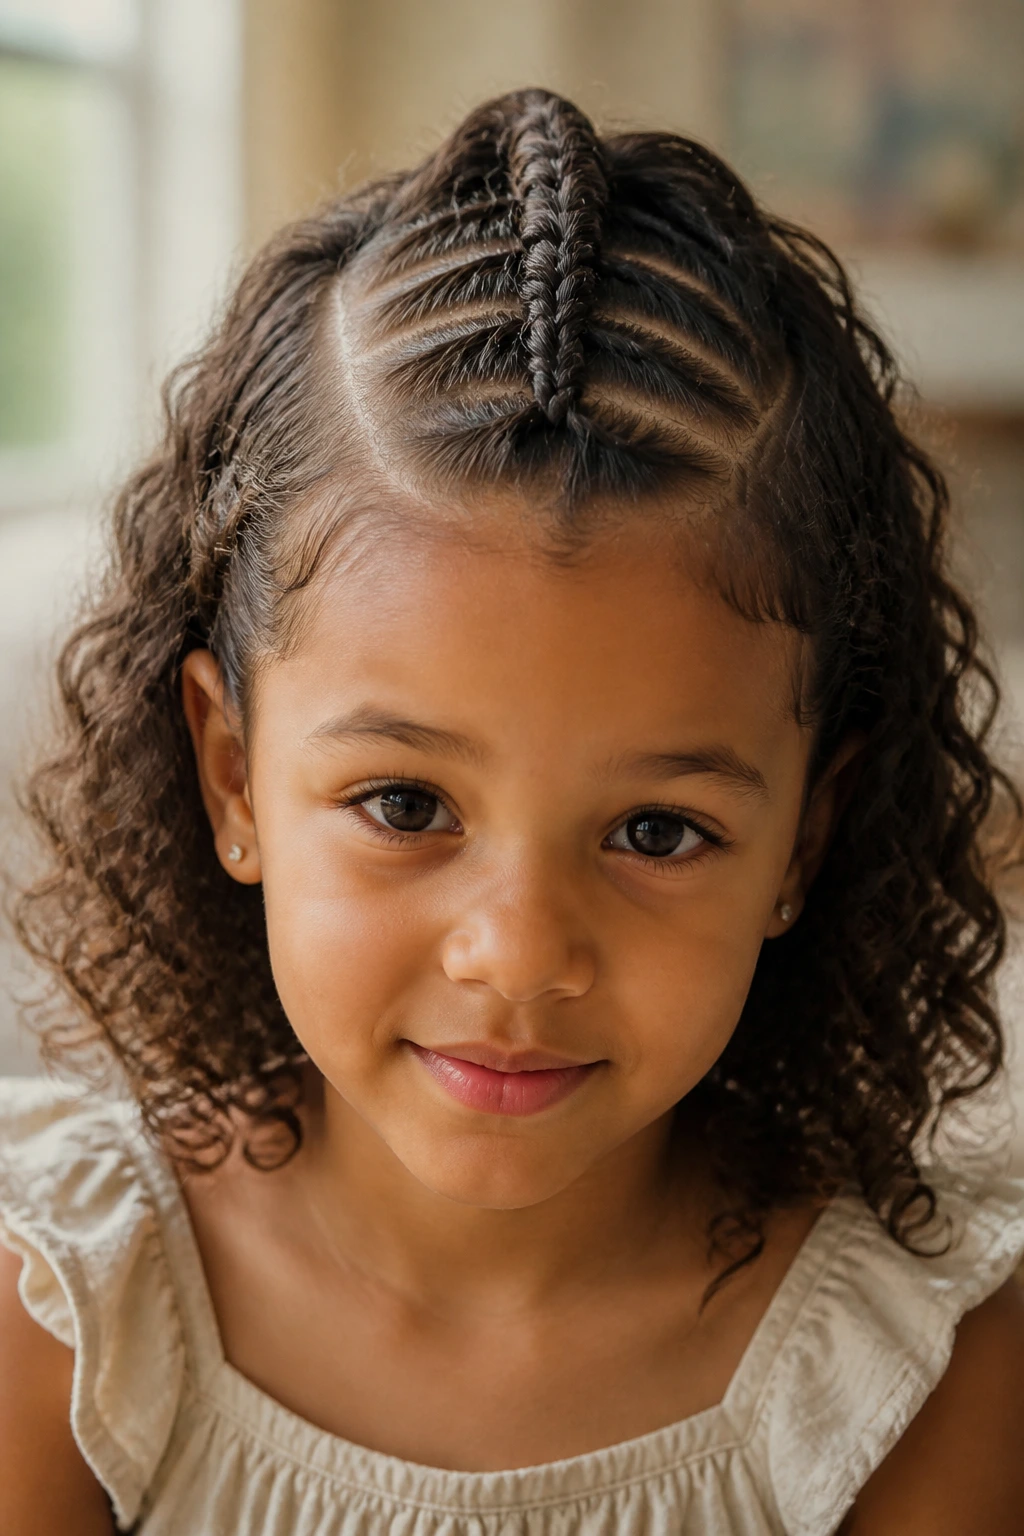
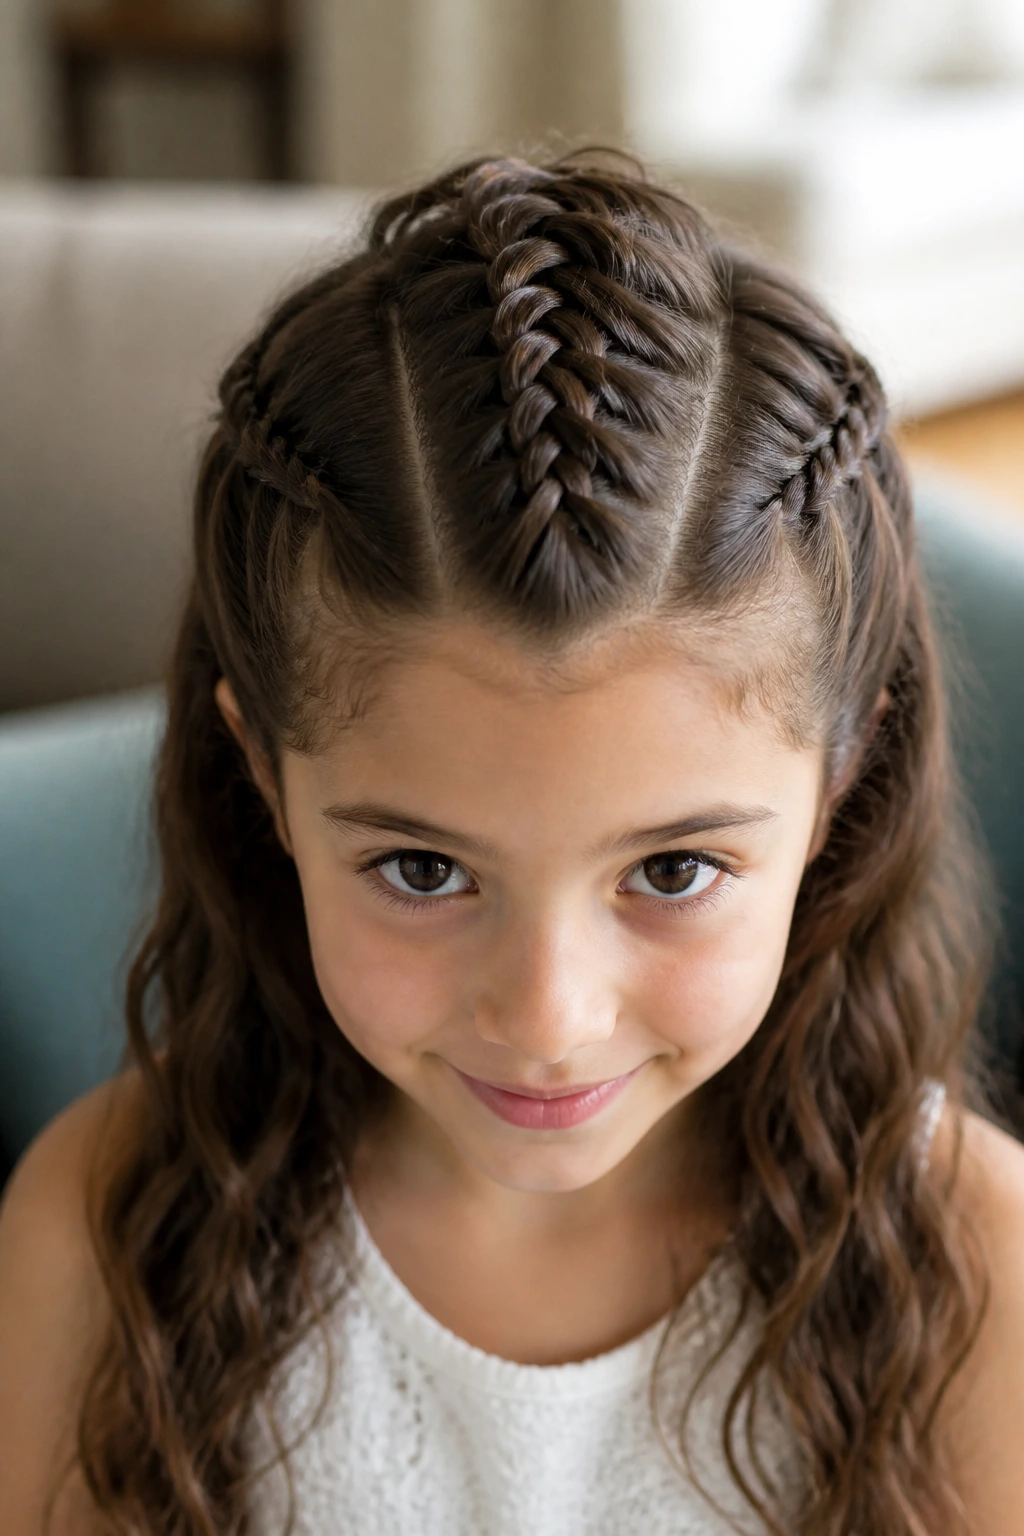
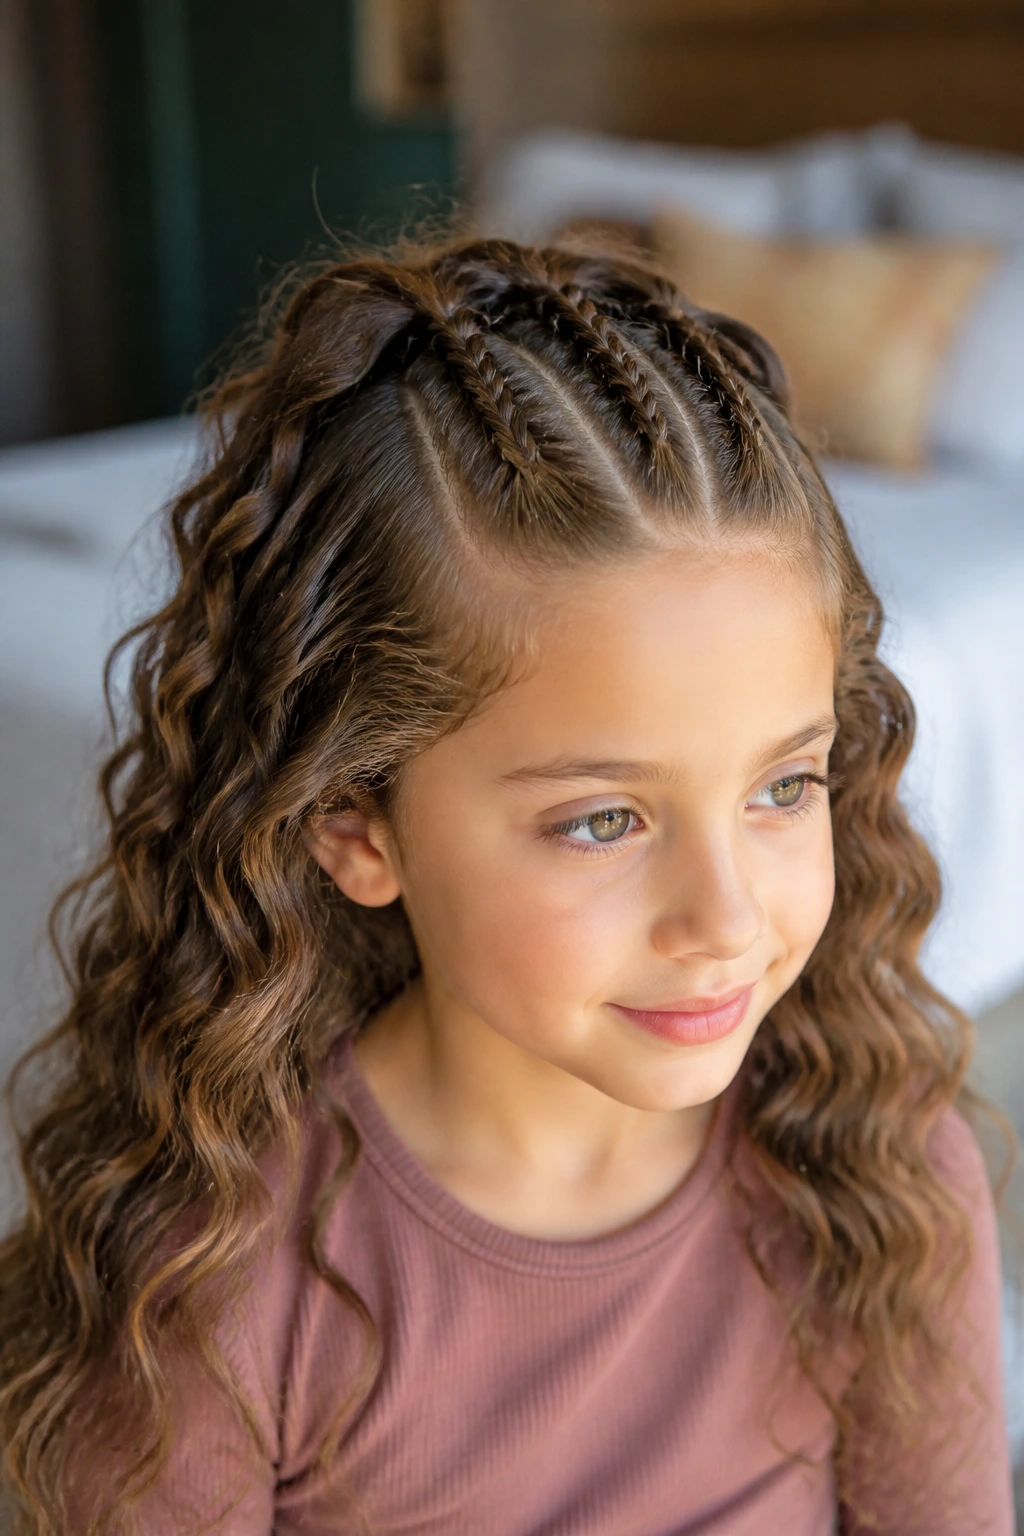
15. Crisscross Mohawk
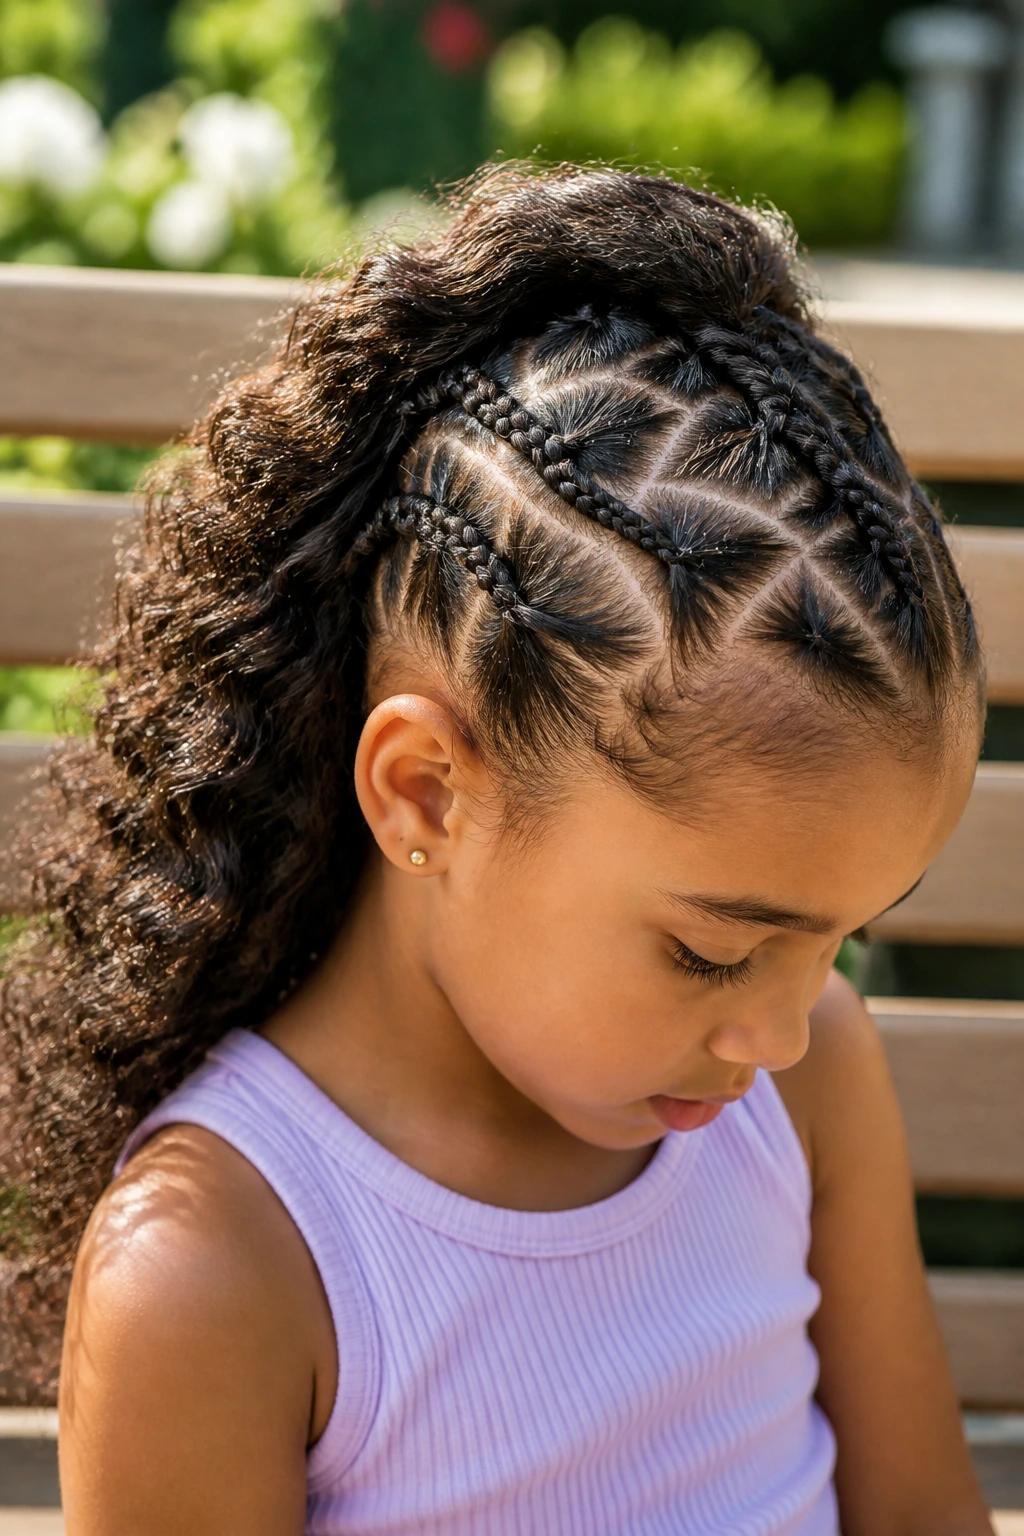
Crisscross braids give you structure without a hard line. Sections overlap in little X-shapes before feeding into the ridge, and the wavy texture softens the geometry so it doesn’t feel too sharp.
This style is nice when you want the hair to look intricate from the front and top at the same time. It works especially well on shoulder-length waves, where the shorter pieces near the crown can be folded into the pattern instead of left out to frizz on their own.
The best version uses small, even sections. Big crisscross pieces can sag. Keep the tension snug enough that the X-shapes stay visible, but not so tight that the scalp starts to show white at the edges. If that happens, the braid is too tight. Start over.
16. Low-Tension School Hawk
This is the style for parents who want the braid to stay put and the child to stay happy. The center ridge sits a little lower, the pull is gentler, and the overall shape still reads as a mohawk braid without the sharp, pulled-back look.
Wavy hair helps here because it gives the braid some natural body even when the tension stays soft. That means you can be kinder to the scalp without losing the shape. I’d choose this one for long school days, especially if your child tends to get sore near the temples.
A quick test helps. After you finish the first few stitches, ask if she can slide a fingertip under the braid at the hairline. If she cannot, it is too tight. You want secure, not pinched.
17. Messy Boho Hawk
This is the mohawk braid for the child who hates looking “done” but still wants something special. The braid stays loose, the face-framing pieces stay soft, and the waves get to do most of the visual work.
The style works because it doesn’t fight the natural bend in the hair. In fact, a little frizz helps. It gives the braid texture and keeps it from looking too stiff or adult. That makes this one useful for casual weekends, family photos, or any day you want the hair to look lived-in rather than pinned into place.
A tiny bit of curl cream on the lengths can help the waves stay defined. Don’t smooth the crown too much. The point is to keep a soft edge, not erase the hair’s texture.
18. Pancaked Wide Hawk
Pancaking the braid turns a narrow center braid into a wide, dramatic ridge. On wavy hair, the braid expands nicely, which makes this a smart choice for fine to medium strands that need more visual weight.
I love this style because it looks fuller without adding extra pieces. That is useful on little girls whose hair looks thin when tightly braided. Once the braid is finished, gently tug the edges outward section by section. Not all at once. If you pull too hard, the braid loosens at the base and the whole thing starts slipping.
This one is a photo favorite. It gives the crown height and the braid a soft, almost cloudlike texture. Keep the first inch near the scalp firm, then do the pancaking mostly on the lower sections where the structure is already set.
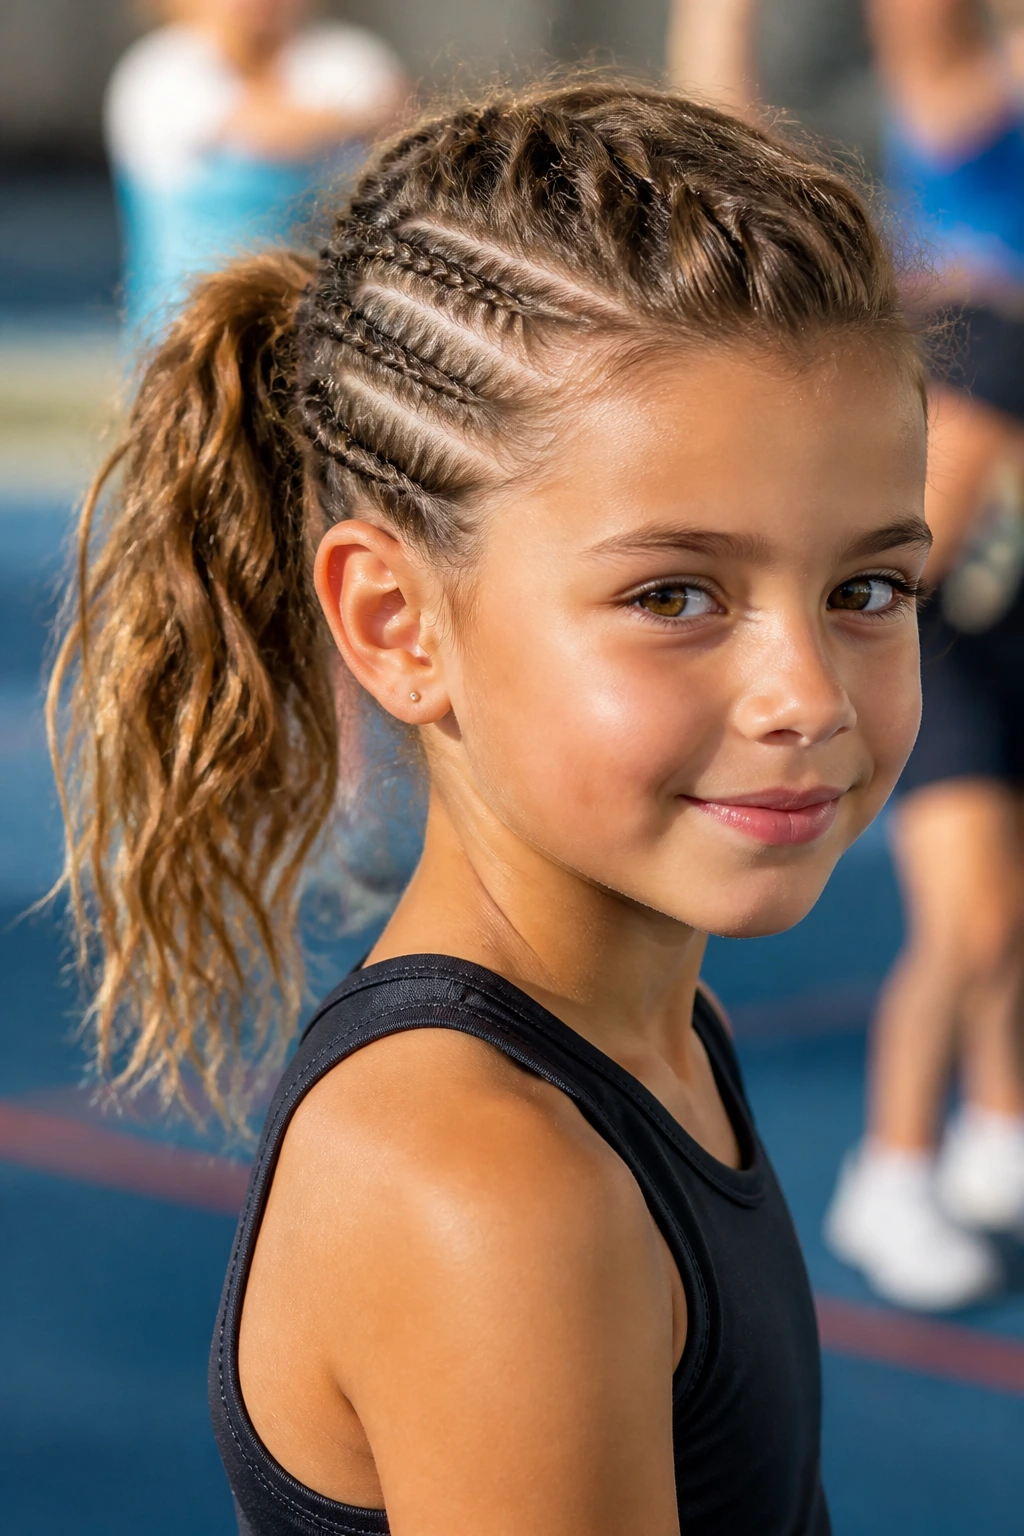
19. Braided Ponyhawk
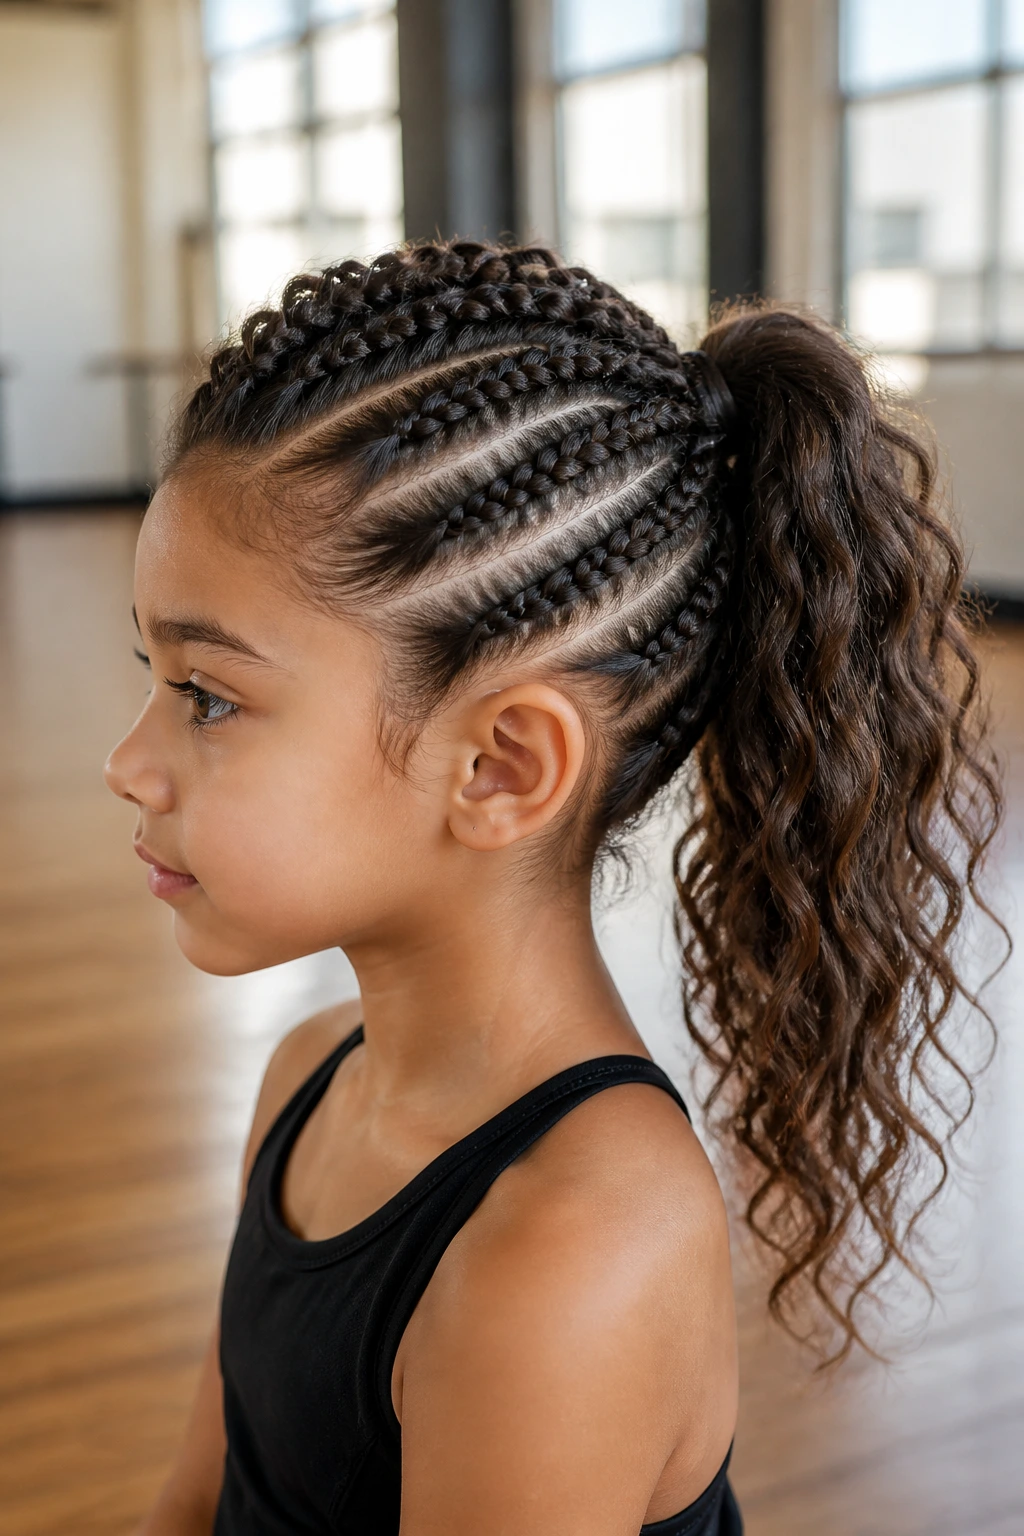
A braided ponyhawk gives you a braid leading into a ponytail, which is a nice compromise between a mohawk and a sporty style. It stays secure, and the tail still swings when she moves.
That movement is part of the appeal. Wavy hair keeps the ponytail from looking flat, so the whole style feels active and fresh. It is a strong option for dance class, bike rides, and any day with a lot of running.
Use a sturdy elastic at the tail and, if the hair is thick, a second elastic underneath for backup. The braid should lead smoothly into the ponytail without a lump at the join. If there is a bump, flatten it with your fingers before you add the last tie.
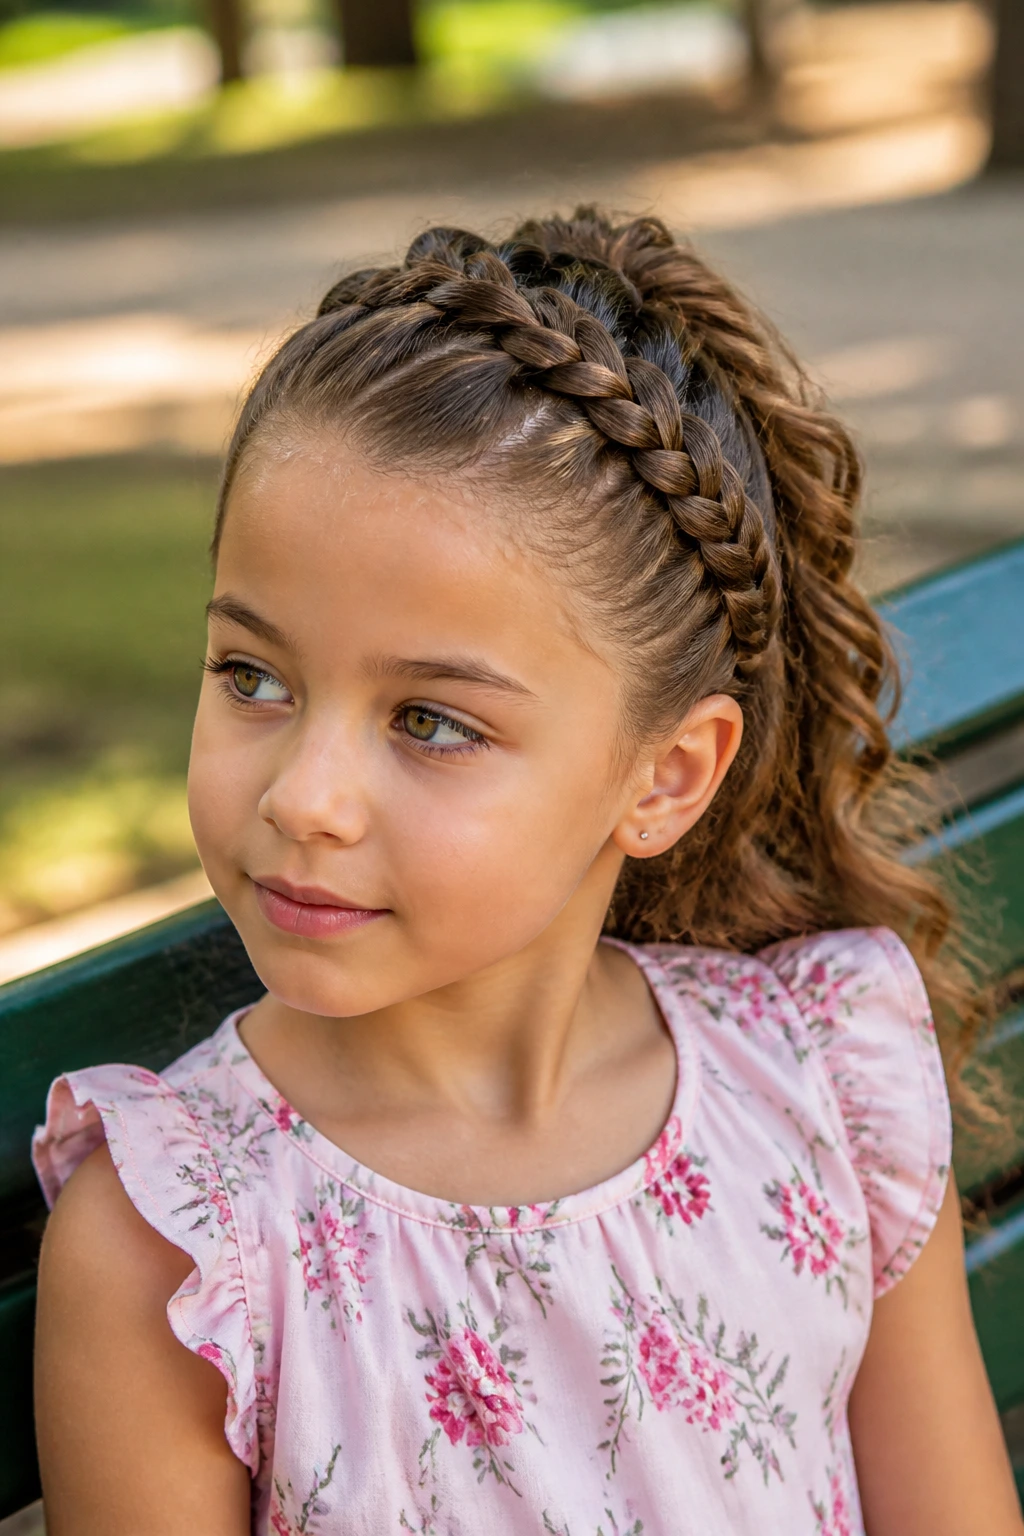
20. Twisted Halo Hawk
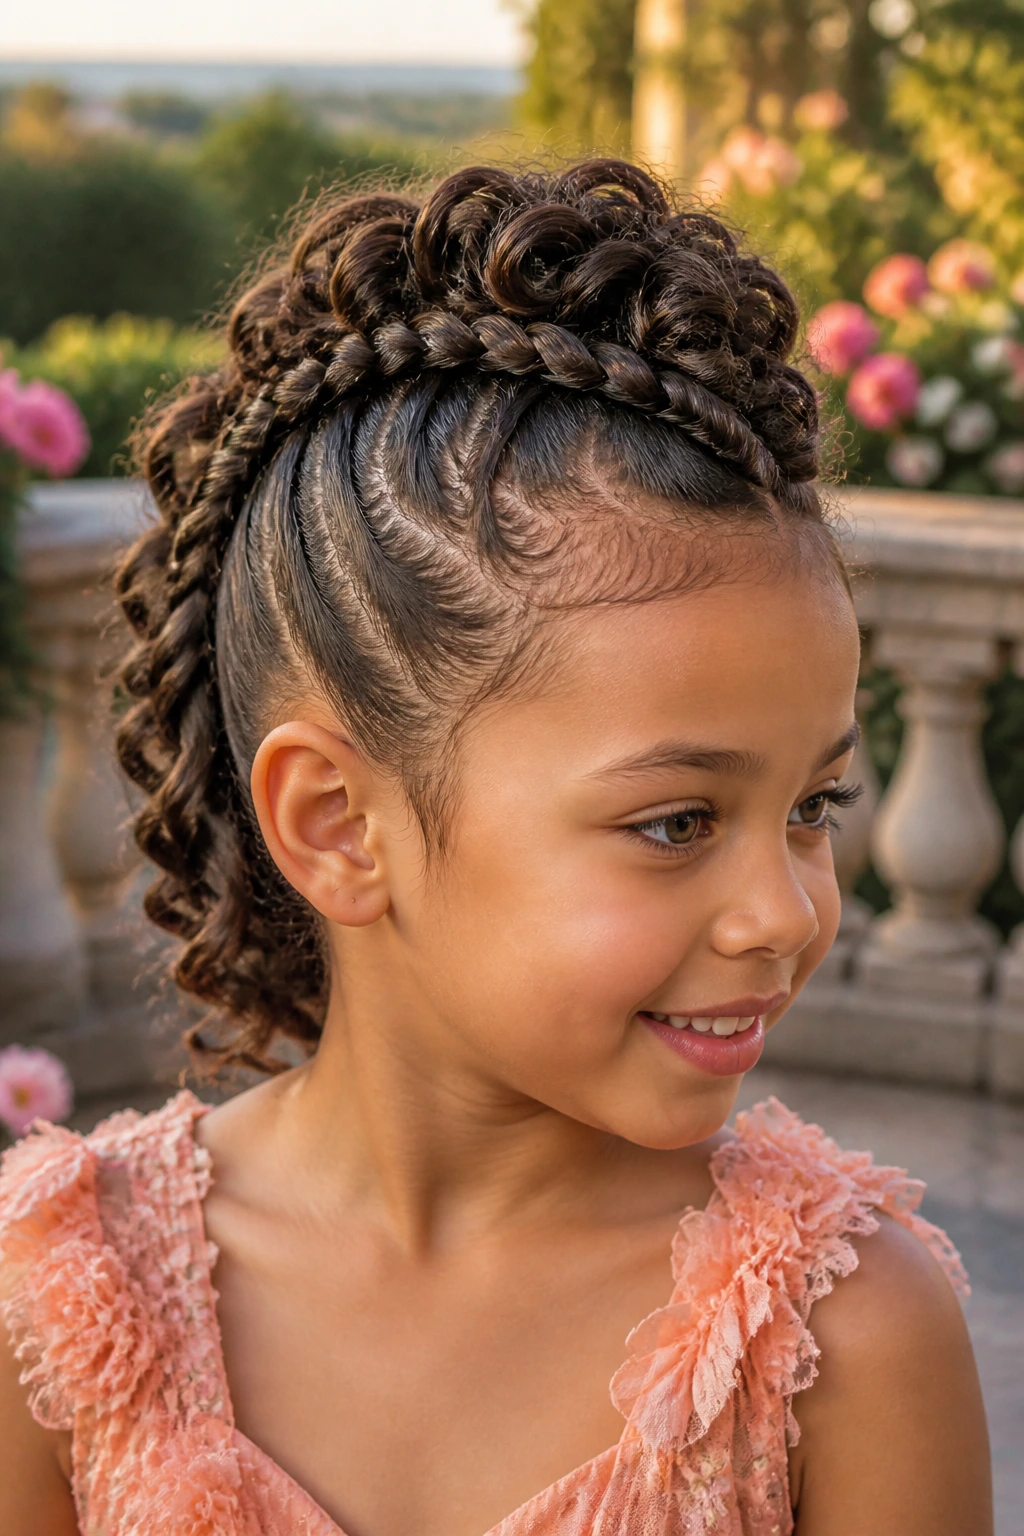
A halo braid around the crown with a center mohawk section gives you a style that feels a little more polished. It has shape, but it also has softness, which makes it lovely on wavy hair.
The halo keeps the edges tidy, while the center ridge brings the drama. That combination is useful for weddings, picture days, or family events where you want the hair to look finished without making it stiff. Wavy texture helps the halo avoid looking too formal or flat.
This style takes a little patience because the braid has to curve smoothly around the head. The payoff is worth it. If you keep the hairline loose enough to avoid pulling, the style stays comfortable longer than people expect.
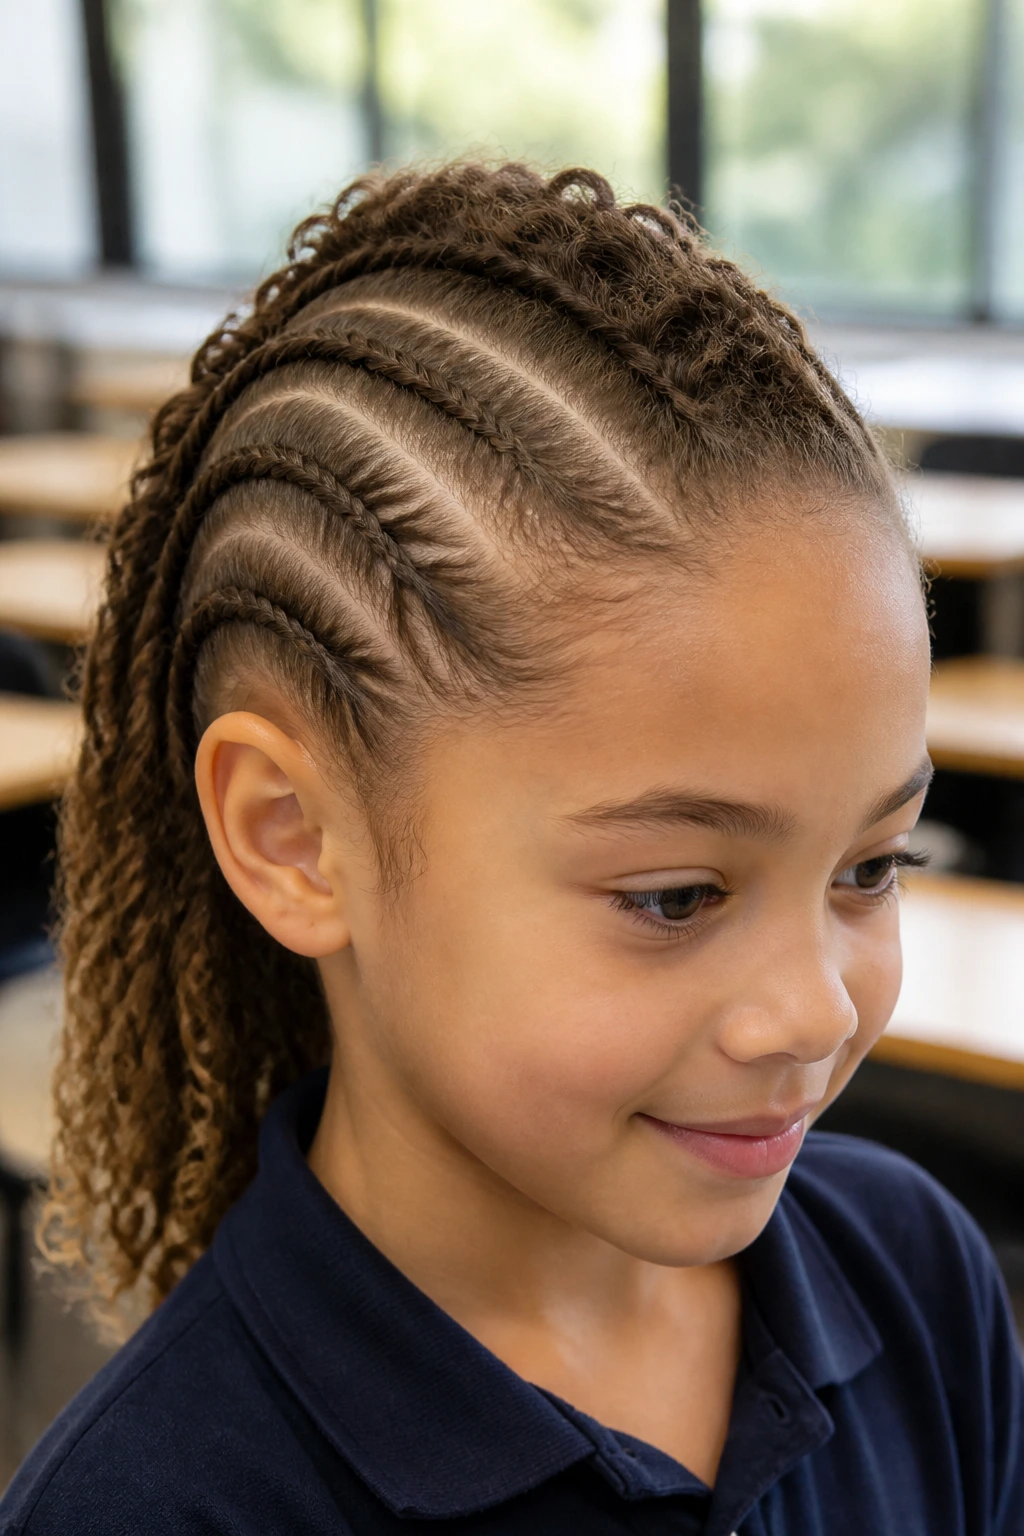
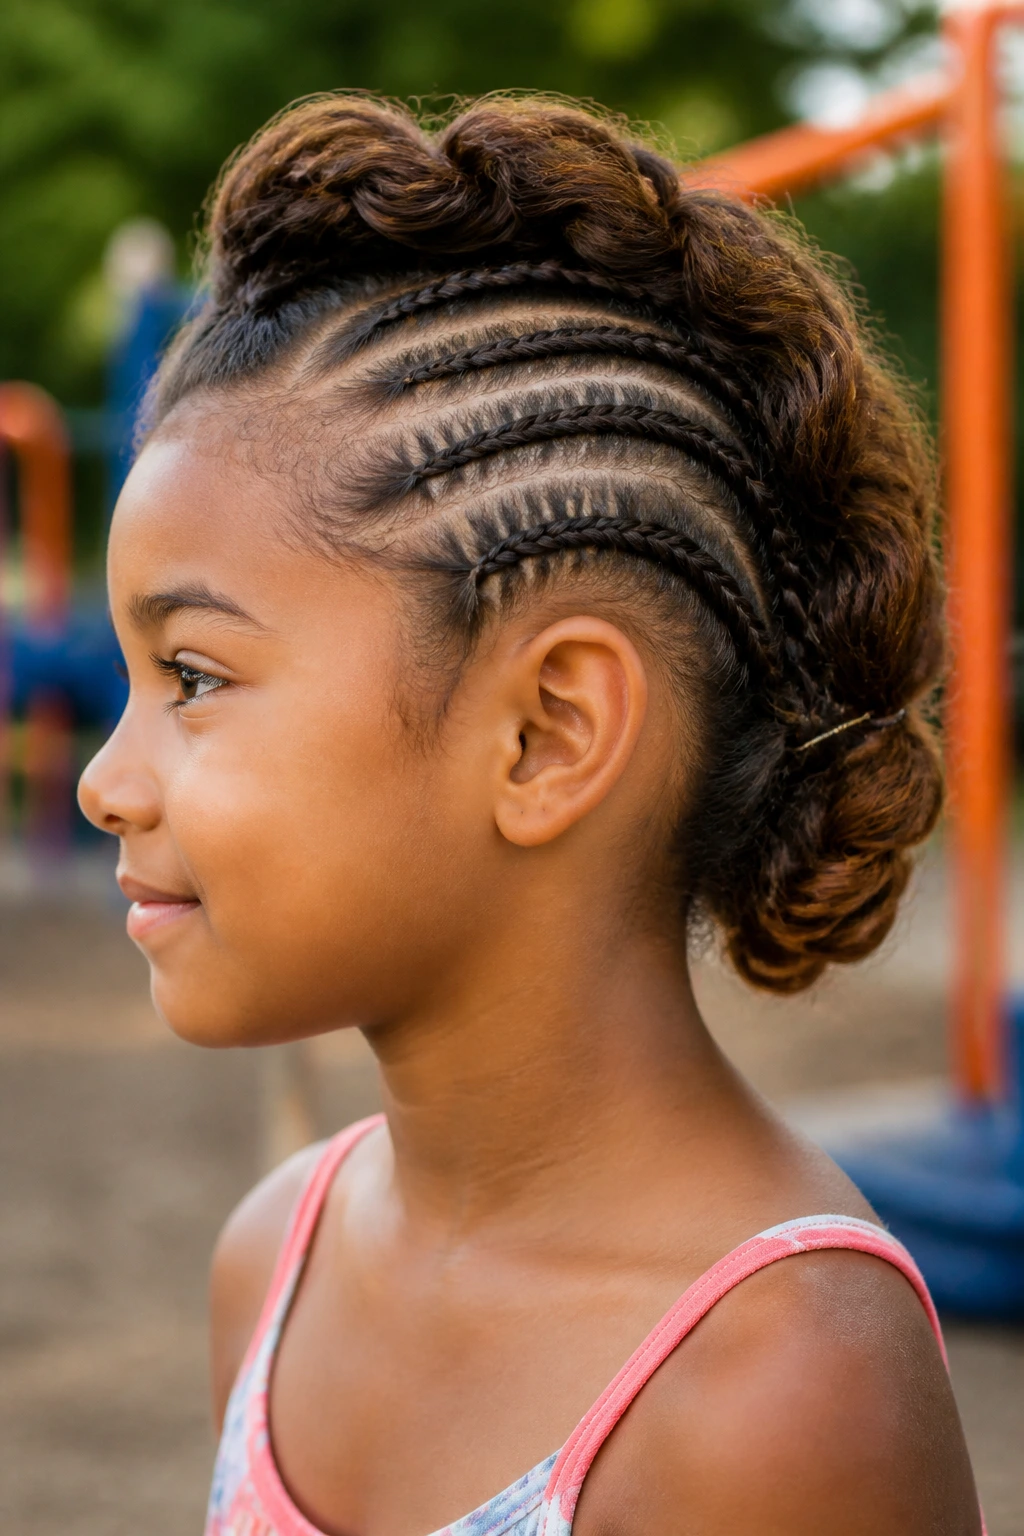
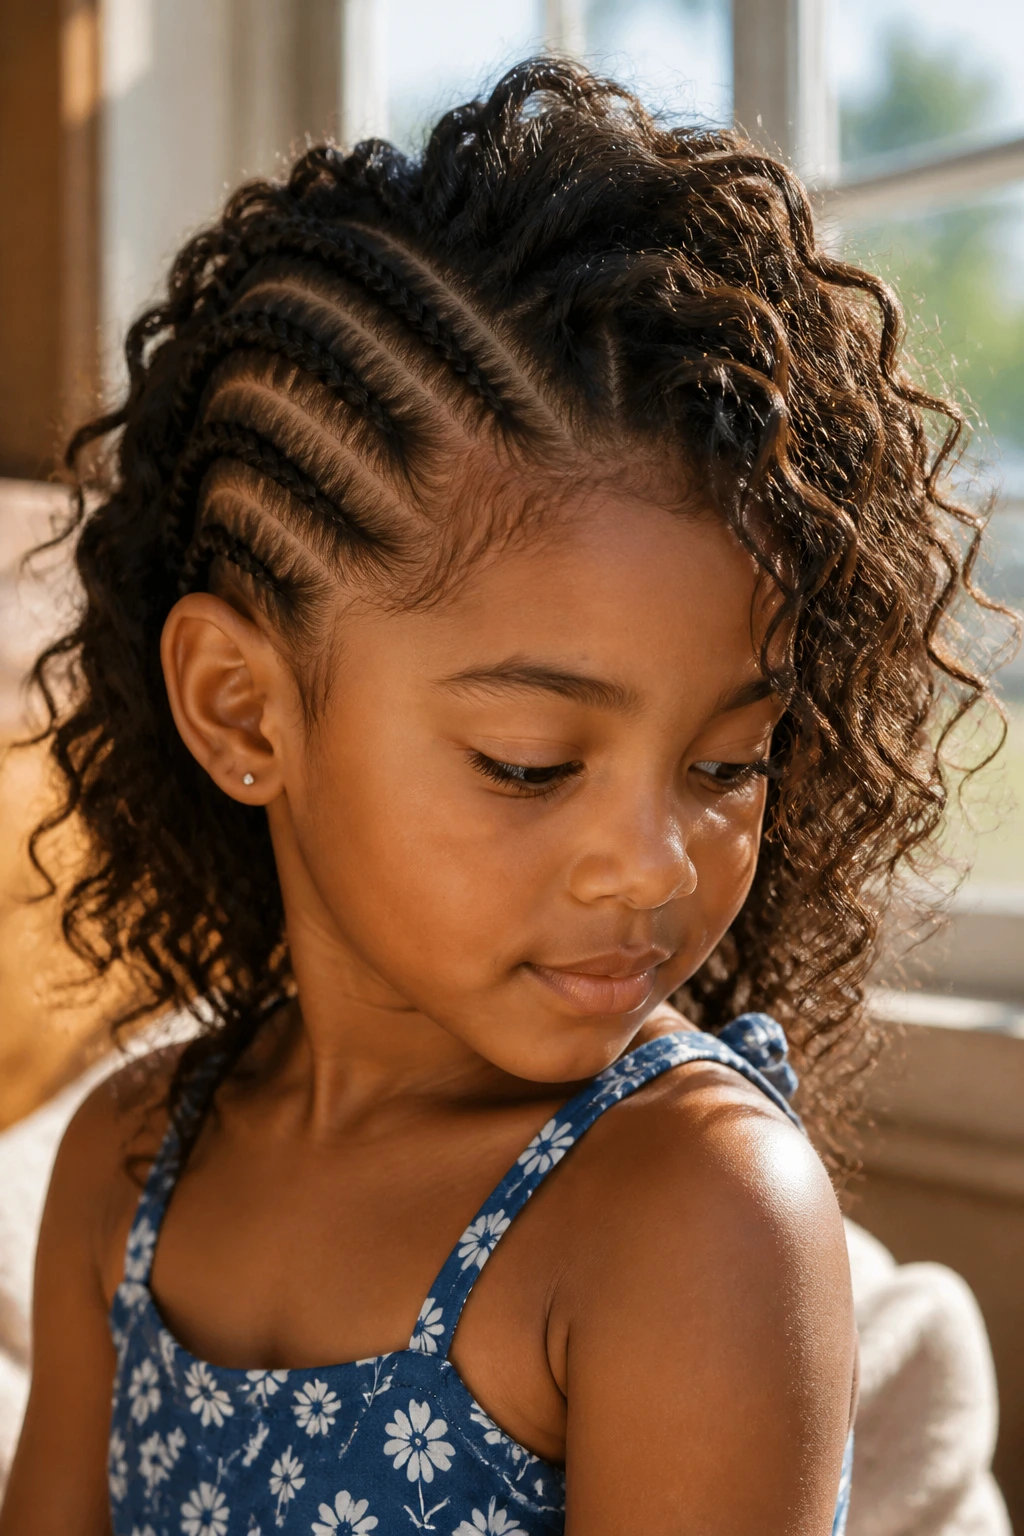
21. Mini Cornrow Hawk
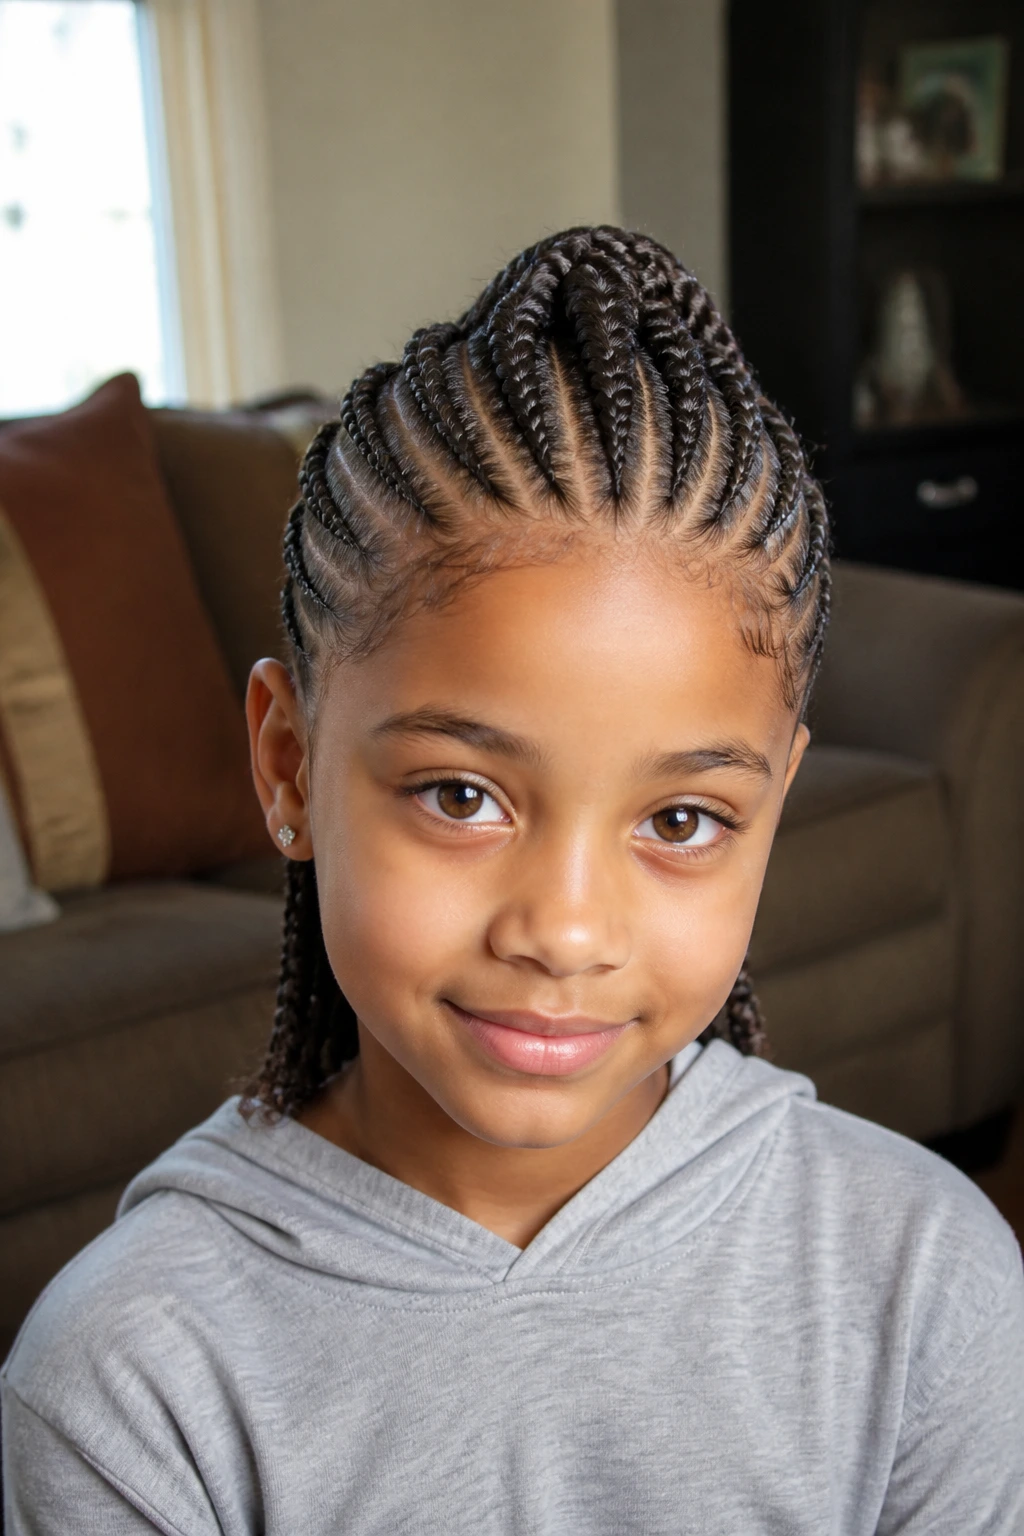
Tiny cornrows leading into a center ridge create one of the longest-lasting mohawk looks on the list. On wavy hair, they settle in with a clean, close-to-the-scalp finish that can stay neat for days if done gently.
This is the style to choose when you want the hair tucked away and the parts to do the decorating. It’s especially useful for thicker waves that tend to frizz quickly. Keep the rows small enough to stay visible, but not so tiny that they pull at the roots.
A clean part matters here. So does patience. If the scalp starts looking shiny from tension, back off. Protective styles are only protective when they do not hurt. That line is easy to miss if you’re rushing.
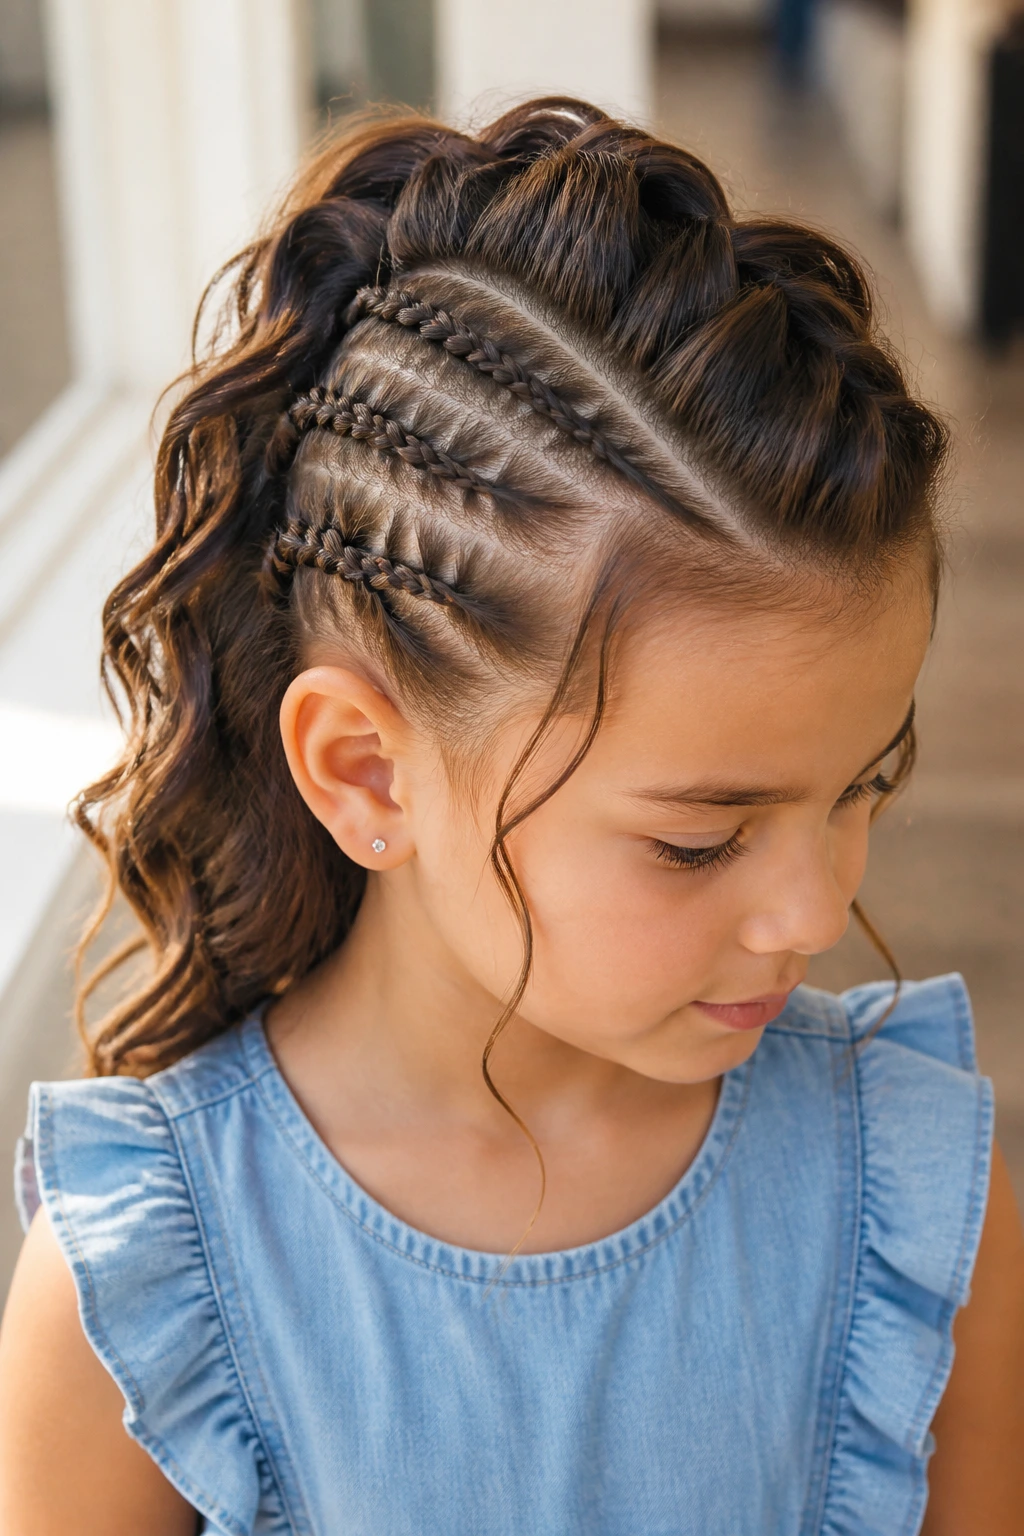
22. Side-Feed French Hawk
A side-feed French braid moves from the temple toward the center, which creates a strong diagonal line and a little lift through the crown. On wavy hair, that diagonal keeps the style from looking too symmetrical or flat.
This is one of my favorite shapes for layered hair. The side-feed motion catches pieces as you braid, so shorter strands stay controlled instead of springing loose around the face. It also gives the style a bit of motion, which is nicer than a hard center line on some face shapes.
Try this when you want the braid to feel a little more grown-up without losing the childlike softness. Keep the end secure with a small elastic, then fan the braid only slightly so it doesn’t lose the directional line.
23. Bow-Stack Hawk
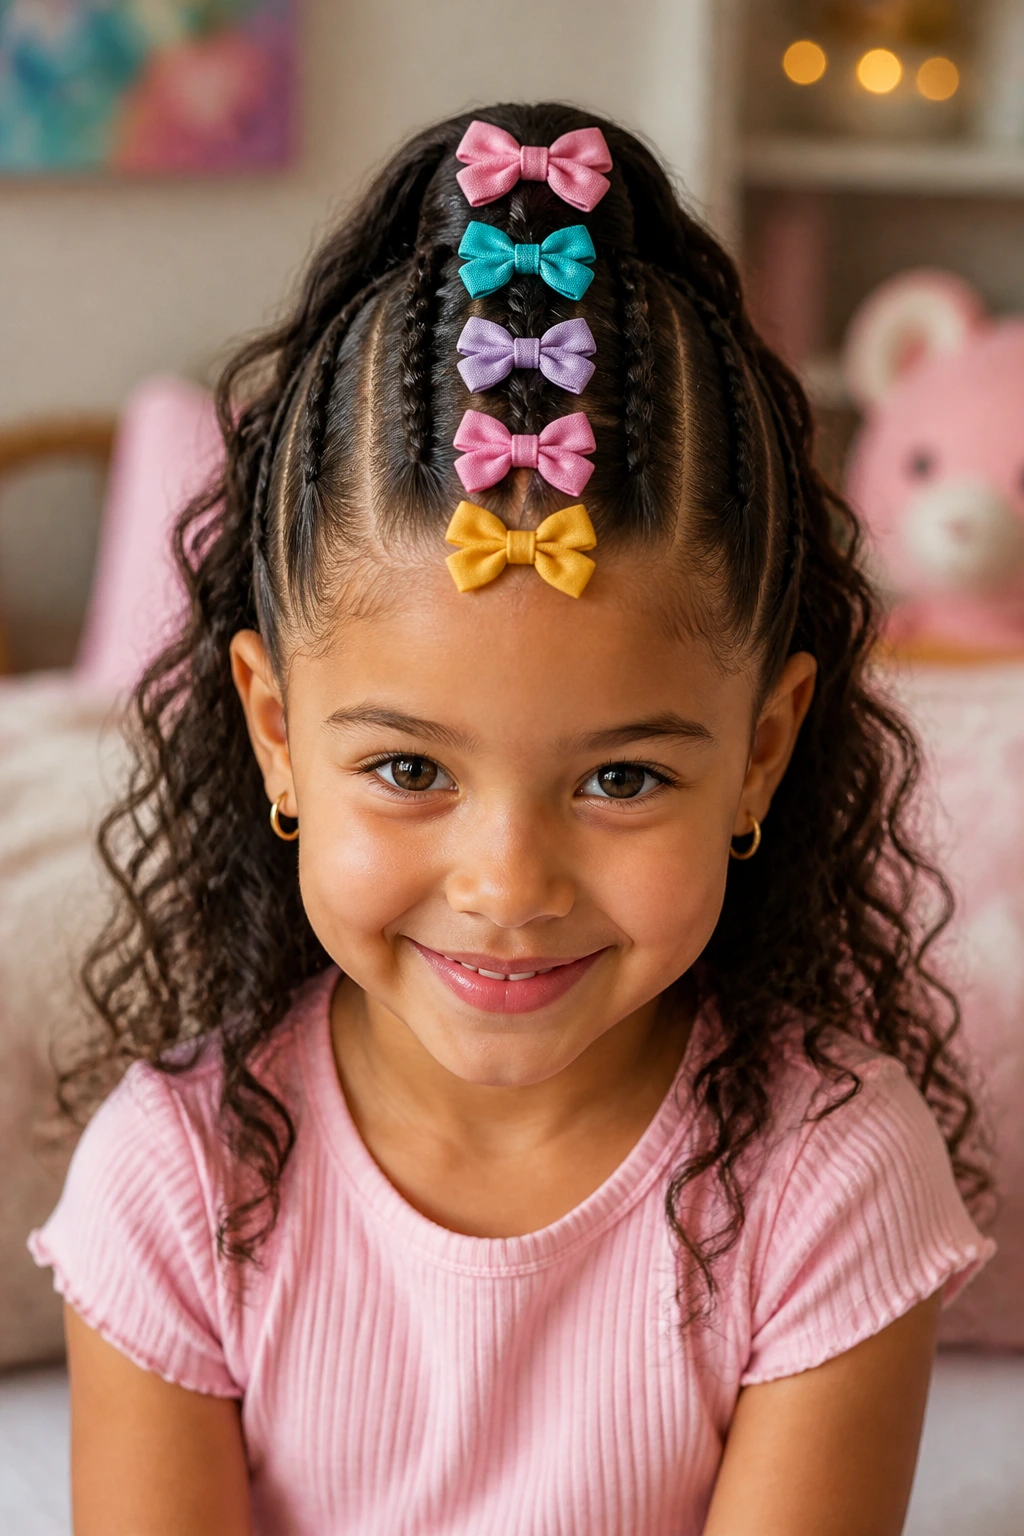
If the child loves bows, this one can turn into a whole mood. A simple mohawk braid becomes a ribbon of little bows stacked along the center, and wavy hair gives each bow a softer, fuller shape.
This style is less about technique and more about placement. Keep the bows evenly spaced so the braid ridge still reads clearly. Too many big bows, and the braid disappears. A few small ones do the job better.
It’s a birthday favorite and a school-spirit favorite. If you want it to hold, clip the bows to the braid rather than tying them around loose, slippery sections. That keeps them from sliding sideways when the child runs around.
24. Festival Clip Hawk
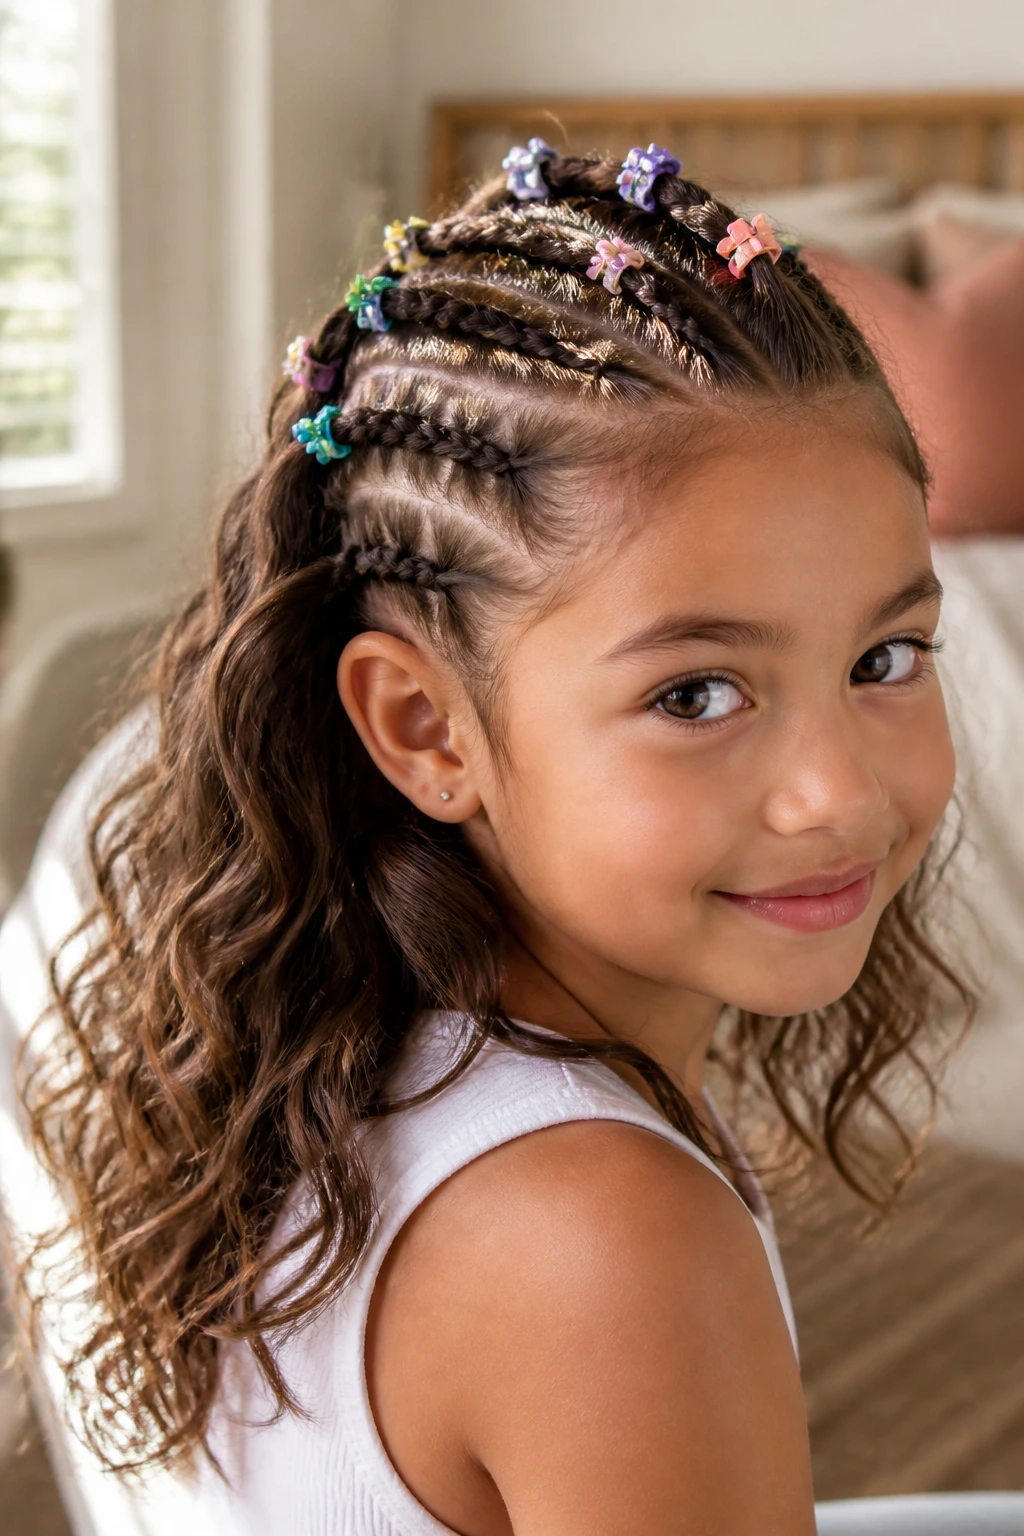
Snap clips, tiny barrettes, and mini claw clips can do a lot of work on a mohawk braid. The style stays playful and quick, and the wave texture gives each clip a little grip so it’s not forever slipping out.
This is the style I’d choose when time is short and color matters more than precision. You can make the braid simple, then let the clips carry the personality. That keeps the styling light on the scalp, which is useful for younger kids who do not want a long appointment in the chair.
Use clips in pairs or threes so they look intentional, not random. And skip anything heavy enough to pull the braid down by the end of the afternoon. Cute should not feel like a paperweight.
25. Tucked-End Hawk
Tucked ends give the mohawk a cleaner finish. Instead of leaving a tail that brushes the neck, you fold or pin the braid under so the shape ends neatly at mid-length.
This works especially well on layered or shorter wavy hair, where loose ends can get frizzy fast. The tucked finish keeps the style sleek without asking the hair to do too much. It also makes the braid feel cooler and more comfortable in warm rooms or during active play.
The important thing is to secure the tuck flat. A bulky fold at the back looks awkward and can poke the child when she leans against a seat. Two small pins usually work better than one big one.
26. Sporty Athletic Hawk
For tumbling, dance, or playground chaos, a sporty hawk is the right call. It stays closer to the head, uses strong but not brutal tension, and usually ends in a tight ponytail or braided tail that won’t whip into the face.
Wavy hair helps keep the style from looking too severe, even when the hold is serious. That matters on a child. You want secure and active, not slicked down and uncomfortable. Use a little water or a light cream at the root sections, then braid firmly enough that the style does not unravel the moment she starts moving.
If she has a habit of touching the front, choose a side part that sweeps away from her dominant hand. Little details like that keep the braid from being a constant distraction.
27. Curved Center Mohawk
Not every mohawk has to sit dead center. A curved line that arcs slightly left or right can solve a cowlick, dodge a stubborn part, or make the braid feel softer.
This shape works well on wavy hair because the curve mirrors the hair’s natural bend. The result looks intentional instead of overly engineered. It also adds a little motion to the style, which is nice on rounder faces or softer hairlines.
Use this when the center of the scalp refuses to cooperate. Trying to force a straight line on a child with a strong crown swirl is a losing game. The curve often looks better anyway.
28. Two-Tone Ribbon Hawk
Two ribbons, two colors, one braid. That’s the whole appeal here. A dual-color ribbon woven into the mohawk gives the style a playful streak, and the waves keep the colors from looking harsh against the hair.
This works especially well for holidays, team days, or matching an outfit with a second color. Keep the ribbon narrow and smooth so it threads through the braid without adding bulk. If the ribbon is too wide, the center ridge gets clumsy fast.
A practical detail: tie both ribbons down securely before you start. If one tail starts sliding as you braid, the pattern loses its clean line and you’ll spend the rest of the style chasing it.
29. Braided Bun Hawk
A braided bun hawk gives the center ridge a polished finish by ending in one or two small buns. It is a smart option for longer wavy hair that needs to stay off the neck.
The style looks tidy, but it still keeps the mohawk shape alive. Wavy hair makes the bun textures look soft instead of hard. That matters if you want something dressy without making the child look over-styled.
Keep the buns small and secure them with pins that won’t poke. If the hair is thick, spread the bun a little wider instead of winding it into a tight knot. Tight buns can feel heavier than they look.
30. Everyday Soft Hawk

This is the style I’d choose when the goal is “nice hair” rather than “big hair moment.” It uses a soft braid ridge, loose face-framing waves, and just enough structure to look cared for without feeling fussy.
It works because it respects the texture. Wavy hair does not need to be ironed flat or soaked in product to look neat. A soft mohawk braid can keep the front controlled and still let the rest of the hair move naturally. That makes it useful for school mornings, family outings, and those days when a child wants something pretty but does not want to sit still for half an hour.
If I had to point to one style here that most families would repeat, it’s this one. It is gentle, flexible, and easy to tweak. Add a bow, skip the bow, pull it tighter, loosen it more. It still reads as a mohawk braid either way.
Why the Braid Ridge Holds Better on Wavy Hair
Wavy hair gives you a head start. The little bends in the strand add friction, so each crossing in the braid has something to catch on. That is one reason these styles often stay put longer than the same braid on very straight hair.
There is a catch, though. Waves can also puff up at the roots if you use too much water or heavy cream. The trick is to keep the scalp sections controlled and the lengths soft. That means product on the mids and ends first, then a tiny bit at the roots only where flyaways keep escaping.
I would also avoid braiding soaking-wet hair unless you are specifically aiming for a sleeker set. Damp hair can shrink as it dries and tighten the whole braid more than you wanted. For little girls, that usually means an itchy scalp by lunchtime. Slightly damp or fully dry hair is easier to manage.
The Styling Kit That Saves Time
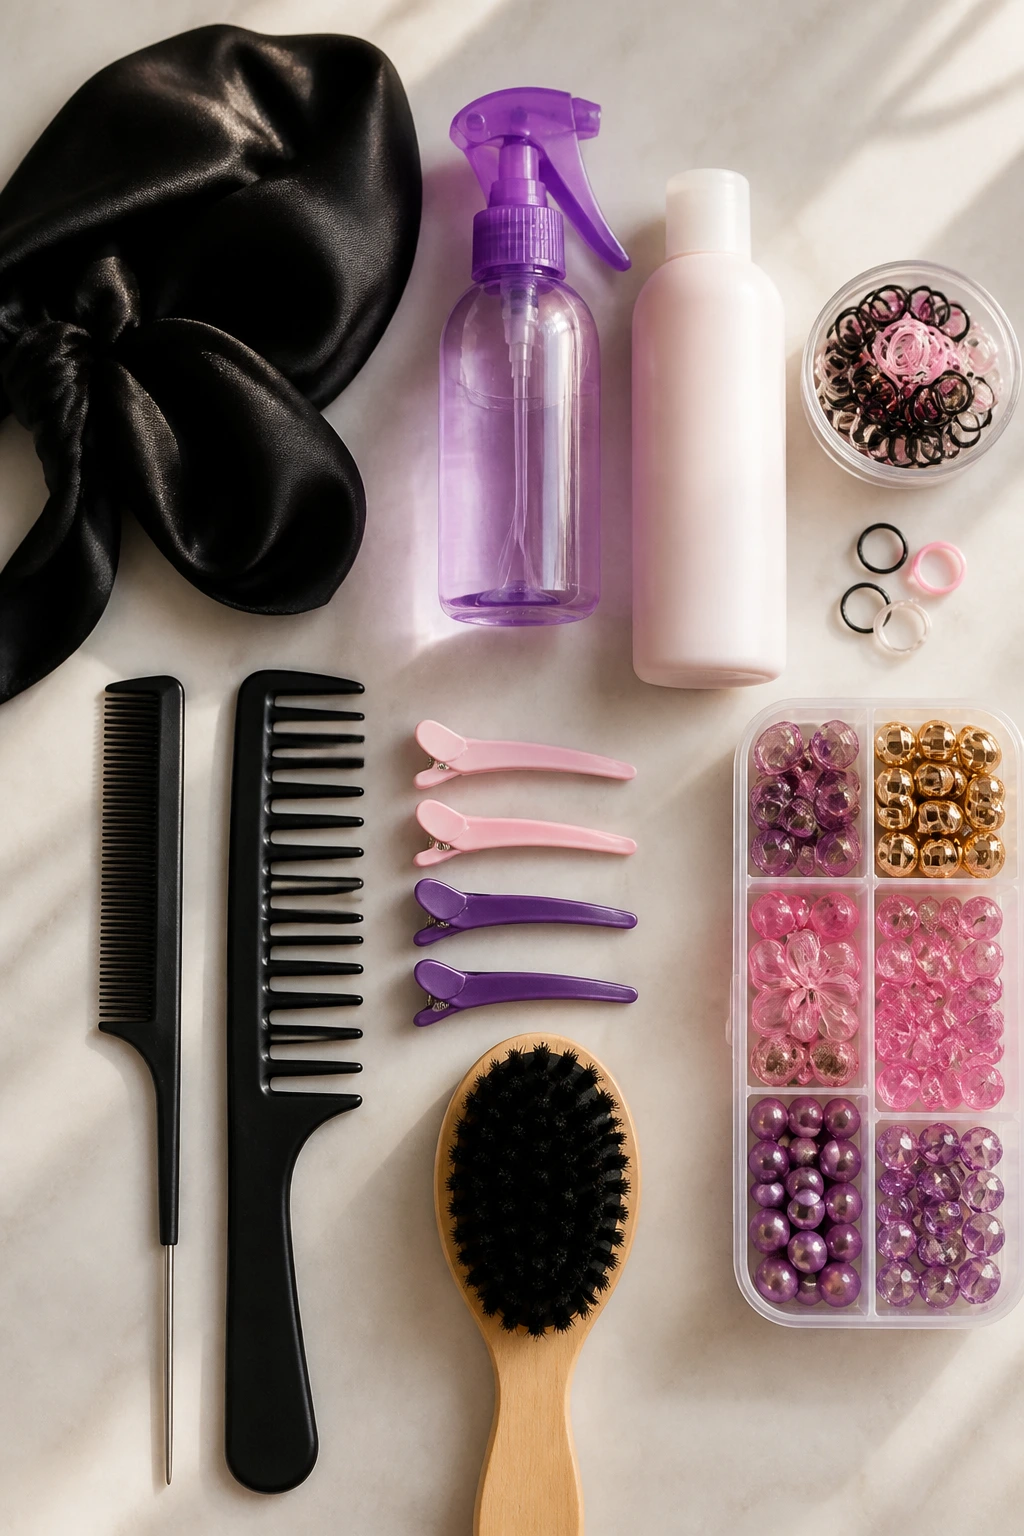
You do not need a salon cart. You need a few tools that behave.
- Rat-tail comb: Best for clean center parts, zigzags, and curved sections.
- Wide-tooth comb: Good for detangling wavy hair without stretching the pattern.
- Spray bottle with water: Use a light mist, not a soaking spray.
- Child-safe detangling spray or leave-in: Helps the braid glide through mids and ends.
- Small snag-free elastics: Clear or matching colors keep the base tidy.
- Duckbill clips or sectioning clips: Hold hair out of the way while you work.
- Soft bristle brush: Handy for smoothing the root line without roughing up the wave.
- Satin scarf or bonnet: Helps the style stay neat overnight.
- Small accessory tray: Keeps bows, ribbons, and beads from disappearing into the bathroom floor.
If one tool matters more than the others, it’s the rat-tail comb. Clean sections make every mohawk braid look sharper, and bad parting is hard to hide later.
Choosing Products That Help Without Making Hair Greasy
The best product for these styles does two things at once: it gives enough slip to detangle and enough control to keep the front from frizzing. That usually means a light detangling spray or a small amount of leave-in cream, not a heavy gel cap.
For wavy hair, I prefer using product in this order: mist the hair lightly, work through the ends with a wide-tooth comb, then smooth the top sections with fingertips or a soft brush. If you start with a thick cream at the roots, the hair gets slippery fast and the braid starts to drift.
Edge control can be useful, but it’s easy to overdo on a child. A pea-sized amount at the hairline is plenty. If you can see product sitting on the scalp, that’s too much. And if the hair looks crunchy once it dries, it will probably feel uncomfortable too.
For accessories, choose elastics without metal joins. Those little metal seams snag wavy hair like crazy.
How to Wear and Show Off These Styles
Presentation: Keep the braid ridge centered when you want a classic look, or shift it slightly off-center for a softer shape. Pancake only the outer edges if you want fullness without losing the braid line.
Accessories: Small bows, slim ribbons, snap clips, and a few light beads all work. Pick one accent, not five, or the style starts looking crowded.
Best Setting: School days call for low-tension versions; birthdays and photo days can handle heart parts, ribbons, and wider pancaked braids. Athletic days are better with tighter braids and tucked ends.
Comfort: If the child keeps touching the sides, loosen the first inch near the temples and move the braid back a quarter inch next time. That tiny change can make the whole style easier to wear.
Outfit Match: Soft denim, simple dresses, and school uniforms all play nicely with mohawk braids because the hair already carries the detail. You do not need a loud outfit to make the hairstyle work.
A style looks better when the child stops fidgeting with it. Comfort wins the photo, every time.
Small Tweaks That Make the Style Yours
Texture Boost: Start with hair that is about 80 percent dry. That gives the waves enough control to braid cleanly, but not so much moisture that the style shrinks and tightens later.
Customization: Swap in ribbons, mini bows, beads, or colored elastics based on the occasion. If the outfit is busy, keep the braid plain. If the outfit is simple, let the hair carry the color.
Scalp Comfort: Ask for a finger-width of space at the hairline and around the ears. That avoids the painful pull that turns a cute style into a complaint by lunch.
Make-It-Yours: For fine hair, go smaller and tighter at the part. For thick hair, widen the braid sections and let the texture do more of the work. For mixed textures, braid the smoother sections first and leave the strongest waves for the ridge so the style holds.
Little changes make a bigger difference than people think. A braid is never just a braid on a child’s head. It’s a compromise between the look and the mood.
Keeping the Style Neat Overnight and Over a Few Days
Mohawk braids on wavy hair usually look best on day one, but some styles hold a decent second day if you protect them properly. The easiest thing is a satin scarf or bonnet before bed. It cuts down on friction, which means fewer frizzy ends and less flattening at the crown.
Before sleep, smooth the sides with your hands, not a brush. Brushing wakes up the wave in the wrong way and can make the braid line puffy by morning. If the ends are exposed, tuck them into the scarf or lay them flat on the pillow so they do not snag.
On day two, a quick refresh is usually enough. Lightly mist flyaways, press them down with your fingertips, and re-tighten any elastic that looks stretched. If the braid itself starts leaning, it is time to take it down and rework the crown. Styles with mini cornrows or double Dutch sections tend to last longer than waterfall or boho looks, which are more about same-day wear.
Do not leave damp hair braided overnight unless you have no other option. Dampness plus warmth can create that weird, stale smell nobody wants near a pillow.
Common Mistakes to Avoid
The biggest mistake is braiding too tight at the hairline. You’ll see little dents near the temples, and the child will probably start touching the same spot after a few minutes. Fix it by loosening the first inch and letting the braid anchor farther back.
Another one is using too much product. The braid gets shiny for a minute, then turns slippery and starts sliding apart. Use just enough leave-in to help the comb move through the waves, then stop.
Ignoring the wave pattern causes a different problem. If you fight the texture too hard, the braid looks stiff and the loose pieces frizz out anyway. Let the wave stay visible in the lengths; the style usually looks better that way.
Heavy bows and chunky beads can also pull the braid down. If the accessory is making the center ridge lean, it is too heavy for the hair. Switch to smaller pieces and anchor them closer to the braid.
And one more: braiding hair that is still too wet. It may feel easier in the moment, but the drying shrink can tighten everything later. Slightly damp is safer. Fully dry is safest if the style needs to last.
Ways to Change the Look Without Starting Over
Soft Party Hawk: Add a ribbon and a few loose curls at the ends. It changes the mood fast without changing the braid structure.
Sports-Ready Hawk: Keep the braid close to the scalp, skip the loose face pieces, and finish with a strong ponytail or tucked end. That keeps everything out of the way.
Birthday Hawk: Use a heart part, a bow stack, or a bright ribbon. The braid itself can stay simple if the accessories do the work.
Low-Key School Hawk: Stick with a single Dutch braid or a soft half-up ridge. It looks neat, holds well, and does not feel overdone.
Long-Hold Hawk: Choose mini cornrows, double Dutch sections, or a braided ponyhawk. These are the styles that usually survive the longest before they need a refresh.
Gentle-Tension Hawk: Use wider sections and fewer accessories. This is the version for tender scalps and kids who are tired of sitting still.
Frequently Asked Questions
How do I keep mohawk braids from slipping on wavy hair?
Start with clean sections and a little grip at the roots, not heavy product. Wavy hair usually holds well, but if the top is too silky, the braid can slide; a light mist and a small amount of leave-in on the mids and ends usually fixes that.
Can these styles work on short hair?
Yes, but you’ll want to stay with smaller braids, bubble sections, or side-feed versions. Very short layers may escape a big central braid, so styles like triple mini Dutch hawks or zigzag part hawks are easier to keep tidy.
What if my child has a tender scalp?
Choose low-tension styles and keep the first braid stitch loose enough to slide a fingertip under it. If she complains about one spot, stop and redo that section instead of pushing through. Pain at the scalp means the braid is too tight.
How long do these styles usually last?
Most of these look best for one day, and the tighter styles can last into a second day with a satin bonnet. Soft boho or waterfall looks are more same-day styles, while mini cornrows and double Dutch versions hold longer.
Can I braid damp hair or should it be dry?
Lightly damp is fine for many of these styles, especially if the hair is thick or frizzy. Fully wet hair can shrink while it dries and make the braid too tight, so I would avoid soaking it unless you are aiming for a very slick finish.
What accessories work best without pulling?
Small bows, narrow ribbons, clear elastics, and light snap clips are the safest choices. Heavy beads or oversized clips can drag the braid down and make the scalp sore by the end of the day.
Do these styles count as protective?
They can, if the tension is gentle and the hairline is not being yanked. Protective styling is about reducing daily handling and friction; it is not protective if the child spends the day wincing.
How do I fix flyaways without making the braid crunchy?
Use a tiny bit of leave-in on your fingertips and smooth only the frizzy spots. A soft brush can help at the root line, but once the braid is finished, avoid layering on thick gels that harden the whole style.
Braids That Stay Soft
Wavy hair gives mohawk braids a kind of built-in movement that straight hair often has to work harder for. The braid supplies the shape. The wave supplies the looseness. That mix is why these styles can look polished without feeling severe.
Start with the gentler versions first. Once you know how the waves behave at the crown, the fancier ones get easier fast. And that is the real win here: a style that looks cute on a busy morning, still feels comfortable by lunch, and does not fall apart the second a child starts living her day.