Straight hair can be brutally honest. If the layers are wrong, it lies there like a ruler. If the layers are right, it moves, sways, and catches just enough light from caramel highlights to look thicker than it actually is.
That’s the part people miss. Volume layers for straight hair are not about chopping the ends into a pile of random shorter pieces. They’re about weight removal, shape, and where the eye lands when the hair falls in a clean line. Caramel highlights help because they break up that flat, sheet-like surface and make the bend of each layer visible, even when the hair is worn smooth.
The trick is getting the cut and the color to work together instead of fighting each other. Too few layers and the caramel can look parked on top of a helmet. Too many, and the hair can start to look stringy. The sweet spot lives somewhere in the middle, and the looks below stay there on purpose.
Why These Volume Layers Earn Their Keep
Built-in movement: Straight hair needs the layer map to do some of the work that curls get for free. The right cut creates lift at the crown, swing through the mid-lengths, and ends that don’t collapse into one blunt line.
Caramel adds depth fast: Warm ribbons of caramel, toffee, and soft amber catch light differently than a single all-over color. That contrast makes the layers read as fuller from the back and cleaner from the front.
The shape survives a long day: A good volume cut on straight hair still looks intentional after a few hours, especially if the layers are placed to support the crown and the face frame instead of only the ends.
Fine and thick hair can both wear it: Fine hair usually needs fewer, smarter layers; thick hair can handle more internal weight removal. The caramel placement changes too, because denser hair can hold chunkier ribbons without looking busy.
Grow-out can be kinder: When the layers are blended well, you’re not stuck with a sharp shelf line two weeks later. The haircut softens as it grows, which matters if you dislike constant salon maintenance.
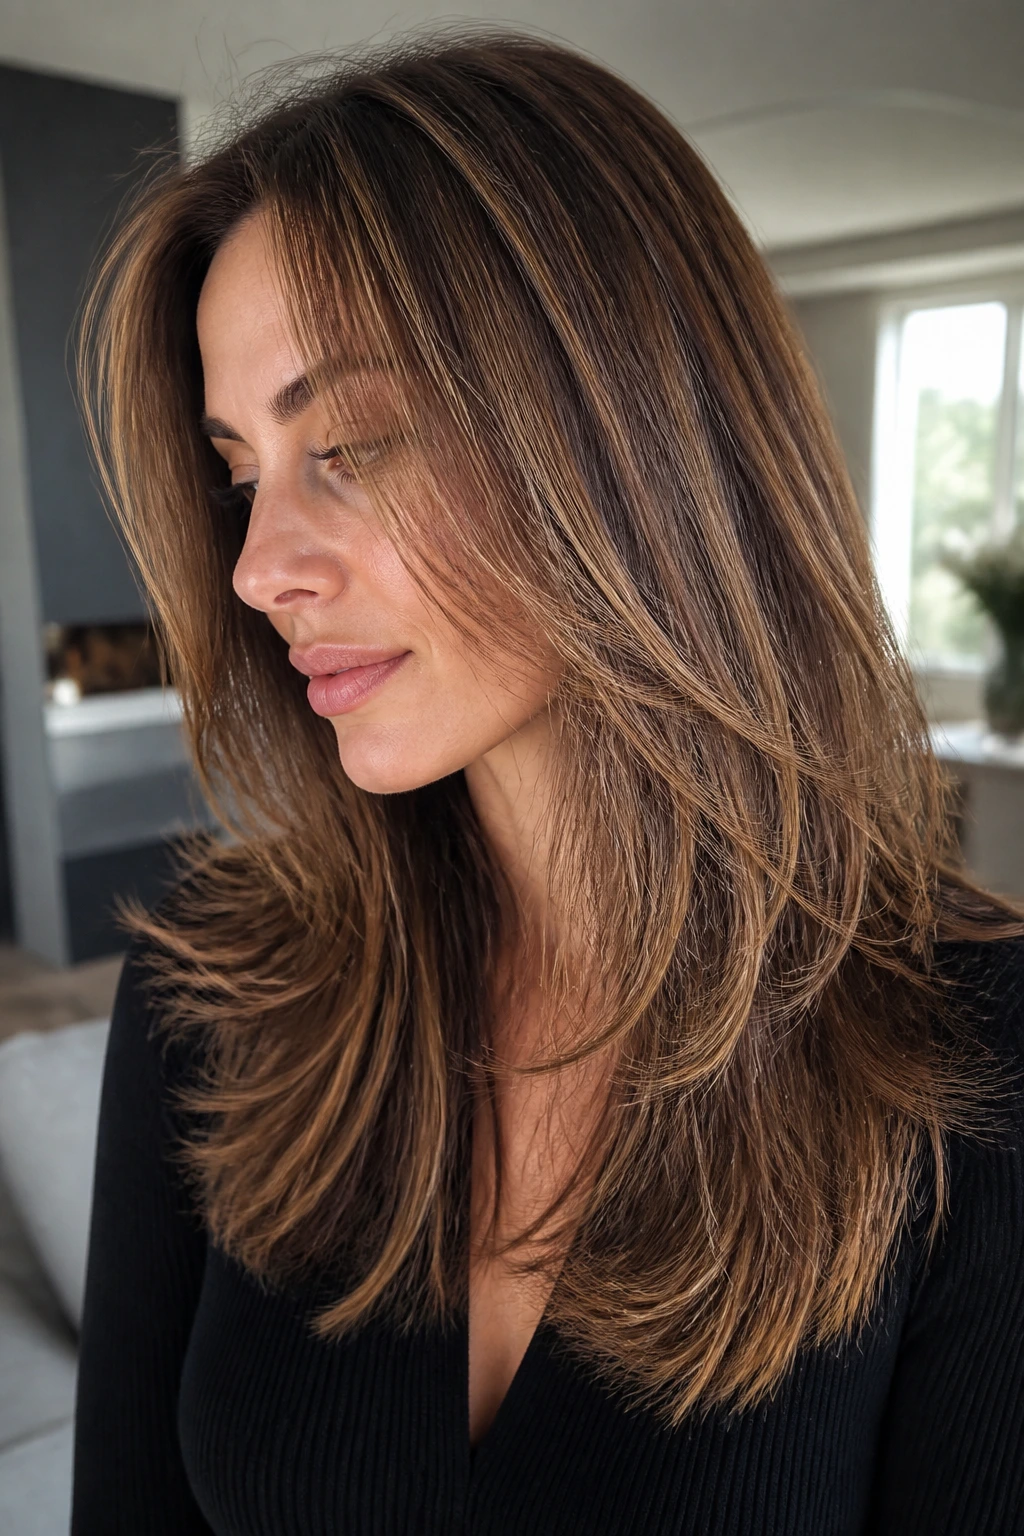
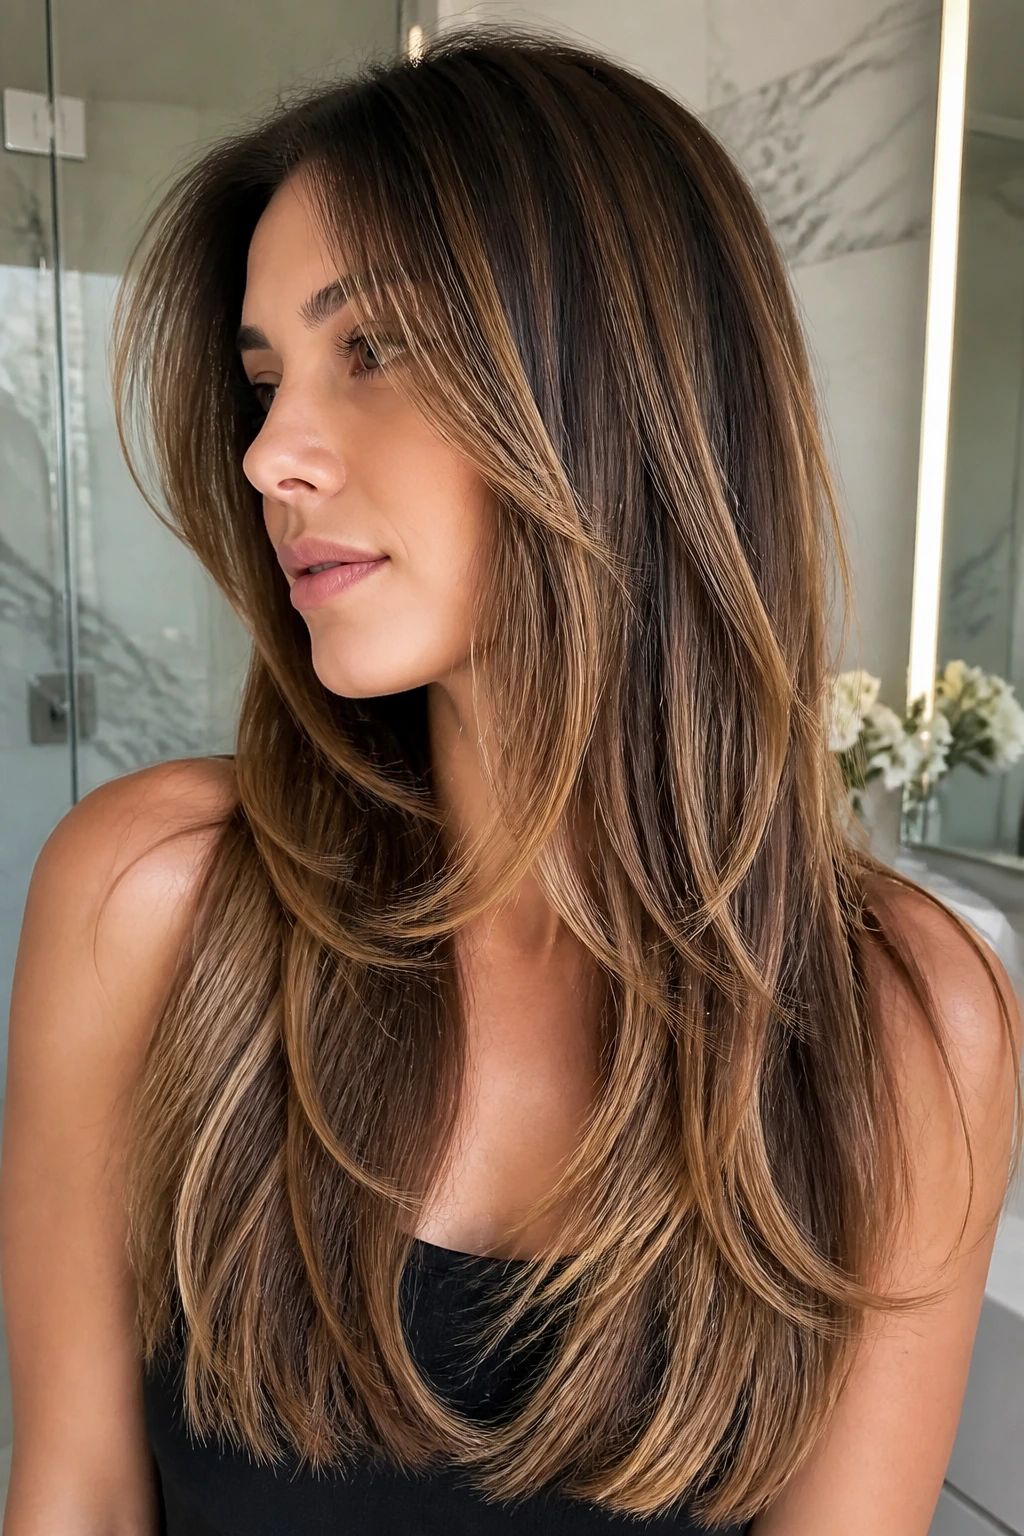
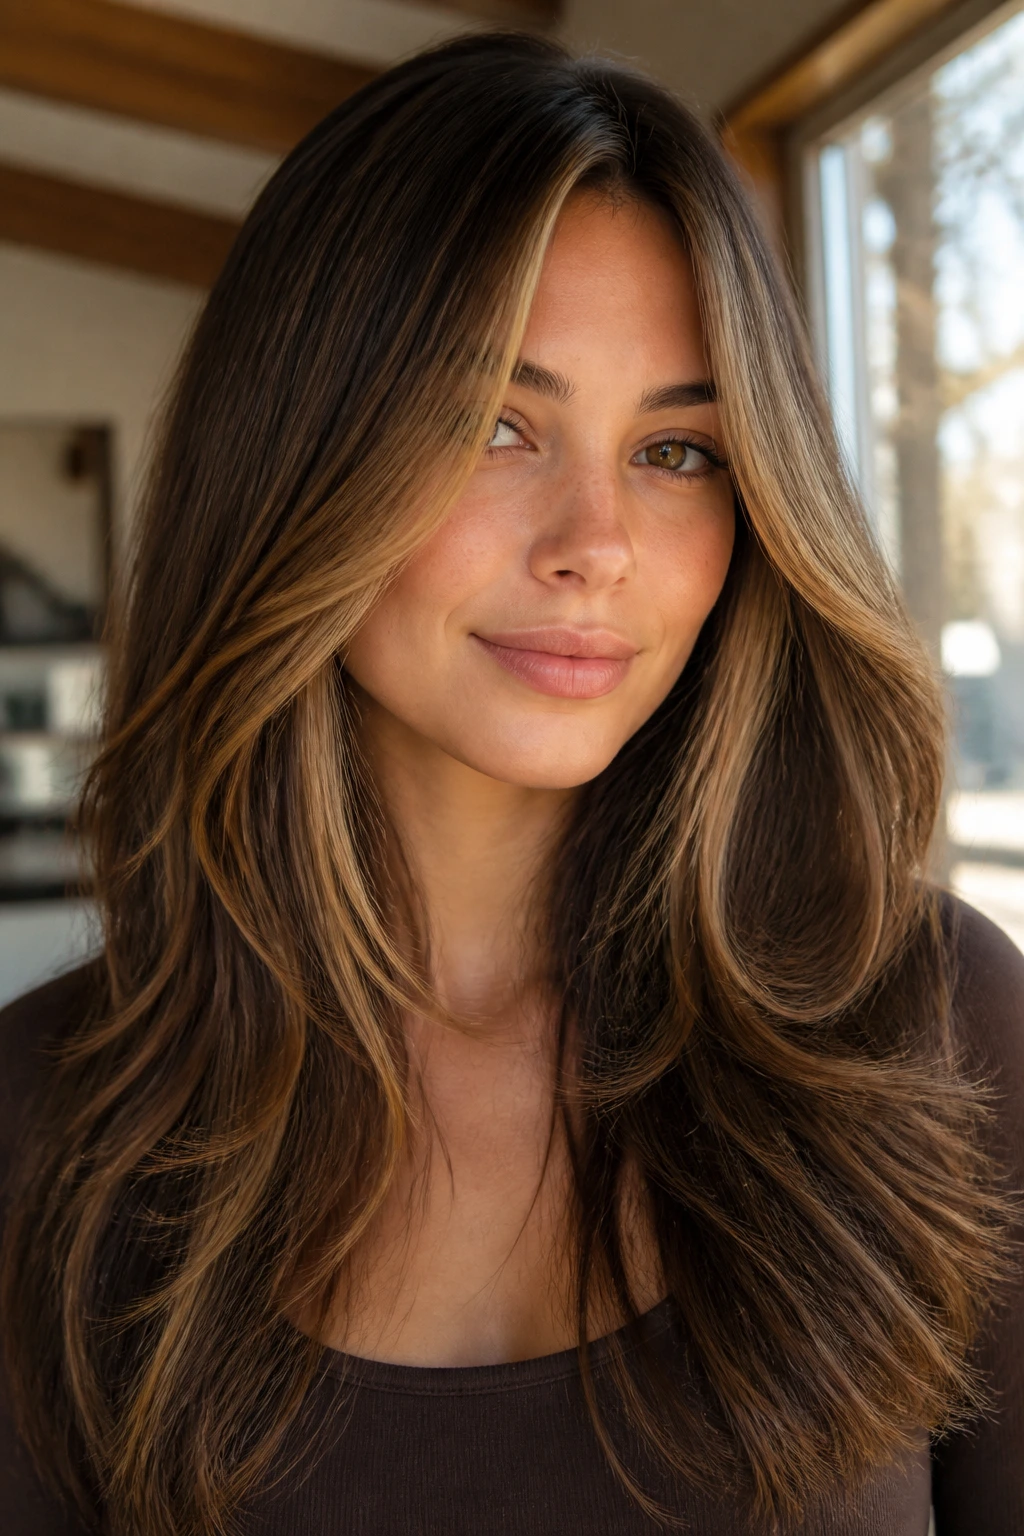
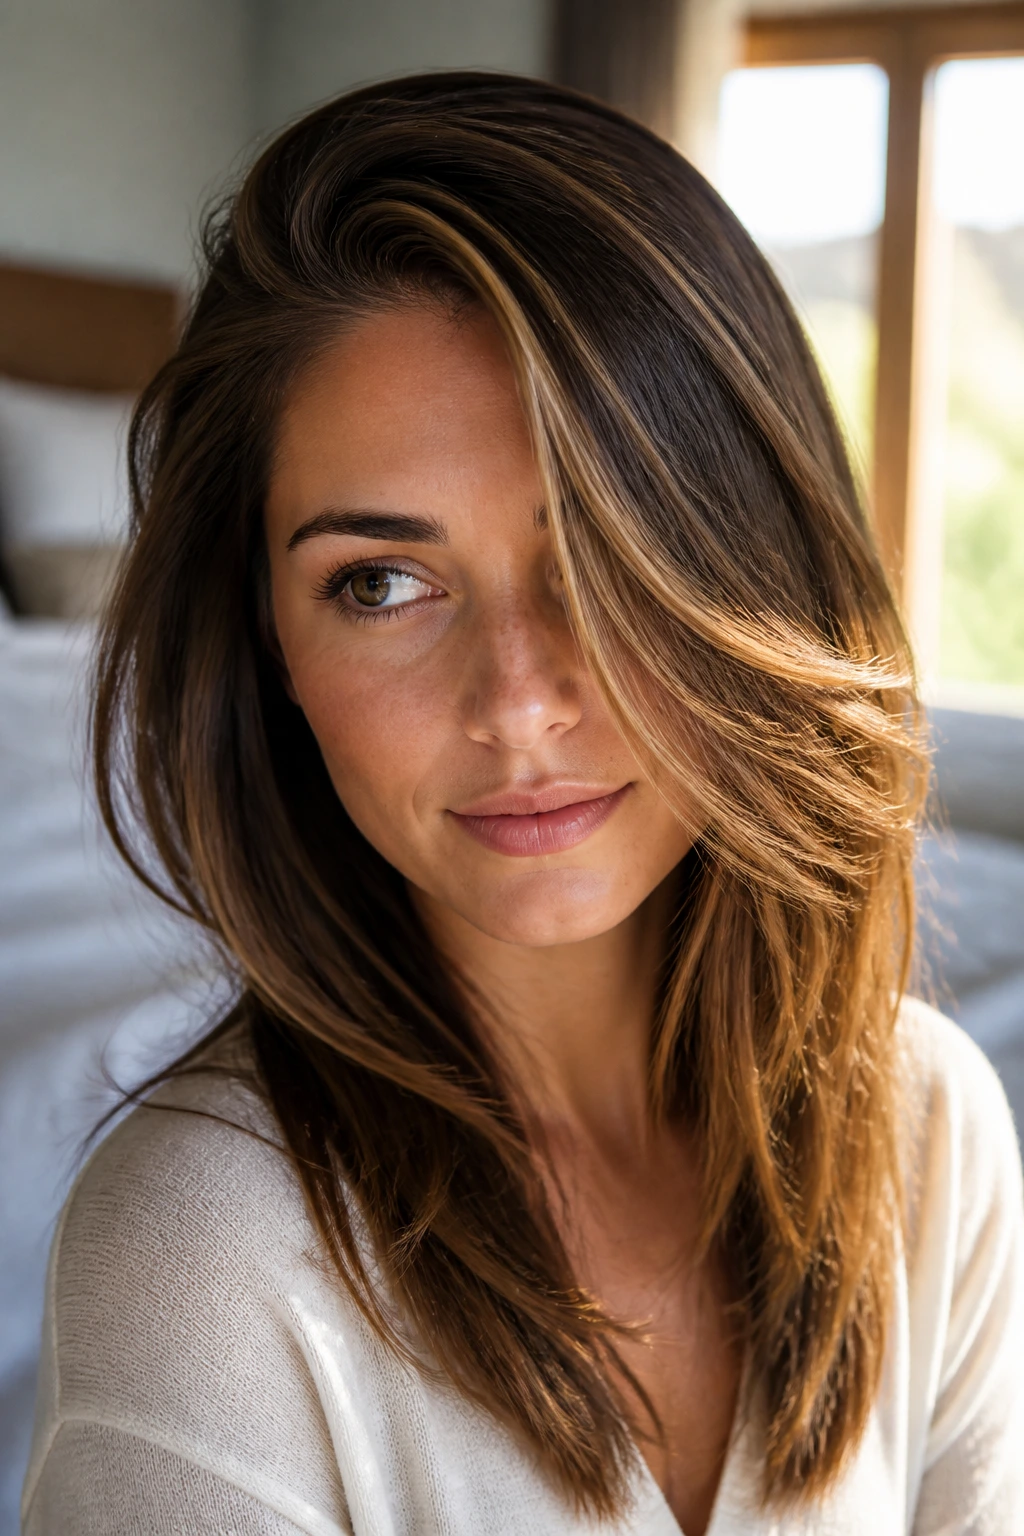
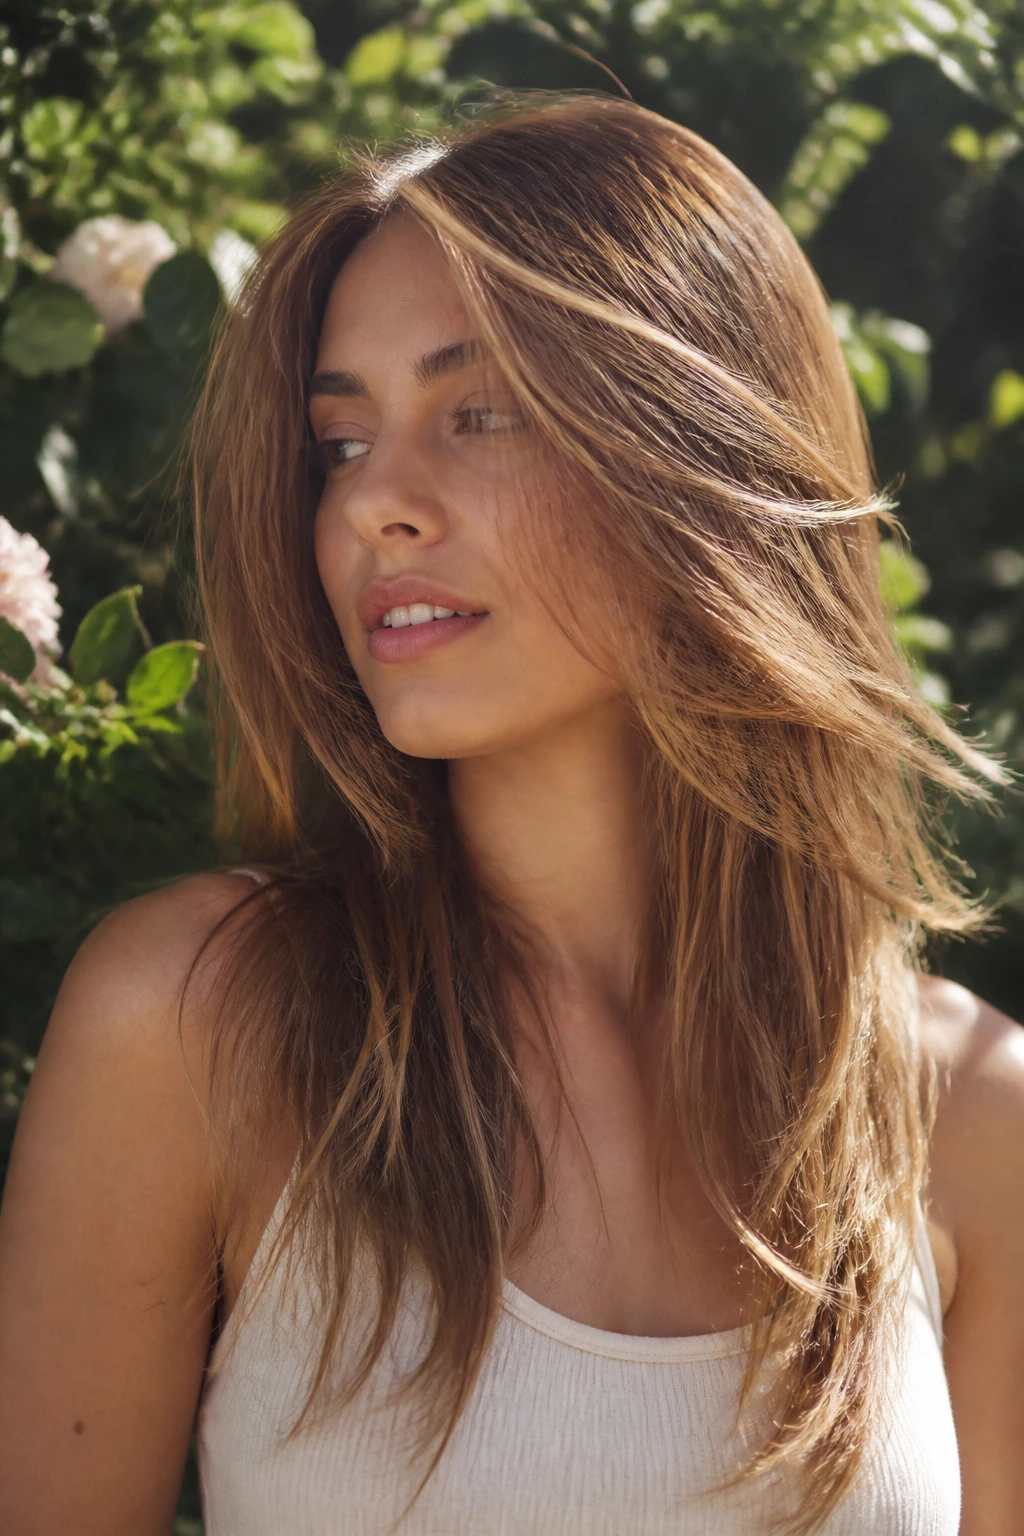
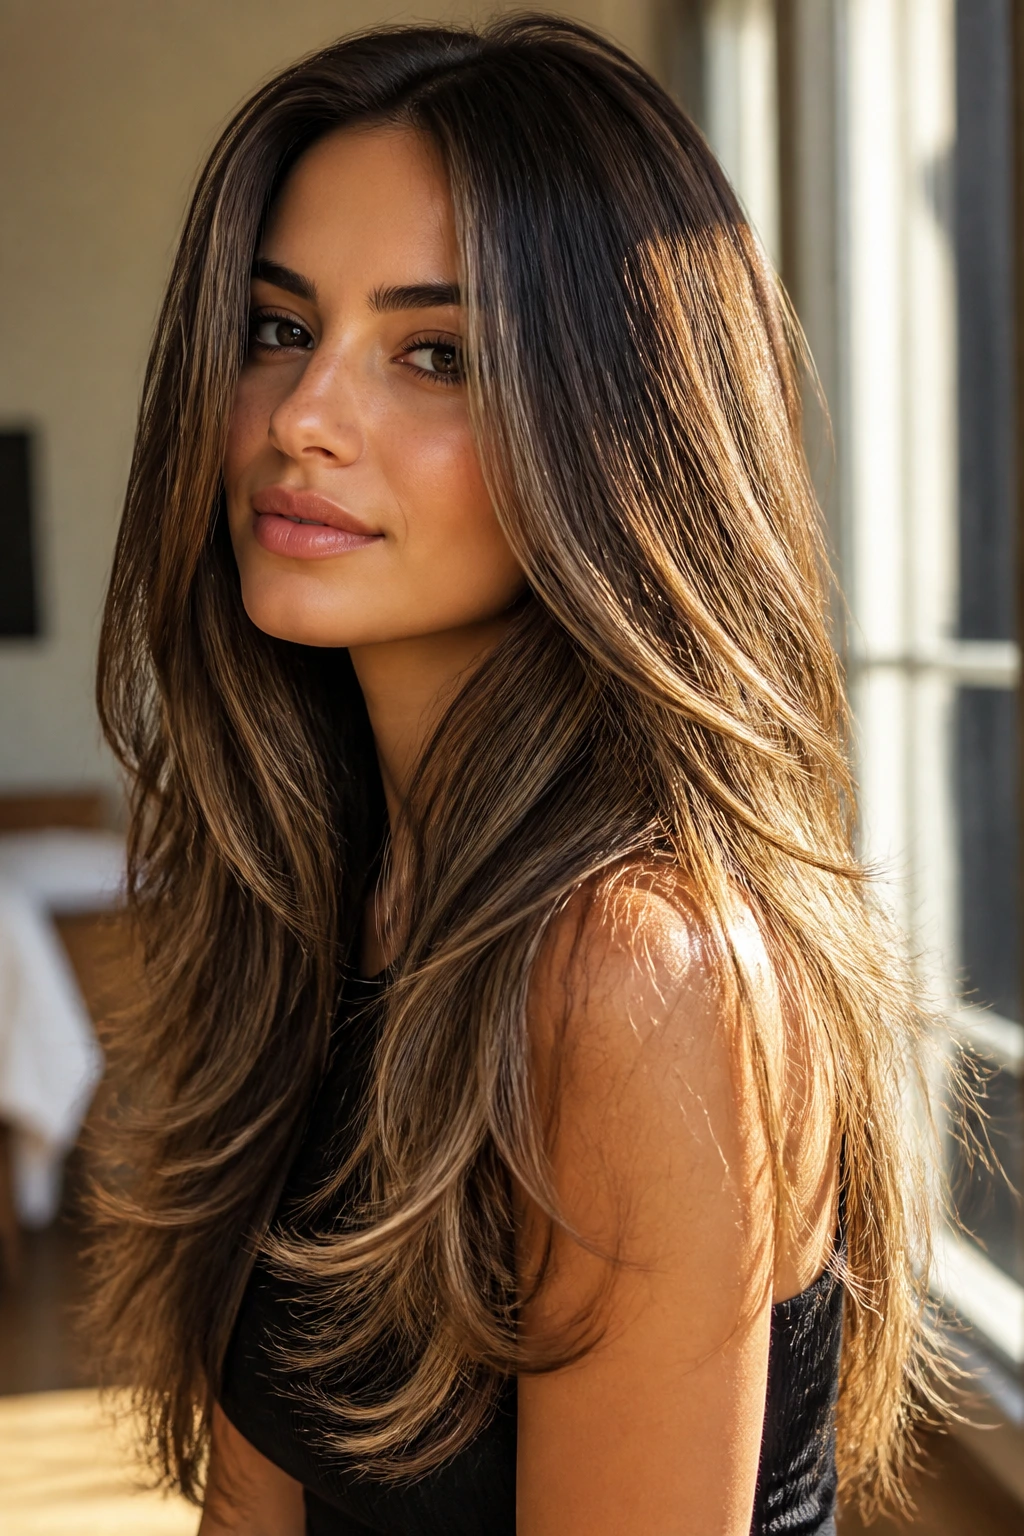
1. Long Feathered Layers With Caramel Ribbon Highlights
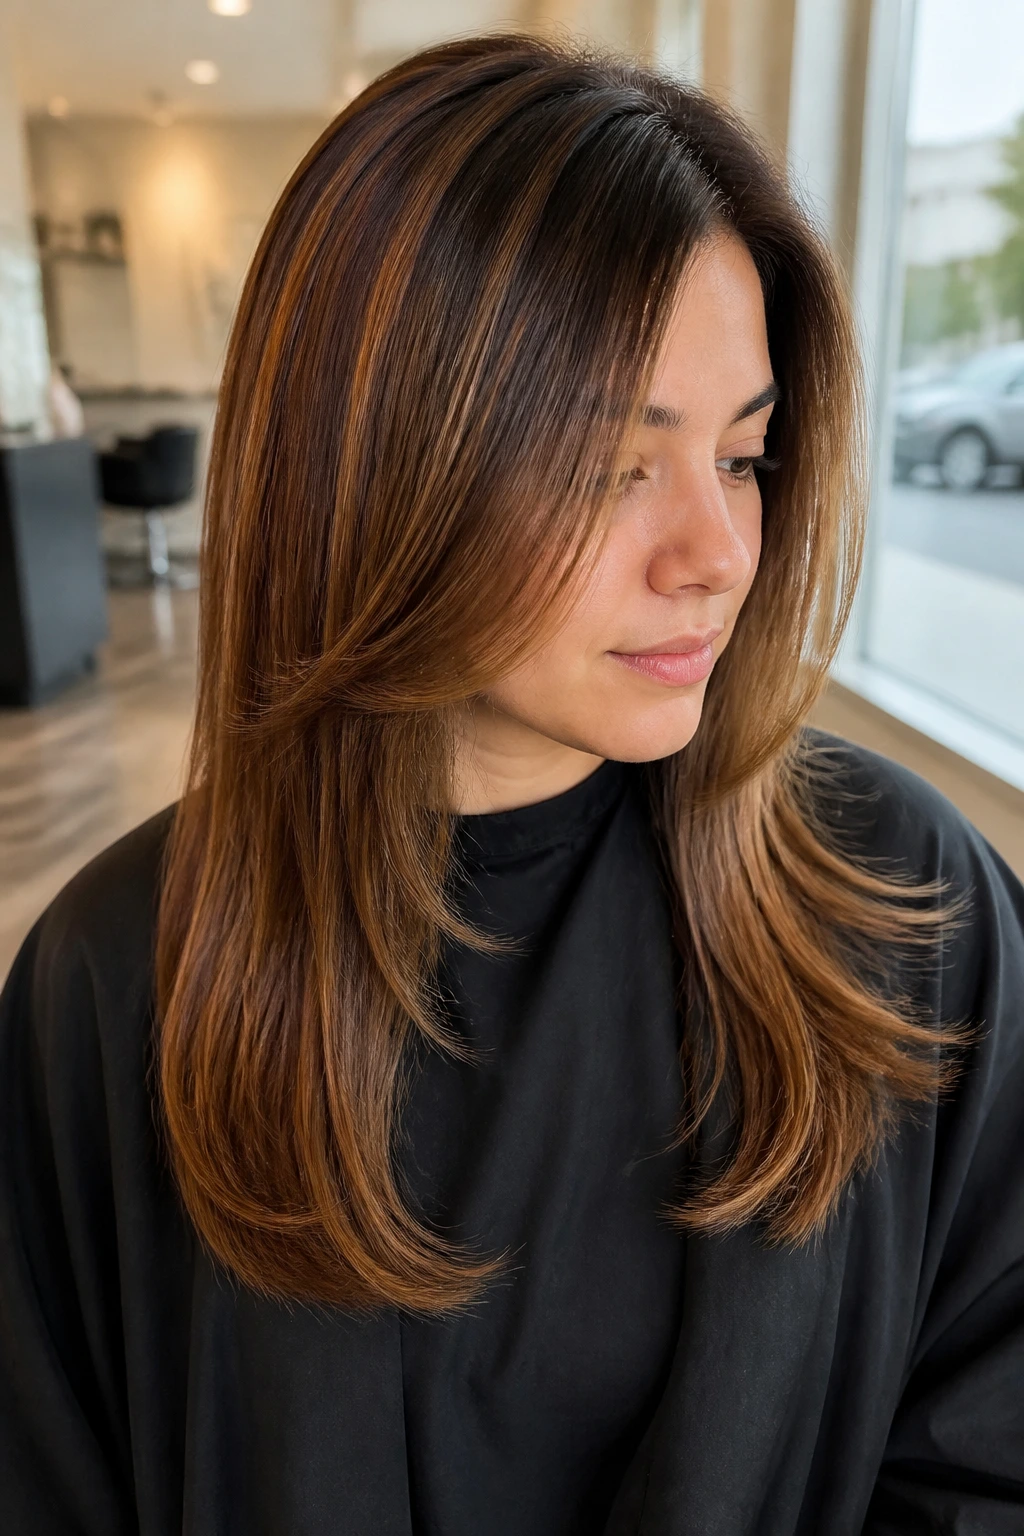
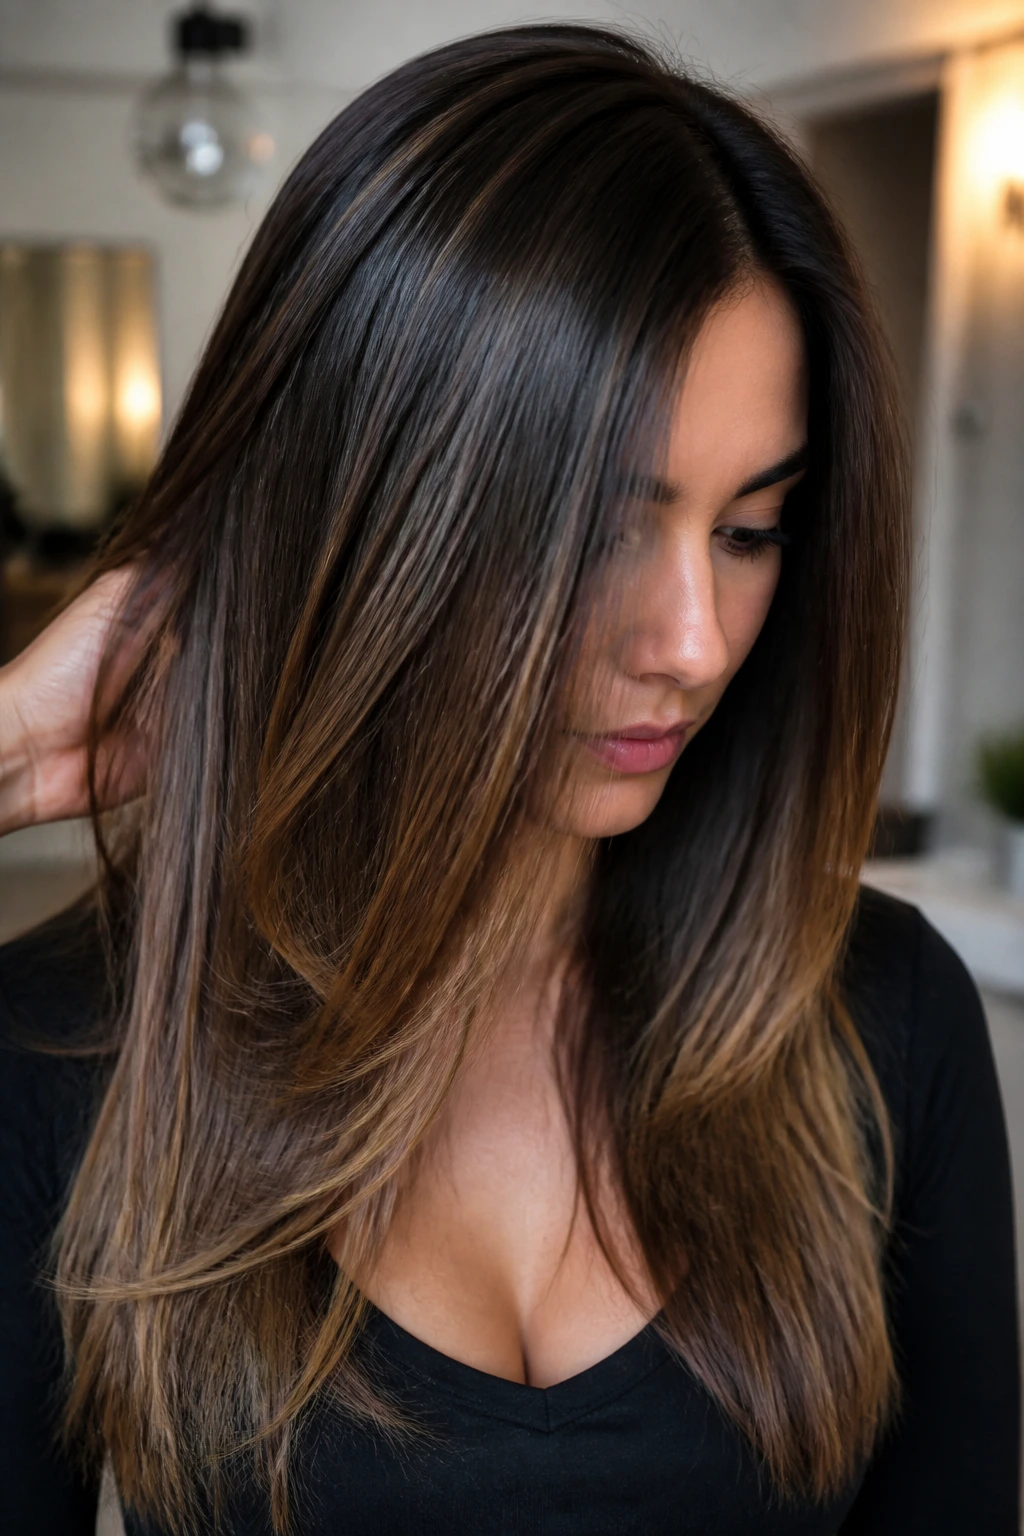
Long feathered layers are the easiest place to start if you want softness without losing length. The hair keeps its long outline, but the ends are lifted enough to move instead of hanging like one heavy curtain. Caramel ribbon highlights work especially well here because they sit through the mid-lengths and lower third of the hair, where the feathering actually shows.
Why it works
Feathering on straight hair is a quiet trick. It doesn’t scream for attention, but it changes how the whole head reads in motion. Ask for soft point-cut ends and layers that begin below the cheekbone if you want the shape to stay airy rather than chopped.
Caramel ribbons should not be packed too close together. Space them so one streak can disappear into the next layer and reappear lower down. That staggered placement keeps the color from looking striped.
Best for
- Long, straight hair that feels heavy at the ends
- Anyone who wants body without losing length
- Warm skin tones that can handle golden caramel or honey-caramel ribbons
A flat iron pass with a slight bend at the ends keeps these layers from turning severe. Skip poker-straight tips. They kill the whole point.
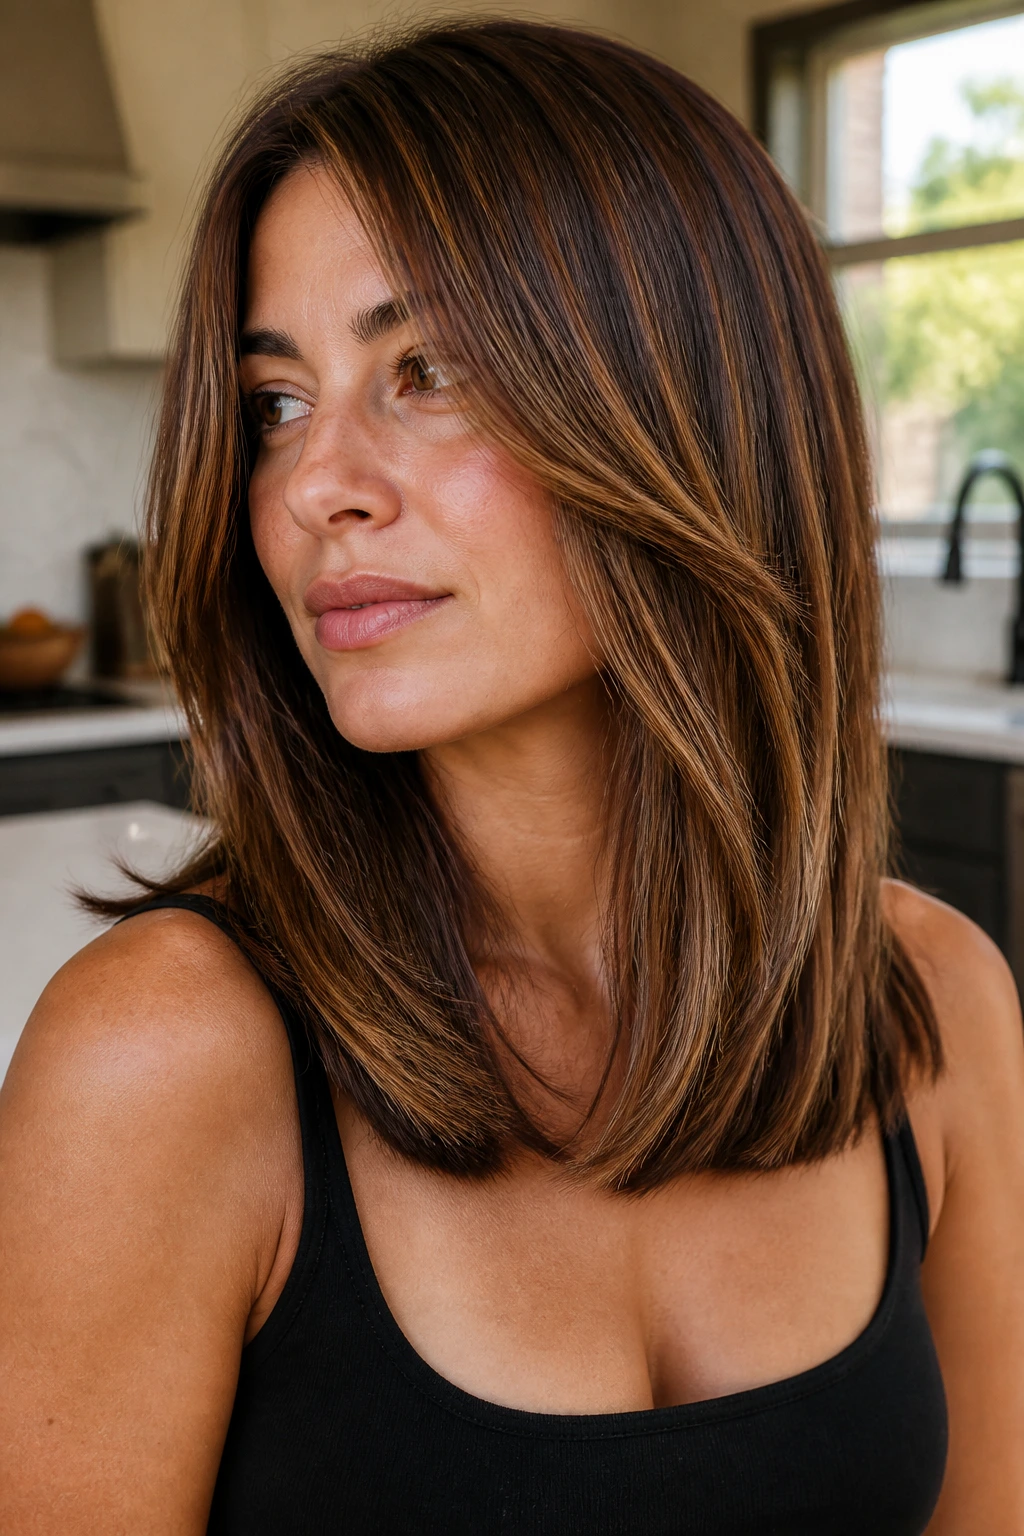
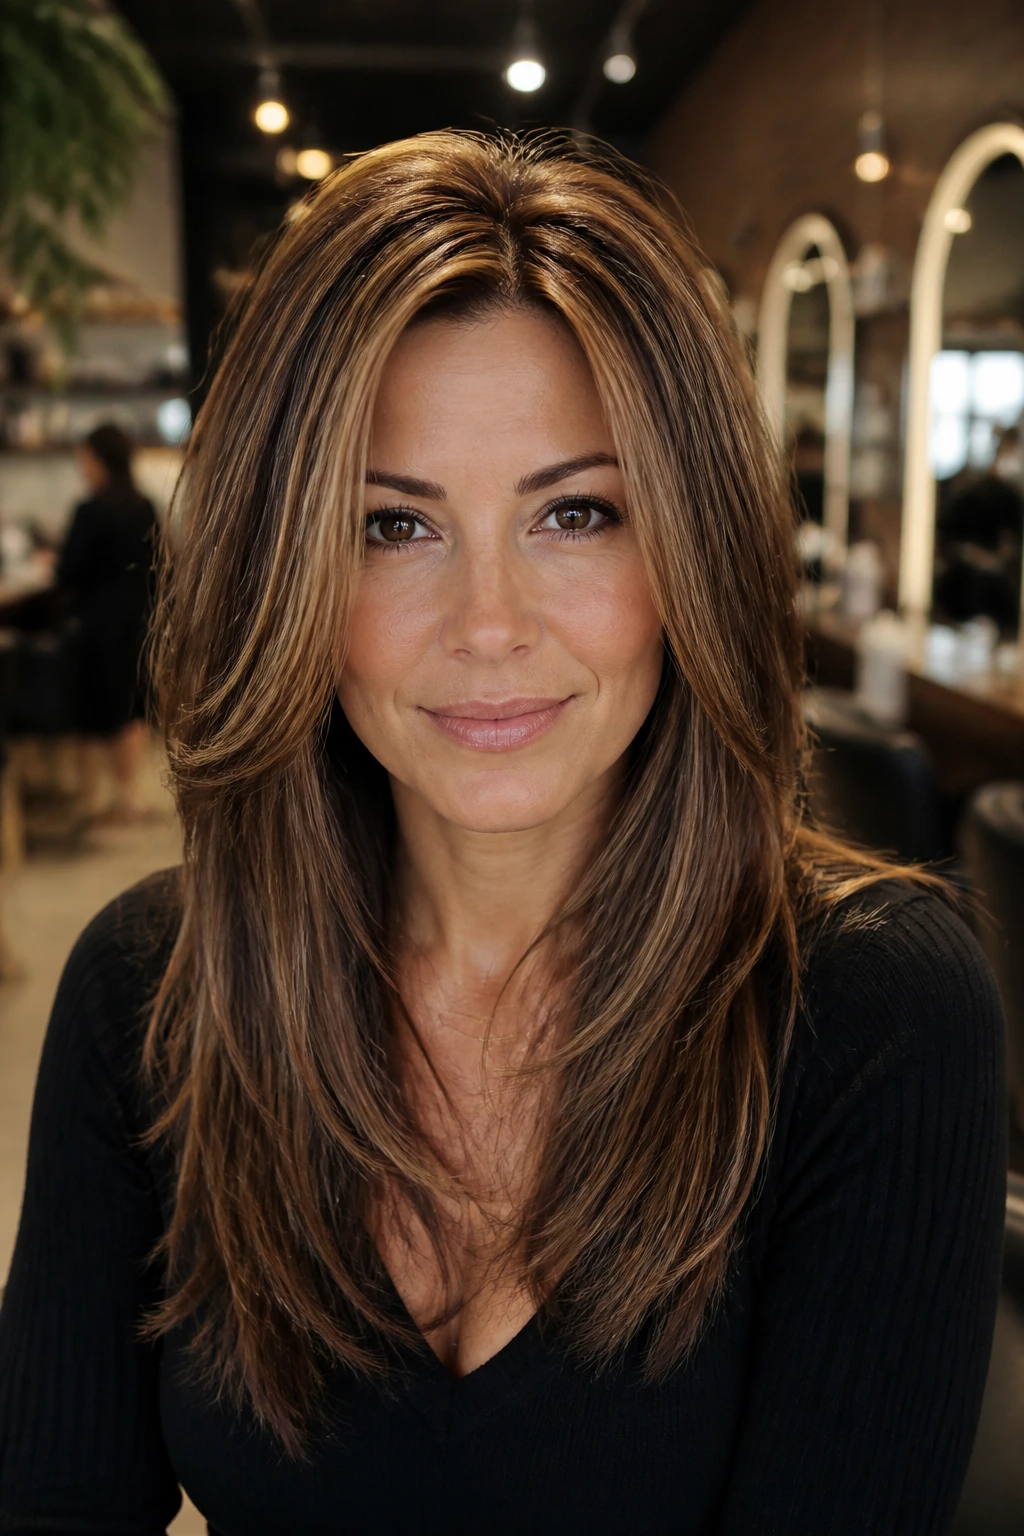
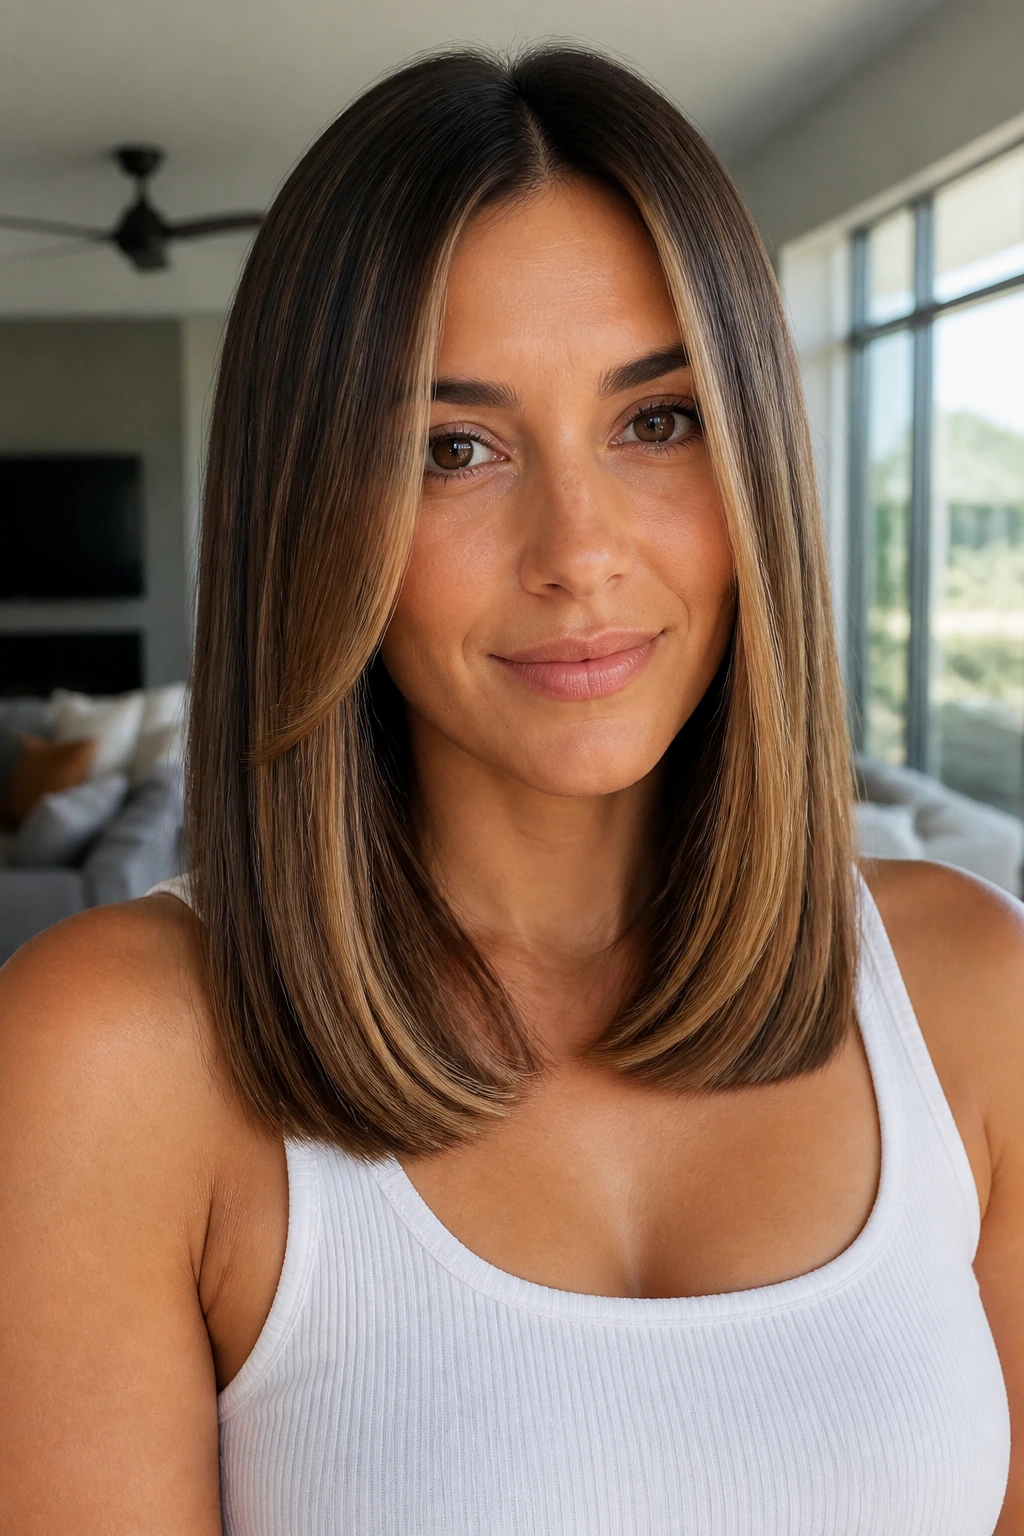
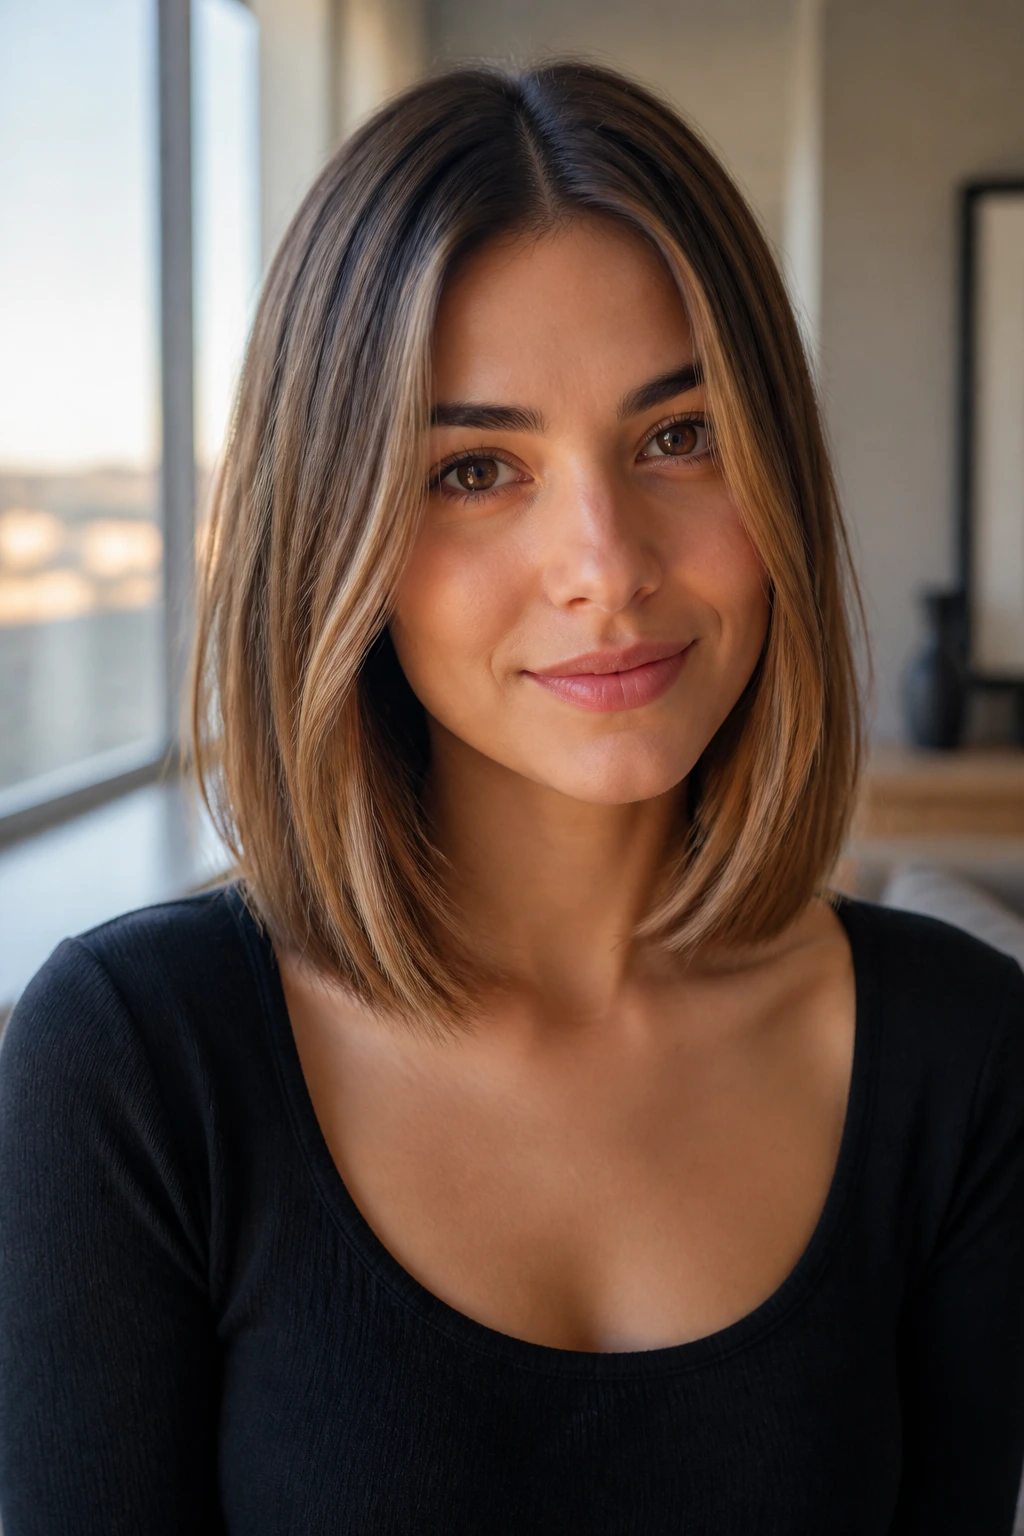
2. Collarbone Layers With a Clean Center Part
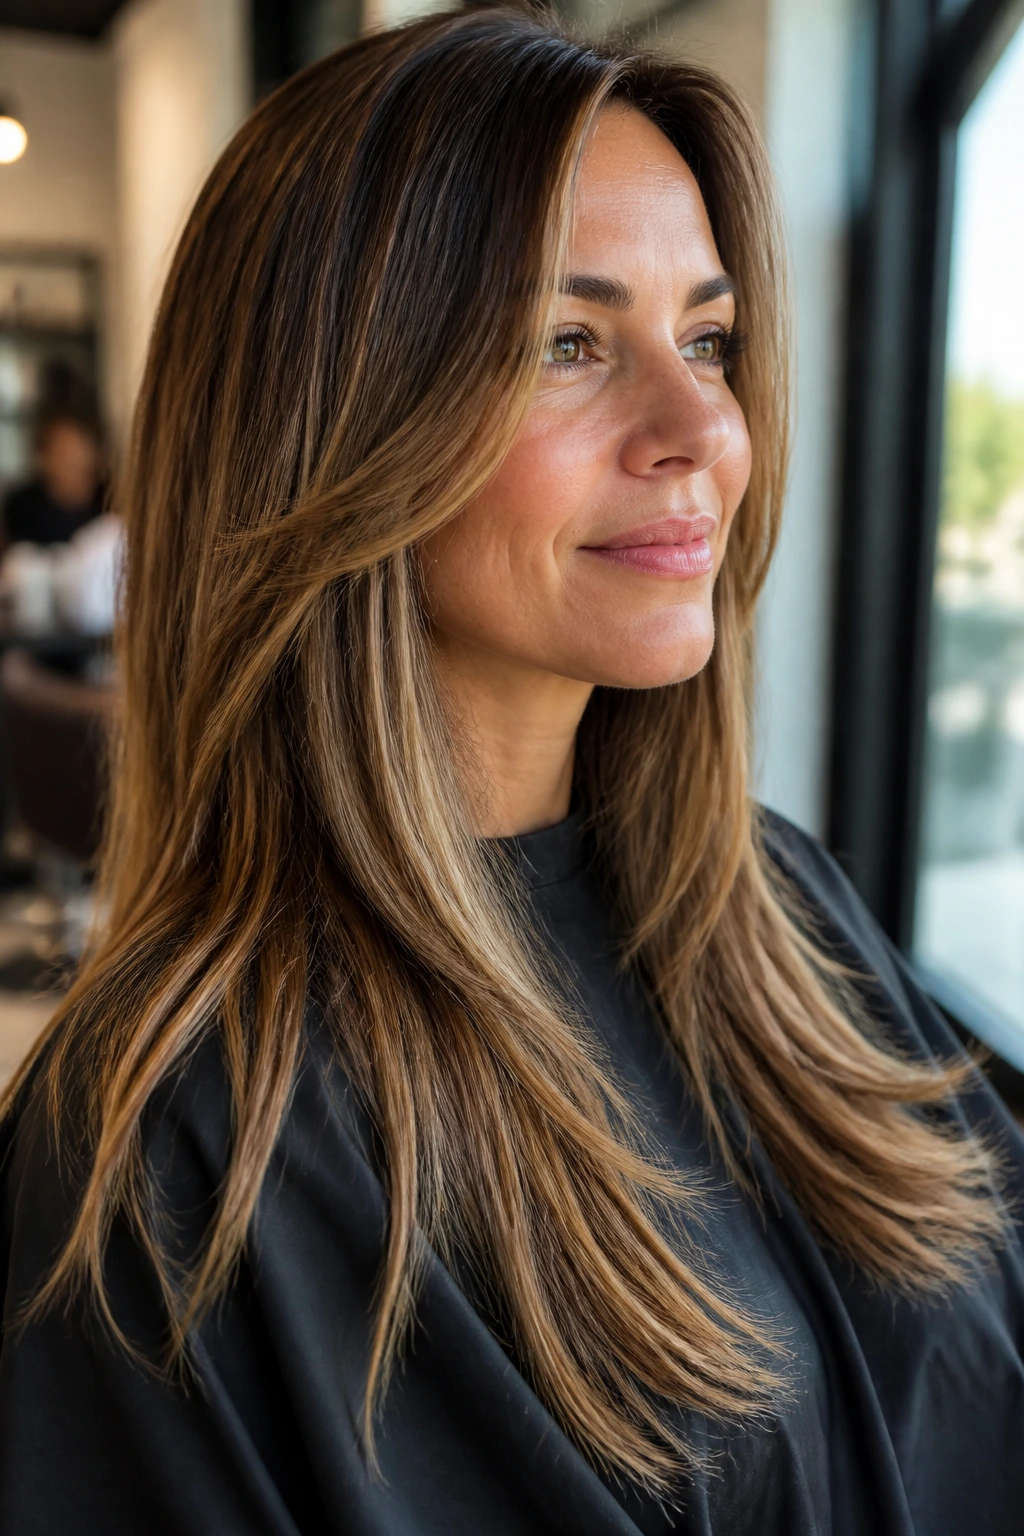
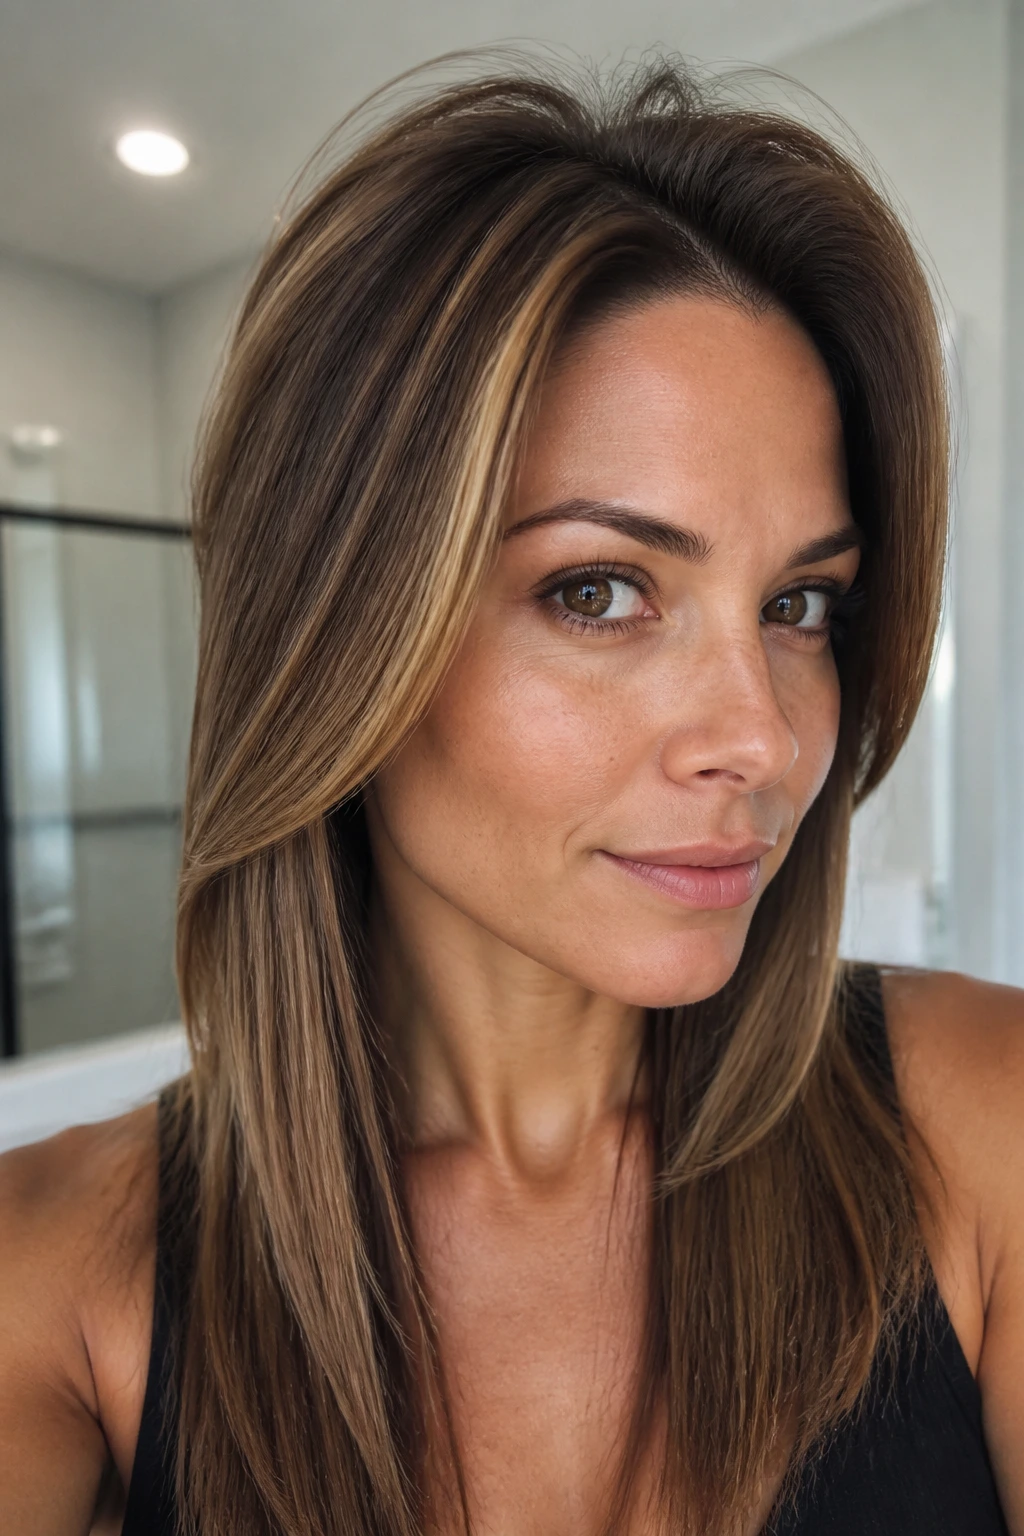
A collarbone cut is one of the smartest choices for straight hair because it sits at that useful in-between length: long enough to tuck behind the ears, short enough to feel lighter. Add shallow layers around the face and a center part, and the whole cut suddenly looks sharper. Caramel highlights placed from the cheekbones down can keep the shape from reading too plain.
This is the kind of cut that looks expensive even when it’s simple. The secret is restraint. The layers should not start too high or they’ll wreck the clean line that makes collarbone length feel polished. A few caramel pieces around the front and through the lower half of the hair are enough to break up the solid block.
If your hair falls flat by noon, this length is a good compromise. It gives you enough shoulder movement to build volume with a round brush, but it doesn’t demand the heavy styling a longer cut often does.
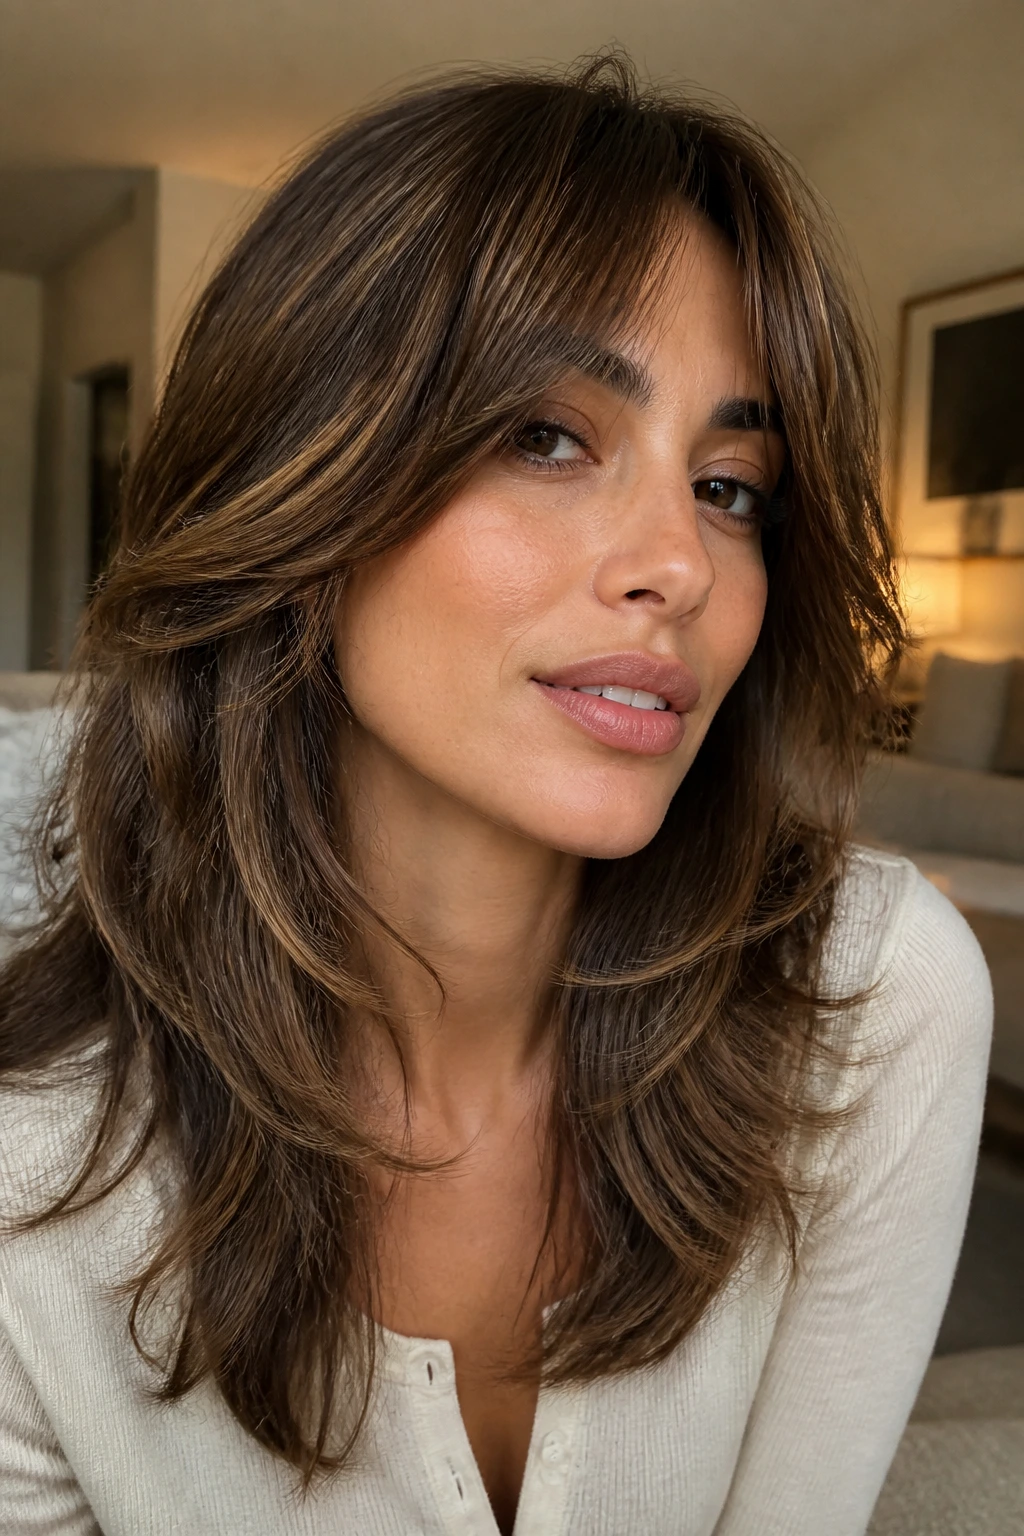
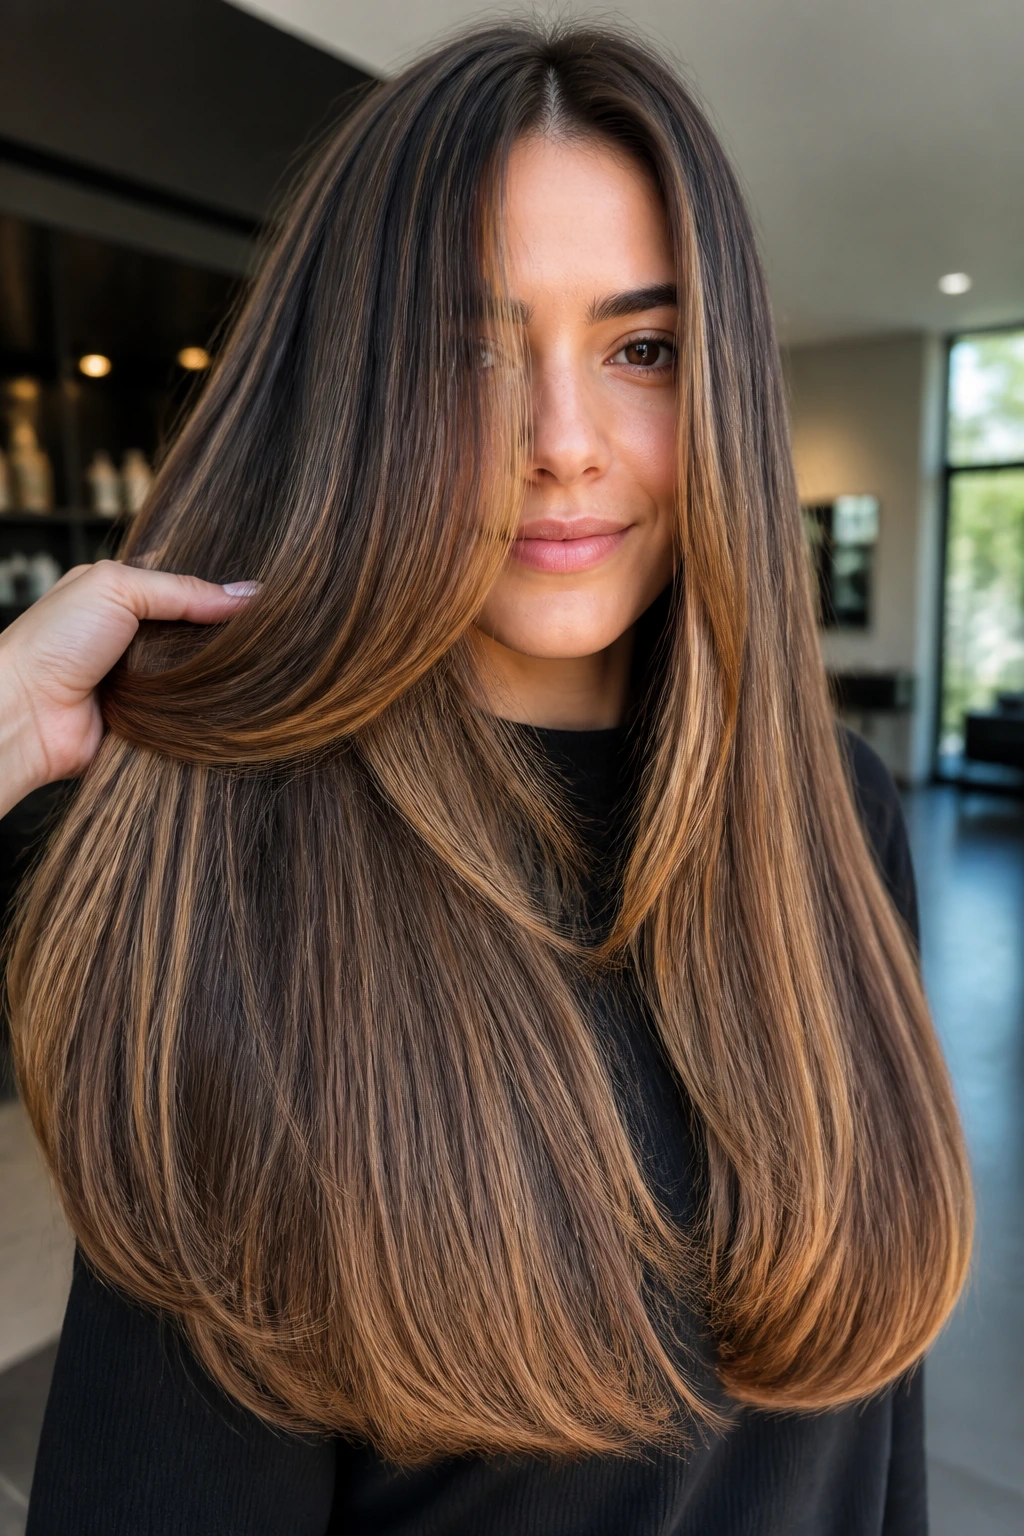
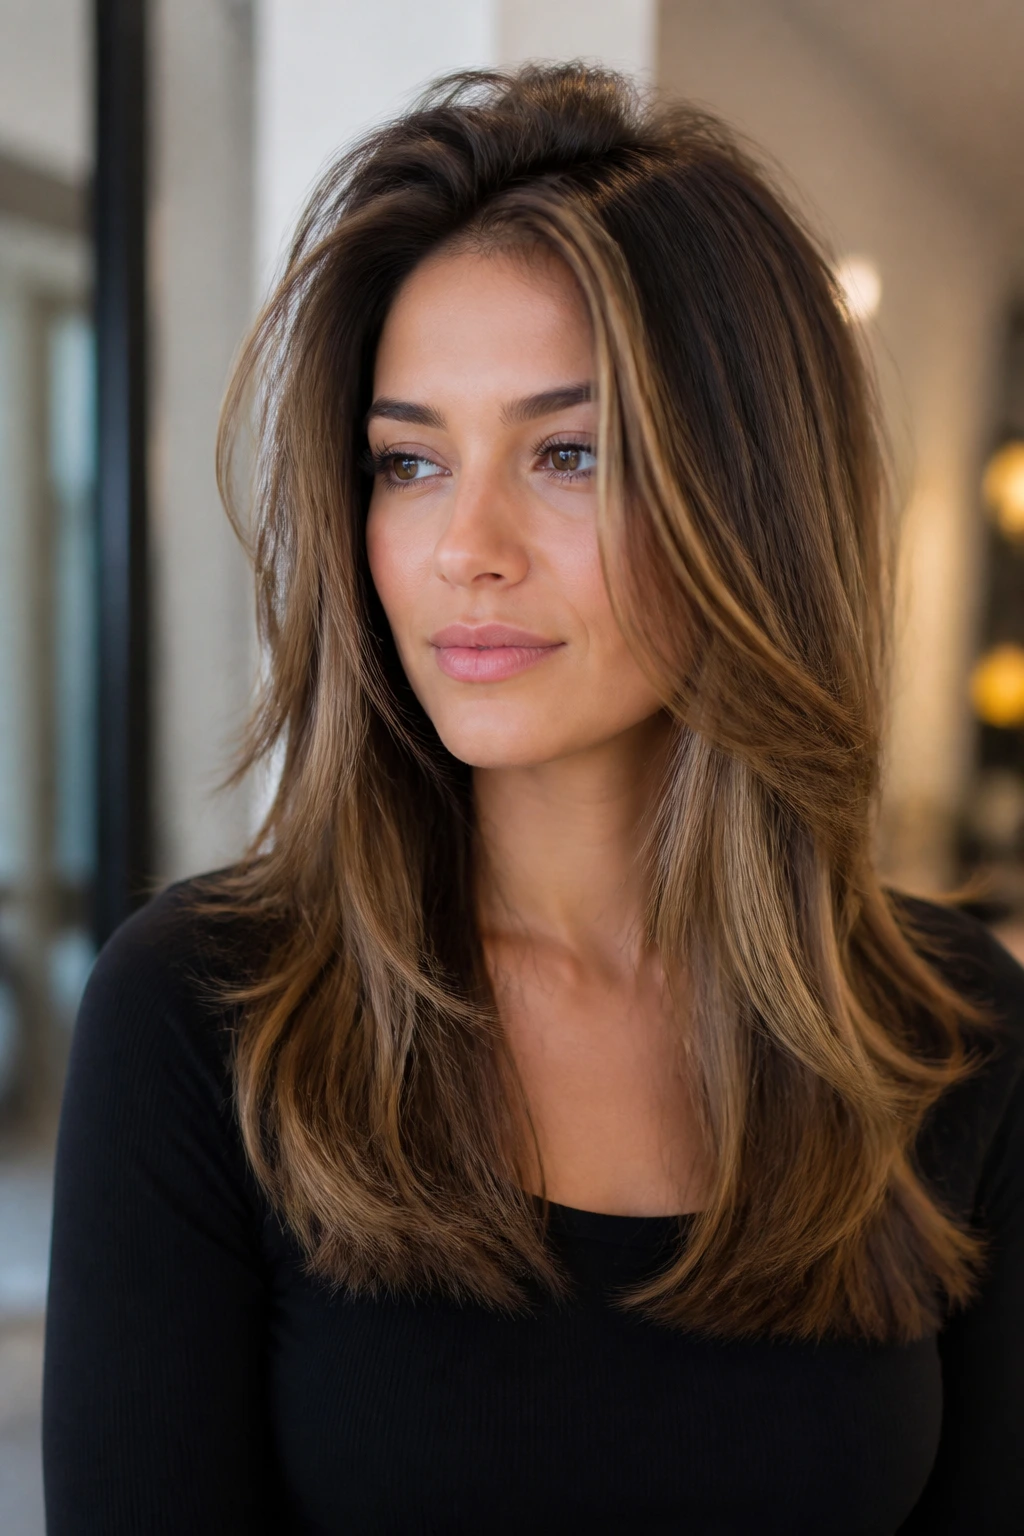
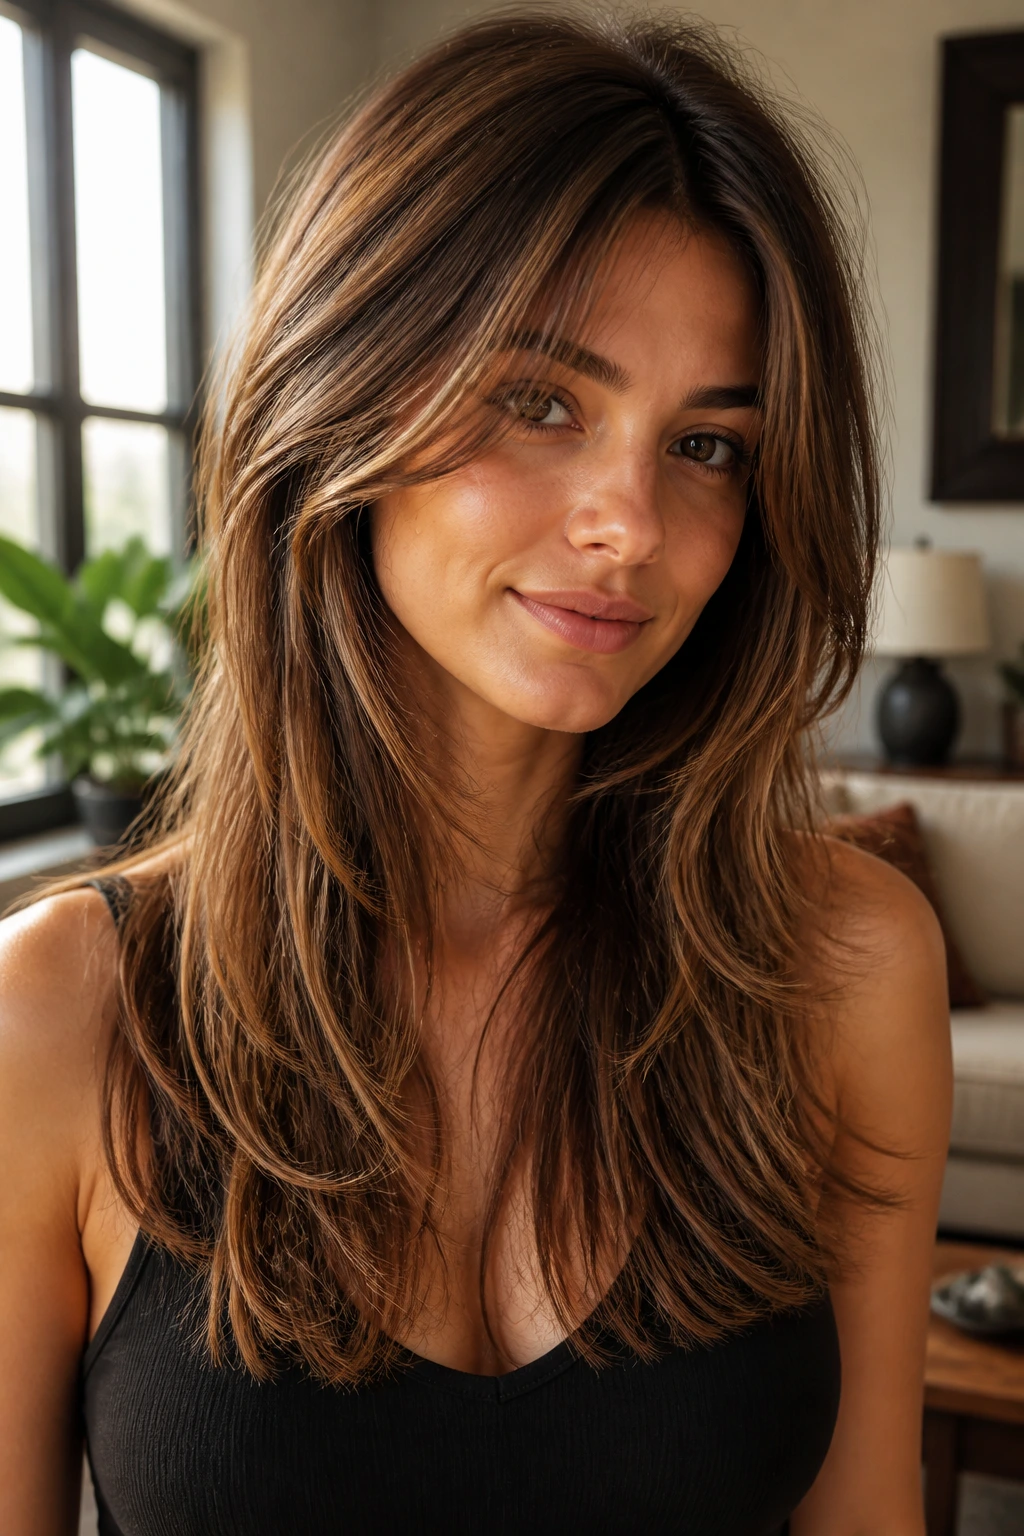
3. Butterfly Layers With Face-Framing Caramel
Butterfly layers are dramatic in the right way. They keep the back long while the front opens up around the face, creating that lifted, almost winged shape that straight hair wears well when the layers are cut cleanly. Caramel highlights should sit in the face frame and just behind it, where the shorter pieces can catch them first.
What makes them different
Butterfly layers are built to make straight hair look like it has more shape than the length alone would suggest. The short front pieces create movement near the eyes and cheekbones, while the long back still gives you something to pull into a ponytail.
The color placement matters here. If the highlights are too low, the whole cut loses its top-heavy lift. Place caramel around the front fringe area and blend it into a softer ribbon through the mid-lengths so the layers read as one shape, not two separate haircuts.
Styling note
Blow-dry the front pieces away from the face with a medium round brush. That slight flip is what gives butterfly layers their lift. Flat, straight-down styling makes them look unfinished.
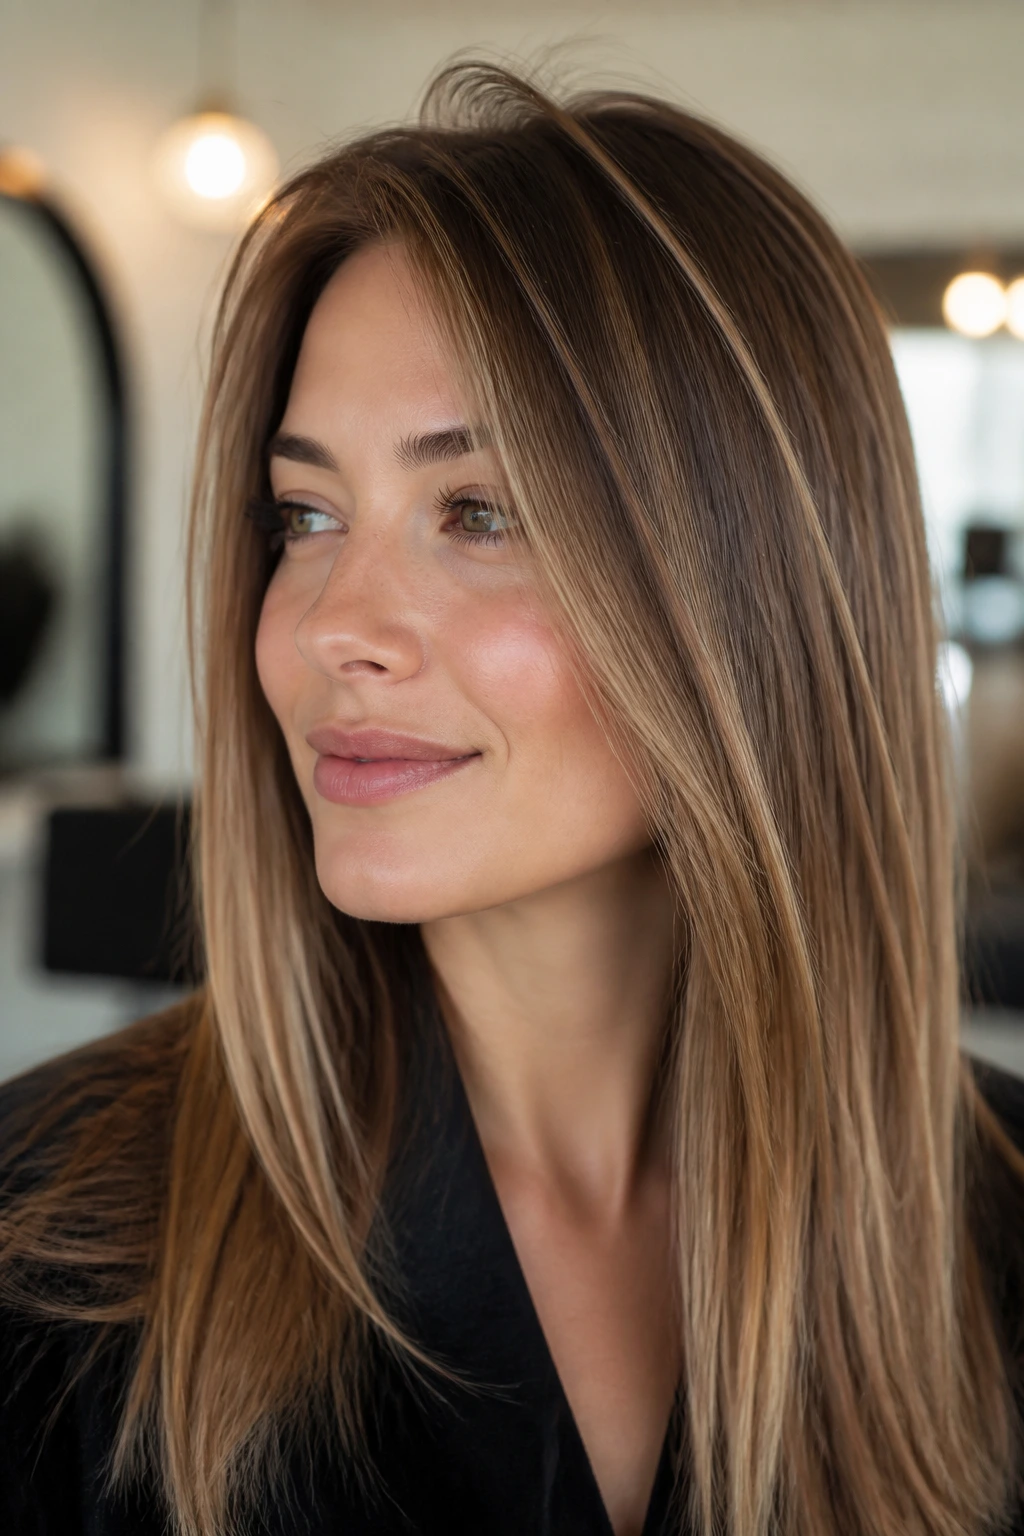
4. Invisible Interior Layers for Fine Straight Hair
Invisible layers are the haircut equivalent of a good lighting setup. You don’t see the structure right away, but the whole style looks fuller because the weight has been moved from the inside instead of chopped off the outside. On fine straight hair, that matters. A lot.
Caramel highlights make this cut look more dimensional because the color peeks out as the hair separates and moves. You want soft, narrow ribbons rather than thick stripes. Think subtle bends of light, not obvious blocks of dye.
The best part is that the perimeter stays clean. That keeps the hair looking dense at the edges, which is exactly what fine straight hair needs. Ask for internal layering, not aggressive texturizing. Too much thinning on fine hair can leave the ends see-through, and that’s a hard look to recover from.
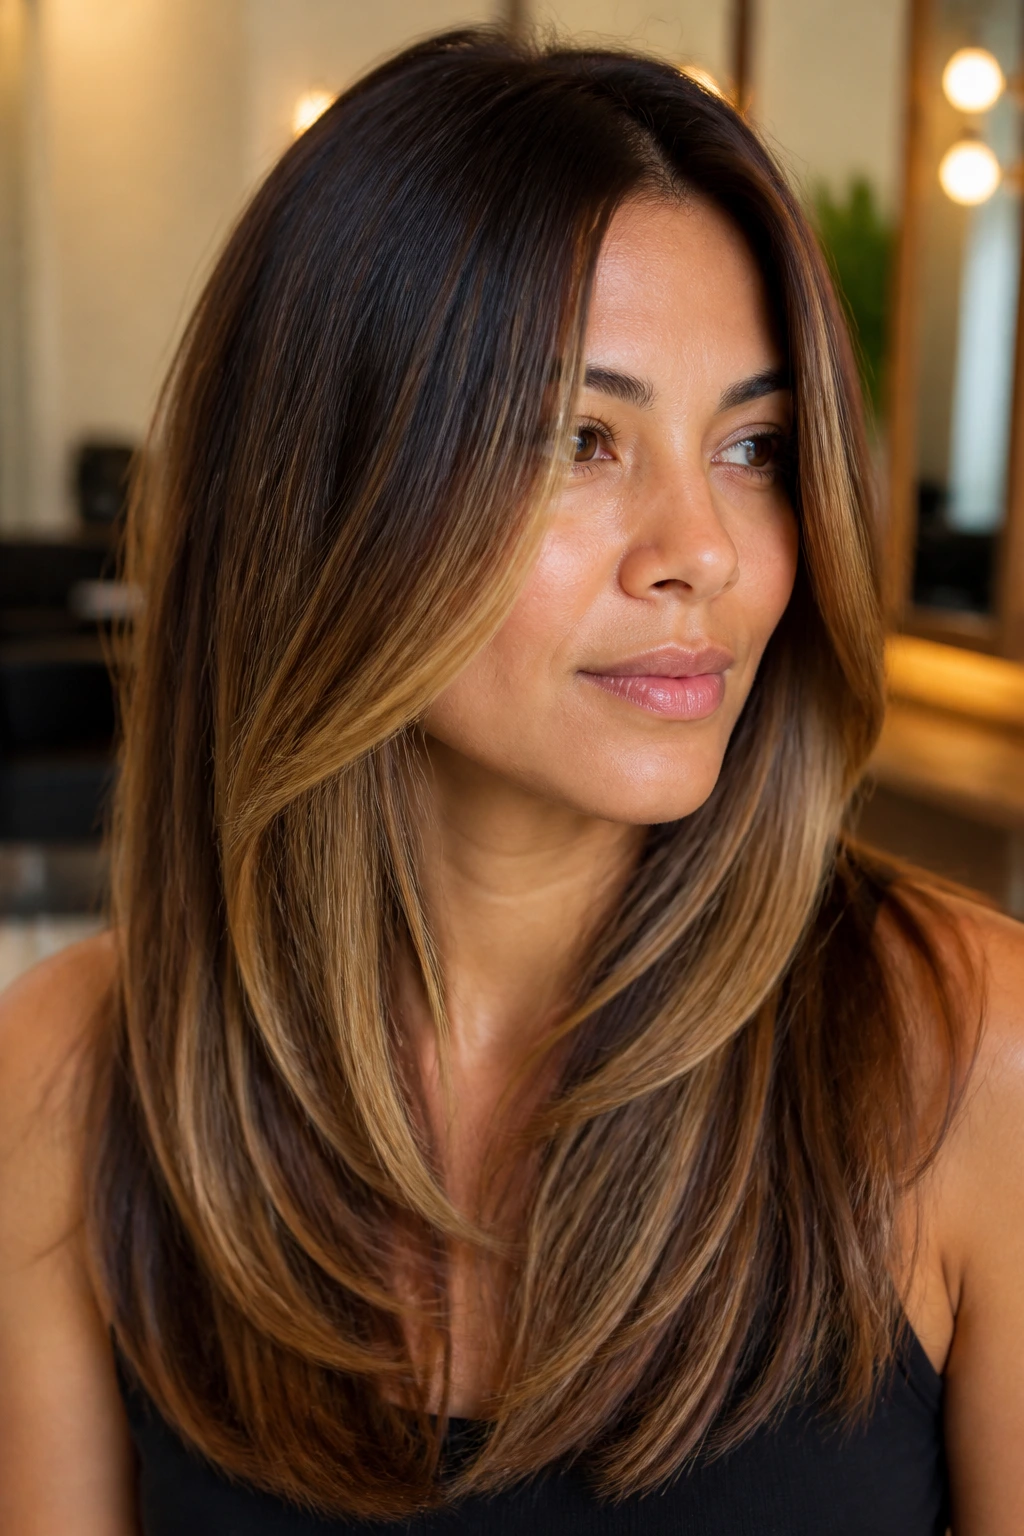
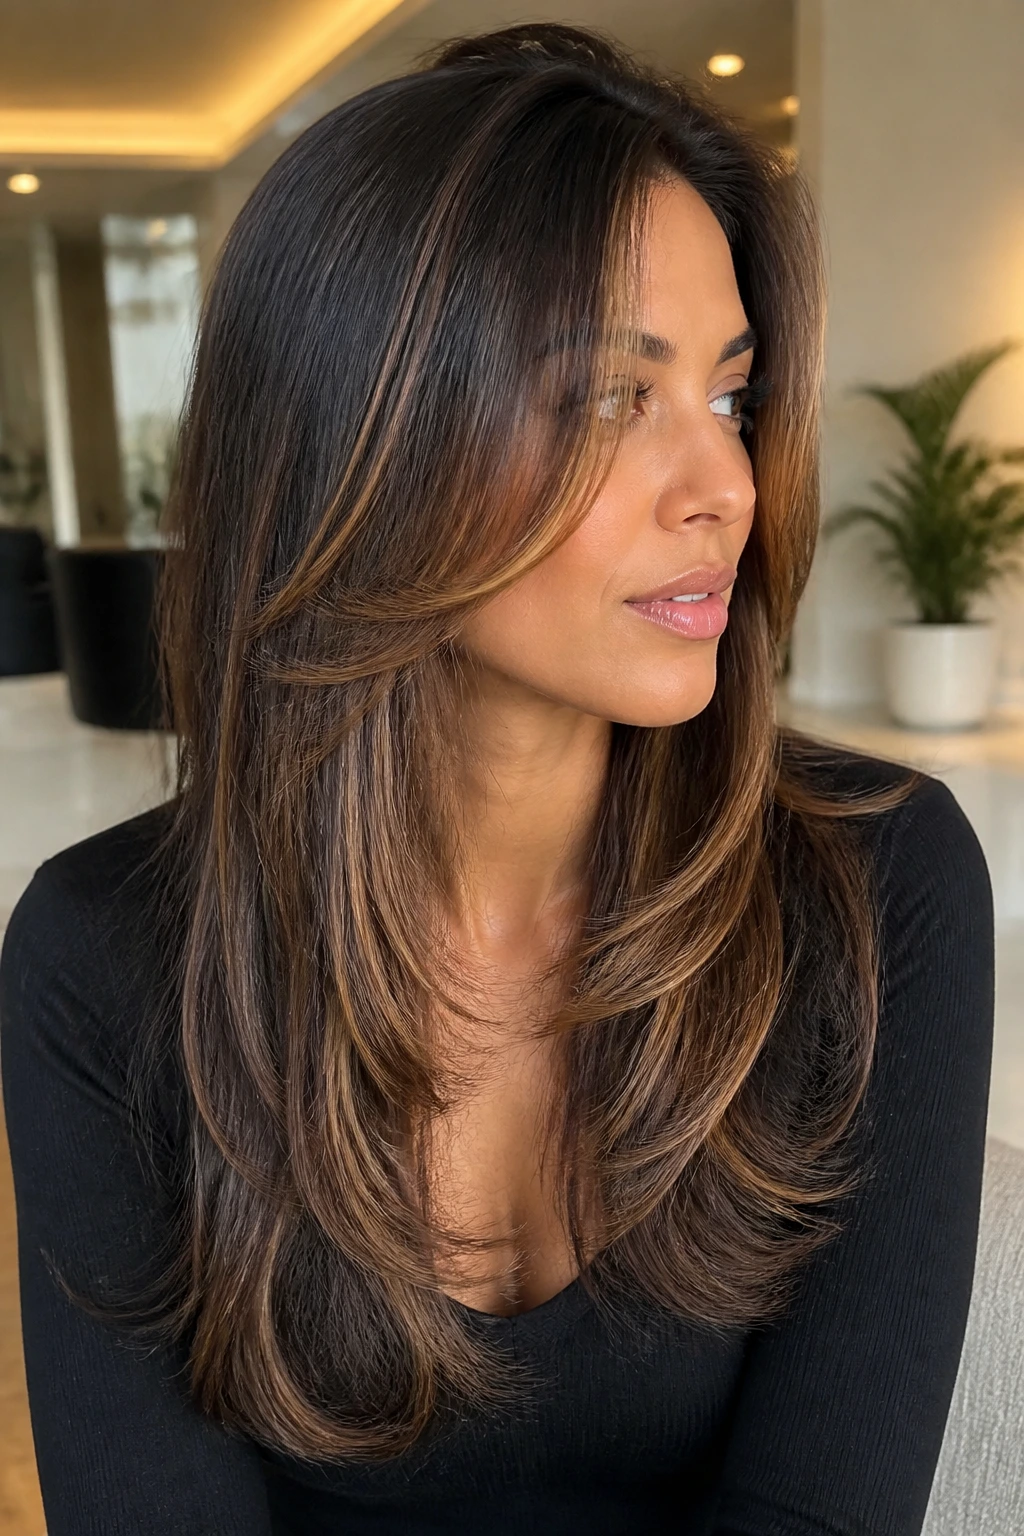
5. U-Shaped Layers With Beveled Ends
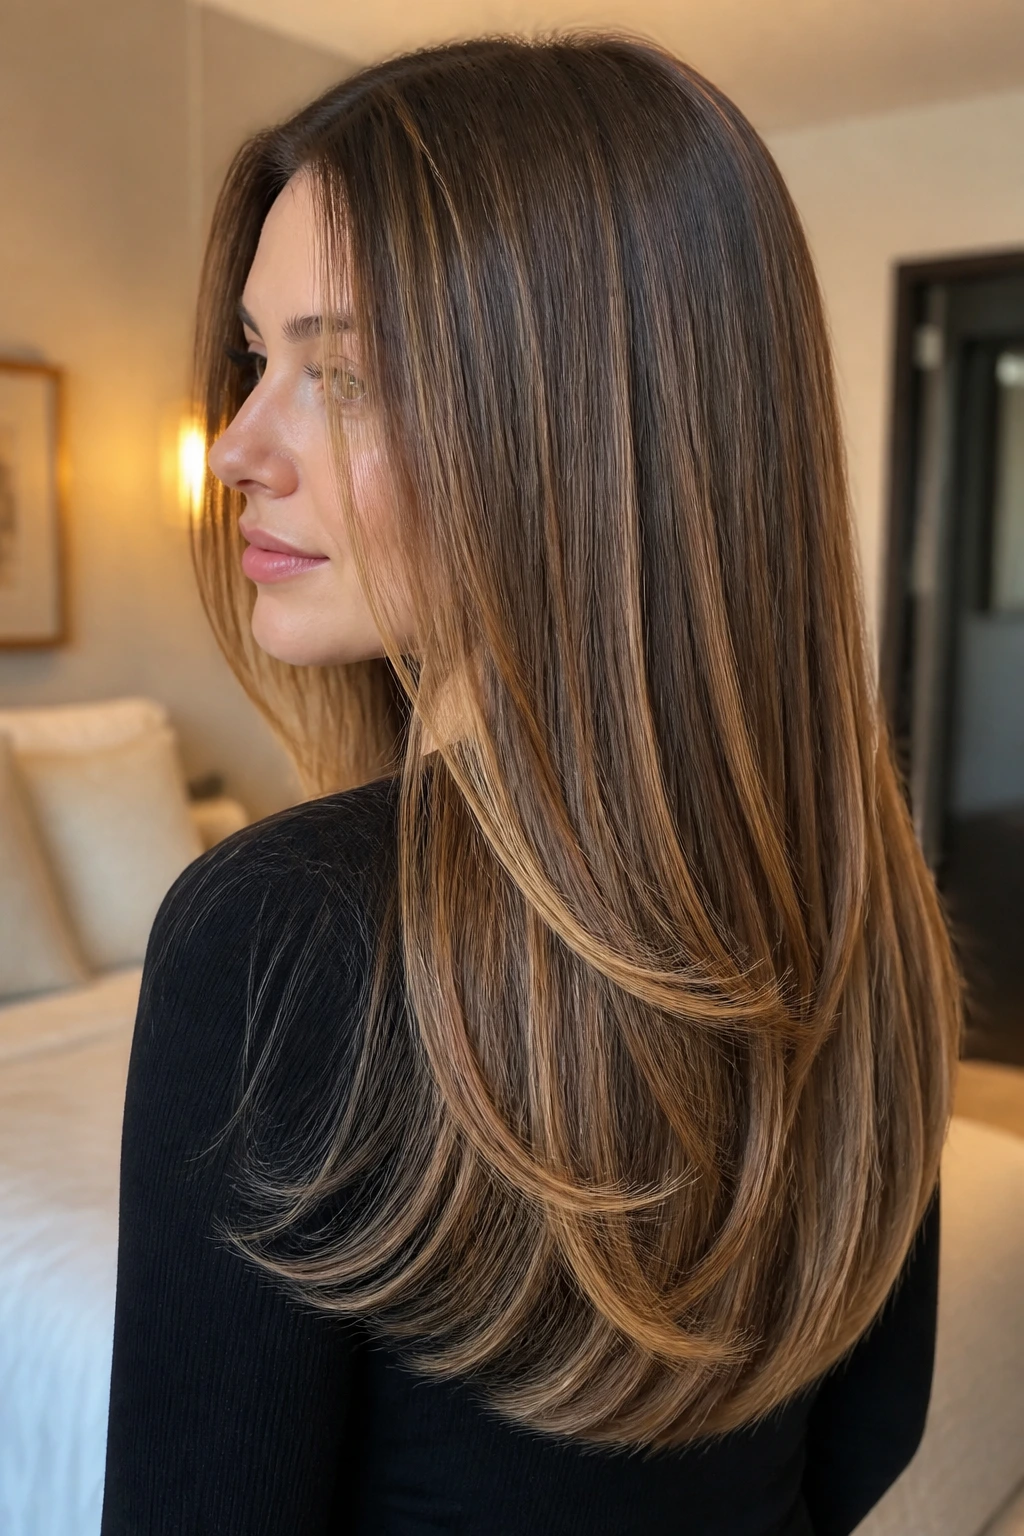
A U-shape gives straight hair a gentle curve that feels softer than a blunt hem. It also makes the back look fuller because the center hangs a little longer than the sides. Add beveled ends and caramel highlights through the lower lengths, and the cut gets a polished, expensive finish without becoming fussy.
This shape works because it keeps the eye moving. A straight, even hemline can feel heavy on long hair, especially when the texture is naturally sleek. The U-shape eases that pressure. The beveled ends catch the light from the caramel tones and stop the bottom edge from looking like a hard shelf.
If you like hair that looks neat even in a low bun or half-up style, this is a strong pick. It’s tidy. Not severe. That’s the difference.
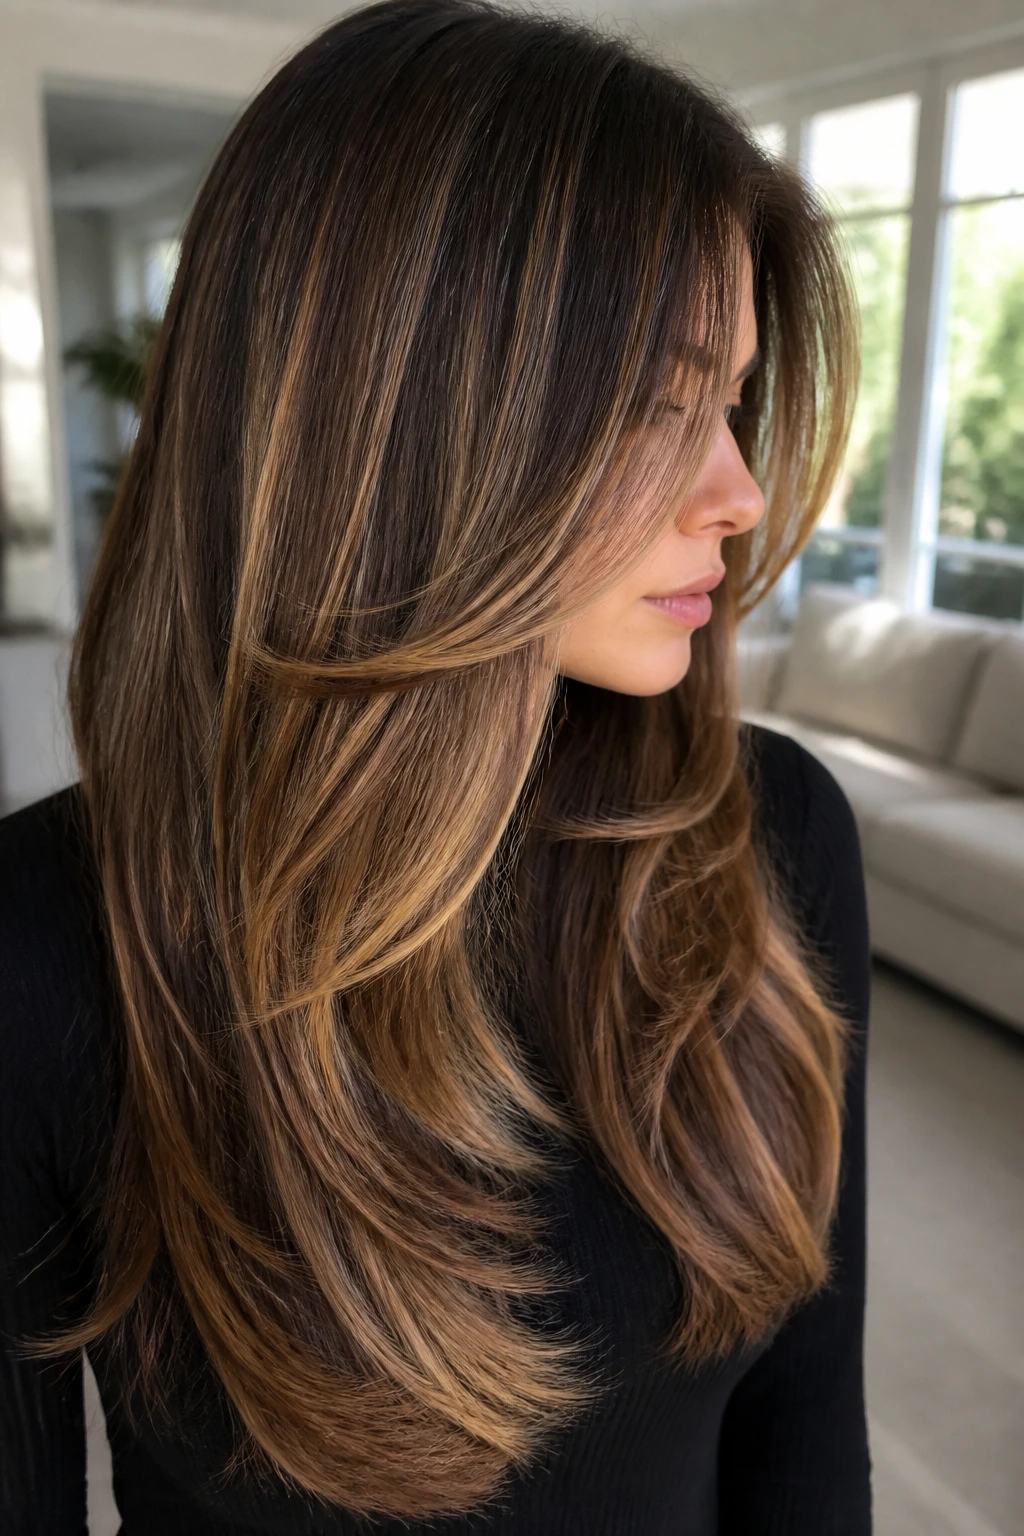
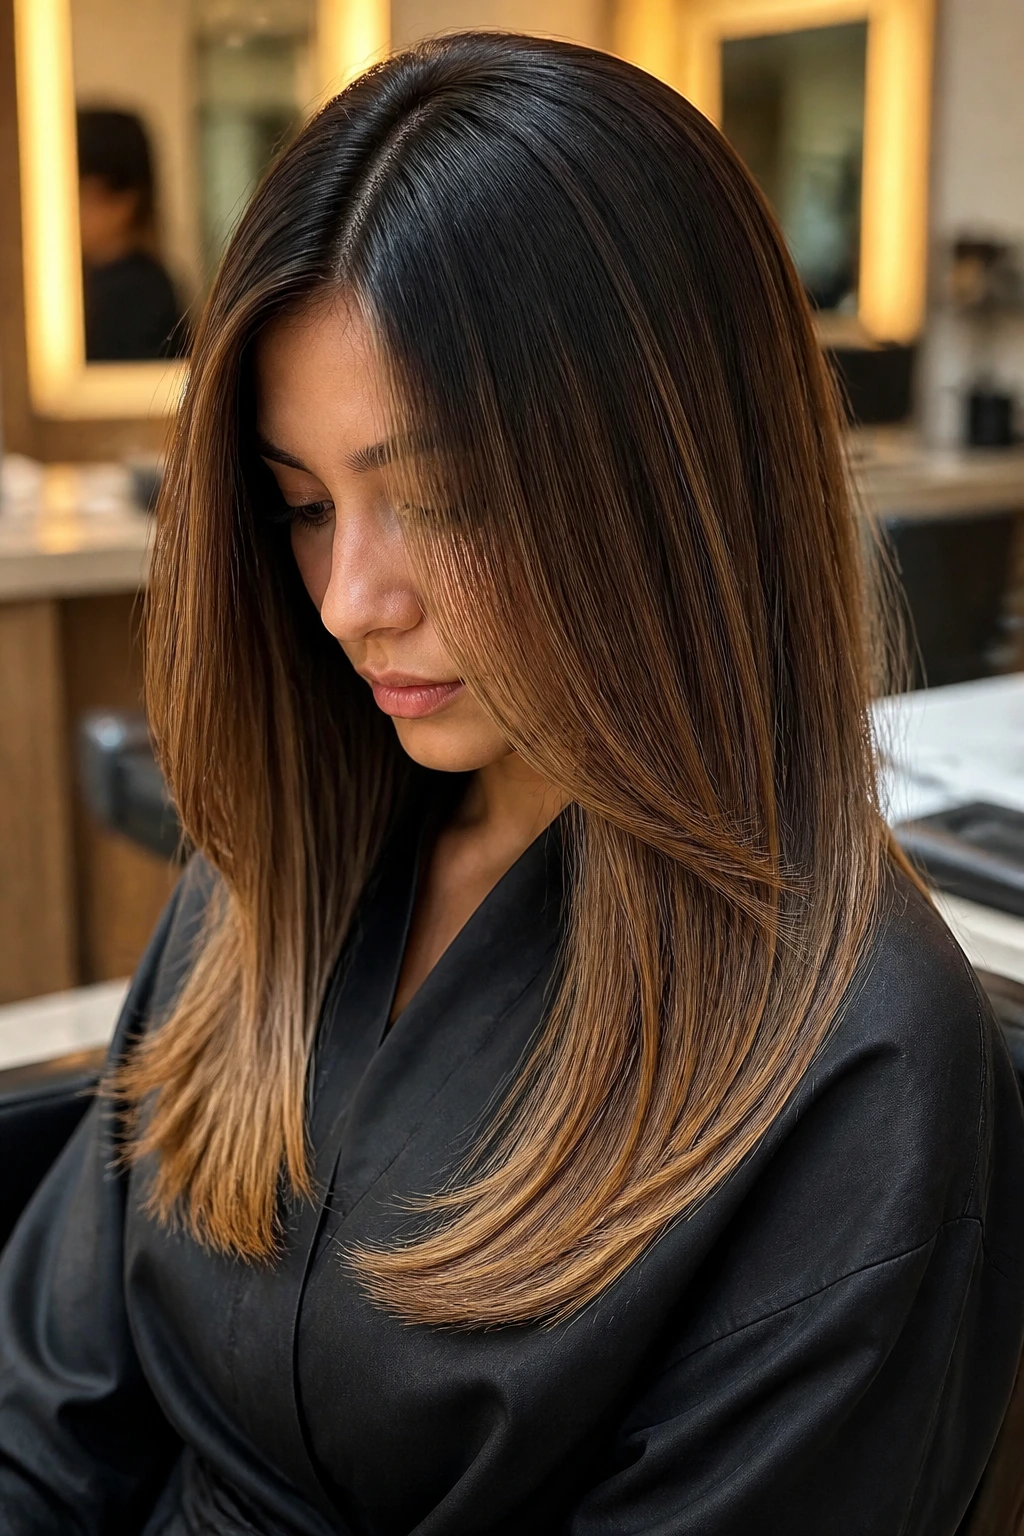
6. V-Cut Layers With a Glossy Caramel Melt
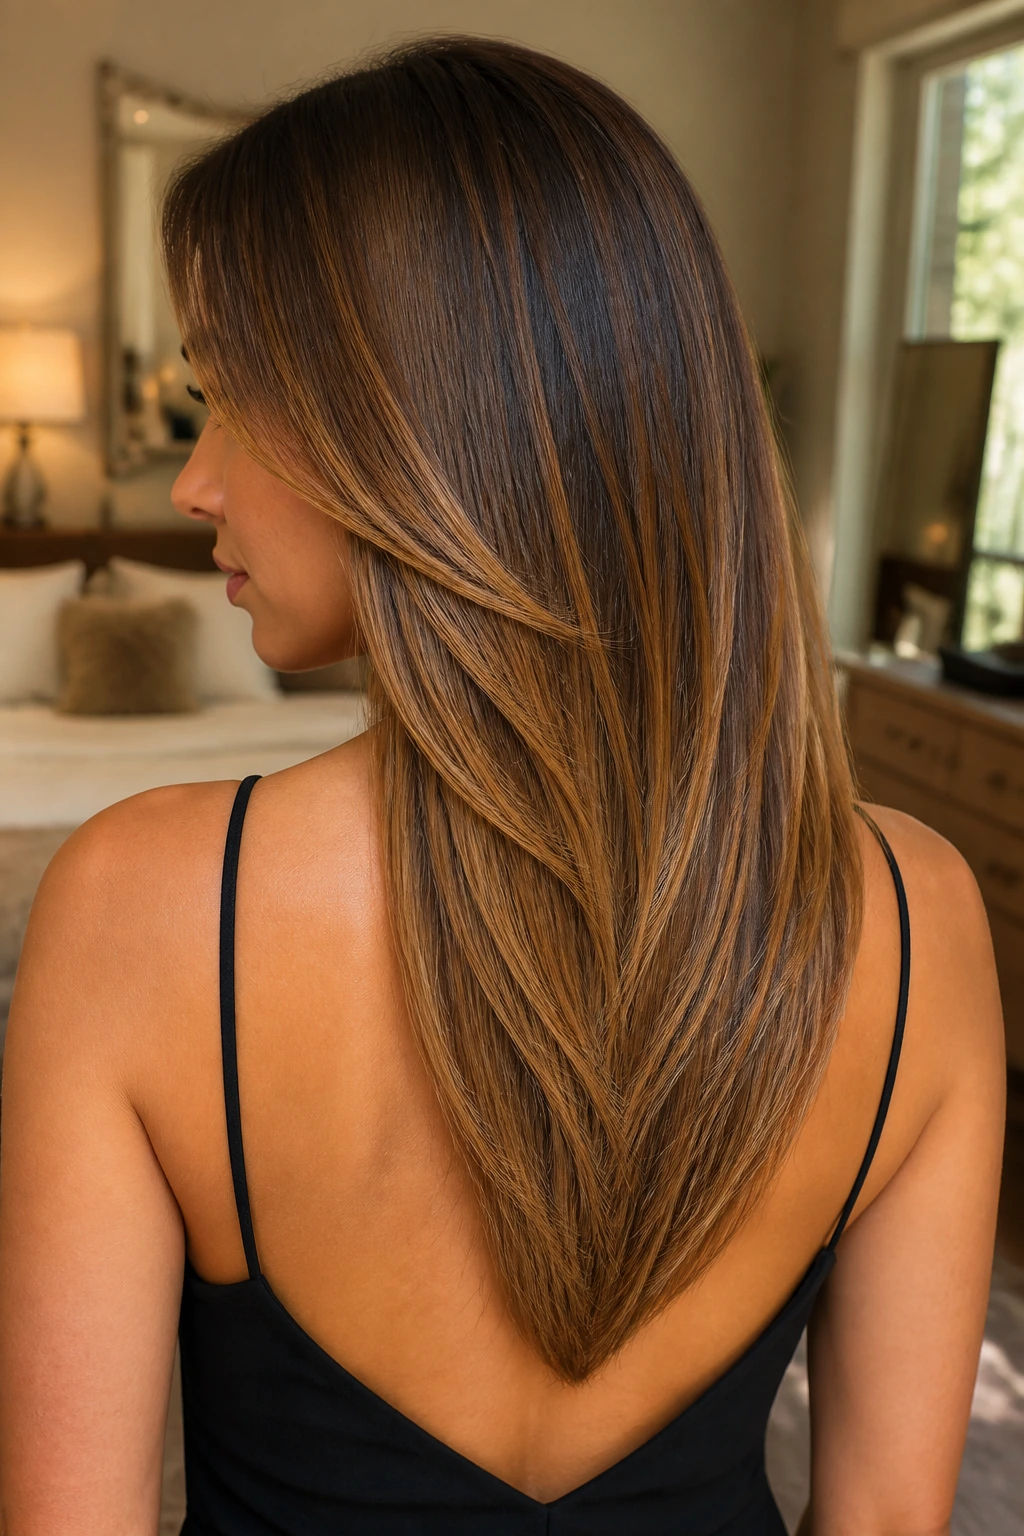
A V-cut gives straight hair a sharper silhouette, with the longest point dropping in the center of the back. That shape can look a little dramatic in the best way, especially if the layers around it are soft enough to keep the edge from feeling heavy. A caramel melt, where the color shifts gradually from deeper roots to lighter ends, adds more motion than a single highlight pattern ever could.
Why it stands out
The V shape works because it creates visible direction. Instead of everything hanging at the same level, the cut funnels the eye downward, which is useful if your hair is thick or you want a longer-looking profile. The caramel melt makes the geometry feel less rigid.
Ask for warmer caramel through the mid-lengths and slightly brighter ends if you want the V shape to show in natural light. Too dark, and the layers disappear. Too bright, and the shape can look dry. The middle ground is the good one here.
Styling tip
Use a large round brush or a wide flat brush to bend the ends inward just a little. A V-cut looks best when the point is visible but not sharp enough to feel harsh.
7. Feathery 90s Blowout Layers
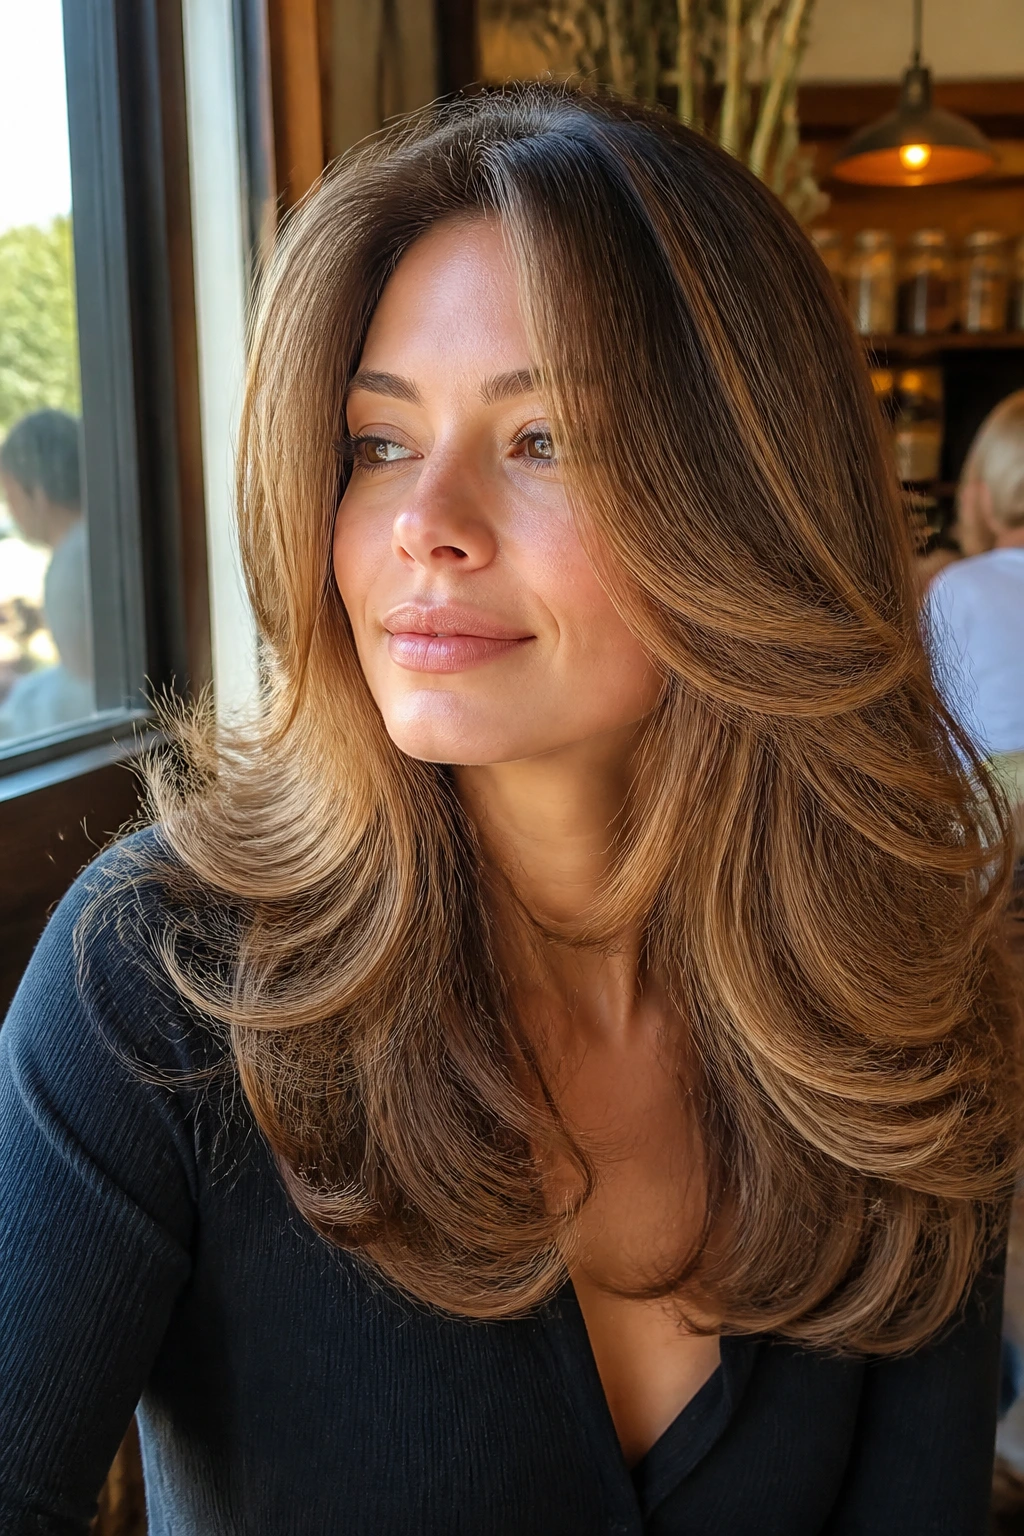
This is the haircut that makes straight hair look like it has been touched by a really good brush and five extra minutes of patience. Feathery blowout layers sit away from the face and create that soft outward sweep people keep chasing with hot tools. Caramel highlights enhance the effect because the lighter strands flare at the ends and around the face.
A good feathered cut should feel light, not choppy. The layers need to be long enough to flip, but not so long that they collapse into the rest of the hair. Ask for soft graduation around the cheekbones and jawline if you want the blowout shape to hold.
The caramel should be slightly lighter around the front, where the brush creates the most movement. That little shift makes the whole style look intentional, even if you styled it in ten minutes before work.
8. Chunky Face-Framing Layers and a Money-Piece Sweep

Sometimes straight hair needs a bolder front edge. Chunky face-framing layers give you that. They start high enough to show off the cheekbones and slide into the rest of the length without making the haircut feel too broken up. A money-piece sweep of caramel near the face adds brightness right where the eye lands first.
This look is more noticeable than invisible layers, and that’s the point. It gives straight hair a visible frame. If your face tends to disappear behind one long sheet of hair, this cut fixes that fast.
The caramel pieces near the front should be slightly wider than the rest of the highlights. That extra width keeps them from vanishing into the layers once the hair is styled. You want a sweep, not a whisper. There’s room for subtlety elsewhere.
9. Mid-Length Layers With a Blunt Perimeter
A blunt perimeter with mid-length layers is one of my favorite combinations for straight hair because it solves two problems at once. You keep the density at the edges, which makes hair look thicker, and you still get movement through the interior. Caramel highlights can live mostly in the middle and lower thirds so the perimeter stays strong.
This cut is especially good if your hair gets stringy when it’s too layered. The blunt line anchors the style. The internal layers keep it from feeling boxy. That balance matters. Straight hair shows the line of the cut immediately, so the shape has to be deliberate.
Caramel placed through the mid-shaft adds depth without stealing attention from the outline. It’s a smart move when you want the haircut to feel modern but not loud.
10. Long Razor Layers With Wispy Ends
Razor-cut layers can be gorgeous on straight hair when they’re done by someone who knows how far to go. The result is soft, wispy movement and ends that feel lighter than scissor-cut layers. Caramel highlights around those wispy edges make every strand look a little more defined.
A quick caution
Razor cutting is not the same as thinning. On straight hair, a heavy hand can leave the ends frayed or see-through. The best version keeps the softness around the face and through the mid-lengths while preserving enough density at the bottom.
How to wear it
This cut likes a sleek blowout or a flat-iron pass with a subtle curve. If you air-dry straight hair that’s been razor cut too aggressively, the ends can separate in a way that looks accidental. A little polish goes a long way here.
11. Soft Shag Layers With Caramel Lowlights
The shag gets less chaotic when it’s softened for straight hair, and that’s exactly why it works. You still get the broken-up movement and a bit of attitude, but the layers stay long enough to behave. Caramel lowlights mixed into lighter ribbons can give the cut more depth, especially if your base color is already warm or medium brown.
This version is for people who want texture without going full rocker. The layers should be point-cut and slightly uneven, but not jagged. If they’re too severe, straight hair can look like it was attacked by scissors instead of shaped by them.
The lowlights matter here because straight hair can get washed out if every piece is lifted equally. A few deeper caramel or chestnut strands beneath the surface give the haircut a thicker, richer read from every angle.
12. Straight Lob Layers With Underlayer Dimension
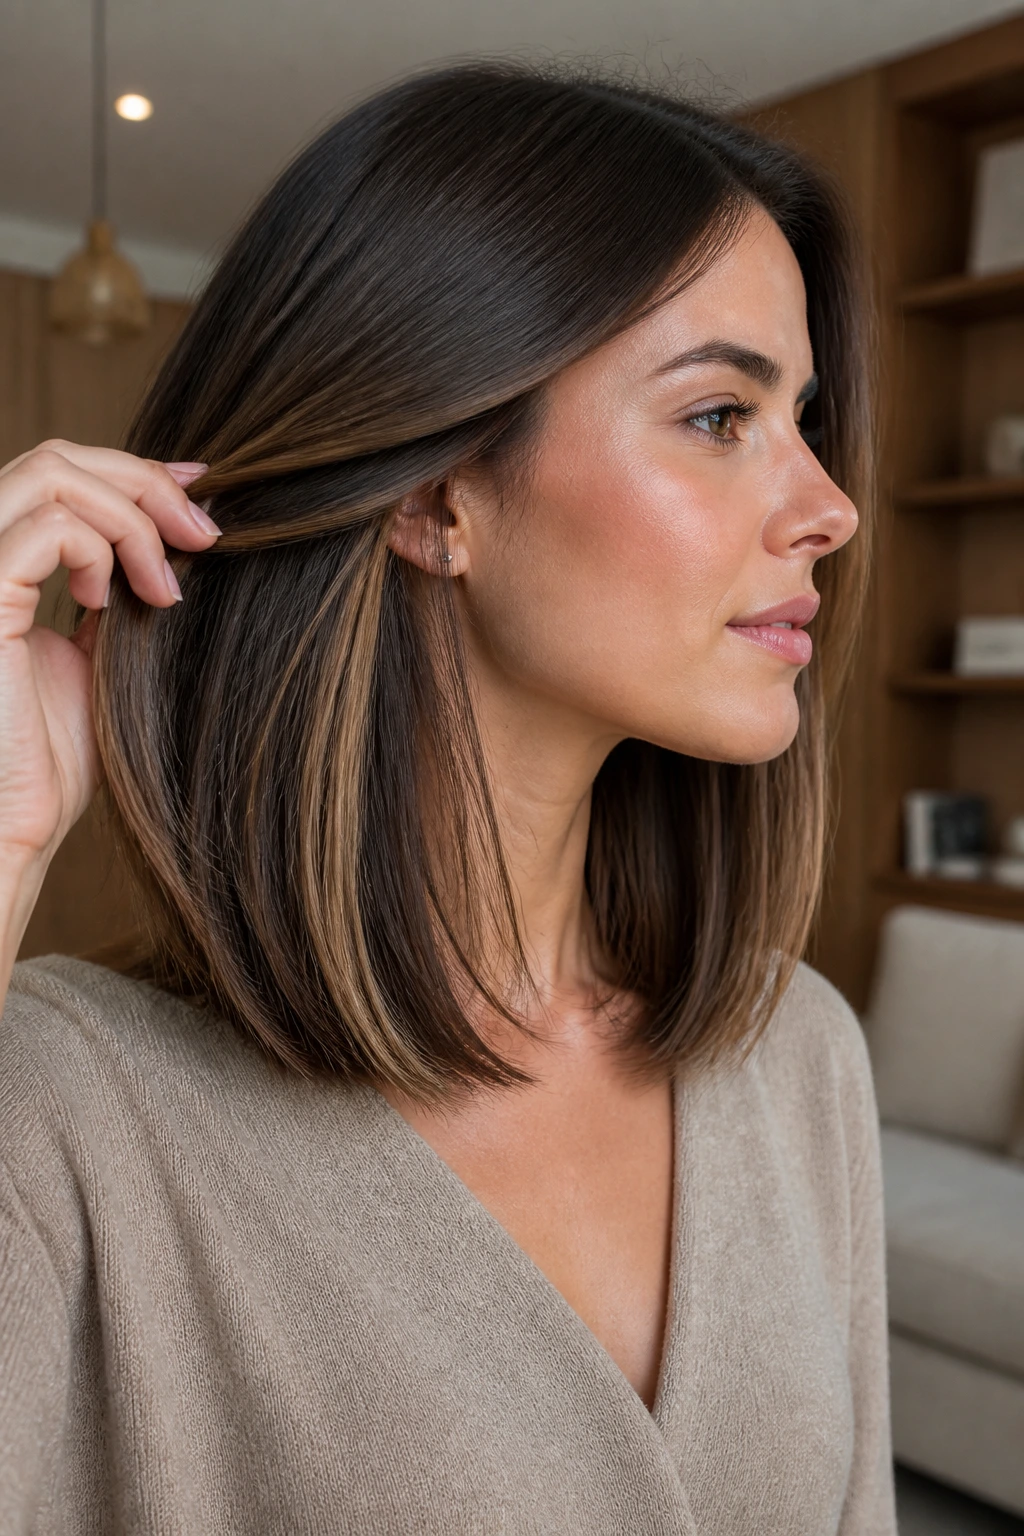
A lob with layers hidden underneath is one of the cleanest ways to add volume without sacrificing the crisp feel of straight hair. The top layer stays smooth. The underlayer gets the movement. Caramel highlights tucked below the surface make the cut look fuller when hair swings or gets tucked behind the ear.
Best for
- People who like a tidy shoulder-length shape
- Hair that needs movement but not obvious chop
- Styling that takes ten minutes, not thirty
The trick here is restraint. If the layers show too much on the surface, the lob loses its sleekness. Ask for soft internal layering and color that peeks through rather than dominates. That underlayer surprise is what makes the haircut feel alive when the hair moves.
13. Curtain Bang Layers With Warm Caramel Streaks
Curtain bangs can change the whole mood of straight hair. They split the face in a soft, easy way and flow into the rest of the layers so the haircut feels connected instead of chopped into pieces. Warm caramel streaks in the fringe area make the bangs stand out without turning them into a separate feature.
This style is especially good if you want a little face framing but hate the upkeep of a full fringe. Curtain bangs grow out better. They also let the rest of the hair stay long and clean through the sides.
The caramel should sit just enough lighter near the front to show texture in the bangs. If the front is too dark, the curtain shape disappears. If it’s too bright, the bangs can take over. You want a soft glow. Not a spotlight.
14. Rounded Layers With a Smooth Blowout

Rounded layers create a softer silhouette than a sharp V or blunt cut, and straight hair wears that shape beautifully when it’s blow-dried with a bit of tension. The result is smooth volume that bends around the head instead of dropping straight down. Caramel highlights follow that curve and make the shape look fuller.
A rounded cut is good for hair that feels a little too narrow at the ends. It fills out the lower half without making the perimeter heavy. Ask for layers that begin around the cheekbone or jawline if you want the shape to arc gently toward the shoulders.
The best finish is a smooth blowout with the ends bent under just slightly. That creates a cleaner edge for the caramel to sit on. Rough drying takes the elegance out of the shape fast.
15. Waterfall Layers That Fall in Sheets
Waterfall layers are all about soft transitions. The hair drops in overlapping pieces that look almost like folds in fabric, which is a lovely effect on straight hair because the surface stays clean while the shape gets complicated underneath. Caramel highlights moving through those layers create a soft shift from one depth to the next.
This cut works best when the layers are long and connected. If the sections are too disconnected, the waterfall effect turns into a stair-step shape. The goal is glide, not gaps.
A slightly warmer caramel through the mid-lengths gives this cut dimension without hard contrast. You want the different levels to show when the light hits them, not when you stare at them from three inches away. That’s a better test.
16. Crown Layers That Build Lift at the Top
If your straight hair goes flat at the roots, crown layers are the answer people ignore because they’re not flashy enough. They remove weight from the top third of the haircut, which helps the blow-dry stay lifted longer. Caramel highlights concentrated around the crown can help the area catch light, which makes the volume look even more obvious.
Why it matters
Most people ask for face-framing pieces and forget the top. That’s where the collapse happens. Crown layers support the whole shape from above, so the front doesn’t droop by lunchtime.
The highlights here should be fine and strategically placed, not chunky. A little brightness near the part line and crown creates the impression of height. It’s a small move with a big payoff.
Styling note
Flip your part from side to side while the hair is still warm from the blow-dryer. That sets the roots away from the scalp and keeps the crown from lying dead flat.
17. Parisian Layers With Dimensional Caramel
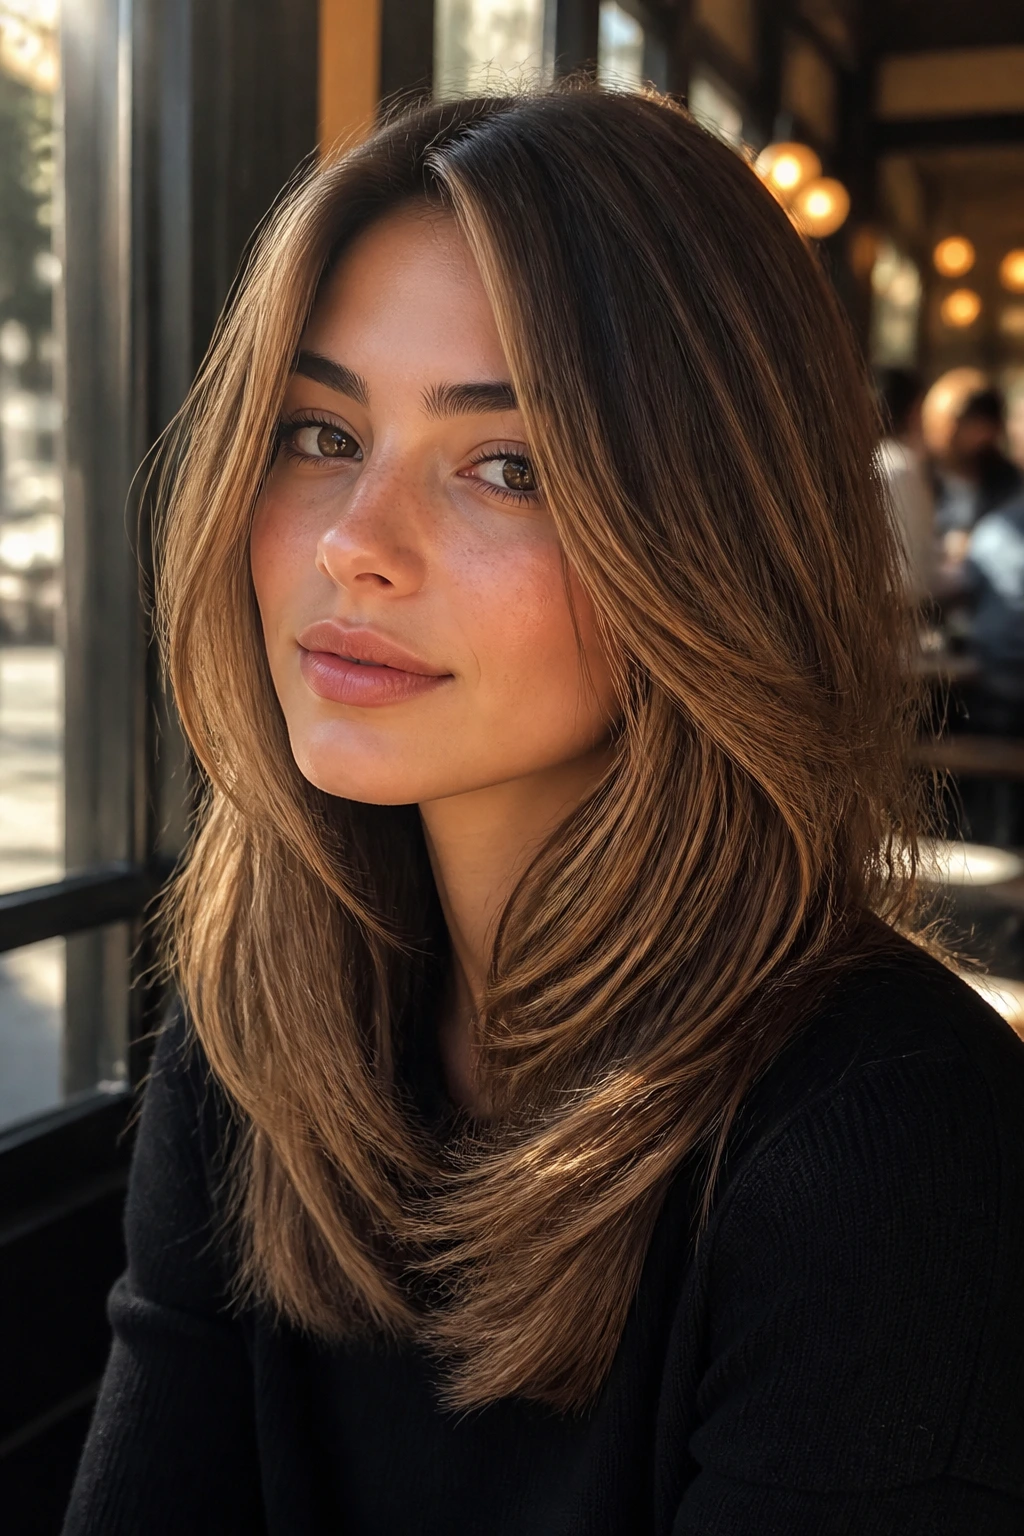
Parisian-inspired layers are soft, loose, and a little bit undone in a way that still looks deliberate. They usually sit around the shoulders or chest, with delicate face-framing and ends that move rather than sit stiffly. Dimensional caramel color suits the style because the whole point is to look like the hair has depth even when it’s worn simply.
This is not a high-drama haircut. It’s more of a quiet shape. The layers are there, but they don’t announce themselves. That’s useful if you like straight hair to look refined instead of highly styled.
Ask for highlights that vary slightly in tone—some toasted caramel, some lighter amber. That variation gives the style its depth and keeps it from looking like one flat color painted over another flat cut.
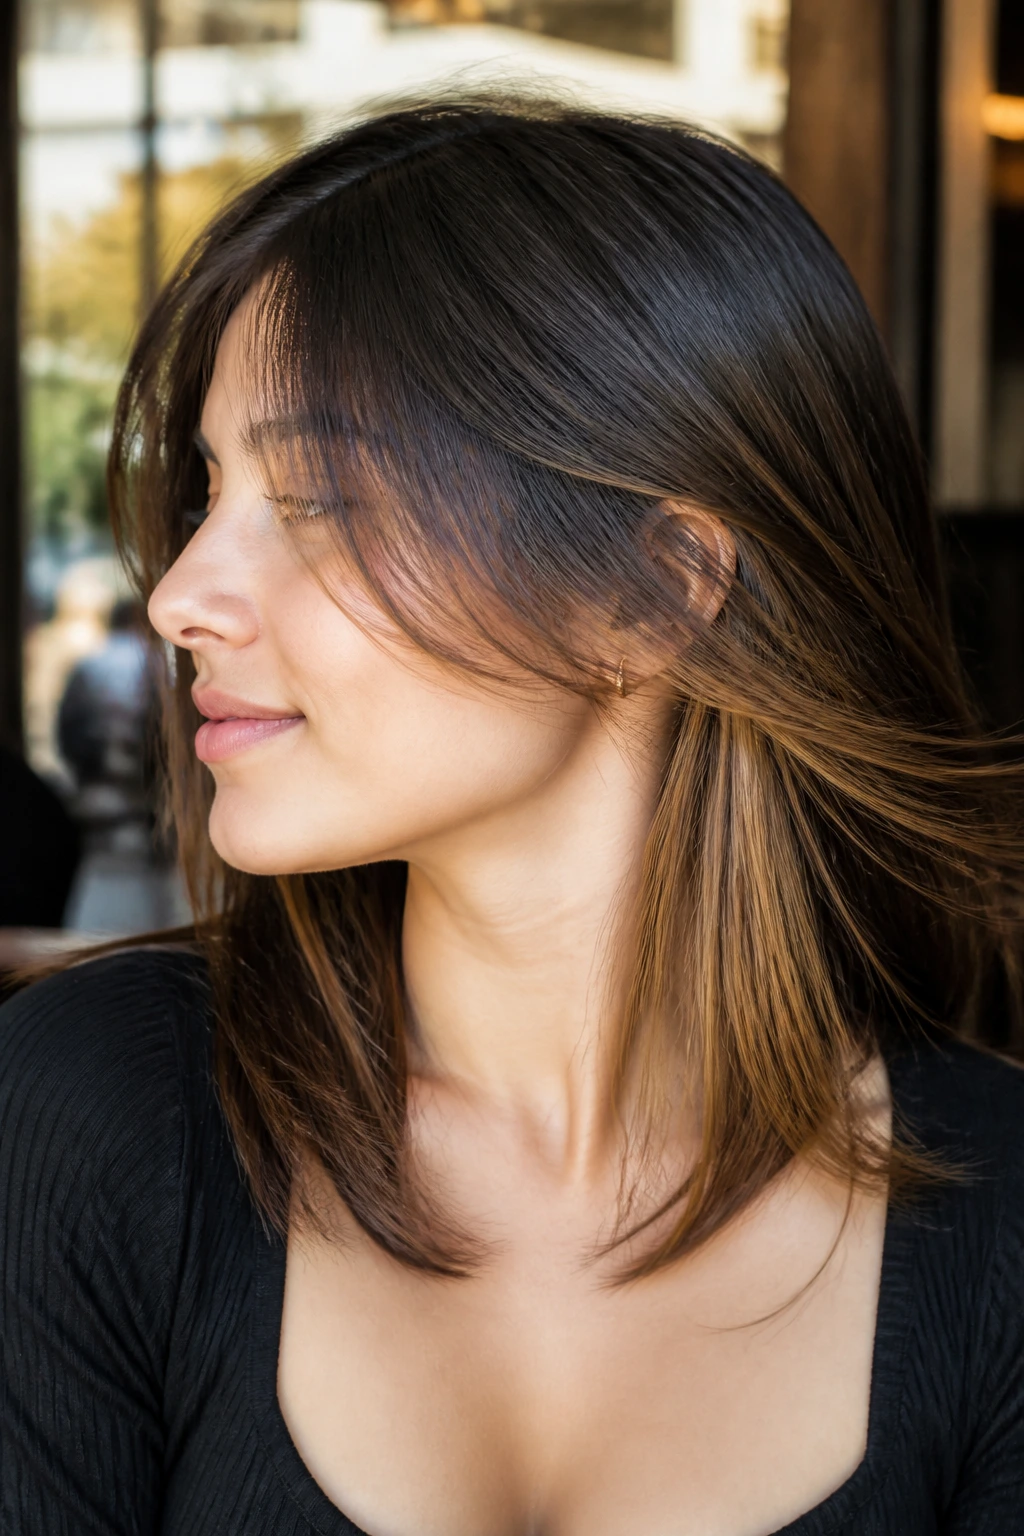
18. Deep Side-Part Layers With a Highlight Sweep
A deep side part can change straight hair faster than almost anything else. It creates instant lift on one side and gives layers a chance to fall in a more dramatic line. Caramel highlights swept across the heavier side of the part catch light in a way that makes the whole cut feel fuller.
This is a good choice if your face looks best with asymmetry. The side part adds movement before the hair even leaves your head. The layers only help from there.
The highlight sweep should be placed where the hair naturally curves across the forehead and cheekbone. That keeps the color from looking random. It follows the shape you already have. Simple. Better that way.
19. Tapered Ends That Keep Straight Hair From Looking Boxy
Straight hair can go boxy fast when the ends are too blunt and the layers stop in the wrong place. Tapered ends fix that. They narrow the bottom edge just enough to keep the haircut from feeling heavy, while the mid-lengths stay strong enough to hold volume. Caramel highlights help because they soften the visual block at the bottom.
A tapered cut is especially useful if your hair is thick or naturally dense. It keeps the silhouette neat without making the perimeter look puffy. Ask for light tapering rather than aggressive thinning. You want shape, not wisps.
The color should follow the taper too. If the caramel is brightest at the ends, the taper feels more pronounced. If the highlights sit mostly in the middle, the haircut looks denser. Both can work.
20. Peekaboo Caramel Underlights
Peekaboo underlights are for the person who wants dimension but doesn’t want color shouting from the roof. The caramel sits under the top layer, so it shows when the hair moves, when it’s tucked behind the ear, or when a breeze lifts the ends. On straight hair, that hidden contrast can be more interesting than obvious highlights.
The cut itself should be layered enough to let the underlights peek through without exposing too much scalp. That balance is what gives the style its depth. If the top layer is too thick, the color disappears. Too thin, and the underlight effect loses the surprise.
This is a smart option if you like to wear your hair sleek at work but a little more playful outside it. Same cut. Different read.
21. Blunt Ends With Hidden Volume Layers
Blunt ends and hidden layers sound like a contradiction, but on straight hair they make a lot of sense together. The bottom line stays thick and clean, while internal layers create lift underneath. Caramel highlights placed through the hidden layers can make the movement look even more layered when the hair is blown out.
What makes it different
You get the illusion of density at the edge and motion inside. That’s useful for people who don’t want the ends to look ragged. The blunt line acts like a frame, and the layered interior does the work.
The caramel should stay tucked into the interior and around the face. That keeps the ends looking polished while the body of the hair reads as dimensional. It’s a neat little sleight of hand.
Best for
Anyone who likes straight hair to look expensive, tidy, and not overworked. Also good if you hate seeing too many short pieces around your face.
22. Airy Layers Finished With Texture Spray
Airy layers are what you ask for when you want movement that doesn’t feel formal. The layers are long and light, usually with soft point-cut ends that let the hair separate a little. Caramel highlights help because the texture spray catches on the different tones and makes the shape look lived-in, not stiff.
This style is easy to like and hard to overstyle. That’s the appeal. Blow-dry the roots, mist a light texture spray through the mid-lengths, and rake it through with your fingers. Too much product will make straight hair collapse, so keep it light.
The caramel should be broken into fine pieces rather than large blocks. Airy layers need the color to look scattered and soft, like threads of light. Heavy highlight panels can make them look patchy.
23. Debulking Layers for Thick Straight Hair
Thick straight hair can carry more layers than fine hair, but it still needs planning. Debulking layers remove weight from the inside so the hair doesn’t feel like a blunt block sitting on the shoulders. Caramel highlights can be used to break up the density visually, especially when the hair has a lot of natural shine.
This cut works best when the stylist keeps the surface clean and does the heavier shaping underneath. If the top is thinned too much, thick straight hair can puff in the wrong places. You want a controlled release of weight, not a frizz halo.
The highlights should be placed where the bulk is strongest—usually around the back and mid-lengths. That way the color and the cut both help the hair feel lighter.
24. Lift Layers for Fine Straight Hair
Fine straight hair needs a different kind of volume layer. Not more. Smarter. Lift layers are shorter, softer internal pieces that support the crown and the upper sides without making the ends look empty. Caramel highlights should stay delicate and a little brighter, because lighter tones reflect more light and can make the hair appear fuller.
This cut is all about protecting the perimeter. Keep the bottom line dense so the hair doesn’t look wispy. Let the lift happen inside the shape where it won’t be obvious unless the hair moves.
A fine-haired client should be careful with chunky highlights. Fine strands can look stringy if the color is too separated. Smaller caramel ribbons are usually better.
25. Growth-Friendly Layers With Seamless Caramel Blend
Not every haircut needs to look dramatic on day one. Growth-friendly layers are cut so they still make sense a few weeks later, which is nice if you’re not living in a salon chair. The caramel highlights are blended through the layers instead of sitting in obvious stripes, so the color softens as the cut grows out.
That blend matters more than people think. Straight hair shows regrowth faster than wavy hair because the surface is so smooth. A seamless transition between root, caramel, and lighter ends keeps the style from looking dated between appointments.
This is the most forgiving option in the group. It gives movement, brightness, and a clean shape without demanding constant maintenance. That’s a pleasant way to wear straight hair.
Why Straight Hair Needs Layer Placement More Than Raw Length
Straight hair does not hide bad geometry. If the layers sit too high, the hair can look thin at the ends. If they sit too low, the cut barely moves at all. That’s why placement matters more than the total number of inches you keep.
The best cuts for straight hair treat the crown, cheekbones, and ends as separate jobs. The crown needs lift. The mid-lengths need direction. The ends need enough density to avoid a see-through finish. Caramel highlights help because they draw the eye to the best parts of the cut instead of the flat parts.
What I like most about this kind of haircut is that it rewards small adjustments. Moving the first layer up half an inch changes the whole silhouette. Shifting the caramel ribbon one section wider can make a face frame look cleaner. Tiny things. Big difference.
Essential Tools for Styling Volume Layers
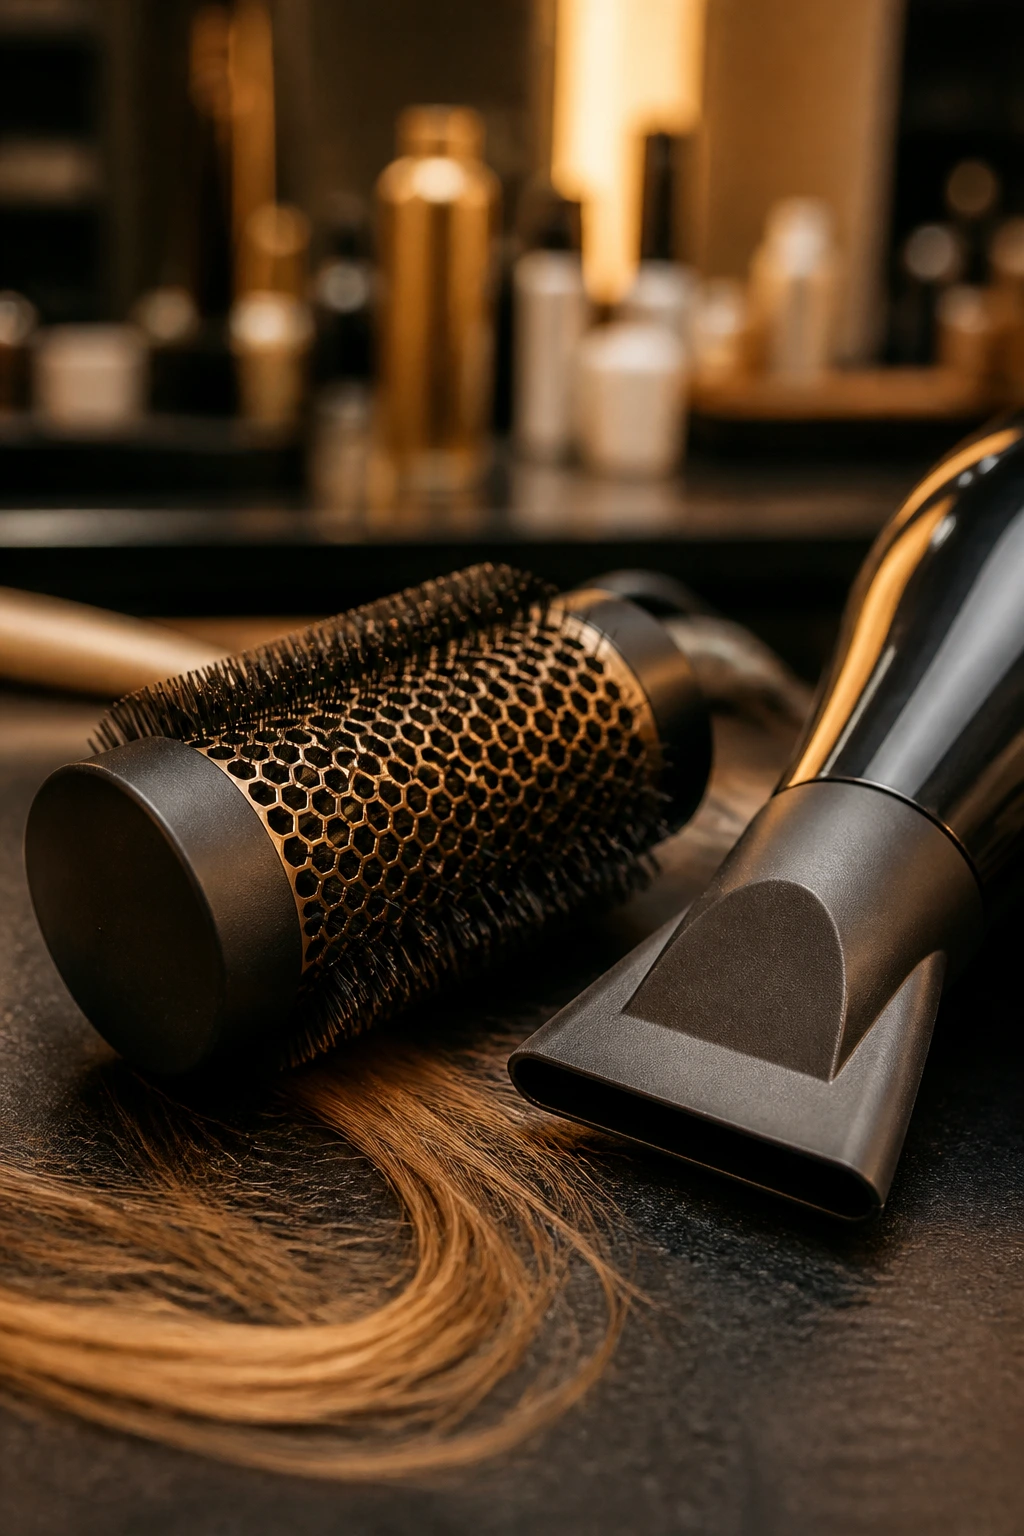
- Blow dryer with a concentrator nozzle: Directs airflow so the layers don’t get blasted around and flattened.
- 1.25-inch to 2-inch round brush: Smaller brushes create more bend near the face; larger ones give a smoother finish through long layers.
- Heat protectant spray: Straight hair shows heat damage fast, especially around highlighted sections.
- Sectioning clips: Help you dry the crown, sides, and back in clean parts instead of lumping everything together.
- Tail comb: Useful for lifting the root area and making a crisp part before blow-drying.
- Volumizing mousse or root lift spray: Keeps the crown from collapsing under its own weight.
- Dry texture spray: Best for airy layers and feathered styles; use it sparingly so the hair doesn’t feel dusty.
- Flat iron or large curling iron, optional: Handy if you want a subtle bend through the ends or a smooth bevel around the face.
How to Ask for the Right Cut and Caramel Tone at the Salon
Tell your stylist that you want movement without losing density. Those four words do a lot of work. They signal that you want volume layers, but you don’t want the ends shredded or the silhouette made too wispy. Straight hair needs that kind of clarity because every line shows.
Bring photos that match your density, not just your color. A thick, wavy reference photo can fool you into thinking you want more layers than you actually do. If your hair is fine and pin-straight, ask for internal layering and a blunt or slightly tapered edge. If your hair is dense, ask where the bulk should come out and where it should stay.
For the caramel, ask for dimension, not uniform brightness. That usually means a mix of fine ribbons, a softer face frame, and a few slightly deeper pieces underneath. If you want warmth, ask for caramel that leans golden or toasted. If you want less brassiness, ask for a cooler beige-caramel with a toned finish.
One more thing. Say whether you wear your hair mostly sleek, blown out, or air-dried. The cut should fit your real routine, not the version of yourself who uses every hot tool in the drawer.
How to Style the Shape Without Losing the Lift
Straight hair loses volume fastest when people dry it in the wrong direction. Start at the roots. Dry the crown first, lifting sections away from the scalp with the nozzle pointed upward and away from the head. That keeps the base from collapsing before the lengths are even dry.
Use a round brush only where you want bend. You do not need to curl the whole head. A slight turn under at the ends and a soft lift at the face frame is enough for most of these looks. Overstyling makes straight layers lose their clean edge, and that edge is part of the point.
If your hair is very sleek, a little mousse at the roots before drying can help. If it’s fine, keep the product light and focus on the top third of the head. Thick hair usually likes a bit more tension on the brush and a slower dry. That gives the layers time to set into shape instead of falling flat the second they cool.
A cool shot at the end matters more than people admit. Hair that’s still warm keeps shifting. Hair that’s fully cooled holds the bend. Small detail. Big payoff.
Additional Tips and Shine Boosters
Root Lift: Blow-dry the crown in the opposite direction of your natural part for the first few minutes, then switch back. That tiny reset gives straight hair a visible bump at the roots without needing a ton of product.
Color Placement: Ask for caramel to sit around the face frame, mid-lengths, and the top layer of the back, not only the very bottom. That way the color shows when the hair moves, not just when it hangs still.
Texture Control: Use dry texture spray only on the roots and mid-lengths if your hair is fine. On thick hair, you can mist a little more through the layers, but stop before it feels gritty. The wrong amount makes straight hair look dirty fast.
Gloss Move: A clear or warm-toned gloss between highlight appointments keeps caramel looking soft instead of orange. It also helps the layers read cleaner because shine exaggerates the separation between pieces.
Make It Yours: If you wear a middle part, keep the front layers symmetrical. If you prefer a side part, let the highlight sweep follow the heavier side so the cut doesn’t fight your styling habit.
Common Mistakes to Avoid
Too many short layers near the ends: Straight hair can turn see-through if the bottom half gets over-layered. The fix is simple: keep the perimeter stronger and move the weight out from the inside instead.
Caramel that is too bright for the base color: If the highlights jump too far from your natural shade, they can look striped instead of blended. A more gradual lift usually reads richer and ages better as the hair grows.
No crown support: People often ask for face-framing layers and forget the top of the head. The symptom is hair that looks fine for an hour and flat by lunch. Ask for crown lift or internal layering near the root zone.
Styling only the ends: If you bend the last inch of hair but ignore the roots, the style still falls limp. Dry the scalp area first, then shape the lengths.
Over-thinning thick hair: Thinning shears can save some volume, but too much makes thick straight hair frizzy and shapeless. Remove weight in controlled sections, not all over.
Ignoring maintenance between glosses: Caramel can turn dull or brassy if it’s left alone too long. A color-safe shampoo and a weekly glossing mask help keep the warmth smooth and even.
Variations and Adaptations to Try
Butterfly Brightness: Keep the long back layers, but make the front pieces a little shorter and a little brighter. This version works when you want a more dramatic face frame without committing to a full shag.
Blunt Luxe Blend: Leave the ends blunt and keep the layers hidden underneath. It’s a good choice if you like straight hair to look dense at the bottom but still want movement inside the shape.
Soft Shag Caramel: Add more texture through the crown and a little more contrast in the highlights. This version suits people who want something messier and less polished, especially with a middle or slightly off-center part.
Fine-Hair Lift Cut: Reduce the number of visible layers and keep the caramel ribbons narrow. This adaptation keeps fine straight hair from looking broken up while still giving the crown and sides a lift.
Thick-Hair Air Cut: Use stronger internal debulking and a few deeper caramel lowlights underneath. Thick straight hair benefits from the extra weight removal, and the darker pieces keep the color from feeling too bright on a dense base.
Warm-to-Cool Caramel Shift: If gold caramel feels too sunny, ask for a beige or toasted caramel finish. The haircut stays the same, but the color reads cleaner against cooler skin tones and ashier wardrobes.
Keeping the Cut and Color Fresh Between Appointments
Straight hair tells on you as it grows. That’s not a flaw. It’s just honest. The good news is that volume layers usually hold their shape better than people expect if you treat them with a little care.
A trim every six to ten weeks keeps the ends from turning thin or uneven, especially if you wear the hair sleek. If the layers are long and soft, you can usually stretch that a bit longer. Shorter front pieces and curtain bangs need more attention because they show growth first.
For color, a gloss or toner refresh helps the caramel stay warm and reflective. In between, use a sulfate-free shampoo if your hair lightens easily or a color-safe shampoo if you’re trying to keep the tone from fading too fast. Wash only as often as your scalp needs. Straight hair can get oily at the roots, but overwashing strips the shine that makes caramel look rich.
Dry shampoo helps, though I’d keep it at the roots only. Spraying it through the layers can cloud the highlight pattern and make the cut look dusty. Not the look.
Frequently Asked Questions
Can straight hair really look full with layers?
Yes, if the layers are placed with some discipline. Straight hair needs lift at the crown and movement through the mid-lengths, not a bunch of random short pieces. That’s why these cuts focus on shape first and texture second.
Do caramel highlights work on dark brown straight hair?
They do, but the tone matters. Warm caramel, toasted brown, and soft amber usually look richer than pale blonde on a dark base. The goal is contrast that still looks like it belongs to the hair.
Should fine straight hair get lots of layers?
Not usually. Fine hair looks fuller when the perimeter stays dense and the layers are more internal. Too many visible layers can make the ends look see-through fast.
What’s the best parting for volume layers?
A soft side part gives the fastest lift, but a center part can work if the crown is cut well. The real issue is root support, not the part itself. If the roots are flat, any part will fall flat eventually.
How do I keep my caramel highlights from turning brassy?
Use color-safe shampoo, avoid very hot water, and ask for a gloss or toner when the warmth starts to drift orange. Sun, hard water, and too much heat can shift caramel faster than people expect.
Can I style these layers without a round brush?
Yes, though the finish changes. A flat brush or even a paddle brush can give you a smoother, straighter result with less bend. If you want the lifted look around the face, a round brush still does the best job.
Do these layers work on thick straight hair?
Absolutely, but thick hair usually needs controlled debulking rather than delicate internal layering alone. If the stylist leaves too much weight at the bottom, the hair can hang like one heavy sheet.
What if my hair falls flat one hour after styling?
The problem is usually at the roots, not the ends. Dry the crown first, add a touch of root lift product, and set the shape with a cool shot before you leave the bathroom. That tiny change often does more than another round of hairspray.
Lasting Lift
The strongest versions of these looks do the same thing well: they keep straight hair clean at the edges while sneaking in movement where the eye wants it. That’s the reason caramel highlights and volume layers play so nicely together. One gives shape. The other gives depth.
If you’re sitting in a salon chair trying to decide between “long and safe” and “short and dramatic,” this middle ground is worth a hard look. It gives you body without fluff, color without chaos, and enough structure that the hair still looks good when you’re not standing under bathroom lighting with a round brush in hand.
A good layered cut on straight hair should look better the second day, not worse. That’s the standard I’d use.