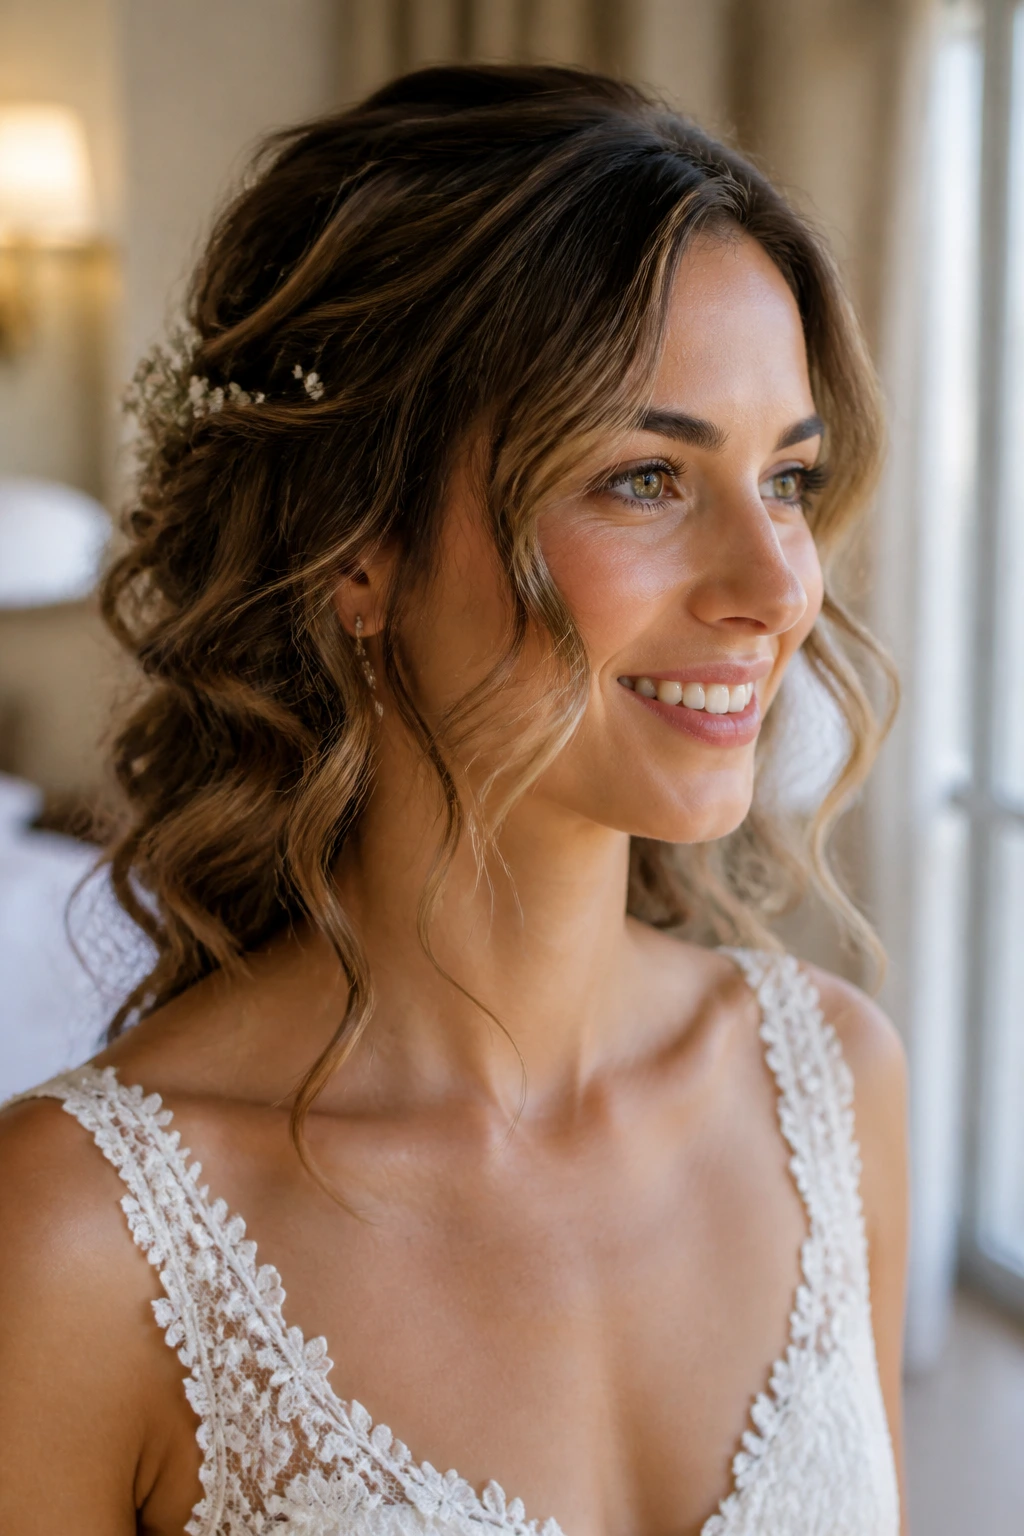
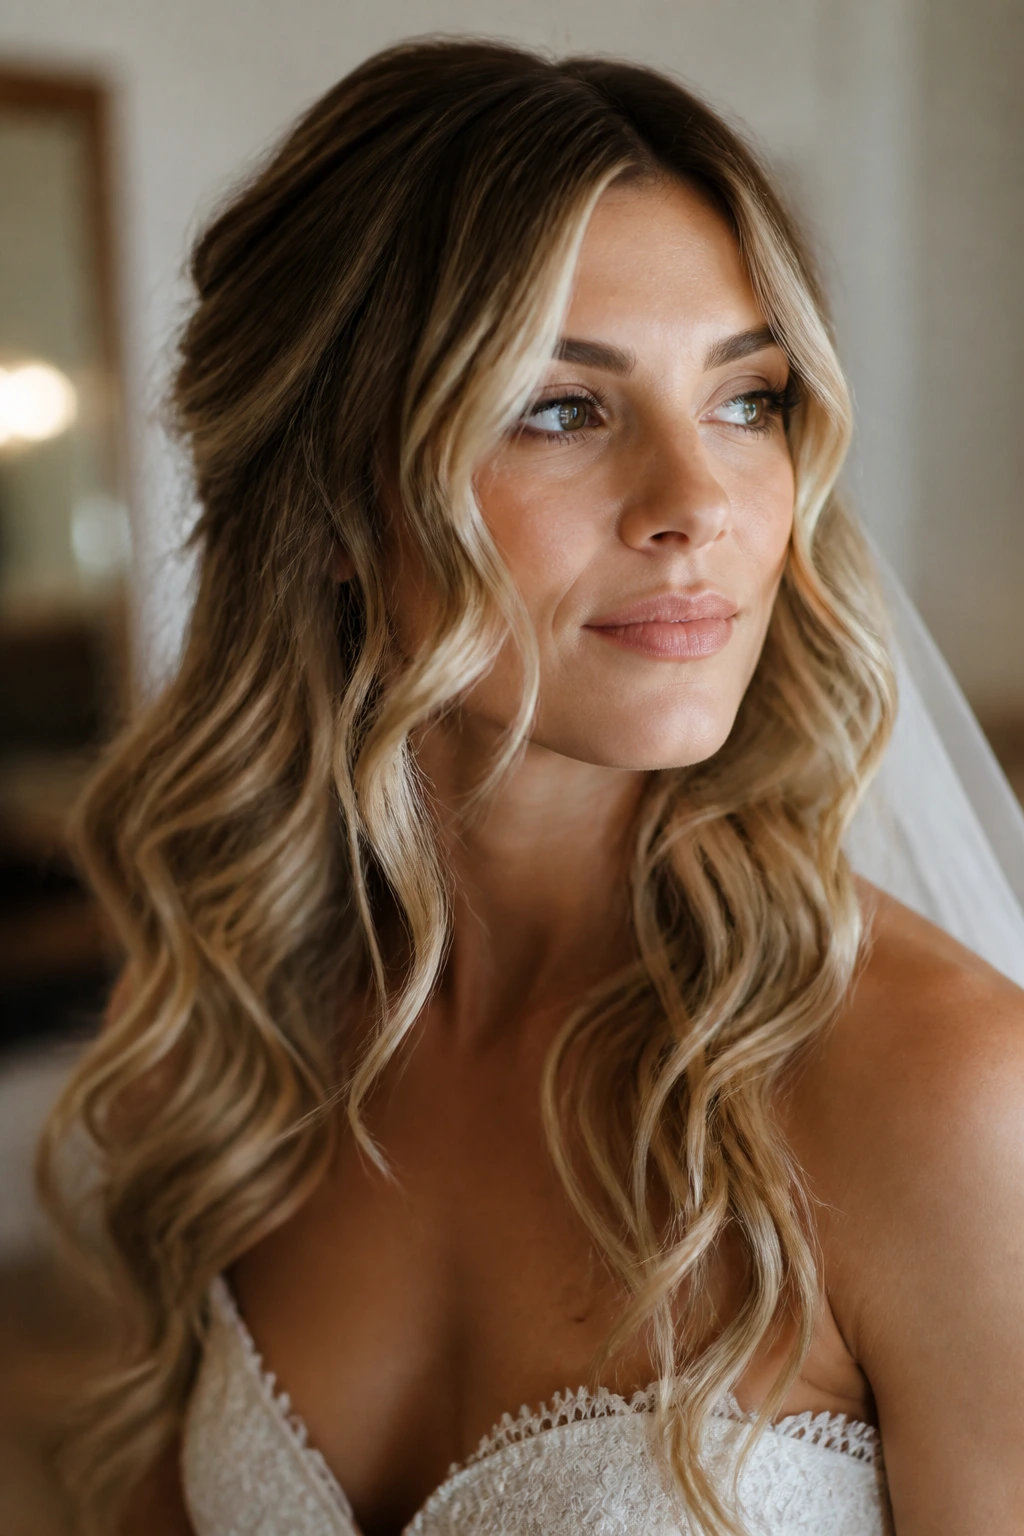
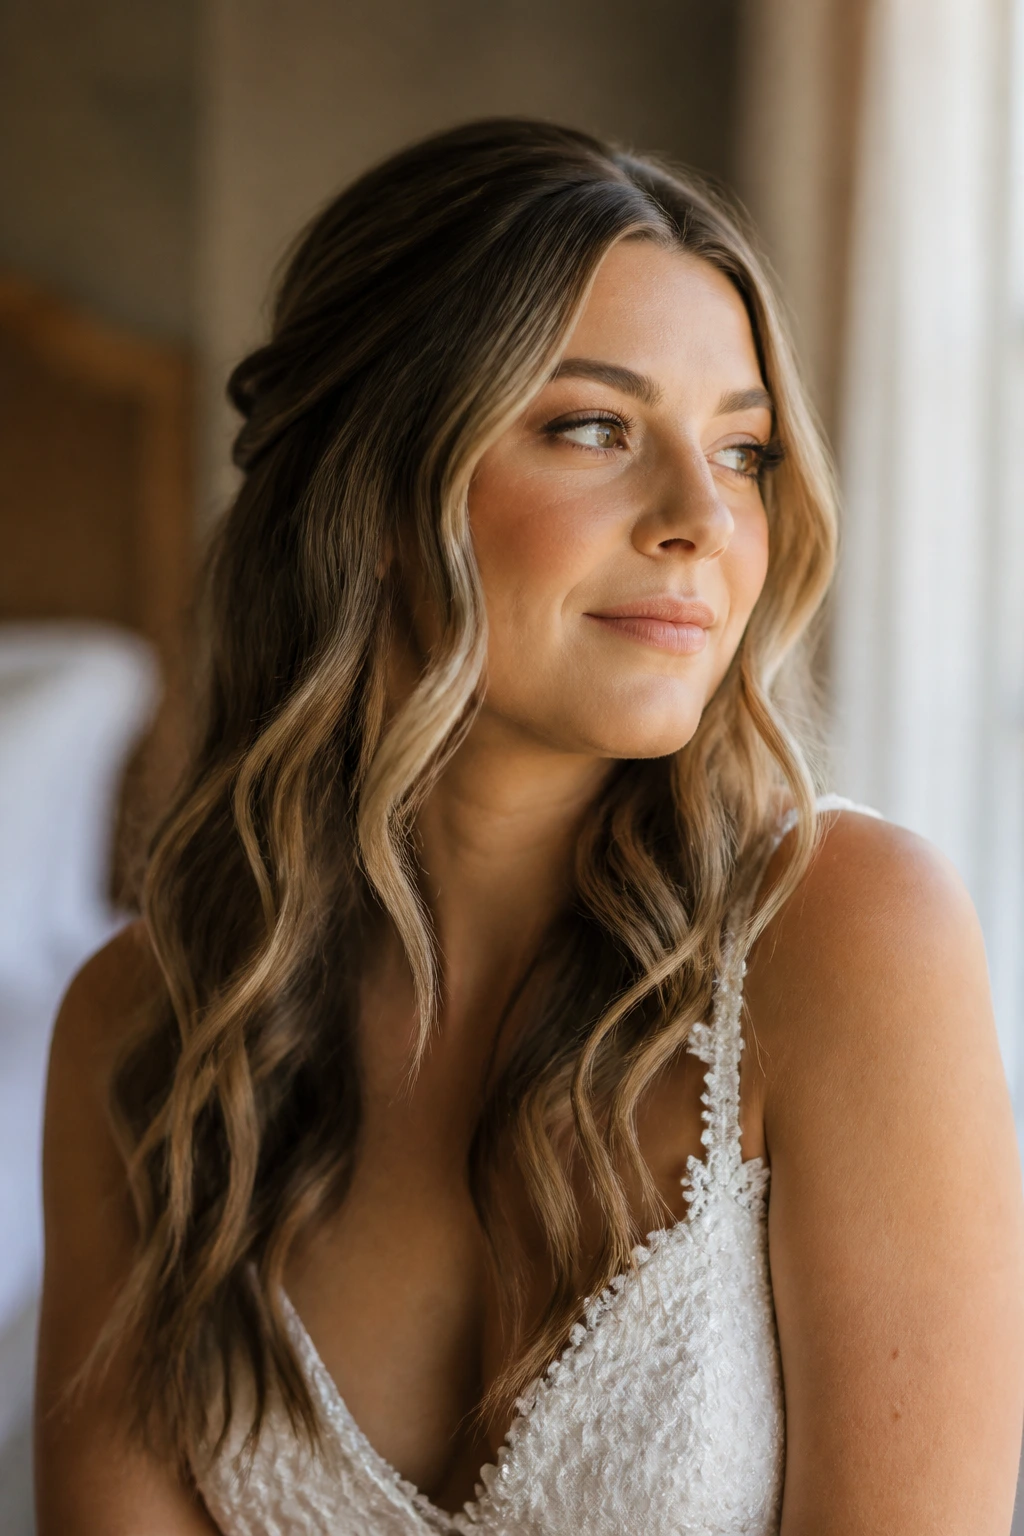
Wavy hair has a built-in softness that straight hair spends a lot of effort trying to fake. On a wedding day, that softness matters. It keeps a style from looking carved into place, and it gives even the simplest pin or twist a little movement when you turn your head. Romantic hairstyles for weddings with wavy hair work best when they respect that texture instead of sanding it down into something stiff and shiny and oddly lifeless.
That is the part people miss. A wavy pattern already does half the work. You do not need a helmet of curls or a shellacked updo to look polished in formal photos; you need shape, balance, and a few well-placed pins that let the hair fall in clean, soft lines. The right style will survive hugs, champagne, and an hour of flash photography without looking like it was built by committee.
And yes, humidity still has opinions. So do veil combs, fine hair, thick hair, layered cuts, and the way a neckline can either make a hairstyle feel intentional or make it look like an afterthought. The good news is that wavy hair gives you room. Plenty of it. The styles below work because they build around that bend and body, not against it, and the difference shows the moment the hair moves.
Why This Collection Feels Different for Wavy Hair
- It starts with texture, not control: These looks use the wave as the base shape, which means less fighting with frizz and less need for heavy product.
- There’s something here for every dress line: From bare shoulders to high lace necks, the styles cover loose, pinned, and half-up shapes that sit cleanly with formal clothing.
- Veils are part of the plan: A lot of wedding hair advice treats the veil like an afterthought; these styles leave room for comb placement, pin anchors, and a graceful reveal after the ceremony.
- The looks age well in photos: Soft bends and face-framing pieces tend to hold up better in candid shots than ultra-tight curls that puff out or flatten under heat.
- They work for more than one hair length: Shoulder-length waves, long layers, and dense mid-back hair all get a real role here, not a token mention.
- They can be dressed up or dialed back: Swap pearls for flowers, a comb for a ribbon, or a braid for a twist, and the whole mood changes without starting from scratch.
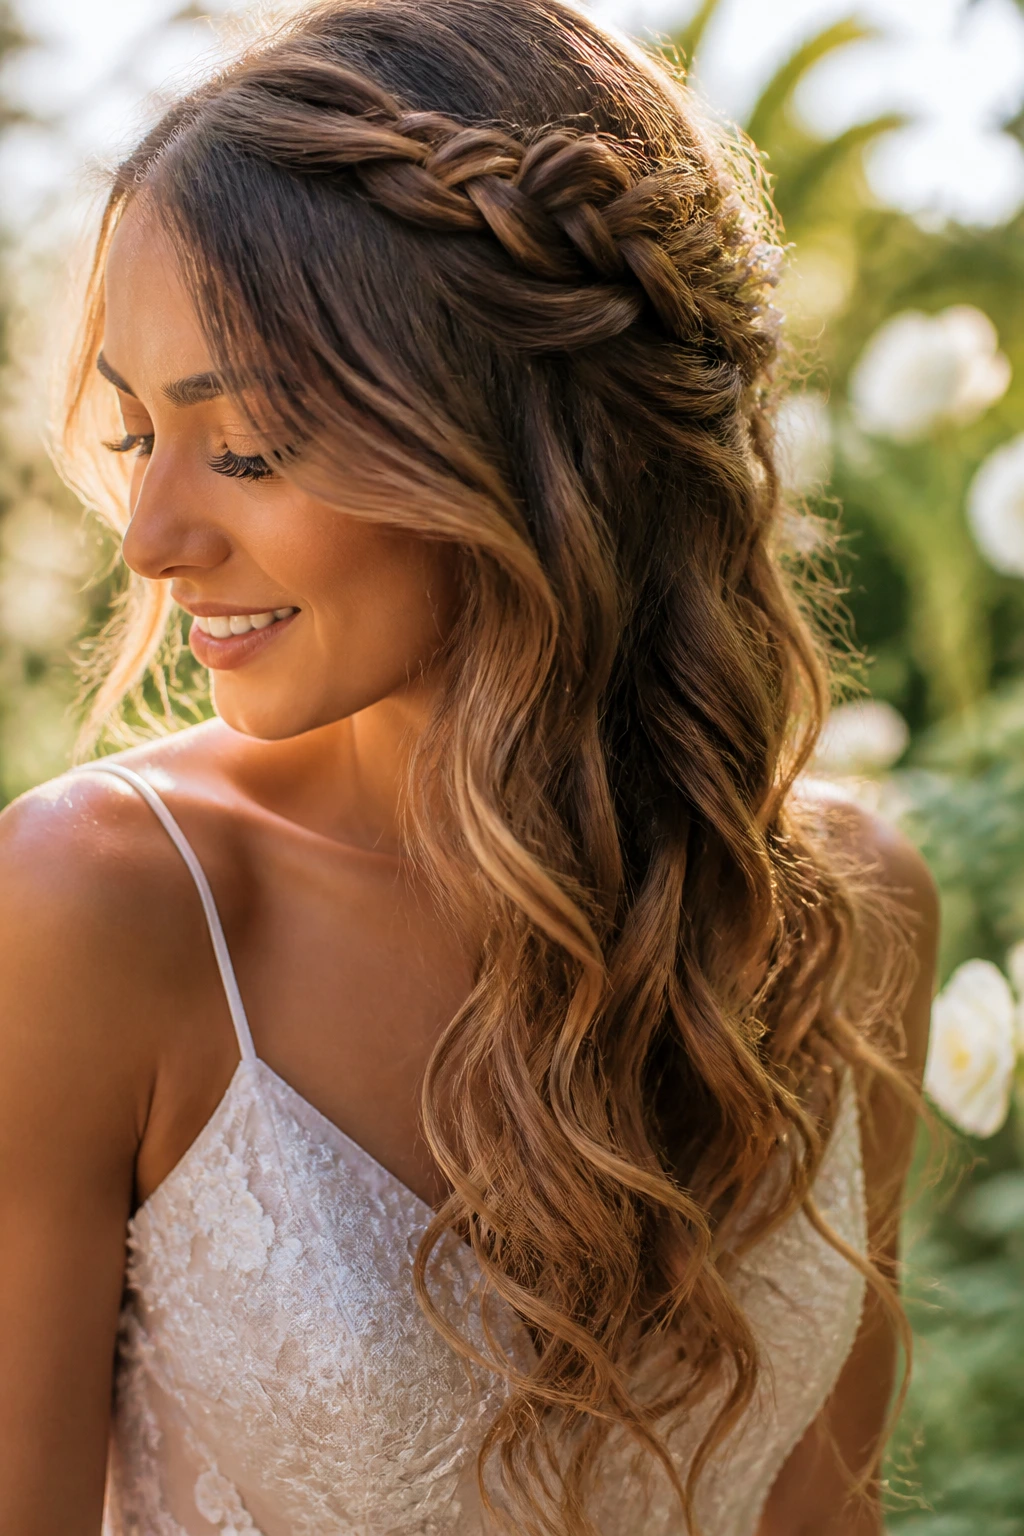
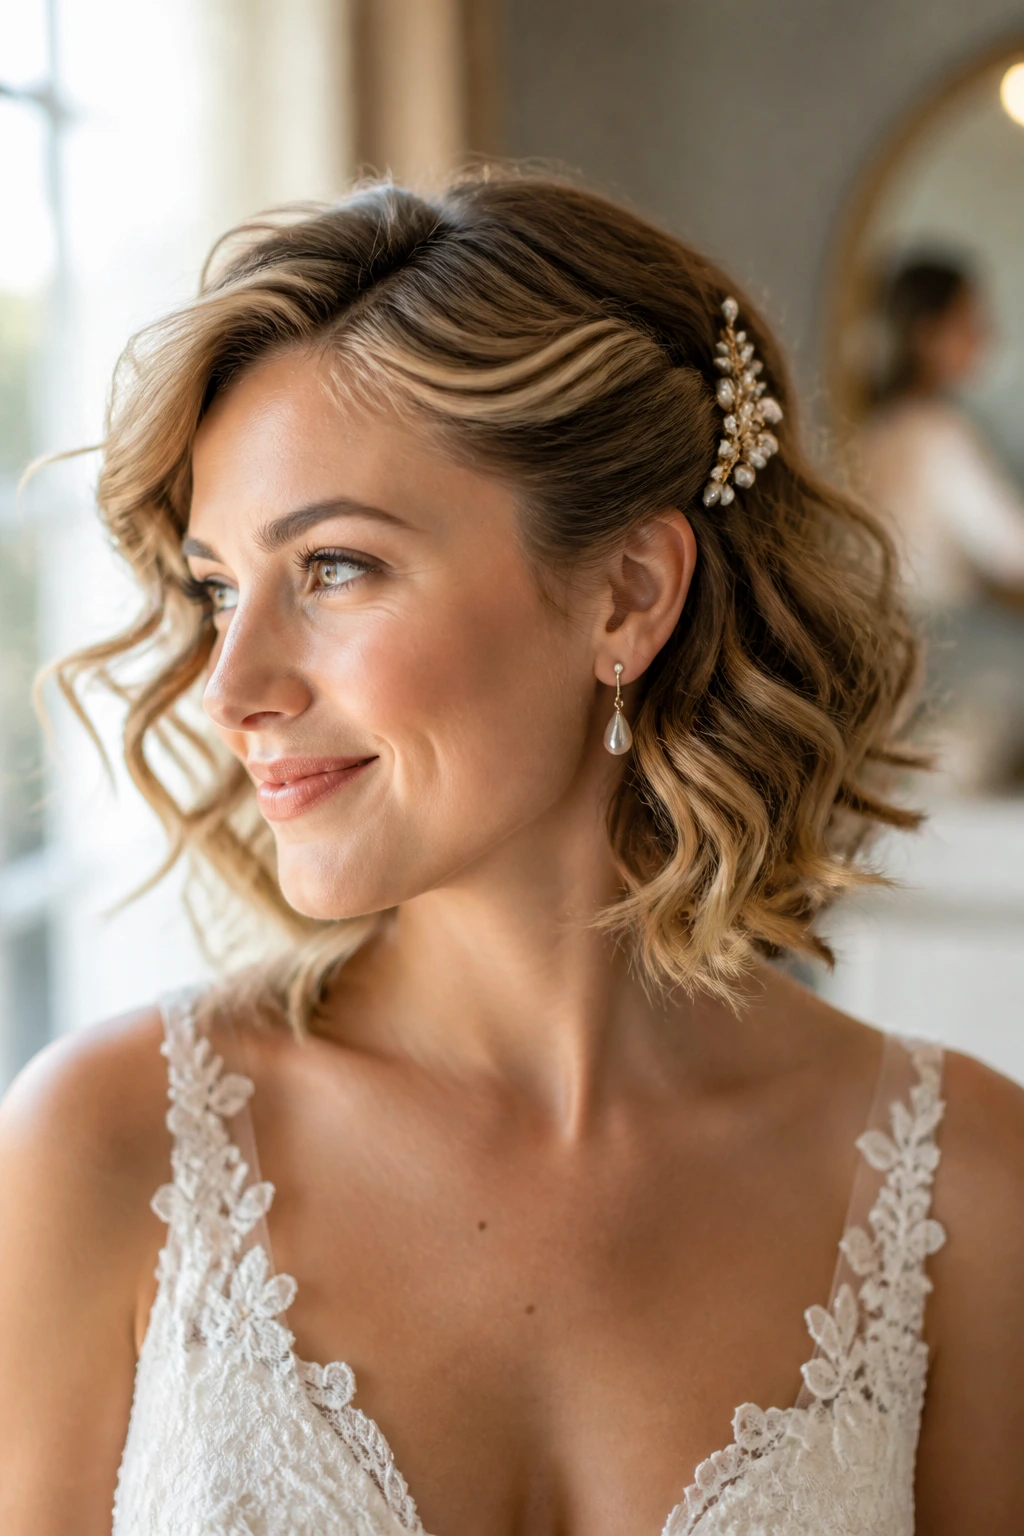
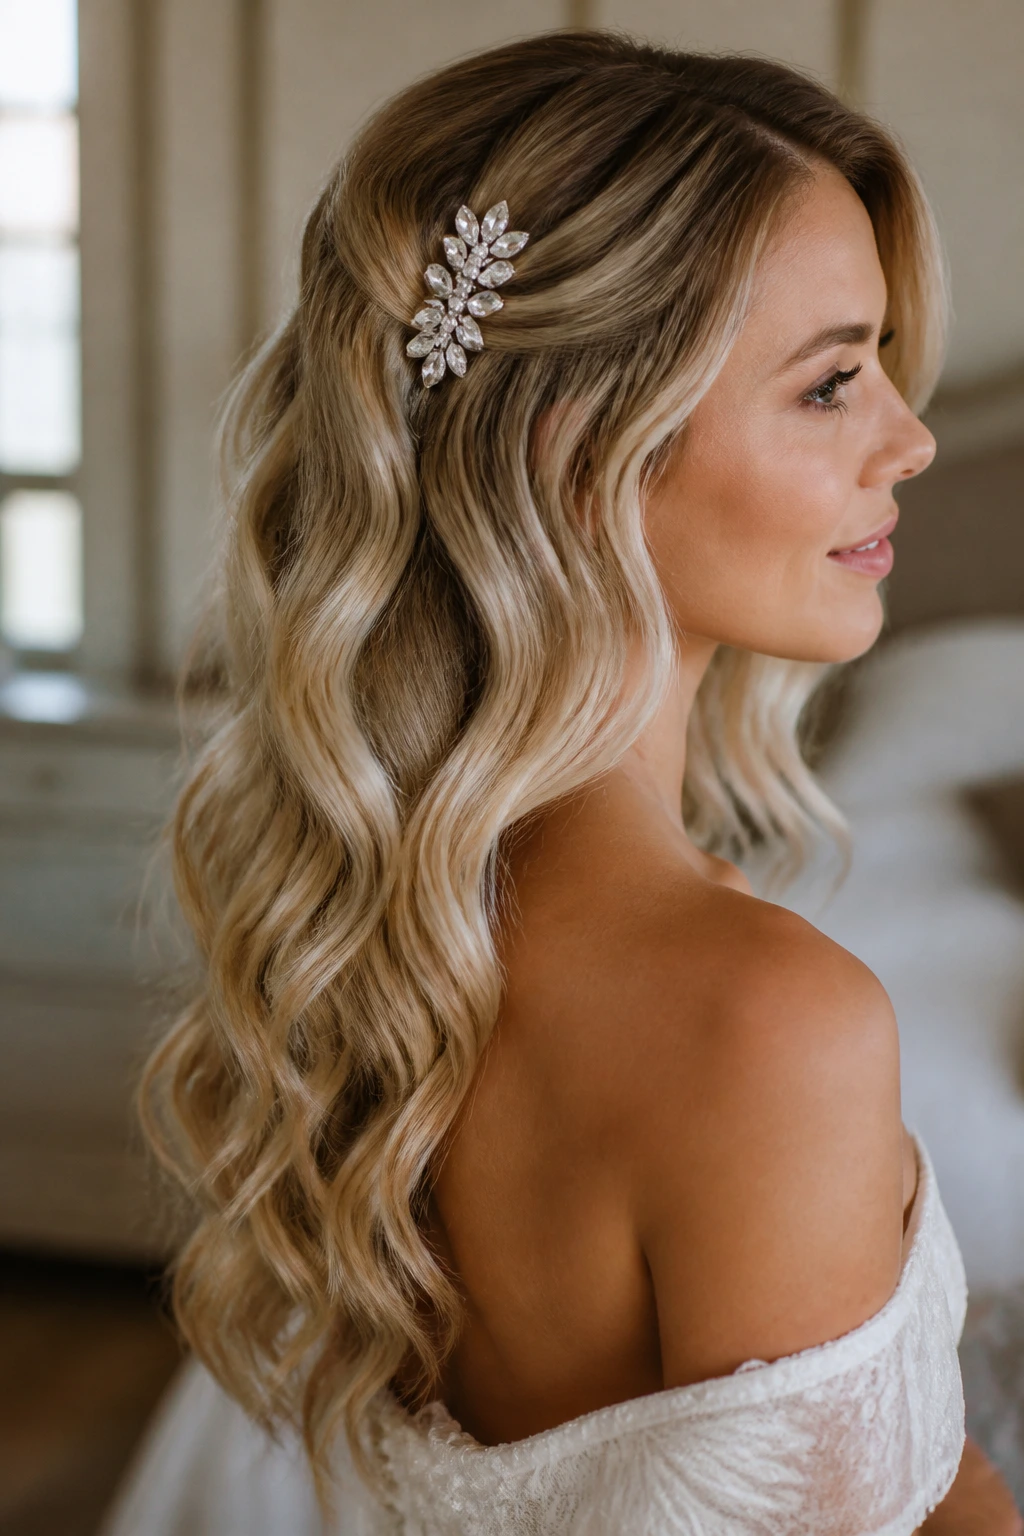
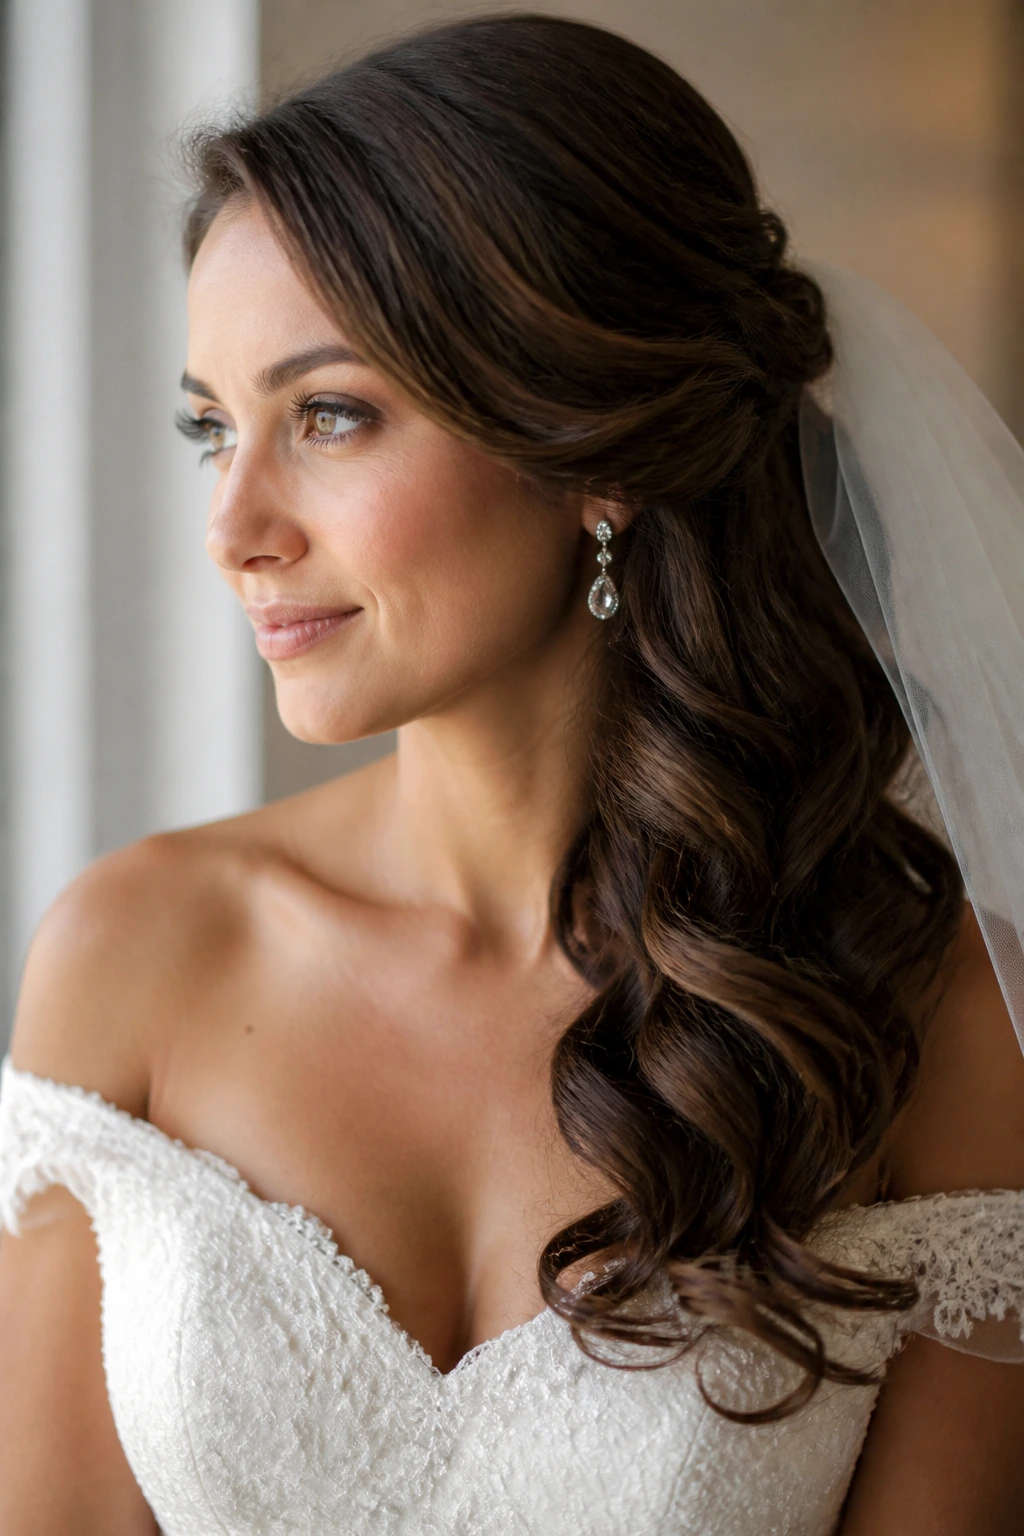
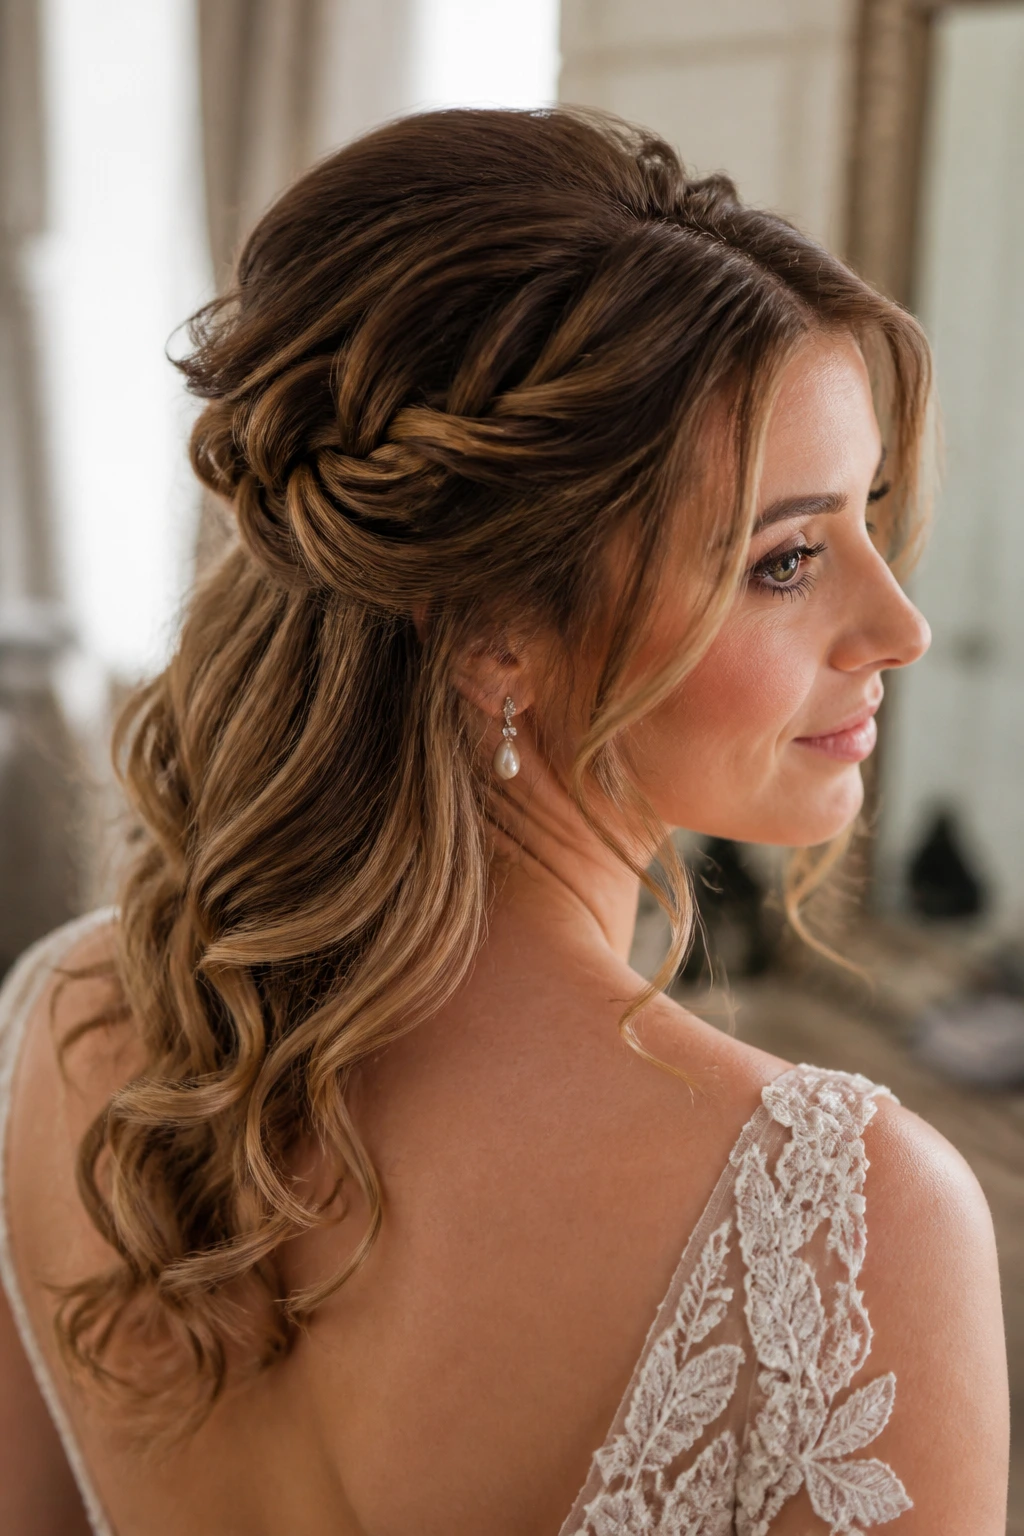
1. Soft Side-Swept Waves with a Deep Part
A deep side part does a lot of quiet work here. It gives the waves direction, opens one side of the face, and makes room for a statement earring without stealing the whole show. I like this look when the dress has an off-shoulder neckline or a clean satin bodice, because the hair adds motion while the outfit stays crisp.
Why it works: The asymmetry keeps wavy hair from settling into that too-equal, too-round shape that can look flat in photos. A 1-inch curling iron can refresh the front sections if the wave pattern is loose, but the trick is to brush the curls out once they cool so the bend reads soft instead of ringlet-tight. A little shine spray on the ends helps, but keep it off the roots or the part will start to look greasy by the reception.
Best for: Brides who want hair down without losing face shape. It also plays nicely with a single comb tucked behind the fuller side.
Watch for: Don’t over-smooth the crown. A tiny bit of lift at the part keeps the style from collapsing into the scalp.
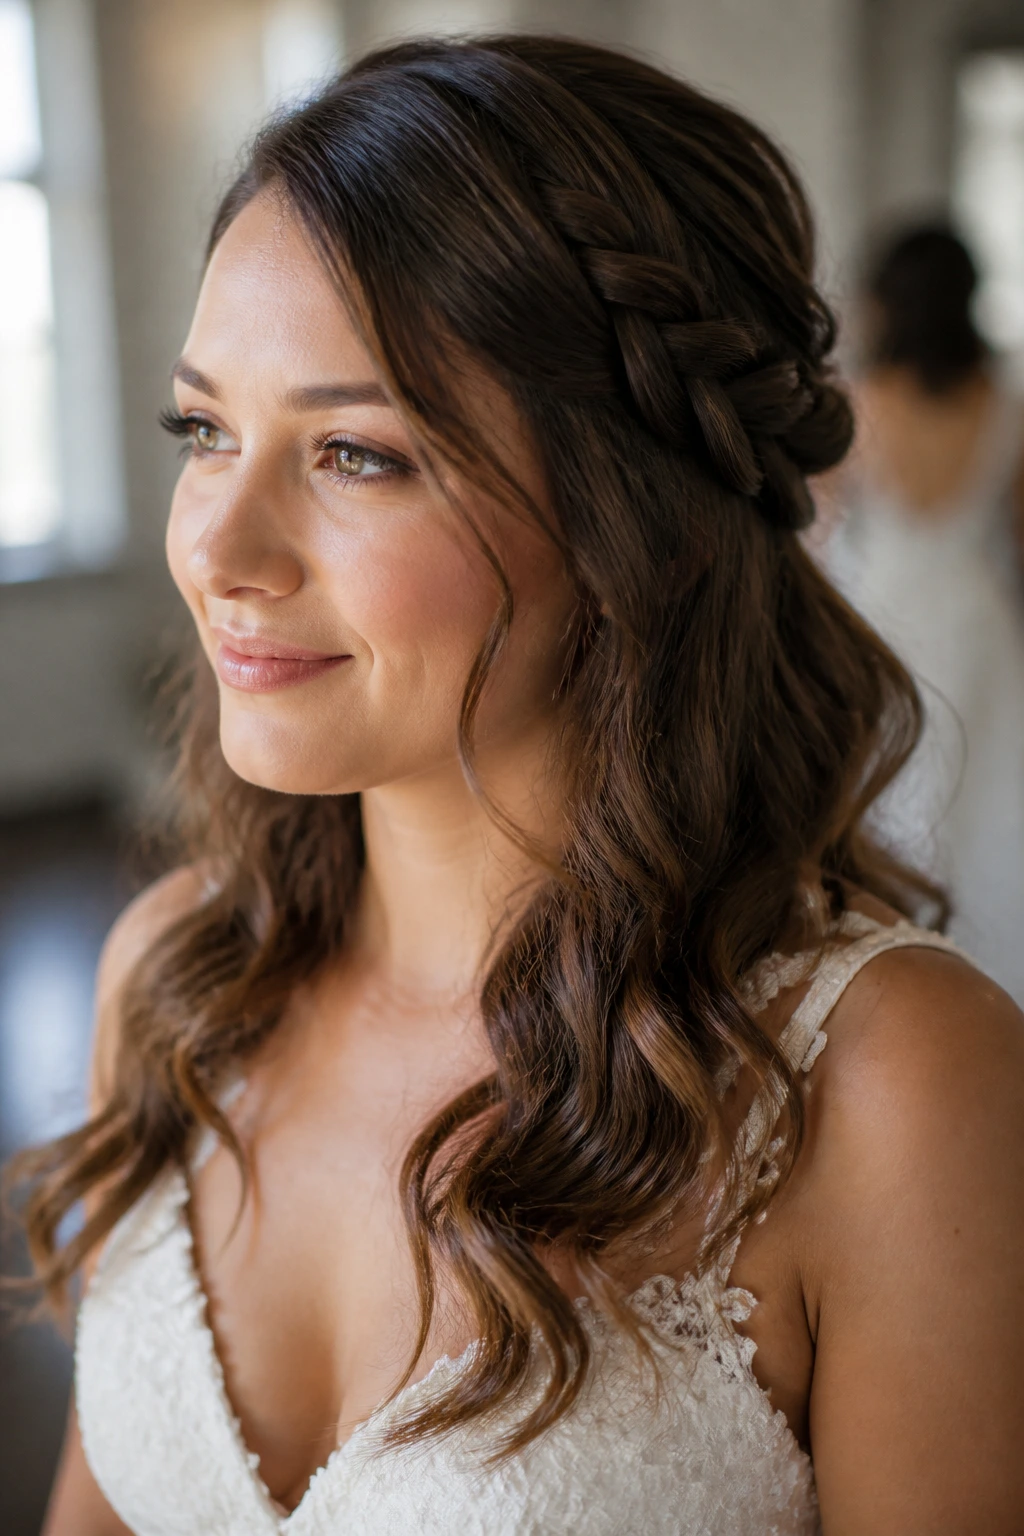
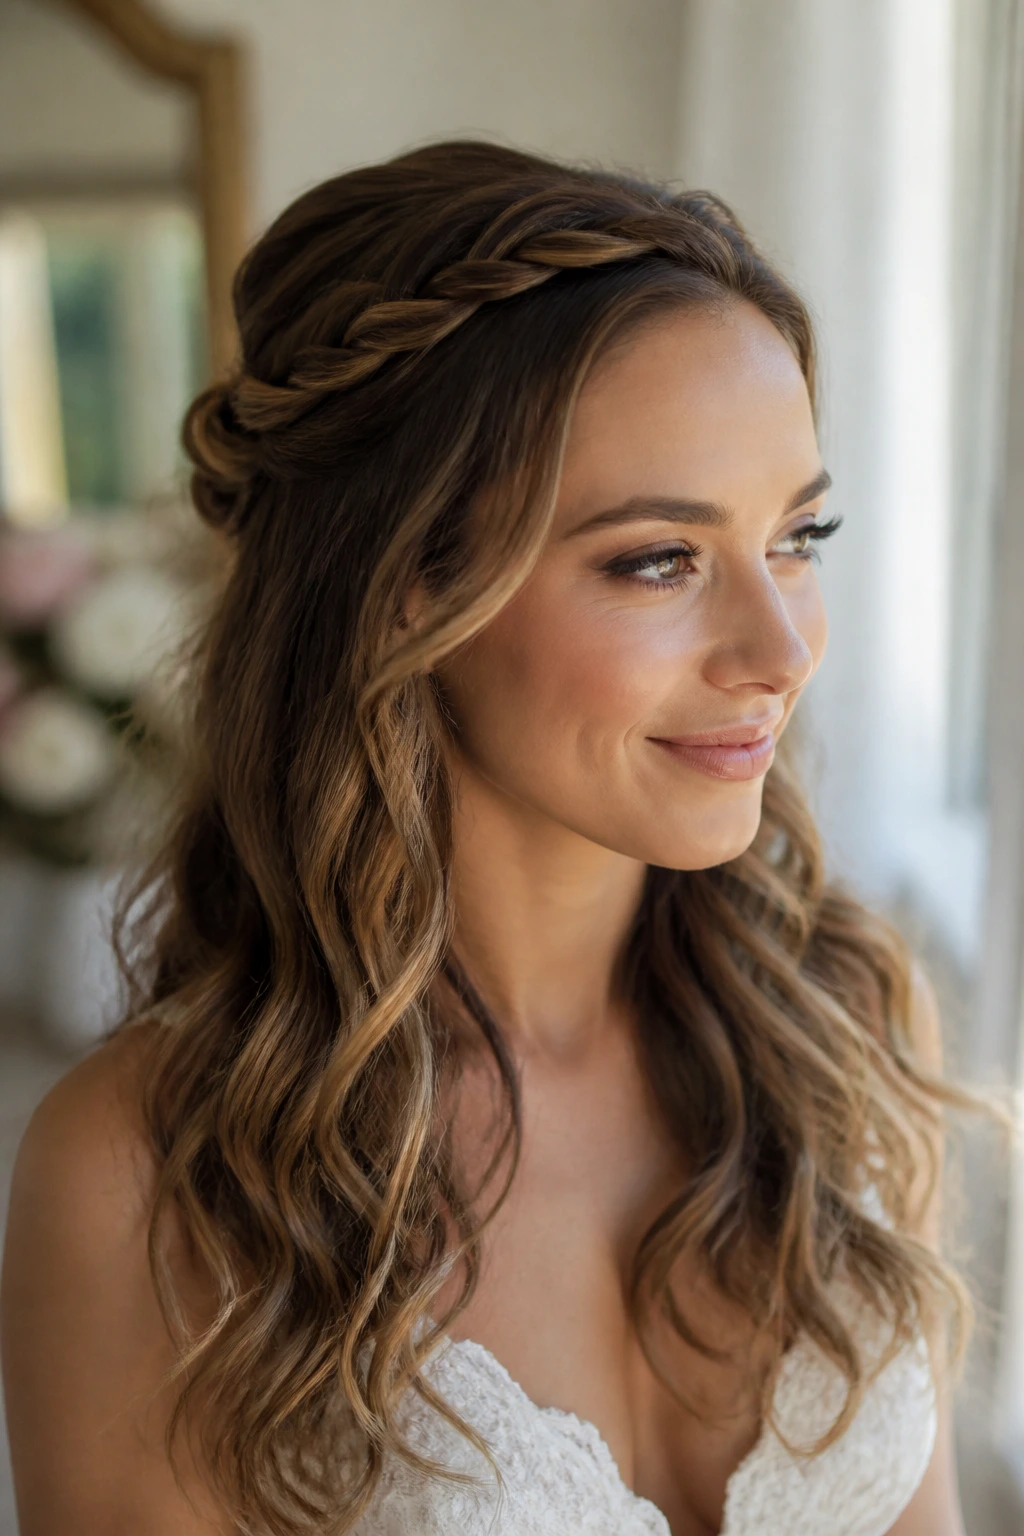
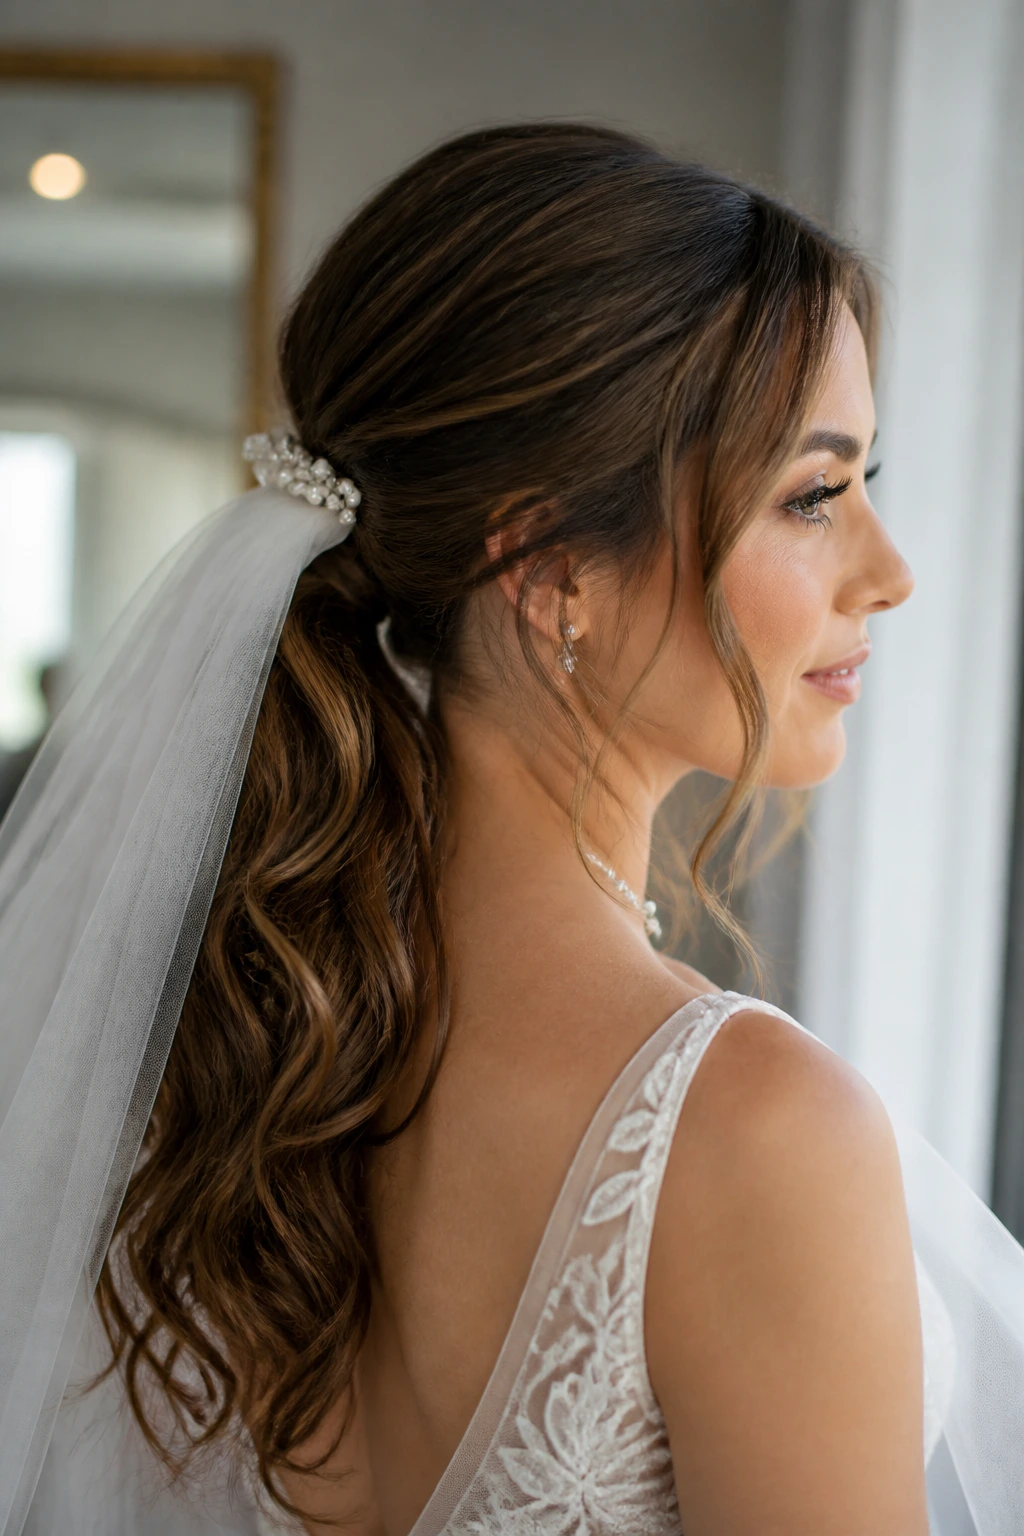
2. Half-Up Twist Crown with Loose Waves
What if you want your hair down, but you also want it out of your mouth while you’re laughing through vows? This is the answer. Two soft twists meet at the back of the head, and the rest falls in loose waves that still move when you walk.
Why it works: The half-up section creates a clean anchor point for a veil or a small floral pin, while the loose length keeps the style from feeling too formal. On wavy hair, the twists have a nice rope-like texture even when they are not perfectly symmetrical, which is part of the charm. If your waves are prone to drooping, mist the lower half with a flexible-hold spray before pinning the crown so the shape stays in place longer.
Best for: Garden ceremonies, outdoor receptions, and anyone wearing a dress with a softer neckline.
Small detail that matters: Twist the sections backward, not inward toward the face. It keeps the front lines open and the whole style less fussy.
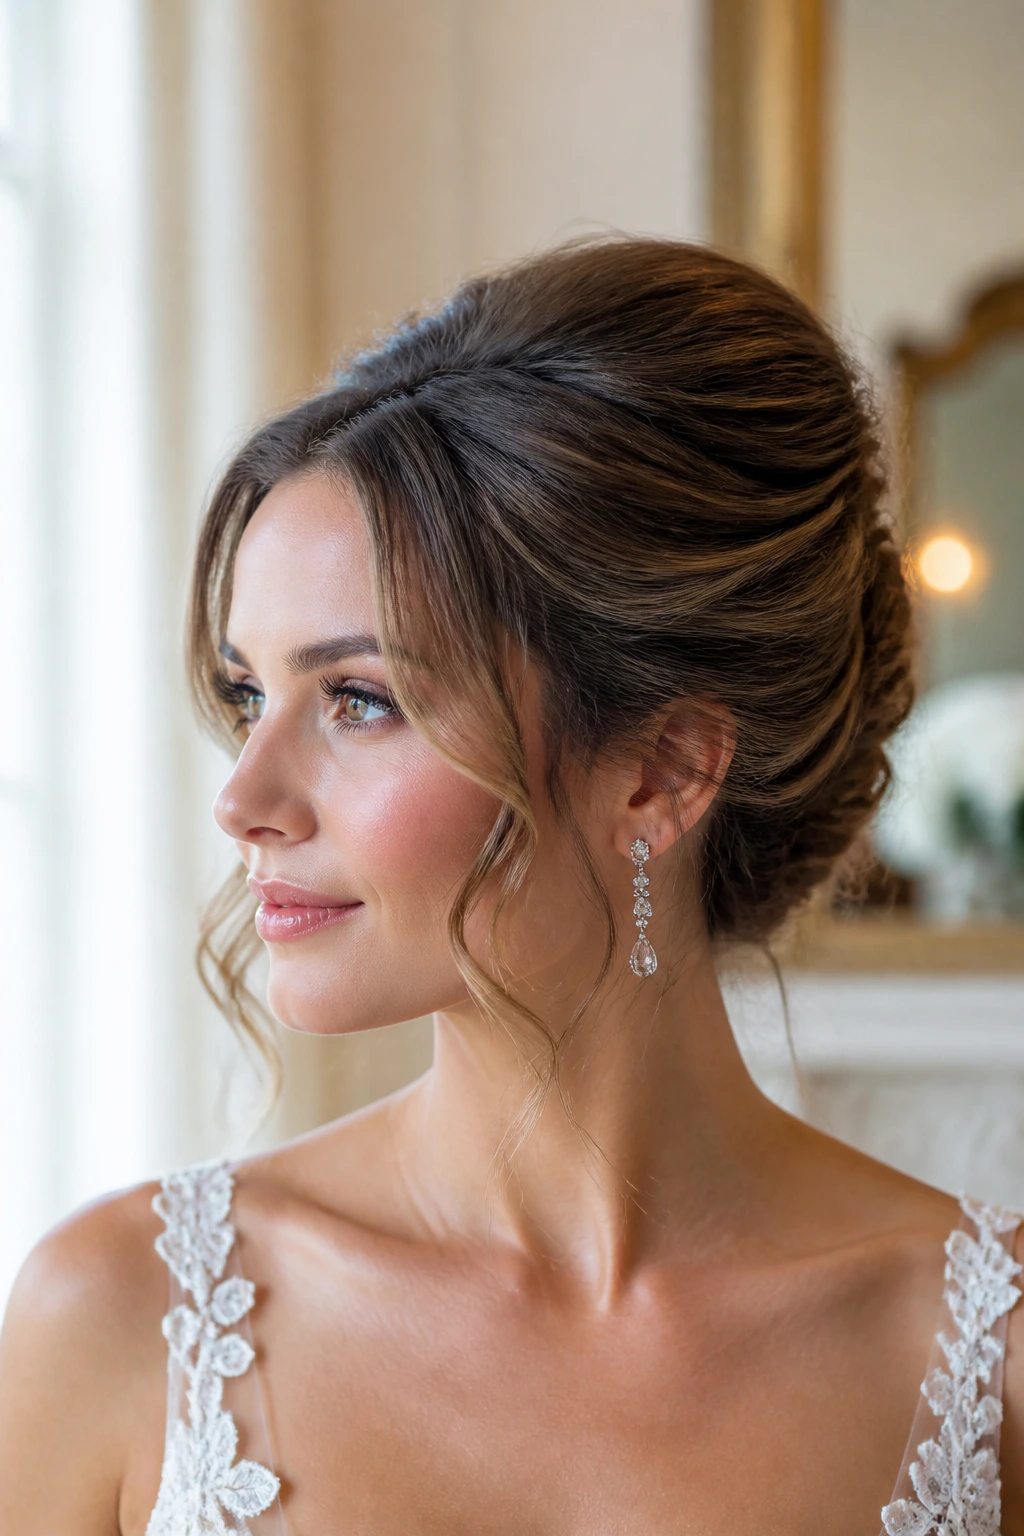
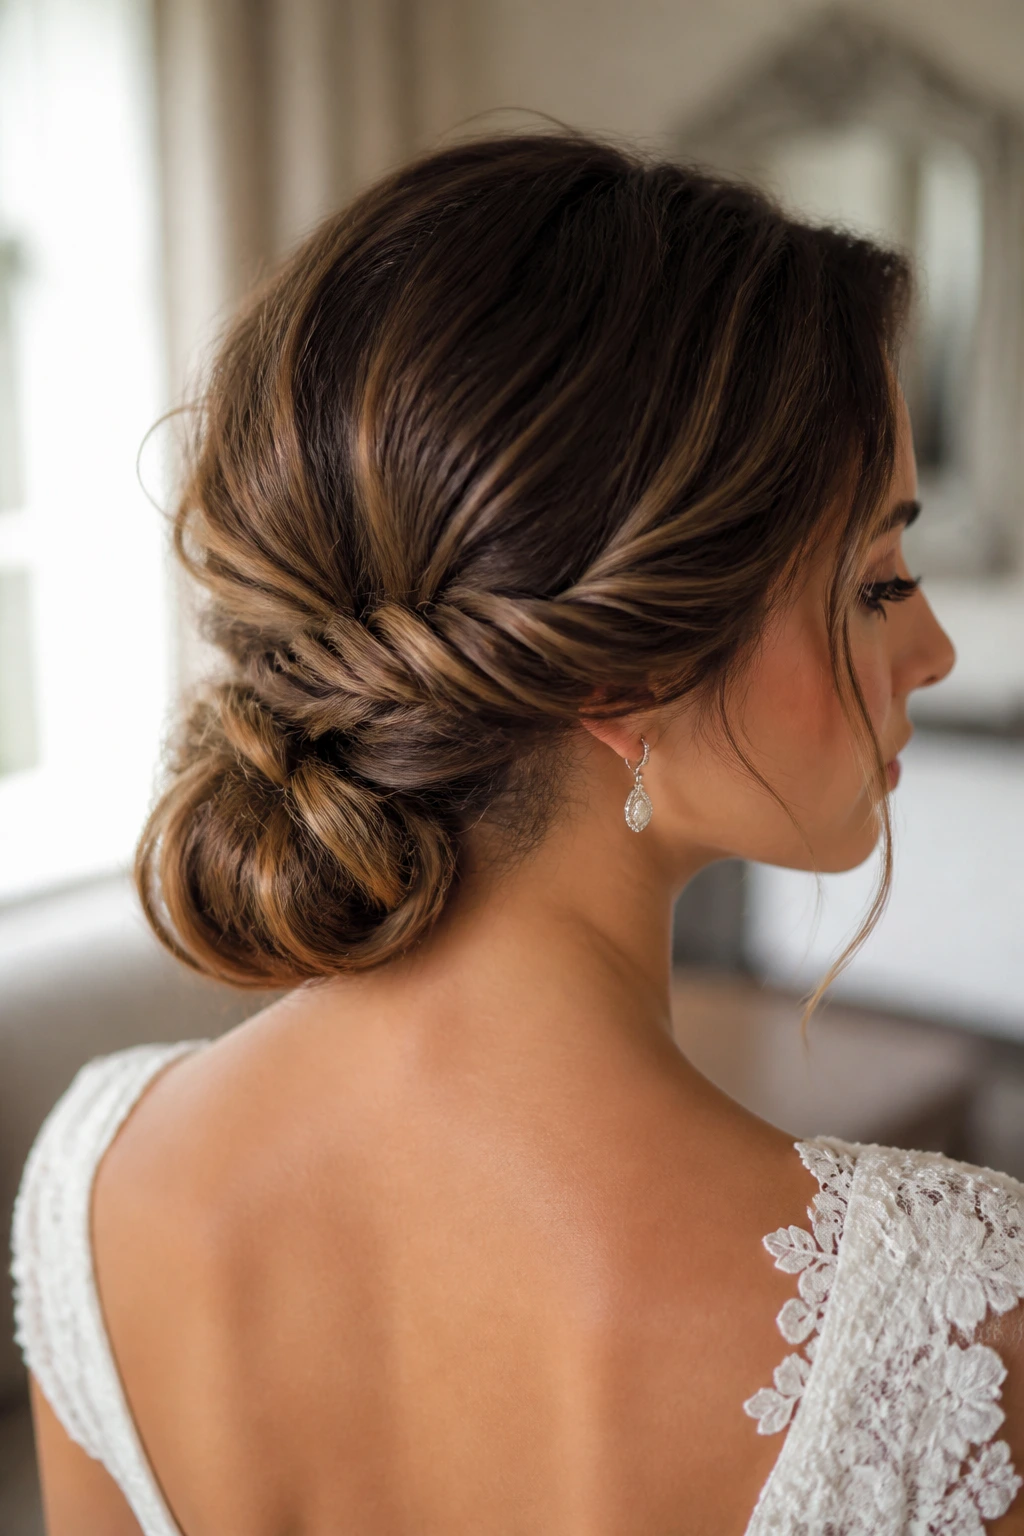
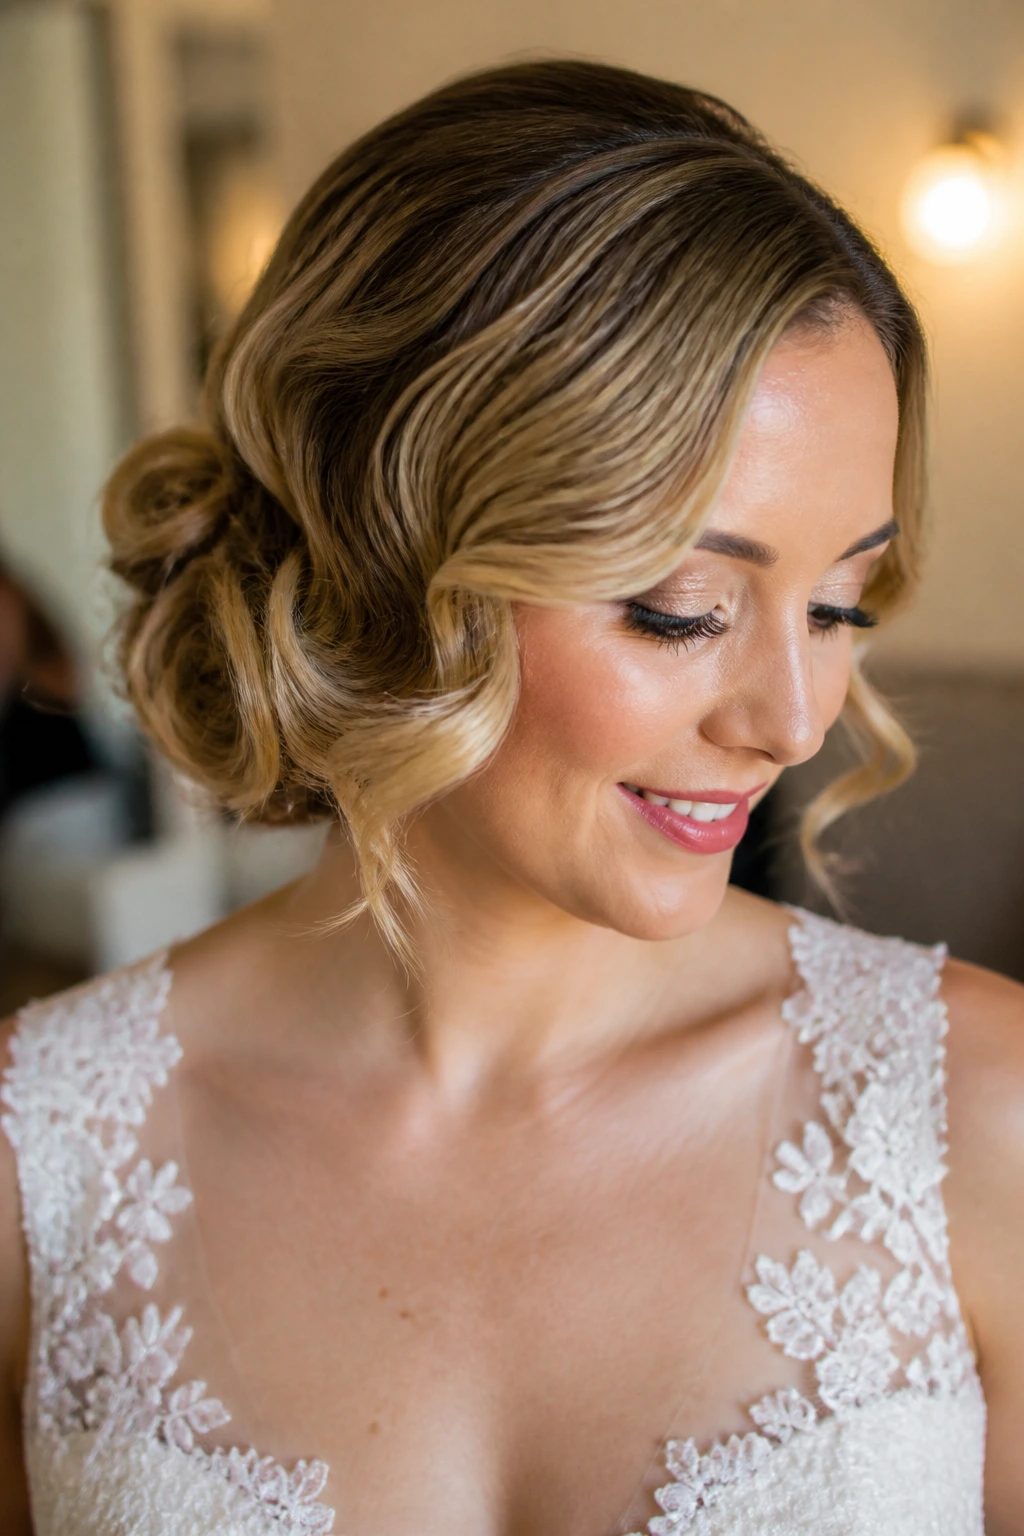
3. Low Textured Chignon with Face-Framing Pieces
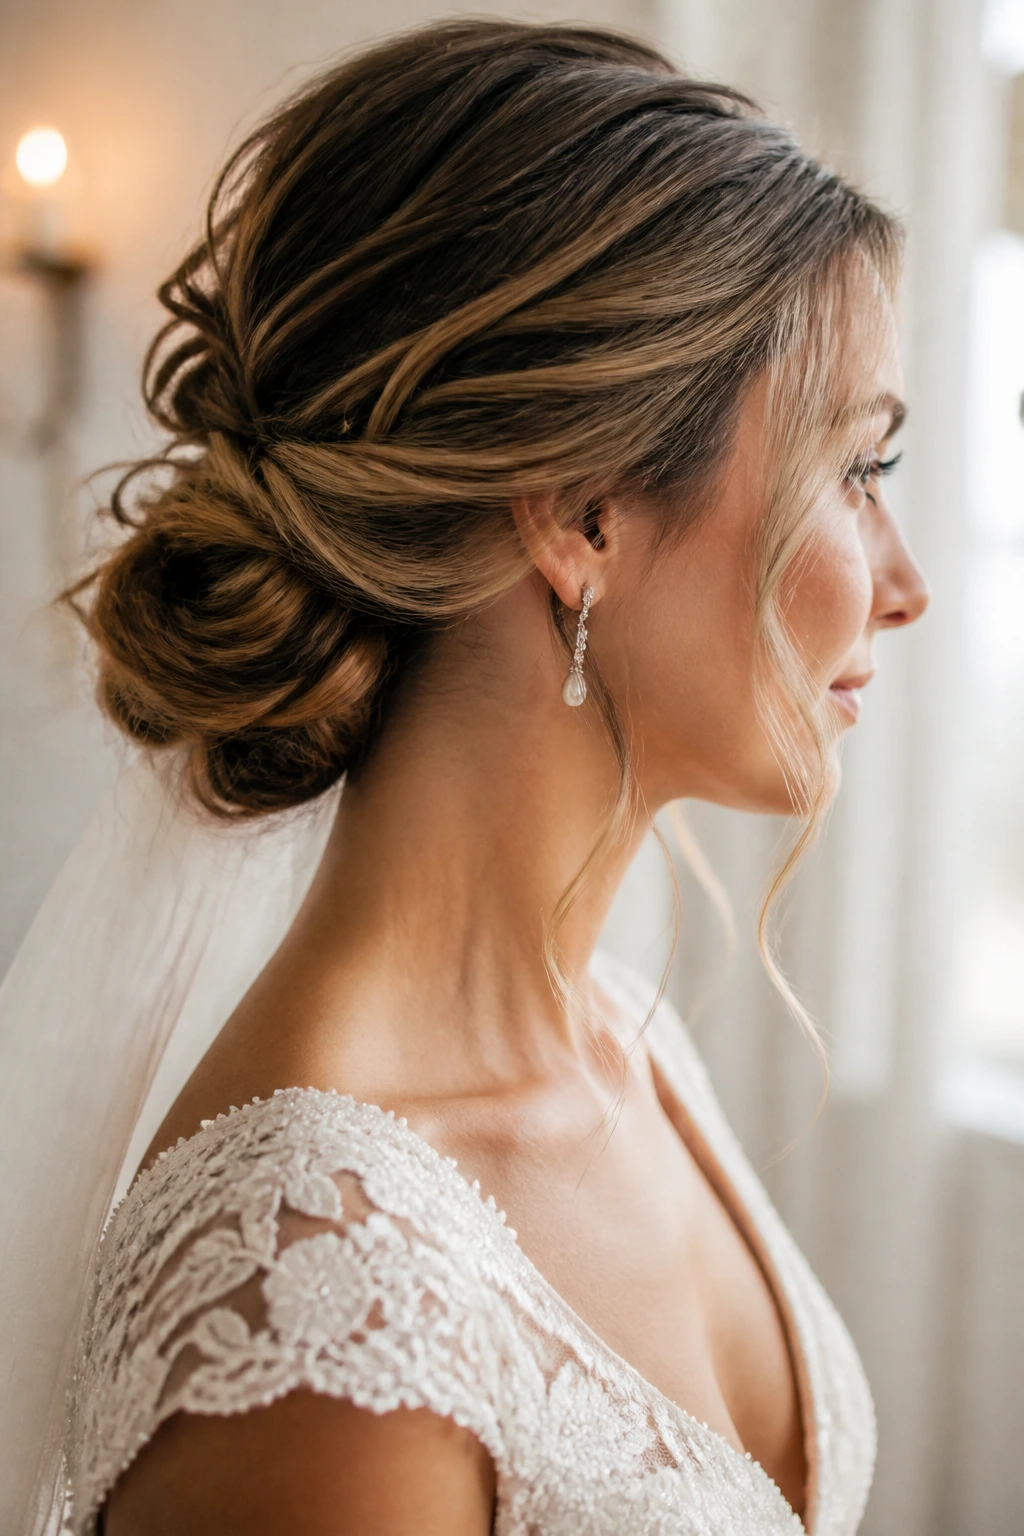
This is the quiet-luxury version of bridal hair. Low at the nape, softly pinned, a little undone at the edges, and polished enough to sit under satin, lace, or a long veil without fighting either one. The face-framing strands are what keep it romantic instead of severe.
Why it works: Wavy hair gives the chignon texture even before you start pinning, which means you do not need to tease the life out of it to build volume. Leave the front pieces out before you gather the rest, then curl those pieces away from the face with a 1-inch iron if they need a cleaner bend. A few hidden U-pins tucked in a crisscross pattern keep the knot from sagging as the evening goes on.
Best for: Formal ceremonies, black-tie dresses, and brides who want an updo that still looks soft at close range.
Best move: Wrap one thin section of hair around the base so the elastic or pins disappear. That little finish changes everything.
4. Waterfall Braid Over Loose Waves
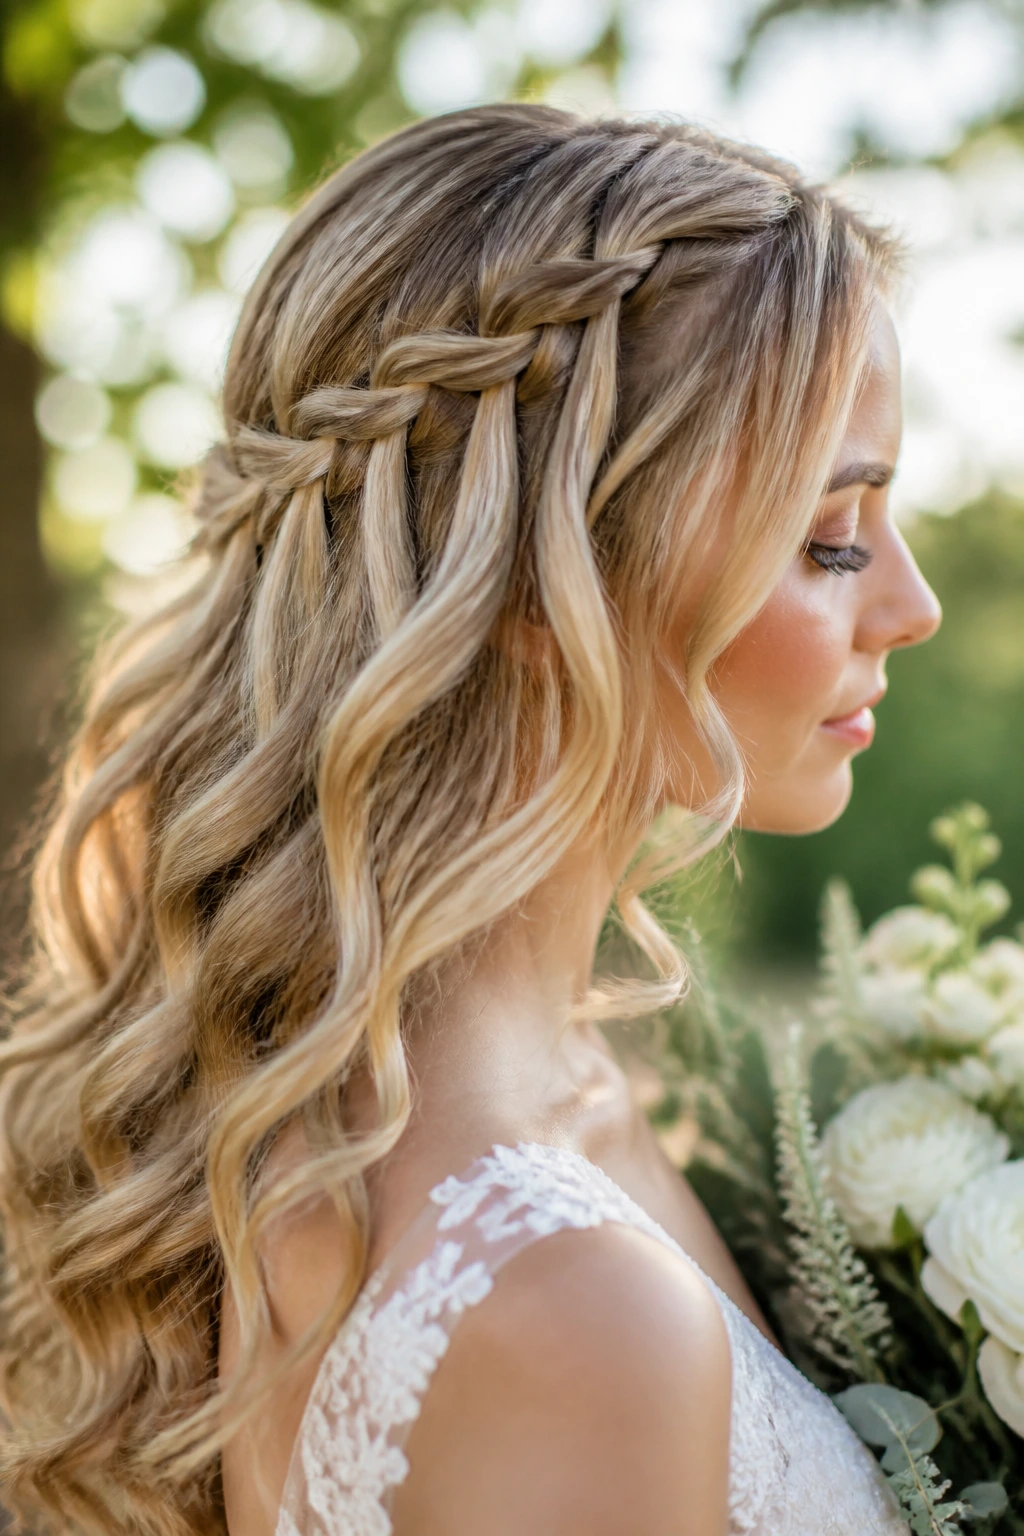
A waterfall braid is one of those styles that looks intricate from across the room and almost light as air up close. The braid traces the crown, then drops little sections into the waves below so the hair feels airy rather than pinned down.
Why it works: The braid gives structure to wavy hair that wants to spread out, especially at the temples and sides. Because the lower lengths stay loose, the style keeps movement; it doesn’t lock the whole head into one shape. Use a tail comb to keep the braid line tidy, then pinch the braid gently once it’s secured so it looks softer and less rope-like. That last step matters more than people think.
Best for: Dresses with illusion necklines, outdoor weddings, and long hair that needs a bit of control without a full updo.
Tiny caution: Don’t pull the braid too tight near the scalp. A waterfall braid should look like it’s resting there, not gripping for dear life.
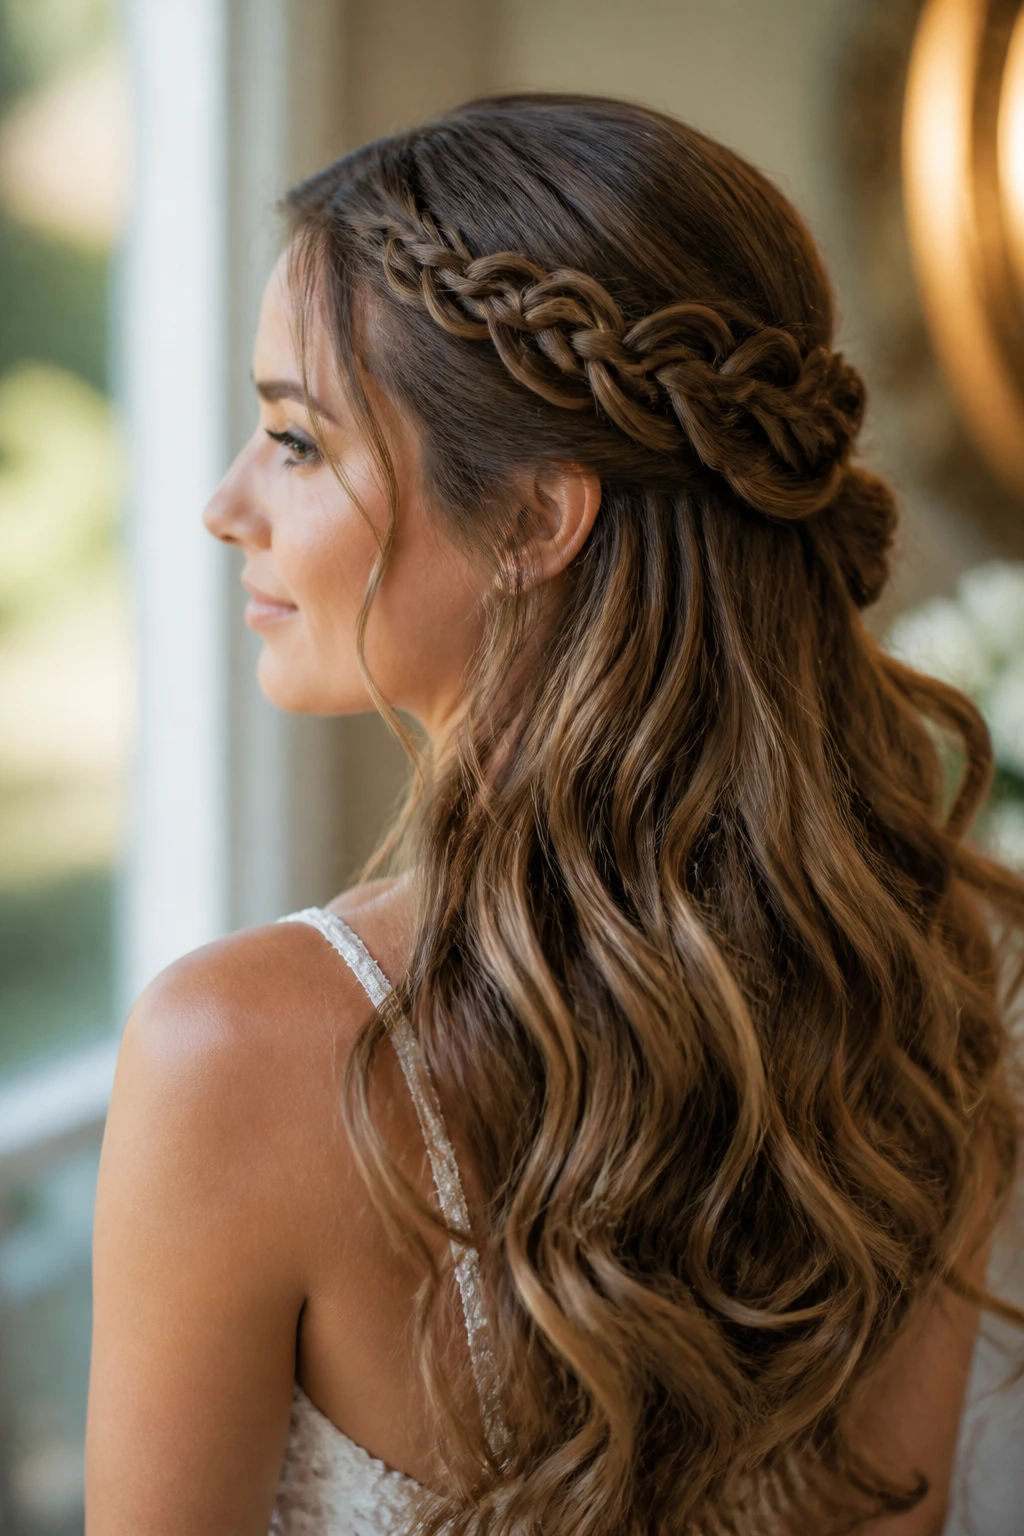
5. Braided Halo with Undone Ends
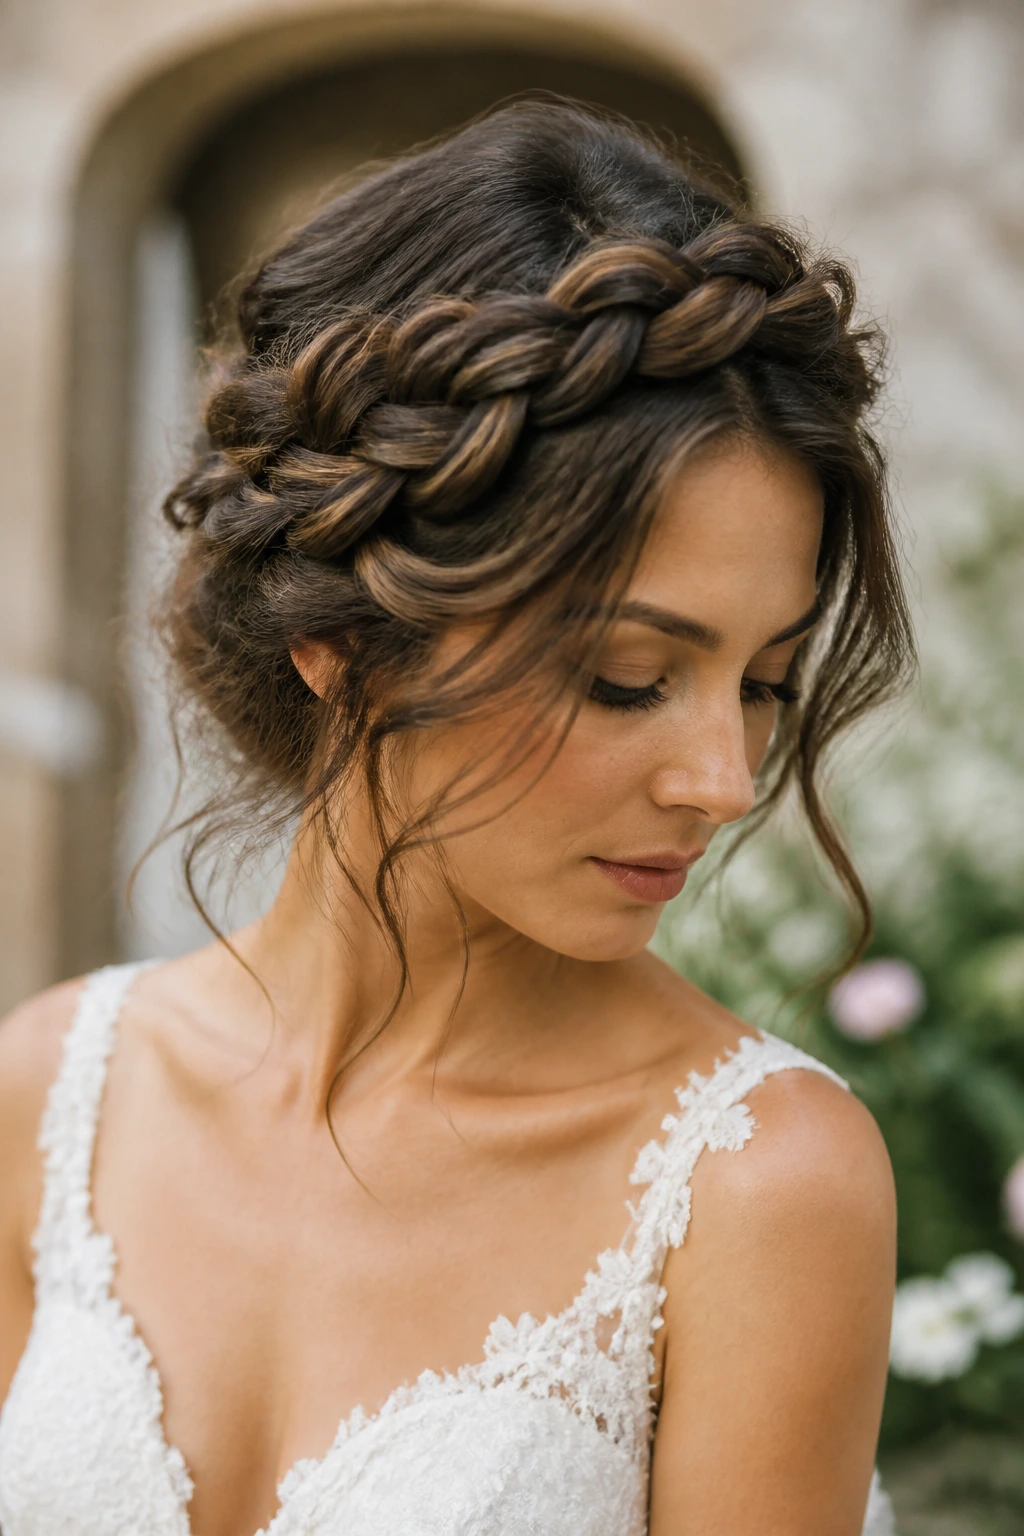
There’s something lovely about a halo braid that isn’t trying too hard. It wraps the head like a soft crown, but with wavy pieces left a little loose near the ears and nape, it avoids that rigid, pageant-polished look.
Why it works: Wavy hair gives the braid a fuller, more textured surface, so you get visual thickness without adding fake bulk. It’s especially nice when the hair is medium to long and the wedding is outdoors, because the braid contains the top layers while the lower softness stays visible. If your hair is slippery, prep the roots with dry texture spray before braiding; clean hair can be too smooth for the braid to hold without fuss.
Best for: Boho dresses, floral accessories, and ceremonies where you want the hair to feel woven into the look.
Best tip: Let one or two thin pieces fall near the ears. It keeps the braid from looking severe, and it frames the jaw in a very flattering way.
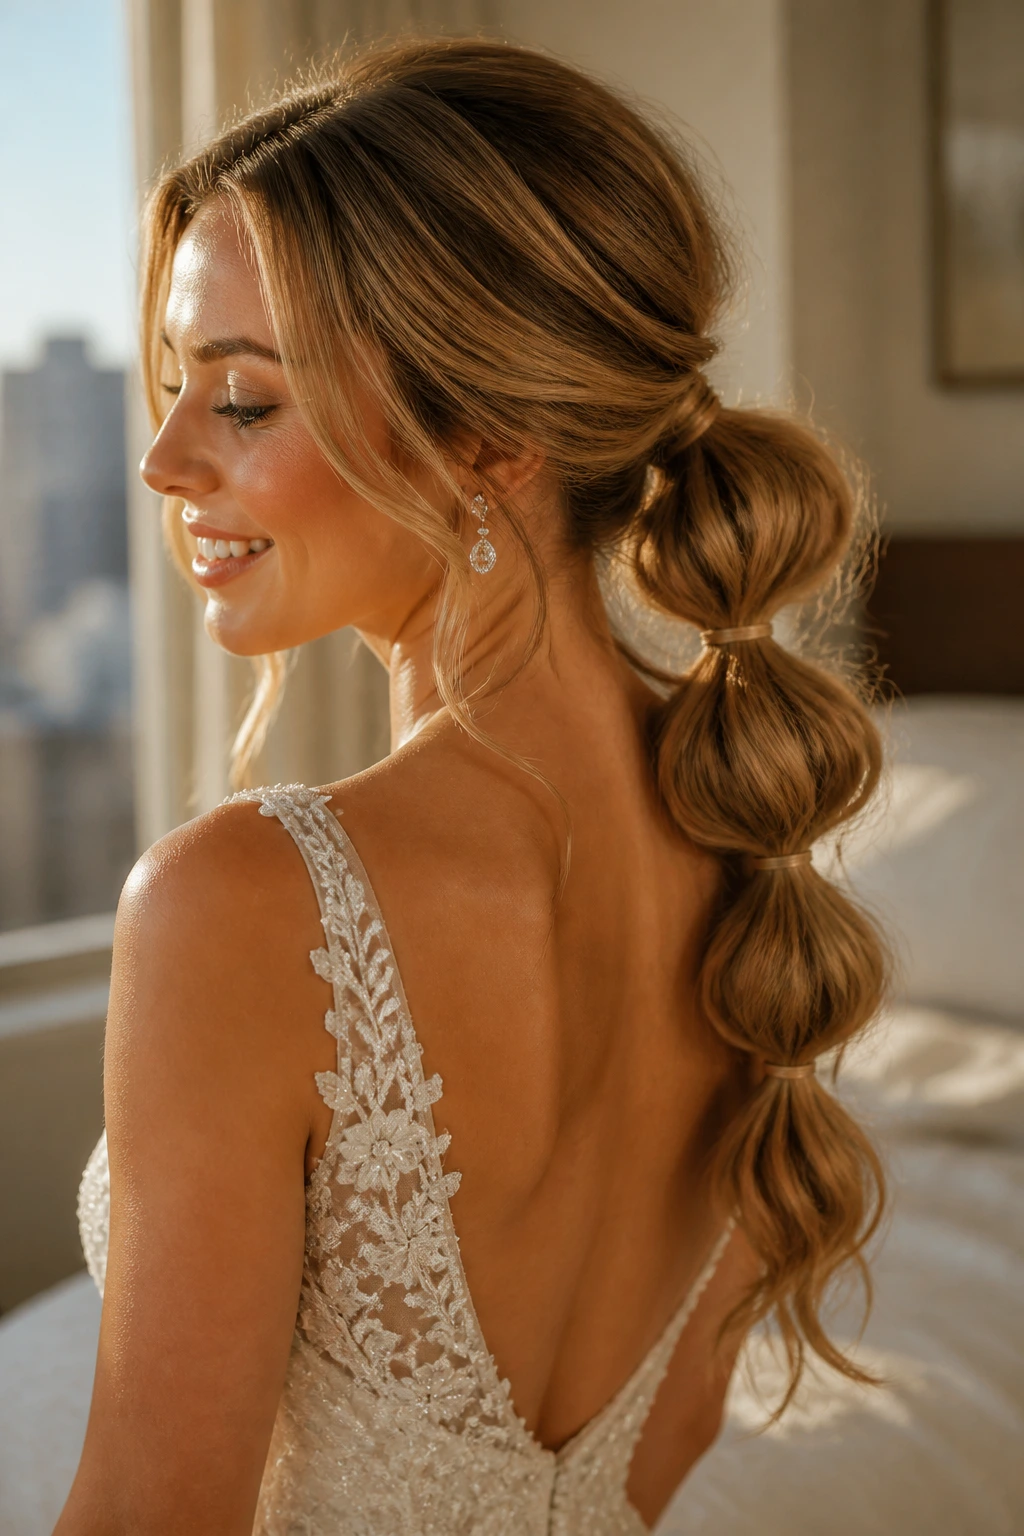
6. Low Ponytail with a Wrapped Base and Wave Tails
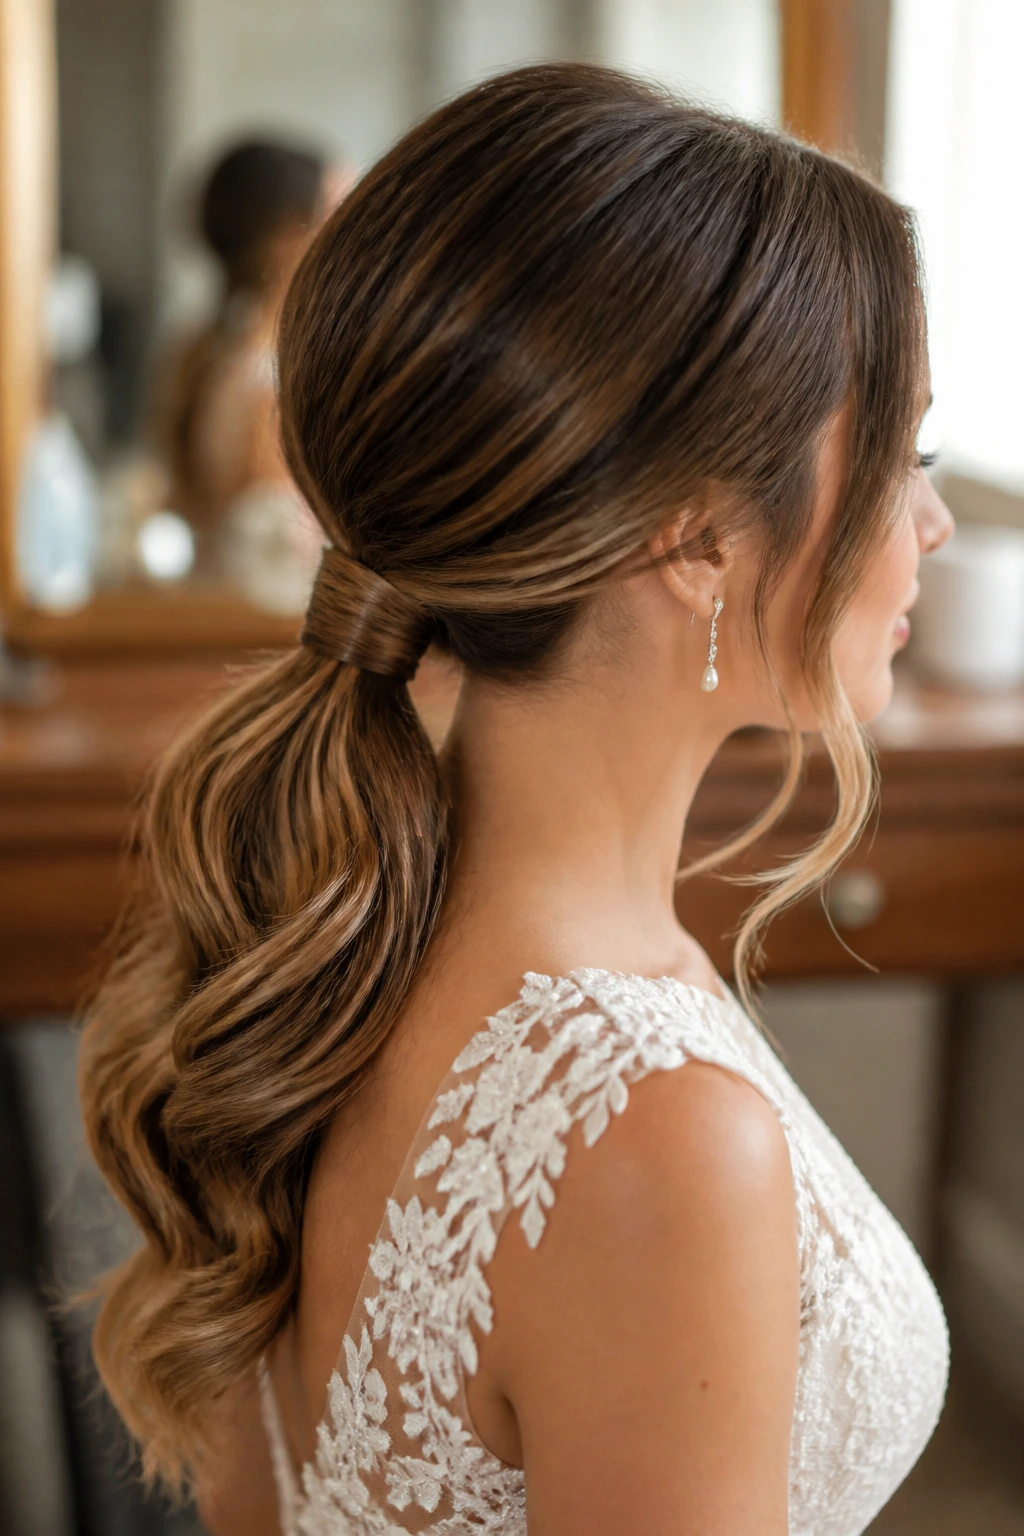
A ponytail can be bridal if it has shape. The base sits low at the nape, a small section of hair wraps around the elastic, and the lengths fall in soft, brushed-out waves that look deliberate rather than gym-ready.
Why it works: This style gives wavy hair a clean centerline, which can be useful when the dress has a dramatic back or when you want earrings and makeup to carry more of the visual weight. It also photographs cleanly from the side. Curl the ponytail lengths in alternating directions if the natural wave is uneven; that keeps the tail from clumping in one direction.
Best for: Modern gowns, courthouse weddings, and brides who want comfort without losing structure.
Watch for: A ponytail that sits too high can feel casual fast. Keep it low, and keep the wrap tight enough that the elastic disappears.
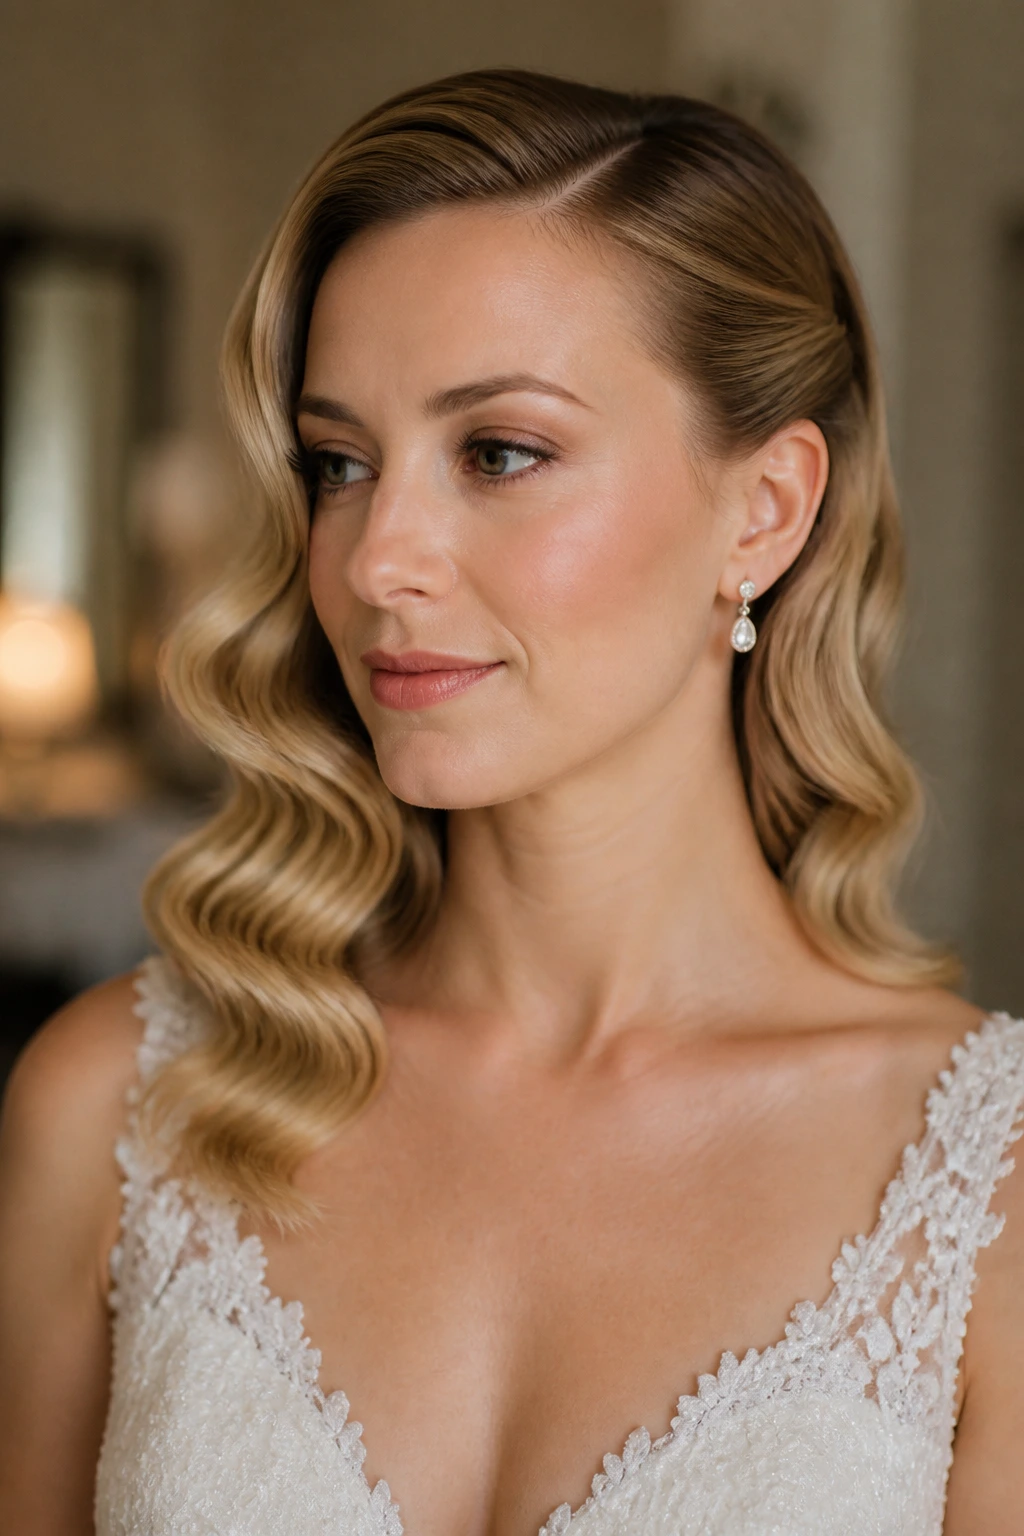
7. Brushed-Out Hollywood Waves
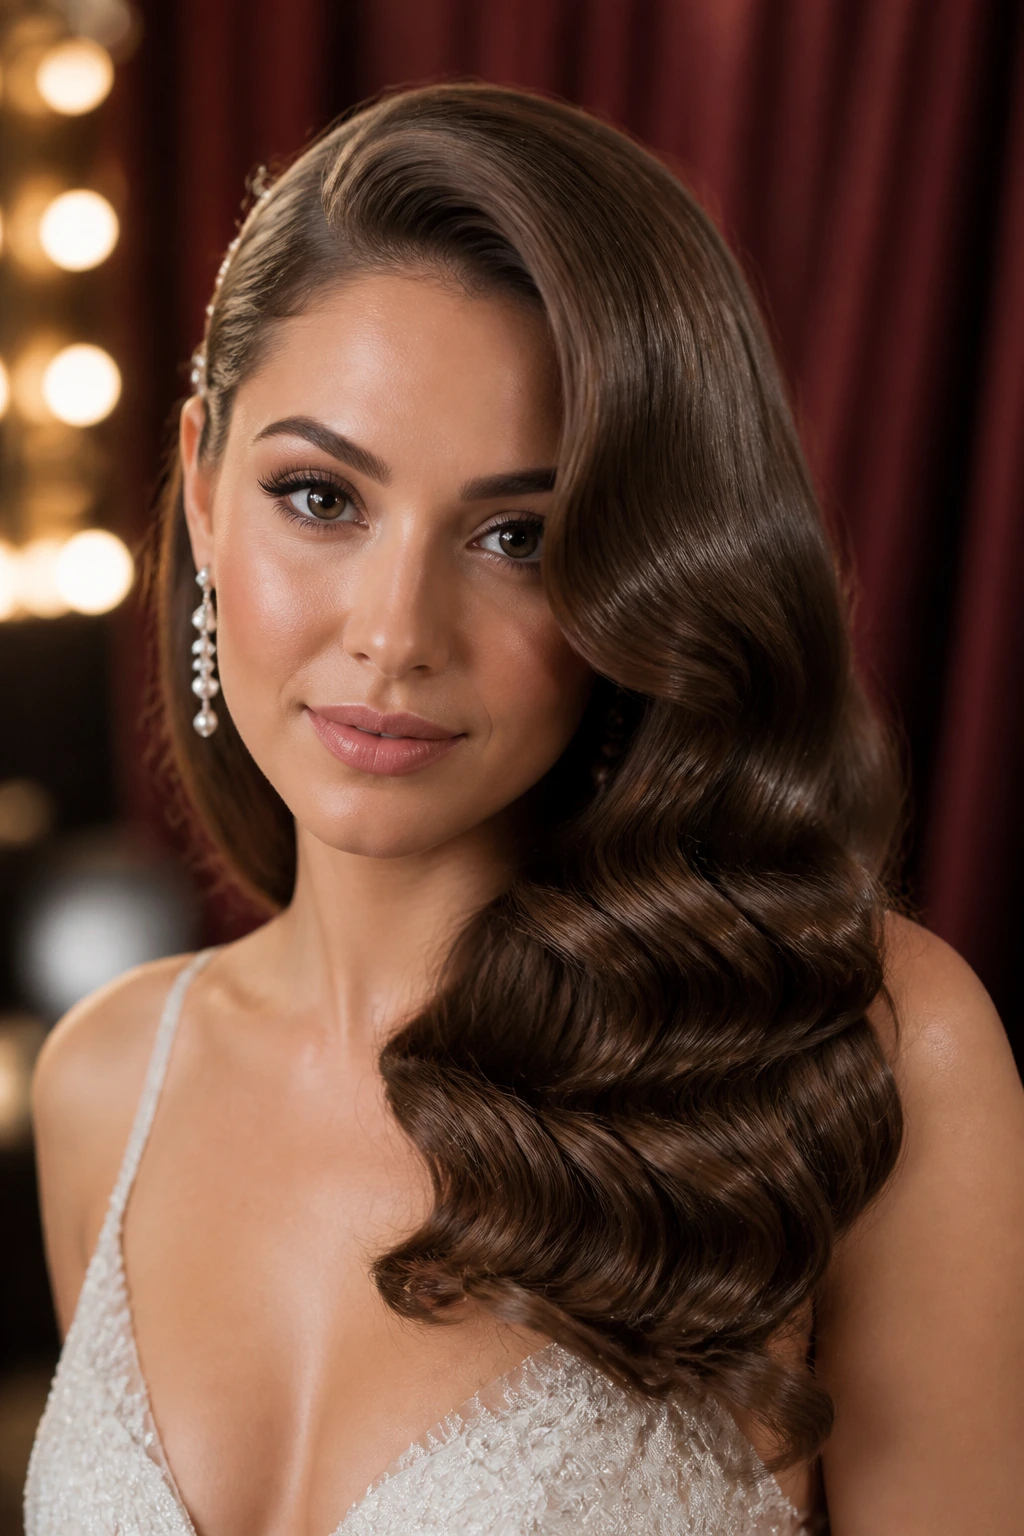
If you like old-school glamour, this is the heavyweight on the list. Think deep side part, glossy S-shaped waves, and hair that looks like it belongs next to a satin glove and a long aisle.
Why it works: Hollywood waves depend on setting, cooling, and brushing in the right order. Curl sections in the same direction on each side, pin them flat while they cool, then brush them out into one continuous wave pattern. The cooling part is not optional; warm hair will give up the shape too soon. A light shine spray at the end keeps the finish elegant, not crunchy.
Best for: Strapless gowns, pearl earrings, and formal portraits with strong lighting.
Best note: This style likes medium to long hair, but layered cuts can still wear it well if the shorter pieces are pinned into the side shape instead of left to float around.
8. Floral Half-Up Knot
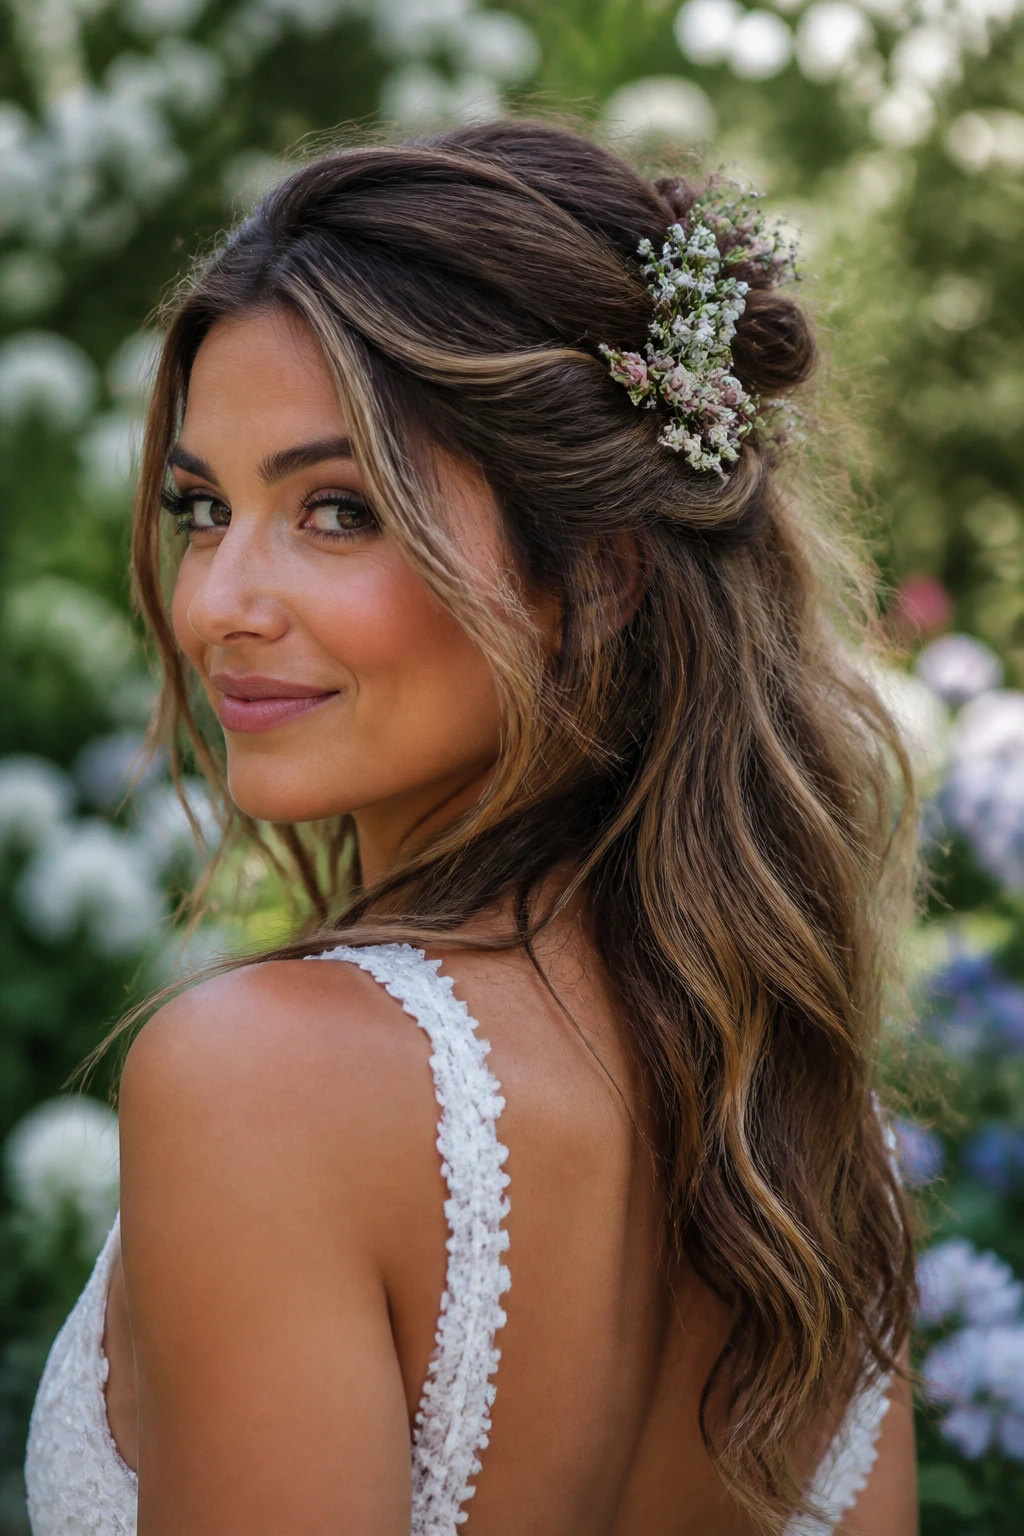
A small knot at the back of the crown, a few loose waves below it, and a cluster of tiny flowers or one carefully placed bloom. That’s all it takes to turn this into something that feels tender without drifting into costume territory.
Why it works: The half-up knot gives you lift at the back without removing the length that makes wavy hair feel soft. The floral detail sits naturally in the fold of the knot, which means it doesn’t need a huge amount of hardware to look finished. Keep the knot slightly flattened rather than tight and round; a flatter knot reads more romantic and is easier to anchor with a few pins.
Best for: Garden weddings, outdoor aisles, and brides who want a little whimsy without a full flower crown.
Small opinion: Use fewer flowers than you think. One or three small pieces usually look more refined than a bouquet trapped in your hair.
9. Twisted Low Bun with Pearl Pins
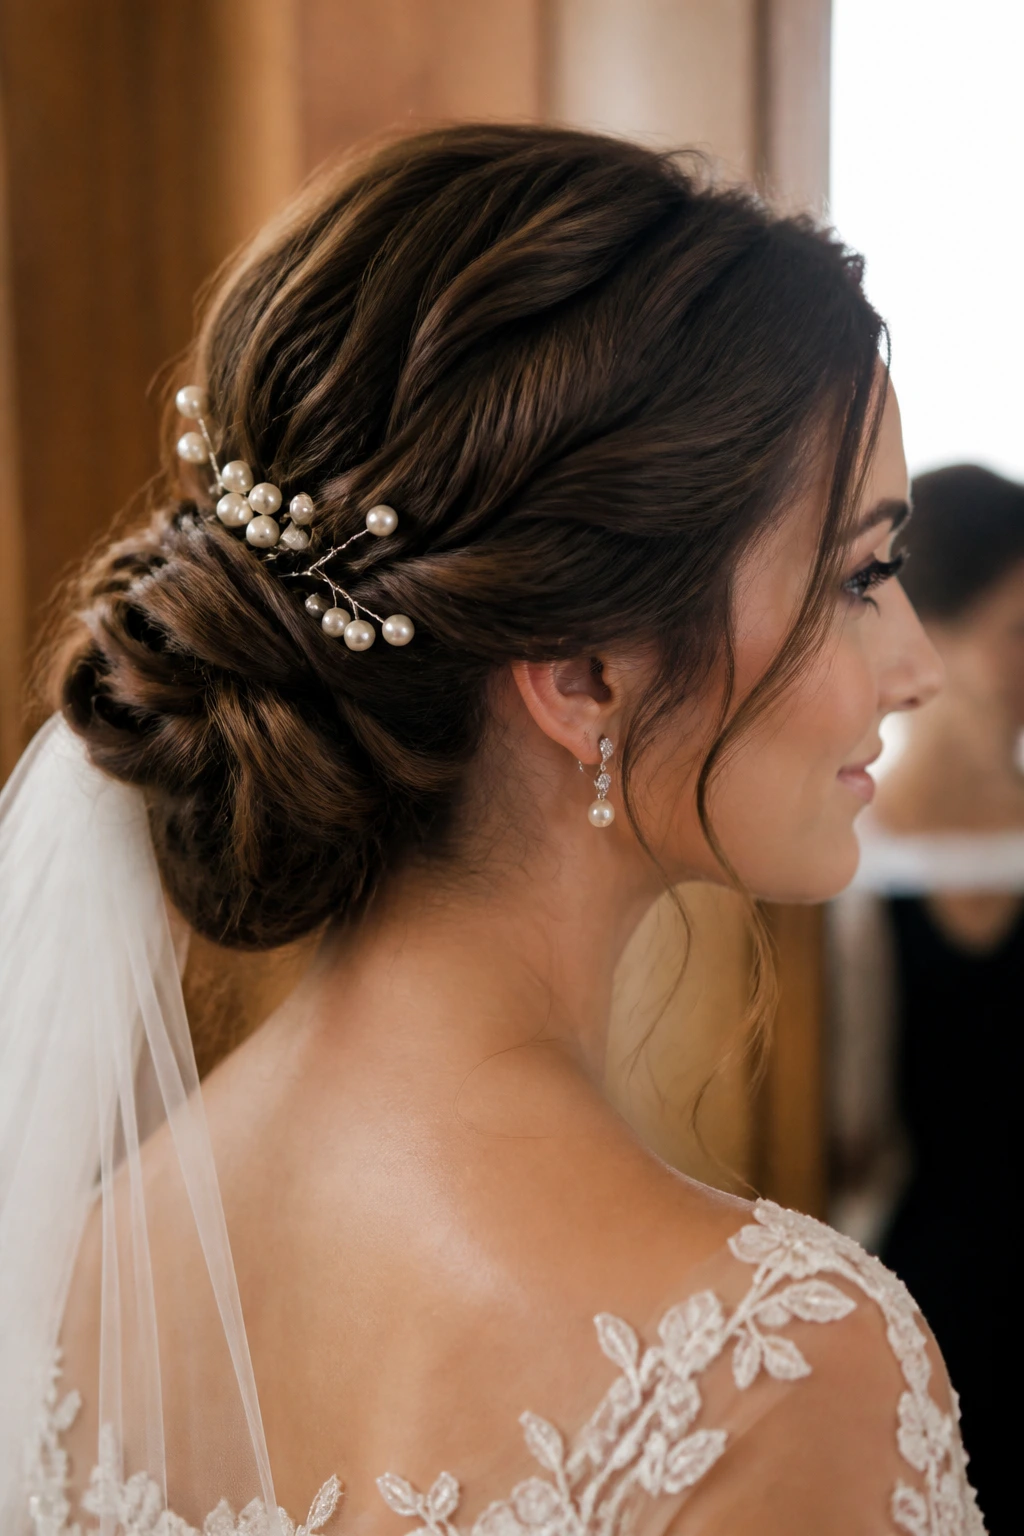
This bun has more texture than a sleek knot and more polish than a messy one. The twists feed into a low bun at the nape, and pearl pins break up the surface with tiny points of light.
Why it works: Wavy hair builds texture into the bun before it is even pinned, so the final shape looks full without stuffing in extra padding. Pearls are especially good here because they read formal without making the style feel heavy. If the bun is meant to hold a veil, create the anchor point first, then set the pearl pins around it so nothing fights for the same space.
Best for: Classic gowns, cathedral veils, and brides who want an updo that still has soft edges.
Best trick: Leave a few millimeters of the twist visible at the outer edge of the bun. That little bit of dimension keeps it from looking like a smooth ball.
10. Boho Braid-and-Wave Cascade
This one is all about movement. A braid starts near the temple or just above the ear, then disappears into a waterfall of loose waves that spill over the shoulder or down the back.
Why it works: The braid gives the eye something to follow, which makes the remaining waves look richer and longer. It’s especially useful for thick hair, because the braid controls the top while the length can stay free and touchable. I like this more than a full crown braid for brides who still want to feel the hair on their shoulders.
Best for: Lace dresses, outdoor ceremonies, and anyone who wants the hair to look a little wild in a controlled way.
Watch for: Keep the braid loose enough to see individual strands. A tight braid can make the whole style feel less airy, and that is the opposite of what this look needs.
11. Side Braid Tucked Into Waves
A side braid is a simple idea, but it changes the whole mood once it’s tucked into wavy lengths. It pulls one side of the face back, opens the cheekbone, and leaves the rest of the hair loose and soft.
Why it works: The braid acts almost like a built-in hair accessory. On wavy hair, it has texture without much effort, and it blends easily into the rest of the style instead of sitting on top of it like a separate piece. Use a small clear elastic at the end, then hide it under a folded section of hair or a small pin so the braid disappears into the wave pattern.
Best for: Brides who want a detail that feels noticeable in person but doesn’t steal focus from the dress.
Tiny caution: Don’t braid too far back. The braid should frame the front and side, not drag the whole style toward the ear.
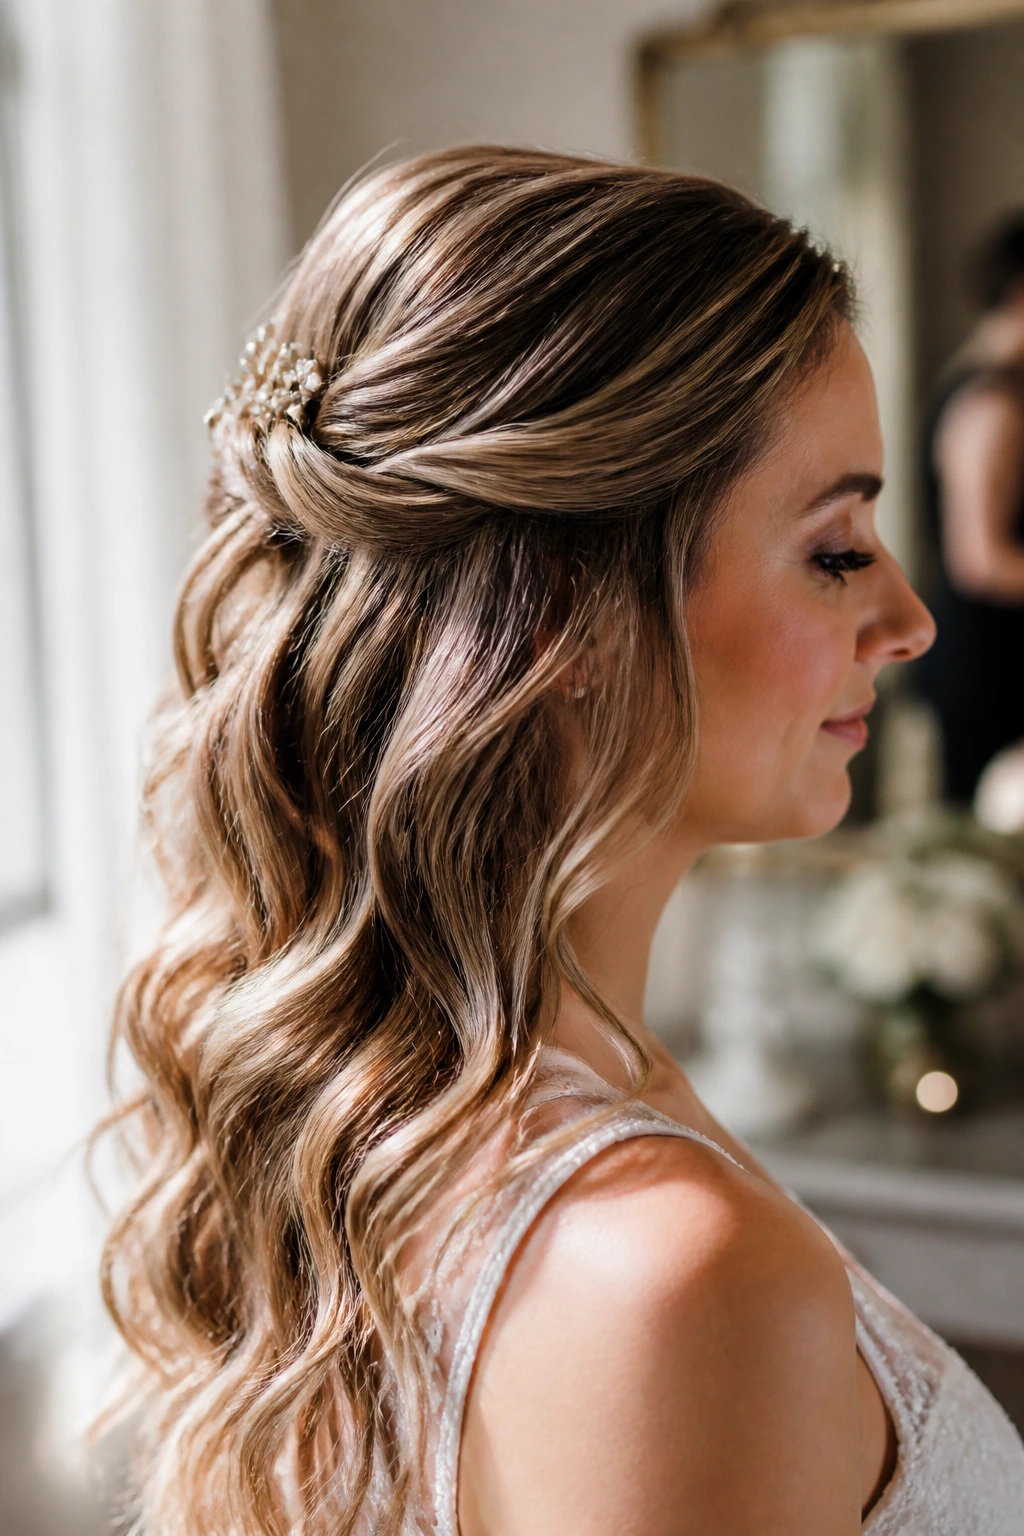
12. Crown Twist with Loose Lengths
Picture two soft twists lifted from the temples and meeting at the back like a slim crown, while the rest of the hair falls freely beneath. It feels less formal than a full updo, but more finished than simply leaving the waves down.
Why it works: This style keeps wavy hair away from the face while still showing off length and texture. The crown twist can hide a comb, a veil base, or a small hairpin cluster, and the open lower half keeps the look relaxed. If you want the twists to hold, slightly rough up the hair at the roots first; a bit of grip makes the pins stay put.
Best for: Brides with long layers, soft veils, or dresses that need hair off the neckline but not fully up.
Best move: Curl the front pieces away from the face before twisting them back. It softens the frame and stops the whole style from collapsing inward.
13. Soft French Twist with Wavy Tendrils
A French twist can feel too stiff when it’s done in a shiny, untouched shell. This version keeps the clean vertical shape, but the edges are softened and a few wavy tendrils are left out around the temples and ears.
Why it works: The twist gives structure to the nape, which is useful if your dress has a high back or if you want the veil comb hidden neatly. Wavy tendrils keep the style from feeling severe. Pin the twist upward with long bobby pins rather than trying to force it all into one tiny twist; a wider base is more secure and usually looks less brittle.
Best for: Formal ceremonies, high necklines, and brides who want to look polished without giving up movement around the face.
Opinion: The modern French twist is much better when it looks a little imperfect. Too neat, and it starts to feel old-fashioned in the wrong way.
14. Bubble Ponytail on Wavy Hair
This style sounds playful, and it is, but that doesn’t make it childish. A low or mid-height ponytail is sectioned with small elastics every few inches, then each section is gently puffed into a soft bubble.
Why it works: Wavy hair gives the bubbles a little texture so they do not look like hard balloons. The sections also create a built-in rhythm that photographs well from the side. If your hair is long, this is a smart way to show off length without leaving it loose enough to tangle during the reception. The elastics should sit about 2 to 3 inches apart, depending on length.
Best for: Modern gowns, minimalist dresses, and brides who want something unusual but still wearable.
Best detail: Wrap a tiny strand of hair around each elastic if you want the finish to look deliberate. It takes a few extra minutes and changes the whole thing.
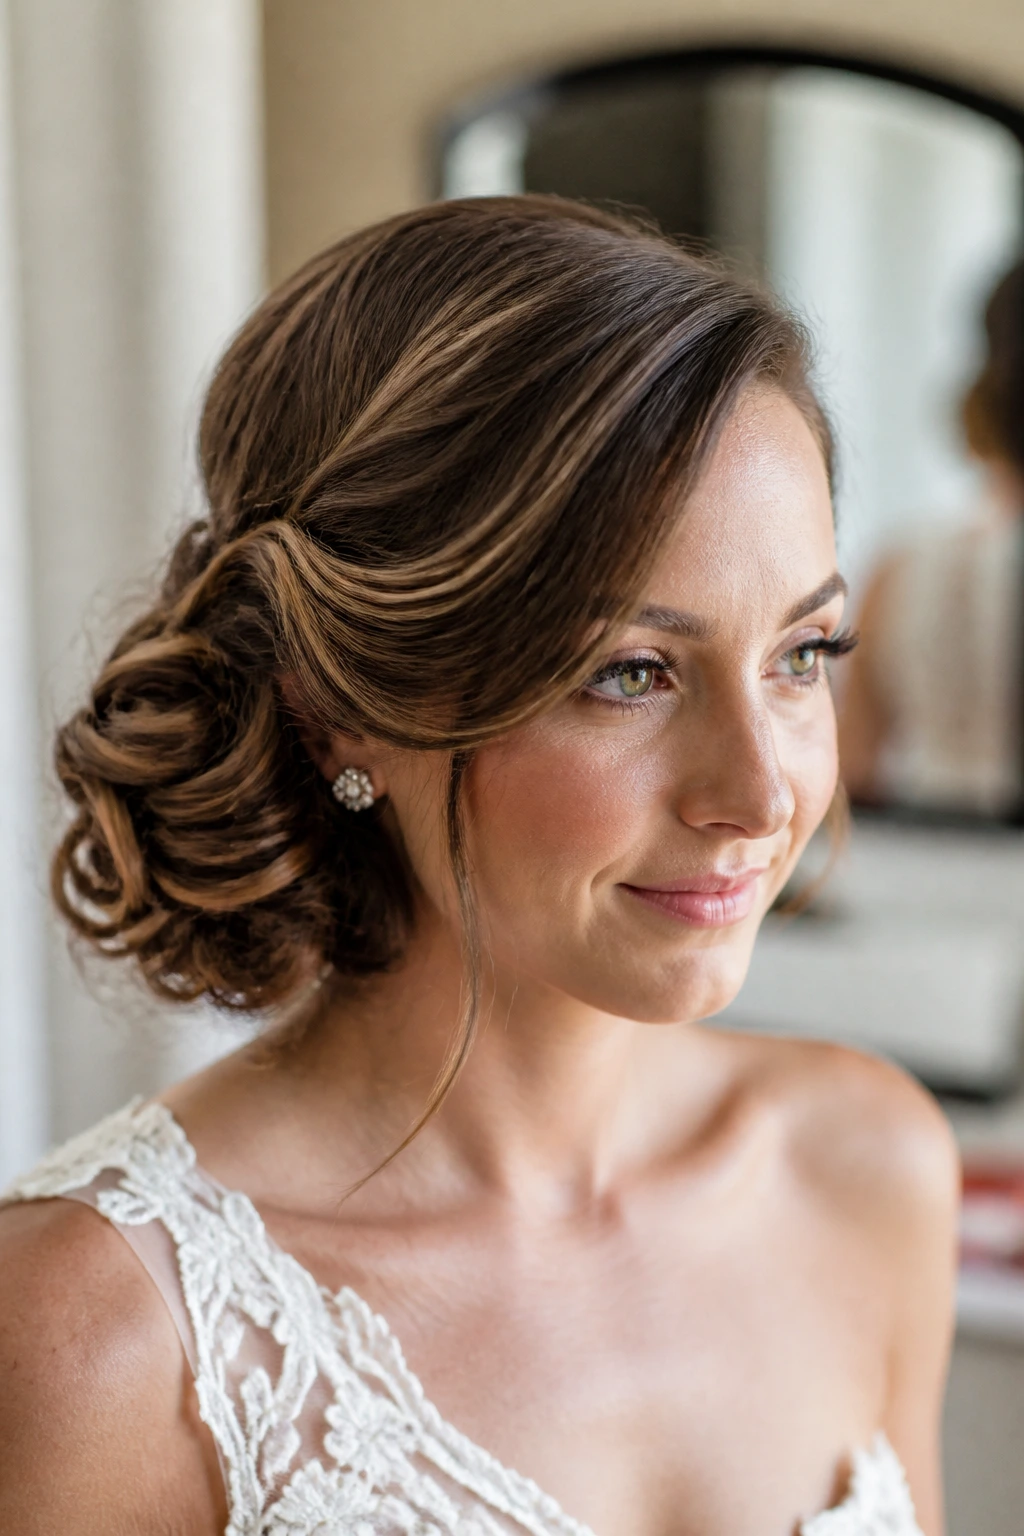
15. Low Knot with Soft Side Pieces
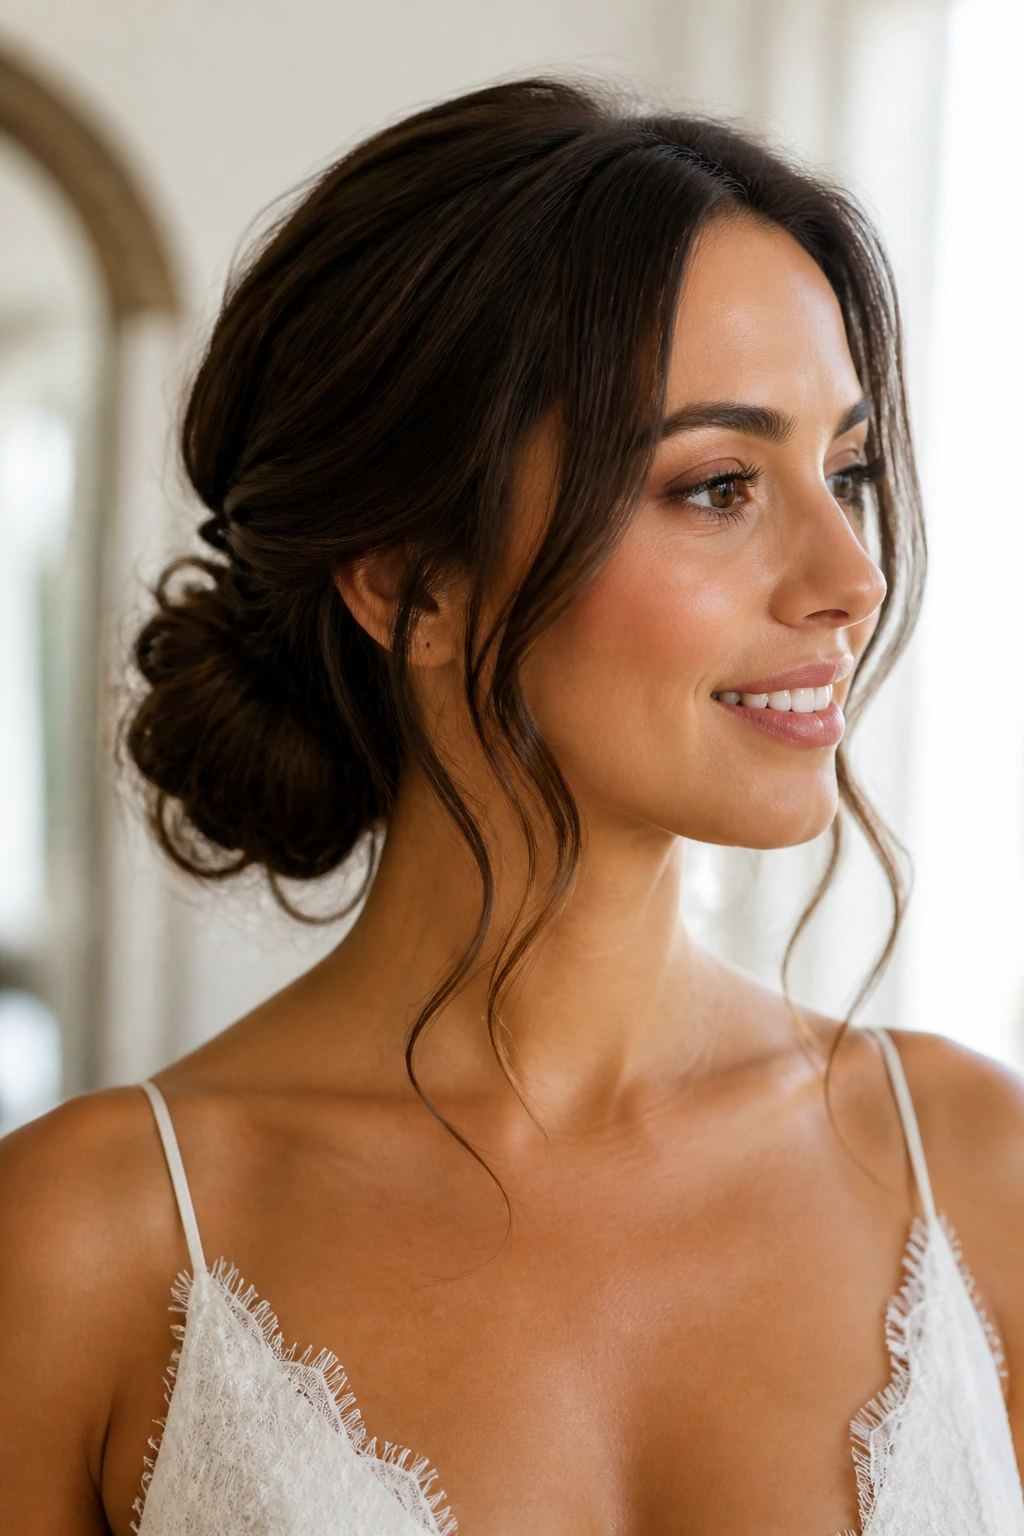
This is the less formal cousin of the chignon. The knot sits low, often a little looser, and the sides stay soft enough that the whole style feels calm rather than severe.
Why it works: Wavy hair naturally gives the knot texture, which keeps it from flattening into a smooth lump at the nape. The side pieces soften the jaw and make room for earrings or a delicate necklace. I like this version for brides who want their hair up but don’t want to look “updo” in the hard, lacquered sense of the word.
Best for: Small ceremonies, civil weddings, and dresses with fine straps or a simple boat neckline.
Small warning: If you leave the side pieces too thin, they’ll frizz before the vows are over. Leave enough hair out to actually curl and shape.
16. Half-Up Pouf with Flowing Waves
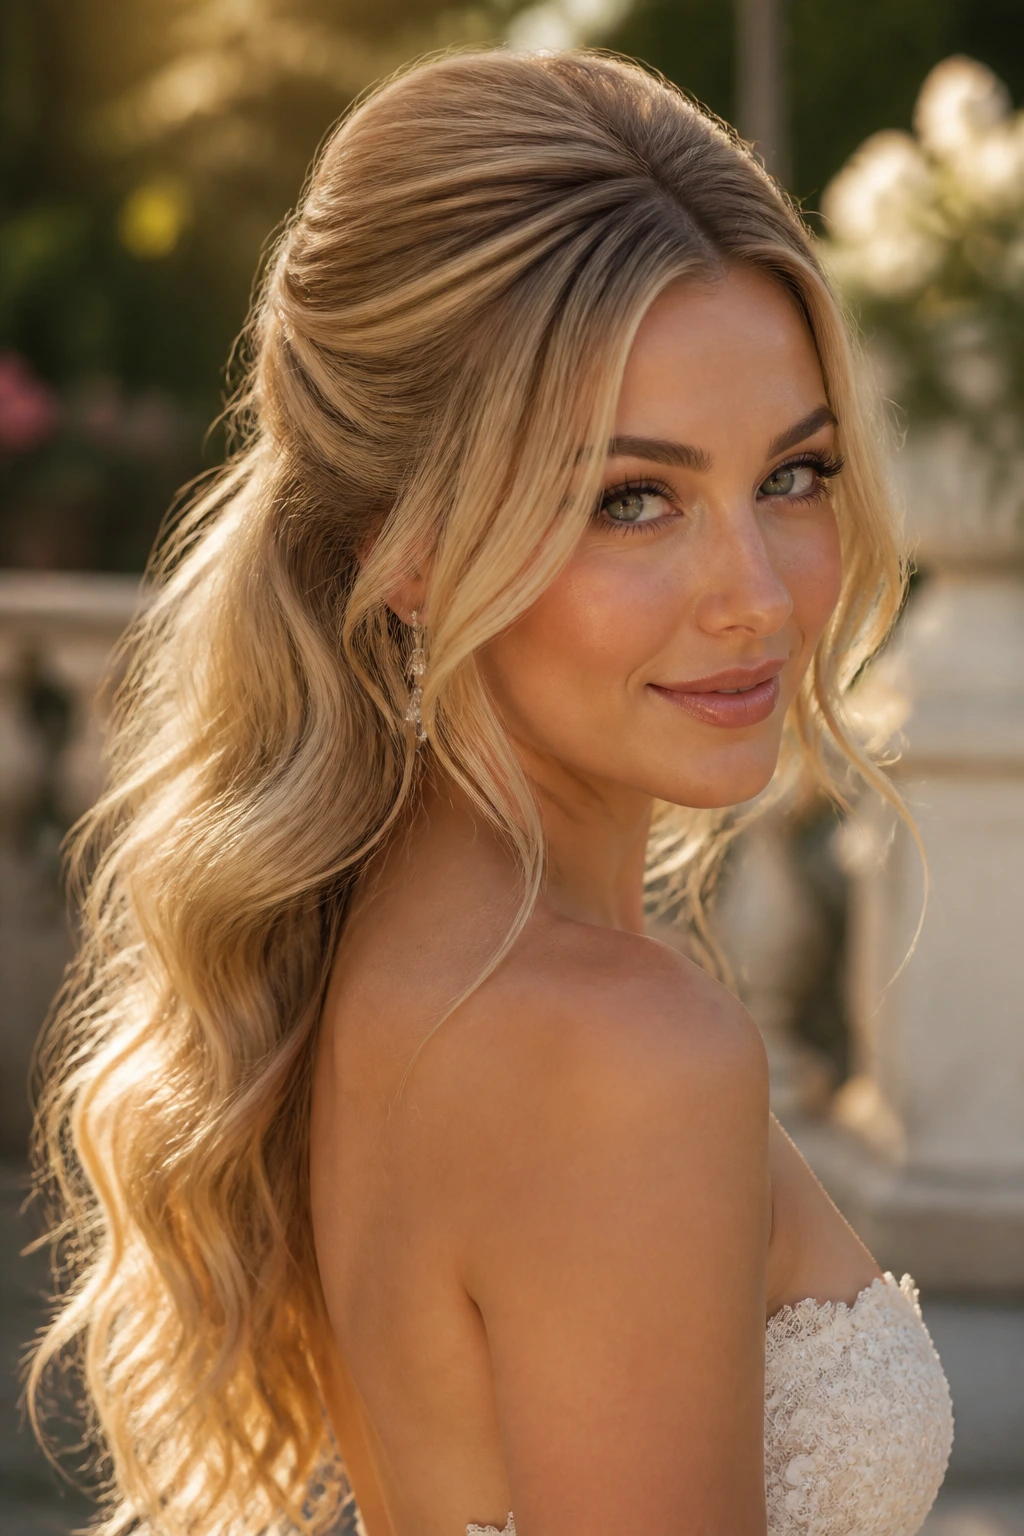
A little crown volume can do a lot. This half-up style lifts the top section just enough to create shape, then lets the rest of the waves fall long and soft.
Why it works: The pouf gives the hair a bridal silhouette without turning it into a full vintage set. It also helps balance a fuller skirt or a dress with more detail on the bodice. Keep the teasing gentle and hidden under the top layer; you want lift, not a bump that looks like it has its own weather system.
Best for: Brides who like a nod to retro style but want the rest of the hair relaxed.
Best tip: Smooth only the top layer after teasing. If you brush too hard, you erase the height and end up with flat roots and sad ends.
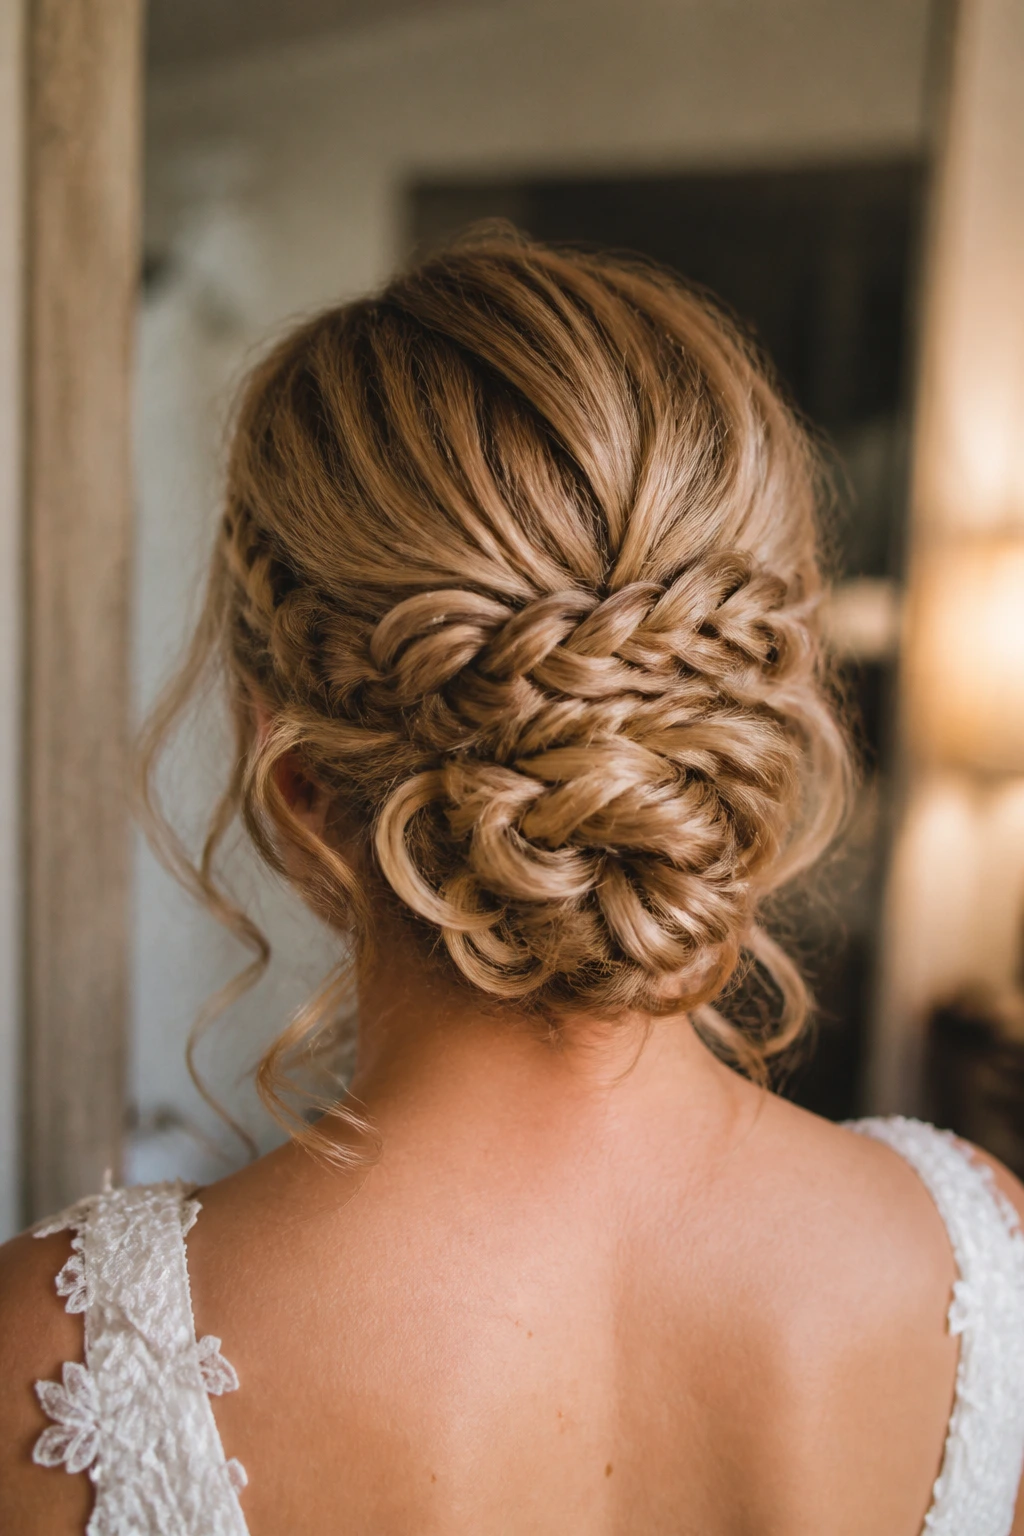
17. Fishtail Braid Into a Low Bun
This one has detail from the first inch. The fishtail braid starts low, often near the nape, then folds into a compact bun that feels intricate without being fussy.
Why it works: Fishtails make excellent use of wavy texture because the braid pattern stays visible even when the hair isn’t perfectly sleek. The bun gets a lot of visual interest from the braid alone, so you don’t need heavy accessories. For thick hair, this is one of the more secure options on the list, especially if the bun is pinned with both bobby pins and a couple of U-pins for structure.
Best for: Formal dresses, long hair, and brides who want an updo that rewards a closer look.
Watch for: A fishtail can loosen too much if the sections are pulled unevenly. Keep the tension steady, then gently tug the braid wider once it’s secured.
18. Scattered Pin Curls with One Side Pinned Back
Not every wedding style needs a full head of curls or a full pinned-up shape. This one leaves most of the length down, but one side gets tucked back with pins while a few curls are shaped and scattered through the rest of the waves.
Why it works: It feels airy and modern, and it’s a good choice if your wavy hair already has enough body but needs a little direction. The asymmetry keeps the style from looking too sweet, which I appreciate. Use pins that match your hair color and stagger them slightly instead of lining them up; that makes the side detail look intentional rather than clipped on.
Best for: Shorter to medium lengths, softer dresses, and brides who want a relaxed feel without losing all structure.
Best move: Keep the pinned side low and close to the temple. If it creeps too high, the style starts to look stiff.
19. Relaxed Top Knot with Tendrils
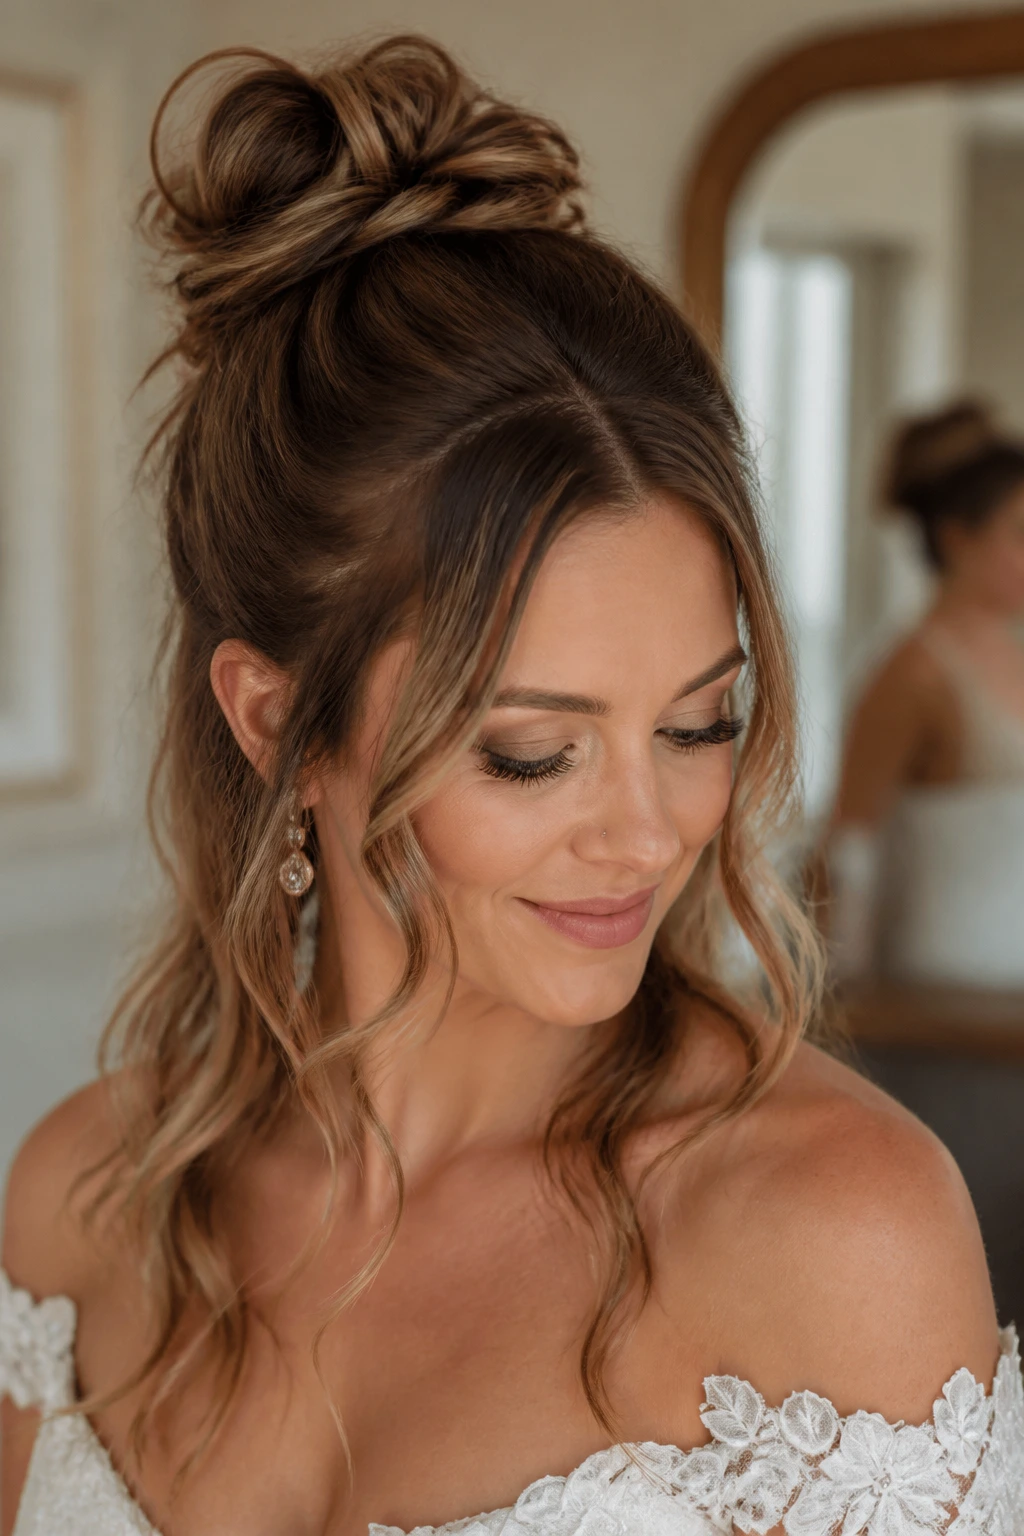
This is the easiest look to mistake for casual, and that’s where the styling matters. A relaxed top knot can feel bridal when the height is controlled, the tendrils are clean, and the waves below are softened into shape.
Why it works: Wavy hair gives the knot texture even when it isn’t sleek, so the bun doesn’t look empty or flat at the crown. The tendrils around the face soften the line and keep the hairstyle from feeling severe. A little shine serum on the ends of the tendrils makes them look finished, but don’t touch the rest of the hair with it or the loose texture can go limp.
Best for: Rehearsal dinners, courthouse weddings, or any ceremony where you want comfort and lightness.
Best note: This is one of the few styles that can look underdone if you do too little. Add one pretty pin or a small comb, and it reads much more formally.
20. S-Shaped Vintage Waves with Tucked Ear Detail
These waves are more uniform than brushed-out Hollywood waves and a little softer around the edges. One side tucks behind the ear, revealing a cheekbone, an earring, and maybe a bit of neck.
Why it works: S-waves hold their own shape well on medium to long hair, and the tucked side gives the style a clean finish without a lot of extra structure. It’s a nice middle ground between loose and formal. If the hair resists the wave pattern, set each section with a clip while it cools; that old-school step makes the curve last much longer than forcing the wave while it’s still hot.
Best for: Vintage-inspired dresses, red lipstick, and brides who like a classic profile.
Small opinion: This one looks better with fewer accessories. The shape is the accessory.
21. Infinity Braid Half-Up
An infinity braid sounds ornate, and it is, but the effect is more graceful than busy. The braid loops in a figure-eight pattern across the back of the crown, then lets the waves fall loose below.
Why it works: Wavy hair helps the braid keep thickness, which matters because the infinity shape can disappear if the hair is too fine or too smooth. The half-up structure also gives you a strong anchor point for a clip or veil. Keep the braid slightly wider than you think you need; the looping pattern reads better when the braid is full enough to show.
Best for: Long layered hair, romantic dresses, and brides who like a little handiwork in the detail.
Best move: Pull the braid apart just a touch once it’s secured. Not too much. Just enough to show the pattern and soften the edges.
22. Veil-Friendly Wavy Ponytail
This style exists for one purpose: to carry a veil cleanly and still look good after the veil comes off. The ponytail sits low enough for the comb to anchor above it, and the loose waves in the tail keep the look soft.
Why it works: A veil can fight with volume at the crown, so a low ponytail gives it room to sit flat and secure. Wavy lengths soften what might otherwise feel like a very practical hairstyle. If you are wearing a longer veil, test the comb placement before the final spray, because a bad anchor point will slide or tug once you start moving.
Best for: Ceremony-to-reception transitions, dresses with low backs, and brides who want an easy veil removal moment.
Best note: Keep the ponytail elastic slim and hidden. Anything bulky under the veil starts to show in photos.
23. Braided Bun with Airy Loops
This bun uses braid structure as decoration and support at the same time. The braids are wrapped into the bun with a few airy loops left visible, so the shape feels sculpted rather than round and dense.
Why it works: Wavy hair contributes movement inside the braid and the bun, which keeps the style from looking too solid. It’s also a durable choice for long ceremonies because the braids lock the shape in place. If you have thick hair, this is one of the safest styles on the list; it holds without needing a mountain of hairspray.
Best for: Big formal gowns, evening receptions, and anyone who plans to dance a lot.
Watch for: Don’t flatten the loops. The airy parts are what keep the bun from looking like a tight ball at the back of the head.
24. Shoulder-Grazing Layered Waves with a Jeweled Comb
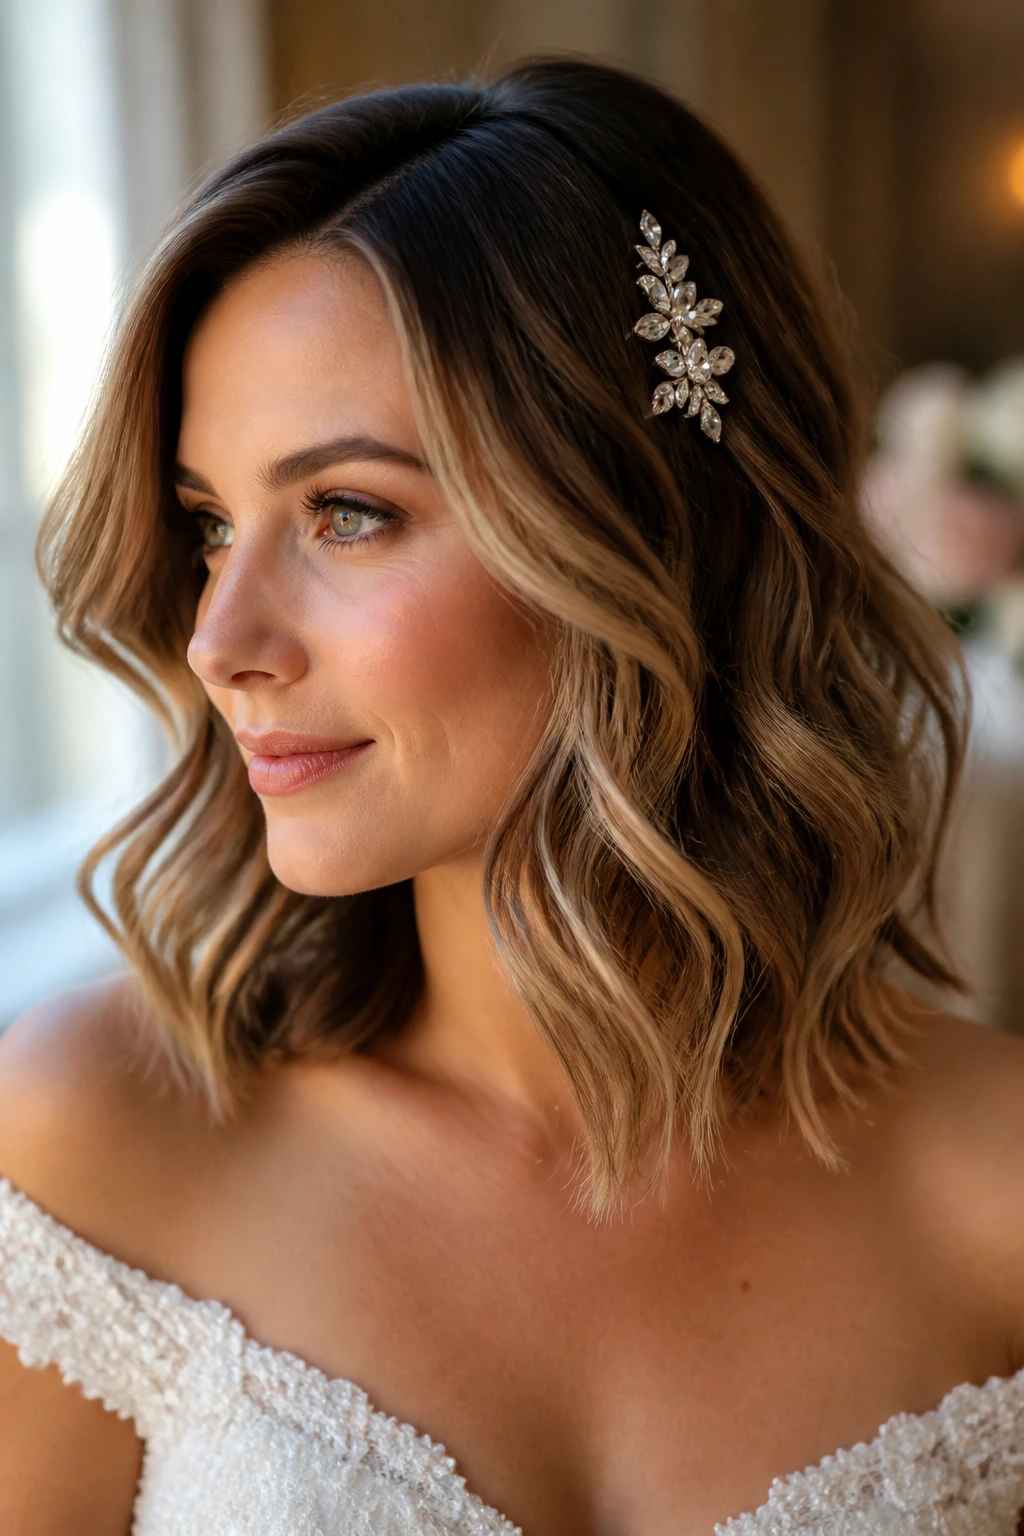
Sometimes the right move is to leave the hair down and add one detail that catches the eye. This look keeps the waves soft at shoulder length and slides a jeweled comb into one side or just behind the part.
Why it works: Shoulder-grazing layers can be tricky because they don’t always have enough length for a full updo, but they do have enough movement to look rich with a good wave pattern. The comb gives a focal point, which helps the style read as intentional rather than simply “hair down.” If the layers flick outward at the ends, wrap only the bottom inch or two around a larger barrel so the finish stays smooth.
Best for: Mid-length hair, shorter veils, and dresses that already carry a lot of visual weight.
Best move: Choose a comb with a narrow base, not a giant cluster. It should sit in the hair, not sit on top of it like a crown jewel.
25. Side Chignon with Sweep-Over Front
A side chignon has a little old-movie drama in it, and I mean that in the best way. Hair sweeps across the front, then gathers low and to one side in a soft knot or roll.
Why it works: The sweep-over front gives the face a long line, which flatters wavy hair by organizing the texture instead of hiding it. Because the knot sits off-center, the style can feel more romantic than a straight-back bun. Use hidden pins to create the sweep first, then build the chignon so the front and back feel connected. That order matters.
Best for: One-shoulder dresses, asymmetrical necklines, and brides who want a profile view with some drama.
Best tip: A side chignon gets better when one side is tucked flatter than the other. The slight imbalance makes it feel softer and more human.
26. Twisted Rope Braid Half-Up

This style has a clean, twisted line that feels polished without going rigid. Two rope twists come from either side and meet at the back, leaving the lower half of the waves loose.
Why it works: Rope braids are easier to soften than classic three-strand braids, which makes them useful when you want the detail to show but not dominate. Wavy hair holds the twist well, especially if the front sections are misted with a little texture spray first. I like this on medium-length hair because the twist frames the top and the rest of the length stays open and light.
Best for: Simple dresses, outdoor weddings, and brides who want a quick half-up style that still looks considered.
Small caution: Keep the rope twists even in thickness. If one side is much fatter than the other, the whole style leans off-balance.
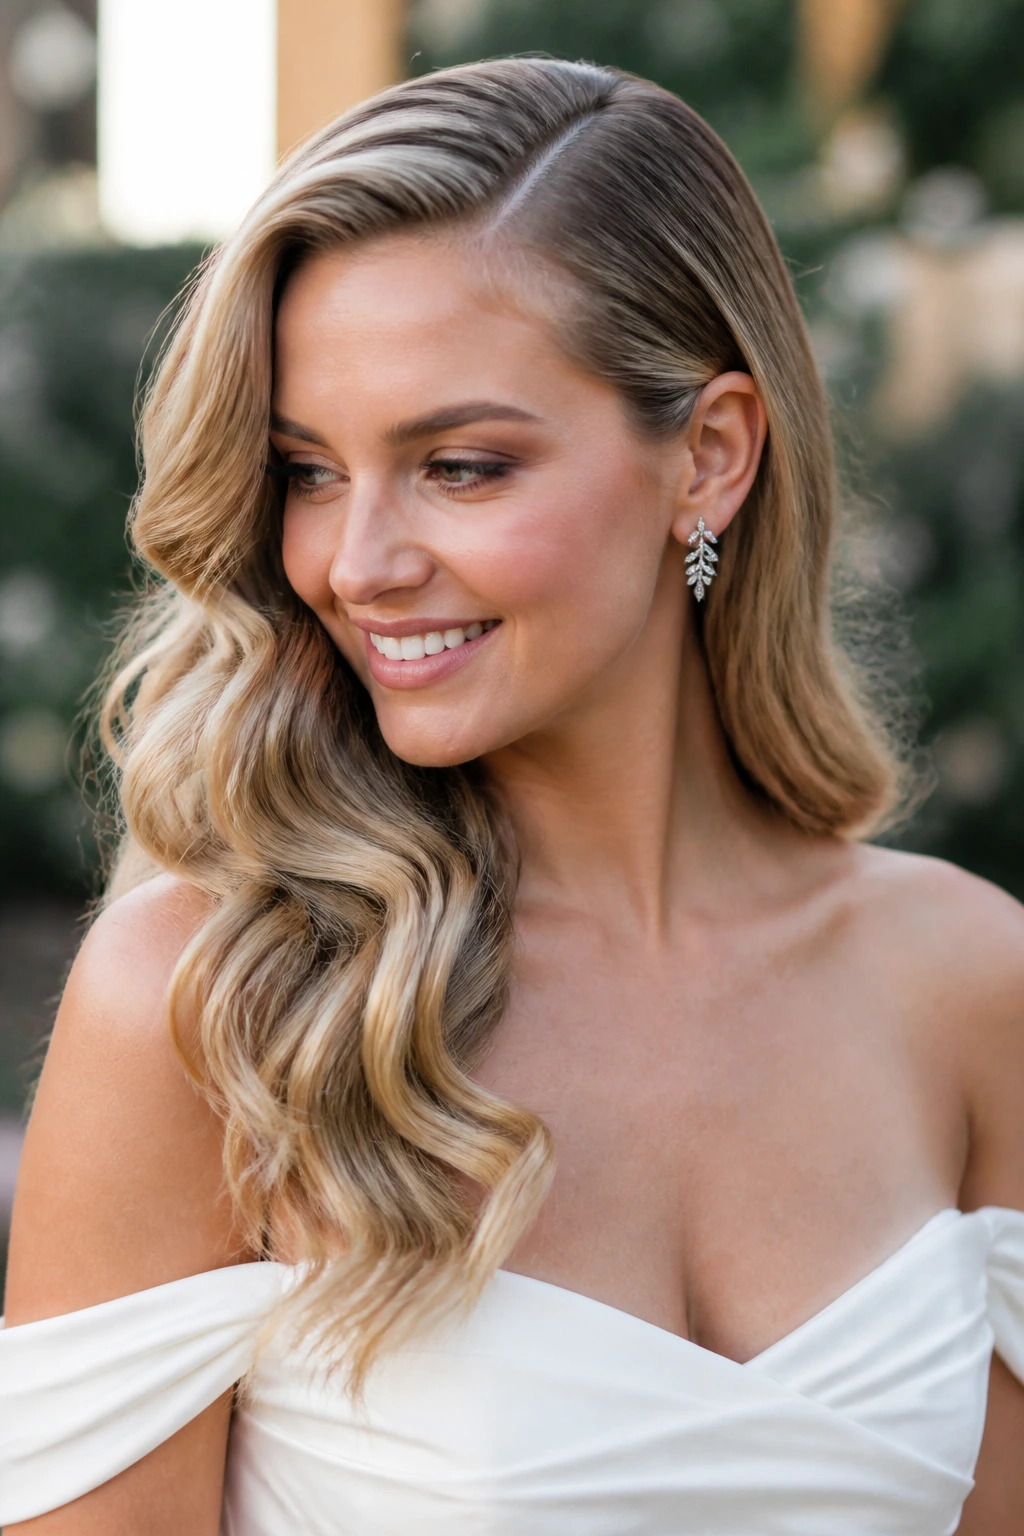
27. Loose Mermaid Waves with a Single Statement Clip
This one is almost stubbornly simple. Big, soft waves fall from root to end, and one strong accessory — a crystal clip, a vintage comb, or a pearl barrette — does the styling work that a braid or bun might do elsewhere.
Why it works: Long wavy hair can carry a lot of visual weight on its own, especially when the wave pattern is stretched into a smooth, flowing shape. A single statement clip gives the eye a place to land and keeps the style from feeling unfinished. Use a wide-barrel iron or a large wand if the natural wave is a bit inconsistent; larger sections create a more flowing bend that suits this look better than tight curls.
Best for: Minimal gowns, dramatic jewelry, and brides who want hair to feel airy and unforced.
Best note: One accessory is enough. If you add too many, the style stops breathing.
28. Soft Faux Bob Pinned Into Waves
A faux bob can feel glamorous and slightly mischievous, which is not a bad thing on a wedding day. The ends are tucked and pinned under so the hair reads shorter, while soft waves at the front keep the shape romantic rather than severe.
Why it works: Wavy hair already has enough bend to fake a shorter silhouette without needing to be pinned into a tight shell. This is useful if you want a vintage edge, if the dress has a lot going on at the neckline, or if you simply want to change the shape of long hair for one night. Work in layers: pin the lower lengths first, then set the top wave over them so the illusion stays smooth from the side.
Best for: Art Deco dresses, shorter veils, and brides who want a look that feels a little unexpected.
Best tip: Test this one with your earrings. A faux bob changes the way jewelry sits against the jawline, and that detail matters more than people expect.
Why Wavy Hair Is Such a Good Bridal Base
Wavy hair sits in a sweet spot. It has enough bend to look styled even when you do very little, but it still has enough flexibility to be pinned, braided, wrapped, or brushed into shape without fighting back like a stiff curl pattern can. That makes it a useful base for wedding hair because the same texture can read soft in one style and polished in another.
There’s also a practical reason these looks hold up. Hair shape changes most when it is warmed, manipulated, and then cooled into place. That means the old habit of curling, pinning, and letting the hair fully cool is not just a stylist’s ritual; it is how the bend sets. A wave that is brushed too soon loses definition faster. A pin placed into hair that is still warm can slip later. Tiny details. Big difference.
Wavy hair also hides some sins. A braid does not have to be perfect to look pretty. A bun does not have to be round to look intentional. A half-up twist can be slightly uneven and still read as romantic, because the texture gives the eye a place to land. That forgiving quality is a gift on a day when you already have enough to think about.
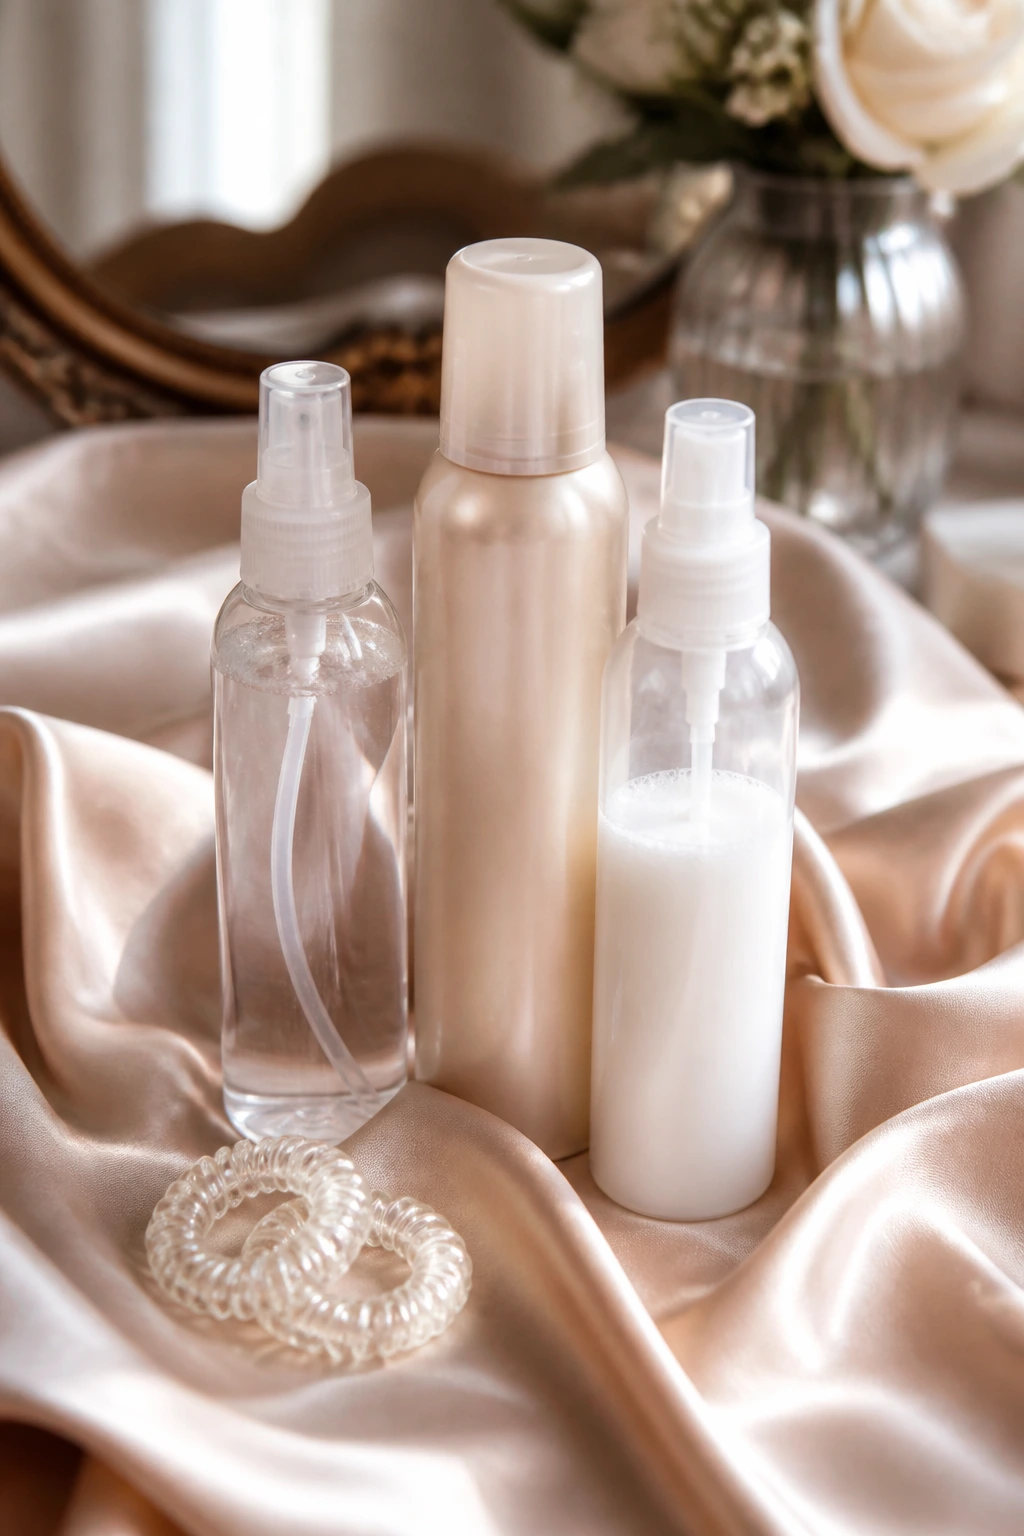
Essential Tools for These Styles
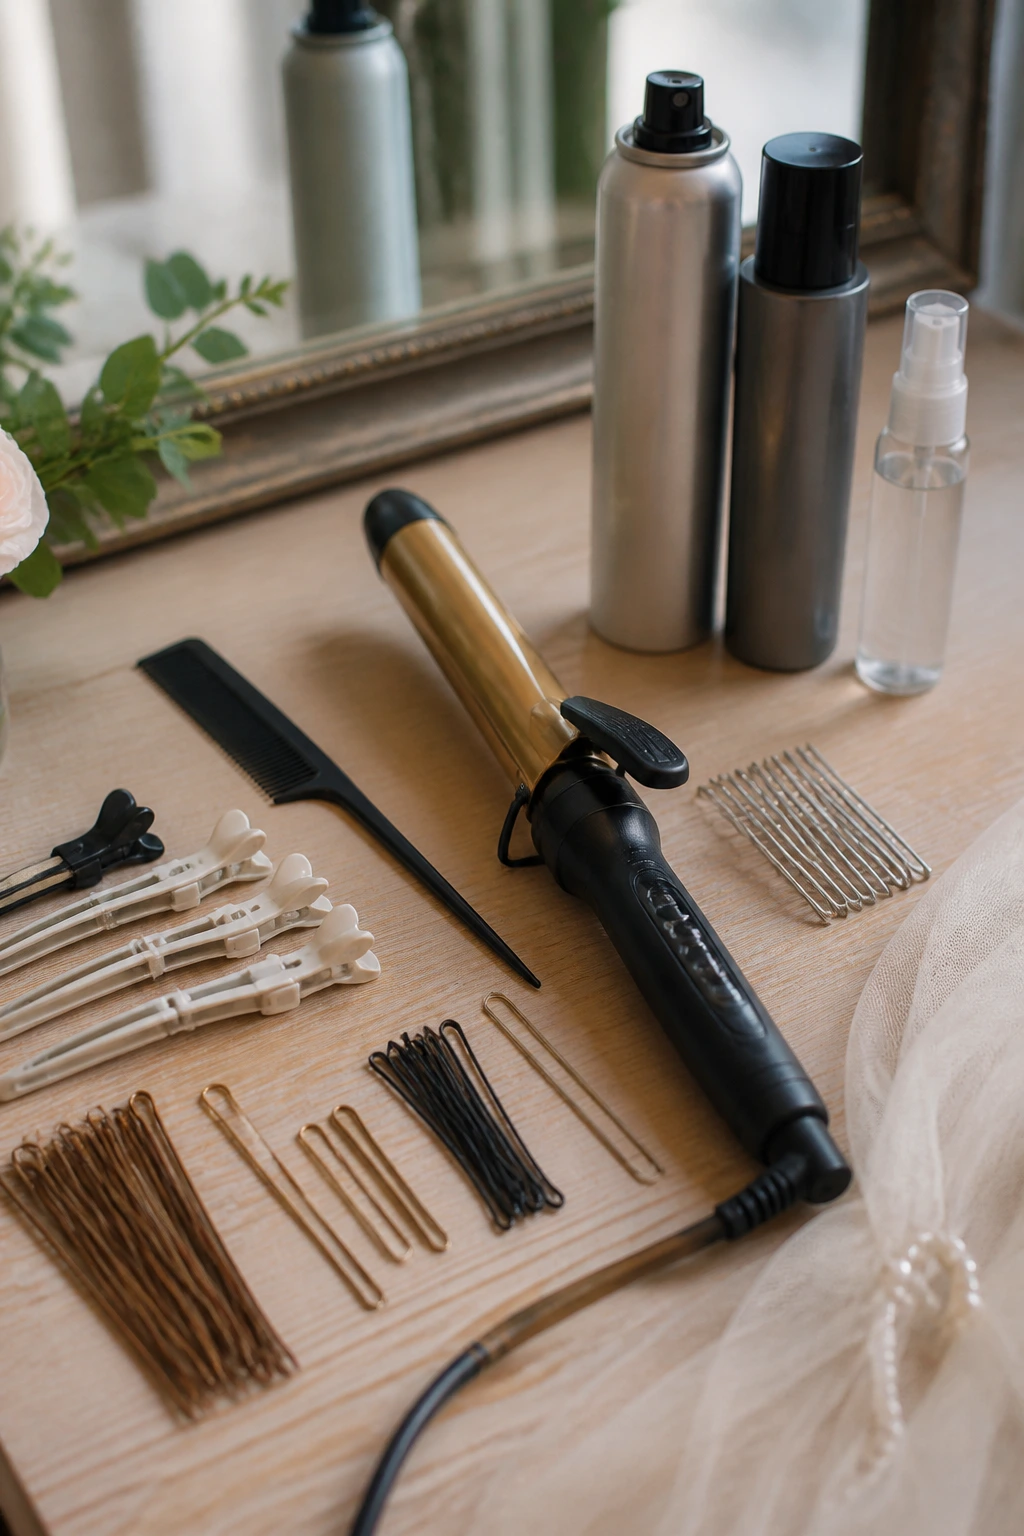
- Tail comb: For clean parts, smooth sectioning, and tidying the crown before you pin.
- 1-inch curling iron or wand: Useful for refreshing pieces that need more shape than the natural wave gives them.
- Hair clips or sectioning clips: These keep the top layers out of the way while you braid, twist, or pin.
- Bobby pins in a hair-matched shade: The right color disappears better in photos and holds more cleanly.
- U-pins: Better than small bobby pins for heavier buns or twist structures.
- Flexible-hold hairspray: Strong enough to set the shape, light enough that the hair still moves.
- Dry texture spray: Adds grip for braids, twists, and roots that need a little lift.
- Shine spray or a tiny bit of serum: Use sparingly on the ends, not the roots.
- Wide-tooth comb or soft brush: Good for brushing out curls into waves without creating a halo of frizz.
- Veil comb or accessory anchor: Helpful if the hairstyle has to support a veil, floral piece, or jeweled clip.
Smart Prep and Product Picks
The best wedding styles on wavy hair usually start the day before, or at least several hours before the ceremony, with hair that is clean enough to behave but not so squeaky-clean that it slips through every pin. If your hair gets oily fast, wash it the night before and use a light mousse at the roots while it is damp. If your hair is dry or porous, a light conditioner on the mid-lengths and ends is enough; do not coat the roots with heavy cream unless you want the style to collapse early.
Heat protectant matters if you are refreshing wave pieces with an iron or wand. Use a light mist, not a drench. Wet-looking protectants can make the hair gummy, which is the last thing you want when you’re trying to create movement. And if the hair already has enough bend, don’t feel obligated to curl every inch. Sometimes it’s enough to touch only the front and top layers, then leave the rest alone.
I also have a strong opinion here: buy more pins than you think you need. Wedding hair eats pins. They disappear into buns, slide during prep, or get used as emergency fixes for veils and stray pieces. A small kit with matched pins, a mini hairspray, and a couple of clear elastics saves a lot of scrambling.
How to Match the Hairstyle to the Dress, Veil, and Jewelry
Presentation: If the dress has a high neckline, use a style with lift or sweep — a French twist, crown twist, or side chignon keeps the front clean and the silhouette balanced. If the dress is strapless or off-the-shoulder, looser waves or a side-swept style help fill the open space without crowding it.
Accompaniments: Veils need anchors. Low buns, veil-friendly ponytails, and twist-based half-up styles usually give the comb a secure place to sit. Floral pins work best in half-up shapes or braided structures where the accessory can nest into the hair rather than perch on top of it. Earrings are a separate conversation; statement earrings usually look best with tucked sides, while delicate drops can sit under looser waves.
Balance: Very detailed dresses often need simpler hair, not more hair. If the bodice is beaded or the back is dramatic, a low knot or brushed wave keeps the outfit from feeling crowded. A plain dress can handle braid work, pearls, or a more intricate crown.
Photo Notes: Hair that opens one side of the face photographs differently from hair that sits evenly down both shoulders. One side tucked, one side swept, or one ear visible gives the photographer lines to work with. That little asymmetry usually looks better in motion than a perfectly centered style.
Practical Ways to Get the Most Out of the Style

Texture Boost: If your waves fall limp by noon, prep the roots with dry texture spray before styling and finish with a flexible-hold hairspray from about 10 to 12 inches away. That distance matters; spraying too close can leave little wet spots that flatten the wave.
Accessory Swap: A pearl comb can turn a plain half-up into a bridal look in seconds. So can a ribbon tied into a low ponytail or a few pinned baby’s-breath stems tucked into a braid. Keep the accessory size in scale with the hair — tiny combs disappear in thick hair, while oversized pieces can overwhelm fine hair.
Frizz Control: Smooth the outer layer with a soft brush or your hands only after the waves have cooled. Touching warm hair is the fastest way to puff up the cuticle and lose the bend. A half-drop of serum on the very ends helps, but the crown should stay light.
Make-It-Yours: If you like a cleaner finish, tighten the twist, flatten the braid, and reduce the face-framing pieces. If you want a softer mood, loosen one twist line, pull out a few side pieces, and let the waves sit with more air between them. That is the nice thing about wavy hair — the same base can move toward polished or undone with very small changes.
How to Keep the Style Alive Through the Ceremony and Reception
A wedding hairstyle should survive actual life, not just a photo. The first test comes before the ceremony starts: if a pin slips when you tilt your head or a braid loosens when you smile, fix it then. Do not assume it will magically improve by the time you’re halfway through the vows.
Keep a tiny touch-up kit nearby. A few bobby pins, a travel hairspray, blotting paper for the forehead, and one small comb can rescue a style that starts to drift. If you plan to take the veil off after the ceremony, ask whoever is helping you to remove it gently from the anchor point rather than yanking up and out. That pull can disturb the entire shape, especially in low buns or twist styles.
The other rule is simpler: stop touching the hair. Everybody does it. They pat the sides, fluff the waves, and run fingers through the front because it feels natural. It also breaks the set. If the style needs a reset, use your hands with a little spray on them, then reshape the section once instead of fussing with it every five minutes.
Common Mistakes That Flatten Wavy Wedding Hair
The first mistake is overcurling. Tight curls can be lovely on their own, but if you’re building a wedding style on top of wavy hair, too much curl makes the hair puffy instead of soft. The fix is to use a larger barrel or to brush the waves out once they cool.
Another common problem is drowning the hair in product. Heavy cream near the roots, too much oil on the ends, and a cloud of sticky hairspray can make the style collapse faster, not slower. Keep the root area lighter than the lengths, and use hold products in thin layers.
Pins are another trap. Too few pins, and the style slips. Too many, and the hair starts to bulge or bruise around the pins. The sweet spot is usually a few well-hidden pins placed in opposing directions, especially in buns and twists.
And then there’s veil placement. If the comb sits on top of a style instead of into it, the veil can tug or tilt once you move. Always test the veil with the finished hairstyle before the spray fully sets. That small rehearsal saves a lot of panic later.
Variations and Adaptations to Try
Fine-Hair Lift: Use a light mousse at the roots and choose styles that create shape without too much bulk, like the half-up twist crown or a low ponytail with wrapped base. Fine hair often looks fuller when the top is lifted just a little and the ends are left brushed into soft waves.
Thick-Hair Control: Braided buns, rope twists, and low chignons handle dense hair better than very loose down styles. Thick hair needs enough structure to keep the shape from spreading, and braids are better than brute-force hairspray for that job.
Veil-First Version: If the veil is the priority, choose a low anchor style — low bun, veil-friendly ponytail, or side chignon. These give the comb a stable seat and keep the veil from fighting a lot of volume at the crown.
Floral Finish: Swap metal pins for small blossoms, pearl-tipped pins, or a narrow floral vine woven into a braid. Keep the placement close to the twist or braid line so the accessory looks like part of the hairstyle, not an add-on.
Humidity Shield: For warm or damp weather, avoid styles that depend on super-sleek roots. Go for texture-based shapes, such as braided halos or low textured buns, and finish with a humidity-resistant spray over the outer layer only.
Shorter-Length Adaptation: Shoulder-length waves can still wear romantic styles if the back sections are pinned up and the front is left soft. The shoulder-grazing wave with a jeweled comb is one of the better options because it doesn’t ask for more length than the hair can actually give.
Frequently Asked Questions About Romantic Wedding Waves

Can I wear these styles if my hair is naturally frizzy?
Yes, and in some cases the texture helps. The trick is to build the style after the hair is smoothed and set, not while it is still puffy from the shower. A light cream on the ends and a flexible spray over the finished shape usually works better than trying to coat every strand.
Should I curl my hair before doing a wedding style if it’s already wavy?
Usually, only the pieces that need help. If your natural wave is strong, curl the front and top layers for consistency, then leave the rest alone. If you curl everything tightly, the style can look overdone once it’s brushed or pinned.
How far ahead should I do a trial run?
Soon enough that you can still change your mind. A trial gives you time to test pin placement, veil anchors, and how long the waves hold before they lose shape. It also shows you whether your hair behaves better with a bit more texture spray or less.
Do these looks work with extensions?
Absolutely, as long as the extensions are matched to your wave pattern and color well enough that they disappear into the style. Clip-ins are especially useful for low buns, side-swept waves, and half-up shapes because they can add length or fullness where the hair needs it most.
What if my waves go flat halfway through the day?
Focus on the root and the crown, not the ends. A quick lift at the part, a little dry texture spray, and a gentle re-formation of the front pieces can bring the style back without rebuilding everything. Keep a small clip in your touch-up kit to reset one side if needed.
Can a wedding hairstyle with wavy hair still look formal if it isn’t very structured?
Yes. Formal does not have to mean stiff. A brushed-out wave, a polished side chignon, or a half-up twist with pearl pins can look fully wedding-ready without being rigid, and I would argue those styles age better in photos than the over-sprayed ones.
Which styles are safest if I’ll be dancing a lot?
Low buns, braided buns, and veil-friendly ponytails are the steady performers. They keep the hair anchored near the nape, which means less shifting as you move. Loose down styles can still work, but they need more touch-ups after a few hours of movement.
The Style That Still Feels Like You
The best wedding hair for wavy textures usually does one smart thing: it lets the wave stay visible. That might mean a braid tucked into the side, a bun with soft ends, or a brushed-out wave that looks calm instead of fussy. Hair that moves a little tends to age better through the day. Hair that has enough structure to survive the day tends to feel calm while it’s doing it.
Pick the style that fits the dress, the veil, and the way you actually wear your hair when nobody is asking for photos. That part matters more than any trendier shape. If the style still looks like you after the first dance, the second round of hugs, and one too many flashes from a camera, you chose well.