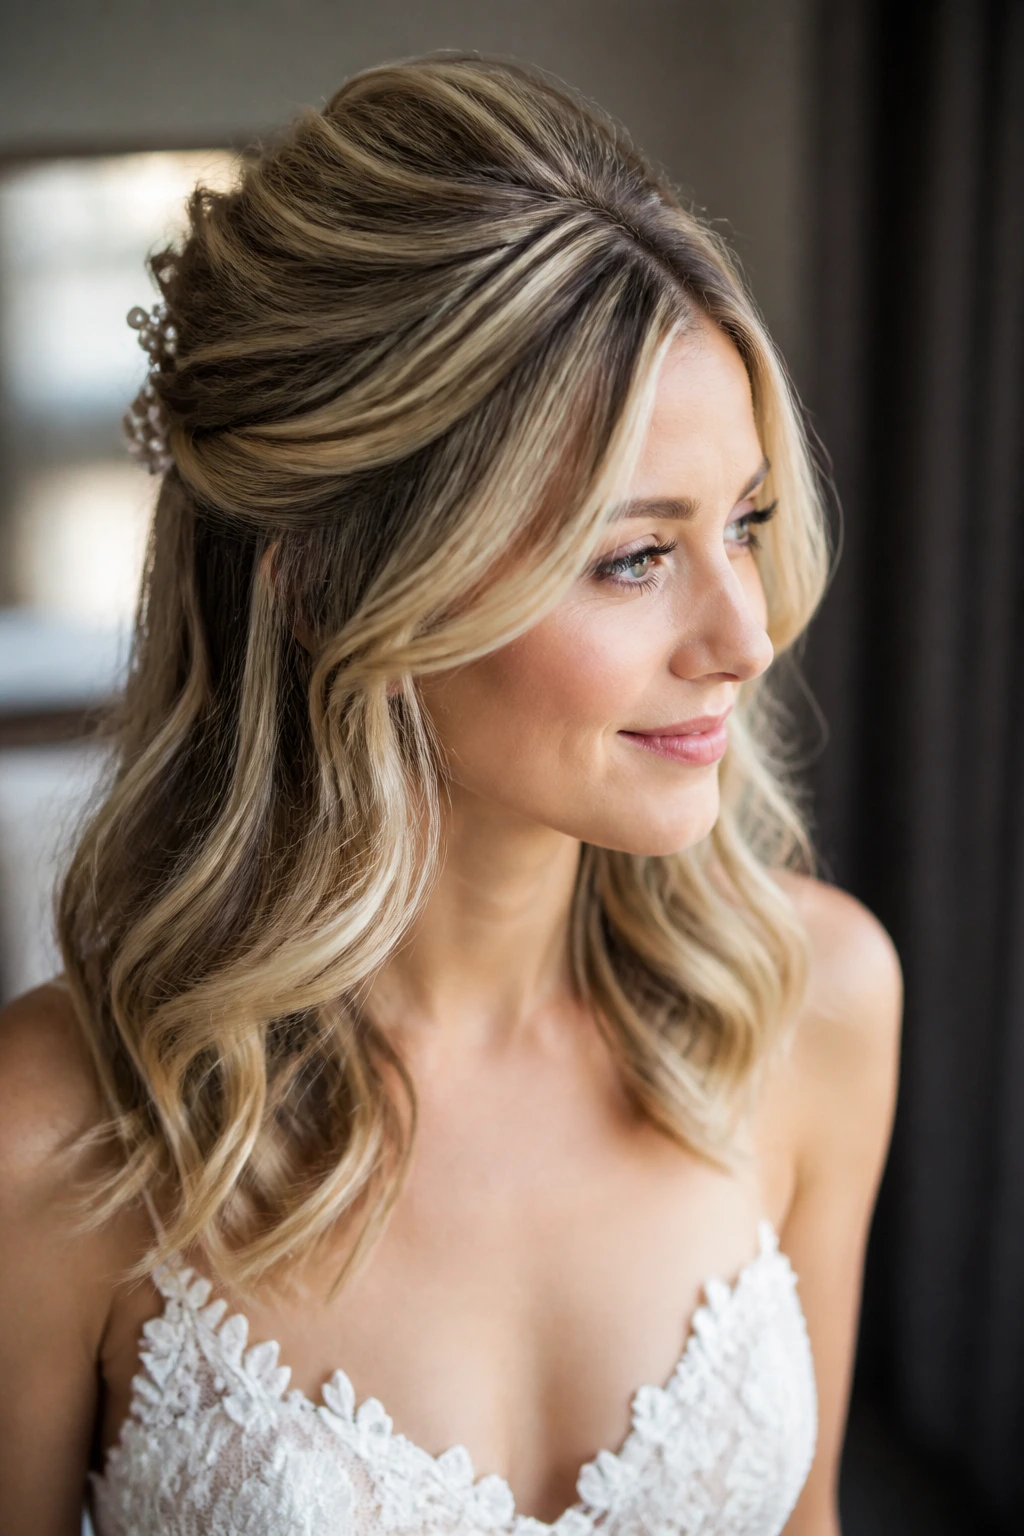
Thin hair can look surprisingly elegant on a wedding day, but only if the style does some of the heavy lifting for you. Medium length is the sweet spot. It’s long enough to twist, pin, braid, and tuck into something polished, yet short enough that the weight doesn’t drag everything flat by the third toast.
The mistake I see most often is not the hair itself. It’s the styling logic. People reach for a huge bun, or a tiny curl routine that disappears before the photographer gets to the altar shots. Medium-length wedding hairstyles for thin hair work best when they build shape in the right places: the crown, the sides, the nape, and the face-framing pieces that make the whole style look fuller without looking stuffed.
That’s where the good stuff lives. A well-placed twist can make a narrow part look intentional. A soft wave can give a lob some body it never had on its own. A low knot can read as graceful instead of sparse if the base is padded, pinned correctly, and finished with a little texture rather than too much shine. The styles below lean into that logic, and they’re chosen with real wedding conditions in mind — heat, movement, veil pins, hugs, dancing, and the fact that no one wants to spend the reception worrying about a collapsing crown.
Why These Looks Earn Their Place on Thin Hair
- They create shape where fine hair needs it most: Most of these styles build volume at the crown or around the face, not at the ends, which keeps thin hair from looking stringy.
- They work with medium length instead of fighting it: Shoulder-grazing and collarbone-length hair gives you enough material to twist and pin without the drag that longer hair can create.
- They survive a long ceremony and a longer dance floor: The best wedding styles for thin hair rely on structure, not just curl, so they stay put after photos, hugs, and a few rounds of champagne.
- They look good from every angle: A wedding style has to read cleanly from the front, side, and back, especially when the photographer keeps moving you around.
- They leave room for accessories: Veils, combs, pearls, and pins all need a landing spot. Thin hair often does better when the accessory is part of the architecture.
- They can be adjusted for brides, guests, and attendants: The same shape can look softer, sleeker, or more dressed-up depending on the finish.
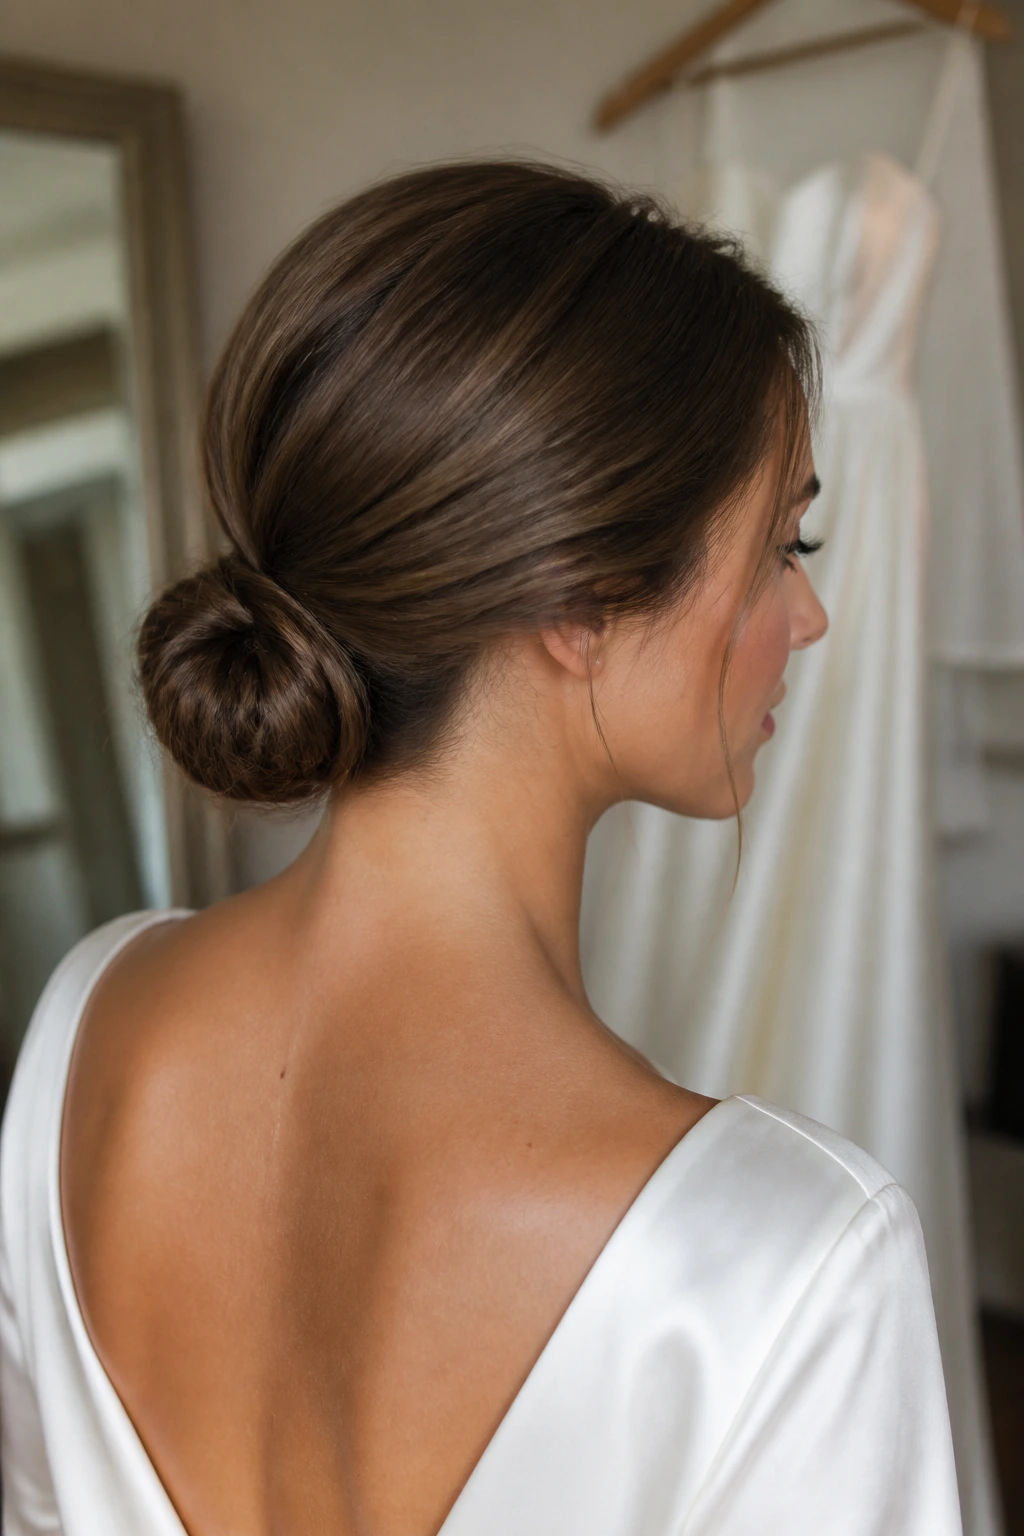
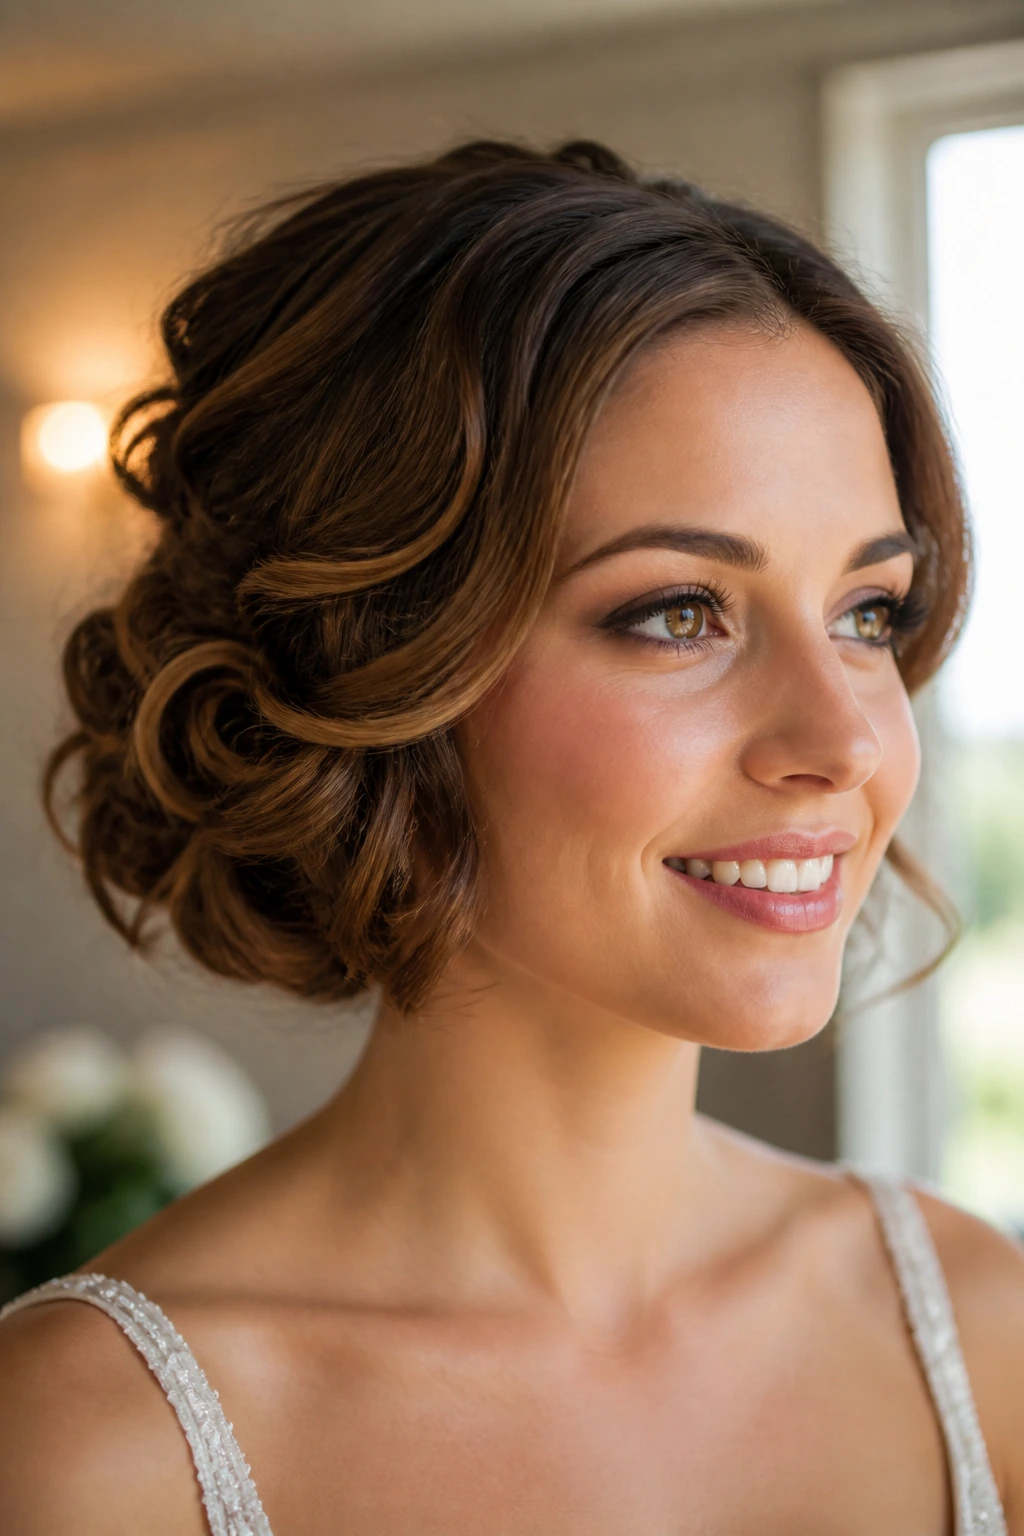
1. Soft Textured Low Chignon

A low chignon is one of the safest bets for thin, medium-length hair because it keeps the shape anchored at the nape, where the hair has the best chance of staying compact. The trick is texture. If the surface is too smooth, the bun can look small and flat. If it has a little grit — mousse, dry texture spray, and a light backcomb at the crown — it reads fuller and more deliberate.
2. Half-Up Crown Twist
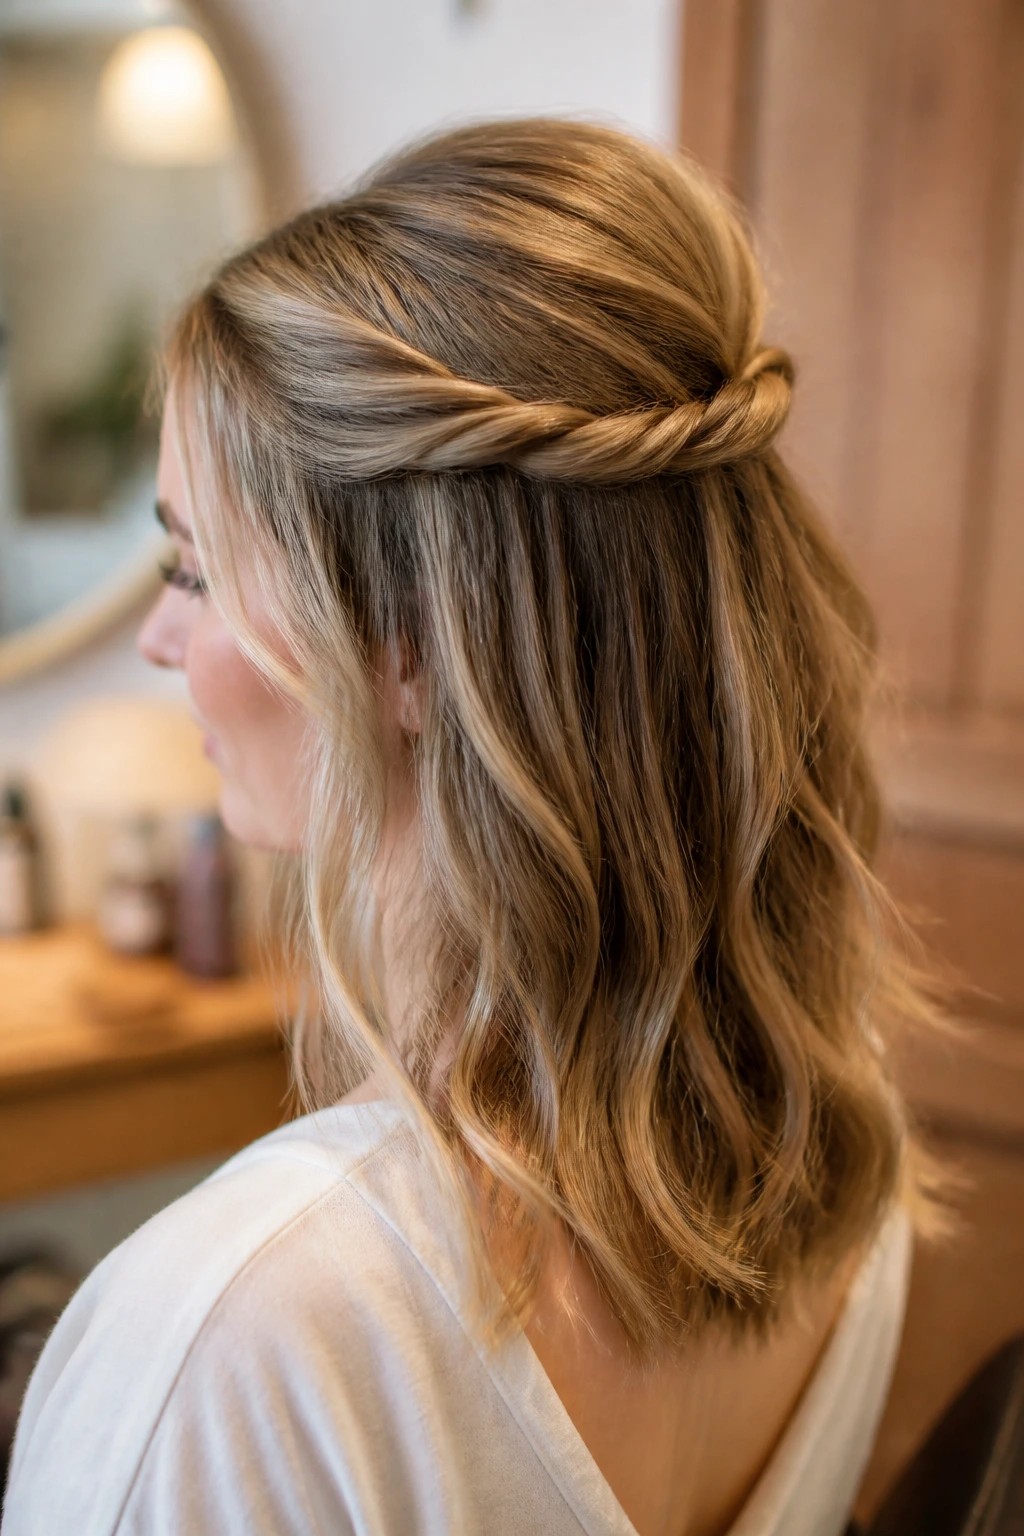
This one is for hair that needs lift without giving up length. A half-up crown twist gathers just enough hair from above the ears to make the crown feel supported, while the rest hangs loose and soft. Thin hair likes this because the top section does the visual work and the lower section gets to act like a backdrop instead of carrying all the weight.
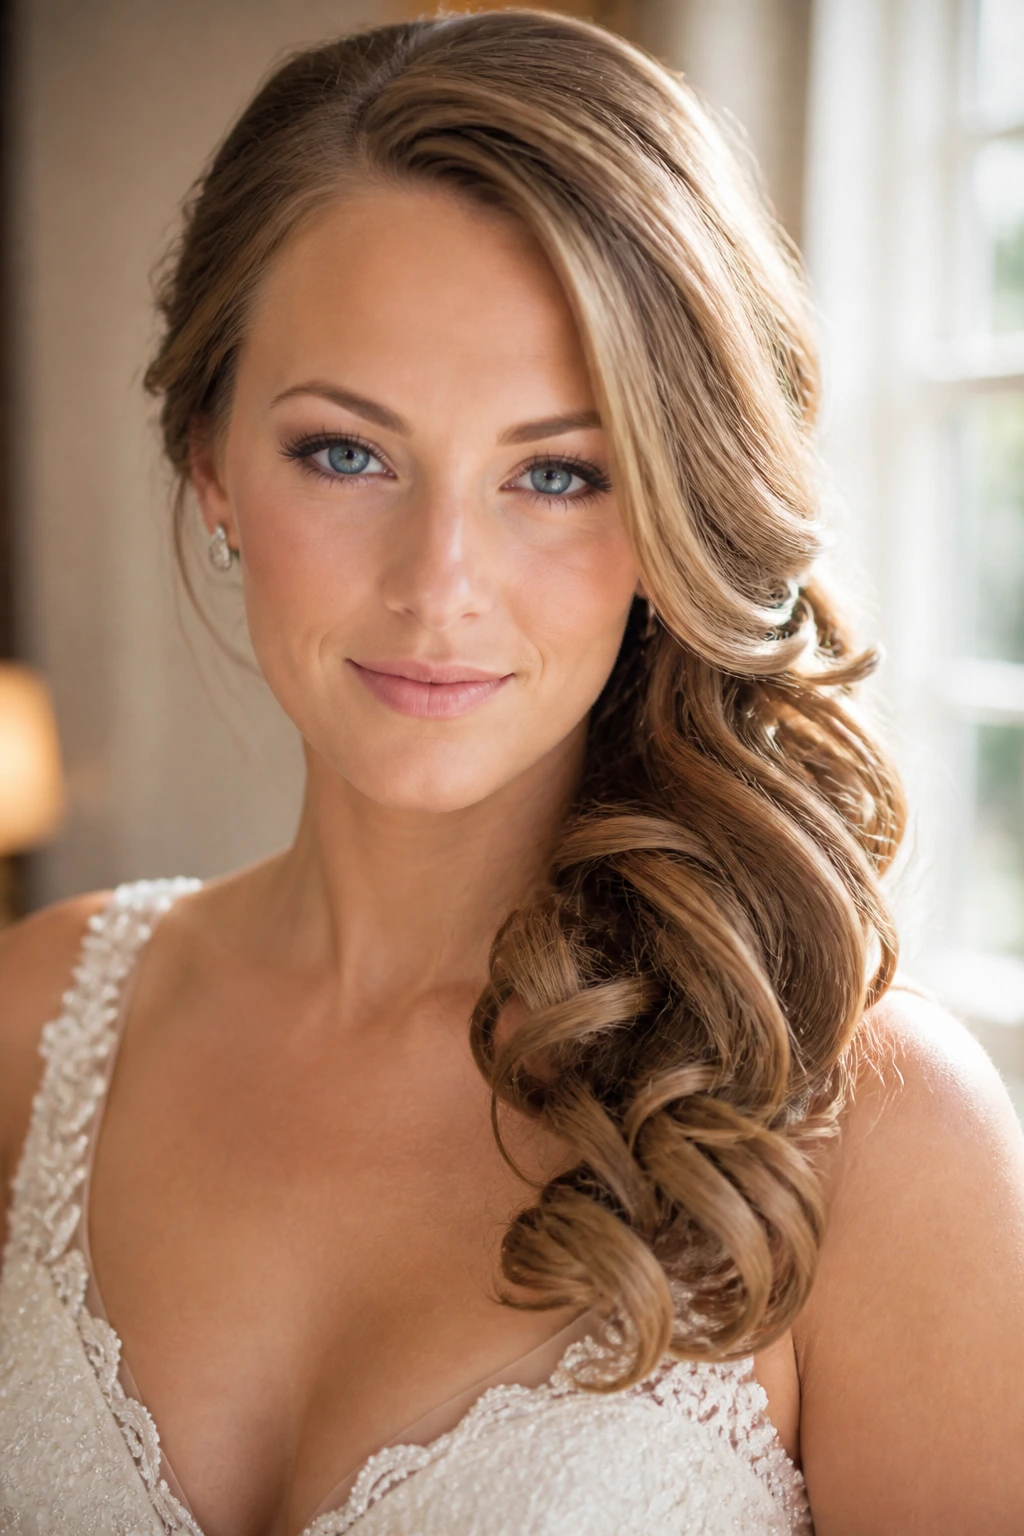
3. Side-Swept Old Hollywood Waves
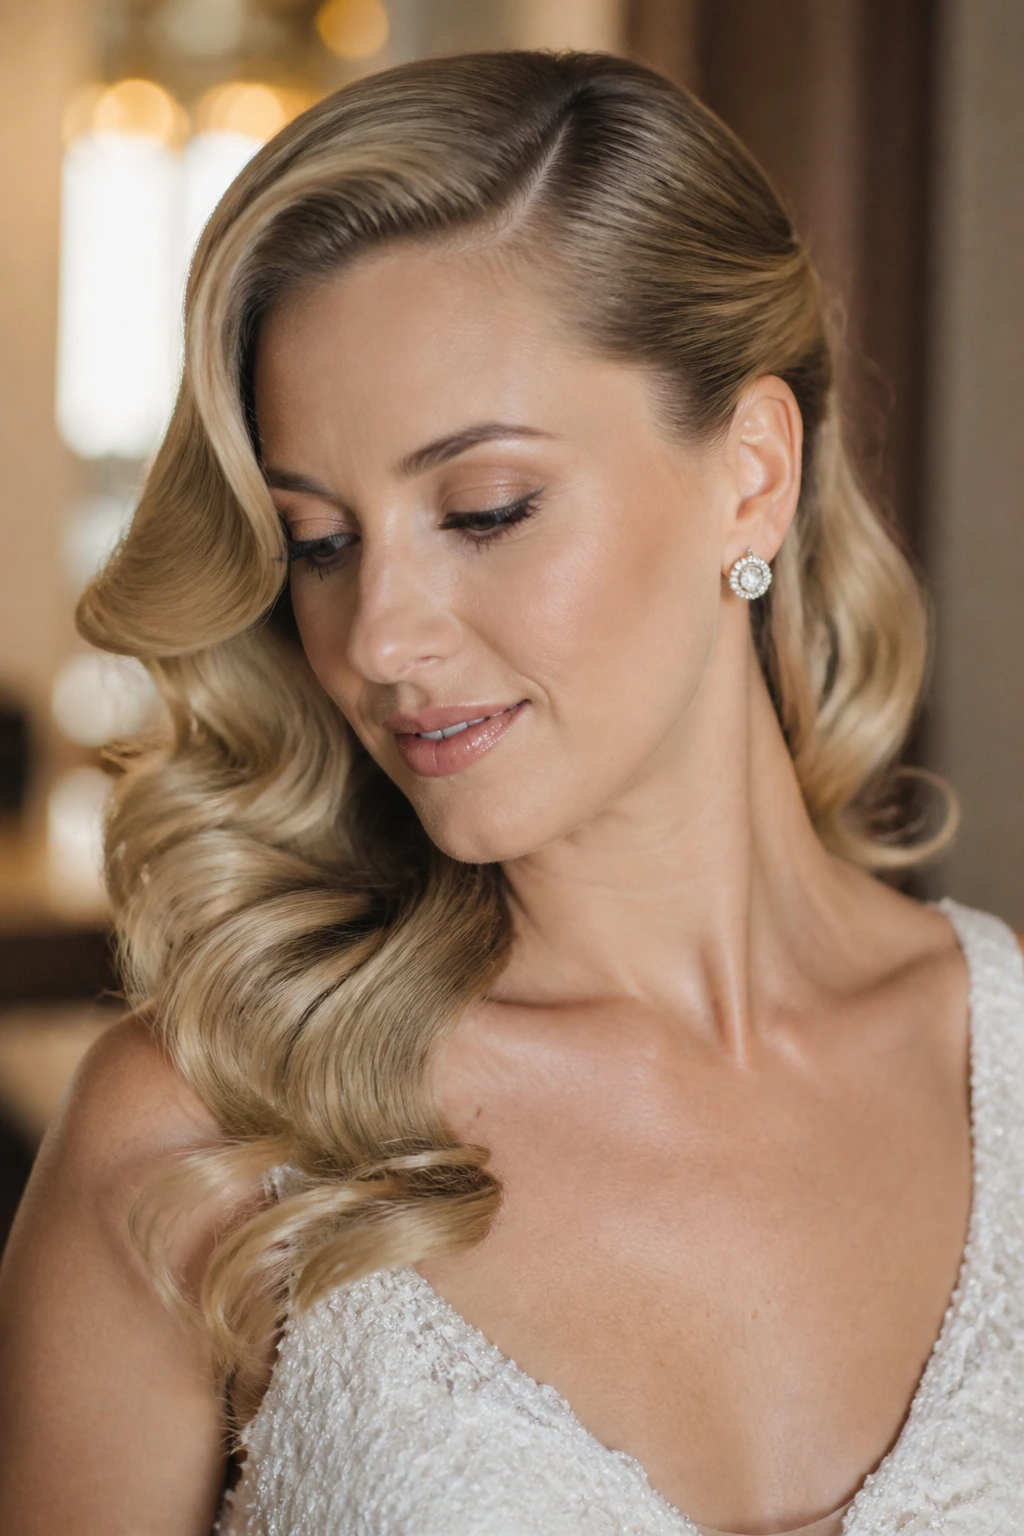
Want one style that makes thin hair look richer instantly? Put in a deep side part and curl everything away from the face with a 1 to 1¼-inch iron. Brush the curls into one continuous wave pattern, pin one side behind the ear, and let the front pieces fall in a curved line. The result is soft, glossy, and a little dramatic in the best wedding way.
4. Braided Halo With Loose Ends
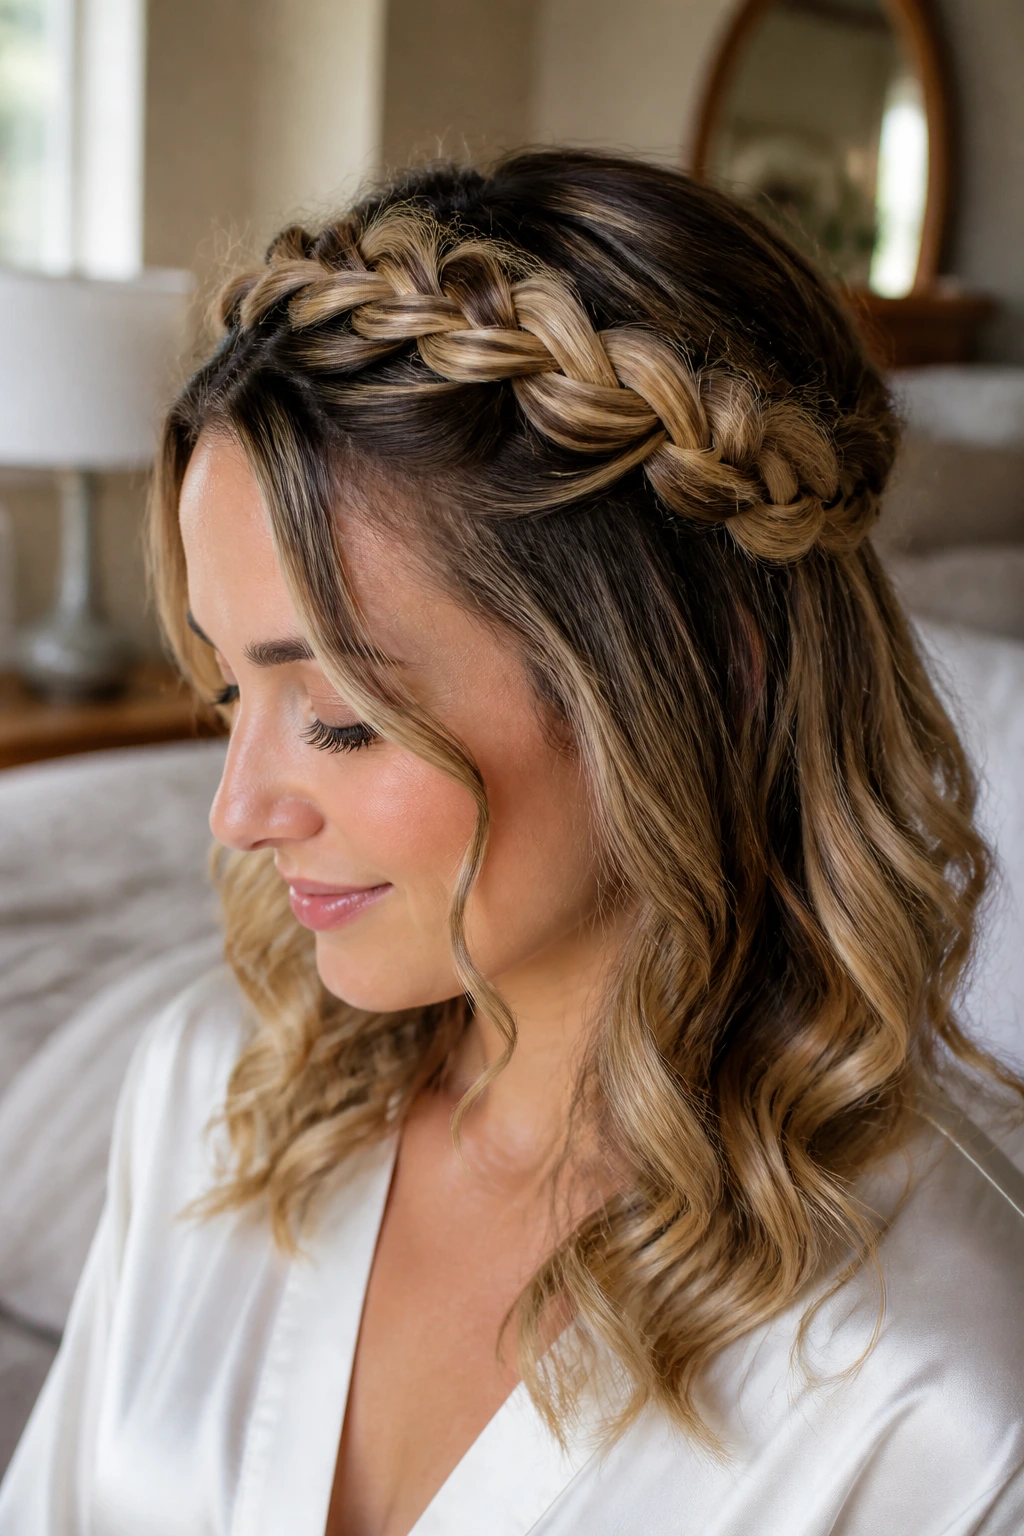
A halo braid around the crown can be a smart move when the top of the head needs visual density. The braid itself gives the eye something to follow, which helps thin hair look more substantial than a simple flat style. I like leaving the ends loose and curled, because a fully wrapped crown braid can look too tight on medium-length hair and expose the lack of length.
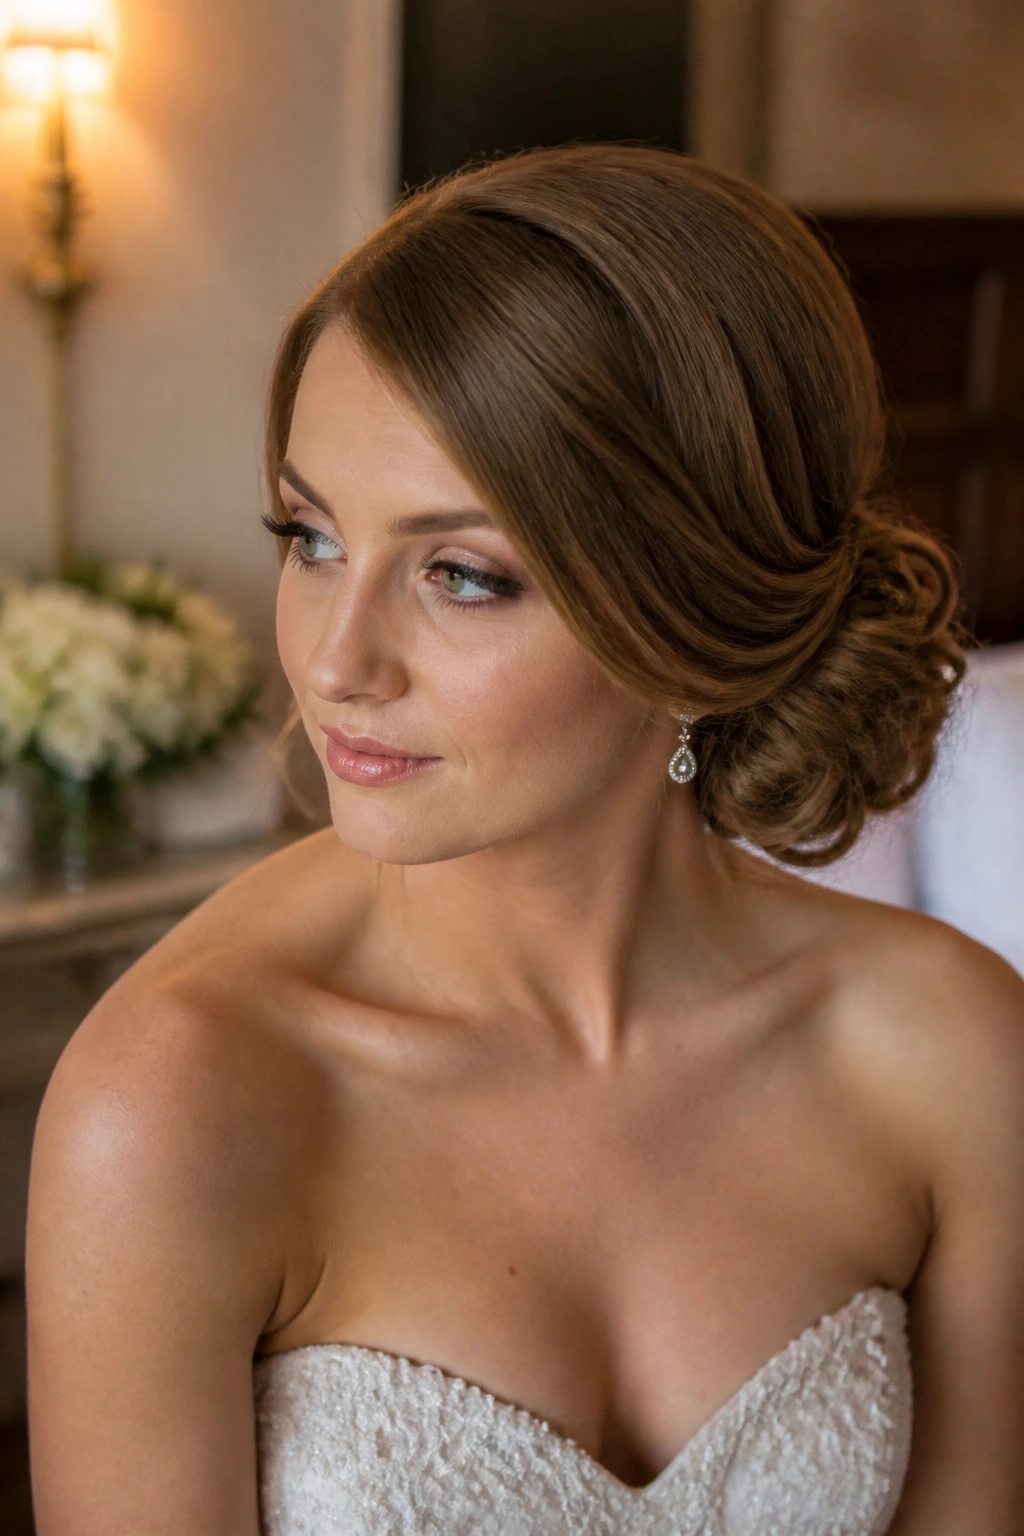
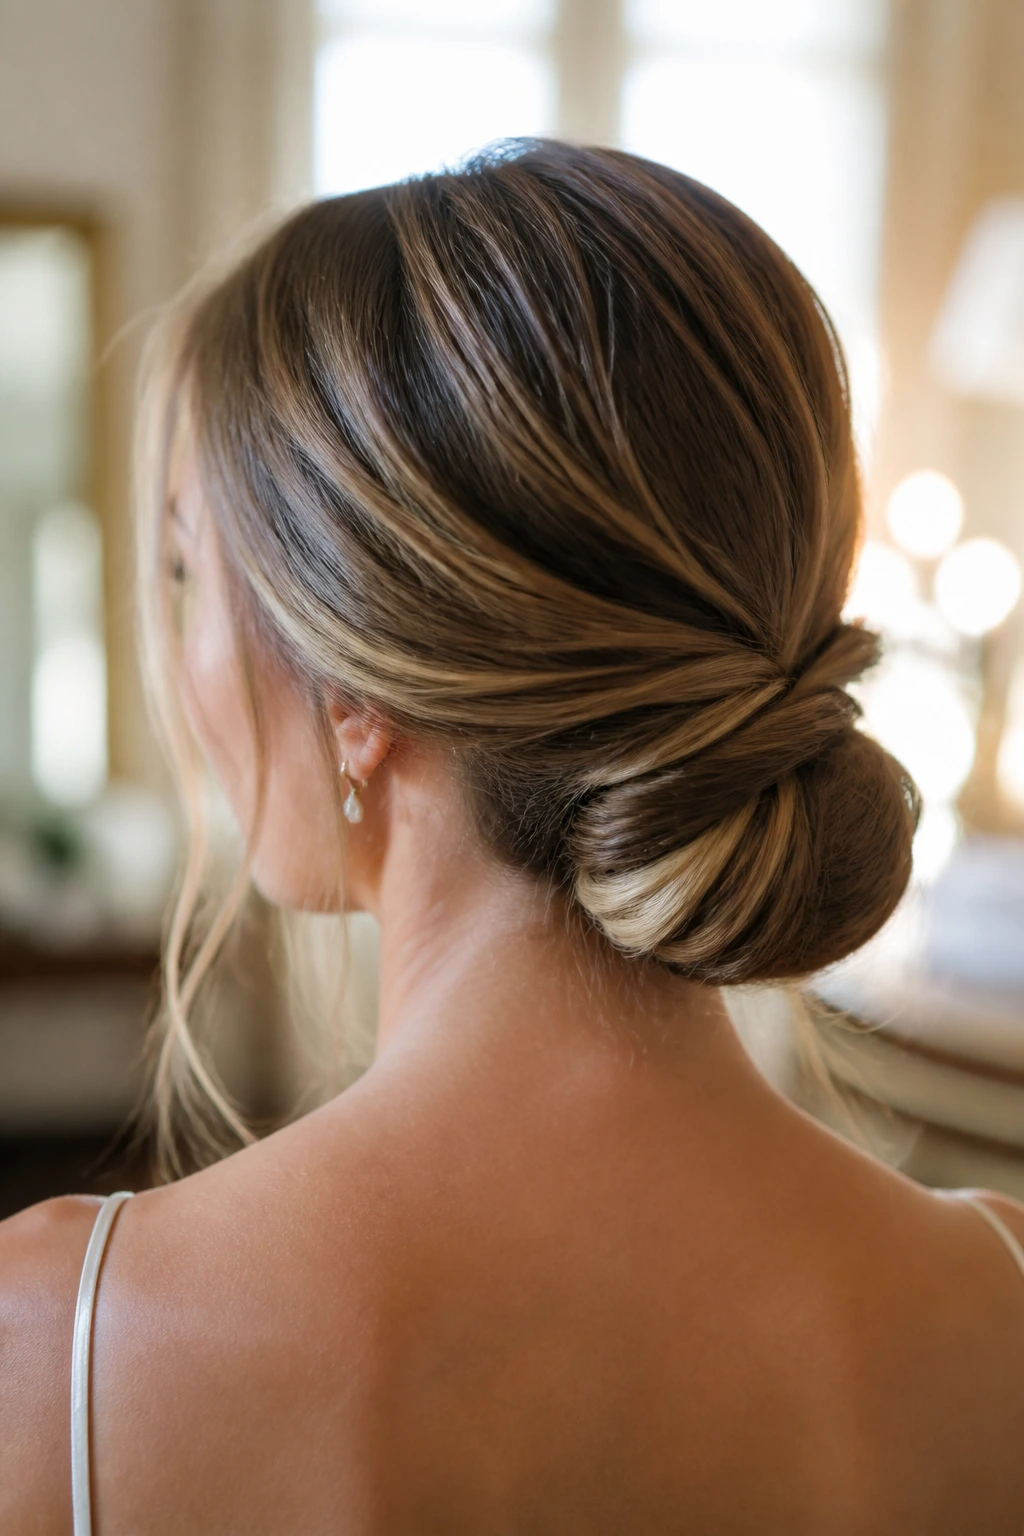
5. Polished Low Knot
A polished low knot is the neat cousin of the chignon. It’s cleaner at the surface, tighter at the base, and especially good for gowns with clean lines — satin, crepe, anything that already has enough visual texture in the dress. Thin hair benefits from the control here. There’s no fighting flyaways, no halo of frizz, just a smooth top and a compact knot that sits low and steady.
6. Ribbon-Tied Half Ponytail
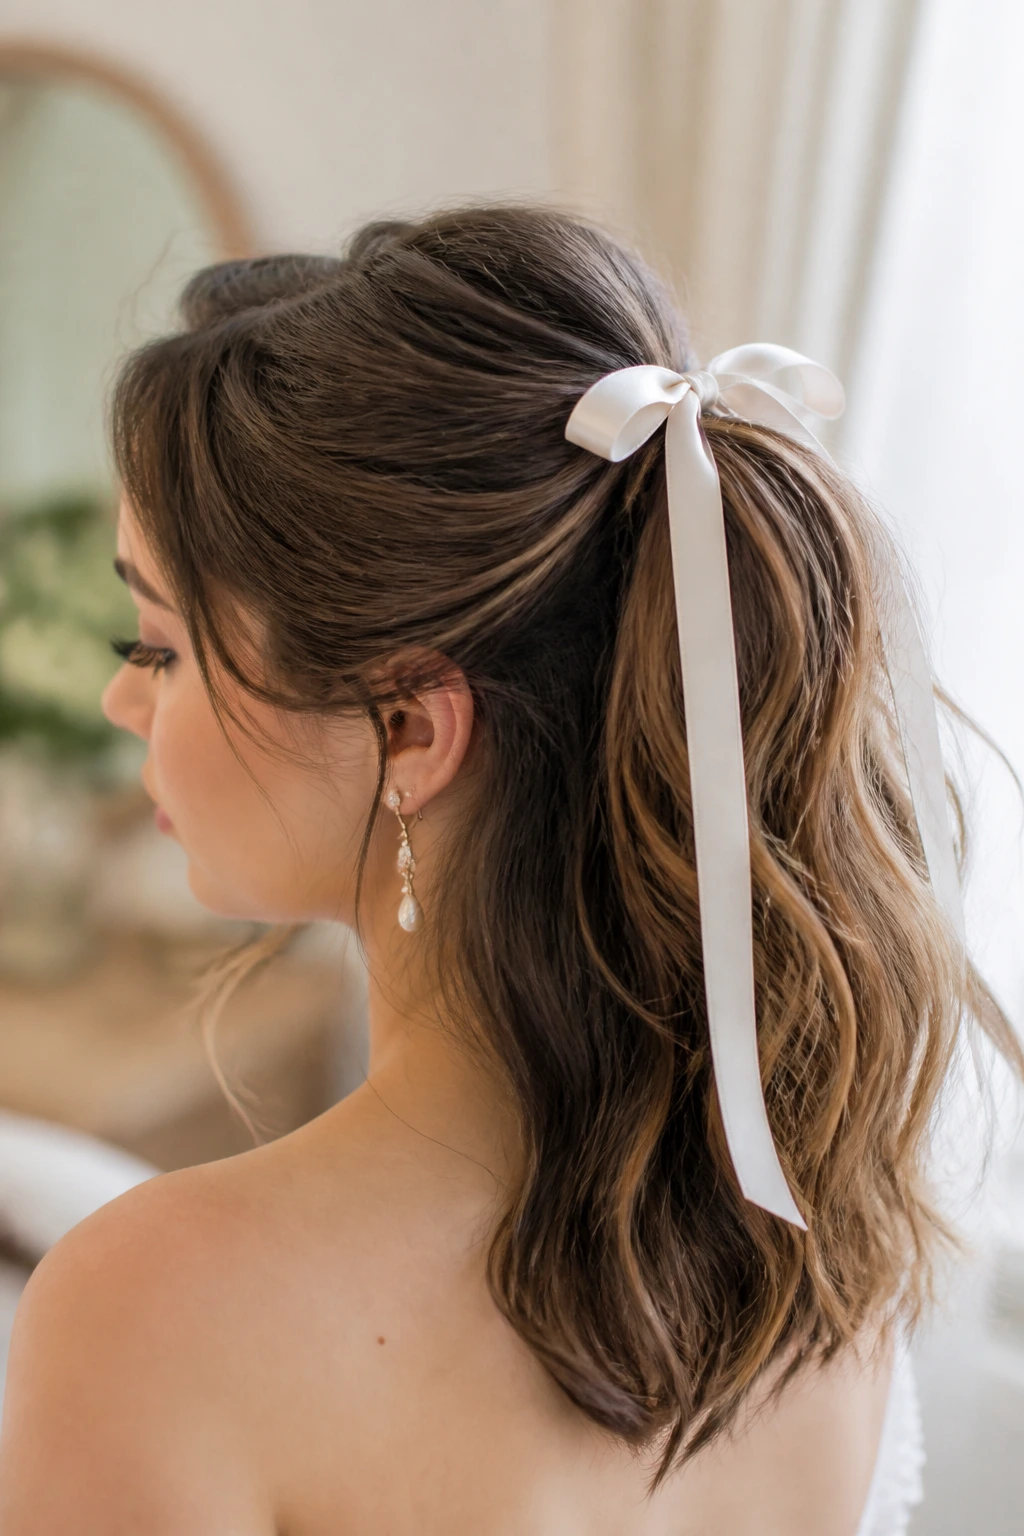
A ribbon adds something thin hair often needs: a focal point that isn’t just more hair. Pull the top half into a loose ponytail, tease the crown slightly, and tie it with velvet, silk, or satin ribbon in a color that echoes the dress or bouquet. The ponytail itself stays airy, but the ribbon gives it presence.
Quick note
A ribbon-tied style works best when the elastic sits just above the occipital bone, not too high. Too high and it starts to read casual. Too low and it collapses into the neckline.
7. Faux Bob With Hidden Pins
Here’s the fun part: a style doesn’t need to be long to feel formal. A faux bob is one of the smartest tricks for medium-length thin hair because it creates the illusion of a shorter, fuller cut without actually cutting anything. Curl the hair first, tuck the ends under, and pin them into the underlayer so the finished shape skims the jaw or collarbone.
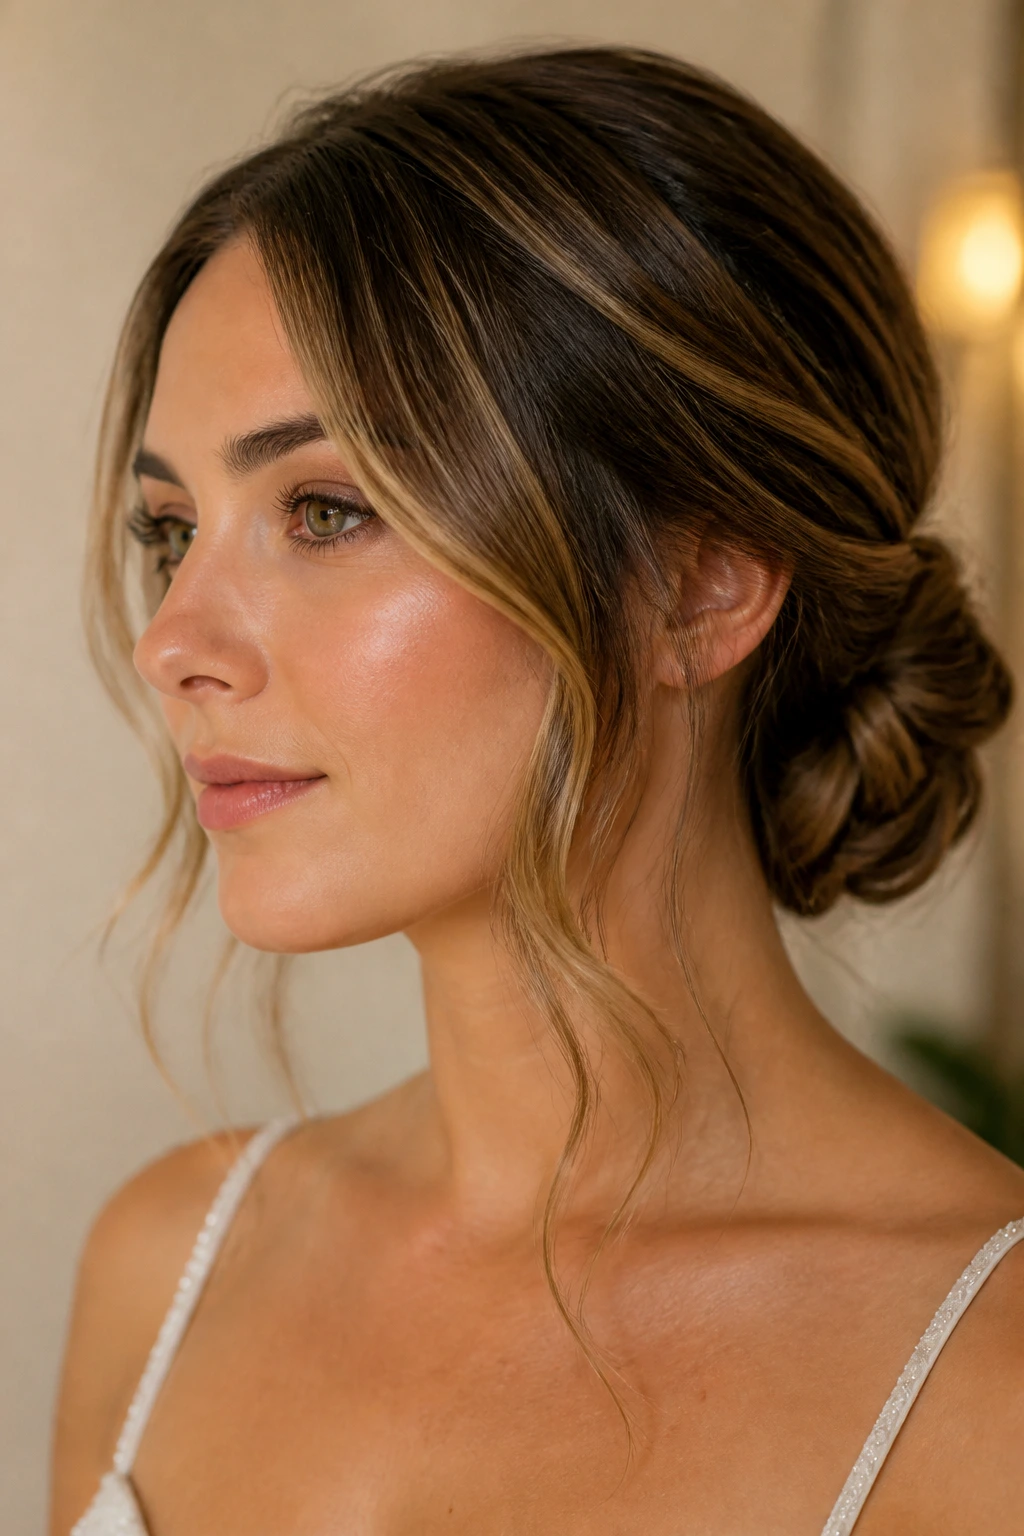
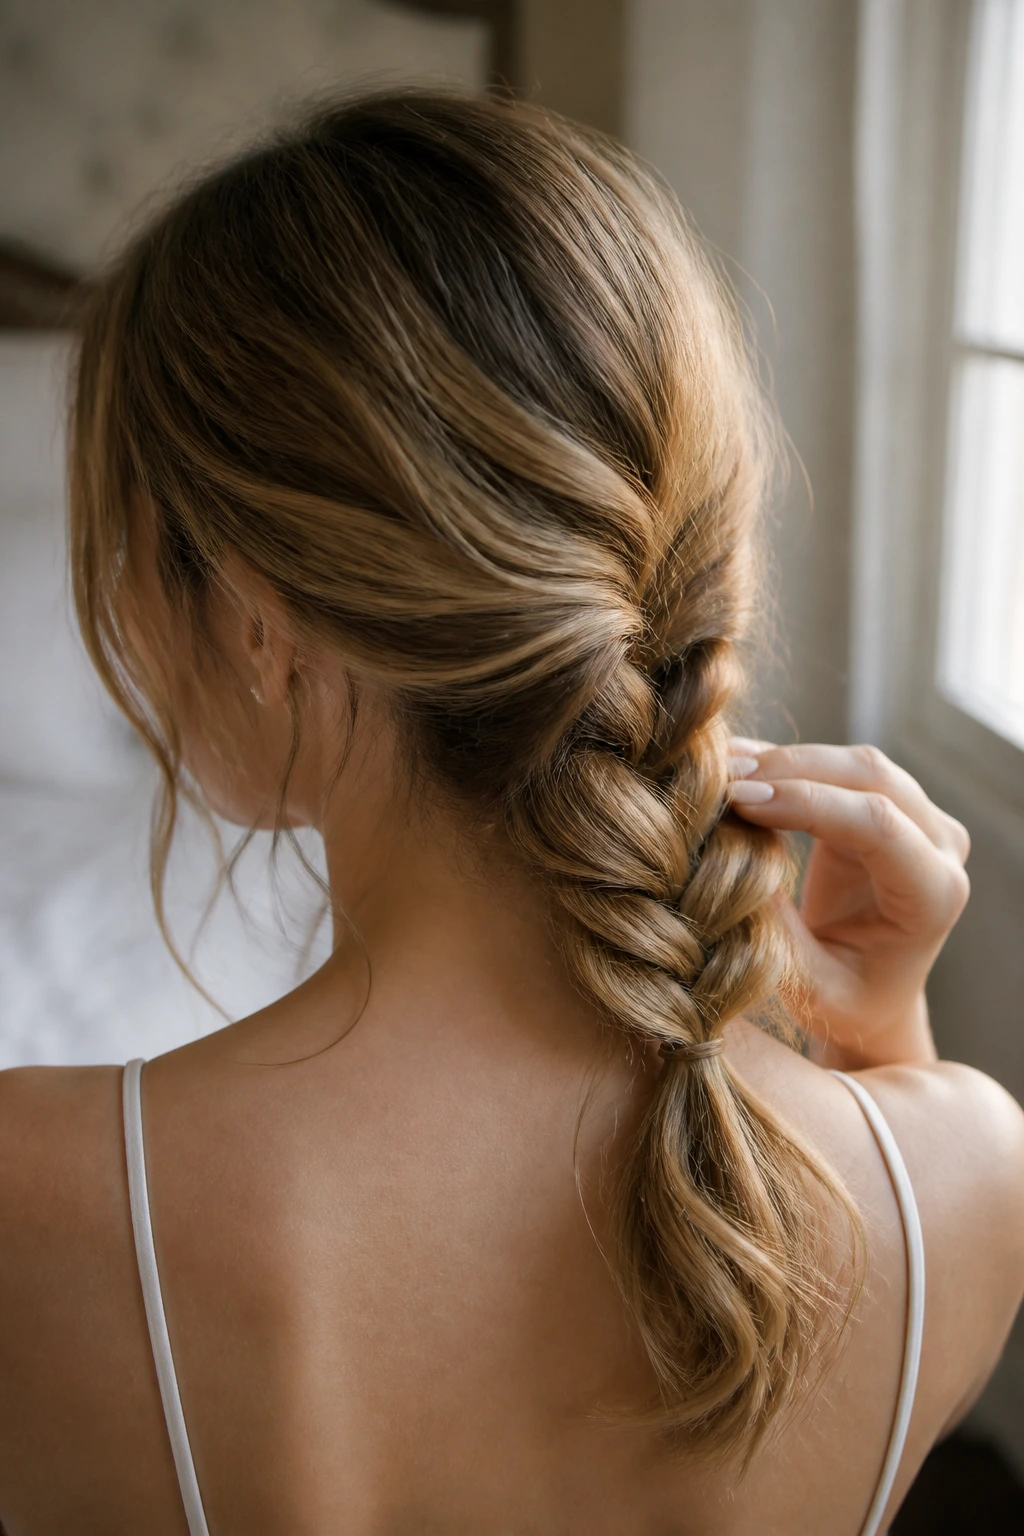
8. Loose French Twist at the Nape

A French twist on thin hair should not feel stiff. It should feel gathered, almost like the hair was folded into place rather than forced. Leave a few soft edges at the nape and keep the top section slightly lifted so the style has that elegant little ridge running from the crown down to the twist. That bit of height matters more than people think.
9. Deep Side-Part S-Waves
A center part can be lovely, but a deep side part does something else entirely for thin hair: it gives the roots a natural lift and lets one side carry more visual weight. Shape the waves into long S-curves, not tight curls, and stop brushing once the pattern is set. Overworking them is the fastest way to turn polished waves into limp fluff.
10. Boho Crown Braid
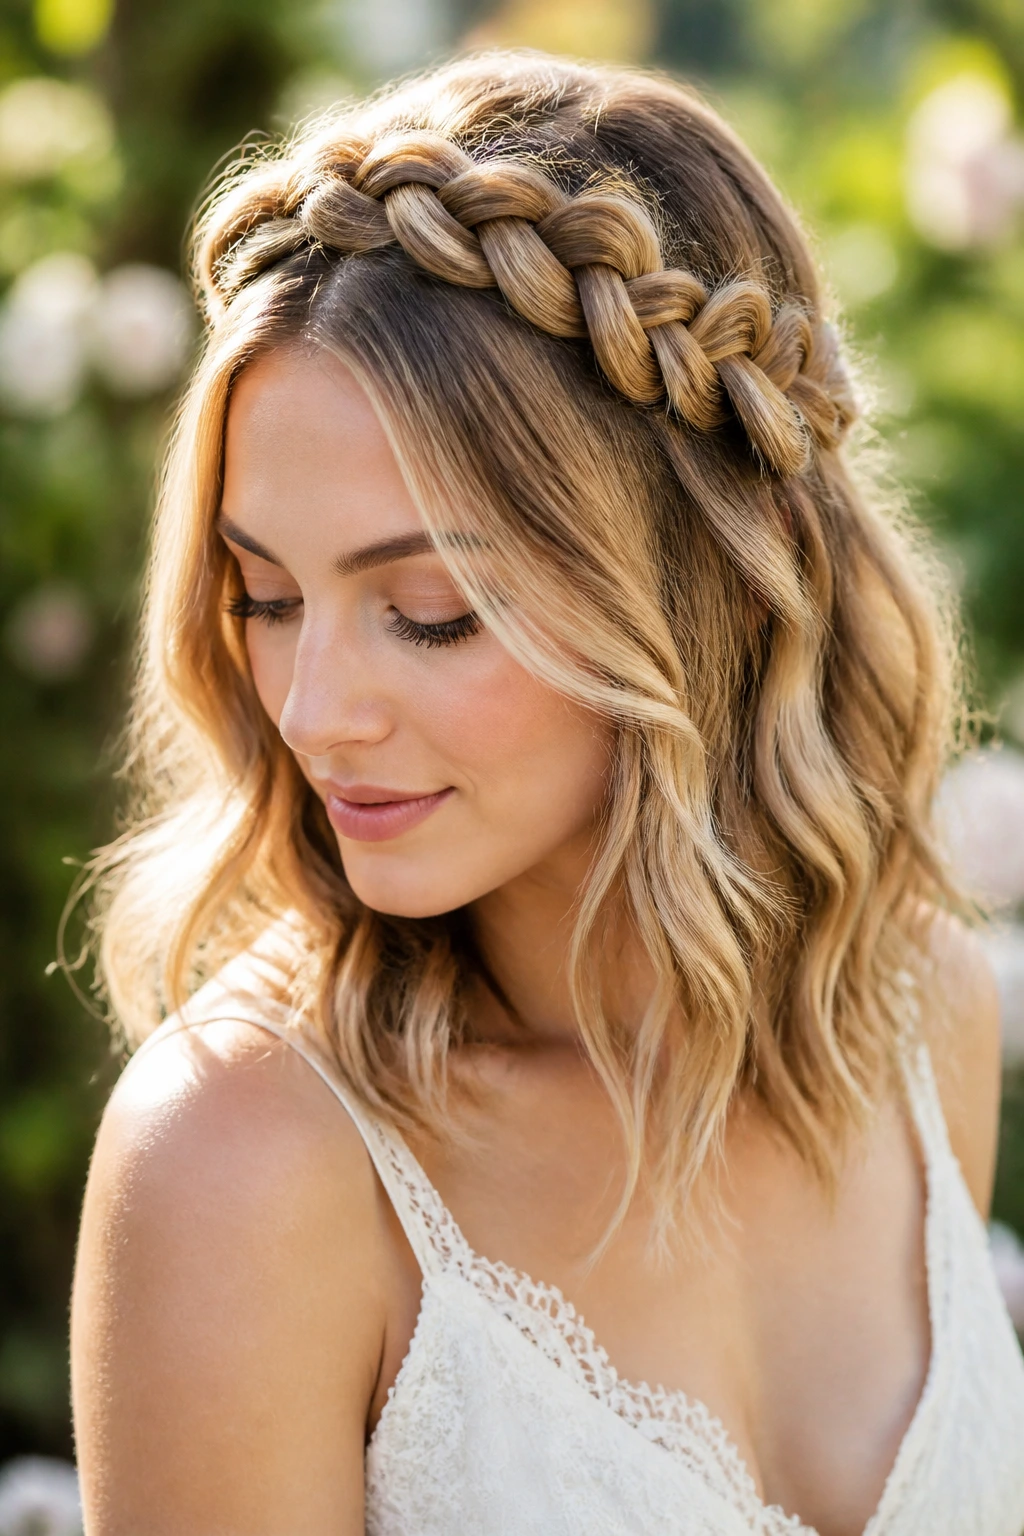
A boho crown braid works when you want the hair to look relaxed but not accidental. Braid along the hairline, keep the tension soft, and pancake the braid gently with your fingers so it appears wider. Then let the rest fall in loose bends around the shoulders. On thin hair, that widened braid line can do more than three extra curls ever will.
11. Pearl-Pin Half-Up Twist
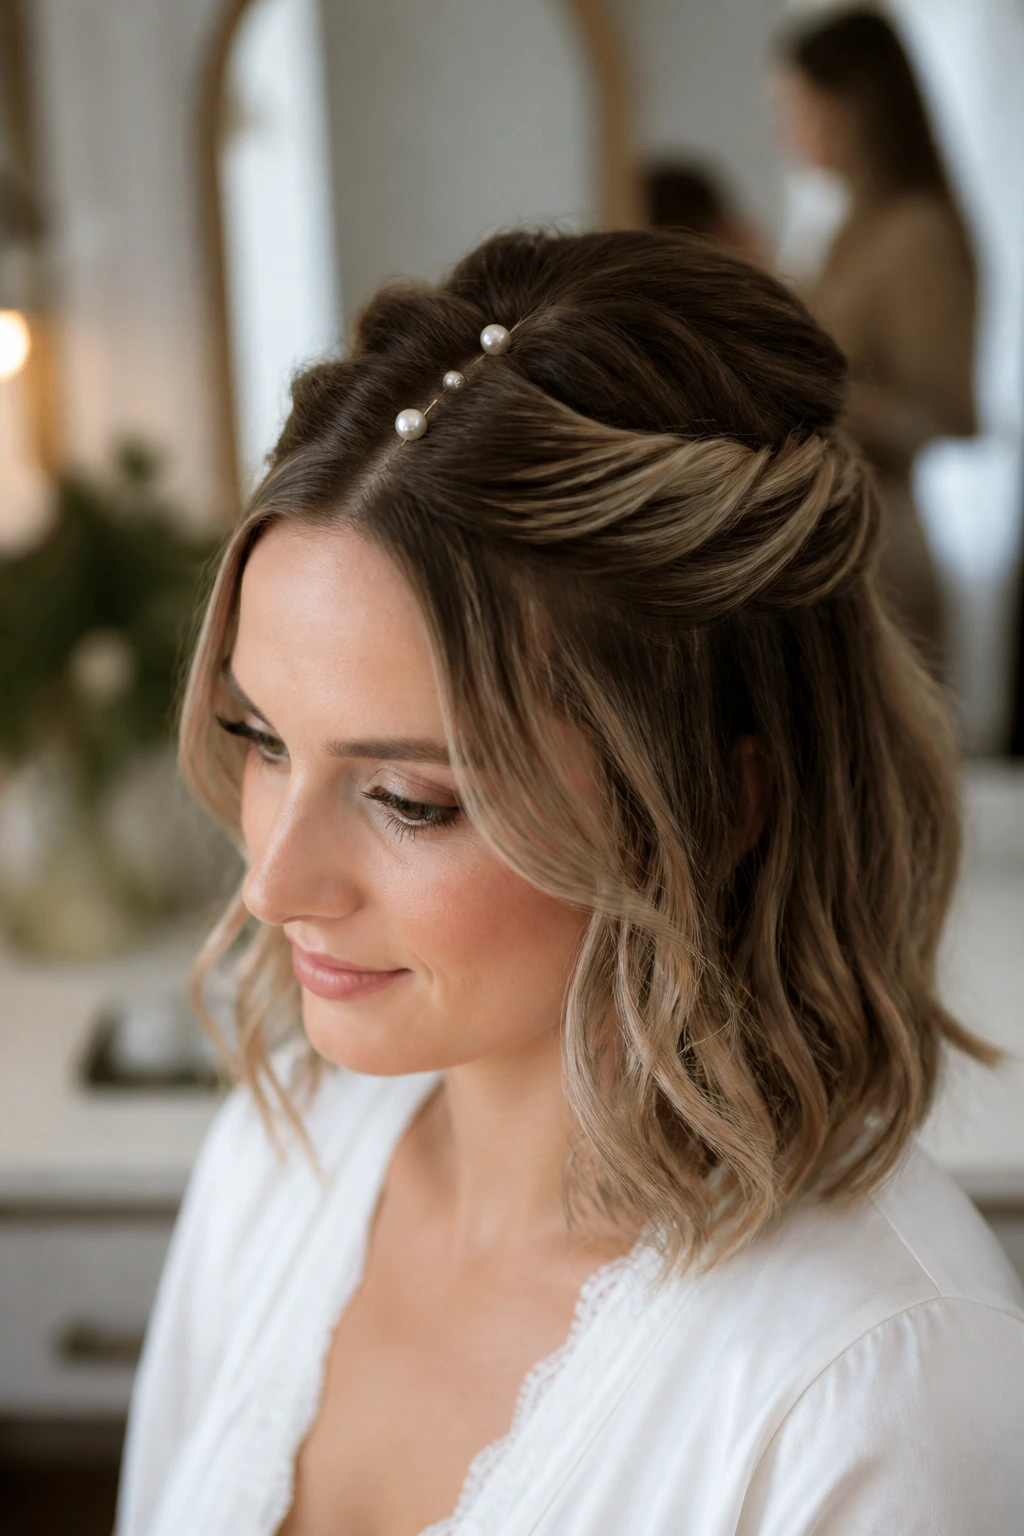
This is a half-up style with a little jewelry baked in. Twisting two sections back from the temples and fastening them with pearl pins gives thin hair a clean center line and a dressed-up finish without needing a giant updo. The pearls do part of the visual work, so the hair itself doesn’t have to look oversized.
12. Sleek Tucked-Behind-Ears Style
Why do I keep coming back to a sleek tucked-back look for thin hair? Because it’s honest. It doesn’t pretend the hair is thicker than it is; it just makes the shape clean and intentional. A center or soft off-center part, a light serum only on the mids and ends, and both sides tucked neatly behind the ears can look very expensive when the accessories are doing their job.
13. Barrel-Curled Shoulder Sweep
This style sits right on the shoulders and uses broad curls to create movement without a lot of teasing. The hair is curled in large sections, then swept over one shoulder or slightly off-center so the bottom line doesn’t look too blunt. It’s one of the easiest ways to make medium-length thin hair feel fuller in photos, especially if the dress has a one-shoulder or asymmetrical neckline.
14. Wrapped Low Ponytail
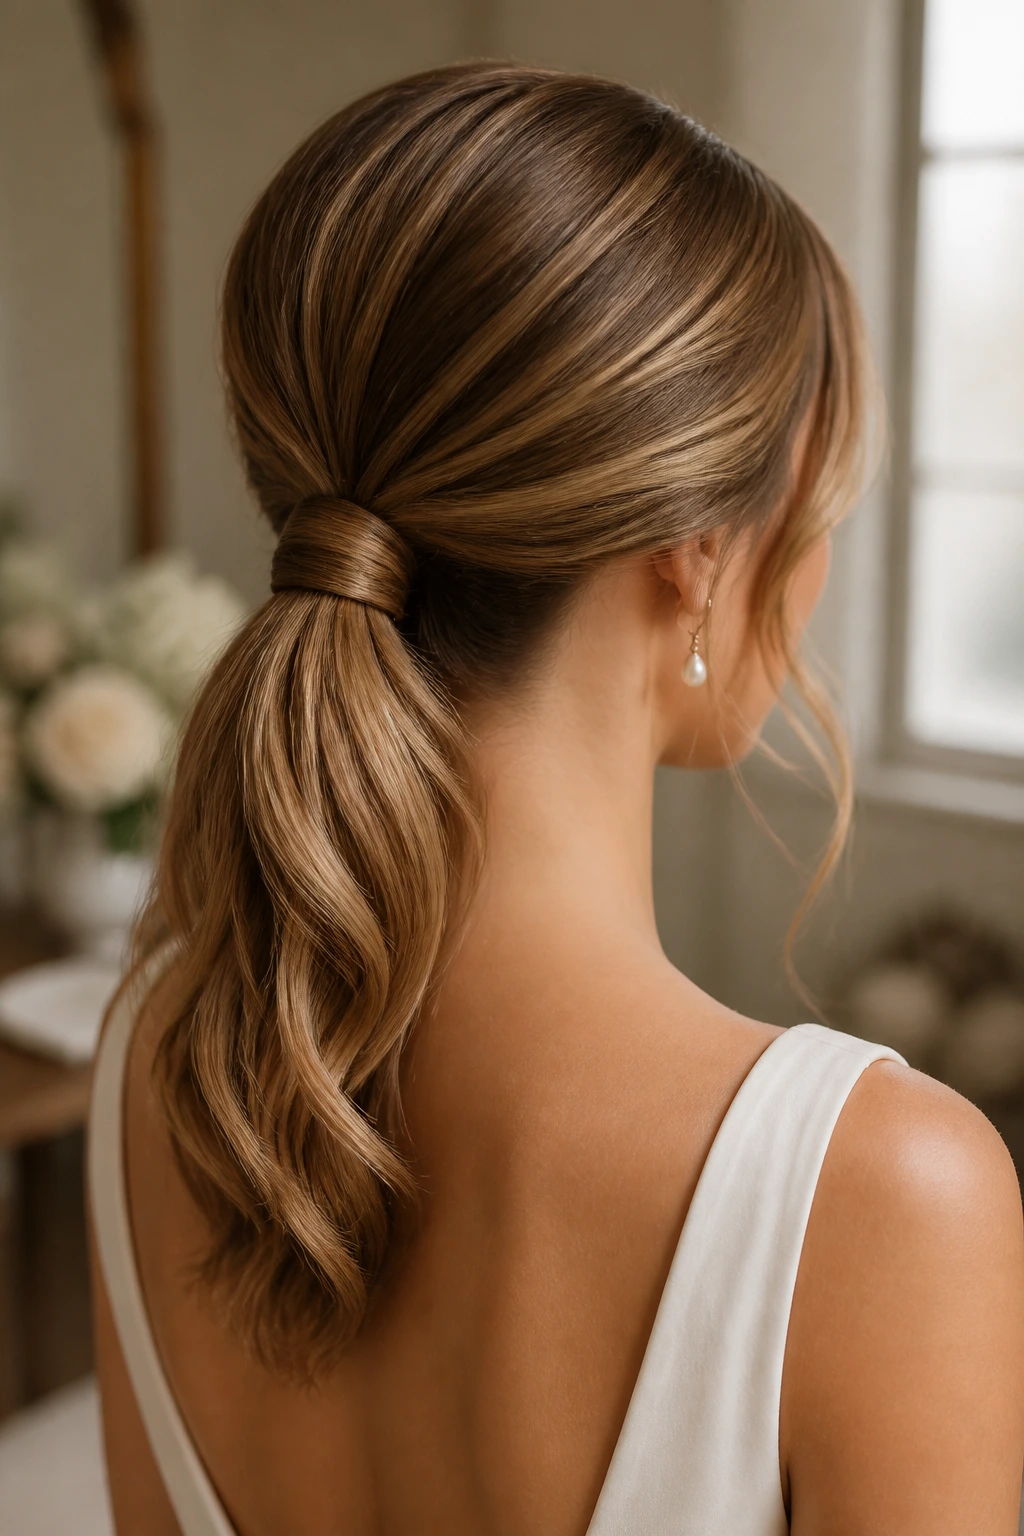
A wrapped low ponytail is a little more refined than the standard pony, and thin hair usually appreciates the clean outline. Secure the pony at the nape, wrap a small section around the elastic, and leave the tail softly waved rather than poker-straight. If the hair is fine, a quick mist of texture spray before the tie helps the ponytail keep some body instead of hanging like a silk ribbon.
15. Waterfall Braid With Soft Waves
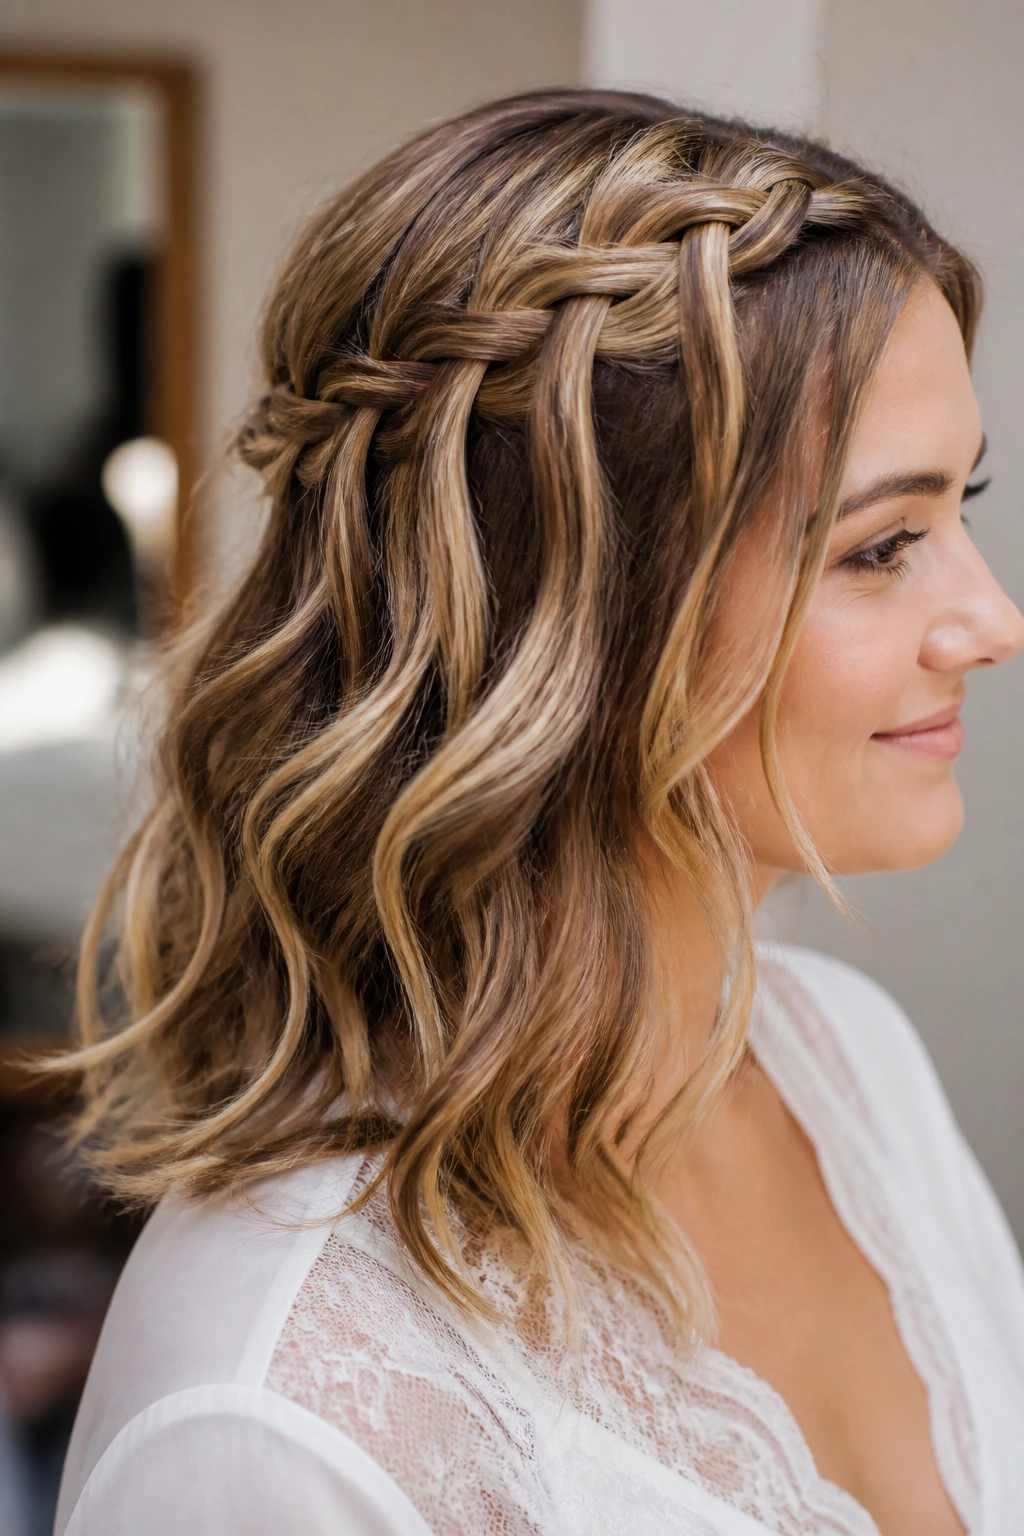
A waterfall braid gives you movement across the top of the head without removing too much hair from the rest of the style. That matters when the hair is thin, because over-braiding can leave too little volume behind. Keep the braid loose and let the dropped pieces merge into soft waves at the back so the whole look stays airy.
16. Pinned-Back Face-Framing Layers
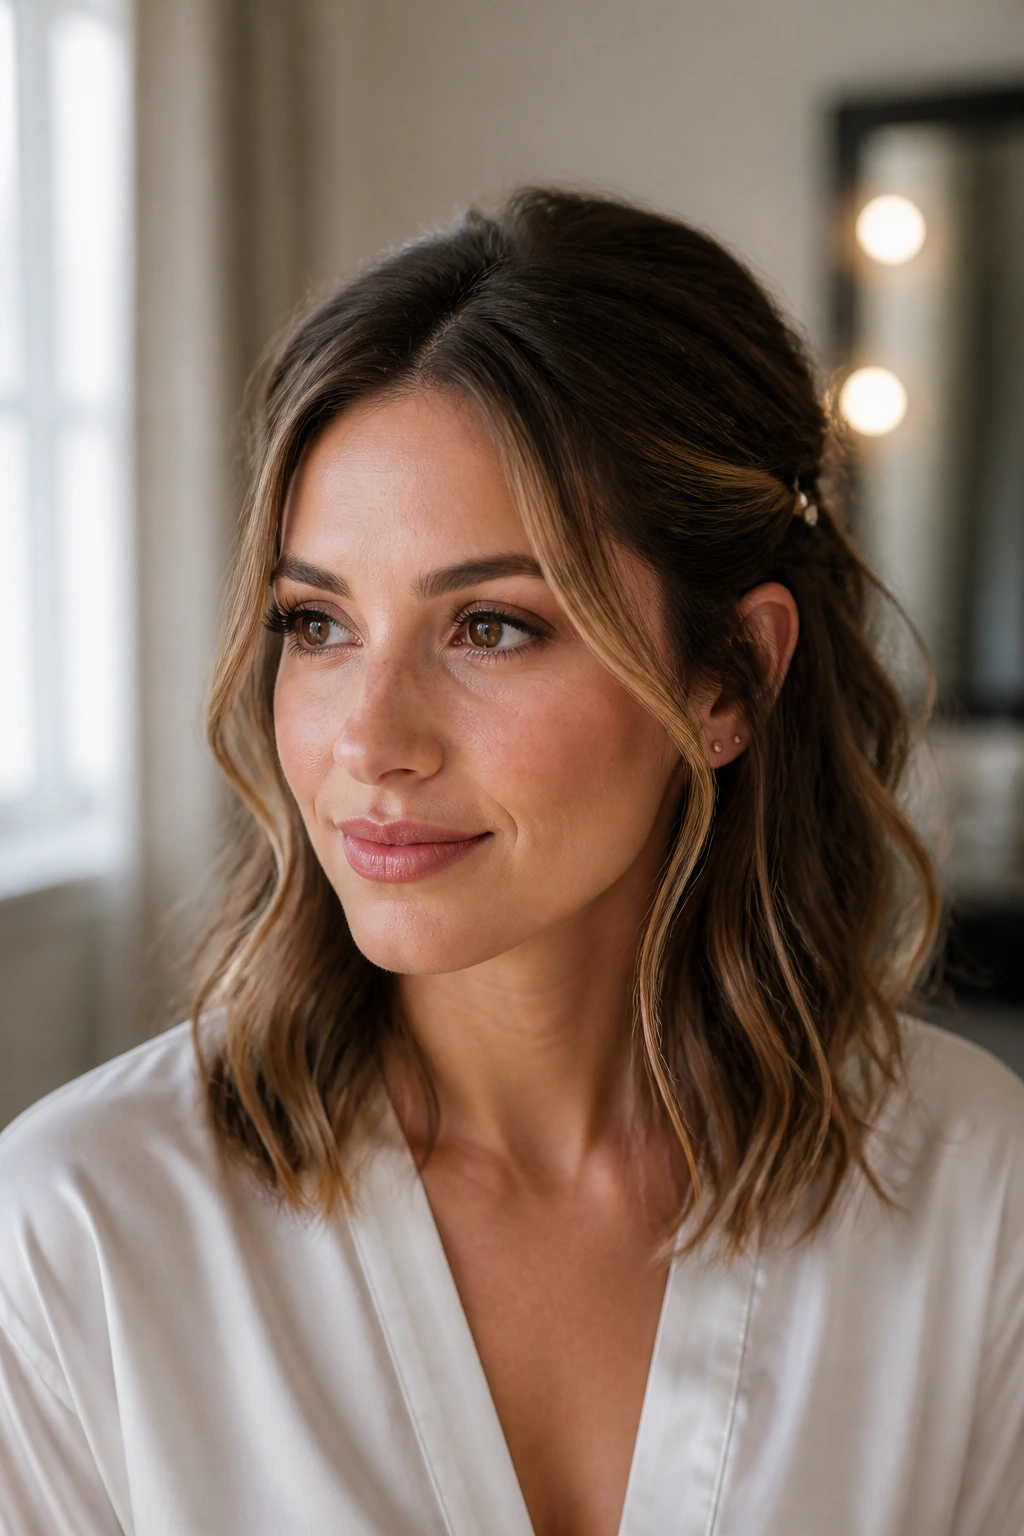
If your hair has layers that keep escaping around the cheeks, use them on purpose. Pinning the front pieces back with decorative clips or tiny bobby pins creates a lifted frame around the face while leaving the rest down. It’s a low-drama solution, but it works, especially if the crown needs a little help and the rest of the hair falls in smooth bends.
- Best for: guest hair, rehearsal dinners, or brides who want movement without a full updo.
- Watch the placement: pin just above the temple, not at the widest part of the cheek.
- Use the right pins: small, color-matched pins disappear into fine hair much better than oversized clips.
17. Low Bun With Airy Tendrils
A low bun with airy tendrils lives in that sweet spot between romantic and practical. The bun is anchored low enough to stay secure, while a few deliberately left pieces soften the hairline and neck. On thin hair, those tendrils are not decoration — they keep the bun from looking too tight or too small.
18. Old-Hollywood Flip Ends
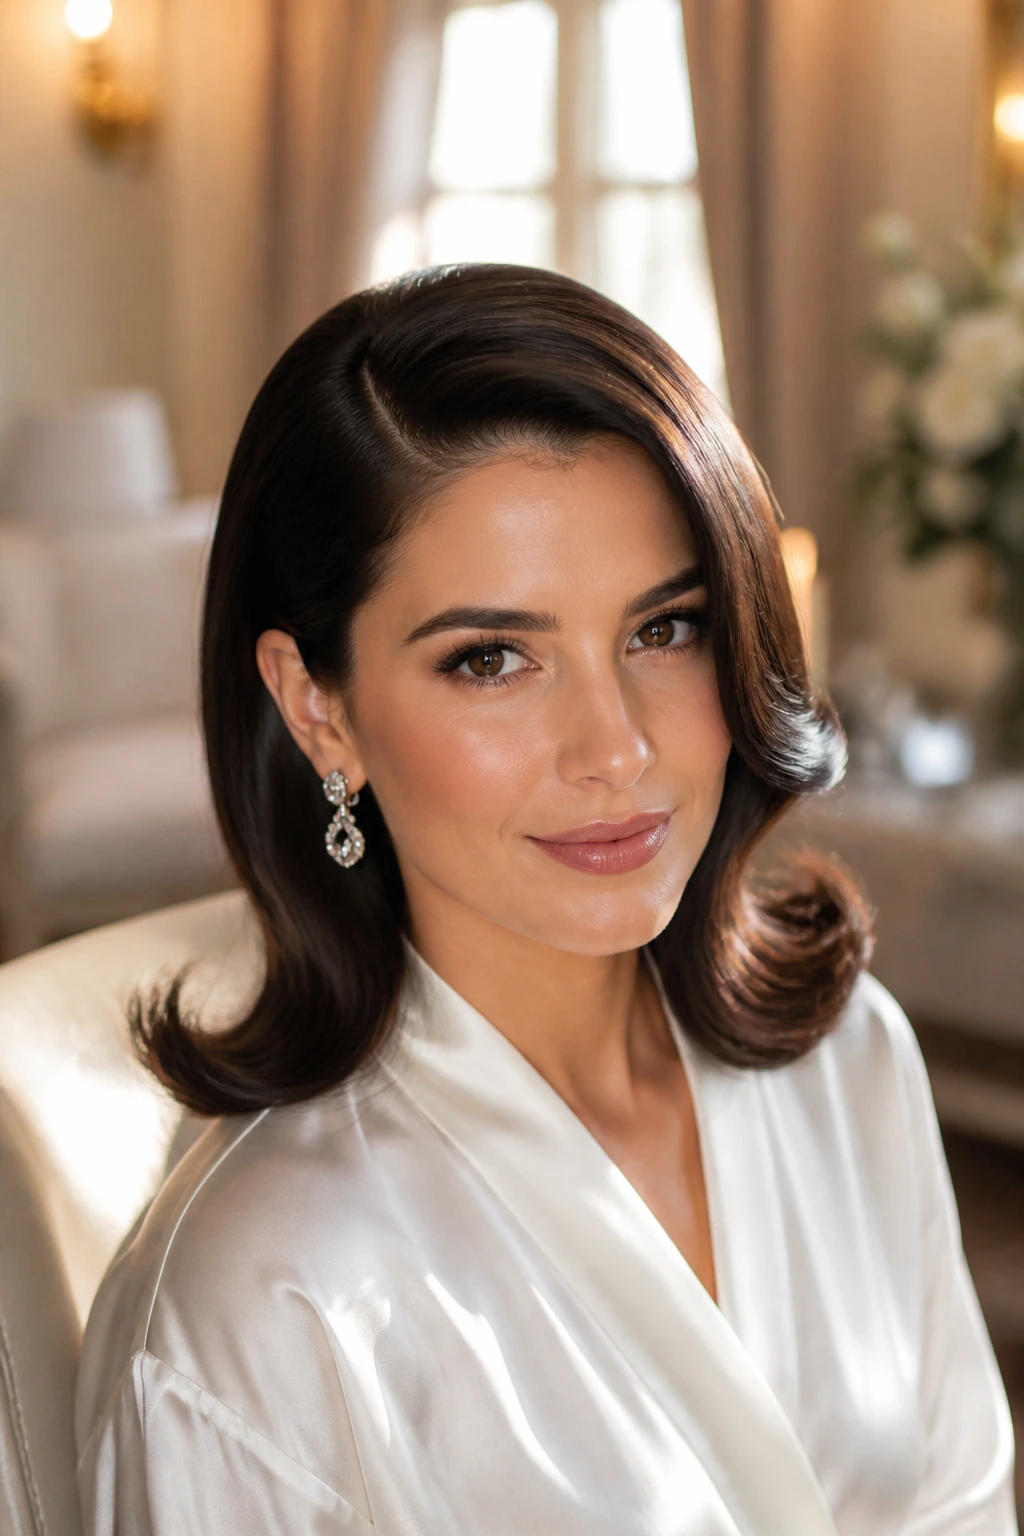
This style loves a medium-length cut because the length is enough to show the flip, but not so long that the ends drag the shape down. Set the hair in large rollers or use a curling iron to flip the ends outward, then brush the top smooth and keep one deep side part. The whole look lands somewhere between classic and glamorous without needing extra bulk.
19. Knotted Half-Up Rosette

A knotted half-up rosette is one of my favorite ways to give fine hair the illusion of a little more density. You twist two sections together, coil them into a small knot at the back of the crown, and pin the edges so the shape reads like a flower or rosette. It’s delicate, but not fussy, and it sits well on hair that doesn’t have a ton of natural thickness.
20. Textured Gibson Tuck

The Gibson tuck has this nice old-fashioned polish to it, but it gets friendlier on thin hair when you keep it loose. Curl the ends first, tuck the length into the roll, and leave the top slightly lifted so the crown does not flatten out. If you’ve got medium length and fine strands, this one can look richer than a standard bun because the roll creates built-in volume.
21. Bubble Ponytail With Soft Volume
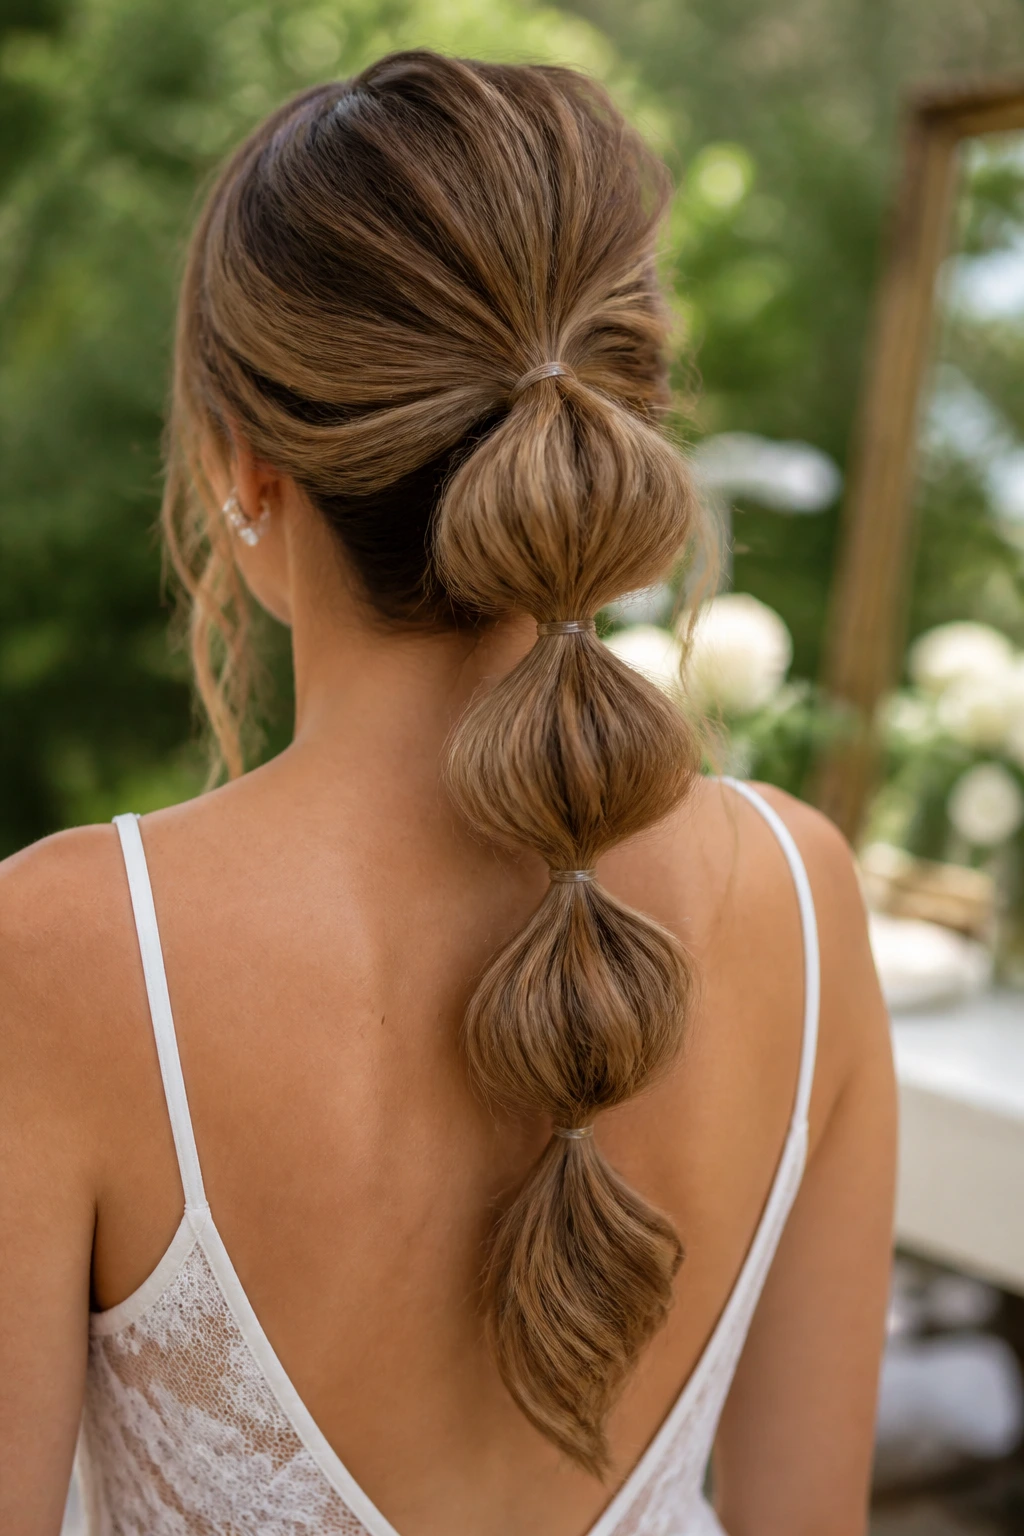
Does a bubble ponytail sound too playful for a wedding? Not if you make it soft enough. Secure the pony at the nape, add clear elastics every few inches, and gently tug each section outward so the “bubbles” feel rounded rather than stiff. Thin hair benefits from the repeated shape because each section looks like it has more width than it started with.
22. Side Bun With Deep Part
A side bun shifts the visual weight away from the center of the head, which can be useful if thin hair shows too much scalp at the part. Deep part first, then gather the hair low and to one side, keeping the bun compact and slightly offset. It works especially well with dresses that have embellishment at one shoulder, because the hair and dress start speaking the same language.
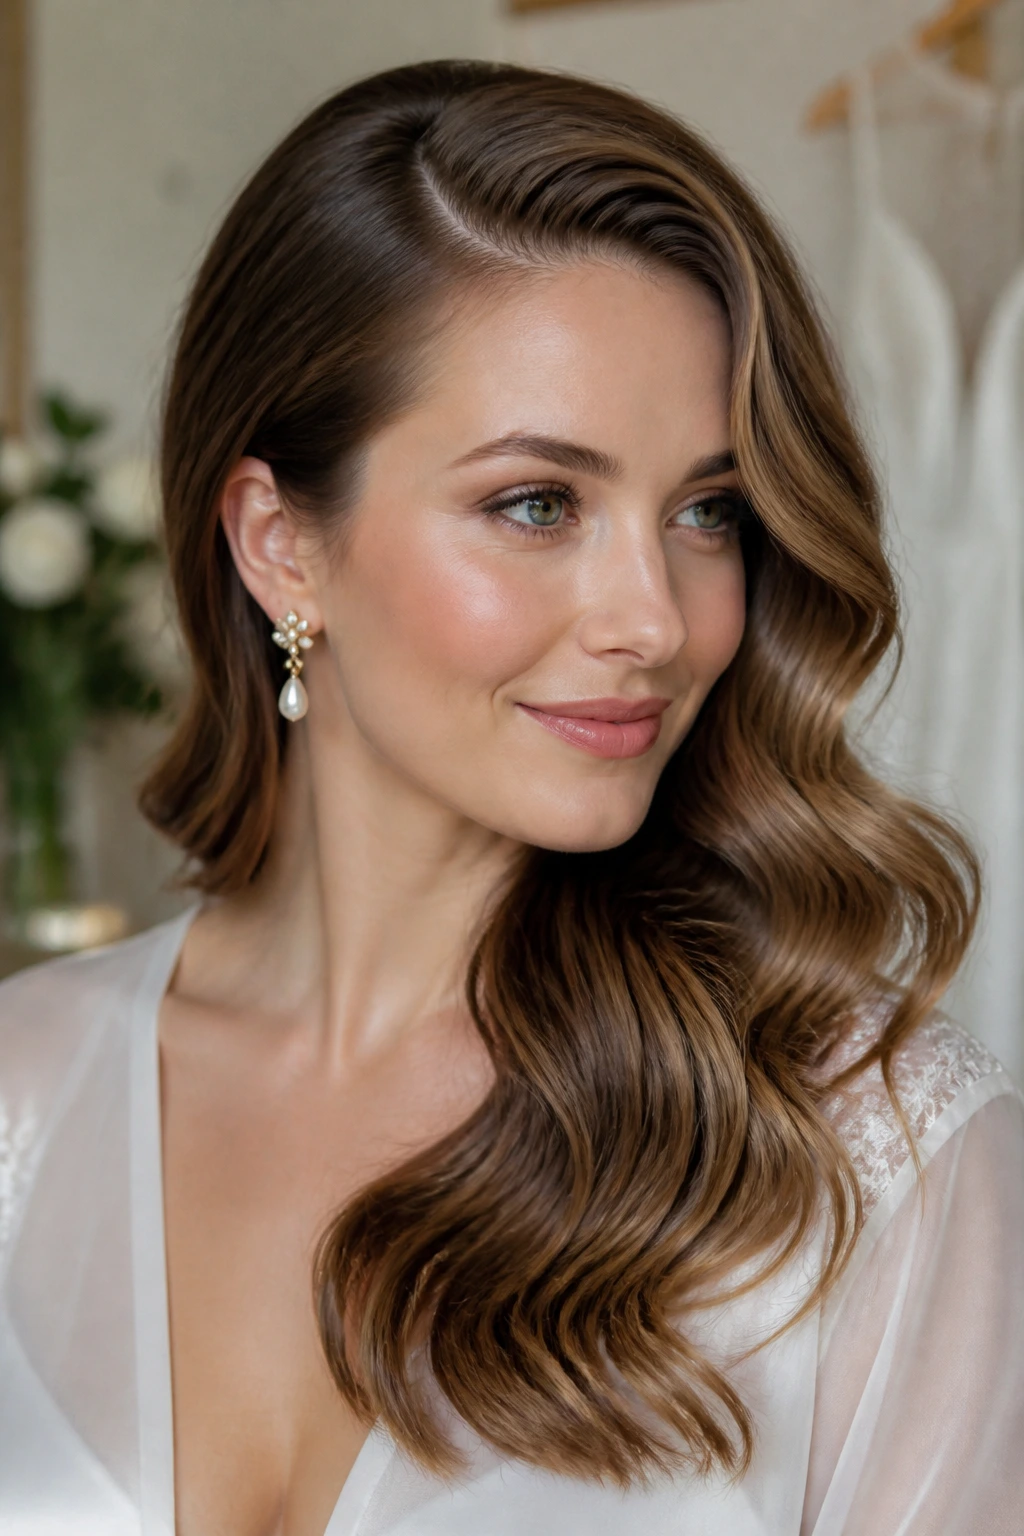
23. Glossy Center Part With Soft Bends
If you want something clean but not severe, a glossy center part with soft bends is a strong choice. The center line makes the style feel modern, while the bends in the lengths stop it from lying flat against the head. This is one of those looks that gets better when the shine is controlled — not greasy, not matte, just enough polish to make the hair look intentional under indoor lighting.
24. Braided Low Ponytail
A braided low ponytail gives thin hair structure all the way down the back. Start with a low pony, braid the tail loosely, and then gently widen the braid with your fingers so it doesn’t look skinny. The braid keeps the ends contained, which is useful if your hair is medium length and tends to taper fast near the bottom.
25. Crown Twist Into Low Knot
This one gives you a little lift at the top and a secure finish at the base. Twist sections back from each temple, join them into a low knot, and pin the knot flat enough that it doesn’t wobble. Thin hair likes this shape because the front gets the volume treatment while the back stays tidy. No wasted length.
26. Lace Braid Half-Up
A lace braid half-up is similar to a waterfall braid, but the braid stays attached to the head instead of letting pieces fall away. That makes the crown look more defined and can help medium-length thin hair feel fuller at the top. Leave the rest in loose waves, and the contrast between the neat braid and soft ends keeps the style from looking too busy.
27. Crystal Comb Sweep
A crystal comb sweep is less about the hair mass and more about the placement of the accessory. Sweep one side back into a soft curve, secure it low near the temple, and slide a jeweled comb where the hair naturally bends. The accessory creates the focal point, which is useful when the hair itself is fine and doesn’t need more manipulation.
Tiny detail that matters
Use a comb with teeth that actually grip. Decorative combs can be gorgeous and useless at the same time, so test the hold during your trial run.
28. Velvet Bow Low Ponytail
A velvet bow can make a low ponytail feel finished without demanding a lot of hair. Keep the pony soft, slightly waved, and low at the nape, then tie the bow over the elastic so the ribbon becomes the visual anchor. On thin hair, this works because the fabric adds presence and the ponytail stays simple. No fighting. No overbuilding.
Why Medium Length Is the Sweet Spot for Thin Hair
Medium length gives thin hair a better proportion than either extreme. Shorter hair can be charming, but it sometimes lacks enough length to twist into a meaningful shape. Longer hair can look luxurious, yet it also brings weight, and weight is the enemy of volume when the strands are fine.
That middle zone — collarbone length, just past the shoulders, somewhere in that range — lets you build a real wedding style without asking the hair to do anything impossible. You can tuck, braid, curl, and pin it without ending up with a style that collapses under its own mass. The hair holds better because the structure is smaller and smarter.
It also gives a stylist room to work around the parts that thin hair tends to expose: the crown, the part line, and the hairline near the temples. A good medium-length style hides those weak points in plain sight. That’s the whole trick.
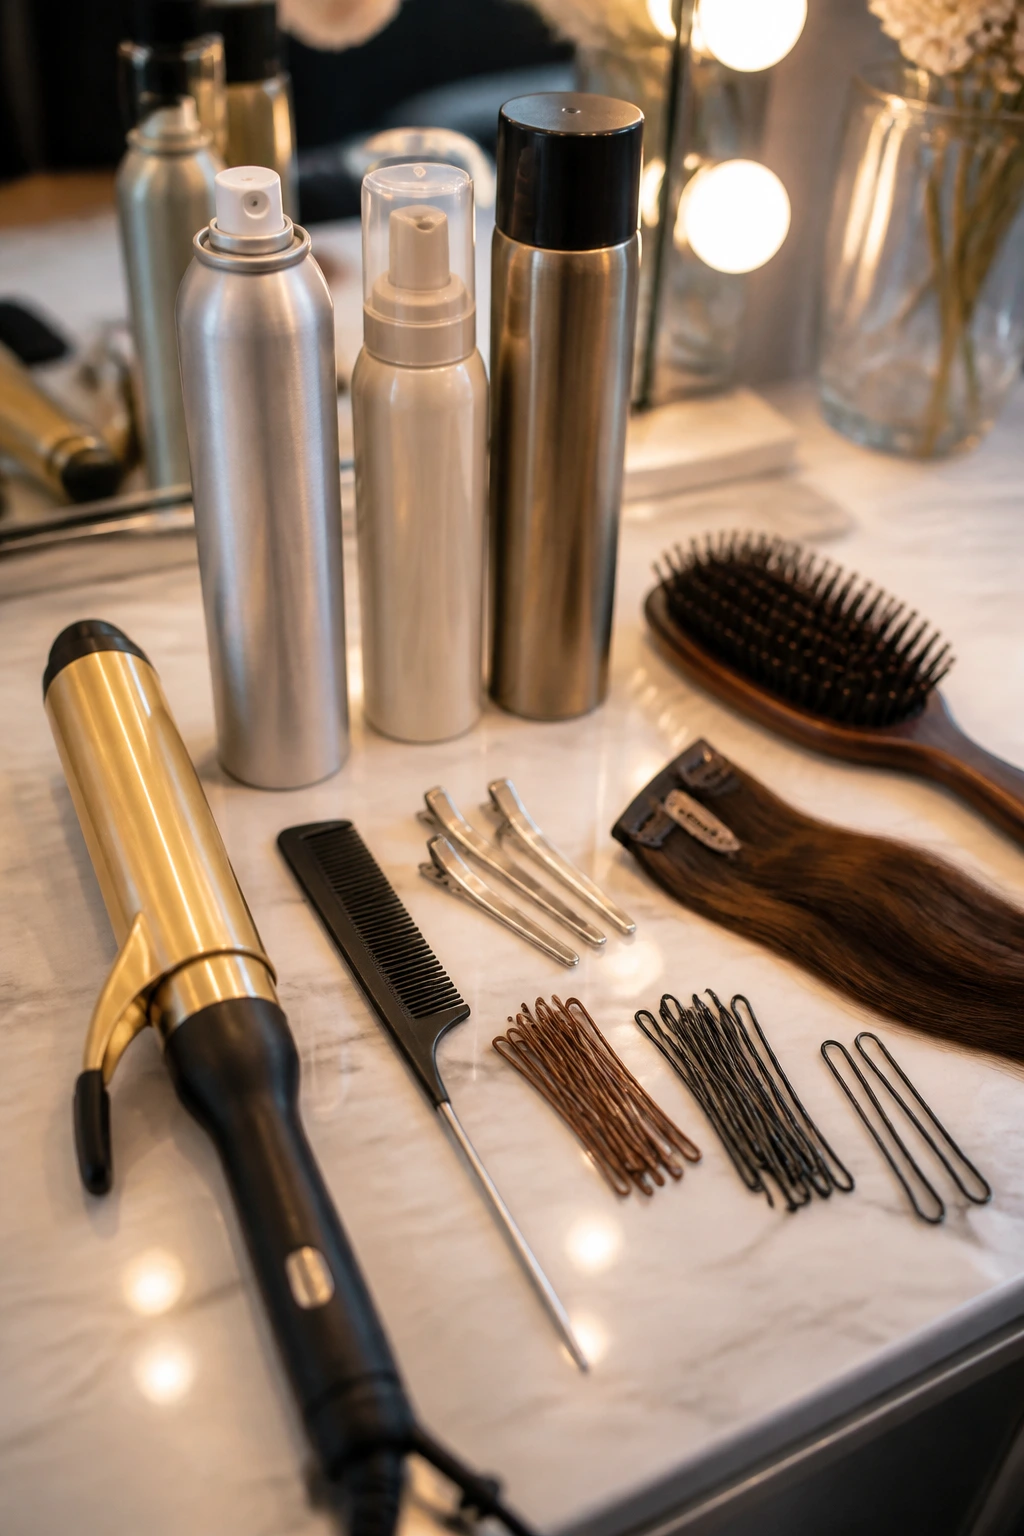
Essential Styling Tools for These Looks
- 1-inch curling iron or wand: Best for defined bends and soft waves that hold without turning into ringlets.
- Tail comb: Useful for clean parts, sectioning, and lifting the crown just enough to create shape.
- Duckbill clips: These keep sections separate while you curl or pin, and they’re worth the drawer space.
- Bobby pins in two shades: Choose pins that match your hair color and a second slightly darker or lighter shade for layered placement.
- U-pins: Better than standard pins for buns and twists because they anchor bulk without crushing the shape.
- Texturizing spray: Gives fine hair a little grip before pinning or braiding; this is not optional for most of these styles.
- Flexible-hold hairspray: Strong enough to keep the style, soft enough that the hair still moves.
- Lightweight mousse or root lift spray: Helps the crown stay lifted from the start instead of sagging after blow-drying.
- Boar-bristle brush or soft paddle brush: Good for smoothing the surface without flattening every bit of volume you just built.
- Optional clip-in volumizer or bun pad: Handy if the hair is very fine or if you want the bun to look fuller without teasing it into dust.
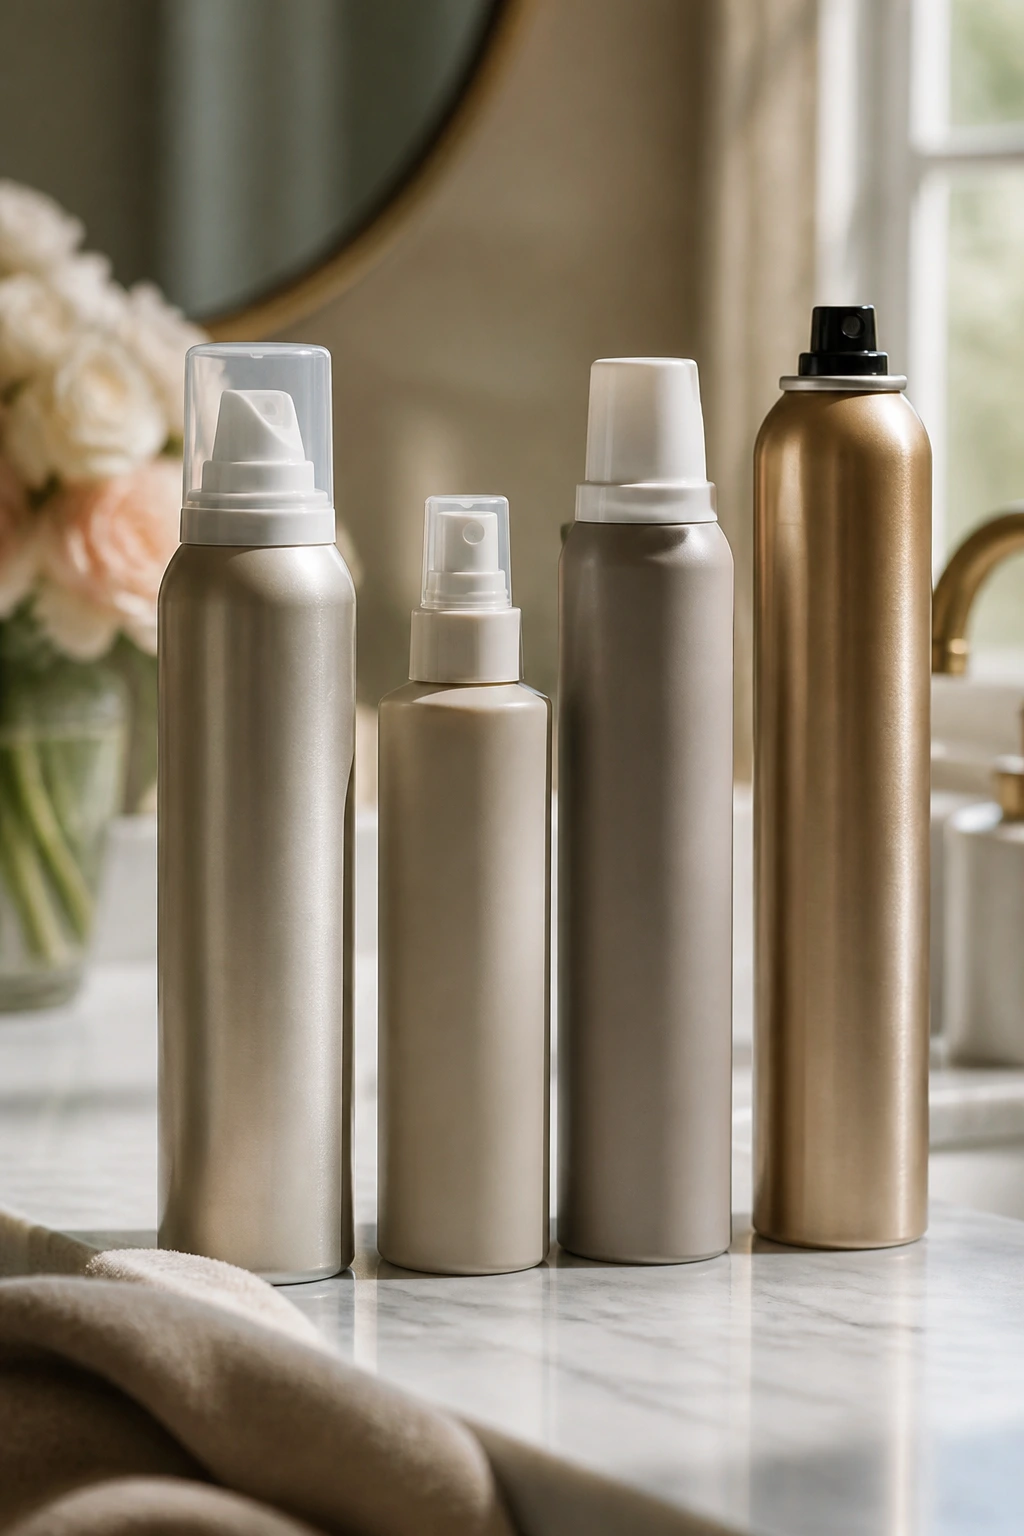
Smart Product Picks for Wedding Hair That Needs Hold
Thin hair needs grip first and shine second. If you pile on oils, heavy creams, or smoothing serums near the roots, the style slides faster than you’d like. Save richer products for the very ends, and keep the crown as dry and workable as you can.
A good mousse or root-lift spray is usually the best starting point. Work it through damp hair, then blow-dry with a round brush or concentrator nozzle so the roots lift off the scalp instead of drying flat. If you skip that step and start from limp hair, you’ll spend the rest of the style trying to fake volume after the fact. That is harder, and it usually shows.
For finishing, look for a texturizing spray that feels almost dry in the hand. The best ones add a little tooth without making the hair feel dusty. Flexible hairspray matters too, especially for wedding hair, because the style has to survive movement and not turn into a helmet when someone hugs the bride.
Accessories matter as much as products. Buy pins that match the hair color closely, and if you’re using a veil comb, check that the teeth aren’t too slick. Smooth combs slide right out of fine hair. Slightly rougher ones stay put.
How to Match the Style to the Dress, Veil, and Jewelry
Neckline: Higher necklines usually like lower, cleaner styles — chignons, knots, tucked twists, or sleek ponytails — because they keep the top of the dress visible. Open necklines can handle half-up shapes, side sweeps, and soft waves that spill around the shoulders.
Veil: If you’re wearing a veil, place the hairstyle in a way that gives the comb a stable base. A low bun, a twisted crown, or a half-up with a padded center section usually gives the comb better grip than a loose, slippery crown. Don’t bury the veil too deep, either. It should sit into the style, not float on top of it like an afterthought.
Jewelry: Statement earrings pair well with tucked-back styles, side parts, and updos that keep the ears visible. If the earrings are small, you can let the hair be softer and keep some movement around the jawline.
Weather and venue: Outdoor ceremony? Pick styles with stronger structure and fewer loose ends. A garden breeze can ruin a delicate face-framing curl faster than you think. Indoor ballroom? You can get away with softer pieces, shinier finish, and a little more movement.
Additional Tips for Fuller-Looking Wedding Hair
Root Lift: Start with lift at the roots, not at the ends. Blow-dry the crown upward with a round brush or tip the head upside down for a few minutes before shaping. That tiny bit of groundwork saves you from piling volume on later with teasing alone.
Texture Balance: Thin hair looks best when some parts are smooth and some parts have grip. If everything is rough, the style looks dry. If everything is silky, pins slide. Keep the surface around the face smoother and leave the hidden layers a little grippier.
Accessory Placement: Put the accessory where the hair already wants to bend. A comb, clip, or pin works harder when it sits at a natural curve instead of fighting the hairline. That’s why so many of the styles above place the detail low or slightly off-center.
Make-It-Yours: If you like a softer look, leave two slim pieces around the face and curl them away from the cheeks. If you want something sharper, tuck everything back and lean on the jewelry. Both can work. The difference is mood, not rules.
Make-Ahead, Hold, and Touch-Up Guidance
Wedding hair for thin strands usually benefits from a trial run. I’d do it at least a couple of weeks before the event, ideally with the same accessories, similar outfit neckline, and the same heat tools you plan to use on the day. You’re checking for more than aesthetics. You’re checking whether the pins bite, whether the crown sags, and whether the waves vanish after an hour.
The best prep window is usually the day before the wedding, or at least 12 to 24 hours before styling, unless your hair is prone to looking oily. Freshly washed hair can be too slippery and too soft for pins. A little natural grit helps. If the hair is very fine, a small amount of dry shampoo at the roots the night before can make a real difference.
Most of these styles will hold through a ceremony, photos, dinner, and dancing if the base is pinned correctly. For very fine hair, think in terms of 6 to 10 hours of hold with a good prep routine, not an all-night miracle. Keep a tiny touch-up kit nearby: a few bobby pins, one travel hairspray, a comb, and maybe a spare accessory pin if your style uses one. If the crown starts to flatten after the ceremony, lift the top gently with your fingers and mist from underneath instead of soaking the surface.
Variations and Adaptations to Try
For Very Fine Hair: Add a small clip-in topper at the crown or a padded bun form under low buns and knots. Keep the outer shape neat so the extra volume looks intentional, not stuffed.
For a Lob That Barely Reaches the Shoulders: Choose half-up twists, tucked styles, or a faux bob. The shorter the hair, the more you want to lean on pinning and shaping rather than trying to force a full braided style.
For Natural Waves or Curls: Don’t fight the texture into a flat finish. Let the curls do the bulk of the work, then pin sections where you need control. The style usually lasts better when the natural pattern is left intact.
For a Veil: Pick styles with a stable center line or a strong low anchor point. A low chignon, crown twist, or compact knot gives the veil comb something solid to grip.
For an Outdoor Wedding: Keep the shape lower and more structured. Wind and humidity are much kinder to low buns, wrapped ponytails, and textured twists than to loose crown volume.
For a More Modern Finish: Skip the extra curl at the ends and go for a cleaner line, like a glossy center part, wrapped ponytail, or tucked-behind-ears style. It feels sharper and can make thin hair look more intentional under strong light.
Common Mistakes to Avoid
- Starting with hair that’s too clean and too soft: Squeaky-clean hair can be slippery, which sounds nice until your pins start migrating. If you know your hair is fine, wash it the day before or use a little texture spray at the roots.
- Overloading the hair with heavy oils or creams: This makes thin strands collapse fast. Keep rich products away from the crown and use them only on the ends if they’re dry.
- Building too much height in the wrong place: A giant crown tease can look disconnected from the rest of the style. Better to lift the roots gently and build shape across the top, not in one obvious bump.
- Using too few pins: Thin hair often needs more pins than you think, but smaller ones placed in crisscrossed layers. If the style feels secure in your hand but loose on the head, add pins where the twist overlaps itself.
- Choosing a style that fights the haircut: A collarbone-length cut is not going to behave like waist-length hair, and that’s fine. Use the length you have instead of trying to imitate a look that needs twice as much hair.
- Skipping the trial in real conditions: A style that holds in a bathroom mirror can fall apart in humidity, heat, or under a veil. Test it with the actual accessories and a few hours of wear before the wedding day.
Frequently Asked Questions
Can thin hair really hold a wedding updo?
Yes, if the updo is built low and pinned correctly. The best versions for thin hair use smaller shapes, more texture, and a strong base at the nape rather than a huge dome sitting on top of the head.
Should I curl thin hair before styling it for a wedding?
Usually, yes. Loose curls or bends give the hair some memory and make pinning easier. The only exception is a sleek style, where you want the surface smooth and the part clean.
Are clip-in extensions worth it for medium-length thin hair?
They can be, especially if you want a fuller bun, more visible braiding, or extra length for a half-up style. Keep them light, match the color carefully, and place them where they won’t show at the crown or around the part.
What if my curls fall flat before the reception?
That’s common with fine hair. Use a little more texturizing spray at the roots and mid-lengths, and set the curls fully before brushing them out. If the ends go soft, that’s fine; the style only needs enough shape to keep the overall outline.
Which style works best with a veil?
Low buns, low knots, and crown twists usually give a veil comb the most stable anchor point. If you want a half-up style, make sure the pinned section is padded enough to support the comb instead of letting it slide into the hair.
How do I hide a thin crown or visible part?
Use a soft off-center or deep side part, then give the roots a little lift with mousse, blow-drying, or dry shampoo. A half-up twist or crown braid can also disguise a sparse area by creating a visual line across it.
Can I do one of these styles myself?
Some, yes. Pinned-back layers, a wrapped ponytail, a side part with soft waves, and a ribbon-tied half pony are realistic DIY options. More structured shapes like French twists, faux bobs, and neat chignons are better with help unless you’ve done them before.
What style looks best if my hair is just above the shoulders?
Half-up styles, faux bobs, low knots, and tucked twists usually work best at that length. You want shapes that rely on pinning and bending the hair rather than on long sections that need extra length to wrap around.
Should bridesmaids all wear the same hairstyle if they have thin hair?
Not necessarily. Matching the finish — smooth, soft, braided, or waved — often looks better than forcing every head into the exact same shape. Different face shapes and hair densities respond differently, and weddings tend to look better when the style feels coordinated rather than copied.
The Styles That Hold Their Shape
Thin hair doesn’t need to be hidden, and it doesn’t need to be inflated into something it isn’t. The smartest wedding styles for medium-length hair work with the cut, the texture, and the weight of the strands you already have. A low knot, a soft twist, a side sweep, a braided halo — each one gives the eye a fuller shape without asking the hair to become a different material.
Pick the structure first, then the finish. Once that’s in place, the details — veil, comb, ribbon, pins, curls — start doing the part they’re meant to do. They stop fighting the hairstyle and start completing it. That’s when thin hair looks its best on a wedding day: not overworked, just arranged with care.