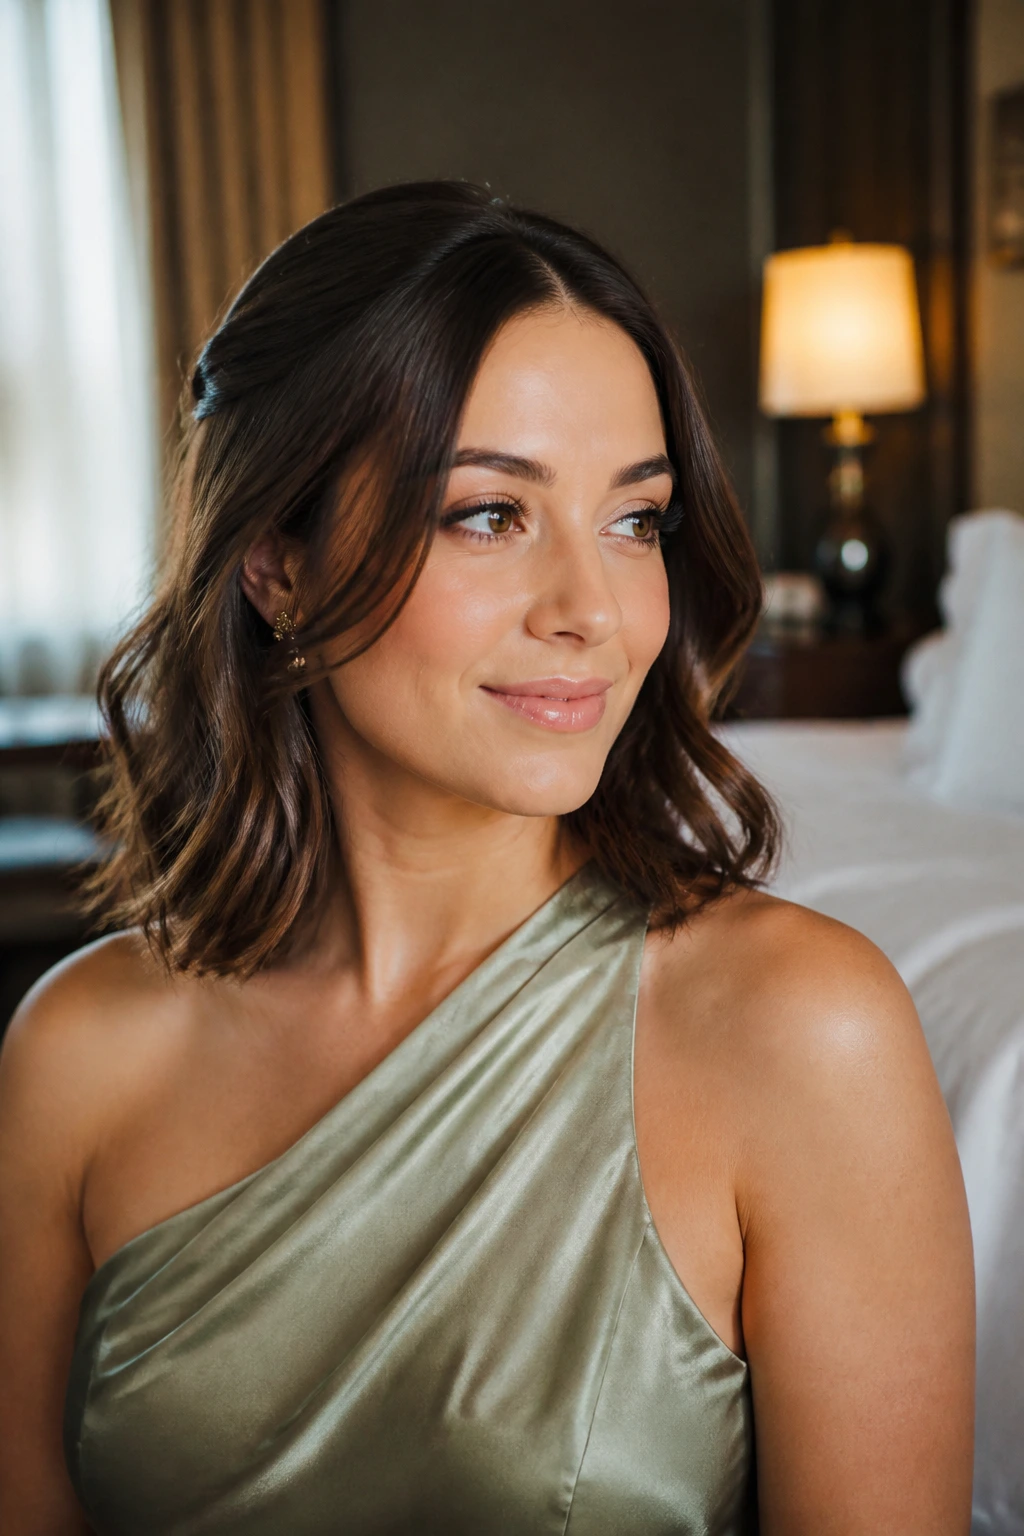
Shoulder-length hairstyles for wedding guests sit in a very useful spot: long enough to pin, braid, twist, and curl, but not so long that the style collapses into a heavy curtain by the time the cake arrives. That length has range. You can go polished, a little romantic, or properly dressed-up without spending half the morning fighting your own hair.
The other nice thing is that shoulder-length hair behaves. It takes a bend faster than waist-length hair, holds a pin closer to the scalp, and doesn’t drag accessories down the way heavier lengths sometimes do. If you’ve ever had a loose curl droop before the ceremony photos were done, you already know why this matters.
And honestly, that’s the sweet spot for wedding guest hair. You want something that looks intentional from the back, doesn’t steal focus from the couple, and still survives heat, hugs, and dancing. The styles below all work with that reality in mind.
Why These Wedding-Guest Styles Earn Their Keep
-
They stay light at the neck: Shoulder-length hair keeps the nape from feeling buried, which matters when the reception runs long and the room gets warm.
-
They use less product than long-hair styles: A few pins, a small amount of mousse, and a medium-hold spray usually do more than a whole can of lacquer.
-
They work with real dresses, not fantasy dresses: A low knot, side sweep, or soft wave can sit under a high neckline or open back without fighting the outfit.
-
They survive a long event better than you’d think: Medium-length hair can be curled, pinned, and refreshed fast, which is useful when you have only one bathroom mirror and a clutch.
-
They let accessories do some of the work: Pearls, ribbons, combs, and clips show up better on shoulder-length hair because there’s space around them.
-
They don’t demand perfect weather: A little wind, a little humidity, or a crowded dance floor won’t ruin every style on this list if you prep it right.
Why Shoulder-Length Hair Gives Wedding Guests More Options Than They Expect
Shoulder-length hair is often treated like a halfway point, as if it’s waiting to become something else. I think that misses the point. At this length, the hair has enough weight to fall nicely and enough grip to stay put once you bend it into shape.
That mix matters. Very long hair can pull a soft twist flat. Very short hair can be hard to pin without pins showing. Shoulder-length hair lands in the middle, which means you can build a style that looks finished from every angle without stacking on an outrageous amount of product.
The trick is choosing the right category of style. If the invitation says black-tie, you want structure. If it says garden or cocktail, you can loosen the outline and let a few face-framing pieces move. If you’re heading to a summer outdoor ceremony, keep the style close to the head and let one accessory do the talking.
The Length Sweet Spot
This is the length where a curled end still has spring. That’s why a lob can look expensive with almost no fuss. One-inch or 1.25-inch barrel curls often create enough movement by themselves, and you don’t need the extra bulk of a long braid to make the style feel dressed up.
Why Accessories Behave Better Here
A pearl pin can disappear in very long hair. On shoulder-length hair, it shows. A ribbon doesn’t vanish either, and a comb sits where you place it instead of sliding into a heavy curtain of ends. That makes medium-length hair a smart base for wedding guest styling.
What to Aim For
Clean lines at the front. Something controlled at the back. One deliberate detail — a twist, a clip, a braid, a tucked section — that makes the style look chosen instead of accidental. That’s the difference between “I brushed my hair” and “I showed up ready.”
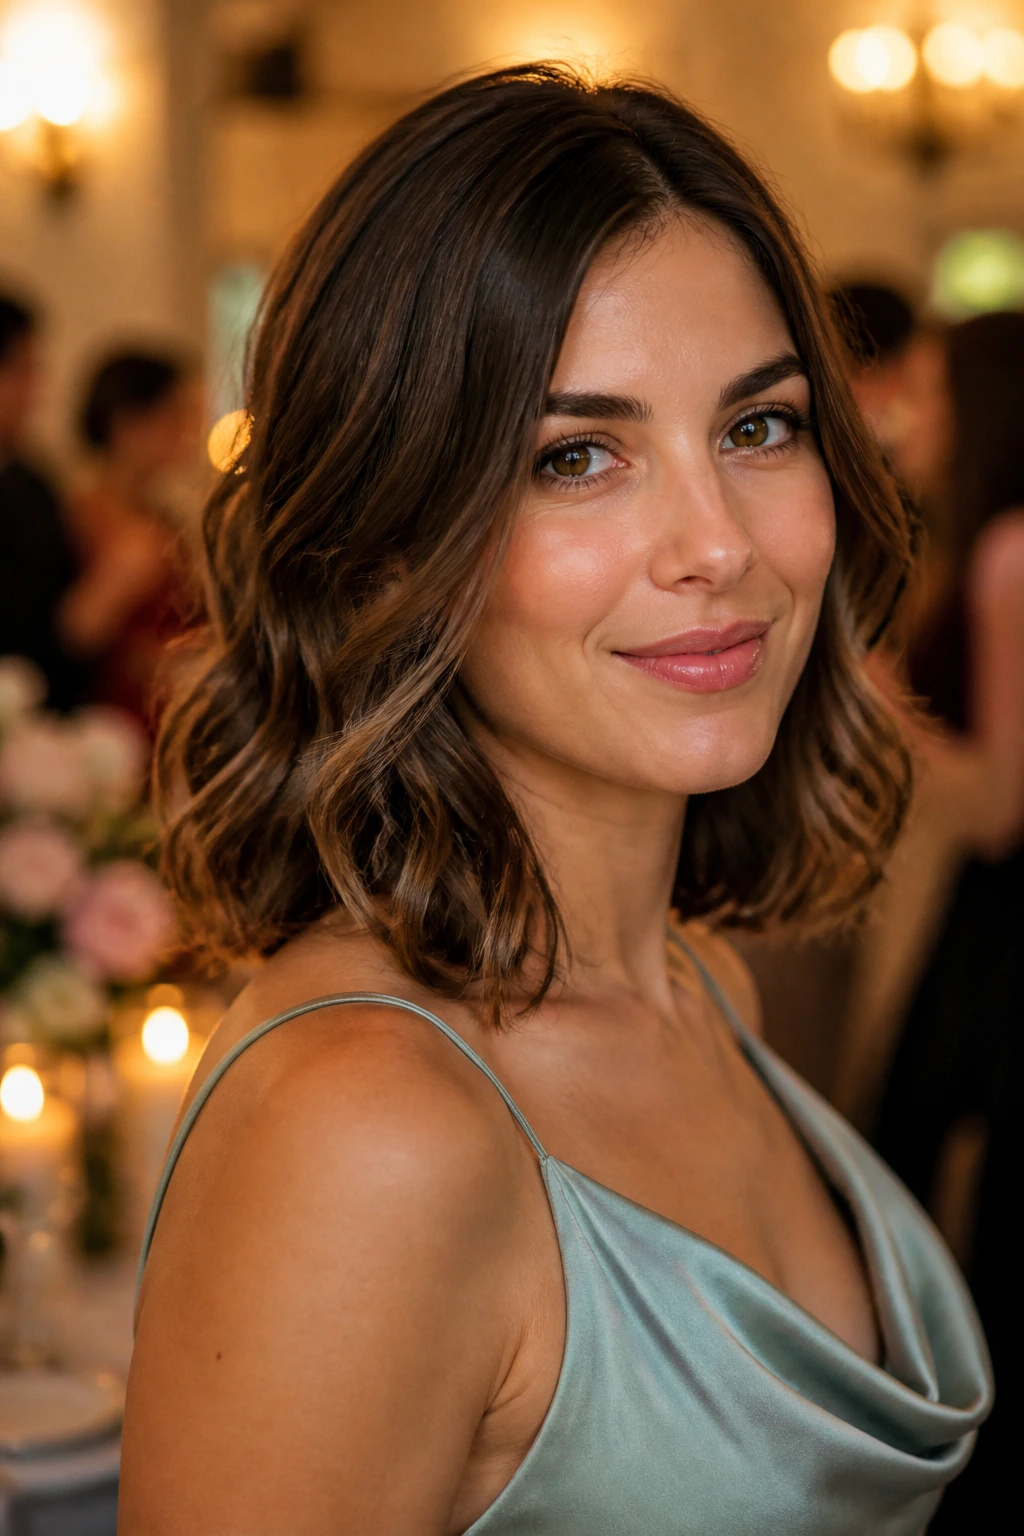
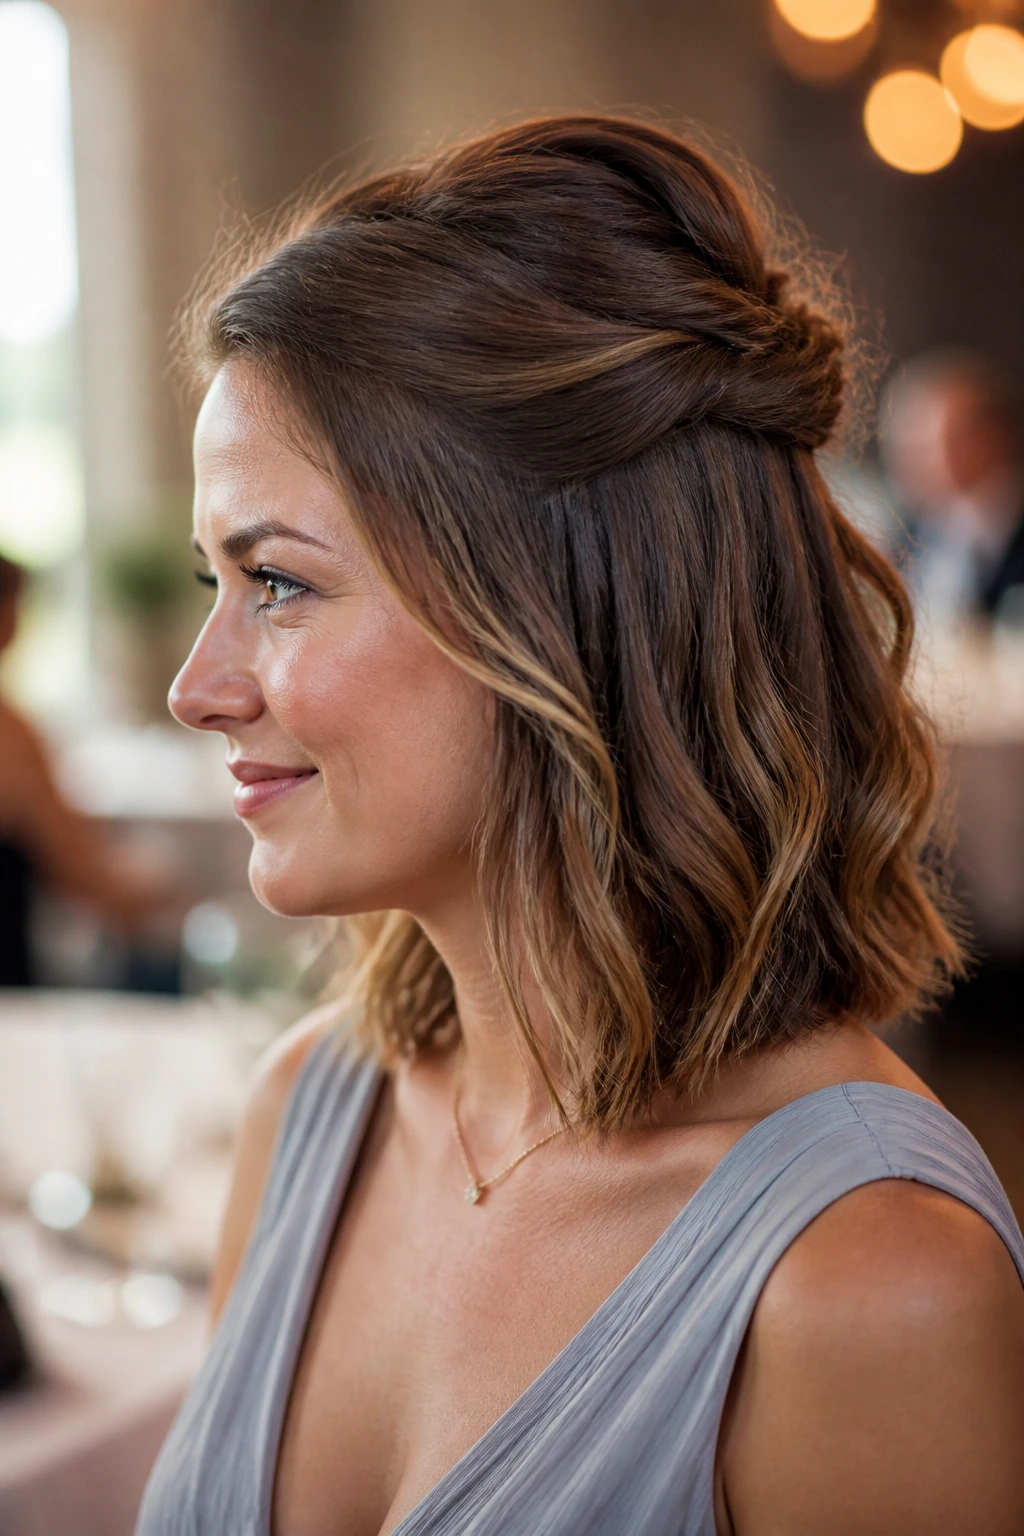
1. Soft Hollywood Waves That Brush the Collarbone
These waves are the dependable formal option, and I mean that in the best way. They look polished, photograph cleanly, and don’t read as trying too hard, which is exactly what you want when the dress code sits somewhere between cocktail and black-tie.
Why It Works
The shape comes from a deep side part and a uniform bend through the mids and ends. On shoulder-length hair, that wave pattern lands right at the collarbone, so the outline feels soft rather than heavy. A 1.25-inch curling iron, a light heat protectant, and a flexible hairspray are enough to get the right finish.
Quick Styling Notes
- Curl away from the face on both sides for a smoother frame.
- Let each section cool in your hand before you drop it.
- Brush through only after the curls are fully cool, or you’ll flatten the bend.
- Finish with a shine spray on the ends, not the roots.
Best for: satin dresses, square necklines, and rooms where you expect a lot of photos.
Bold tip: If your hair tends to collapse, pin each curled section to your head while it cools. Ten minutes of cooling makes more difference than another layer of spray.
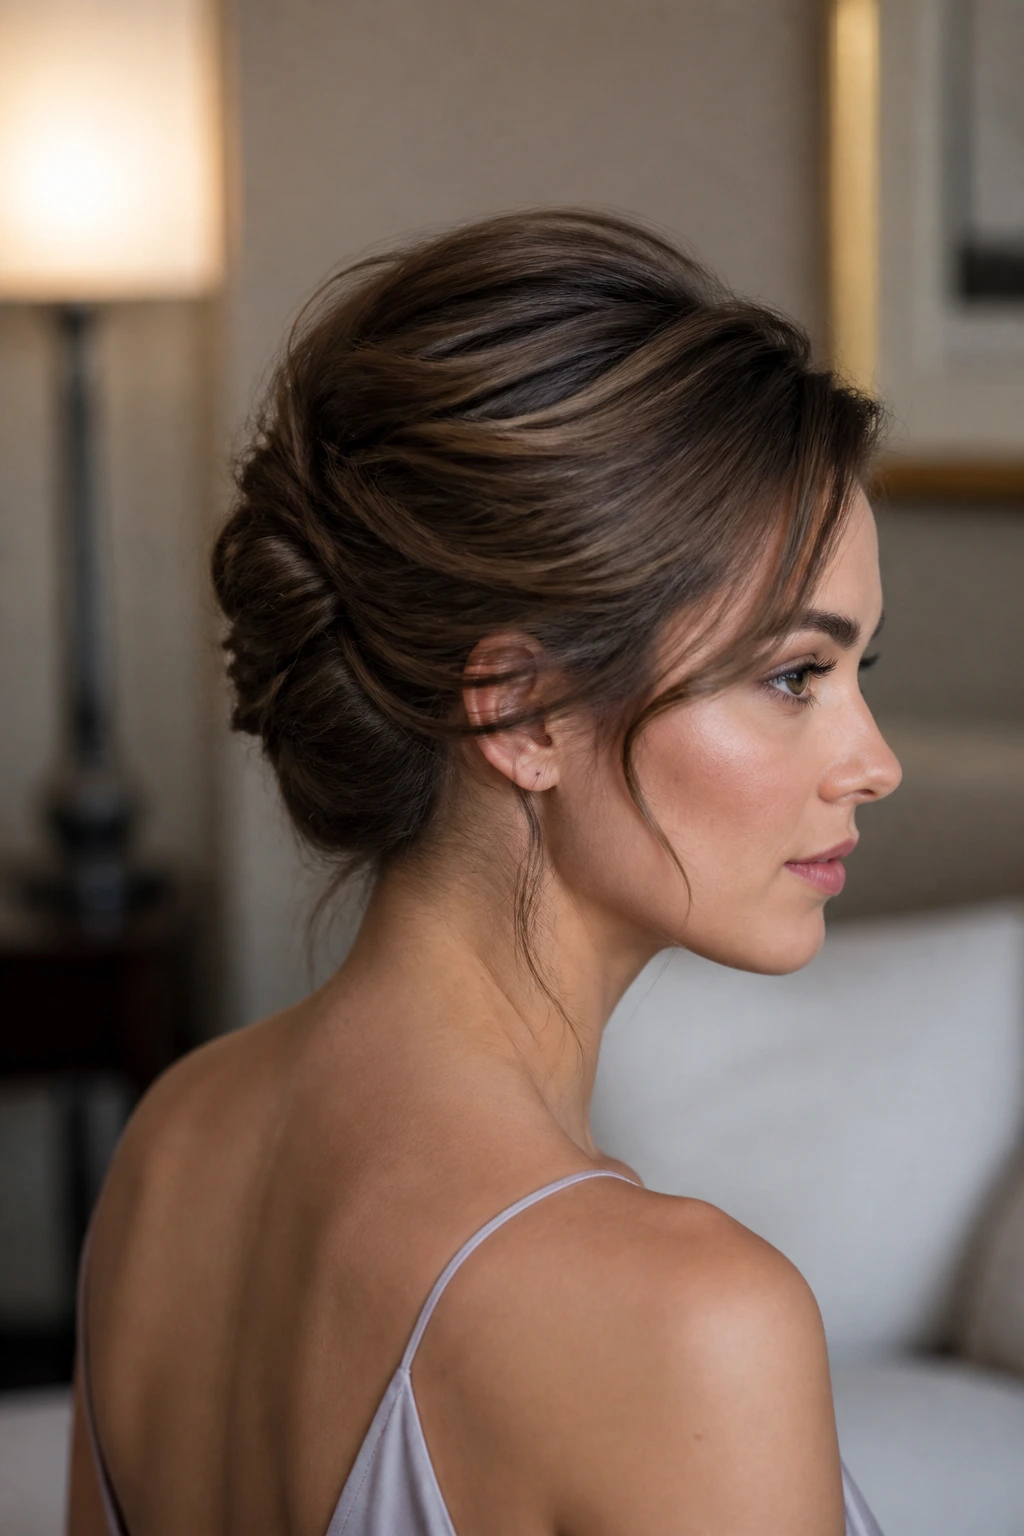
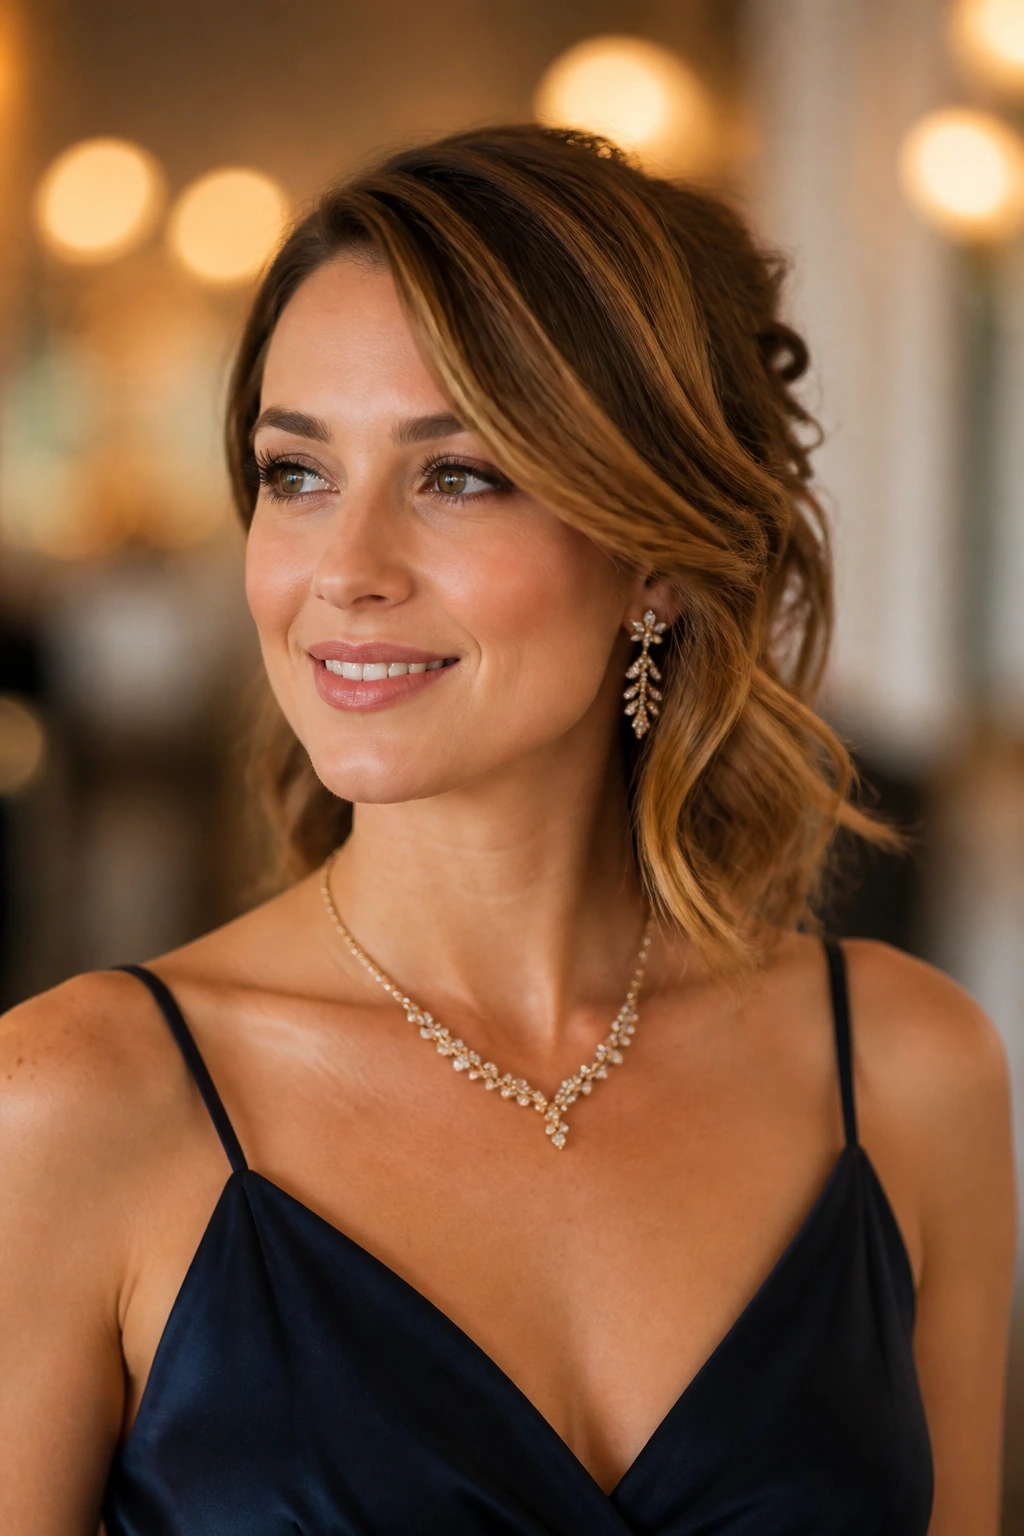
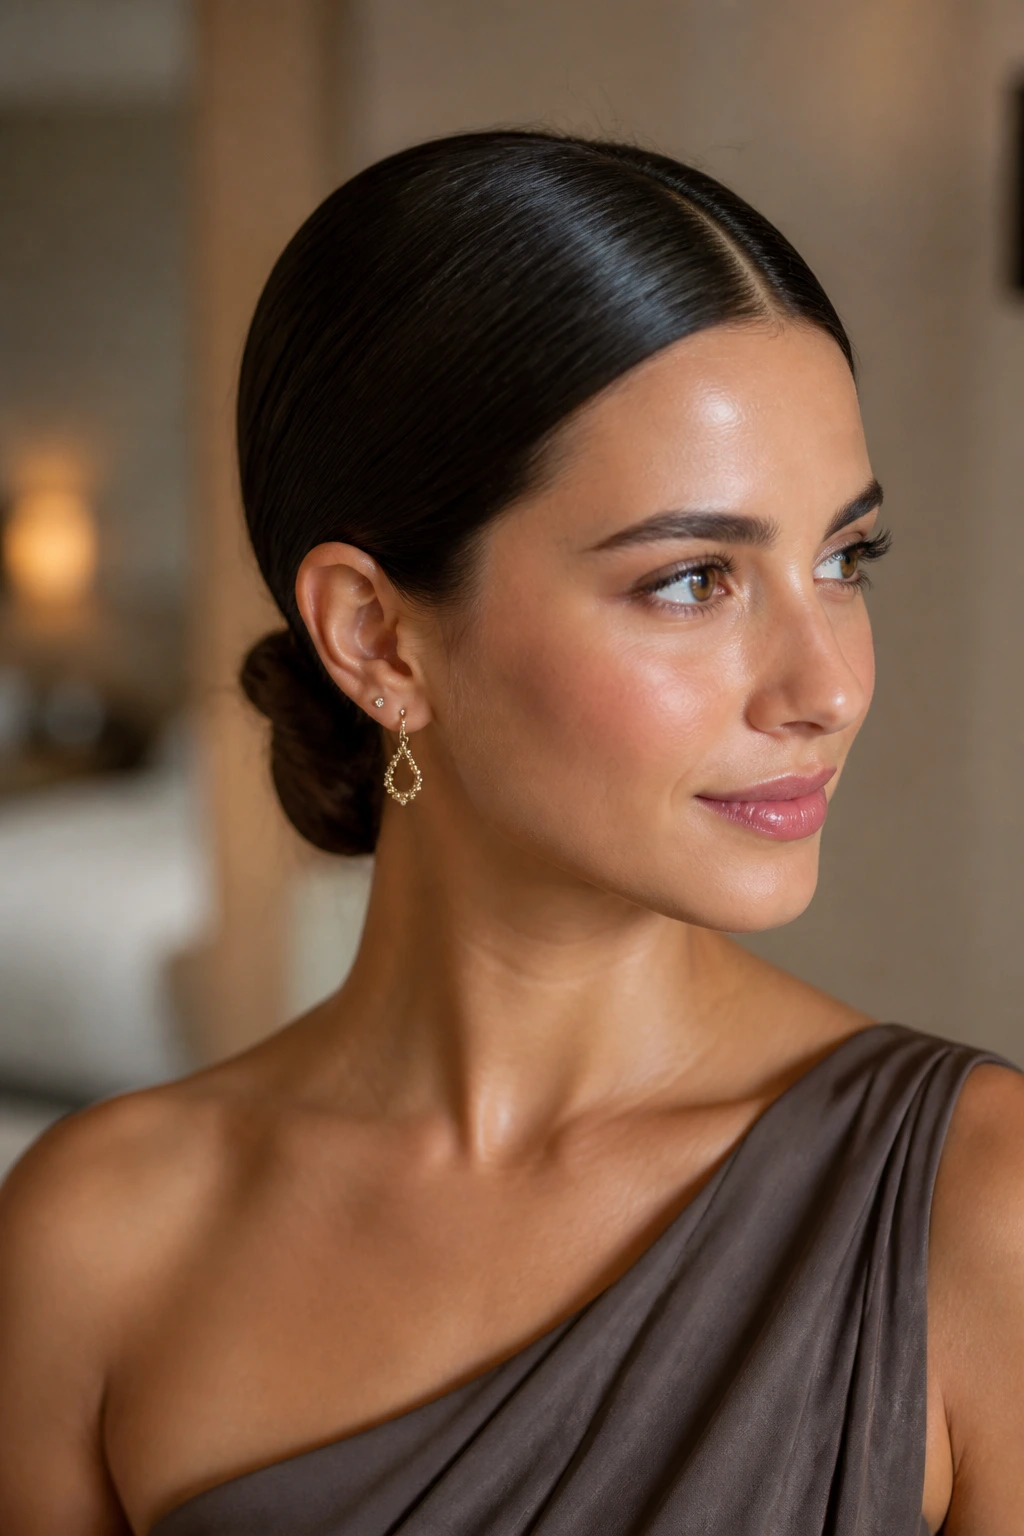
2. Sleek Low Knot With a Clean Middle Part
This is the style I reach for when the outfit is doing a lot. If the dress has beading, a strong neckline, or big earrings, a low knot keeps the hair from competing with all of that.
A middle part gives the look its clean line, and the knot itself should sit just above the nape, not high in the back like a school-bun situation. Keep the surface smooth with a small boar-bristle brush and a pea-sized amount of serum. Too much serum makes the hair look greasy by hour two.
The knot doesn’t need to be enormous to look formal. On shoulder-length hair, a compact twist or folded bun actually looks sharper than a bulky one. Secure it with two crossed bobby pins, then one U-pin if you want extra hold.
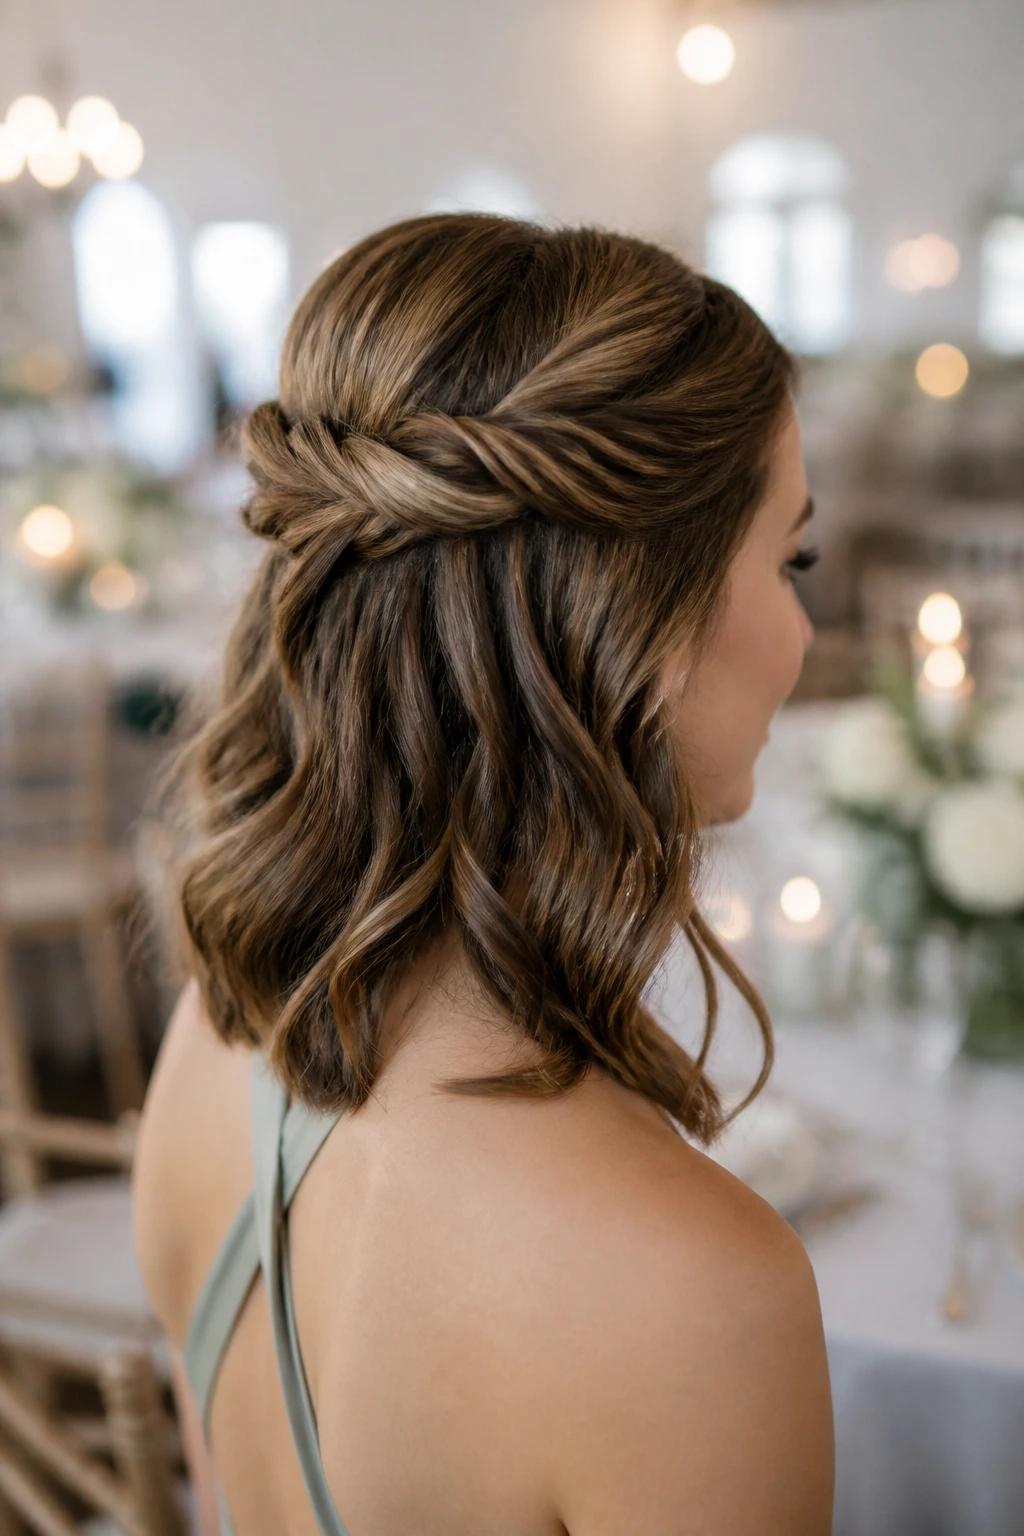
3. Twisted Half-Up Crown for Soft Face-Framing
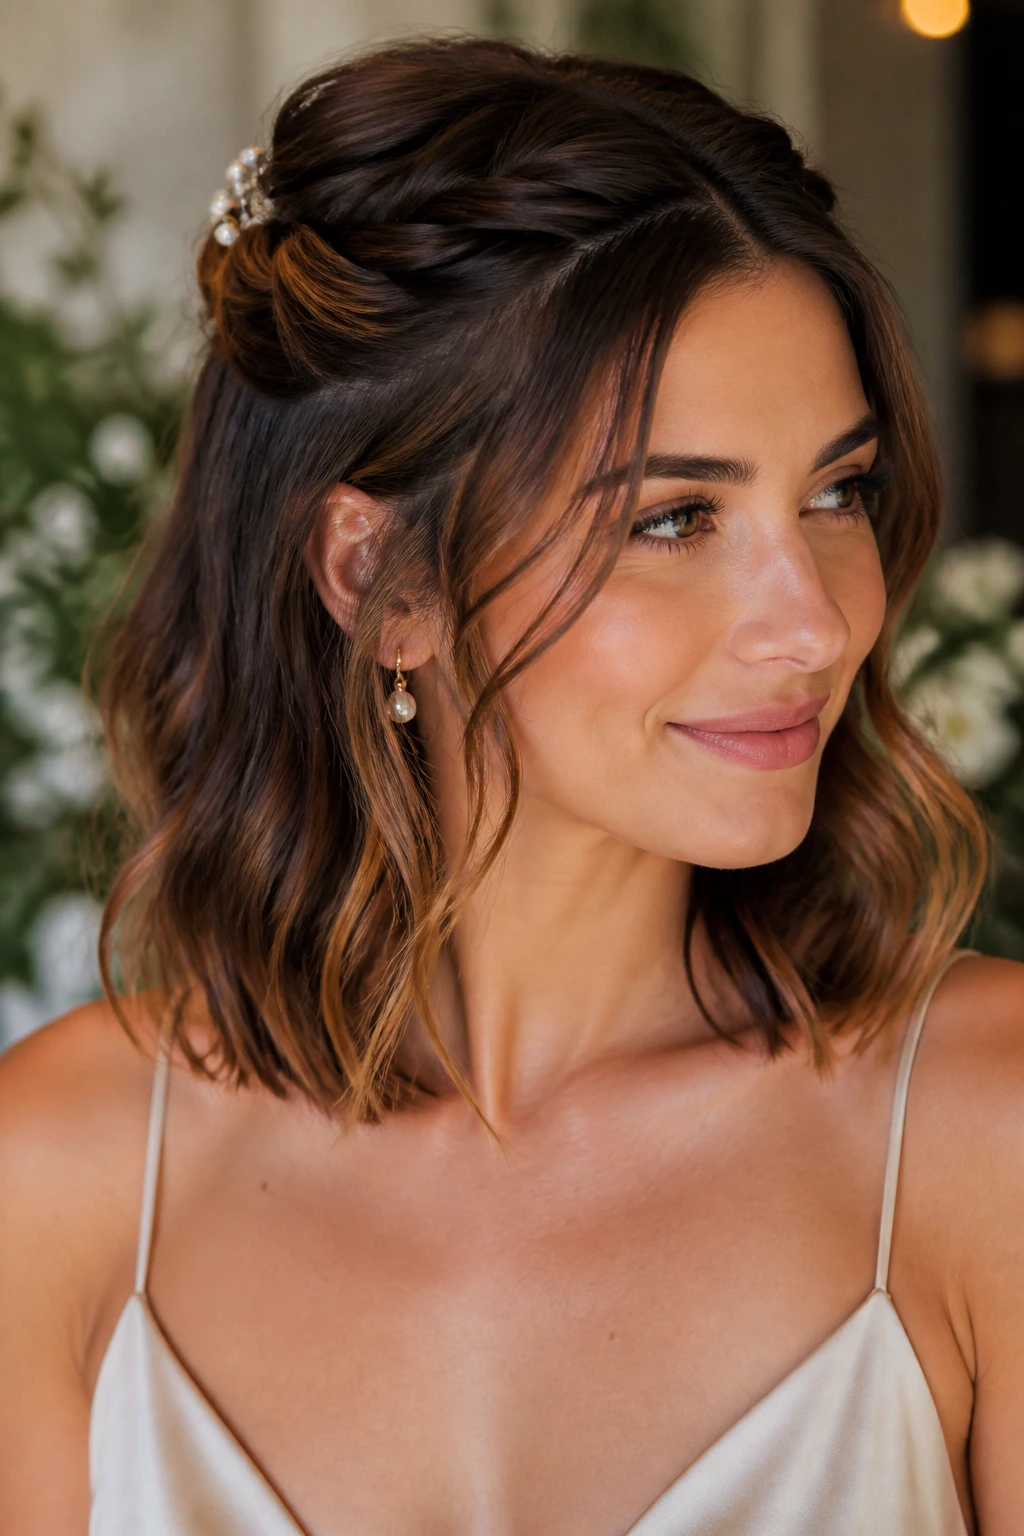
Do you want hair off your face without giving up movement through the ends? This is the easy answer. A twisted half-up crown gives a little structure at the top while leaving the rest of the hair loose and soft.
Start by taking two sections from each temple and twisting them back toward the crown. Pin them where they meet, then hide the pins with a small pearl barrette or a matte clip. The rest of the hair can stay in loose bends or brushed-out waves, which keeps the whole thing from feeling stiff.
How to Wear It
This style works best with dresses that have open necklines or thin straps. If you’re wearing statement earrings, the half-up shape keeps them visible. It also behaves well on fine hair because the top section gives the illusion of lift without making the style look overbuilt.
Small Detail That Helps
Mist the roots with a texturizing spray before twisting. The hair will grip the pin better and won’t slide apart halfway through the toast.
4. Textured Lob With a Deep Side Sweep
A deep side sweep makes shoulder-length hair feel a little more dramatic without requiring a full updo. It’s one of those styles that looks relaxed from across the room and deliberate when you get close.
The easiest way to do it is to create bend with a wand, then push the heavier side over one shoulder and pin a small hidden section behind the opposite ear. That tiny hidden pin matters. Without it, the whole shape drifts back to center.
What Makes It Work
- Adds volume at the crown without teasing the hair into stiffness.
- Lets the ends fall in a loose curve instead of a hard curl.
- Keeps one side open for earrings and the other side soft around the cheek.
This is the style for guests who want movement. Not chaos. Movement. The difference is a side part, one controlled bend, and enough spray to keep the shape from unraveling in the breeze.
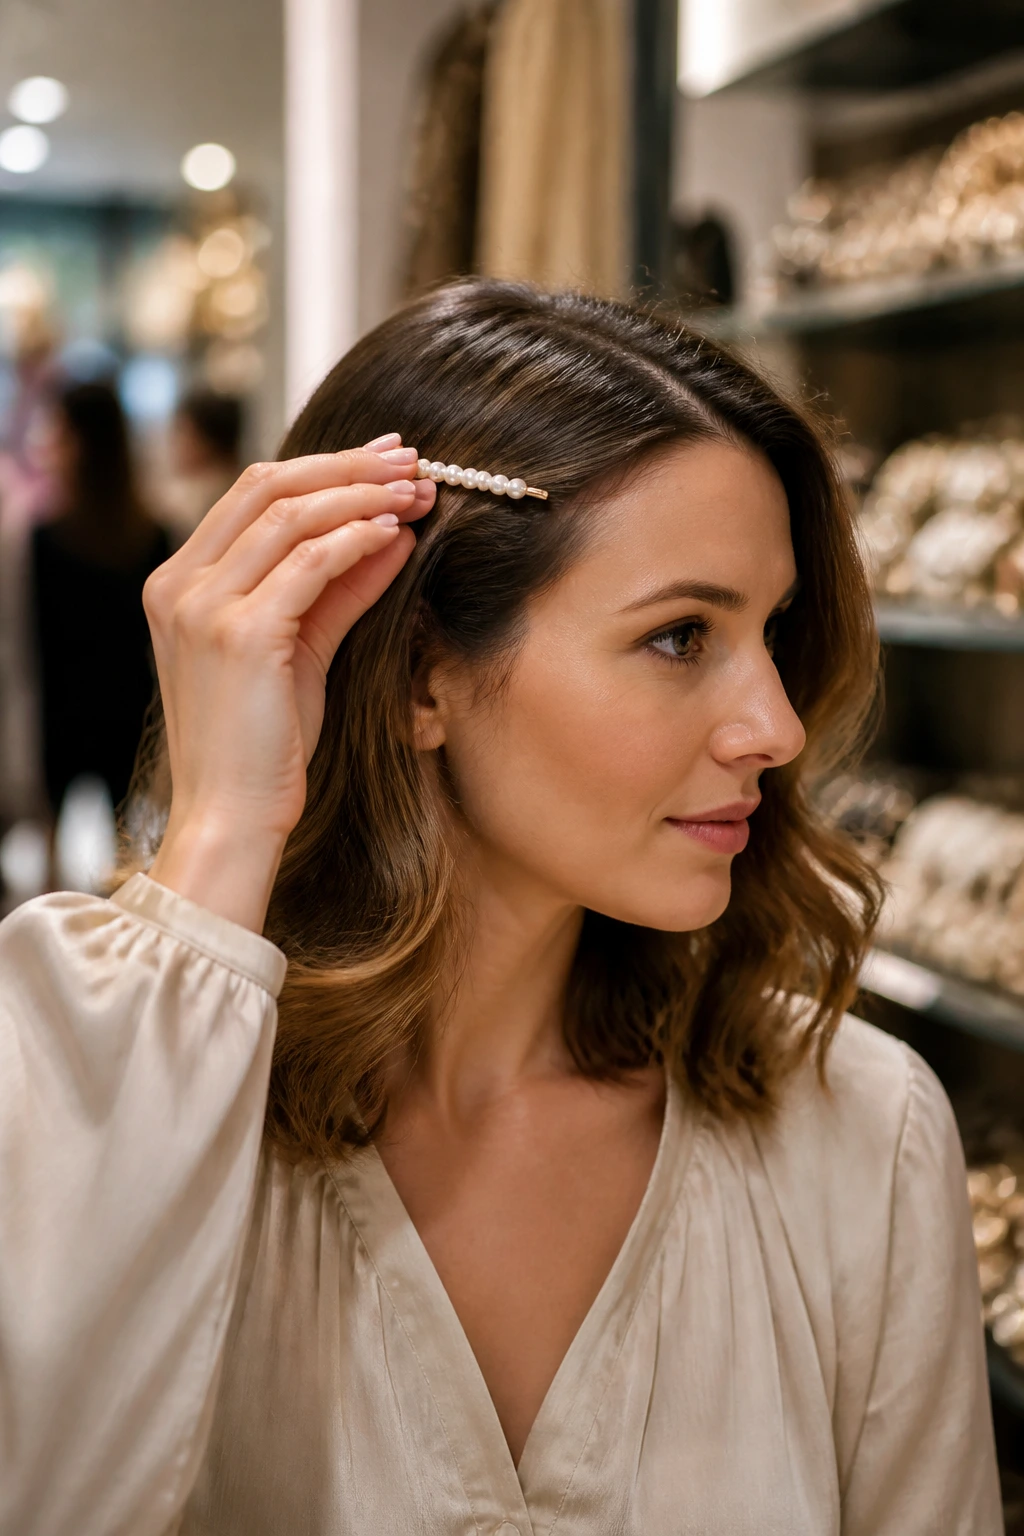
5. Pearl-Pinned Faux Finger Waves

Pearl pins can rescue even plain shoulder-length hair, and this style leans into that. You get the polished look of finger waves without needing old-Hollywood precision or ten extra minutes in front of the mirror.
The hair is parted off-center, then smoothed into soft S-shaped bends along one side while the other side is tucked and pinned. I like using a fine-tooth comb and a touch of styling cream for this. The cream helps the surface look sleek, but do not overload it or the wave pattern turns limp.
A cluster of two or three pearl pins placed near the temple gives the style its wedding feel. Keep them in a tight line rather than scattering them. Scattered pins look random. A row looks designed.
This style works especially well if you’re wearing a simple dress and want one detail to carry the outfit. That’s where pearl pins earn their keep.
6. Loose French Twist With a Soft Finish
A French twist on shoulder-length hair sounds more ambitious than it is. The shortened length actually helps, because there’s less excess hair to tuck and less weight trying to drag the roll downward.
This version should be soft, not shellacked. Sweep the hair to one side, twist upward, and tuck the ends in with pins instead of forcing every strand into a perfect tube. Leave a few narrow pieces at the ears and the nape. Those soft edges keep the style from feeling severe.
It’s a strong pick for formal receptions because it sits close to the head and stays neat even after a few hours. If your hair is slippery, rough it up with dry shampoo first. If it’s very clean and fine, the twist may need a hidden mini clip under the fold.
I prefer this style with a bateau neckline or a halter. It gives the face room. It also holds up better than many people expect, which is probably why stylists keep coming back to it.
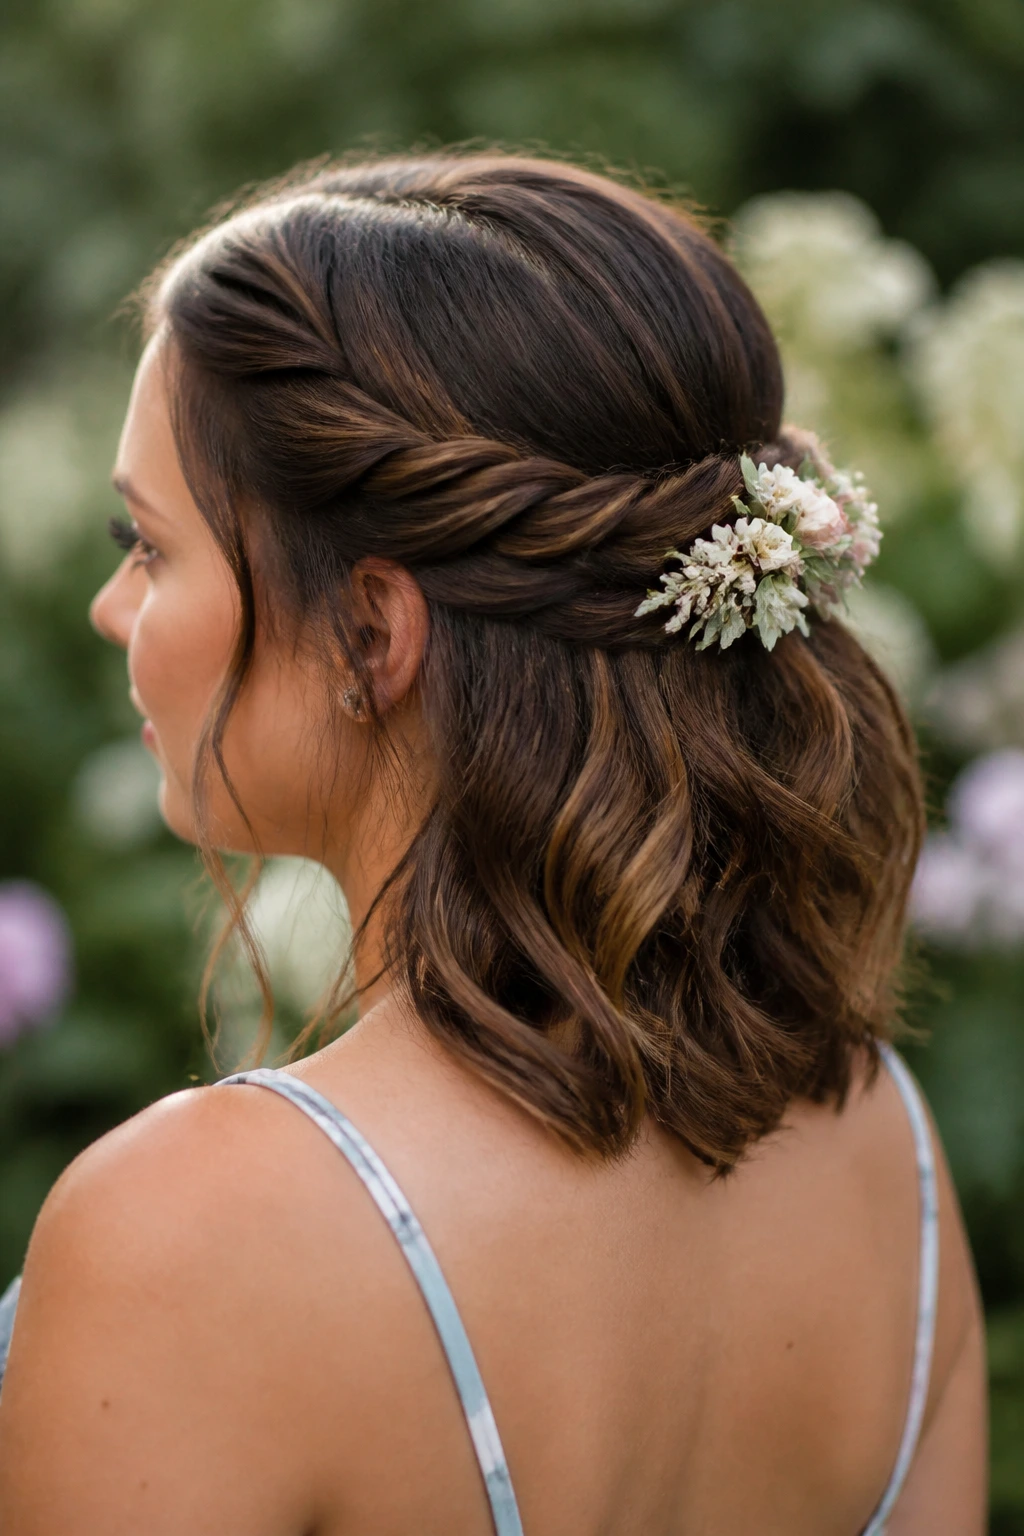
7. Braided Halo With Left-Out Ends
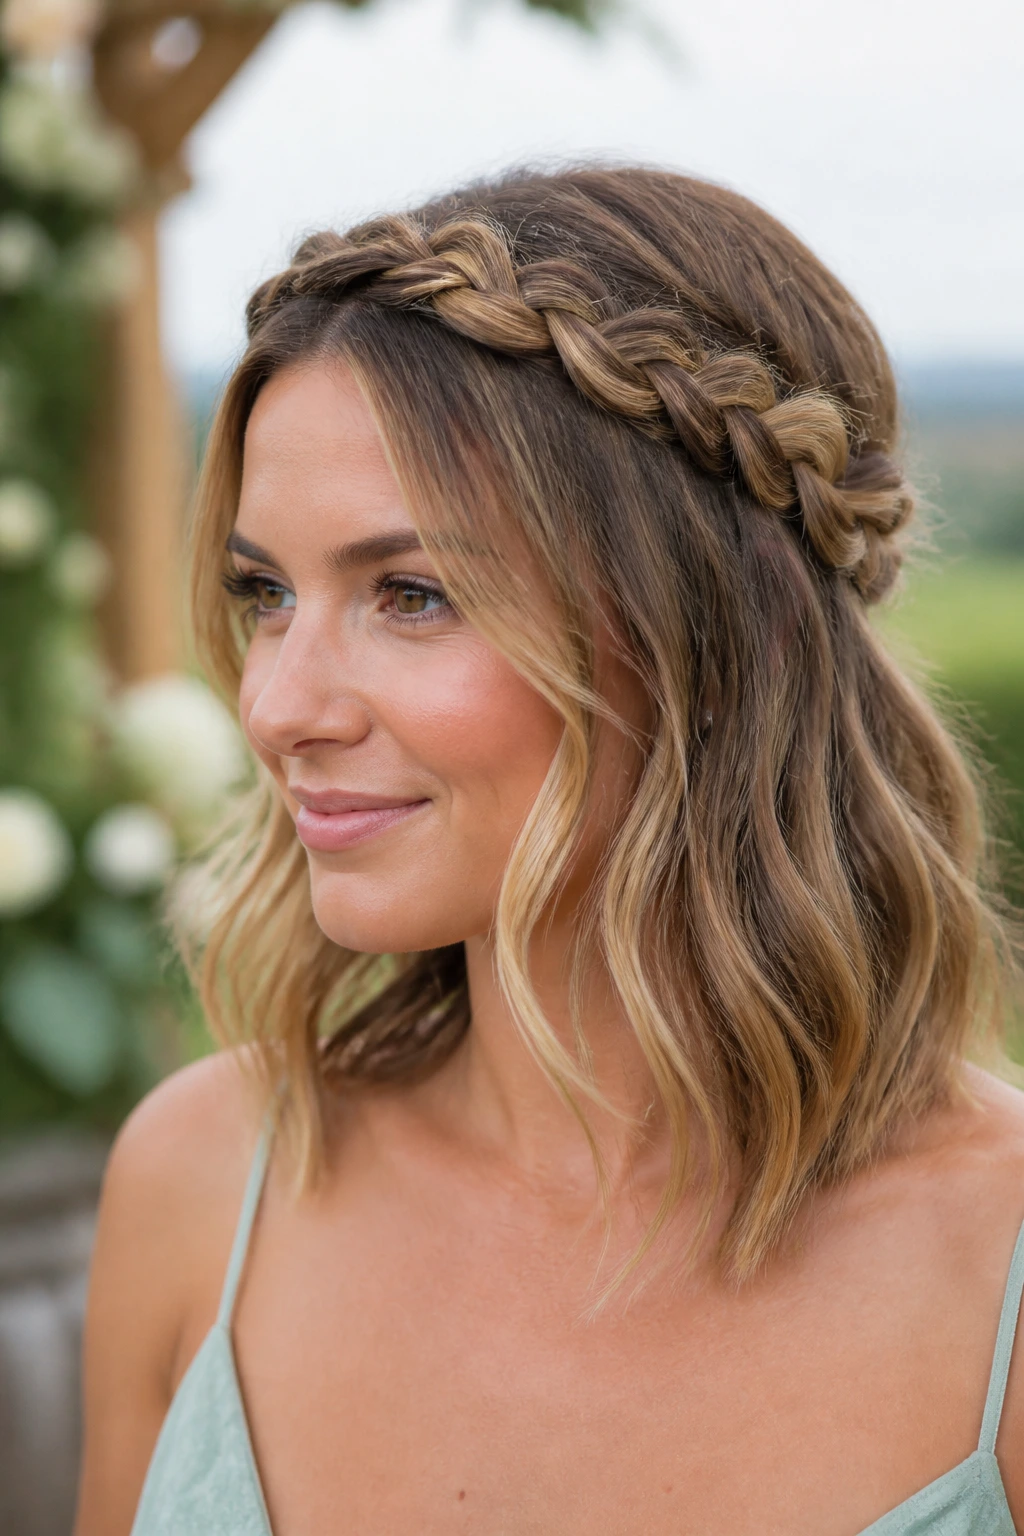
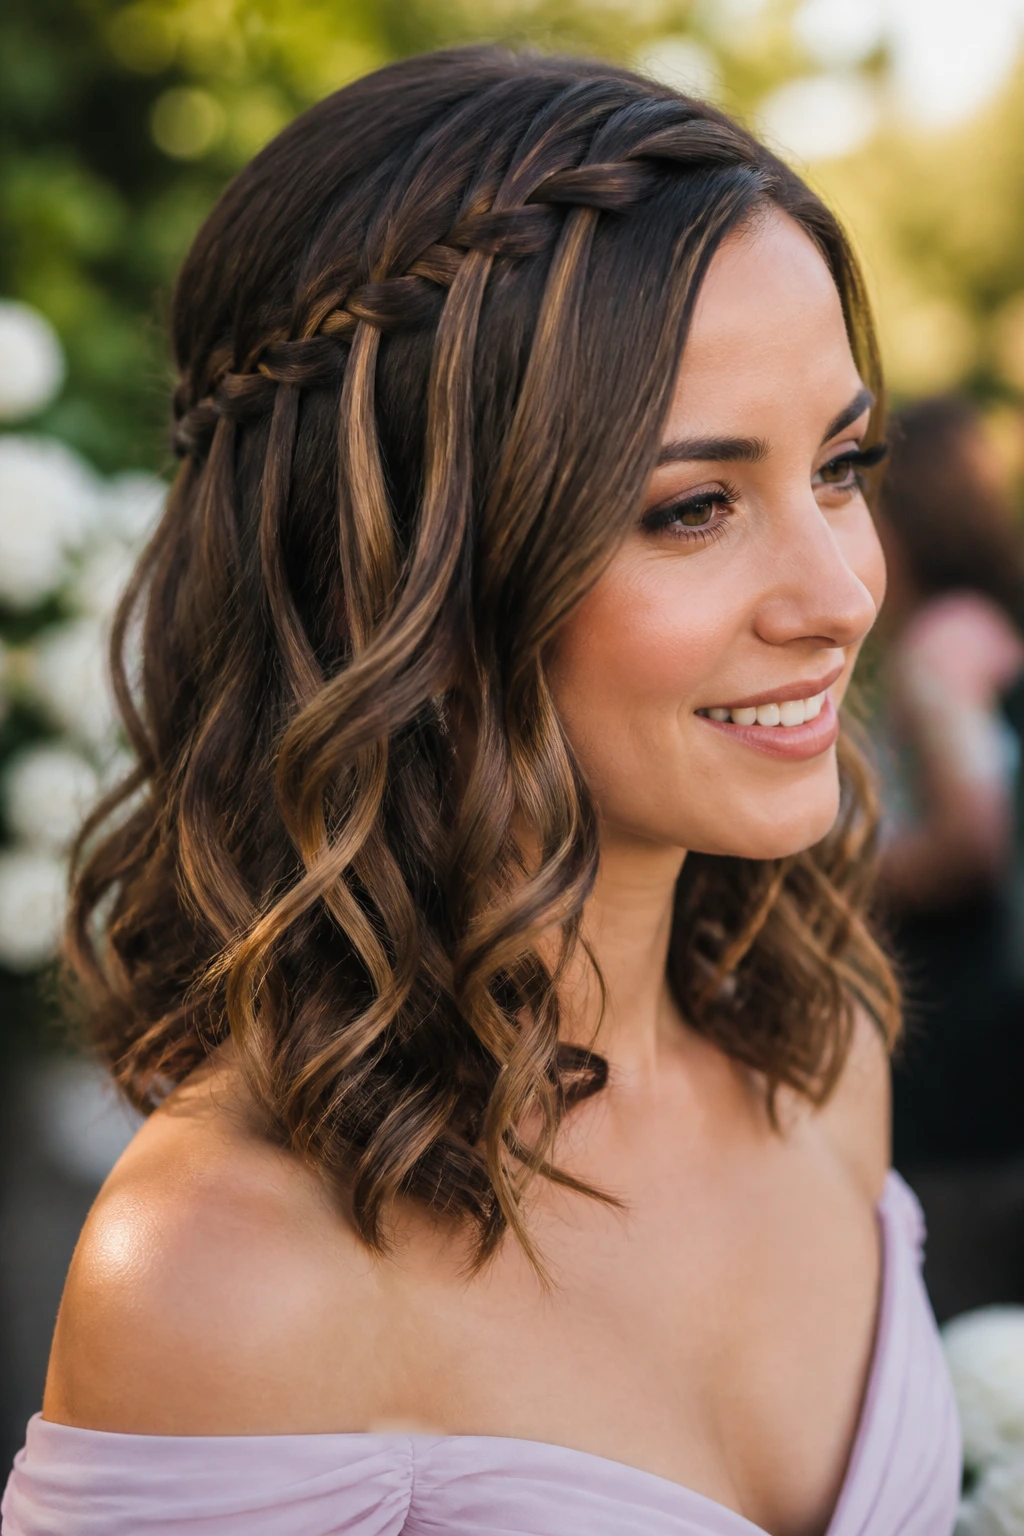
A braided halo can feel romantic without looking bridal, which is a useful line to walk at someone else’s wedding. On shoulder-length hair, the braid sits lower and more relaxed, so the whole thing reads softer than a full crown braid on long hair.
Start with two braids from the temples or a single braid across the hairline, then pin it around the crown. Leave the rest of the hair in loose waves or a brushed texture. The left-out ends keep the style grounded; otherwise, it can start to look too polished for a guest outfit.
Best For
- Outdoor ceremonies where you want the front pieces controlled.
- Dresses with open backs.
- Hair that has a little natural texture and won’t slip out of braids immediately.
A dab of styling paste on the braid helps the strands stay defined. Don’t overdo it. Braids look best when you can still see the pattern of the plait, not a glossy helmet of product.
8. Polished Blowout With Curved Under Ends
Sometimes the smartest wedding guest hairstyle is the one that looks expensive without looking fussy. A polished blowout with the ends curved under does exactly that.
Use a round brush and a blow dryer with a concentrator nozzle. Direct the hair away from the face at the roots, then roll the ends under for that clean finish that sits right at the shoulders. On a lob, the shape is neat and modern. On a slightly longer shoulder-length cut, it feels more soft and full.
This style is a good choice when you don’t want pins in your hair at all. It also pairs well with earrings because the hair stays away from the face without needing a clip. If your hair tends to flip out at the ends, bend the last inch inward with a flat iron after blow-drying.
A shine mist on the mid-lengths is enough. Skip heavy oil near the crown unless you enjoy watching volume disappear by dinner.
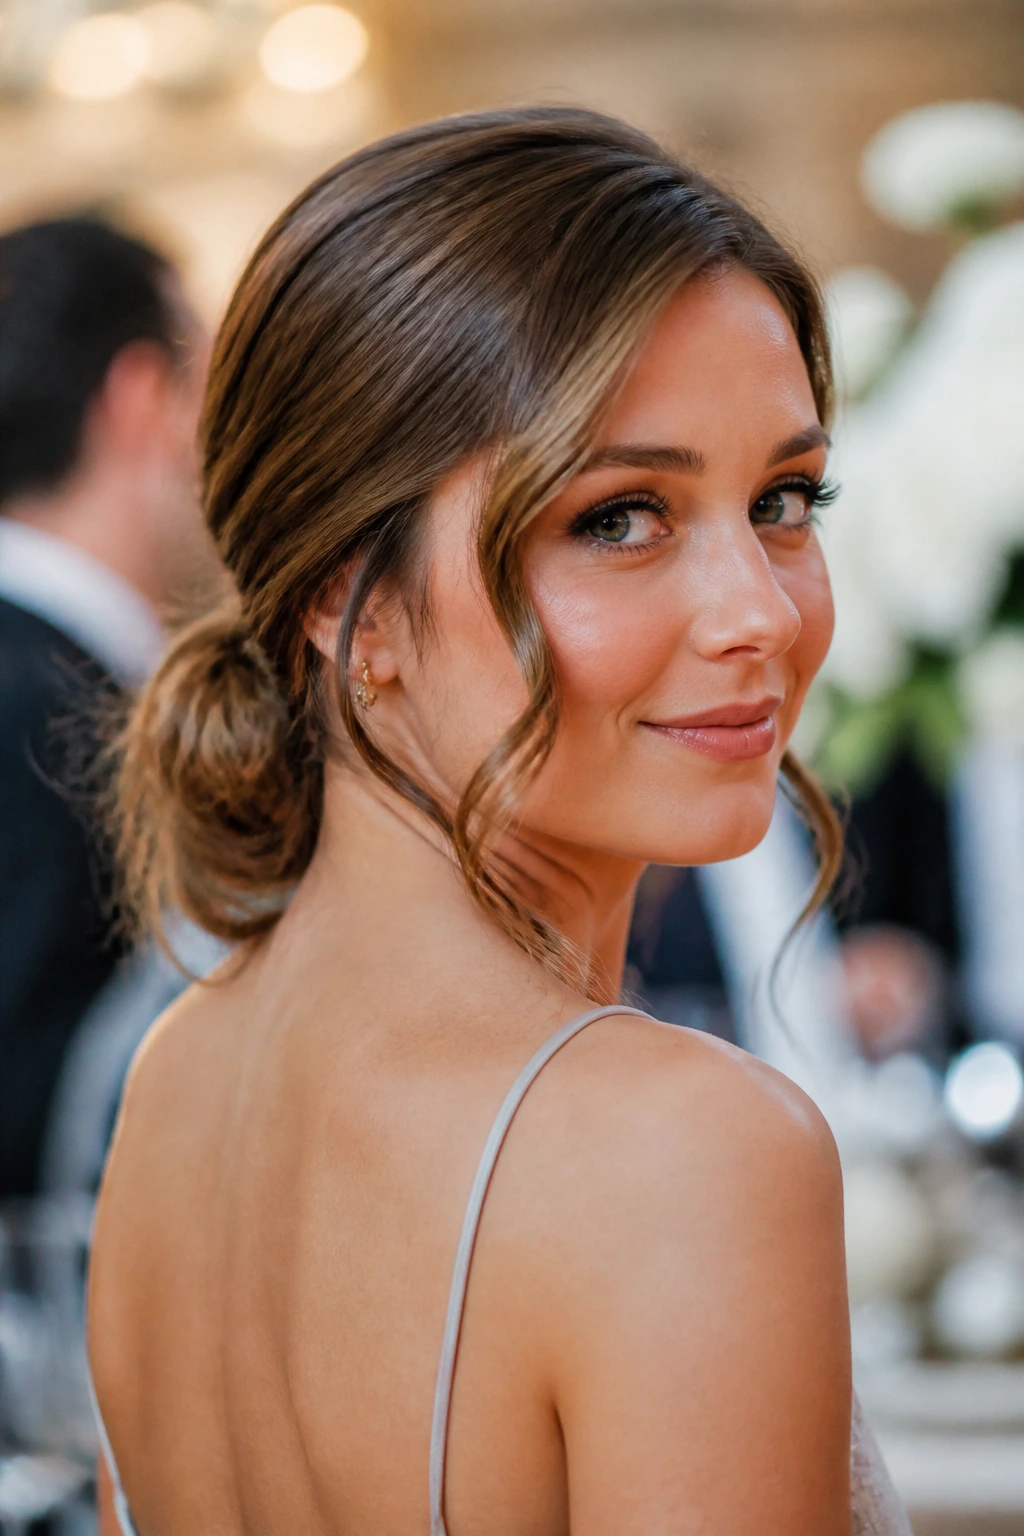
9. Wrapped Low Ponytail That Looks Intentional
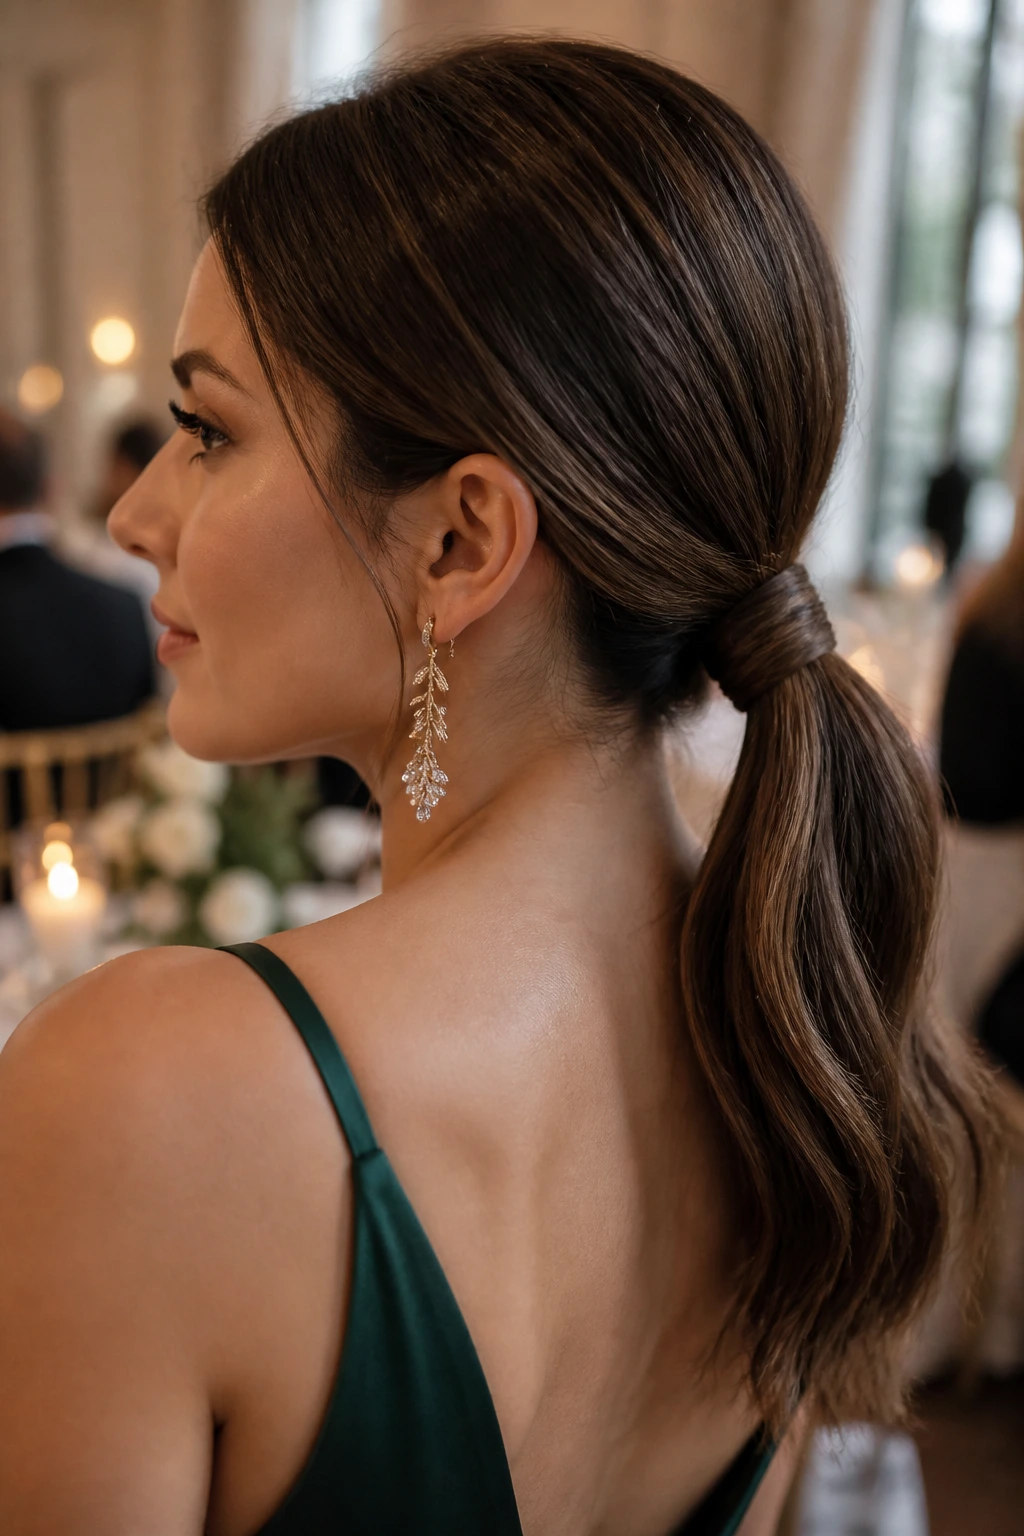
A ponytail can absolutely work for a wedding guest. The problem is that most people stop too early and leave it looking like a weekday errand style. Wrap one section of hair around the elastic and the whole thing sharpens up fast.
Smooth the hair into a low pony at the nape, then take a thin strand from underneath and wrap it around the elastic until no band shows. Pin the end underneath with a bobby pin. If you want a little lift at the crown, loosen the top layer just a touch with the tip of a comb.
Why It Works
A low ponytail gives you clean lines at the front and movement through the tail. That balance is useful when your dress has detail at the shoulders or back, because the hair doesn’t cover it. It also holds up well under a jacket or wrap, which matters if the event moves indoors and outdoors.
My opinion: this style looks best when the hair is glassy at the top and soft at the tail. That contrast keeps it from feeling too plain.
10. Waterfall Braid Into Loose Curls
This one gives you some braid work without swallowing the whole head in plaited hair. A waterfall braid across one side, then loose curls through the rest, feels airy and a little dressed up.
The braid should stay shallow. Think of it as a front detail, not the whole story. Once it’s pinned, curl the rest of the hair in soft, separate sections so the braid has a textured backdrop. If the curls are too tight, the braid gets lost. If they’re too loose, the braid looks unfinished. There’s a narrow middle lane here, and it’s worth staying in it.
This is a good choice when you want something romantic but not too formal. It keeps the face open and still gives you movement from every angle. A tiny flower pin at the braid’s end can be lovely, but one accessory is enough.
11. Tousled Chignon With Two Slim Tendrils
A chignon on shoulder-length hair should never look too perfect. If it does, it starts to feel stiff, and the whole point is to keep it relaxed enough for a wedding guest.
The structure is simple: gather the hair low, twist it into a compact bun, and leave two slim tendrils at the front. Those tendrils should be narrow — about the width of a pencil, maybe a touch wider. Giant face-framing pieces make the style look undone in a way that’s hard to control.
The texture matters. A light wave in the hair before pinning gives the chignon a better surface to hold onto. Straight, slippery hair can be tucked into place, but it needs more pins and a bit of grip spray.
I like this style for cocktail weddings because it looks finished from the front but still has some movement at the back. It’s the kind of hair that says you made an effort without announcing the effort.
12. Side-Swept Waves and a Statement Clip
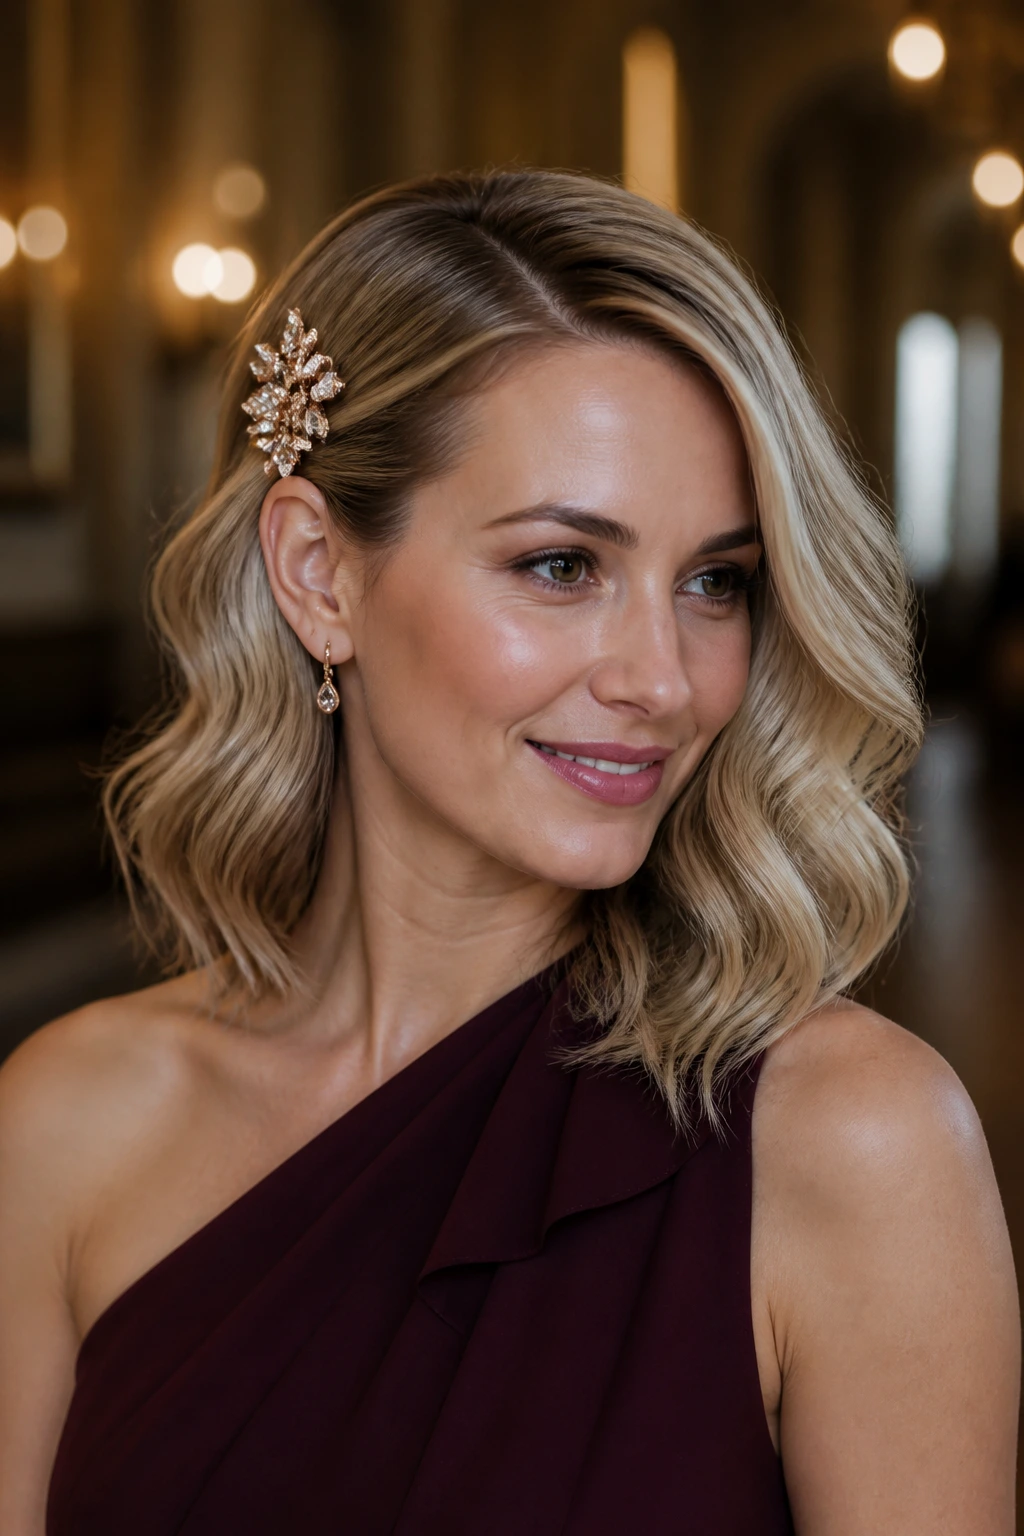
A single strong clip can do more for shoulder-length hair than a whole tray of tiny pins. Side-swept waves plus one statement clip is the cleanest example of that.
Start with brushed-out curls or a bend from a flat iron. Sweep one side behind the ear and fasten it with a decorative clip just above the jawline or at the temple. The clip should sit where people can see it when you turn your head, not hidden under the hair.
What Makes It Different
This style balances loose and controlled in a very tidy way. One side is pinned, the other side moves. That asymmetry gives the style some energy, especially if your dress is plain or your neckline is straight.
Use a clip with teeth if your hair is very smooth. A barrette with a smooth underside may slide, and there’s nothing glamorous about stopping mid-reception to fix it.
13. Ribbon-Tied Half Ponytail
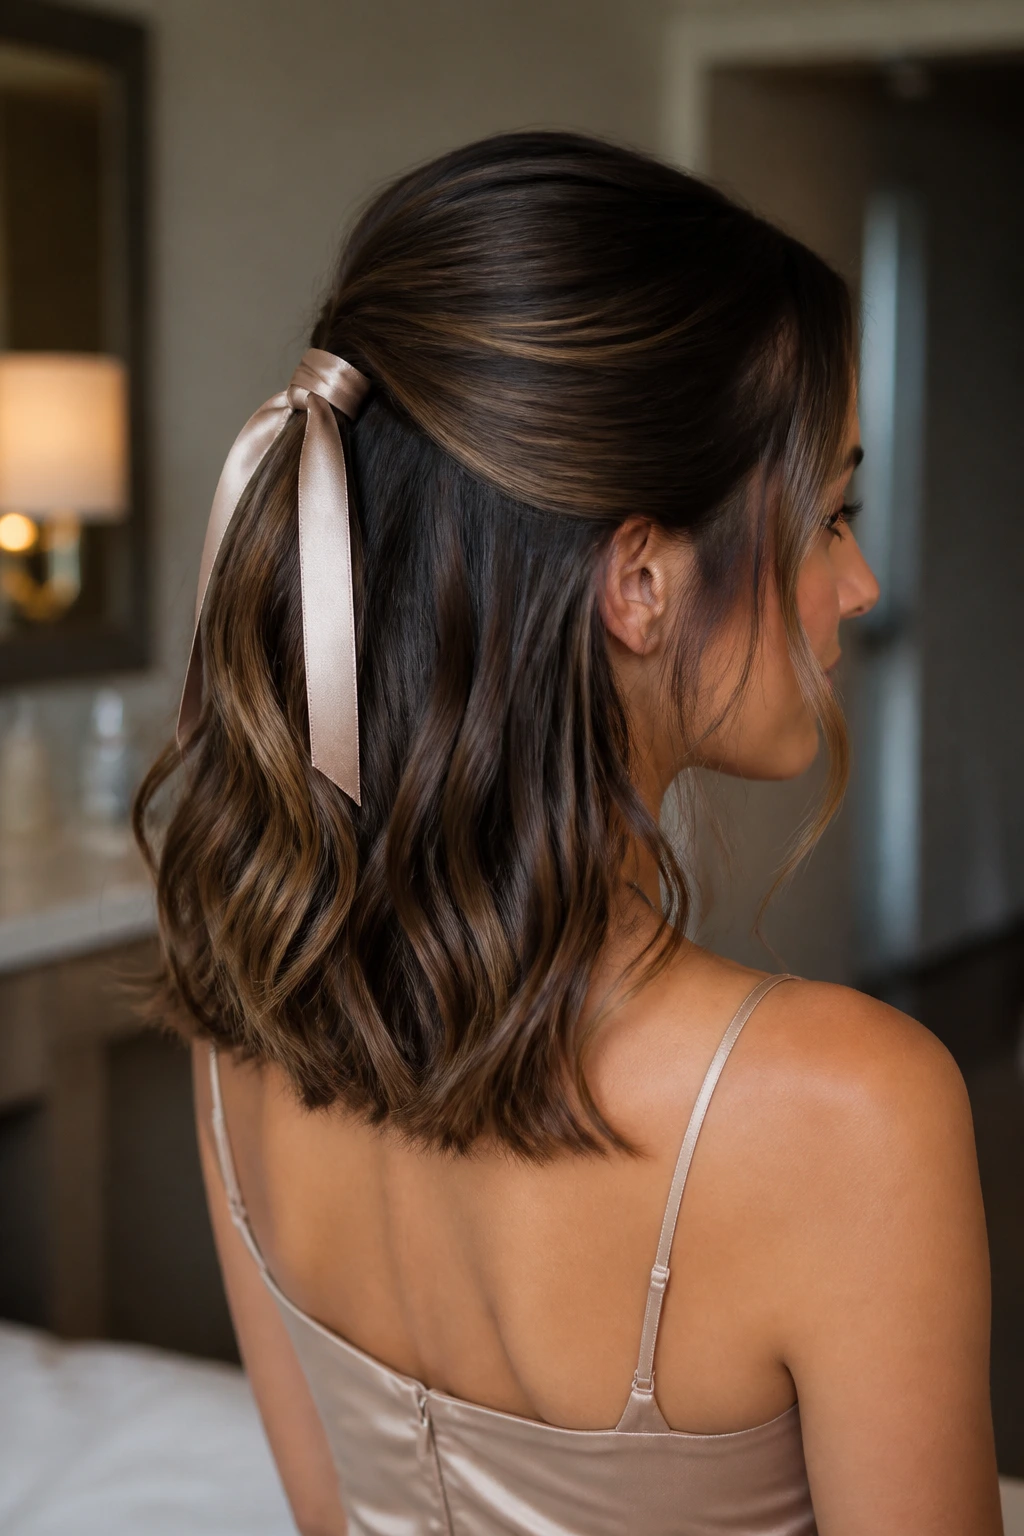
A ribbon can make a half ponytail feel more formal than a hair elastic ever will. And on shoulder-length hair, the ribbon sits in just the right place to show without overpowering the shape.
Pull the top half of the hair back gently, secure it with a small elastic, then wrap a satin or grosgrain ribbon around the base. Let the ends of the ribbon hang loose, or tie them into a short bow if the outfit calls for something softer. Keep the lower half of the hair in waves or a blowout so the style doesn’t feel juvenile.
This one works best when the rest of the outfit is clean and simple. A ribbon already brings softness. You do not need lace, rhinestones, and five other accessories fighting it.
A narrow ribbon in a shade close to the dress often looks better than a bright contrast. Quieter reads smarter.
14. Vintage Flip Ends With a Satin Headband
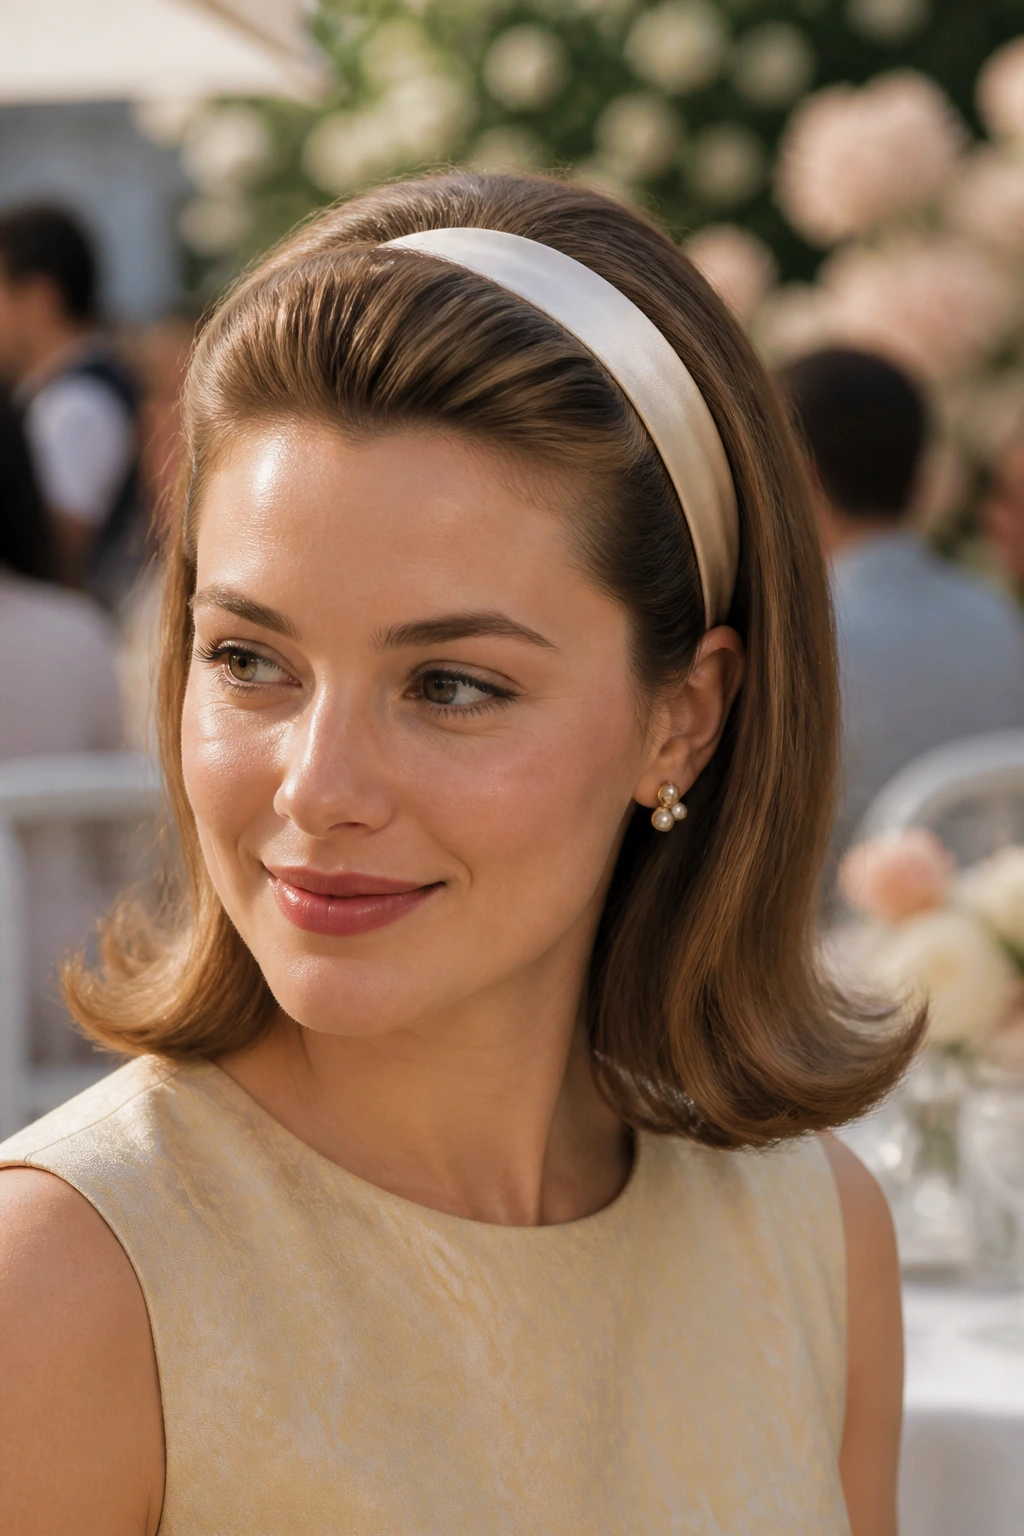
If you like a little retro shape, this style has real charm. Flip the ends out with a round brush or flat iron, then set a satin headband slightly behind the hairline so the front has some lift.
The flip at the ends keeps shoulder-length hair from falling flat against the dress. It also gives the cut a bit of personality, which I think matters at weddings where everyone else seems determined to wear the same soft wave. The headband should be smooth and snug, not tight enough to leave a mark.
When It Works Best
- Brunch or daytime receptions.
- Garden or museum weddings.
- Dresses with simple silhouettes that need one visual detail.
If you have bangs, this style is especially easy. If you don’t, the headband creates the feeling of a framed face without forcing the hair back too harshly.
15. Bubble Ponytail for Shoulder-Length Hair
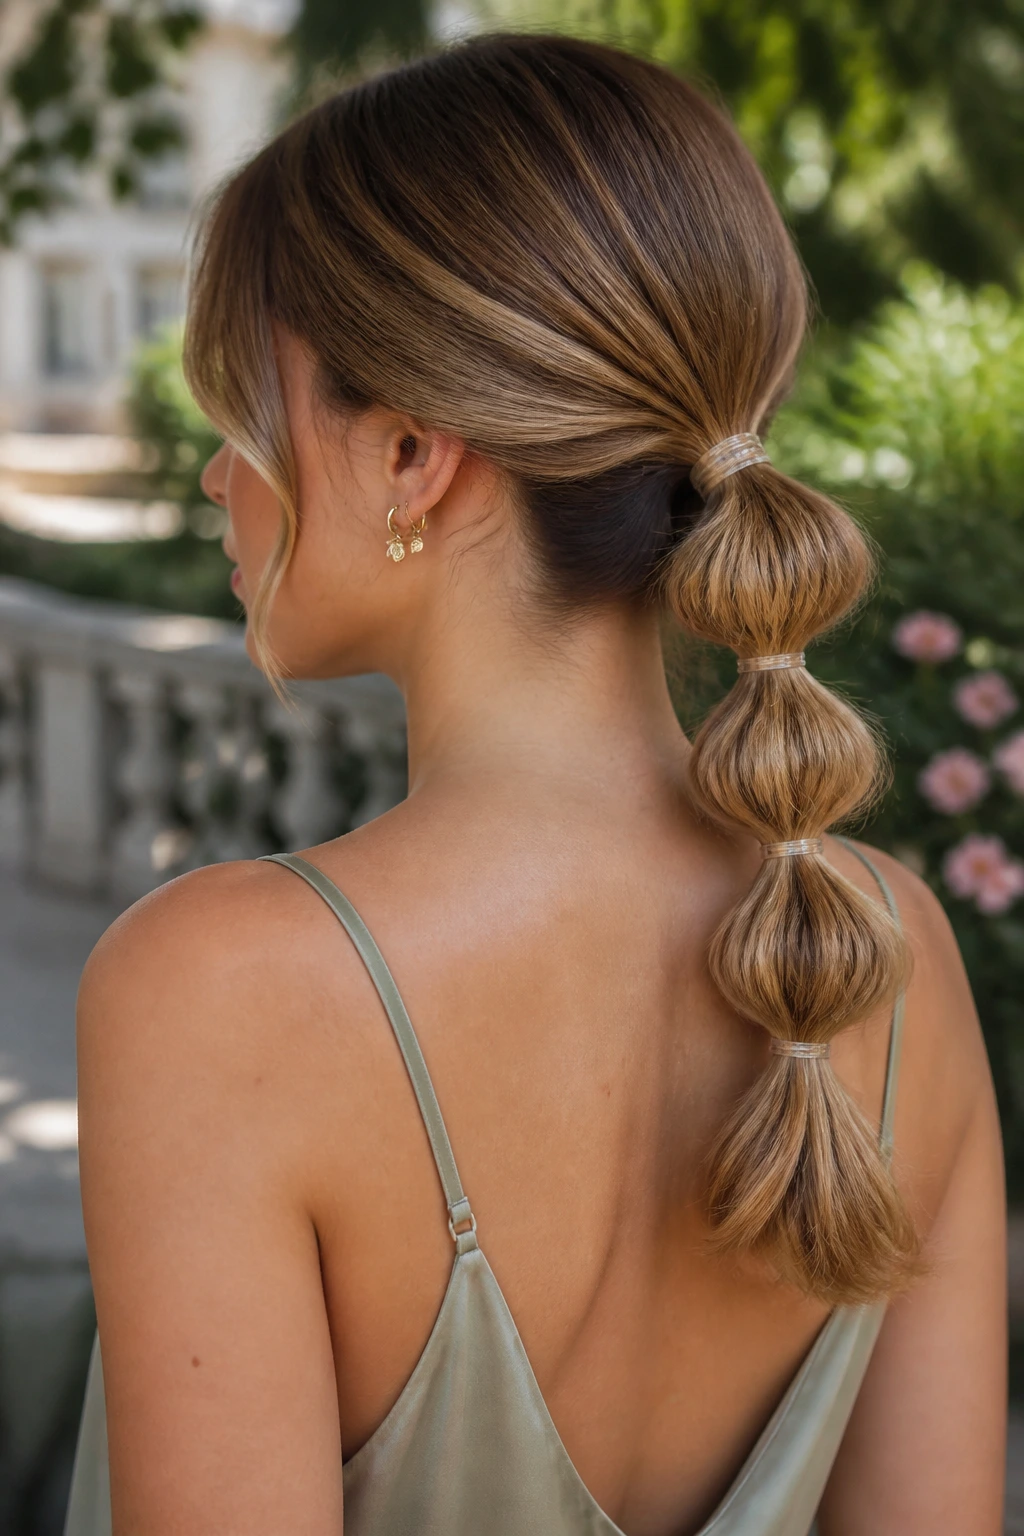
A bubble ponytail sounds playful, and it is, but it can also look polished if you keep the sections even and the elastics discreet. This is one of the better choices for shoulder-length hair that needs to stay up and off the neck.
Start with a low or mid ponytail. Add small clear elastics every 2 to 3 inches down the tail, then gently pull each section outward to form rounded bubbles. On shoulder-length hair, you may only get two or three bubbles, and that’s fine. More is not always better.
The style reads especially well in thick hair because the bubbles have shape. Fine hair can still do it, but you’ll want a little texturizing spray first so the sections don’t collapse. A ribbon or silk tie at the top can soften the look if the dress code leans formal.
16. Crisscross Twist Half-Up Style
Here’s a style that looks more complicated than it is. Two side sections are twisted backward and crossed over each other at the back, then pinned into place so the shape feels like a woven detail across the crown.
This works nicely on shoulder-length hair because the shorter length keeps the twist close to the head. That makes the style hold better than it would on very long hair, where the weight tends to tug the twists down. The ends can stay loose in soft waves or a brushed bend.
I like this style for weddings where you want something distinctive but not ornate. It gives you a little structure, a little softness, and none of the heaviness of a full updo. Use two pins per side if your hair is fine; one pin is often not enough.
17. Defined Curls With Sparkly Pins
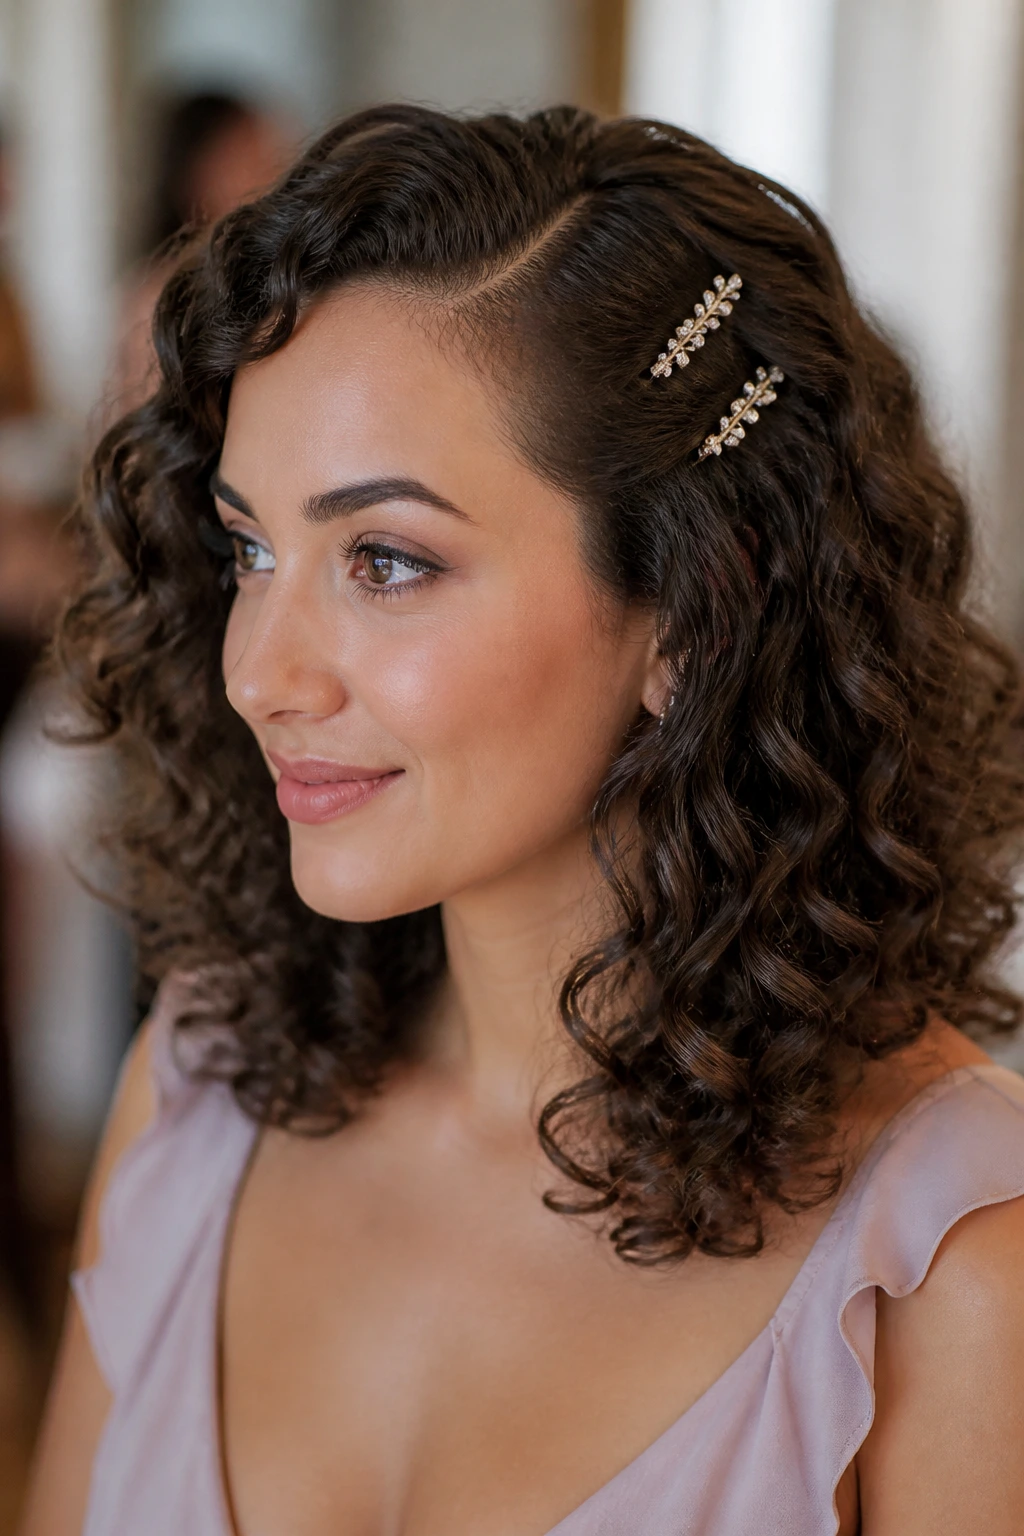
If your hair is naturally curly, this might be the easiest formal option on the whole list. The job is not to fight your texture. It’s to shape it and let the curls do the work.
Apply curl cream or gel to damp hair, diffuse until dry, then pick a side part and place two or three sparkly pins where the curls naturally lift away from the face. The pins should feel like punctuation, not decoration piled on decoration.
What makes this style work for weddings is the combination of definition and restraint. You get movement, height, and a little sparkle without locking the curls into a rigid shape. If a few curls fall differently during the event, that’s not a mistake. It’s texture doing texture things.
A light mist of anti-humidity spray helps, especially around the crown. Keep it light. Too much spray can make curls crunchy and dull.
18. Rope-Braid Low Bun

A rope braid has a cleaner look than a three-strand braid, and when you fold it into a low bun, the result feels sleek and modern. It’s also friendly to shoulder-length hair because rope twists don’t need as much length as big braids do.
Split the ponytail into two sections, twist each section in the same direction, then wrap them around each other in the opposite direction. That rope structure gives the bun extra grip. Tuck the twisted tail into a low circle and pin it tight against the nape.
This is a style I’d pick for a more formal room or a ceremony with a stricter dress code. It doesn’t wander. It stays close and tidy. If your hair is layered, spray the shorter pieces before twisting so they don’t poke out.
A side part makes the whole thing look less severe. Small choice. Big payoff.
19. Sleek Middle-Part Tuck Behind the Ear
There’s a lot to like about a style that looks this simple and still feels dressed for a wedding. A sleek middle part with one side tucked behind the ear is minimal, but it has real presence when the hair is cut at the shoulder.
Straighten or smooth the hair so the ends fall in one clean line. Then tuck one side behind the ear and secure it invisibly if you need to. A small earring or a single drop earring works especially well here because the hair creates a frame instead of hiding the jewelry.
Quick Read
This style is strongest when the hair is healthy and shiny. If the ends are dry, a light cream or serum on the bottom inch helps the whole shape look intentional. If the roots are flat, lift them with a blow dryer at the crown before you smooth the rest down.
It’s a very good option when you want the outfit to carry the weight and the hair to stay quiet.
20. Crown Twist With a Floral Comb
A floral comb can turn shoulder-length hair into wedding-guest hair fast, but I prefer it when the comb has a real function. The twist at the crown gives the comb something to anchor into, which keeps it from looking like an afterthought.
Take two sections from each side, twist them back, and pin them where they meet. Slide the comb just above that point so it sits in the twist instead of floating over it. If the comb has real flowers or crystal detail, keep the rest of the hair loose and understated. Too many competing details and the whole look starts to feel crowded.
This is a strong option for outdoor or daytime weddings because the floral element makes sense without becoming costume-y. If you’re wearing a patterned dress, choose a comb with fewer colors so the hair doesn’t turn busy.
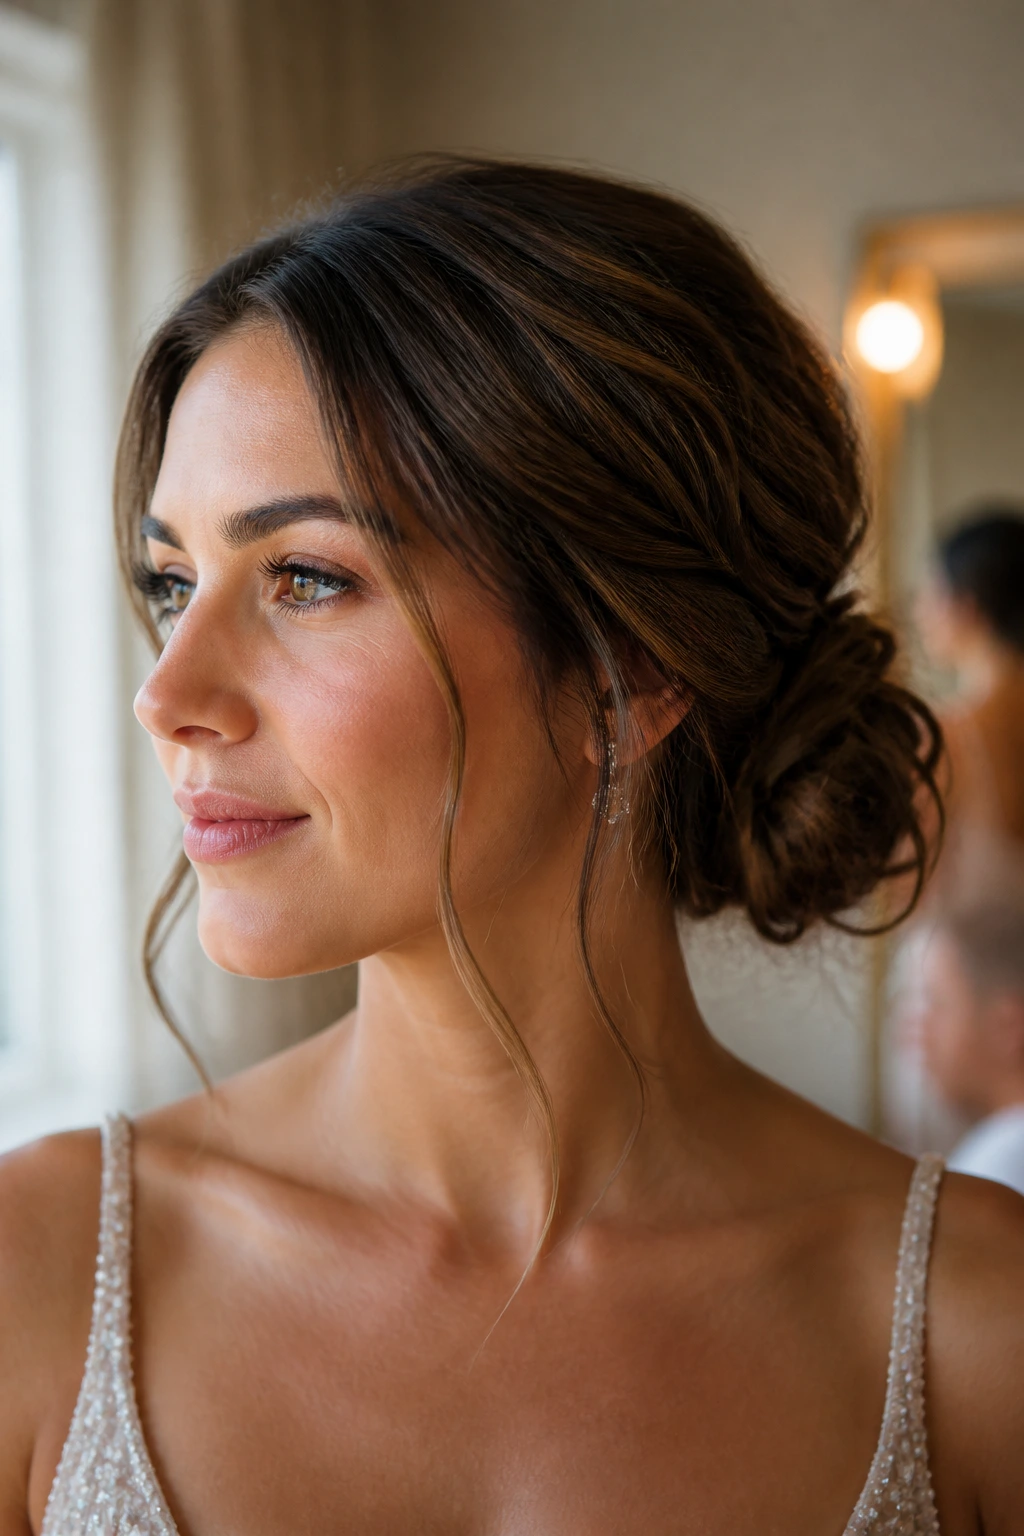
21. Compact French Roll for Shoulder-Length Hair
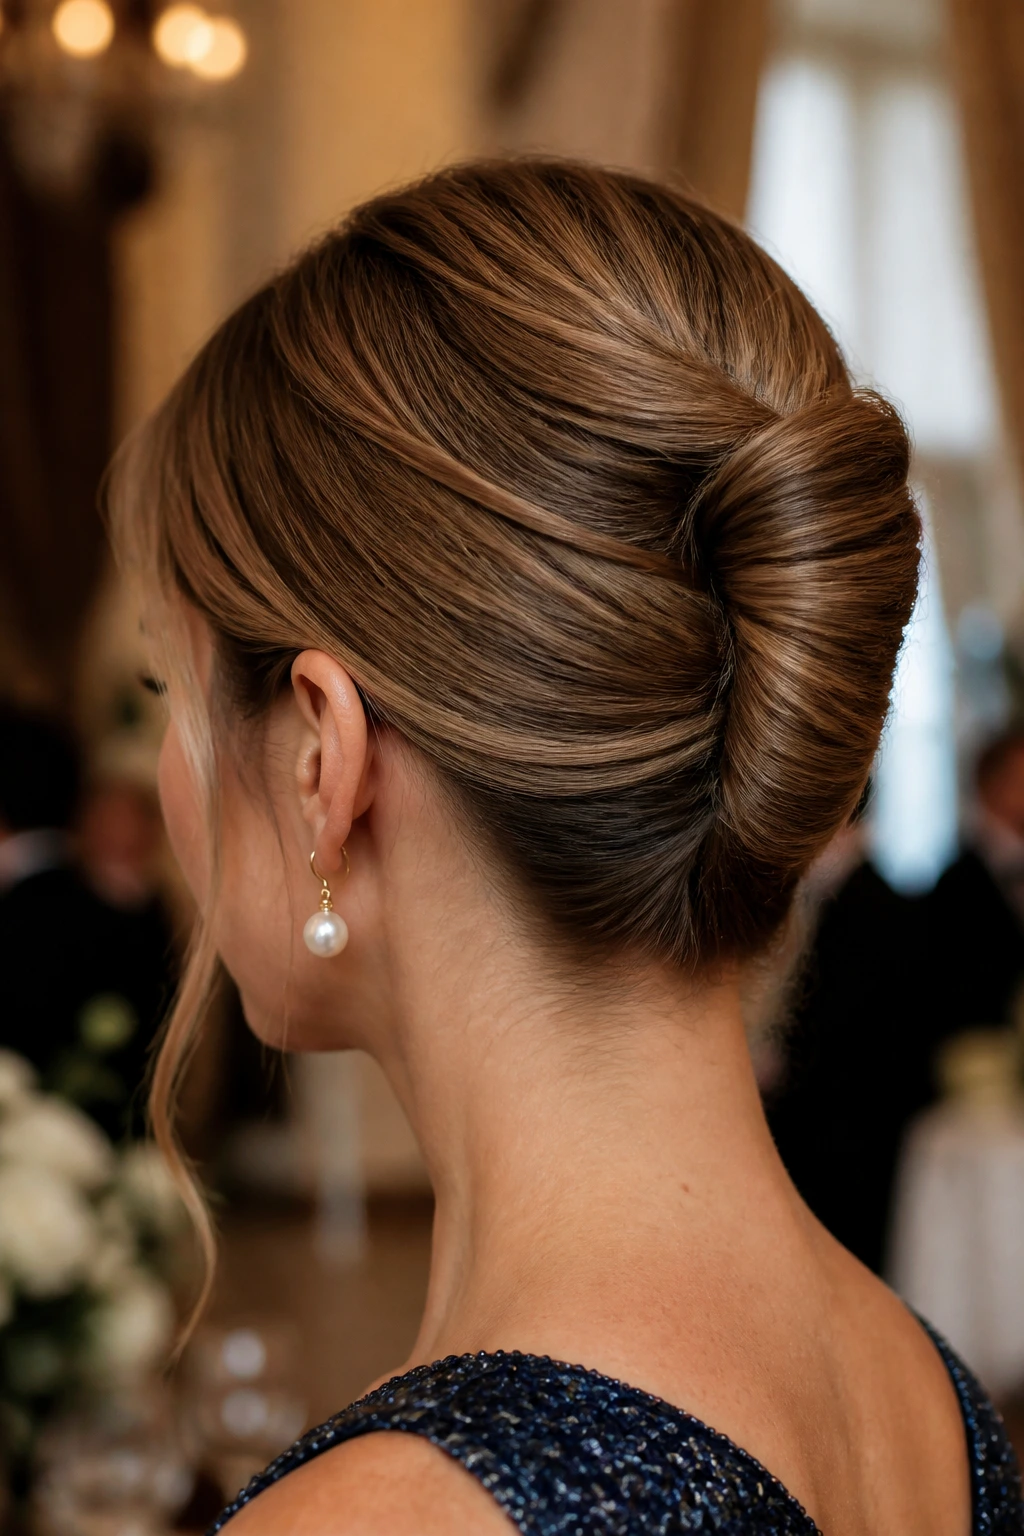
A French roll doesn’t need a lot of length to work. On shoulder-length hair, the roll becomes compact and neat, which gives it a sharper line than the larger version people picture.
Gather the hair low, twist it upward along the back of the head, and tuck the ends inside the roll. Pin the seam tightly. The shape should feel slim and vertical, not puffy. That’s where the elegance comes from, and I use that word carefully because it gets thrown around too easily.
This style suits a more formal wedding, especially if the dress has a high or structured neckline. It also works if you want the back of the dress to show. The roll leaves room for that instead of covering it up.
If your hair is layered, you may need to smooth the shorter top pieces with a little gel or pomade before pinning. Annoying? A little. Worth it? Completely.
22. Soft Blowout With a Velvet Bow
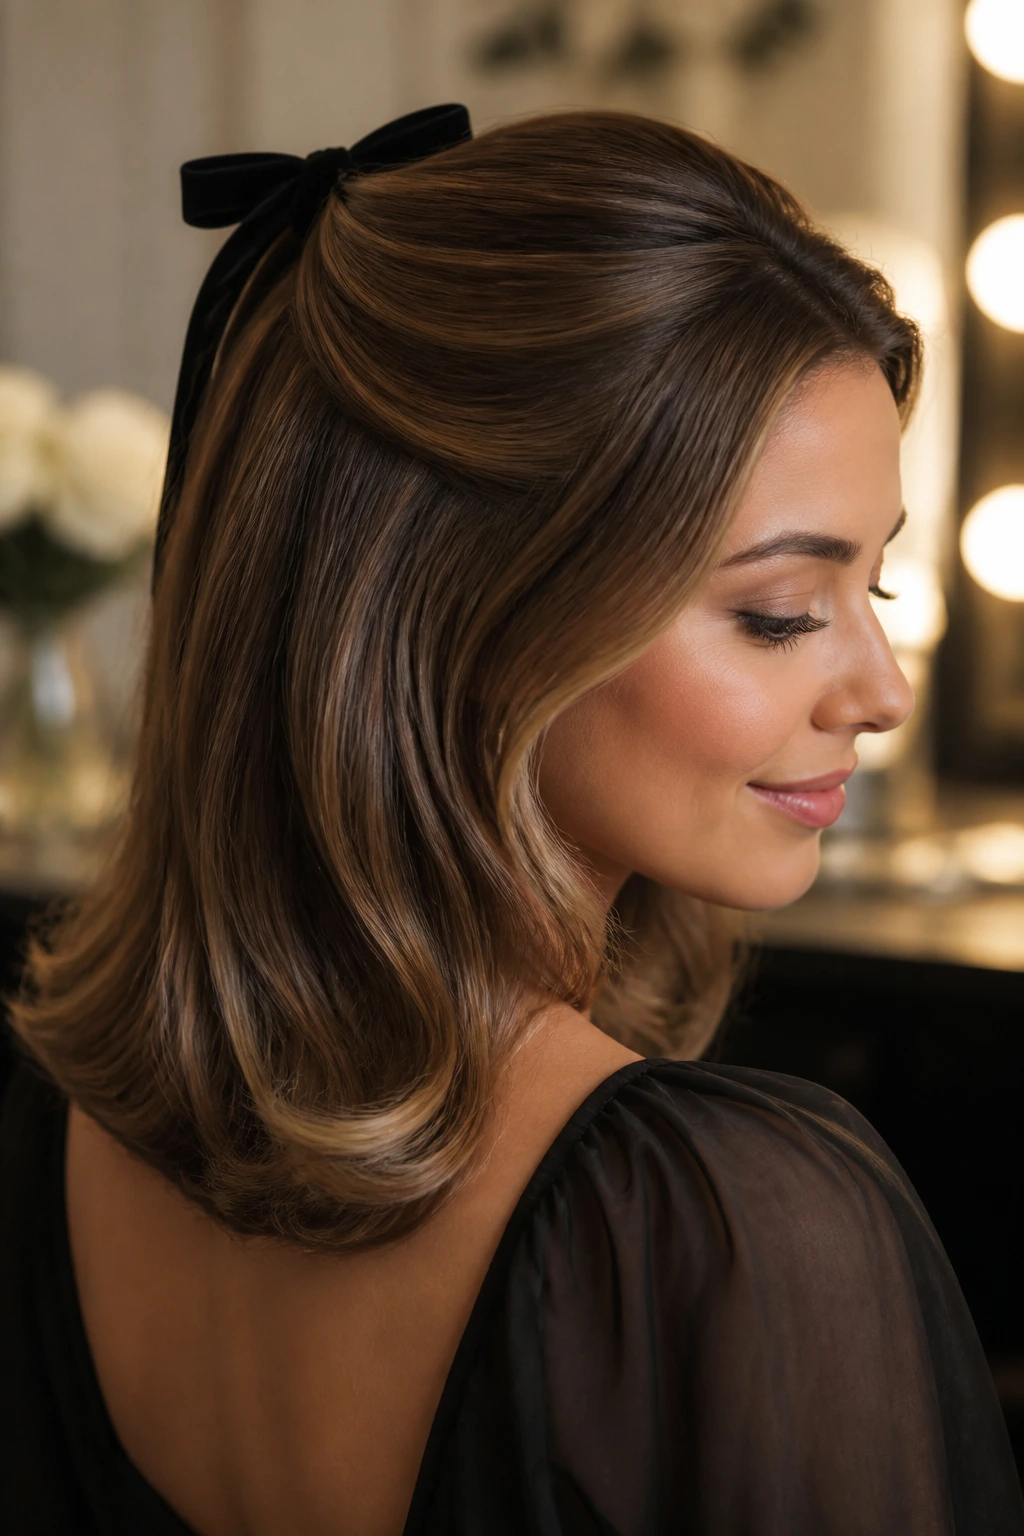
A velvet bow is the easiest way to make a simple blowout feel dressed for the occasion. The style itself stays relaxed; the bow does the formal work.
Blow the hair out with volume at the roots and a soft bend through the ends. Secure a narrow velvet bow at the back of the crown or slightly lower, depending on where the hair feels fullest. The bow should look like it belongs there, not like it was clipped on as an emergency fix.
This style is one of my favorites for shoulder-length hair because it doesn’t demand perfection. If the blowout softens a little during the night, it still looks good. The ribbon keeps the whole thing anchored in a way that reads thoughtful rather than fussy.
Use this when the outfit is simple and you want a single strong finishing touch. That’s where a bow earns its place.
What Holds a Wedding Guest Style Together All Day
Wedding-guest hair has to survive more than a quick photo. You’re sitting, hugging, dancing, leaning over tables, maybe stepping into warm weather, maybe standing under strong indoor air conditioning. The style has to handle all of it without turning into a loose mess by dessert.
The biggest secret is not more spray. It’s better prep. Hair that has a little grip — from dry shampoo, from blow-drying the day before, from a light texturizer — usually holds shape better than freshly washed hair that’s too soft. Freshly washed hair can look pretty for an hour and then slip apart when you least want it to.
I also think shoulder-length hair benefits from smaller, smarter structure. A hidden pin at the crown, a wrapped elastic, or a small twist at the side does more than a giant pile of product. Think shape first, hold second, shine last. In that order.
The Right Kind of Hold
Medium-hold spray gives you flexibility. Strong-hold spray works for the final lock-in on a smooth knot or a French roll, but if you use it everywhere, the hair gets stiff and dusty-looking. Keep the strongest products for the areas that actually move.
Why Day-Two Hair Helps
A little natural oil helps. So does the slight roughness that comes after a day without washing. If your hair is fine or slippery, a fresh wash often works against you here. For most wedding guest hairstyles, day-two hair is easier to shape and less likely to slide.
One Small Clutch Kit
Bring two bobby pins, one mini comb, and a travel-size spray. That’s enough to handle almost anything short of a full disaster. And most “disasters” are just one front section coming loose.
Essential Tools for These Hairstyles
-
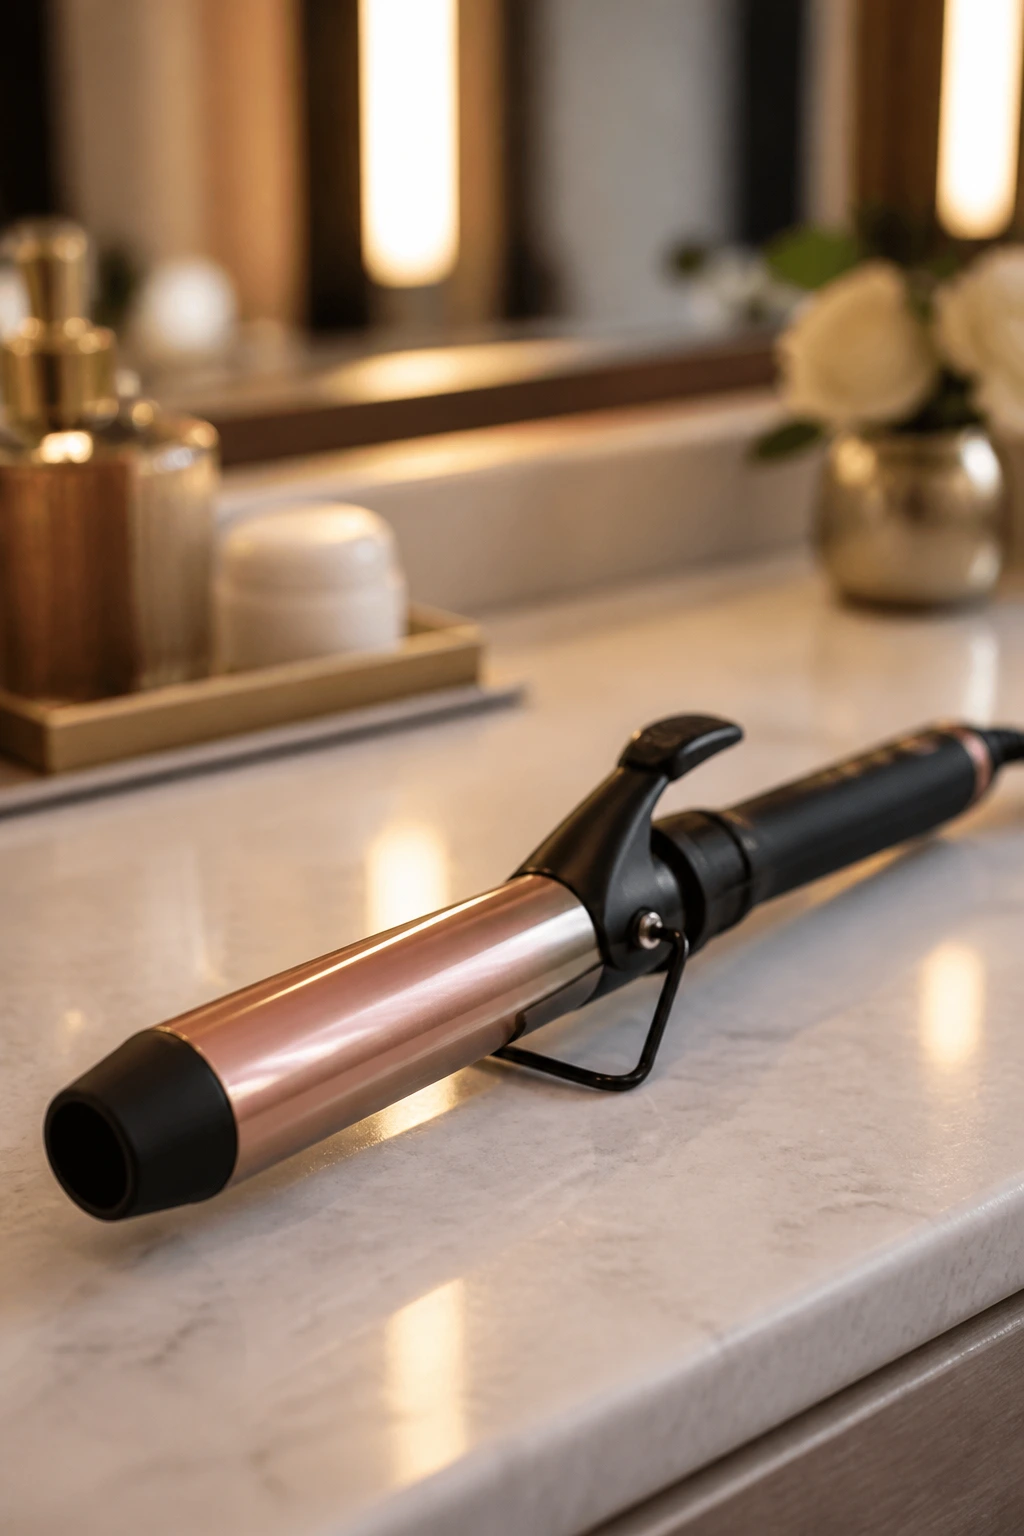
1-inch curling iron or wand — Best for tighter bends, pinned waves, and styles that need more lasting shape.
-
1.25-inch curling iron — My first pick for collarbone-length waves and brushed-out curls.
-
Blow dryer with concentrator nozzle — Makes sleeker styles and polished blowouts much easier to control.
-
Round brush — Useful for curving the ends under or flipping them out.
-
Fine-tooth comb — Essential for clean parts, smooth crowns, and tucked styles.
-
Boar-bristle brush — Good for smoothing without making the hair puffy.
-
Bobby pins in hair-matching shades — Buy more than you think you need; shoulder-length hair can hide a pin, but it also loves to spit one out.
-
U-pins or spin pins — Optional, but helpful for low buns and French twists.
-
Texturizing spray or dry shampoo — Gives grip to slippery hair and keeps styles from sagging.
-
Flexible-hold hairspray — Better for waves and curls that need movement.
-
Medium- to strong-hold hairspray — Better for smooth knots, rolls, and sleek ponies.
-
Smoothing serum or lightweight cream — Use a small amount on the mids and ends for polished styles.
-
Decorative clips, pearl pins, ribbons, or a comb — Optional, but they can do a lot of the visual work with very little effort.
Smart Product and Accessory Shopping
Picking the right styling products matters more than people admit. A lot of wedding guest hair failures start with the wrong spray, the wrong pins, or a decorative clip that looks pretty in the package and slides apart in the hair. Cheap tools are fine if they grip. Cheap tools that don’t grip are a waste.
For smoothing products, choose something light enough that it won’t weigh down the ends. On shoulder-length hair, a pea-sized amount often goes further than you expect. If your hair is fine, reach for a texture spray or light mousse instead of a heavy cream. If your hair is thick or coarse, a serum can help the surface lay flatter, but keep it off the roots.
Accessory choice should match both your hair texture and the outfit. Pearl pins tend to read softer and more classic. Velvet bows feel warmer and a little richer. Metal clips sharpen the look. Floral combs work best when the dress is simple enough to let the accessory breathe. And if your hair slips, look for accessories with teeth or a comb base instead of smooth decorative backs.
A final note: test the accessory before the event. Clip it in, shake your head a little, and see if it shifts. That sounds obvious. Lots of people skip it and then spend the ceremony with one hand near the temple.
How to Wear These Styles With Dresses, Necklines, and Jewelry
Presentation: A high neckline usually wants hair pulled back or smoothed close to the head, while open necklines can handle looser waves, side sweeps, or half-up styles. If the dress already has beading, lace, or a dramatic shoulder shape, keep the hair quieter and cleaner.
Accessories: Pearl pins, slim ribbons, and small floral combs work best when they have room to show. Large statement earrings pair well with tucked styles, low knots, and side-swept hair because the hair doesn’t cover the jawline.
Comfort: If you’ll be wearing the style for six hours or more, avoid anything that presses hard at the temples or crown. A style that gives you a headache at hour one will not magically improve after the third toast.
Touch-Up Kit: Put two bobby pins, one mini hairspray, and a travel comb in your bag. If you’re wearing a ribbon or bow, bring a spare hair tie too. One windy walk from the car to the venue is enough to justify it.
Additional Tips and Flavor Boosters
Texture Boost: If your hair is too soft to hold shape, dry shampoo at the roots and a small mist of texturizing spray through the mids can change the whole result. The hair should feel slightly grabby, not dusty.
Accessory Upgrade: Use one strong accessory instead of three weak ones. A single pearl barrette or a velvet bow usually looks better than a handful of tiny clips scattered everywhere.
Face-Framing: Leave front pieces narrow. A slim tendril near the cheekbone looks polished. A thick chunk of hair at the front can drag the whole style down and make it feel less dressed up.
Color and Shine: If your hair is one flat shade, a shine spray on the ends or a glossing cream can give the finish more depth under indoor lighting. Keep it off the scalp unless you want the roots to flatten.
Make-It-Yours: For fine hair, lean into sleeker styles, side sweeps, and tucked shapes. For thick hair, use the weight to your advantage — braids, low knots, and compact rolls hold especially well. For curly hair, shape the curl pattern first and decorate second. That order matters.
How to Prep, Refresh, and Preserve the Style
The best wedding guest hairstyles for shoulder-length hair usually start the day before the event. A fresh wash can make the hair too soft and slippery, which is a lovely thing for some styles and a disaster for others. If you’re doing waves, braids, or a pinned half-up, day-two hair is often easier to control.
If you want to prep ahead, curl or blow-dry the hair the night before, let it cool fully, then sleep with it loosely clipped or pinned in sections. A silk pillowcase helps the ends stay smoother. In the morning, brush lightly, re-bend any flat spots with a 1-inch iron, and pin the style into place.
Most of these looks will last 8 to 12 hours if the prep is good and the pins are secure. A compact knot or French roll can last longer. Loose waves and half-up styles may need one bathroom refresh after the ceremony. That’s normal.
For touch-ups, bring a mini spray, a comb, and a couple of pins. If your style has a ribbon or headband, check the placement before you leave the hotel or house. A ribbon that starts centered can drift after a few hugs, and it’s easier to fix early than after the dance floor starts.
Common Mistakes to Avoid

The first mistake is starting with hair that’s too clean and too soft. Freshly washed hair slips, and shoulder-length hair can lose shape faster than long hair if there’s no grip. The fix is simple: work with day-two hair or add dry shampoo and a bit of texture spray before styling.
The second mistake is overloading the hair with serum or oil. It’s tempting when you want shine, but too much product makes the roots collapse and the mids separate into little greasy-looking strings. Use the smallest amount you can get away with, then add more only to the ends if needed.
The third mistake is choosing a style that fights the dress. A bulky bun with a high, detailed neckline looks crowded. Loose hair with a heavily embellished dress can feel equally busy. Match the shape of the hair to the shape of the outfit, and the whole thing settles down.
The fourth mistake is using decorative clips that don’t actually hold. If the clip slides on your hand before it goes into your hair, it will probably slide in your hair too. Choose clips with teeth or a secure clasp, especially if your hair is fine or silky.
The fifth mistake is leaving the front pieces too large and too loose. A couple of slim tendrils can soften the face. Big front sections make the style look unfinished, which is a different thing entirely.
Variations and Adaptations to Try

For Fine, Slippery Hair: Use a root-lifting mousse before blow-drying, then build styles that sit close to the head: low knots, tucked rolls, side sweeps, and pinned half-up shapes. A little texture makes a bigger difference than more spray.
For Thick or Heavy Hair: Favor styles with real anchor points. Rope braids, compact chignons, and wrapped ponytails hold better because the structure distributes weight instead of letting the whole style pull downward.
For Curly and Coily Texture: Shape the curl pattern first, then decide whether you want to pin one side, gather a half-up, or leave the volume loose. Curl cream and a diffuser usually do more for the finish than flat ironing the texture into something it doesn’t want to be.
For Humid Weather: Keep the shape closer to the head and avoid overly soft ends. Twists, knots, tucked styles, and braided details tend to last longer than airy curls when the air gets heavy.
For Formal Evenings: Choose smoother styles, shinier finishes, and one refined accessory. A pearl pin, a velvet bow, or a clean metal comb keeps the look sharp without turning it stiff.
For Laid-Back Garden Weddings: Loosen the outline. Slightly softer waves, a ribbon, or a braided detail fits the setting better than a rigid roll or a shellacked blowout.
Frequently Asked Questions
What shoulder-length hairstyle holds best for a wedding guest?
Low knots, compact French rolls, and wrapped ponytails usually last the longest because they sit close to the head and don’t get pulled apart as easily. If your hair is slippery, prep with dry shampoo or texture spray first so the style has something to hold onto.
Can I do one of these styles on day-old hair?
Yes, and for many of them, that’s the better move. Day-old hair has more grip, which helps waves, braids, and pins stay where you put them.
What if my hair is too short for a braid?
You can still use twists, half-up sections, or a tucked style. Shoulder-length hair often works better with partial braiding or braided details at the crown than with long full braids.
How do I keep curls from falling flat before the reception?
Let each curl cool fully before brushing it out, and don’t overload the hair with oil. A light flexible hairspray after curling helps, but the real trick is cooling time. That’s where the shape sets.
Which styles work best with bangs?
Sleek blowouts, side sweeps, headbands, and soft half-up styles usually play nicely with bangs. If your bangs are heavy, keep the top section smooth and let the front pieces blend instead of fighting for space.
What accessories look formal without feeling bridal?
Pearl pins, satin ribbons, slim metal clips, and velvet bows all work well. Choose one piece with a clear shape and keep the rest of the style restrained so the accessory feels like part of the outfit.
How do I adapt these styles for very thick hair?
Use smaller sections and more pins. Thick hair needs structure at the base, not just hold spray on top, so low buns, twists, and braided details are often easier than loose, airy styles.
Can I leave my hair completely down and still look dressed up?
Absolutely. A polished blowout, brushed-out Hollywood waves, or a deep side sweep can look formal on shoulder-length hair without any pins at all. The key is clean shape, controlled shine, and one intentional detail.
What should I carry in my bag for a touch-up?
Two bobby pins, a small comb, and a travel-size hairspray are enough for most styles. If you’re wearing a ribbon, clip, or comb, check it once before the reception starts so you’re not fixing it in a mirror later.
The Sweet Spot
Shoulder-length hair gives wedding guests something useful: options that do not require heroic effort. You can keep things sleek, soften them with movement, or add one small detail and change the whole mood of the style. That range is the real advantage.
My honest preference? Pick the style that fits the dress first, then the weather, then your patience level. A clean low knot beats a complicated updo if the room is hot. Soft waves beat fussy curls if you know you’ll be dancing. Hair that feels like it belongs to the outfit always wins.
And if you’re stuck between two looks, choose the one that will still make sense after three hours, two hugs, and one too-many pieces of cake. That’s the one that deserves the mirror time.