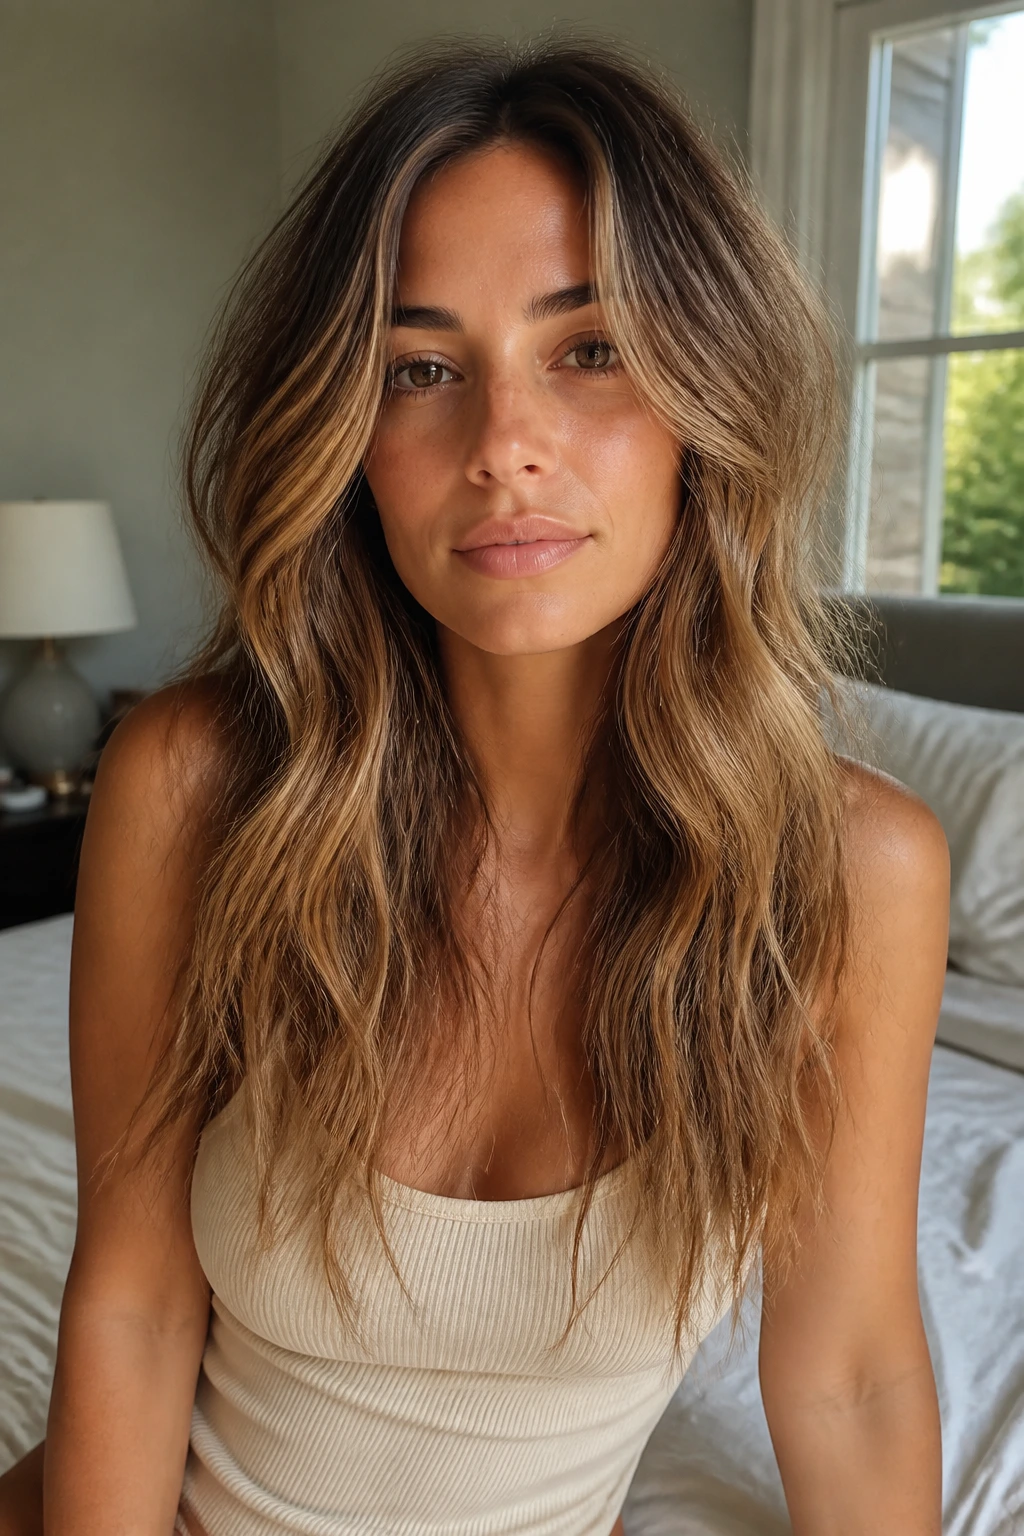
Long hair can start to look skimpy in the exact places you wish it wouldn’t — along the ends, around the temples, and at the crown when the part sits too cleanly. The fix is not always a shorter cut, and it is definitely not pretending thin hair can behave like a thick curtain if you just “add volume.” With the right shape, a little movement, and caramel highlights placed where they can catch light, long hair can look fuller without losing the length you actually want to keep.
If you’ve been hunting for thinning hairstyles for long hair with caramel highlights, the trick is to stop fighting the natural fall of the hair and start using it. A blunt sheet of long hair can look honest in the mirror and unforgiving in daylight. Add feathered layers, soft twists, braids that compact the strands together, or a side part that breaks up the flat center line, and the whole thing changes. Caramel highlights help because they create tiny shifts in tone that make each bend, wave, and braid look more layered than it is.
The best looks here do one of two things: they build lift at the roots, or they gather the hair in a way that makes the ends look denser. Some are easy weekday fixes. Some are a little more dressed up. All of them work with that warm caramel ribboning instead of burying it, which is a mistake a lot of people make when they keep the style too flat and too tidy.
Why These Hairstyles Give Thin Length More Body
Built-in shape: These styles remove the “heavy at the top, wispy at the bottom” problem by putting movement where long hair usually goes limp.
Caramel contrast: Warm highlights break up a single flat color, so waves, braids, and twists read as thicker from a distance.
Crown lift: A little height at the roots — even 1 inch helps — keeps the scalp from showing through the part.
Soft edges: Pieces that fall around the face or curl under at the hem make thin ends look intentional instead of sparse.
Easy second-day wear: The smartest looks here still behave after sleeping on them, which matters because fine hair rarely loves being restyled from scratch every morning.
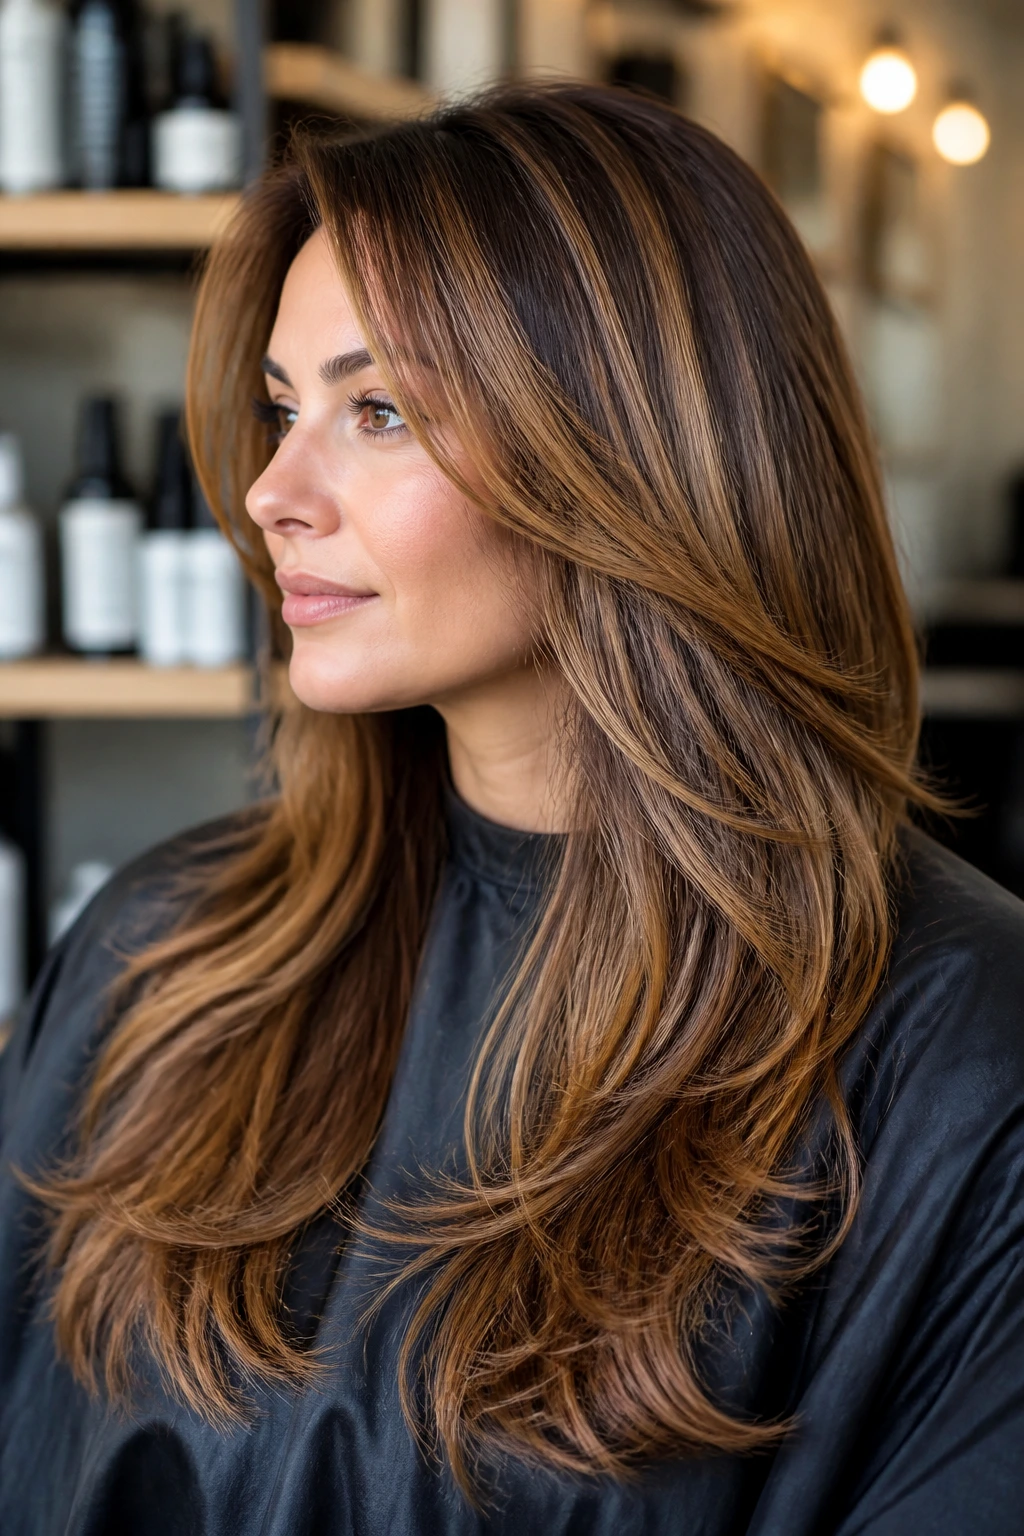
1. Butterfly Layers with Caramel Ribbons
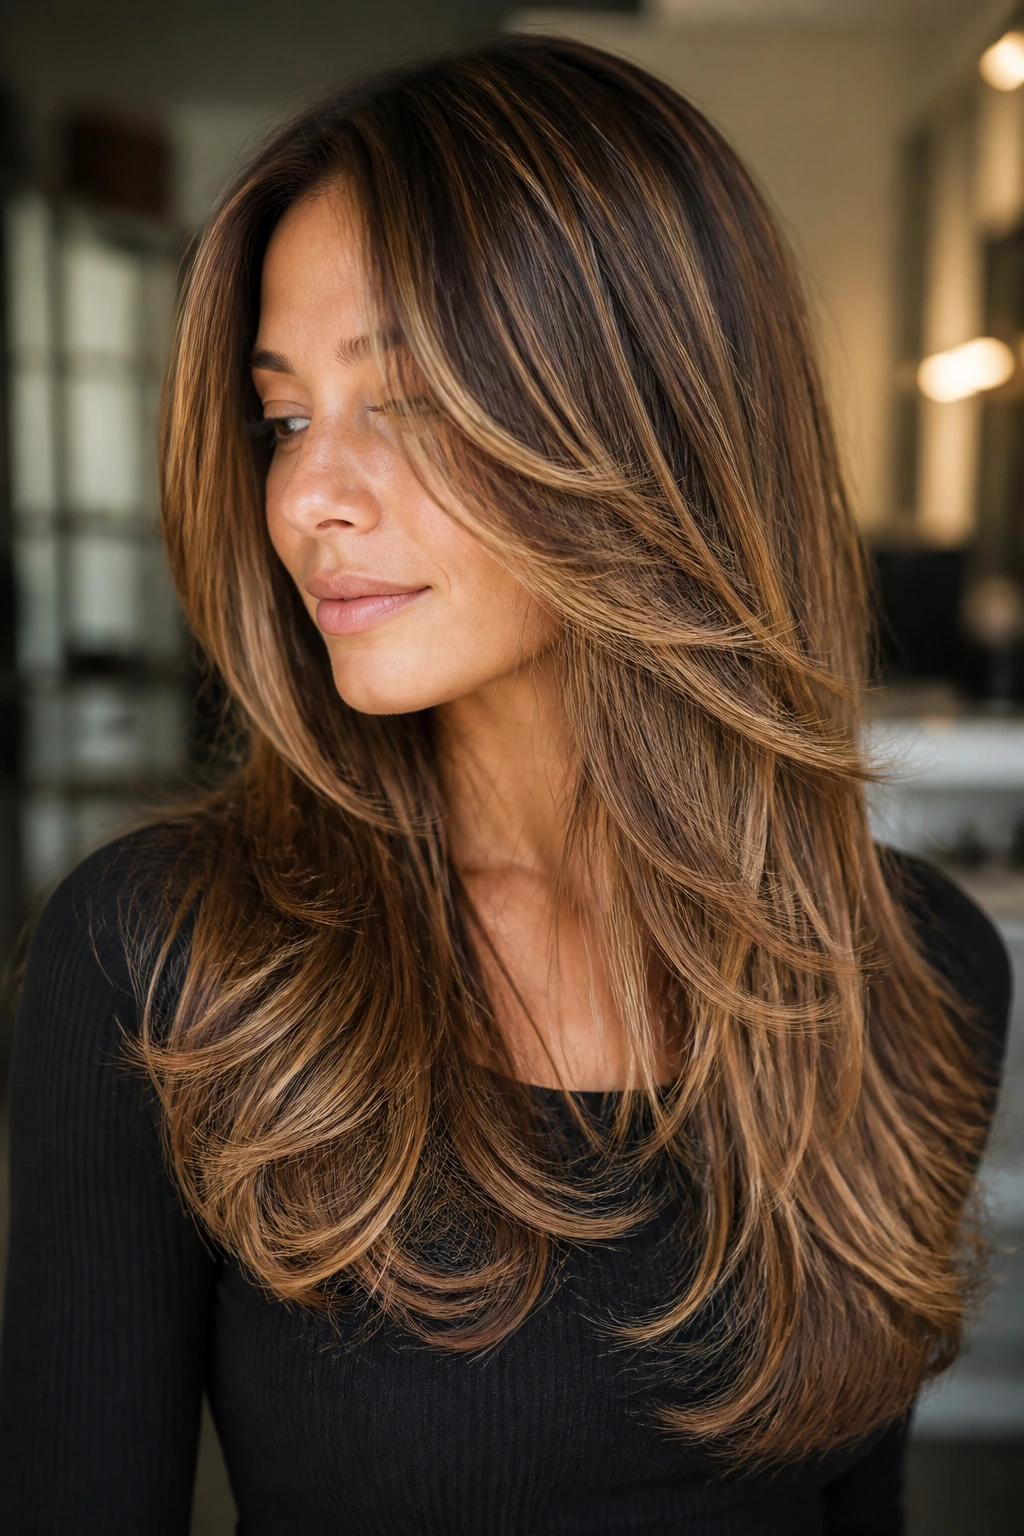
The butterfly cut is one of those rare styles that earns its reputation. On long, fine hair, the shorter face-framing layers take weight off the top half while the longer bottom layer keeps the length you came for. Caramel highlights make the split between those layers easier to see, which is exactly why this cut looks fuller than a one-length fall.
Why It Works
The shortest pieces usually start around the cheekbone or just below the chin, and that placement matters. If they sit too high, the cut can turn choppy fast. If they sit too low, you lose the lift that makes the style worth wearing. A 1.25-inch curling iron or a round brush gives those upper pieces a little bend, not a hard curl.
- Ask for long internal layers, not razor-thin ends.
- Keep the face frame soft so it skims the cheekbones.
- Style the top layer away from the face; it opens the highlight pattern.
- Finish with a light mist of texture spray, not sticky hairspray.
Best move: let the shorter pieces bounce forward and the longer layer drop straight. That split is what gives thin hair its shape.
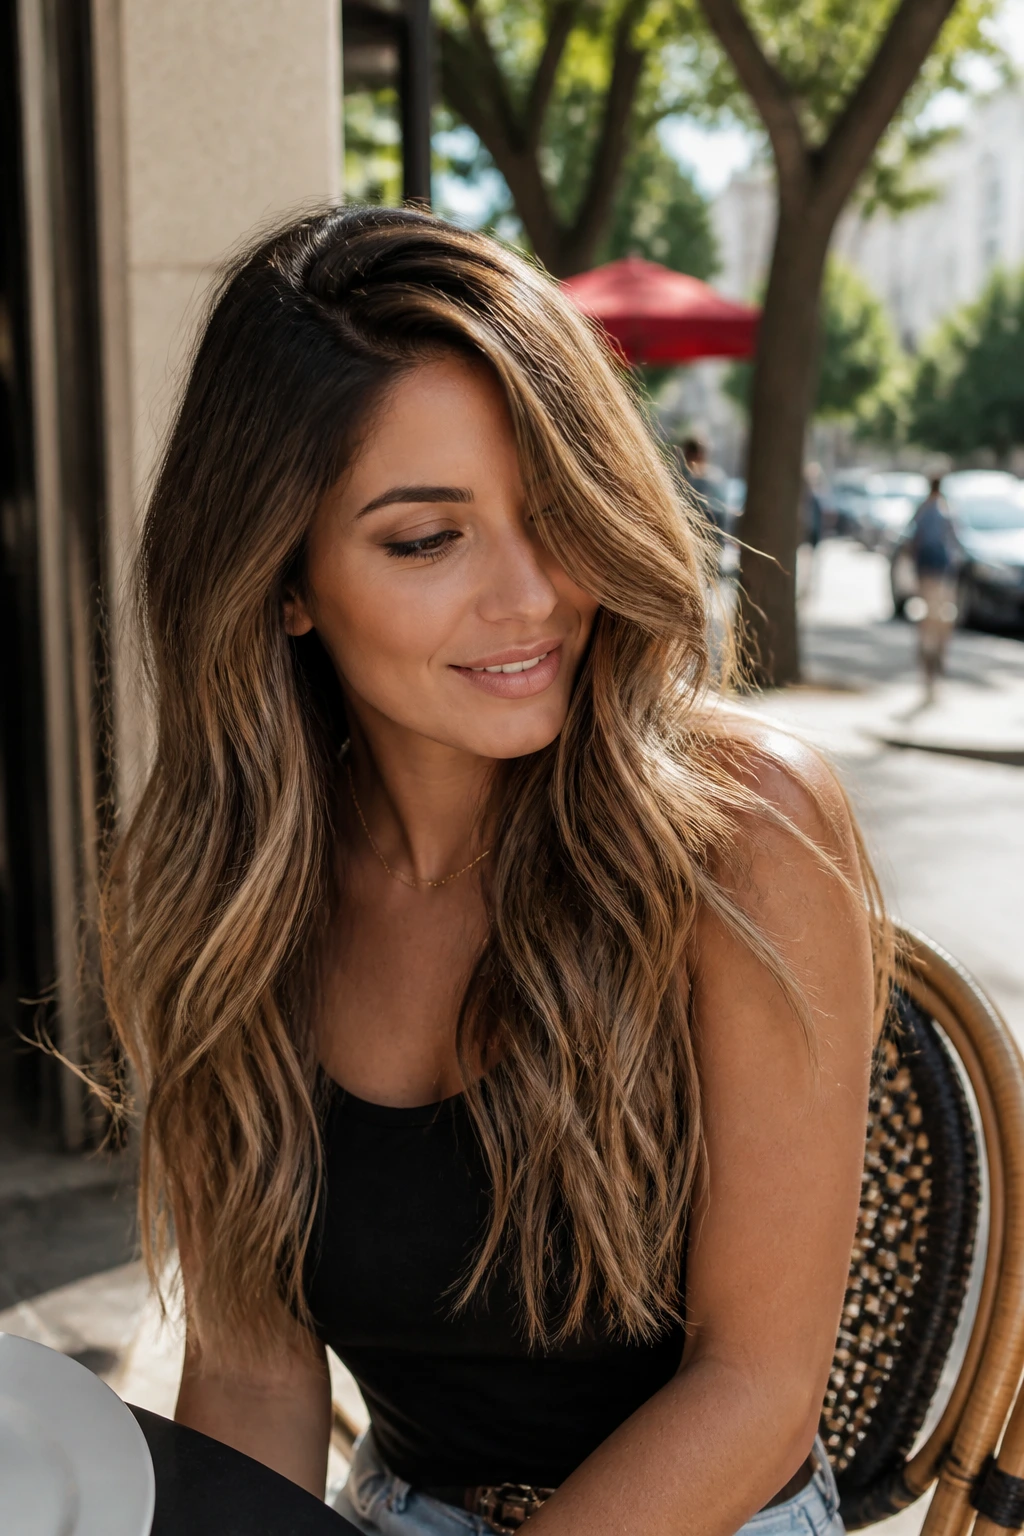
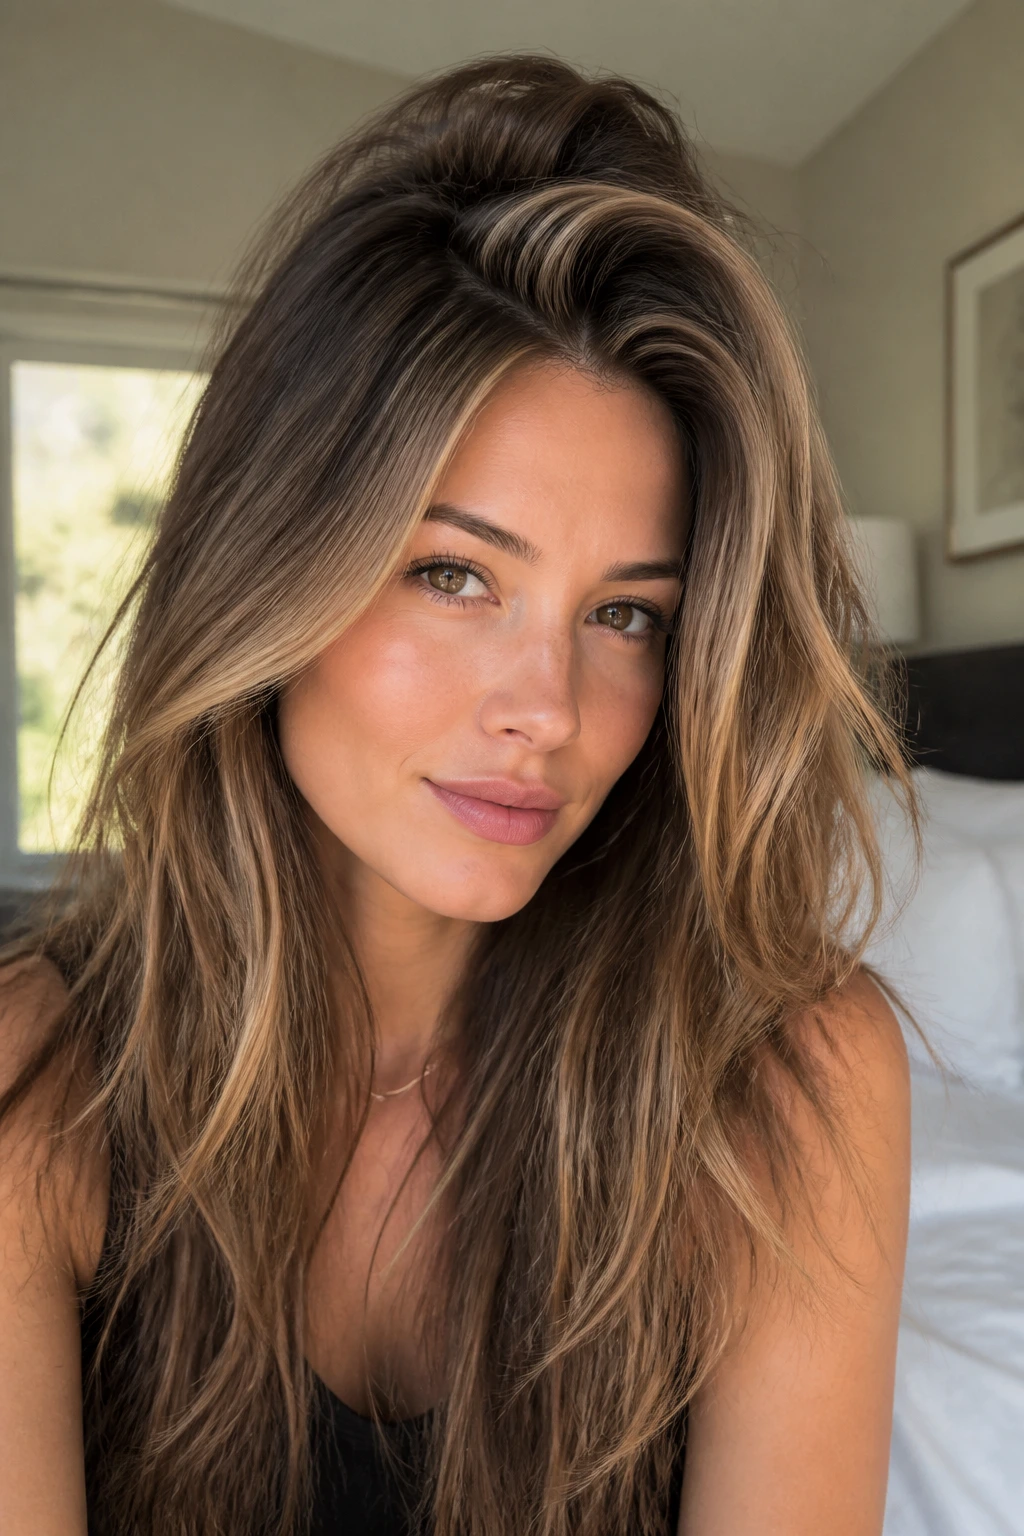
2. Curtain Bangs and Soft Beach Waves
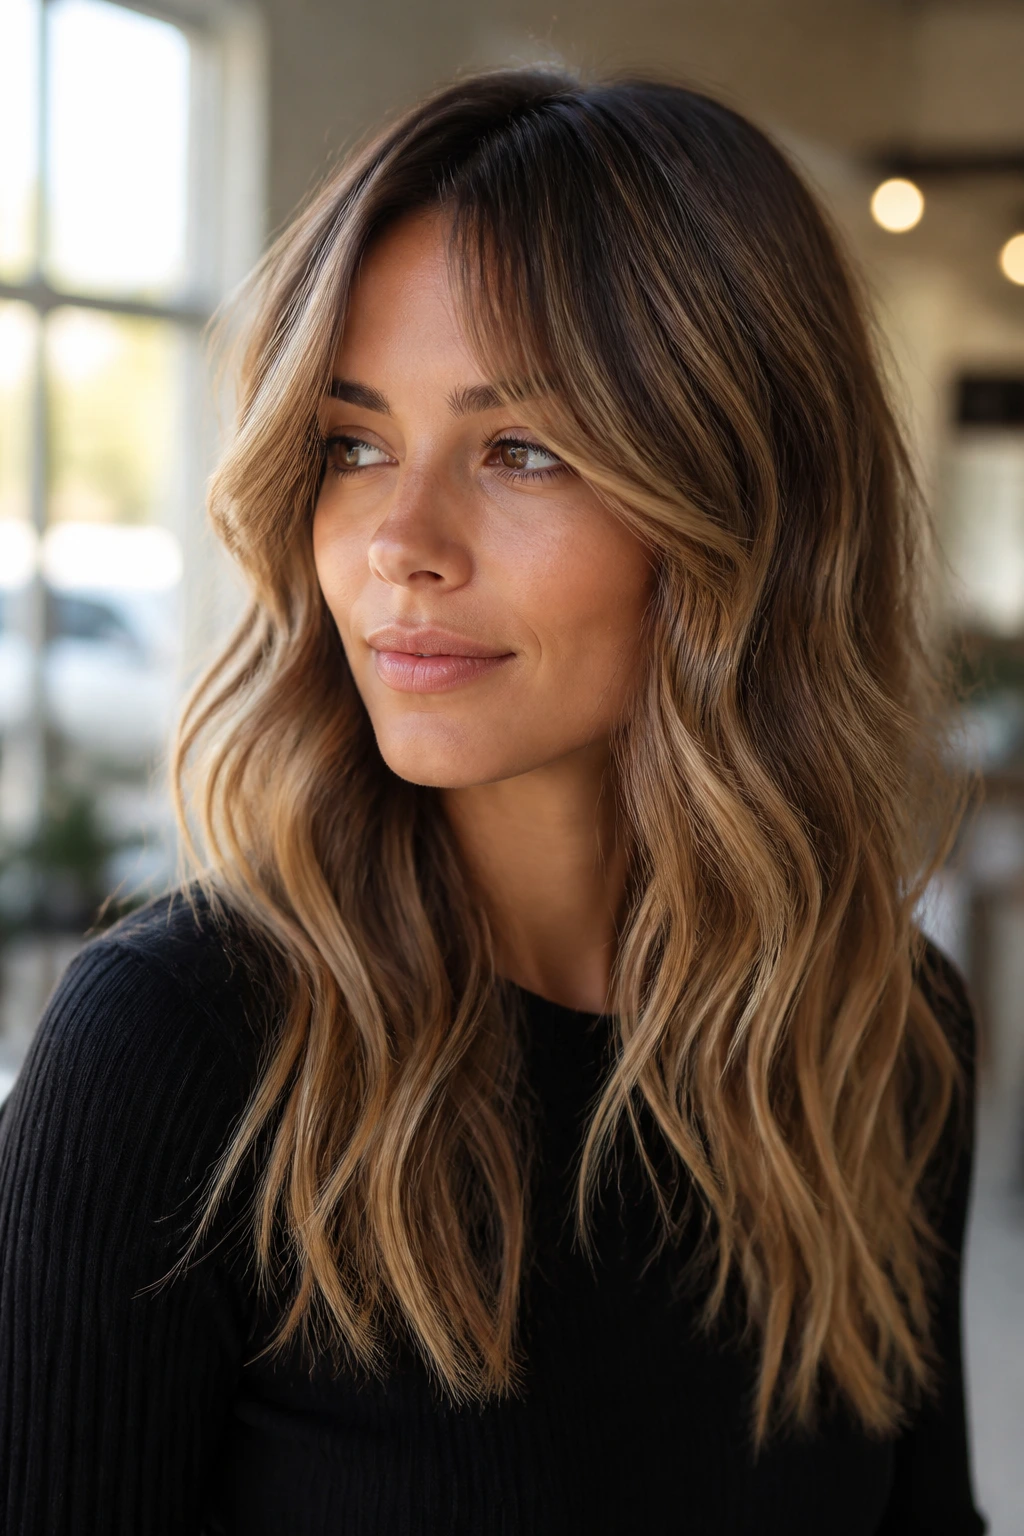
Curtain bangs are not just a face-framing trend. On thin long hair, they act like a visual anchor right where the eye lands first, which keeps the length from reading as one uninterrupted sheet. Add soft beach waves and the caramel highlights start doing real work around the eyes and cheekbones.
The sweet spot is softness, not a heavy fringe. You want the bangs to part easily at the center and taper into the sides, usually around the brow-to-cheekbone zone. Anything too dense can swallow fine hair and make the rest of the length look even flatter.
I like this on hair that needs a little attitude without a lot of effort. A 1-inch iron, a bit of root lift at the crown, and alternating wave direction are enough. The caramel pieces near the front of the face catch light first, so the haircut looks fuller even when the rest of the hair is behaving.
3. Rounded U-Cut with Feathered Ends
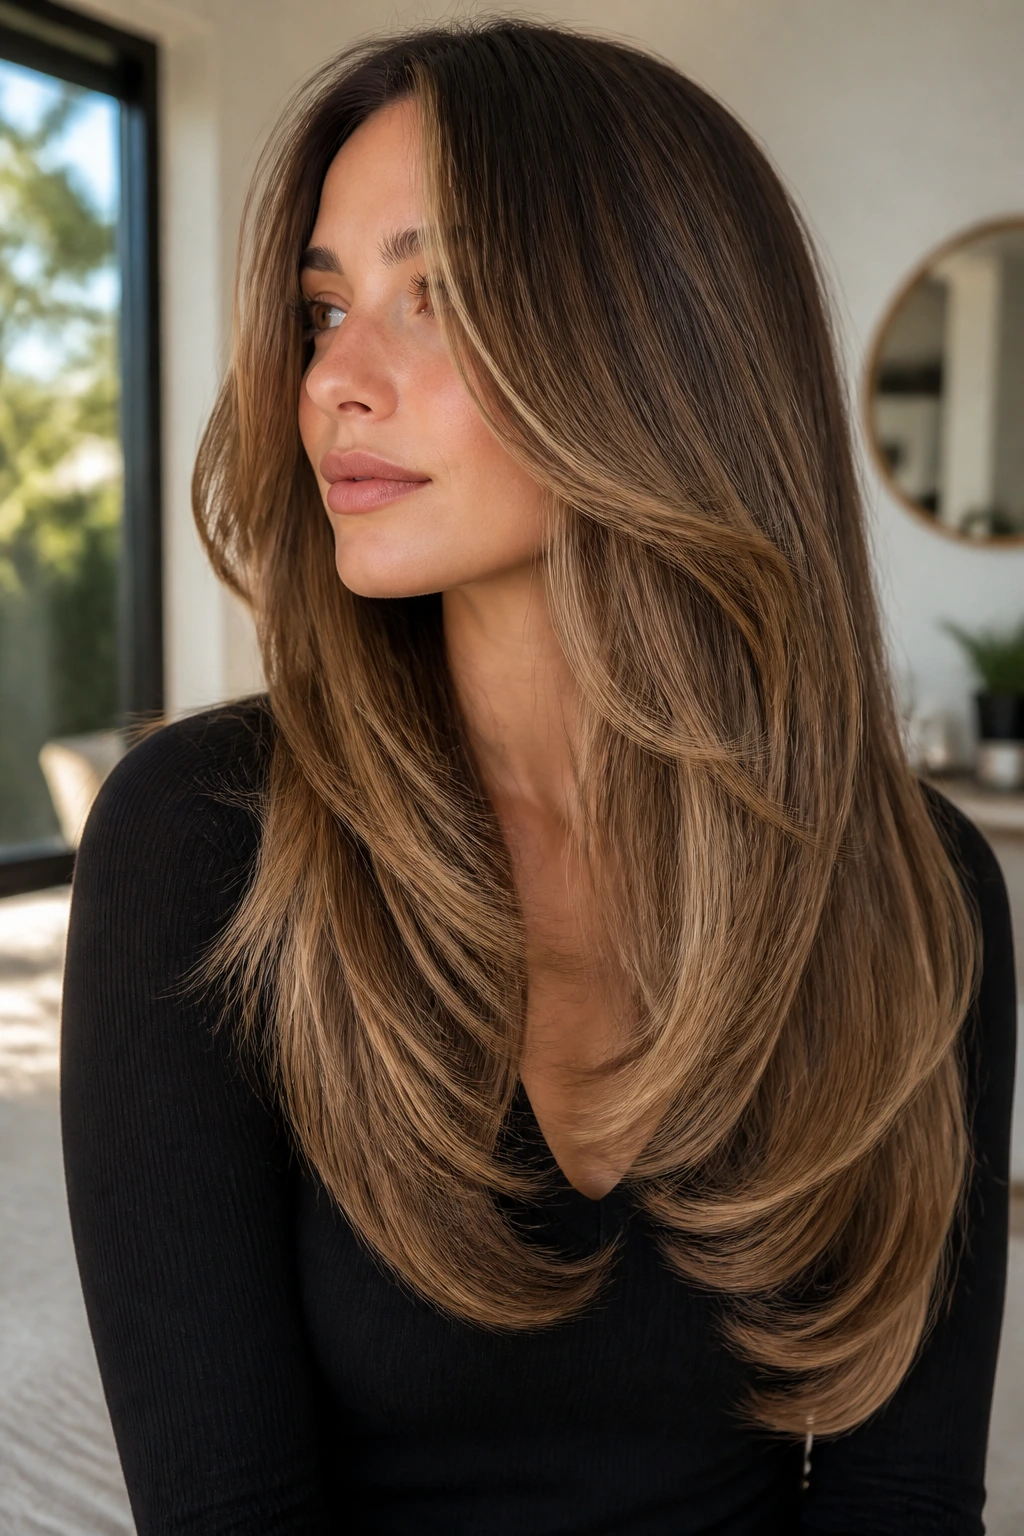
Why does a U-cut help long, thin hair so much? Because the rounded hem avoids that hard, see-through line that a straight-across cut can create when the ends are sparse. The middle stays a touch longer, the sides sweep back gently, and the whole shape feels less severe.
The part that matters
Feathered ends keep the outline soft, but they should not be too wispy. That is the line you do not want to cross. Ask for point-cutting only at the very edge, and keep the interior shape clean so the body of the hair still looks thick.
Caramel highlights are useful here because they emphasize the curve of the U. When the hair falls across the back, the tonal shift helps the length look rich instead of stringy. If you wear it straight, a quick under-bend with a flat iron at the ends makes the cut show up better.
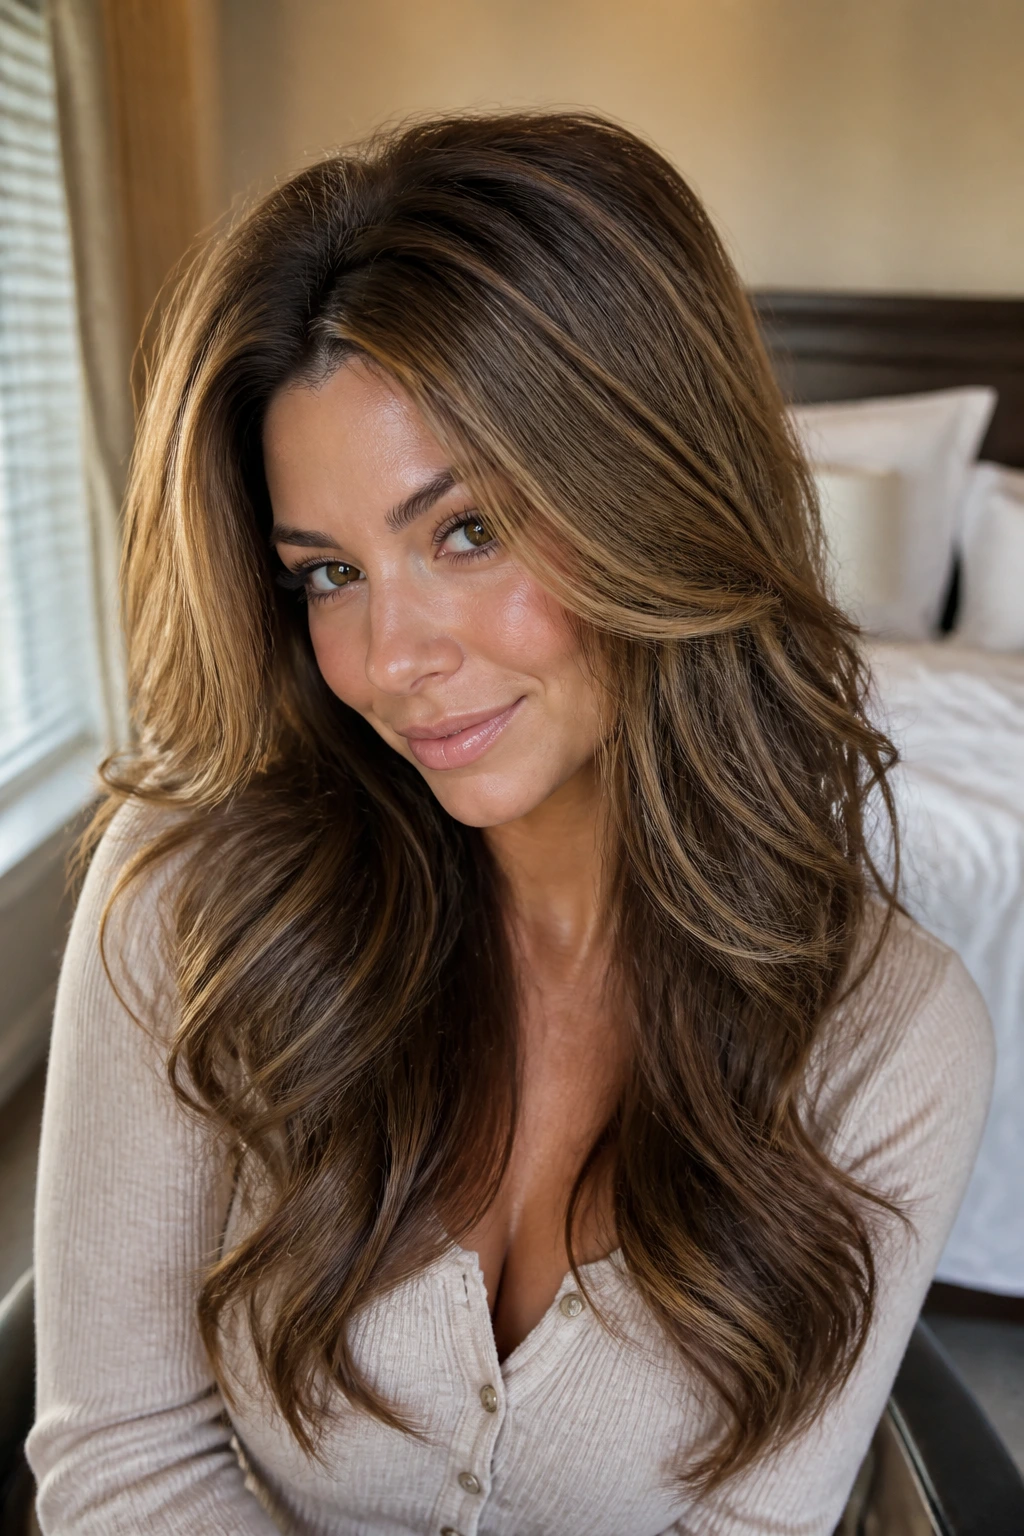
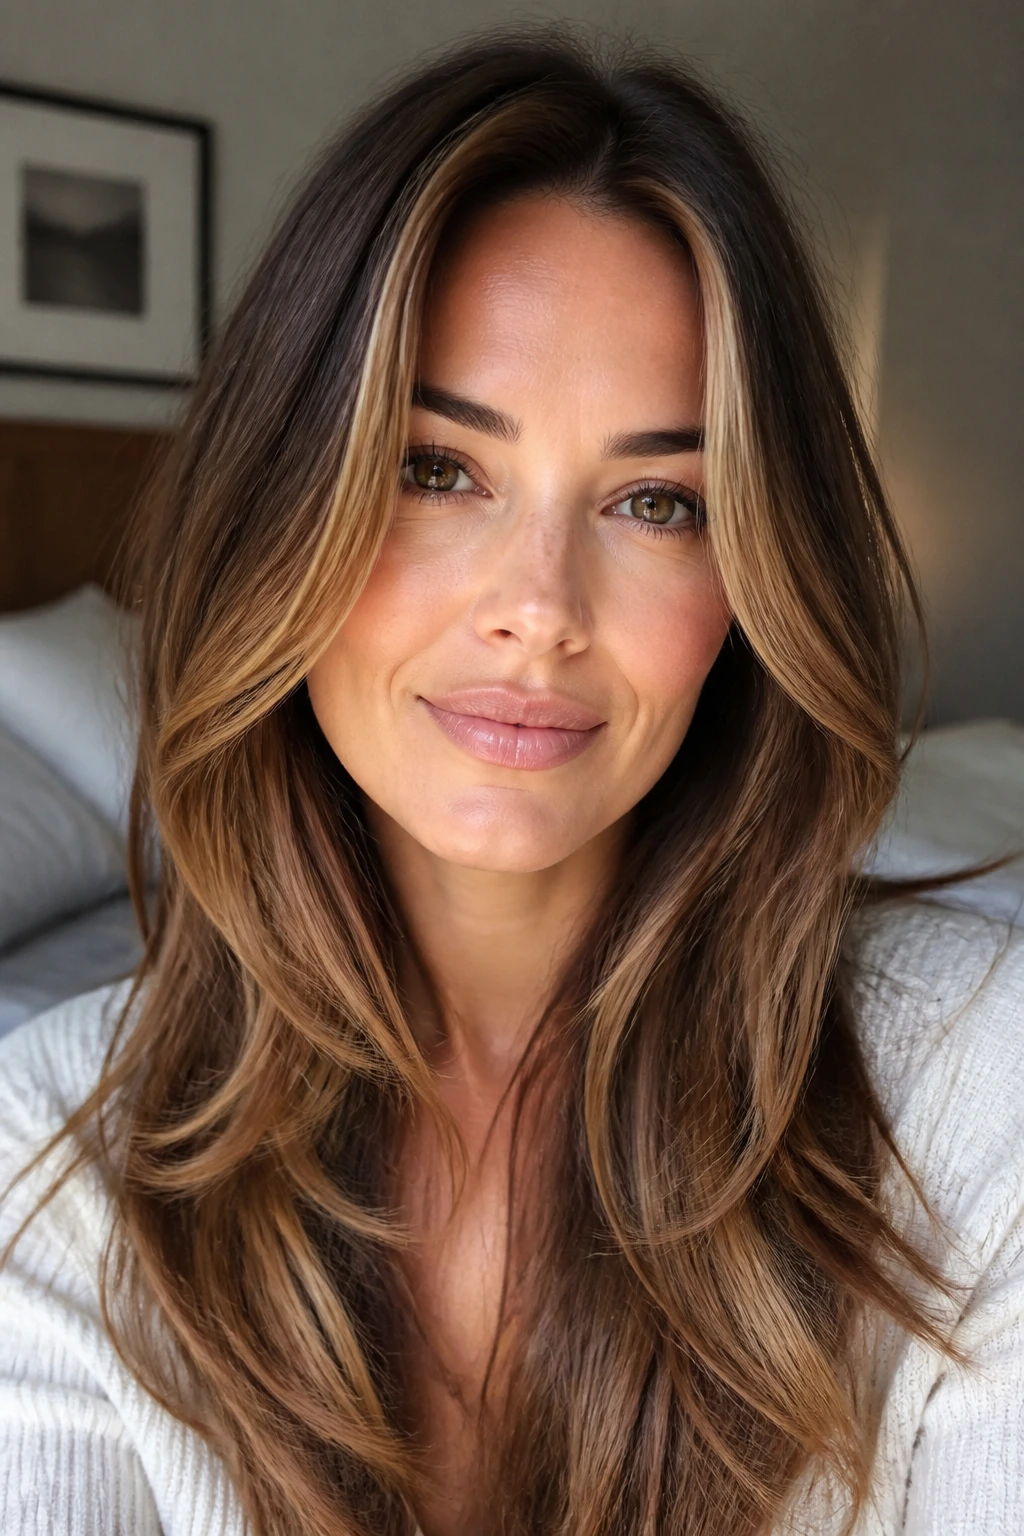
4. Deep Side Part and Feathered Blowout
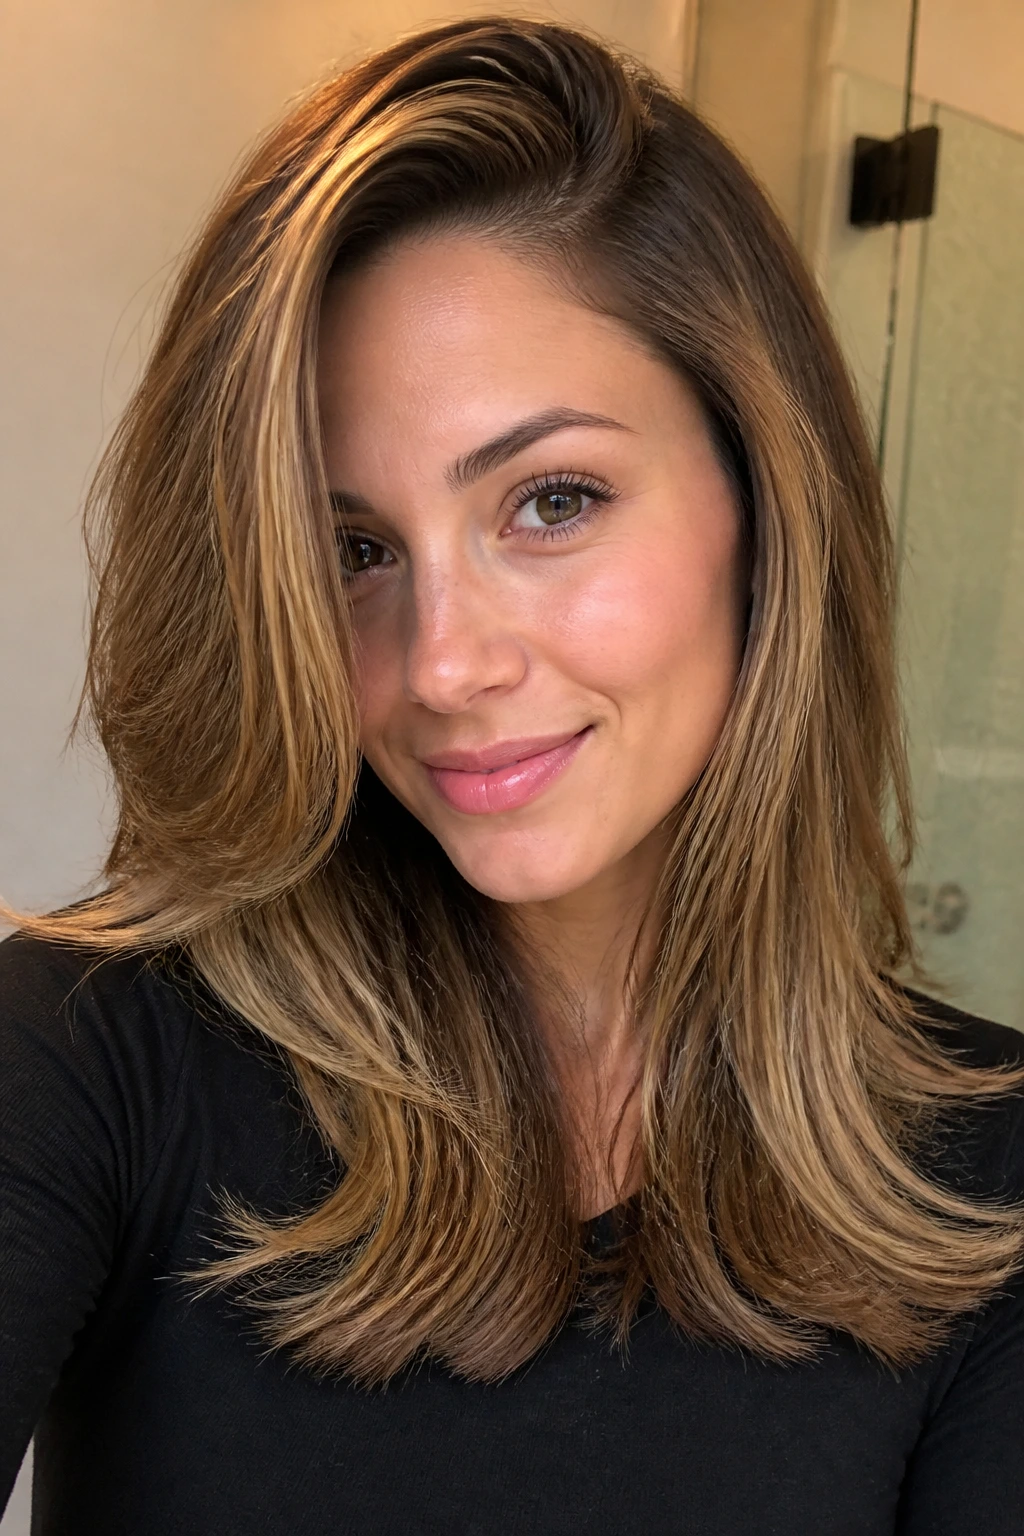
If your hair collapses by lunch, a deep side part with a feathered blowout gives you a fast rescue. The part immediately breaks the flatness of a center line, and the blowout lifts the roots just enough to keep the crown from lying dead against the scalp.
Start with root-lift mousse at the roots and blow-dry using a round brush, pulling the hair up and over rather than straight down. A 2-inch brush works well if your hair is long; it gives a bigger bend and does not over-curl the ends. The feathered shape around the face helps the caramel highlights show through in layers instead of in one flat band.
This is one of my favorite looks for fine hair that still wants polish. It does not shout. It just makes the hair look like it has more of it.
5. Half-Up Crown Twist with Loose Length
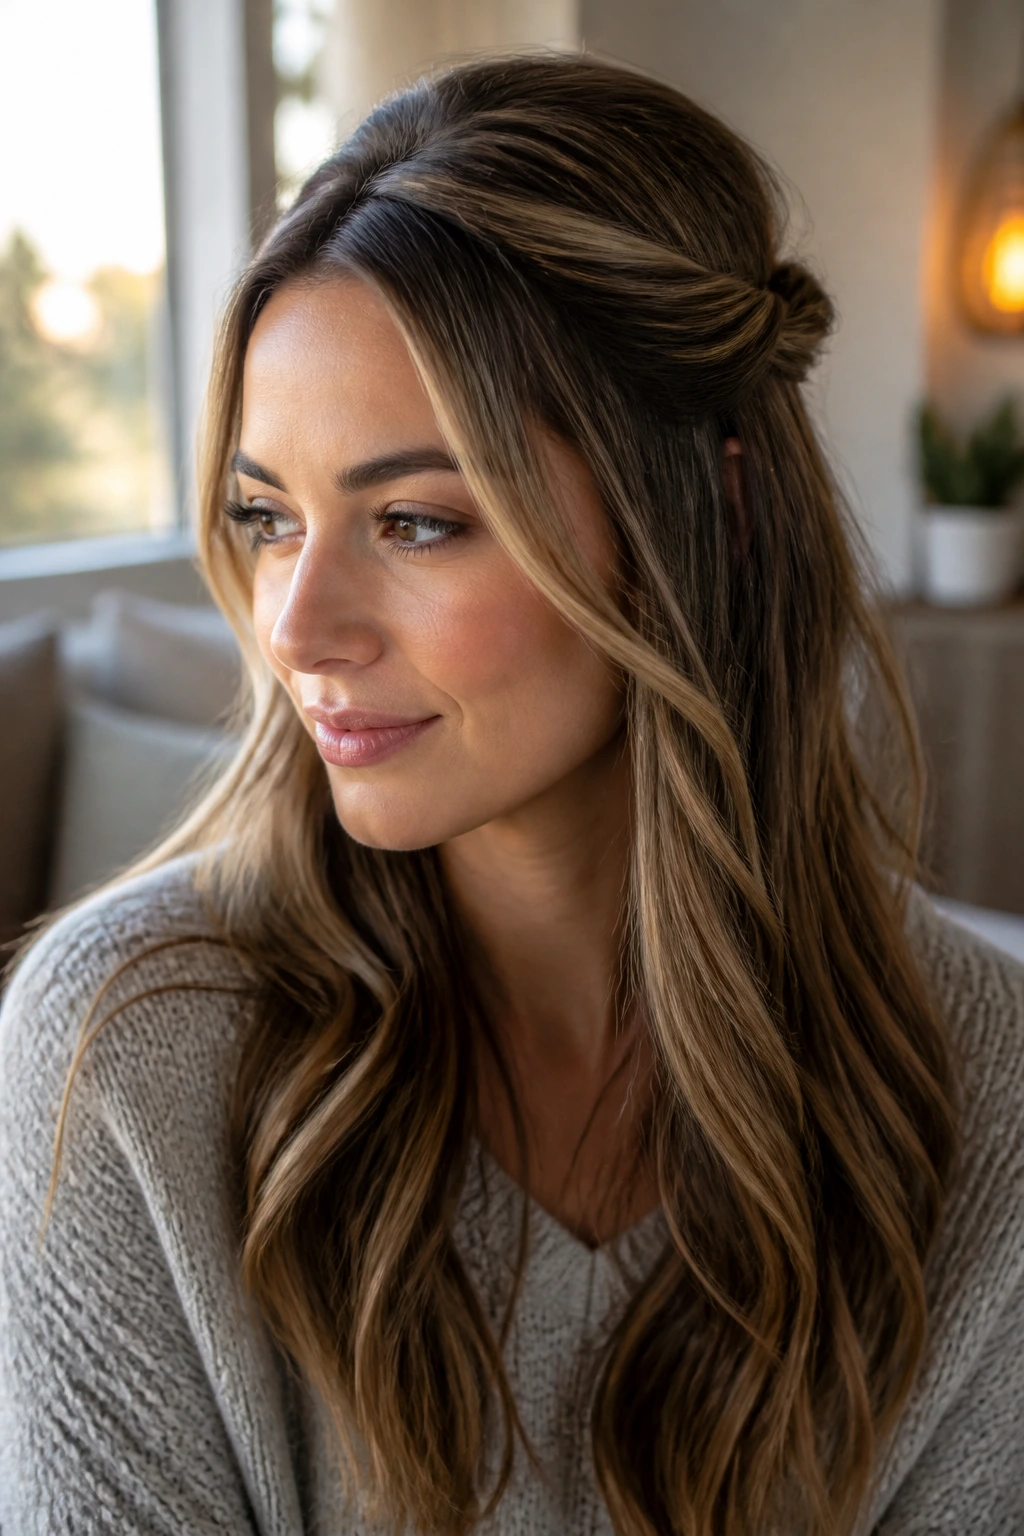
There’s a reason the half-up crown twist keeps showing up on long, fine hair: it creates height right where thin hair usually gives up. The twist lifts a small section at the top, then lets the rest fall loose, so you get volume without sacrificing length.
The trick is not to over-tighten the top section. If you pull it too hard, the crown goes flat and the twist looks pinched. Looser is better. Leave a few fine strands around the temples, because those wisps soften the hairline and make the caramel highlights near the front look brighter.
This style works best on second-day hair with a little dry shampoo at the roots. The grip helps the twist hold, and the loose lower section keeps the ends from looking lonely.
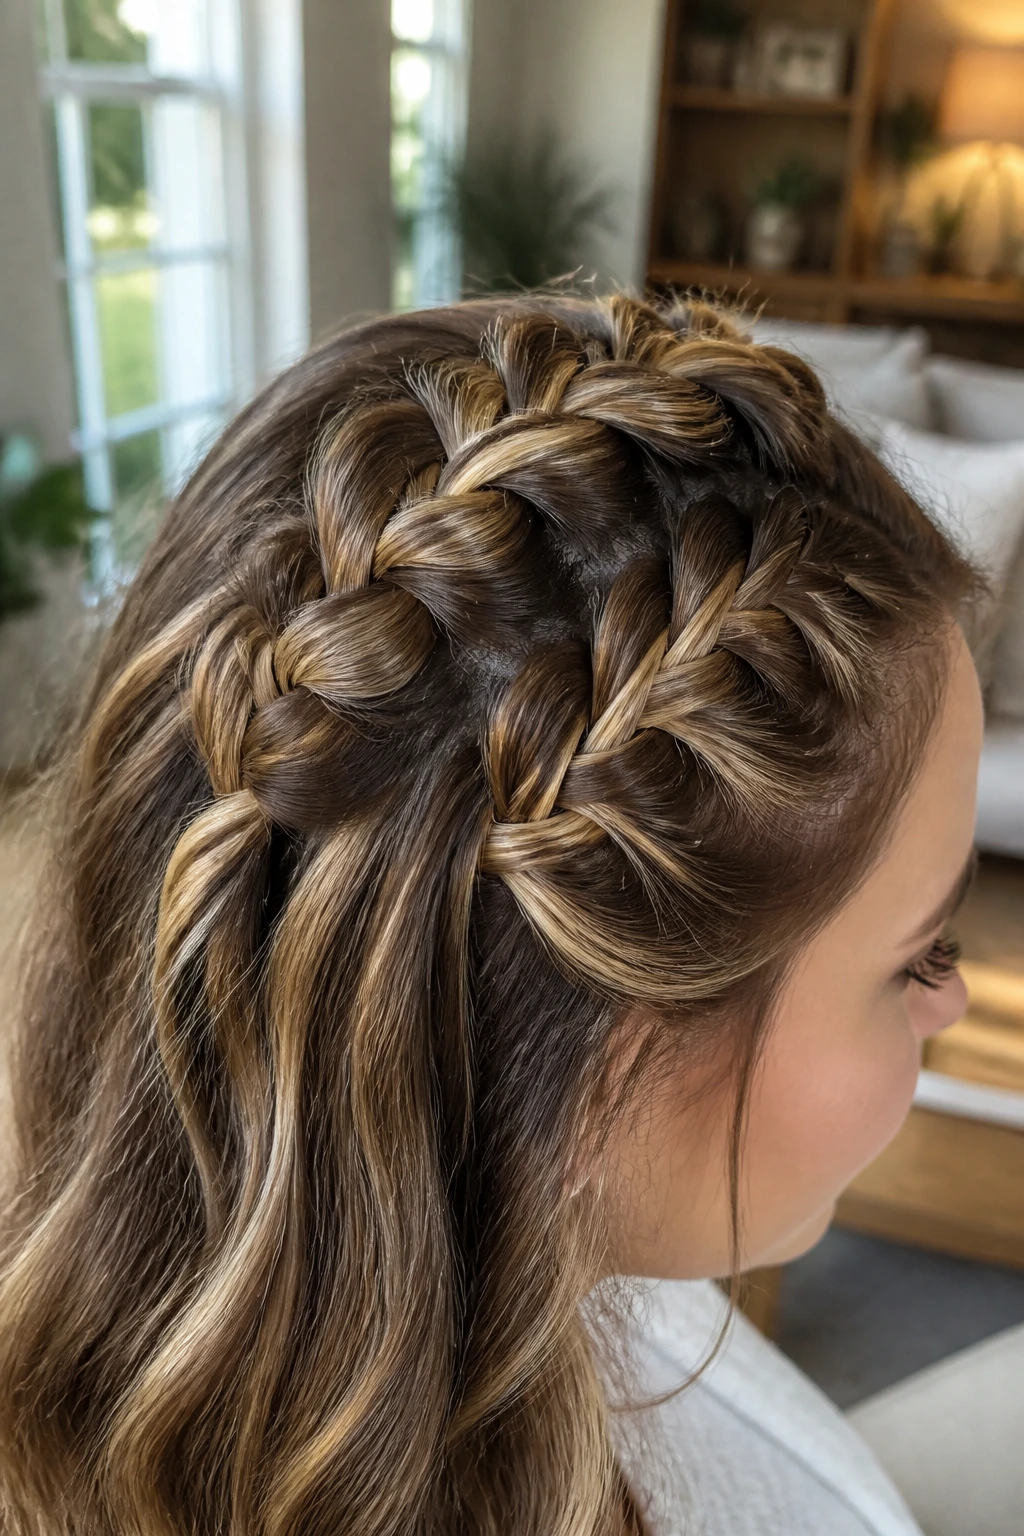
6. Loose Halo Braid with Face Pieces
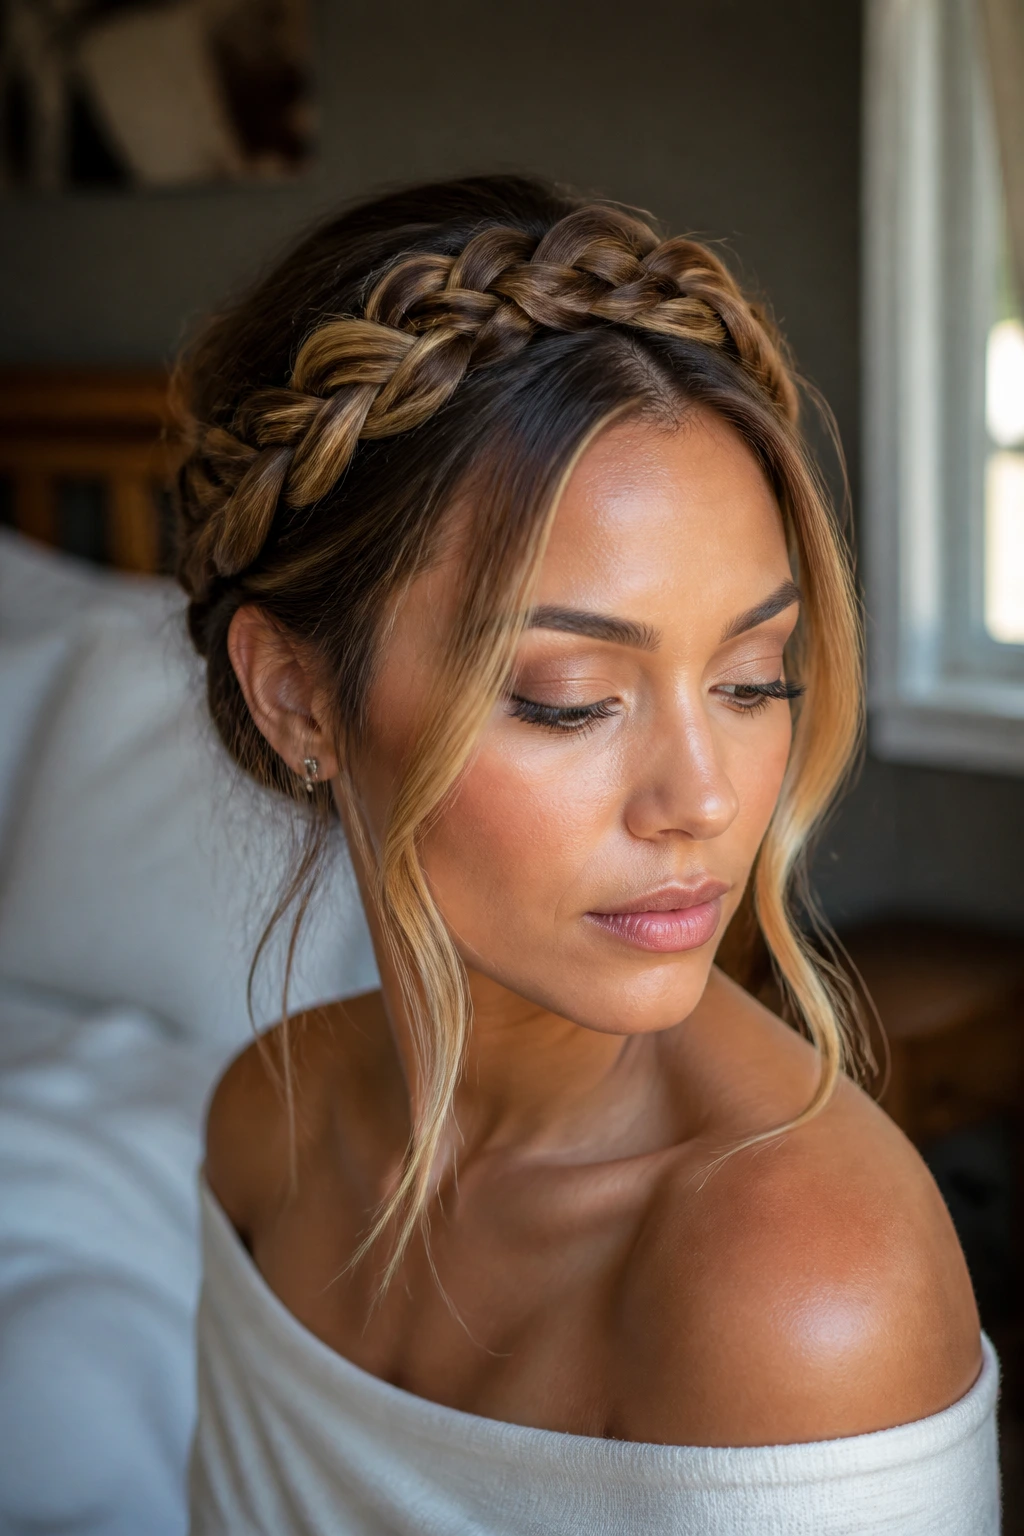
A halo braid can sound fussy, but on thinning long hair it solves a real problem: it gathers the hair into one compact shape so the individual strands stop advertising how fine they are. Caramel highlights make the braid pattern visible, almost like little woven stripes.
Keep the braid loose and slightly imperfect. Tight braids expose every gap in the plait, and that is the last thing you want. Pancake the braid gently after securing it — just tug the outer edges with your fingertips to widen it a bit. That one move makes the braid look twice as full.
Leave a few face pieces out. Not too many. Two slim sections, one on each side, are enough to keep the style from looking severe and to let the highlight placement show near the cheeks.
7. Low Ponytail with a Teased Crown
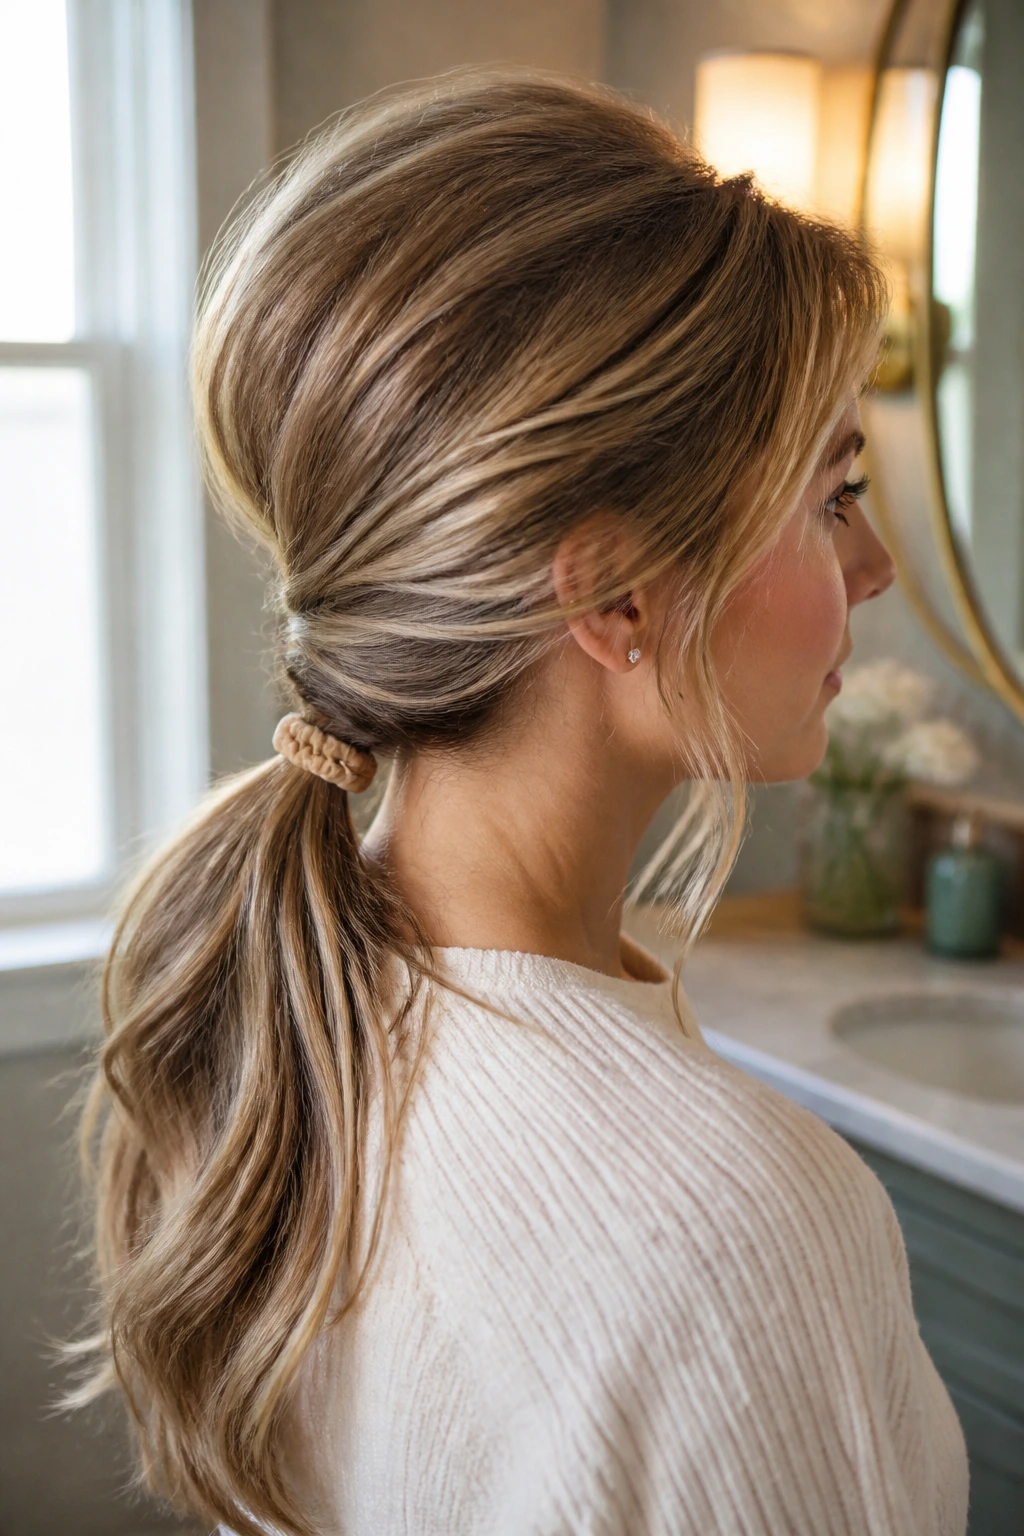
A low ponytail sounds simple because it is simple, but the details matter. On thin hair, a flat low ponytail can look smaller than you want. Teasing the crown lightly — just enough to create a soft mound, not a nest — changes the whole proportion.
How to keep it full
- Backcomb the crown in 2 to 3 small sections, then smooth only the top layer.
- Use a silk or fabric-covered elastic so the ponytail does not look dented.
- Wrap one small strand around the base to hide the band.
- Curl the tail in large bends if you want the caramel highlights to flash through.
The reason this works is that the eye sees the lifted crown first, then the compact ponytail second. That order matters. Thin hair can look fuller if the top half has a little structure.
8. Messy Claw-Clip French Twist
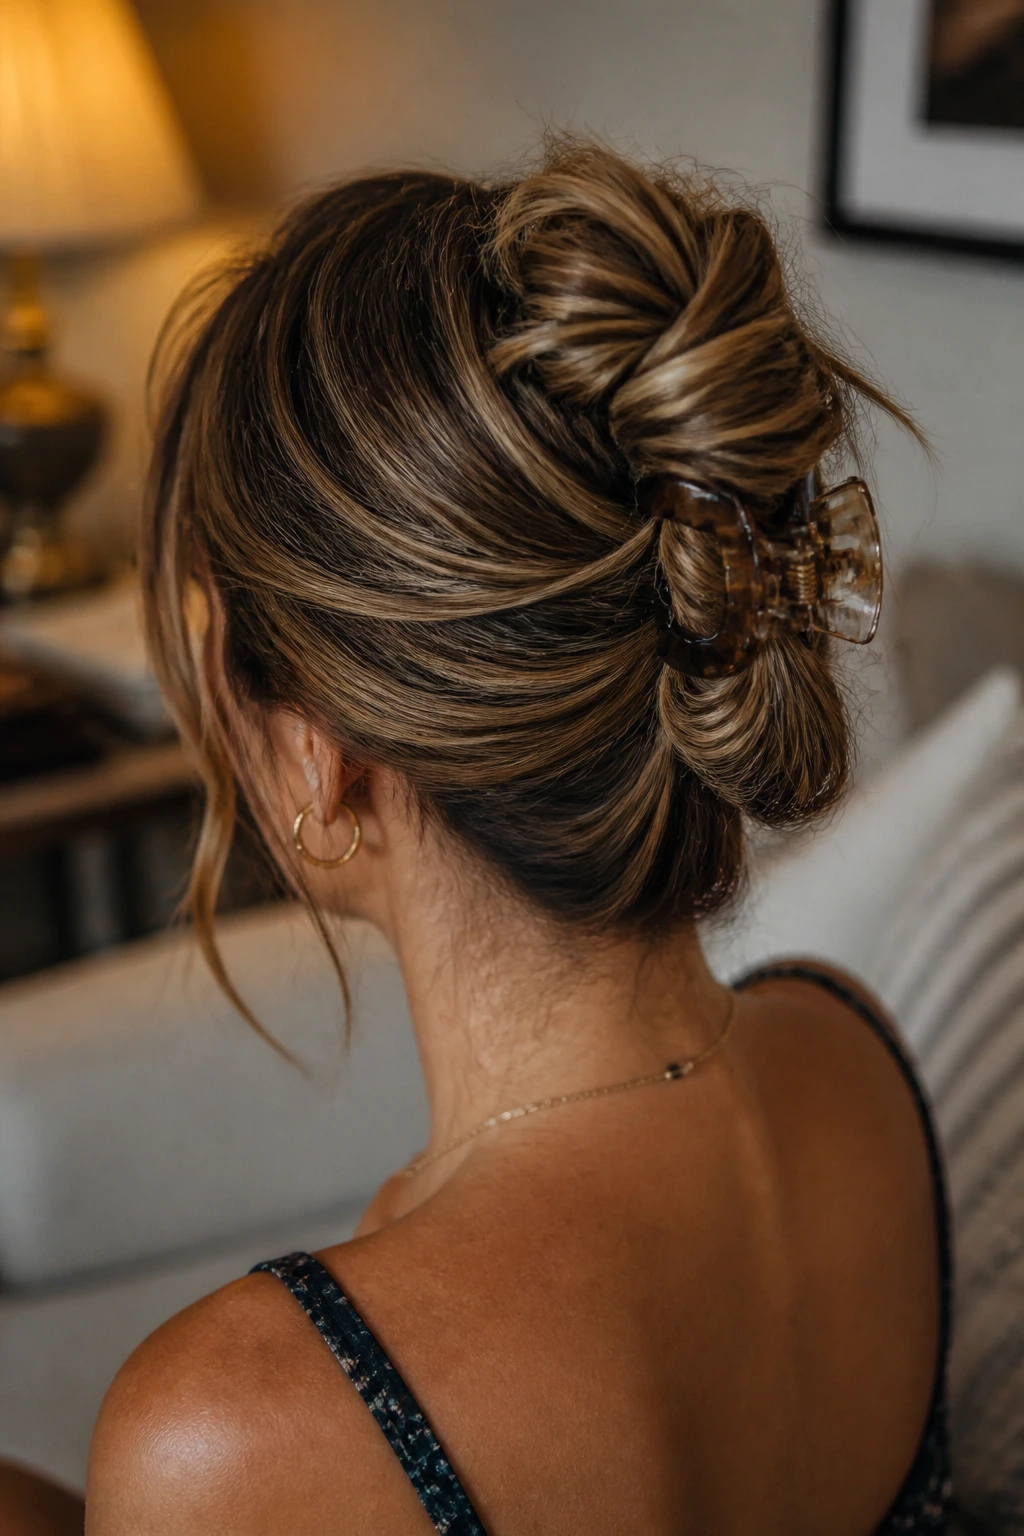
A claw clip can be your best friend when long hair looks too limp to cooperate. The messy French twist keeps the hair off the neck, gathers the ends together, and creates a bit of lift at the back that flat hair usually lacks.
Do not twist it into a perfect roll. That makes the scalp show more. Instead, gather the hair loosely, twist upward, and let a few lengths spill out around the clip. The caramel pieces catch light in those loose folds, which keeps the style from looking like a solid lump.
I prefer this on hair that is clean but not freshly washed. A little grip makes the twist hold, and the piecey texture keeps the look from turning slick or overcontrolled.
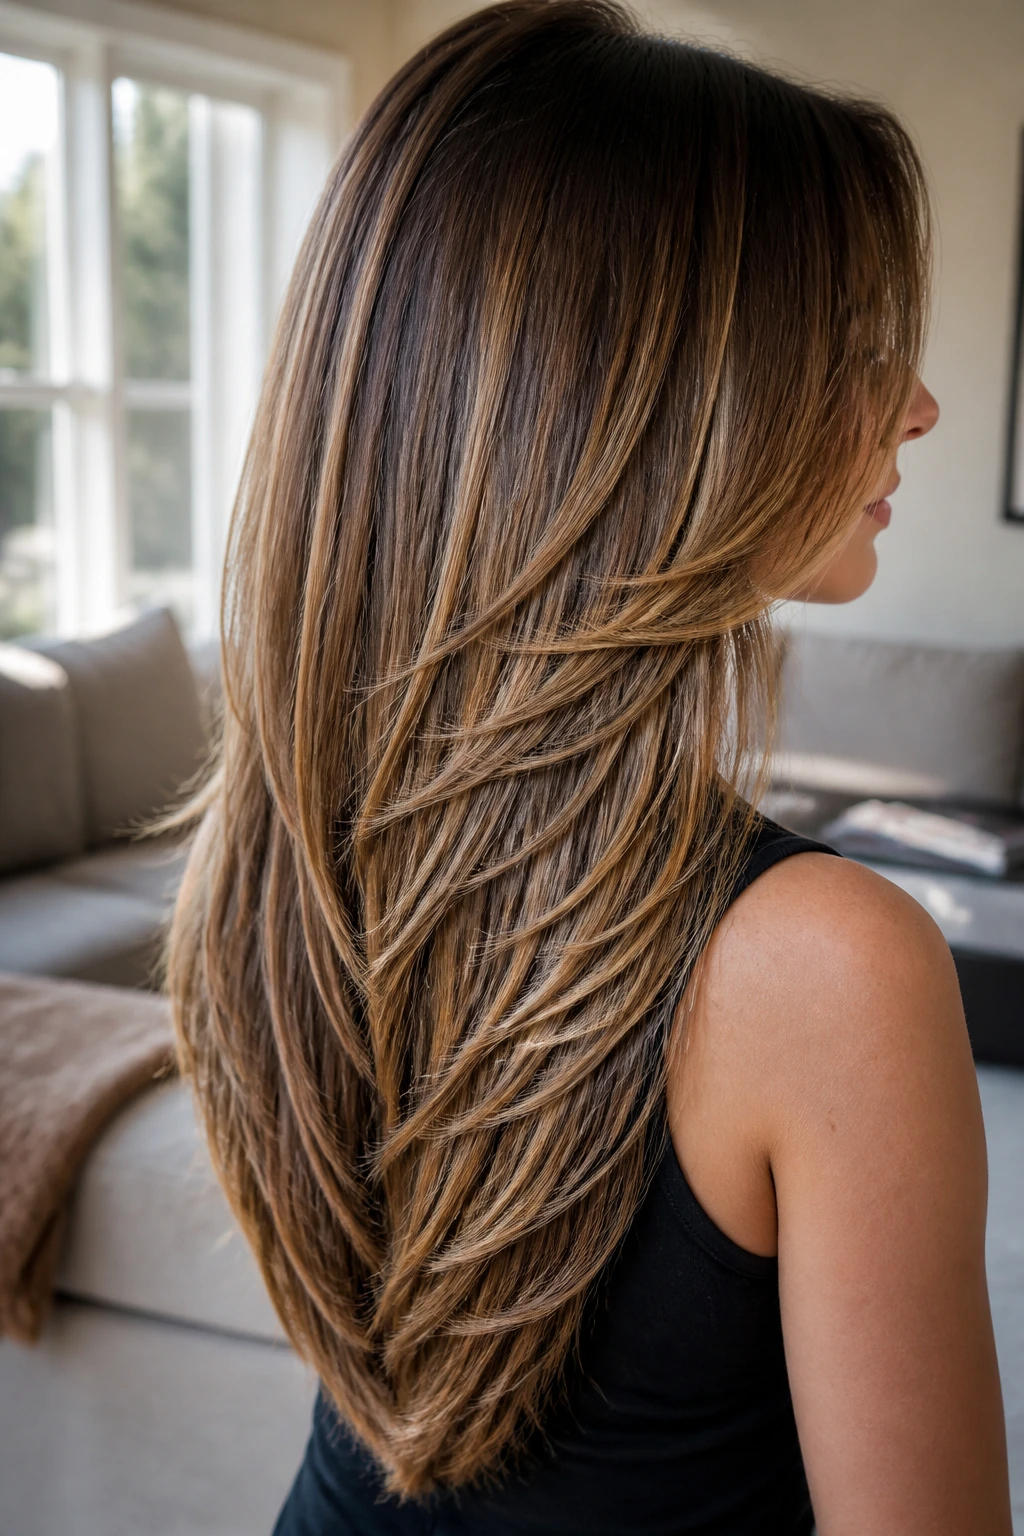
9. Long Shag with Wispy Fringe
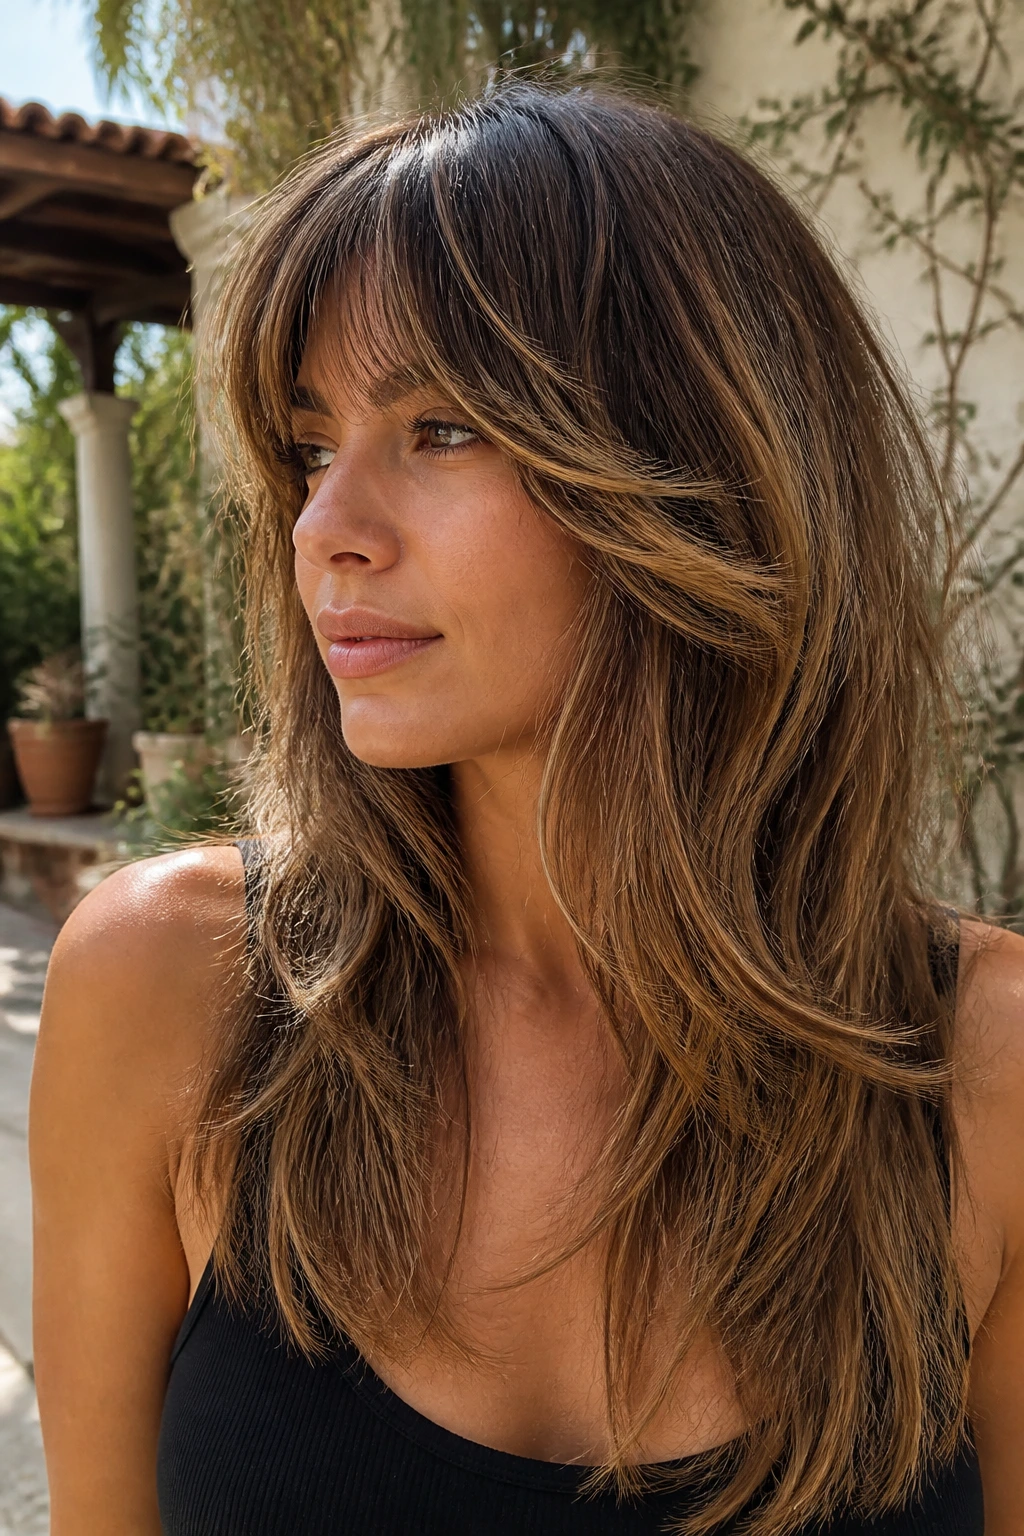
The long shag is for people who want movement more than they want sleekness. It breaks up the length with layers that hit at different points, which is exactly what thin hair needs when it starts hanging straight and tired. The wispy fringe adds a soft top edge without eating up too much density.
This cut can go wrong if the layers are cut too short or too aggressively. Then the ends start to look frayed. The better version keeps the layers long enough to move, but not so sparse that the shape falls apart when you air-dry it.
Caramel highlights are a gift here. They land on the outer layers and around the fringe, so the haircut gets a little shimmer without needing much styling. A rough dry with a diffuser or a loose blowout is enough.
10. Side-Swept S-Waves
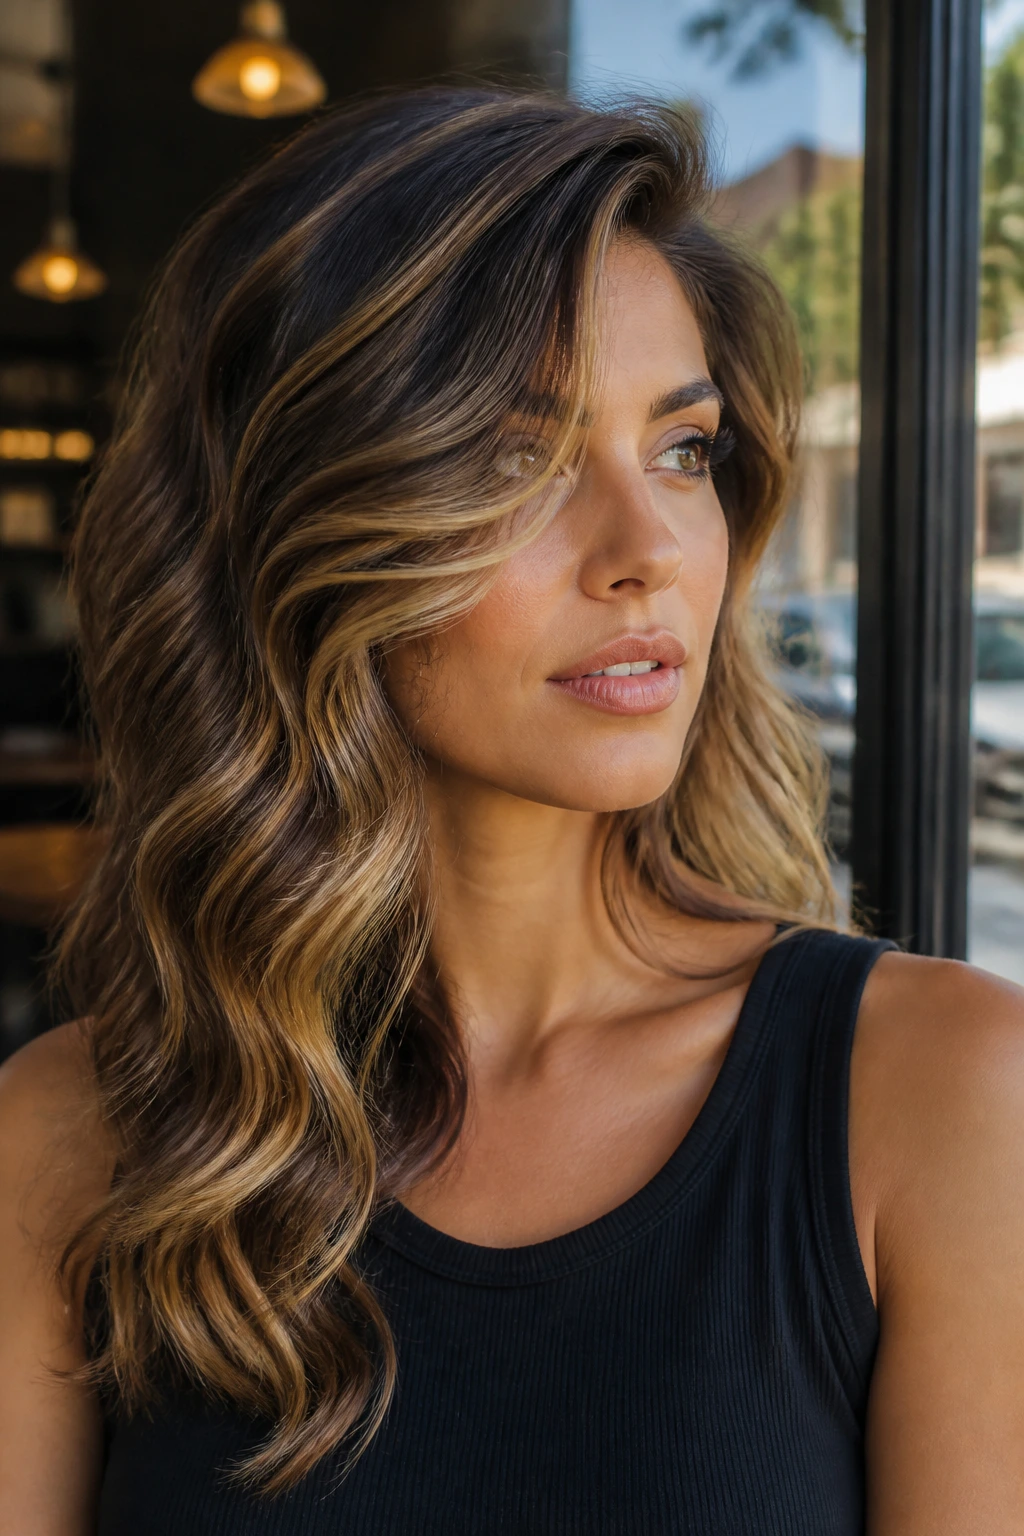
A side-swept wave pattern changes how the hair sits on the head. Instead of splitting straight down the middle and showing every thin spot evenly, the hair stacks itself to one side, which gives the illusion of more density. The S-shape also softens the ends, and that matters a lot on long lengths.
Why not uniform curls? Because uniform curls can make thin hair look styled but not full. S-waves have more movement through the mid-lengths, and the caramel highlights show up in those bends like strips of toffee.
Use a 1-inch iron and alternate the direction of each wave. Then brush lightly with your fingers, not a paddle brush. The point is to keep the curve visible without turning the hair into a puffed-out cloud.
11. Rope-Braid Ponytail
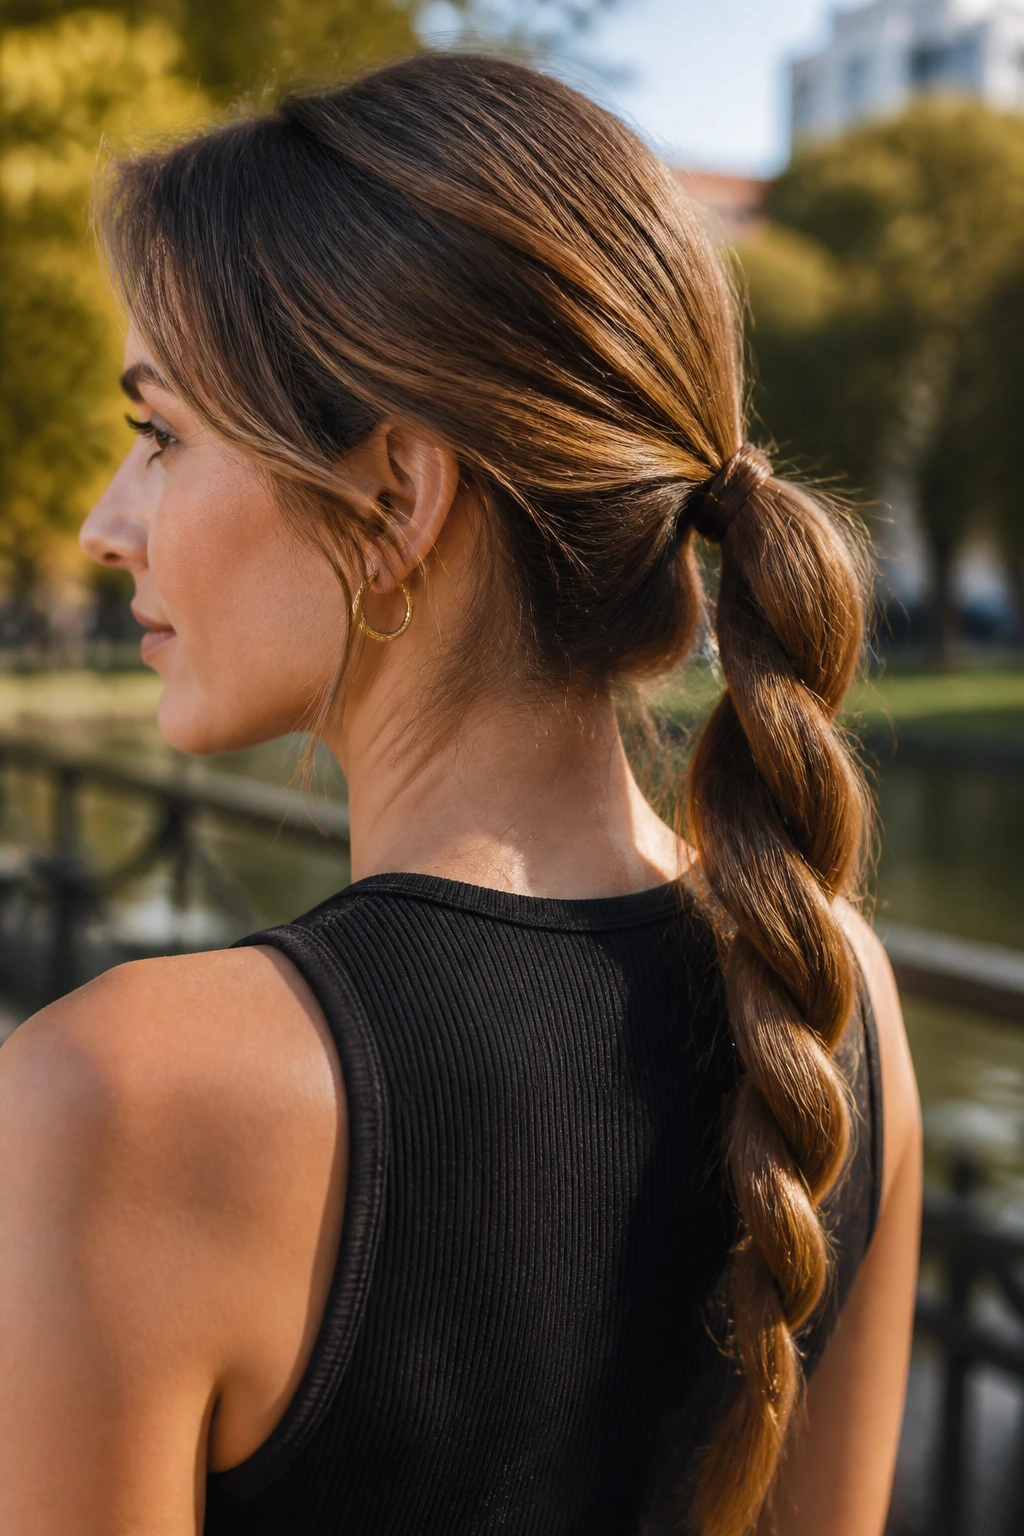
Compared with a regular three-strand braid, a rope braid adds twist and tension that makes thin hair look denser. Each section wraps around the other, and that spiral shape creates a more solid silhouette. It also lets caramel highlights show in little spirals instead of flat stripes.
This is a good choice if your ends are the thinnest part of your hair. The braid gathers them together and keeps them from separating into a see-through tail. A little texturizing spray helps, because slippery hair slips out of rope braids faster than you’d expect.
Keep the braid low or mid-height for the cleanest finish. High rope braids can look playful, but they also pull the scalp tighter, which can expose the part.
12. Velcro-Roller Blowout Volume
If you want old-school body without a curling iron curling everything into submission, Velcro rollers are still hard to beat. They lift the root, set the bend, and make long fine hair feel like it has more backbone than it really does.
Quick facts
- Use 2-inch rollers on the top and crown.
- Roll the front sections away from the face.
- Leave the rollers in until the hair is fully cool.
- A light mist of flexible-hold spray is enough; heavy spray collapses the lift.
The caramel highlights matter here because they catch the arcs created by the rollers. The color shifts make the blowout look fuller than a single tone would. It is a fussy style only if you treat it like one.
13. Loose Dutch Braids
Loose Dutch braids are a smart way to make thin long hair look thicker because the braid sits on top of the hair instead of disappearing into it. That raised texture creates a wider profile, which is what you want when the ends are fine.
Tight Dutch braids can expose the scalp along the part, so go easy on the tension. Start the braid a bit farther back, and keep the first few crosses loose. Then loosen the outer edges with your fingers once the braid is secured.
I like this style most on day-two hair. It has enough grit to hold, and the caramel highlights look especially good when they peek through the braid’s raised edges.
14. Tucked-Behind-Ear Waves

Why does tucking one side behind the ear help? Because it changes the silhouette. Thin hair often looks strongest when it is not trying to cover every inch of the face. A tucked side opens the cheekbone, and the loose side keeps the style from feeling severe.
The wave pattern should be soft, not barrel-shaped. Use a wide iron or a big round brush bend, then tuck just one side with a small barrette or a hidden bobby pin. The caramel highlights near the front line get a lot more visibility this way, which keeps the hair from looking dark and flat around the face.
This is a good everyday style when you want tidy without looking pinned down. It works with glasses, earrings, and almost any neckline.
15. Twisted Half-Up Knot
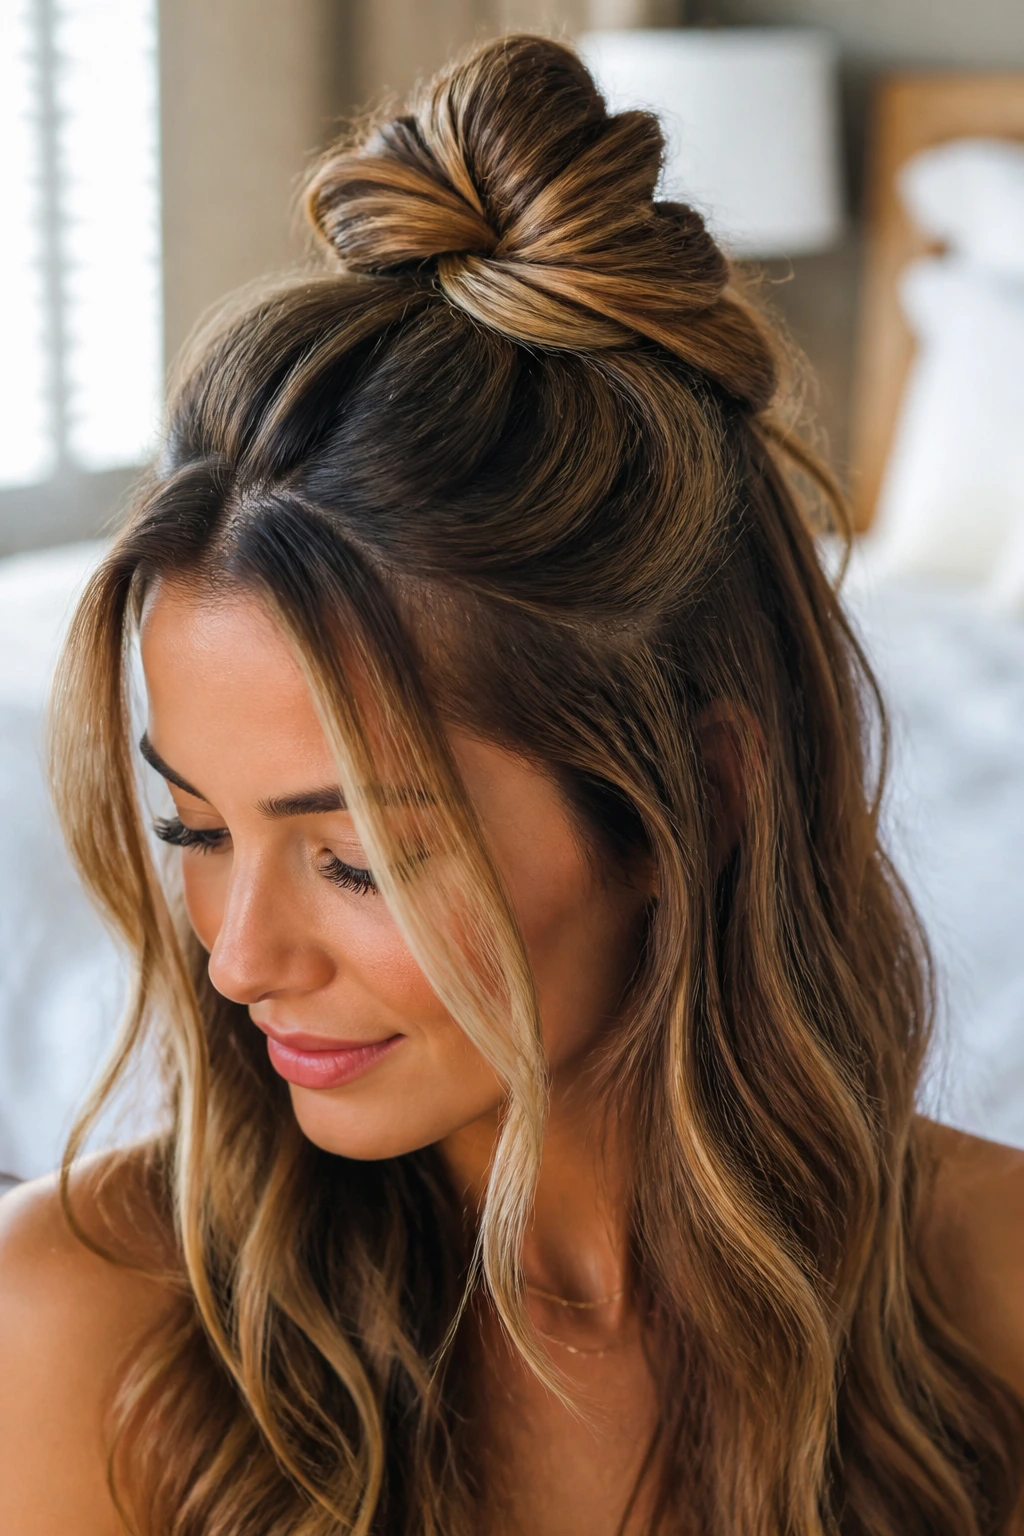
A twisted half-up knot is basically a small volume trick disguised as a simple style. By taking the top section and looping it into a knot, you add height at the crown and preserve the length underneath. That split — lifted top, loose bottom — is flattering on long fine hair.
Best way to wear it
Leave the twist loose enough that it has width. If you pull the knot too tight, it becomes a tiny hard bump instead of a soft lift. Two side pieces left out around the temples make the style look less severe and give the caramel tones a place to frame the face.
This is one of those styles that looks more complicated than it is. A couple of bobby pins, a texture spray, and a quick twist are enough. No need to overwork it.
16. Bubble Ponytail with Caramel Segments
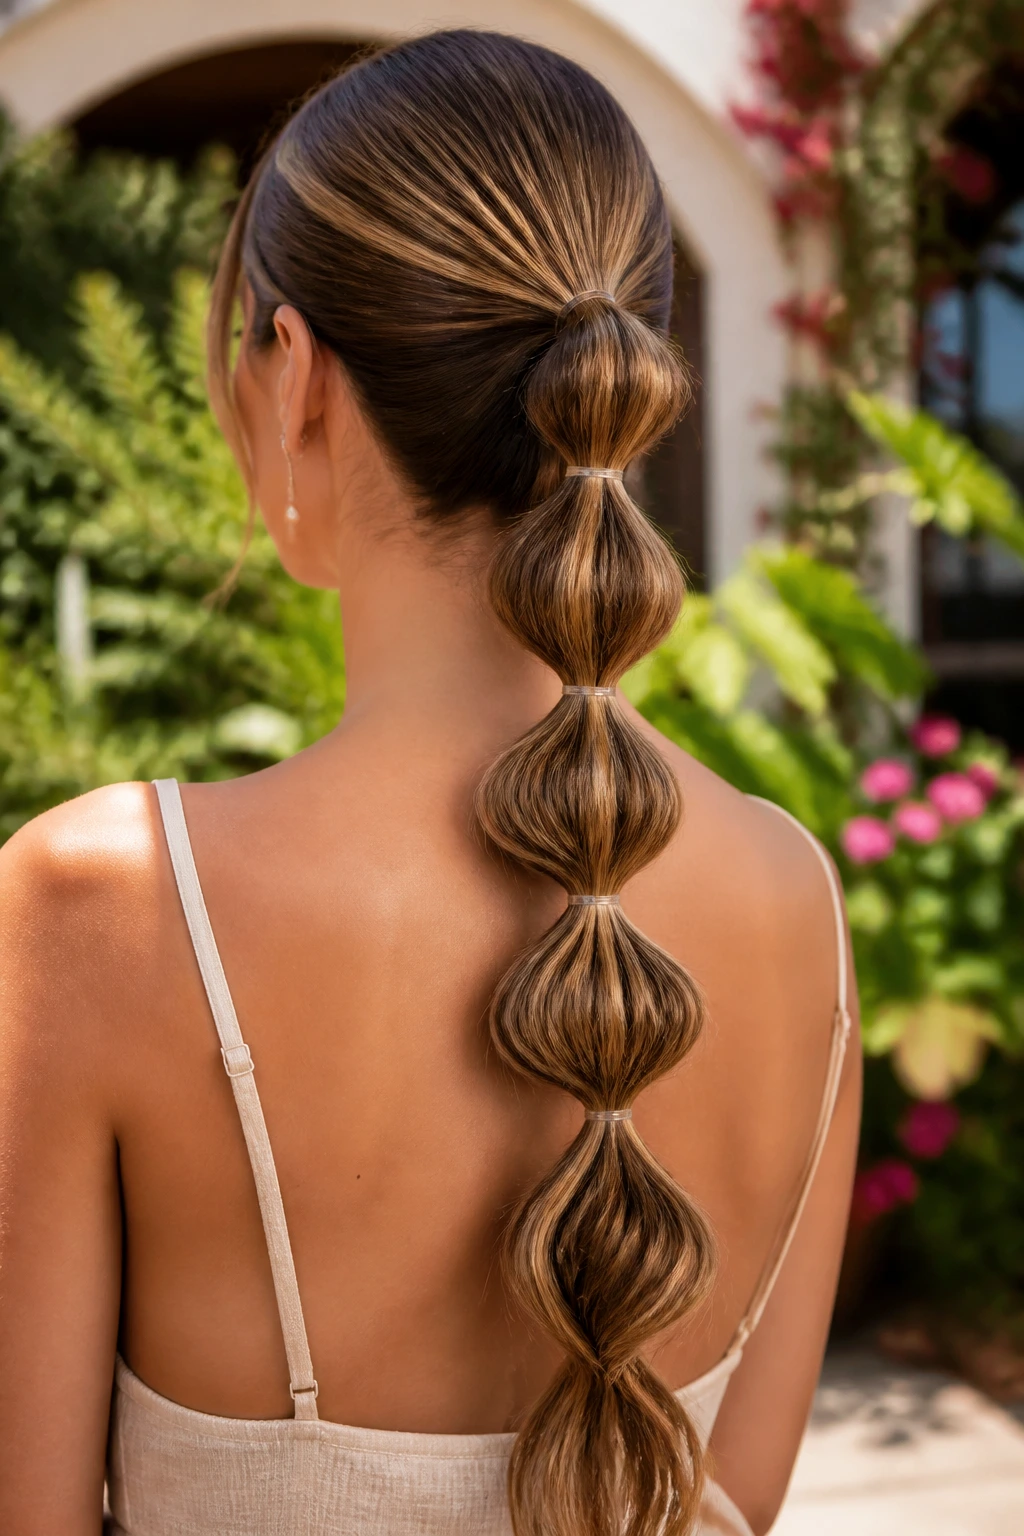
A bubble ponytail is a quiet cheat code for thin hair. It breaks one long tail into a series of puffed sections, and those little segments create the visual illusion of volume where there may not be much. The caramel highlights make each bubble pop a little more, especially when the light hits the outer bands.
Start with a ponytail secured at the nape or slightly higher. Then add small elastics every 2 to 3 inches down the tail and gently tug each section outward. The key is equal spacing and a soft pull, not giant balloons.
What to watch for
- Keep the first section near the base a little fuller than the rest.
- Use clear elastics or ones that match your hair.
- Add a tiny curl to the ends if they look too spindly.
It is playful, but not childish. When done right, it reads as deliberate.
17. Layered V-Cut
The V-cut gives long hair a pointed hem that narrows toward the center back, and that shape can be a good thing for thin hair. It keeps the sides fuller than a blunt tail and lets the length feel directional instead of just long. The caramel highlights follow that V shape in a way that makes the ends look more layered.
Compared with a straight hem, a V-cut hides see-through tips better. The middle point draws the eye down, while the sides retain enough weight to feel substantial. If your hair is very fine, don’t let the point get too sharp; a softer V is more forgiving.
This cut tends to look best with a bit of bend at the bottom. Even a subtle under-turn with a flat iron helps the whole shape settle.
18. Waterfall Braid
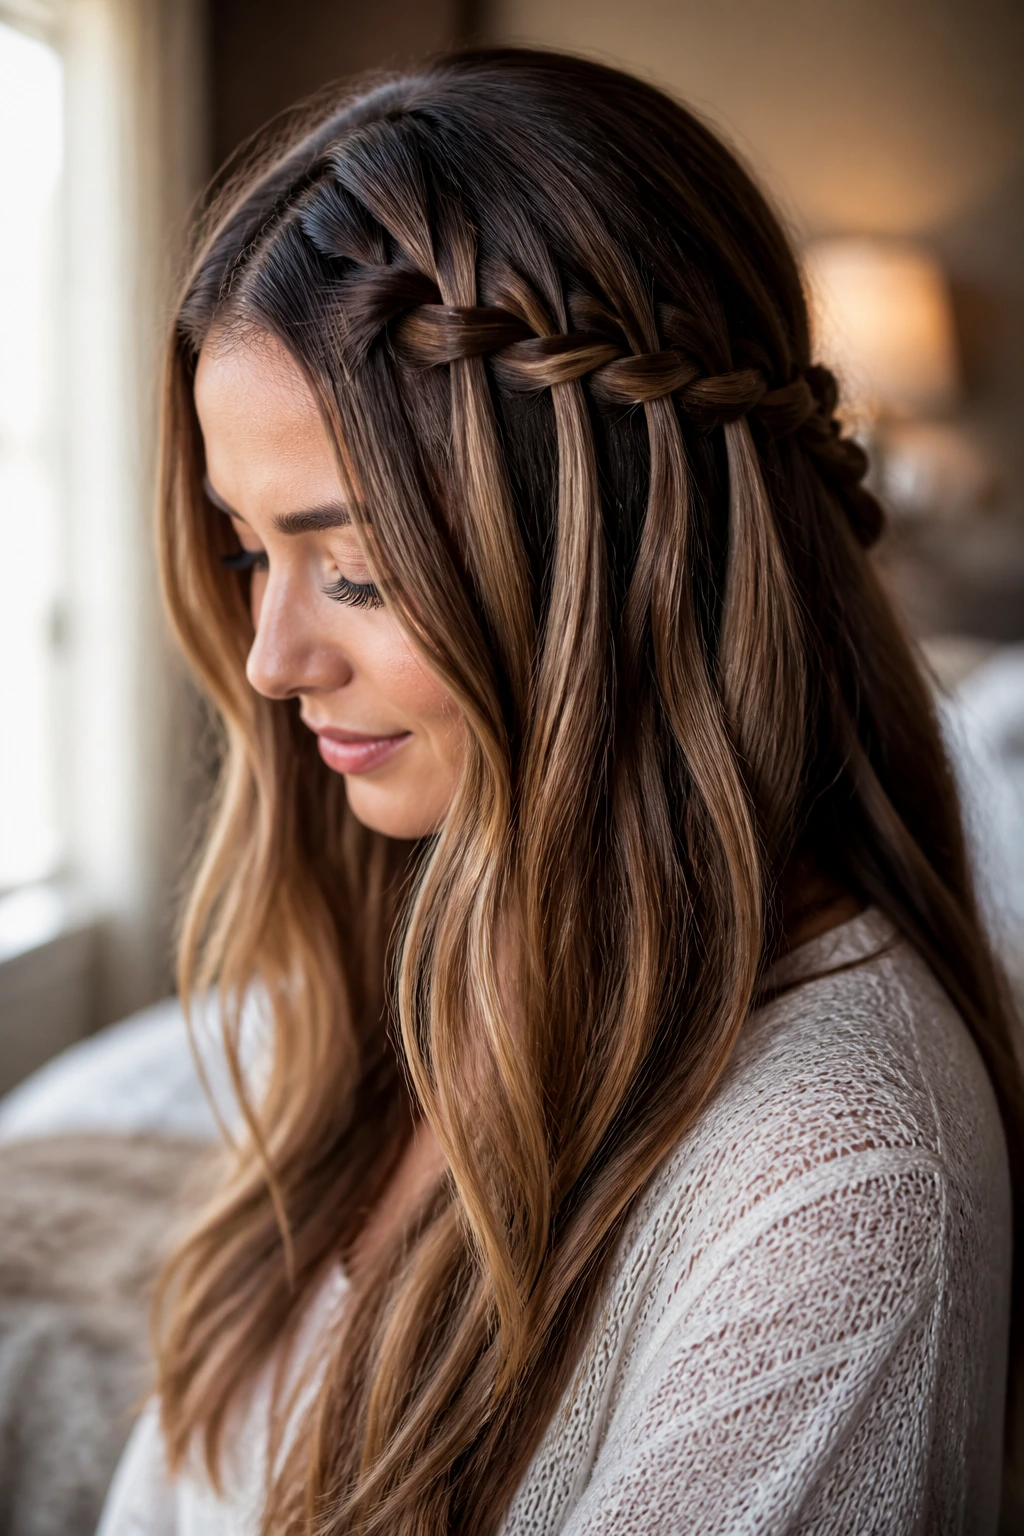
A waterfall braid is one of the prettiest ways to show off caramel highlights without pinning up the entire head. The braid weaves across the top while dropping sections through, so the hair keeps moving underneath. That movement is the point.
It works especially well when the hair is thin because it does not rely on thickness for impact. The braid itself gives you structure, and the loose sections provide softness. If the hair is too silky, a little dry texture spray at the crown makes the braid hold better.
The best part is how the color looks. Caramel pieces flow in and out of the braid like thin ribbons. That’s a far better use of highlights than hiding them under a tight updo.
19. Low Chignon with Face-Framing Strands

Can a chignon work on thin long hair? Yes, if you keep it soft and low. A tight, polished bun exposes every gap and makes the head look smaller. A looser chignon, gathered at the nape with a few face-framing strands, creates a fuller silhouette and keeps the highlight pattern near the front of the hair visible.
Better with these details
- Pin the bun loosely so it has a little width.
- Pull out two slim front pieces and curl them away from the face.
- Tease the crown before you twist the bun into place.
- Use bobby pins that match your hair color.
This style is especially good for dressier situations when you want long hair to stay elegant but not flat. The caramel pieces around the face keep it from looking too severe.
20. Blunt Ends with Invisible Internal Layers
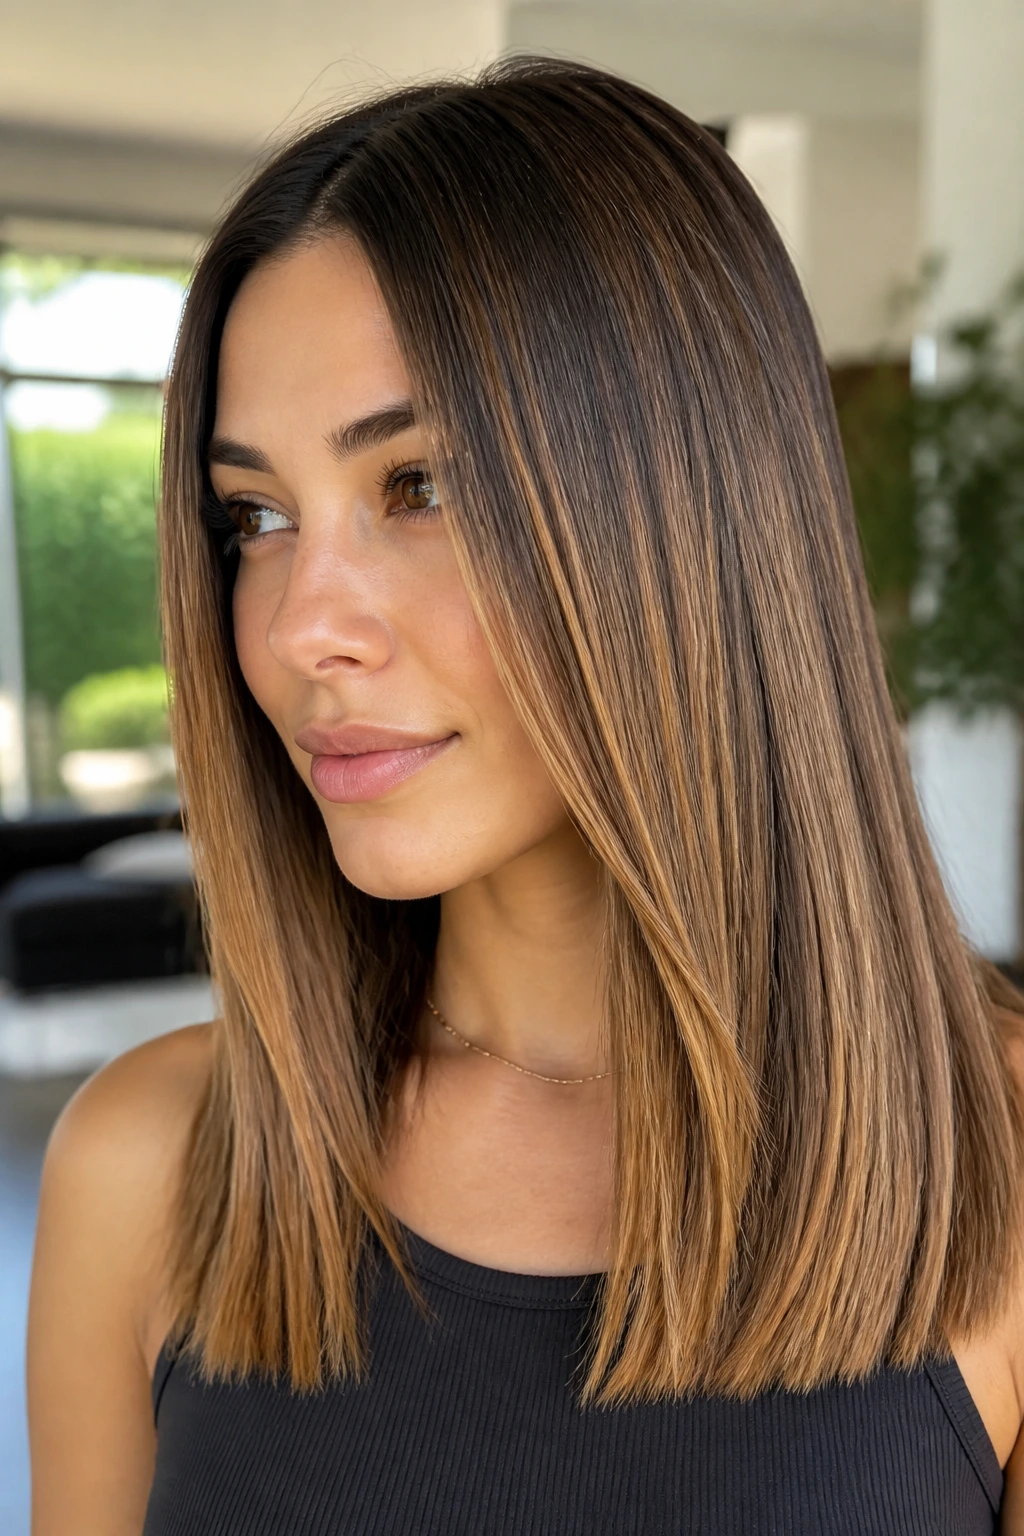
A blunt hem sounds counterintuitive for thin hair, but hear me out: when the ends are sparse, a clean line can make the whole length look denser. The trick is to keep the outer edge blunt while sneaking in internal layers that remove weight where the eye does not need to see it.
That means the hair moves when you walk, but the bottom line still looks solid. It is a subtle cut, not a dramatic one. Caramel highlights make this especially useful because they give the blunt edge some dimension without requiring curls or extra styling.
I would choose this if your hair is fine but healthy and you wear it down often. It gives you a thicker-looking hemline, which is worth a lot.
21. High Ponytail with Wrapped Base
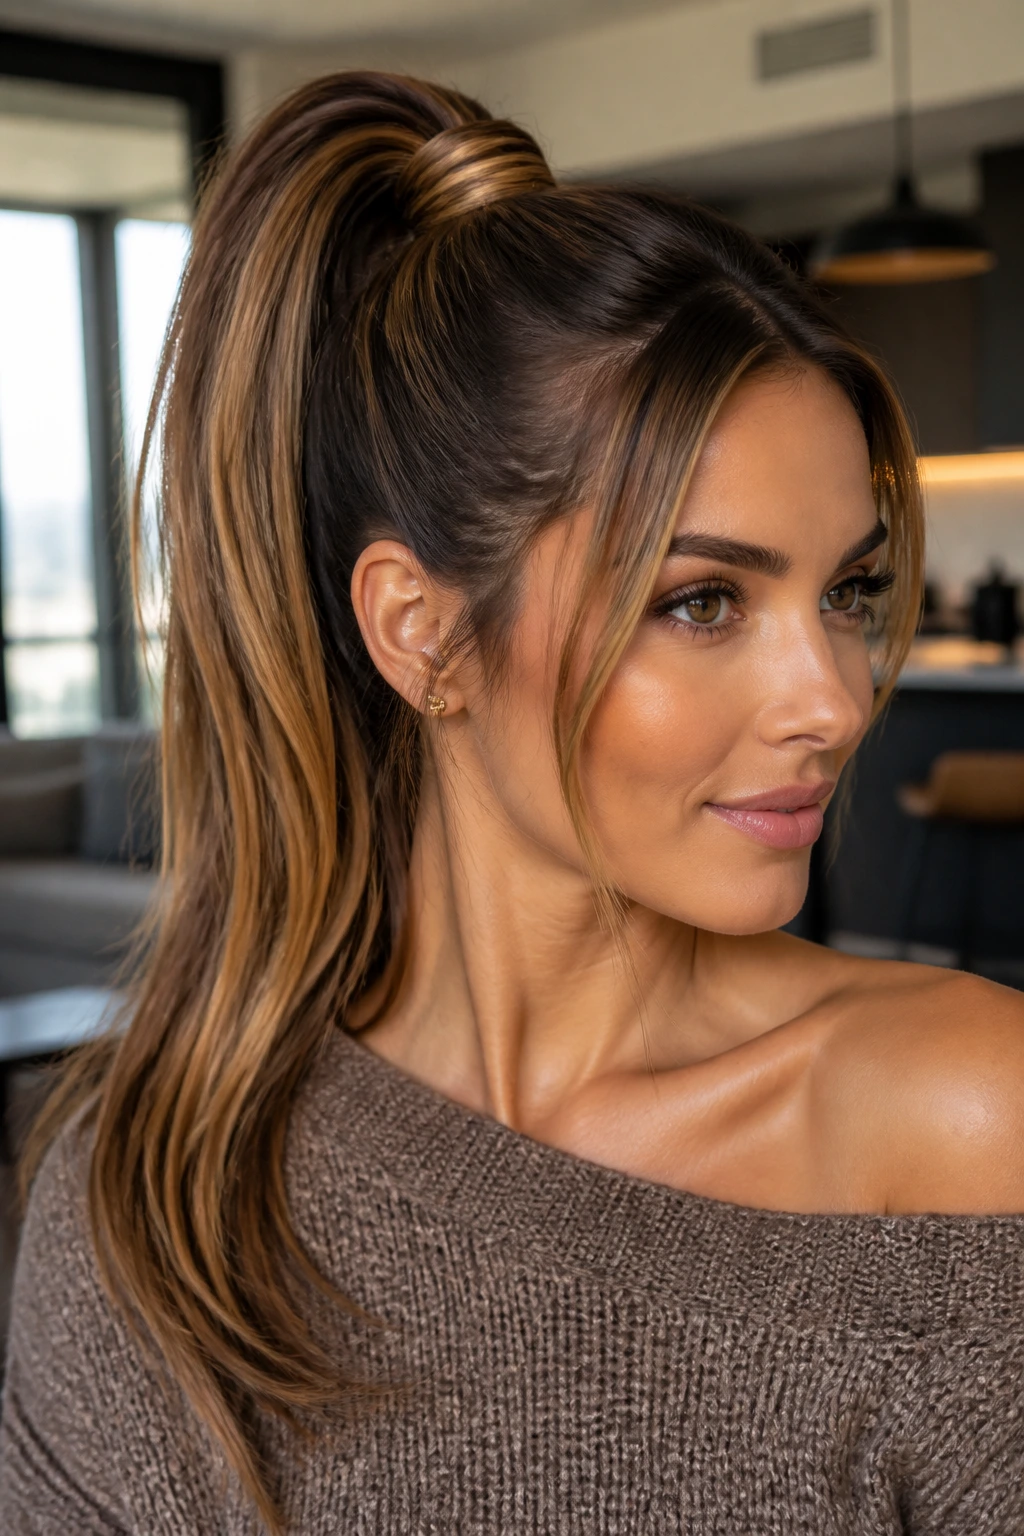
A high ponytail can look fantastic on thin long hair if you stop trying to make it sleek from scalp to ends. A little crown lift, a wrapped base, and some soft bend in the tail give the style shape. The height pulls the eye upward, which is useful when the ends are the weakest part.
This is not the place for a glass-flat finish unless you really want that polished look. If you do, the ponytail should still have some width at the base. Wrap a small strand around the elastic to make the style look finished, then gently tug the crown to soften the lift.
Caramel highlights add a nice flicker through the tail. They make the ponytail read as thicker because the light catches more than one tone at once.
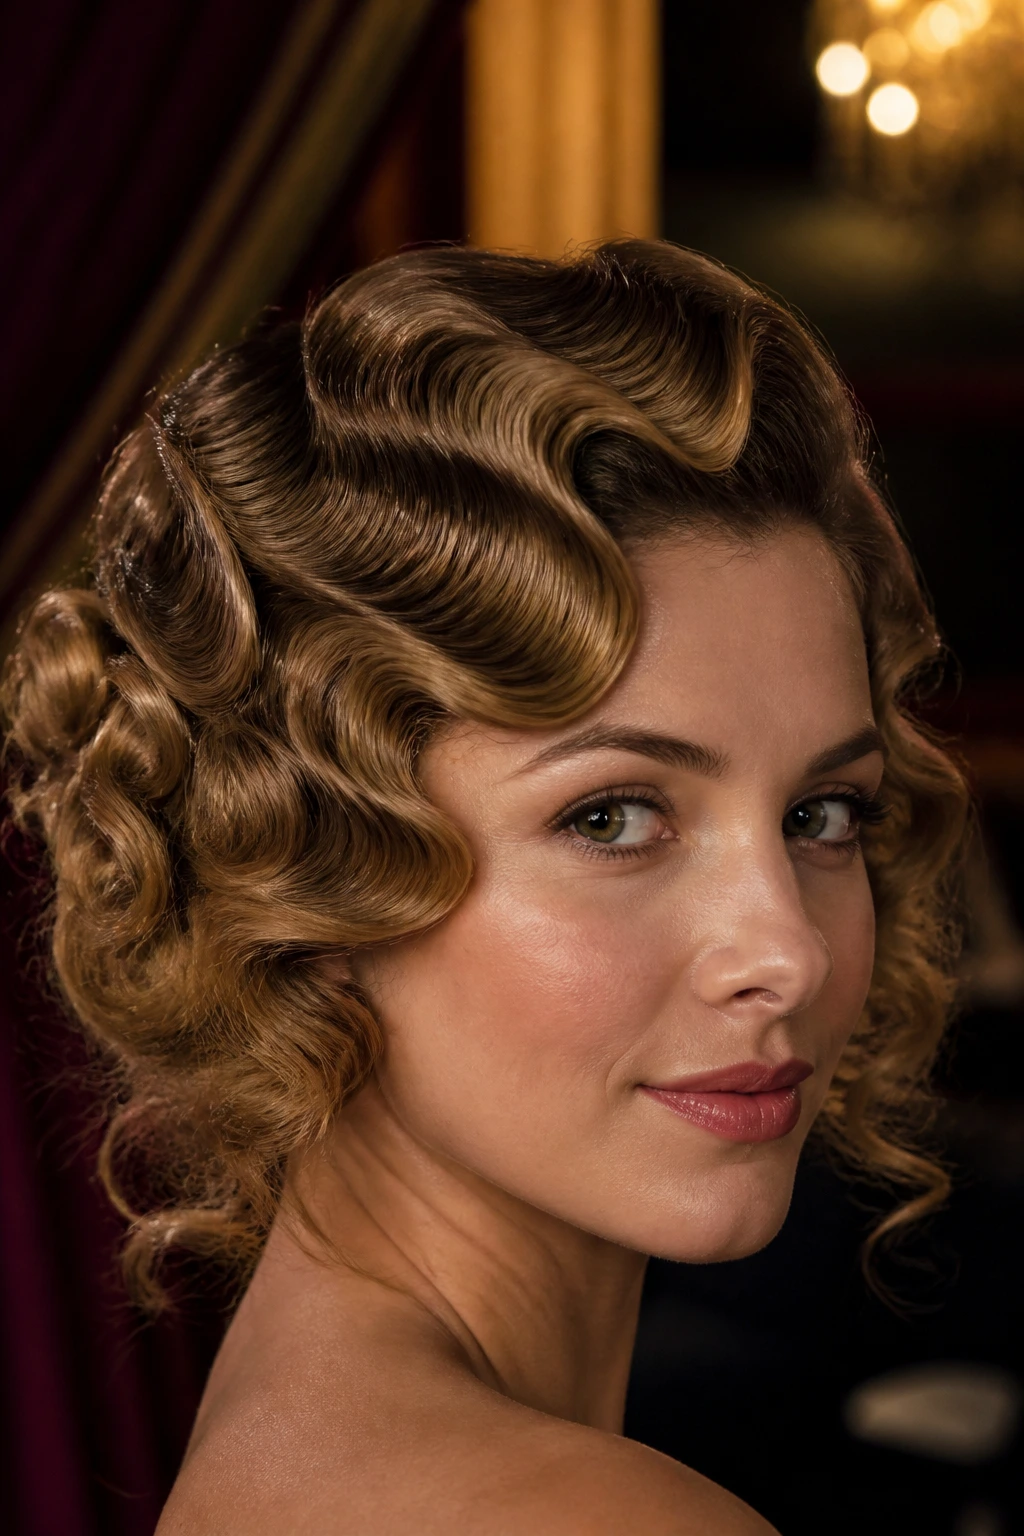
22. Vintage Pin-Curled Waves
Pin curls bring a packed, old-fashioned texture that thin hair can wear surprisingly well. Instead of one or two loose curls hanging off the head, you get a pattern of smaller waves that sit close together and create a fuller shape. The caramel highlights shine through the bends in a way that feels deliberate, not overdone.
This is a strong choice for events or evenings when you want long hair to look dressed without losing softness. Set the curls while they’re warm, pin them flat, and let them cool completely before brushing out. If you rush the cool-down, the wave falls apart fast.
It takes more time than a quick blowout. Worth it, if you want the hair to feel rich and textured.
23. Sleek Wet Look with Loose Ends
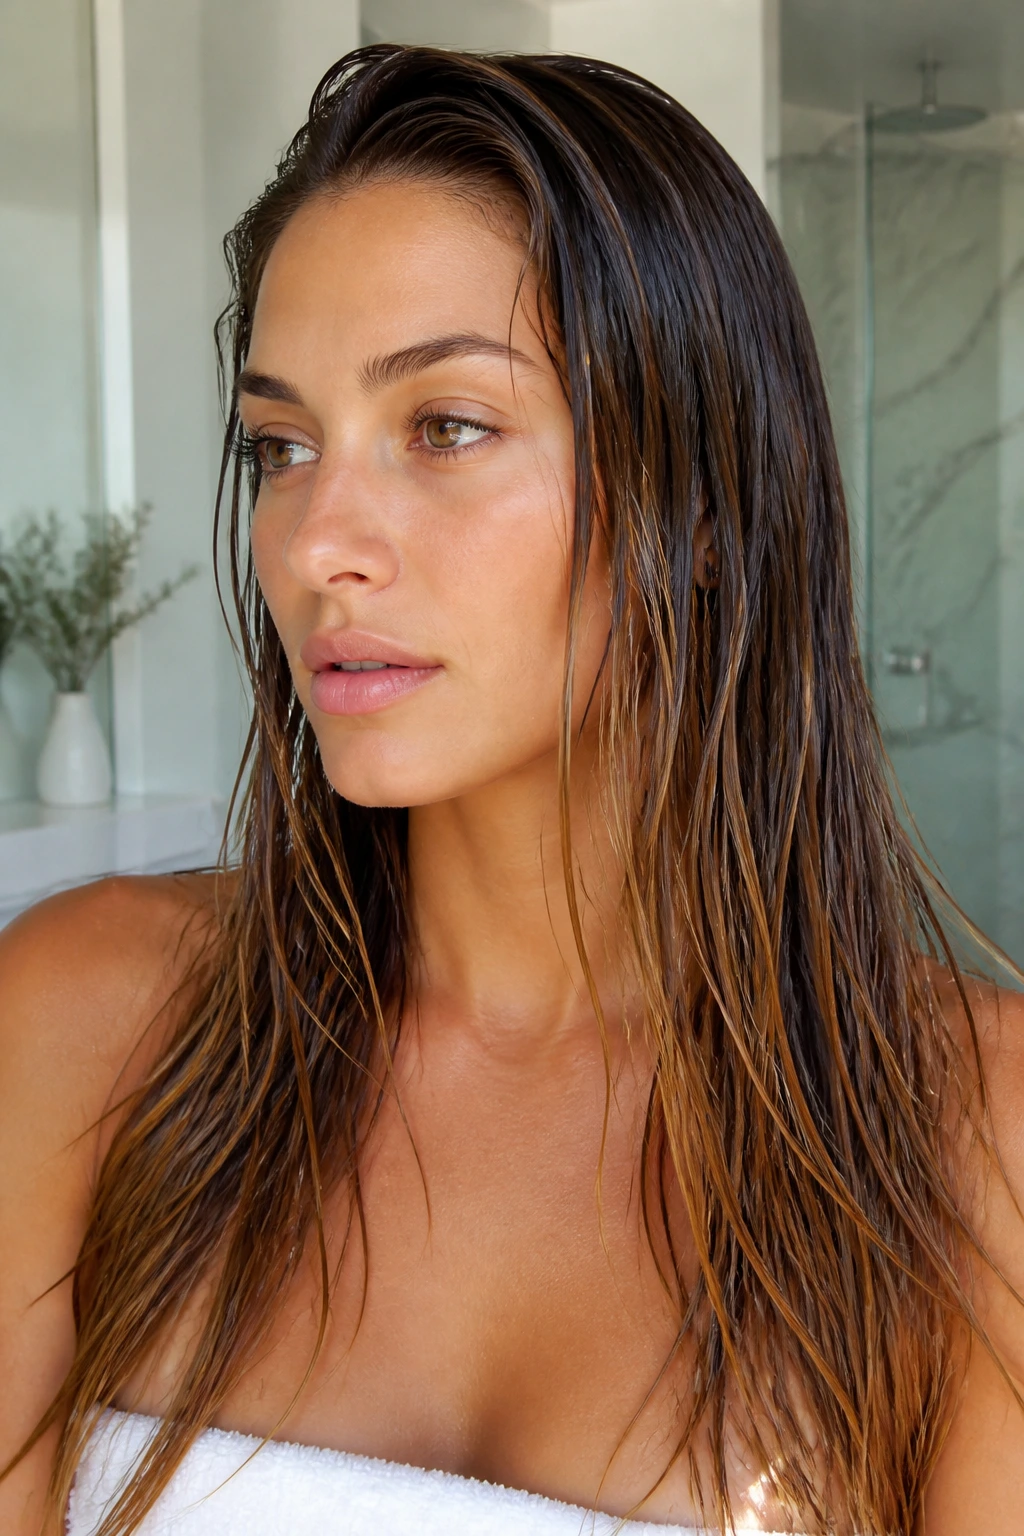
A wet look can actually be kind to thin long hair. Not because it adds volume — it doesn’t — but because it turns the hair into one smooth shape instead of many separate, sparse pieces. That can be a smart trade when the ends are wispy and you want the caramel highlights to read as glossy bands.
Use it when you want control
- Apply gel or styling cream mostly through the top and mid-lengths.
- Keep the roots sleek, but don’t crush the ends into a helmet.
- Leave the last few inches soft so the length doesn’t vanish completely.
- Pair it with a center or slight off-center part, depending on what flatters your face.
This look is blunt. That’s the point. It’s not trying to hide fine hair; it’s making it look intentional and shiny.
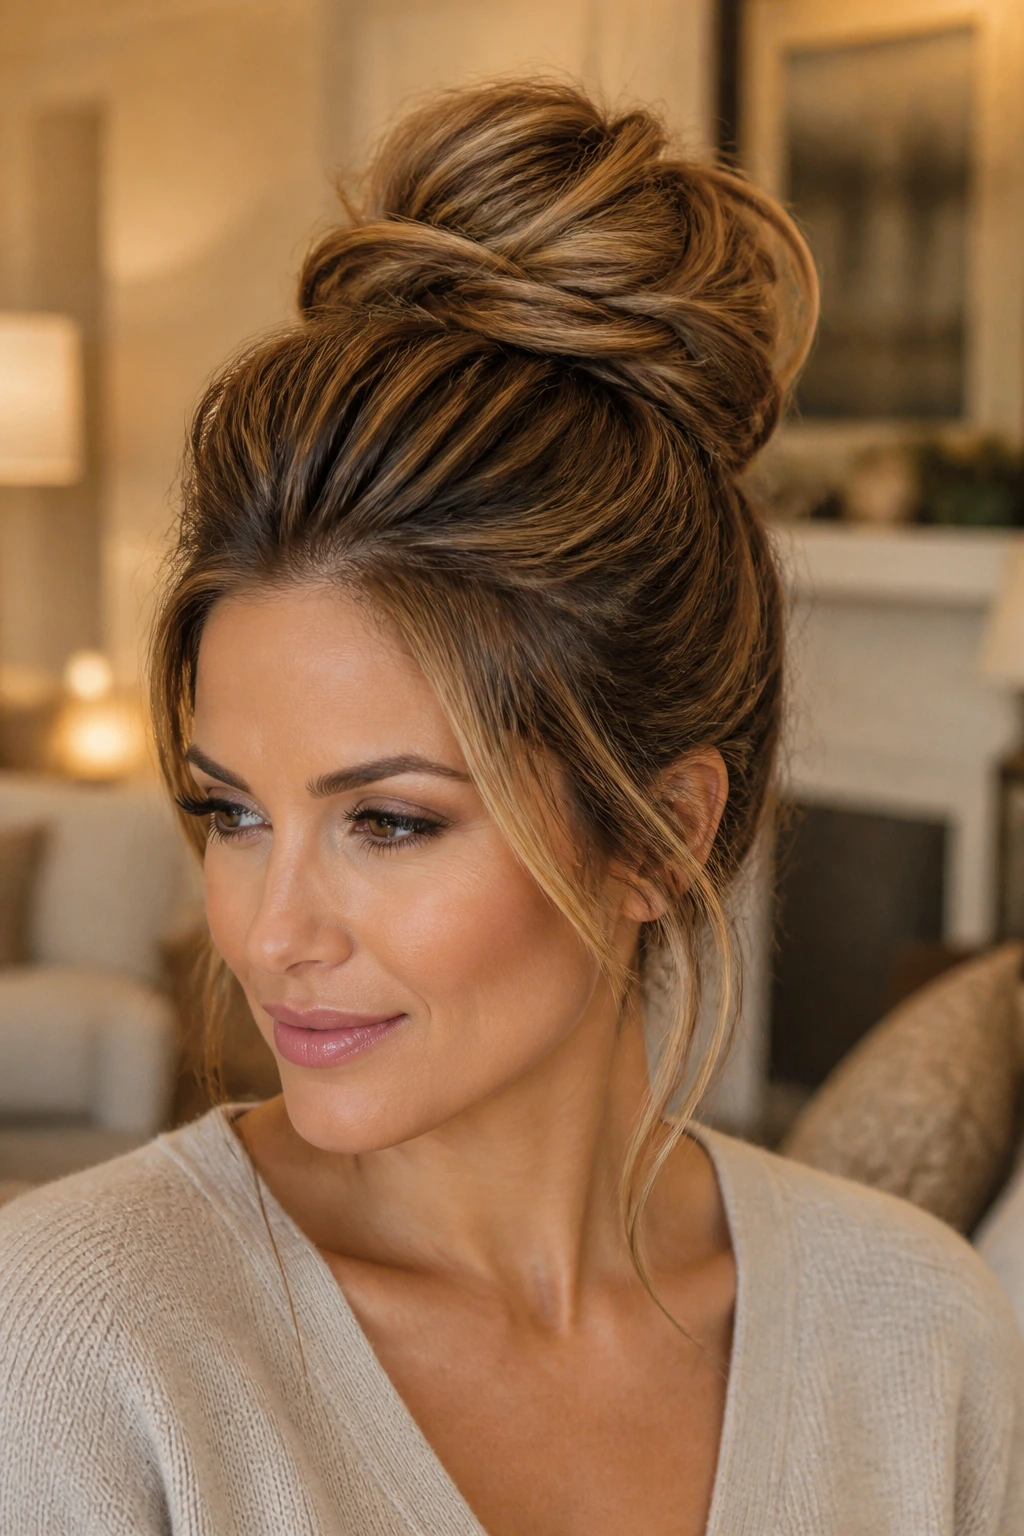
24. Crown-Volume Bun
What if you need your long hair up, but you still want it to look full? A crown-volume bun solves that by putting the lift where the eye notices it first. Tease the top lightly, gather the hair into a bun at the back or slightly lower, and let the outer shape stay soft.
The bun should not be too tight or too tiny. A small bun on fine long hair can look like a knot. A fuller bun with tucked ends and a little looseness around the crown reads much better. Caramel highlights help the curves show up, especially around the sides where the light lands.
This is one of those styles that looks best when it is a little imperfect. Good. Perfect buns often expose the problem you are trying to hide.
25. Air-Dried Waved Length with Light Micro-Layers
If you want the lowest-effort option, this is the one I’d keep in the back pocket. Light micro-layers — barely there, but enough to stop the ends from hanging in a single sheet — let air-dried waves land with some shape instead of collapsing into a flat line. The caramel highlights do the rest by giving every bend a little contrast.
How to make it hold
- Work a small amount of leave-in conditioner through the mids only.
- Scrunch in a lightweight mousse from ears down.
- Let the hair dry without touching it for the first 20 minutes.
- Break up the finished wave with fingers, not a brush.
This style is not about big drama. It is about making thin hair look lived-in, soft, and a little fuller without heat. That matters more than people admit.
Why Long Layers and Caramel Highlights Work So Well Together
Long layers can make thin hair look softer, but the real trick is where the highlights land. Caramel highlights around the face, through the mid-lengths, and just under the top layer create a fake sense of depth that a single flat color can’t match. The hair looks like it has more movement because your eye keeps finding a new strip of tone.
Placement matters more than brightness. If the caramel is too high-contrast, the scalp can look wider and the ends can look thinner by comparison. If the tone sits only at the bottom, the hair can look skunky at the roots and light at the tips, which is an awkward trade. A few lowlights two shades deeper than the base can help if your color needs more shadow through the mids.
I like this combination most when the cut is doing half the work and the color is doing the rest. That is the sweet spot. You are not asking one thing to carry the whole look.
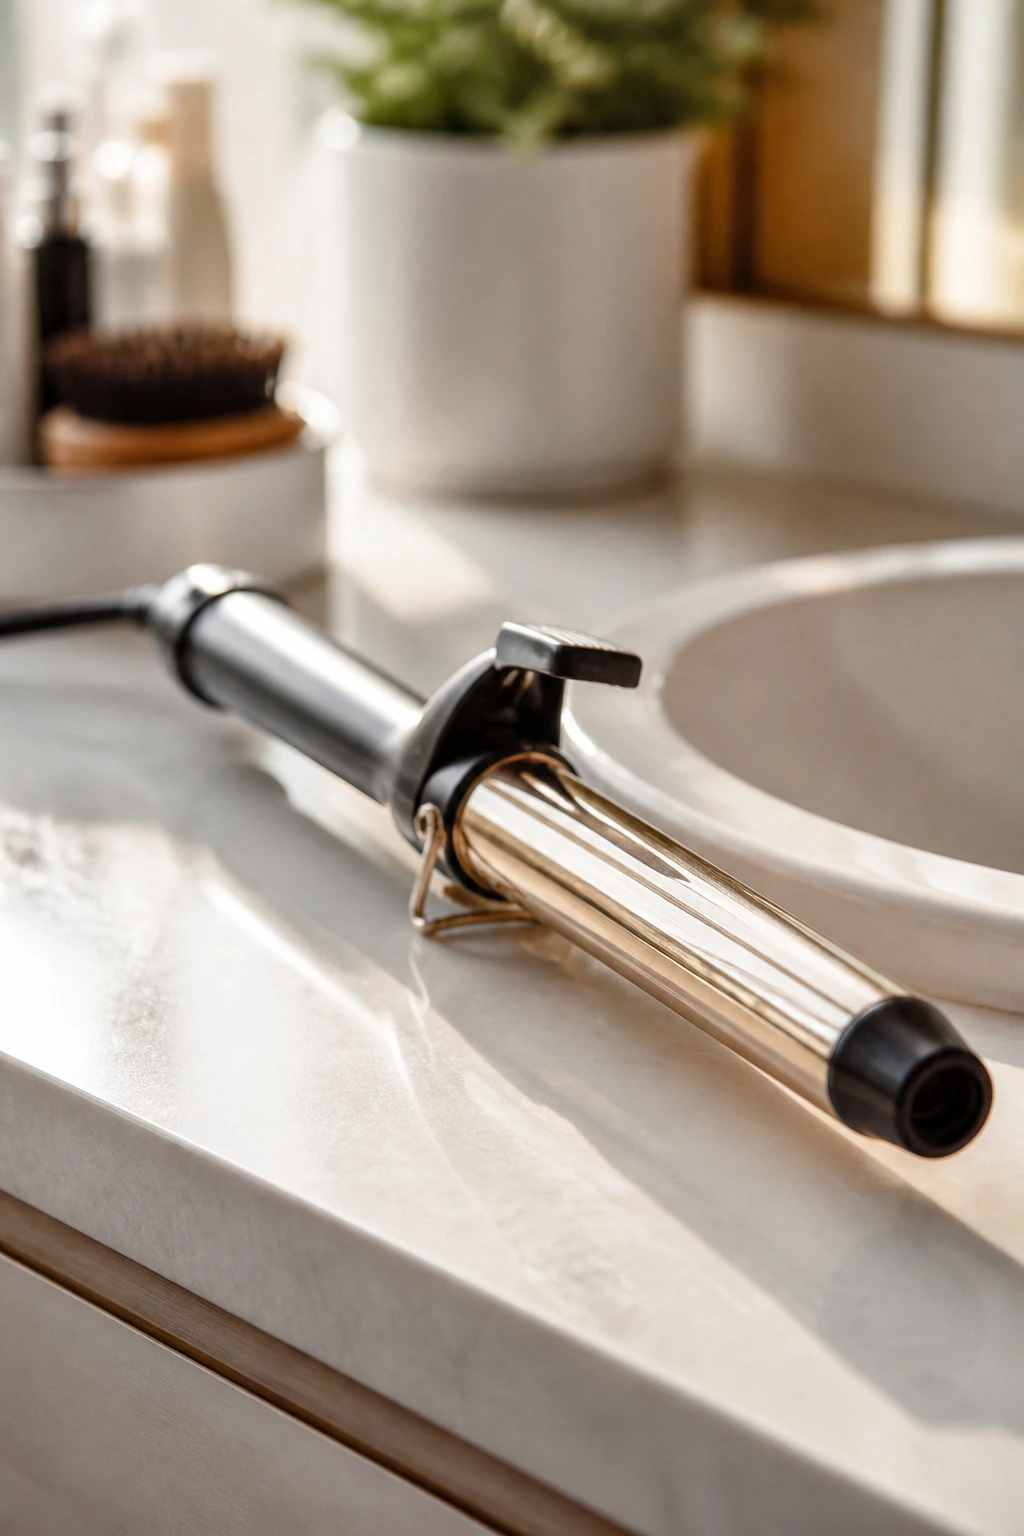
Essential Tools for These Hairstyles
- 1-inch curling iron: Best for loose waves, pin curls, and face-framing bends without creating huge, heavy loops.
- 1.25- to 1.5-inch round brush: Gives lift at the crown and smooth bend through the ends.
- Blow dryer with nozzle attachment: The nozzle keeps air focused so fine hair does not frizz while you’re trying to build shape.
- Velcro rollers: Useful for crown lift and a bigger blowout without hard curls.
- Tail comb: Clean parts matter on thin hair; a tail comb makes the sectioning neat.
- Bobby pins in hair-match colors: Small but important for twists, buns, and hidden fixes.
- Silk or fabric scrunchies: They leave less dent in ponytails and half-ups.
- Texture spray or dry shampoo: Adds grip at the roots and stops braids from slipping.
- Heat protectant: Especially important if the highlights are lightened and the ends are already dry.
- Wide-tooth comb: Better than yanking a brush through waves or braids.
Smart Cut, Color, and Product Choices
Ask for a cut that keeps the perimeter strong. That means long layers, but not so many that the ends turn into fringe. If your hair is fine, the shortest face-framing pieces usually work best around the cheekbone or collarbone. Shorter than that can get fluffy in the wrong places and make the rest of the hair look thinner.
For color, caramel works best when it sits one to two shades warmer than the base, not three or four. Too much contrast can separate the hair into “light pieces” and “everything else,” which is exactly what you don’t want. A good color placement usually concentrates the brighter bits around the front, crown, and a few ribbons through the mids. If the hair is very fine, a couple of understated lowlights underneath can make the highlight pattern feel richer.
Product matters more than people think. A lightweight mousse at the roots, a texture spray through the mids, and a flexible hairspray at the end usually beat one heavy serum that makes the whole head collapse by noon. If your hair gets greasy fast, dry shampoo at the roots before styling often works better than piling it on after the style has already dropped.
How to Wear These Styles in Real Life
Presentation: The cleanest finish is not always the best one for thin hair. A little lift at the crown, a soft bend at the ends, or a braid that’s been gently widened by hand usually makes the style look fuller than a perfectly pressed finish.
Occasions: Loose waves, side parts, and half-up twists suit everyday wear because they don’t expose every fine strand. Braids, buns, and pin curls work better when you want the hair secured for a longer stretch of the day or a more dressed-up look.
Shape: If your hair is very fine, keep the top area light and airy instead of stacking too much teasing in one spot. If it is medium-fine, you can go a little bigger with rollers, twists, and a teased crown without the style falling apart.
Accessory pairing: Small hoops, hair clips, silk ribbons, and slim headbands can help finish the look, but heavy accessories can bury fine hair. Pick one focal point, not three.
Additional Tips and Volume Boosters
Root Lift: Put mousse or root spray on damp hair at the scalp, then blow-dry the roots in the opposite direction of the part for the first few minutes. That tiny shift makes the crown stand up better than teasing alone.
Highlight Placement: If you’re coloring, ask for caramel ribbons around the face and through the top layers first. That’s where movement shows most, and it keeps the lower lengths from looking like one dark block.
Texture Trick: Curl or wave the hair away from the face on one side and toward the face on the other. Mixed direction creates a fuller, less uniform look. Uniform curls can feel tidy and still look flat.
Accessory Trick: A small claw clip, a slim barrette, or even one pin at the temple can redirect the eye upward. That’s useful on days when the ends feel stringy and you need a visual distraction.
If Your Hair Is Extra Fine: Skip heavy oils at the roots and keep shine products to the very ends. Fine hair does not need much. A pea-sized amount can be too much if it lands on the wrong section.
Maintenance, Refreshing, and Night Care
Thin long hair usually looks best on day one or day two after washing, not after a week of dry shampoo and hope. If your scalp gets oily fast, wash every 2 to 4 days and use a light conditioner only from mid-lengths down. The ends need softness; the roots need room to breathe.
For heat-styled waves or blowouts, a quick refresh is often enough. Mist the mids lightly with water or a curl refresher, twist a few sections around your fingers, and add a bit of dry shampoo at the roots. You do not need to restyle every strand. In fact, that often makes fine hair frizzier and flatter.
Braids and twists can hold overnight if you sleep on a silk pillowcase or tuck the hair into a loose braid before bed. Ponies and buns should be secured softly, not cranked tight with a rubber band that leaves a dent. If you wear caramel highlights, keep a nourishing mask in the routine every 2 to 3 weeks, especially if the ends feel rough or pale. Lightened hair needs some care, even when the cut is doing half the styling for you.
Variations and Adaptations to Try
The Fine-Hair Softness Version: Keep all layers long, the curls loose, and the part movable. This version is best when your hair gets stringy fast and you want a style that still looks natural by the afternoon.
The Heatless Wave Version: Braid damp hair into two loose braids or use a soft robe tie overnight. When you release it, finger-comb the waves and mist in a little texture spray. Caramel highlights look especially good in heatless bends because the pattern stays soft, not overdefined.
The Extra-Volume Version: Use rollers at the crown, a side part, and a teased top section. This is the bolder choice for events or photos, and it works best when the ends are still kept soft so the hair does not look overworked.
The Straight-and-Sleek Version: Flat iron in small sections and keep the outline blunt. This one suits polished settings, especially if the caramel highlights are painted in long ribbons rather than scattered in tiny pieces.
The Curly-Hair Adaptation: If your long hair has natural wave or curl, skip the heavy layers around the crown and keep the shape longer through the perimeter. The caramel pieces will show up in the bends already there, which saves you from chasing the style with too much heat.
Common Mistakes That Flatten Thin Long Hair
Too many short layers: The hair starts to look airy in a bad way, especially at the ends. Keep the shortest pieces long enough to blend instead of fray.
A part that never moves: A dead-center part can expose the scalp in the same place every day. Shift it slightly off-center or alternate sides to break that line.
Heavy oil at the roots: Fine hair drinks product for about five minutes, then collapses under it. Save oils and serums for the bottom inch or two.
Curling every piece the same way: Uniform waves can look stiff and separate. Alternate the direction, then brush lightly with your fingers to soften the pattern.
Tight ponytails and braids: They pull the sides back so hard that the crown goes flat and the head looks smaller. Looser ties, a little teasing, and some face pieces fix that fast.
Ignoring the color balance: Caramel that is too bright or too sparse can make thin hair look patchy. A smoother ribboning pattern usually reads as fuller and calmer.
Frequently Asked Questions
Are layers good for thin long hair?
Yes, but only if they’re kept long enough to preserve density at the ends. Choppy short layers can make the tail look see-through fast, while long layers add movement without stripping away the outline.
Do caramel highlights make hair look thicker?
They can, because light and shadow create the illusion of depth. The effect is strongest when the caramel is placed around the face and through the top layers, not only on the very ends.
What part is best for thinning long hair?
A slight side part usually beats a hard center part because it breaks the scalp line and adds lift at the root. If you like a center part, moving it a half-inch off center can help more than you’d think.
Can I wear braids if my hair is thin at the ends?
Yes. Loose Dutch braids, rope braids, and halo braids tend to gather the strands together in a way that makes the style look thicker. Keep the tension soft so the scalp does not show through.
How often should I trim long fine hair?
Every 8 to 10 weeks is a good rhythm if the ends split easily or look wispy. Regular trims keep the hemline solid, which matters more on thin hair than on dense hair.
What if my hair falls flat after styling?
Start with less conditioner near the roots, add a root-lift product on damp hair, and let the style cool fully before touching it. Hot hair that gets brushed too soon usually collapses faster.
Are lowlights worth adding with caramel highlights?
They can be, especially if the base is very light and the hair lacks shadow. A few lowlights underneath the caramel make the color look richer and can help thin hair read as denser.
Can I use extensions with these styles?
Yes, but keep them subtle and color-matched. The point is to support the shape, not to create a sudden thick block that looks separate from your real hair.
A Softer Way to Keep the Length
Thin long hair does not need to be hidden, and it does not need to be bullied into pretending it’s something else. The better move is to give it a shape that holds up from root to end, then let caramel highlights do their quiet work in the bends, braids, and lifted sections. That’s where the style starts looking intentional instead of fragile.
If you keep one thing from all of this, make it the silhouette. Lift the crown a little, keep the ends from dangling separately, and let the color placement help the eye read fullness where the hair needs it most. Once you see how much difference that makes, it gets hard to go back to flat, one-note length.