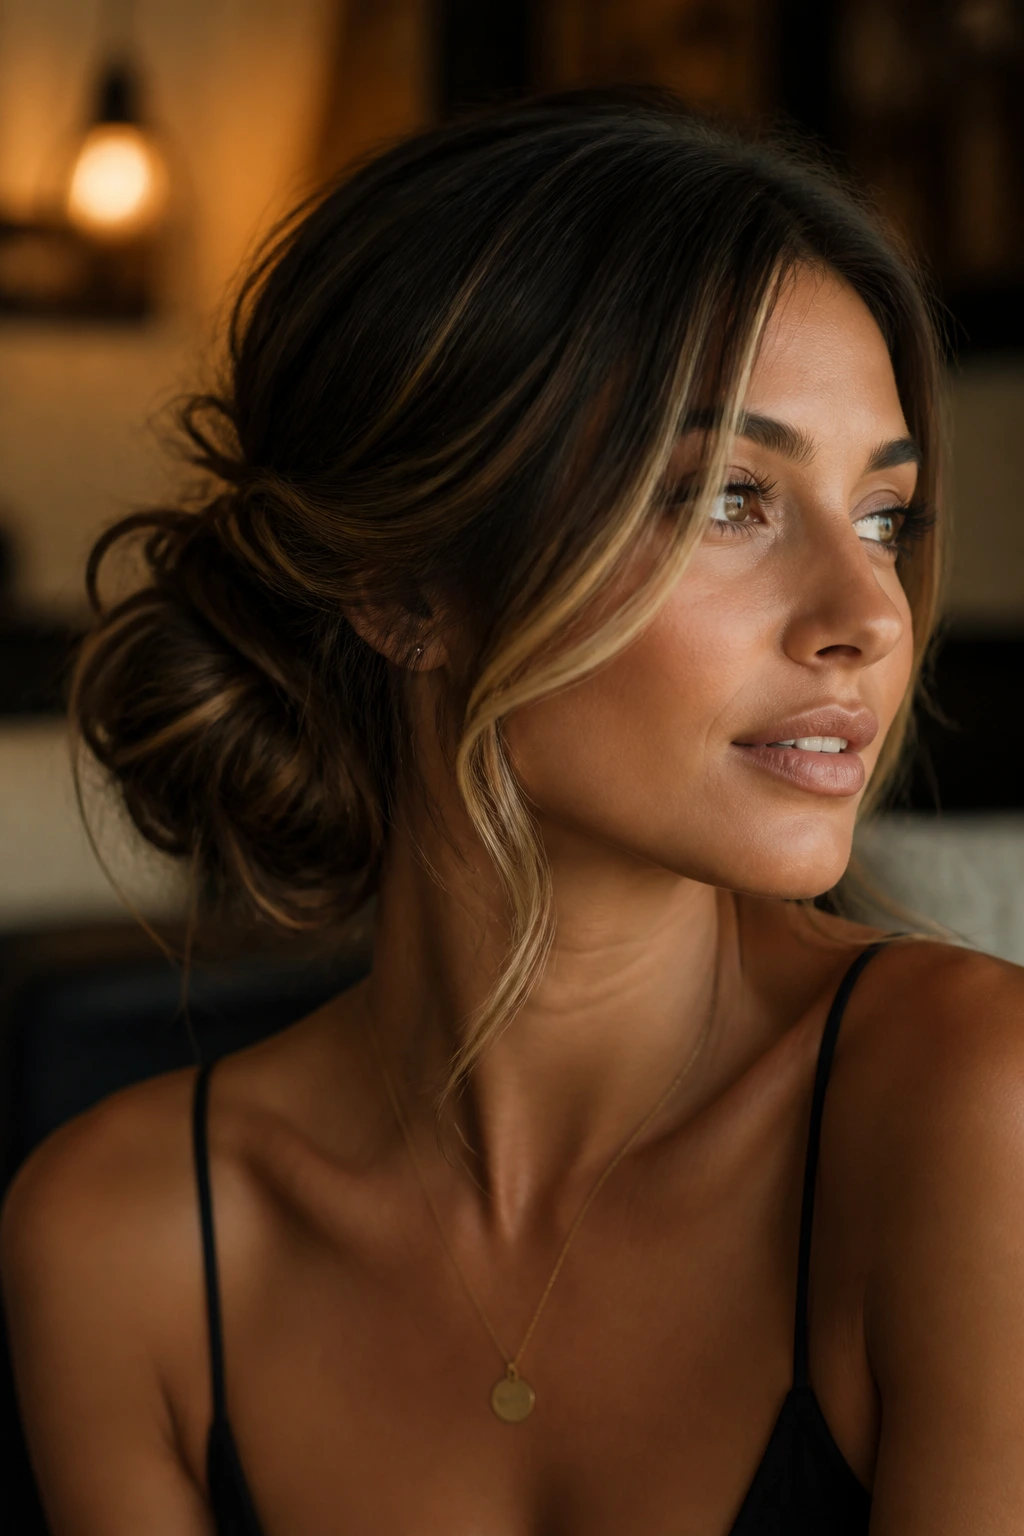
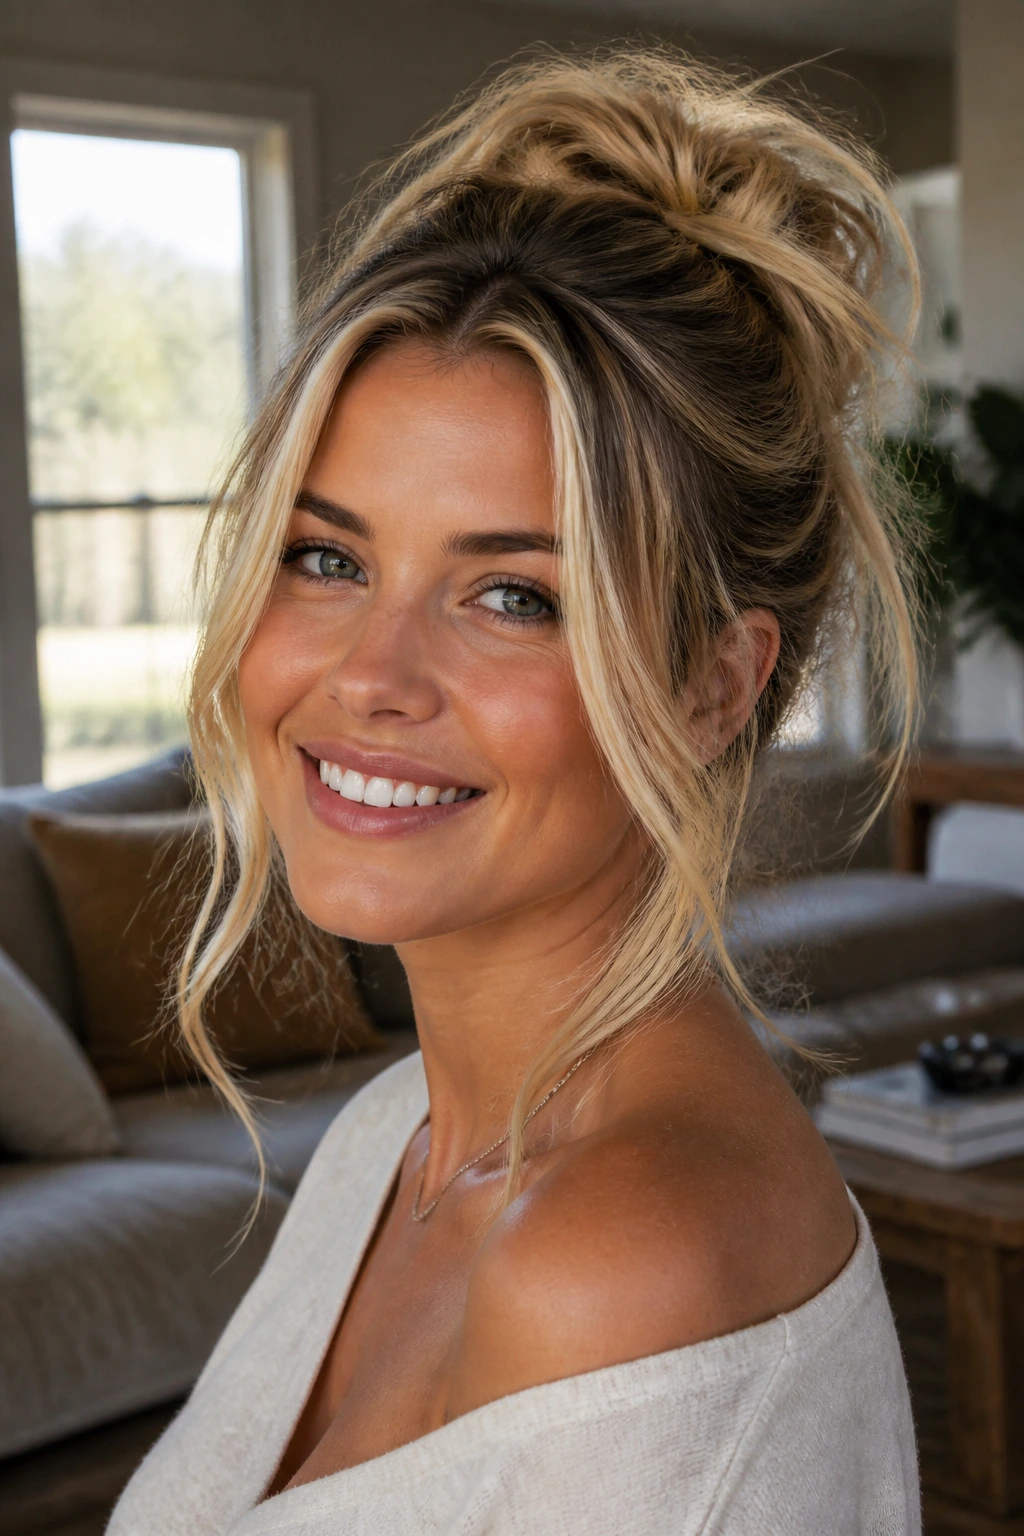
Messy updos have a funny reputation. People call them relaxed, undone, effortless—then spend twenty minutes trying to make every pin invisible and every strand obedient. That’s where money piece highlights change the whole game. Those bright face-framing ribbons give the style somewhere to live, so the hair at the back can be loose, bent, pinned, and a little imperfect without looking unfinished.
The best messy updos are never truly messy. They’re controlled in the places that matter: the nape, the crown, the anchor pins, the front pieces that skim the cheekbones. Money piece highlights sharpen that contrast. A few lighter strands around the face keep the style from sinking into the back of the head, and a bit of grit at the roots helps the whole thing hold without turning helmet-hard.
That mix is why these looks work for so many situations. A low knot can look polished enough for dinner. A high, airy bun can survive a humid afternoon. A side chignon can dress up a plain dress that would otherwise feel flat. And if your color already has dimension—blonde money pieces, caramel ribbons, copper front panels—the right updo makes that dimension visible instead of hiding it.
Why This Mix Feels Different
- The front stays alive: money piece highlights keep the eye moving around the face, even when the back is pinned tight.
- Texture does half the work: second-day hair, dry shampoo, and a little product grit are friends here, not problems.
- The styles bend to the occasion: the same basic twist can look casual at brunch or dressy with a deeper part and a stronger finish.
- They flatter real haircuts: layers, grown-out bangs, and uneven lengths stop looking accidental once they’re folded into the style.
- Color and shape work together: the bright front pieces make loose twists and soft knots read clearly from the front, which is where most styles either win or fall apart.
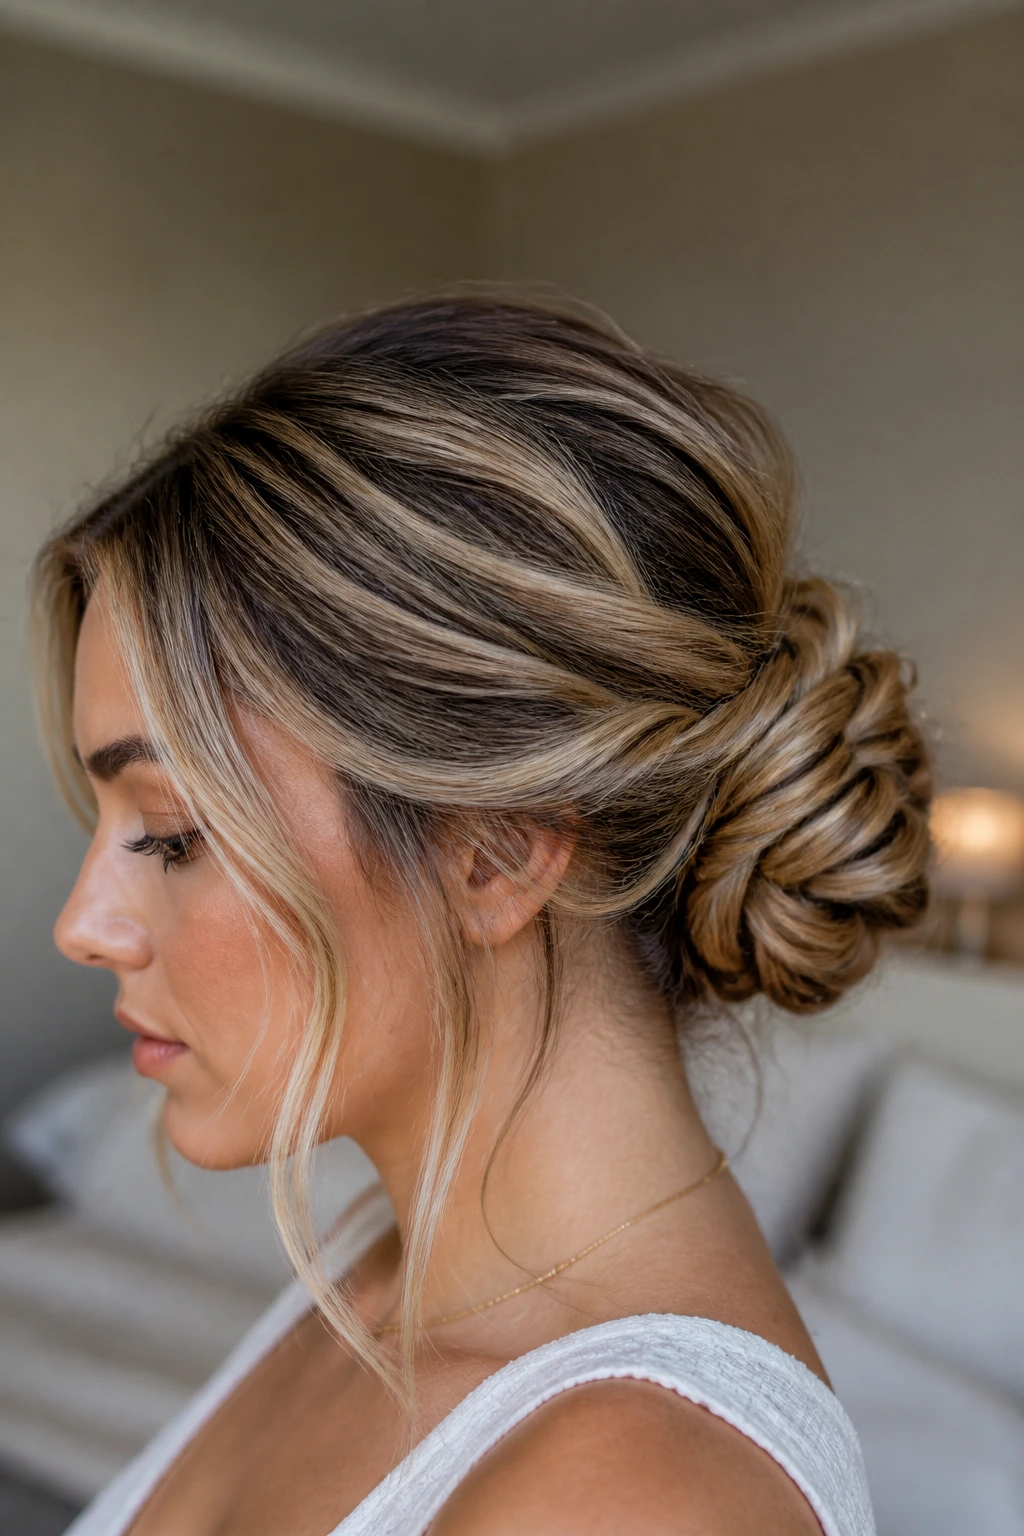
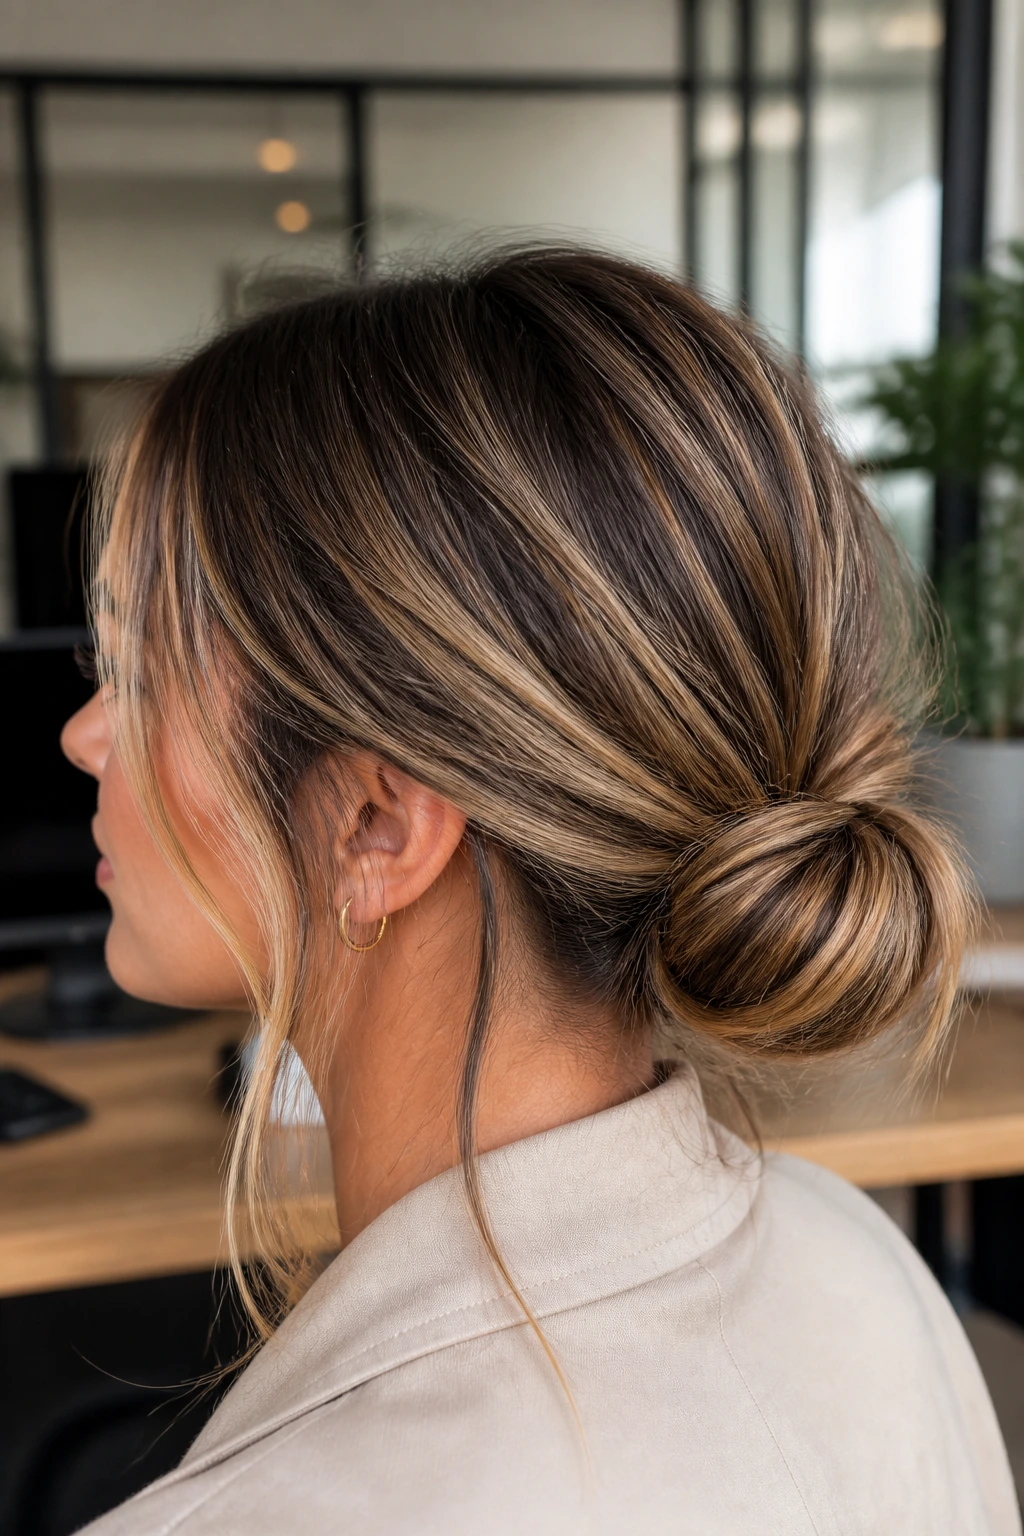
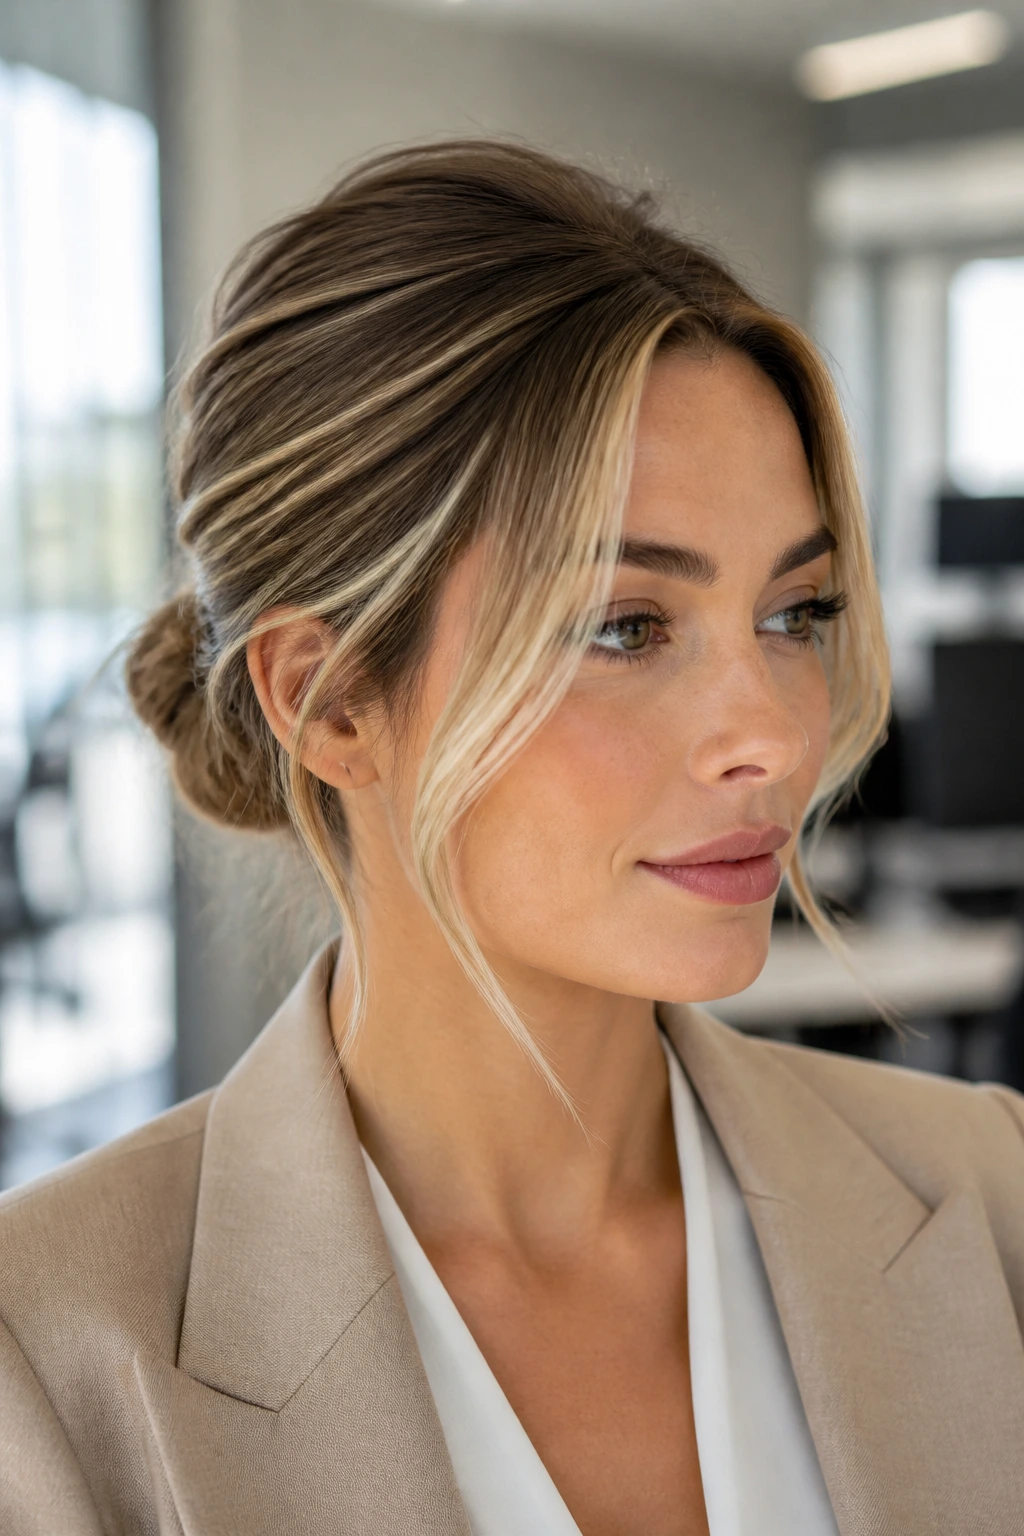
1. The Low Twisted Knot That Sits Just Above the Nape
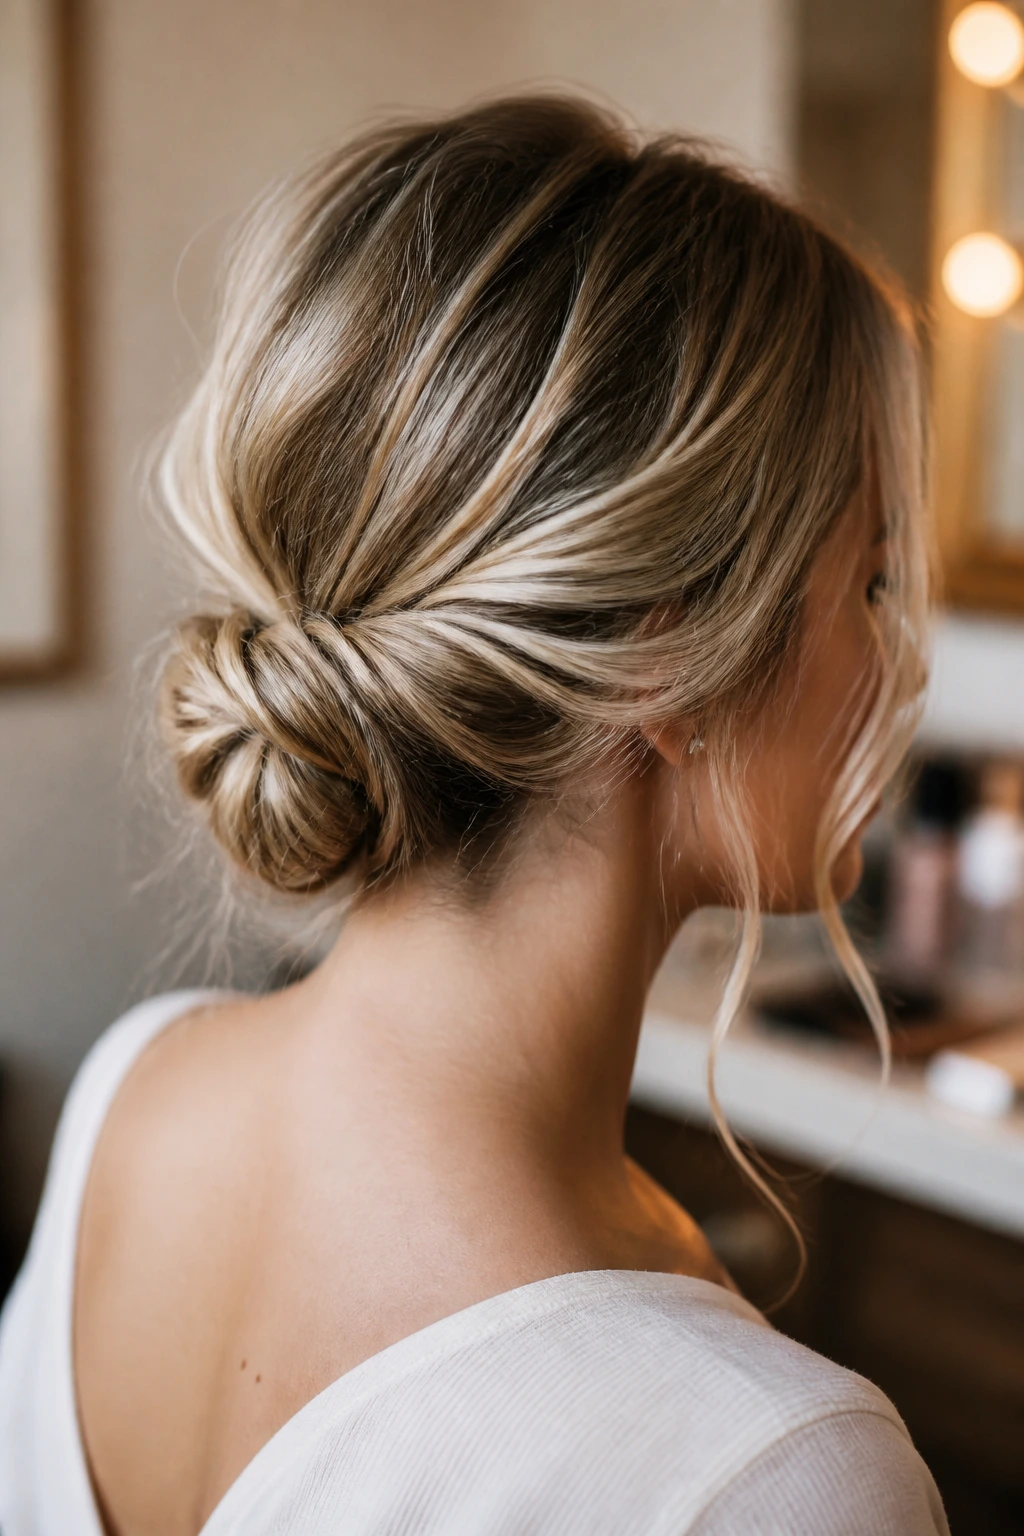
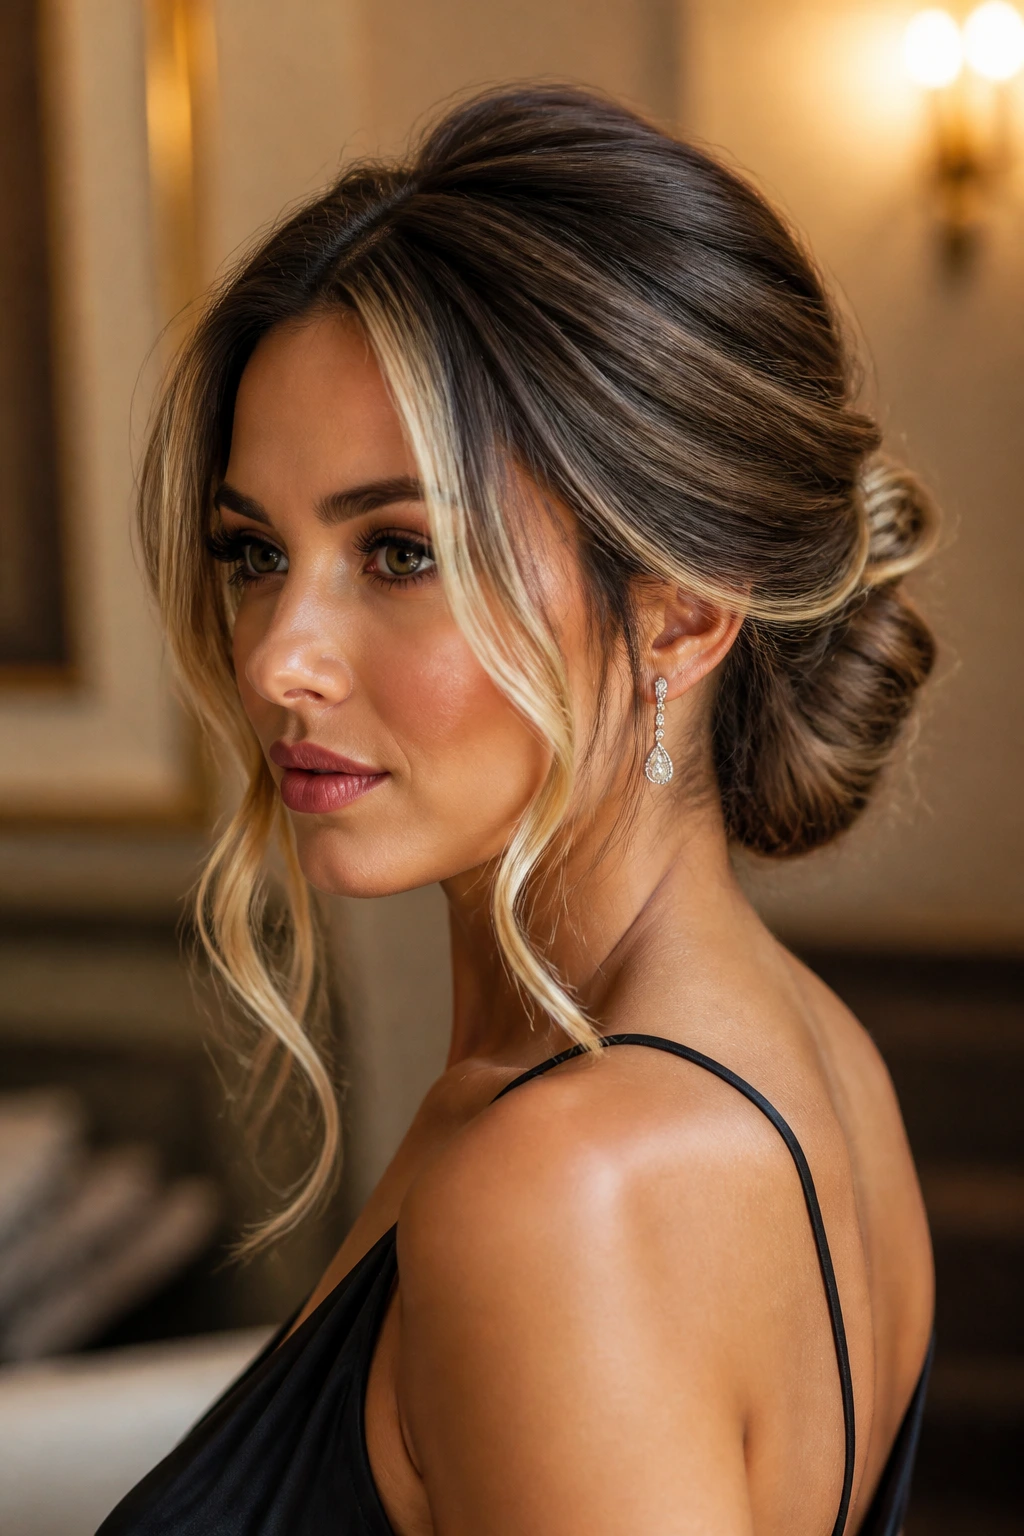
A low twisted knot is the kind of style that looks like you thought about it, even when you didn’t spend long on it. The knot sits at the nape, tucked close enough to feel neat but loose enough that a few pieces can slip out around the ears. With money piece highlights, the front takes on a soft frame-and-shadow effect that feels far more intentional than a plain bun ever could.
What makes this one strong is the balance between control and movement. Pull the top back with your fingers instead of a brush if you want the crown to stay a little airy. Then leave the money pieces out, bend them away from the face with a curling iron, and pin the knot low enough that the bright front strands can still drop forward a bit.
This is the style I reach for when the outfit is doing a lot of work already. It keeps the neck open, shows earrings well, and doesn’t fight a high neckline or a blazer.
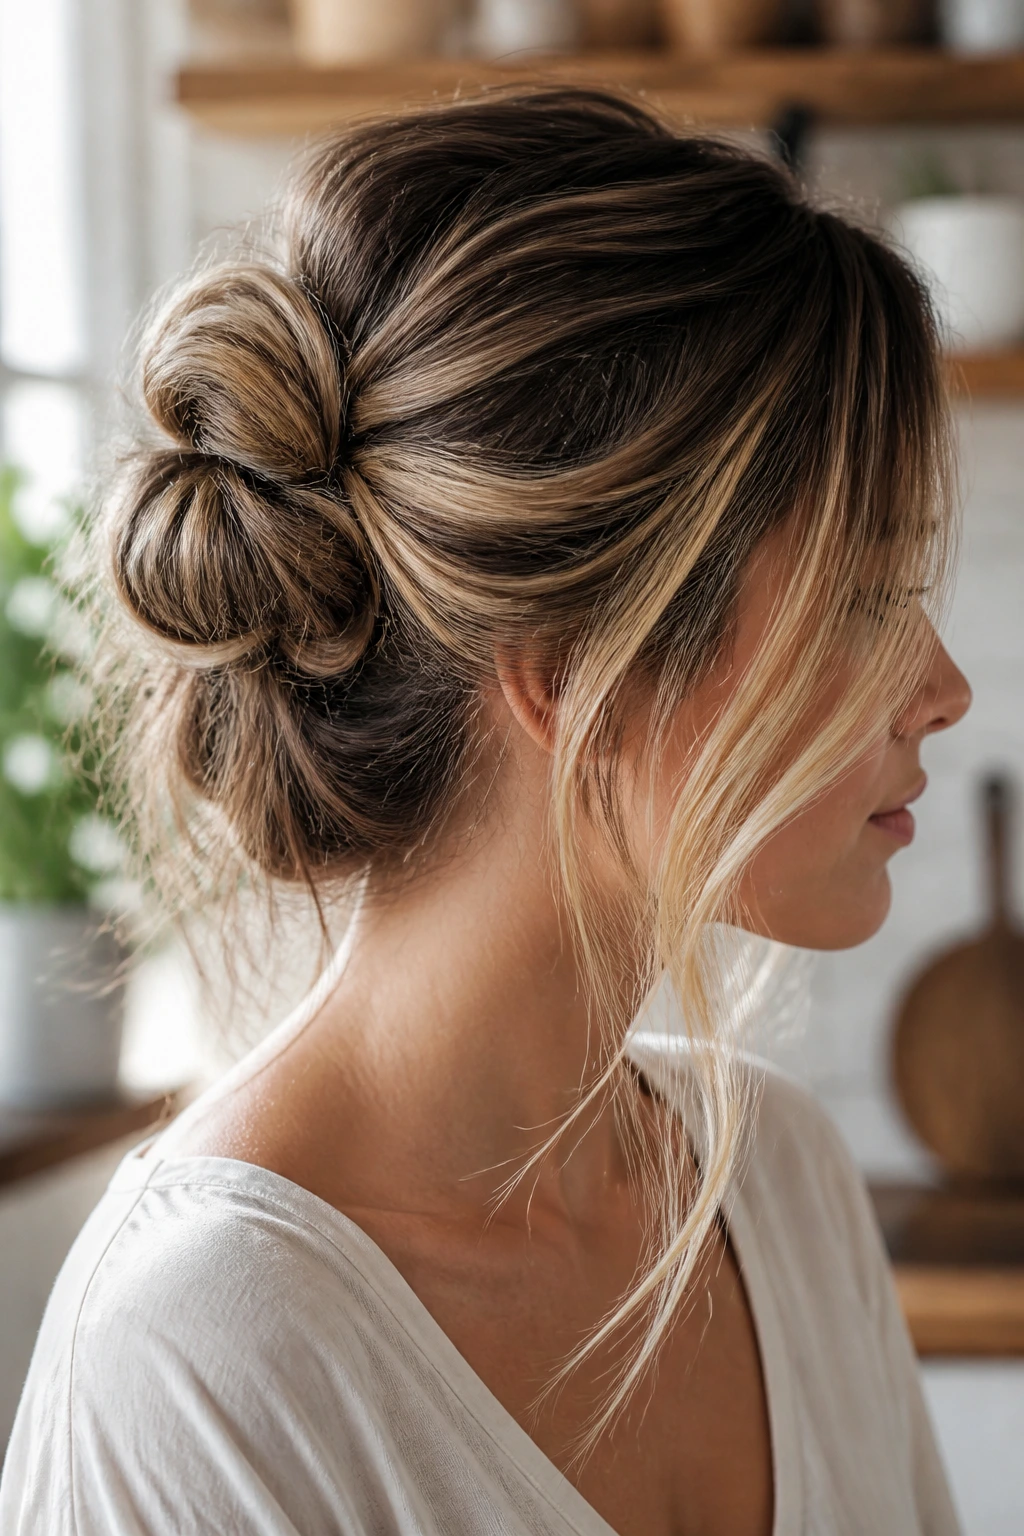
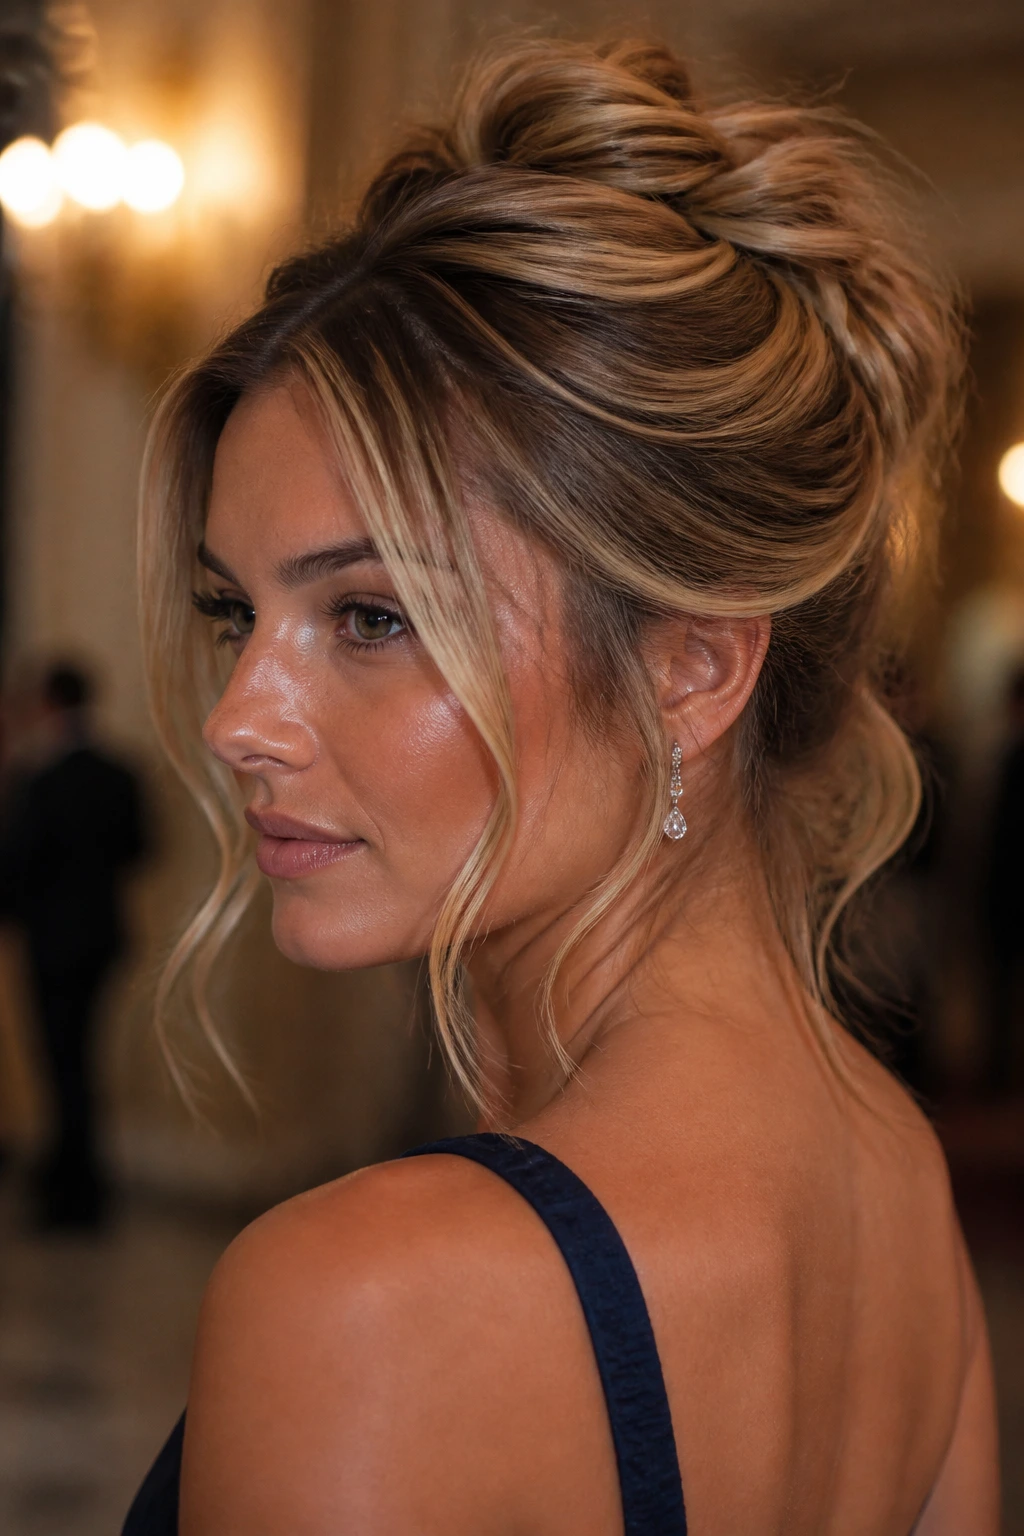
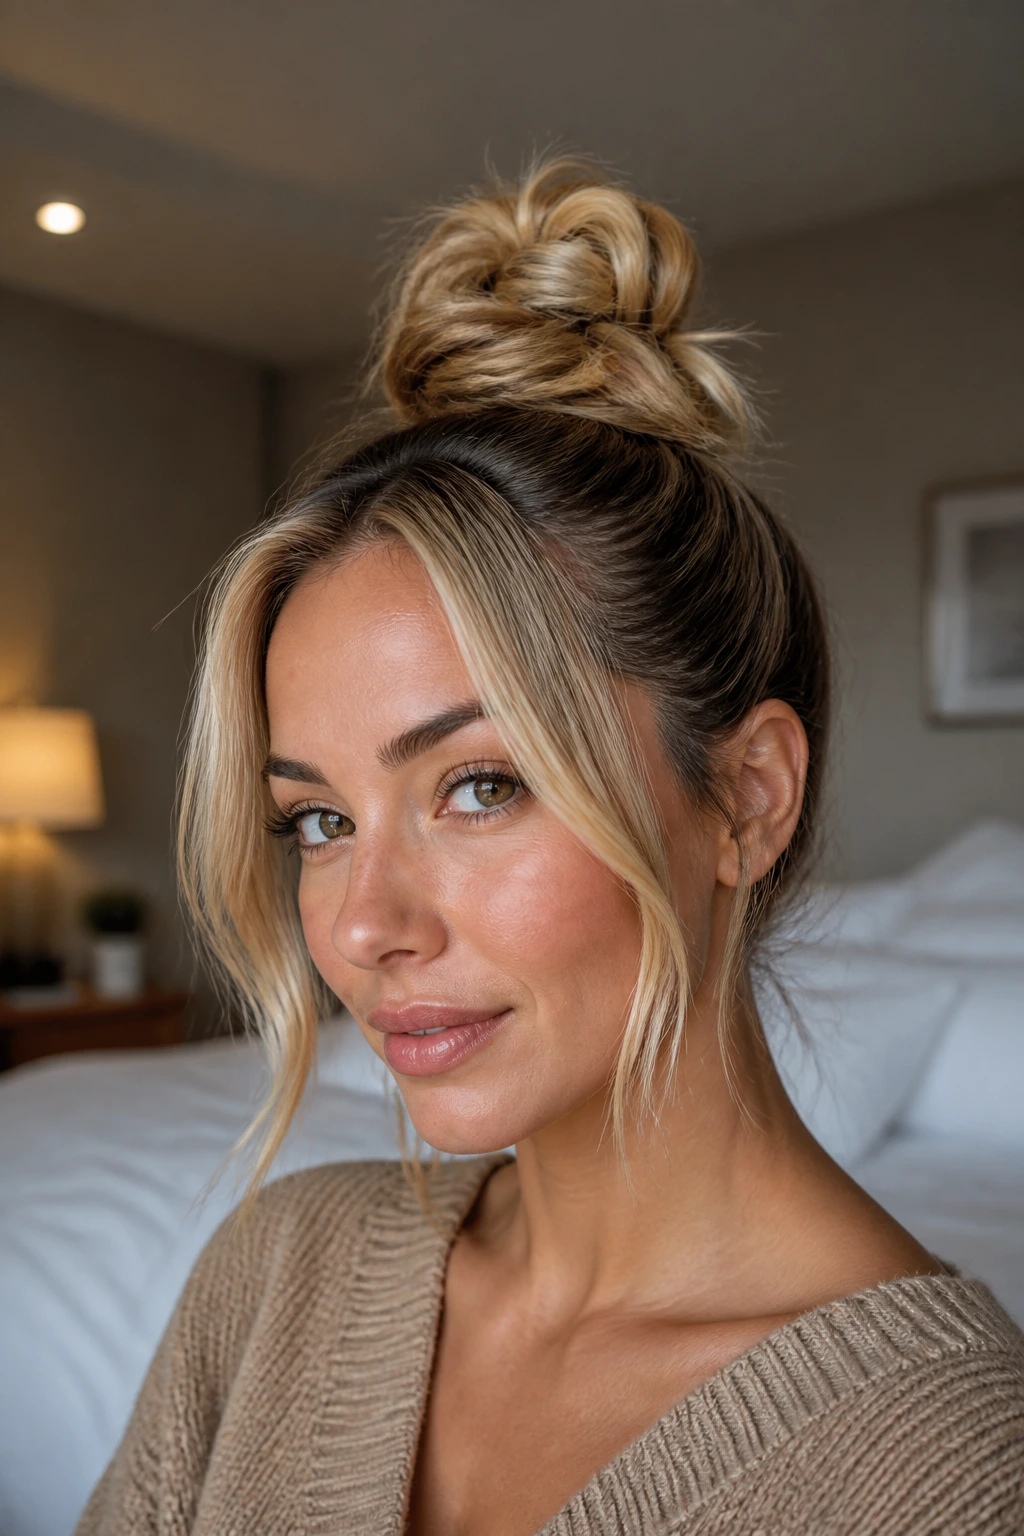
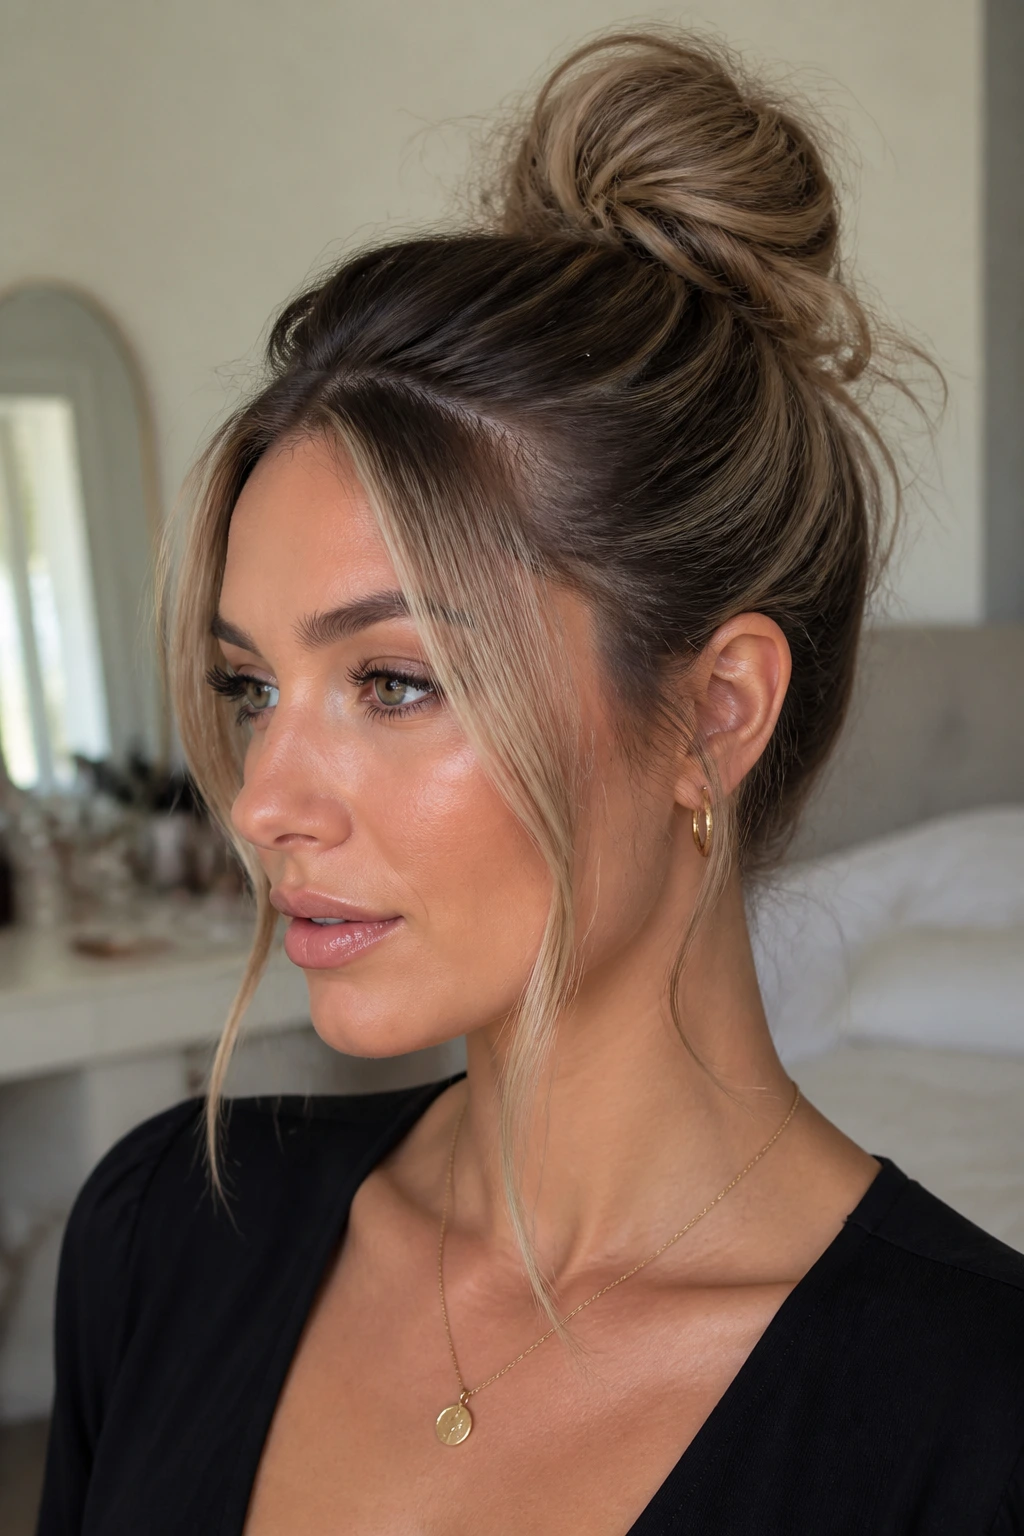
2. The High Airy Bun With a Soft Crown
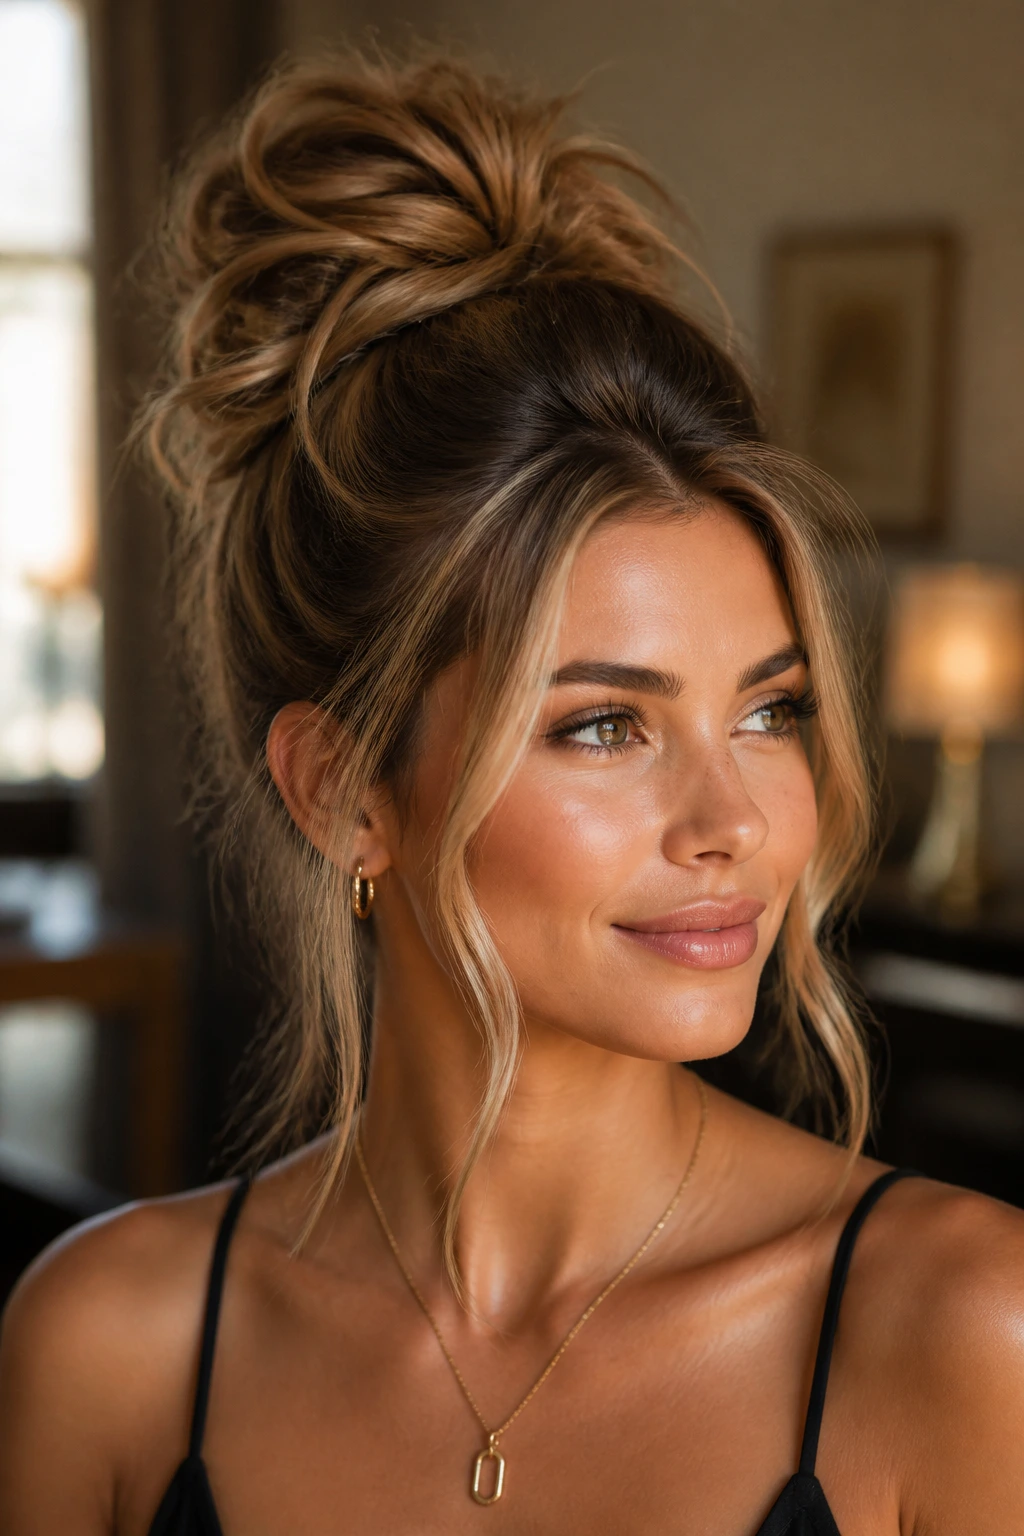
A high bun can look severe if you over-smooth it. The airy version is different. It’s placed high enough to lift the face, but the crown stays slightly lifted and the bun itself is built in loose wraps, not a tight coil. Money piece highlights help here because they break up all that vertical lift and stop the style from feeling too top-heavy.
Try this when you want the cheekbones to do the talking. Pull the front pieces out before you secure the ponytail, then tease the crown lightly with a tail comb so the bun has some height without looking teased within an inch of its life. The money pieces should curve beside the temples, not disappear behind the ears.
This one is especially good for round or soft facial shapes. It adds length without looking stiff.
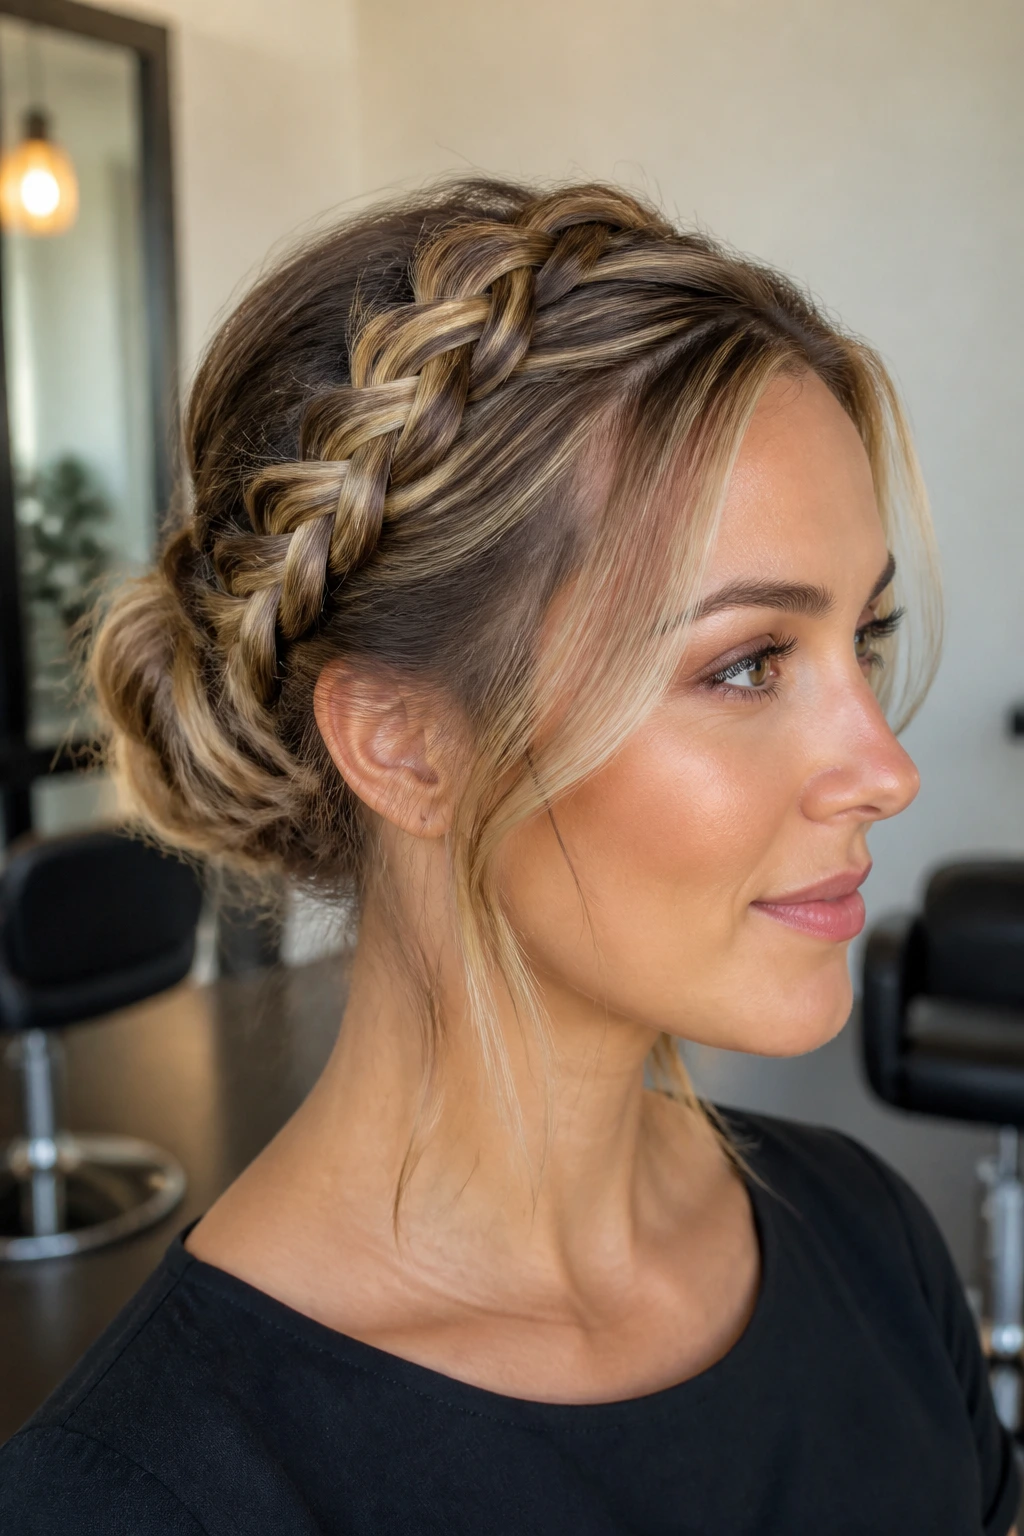
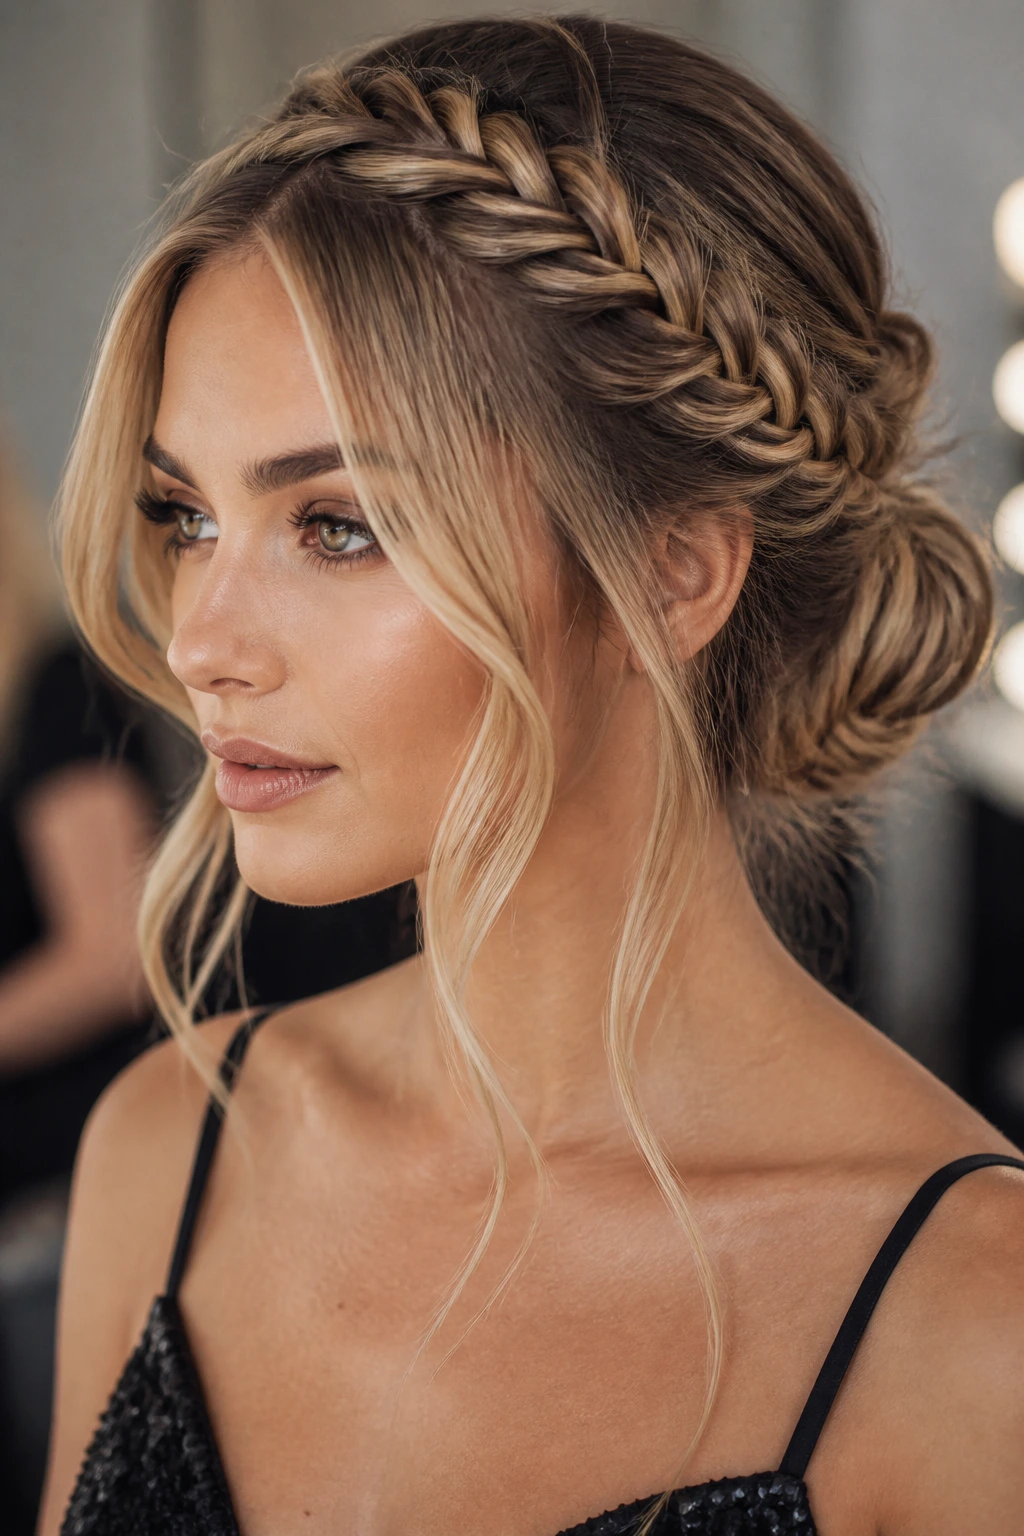
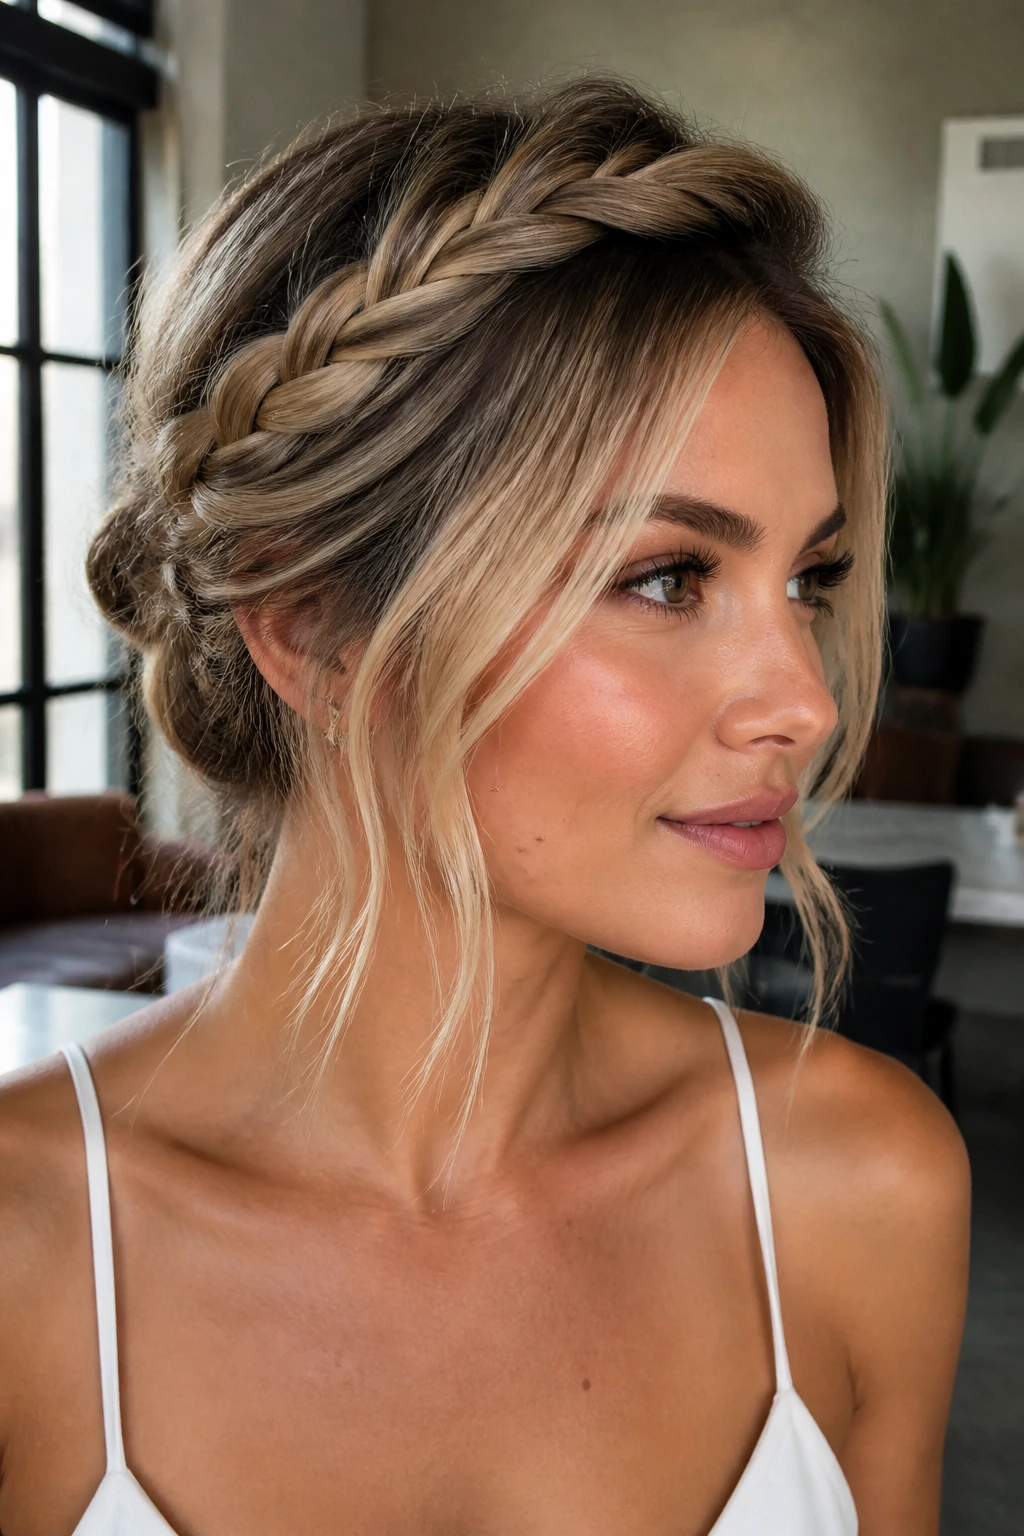
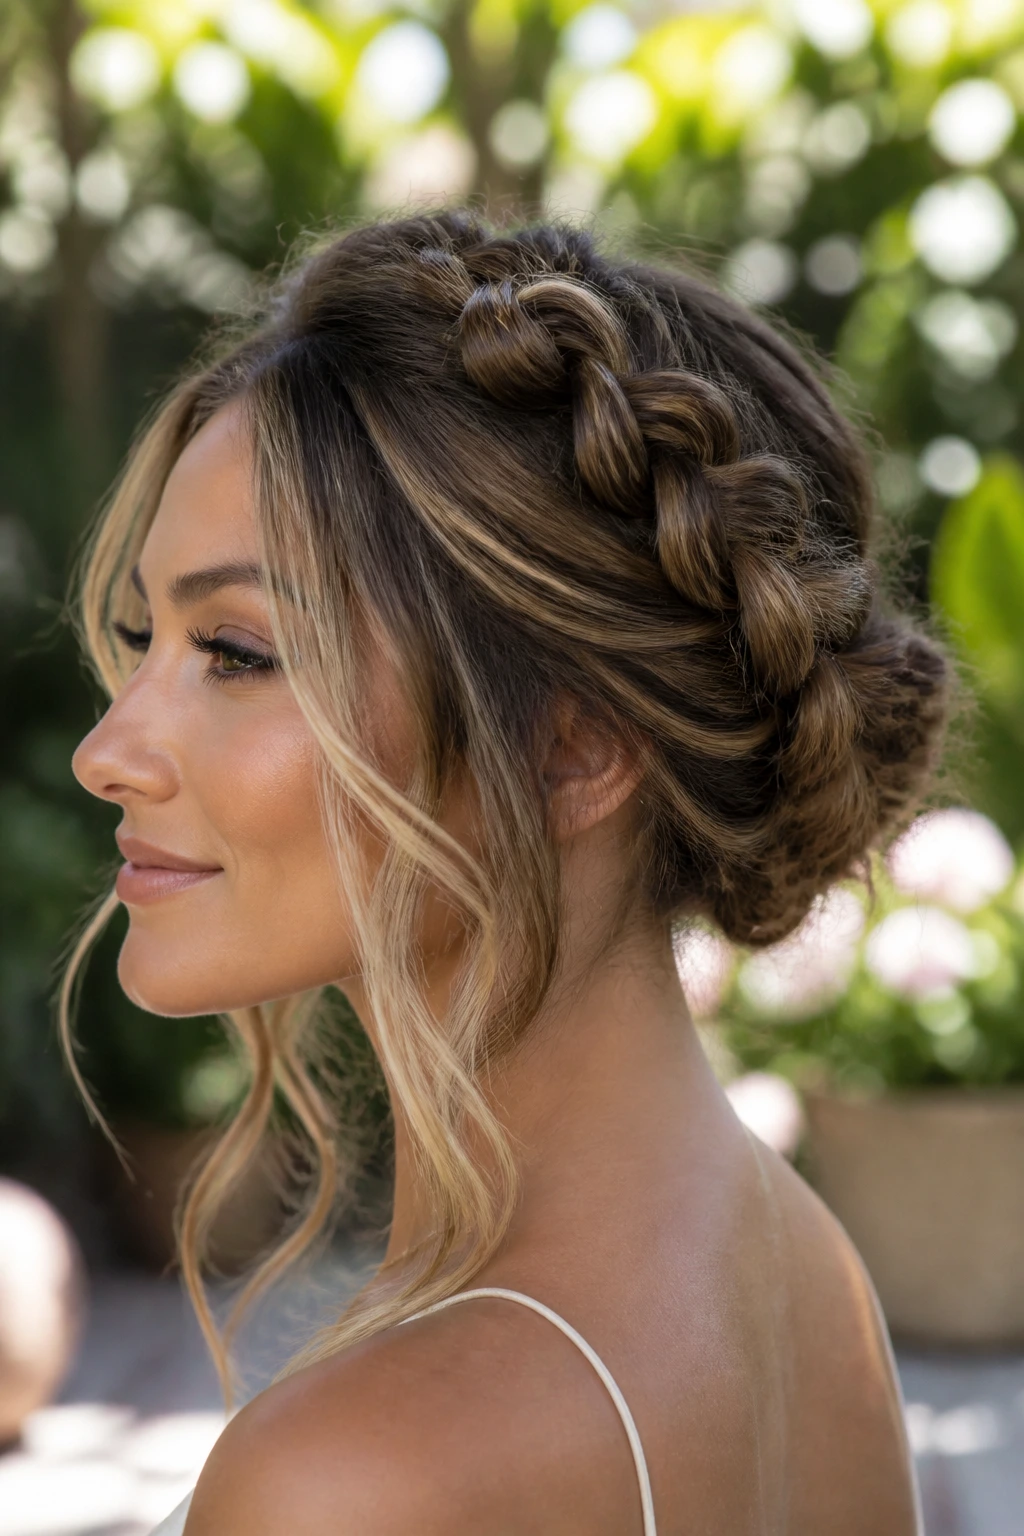
3. The Braided Crown Bun That Keeps Everything Off the Face
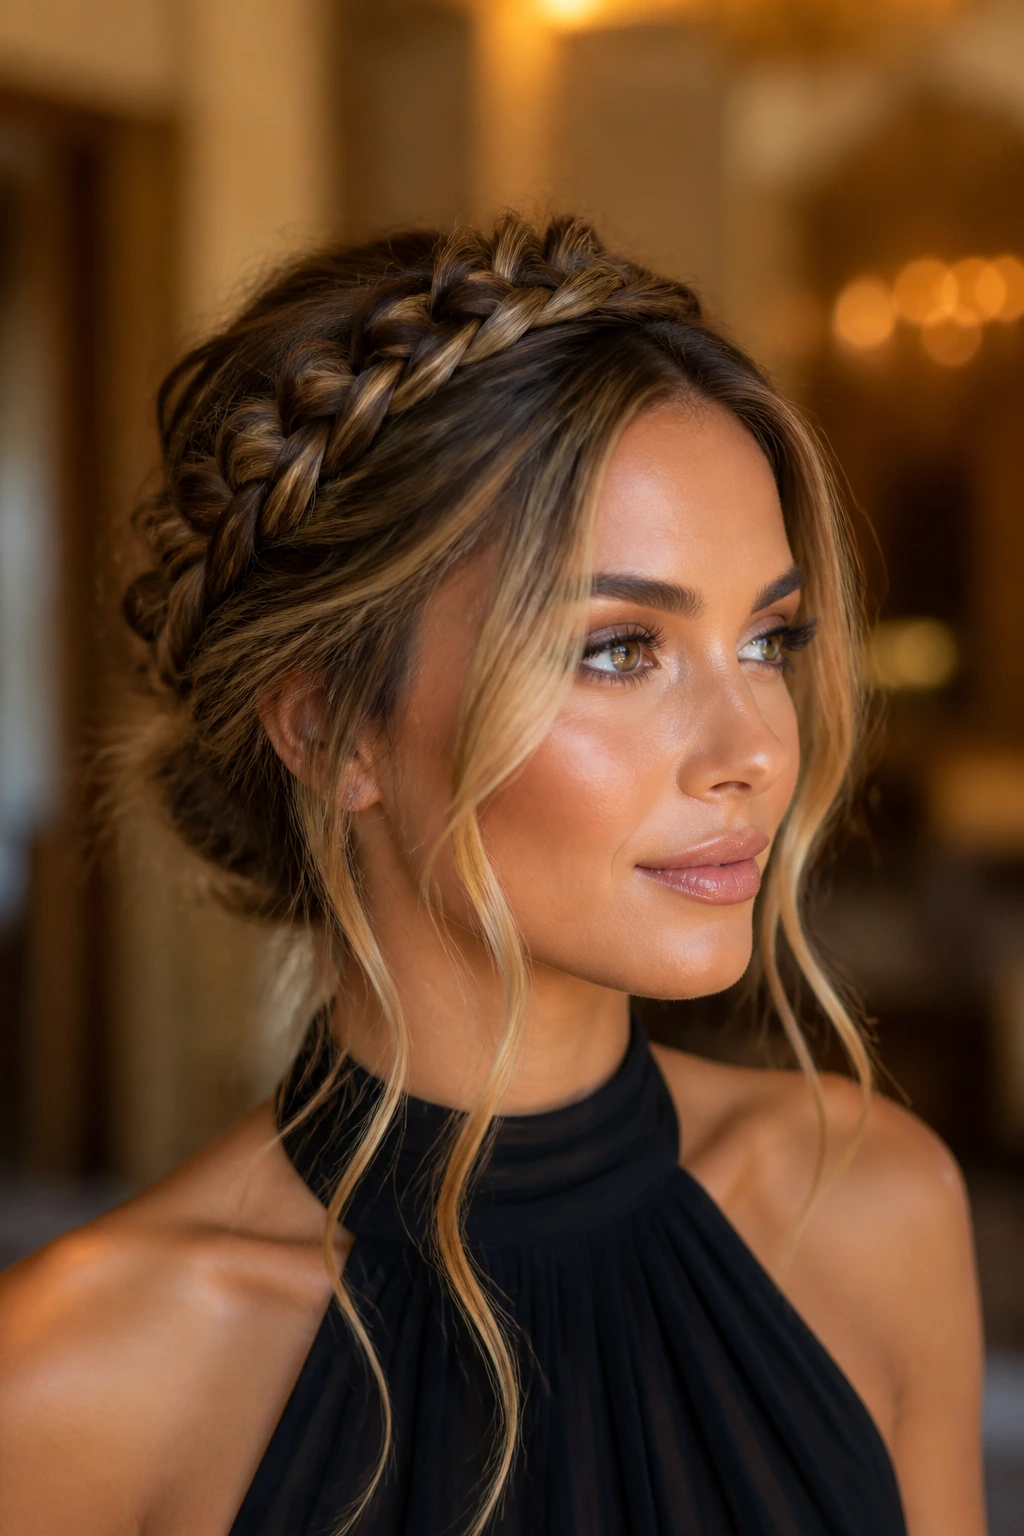
A braided crown bun gives you structure at the top and softness at the edges. It starts with a braid or two along the hairline, then folds into a bun or tucked coil at the back. The money pieces can stay loose at the front, where they frame the face and keep the braid from feeling too severe.
Why the Braid Matters
The braid is doing more than decoration. It adds grip, which helps if your hair is clean or slippery, and it gives the whole style a visible shape from the front and the side. That matters with money piece highlights because the braid creates a line for those lighter strands to sit against. Without that contrast, the front pieces can look like they’re floating.
Use this style for weddings, photos, or any event where you want detail without a stiff finish. If your hair is layered, tuck the shortest ends under the braid as you go instead of trying to force them to behave. That tiny adjustment saves a lot of frustration.
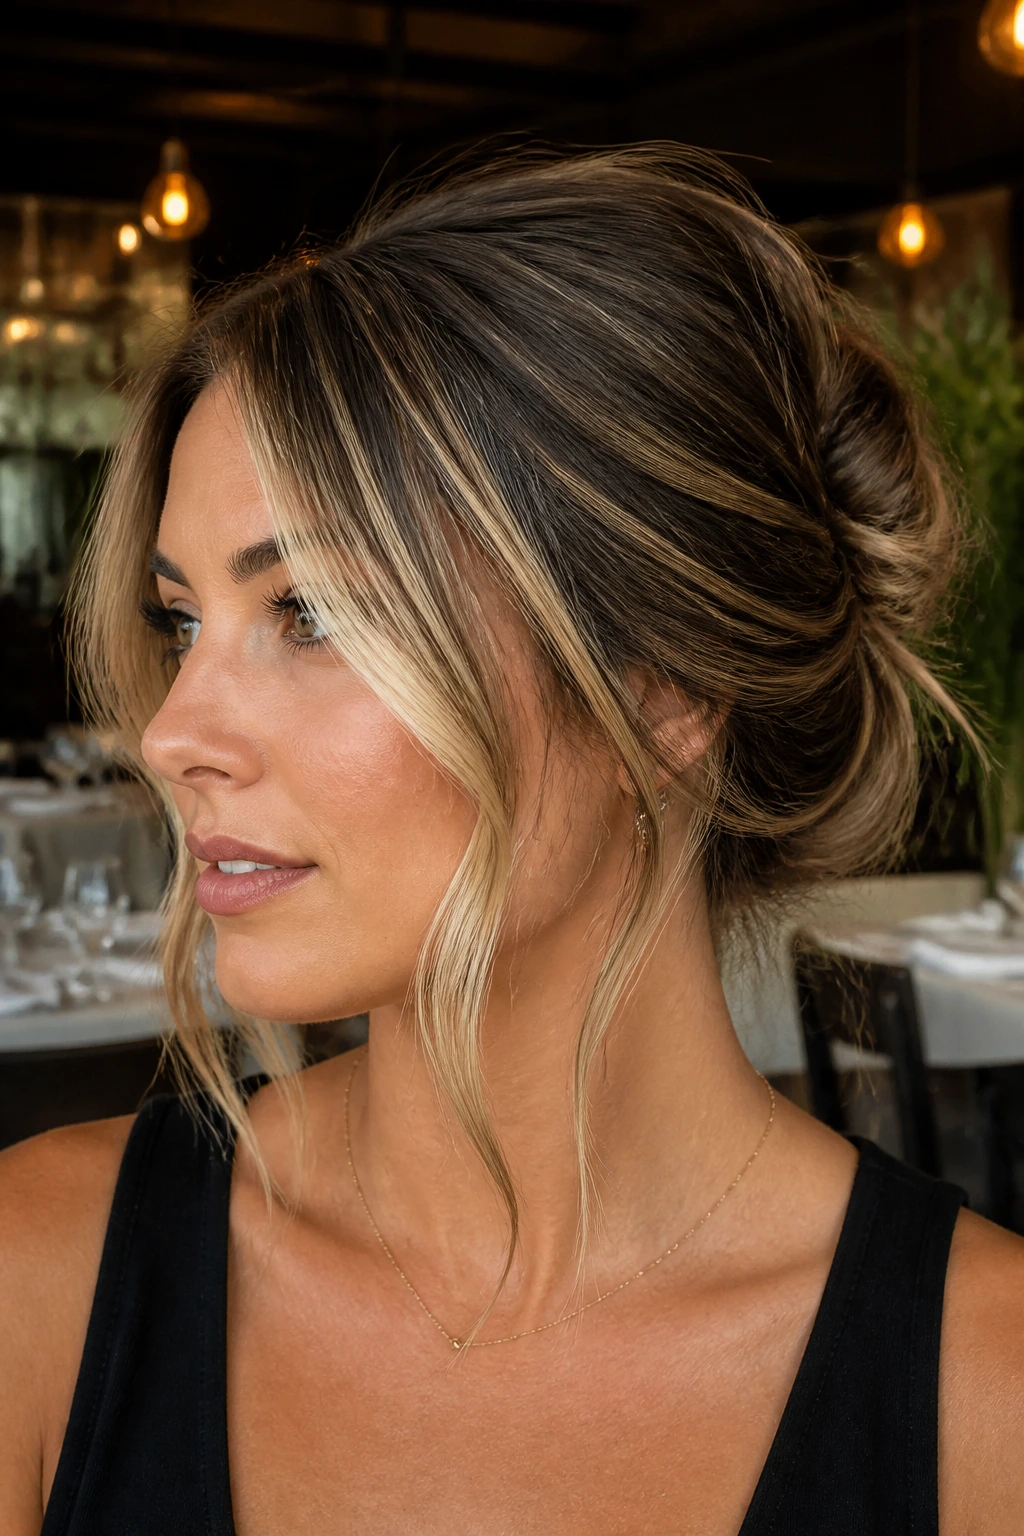
4. The Soft French Twist That Refuses to Be Too Serious
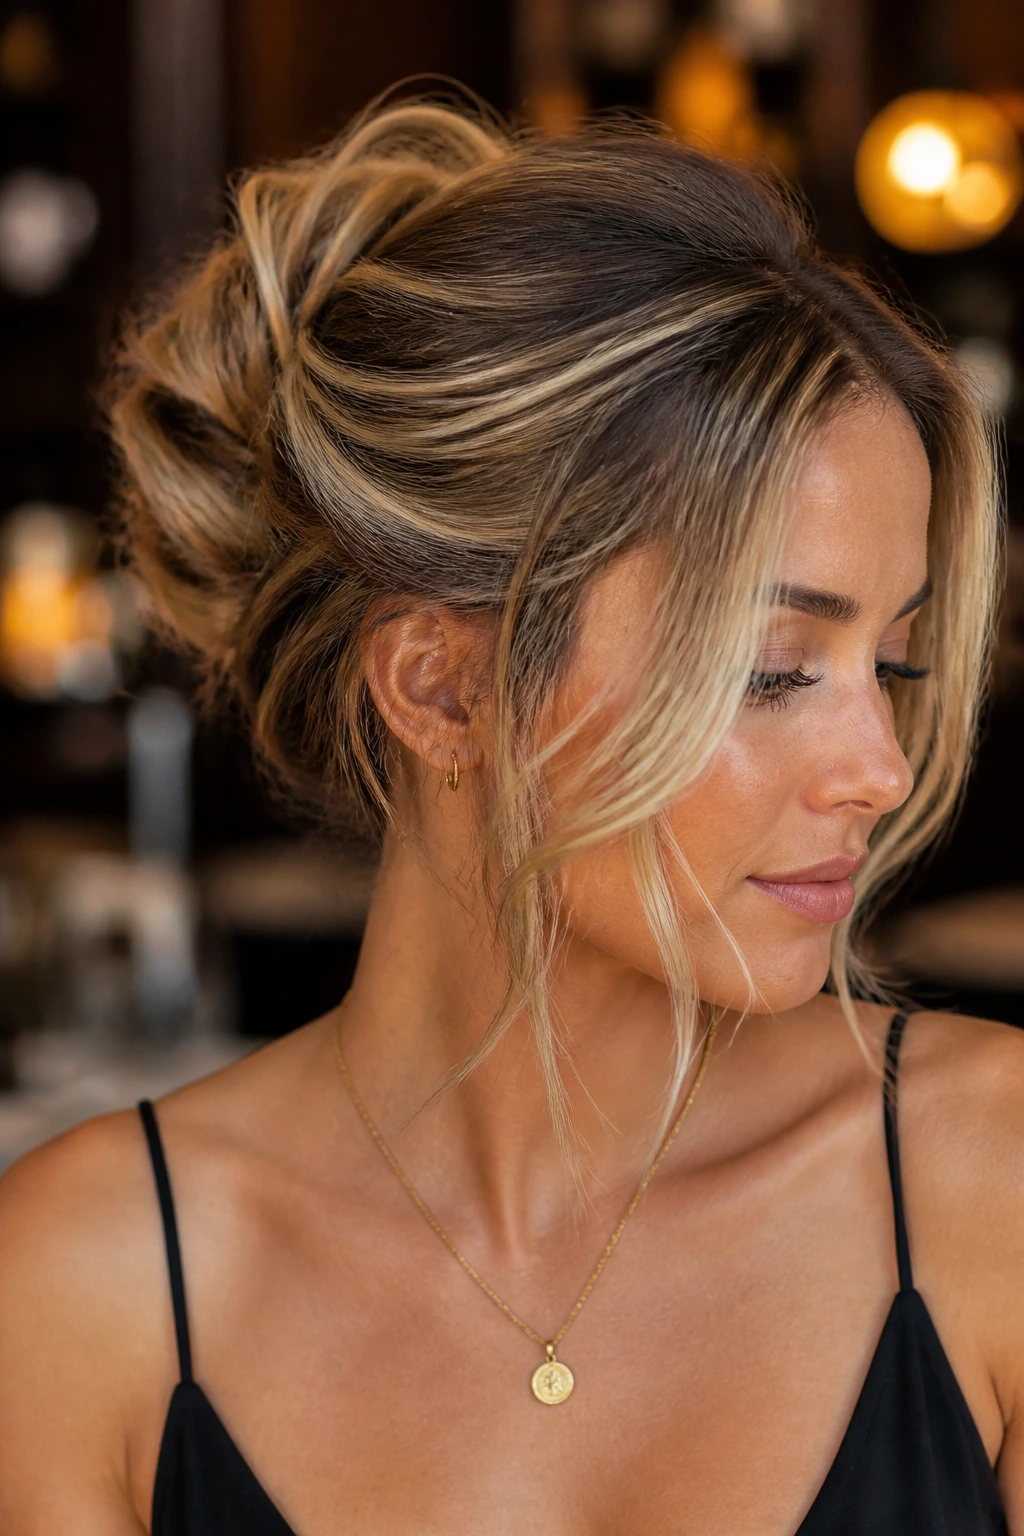
A French twist does not have to look formal in the old-school sense. In the messy version, the seam is still there, but it’s softened by a few loose bends, a gentler roll, and a couple of face-framing pieces that stay out on purpose. Money piece highlights are what keep it from reading as a plain shell at the back of the head.
The trick is to leave the hair a little rough before you roll it. Smooth roots, yes. Silky, slippery lengths, no. If you’ve got bright front pieces, let them fall forward naturally, then give them a soft wave so they skim the jawline instead of hanging straight and thin.
I like this one for dinners, receptions, or any event where you want polish but not stiffness. It looks especially good with satin, bare shoulders, or a neckline that needs a little lift.
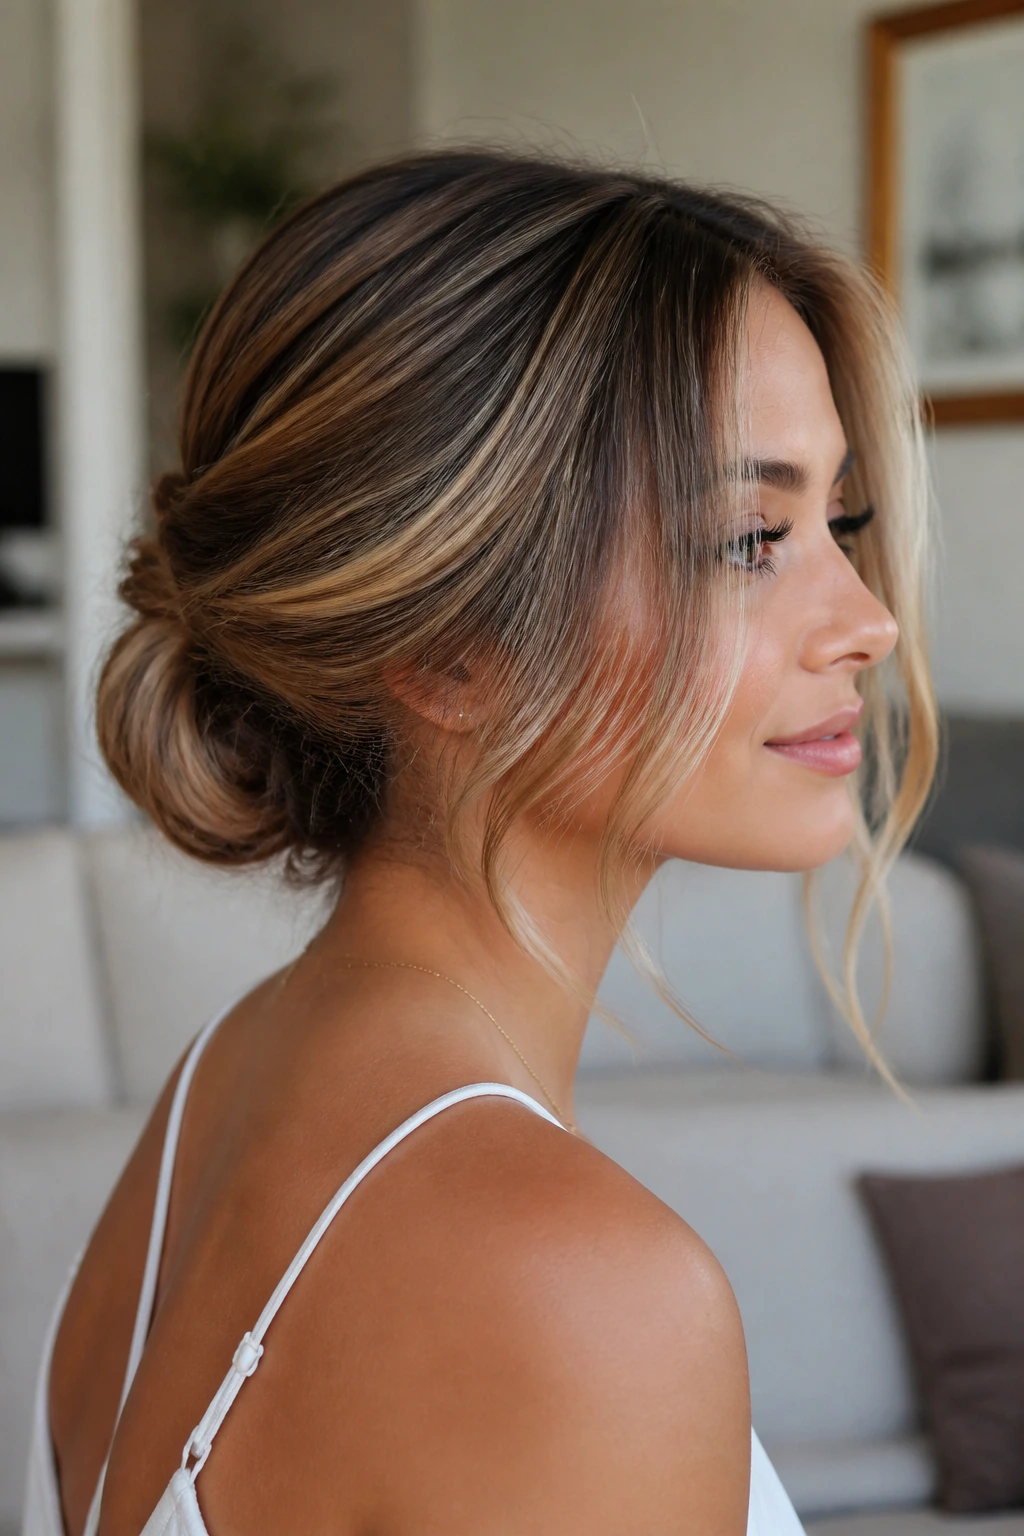
5. The Side-Swept Chignon That Feels Slightly Romantic
A side chignon changes the mood instantly. Move the part off-center, gather the hair low and slightly to one side, and twist the bun so it rests just behind one ear or near the jaw. With money piece highlights, the off-center placement gives the front strands more purpose; they’re not just loose, they’re part of the shape.
The style works because it gives the face one strong line and one softer line. One side gets the bun’s weight. The other side gets the lighter, brighter fringe of the money pieces and a little curve around the cheek.
Use this when you want something softer than a severe low bun. It plays well with one-shoulder dresses, side-parted bangs, or a neckline that needs an asymmetrical finish.
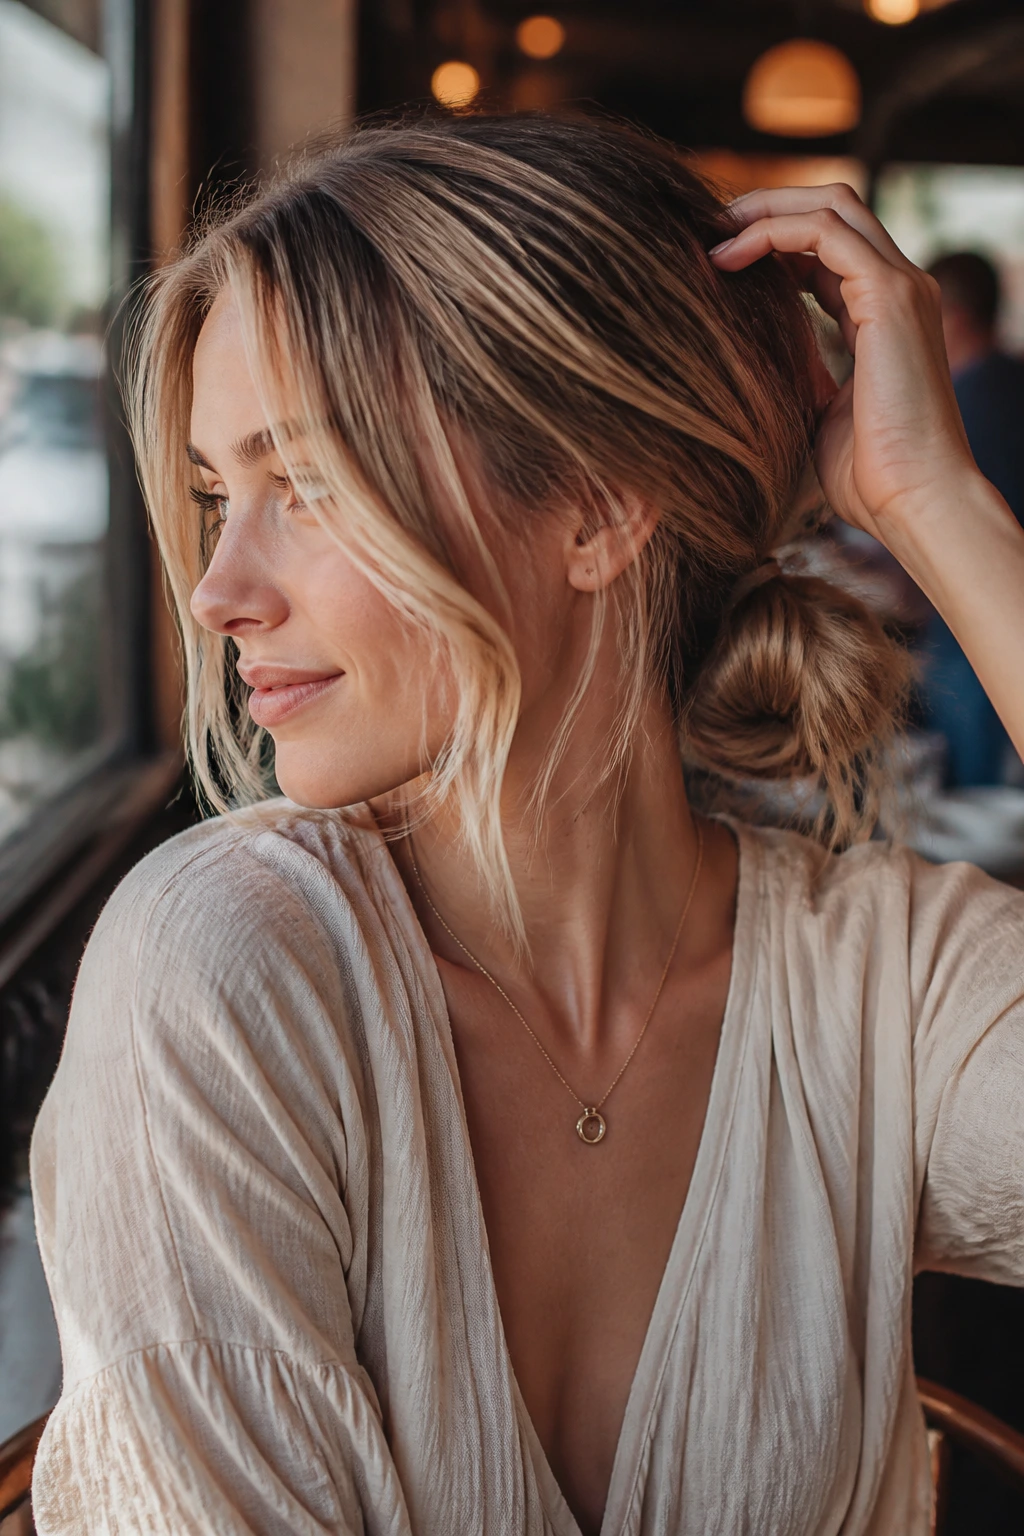
6. The Half-Up Messy Knot That Leaves the Front Pieces in Charge

Need your hair off your neck but still want the front to do something useful? The half-up messy knot is the answer. The top section goes into a small knot or bun, while the rest stays loose, giving the money piece highlights room to sit right where they matter most.
This style works because it doesn’t ask the front strands to hide. They can bend around the face, fall a little lower at the temples, and even get tucked behind one ear on one side while staying loose on the other. That unevenness is part of the charm.
It’s one of the easiest styles to dress up or down. Add a few bends through the loose lengths and it becomes dinner-ready. Leave the ends more natural and it reads as weekend hair with better intentions.
7. The Claw-Clip Roll for Days When You Want Speed
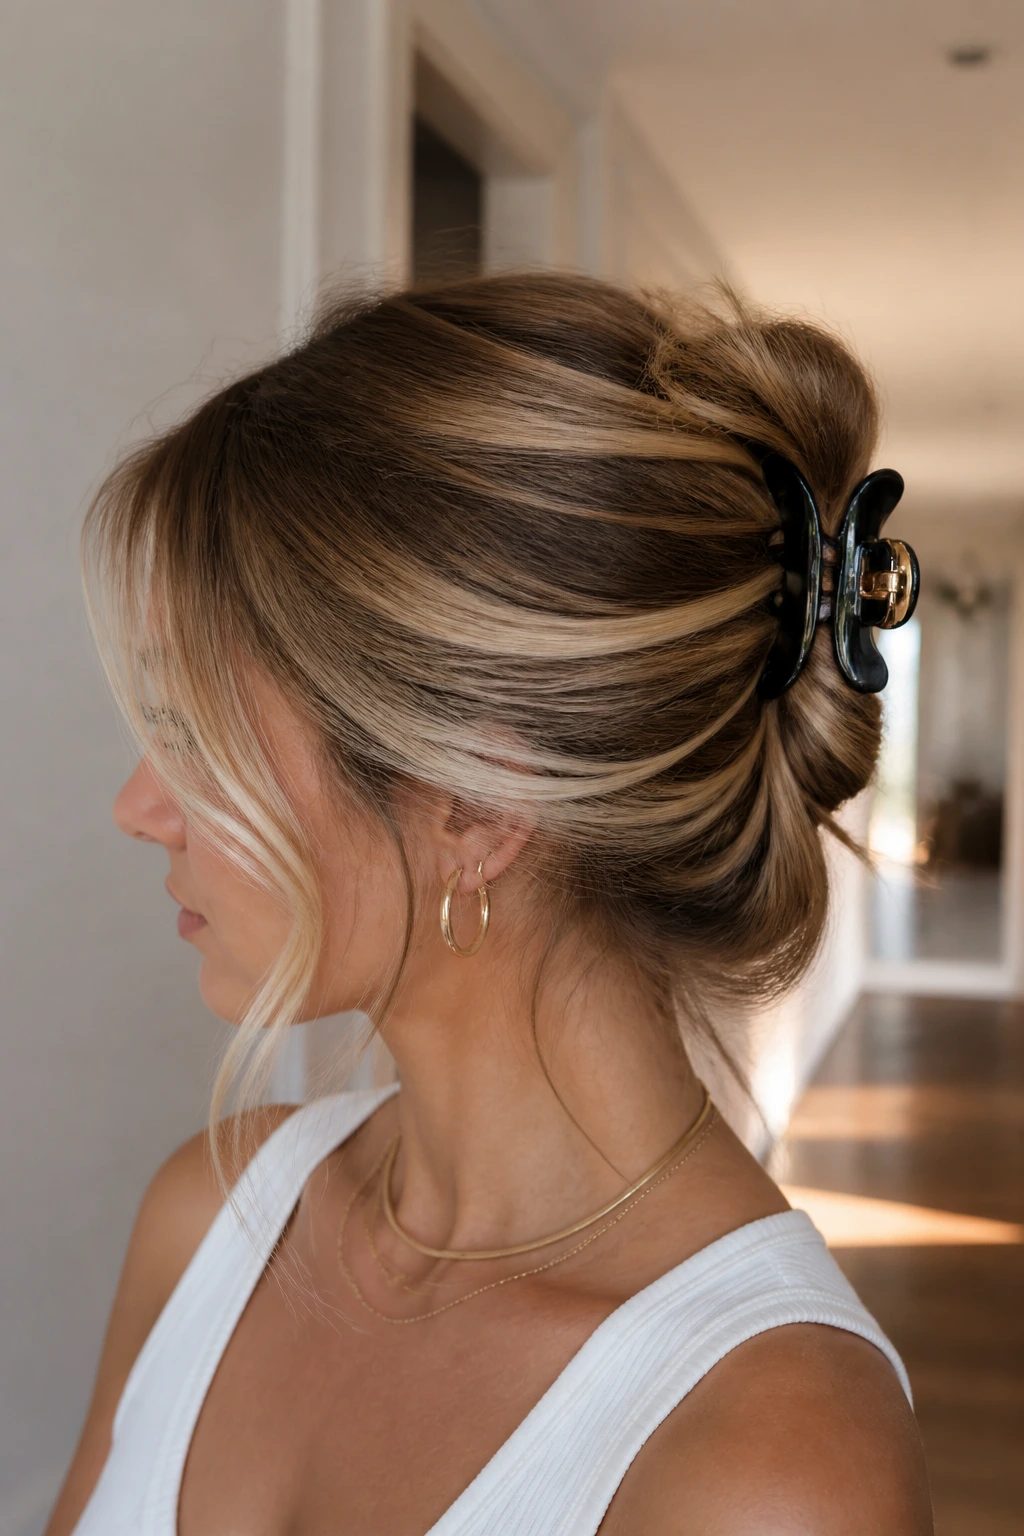
A claw-clip updo can look lazy if the clip is slapped on without any shape. A better version starts with a loose twist, folded upward and secured with a clip that grabs the hair at the center, not just the surface. The money pieces stay out at the front and do the pretty work while the back stays fast and practical.
If your hair is shoulder length or medium long, this is one of the easiest ways to create an updo without a pile of pins. Twist the hair in one direction, fold it up once, and let a few ends peek out below the clip for texture. The lighter front pieces should be bent away from the face so they don’t cling.
This is the style for errands, office days, or last-minute plans when you still want the front of your hair to look considered.
8. The Rope-Braid Wrapped Bun That Adds Shape Without Bulk
A rope-braid wrapped bun gives you the tidy outline of a bun with a little twist—literally. Split the hair into two sections, twist them in the same direction, wrap them around each other, and then circle the result into a bun at the back. The money pieces can stay loose or be brought into slim front twists if you want a bit more structure.
How to Keep It Soft
Don’t twist the sections too tightly at the start. If you pull them like guitar strings, the braid will look hard and shiny, and the whole thing loses that relaxed finish. Looser twists make the loops sit with a little air between them, which is what gives the style depth.
This one works especially well on hair that tends to slip out of simpler knots. The rope twist gives the bun something to hold onto. It’s also one of the better options if your highlights are chunky and you want the color to show in small, broken pieces rather than one solid ribbon.
9. The Bubble Ponytail Turned Into an Updo
A bubble ponytail sounds playful because it is, but the updo version has more range than you’d think. Start with a ponytail, add elastics down the length, puff each section outward, then tuck the length under at the base and pin it into a loose bun or rolled shape. The money pieces frame the front and keep the look from leaning too hard into costume territory.
This style is a clever choice for parties or occasions where you want movement. The bubbles create shape without needing a lot of teasing, and the tucked ends give the back some fullness. If your front pieces are long enough, bend them into an S-shaped wave so they echo the rounded sections in the back.
It’s one of those styles that looks harder than it is. That’s always useful.
10. The Double-Knot Bun That Works Best on Medium Length
The double-knot bun is one of the easiest ways to make medium-length hair look fuller than it is. Split the hair into two loose sections, knot them once, then again, and pin the remaining ends into a small tucked bun. The money pieces stay free, which matters because this style can otherwise look a little compressed.
What I like here is the shape. It feels less neat than a standard bun and more lived-in, which suits the bright face-framing pieces. If the front sections are very light, leave them with a small bend instead of a tight curl so they don’t read as separate strands pasted on the face.
Use this when your hair hits the collarbone or slightly below. It gives enough structure to stay up without needing a lot of length.
11. The Low Loop Bun With a Hidden Elastic
A low loop bun looks calm from the front and slightly undone from the side, which is a nice trick if you want something clean but not precious. Pull the hair into a low ponytail, loop the length through the elastic once, then let the ends stay partially out and pin them under. The money pieces can fall forward in soft lines or be tucked loosely behind the ears.
The key is not to force the loop into a perfect circle. A little asymmetry makes the bun feel modern. If your highlights are bright, they act like little light bars around the face and keep the style from sinking into the neck.
This is a good office-to-dinner style. It’s quick, but it doesn’t look rushed.
12. The Dutch-Braid Tucked Updo for Thick Hair
Thick hair loves a Dutch braid because the braid gives the style a spine. Start with a Dutch braid from the hairline or temple area, then tuck the remaining length into a bun or fold at the back. The money pieces can sit free at the temples, where they soften the braid’s strong outline.
Best for Thick Hair
If your hair is heavy, this style solves one annoying problem: loose updos that collapse before lunch. The braid anchors the top section so the back doesn’t drag downward. Use matte pins and a strong elastic, because thick hair can chew through weak hardware fast.
The front pieces should be styled with a little bend, not a tight curl. Thick hair can make money pieces look bulky if they’re overworked. A soft wave keeps the lighter strands from overpowering the face.
13. The Soft Roll Updo That Flatters Shoulder-Length Cuts
Shoulder-length hair is often awkward in updos because it’s long enough to pin but not always long enough to wrap cleanly. The soft roll fixes that. Roll the ends upward at the back, secure them loosely, and leave a few end pieces visible so the style has texture. The money pieces stay out at the front and give the whole shape some brightness.
This is a smart choice when your hair ends around the collarbone or shoulders. It doesn’t demand a ton of length, and it doesn’t need every strand to behave. In fact, a little unevenness is what makes the roll look airy instead of forced.
I’d reach for this at a party or a dinner where you want a softer profile than a bun gives you.
14. The Fishtail Halo Bun With a Bit of Edge
A fishtail halo bun has more detail than most messy updos, but it still feels wearable. Braid the hair in a fishtail around the crown or along the sides, then tuck the ends into a soft bun at the back. The money pieces can stay loose and curved, which keeps the style from feeling too woven or busy.
What Makes It Work
The fishtail braid breaks the hair into tiny sections, so the style gains texture without looking heavy. That texture is useful if your highlights are subtle, because the braid creates enough visual movement for the color to catch without shouting. If your money pieces are chunkier, the braid acts like a frame and keeps them from taking over.
This one is good for dressier events, especially if you like hair that looks touched but not stiff. It has enough detail to stand up to earrings, makeup, or a high-neck dress.
15. The Gibson Tuck With Bright Front Strands
The Gibson tuck has an old-fashioned charm that works surprisingly well with modern money piece highlights. The hair is rolled upward and tucked into itself low at the back, leaving a clean lower line and a soft front frame. The face-framing pieces should be left loose and bent outward so they don’t look trapped by the tuck.
This is one of my favorites for dresses with a clean neckline. It keeps the shape smooth where you need it and soft where you don’t. If the front highlights are very light, a narrow wave through those pieces stops them from looking too stripey against the skin.
It also has a nice advantage: it can look formal without requiring a lot of volume. That’s rare.
16. The Messy Shell Twist for Formal Events
A shell twist sounds fancy because it is a little fancy, but the messy version takes the edge off. Instead of making the twist perfectly shell-shaped and smooth, let the edges break up and leave a few ends peeking out from the tuck. The money pieces can stay loose, which keeps the front from feeling pulled back too hard.
This style shines when the back of the dress or the shape of the neckline needs a clean frame. It works best when the crown is gently lifted and the twist starts low enough to keep the line long. If your hair is fine, a bit of dry shampoo at the roots helps the shape hold without slipping.
It’s formal, but not fussy. That matters.
17. The Crown Twist Halo That Gives the Face a Frame
A crown twist halo is softer than a full braid crown and easier to wear on a regular head. Twist sections from the temples or sides, bring them around the head, and pin them into a halo-like shape while leaving the money pieces to float free at the front.
If Your Part Runs Down the Middle
This style is especially good if you wear a center part. The bright front pieces become part of the halo effect, not something you’re trying to hide. Let them fall with a little bend toward the cheekbones so the face gets a soft outline instead of a hard line.
This is one of the prettiest options for someone who wants movement around the face without committing to a full braid. It’s also forgiving if your hair has layers that pop out quickly. Those little pieces become part of the texture instead of a problem.
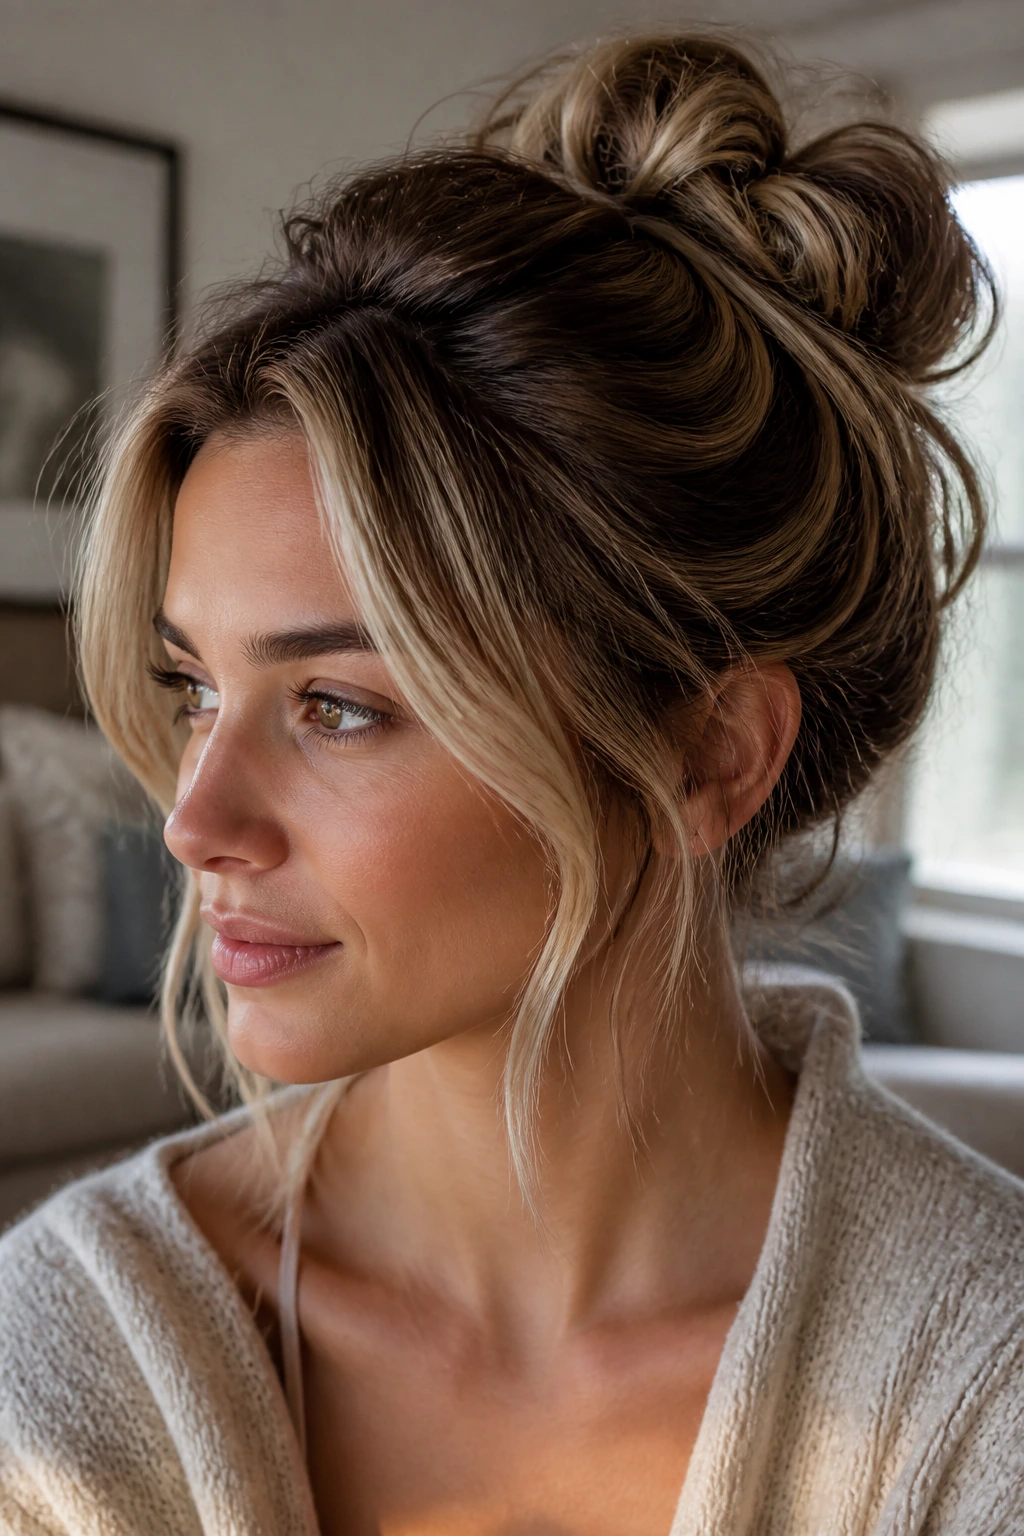
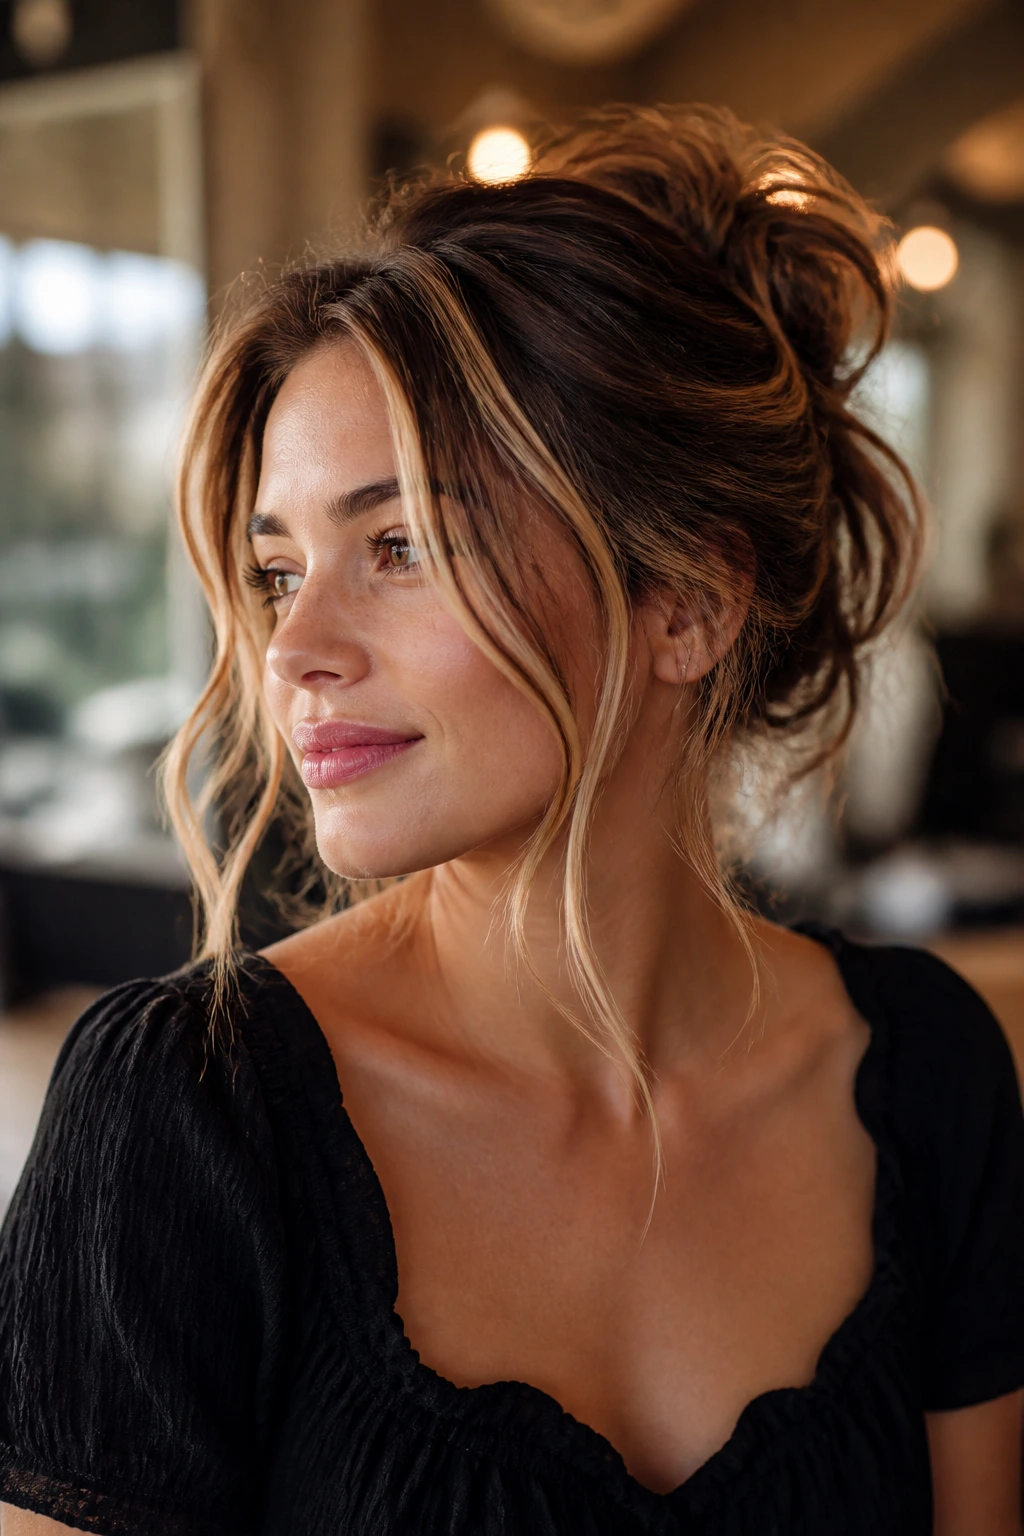
18. The Textured Top Knot With Clean Sides
A textured top knot is the style most people reach for when time is short, but the difference between good and bad is in the sides. Keep the roots smooth enough to look intentional, then build the knot with enough texture that the bun doesn’t look flat. Money piece highlights soften the clean sides and stop the style from turning severe.
The front pieces should have a bend, not a curl with too much bounce. If the knot is high, the face-framing strands need to angle slightly downward so they connect to the style instead of hovering beside it.
This is a strong weekday choice. It also works when your hair is a little greasy at the roots. A dry shampoo blast at the crown makes it behave.
19. The Faux Bob Updo That Cheats the Length
A faux bob is the kind of style that makes shorter long hair look deliberately styled. Tuck the ends under at the nape, pin them in layers, and allow the front pieces to stay loose and curved around the face. The money piece highlights are a big part of the illusion because they help the eye read the front as a finished shape.
The trick is to keep the lower tuck hidden but not smashed. If you pin everything too tight, the bob loses its air and starts looking like a mistake instead of a choice. Soft volume at the crown helps, especially if your hair is fine.
This is a good one for a dressy event when you want a different silhouette without cutting your hair.
20. The Ribbon-Tied Bun That Uses the Accessory as a Feature
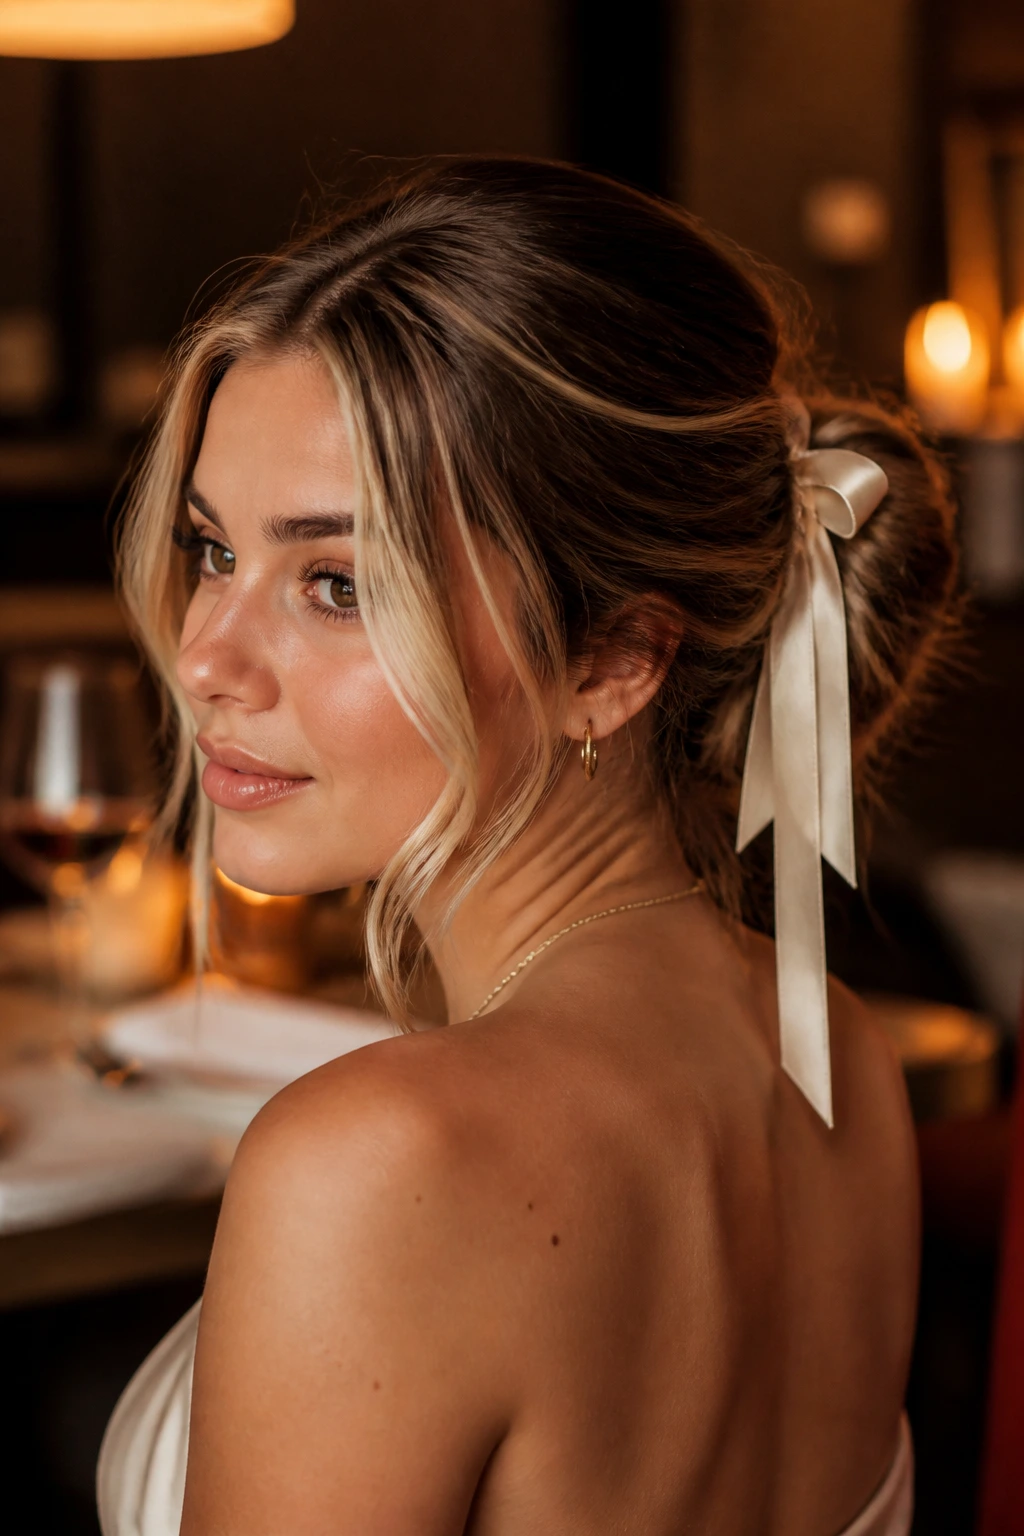
A ribbon-tied bun does not need a lot of extra decoration. A satin ribbon, velvet tie, or thin grosgrain strip can wrap the base of the bun and anchor the whole look, while the money pieces stay loose and bright at the front.
When an Accessory Does the Heavy Lifting
This is the style to pick when the outfit needs a softer finish. The ribbon adds color and structure without demanding perfect hair. If your money pieces are blonde or copper, a ribbon in a deeper tone keeps the front strands from disappearing into the background.
It works especially well for date nights, holiday dinners, or any event where you want the hair to feel a little more deliberate than a plain knot. Keep the bun loose enough that the ribbon can sit at the base without strangling the shape.
21. The Asymmetrical Side Knot for an Off-Center Look

An asymmetrical side knot is a little bolder than the average updo. Part the hair deeply, sweep most of it to one side, and build the knot low and off-center. The money pieces become part of the asymmetry, which means they can stay more visible on the heavier side and softer on the lighter side.
This shape flatters people who don’t love balance for balance’s sake. It gives the face a diagonal line, which is useful if you want to soften roundness or add some angle to a very even haircut.
I like this with statement earrings. The hair and the jewelry can both do something interesting without fighting.
22. The Knotted Crown Updo That Holds Up in Humidity
A knotted crown updo is built from a few small knots or twists across the crown, then tucked at the back so the hair sits close to the head. It’s a smart style when the air feels sticky and you need something that won’t puff out by midafternoon. The money pieces stay loose and give the style enough brightness that it doesn’t feel flattened.
The knotting process gives the style grip, which matters more than people think. Loose, humid hair slips. Knotted sections hold better. If you’re working with highlight pieces, leave them out until the end so they don’t get swallowed by the crown sections.
This is the one I’d pick for outdoor events where the weather is not being cooperative.
23. The Pin-and-Pinch Work Bun
A pin-and-pinch bun is a workhorse style, but it doesn’t have to look dull. Build a low bun or coil, pin it in place, then pinch out a few small sections at the crown and around the face so the shape feels soft. The money pieces should sit neatly at the front, bent just enough to keep the style from reading too severe.
Why Polished Roots Help
The cleaner the root area, the sharper the highlight contrast. That’s useful here because the money pieces are doing the visual softening while the base stays neat. If you have a strong shadow root or lowlights near the crown, the style gets even more depth.
This is one of the few updos that can sit in a work setting all day without looking overstyled. It’s restrained in the right places and forgiving where it should be.
24. The Sleek-Root, Messy-Length Bun
A sleek-root bun with messy lengths is a neat compromise for people who want order at the top and movement below. Smooth the roots with a brush or a little wax stick, then gather the hair into a bun that leaves the ends loose, tucked, or lightly frayed. The money pieces stay visible, and the contrast between the smooth crown and the looser front strands makes the whole thing look sharper.
This style loves a center part. It also benefits from highlights that are not too thin, because the cleaner root area gives the light pieces room to stand out. If the front strands get fluffy, a tiny bit of smoothing cream on the mid-lengths—not the roots—keeps them from puffing up.
It’s a good choice when you want a more dressed-up finish without losing all texture.
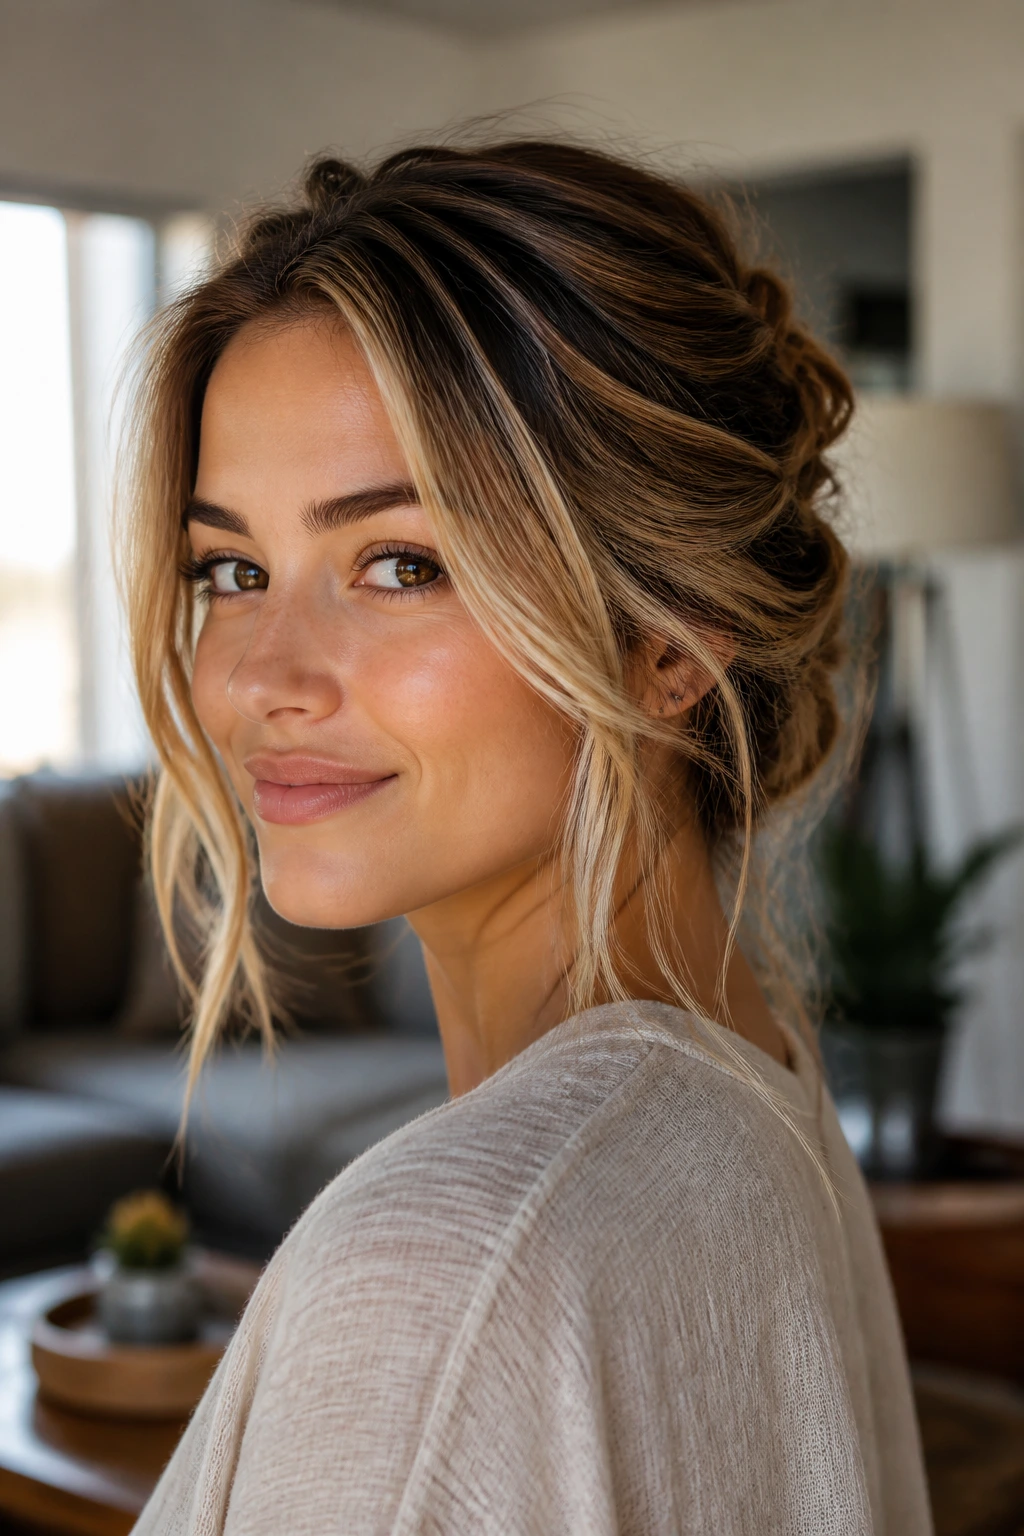
25. The Airy Face-Framing Knot That Fits Almost Anywhere
The airy face-framing knot is the style I’d hand to someone who wants one dependable option and doesn’t want to think about it too much. Start with a loose low knot, leave the front pieces out, and create a little space at the crown by lifting with your fingers instead of a brush. The money piece highlights become the most visible part of the style, which is exactly the point.
This one works at brunch, at a wedding, at a casual work dinner, and probably at the grocery store if you’re having a good hair day. It changes with the finish. Add shine spray and it looks cleaner. Add dry texture spray and it looks more lived-in. That’s the kind of style worth keeping around.
Why Messy Updos and Money Piece Highlights Play So Well Together
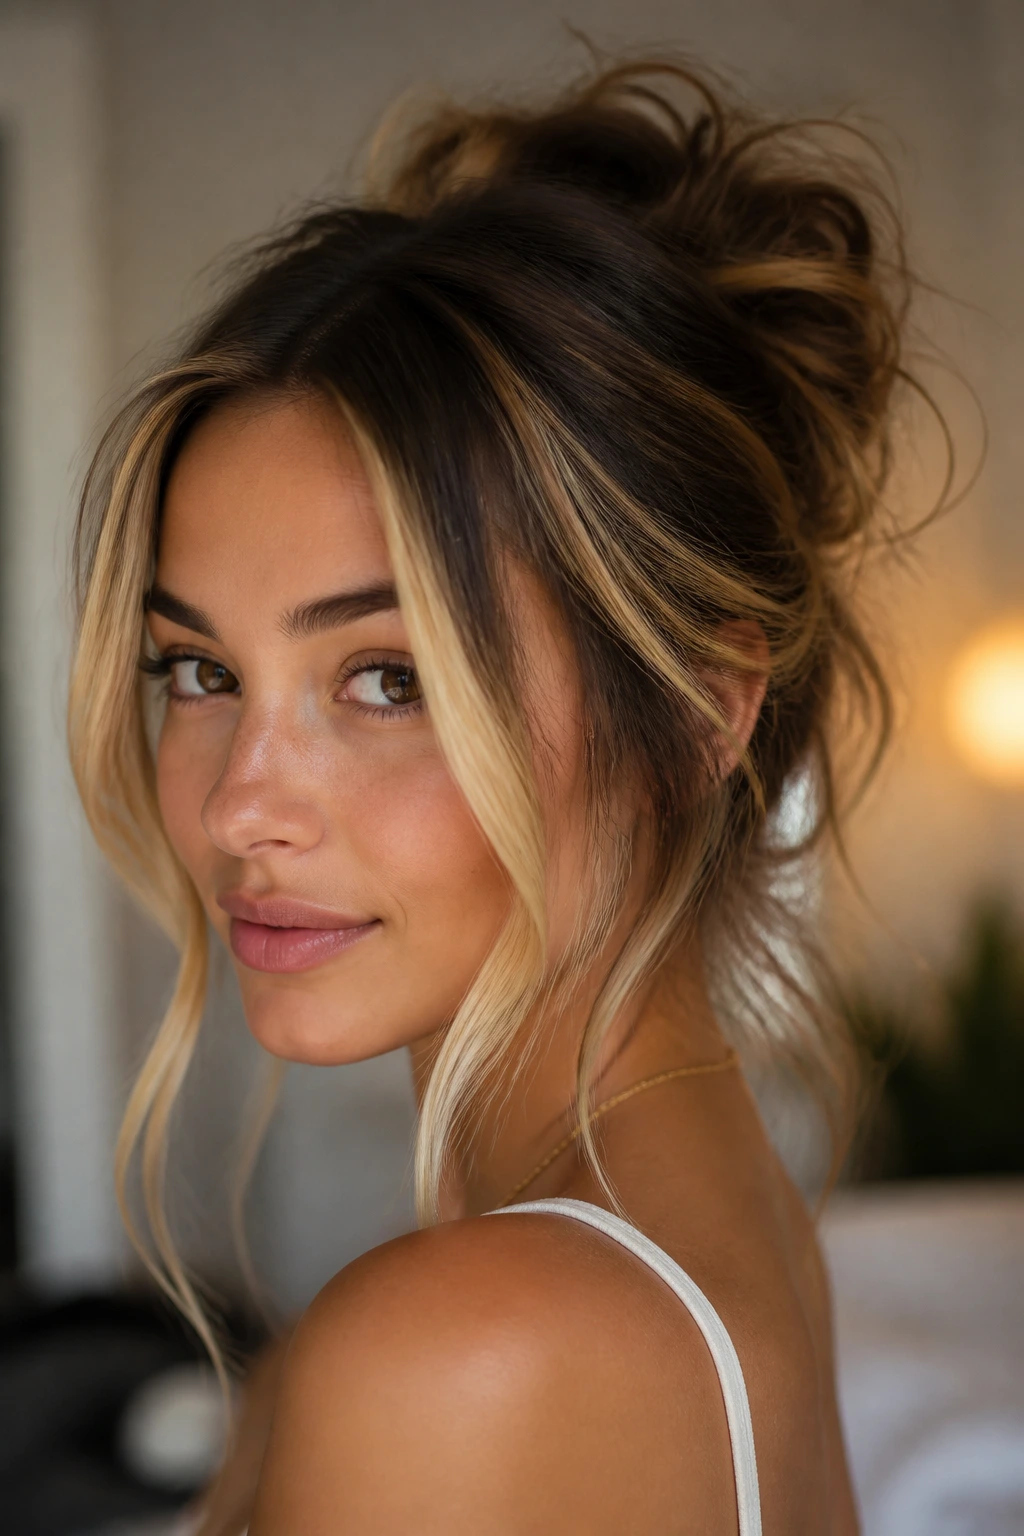
The short version? They solve each other’s problems. Messy updos need a visual anchor, and money piece highlights give the face one immediately. Bright front strands keep the hair from disappearing into the back of the head, especially when the bun sits low or the braid gets a little loose. That’s a big reason these styles read well in photos and in person.
There’s also a color reason this pairing works. Money pieces are often a little brighter than the rest of the hair, so they catch light at the temples, along the cheekbones, and around the jaw. In an updo, those are exactly the spots that still stay visible once the rest of the hair is pinned up. If the pieces are too thick, they can look blocky. If they’re too thin, they vanish. The sweet spot is usually a pair of front panels that are light enough to frame the face but not so wide that they fight the style.
A little lowlight at the crown helps, too. Strange as it sounds, depth makes the light pieces stand out more. A flat one-tone base can make money pieces feel pasted on. A bit of shadow at the roots gives the whole updo shape.
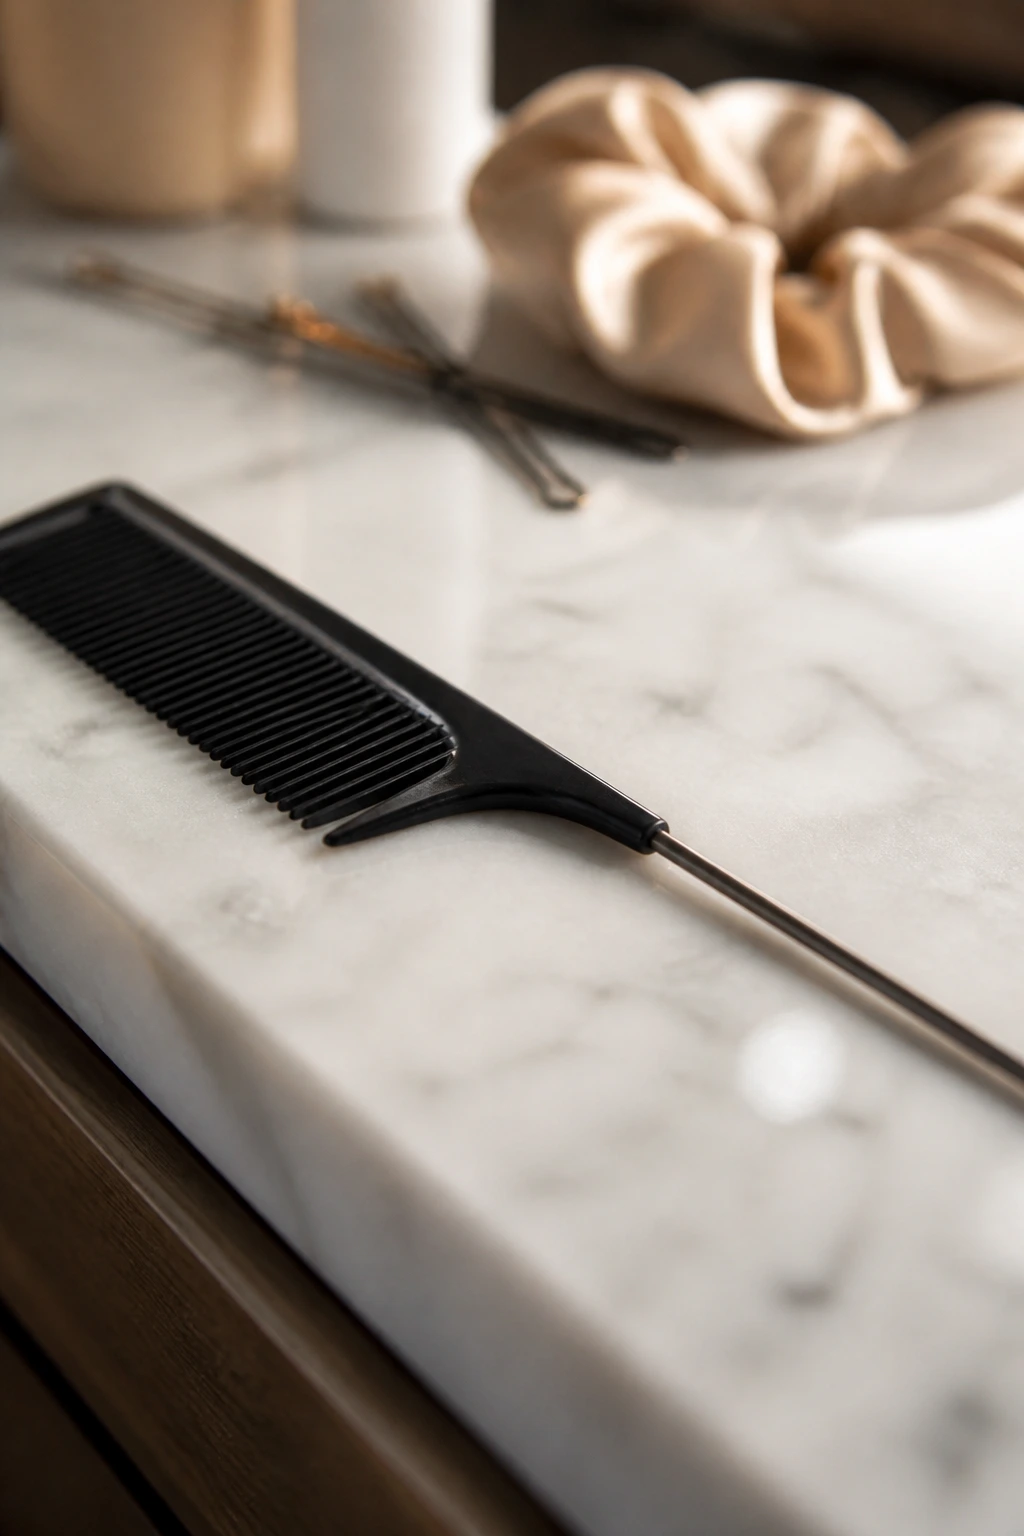
The Tools That Make These Styles Easier
- Rat-tail comb: clean parts, easy sectioning, and a quick way to lift the crown without wrecking the whole style.
- Texturizing spray: adds grip to soft hair and keeps twists from sliding apart halfway through the day.
- Dry shampoo: the fastest fix for fresh hair that won’t hold a pin.
- Bobby pins in your hair color: they disappear better and make the style look cleaner from the side.
- Clear elastics: useful for half-ups, bubble styles, and hidden anchoring.
- 1-inch curling iron or wand: ideal for bending the money pieces and softening the ends.
- Teasing brush: gives the crown enough lift for buns and twists that need volume.
- Strong-hold hairspray: hold it in reserve until the shape is right; then mist lightly from a distance.
- Smoothing cream or wax stick: keeps flyaways down at the hairline without making the roots greasy.
- Small claw clip: handy for quick rolls, temporary holding, or styles that need a fast reset.
- Hand mirror: the back of a messy updo can lie to you. Check it.
Choosing the Right Updo for Your Length, Texture, and Face Shape
Hair length changes everything. Shoulder-length hair usually does best in styles that fold, tuck, or half-up rather than trying to build a giant knot. Medium hair can handle loops and double knots. Long hair can stack more volume, but it also needs more anchoring or the back will collapse. If your hair is short, lean into faux-bob tricks, clips, and low twists rather than forcing a bun that wants to escape.
Texture matters just as much. Fine hair usually needs dry shampoo, texture spray, or a bit of teasing at the crown so the style has something to grip. Thick hair needs strong pins, sectioning, and sometimes a braid or twist at the base to control the weight. Curly hair should not be brushed into submission unless you want a puffball by the end of the day. Work with the curl pattern, stretch it only a little at the root, and let the front pieces keep some shape.
Face shape changes where you place the volume. Round faces tend to like height at the crown or a side part with longer front pieces. Longer faces usually benefit from a lower bun or a side-swept shape that breaks up the vertical line. Heart-shaped faces often look balanced with softness around the jaw and a little lift near the crown. None of this is rigid. It’s more like steering than obeying.
How to Make Money Pieces Pop Without Hiding Them
Bright front pieces can disappear if you pin them back with the rest of the hair too early. Leave them out until the last step. That sounds obvious, but it’s the mistake I see most often. People build the whole updo, then try to rescue the front with a single curl. Too late. The shape has already decided what it wants to be.
A small bend is usually better than a tight curl. A money piece that swings like a ringlet can feel separate from the rest of the hair, especially if the updo is soft and undone. A gentle wave that turns away from the face is enough. If the pieces are very light blonde, keep them glossy but not greasy. If they’re caramel or copper, a little texture makes the color look richer.
Part placement matters more than people admit. A deep side part can make the front pieces feel dramatic. A center part gives the style symmetry. If the money pieces are chunky, a center part with a loose bun can look balanced. If they’re subtle, a side part helps them register from across a room.
Practical Styling Moves That Save Time and Frustration
Grip first, shine later. If the hair is too soft, a mist of dry shampoo or texturizing spray at the roots gives the pins something to bite into. Add shine only at the end, and keep it off the scalp.
Pin through layers, not just around them. A bobby pin lasts longer when it catches two or three sections of hair. Slide it in, twist it, then push it back toward the anchor. A lazy pin job slides out fast.
Leave the face-framing strands until the final minute. If you curl them too early, they cool in the wrong shape while you’re still building the back. Finish the bun, then deal with the front.
Use less product than you think. Too much cream, oil, or pomade turns the updo limp. If you need control, start with a pea-sized amount and spread it through your hands first.
Match the finish to the occasion. A wedding updo can have smoother roots and softer bends. A casual knot can handle more roughness. Same basic shape. Different polish.
Common Mistakes That Flatten the Look

The biggest mistake is hiding the money pieces. If the front strands disappear into the bun, the whole point of the color is wasted. Leave them out on purpose, and if they’re too wild, tame them with a bend rather than pinning them back.
Another one: over-smoothing the crown. A flat top makes the style look helmet-like, and the money pieces end up doing too much work. A little lift gives the updo shape and keeps the face frame in proportion.
Pins are another trap. People either use too few or jam in too many in the wrong places. Too few, and the style falls. Too many, and the bun gets lumpy. Use enough pins to anchor the base, then stop. If the style still shifts, add a couple more where the weight is actually pulling.
Heavy oil near the roots is a bad idea. It sounds like a fix for frizz, but it turns the hair slick and weak. Save oils for the ends, if you use them at all.
And don’t force every layer to behave. A loose end at the nape or a bent piece by the ear often makes the style look better, not worse.
Ways to Adapt the Whole Collection
For fine hair: build texture first. Dry shampoo, a light tease at the crown, and smaller sections for twisting help the style stay up without drooping by noon. Fine hair often looks best in tighter shapes with a few loose front pieces rather than giant buns.
For thick hair: braid the base or split the hair into sections before pinning. Thick hair needs structure, or the weight drags everything down. Use stronger pins and don’t be shy about hidden elastics.
For curly hair: let the curl pattern stay visible. Stretch the roots a little if needed, but leave some coil in the front pieces so the money highlights sit inside the curl instead of on top of it.
For short hair: lean on half-up knots, faux-bob tucks, claw clips, and low twists. You do not need a huge bun to make the style feel finished.
For more formal events: smooth the roots, tuck the ends more cleanly, and use a shine spray sparingly. The mess belongs in the shape, not in the hairline.
Keeping the Style Fresh Through the Day and Next Morning
Messy updos usually survive longer than straight hair, but the front pieces need care. If the money pieces fall flat, mist them lightly with water, then wrap them around your finger for a few seconds to reset the bend. A little heat from a curling iron works too, but keep it quick. Five seconds is often enough.
If the back loosens, don’t tear the whole thing apart. Find the anchor point—usually the elastic or the first pin—and reinforce there. Most updos fail at the center, not at the edges. Add one pin, maybe two, and check the balance before adding more.
Overnight wear is a different beast. Sleep on a silk pillowcase if you can. It cuts down on snagging and keeps the front pieces from turning into a frizzy halo. The next morning, revive the bun with dry shampoo at the roots and a tiny mist of hairspray on the loose ends.
Frequently Asked Questions
How do I keep money piece highlights visible in an updo?
Leave the front pieces out until the very end, then style them with a soft bend away from the face. If they’re pinned too early, they disappear into the back shape and lose the whole effect.
Can I do these styles on shoulder-length hair?
Yes, but choose the ones that fold and tuck rather than the ones that demand a giant wrap. Soft rolls, low loops, half-up knots, and faux-bob styles usually behave better on shorter lengths.
What if my hair is very fine and slippery?
Start with texture spray or dry shampoo at the roots, then build the updo on second-day hair if you can. Fine hair needs grip before it needs polish.
Do I have to curl the money pieces?
No. A soft bend is often enough, and it can look better than a tight curl. The goal is to frame the face, not create a separate set of ringlets that fight the rest of the style.
Which style works best for a wedding guest look?
The side-swept chignon, braided crown bun, French twist, and ribbon-tied bun all feel dressy without looking rigid. Pick the one that matches the neckline of the dress instead of forcing the most complicated shape.
How do I keep a messy updo from looking sloppy?
Keep the hairline clean, anchor the back well, and make sure the front pieces are styled with intention. Messy should describe the texture, not the structure.
Can I wear these styles with grown-out highlights or lowlights?
Absolutely. In fact, a little shadow at the roots or crown gives the bright front pieces more depth. Flat one-tone hair tends to hide the shape more than dimensional color does.
What’s the fastest style on the list?
The claw-clip roll and the textured top knot are the quickest once you know the motion. Both rely on a simple base and a few smart pins rather than a long set of steps.
The Styles That Earn Their Keep
The best messy updos are the ones that look like they were shaped by hand, not by a template. Money piece highlights make that easier because they give the face a bright frame while the back stays loose, tucked, or twisted in whatever way suits the day.
A good updo doesn’t need to be perfect to look finished. It needs a clear shape, a few smart pins, and front pieces that feel like they belong there. Get those three things right, and the style can go anywhere from a work meeting to a wedding dance floor without changing its bones.
And that’s the part worth keeping: one loose knot, one soft braid, one better front piece, and suddenly the whole thing feels more lived-in, more flattering, more yours.