Thick hair gives you a built-in cushion under extensions, which is why long weaves for little girls with thick hair can look full instead of floppy. The hair already has enough grip to hold braids, ponytails, and sewn bases without the tracks staring back at you from the scalp. But the style still needs to feel light enough for school, car rides, naps, and the occasional dramatic head shake when a bow is crooked.
That balance is what most people miss. They add too much hair, braid too tight, then act surprised when the style looks stiff by the second week. I like long weave looks that keep the crown neat, leave the edges soft, and give the length some movement — not the helmet effect that turns a child into a little mannequin.
When the install is done well, thick hair makes the whole thing easier. Parting stays cleaner. Ponytails sit higher. Braids feel less skimpy at the base. The styles below are the ones I keep coming back to because they make sense on real heads, not just in photos. Some are school-day safe, some are birthday-party pretty, and some split the difference.
Why These Long Weave Looks Earn Their Keep
- Thick Hair Does the Heavy Lifting: Dense natural hair gives each style a stable base, so the added length sits with more body at the crown instead of sagging flat by noon.
- The Length Can Be Scaled: Most of these looks work at 14, 16, 18, or 20 inches, which means you can keep the drama without dragging the style past a child’s comfort zone.
- They Can Survive a Busy Day: Braids, ponytails, and tucked sew-ins tend to hold up better than loose styles when a little girl is running, flipping, and leaning against car seats.
- Accessories Do the Heavy Lifting: A ribbon, a few beads, or one clean part can change the whole mood without adding extra tension.
- The Front Can Stay Soft: The best versions keep the hairline gentle and the edges clean, which matters a lot more on a child’s head than mirror-sharp parts.
- They Photograph Well for a Reason: Long length and thick roots give you movement, but the style still looks tidy when she turns her head or grins at the camera.
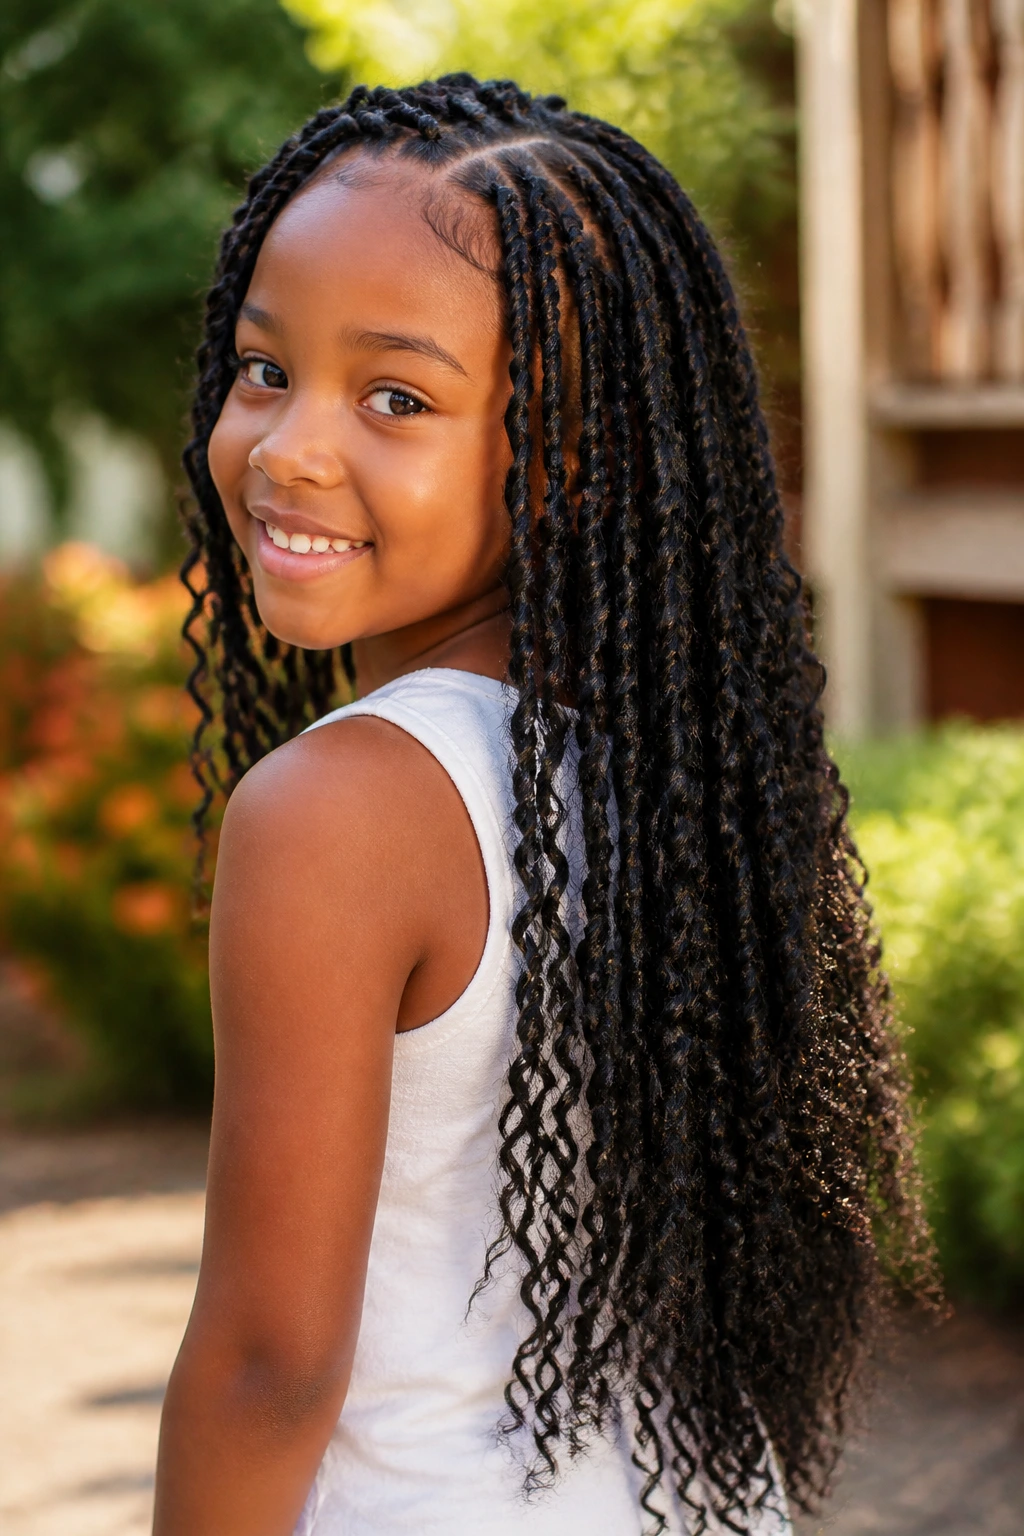
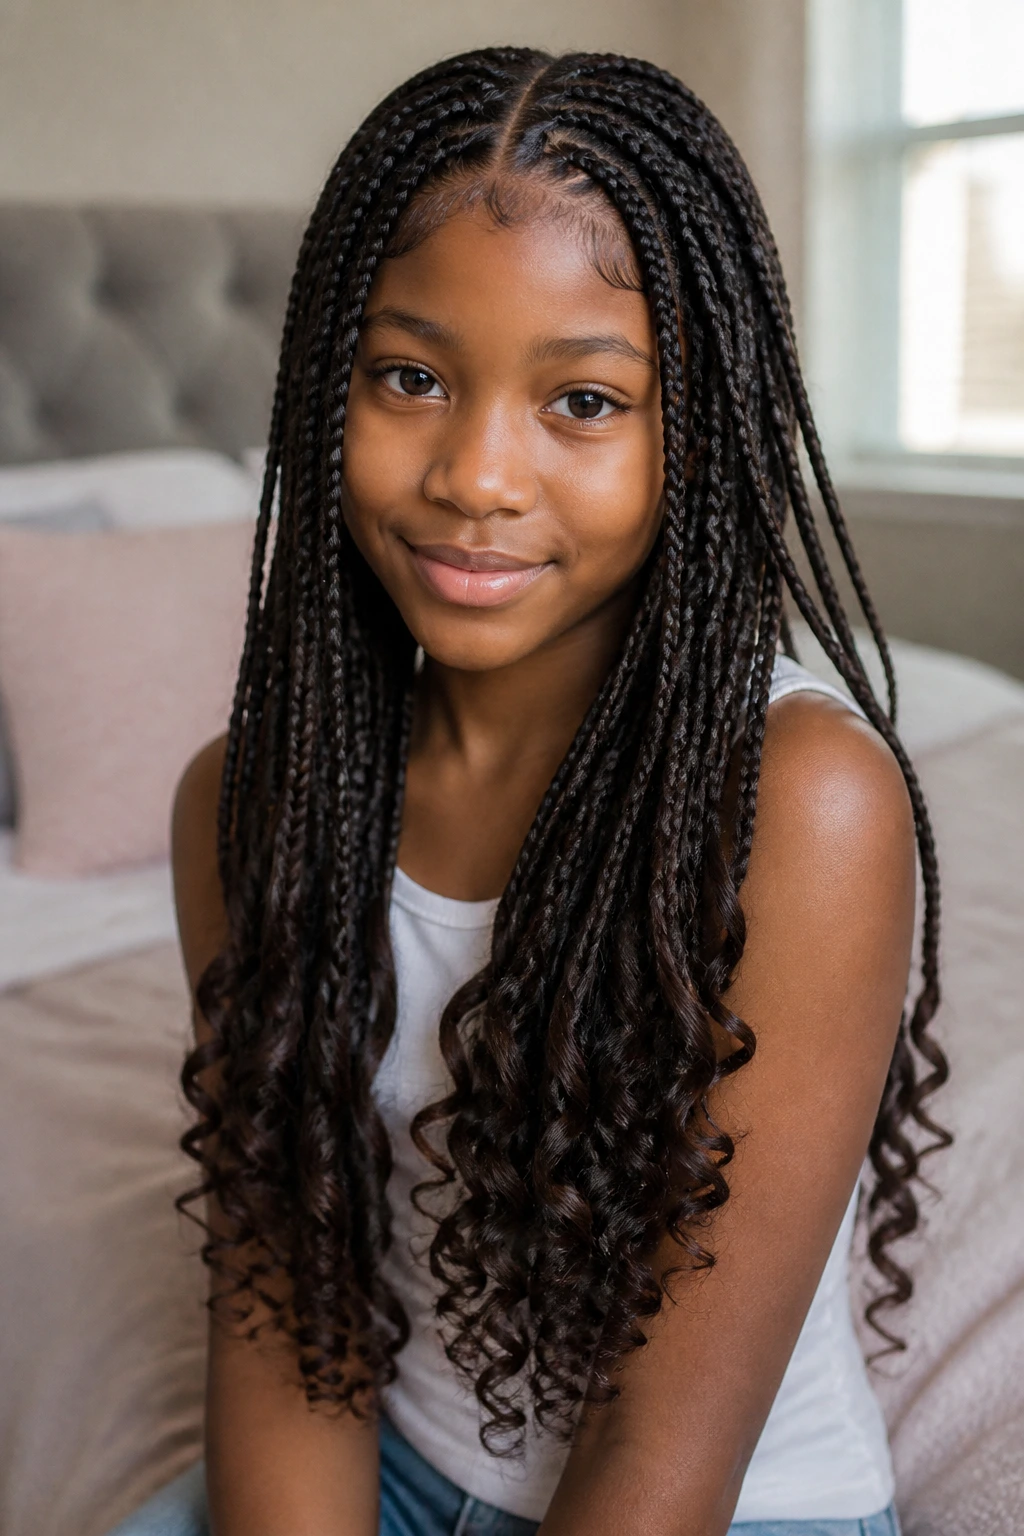
1. Waist-Length Box Braids with Curled Ends
These are the style I reach for when I want length, but I don’t want the hair to look crowded. Waist-length box braids on thick hair have enough anchor to stay neat, and the curled ends keep the finish from feeling too severe. The result is tidy at the scalp, soft at the bottom, and easy to clip back when school starts at 8 a.m.
Why It Works on Thick Hair
Thick hair fills the base of the braids without forcing the sections to get huge. That means you can keep the parts around 1/2 inch to 3/4 inch and still build a full look. The curled ends also take pressure off the overall shape, because the style moves instead of hanging in one straight, heavy line.
- Best braid size: Medium sections, about the width of a fingertip.
- Length sweet spot: 16 to 20 inches for most children.
- Finish detail: Use hot water on the synthetic ends only if the hair type allows it, then wrap the braids around soft foam rollers for a bend at the ends.
Best tip: Keep the braids slightly lighter at the hairline and denser toward the back. The style lasts longer when the front is not doing all the work.
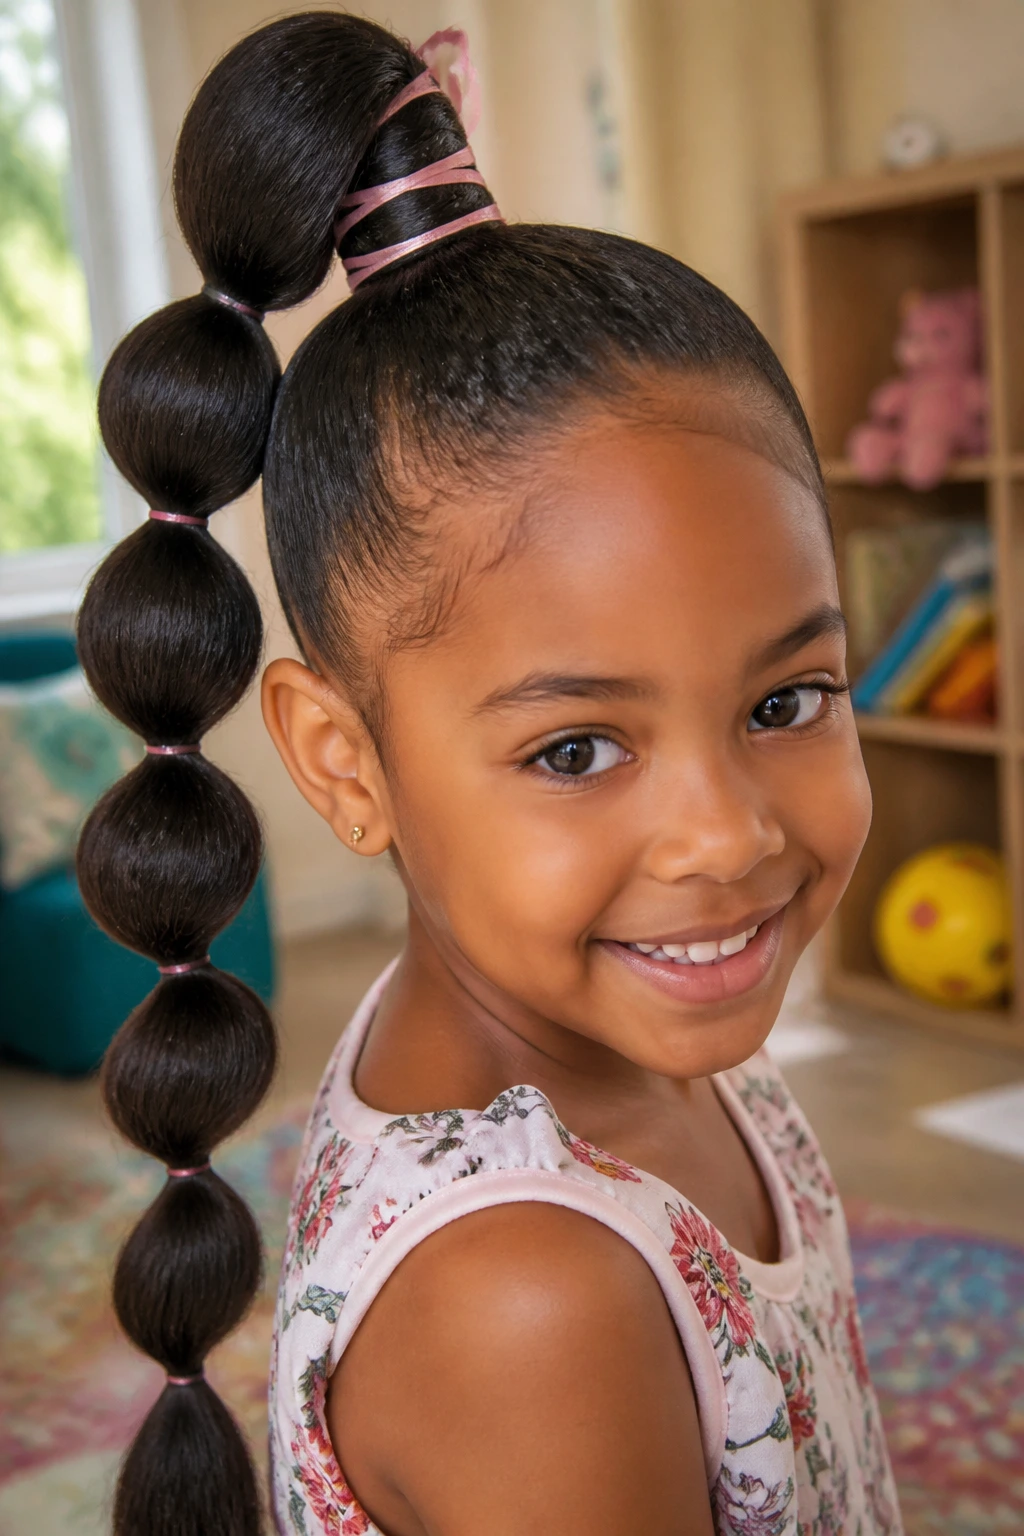
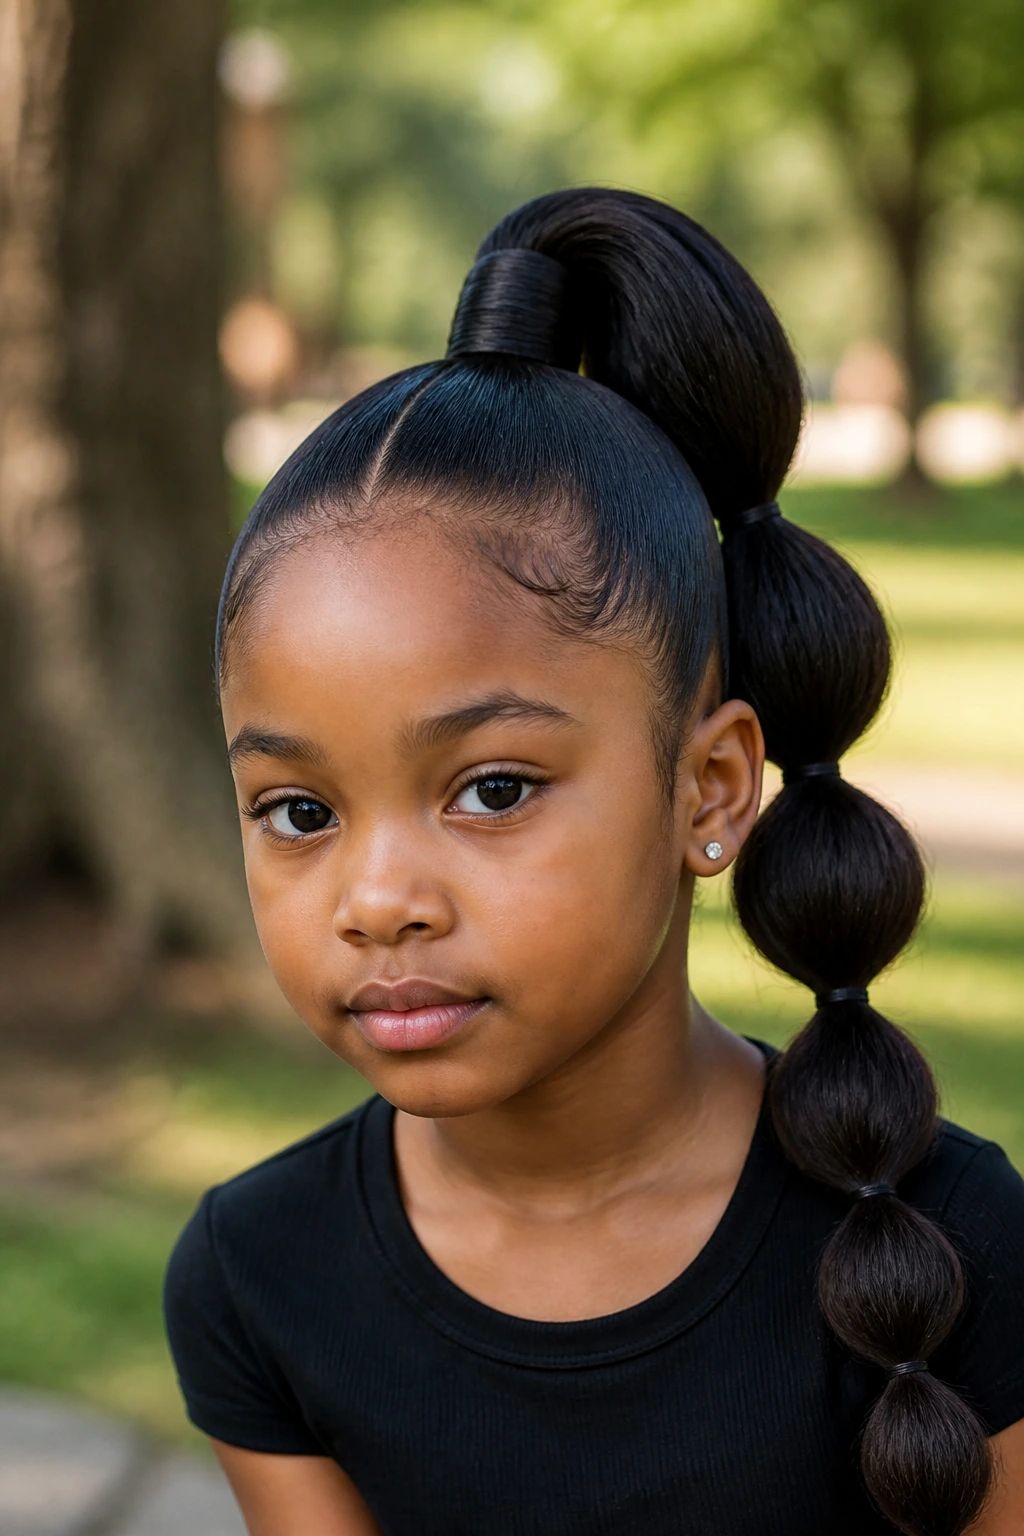
2. High Bubble Ponytail with Wrapped Base
A high bubble ponytail is one of those styles that looks playful without becoming messy. On thick hair, it sits up with real height, and the added length gives each bubble something to hold onto instead of collapsing into one long tail. I like this for birthdays, dance days, and any afternoon when a child wants her hair “big.”
What Makes It Different
The trick is spacing the elastics every 3 to 4 inches so the bubbles stay round instead of stretched thin. A wrapped base — usually one small section of hair or a braid strand around the ponytail holder — keeps the top from looking like a gym style. It looks polished without asking for a lot of fuss.
- Use: 4 to 6 small elastics and one soft wrap piece.
- Shape: Three or four bubbles usually look balanced on a child’s frame.
- Move: Add a little mousse to the tail before dividing it so the sections don’t frizz apart.
Thick hair helps the ponytail stand upright, which is half the battle. The only thing to watch is weight. If the tail starts pulling down by the nape, shorten the extension or move to a lighter texture.
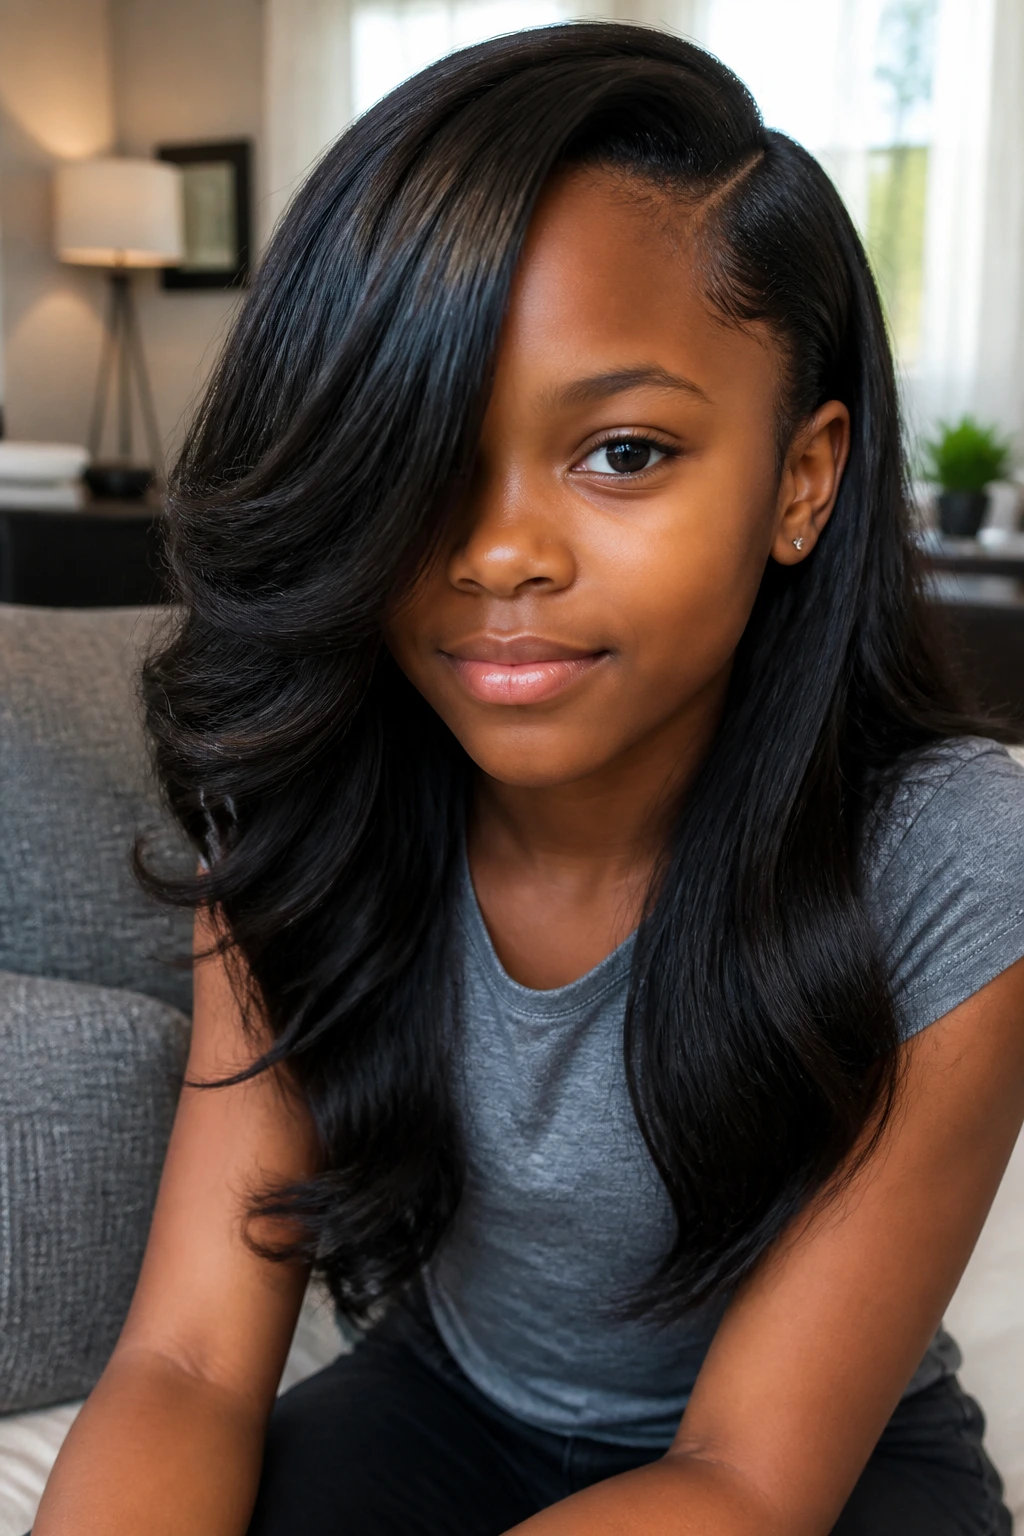
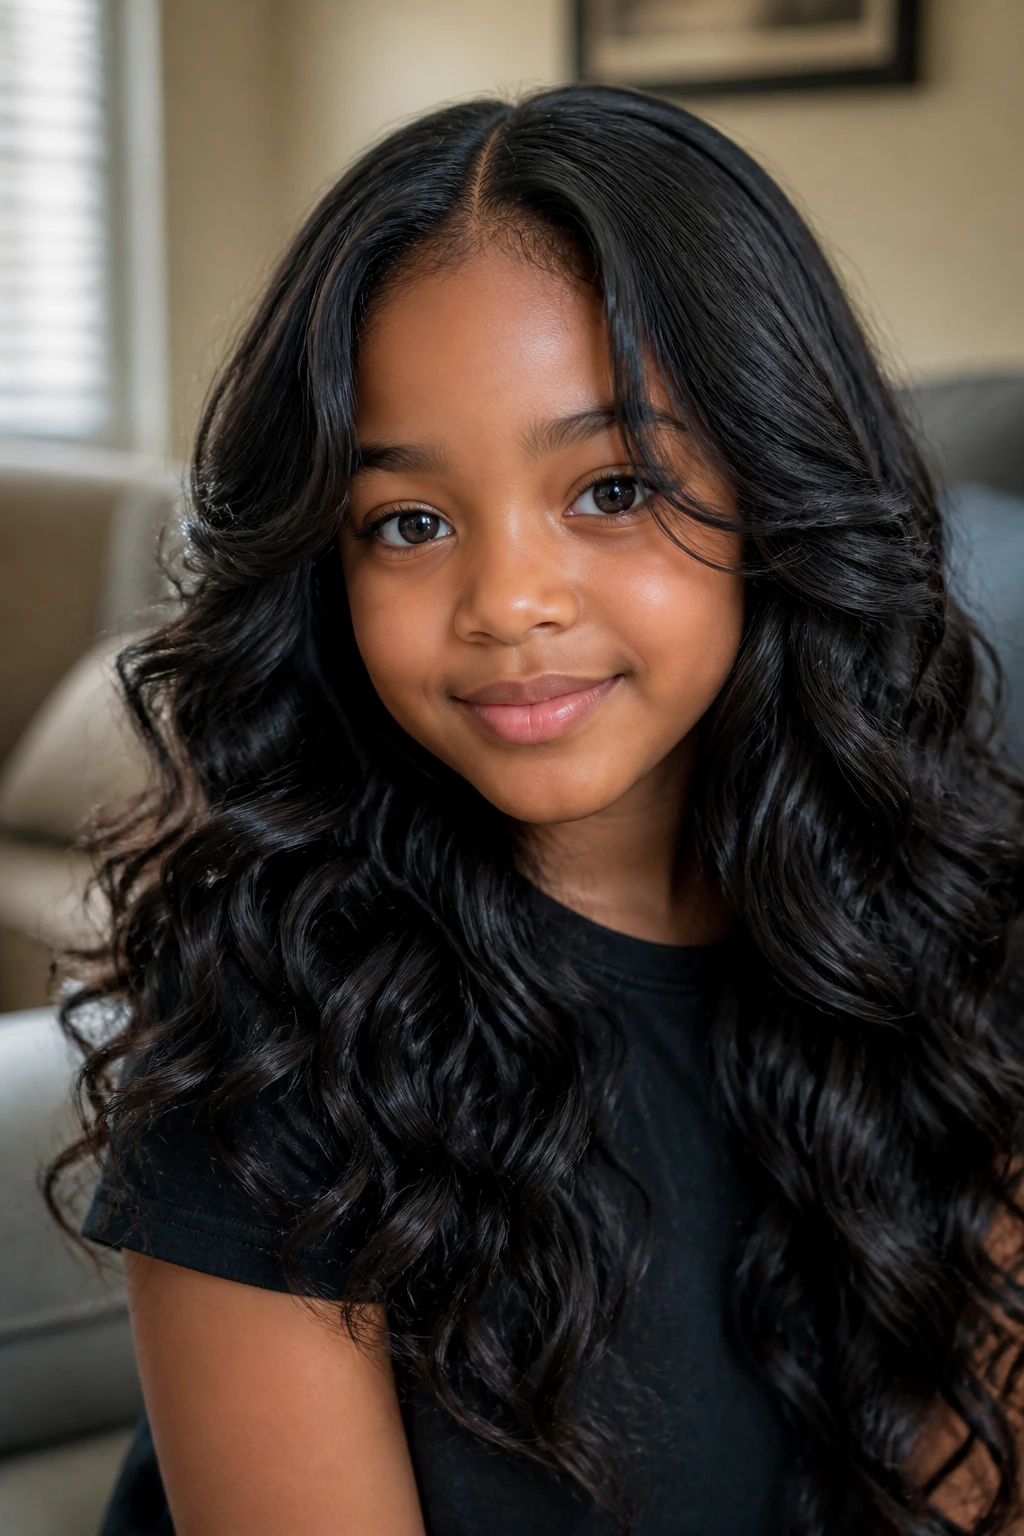
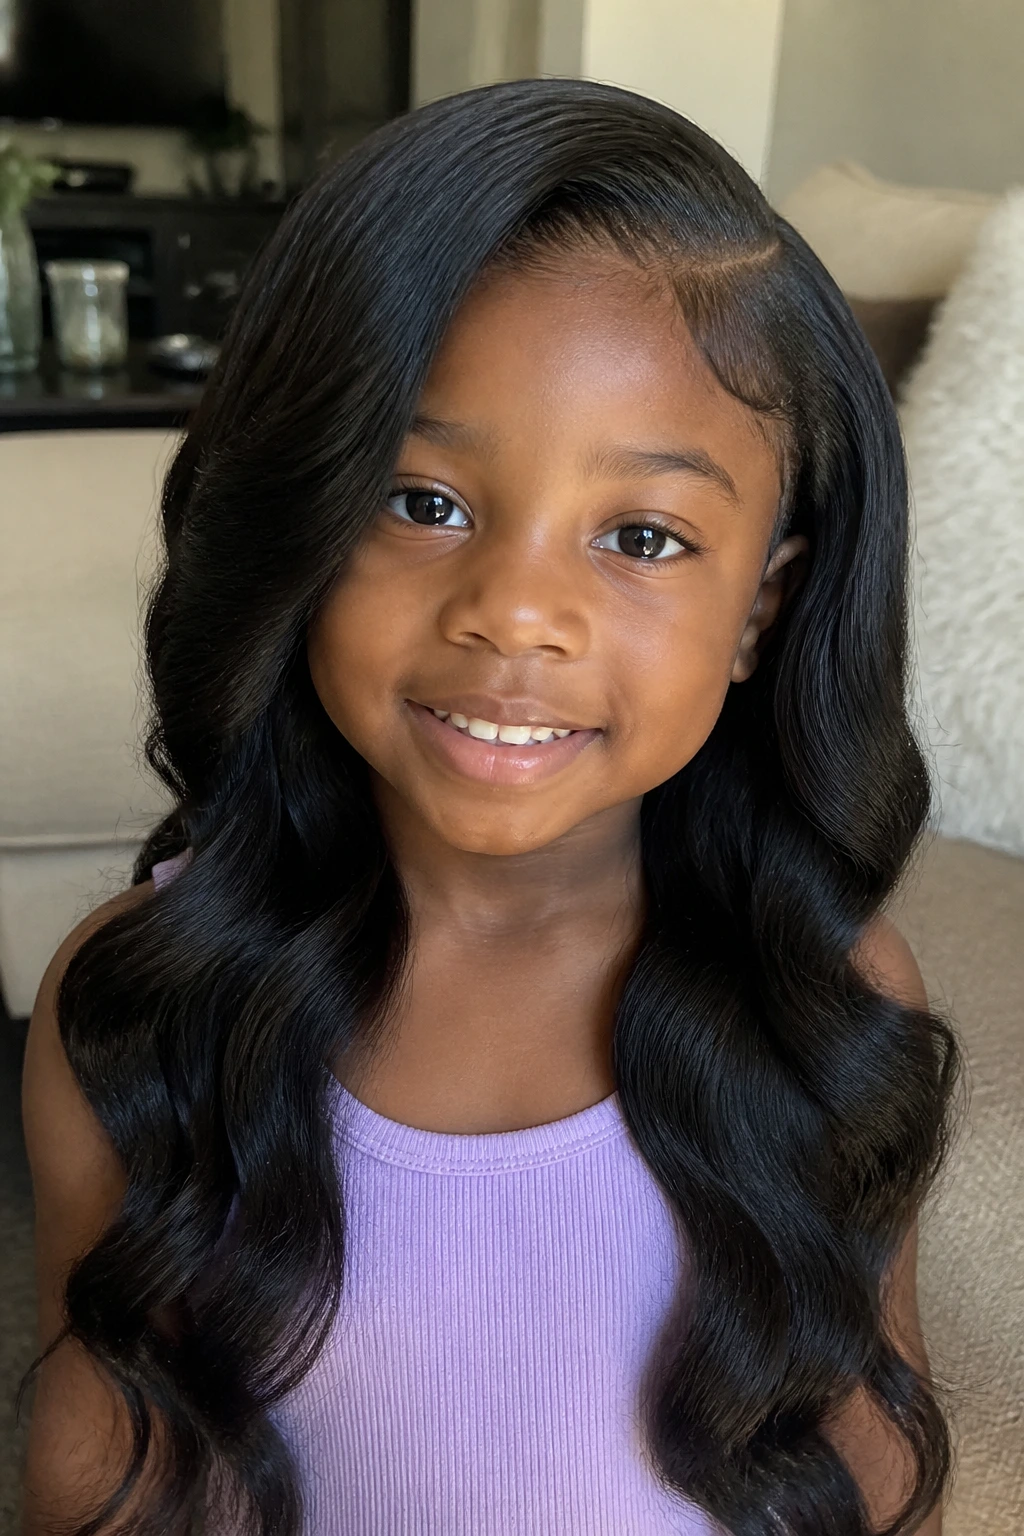
3. Side-Part Body Wave Sew-In
If you want something soft and grown-up without being overly serious, a side-part body wave sew-in is a strong choice. The waves move when she turns her head, and the side part gives the style enough shape that you do not need a pile of accessories to make it interesting. On thick hair, the base stays covered better than it would on fine hair, which is a real advantage.
Why It Sits So Nicely
Body wave hair has enough bend to fall naturally, but not so much curl that it tangles the second she leans on a pillow. I like a closure more than a leave-out for younger children because it keeps heat out of the picture and makes the finish more even. If you do leave out a small front section, keep it minimal and smooth it gently — not bone-flat, just tidy.
A side part also helps when a child has a wider forehead or likes hair off the face. It frames the eyes without swallowing the cheeks. Nice little detail. Very practical too.
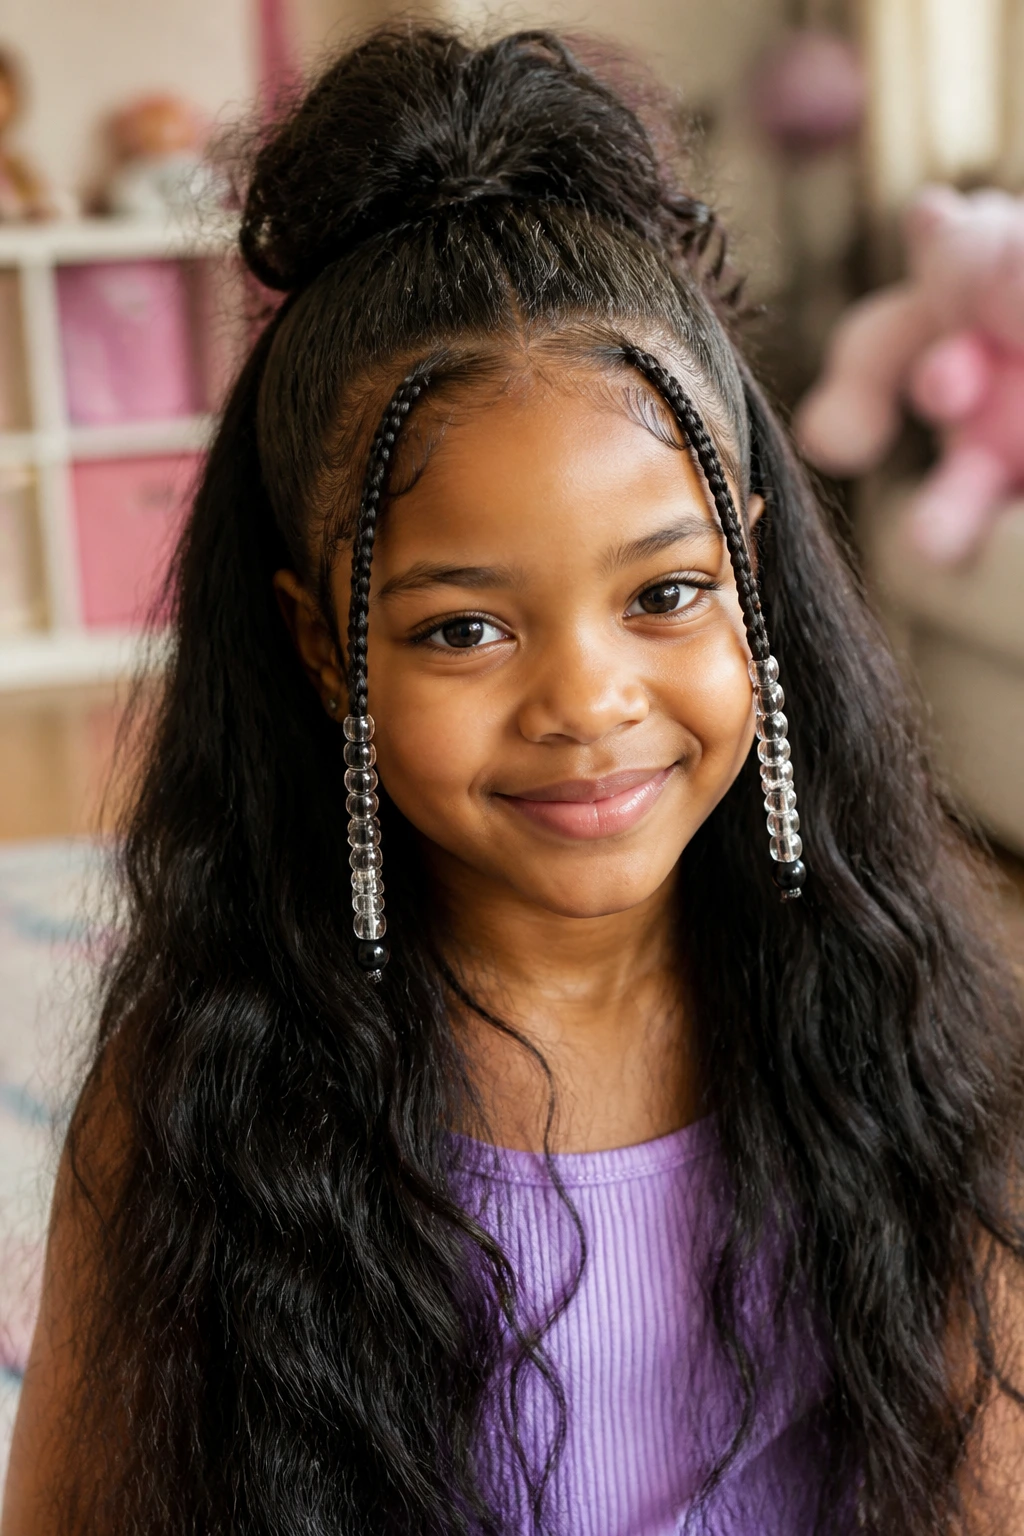
4. Half-Up, Half-Down with Beaded Front Pieces
This one has real range. The top half gets pulled into a neat ponytail or puff, while the bottom half hangs long and loose. On thick hair, the top has enough body to stay lifted, and the lower section gives movement without making the whole head feel heavy. Beads on the front pieces bring a little sparkle without turning the style into a costume.
How to Wear It Well
Keep the top section around ear level to crown level, depending on how much volume you want. If the child is tender-headed, a softer half-up with only the front and crown gathered is easier to live with than a tight high section. The beads should stay light; three or four on each side is plenty.
- Best hair for this look: Lightweight straight or body-wave extensions.
- Front detail: Two thin braided pieces with beads keep the style playful.
- Good pairing: A flat bow or a satin scrunchie at the half-up knot.
This style is especially good when you want a lot of length but do not want it all swinging around during play.
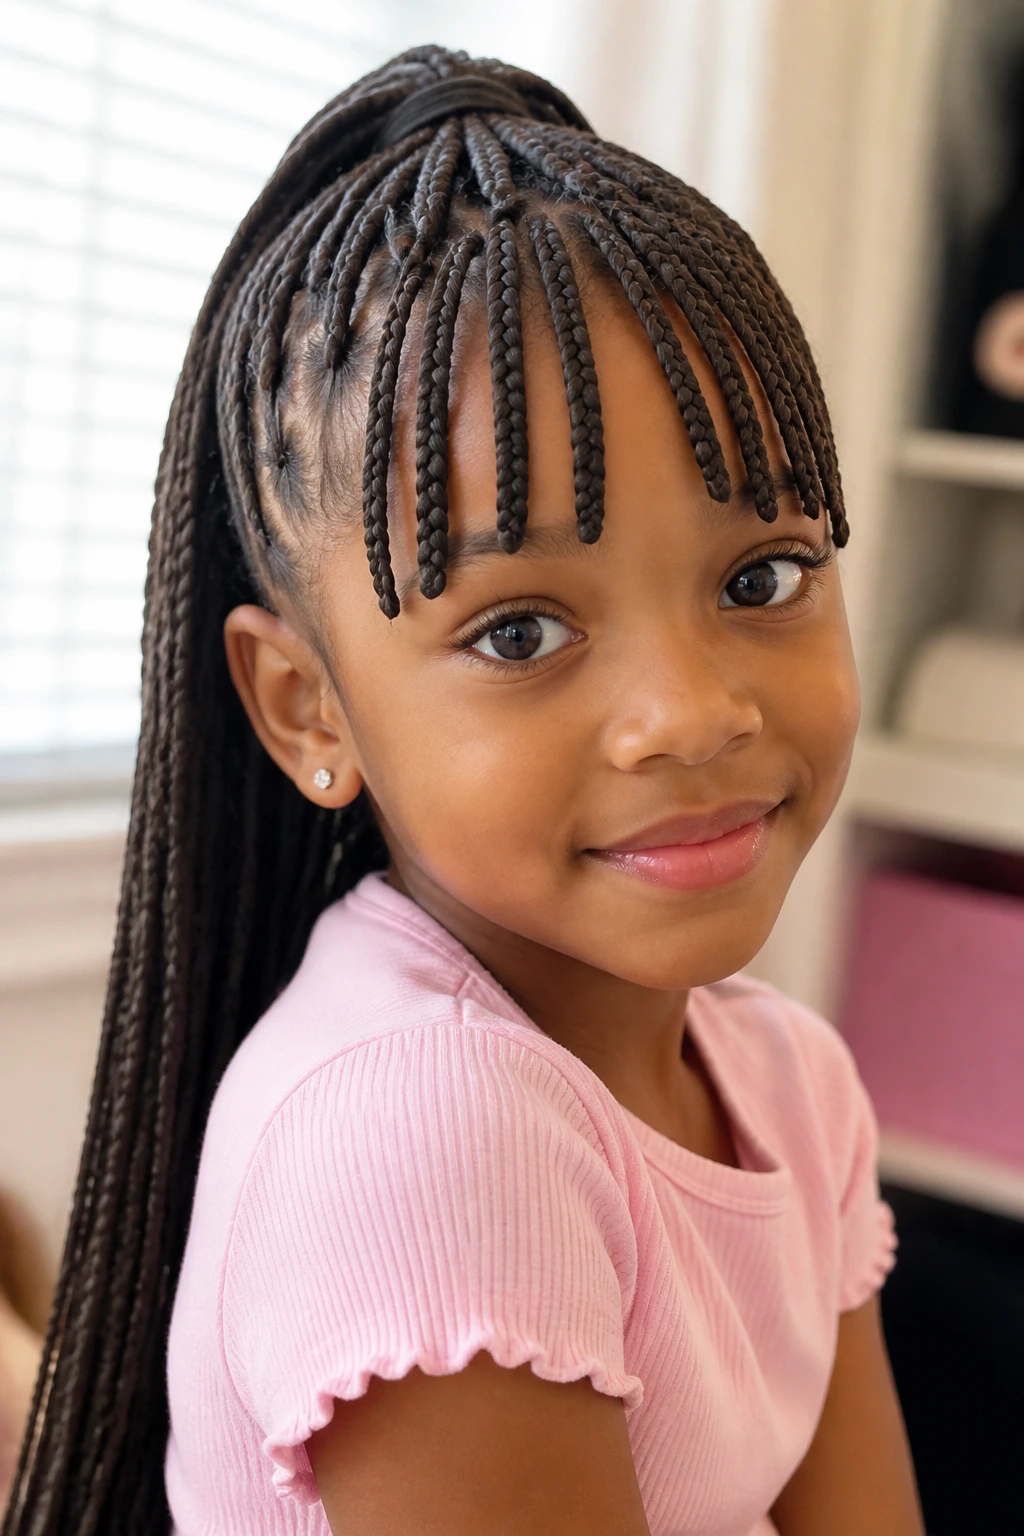
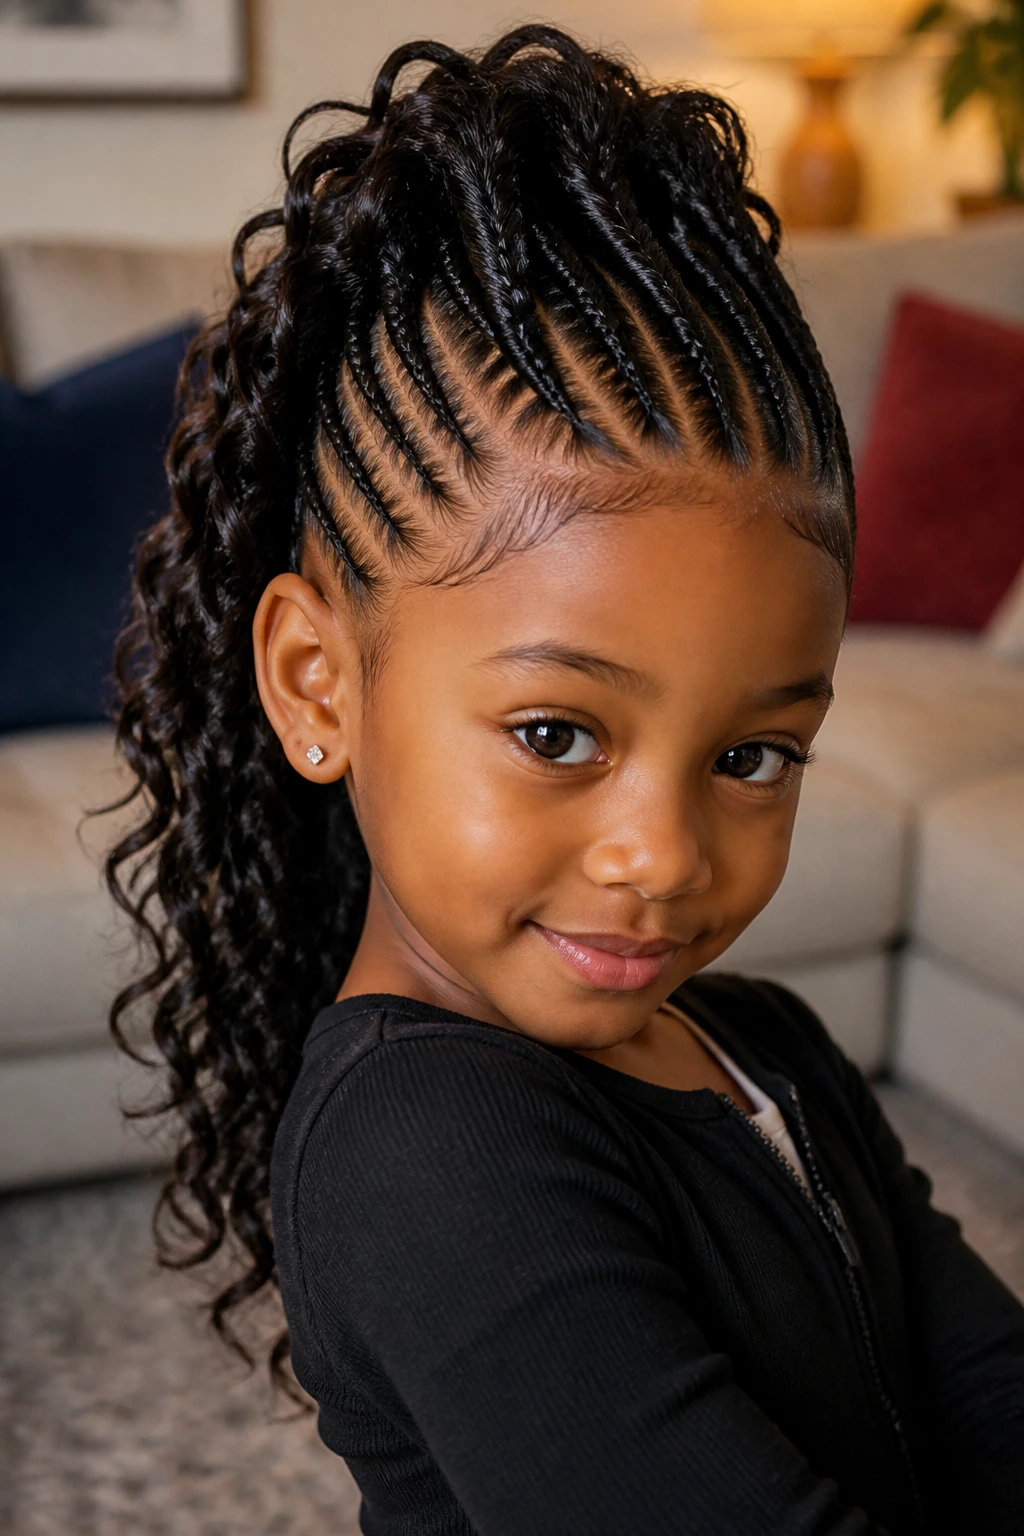
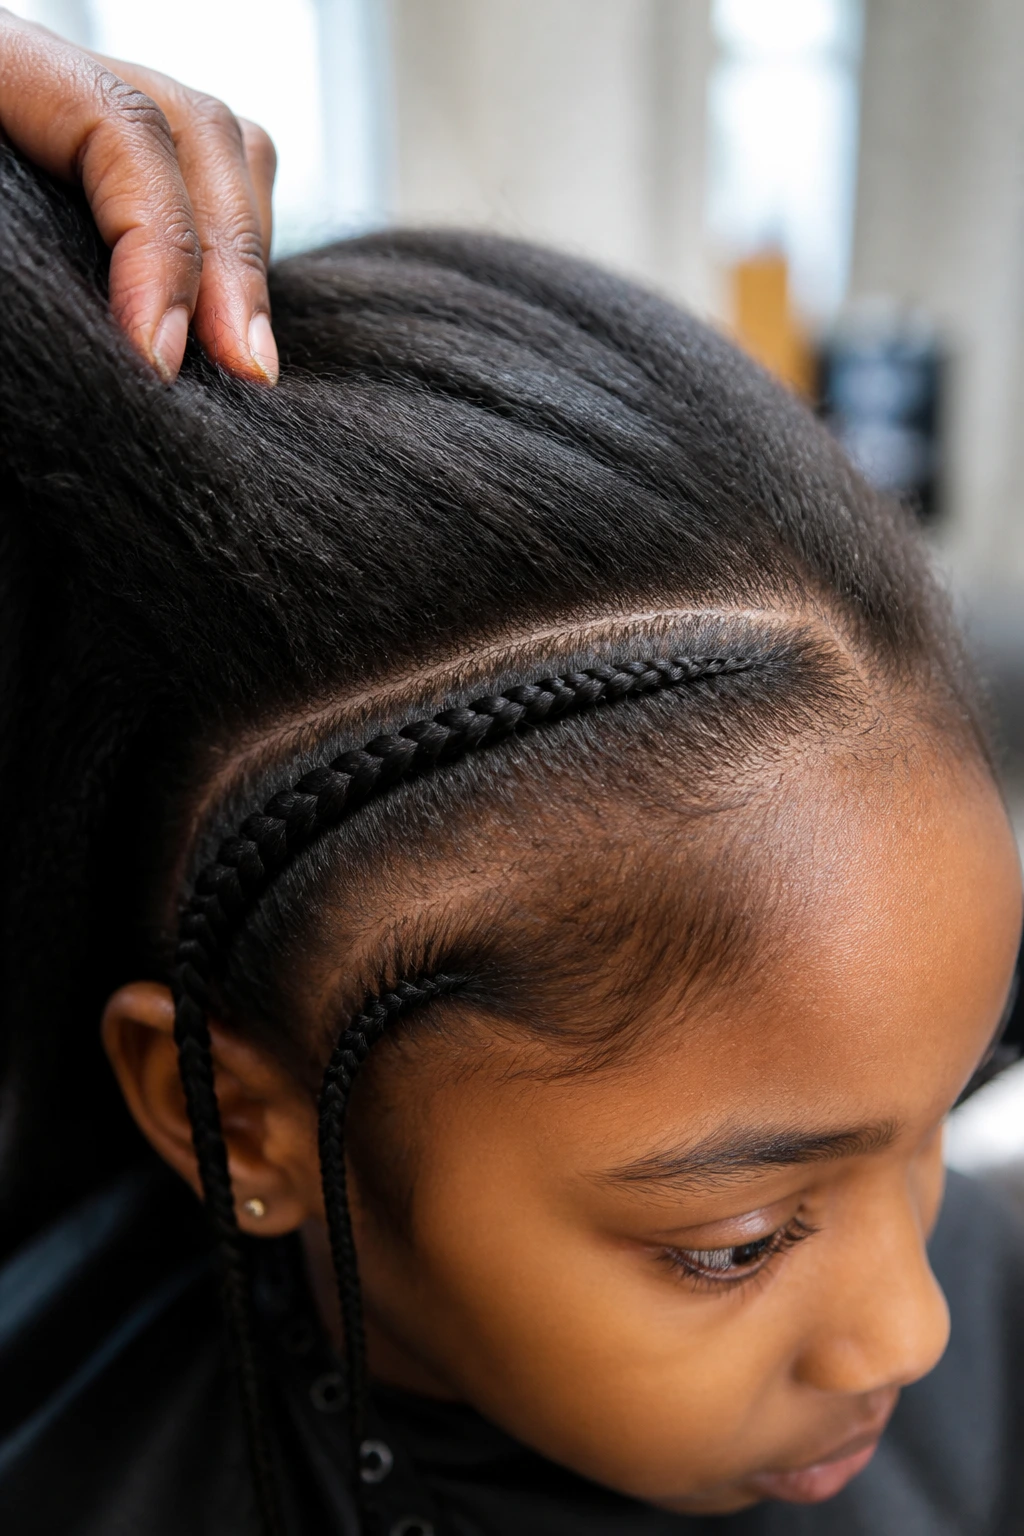
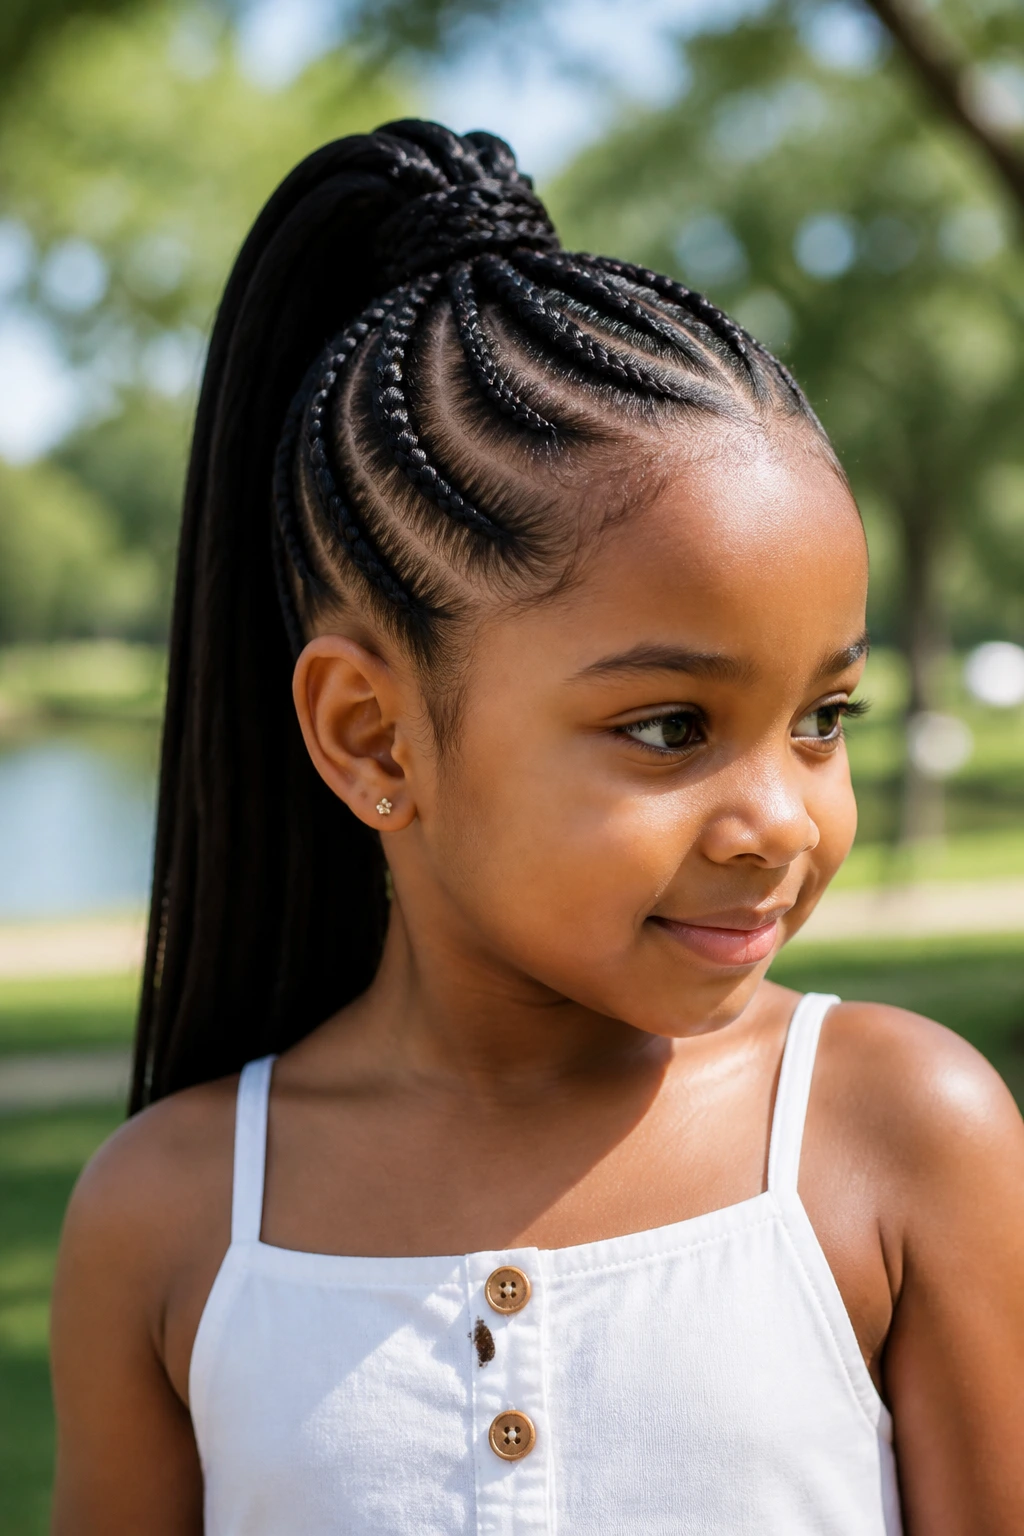
5. Feed-In Cornrow Ponytail
A feed-in cornrow ponytail keeps the scalp clean and the length dramatic. Thick hair gives the braids something solid to grip, so the ponytail base looks smooth and not bumpy. I like this for active kids because the front stays tucked away, which means fewer fingers in the hair by lunch.
The feed-in part matters. Start with tiny sections at the hairline and build gradually into thicker braids so the front does not look stuffed. Once the cornrows reach the crown, gather them into a long ponytail and let the tail fall straight or lightly curled. If the child has a sensitive scalp, this is one of the more comfortable long looks when it’s installed with patience.
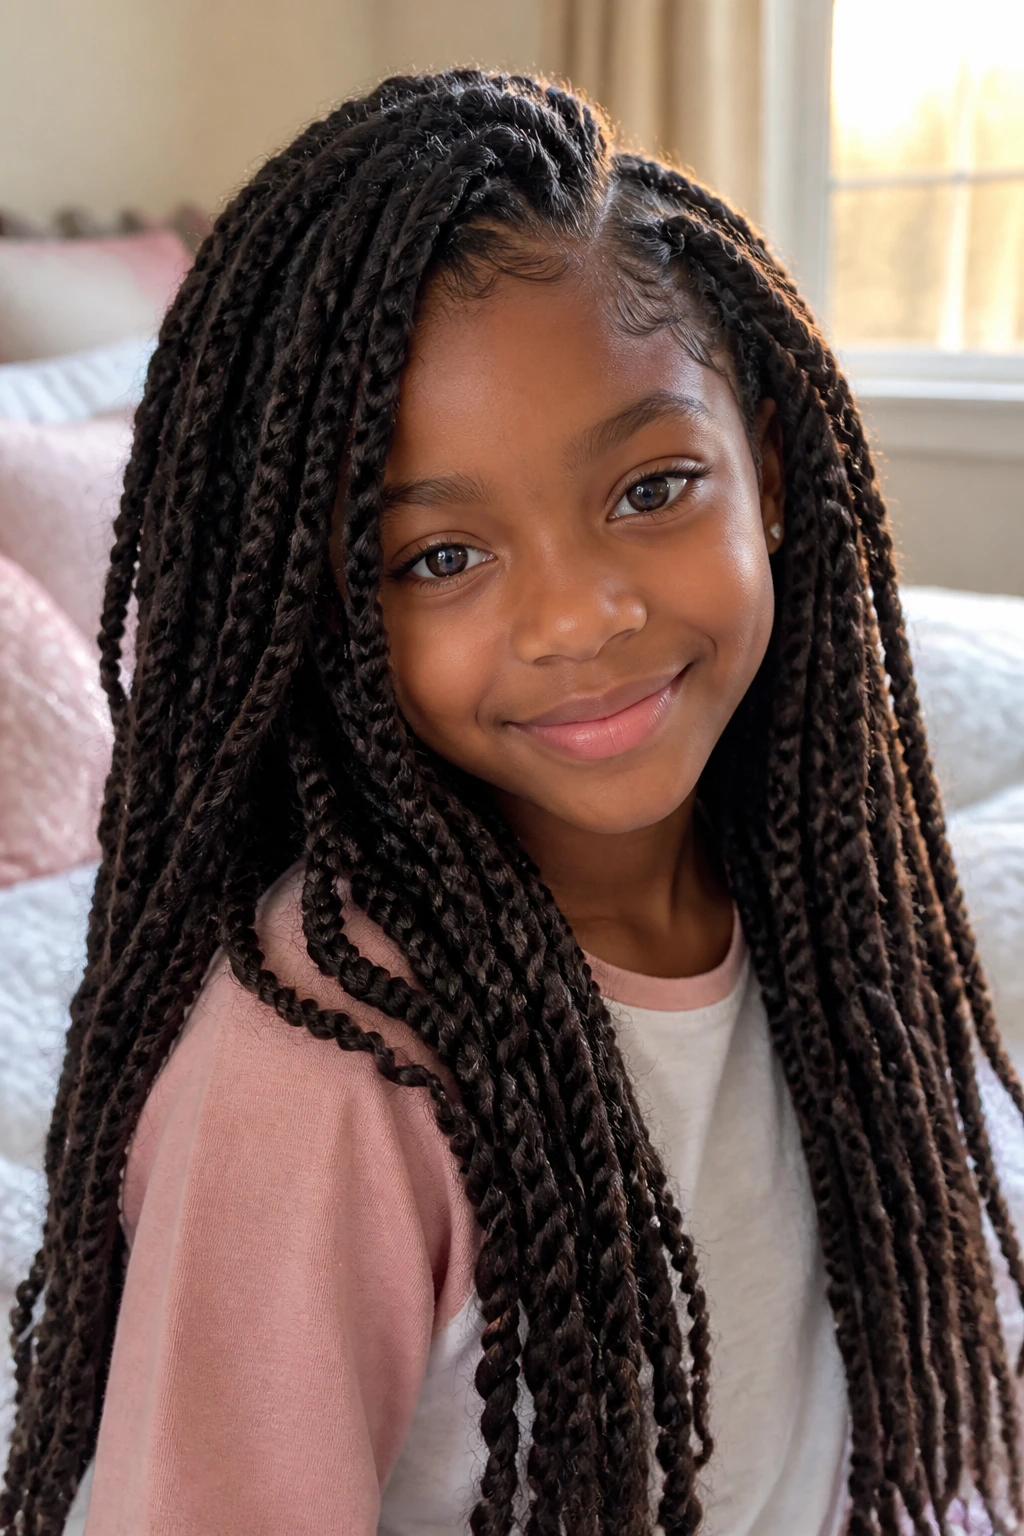
6. Long Passion Twists
Passion twists have a softer, looser look than stiff braids, which is why they work so well when you want movement. On thick hair, they sit with more fullness at the base and don’t expose the scalp as easily. The shape is relaxed, but it still reads neat.
Why It Fits Thick Hair
The texture of passion twists gives a little puff and grip, which helps them blend with dense natural hair. Keep the twists medium-sized, about pencil width or slightly thicker, so they do not get too bulky. Long ones are pretty, but I would still stop around mid-back for most little girls; past that, they start asking a child to carry too much weight.
A side part softens the whole thing. So does a few face-framing pieces that fall a little shorter than the rest.
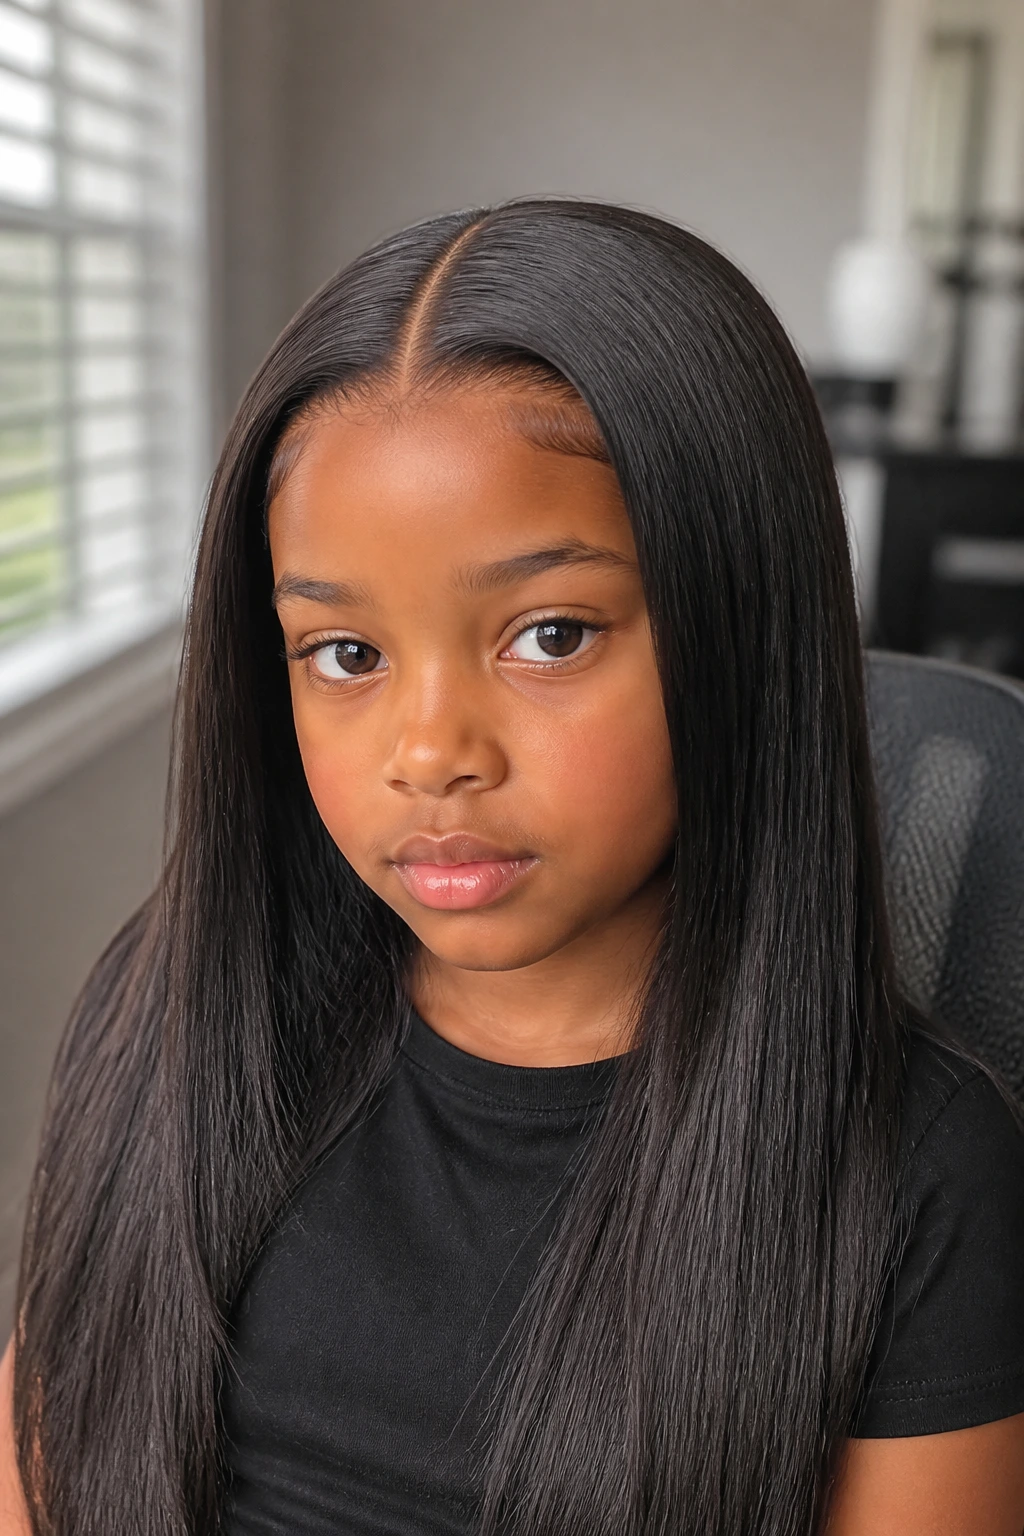
7. Sleek Middle-Part Straight Weave
A straight weave with a clean middle part is simple in the best way. No extra fuss. No tangled layers getting caught under backpacks. The straight finish makes thick hair look smooth at the top, and the middle part gives the style a calm, balanced shape.
This look works best when the base is flat and the extension hair is not overly dense. For kids, I prefer a light-to-medium straight bundle over a super thick one. If the hair starts looking too full at the ends, it can overwhelm a small face. A slight bump under the layers is fine; helmet straight is not.
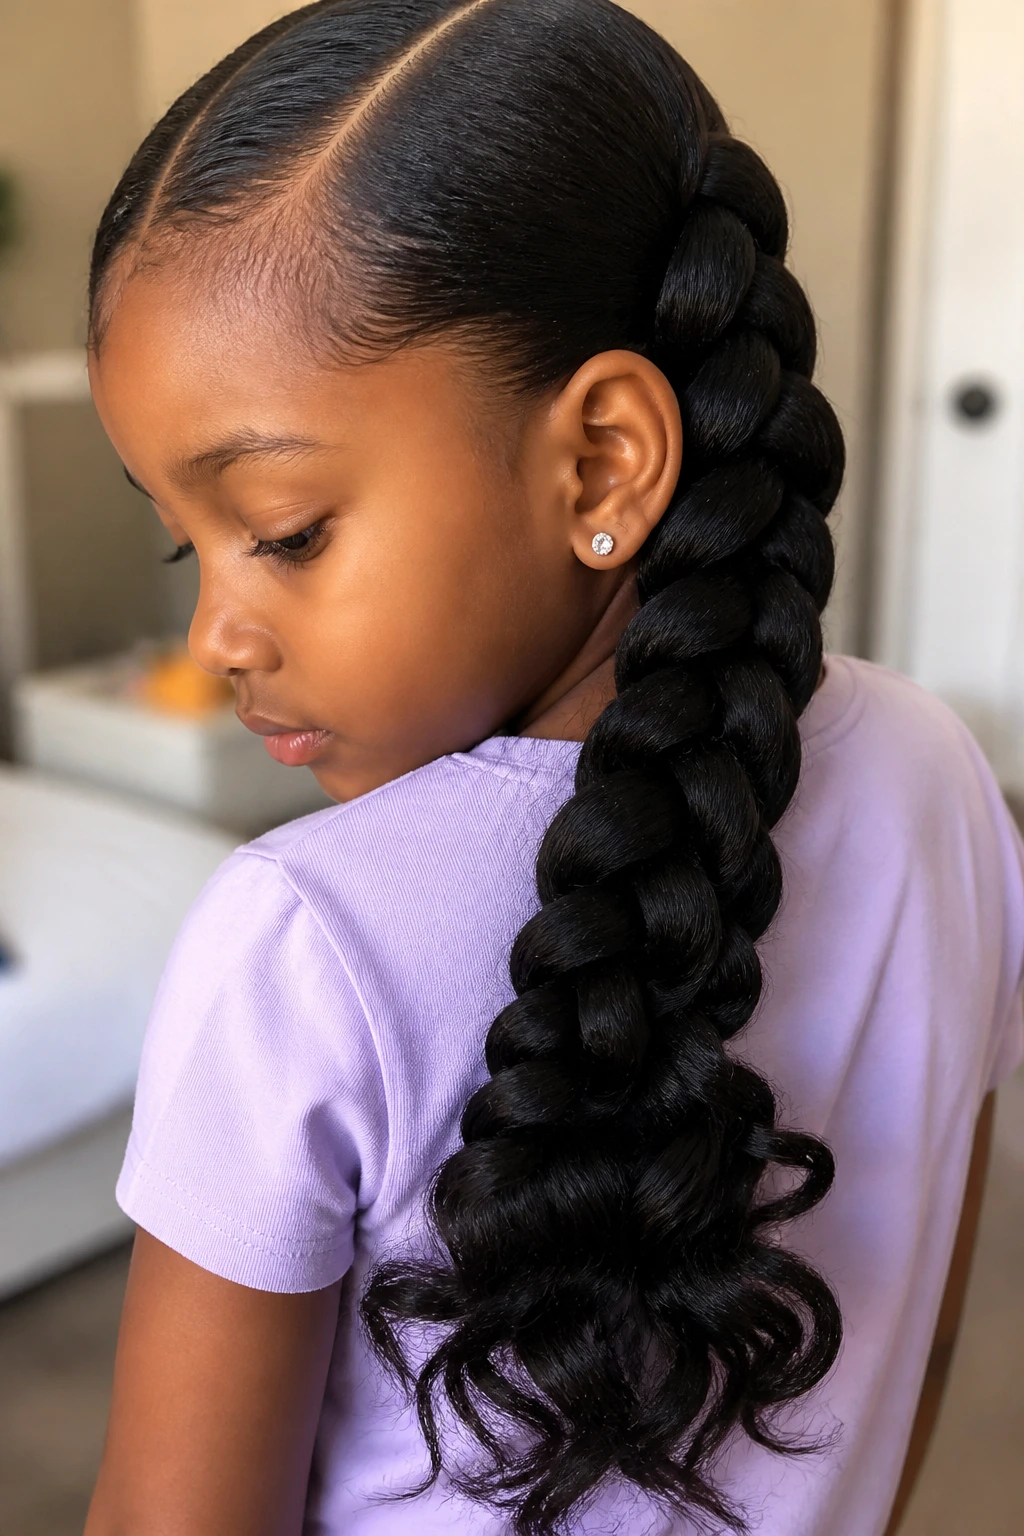
8. Jumbo Braid with Loose Curls
A jumbo braid with loose curls at the end is one of the easiest ways to get drama without a long salon day. One thick braid down the back or over one shoulder keeps the style readable, and the curled tail adds softness. Thick hair makes the braid look solid instead of skinny and stringy.
Quick Notes
- Parting: A clean center or deep side part sets the whole shape.
- Braid size: One braid, or two if you want a twin-braid look.
- Finish: Use curlers or flexi rods on the ends overnight for a bend instead of a tight ringlet.
I like this look when a child wants to feel dressed up but still wants to swing her head around without twenty tiny braids catching on everything. It’s a little fancy. Not fussy.
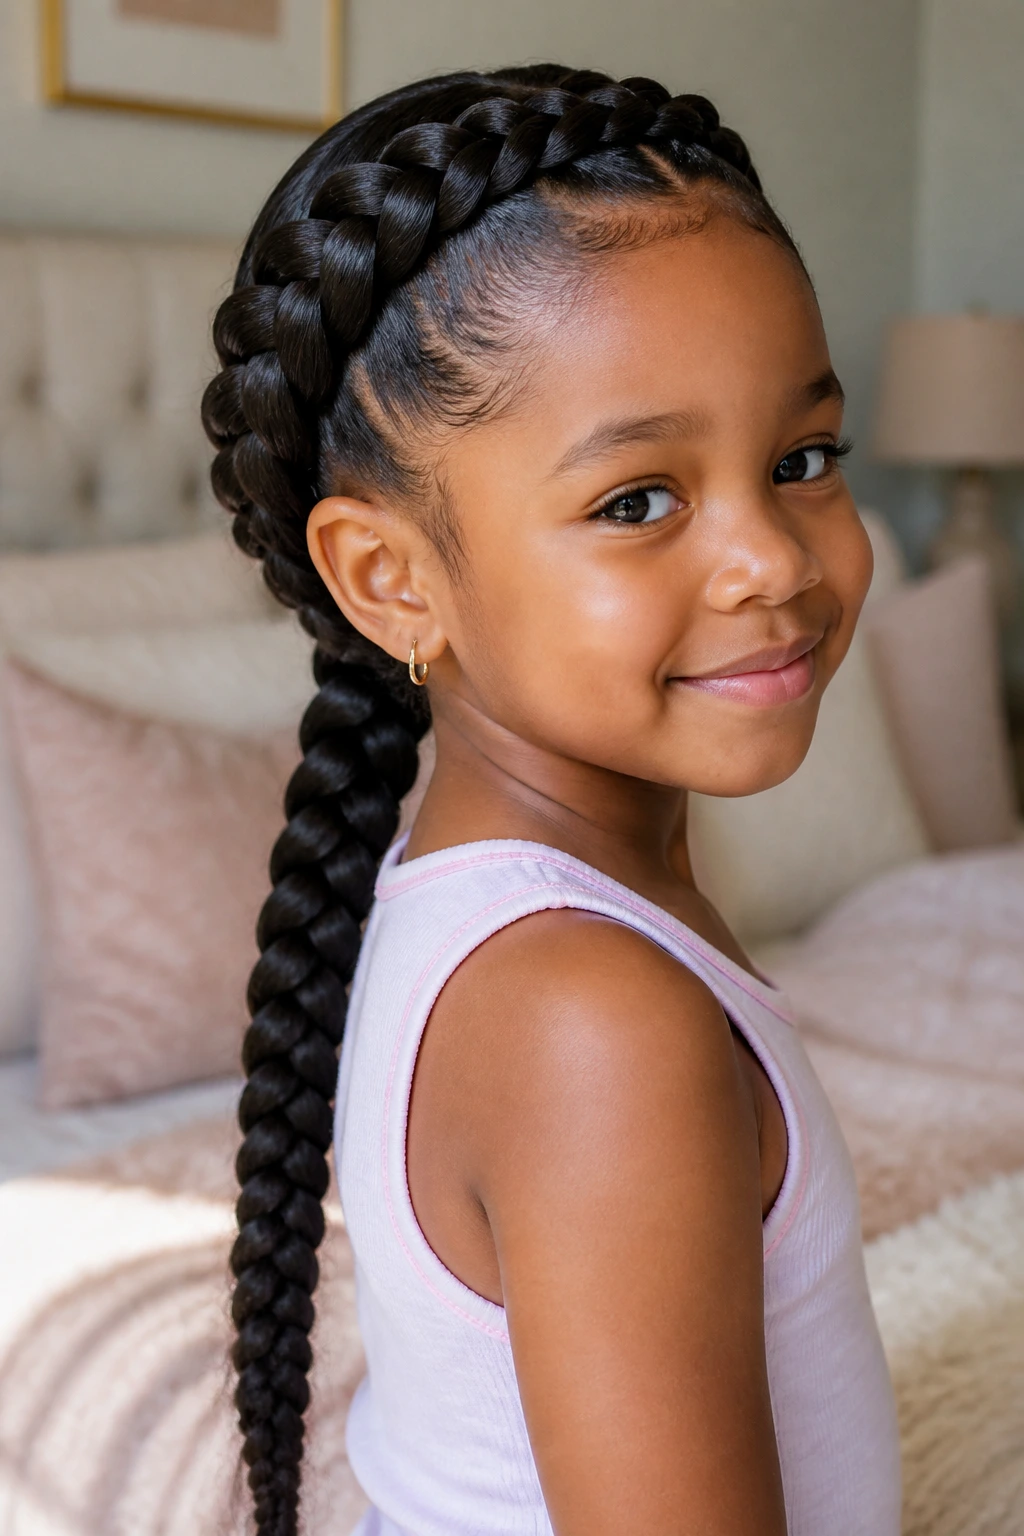
9. Crown Braid into a Hanging Tail
This is the style that makes people ask who did the hair, and then ask again when they see how clean the back is. The crown braid keeps the front neat and secure, while the long tail gives the rest of the style room to move. On thick hair, the crown braid sits firm without looking overstuffed.
A good version uses the braid as a halo across the front hairline, then drops into one long tail at the back or side. Keep the braid snug enough to stay in place, but not so tight that it leaves the child tugging at the temples. The hanging section can be straight, waved, or curled — straight looks more polished, curls make it softer.
10. Layered Water Wave with Barrettes
Water wave hair has that soft, airy bend that keeps a long style from feeling heavy. Layered on thick hair, it looks full from the roots to the ends, and the texture takes barrettes nicely without slipping. This is one of my favorites for little girls who like hair that moves but do not want a stiff braid every time.
A middle part keeps the layers balanced, but a side part works if the child likes more hair off one eye. Add two barrettes near the temple or just above the ears. Not six. Two. That little restraint matters. Too many clips can make the style feel crowded.
11. Braided Bangs with Long Extensions
Braided bangs solve a real problem: some children hate hair in their faces, but they still want length. Tiny braided bangs, fed into a longer extension style, keep the front controlled and the back long. On thick hair, the bangs blend more easily because there’s enough density to hide the transition.
How to Make It Look Clean
The bangs should stay narrow — think half-inch sections, not thick ropes. Use them to frame the forehead or sweep across one side. The long extension behind them can be a ponytail, loose weave, or braid tail. If you want a softer finish, curl the longer pieces so the front and back feel connected instead of separate.
This style is especially good for photo days because the face stays visible. Very practical. Very cute too.
12. Side-Swept Ponytail with Spiral Ends
A side-swept ponytail has a little old-school charm, and spiral ends make it feel finished. The ponytail sits low over one shoulder instead of pulling straight back, which is useful when a child’s hairline needs a gentler day. Thick hair supports the sweep without collapsing.
Use a diagonal part or just brush the hair to one side from the crown. The ponytail base should sit around mid-height — too high and the side sweep loses its shape. Spiral the ends with rods or a curling wand on the extension only, depending on what hair type you’ve chosen. I’d skip anything super stiff here; the whole point is movement.
13. Butterfly Locs with Long Length
Butterfly locs are a smart option when you want texture and a little edge without hard lines. The loops give the style softness, and the long length makes the whole thing feel dressed up. On thick hair, the locs sit fuller and the parts can stay neat for longer.
The best version for a child is usually medium-sized and not overly heavy. I would not push the length too far down the back on a small frame. Mid-back is enough. If the loops are too tight, the style loses its charm, so keep them loose and a little uneven on purpose. That’s what gives them the name.
14. Deep Side Part Flip-Over Weave
A deep side part flips the mood of a style fast. It gives the hair volume on top and a softer fall across one side of the face, which is handy if the child likes dramatic hair but not a lot of movement in front of her eyes. Thick hair gives the part something to hold onto, so it does not disappear by lunchtime.
This look is strongest with straight, body-wave, or soft curl extensions. The key is keeping the root smooth on the part side and letting the flip-over side have a little lift. Don’t overdo the product. A light mousse and a soft wrap overnight are usually enough.
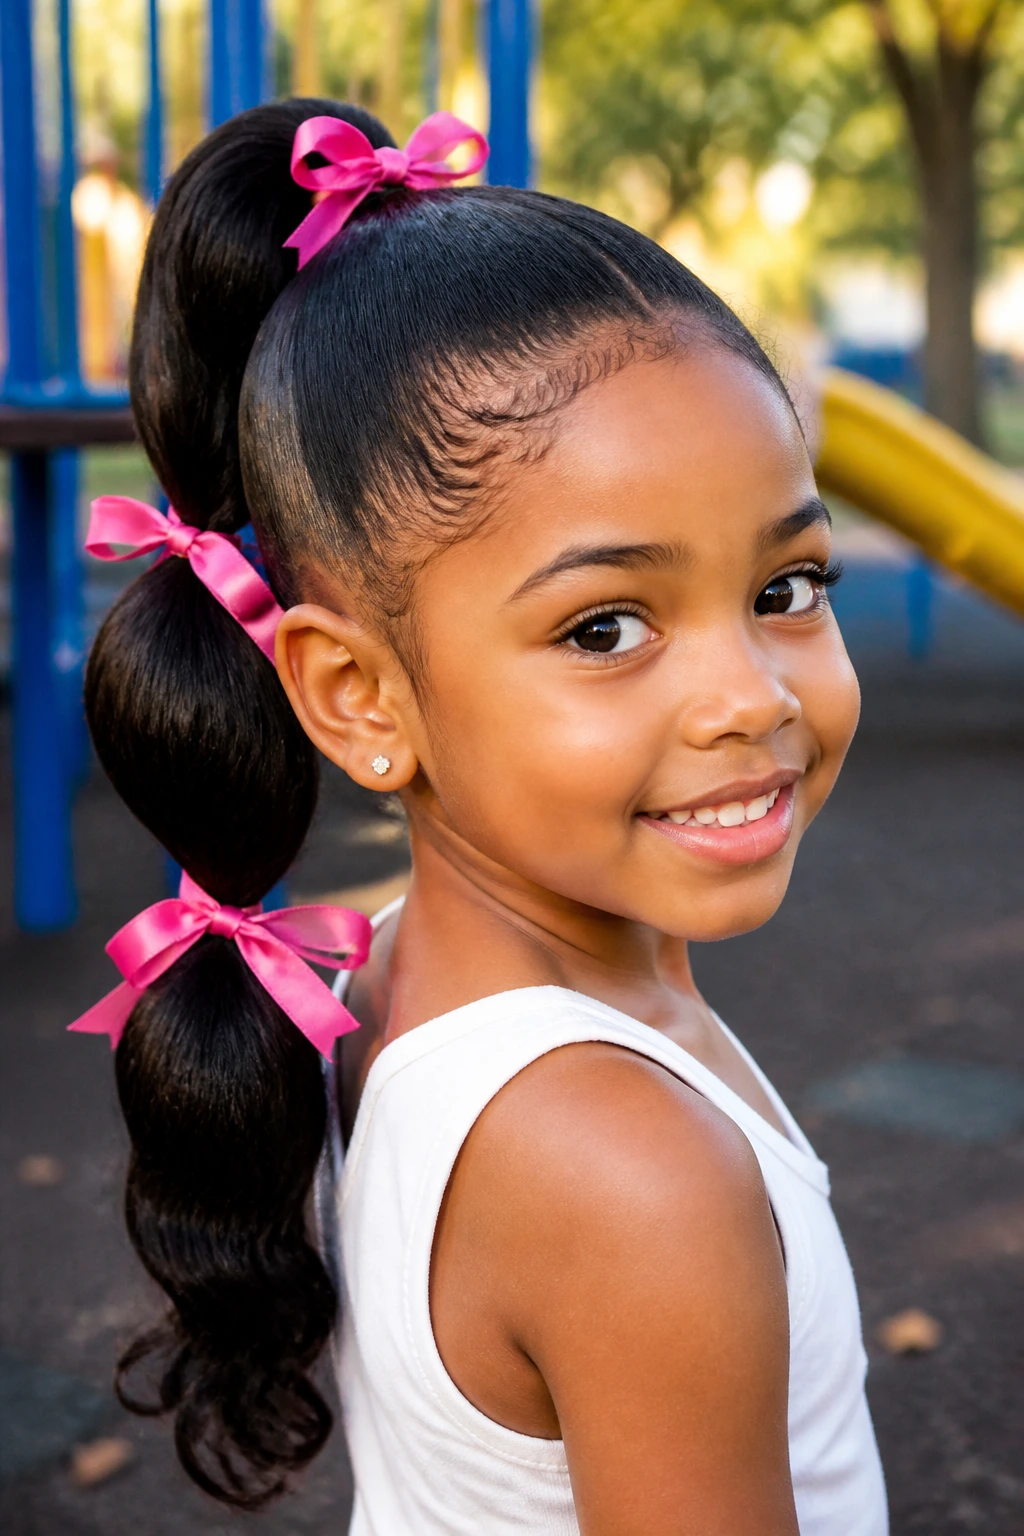
15. Bubble Ponytail with Ribbon Wraps
If you want playful, this is the one. Ribbon-wrapped bubble ponytails have a storybook feel, and the bubbles make long hair easier to manage because the length is broken into sections. Thick hair keeps each bubble round instead of thin and droopy.
Wrap a thin ribbon around the first section of the ponytail, then create bubbles every 3 inches or so with clear elastics. You can tuck the ribbon between bubbles or leave little tails at the end. Color matters here. A red or gold ribbon changes the whole tone, and a satin finish looks cleaner than a stiff craft ribbon.
16. Crisscross Cornrows into a Long Tail
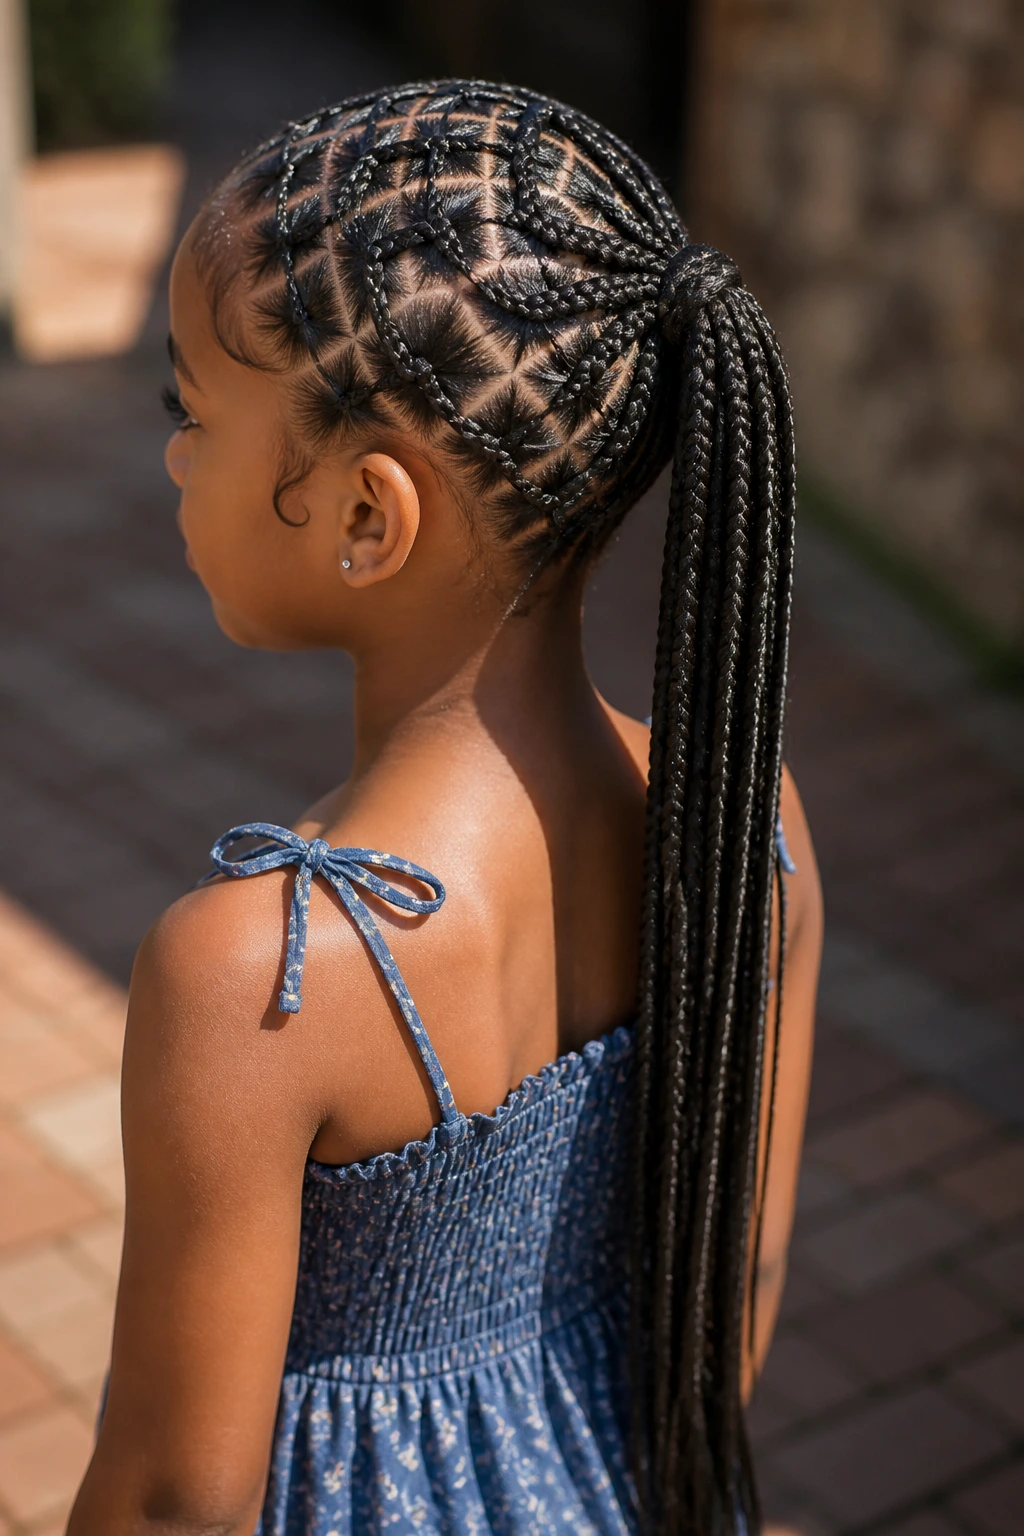
Crisscross cornrows bring visual interest to the scalp without needing a lot of extra add-ons. The braid pattern is what people notice first, and the long tail that follows keeps the style practical. Thick hair helps the crisscross look sharper because each braid has enough body to stay visible.
Best Uses
- School weeks: Keeps the front controlled and the back easy to tie.
- Vacations: Holds up well under hats and hoodies.
- Special days: Works nicely with one statement bow at the base.
I like this style because it gives you detail where it matters and fewer loose pieces where they cause trouble. If the child has a strong crown swirl or a stubborn hairline, a crisscross pattern can help everything lay flatter without forcing the hair to fight itself.
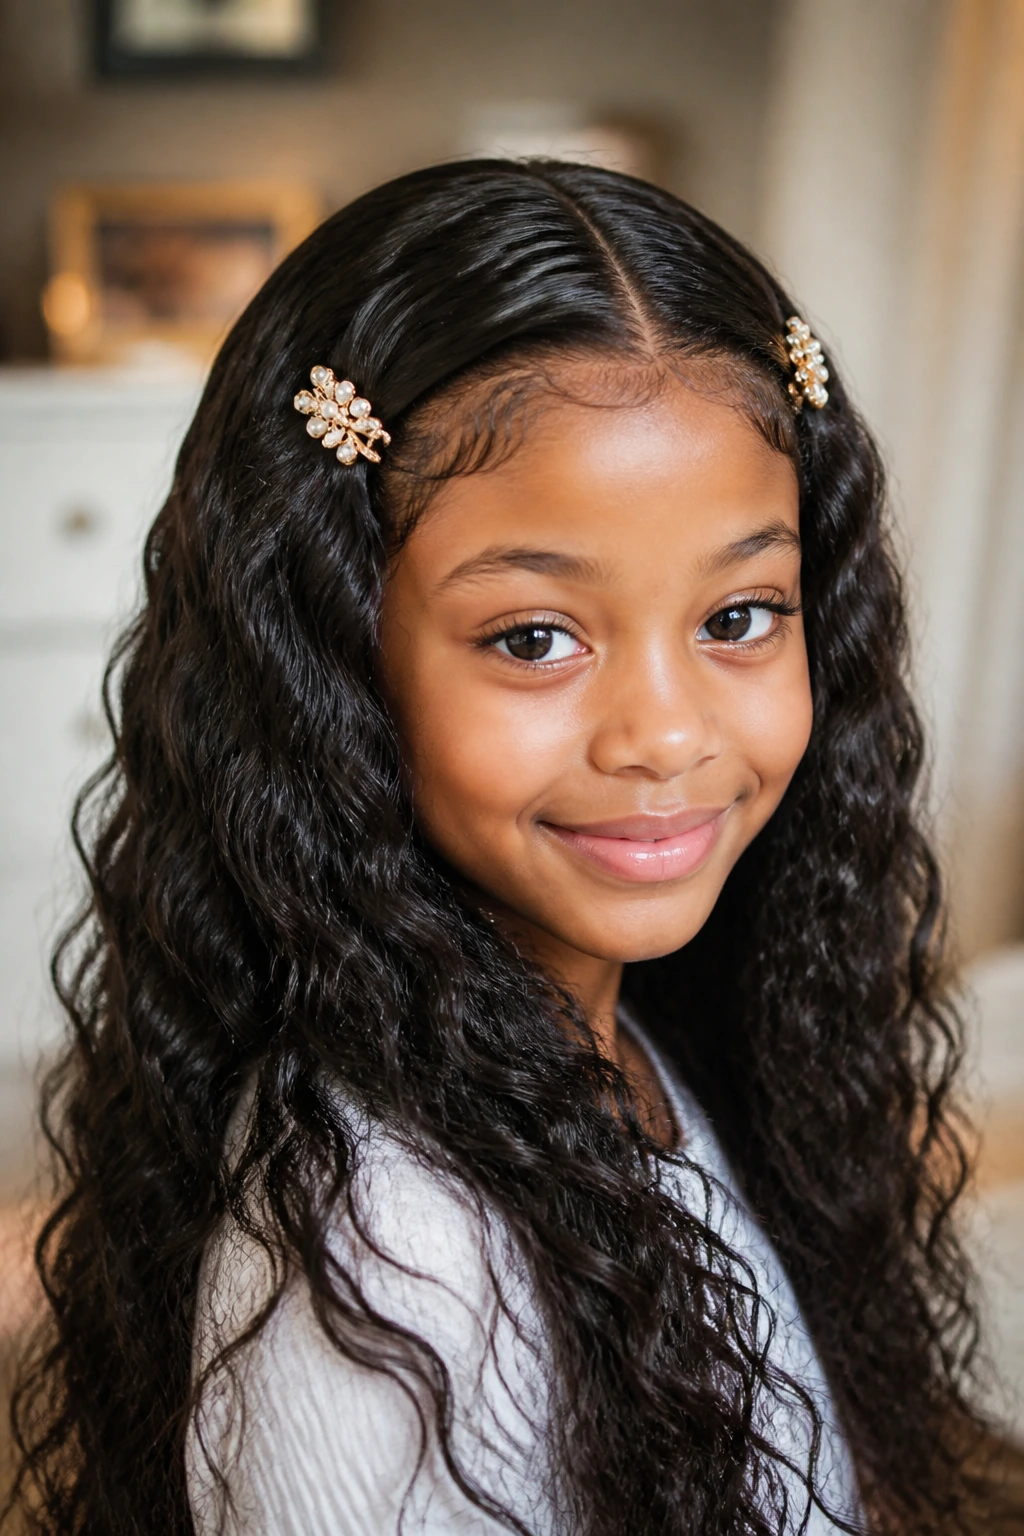
17. Long Curly Sew-In with Face-Framing Layers
This is one of the prettiest long weave looks on thick hair because the curls and layers do all the talking. A closure or carefully done leave-out frames the face, and the long curls bring softness around the shoulders. The layers keep the hair from looking like one giant curtain.
The face-framing pieces should fall a little shorter than the rest — just enough to sit around the cheeks or jaw. That small shift makes the style look intentional. I prefer medium curls over tiny ones for children because tiny curls tangle faster, especially around the collar. A wide-tooth comb and a little mousse go a long way here.
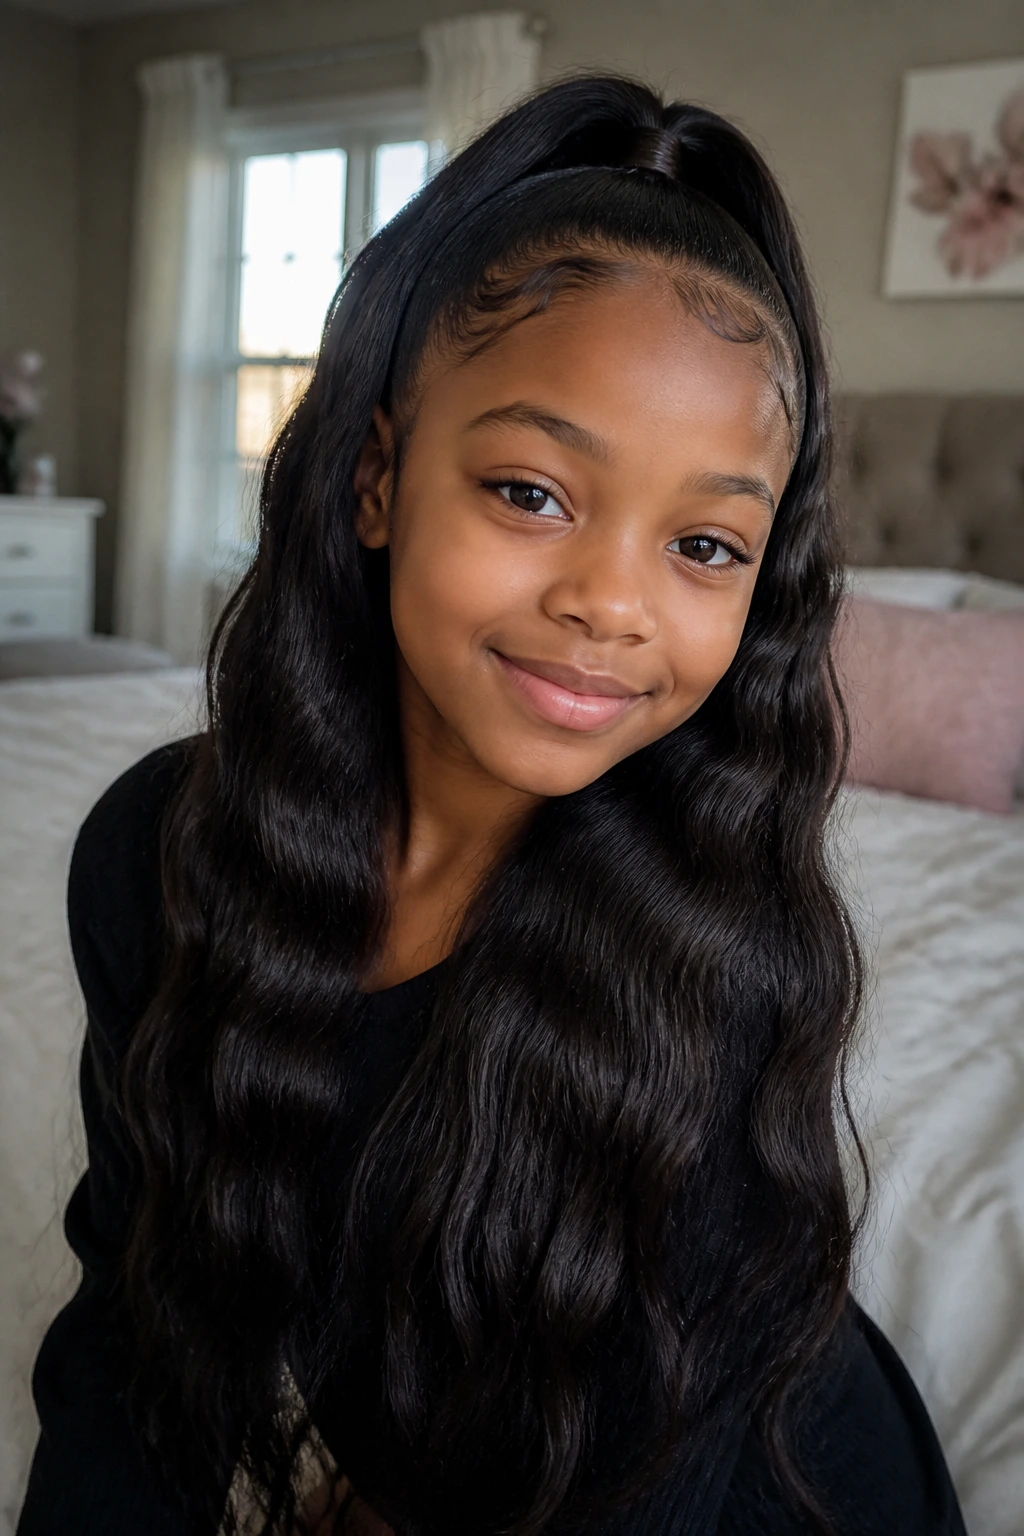
18. High Bun with a Long Hanging Piece
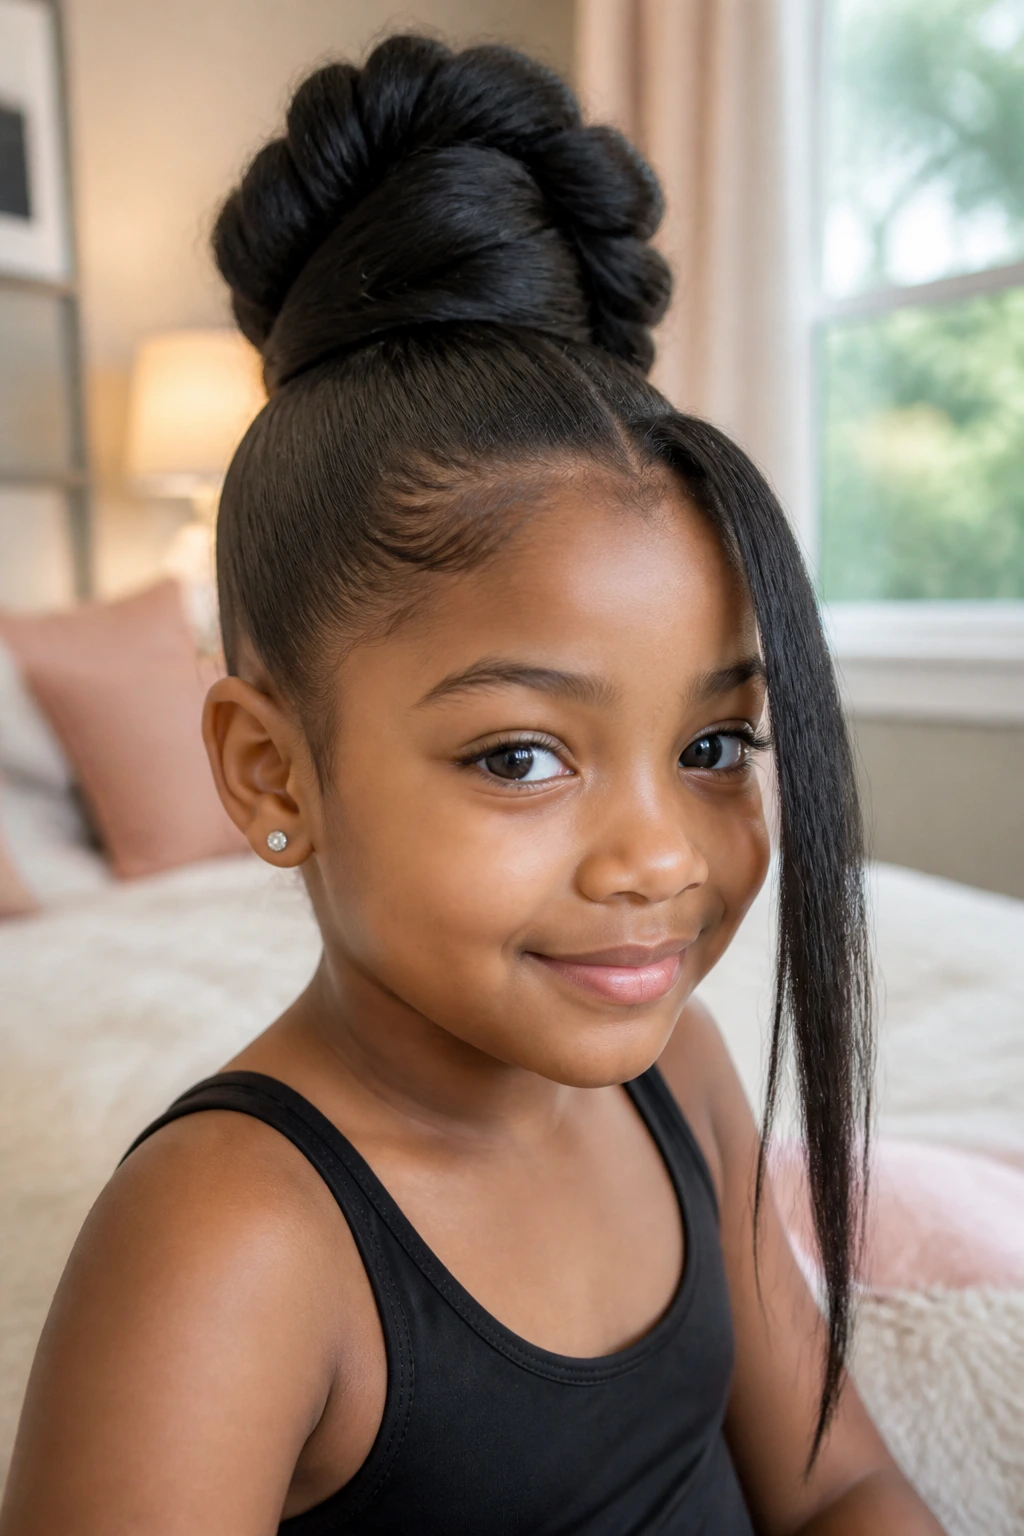
A high bun with one long hanging piece gives you a polished top and a little drama in the back. It’s an easy way to keep thick hair off the neck while still using the weave for length. The bun should sit high enough to feel cheerful, not so high that it strains the scalp.
The hanging piece can be a straight tail, a curl, or a braid wrapped with a strand of hair. If the child is active, keep the bun compact and the tail light. That keeps the style from swinging too hard during play. It’s a good halfway style when you want formal and practical in the same head.
19. Two Braids with Woven Extensions
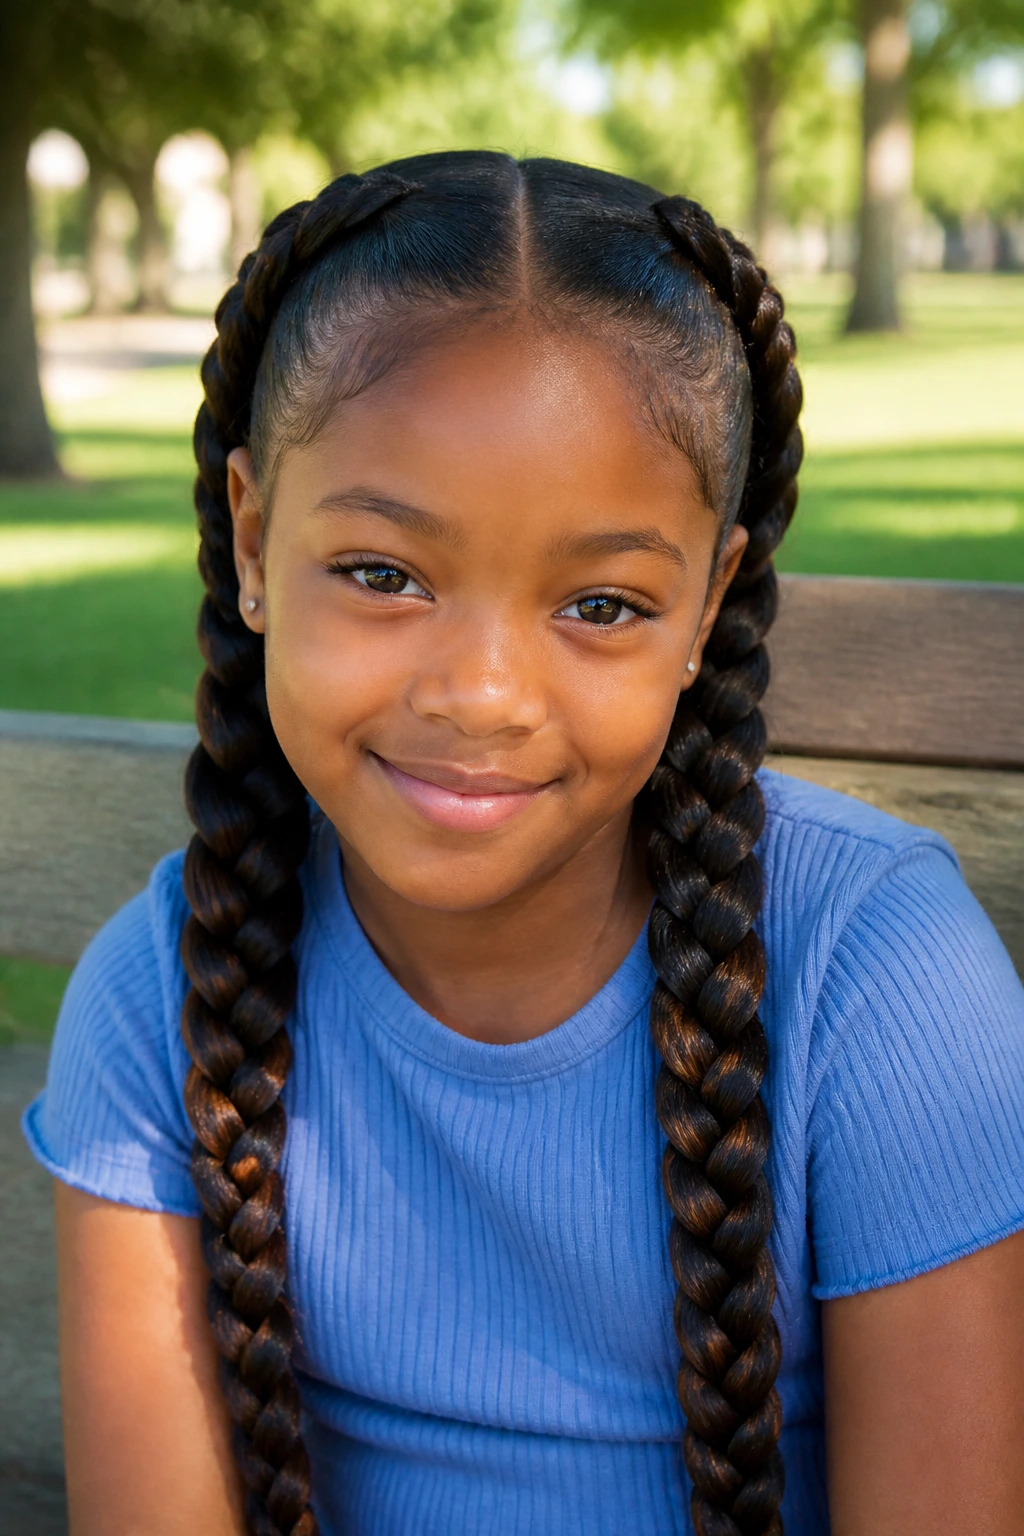
Two long braids never go out of rotation because they are easy to wear, easy to refresh, and easy to sleep on. Woven extensions give the braids length and fullness without needing a dozen tiny parts. Thick hair helps the braid bases stay neat and gives the ends a more balanced look.
A middle part makes the look classic, but a side part can soften it. Keep the braids equal in thickness so one side does not end up dragging the other around. If you want to make them feel less plain, add cuffs or beads near the ends instead of loading up the entire braid.
20. Triple Ponytail with Satin Ribbons
Three ponytails arranged from front to back — or top to nape — make a long style feel structured. Satin ribbons tie the sections together and keep the finish childlike without looking babyish. On thick hair, each pony has enough volume to stand on its own.
How to Shape It
The sections should be clean and even, about 2 to 3 inches apart depending on the child’s head size. The first pony can sit high, the second at mid-head, and the third near the nape. If you want extra length, add extensions only to the back pony while keeping the front two lighter. That keeps the hair from getting too heavy at the crown.
This is one of those looks that stays neat if you keep the parts crisp and the ribbons simple. Too many colors at once can fight the style.
21. Feed-In Mohawk with a Soft Tail
A feed-in mohawk gives you edge without a rough finish. The sides stay braided close to the scalp, and the center section drops into a soft tail that can be curled or left straight. Thick hair is useful here because the mohawk ridge sits firmly and does not collapse the moment the child turns her head.
This style is best when the braids are symmetrical and the center part is wide enough to show the pattern. Keep the tail lighter than you think you need. If the tail is too dense, the whole look turns top-heavy. A soft tail keeps the mohawk playful instead of severe.
22. Ombre Waves with Center Part

Ombre waves can look beautiful on little girls when the color shift stays subtle. I do not love loud, high-contrast color for children. A gentle fade from dark root to warm brown, honey, or soft auburn reads sweet and polished without shouting.
The center part anchors the style and lets the waves frame both sides evenly. Thick hair gives the ombre more depth because the darker root area stays solid while the lighter lengths show movement. If you choose this route, keep the finish soft and the wave pattern loose. Tight ringlets make the color look busier than it needs to be.
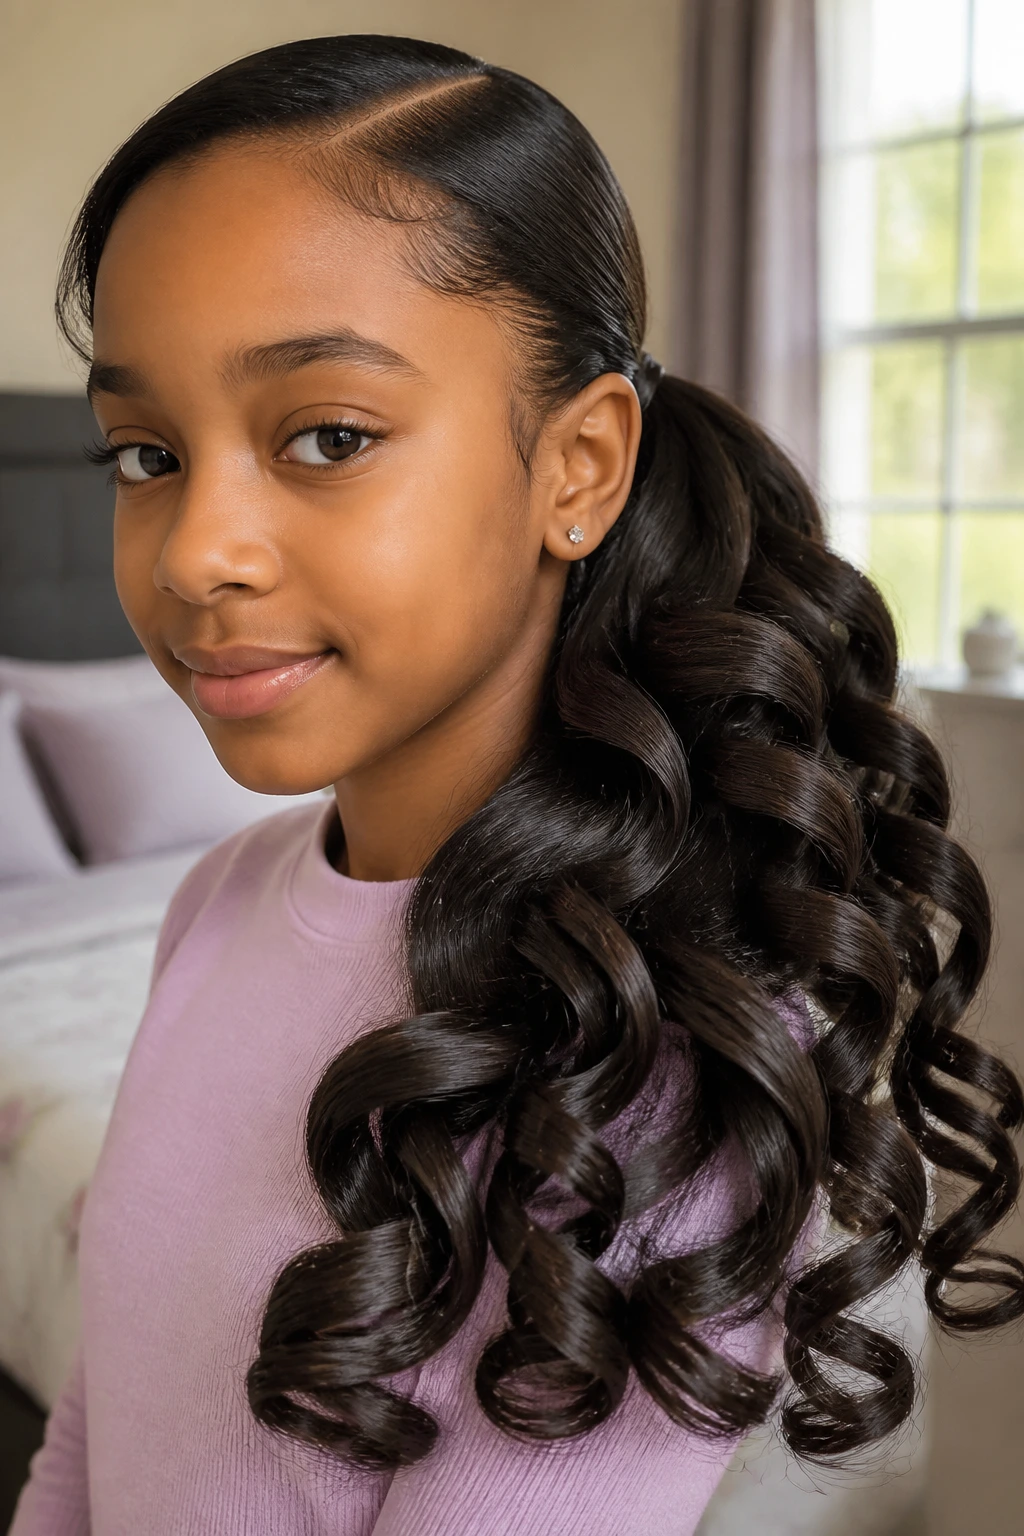
23. Low Ponytail with Curled Ends
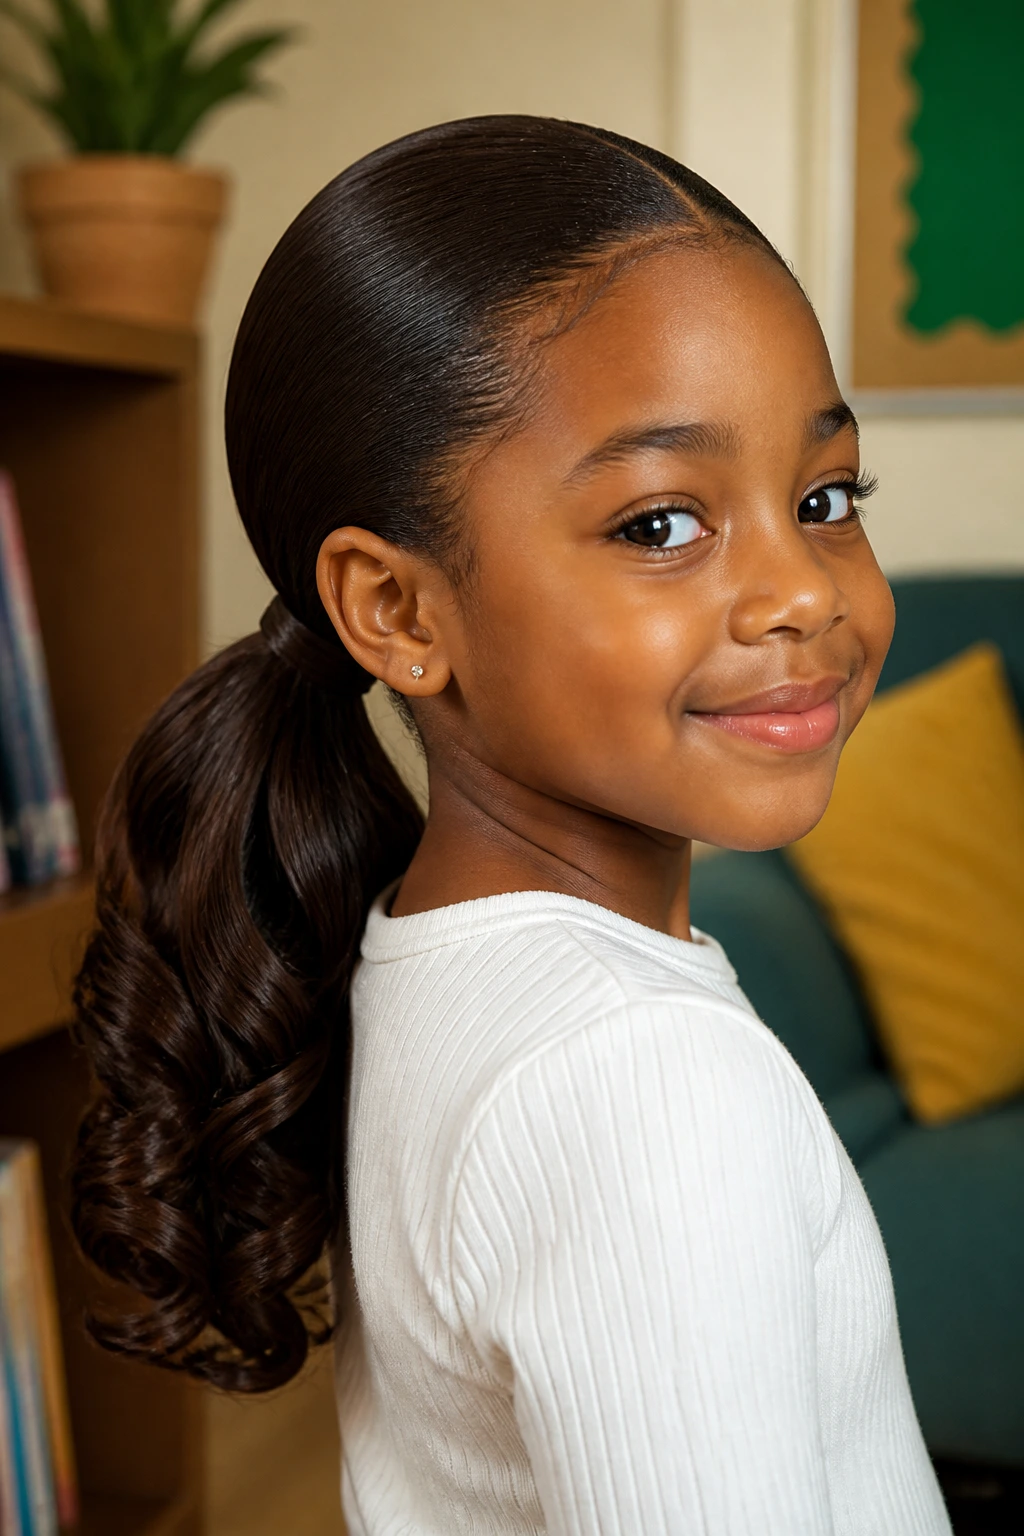
This is the style I recommend when a child needs polish with almost no drama. A low ponytail sits close to the neck, which makes it comfortable for sitting, reading, and car seats. The curled ends keep it from feeling plain.
A middle part gives it a more formal feel, while a side part makes it sweeter. Wrap a small section of hair around the base so the band disappears, then curl the tail in 1-inch sections if you want bounce. Thick hair keeps the ponytail full without needing a lot of extra extension hair, which is a nice relief on smaller heads.
24. Kinky-Straight Blowout Weave
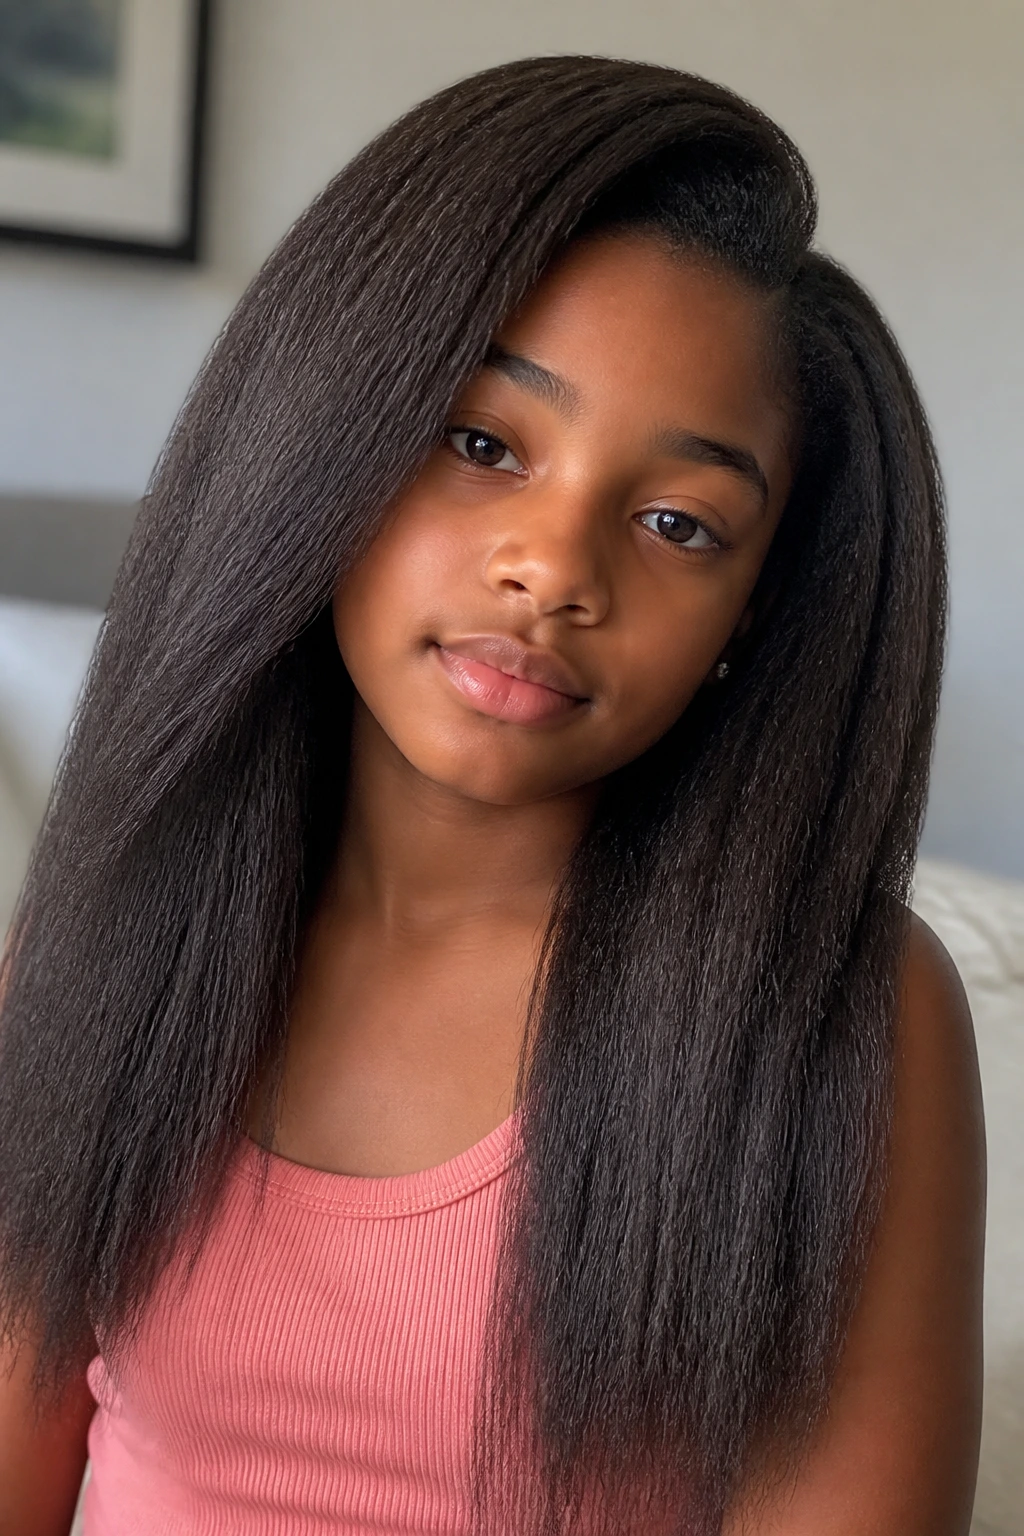
Kinky-straight hair matches the texture story of thick natural hair better than pin-straight hair in many cases. It has enough body to blend and enough softness to move. If you want a style that looks like an elevated blowout without needing heat every morning, this is a smart pick.
The texture is the point. It sits fuller at the top, so the weave does not look pasted on. I like this with a slight side part and a rounded shape around the face. If the hair is too long, the style can turn into a lot of fabric hanging from a small head, so keep the length within reason. Mid-back usually does the job.
25. Layered Side Pony with Headband Finish
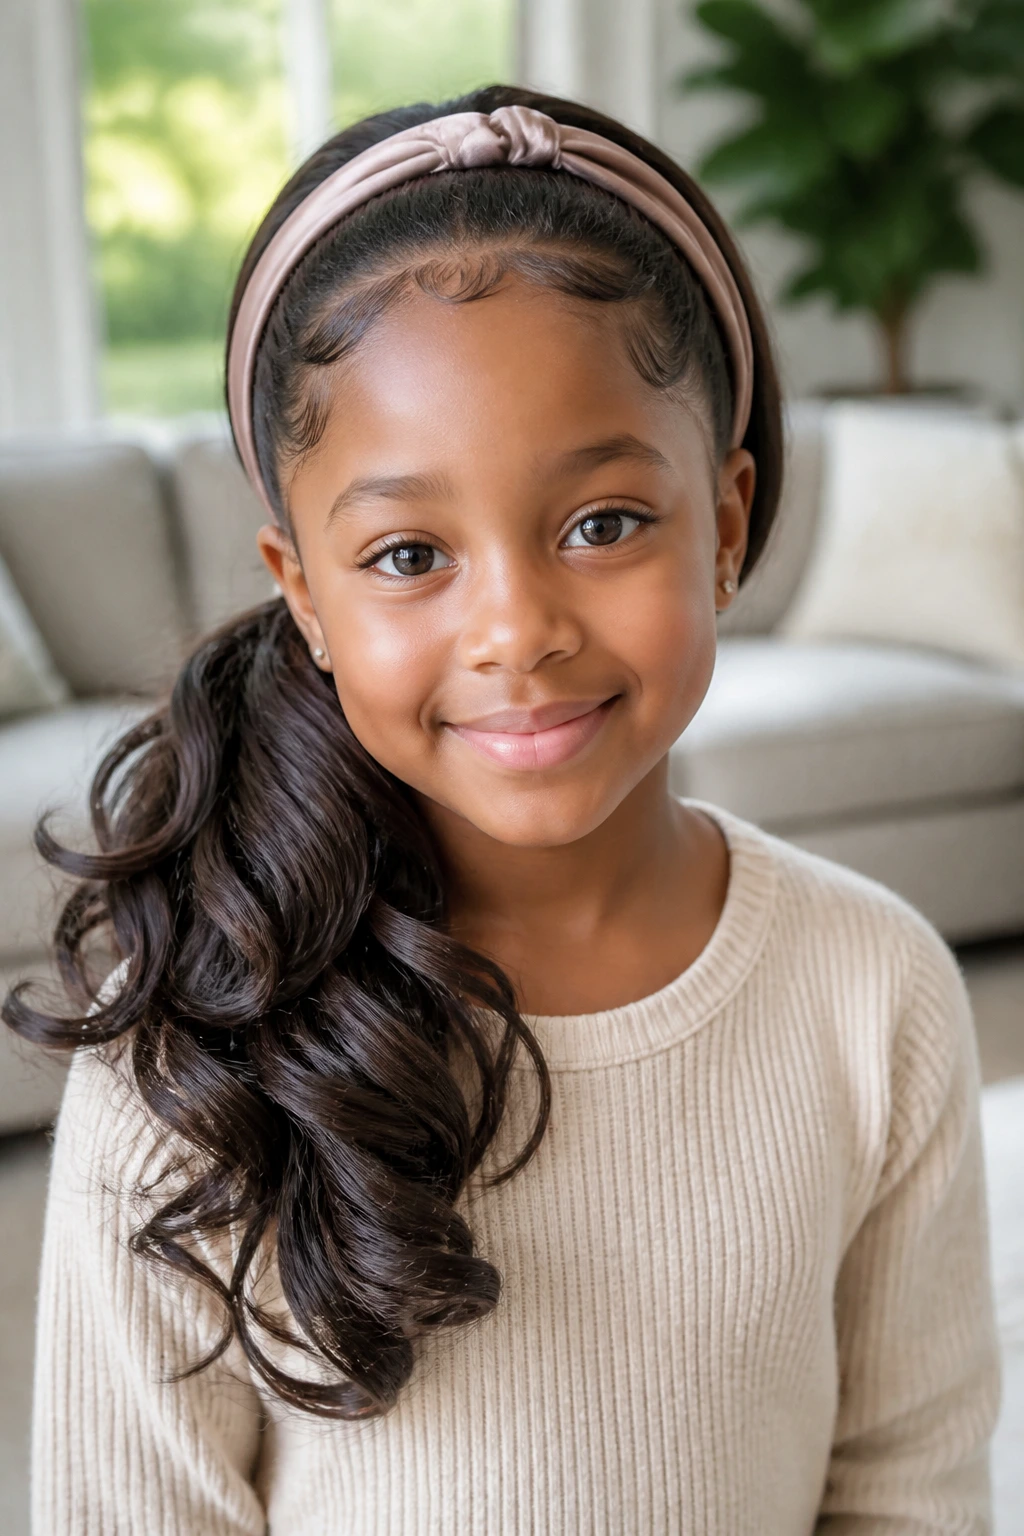
A layered side pony with a headband finish is the kind of style that looks simple until you realize how much is going on. The pony sits low and to one side, the layers keep it from looking flat, and the headband gives the front a clean frame. For thick hair, the layered tail has enough movement to feel lively instead of stiff.
This works beautifully when the extensions are cut in staggered lengths. The top layer should skim the shoulders, and the longest piece can fall lower for shape. A soft headband — satin, velvet, or padded fabric — keeps the crown neat and helps the style hold up through a long day. If the child likes a little polish without a lot of fuss, this one earns its place.
What Thick Hair Changes About the Install
Thick hair changes the game in a few specific ways. First, it gives the braid foundation more grip, which means the style can sit flatter if the parting is done cleanly. Second, it hides the transition between natural hair and extensions better than fine hair does. That matters when you want the style to look smooth from every angle, not just from the front.
There is a catch, though. Thick hair can also trick people into adding too much extension hair because the base looks sturdy. That is where the trouble starts. A child’s scalp can carry a lot, but not that much. If the front starts feeling tight by the end of the install, or if the ponytail feels like it is being pulled backward, the hair is carrying more than it should.
I like to keep the foundation compact and the extension density moderate. That gives you the fullness thick hair already brings, without turning the whole style into a heavy block.
Essential Tools and Styling Supplies
- Rat-tail comb: Needed for clean parts and neat sections, especially around the hairline.
- Wide-tooth comb: Saves the ends when you’re separating curls or working through a finished weave.
- Small no-snag elastics: Good for bubble ponytails, side ponies, and sectioned styles.
- Duckbill clips: Keep sections out of the way while you braid or install hair.
- Light mousse or foam wrap lotion: Helps flyaways lay down without making the hair greasy.
- Satin scarf or bonnet: Protects the style at night and keeps the crown from puffing up.
- Kids-safe detangling spray: Useful before styling, especially on thick natural hair that needs gentle glide.
- Edge brush: Handy for smoothing the perimeter without pressing too hard.
- Pre-stretched braiding hair or lightweight bundles: Makes the install faster and keeps the finished style from feeling heavy.
- Blow-dryer with a cool setting: Optional, but useful if you need to dry moisture before braiding or setting curls.
How to Choose Hair That Feels Light on a Child’s Head
The first thing I look at is density, not just length. A 20-inch bundle can be fine if it is light and airy; a short bundle can still feel too heavy if it is packed thick. For little girls, 14 to 18 inches is usually the sweet spot for everyday wear, while longer lengths work better for events or short install cycles.
Texture matters too. Straight hair sits sleek, but it can show every bump if the base isn’t flat. Body wave and water wave give a softer finish and are often easier to wear because they don’t fight the child’s movement. Kinky-straight is a strong choice when you want something that blends with thick natural hair instead of sitting on top of it.
For braid-based styles, pre-stretched braiding hair saves time and reduces bulk at the ends. For sew-ins, I like lighter bundles over heavy, dense ones. If a style requires a lot of hair to look good, it may be the wrong style for a child’s head. That’s the part people skip, and then the child spends the second week wishing she could rip it out.
How to Dress Up Long Weaves Without Overloading Them
Presentation: Keep the part crisp, the base smooth, and the length shaped so it falls where the child’s frame can carry it. A soft center part gives symmetry; a deep side part adds movement. Both work, but the part should look clean enough to stand on its own before any accessories go in.
Accessories: Use a few pieces well instead of piling on everything in the drawer. Satin bows, barrettes, beads, cuffs, and ribbons all work, but the style usually looks cleaner with one accessory family at a time. If the hair is already long and full, one bow or a small set of clips is enough.
Comfort: Check the perimeter after the style is finished. The child should be able to smile, turn her head, and lean back without feeling the front pull. If she keeps touching one side, that side is probably too tight.
Scale: Longer is not always better on a little head. Mid-back often looks fuller and neater than waist length, because the hair hangs with shape instead of dragging. When in doubt, trim a little less, then adjust after the first week if needed.
Practical Tips for a Neat, Child-Friendly Install
Parting discipline: Clean parts make every style look better. I like to mist the natural hair lightly, comb it straight, and work in small, even sections so the base stays flat. Messy parting shows fast on thick hair, especially once the style starts to grow out.
Tension check: After each section, pull gently at the hairline. If the child winces, the braid is too tight. No style is worth that. A good install feels secure, not aggressive.
Night wrap: Wrap the hair in a satin scarf for 10 to 15 minutes before bedtime if you’ve just used mousse or wrapped curls. That helps the front settle and reduces morning puff.
Refresh rhythm: A small amount of mousse every 3 to 4 days usually keeps flyaways under control without loading the hair with product. If the scalp starts itching, clean it — do not just add more product and hope for the best.
Heat caution: If you need heat for straightening or setting curls, keep it low and use it sparingly. For children, less heat is almost always the better call.
Common Mistakes That Make Kids’ Weaves Uncomfortable
- Too much hair at the base: The style may look impressive for a day, then start pulling. If the crown feels heavy when you lift the ponytail, remove some hair.
- Braiding too tight around the edges: This shows up as soreness, tiny bumps, or a child who keeps lifting her fingers to the hairline. Loosen the front rows and start again if needed.
- Choosing a length that fights daily life: Waist-length hair is fine for special occasions, but if the child is playing hard or riding in a booster seat, extra length can become a tangle magnet.
- Using the wrong texture: Very silky hair on a very thick head can look disconnected. A little texture helps the style sit more naturally.
- Skipping night care: Even the best install frizzes when it sleeps loose on a cotton pillowcase. Satin saves the day.
Variations and Alternatives to Try
School-Week Version: Keep the style around 14 to 16 inches, use lighter accessories, and avoid anything that needs daily curling. It stays neat without asking for a lot of morning work.
Birthday-Photo Version: Add curled ends, a ribbon, and one clean part. This is the version that can stand in front of a cake and still look smooth after the candles.
Low-Tension Version: Swap tight leave-out styles for a closure, ponytail base, or braid foundation with no pulling at the perimeter. It is the safer choice for tender-headed kids.
Budget-Saver Version: Use synthetic hair with a soft finish, keep the length moderate, and choose one accent accessory instead of buying a pile of extras. Good parting matters more than fancy hair.
Heat-Free Version: Stick with braids, twists, bubble ponies, and braided tails. You can get plenty of length and shape without touching a flat iron.
Extra-Polished Version: Add layers, curl the ends, and keep the front smooth with a satin wrap overnight. This version is best when the style needs to hold up for photos, church, or a family event.
Night Care, Washing, and Reinstall Timing
The cleanest long weave in the room can still start looking tired if nobody takes care of it at night. A satin bonnet or scarf keeps friction down, and a satin pillowcase helps when the scarf comes off in the middle of the night. For braided styles and ponytails, I like a light wrap before bed, then a quick finger check in the morning to smooth the front and the part.
Washing depends on the style. For braid-based installs, a diluted shampoo on the scalp every 1 to 2 weeks usually keeps things fresh without soaking the hair. For sew-ins, keep the wash focused on the scalp and let the hair dry fully so the base does not stay damp. Damp roots and children’s busy schedules are a bad mix.
Reinstall timing should stay short on children. Most braid-heavy styles are happier when removed or redone after 3 to 6 weeks, and sooner if the scalp looks irritated or the edges are puffing up. Sew-ins and adhesive styles need even more judgment. If the install starts feeling loose, itchy, or stiff, take it out rather than stretching the wear just to get extra days out of it.
Frequently Asked Questions
Are long weaves safe for little girls with thick hair?
They can be, if the install is light and the hairline is handled gently. Thick hair helps anchor the style, but the child still should not feel pulling at the temples, crown, or nape.
What length is best for a child who plays a lot?
For daily wear, 14 to 18 inches is the range I lean toward most often. Longer hair can work for special occasions, but it tends to tangle faster during recess, car rides, and naps.
Is braid hair or bundle hair better for little girls?
It depends on the style. Braid hair is better for ponytails, feed-ins, and twists; bundles make more sense for sew-ins and loose wave looks. For kids, lightweight hair usually wins.
Can you do these styles without heat?
Yes, and I’d rather see that on a child whenever possible. Braids, twists, bubble ponies, and curled ends set on rods all give you length without flat-ironing the natural hair.
How do I know if the style is too tight?
If the child complains, scratches the front, or keeps tilting her head to one side, that is your answer. Good tension feels snug but not sharp, and the hairline should not look red or flattened.
What if the weave gets puffy after one night?
Wrap it tighter in satin, smooth the front with a little mousse, and reset the shape with your hands instead of piling on more product. If the style is humid, a light re-braid of the front pieces may be needed.
Can I wash the scalp with the weave still in?
Yes, but keep the water and shampoo focused on the scalp and rinse carefully. Do not soak the whole style unless it is designed to be washed that way.
What if my child hates hair on her neck?
Choose a high bun, high ponytail, or crown-braid style that keeps the length off the nape. Those usually feel lighter during warm weather and long school days.
A Last Word on Length That Still Feels Light
The prettiest long weaves for little girls with thick hair are the ones that move well and stay kind to the scalp. A style can be full, long, and dressed up without turning into a heavy block of hair that needs constant rescue. That balance is the whole point.
If you keep the base neat, the length realistic, and the accessories light, these styles hold up in real life — not just in the mirror. Start with comfort, then add the flair. The right one will make itself obvious the first time she runs across the room and the hair still falls back into place.