Long wavy face-framing layers for straight hair have a funny habit of looking modest in the chair and then doing a lot of work once the hair settles. On pin-straight lengths, even a few inches cut in the right place can change where the eye lands first, soften a strong jaw, lift a flat cheek area, and keep the whole cut from reading as one heavy sheet.
The part people miss is this: straight hair does not need to be cut shorter to look alive. It needs weight moved to better places. If the front pieces start too high, they can feel thin and fussy. Too low, and the whole thing disappears into the rest of the length. The sweet spot sits somewhere between the cheekbone and the collarbone, depending on face shape, density, and how much wave you plan to put in every morning.
I’ve always preferred layers that still make sense when the hair is freshly brushed out. That’s the real test. If the front only looks good on day one with perfect curling and half a can of spray, it is too needy for most people. The best versions keep their shape when you tuck one side behind the ear, bend the front with a flat iron, or let the pieces fall naturally with a little polish. That balance is where the good cuts live.
Why These Layers Earn Their Keep
-
They fix the front without losing the length: Straight hair can look blunt fast, and these shapes break up that heavy edge without turning the ends wispy.
-
They give you a real face shape choice: A cheekbone start opens the middle of the face, a jaw start softens angles, and a collarbone start keeps more length in play.
-
They work with small styling habits: You do not need a full blowout every time; a soft bend with a 1 to 1.25-inch iron or round brush is enough to make the frame show up.
-
They grow out more politely than hard layers: Soft, long face-framing pieces can stretch a few inches before they look awkward, which matters when you do not want a trim every month.
-
They keep straight hair from looking stiff: The front pieces add movement where straight strands usually fall flat first, right around the cheek and mouth.
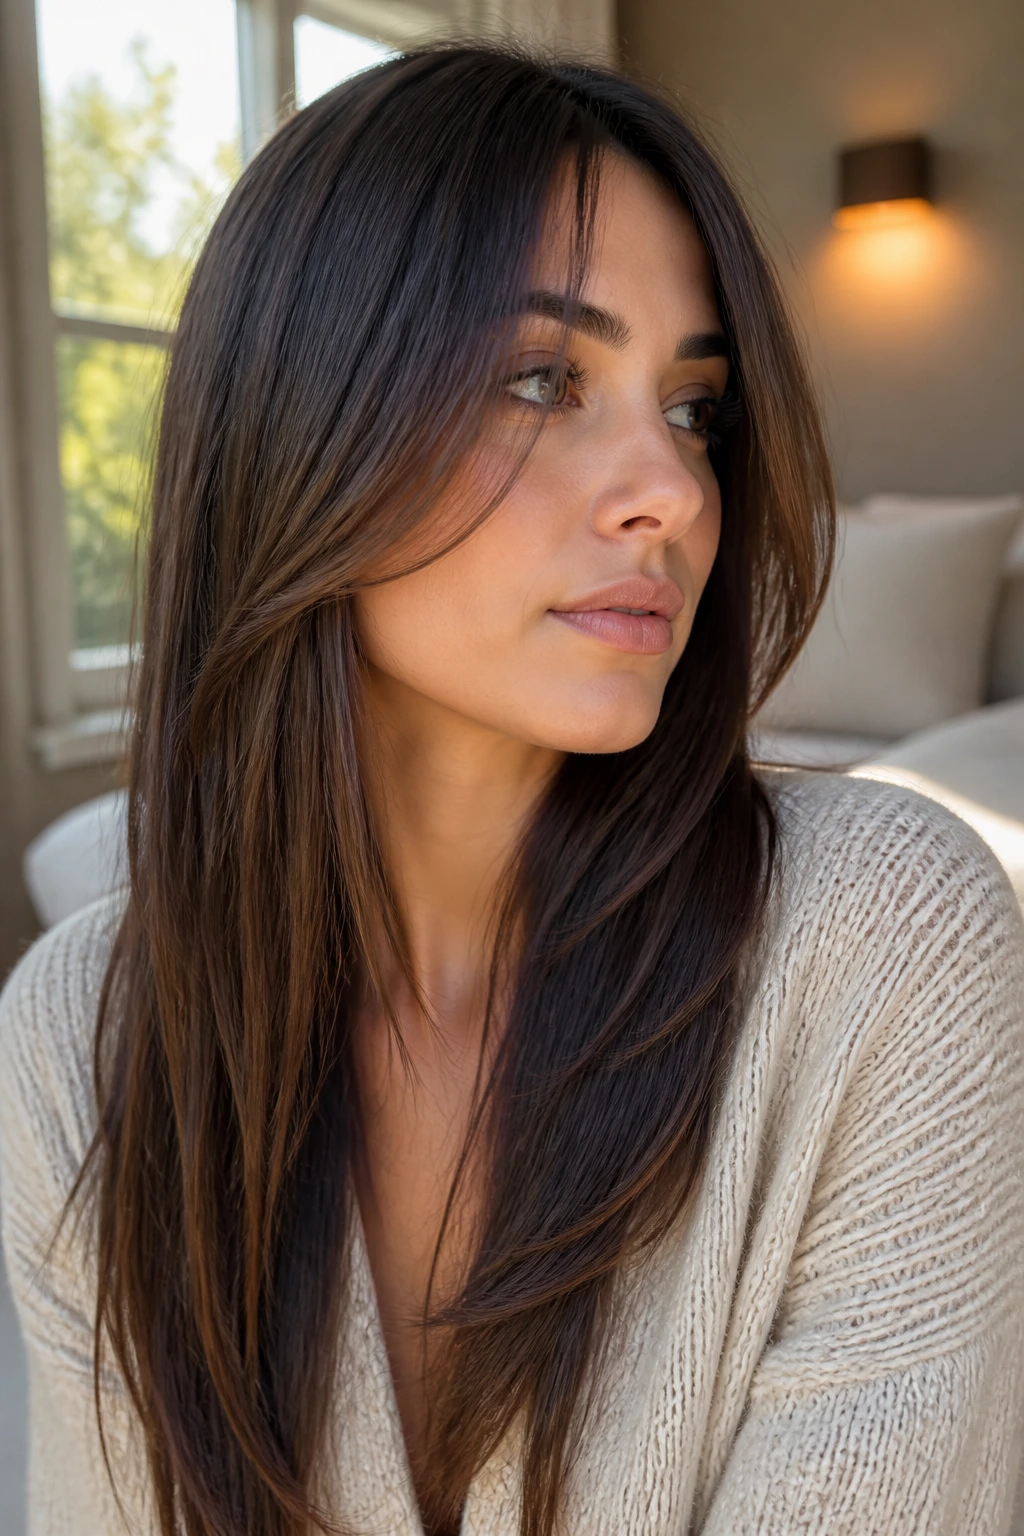
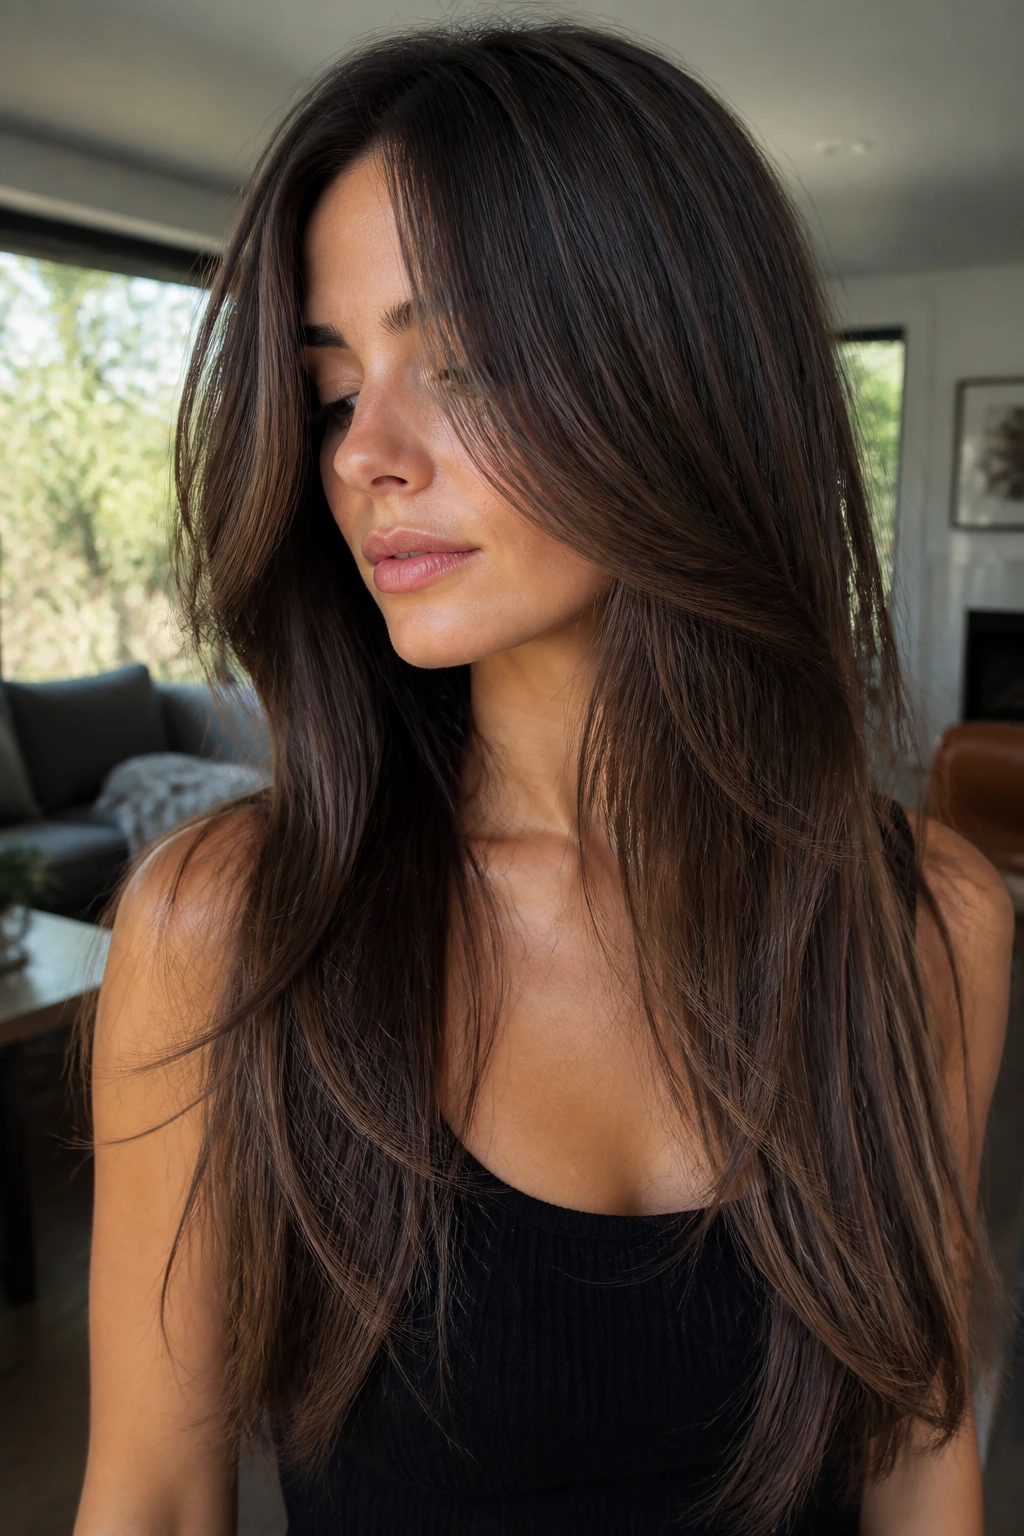
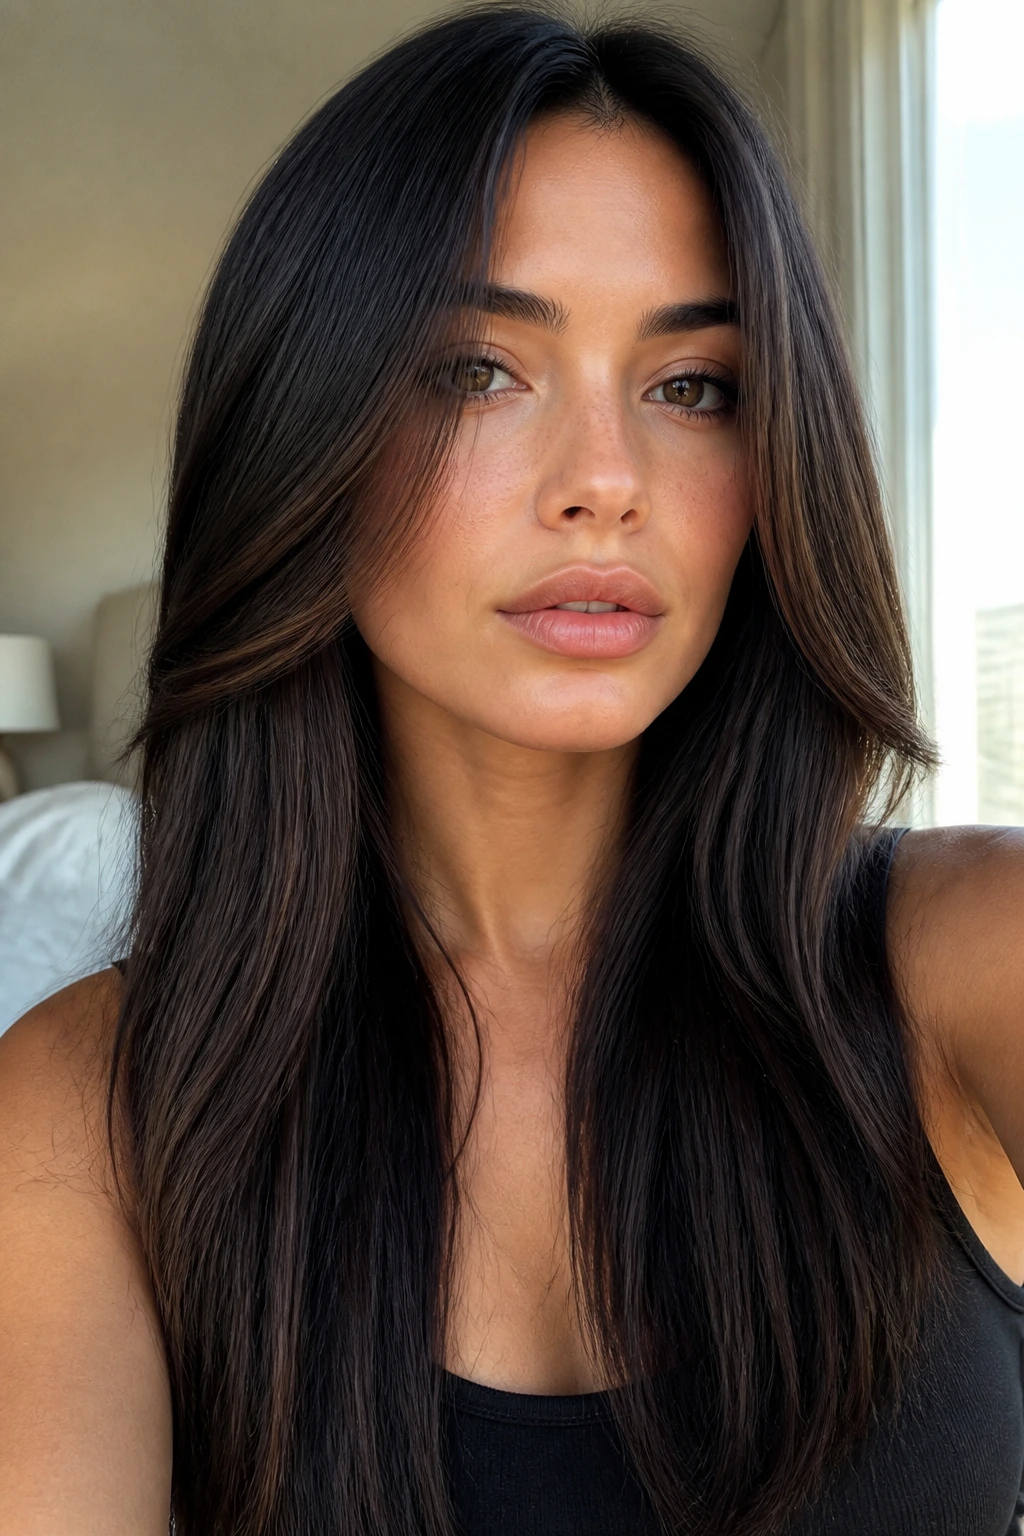
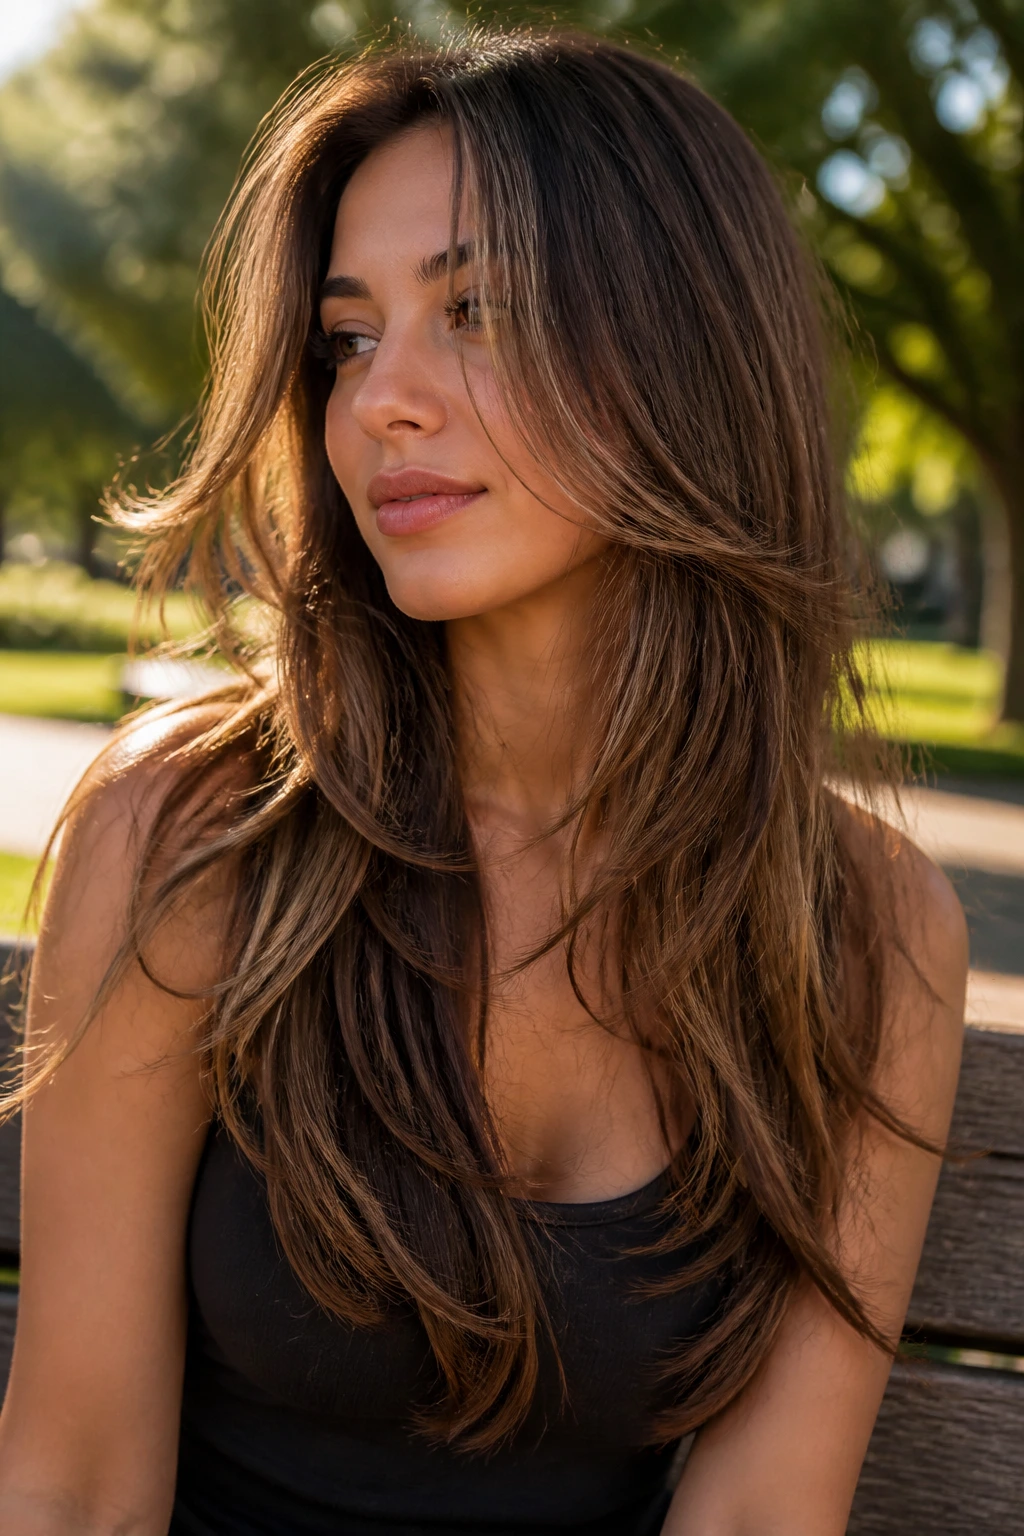
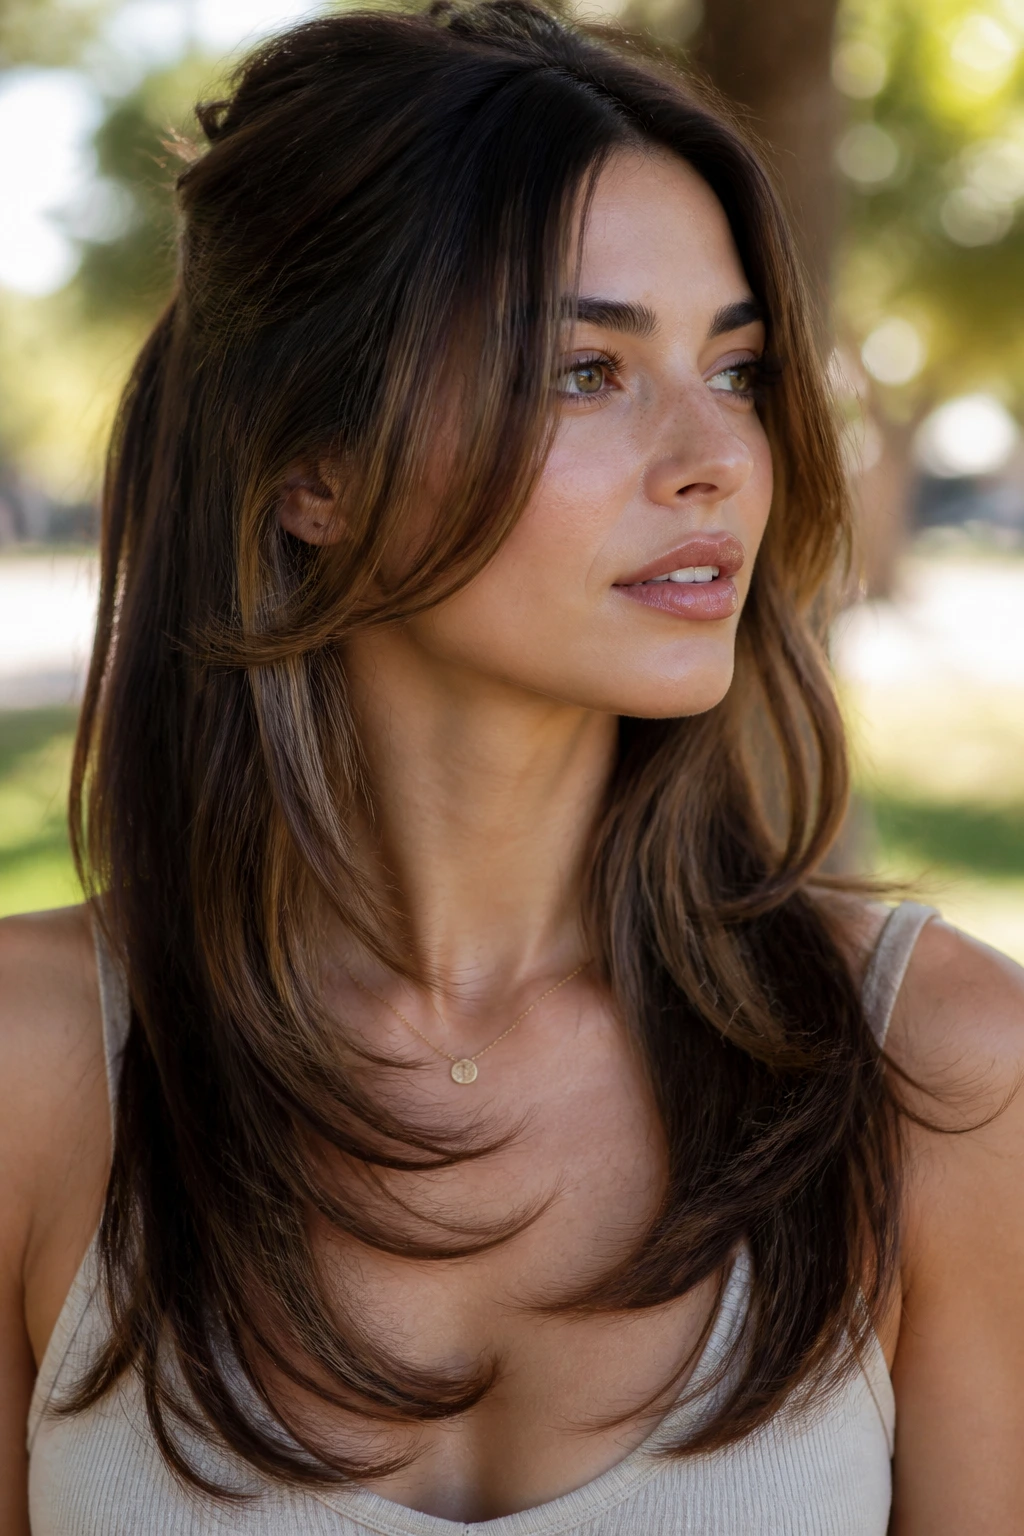
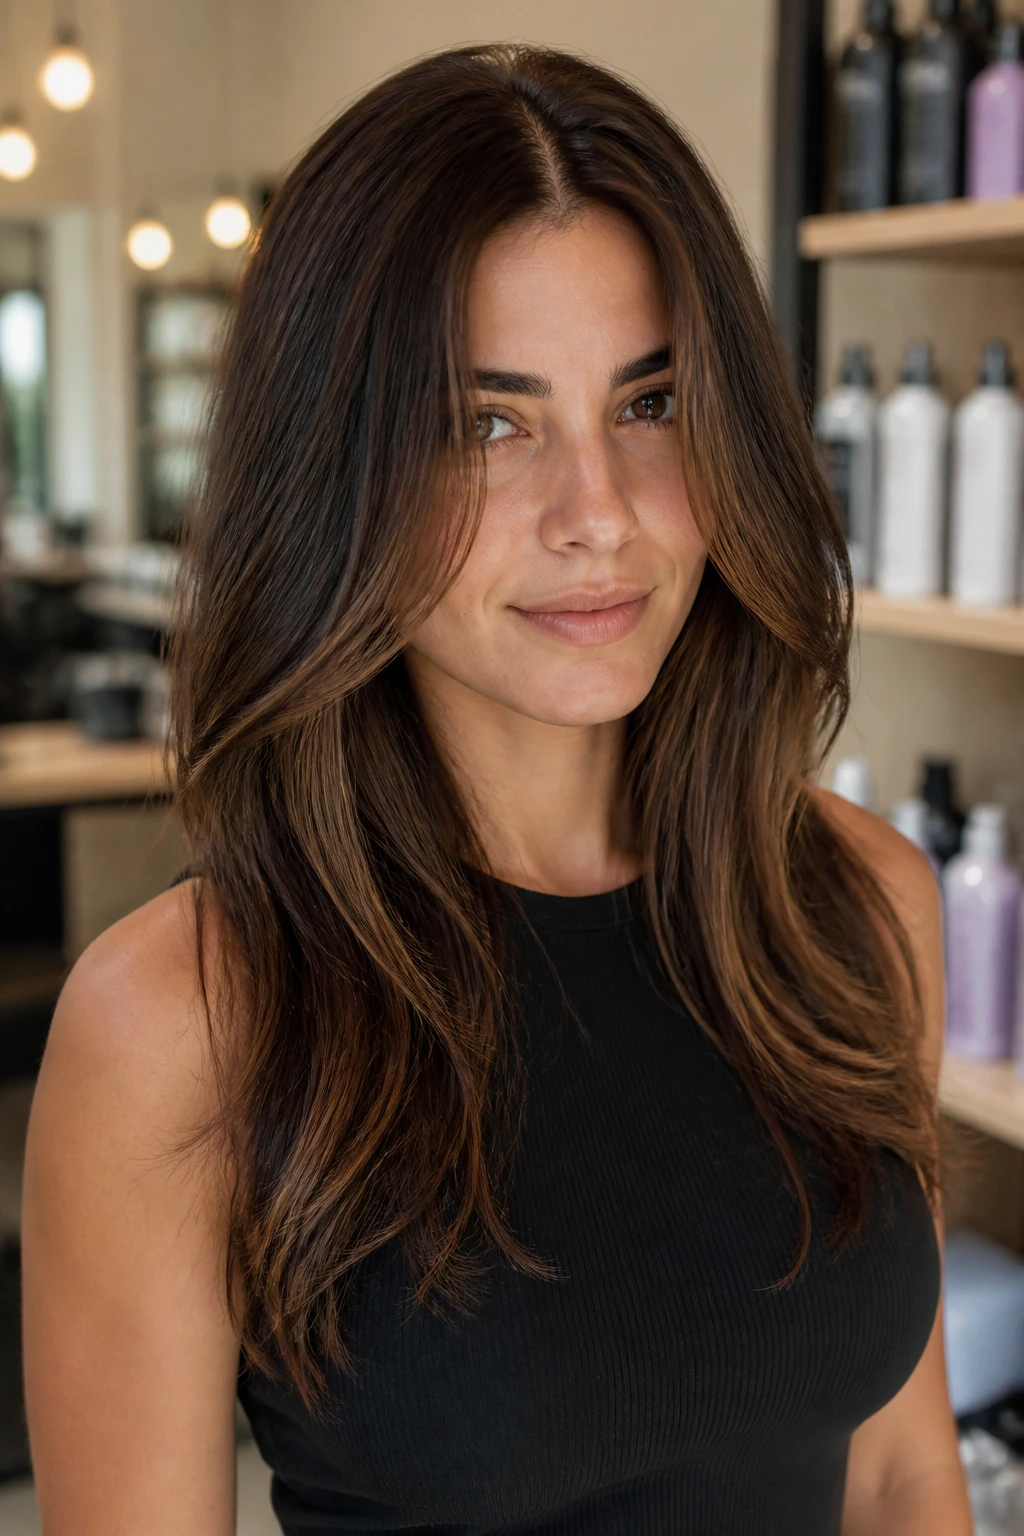
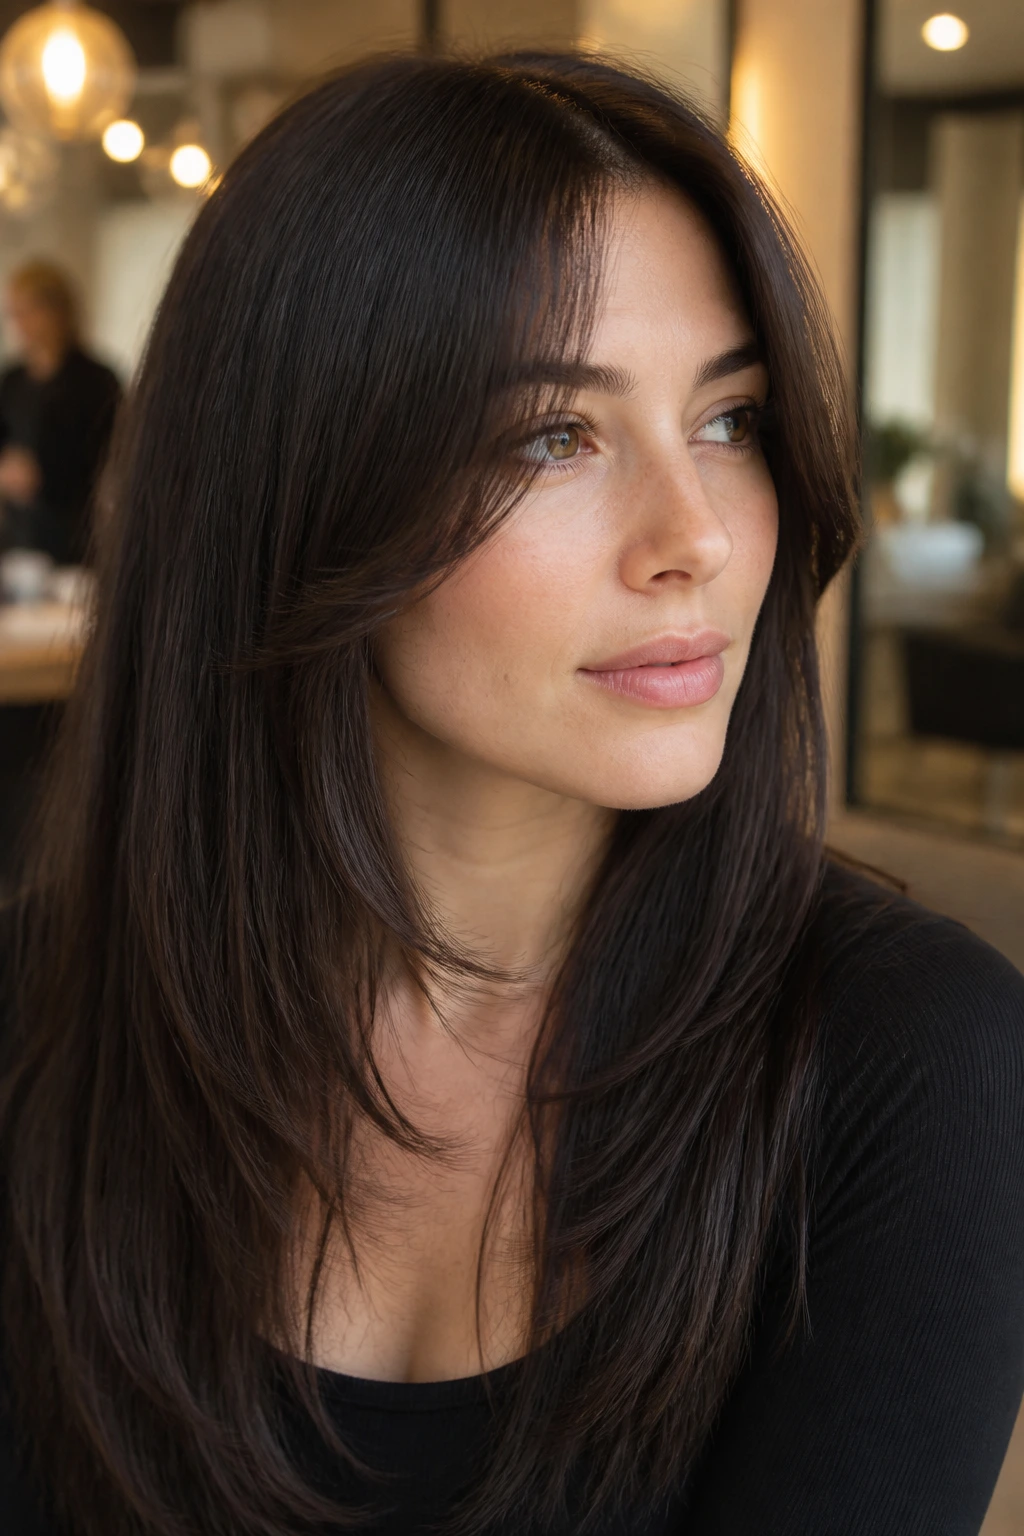
1. Cheekbone Curtain Layers
Cheekbone curtain layers are the cleanest answer when you want movement without losing the blunt strength of long straight hair. The shortest pieces sit just outside the cheekbone, then taper down toward the lips and chest, so the front looks soft but still deliberate. That little curve changes the whole haircut.
Why this shape works
Straight hair can go limp in a hurry, so the cut has to do some of the work before the styling begins. These pieces create an easy frame even if you only bend them slightly away from the face with a round brush or a flat iron.
Ask for the shortest point to land around the outer cheekbone, not the eyebrow. The difference is bigger than it sounds. Brow-length pieces can shrink and bounce up too much on straight hair, while cheekbone length gives you room to bend the front and still keep the line long.
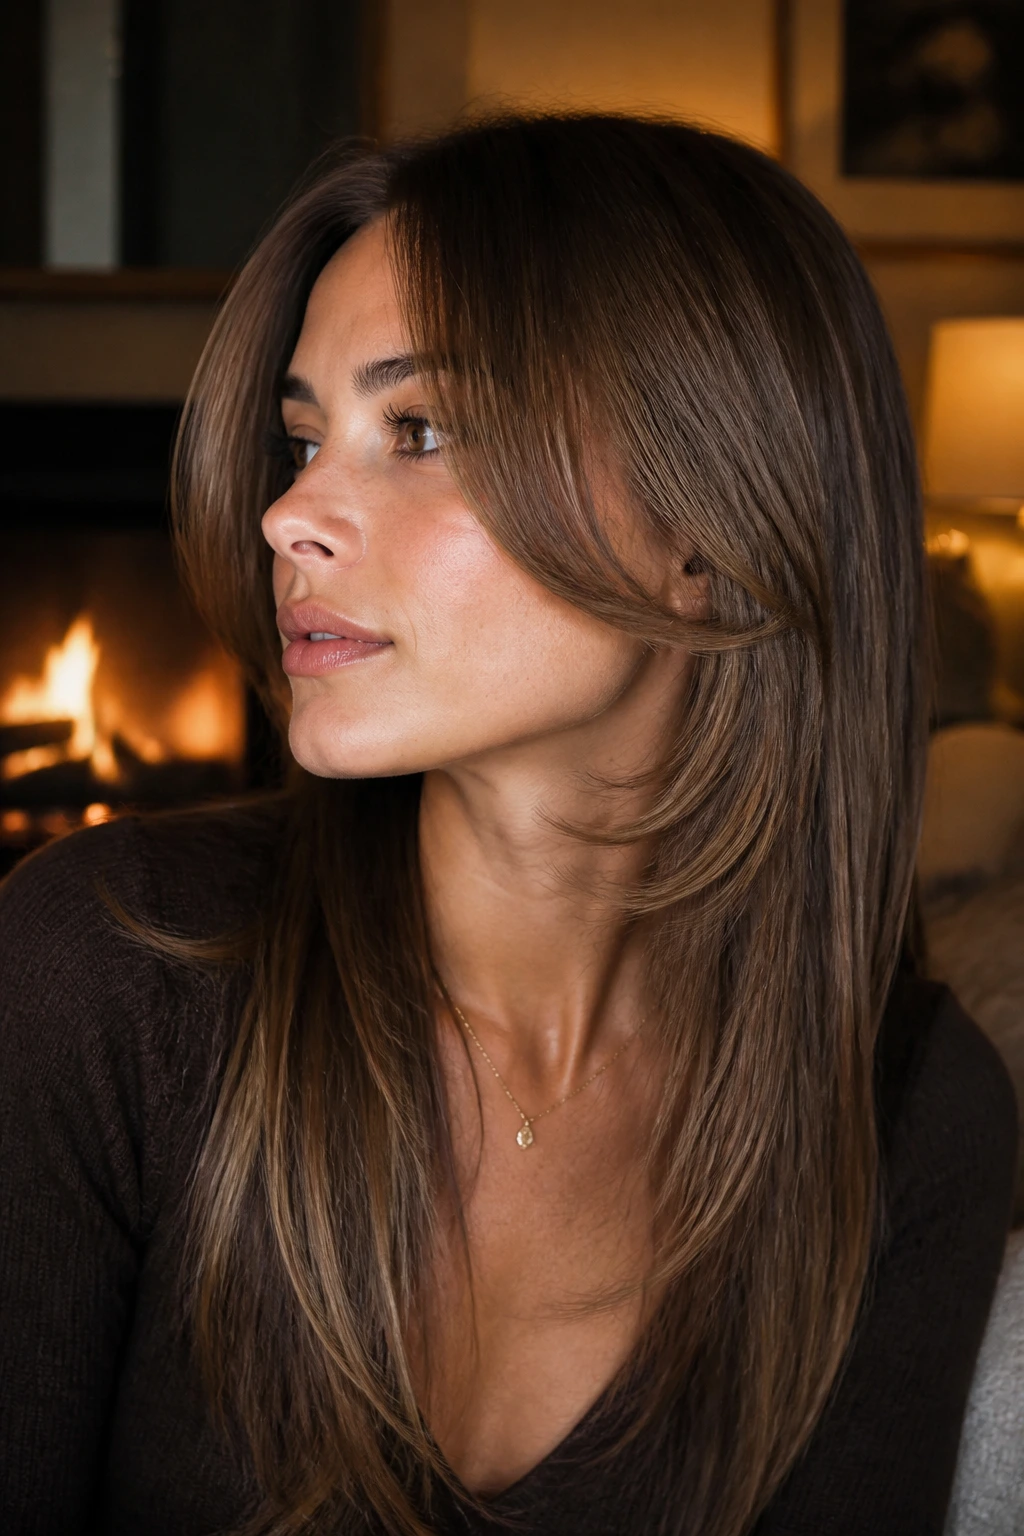
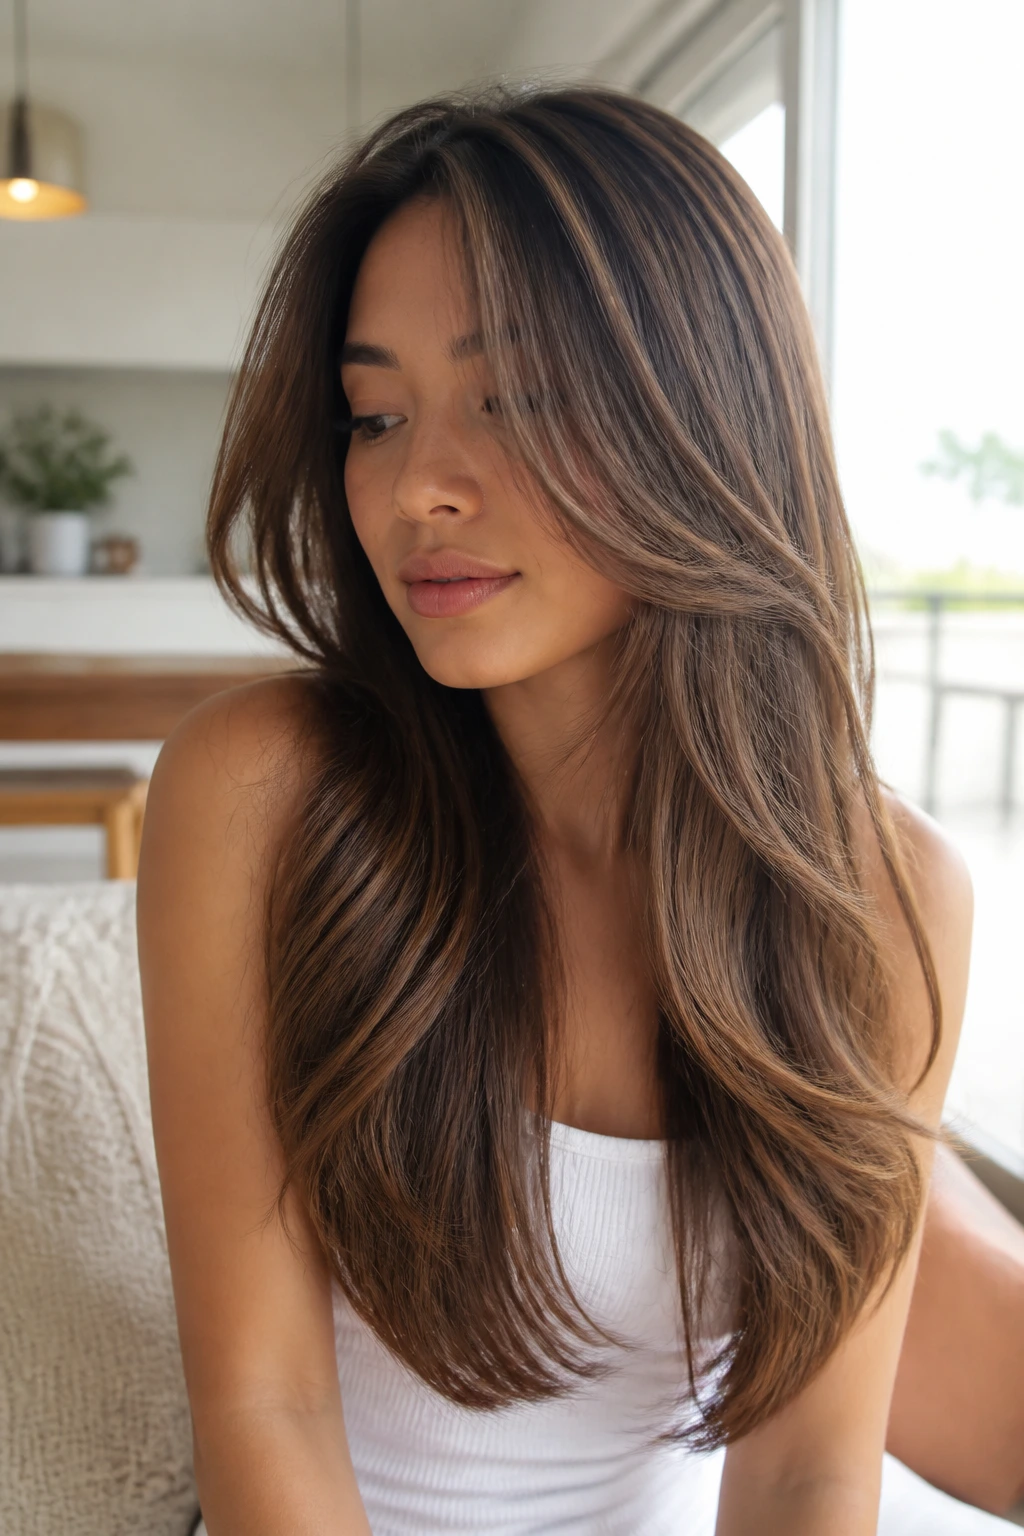
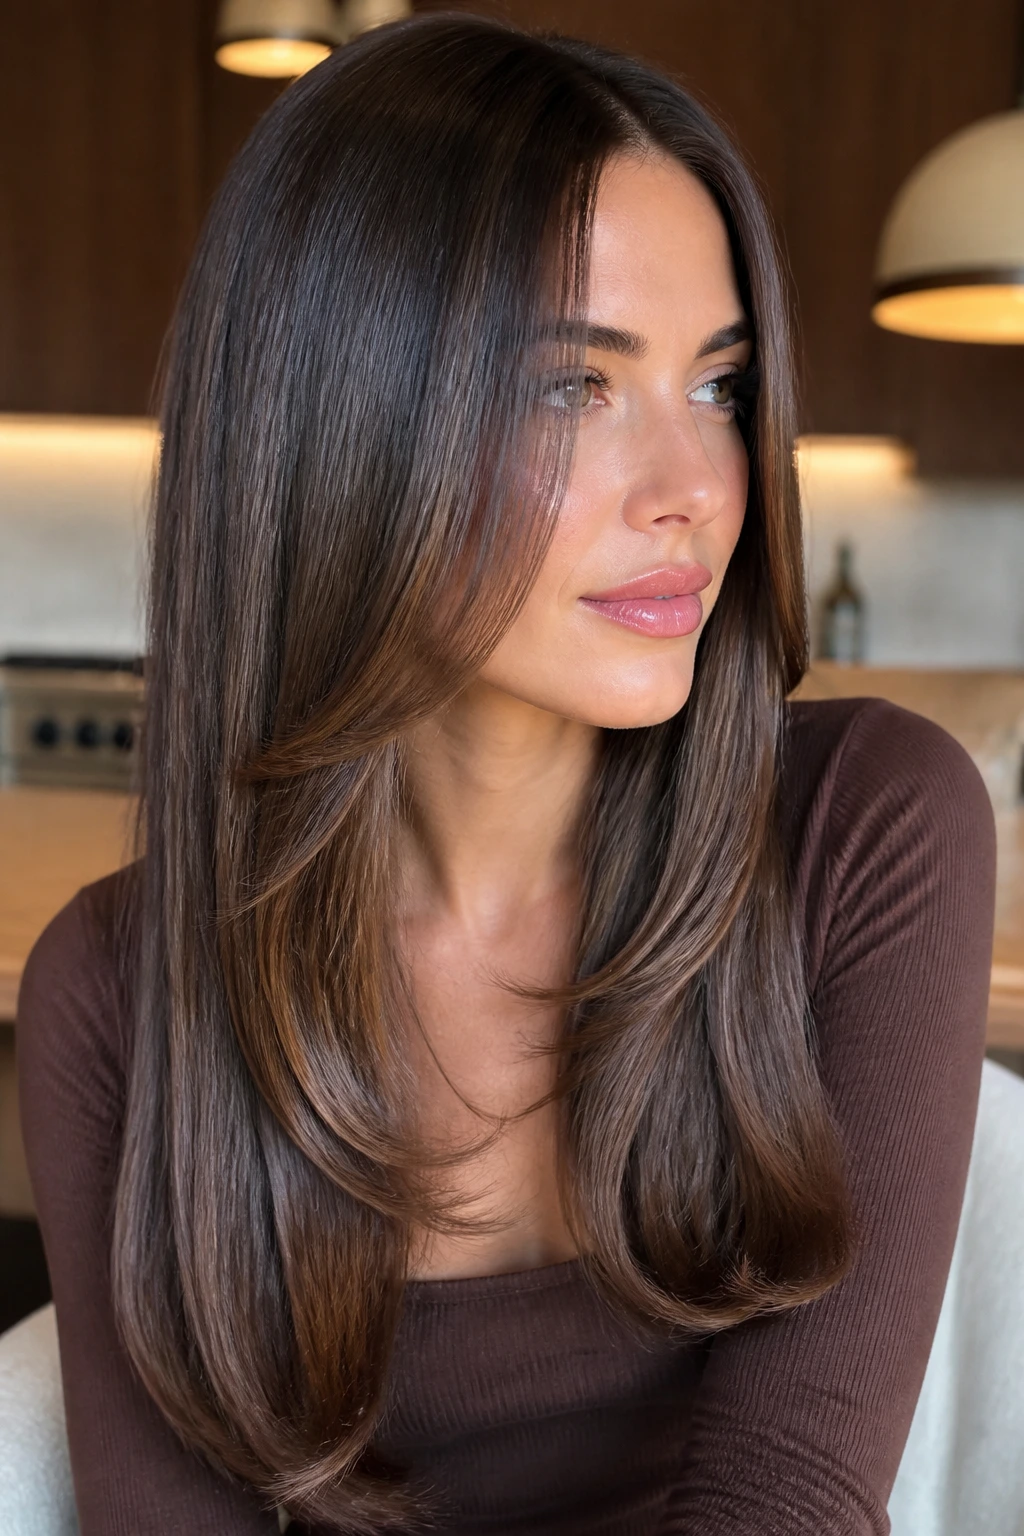
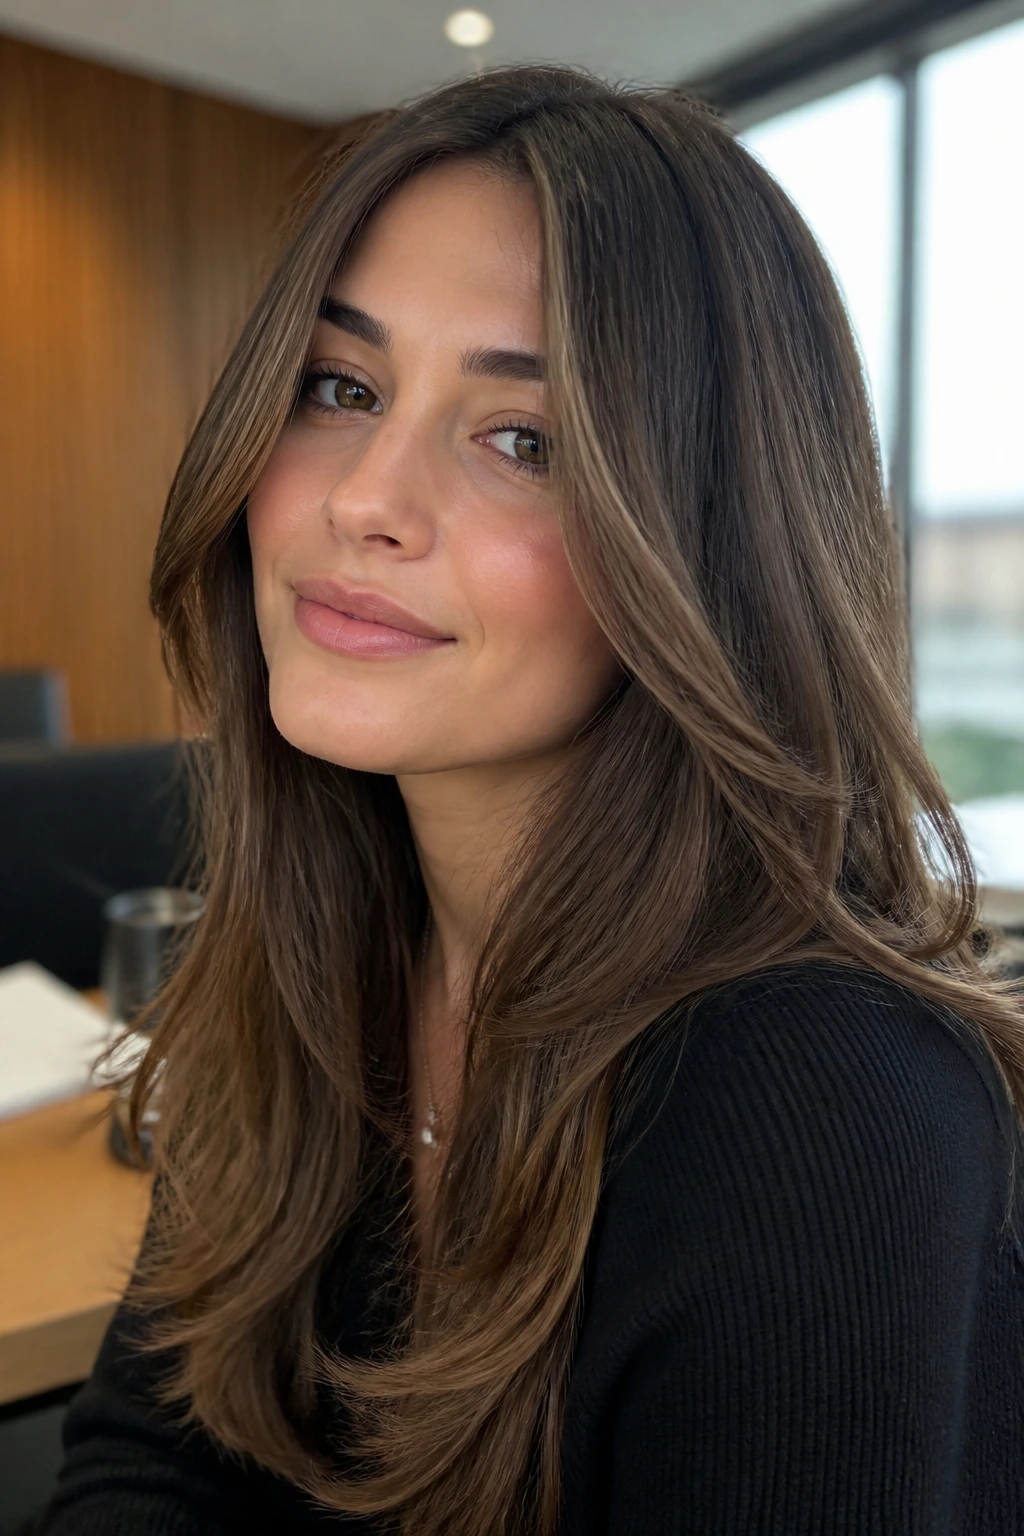
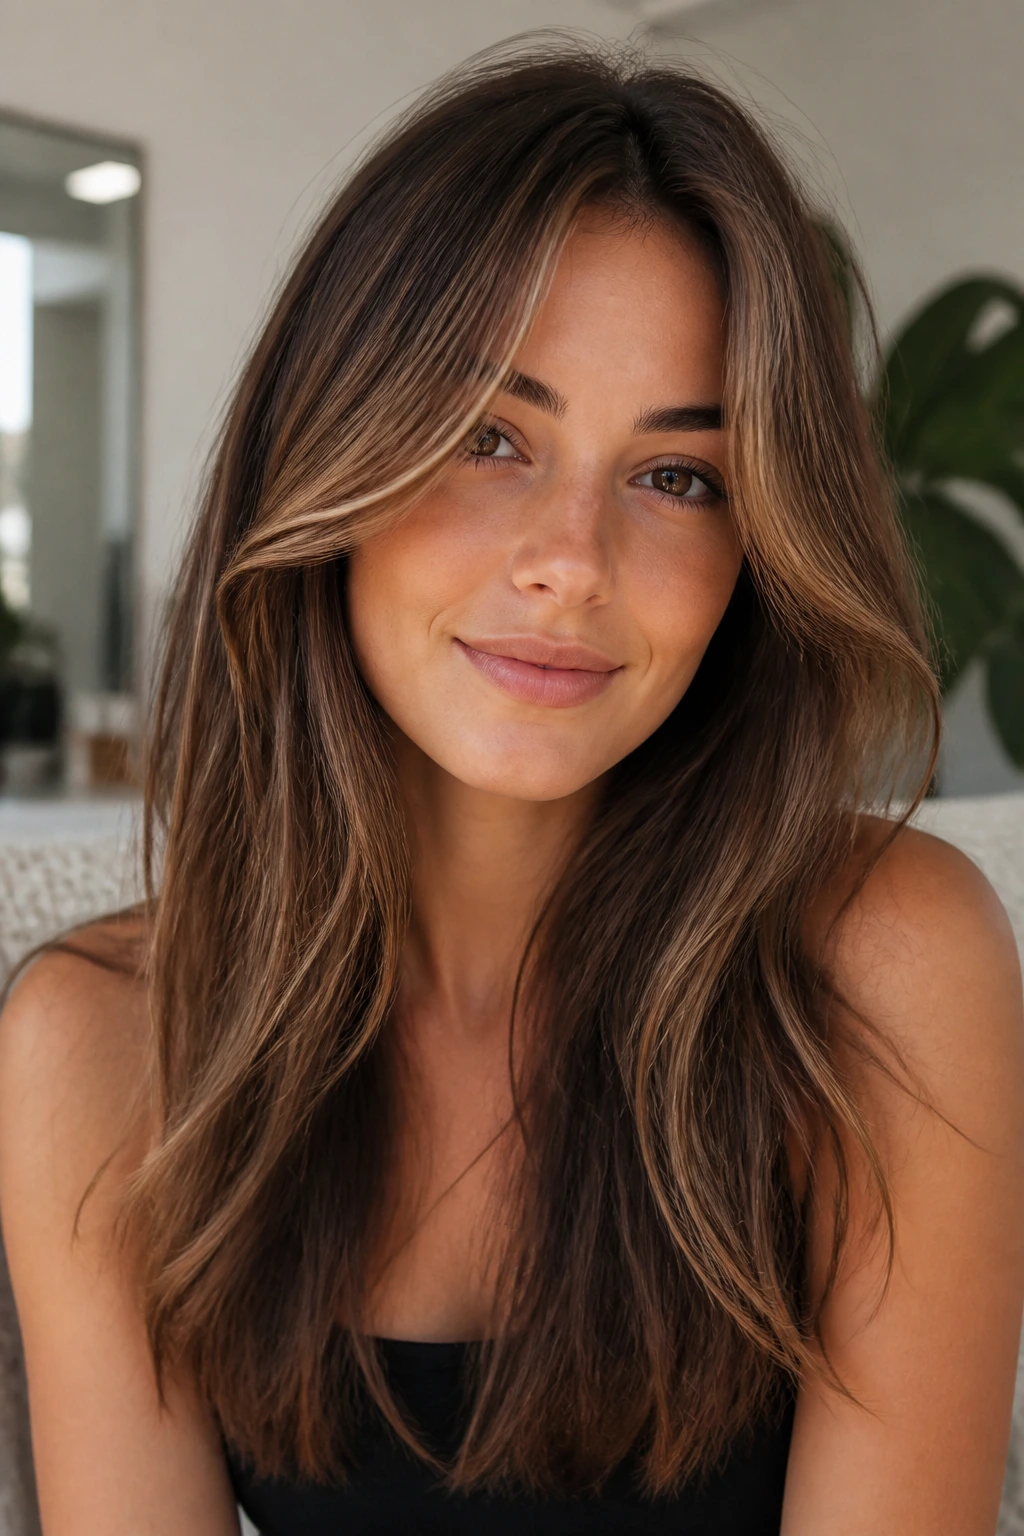
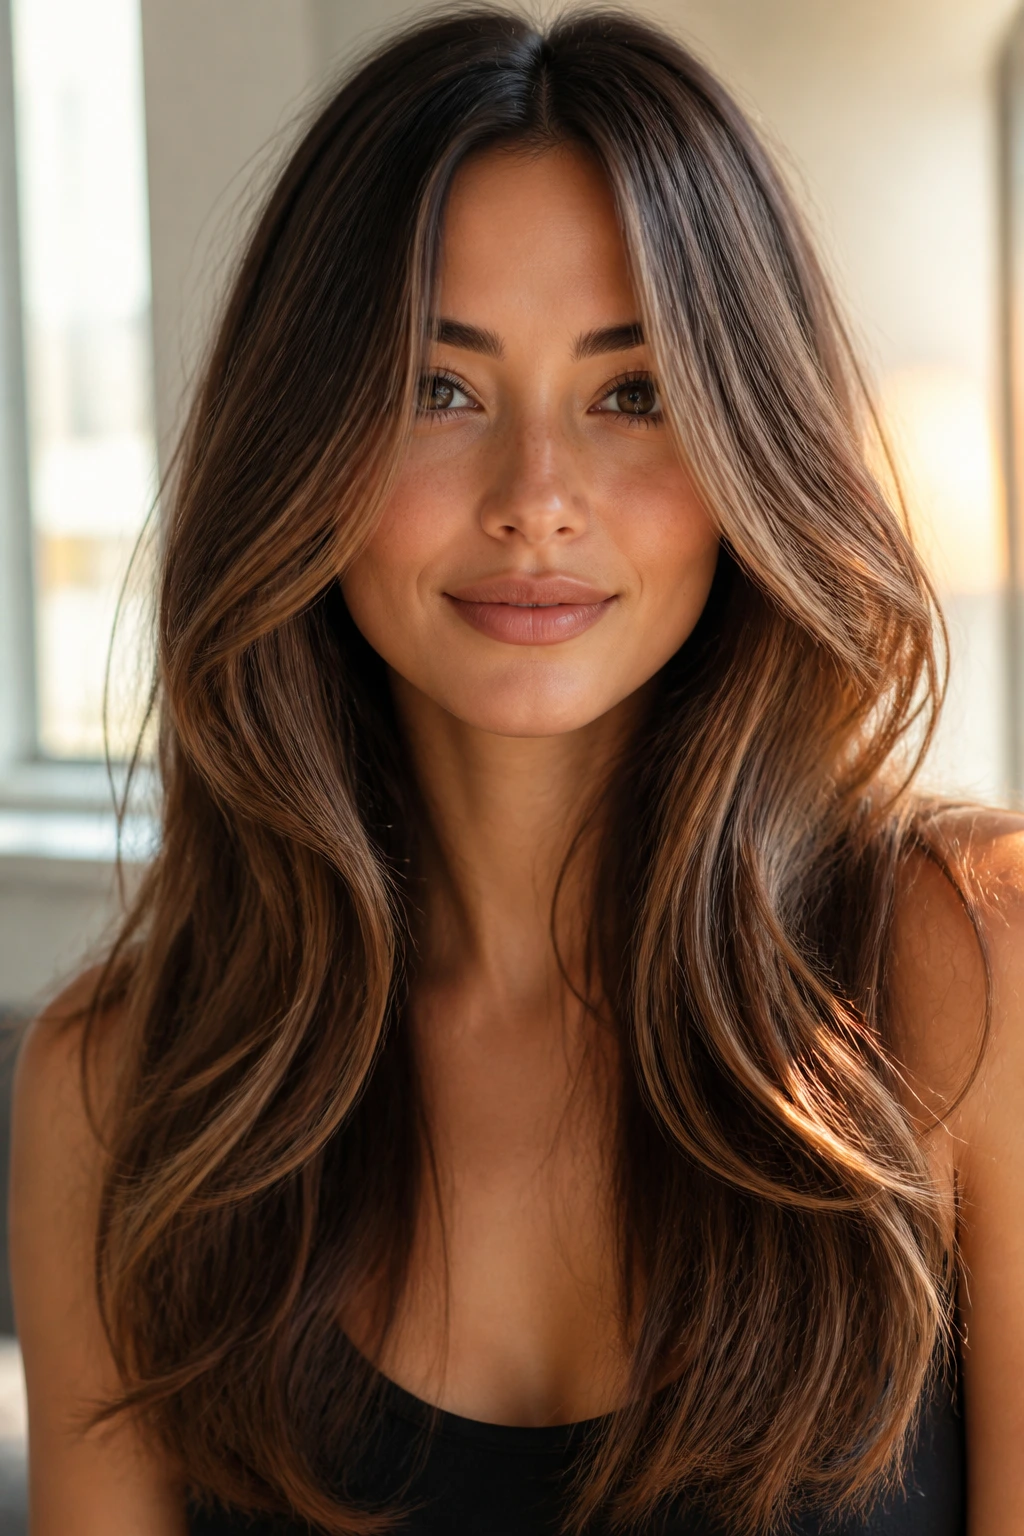
2. Collarbone Sweep Layers
These are the layers I reach for when someone wants movement but hates seeing chopped lines. The front pieces start low, around the collarbone, then sweep back into the length so the haircut stays sleek even on a dry, brushed-out day. It’s a quieter look, which is often the better look.
The trick is in the bend. Curl the front sections away from the face and let them fall over the collarbone with a soft inward turn at the ends. On straight hair, that single curve is enough to make the whole cut read as intentional instead of flat.
This works especially well if your hair is thick or heavy and tends to settle into one straight wall. A lower starting point means you keep the weight, which keeps the ends from looking skinny.
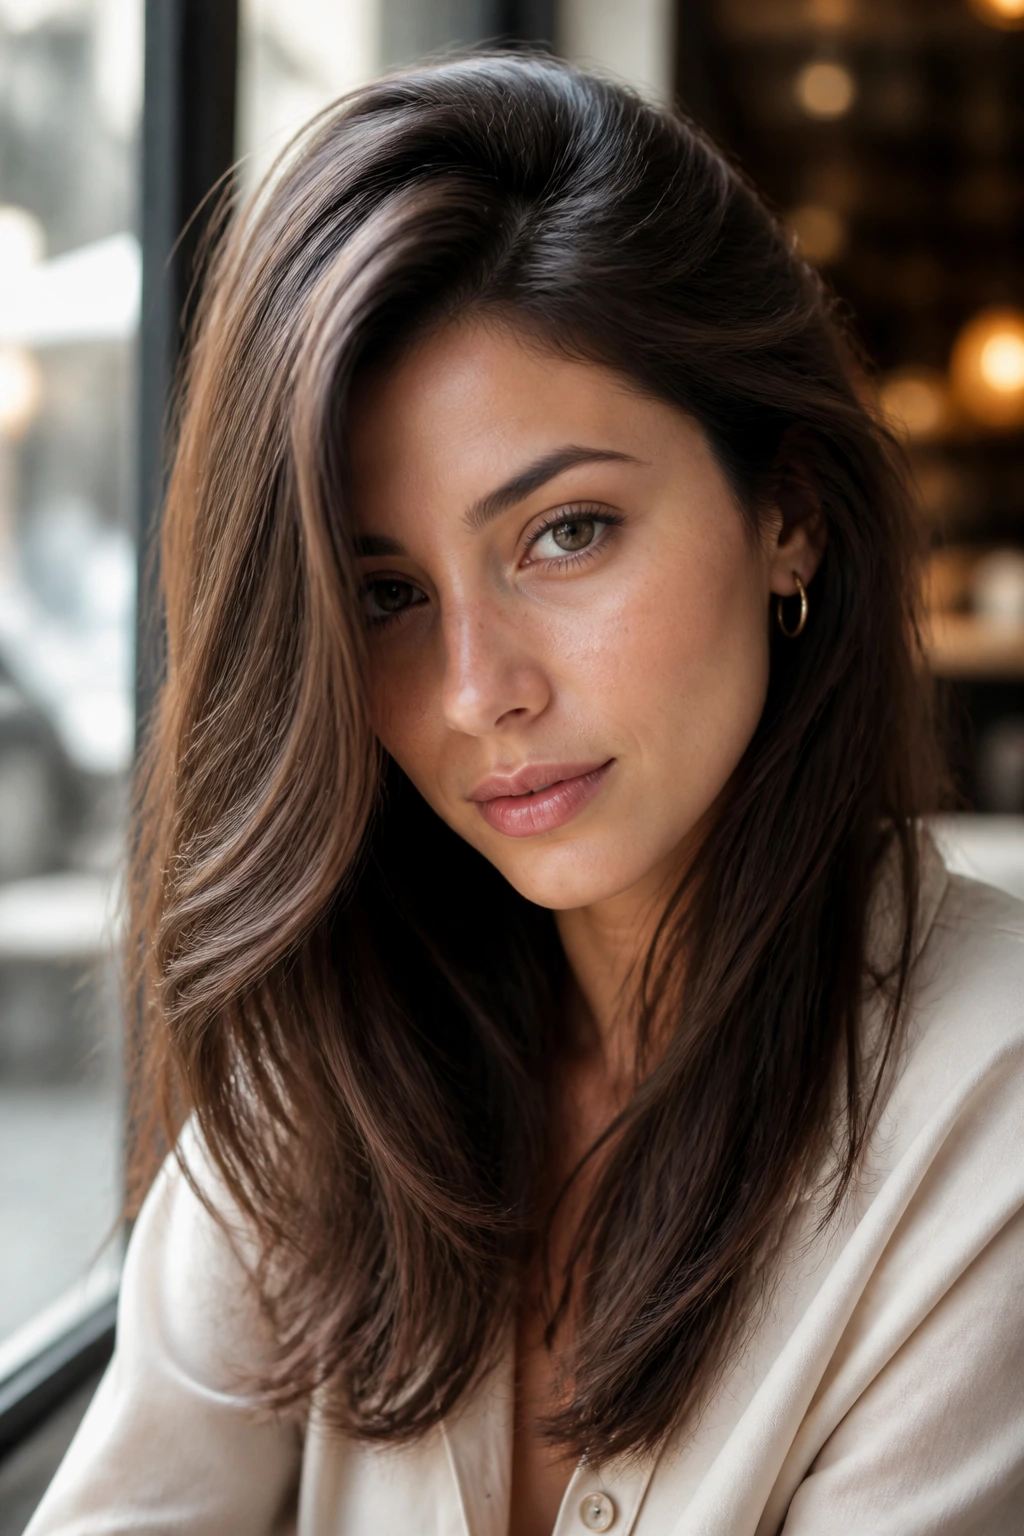
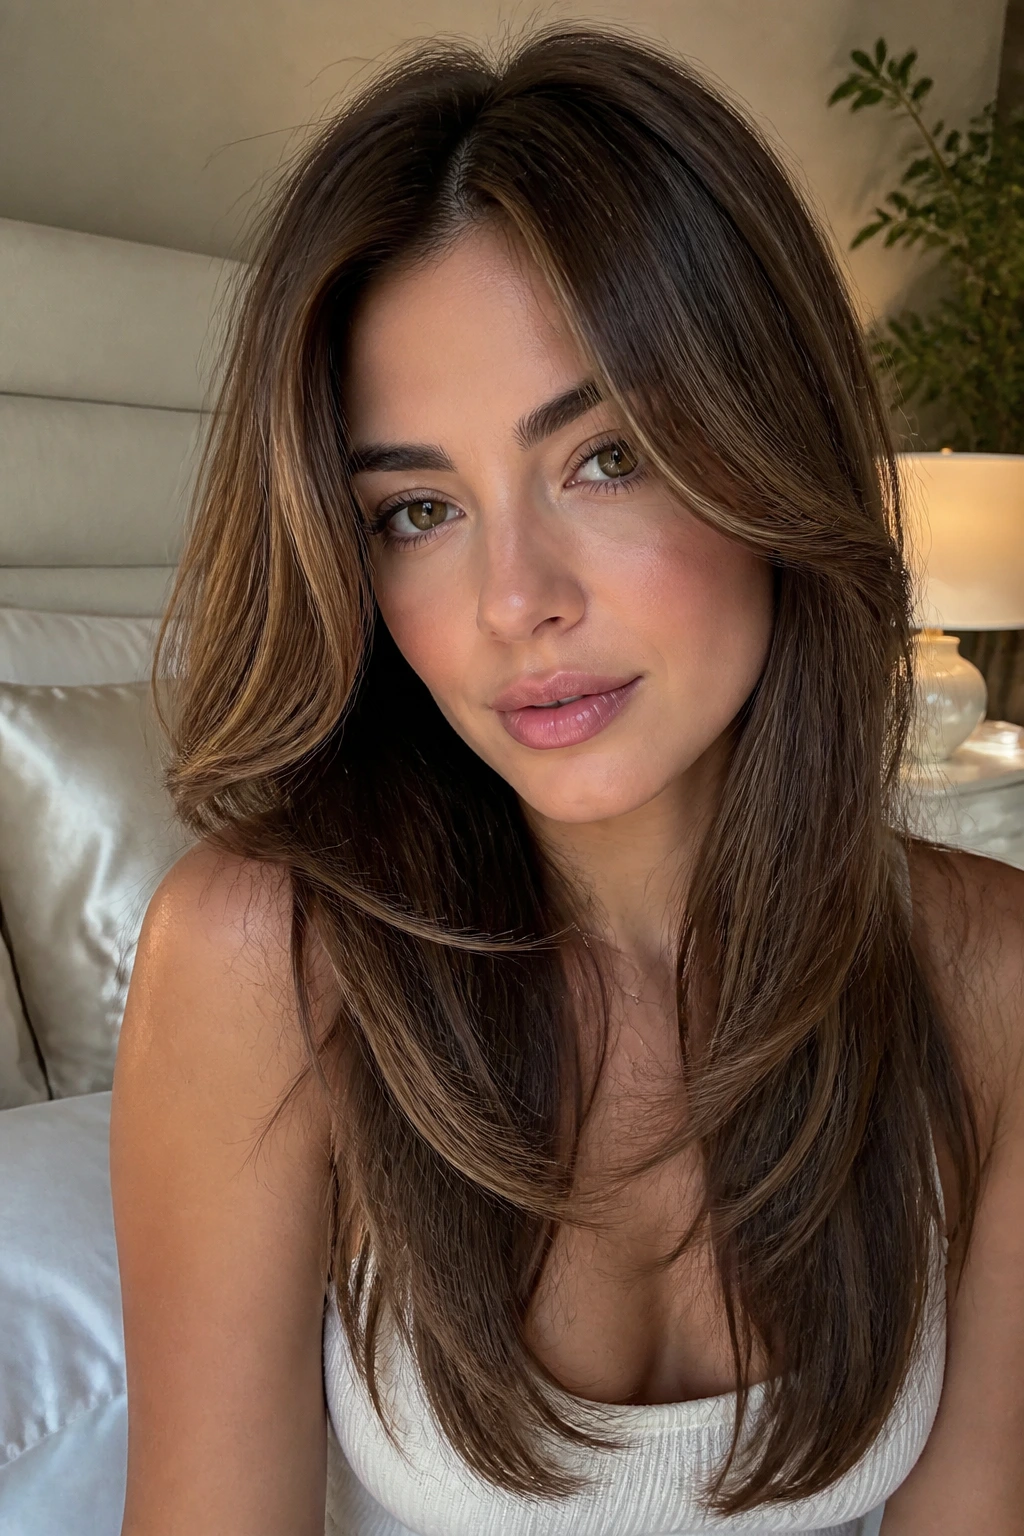
3. Jawline Flick Layers
Want the front to soften a strong jaw without going short? This is the one. Jawline flick layers land right where the jaw begins to widen, then kick outward at the ends so the face gets a little movement without losing length around the neck.
Best for a sharper profile
The shape is especially nice on straight hair because the ends can be trained into a small outward flick with a dryer brush or a flat iron twist. You do not need a tight curl. In fact, tight curls make the front look too styled for the rest of the length.
Ask your stylist to keep the interior long and to point-cut the front rather than chopping a hard line. Hard edges show every flaw on straight hair. Softer edges blur into the rest of the cut and move better when you tuck one side behind the ear.
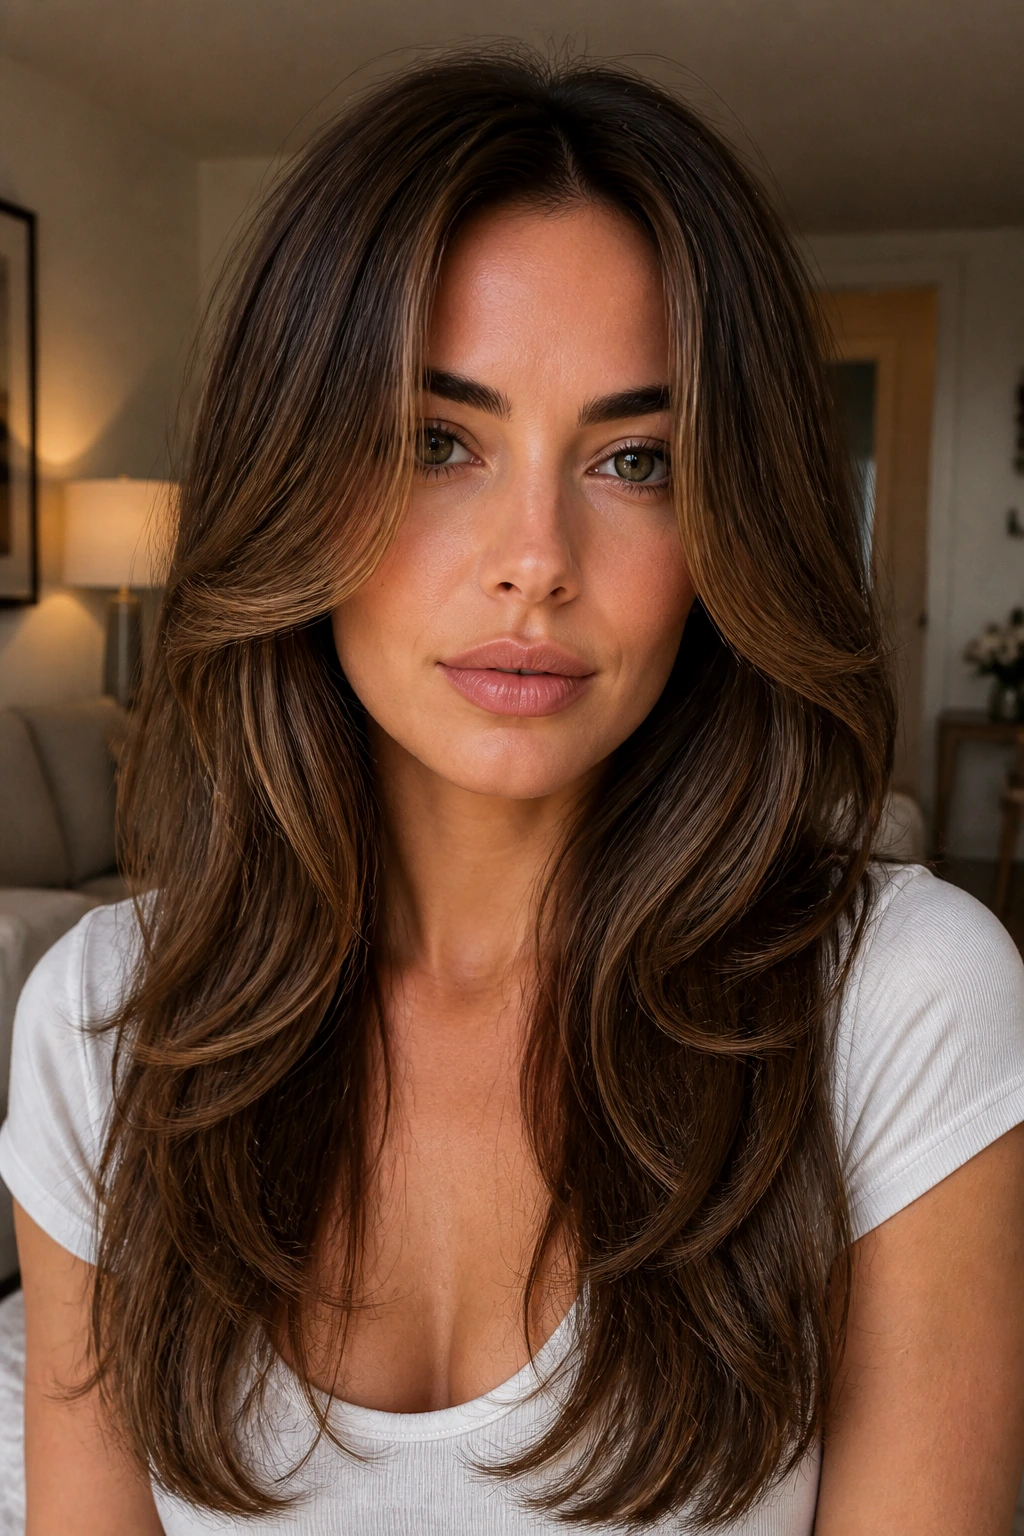
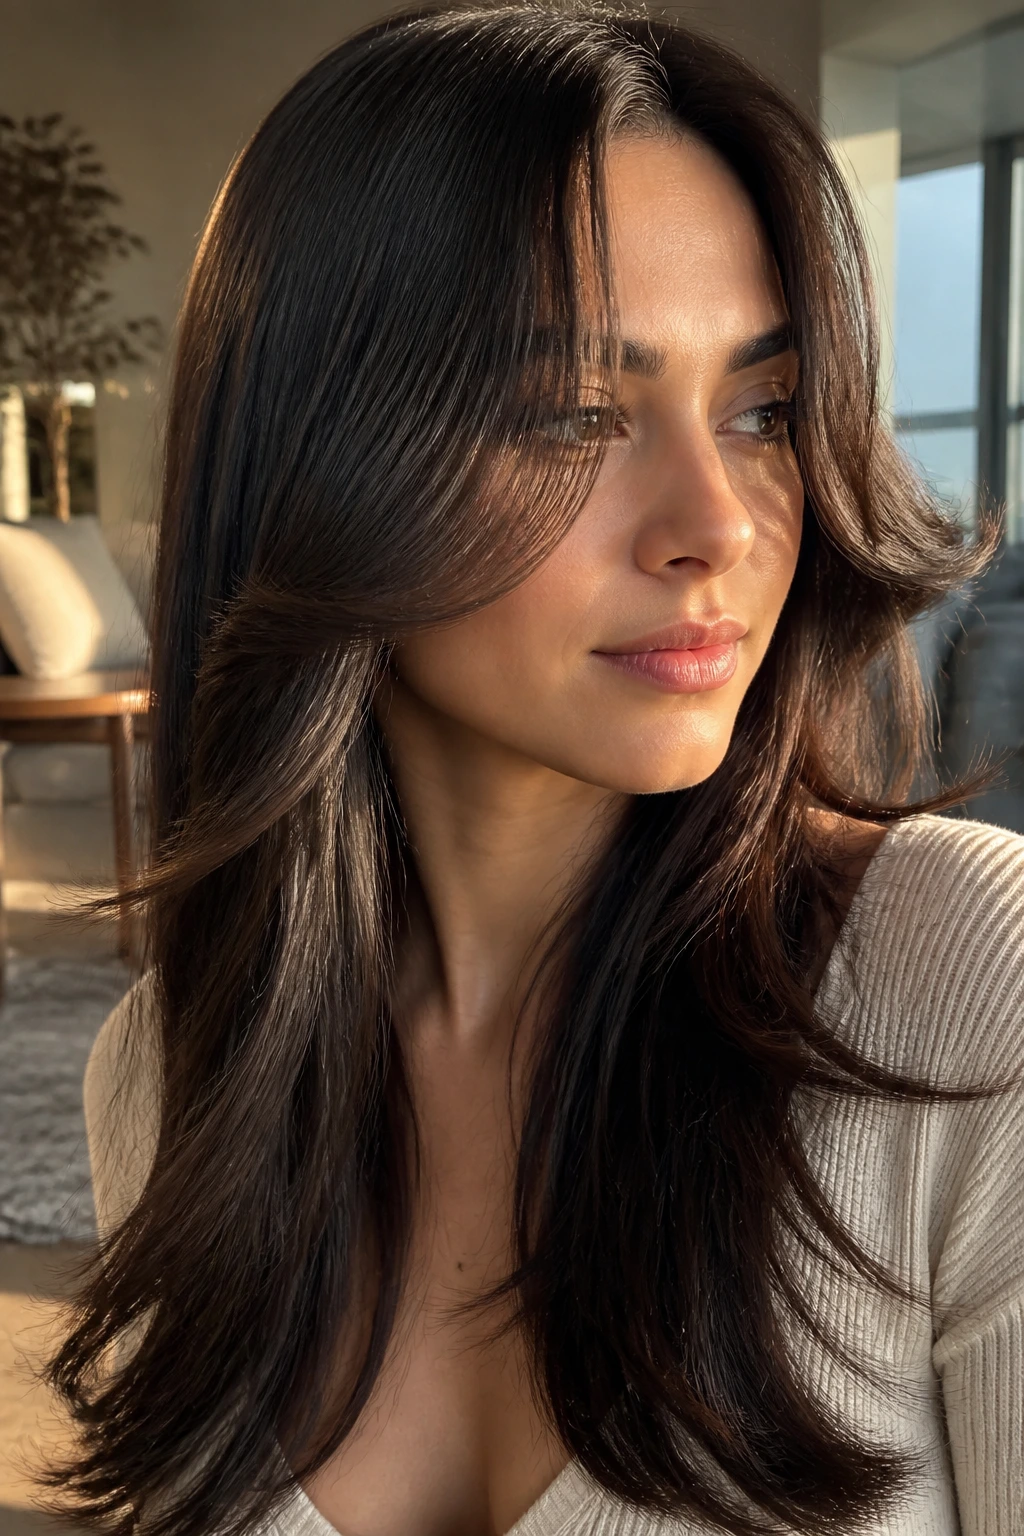
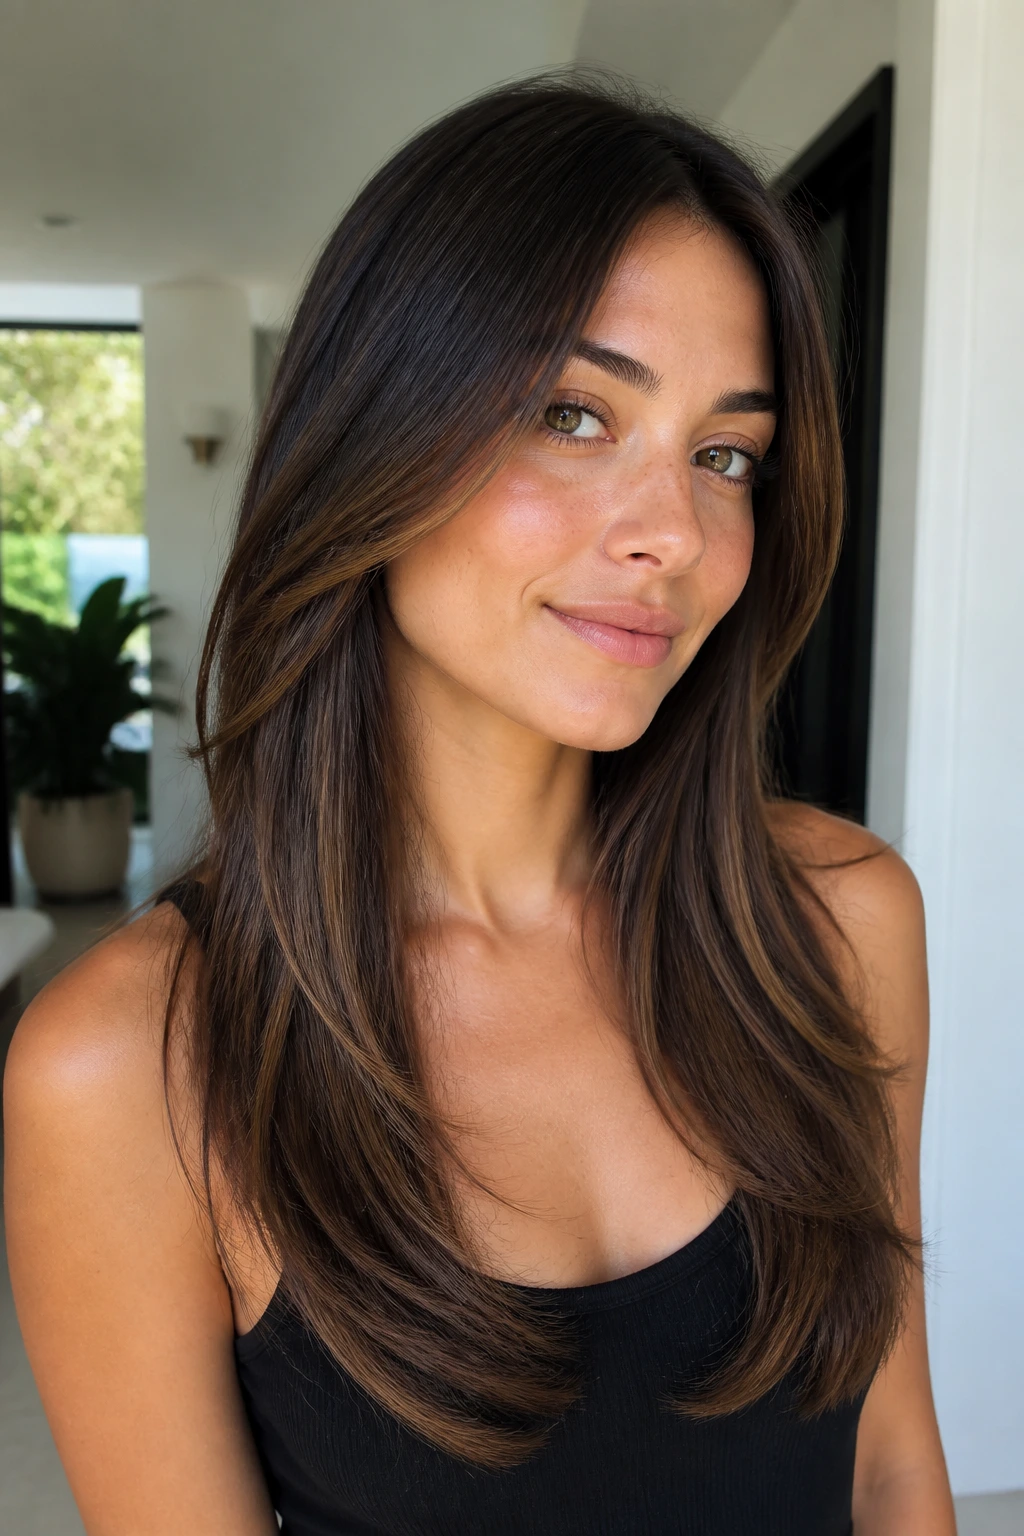
4. Bottleneck Blend Layers
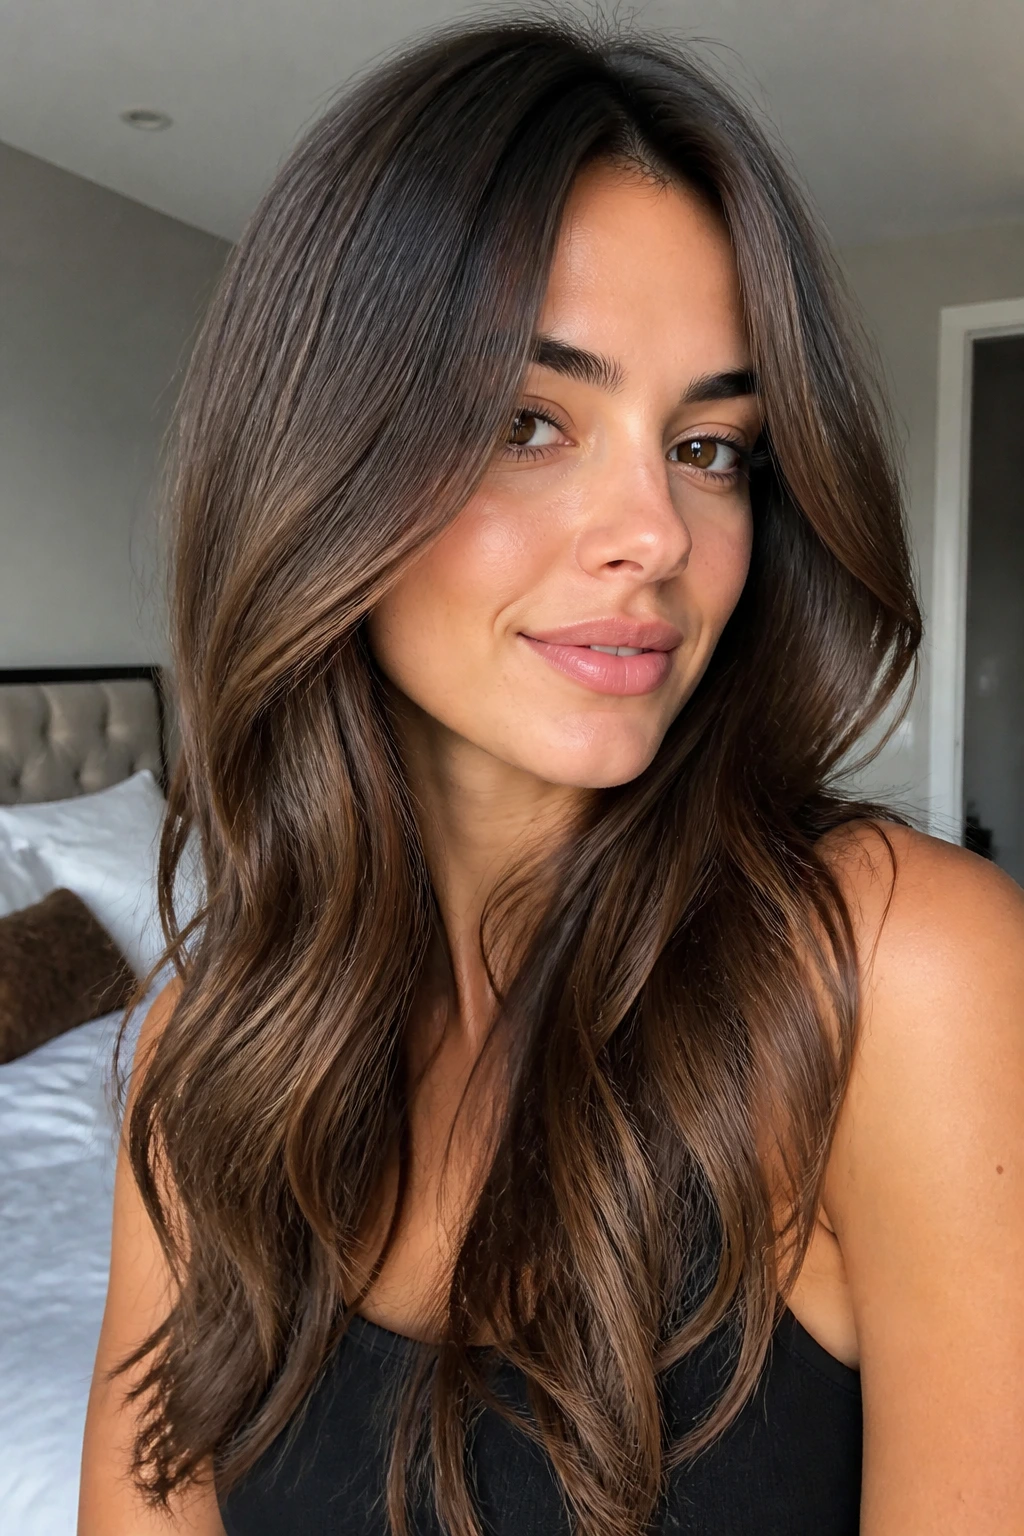
Bottleneck layers are named well, which does not happen often. The top of the frame stays narrow and short near the nose or upper cheek, then widens and lengthens as it drops toward the mouth and collarbone. On straight hair, that shape gives you curve without needing much hair to curl.
The reason it works is the transition. Instead of one obvious face frame, you get a gradual opening that feels built in. If your hair lies flat by noon, this style still keeps the front from disappearing because the line keeps changing length.
I like this shape on people who wear a middle part and want something a little more modern than classic curtain bangs, but without committing to actual bangs. It also grows out nicely, which matters when the front is the first area to get fussy.
5. Long Feathered Ribbons
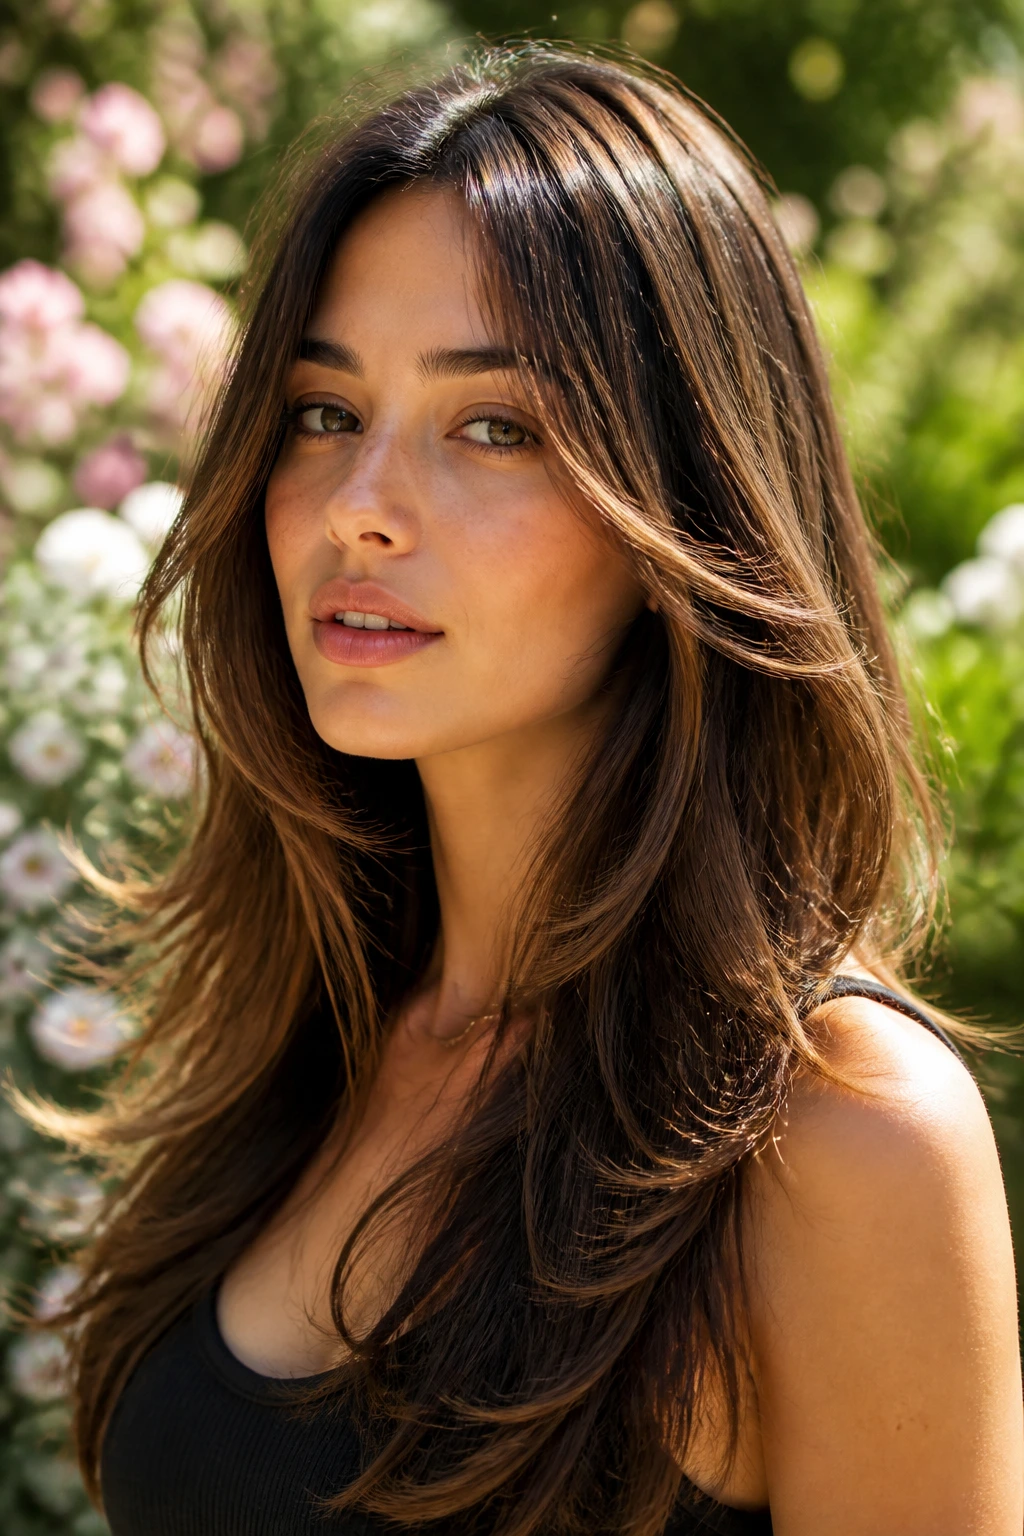
Long feathered ribbons are for people who want the front to feel soft, not sliced. The pieces are cut so they taper and separate like thin ribbons rather than thick strips, which keeps the finish airy on straight hair. It is a gentler look, and I mean that in the best way.
What to ask for
Tell the stylist you want the face frame to blend into the length, not sit on top of it. Point cutting helps here. Razor work can work too, but only if the hair has enough density; otherwise it can make fine straight hair look stringy at the front.
These layers are a good choice if you like movement but still pull your hair back a lot. The shorter pieces sweep out around the face, and the longer ones disappear into ponytails and half-up styles without leaving harsh steps.
6. Center-Part Wing Layers

Center-part wing layers flare out from the part like soft wings, then fold back toward the shoulders. They are one of the easiest ways to make long straight hair feel less one-note, especially if the crown lies flat and the front needs help.
The shape depends on direction. Blow-dry the roots forward first, then sweep the front away from the face so the pieces curve out and back. That creates a little lift around the cheekbones without turning the whole head into a curl set.
If your face is long, this shape can be a smart move because the outward sweep adds width near the eyes and cheeks. If your hair is fine, keep the layers long enough to hold a bend; otherwise the wings collapse into wisps.
7. Side-Swept Front Slices

A deep side part changes the personality of the cut fast. Side-swept front slices tilt across the forehead and cheek instead of splitting evenly down the middle, which makes the whole shape feel softer and a little more dramatic. It is a good answer for anyone who has never loved a center part but still wants face-framing movement.
The front pieces should be cut so they fall naturally with the part, not fight it. On straight hair, that means keeping one side slightly fuller and letting the opposite side fall closer to the cheek. The asymmetry is the point.
This style is especially useful if one side of your face is a little fuller or if you like tucking hair behind one ear. The sweep gives you a clean view on one side and a soft frame on the other.
8. Invisible Interior Layers
Invisible interior layers are the quiet overachiever of this whole group. You keep the surface length looking full, but the stylist removes some weight inside the shape so the front pieces move instead of hanging like a single board. From the outside, the cut still looks long and polished.
That hidden movement matters on straight hair because too much visible layering can turn into a choppy shelf. Interior layers avoid that. They let the front bend while the perimeter stays solid, which is a nice balance when you want polish more than texture.
This is a good option if you work in a setting where obvious layers feel too casual, or if your hair is already thin at the ends. The cut gives motion without advertising the fact that it has been layered.
9. Rounded U-Frame Layers
Rounded U-frame layers curve around the face and chest in one smooth line instead of stopping at a blunt angle. The silhouette is especially flattering on long straight hair because it keeps the bottom from looking heavy while still leaving the length intact.
The shape to picture
Think of the outer edge as a soft U, not a sharp V. The front pieces begin near the cheek, then drift lower around the mouth and collarbone before meeting the rest of the length. It reads as softer and fuller than a steep front layer.
If your hair is dense, this cut is worth a serious look. The rounded contour removes enough bulk to keep the ends from feeling thick and stiff, but not so much that the front starts to fray.
10. Soft Wolf-Lite Layers
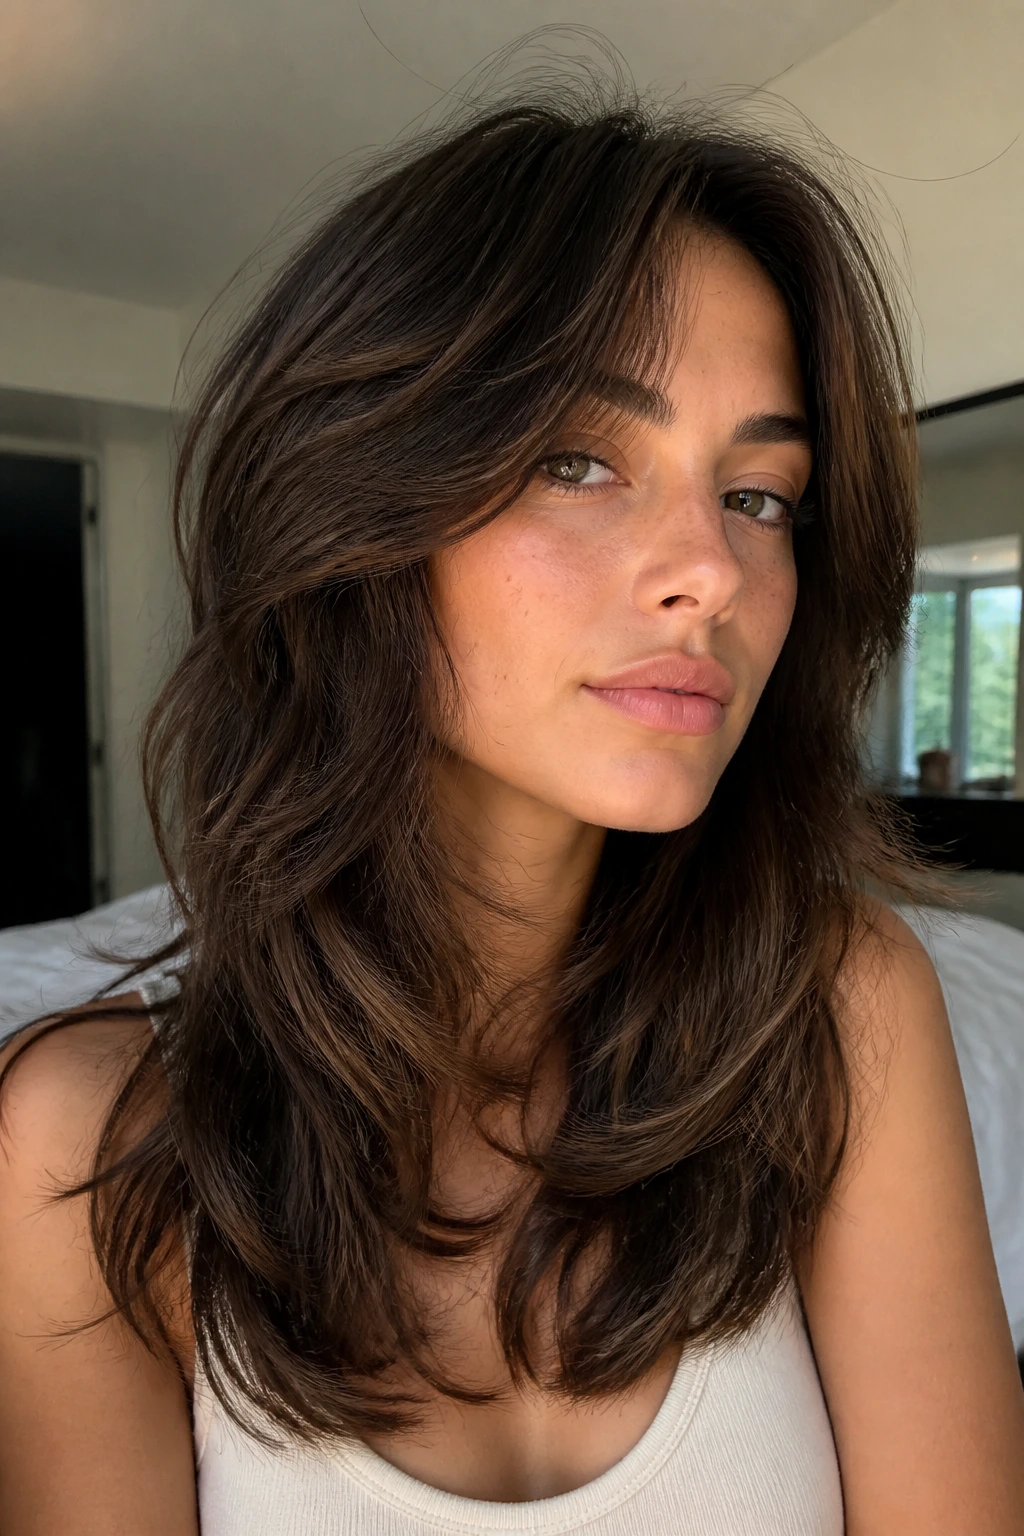
This is the version for people who like a little edge but do not want to look like they borrowed a shag from someone with three times the texture. Soft wolf-lite layers keep the face frame long, but add a bit more lift and separation through the crown and front so straight hair gets some attitude.
The key is restraint. If the shortest pieces climb too high, straight hair can go patchy fast. Keep the front pieces long enough to bend cleanly around the cheekbones, then let the rest of the haircut carry the texture.
I like this cut on thicker straight hair, especially when the ends tend to feel heavy. It takes some weight off without turning the haircut into a staircase.
11. Temple-Kiss Layers
Temple-kiss layers begin higher and narrower than most face frames, grazing the temples first and then dropping into the cheek. They are subtle, which is precisely why they work. On straight hair, a subtle change often looks more expensive than a loud one.
The shape is nice if you wear glasses, because the front pieces can sit beside the frame instead of crowding it. They also work well with tucked hair, since the shortest pieces are near the sides of the face rather than all over the front.
Tiny, useful detail
Ask for soft, blended ends. Temple pieces should not look like a separate fringe sitting in front of the haircut. If they do, the whole thing can feel disconnected and a bit dated.
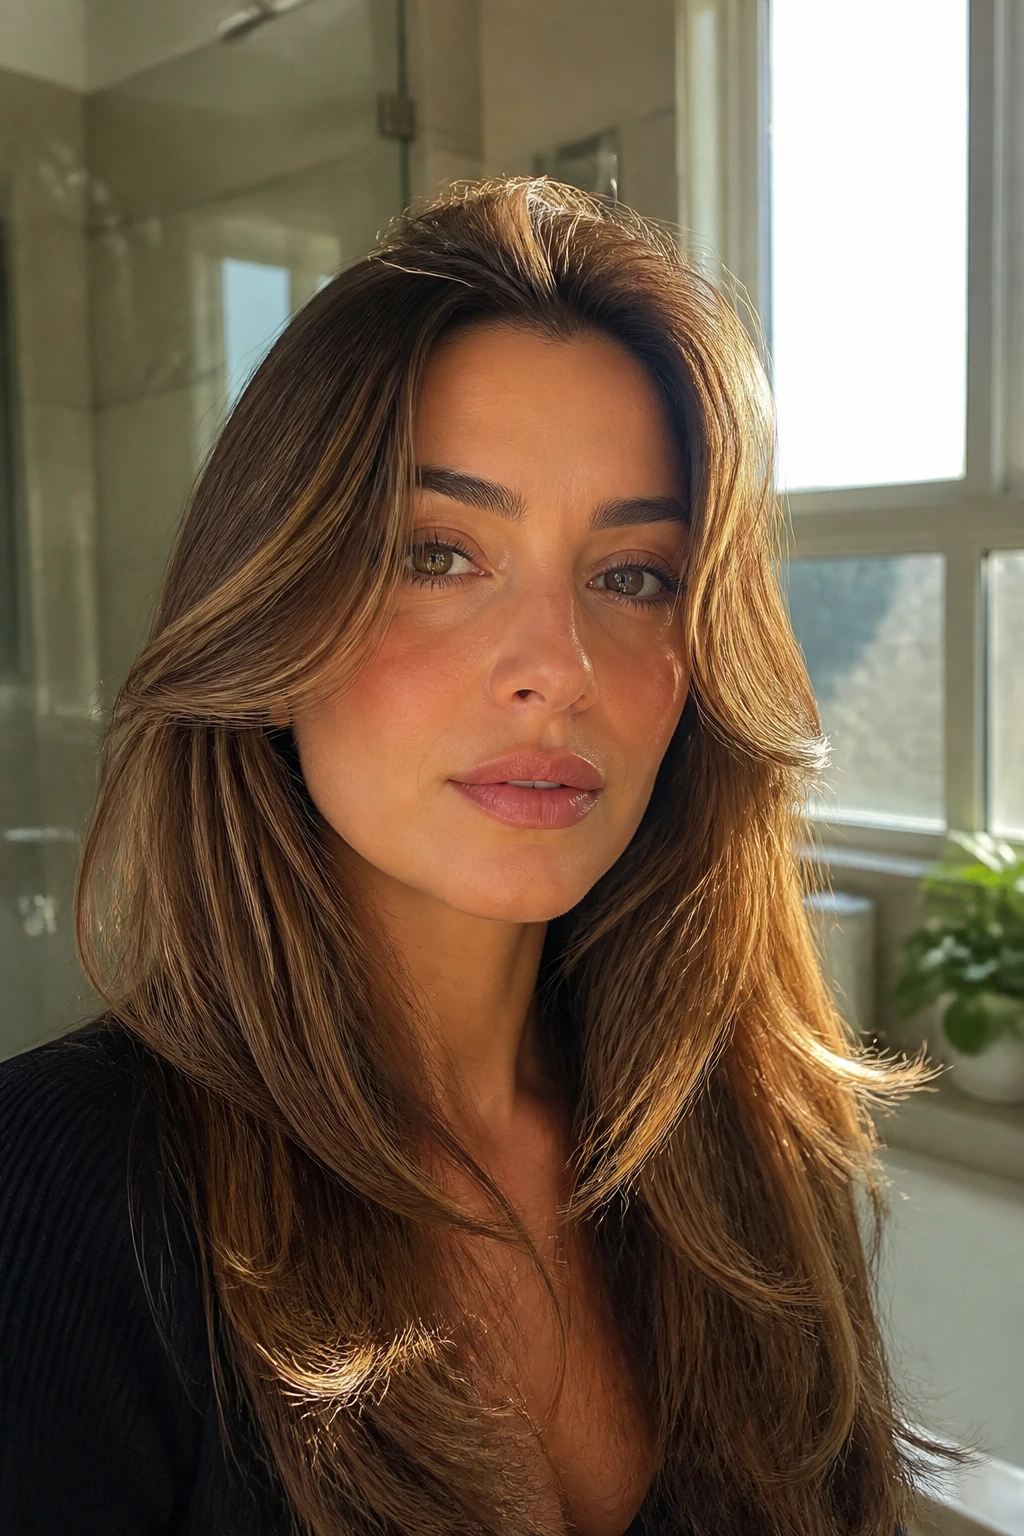
12. Lip-Line Face Frame
Lip-line face frames draw the eye to the mouth and cheekbones, which sounds small until you see how much it changes the balance of long straight hair. The front pieces start around the lip, then angle down into the length so the cut has a clear focal point.
This is one of my favorite shapes for hair that is straight enough to show every line. Why? Because the lip-line start gives the front something to do. Even a simple bend at the ends makes the frame look deliberate instead of accidental.
It is also a good choice if your jawline is strong and you want the haircut to soften that area without hiding it. The pieces move around the mouth, and that shifts the attention upward in a clean way.
13. Long Waterfall Layers
Long waterfall layers let the front flow from cheek to chest in a long cascade, which is exactly what straight hair needs when it wants movement but not fuss. The pieces are long enough to fold back into the rest of the hair, so the cut feels smooth when you brush it out.
The fall matters more than the curl
If you plan to style with a round brush, ask the stylist to keep a gradual slope through the front. Too much step will show once the hair falls flat. A waterfall shape should still look good when it is freshly blown out and a little imperfect.
This is a smart pick for dense hair. The long layers release some weight at the front, but the overall silhouette stays heavy and glossy instead of airy in the wrong places.
14. Deep Side-Part Sweep
A deep side-part sweep can save a haircut that feels too plain at the center. The front pieces move in one strong direction, which creates lift at the root and a smoother curve around the face. It is a small shift with a big payoff.
On straight hair, the part itself becomes part of the design. The longer side can skim the cheek and jaw, while the shorter side lifts near the temple and folds back more tightly. That asymmetry keeps the cut from looking flat.
If you like a more polished finish, this shape behaves well with a little smoothing cream and a brush blowout. If you prefer a more casual bend, use a flat iron on just the first inch or two of the front pieces.
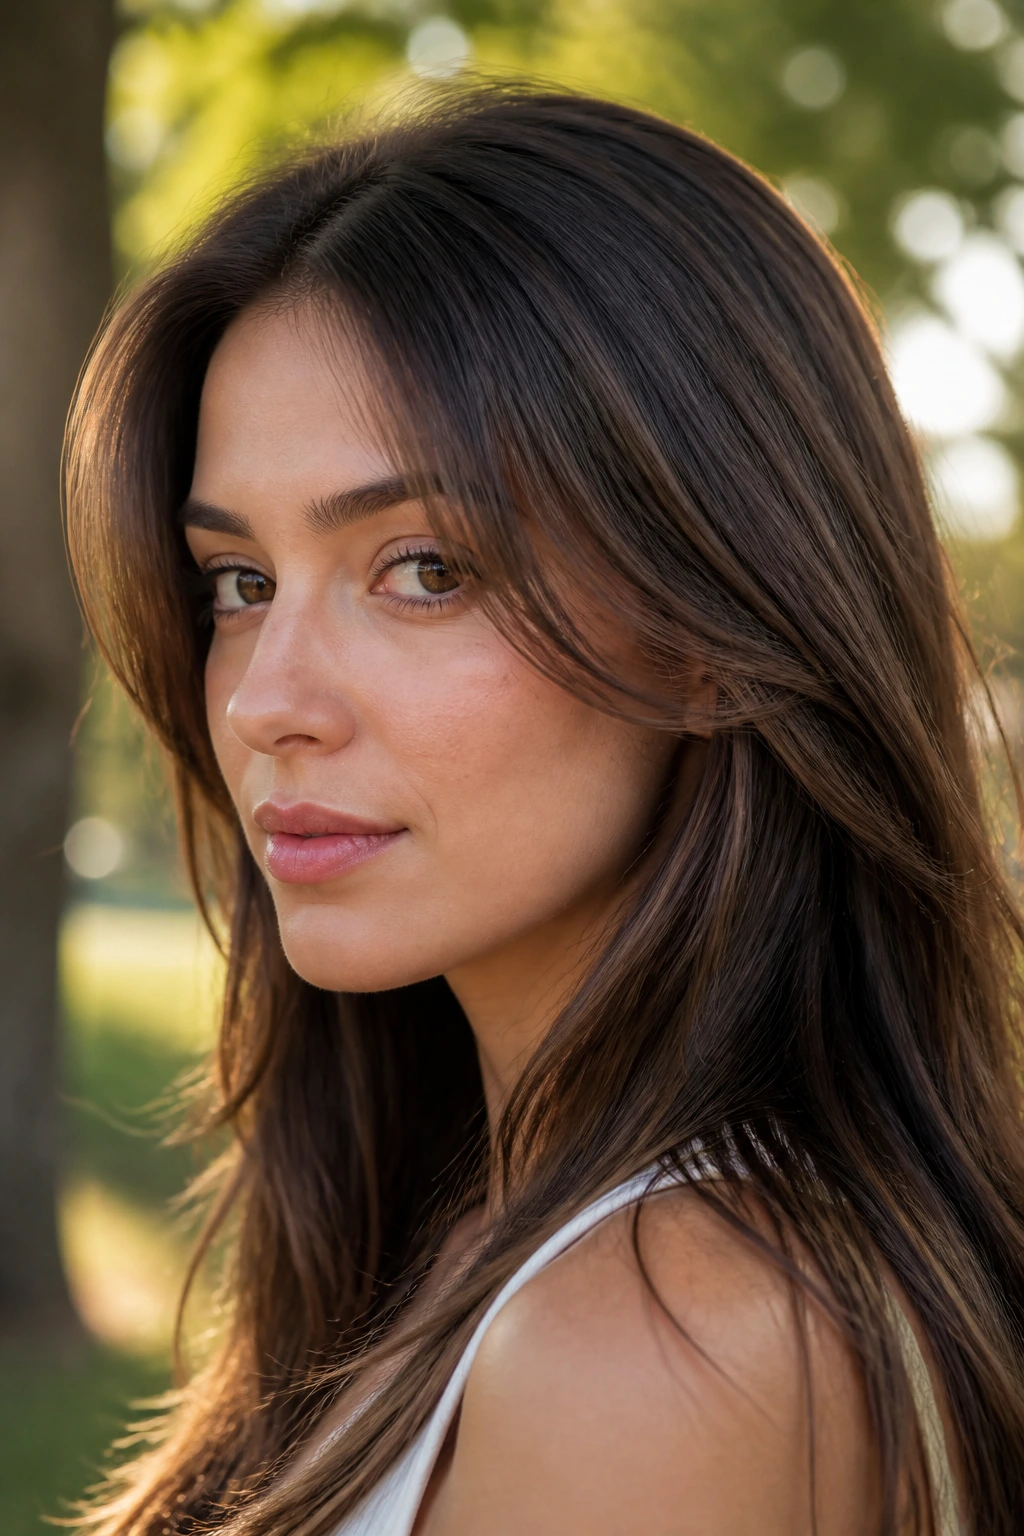
15. Air S-Curve Layers
Why does an S-curve look softer than a loose curl? Because the movement changes direction once before it lands, which keeps the front from looking too round or too styled. Straight hair usually needs that shape more than a full curl.
Air S-curve layers are cut so the front can bend in, then out, then settle. You can create that shape with a flat iron or a brush and dryer, and it looks especially good when the rest of the hair stays mostly straight. The contrast is the point.
This is a nice choice if you want face-framing layers that read modern instead of vintage. They hold the line better than a bounce curl, and they sit well around glasses, earrings, and soft necklines.
16. Butterfly Front Layers
Butterfly front layers borrow the high-front, long-back feeling of a butterfly cut, but keep the face frame long enough for straight hair to behave. The shorter front pieces lift around the cheekbone while the length underneath stays substantial.
That blend works because the front gets movement without the whole head going choppy. Straight hair can handle this if the shortest layers stay soft and the transition into the length is smooth. Sharp separation is the enemy here.
It’s a good match for hair that feels heavy around the face but still needs length at the back. You get the visual lift of shorter layers without sacrificing the clean outline that long hair gives.
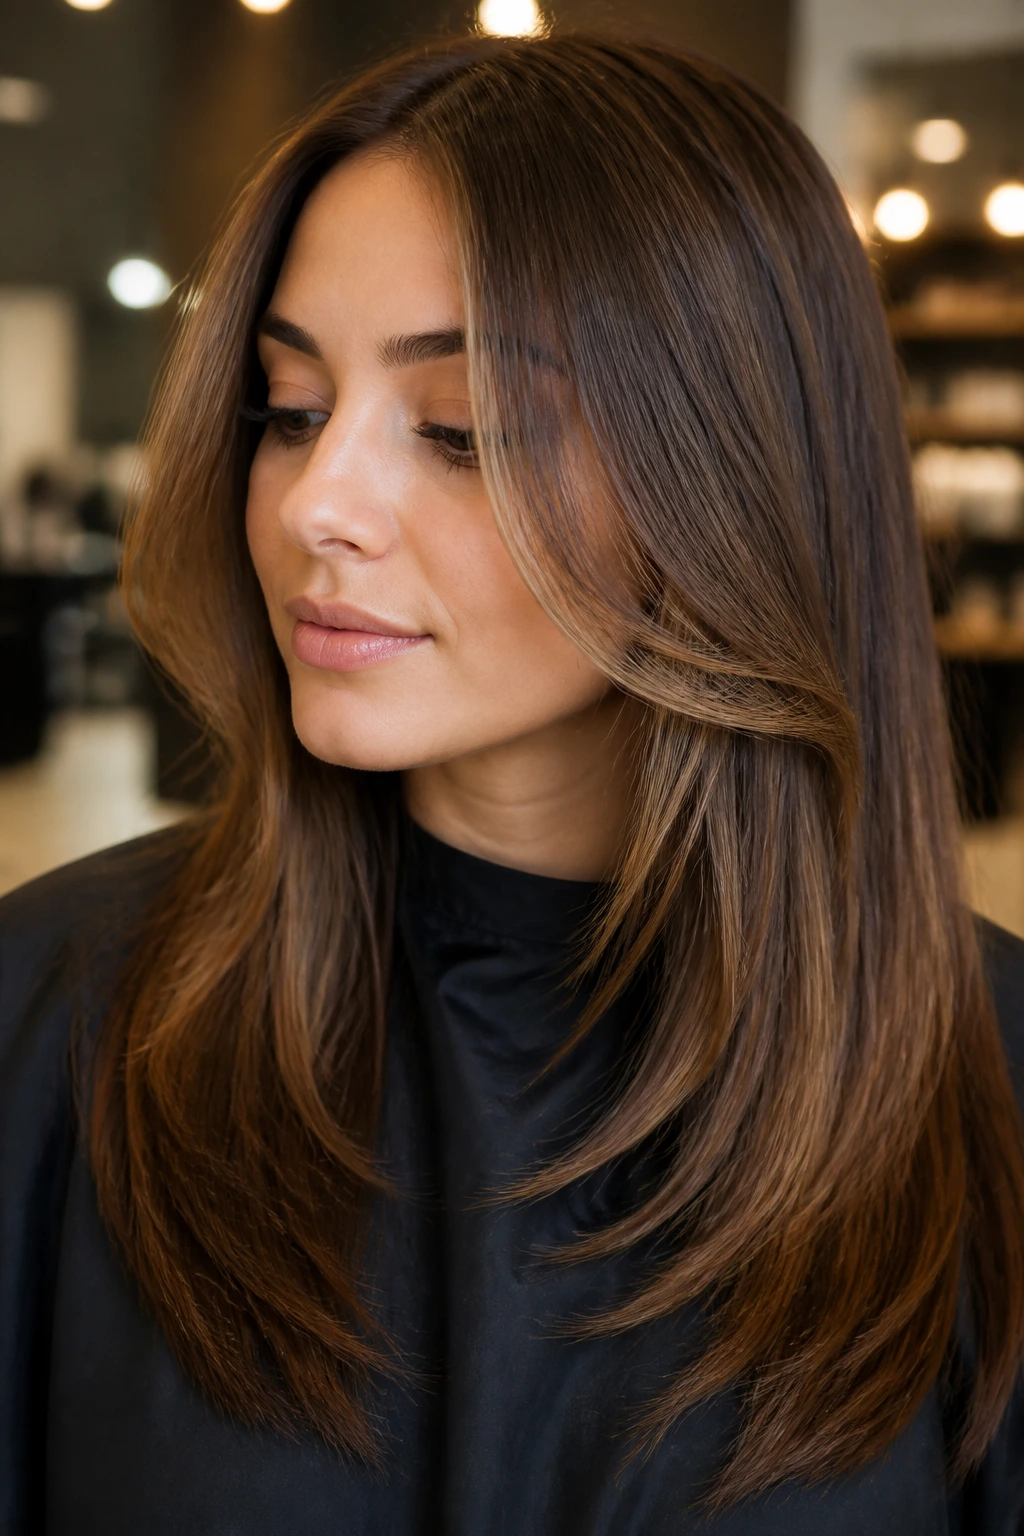
17. Glassy Bend Layers
Glassy bend layers are for the person who wants shine first and texture second. The face-framing pieces stay long, sleek, and controlled, then pick up one soft bend at the ends so the haircut has shape without looking fluffy.
The result is neat, not stiff. Straight hair loves this when the cut is precise and the finish is smooth, because the front pieces show off the hair’s shine instead of fighting it. A flat iron with rounded edges is usually enough.
I would choose this shape for fine straight hair that can look overworked fast. Too much layering turns it see-through. A glassy bend keeps the outline strong and the face frame subtle.
18. Chin-Rest Layers
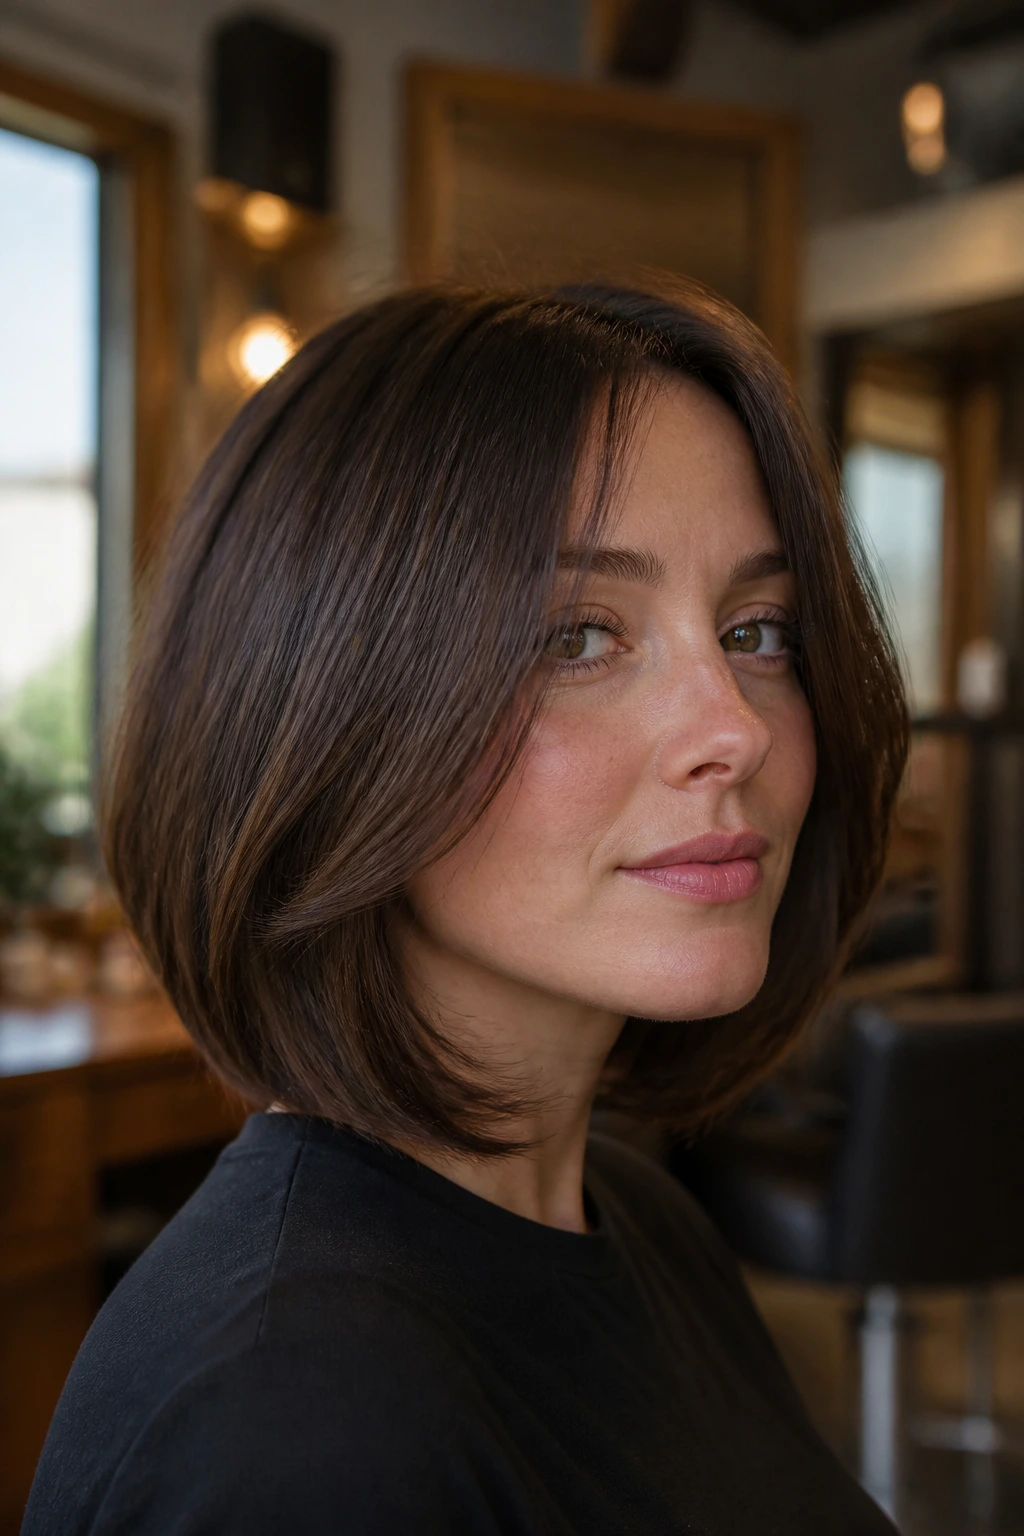
Chin-rest layers are a clean fix for rounder faces or anyone who wants more length around the cheeks. The front pieces sit right at the chin, which stretches the silhouette downward and keeps the face frame from ending too high.
Quick things to know
- The chin is the anchor point, not the end of the haircut.
- Straight hair will show every tiny line, so the ends should be soft, not blunt.
- A small inward bend keeps the shape from flipping out too hard.
- If you have a very strong jaw, the chin start softens it without hiding it.
This is a no-nonsense cut. It does not try to do too much. And sometimes that is exactly what straight hair needs.
19. Mixed-Length Ribbon Layers

Mixed-length ribbons give the front a little visual rhythm. One piece might land near the temple, another around the cheek, and another closer to the jaw, all blending into the long lengths behind them. It sounds busy on paper, but on straight hair it reads as movement.
The reason it works is the staggered fall. A single face-framing layer can look too tidy; multiple lengths create a softer spill around the face. Keep the differences subtle, though. If the jumps are too large, the front starts to look disconnected.
This shape is useful if you like to change your parting. The pieces still make sense from center or side, which gives you more freedom on days when you cannot be bothered to style every section the same way.
20. Long Shag-Softened Layers

Long shag-softened layers are the closest I’ll get to shag energy on straight hair without making a mess of it. The texture lives in the front and through the mid-lengths, but the overall length stays long enough to feel tidy.
The cut needs a careful hand. Straight hair shows uneven feathering fast, so the stylist should keep the layers soft and blended rather than carving in obvious chunks. A little movement goes a long way here.
This is best for hair that feels too heavy with a one-length outline. If the ends sit like a curtain and refuse to move, a softened shag frame gives them life without asking you to do much more than brush and bend the front.
21. Swoop-Fringe Blend
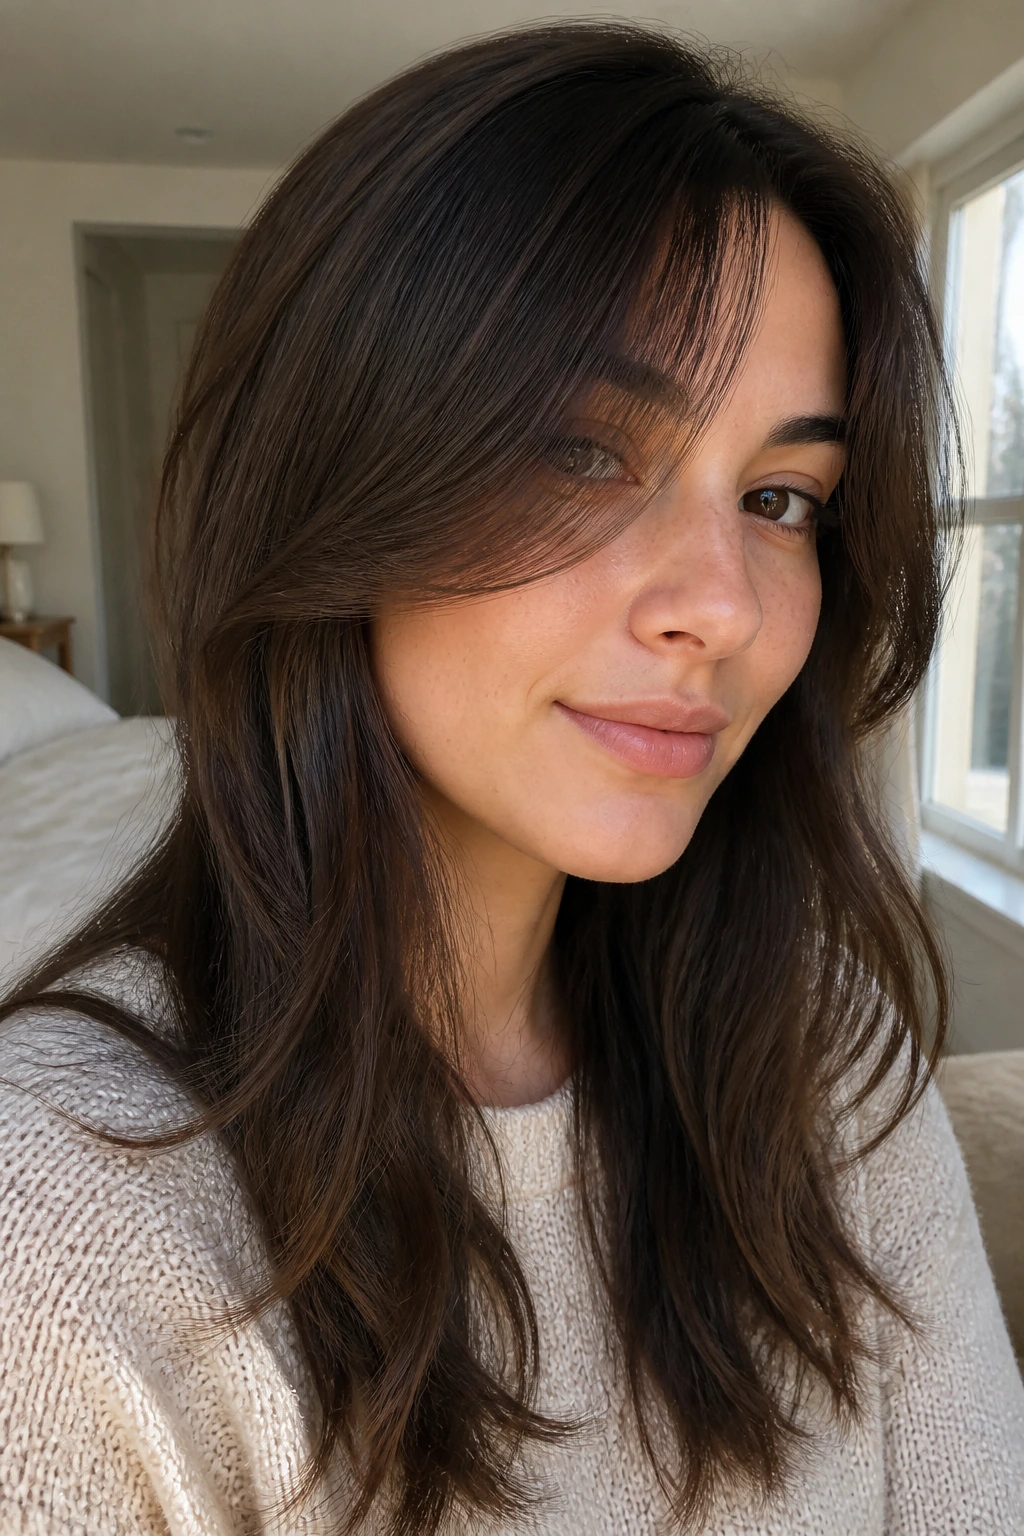
Can you want bangs and still not want bangs? Yes. The swoop-fringe blend is basically the answer. It gives you a long, sweeping piece at the front that behaves like a fringe on good days and like a face-framing layer on lazy days.
The cut should start high enough to skim the upper cheek, then slide down into the rest of the hair. Straight strands make this shape look especially crisp, because the sweep line stays visible. If your hair parts easily, this can be a lovely compromise.
I like this option for anyone who wants to soften the forehead without committing to a blunt fringe. It also grows out more smoothly than a true bang, which spares you the awkward middle stage.
22. Collarbone Arc Layers
Collarbone arc layers curve around the neckline and shoulders, which makes them a quiet winner for straight hair with good density. The front pieces travel down and out instead of stopping abruptly, so the haircut feels fluid from root to hem.
The collarbone is a useful landmark because the hair naturally bends there when you move. That means the shape keeps showing up even when you are not styling every section. A light wave at the front is enough; the cut does the rest.
This is one of the most wearable options if you like putting hair half-up, because the lower front frame still shows around the face. It’s understated, but it is not boring. There’s a difference.
23. Low-Contrast Face Frame
Low-contrast face framing is for people who want the cut to whisper, not shout. The shortest front pieces are only a little shorter than the rest, which means the movement is there without looking layered from across the room.
That subtlety helps straight hair a lot. Too much contrast can make the front look pieced out and thin. A low-contrast frame keeps the edge solid and the shape believable, especially if you wear your hair mostly smooth.
This is a smart office-friendly cut, but it is not dull. A small bend at the front, a clean part, and a touch of shine serum can make the whole thing look finished in a way that blunt long hair rarely does.
24. Root-Lift Front Layers
Root-lift front layers are what you ask for when the front of your hair falls open and flat by lunch. The shape builds a little upward movement near the roots, then lets the front pieces curve down and away from the face.
The cut matters, but so does the direction of the dry. Blow the front up and over the brush first, then guide it away from the face as it cools. That keeps the lift from collapsing the second you leave the bathroom.
This style is especially useful for straight hair that is fine at the crown but heavier through the lengths. You get volume where you need it and softness where you want it. That’s not a bad trade.
25. Grow-Out Friendly Layers

Grow-out friendly layers are the ones I trust when someone says, “I like the cut, but I do not want to babysit it.” The front pieces are long, blended, and soft enough to keep looking decent as they stretch an inch or two.
That matters more than people admit. The best haircut is not always the freshest one; it is the one that still behaves after a few weeks of ordinary life. Straight hair can show growth lines faster than wavy hair, so a gentle blend helps the front stay smooth.
If you want a safer starting point, this is it. Ask for a long frame that begins around the cheek or mouth and keeps the transition into the rest of the hair gradual. You can always go shorter later. You cannot put it back once it’s gone.
What Makes the Front Pieces Move on Straight Hair
Straight hair does not refuse movement. It just advertises every mistake. That is why these cuts depend so much on weight placement. If the front is too heavy, the pieces hang straight down and disappear into the rest of the hair. If the front is too short, they can spring up and look thin.
The sweet spot is usually a soft, blended transition that starts somewhere the eye already wants to look: cheekbone, lip line, chin, or collarbone. From there, the cut can be pushed a little away from the face with a round brush, a flat iron bend, or even a loose roller set. The wave is the finish. The cut creates the possibility.
Weight beats drama
A lot of straight-haired people think they need more layers. Usually, they need better layers. That means removing bulk where the hair feels stuck, then leaving enough length at the front so the pieces still drape instead of flipping into odd angles.
Point cutting and slide cutting help here because they soften the edge without making the line vanish. You want movement, not holes. And if the hair is very fine, even a small amount of carving at the front can change how full the style reads, so less is safer than more.
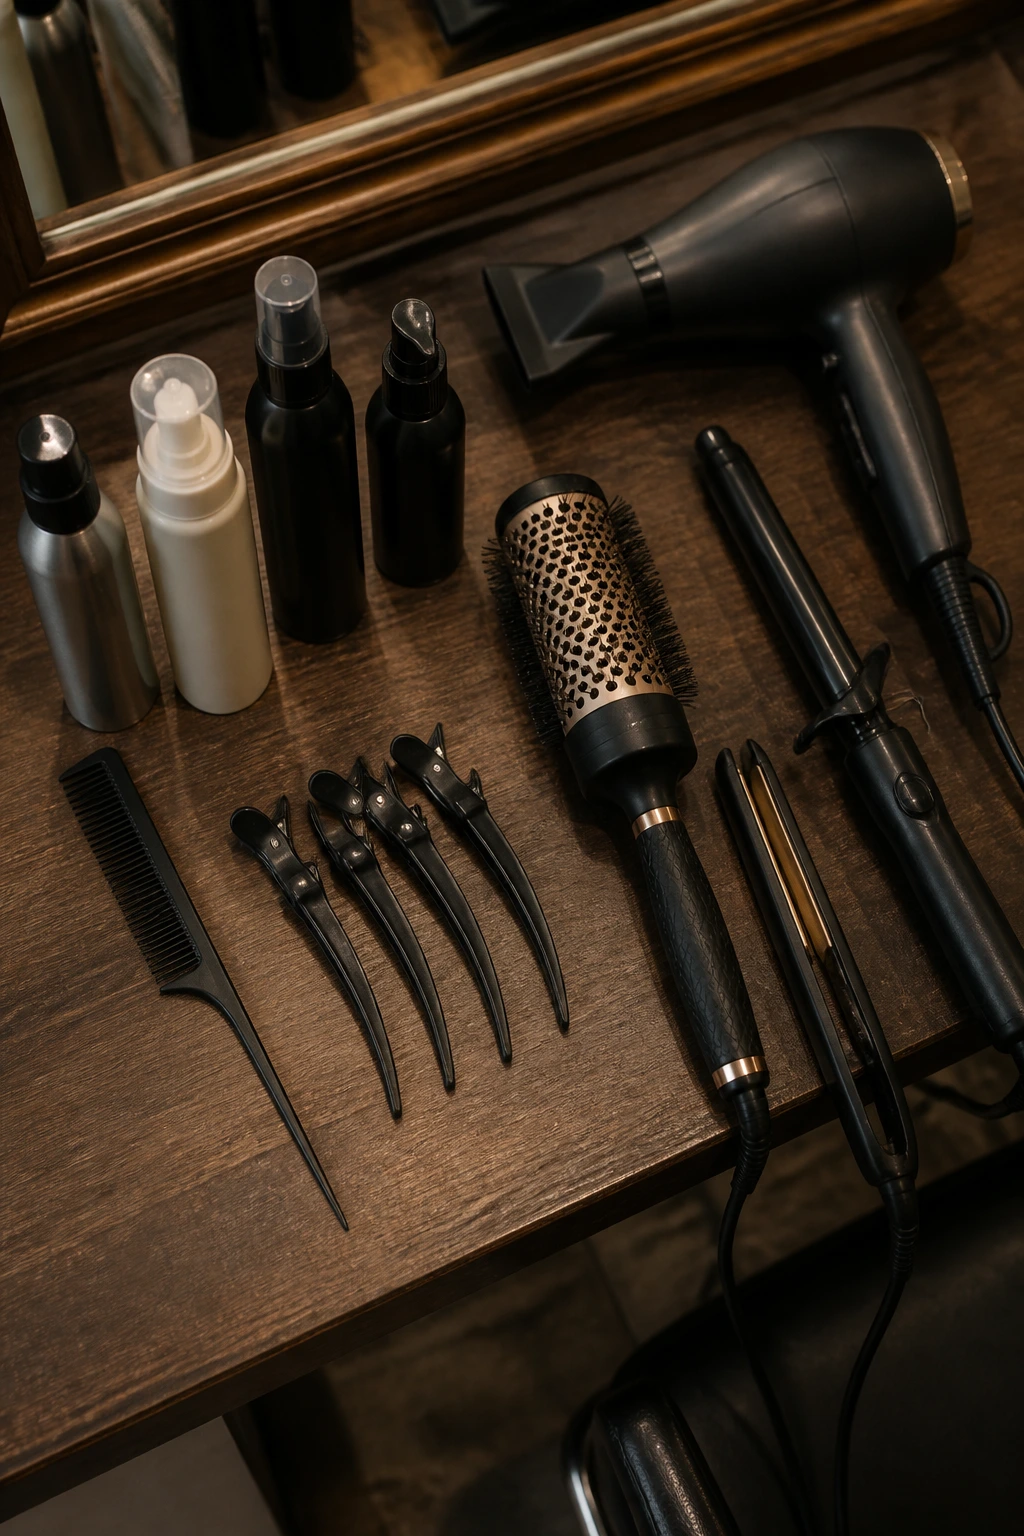
Essential Tools for the Cut and the Styling Finish
-
Tail comb: Use it for clean center parts, side parts, and narrow sections at the front.
-
Sectioning clips: These keep the face-framing pieces separate while you blow-dry or curl them, which matters more than people think.
-
Blow dryer with concentrator nozzle: The nozzle helps direct airflow down the hair shaft so the front lies smoother and shinier.
-
Round brush, medium barrel: A 1.5-inch brush gives a soft bend without making the front look like a full curl set.
-
Flat iron with rounded edges: Best for the S-bend and the subtle kick at the ends.
-
1 to 1.25-inch curling iron or wand: Useful when the front needs a little more curve than a brush can give.
-
Heat protectant spray: Use it every time. Straight hair can scorch fast because the surface is so smooth.
-
Light mousse or root spray: Good for flat crowns and front pieces that drop by midday.
-
Texture spray or dry shampoo: Adds grip at the front so the layers do not slide back into one shape.
-
Light serum: A drop on the last inch or two of the hair keeps the ends glossy without flattening the whole cut.
How to Choose the Right Length, Part, and Products
The right version of this haircut depends less on trend and more on where your hair falls when it is doing nothing. That’s the truth. If your strands are very straight and fine, longer front pieces usually behave better because they have enough weight to hang cleanly. If your hair is thick, you can handle a more obvious frame because there is enough bulk behind it.
At the salon, bring one photo of the overall cut and one photo of the front line. Stylists read pictures faster when the silhouette and the face frame are shown separately. Then use real landmarks: cheekbone, lip, chin, collarbone. Those words do more work than “somewhere in the front.”
Product choice matters too. If your hair gets slick fast, lean on lightweight mousse, root spray, and a mist of heat protectant rather than heavy oils. Silicones in smoothing sprays can help the front glide and shine; heavier butters tend to sit on top and make straight hair collapse. If you want bend that lasts, choose product with hold at the root and slip at the ends.
How to Wear the Shape So the Front Pieces Show Up
Presentation: The front pieces should look like they belong to the haircut, not like two random strands someone forgot to tuck away. A soft bend away from the face works best, because it shows the layer line and keeps the cheekbone area open.
Pairings: These cuts work with a middle part when you want symmetry, a deep side part when you want lift, and a tucked-behind-the-ear finish when you want the front to read cleanly. Hoop earrings, simple studs, and neckline-heavy tops can all make the frame more visible without making it louder.
Scale: Fine hair usually needs a lighter wave and a little root lift so the front does not disappear. Thick hair can carry a bigger bend and still look polished. If you are wearing the hair sleek, keep the front curve soft and stop styling once the ends have direction. If you want more movement, add bend only to the first two sections near the face.
Finish: A shine spray or a pea-sized bit of serum on the last inch of hair keeps the layers from looking dry. Texture spray gives a more piecey finish, which I like on shag-leaning cuts. Pick one mood and stop there. Too many finishes in one head of hair make the front look busy.
Extra Styling Tweaks That Keep the Front from Falling Flat
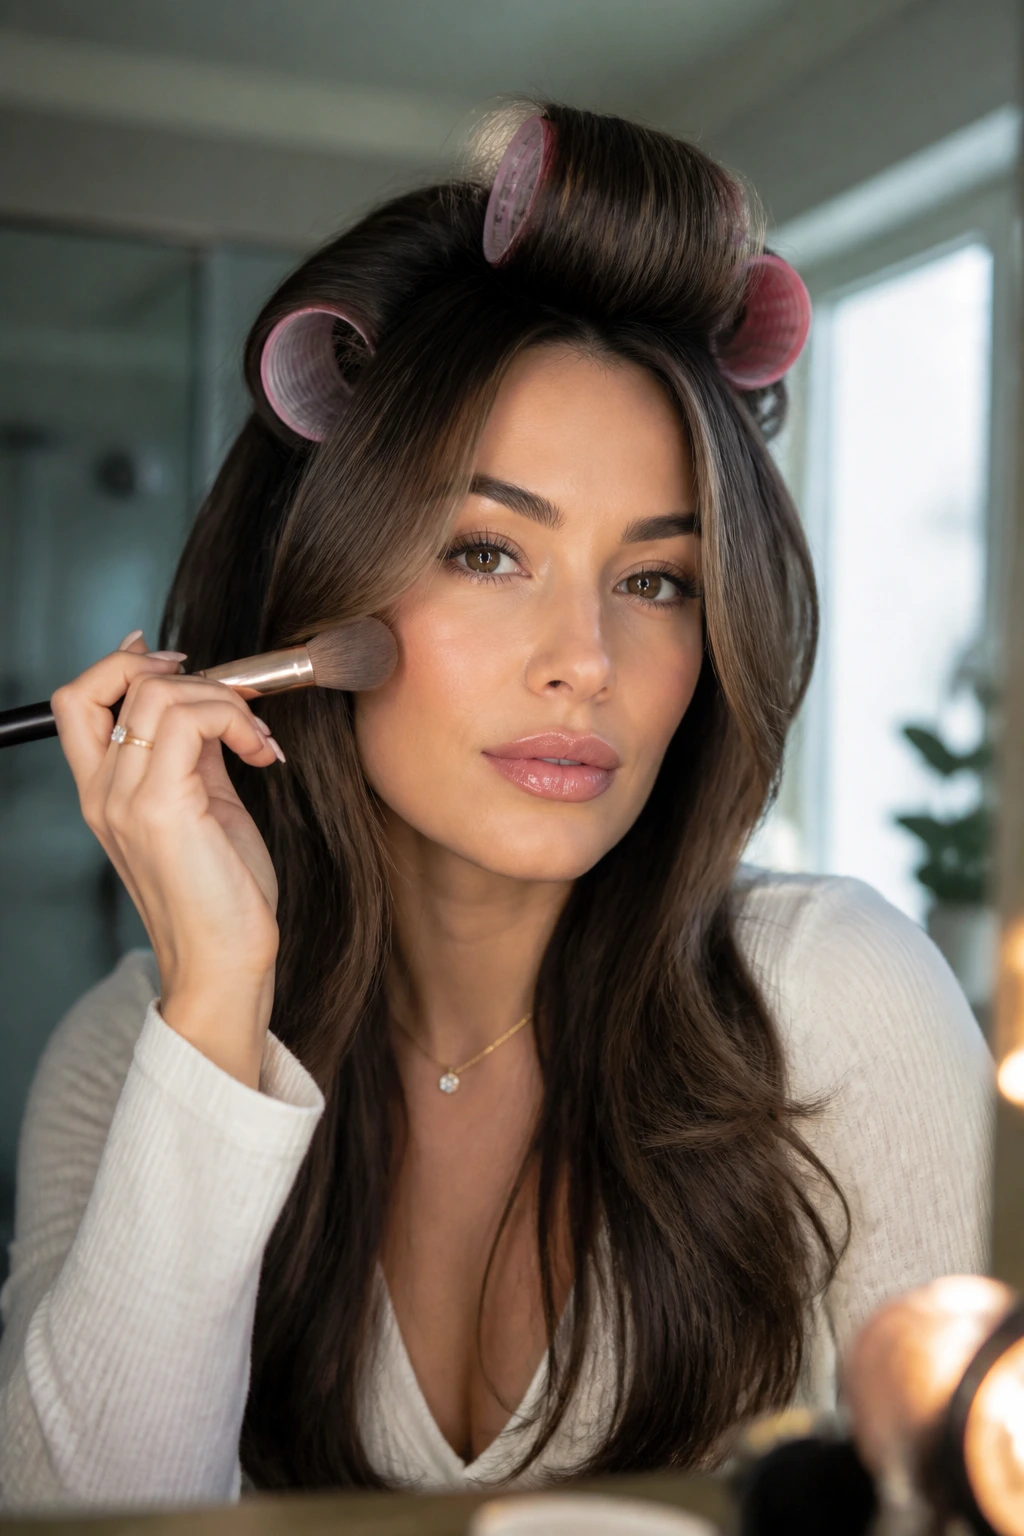
Shape Boost: Clip the front pieces in Velcro rollers for 10 to 15 minutes while you do your makeup or get dressed. That little cool-down period helps the bend last longer than a quick pass with a hot tool.
Time-Saver: Style only the front sections and the crown. The back length can stay smoother and straighter. Straight hair often looks best when the eye catches movement near the face and shine through the rest.
Pro Move: After blow-drying, let the front cool before you touch it again. Warm hair remembers the last shape you give it, and straight hair loses that memory faster if you brush it too early.
Make-It-Yours: If you wear glasses, keep the shortest pieces at the temple or upper cheek so they do not keep landing on the frames. If you wear your hair up a lot, ask for a longer front frame that still reaches the chin. If you want more edge, add a slight side sweep instead of going shorter.
Common Mistakes That Make the Layers Look Choppy
-
Starting the layer too high: The front can look thin and fussy, especially on fine straight hair. Fix it by keeping the shortest point lower, often around the cheekbone or lip line.
-
Cutting for a curled photo but wearing the hair straight: A cut that looks balanced in a bouncy curl set may collapse when brushed out. Ask for the shape to work in your everyday finish, not just on a styling day.
-
Over-texturizing the ends: Too much thinning turns the front into frayed pieces that separate in bad ways. On straight hair, a little softness is enough.
-
Using heavy oils near the face: The front pieces flatten first, so oily products near the roots or cheek area can erase the shape fast. Keep rich serums on the ends only.
-
Styling every section the same way: If every piece curls in the same direction, the front can look helmet-like. Alternate direction through the lengths, but keep the face frame moving away from the face.
Ways to Change the Mood Without Losing the Length
The Soft Curtain Version: Ask for cheekbone-to-lip pieces with a center part and a gentle bend. This keeps the face open and the length intact.
The Side-Sweep Version: Move the part low and let the front sweep across one side of the face. It gives more lift at the crown and feels a little more polished.
The Glossy Straight Finish: Keep the cut soft but style it with a rounded blowout and a light serum. This version works well if you want the layers to show up mostly through shape, not texture.
The Air-Dry Bend: Twist the front pieces loosely while damp, pin them for a while, then let them fall and brush them with your fingers. It is looser and less controlled, which suits more casual hair days.
The Soft Shag Blend: Add a little more texture through the front and crown, but keep the overall length long. This is the right lane if plain straight hair feels too flat and you want a bit of edge without losing softness.
Keeping the Shape Fresh Between Trims
The front of a layered cut shows wear first. That is just how straight hair behaves. The pieces around the face get brushed, tucked, pulled back, and heat-styled more than the rest, so they lose their shape faster than the length behind them.
For most people, a trim every 8 to 10 weeks keeps the front pieces neat without forcing a major reset. If your hair grows quickly or the face frame starts to split open early, bring that closer to 6 to 8 weeks for the front corners only. The back length can often go a little longer if the outline still feels solid.
Night care matters too. A loose silk scrunchie, a low braid, or a silk pillowcase keeps the front from getting crushed. If you wash often, use a light conditioner from ears down and keep the roots cleaner so the layers do not lose lift. Dry shampoo helps on day two, but use it sparingly; too much grit near the face makes straight hair look dusty instead of airy.
When the cut grows out, do not rush to shorten everything at once. Sometimes moving the shortest face frame down by one inch on the next trim keeps the shape intact far better than starting over.
Frequently Asked Questions
Will these layers work if my hair is pin-straight?
Yes, but the cut should be softer and a little longer than it would be on wavy hair. Pin-straight strands show every line, so a blunt face frame can feel harsh fast. Ask for a blend that still looks good when brushed out, not just when styled.
Should the shortest pieces hit the cheekbone or the chin?
Cheekbone pieces give more lift and make the face feel open. Chin-length pieces soften the jaw and stretch the face vertically. If you are unsure, ask the stylist to show you both points before cutting.
Do I need curtain bangs for this look?
No. Curtain bangs are one version of the idea, not the whole thing. You can keep everything as long face-framing layers and still get plenty of movement.
Will this make fine hair look thinner?
Not if the layers are kept low and blended. Fine straight hair gets into trouble when the front is cut too short or thinned too much. A long, soft frame usually works better than a choppy one.
How do I stop the front from flipping out weirdly?
Use a round brush or flat iron to give the front one consistent direction, then let it cool before touching it again. If the ends keep kicking out, the layer may be too short or the cut may need softer blending.
Can I wear a side part with these layers?
Absolutely. A side part can make the front look fuller at the crown and softer across the face. Just tell the stylist which side you part on most often so the shorter pieces land in the right spot.
How often do I need trims?
The front usually needs attention before the rest of the length does. Plan on 6 to 10 weeks for cleanup, depending on how precise you want the shape to stay.
What if I want the cut but I rarely heat-style my hair?
Choose longer, lower-contrast layers. They will still give shape when air-dried, especially if you scrunch the front lightly while it is damp or tuck it behind the ears while it sets.
The Shape That Does the Heavy Lifting
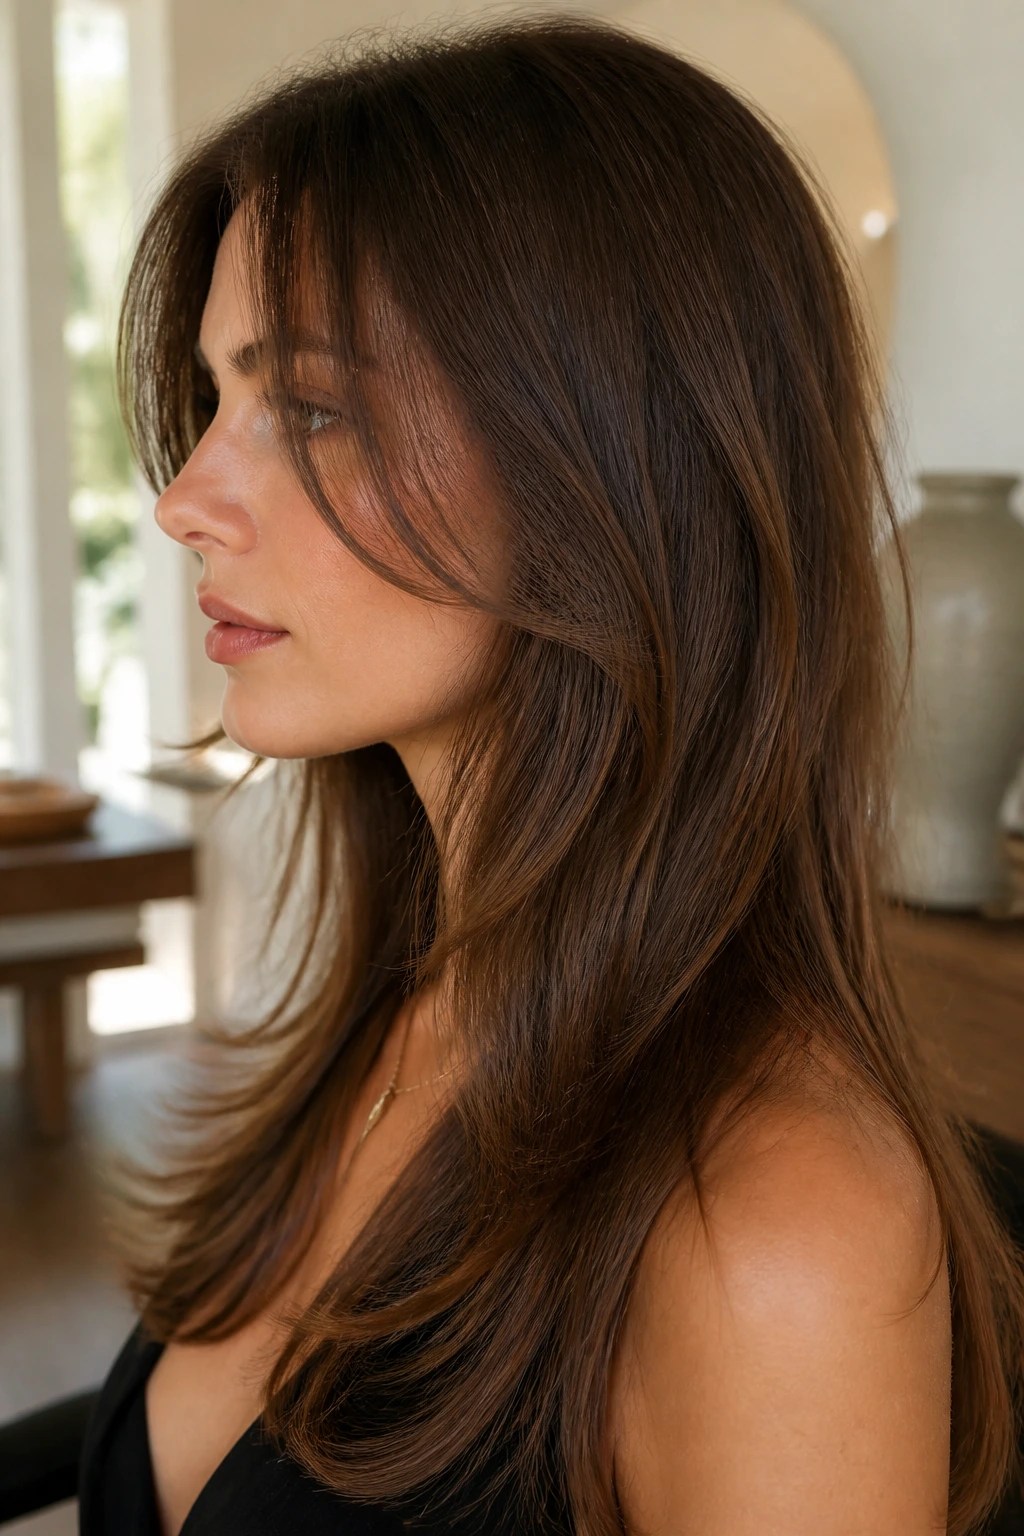
The nicest thing about these layers is that they do not demand a dramatic lifestyle to make sense. A clean part, a little bend at the front, and a cut that starts in the right place can carry a straight head of hair farther than people expect. That is why the details matter so much. One inch up or down changes everything.
If you are taking the idea to a stylist, bring photos that show the profile, not just the front. The side view tells the truth about where the shortest pieces land, and that is the part that decides whether the haircut feels soft, sharp, or awkwardly chopped. Get that piece right and the rest falls into place almost on its own.