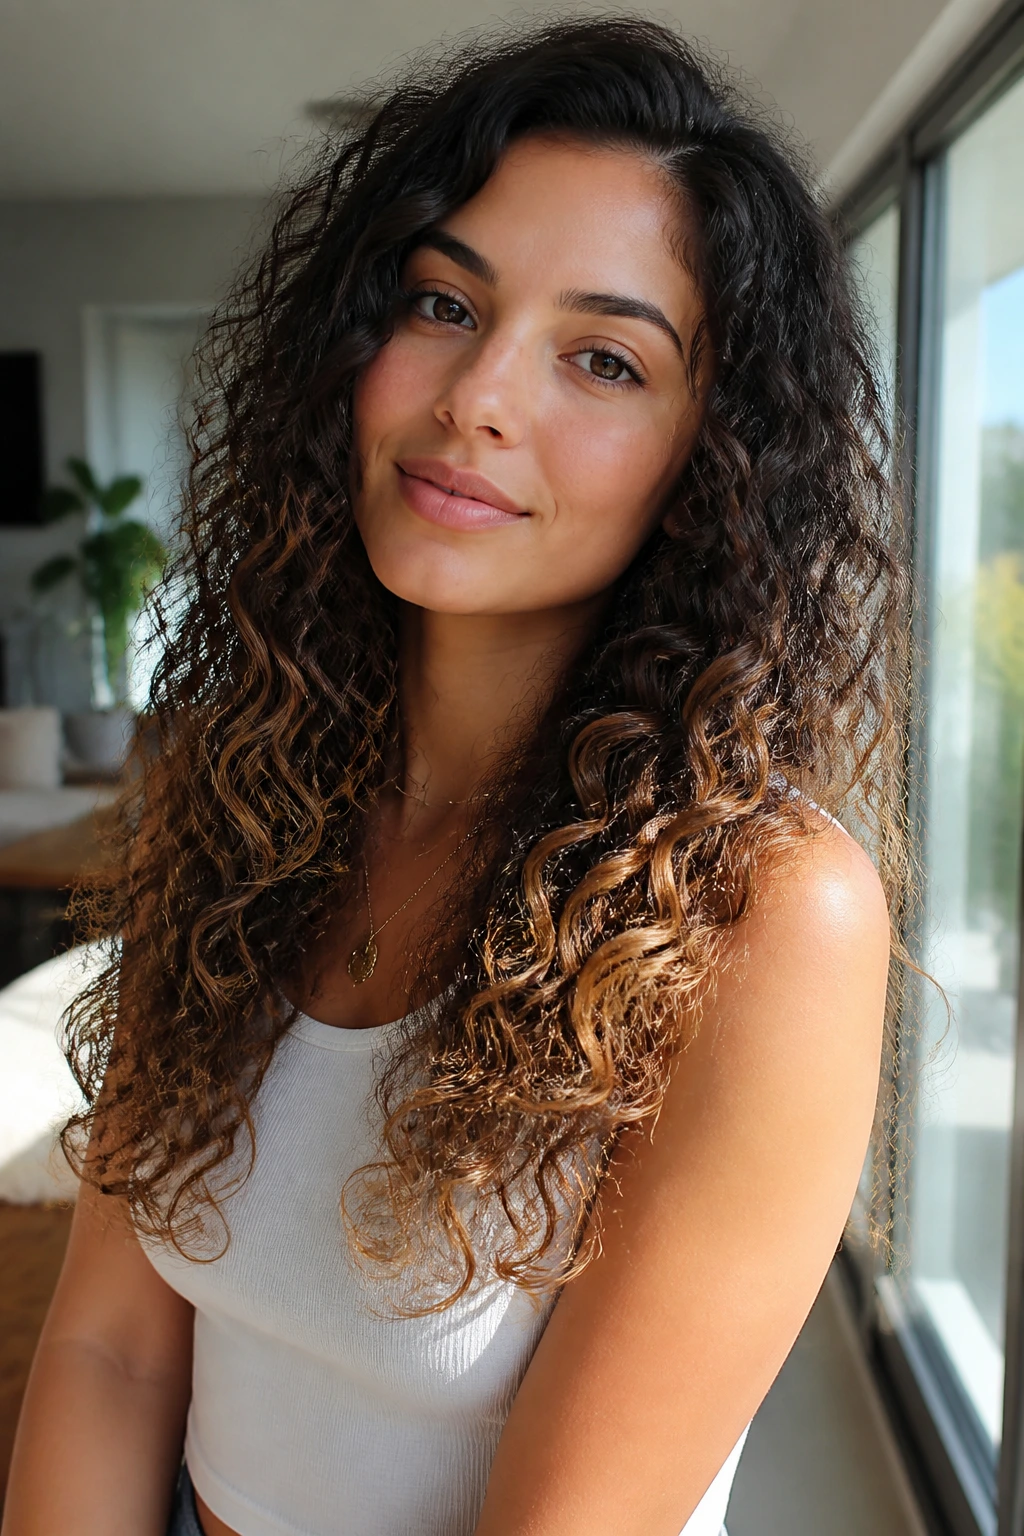
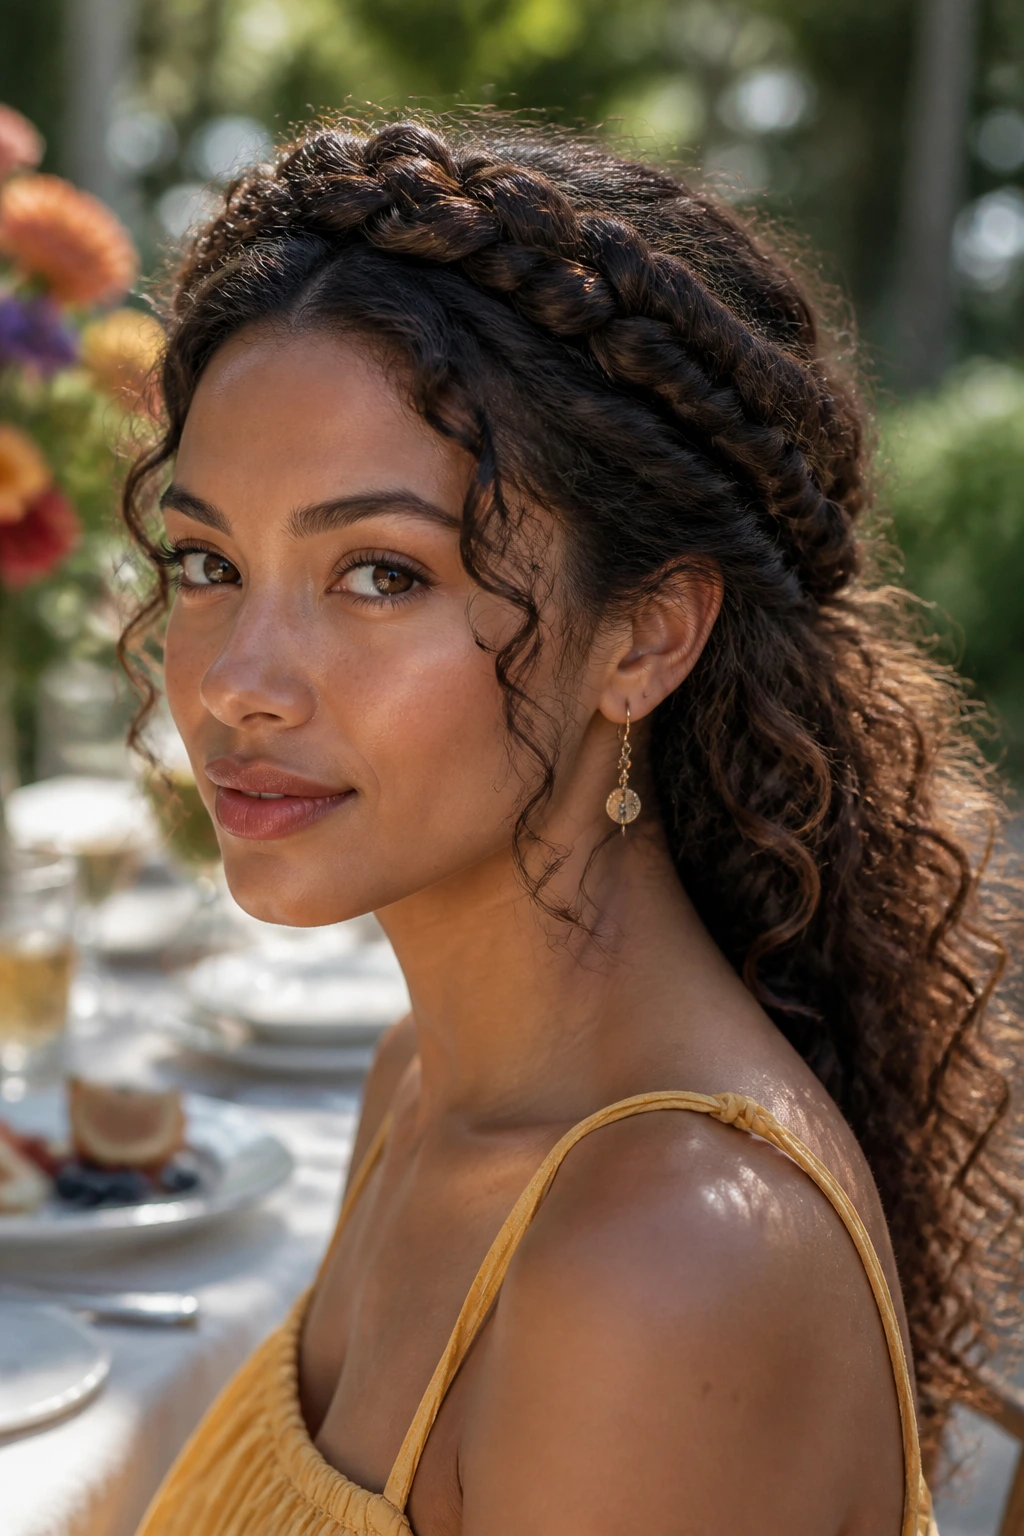
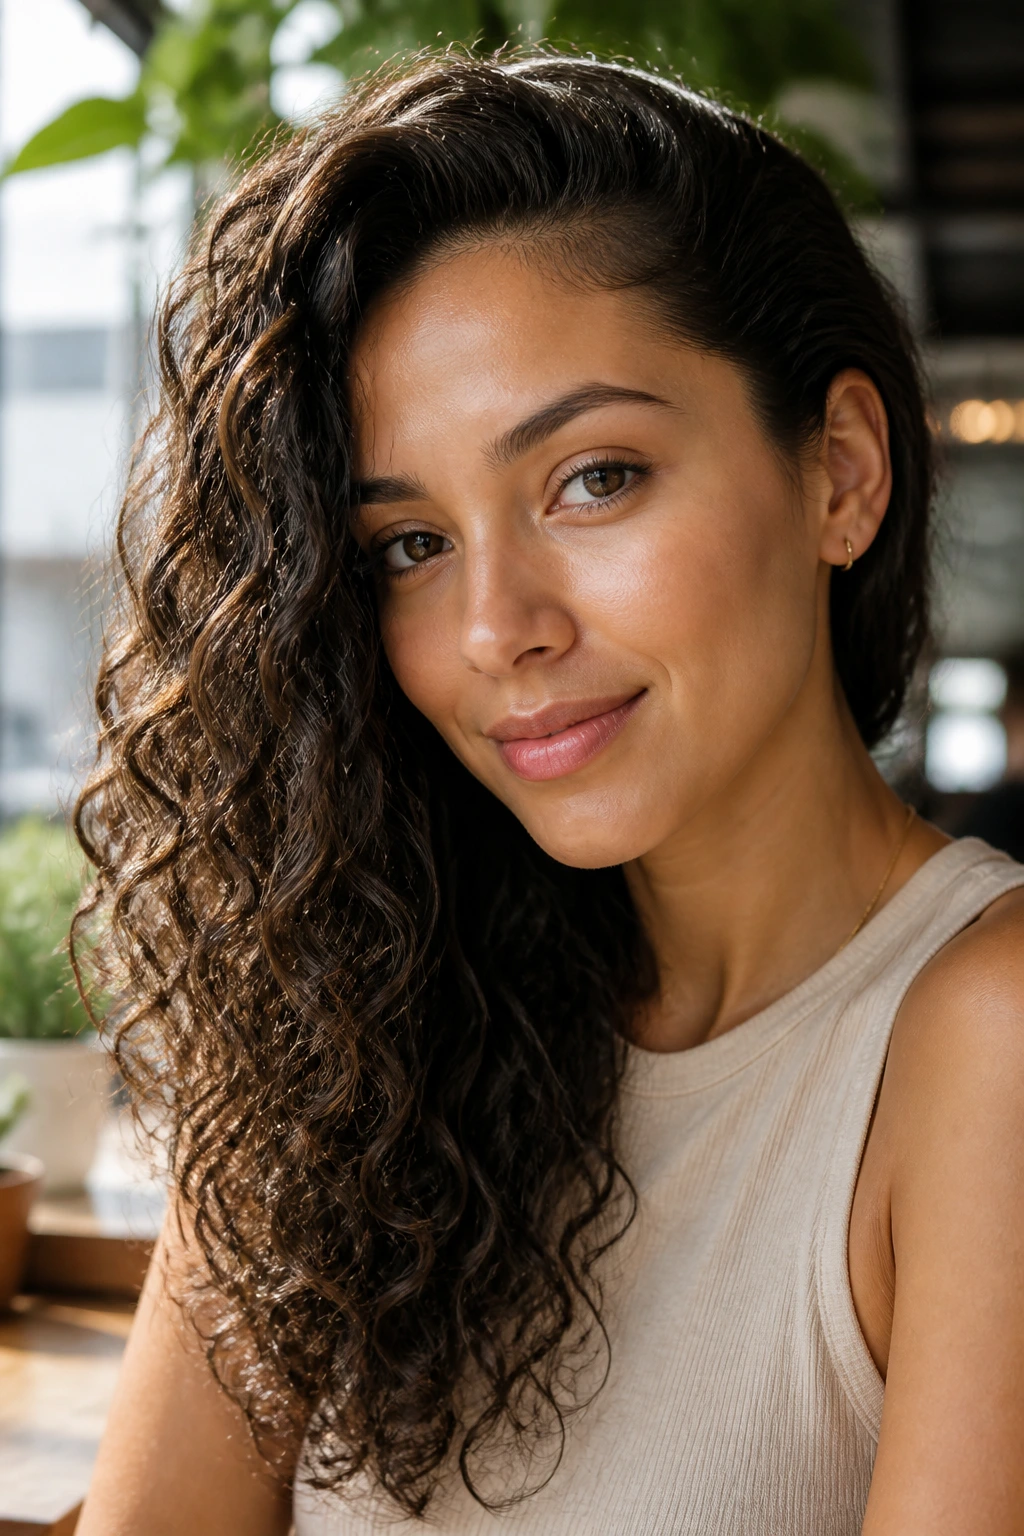
Long length hairstyles for women with curly hair have a way of exposing bad advice fast. If the cut fights the curl pattern, the whole head turns wide at the wrong point and flat at the crown. If the style ignores shrinkage, a braid that looked shoulder-length in the mirror can bounce up to the ear by lunchtime.
The good versions do the opposite. They let the curls stack, fall, and bend where they want to, while giving the shape enough structure to look intentional instead of accidental. That usually means smarter layering, a cleaner part, or a pinned detail that keeps the ends from competing with the rest of the hair. The difference is not subtle when you’ve lived with curly hair for a while. You can feel it the second the weight is in the right place.
Long length hairstyles for women with curly hair also need to survive ordinary life: a car seat, a jacket collar, a humid sidewalk, a rushed morning, a second-day refresh that doesn’t involve starting from scratch. That’s where the useful styles live. Not in the glossy photo that only looks perfect for 12 minutes, but in the ones that still make sense when your hair has memory, volume, and a little attitude.
Why These Styles Earn Their Keep
-
Shape without flattening: These styles keep the length visible while moving bulk where it helps, so the curls don’t balloon into a triangle at the bottom.
-
Works with curl memory: Several of the looks below are built for second-day or third-day curls, when the pattern is already clumped and a bit more obedient.
-
Less heat dependence: Pins, braids, twists, clips, and smart parts do the heavy lifting, which means your flat iron can stay in the drawer.
-
Good in motion: Long curly hair moves. The best styles keep that movement but stop the ends from tangling into a frizzy knot by the end of the day.
-
Easy to dress up or down: The same base shape can look casual with a cotton tee or polished with a statement earring and a clean side part.
-
Better for length retention: Styles that tuck ends away, distribute tension, or avoid constant brushing tend to be kinder to the hair’s fragile spots.
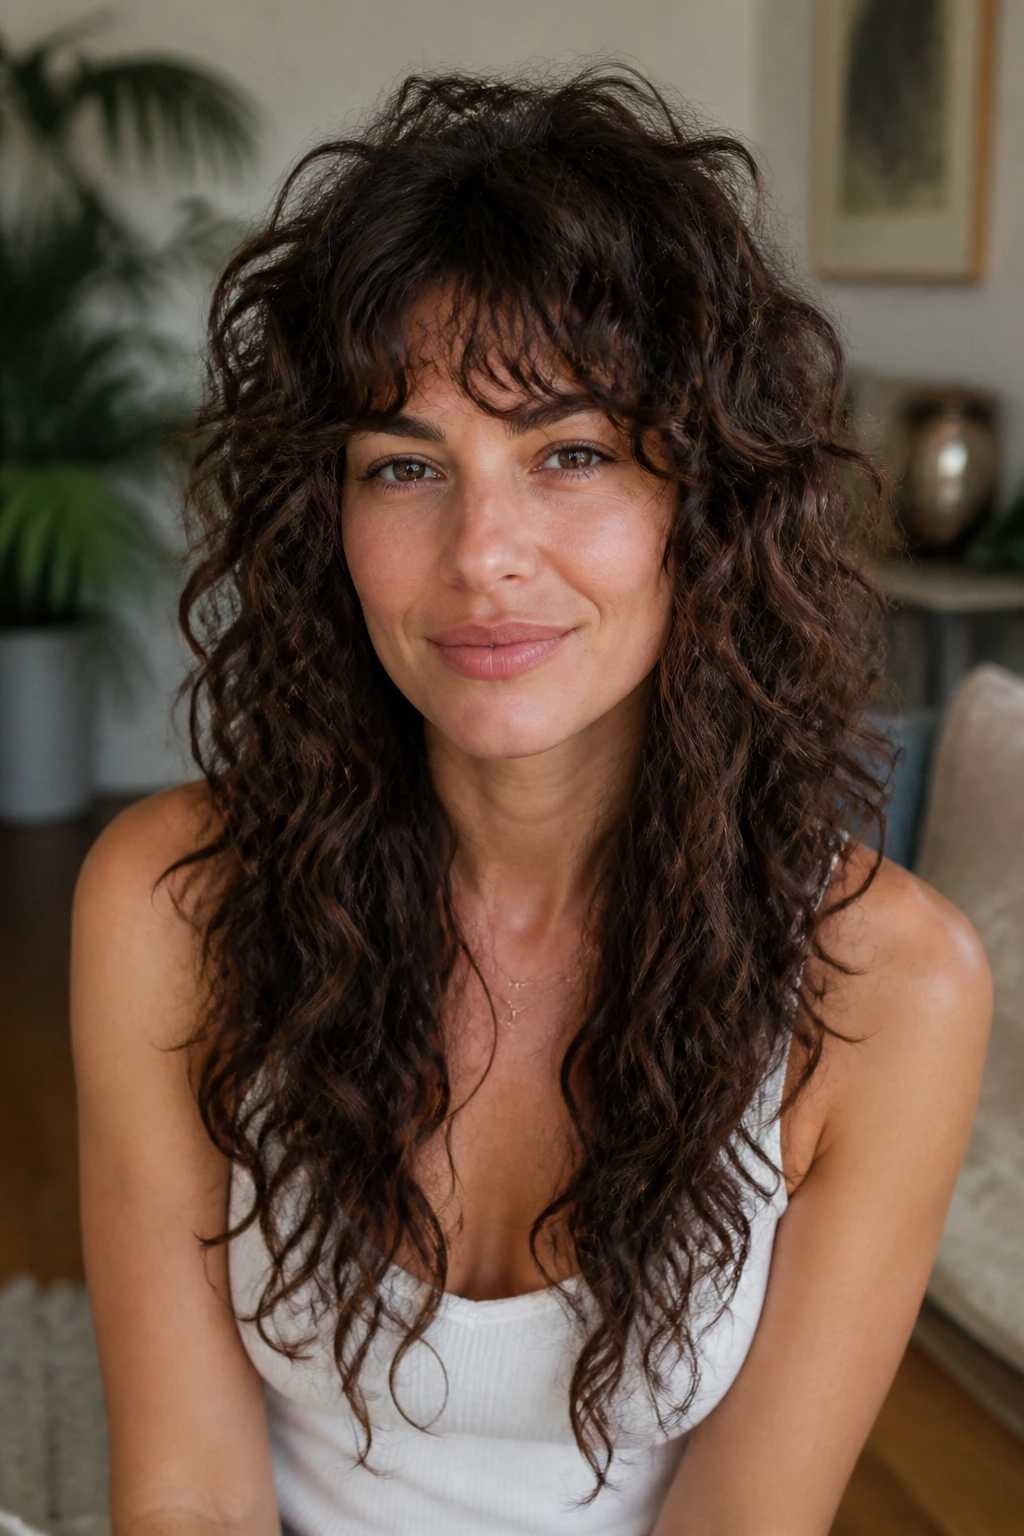
1. Long Layers That Keep the Ends Light
Long layers are the quiet hero here. They remove weight where curls usually collapse first, which is around the shoulders and the back of the neck, while leaving enough length for the hair to still read as long. On dense curls, that matters a lot. A one-length shape can look heavy and boxy. Layers keep the silhouette moving.
Why it works on curly length
A skilled curl cut should respect shrinkage, not pretend it doesn’t exist. That means the stylist usually shapes the hair dry or at least finishes it dry, curl by curl, so the real fall is visible. The point is not to shave off length for the sake of movement. The point is to make the length look longer because it hangs cleanly instead of puffing out at the sides.
This style suits women who want everyday wearability more than drama. It’s the one I’d choose when the hair needs to sit nicely under a coat collar, survive a full workday, and still look good at dinner.
Best for: medium to dense curls, especially 3A through 4A textures.
Watch for: layers that start too high. If the shortest pieces hit above the chin, the shape can turn into a halo of frizz around the face.
Quick styling note: a lightweight leave-in plus a medium-hold gel keeps the layers defined without dragging them down.
2. U-Shaped Cut with a Soft Hem
A U-shape is the gentler cousin of a blunt line. The back dips a little lower, the sides stay slightly shorter, and the result is softer at the hemline. On curls, that softer curve matters because the ends do not all shrink to the same place. A straight-across edge can look sudden and heavy; a U-shape gives the eye a nicer path to follow.
What I like about this shape is how it behaves when the curls expand. The ends still look finished, but the line doesn’t shout at you. It’s a clean choice for someone who wants long hair to feel polished without looking stiff. And yes, it still reads as long. That’s the whole point.
The shallow version works better than a dramatic one. If the dip is too deep, the sides can look thin once the curls dry and spring up. Ask for a soft U, not a swooping arch.
This one is especially good if you wear your hair down most days and want the back to move in a smooth curtain instead of a slab.
3. V-Cut Length with a Strong Back Line
A V-cut gives long curls a sharper finish. The center back tapers to a point while the sides sweep away from it, which can look dramatic in a good way when the curl pattern is defined. The style adds visual length down the middle, and that can be a nice trick if your hair is dense enough to support the shape.
It works best when the curls have enough weight to hold the outline. Thin or wispy curls can look stringy in a V because the point becomes too obvious. Dense curls, though, can take the shape and run with it. The lower layers fall in a way that feels deliberate, not chopped up.
I’d pair this cut with a center part or a slightly off-center part. That keeps the shape from looking too severe. If your curls are springy and tend to shrink more at the crown, tell the stylist you want the point to sit below the shoulder blades once the hair is dry. Otherwise the V can vanish into the back.
A good V-cut on curls should look like motion, not a blade.
4. Curtain Bangs That Blend Into the Curl Pattern
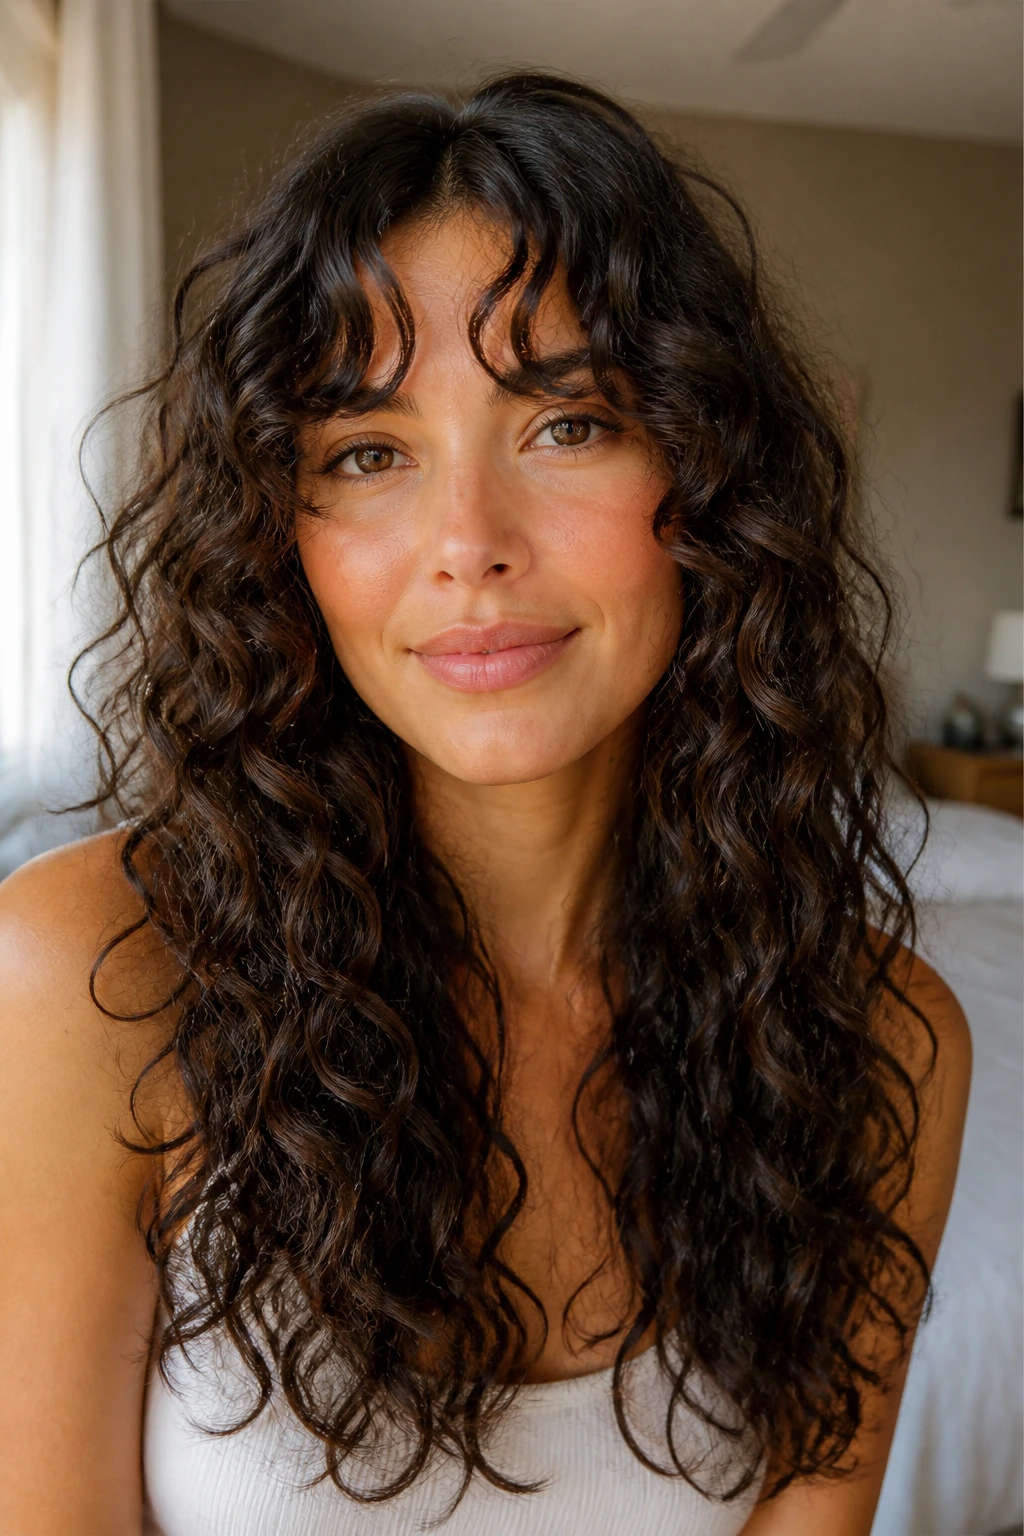
Curly curtain bangs can be lovely, but only when they’re cut with restraint. The worst version is too short, too blunt, and too eager to sit on the forehead like a little fringe wall. The better version opens the face and slides into the rest of the hair, almost as if the bangs were always part of the cut.
How to wear them without losing the shape
Ask for longer pieces than you think you need. Curly bangs spring up, and that spring is not polite. A stylist who understands curls will usually leave room for that bounce so the bangs land near the cheekbones or lips once they dry.
The payoff is real. Curtain bangs give long curly hair a focal point. They break up the mass around the face and keep the style from becoming one huge outline. When the curls are defined, the bangs can be brushed lightly to the sides and left to settle. When they’re having a chaotic day, a couple of small pins can train them back into place.
Good pairing: a shoulder-grazing layer through the front and a longer back. That keeps the bangs from looking detached.
Best tip: dry the front with a diffuser and your head tilted slightly forward. That helps the bangs fall in the direction you actually want.
5. Curly Shag with Length Left Intact
The modern curly shag is not about tearing the hair apart. It’s about freeing the top and sides so the curls do not sit like a heavy curtain. When done well, it gives the crown lift, keeps the face from being buried, and still leaves the overall length intact. That is a rare balance, and worth keeping.
A lot of people hear “shag” and picture choppy, over-textured hair with no shape. On curls, the good shag is more controlled than that. The interior layers do the work. They remove bulk from the middle so the hair bends instead of stacking into a block. The outer length stays long enough to feel feminine, soft, and a little wild in the best way.
This style is strongest on hair that wants volume anyway. If your curls naturally expand, the shag gives that energy somewhere to go. If your hair is fine and low-density, keep the layering lighter or you can lose too much visual weight.
I’d call this a confident cut. It is not trying to behave. It is trying to look alive.
6. Butterfly Layers for Crown Lift
Butterfly layers are built around the illusion of shorter pieces around the face and top, with the long length staying underneath. On curly hair, that can be a smart move because the hair gets lift where the crown tends to sink and movement where the ends tend to drag. The result is airy up top and grounded at the bottom.
The catch is overdoing it. Too many short internal layers and you’ll get a halo of pieces that puff up the second humidity hits. That is not the look. The better version keeps the shortest pieces just long enough to fall into the overall curl pattern instead of sticking out like feathers.
This is a good shape for women who want big hair but not wide hair. It creates lift around the face and keeps the lower length visible when the curls settle. If you have dense hair, this is one of the better ways to stop the whole head from feeling heavy after a few hours.
Styling cue: use a diffuser on low heat and stop when the roots are about 90% dry. Over-drying can make the shorter layers frizz faster than the long ones.
7. Deep Side-Part Glam Curls
A deep side part can change curly hair faster than a haircut. Seriously. Move the part over by two or three inches, and the whole head suddenly has sweep, lift, and a little old-school drama. Long curls respond well to this because the length gives the part something to fall into.
The style is at its best when the heavier side is left loose and the smaller side is tucked back with a pin or clip. That keeps the face open without stealing the softness of the curls. If the hair is worn very smooth at the roots, the result can look too polished. A bit of root texture is better. It gives the style grip and stops the top from looking flat.
I like this one for dressier settings, but it also works on a normal day if you want a little more shape. A satin-lined side clip or a flat barrette can hold the tucked side without crushing the curl pattern.
The trick is not to overthink it. The part does most of the talking.
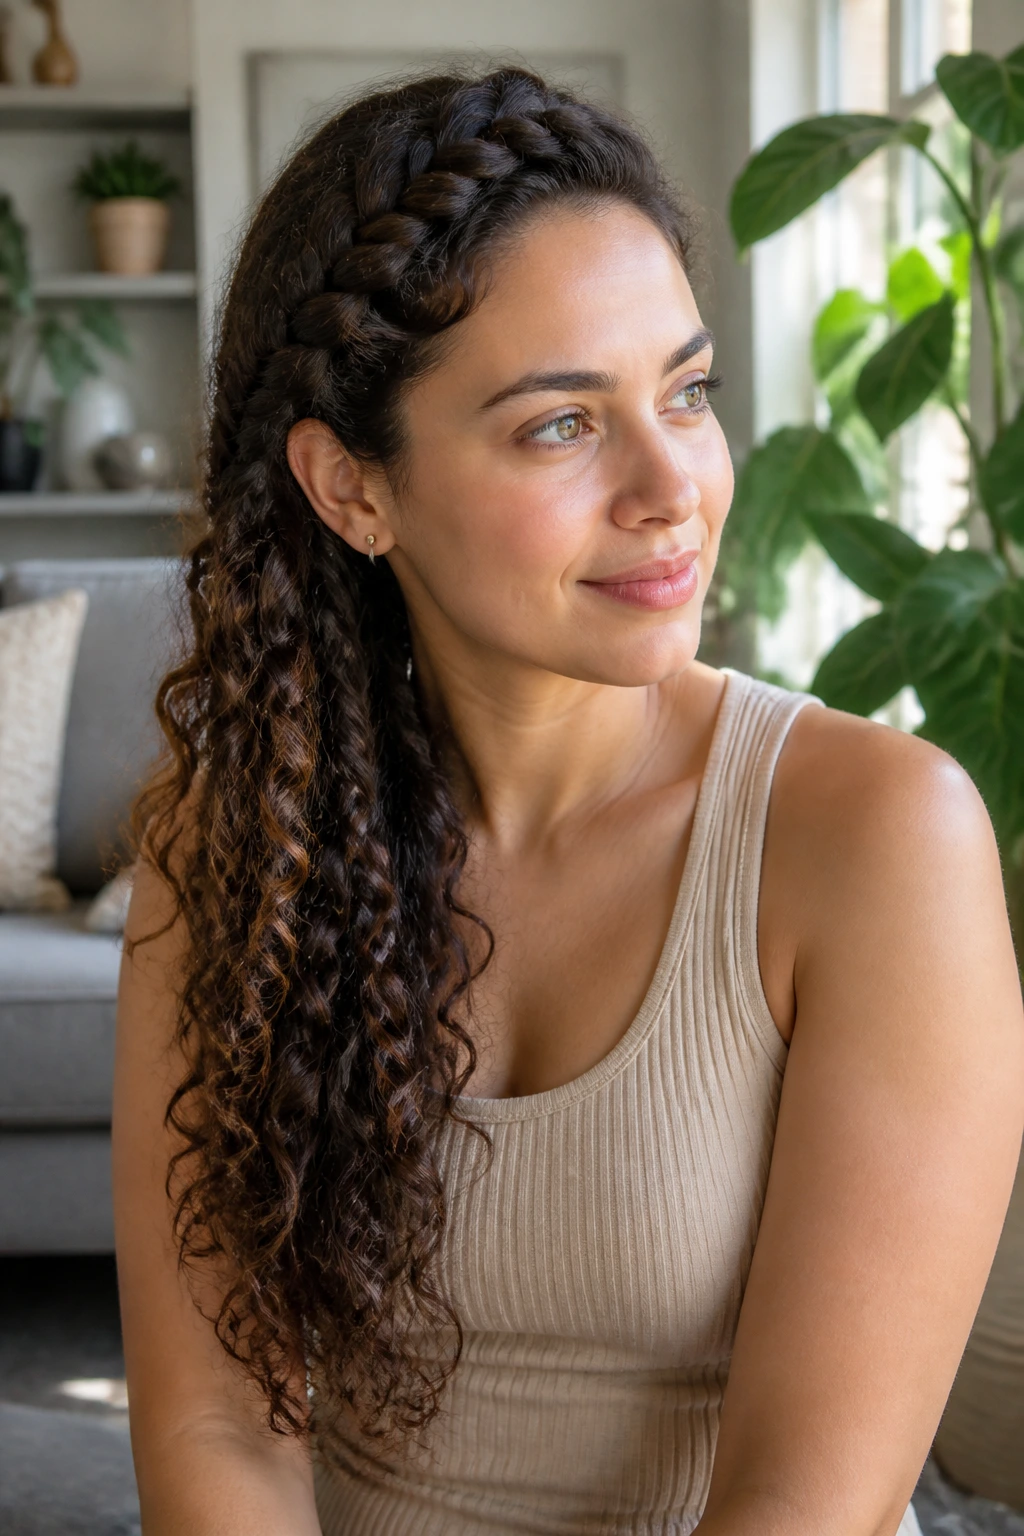
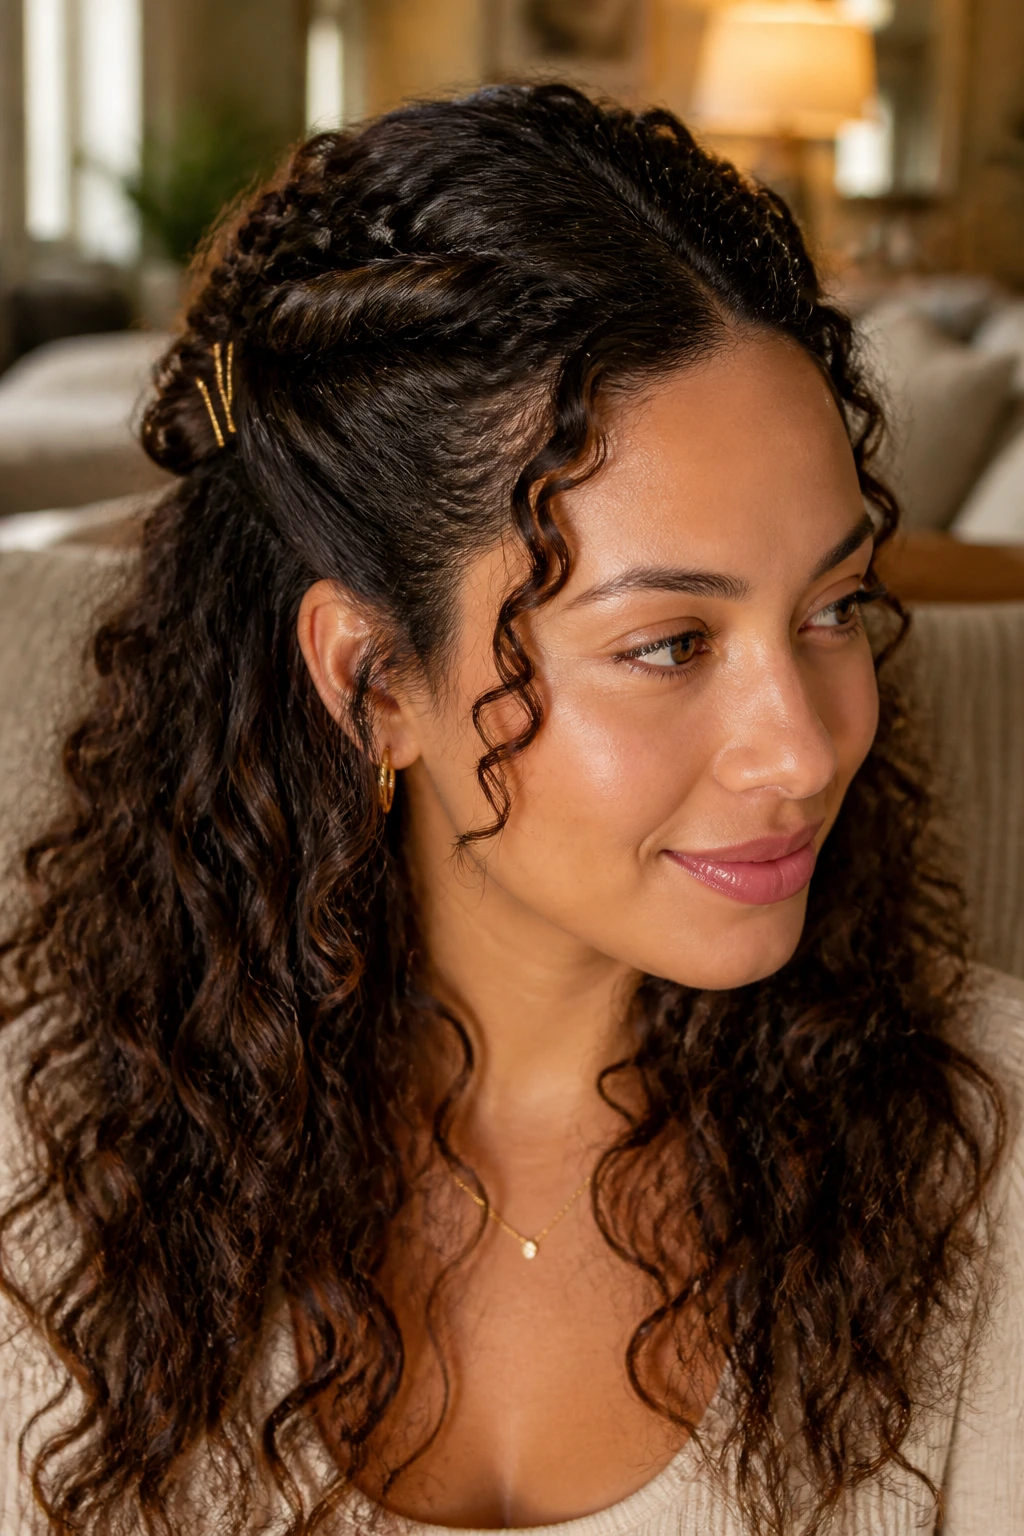
8. Half-Up Crown Twist
A half-up crown twist is one of those styles that looks more complicated than it is. You take the top sections, twist them back, and pin them where the head starts to round out. The lower curls stay loose, so the style keeps length on display while lifting the crown away from the face.
Why it suits long curls
Curly hair likes escape routes. A half-up style gives the top some order while letting the bottom stay full and soft. That combination is what makes it useful on days when the roots are a little flat but the ends still look good. It hides the need for a refresh without looking like you tried too hard.
It also pairs well with face-framing pieces. Leave out a few spirals around the temples and jawline. They make the whole thing less severe and give the twist a little movement.
Best for: medium to thick curls with some grip.
Use: two small pins per side, not one oversized clip. Smaller anchors hold the twist flatter and keep it from sliding.
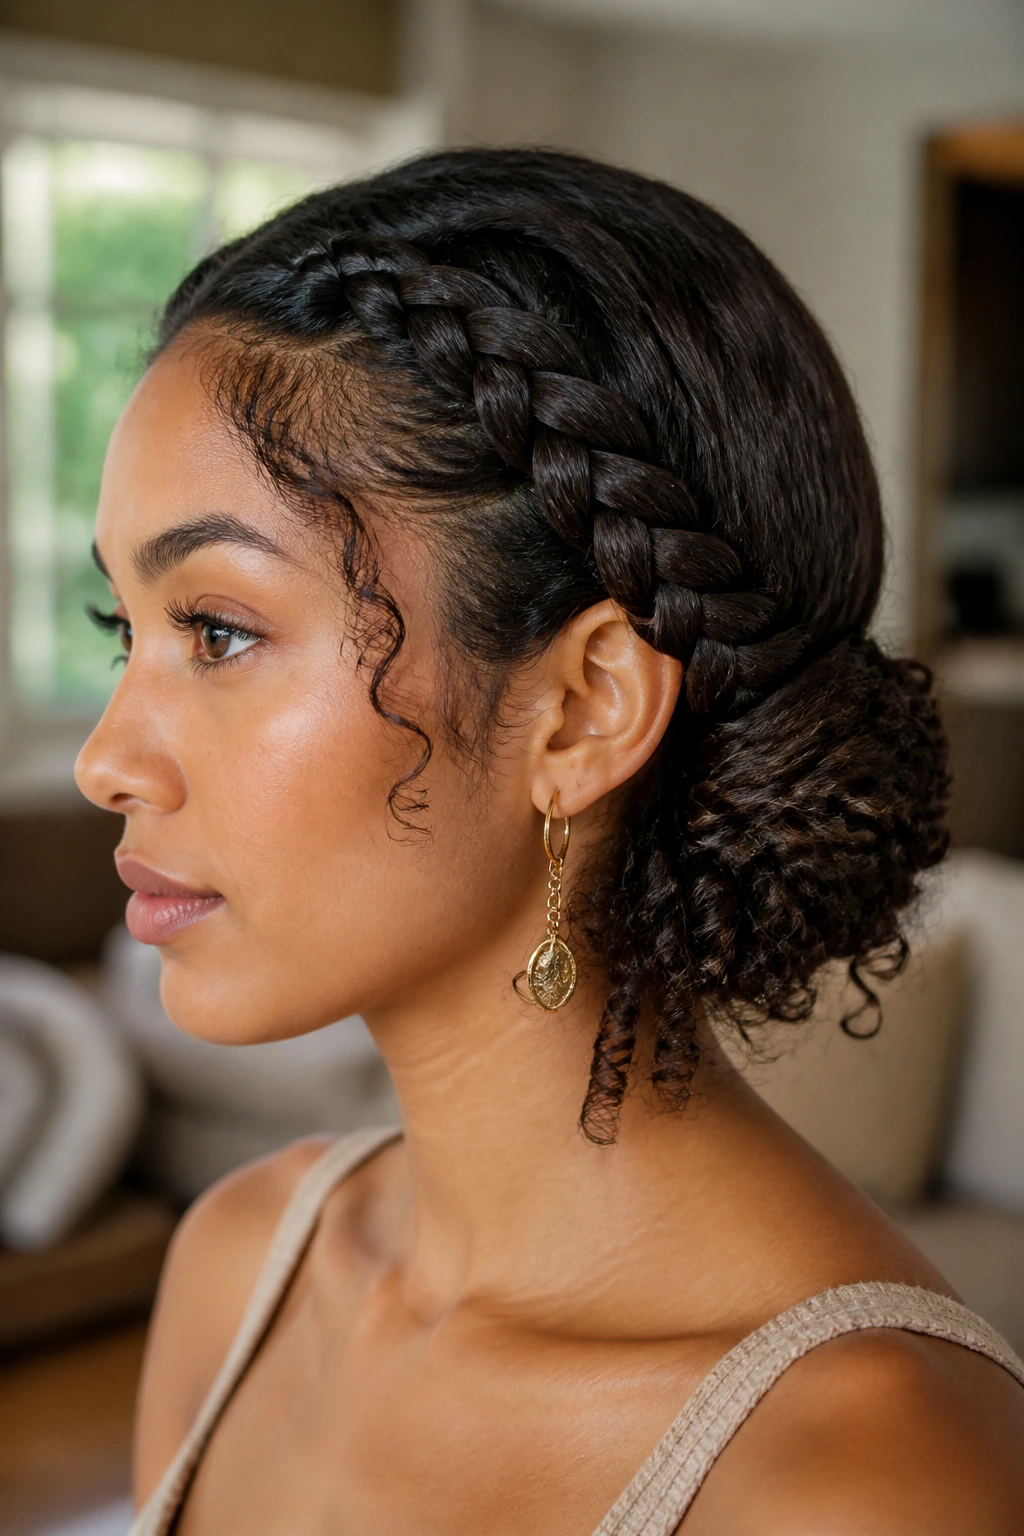
9. Braided Halo with Loose Ends
A braided halo keeps the front and sides tidy while still showing off the length in the back. The braid can run from one temple around the hairline like a crown, then stop and leave the remaining curls loose. That mix of control and softness is what makes it such a good long-hair look.
On curly hair, the braid does not need to be perfect. In fact, a slightly textured braid often looks better because the curl pattern gives it body. If the hair is freshly washed and slippery, add a touch of mousse or texture spray before braiding so the sections do not slide apart.
This style shines when you want the hair out of your face but refuse to hide the length. It works for garden parties, brunch, or any day when you want the top to feel orderly and the bottom to stay romantic. The loose ends should still be defined. If they’re fuzzy, the braid loses its contrast.
The best version looks like the hair made a decision halfway through and changed its mind in a flattering way.
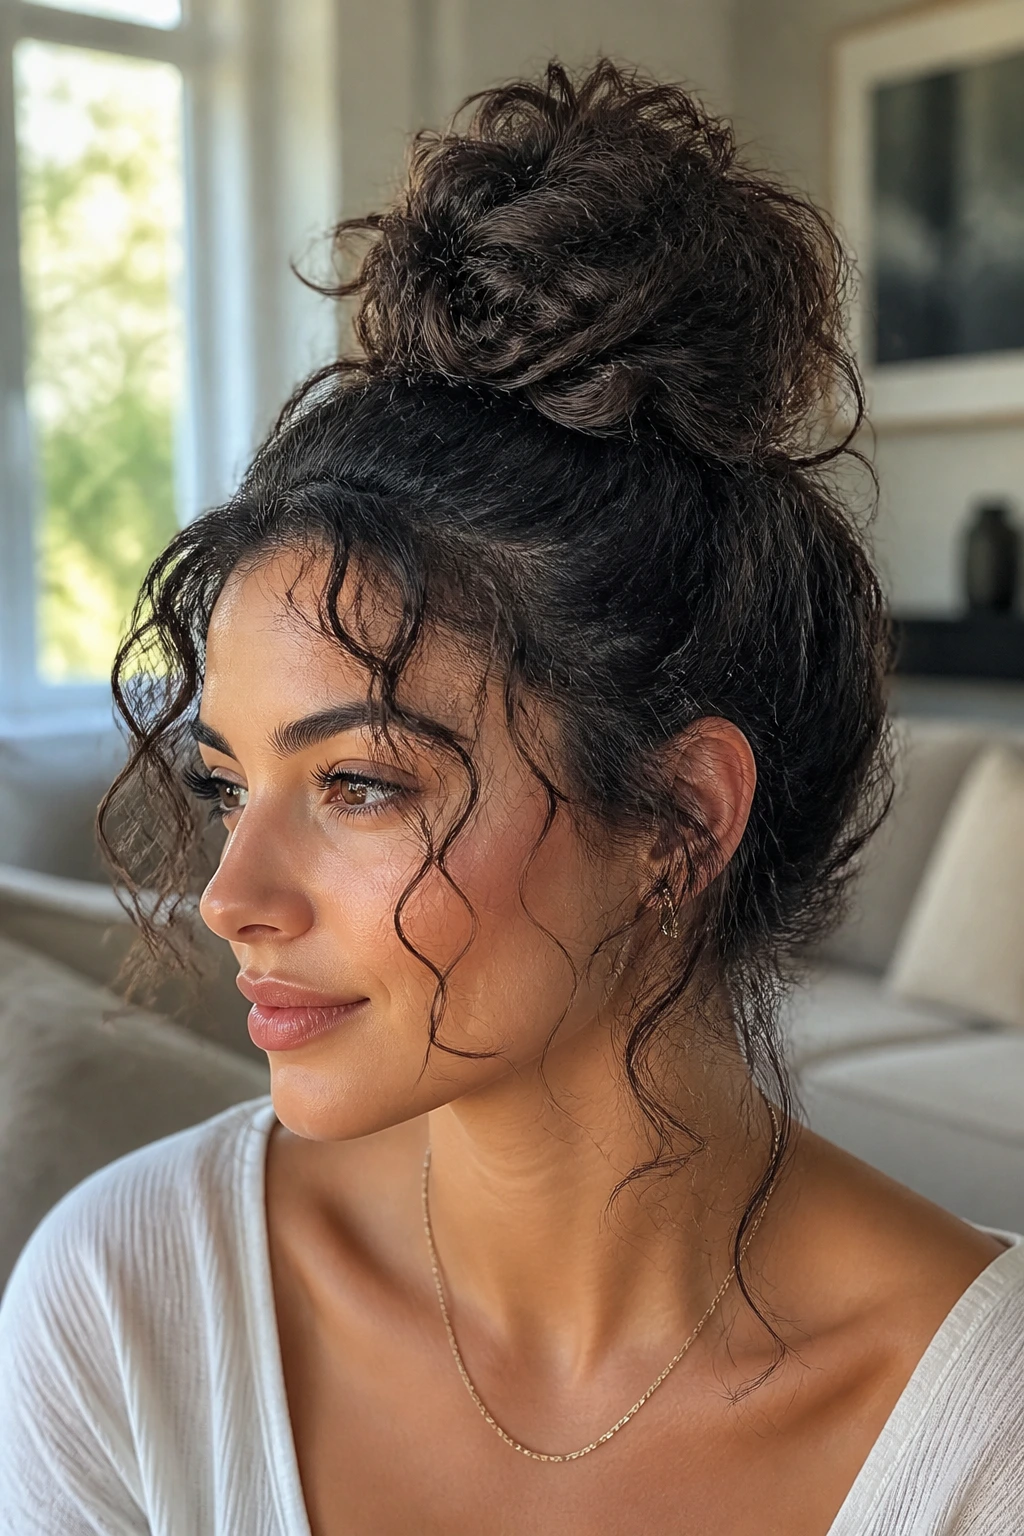
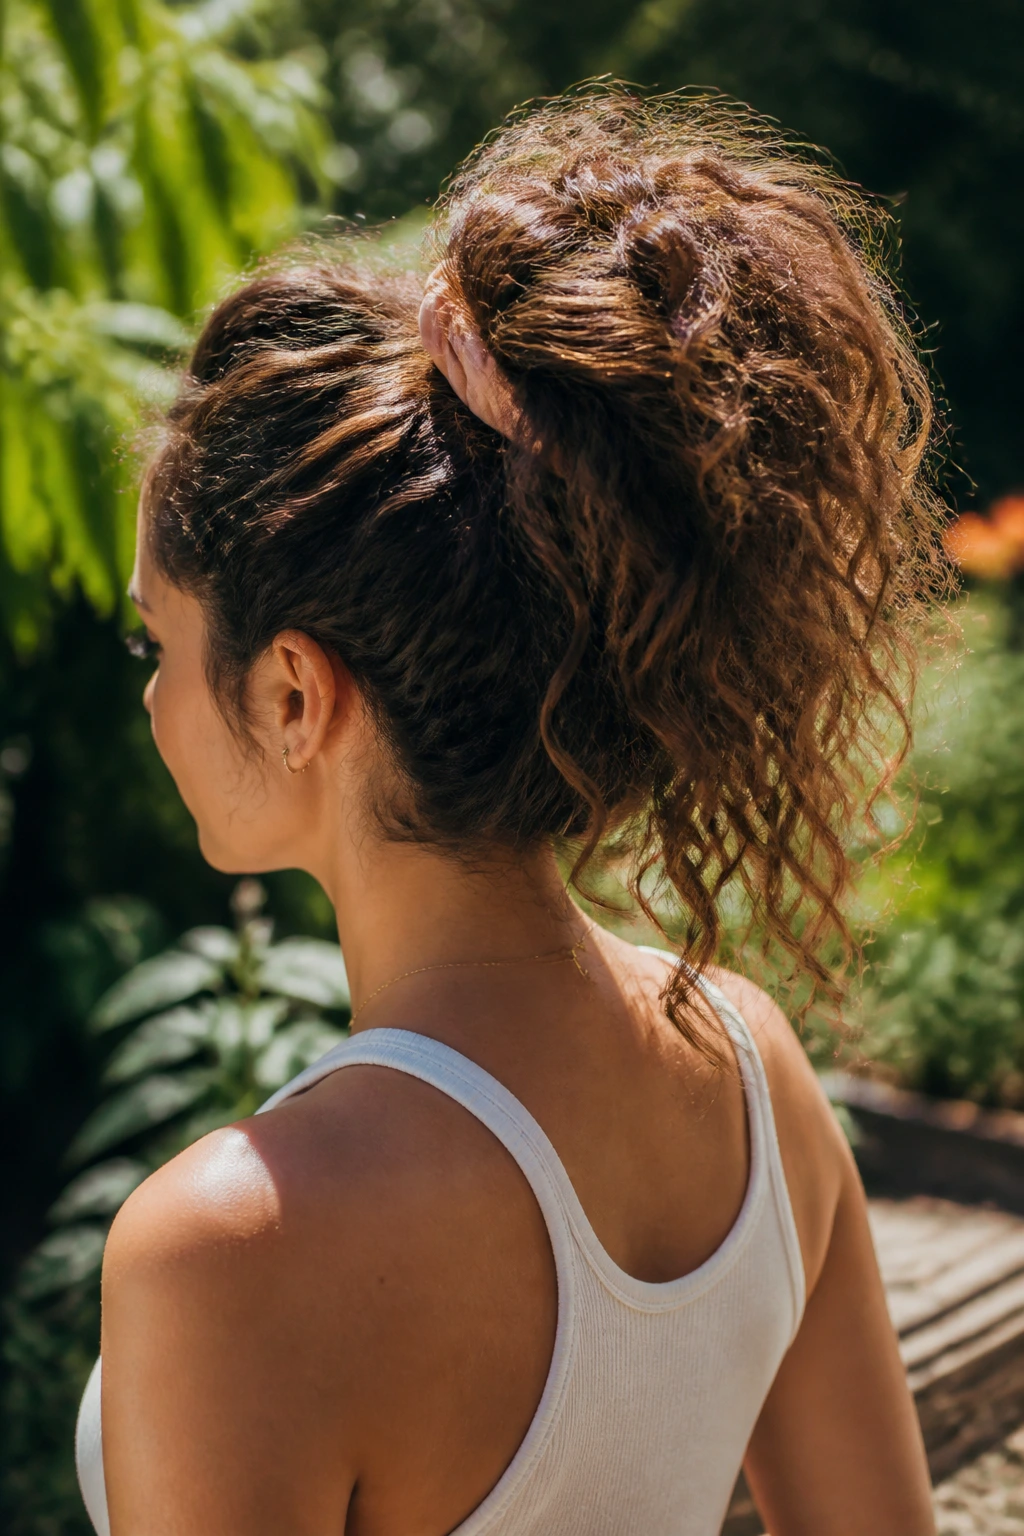
10. Pineapple Ponytail for Second-Day Hair
The pineapple ponytail is not just for sleeping. Worn high and loose, it can turn second-day curls into a style with height and bounce. The key is placing the elastic at the crown or a little above it so the curls fan outward instead of being dragged down the back of the head.
This is one of my favorite low-effort looks for long curly hair because it acknowledges the state of the hair instead of pretending you have a fresh wash day. The roots get lifted. The ends stay visible. And the whole thing takes about a minute if the curl clumps are still decent.
Use a soft scrunchie or a coil tie that won’t leave a dent. Pull the hair up only once, maybe twice at most. If you stretch it too tight, the crown flattens and the ponytail loses the easy shape that makes it work.
A few curls around the hairline can stay loose. That small messiness keeps the style from looking like a gym ponytail with better lighting.
11. Low Puff with Wrapped Sides
A low puff can look elegant, casual, or both, depending on how much you smooth the sides. On long curly hair, the style gathers the volume low at the back or nape, where it feels grounded instead of top-heavy. That makes it a nice option when the ends need a break from rubbing against everything in sight.
What matters here is tension. Pulling the hair too tightly across the temples creates headaches and can thin out the edges over time. Keep the sides brushed only as much as needed to hold the shape. Then secure the puff with a strong, soft band and wrap a small curl around the base if you want the finish to look cleaner.
This style is especially good for dense, coily textures that want structure without being flattened. The puff should still look full. It should not look squeezed. If it does, loosen the sides and let the volume sit lower.
A low puff is one of those styles that proves curly hair does not need length to be the story. It just needs the right place to gather.
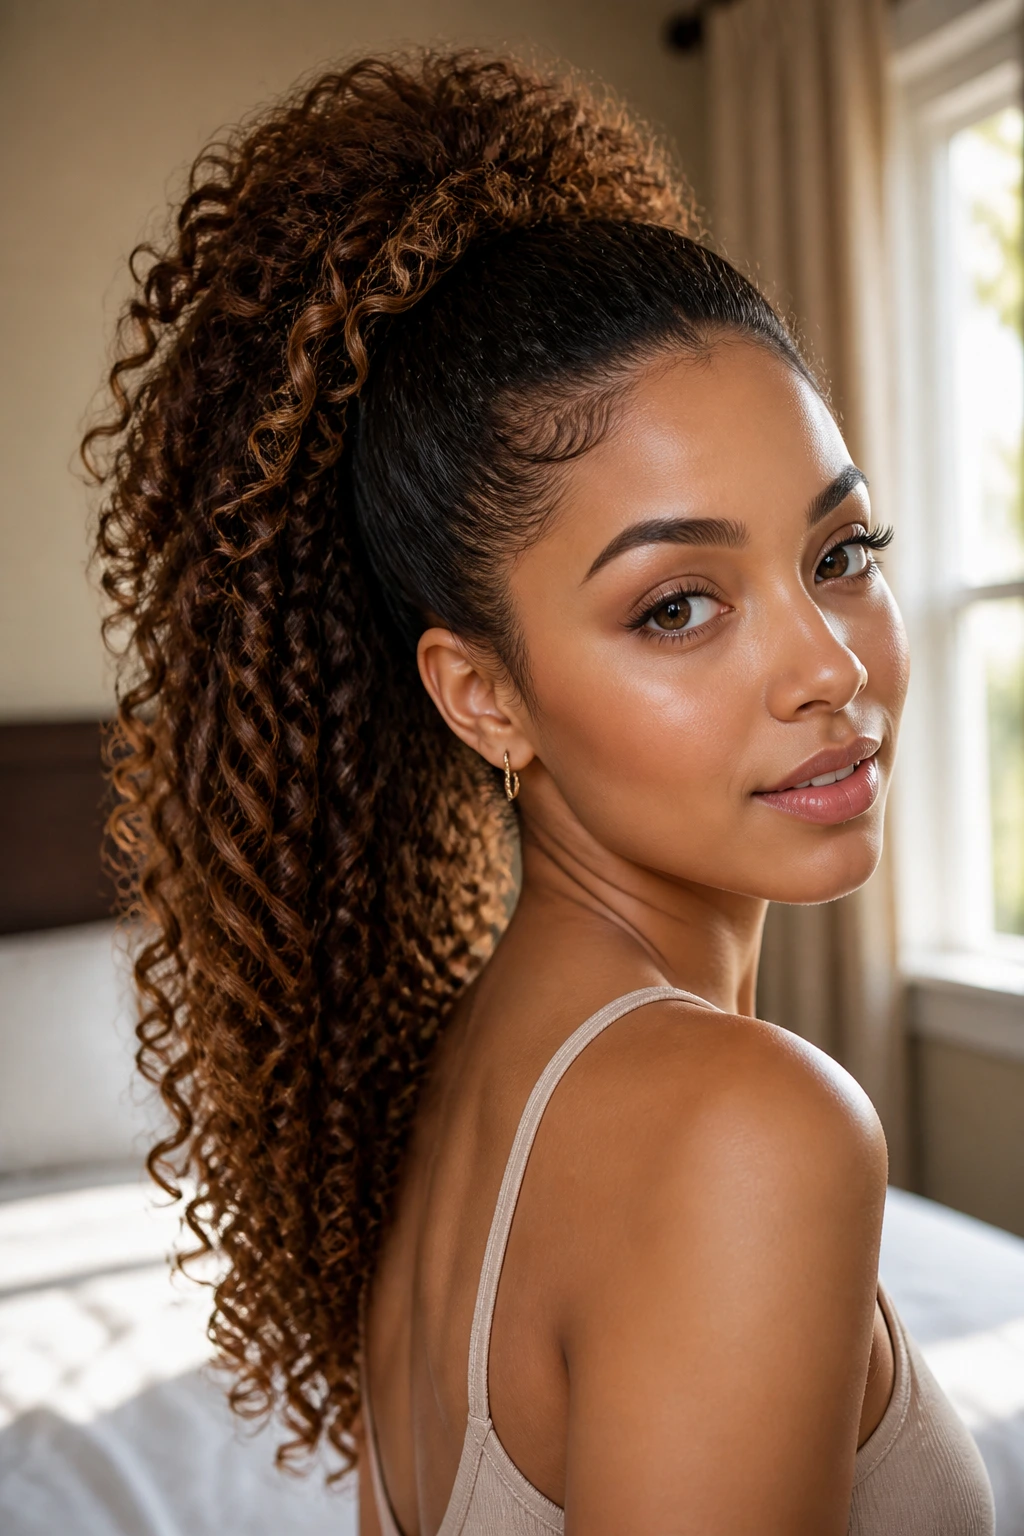
12. High Curly Ponytail with a Full Crown
A high curly ponytail changes the mood fast. The crown gets lifted, the face opens up, and the length drops down the back with a little swing. On long curls, the style works best when the top is firm but not tight and the ponytail itself stays thick and round.
The part most people miss
The ponytail should be supported, not strangled. A bungee or two-step elastic often holds better than one standard tie, especially if the hair is dense. That lets you lift the crown without creating a crease where the ponytail starts.
Leave the ends full. Don’t brush the tail into submission. The curls should keep their own shape so the ponytail reads as curly, not polished-flat. If the roots are a little puffy, smooth them with a small amount of gel or cream on a toothbrush or edge brush.
Best with: long hair that reaches past the shoulders when stretched.
Extra move: wrap a small curl around the elastic for a cleaner finish.
13. Side Sweep with One Side Tucked Back
The side sweep is simple and quietly sharp. Push the curls to one side, tuck the other side back with a pin, and let the remaining length spill forward over one shoulder. It gives the face a diagonal line, which is flattering on long curly hair because it breaks the vertical curtain of the length.
This style is useful when you want to keep the hair down but need a little control at the face. A single statement earring on the exposed side can make the whole look feel more finished. That’s not an accessory trick; it’s a shape trick. The hair and jewelry work together.
It suits medium to dense curls best, since there has to be enough weight to hold the sweep. Fine curls can do it too, but they usually need a clip with teeth or a barrette with a little grip. If the tucked side keeps slipping, mist the roots lightly with setting spray before pinning.
The end result feels easy, but it still looks planned. That is a hard balance to fake.
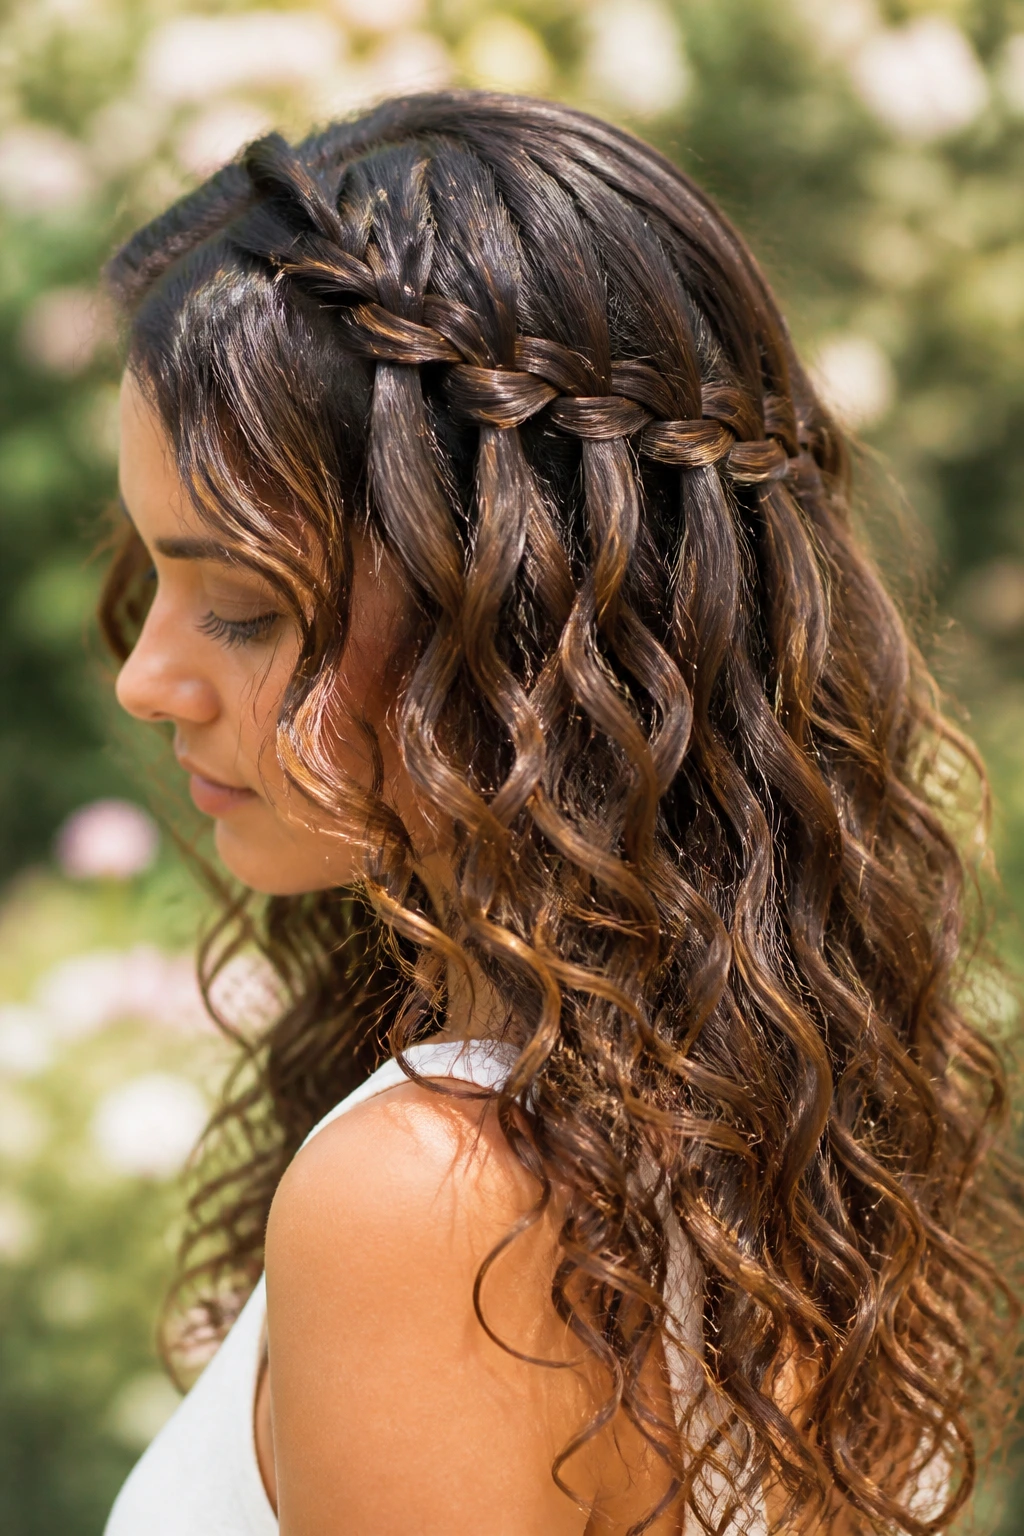
14. Waterfall Braid into Loose Length
A waterfall braid is one of the few braided styles that actually flatters long curls without swallowing the texture. The braid holds the top in place while letting sections drop through like little windows, so the curls stay visible and the length still does the talking.
It works best when the hair is already defined. Freshly finished curls give the braid a better shape and stop the loose pieces from fraying. If the hair is too slippery, the braid collapses. If it’s too dry and puffy, the sections won’t stay neat. There’s a sweet spot, and it’s usually day one or day two.
The style is more forgiving than it looks. The braid doesn’t need to be crisp from end to end. A little softness makes the pattern prettier, especially in curly hair where perfection tends to fight the texture. If the braid lives on one side only, it can also help balance a heavier curl pattern on the other.
I’d choose this for a long day out. It keeps the top from getting in your face without hiding the best part of the length.
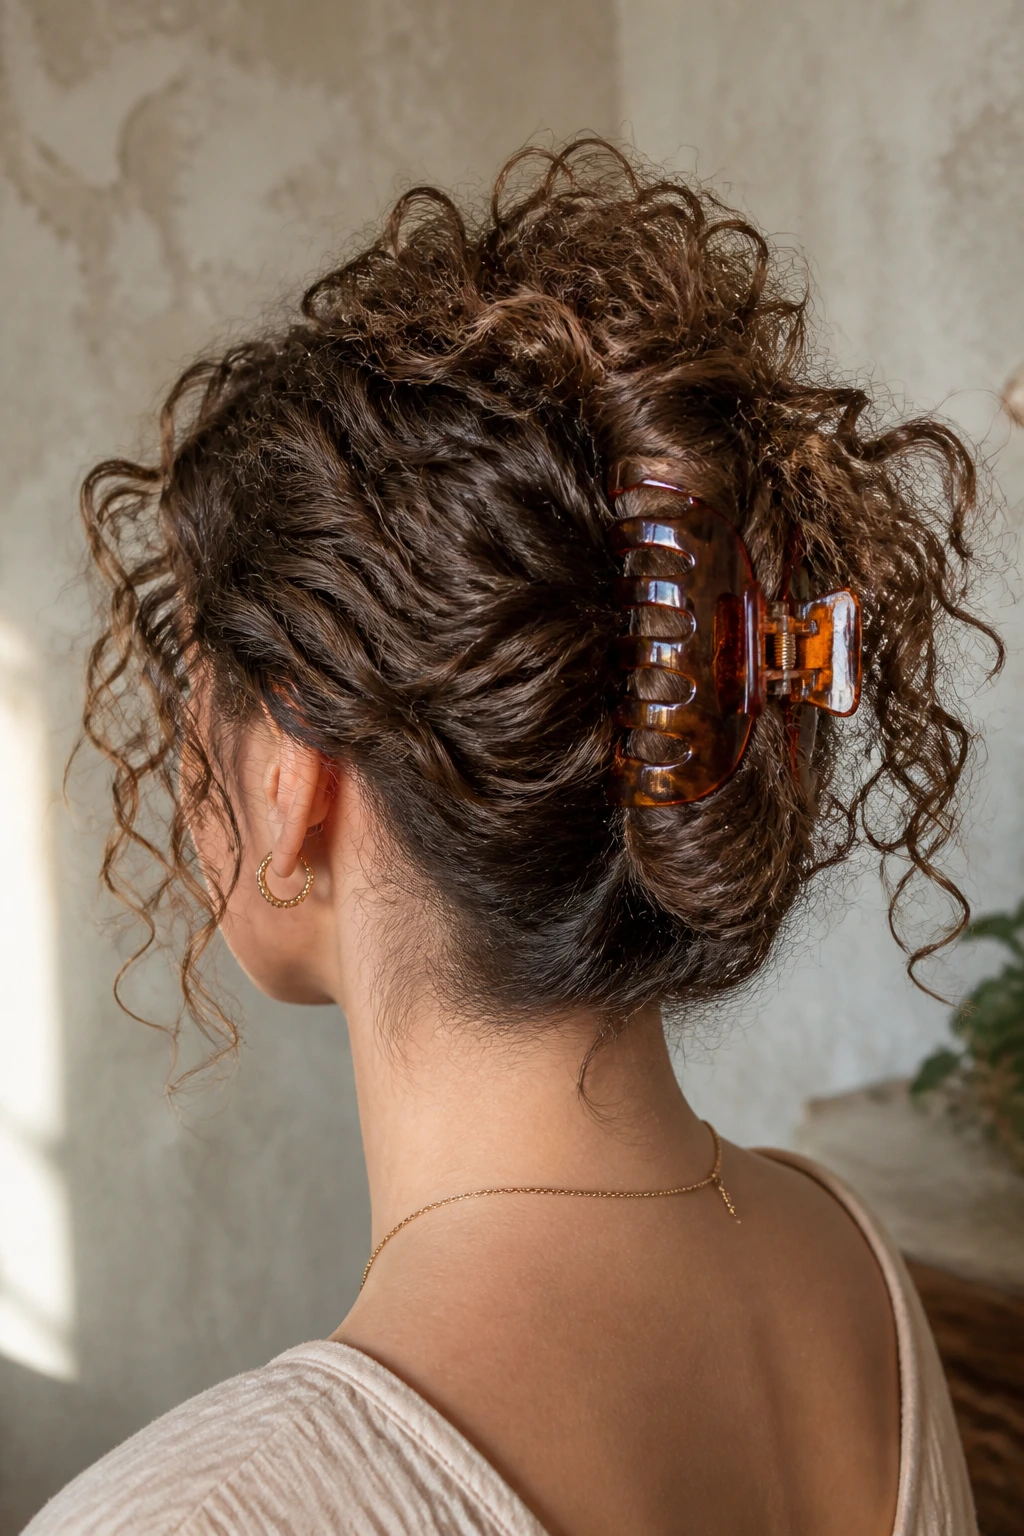
15. Claw-Clip French Twist Hybrid
This is the style for people who want a fast updo that still lets the curls hang on. You gather the hair, twist it upward like a loose French twist, and secure it with a large claw clip. Then you leave a few ends spilling out on purpose. That spill is the whole point.
Long curly hair behaves better in a claw clip when the clip is large enough to catch the bulk without snapping shut on one tiny section. If the clip is too small, the twist slides. If it’s too tight, the curls flatten into one hard lump. The right clip sits flat against the head and lets the top keep some softness.
This one is useful on hot days, on the way to dinner, or when you want the hair off your neck but refuse to pin every strand. It looks especially nice when the lower curls are still defined. A bit of frizz at the ends can actually help here, because it makes the twist feel less severe.
The hybrid part matters. It’s not a formal twist, and it’s not a sloppy clip. It lives in the middle, which is where a lot of the best curly styles live too.
16. Messy Curly Bun with Face-Framing Tendrils
A curly bun should not be smoothed into a tiny perfect knot unless that is the point. Long curly hair looks better when the bun keeps some bulk and the face-framing pieces are left loose. The result is soft, a little undone, and far more flattering than a slick bun that fights the hair’s natural bend.
The bun itself can sit high or low. High feels more playful. Low feels calmer and works well when the hair is long enough that the bun would otherwise get too heavy. The tendrils around the face matter more than people think. They break the shape open and stop the style from looking severe.
If the hair is very thick, don’t try to twist all of it into one knot at once. Gather it in sections, pin the base first, then tuck the leftover length around it. That keeps the bun from bulging out at odd angles.
A few loose curls around the ears make the difference between “I hurried” and “I know exactly what I’m doing.”
17. Sleek Root Contrast with Defined Mid-Lengths
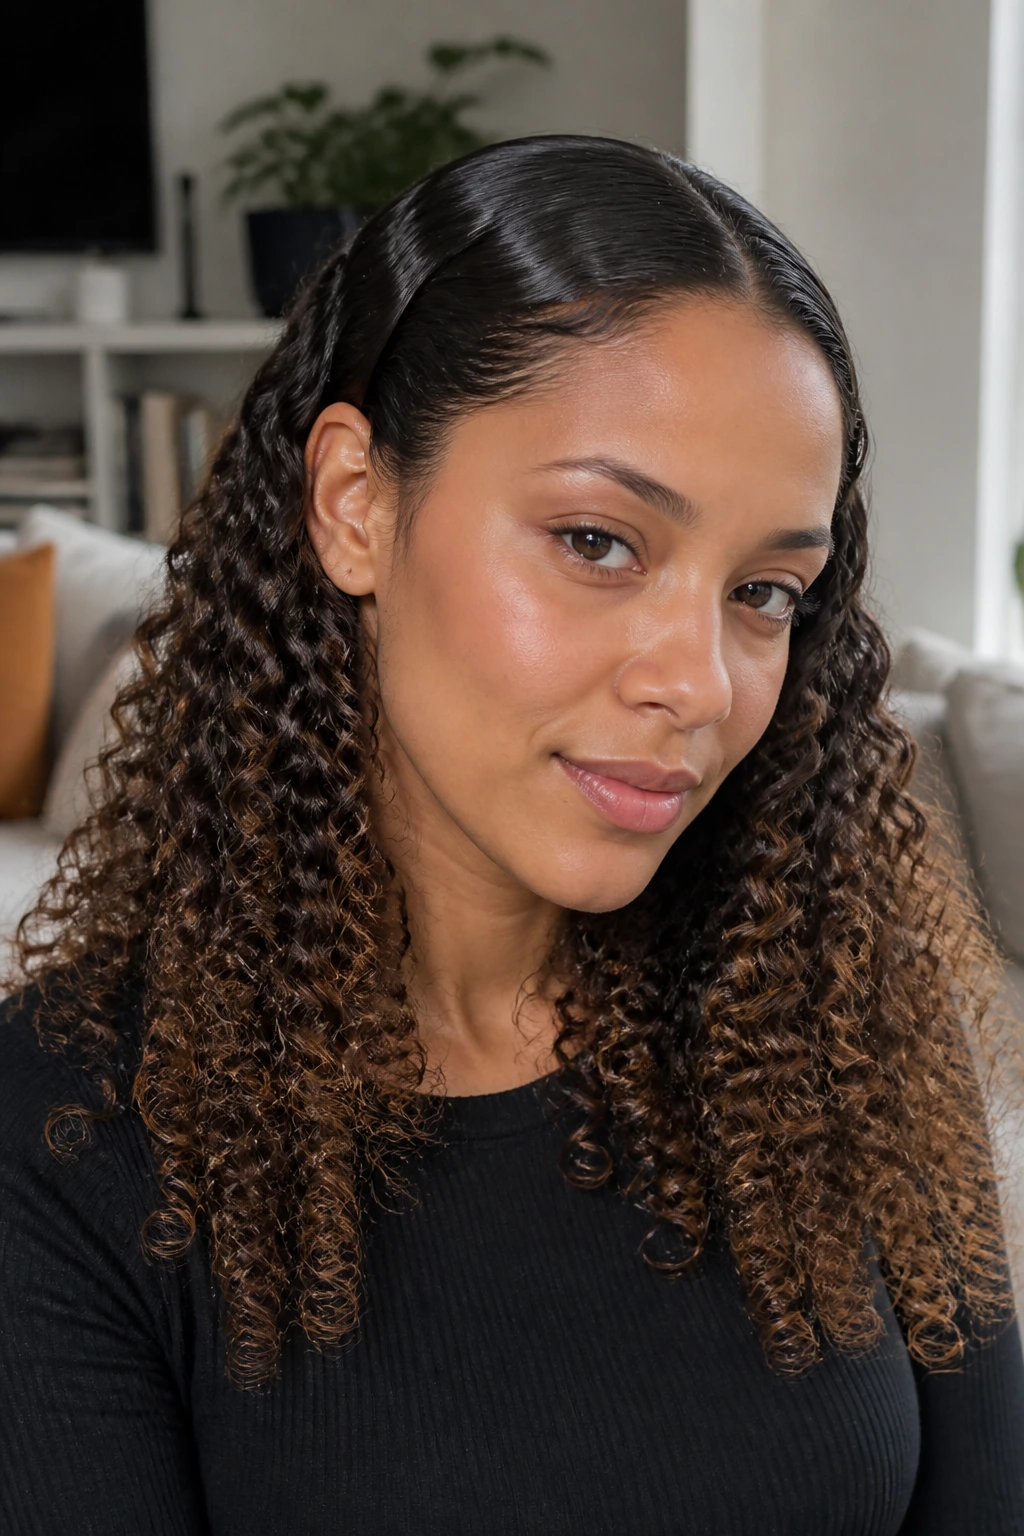
This style is all about contrast. The roots and crown are smoothed just enough to sit close to the head, while the mids and ends keep their curl definition. On long curly hair, that contrast can look very clean without erasing the texture. It’s one of the few polished looks that still lets curls be curls.
What makes it work
The root area needs product with hold, not oil. A soft brush, a bit of gel, and careful sectioning usually do more here than a heavy cream. Once the crown is controlled, the lengths can be left alone. That split makes the style look deliberate instead of accidental.
I like this for formal events because it keeps the face tidy and lets the rest of the hair move. If the lengths are dry and frizzy, the contrast falls apart. So finish the mids and ends with a curl cream or gel that gives a defined cast, then scrunch it out once dry.
Avoid: flattening the whole head. Then you lose the point of the style.
Best for: medium to thick curls that hold a crown shape well.
18. Two-Strand Twist-Out on Long Hair
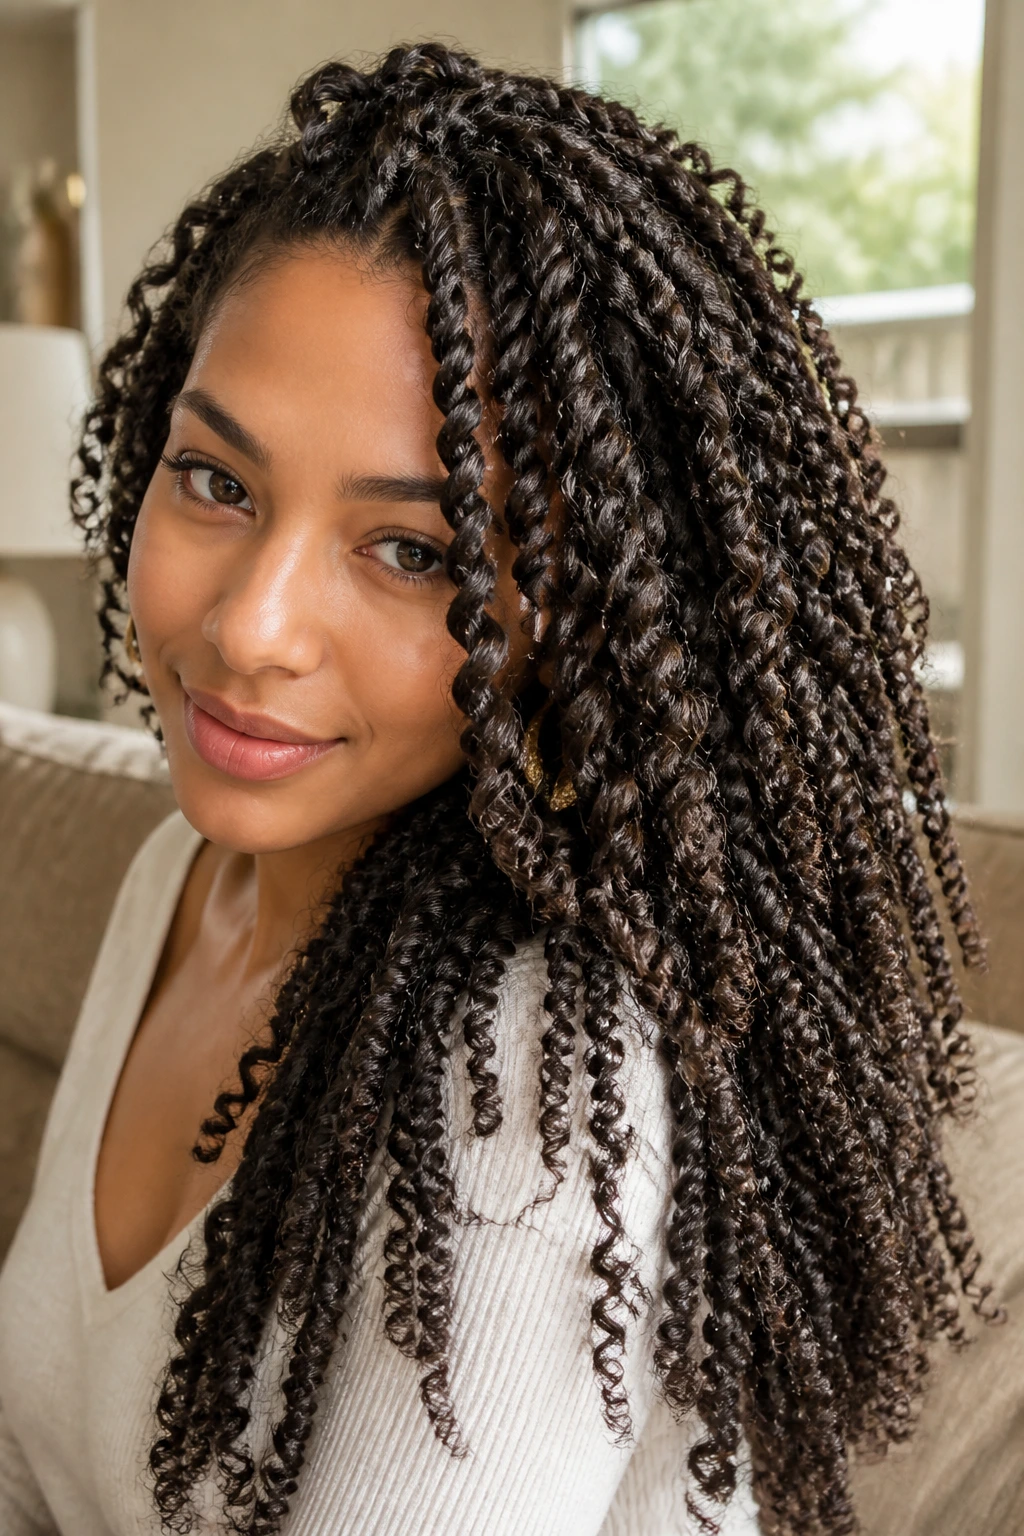
A two-strand twist-out is one of the nicest ways to stretch curly hair without heat. Twist the hair in sections, let it set fully, then separate and wear the resulting pattern as a defined, elongated style. On long lengths, it gives you movement plus a little extra length in the visual line.
The appeal is the finish. The curls or coils sit in clean ropes, and once they’re separated, the hair looks full but not messy. The style works especially well when the hair needs to be stretched for a braid-out look, a professional setting, or just a change from the usual wash-and-go.
Set the twists while the hair is damp, not wet. Too much water slows the dry time and can leave the inside of the twist damp by morning. A little leave-in and a cream with enough slip are usually enough. If you want more hold, add a light gel at the ends.
When you untwist, do it with dry hands and a drop of oil on your fingers. That helps keep the twist pattern clean instead of fuzzy.
19. Bubble Ponytail on Dense Curls
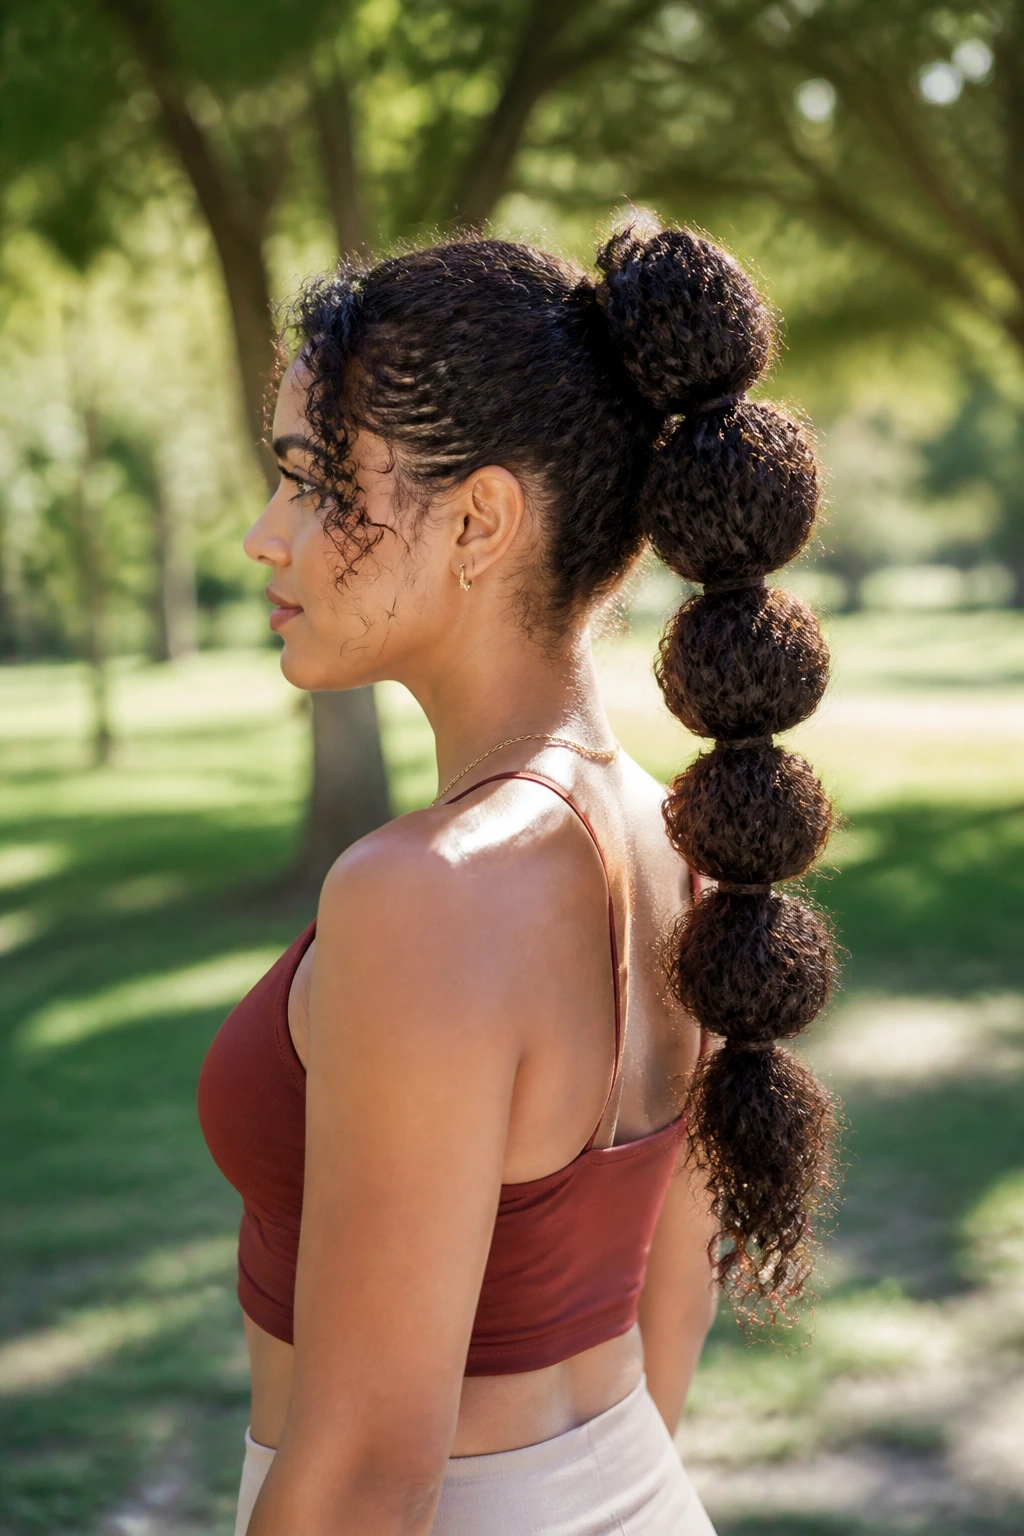
Bubble ponytails are underrated on curly hair because the texture does the puffing for you. You gather the hair into a ponytail, then add more elastics down the length, gently pulling each section outward so the ponytail forms rounded “bubbles.” With long curls, the result looks playful and full, not childish.
This style needs enough length to show the shape. If the ponytail is too short, the bubbles collapse into one lump. If the hair is dense, though, it holds beautifully and gives you a long, sculpted silhouette. It is also a useful style when you want the hair controlled but do not want to lose the drama of the length.
Use soft elastics, not tiny rubber bands that snag. The bubbles should be spaced evenly, but they do not need to be measured with a ruler. A little unevenness makes the style look more natural, especially when the curls are springy and the ponytail has its own rhythm.
I like bubble ponytails for days when regular ponytails feel too flat. This one has shape.
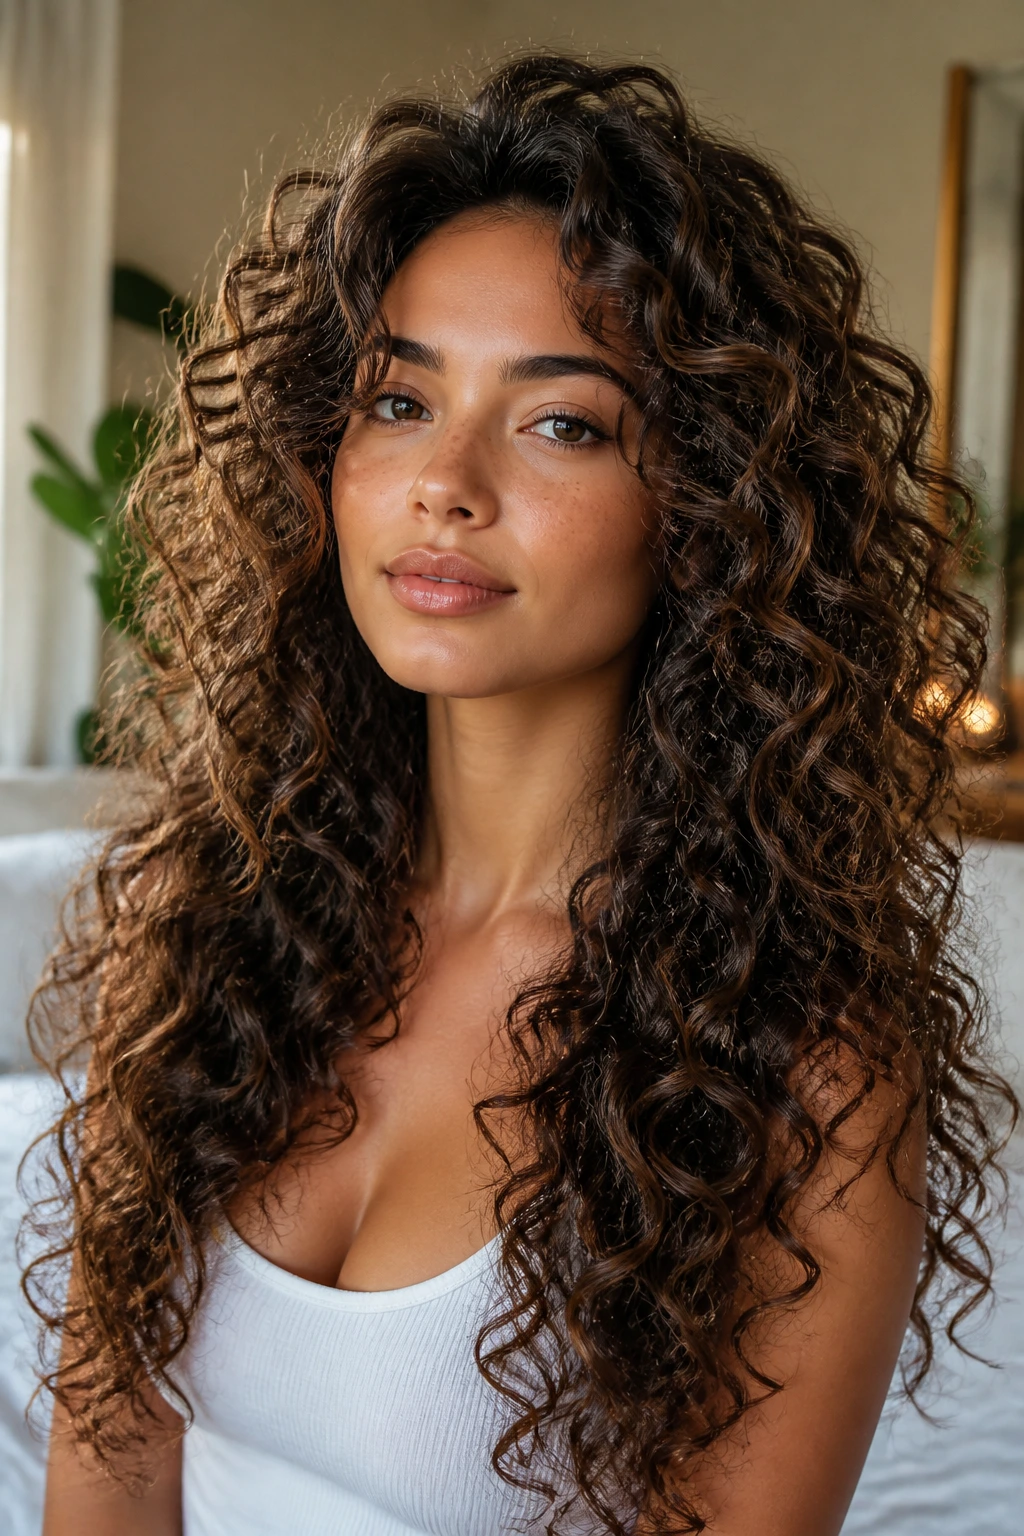
20. Defined Wash-and-Go with a Statement Accessory

A wash-and-go is only boring when people stop at “wash and go.” The long version can be the best showcase for curl definition, especially if the hair is cut with shape and finished with one accessory that gives it direction. A headband, a jeweled clip, a wide barrette, or a silk scarf can change the whole mood in five seconds.
The style depends on product discipline. Leave-in, curl cream, and a gel or mousse with enough hold usually work better than a random assortment of oils. Long curls need clumping first, shine second. If you spend all your energy chasing gloss, the curls fall apart faster.
The accessory should support the shape, not cover it. Put it where the eye needs help — near the part, above one ear, or at the crown. Then let the rest of the length stay loose. That contrast between polished detail and free texture is what makes the style read as finished.
It’s a practical look, but it can still feel special. That’s a nice combination.
21. Side Braid into Free-Flowing Ends
A side braid is useful because it controls the hair where tangles start most easily, then releases the length at the end. You braid one side or the back just enough to anchor the shape, then let the remaining curls hang loose. On long curly hair, that gives you the security of a braid without losing the full effect of the length.
The braid can be loose and thick or narrow and tidy. I prefer a looser braid on curly hair because it blends better with the natural texture. If the braid is too tight, the transition into the free ends can look abrupt. If it’s too soft, though, it won’t hold. There’s a middle ground, and curly hair usually finds it quickly if you use a bit of texture spray or dry shampoo first.
This style is a nice answer to humidity. It keeps the front and one side controlled, which means fewer flyaways near the face. The free ends still move, and that matters. No one wants a braid that turns the whole head into a knot.
A small satin ribbon at the end can make it feel more finished without adding much weight.
22. Vintage Pin-Up Roll with Soft Ends
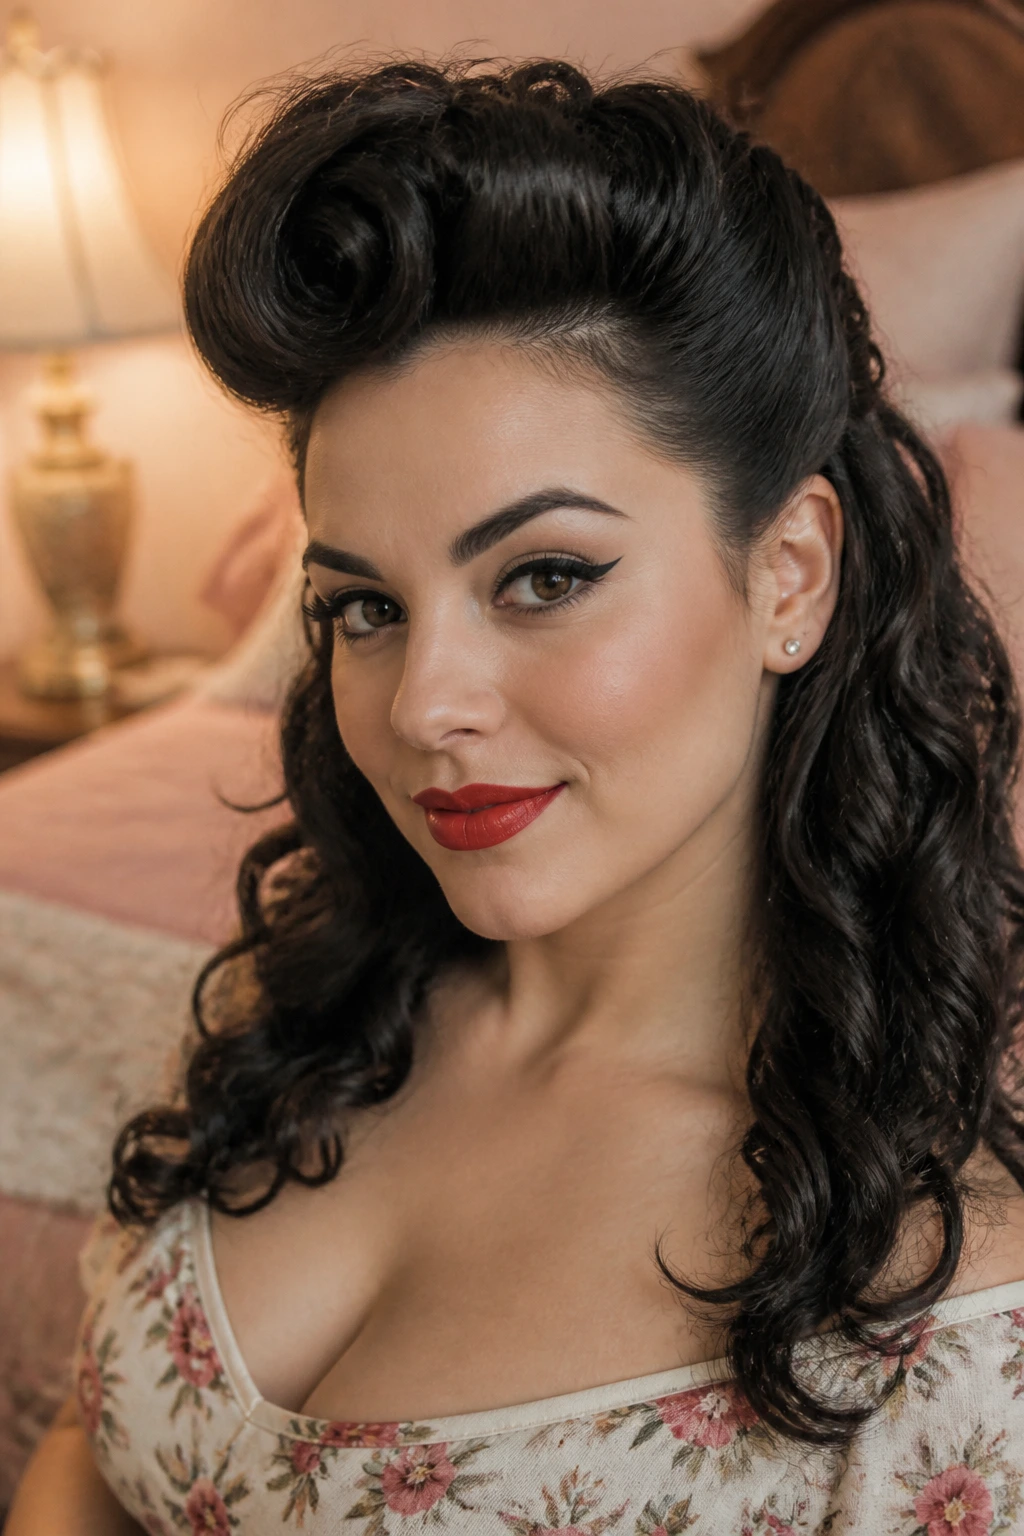
Pin-up rolls on curly hair can look fantastic because the texture gives the front roll a little extra body. You smooth and roll the front section back, pin it in place, then leave the remaining curls loose or gathered low. The result is a style with structure up top and softness through the rest of the hair.
This one has a stronger personality than many of the others. It reads retro, but not costume-y if you keep the rest of the hair relaxed. The soft ends matter. They keep the style from feeling stiff. If the curls are very defined, the contrast between the rolled front and the free back is gorgeous.
Use strong pins and hide them under the roll. If the hair is layered, you may need a couple of extra bobby pins to keep the shorter pieces from escaping. That is normal. Curly hair likes to slip a little.
I’d pick this look when I want the front of the hair completely out of the face but still want the length to be obvious from behind. It photographs well in real life, not because of filters, but because the shape has actual depth.
23. Half-Up Space Buns on Long Curls
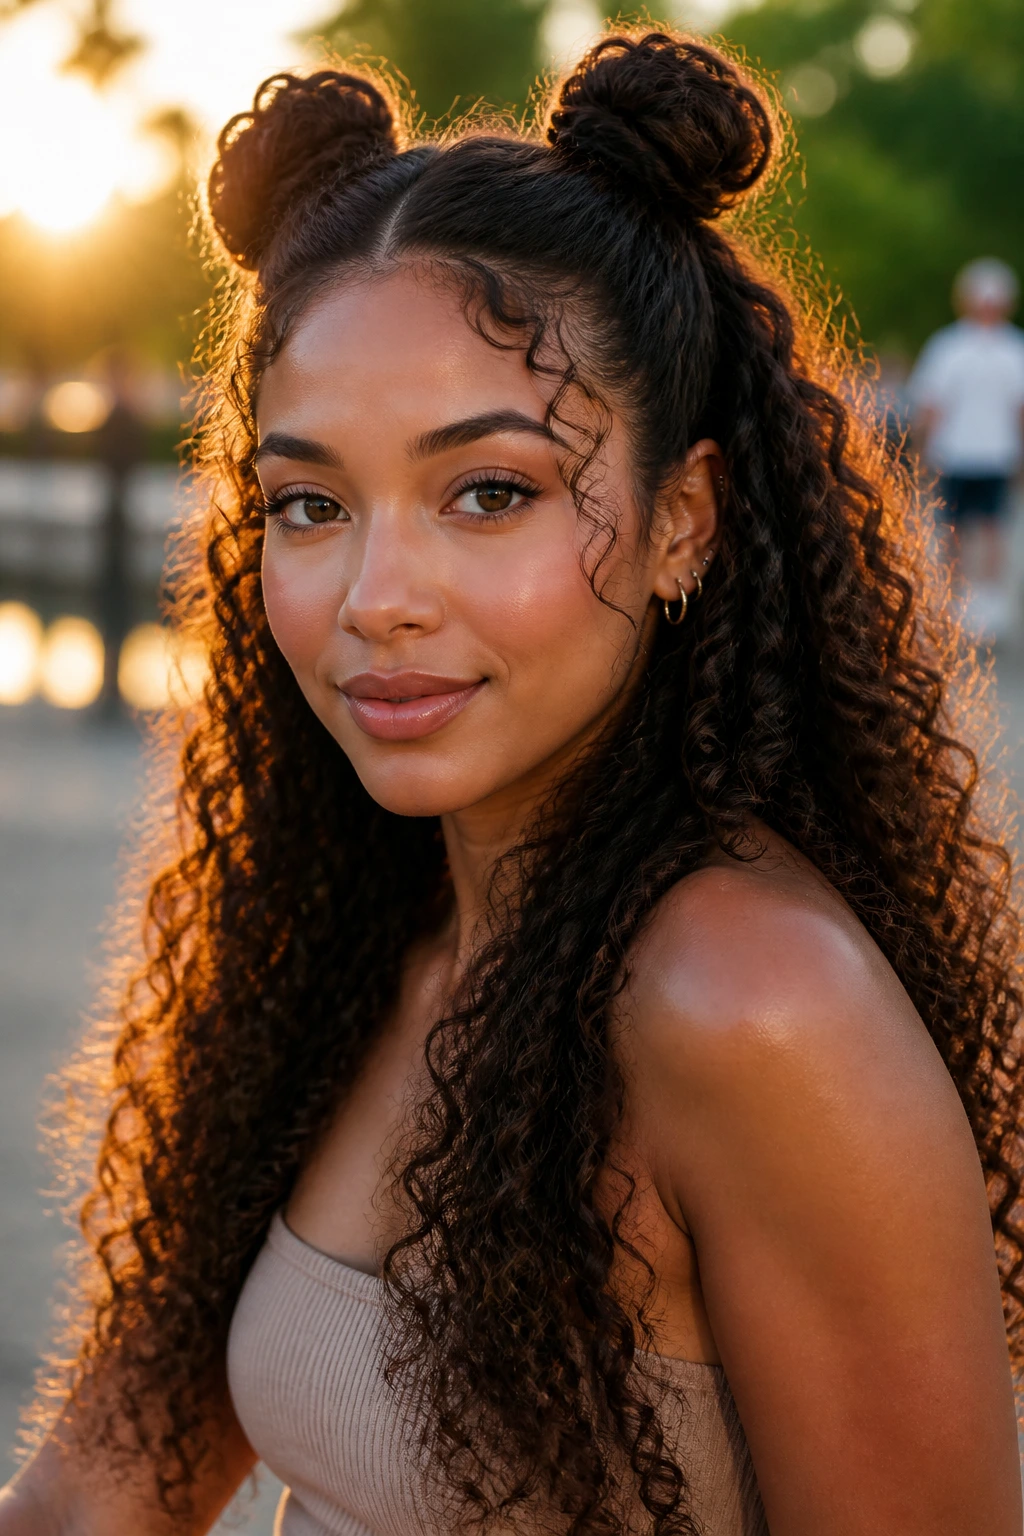
Space buns on long curly hair should be scaled down. Two huge buns can overwhelm the head, especially if the hair is dense. Small or medium buns near the crown, with the lower curls left loose, feel more balanced and keep the length from disappearing.
The charm here is the mix of playful and grown-up. The top section gets split and twisted into two buns, while the rest of the curls fall around the shoulders and back. If the buns are tidy and the lower curls stay defined, the style looks intentional rather than costume-like.
This works particularly well when the root area needs control but the ends still look good. It is also friendly to longer layers because the top can be pinned without forcing every curl into the same direction. Use a few bobby pins per bun, not one lone elastic doing all the work. That gives the style a flatter base and stops the buns from wobbling.
A center part keeps it balanced. A slightly messy finish keeps it from feeling stiff. The line between those two things is where this style lives.
24. Low Braided Chignon with Curly Ends
A low braided chignon is one of the cleaner formal styles for long curly hair. You gather the hair low, braid the length, coil it into a bun, and let a few curly ends peek out instead of tucking everything in. That bit of texture keeps the style from looking too severe.
It’s especially useful when you want the nape clear and the profile neat. Long curls can become a lot of hair at the back of the head, and this shape tamps that down without erasing the curl identity. If your hair is very layered, pin the shorter pieces first so they don’t poke out in random directions while you’re shaping the bun.
The chignon should sit low enough to feel anchored. Too high, and it starts to compete with the length. Too tight, and the curls flatten. The sweet spot is right at or just below the nape.
I like this for events where you want the hair to look done but not overly styled. It has enough polish for a dress, and enough texture to feel like curly hair instead of a wig made to imitate it.
25. Ribbon-Tied Romantic Cascade
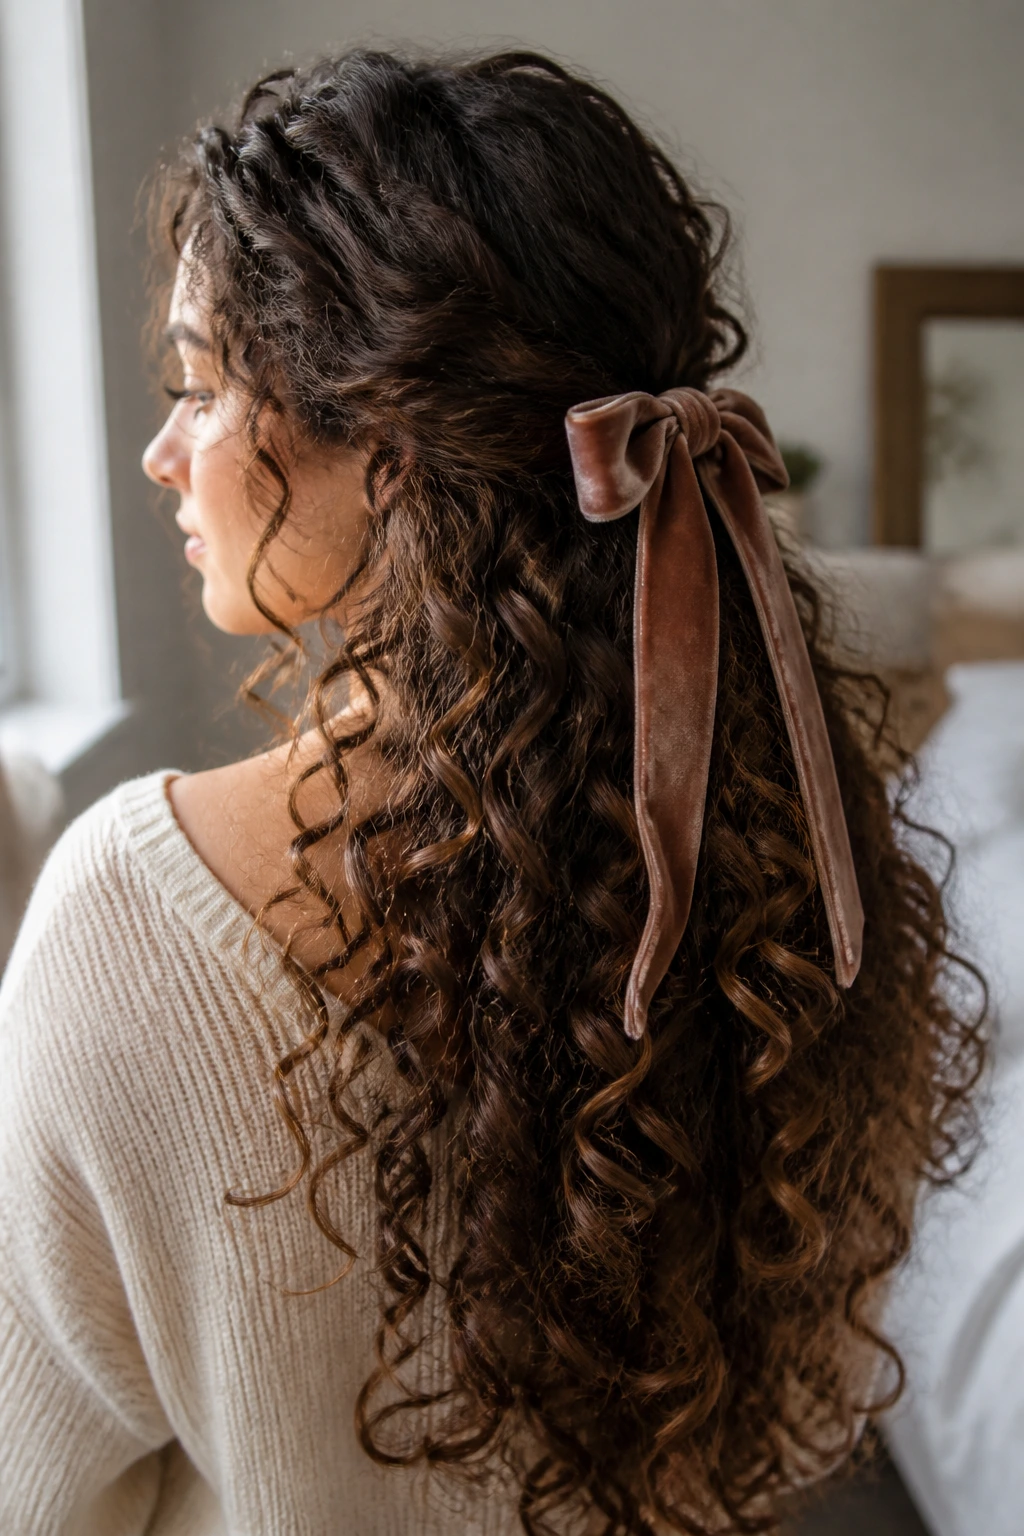
A ribbon-tied cascade is one of the easiest ways to make long curly hair feel deliberate. Gather the hair into a low half-up or low ponytail, tie it with a ribbon, and let the curls spill down the back. The ribbon acts like a finish line, giving the style a clear point of focus without taking over the whole head.
The best part is how much control you get with so little effort. A velvet ribbon feels rich. A silk ribbon moves more softly. A cotton ribbon reads casual. The curl pattern does the rest. If the hair is layered, let a few shorter pieces frame the face and keep the tail full so the shape still feels lush.
This works well when you want something romantic but not fussy. It looks especially good on second-day curls that still hold their definition. If the roots need a little lift, tease the crown gently with your fingers before tying the ribbon. Not a comb. Fingers.
The whole style depends on balance: a neat tie, a loose fall, and curls that keep their own voice.
What Long Curls Need Before a Style Can Hold
Long curly hair asks for a different kind of planning than straight hair. The curl pattern changes the math. A section that looks long when wet can shrink several inches once dry, and that shrinkage changes where a braid lands, where a ponytail sits, and how much weight a bun can carry. Ignore that, and the style ends up too short in the wrong places.
There’s also density. A long style on fine curls needs support from product and shape because the hair can look airy fast. Dense curls need weight removed in the right spots or the whole head can feel bulky by midday. One length does not solve either problem by itself.
That is why curl specialists often dry-cut or finish the cut dry. They want to see where each curl falls on its own, not stretched into a false line. The result is less guesswork and fewer surprises when the hair dries into its real shape. Frankly, that’s the kind of honesty curly hair deserves.
The Tools That Save Time and Frizz

-
Wide-tooth comb: Good for detangling in the shower when the hair is loaded with conditioner and has slip.
-
Microfiber towel or cotton T-shirt: Squeezes out water without roughing up the curl cuticle like a terry towel can.
-
Leave-in conditioner: Helps long curls stay soft enough to section without turning brittle.
-
Curl cream or mousse: Gives shape and a bit of control before the gel or styling glaze goes in.
-
Medium- or strong-hold gel: Useful when you want the style to last longer than one afternoon.
-
Diffuser attachment: Keeps the pattern intact while drying the roots faster than air alone.
-
Duckbill clips or sectioning clips: Handy when you’re setting curls, pinning a half-up style, or drying the crown in place.
-
Silk scrunchies and bobby pins: The scrunchies protect the ponytail base; the pins keep half-up styles from slipping.
-
Rat-tail comb: Useful for clean parts and sectioning, especially on dense hair.
Choosing the Right Layers, Length, and Products for Curly Hair
The smartest long curly styles start with the cut underneath them. If the hair is thick and heavy, long layers usually help the shape move. If the hair is fine or loose-curled, too many layers can hollow the ends out and make the style look thin from the side. Ask for a cut that respects where the hair naturally wants to sit, not one that forces every curl into the same line.
Product choice matters just as much. A creamy leave-in with a lightweight mousse can be enough for softer curls, while dense coils often need a cream-plus-gel combination to keep the curl clumps from expanding into fuzz. If your hair gets weighed down easily, skip the rich butters and heavy oils before styling. They can make the roots go flat by noon.
If you’re seeing a lot of frizz at the crown, that’s often a sign the top needs more hold and less touching. If the ends feel crunchy but still look undefined, the product layer is probably wrong — too much cream, not enough hold. The fix is usually less dramatic than people expect. One better product, applied with sectioning, can change the whole shape.
How to Wear Long Curly Hairstyles for Work, Weekends, and Events
Presentation: For work, a clean part and controlled crown usually read more polished than a very fluffy top. For weekends, loose pieces around the face and a softer finish feel better because they let the texture stay relaxed. At events, I like a style that has one clear detail — a braid, a ribbon, a clip, a twist — instead of trying to make every curl behave at once.
Accompaniments: Curly hair looks good with open collars, hoop earrings, and necklines that do not fight the hair at the shoulders. If you wear a turtleneck or high collar, keep the hair lifted off the neck in a ponytail, twist, or braid so the fabric and the hair aren’t competing for space.
Portions: Fine curls usually need smaller sections, smaller clips, and less bulk in the top half. Dense curls can handle bigger shapes, but they also need stronger pins and a little more planning so the style does not sag. If your hair reaches the lower back, braided styles tend to hold their outline better than loose buns.
Refresh plan: A few sprays of water mixed with leave-in, then a small squeeze of gel into the outer layer, usually works better than rewetting the entire head. The goal is to wake up the curl pattern, not drown it.
Extra Ways to Add Shine, Hold, and Shape
Shine Boost: A pea-sized amount of lightweight serum rubbed only over the outermost layer can calm the halo frizz without stealing volume from the rest of the hair. I would not coat the whole head. That tends to make long curls limp.
Customization: Add a braid at one temple, a ribbon at the ponytail base, or a decorative clip above the ear to change the mood without redoing the whole style. Those small details matter more on curly hair than on straight hair because the texture already gives you visual interest.
Hold: If the style needs to survive a long day, layer mousse under gel instead of piling on one heavy product. The mousse gives airy support, the gel gives shape, and the pair usually lasts longer than cream alone.
Make-It-Yours: Fine curls do better with lighter products and fewer touchpoints. Thick curls usually need stronger pins, wider parts, and more sectioning. Coily hair can take more structure around the edges and still look soft in the length.
Keeping a Style Fresh Between Wash Days
Most long curly styles look best on day one and day two. After that, the roots usually need a refresh and the ends may need a little re-clumping. That does not mean the style failed. It means curly hair has memory, and memory needs maintenance.
Sleep protection matters more than people think. A satin bonnet, satin pillowcase, or a loose pineapple can save a style from the rough, flattened look that plain cotton causes overnight. If the style has pins or a braid, take out anything uncomfortable before bed and re-pin in the morning. Don’t sleep with metal digging into your scalp. That is a bad trade.
For ponytails and buns, loosen the elastic before bed if it’s pulling. For loose styles, a light mist of water and a squeeze of leave-in around the top layers is usually enough to bring the shape back. If the crown has collapsed, clip it up for 10 to 15 minutes while the hair dries a little in the lifted position. That small reset often works better than a full wash.
Variations and Adaptations for Different Curl Types
Fine-Curl Lift Kit: Use lighter mousse, skip the heavy butters, and choose styles that rely on clips or half-up shaping instead of large braided masses. Fine curls collapse when overloaded, so the goal is support, not weight.
Thick-Curl Armor: Strong-hold gel, larger bobby pins, and more deliberate sectioning keep dense curls from slipping out of buns and twists. This version usually benefits from deeper parts and slightly lower ponytails so the style has a stable base.
Humidity Shield: Start with leave-in, add curl cream, then seal the style with gel while the hair is still damp. Do not keep touching it once it dries. That’s what wakes up the frizz.
Event-Ready Softness: Swap everyday elastics for satin scrunchies, ribbon ties, or polished clips. A simple half-up or braided style becomes more dressed up with one visible finishing piece.
Stretch-and-Go Version: If shrinkage is your enemy, twist-outs, braid-outs, and low ponytails give the hair a longer visual line without heat. These are useful when you want length to show up instead of curling back on itself.
Common Mistakes That Make Long Curls Puff Out
Cutting the whole shape too blunt: A straight, heavy hemline can make dense curls sit like a shelf. The fix is a U-shape, soft layers, or at least some internal removal so the hair can move.
Using too much oil before hold product: Heavy oil can make gel slide around instead of gripping the hair. If the curl pattern looks defined for five minutes and then drops, that’s often the problem.
Brushing after the style is set: Once curls are dry, brushing them apart turns definition into fluff. Use fingers, a pick only at the roots, or a light mist to re-clump before you touch the ends.
Pulling ponytails too tight at the crown: That creates tension, flat roots, and a headache you did not ask for. Use a soft tie or bungee and leave a little give at the scalp.
Skipping overnight protection: Cotton pillowcases rough up the outer layer and flatten the crown. A bonnet or silk pillowcase is not a luxury move. It’s basic maintenance for long curly hair.
Choosing clips that are too small: If the clip cannot hold the actual bulk of the hair, the style will slide open by lunch. Bigger claw clips, stronger pins, and wider elastics usually solve the problem without drama.
Frequently Asked Questions
What haircut is best for long curly hair?
A soft U-shape, long layers, or a shallow V-cut usually gives the best mix of shape and movement. The right choice depends on density: thick curls need more weight removed, while finer curls need a lighter hand so the ends don’t look thin.
Should curly hair be cut wet or dry?
Dry cutting is often better because it shows the real curl pattern and shrinkage. Wet hair stretches and can hide several inches of bounce, which makes it easy to cut too much off in the wrong place.
How do I stop my long curly ponytail from sagging?
Use a strong but gentle tie, place the ponytail slightly higher than you think, and avoid overloading the roots with heavy product. If the base is flat, lift it with your fingers or clip it in place for 10 minutes while it settles.
Which styles hold up best in humidity?
Braids, twists, low puffs, and half-up styles with gel at the roots usually last better than loose wash-and-go styles. The less the hair rubs against itself and the air, the less the frizz has to work with.
Can fine curly hair wear long layers?
Yes, but keep them light. Too many short internal layers can make fine curls look see-through at the ends, so ask for long, soft movement rather than heavy texturizing.
How often should long curly hair be trimmed?
Most long curls do better with trims every 8 to 12 weeks, depending on how fast the ends fray and how often you wear protective styles. If the shape starts puffing at the bottom before the rest of the hair, that’s usually a trim signal.
What’s the fastest style for day-two curls?
A pineapple ponytail, a side sweep, or a half-up crown twist usually takes the least time. They work because they build on what the curls are already doing instead of asking for a full reset.
How do I keep long curls from tangling overnight?
A loose pineapple, satin bonnet, or silk pillowcase helps a lot. If the hair is very long, put the ends into a loose, low section so they’re not rubbing against the back of the neck all night.
A Shape Worth Keeping
Long curly hair looks best when the shape lets the texture do its own work. That usually means giving the roots some lift, the lengths some direction, and the ends a break from constant friction. The styles above do that in different ways, which is why they’re worth keeping around.
Pick one style that handles your ordinary days and one that solves your messy days. That small rotation is often enough to make long curls feel easier, and easier hair tends to look better too.