Grey highlights for pale skin and square faces can go one of two ways. They can look crisp, soft, and expensive in that quiet, expensive way hair sometimes does when the tone is right. Or they can go icy, flat, and boxy, which is usually a placement problem before it’s a color problem.
That’s the part most people miss. Grey is not one look. It’s a whole family: silver, smoke, pearl, pewter, graphite, slate, mushroom-grey, lavender-grey. On fair skin, the wrong cool tone can make redness look louder. On a square face, the wrong placement can draw a hard line right where you wanted softness.
I like grey when it behaves like mist instead of paint. A few fine babylights. A rooted melt that keeps the regrowth from shouting. A face frame that bends around the cheekbone instead of cutting straight across the jaw. The best versions don’t fight the face. They guide the eye.
Why These Grey Highlight Ideas Work on Pale Skin and Square Faces
-
Cool tones flatter fair skin without washing it out: Pearl, smoke, and silver-grey sit cleanly against pale complexions, while harsh blue-white shades can make skin look redder than it is.
-
Placement matters as much as shade: When the brightest pieces land near the temples, cheekbones, and outer layers, square faces look softer without losing structure.
-
Grey looks richer with depth underneath: A little mushroom brown, ash lowlight, or dim root shadow keeps the color from going flat and helps the silver pieces read as intentional.
-
Face-framing pieces do the heavy lifting: A narrow money piece, curtain fringe, or diagonal front highlight bends the eye away from the jaw corners.
-
Low-contrast blends age better: If the grey is woven through instead of painted in one hard stripe, grow-out stays calmer and the style keeps its shape longer.
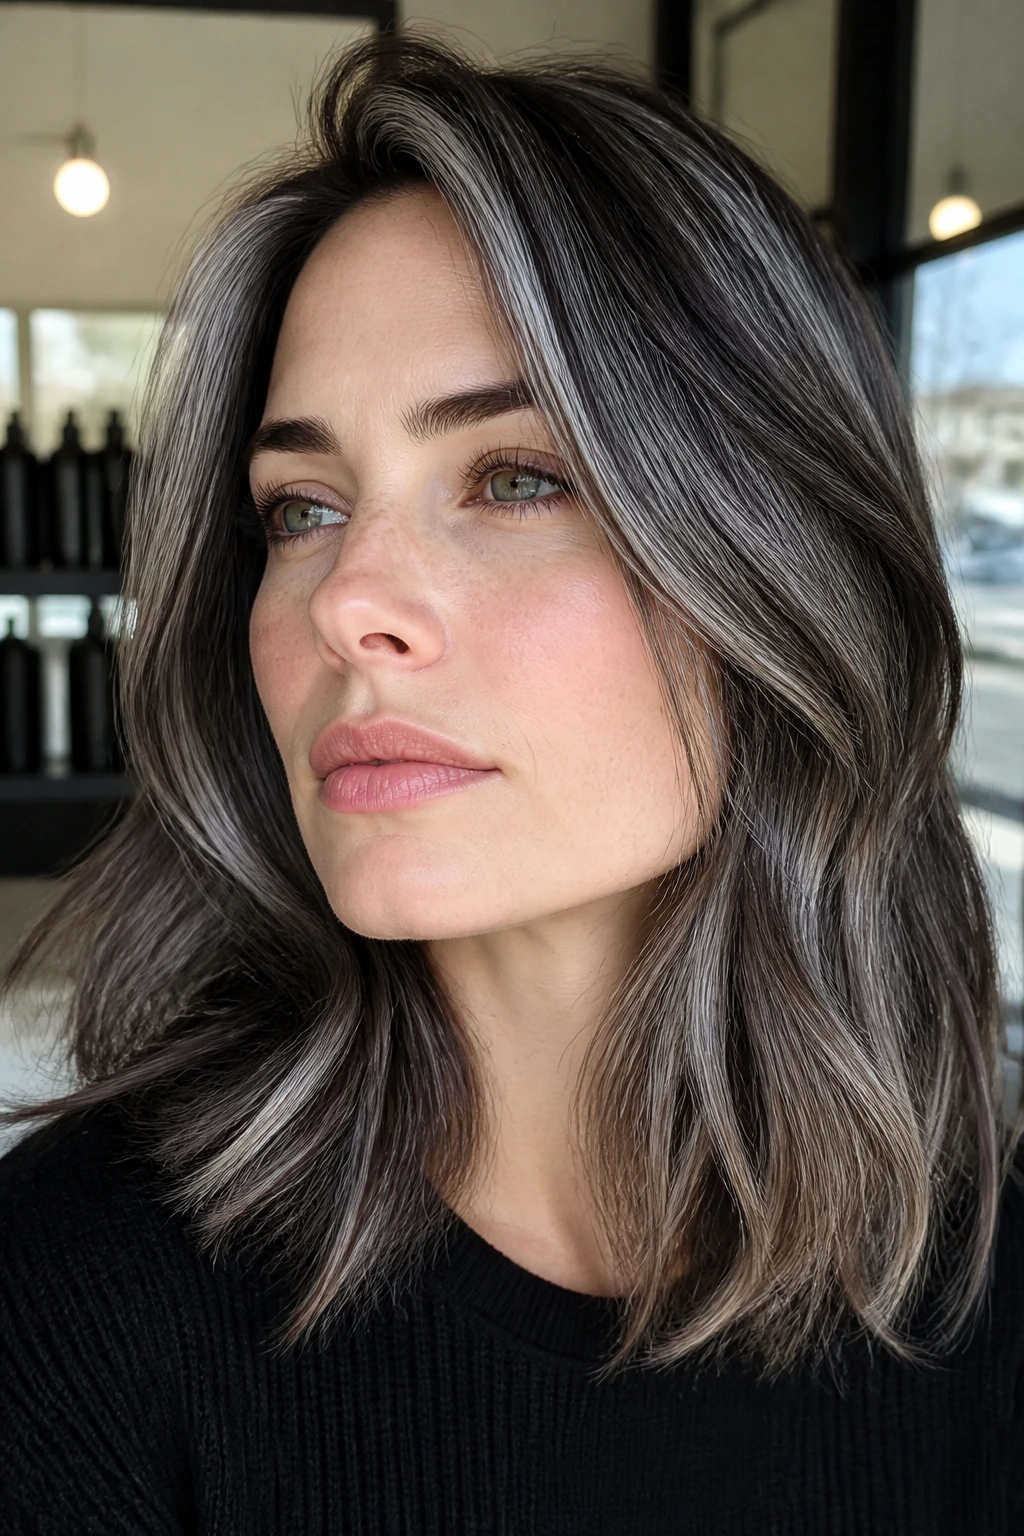
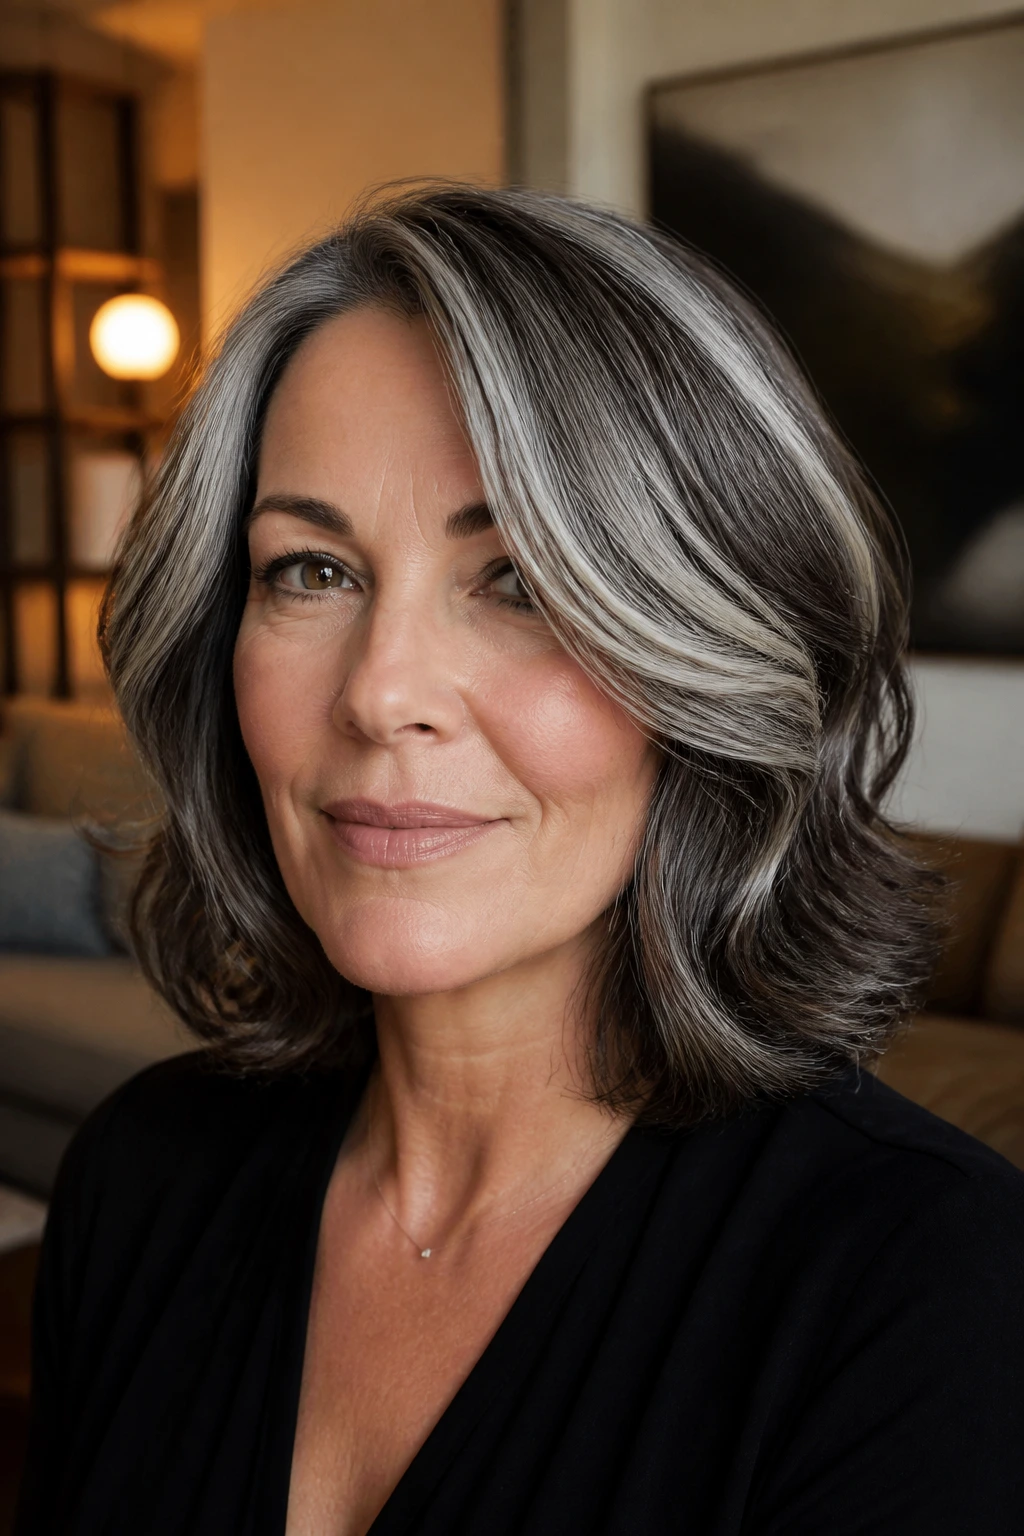
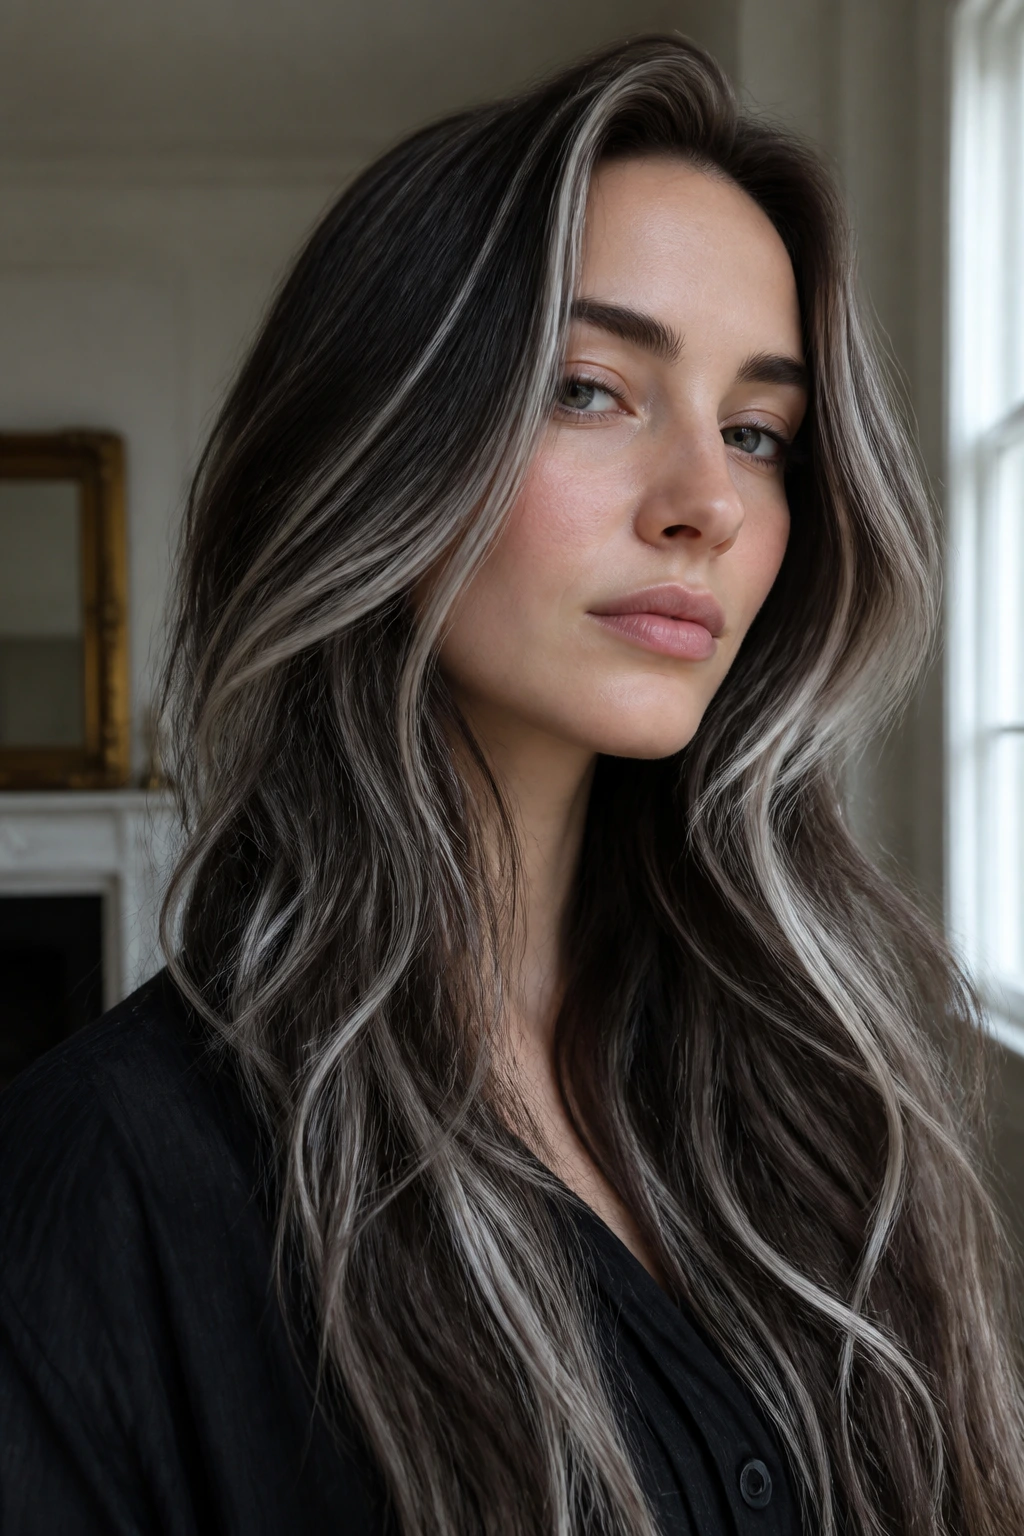
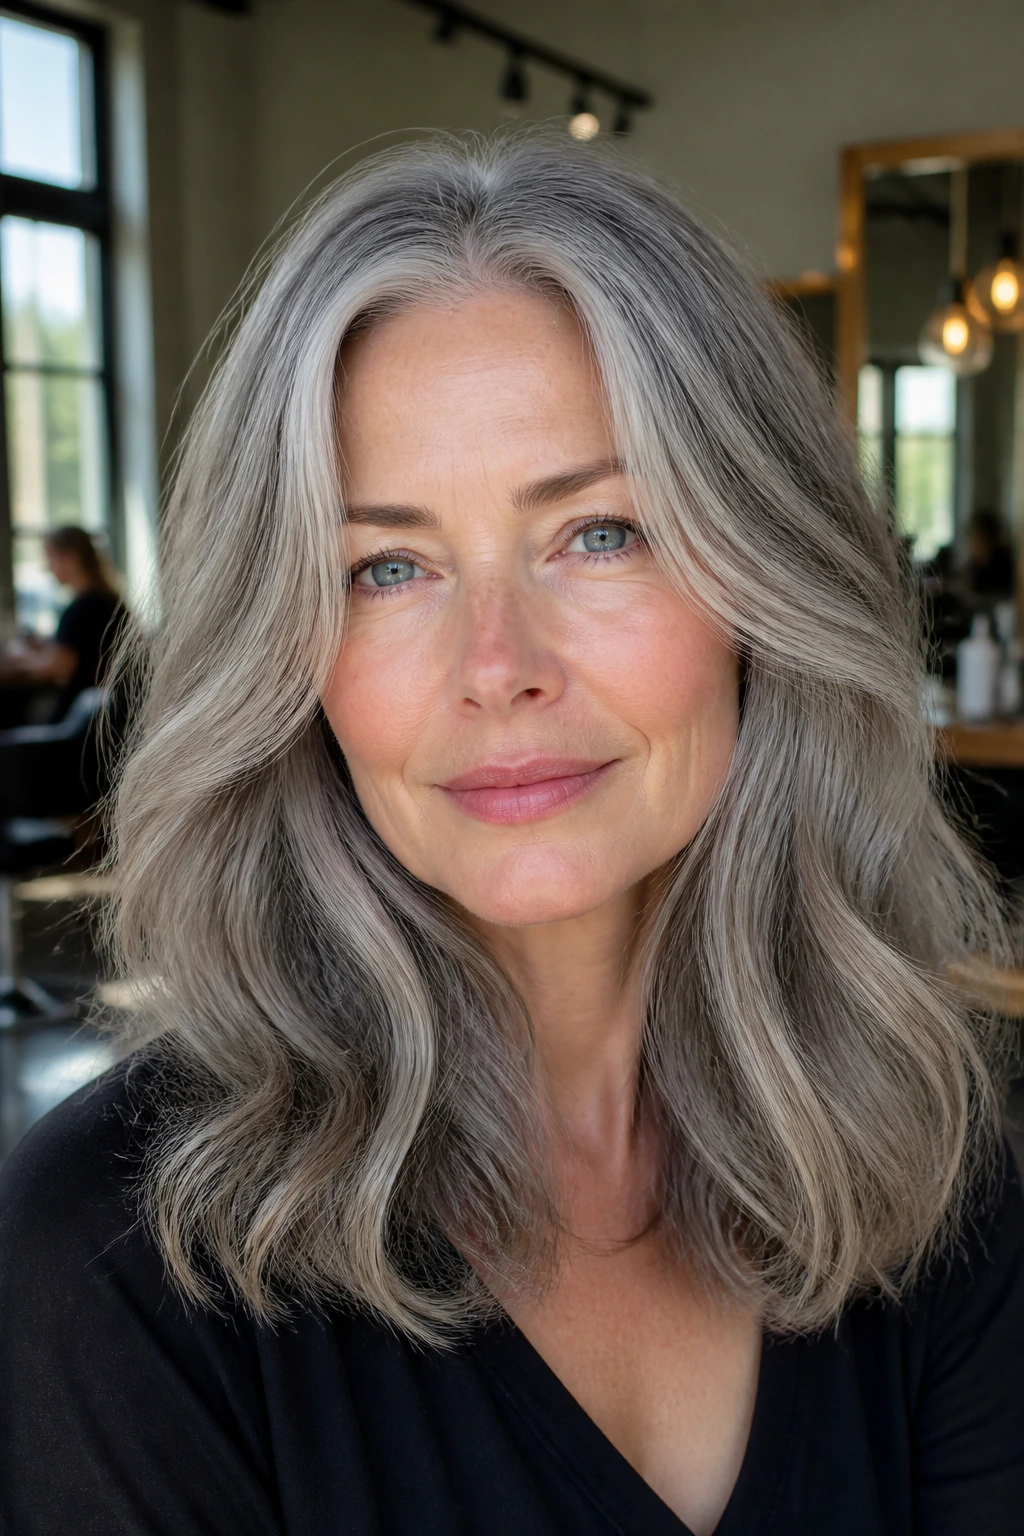
1. Soft Silver Babylights Over Mushroom Brown
Soft silver babylights are the quietest way to wear grey, and that’s exactly why they work so well on pale skin. The strands are fine enough to shimmer instead of stripe, so the hair moves like steel wool in soft light rather than looking frosted from root to tip.
Why This Placement Flatters a Square Face
Babylights let you scatter brightness around the face without building a hard edge at the jaw. On square faces, I like them concentrated through the top half of the hair, the temple area, and the outer veil of the lengths. That keeps the eye moving upward and softens the corners without hiding the face.
- Best base: A level 5 to 6 mushroom brown gives silver something to sit on.
- Best result: Thin foil slices keep the grey airy, not chunky.
- Best styling: Loose bends show the shimmer better than tight curls.
- Best maintenance: A gloss every 6 to 8 weeks keeps the silver from dulling.
A little tip I keep coming back to: ask for the front babylights to be a shade brighter than the interior ones. It sounds tiny. It changes everything.
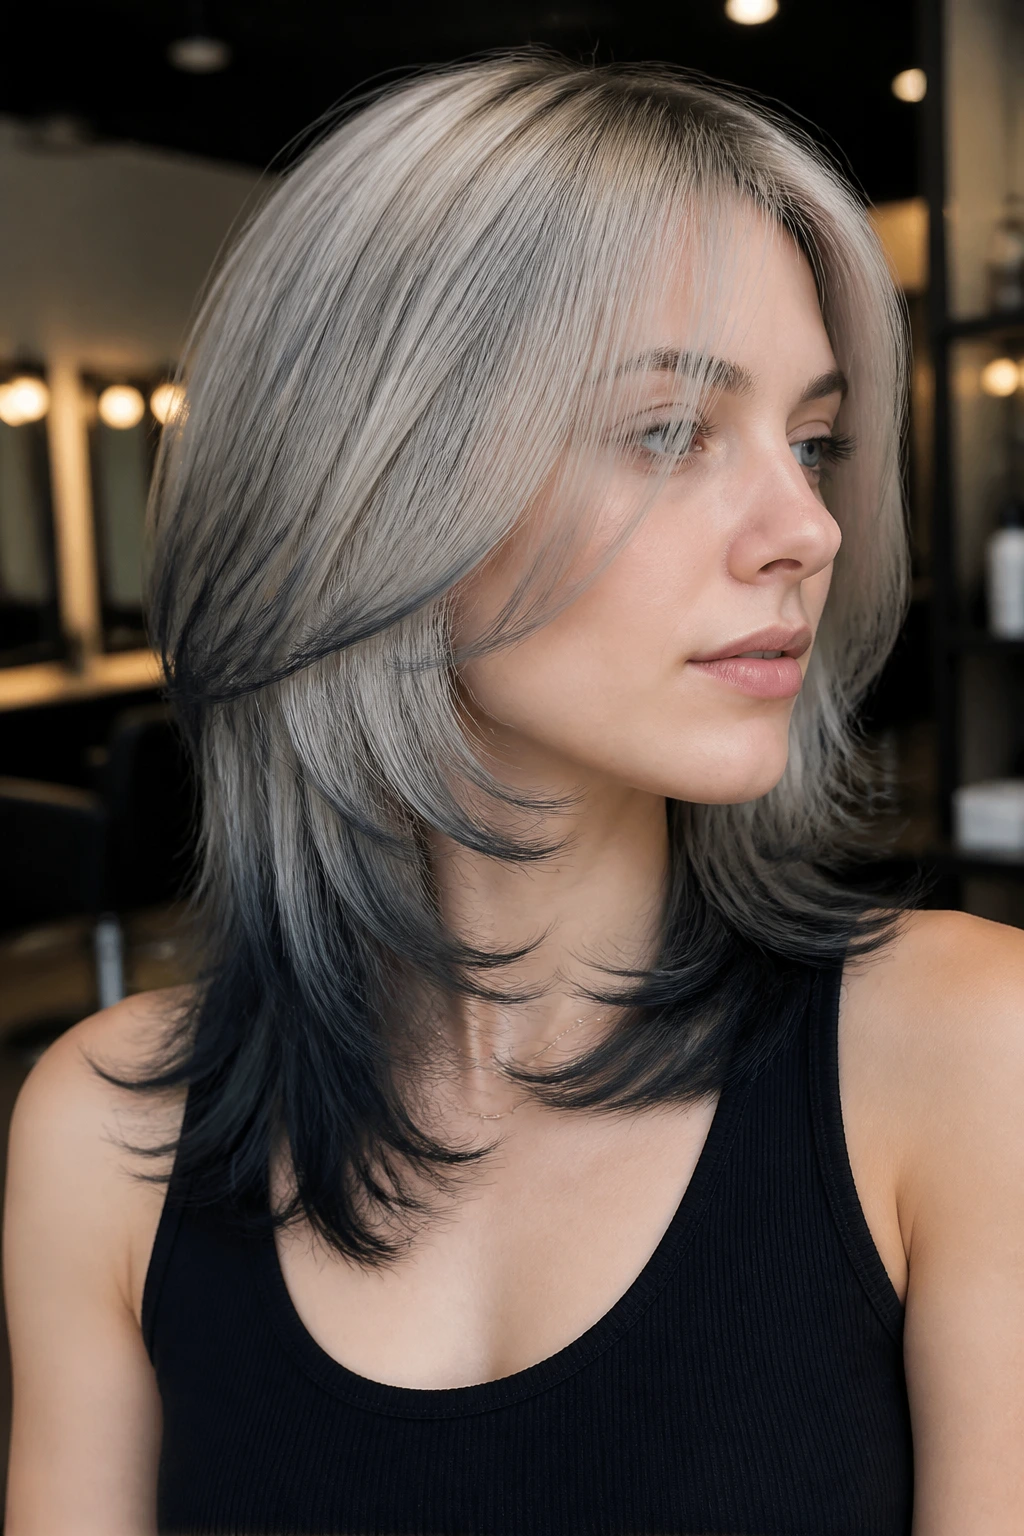
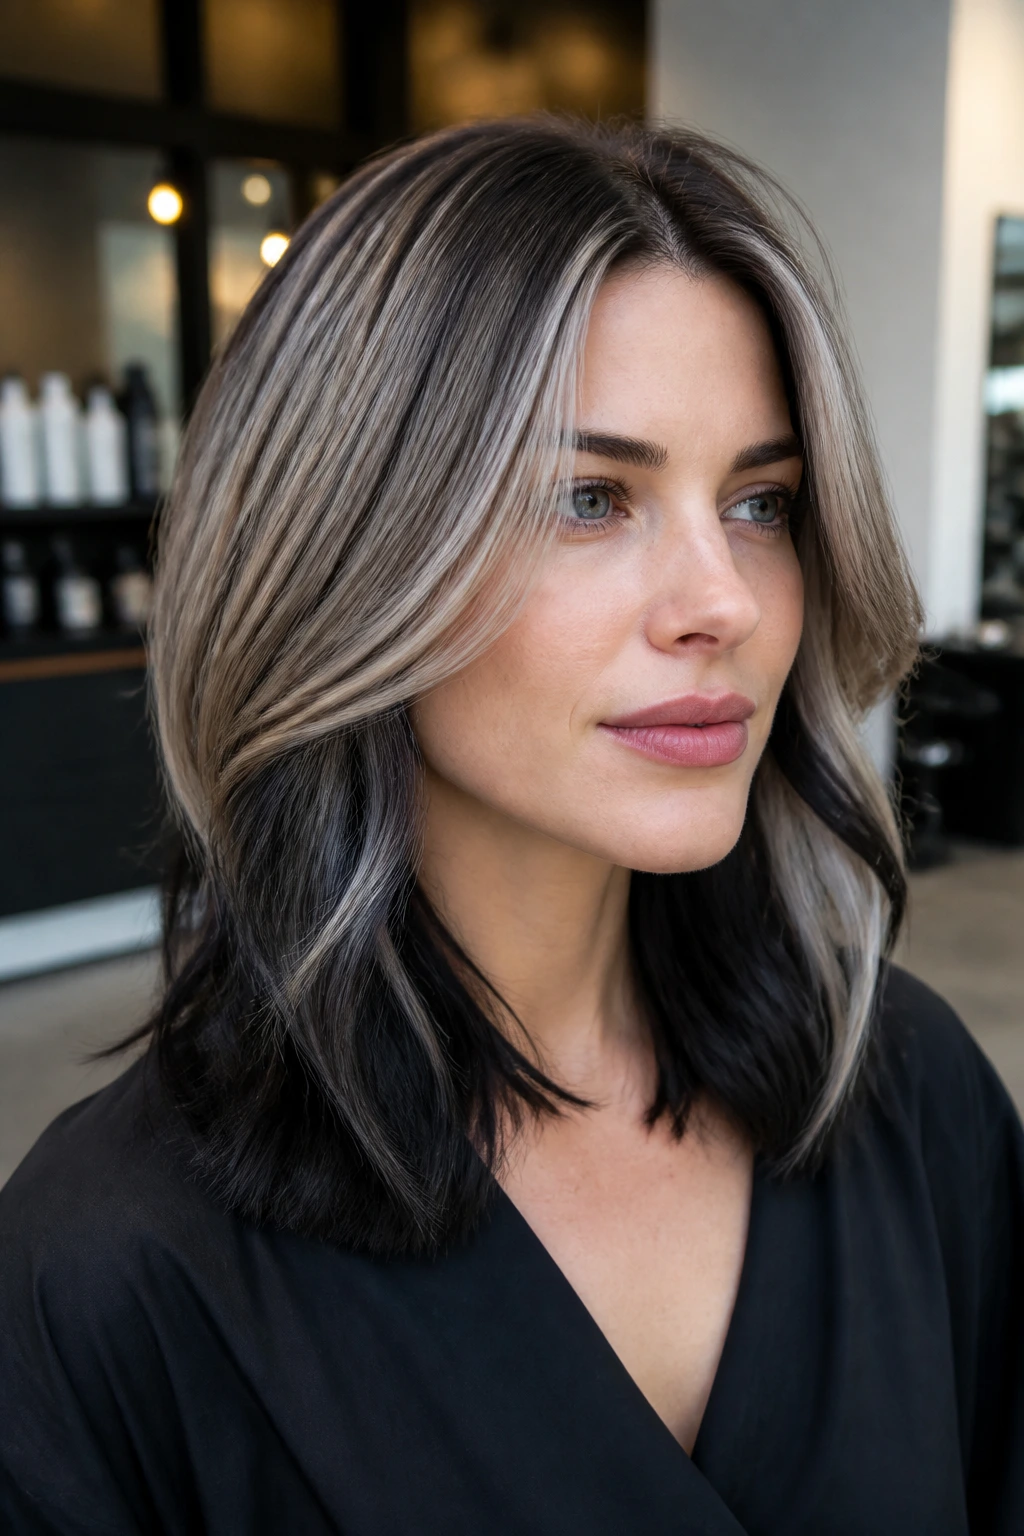
2. Smoky Money Piece With a Dim Root Melt
A bright money piece can flatter a square face, but only if the roots stay dim and the front pieces stay smoky rather than white-hot. That contrast gives the face a clean frame without turning the forehead into a spotlight.
The root melt is the part that saves this look. You want the grey to fade out of the base in a soft gradient, not start like a thick stripe. On pale skin, a smoky silver with a beige-grey root keeps the color cool without going chalky.
The best version is for someone who wants an obvious front frame and a lower-maintenance grow-out. It looks sharp with a middle part, but it’s even better with a slight off-center part and a bend at the cheekbone. Straight, poker-flat hair can make the money piece feel too graphic; a little wave makes it breathe.
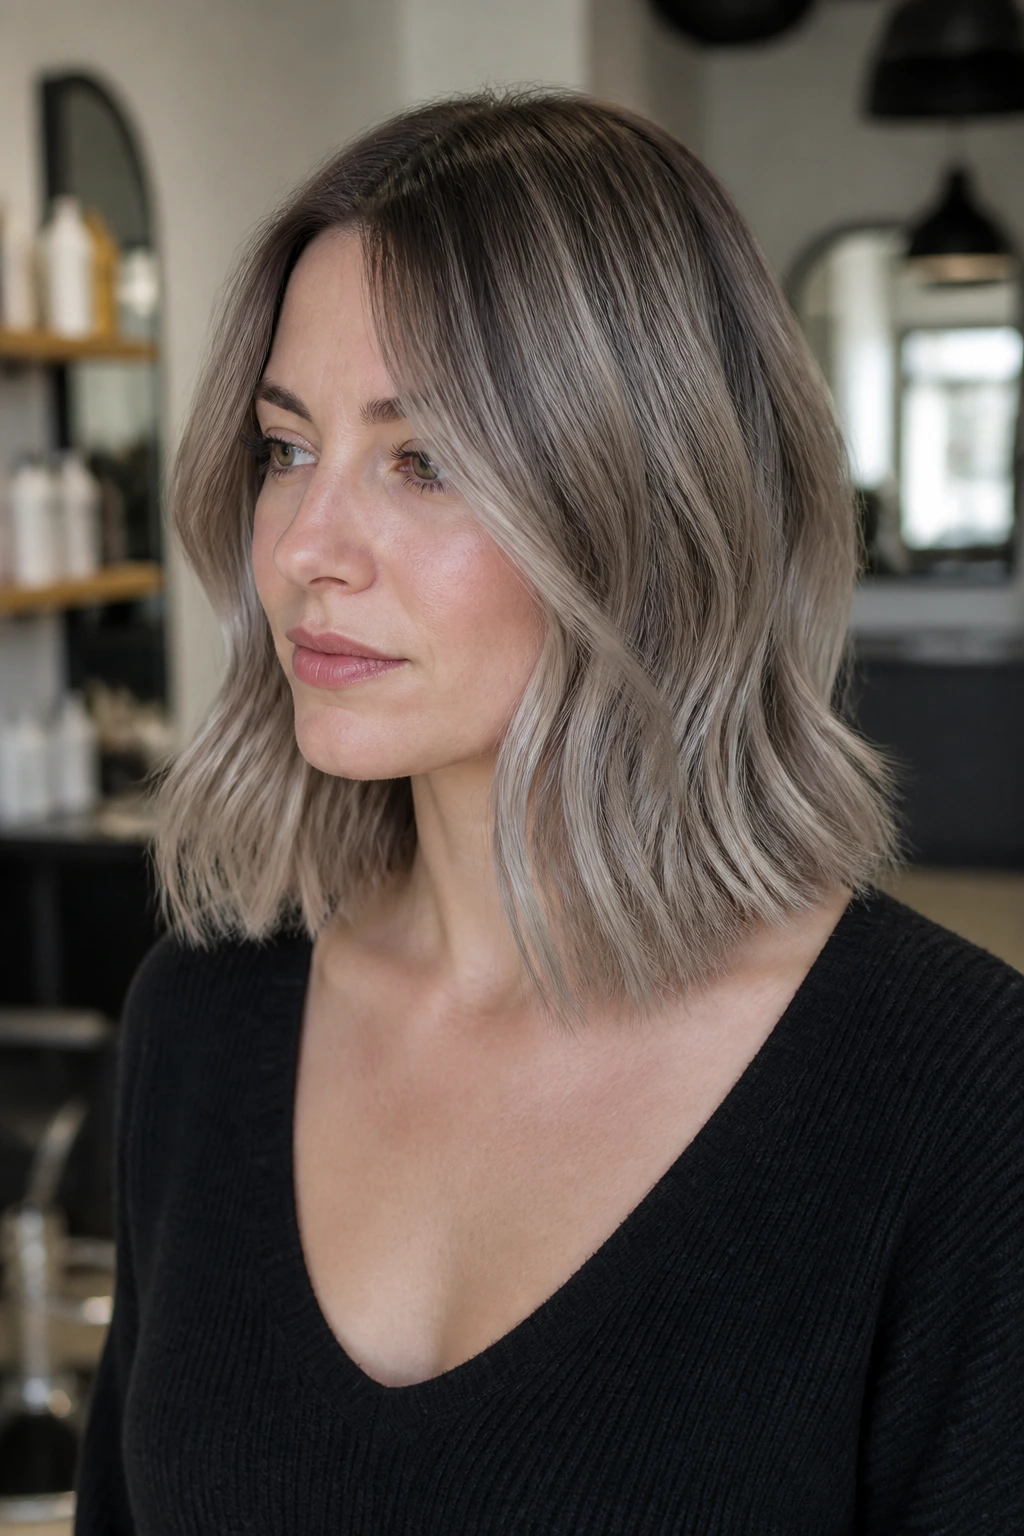
3. Ash Balayage on a Collarbone Lob
Picture a collarbone lob that swings just under the jaw instead of sitting on top of it. Now add ash balayage through the ends and mid-lengths, and you get a cut-color combo that actually helps a square face do what it wants to do: move.
Balayage is forgiving here because the painted pieces don’t march across the head in a rigid pattern. The color lives in the lower half of the hair, where it can blur the jawline a little and keep the face from feeling boxed in. On pale skin, ash reads cool and neat, but not icy enough to drain the face.
I like this version for anyone who wants grey without committing to all-over silver. The lob keeps it modern; the balayage keeps it soft. If your hair naturally bends at the ends, even better. The piecey texture makes the ash look expensive instead of heavy.
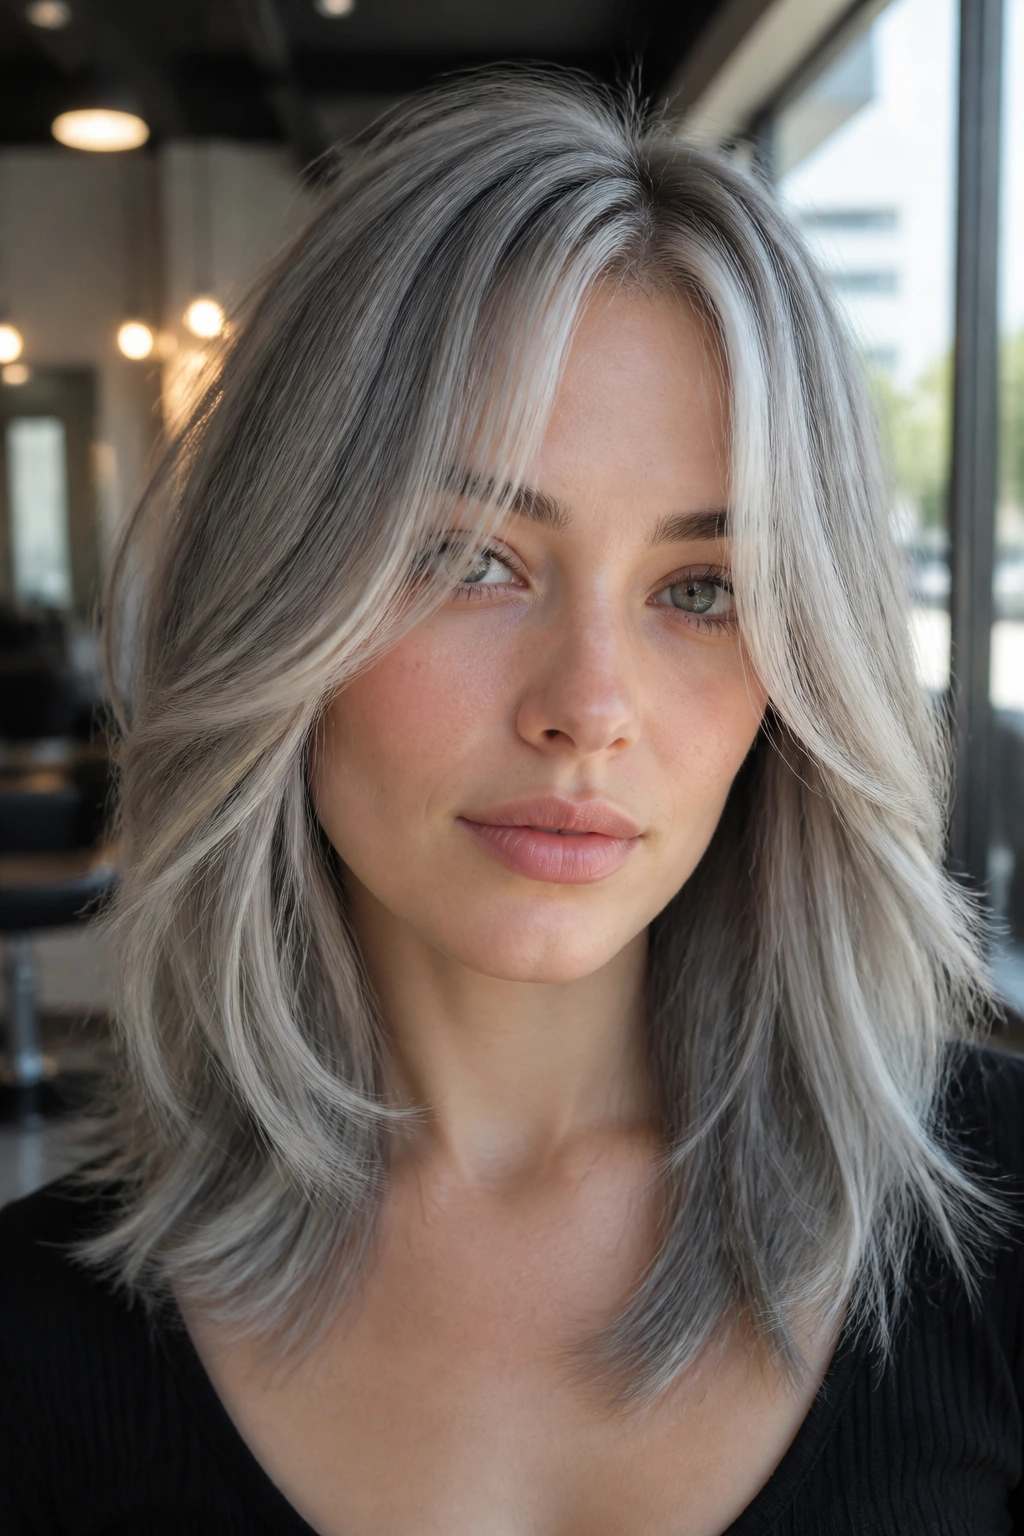
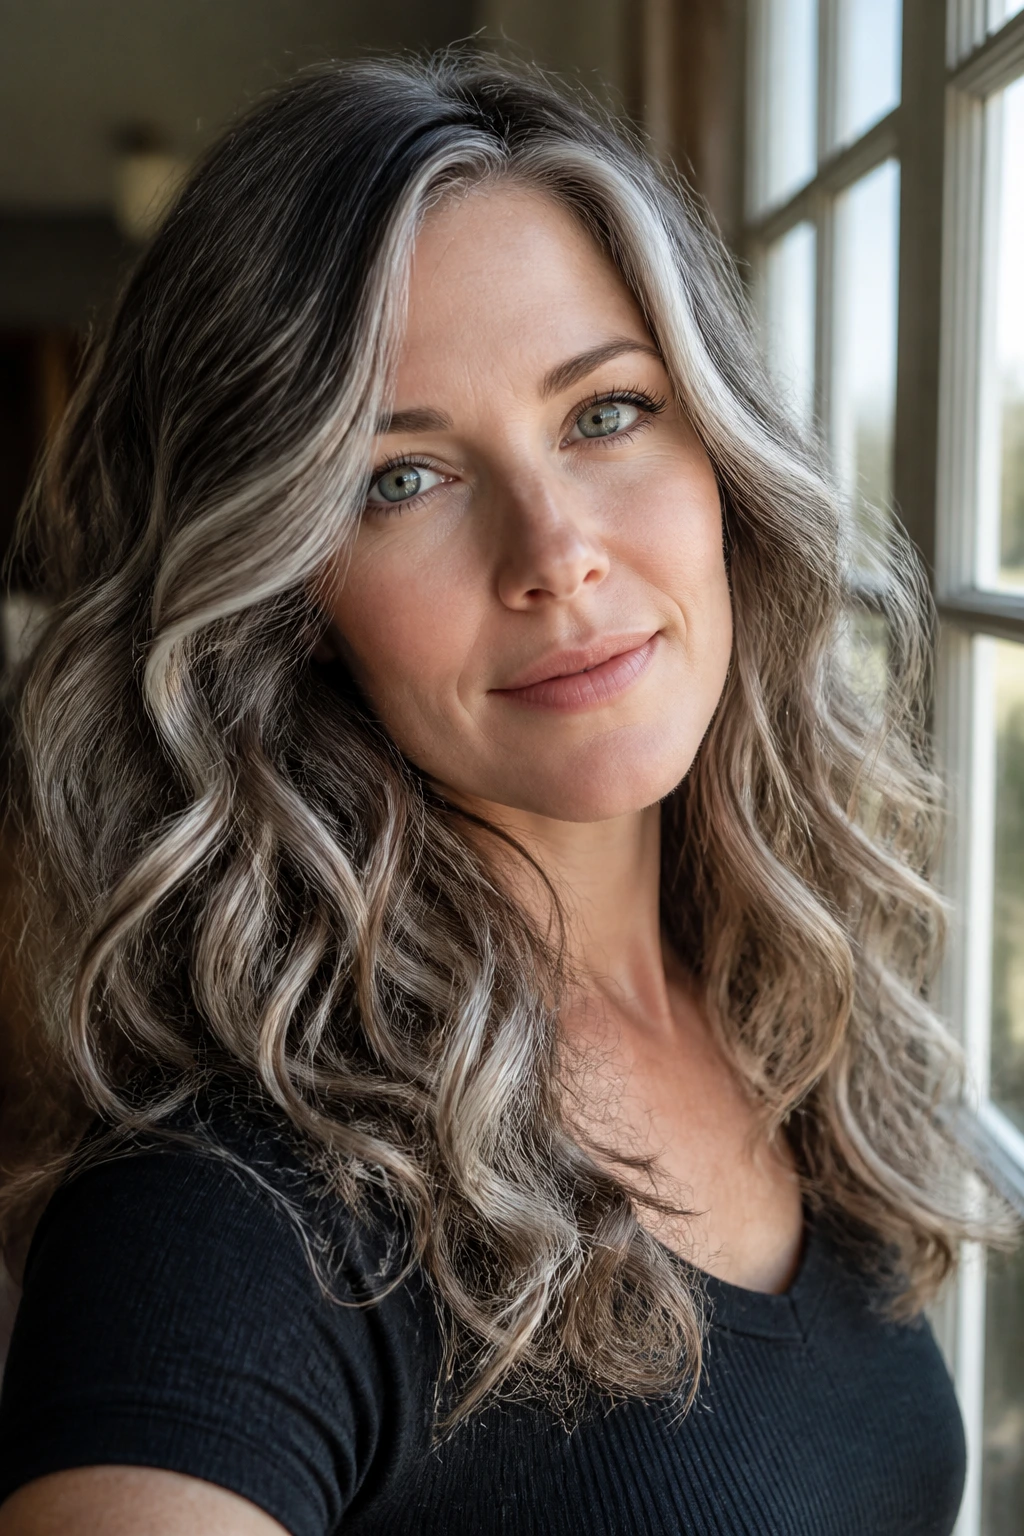
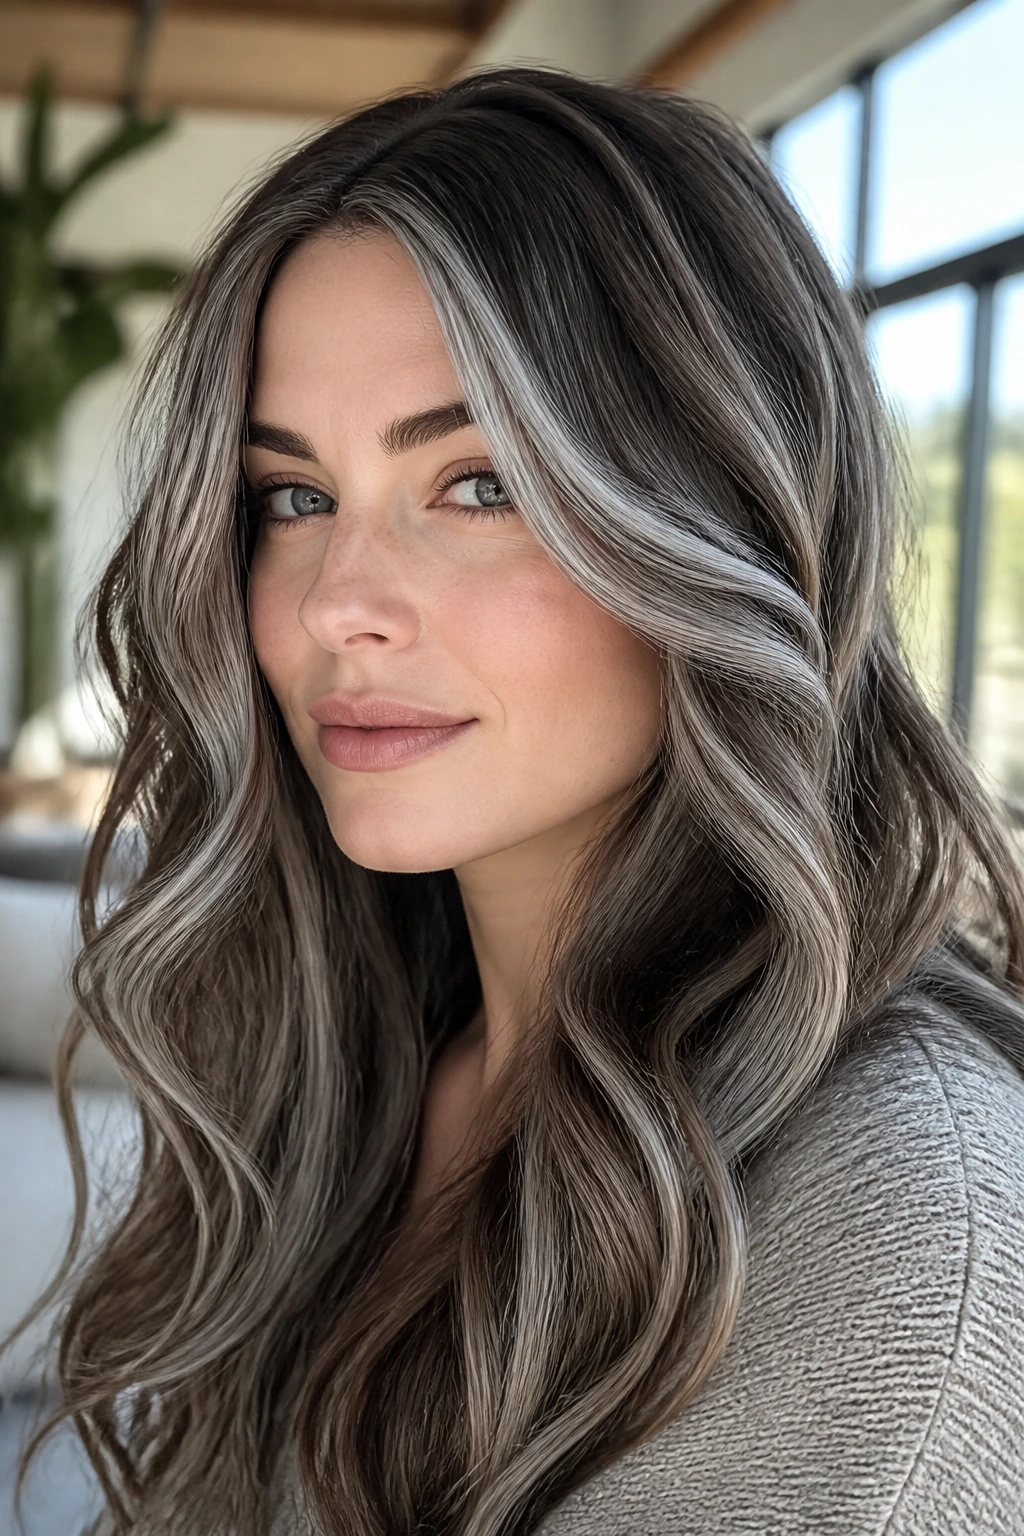
4. Pearl Grey Ribbons Through Soft Waves
Pearl grey is the shade I reach for when I want grey to look polished instead of metallic. It has a softer, almost milky finish, which matters on pale skin because it avoids that flat, blue-steel cast some greys get under indoor light.
Ribbons of pearl grey work especially well on square faces because they can be placed in diagonal lines. That diagonal movement matters more than people think. Straight horizontal streaks widen the face; diagonal ribbons soften it. Add loose waves, and the light bends across the hair instead of sitting in one hard band.
This look is a good middle ground if you like brightness but don’t want the front of your head screaming for attention. Keep the roots a touch deeper, and let the pearl pieces appear in the mid-lengths and around the outer curve of the face. The finish should look like satin, not foil.
5. Silver Face-Framing Layers With Curtain Bangs
Do curtain bangs and grey highlights get along? They do, when the brightest pieces start near the brow and soften by the cheekbone. That’s the trick. The fringe opens the face, while the silver framing pieces do the softening work square faces need.
I love this on pale skin because the bangs and front layers can hold a little extra brightness without the whole head turning pale and washed out. The grey should be cool, yes, but not so white that the fringe disappears against fair skin. A soft silver with a whisper of beige or violet keeps it readable.
How to Wear It
A round brush blowout makes the curtain bangs sit away from the forehead just enough to show the color change. If you wear your hair wavy, bend the front pieces outward with a large iron so they skim the jaw instead of stopping at it. That small detail keeps the look gentle rather than blocky.
6. Charcoal Peekaboo Panels Under Chestnut Hair
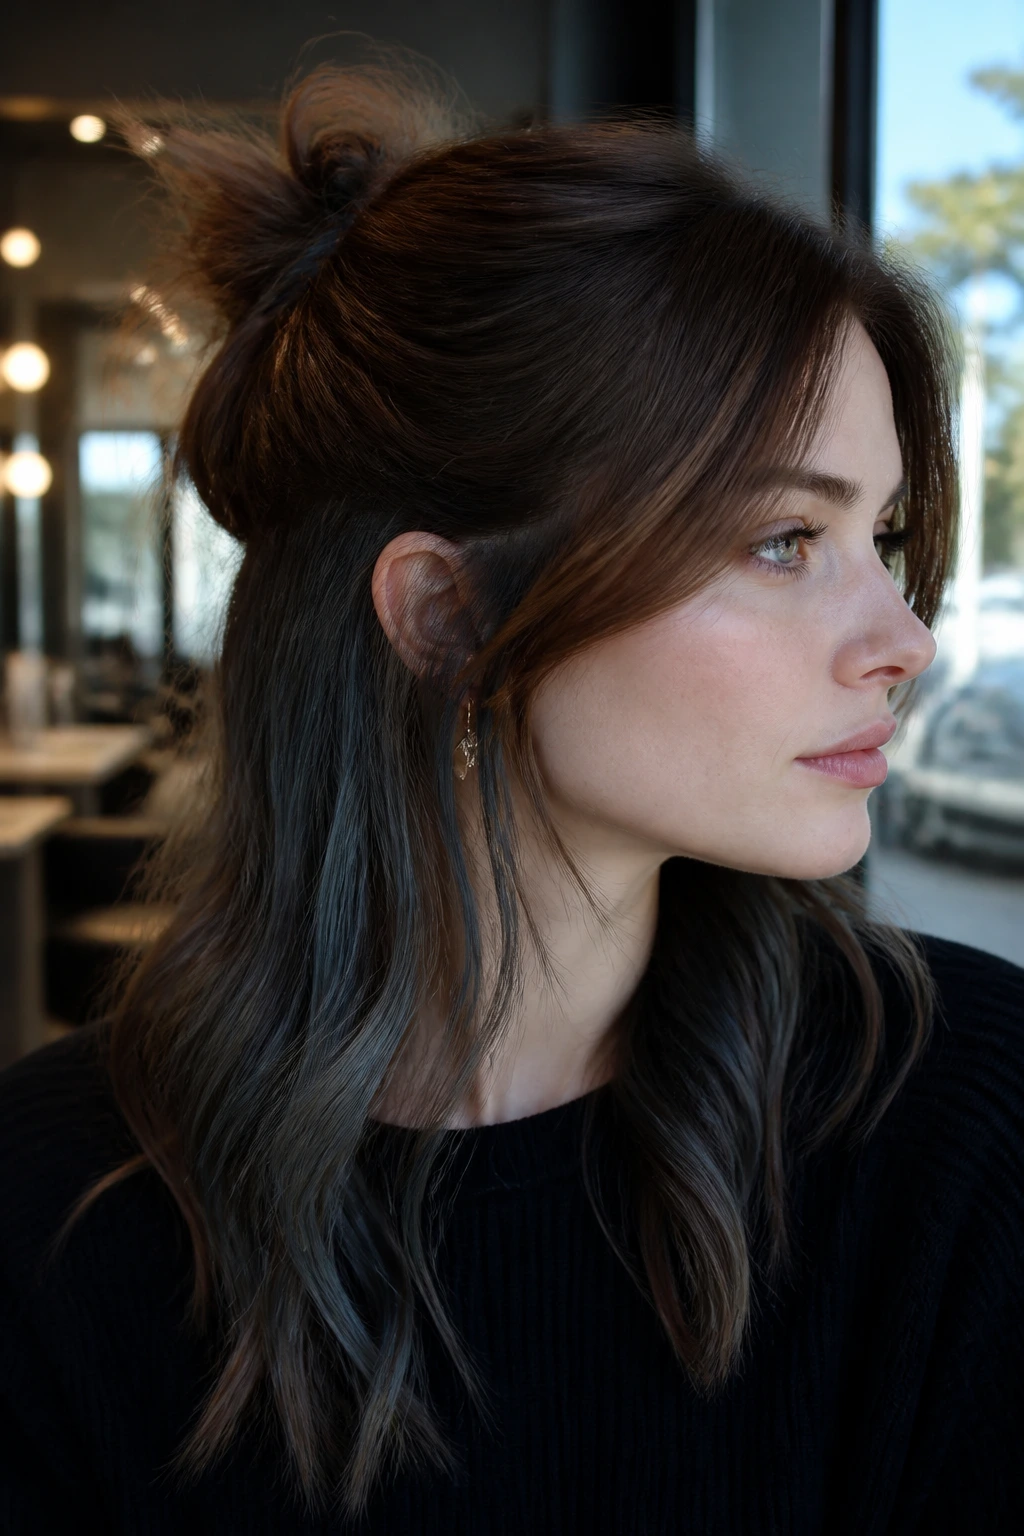
Unlike full-head grey, peekaboo panels give you the moody part under the surface and keep the top layer calm. That makes them useful for square faces, because the drama sits underneath the hairline instead of spreading across the widest part of the face.
Charcoal works better than bright silver here. It adds depth under chestnut or cool brown hair and creates movement when the hair swings. On pale skin, the hidden grey reads more like a flash of shadow than a hard color block, which I prefer when the complexion is already light.
This is the option for someone who wants personality but not constant attention. Wear the hair half-up or tucked behind one ear, and the charcoal will show. Leave it down, and it softens into the cut. That flexibility is the whole point.
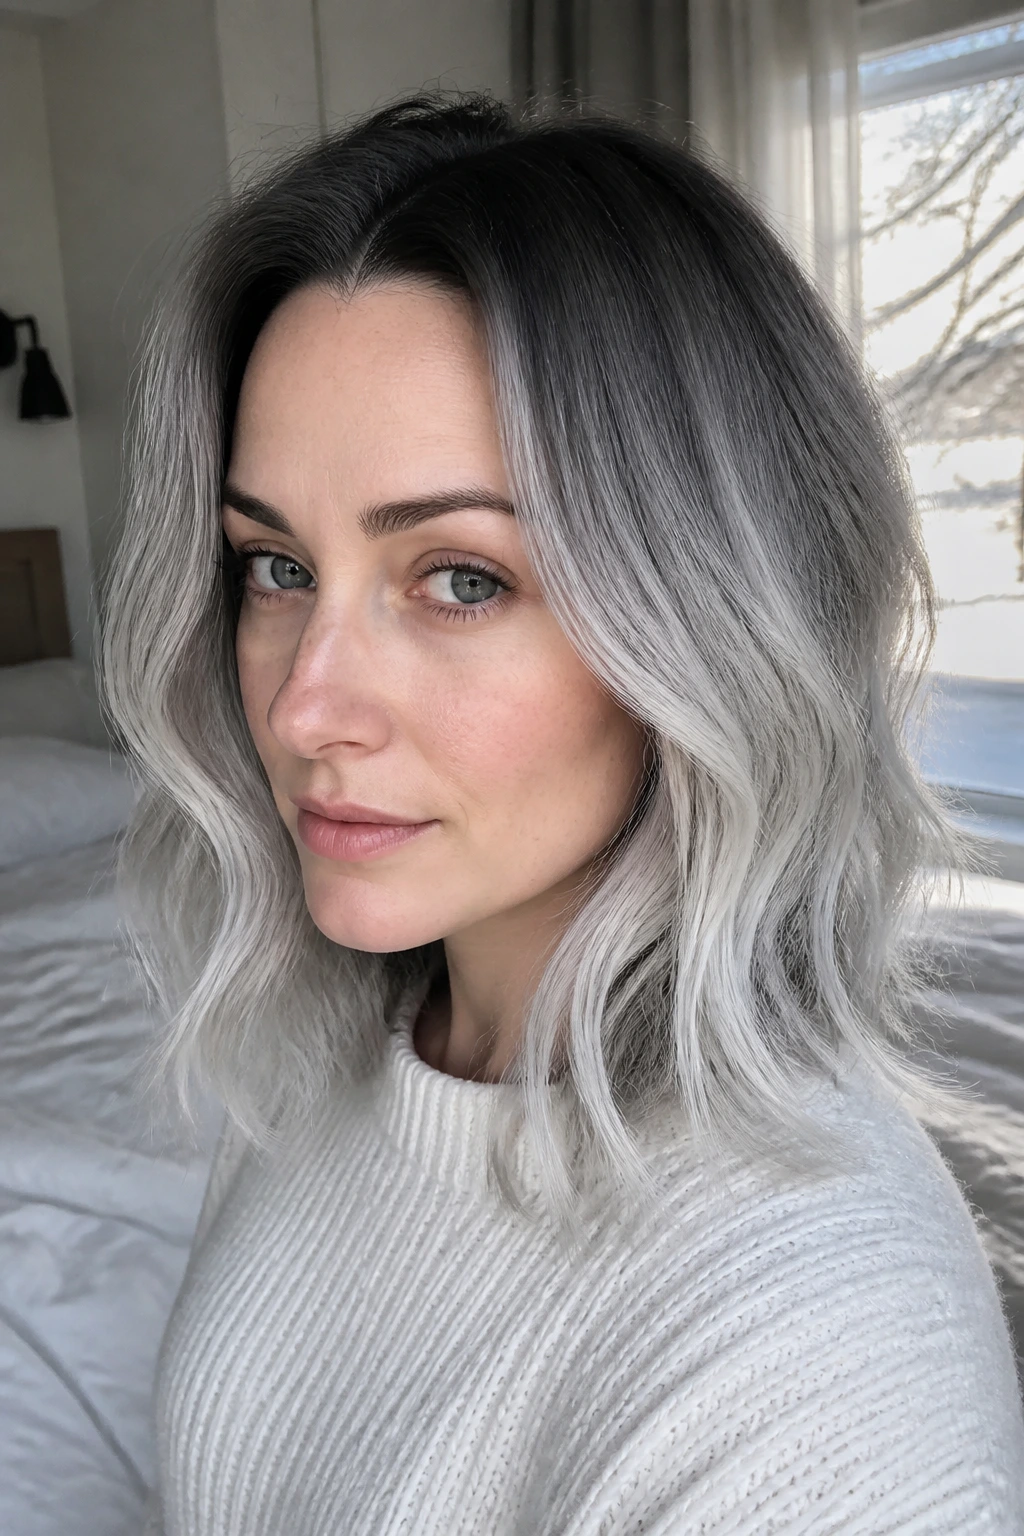
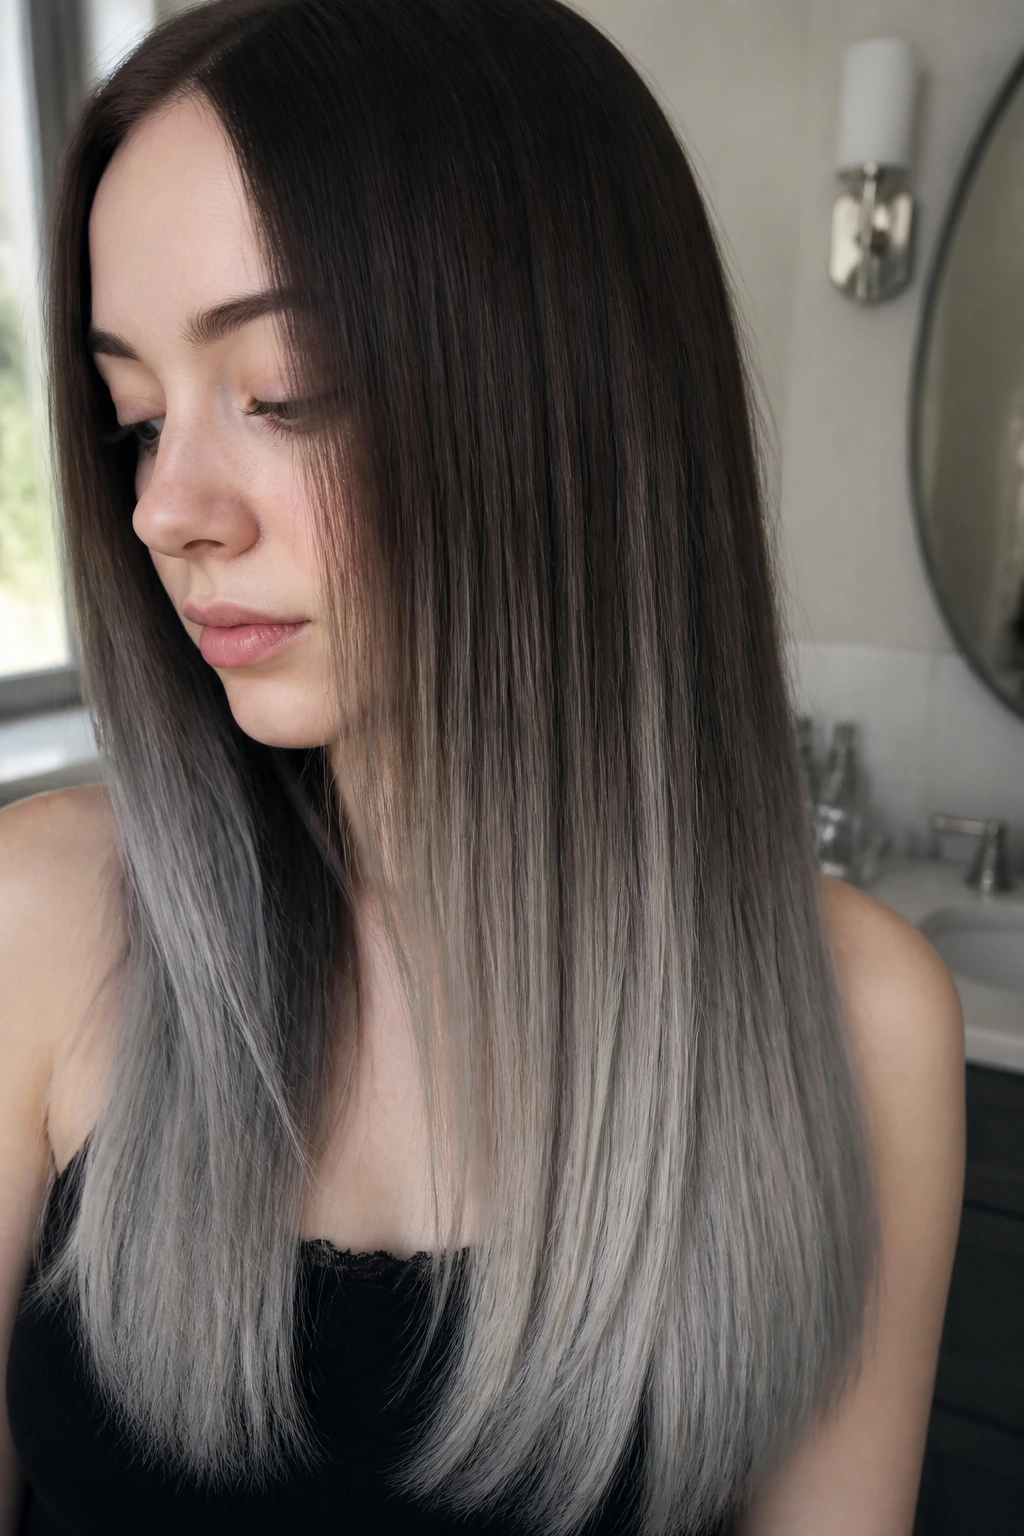
7. Beige-to-Grey Ombré With a Satin Finish
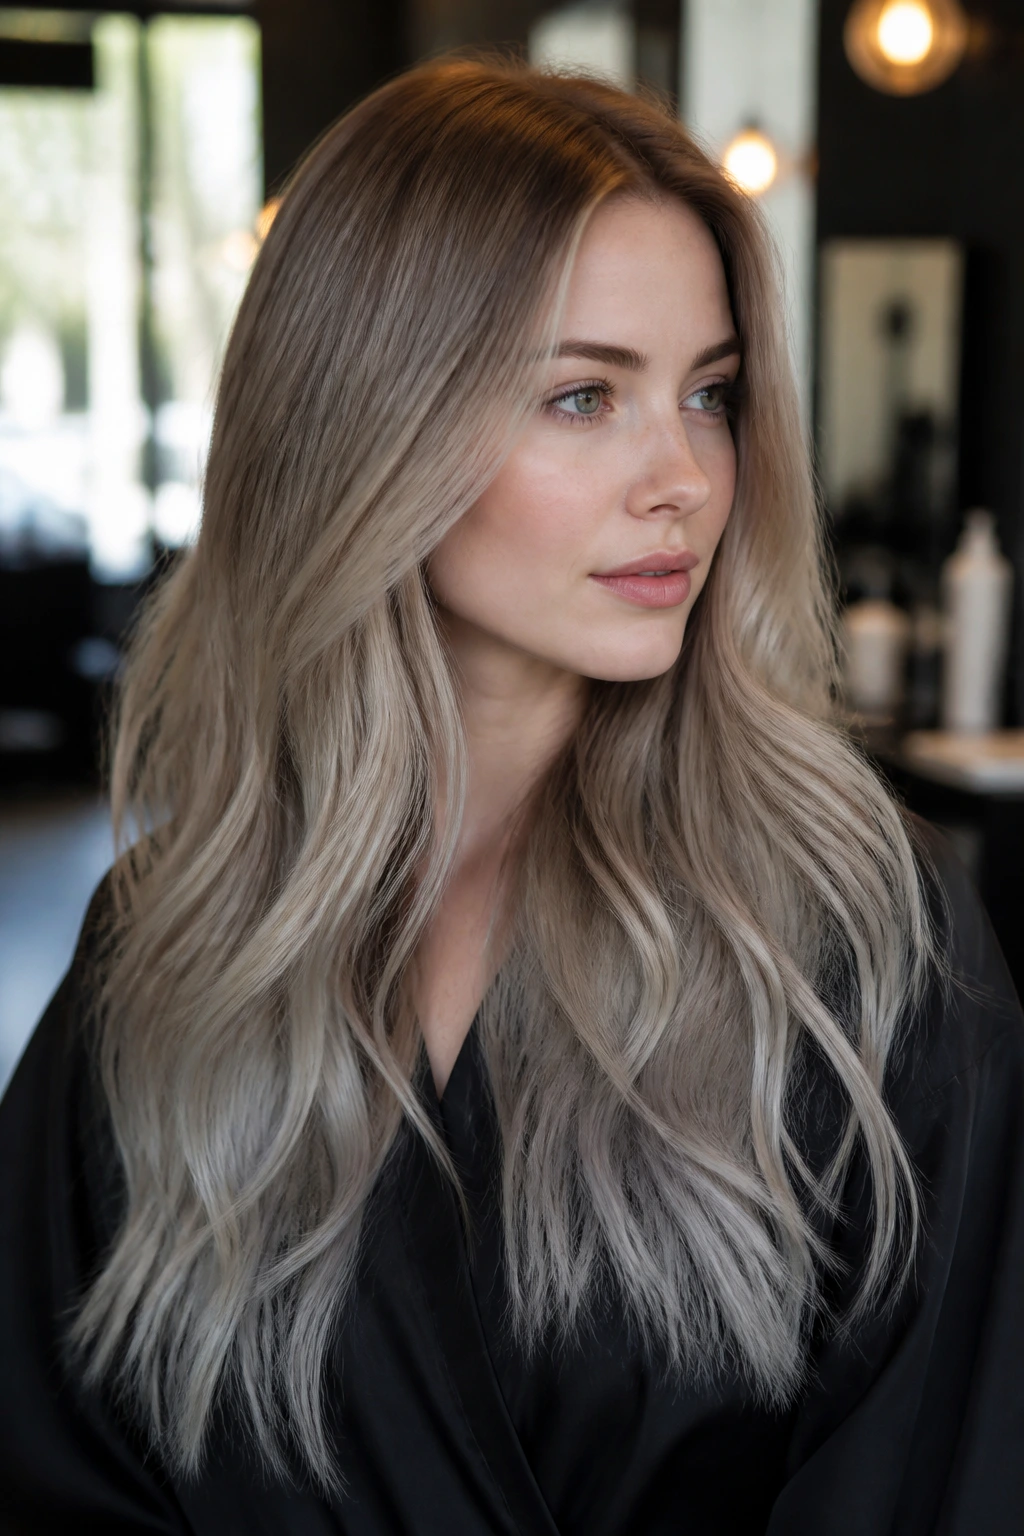
A beige-to-grey ombré is what I call the “slow fade” version of this trend. The top stays soft and neutral, then the mid-lengths drift into smoke, and the ends settle into grey. It’s calm. It’s controlled. It doesn’t shout.
For pale skin, the beige start point matters because it keeps the face from looking drained at the root. That neutral warmth at the top acts like a buffer before the cooler grey takes over. On square faces, the fade draws the eye down the length of the hair instead of parking it at the jaw.
If you wear your hair long, this is one of the easiest ways to make grey feel graceful instead of stiff. The ombré shape lengthens the face a little, which is useful when the jawline is strong. Keep the ends hydrated, though. Dry grey ends can look frayed fast.
8. Mushroom Blonde With Grey Lowlights

Mushroom blonde gets a lot of attention, but the grey lowlights are the part that make it interesting. They sink into the blonde and give the whole style a darker, cooler base without taking away brightness from the face.
On pale skin, this shade family is useful because it doesn’t swing too white. It stays grounded. Square faces benefit from that ground, too, because the darker lowlights in the interior of the hair keep the width from feeling too blunt. The light pieces can live at the edges while the lowlights pull the eye inward.
This is one of my favorite choices for people who want dimension more than drama. It looks especially good on layered cuts, where the darker grey pieces disappear and reappear as the hair moves. If your hair is naturally fine, this is a nice trick for making it look thicker without needing obvious stripes.
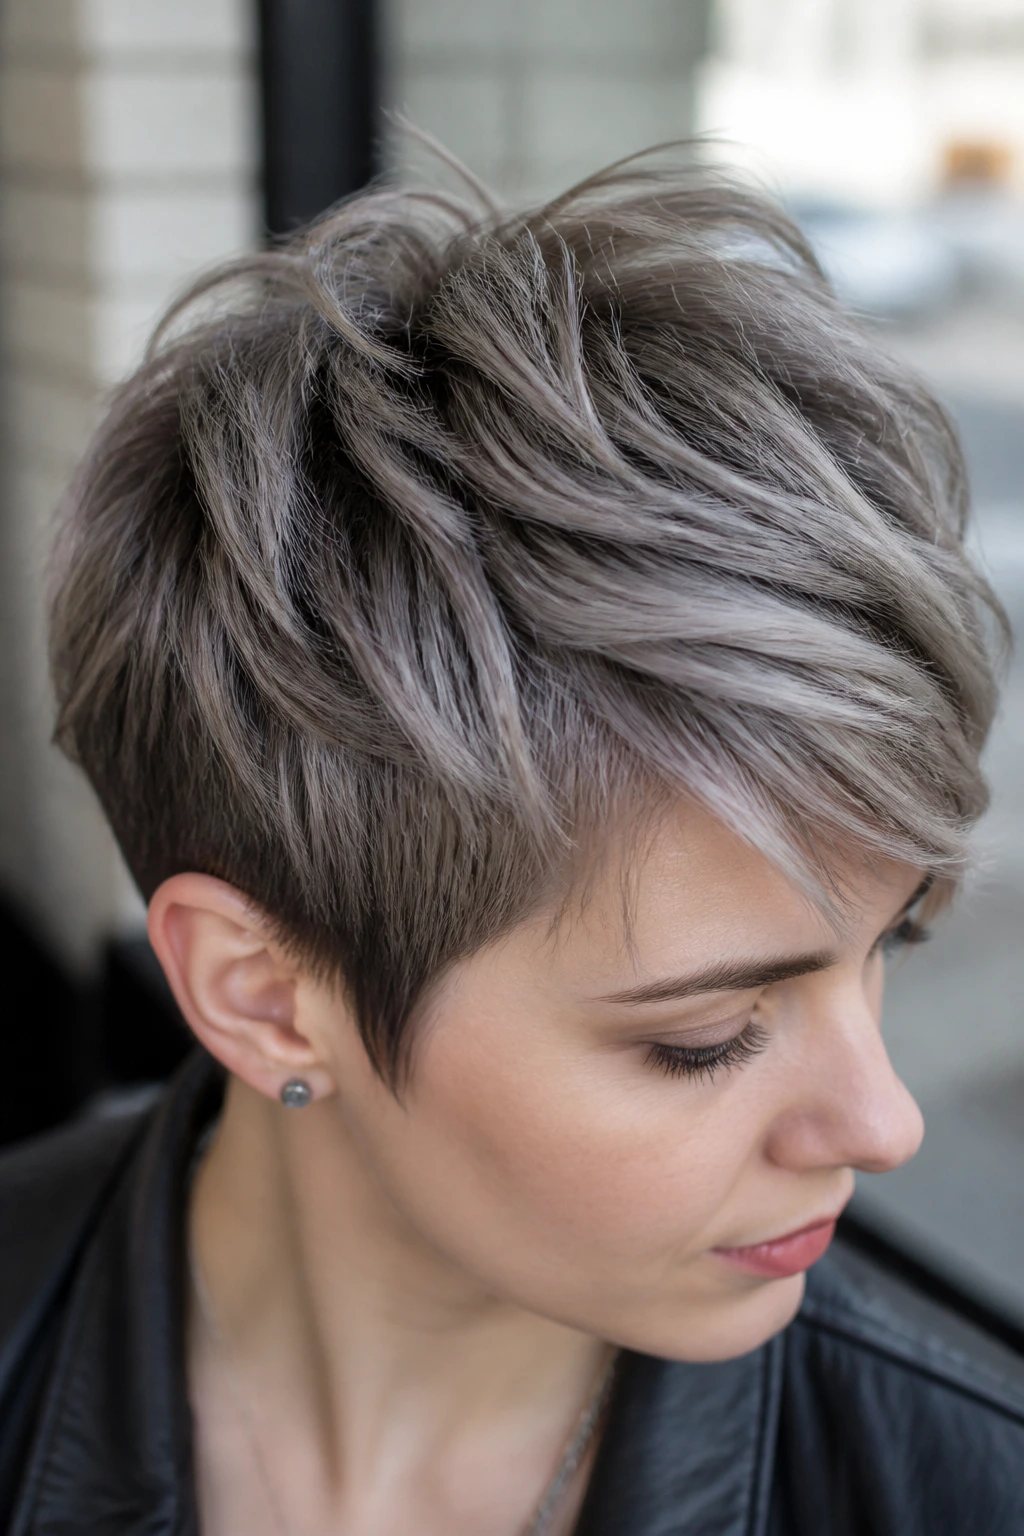
9. Steel Grey Foils on a Cropped Pixie
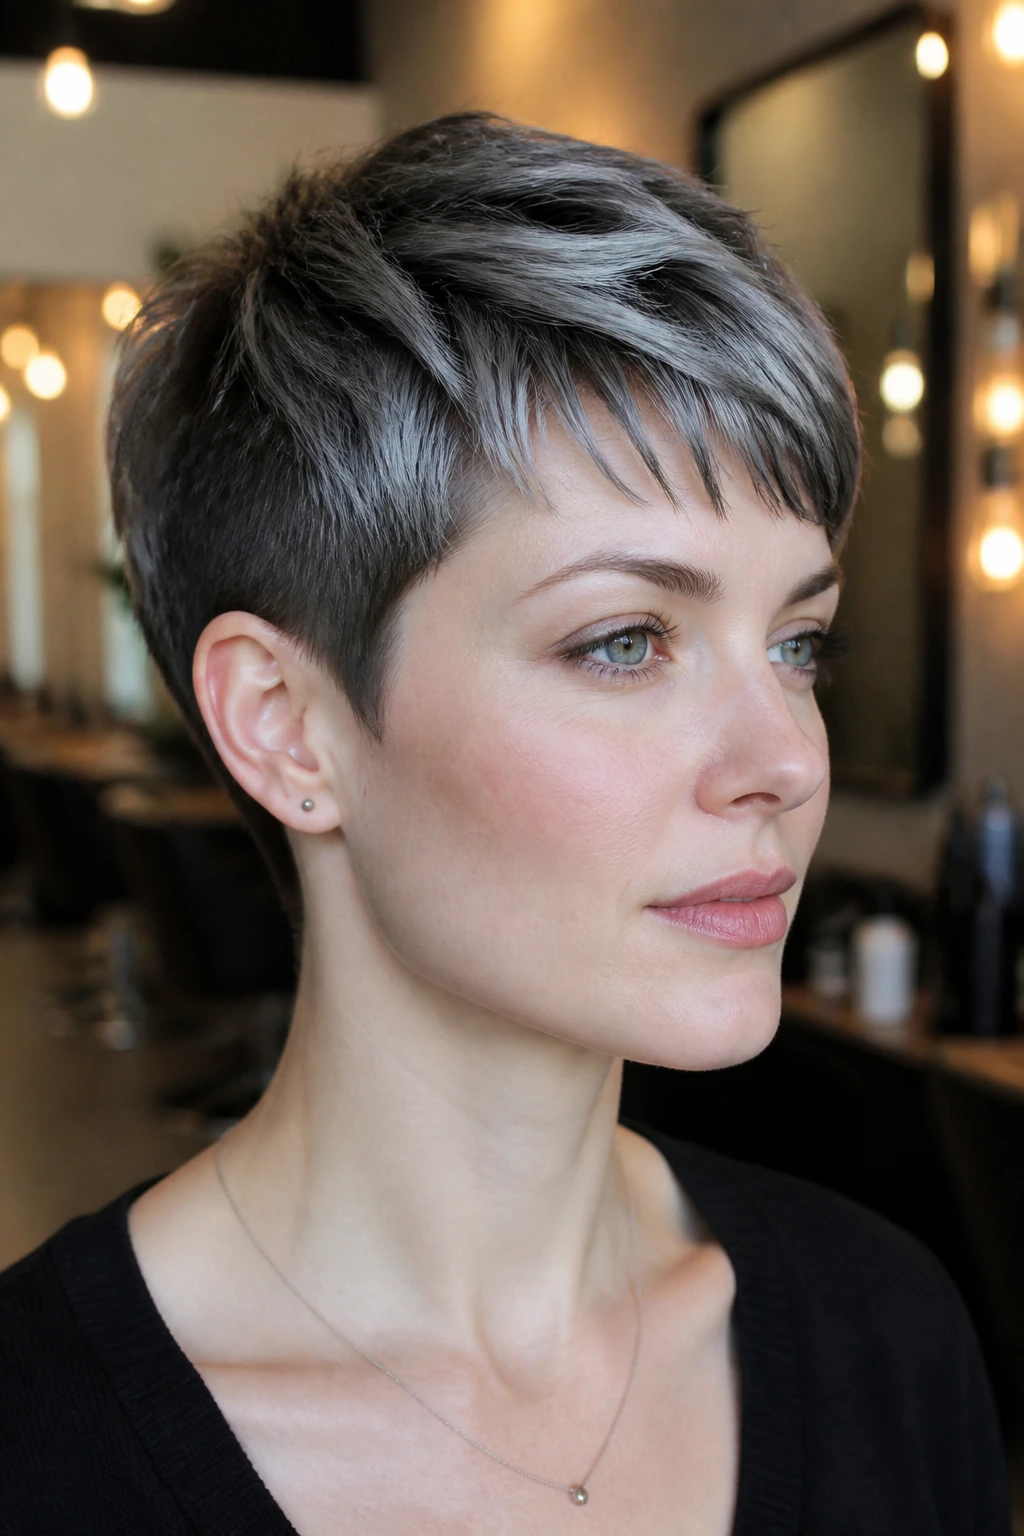
Short hair gives grey nowhere to hide, so the tone has to be clean. Steel grey foils on a pixie can look sharp in the best sense, especially on pale skin where the cool reflect catches the light at the temples and crown.
Square faces usually benefit from a pixie when the top has height and the sides stay softer. The foils should follow that logic. Keep the brightest steel through the top and a little around the fringe, then let the sides stay a shade deeper. That keeps the face shape from feeling squared off by the cut itself.
I don’t love ultra-white grey on a pixie unless the skin has a lot of natural contrast. Steel, slate, and pearl-grey usually behave better. They look deliberate. White can turn harsh in a hurry, especially if the haircut is already blunt.
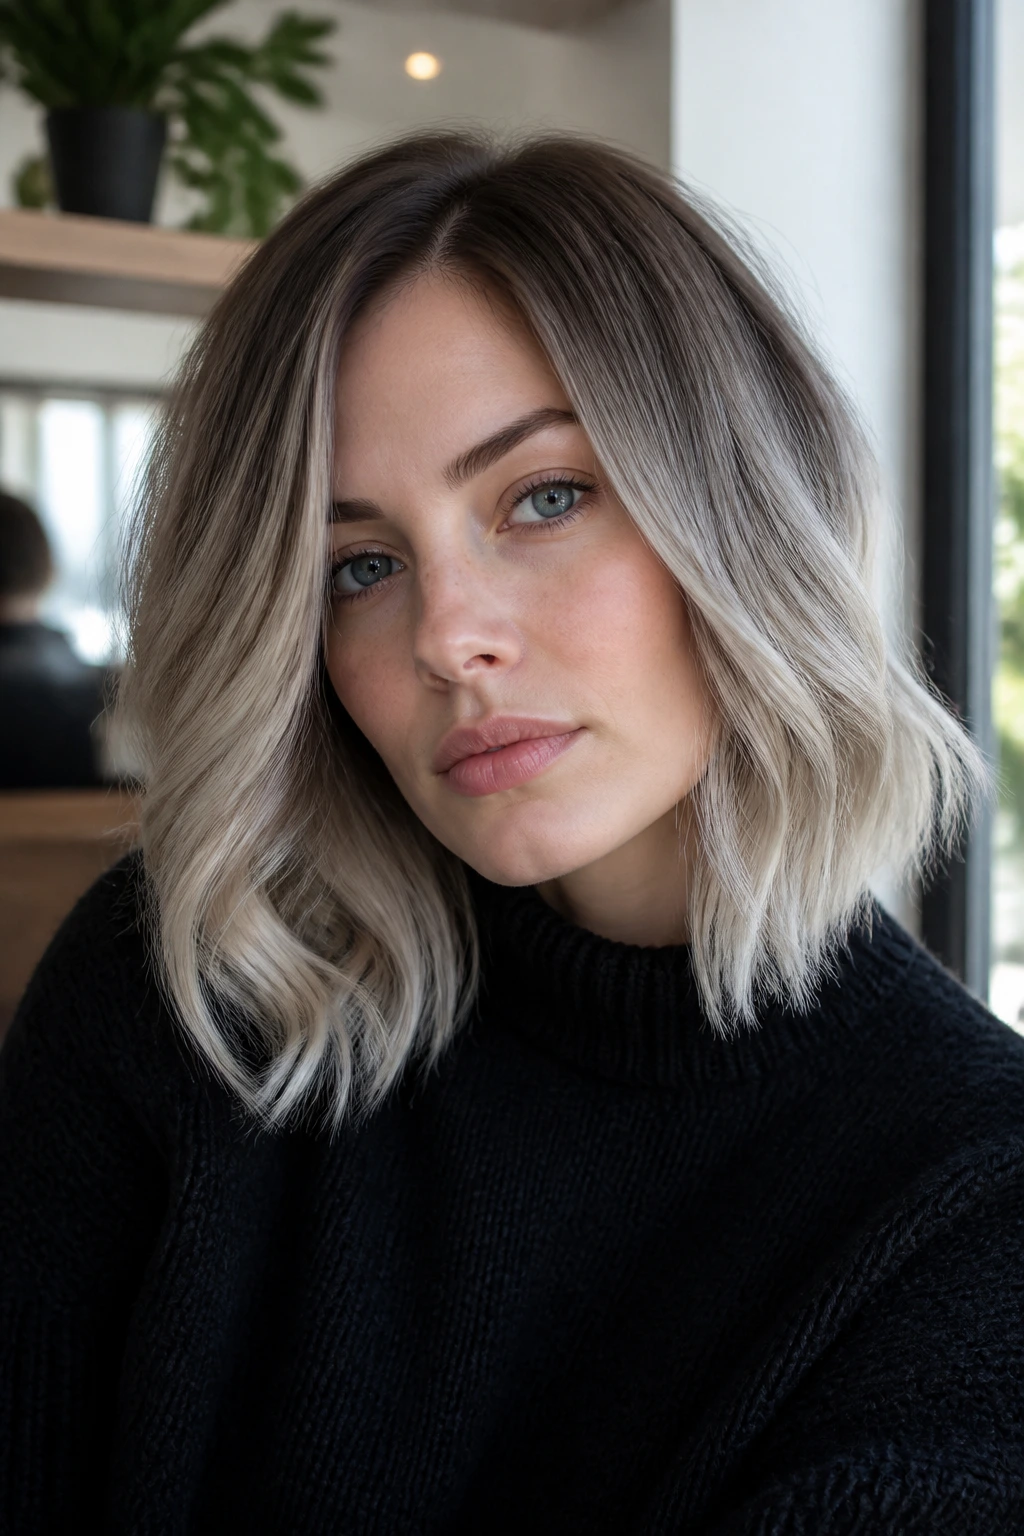
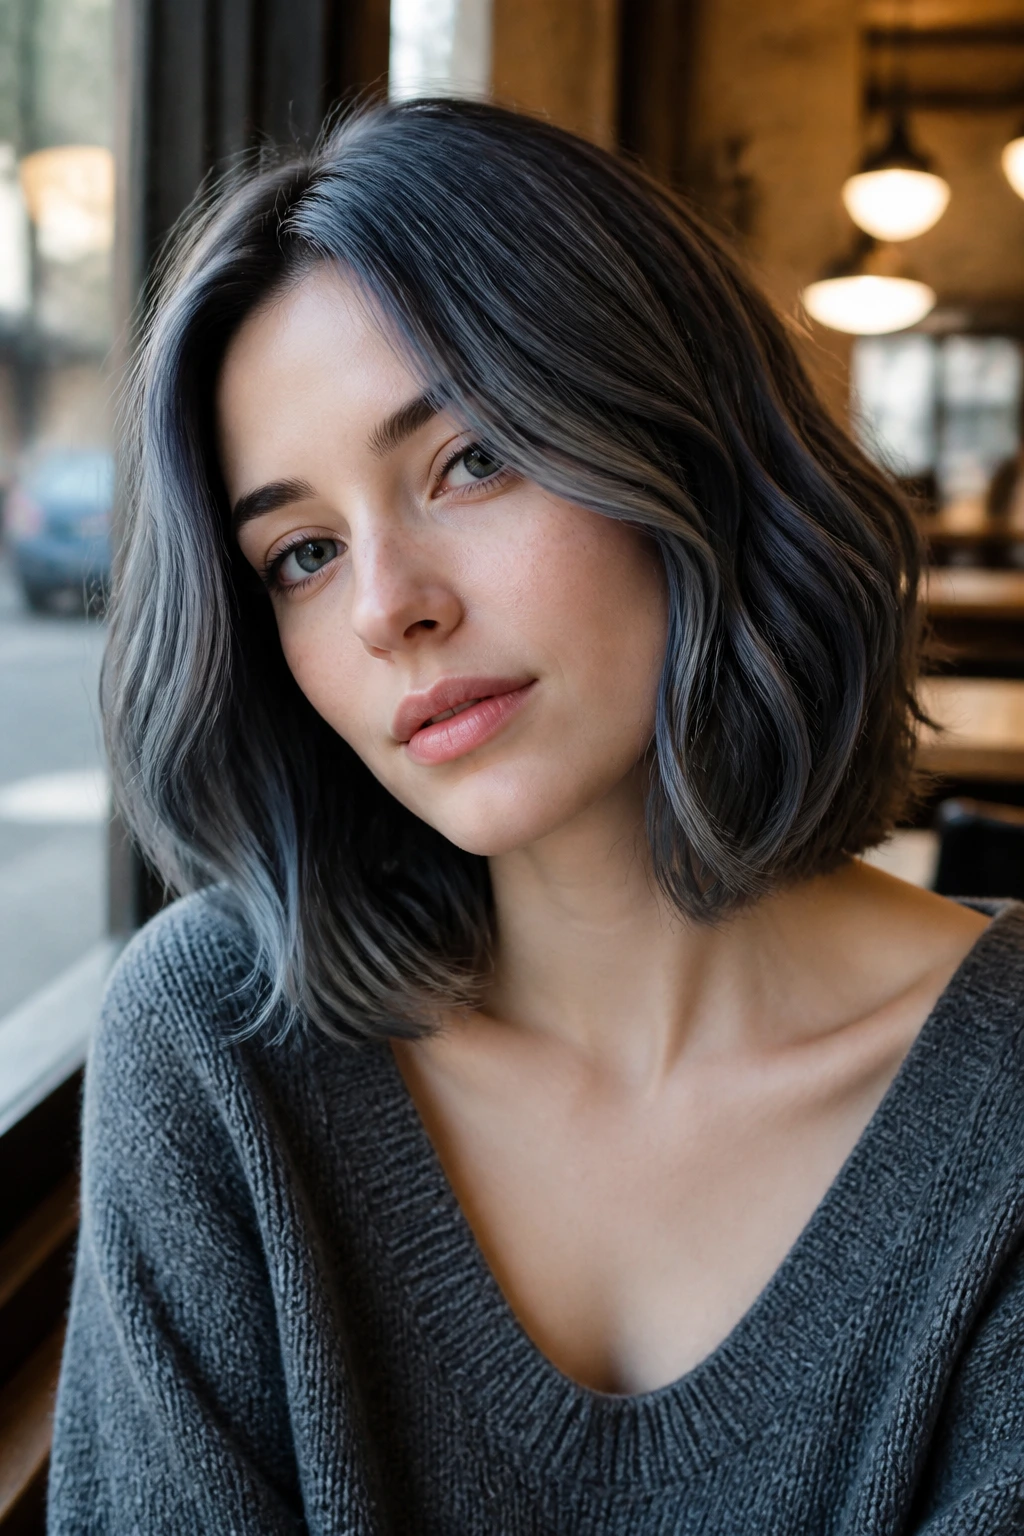
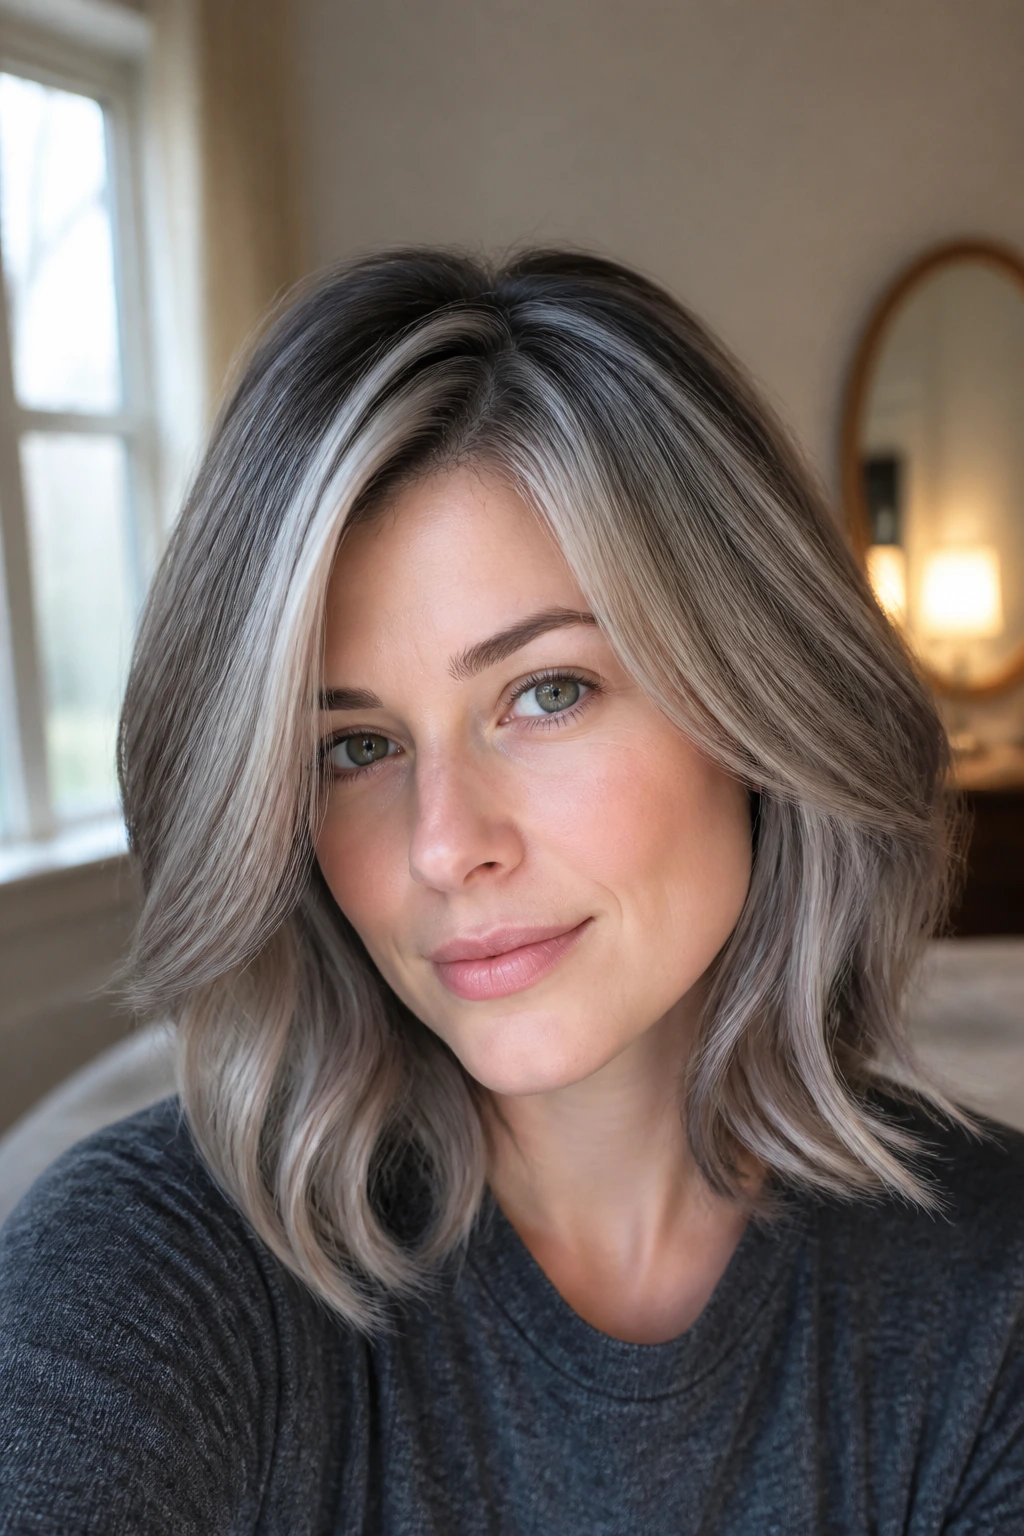
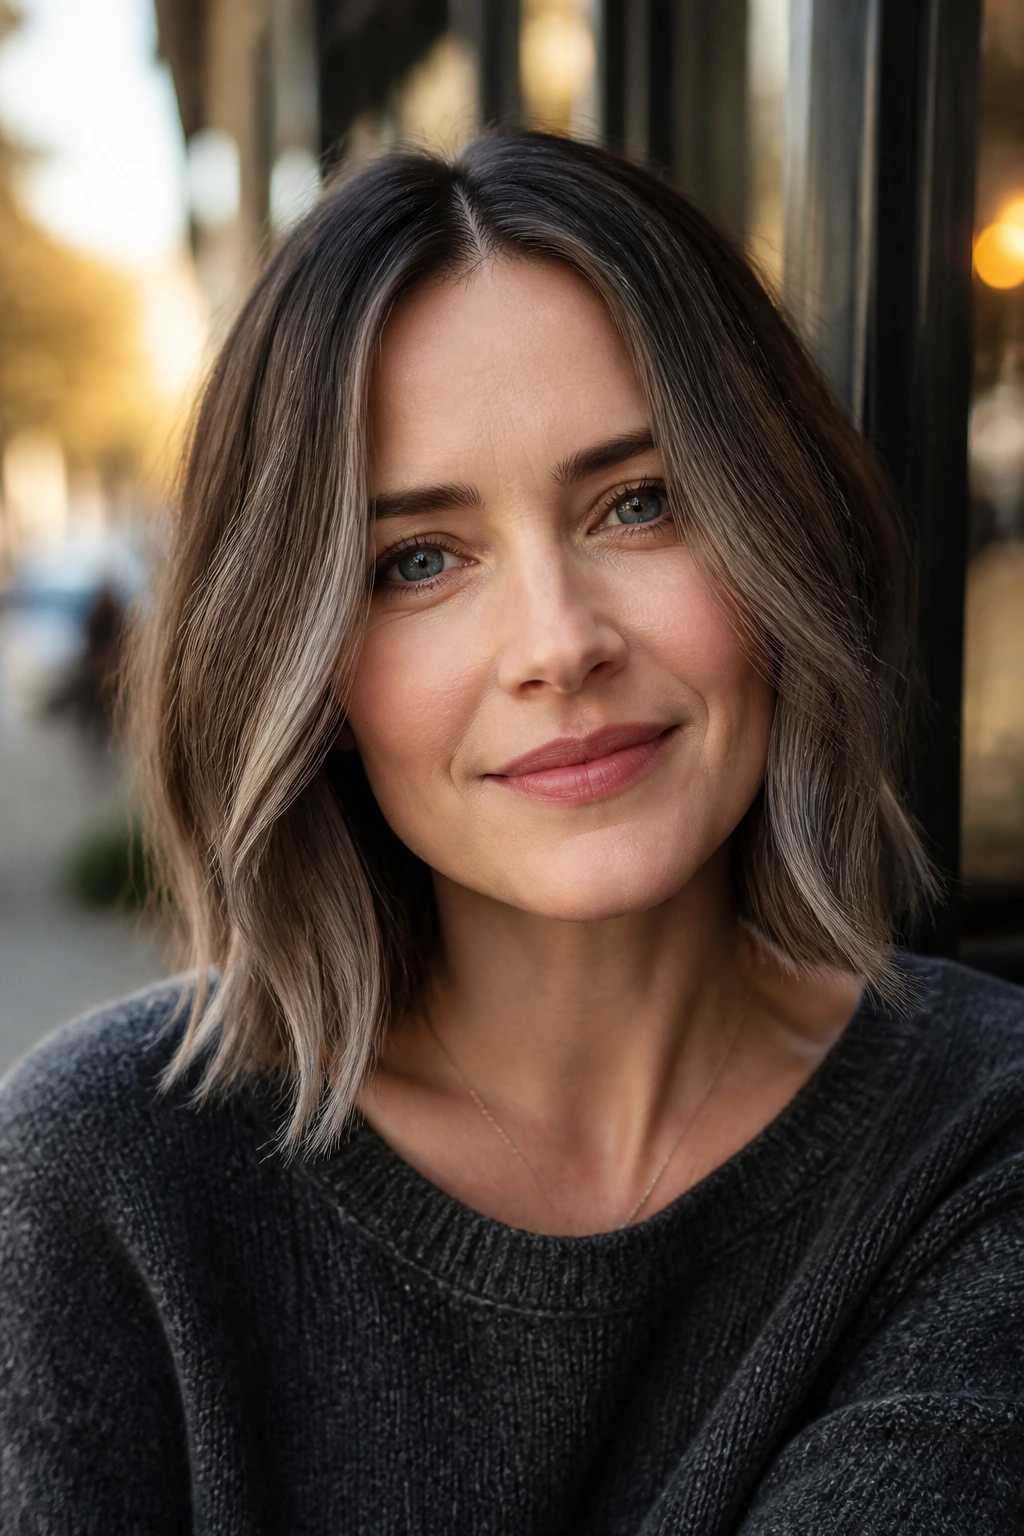
10. Smoky Quartz Highlights on a Wavy Bob
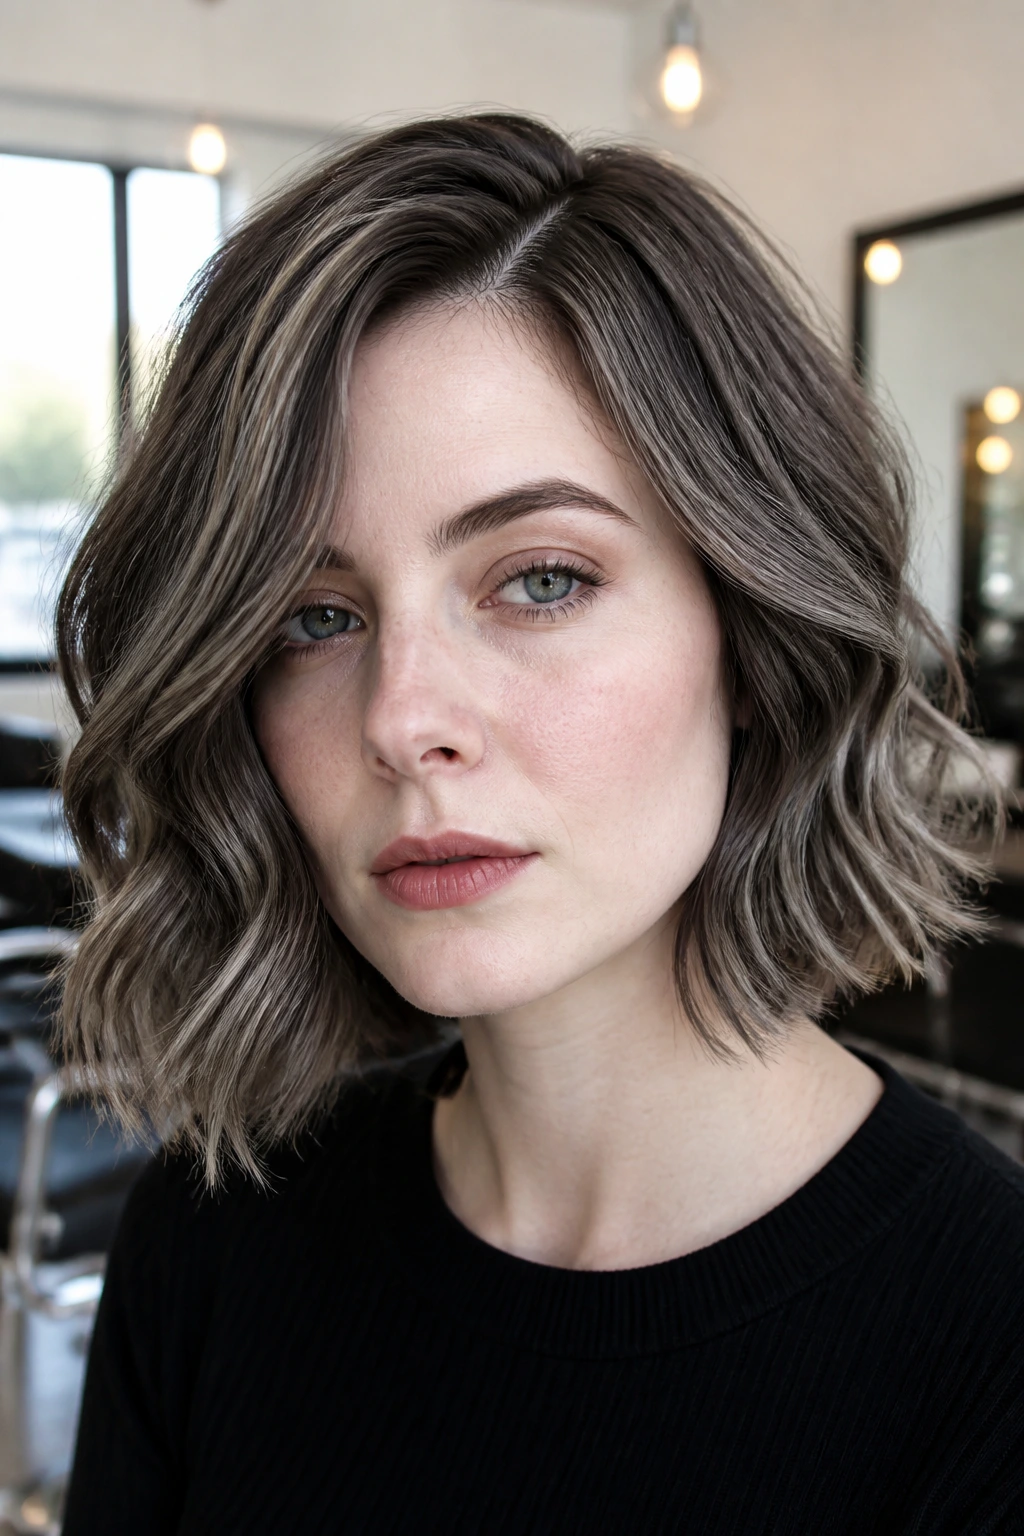
Smoky quartz sits in that lovely middle zone between silver and brown, which is why it flatters pale skin so easily. It has enough coolness to read grey, but enough depth to avoid the washed-out problem that can happen with ultra-light silver.
On a wavy bob, the highlights curl in and out of the surface, so the color never looks flat. That movement helps square faces because the waves soften the corners of the jaw and keep the style from reading like a helmet. If the bob ends just below the jawline, even better. The color and cut work together.
I like this one with a side part or a loose off-center part. It breaks up symmetry, which is the whole game with a square face. A tiny change in parting can make the grey feel less graphic and more fluid.
11. Lavender-Tinted Grey Streaks
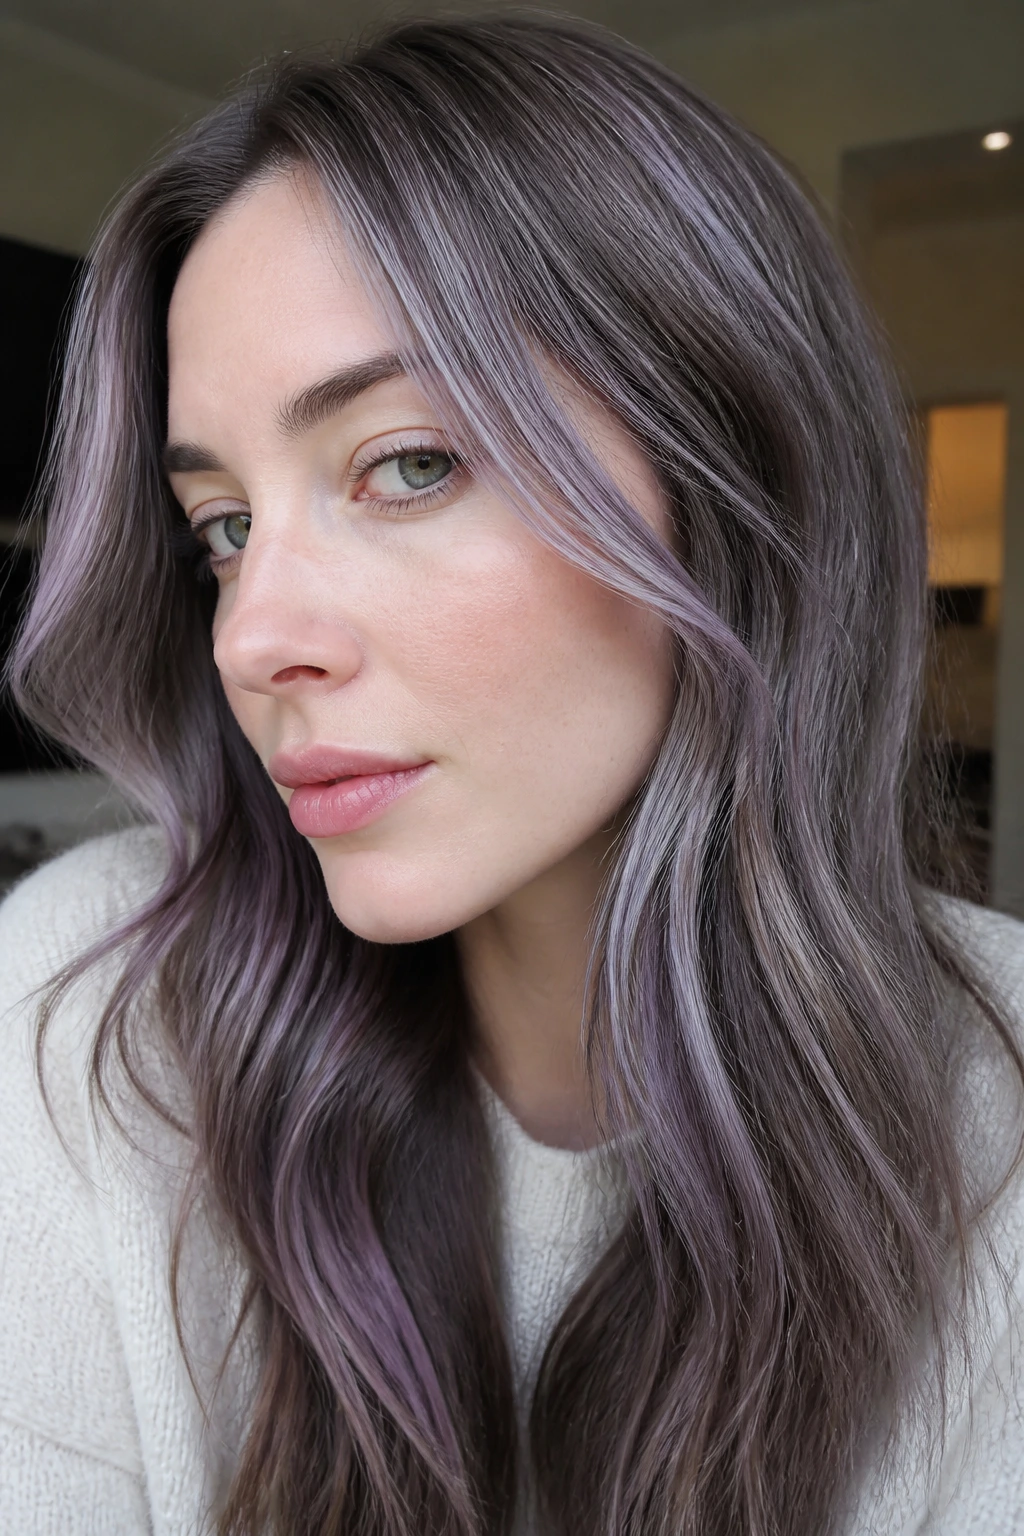
Pure grey can feel a little severe on very pale skin, especially if the complexion leans pink. A whisper of lavender changes the story. It warms the grey just enough to soften the cast without turning it pastel in a childish way.
These streaks work best when they’re thin and scattered, not packed together. The lavender tint should appear as a cool glaze, not a loud purple stripe. Square faces get a nice benefit from that subtlety because the color distracts from the corners of the jaw without making the hair look busy.
If you want this to stay clean, don’t over-wash it. Lavender-grey fades into a muddy lilac if you scrub it with harsh shampoo. Gentle washing and a cool rinse keep the tone looking deliberate rather than faded.
12. Ash-Silver Curtain Bangs on Long Layers
Curtain bangs already soften a strong jaw. Ash-silver curtain bangs do the same job with color, which is why this combo makes so much sense on square faces. The fringe splits the forehead, the silver catches the light, and the long layers keep the rest of the hair from feeling boxy.
Pale skin tends to love this when the silver isn’t too white. A smoky ash-silver is safer than a high-ice silver because the bangs sit close to the face. You want them to look bright, not blinding. A few slightly darker ash strands at the root keep the fringe from looking pasted on.
This look is one of the easiest to style with a round brush or a wide curling iron. Pull the bangs away from the face, then let the ends curve back in. That little bend softens the square shape without making the hair look overdone.
13. Graphite Tips on a Layered Cut
Graphite tips are for someone who wants the grey story to end with a little edge. The roots and mid-lengths can stay cool brown or ash blonde, while the very ends turn deeper and darker. The result is a grounded finish that keeps pale skin from getting overwhelmed by brightness.
Square faces often look better when the color gets heavier toward the bottom only if the cut has layers. Otherwise the ends can feel like a block. Layers break that weight apart. The graphite pieces then move instead of sitting like a heavy line at the bottom of the face.
I like this on longer cuts because it creates a kind of visual anchor. The eye reads the lighter top first, then lands on the graphite ends. That descent makes the face feel longer and gentler.
14. Moonstone Balayage on Loose Curls
Moonstone grey has that pale, almost luminous quality that works beautifully on fair skin, especially when the hair has a curl pattern that catches light in pockets. The highlights don’t need to be dramatic. They need to be placed where the curl naturally opens.
That matters on square faces because curls create roundness and movement without fighting the bone structure. The moonstone balayage rides the curls and softens the outer edge of the hair, which is where the square shape often needs help. I’d keep the front pieces slightly brighter and the lower back a touch deeper so the face doesn’t lose shape.
If your curls are thirsty, use a leave-in that doesn’t leave a greasy film. Grey tones look dull fast on dry curls. A clean curl definition keeps the color readable.
15. Smoke Highlights on a French Bob
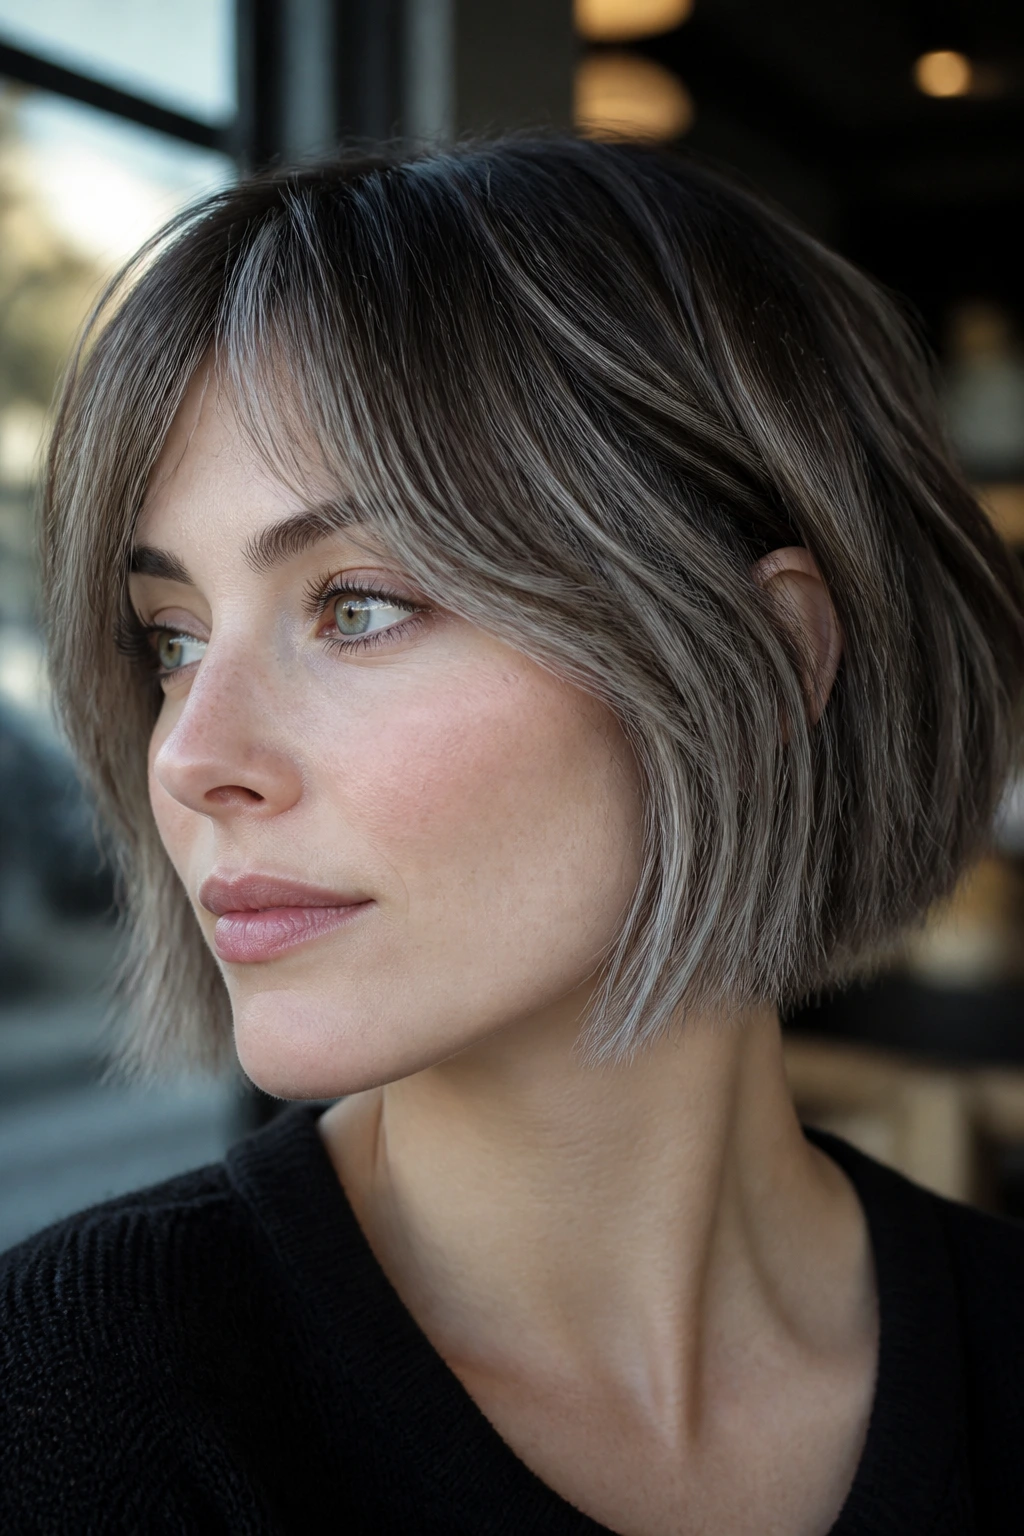
A French bob already has attitude. Smoke highlights give it a little polish so it doesn’t feel too severe. This is a good choice when you want grey but still want the haircut to do most of the talking.
The shorter length is helpful for square faces because it ends above or right at the jaw, which can sharpen the face if the color is too hard. Smoke softens that line. On pale skin, it reads chic instead of chalky, especially if the base is a natural cool brown or dark blonde.
Keep the texture a little undone. Sleek French bobs can make the grey look cold. A touch of bend at the ends keeps the shape from feeling boxy and gives the highlights room to breathe.
16. Silver Tea-Light Babylights Around the Part
These are tiny, bright pieces placed right around the part line, and they work because they create a little halo without flooding the whole head with grey. On pale skin, the brightness is delicate enough to look airy. On square faces, the focus stays at the top, where light can soften the shape without widening the jaw.
I like this better than big face-framing money pieces for someone who wants restraint. The look is almost jewelry-like. It shows when the hair moves or parts shift, then disappears back into the base. That makes it low-drama, which I always appreciate in grey.
The part placement matters. A deep side part gives you more visible silver on one side and can pull the face slightly diagonal. A center part gives a cleaner, more symmetrical finish. Pick the one that works with your features, not the trend photo.
17. Pewter Chunky Highlights With a Retro Bend
Chunky highlights have a bad reputation because people remember the stripy versions. Pewter chunky highlights done well are different. They’re thicker, yes, but the tone is softer and the spacing is smarter, so the hair keeps movement.
Square faces can wear a chunkier grey if the pieces are placed in curved paths rather than straight bands. That’s the whole point. Pewter has enough depth to sit nicely on pale skin without glaring, and a retro bend in the styling keeps the color from reading too rigid.
I’d only choose this if the haircut has some shape. Think a layered bob, a shag, or a mid-length cut with movement. On a blunt one-length cut, chunky grey can look boxy fast. The bend does the softening work the cut can’t.
18. Arctic Frost Ends on Shoulder-Length Hair
Arctic frost at the ends is a bold move, but it can work if the top stays rooted and soft. The hair reads like it has been dusted with winter light. That contrast looks striking on pale skin without being too loud, as long as the root shadow is present.
On square faces, shoulder-length hair gives you enough length to drag the eye below the jaw. Frosted ends help with that, too. The lightest point sitting lower in the silhouette makes the whole face feel a touch longer. It’s a simple trick, and a useful one.
The catch: frost ends need good condition. Dry, lightened tips can look fluffy and fried in a way that ruins the clean effect. Trim them before they split, and keep a bond-building mask in rotation.
19. Gunmetal Underlights for Depth
Gunmetal underlights are the dark twin of peekaboo panels, and I like them when the goal is depth rather than brightness. The underlayer stays darker and cooler, which makes the silver or ash top pieces look brighter by comparison. That contrast flatters pale skin because it gives the face some frame without bleaching it out.
For square faces, underlights can be a smart choice if the hair is layered. The darker interior adds contour, especially around the mid-lengths and jawline. You get shape without harshness. It’s a subtle version of contouring, basically, except it doesn’t feel fake.
This also works well if your hair has a lot of texture. The shadows under the top layer change as the hair moves, and that movement keeps the style from going stiff. Flat hair shows underlights less well, so give it some bend if you want the contrast to show.
20. Pearl-and-Smoke Melt With a Root Shadow
A pearl-and-smoke melt is one of the prettiest ways to wear grey when you want soft contrast. The root stays slightly deeper, the middle becomes smoky, and the ends finish in pearl. Nothing is hard. Nothing is abrupt. That matters on square faces, where sharp color edges can fight the bone structure.
On pale skin, this blend avoids both common traps: it doesn’t go too icy, and it doesn’t go muddy. The pearl brings light near the face; the smoke keeps the color grounded. I’ve seen this look fail when the root shadow is too dark, so keep it soft. Think dim, not black.
It’s a good choice if you want grey to feel grown-up rather than edgy. The finish is calm. That’s the appeal.
21. Winter White Ribbons on Dark Ash Brown
Winter white ribbons can be gorgeous, but they need a dark ash base to stop them from looking accidental. The contrast is the point. On pale skin, the white reads bright and clean; on square faces, the dark base carves shape while the ribbons pull attention upward.
I like this most when the ribbons are placed in long vertical sweeps instead of wide stripes. That keeps the look elegant and avoids widening the face at the jaw. If the hair is layered around the front, the white can flick in and out of view. That motion is what keeps it from feeling harsh.
This is not a low-maintenance choice. The white needs toner, and the dark base needs gloss to stay cool. But when the upkeep is handled well, it can look sharp in a way few grey styles do.
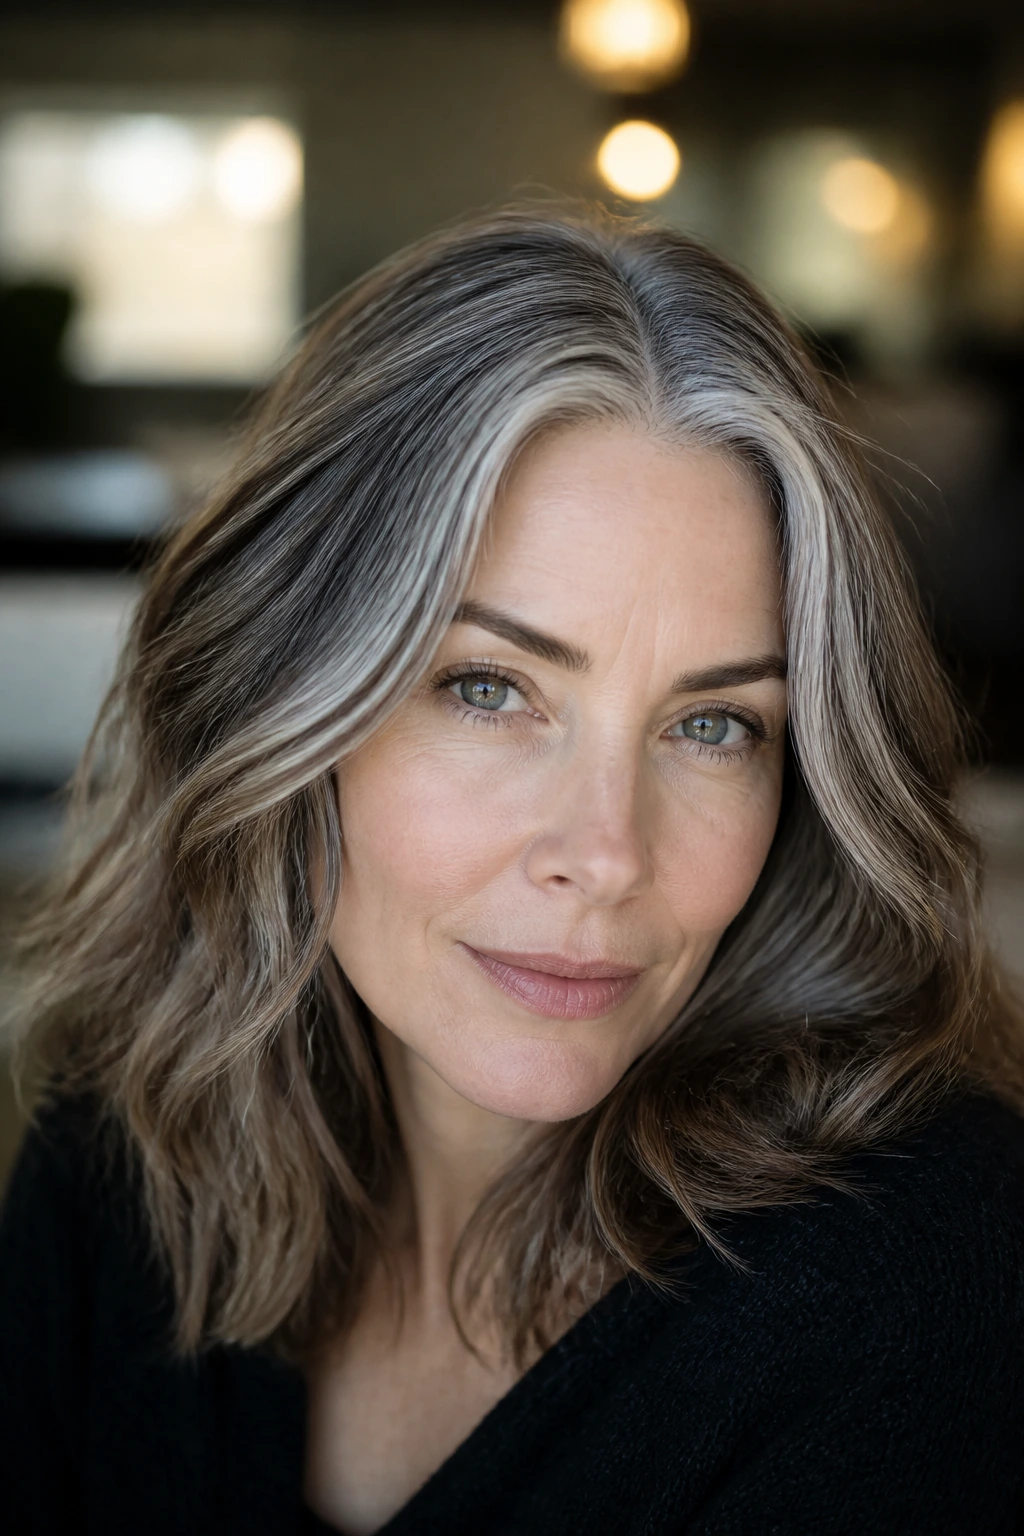
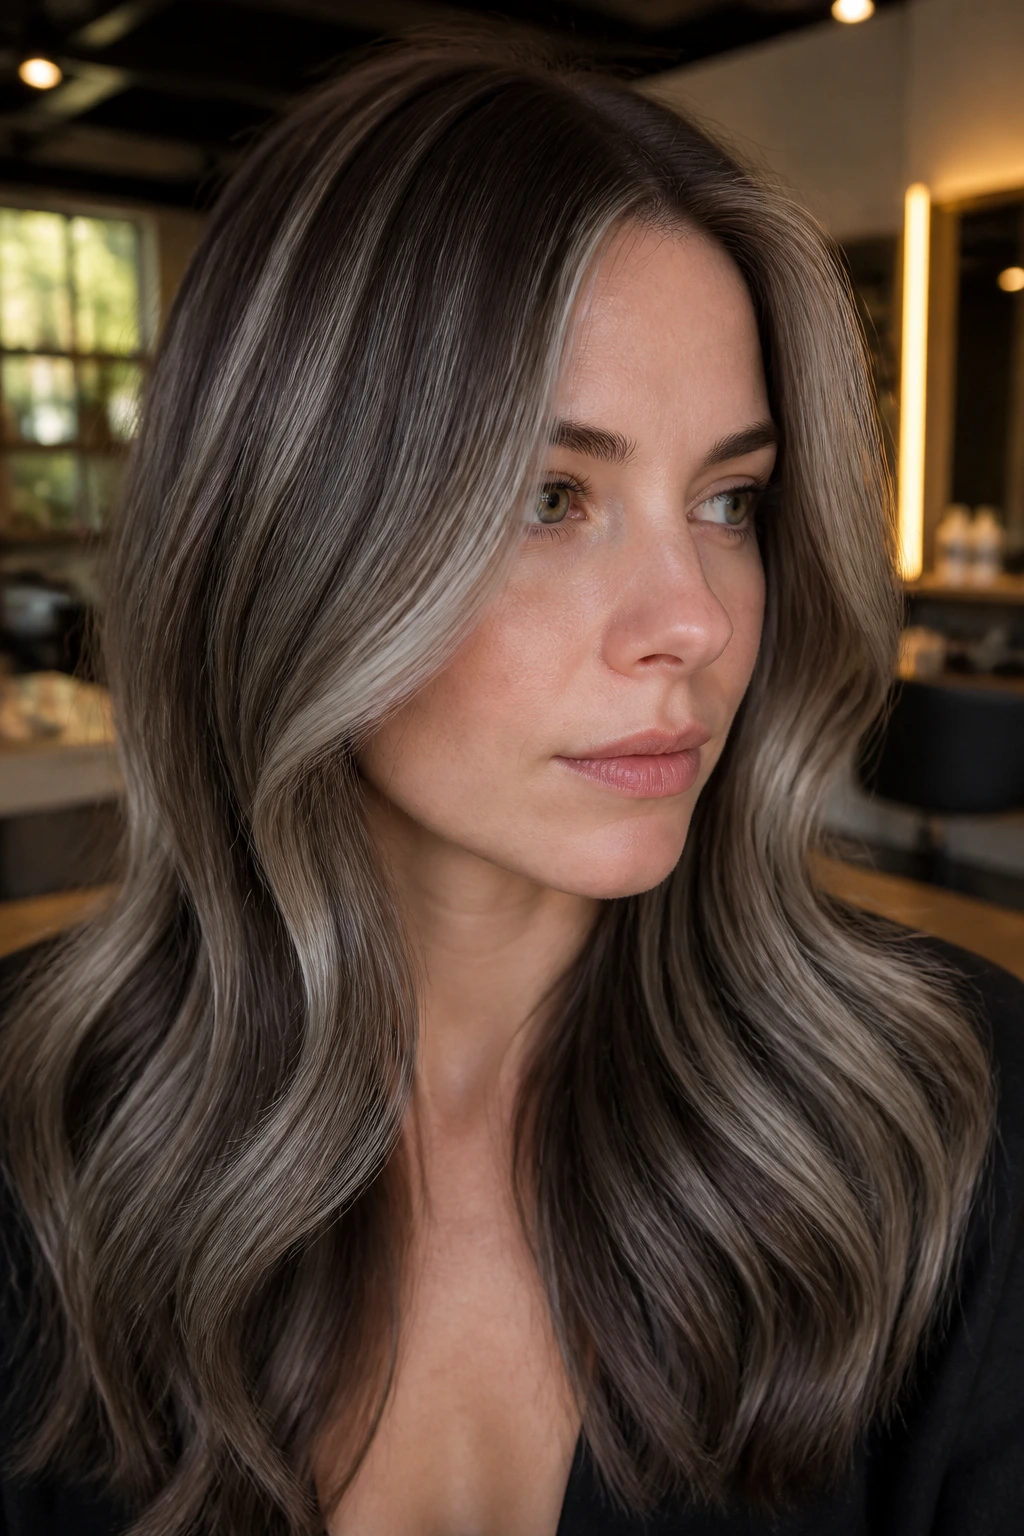
22. Soft Slate Highlights on a Collarbone Cut
Soft slate is one of the most underrated grey tones for pale skin. It sits a little deeper than silver, which means it doesn’t bleach out the face, and it has enough blue-grey to keep the color crisp. On a collarbone cut, it adds a gentle weight that helps square faces feel more oval.
The collarbone length is doing a lot here. It sits below the jaw, so the slate pieces can trail downward instead of stopping at the widest part of the face. I’d keep the layers subtle and the front a touch lighter. That keeps the cut from looking heavy at the ends.
This is one of the easiest styles to live with if you’re not chasing drama. It’s tidy, cool, and it doesn’t demand a lot of styling. A soft wave or a bend at the ends is enough.
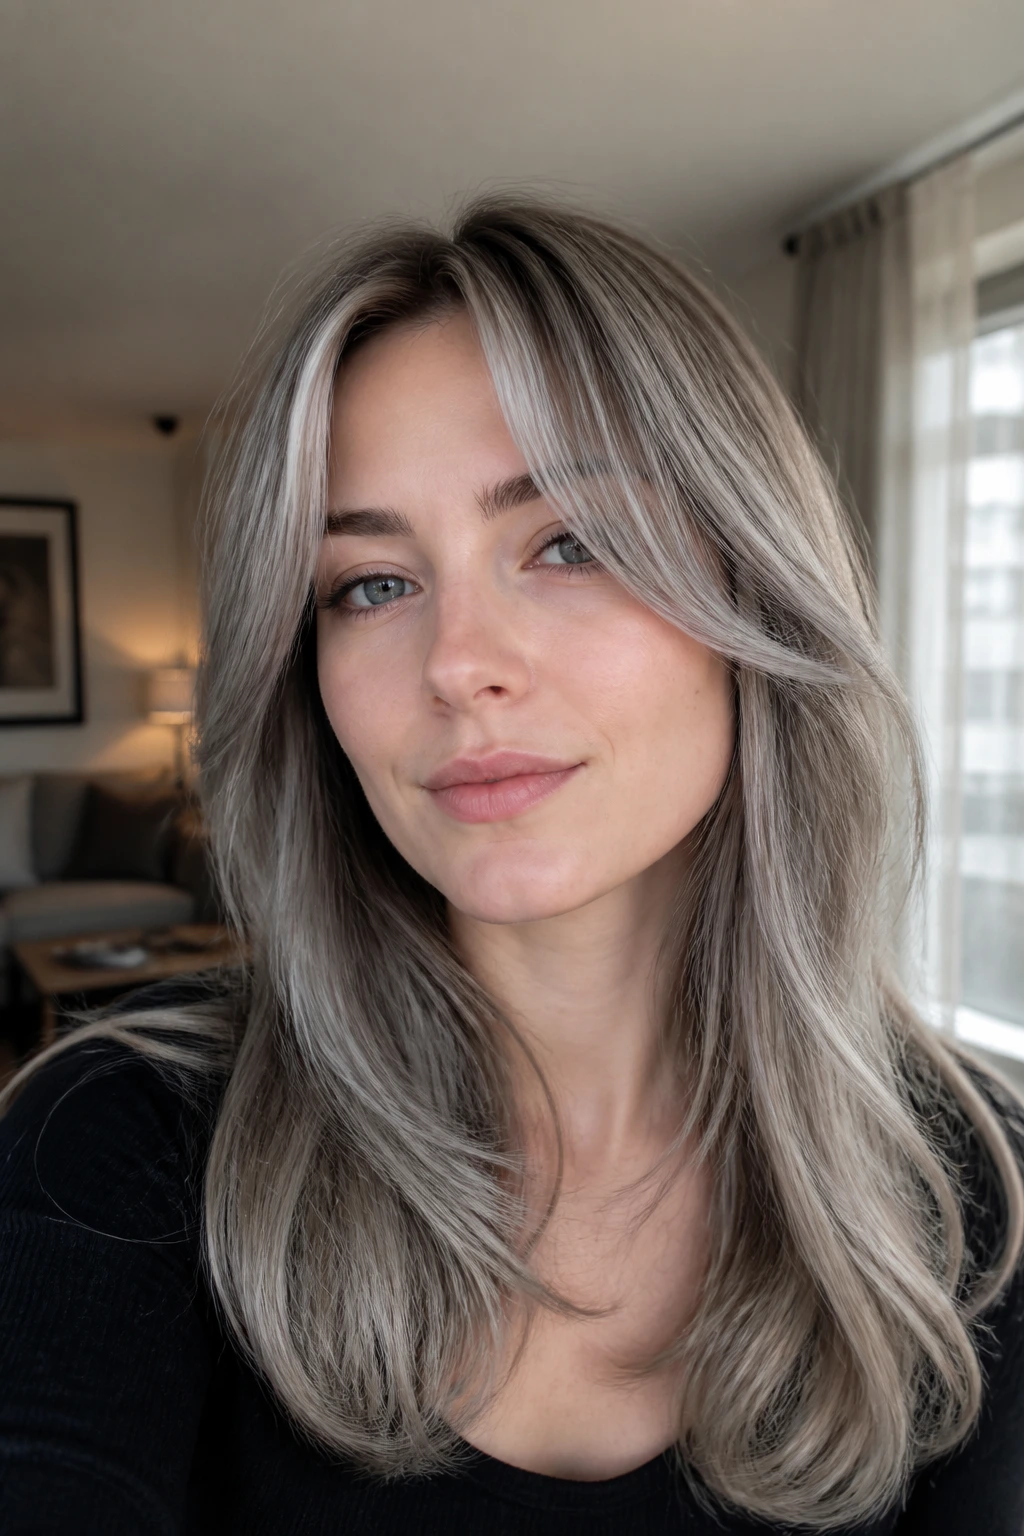
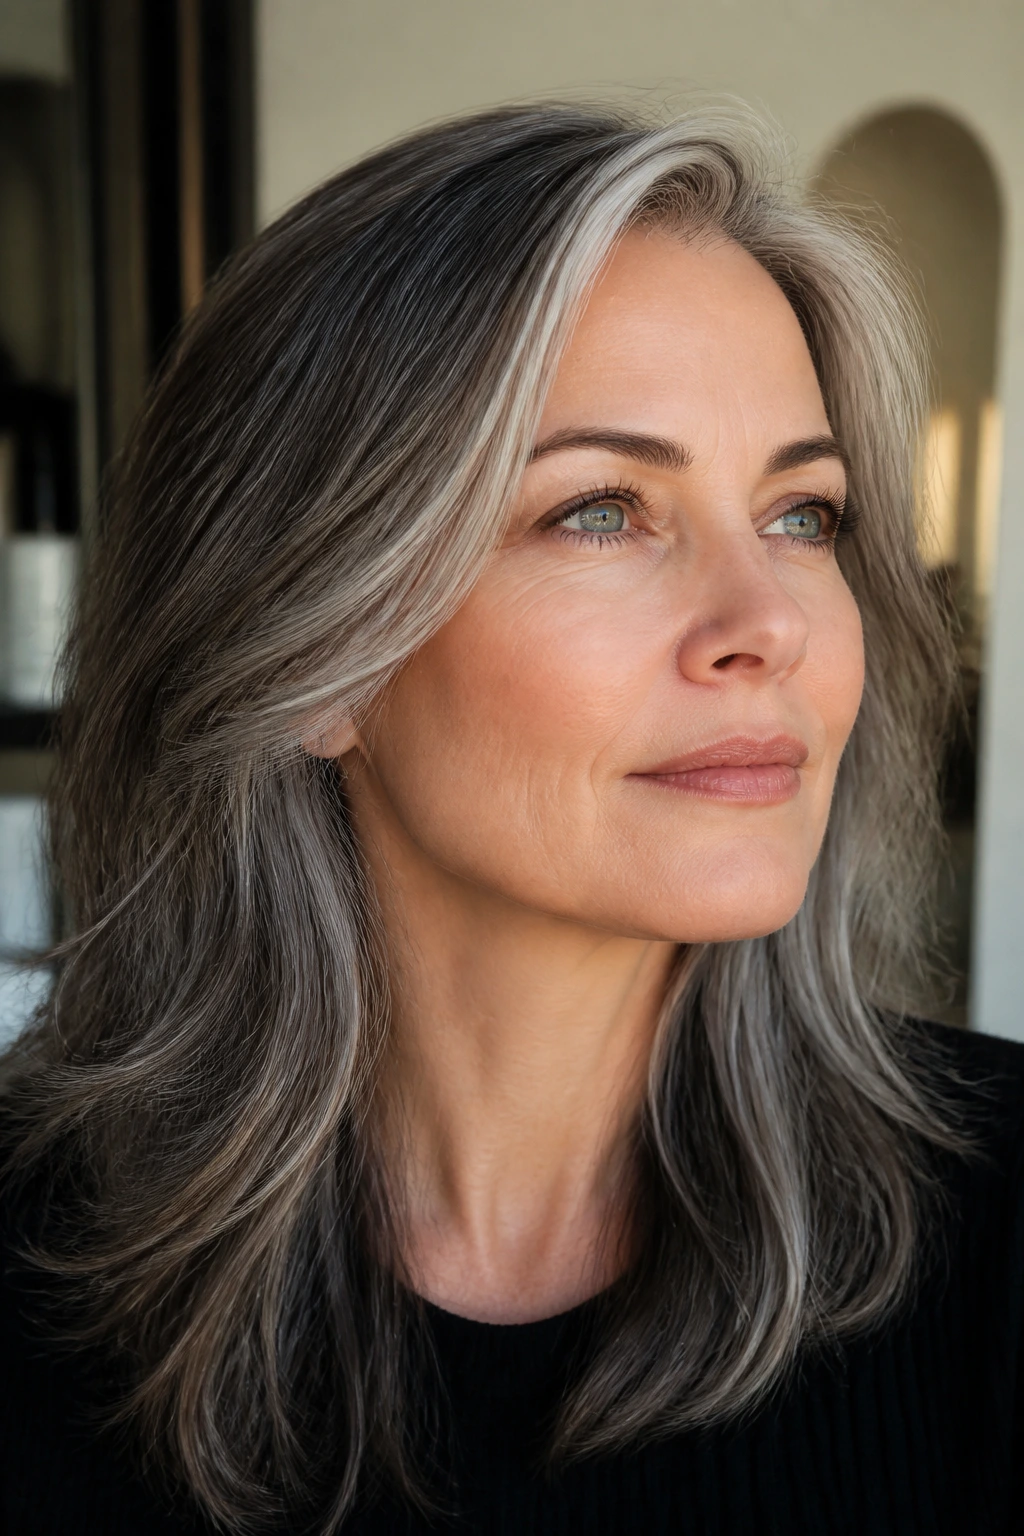
23. Silver Veil Highlights on Long Layers
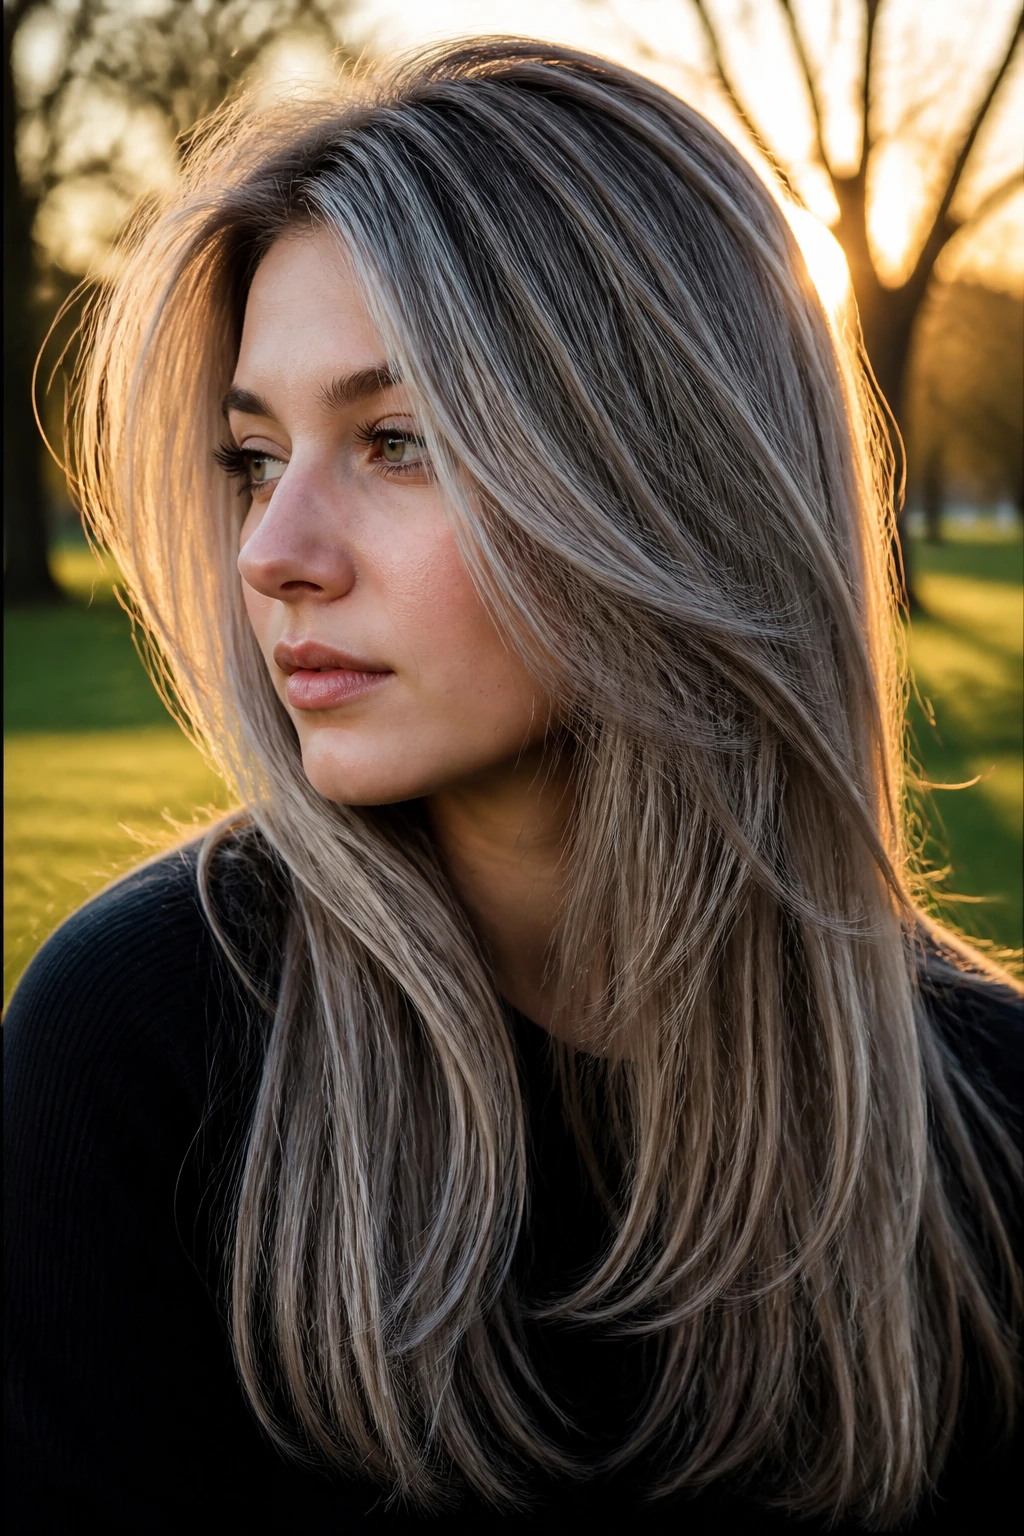
Silver veil highlights are what I call the “barely there, but not actually there” version of grey. They’re thin enough to disappear into the base until light hits them. On pale skin, that makes the color feel airy rather than stark. On square faces, the long layers keep the shape moving.
The nice thing about this style is that it doesn’t need shouting placement. The layers do the work. A few silver veils near the temples, some through the mid-lengths, and a lighter veil through the outer top layer are enough to build the effect. Too much and you lose the softness.
If your natural hair is medium brown or dark blonde, this can be a very flattering first step into grey. It’s less commitment than a full silver look, and the grow-out is gentler. Quiet, but not boring.
24. Ash Mist Dip-Dye on Straight Hair
Straight hair can make grey highlights look brutally clear if you’re not careful. Ash mist dip-dye solves that by keeping the grey at the ends, where it can soften the line of the cut instead of cutting across the face. That makes it a decent option for square faces that need some length.
The trick is to keep the transition blurred. No hard line. Ash mist should look like smoke caught at the bottom of the hair, not two separate colors stacked on each other. On pale skin, the cool tone reads clean, but the dip-dye shape keeps it from feeling sterile.
I’d pair this with a center part or a low side part and some ear-tuck styling. That keeps the upper hairline calm and lets the ends carry the personality. Straight hair loves precision, but grey usually looks better with a little softness.
25. Cool Grey Blend for Short Textured Cuts
Short textured cuts are where grey can look sharpest, and I mean that in the good way. A cool grey blend through a crop, curly pixie, or choppy short cut gives the hair movement without needing length to carry the color. On pale skin, the cool blend can look almost smoky, which I like a lot.
Square faces benefit when the texture sits higher on the head and the sides stay soft. That keeps the cut from widening the lower face. The grey should be mixed through the texture, not painted in blocks. Texture wants dimension. Blocks kill it.
This is the easiest style to make look modern without trying too hard. A little paste, a little finger lift at the crown, and the grey does the rest. If the cut is sharp, the color can be softer. If the cut is soft, the color can be sharper. That balance is the whole game.
Why Grey Placement Needs More Thought on Square Faces
Square faces don’t need camouflage. They need a smarter map of light. That’s a different thing, and it’s why so many grey styles miss the mark when they’re copied straight from a mood board with no face-shape logic behind them.
The jaw is the first thing to think about. If the brightest grey sits in a hard band right across the jawline, the face reads wider and flatter. If the brightness starts near the temples, cheekbones, or the upper layers and then drifts downward, the eye moves in a longer line. That softens the square shape without pretending it isn’t there.
The Three Zones That Matter Most
- Temples and crown: A little brightness up top adds lift and keeps the face from feeling bottom-heavy.
- Cheekbone area: Soft face-framing grey bends the eye around the face instead of across it.
- Below the jaw: Longer light pieces help lengthen the silhouette, especially on lobs and mid-length cuts.
I keep coming back to this because it matters more than the shade itself. A perfect silver placed badly still looks wrong. A slightly less dramatic grey placed well can look expensive and easy at the same time.
Tools, Photos, and Products That Make the Appointment Easier
A good grey highlight appointment starts before the dye bowl. Bring pictures, yes, but bring the right pictures. One image for tone and another for placement usually works better than one perfect-looking photo that hides the details.
- Two reference photos: One shows the grey shade you like, the other shows how you want the highlights placed. That helps the stylist separate color from layout.
- Fine-tail comb and clips: Useful if you’re sectioning hair at home or just want to explain where the face frame should sit.
- Foils or balayage brush: Not for your own coloring unless you know what you’re doing, but helpful to understand how the look was made.
- Color-safe shampoo: Keeps the grey from fading into dull beige.
- Purple or blue-violet shampoo: Use sparingly to control yellowing, not as a daily wash.
- Bond-building treatment: Handy if the hair has been lightened before or feels weak at the ends.
- Heat protectant: Grey highlights show dryness fast, so this is not optional if you use hot tools.
- Color-depositing mask or gloss: Good for stretching time between salon visits without leaving the tone flat.
If you ask me, the photo of the root area matters as much as the finished style. That’s where the grow-out story lives.
Picking the Right Grey for Pale Skin

Pale skin is not one thing. Some fair skin leans pink and flushes easily. Some leans blue and looks almost porcelain in daylight. Some has a peach cast that needs a gentler grey. The shade family should shift with that.
If your skin reddens fast, I’d stay away from pure ice-grey near the face. It can make the redness look louder, especially in bright indoor light. Pearl-grey, smoke, and mushroom-grey are safer because they carry a little softness in the tone. They still read cool. They just don’t feel harsh.
If your skin is very neutral or slightly blue, you can go cooler. Silver, slate, and graphite can look clean and modern. The trick is not to take the whole head to the same level of brightness. A deeper root or a lowlight helps the face stay alive.
Easy Shade Matches
- Pink-leaning pale skin: Pearl, smoke, lavender-grey, mushroom-grey.
- Neutral pale skin: Silver, slate, cool ash, soft pewter.
- Peach-leaning pale skin: Mushroom blonde with grey ribbons or a rooted silver melt.
Grey hair looks best when the toner is one shade softer than you think. Mirrors under salon lights lie. Daylight tells the truth.
How to Style Grey Highlights So They Soften the Jawline
A square face looks best when the styling bends the eye around the edges instead of sitting right on top of them. That means the final shape matters as much as the color.
Placement
Keep the part a little off-center if the face feels very even from side to side. A center part can work, but it tends to emphasize symmetry, which is not always your friend with a square jaw. Face-framing pieces should begin near the cheekbone or just above it, then taper past the jaw instead of stopping on it.
Styling
Loose waves are the safest bet. They break up the width of the face and make grey shimmer instead of sitting in one flat plane. If you like straight hair, add a bend at the ends with a round brush or a large iron. Even one soft curve changes the whole read of the style.
Finish
Use a light serum or cream, not a heavy oil that clumps the silver strands together. Grey highlights look best when the finish stays silky and separate. Too much product turns them dark and damp-looking, which is not the mood anyone asked for.
Extra Ways to Make Grey Highlights Pop
Tone Boost: A clear or slightly violet gloss every few weeks can keep the silver clean without making it lilac. I’d rather see a glossy grey than a bright grey that looks dry and brittle.
Texture Boost: Grey loves movement. If your cut is flat, add a few soft layers or wear a loose wave so the highlights can break the surface in different places.
Face-Softening Move: Keep the brightest pieces away from the jaw corners. Let them sit at the temples, through the upper cheek area, or in the front layers where they can do the softening work.
Color Boost: If the grey feels too cool, a mushroom or beige-grey lowlight can warm the balance back up without taking away the silver effect. That’s a better fix than piling on more toner.
Make-It-Yours: For low-maintenance wearers, ask for rooted grey with a soft melt. For bolder wearers, ask for brighter money pieces and deeper underlights so the color has more contrast.
Mistakes That Turn Soft Grey Into Flat Silver

Going too icy at the front. The hairline turns white, the skin looks pinker, and the face loses warmth. The fix is simple: keep the front pieces pearl, smoke, or ash-silver instead of pure ice.
Putting brightness in one hard band. That stripe across the jaw or cheek can make a square face look wider. Break it up with diagonal foils, babylights, or a softer blend around the face.
Ignoring the base shade. Grey over a too-dark or too-brassy base can turn muddy. If the underlying tone is warm and strong, it needs proper lightening and toning before the grey will sit cleanly.
Overusing purple shampoo. Hair turns chalky or dull lilac, and the shine goes missing. Use it once every few washes, leave it on only 1 to 3 minutes, and follow with moisture.
Forgetting that dry ends show everything. Grey highlights expose split ends fast. Trim regularly and use a mask that actually smooths the cuticle, not one that just smells nice.
Variations and Adaptations to Try

Soft Smoke Melt: If you want a gentler entry point, keep the base rooted and float smoke-grey through the mid-lengths only. It’s easier to maintain and still softens square faces.
High-Contrast Graphite Frame: Use a deeper graphite underlayer and brighter silver face-framing pieces. The contrast is sharper, but the shape still works if the front pieces stay curved.
Curly Ribbon Grey: On curls and coils, ask for ribboned grey rather than striped highlights. The color follows the curl pattern and avoids the liney look that can harden a square face.
Short-Cut Steel Frost: For pixies and crops, keep the top brighter and the sides slightly deeper. The shape stays lifted, and the cool steel tone looks clean against pale skin.
Lavender-Silver Blend: If your skin leans very pink, a whisper of lavender can stop grey from looking clinical. Keep the purple low and smoky, not pastel.
Keeping Grey Highlights Fresh Between Appointments
Grey tones fade in two annoying ways: they go yellow, or they go dull. Sometimes both, which is rude. The fix is a regular rhythm, not panic washing.
Wash the hair two to three times a week if you can. Use color-safe shampoo, then follow with a purple or blue-violet product only when the tone needs it. For most people, that means every second or third wash, not every wash. Leave it on for 1 to 3 minutes, then rinse well. More is not better. More usually means flatter hair.
A gloss or toner refresh every 4 to 8 weeks keeps the grey clean, depending on porosity and water quality. If your water is hard, the tone can get cloudy faster. A clarifying wash once a month helps, but follow it with a good mask so the hair doesn’t feel like straw.
Heat is the other thief. Straighteners and curling irons make grey fade faster and show dryness sooner, so heat protectant should go on before every blow-dry, curl, or flat iron pass. If you swim, rinse the hair first and coat it lightly with conditioner before the pool. Chlorine and grey do not play nicely.
Grey Highlight Questions People Ask First
Will grey highlights make pale skin look washed out?
They can, if the tone is too icy or the placement is too flat. Pearl-grey, smoke, and mushroom-grey usually behave better on fair skin because they keep a little softness in the color.
Are grey highlights good for square faces?
Yes, if they’re placed with movement in mind. Highlights that start near the temples, cheekbones, and outer layers soften the jaw better than hard horizontal stripes.
Do I need bleach for grey highlights?
Most of the time, yes, especially if your base is dark blonde, brown, or darker. Grey needs a light enough canvas to read properly, and that usually means careful lightening first.
What if my hair turns yellow after toning?
That usually means the toner has faded or the underlying warmth is coming back through. Use a violet shampoo sparingly, then book a gloss or toner refresh instead of piling on more at home.
Can grey highlights work on curly hair?
Absolutely. Curly hair can make grey look soft and dimensional because the highlights catch on the curl pattern. The key is ribbon placement rather than straight stripes.
How do I ask for the right grey at the salon?
Bring photos of both the tone and the placement, then ask for a soft root shadow if you want the grow-out to stay calm. Mention whether your skin leans pink, neutral, or peach so the stylist can steer the tone.
Will this style make my hair look thinner?
Not if the highlights are blended with some lowlight or root shadow. Fine grey ribbons can actually create the look of more texture, which is useful on thinner hair.
Can I do this on dark brown hair in one appointment?
Sometimes, but not always safely. Dark hair often needs more than one session to reach a clean grey, and rushing it can leave the ends fragile and orange underneath.
The Grey That Softens the Edge
Grey highlights do their best work when they look thought through, not copied. Pale skin needs the right cool tone. Square faces need movement in the right places. Put those two things together and the hair stops feeling severe. It starts feeling deliberate.
That’s what I’d aim for: not more silver for the sake of silver, but a shape that lets the color soften the jaw, brighten the skin, and keep a little depth in the roots. The prettiest grey styles never look like they tried too hard. They look placed, balanced, and lived-in.
Pick the version that matches your haircut, your undertone, and your tolerance for maintenance. The right grey will look like it was always meant to be there.