Thin hair can make braid styling feel fussy for one simple reason: there isn’t much bulk to hide loose strands, so every skipped piece shows up fast. That does not mean braid styles are off the table for little girls. It means the braid has to match the hair, not fight it. Fine strands usually lay flat, slip through fingers, and tug out of shape if the section is too wide or the tension is too harsh.
That’s why the best braids for little girls with thin hair are the ones that start small, stay gentle, and look neat without needing a ton of product. A tiny side braid, a low pair of pigtails, a French braid, a pull-through style, even a simple braided ponytail—those can all hold their shape on fine hair if you part cleanly and keep the grip light. The win here is not thickness for its own sake. It’s control.
I like braid styles that can survive a school morning, a car seat nap, and a playground sprint without turning into a cloud of flyaways by noon. Anything that pulls too hard at the temples or asks for heroic patience from a child gets old fast. So the styles below lean practical, tidy, and fixable when one side comes out a little better than the other. That happens. Often.
Why This Collection Is Different
- Built for fine strands: These braid ideas use smaller sections and lighter tension, which helps thin hair hold its shape instead of slipping apart.
- Beginner-friendly by design: Most of the styles rely on the same three-strand rhythm or a simple twist, so you are not learning five techniques at once.
- Kind to small heads: The styles stay close to the scalp or sit low, which matters when a child cannot tolerate a tight pull for long.
- Accessory-friendly: Bows, ribbons, tiny elastics, and clips can do a lot of the visual work when the hair itself is light and fine.
- Fast enough for real mornings: A braid that takes 4 minutes and stays put beats a prettier style that needs ten minutes of fuss and two re-dos.
- Easy to refresh: If one piece loosens, these braids can usually be fixed with one bobby pin or a quick re-wrap, not a full restart.
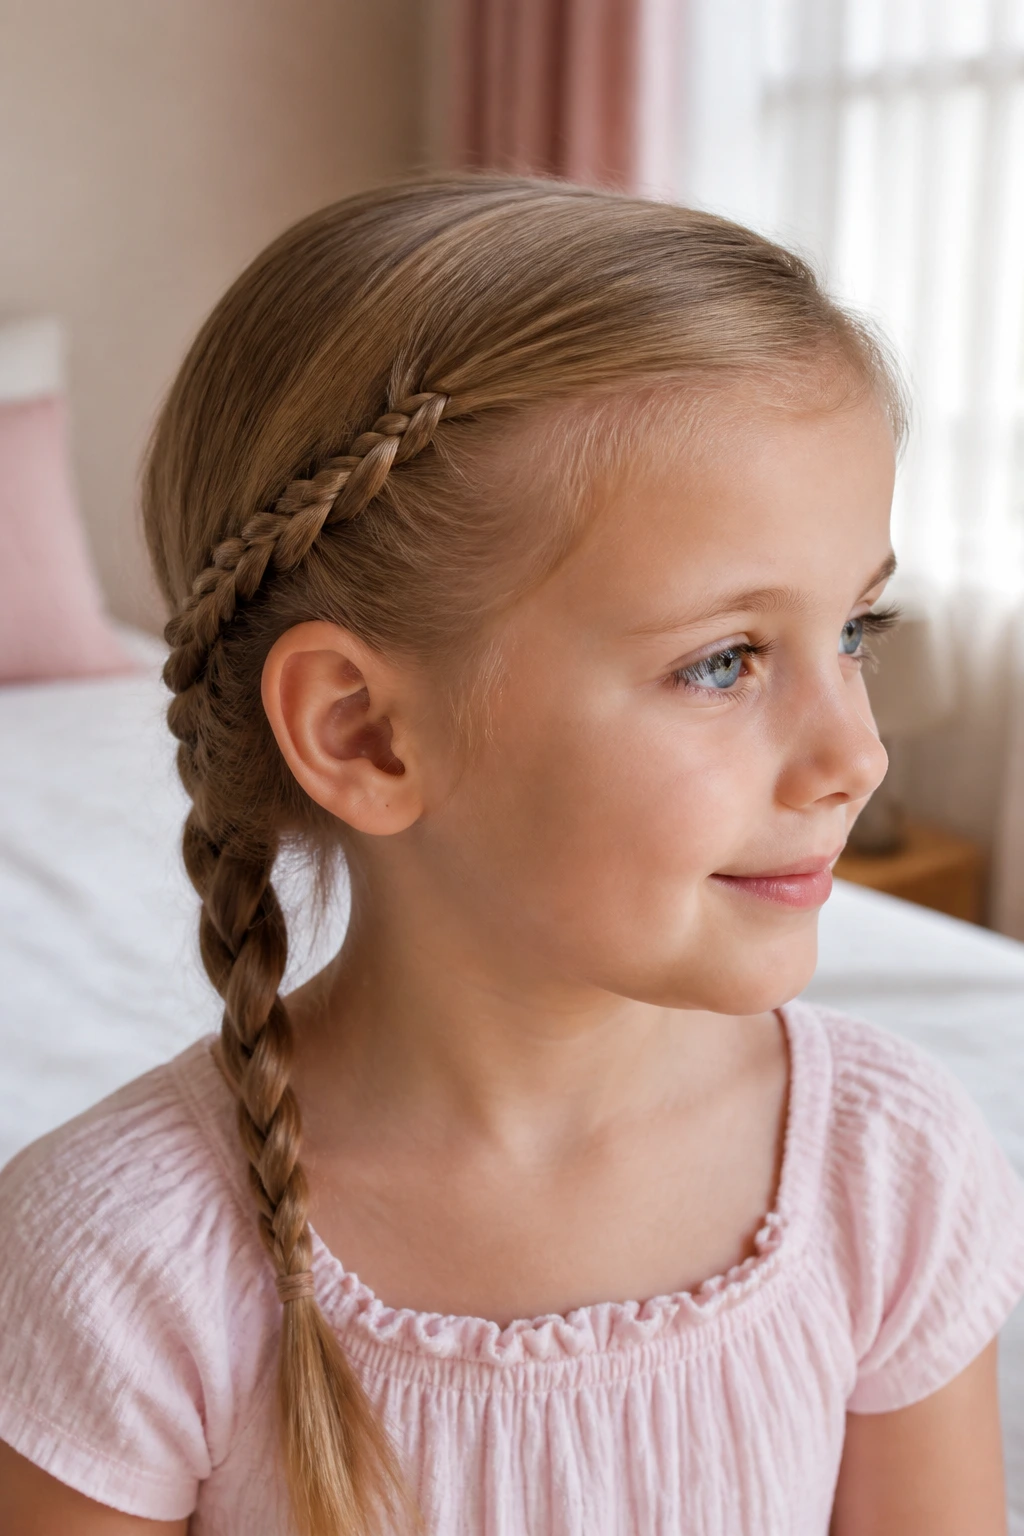
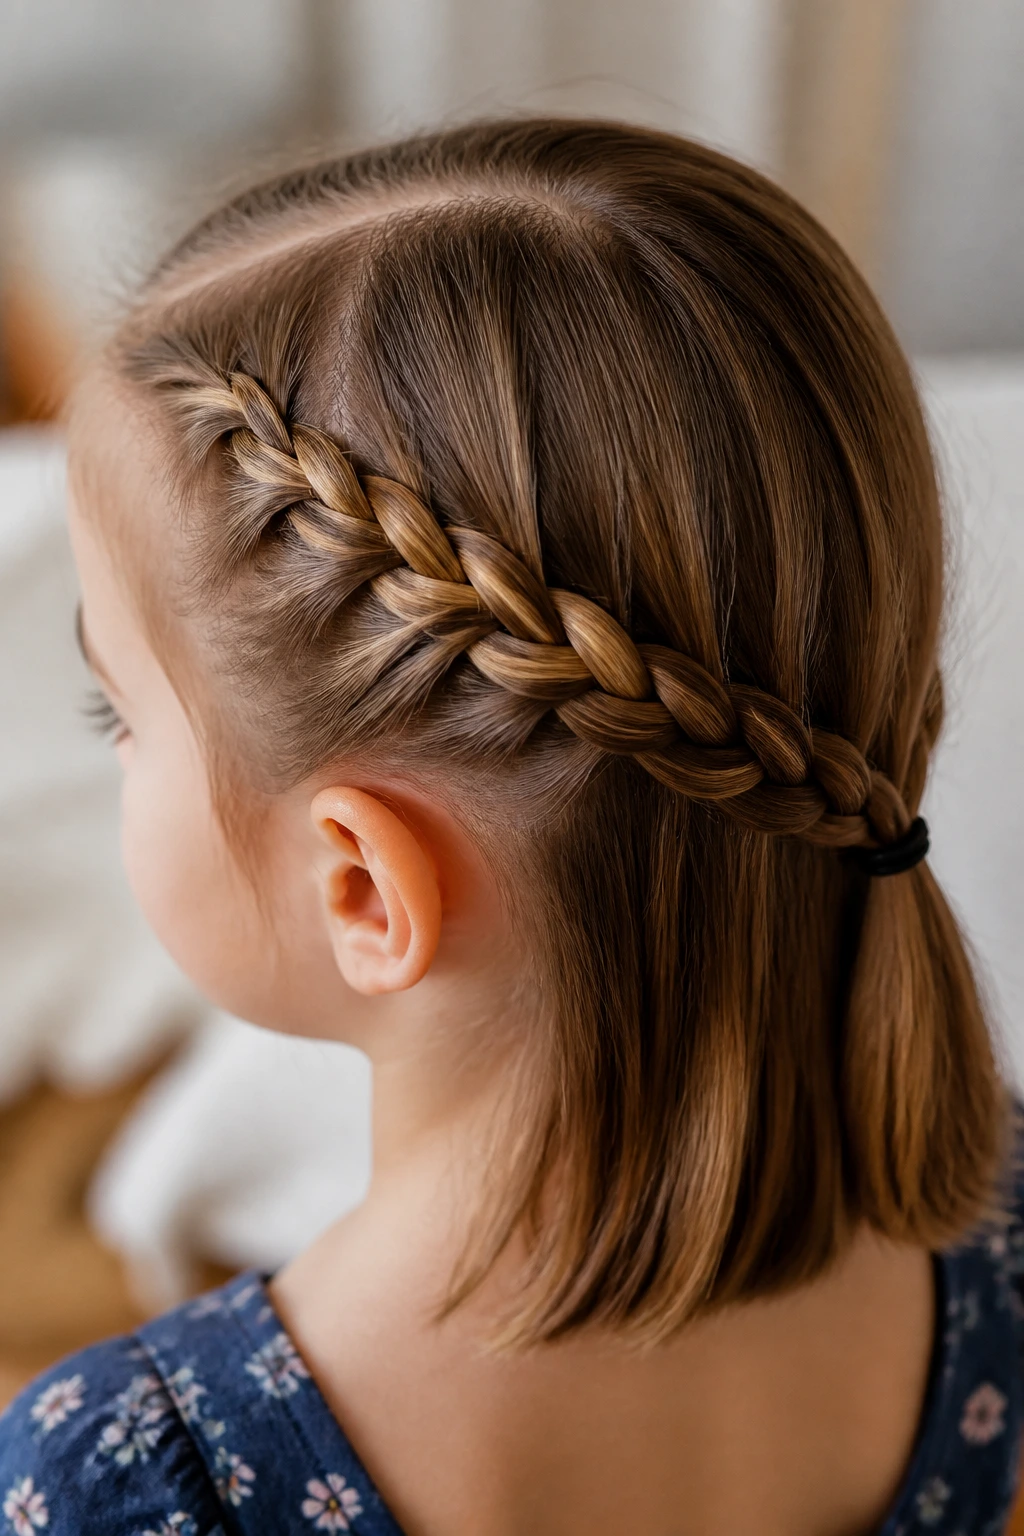
1. A Soft Side Braid That Follows the Ear
A single side braid is where I’d send a beginner first. It keeps the hair gathered, lets the thinness work in your favor, and looks tidy even when the braid itself is small. The trick is to start low, just behind one ear, where the hair is easier to control and less likely to slide free.
Keep the sections narrow. If you grab too much hair at once, the braid comes out loose and puffy in the wrong places. A side braid should lie smooth against the head, then drift down over one shoulder with a small elastic at the end.
For little girls with thin hair, this style is also forgiving if the part is crooked. Nobody notices. Really. The braid sits off to one side, so a slightly imperfect line only makes it look soft, not wrong.
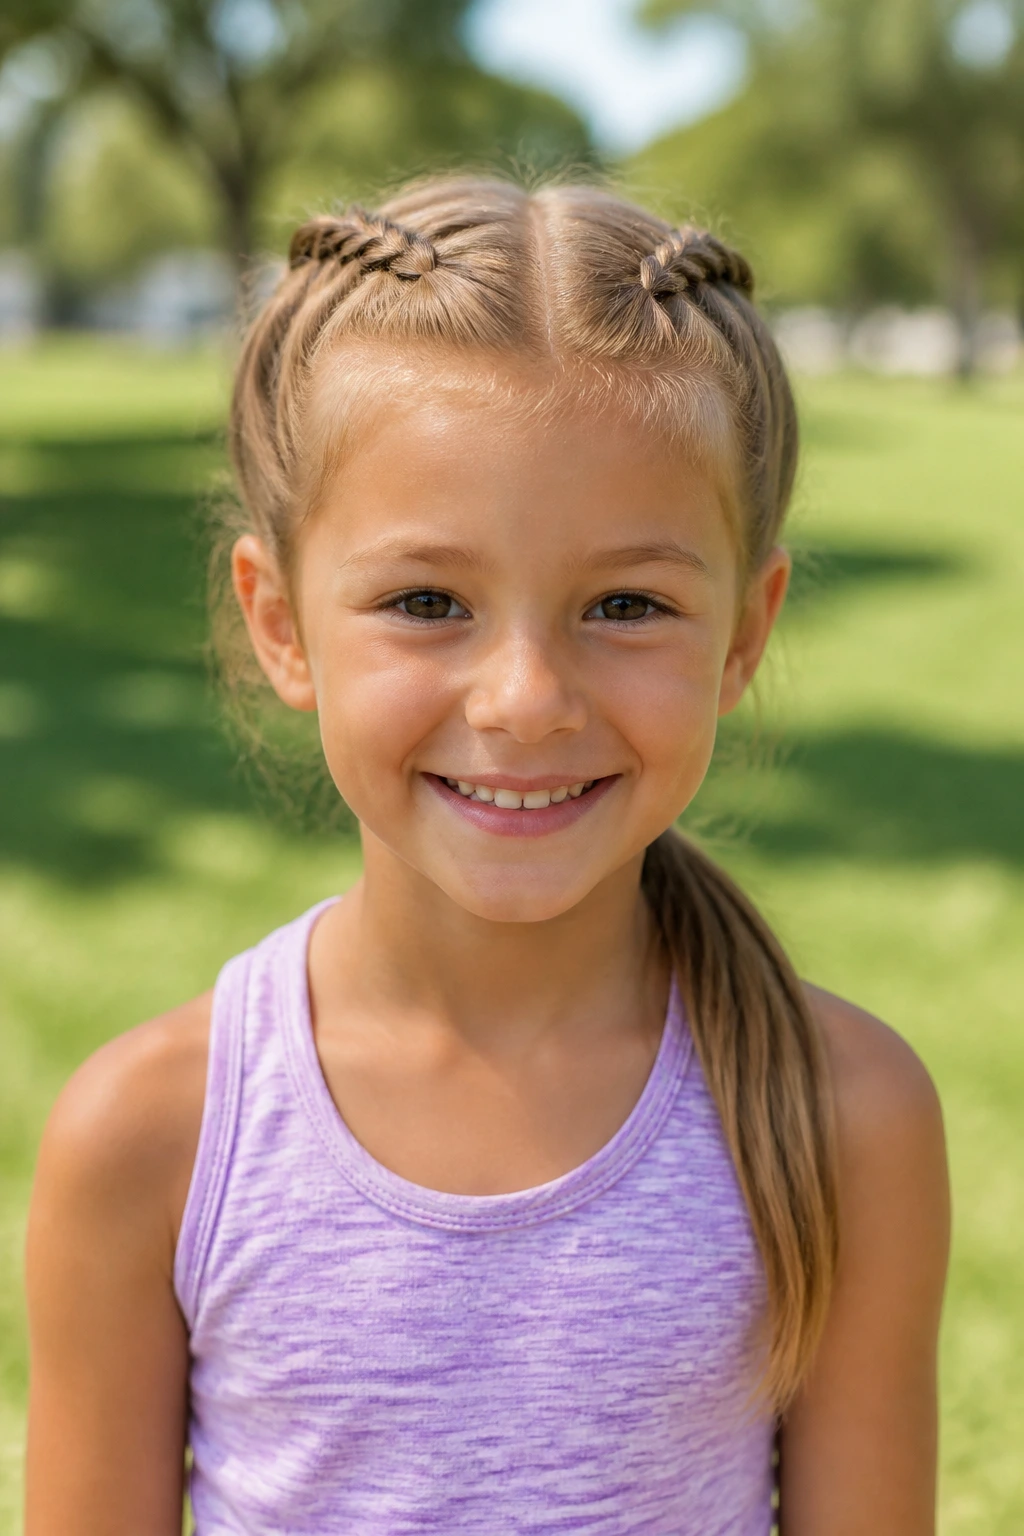
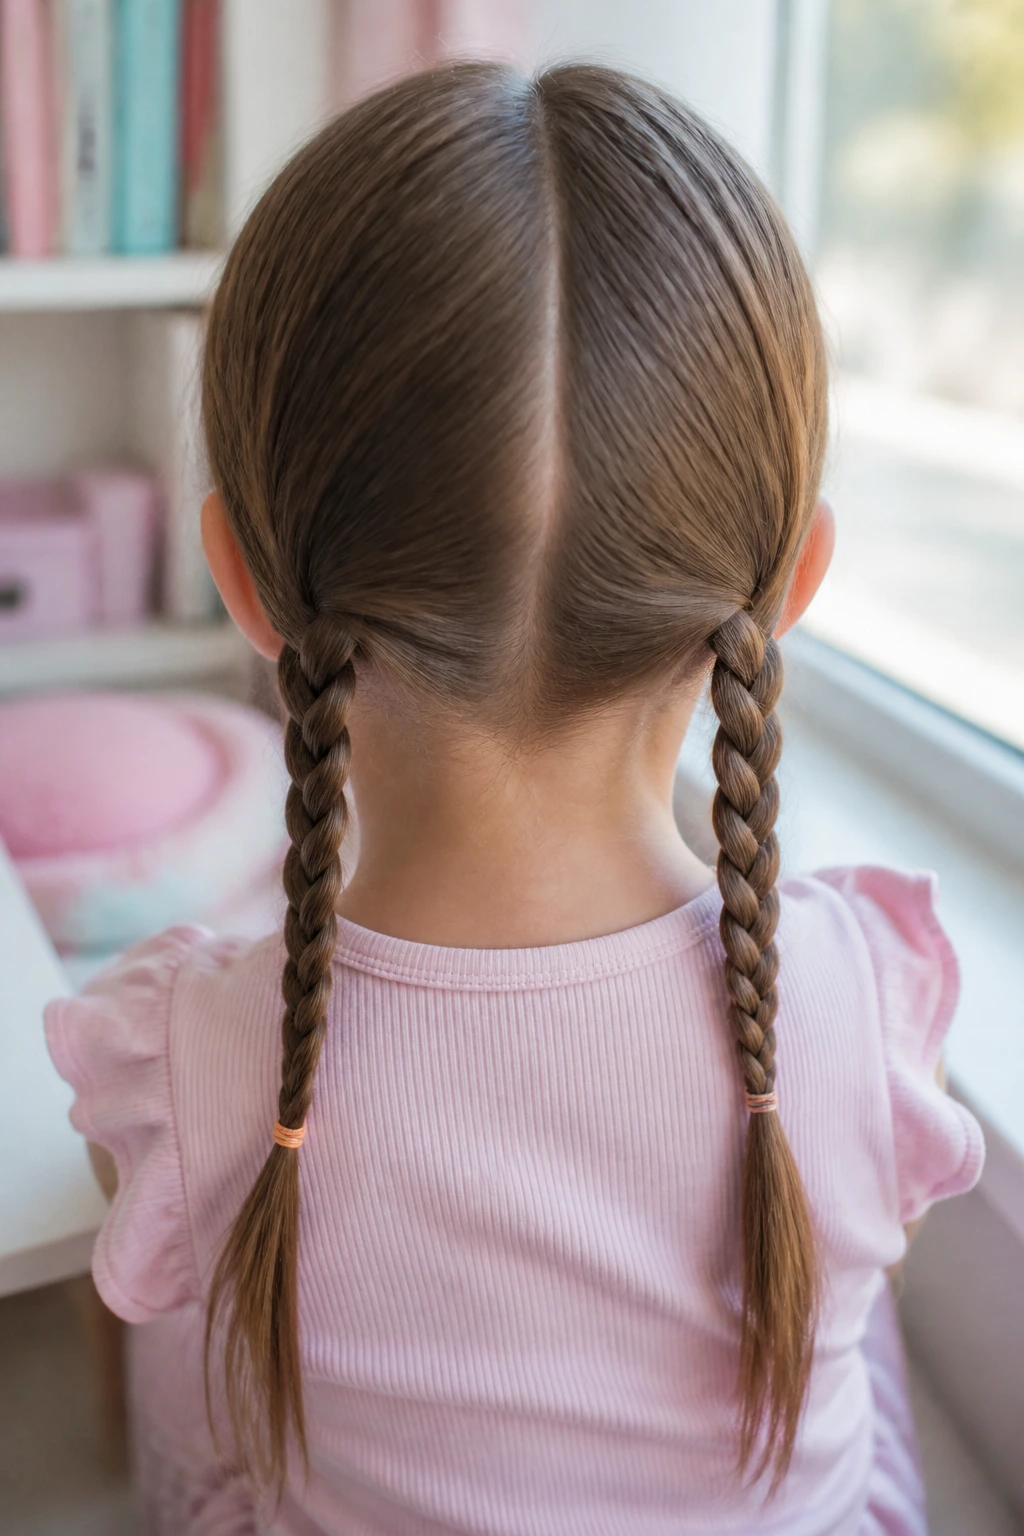
2. Two Low Pigtail Braids That Stay Neat All Day
Two low braids are the simplest way to make thin hair look intentional instead of unfinished. They divide the hair into smaller, manageable sections, which means each braid gets enough grip to hold together better than one oversized braid would. That matters on fine hair. A lot.
Start with a clean center part and brush each side down before you begin. The braid should begin close to the nape, not halfway up the head, or it can start to puff out too soon. If the hair is extra slippery, mist the lengths lightly with water or detangling spray before you split them.
These braids are especially useful when the child wants hair out of the face but still wants movement. The ends swing. The roots stay calm. That’s the balance you want.
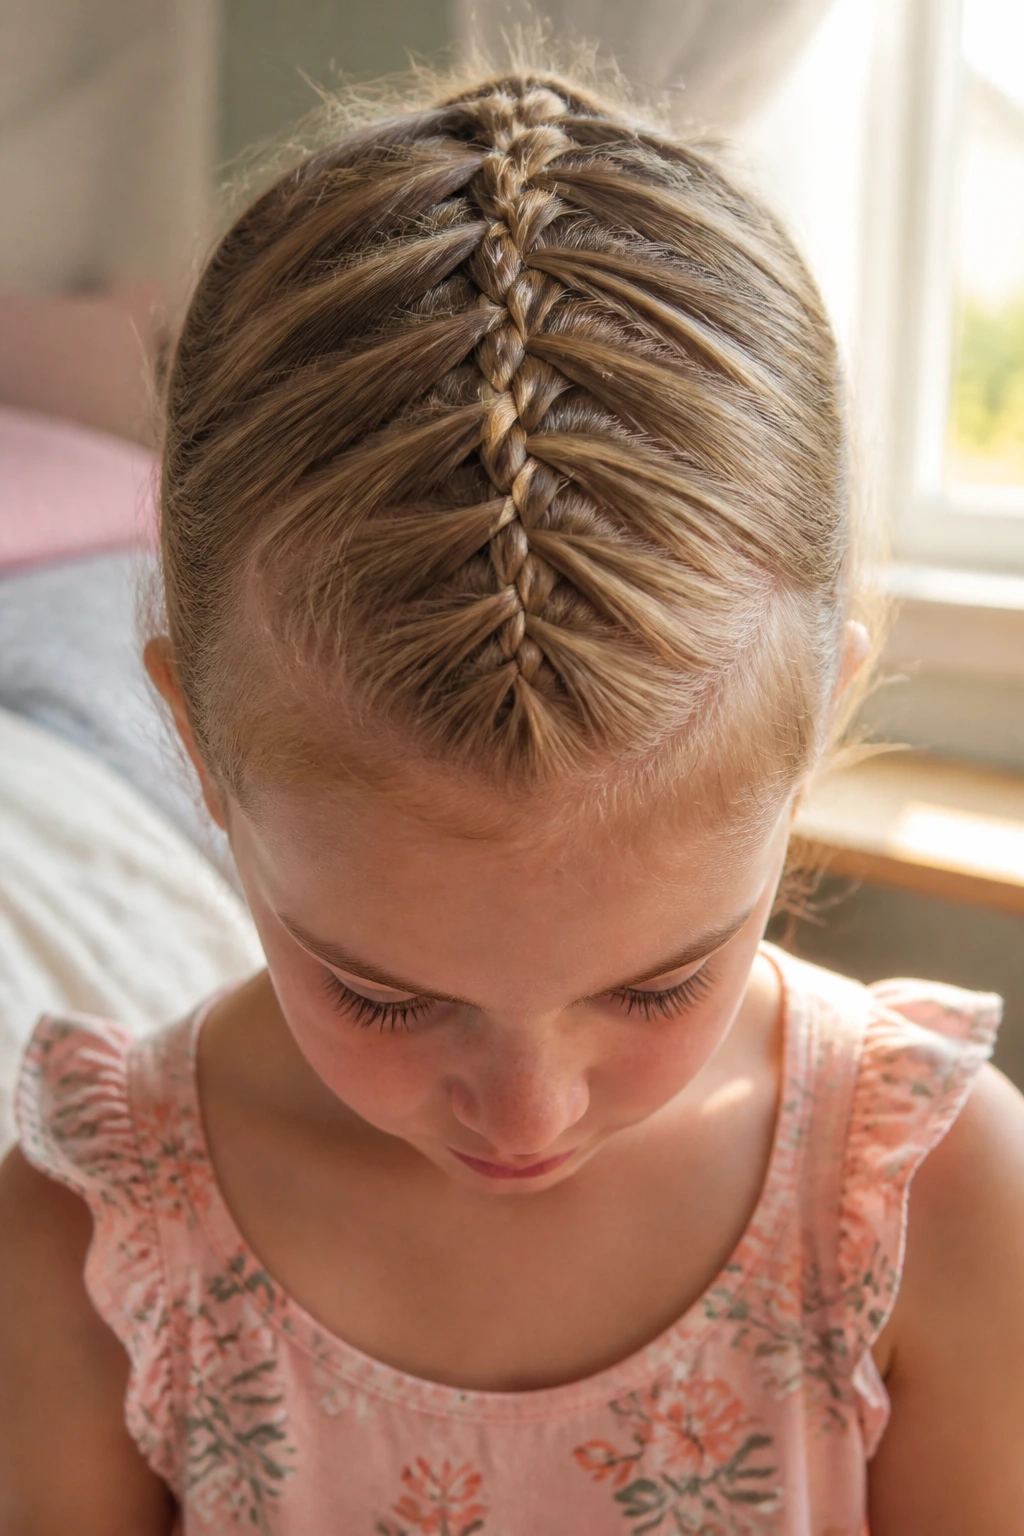
3. A French Braid Down the Center That Builds Its Own Shape
French braids are a gift for thin hair because they add hair as they go. That means the braid starts with a small section near the crown and gets more substance lower down, which helps it feel fuller than a braid made from one static ponytail. It also keeps the top flatter, which is often easier on a child’s scalp.
Why it behaves well on fine hair
The braid hugs the head, so it does not depend on a lot of bulk to look finished. If the strands are very silky, use a tiny bit of texturizing spray or even a light mist of water first. You want the hair to feel less slippery, not sticky.
Take tiny side sections as you move downward. Small additions are cleaner than big grabs. And if the braid narrows at the end, that is normal on thin hair. Don’t chase fullness with tight pulling. That only makes the scalp look strained.
4. Dutch Braids That Sit Proudly on the Head
A Dutch braid is the inside-out cousin of the French braid, and on fine hair it can be a smart choice because the braid stands up a little more instead of blending into the head. That slight lift gives the braid more presence, which is helpful when the hair is thin and soft.
It looks best when the sections are narrow and even. If you braid too broadly, the braid gets lumpy fast. I’d rather see a neat, smaller Dutch braid than a loose, oversized one that collapses at the nape.
This one is a good pick for kids who like a style that feels active and sporty. It keeps the hair contained, but it still has some shape. Very little effort. Decent payoff.
5. A Half-Up Mini Braid for Days When You Want Something Quick
Half-up braids are one of the easiest ways to style thin hair without touching every strand on the head. You only gather the top section, so there is less hair to manage and less chance of tangles turning into tears. That alone earns it a place on this list.
The braid can be a tiny three-strand braid, a small French braid, or even two mini braids joined in the back. The important part is that it pulls the front hair away from the face while leaving the length free. On little girls with fine hair, that split usually feels lighter and looks softer.
A bow or clip at the join makes the style look finished. Without it, the braid can read as accidental. With it, it looks deliberate.
6. A Braided Ponytail That Keeps the Ends Tidy
A braided ponytail is practical in the best way. You gather the hair into a ponytail first, then braid the tail, which means the style starts from a secure base and finishes with a compact end. Fine hair likes that. It gives the braid one strong anchor point.
If the hair slips a lot, use a small elastic at the base of the ponytail before you braid. That helps the whole style hold. You can even wrap a tiny strand of hair around the base to hide the elastic if you want a cleaner look, but that is optional.
This braid works especially well for active days. The hair stays off the shoulders, and the braid doesn’t explode into frizz as quickly as loose hair does. Simple. Reliable. No drama.
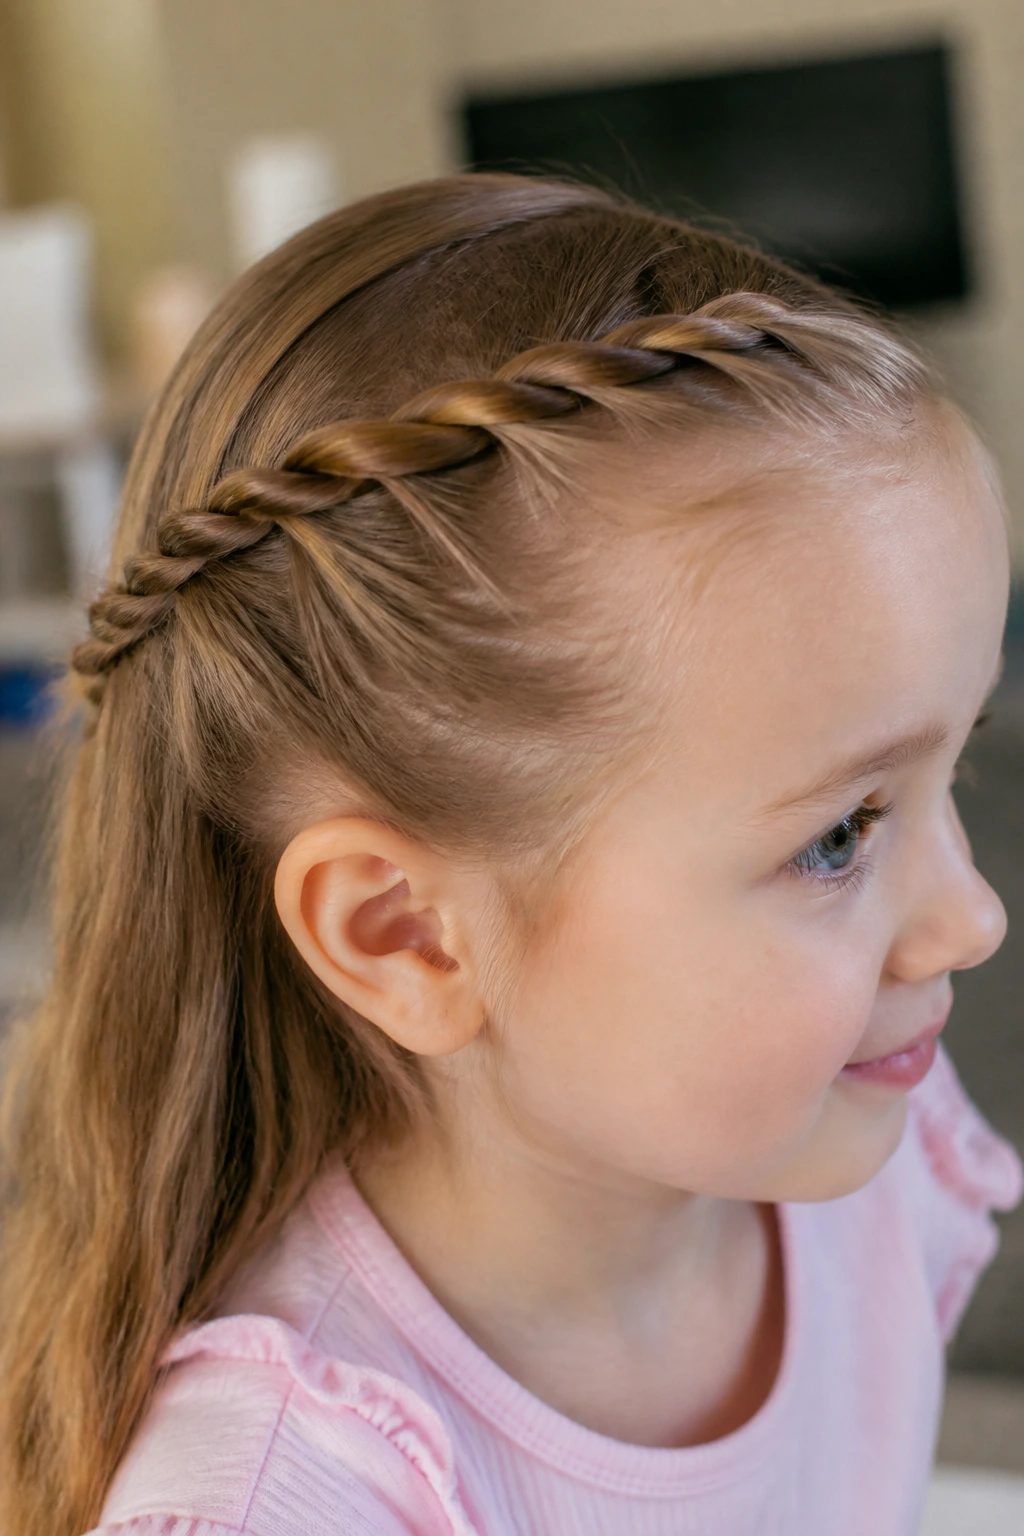
7. A Rope Braid for Hands That Are Still Learning
A rope braid is one of the easiest braid-like styles for beginners because it uses two sections instead of three. Twist each section in the same direction, then wrap them around each other in the opposite direction. That’s the whole trick. Once it clicks, it feels almost too simple.
On thin hair, rope braids can look cleaner than a loose three-strand braid because the twist pattern shows even when the strands are narrow. Use small sections and keep the twist snug, not tight. If you pull hard, the braid gets springy in the wrong way and starts to unwind.
This is a nice style for kids who do not sit still for long. It moves fast, and it still looks tidy enough for school pictures or a family outing.
8. A Pull-Through Braid That Looks Fuller Without Needing Fuller Hair
Pull-through braids are not true braids, and I think that is part of their charm. They use a line of small ponytails with the hair split and looped through itself, which creates the look of a thick braid even when the hair is fine. Thin hair loves this trick.
The one thing that makes it work
You need clear elastics and a little patience. Start with a ponytail at the crown, then keep adding smaller ponytails underneath, pulling the ends of each section apart gently to fluff the look. The braid gets bigger visually because the loops stack on top of each other.
If the hair is very short, stop earlier and secure the end with a bow. If it is longer, let the tail hang loose after the final elastic. Either way, this style gives more visual volume than a standard braid usually can.
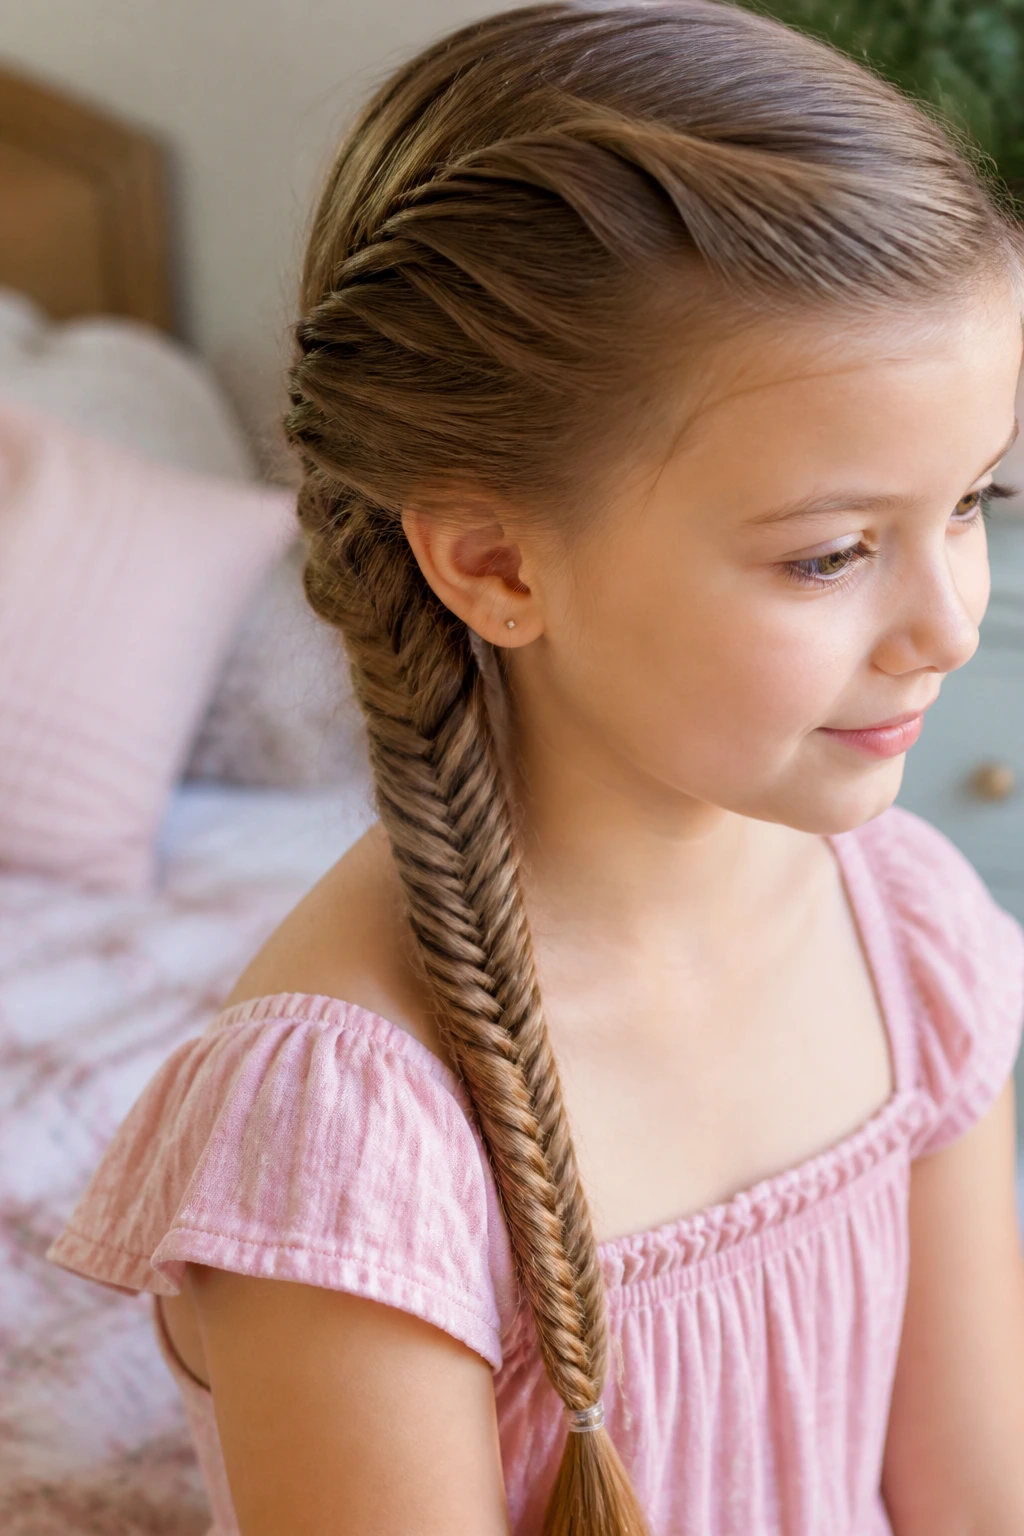
9. A Fishtail Braid That Looks Fancy but Uses Tiny Sections
Fishtail braids can look intimidating, but they’re really just small pieces crossing from one side to the other over and over. On thin hair, that’s useful because tiny sections are easier to grip than thick ones. The braid also creates a tight, detailed texture that makes fine strands look more deliberate.
The key is not to rush. If you keep grabbing huge chunks, the braid will look messy instead of textured. Tiny pieces give that neat, woven look that fishtails are known for, and they help the braid stay compact.
A side fishtail is often easier for little girls than a centered one because you can rest the braid over one shoulder and keep both hands in a comfortable spot. Less wobbling. Fewer stray strands. Better results.
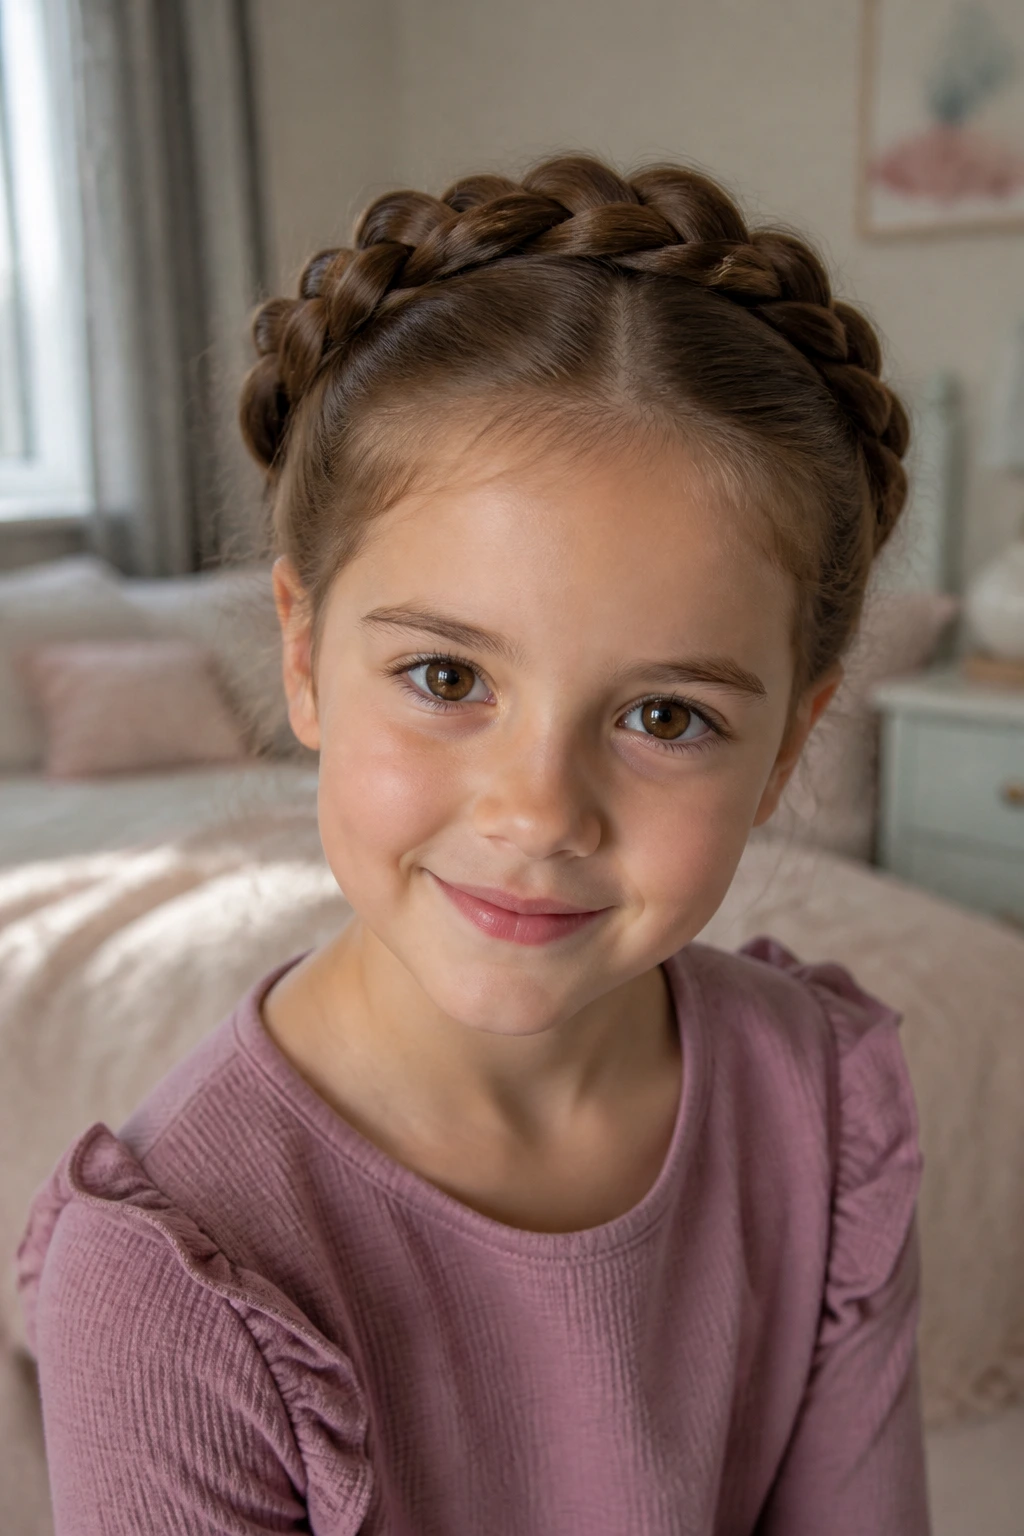
10. A Crown Braid That Frames the Face Without Heavy Pulling
A crown braid wraps along the hairline and across the top of the head, and on thin hair it can look especially sweet because it doesn’t need bulk to read clearly. The braid itself becomes the shape. The hair underneath just follows along.
Pin it, don’t force it
The mistake people make with crown styles is trying to pull the braid too tight in order to make it “last.” That only creates a sore scalp and loose pieces at the back. Use small sections, braid gently, and pin the ends where they land. Bobby pins are doing half the work here.
This style is lovely for dressier days, but it does not have to feel precious. A slightly loose crown braid can look soft and childlike in the best way, especially if you leave a few wisps around the ears.
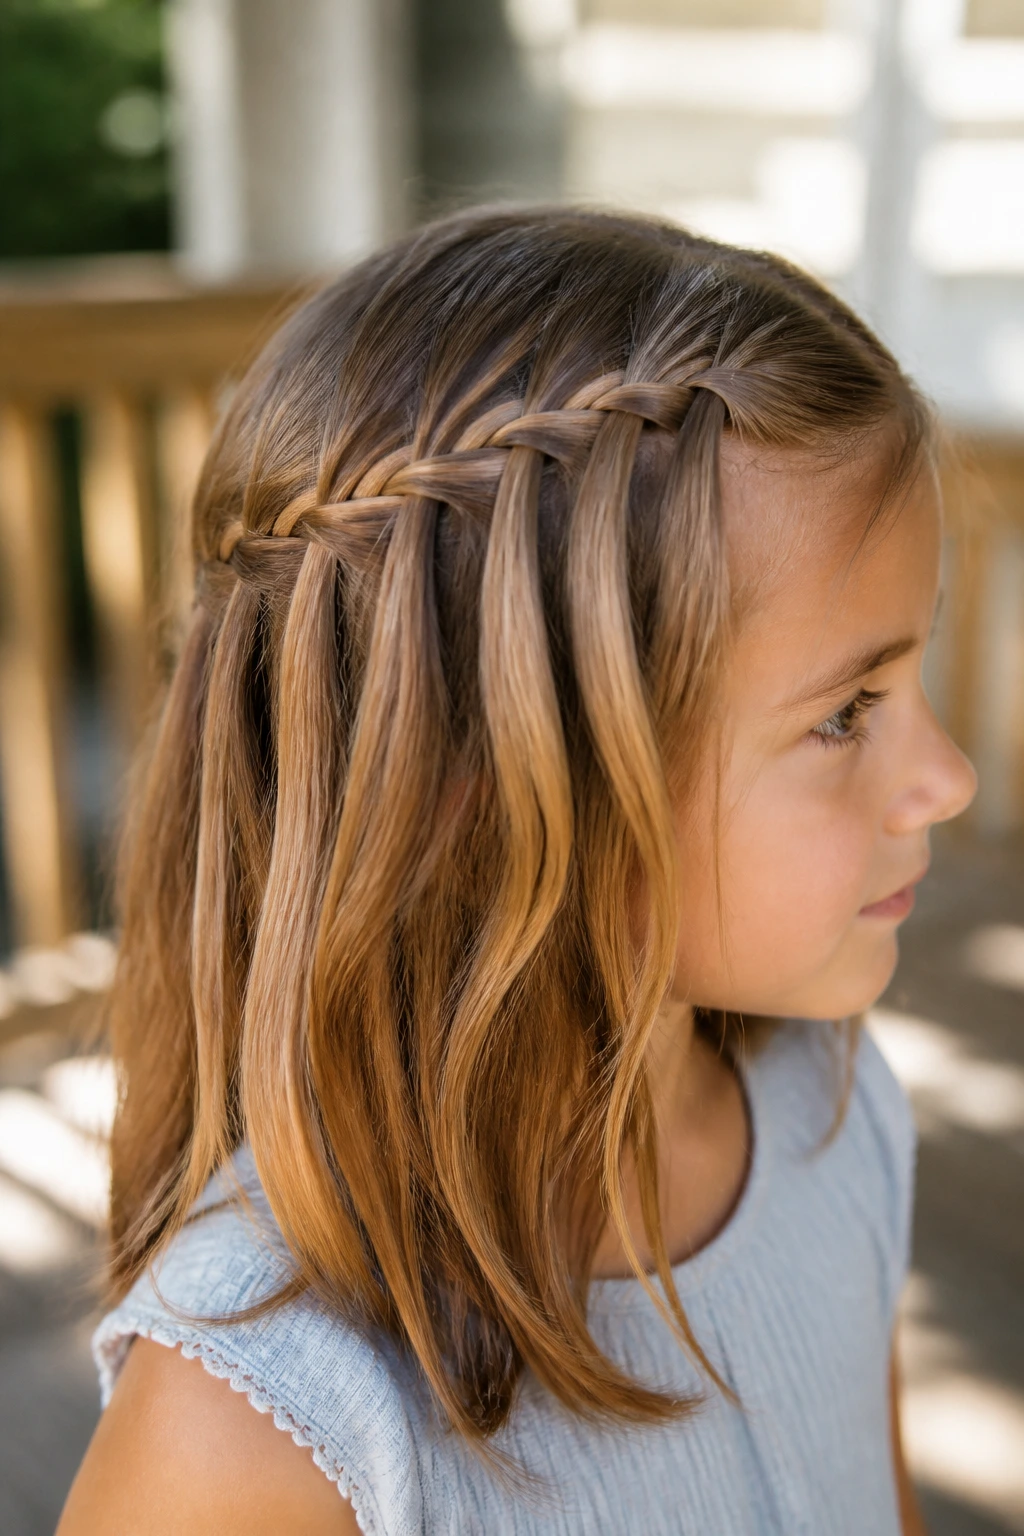
11. A Waterfall Braid That Lets Some Hair Stay Loose
Waterfall braids are one of the prettiest ways to work with thin hair because they make use of the hair you have without trying to contain all of it. One strand drops out of the braid at each pass, which leaves a loose curtain effect and gives the braid a delicate look.
They work best on hair that is at least shoulder length. Very short thin hair tends to slip too much for this style to stay neat. A little texturizing spray or a light mist of detangler can help the braid grip the top layer better.
I like waterfall braids for special occasions because they look more detailed than they are. That’s a nice bargain.
12. Milkmaid Braids That Tuck Up and Away
Milkmaid braids are basically two braids wrapped over the top of the head and pinned in place. On fine hair, that pinning step matters a lot because the braid does not need to be huge to sit nicely. It only needs to be secured where it crosses.
If the hair is thin, braid each side first, then tug the outer edges very lightly to make the braids look wider before you wrap them. Not too much. You want fullness, not fluff. Once they’re pinned, tuck the ends under so nothing sticks out awkwardly at the back.
This style works well when you want the hair off the neck completely. It’s neat, pretty, and a little old-fashioned in a way that still feels childlike.
13. Braided Bangs That Keep the Front Pieces Out of the Eyes
Braided bangs are one of those tiny styles that do a lot of work. They take the front hairline, braid it back or across, and hold the most annoying little strands away from the eyes. Thin hair often has wispy front pieces that refuse to stay where they belong. This fixes that problem fast.
You do not need much hair to make it work. A narrow section from one side of the part, braided tight enough to hold but not yank, does the job. Clip the end behind the ear or blend it into the rest of the hair.
For little girls, this is a nice “school-day helper” style because it keeps the forehead clear without asking for a full updo. Tiny change. Big comfort.
14. An Accent Braid Into a Low Bun
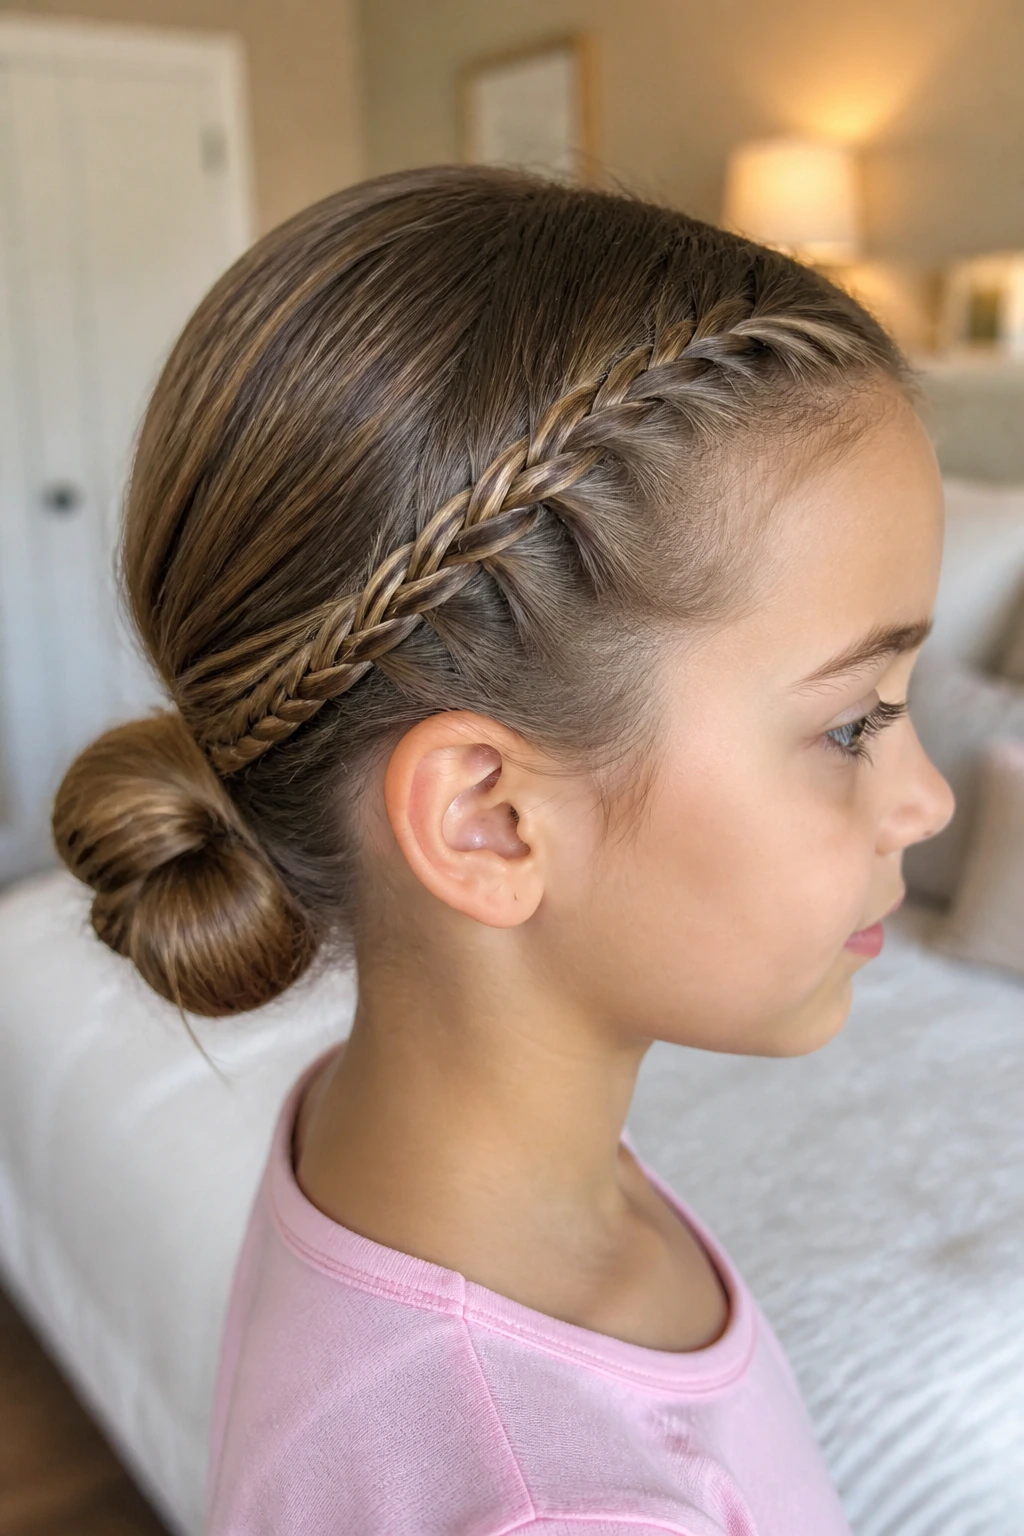
An accent braid gives thin hair a little structure before it disappears into a bun, which is often exactly what the style needs. Start with a small braid near one temple or just above the ear, then gather the rest of the hair into a low bun at the nape.
The braid does not need to be long. In fact, short is fine here. Its job is to add a touch of detail and help the bun look less sparse. Fine hair can make buns look smaller than parents expect, so the braid gives the style a little visual lift.
If the bun itself is thin, wrap it loosely and secure it with two crisscrossed bobby pins instead of one elastic alone. That keeps the shape from sliding.
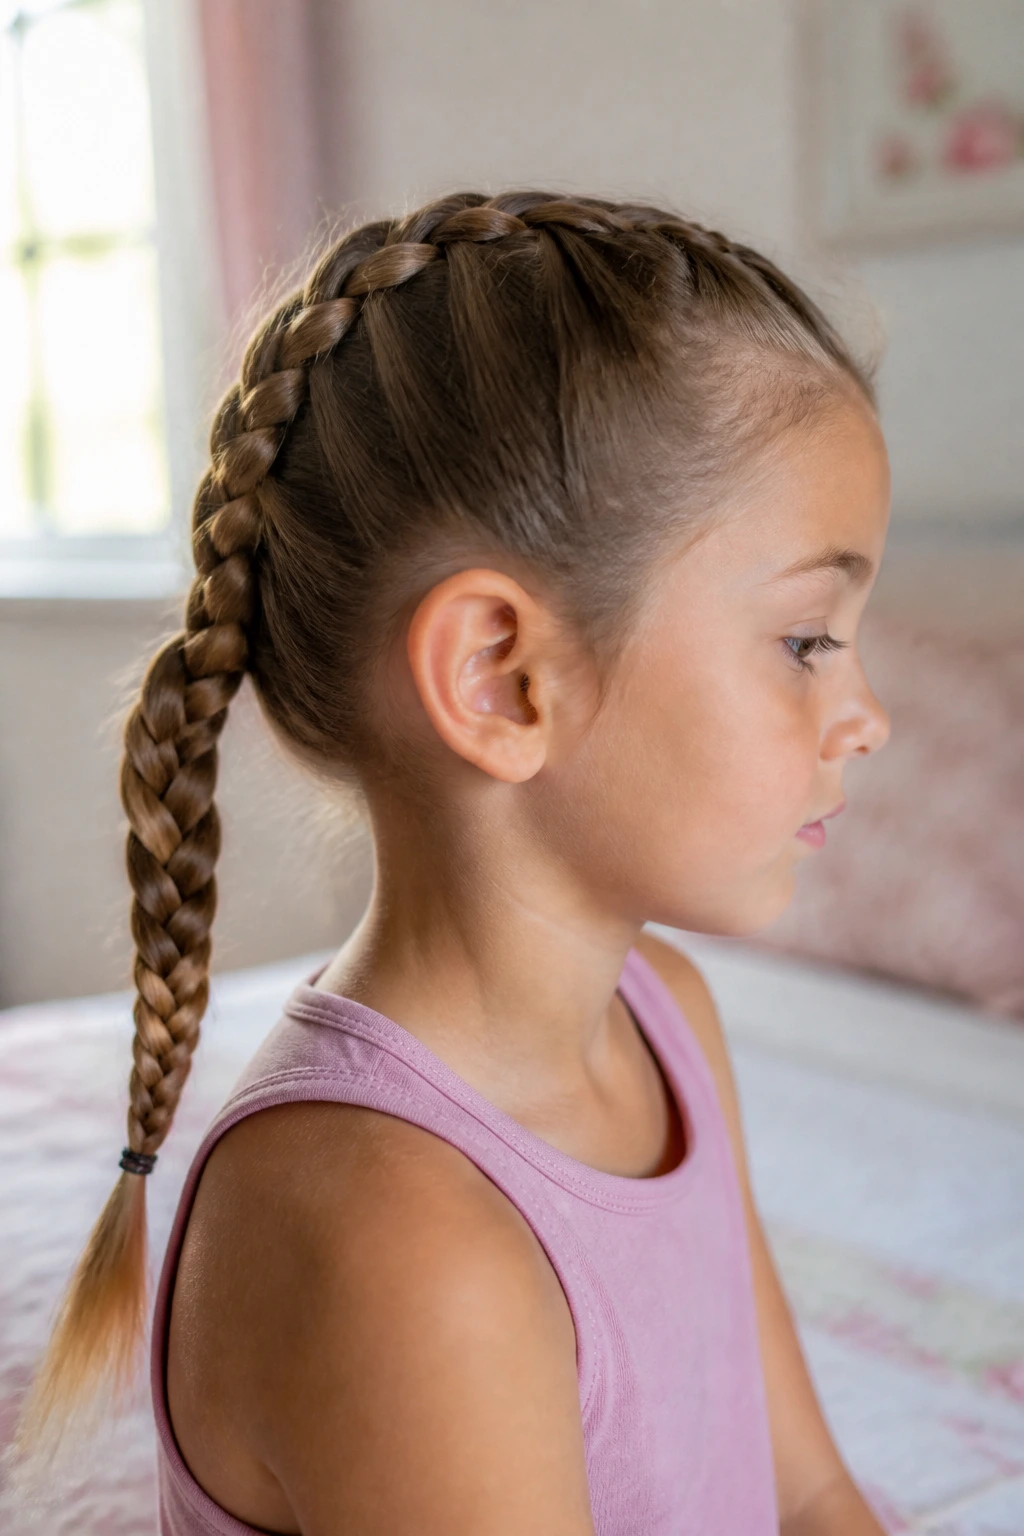
15. Double Dutch Braids That Join Into a Ponytail
Two Dutch braids that meet into one ponytail are a smart choice when you want a style that can handle movement. The braids hold the top and sides close to the head, then the ponytail gives the style an easy finish. It’s neat without being stiff.
Best for active little ones
This one is especially good for playground days, dance classes, or any stretch of time when the hair will get bumped around. The braid pattern anchors the top sections, and the ponytail keeps the ends from tangling into knots.
For thin hair, keep the braids narrow. If you widen them too much, they can puff apart before the ponytail base is even finished. Tiny sections at the scalp make the whole thing look cleaner and last longer.
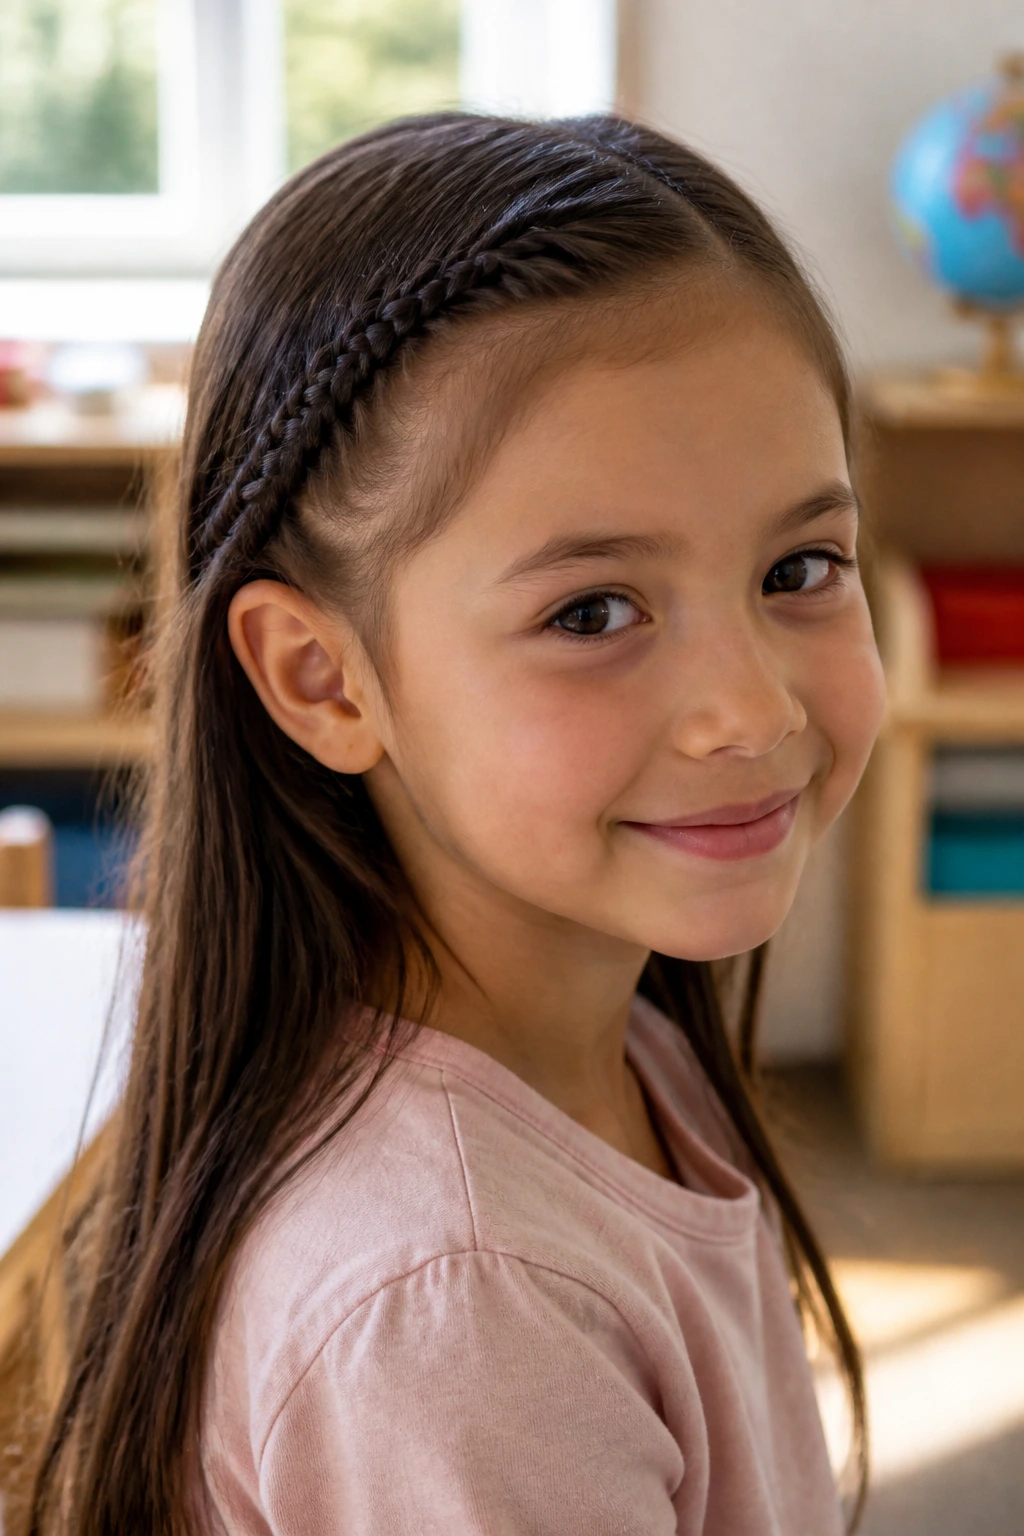
16. A Lace Braid Along the Hairline That Feels Soft and Fancy
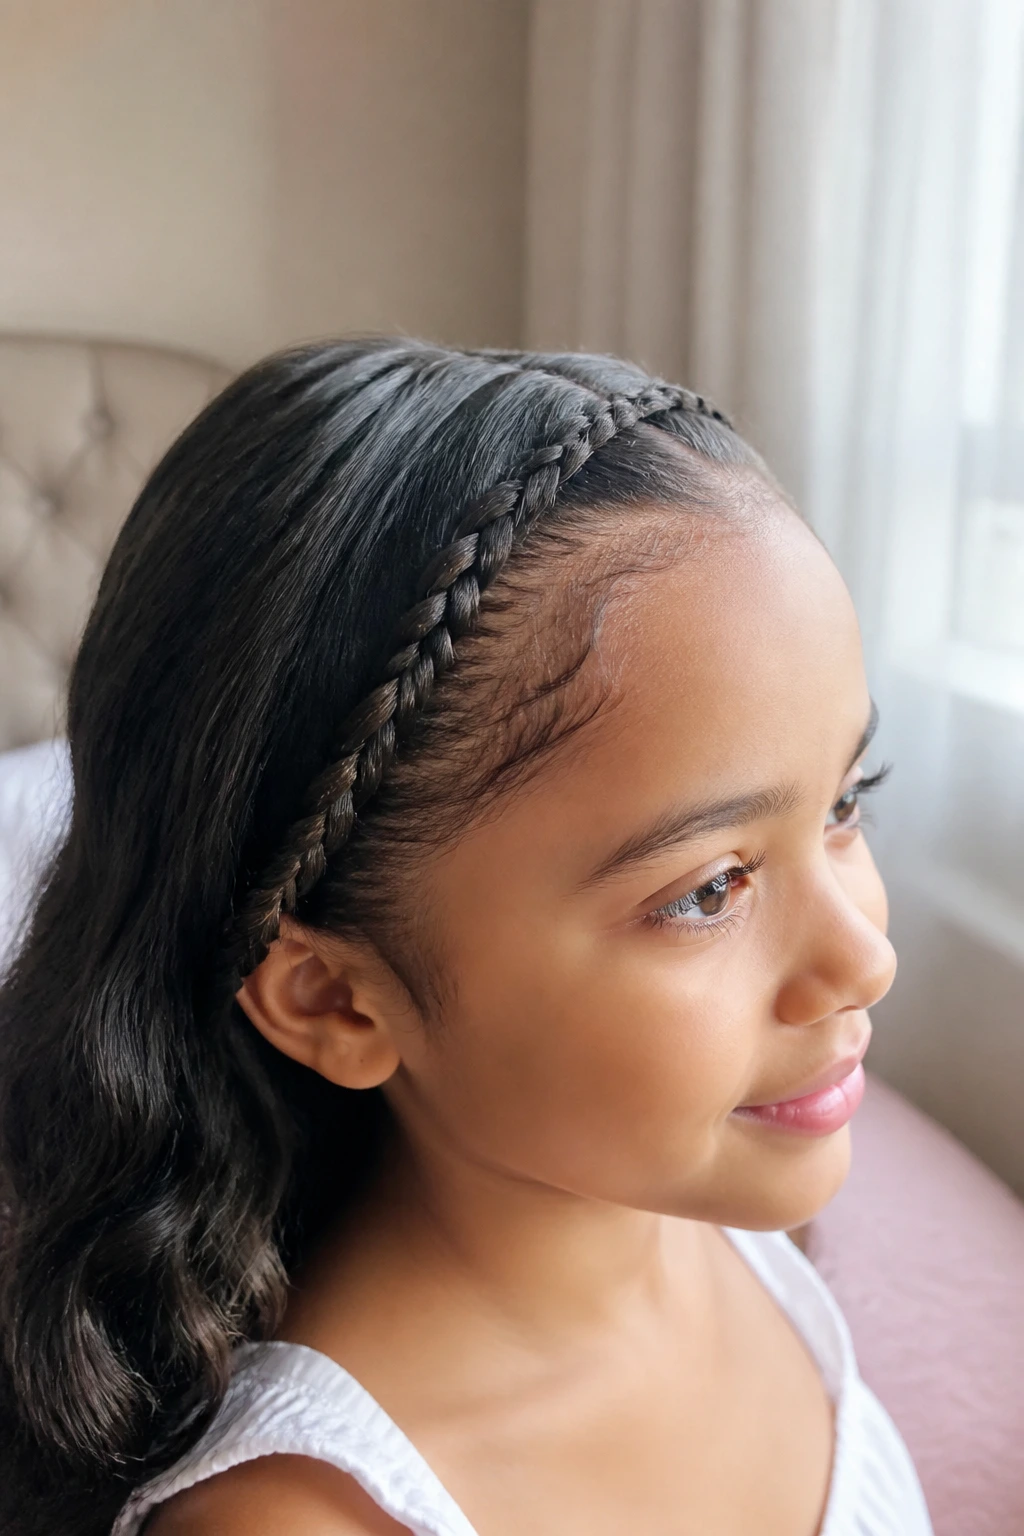
A lace braid is like a French braid that only adds hair from one side. That gives you a pretty sweep along the hairline without making the whole style feel heavy. Thin hair takes well to this because the braid stays small and controlled.
I like lace braids around the face when the child wants some hair back but not all of it. It’s a softer look than a full braided crown, and it works well if the hair is cut in layers. The loose side pieces help disguise the fact that the hair is fine.
If the braid slips, use one tiny bobby pin under the back section to anchor it. One pin is often enough. More can look clunky.
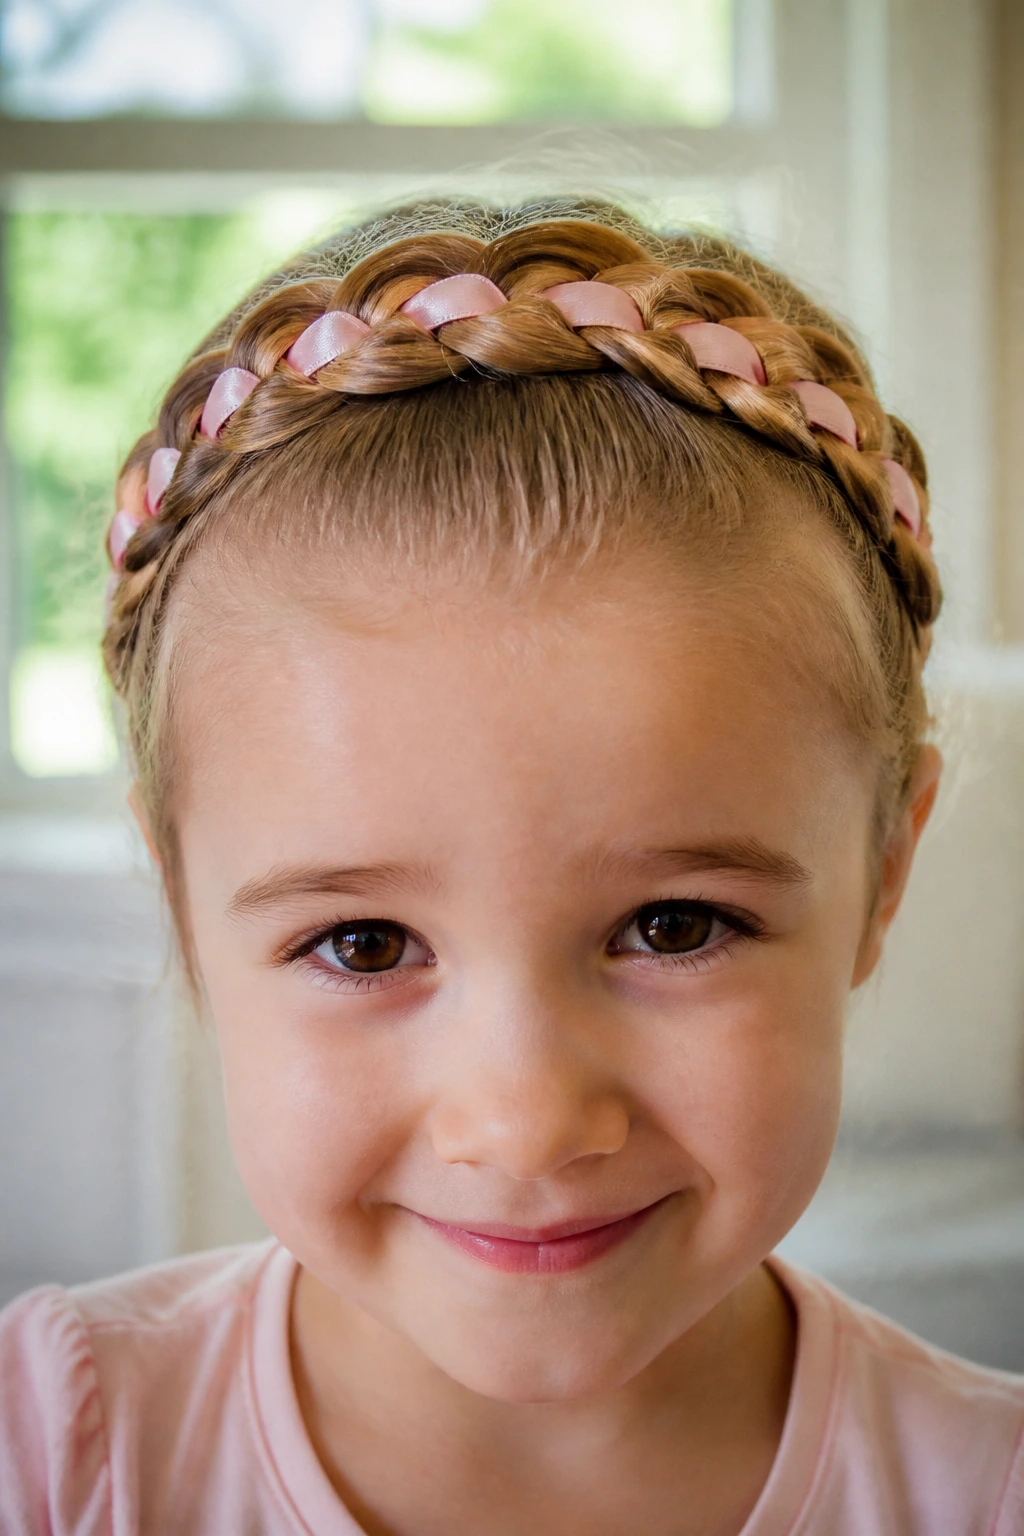
17. A Ribbon-Woven Braid That Adds Color and Makes Thin Hair Pop

Ribbon is one of the easiest tricks for thin hair because it adds visual width without adding heaviness. Thread a slim ribbon into one strand or tie it near the top of the braid and weave it down with the sections. The color gives the braid more presence right away.
This works especially well on plain hair days when you want the style to feel a little more playful. A pale pink ribbon, a school-color ribbon, or even a simple white satin strip can change the whole look. The braid itself can stay simple.
Choose ribbon that is soft and smooth, not stiff and scratchy. If it catches on the hair, the braid gets messy fast. That’s a detail worth getting right.
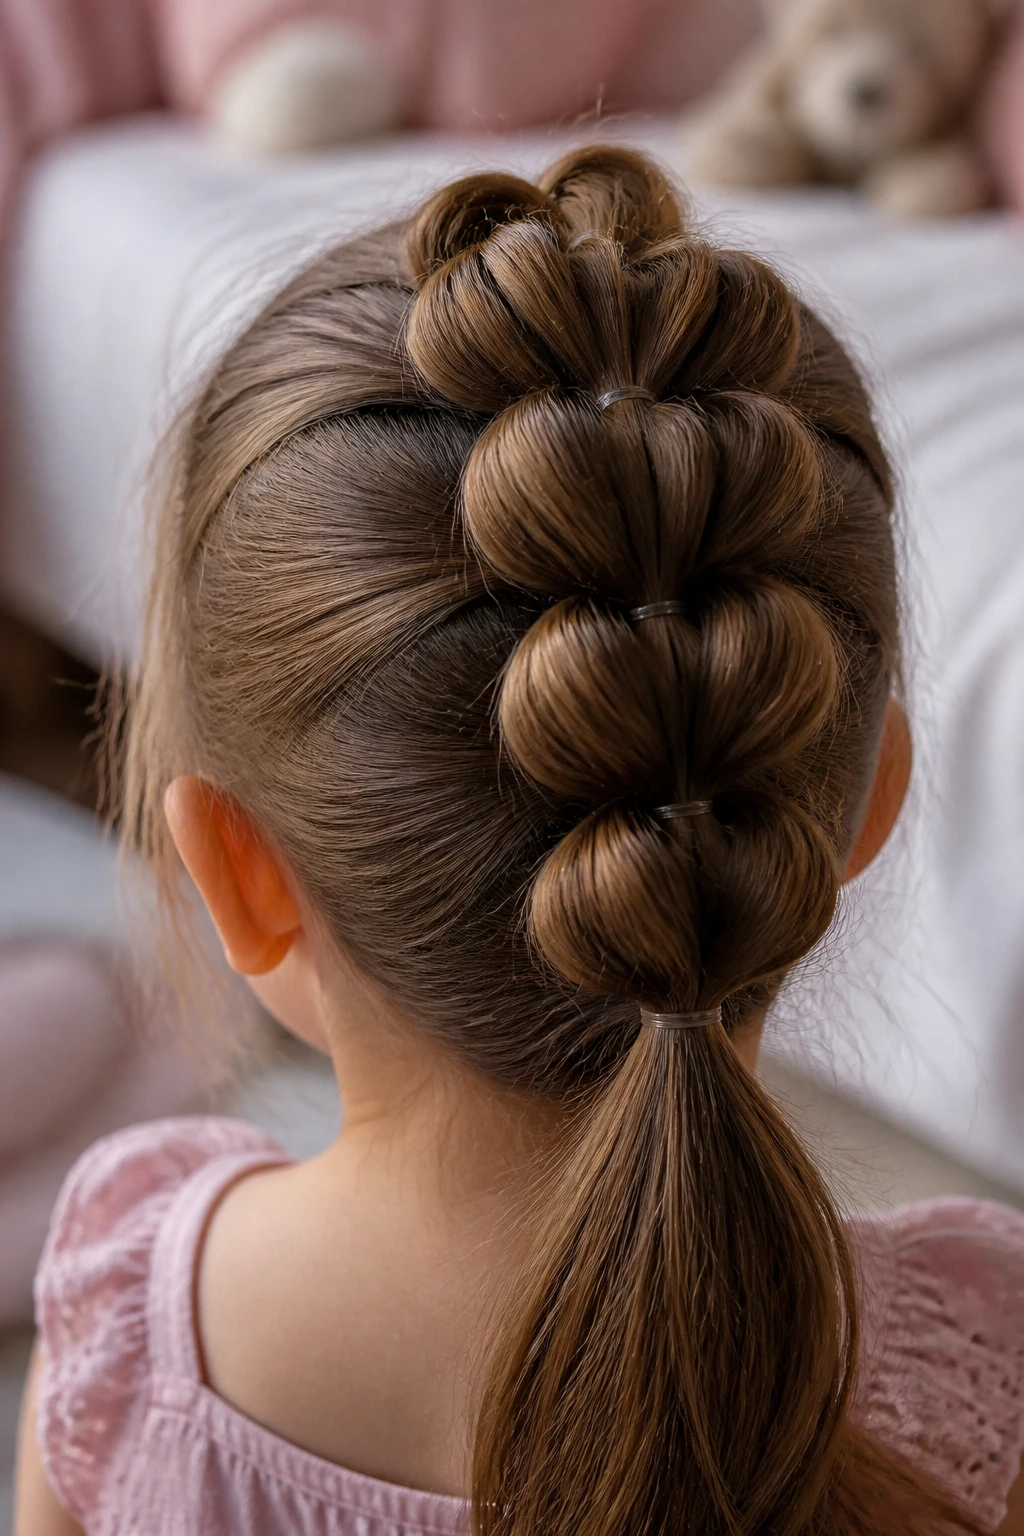
18. A Bubble Braid With a Tiny Braided Start

Bubble braids are great on thin hair because the style does not pretend the hair is thick. It uses elastics spaced down the length of the ponytail, then gently pulls each section outward to make round “bubbles.” If you start with a tiny braid at the top, the style looks more finished and stays anchored better.
The top braid can be short—just enough to lead into the ponytail. After that, clear elastics every 1½ to 2 inches do the shaping work. The bubbles create the illusion of more body, which is useful when the tail is fine and wispy.
This one is a favorite for kids who like something a little playful. It looks fun without needing much skill. Good trade.
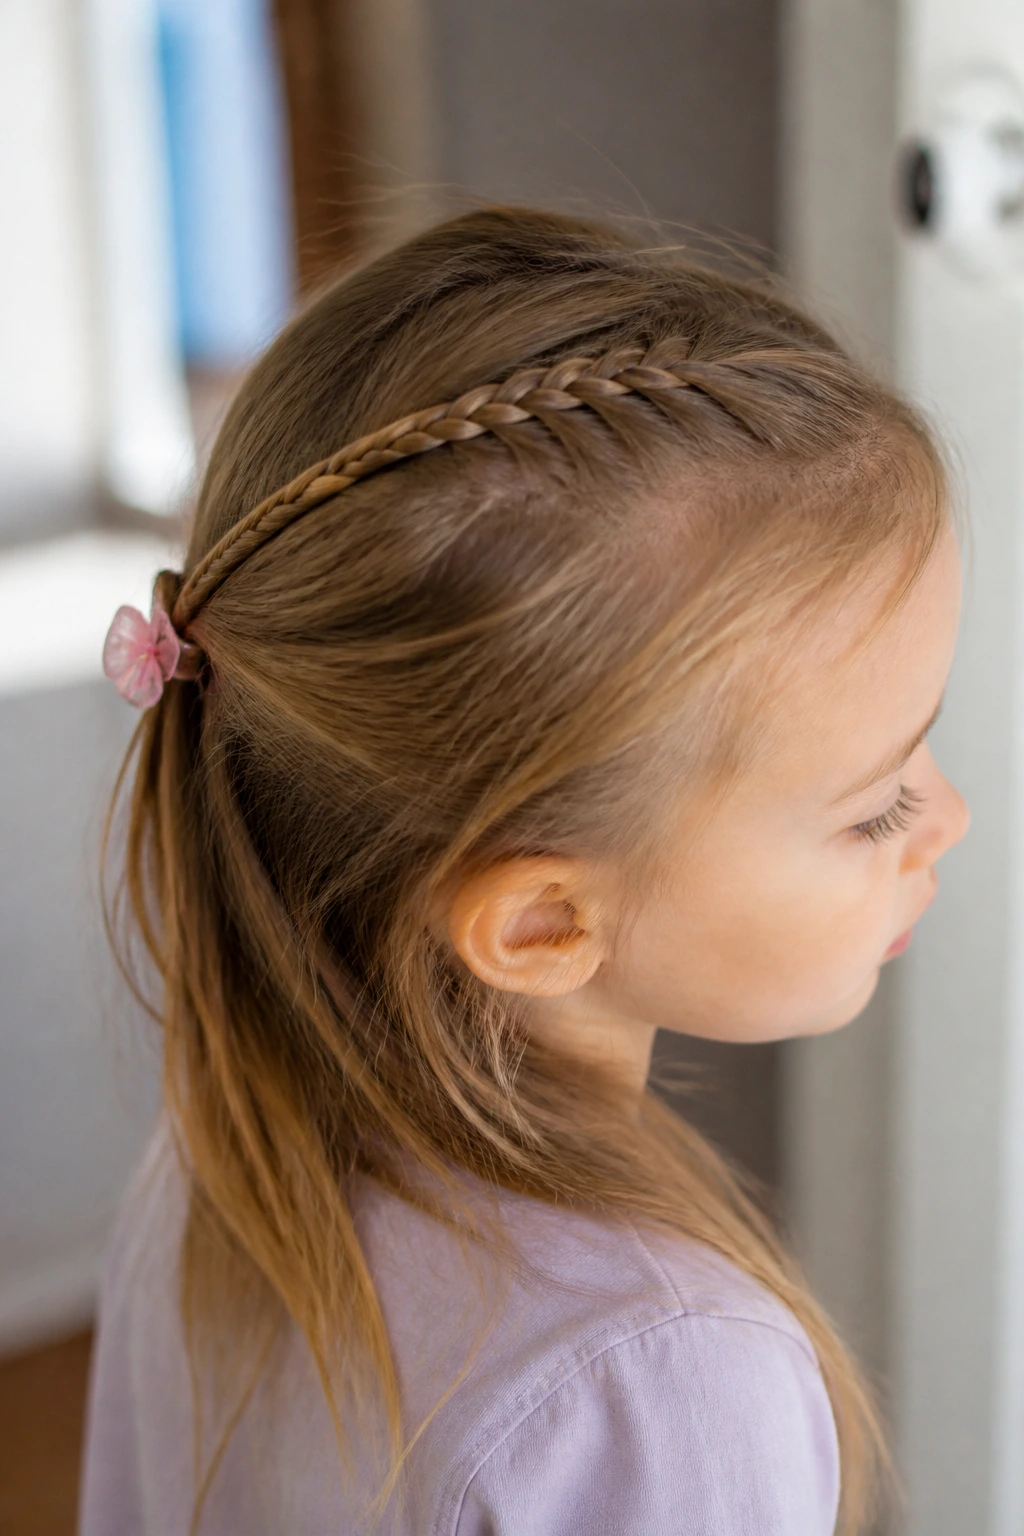
19. A Braided Headband That Clears the Face
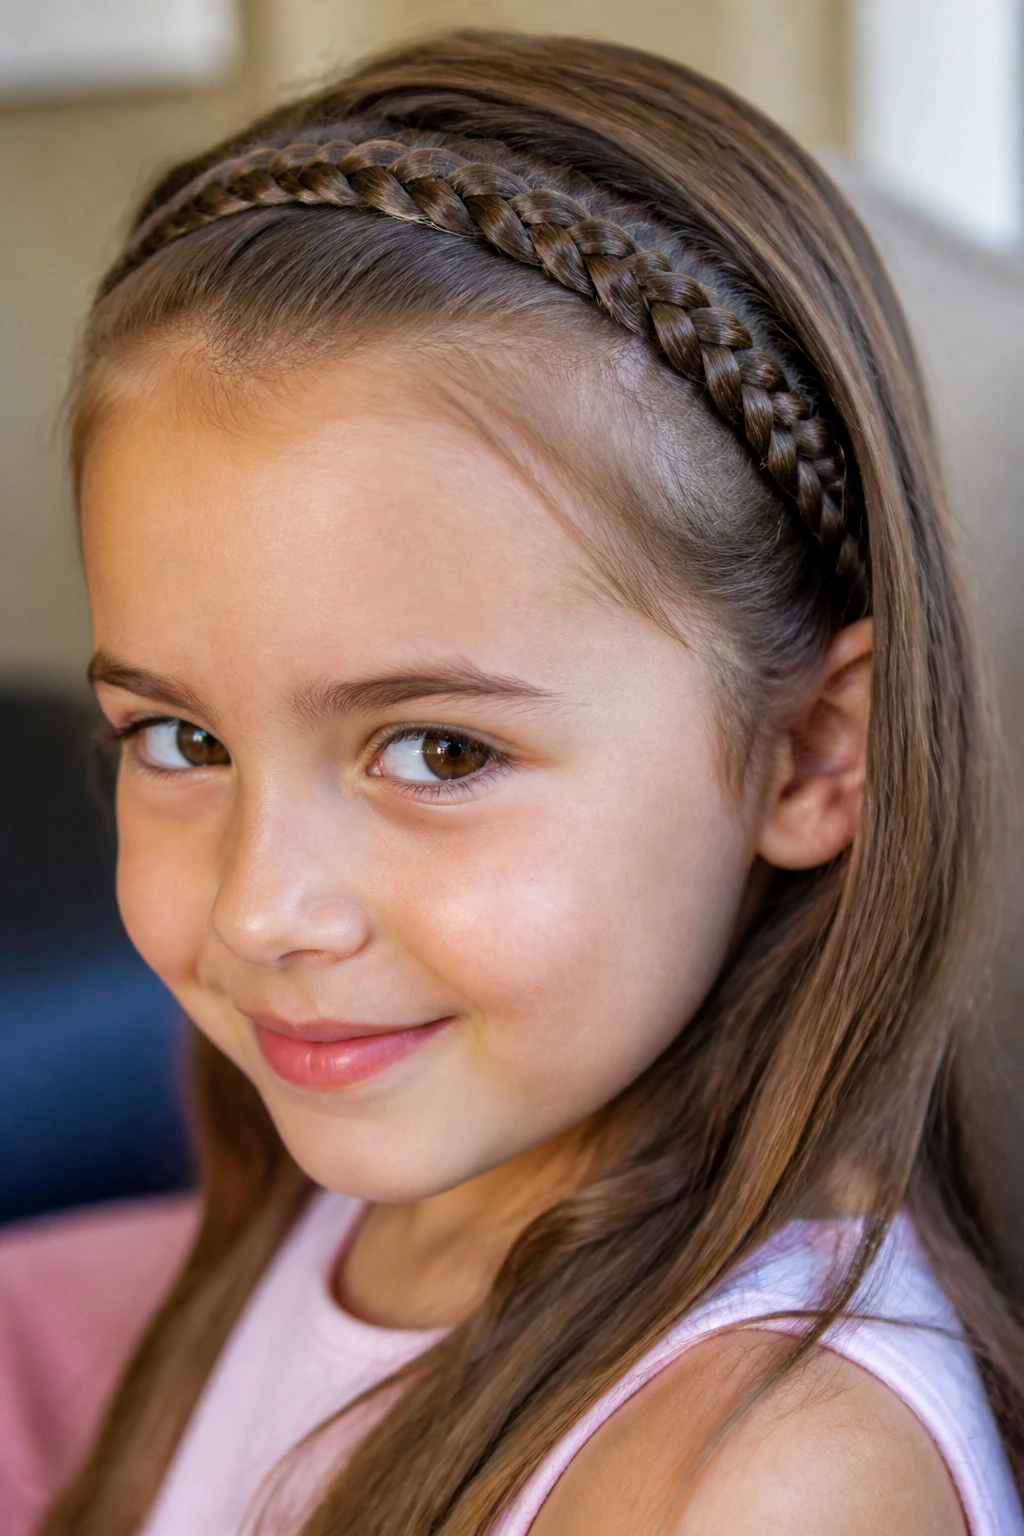
A braided headband takes a front section of hair, braids it from ear to ear, and pins it across the top or just behind the hairline. It is one of the cleanest ways to keep fine hair off the face while still leaving most of it down.
The braid should be snug enough to hold, but not so tight that it tugs the temples. That pressure shows fast on little girls, especially if the hairline is delicate. Use small sections and pin the ends where the braid meets the other side.
This style is useful when the rest of the hair is too thin to hold a full updo comfortably. It gives shape without asking too much of the hair.
20. Tiny Cornrow Pairs for a Sleek, Secure Finish
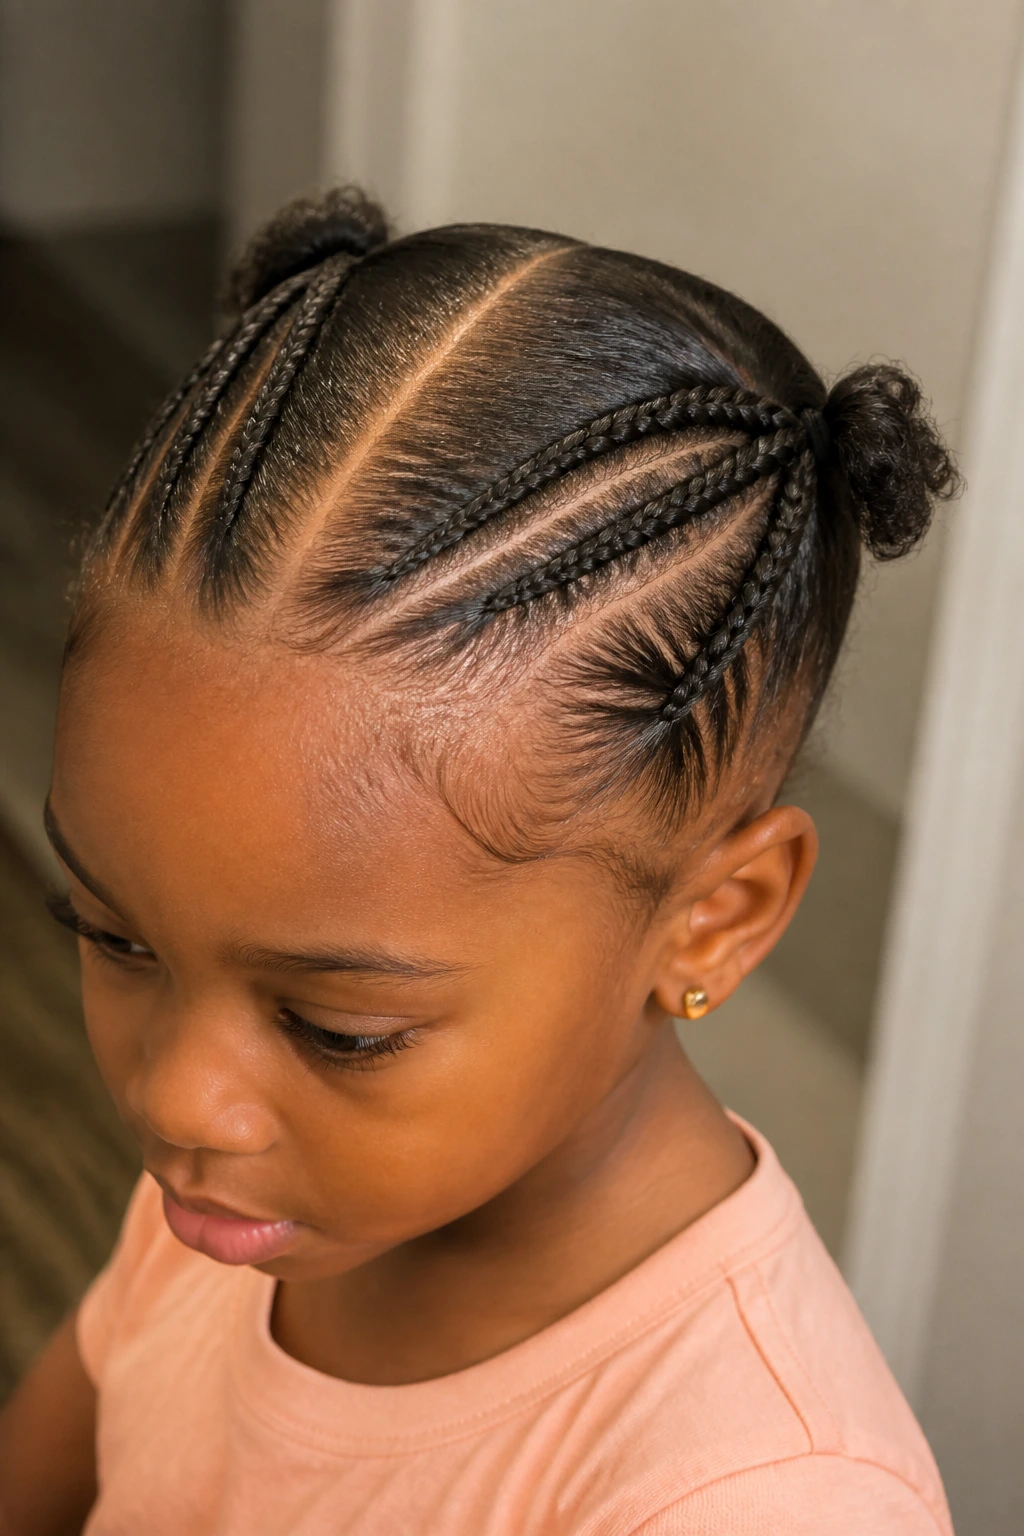
A pair of tiny cornrows can work beautifully on fine hair if you keep the sections small and the tension gentle. I would not force this style on a child with a sensitive scalp, but when it’s done lightly, it keeps the hair very close to the head and out of the way.
The braid lines should be crisp, not tight. Tiny sections help because they reduce the pull and make the braid stay flatter against the head. That flat shape is useful on thin hair, which can look stringy if the braid is too loose.
If you are new to cornrows, start with just two rows. One on each side is enough. You do not need a full grid unless you want the extra work.
21. A Diagonal Back Braid That Uses Shorter Hair Well
A diagonal braid starts near one temple and travels across the back of the head toward the opposite side. This path is helpful for thin or shorter hair because it uses the shape of the head to keep the braid supported instead of hanging all the weight in one place.
The braid feels a little more interesting than a straight-down style, but it does not require advanced finger work. That makes it a smart choice for beginners who want something beyond the basics without stepping into complicated territory.
If the braid starts to loosen at the nape, a single clear elastic there can save it. No need to rebuild the whole thing. Just pin and move on.
22. A Low Braided Bun That Keeps Everything Tucked In
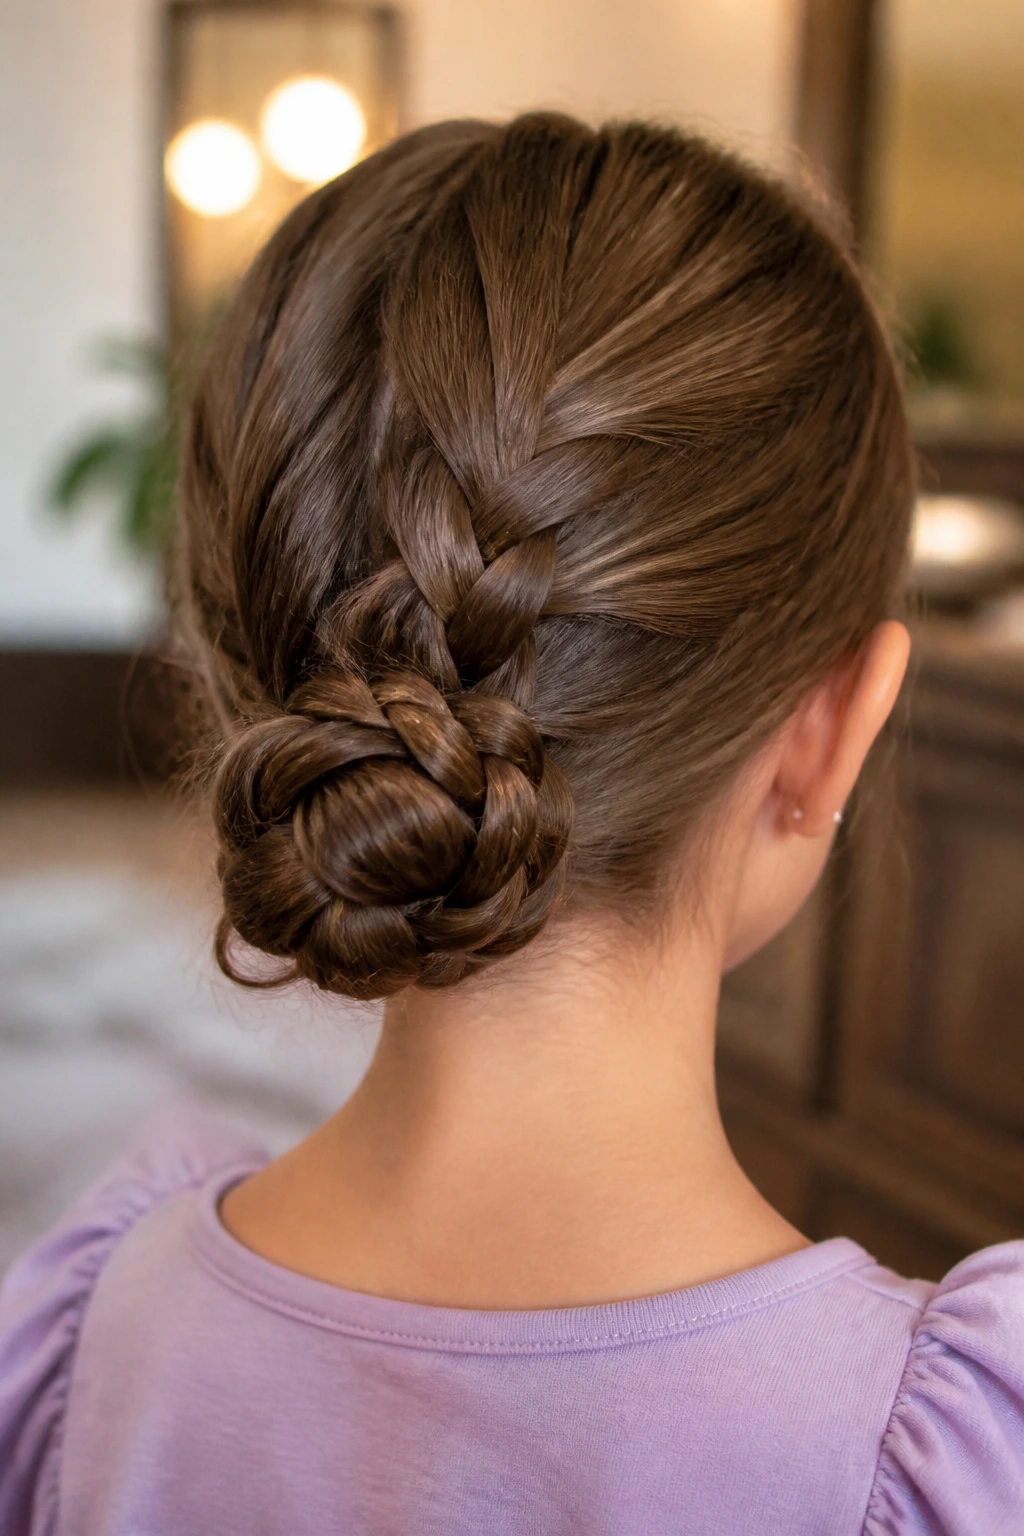
A low braided bun is one of the neatest styles for thin hair because it starts with a braid and ends with a wrapped coil. The braid gives the bun some structure, which matters when the hair itself is too fine to make a full bun on its own.
The part most people miss
Do not make the braid too loose before you wrap it. Thin hair can fall apart if the braid is over-fluffed before it even reaches the bun stage. Keep it compact, wrap it around the base, then pin the bun from two sides so it sits flat.
This is a useful style for dress-up days, but it also works for ordinary school days when you want the hair off the neck. It’s tidy without being fussy.
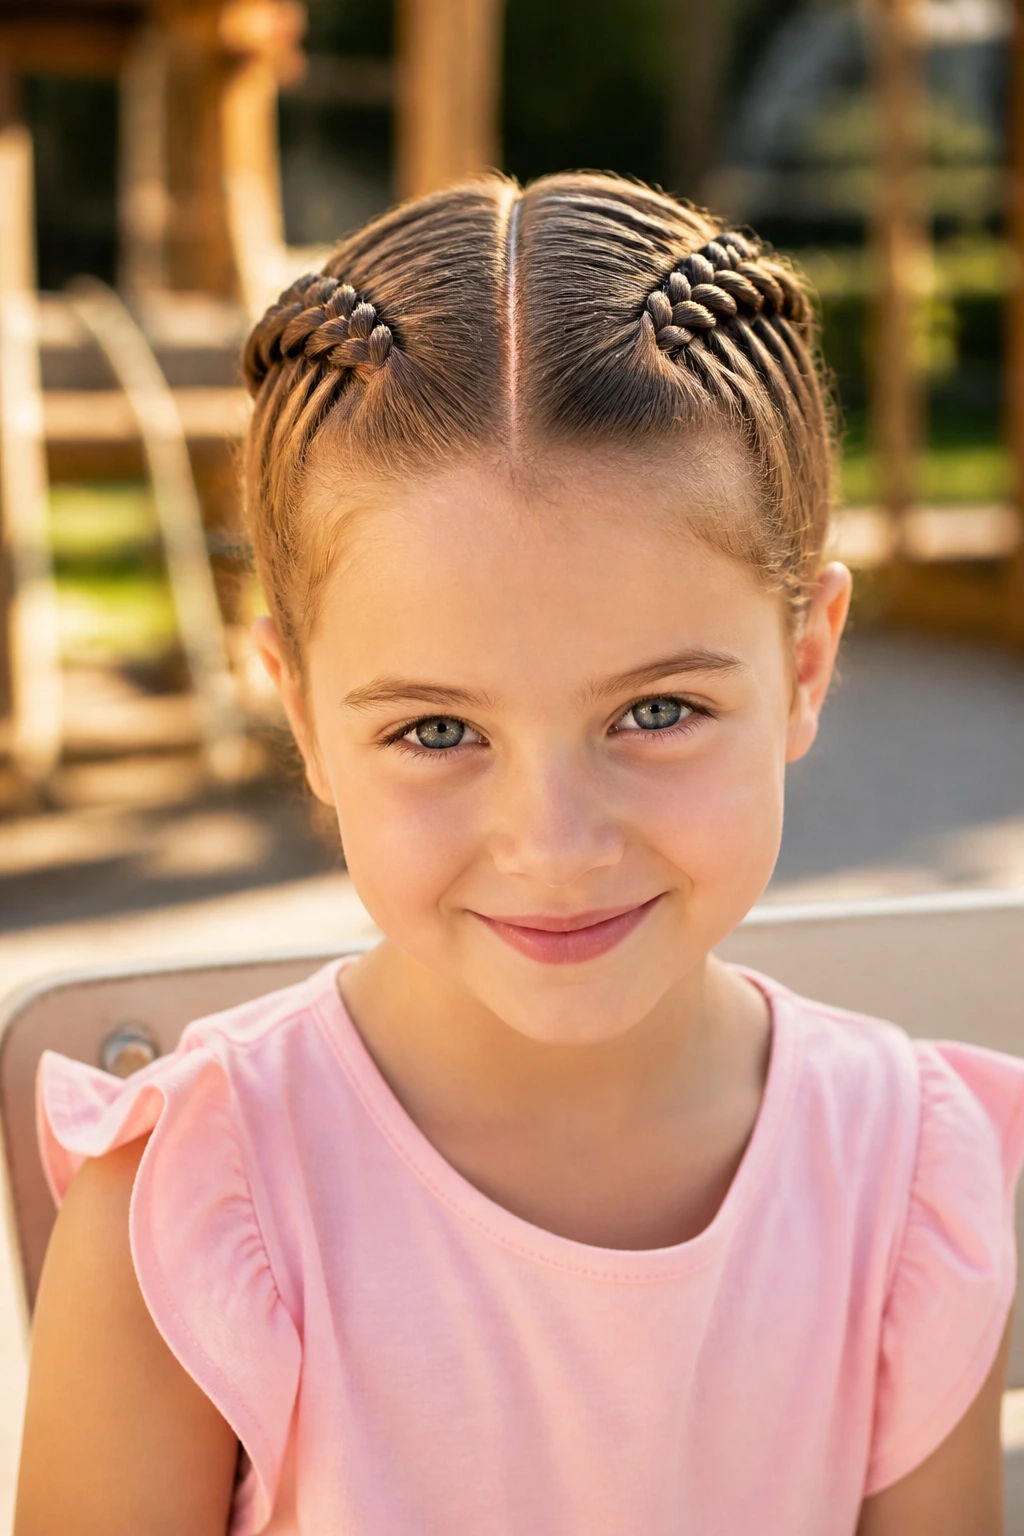
23. Criss-Cross Braids That Make the Back Look Finished
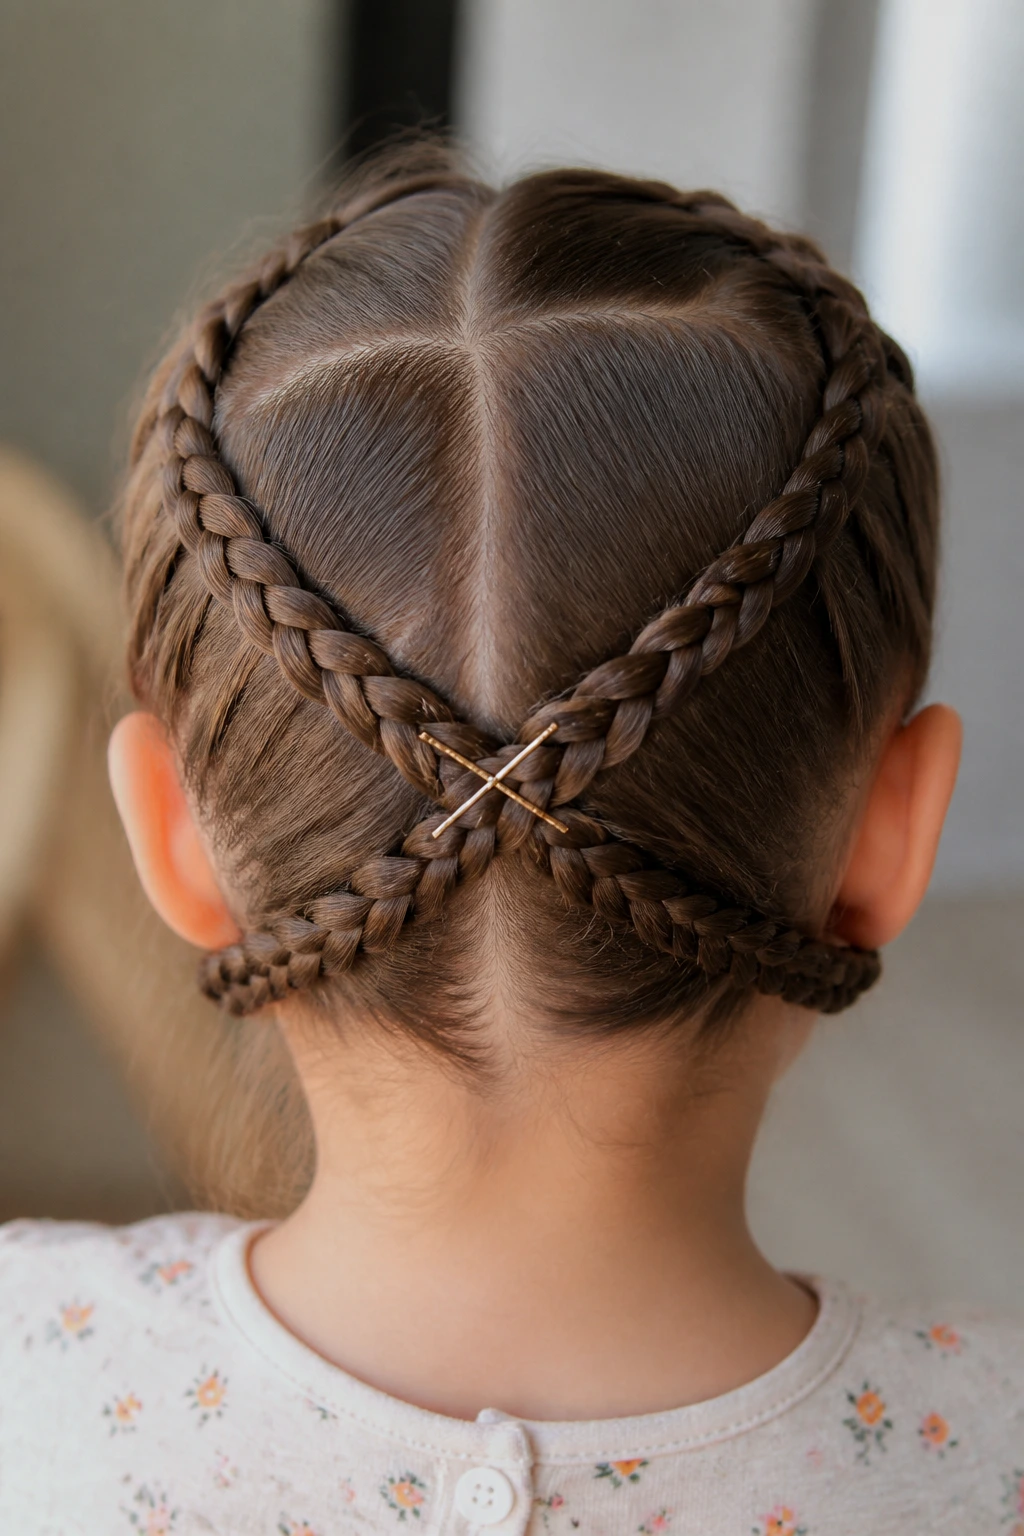
Criss-cross braids use two small braids that cross over each other and pin near the back of the head. On thin hair, that cross pattern gives the illusion of more detail than there actually is, which is handy when the hair is too fine for a big statement braid.
The sections can be simple three-strand braids. Nothing fancy. The crossing motion is what makes the style stand out, not the braid type itself. Secure the overlap with two bobby pins in an X shape, and it usually stays put better than you’d expect.
This is a nice one for parents who want something cute but not time-consuming. It looks like you did more than you actually did. I’m not against that.
24. A Braided Ponytail with Little Bows Along the Length
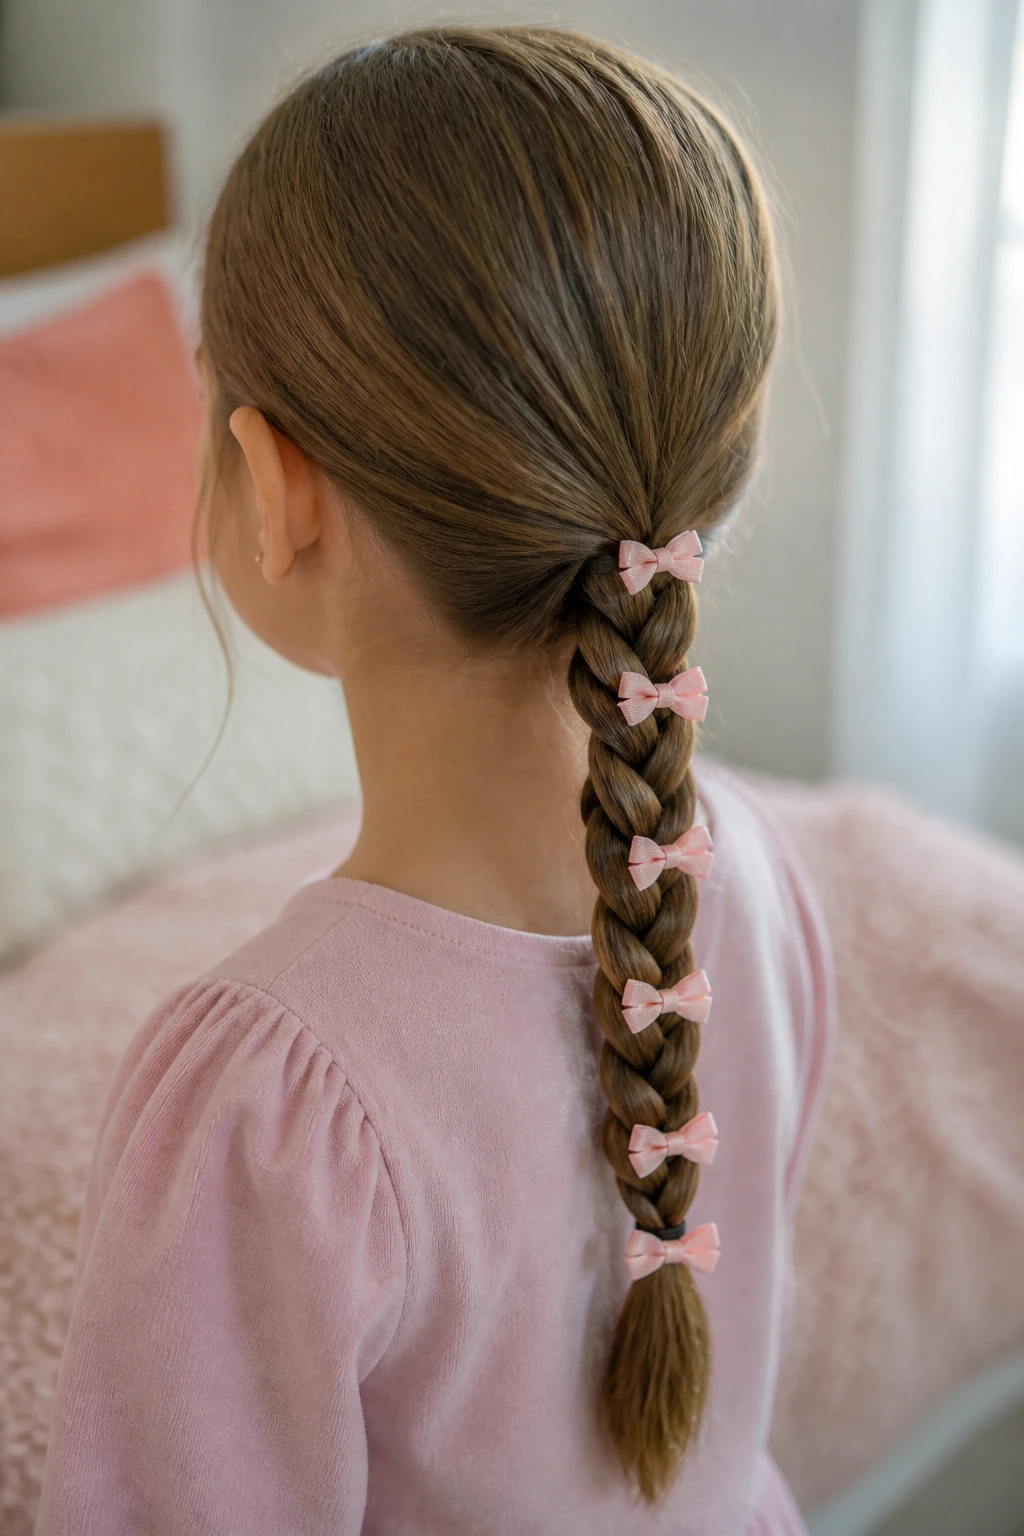
A plain braid can look sparse on thin hair, which is why tiny bows or clips placed along the length make such a difference. Start with a low or mid ponytail, braid it down, then tuck in small bows every few inches if the child likes decoration.
The braid itself should stay neat and simple. The bows add the extra lift the style needs, both visually and emotionally. Some kids care more about the ribbon than the braid. That’s fine. Use the ribbon.
If the hair is very fine, avoid oversized bows that drag the braid down. Small, soft clips sit better and feel lighter.
25. Three Tiny Accent Braids on One Side
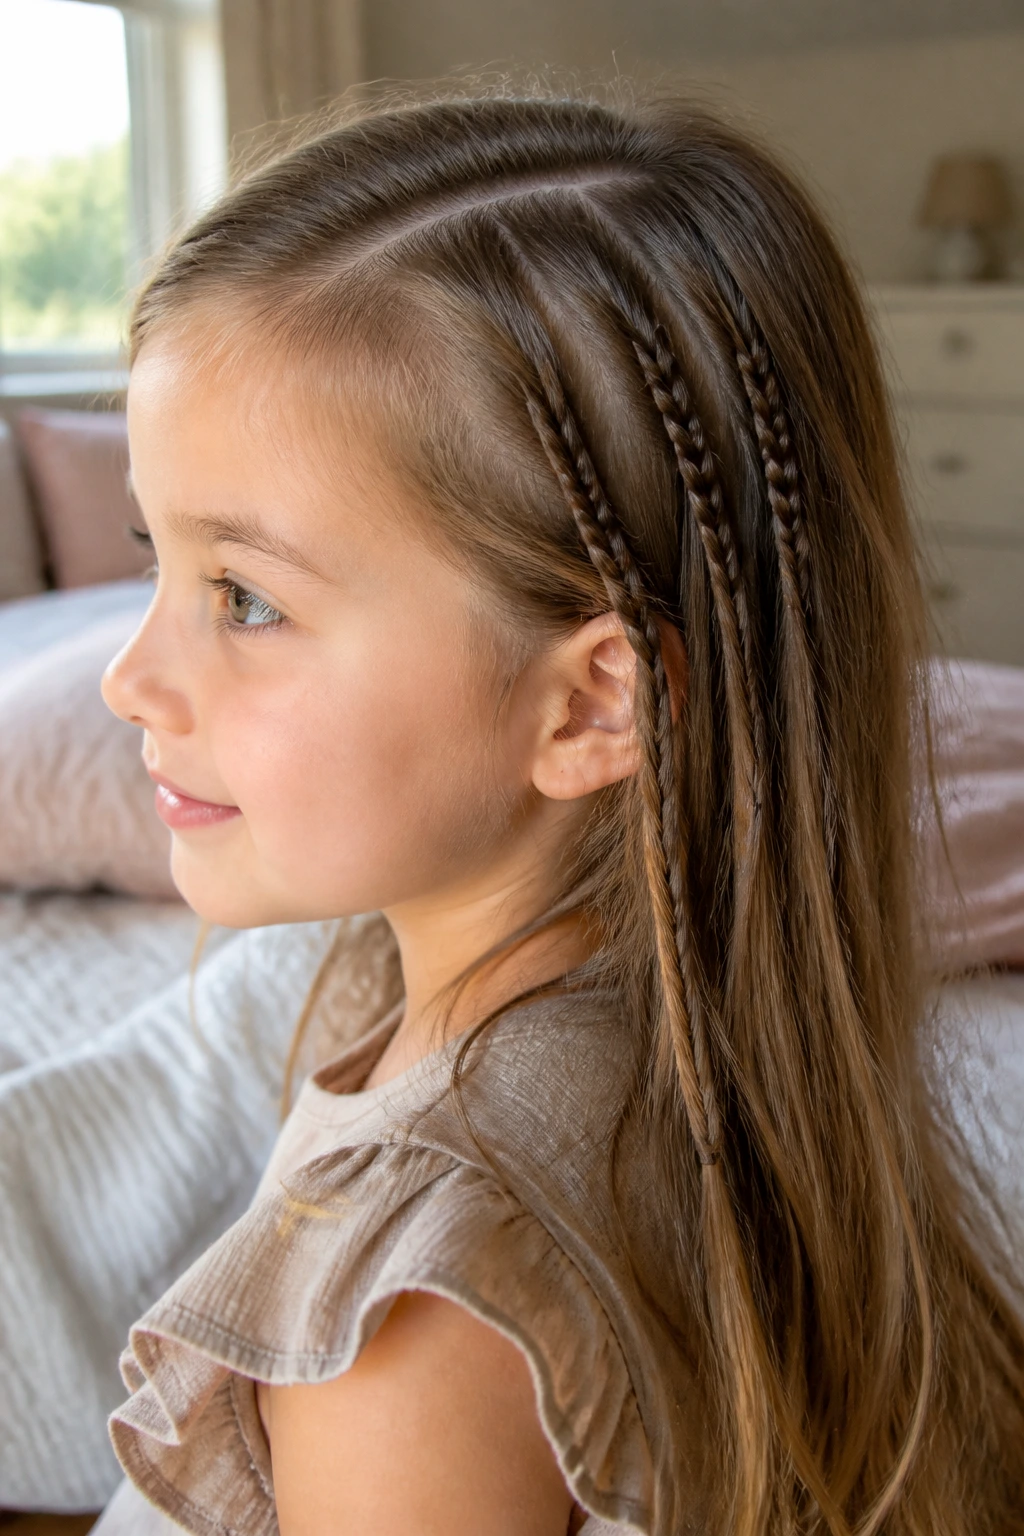
Three little accent braids are one of the easiest ways to add interest to thin hair without making a big production out of it. Part a narrow section on one side, split it into three tiny braids, and let them fall loose or secure them together with a small elastic.
This style works well when the rest of the hair is left down. It gives the hair some texture near the face, which can make fine strands look more styled without needing a full head of braids. The key is keeping the parts clean and the braids small enough to hold.
It’s a good last-minute style, too. A few tiny braids can save a day when the hair is behaving badly and you do not have time for something bigger.
Why Thin Hair Needs a Gentler Braiding Approach
Thin hair behaves differently from thick hair, and the braid has to respect that. Fine strands usually slide around more, separate faster, and show tension at the scalp sooner. If you braid as though the hair is dense and heavy, the style can end up loose at the ends and sore at the roots. That is a bad trade.
The answer is not more force. It’s smaller sections, cleaner parts, and a little bit of grip before you start. A mist of water or detangling spray, a smooth brush, and a rat-tail comb do more for thin hair than a thick layer of gel ever will. Heavy product can flatten the braid in a greasy way that makes it look limp by lunchtime.
I also like braids that include an anchor point—an elastic, a ponytail base, a pinned section, or a wrapped bun. Thin hair often needs one extra bit of support where thick hair could just hold itself together. That’s not a flaw. It’s the rule you work with.
The Tools That Make Fine-Hair Braiding Easier
- Rat-tail comb: The pointed end makes clean parts, and clean parts are half the battle with thin hair.
- Wide-tooth comb or soft brush: Use this to detangle before braiding so you do not snap delicate strands.
- Light detangling spray: A small mist gives slip without coating the hair in a heavy film.
- Small clear elastics: These hold tiny braids and pull-through styles without adding much bulk.
- Soft bristle brush: Good for smoothing the top layer before you start.
- Bobby pins in a matching color: Helpful for crown braids, buns, and any style that needs a quiet anchor.
- Hair clips or sectioning clips: These keep the unused hair out of the way while you work one section at a time.
- Ribbon or small bows: On thin hair, accessories often do as much visual work as the braid itself.
- Satin scrunchie or bonnet: Useful for keeping the braid neat overnight and reducing friction.
How to Prep Thin Hair So the Braid Actually Holds
Hair that is too slippery is hard to braid well. Hair that is too dry can frizz and slip apart in a different way. The sweet spot is usually hair that has been freshly brushed, lightly misted, and separated into clean parts before you even begin the braid. If the hair was washed that morning, give it a little time to dry so it does not feel squeaky and slick.
Start by detangling from the ends upward. That keeps little knots from turning into bigger ones when you start crossing sections. If the hair is extra fine, a pea-sized amount of lightweight leave-in on the ends is enough. You do not need to coat the roots.
I also like to braid fine hair when there is a touch of natural texture in it. Day-two hair often holds better than silky fresh-wash hair. If that sounds backward, it is. But thin hair has opinions, and slippery hair likes to rebel.
How to Wear These Braids So They Look Good All Day
Presentation: Keep the braid where the haircut already wants to fall—side, center, low at the nape, or tucked along the hairline. Fine hair usually looks best when the braid follows the head’s shape instead of fighting it.
Accessories: Small bows, clear elastics, ribbon, and tiny clips work better than heavy decorations. Big accessories can drag thin braids down and make the roots feel pulled.
Portions: One braid is often enough for very fine hair. Two braids work well when you want symmetry. Five or six little braids can be charming, but they can also look overdone on a small head, so keep the number in proportion to the child’s hair length.
Best For: These styles are useful for school, family photos, active play, and days when hair needs to stay off the face. A plain three-strand braid is usually best for busy mornings. Save the waterfall or crown braid for the days when you can spare an extra five minutes.
Extra Tips and Style Boosters
Texture Boost: If the hair slips too much, mist the mid-lengths lightly with water or a fine detangler and let them sit for a minute before you start. That tiny pause helps the hair grip itself better.
Fuller Look: Gently tug the outer edges of the braid after it is tied off. Do not pull hard. Thin hair only needs a little widening to look more substantial, and too much will make it messy.
Finish Line: A ribbon, bow, or small barrette near the end of the braid often makes the style feel complete. Fine hair usually needs that visual “stop” so the braid does not look unfinished.
Make-It-Yours: If the child hates hair on the neck, choose a crown braid, a braided headband, or a braided ponytail. If she likes to wear her hair down, go with a half-up braid or a side accent braid that keeps the front neat without hiding the length.
Common Mistakes That Make Thin Hair Braids Fall Apart
The first mistake is braiding too tightly in the hope that the style will last longer. It usually does the opposite. Fine hair shows stress at the scalp quickly, and a braid that feels tight at the start can become uncomfortable before the day is over. The fix is to work with smaller sections and secure the end well, instead of yanking the roots.
Another common problem is starting on hair that is either soaking wet or overly slick with product. Wet hair slides, and heavy product makes thin strands feel waxy and limp. Use hair that is mostly dry, lightly misted, or day-two textured if you need more grip.
Skipping the detangling step causes trouble too. Tiny knots hide in fine hair, then pop up as a rough bump in the middle of the braid. Brush or comb the hair first, every time. It takes two minutes and saves ten.
Last, people often try to make one braid carry too much hair. Thin hair does better with smaller, clearer sections. If the braid looks narrow, that is not failure. That is the shape of the hair you have.
Variations and Adaptations to Try
Ribbon-First Braids: If the hair is very fine, weave ribbon through a simple braid from the start. It adds color and makes the braid look fuller without needing extra hair.
Picture-Day Polish: Use a French braid, crown braid, or braided headband with a small bow at the finish. These styles read cleaner in photos because they sit close to the head and keep flyaways under control.
Playground-Ready Braids: Choose Dutch braids, braided ponytails, or double braids into a ponytail. These hold better when there is running, climbing, and head-turning involved.
Sensitive-Scalp Version: Stay with looser side braids, half-up styles, or a braided ponytail placed low at the nape. Skip cornrow-style tension if the child complains about pulling at the hairline.
Short-Hair Adaptation: Use smaller sections and stop earlier. A tiny braid clipped in place can be more useful than trying to force a long style on hair that is not there yet.
Make-Ahead, Nighttime, and Next-Day Maintenance
Braids on thin hair usually hold best for one full day, sometimes two if the hair is not getting sweaty or rubbed hard. If you want the style to last overnight, use a satin bonnet or a satin pillowcase. Cotton pillowcases rough up fine hair fast, and the braid can wake up puffy and flat in the wrong places.
For the next day, a light mist of water or detangling spray on the outer layers is usually enough. Do not soak the braid. You only want to relax the frizz around the face and maybe smooth a loose end or two. If the front has slipped, re-braid the top inch instead of rebuilding the whole style.
If you used ribbons or bows, remove them before sleeping if they feel stiff or bulky. Soft elastics can stay in, but anything with hard edges will leave dents. For longer wear, redo the part every couple of days so the roots do not look crooked.
Common Mistakes to Avoid
- Braiding too much hair at once: Large sections make fine hair look loose and shapeless. Use narrower sections and let the braid build gradually.
- Pulling the scalp too hard: If the child winces, the braid is too tight. Ease up right away; comfort matters more than a perfectly slick look.
- Using heavy creams or oils near the roots: Thick product can make thin hair collapse before lunch. Keep product light and use it mostly on the ends.
- Skipping tiny elastics: Fine hair often needs an elastic at the base or end to stop the braid from loosening. A small clear tie can save the whole style.
- Ignoring the haircut’s shape: Layered hair and blunt cuts behave differently. Work with the shape instead of forcing every braid to look identical.
Frequently Asked Questions About Braids for Little Girls with Thin Hair

How do I make thin hair braids look fuller?
Use smaller sections, then gently tug the outer edges of the braid once it is secured. A ribbon woven in or a pull-through braid can also create a fuller look without adding fake hair.
Should I braid thin hair wet or dry?
Mostly dry hair works better. Wet hair slips and can stretch too much, while very dry hair can frizz. A light mist of water or detangler is usually the safest middle ground.
What braid is easiest for a beginner?
A side three-strand braid or two low pigtail braids are the easiest starting point. They use the same hand motion the whole way and do not ask for complicated sectioning.
How tight should braids be on a little girl?
Snug enough to stay put, never tight enough to pull at the hairline. If the scalp looks raised, red, or sore, the braid needs to be loosened and redone.
Can I do these styles on short thin hair?
Yes, but the shortest hair works best with styles like a half-up braid, braided bangs, tiny accent braids, or a braid that ends early and is clipped in place. Very long crown braids usually need more length.
How long do braids last on fine hair?
Most will hold through the day, and many can last into the next morning with a satin bonnet or pillowcase. Styles with clear elastics, like pull-through braids, often hold longer than loose side braids.
What if the braid keeps slipping apart?
The hair probably needs more texture or smaller sections. Try a light detangling spray, braid on day-two hair, and secure the end with a tiny elastic instead of relying on the braid alone.
Are tight braids bad for thin hair?
Yes, they can be. Thin hair and delicate scalps show tension fast, and repeated tight styles can cause breakage around the temples. Gentle tension and clean parts are the safer choice.
Braids That Stay Gentle
Thin hair does not need a harder braid. It needs a smarter one. Once you start working with small sections, light prep, and a little help from elastics or ribbon, the styles stop fighting the hair and start fitting it.
That’s the whole trick, really. A braid on a little girl with fine hair should feel comfortable first, neat second, and decorative third. If it does those three things, it earns its place in the morning rotation—and probably stays there.