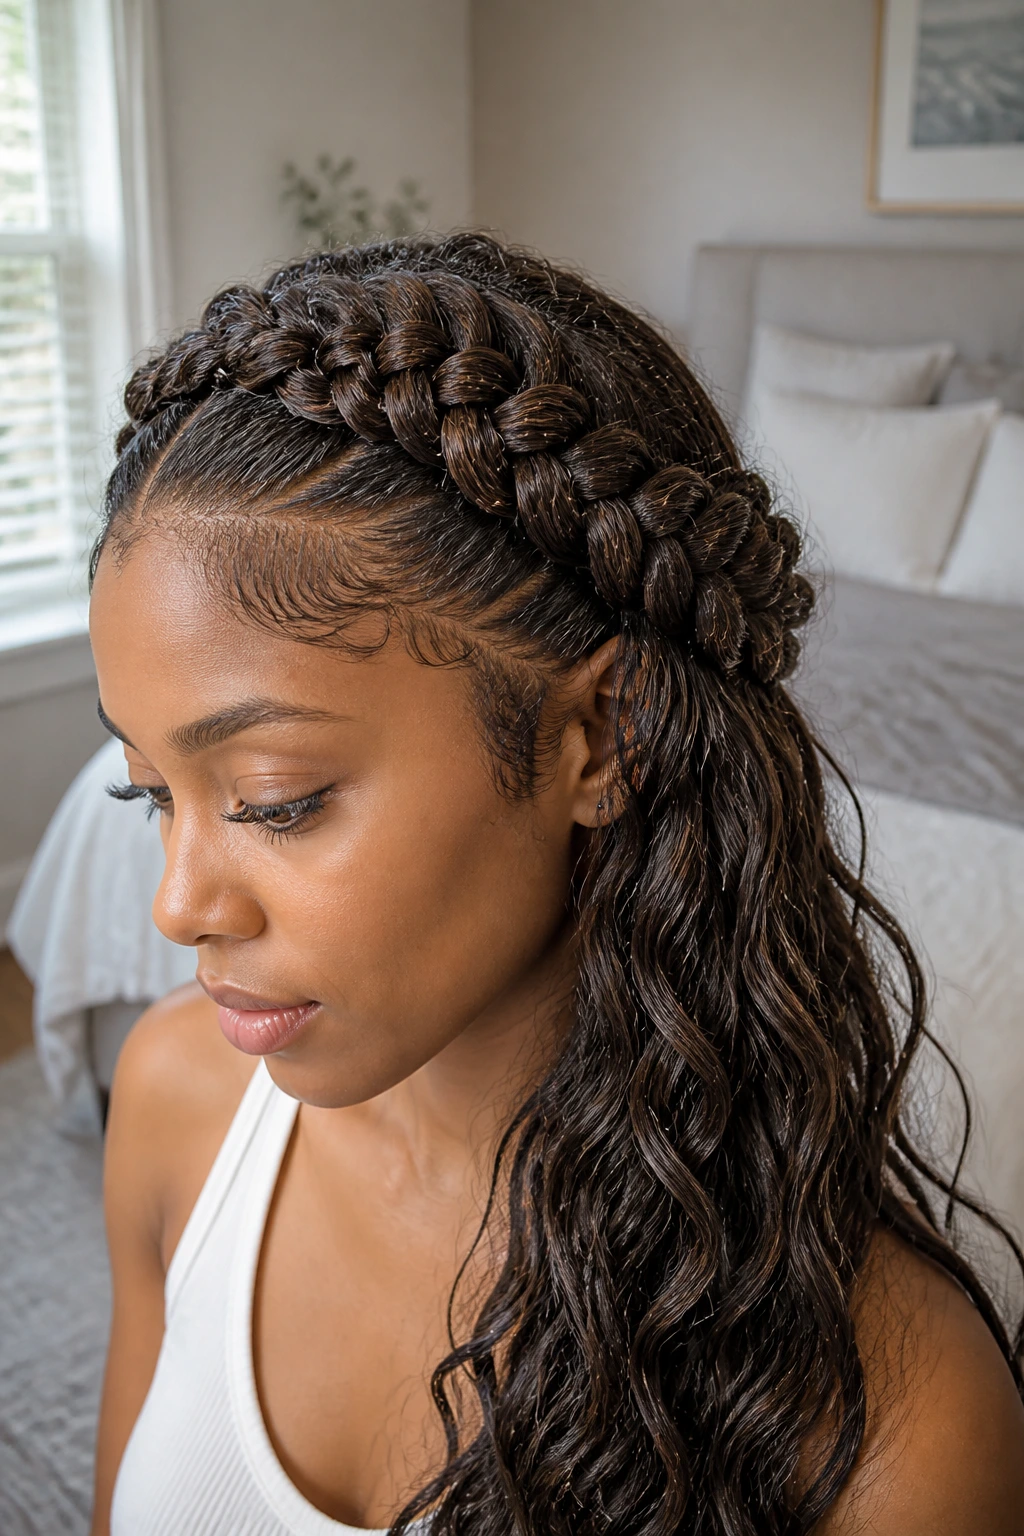
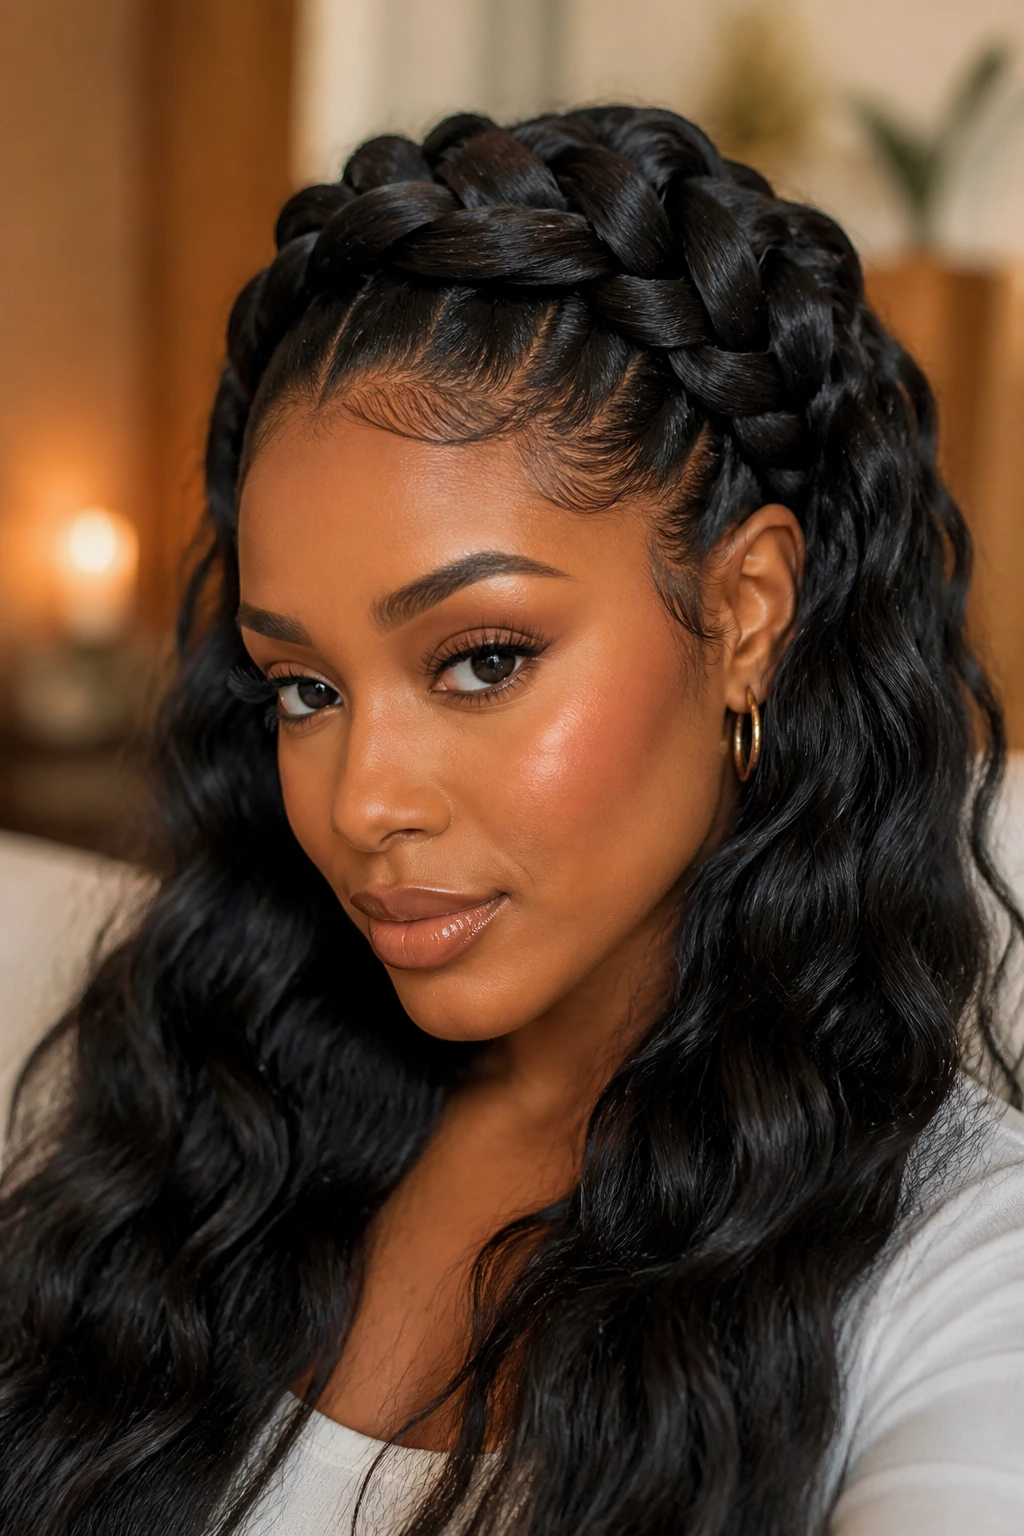
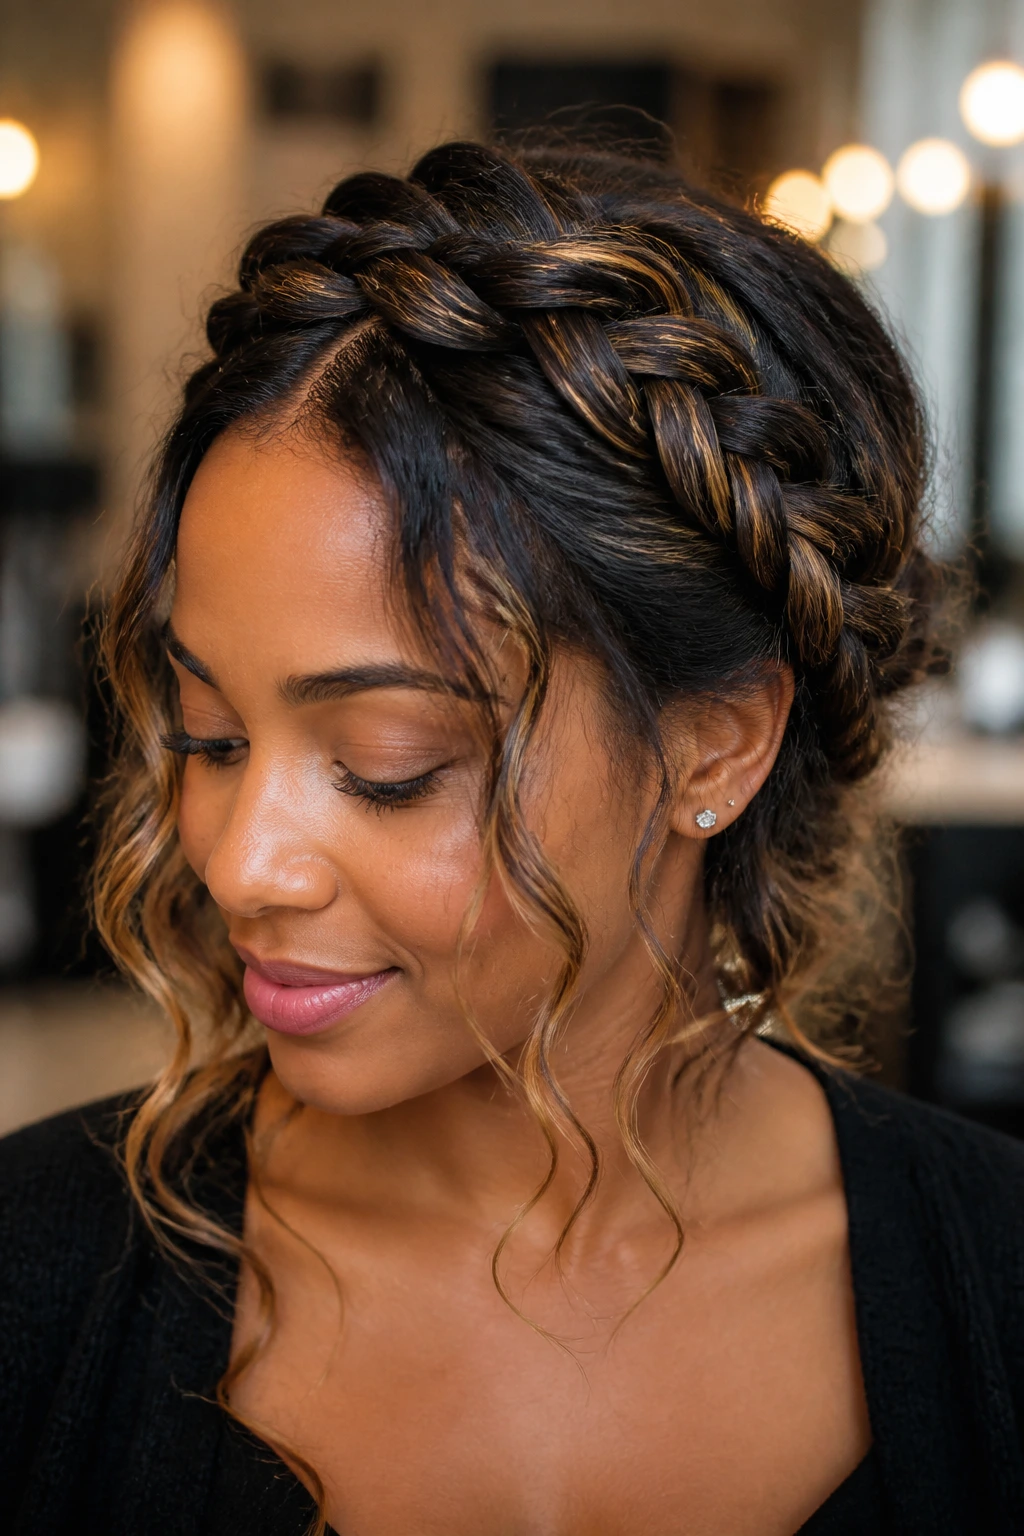
Dutch crown braids on natural hair have a very specific kind of charm: the braid gives you shape, the texture gives you life, and the beachy waves keep the whole look from feeling stiff or overly polished. That mix matters. A Dutch braid crosses strands under, so the braid sits up off the scalp instead of sinking into it, which means the crown reads clearly even when the loose lengths are soft, airy, and a little imperfect.
On coily, curly, and wavy natural hair, that raised braid can be a gift and a trap at the same time. Get the prep right and the style feels secure, balanced, and wearable. Start on tangled, over-moisturized, or soaking-wet hair, and the crown can puff in odd places, slip at the hairline, or swallow the wave pattern before it ever gets a chance to show. The sweet spot is stretched hair, clean parting, and just enough product to give grip without turning everything slick.
What makes this look so good is the tension between the braid and the loose texture. The braid frames the face and keeps the front controlled. The waves soften the back and sides, so the style moves when you move. Not neat in a rigid way. Better than that.
Why Dutch Crown Braids and Beachy Waves Click on Natural Hair
- Raised Texture: A Dutch braid sits on top of the hair instead of disappearing into it, so the crown stays visible and sculpted even when your natural texture is dense.
- Wave Contrast: The braid gives structure while the loose lengths bring bend and movement, which keeps the style from looking helmet-like.
- Flexible Finish: You can set the loose hair with a braid-out, flexi rods, a wand, or twists, and the style still reads the same from the front.
- Protective Without Looking Severe: When the braid is snug but not tight, the front stays neat while the rest of the hair gets a break from daily handling.
- Length-Friendly: Shoulder-length, mid-back, and long natural hair can all wear this look; the braid size just changes to match the density.
- Event to Errand Friendly: A polished crown with clean parts can go to a wedding or dinner, while a pulled-apart version looks relaxed enough for a grocery run.
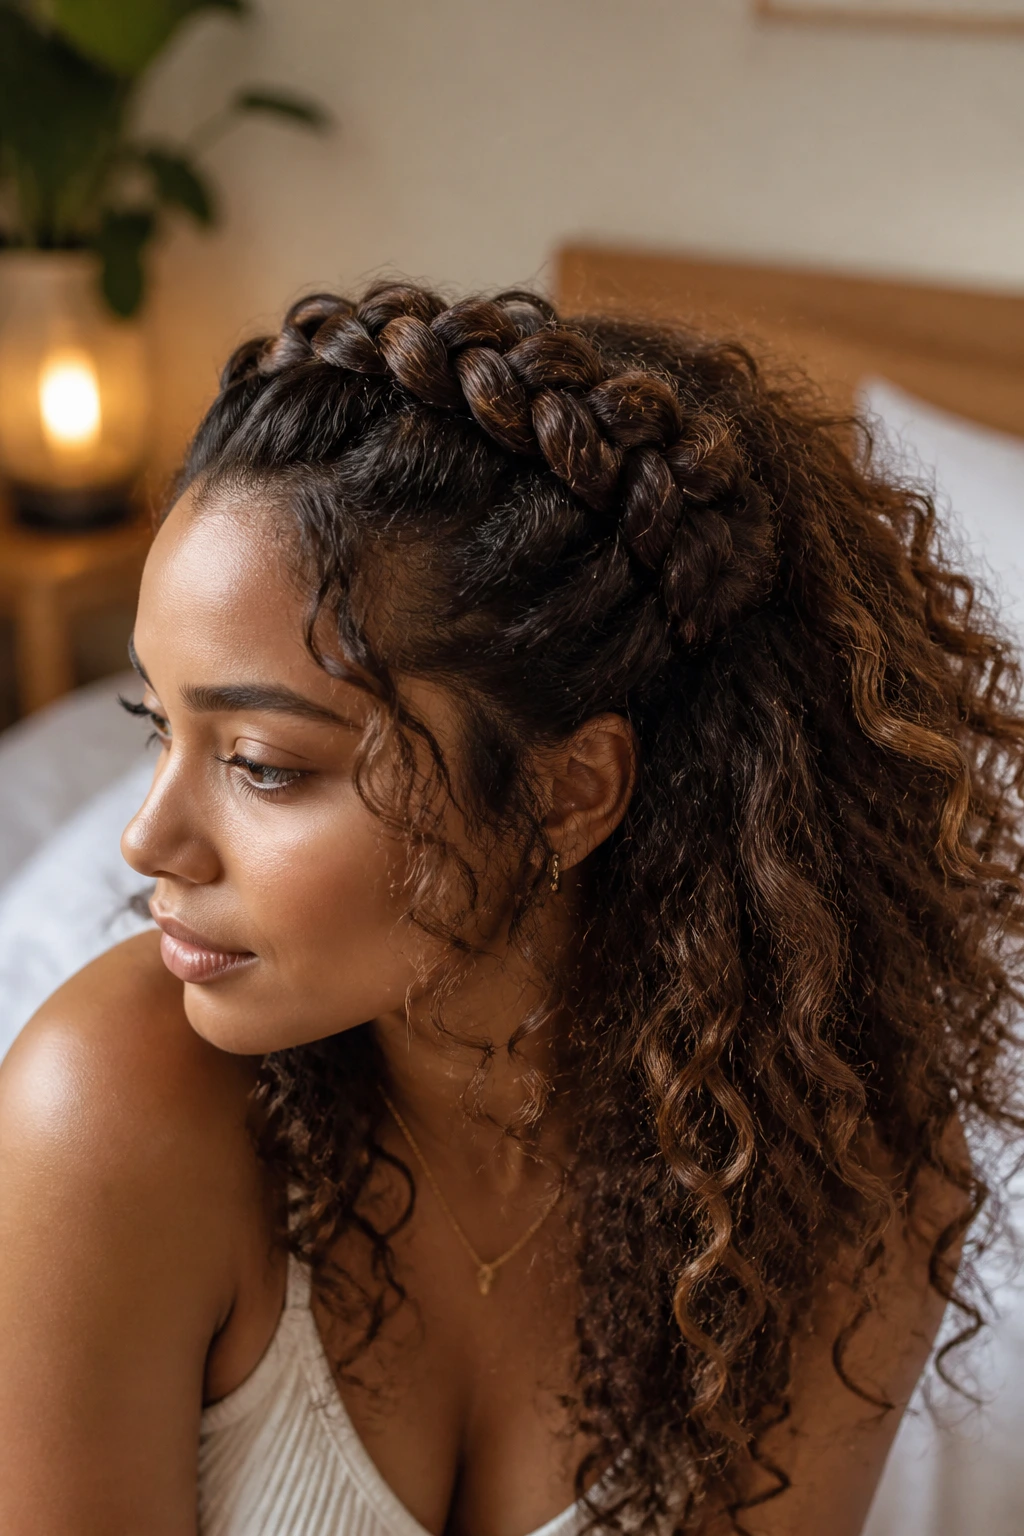
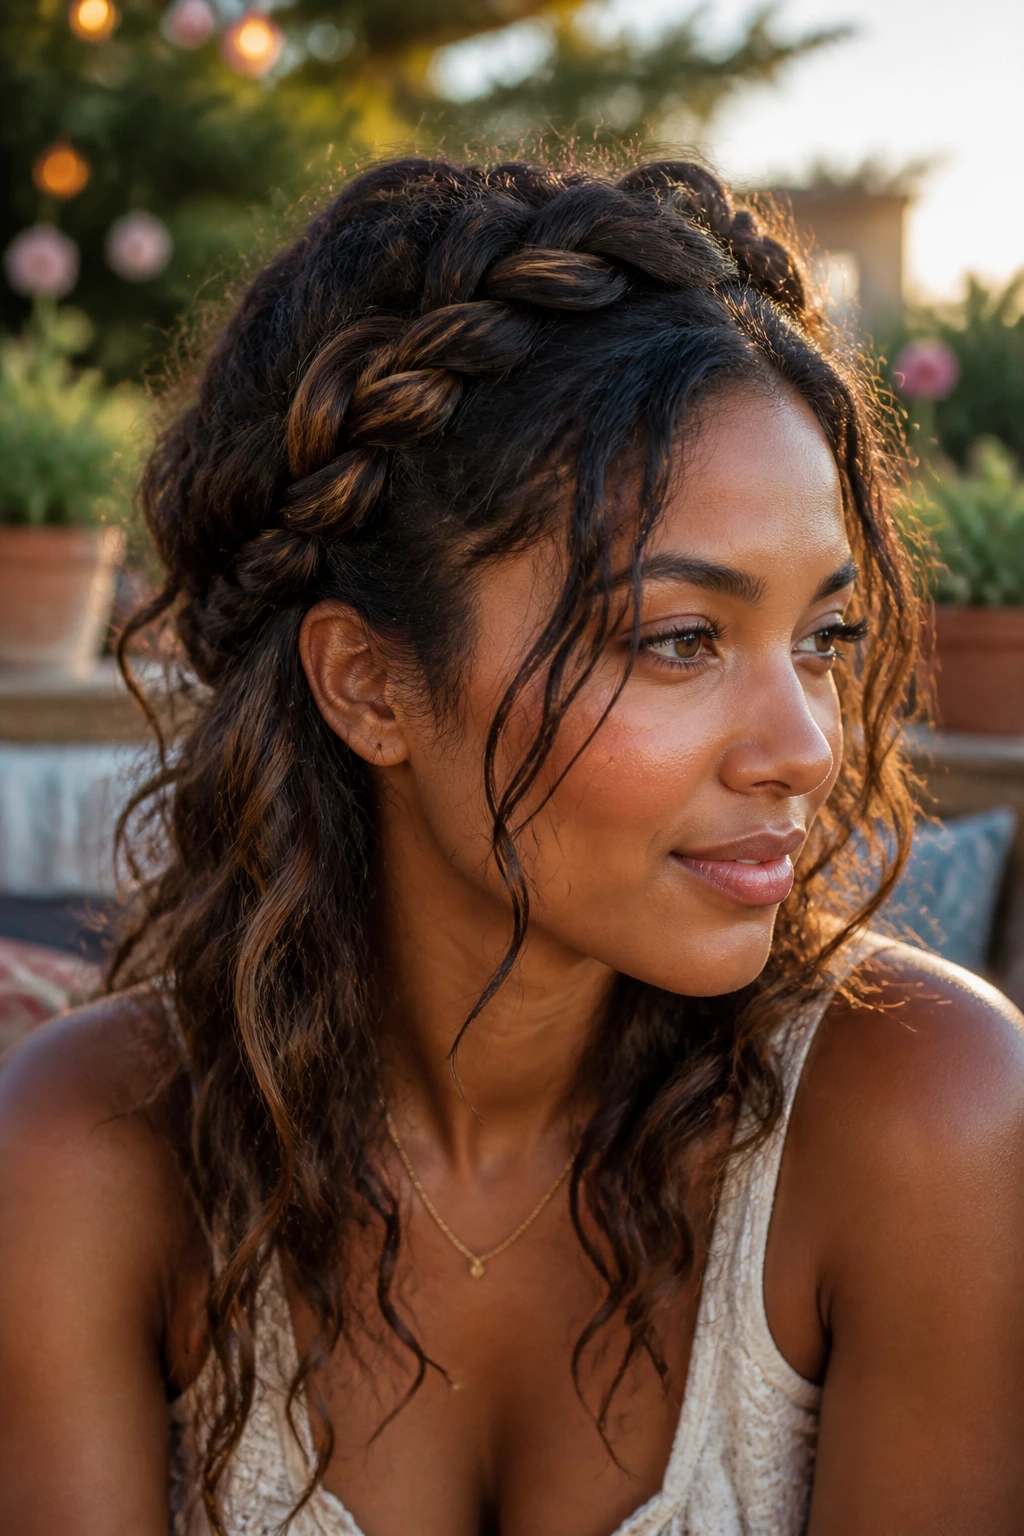
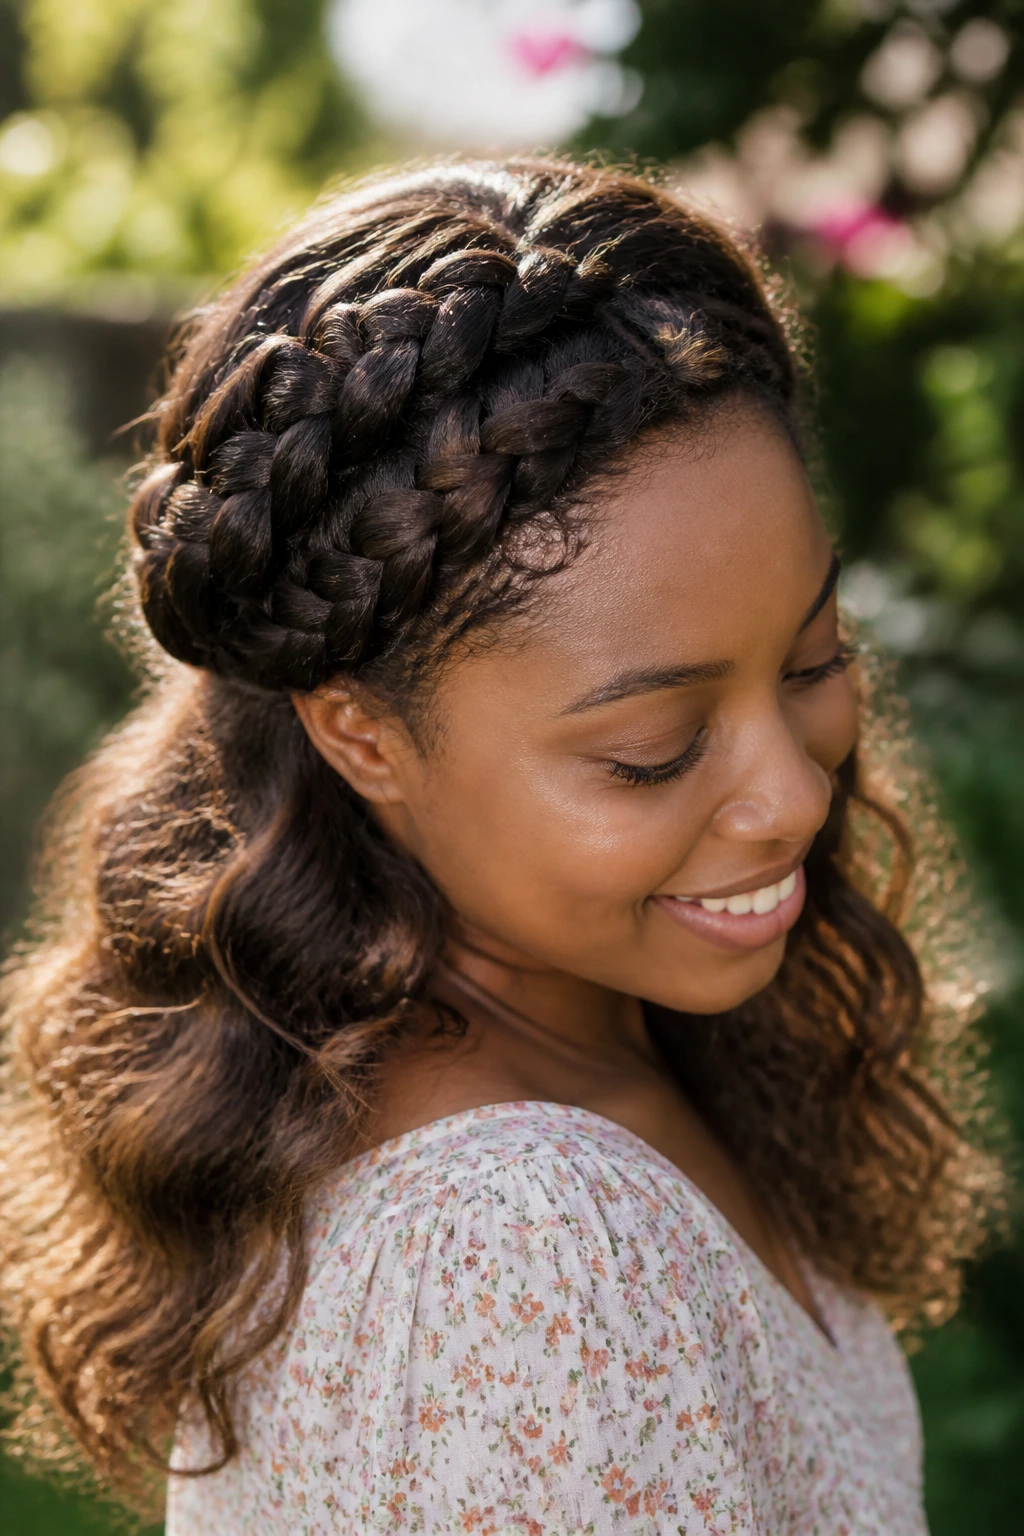
1. The Classic Center-Part Halo
A center part gives this style its cleanest frame. Both sides pull evenly into the crown, and the beachy waves fall with that calm, symmetrical shape that makes the face look balanced without trying too hard.
Why It Works
The center line keeps the braid from drifting and gives you a built-in guide for both sides. On natural hair, that matters because the braid can already carry enough visual weight; you do not need a dramatic part fighting it.
I like this version on stretched curls that have been set in chunky twists or a braid-out. The loose lengths land in soft bends instead of puffy spirals, and the braid stays crisp at the top because the sectioning is simple. If your hairline is sensitive, this is also one of the easier versions to keep comfortable, as long as you avoid pulling the first inch too tight.
Best for: Oval, heart-shaped, and round faces that need a clean frame.
Wave note: Set the loose sections on 1-inch flexi rods overnight if you want the ends to fall in softer S-waves rather than curls.
Small detail that helps: Clip the two front sections out of the way before you start braiding. It keeps the part sharp and stops the crown from wandering as your hands get tired.
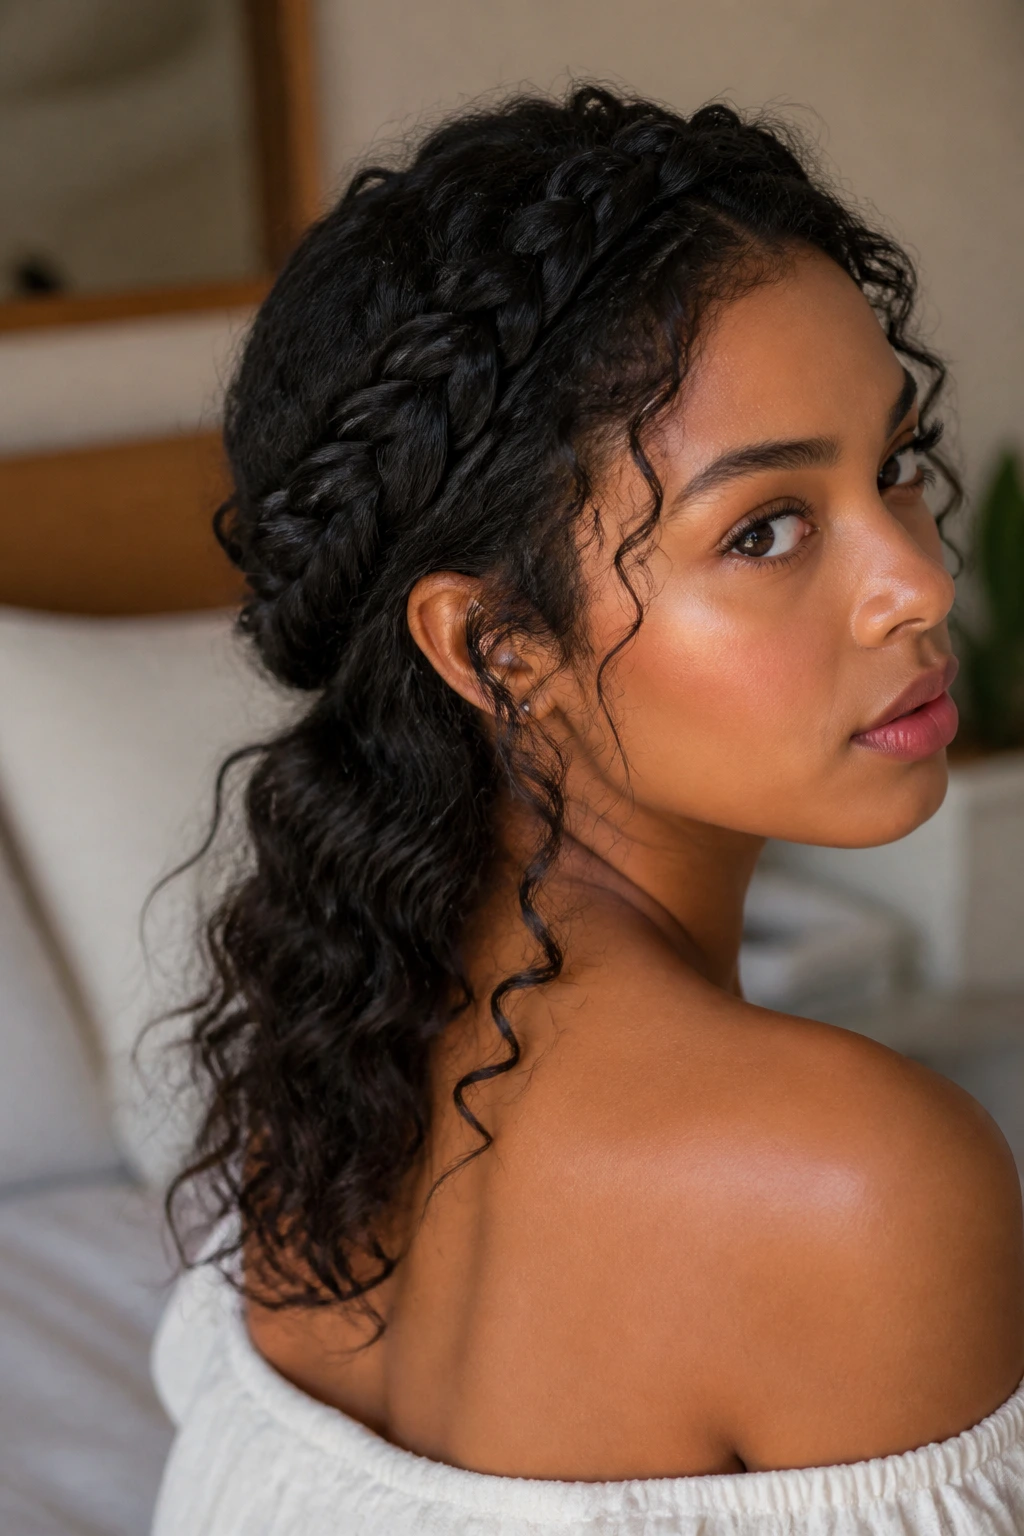
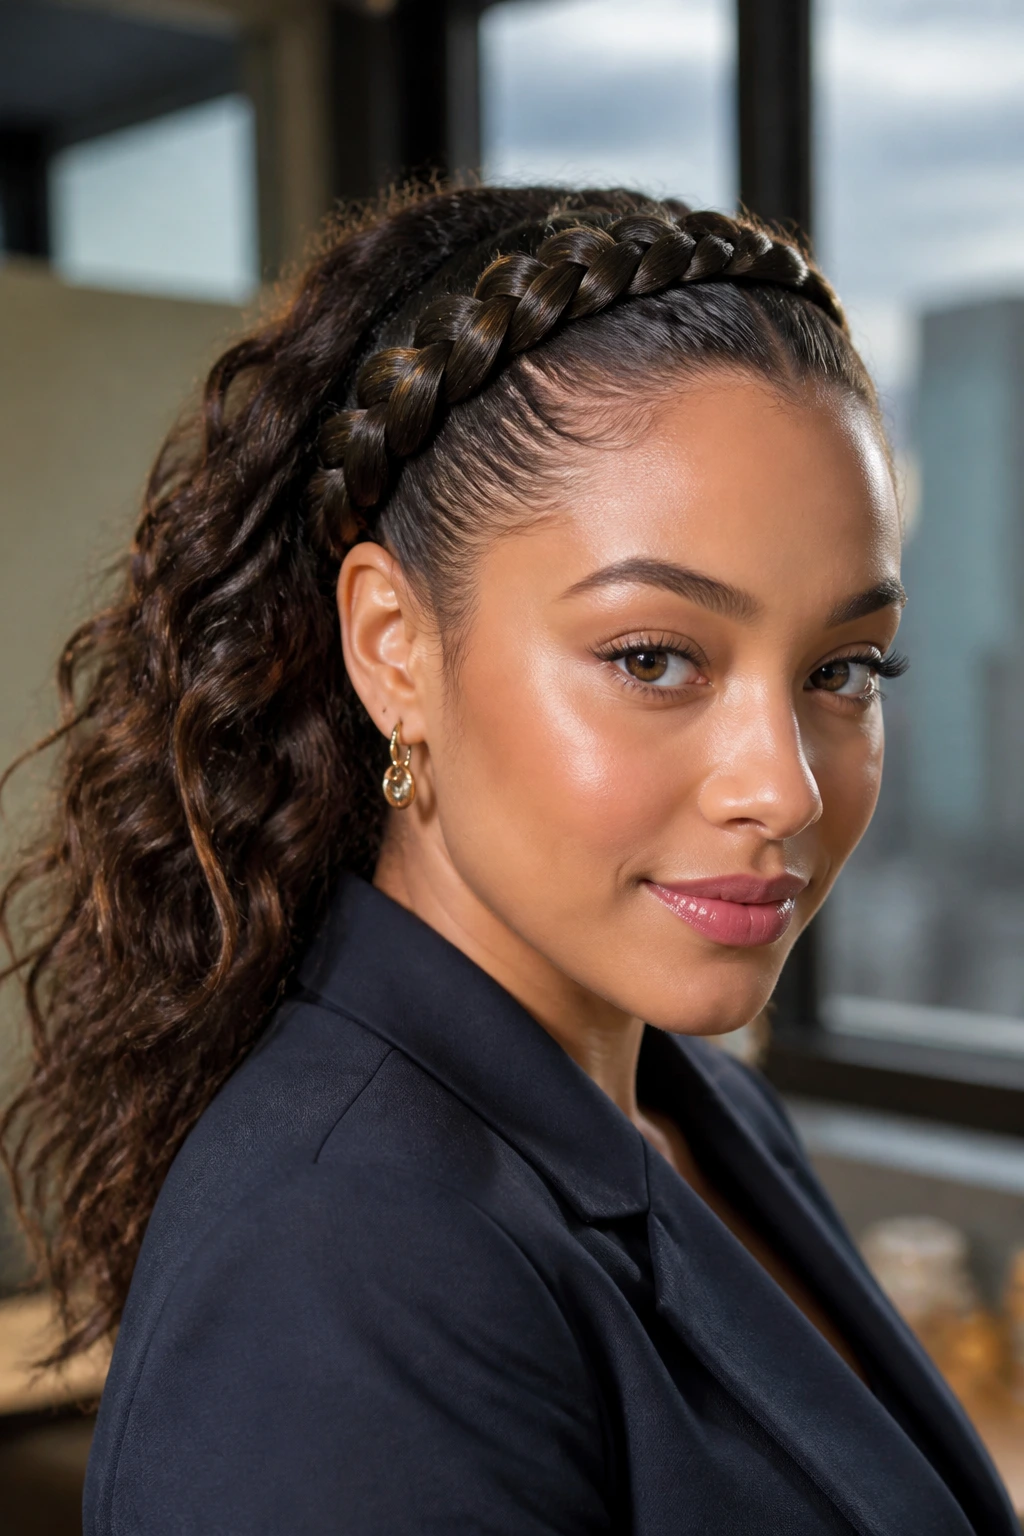
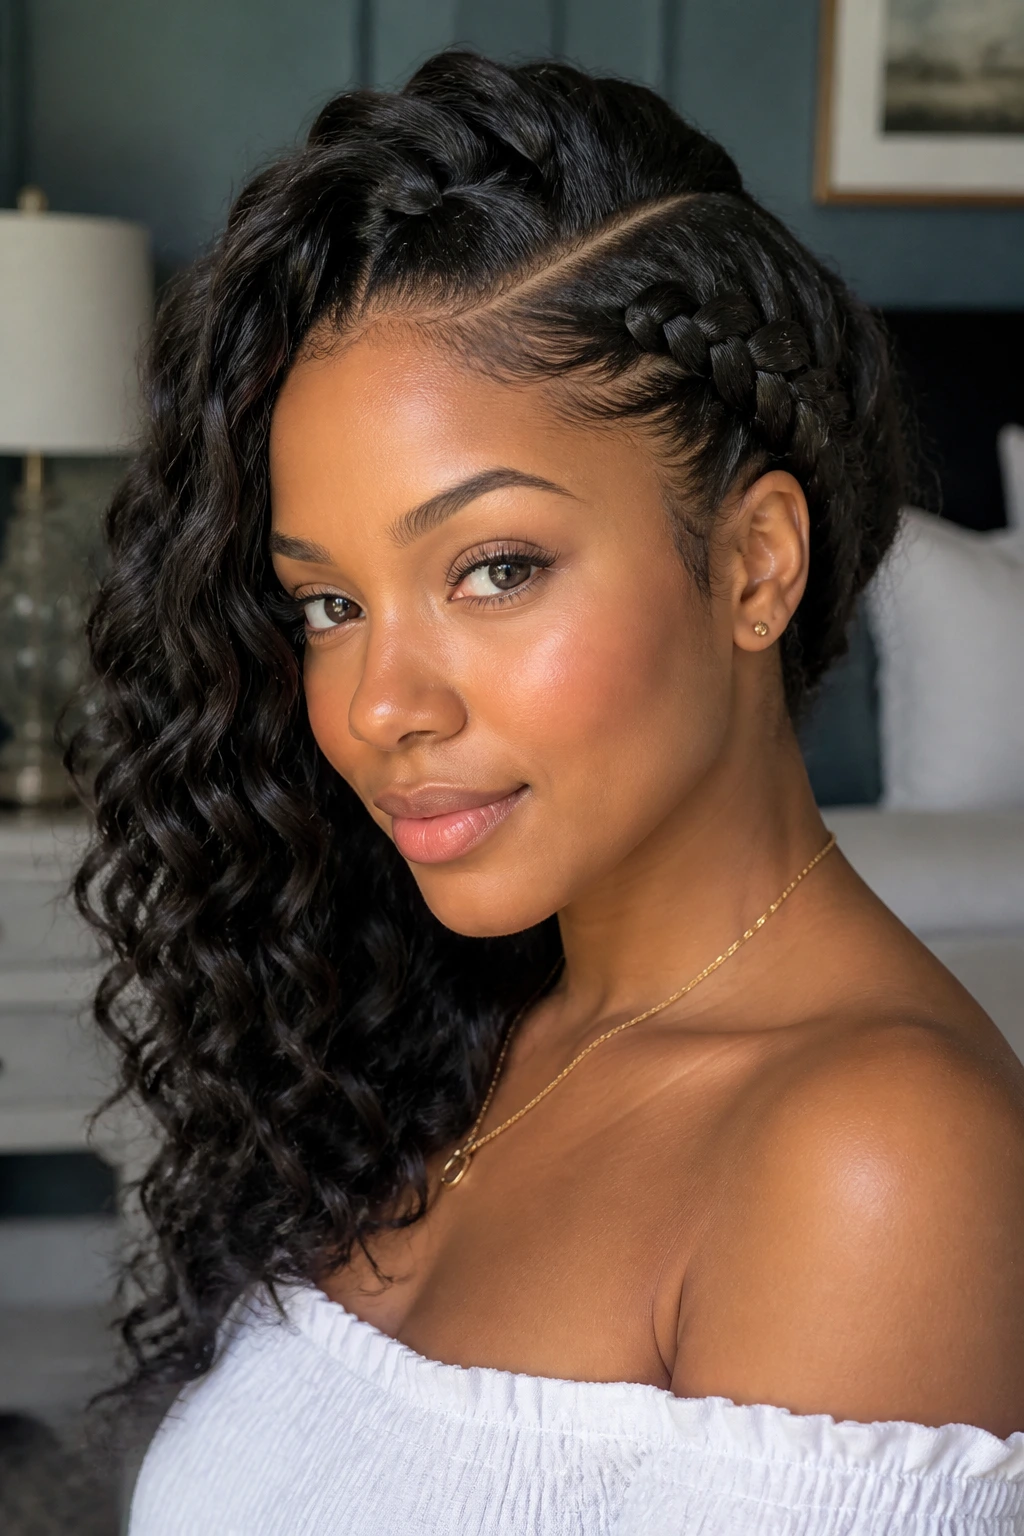
2. The Deep-Side Sweep Crown
A deep side part changes the whole mood fast. One side starts lower, the crown arcs more dramatically across the head, and the beachy waves spill over the shoulder instead of sitting evenly around the face.
The nice part is that this version hides a little asymmetry. If one temple is denser than the other, or if one side of your hair wants to frizz more, the sweep makes that feel intentional. The braid also sits nicely under earrings, which is why I reach for this shape when the outfit has a sharp neckline or one bare shoulder.
Why it’s useful: The deeper part removes some bulk from the front, so thick natural hair feels lighter at the hairline.
What to watch: Do not push the braid too far back behind the ear. It can start to look like the crown is sliding instead of sweeping.
My preference: Finish the loose lengths with a soft bend from a wand set or heatless twists. Tight curls read busier here, and the braid already gives you enough structure.
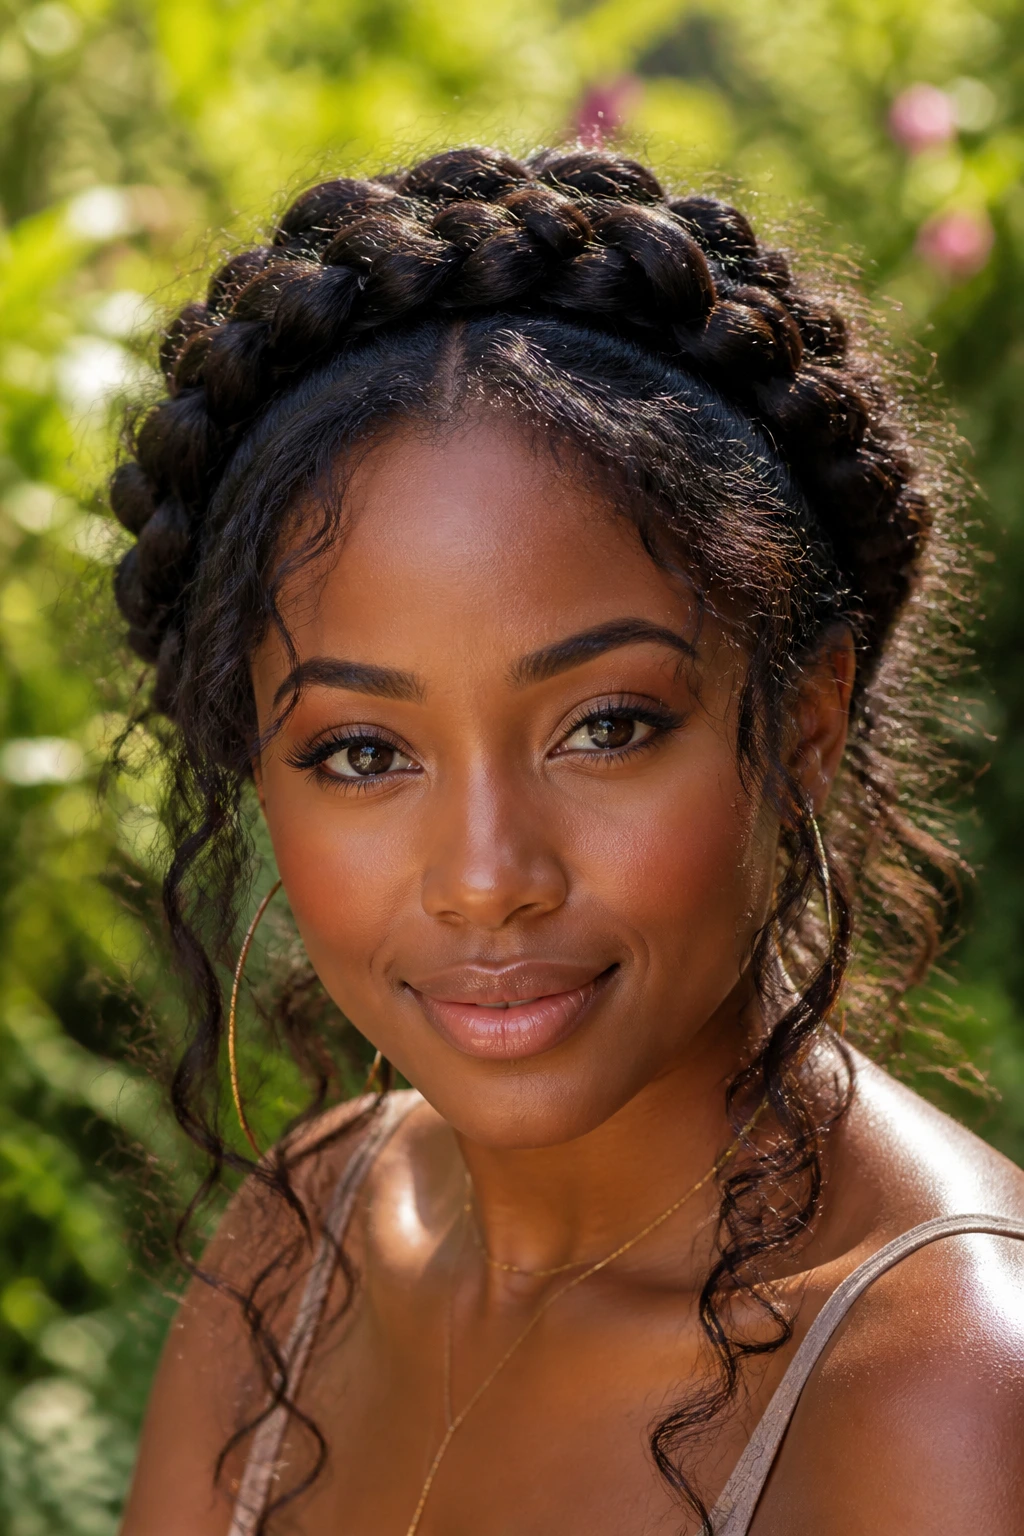
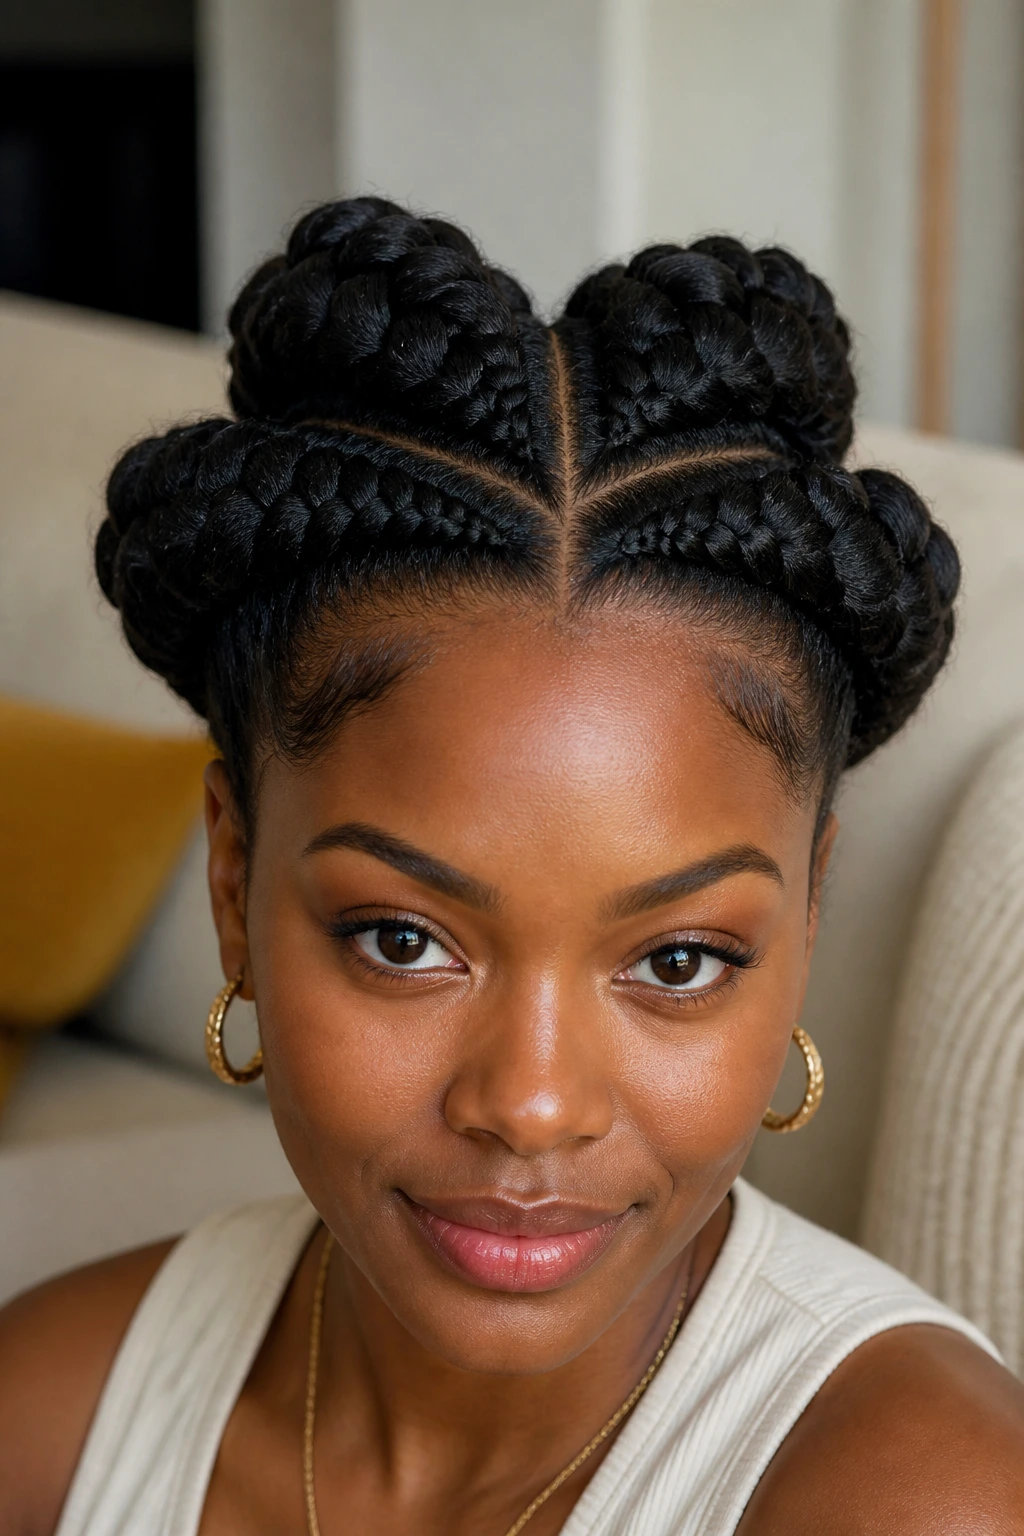
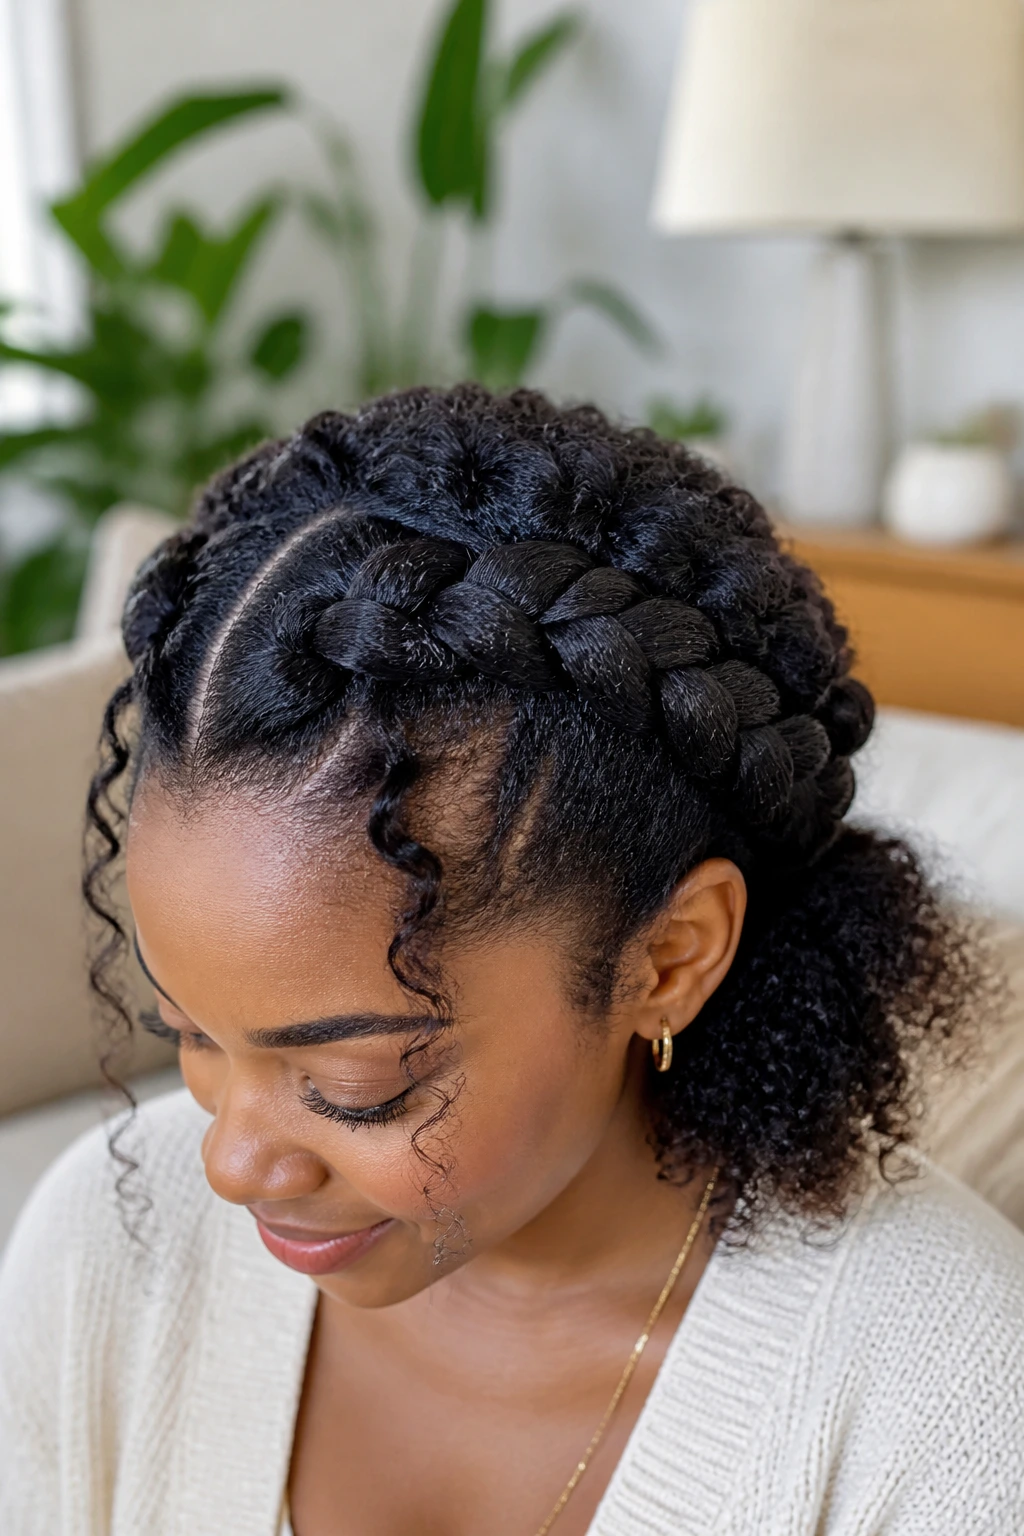
3. The Double Dutch Halo
Why does a double halo hold so well on thick natural hair? Because each braid carries less weight. Instead of asking one braid to travel all the way around the head, you split the job into two raised braids that meet cleanly at the back or near the temples.
That small change matters when you have a lot of density at the root. The style feels anchored without needing aggressive tension, and the beachy waves underneath get more room to show. On fuller hair, a single crown can sometimes turn into one big rope. A double halo keeps the shape readable.
How to wear it
- Keep the two braids the same thickness on both sides if you want a tidy, formal finish.
- Leave the lower half loose and set it in chunky bends for a softer look.
- Pin the meeting point at the back with two crossed bobby pins so the seam does not bulge.
Best use case: Medium to long hair that usually feels too heavy in one braid.
Extra note: If your hair is very dense, a little mousse on the loose lengths helps the waves stay separate instead of puffing into one cloud.
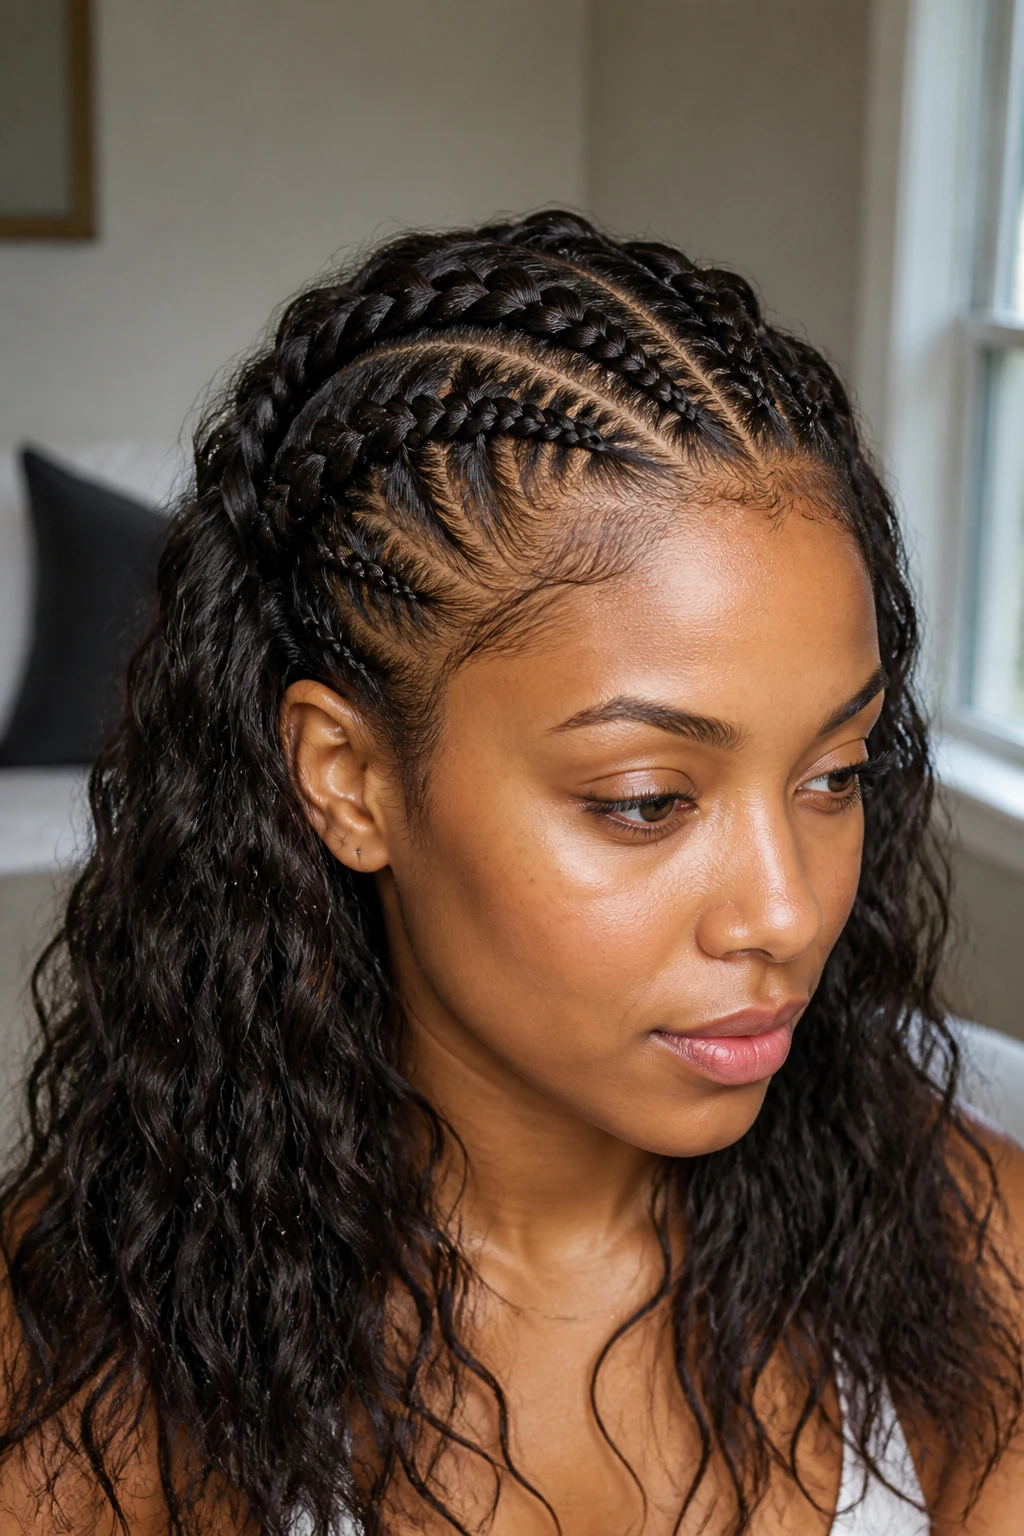
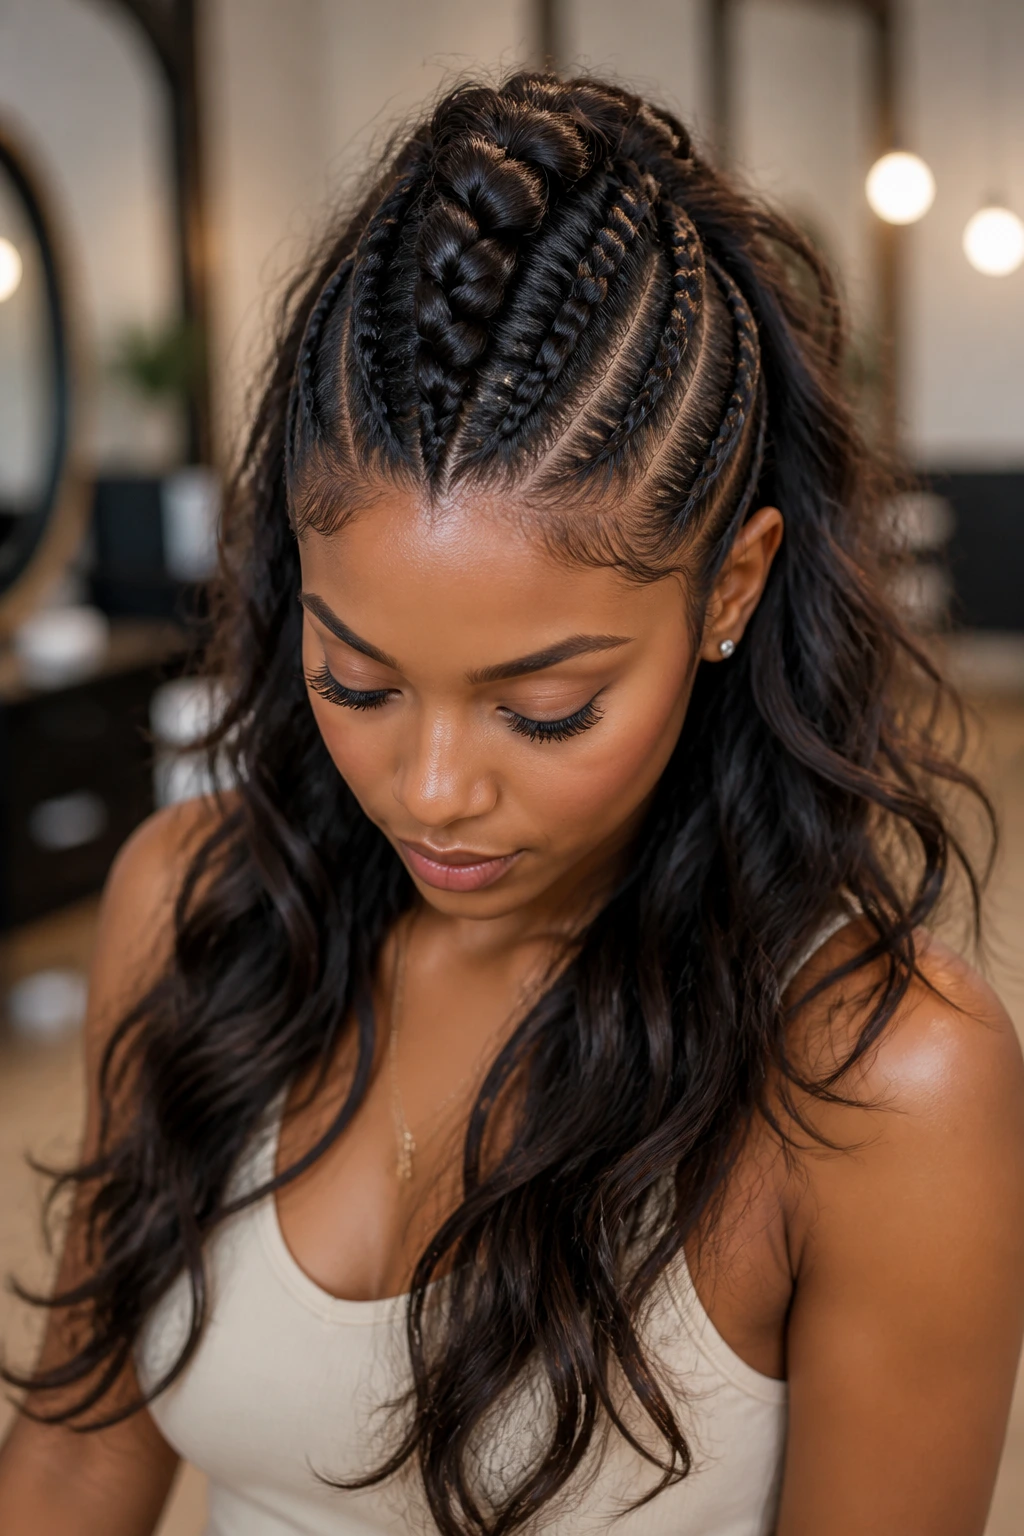
4. The Braided Mohawk Crown
This is the style I think of when someone wants the front fully controlled but still wants the lengths to feel alive. The side sections braid up and in, creating a raised ridge through the middle of the head, while the loose hair underneath gets all the motion.
Picture it on a day when you need your hair off your face, but a plain bun feels too plain. The mohawk crown gives height without making the whole style tall. It also works with beachy waves because the eye lands on the ridge first, then follows the loose texture down.
The trick is keeping the side braids narrow enough to stay neat and wide enough to anchor the ridge. Too skinny and they disappear. Too fat and the mohawk starts looking bulky. No mystery there.
Best for: Thick, coily hair that can support a strong center shape.
Wave tip: Set the back in two big twists overnight, then separate them by hand the next morning. That gives you a wave pattern with a little body but not too much frizz.
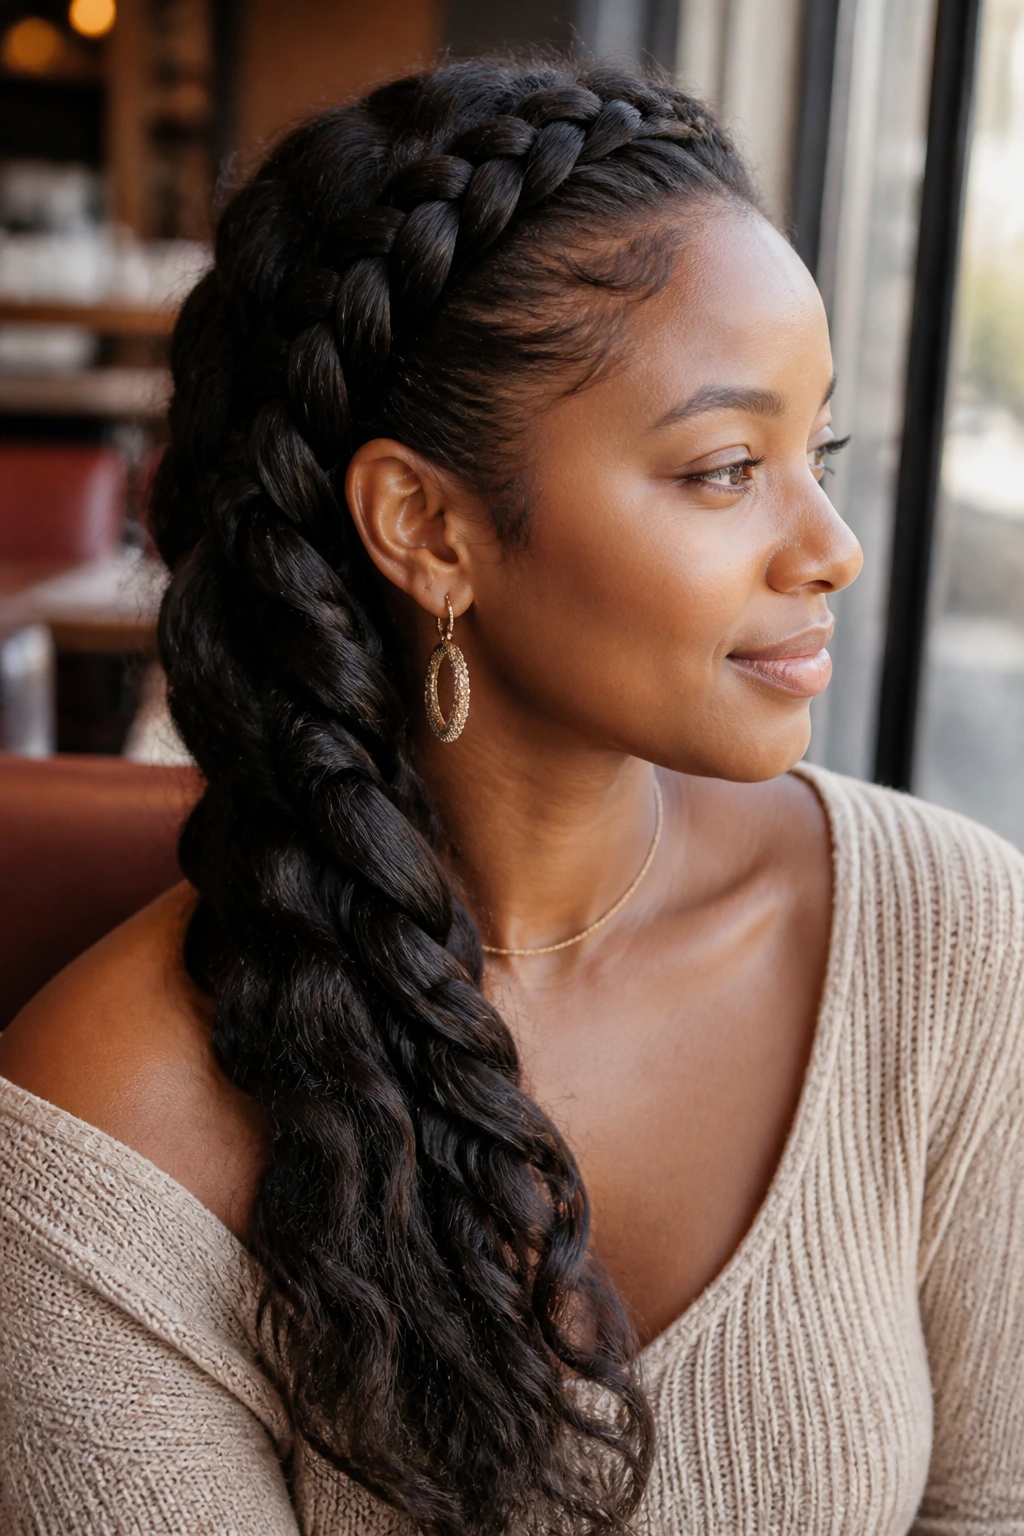
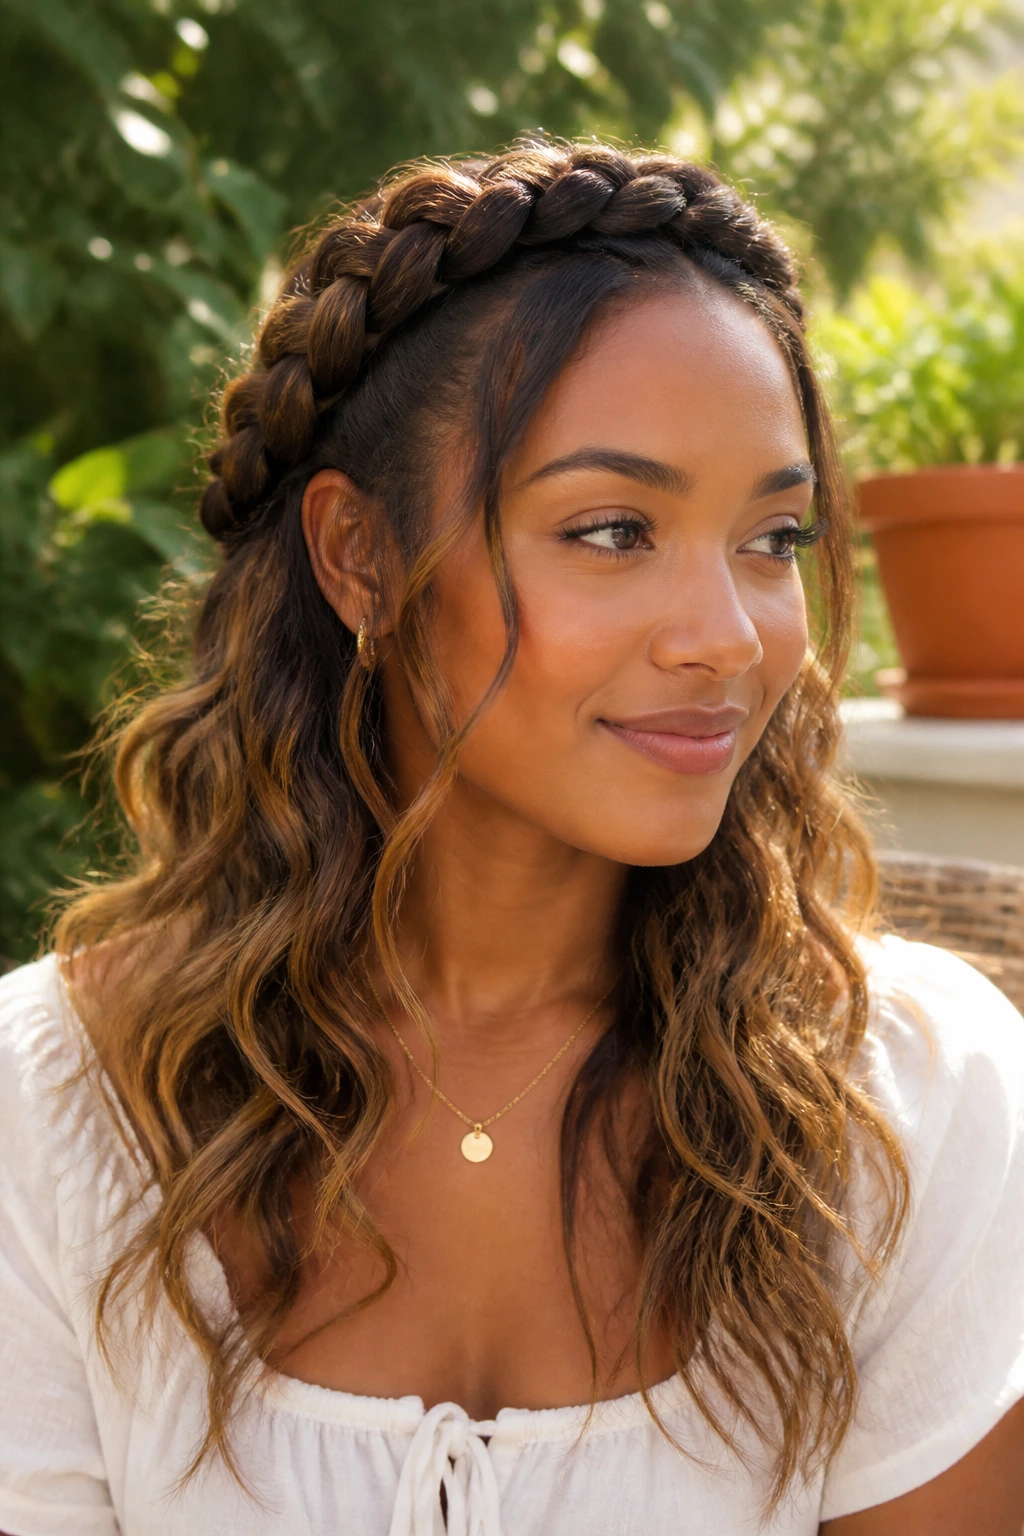
5. The Half-Up Crown with Loose Length
Some styles want to be formal. This one wants movement. The half-up crown takes the hair from temple to temple and leaves the bottom half free, which means the braid frames the face while the beachy waves carry the rest of the look.
That balance is the whole point. If you like your natural hair to still look like natural hair, this is a solid choice. The crown keeps the front polished, but the loose length keeps the style from feeling locked down. On layered hair, especially, the waves fall in little tiers that look good without much coaxing.
It’s also a forgiving style. If one side of the braid is a touch chunkier than the other, the loose lengths soften the mismatch. And if you’re wearing it for a full day, this version gives your scalp a little more breathing room than a full halo.
Best for: Shoulder-length to mid-back hair.
Good pairings: Big hoop earrings, a knit sweater, or anything with a wide neckline. The style likes space around the face.
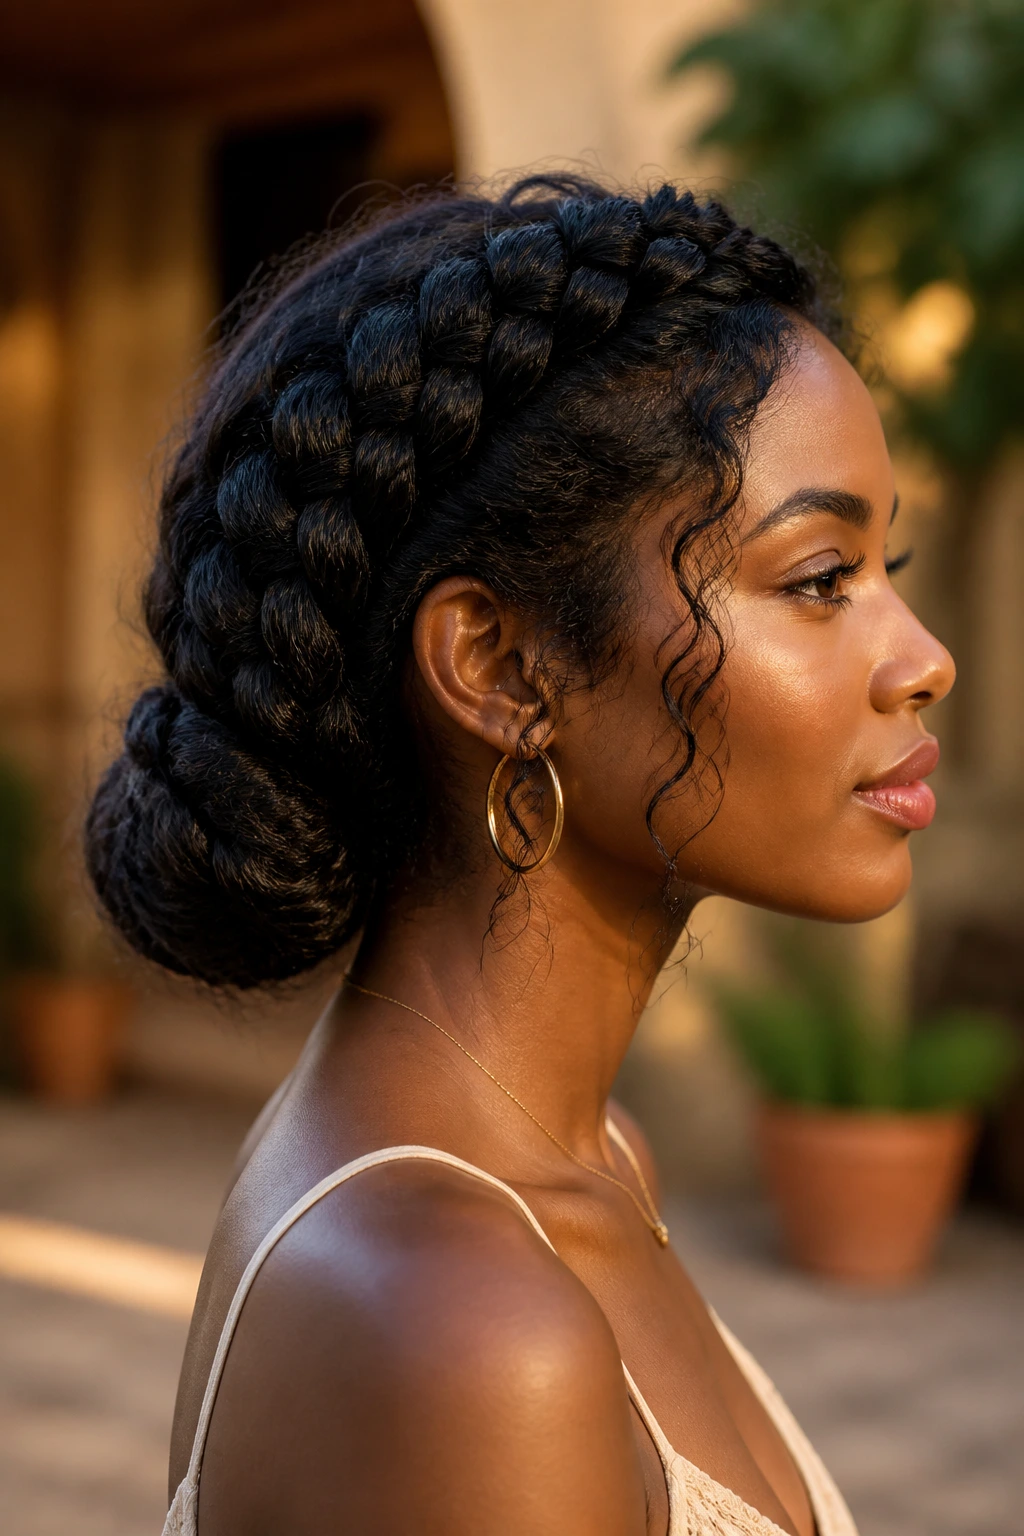
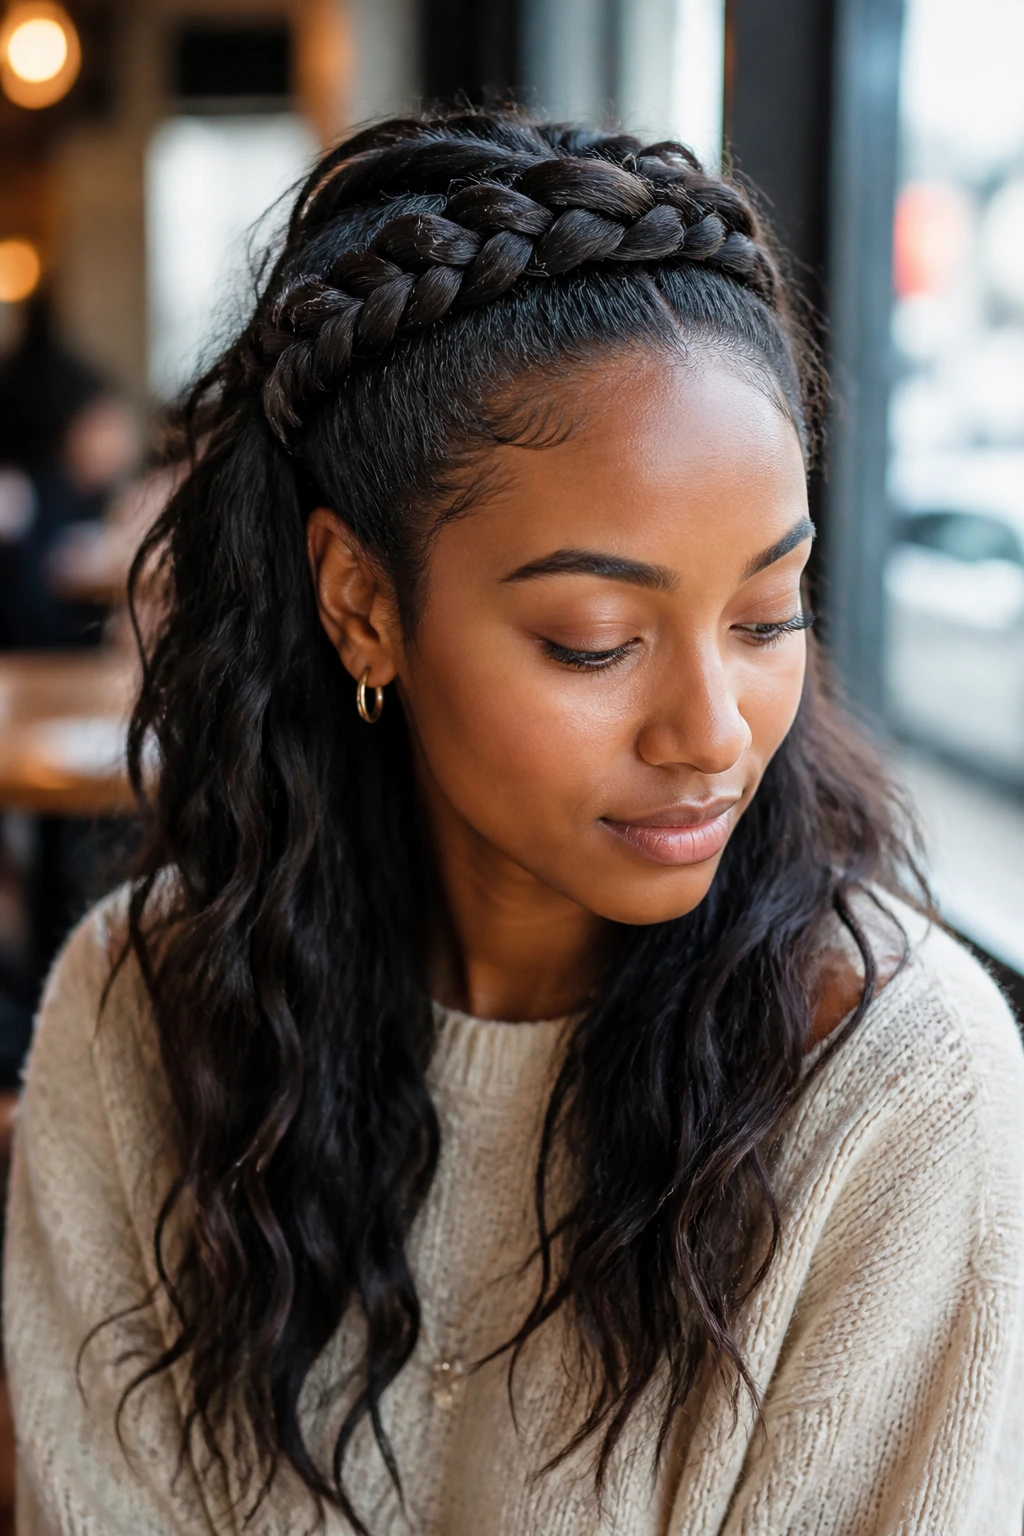
6. The Low Nape Crown
A low crown sits closer to the ears and curves around the head with a calmer line than a high halo. That small shift changes everything. The style feels less ceremonial, more grounded, and on natural hair it tends to stay put because the braid is working with the shape of the head instead of against it.
This version is one of my favorites for hair that has a lot of density at the top. Pulling the braid too high can make the crown fight the roundness of the hair. Lower placement solves that. The beachy waves then spill from the nape and shoulders, which gives the whole look a soft, lived-in finish.
It’s also easier to pin. The braid has a natural place to rest just above the ears and along the occipital curve, so the style needs fewer hidden pins than a high crown.
Best for: Thick hair, long hair, or anyone who wants a less lofty shape.
Recommendation: Set the loose ends on large rollers or big twists if you want the wave pattern to stay wide and soft instead of springy.
7. The Chunky Pull-Apart Crown
Chunky braids do one thing better than almost any other crown style: they make natural hair look full without making the braid complicated. You take bigger sections, braid them under, then pull the outer edges apart once the braid is set. That gives the crown a wider, softer look and leaves the beachy waves feeling loose rather than fussy.
I prefer this on dense hair because it keeps the crown visible from the front. Tiny braids can disappear in thicker textures unless you spend forever refining them. Big sections read fast, and the look is more relaxed.
What makes it work
- Fewer braiding passes mean less arm fatigue.
- The pulled-apart edges create a soft, rounded braid line.
- The loose length blends into wave sets more naturally than a tight braid would.
One warning: Pull the braid apart after it has a little grip. If you tug too early, the crown can lose shape and start frizzing at the edges.
8. The Petite Stitch Crown
Small sections. Clean lines. A lot of patience.
That is the trade-off here, and the payoff is a crown that looks sharp around the hairline and detailed from every angle. Petite Dutch braids work well on shorter natural hair or on tighter textures that can benefit from more frequent anchoring points. The beachy waves underneath stay soft, but the braid itself looks more refined than relaxed.
Why it holds
A petite braid grabs the hair closer to the scalp, so it can control shrinkage and keep the front from puffing out early. That makes it useful when your hair is freshly stretched and you want the braid to stay tidy for several days.
How to use it
- Part small, even sections with a rat-tail comb.
- Mist each section lightly, not heavily.
- Keep the tension even from root to end so the braid does not bulge in one spot.
My take: This is not the fastest version, but it is one of the cleanest-looking. If you like detail, it rewards you.
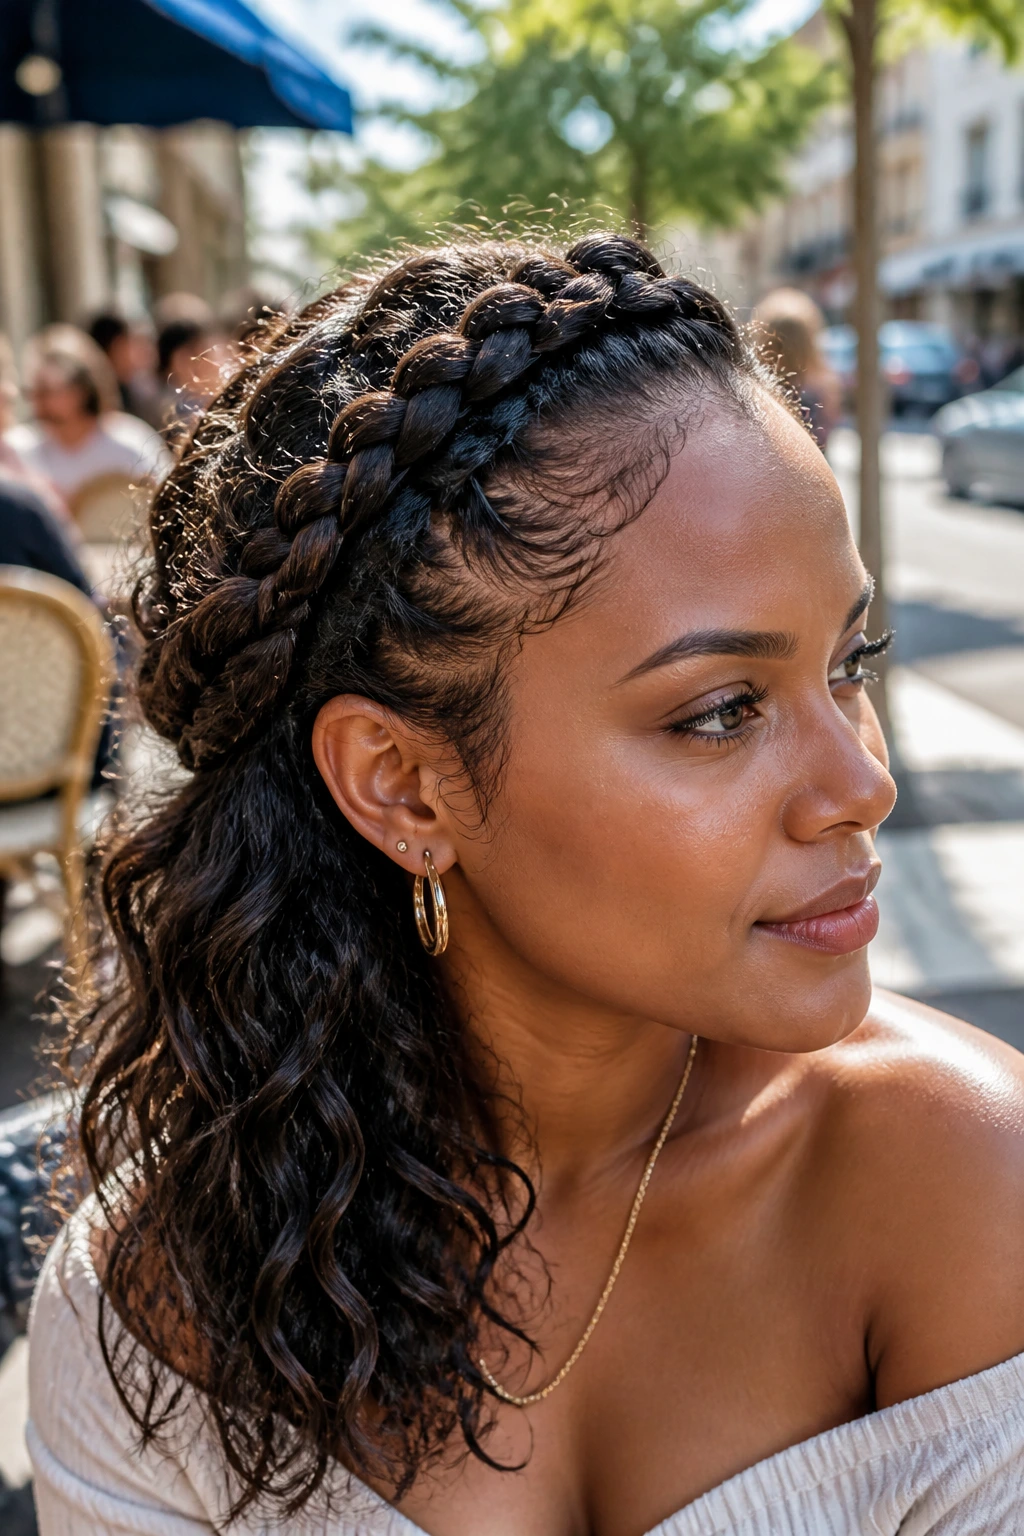
9. The One-Shoulder Crown Sweep
Sometimes the best move is to let the hair fall where it wants to fall. This crown starts around the hairline and leads all the loose waves over one shoulder, which gives the style a softer line than a centered shape.
It’s a good choice when you want the braid to be seen from the front but still want the length to feel long and drapey. The beachy waves get a little more drama because they’re gathered to one side, and that makes them look fuller without adding more hair.
This version also photographs well from profile angles, though that is not the real reason I like it. The real reason is practical: fewer loose pieces brush your face, and the braid remains the main event.
Best for: Layered natural hair, side-part lovers, and anyone wearing statement earrings.
Tip: Curl or wave the shoulder side slightly more than the back side. It keeps the drape from falling flat under its own weight.
10. The Four-Section Crown for Dense Hair
Three sections are fine. Four sections are often better when the hair is heavy, long, or extra full at the root. Splitting the crown into smaller segments lets you control bulk, and it gives the braid a cleaner path around the head.
That extra section makes the style feel more intentional rather than overloaded. The wave lengths below can stay soft, because the crown is doing the work of lifting and shaping. On very dense natural hair, this version also makes your hands happier. Less fighting. Less strain.
The other benefit is balance. A four-section crown can be distributed so one braid does not carry all the tension around the back of the head, which helps the style stay comfortable for a full day.
Best for: Long, thick, coarse hair that tends to make a single crown too chunky.
Practical note: Use clips to hold the unused sections. Trying to braid everything loose at once is where this style turns into a tangle.
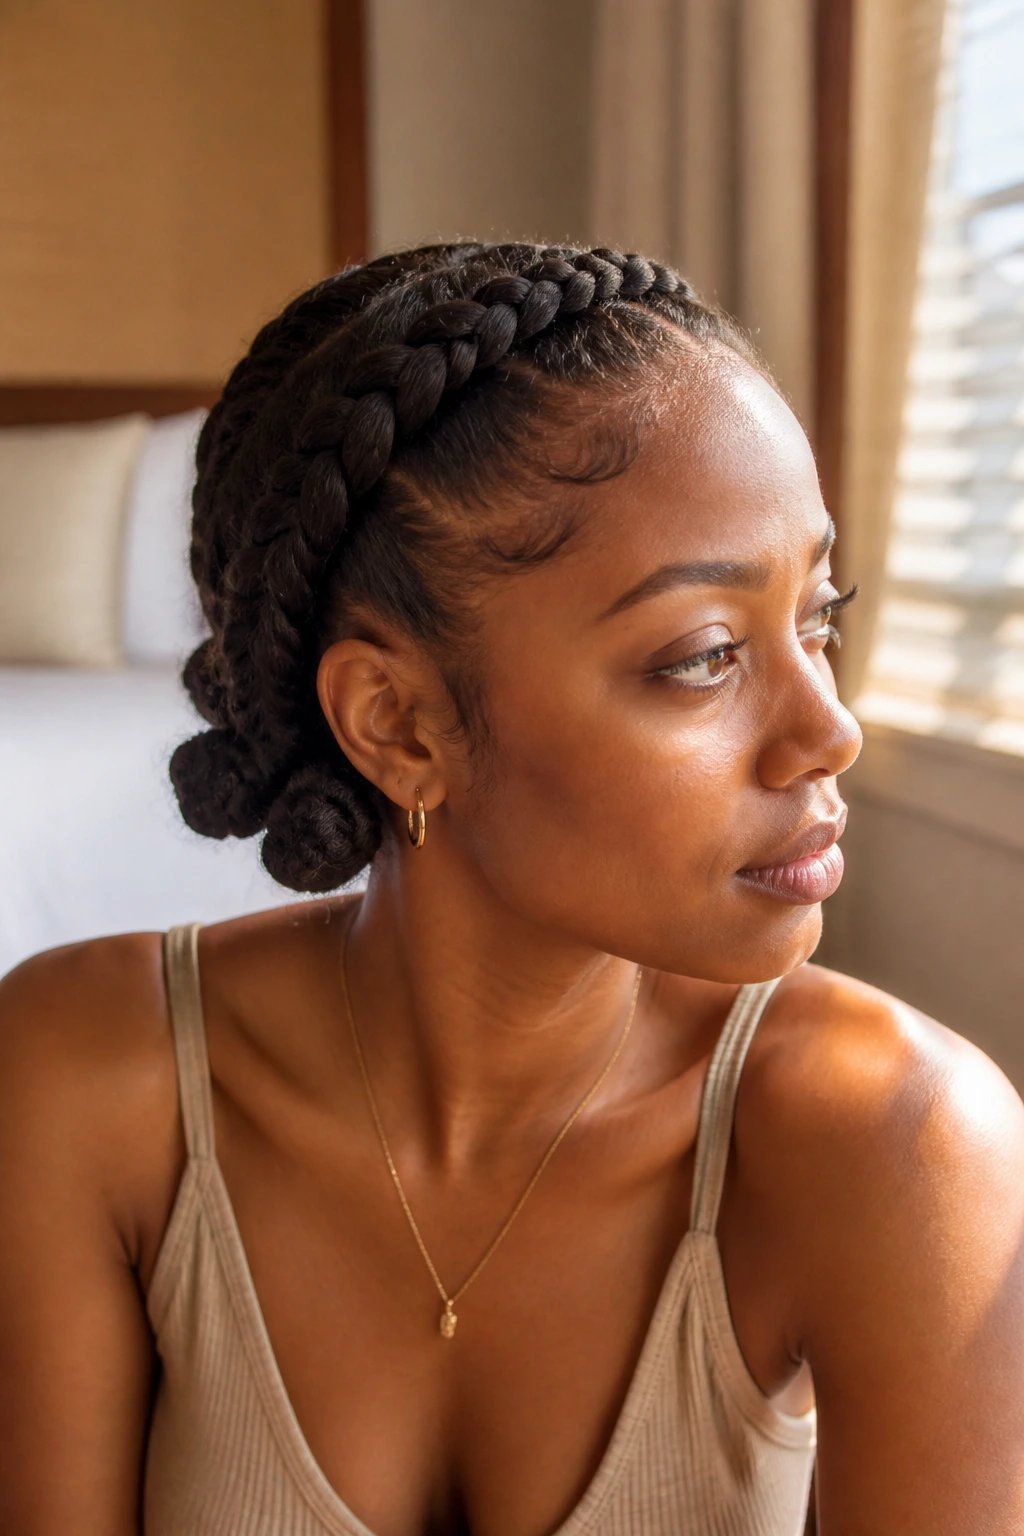
11. The Crown That Folds Into a Tucked Bun
Loose waves look beautiful, yes, but sometimes you want the ends tucked away. This version braids around the crown, then folds the loose length into a compact bun at the nape or off to the side. The beachy texture still shows in the folded tail, but the finish feels neater and more controlled.
That makes it useful for humid weather, long events, or any day when your hair cannot be left loose. The crown carries the visual interest, and the bun keeps the style from unraveling by mid-afternoon.
It’s also a smart compromise for natural hair that gets fuzzy at the ends first. Keep the front and crown detailed, tuck the rest, and the style lasts longer without constant finger-combing.
Best for: Formal events, hot weather, or hair that frizzes at the ends fast.
Small detail: Secure the bun with pins in an X pattern. A single pin usually gives up too soon.
12. The Crown with Bantu-Knot Ends
Why stop the texture at the braid? With this version, the crown leads into Bantu-knot set ends, which gives the loose hair a defined wave pattern after you take the knots down. The result sits somewhere between polished and playful.
The braid keeps the top of the style controlled. The knot-set ends bring the beachy movement. And because Bantu knots create a rounded bend instead of a tight curl, the finish feels softer than a classic rod set.
How to set the ends
- Braid the crown first and leave the remaining length detangled.
- Split the loose hair into 4 to 8 sections, depending on density.
- Twist each section into a small knot and secure the end with itself or a tiny pin.
- Let the knots dry fully before unraveling.
Best for: Natural hair that holds shape well and can tolerate an overnight set.
13. The Gold-Cuff Accent Crown
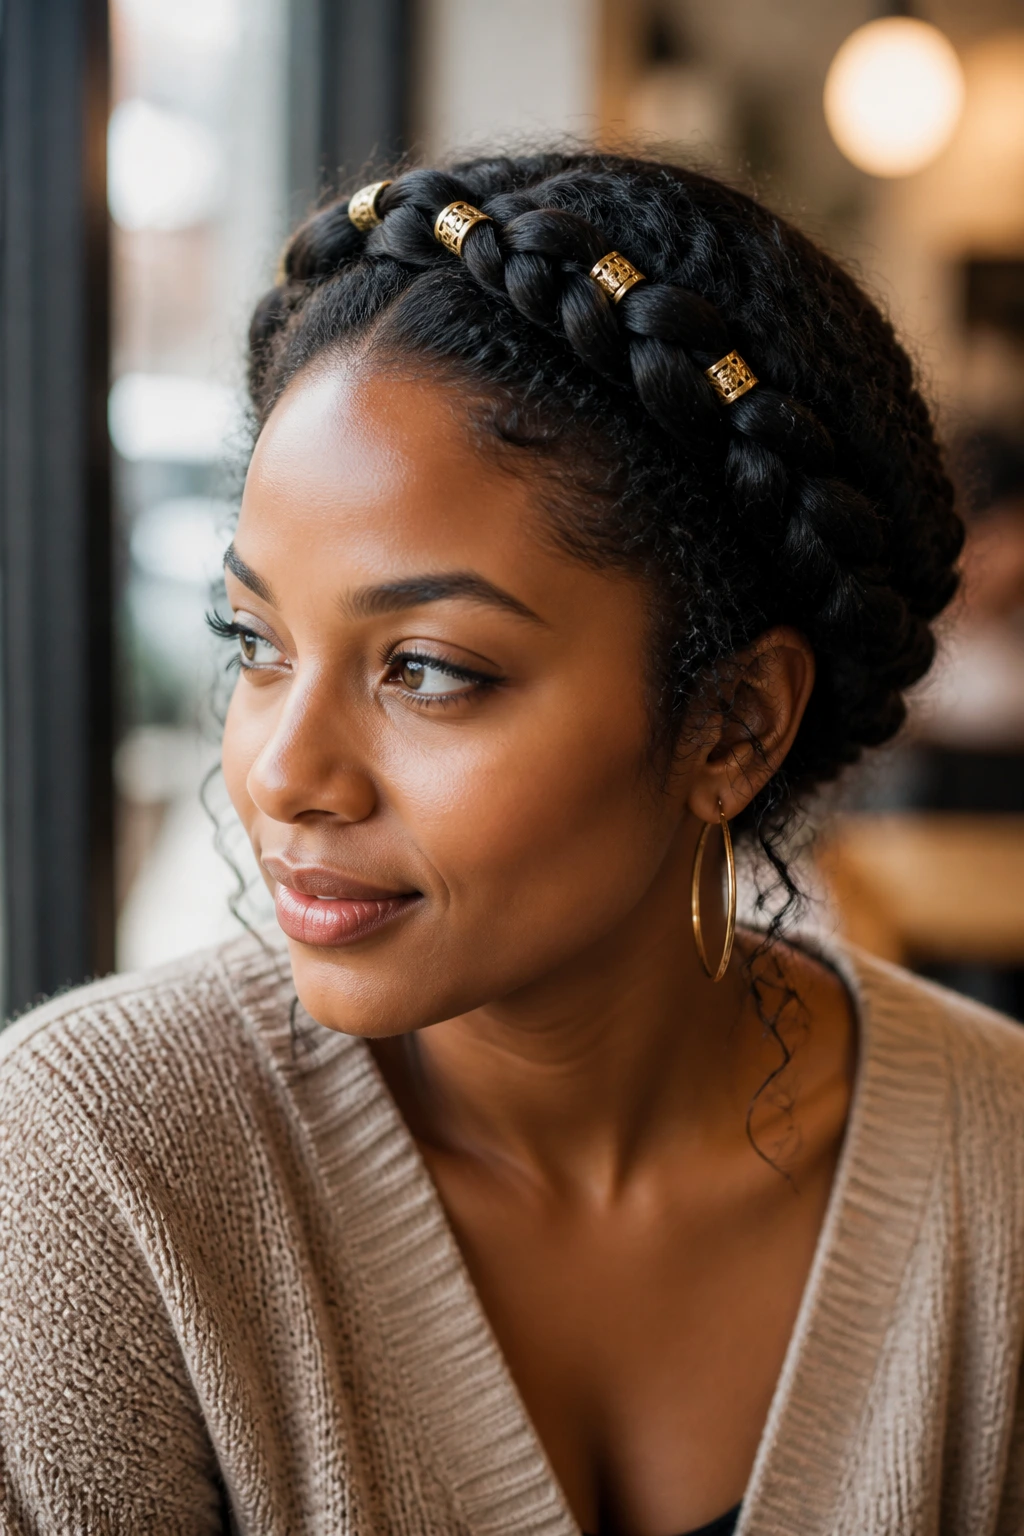
A few small cuffs can change the read of a crown braid more than most people expect. The braid itself stays the same, but the metal gives the texture something to catch against, which makes the style feel finished even when the waves are loose and airy.
This is the one I reach for when the braid is simple and the outfit needs one extra line. Not a lot of jewelry. Just enough to keep the crown from disappearing into the rest of the hair.
The trick is restraint. One cuff near the front, one around the back seam, maybe three total. More than that can start to look busy, especially if the waves already have a strong pattern.
Best for: Parties, dinners, photos, or any day you want the braid to read from across the room.
Tiny rule: Put cuffs on the straightest part of the braid. If you place them on a bend, they slide.
14. The Asymmetrical Crown
A crown does not have to sit evenly to work. In fact, an asymmetrical version often looks more natural on coiled hair because the braid can follow the hair’s real density instead of forcing both sides to behave the same way.
One side starts higher, the other side drops lower, and the wave lengths lean into that imbalance. It gives the style a little motion before the wearer even moves. If your parting is never perfectly even anyway, this version will feel less fussy.
It also makes a nice change from the standard halo. Same family, different mood. The crown stays the same idea, but the shape feels less expected, which can be useful when you’ve worn the same braid pattern for weeks and need a reset.
Best for: Hair with layers, uneven density, or anyone who likes a little edge.
Recommendation: Keep the lower side smoother and the higher side a touch fuller. That contrast is what sells the shape.
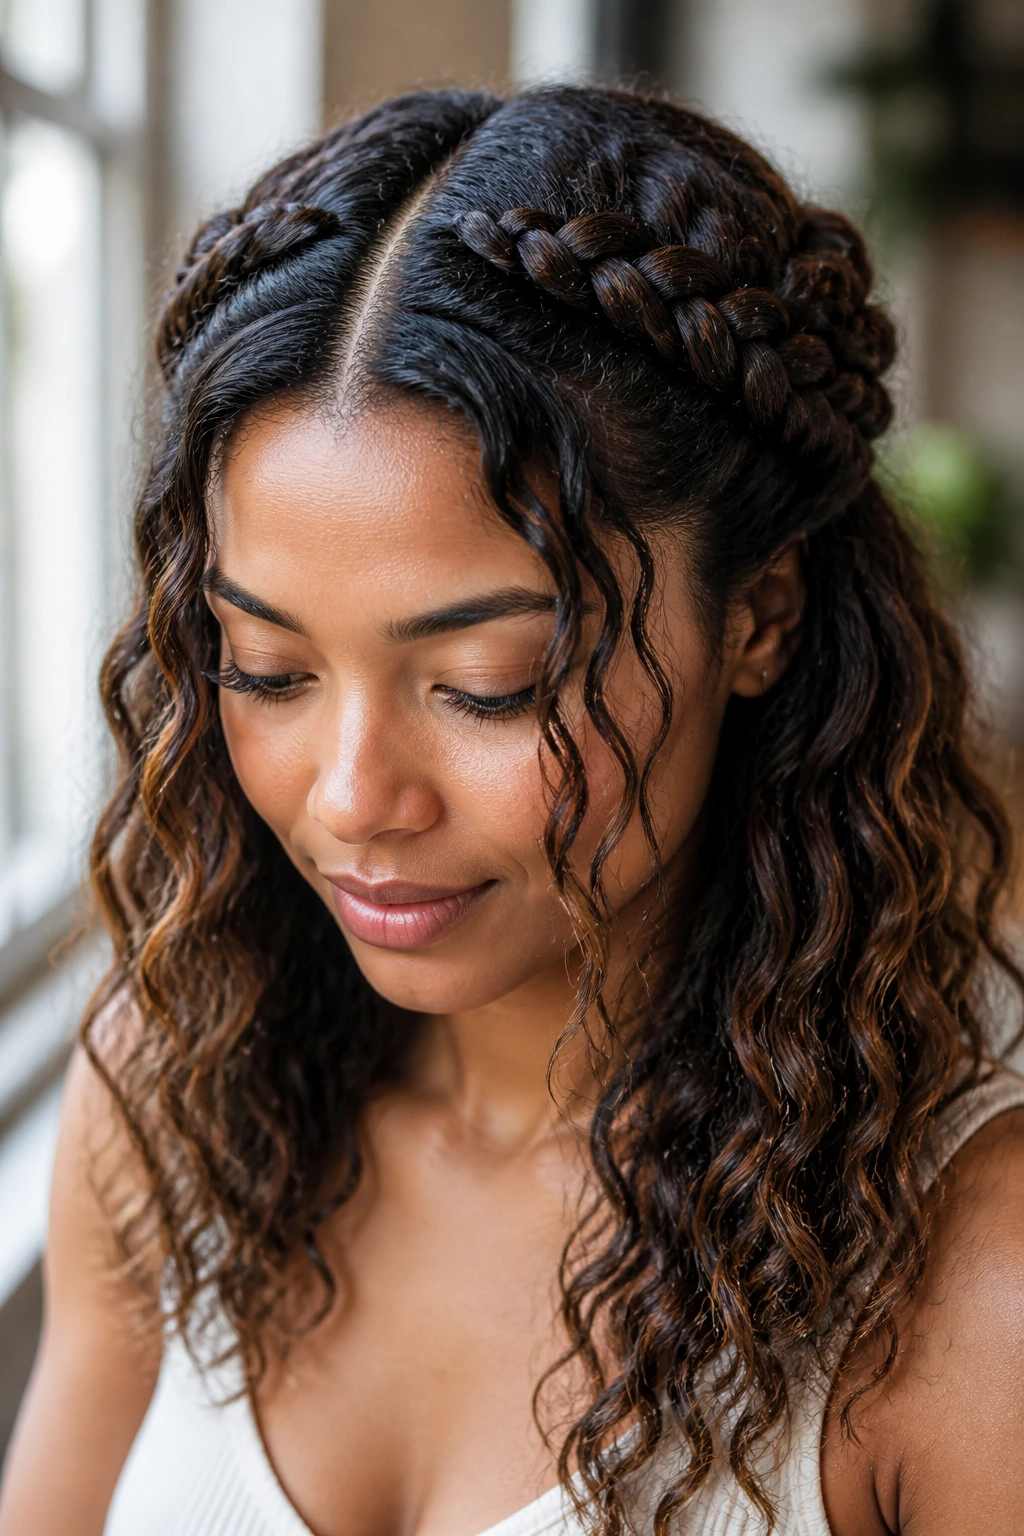
15. The Twin Halo with a Center Seam
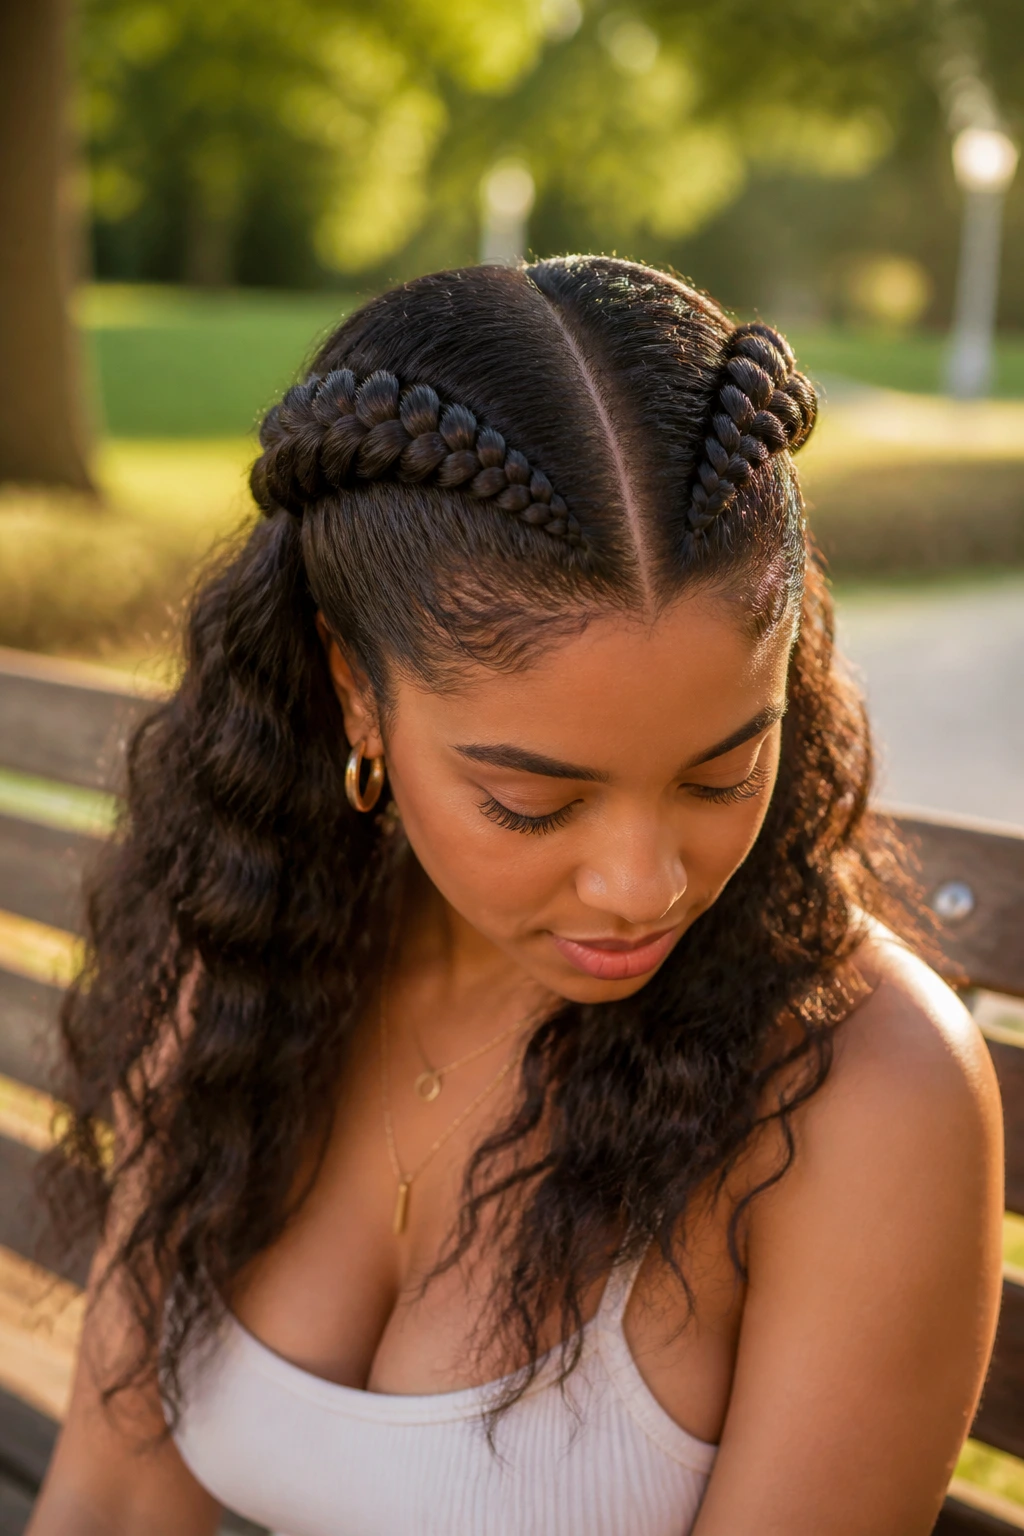
This one looks more complex than it is. Two separate Dutch braids track along the hairline, and a clean center seam keeps the design anchored. The beachy waves drop underneath or between the braids, depending on how much hair you leave free.
The center seam matters because it gives the style structure. Without it, two braids can feel like they are floating. With it, the eye reads the whole crown as a single design. It also helps on denser natural hair, where a broad center part can stop the front from looking crowded.
Why it works
- The two braids share the load instead of letting one braid pull too much weight.
- The seam keeps the parts tidy and readable.
- The loose waves underneath soften the style so it does not feel too architectural.
Best for: Full hair, longer lengths, and wearers who like a cleaner top line.
16. The Twisted-Front Hybrid Crown
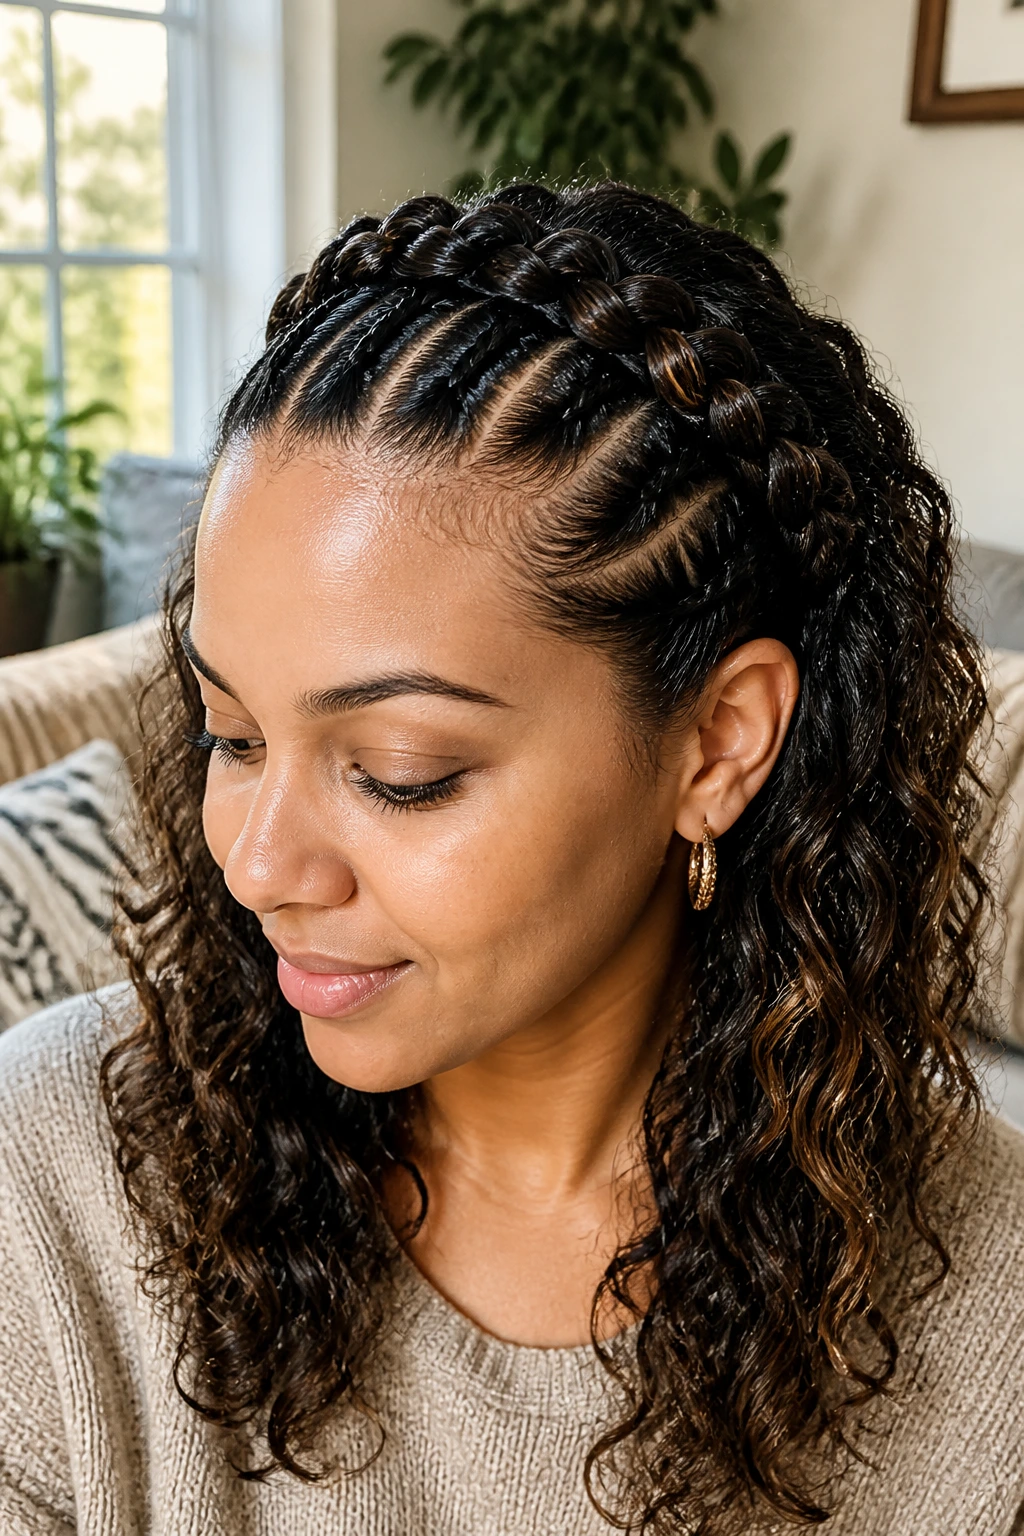
Not every crown needs to start with a full braid at the temples. This hybrid version begins with flat twists near the hairline, then feeds into Dutch braids around the crown. That switch is useful on natural hair because twists can feel gentler at the front while still giving the style a tidy frame.
The finish is softer than an all-braid crown. The twist section lies flatter, the braid section carries the visible lift, and the beachy waves at the ends keep the whole thing from feeling too strict. I like it on finer edges or on hair that needs a little break from heavy tension.
It’s a good in-between style. Protective, but not bulky. Structured, but not severe.
Best for: Tighter coils, fragile edges, or anyone who wants less pull at the front.
Tip: Keep the twists neat and short; long twists can unravel faster than the braid they feed into.
17. The Loose Boho Crown
This is the style for people who want the crown braid to look worn in the best possible way. The braid is pulled apart a little, face-framing pieces are left out, and the beachy waves underneath stay soft and open instead of polished to a shine.
The beauty of the boho version is that it forgives a lot. A small bit of puff around the crown becomes part of the charm. The waves do not need to match perfectly. The whole look feels like you got dressed and left the house, not like you stood in front of a mirror for an hour.
Still, there is a line. Loose is good. Sloppy is not. Keep the braid anchored, especially at the nape, or the style starts looking unfinished instead of relaxed.
Best for: Layered natural hair and low-key events.
One strong opinion: The face-framing pieces should be intentional. Two or three pieces, not half your front section.
18. The Sleek Front, Soft Back Crown
A sleek front changes the balance of the style. You smooth the first inch or two near the hairline, braid the crown cleanly, and leave the back full of soft beachy waves. That contrast is sharp in a good way.
On natural hair, this is one of the easiest ways to make the crown look deliberate without flattening the whole head. A little gel or styling foam near the part keeps flyaways down, and then the waves below do the softer work. It is a smart pairing: control where the eye starts, texture where the eye lands.
This version also handles humidity better than a fully loose style. If the crown stays neat, the waves can frizz a bit and still look on purpose.
Best for: Formal-casual days, interviews, or outfits with clean lines.
Small caution: Don’t coat the front in heavy product. A little shine goes a long way; too much turns the braid slippery.
19. The Protective Crown for Dense Coils
Dense coils need a crown that respects the hair instead of flattening it. Wider sectioning, low tension, and careful parting make this version feel calm at the scalp and stable through the lengths.
What keeps the roots calm
- Stretch the hair first so the braid does not have to fight shrinkage.
- Use small amounts of mousse or cream, not a heavy stack of products.
- Anchor the braid with pins at points where the head naturally curves.
This version is ideal when you want the crown to last several days. The beachy waves can be set with chunky twists or rods, then lightly separated so they stay soft. The style looks fuller than a sleek version, but that fullness is part of the point. Dense coils should not be forced into a skinny braid just to look tidy.
Best for: Very full 4A to 4C hair.
My preference: Prioritize comfort over tightness. A braid that hurts by hour two is not a good crown.
20. The Short-Hair Faux Crown
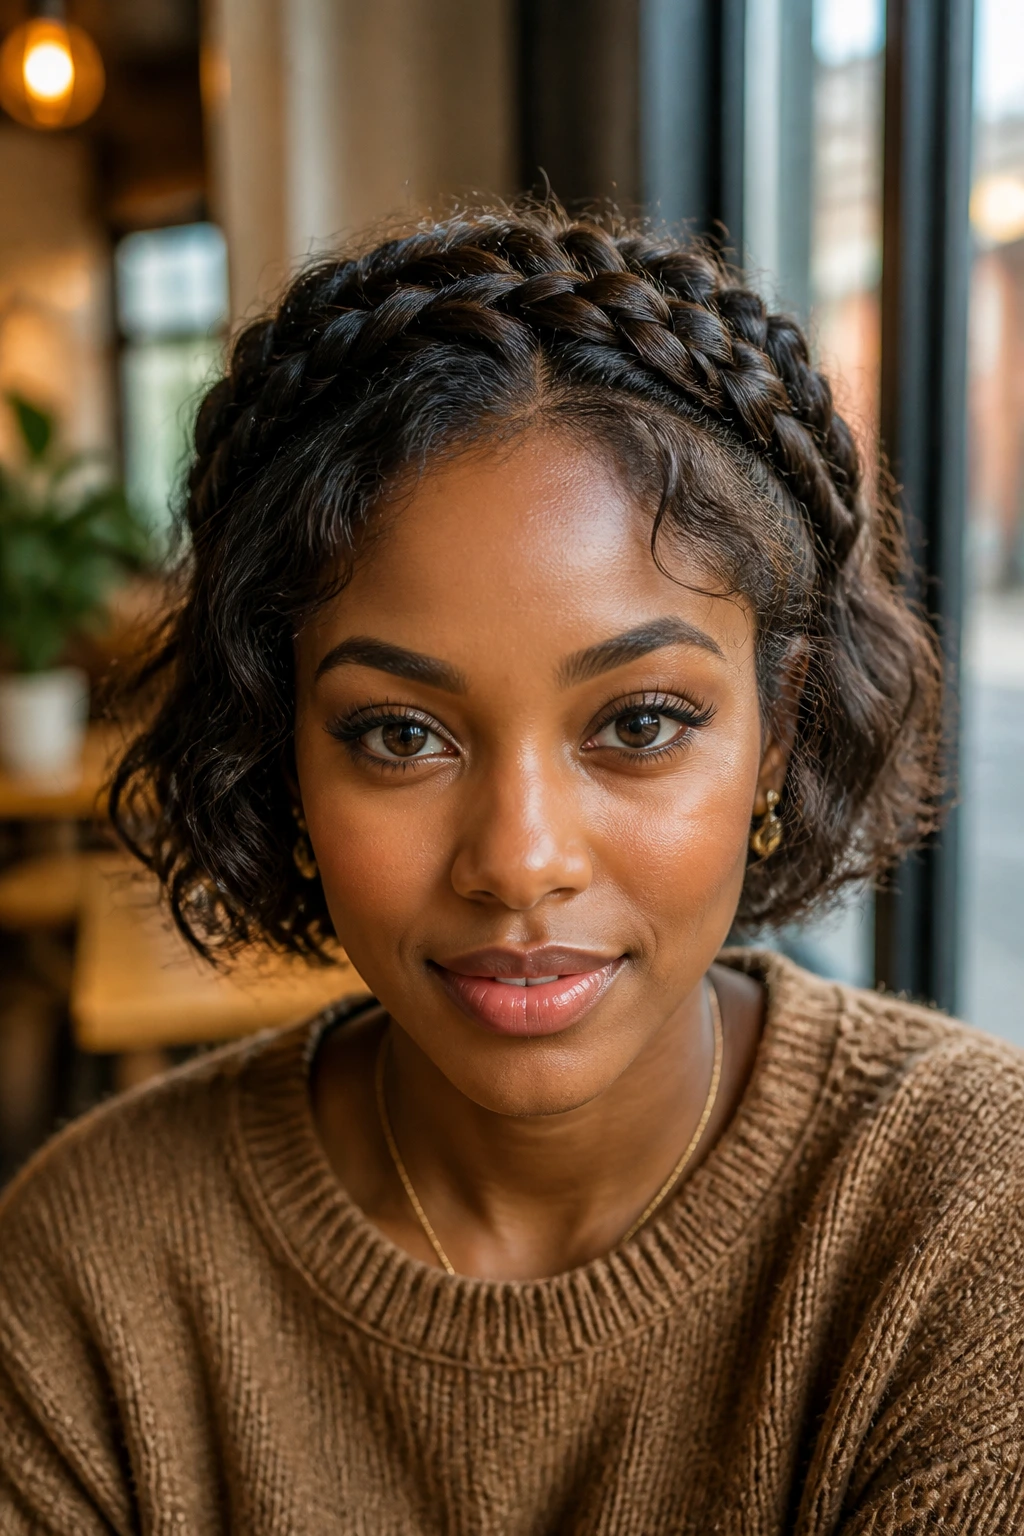
Short natural hair can absolutely wear the crown shape, even if it cannot do a full wrap without help. The trick is to build the illusion with smaller braids, strategic pinning, and a few tucked sections that travel around the head visually.
This is one of those styles where the parting matters more than the length. If the sections are clean and the braid starts with enough grip, the eye fills in the rest. The beachy waves can live in the top layers or the loose ends, depending on how much length you have.
It is not a fake-out in a bad way. It is a smart workaround. And on chin-length or bob-length hair, smart workarounds are what keep people from assuming the style is “too short” before they even try it.
Best for: Short bobs, lobs, and growing-out natural hair.
Tip: Use bobby pins that match your hair color and hide them under the braid line. They matter less when you cannot see them.
21. The Extended Crown with Added Hair
Sometimes the best crown braid is the one that cheats a little. If your natural hair is too short, too layered, or too soft to hold a full arc, adding a small amount of pre-stretched braiding hair can give the braid the body it needs.
That extra hair does two jobs. It adds length so the crown can travel farther around the head, and it adds structure so the braid sits higher instead of collapsing. The loose ends can still be set into beachy waves, but the crown itself looks fuller and more finished.
Blending matters here. Match the texture as closely as you can, and do not overload the braid with added hair. Too much extension hair makes the crown heavy, and heavy crowns sag.
Best for: Shorter natural hair, low-density sections, or styles that need extra drama.
One practical note: Keep the added hair soft and pre-fluffed. Stiff extension hair can make the braid look too clean against natural texture.
22. The Formal Tucked Crown
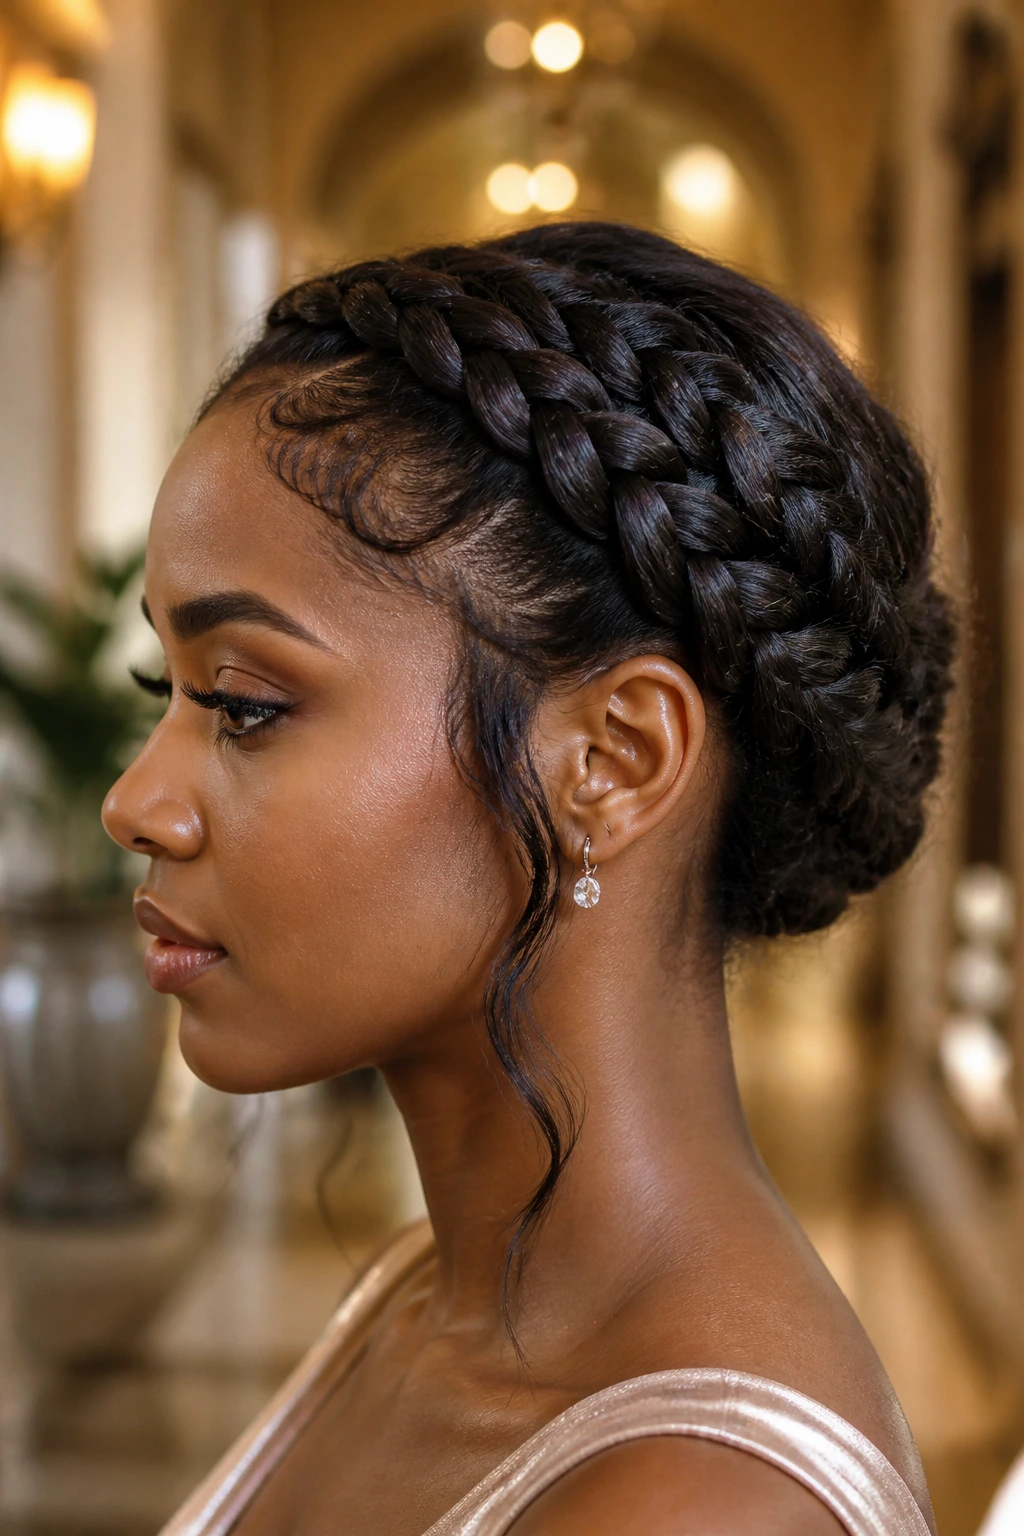
This is the version that belongs at weddings, dinners, and anywhere you want the crown to look deliberate from every side. The braid wraps around the head, the loose length gets tucked or pinned under, and the wave texture shows in controlled sections instead of hanging freely.
I like this when the outfit already has enough movement — lace, silk, big sleeves, anything with a lot happening. The hair should support the clothes, not fight them. The tucked crown does that job neatly.
The finish can be sleek or soft depending on how much you smooth the roots. If you want more polish, use a light gel at the part and a shine spray on the braid itself. If you want less formality, leave a little root lift. Both work.
Best for: Dressy events, family photos, or a style that needs to hold through a long day.
23. The Festival Crown with Feathered Waves
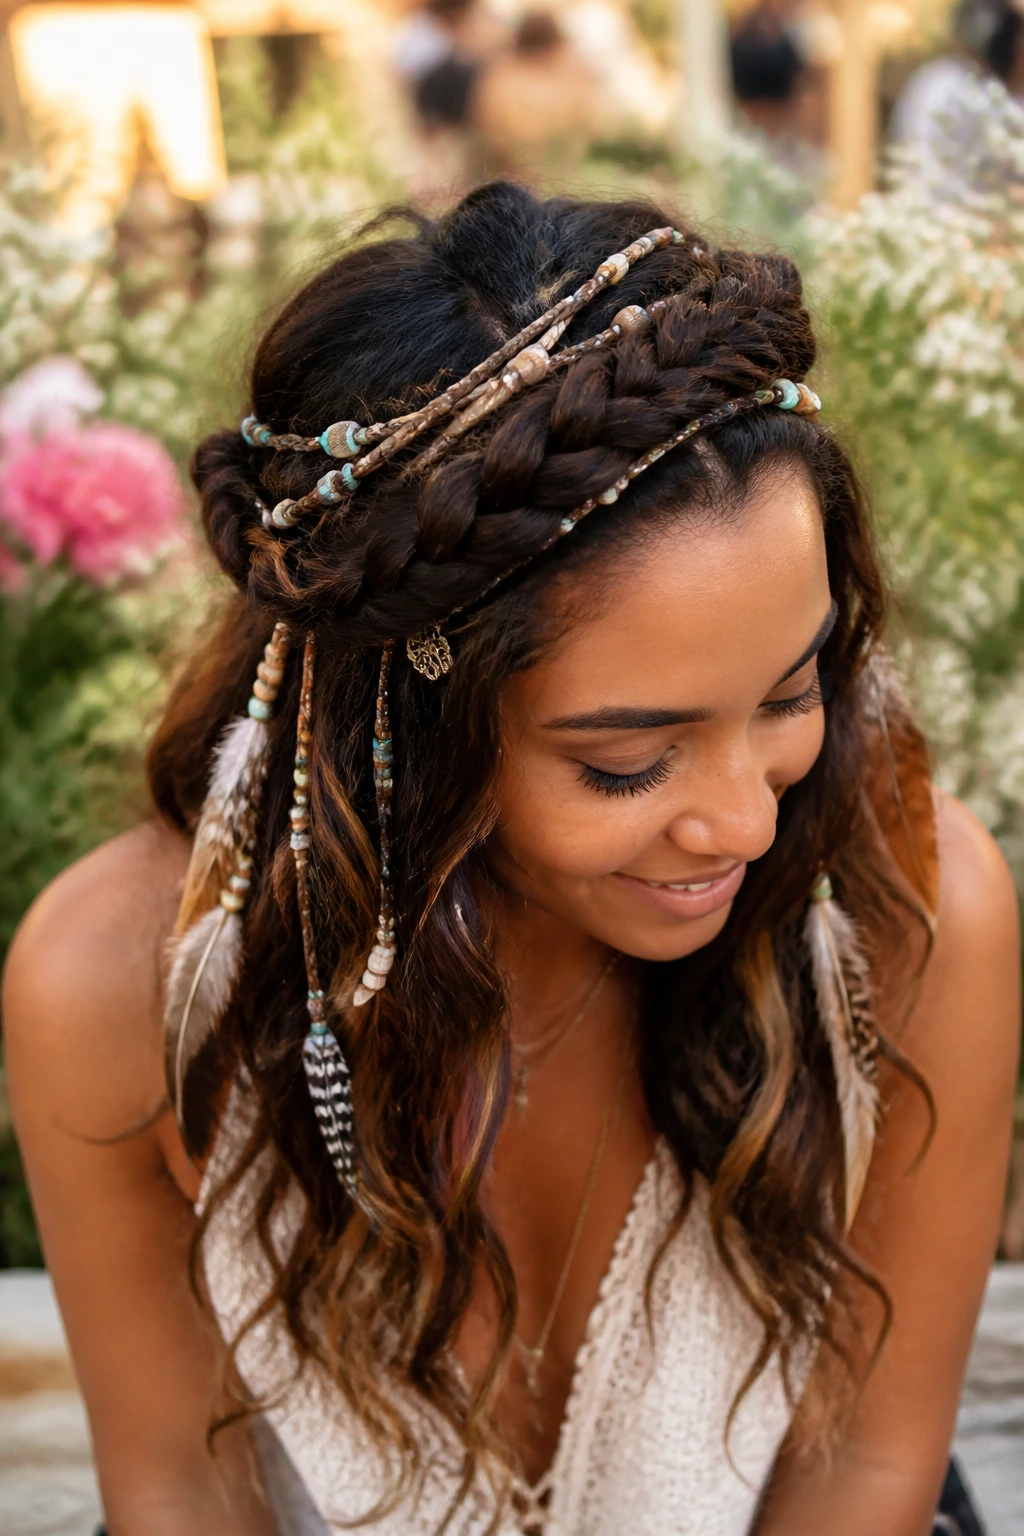
A crown braid can carry accessories, but it does not need them. This version leans into them with tiny cords, beads, or light feather pieces woven into the braid and a loose wave set underneath.
The important part is restraint. The braid should still be visible under the extras. If the accessories take over, the crown stops being a hairstyle and starts feeling like a costume. A few well-placed accents near one temple or at the back seam are enough.
The beachy waves help here because they soften the added pieces. Straight hair with accessories can look rigid; waves keep it looser and more wearable.
Best for: Outdoor events, concerts, and creative looks.
A sensible rule: Use lightweight accents only. Heavy pieces pull at the braid and are not worth the headache.
24. The Minimal Tiny Crown Braids
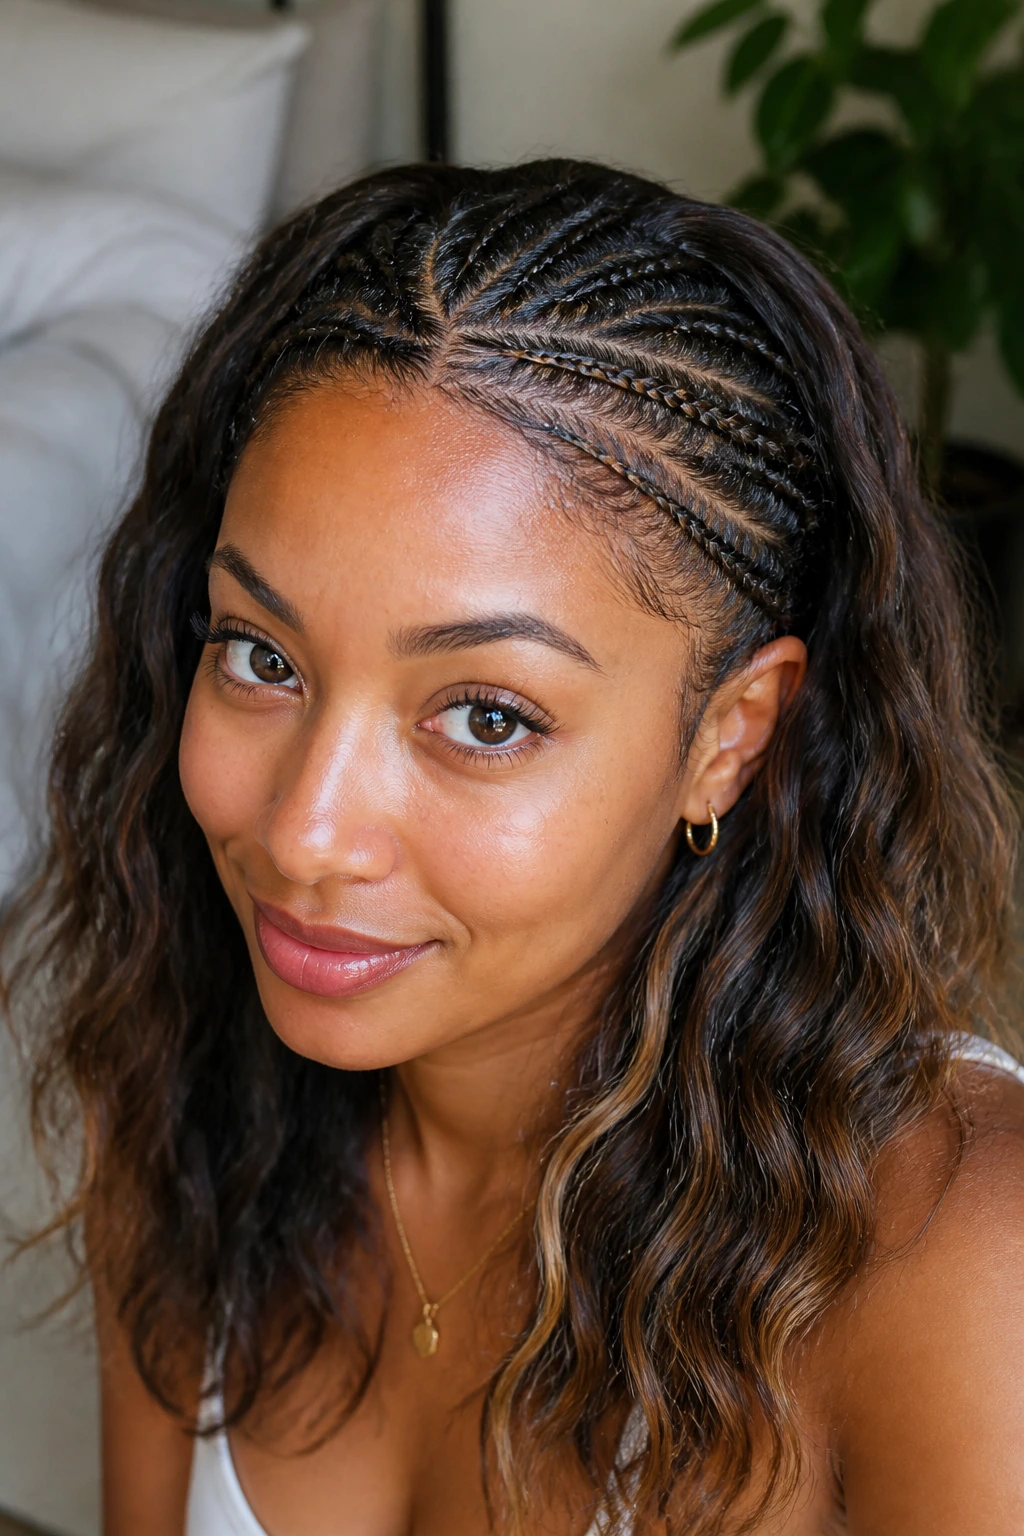
Why does a tiny crown braid look so refined on natural hair? Because it lets the texture speak without crowding the head. The braid is narrow, the parting is tight, and the beachy waves below stay the main source of movement.
This is the version for people who do not want a big braid taking over their face. It works especially well when you want the hairline neat but still want the rest of the style soft. A few tiny braids around the crown can also make a good base for more elaborate waves underneath.
It takes patience. No way around that. But if you like detail, the clean lines are worth it.
Best for: Fine-to-medium natural hair, short to medium lengths, and low-profile styling days.
Tip: Keep the braids uniform in size. Tiny and uneven reads messy fast.
25. The Jumbo Statement Panel Crown
Big braids have presence. A jumbo crown braid turns the hairline into one strong shape, and the beachy waves underneath make that shape feel less severe.
This is the version I’d choose when speed matters or when the hair is so dense that smaller braids would take too long. Larger sections mean faster styling, fewer pieces to pin, and a bolder outline around the head. The risk is bulk, so the answer is to keep the panels smooth and the loose waves soft.
Compared with the petite stitch crown, this one is more relaxed and less detailed. That is not a flaw. It is a trade-off. If you want the style to read from across the room, this is the move. If you want delicate, go smaller.
Best for: Long, thick, or very full natural hair.
Recommendation: Pair it with a wide, soft wave set at the bottom — large twists or a loose braid-out work better than tight curls here.
How to Prep Natural Hair So the Crown Sits Cleanly
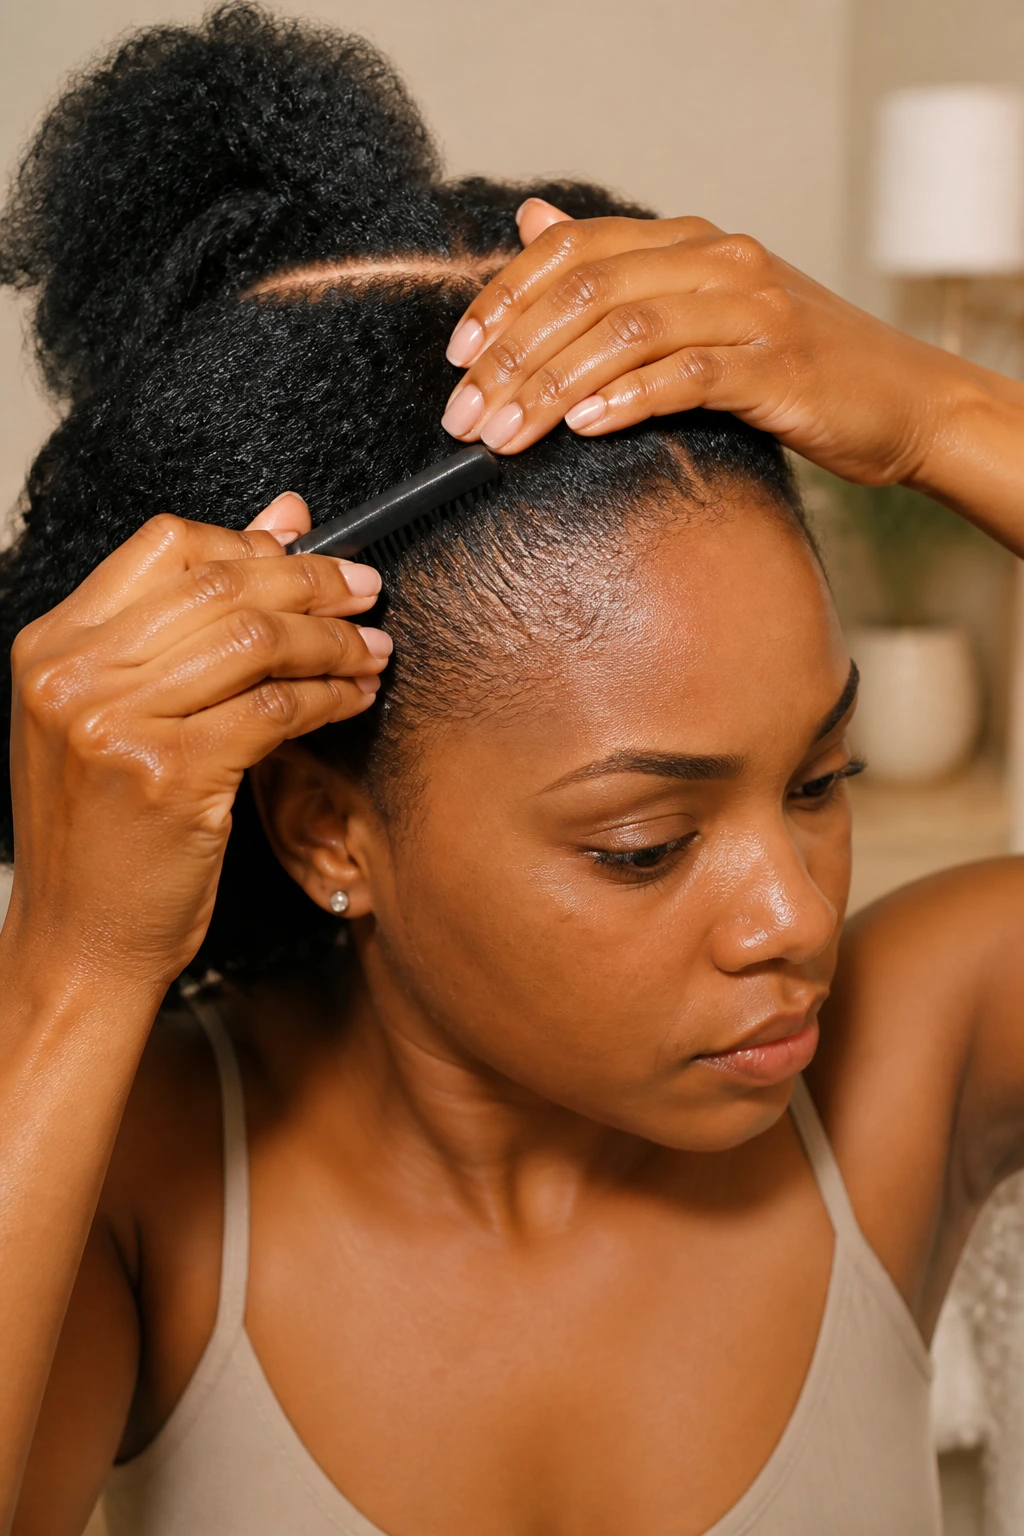
The braid is only half the job. The prep decides whether the crown sits flat, slips, or stays neat for several days.
Start with hair that is detangled all the way through and stretched enough that shrinkage will not fight the braid immediately. That can mean a blowout on low heat, a stretched braid-out, or a well-set twist-out. I prefer hair that is about 80% dry before braiding. Fully wet hair can feel easy at the start, but it takes forever to set and often puffs up once it dries.
Use a lightweight leave-in and, if your hair likes it, a little mousse or setting foam. Skip heavy butters near the roots. They make the braid slide and leave the crown looking greasy before the day is done. For the part, use a rat-tail comb and clip away what you are not braiding. Clean sections are not a luxury here. They save time later.
One more thing. Smooth the first inch at the hairline with your fingers before you braid. That tiny bit of control keeps the front from looking fuzzy while the rest of the hair stays soft.
Essential Tools for These Styles
- Rat-tail comb: Best for crisp center parts, side parts, and the narrow sections used in petite crown braids.
- Sectioning clips: Keep unused hair out of the way so the braid path stays clean.
- Spray bottle with water: Useful for lightly rehydrating curls or twist-outs without soaking the whole head.
- Wide-tooth comb or detangling brush: Helps stretch the hair before braiding without tearing at the ends.
- Edge brush: Good for smoothing the front inch of hair if you want a neater hairline.
- Bobby pins: Essential for tucking seams, securing buns, and hiding short ends.
- Small clear elastics: Helpful for short-hair faux crowns, tucked ends, or mini accent braids.
- Mousse or setting foam: Gives the loose waves hold without the sticky feel of heavier creams.
- Light gel or edge control: Best used sparingly near the part and hairline only.
- Silk scarf or bonnet: Keeps the crown from puffing up overnight.
- Optional flexi rods or a 1-inch wand: Use these when you want the loose lengths to read as waves instead of curls.
Smart Product Choices for Braids and Beachy Waves
The product choice matters more than the finish spray. A Dutch crown braid on natural hair needs grip at the roots and softness in the loose lengths, and those two jobs do not always use the same product.
For the braid itself, I like a light cream or a mousse-like styler better than a thick butter. Butter makes the hands glide, which feels nice at first, but it can also make the sections slippery and turn the crown into a puzzle. If your hair is coarse and dry, a small amount of cream under the mousse can help. Keep it close to the root and mid-shaft, not piled on.
For the waves, use a product that dries with some movement. Setting foam, flexible-hold mousse, or a light leave-in all work. Heavy gels can freeze the wave too hard and leave the ends crunchy instead of beachy. If you are using heat, add a heat protectant. If you are not, a little water-based product is enough. You do not need six layers.
One honest note: the more product you use, the less the style tends to breathe. That can be good on very frizzy hair. It can also make fine natural hair collapse. Match the product to the density in front of you, not to a tutorial thumbnail.
How to Keep the Style Fresh Overnight and Through the Week
A crown braid lasts longer when you protect the roots and the loose waves separately. That sounds obvious. People still skip it.
At night, wrap the braid with a silk scarf or wear a bonnet that does not crush the crown flat. If the loose waves hang long, gather them into a loose pineapple or tuck them gently under the scarf so they are not rubbing on cotton all night. Satin pillowcases help, but they do not replace a wrap.
In the morning, do not drench the hair. Mist the frizzy spots lightly with water, then smooth a pea-sized amount of mousse between your palms and press it over the loose bends. If the crown itself is puffy, use a tiny dab of edge control on a clean toothbrush or edge brush and touch only the problem spots.
Most of these styles hold well for 3 to 5 days. A formal tucked crown or an extended version can stretch to about a week if the scalp stays comfortable and you are not sweating heavily. If you wake up with a flat spot at the crown, pin it back into shape for an hour. That is usually enough.
Common Mistakes That Make the Crown Puff Up or Slip
- Braiding hair that is too wet: The braid may look neat at first, then puff out as it dries. Start on stretched hair that is mostly dry so the shape stays put.
- Pulling the front too tight: A crown that feels sharp at the hairline usually becomes annoying by the end of the day. Keep the first inch snug, not strained.
- Using heavy product on the roots: Thick creams and oils make the braid slide, especially on finer natural hair. Use lighter hold near the crown and save richer products for the ends.
- Making the parts uneven: Uneven sections show fast in a crown braid because the shape repeats around the head. Clip and re-part before you keep braiding if one side feels off.
- Leaving the loose waves un-set: If the ends are left totally raw, they frizz faster than the braid can hold. Set them with twists, rods, or a quick wand pass so they have a pattern.
- Skipping pins where the braid changes direction: The curve near the back often needs an extra bobby pin. One anchor point is usually not enough.
Variations and Adaptations to Try
- Heatless Wave Version: Set the loose lengths in chunky braid-outs or flexi rods instead of a curling wand. This keeps the finish softer and avoids heat on already-stretched natural hair.
- Low-Tension Crown: Use wider sections, start the braid farther back, and keep the hairline loose. This is the one I’d pick for sensitive edges or for anyone who wears crowns often.
- Dressy Gloss Version: Smooth the part with a light gel, add one or two cuffs, and keep the waves more uniform. It works for weddings, dinners, and formal photos.
- Short-Hair Pin-Up Version: Build the crown with mini braids and hidden pins, then tuck the short ends under. Good for bobs and growing-out shapes that still want the halo effect.
- Extension-Boosted Version: Feed in a small amount of pre-stretched braiding hair when your natural length is too short for a full wrap. Keep the added hair soft and light so the braid does not sag.
- Soft Boho Version: Pull the braid apart a little, leave two face-framing pieces out, and let the waves stay uneven. It looks less polished, in a good way, and takes less time to maintain.
Frequently Asked Questions
How long do Dutch crown braids last on natural hair?
Most versions hold for 3 to 5 days if you wrap them at night and keep product light. A tucked or extension-boosted version can last longer, but the hairline usually tells you when it is time to take it down.
Do I need blown-out hair to make this style work?
No, but stretched hair makes the braid cleaner and the waves easier to control. A braid-out or twist-out with good stretch is often enough if you do not want heat.
Can short natural hair wear a Dutch crown braid?
Yes, though you may need pins, mini braids, or a small amount of added hair to complete the arc. Hair as short as a bob can wear a faux crown shape if the sections are planned carefully.
What makes the waves look beachy instead of curly?
Larger set pieces. Chunky twists, big braid-outs, or a 1-inch wand give you softer bends, while tiny rods create tighter curls. The bigger the section, the looser the wave.
How tight should the braid be?
Tight enough to hold, never tight enough to sting. If the front starts to feel tender while you braid, loosen your hands and rework that section before you go farther.
Can I sleep in the style without ruining it?
Yes. A silk scarf or bonnet keeps the braid from puffing up and helps the waves stay in place. Cotton pillowcases rough up the ends fast, so skip them if you can.
What if the crown starts to look bulky at the back?
That usually means the braid is carrying too much hair at the turn. Use a hidden bobby pin at the curve, flatten the section with your fingers, and reduce the size of the next section slightly.
Is added hair too heavy for natural hair?
It can be if you overdo it. A small amount of soft, pre-stretched braiding hair is usually enough for length and shape; piling on too much adds weight and puts strain on the front.
Braids That Hold Their Shape
The best Dutch crown braids do not look frozen. They look held together. That is a different thing, and natural hair wears the difference well. A braid with enough grip, a wave set with enough softness, and a hairline that has not been bullied into place — that combination keeps showing up because it works.
The styles above give you room to move between neat and loose, polished and lived-in, protective and expressive. Pick the one that fits your hair density, your time, and your patience. Then give the loose lengths a wave pattern with a little breathing room. That is where the look stops being a braid tutorial and starts feeling like your hair, only more deliberate.