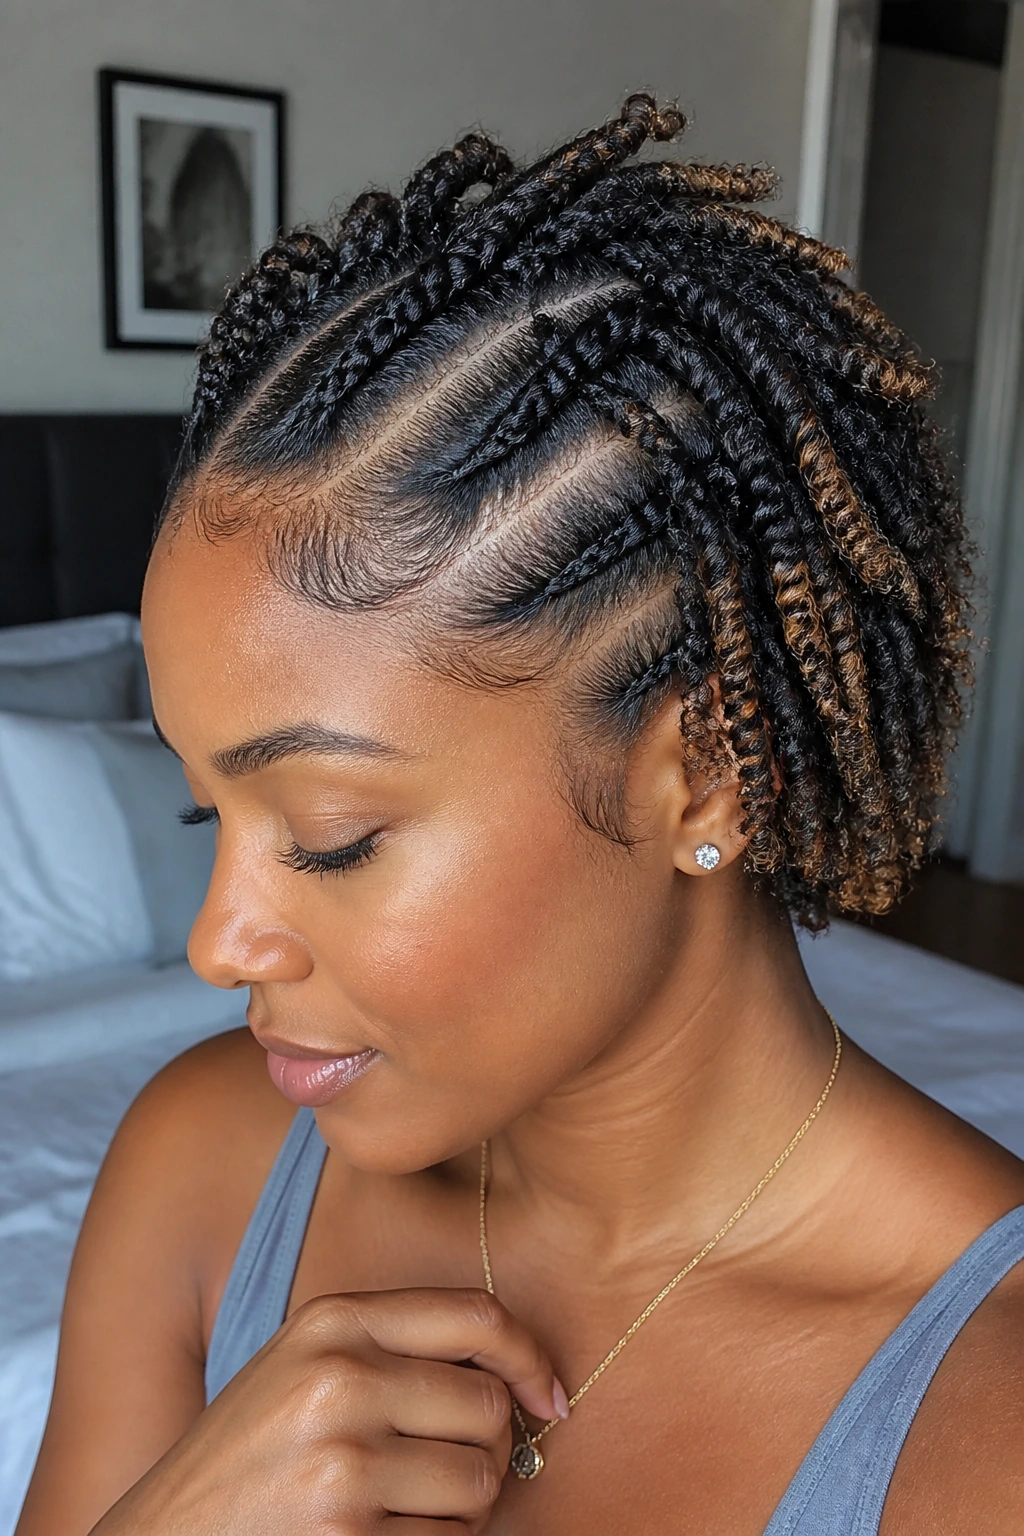
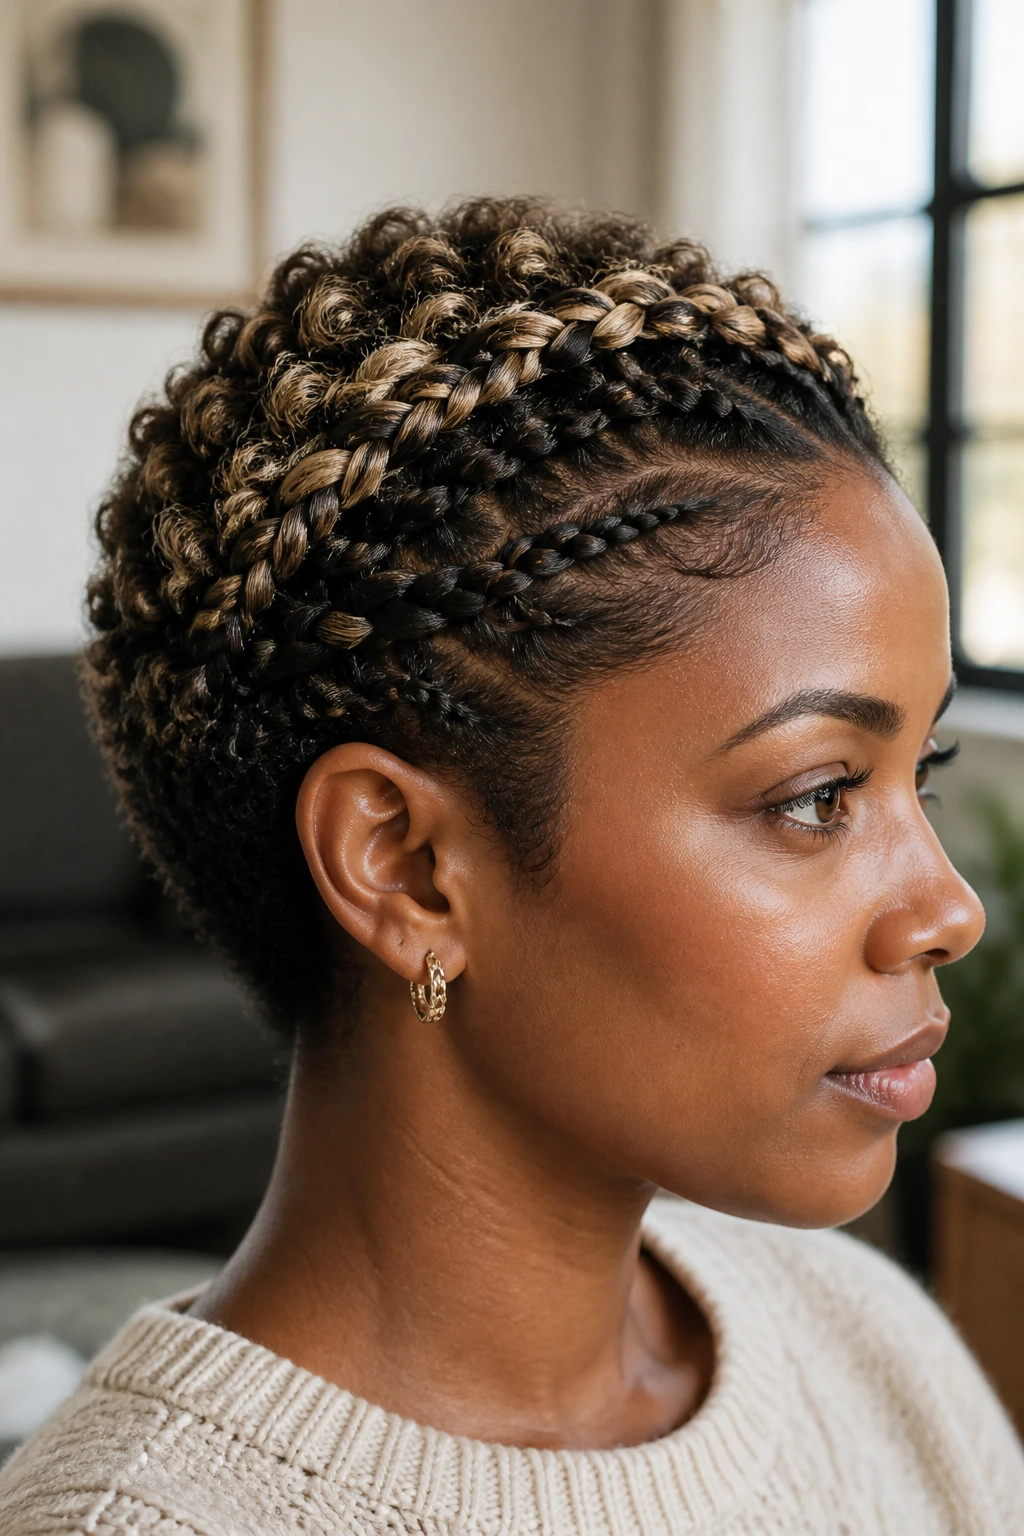
Dutch braids for short natural hair with babylights have a nicer payoff than a lot of people expect. A raised braid turns those fine light pieces into stitched ribbons instead of burying them inside the hair, and that little bit of lift can make a cropped cut look deliberate instead of like it’s waiting for more length.
Short natural hair also behaves in its own stubborn, useful way. It puffs. It shrinks. It sits where it wants to sit. So the braid has to work with the cut, not bully it into pretending to be something else. When the part is clean and the tension is even, though, the whole style sharpens up fast — and the babylights start doing that quiet, expensive-looking thing where they flash at the braid ridge and then disappear again.
Some of the prettiest versions are also the least fussy: a side sweep that lands just above the ear, a crown braid that leaves the back texture free, a pair of braids tucked into tiny buns, or a mohawk line that makes a tapered cut look almost architectural. The real trick is matching the braid to the length you actually have, not the length you wish you had on a good hair day.
Why These Braids Look Better Than You’d Expect on Short Hair
- Babylight Visibility: Raised Dutch stitches sit on top of the braid, so the lighter strands show as thin ribbons instead of disappearing into the weave.
- Short-Length Advantage: Less hair weight means less sag, which helps the braid stay close to the scalp and hold its shape longer.
- Shrinkage-Friendly: These styles work with coils that spring up after styling, because the braid anchors the roots even when the ends are short.
- Low-Tension Options: A lot of the looks here stay snug without dragging the hairline, which matters more than people admit.
- Fast Refresh: Most of them can be revived with a mist bottle, a dab of leave-in, and a quick re-pin at the nape.
- Style Range: You can go polished, sporty, dressy, or a little undone without changing your whole routine.
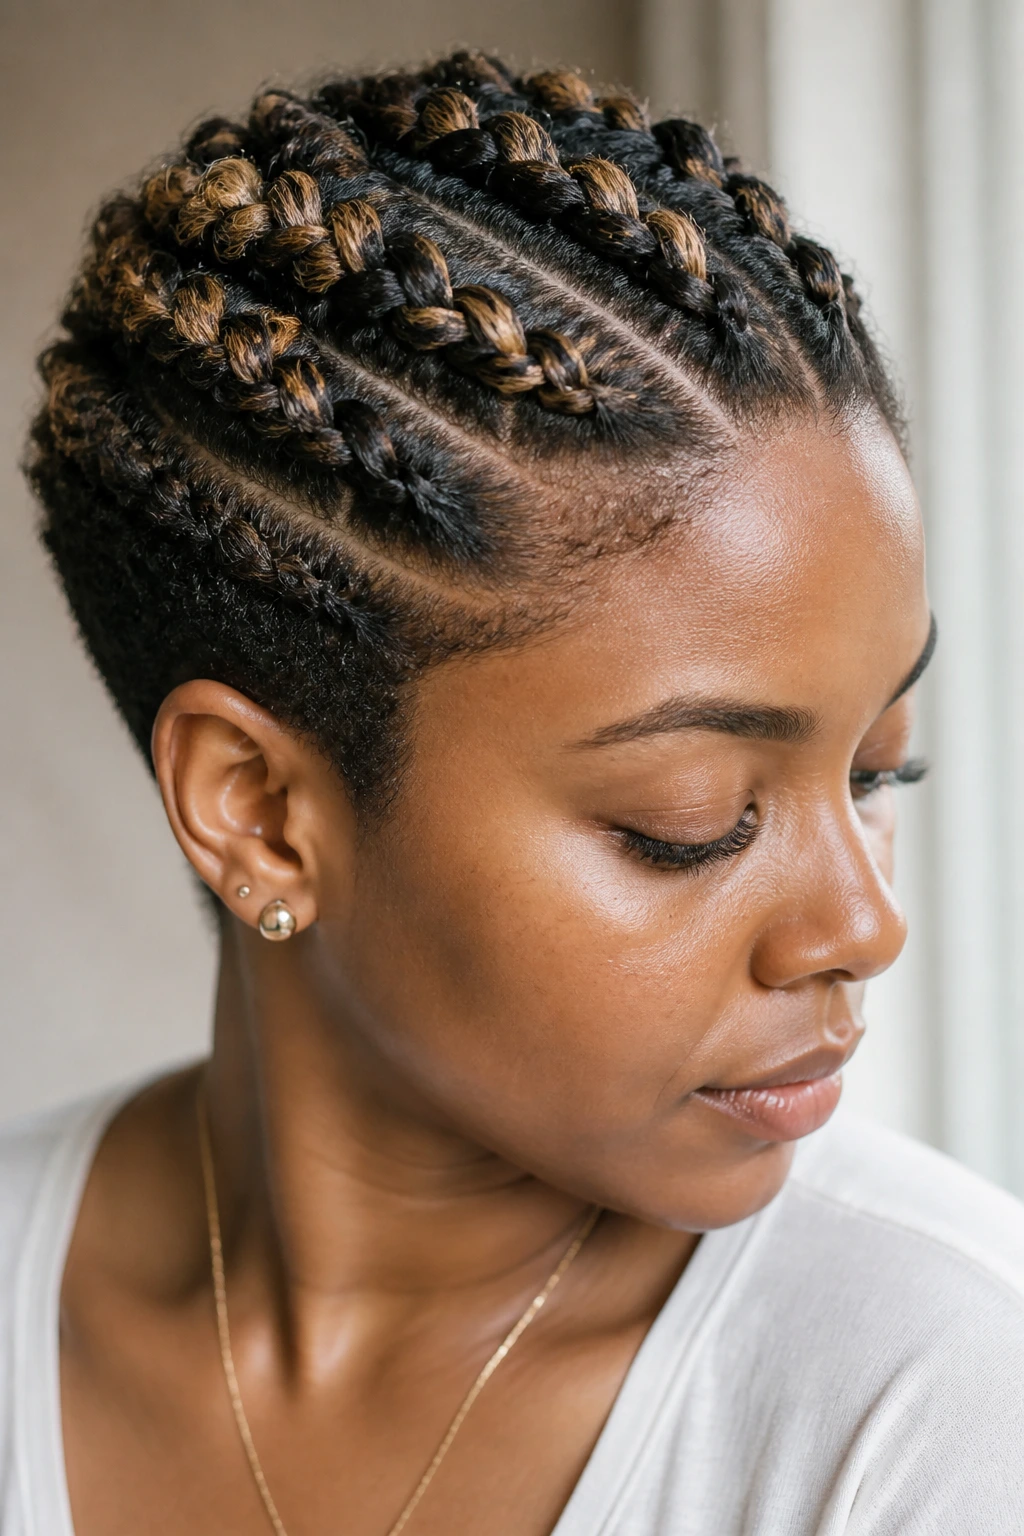
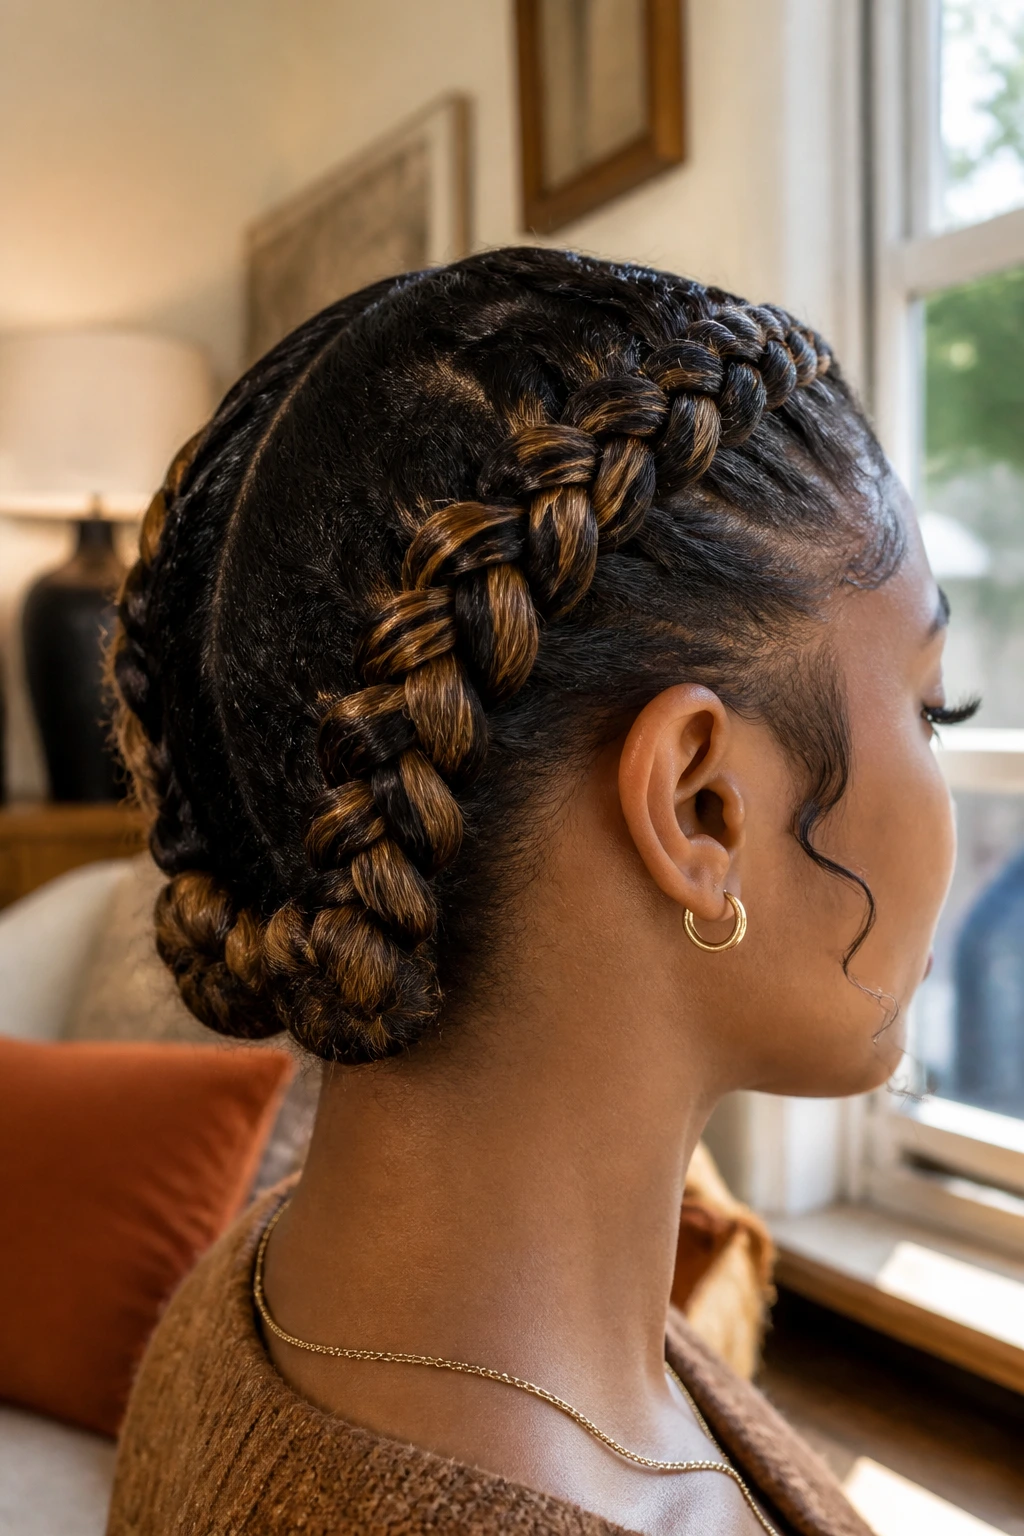
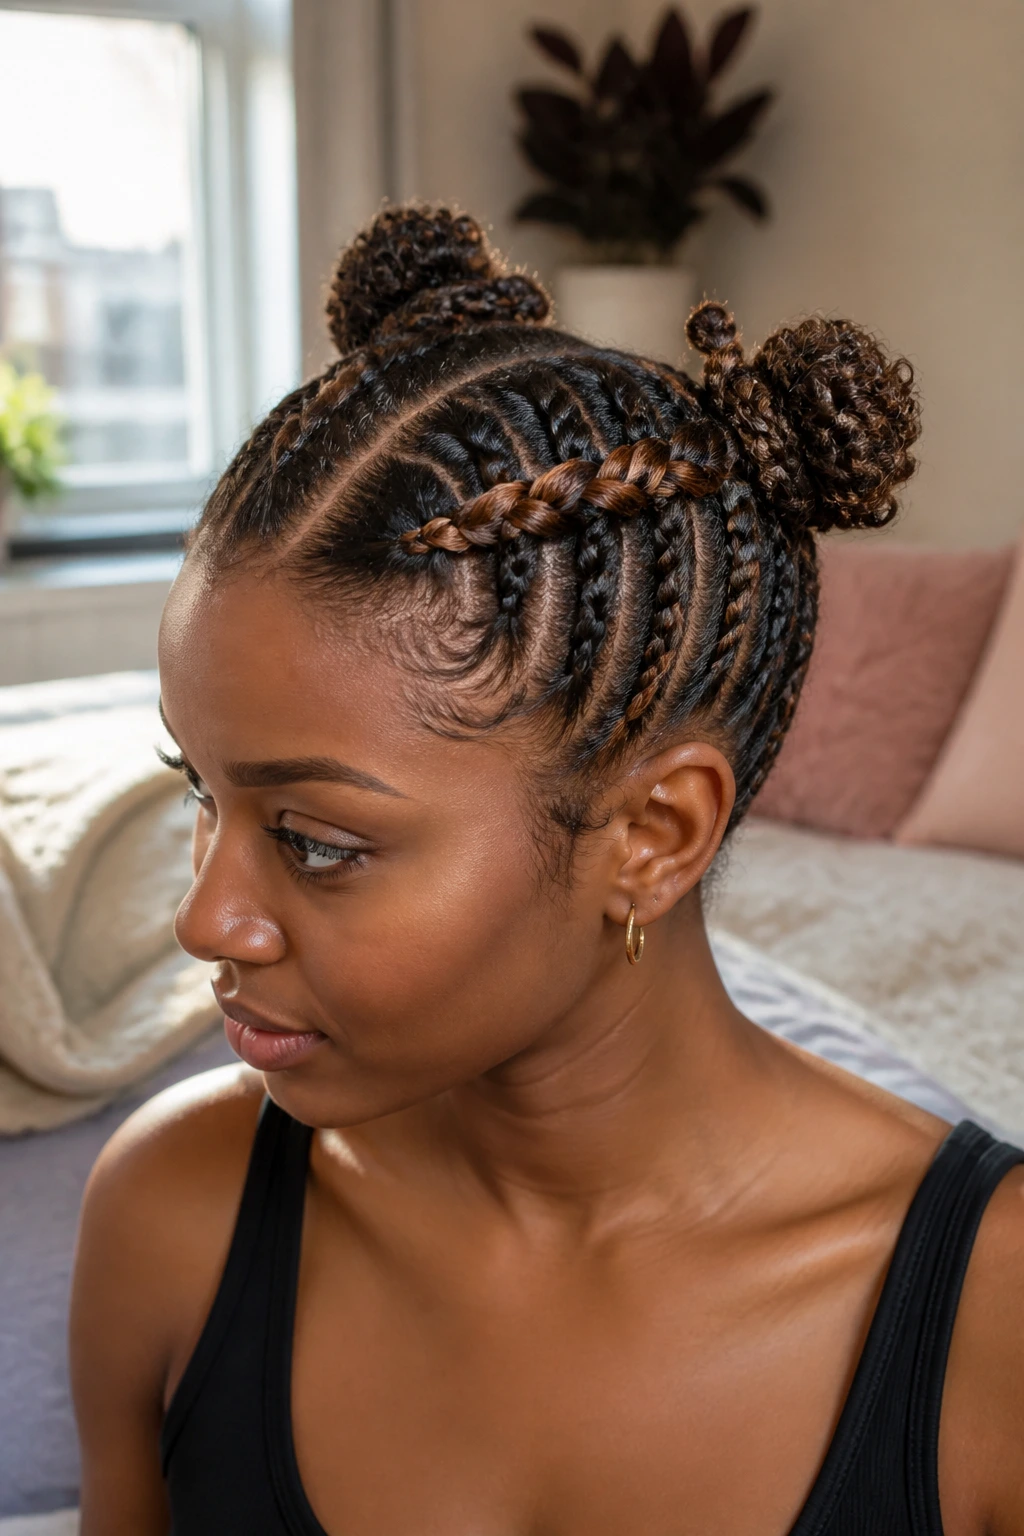
1. Tucked-Under Twin Dutch Braids

Twin Dutch braids that tuck under at the ends are the cleanest place to start. They give short natural hair a shape that reads on purpose, and the babylights ride the outer edge of each braid like tiny painted lines.
Why it holds so well
Braid each side from the temple back to the nape, then stop once the ends get too short to stay neat and secure them with mini elastics. Fold the tips upward and pin them flat with two bobby pins per side. The style looks best when the part is straight and the first stitch is snug, because that’s where the whole braid gets its backbone.
2. Side-Swept Dutch Braid With a Deep Part
A deep side part changes the whole mood. Instead of two matching rows, you get one braid that arcs across the front and lets the babylights show along the top where the braid bends.
This version is good when one side of your haircut is shorter or more tapered than the other. Start on the heavier side, braid toward the opposite ear, and let the loose side fall in soft coils or a pinned tuck. It’s the kind of style that looks more styled than it actually is, which is my favorite kind of hair math.
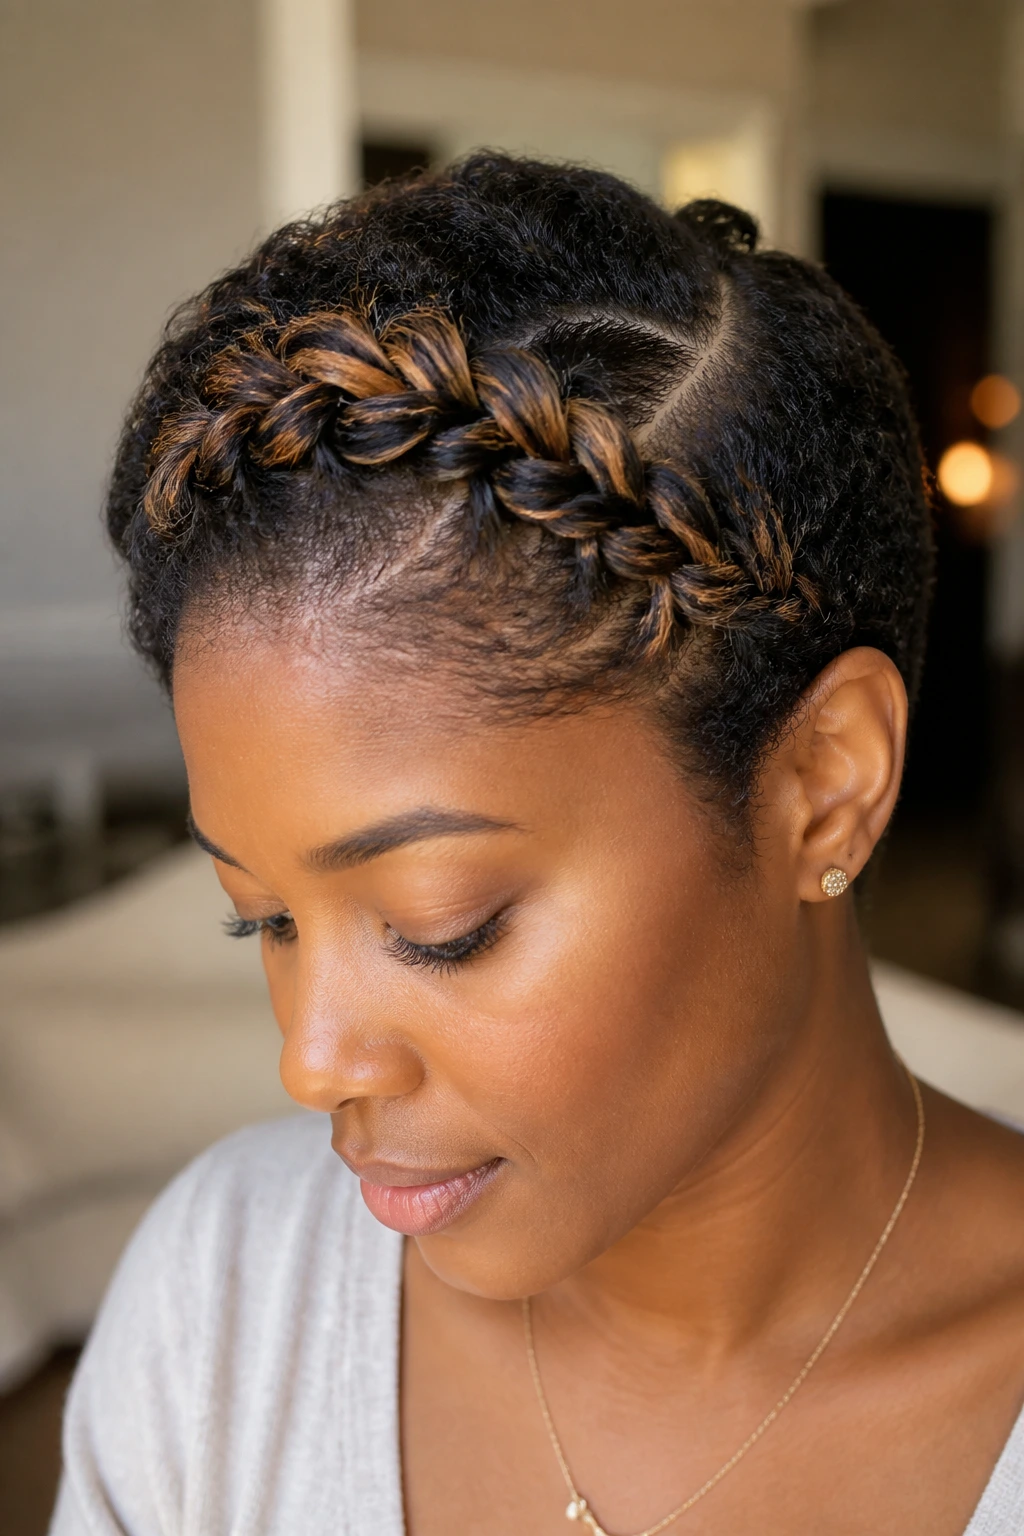
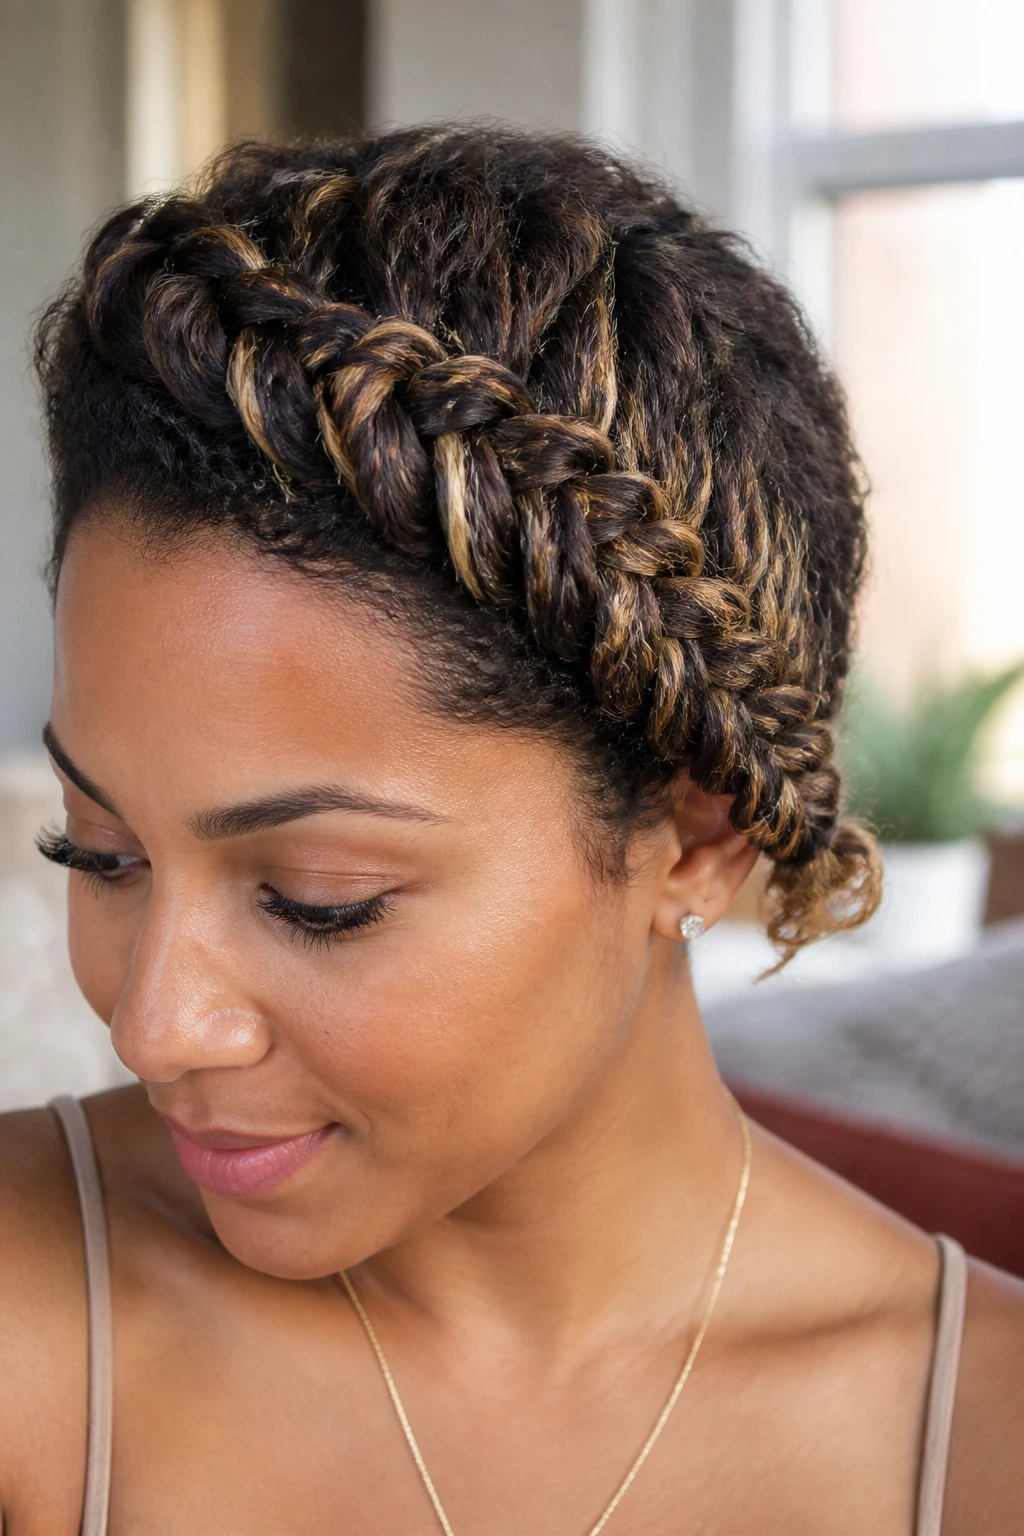
3. Halo Braid Around the Hairline

Why does a halo braid look richer on short coils than on long hair? Because the braid sits right where the eye lands first — around the face — and the babylights get a chance to flicker at the crown and temples.
What to watch for
Keep the braid close to the hairline, not pushed way back into the middle of the head, or you’ll lose the halo effect. If the back section is too short to wrap all the way around, stop at the opposite ear and pin the tail under a curl or puff. The style works especially well when the front pieces are stretched just a little, because a stretched root gives you cleaner part lines.
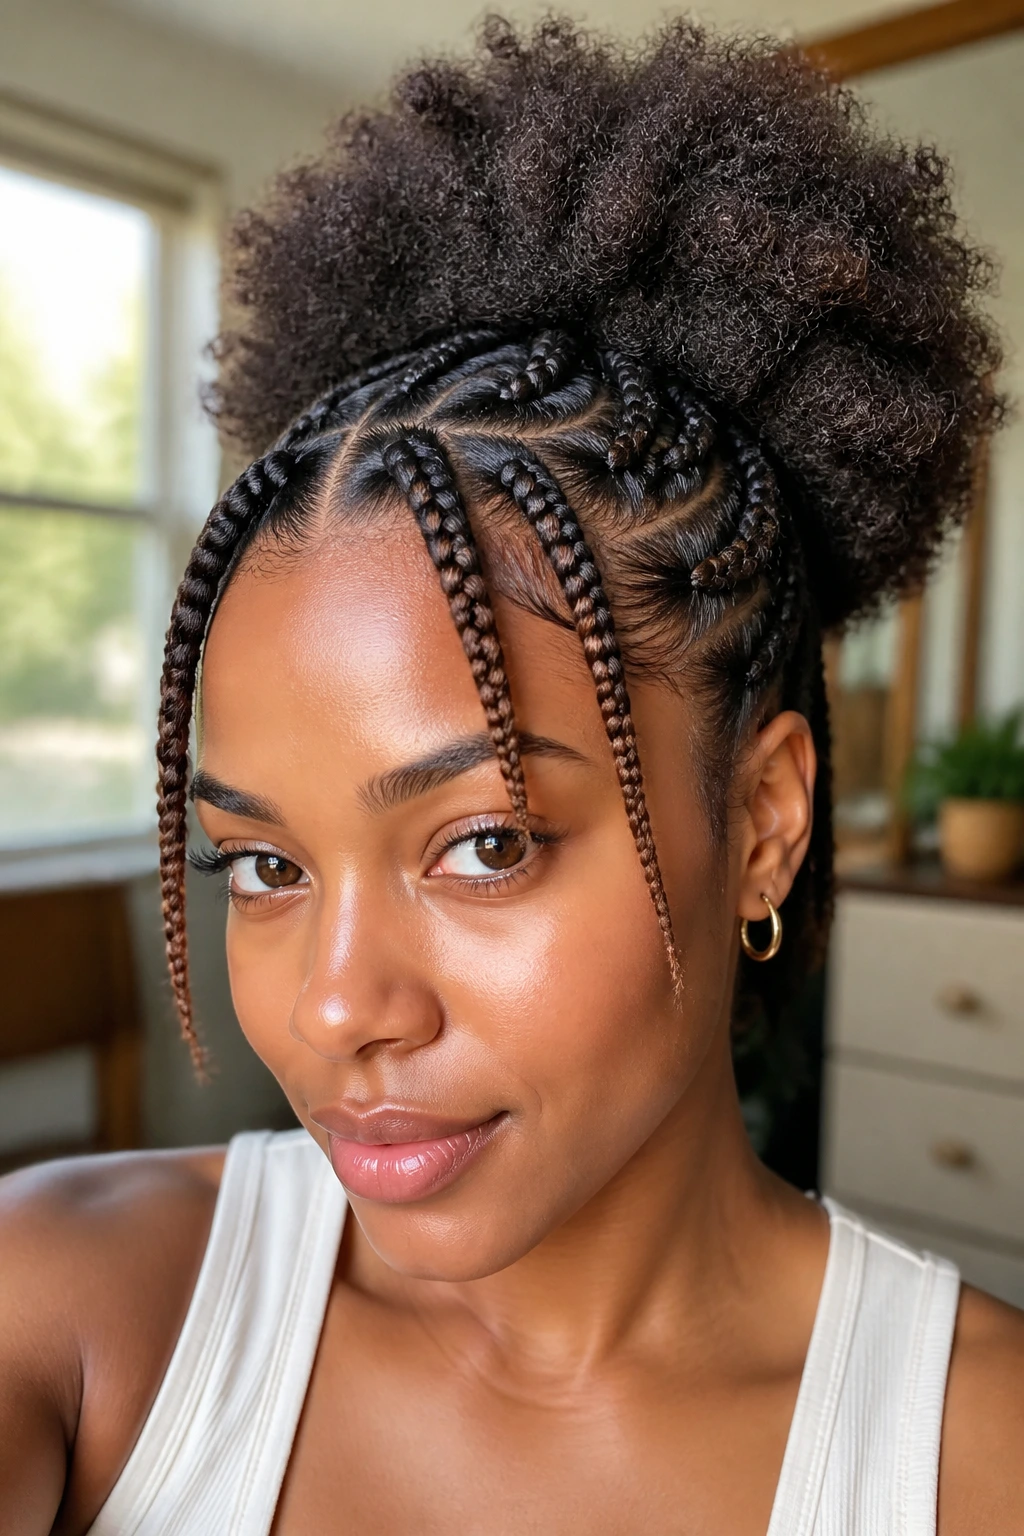
4. Half-Up Double Dutch Braids and Loose Coils
A half-up pair of Dutch braids is the answer when you want the top controlled and the rest free. It leaves the crown polished, but the loose back keeps the style from feeling stiff.
Use the braids to frame the babylights near the front and top, then let the lower section keep its natural texture. This is one of those styles that forgives uneven growth and layered cuts, because the braid only has to handle the upper half. If your hair frizzes at the edges by midday, that’s not a failure. It’s part of the look.
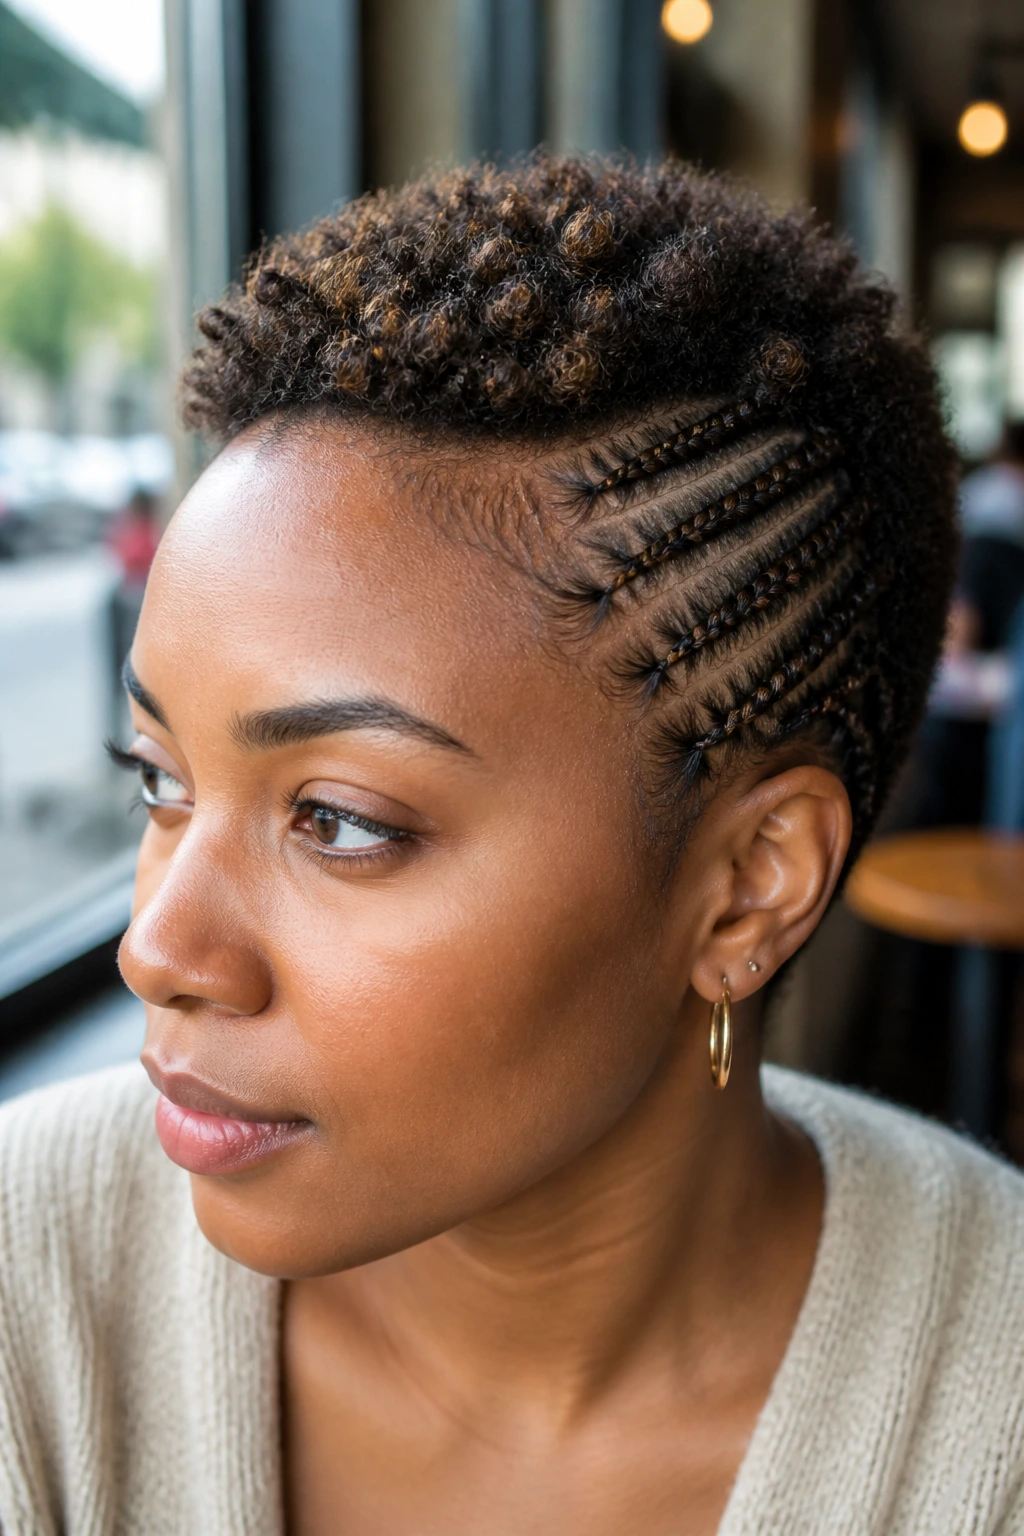
5. Central Mohawk Dutch Braid
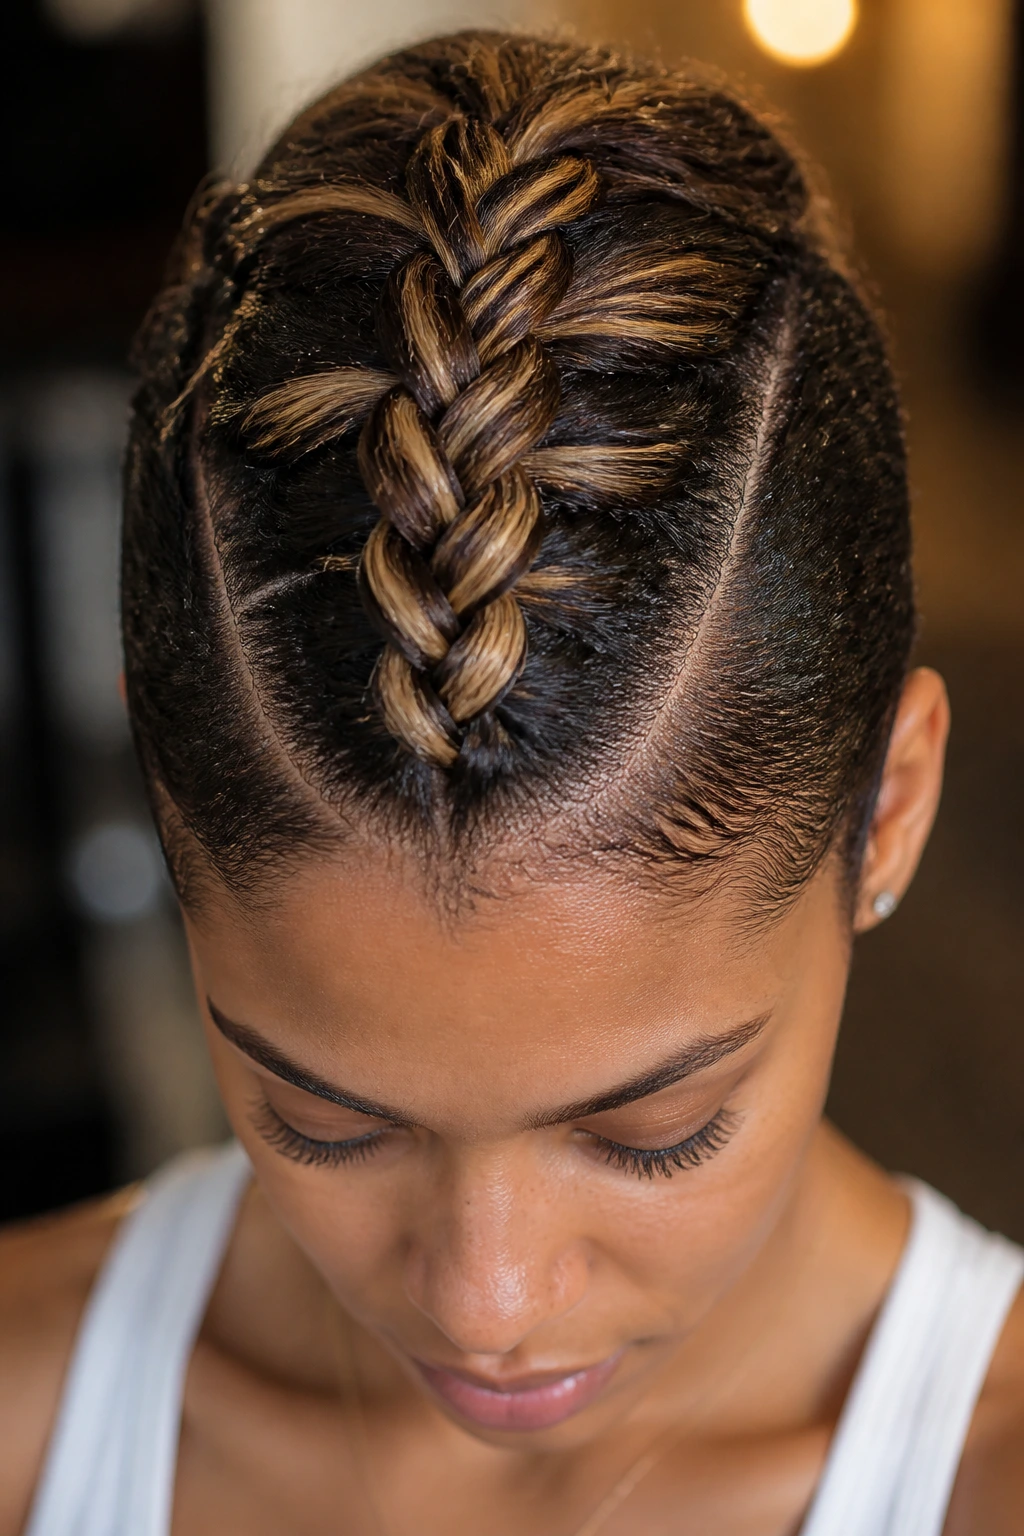
A single braid running down the middle is bold without trying too hard. It pulls the eye straight to the center, which is where babylights often show best anyway if your color is concentrated around the part and crown.
This shape works well on short natural hair because it does not need much side length to feel complete. Smooth the sides back with a touch of gel, braid the middle section tight enough to stay raised, and leave the ends in a small coil, a tucked pin, or a tiny elastic knot. It’s neat, sharp, and a little bit fierce. Good combination.
6. Asymmetrical Dutch Braid Swoop
Unlike a symmetrical twin-braid set, this one leans into unevenness. The braid starts heavier on one side, then sweeps across the head and ends low, which makes a short cut look longer than it is.
That diagonal line is also nice for babylights because it cuts across the lighter strands at an angle. You see more contrast where the braid turns. If your haircut has one side that bends out faster than the other, this is the style that turns that little annoyance into part of the design.
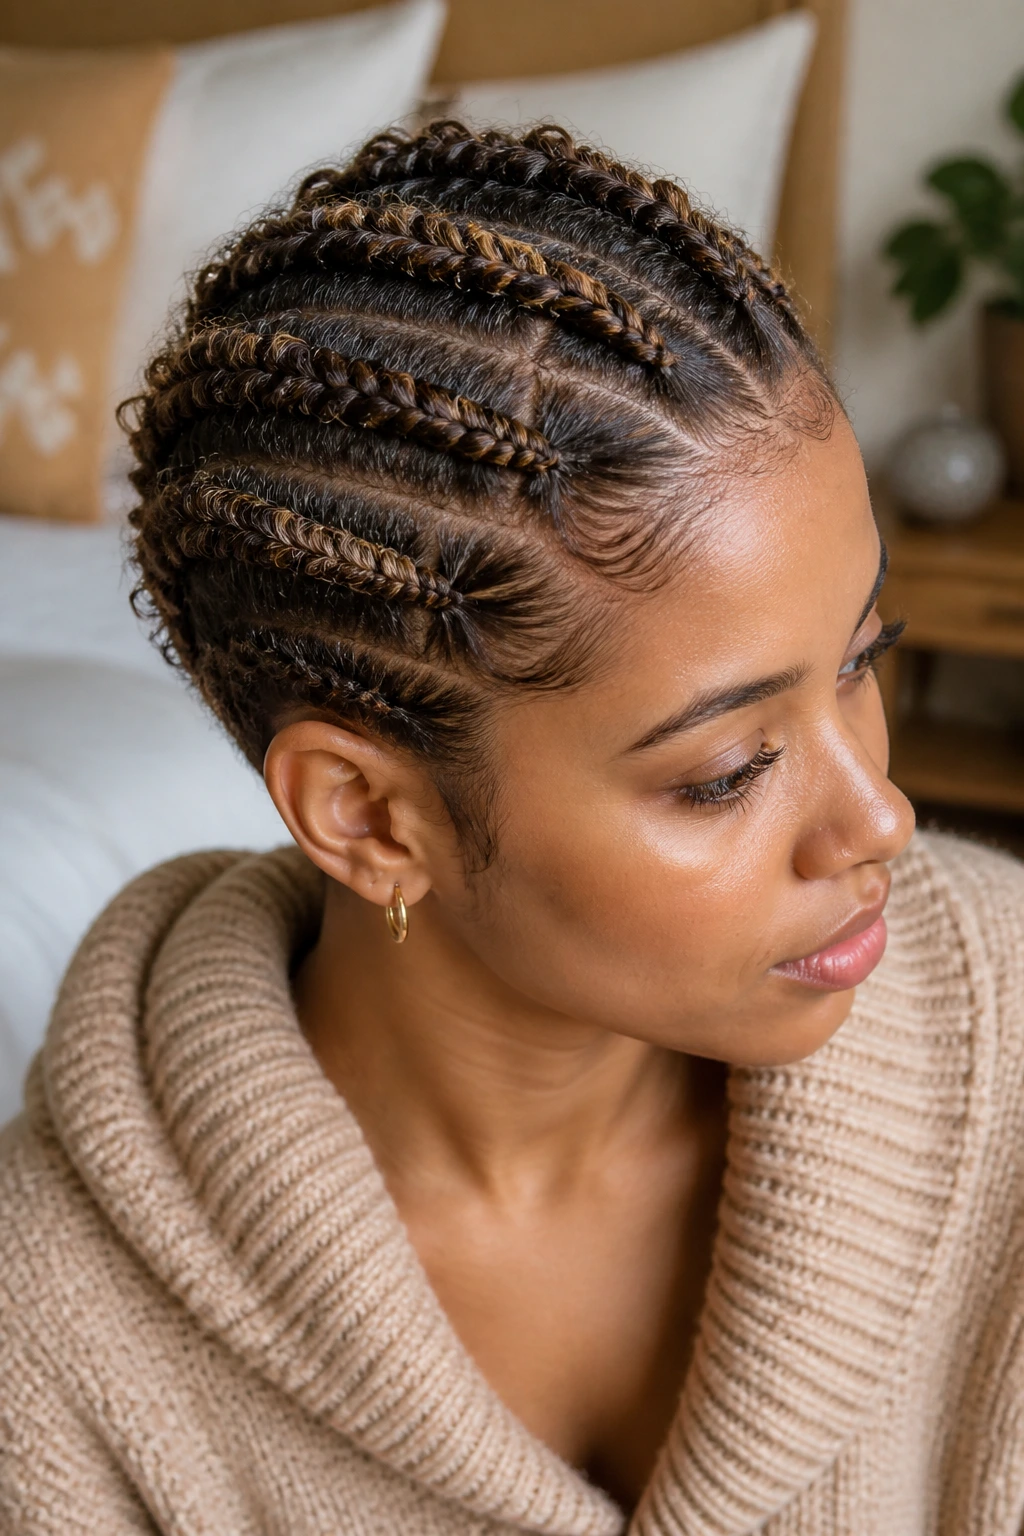
7. Zigzag-Part Twin Braids
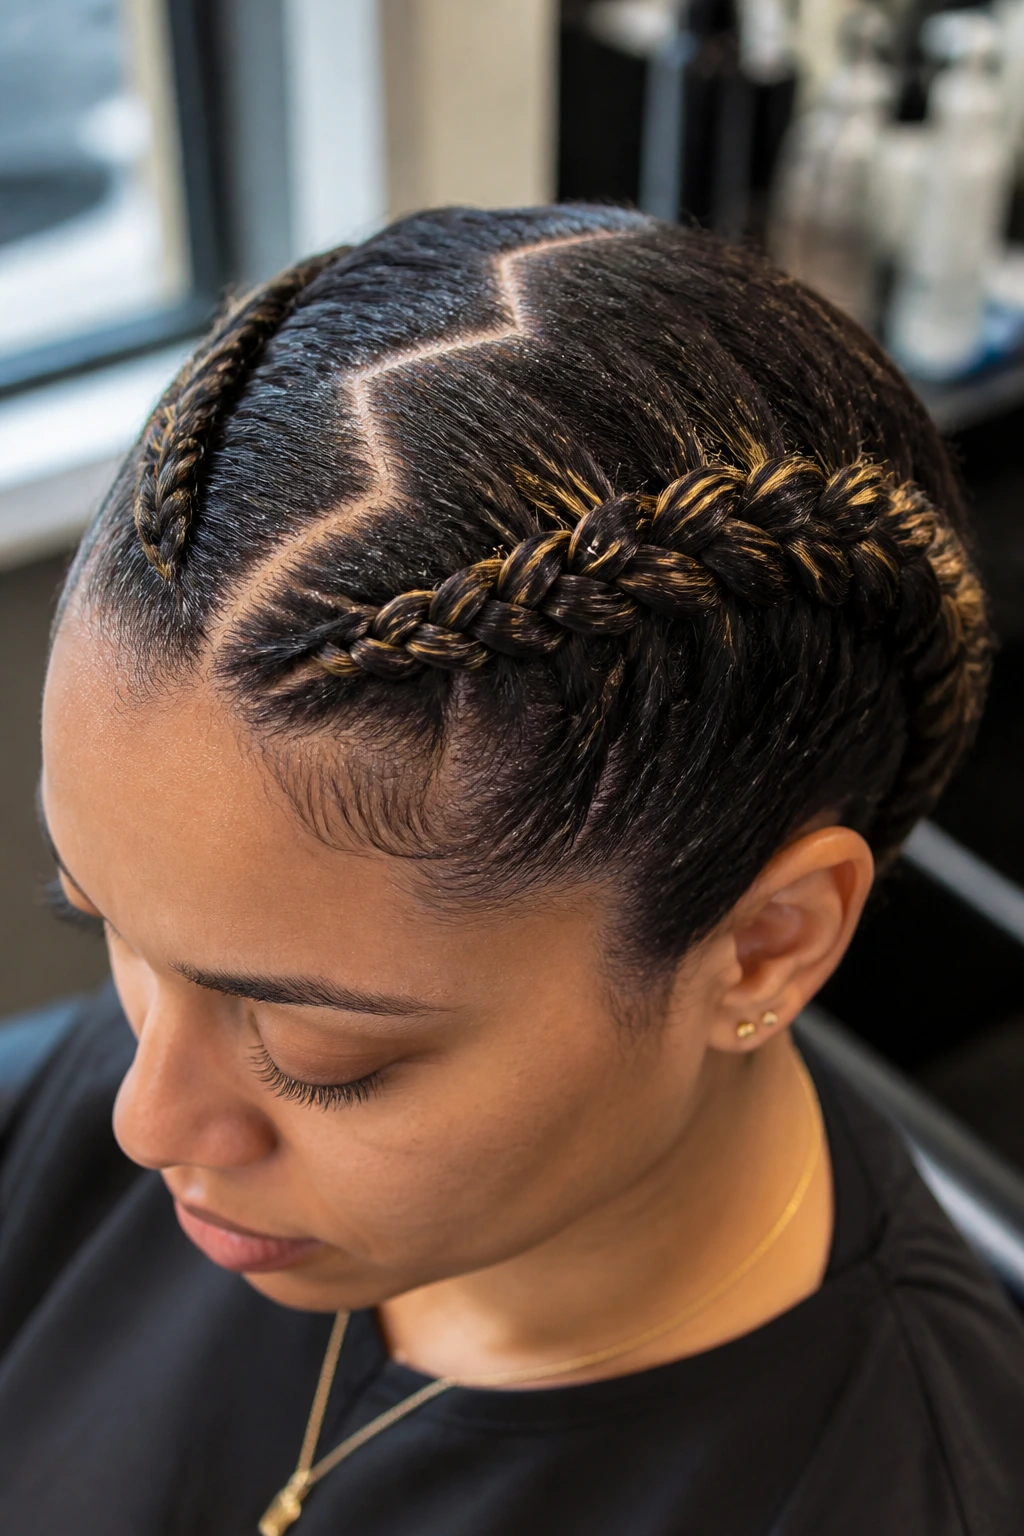
A zigzag part keeps twin braids from feeling too school-uniform. It adds movement before the braiding even starts, and it gives babylights a chance to pop in the little corners of the part line.
Details worth getting right
- Use the tail of a rat-tail comb and make the zigzag first, then clip one side away.
- Keep each section roughly the same size so the braids finish evenly.
- If the hair is very soft, add a thin layer of gel just on the part line, not all over the hair shaft.
- Tuck the ends at the nape or fold them into tiny pinned loops.
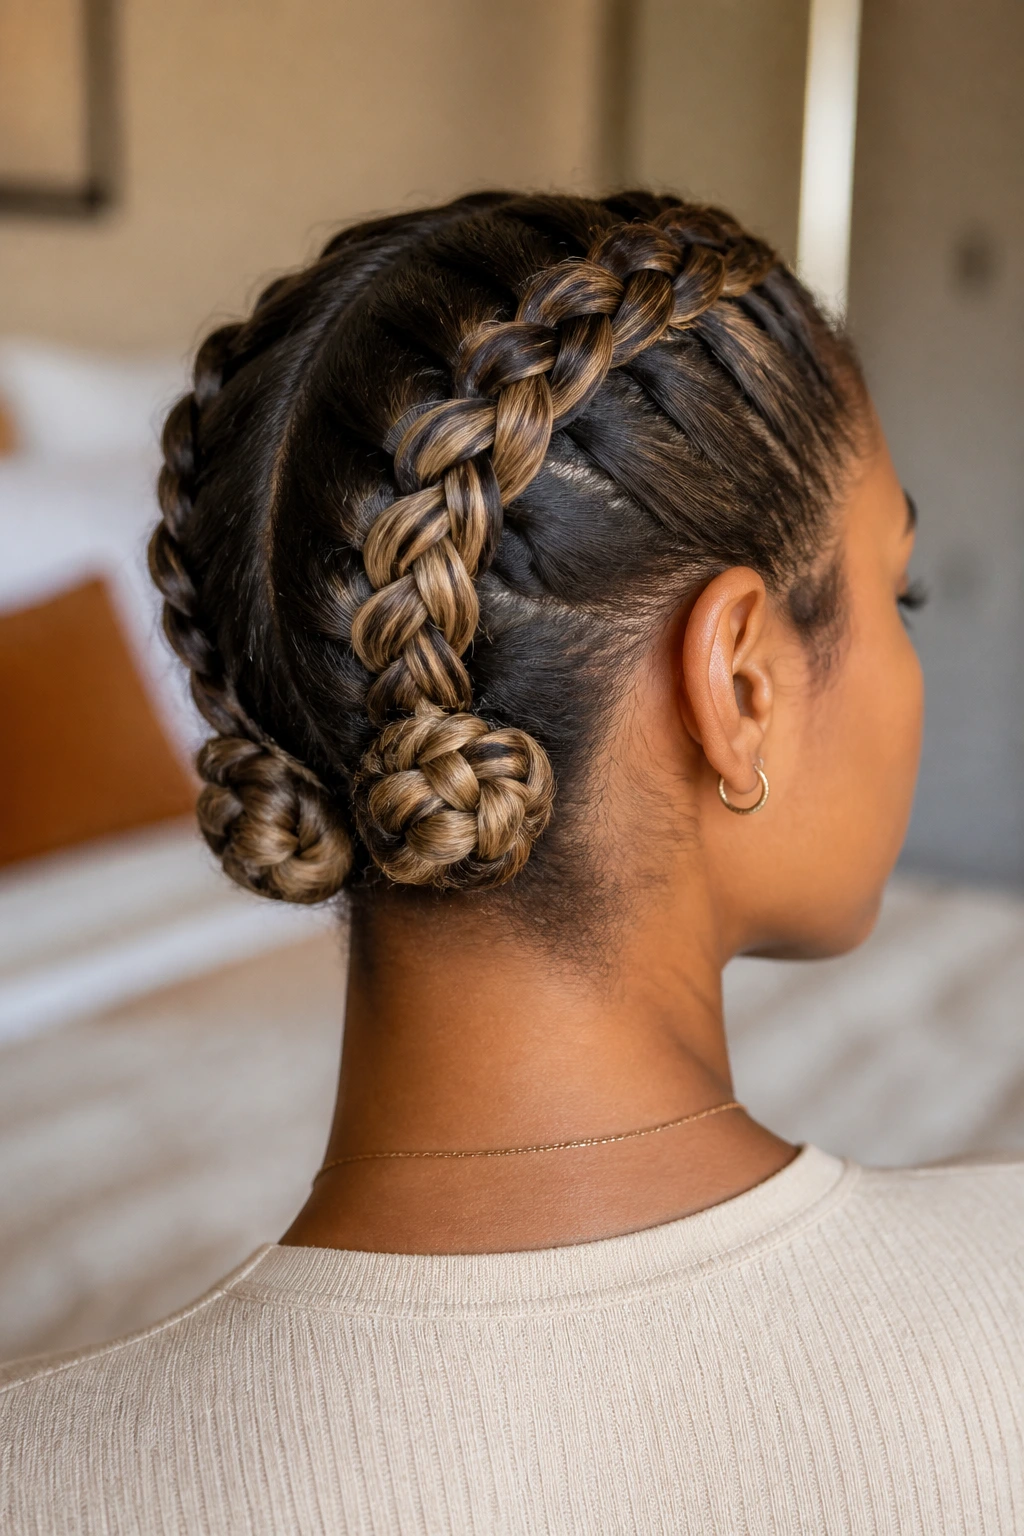
8. Dutch Braids Folded Into Mini Buns
Mini buns at the ends make short hair look finished even when there is not much length to work with. The braids give the style structure, and the buns add a little sculpture at the back.
This is a good one when your babylights are brighter near the ends, because the bun exposes those lighter pieces instead of hiding them. Braid each side down as far as you can, coil the ends into tight knots, and pin them flat against the scalp. The result is neat from the front and surprisingly playful from the side.
9. Braided Bangs With a Full Puff
What if you only want to braid the front? Good. You do not need to braid the whole head for the look to land.
Braided bangs are one of the smartest ways to frame babylights on short natural hair, especially if the rest of your hair pulls up into a puff. Start at the front hairline, make two small Dutch rows or one curved braid across the forehead, then leave the back full and soft. The contrast between the crisp front and the fluffy puff behind it is doing more work than people realize.
10. Low Nape Dutch Braids
Low nape braids feel calm and close to the head. They’re less flashy than a mohawk line, but they hold up well on hair that shrinks or layers that refuse to stay tucked.
A low start also keeps babylights visible near the ear and neckline, where the braid often bends and catches light. Braid low, keep the tension even, and stop before the ends get brittle or fuzzy. If your ends are too short to keep braiding, a single wrapped pin or a flat clip at the nape is cleaner than forcing one more clumsy stitch.
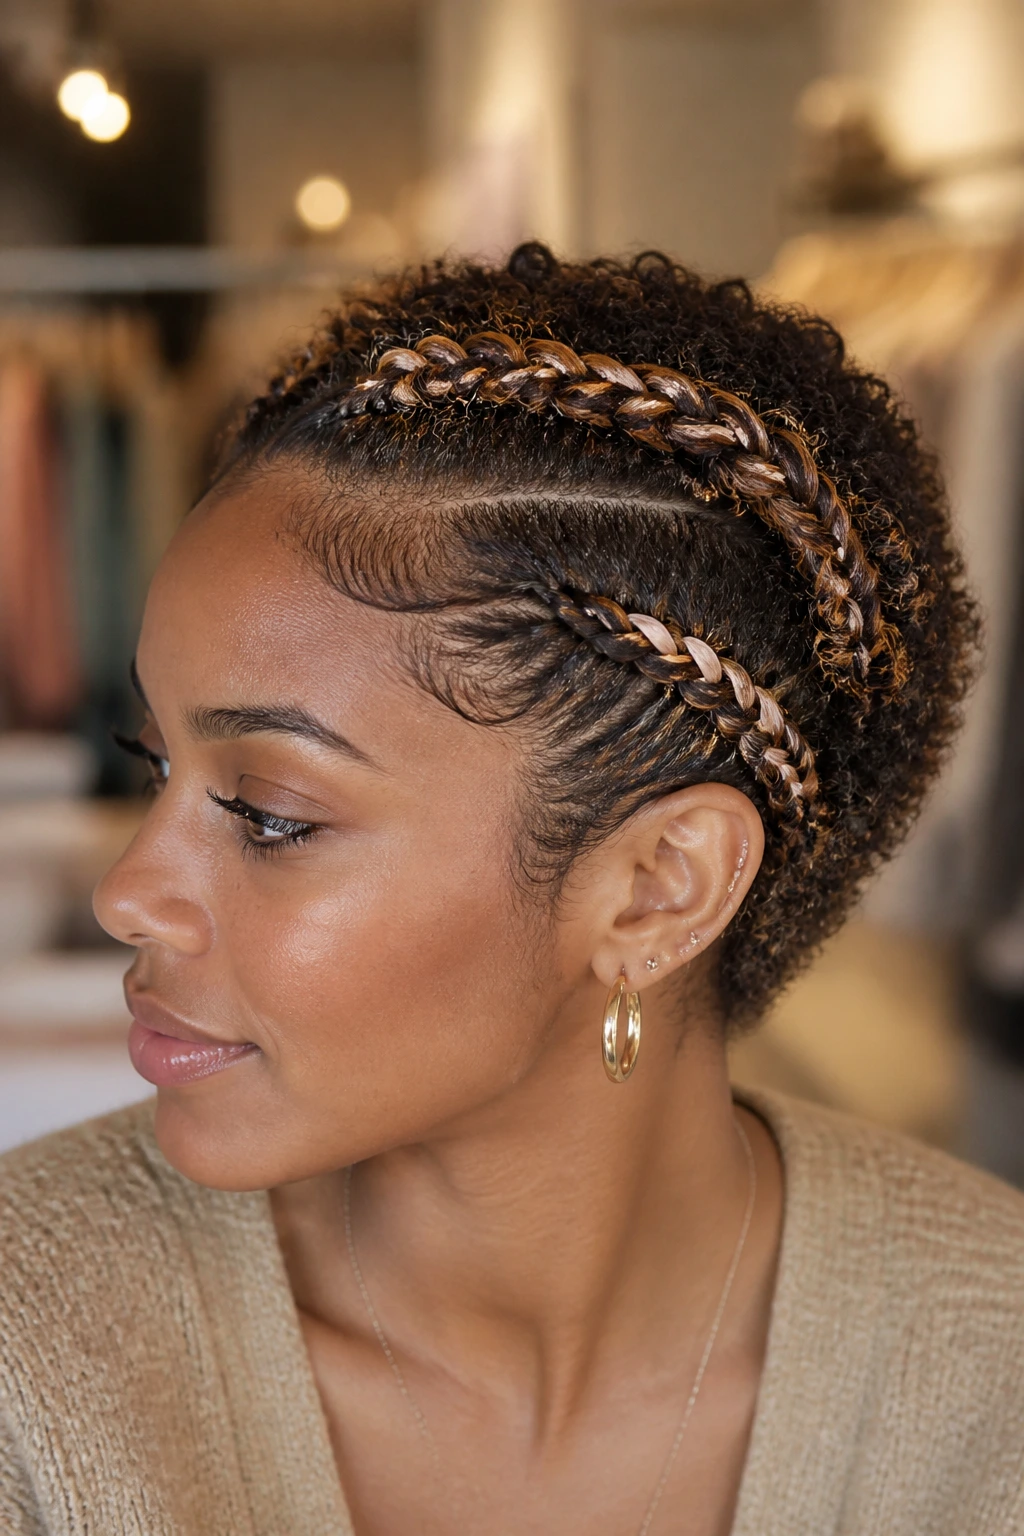
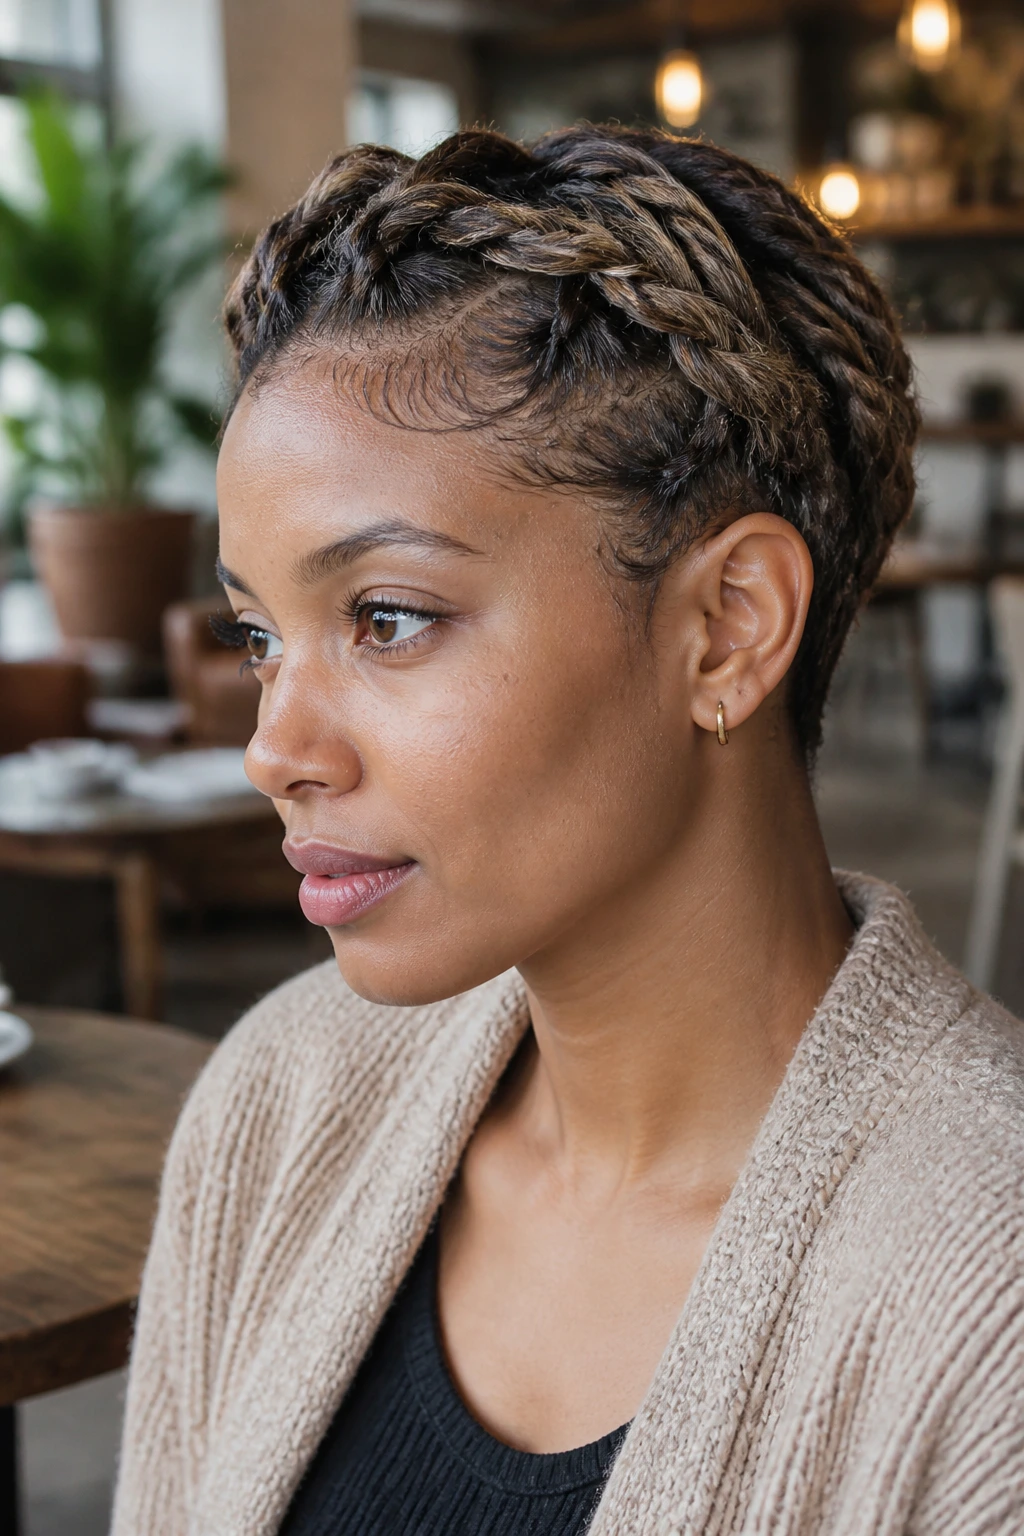
11. Crown Braid With Tapered Sides

A crown braid on a tapered cut does something I like a lot: it lets the edges stay clean while the top carries the interest. That means the babylights at the crown can show without the whole style getting busy.
Best use case
This is the braid to pick when you want the top to feel dressed up but you don’t want to hide the natural shape of the cut. Keep the crown section narrow, braid around the perimeter, and leave the lower fade or tapered sides visible. The look reads crisp from the front and smart from the back. No extra tricks needed.
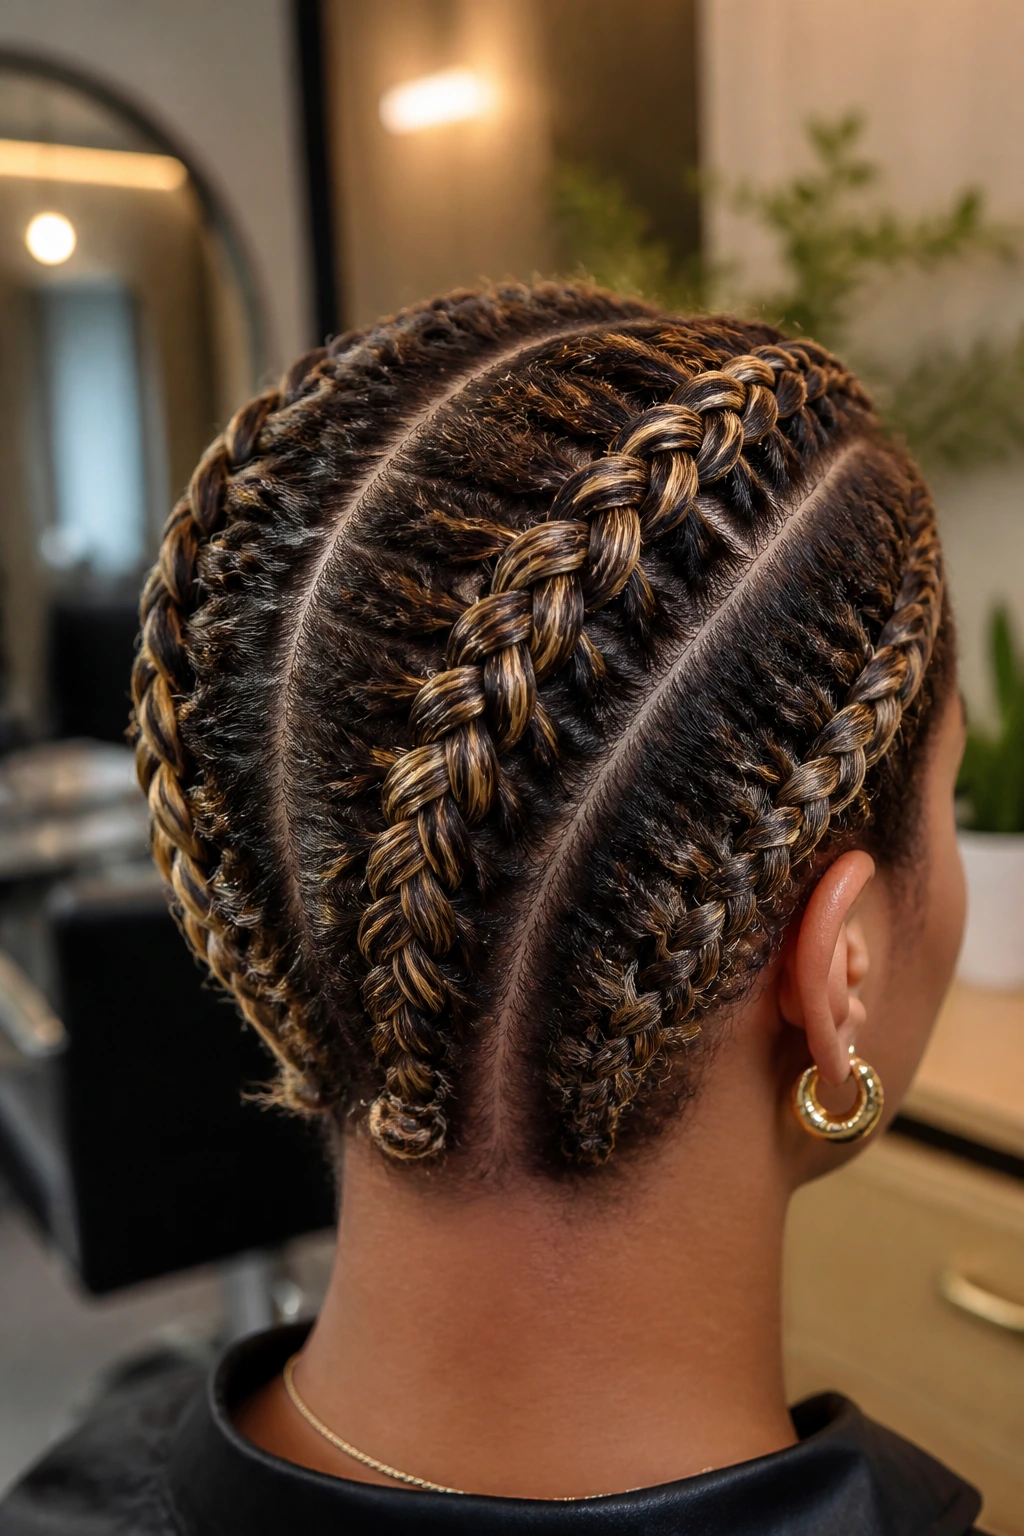
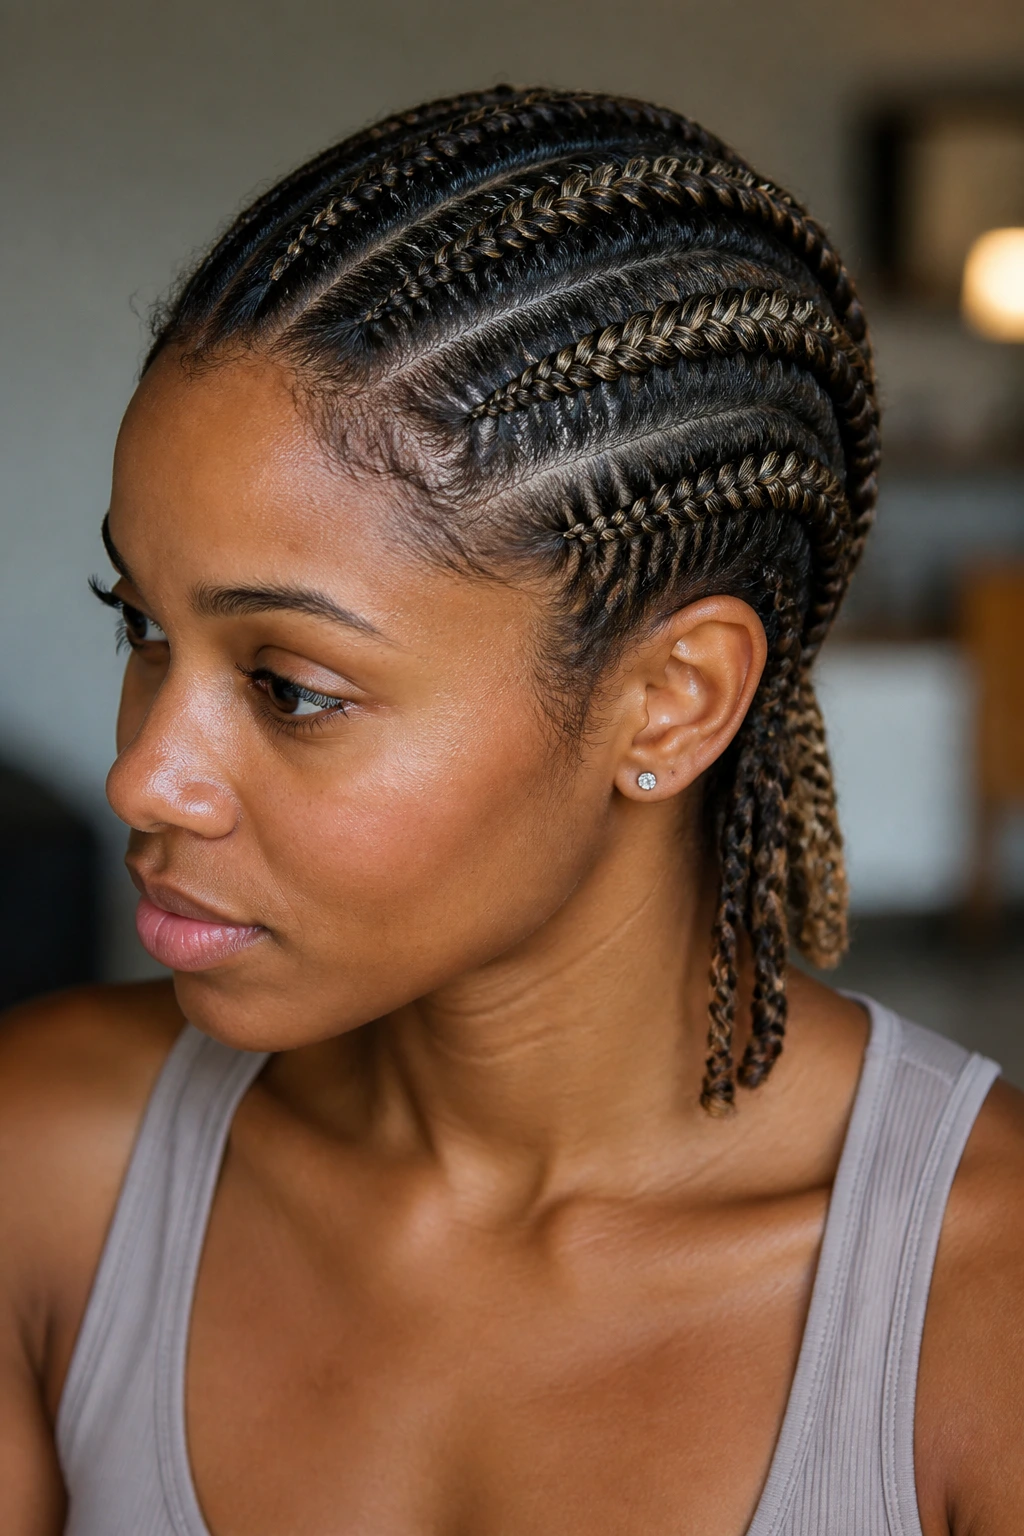
12. Triple Feed-In Dutch Lines
Three thin Dutch braids can look sharper than one thick one on short hair. The spacing creates a striped effect, and the babylights sit between the rows like little streaks of thread.
This style works best when the sections are narrow and the parting is precise. Don’t try to make each braid oversized; that’s how you end up with uneven tension and stray ends. Keep them close, use a light hand on the scalp, and let the geometry do the talking. It’s a tidy style, but not a boring one.
13. Faux Hawk Dutch Braid With Loose Ends
A faux hawk braid gives you attitude without needing long hair to fake volume everywhere. The braided center lifts the middle of the head, while the sides stay smooth or softly slicked back.
Babylights look especially good here because the raised center catches them as the braid curves over the crown. Braid from the front toward the nape, pinch the edges a little wider if you want more shape, and let the tail stop in a small puff or twisted coil. It’s a strong silhouette. Not delicate. That’s part of the appeal.
14. Single Center Dutch Braid With Face Framing Pieces

Why choose one braid instead of two? Because sometimes a single center line gives you more room to let the babylights breathe.
Leave two slim face-framing pieces out, braid the center from the front hairline to the crown or nape, and let the loose pieces soften the edges. This version is especially good if your haircut sits above the shoulders, because the braid doesn’t need much length to look intentional. The loose tendrils also keep the style from feeling severe, which is useful if you wear braids to work and do not want to look like you’re headed to a drum line rehearsal.
15. Crisscross Dutch Braids at the Back
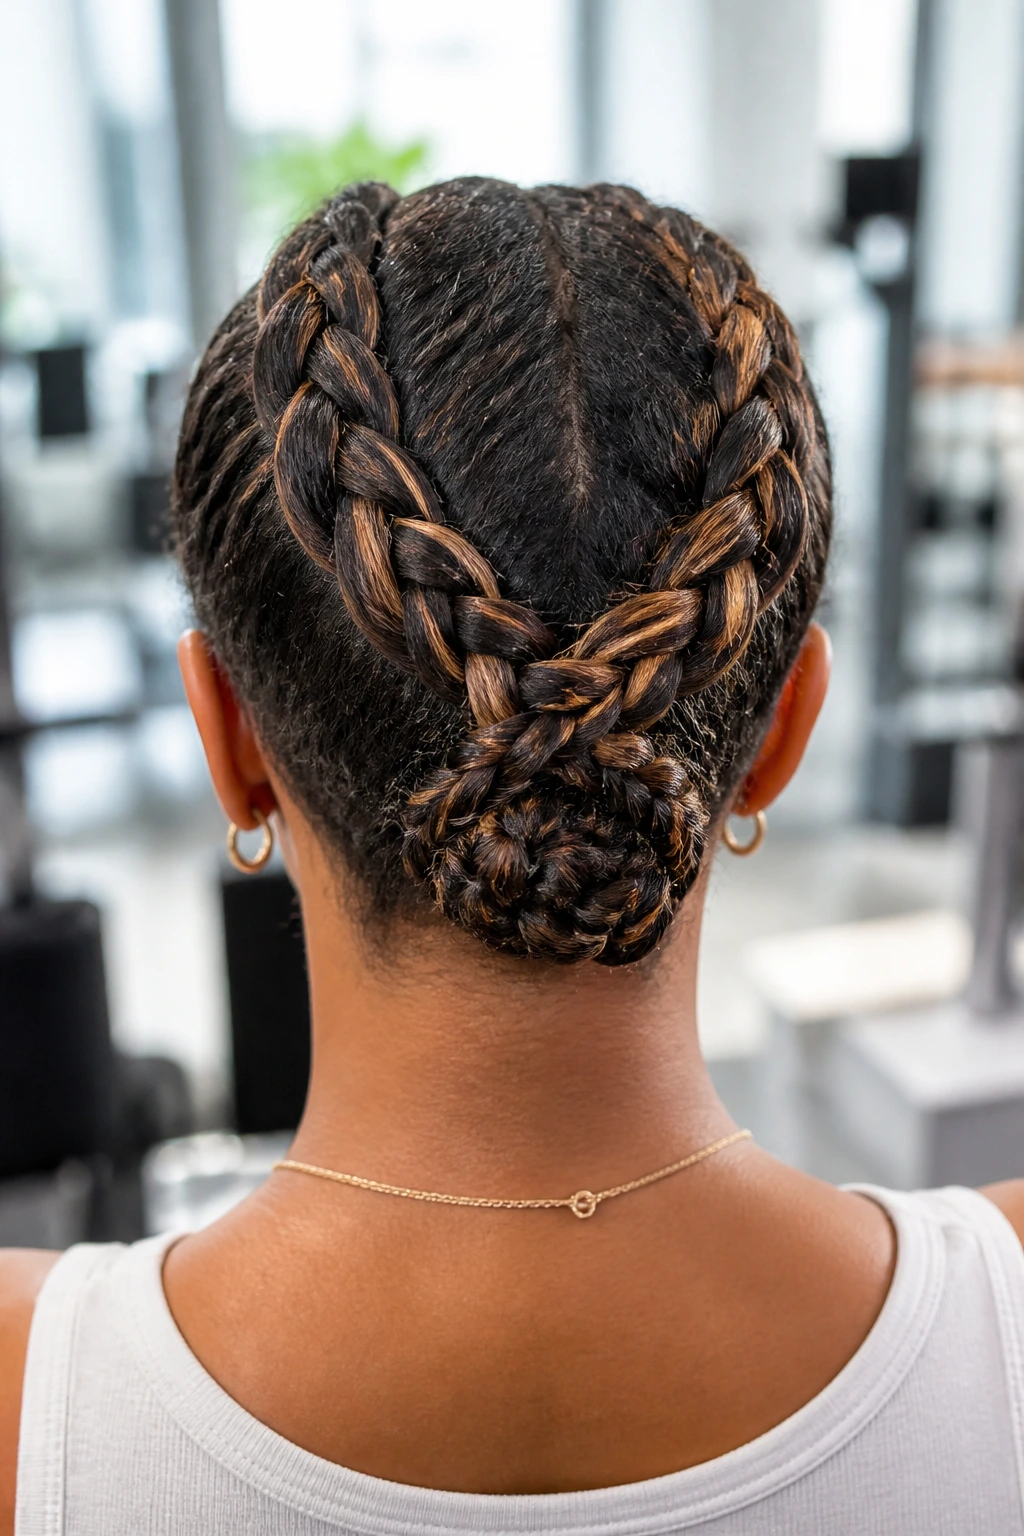
A crisscross finish sounds fussy, but it’s not. Two Dutch braids start separate, cross once at the back, and then tuck into one another or into a pinned knot.
Where this shines
- It keeps short ends hidden.
- It gives babylights a chance to flash at the cross point.
- It works well on layered hair because the back gets bundled instead of exposed.
- It looks more complex than it is, which is never a bad deal.
If your hair tends to split apart at the nape, a tiny clear elastic makes the cross cleaner than trying to pin loose sections and hoping for the best.
16. Space Buns Set Off Twin Dutch Braids
Space buns are not only for long hair. On short natural hair, a pair of small buns at the back can make twin Dutch braids look more playful and help the babylights show around the bun edges.
This version is best when the braids are finished close to the scalp and the buns sit compact, almost like little knots. You want shape, not extra bulk. If the ends are too short to wrap, twist them into themselves and pin. It’s a style with a little personality. That matters.
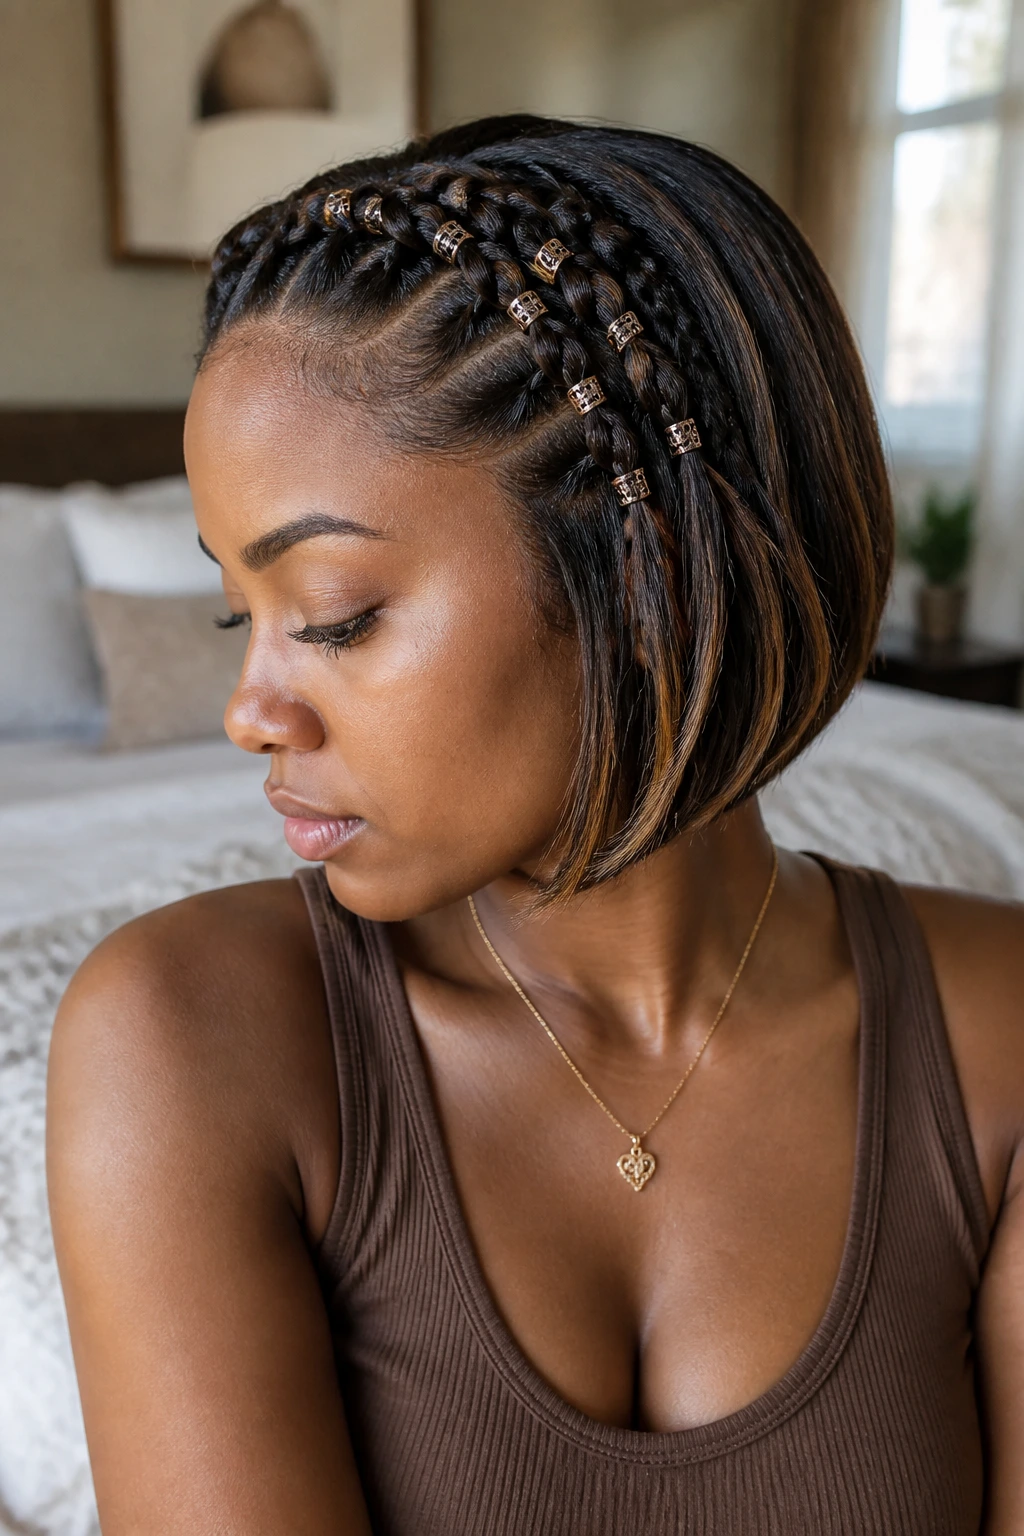
17. Beaded Dutch Braids on a Short Bob
Beads make a short bob feel finished because they add weight right where the braid wants to stop. They also put the babylights on display by pulling the eye downward along the braid line.
Keep the beads small if the braid is narrow. Heavy beads on tiny braids look awkward and tug at the roots. A simple set of two or three beads per tail is enough. This is one of the few times where a little sound — that soft click of beads against each other — feels like part of the style instead of an extra.
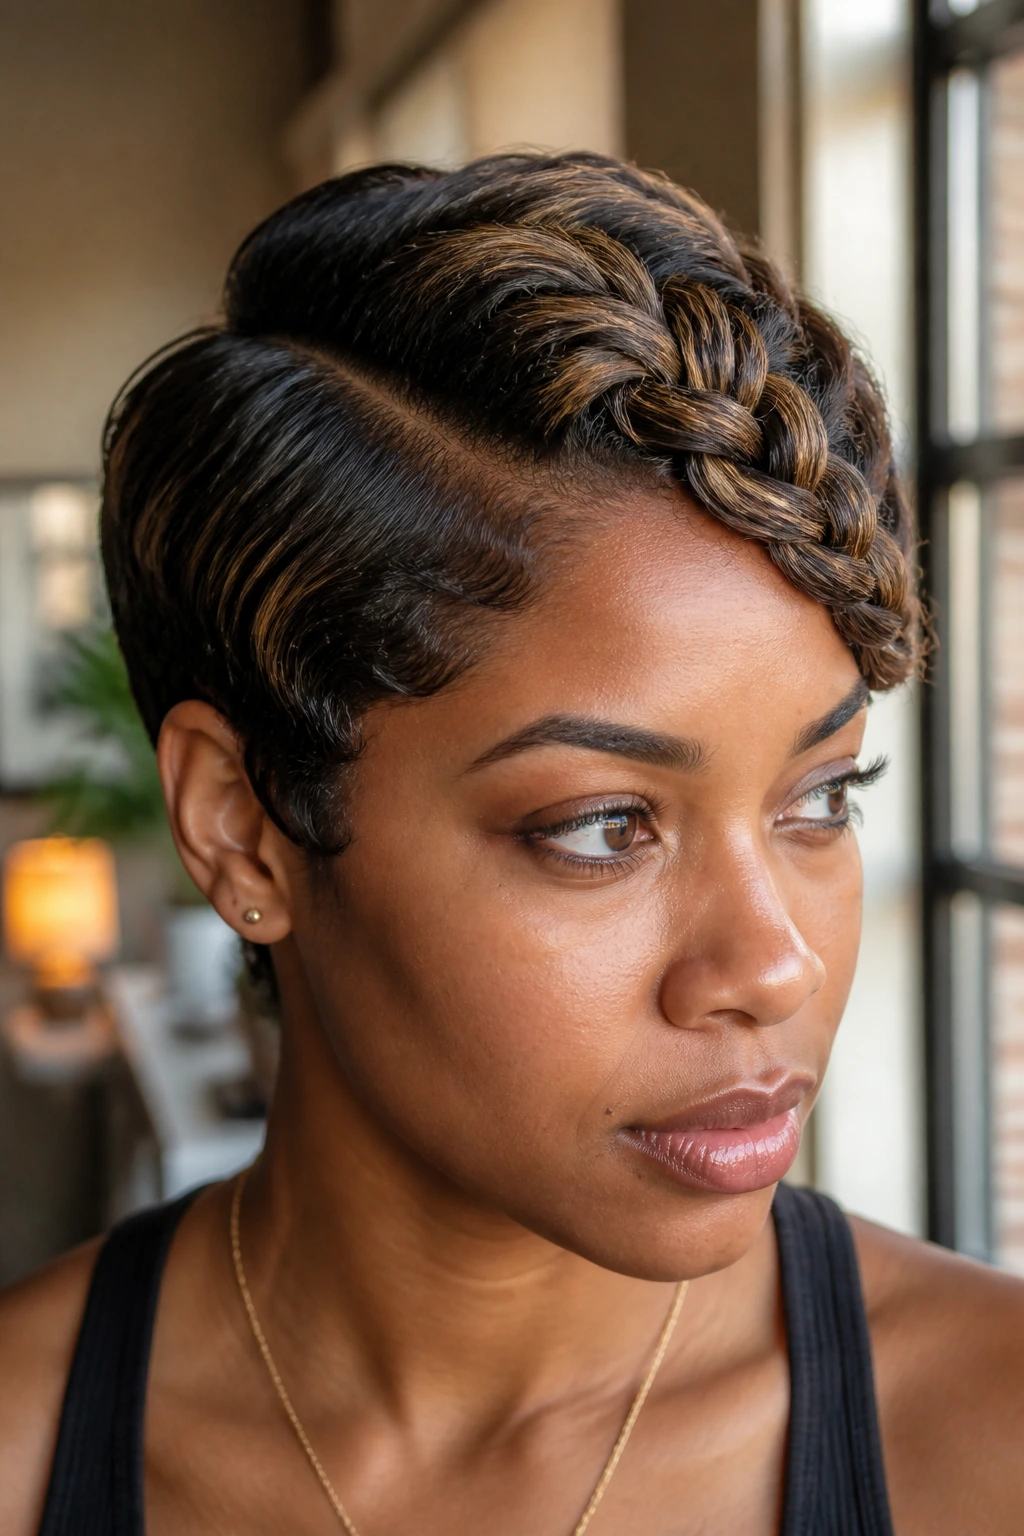
18. Flat Dutch Braids With Twisted Ends
Not every braid needs a big ending. Flat Dutch braids with twisted ends are useful when your hair is short enough that a full plait would fall apart before it reaches the back.
The twist keeps the tail neat, and the flat braid lets the babylights show along a smooth surface instead of getting lost in a puffy finish. This one is practical on finer coils or hair that has been stretched from a twist-out. Twist the last inch, secure with a mini elastic, and pin the tail flat. Done.
19. Side-Part Dutch Swoop With Tucked Length
A side-part swoop gives you a bit of drama without a lot of extra work. The braid starts heavy at one side of the part, curves across the forehead or crown, and ends tucked under the opposite side.
Quick shape notes
- Keep the side part deep enough to create that visible curve.
- Use the lighter babylight pieces on the outside of the braid so they show at the sweep.
- Pin the tail low and flat so the shape stays clean from behind.
- If one side of your cut is much shorter, this is the braid that hides it best.
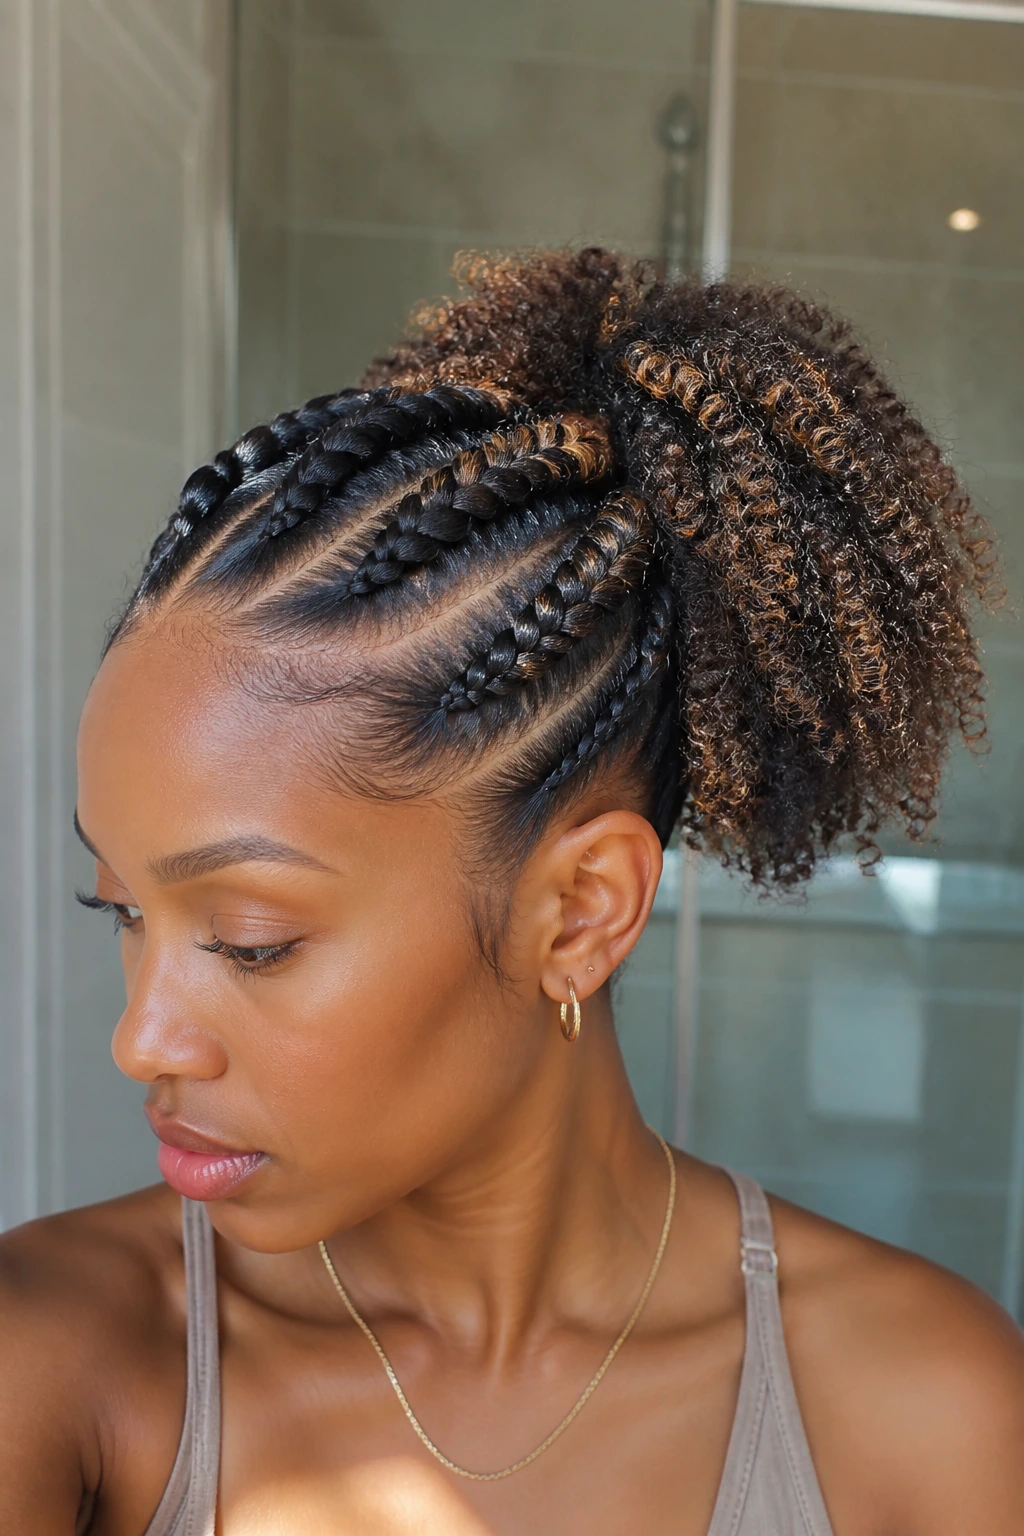
20. Shrinkage-Friendly Braided Pony
A braided pony is a quiet little cheat code for short natural hair. The top gets braided into a ponytail base, and the pony itself can stay coily, curly, or lightly stretched.
That setup is good when your length is borderline for a full braid but still long enough to gather. It also lets the babylights show at the root area, where the braid meets the pony and the contrast is strongest. Secure the base firmly, then wrap a small strand around the elastic if you want the finish to look cleaner. Simple. Effective.
21. Braided Headband Over a Coily Puff
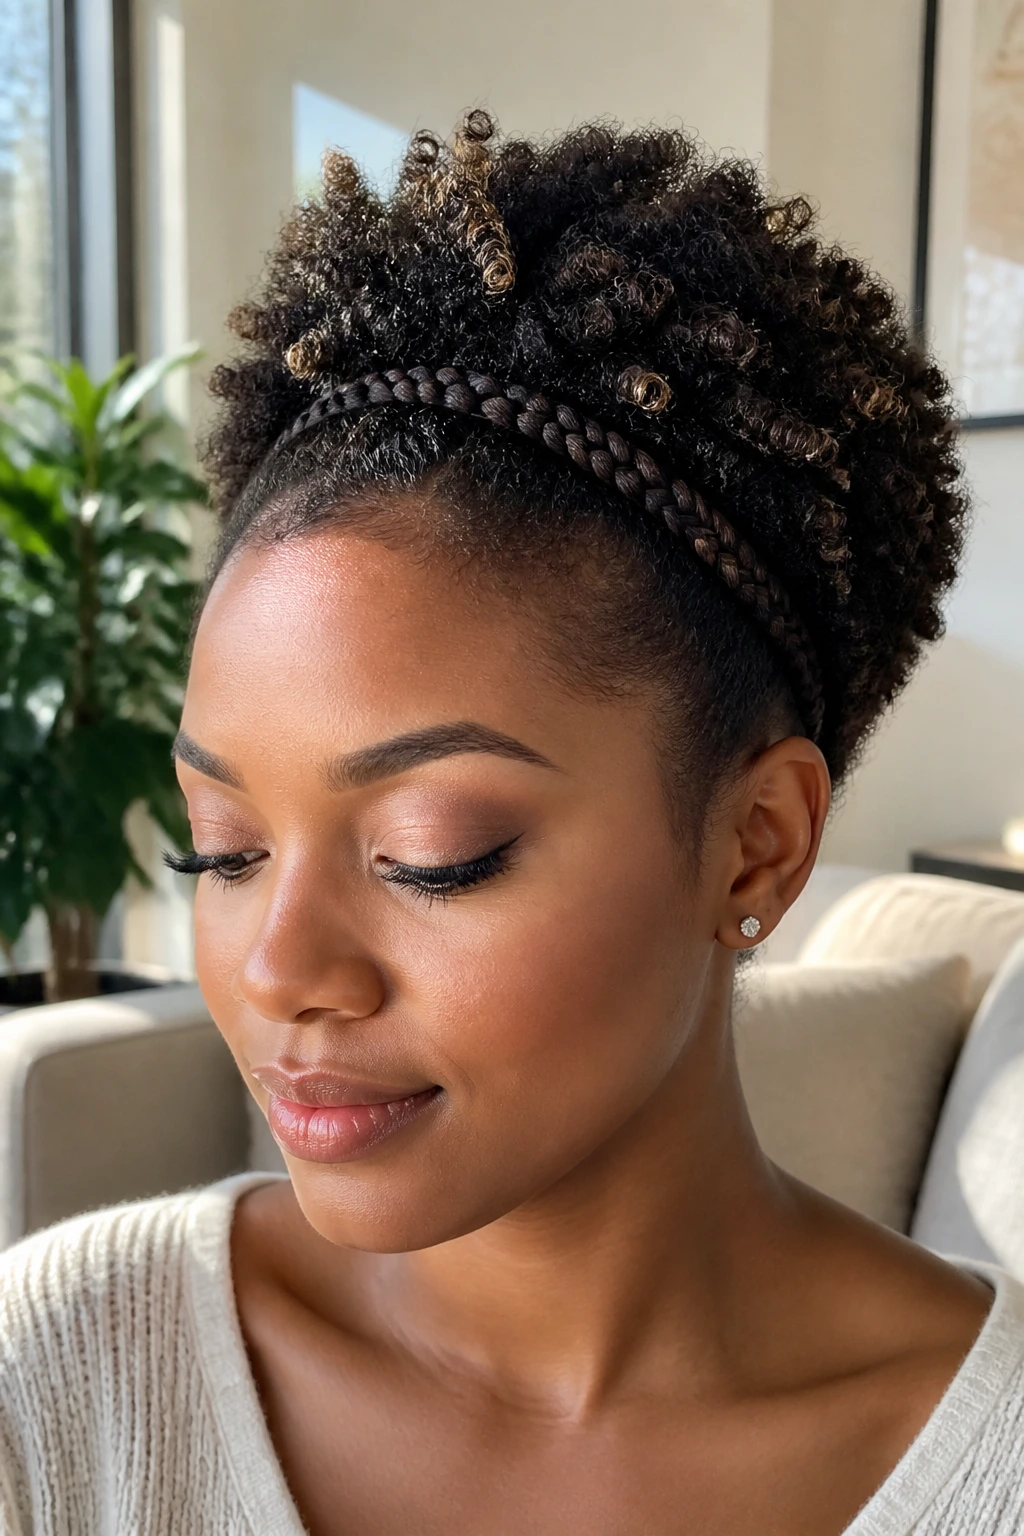
A braided headband is one of the easiest ways to frame short natural hair without committing to full-head braids. The braid crosses the front hairline like an actual band, while the puff behind it keeps the style soft.
This is a smart choice when the babylights are concentrated around the temples or front top layer, because that’s where the braid will sit. Keep the band narrow enough to lie flat, then lift the puff at the back so the silhouette doesn’t feel squashed. It’s a nice balance. Clean in front, full in back.
22. Micro Accent Dutch Braids
Micro accent braids are for the days you want detail, not a complete overhaul. A few tiny Dutch stitches tucked into the front or sides can break up a wash-and-go and show off babylights in sharp little flashes.
They work especially well on short coils because they don’t demand much length. Place them near the part, around the temple, or just above one ear, then leave the rest of the hair free. This is the sort of style that looks casual from a distance and a little more deliberate up close. I like that.
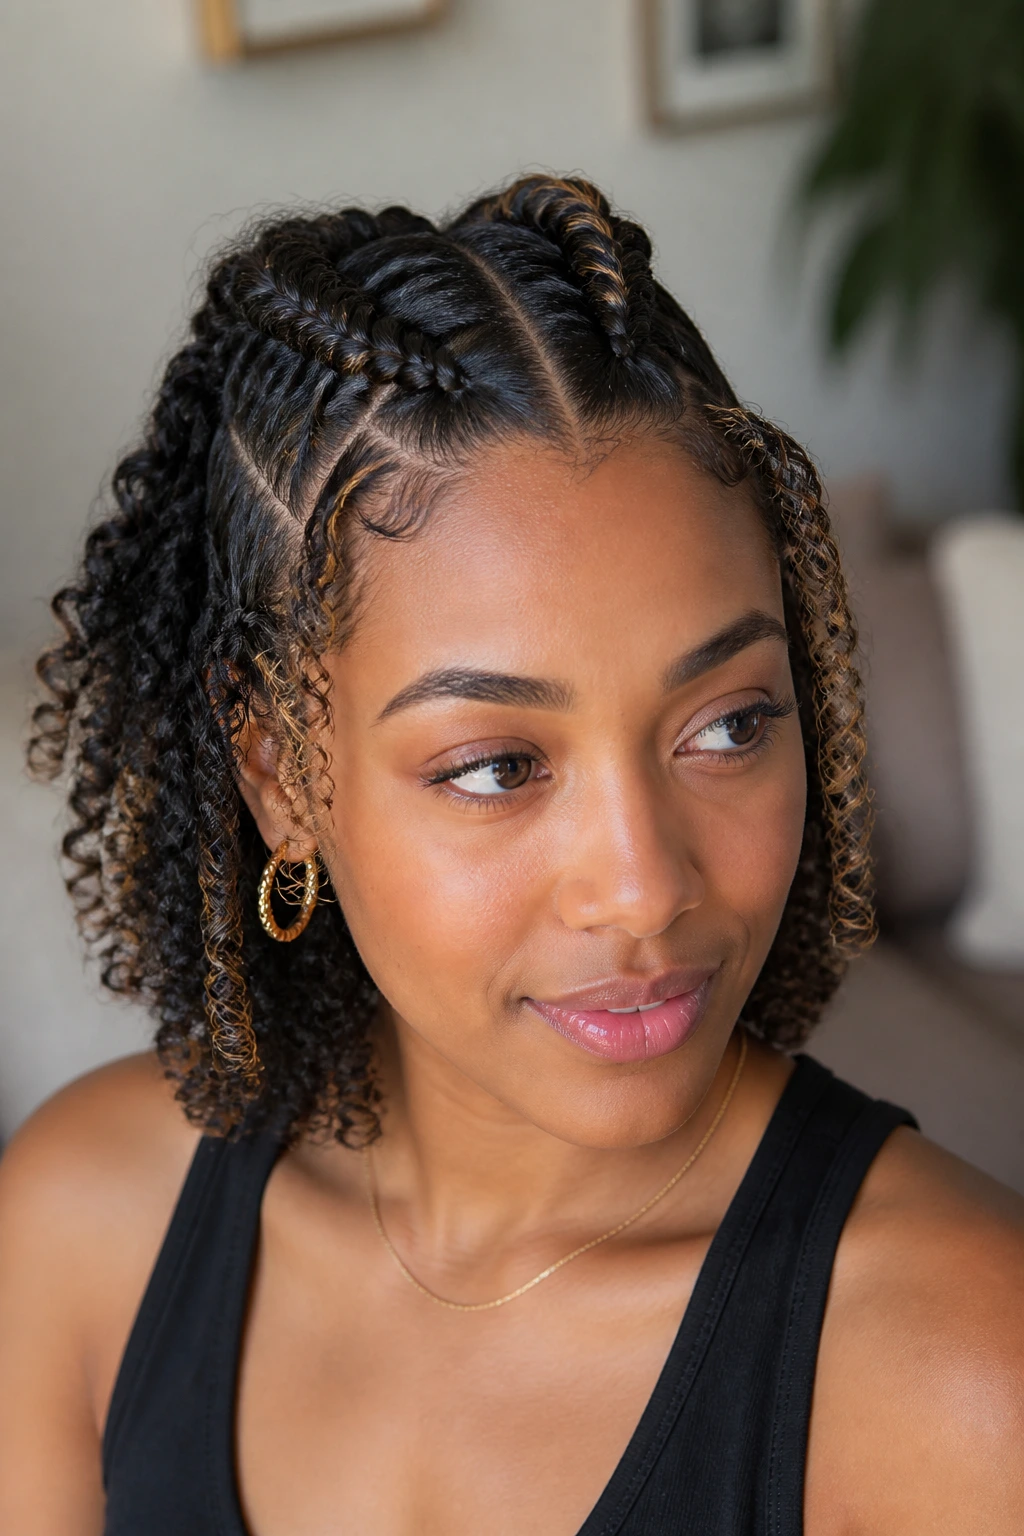
23. Dutch Braids Into a Twist-Out Finish
Why stop at a braid when you can braid the top and twist the ends? This mix gives you the clean braid line up front and a softer finish where the hair is shortest.
The twist-out finish is useful when your babylights are more visible in loose texture than in tight plaits. Braid the roots, then switch to two-strand twists once the hair gets too short to continue cleanly. Let the twists set overnight if you can. The texture mix looks richer than a full braid, especially on layered hair.
24. Ribboned Dutch Braids for Dressy Days
A ribbon threaded through Dutch braids changes the whole tone of the style. It can make short natural hair feel dressed up without turning it into a heavy updo.
Ways to wear it
- Choose a thin satin ribbon if the braid is narrow.
- Work the ribbon into the braid from the second or third stitch so it stays visible.
- Match the ribbon to one tone in the babylights if you want the color to feel intentional.
- Tie the ends at the nape and tuck the knots under the braid.
The result is neat, a little festive, and easier to wear than a full set of pins.
25. Soft, Undone Dutch Braids for Off-Duty Texture
Not every braid needs to look freshly pressed. Sometimes the best version is the one that’s a little loose at the edges, a little fluffy at the roots, and fully comfortable by day two.
This softer finish works beautifully with babylights because the lighter strands break up the braid texture instead of flattening it. Braid with moderate tension, gently widen the outer stitches with your fingertips, and let the back stay imperfect on purpose. If you want one style from this whole list that feels lived-in rather than dressed up, this is the one I’d pick.
Why Dutch Braids and Babylights Work So Well on Short Natural Hair
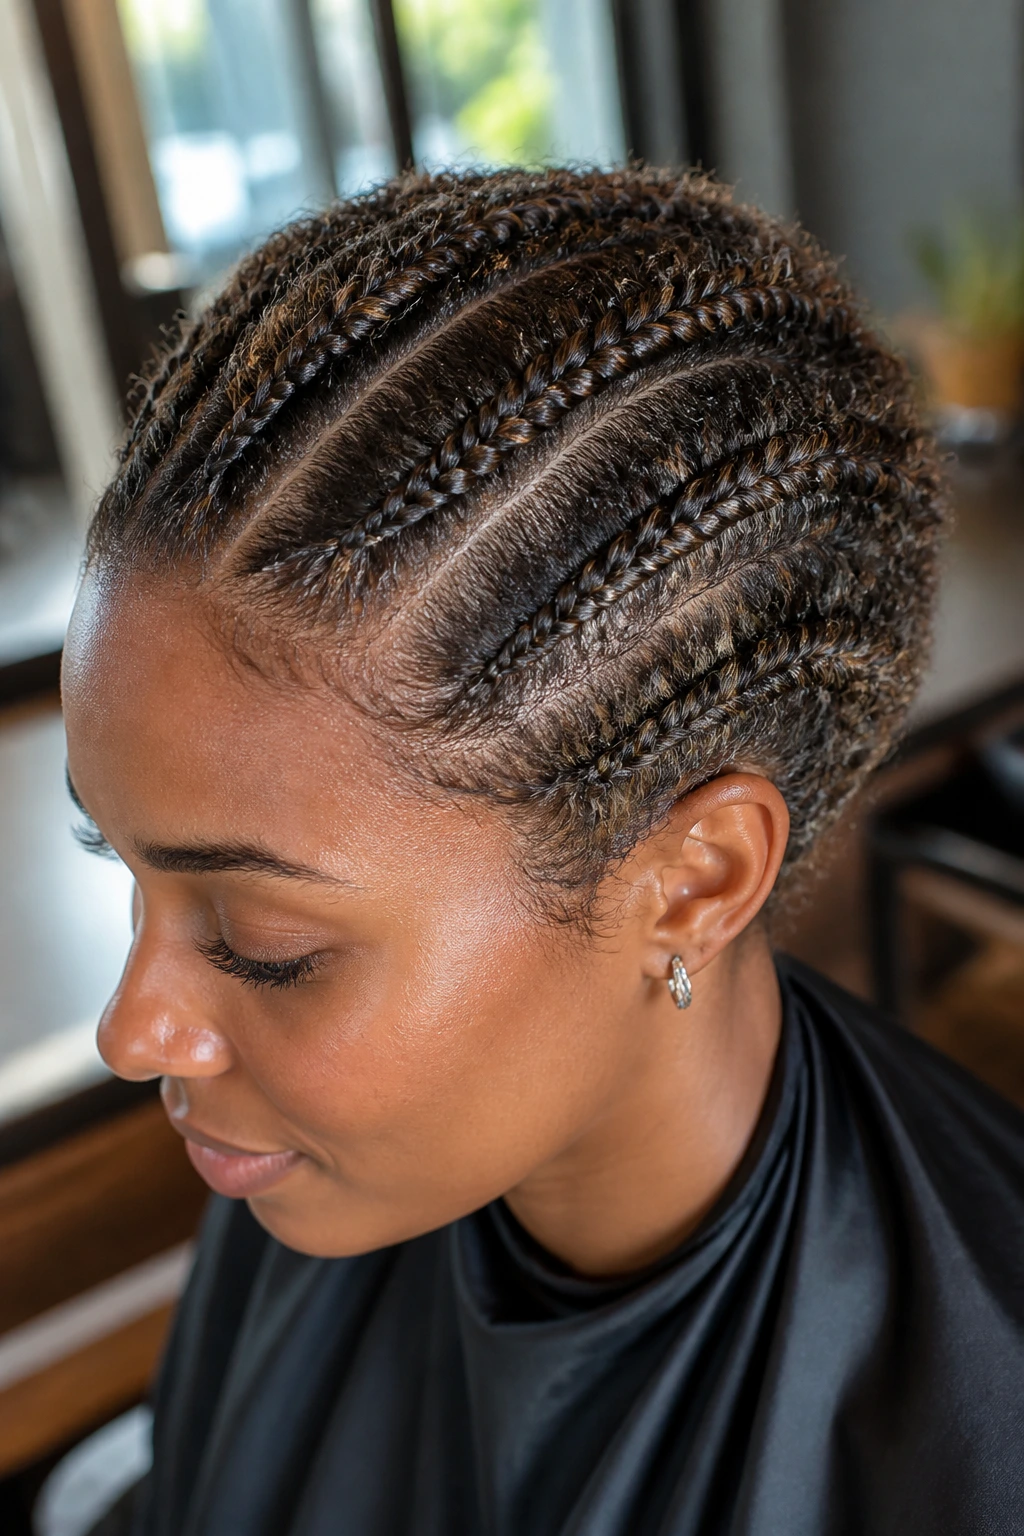
The mechanics are doing real work here. A Dutch braid crosses sections under instead of over, which raises the braid off the scalp and exposes the outer strands. On short natural hair, that raised ridge matters even more, because there’s less length to drag the pattern down or make it sag.
Babylights are the right kind of color for this shape. They’re fine enough to sit inside the braid without turning stripey, but they’re light enough to catch the twists and turns of each stitch. Chunkier highlights can fight with the braid line and look blotchy when the hair shrinks. Babylights usually read as softer, more woven, which suits textured hair better than a harsh block of color.
There’s also a practical piece people skip over. Short natural hair can be tough about ends, but it is often easier to anchor at the root because the braid has less weight pulling on it. That means a clean part, a bit of stretch, and enough grip from your product are more useful than trying to create fake length. The braid should sit where the hair wants to sit. Everything else is decoration.
Essential Tools for Braiding Short Coils
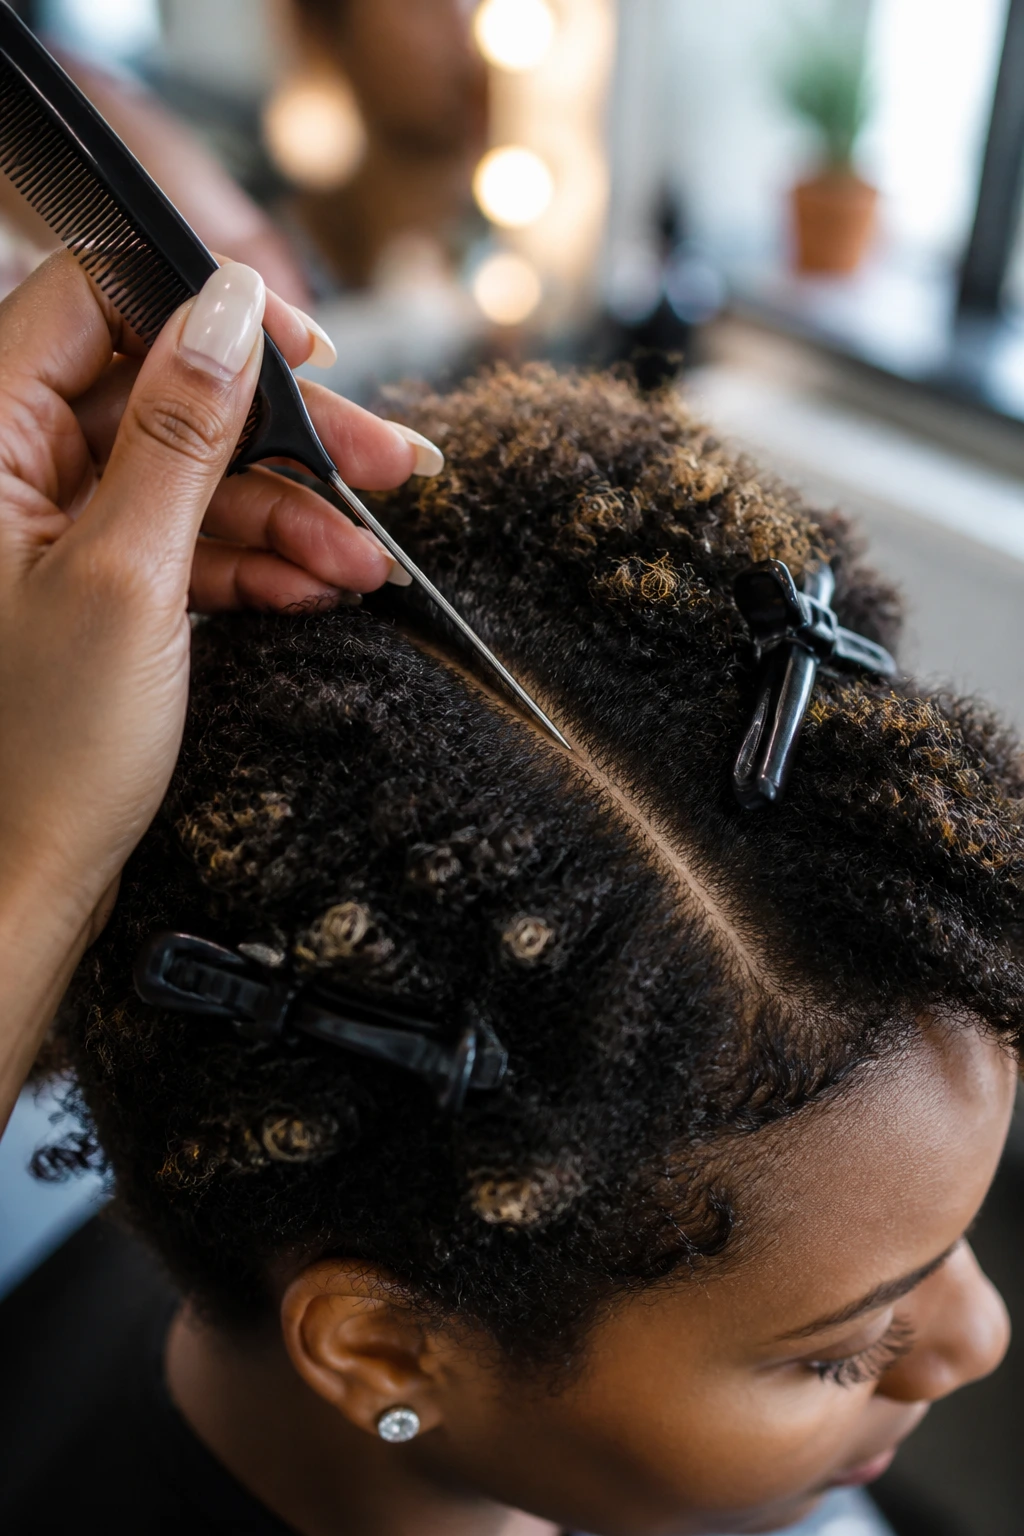
- Rat-tail comb: The fine tip helps you cut clean parts and lift small sections without tearing through the hair.
- Spray bottle: A light mist softens the hair just enough to part and braid, but don’t soak it.
- Leave-in conditioner: Use a small amount for slip so the strands glide under each other without snagging.
- Braiding cream or soft-hold gel: Choose something that smooths the roots without turning them sticky or crusty.
- Duckbill clips or sectioning clips: These keep the rest of the hair out of the way while you work on one braid at a time.
- Mini elastics: Clear or black ones are handy for short ends that can’t keep folding neatly.
- Bobby pins: Flat pins help tuck short tails under halos, buns, and nape styles.
- Edge brush: Good for smoothing the front hairline without drowning it in product.
- Satin scarf or bonnet: This keeps the braid ridges from rubbing flat overnight.
- Light oil or sheen spray: Use the bare minimum on the finished braid so the babylights stay bright, not greasy.
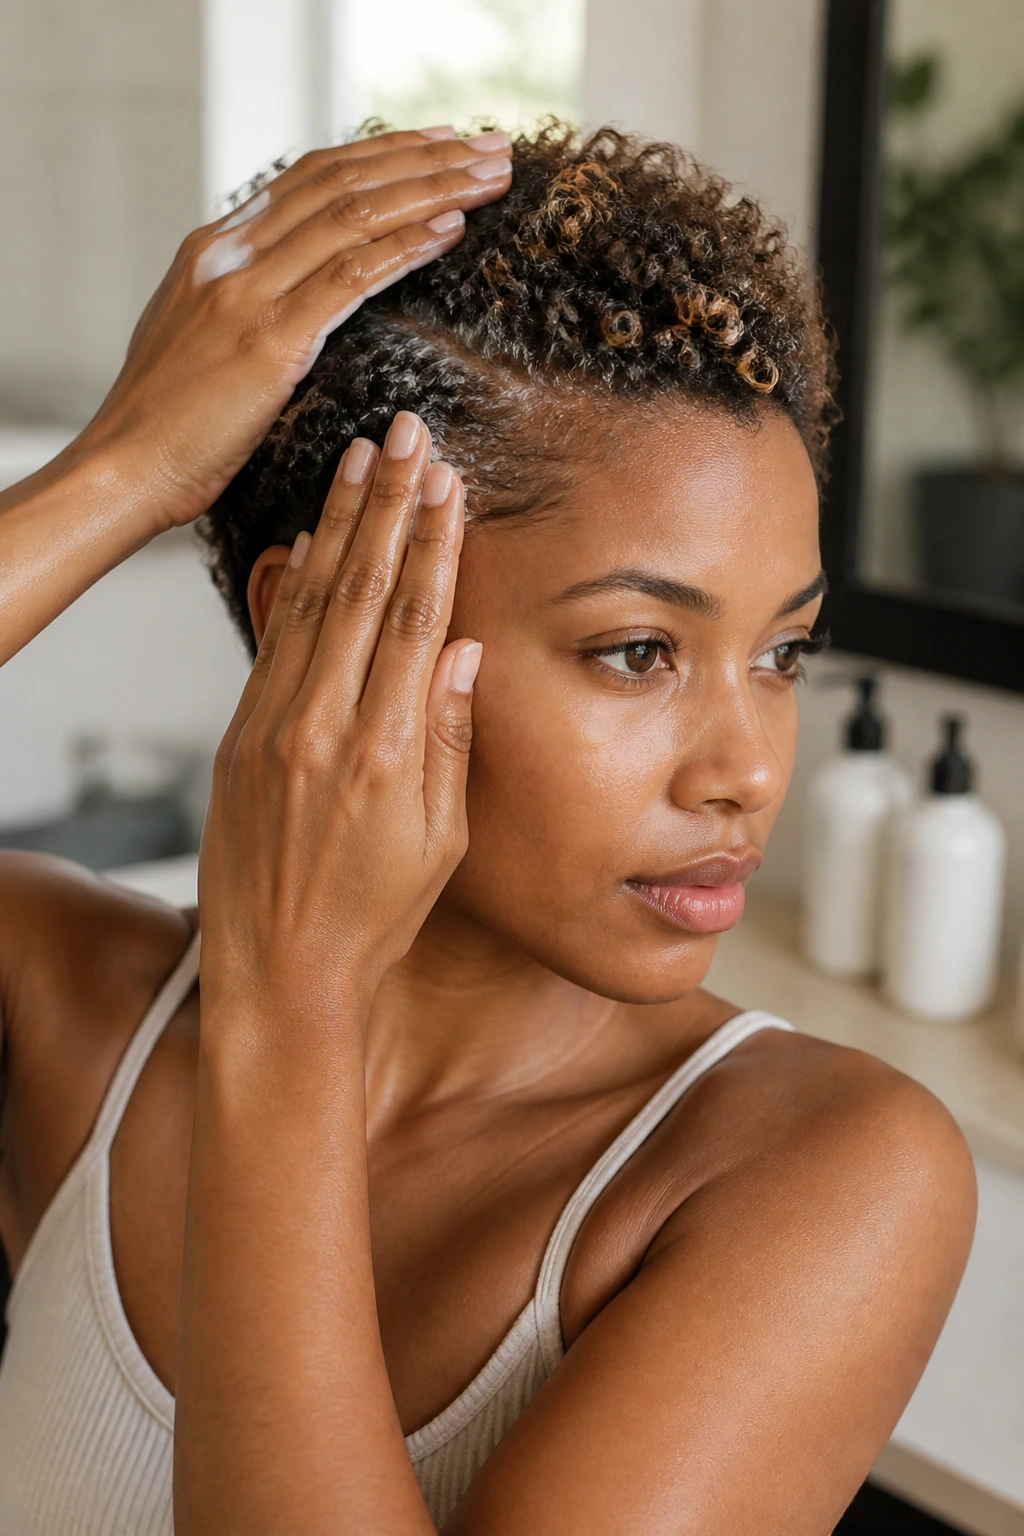
Smart Product Picks and Prep for Dutch Braids on Short Natural Hair with Babylights
Babylights show up best when the hair is clean enough to move, but not so slippery that the braid slides out. That usually means a light leave-in first, then a small amount of gel or braiding cream on the roots and part lines. If you coat the whole head, the braid loses definition and the lighter pieces can look muddy.
Color-treated hair needs a gentler hand than people think. Heavy butter on fresh babylights can flatten the tone and make the ends look dull, especially in indoor light. I prefer a lighter cream on the lengths and a firmer product at the part. Keep the shine on the braid surface, not on the whole head.
If your hair is tightly coiled or very short, stretching helps. A quick blow-dry on low heat with tension, a banding set, or a previous twist-out gives the braid more reach and makes the stitches easier to see. That one step can decide whether the style looks crisp or fuzzy at the roots. And if your scalp is sensitive, don’t chase super-tight parts. A neat braid that sits comfortably will last longer than a strained one that makes you want to take it down in an hour.
How to Wear These Styles So the Color Shows
Presentation: Keep the braid ridges slightly widened after you finish, but stop before the braid starts to lose its shape. That little bit of pancaking lets the babylights sit on the outer edge where they catch the eye.
Accessories: Small hoops, a satin scarf, a couple of cuffs, or nothing at all. The braid already has texture and color going for it, so oversized extras can crowd the look fast.
Length Match: If your hair is very short or tapered, stick with halo, braided headband, or front-only styles. If your hair reaches the nape when stretched, twin braids, crowns, and low sweeps become much easier to control.
Finish: A feather-light mist of sheen spray or a pea-sized touch of gloss on your fingertips is enough. Too much product mutes the babylights and makes the braid surface feel tacky.
Additional Tips for Cleaner Parts and Sharper Stitching
Color Placement: Start the braid where the babylights are strongest if you want the dimension to show. A braid that begins in a darker underlayer can look flat until it reaches the lighter top pieces.
Tension Check: Braid the first two stitches snugly, then ease up a touch through the middle. That gives the braid structure at the front without yanking the hairline into a line that feels too tight.
Time-Saver: Work on stretched hair from a twist-out or a low-heat blow-dry set. You’ll spend less time fighting shrinkage and more time shaping the braid where it matters.
Pro Move: Use the tail of the comb to smooth only the part line and the first inch of hair. That’s where neatness matters most. The rest can keep some texture.
Soft Finish: If the braid looks too sharp against the rest of the hair, rub a tiny bit of leave-in between your palms and tap it over the loose sections. Do not coat the braid itself. That’s how you keep the definition.
Common Mistakes That Flatten the Style
- Braid too wet: Soaking hair swells, slips, and frizzes when it dries. Mist lightly instead, or braid fully dry stretched hair.
- Too much product: Heavy butter and thick gel make babylights look dull and can turn the braid slick. Use a thin layer only where you need grip.
- Starting too late: If the braid begins too far back on short hair, you run out of length before the style has a chance to look finished. Start close to the hairline.
- Pulling too hard at the roots: Tight braids give a clean look for about ten minutes, then your scalp complains. Keep the tension firm, not strained.
- Ignoring shrinkage: Hair that looks long enough when stretched can shrink up fast once braided. Leave extra room for the crown and nape, or choose a style that ends in a tuck, bun, or puff.
Variations and Alternatives to Try
No-Heat Stretch Set: If you don’t want to blow-dry, band the hair or do a stretched twist-out first. The braid parts will look cleaner, and the babylights won’t get buried under puffed-up roots.
Dressy Pin Finish: Swap plain elastics for pearl pins, gold cuffs, or a satin ribbon. Keep the extra pieces small; the braid should still be the main event.
Low-Tension Version: Use wider sections and looser parts for halo, headband, or side-swoop styles. This is the route I’d choose when the hairline needs a break.
High-Contrast Color Play: Place the lightest babylight pieces on the outside of the braid rather than underneath. The braid becomes more dimensional and less muddy in low light.
Gym-to-Street Style: Choose a low nape braid or twin tuck that stays flat under a cap or hoodie. Short natural hair loves styles that can survive friction without collapsing.
Keeping the Style Fresh Between Wash Days
Most of these braids wear best for about three to five days, depending on how much product you used and how much your hair likes to puff. At night, wrap the hair with a satin scarf or bonnet, making sure the braid ridges are covered and the ends are secured so they do not rub loose.
If the roots fuzz up, use a mist bottle with plain water or a light leave-in mix, then smooth the part with your fingers or the tail of the comb. Do not drench the hair. Too much water loosens the braid and can make the babylights feel dry once everything dries down again.
For styles with tucked ends, check the pins every morning before you leave the house. They work themselves loose faster than most people expect. If you wear beads, clips, or ribbon, take them off before bed unless they’re fixed very securely. When it’s time to take the style down, unravel slowly, add a little oil to the fingers, and detangle in sections. Short natural hair gets knots fast if you rush the removal.
Frequently Asked Questions
Can short natural hair really hold Dutch braids?
Yes, if the hair is sectioned cleanly and the style matches the length you actually have. Shorter cuts often hold close to the scalp better than people think, especially when you finish with a tuck, bun, or puff instead of chasing long tails.
How do babylights show best in braids?
They show best when they sit on the outer edge of the braid or near the crown, where the raised stitch catches the eye. Fine highlights can get buried if the braid is too flat or overloaded with product, so keep the surface light and a little lifted.
Should I braid damp or dry hair?
Damp hair gives you more control, but soaking wet hair is a mess. If your hair is soft and slippery, braid it about 70% dry or work from a stretched set so the sections stay clean.
What if my ends are too short to braid all the way down?
Stop early and hide the ends on purpose. Tuck them under with bobby pins, twist them into a small knot, or secure them with a mini elastic and pin the tail flat. A neat finish beats forcing one awkward extra stitch.
Do Dutch braids pull more than other braid styles?
They can if you braid too tightly at the hairline, but the style itself is not the problem. The front section should feel snug, not strained. If your scalp feels sore after ten minutes, loosen the braid and restart instead of hoping it settles.
How long can I keep these styles in?
Most short natural hair braids are happiest for a few days, not a full week of abuse. If the roots puff too much, if the parts blur, or if the scalp gets itchy, it’s time to refresh or take the style down.
Can I do these on color-treated hair?
Yes, and babylights actually look especially good in raised braids. Just keep the product light and avoid piling heavy oils over the color, because that can mute the contrast and make the light pieces look dusty.
What if one side looks fuller than the other?
That usually comes from uneven sectioning, not bad hair. Re-part the fuller side a little narrower and make the braid stitches match in size. On short cuts, tiny section changes matter more than people expect.
Braids That Keep the Dimension Visible
Short natural hair does not need extra length to look finished. It needs clean parting, a braid pattern that respects the cut, and babylights placed where the weave can actually show them. That’s the whole trick, really. Not more hair. Better shape.
The best part is how forgiving these looks can be once you stop asking them to behave like a long braid. Tuck the ends, let the puff stay full, keep the crown lifted, and choose the version that fits the haircut in front of you. Then let the color do its work.