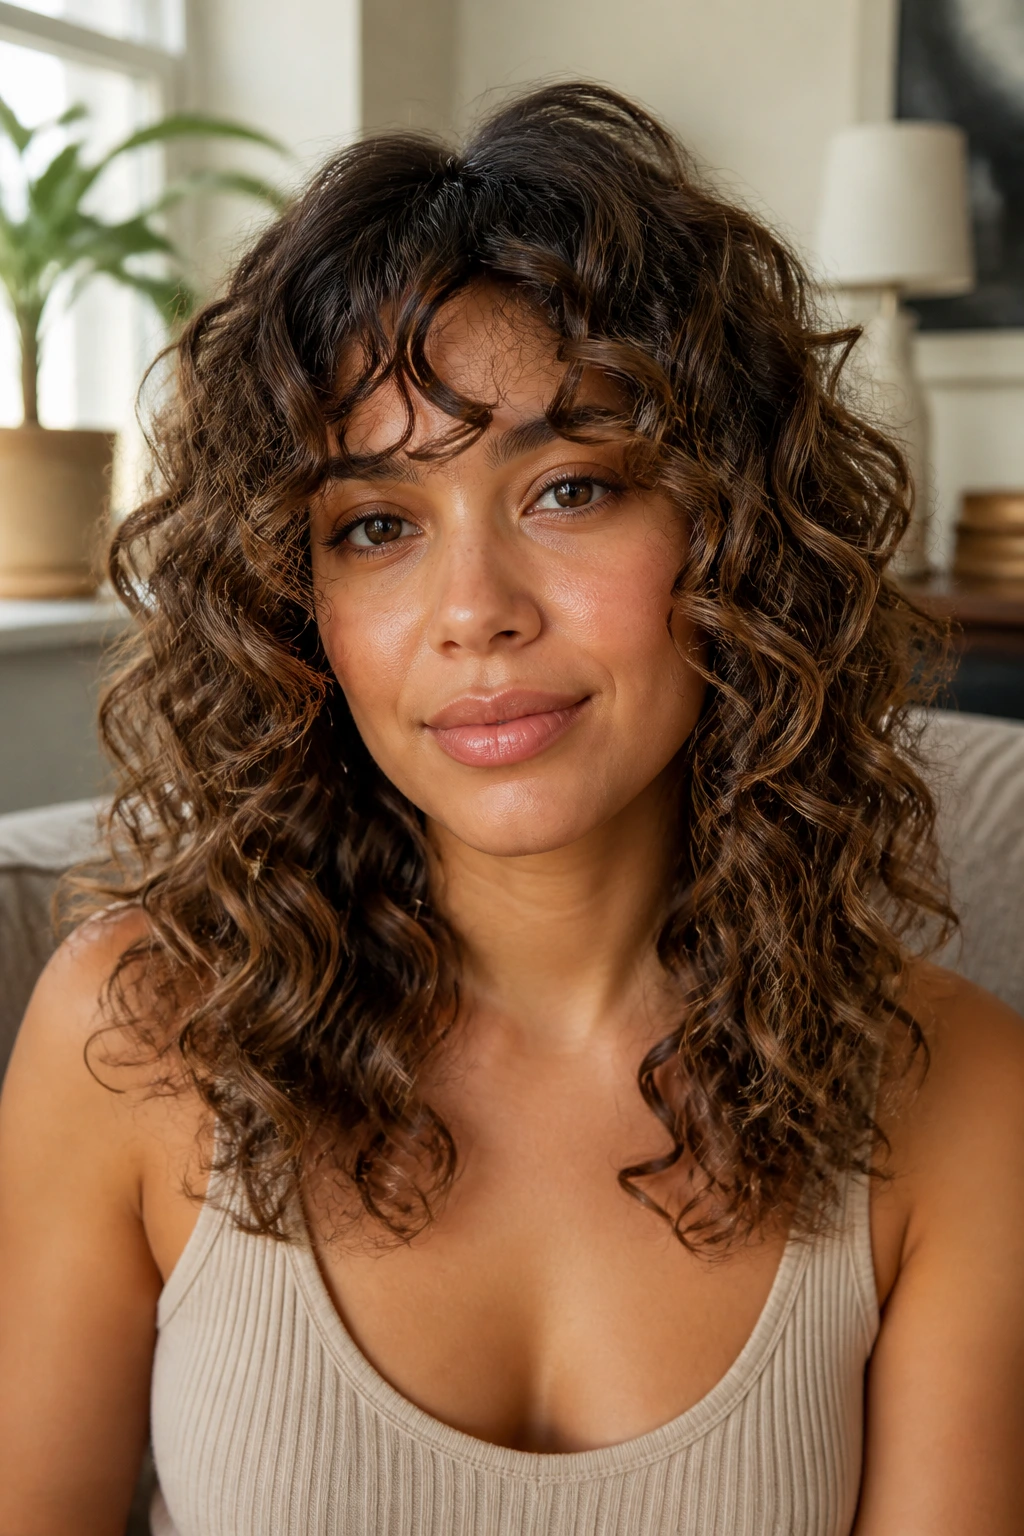
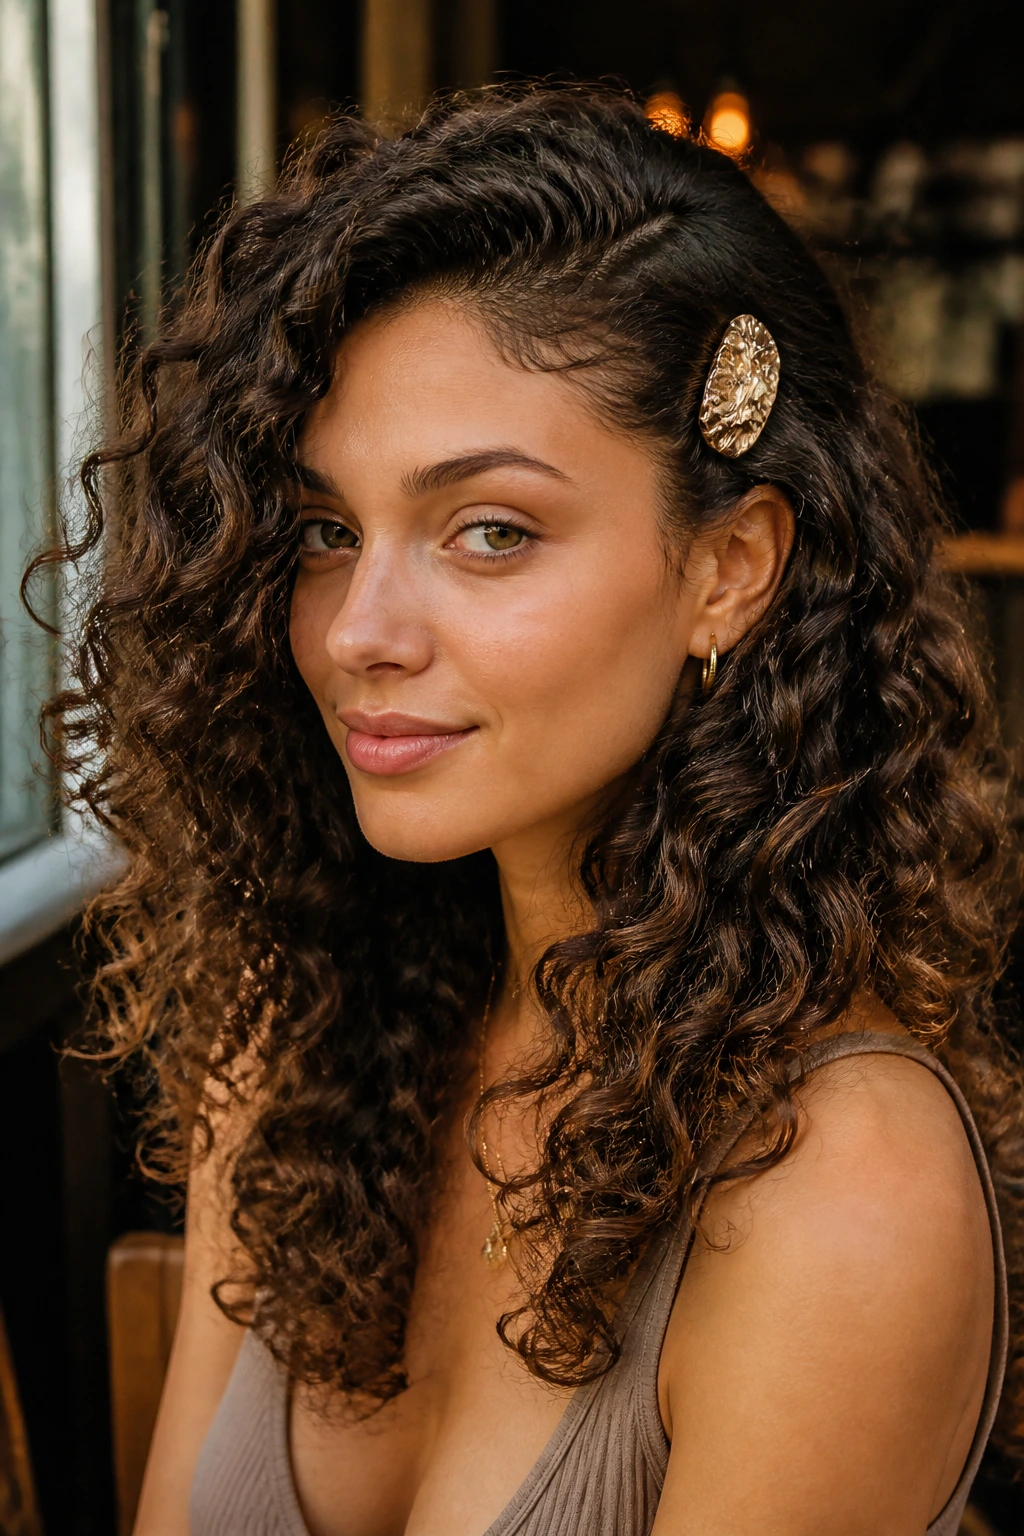
Beachy waves on curly hair work best when they look chosen, not accidental. That’s the difference between a soft, piecey bend and the kind of frizz that swells up the second your hair hits humidity or gets brushed too hard. On curls, definition is never only about the product. It’s about shape, parting, drying pattern, and which pieces you leave alone.
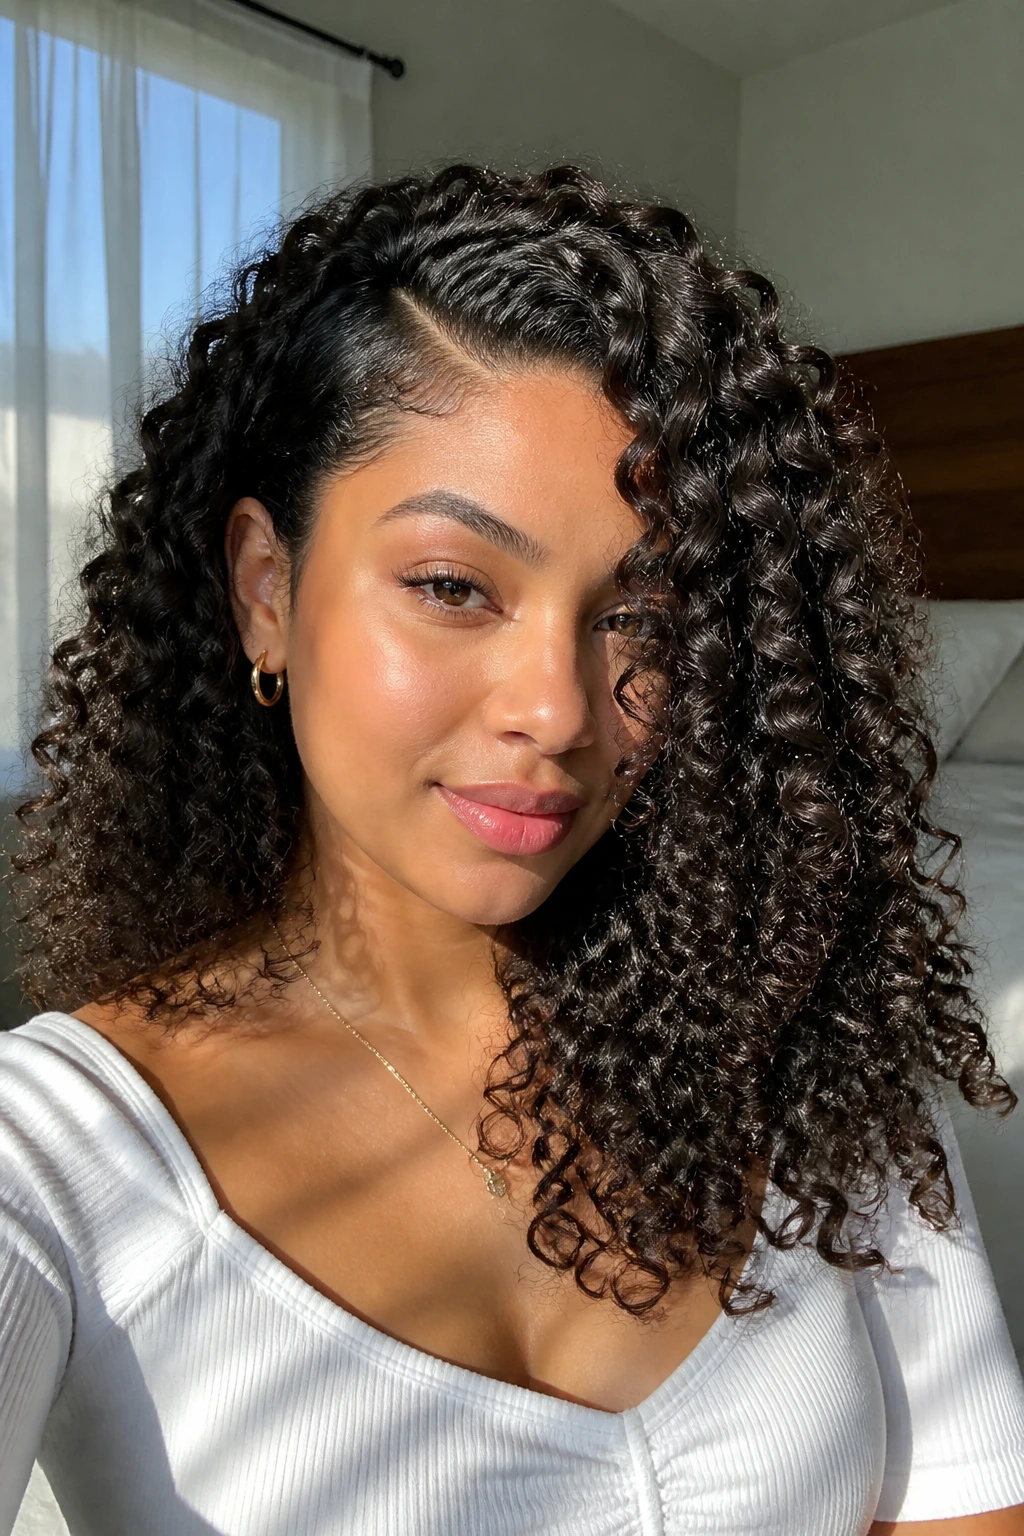
The good versions have a little swing at the ends and enough control at the roots to keep the whole shape readable. A side part can make curls fall in clean ribbons. A claw clip can lift the crown without crushing the curl pattern. A few tiny braids can break up a heavier texture and give it that loose, sun-warmed feel people usually want from beachy waves. And yes, curly hair can do this without looking flat or stiff.
What matters most is restraint. Too much brushing and you get fluff. Too much cream and you get limp ends. Too much heat and the wave pattern turns into a vague memory. The styles below stay on the right side of that line, using the curl itself as the main event instead of trying to force it into straight-hair logic.
Why These Styles Make Curly Hair Look Intentional
-
They keep curl clumps visible: Instead of separating every strand, these styles let the hair gather into ribbons, which is what gives curly hair that soft, beachy look instead of fuzzy volume.
-
They use shape, not force: A deep part, a clipped crown, or a low twist changes the silhouette fast, without flattening the curl pattern into submission.
-
They survive real life better: The styles lean on pins, braids, and controlled volume, so they keep their outline even after a subway ride, a humid walk, or a long workday.
-
They work across lengths: Short curls, shoulder-length lobs, and long coils all have options here, because the styling idea changes before the hair has to.
-
They make second-day hair useful: A lot of curly hair looks better once the roots have settled a little, and these styles take advantage of that instead of fighting it.
1. Deep Side-Part Wash-and-Go
A deep side part is the fastest way to make curly hair read as beachy instead of bulky. It pulls one side forward, lets the other side fall back, and breaks up the round “pyramid” shape that curls can build when they dry straight down. The result feels soft and a little undone, but the curl pattern still stays crisp where it counts.
What makes this one work is the tension between volume and direction. You’re not trying to create a perfect wave; you’re giving the hair a line to follow. Use a curl cream on soaking-wet hair, then a gel with enough hold to keep the clumps together while they dry. Once the cast forms, scrunch it out lightly with clean hands or a tiny bit of oil. That little bend at the front is the whole point.
If your curls sit in the 2C to 3B range, this style gives you shape without making the ends look stringy. On tighter curls, it softens the overall outline and keeps the top from getting too wide.
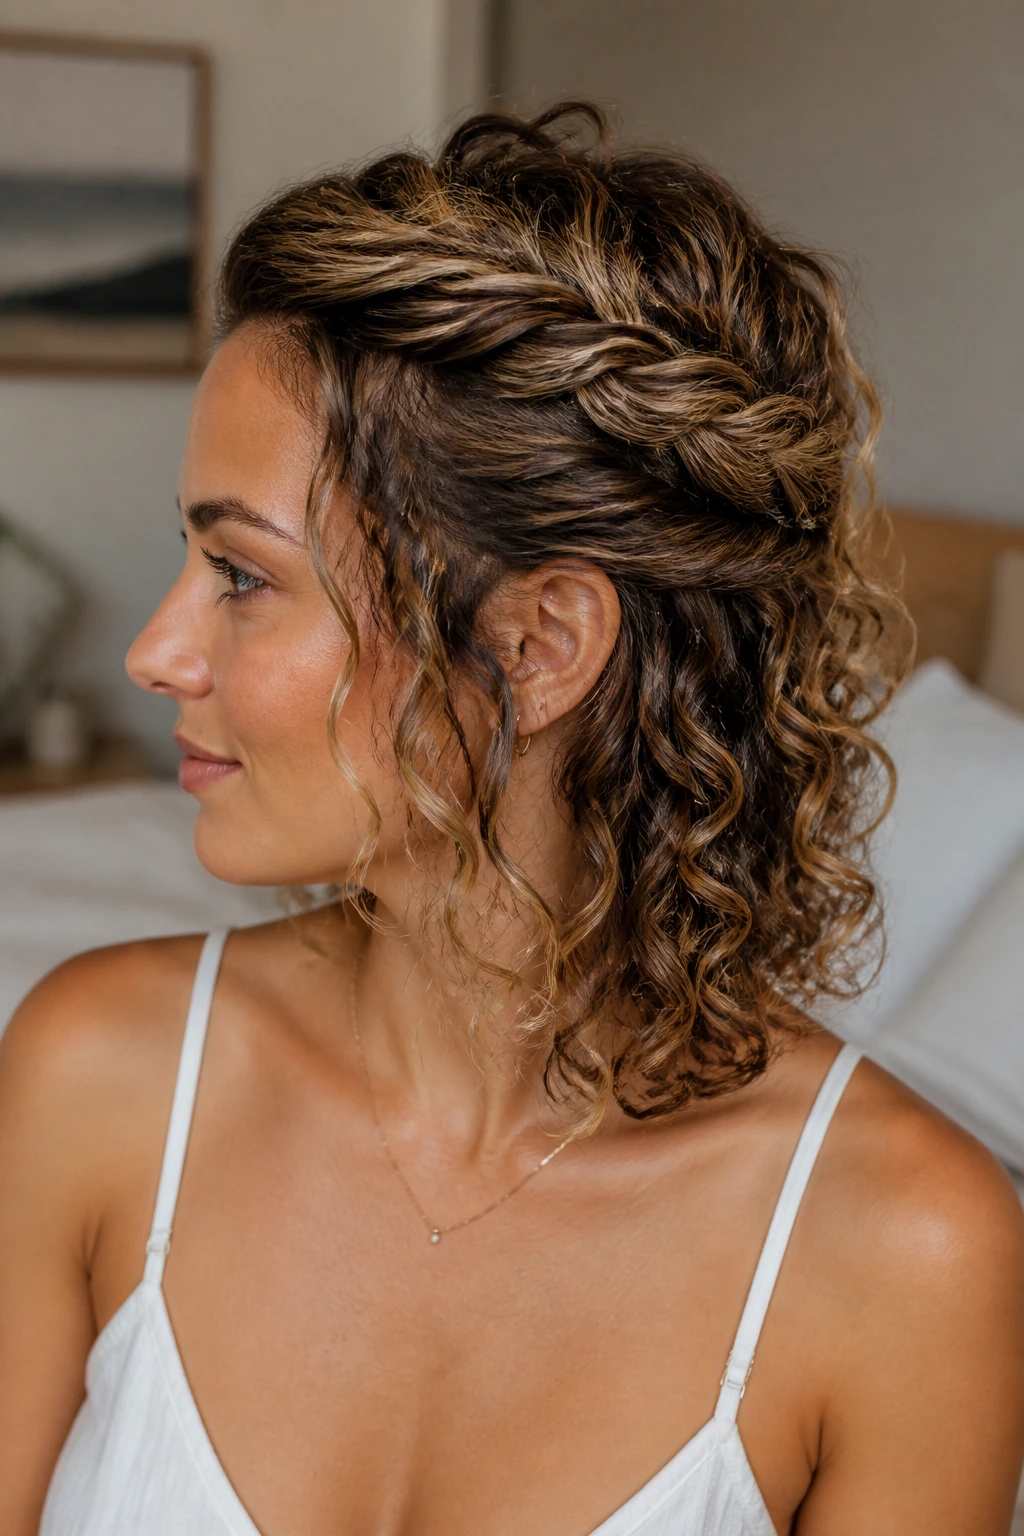
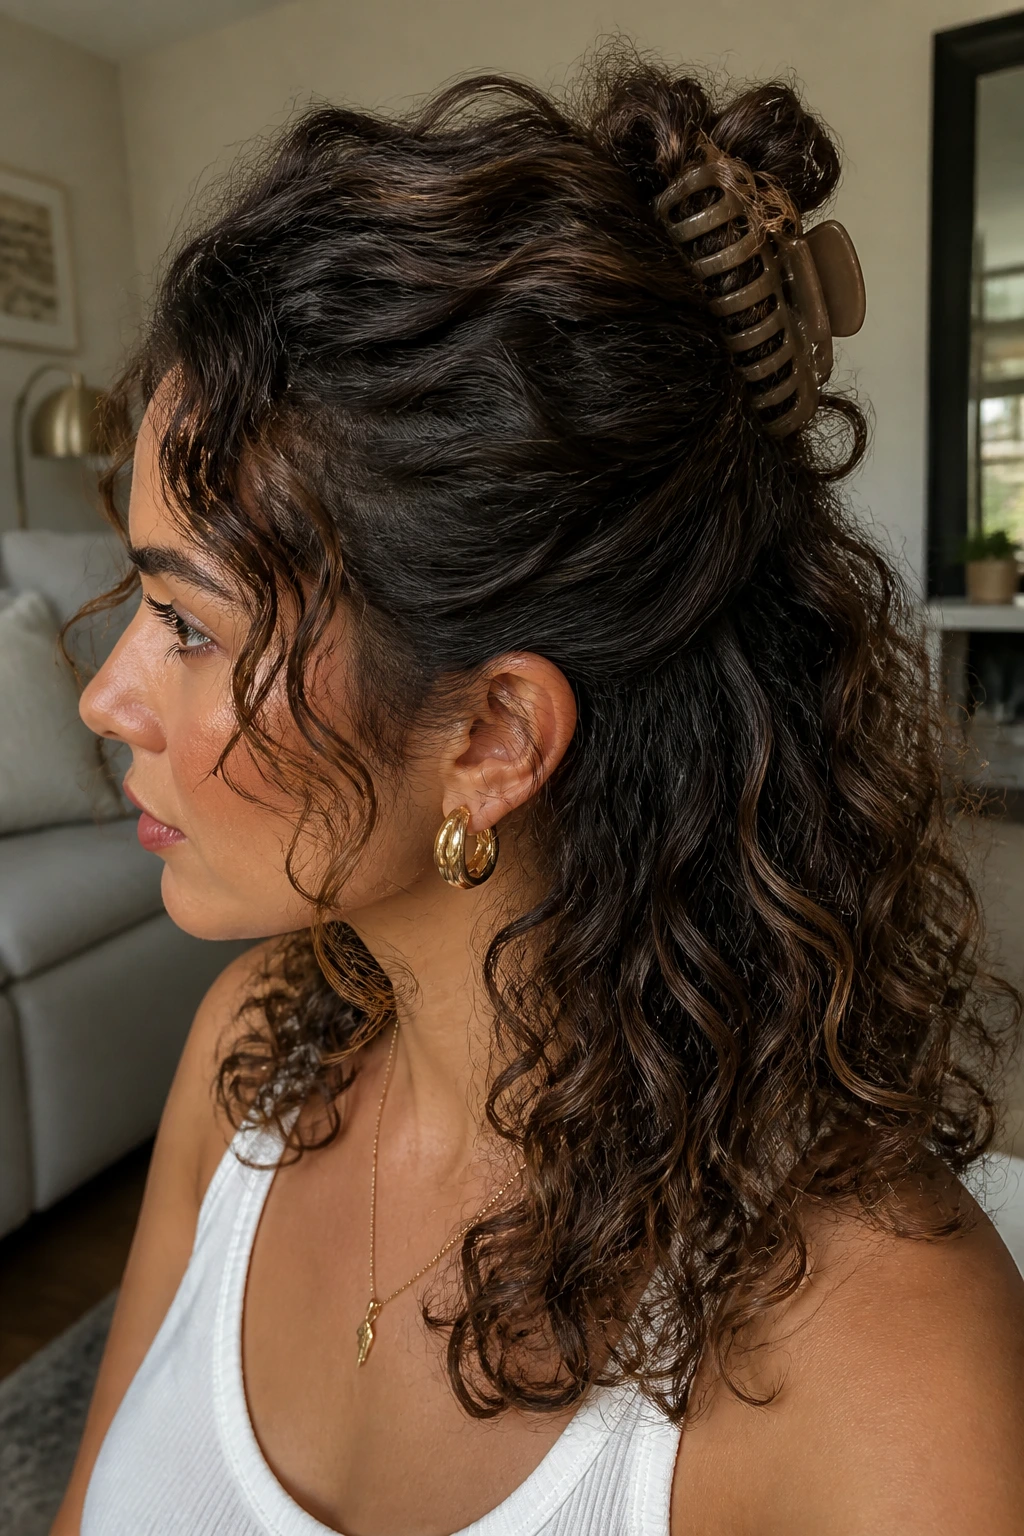
2. Half-Up Claw Clip Twist
This is one of those styles that looks more deliberate than it has any right to. You gather the top half of the hair, twist it once or twice, and pin it into a medium claw clip so the ends spill out in a loose fan. The lower half stays open, which keeps the curl texture visible and stops the style from feeling too “done.”
It works because the clip lifts the crown without dragging the whole head into a tight ponytail shape. If your hair is dense, twist only the top section and leave a few front curls out so the clip has room to sit flat. If your hair is finer, pinch the twist a little looser and tug at the sides after clipping. That gives the illusion of more width without making the roots collapse.
The nicest part is the way it handles day-two hair. Slightly stretched curls actually behave better here than freshly washed ones. They hold the twist, keep the face framing pieces soft, and give you that easy beachy lift people keep trying to fake with heat.
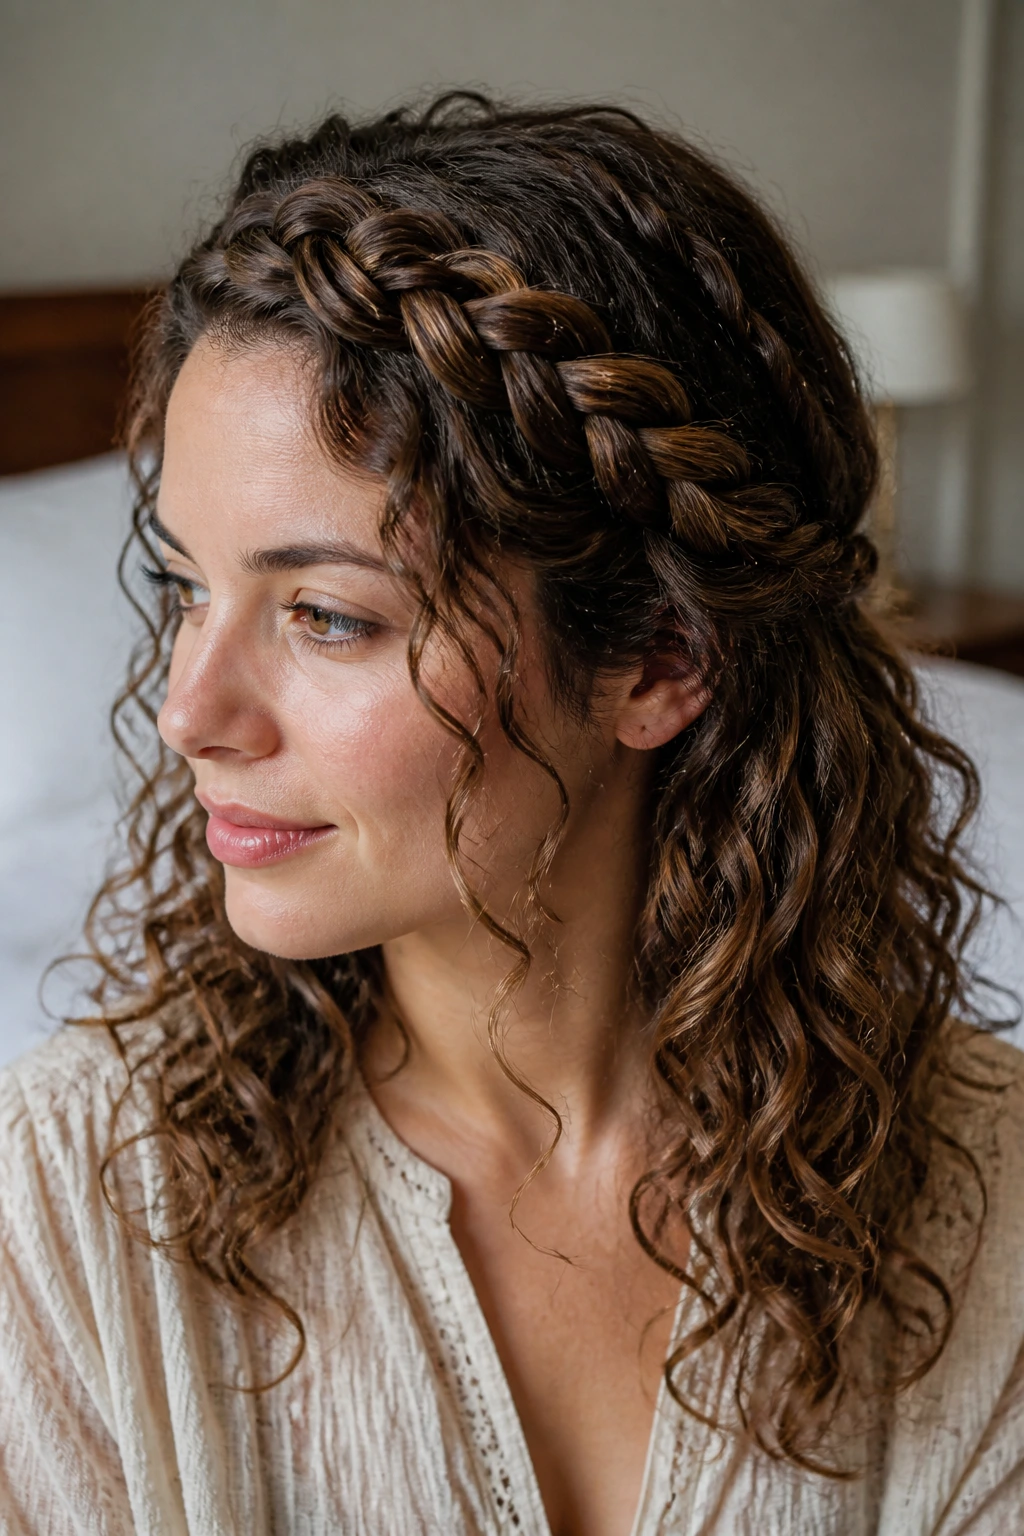
3. Braided Crown with Loose Ends
A braided crown on curly hair is not stiff and school-uniform neat unless you make it that way. Leave the braid a little loose, start it just above one temple, and let it arc across the head so the back stays open and curly. The contrast is what makes it feel modern. Tight braids can look formal. A looser crown looks like the hair decided to cooperate for once.
The key move is stopping the braid before it gets too polished. Once it crosses the top of the head, secure it with a small clear elastic or a pin hidden under a curl. Then tug gently at the braid loops so the braid looks wider and sits flatter against the head. The loose ends behind it should keep their wave pattern; if they don’t, finger-coil just the last inch or two.
This style is especially good when the top layer of your curls has more frizz than the bottom. The braid handles the fuzzy part and turns it into texture on purpose. Handy. Very handy.
4. Low Curly Bun with Face-Framing Pieces
A low bun can look severe on curly hair if you pull everything back too hard. Leave two or three front pieces out, gather the rest at the nape, and twist the length into a loose bun that still shows some curl pattern. The finished shape should sit a little soft at the sides, not slicked to the skull like a ballet bun.
The face-framing pieces do most of the work here. Curl them with your fingers and a pea-size amount of gel if they’re acting stubborn, then let them fall where they want. The bun itself does not need to be perfect. In fact, a slightly uneven coil reads better because it keeps the style from looking too formal.
If your curls are thick, this is a good way to get them off your neck while still keeping some movement. If they’re fine, use a couple of pins tucked crosswise so the bun doesn’t sag after an hour.
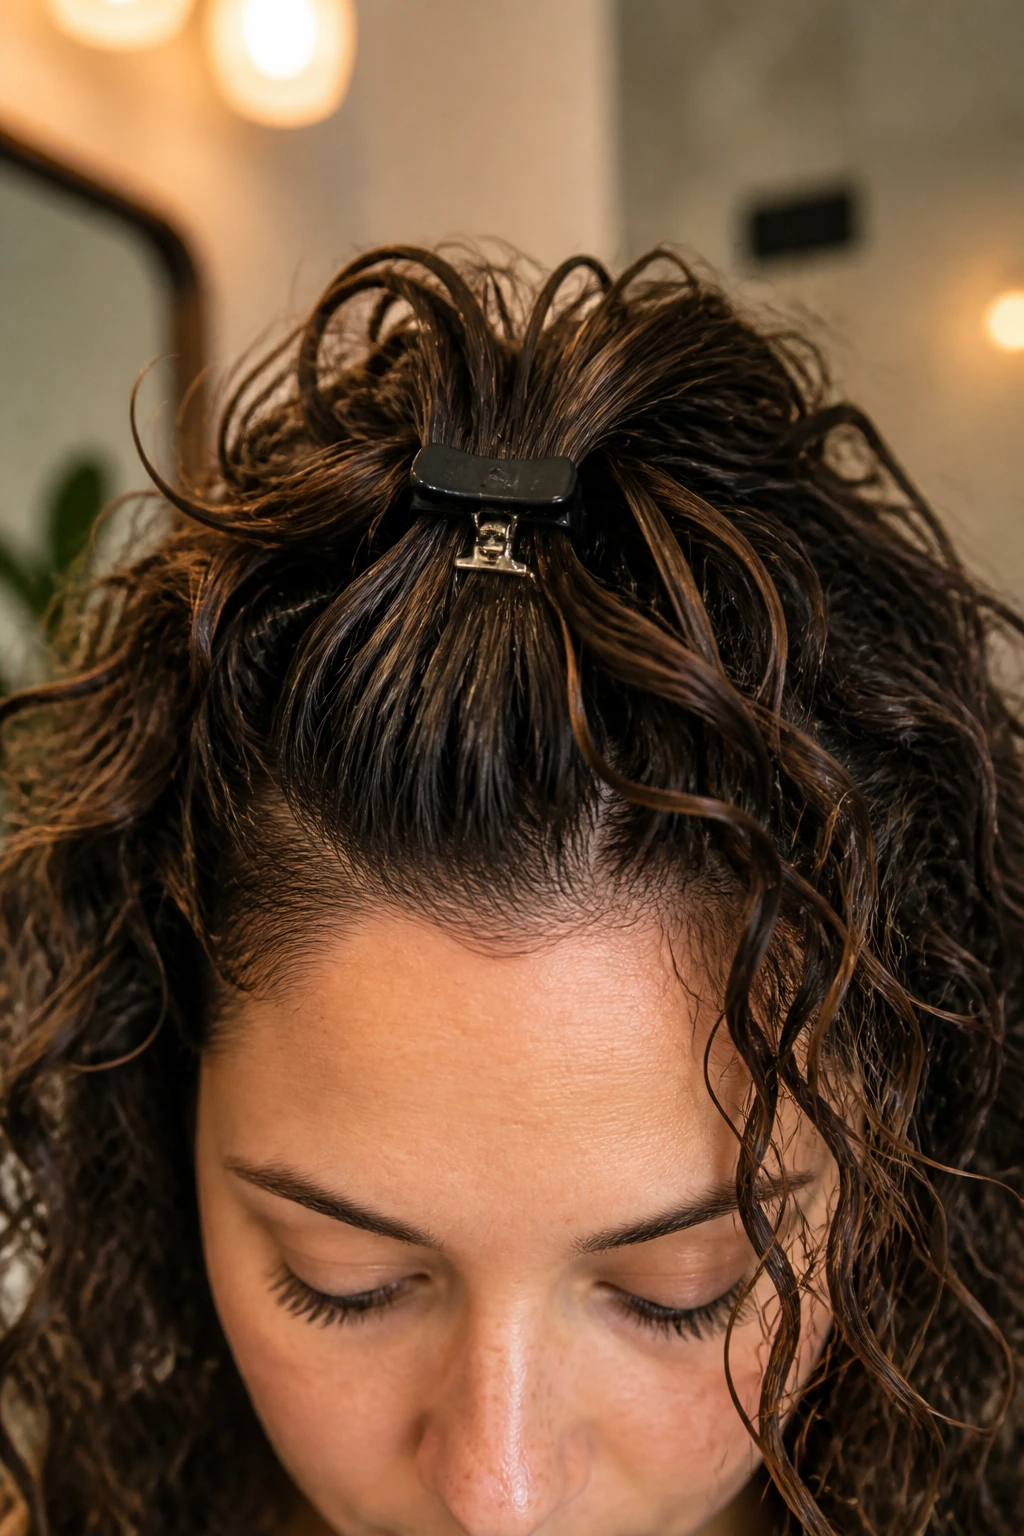
5. Pineapple Puff with Soft Ends
The pineapple puff has a specific kind of energy: high, easy, and a little playful without crossing into messy. You gather the hair high on the crown with a satin scrunchie, but you do not crush the ends into a tight knot. Let the ends stay loose and curly, falling over the top or to one side depending on your length.
This style works because it creates lift where curly hair often goes flat first. The high placement gives the face open space, and the loose ends keep the outline soft. If the roots are freshly washed and too slippery, rough-dry them a little first or use a pinch of mousse at the crown before gathering the puff. That helps the elastic hold without sliding.
It’s especially good for longer curls that need a fast shape change. One minute your hair is down and voluminous; the next it feels lighter, cleaner, and a lot more beachy. Not a bad trick.
6. Curly Shag with Piecey Fringe

A curly shag is practically built for this whole beachy-waves mood. The layers break up the density, the fringe sits lightly on the forehead, and the overall shape avoids that heavy triangle that can happen when curls all fall to one length. When the cut is right, you barely need to force the texture. The hair does the work itself.
The best version of this style has piecey separation, not fluffy chaos. Use a light cream at the ends and a gel that defines without turning the fringe into a helmet. Scrunch, diffuse on low, then stop touching it. The fringe should fall in soft chunks, not blend into one thick curtain.
This cut gives you movement even on lazy styling days. That’s why it’s such a strong match for beachy waves on curly hair: the haircut already knows where the hair should move.
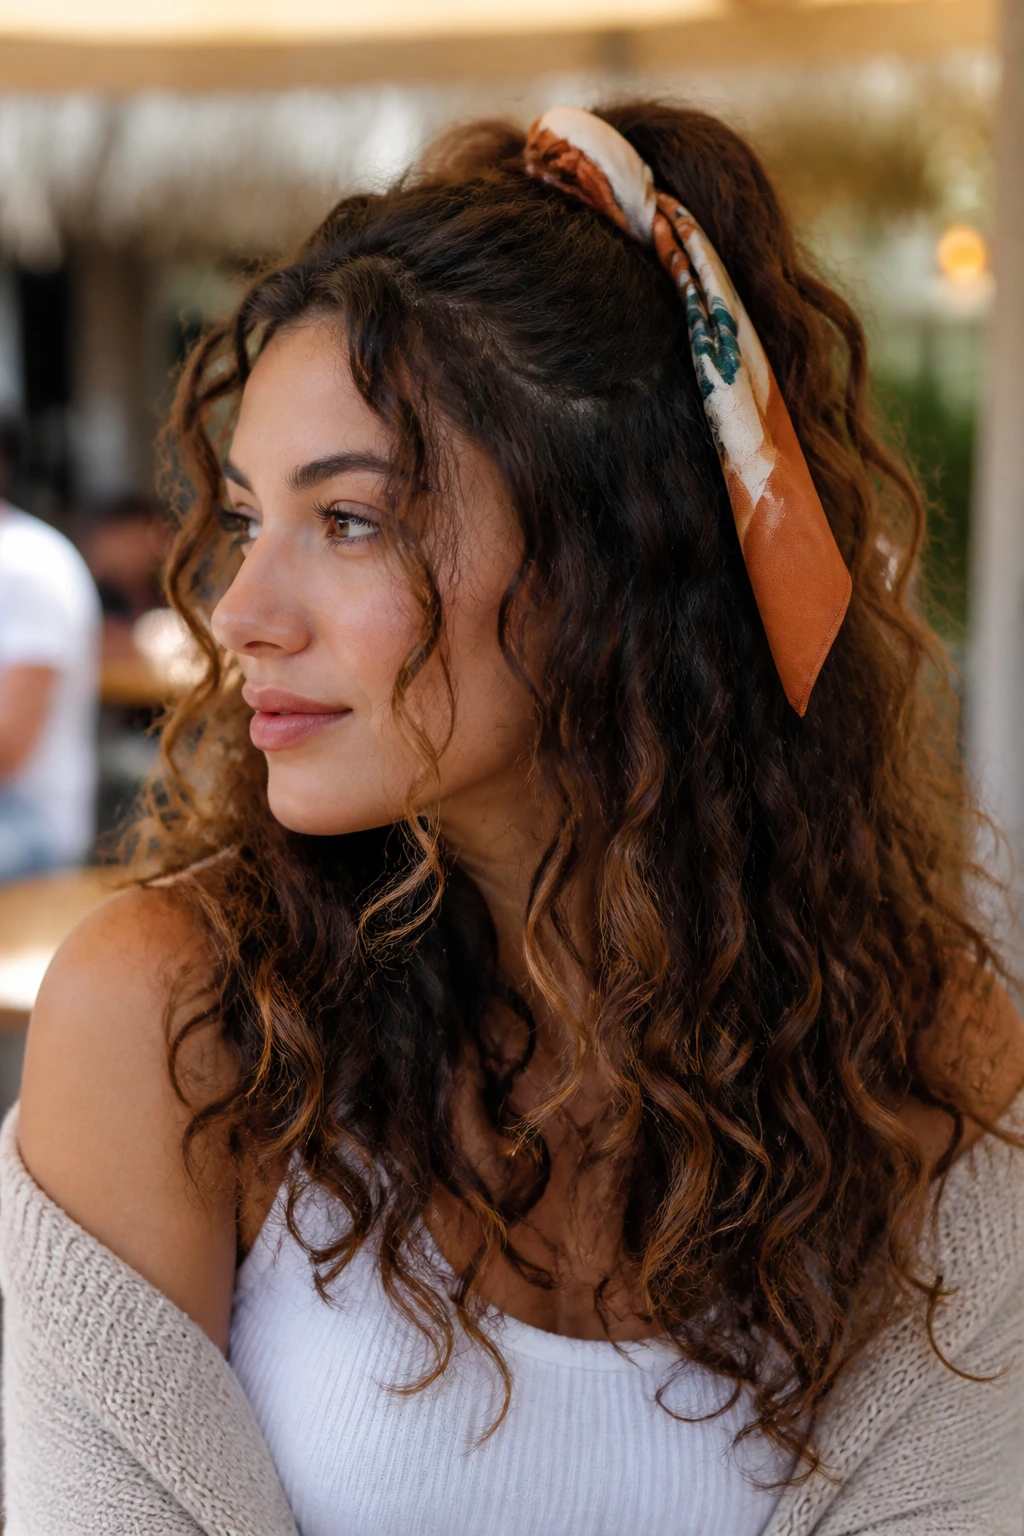
7. Headband Tuck with Airy Front Pieces
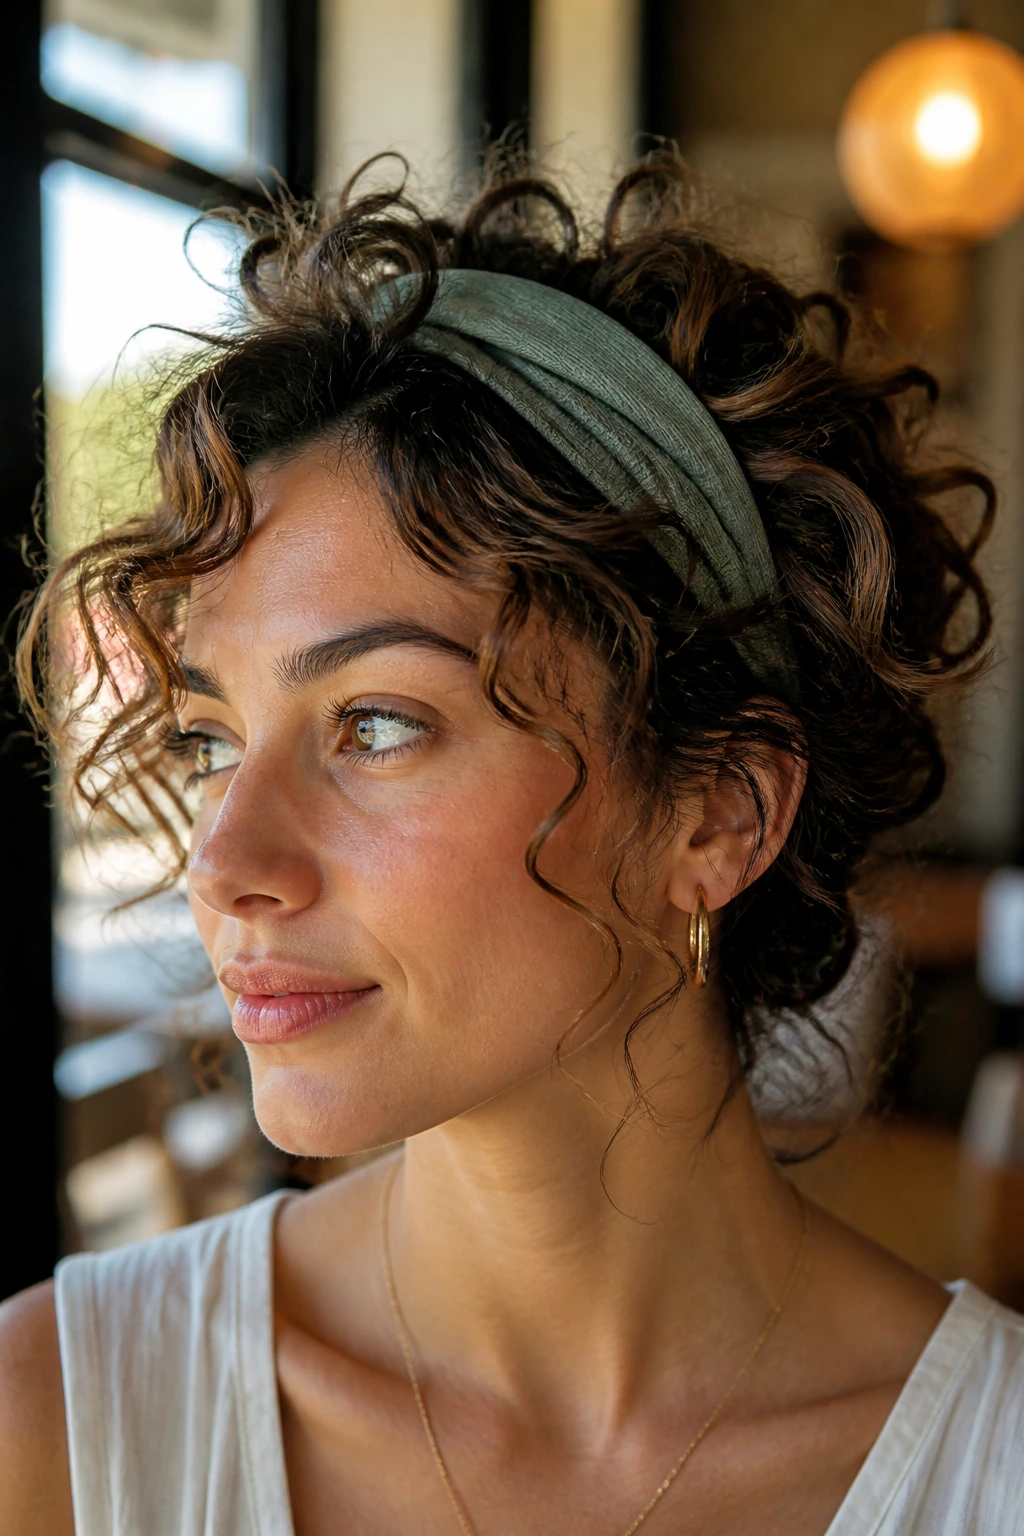
The headband tuck is one of the easiest ways to make curly hair look styled in under ten minutes. Slip a fabric headband on, tuck the sides back loosely, and leave the front curls soft so they spill just above the band. The shape should feel relaxed, not trapped.
This style depends on placement. If the band sits too far forward, it squashes the front curls and makes the whole look feel flat. Set it a little behind the hairline so the curls can spring up around it. On looser curls, a wider band works better because it gives the texture something to rest against. On tighter curls, a narrow band keeps the look lighter.
I like this one for days when the root area is a little wild but the mid-lengths still look good. The band handles the top, the curls handle the rest, and nobody has to know you spent two minutes on it.
8. Slicked-Back Root Puff
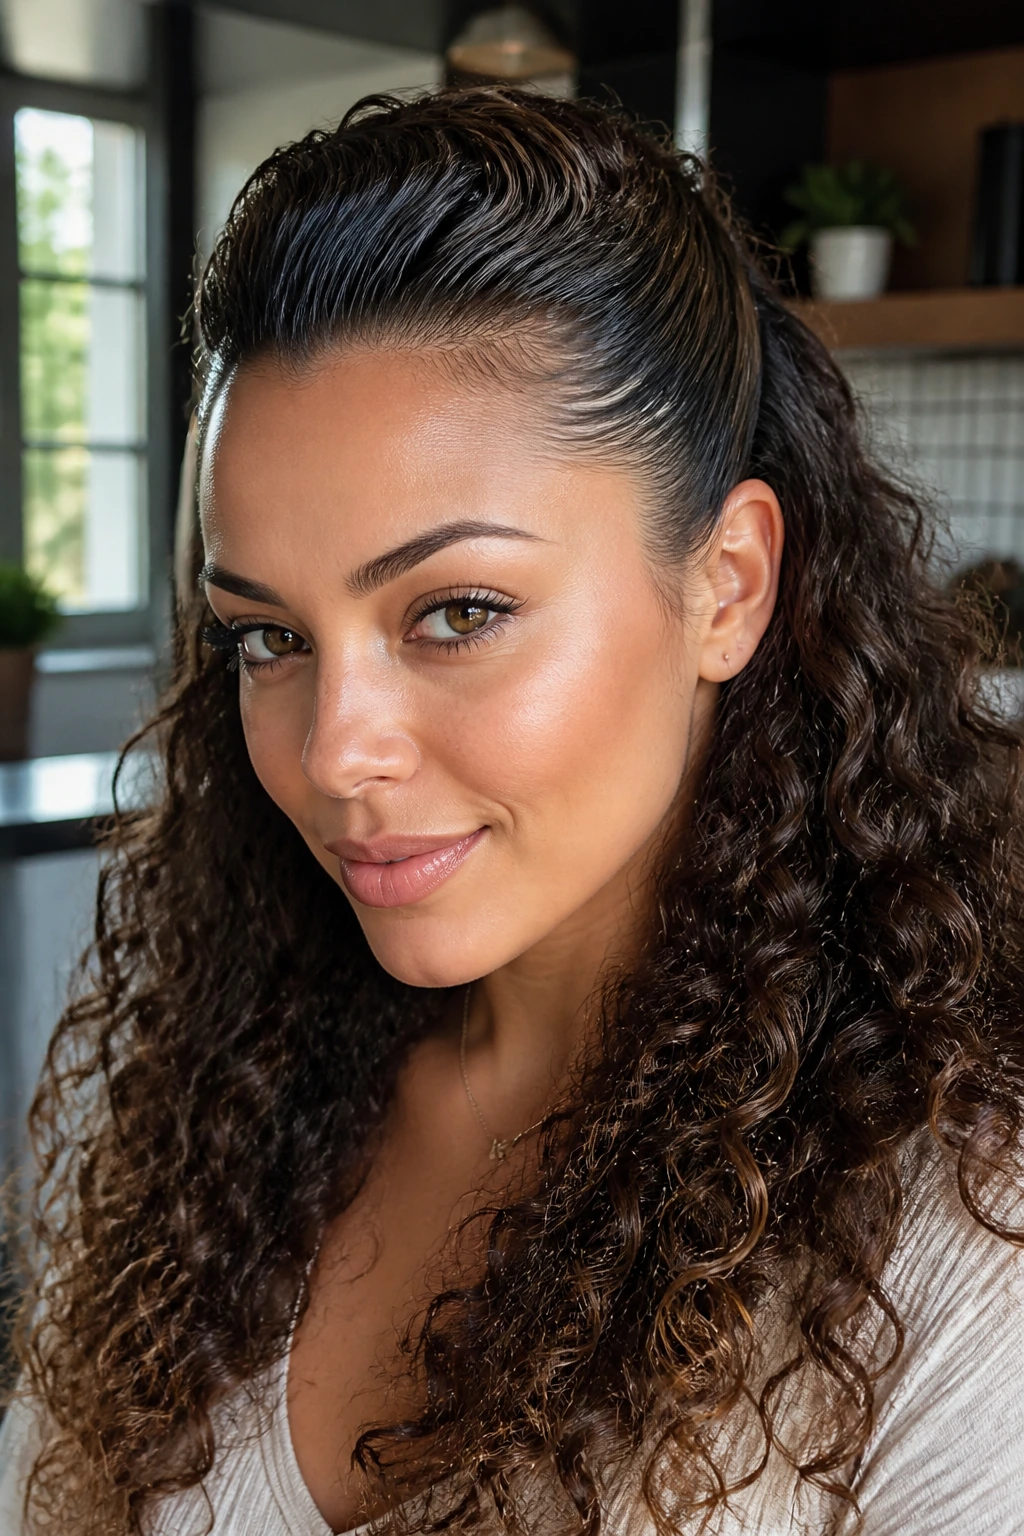
This one is a study in contrast. The roots are smoothed back with a touch of gel, and the lengths are left curly and full, creating a clean top line with a textured body. It’s a smart move when the front section is frizzy or when your curl pattern loosens near the crown but stays defined lower down.
Use a toothbrush or edge brush with a tiny amount of gel to smooth just the front hairline and sides. Do not soak the top with product; you want control, not a wet helmet. Then gather the hair into a loose puff at the back or leave it half up if the length is shorter. The contrast between the sleek top and the curly volume below is the whole point.
This style looks especially good with hoop earrings or a neckline that shows some skin. The clean front opens the face, and the back keeps the texture alive. Simple. But not boring.
9. Rope-Twisted Half-Up Style
A rope twist gives curly hair a softer, more irregular texture than a standard braid. Split two front sections, twist each section tightly in one direction, then twist them around each other in the opposite direction. Pin the twist at the back and let the remaining hair fall open.
The rope twist works well on curls because it adds definition without flattening the top layer. It also makes short-to-medium lengths easier to manage, since the twist holds with less hair than a full braid. If you want more beachy texture, tug the twist slightly after pinning so it looks fuller and less rope-like.
This is a good style for hair that has a little frizz at the front but still plenty of movement through the ends. The twist fixes the top problem and lets the rest do its thing.
10. Side-Swept Clip-Back with One Statement Pin
Sometimes one good pin is enough. Sweep a front section to one side, clip it back with a large barrette or decorative pin, and let the rest of the curls fall freely. The point is not symmetry. The point is to make the hair feel arranged without looking overworked.
This style gets its shape from the sweep across the forehead. A deep side section gives the front piece more movement, and the clip creates a focal point that keeps the style from disappearing into plain down-hair. Use it when your curls are defined but the crown needs a little order. That’s where the clip earns its keep.
The most common mistake here is clipping too much hair away from the face. Leave enough out so the style still frames your features. Otherwise it starts to look like the hair gave up halfway through.
11. Defined Bob with Tucked One Side

A curly bob can read beachy when one side stays open and the other side gets tucked behind the ear. That tiny asymmetry matters. It shows off the jawline, keeps the shape moving, and stops a short cut from feeling boxy.
The curls should be defined enough that each clump still has its own outline. If the bob is freshly washed, use a foam or mousse at the roots and a small amount of gel at the ends to keep the perimeter neat. Tuck one side behind the ear and leave the other side loose. That tucked side creates a smooth line; the loose side keeps the texture visible.
This is one of the best styles for shorter curls that need shape, not length. The cut does most of the work, and the tuck makes the result look intentional rather than “I ran out of time.”
12. Bubble Ponytail on Curly Length
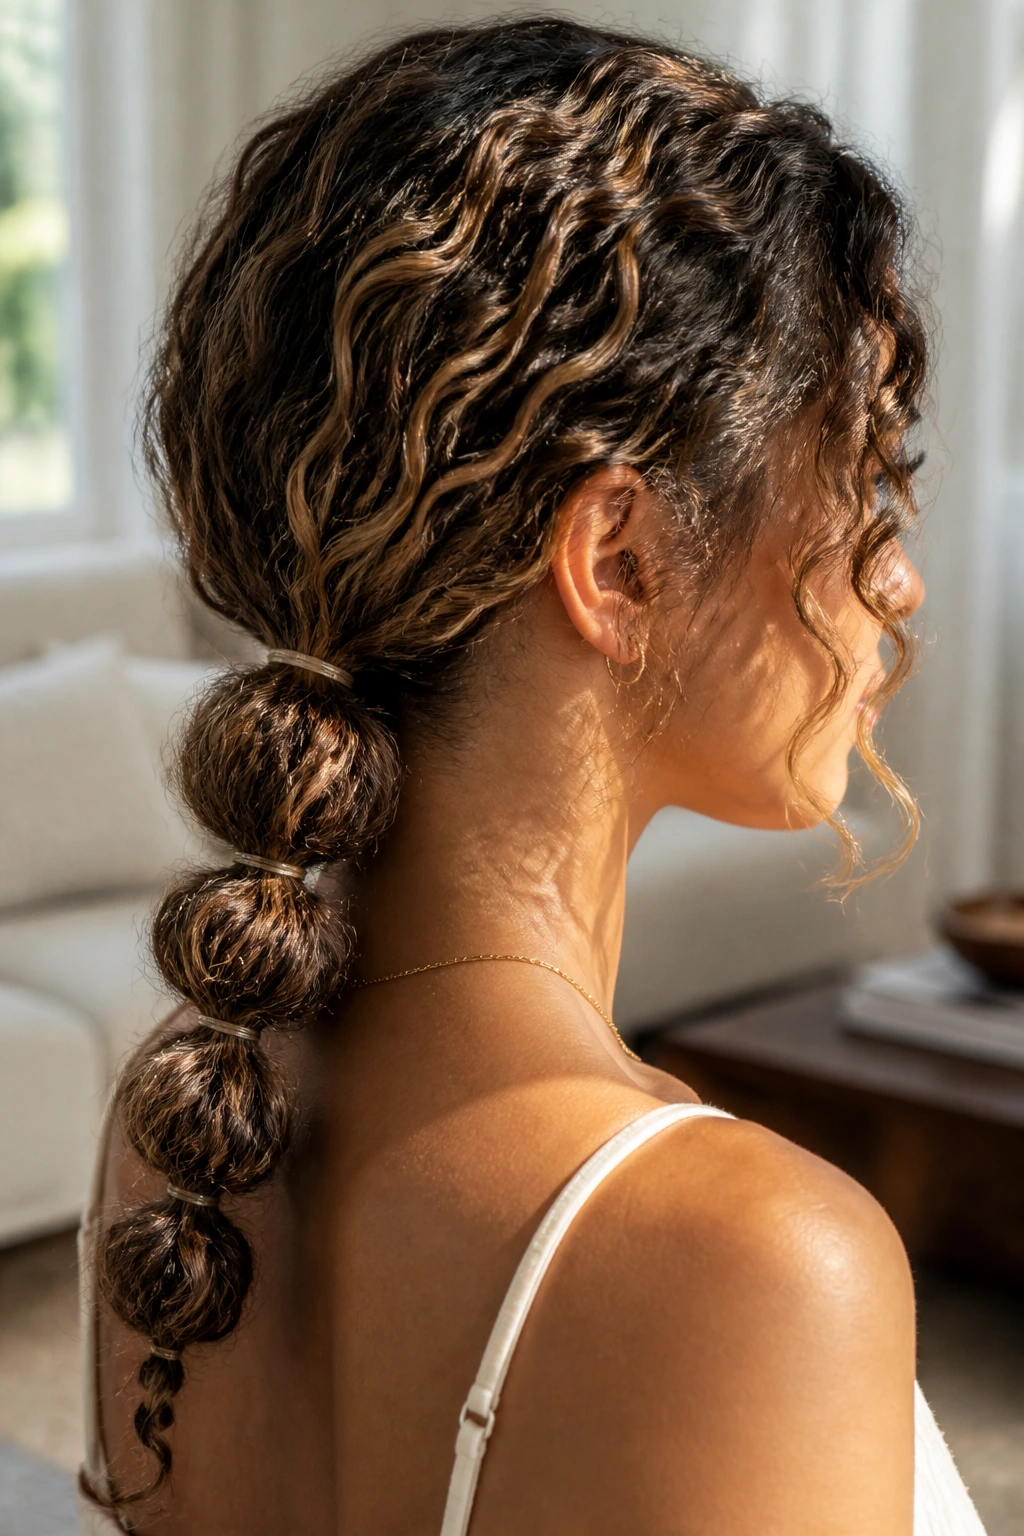
A bubble ponytail turns ordinary pony length into something with real shape. Secure the hair low or mid-height, then add small elastics every few inches down the length, gently pulling each section out into a rounded bubble. On curly hair, the texture helps each bubble look fuller and less rigid.
The trick is not over-tightening the elastics. If they bite into the curls too hard, you lose the softness that makes the style feel beachy. Use small clear elastics or wrap tiny curls around each tie point if your hair is long enough. That hides the bands and gives the whole style a cleaner line.
It’s a strong option for medium and long curls that need control at the root but still want movement. The bubbles create structure, and the wave ends keep it from looking stiff. That balance is the whole game.
13. Low Braided Pony with Wave Ends
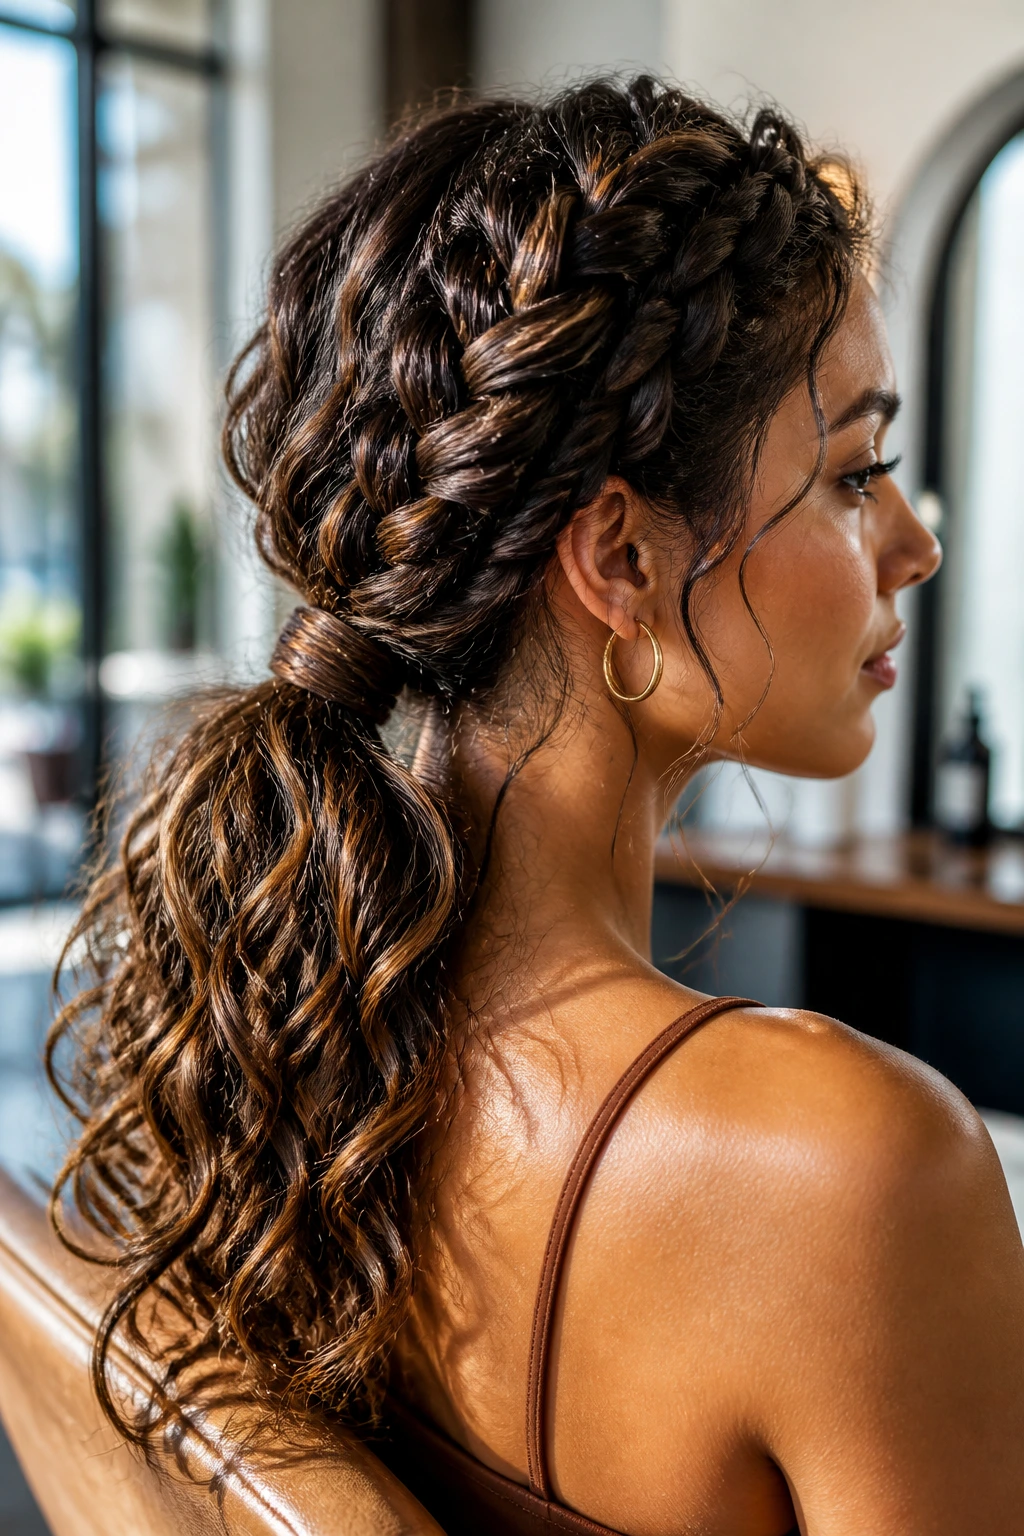
A low braided ponytail on curly hair keeps texture front and center while making the base look tidy. Start with a low pony at the nape, braid it loosely, and stop before the ends if you want the last few inches to stay curly and soft. That unfinished tail gives the braid a more relaxed, lived-in feel.
This style works especially well when the mid-lengths are defined but the crown needs taming. The braid compresses the bulk just enough to keep the shape smooth, but the curls still peek through the edges. If your hair is thick, braid only the top layer and let some underneath remain free. It makes the pony look fuller without feeling heavy.
A ribbon or fabric tie can soften the whole thing. Avoid thick elastics that create hard dents. Curly hair shows those dents fast.
14. Scarf-Wrapped Half Pony
A scarf wrapped around a half pony gives curly hair a dose of color and keeps the top section from puffing up too much. Gather the top half, secure it with a small elastic, and tie a silk or cotton scarf around the base so the knot sits off to one side or behind the head. The rest of the hair stays loose and wavey.
This look is useful when you want the top out of your face but still want the ends to move. The scarf adds shape at the crown and acts like an accessory and structure piece at the same time. Choose a scarf with enough length to make a neat knot; tiny scarves tend to disappear in thick curls.
The style feels casual, but not careless. It’s one of those rare options that can handle errands, lunch, and a long day without needing much touch-up.
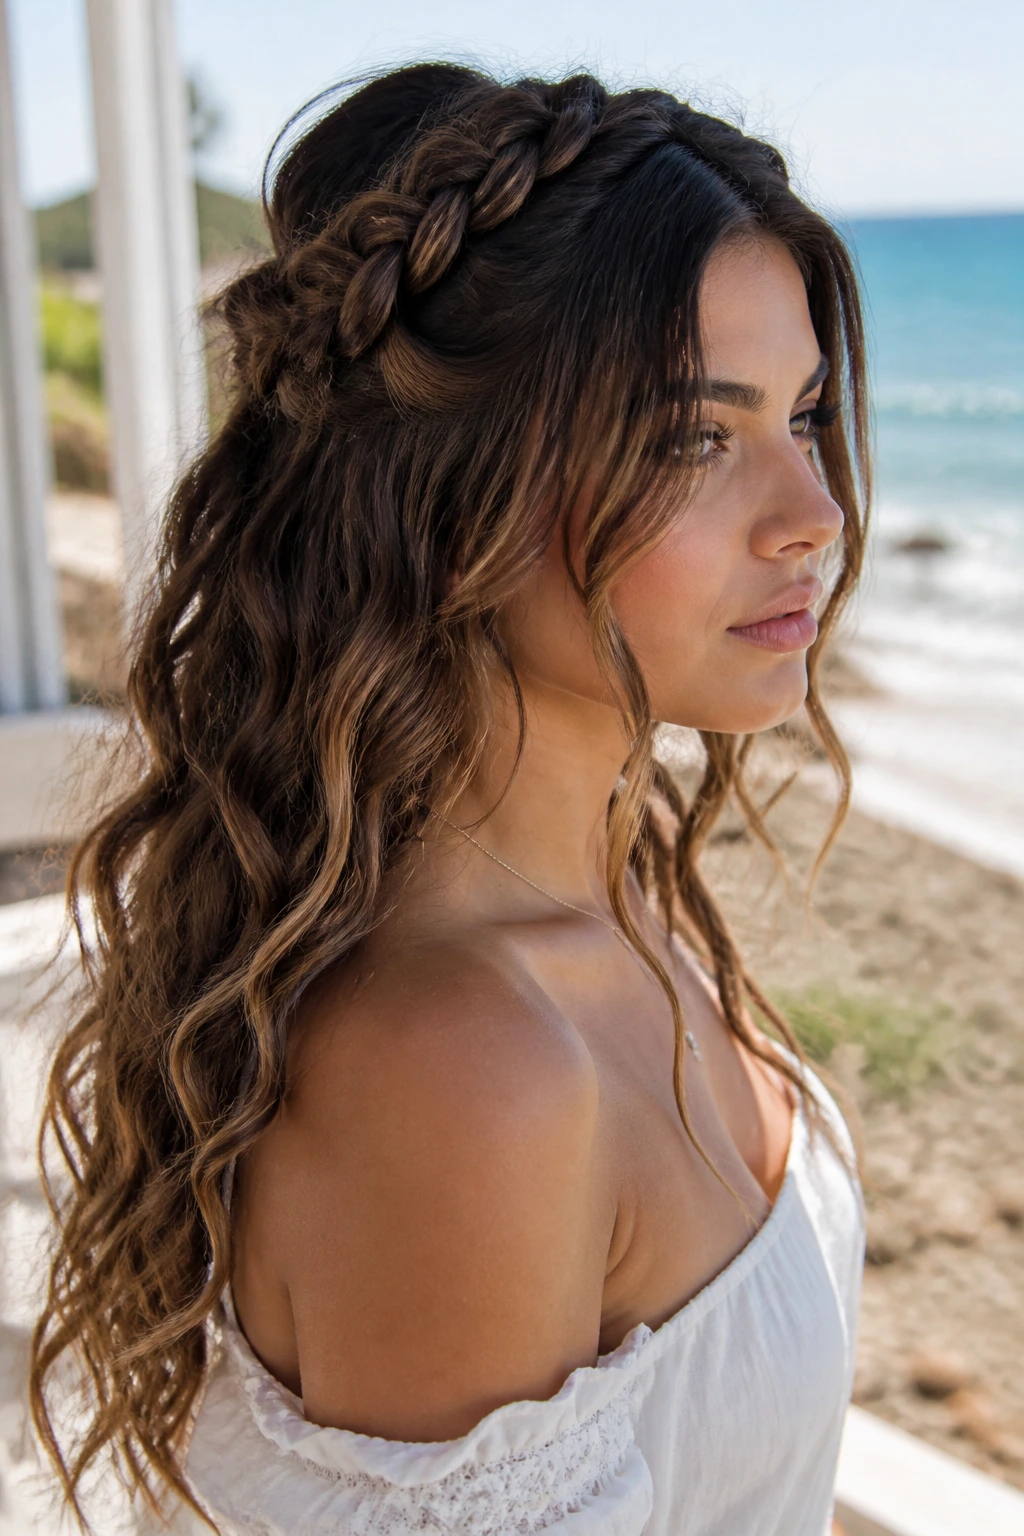
15. Twisted Crown with Open Back
A twisted crown is the more laid-back cousin of a braided halo. Instead of braiding, twist two front sections back toward the crown and pin them in place so the back remains fully open. The twist gives the top a lifted line, while the loose back keeps the curl pattern visible.
This works well on hair that’s slightly stretched or on curls that have more definition through the lower layers than at the roots. Twisting rather than braiding means the style keeps a softer edge. If you want the crown to look fuller, tug the twists apart gently after pinning. A little width makes a big difference here.
It’s a good compromise when you want some face framing control but don’t want to hide the hair under a full updo. Clean enough for a nicer setting. Soft enough for everywhere else.
16. Curly Lob with Curtain Bangs
A curly lob with curtain bangs has a built-in beachy feel because the haircut already separates the face from the length. The bangs fall open at the center, the layers around the jaw stay light, and the rest of the hair keeps enough weight to move rather than poof up.
The best version of this style is all about balance. Curtain bangs should be defined, not blown dry into straight pieces that fight the curl pattern. Use your fingers to set them into two loose curves, then let them dry in that open shape. The lob length keeps the ends from becoming too heavy, which helps the whole cut swing a little.
If you’ve ever felt like curly bangs swallow your face, this cut solves that by opening the center and letting the sides frame instead of crowd. It’s a nice one.
17. Mini Braids at the Hairline
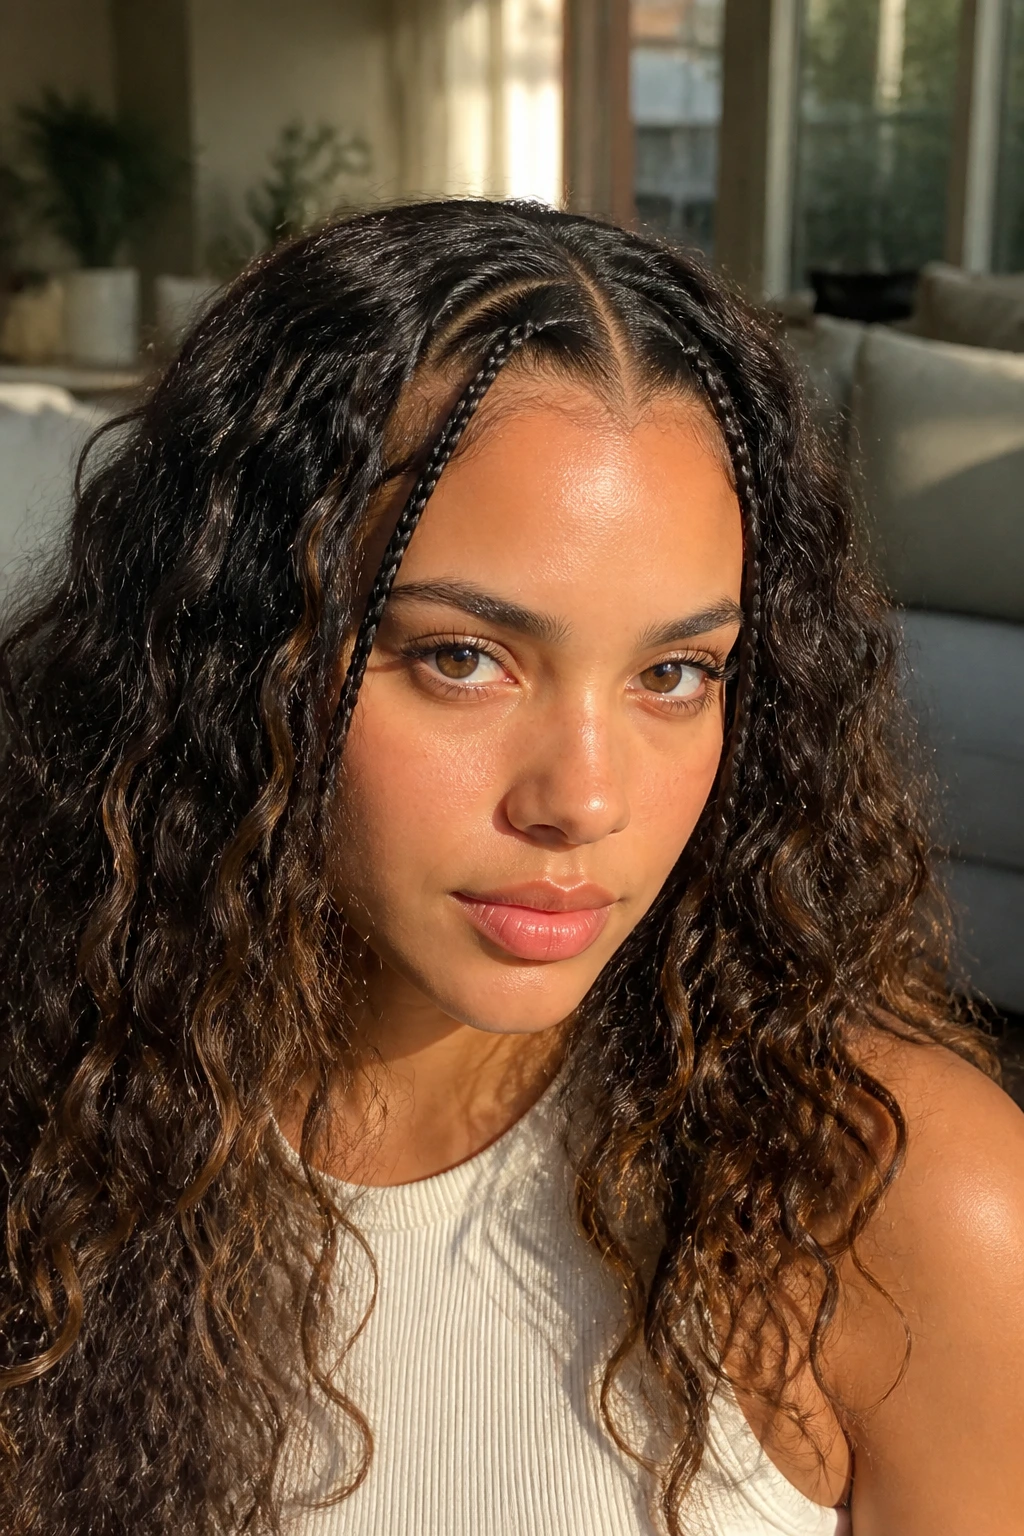
Tiny braids at the front hairline do a lot of quiet work. They pull frizz away from the face, add a bit of detail, and make loose waves behind them feel even softer by contrast. You can do two slim braids on each side or just one small braid tucked near the temple.
This style is especially useful when the front section won’t cooperate. Instead of smoothing it flat with more product, braid it and move on. The result keeps the texture visible and saves the rest of the style from getting overloaded with cream or gel. After braiding, leave the rest of the hair open and defined.
A small braid can also change the mood of a simple wash-and-go in about two minutes. That’s why I like it. It looks like a decision, not damage control.
18. Voluminous Afro with Gel-Defined Ends
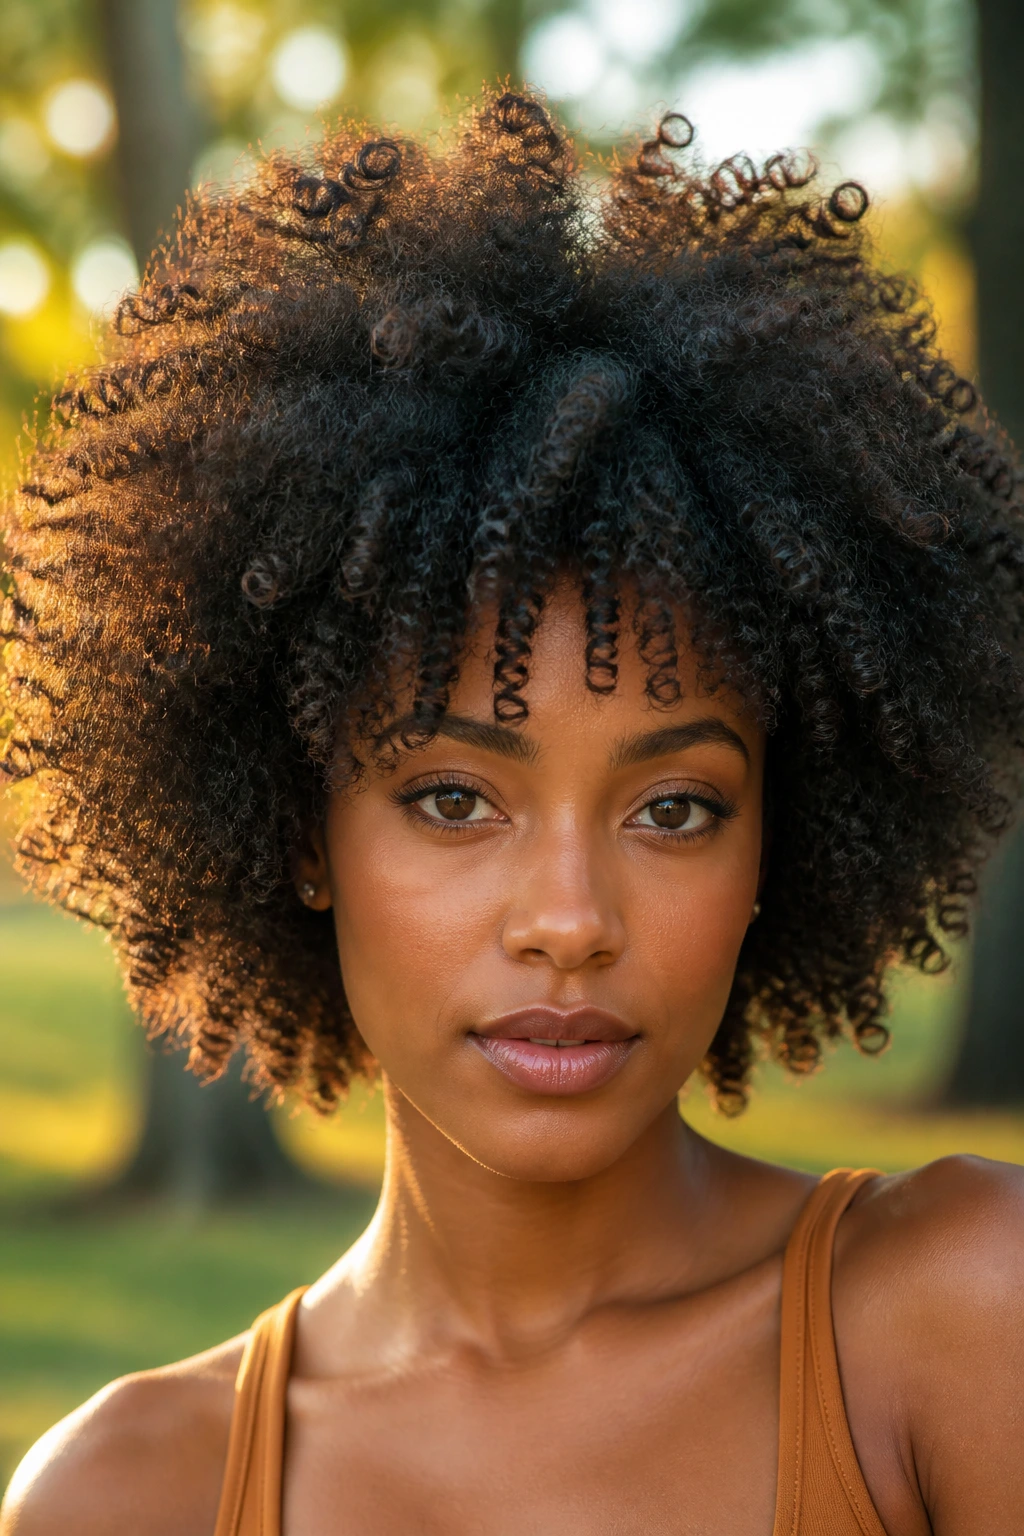
This is not about shrinking the hair. It’s about shaping it. A voluminous afro with the ends defined in small clumps gives you height at the crown and a softer, beachier outline at the perimeter. It works especially well on tighter curls that look best when they’re allowed to expand.
The trick is controlling the outer layer so it doesn’t blur into one big cloud. Use a styling cream first, then a strong-hold gel on the last inch or two of each section. That keeps the ends readable while the body stays full. Pick the hair out only at the roots if you want more lift; do not disrupt the curl clumps at the edges.
This version reads polished because the shape is intentional. Big. Soft. Controlled where it matters. That combination is hard to beat.
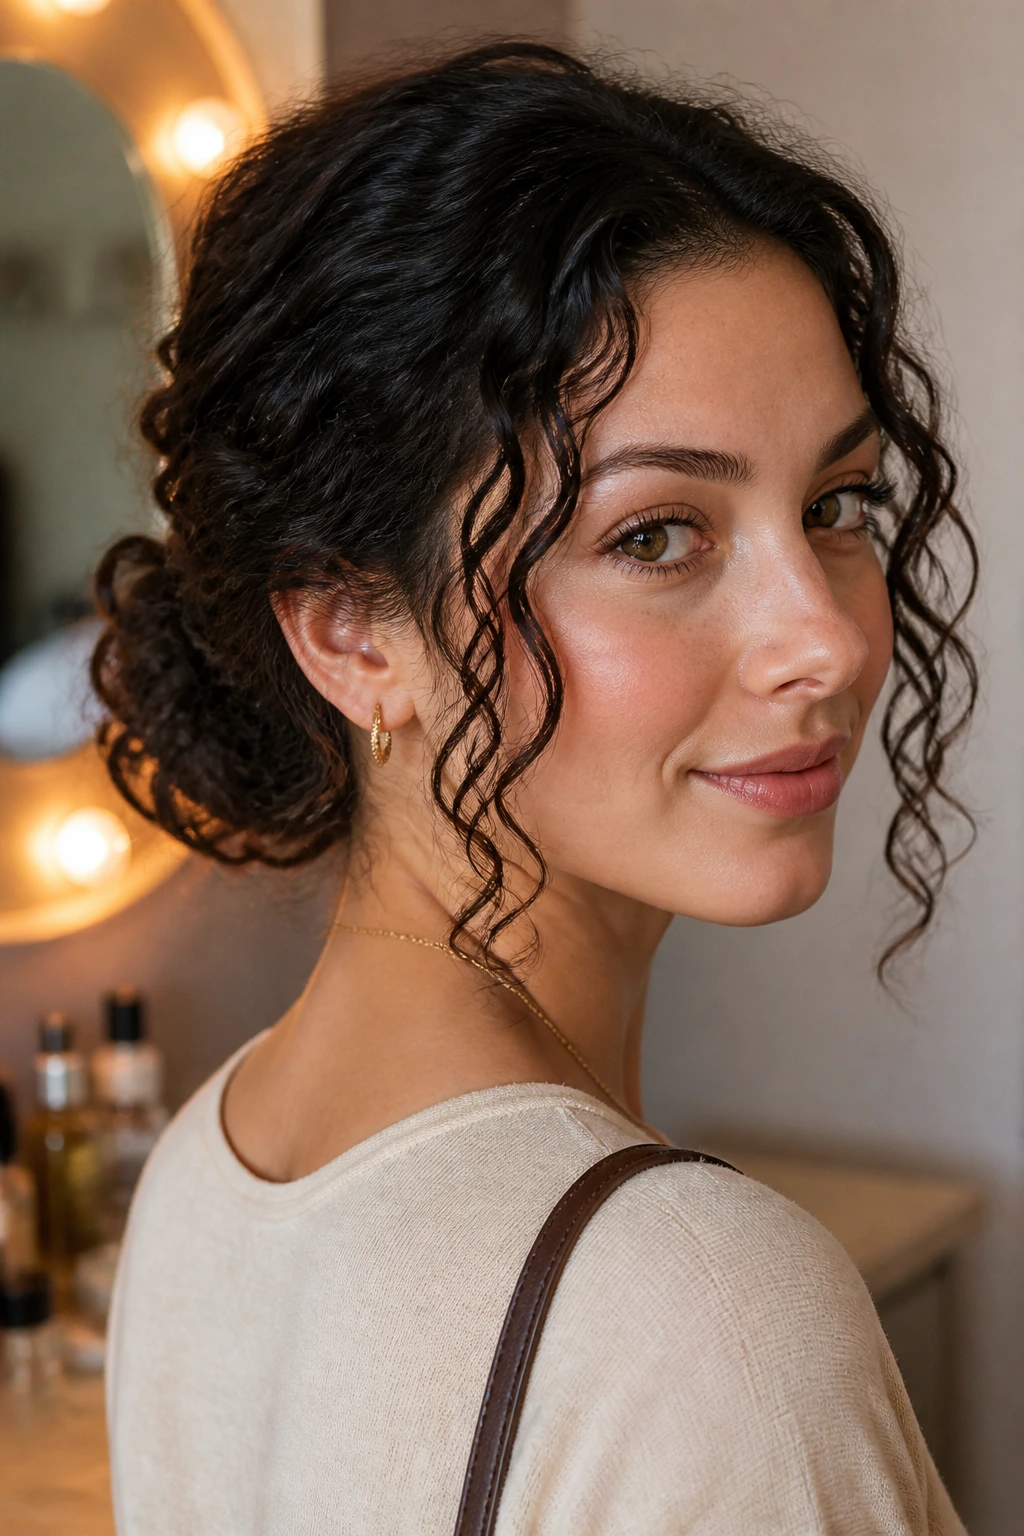
19. Low Chignon with Tendril Slices
A chignon can feel old-fashioned if every piece is tucked away, so leave out several slim tendrils around the face and neck. Gather the rest low, twist it into a compact knot, and secure it with pins hidden under the curl mass. Then let the tendrils do the softening.
The tendril slices are what bring in the beachy note. They should look like they fell out on purpose, not like you forgot to pin them. If the curls are too tight, stretch just the front bits with your fingers after adding a drop of serum. That gives the edges a gentler bend.
This is a strong choice for dressier settings, but it doesn’t feel rigid because the curls around the face keep it from turning into a hard updo. A little softness changes everything.
20. Messy Top Knot with Curly Cascade
A top knot on curly hair should never be packed so tightly that it erases the texture. Leave a thick section loose enough to form a knot, then allow the ends to spill out in a curly cascade. The shape should sit high, but not be so tight that the crown goes flat.
This is a smart style for hair that has too much volume to leave down all day. It gets the length out of the way and leaves enough curl outside the knot to keep the style from feeling severe. A few pins under the knot help it stay put without needing an elastic that pulls too hard.
If you want more shape, pull out a few curls from the sides and let them frame the face. That small move makes the knot feel softer and less “gym hair,” which is usually the line people are trying not to cross.
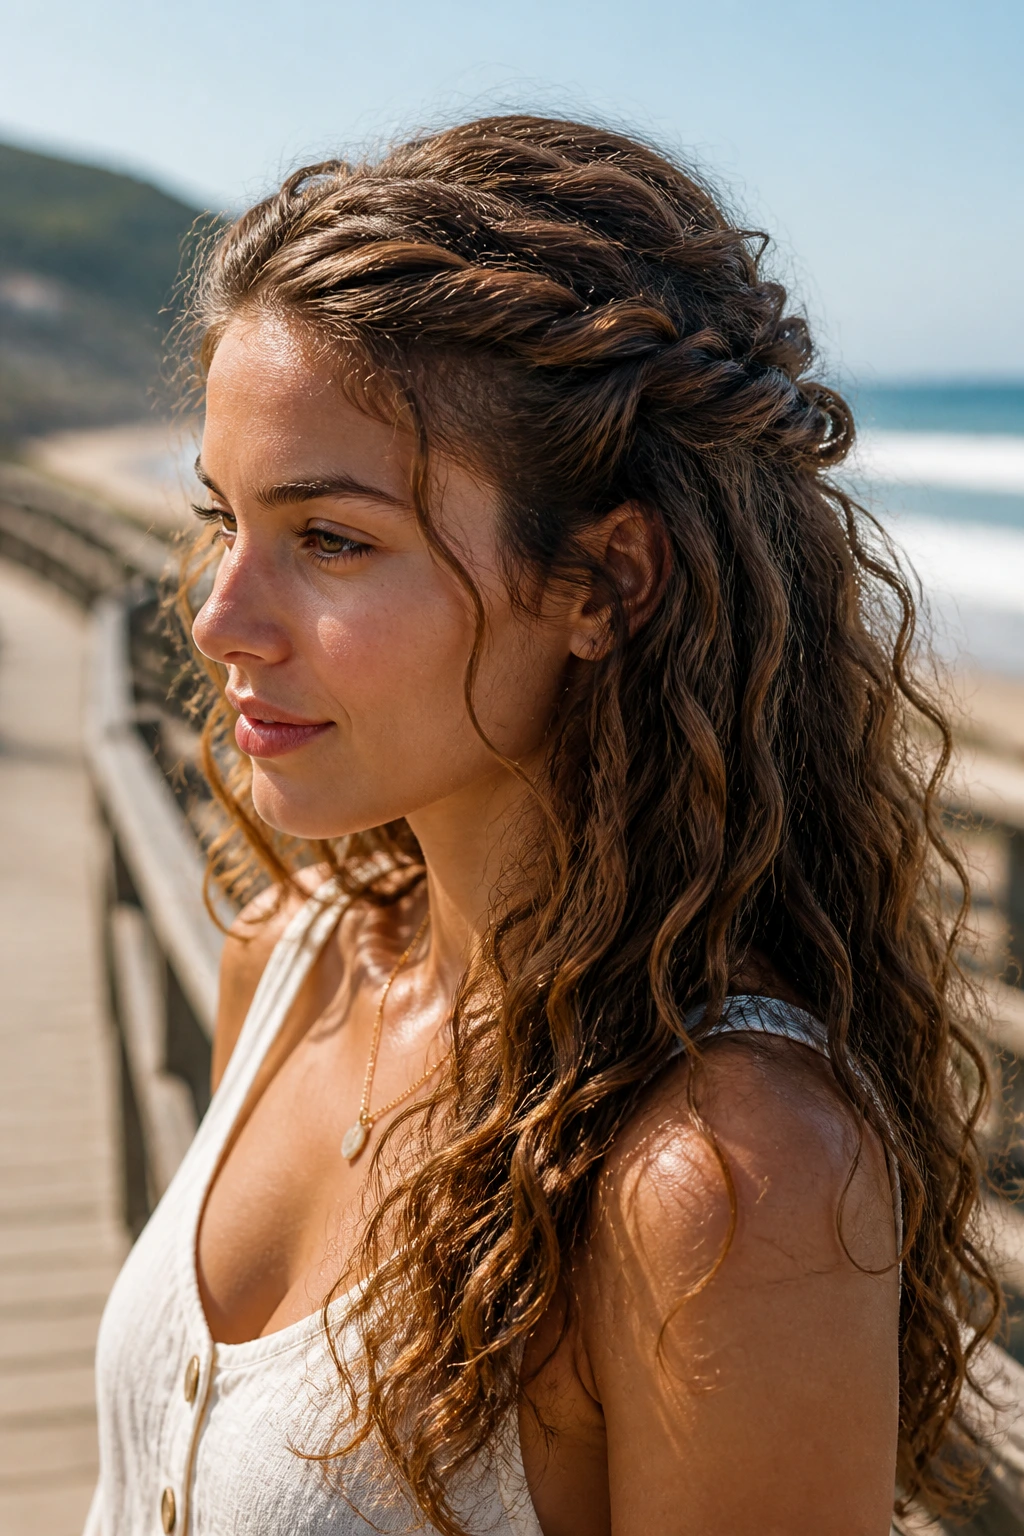
21. Mermaid Braid on Stretchy Waves
A mermaid braid is a loose, dramatic braid that works best when curly hair has been stretched a little, either with a blow-dry, twist-out, or overnight braid-out. The braid holds the length while the outer pieces stay soft and wavey, which gives the whole style that half-sea-goddess, half-real-life energy people like.
The braid itself should be loose enough that the texture still shows. Pull the sections apart gently after securing them so it looks fuller. If your hair is very dense, braid only the top portion and let the ends stay loose. That keeps the braid from becoming a heavy rope.
This style is especially good when you want the hair to feel contained without looking flat. It’s one of the few braid styles that actually gets better when the texture is a little imperfect.
22. Finger-Coiled Pixie with Side Sweep
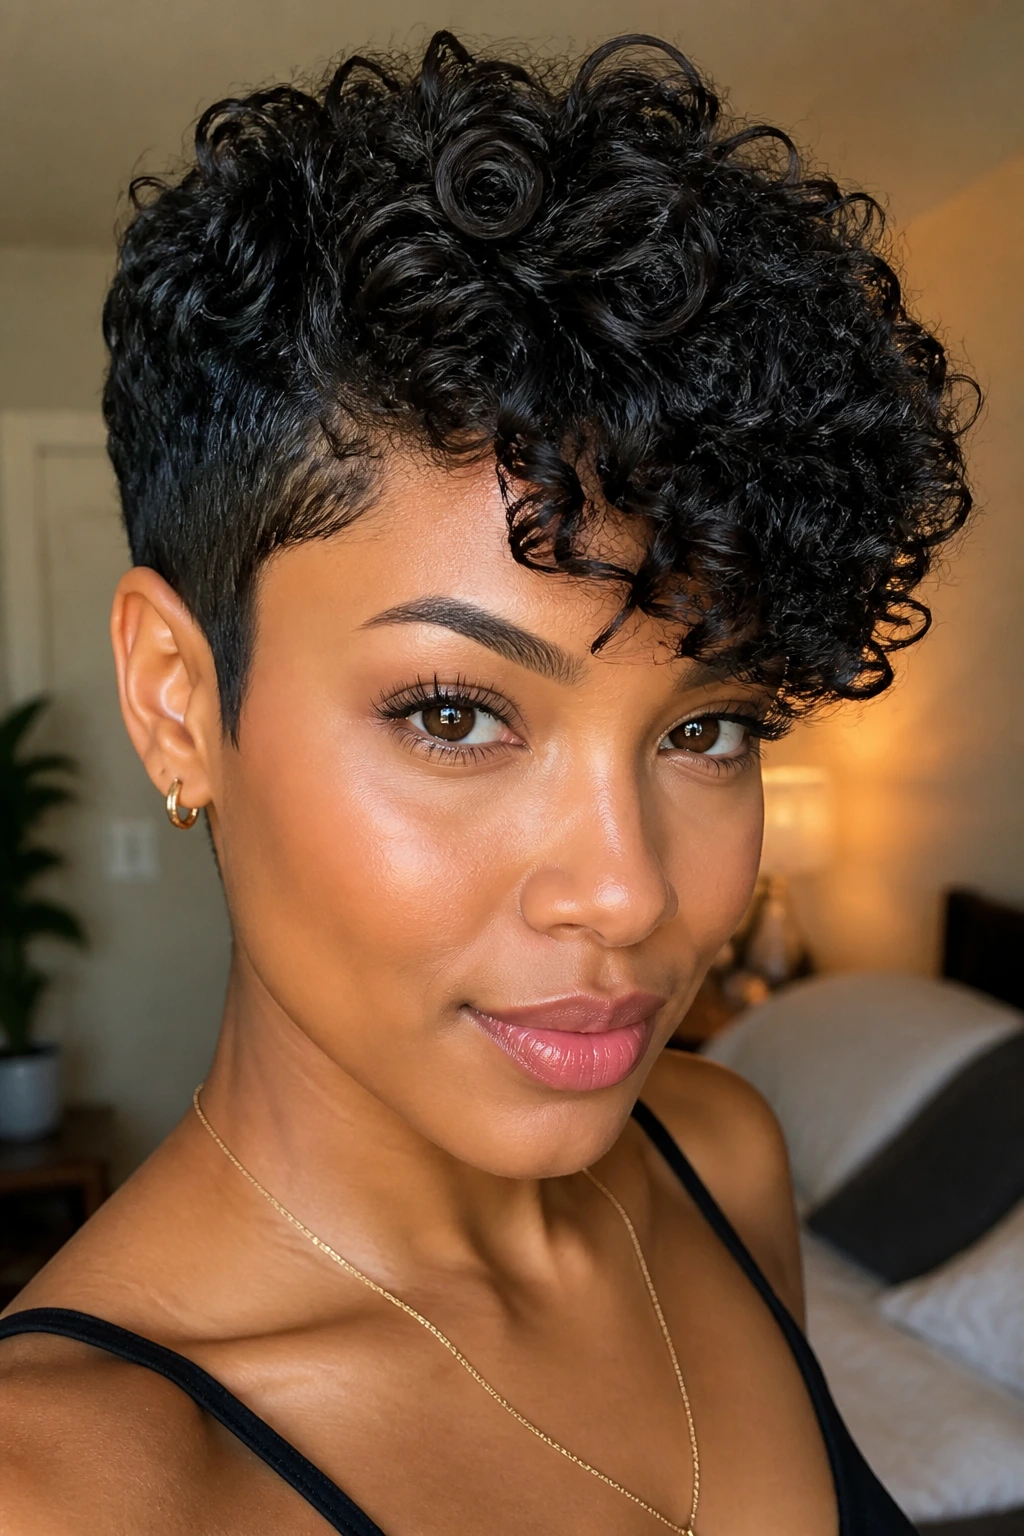
A curly pixie can still read beachy if the coils are defined and the front is swept to one side. Finger-coil the longer top pieces with a dab of gel, let them dry, then lift them slightly at the root and sweep the front section across the forehead or temple. The shape becomes soft, structured, and a little glossy.
The beauty of this cut is that it doesn’t need length to make a statement. Definition matters more here than volume. If the coils are too compact, separate just the ends with your fingertips so they don’t look like tiny helmets. You want movement on top and clean edges around the ears and neck.
This one is for people who want texture to stay visible all the way down to the shortest haircuts. No pretending it’s long. No pretending it isn’t curly. Good.
23. Old-Hollywood Side Set for Curly Hair
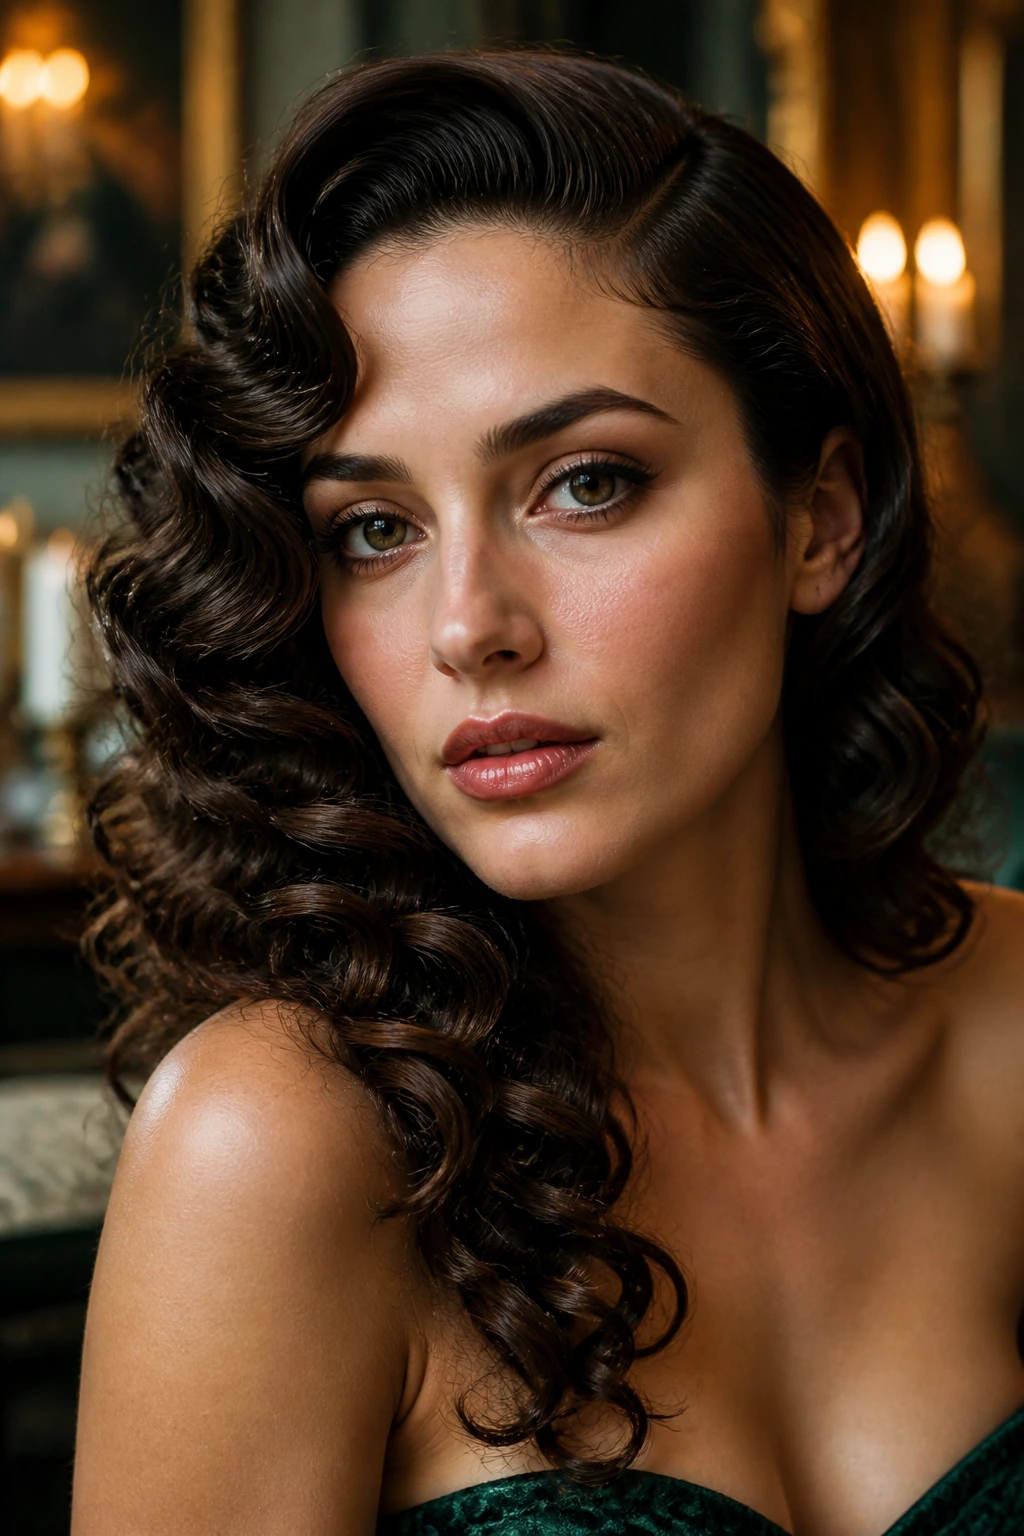
An Old-Hollywood side set on curly hair starts with a deep side part and a smooth direction through the front, then lets the rest fall in glossy waves. The shape is more sculpted than the others here, but the wave pattern still stays soft enough to count as beachy. Think controlled movement, not tight curls.
The style works best when the front is clipped while drying so the hair learns the bend you want. Once the section is set, release it and brush only the surface lightly if needed. On curls that hold shape well, you may not need a brush at all. Fingers can do more than people think.
This is a good choice when you want curly hair to look elegant without losing texture. It’s still your hair. It just happens to be behaving nicely for an hour or two.
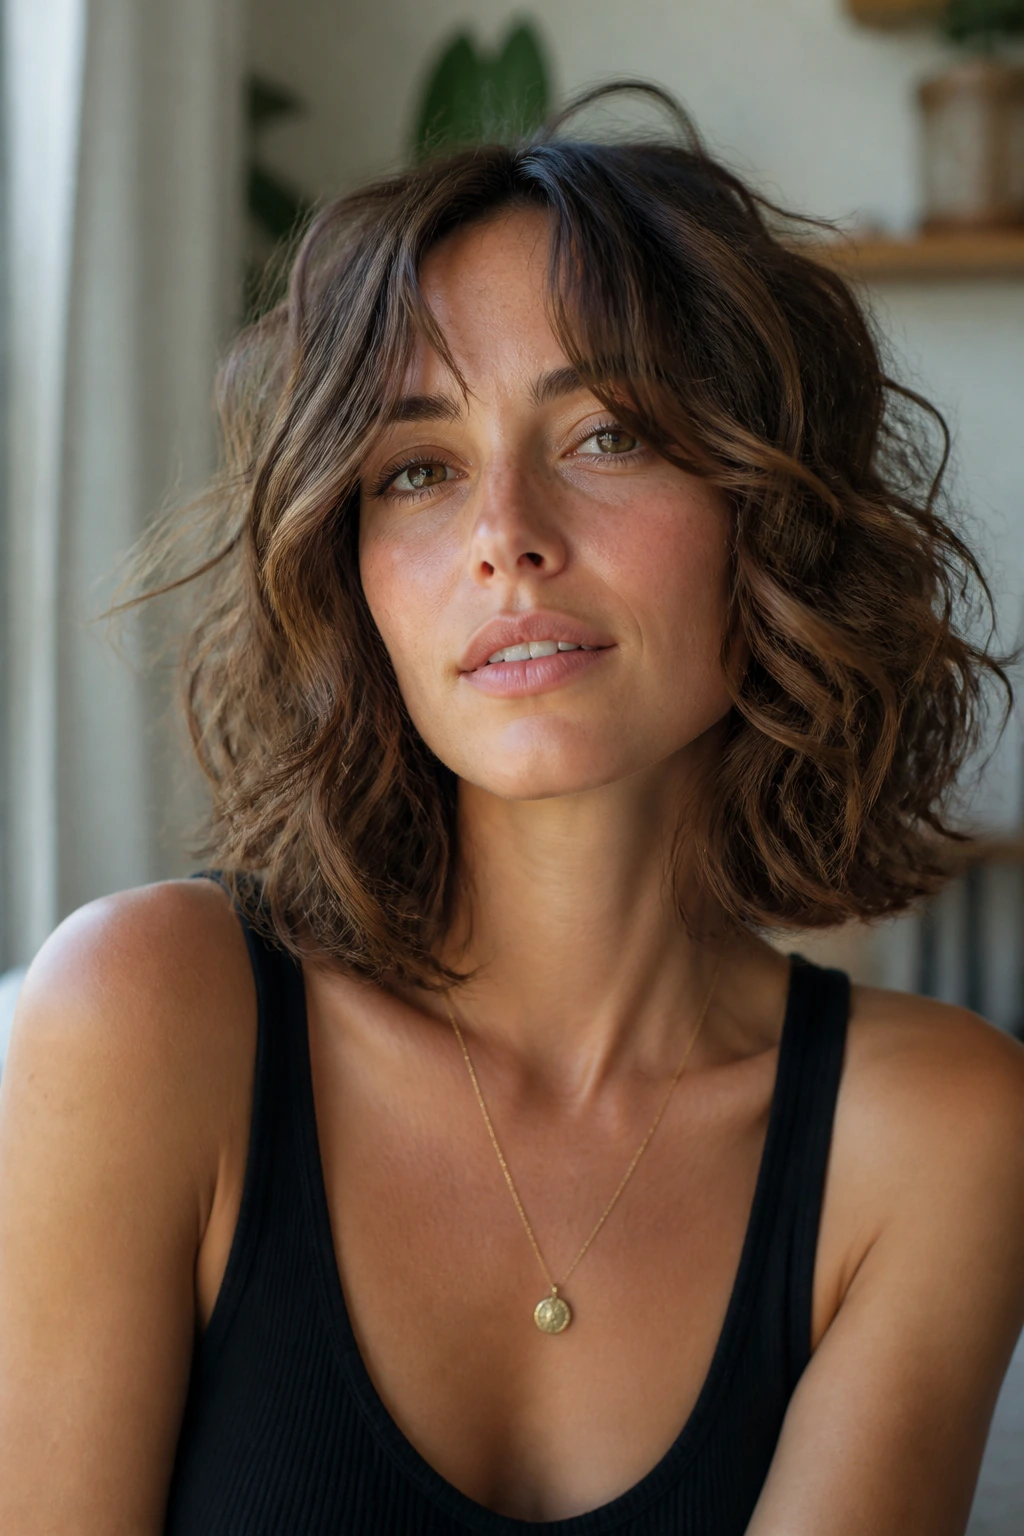
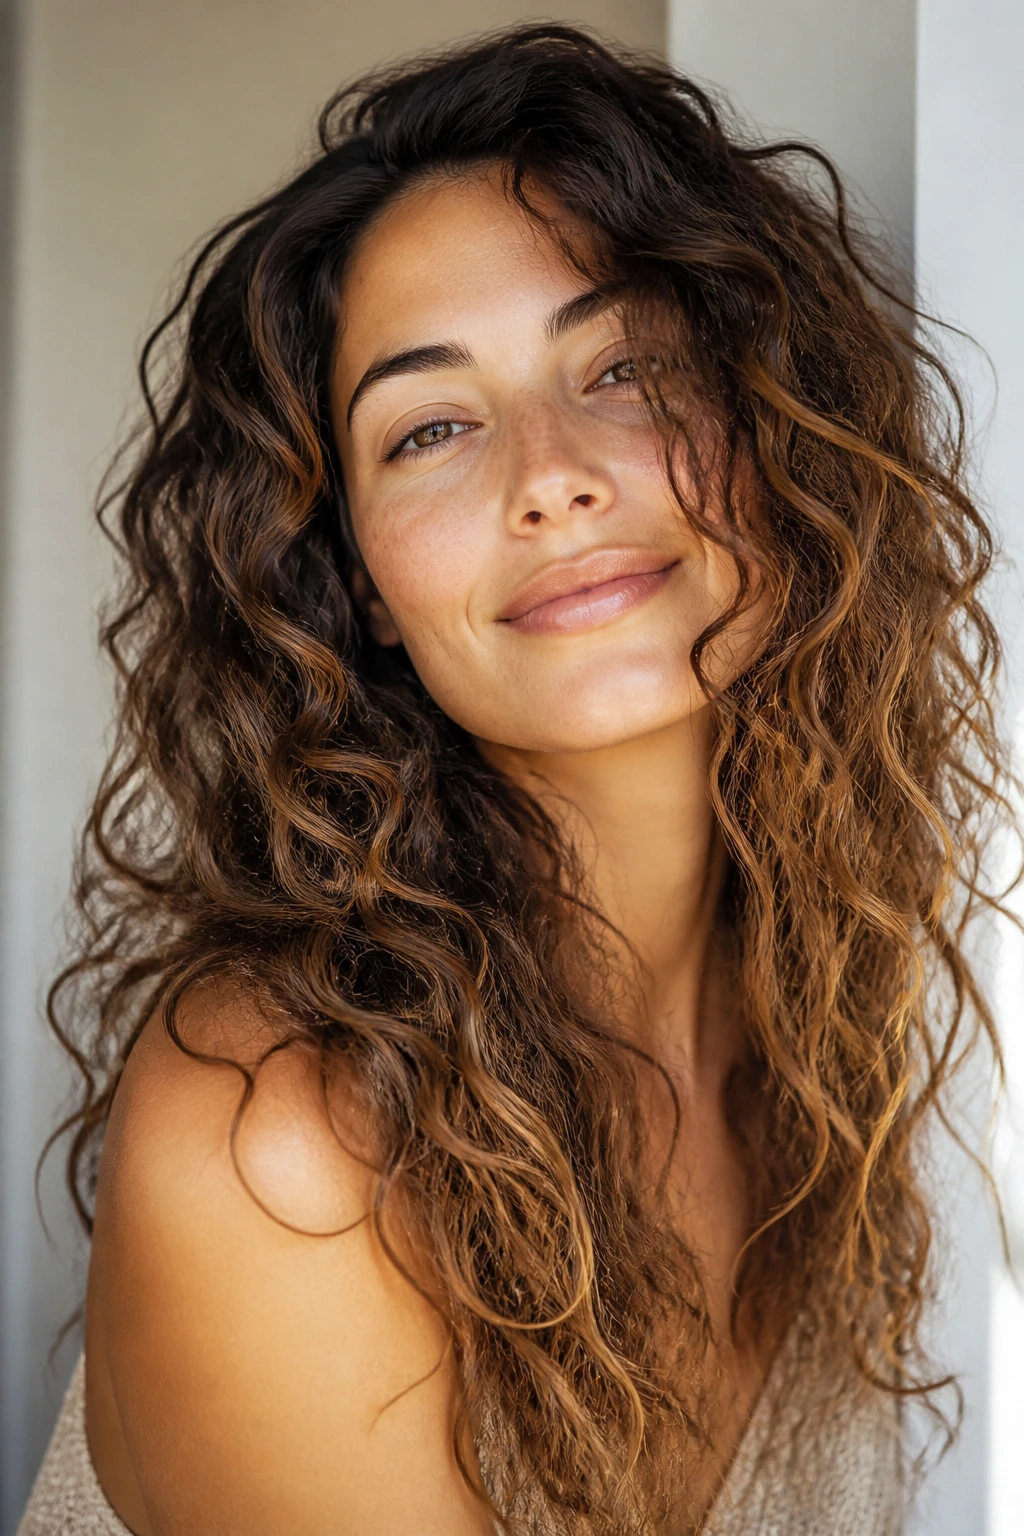
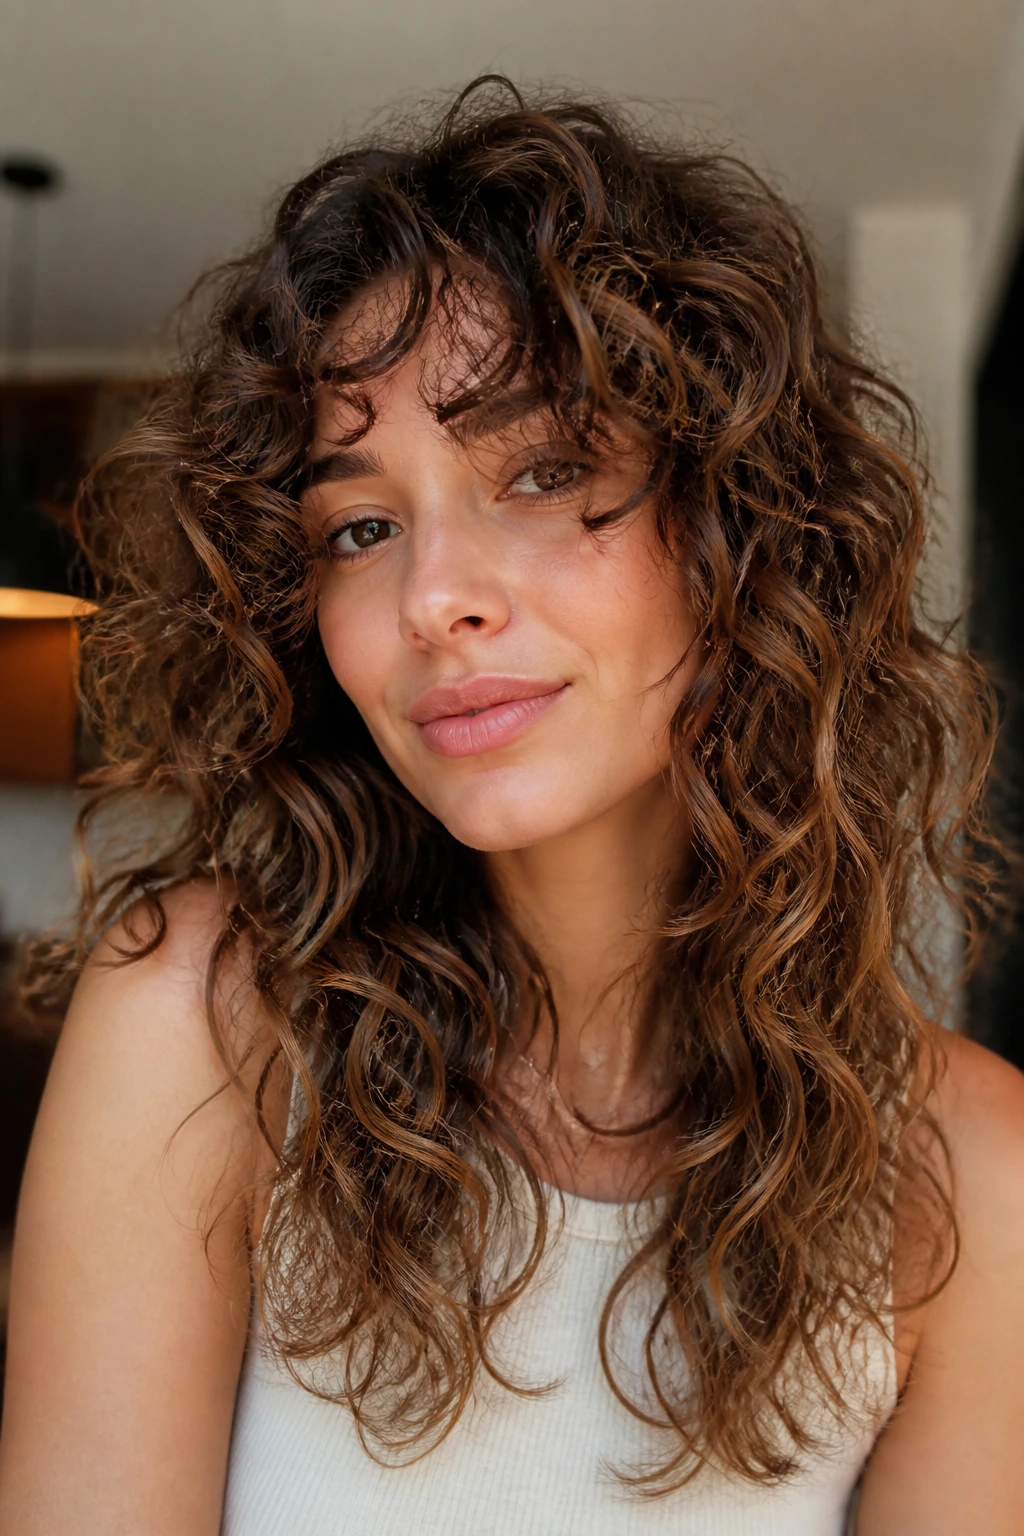
24. Air-Dried Long Layers with Glossy Definition
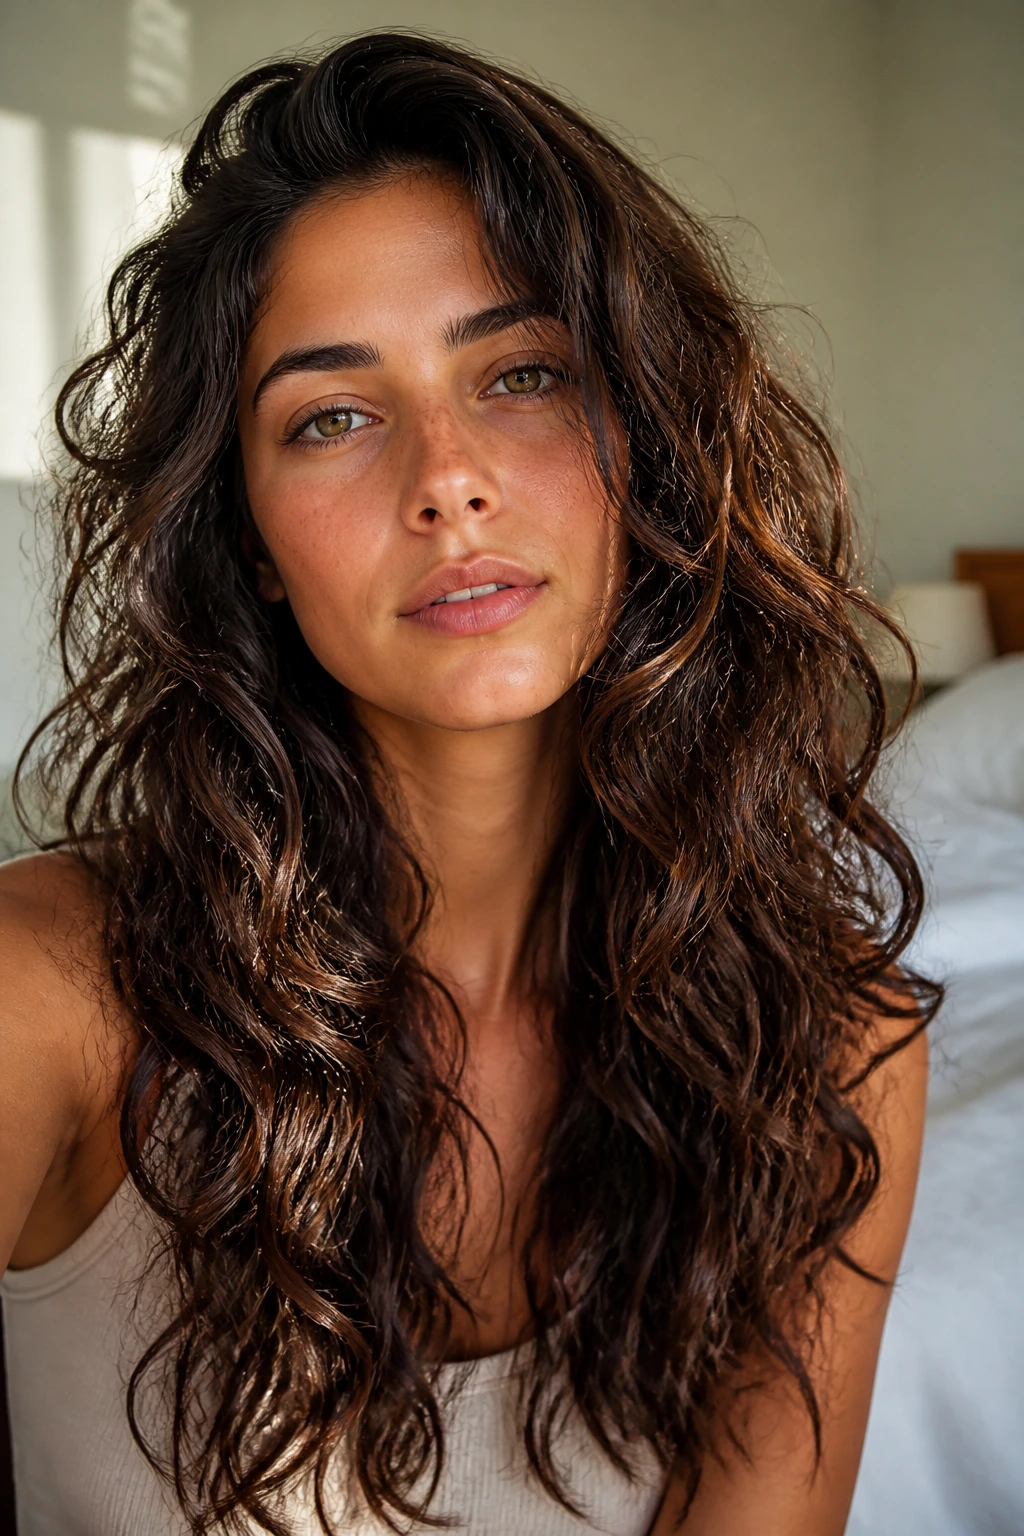
Long layers change everything. They stop heavy curly hair from hanging in one large sheet and give the wave pattern room to separate. Air-dry with a leave-in, then use a gel or mousse that keeps the mid-lengths from puffing while the ends dry into soft ribbons.
The real trick here is restraint while drying. Don’t keep touching the hair to “help” it. Once the product is in, scrunch once, shape the part, and leave it alone until it’s dry enough to handle. If the hair needs a little more shine, smooth a drop of lightweight oil over the outer layer only.
This style is the closest thing to natural beachy waves on curly hair without trying to fake a straight-hair wave pattern. The length moves. The layers separate. The texture stays honest.
25. Twist-Out with Beachy Separation
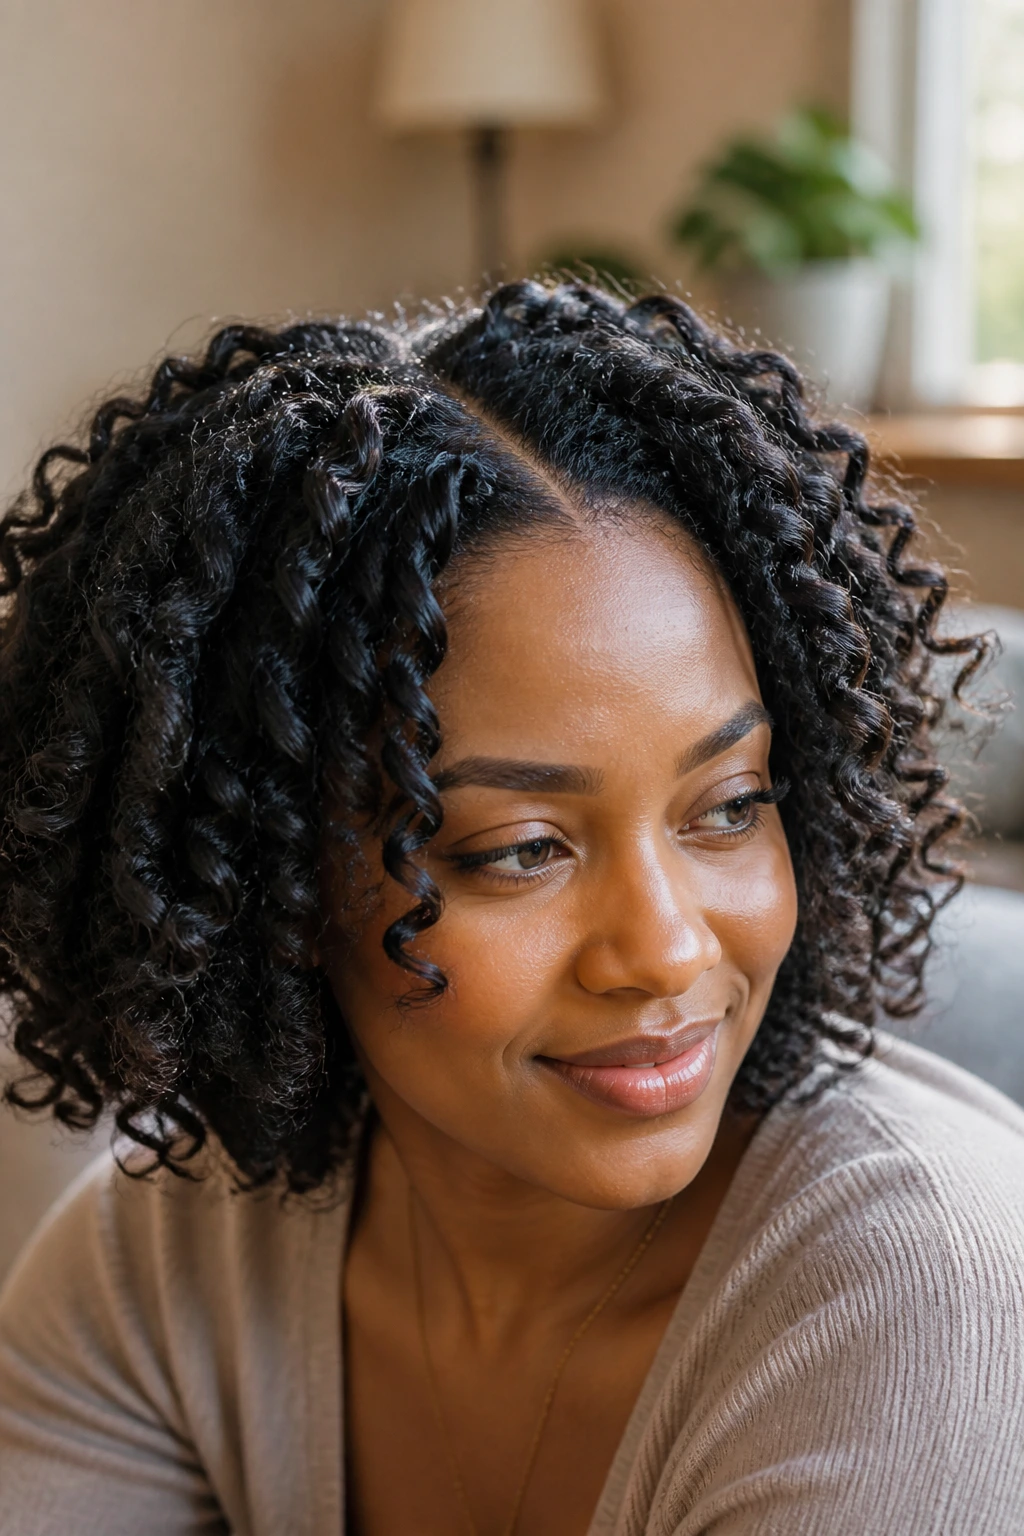
A twist-out is one of the best ways to get soft, defined waves on curly hair without heat. Twist damp sections at night or after a wash, let them dry fully, then separate the twists carefully so the resulting wave pattern stays clean and elongated. The ends should fall in loose bends, not frizz into a halo.
This style gives you definition with real texture, which is why it belongs at the end of the list and not as a side note. Use smaller twists for more definition and larger ones for a looser beachy shape. If you want more separation, coat the hands with a tiny bit of oil before untwisting so the strands slide apart instead of snagging.
It’s a strong fallback when your hair needs a reset. No hot tools. No wrestling. Just a shape that looks like you planned it the night before.
Why Curly Hair Looks Beachier When You Keep the Shape Loose
Curly hair turns beachy when it keeps enough structure to read as a style, but not so much that it looks carved. That balance is easier to hit when you work with the curl clumps instead of separating every strand. The clumps catch light in a softer way, the ends stay movable, and the whole shape feels less stiff around the face.
A lot of people try to make curly hair look like straight hair with a wave in it. That’s the wrong target. Curly hair looks best when the part, the lift, and the finish all come from the curl pattern itself. A side part can open the face. A clip can raise the crown. A braid can quiet the front section without killing the texture underneath. Simple moves. Big change.
Humidity matters here, too. When hair has enough hold at the root and enough slip through the lengths, it resists that swollen, fuzzy look that can happen after drying. So the styles that hold their line tend to look beachier for longer. That’s not magic. It’s just shape.
Essential Tools for These Styles
-
Wide-tooth comb: Use it on wet hair only if you need to distribute product without breaking up the curl clumps.
-
Duckbill or sectioning clips: These hold the crown, sides, or front pieces while you dry them into the shape you want.
-
Satin scrunchies: They grip without carving a hard dent into curls, which matters on ponytails, puffs, and pineapples.
-
Claw clip: A medium or large clip can anchor half-up styles and low twists without crushing the ends.
-
Microfiber towel or cotton T-shirt: Either one cuts down on frizz from rough towel drying and helps the curl pattern stay intact.
-
Spray bottle: Useful for refreshing the top layer, reactivating product, or re-wetting one section that dried too fast.
-
Diffuser attachment: Best on low heat and low speed. It helps set the shape without blasting the curls apart.
-
Bobby pins and small clear elastics: Keep a few on hand for braids, twists, and tucked styles; the small stuff matters.
-
Light gel, mousse, and leave-in cream: Those three cover most of these looks. The right combo depends on how fine or dense your curls are.
Product and Cut Choices That Change the Outcome
The product stack matters more than the label on the bottle. Fine curly hair usually needs less cream and more mousse or light gel, because heavy butters sit on the surface and drag the roots down. Coarser curls usually want a leave-in for slip, then a gel on top to keep the definition from unraveling by noon.
If your waves collapse at the crown, look for hold near the root first, not just softness on the ends. If the length frizzes while the top stays neat, the product is probably too light for the mid-lengths. That’s a common mismatch. People blame the haircut when the real issue is that the ends never got enough control.
A good curly cut changes the whole story. Long layers help loose waves move. A shag breaks up bulk. Curtain bangs can keep the face from disappearing into the hair. A blunt one-length cut can still work, but it usually asks for more intentional styling because the weight piles up faster. Pick the cut that matches how much effort you actually want to give it on a weekday morning.
How to Wear These Styles Without Fighting Your Curls
Face Framing: Keep a few front pieces visible in almost every style. Curly hair looks softer when the face isn’t buried under one heavy sheet of texture, and those pieces also make beachy waves feel intentional rather than unfinished.
Accessories: Medium claw clips, slim scarves, satin scrunchies, and one good barrette can change the whole mood of a look. Don’t stack too many at once unless you want the style to lean busy. One clean accessory is enough most of the time.
Outfit Match: Loose collars, open necklines, and earrings that move a little tend to fit these styles better than stiff neck-high pieces. The hair already has texture and volume; let the rest of the outfit leave some space around it.
Best Settings: Wear the tighter updos and clipped styles when you need the hair controlled for work, travel, or a damp day. Save the open, airy versions for when the curl pattern is fresh and you want the texture to show.
Small Styling Tweaks That Make the Biggest Difference
Root Lift: Clip the roots at the crown for 10 to 15 minutes while the hair is drying. That one step keeps the top from lying flat against the scalp and gives beachy waves the lift they need.
Shape Memory: Set your part while the hair is still damp. Curly hair remembers the shape better then, and the finished style won’t fight you as much when you take the clips out.
Finish Control: Once the hair is dry, break the cast with clean hands and a tiny drop of oil or serum. Don’t rub. Just press and scrunch lightly so the curl clumps stay intact.
Humidity Shield: If the air is heavy, mist the outer layer with a light anti-frizz spray or smooth a pea-size amount of serum over the top half only. The inner layers need movement; the outer layer needs control.
Speed Trick: Diffuse for just long enough to set the shape, then stop and let the hair finish drying on its own. Full-on blasting can rough up the surface and make the style look broader than you planned.
Nighttime Care and Day-Two Refresh
Most of these styles hold best for one full day with minimal fuss, and some of the updos or braids can stay presentable for two to three days if you protect them at night. The difference usually comes down to friction. Cotton pillowcases rough up curls. Satin or silk keeps the surface smoother and helps the shape stay readable longer.
For loose styles, pineapple the hair on top of the head with a soft scrunchie or tuck it into a satin bonnet. If the curls are shorter, a loose scarf tied around the hairline can keep the front from flattening. In the morning, refresh only the pieces that lost shape. A spray bottle with water and a few drops of leave-in is enough for most wave patterns; don’t soak the hair unless you want to start over.
Braids, twists, and clipped-up styles last longer if you avoid pulling at them during the day. Sounds obvious. People still do it. If a section starts to fray, smooth the outer layer with damp fingers and leave the curl clumps alone underneath. That usually fixes 80 percent of the problem without a full wash.
Variations and Adaptations to Try

Fine-Curl Soft Lift: Use mousse instead of heavy cream and clip the roots while drying. Fine curls need shape without weight, and this swap keeps the top from falling flat by lunchtime.
Thick-Curl Cloud Control: Apply leave-in in sections, then seal with gel and dry in a diffuser. Dense curls need more product distribution, not more product dumped on top all at once.
Humidity-Heavy Day Mode: Choose braids, twists, or a low bun with face-framing pieces. Open styles can swell fast in damp air, while controlled shapes keep the outline cleaner for longer.
Short-Hair Shortcut: Favor side parts, mini braids, clips, and finger coils. Short curls need direction more than length, so tiny adjustments carry more weight than a big style change.
Protective Weekend Version: Use flat twists, scarf wraps, or a low tucked bun. You still get a styled look, but the ends stay protected and the curls get a break from daily friction.
Heatless Overnight Version: Set waves with two-strand twists, braids, or flexi rods before bed. In the morning, separate gently and stop before the pattern turns fluffy. Less touching, better shape.
Common Mistakes That Flatten or Frizz the Style
Overbrushing dry curls: The hair turns bigger, not smoother. If you need to separate curls, do it with oiled fingers after the style is fully dry.
Loading heavy cream at the root: That’s how the crown collapses. Keep richer products through the mid-lengths and ends, then use lighter hold near the scalp.
Separating too early: If you take apart curls before they’re dry, they lose shape and puff. Wait until the hair feels cool and dry all the way through.
Tight elastics and over-pinning: Both leave dents that look harsh on curly hair. Use satin ties, pin from underneath, and spread tension across a wider area.
Ignoring the haircut shape: Product can help, but it cannot fix a cut that fights your texture. If the silhouette always looks wide or bottom-heavy, the layers may need adjustment.
Sleeping on it bare: Cotton eats definition. Satin, silk, or a bonnet protects the style and cuts down on the morning frizz halo.
Frequently Asked Questions
What curl types do these beachy styles work best on?
Most of them work on 2B through 4A curls, but the styling approach changes. Looser curls usually need less product and more shape control, while tighter curls often need stretch, sectioning, and stronger hold at the ends.
Can I do these styles on second-day hair?
Yes, and some of them are better that way. Second-day hair usually has less slip at the roots, which makes clips, twists, and braids hold better without sliding.
What if my hair gets frizzy as soon as I touch it?
That usually means the style is being handled too early or the product hold is too weak. Let it dry completely, then scrunch with a small amount of oil or use a light serum only on the outer layer.
Do I need heat to make curly hair look like beachy waves?
No. Heat can help shape the front or the ends, but braids, twists, diffusing, and proper product layering can build the same loose, defined finish without frying the curl pattern.
Which style is best for humid weather?
Braided crowns, low buns, twists, and clipped-back styles hold up best because they keep the shape controlled. Loose wash-and-gos can still work, but they usually need stronger hold and less touching.
How do I keep the front pieces from puffing up?
Set them with gel or mousse while damp, then clip them in place until they dry. If they still swell, smooth them with damp fingers instead of adding more and more product.
What should I do if my curls look flat at the crown?
Clip the roots while drying, switch your part, or try a half-up style that lifts the top section. The crown usually needs support more than the ends do.
Can these styles work on short curly hair?
Absolutely. Short curls often look best with side sweeps, mini braids, clips, and finger-coiled pieces because those moves create shape without needing length.
A Style That Still Looks Like Your Hair

The best beachy styles for curly hair don’t hide the texture. They arrange it. That’s the difference between a look that feels forced and one that feels like your curls happened to behave for you, which is always more convincing anyway.
Pick the style that solves the problem you actually have that day. Flat crown? Clip it. Heavy front? Braid it. Too much volume? Gather it low and leave a few pieces loose. Once you stop trying to make curly hair act like something else, the definition gets easier to see.
And that’s the part worth keeping. The cleanest looks here still have movement, frizz in the right places, and enough softness to feel lived-in. Start with the one that matches your length and curl pattern, then keep the rest of the routine simple.