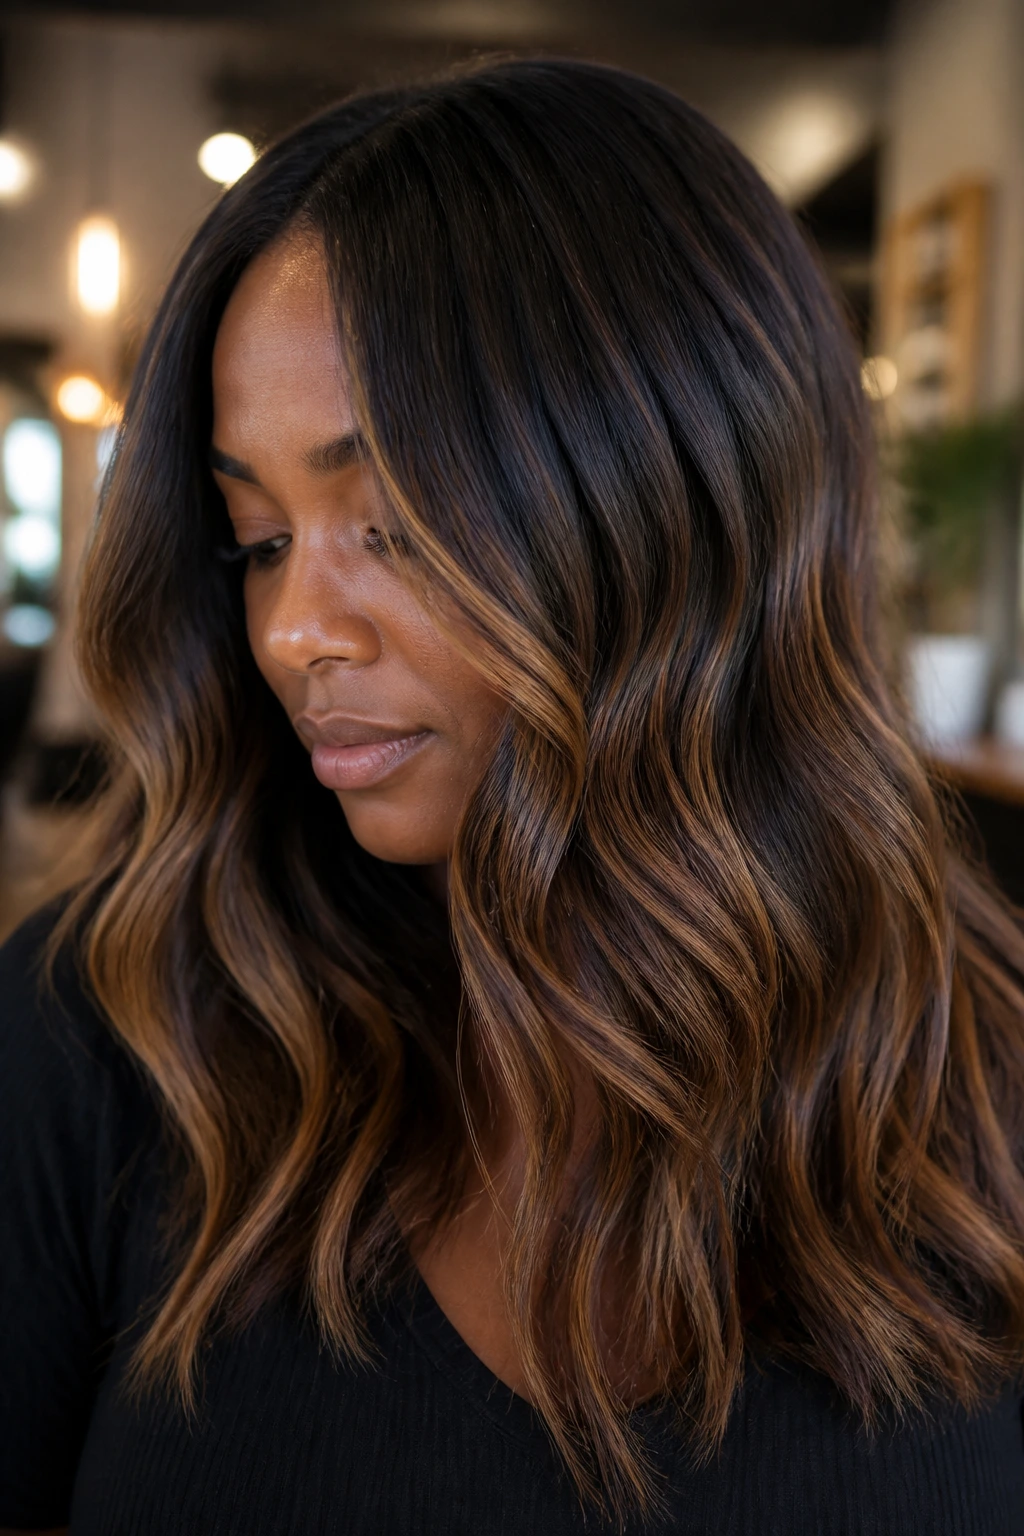
Dark brown caramel highlights can go wrong in two directions, and both are loud. Too pale, and the color sits on the hair like a chalk line. Too orange, and the whole head starts fighting the skin instead of flattering it.
The sweet spot is richer than people expect. Think brown sugar, toffee, toasted maple, a little amber at the edges — not blond, not coppery brass, not a stripe that looks pasted on in bright bathroom light. On deep skin tones, that darker caramel family does something smarter than a high-contrast blond streak ever could: it catches light without draining the richness out of the base.
That’s why this look keeps showing up in salons, on curls, on silk presses, on layered cuts that need a little movement, and on straight styles that need a touch of depth. The right caramel highlight does not scream for attention. It lifts. It bends with the haircut. It makes the hair look like it has been touched by warm indoor light even when you’ve done nothing dramatic at all.
Why Dark Brown Caramel Highlights Look So Good on Deep Skin
Warmth without washout: The best caramel shades live in the brunette family, so they keep enough brown in them to sit naturally against deep complexions. That matters. A highlight that is too pale can make the base look flat by comparison, while a toffee-brown ribbon keeps the whole head looking deliberate.
Dimension beats streaks: Deep hair color needs movement, not random brightness. Caramel placed through mid-lengths, ends, and face-framing sections creates that shifting effect you see when curls move or a blowout swings past the shoulder.
Undertones stay in the conversation: Golden, neutral, and even cool deep skin tones can wear caramel, but the shade has to be tuned. A warm undertone likes toasted honey and amber; a cooler undertone often looks better with mocha-caramel or smoked brown sugar rather than anything yellow.
Grow-out is kinder: Root shadow and balayage placement let the color soften as it grows. That is one reason dark brown caramel highlights stay wearable longer than bright blond foils on the same base.
The haircut matters more than people think: Layers, curls, and bends in the hair give the highlight somewhere to land. On a blunt cut with no movement, the same color can look louder and less expensive-looking. On textured hair, it can look painted in the best possible way.
Why This Collection Is Different

-
Placement gets as much attention as shade: Some of these looks use thin ribbons, others use chunky face pieces, and others hide caramel under the top layer so the color only flashes when the hair moves.
-
Deep skin is treated like the starting point, not an afterthought: These ideas are built around how caramel behaves against deeper complexions, which means the tones stay rich instead of drifting into flat blond territory.
-
Low-maintenance and high-drama options both show up: If you want a subtle glow, there are babylights and veils. If you want the room to notice your hair when you walk in, there are money pieces and chunkier slices.
-
Curly, coily, wavy, and straight textures all get a lane: The placement changes depending on how your hair falls, because a highlight that looks soft on a silk press can read very differently on a twist-out.
-
The color stories stay in the brunette family: Brown sugar, chestnut, maple, toast, amber, and smoky caramel all show up here. That keeps the palette believable on deep skin instead of veering into costume territory.
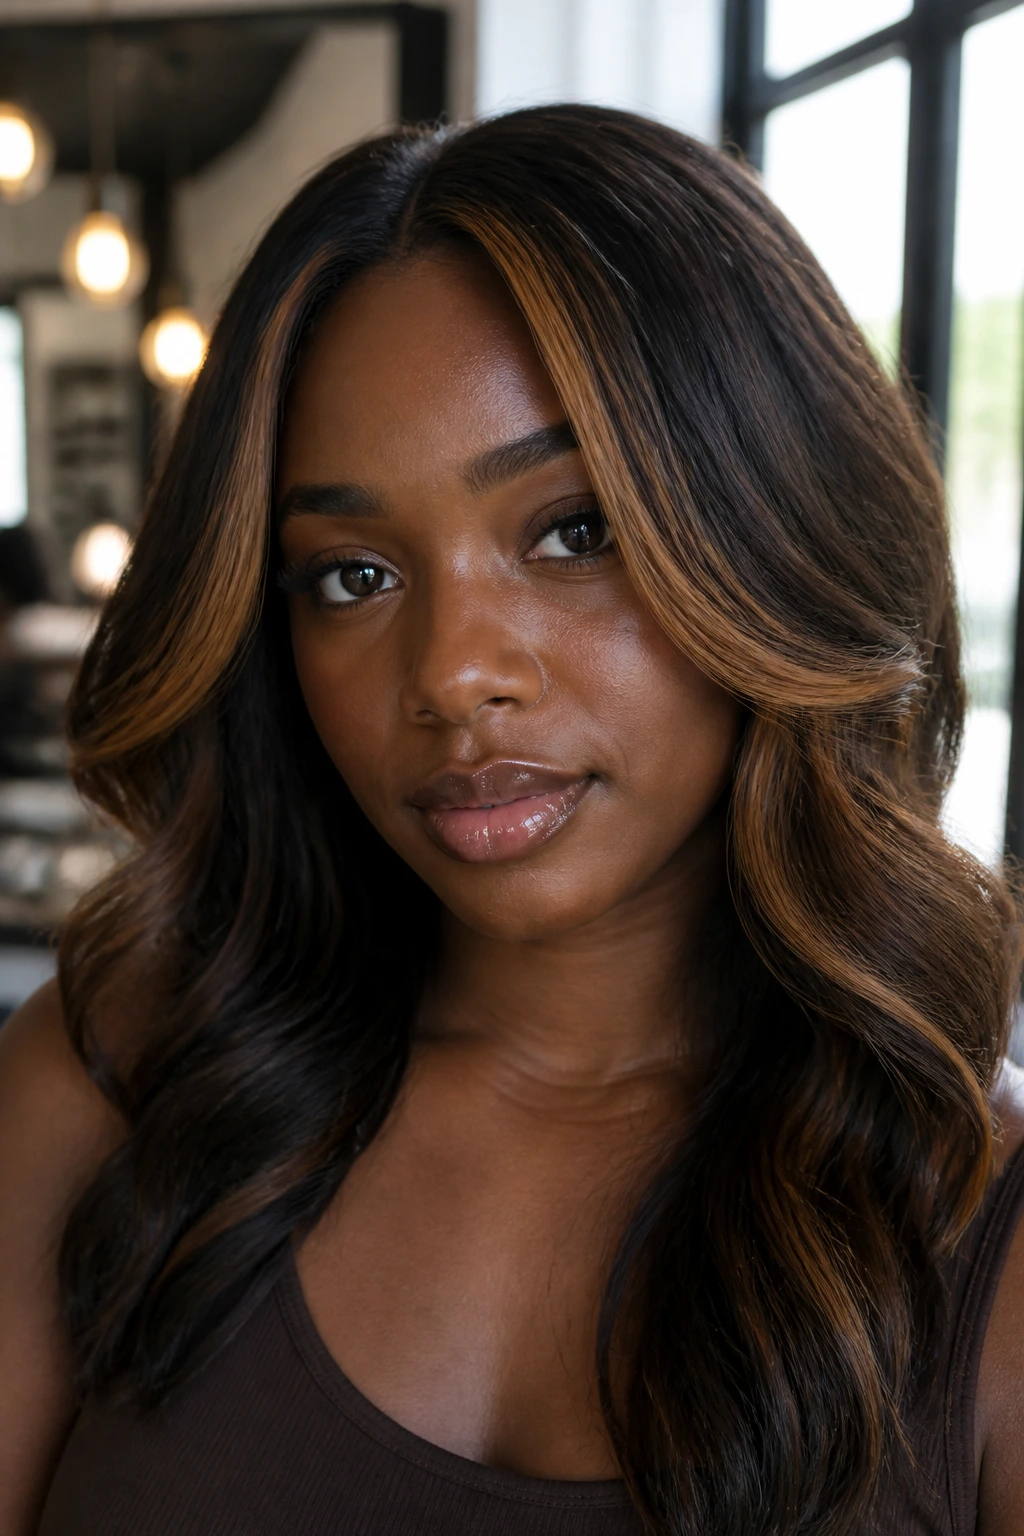
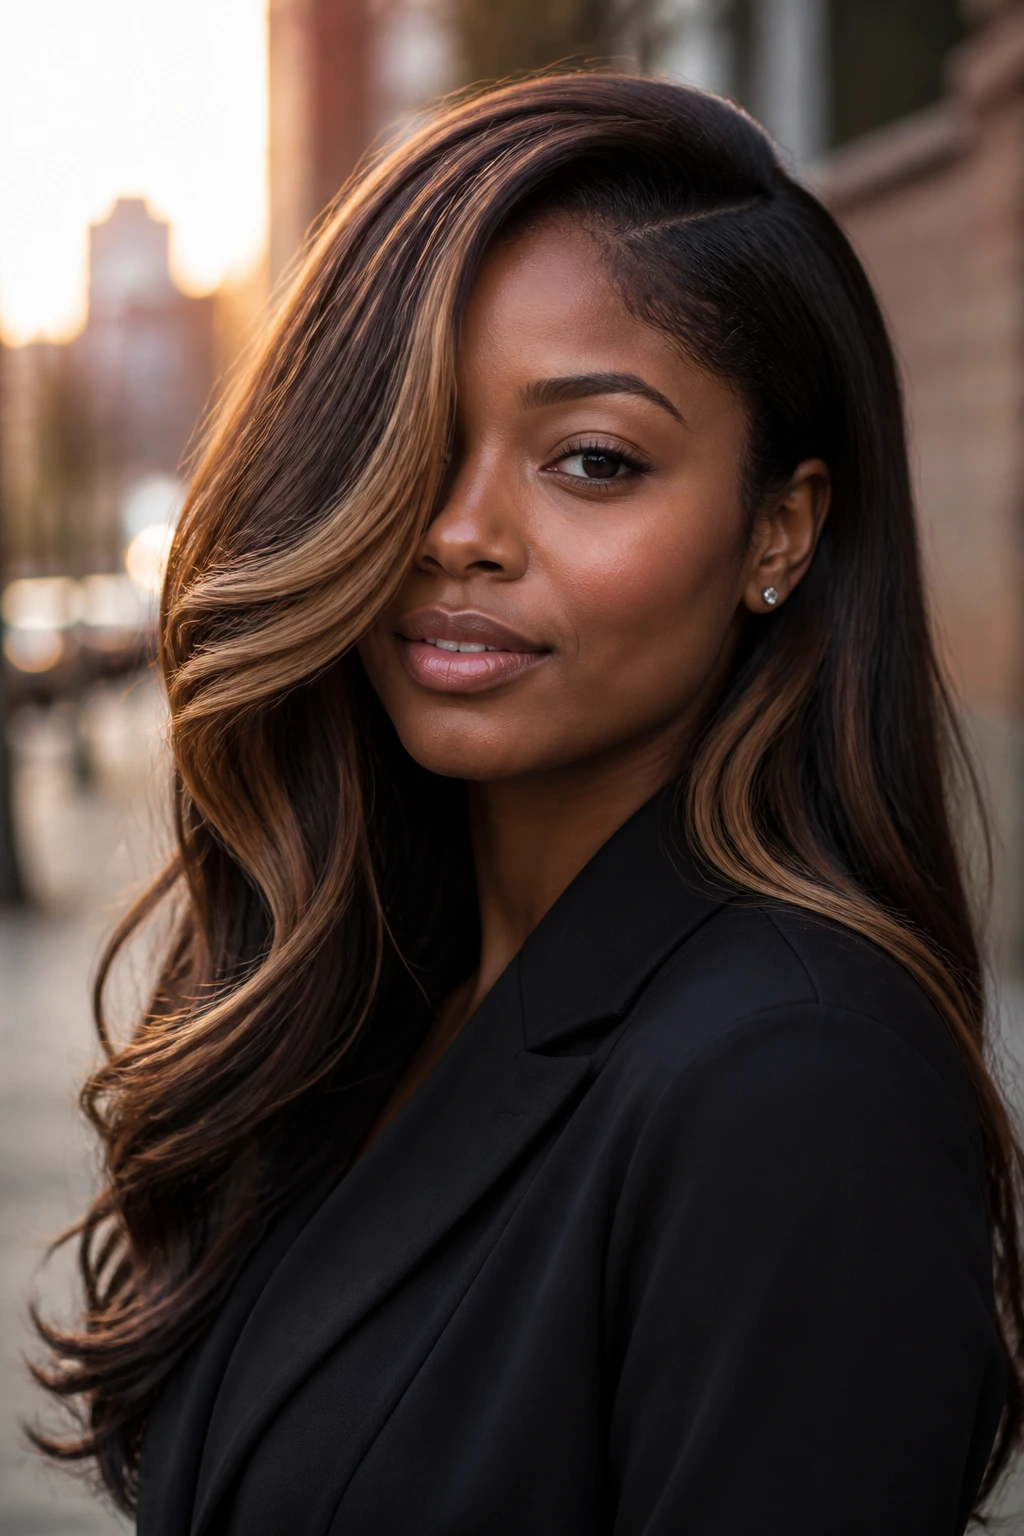
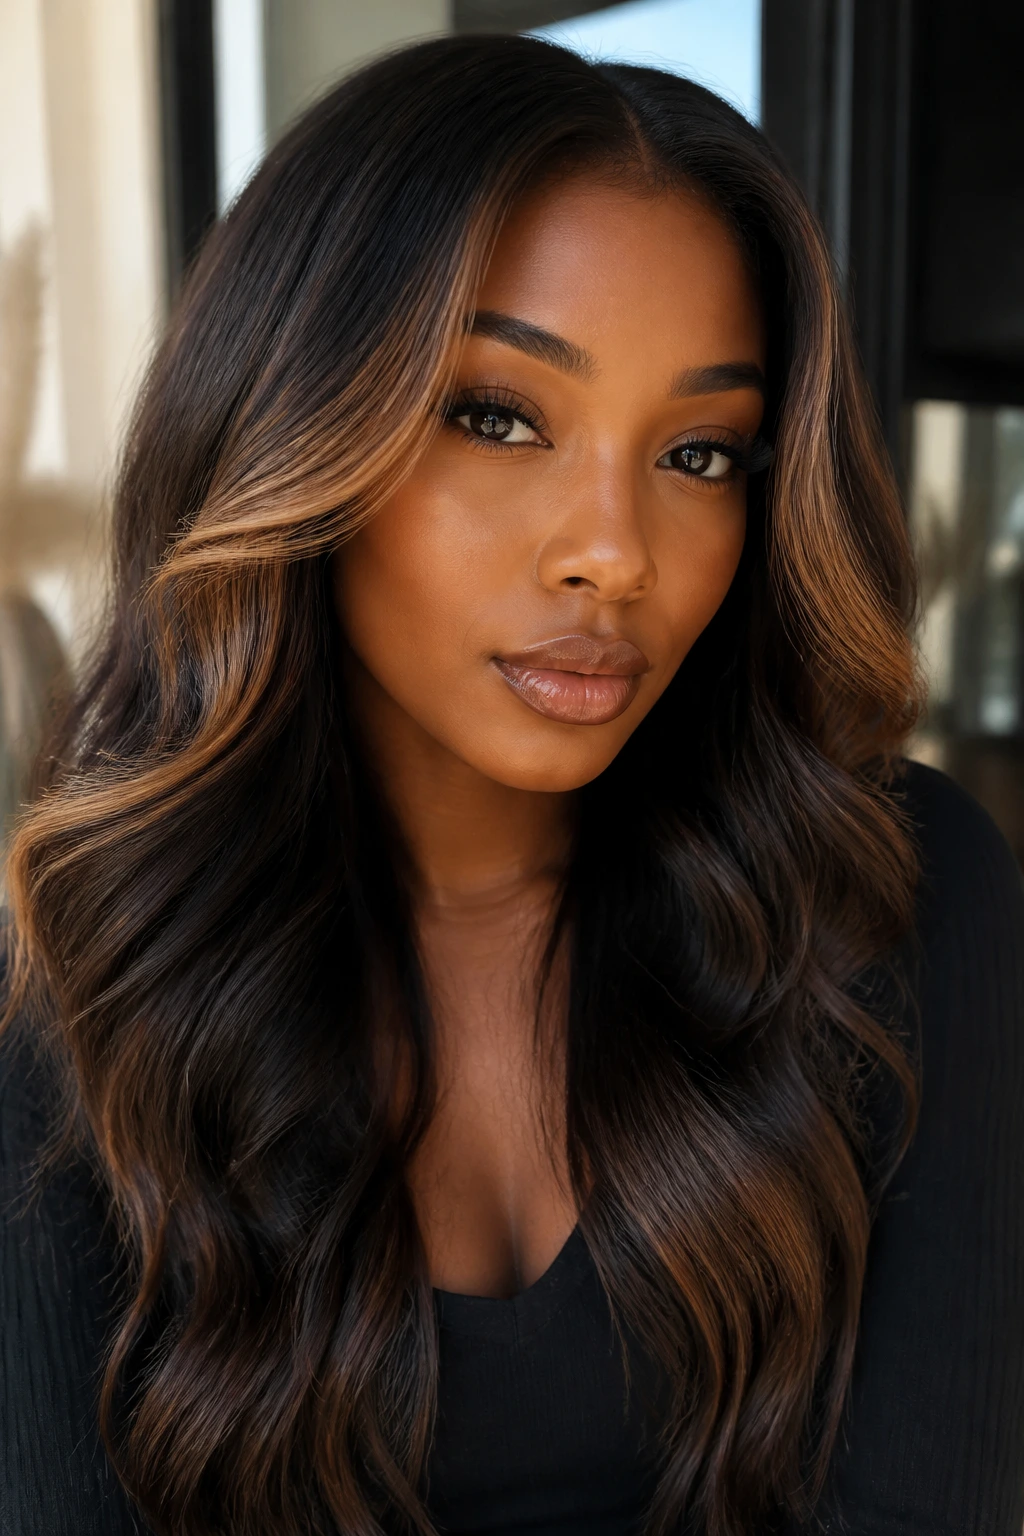
1. Honey-Frame Face Lights
A few thin caramel ribbons around the face can change the whole mood of dark brown hair. They wake up the cheek area, brighten the eyes, and keep the rest of the head deep and glossy instead of overprocessed. On deep skin tones, this works because the contrast stays small and controlled.
Why It Works
The front pieces catch light first, which is exactly where you want the eye to go. Ask for a level 6 or soft level 7 caramel, placed a half-inch off the hairline so the color blends instead of drawing a hard outline.
A few details to ask for
- Keep the brightest pieces in the front only.
- Feather the highlight into the first 2-3 inches of hair.
- Leave the root shadow intact for a softer grow-out.
- Style it with a side part if you want the face frame to feel even more pronounced.
Best tip: If your skin reads warm-golden, keep the caramel toasted rather than buttery. That one shift keeps the look rich.
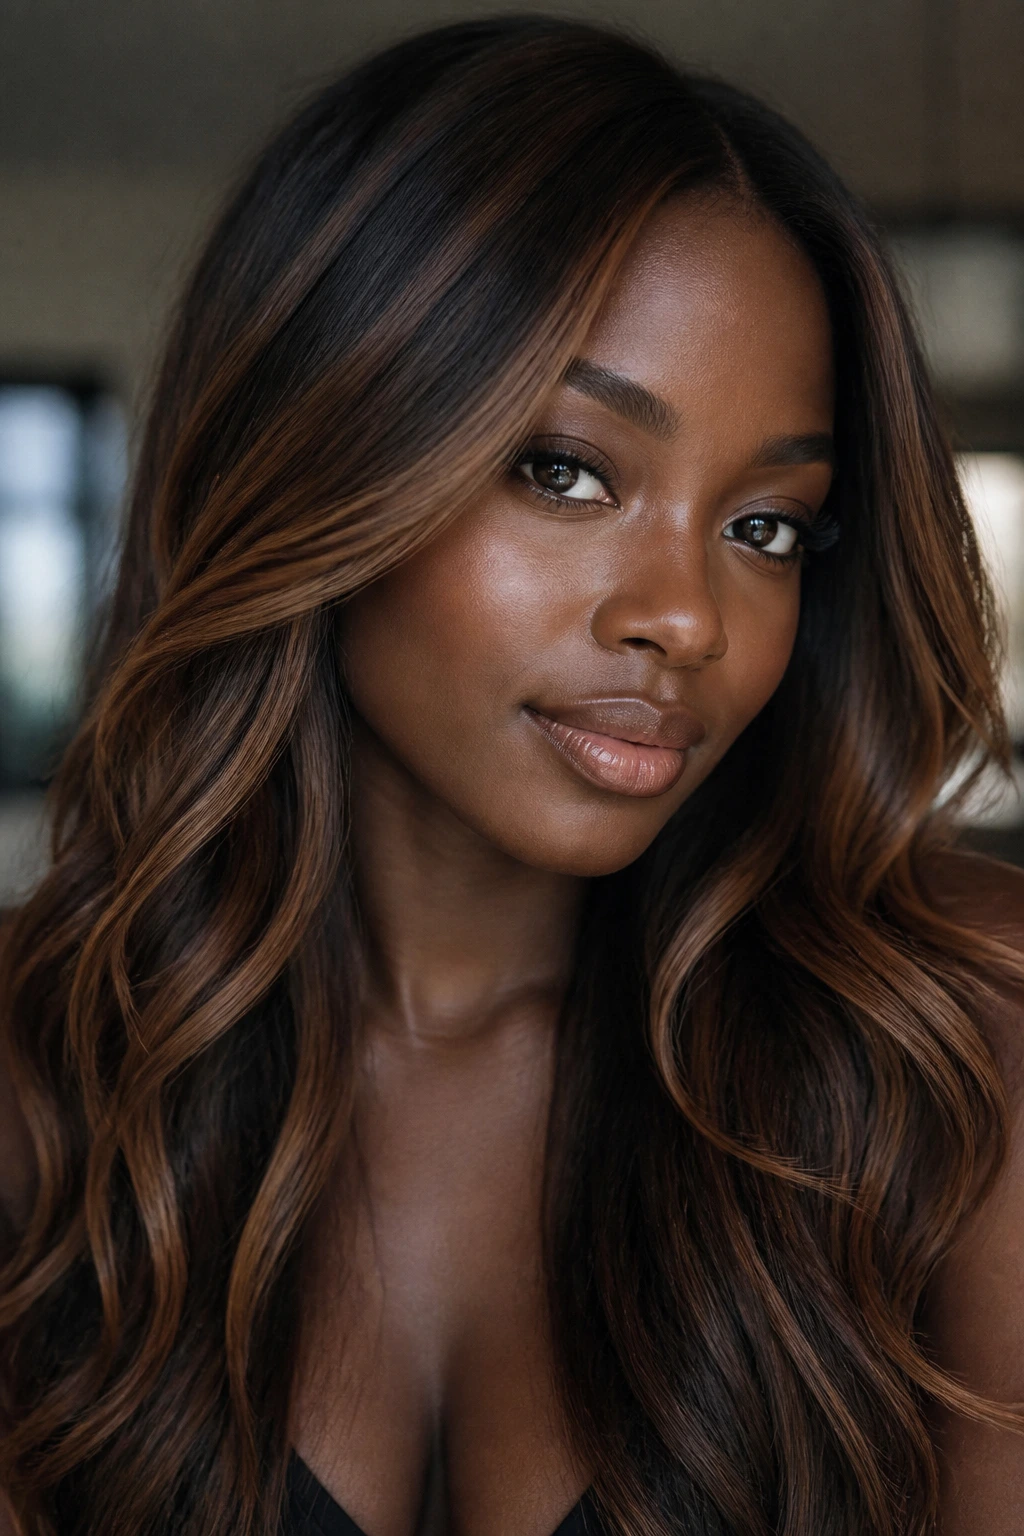
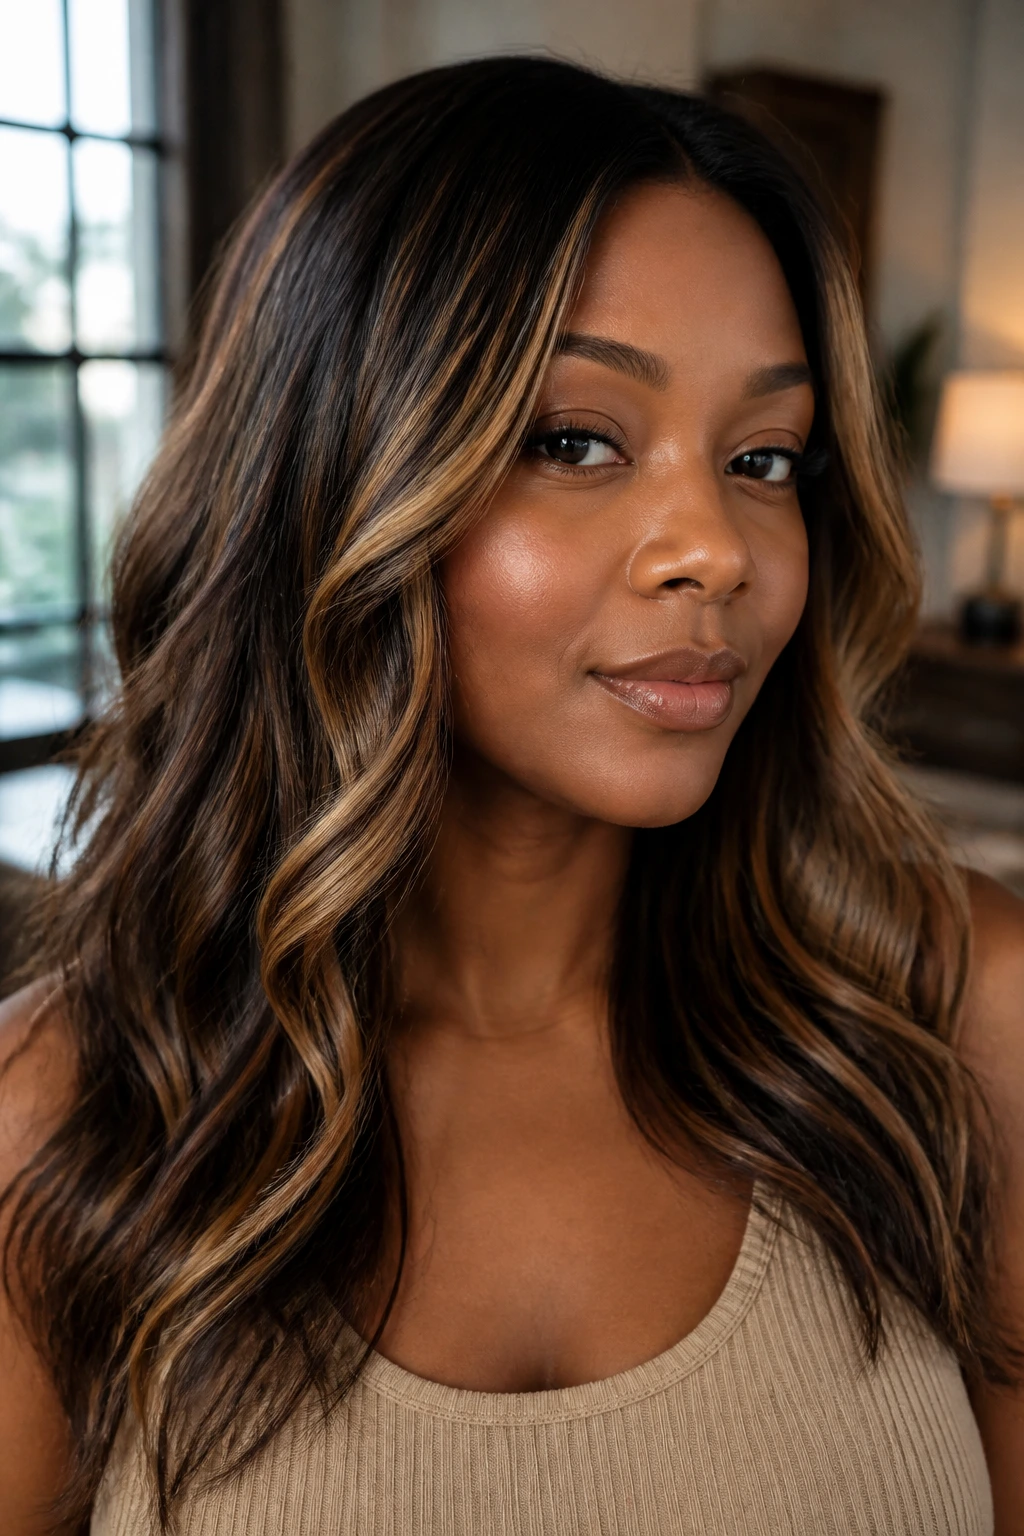
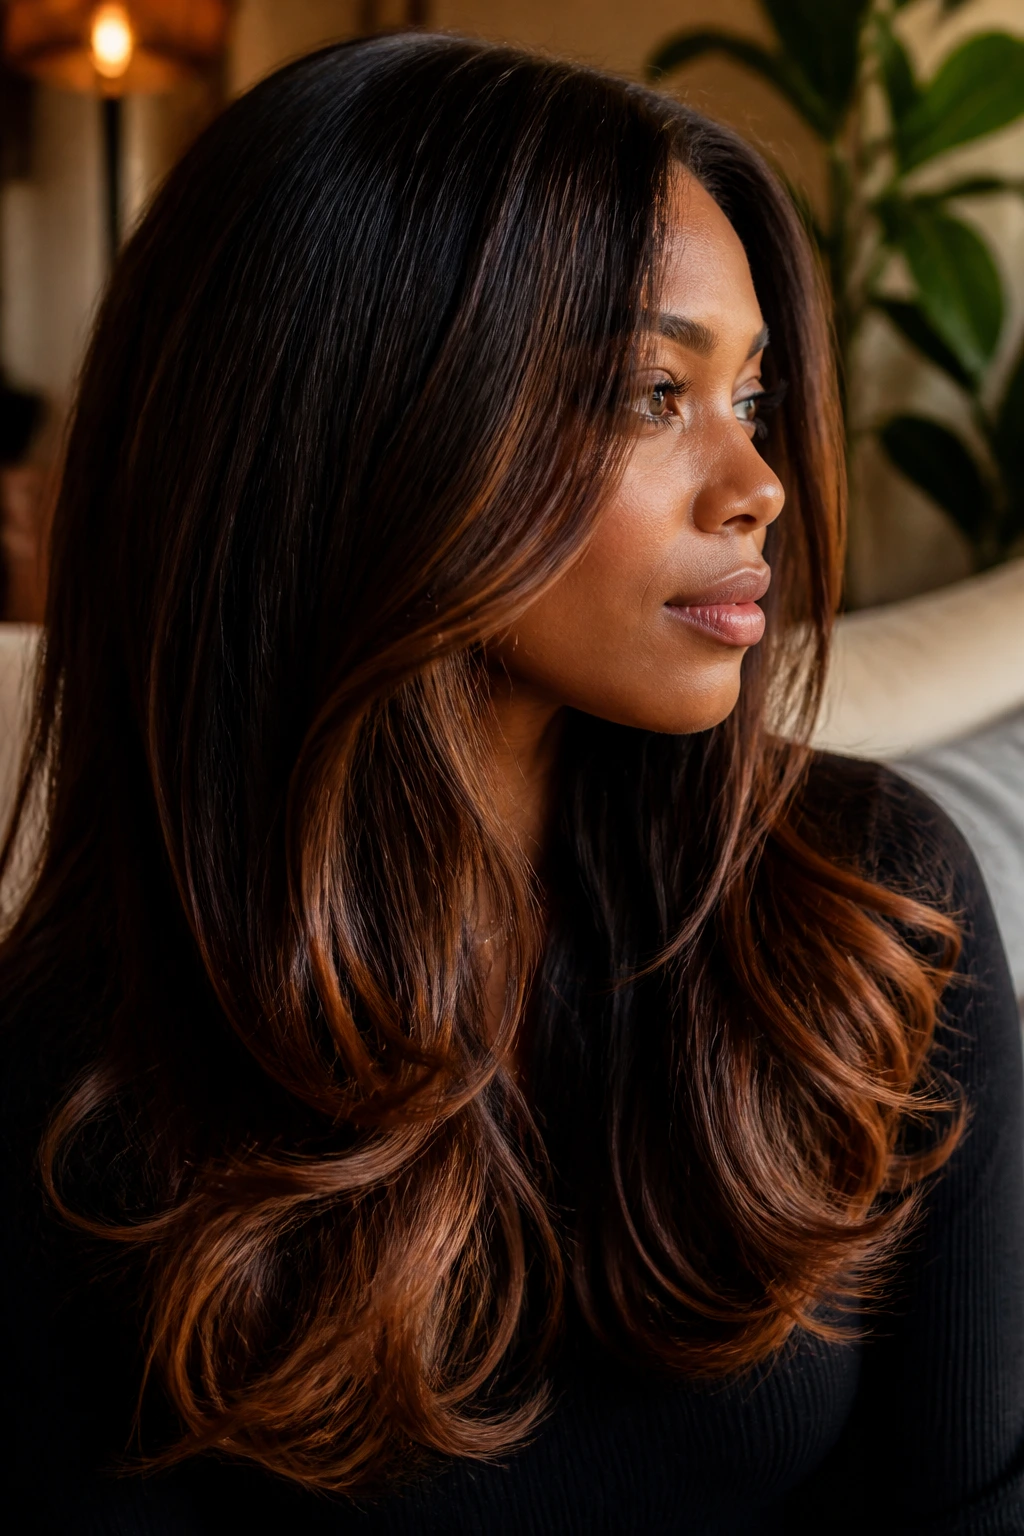
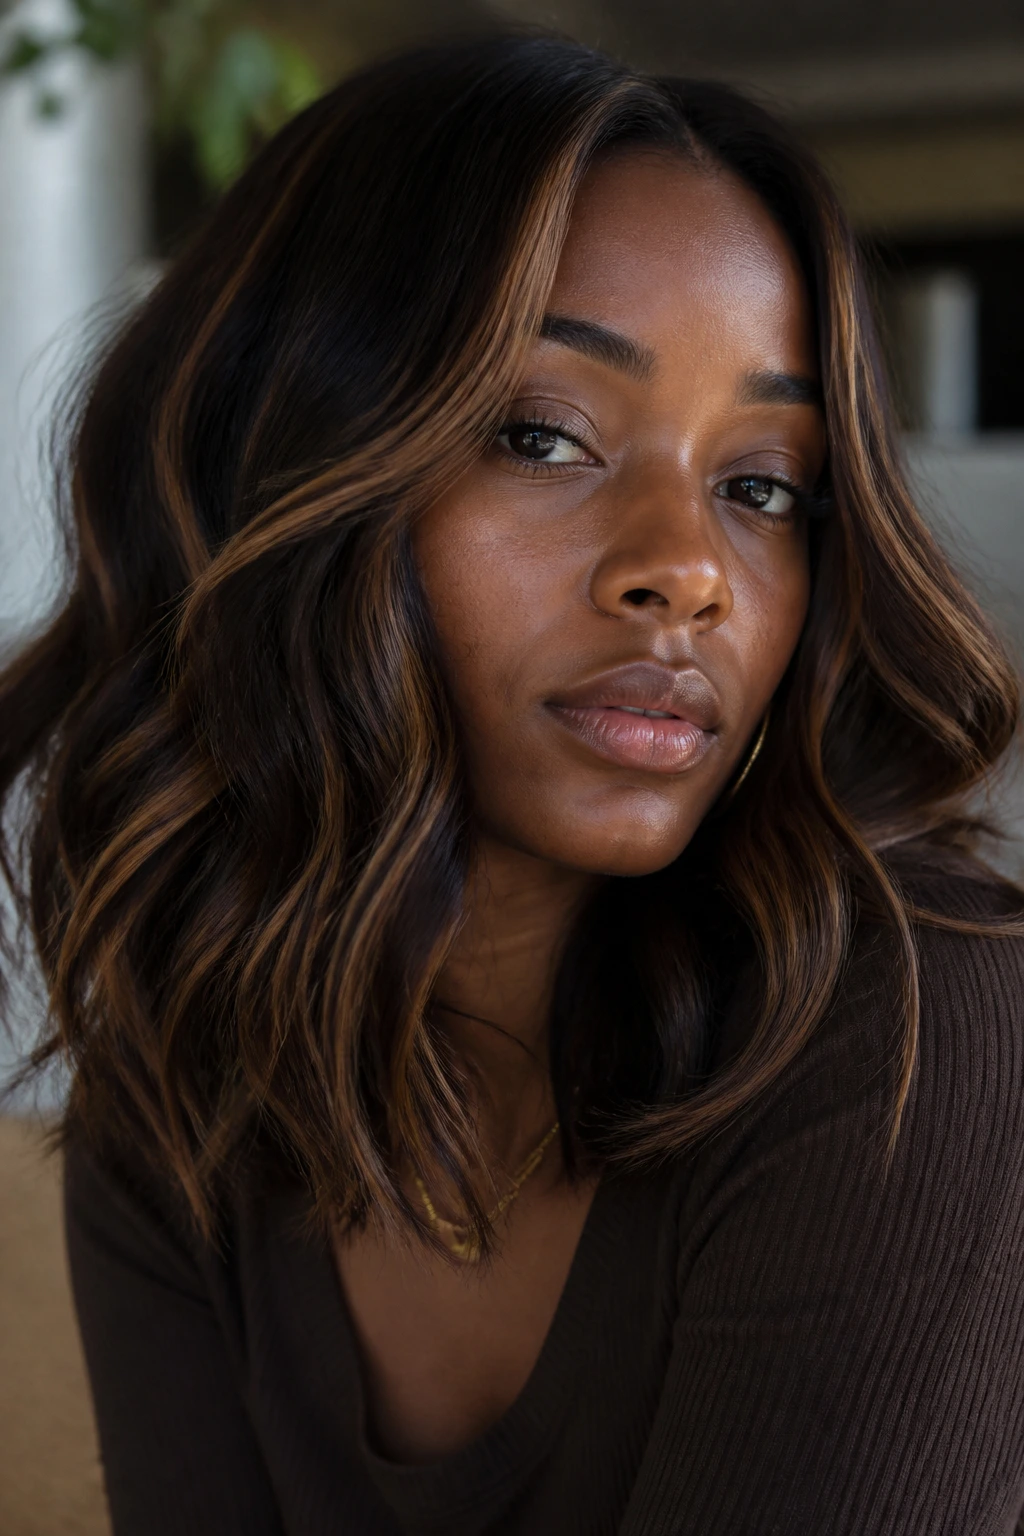
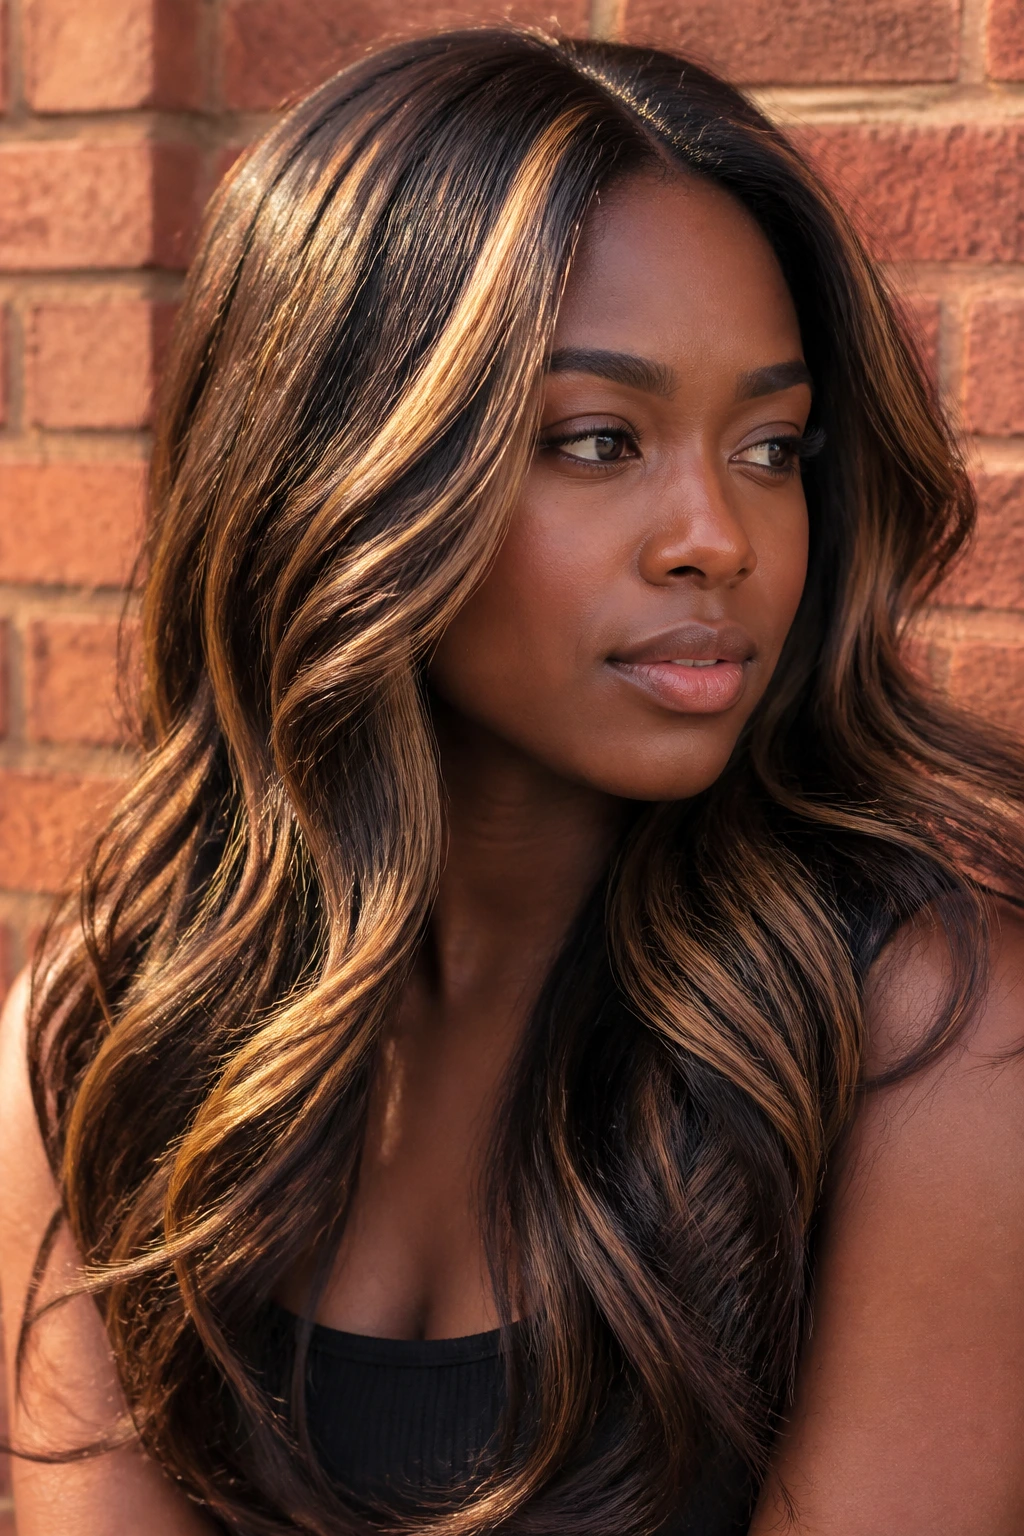
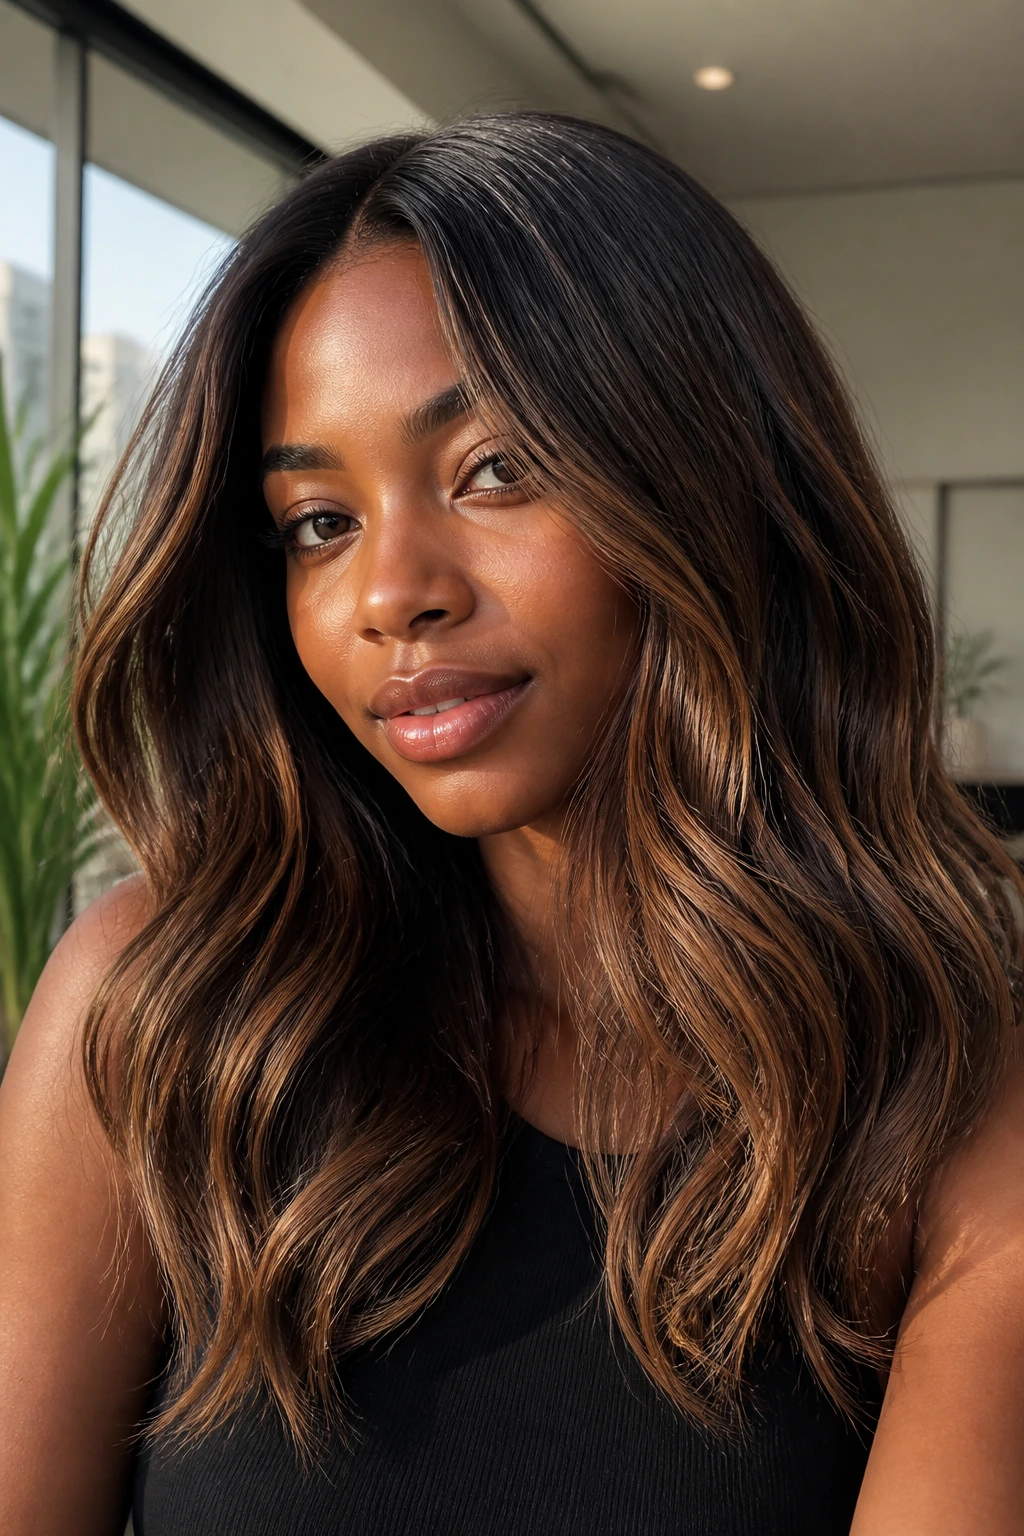
2. Toasted Balayage Melt
This is the quiet one. The color starts as dark brown, then drifts into caramel through the mid-lengths and ends without any obvious line. On long hair, it looks like the sun found the same strands more than once.
Balayage suits deep skin well because the lightest pieces don’t all sit at the top of the head. They move. That motion matters. You want the caramel to feel melted into the brunette base, not dropped on top of it.
If you wear your hair in loose curls or a blowout with body, this version looks especially good. The bend in the hair lets the lighter and darker pieces alternate, which keeps the whole style from flattening out. It also grows out without a sharp regrowth band, which is a mercy if you hate sitting in a chair every few weeks.
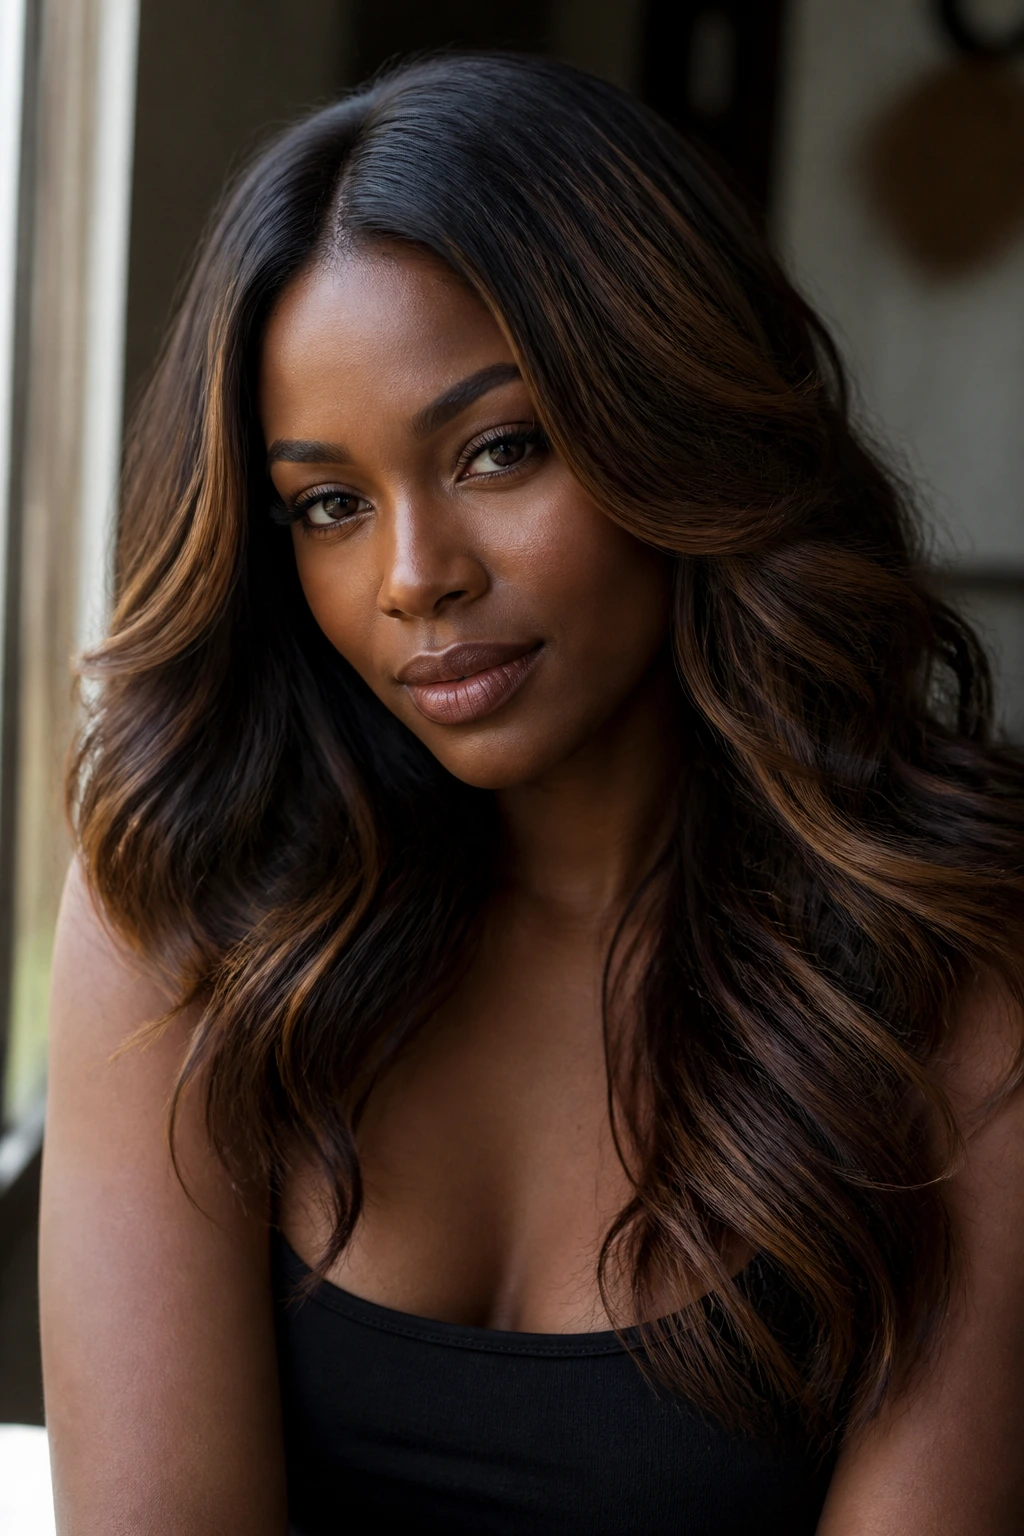
3. Big Money Piece Caramel
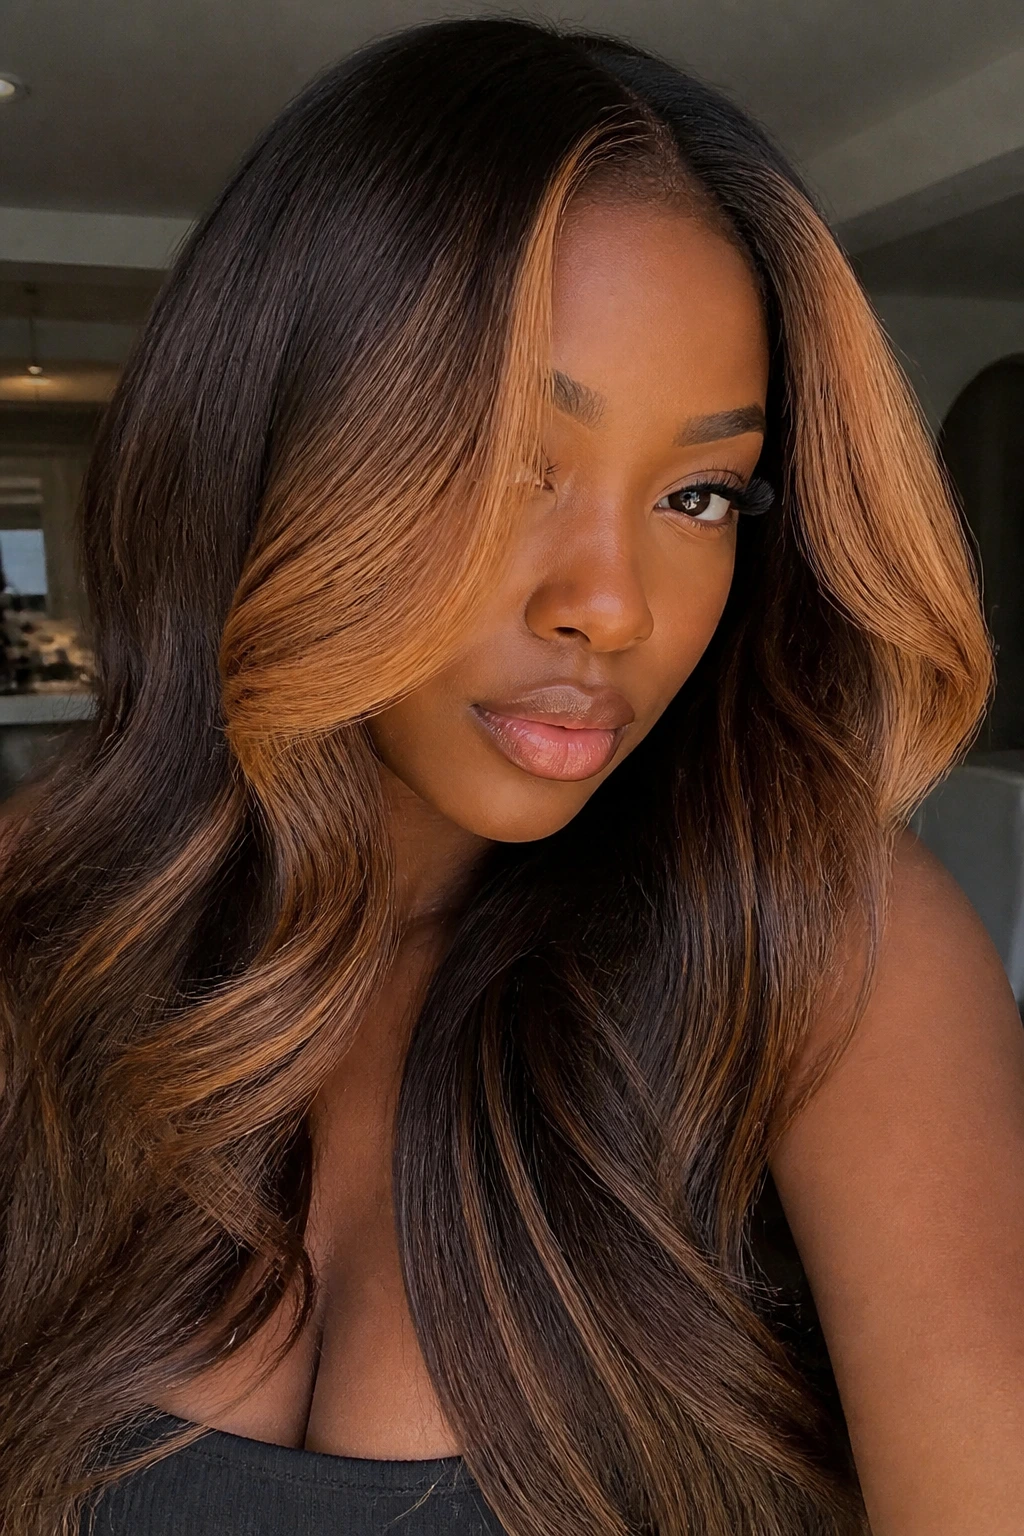
A bold money piece changes the whole face in one shot. Think thicker front panels, not tiny baby strands, and a caramel shade that sits one strong step lighter than the rest of the hair. It has real attitude.
This look is best when the base is a very dark brown or espresso brown, because the contrast gives the front pieces something to do. On deep skin, the trick is keeping the caramel warm enough to read soft, but not so yellow that it starts shouting. That balance is the entire game.
What to ask your colorist for
- Thick face-framing panels.
- A soft root smudge so the line doesn’t look harsh.
- Caramel that sits in the toffee-to-honey range.
- Slightly brighter ends than mids for a tapered effect.
Pick this if you like your hair to show up in photos without needing a full-head color service.
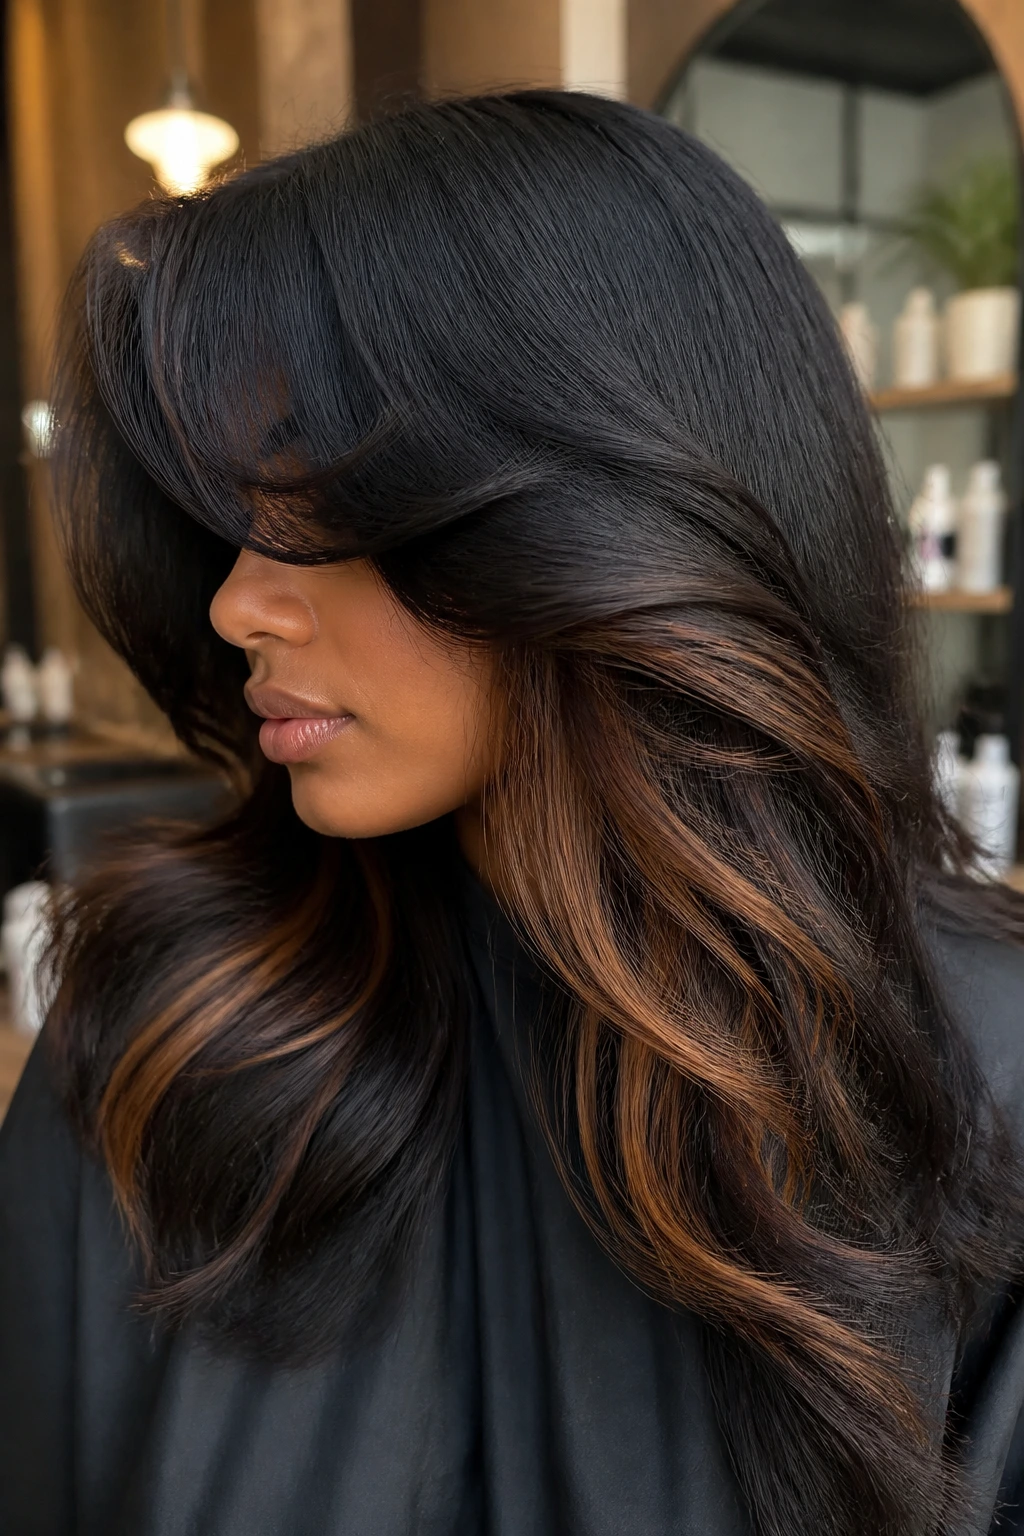
4. Ribboned Curls Through the Ends
Curls love this one. Instead of changing the whole head, the caramel is woven through the lower half of the curl pattern so each spiral has its own highlight ribbon. The effect is lively, not striped.
It works because curly hair doesn’t need every inch lightened to look dimensional. A few well-placed ribbons around the ends and outer curve of the curl are enough to make the texture pop. On deep skin, the dark root and root-to-midsection contrast keeps the color from looking dusty.
If you wear wash-and-gos, twist-outs, or braid-outs, this placement makes the pattern easier to see from across the room. And yes, it also means less maintenance than full highlights. That is usually the trade most people want but forget to ask for.
Why It Works
Caramel near the ends creates movement where the curl opens up. It shows the shape of the strand rather than just the color.
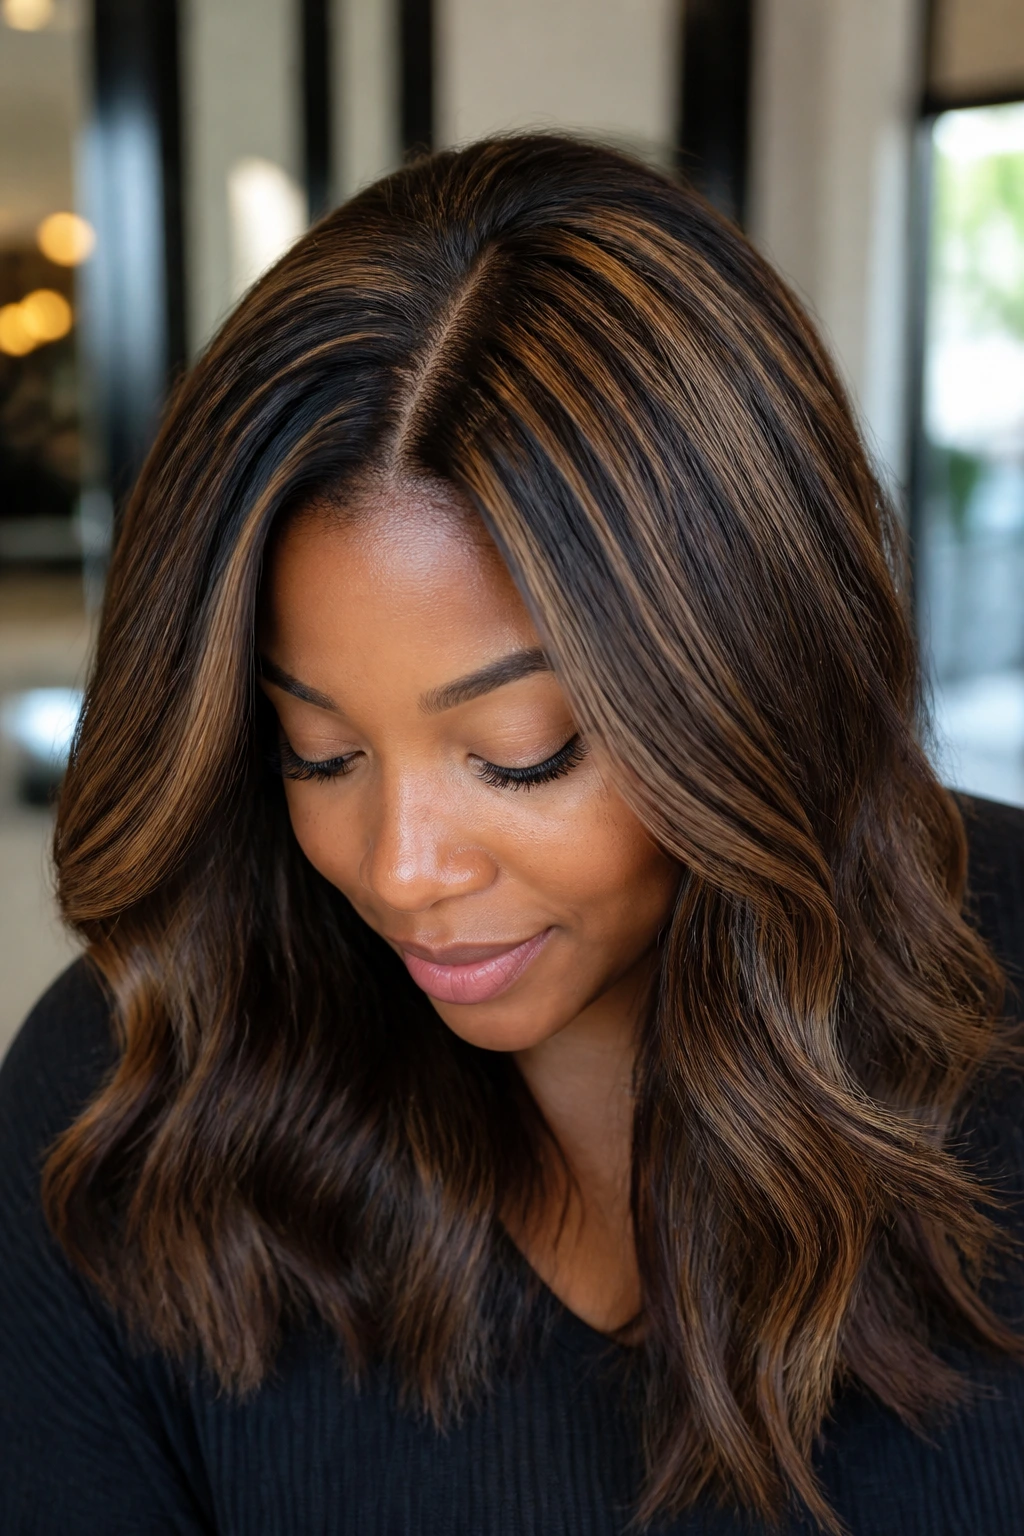
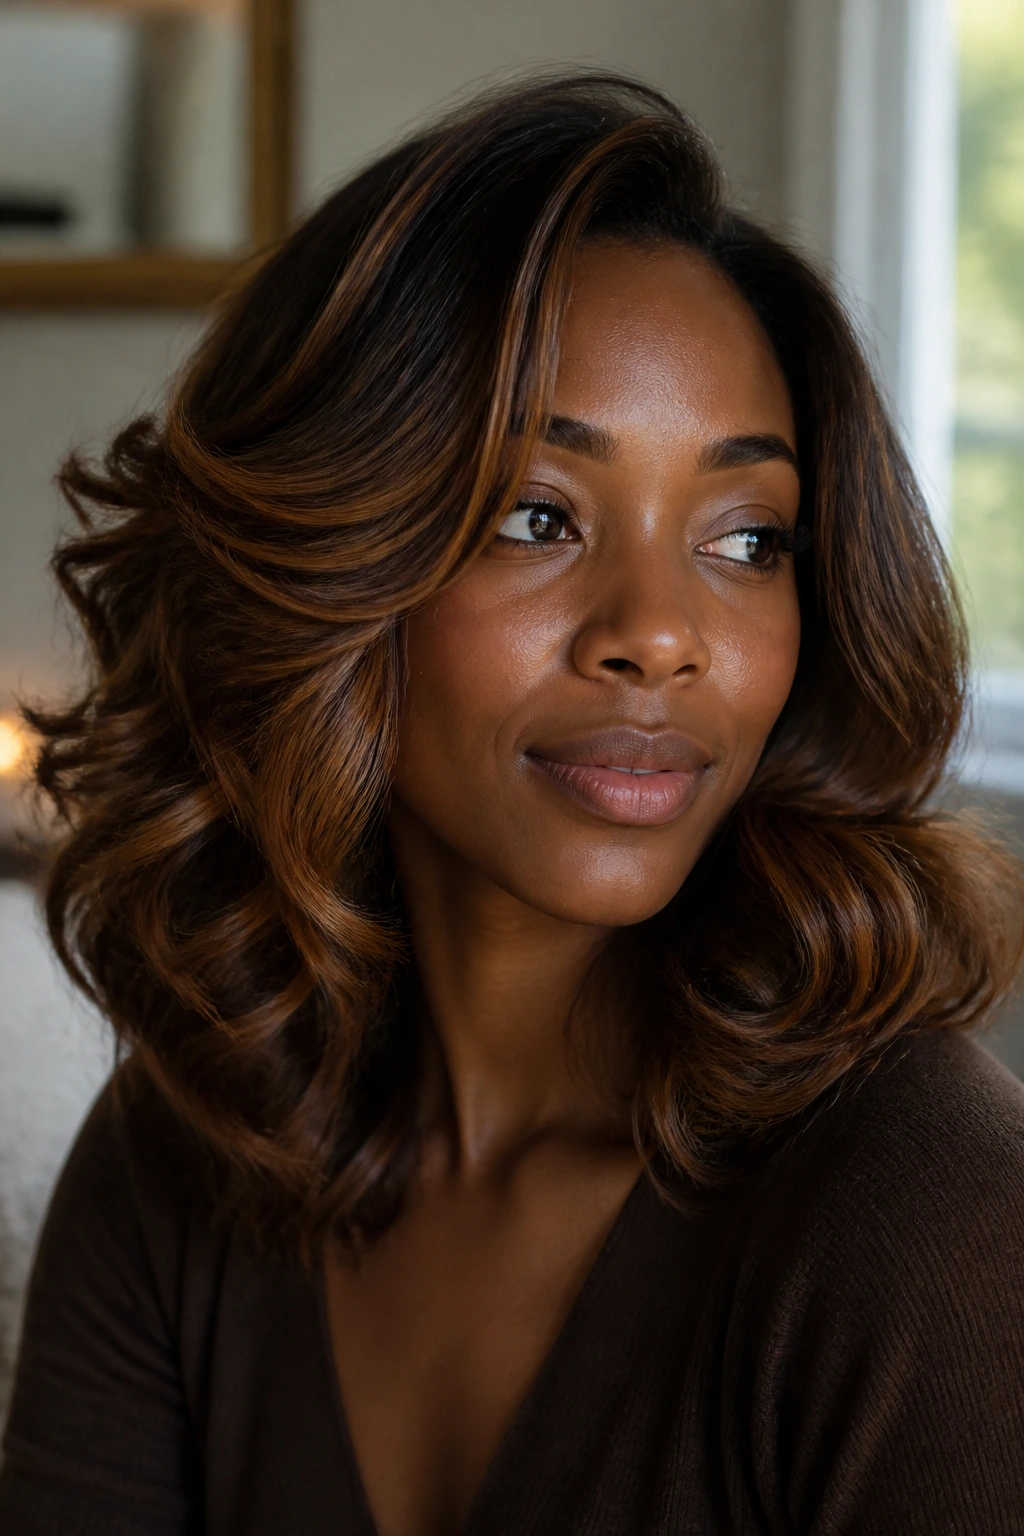
5. Cinnamon Contour Layers
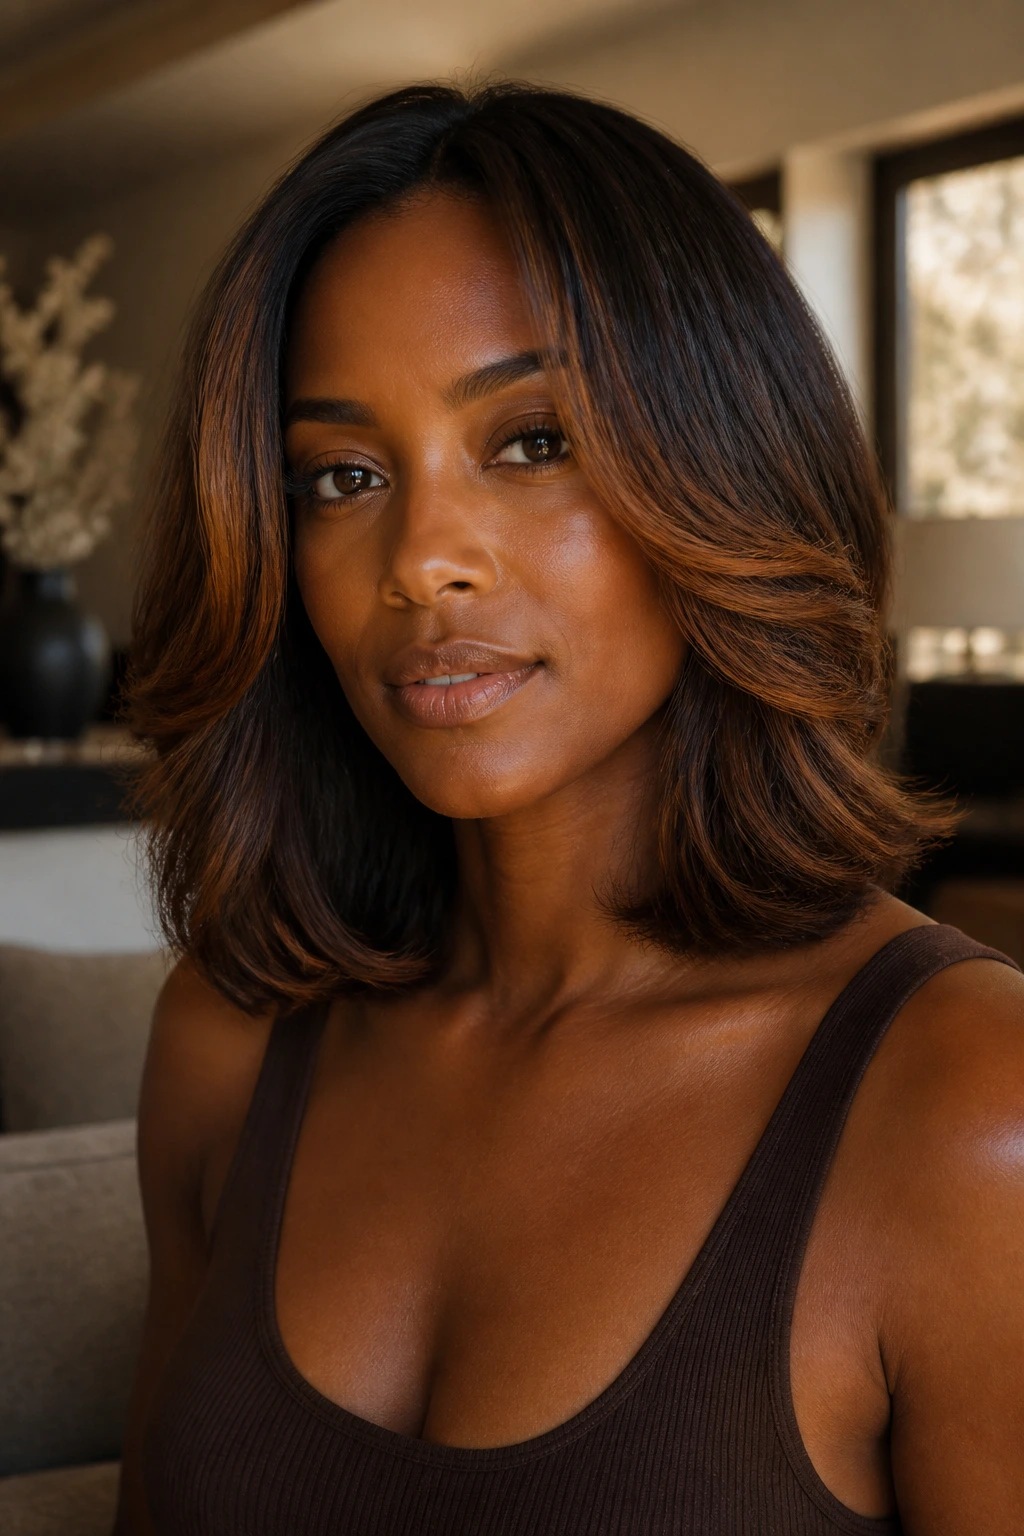
This one is about shape, not just brightness. The caramel follows the haircut’s layers — around the face, under the crown, and along the parts that swing forward when you move. The result is almost like contouring with hair color.
On deep skin, the warm cinnamon-caramel tone looks especially good when the hair has some layering around the cheeks or collarbone. A blunt one-length cut can hide the effect. Layers let the highlight slide in and out of view, which is the whole point.
I like this look on shoulder-length cuts because it feels intentional without needing a huge amount of color. Ask for the lightest pieces where the layer bends outward. That tiny detail keeps the shape readable.
6. Espresso Base with Caramel Veil

If you want a subtle shift rather than a big color moment, this is the one. The base stays dark espresso, and the caramel appears only as a thin veil over the top layer and around the crown.
It’s the kind of look that reads as expensive not because it shouts, but because it looks finished. That finish comes from restraint. The caramel should be visible when you move, not all at once from every angle.
This is a smart pick for office settings, conservative dress codes, or anyone who likes dark hair but wants a little more life in it. It also flatters deep skin because the brown base stays dominant. The lighter pieces act like reflection, not a costume change.
7. Foilayage Around the Crown
Foilayage gives you a bit more lift than open-air balayage, especially near the crown and part line. That makes it useful when you want caramel that actually shows up on darker bases instead of sinking back into the hair.
The crown placement matters here. Lightening pieces near the part makes the whole style look brighter without loading the ends with too much color. On deep skin tones, that keeps the hair from reading flat when it’s worn straight or pulled half up.
What Makes It Different
Balayage alone can be soft, but foilayage gives you a little more brightness control. It is a good middle ground if you want visible caramel and still want the grow-out to stay softer than classic foils.
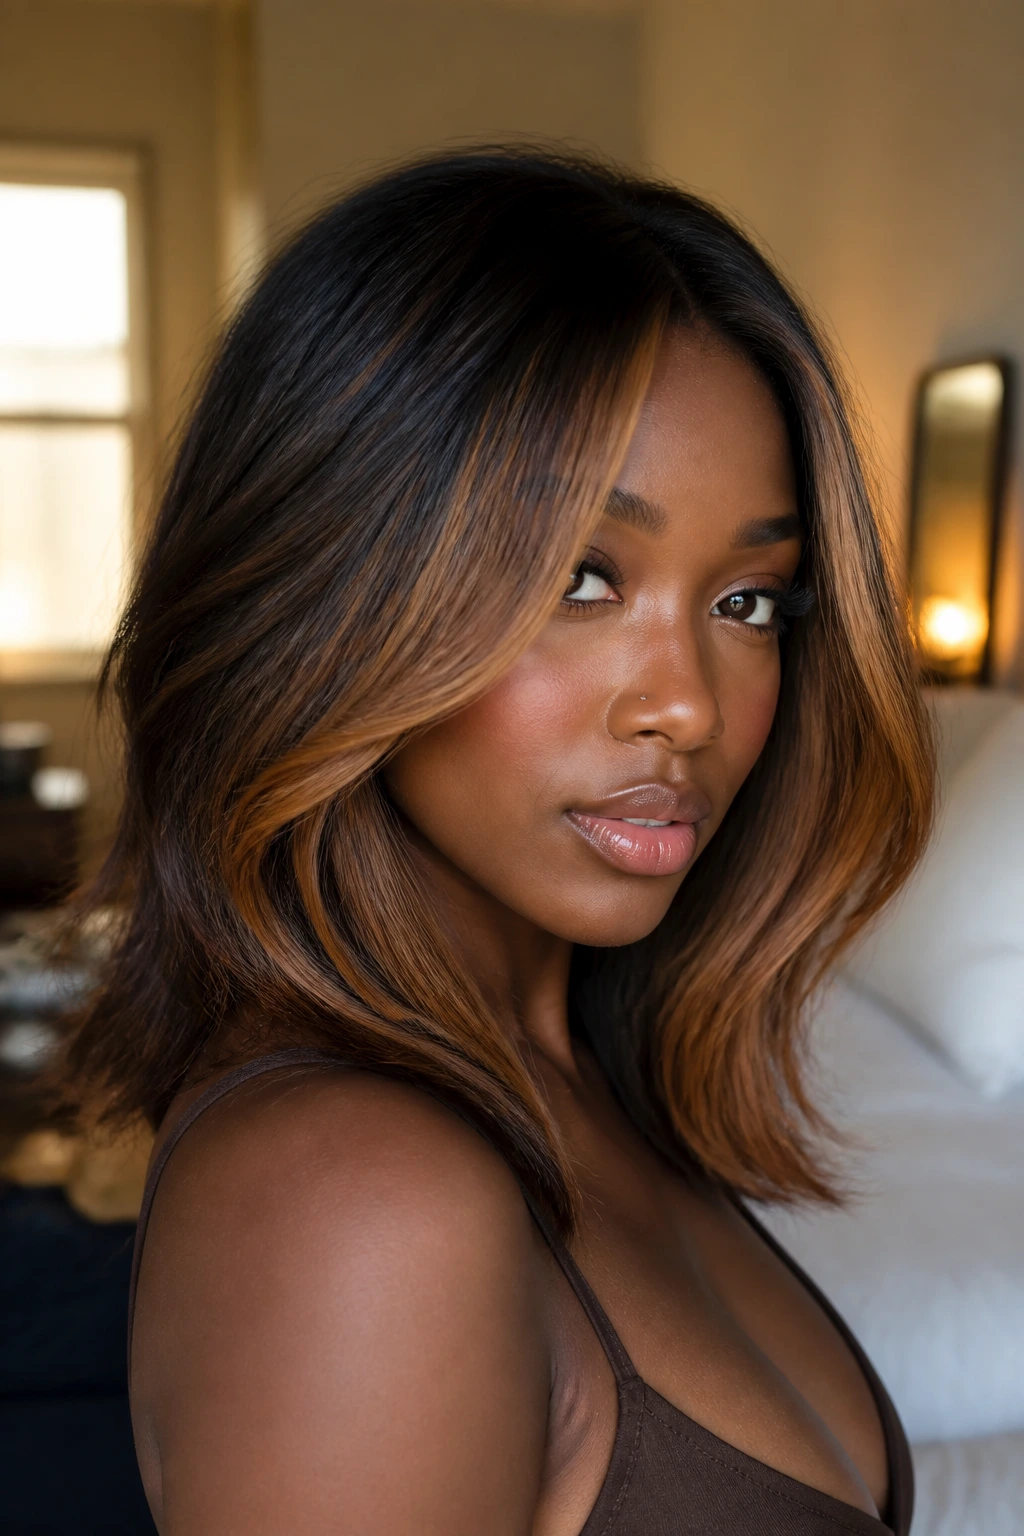
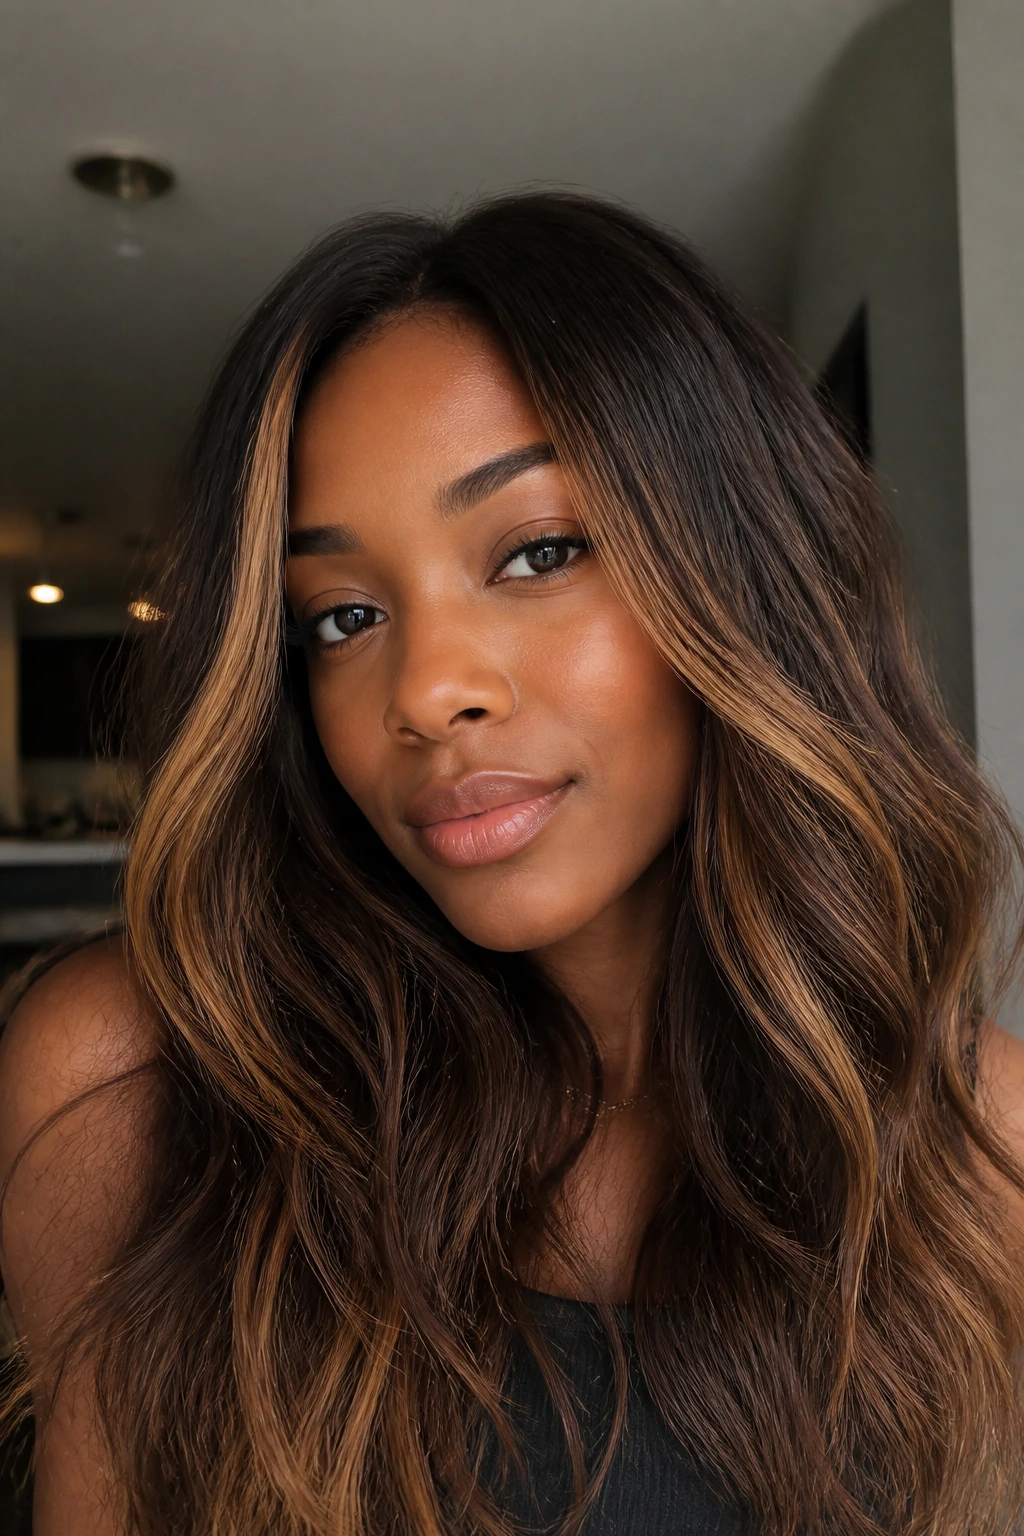
8. Soft Ombré Into Toffee
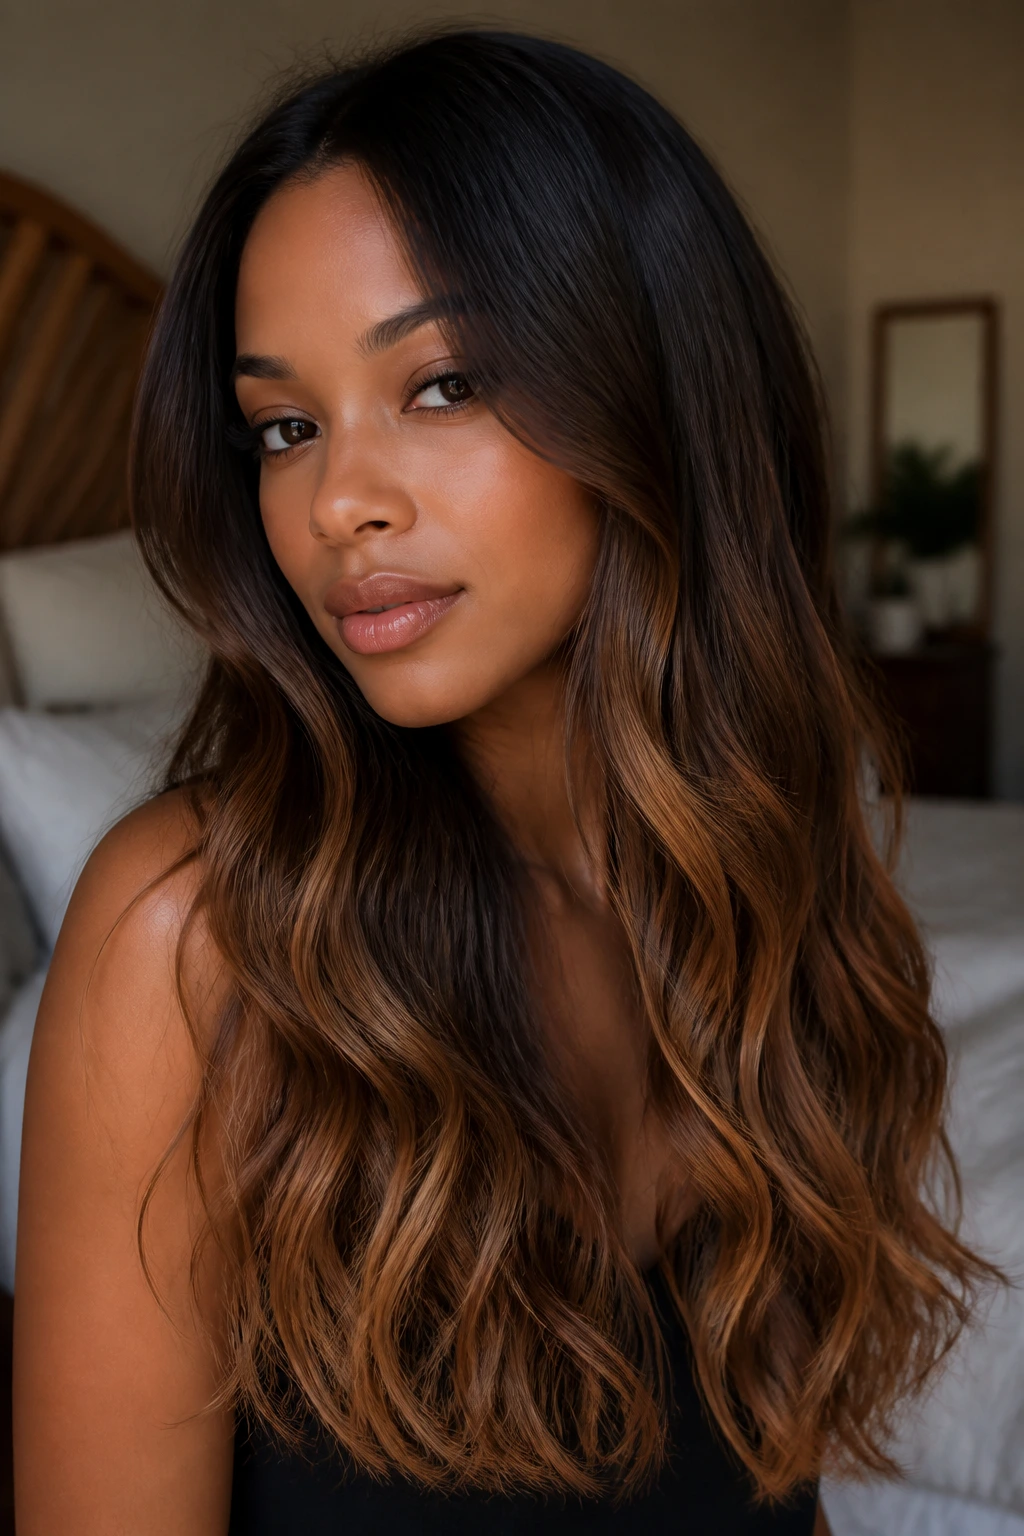
This version keeps the roots dark and lets the ends carry the lighter work. The fade is gradual, from dark brown to toffee, with no hard jump in the middle. It is especially good on long hair because the blend has room to breathe.
Deep skin tones can wear this look when the toffee stays brown enough. The second the ends drift too blond, the style loses its depth. Better to stay in the caramel-brown lane and let the finish look warm rather than pale.
If your hair is long and you like wearing it in loose waves, this placement gives you a lot of payoff with very little root pressure. It’s also one of the easier ways to try caramel if you’re nervous about committing to bright front pieces.
9. Chestnut Lowlights with Caramel Lift
A little contrast goes a long way. This style uses chestnut lowlights to deepen certain sections, then drops caramel highlights in the lighter zones so the whole head looks richer and more layered.
That mix matters on deep skin because pure light pieces can sometimes sit too high against the complexion. The lowlights pull the whole palette back into the brunette family. Then the caramel comes through where it counts.
It’s a good move if your hair has been lightened before and needs more depth again. It is also smart for finer hair, because alternating darker and lighter strands makes the hair look fuller without needing heavy, broad highlights.
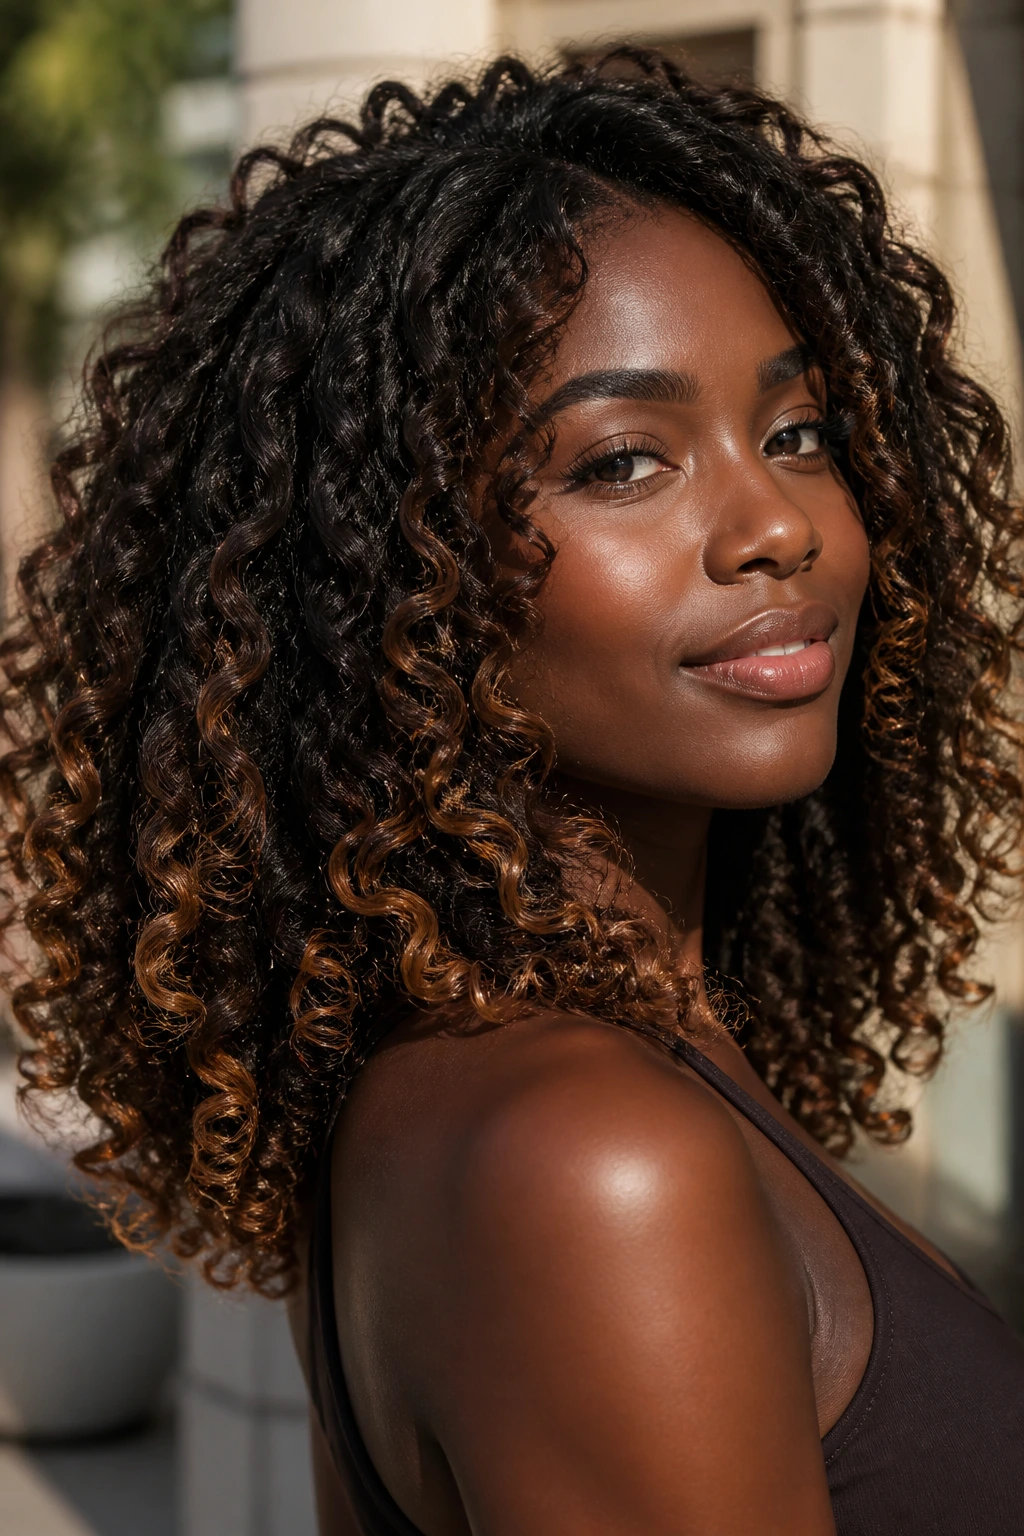
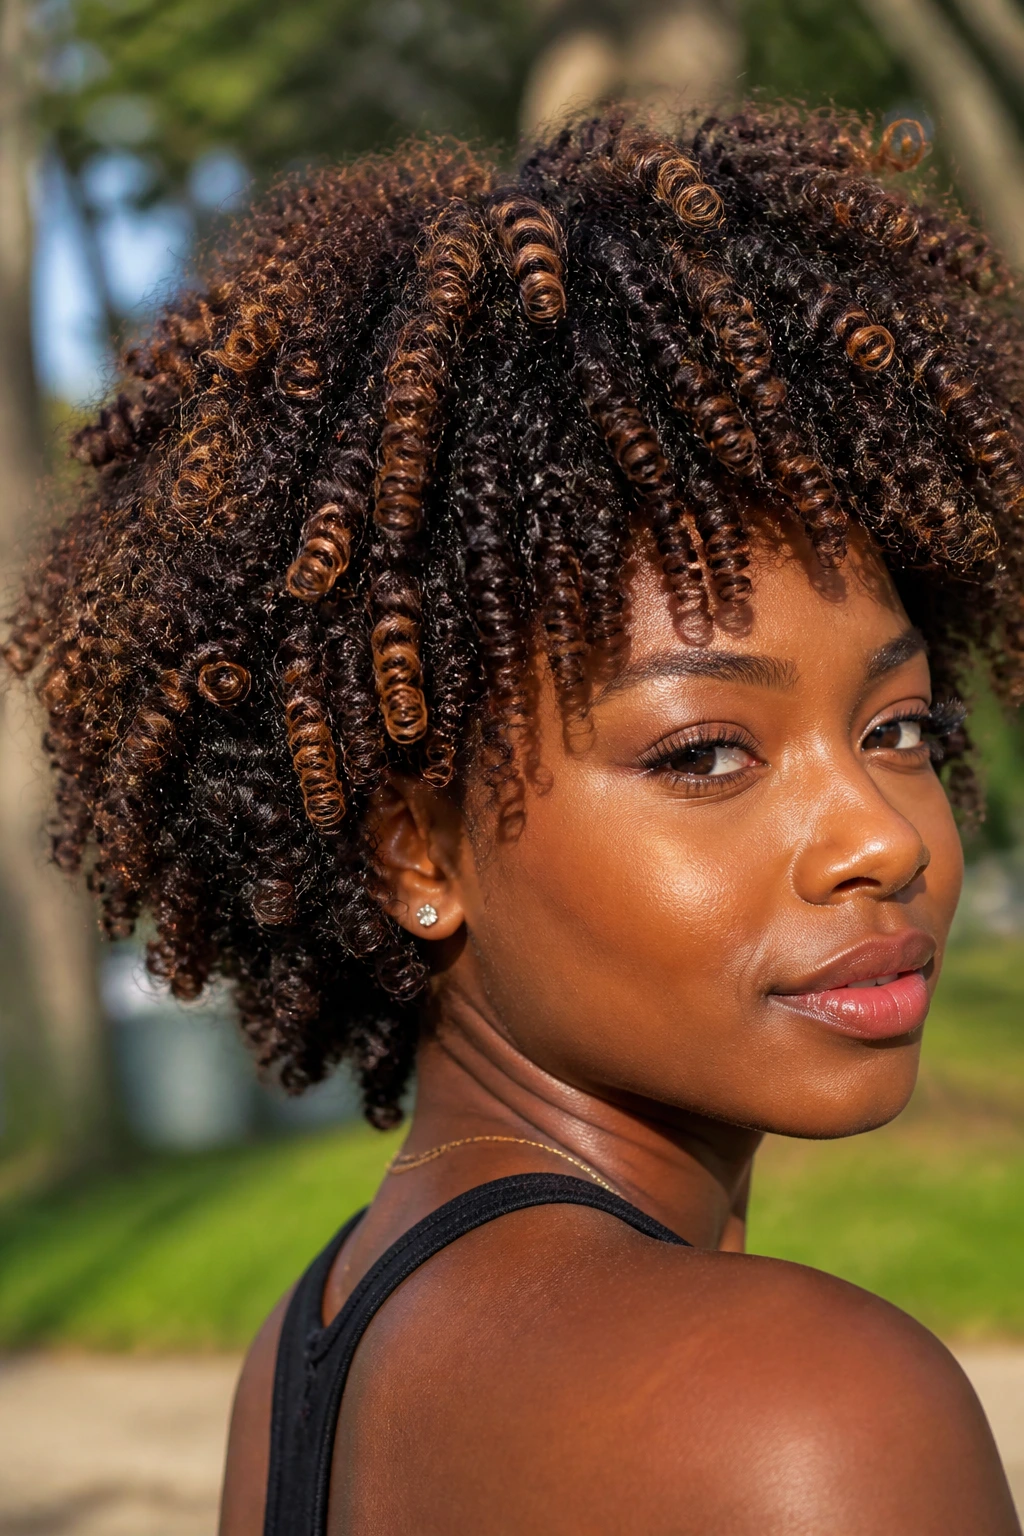
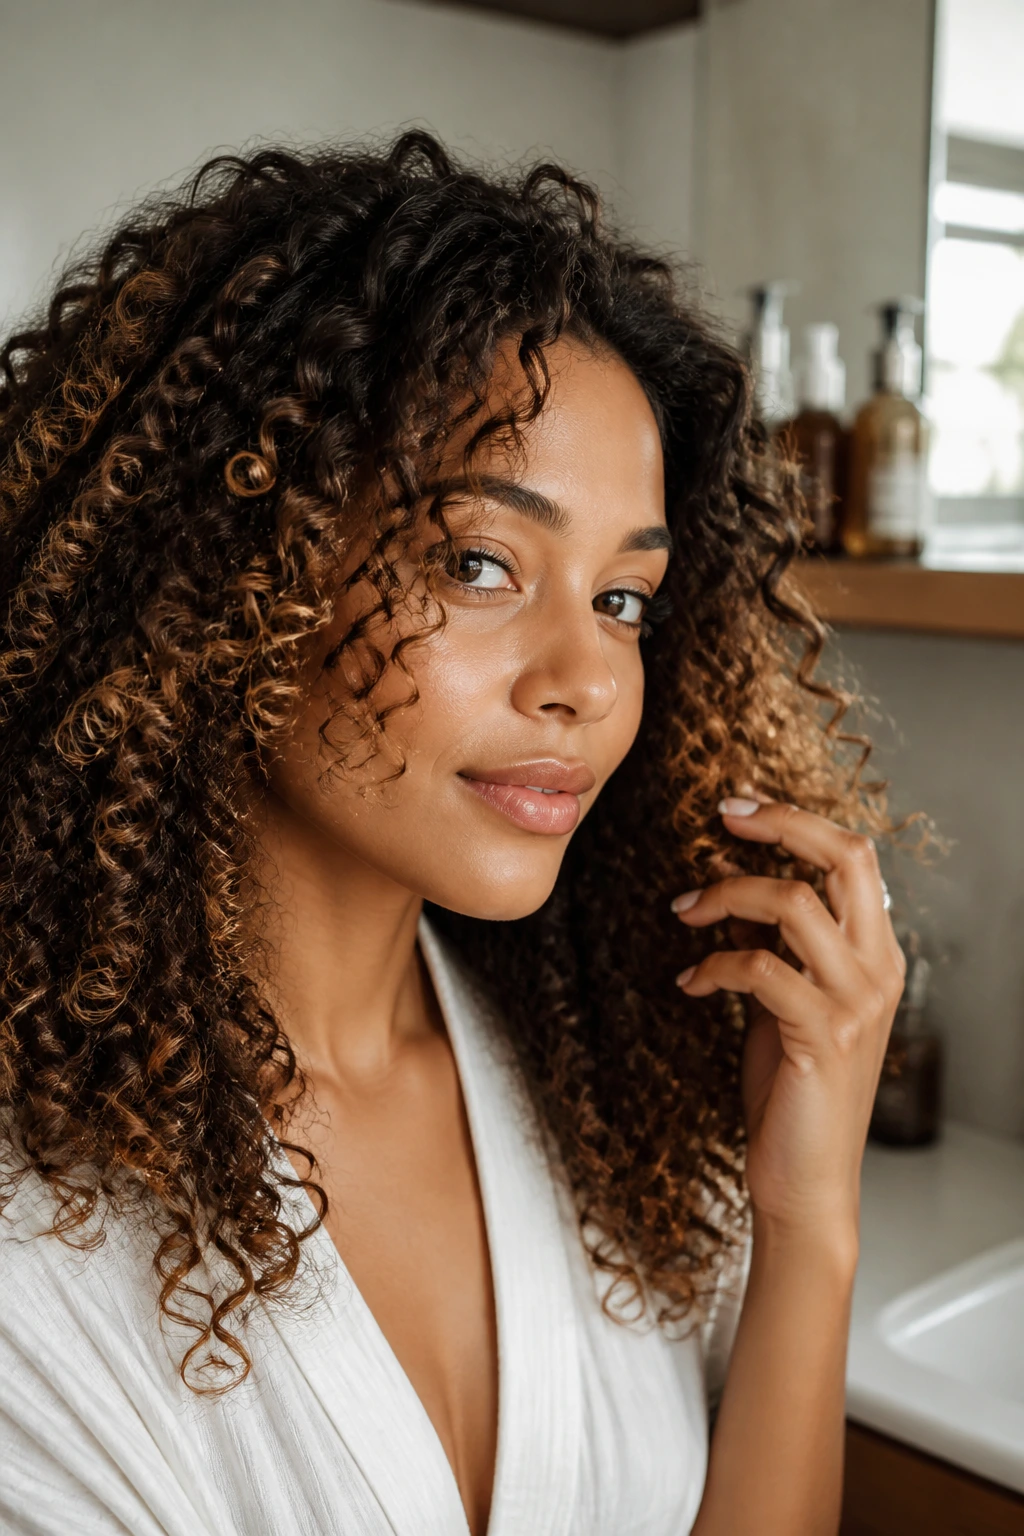
10. Curly Halo Highlights

This is one of my favorites on natural curls because it follows the shape of the hair instead of fighting it. The caramel sits around the outer perimeter and crown, which makes the curl pattern look brighter from the outside in.
The halo effect works best when the color is concentrated where the curls naturally fall forward. Think top layer, outer edges, and a few pieces around the face. You do not need every curl touched. In fact, you probably shouldn’t.
Deep skin tones handle this look well because the caramel shows up as light inside the coil rather than a big block of color. When the curls shrink, the highlights tuck in. When they stretch, the warmth opens up. Nice little trick.
11. Micro-Babylights on Deep Brunette
Babylights are tiny, almost stitched-through strands of lightness. On a dark brown base, they give you shimmer instead of obvious stripes, which is exactly why they work so well on deeper complexions.
This approach is the least fussy of the bunch. The pieces are thin enough that the grow-out is smooth, and the color stays soft even if you wait a little longer between appointments. It is ideal if you want dark brown caramel highlights that people notice only after they’ve been looking at your hair for a minute.
If your hair is straight or lightly waved, babylights create movement across the top layer. On curls, they add depth around the bend. Quiet. Pretty. Hard to mess up when the tone is done right.
12. Caramel Peekaboo Panels
Peekaboo color lives under the top layer, which is exactly why it’s fun. You get flashes of caramel when the hair swings, parts, or gets tucked behind the ear, but the overall look stays dark and grounded.
This is a smart choice if you want a little edge without changing your whole head. On deep skin, peekaboo panels can be stunning because the caramel shows only in motion. That makes the color feel intentional and a little mysterious.
Good places for this placement
- Under the crown on straight hair.
- Beneath longer layers for movement.
- Around the inner curve of curls.
- At the nape if you like updos and ponytails.
Pick this if you want a color surprise that does not need daily explanation.
13. Smoked Amber Money Pieces
Amber can go too bright. Smoked amber usually behaves better. The shade keeps the warmth, but it mutes the shine just enough to sit next to deep skin instead of glowing like a traffic signal.
That matters because front pieces are the first thing people see. If they are too yellow, the whole face can look disconnected from the rest of the hair. Smoked amber keeps the richness while still giving you brightness around the face.
This one flatters warm and neutral undertones most easily, especially on dark brown bases with a little red in them already. It’s a strong pick if you want money pieces but not the hard contrast of a bright blond stripe.
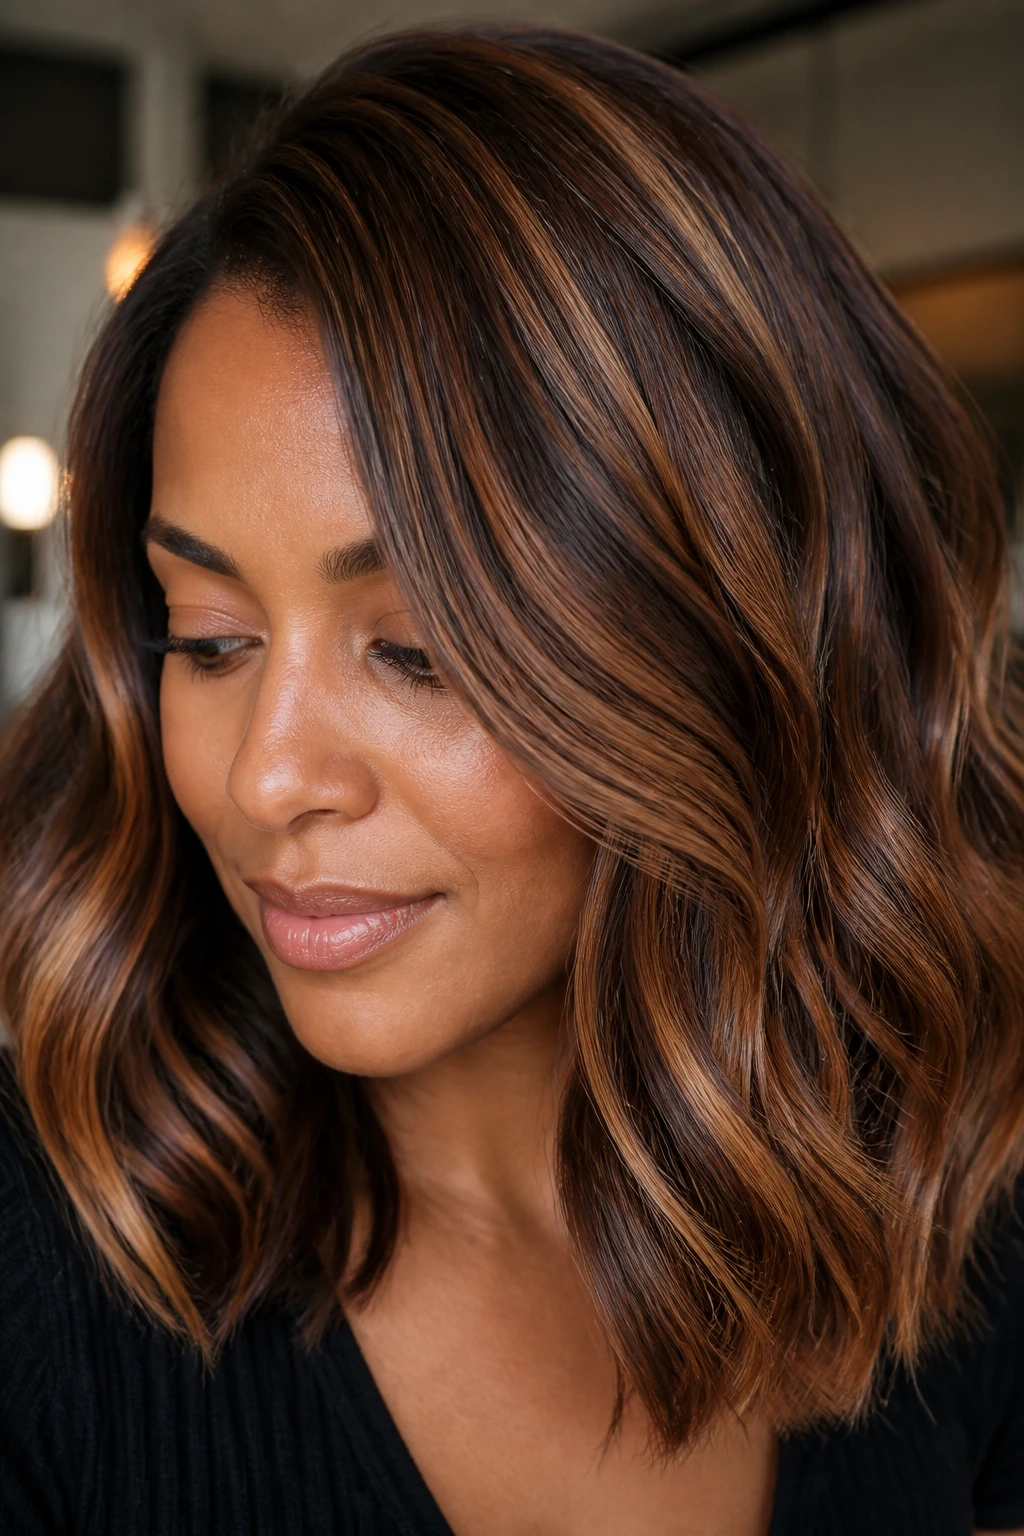
14. Wavy Lob with Buttery Slices
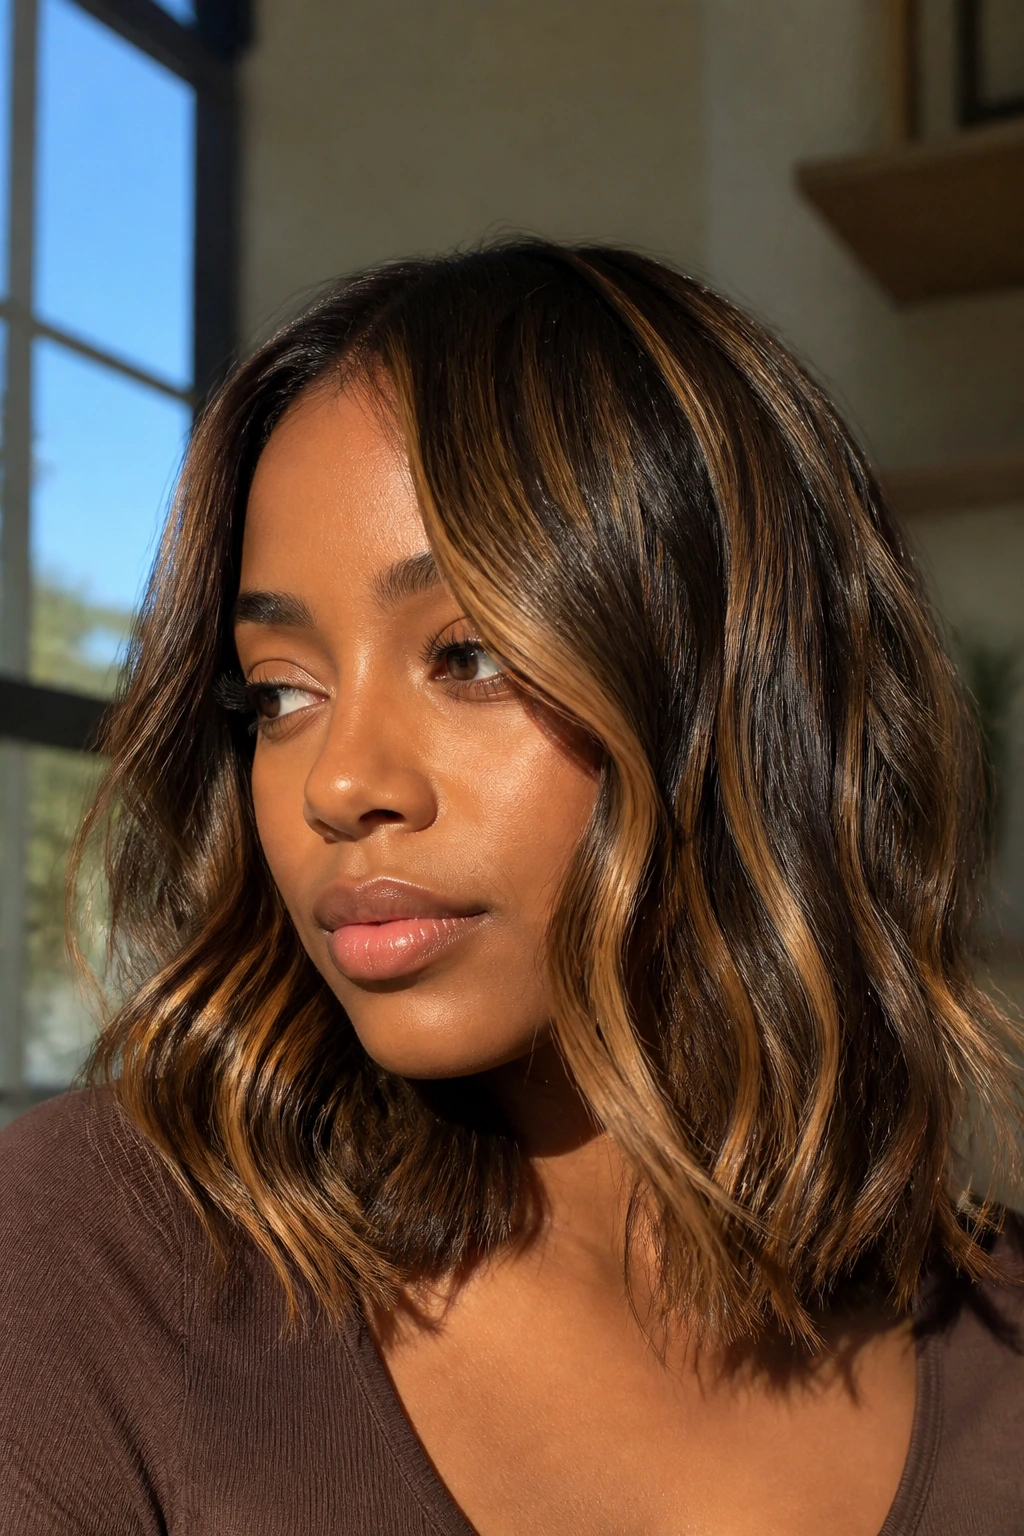
A lob loves slices. The shorter length means every highlight shows, so the caramel has to be placed with a little discipline. Thicker slices through the midsection and ends give the cut enough shine without making it busy.
On deep skin tones, buttery caramel can work here if it stays warm-brown rather than yellow. The wavy bend in the lob keeps the color moving, which helps the highlights read softer. Straightened out, the slices are more visible; waved, they blur into the cut.
This is the style I’d pick for someone who wants the color to look obvious on purpose. It is tidy, modern, and easy to style with a curling wand or a few bends from a flat iron.
15. Caramel Ends on Long Layers
Sometimes the smartest highlight placement is down low. Dark roots, dark mid-lengths, and caramel just on the ends give long layered hair a sun-kissed finish without chasing brightness all over the head.
The reason it works on deep skin is simple: the darker top keeps the color grounded. Then the lighter ends catch movement when the hair falls over the shoulders. It’s a good strategy if you want a low-pressure grow-out and you wear your hair down often.
Long layers help a lot here. Without them, the end color can look blunt. With them, the caramel breaks up the silhouette and makes the length feel lighter.
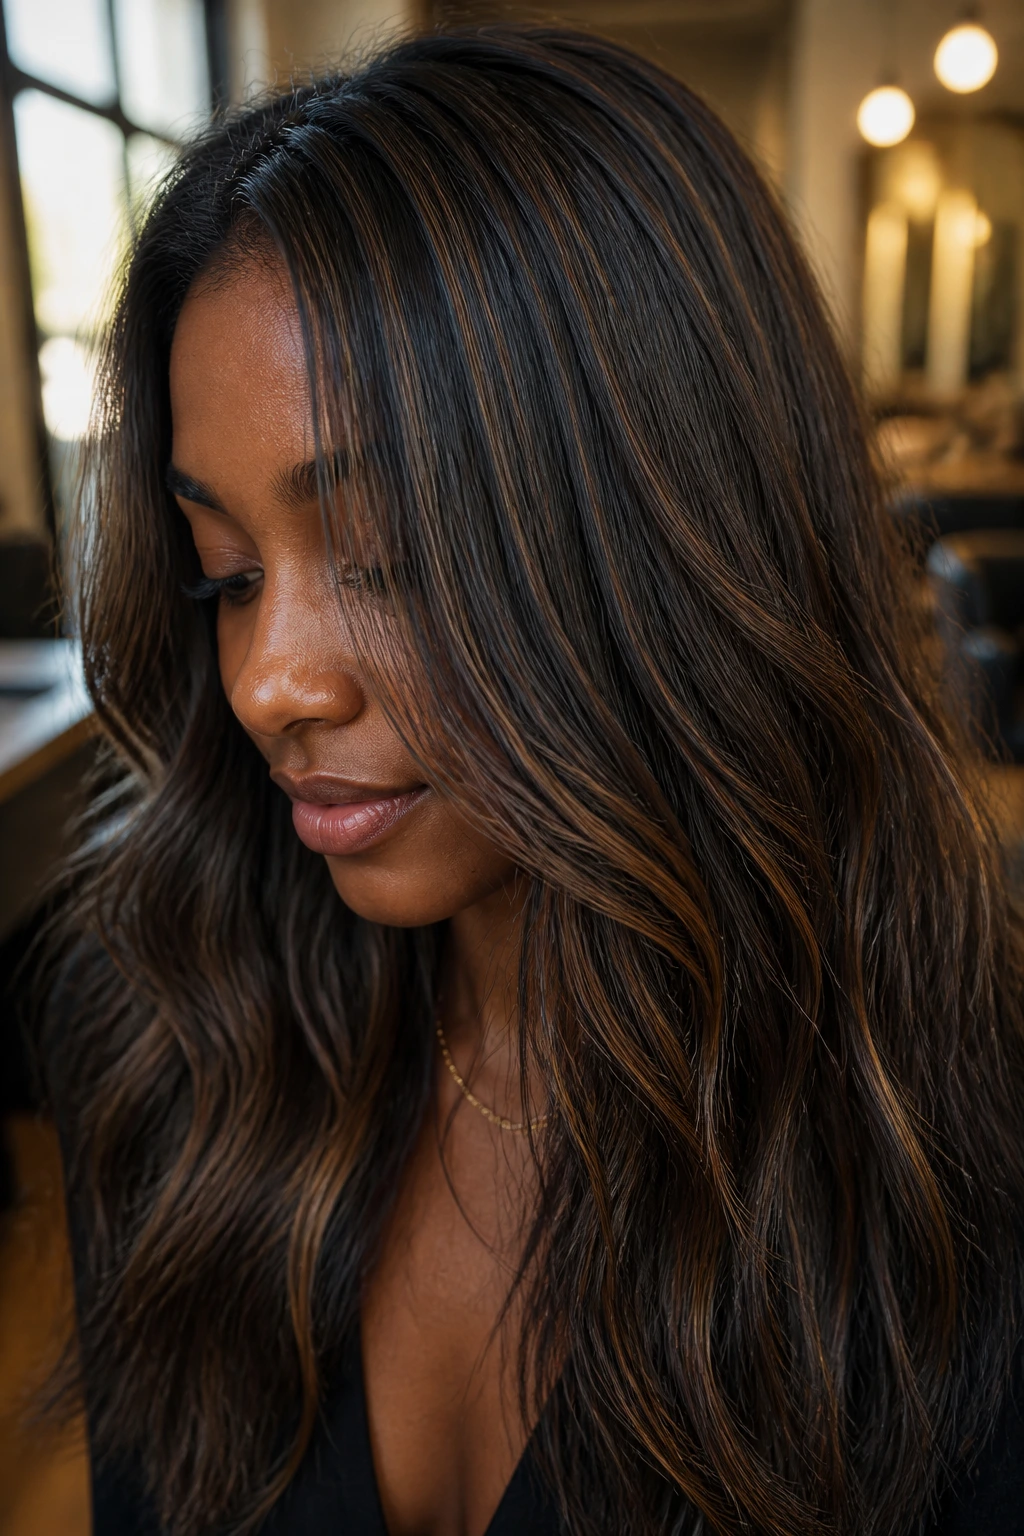
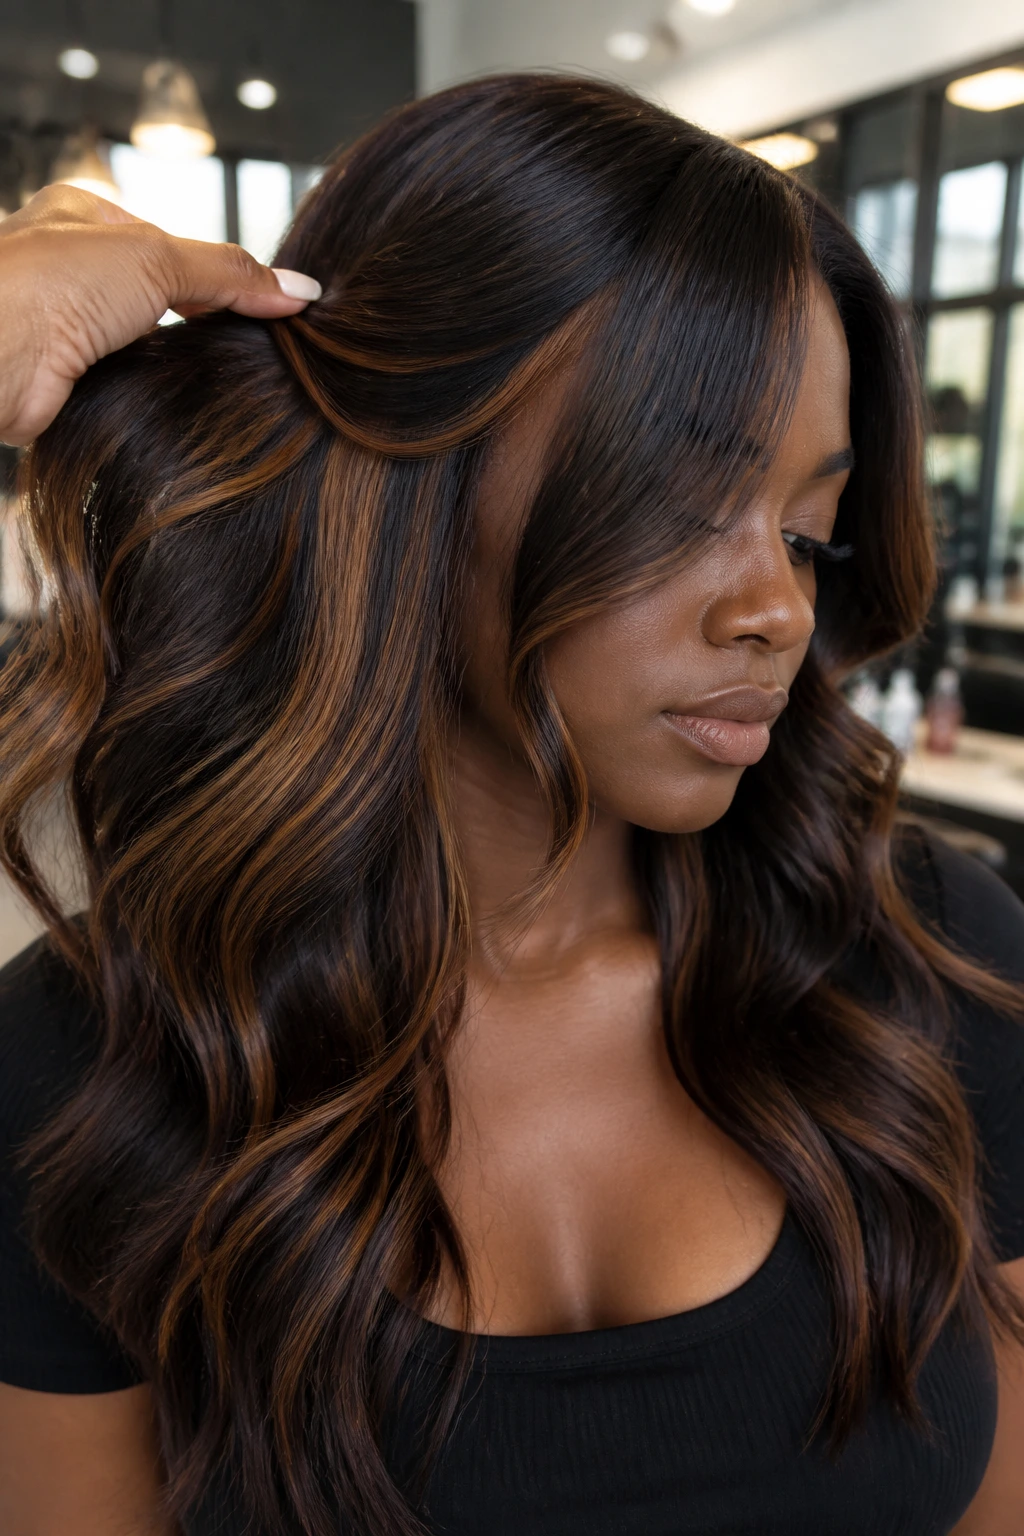
16. Chocolate-Drip Midlength Ribbons
This look sits in the middle of the hair — not at the root, not only at the ends. That middle-zone placement is what gives it the “drip” effect, like the caramel is melting through dark chocolate.
It is one of the nicer options for shoulder-length hair because the lighter ribbons have room to show without taking over the whole cut. Deep skin tones like this version when the caramel is more toasted than golden. The darker the base, the cleaner the contrast looks.
There’s also a practical upside: midlength ribbons grow out softer than root-heavy foils, and they still show when you tuck the hair behind the ear or wear it half-up.
17. Golden Brown Face Framing
This is the warmer cousin of the honey frame. The pieces are still caramel, but they lean more golden-brown and less amber. That small difference can matter a lot on skin that already has a warm or golden undertone.
I like this version when the goal is brightness near the face without making the front pieces look pale. The golden tone helps the light catch, but the brown keeps it usable. It’s flattering on curled styles, blowouts, and layered cuts that skim the jaw.
If you want a softer salon look, keep the front pieces narrow and let them taper into a few mid-length strands. The line disappears faster that way.
18. Glossed Brunette with Barely-There Caramel
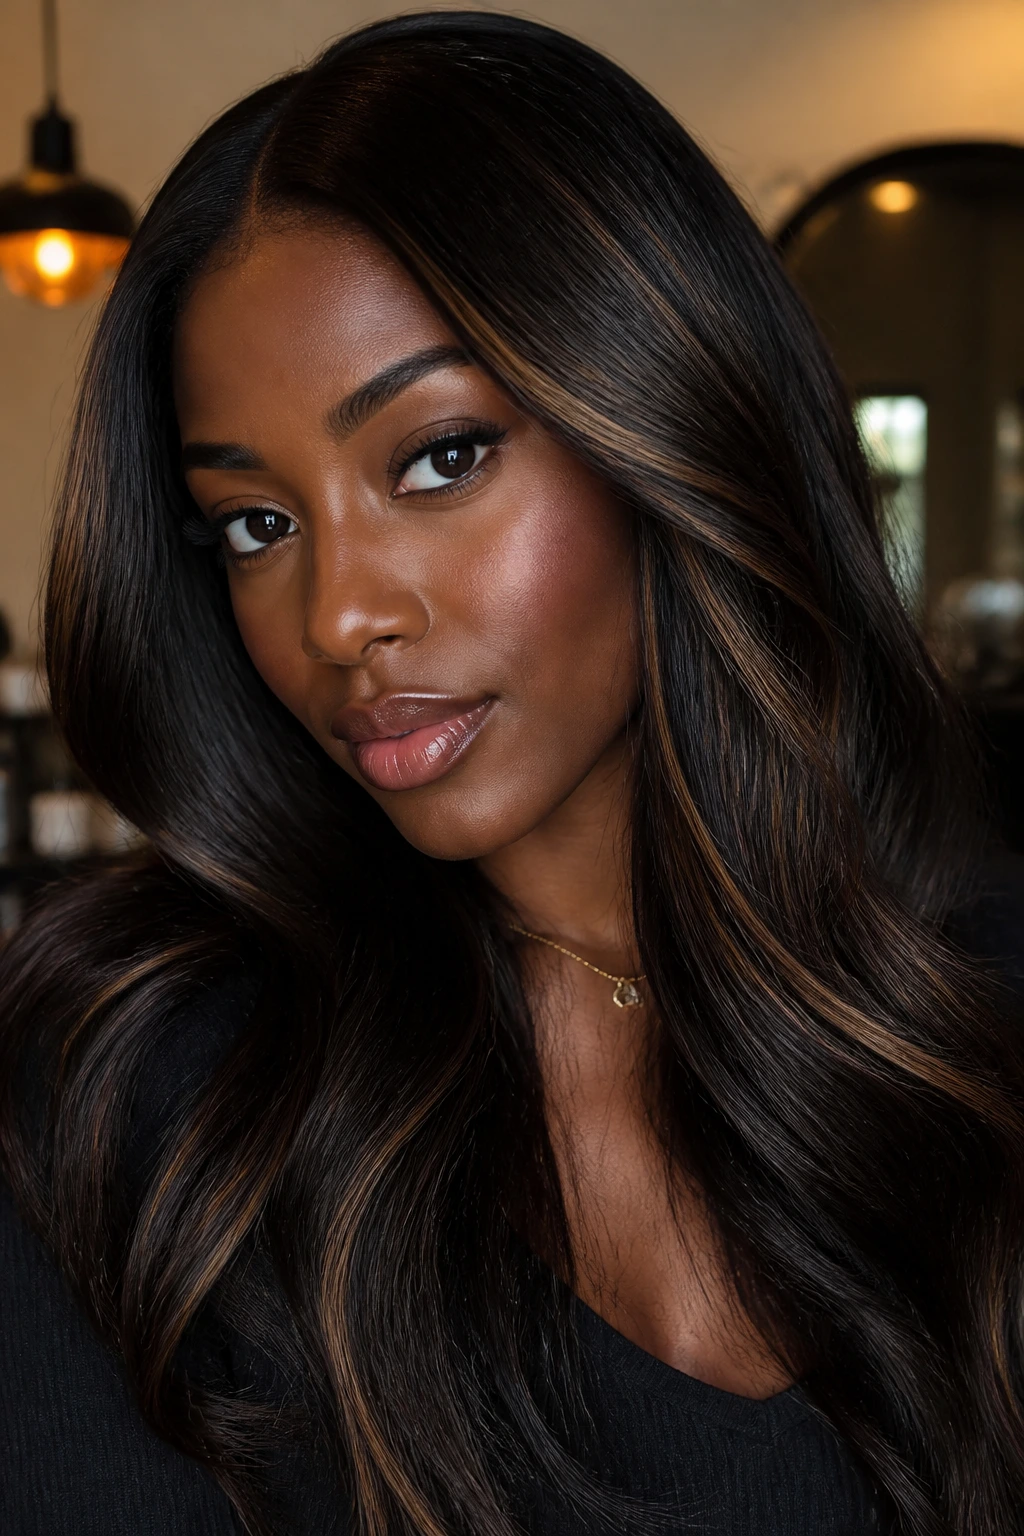
Not every caramel look has to read from across the street. Sometimes the best move is a dark brunette gloss with only a handful of caramel strands woven through the surface layer.
That approach is especially good on deeper skin if you want the hair to look healthier and shinier rather than lighter. The caramel acts like punctuation. A few well-placed lines can change the whole vibe without changing the identity of the hair.
This is the sort of style that looks expensive in the quiet way — and I mean that in the most practical sense. It needs a good gloss, regular conditioning, and a colorist who knows when to stop pulling pieces.
19. Layered Coil Pop Highlights
Coily hair does not need broad, chunky lightening to look dimensional. Often, the smartest caramel sits on the outer curve of the coil and the top of each section, where it can catch light without destroying the shape.
This version is useful if you want the coil pattern to stay the main event. The highlight should help the curl read, not flatten it. On deep skin tones, the contrast looks best when the caramel is narrow and warm enough to sit inside the brunette family.
If you wear your hair in a tapered cut, this placement can make the shape look more sculpted. If your curls are longer, it gives the crown some lift without forcing brightness into every strand.
20. Side-Part Sweep with Warm Caramel
A deep side part changes where the eye goes, and warm caramel on the heavier side of the part makes that shift obvious. It’s a neat little trick, especially if your hair has body and some bend.
The highlight placement should follow the sweep of the part line, almost like a spotlight. On deep skin, that warm caramel reads best when the rest of the hair stays dark enough to support it. Too much light and the shape loses the contrast that makes the style work.
This is a good choice if you often wear your hair tucked to one side, curled away from the face, or styled into a side-swept blowout. It gives you movement without a full head of obvious light pieces.
21. Tapered Pixie with Tiny Toffee Strokes
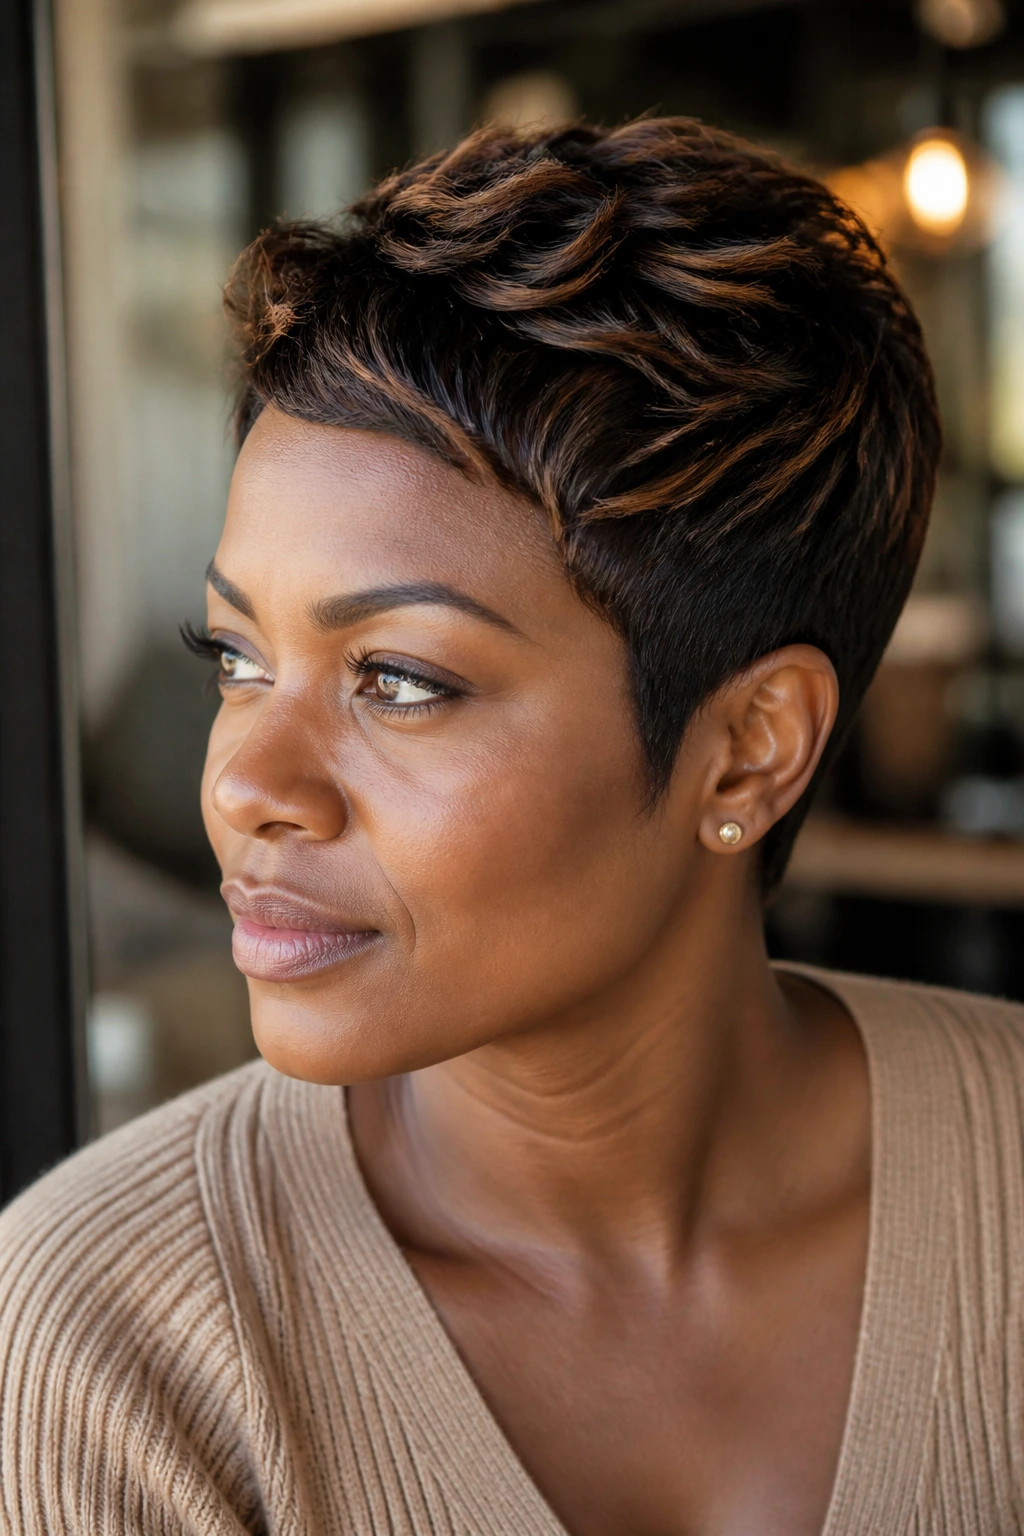
Short hair can carry caramel just fine — it only needs a smaller hand. Tiny toffee strokes in a tapered pixie bring out the shape of the cut, especially around the crown and the longer top pieces.
The color should look deliberate, not busy. A few fine strokes are enough because the haircut does the heavy lifting. On deep skin, a warm toffee tone keeps the short cut from looking flat under indoor lighting.
This style is sharp if you like texture paste, finger styling, or a side-swept fringe. The highlights help the edges show up, which matters a lot on cropped cuts where every line is visible.
22. Retro Chunky Highlights, Softer Version
Chunky highlights are back, but they work better when they’re softened at the edges. Think broader caramel pieces spaced through the front and top, then blended enough that they do not look like hard stripes from a distance.
On deep skin, this can be a fun move if you want contrast and nostalgia without the harshness of old-school striping. The caramel should still feel brown-based — a rich syrup tone, not pale blond. That keeps the look wearable.
I’d keep the chunks around the face and through the crown rather than scattering them everywhere. Too many broad pieces can start to fight the texture of the hair. A few strong ones. That’s enough.
23. Soft Mocha Ribbon Balayage

This is the cooler end of the caramel family. The ribbons sit between mocha and brown sugar, which makes the whole look less golden and a little smokier. Deep skin tones with cooler or neutral undertones often wear this beautifully.
The nice part is that it still reads as caramel, just not the shiny dessert version. The color lands in a quieter register. It’s the kind of highlight that works in daylight, office light, and evening light without changing personality every time you move.
If your base is already a deep brunette with cool shine, this may be the easiest caramel lane to stay in. It blends without too much warmth, which is harder to do than it sounds.
24. Almond-Caramel Underlights
Underlights hide the color beneath the top layer, which means the caramel shows when you flip the hair, pin it up, or catch a bit of movement. On deep skin, that hidden flash can look especially nice because it feels playful without overwhelming the face.
This is a smart pick if you like dark hair most days but still want a change. The lighter panels do not have to cover the whole head to matter. A few underlayers near the nape or beneath the crown can shift the entire feel of the style.
It also works well with straightened hair and longer layers, since the top section can part just enough to reveal the tone underneath. A little surprise, not a full announcement.
25. Smoky Brown Butter Highlights
This is the richest version in the bunch. The caramel is muted, brown-based, and touched with a smoky edge so it does not go loud or yellow. On deep skin, that kind of shade can look beautifully controlled.
What makes it work is the restraint. The highlight should feel like warm light filtered through brown glass, not like a bright stripe pasted on the hair shaft. If the base is very dark, a few smoky butter ribbons through the mid-lengths and around the face are enough.
This is the style I’d hand to someone who wants depth first and brightness second. The hair stays dark at a glance, but the movement tells a different story once it shifts.
Smart Shade Picking for Dark Brown Caramel Highlights
Warm undertones want toasted caramel: If your skin leans golden, olive, or peach, shades like toffee, amber, brown sugar, and honeyed caramel usually sit comfortably against the face. They look soft because they echo the warmth already in the skin instead of trying to outshine it.
Neutral undertones have the most room: A neutral deep complexion can wear both golden caramel and smoked mocha-caramel. That means you can decide how bold you want the contrast to be without the color fighting your skin.
Cool undertones need a little more brown in the mix: If your complexion reads red, blue, or neutral-cool, stay away from yellow blond caramel. A mocha-caramel, chestnut caramel, or muted maple tone usually looks cleaner.
Texture changes the read of the color: Tight curls make highlights look brighter because the hair moves in small pieces. Straight or blown-out hair shows the placement more clearly, which is why tonal control matters so much there.
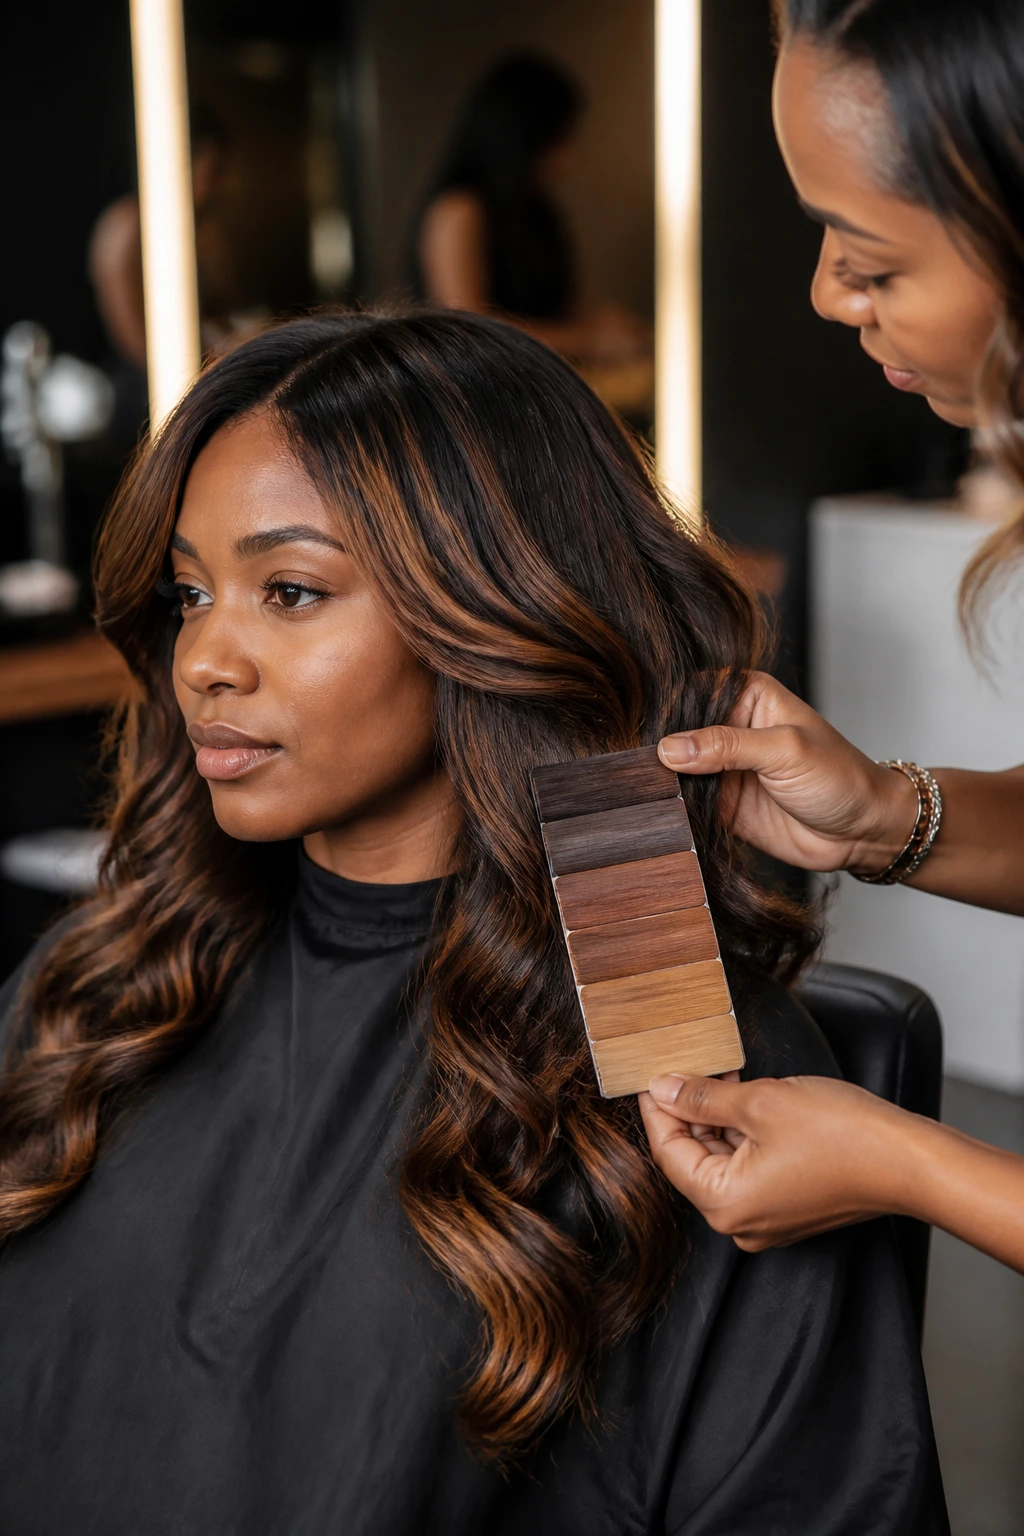
What to Bring to the Salon Chair
- Reference photos with similar base depth: Photos of deep brunette hair are more useful than blond inspiration shots, because you want the tone family to match first.
- A short note on your undertone: If you know your skin reads warm, neutral, or cool, say it out loud. That saves a lot of guesswork.
- A picture of your hair in natural light: Indoor phone photos can lie. Natural light shows the true brown and red tones in your base.
- Sectioning clips or a hair tie if your stylist wants your hair fully visible: Small thing, big help.
- Color-safe shampoo and conditioner: You’ll need them after the service, and it’s better to have them ready than to wash with a stripping formula.
- Leave-in conditioner: Lightened pieces on darker hair usually need extra moisture, especially if your texture is curly or coily.
- Heat protectant: If you smooth, stretch, or blow-dry your hair, this is non-negotiable.
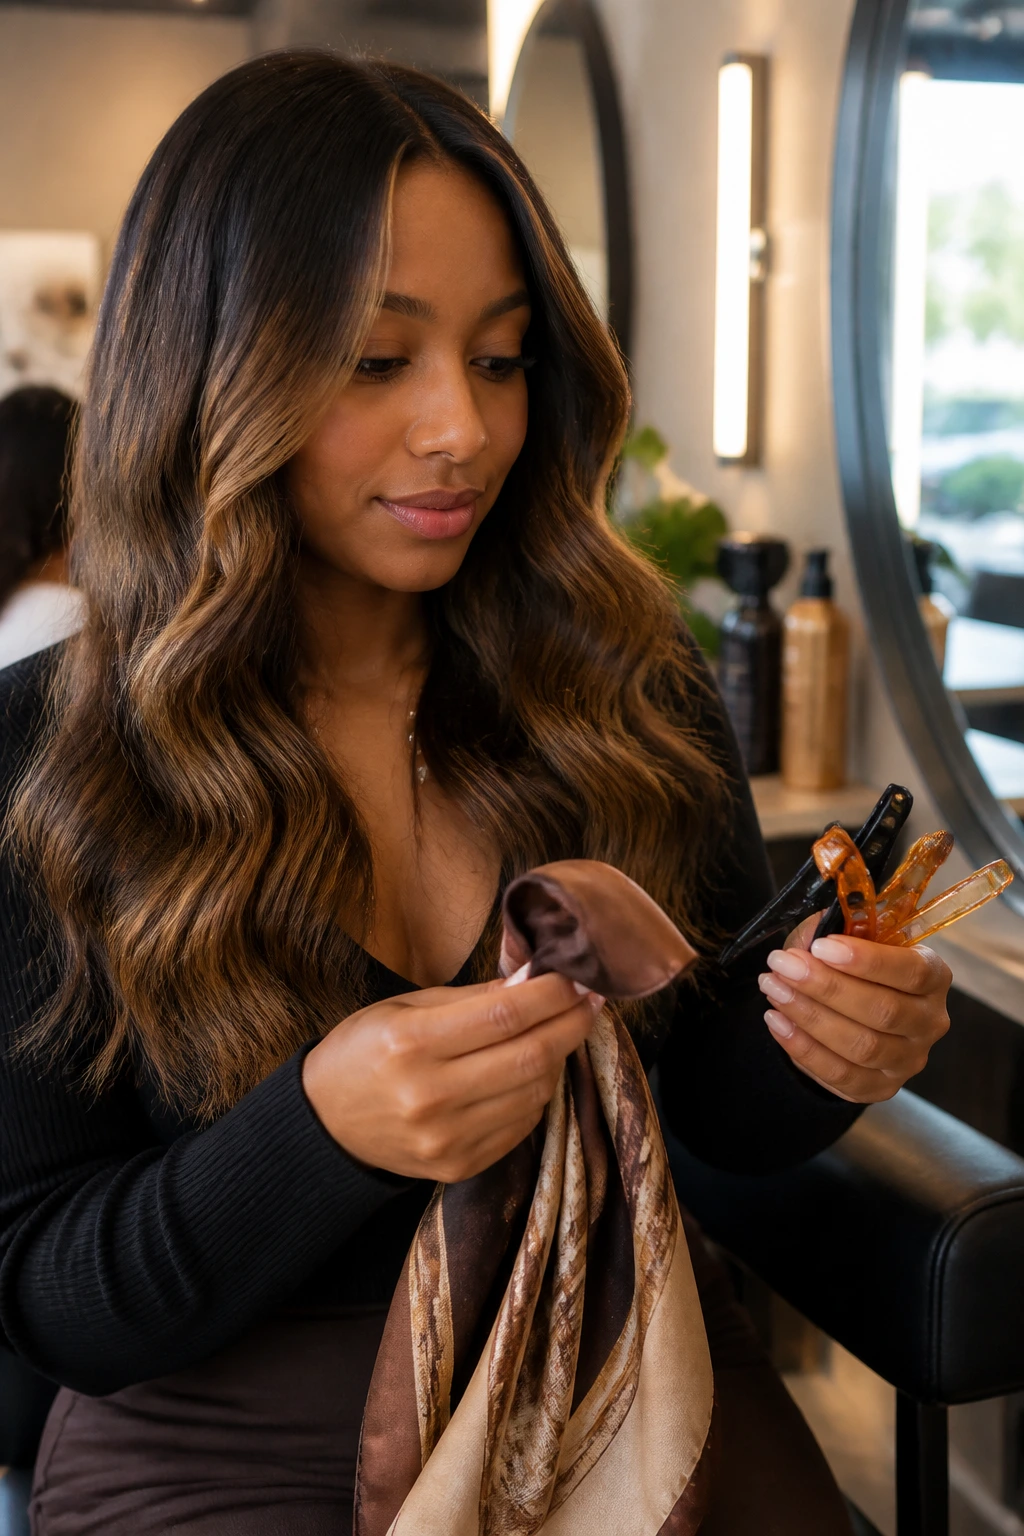
- A silk scarf or bonnet: Caramel shows dullness fast if the hair rubs against cotton all night.
- Blue or purple shampoo, used carefully: Optional, but useful if the caramel starts drifting brassy.
Picking the Right Caramel at the Consultation
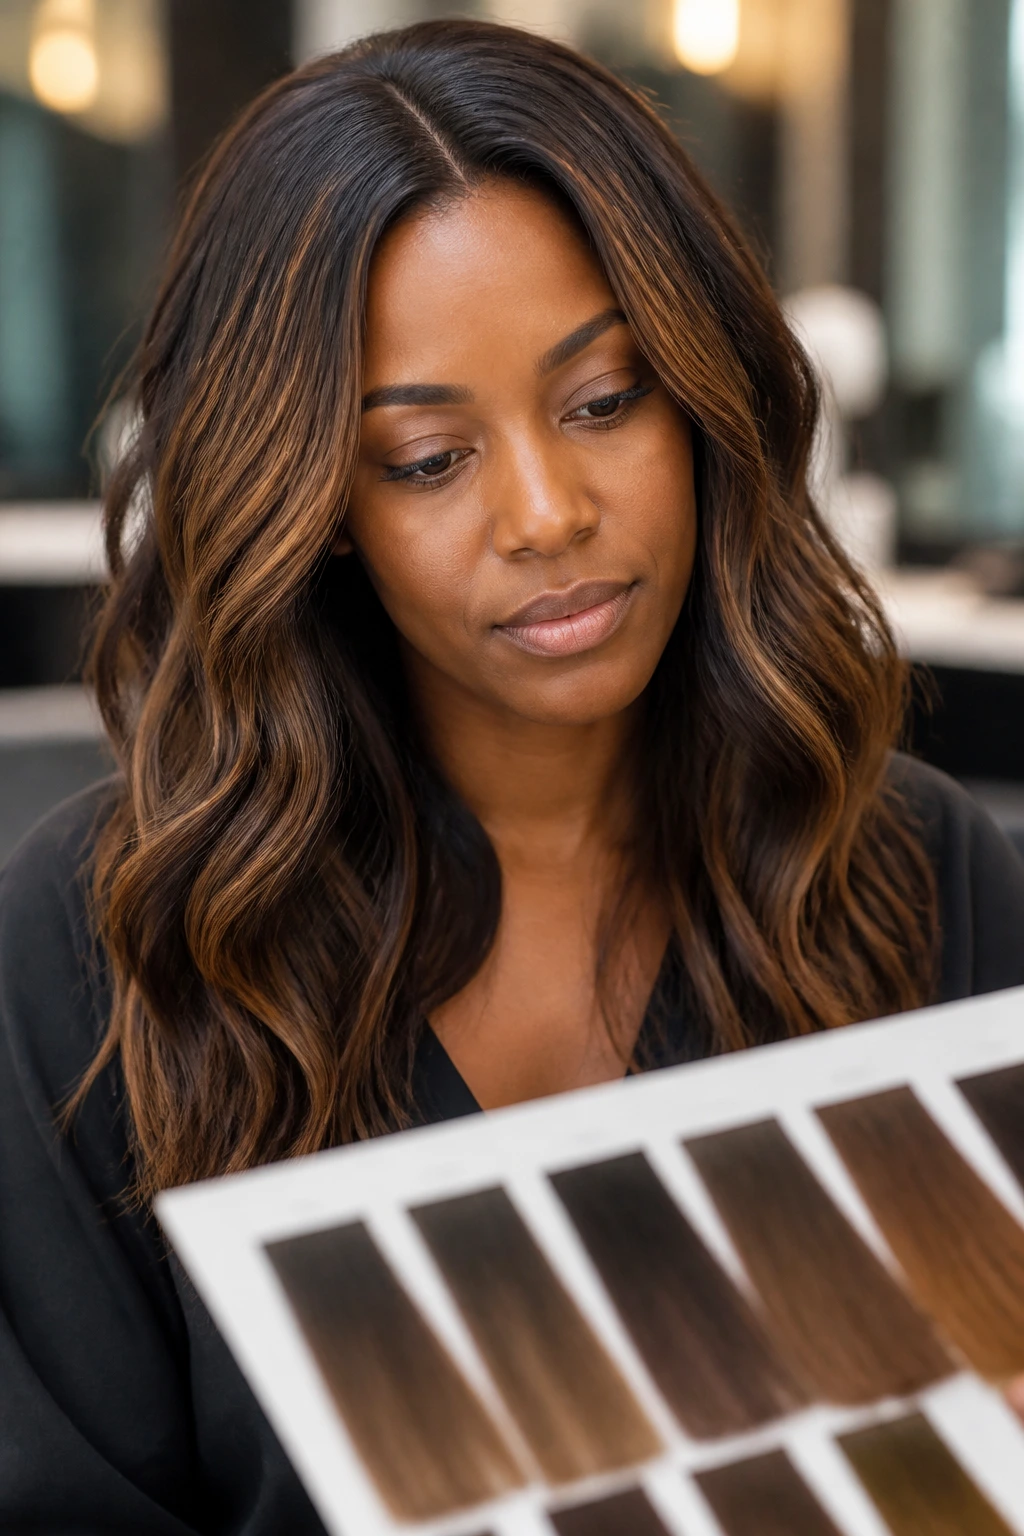
Bring more than one photo, and make sure the examples all sit near your natural base depth. A stylist can usually read a good inspiration shot in under thirty seconds if the tone and placement are clear. What usually confuses the room is a photo of soft brunette caramel next to a picture of pale blond balayage. Those are not the same conversation.
Ask where the lightest pieces will live. Face frame? Crown? Ends only? Underlayers? That question matters more than saying you want “caramel” and hoping for the best. Caramel without placement is a vague wish. Caramel with placement is a plan.
If your hair is fragile, stretched from previous color, or very porous, stay on the side of restraint. Fewer pieces can still make a real difference. A gloss, a softer face frame, and a few ribbons through the top can do more than a full head of over-lightened sections that need repair three weeks later.
How to Wear These Looks So They Read Rich
Presentation: Loose curls, a soft blowout, or even a simple bend through the ends will show off the caramel better than pin-straight hair with no movement. The lighter strands need a little curve to catch light.
Accompaniments: Layered cuts, curtain bangs, side parts, and tapered ends help the highlight pattern make sense. A blunt shape can still work, but the placement has to be cleaner.
Scale: Short hair usually needs fewer, stronger pieces. Long or dense hair can handle more ribbons and still look balanced. The goal is to match the amount of color to the amount of hair the eye can actually see.
Finish Pairing: A light gloss serum, a shine spray, or a cream that smooths the cuticle keeps caramel from looking dry. That little sheen is the difference between warm and dusty.
Small Moves That Make Caramel Look Better
Gloss Boost: Ask for a beige or neutral gloss after the highlight service if the caramel starts reading too yellow. That keeps the tone brown-based and polished instead of brassy.
Customization: Add one or two darker lowlights in between brighter ribbons if the hair feels too light on top. The contrast gives the caramel a place to live.
Serving Suggestions: Tuck one side behind the ear, bend the front pieces away from the face, or wear a half-up style with the lighter sections left loose. The whole point is to let the placement show.
Make-It-Yours: If you want low maintenance, choose balayage or babylights. If you want drama, ask for thicker face pieces. If your skin is cool-toned, mute the gold. If your skin is warm, keep the caramel toasted and soft.
Keeping the Color Fresh Without Overdoing It
Caramel fades. That is normal. The trick is slowing the fade before it gets dull or orange. I’d treat the first 48 hours after coloring as a no-wash window if your stylist agrees, because fresh color needs a little time to settle into the cuticle.
After that, shampoo less often than you think. Two to three washes a week is plenty for many textured styles, and using a sulfate-free shampoo helps the tone hang on longer. If you wear your hair curly or coily, keep the cleanser mostly at the scalp and let the suds rinse through the lighter pieces on the way down. That keeps the ends from drying out.
Glosses and toners matter more than most people admit. A quick salon gloss every 4 to 8 weeks can pull the caramel back into that brown-sugar range before brass creeps in. Root touch-ups for balayage or softer highlights usually land around 8 to 12 weeks. Full refreshes can wait longer if the placement is soft and the grow-out is doing its job.
Heat changes the tone fast. Always use heat protectant before a blow-dryer, flat iron, or curling iron, and keep the temperature modest if your hair has already been lightened. Frizz and dryness make caramel look lighter than it is. Moisture keeps the depth intact.
Variations and Adaptations to Try
Warm Honey Shift: Ask for a slightly warmer caramel if your skin has golden undertones and your hair already carries a little red. The result is brighter around the face and softer through the ends.
Mocha Smoke Blend: Choose this if your complexion runs cool or neutral and you want the highlight to feel quieter. The caramel gets muted just enough to sit inside the brunette base instead of floating above it.
Curly Coil Halo: Concentrate the lighter pieces around the perimeter of curls and the outer crown. That makes the shape of the coil more visible without loading the whole head with light sections.
Short-Cut Spark: On bobs, lobs, and pixies, keep the caramel pieces smaller and more deliberate. Too much color on a short cut can look busy, while a few tight ribbons bring out the structure of the cut.
High-Contrast Face Frame: For a bolder look, keep the face pieces thicker and brighter than the rest of the head. That works well when the rest of the hair stays dark and glossy.
Low-Maintenance Root Stretch: Ask for a darker root and softer blend through the mids if you do not want frequent salon visits. The grow-out stays softer, and the caramel lasts longer before it needs a full refresh.
Common Mistakes That Make Caramel Highlights Fall Flat
Going too light too fast: The biggest problem is chasing blond instead of caramel. On deep skin, that can make the highlight look disconnected from the base. Keep the lightness inside the brunette family and stop before the pieces turn pale.
Ignoring undertone: Yellow-gold caramel on a cool complexion can read brassy in a hurry. On the flip side, a smoky caramel on warm skin can look muddy. Match the tone to the skin, not the Pinterest board.
Placing color everywhere: When every section gets the same amount of highlight, the hair loses shape. You need darker gaps for contrast. That dark space is part of the design.
Skipping the gloss: Raw highlights often look too bright on day one and too flat a few washes later. A good gloss softens the brightness and keeps the shade richer.
Overprocessing fragile hair: If the hair has been colored before, has rough ends, or stretches too much when wet, aggressive lightening can cause breakage. Fewer sections and a gentler lift are safer than pushing for maximum brightness.
Frequently Asked Questions
Will dark brown caramel highlights work on very deep skin?
Yes, if the caramel stays brown-based and not yellow. Think toffee, brown sugar, amber, or smoky honey rather than pale blond. The richest versions usually look best when the contrast stays controlled.
Do I need bleach for caramel highlights on dark brown hair?
Most of the time, yes, because dark brown hair has to be lifted before it can hold caramel. How much lift you need depends on the final shade you want. A softer caramel may only need a modest lift, while brighter face pieces need more careful lightening.
What if my highlights turn orange instead of caramel?
That usually means the tone needs correcting with a gloss or toner that pulls the warmth back into balance. Orange is often a sign the hair lifted but did not get refined enough after. A beige or neutral gloss can help, but the fix depends on how light the pieces are already.
Are caramel highlights high maintenance?
Not if they’re placed well. Balayage, babylights, and rooted face-framing pieces grow out much easier than all-over foils. The more you keep the root dark, the less obvious the maintenance line becomes.
Can I wear caramel highlights on natural curls or coils?
Absolutely, and the placement matters more than the exact method. Curly and coily hair usually looks best with highlights placed on the outer curve, crown, and perimeter so the pattern stays intact. Too many broad light pieces can flatten the shape.
What’s the difference between caramel highlights and caramel balayage?
Highlights describe the lighter pieces themselves; balayage describes the hand-painted placement method. You can have caramel highlights in foils, balayage, foilayage, or babylights. The method changes how soft or bold the grow-out looks.
How often should I refresh the color?
A gloss every 4 to 8 weeks is a common rhythm if you want the caramel to stay rich. Root touch-ups can stretch farther if the placement is soft, usually around 8 to 12 weeks. If the color still looks glossy and the tone is holding, you do not need to rush back.
Can I get this look on short hair?
Yes, but the color needs to be tighter and more controlled. Pixies and bobs do well with micro-babylights, small face pieces, or a few strategic slices through the top. Short hair shows every inch, so restraint helps.
A Richer Kind of Bright
Dark brown caramel highlights work because they respect the base. They don’t try to replace it. They sit inside the brunette family, then lift the face, the curls, the layers, or the ends just enough to make the whole style move.
That’s the part most people miss. The best caramel on deep skin is not the lightest one. It’s the one that looks like it belongs there from the first glance and gets better the longer you look at it. Choose the placement with care, keep the tone brown enough to stay rich, and the color will carry itself.
A good photo, a clear consultation, and one shade family at a time. That’s usually the difference between “nice highlights” and hair that looks considered every time it catches light.