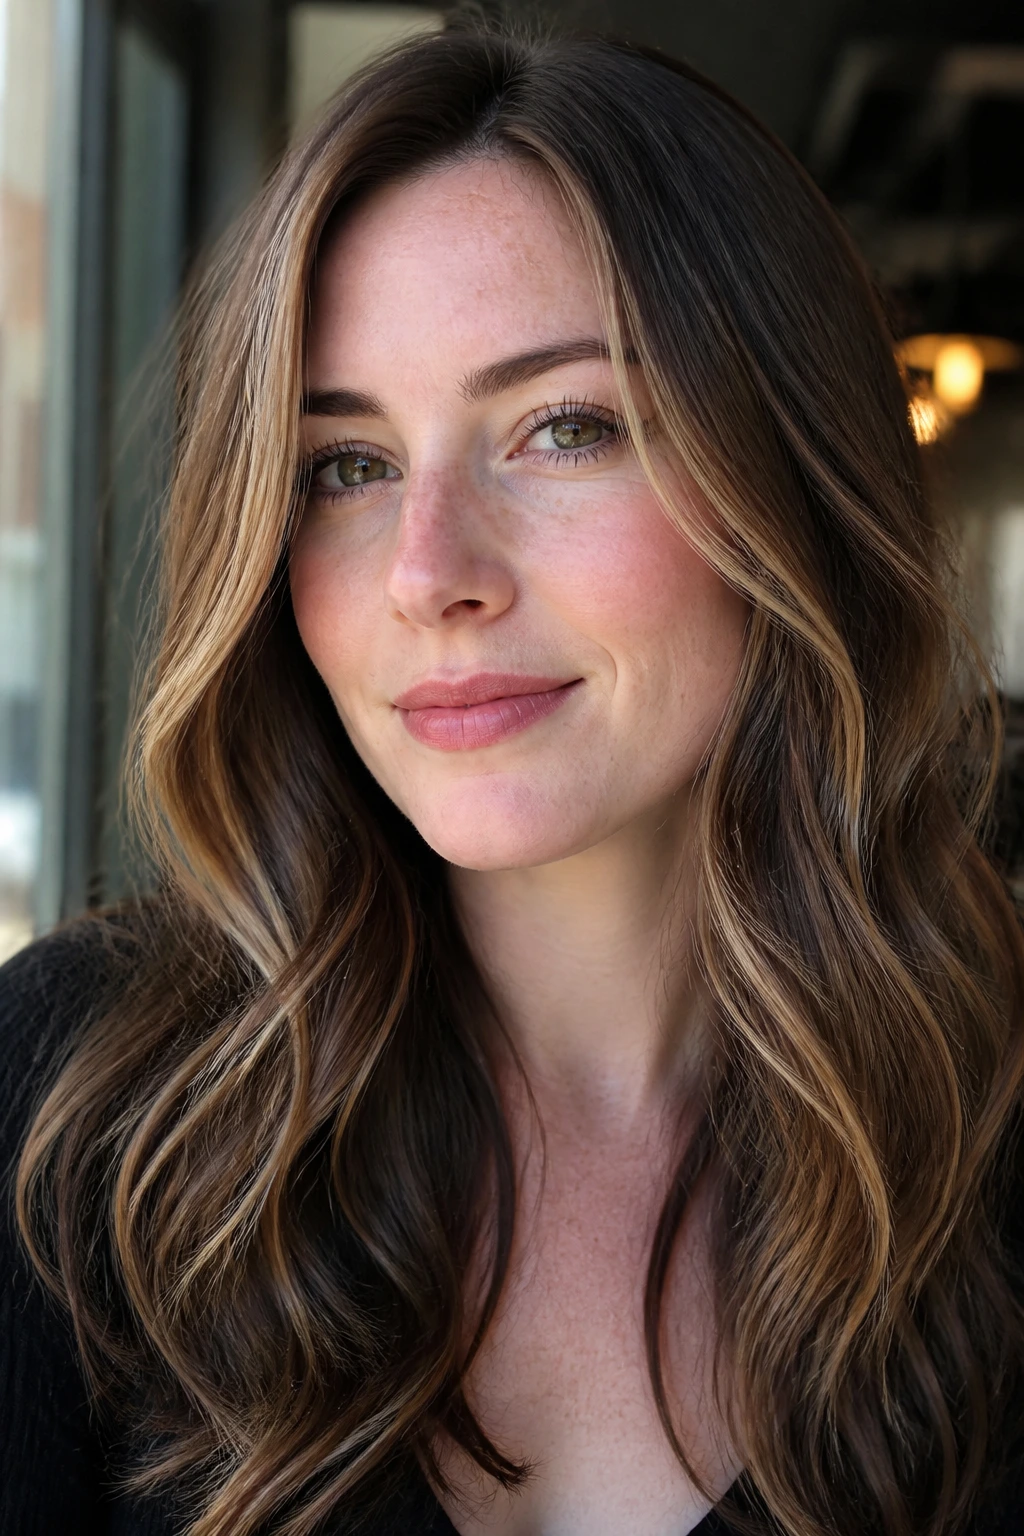
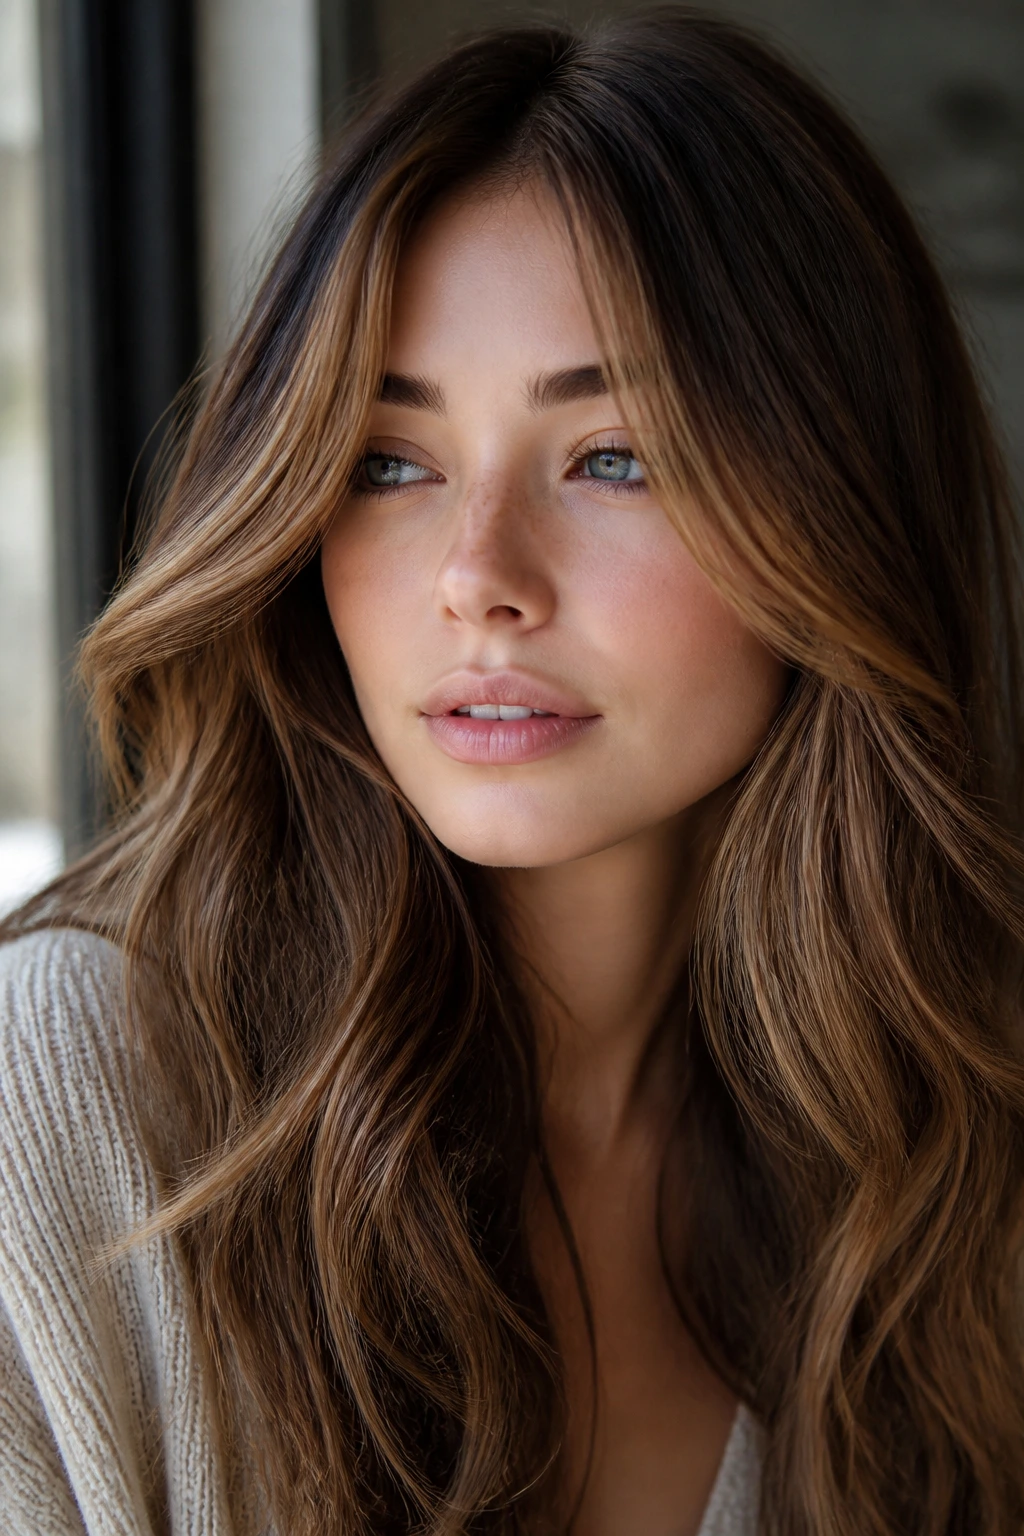
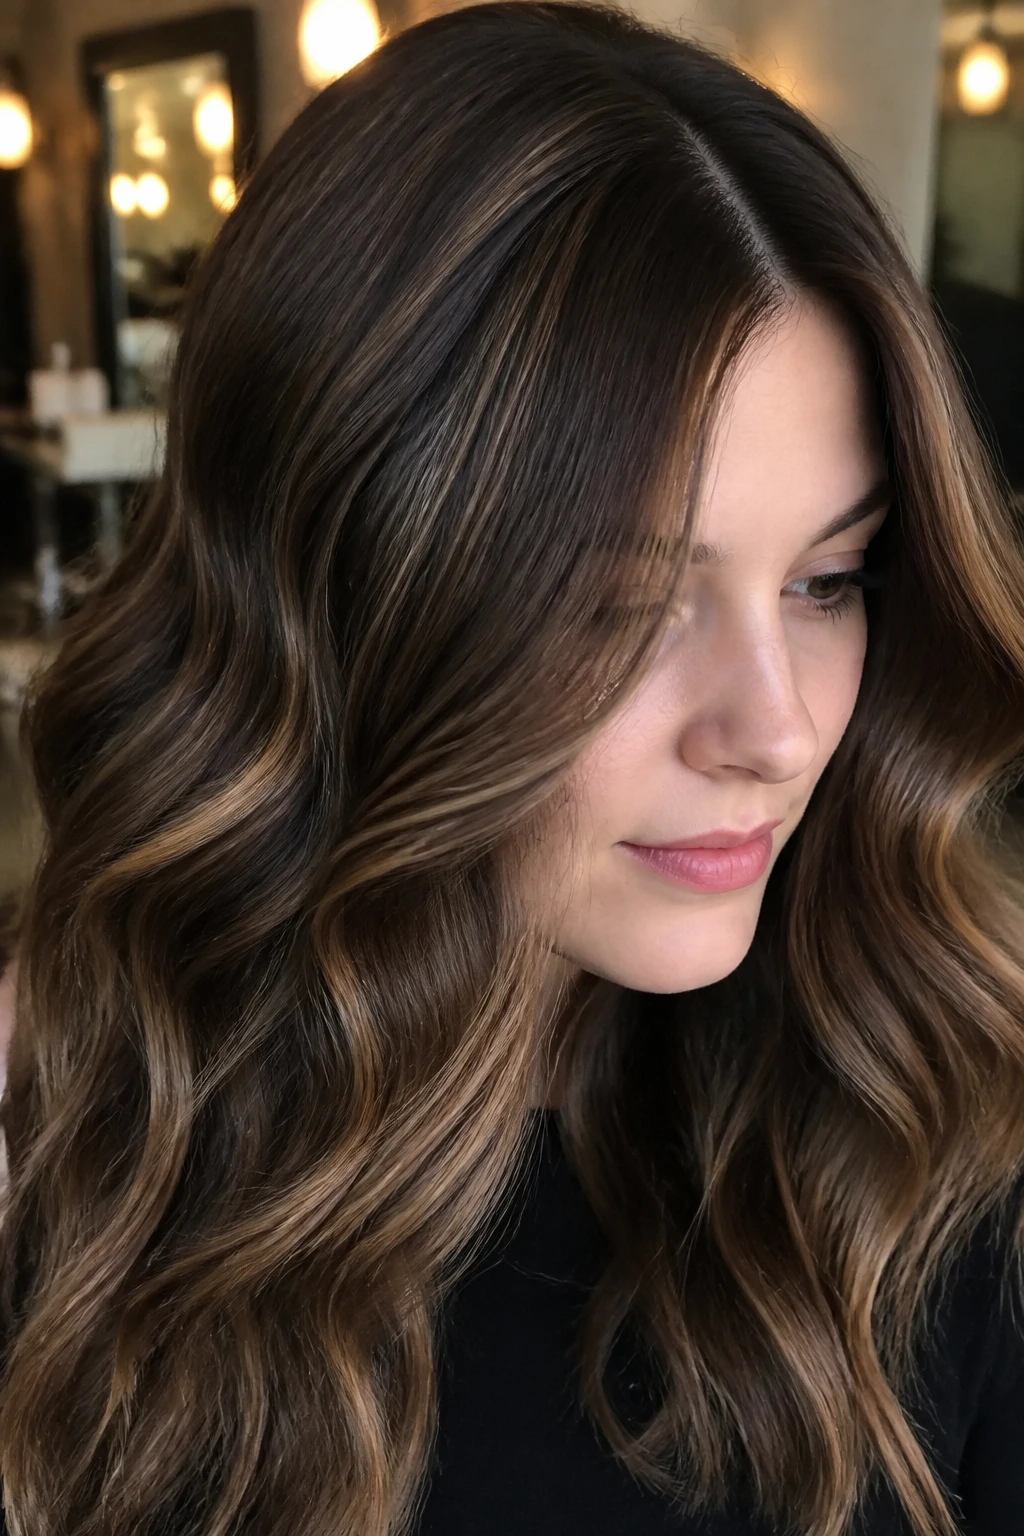
Chocolate caramel highlights can make fair skin look luminous in a way that flat blonde never quite manages. The trick is that the balance has to be exact. Too much gold and the color starts shouting. Too much dark brown and the whole thing can go flat, especially around the hairline where pale skin shows every tonal mistake.
What works best, in my book, is a brown that has enough depth to anchor the face and enough warmth to keep the hair from looking dull in daylight. On fair skin, that usually means chocolate placed a shade or two deeper than your base, then caramel that leans beige, toffee, or soft gold instead of copper. The difference between “expensive dimension” and “striped and brassy” is often only one toner step.
The 25 looks below range from whisper-soft ribbons to bolder money-piece contrast. Some live almost entirely in the midlengths. Others use the hairline as a frame and let the rest stay quiet. Pick the tone first, then decide how obvious you want the placement to be. That order saves a lot of regret later.
Why These Shades Work So Well on Fair Skin
- Soft contrast does the heavy lifting: A medium chocolate base against fair skin gives depth without washing out the face, especially when the lighter pieces are kept thin and broken up.
- Beige caramel beats loud gold: Caramel that leans beige or toasted gold usually flatters pale skin better than orange-gold, which can make the complexion look redder than it is.
- Placement matters as much as color: A face frame, hairline veil, or ribboned balayage changes how the eye reads the whole head, even when the actual shade shift is small.
- The grow-out stays calmer: Root shadow and babylights blur regrowth so you don’t get a hard line at the part after three weeks.
- Texture shows the color better: Waves, bends, loose braids, and even a rough blow-dry catch the different brown tones more clearly than pin-straight hair.
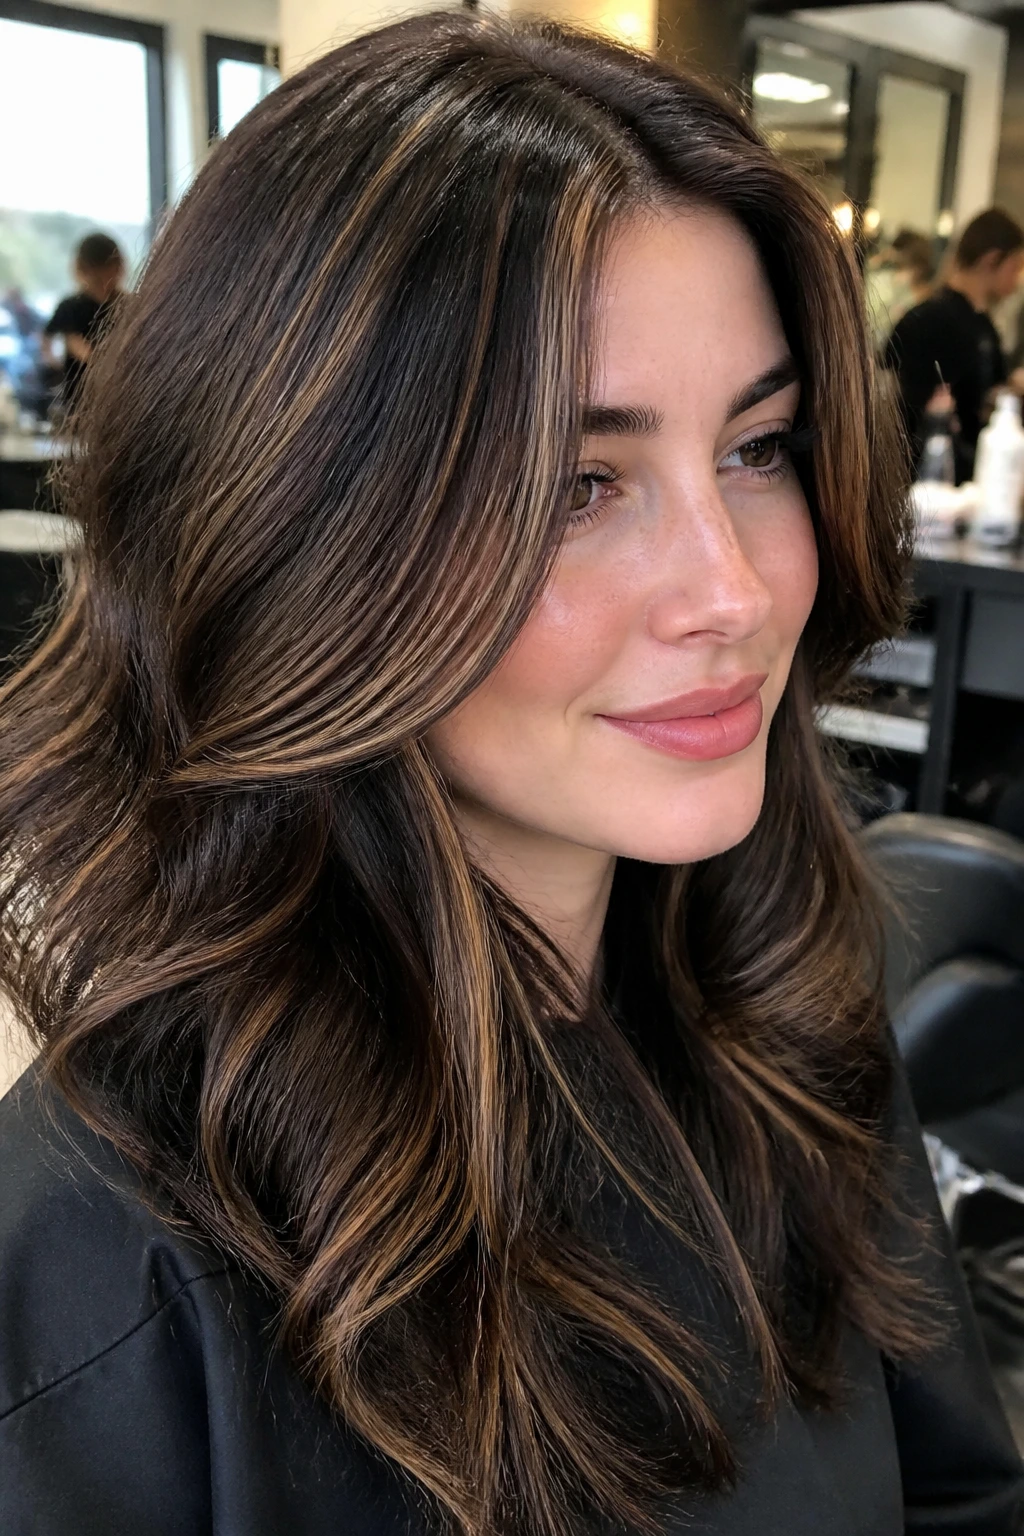
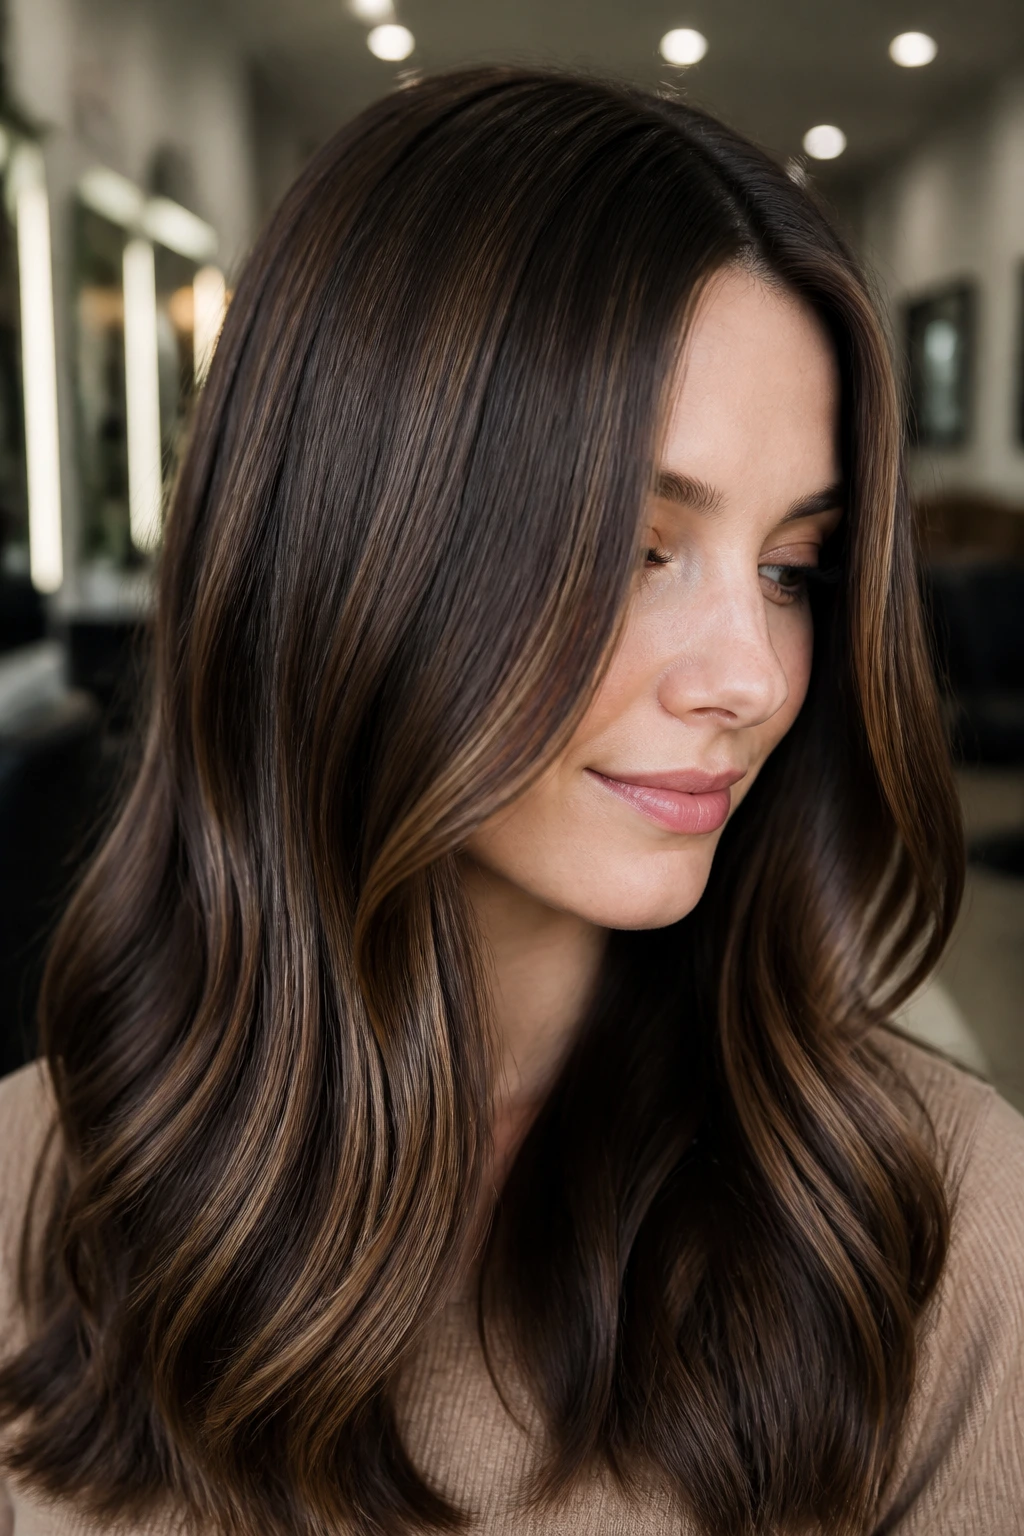
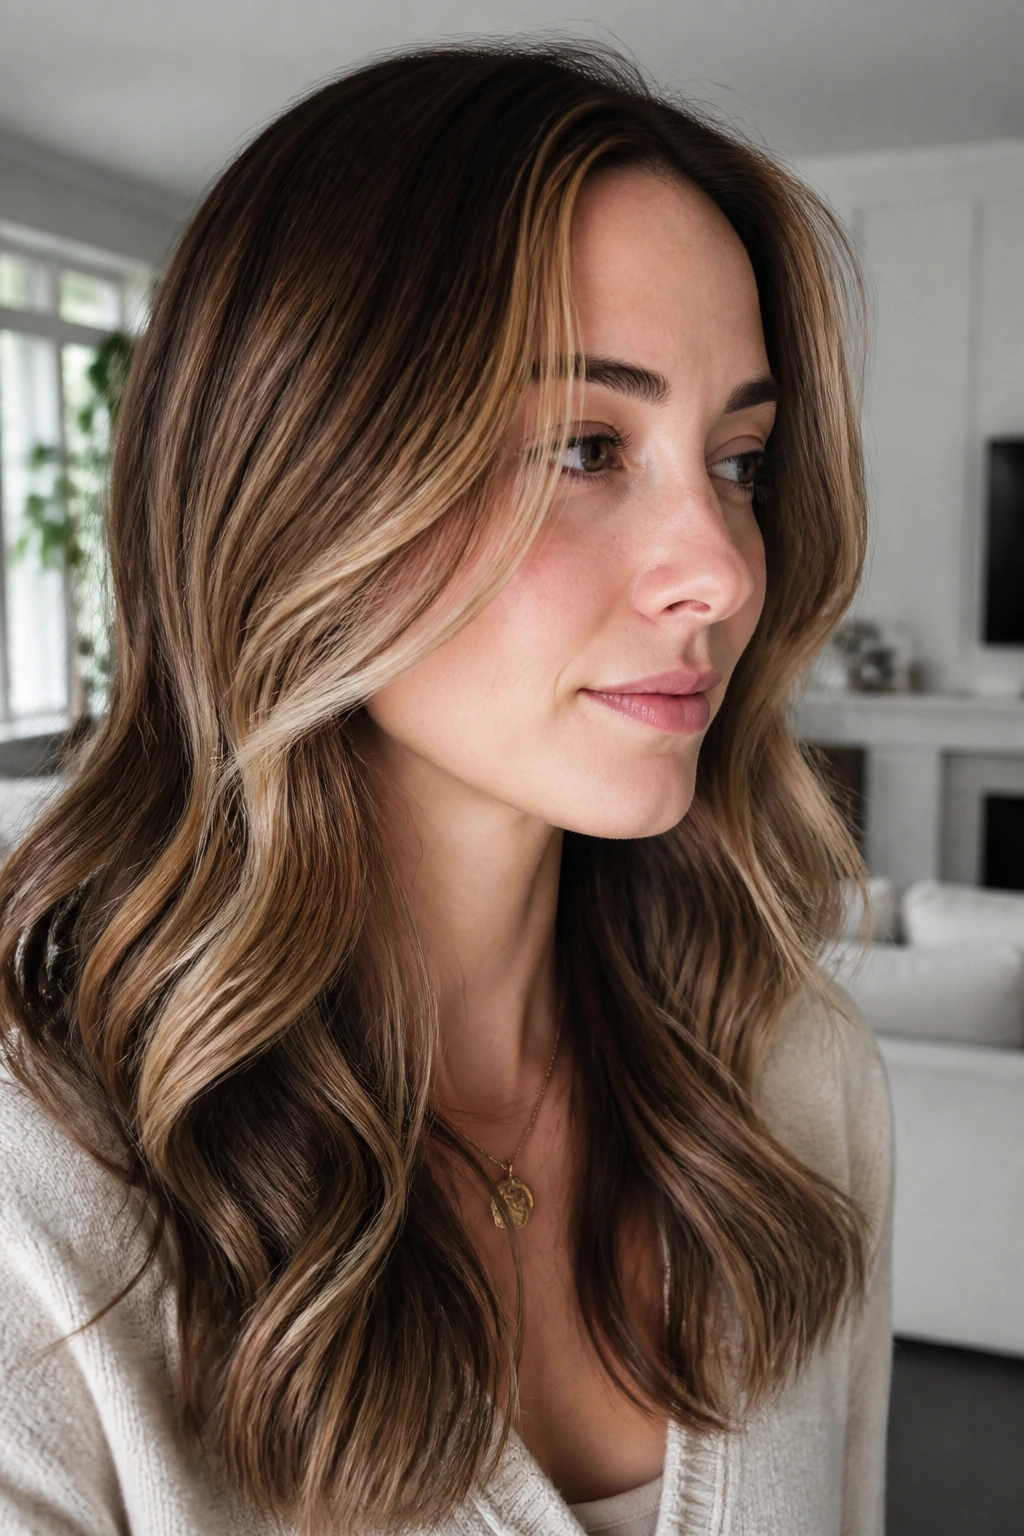
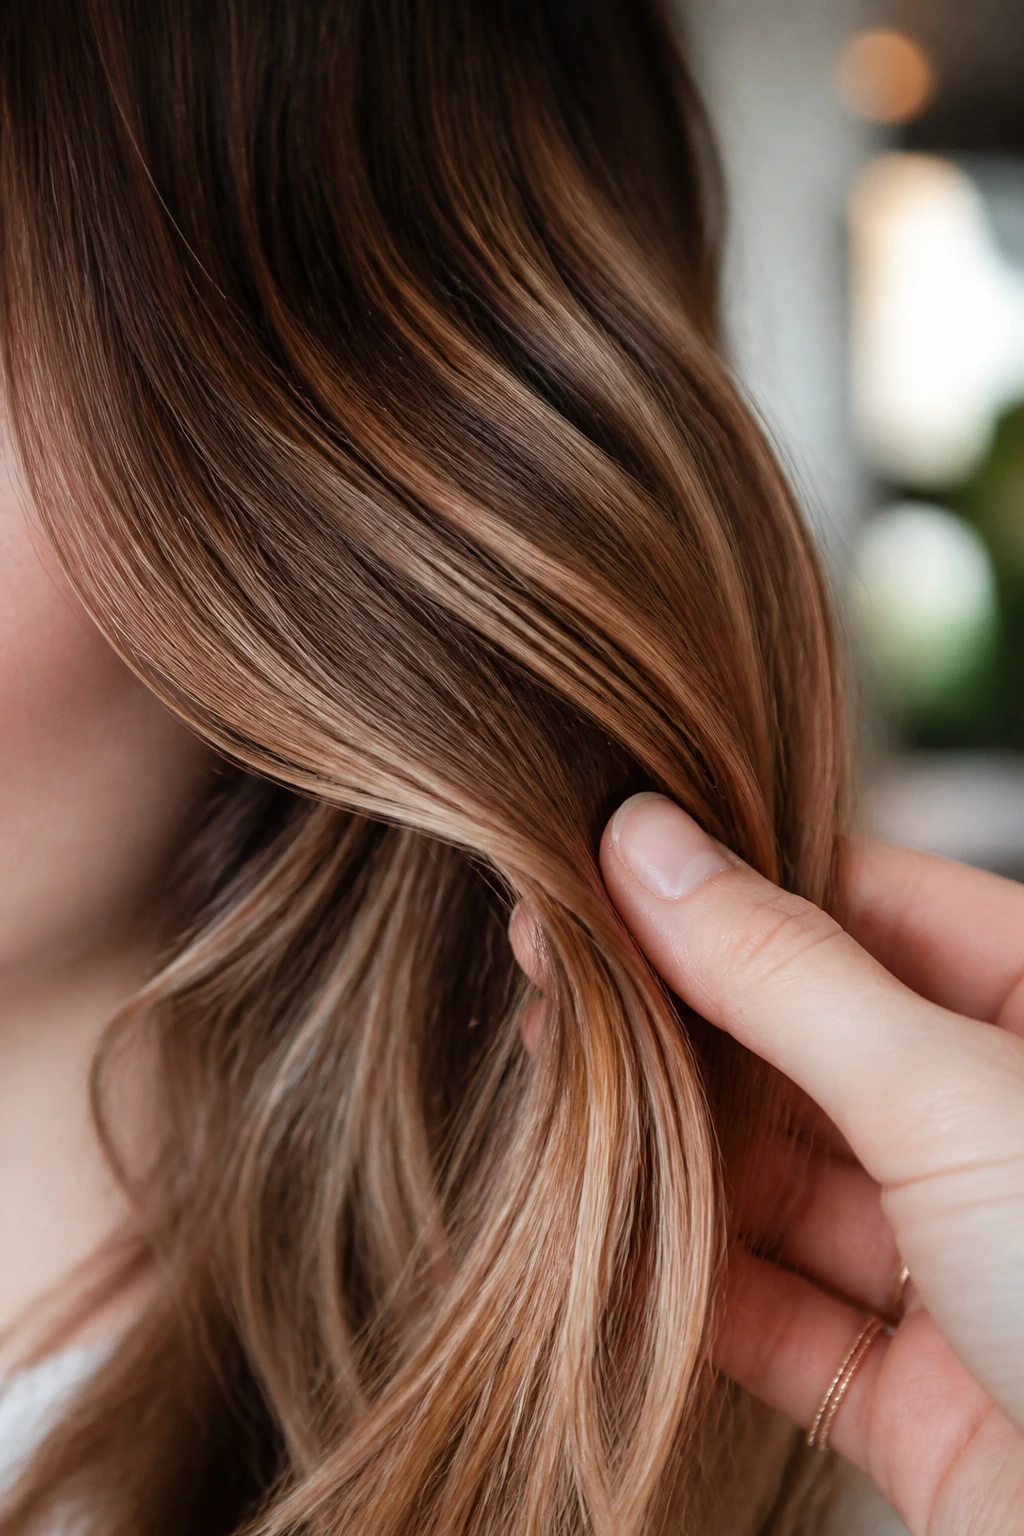
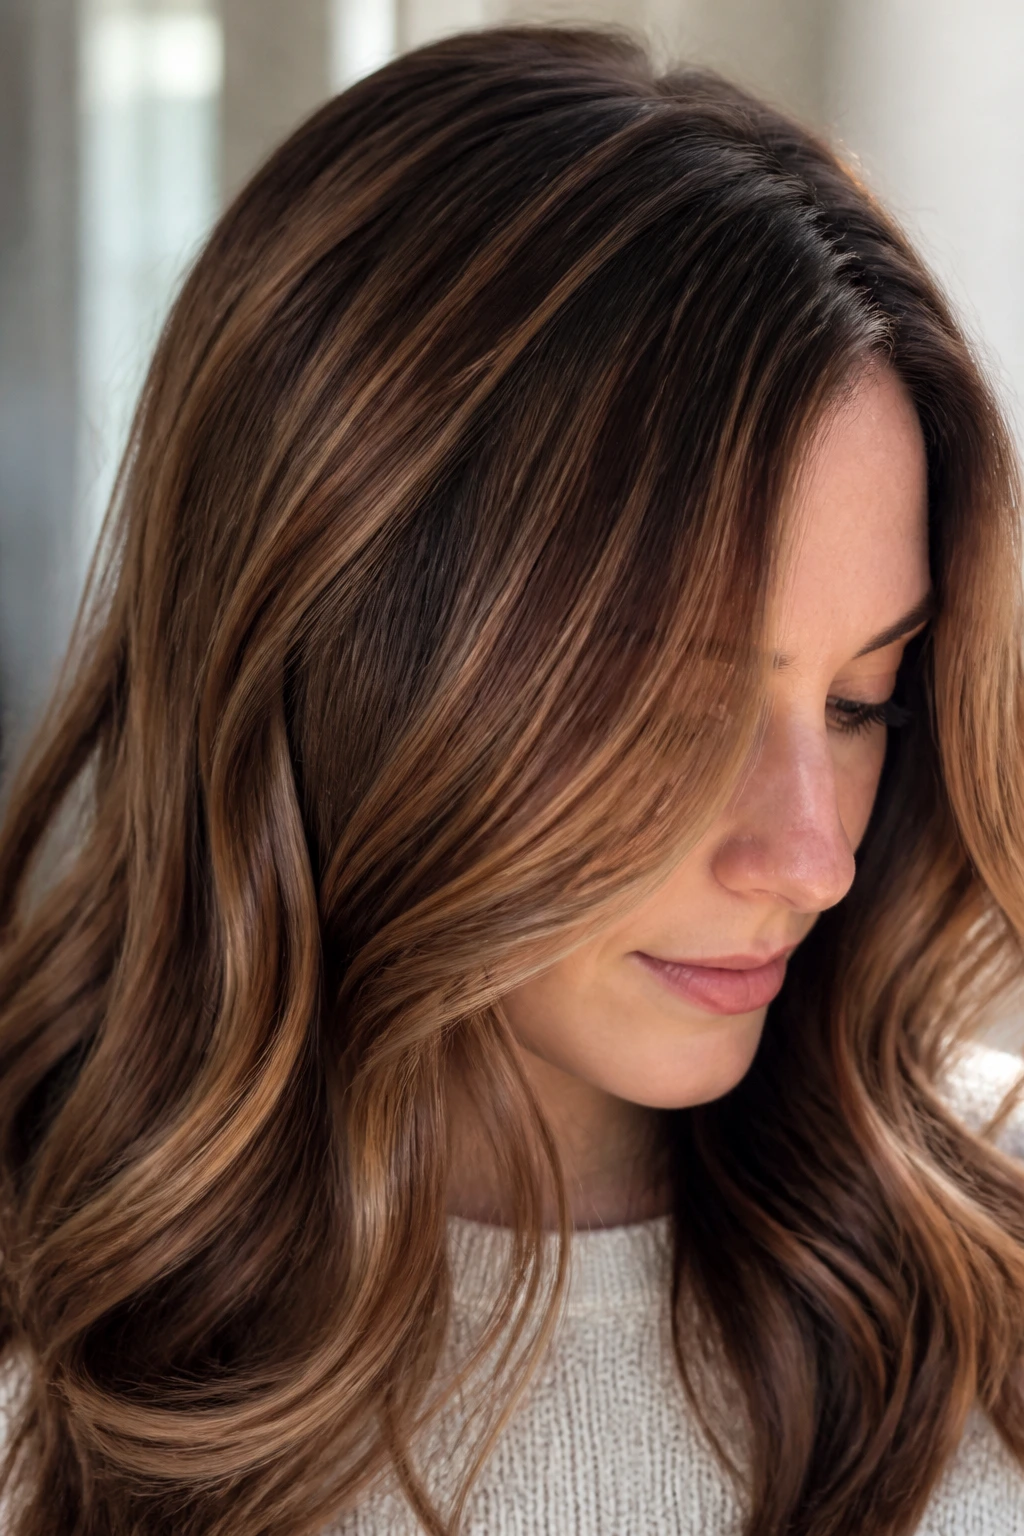
1. Soft Ribbon Balayage
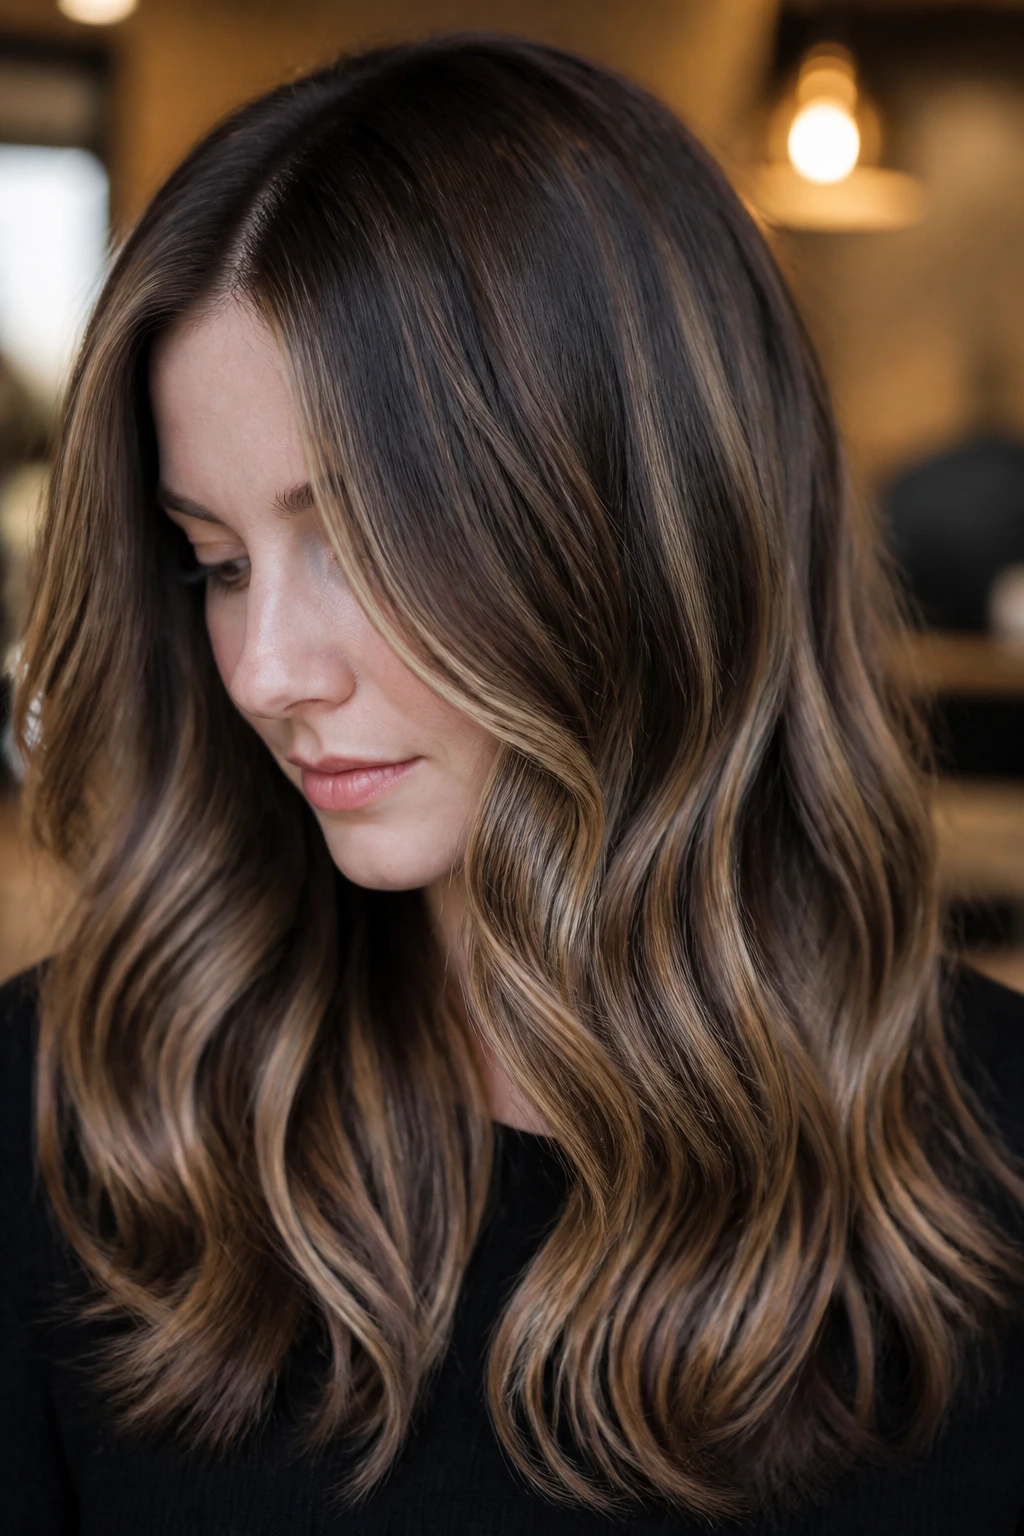
This is the version I reach for when someone wants chocolate caramel highlights that whisper instead of announce themselves. The caramel is painted in thin ribbons through the midlengths and ends, with the chocolate base left deep near the root so the whole head still feels grounded. On fair skin, that keeps the face from going too light and chalky.
Ask for beige caramel, not bright copper. That one detail matters more than people think. The ribbons should look like they were placed by hand, not stamped in with a wide brush, and they should soften as they fall toward the ends.
2. Face-Framing Money Piece
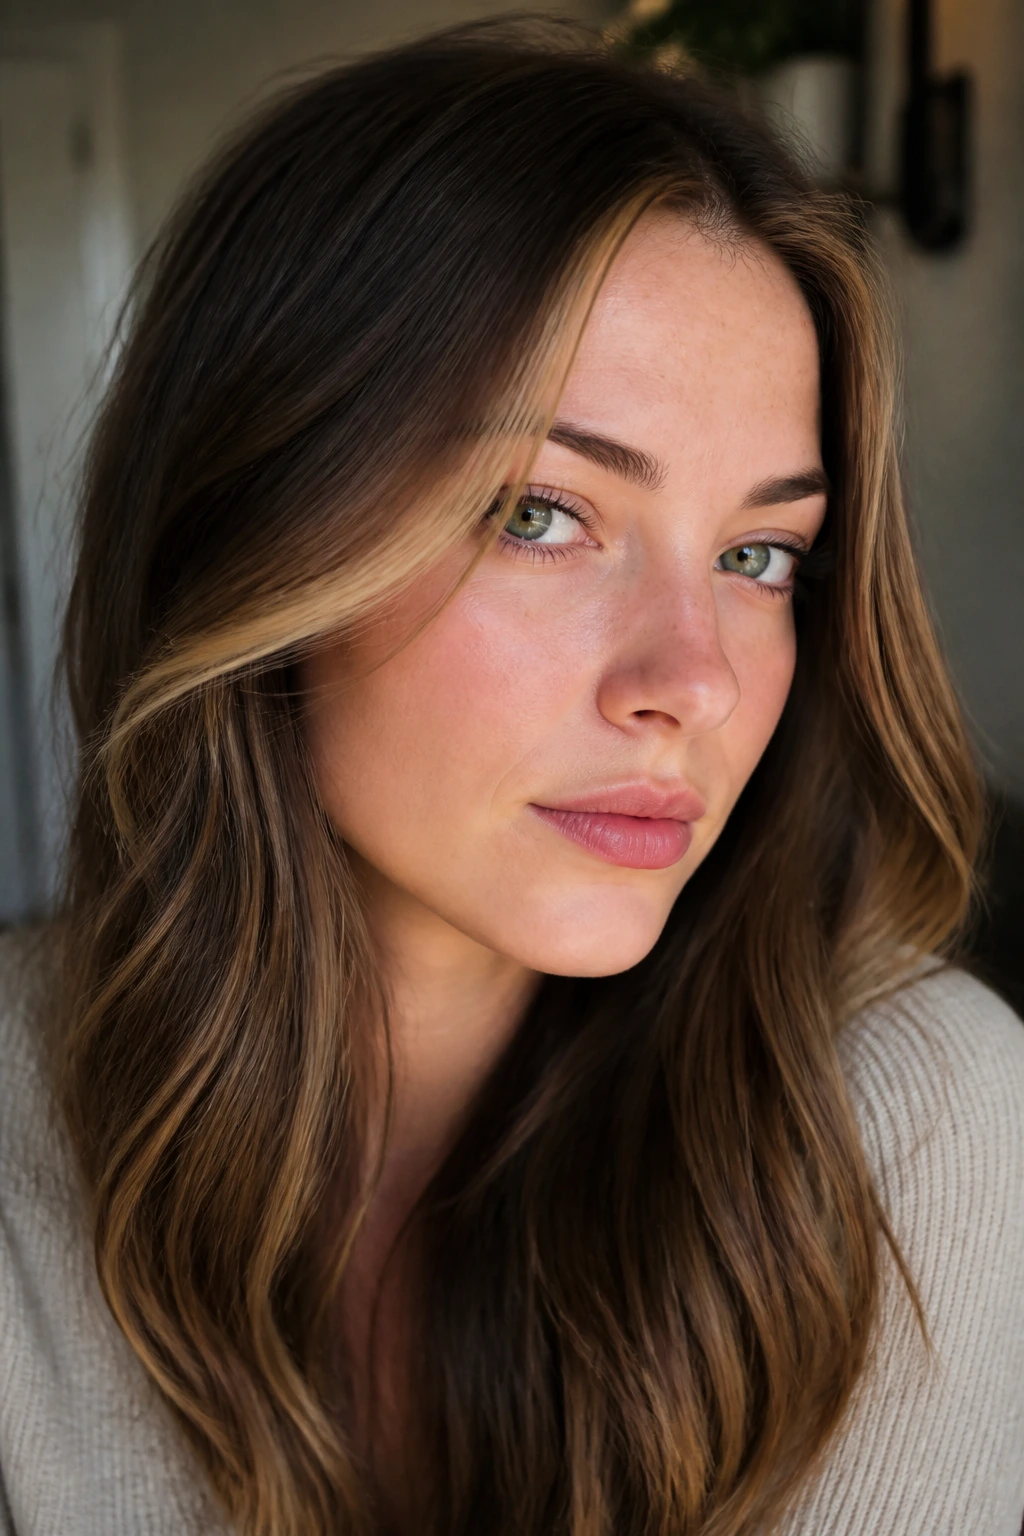
A slim money piece can wake up fair skin fast. Not a chunky one. Just a clean, caramel frame around the cheekbone and temple area, with the interior kept darker so the brightness has somewhere to land.
I like this look on pale skin with pink undertones because the lighter frame stops the face from disappearing against a dark brunette base. It also holds up nicely in a ponytail or half-up style, which is handy if you wear your hair back a lot.
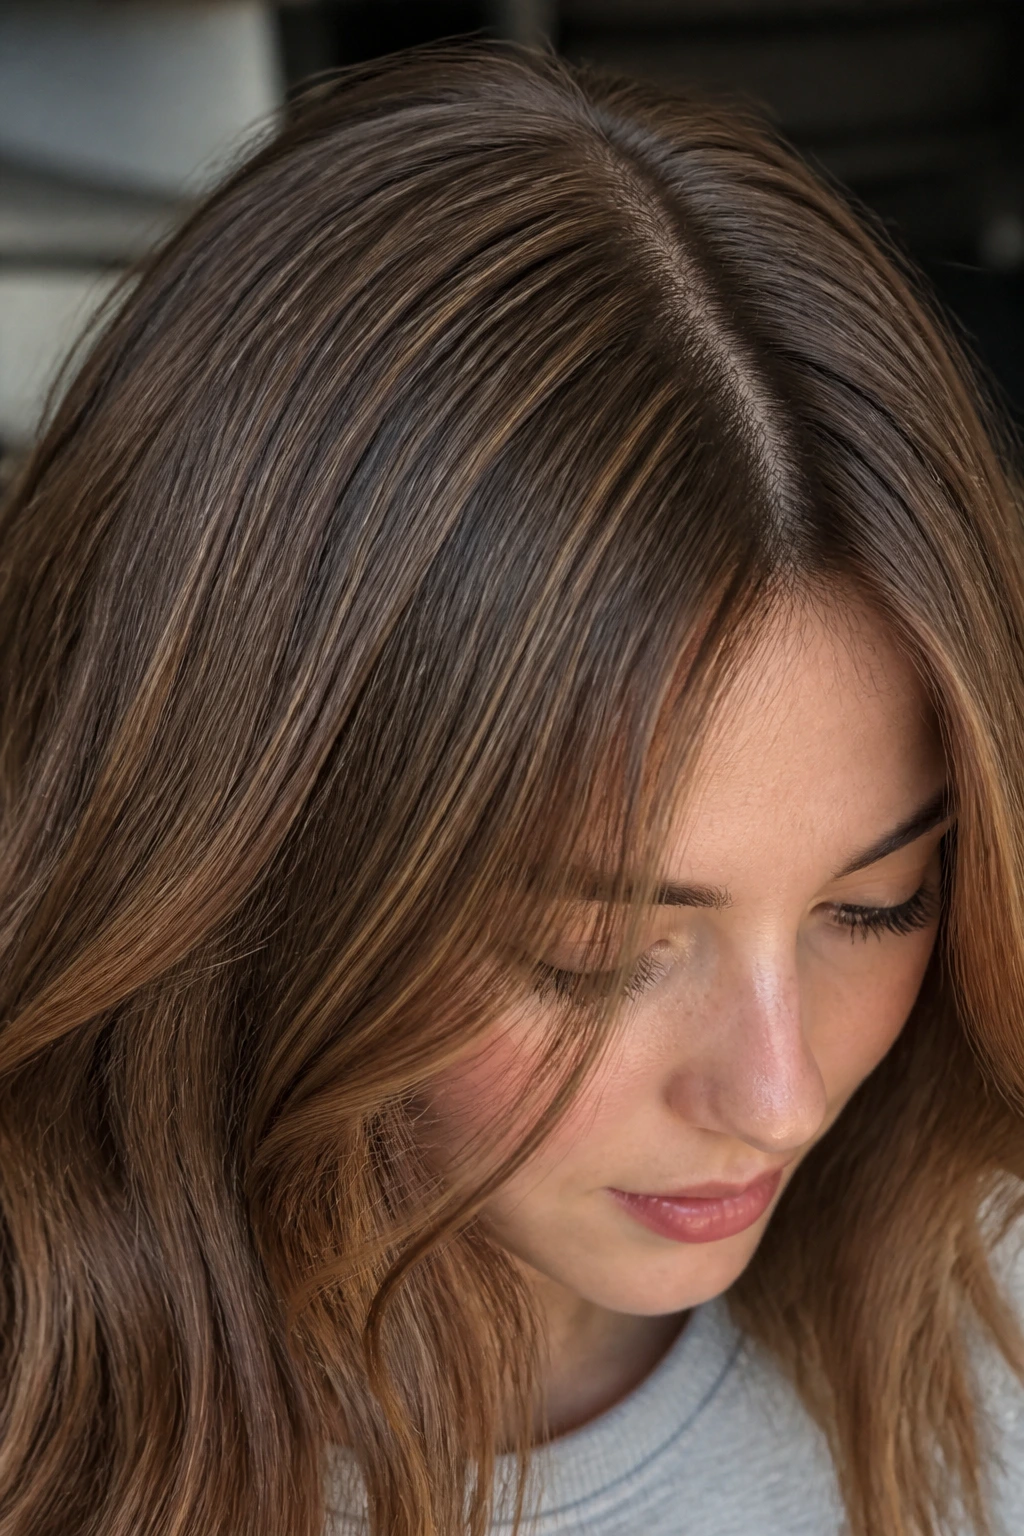
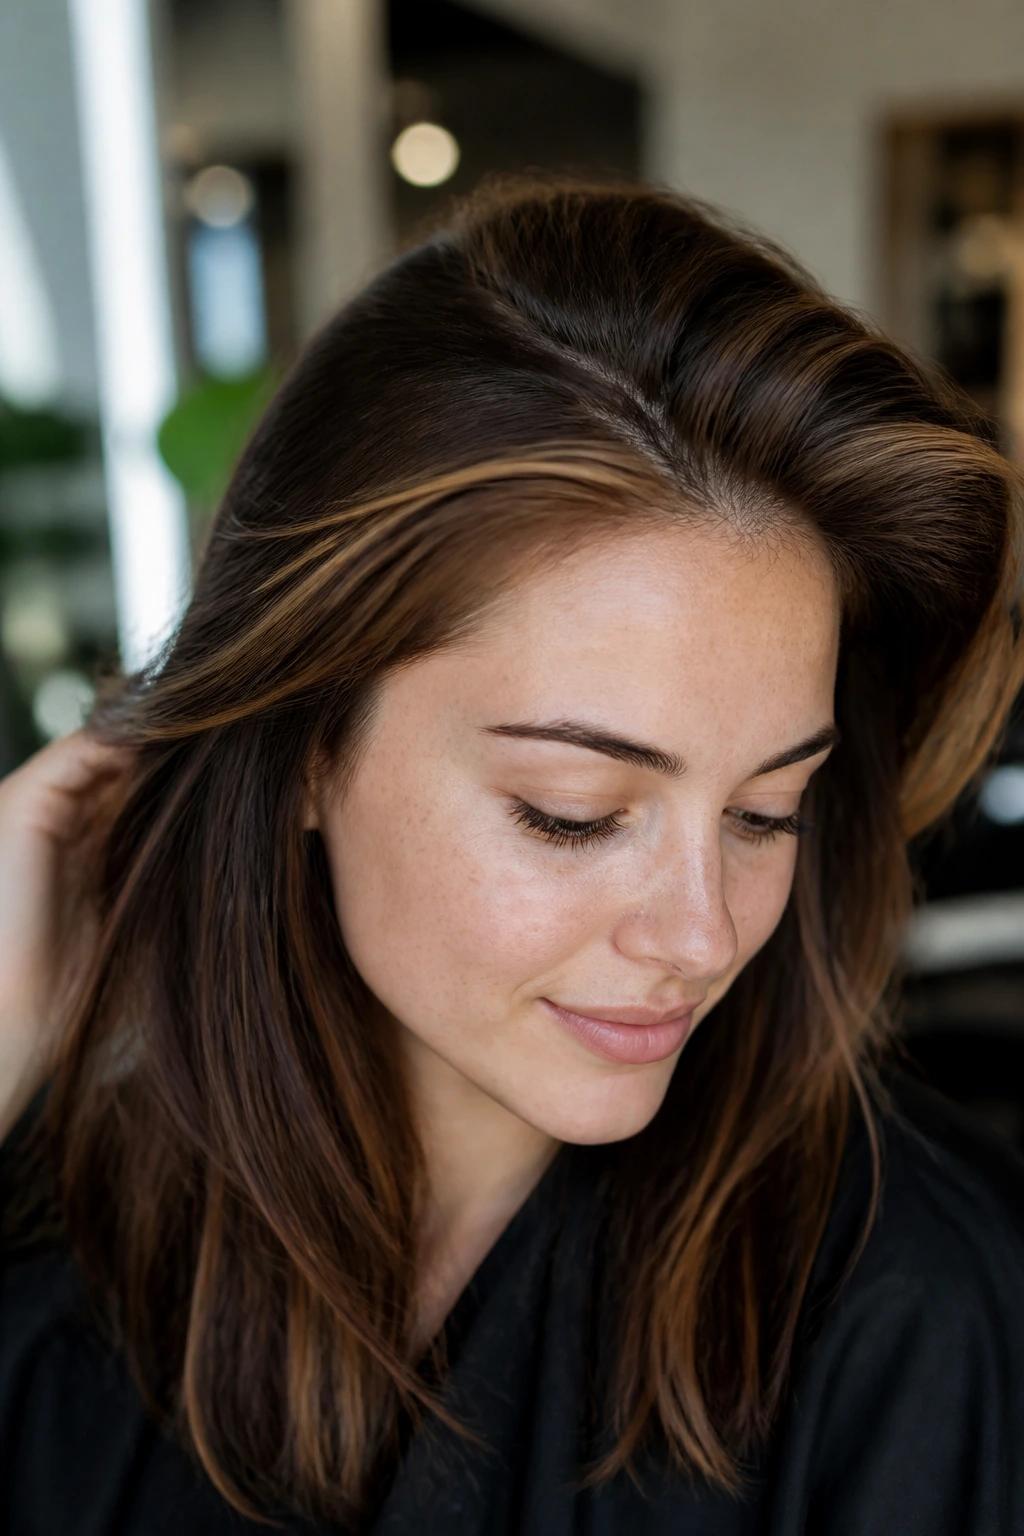
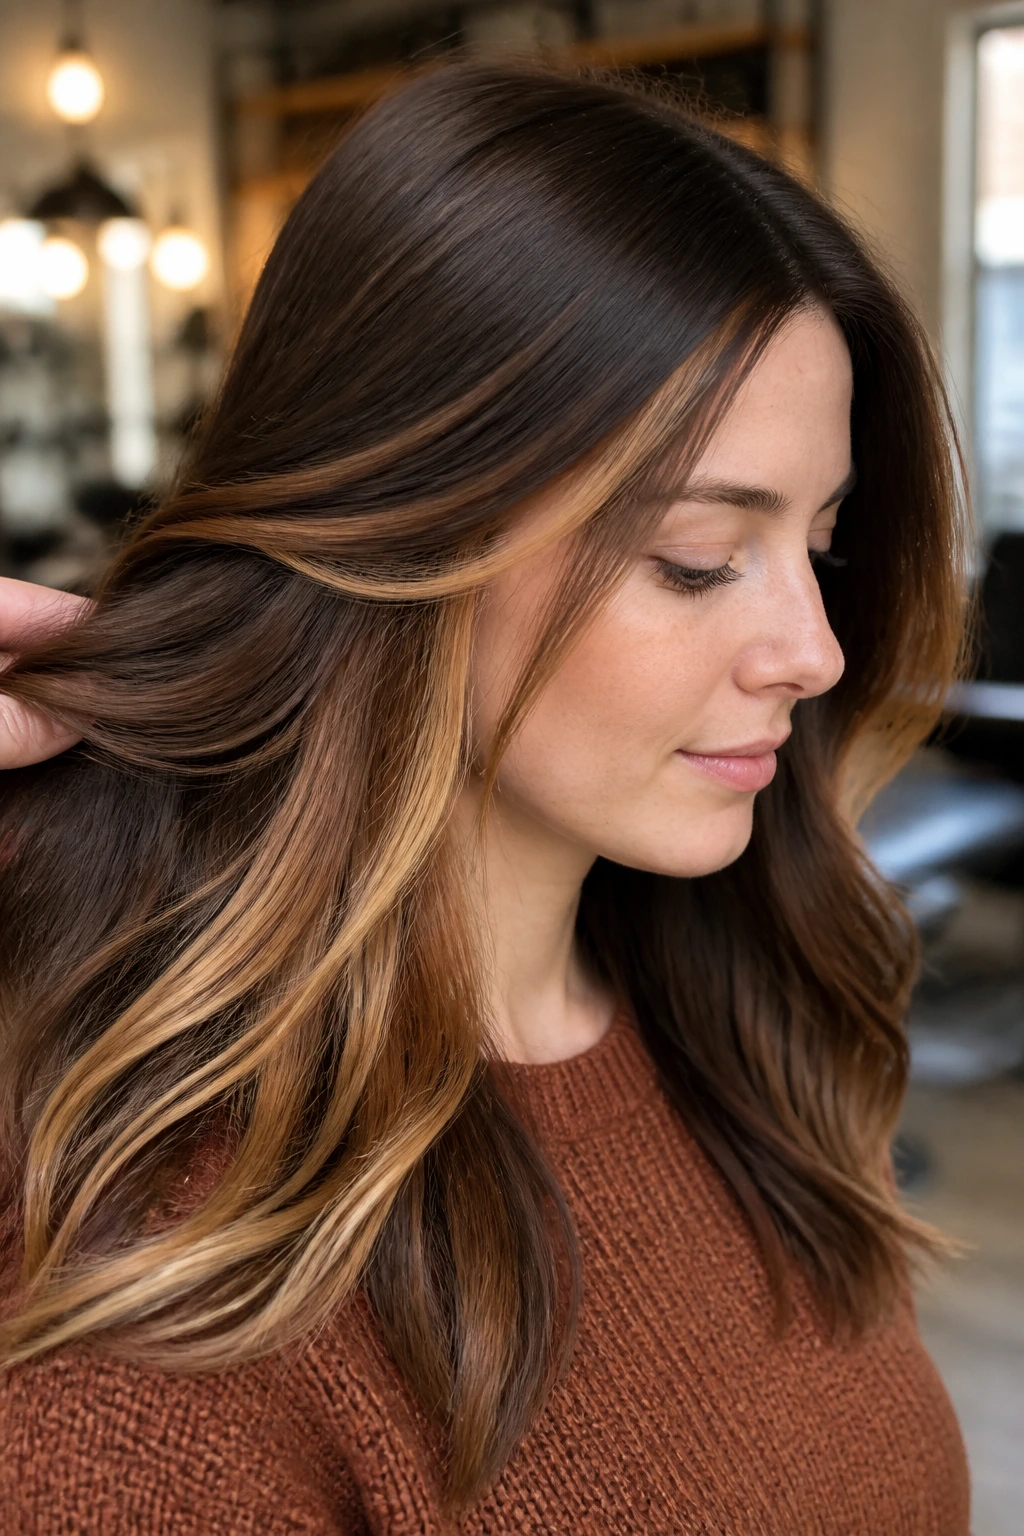
3. Mocha Root Melt

If you hate obvious regrowth, a mocha root melt is a smart move. The color begins in a richer chocolate at the root and gradually softens into caramel through the mids, so the whole blend feels like one long fade instead of separate stripes.
This one is especially good on fair skin with neutral undertones. The deeper root gives contrast, and the warmer ends keep the hair from reading too severe. It also looks good straight, which not every highlight style can claim. Straight hair can be brutally honest.
4. Cocoa Babylights
Cocoa babylights are tiny, fine highlight strands that barely announce themselves until the light hits them. They’re perfect if you want dimension without the salon-fresh “I just got foils” look. On fair skin, they add movement without overpowering delicate features.
I like babylights around the crown and part line, where they catch daylight and keep the top from looking like one flat brown sheet. If your hair is fine, this is one of the easiest ways to make it look fuller without adding chunky contrast.
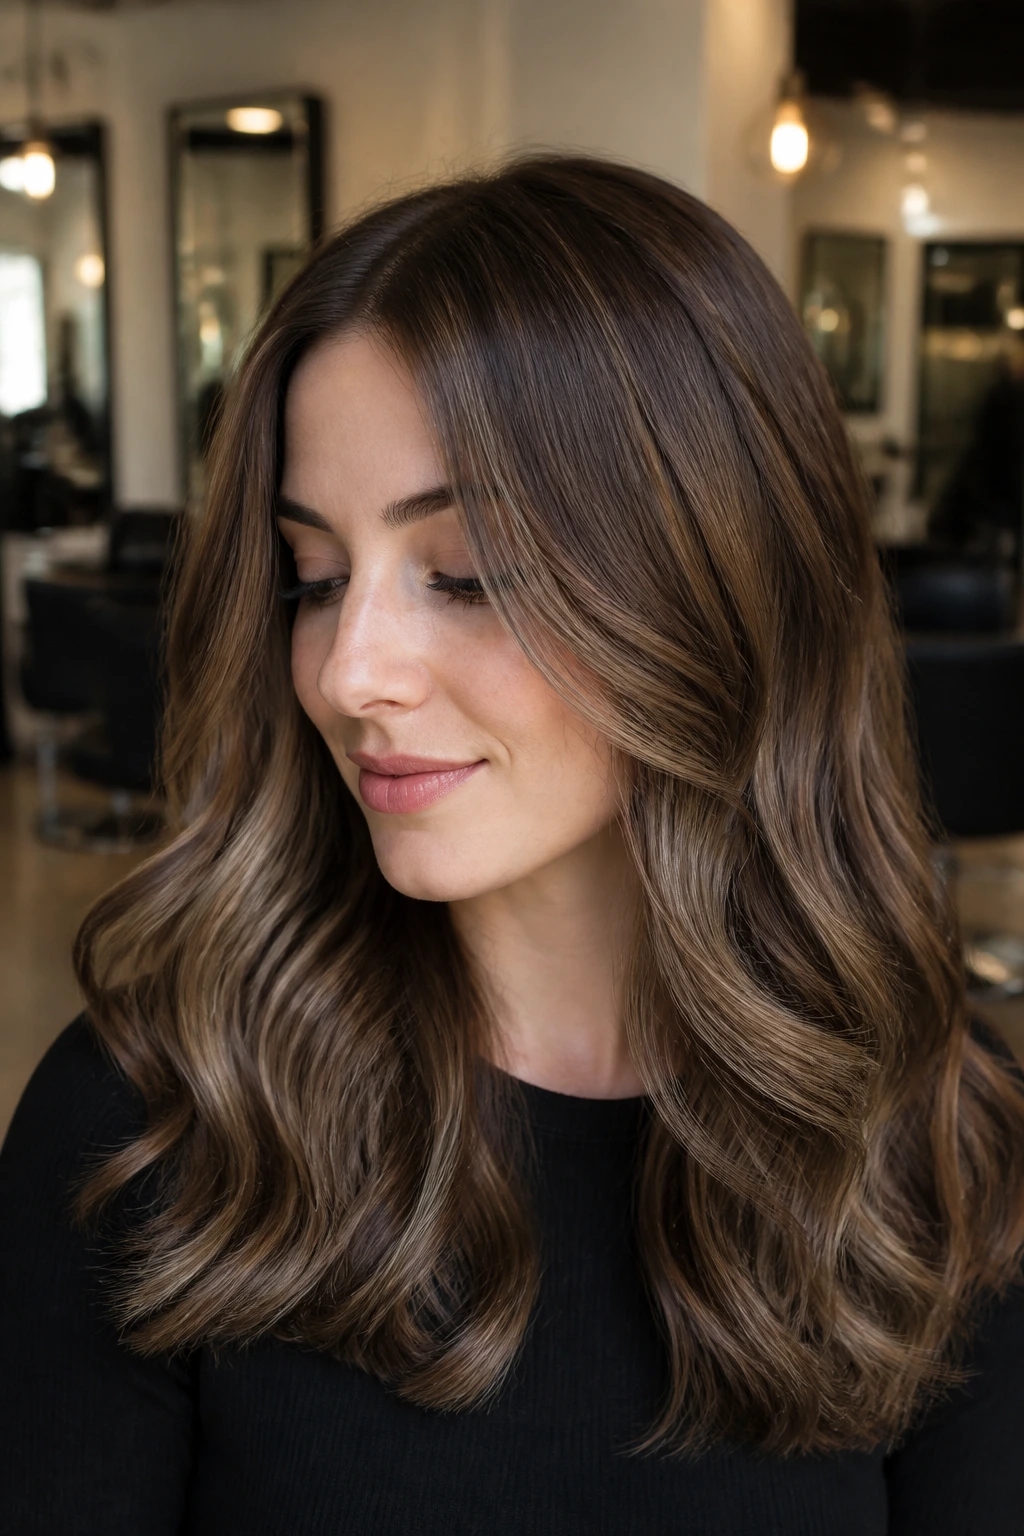
5. Toffee Contour Highlights
Toffee contour highlights work like makeup contour, only in hair form. The lighter caramel is placed around the face and upper layers so the eye reads a soft frame, then the darker chocolate sits behind it for depth.
This one flatters fair skin that can handle a touch of warmth. If your complexion leans ivory or neutral-beige, toffee gives the face a healthy glow without turning orange. It’s also one of the better choices for curtain bangs because the lighter pieces show up even when the rest of the hair is tucked back.
6. Smoky Espresso Lowlights
Not every fair-skinned brunette needs more light. Sometimes the smarter move is to add smoky espresso lowlights so the caramel pieces have something richer to sit against. The darker strands tighten the whole palette and stop the lighter pieces from looking washed out.
This is a good fix when your current highlights have gone too bright or too yellow. The espresso pieces lower the contrast just enough to make the caramel look cleaner and more expensive. It’s a very useful move for anyone whose hair is starting to look thin or overly processed at the ends.
7. Chestnut Foilayage
Chestnut foilayage gives you a little more lift than open-air balayage, but without the hard edge that classic foils can leave behind. The chestnut tone sits nicely between brown and caramel, which makes it a forgiving choice for fair skin that doesn’t love obvious gold.
I like this when the hair needs shape more than brightness. A few well-placed foilayage pieces around the front and crown can make layers pop, especially on shoulder-length cuts. The finish feels a touch more polished than beachy.
8. Caramel Veil Along the Hairline
This one is almost mischievous in how subtle it is. A thin caramel veil sits right along the hairline and the first inches back from the face, then disappears into the deeper brown underneath. On fair skin, the effect is soft brightness rather than a full highlight transformation.
It works well for bobs, lobs, and tucked-behind-the-ear styles. You see it when the hair moves, which keeps the look lively instead of obvious. If you’re cautious about color, this is a very safe place to start.
9. Walnut Dimension
Walnut dimension leans cooler and deeper, with narrow caramel ribbons woven through a brown that has a muted, nutty finish. It’s one of the better choices for fair skin with cool or pink undertones because it avoids the orange cast that can make the cheeks look flushed.
This look has a little more structure than soft balayage. I like it on longer layers where the different brown tones can travel from root to end without looking choppy. It’s also a strong choice if you wear a lot of straight styles and want the color to hold its shape.
10. Butterscotch Peekaboo Panels
Peekaboo panels are for people who want a small surprise under the top layer. The caramel or butterscotch is hidden beneath deeper chocolate, so it flashes when the hair swings or gets pulled into a bun. On fair skin, that hidden contrast keeps the look playful without being too bright across the whole head.
This works especially well on medium-density hair, where the inner layers can carry the lighter color without showing too much scalp. If your base is very dark, keep the butterscotch soft. Too pale and the panels can jump out like neon under salon lighting. Nobody needs that.
11. Mushroom Mocha Blend
This is the cool-girl brown that still feels wearable. Mushroom mocha blends chocolate with a taupe caramel finish, so the highlights read earthy rather than sweet. On fair skin, especially skin with pink or blue undertones, it can be a relief because it keeps warmth under control.
I like this one on blunt bobs and long, sleek cuts. The tone looks especially clean when the hair is glossy and the color is smoothed from root to tip. If you’ve ever felt that caramel turns too orange on you, start here.
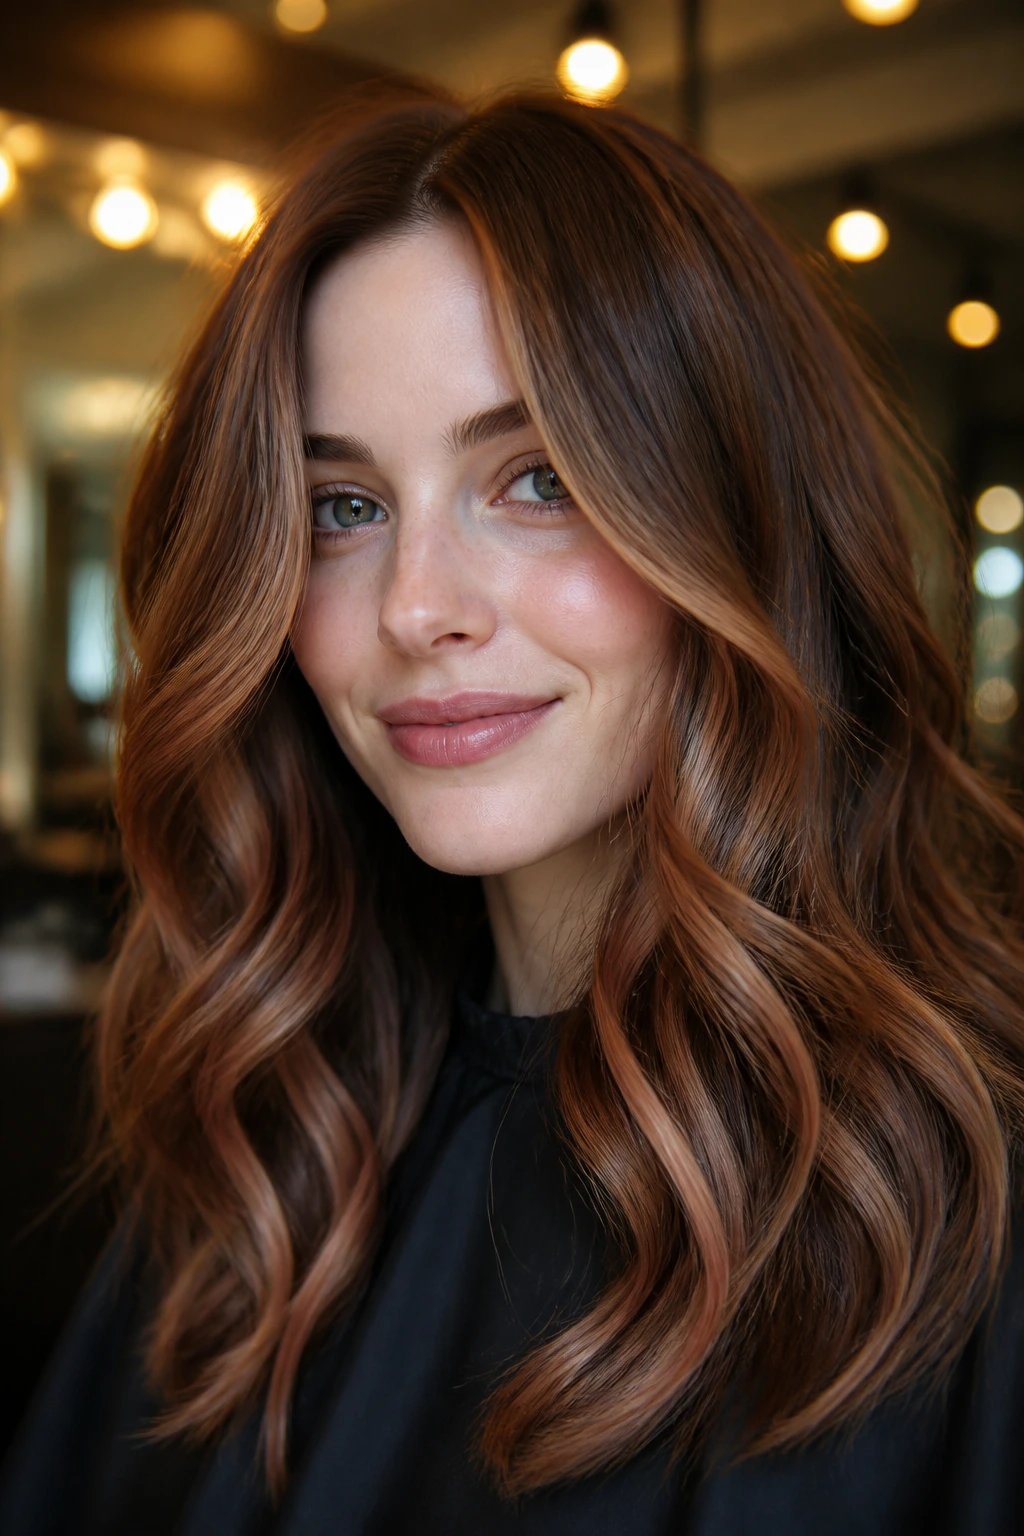
12. Cinnamon Ribbon Ends
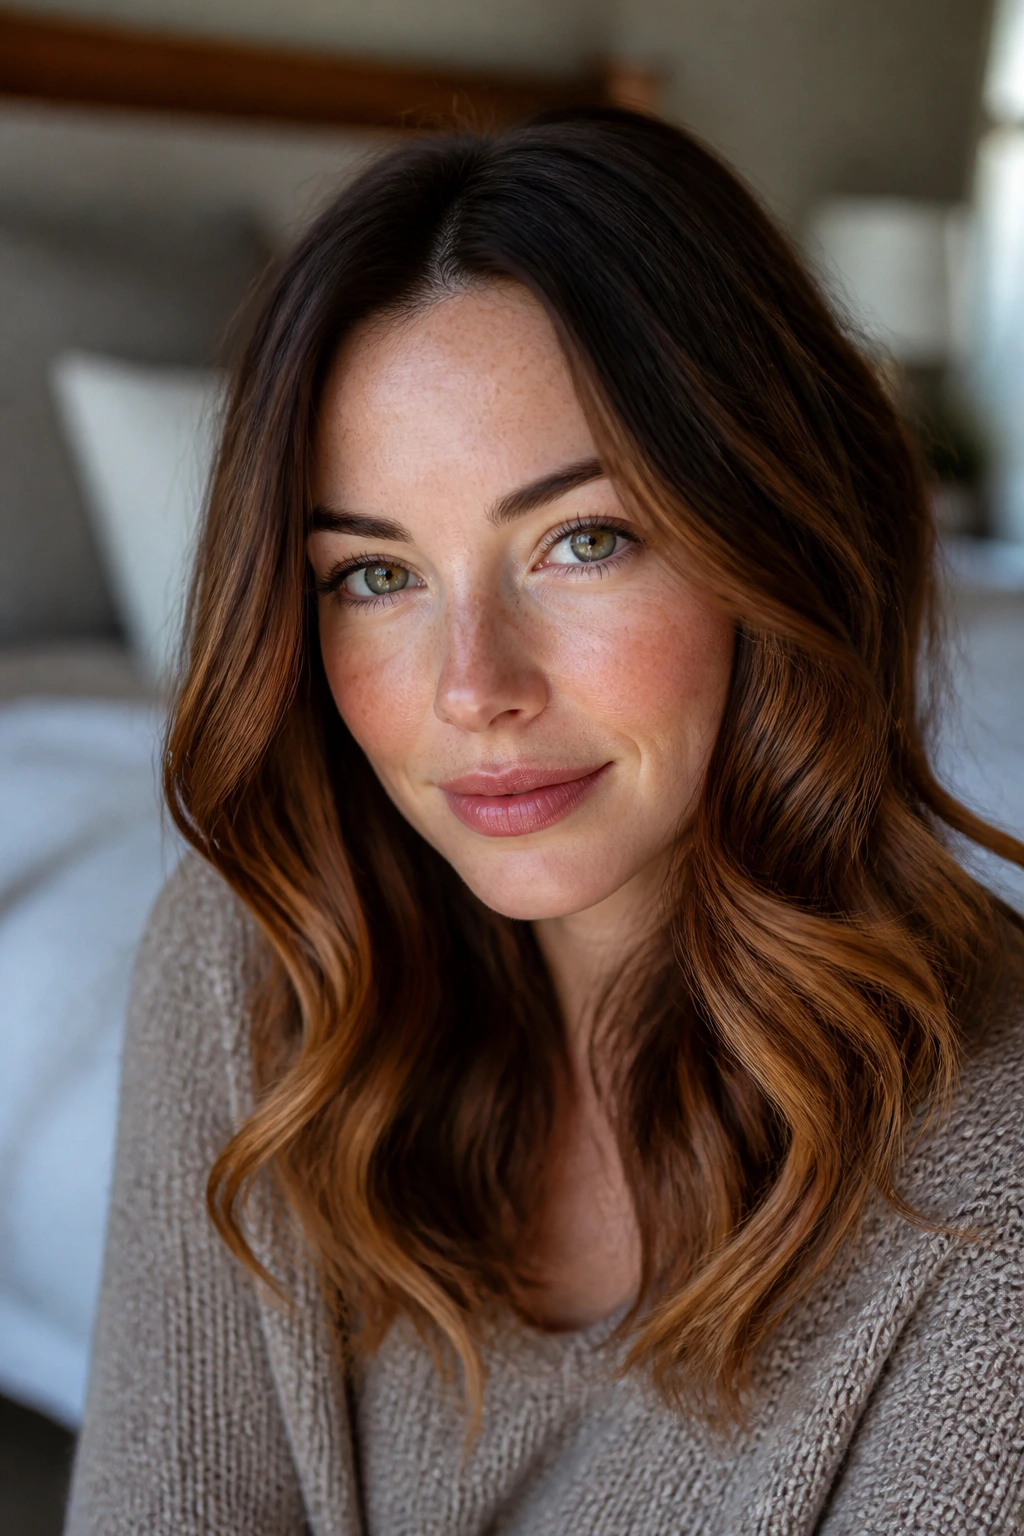
Cinnamon ribbon ends put the warmth lower, which keeps the color from overwhelming the face. The root and midlengths stay chocolate, then the ends soften into a warmer caramel with a cinnamon lean. It’s cozy without turning the whole head copper.
Fair skin with freckles or a little natural warmth can wear this nicely. I would not push it too hard on very pink skin, though; cinnamon near the face can start to read reddish fast. Keep the hotter tones toward the lower thirds and you’ll get the nicest result.
13. Almond-Cocoa Contour
Almond-cocoa contour is a softer, slightly creamier take on face-framing dimension. The almond-toned caramel goes around the front, then the cocoa pieces behind it give the color some weight. The whole effect is gentle but not dull.
It’s a strong match for fair skin with neutral undertones and layered cuts that move a lot. Curtain bangs, airy shags, and long layers all benefit from the way the light pieces trace the face. If you want dimension you can see from across the room, this is not the one. If you want a lift that shows up in person, it’s excellent.
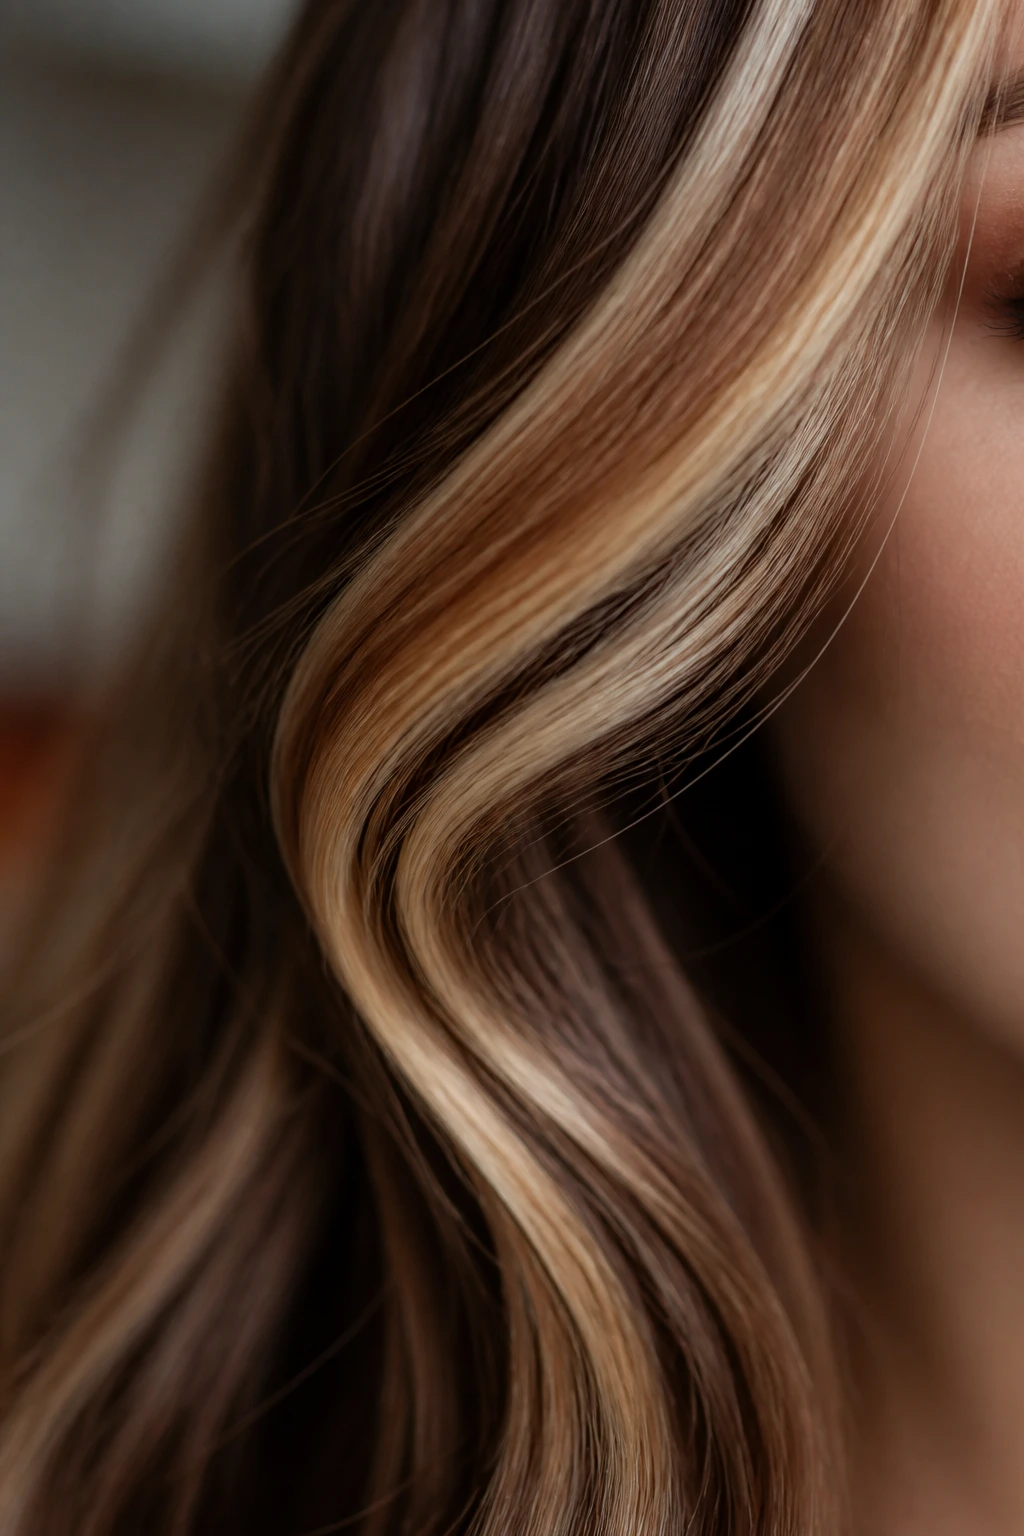
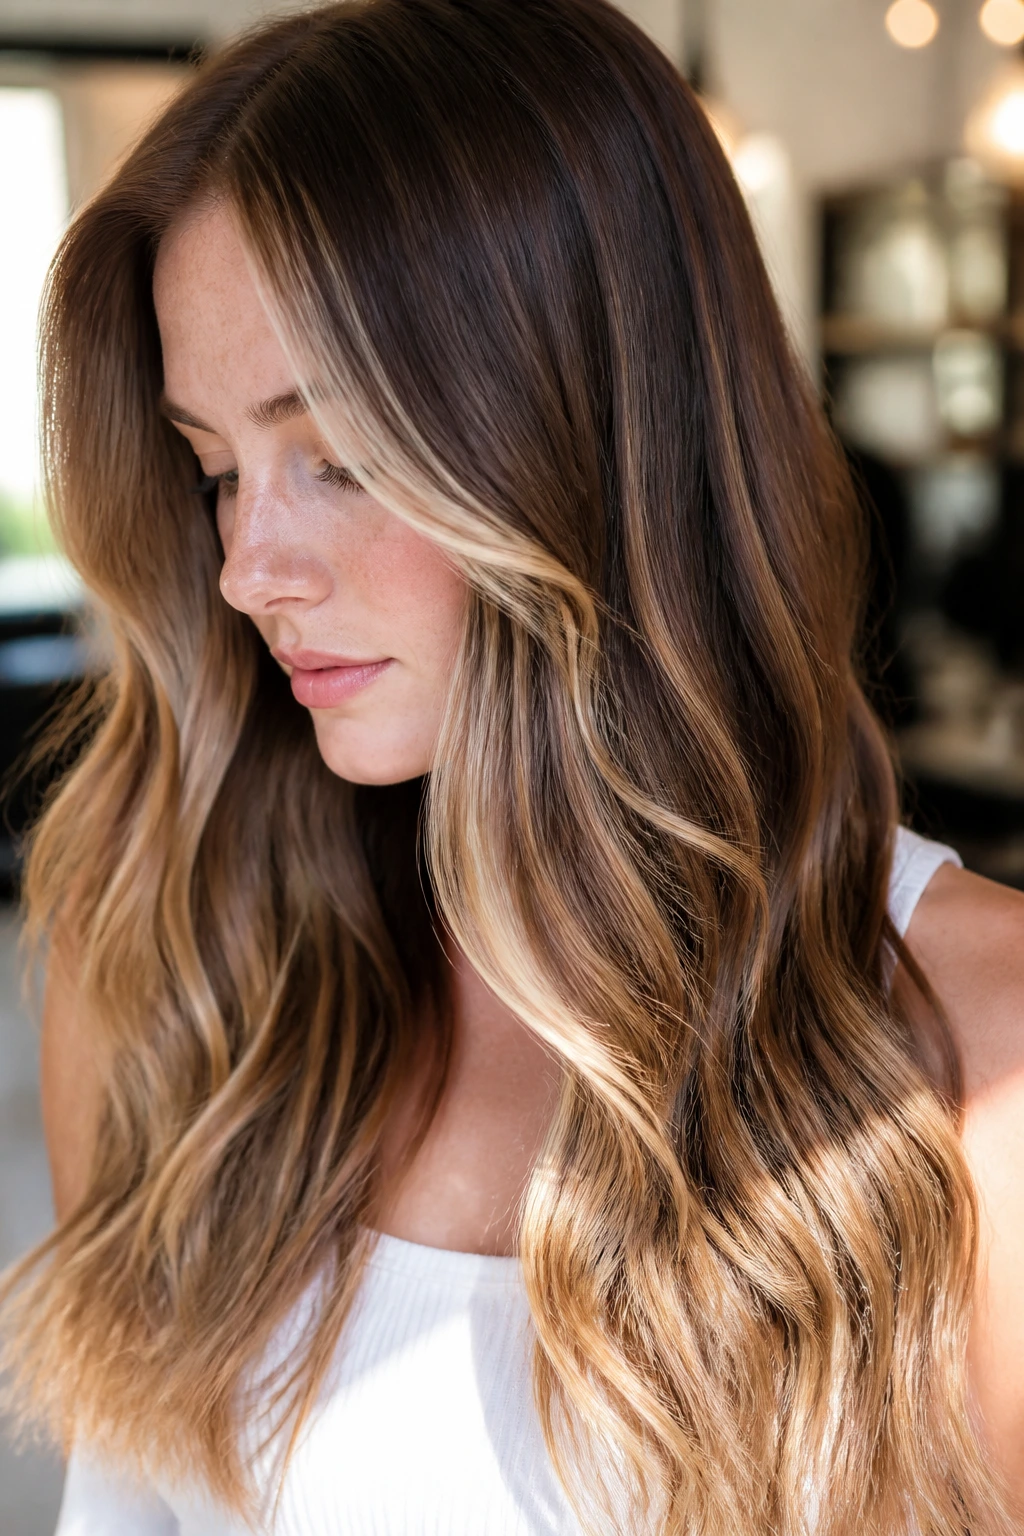
14. Honeyed Brunette Ribbons
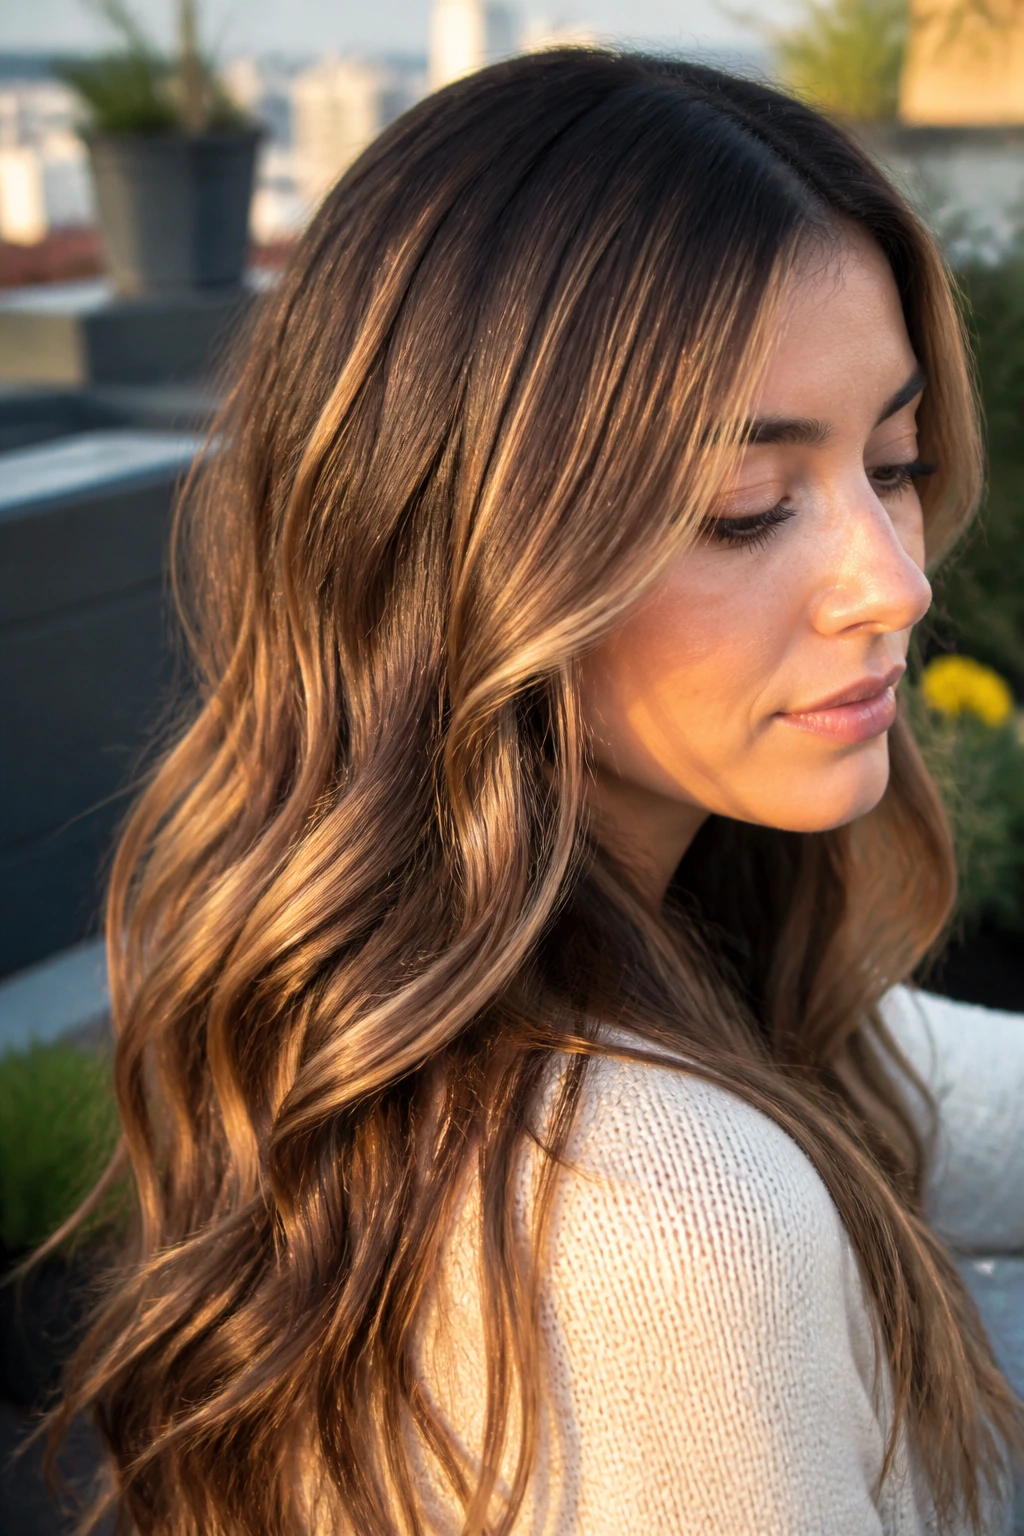
Honeyed brunette ribbons have a sunnier feel, but they still need restraint on fair skin. The honey should be narrow, placed in ribbons rather than broad swaths, and blended into a brunette base that stays rich. Done well, it brightens the complexion without flattening it.
I like this for fair skin that tans a little or has warmer undertones. The honey catches light beautifully in waves and braided styles, where the contrast between the brown and gold gets a little more obvious. If your hair tends to turn brassy, ask for a beige honey rather than a bright yellow one.
15. Dark Chocolate Underlights
Underlights live underneath the top layer, so they add depth without changing the surface too much. Here, the darker chocolate is used to make the lighter caramel above it look sharper and more dimensional. Fair skin often benefits from this because the face still has brightness, but the overall color isn’t airy to the point of looking thin.
This is a solid choice for thick hair. The underlayer prevents the lighter pieces from getting lost in the bulk, and it gives long curls a richer look from the side. Straight hair shows it too, but curled or waved hair makes the contrast sing.
16. Taupe Caramel Melt
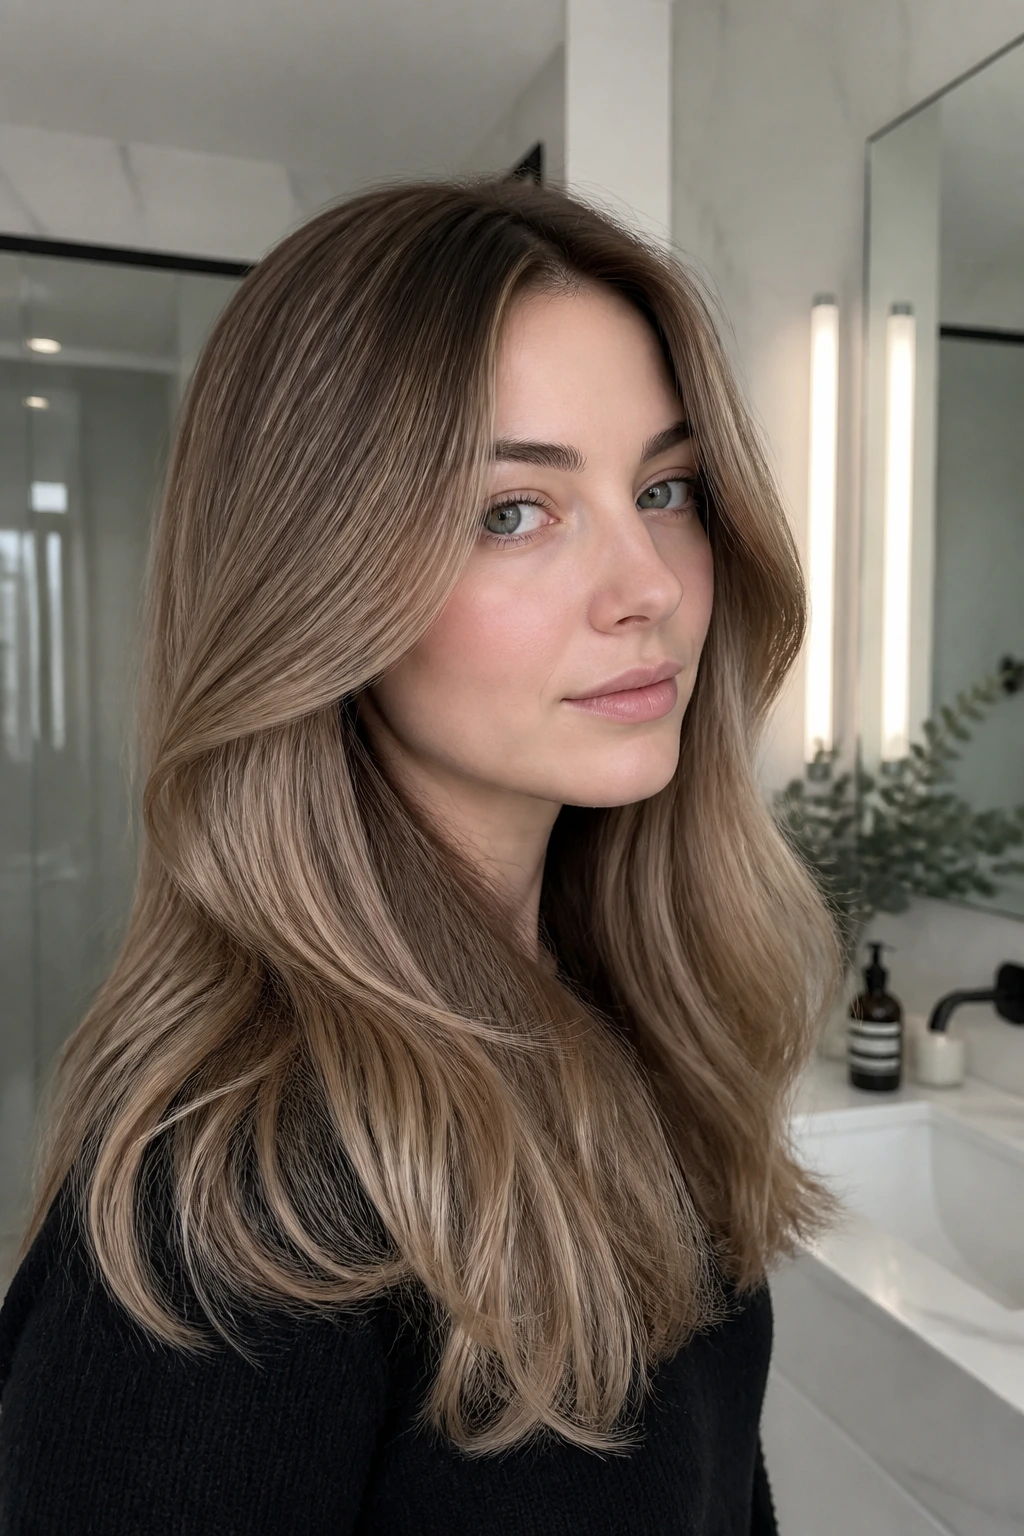
Taupe caramel melt is one of the calmest versions in the whole set. It has a cool, muted finish that sits between beige and ash, so the hair looks soft rather than sweet. On fair skin, it’s especially flattering when the skin leans cool, rosy, or porcelain.
If you like clean lines and understated color, this one deserves a look. It works well on blunt cuts, glassy blowouts, and any style where shine matters more than big contrast. Ask for a neutral or ash-beige gloss so the caramel doesn’t drift golden.
17. Maple Brown Balayage
Maple brown has a touch of warmth that can be lovely on fair skin with freckles or golden undertones. It’s richer than straight caramel and less red than cinnamon, which puts it in a comfortable middle ground. The result feels polished rather than sugary.
I prefer this on longer layers or soft waves, where the maple tones can move through the hair without getting chunky. If your base color is naturally medium brown, this can look especially seamless. If your skin is very cool, keep the maple tone muted; otherwise, it can lean a bit autumn-heavy.
18. Toasted Sugar Slices
These are wider slices than babylights, but they’re softened enough that the finish still feels wearable. The caramel sits against a chocolate base in fuller panels, which gives more obvious contrast. On fair skin, that extra contrast can be useful if you want the hair to show up more strongly in photos or in a low bun.
This style likes density. Fine hair can take it, but thick hair wears it better because the slices don’t disappear. Keep the edges blended well. If the line is too sharp, the whole thing starts to look old-school in a way that isn’t the fun kind.
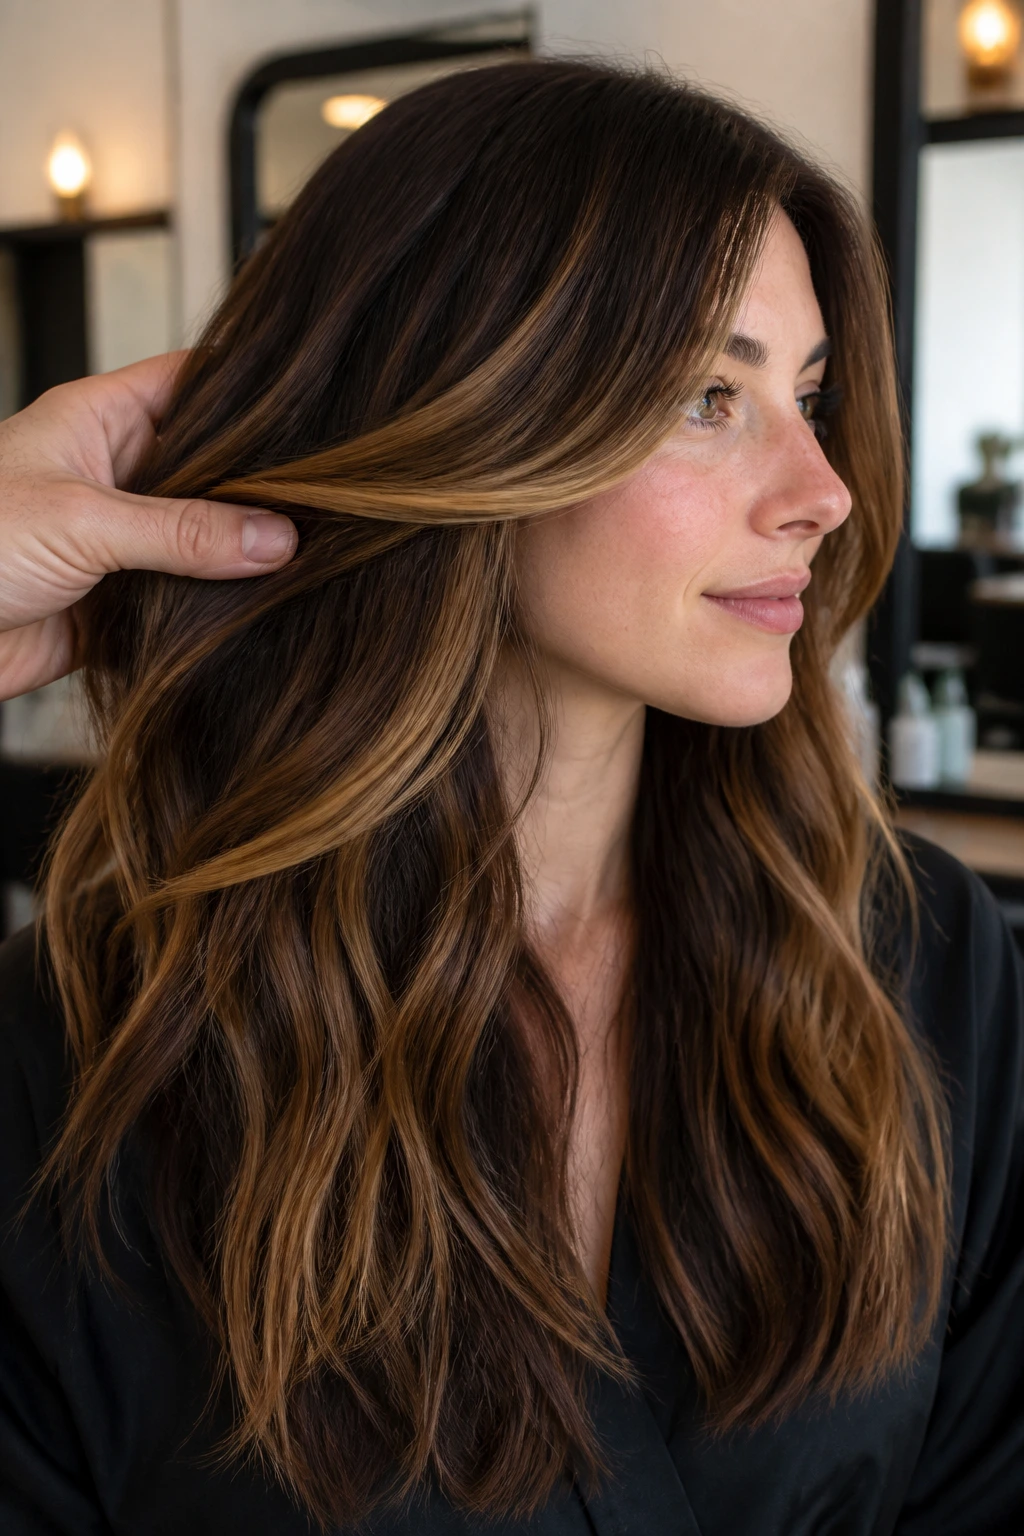
19. Espresso and Caramel Money Pieces
This is the boldest contrast in the group. Deep espresso frames the face, then caramel money pieces sit right beside it so the front section has a crisp, high-definition look. On fair skin, that dark-to-light jump can make the complexion look brighter and the eyes look clearer.
I like this on people who want the color to be visible immediately, not only when the sun hits. It’s sharp on long layers, striking on lobs, and especially nice when styled with a middle part. If you want soft and subtle, skip this one. If you want the front of the hair to do the talking, keep reading.
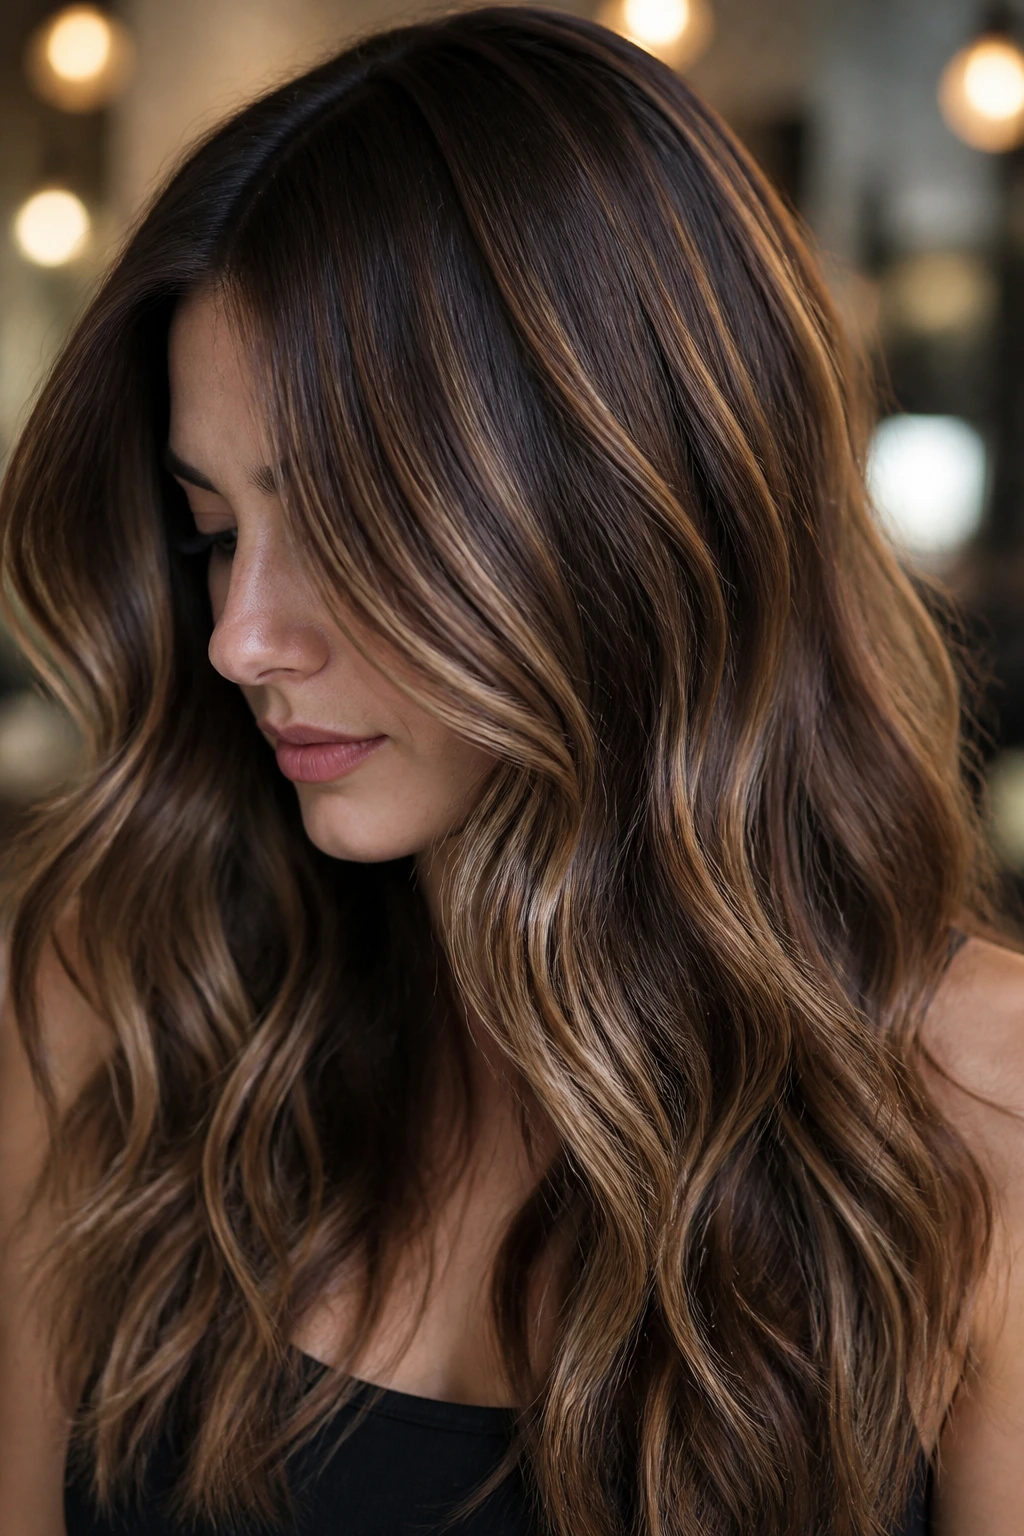
20. Burnt Sugar Balayage
Burnt sugar balayage sits warmer than taupe but deeper than honey. The caramel is toasted enough to avoid looking pale or washed out, which matters on fair skin that needs a bit of color around the face. Done right, it looks like the hair has been gently warmed by sunlight, not dyed in blocks.
This works nicely on medium-length waves and textured blowouts. I’d keep the lift moderate and the toner warm-beige, not gold-gold. If the caramel gets too bright, the whole look starts leaning orange. A small thing. A big difference.
21. Velvet Brunette Panels
Velvet brunette panels are all about richness. The panels are deeper brown sections placed through the crown and sides so the caramel pieces have a plush backdrop. On fair skin, that depth can be very flattering because it gives the face a frame without stealing attention.
This is one of my favorites for straight hair that can look flat under bright light. The alternating panels create movement even before you curl it. It’s also a good option if your ends are too light and you want the overall color to feel more expensive and less sun-faded.
22. Sandy Caramel Threads
Sandy caramel threads are thin, cool-beige streaks woven through chocolate brown. They’re faint in the best way. On fair skin, the color can look clean and airy, especially if your undertones are pink or neutral and you don’t want a warm finish near the face.
This style is very good for fine hair because it doesn’t need a lot of hair density to read properly. It also looks nice in ponytails and braids, where the thin threads break up the shape without looking busy. If you like a subtle grown-in look, this is a quiet winner.
23. Cocoa-Latte Gloss Highlight
This is the least obvious option and one of the prettiest. Cocoa-latte gloss highlight is more about shine and tonal shift than dramatic lift, so the hair stays brown but picks up a soft latte sheen across the surface. On fair skin, that kind of finish reads polished instead of obvious.
It’s a smart move if your hair is already light brown and you just want more movement. I like it when someone says they want “something, but not too much,” which is usually code for a gloss, a soft face frame, and no heavy lift near the crown. Simple. Clean. Hard to mess up.
24. Amber-Infused Waves
Amber-infused waves lean warm, but the warmth needs to stay controlled. The caramel carries a tiny amber note that shows up best in bends and loose curls, where the light catches the curve of the hair. On fair skin with warm or peachy undertones, the result can look very alive.
I would keep the amber away from the root unless the client already wears warm tones well. Too much amber at the hairline can go brassy fast. Kept in the lengths, it adds a nice glow that feels richer than plain gold.
25. Soft Syrup Highlights
Soft syrup highlights are the gentlest finale to the whole palette. The pieces are narrow, the contrast is soft, and the chocolate-caramel shift is meant to feel glossy rather than loud. On fair skin, this kind of highlight can make the hair look healthier without changing the overall identity of the color.
This is the look for someone who wants movement that shows in daylight and disappears a little in dim rooms. I like it best when the hair is cut in layers and styled with a loose bend, because the syrupy shine needs motion. It’s subtle. That’s the point.
What Makes Chocolate Caramel Read Soft Instead of Stripey
The difference usually comes down to depth and placement, not some magical salon secret. On fair skin, the most flattering chocolate sits deep enough to create contrast but not so dark that it looks like a marker line against the face. The caramel should then sit in ribbons, veils, or thin slices that break up the light instead of flooding the whole head with warmth.
I also prefer a little root shadow. Not a harsh shadow. Just enough of a darker base near the scalp to keep regrowth from looking like a bright, obvious stripe two weeks later. That tiny buffer is one of the easiest ways to make the color feel calmer.
What to Tell Your Colorist at the Chair
Bring a photo, but don’t stop there. Say what you like about the photo: the placement, the depth of the brown, the warmth of the caramel, or the way the front pieces frame the face. That matters more than pointing and saying “this.” One person’s caramel is another person’s orange.
Mention your base color in plain language if you know it, and tell them whether your skin runs pink, neutral, or golden. A colorist can work from that faster than from a vague request for “brighter highlights.” If you want soft grow-out, ask for a root shadow and thin dimension through the mids. If you want more obvious contrast, say so before the foils go in. Not after.
Placement Moves That Keep the Color Soft
A lighter piece near the part gives the whole head lift, but the best chocolate caramel looks usually don’t crowd the scalp. The cleaner move is to keep the brightest pieces around the face and upper mids, then let the ends carry the rest of the story. That keeps fair skin bright without making the crown look too busy.
Around the Face
The hairline is where color mistakes show first, so keep the front pieces slim unless you want a bold statement. A soft veil or thin money piece makes the face look awake without turning the whole look loud.
Through the Midlengths
Midlength ribbons are where the dimension lives. They give movement when the hair swings, and they stop the color from looking like a one-note brown from root to tip.
At the Ends
If you want the caramel to show more in curls and waves, let the ends hold a little more light. The movement lands there, and the color reads more alive when the ends are not all the same tone.
Small Tweaks That Make the Finish Look Better
Color Depth: Keep the chocolate at least one step deeper than your natural base if you want contrast that still feels soft. If the base is already dark blonde or light brown, don’t go much deeper or the hair can look muddy.
Texture Matters: Loose waves show off ribboned color far better than stiff curls. A 1-inch iron, wrapped away from the face, usually gives enough bend to make the caramel show without turning the whole style into pageant hair.
Part Changes Help: Switching your part by an inch or two can move the lighter pieces into different light. It sounds small. It isn’t. That little shift can change which highlights catch the eye first.
Tone Checks: If the caramel starts reading too gold, ask for a beige gloss rather than jumping straight to stronger lightening. Most brass problems are tone problems, not “need more bleach” problems.
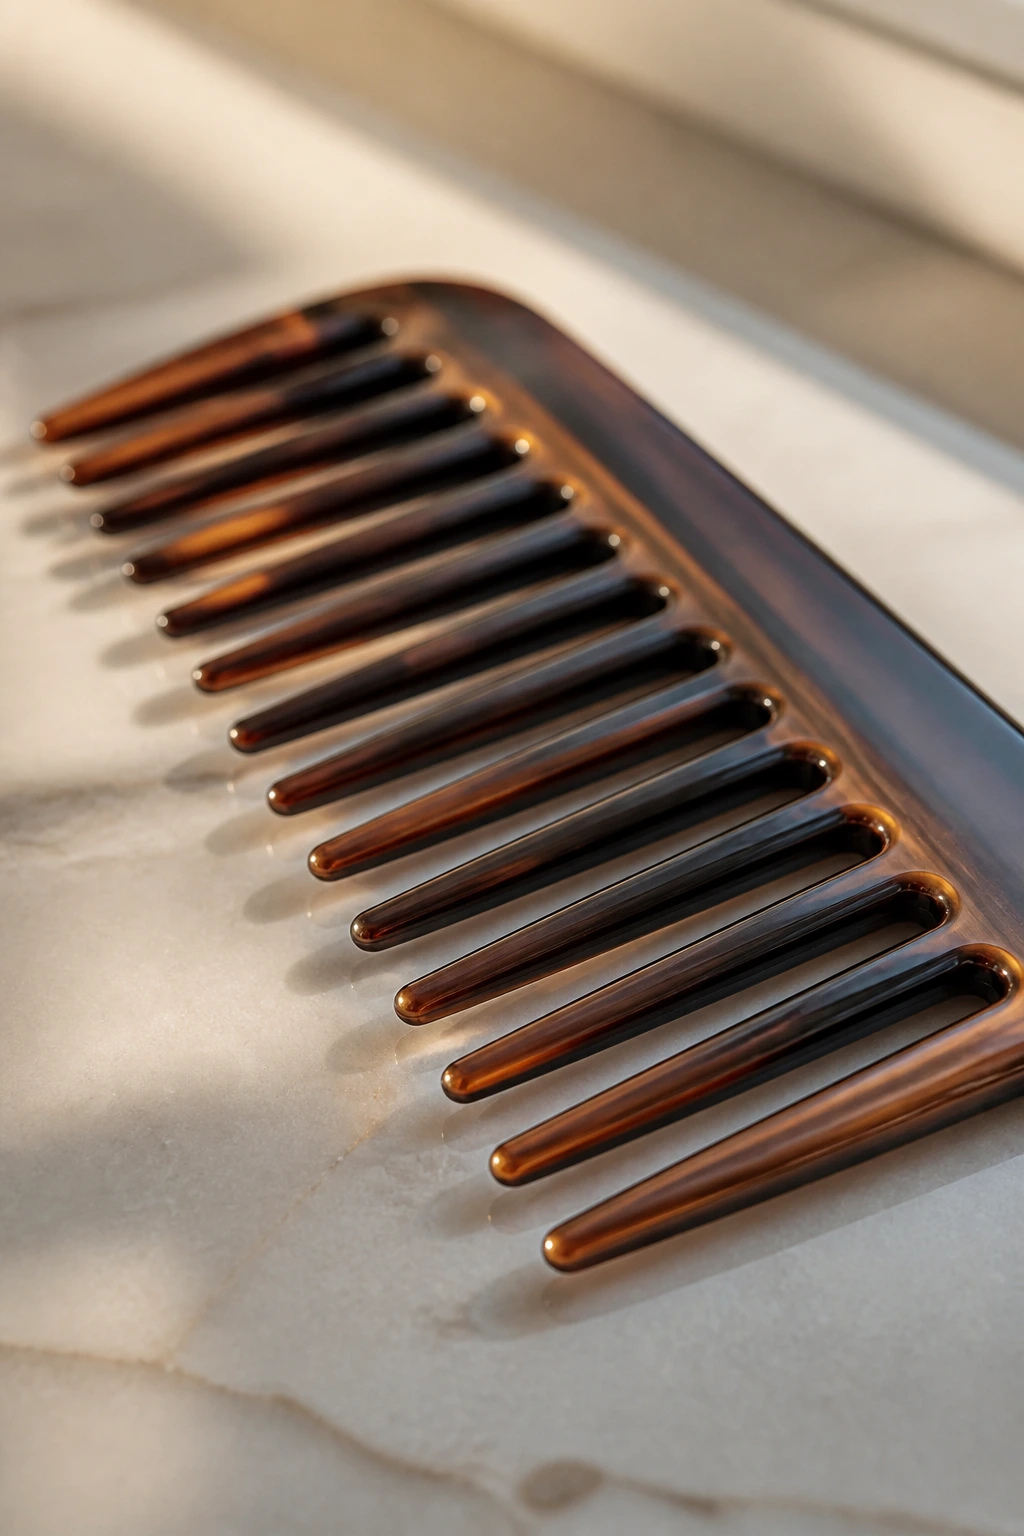
Tools and Products Worth Having
- Wide-tooth comb: Helps detangle highlighted hair without snapping the lighter pieces when they’re damp.
- Color-safe shampoo: Keeps the caramel from fading too fast and strips less than harsh clarifying formulas.
- Beige or violet-toned gloss shampoo: Useful if the caramel starts drifting warm or yellow between appointments.
- Heat protectant spray: Non-negotiable if you blow-dry or curl regularly; the lighter pieces show damage first.
- Microfiber towel or soft T-shirt: Cuts down on frizz and roughing up the lifted sections.
- Bobby pins and clips: Handy for pinning back a face frame while you let a heatless bend set.
- Bond-repair mask: Worth keeping if you’ve had lightening done more than once. The highlighted ends thank you later.
- Tail comb: Good for parting and separating the front sections when you style, especially if you wear a middle part.
Keeping the Tone Fresh Between Appointments
Chocolate caramel can fade in two directions: it can go warm and brassy, or it can wash out and lose the depth that made it interesting in the first place. The fix is usually a small maintenance rhythm, not a rescue mission. A beige or violet shampoo once a week is enough for most people. More than that, and the hair can start looking dull or too cool.
Gloss appointments every 4 to 6 weeks help the caramel stay clean. Root touch-ups usually live in the 8 to 12 week range, depending on how much contrast you chose at the start and how fast your hair grows. If you wear a lot of heat, use protectant every time and keep hot tools in the 300°F to 350°F range when you can. Fine hair does not need a 400°F iron to look finished.
Common Mistakes That Make the Color Go Wrong
The first one is choosing caramel that’s too orange. On fair skin, orange-gold can pull the whole face redder, especially around the nose and cheeks. The fix is a beige, toffee, or neutral-gold tone instead of a bright copper shade.
Another problem is going too thick with the face frame. A broad, chunky money piece can look streaky fast, and it’s usually the first thing that dates the color. Thin front pieces age better and blend more naturally into the rest of the hair.
Skipping toner is another classic mess. Lightened brown hair without a proper tone often turns raw, yellow, or flat. A good gloss doesn’t just “finish” the look; it keeps the chocolate and caramel from fighting each other.
And yes, overusing purple shampoo can backfire. The hair ends up looking muted and chalky rather than fresh. Once a week is usually enough unless the brass is really aggressive.
Variations and Alternate Routes
Cool Cocoa Edit: If gold makes you nervous, keep the caramel on the beige-ash side and deepen the chocolate a touch. This version is especially good for fair skin with pink undertones and straight cuts that need polish.
Warm Honey Sweep: If your skin has more peach or gold in it, nudge the caramel warmer and keep the ribbons narrow. The result feels sunnier, especially in waves and curls.
High-Contrast Frame: Dark chocolate near the roots and underneath, with caramel only around the face and top layers. This is the bold option for people who want the front to pop.
Barely-There Beige Threading: For people who want change without obvious highlights, use very fine babylights and a soft gloss. The whole look stays brown, just brighter and more alive.
Curly-Hair Ribboning: On waves and curls, place the caramel where the curl pattern opens up, not only at the surface. That keeps the dimension visible all the way through the shape instead of hiding under the top layer.
Frequently Asked Questions
Will chocolate caramel highlights work on very fair skin?
Yes, but the caramel should stay muted. Beige, toffee, or soft gold usually flatters fair skin better than bright copper or yellow-gold, which can look harsh next to pale undertones.
What’s better for this look: balayage or foils?
Balayage gives a softer, swept finish with gentler grow-out. Foils give more lift and a brighter result. If you want subtle dimension, balayage is easier to live with; if you want a cleaner contrast, foils or foilayage make more sense.
How do I keep caramel from turning brassy?
Use a color-safe shampoo, limit hot tools, and book a gloss when the tone starts to warm too much. A beige or violet-toned product once a week can help, but don’t overdo it or the hair can go dull.
Can this work on naturally blonde hair?
Absolutely. On lighter hair, the chocolate pieces act more like lowlights, which can make the face look more defined. You usually do not need as much lift, just thoughtful placement and a clean toner.
Will these highlights make fine hair look thinner?
Not if they’re done in fine ribbons or babylights. Chunky highlights can expose scalp and make fine hair look sparse, but narrow placement tends to build the illusion of density.
How often do I need touch-ups?
Most people can stretch root work to 8 to 12 weeks and glossing to about 4 to 6 weeks. If you chose a strong money piece, the front may need attention sooner because it shows regrowth faster.
What if the highlights look stripey after the appointment?
That usually means the pieces are too wide or the contrast is too sharp. A good gloss and a softer style finish can help, but if the stripes are severe, ask for finer blending the next time.
Can I ask for this if I usually wear my hair straight?
Yes, and straight hair is actually useful here because it shows the line and tone clearly. Just keep the pieces soft and broken up so the look doesn’t turn into flat bands.
A Shade Mix That Stays Kind to Fair Skin
Chocolate caramel highlights work because they give fair skin a frame, not a fight. The best versions don’t flood the head with brightness. They tuck the warmth into ribbons, blur the root, and leave enough depth in the chocolate for the face to stay grounded.
If you want a safe starting point, I’d pick a soft balayage or thin babylights with a beige caramel finish. If you want more drama, move toward a money piece or a stronger foilayage placement. The color family can handle both. The difference is how loudly you let it speak.