Caramel dark highlights can make deep skin glow without sanding down the depth that makes the whole look work.
The sweet spot is not pale blonde. It’s amber, toffee, bronze, maple, and the darker end of caramel — shades that sit close enough to the base color to look expensive, but warm enough to catch the light when you turn your head. On deep skin tones, that little bit of restraint matters. Too much lift and the color starts shouting. The right caramel whispers, then people notice it anyway.
I’ve always thought the best caramel highlights behave more like jewelry than paint. They sit where the eye naturally lands: around the face, through the top layers, at the ends of a bob, or in soft ribbons that break up a solid dark base. Curly hair makes the color bloom. Straight hair shows every line. Coils compress the placement and make the shade look denser. Same color family, different effect every time.
So the real question isn’t whether caramel works on deep skin tones. It does. The real question is which caramel, where it goes, and how much contrast you actually want. That’s where the good looks live.
Why This Collection Feels Different
Warmth without brass: The caramel shades here lean amber, toffee, bronze, and honey-brown instead of pale yellow, which keeps deep skin looking lit rather than washed out.
Depth still matters: Every look keeps some dark base visible, because that contrast is what gives curls, layers, and blunt cuts their shape.
Placement changes everything: A money piece, a whisper of babylights, and a full balayage melt all tell very different stories on the same head of hair.
Texture shifts the finish: The same caramel reads softer on coils, sharper on straight hair, and airier on a shag or bob.
Low-commitment options exist: Peekaboo panels, gloss refreshes, and face-framing ribbons let you test the color before you go all in.
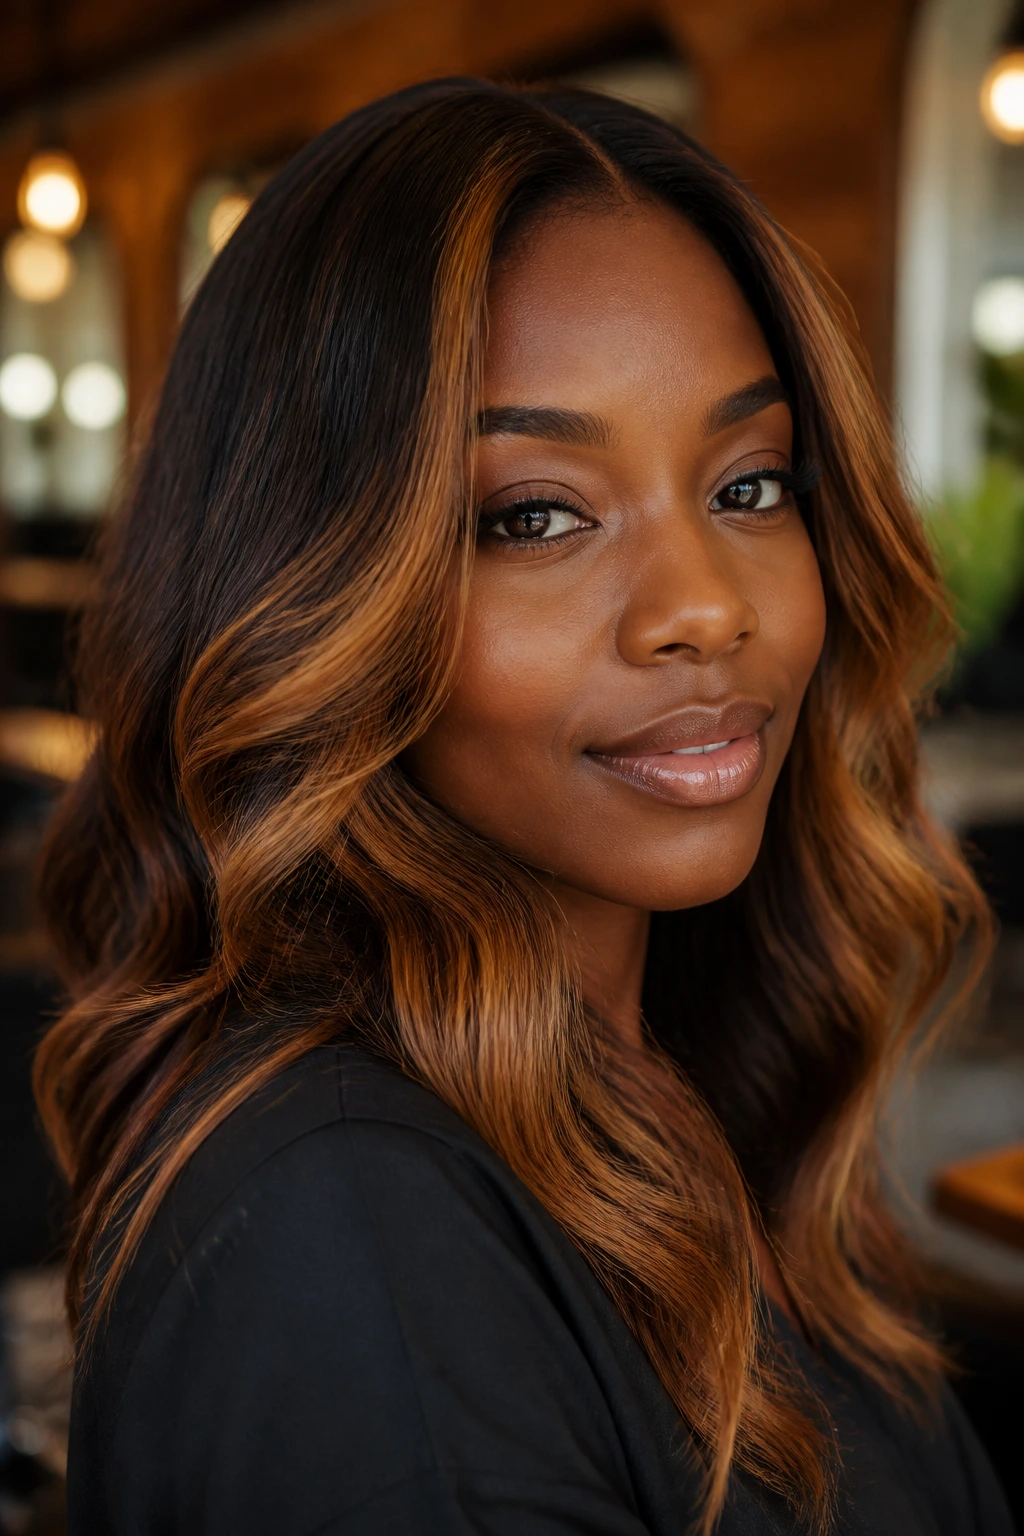
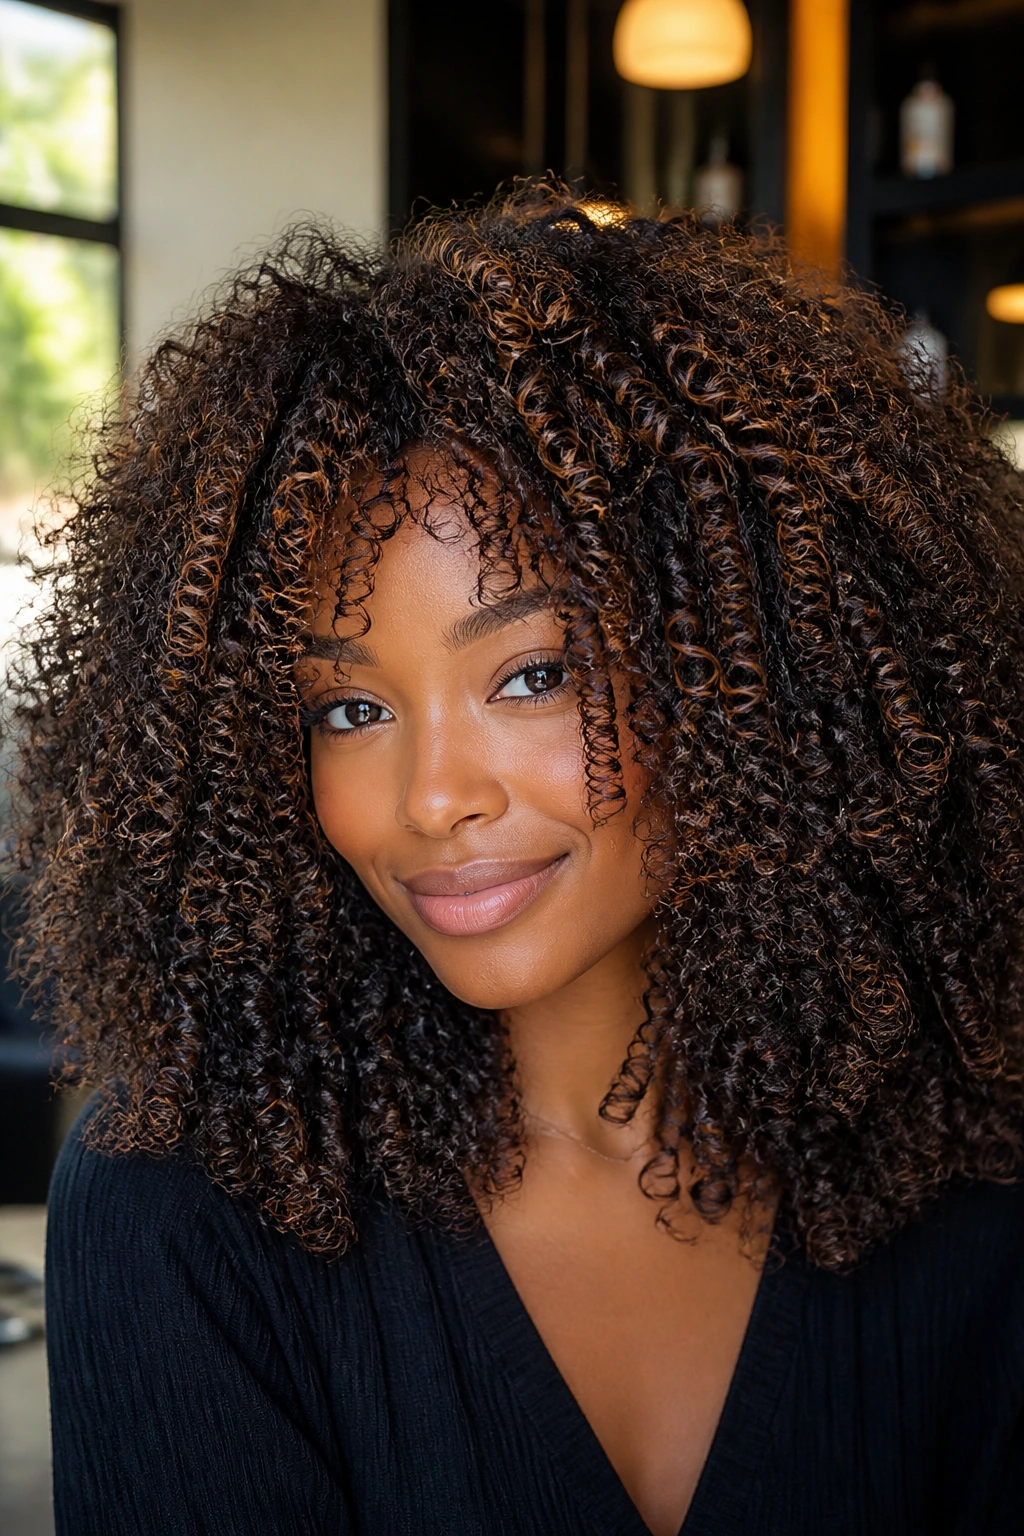
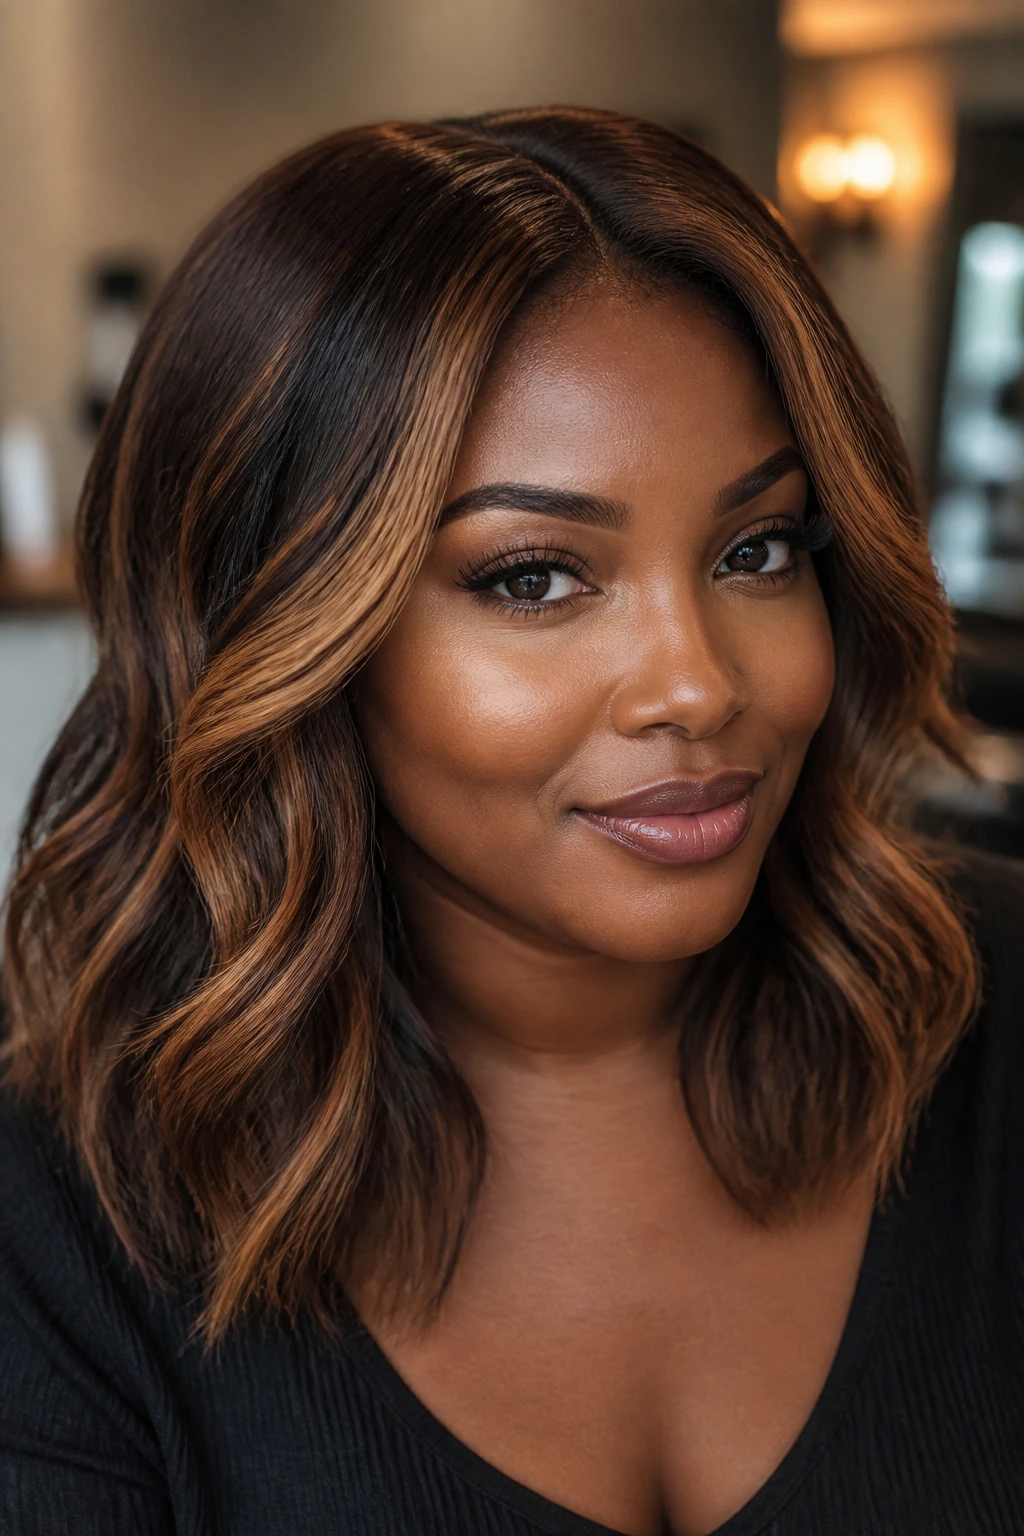
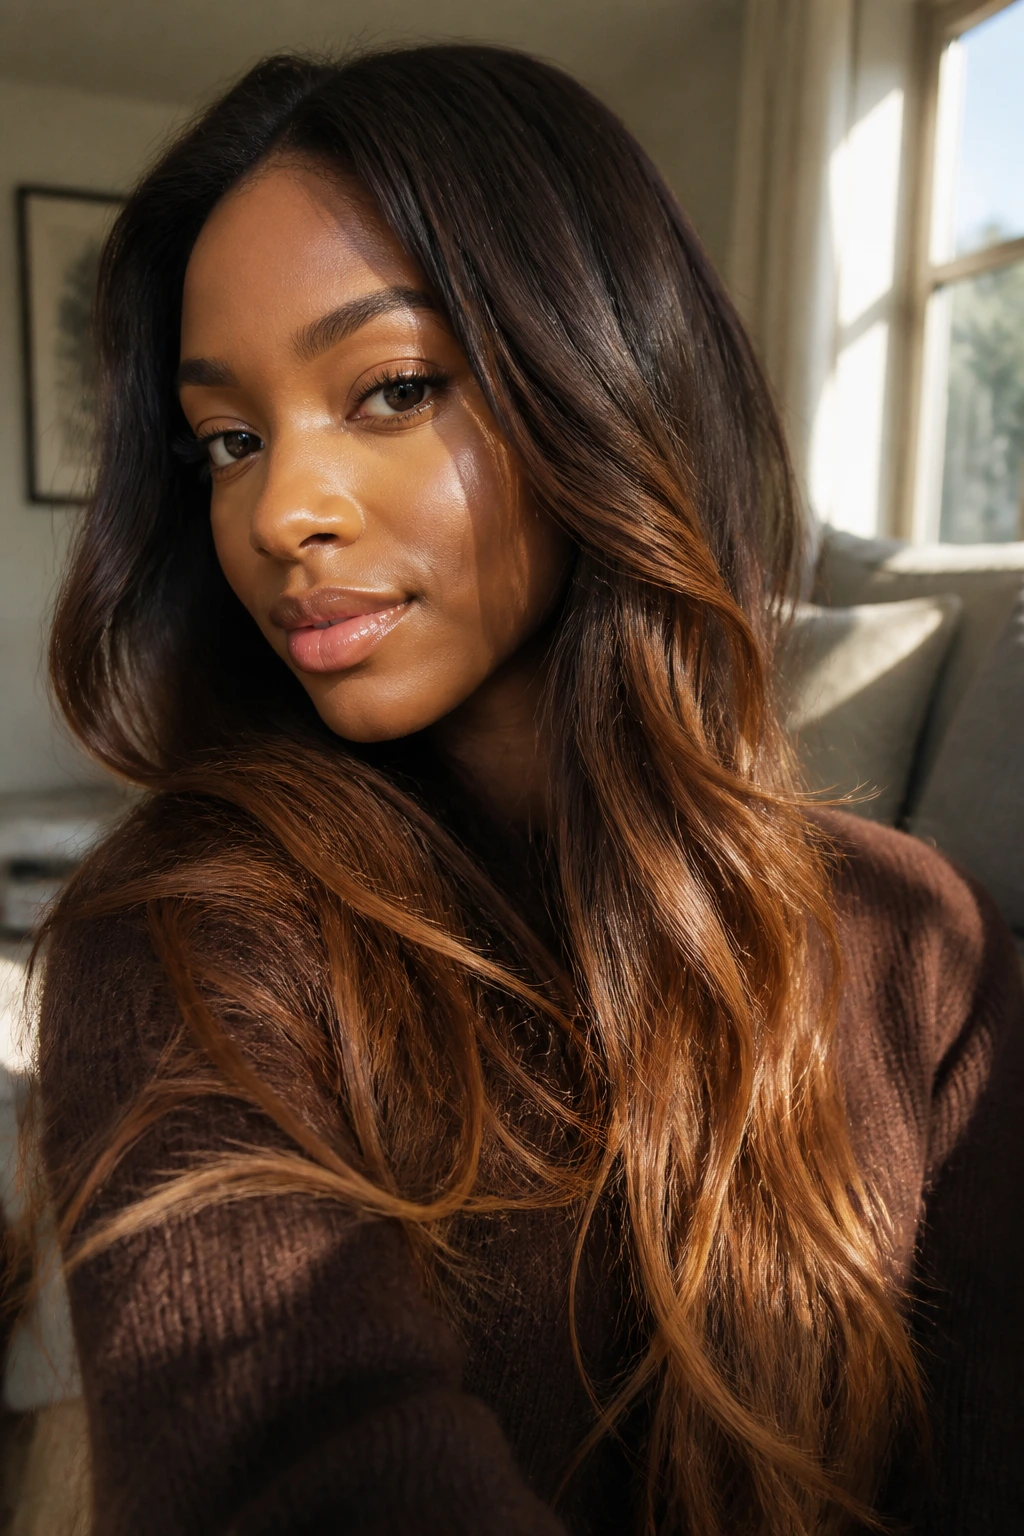
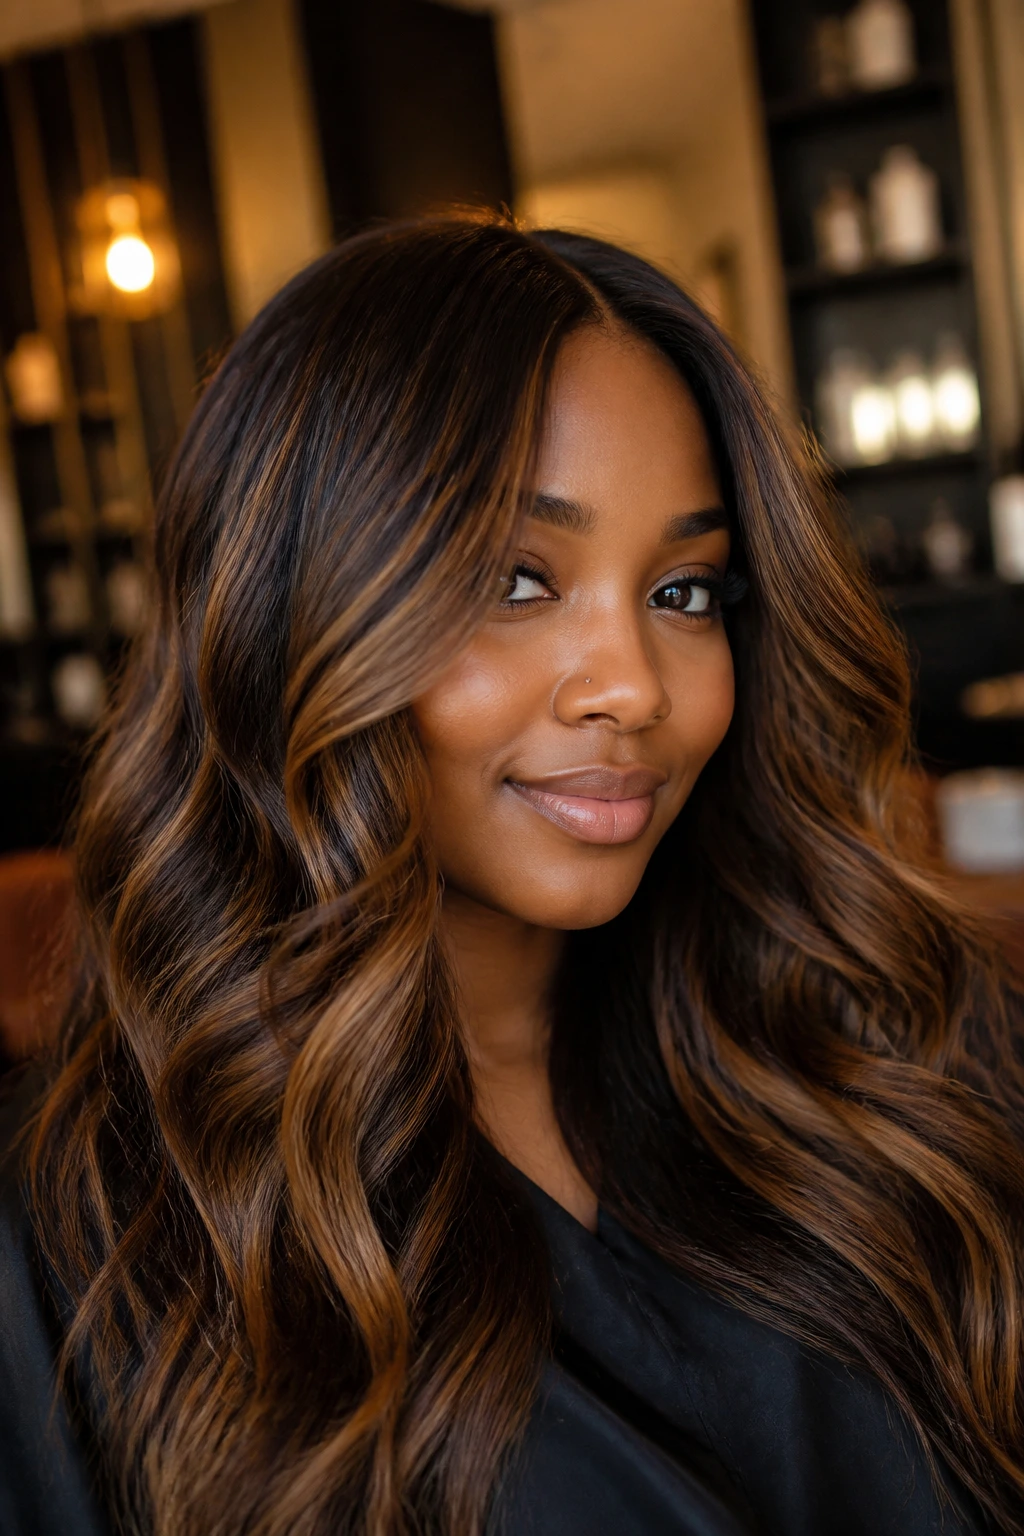
1. Espresso Hair with Honey Caramel Ribbons
Honey ribbons through espresso hair do a better job than a whole head of light pieces, and I’ll die on that hill. The contrast stays narrow, which means the color catches at the temples, crown, and ends without turning the whole style stripey.
Ask for thin foils or hand-painted slices that sit just under the top layer. I like the brightest pieces near the face and then a few softer ribbons through the mids so the back doesn’t steal the show. If your hair is curly, let the sections wander a little instead of lining them up in perfect rows. Curves soften the color fast.
One detail people miss: honey caramel should still have brown underneath it. If the lift goes too far, the ribbon loses that warm coffee-caramel feel and starts looking like a different hair entirely. Keep it one to two levels lighter than the base, and the result stays anchored.
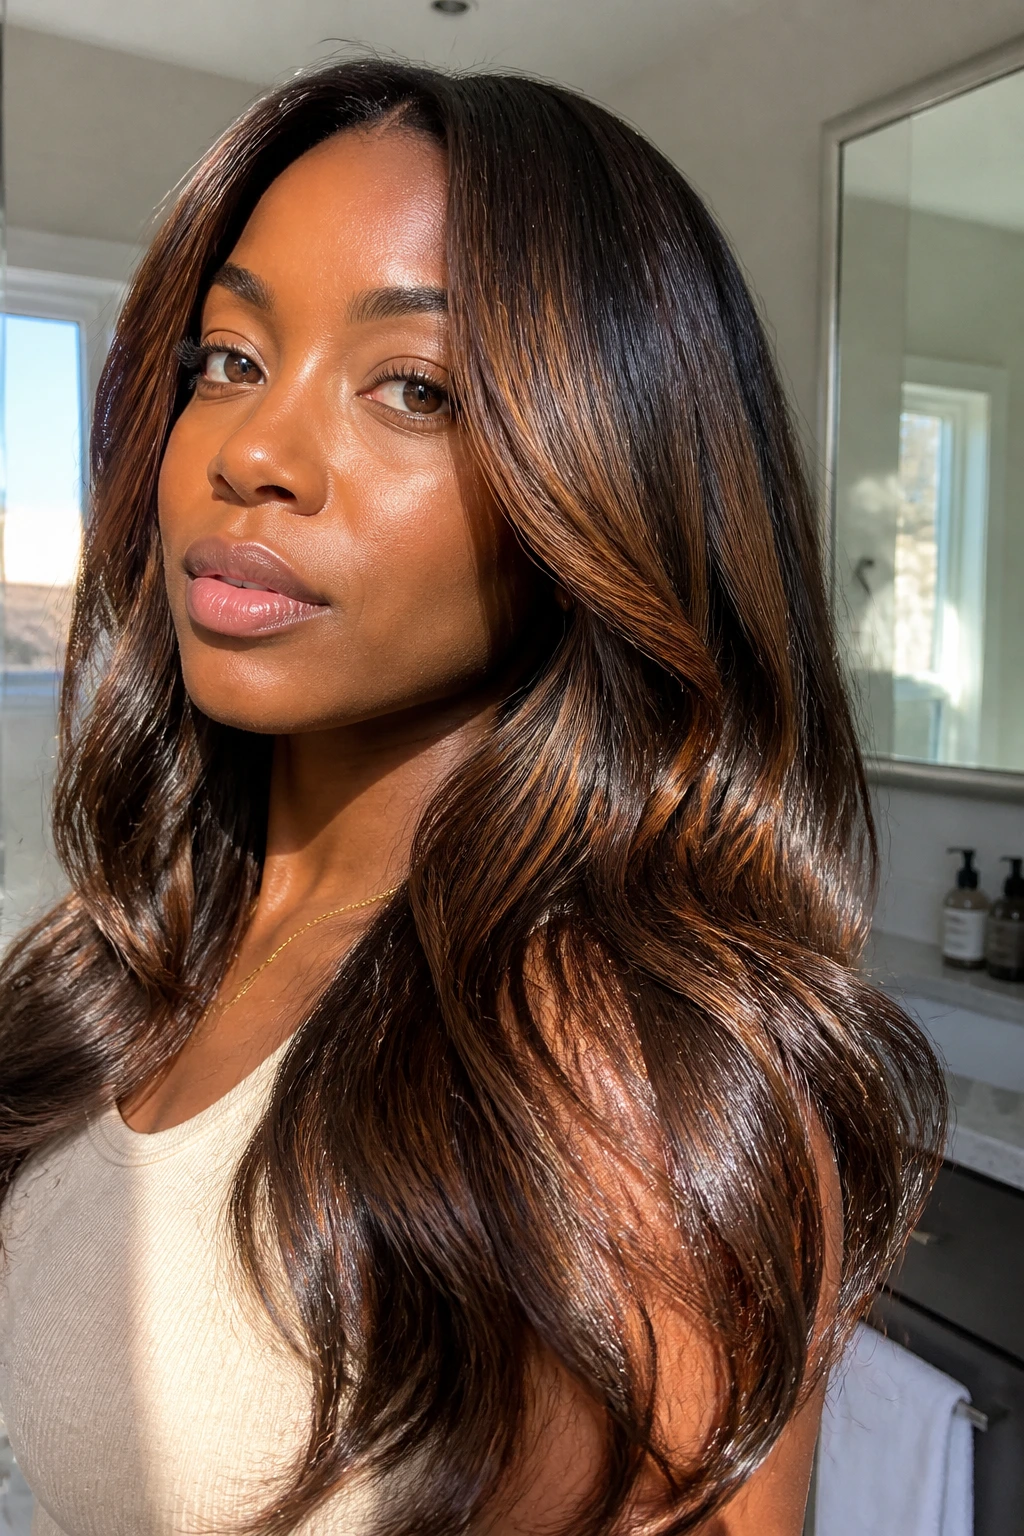
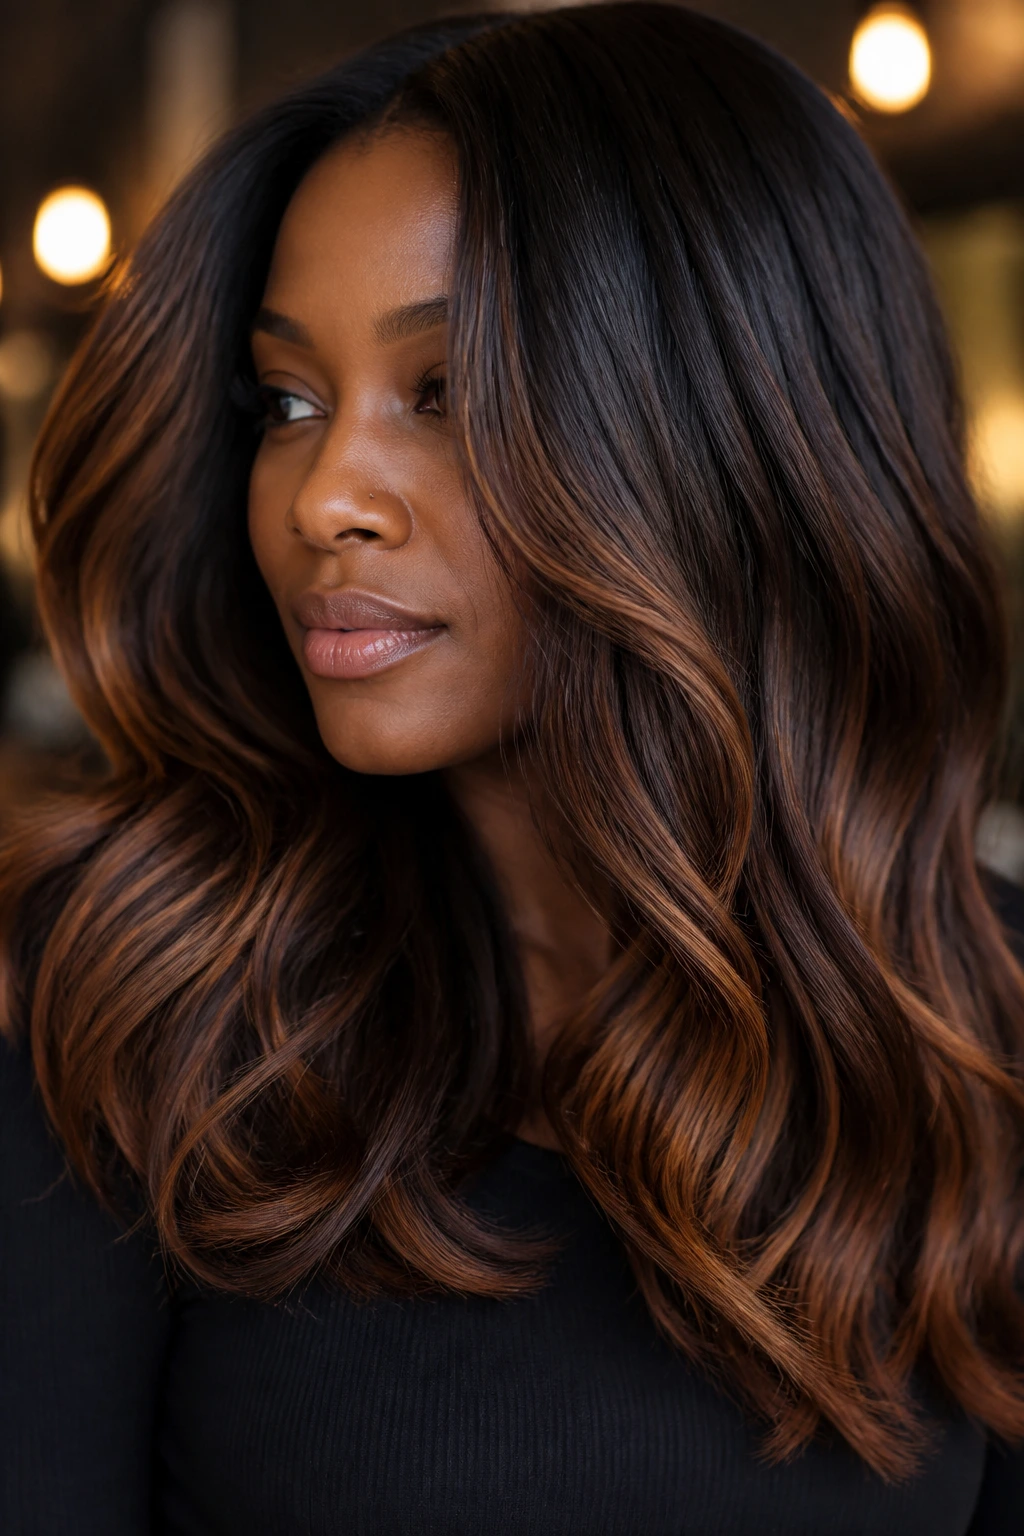
2. Deep Mocha Balayage with Cinnamon Ends
What if you want warmth without going blonde? Cinnamon ends are the answer I reach for most often. They read red-brown in motion, which gives deep skin a richer frame than a yellow-toned highlight ever could.
Balayage this look from around the mid-shaft down, then let the lightest tone gather at the ends. That keeps the root deep mocha and lets the color melt rather than stop and start. On layered cuts, the cinnamon pieces show up in movement instead of sitting as a flat block. That’s the part I like.
Cinnamon is especially good if your complexion has red or golden undertones. It echoes the skin instead of fighting it. If your skin leans cooler, ask for a smokier cinnamon with a brown gloss so the warmth doesn’t go too loud.
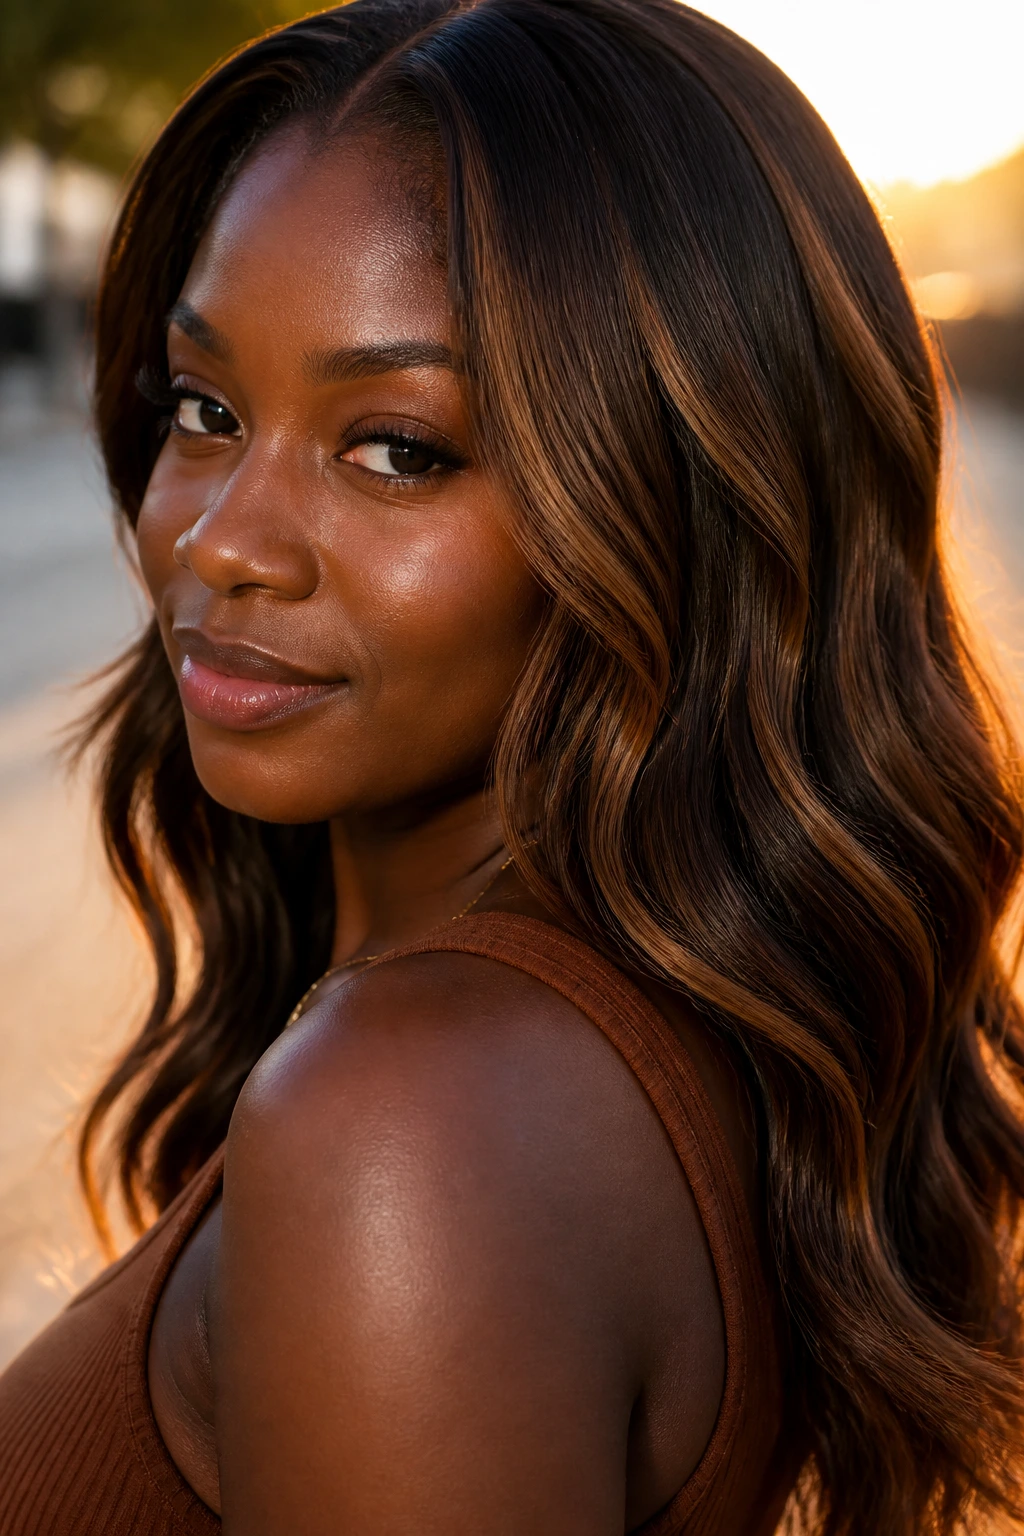
3. Caramel Money Piece on a Curly Bob
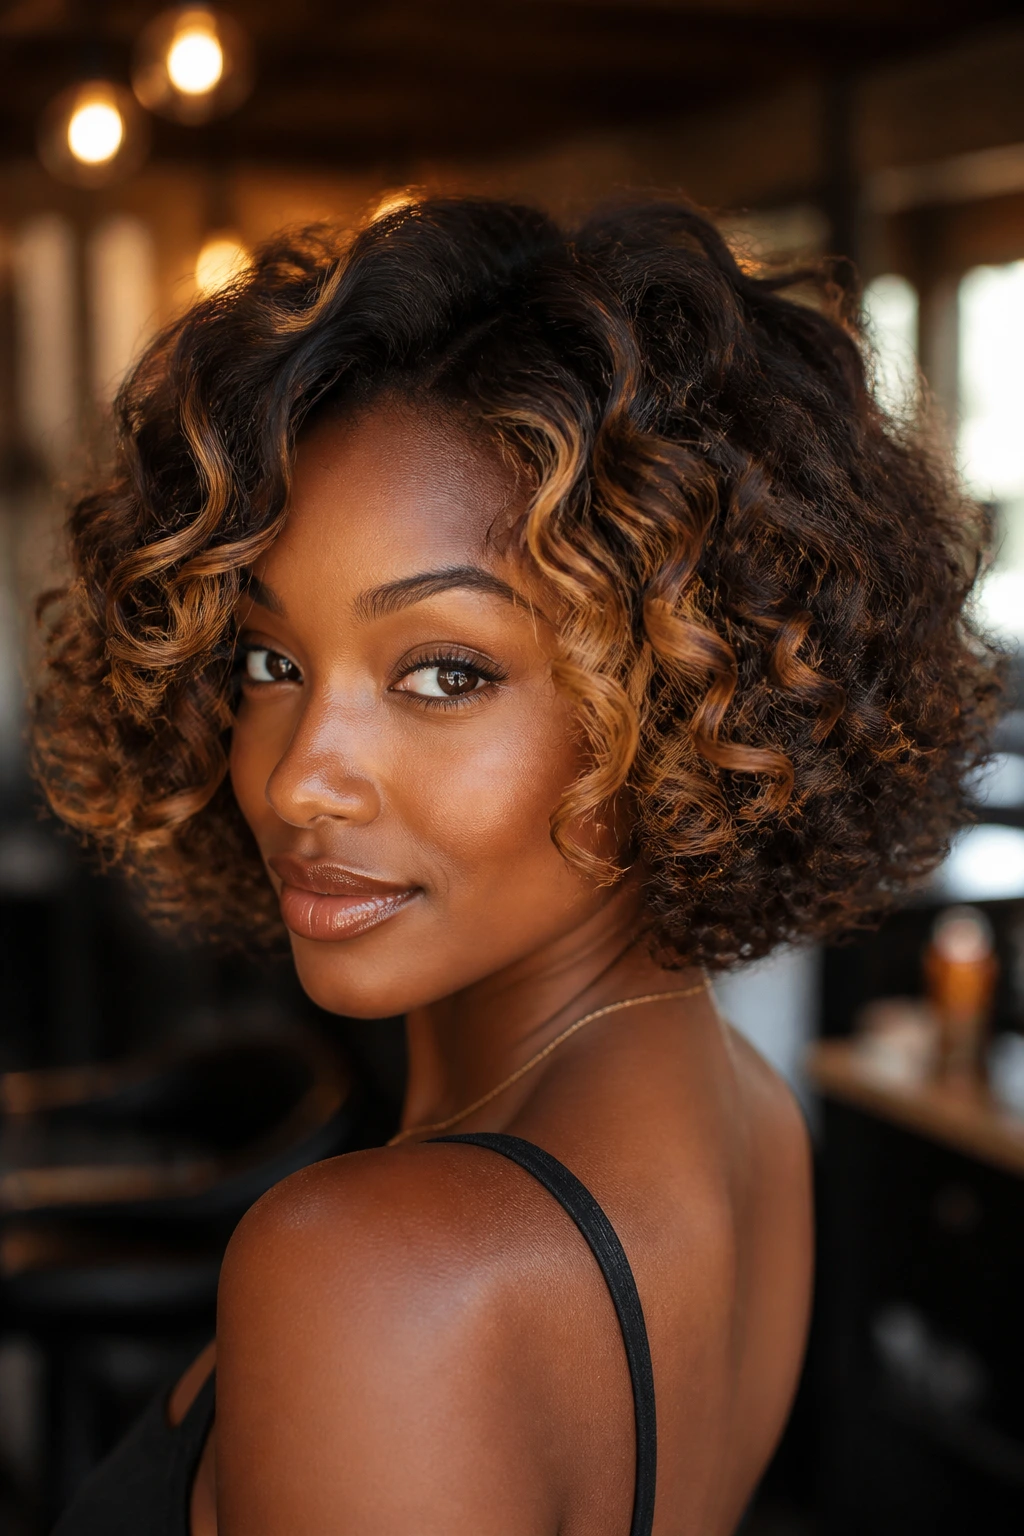
A curly bob with a caramel money piece is one of those looks that makes a face look awake before the coffee even kicks in. The front curls catch light first, so the brightest pieces belong there, not buried in the back where nobody sees them.
Ask for a money piece that sits one or two levels lighter than the rest of the hair. On curls, that brightness spreads as the shape expands, so you do not need a huge slab of color. A couple of clean foils at the hairline and a softer sweep through the crown are enough. Keep the bob itself crisp. The cut does some of the work for you.
Best placement
- Temple curls, where the face opens up.
- A few crown pieces, so the top doesn’t go flat.
- Ends around the jawline, where the bob swings.
If you want to keep the look soft, leave the nape darker. It gives the front pieces more authority without making the whole cut feel busy.
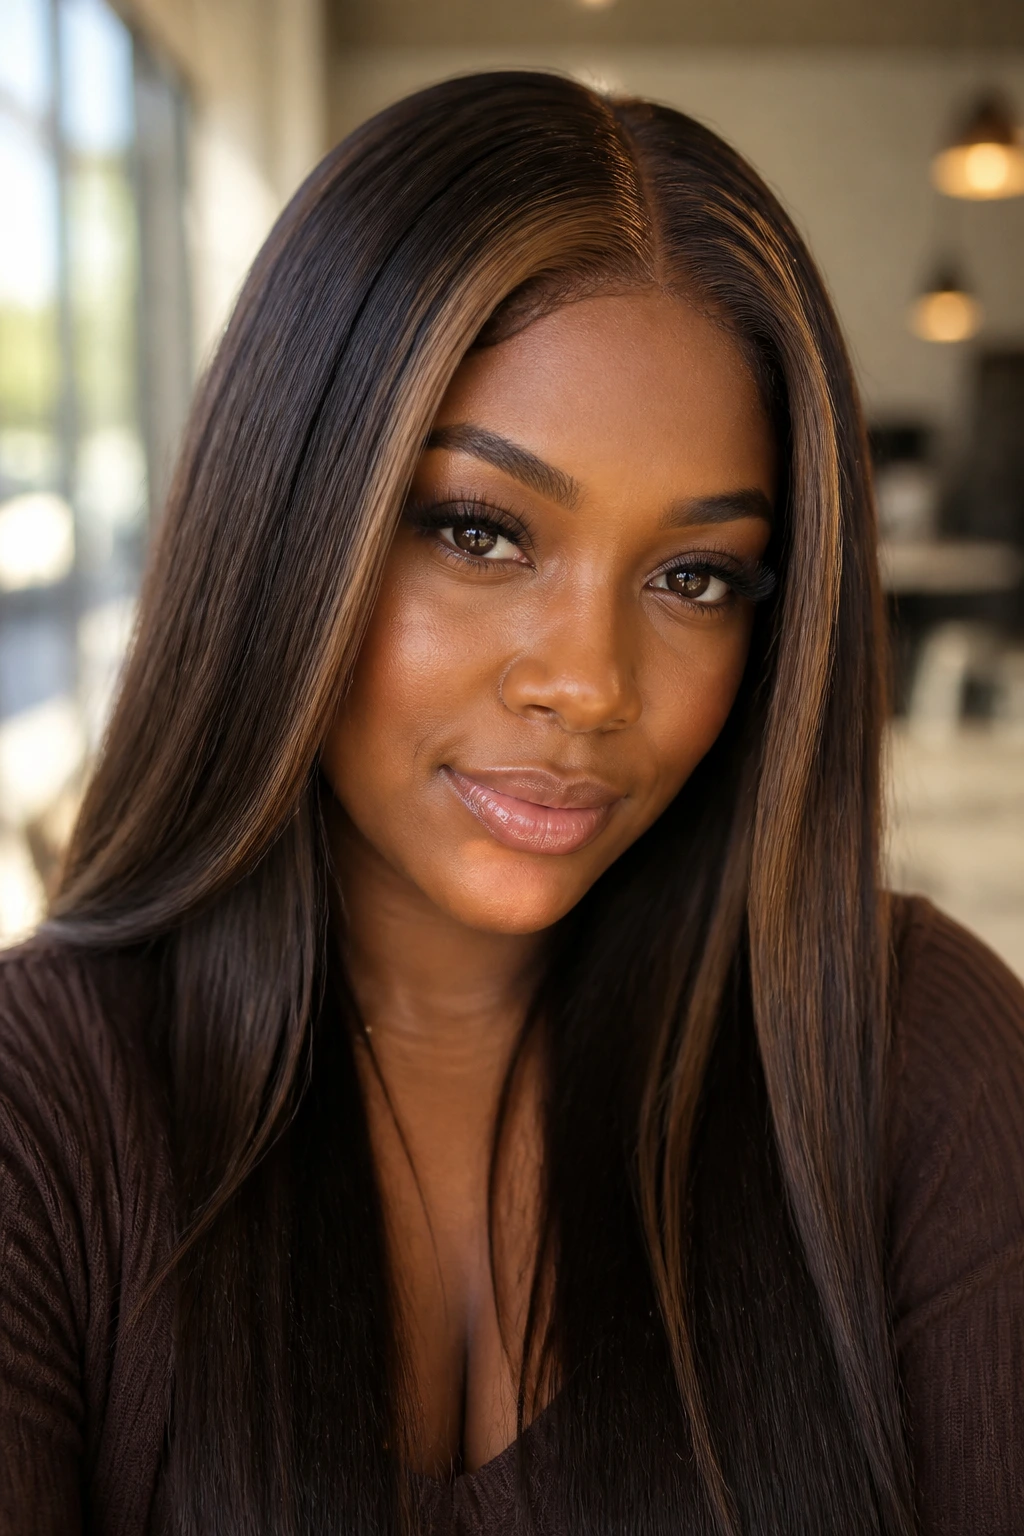
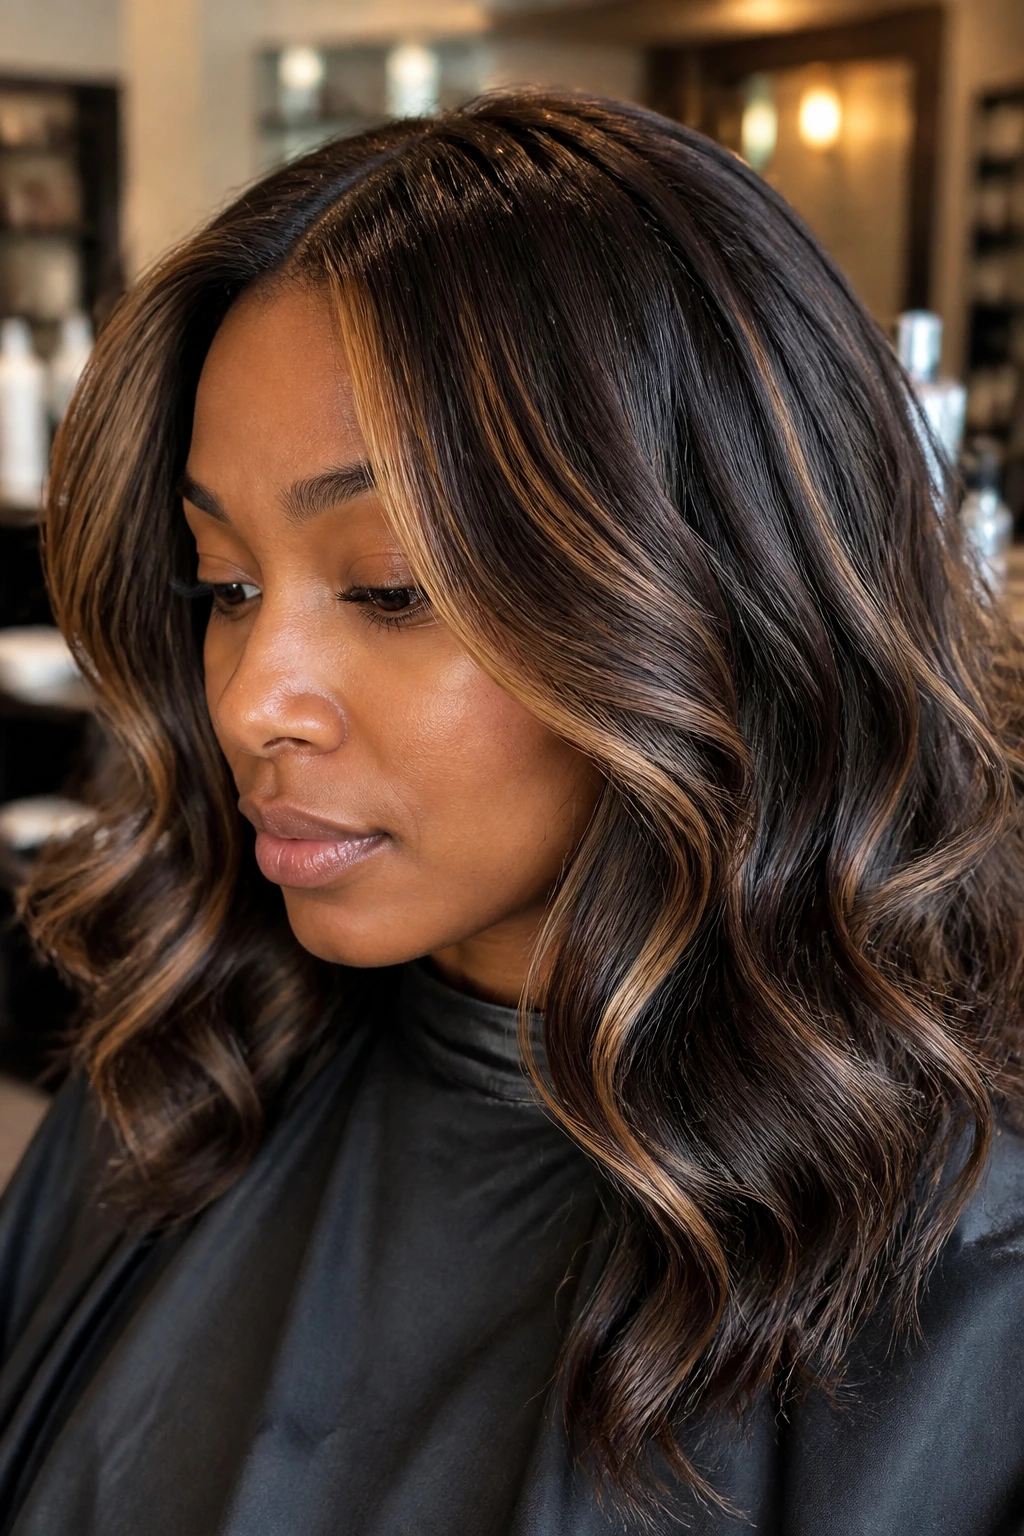
4. Toffee Face-Framing Highlights on a Silk Press
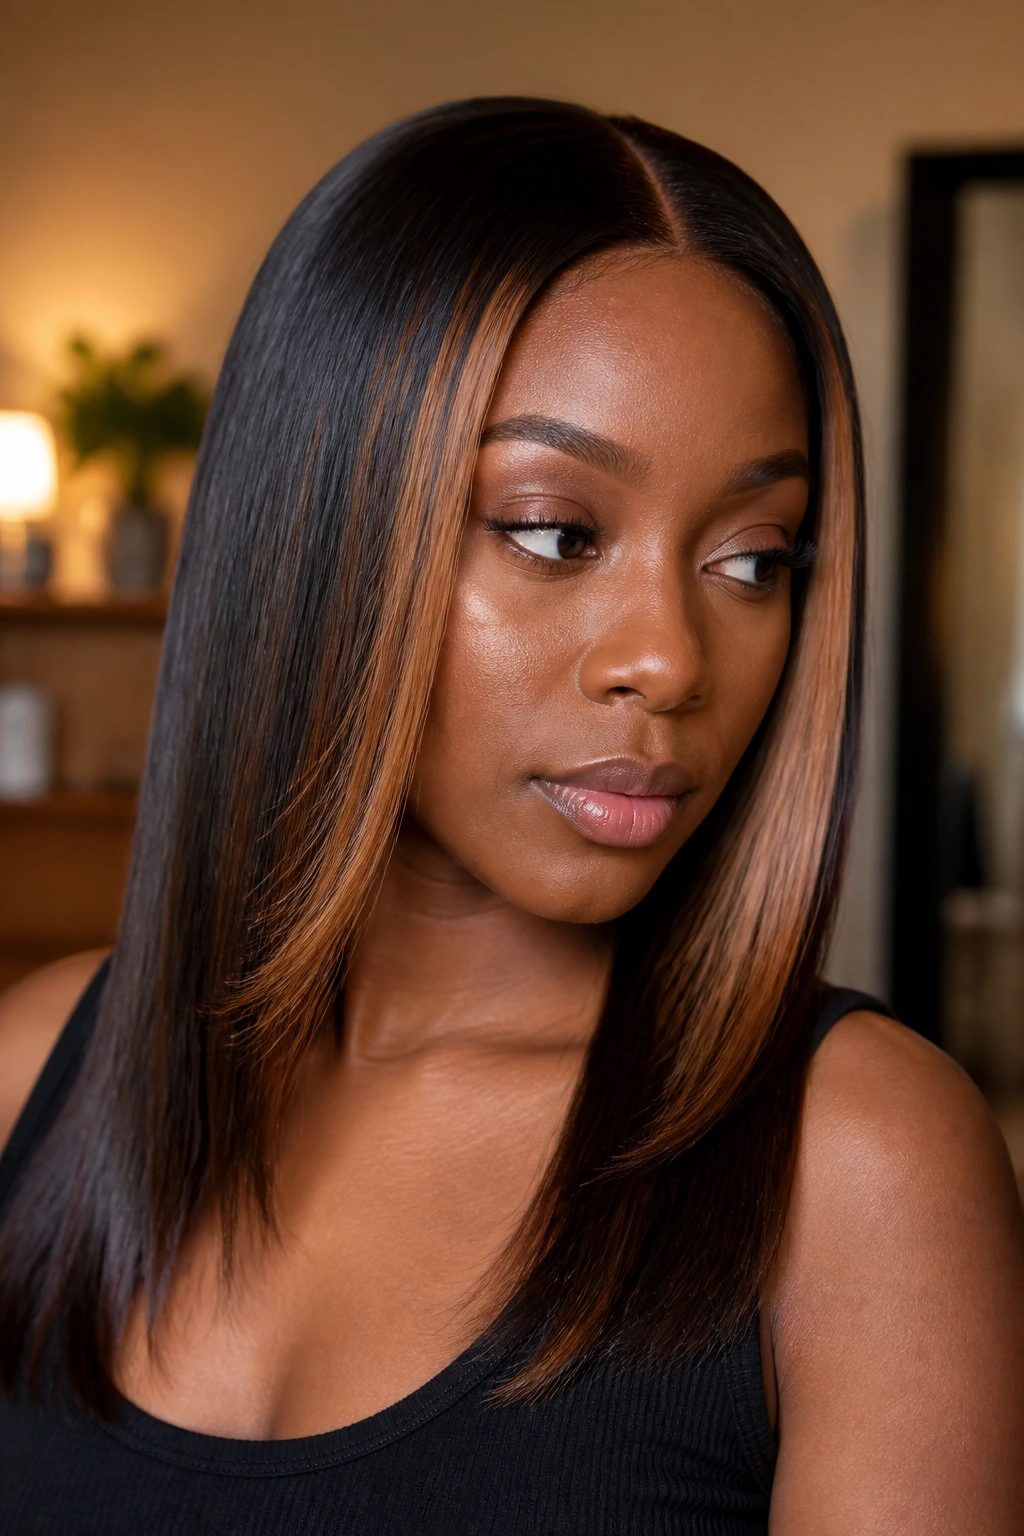
Not every caramel look needs a dramatic light streak. Toffee at the hairline can be enough, especially on a silk press where the straight finish gives every ribbon a clean edge.
The trick is keeping the toffee deep. Think beige-caramel with a brown backbeat, not buttery blonde. Place the brightest strands from the cheekbone down toward the jaw, then let the ends feather out. On a silk press, those lines fall clean and neat; they won’t disappear into curls the way they might on a tighter texture.
I like this look for people who wear their hair sleek most of the time but still want movement around the face. It’s polished, yes, but it’s also practical. The grow-out is gentle because the darker root still does the heavy lifting.
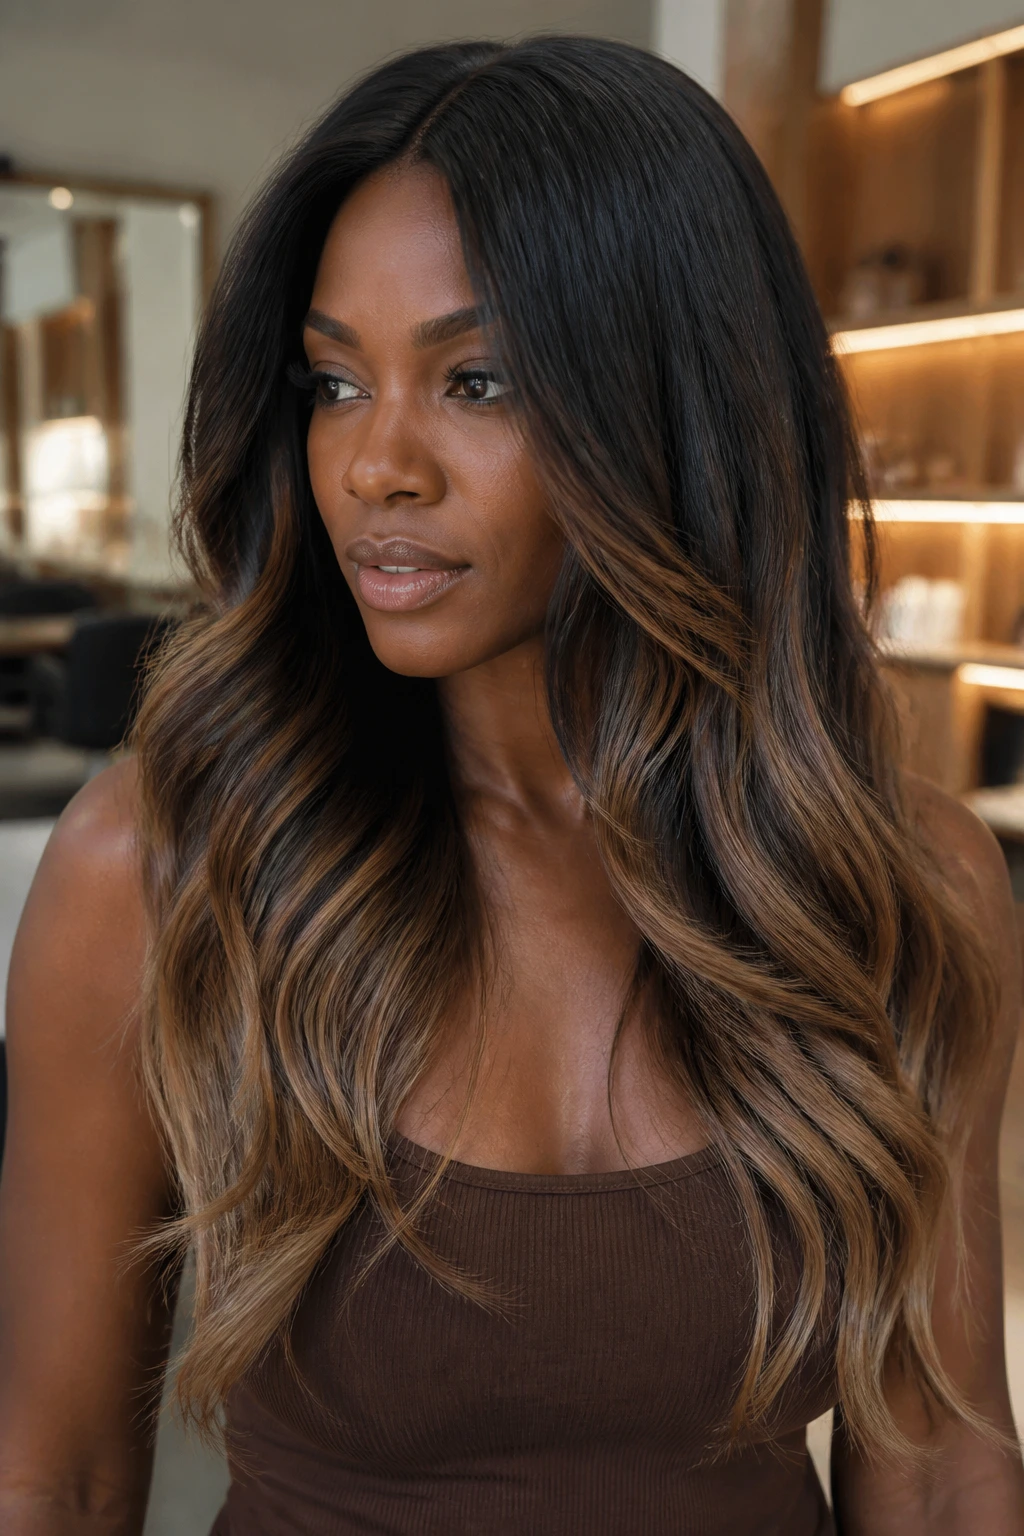
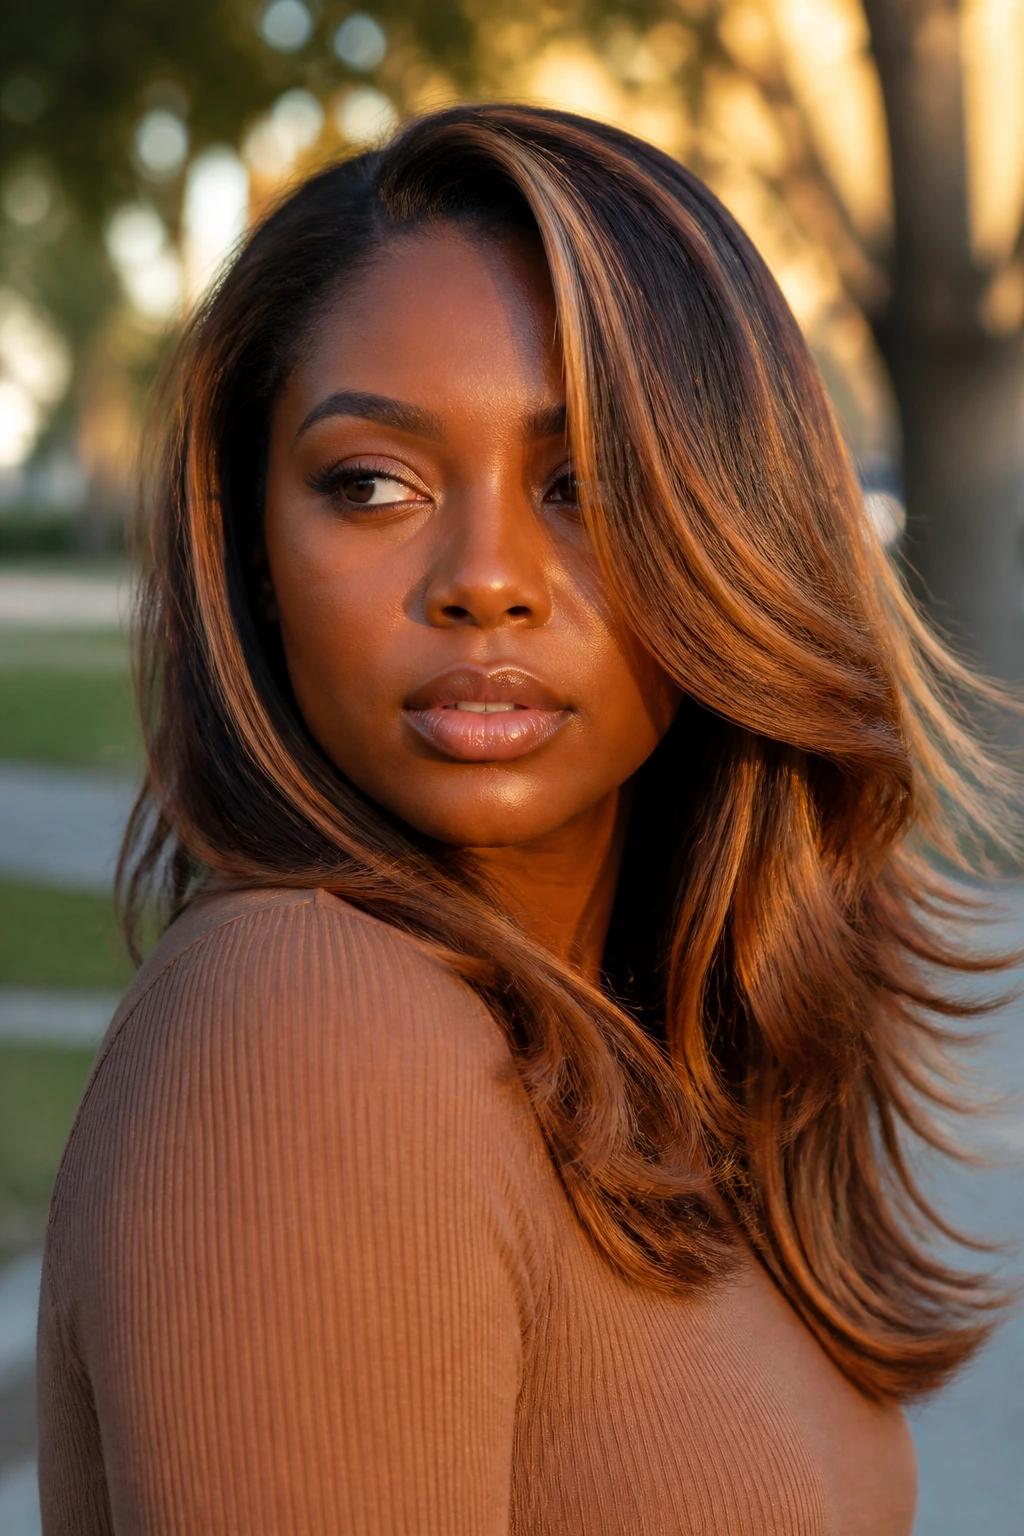
5. Bronze Melt from Mid-Length to Ends
Bronze melt hair has a heat to it that feels different from classic caramel. Bronze sits a little deeper, a little moodier, and that’s exactly why it looks so good on deep skin. It doesn’t fight for attention. It glows.
Start the lightening around ear level or just below the collarbone, then feather the tone down into the ends. The point is not to create a hard ombré line. You want a slow slide from dark mocha into bronze and then into a soft caramel finish at the tips. Long layers make this look easier because the pieces can move independently instead of lying in one flat sheet.
This one works beautifully if your hair already has a lot of thickness. Bronze keeps the color from reading too airy or fragile. Add a gloss at the end, and the whole thing gets that polished, metallic sheen that shows up best in daylight.
6. Walnut Babylights on Natural Curls
Babylights are tiny, and that’s exactly why they work here. On deep curls, a 1/8-inch section can look like a soft halo once the hair springs back into shape.
Walnut caramel is the right tone if you want something quiet. It leans brown instead of gold, so the color sits inside the curl pattern instead of floating on top of it. Ask for very fine foils around the crown and face frame, then let the rest of the head stay dark enough to keep the shape readable. Coils and tight curls need less saturation than people think.
- The pieces should be narrow enough to disappear into the curl cluster.
- A bond-building treatment matters here because tiny sections lift fast.
- A neutral gloss keeps the walnut tone from turning orange after a few washes.
If you want dimension without obvious stripes, this is one of the smartest ways to get it.
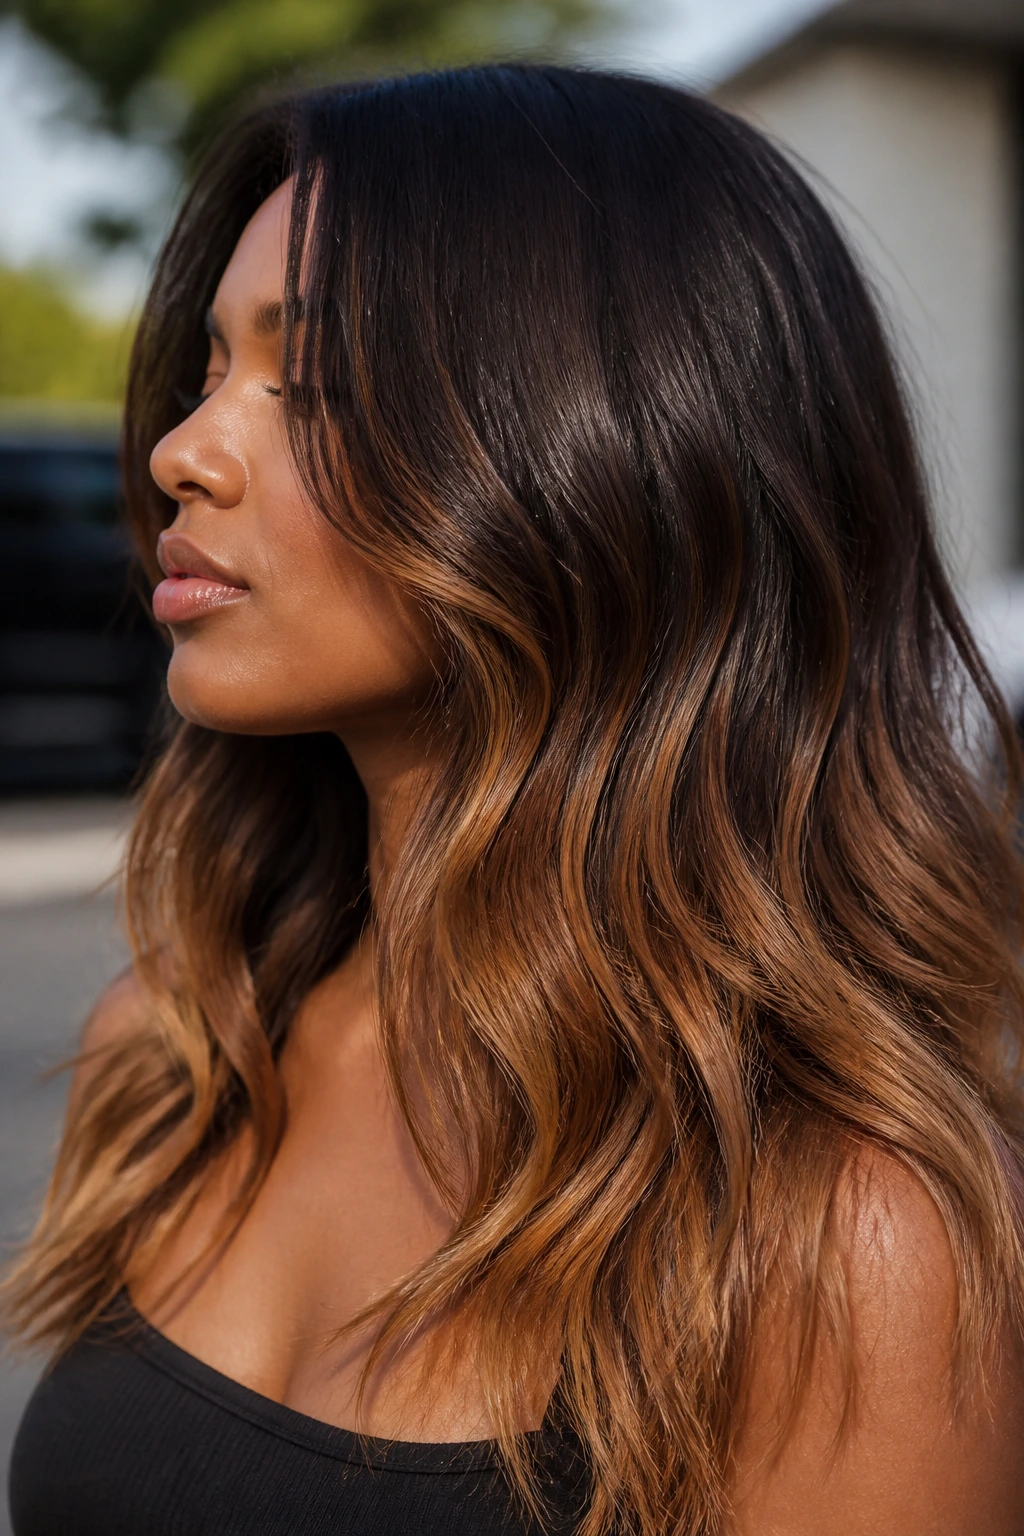
7. Smoky Caramel Ombré on Long Layers
Smoky caramel ombré is the low-maintenance cousin in the group, and that’s not a slight. The root stays deep and dark, then the color eases into a cooler caramel with a muted finish. No sharp line. No loud jump.
Why does that matter on deep skin? Because the darker root keeps the style grounded, while the smoky caramel at the ends still gives you movement and light. Long layers help the transition look natural, especially when the lighter pieces land on bends and not straight across the hair.
This is a good choice if you do not want to babysit your color every few weeks. The grow-out is forgiving, and the tone stays elegant even when it softens. If your skin leans neutral or cool, ask for a caramel glaze with beige-brown notes rather than a golden one. That keeps the smoke in the smoke.
8. Maple Streaks in a Shoulder-Length Lob
A lob can hold brighter caramel than a lot of people expect. The cut supplies its own shape, so the color doesn’t need to do all the talking.
Maple streaks sit in that warm brown-red space that flatters deep skin without going copper-crazy. I like 6 to 10 narrow streaks placed through the top layers and around the face, with a little extra concentration near the part. Shoulder-length hair shows this especially well because the ends swing into view when you tuck the hair behind your ears.
The important thing is restraint. If every inch of the lob gets lightened, the whole head can look busy. Keep some dark space between the lighter pieces and the color starts to feel deliberate instead of scattered.
9. Peekaboo Caramel Panels Under Dark Hair
Peekaboo caramel is for the person who likes a little secret in the haircut. From the top, the hair can look almost all one deep shade. Move it, pin it up, or sweep it to one side, and the caramel flashes underneath.
That hidden placement is lovely on deep skin because the base stays rich. You get the brightness without losing the depth that makes the complexion pop. Ask for the panels under the crown and near the nape, not too high up the head. If the pieces sit too close to the top layer, the effect stops being peekaboo and starts reading like regular highlight placement.
This option also grows out quietly. When the color softens, it still looks intentional. I like it for anyone trying caramel for the first time, or for anyone who works in a setting where loud color would feel off.
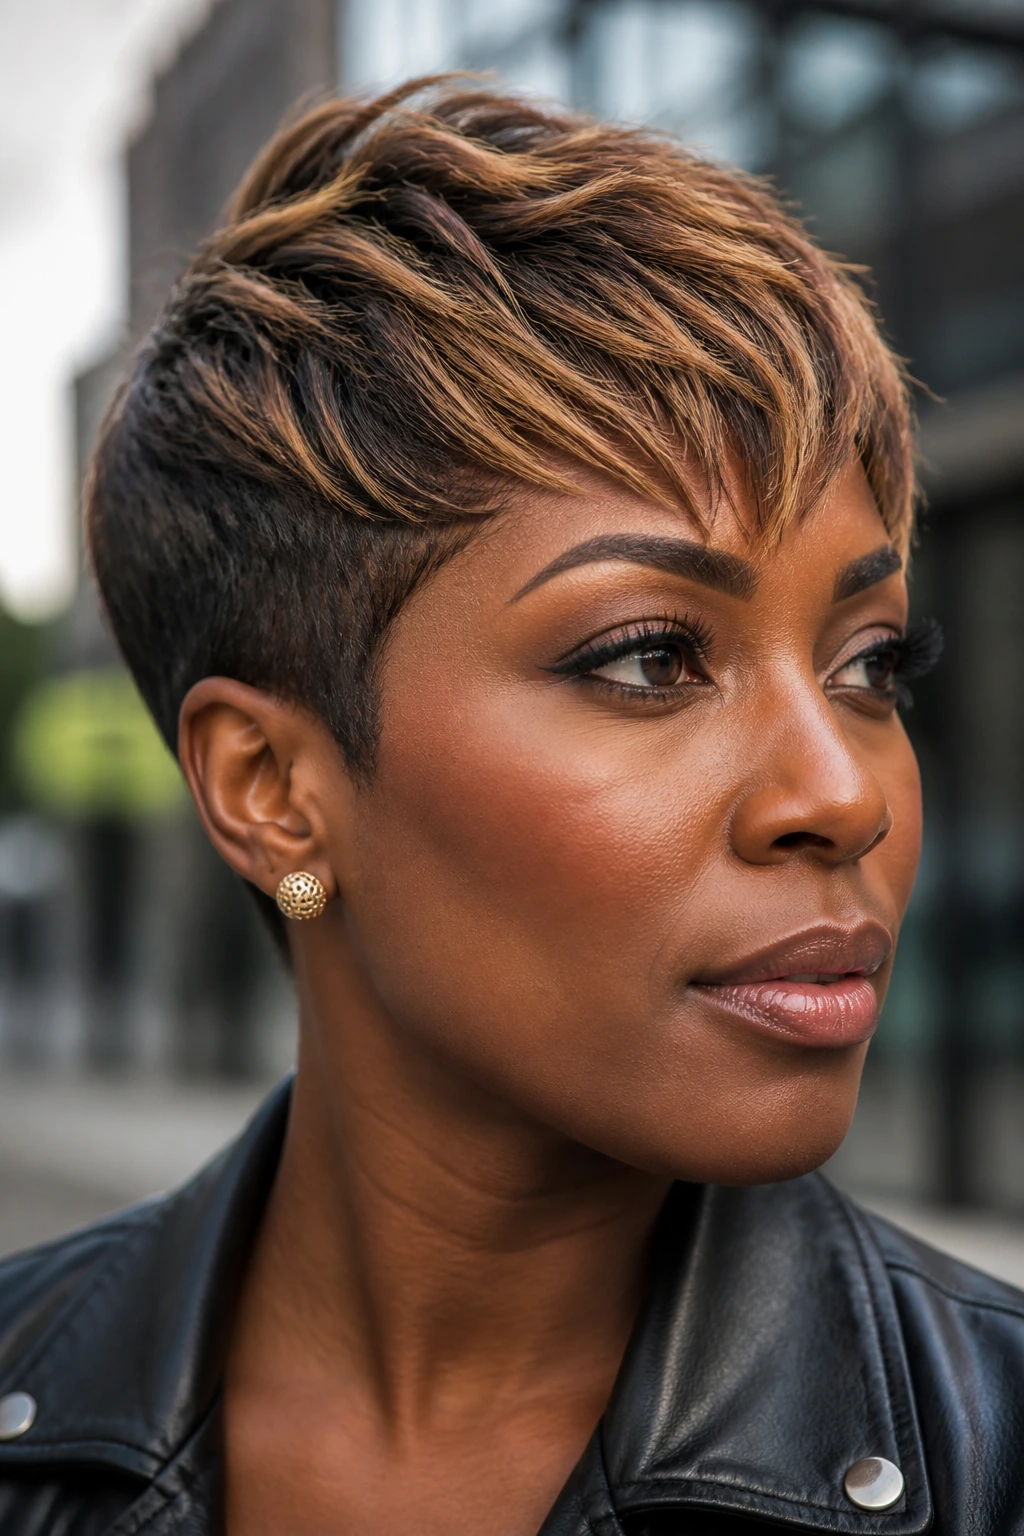
10. Butterscotch Ribbon Highlights on a Tapered Cut
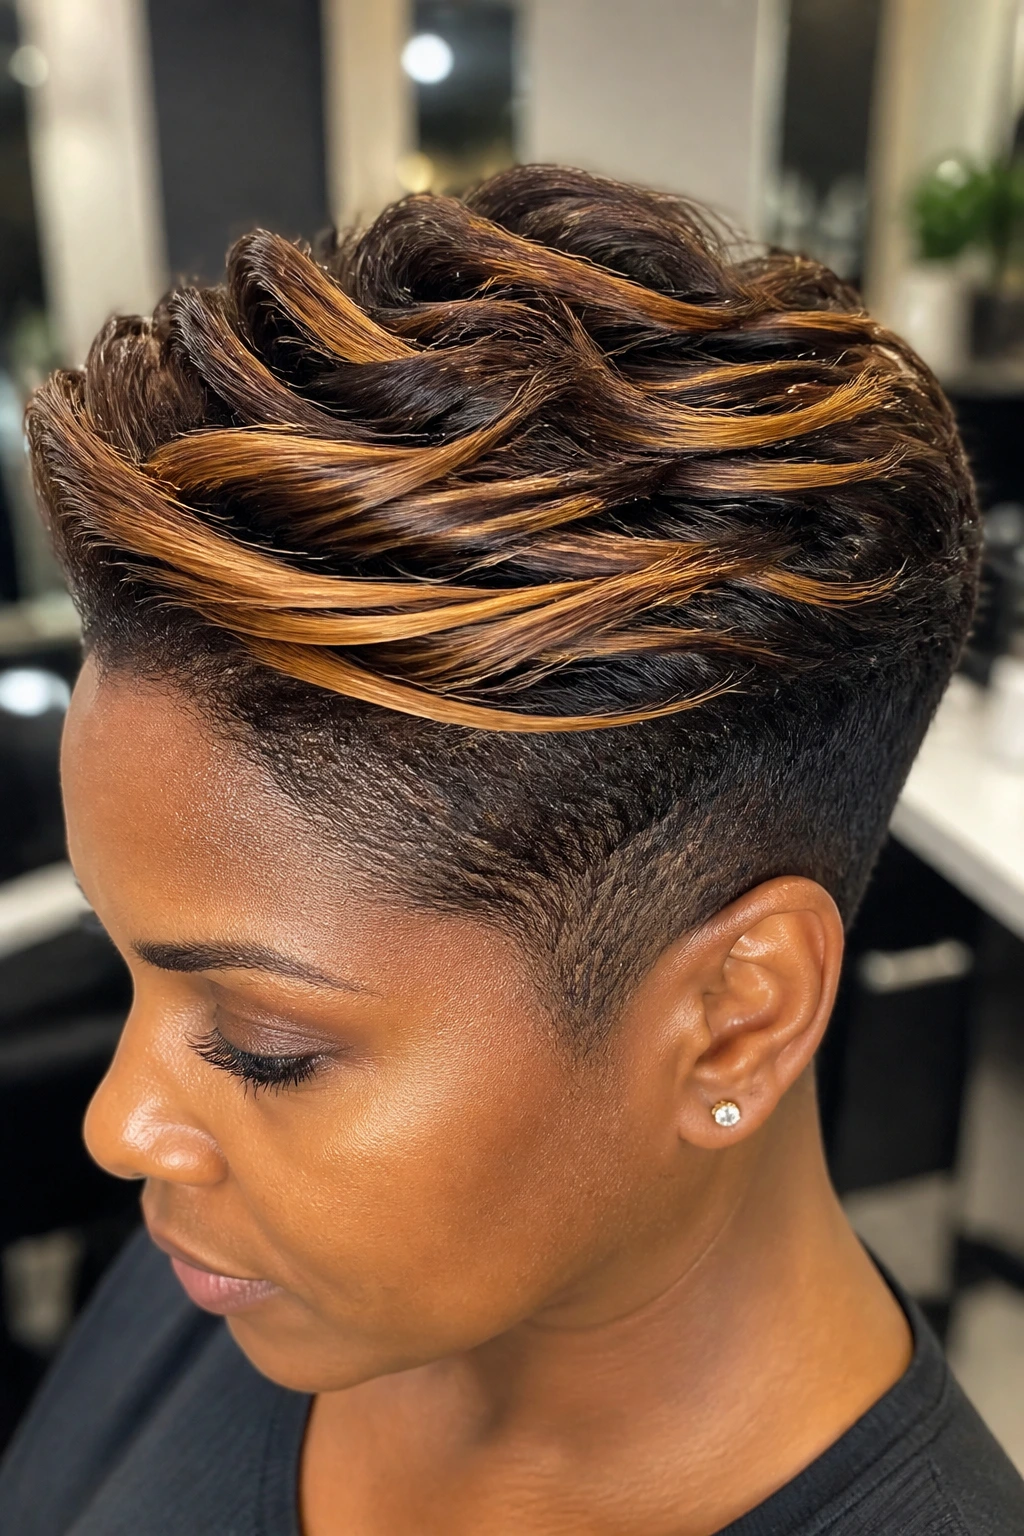
Short hair needs precision. There’s nowhere to hide sloppy placement.
Butterscotch ribbons on a tapered cut work because the shape is already sculpted. Put the brighter pieces on the top ridge, through the crown, and around the front edge where the hairline curves. Keep the sides darker so the cut still reads clean. If the ribbons are too wide, the whole style loses that sharp, tailored feel.
The butterscotch tone should stay warm and brown-based. You want a soft sweetness, not a yellow note that sits on top of the haircut. On a tapered cut, that color turns movement into a feature. The shorter layers rise up, the lighter pieces catch, and the whole shape looks more alive.
11. Golden Beige Caramel on a Twist-Out
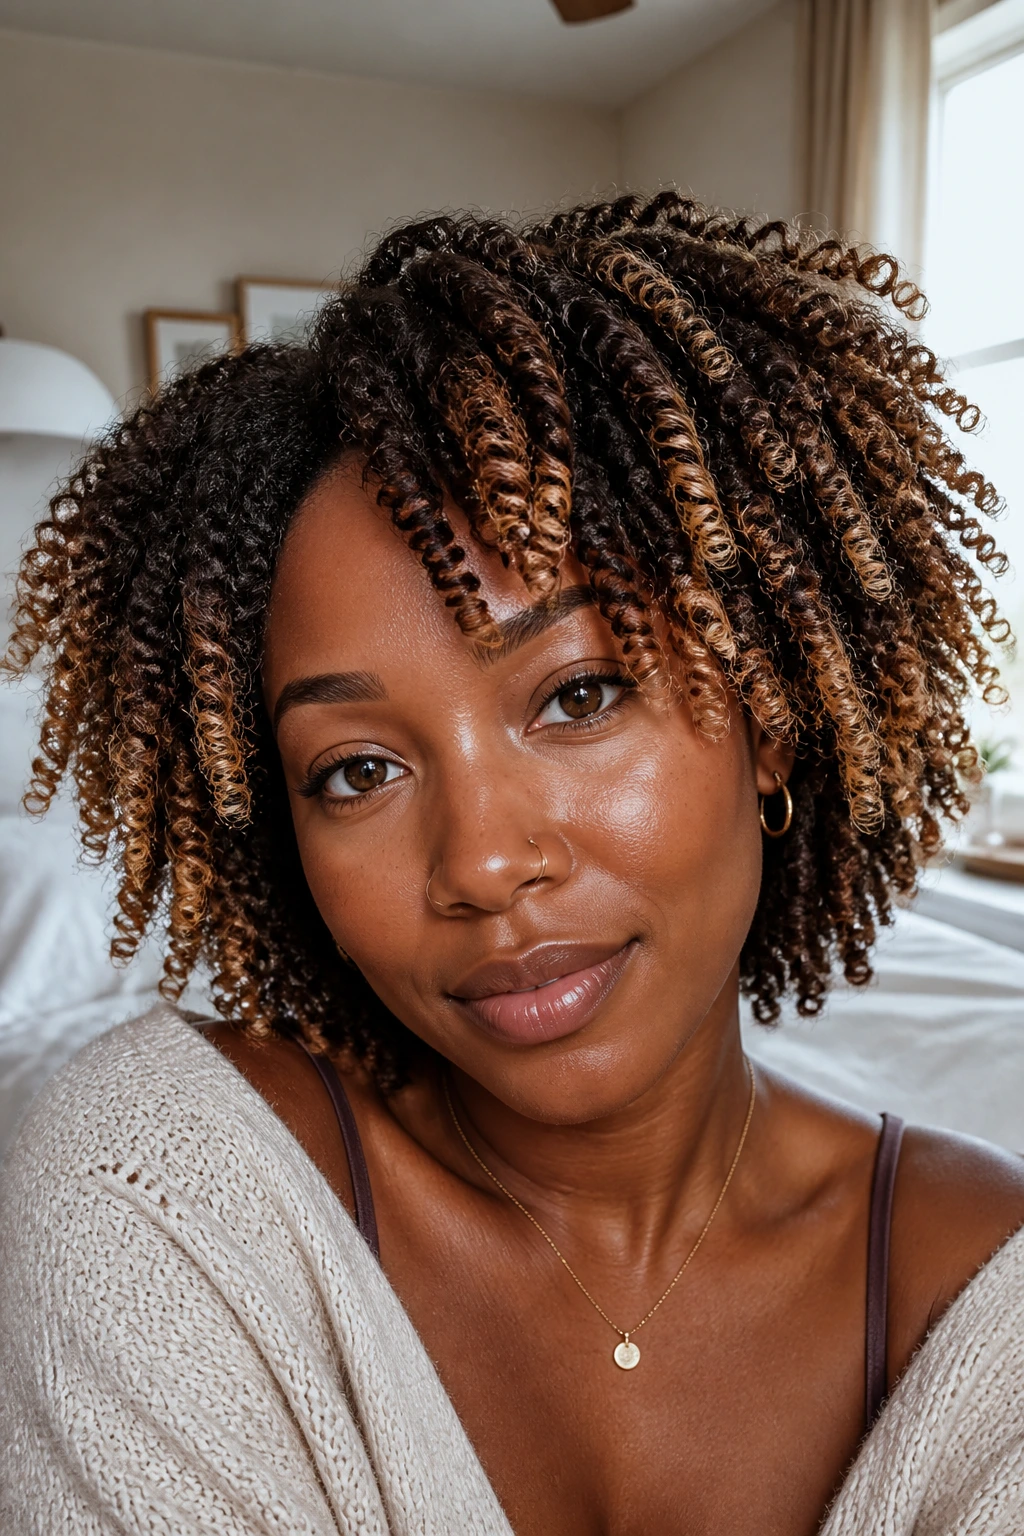
A twist-out can carry a beige caramel better than almost any other texture, because the curl pattern breaks up the color into little flashes instead of long stripes. That’s the whole magic.
Why the beige matters
Golden beige caramel stays warm without going brassy. It’s the difference between hair that looks softly lit and hair that looks like it was dipped in gold paint. On deep skin tones, that softer warmth usually reads cleaner, especially if your undertone is neutral or cool.
Ask your colorist for fine babylights along the outer surface of the twist pattern and a few brighter pieces around the face. Let the inner layers stay darker. When the twist-out expands, the lighter strands move with the curl instead of fighting it. That makes the finish feel airy, not loud.
12. Amber Foils with a Gloss Finish
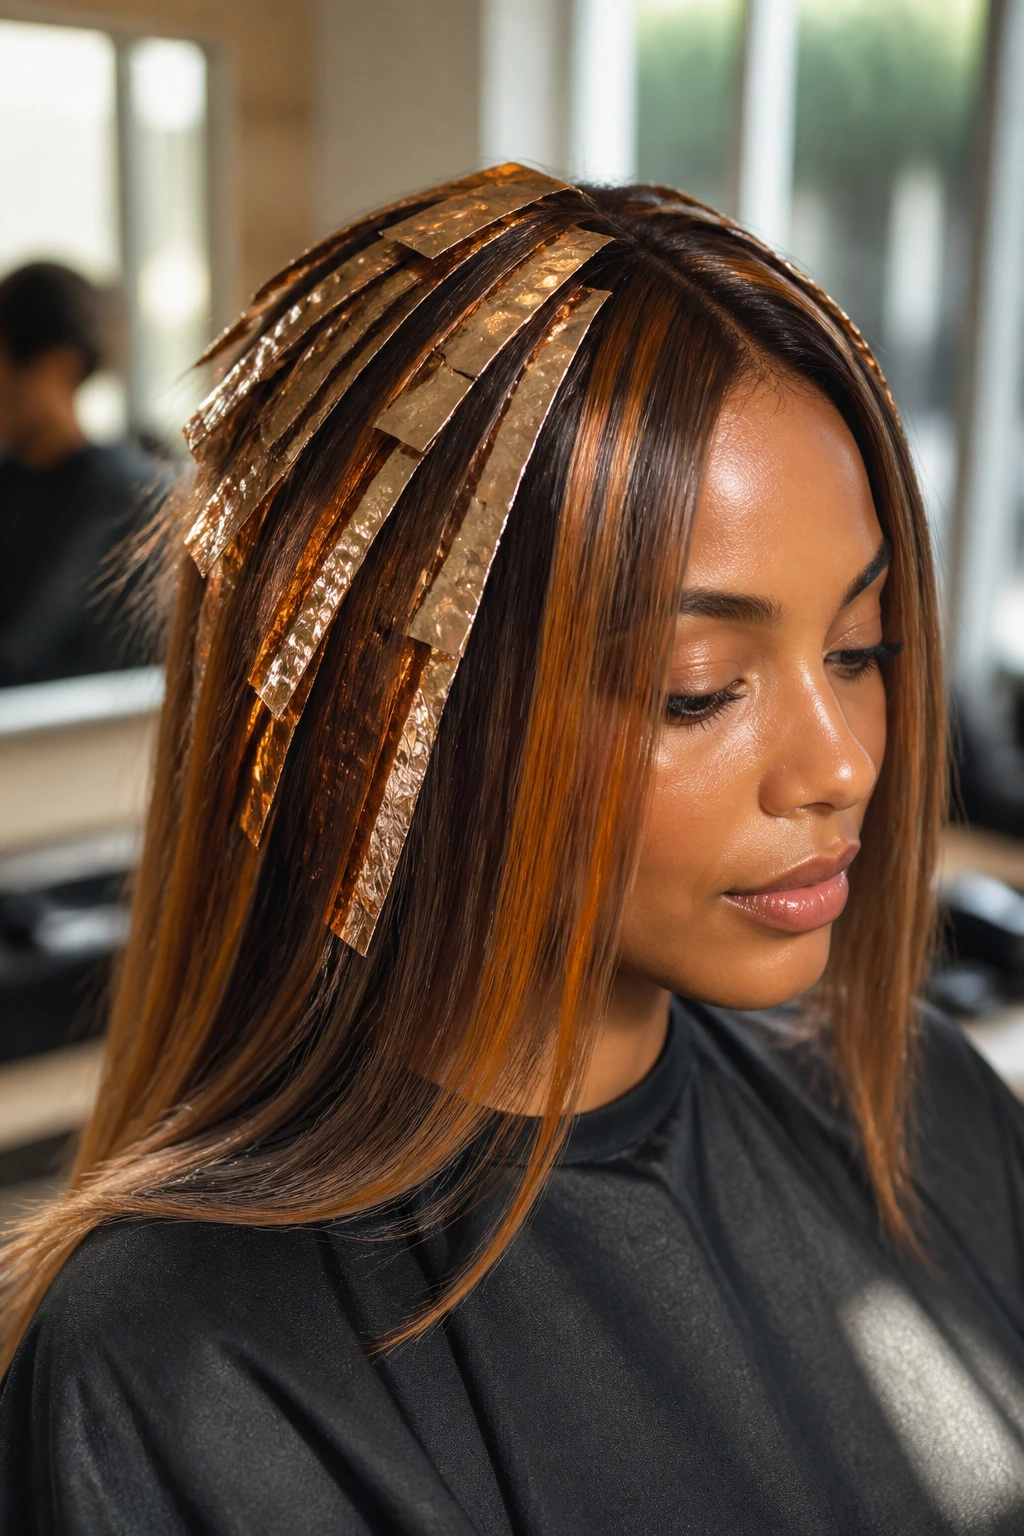
Foils give you control, and control matters when you want amber to read rich instead of flat. The foil keeps the lift clean, so the caramel tone lands where you want it instead of bleeding into the darker sections.
Amber is one of my favorite shades for deep skin because it sits between gold and copper. It has enough warmth to glow, but enough brown in it to stay grounded. On straight hair, it shows up as tidy ribbons. On textured hair, it breaks into warm flashes that follow the movement of the style.
The gloss is not optional here. It pulls the tone together after the lift and takes away any rough edge left by the lightening. If you want color that looks cared for rather than simply colored, amber plus gloss is a very good lane.
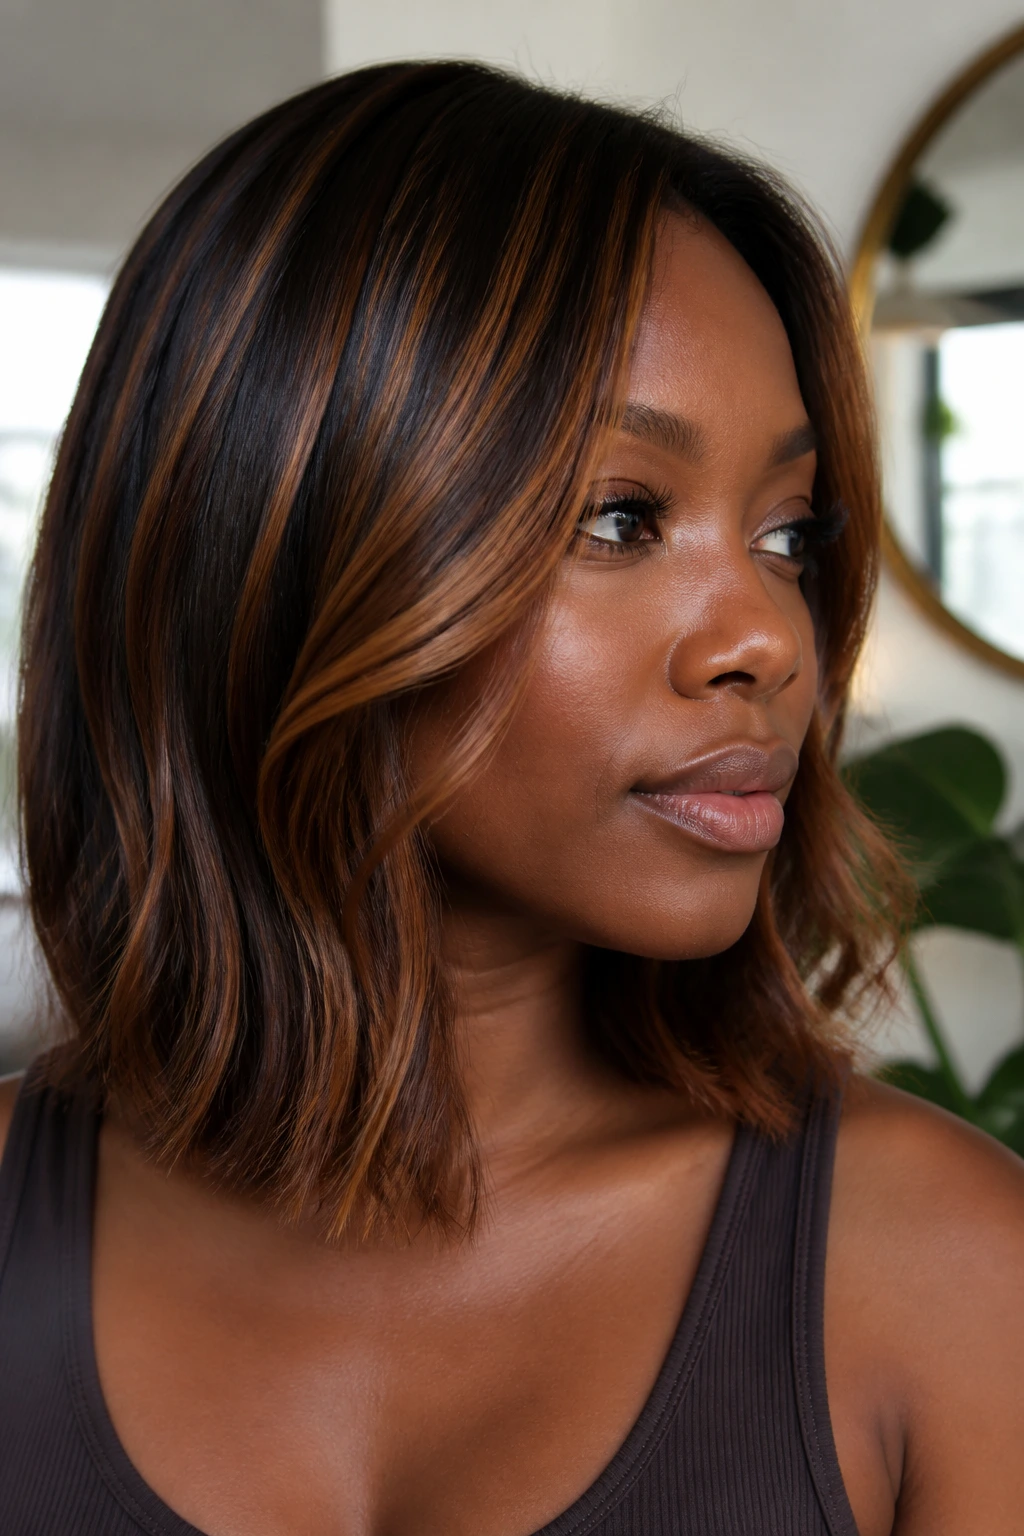
13. Caramel Dark Highlights on a Blunt Lob
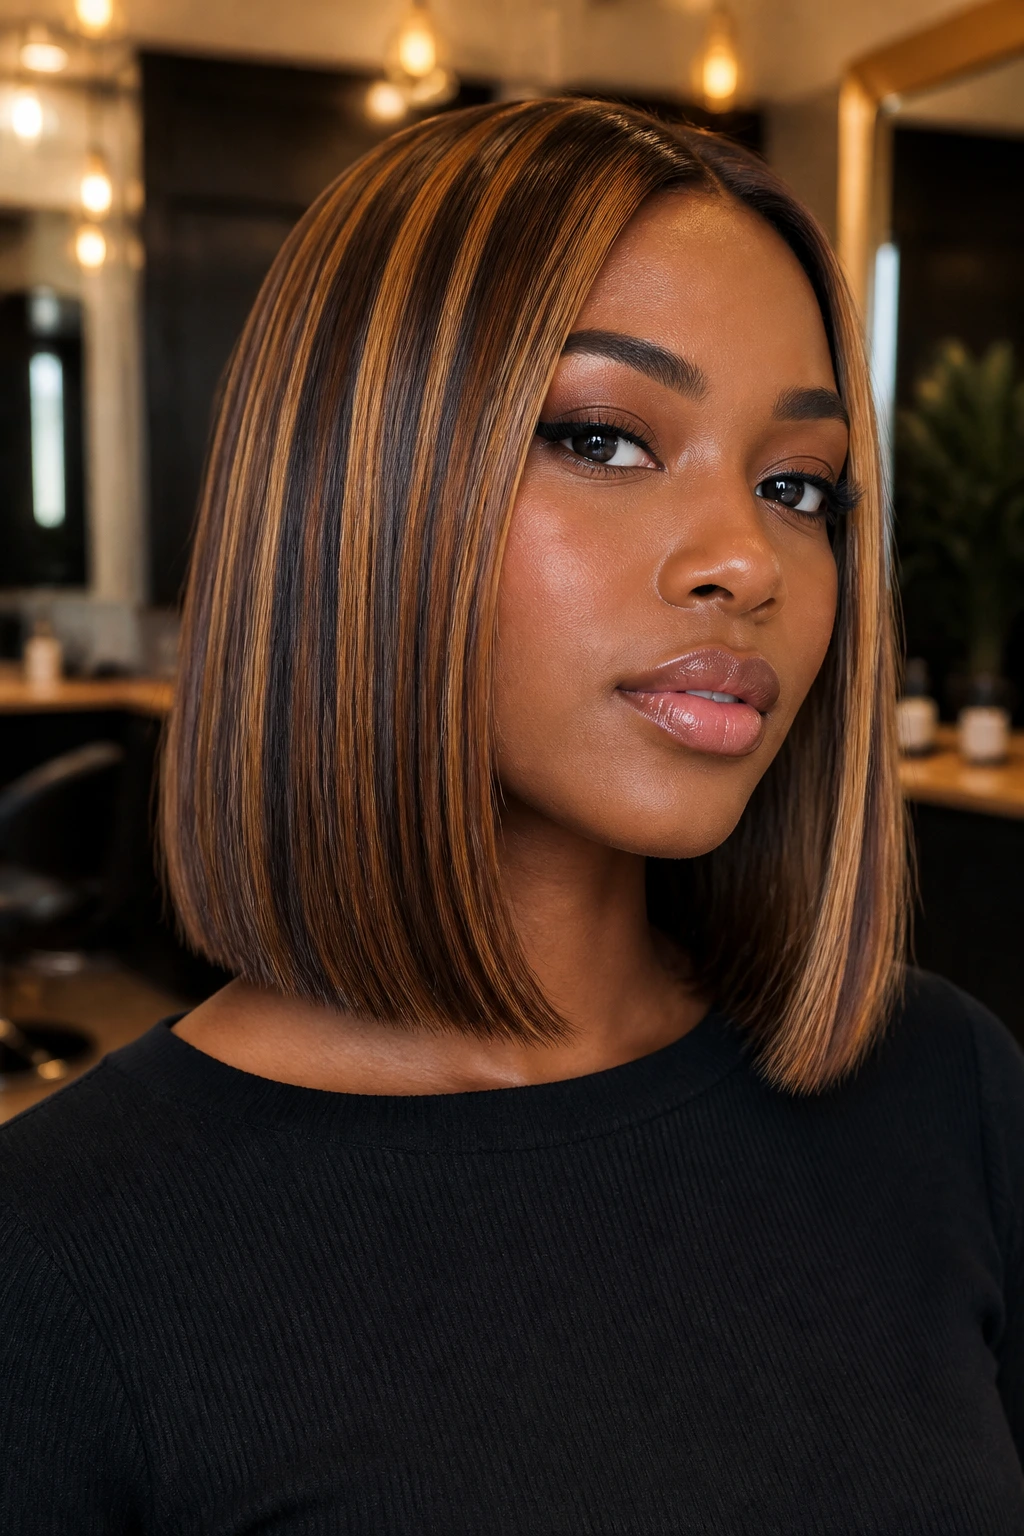
A blunt lob can handle bolder caramel because the haircut already gives you structure. The line at the bottom is strong, so the color doesn’t need to create shape from scratch.
That’s why I like thicker ribbons here than I would on a curlier or more layered cut. Put the lightest pieces around the face and through the top, then let a few interior ribbons run toward the ends. The blunt edge will catch them in a clean line, which keeps the whole look tidy instead of streaky.
If you want a look that sits between polished and casual, this is a solid choice. Caramel dark highlights on a blunt lob don’t need a lot of styling to show up. A flat iron pass, a loose bend, even a tucked-behind-the-ear finish — the color still reads.
14. Cocoa Lowlights with Caramel Rims
Sometimes the smartest caramel move is to add more dark, not more light. Cocoa lowlights underneath caramel pieces make the brighter shade look fuller and warmer, especially if your hair has been lightened before.
This works because the darker strands act like shadows around the caramel. The eye reads contrast, not just brightness. Put the cocoa lowlights through the interior and underneath the crown, then let caramel sit on the perimeter, around the face, and at the ends. The hair looks deeper and more expensive, not thinner.
It’s a good fix for hair that has gone too warm or too flat. The added depth gives the caramel a place to land. On thick hair, especially, the lowlights help the style hold its shape from root to end.
15. Burnt Sugar Balayage on a Rounded Afro
Burnt sugar is one of those colors that looks simple until light hits it. Then it turns dark amber and catches the eye in all the right places.
On a rounded afro, balayage should stay mostly on the outer halo and the lower edge of the shape. Leave the inner core richer and darker. That keeps the cut looking round instead of bleached all the way through. The color should follow the curve of the silhouette, not chop it up.
This one is especially good if you like volume. The lighter pieces ride the outer surface, so they show first when the hair moves. A gloss or a light serum can help the color reflect light without making the hair look greasy. If your curls are tight, go softer than you think you need. The shape will make the color look stronger anyway.
16. Latte Stripes Around the Part
A part line is prime real estate. Put the brightness there, and people notice it before they even know why the hair looks different.
Latte stripes work best when they’re narrow — three to five pieces around the part and a few more at the temples if you want a little lift. On straight or blown-out hair, the line stays neat and the color reads clean. On curls, the stripes loosen up and look more blended, which can be a nice surprise.
Keep the rest of the head darker. That contrast is what stops the look from floating away. The latte tone itself should stay brown-beige, not icy. On deep skin, the soft creaminess of latte is enough. You do not need to chase blonde to make this feel bright.
17. Cinnamon-Maple Highlights on a TWA
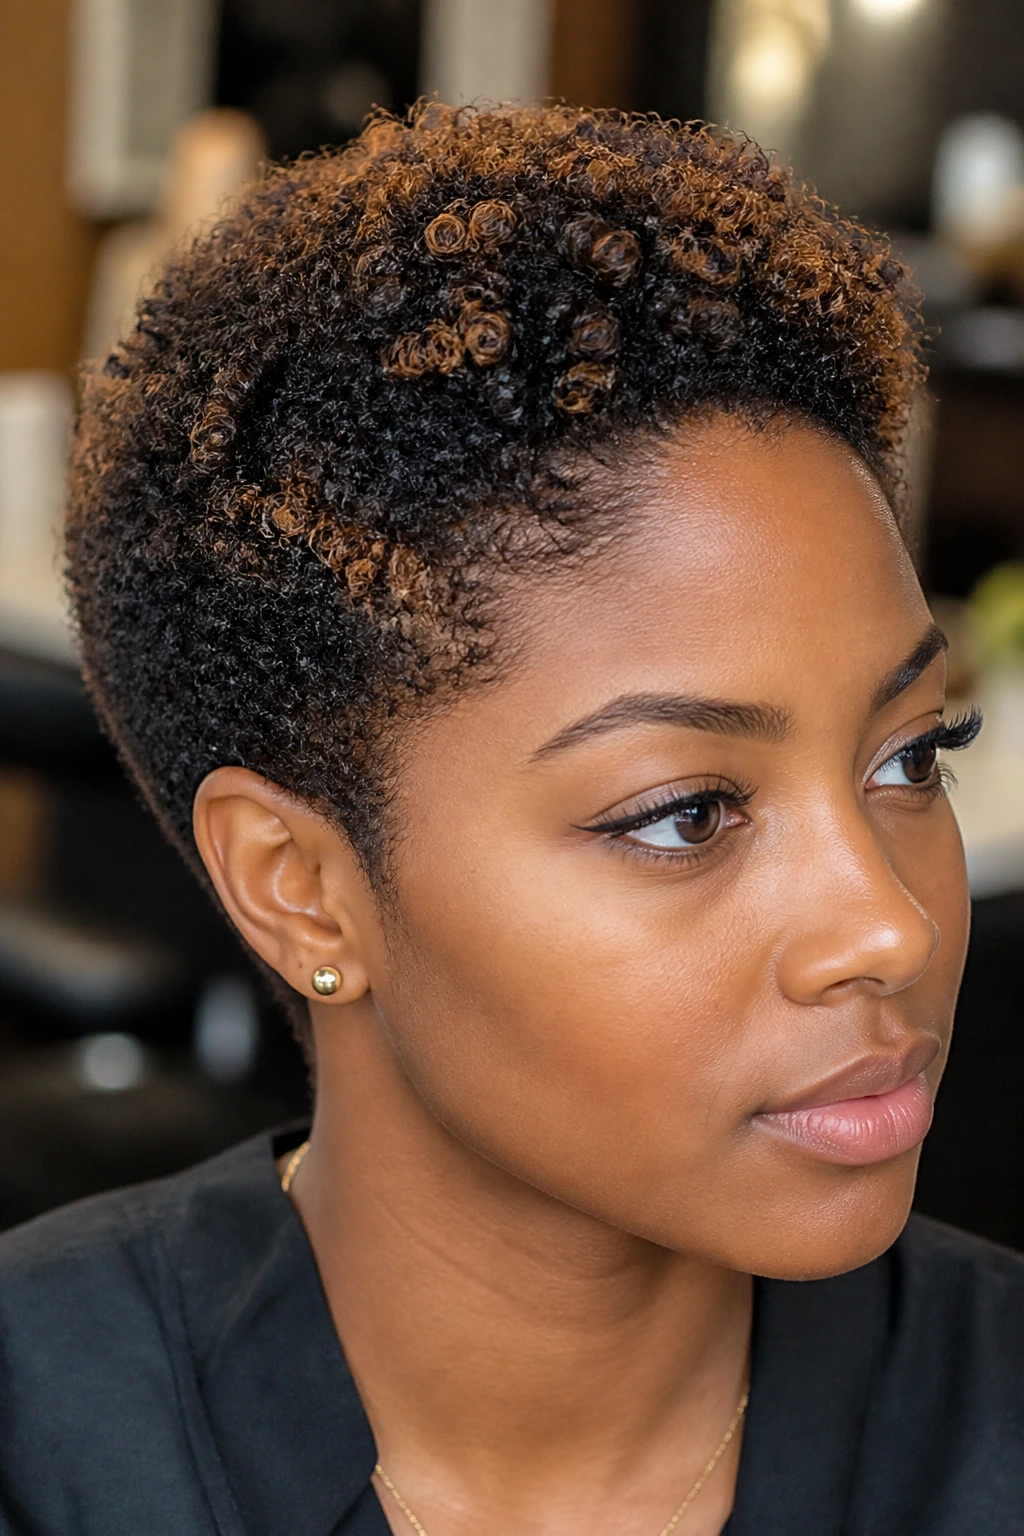
A TWA does not need much color to change the whole mood of the cut. A few cinnamon-maple pieces can make the texture look sharper and the shape look more deliberate.
The placement should stay small and exact: top ridge, fringe, and maybe a touch at the temple. Micro-foils or tiny painted sections work better than broad strokes because a short cut has no room for sloppy blending. If the pieces get too wide, the color starts to look patchy.
Cinnamon-maple is a good tone if you want warmth without a heavy gold finish. It has enough red-brown to flatter deep skin and enough brown to keep the cut grounded. Short hair like this often looks best when the color feels like a detail, not a headline.
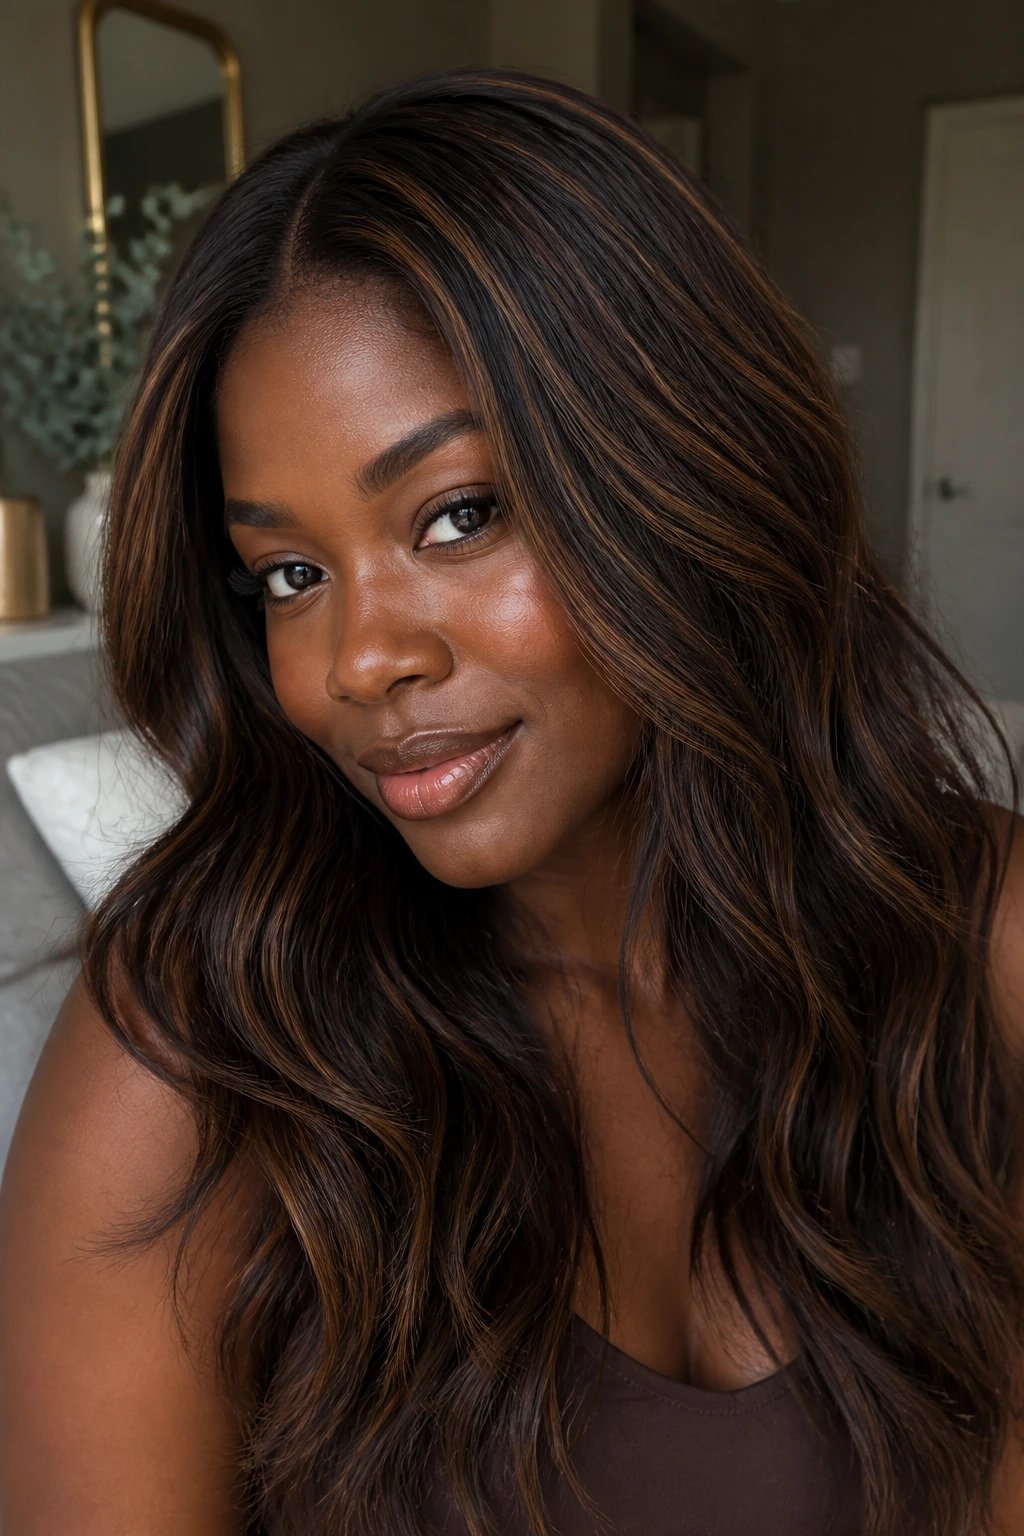
18. Chestnut Base with Warm Caramel Ends
When the ends are the lightest part of the style, the haircut movement shows itself first. That’s why chestnut into caramel works so well on longer hair.
Chestnut keeps the root and mids deep, which lets the caramel ends read as a finish rather than a complete color change. The shift should be soft — almost like the hair has been warmed by sunlight, not painted line by line. On layered curls or blowouts, the lighter ends catch movement every time the hair swings.
If your ends are porous, this is where a gloss matters. Caramel on dry ends can go dull fast. A demi-permanent glaze keeps the color smoother and helps the texture look healthier than a stripped blonde finish ever could.
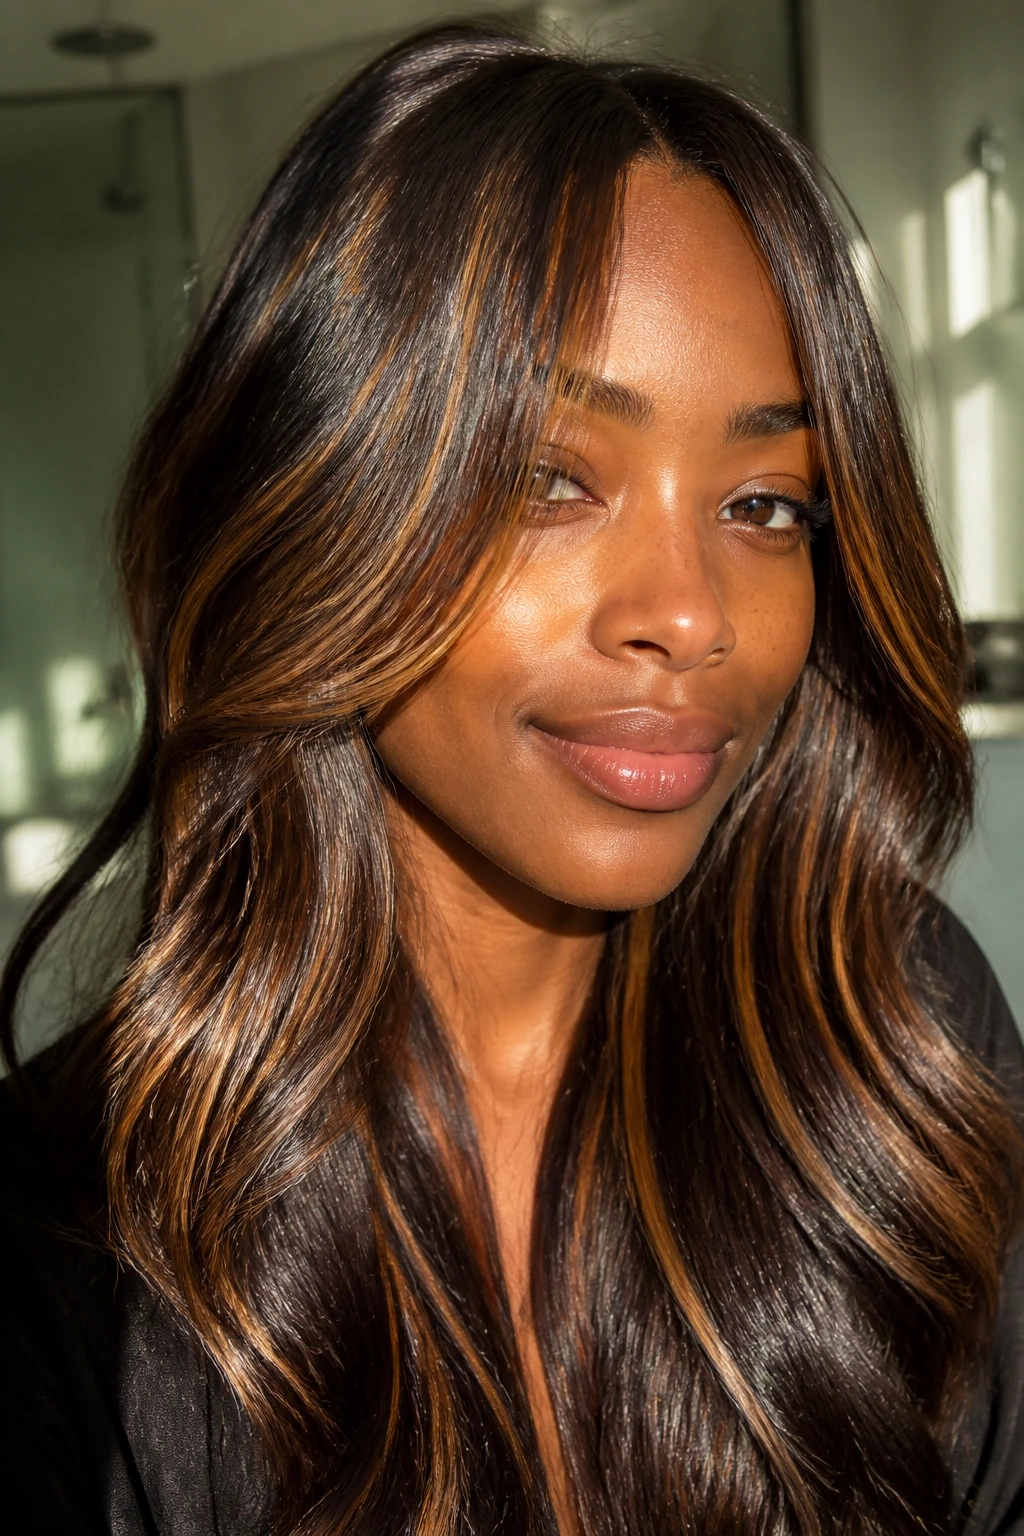
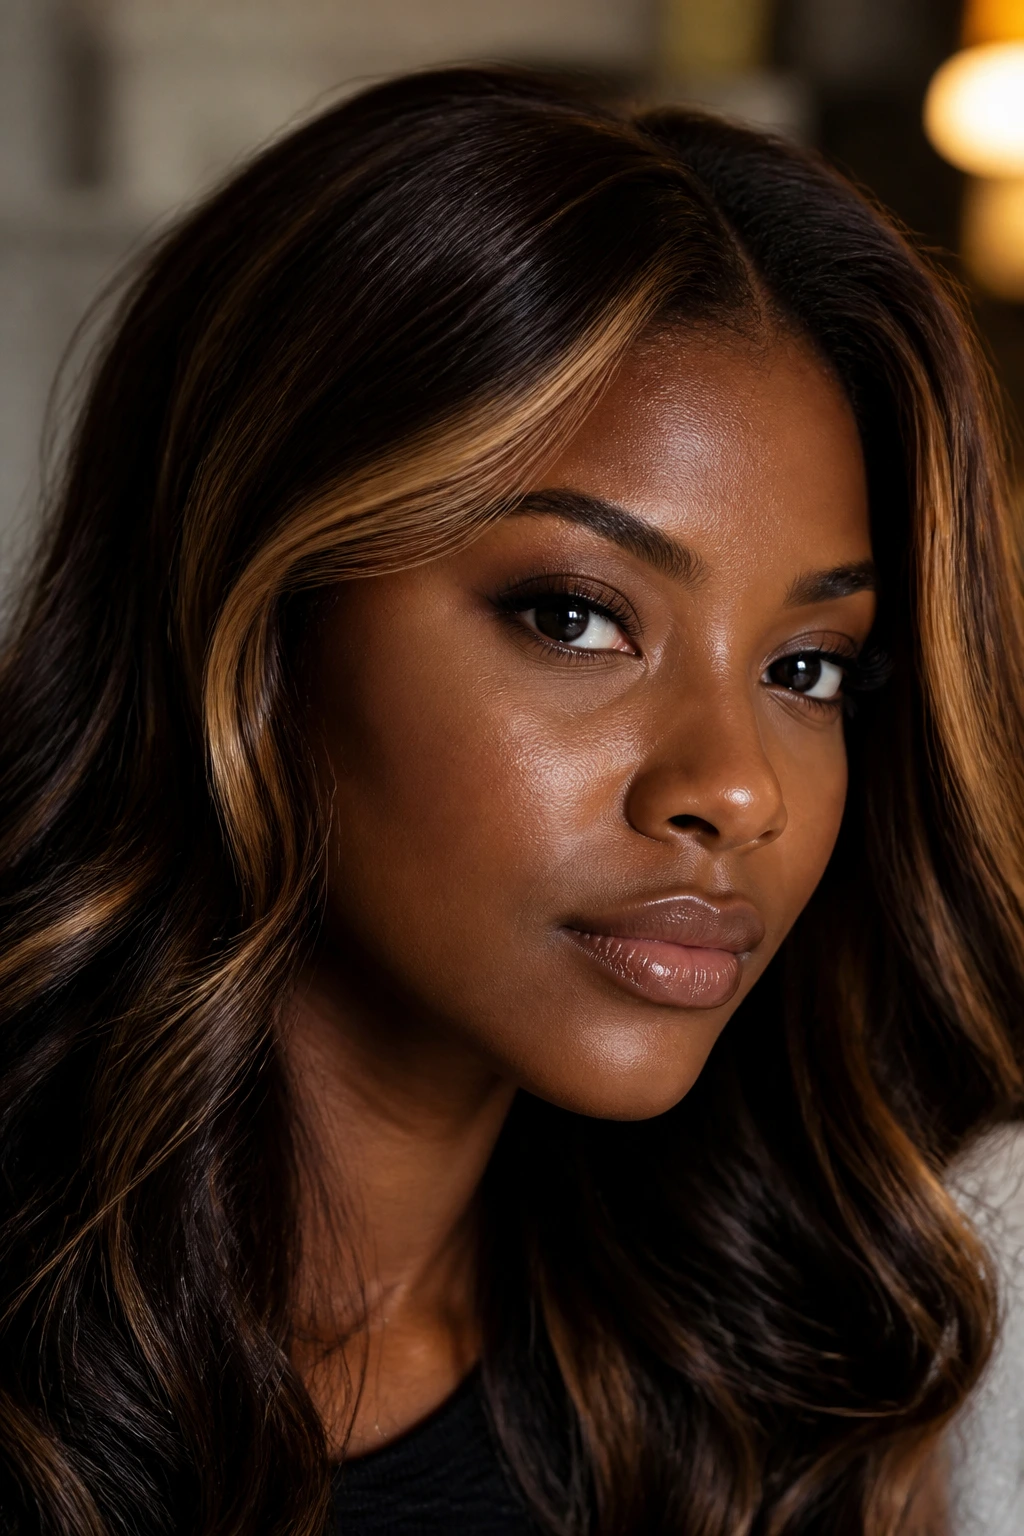
19. Soft Tiger-Eye Highlights for Deep Skin Tones
Tiger-eye color works because it refuses to be one single thing. It blends caramel, bronze, and honey into a warm pattern that feels alive when the hair moves.
That mix is especially kind to deep skin tones. One flat shade can get lost or turn too yellow, but three tones layered together create depth without making the style loud. Ask for alternating shades in the same section so the hair doesn’t read as a single block of color. Layered cuts handle this beautifully because each tier catches a different tone.
I like tiger-eye for people who want dimension first and brightness second. It’s less about obvious streaks and more about that rich, shifting finish that keeps revealing itself. It also holds up well on both straight and textured hair because the color range gives the style something to do.
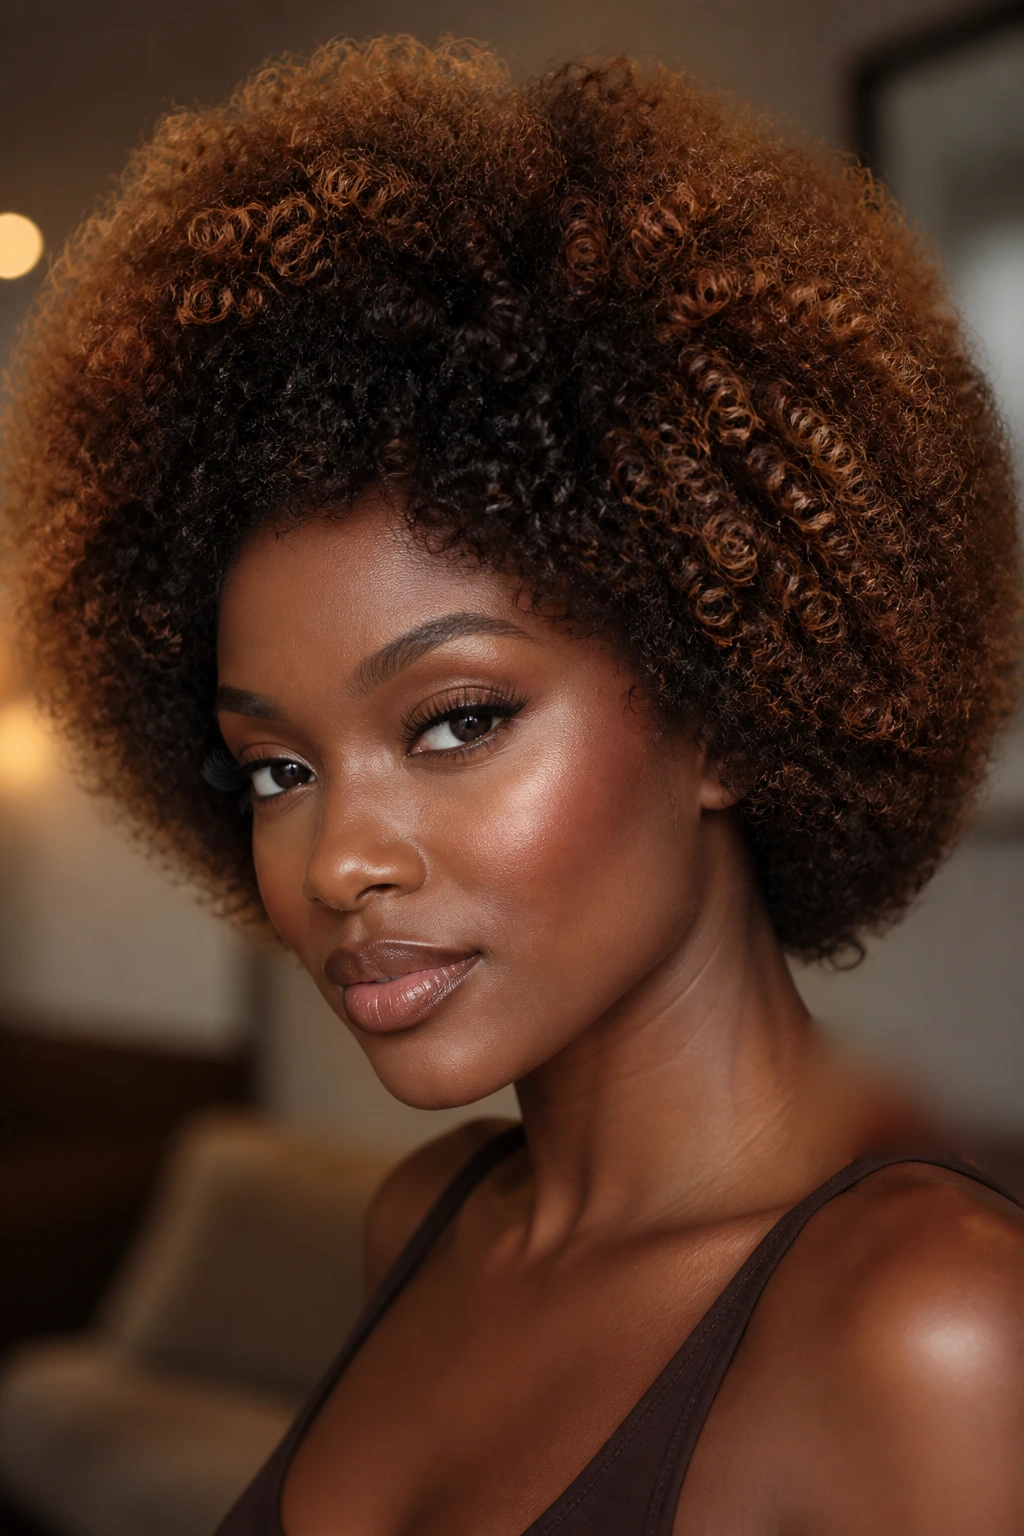
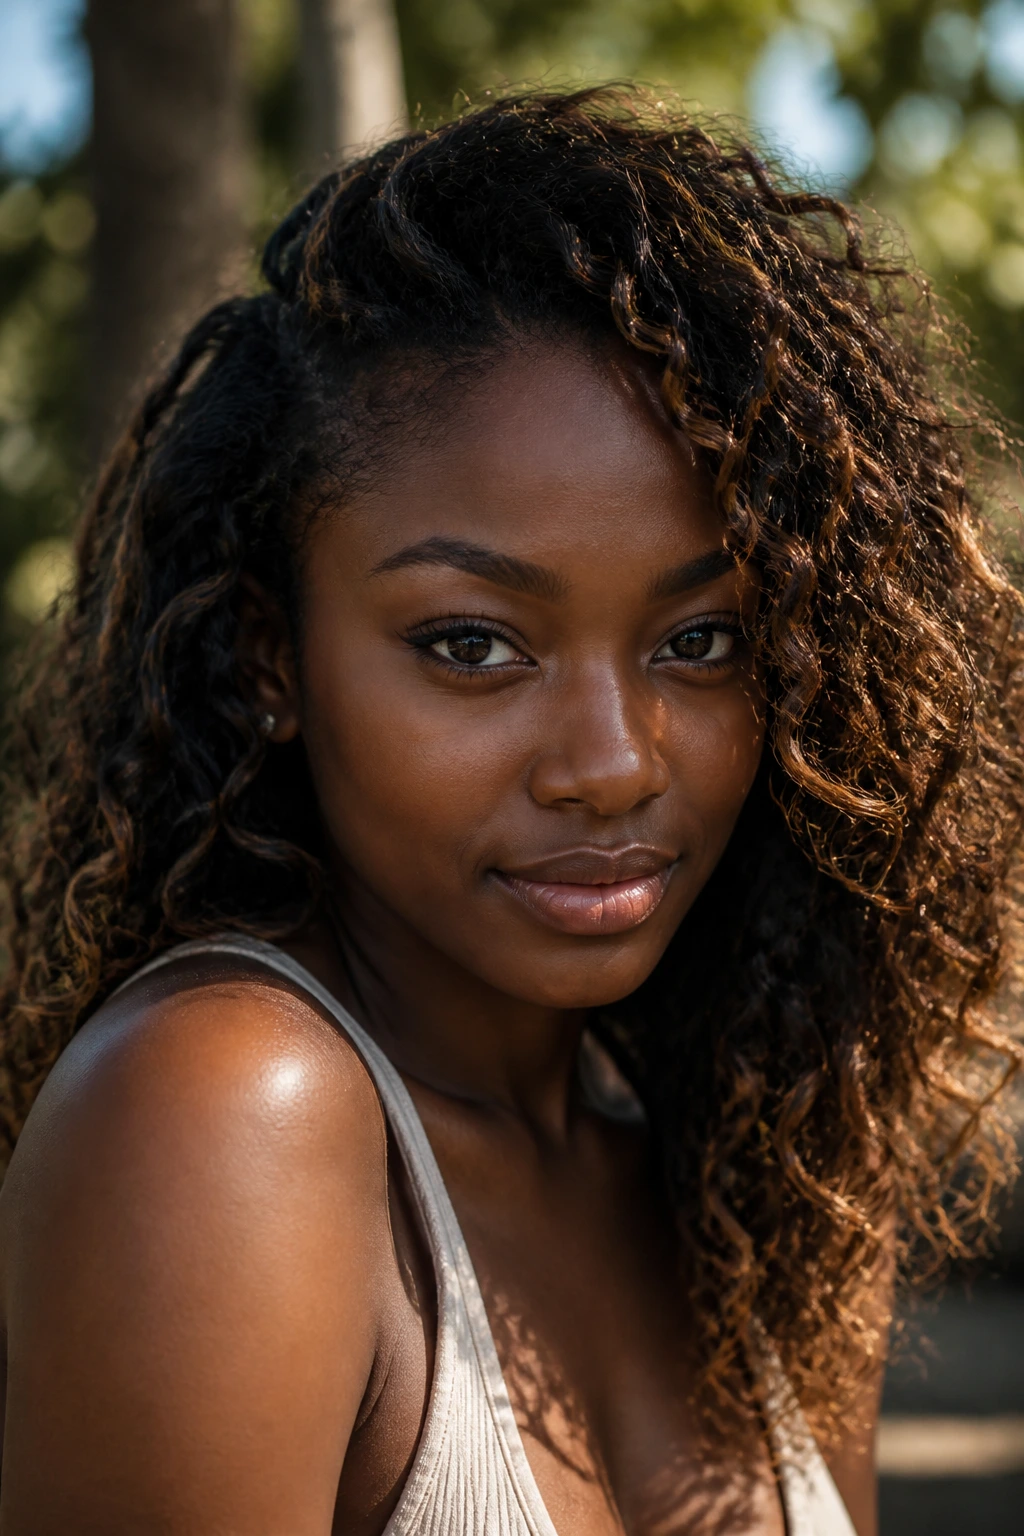
20. Auburn-Caramel Glow on Coily Hair
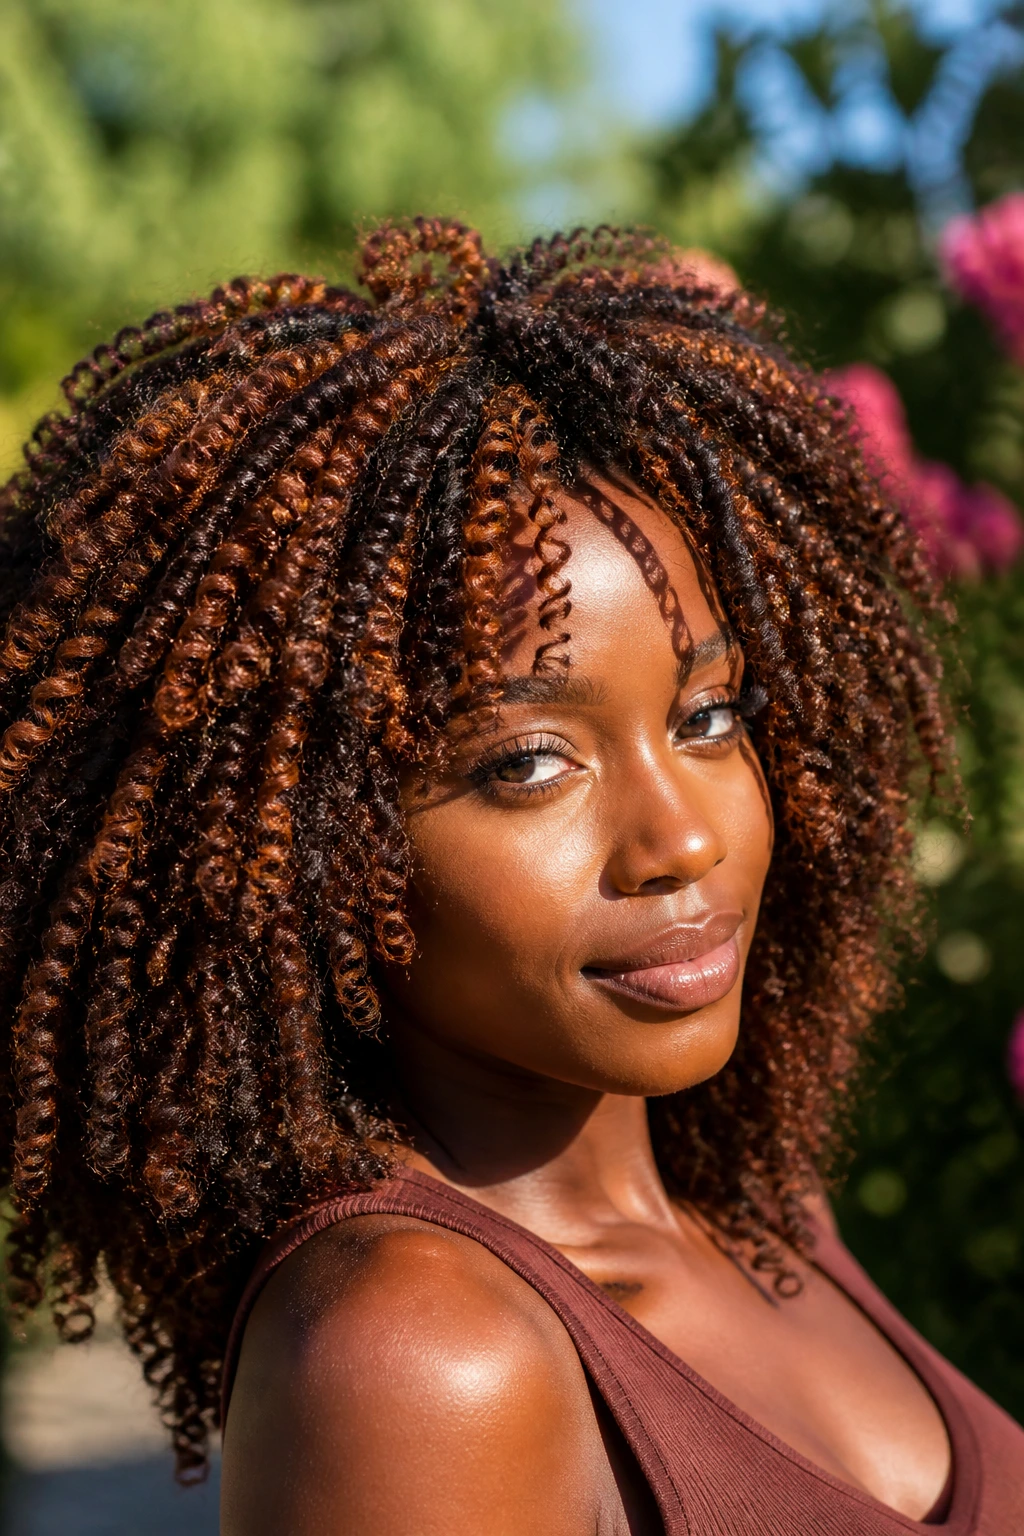
Auburn-caramel glow has a heat to it that makes coily hair look almost embered from the inside. It’s warm, but not coppery enough to pull away from the base.
Coily hair usually needs less lift than people expect because the texture itself makes the color look fuller. That’s good news. You can keep the lift modest and still get plenty of impact. Stretch the hair, and the auburn-caramel shows as a warm ribbon; wear it in its natural state, and it reads deeper and richer.
The best version of this look stays soft at the root and warmer at the curls that frame the face. If you want the color to look more polished, a light leave-in and a gloss make a big difference. Dry coils can swallow shine, and this shade deserves shine.
21. Honey Bronze Highlights on a Layered Shag

A shag cut lives or dies by its layers, so the color has to respect that movement. Honey bronze does, because it lands lightly on the feathered pieces and leaves the crown dark enough to keep the shape clear.
I’d place the lightest sections on the ends of the layers and around the bangs or face frame. That way, every flip of hair shows a bit of bronze without covering the whole cut. Honey bronze also keeps the shag from looking too punk or too flat; it gives the cut some warmth, which deep skin tones can handle easily.
What to ask for
- Light pieces on the outer layers only.
- A darker root for the crown.
- A soft glaze so the bronze doesn’t go yellow.
That combination keeps the shag airy and dimensional instead of washed out.
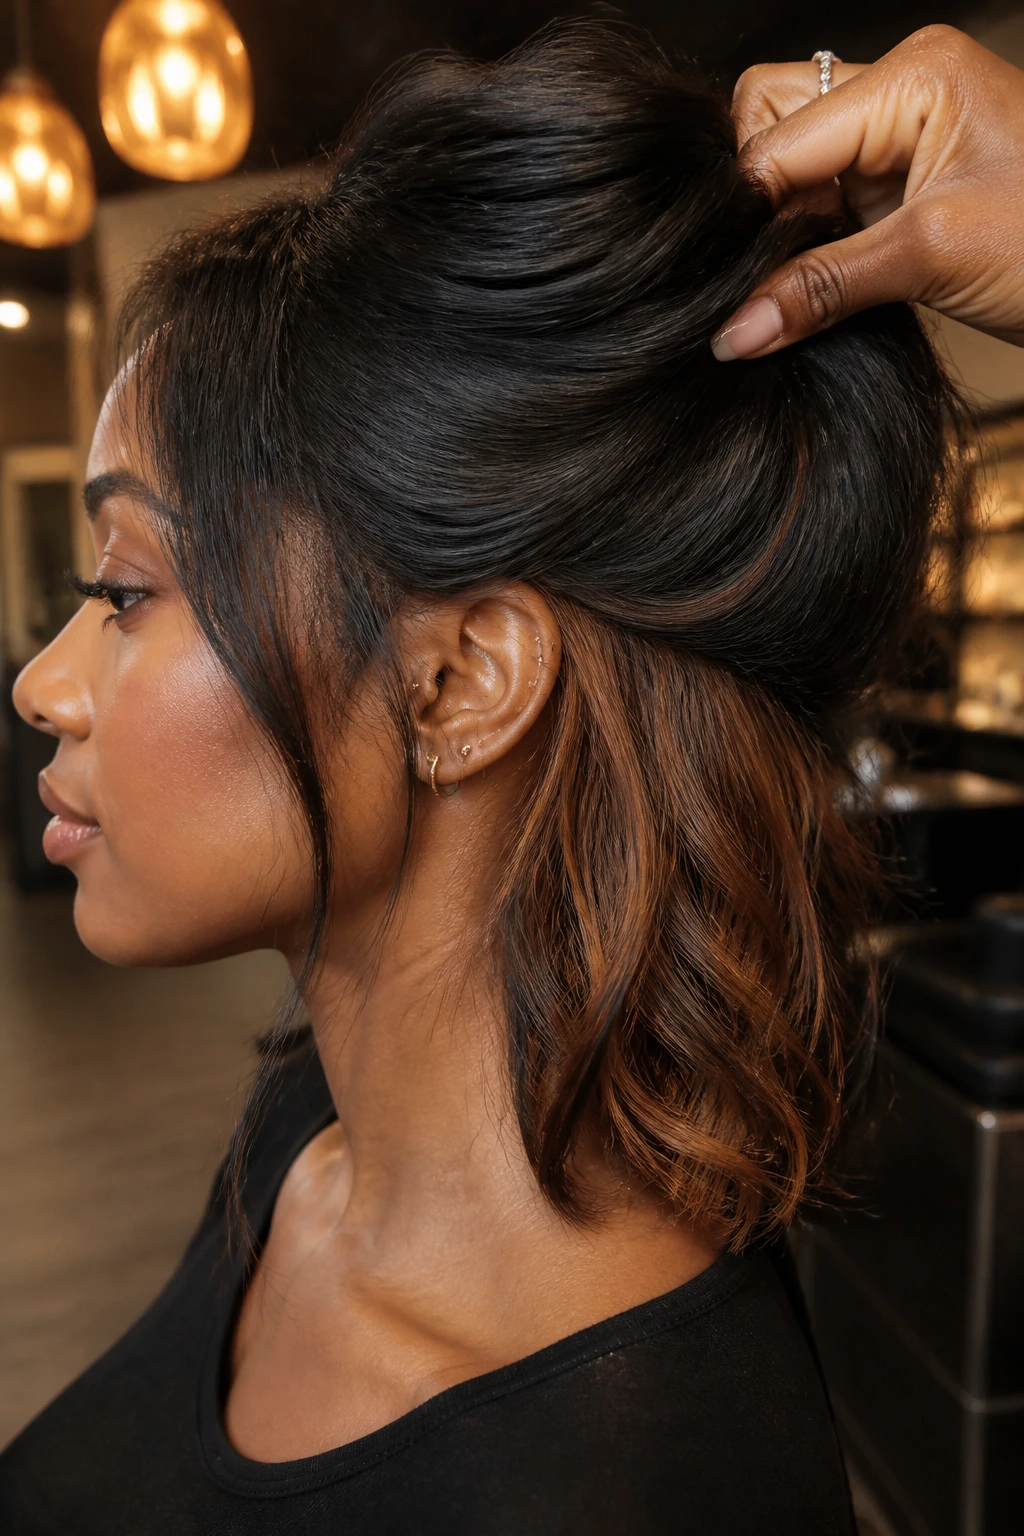
22. Mocha-to-Toffee Color Melt
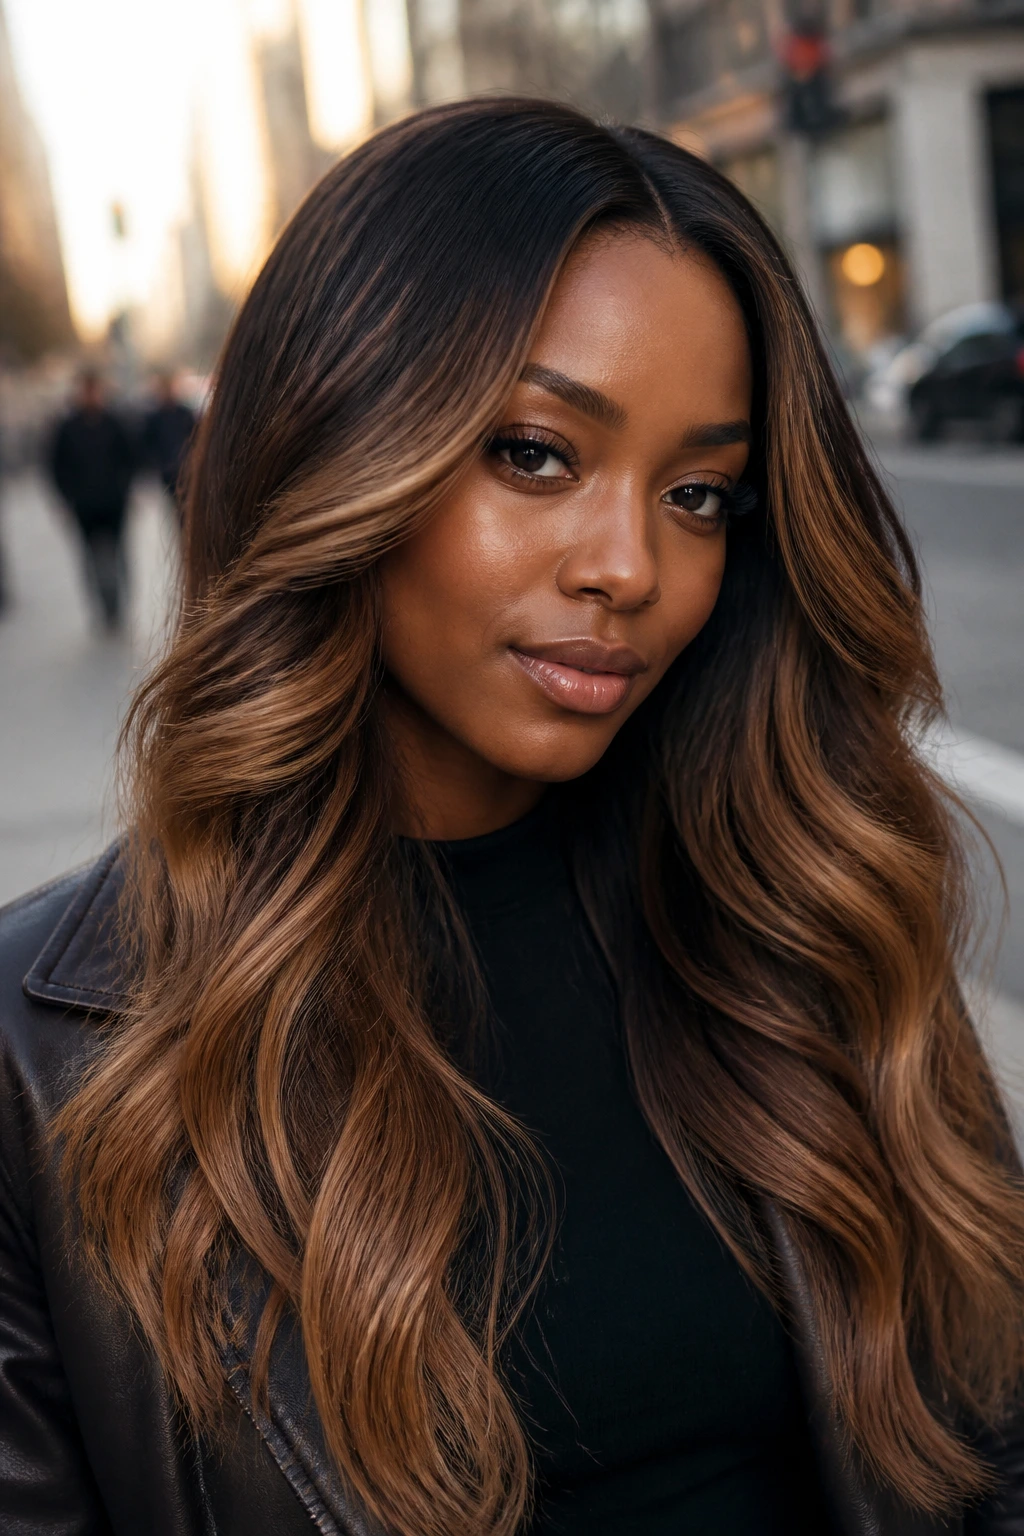
A color melt is the quietest way to wear caramel, and sometimes quiet is the smartest move. Mocha at the root, toffee through the mids, lighter toffee at the ends — no hard line, no sudden jump.
On deep skin, that kind of gradient reads expensive because the hair keeps its depth. The eye sees movement, not a bleach job. This is the look I’d point to if someone wants caramel but hates obvious highlights. It also ages well between appointments, which matters more than people admit.
The key is a smooth transition. No stripe at ear level. No chunky bands. If the colorist blends the shades with a light hand, the whole thing feels like one long exhale.
23. Toasted Almond Streaks on a Pixie Cut
Pixies are made for precise color. There’s nowhere to hide, so the placement has to be clean and the tone has to be chosen with care.
Toasted almond sits in that brown-beige range that flatters deep skin without overpowering the cut. A few streaks at the fringe and top ridge are enough. The sides can stay darker so the shape holds. On short hair, too many light pieces flatten the edge and make the cut look fuzzy instead of sharp.
This is one of those styles that looks better the less you fuss with it. A quick finger-style, a touch of cream, and the almond pieces do the rest. If you want a short cut with just enough brightness to keep it from disappearing, this one has good bones.
24. Sable Hair with Micro Caramel Ribbons
Sometimes the best highlight is the one you almost miss. Micro ribbons can look like natural light shift, especially when the base is a rich sable brown.
That tiny placement is ideal if you dislike obvious streaks or work in a setting where big color changes feel like a headache. Ask for very fine slices — smaller than a shoelace, honestly — scattered through the top and around the face. The result is softer than classic highlight placement, but it still changes the way the hair moves.
Deep skin tones wear this kind of dimension well because the dark base stays present. The caramel never overwhelms the face. It just warms the hair a notch, which is often enough.
25. The Glossed Caramel Finish That Makes Dark Hair Glow
Not every caramel look needs more bleach. Sometimes what you really need is a gloss.
A caramel glaze over existing highlights can revive tone, warm up faded pieces, and make dark hair reflect light without changing the whole head again. That’s especially useful if your hair already feels dry or porous. More lifting would be a bad idea. A tinted gloss gives you the caramel mood without the extra stress on the ends.
I like this option for anyone who already has some highlight history and wants the color to look fresh again. A good gloss can pull a tired beige piece back toward amber, or take a brassy orange patch and calm it down into something much softer. It’s the cleanest finish in the group, and sometimes the smartest one.
How Caramel Stays Rich on Deep Skin
The shade only works if the depth stays in the picture. That’s the part people forget when they chase bright highlights on dark hair. If the base gets lifted too far, the color loses its frame and starts looking disconnected from the skin. Keep the base visible and the caramel has something to sit against.
Texture matters just as much as tone. Coils and curls make the same caramel look softer because the pieces break up as they move. Straight hair shows every line, so the placement has to be cleaner. A blunt cut can take thicker ribbons. A shag wants finer ones. A rounded afro needs the color to follow the silhouette, not fight it. And a bob? That cut can carry more contrast than people expect, which is one reason I keep reaching for it.
The shade range that usually works
- Amber caramel for warm deep undertones.
- Toffee caramel for neutral skin.
- Smoky beige caramel for cooler undertones.
- Bronze-caramel if you want the color to feel deeper and moodier.
Tools That Make the Process Easier
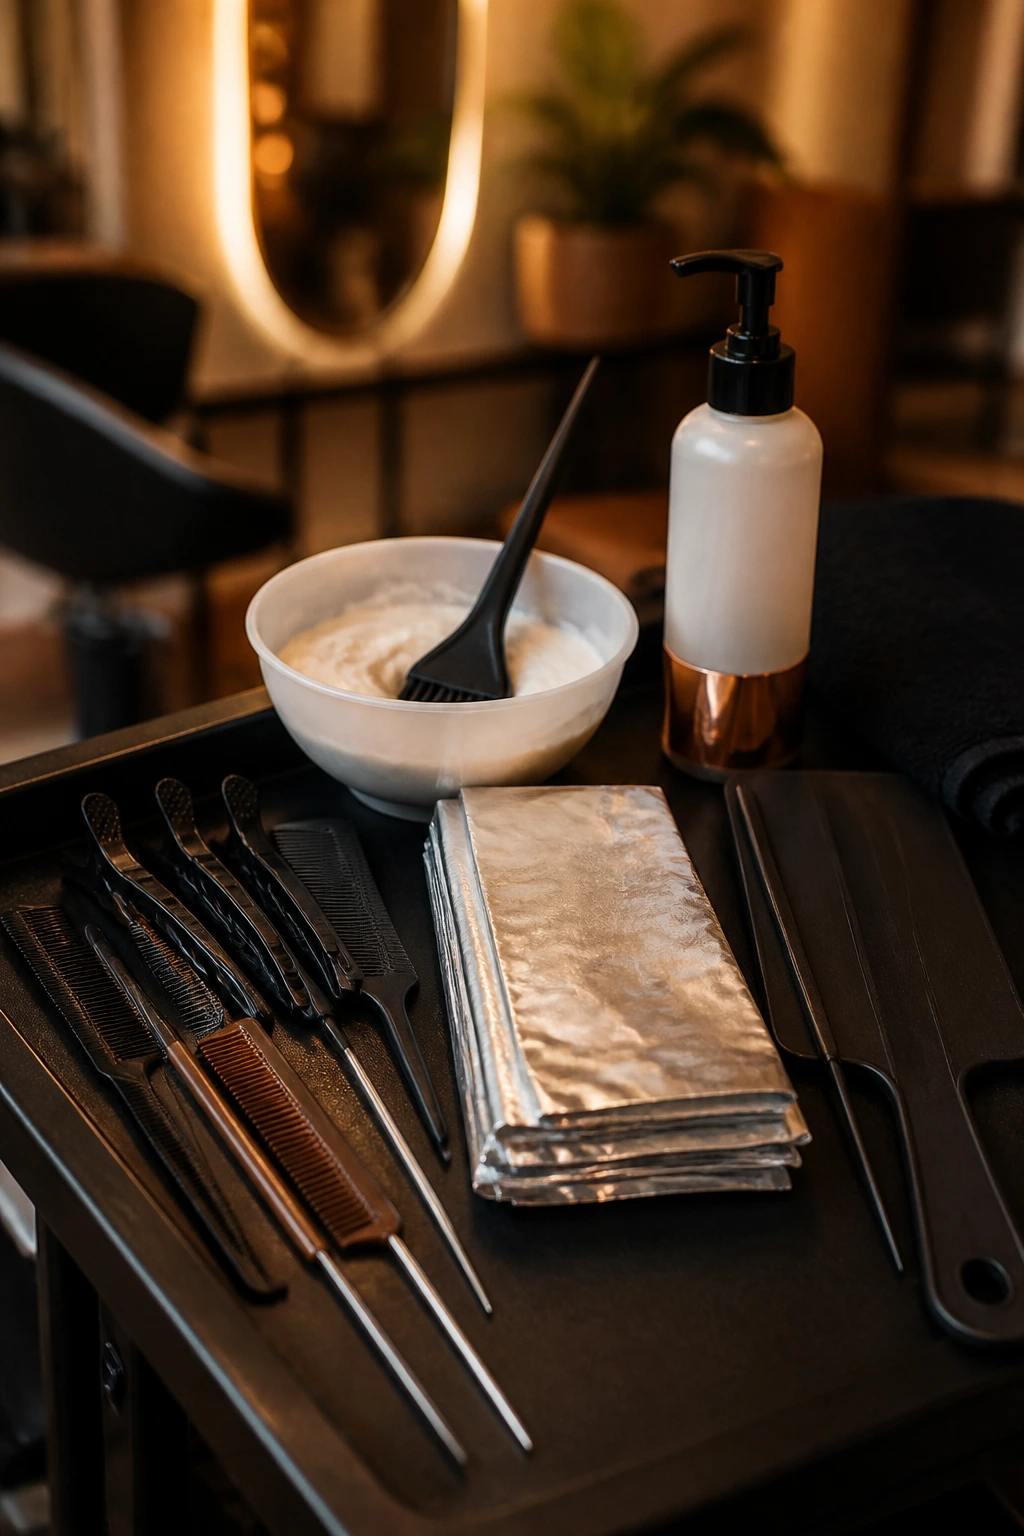
- Daylight reference photos — salon lights can skew caramel too gold, so keep a few photos in natural light on your phone.
- Tail comb and sectioning clips — needed for clean part lines and narrow highlight sections.
- Foils or balayage board — foils give sharper lift, while a board helps when the goal is soft hand-painted ribbons.
- Bond-building treatment — useful anytime lightening is involved; it helps the hair feel less brittle afterward.
- Color-safe shampoo and conditioner — regular shampoo can fade toner faster than you’d think.
- Deep conditioning mask — especially helpful if your ends have been lightened more than once.
- Heat protectant — non-negotiable if you blow-dry or flat-iron the hair.
- Satin scarf or bonnet — keeps the cuticle smoother overnight and slows down frizz on the highlighted pieces.
How to Ask for the Right Caramel in the Chair
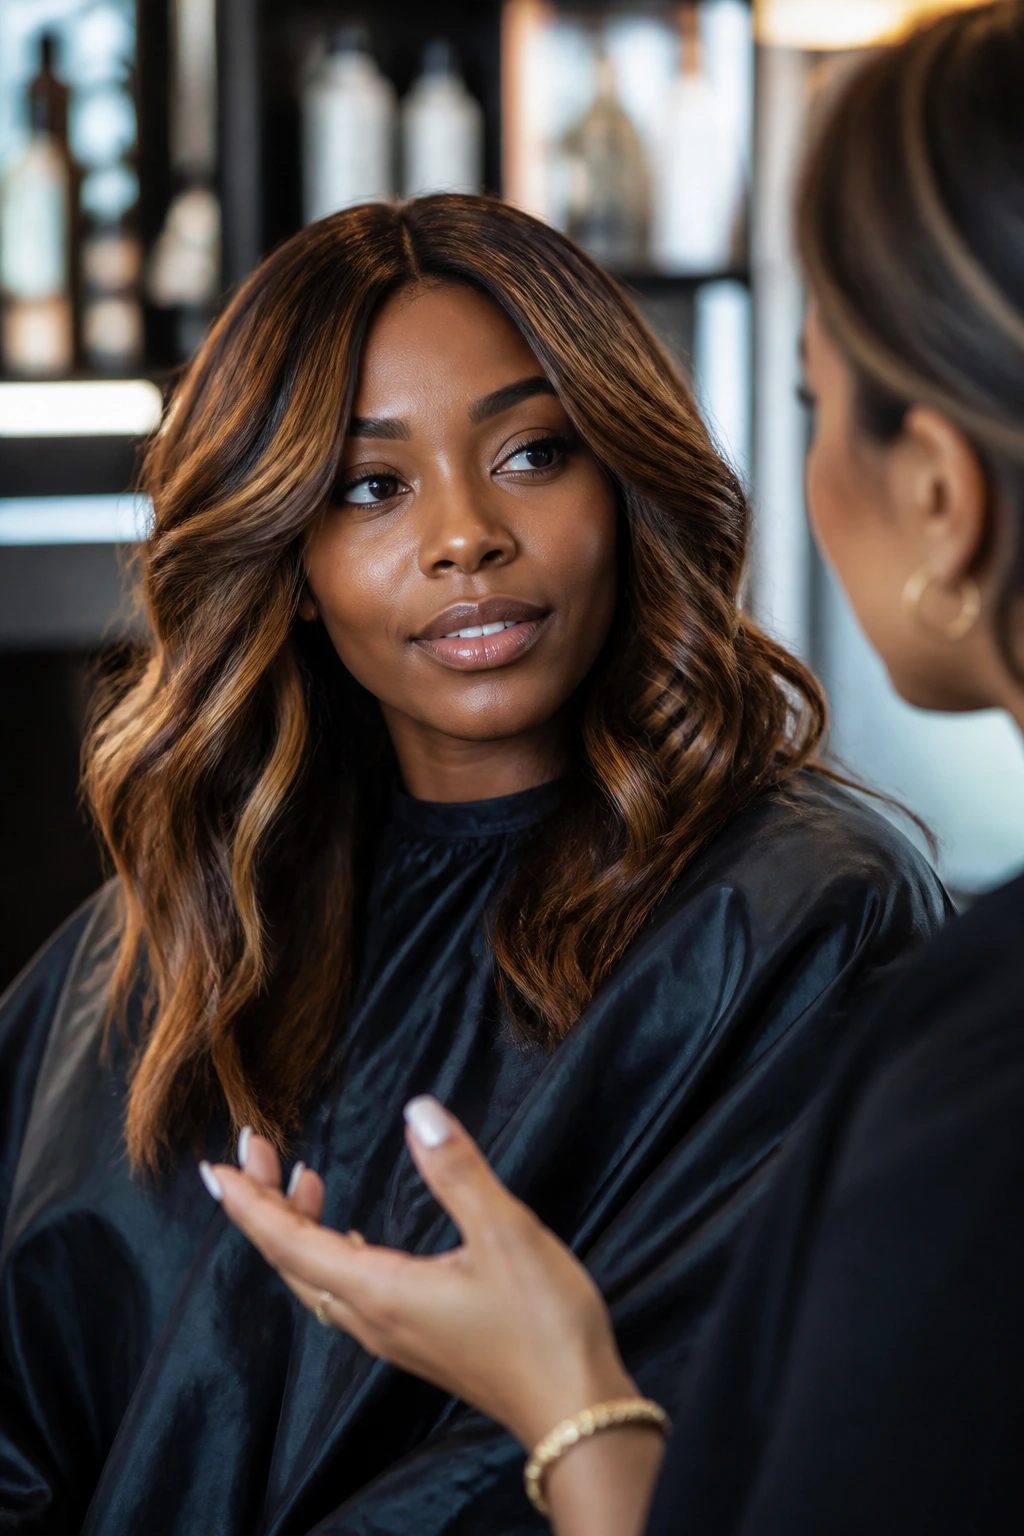
The smartest caramel starts with the base level, not the inspiration photo. If your hair is very dark, ask how many levels the color needs to lift and whether the goal is caramel, bronze, or a softer toffee. Those words matter. A pale beige picture can look lovely on a screen and terrible against deep skin if the undertone is wrong.
Bring photos that show the color in daylight, not just in salon flash. You want to see the actual brown in the caramel. If the image looks almost blonde, it’s probably too far up the scale for the effect you’re after. A good salon conversation also covers placement. Ask where the brightest pieces will sit, how wide they’ll be, and whether the back will stay darker for contrast.
Good questions to ask
- How much lift is needed to reach this tone?
- Will you use foils, balayage, or a gloss?
- Where will the brightest pieces sit around my face?
- How will this look when it grows out?
Small Moves That Keep the Color Looking Rich
Face frame first: Bright pieces around the temples and cheekbones do more work than random streaks buried in the back. If you only lighten one area, start there.
Keep a shadow root: Leaving an inch or two of depth at the scalp helps the color grow out smoothly and keeps the caramel from floating on top of the hair.
Gloss after lift: A demi-permanent gloss or toner smooths the warm notes and makes the shade look intentional instead of patchy. Skip this, and the color can go rough fast.
Use heat like it matters: Colored hair does not love 450°F flat irons. Stay lower, use a heat protectant, and stop blasting the same section over and over.
Match placement to texture: Tight curls need less obvious contrast. Straight hair can handle cleaner slices. Short cuts need precision. Long layers need softness. That’s the whole game.
Mistakes That Make Caramel Go Flat
- Going too pale too fast: The symptom is obvious — the color starts looking detached from the base. The fix is asking for a caramel that stays two to four levels lighter, not six.
- Using chunky stripes everywhere: Big stripes can work in photos, but in real life they often look dated. Break the color into finer ribbons, especially on curls and textured styles.
- Ignoring undertone: Too gold on cool skin can look loud; too smoky on warm skin can look dusty. Match the caramel to the skin’s undertone, not to a random swatch name.
- Skipping the gloss: Lightened hair without a toner tends to drift brassy. A gloss pulls the caramel back into shape.
- Over-lightening porous ends: Ends that have already been colored once can grab too much light and start frizzing. A strand test saves a lot of regret.
- Using heat with no protection: The color fades faster, the ends rough up, and the shine disappears. A good protectant buys you time.
Variations and Alternatives to Try
Honey Cocoa Melt: Keep the base dark and add warmer honey-caramel through the mids and ends. This suits warm and neutral undertones best, especially if you want the color to feel soft rather than loud.
Smoked Toffee Finish: Ask for beige-brown caramel with a cooler gloss. It works well on deep skin that leans cooler and on anyone who wants the highlight to stay understated.
Copper Ember Ribbons: Add a little red warmth to the caramel for a glow that shows up in sunlight. This works nicely on coily and curly hair, where the red-brown tone can look deep instead of orange.
Face-Frame Only: Keep the rest of the hair dark and limit the color to the money piece and a few part-line ribbons. This is the one I’d pick for someone testing the waters.
Gloss-Only Revival: If the highlights already exist but look tired, refresh with a caramel glaze rather than more lift. It’s the gentlest way to make faded color feel alive again.
Keeping the Shine Between Salon Visits
Caramel color can stay rich for a while, but it needs a little discipline. I like to think of it less like “maintenance” and more like keeping the finish from getting muddy.
Wash about once or twice a week if your hair allows it, and use a sulfate-free shampoo that won’t strip the toner out in two washes. Blue shampoo can help if the caramel starts drifting orange; purple shampoo only helps if the tone is moving yellow. That distinction gets ignored all the time, and then people wonder why the wrong bottle did nothing.
Deep condition once a week if the hair was lightened at all, especially on the ends. Porous hair drinks up product and then gives it back just as fast, so a leave-in and a light oil on the ends can help the color look smoother. Sleep in a satin bonnet or on a satin pillowcase. It keeps the highlighted pieces from roughing up overnight.
If you heat-style, lower the temperature and use protectant every single time. For most colored hair, a gloss refresh every 4 to 6 weeks keeps the caramel tone from going flat. A touch-up on the highlight placement can wait longer, often 8 to 12 weeks, depending on how visible the grow-out is and how close the pieces sit to the face.
Questions People Usually Ask
What caramel shade looks best on deep skin tones?
Amber, toffee, bronze, and smoky beige caramel tend to sit best because they keep a brown base underneath the warmth. If the shade gets too pale or too yellow, it can look disconnected from the skin instead of enhancing it.
Do caramel highlights work on natural curls and coils?
Yes, and they often look softer on textured hair because the curl pattern breaks the color into smaller flashes. The key is to keep the sections finer and the placement more strategic, since curls make bright pieces spread visually.
How light should the caramel be?
Usually two to four levels lighter than the base is enough. That range gives you visible contrast without turning the hair into a blonde story that no longer feels like caramel.
Can I get this look without bleach?
If your hair is already light brown or previously colored, a gloss or high-lift color may shift it enough. On very dark hair, true caramel usually needs some lightening, even if it’s modest.
What if the highlights turn orange?
That means the hair lifted into the warm pigment underneath and needs toning. A caramel gloss, blue-based toner, or a cooler beige-caramel adjustment can pull it back into line.
Is balayage better than foils for deep skin tones?
Neither is always better. Balayage gives a softer grow-out and a more diffused look; foils give cleaner, brighter ribbons. Pick based on how visible you want the highlight to be and how often you want to touch it up.
Can I keep my natural root with caramel highlights?
Absolutely. In fact, keeping a dark root often makes the caramel look richer and helps the style grow out without a harsh line. That’s especially useful if you wear your hair curly or textured.
How often should I refresh the color?
Glosses usually need a refresh every 4 to 6 weeks, while the actual highlight placement can often wait 8 to 12 weeks. If the tone goes dull before that, you probably need a toner, not a new round of bleach.
The Shade That Sits Right
The nicest caramel highlights on deep skin do not fight for the spotlight. They sit in the hair like they belong there, warm and grounded, with enough contrast to move when you do. That’s why the best versions are rarely the palest ones. They’re the shades that keep the depth, then add just enough brightness to make the whole style feel awake.
Start smaller if you’re unsure. A gloss. A money piece. A few micro-ribbons around the part. Those are often the smartest first steps, and they leave room to build if you want more later. Once caramel is placed with the right depth and tone, it doesn’t need much else.