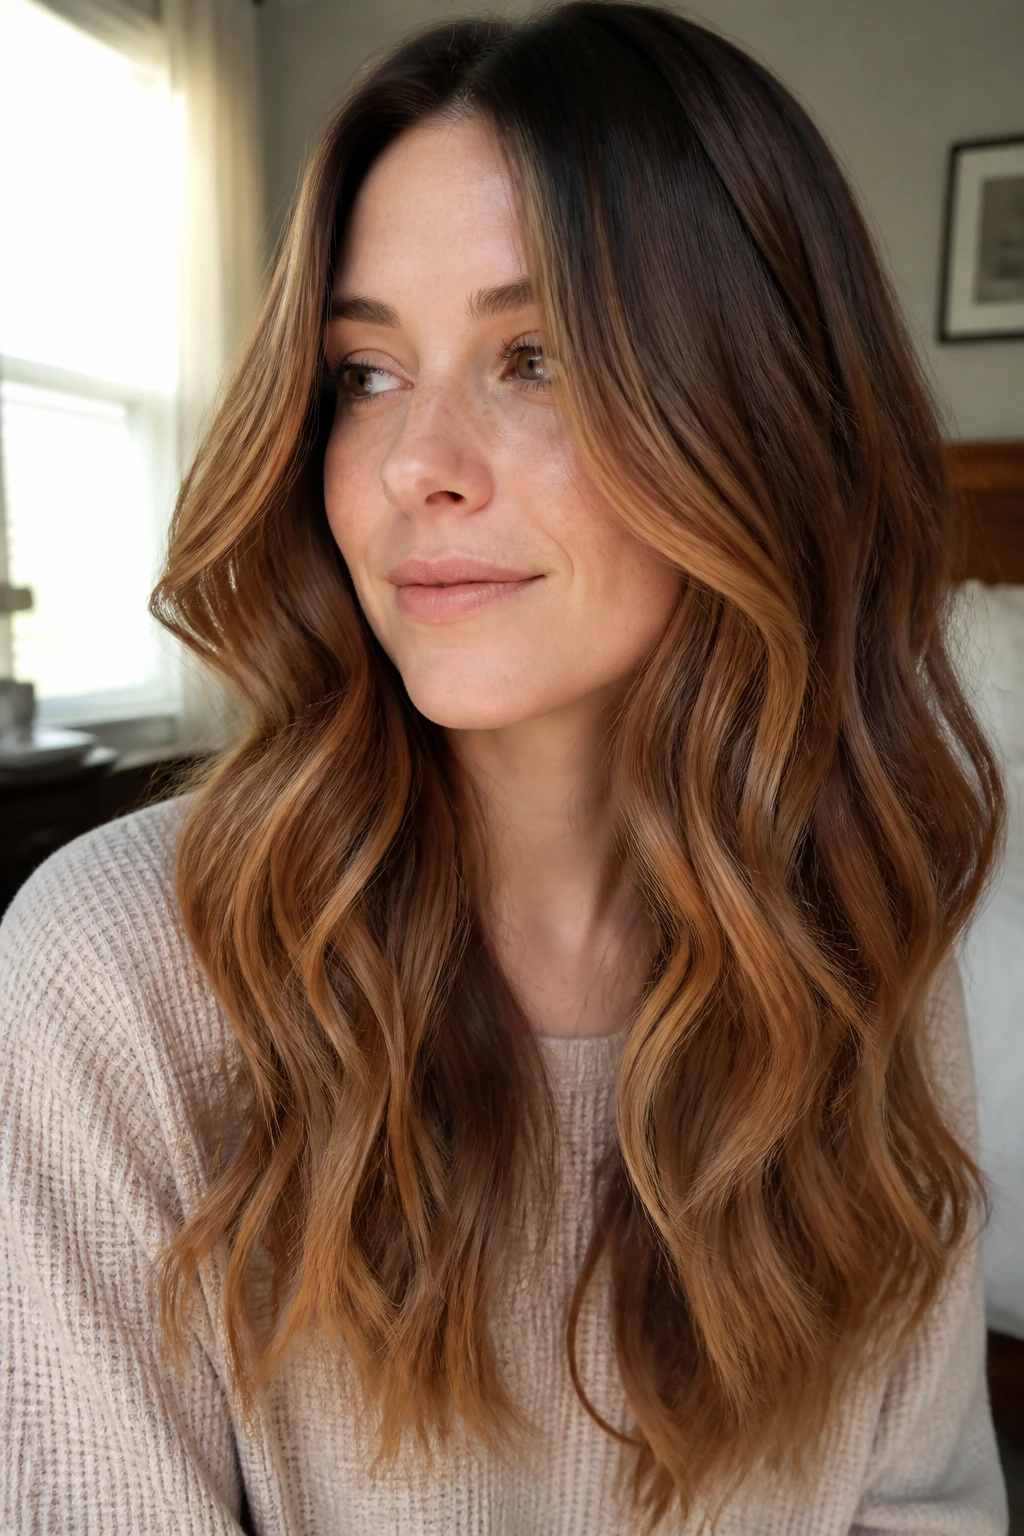
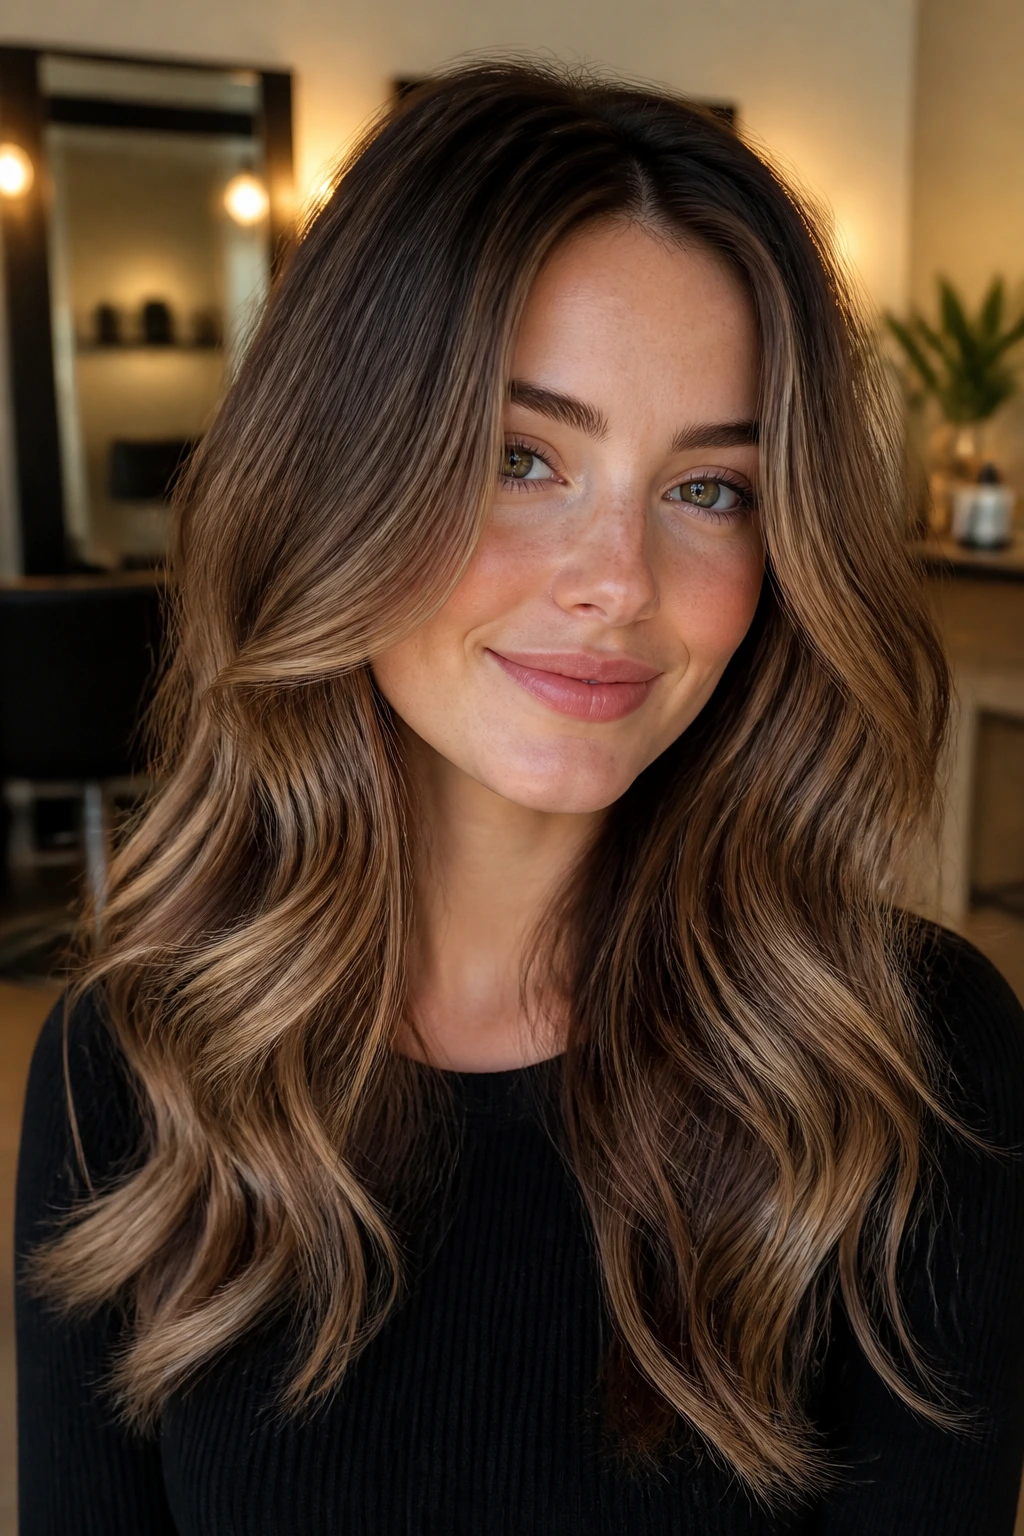
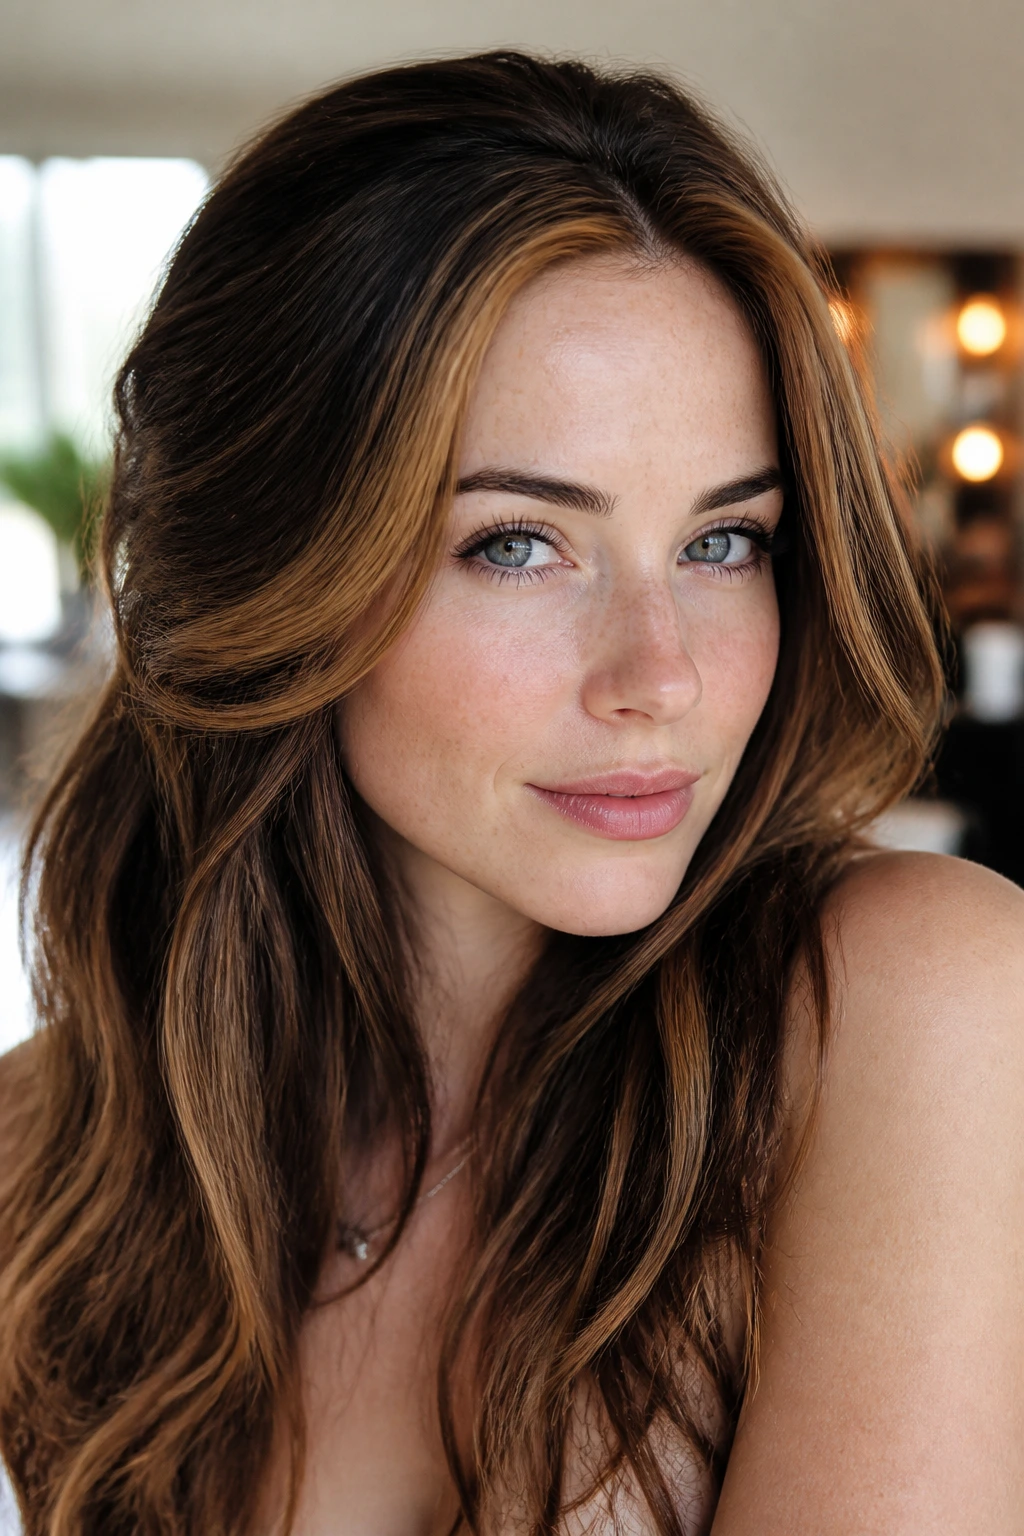
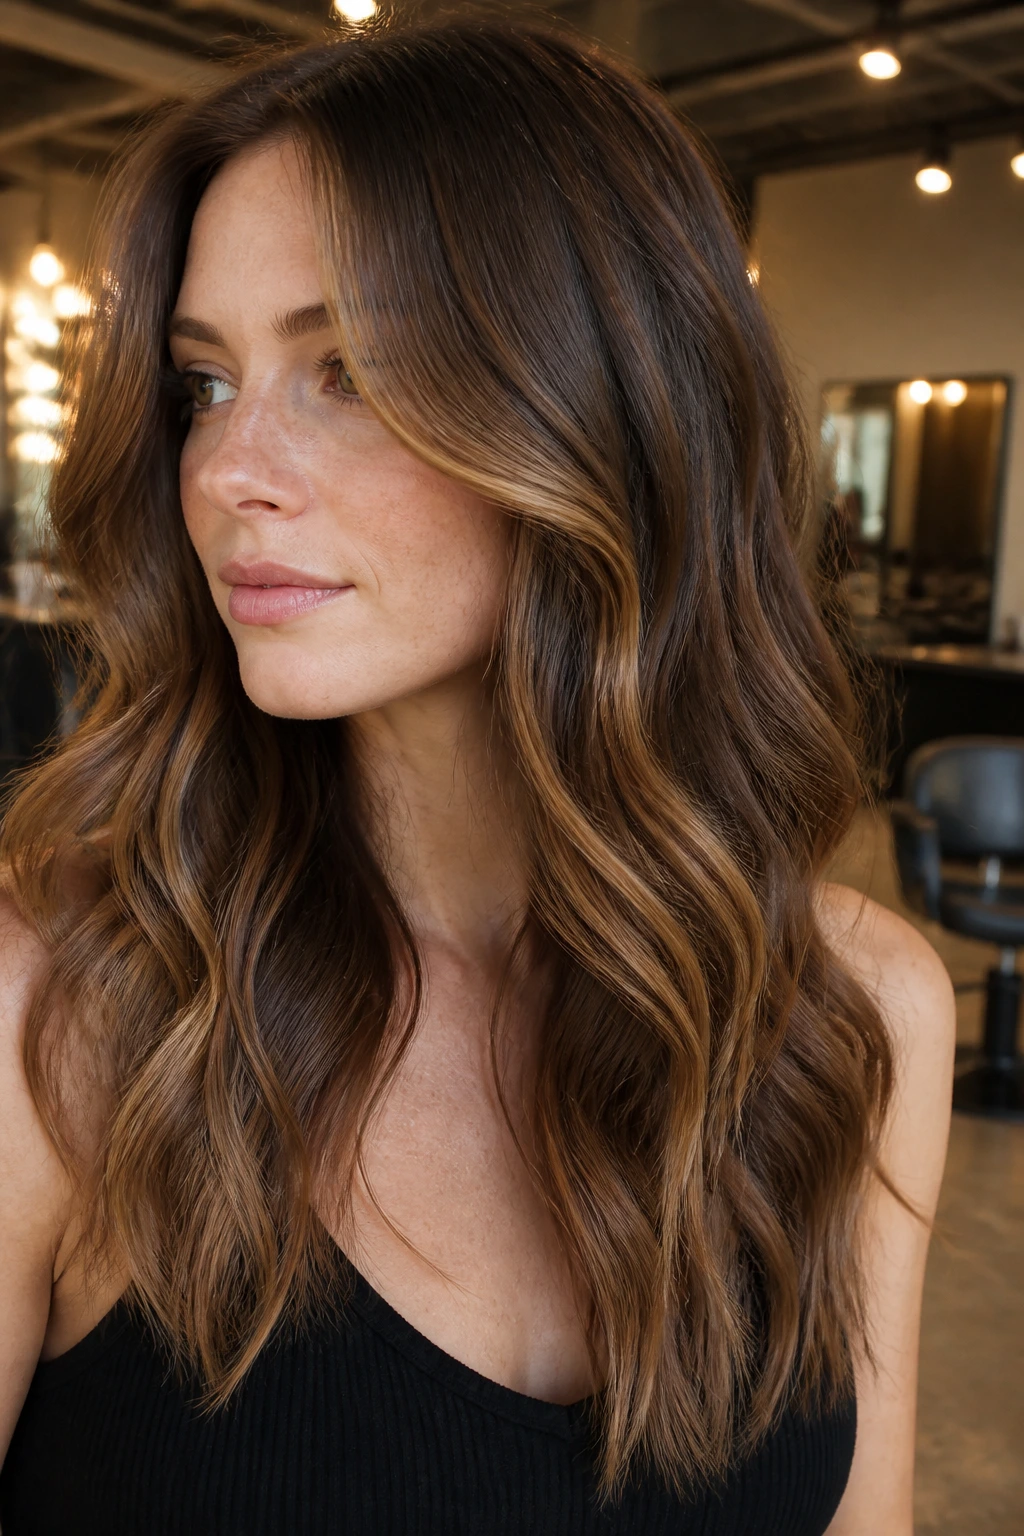
Chocolate caramel balayage for fair skin works best when the brown stays plush and the caramel stays controlled. Too much gold can turn orange under bathroom bulbs. Too little depth, and the whole thing sits flat on pale skin like one heavy strip.
The sweet spot is a brunette base with movement: not a block of dark color, not a blonde makeover in disguise. Fair skin usually needs a little contrast around the face and a little softness through the ends, which is why this shade mix has so much room to behave well. The right version can make a blunt cut look airier, a long wave pattern look richer, and a dull grow-out look intentional instead of overdue.
That balance is the whole game here. Level 5 or 6 brown at the root, beige or honey caramel one to two levels lighter through the lengths, and enough shadow left behind so the eye sees dimension, not stripes. Get the undertone wrong and the color starts arguing with your skin. Get it right and the hair does that quiet, expensive-looking thing that makes people lean in a little.
Why These Shades Work on Fair Skin
-
The contrast is visible without being harsh: A brunette base gives fair skin something to sit against, so the face looks brighter instead of washed out by one note of brown.
-
Caramel can be tuned cooler or warmer: Beige caramel, smoky mocha, and toasted toffee all behave differently, which lets you match pink, peach, or neutral undertones without guessing.
-
The grow-out is kinder than solid highlights: Balayage leaves soft edges and shadow at the root, so the line of demarcation stays blurry for weeks instead of shouting at you.
-
Placement changes everything: A few ribbons around the cheekbones and part line do more for fairness than a thick blanket of light pieces ever will.
-
The color works with waves, curls, and straight hair: The same chocolate-caramel blend can look glossy and sleek or broken up and dimensional, depending on how you style it.
-
It can go subtle or high-contrast: You can stay close to your natural brunette level or push the ends lighter if you want the color to show from across the room.
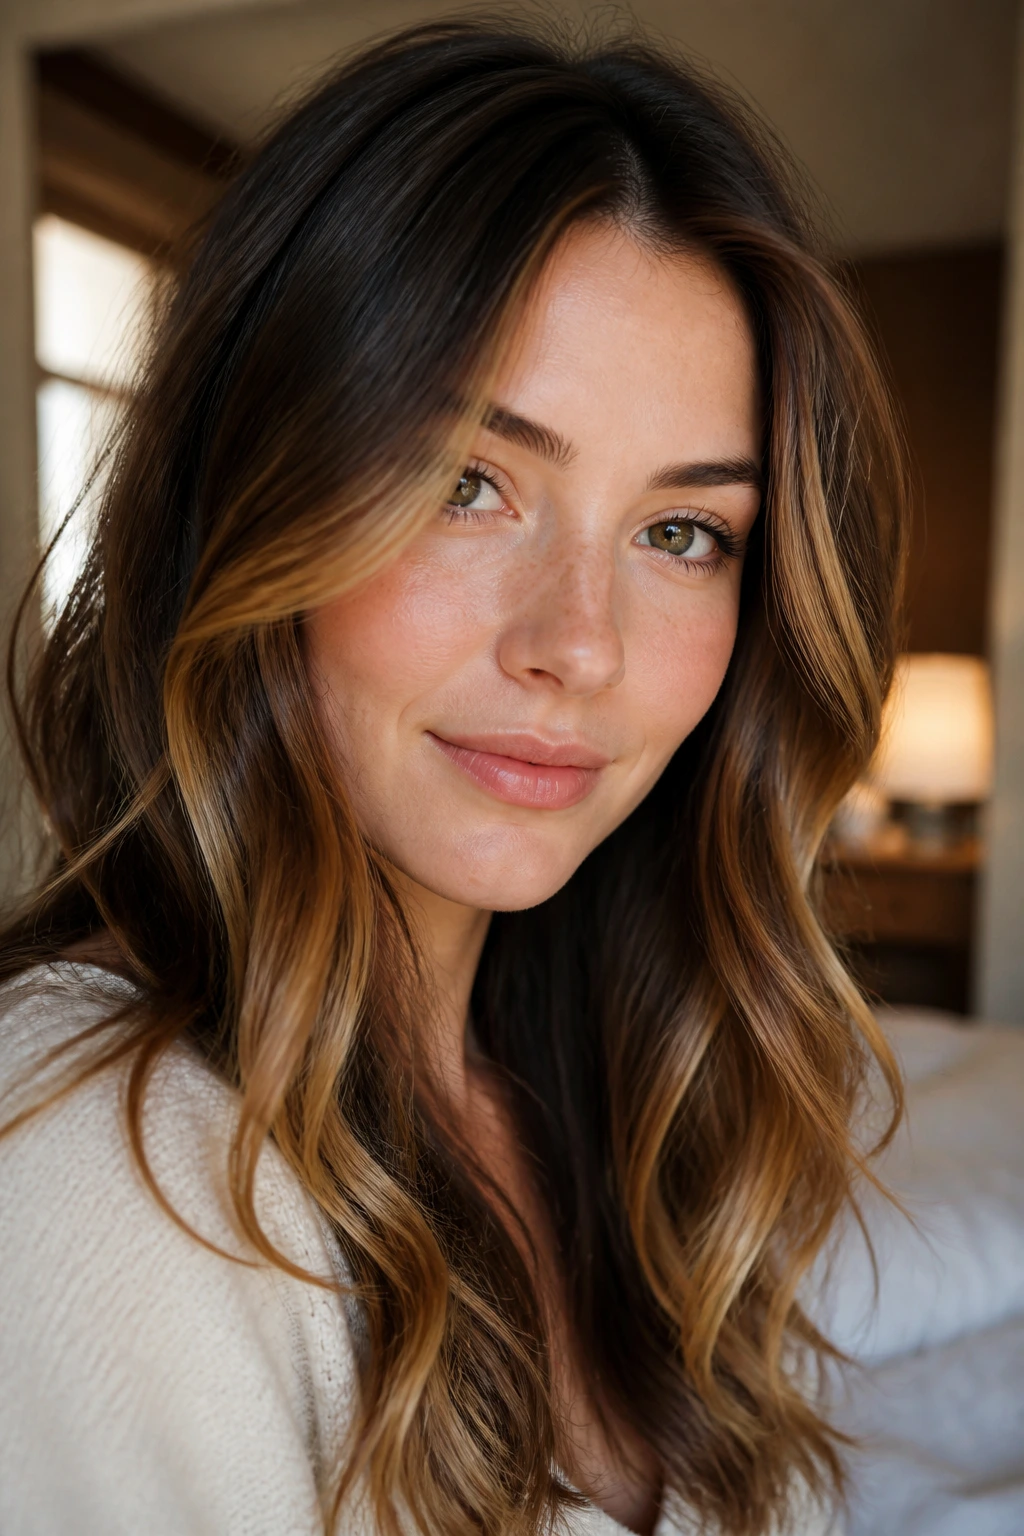
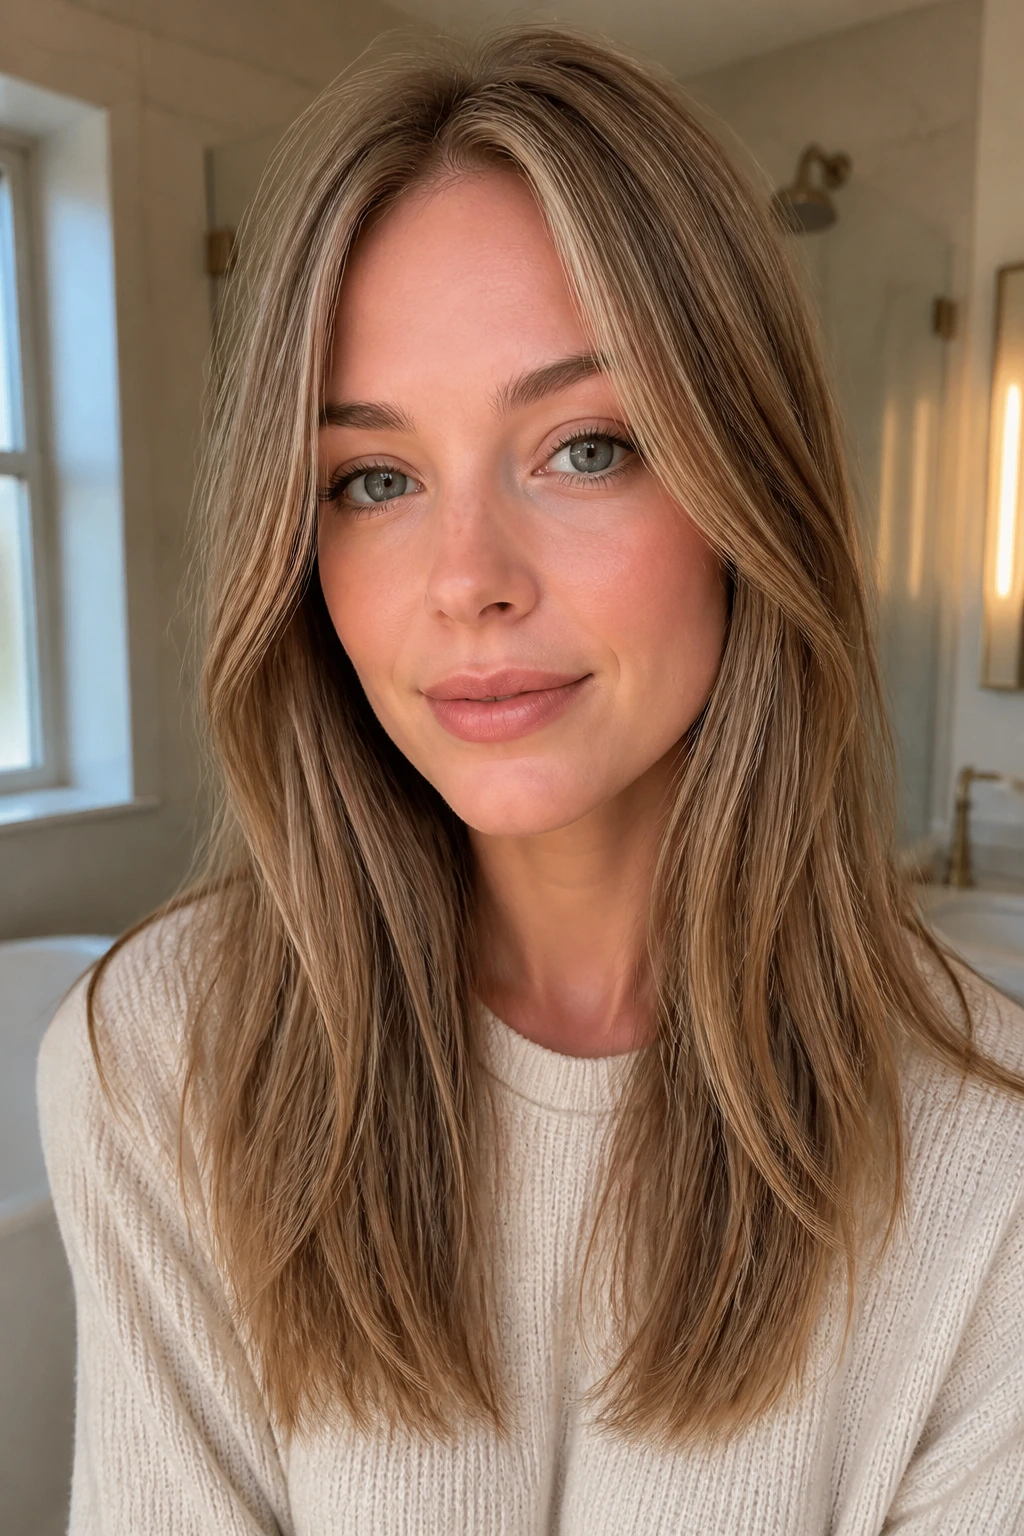
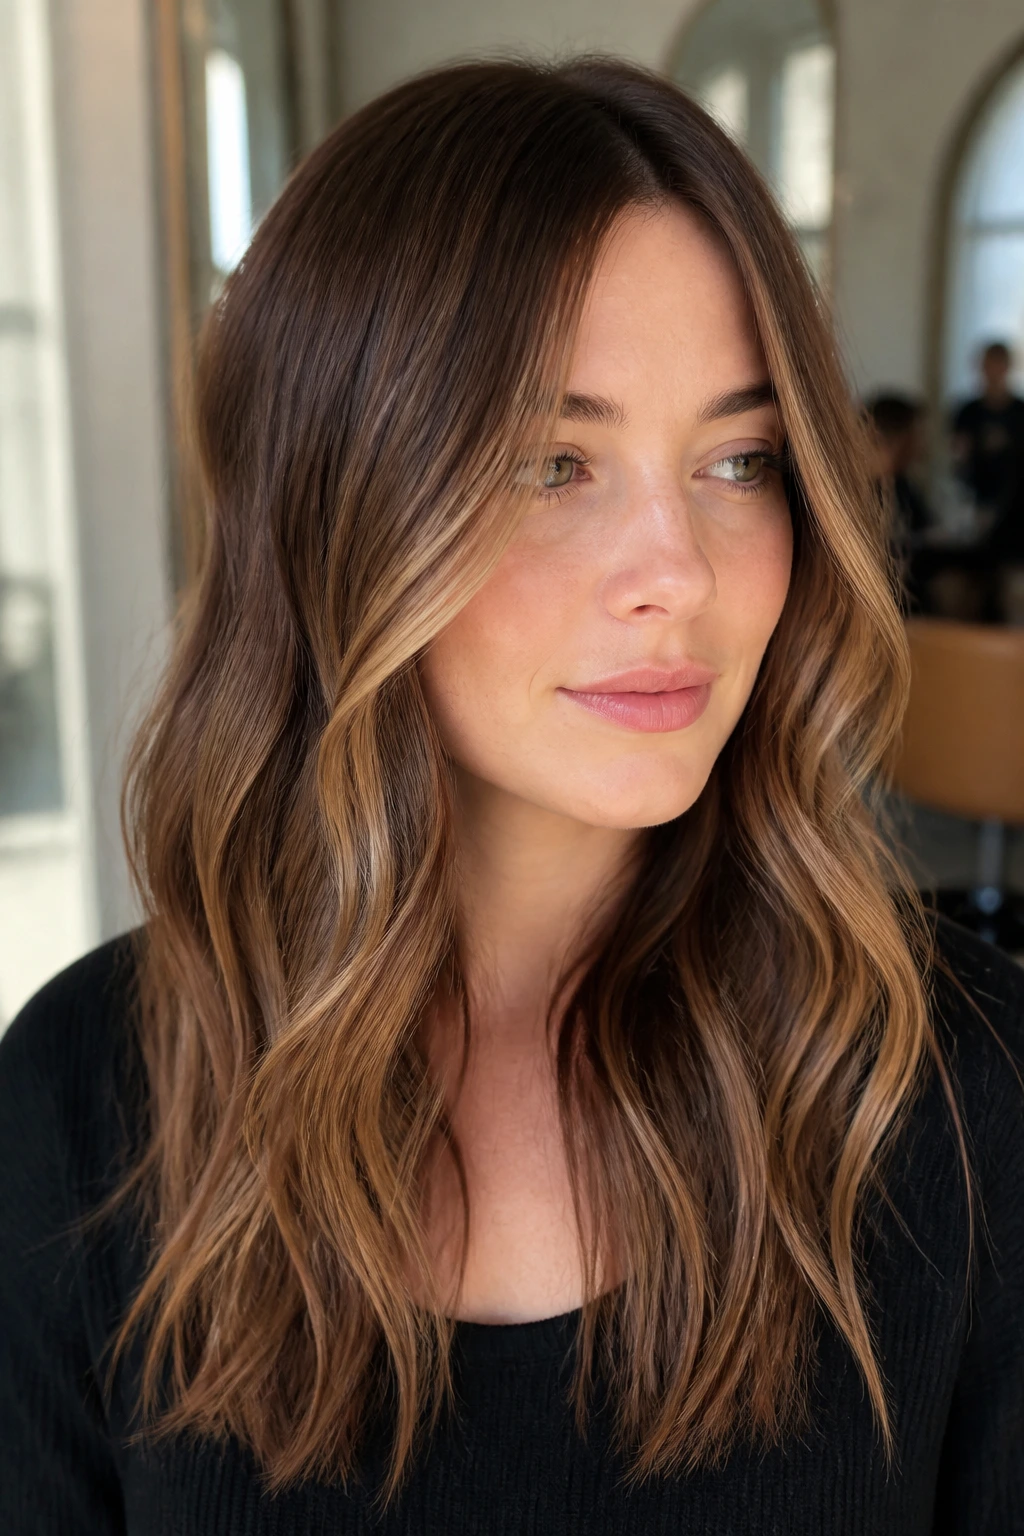
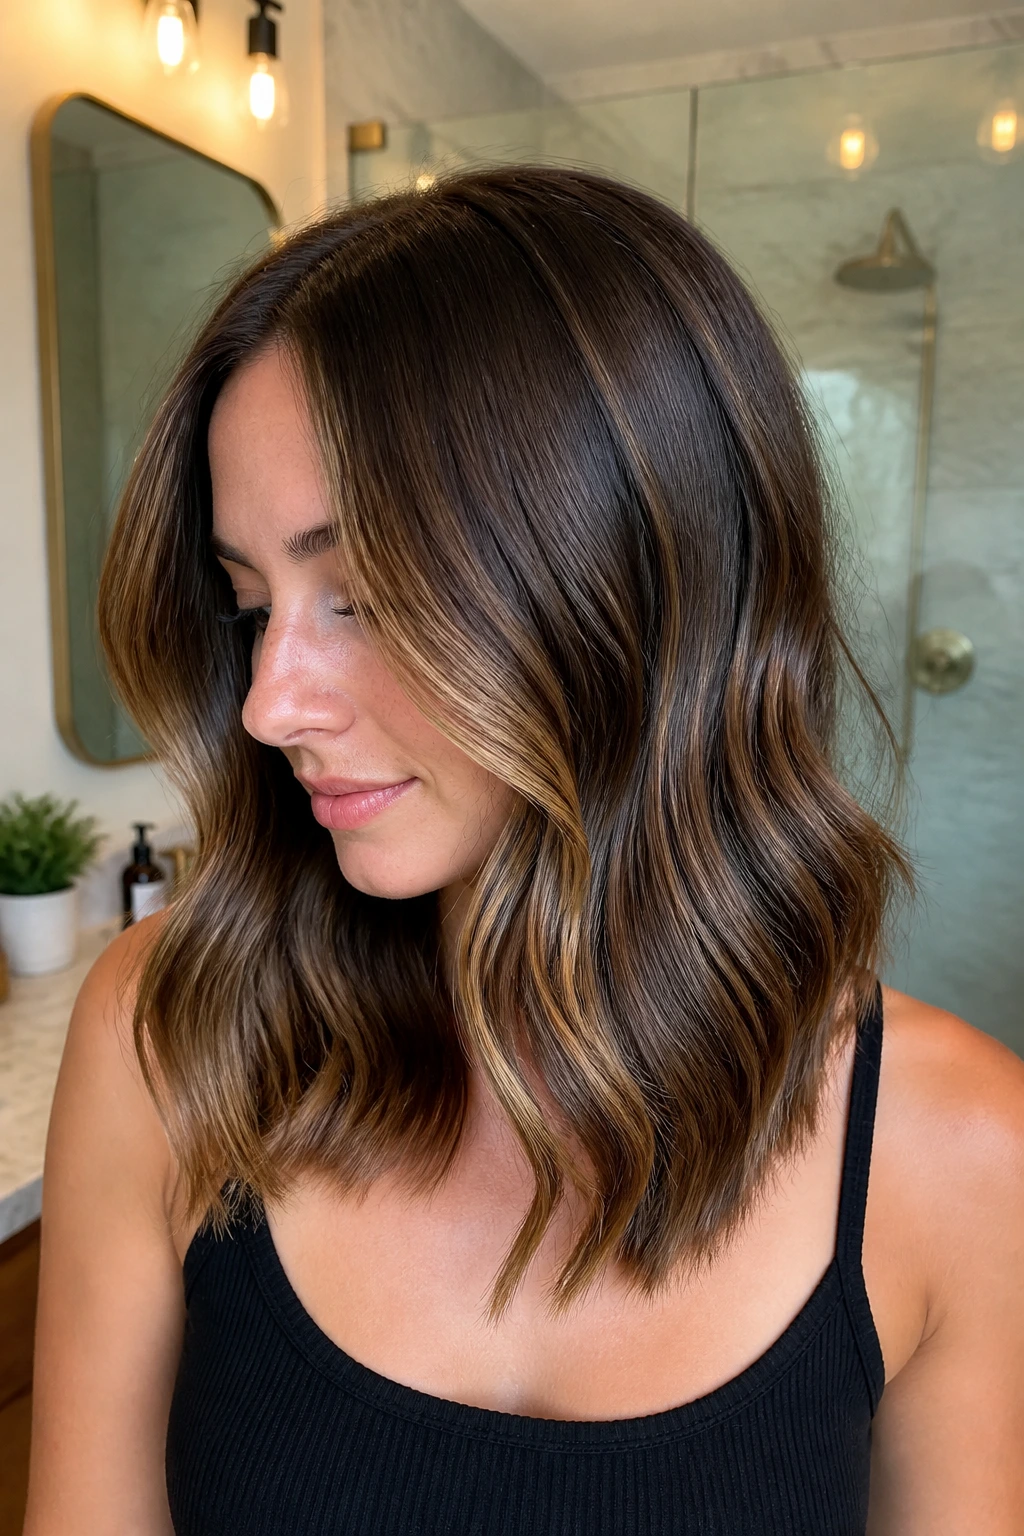
1. Creamy Mocha Melt with Soft Caramel Ribbons
This is the safest entry point if you want chocolate caramel balayage for fair skin without a big leap. The base stays a creamy mocha, usually around a level 5 or 6 brunette, and the caramel sits as thin ribbons through the mid-lengths instead of loud streaks near the crown. It reads soft in daylight and still has enough movement to keep a blunt cut from looking heavy.
Ask for: a muted beige-caramel gloss over hand-painted ribbons, with the brightest pieces starting below the cheekbone.
Why it works on fair skin: the mocha base gives pale skin contrast, while the caramel stays soft enough not to fight pink or cool undertones. The effect is gentle, not sleepy.
Best on: medium-length waves, layered lobs, and straight hair that needs shape without obvious striping.
A tiny root shadow helps here. Even half a shade deeper at the root stops the color from looking dusty.
2. Beige Caramel Money Piece on a Chocolate Base
Want the face to brighten first and the ends later? Start with a money piece. A beige caramel frame around the front hairline gives fair skin a lift without needing a full-head lightening session, and the rest of the hair can stay deeper chocolate for balance.
Why the front matters
The area around your face changes the whole read of the color. One or two brighter sections near the part and temples catch light fast, especially when the hair is tucked behind the ears or worn in loose bends.
Keep the money piece beige, not yellow. On fair skin, high-gold front pieces can go brassy fast, while a creamy beige caramel looks cleaner and more modern. If your skin already runs rosy, ask your colorist to mute the front a touch so it doesn’t compete with your cheeks.
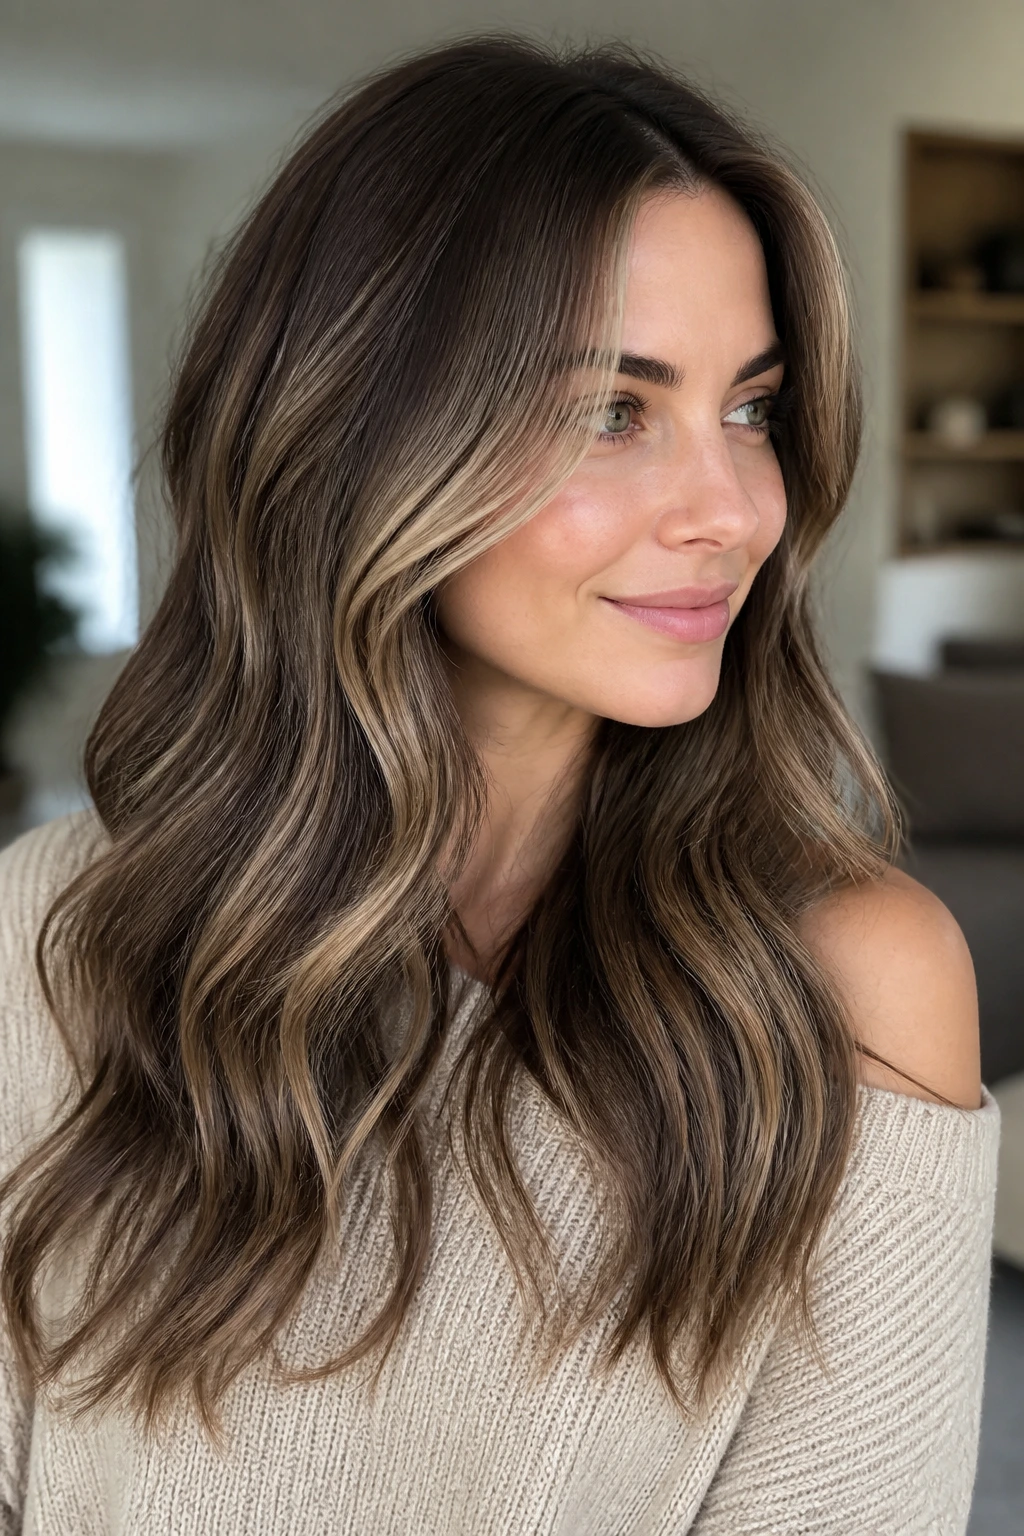
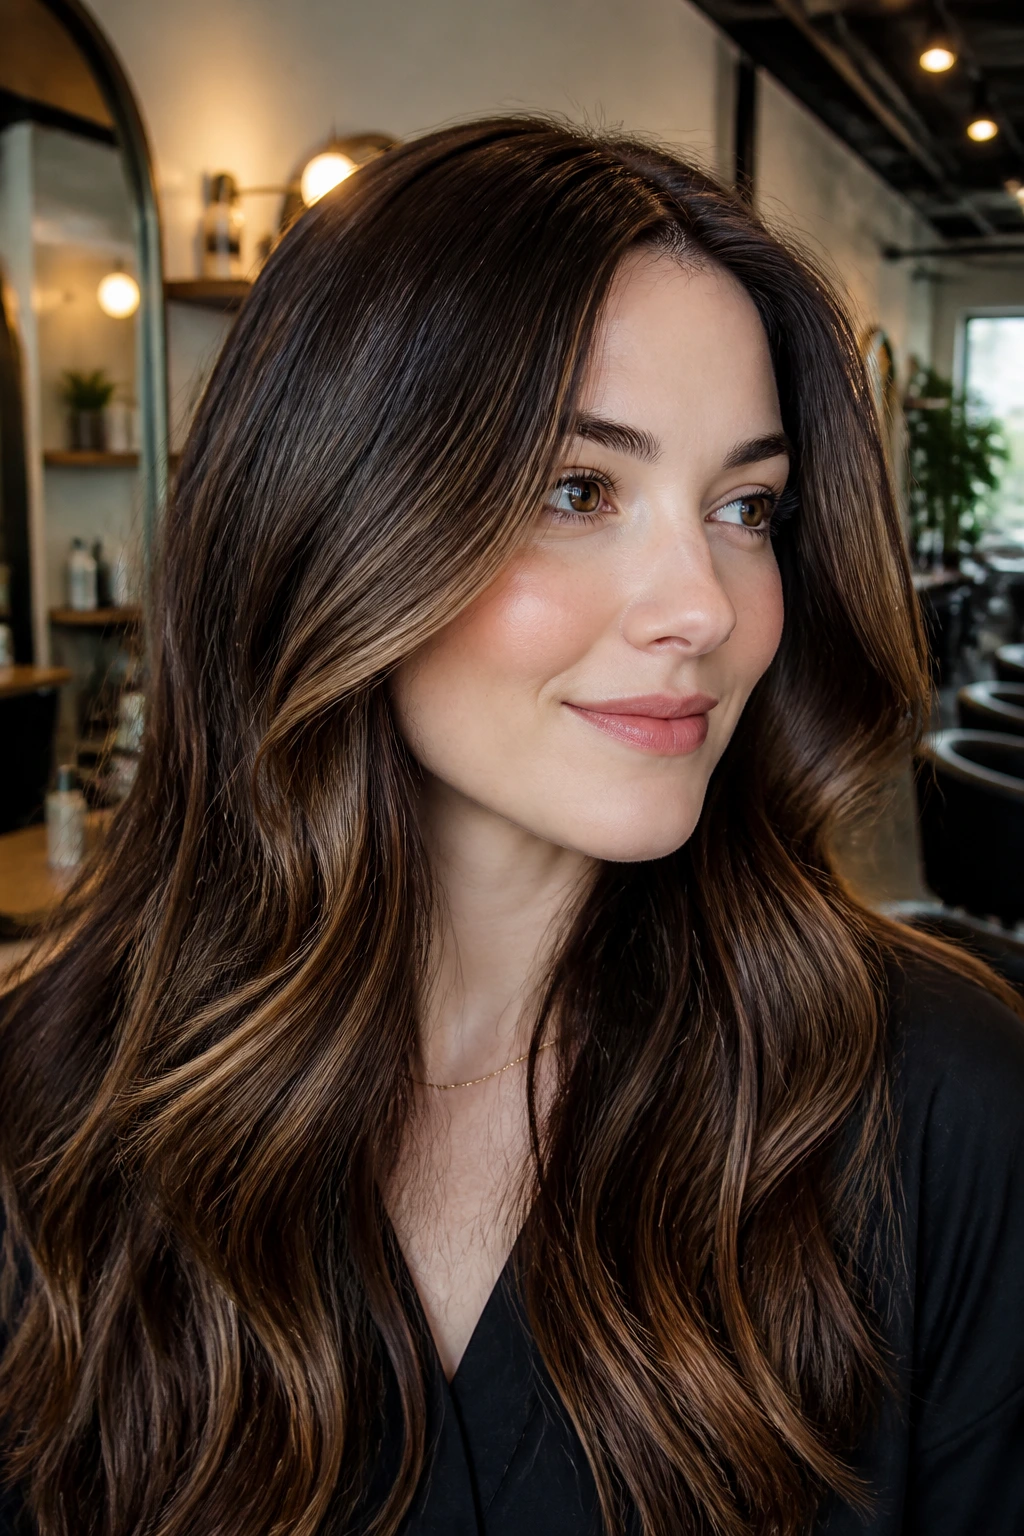
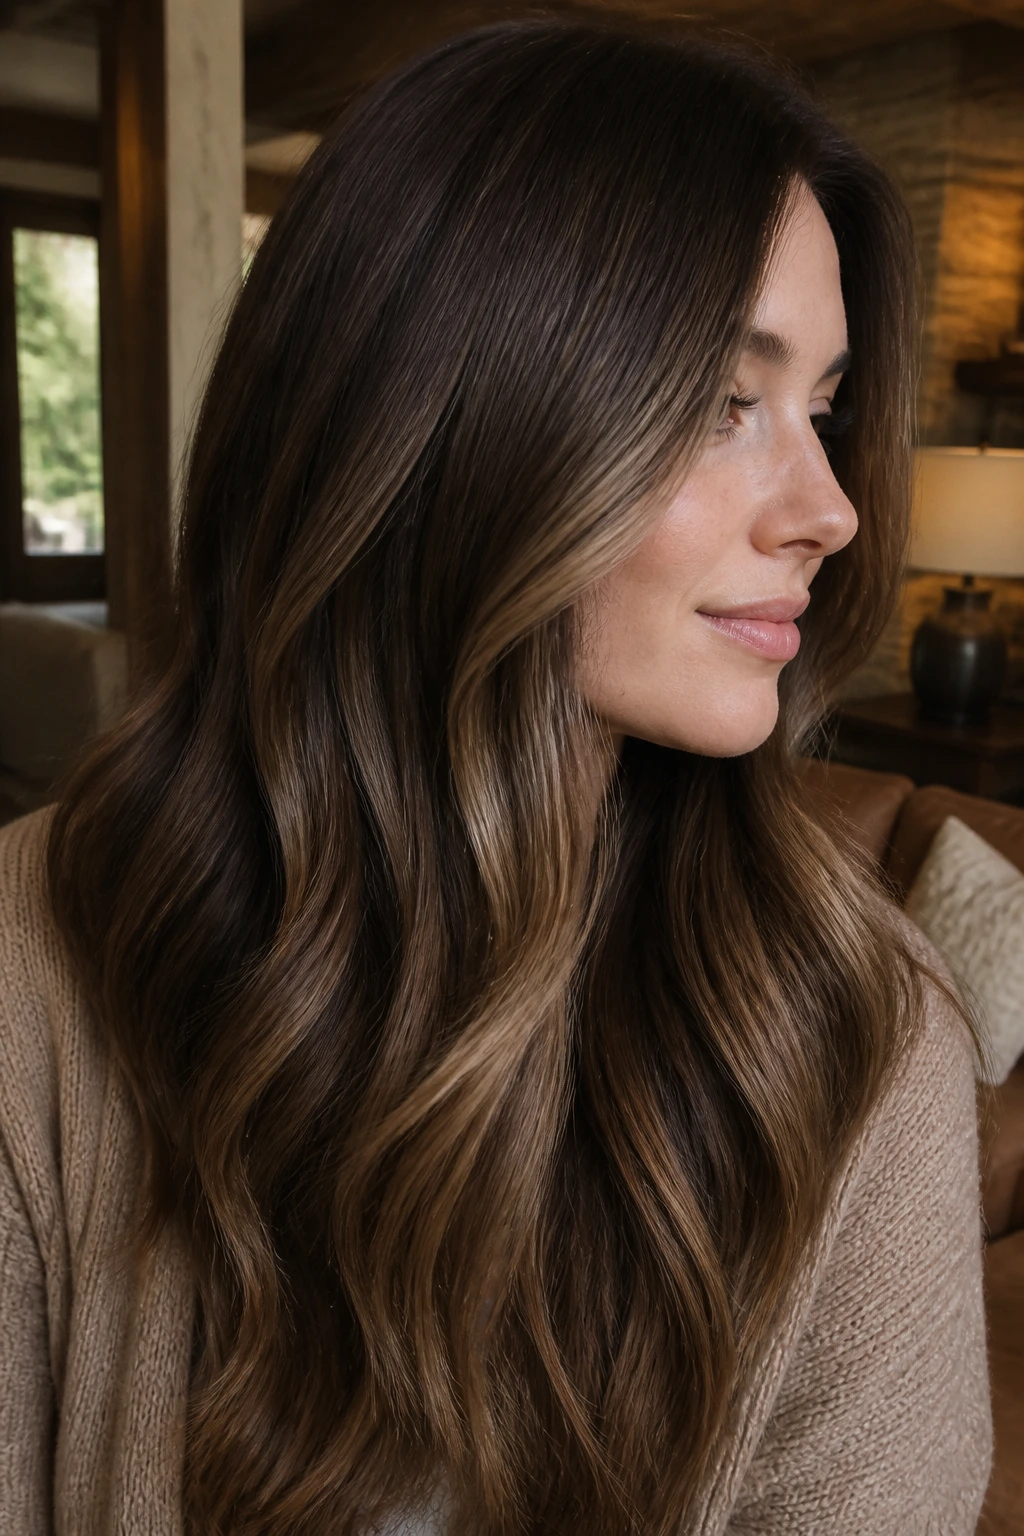
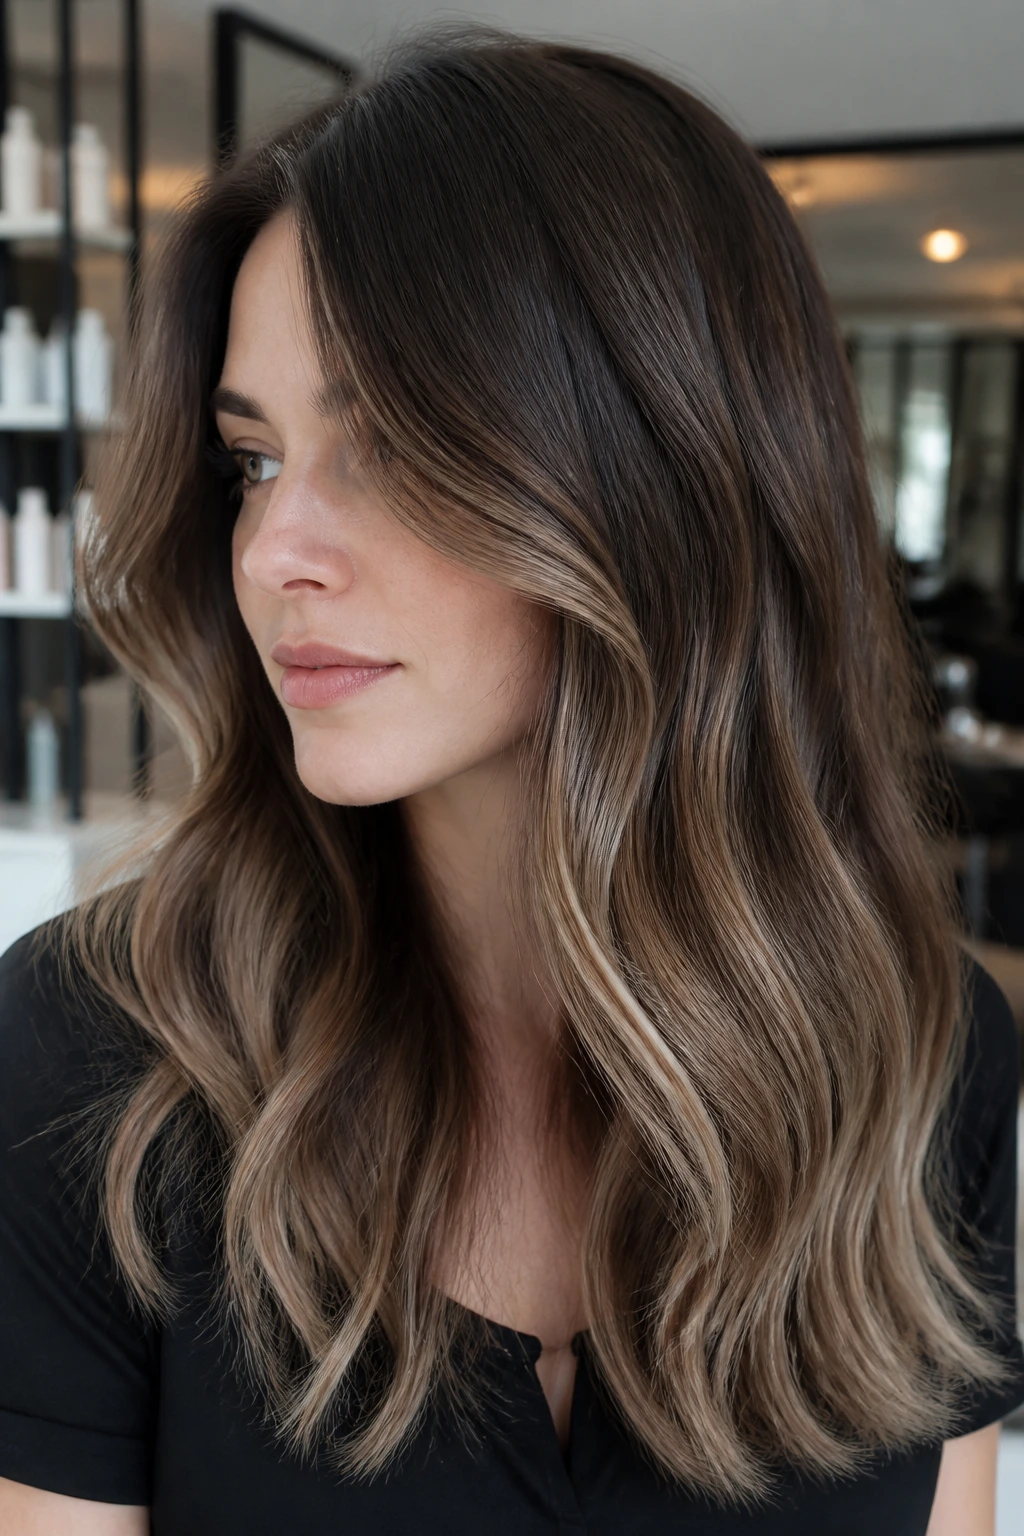
3. Smoky Espresso Balayage with Toasted Ends
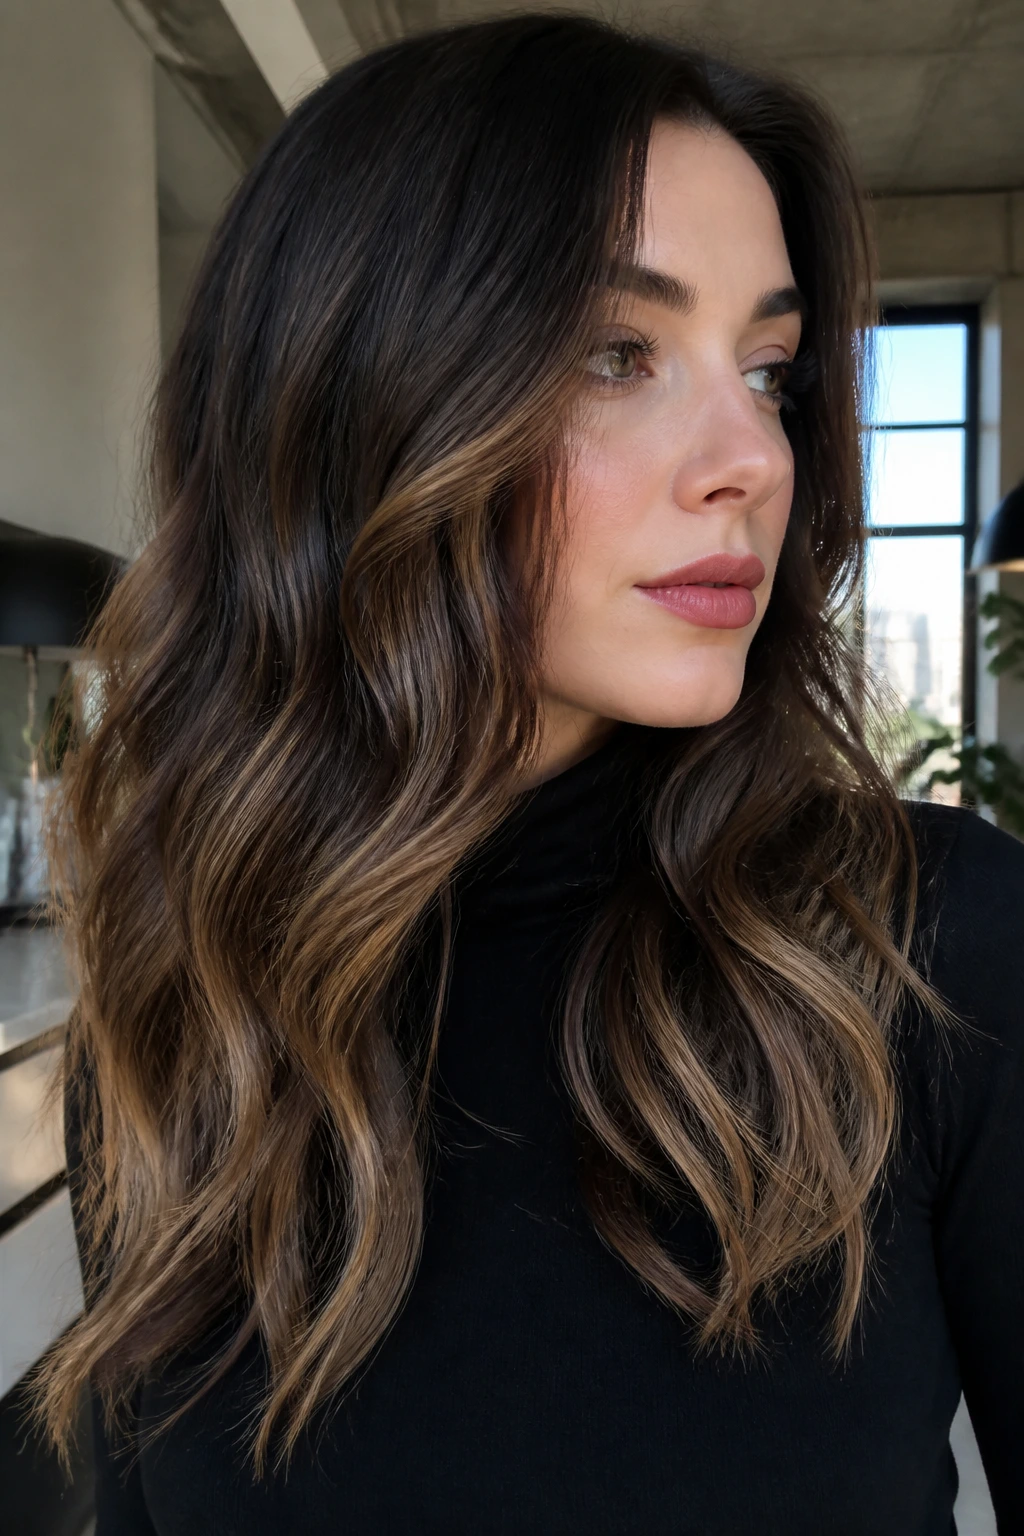
This one leans cool. Think dark espresso at the root, then toasted caramel that never turns pumpkin. On fair skin with pink or blue undertones, that cooler edge keeps the hair from glowing too warm against the face.
The nice part is the restraint. The ends are still lighter, but the transition is shaded enough that the color feels expensive in the way a good wool coat does — plain at first glance, fuller the longer you look.
A style like this loves loose waves and glossy blowouts. The smoke in the brown keeps the caramel from screaming, which is exactly why it works when you want dimension without a lot of brightness.
4. Toffee Ribbon Lights Through Mid-Lengths
Toffee ribbons are for the person who wants movement but hates the idea of obvious highlights. The lighter pieces sit through the middle of the hair, where they break up a dark curtain and stop it from swallowing your skin. Fair complexions often look sharper when the brightness lives near the jawline and collarbone instead of only at the ends.
Good if you have: thick hair, medium density, or long layers that need shape.
Ask for: thin, hand-painted ribbons with a toffee-beige tone and minimal lightness at the root.
Skip if: you want the contrast to be obvious from across the room. This is a quiet look.
The payoff is clean. The hair moves, the face opens up, and you don’t get that chunky stripe effect that makes brunette balayage look dated.
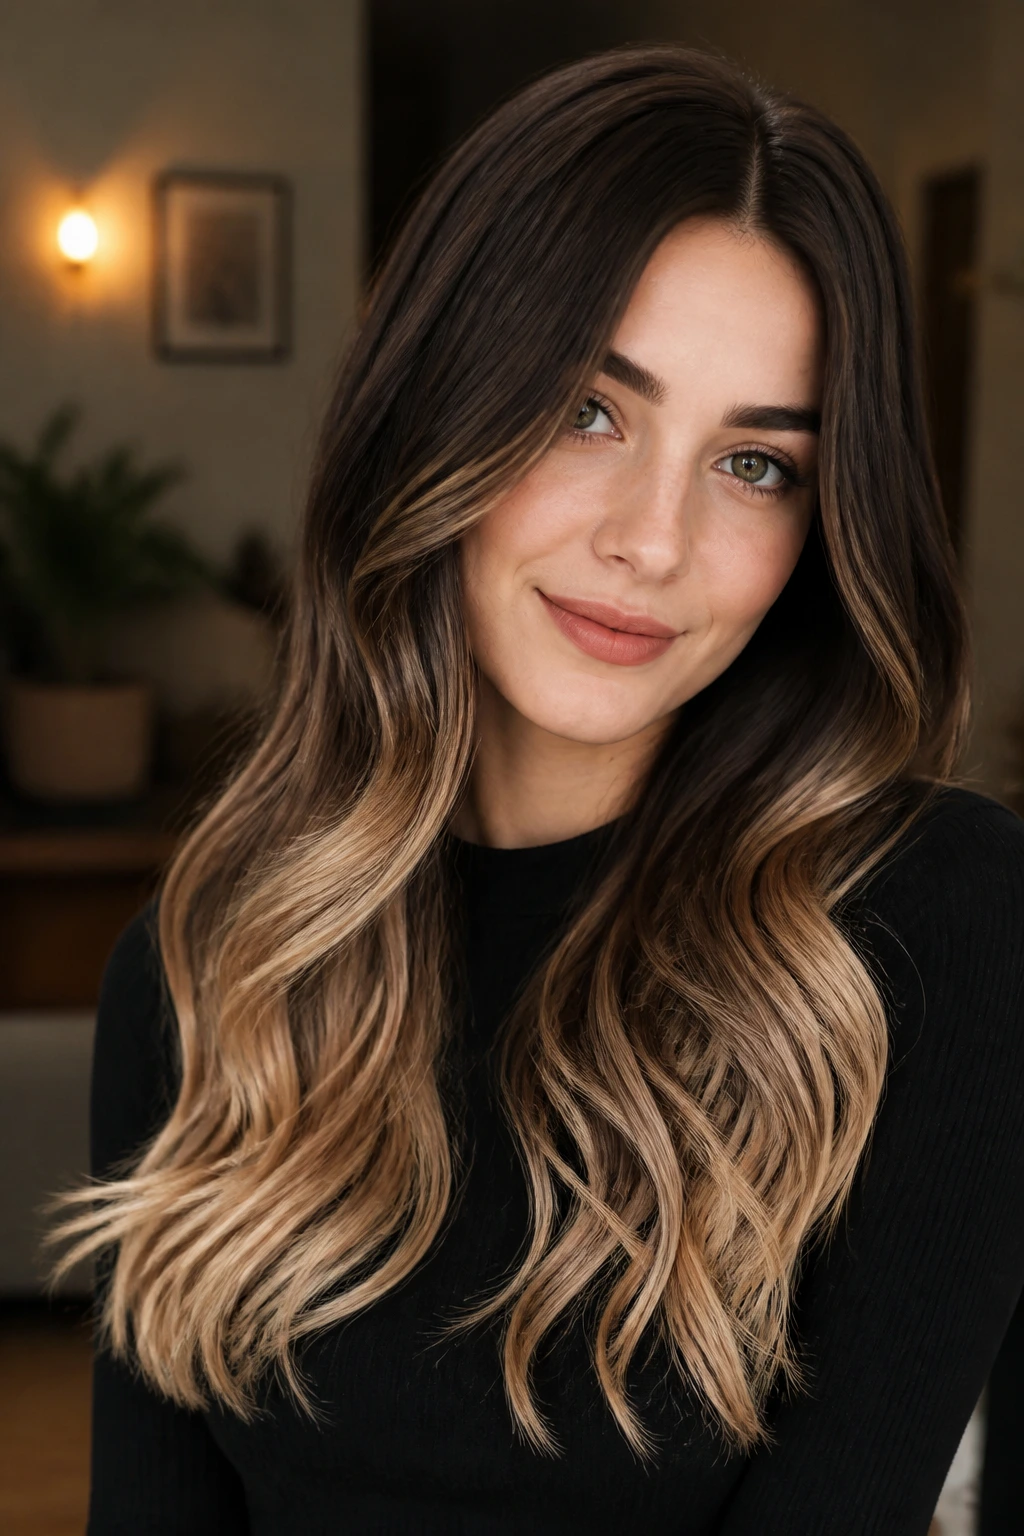
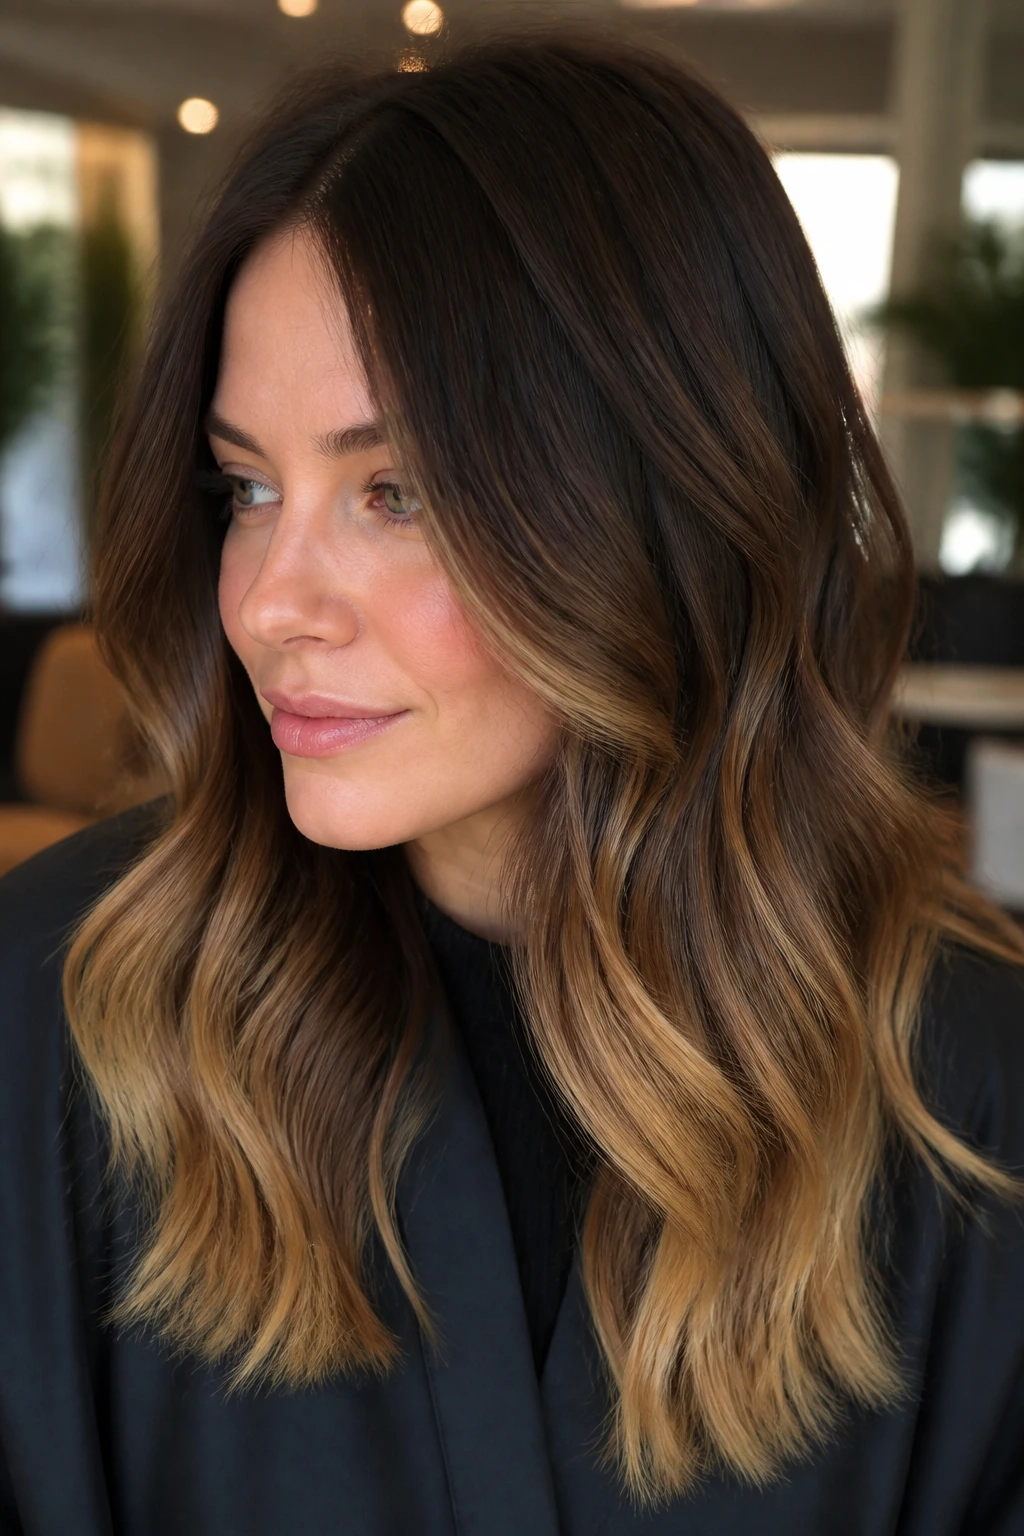
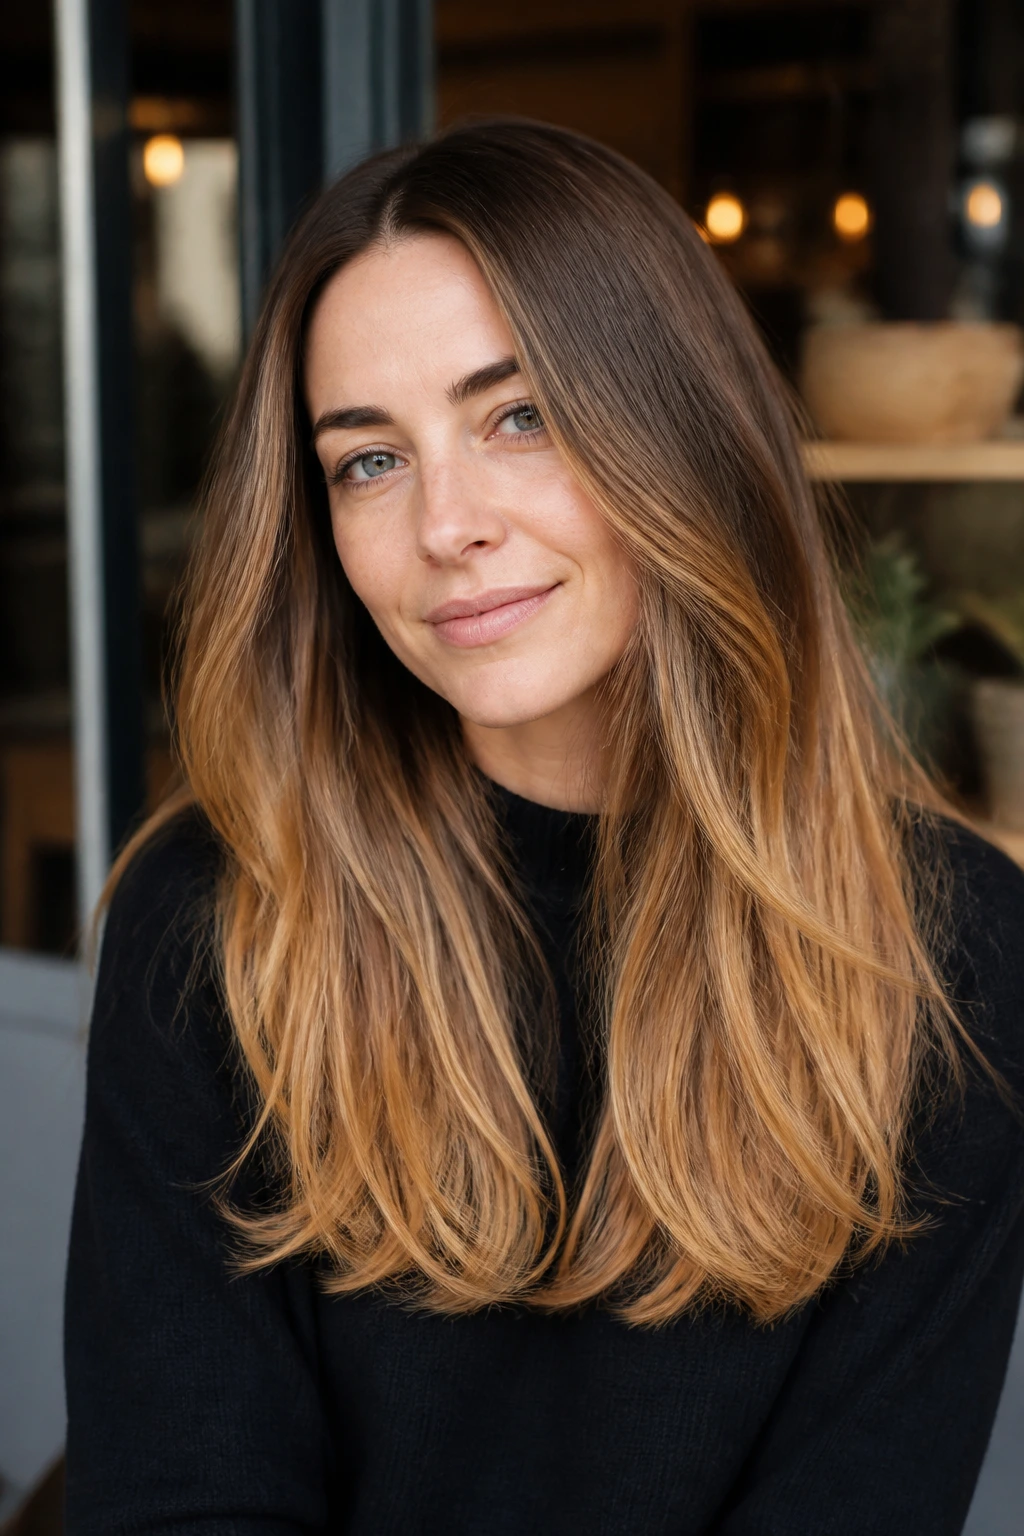
5. Chestnut-to-Caramel Ombré with a Soft Root Shadow
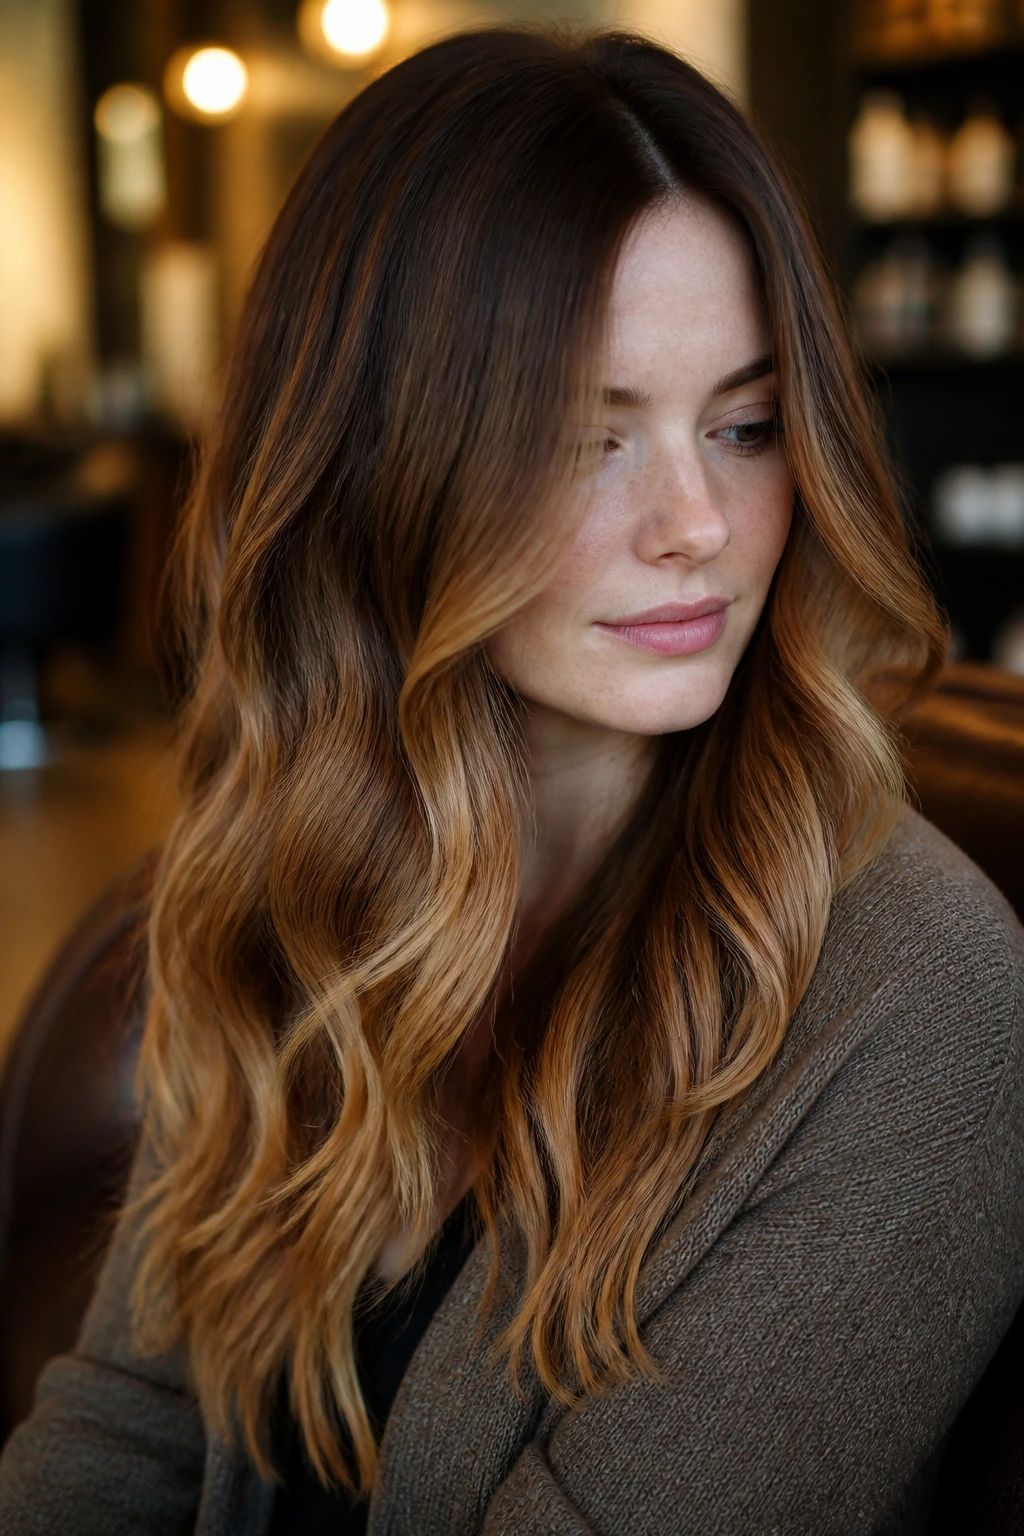
Ombré earns its keep when you want the fade to be part of the look, not a mistake you need to hide. Chestnut at the top, caramel at the bottom, and a soft root shadow in between make fair skin look a little warmer without going gold-heavy.
The key is blur. If the handoff from brown to caramel is too sudden, pale skin can make the line look harder than it should. Keep the transition smoky and the lighter ends creamy, and the whole thing reads polished instead of dipped.
This style is especially good on longer hair, where the fade has room to breathe. On shoulder-length cuts, it can still work, but the transition needs to start a little higher so the color doesn’t disappear.
6. Cocoa Babylights for Fine Fair Hair
Fine hair and chunky highlights rarely get along. Cocoa babylights fix that by using tiny woven sections that build brightness slowly, almost like a shimmer instead of a stripe. On fair skin, that softness matters because the hair doesn’t need to shout to lift the face.
What makes it different
Babylights look expensive when they’re thin enough to blend, not thick enough to outline each section. The cocoa base keeps the hair grounded, while the light caramel pieces create movement without making the ends look see-through.
If your hair is fine, this is one of the least risky ways to add depth. It gives the illusion of more density because the eye sees variation, not a few obvious pieces. That trick is worth the salon time.
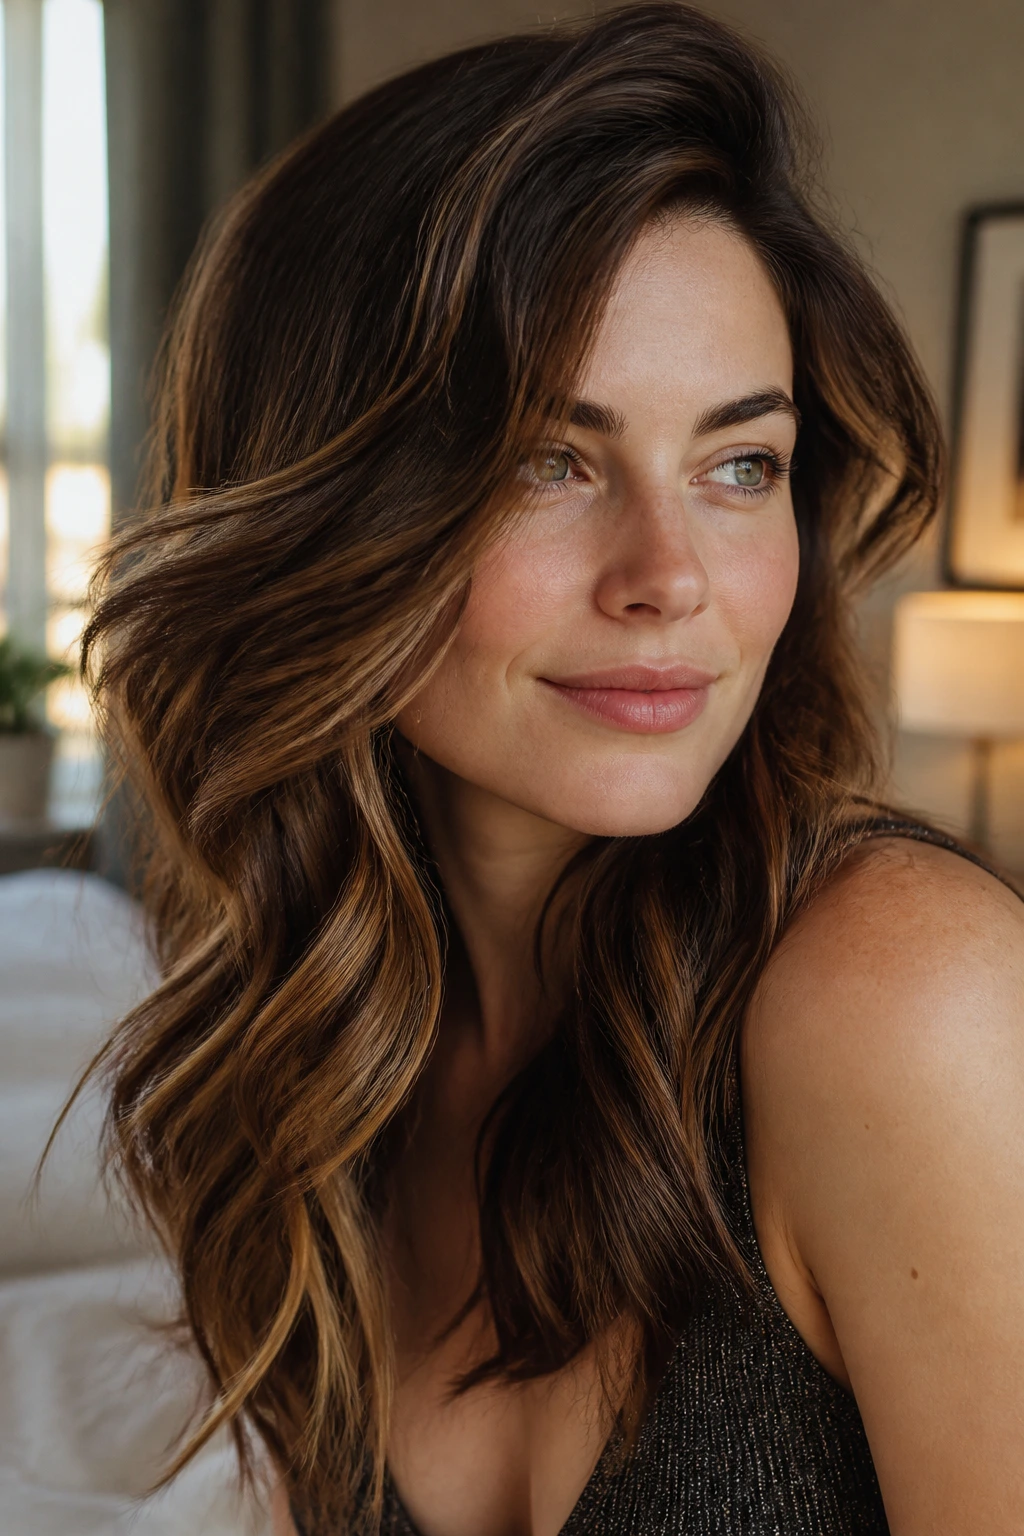
7. Honeyed Chocolate Swirl with Face-Framing Lift
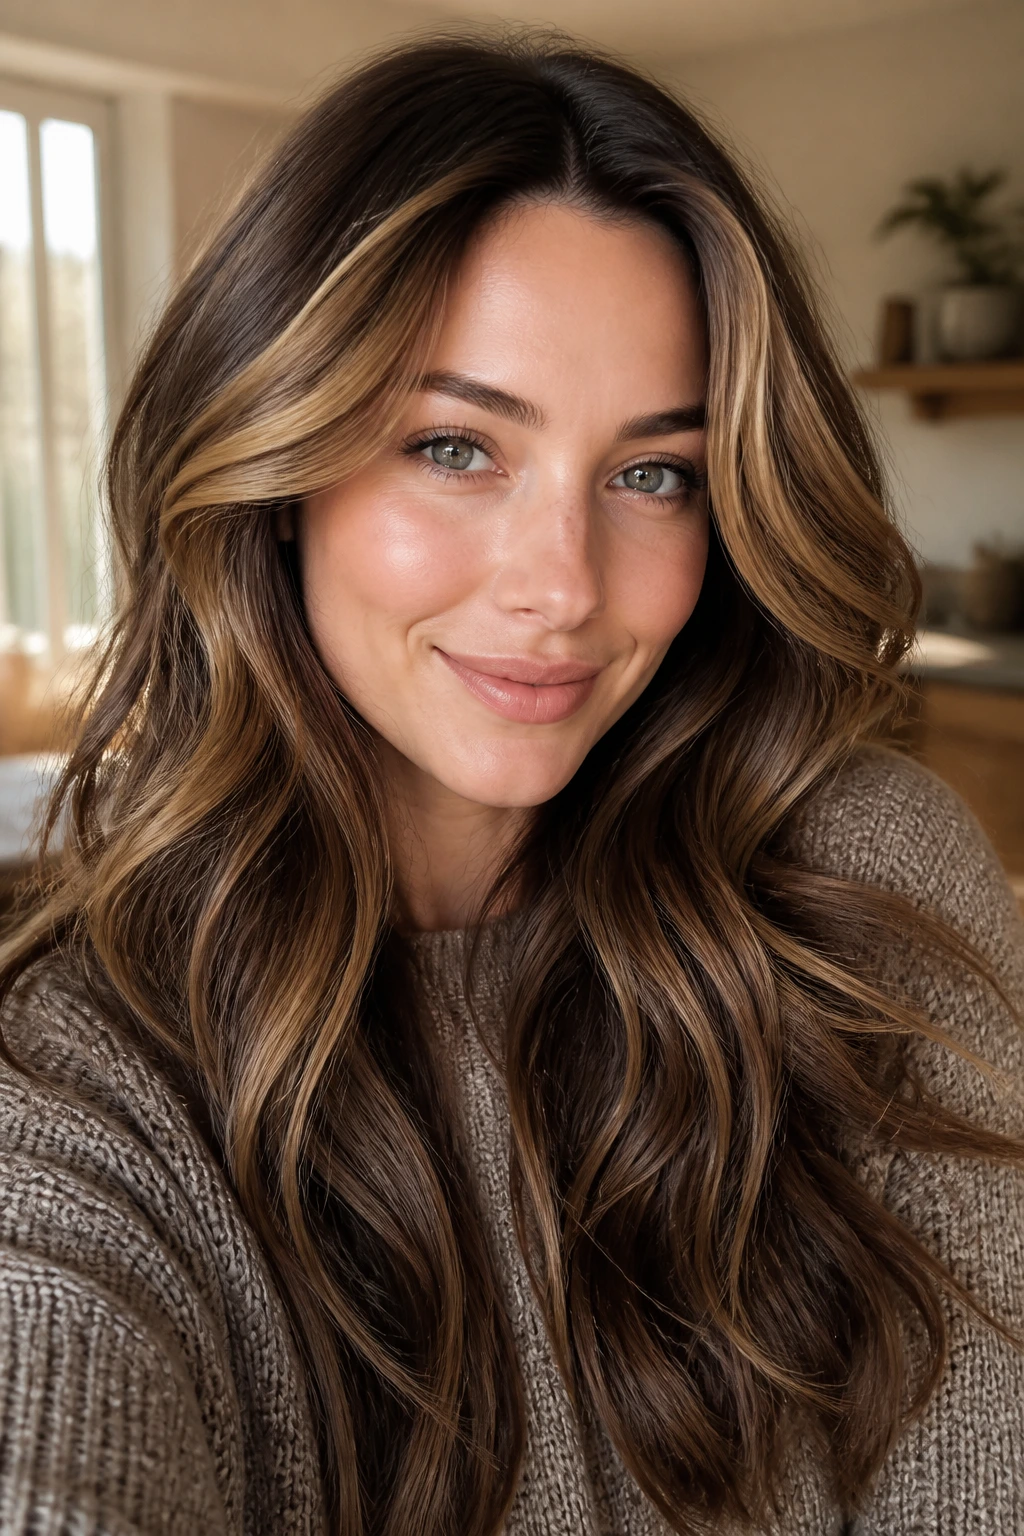
This is the warmer end of the chocolate caramel balayage spectrum, and it works best on fair skin with peach, golden, or freckled undertones. The honey note sits on top of a chocolate base like sunlight on wood — warmer, but not sticky if the gloss is kept clean.
The face frame matters most here. A brighter honey caramel around the hairline lifts the eyes and cheekbones fast, especially on layered cuts or soft waves. The rest of the balayage can stay muted so the front pieces do the talking.
If your skin flushes pink easily, go lighter on the honey and heavier on the beige. That tiny adjustment keeps the color from drifting orange when the room lights get warm.
8. Mushroom Brown Balayage with Caramel Veils
Mushroom brown sounds trendier than it is. In practice, it’s a muted brunette with a smoky edge, and that shadowy quality is exactly why it can flatter fair skin so well. The caramel comes in as veils, not stripes, which keeps the whole look soft around the temples and crown.
This version is strong on cool or neutral undertones. Mushroom brown doesn’t fight redness the way a rich copper brunette can, and the beige caramel breaks up the depth without turning brassy.
A little wave pattern helps the veils show. On very straight hair, the look stays more subtle; on bends or loose curls, the dimension opens up and the finish reads richer.
9. Walnut Halo Balayage Around the Hairline

A halo placement works when you want the brightness to live around the face, part line, and upper temples. Walnut brown near the base gives fair skin contrast, then the caramel halo softens the line where the hair meets the face. It’s a clever setup if you wear your hair in buns, half-ups, or tucked-behind-the-ear styles.
The halo should not be thick. Thin painted sections, placed with a light hand, keep it from looking like a strip of highlights from a different decade. The goal is lift, not a high-contrast frame that sits on top of the hair.
This one has a nice trick: it stays visible even when the rest of the hair is pinned back. That makes it useful for people who want the color to show without styling every strand.
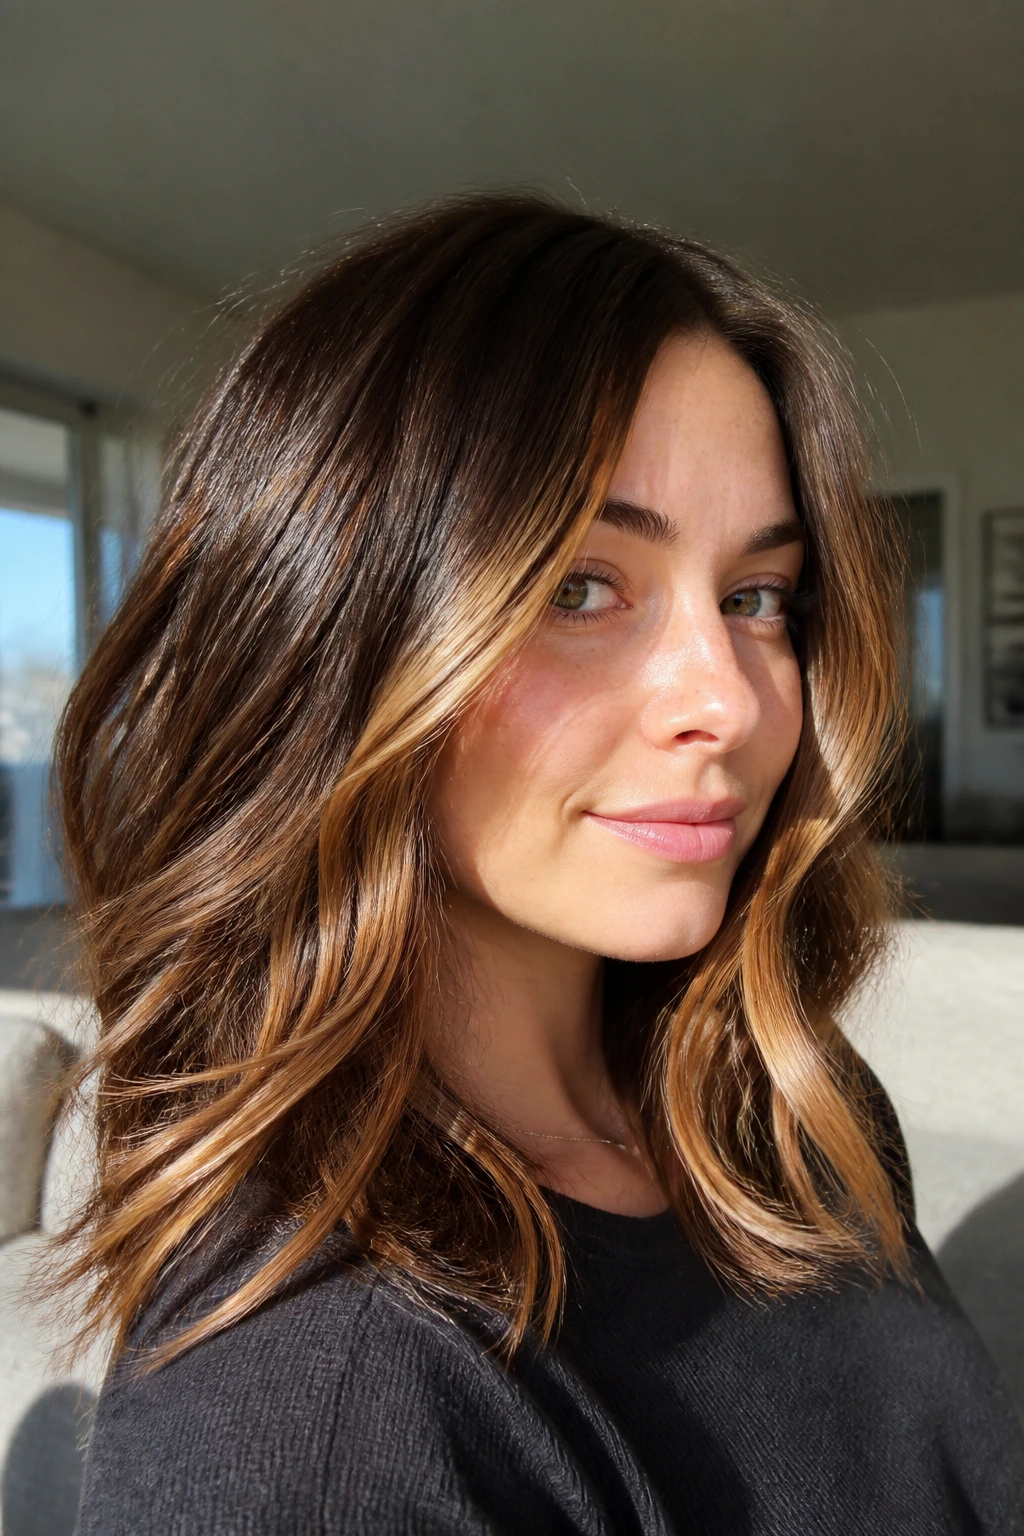
10. Milk Chocolate Face Frame with Airy Ends
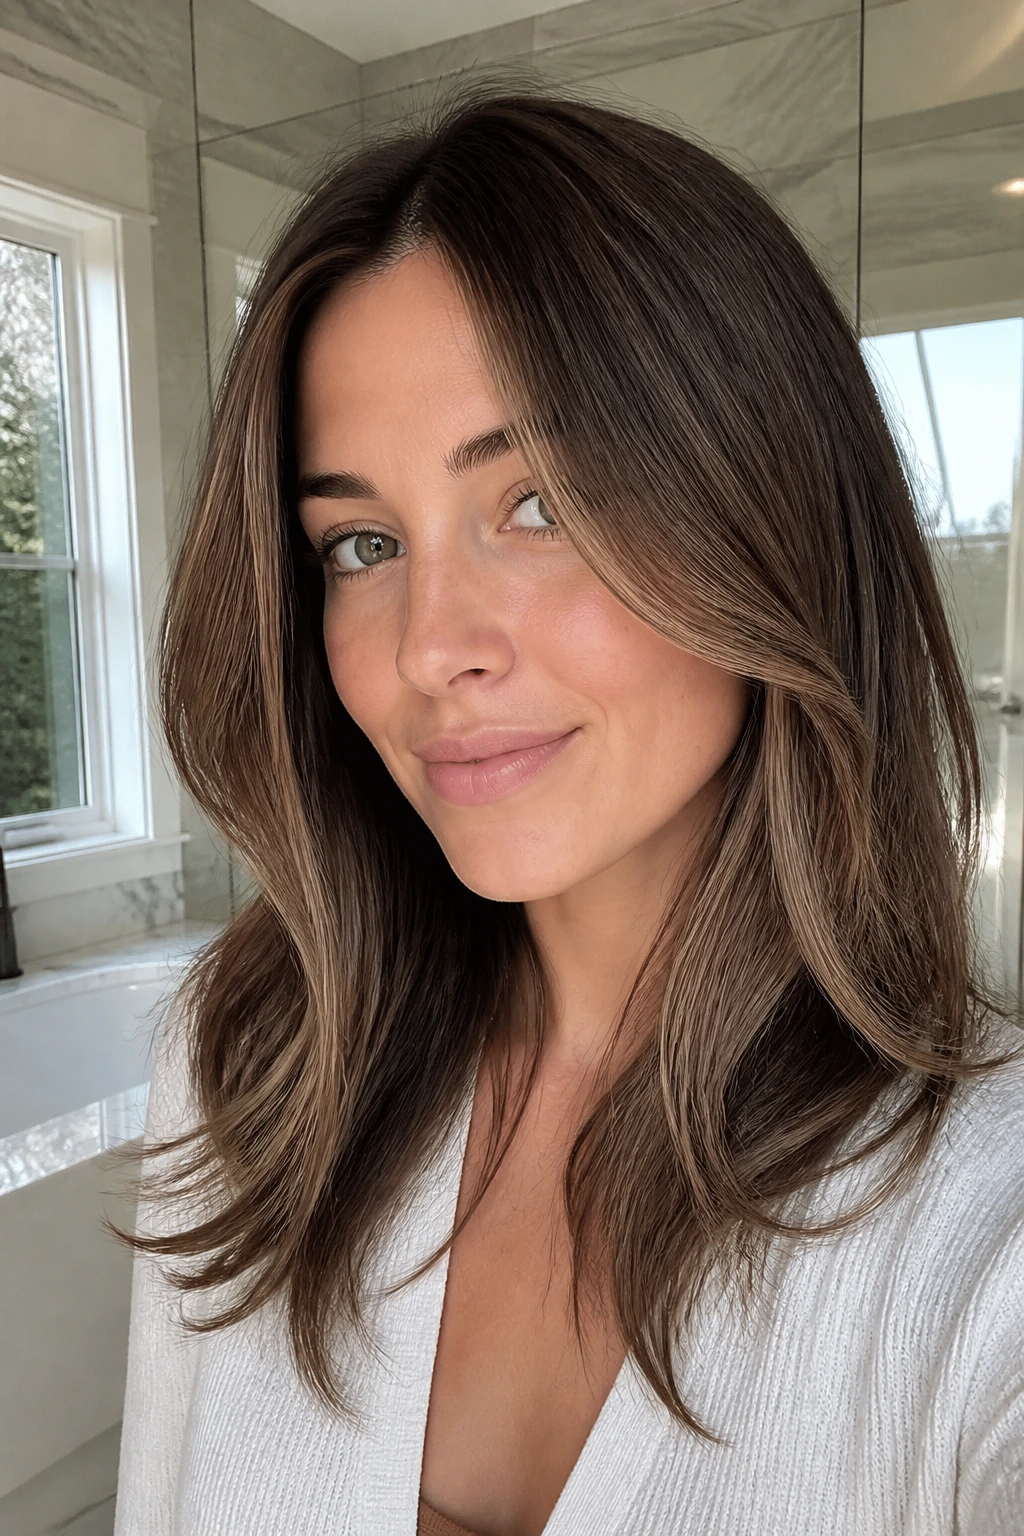
Milk chocolate is softer than deep espresso and richer than light brown, which makes it a very useful middle shade on fair skin. Add a face frame and airy ends, and the whole cut starts moving without getting loud.
The front pieces should sit near the cheekbones and graze the jaw, not flare out in a thick block. That shape keeps the skin bright while still letting the darker base do its job. If your hair is layered, the ends can be a little lighter to keep the silhouette from sinking.
This is one of those looks that rewards a good blow-dry. A round brush and a bit of bend at the bottom show the caramel in motion, which is where the whole color really wakes up.
11. Iced Mocha Ends on a Neutral Brunette Base

Iced mocha is for someone who likes a cooler finish but does not want to look flat. The base stays neutral brunette, then the ends are lifted just enough to feel cool, creamy, and a touch ashier than classic caramel. On fair skin, that cooler edge can look crisp and clean.
The danger is going too gray. Ask for mocha, not silver-brown. You want the ends to feel like iced coffee with a splash of cream, not a toned-down ash disaster that disappears in low light.
This style looks sharp on straight hair and polished lob cuts. It also works well if your hair pulls orange fast, because the cooler gloss can hold the warmth in check a little longer between appointments.
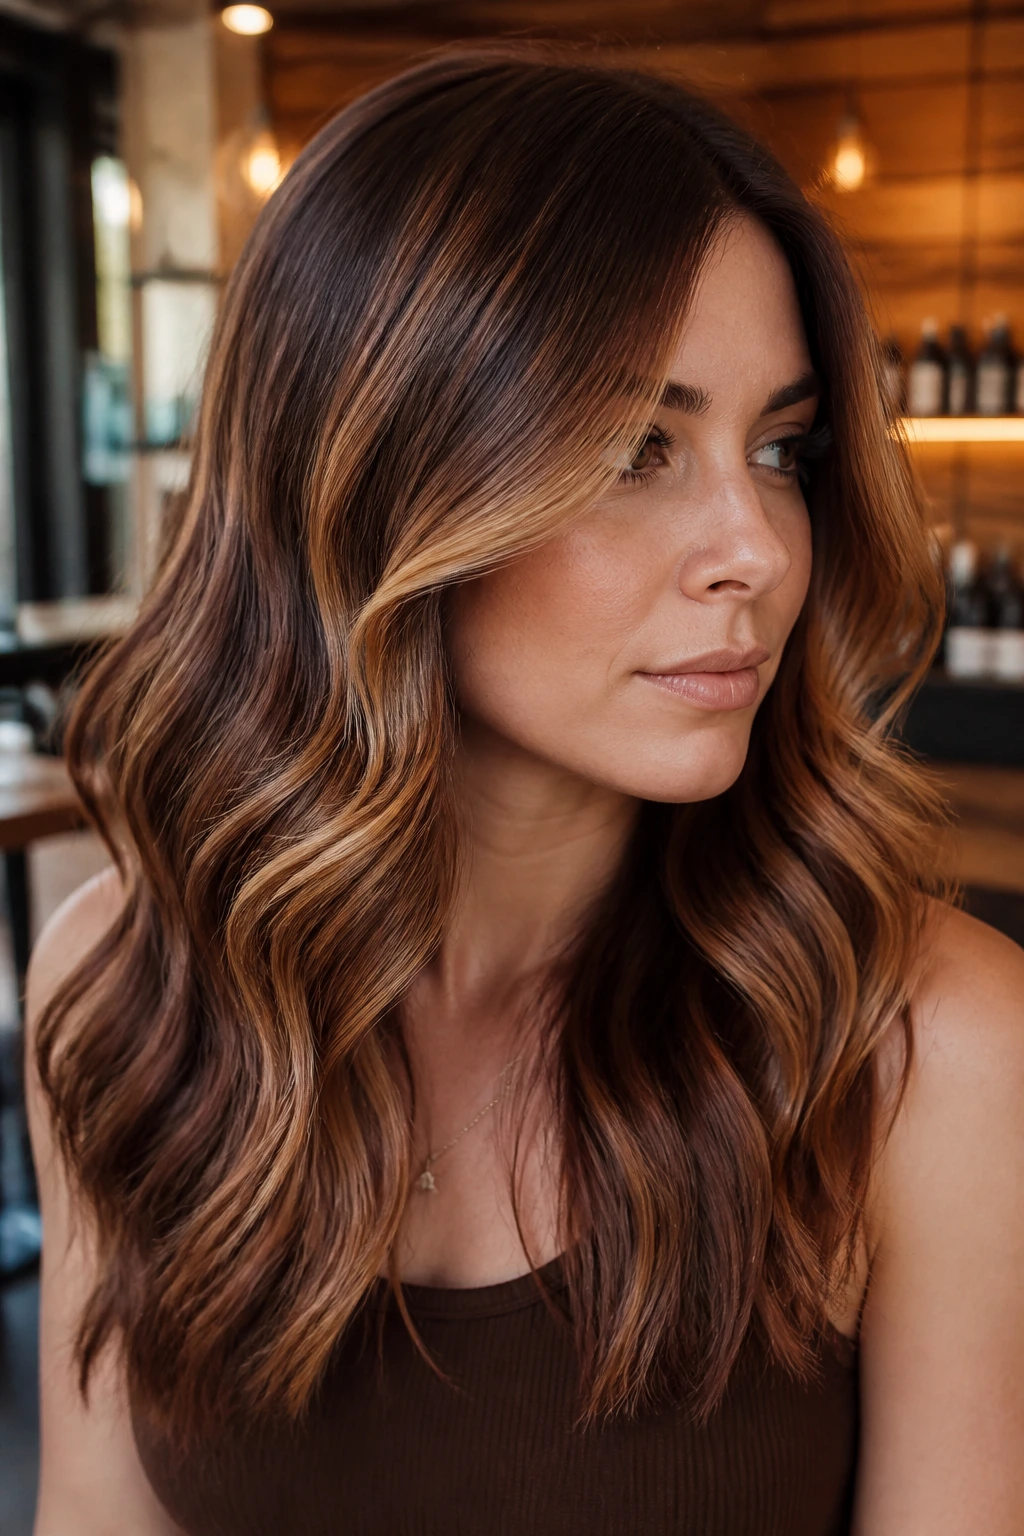
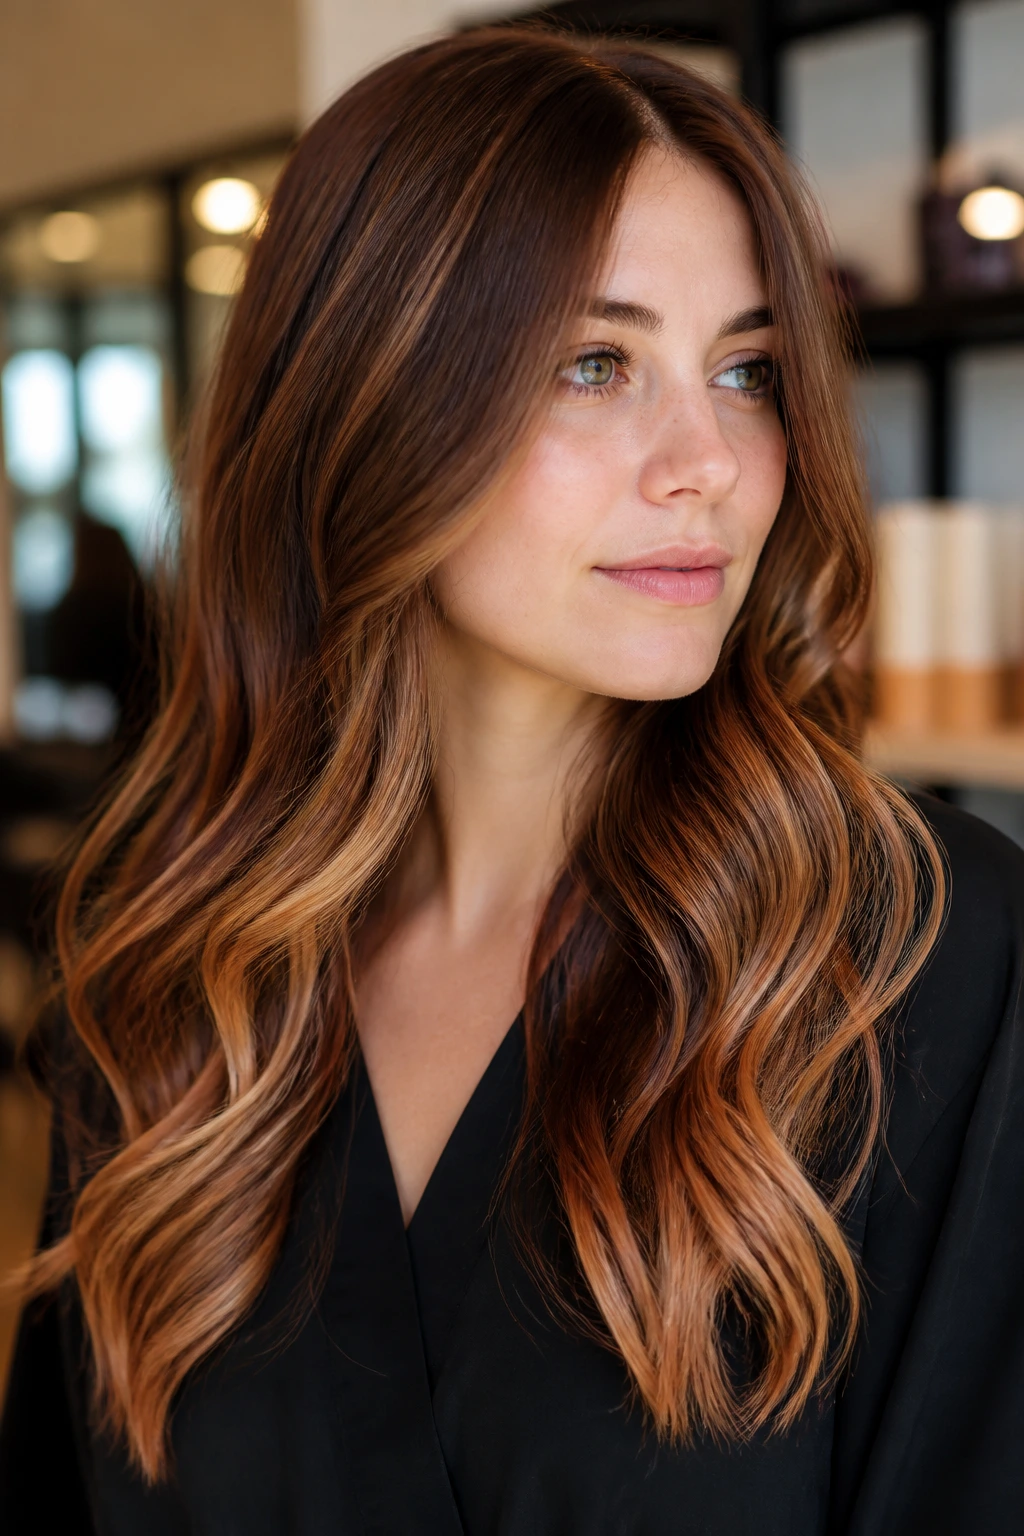
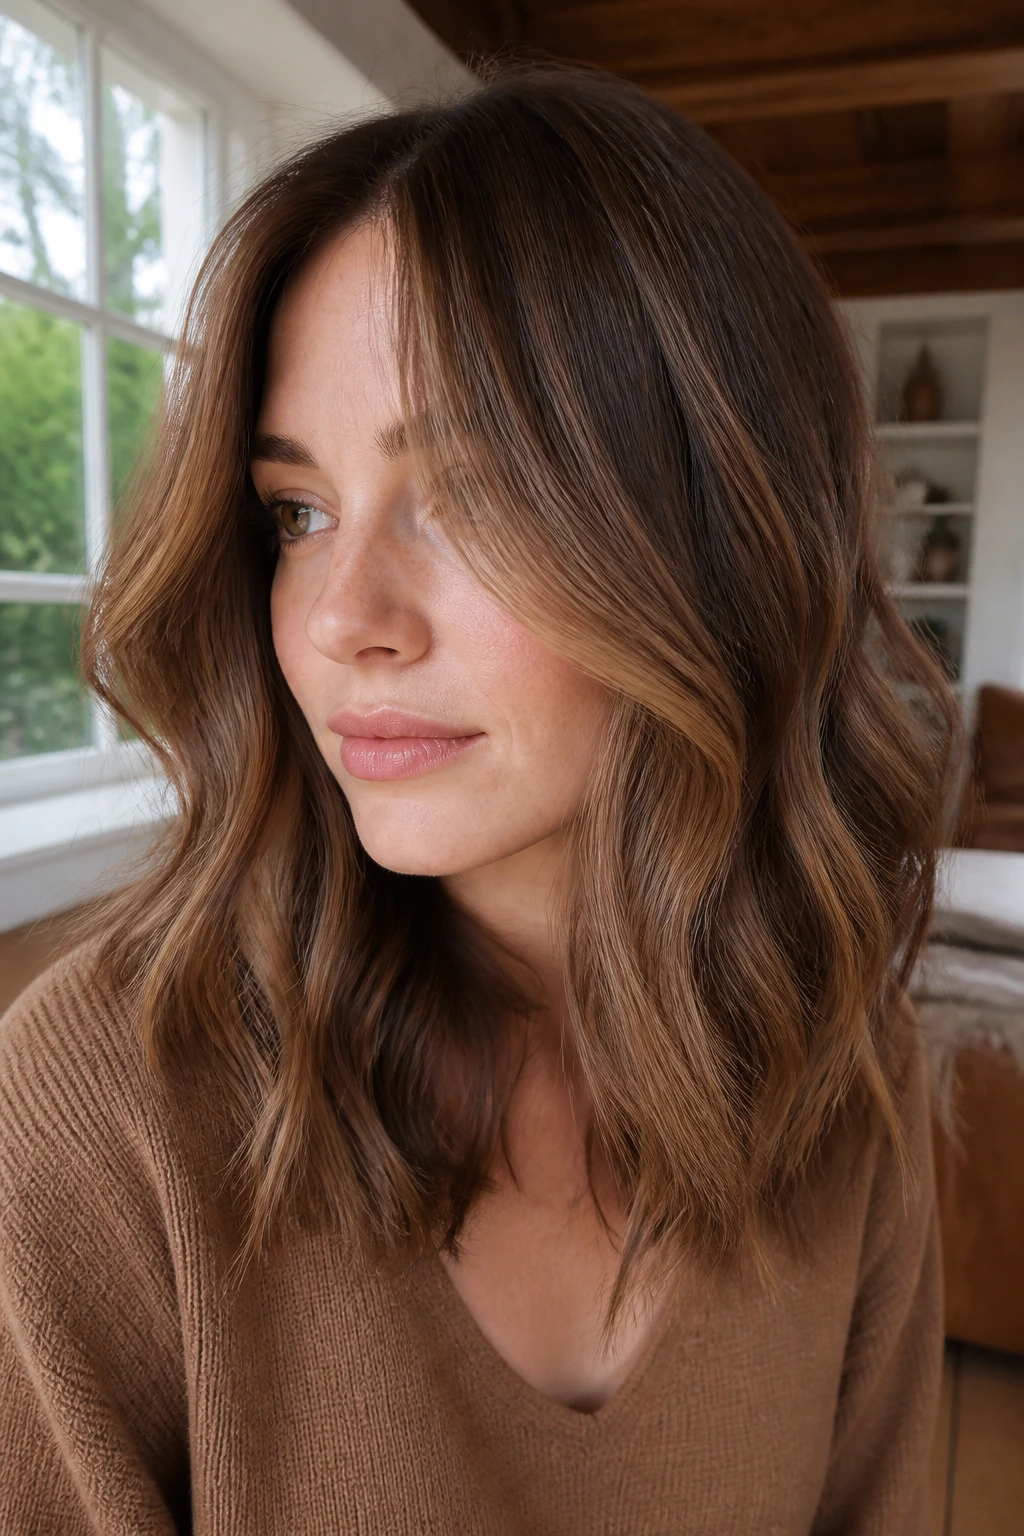
12. Cinnamon Toast Caramel with Warm Dimension
Cinnamon toast caramel is warmer, toastier, and a little more golden than the smoky looks above. On fair skin with peach or neutral undertones, it can add a soft glow that feels natural rather than dramatic. The trick is moderation. A little cinnamon goes a long way.
The root area should stay brunette enough to anchor the face. If the caramel climbs too high, the whole thing starts to glow in a way that can make light skin look pale by comparison. Keep the brightest pieces through the mid-lengths and ends, and the warmth stays flattering.
This is the look for someone who likes softness with a bit of life. Not flashy. Just warm enough to keep the hair from feeling sleepy.
13. Truffle Brunette Dimension for a Glossy Finish
Truffle brunette is deep, rich, and polished, with caramel tucked into the surface rather than painted everywhere. Fair skin benefits from that kind of controlled contrast because the base gives the face shape while the lighter ribbons stop the hair from reading as one solid mass.
What makes this version so good is the gloss. A shiny truffle base catches light differently than a matte brown, so even the darker sections look dimensional. You don’t need much lightness for the effect to show.
Who should wear it
- People with fair skin and dark brows
- Thick hair that can hold deeper depth
- Cuts that look better with shine than with obvious contrast
If you want your brunette to look sleek rather than highlighted, this is the one I’d put near the top of the list.
14. Latte Swirl Layers on Shoulder-Length Hair
Shoulder-length hair is a sweet spot for balayage because the color has enough room to move without disappearing into a long curtain. Latte swirl layers use that length well: soft brown at the top, caramel through the bends, and lightness at the ends so the layers stay visible.
On fair skin, this keeps the cut from swallowing the face. The brightness sits where the hair swings, which means it shows every time you turn your head. That little bit of movement matters more than people think.
If your hair is medium density and you wear it waved most days, this is a very forgiving choice. It grows out quietly and still looks planned when you skip a styling session.
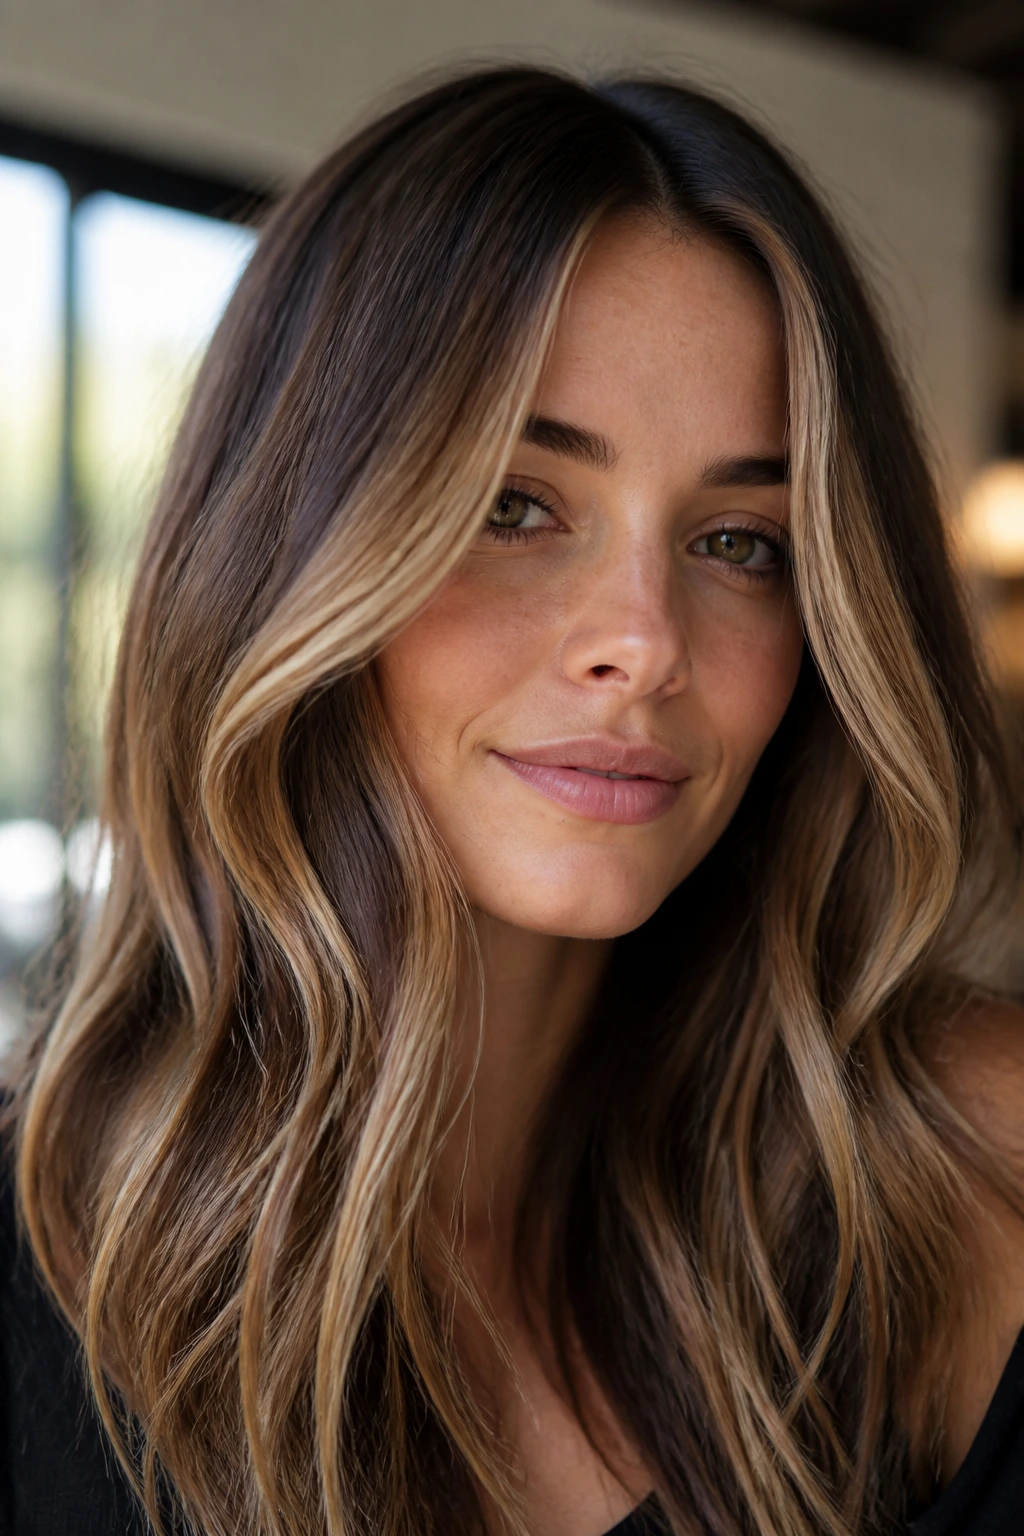
15. Dark Chocolate with Buttery Beige Ends
There’s a sharper edge to this look. Dark chocolate at the root gives fair skin a strong frame, and buttery beige ends bring enough brightness to stop the contrast from looking severe. The beige matters. Yellow ends would turn the whole thing into a loud mismatch.
This is for someone who wants the color to announce itself a little more. The ends should be bright enough to show at a glance, especially in curls or bends, but still creamy enough to sit nicely against pale skin.
The haircut matters here too. Long layers or a softly textured cut help the lighter ends show off. On a one-length cut, the contrast can look heavier unless the placement is very precise.
16. Almond-Cocoa Bronde for a Softer Grow-Out
Bronde sits between brunette and blonde, and almond-cocoa bronde leans into that middle ground with a creamy finish. It’s one of the easiest ways to wear chocolate caramel balayage on fair skin if you want lightness without a stark shift.
The advantage is the grow-out. Because the base is not very dark and the highlights are not very pale, the regrowth line stays mild. That makes it a practical choice for anyone who hates sitting under a foil too often.
The almond note is useful here. It keeps the color from turning muddy and gives fair skin enough warmth to look alive without tipping into brass.
17. Sable Melt with Diffused Caramel
Sable brown has a cool, deep richness that pairs well with fair skin when you want the brunette to feel dominant. Diffused caramel is layered on top in soft strokes, not broad swaths, so the result is more shadow than shine at first glance.
What to notice
The hair should look blended from the side, not striped from the front. That’s the point of a melt: you see the movement when the light shifts, not a hard pattern every time the hair moves.
If your hair is naturally straight, this shade can look especially polished. If it waves, the caramel breaks up just enough to catch the eye without taking over the whole head.
18. Caramel Veil on Neutral Brown Lengths
A veil of caramel is subtle, translucent, and easy to wear. Neutral brown lengths give fair skin enough depth, while the caramel sits on the surface like a thin wash of light. You can keep this almost understated or push it a little brighter around the face.
What I like about this one is its flexibility. It works on new balayage clients who want a small change, and it also works on people growing out older highlights who need something to soften the transition.
The word veil matters here. If you can point to every piece, it’s not a veil anymore. It’s a stripe, and that’s a different mood entirely.
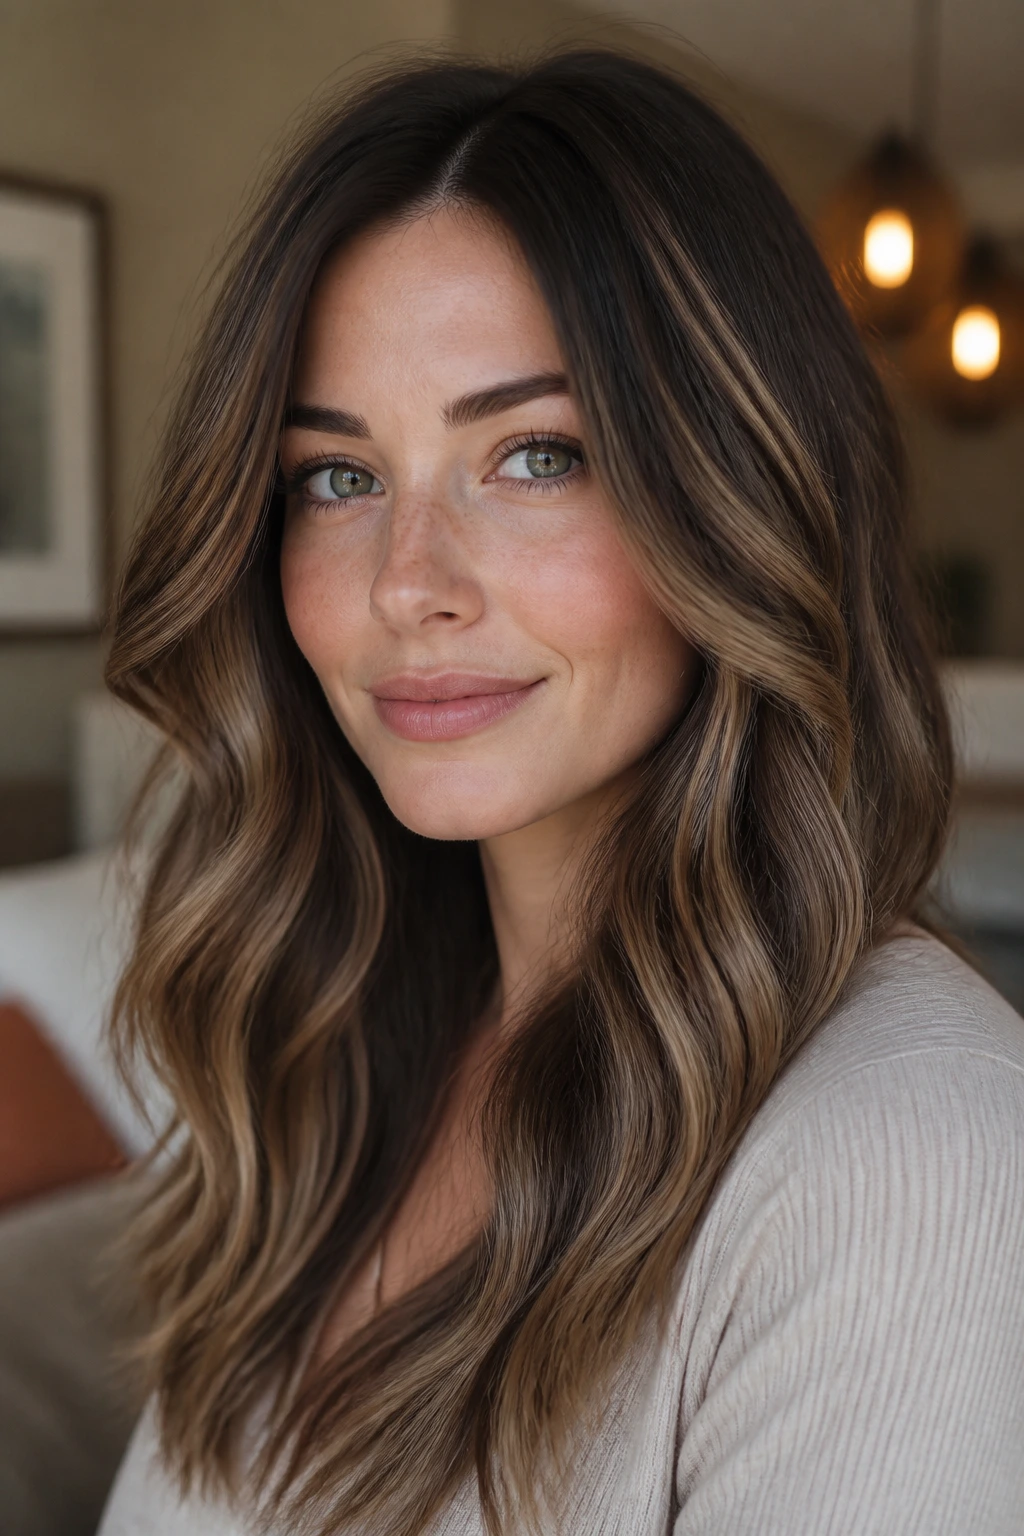
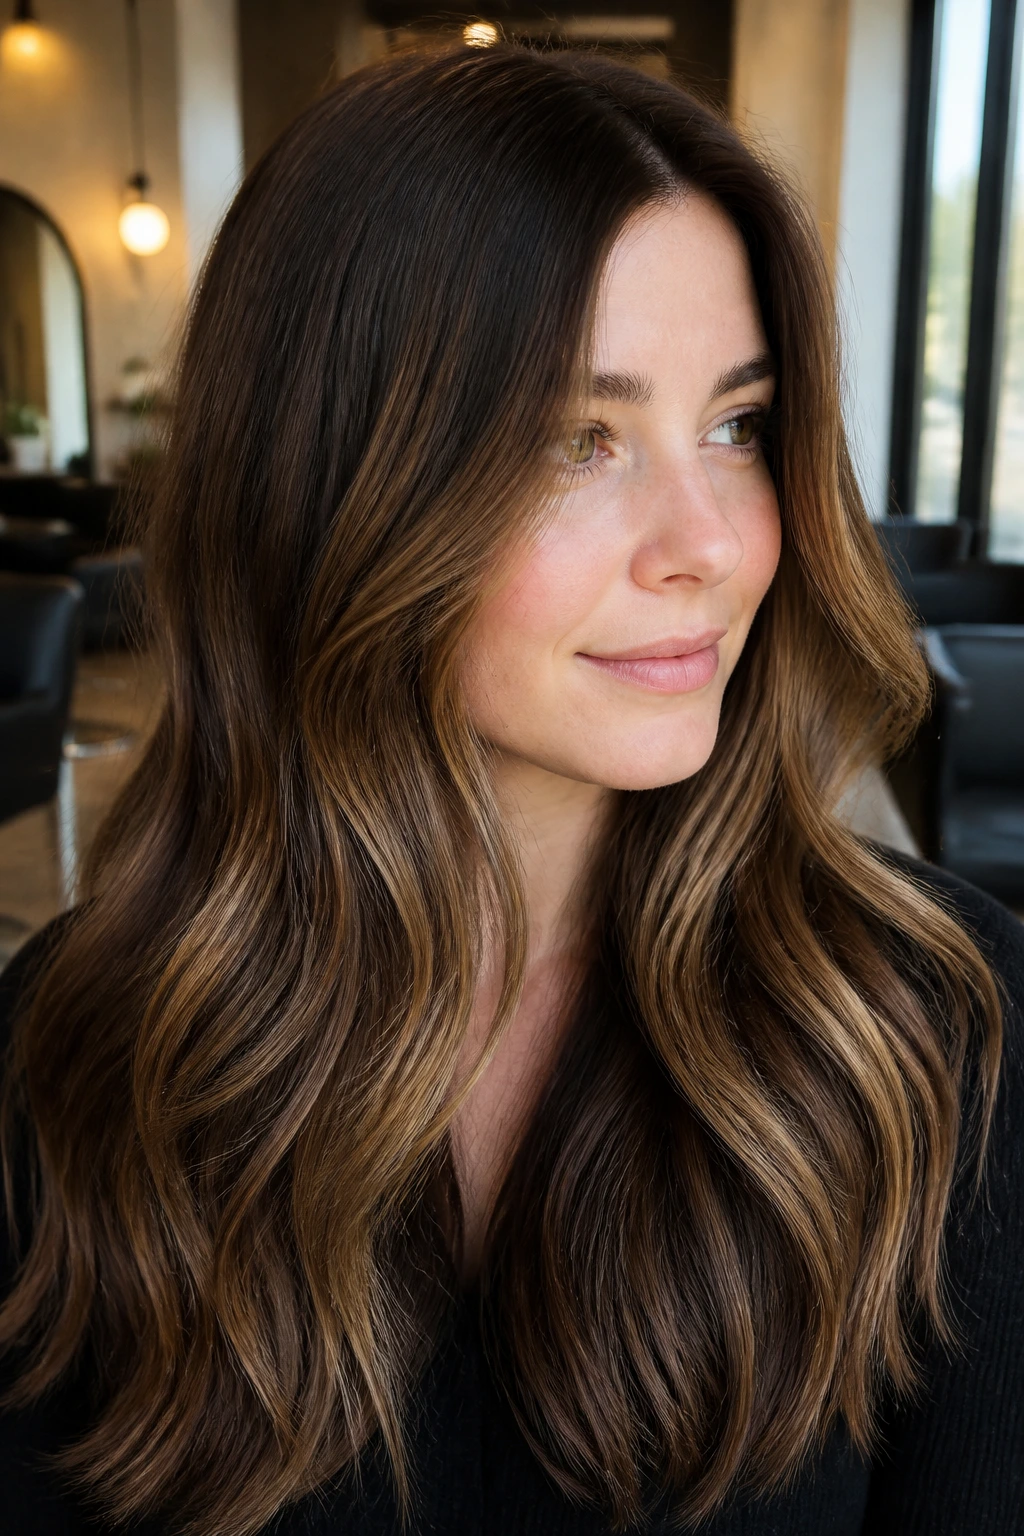
19. Maple Mocha Balayage with Golden Depth
Maple mocha leans warmer, richer, and a bit more golden than the cooler versions on this list. On fair skin with warm undertones, freckles, or a peachy cast, that warmth can be lovely because it echoes the color already in the face instead of fighting it.
The golden depth should stay in the caramel, not the base. If both the root and the lighter pieces turn too warm, the whole head can go brassy fast. Keep the root chocolatey and let the maple come through where the light actually hits.
This is a strong choice for layered hair, especially if you wear soft curls. The waves break the gold into pieces instead of one flat shine.
20. Hazelnut Sweep Along the Hairline
Hazelnut sweep is all about placement. The caramel starts near the hairline and part line, then sweeps back into a deeper brunette body. On fair skin, that front-loaded brightness can make the eyes look sharper and the face look more awake in a way that doesn’t need a full blonding job.
The sweep should be soft, almost brushy. No chunky front panel. Just enough lighter tone to frame the forehead, temples, and cheekbones. If you often wear sunglasses, this placement also keeps the color visible when the rest of the hair is tucked away.
This one photographs nicely in real life because the front pieces move first. That sounds small. It isn’t.
21. Ash Chocolate with Beige Caramel Contrast
If your fair skin leans pink, red, or cool, ash chocolate can be a smart move. The base stays cooler and deeper, while the caramel shifts beige instead of gold, which keeps the whole look from warming up too much against the face.
This is a clean, modern version of the trend. The contrast exists, but it’s restrained. You see the difference most around bends in the hair and at the ends, where the beige pops just enough to keep the color from going flat.
What to ask for
Ask for a cool brunette base, beige rather than honey caramel, and a soft gloss at the sink. That combination keeps the brass down without making the hair look dusty.
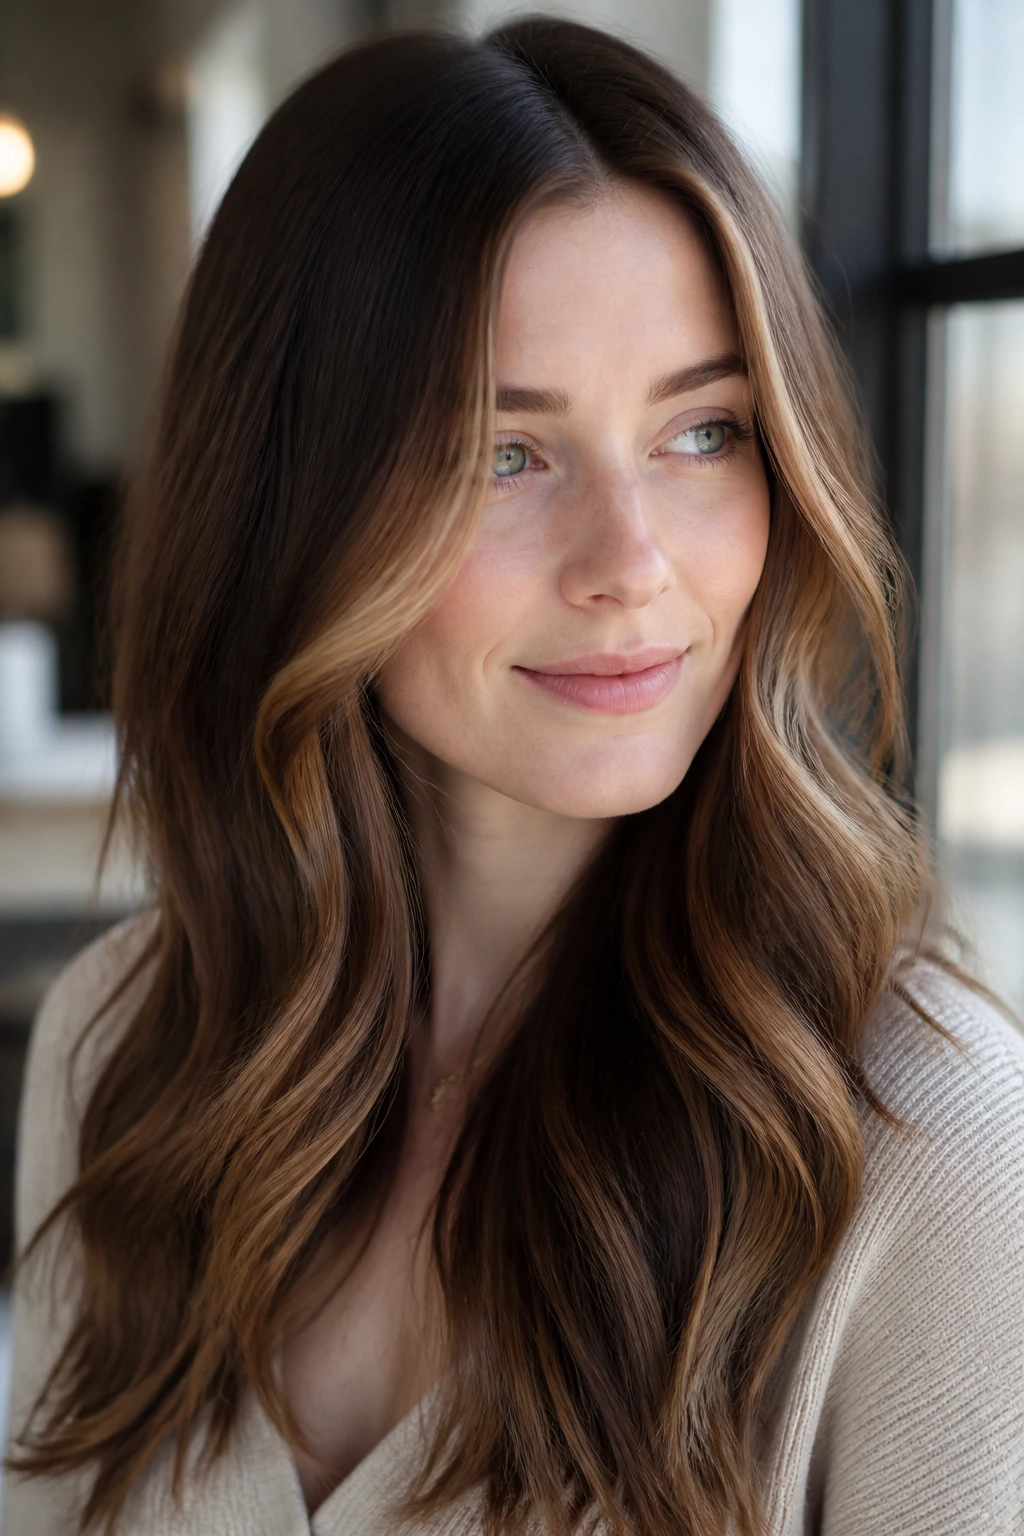
22. Burnished Chestnut with Ribboned Ends
Burnished chestnut sits in that sweet spot between warm and rich. The caramel is painted as ribboned ends, which helps fair skin keep some glow without forcing the color into a full golden look.
This version behaves nicely on long waves and medium layers because the ends do the visual work. If the ribbons are too thick, the look can get heavy; if they’re too thin, you lose the whole point. The middle ground is what makes it useful.
People who like polished brunette shades tend to land here. It still feels dimensional, but it doesn’t ask for the kind of maintenance that bright front pieces do.
23. Espresso Root Shadow with Golden Tips
Espresso root shadow gives you depth right where you need it, and golden tips keep the rest of the hair from feeling severe. On fair skin, that deep root can act like eyeliner for the face. It sharpens the whole silhouette.
The golden tips should stay controlled. A touch of warmth is nice; too much and the tips start pulling orange. Keep the lift gradual, especially if the hair is fine or porous, because porous ends drink up toner fast and can go weird sooner than you expect.
This is a stronger, more obvious choice than some of the softer melts above. It’s good when you want the hair to look styled even when it isn’t.
24. Velvet Cocoa Balayage Bob
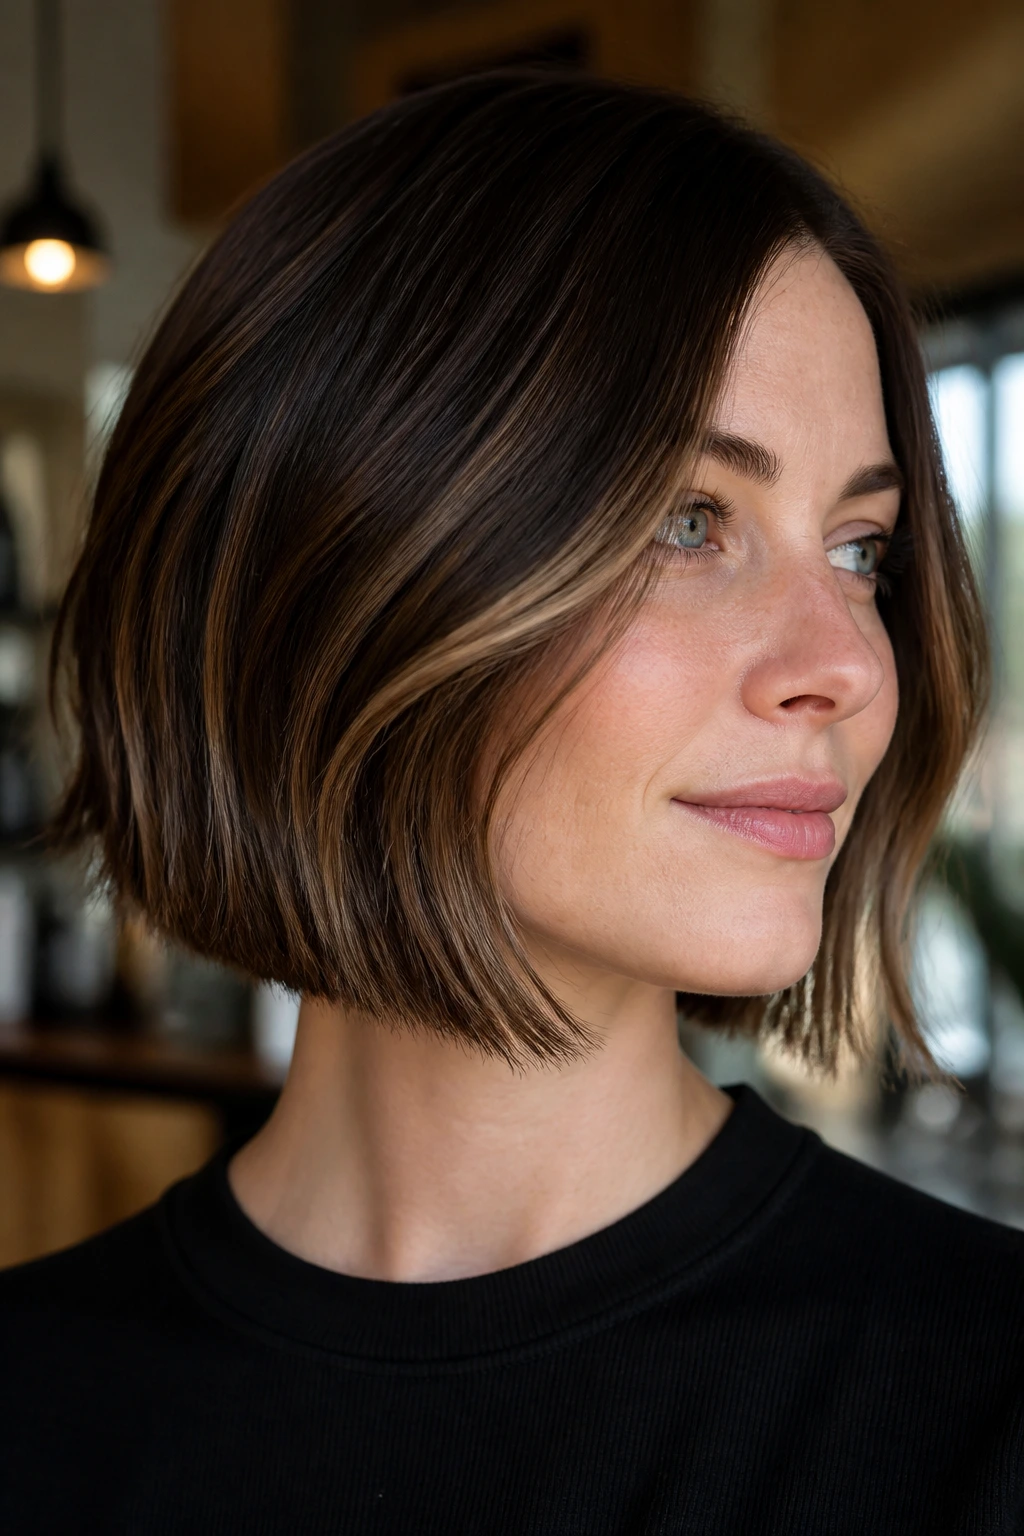
A bob doesn’t need a lot of color to look interesting, but it does need placement with purpose. Velvet cocoa balayage uses small, surface-level ribbons to keep the shape crisp while giving fair skin enough brightness around the jaw and cheek area.
Because the length is shorter, the light pieces need to do more work. Keep them airy. A heavy highlight pattern can make a bob look blocky fast. Thin strokes, placed near the curve of the cut, keep the hair moving.
This is one of my favorite ways to wear brunette-on-brunette dimension. It looks clean from every angle and doesn’t rely on long lengths to make sense.
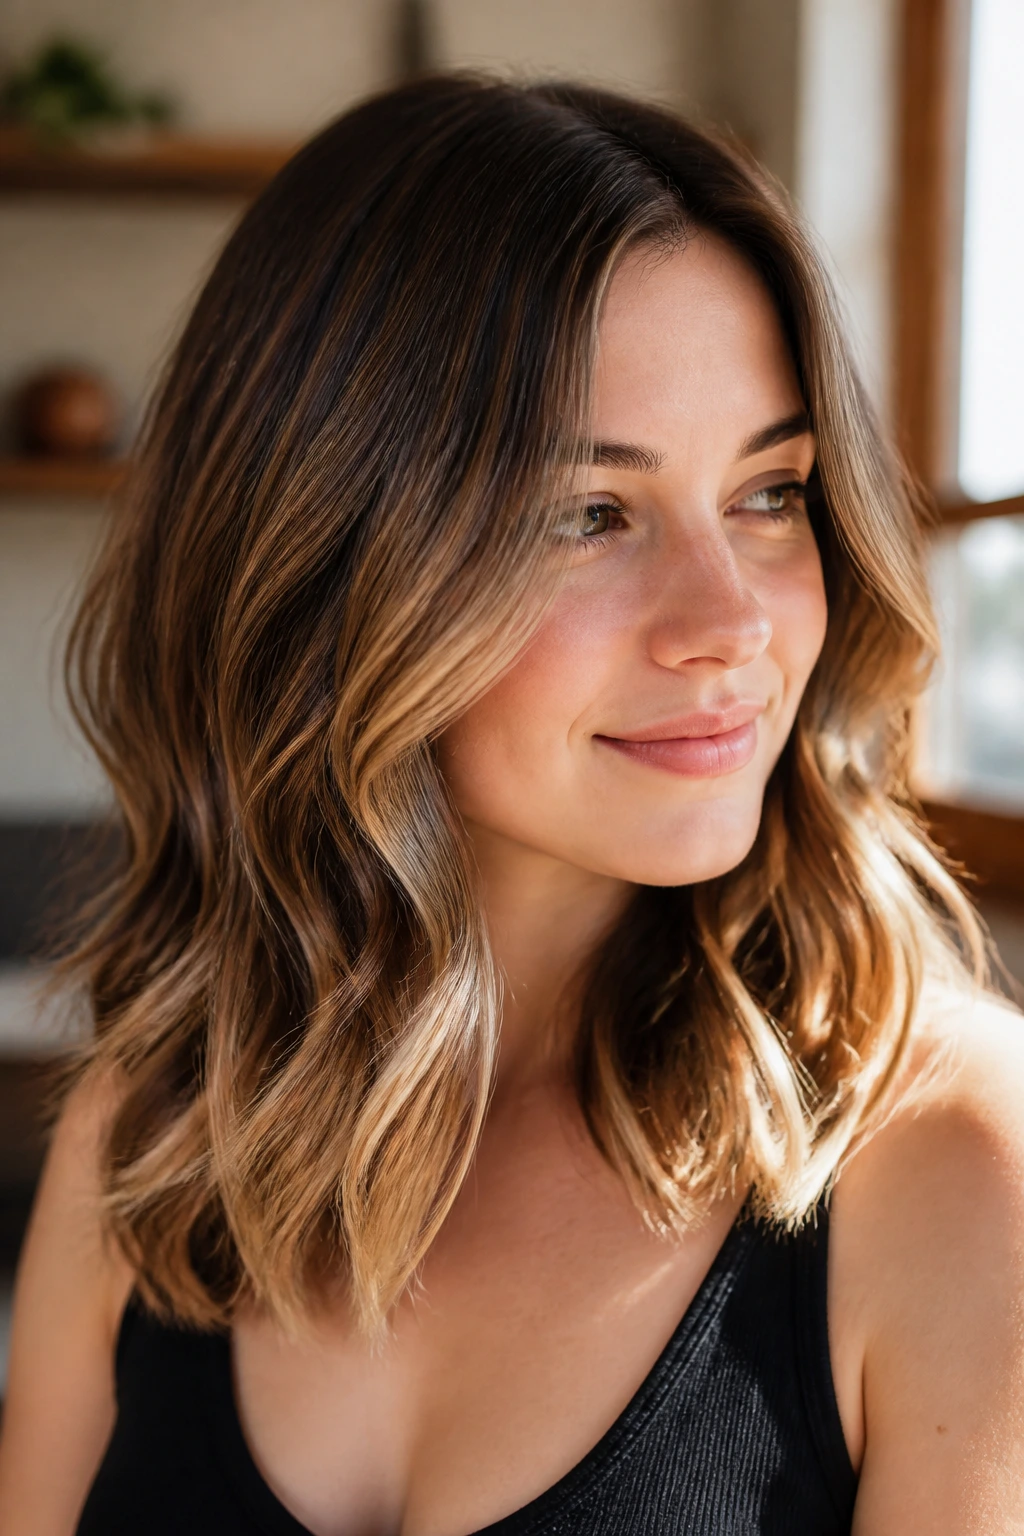
25. Soft Brown-Butter Ombré for a Gentle Finish
If you want the whole idea of chocolate caramel balayage for fair skin without a loud contrast, this is the calmest route. Soft brown at the top, buttered caramel at the bottom, and a gradual fade between the two give the hair a gentle finish that still has shape.
The ombré should feel like a slow slide, not a jump. That’s the difference between pretty and patchy. The lighter ends should stay creamy, not yellow, and the root should keep enough depth to stop fair skin from looking washed out.
This is the version I’d point a first-timer toward. It is easier to live with, easier to grow out, and less likely to feel fussy when you miss a salon visit by a couple of weeks.
Why Chocolate Caramel Balayage Flatters Fair Skin
Fair skin needs contrast more than it needs more color. That’s the part people miss. A flat brunette can look dull against pale skin, while a too-bright caramel can feel loud and clash with pink or cool undertones. Chocolate caramel balayage sits in the middle and gives the face structure without flooding it with light.
The most flattering versions usually keep the root between a level 5 and 6 brown and lift the ribbons or ends to a level 7 or 8 caramel. That spread is enough to show dimension, but not so much that the hair turns into a blonde project. On fair skin, that middle range tends to look cleaner in daylight and kinder under indoor lighting.
Placement matters just as much as tone. Brightness near the face opens things up fast, but if every lighter piece sits at the very top, the contrast can look stripy. Softly painted mid-lengths, face-framing pieces, and a shadowy root keep the color sitting close to the head instead of hovering over it.
Picking the Right Undertone for Your Skin
The wrong caramel is the fastest way to ruin this look. Not the haircut. Not the styling. The undertone.
Cool Fair Skin
If your skin leans pink, red, or blue, choose mushroom brown, smoky mocha, ash chocolate, or beige caramel. These tones keep the hair from heating up too much against the face. Skip orange-gold caramel unless you want the warmth to be obvious.
Neutral Fair Skin
Neutral fair skin can wear the widest range. Beige caramel, toffee, walnut, and soft chestnut all make sense here, especially if your brows and eyes are a medium brown. You can push warmer or cooler based on how bold you want the finish.
Warm Fair Skin
If your skin has peach, golden, or freckled warmth, maple mocha, honeyed caramel, and burnished chestnut usually look easy. Keep the root rich and the lighter pieces creamy, not yellow. That keeps the brightness from turning sticky.
If you’re unsure, start beige. Beige is usually the least annoying choice, and hair color should not be annoying.
Placement Tricks That Keep the Color Soft
A good balayage looks like it was born in the hair, not pasted on top of it. That starts with placement.
The brightest pieces should live where the hair moves: around the face, through the outer layers, and across the ends where the wave pattern bends. If the lightest caramel is packed into one top section, fair skin can look even paler by comparison. Spread the brightness so the eye keeps traveling through the hair.
Root shadow is the other non-negotiable. Even a small shadow — one level deeper than the surrounding brown — gives the color somewhere to rest. It also keeps the regrowth from looking like a hard line a few weeks later.
For curls and waves, ask your colorist to paint around the curl clumps, not through them at random. That keeps the dimension visible in motion. For straight hair, softer ribbons and a glossy finish matter more because the tone has less texture to hide behind.
How to Brief Your Colorist
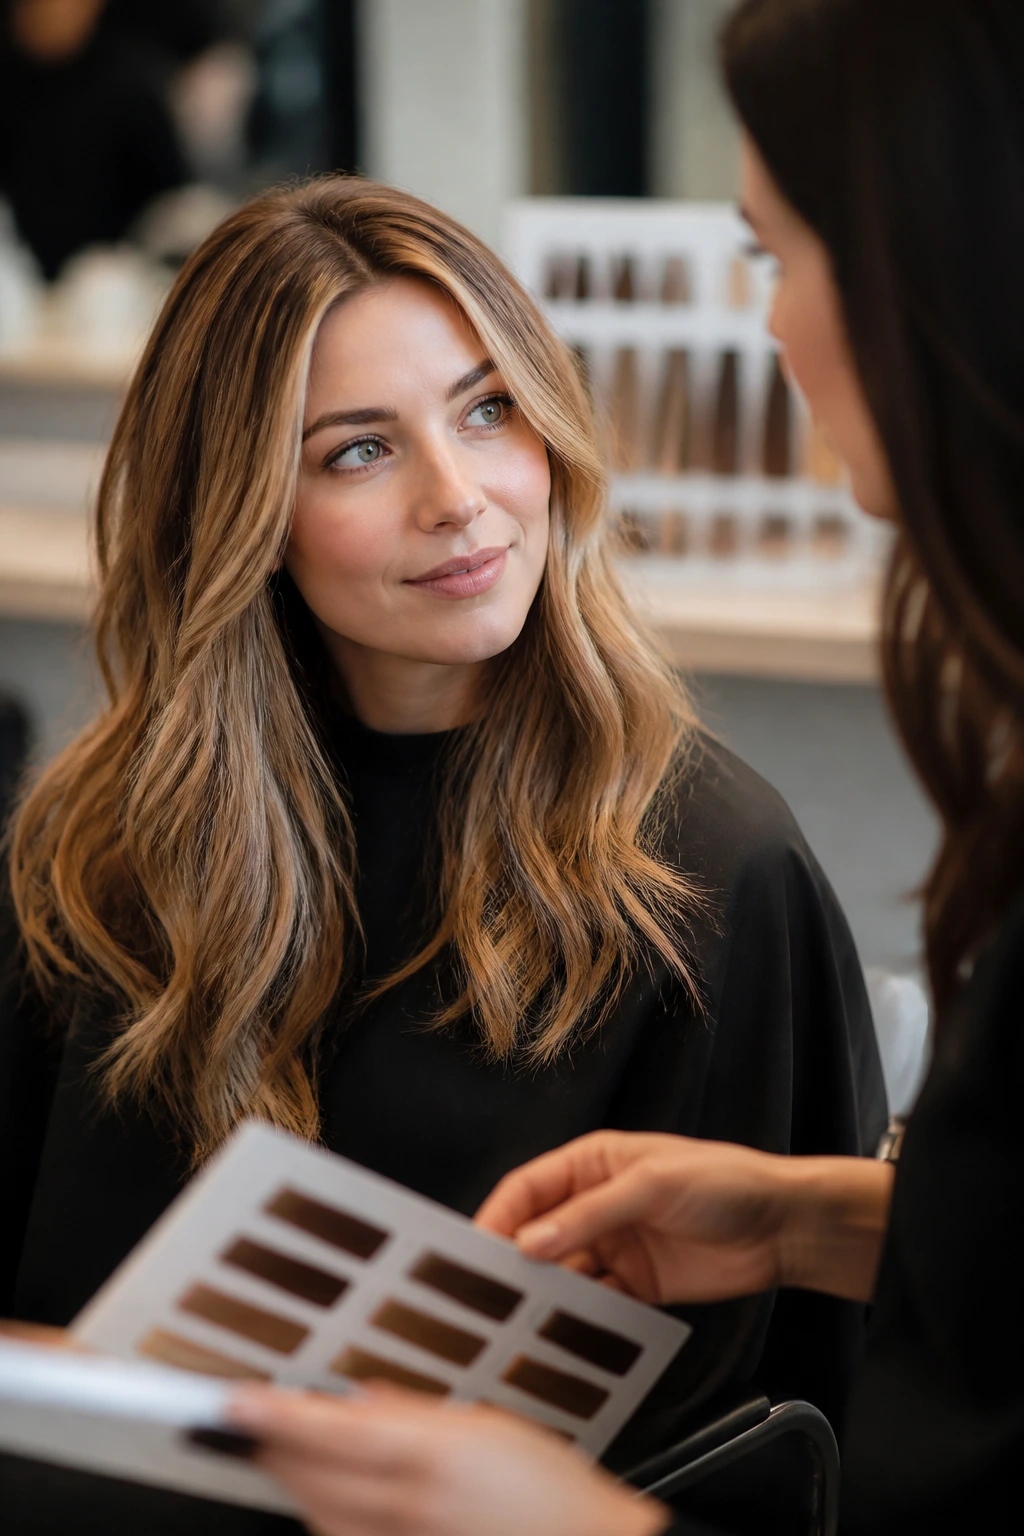
Bring photos. Real ones. Not twenty screenshots, and not pictures with completely different skin tones than yours. Three is enough if they show tone, placement, and brightness separately.
Say what you want the hair to do, not only what color it should be. “I want the front brighter than the back” helps more than “I want caramel.” So does “I can only come in every 10 to 12 weeks” or “I heat-style twice a week.” Those details change the technique.
A few useful phrases:
- “Keep the root shadow soft.”
- “I want beige caramel, not orange-gold.”
- “The brightness should sit around the face and mid-lengths.”
- “I want a grow-out that stays clean.”
If you have a history of brassiness, say so. If your hair is porous, say that too. A colorist can adjust the gloss and tone, but only if they know what the hair has been through.
Styling Moves That Show Off the Blend
Chocolate caramel balayage can look flat if you style it the wrong way. A tiny bend does more for the color than a perfectly straight sheet of hair ever will.
-
Loose waves: Use a 1-inch curling iron or wand and leave the ends slightly undone. The ribbons open up, and the caramel catches the bends instead of disappearing.
-
Straight and glossy: If your cut is blunt or your hair is thick, a sleek blowout can make the chocolate base look richer. A shine serum on the ends helps the lighter pieces stay clean.
-
Half-up styles: These show off halo placement and money pieces fast. They also keep the front brightness from getting lost under layers.
-
Low ponytails and clips: Good for showing off face-framing pieces, especially on shoulder-length hair. Pull a few strands loose near the temples so the lighter sections don’t vanish.
Heat is a tool here, not a requirement. Air-dried texture works too, especially if the balayage is painted in ribbons that have enough movement on their own.
Tools and Products That Keep the Shade Clean
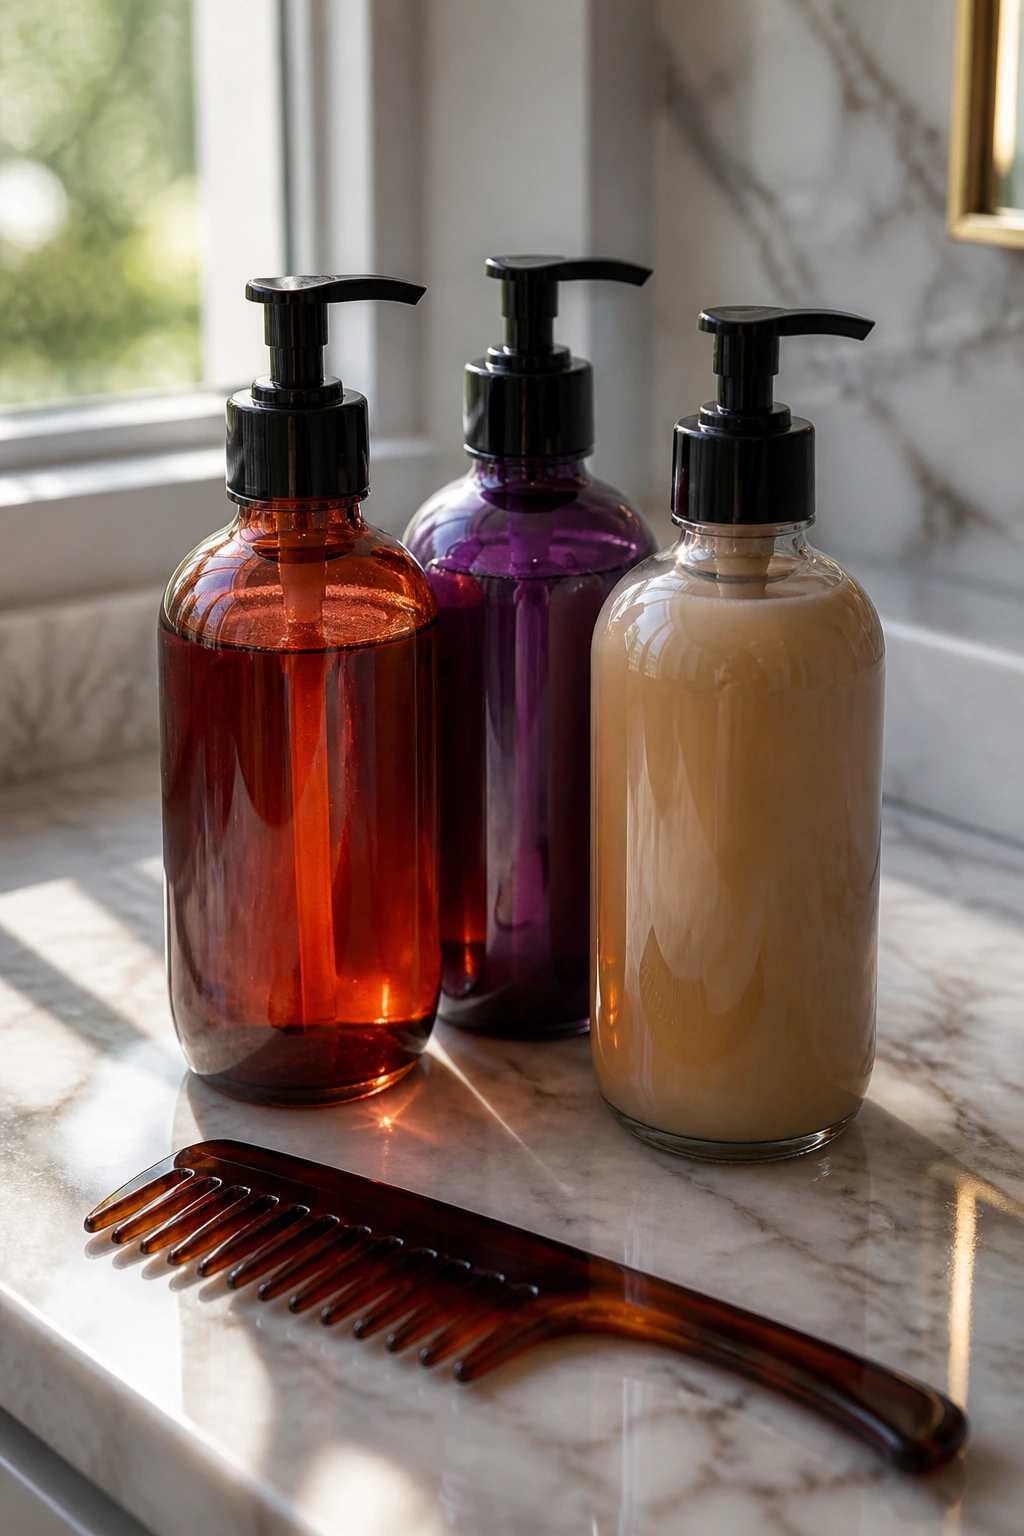
You do not need a bathroom full of hair products. You do need the right few.
-
Color-safe shampoo: A sulfate-free formula helps the caramel stay glossy longer and keeps the brunette from looking stripped.
-
Rich conditioner: Pick one with enough slip to smooth the mid-lengths and ends, especially if they were lightened.
-
Weekly mask: Use it once a week on the lighter pieces if they feel rough or start snagging when you comb them.
-
Heat protectant: Every time you blow-dry, curl, or flat-iron. No exceptions if you want the gloss to last.
-
Purple shampoo: Useful if the caramel starts to go too yellow or brassy, but don’t overuse it. Once every 1 to 2 weeks is usually enough.
-
Blue shampoo: Better if the brown base starts to look orange rather than yellow. Use it sparingly and only where brass shows.
-
Wide-tooth comb: Helpful for detangling wet hair without snapping the lighter pieces.
-
Microfiber towel: Reduces roughing up the cuticle after washing, which helps the color reflect better.
-
Shower filter: Optional, but worth it if your water is hard and your caramel goes muddy fast.
Keeping Chocolate Caramel Balayage Fresh Between Visits
Balayage grows out softer than traditional highlights, but it still needs a little care. Wash too often and the caramel fades. Go too long without a gloss and the color starts to look tired instead of dimensional.
Aim for 2 to 3 washes a week if your scalp allows it. Use lukewarm water, not hot water, because hot water opens the cuticle and lets toner slip out faster. Once a week, add a deep conditioner to the ends and leave it on for 5 to 10 minutes.
If your caramel leans brassy, use purple shampoo once every 7 to 10 days and leave it on for only 1 to 3 minutes at first. If the base starts looking orange, blue shampoo can help, but it is easy to overdo. A little goes a long way.
Most people with this color do well with a gloss or toner refresh every 4 to 8 weeks, depending on how light the caramel is and how often they heat-style. A full balayage refresh usually lands around 8 to 12 weeks if you want the blend to stay crisp. If you like a grown-out look, you can stretch that longer. The roots will forgive you.
Common Mistakes That Throw Off the Look
-
Choosing caramel that’s too orange: The hair may look warm in the chair and brassy by the next day. Ask for beige, mocha, or toffee if your skin is fair and cool.
-
Putting all the brightness at the top: That creates a hard band around the crown and can make the ends disappear. Spread the lighter pieces through the mid-lengths and lower sections.
-
Skipping root shadow: Without a little depth at the root, the color can look flat and over-lightened. A soft shadow keeps the balayage from looking pasted on.
-
Over-toning into ash: Ashy toner can save brass, but too much of it makes caramel look dull and muddy. Stop once the warmth is controlled, not erased.
-
Forgetting the haircut: A blunt, heavy cut needs placement that opens it up. Fine hair needs thinner ribbons. Curly hair needs a different map than straight hair. The color has to match the cut.
-
Using purple shampoo like a daily cleanser: That’s a fast road to a dry, chalky finish. Use it occasionally, not as your main shampoo.
Variations and Adaptations to Try
-
Cool Smoke Edit: Ask for more mushroom brown and beige caramel, with no gold at the front. This version works well if your fair skin is pink or easily flushed.
-
Golden Maple Edit: Push the caramel warmer and slightly richer, but keep the root deep enough to balance it. Good for freckles, peach undertones, and softer waves.
-
Face-Frame First: Brighten only the front money piece and leave the rest of the balayage subdued. This is the simplest way to test whether you want more lightness later.
-
Curly Halo Placement: Place the caramel around curl clumps and the outer halo, not in thick ribbons. The color will show in motion instead of getting swallowed by texture.
-
Soft Bronde Fade: Lighten the base a little more and keep the caramel close to beige. That’s the route for people who want something between brunette and blonde without a hard jump.
-
Gloss-Only Refresh: If you already have balayage, ask for a demi-permanent gloss rather than new lightening. It can revive chocolate and caramel tones without stressing the hair again.
Frequently Asked Questions

Will chocolate caramel balayage work on very fair skin?
Yes, as long as the caramel is tuned carefully. Very fair skin usually looks better with beige, mocha, or smoky caramel than with bright orange-gold pieces.
Is balayage less damaging than regular highlights?
Usually, yes, because the lightener is painted where it’s needed instead of packed into every section. That said, any lightening process can dry the hair, so the aftercare still matters.
How often will I need toner?
Most people need a gloss or toner every 4 to 8 weeks, depending on how warm their hair pulls and how often they wash. If the caramel starts looking dull, the toner has faded before the balayage itself is gone.
Can I get this look if my hair is dark brown?
Yes, but the lighter pieces may need more than one session if your hair is very dark or resistant. A good colorist will usually work toward chocolate-caramel depth in stages rather than forcing it in one sitting.
What if my hair turns orange after lightening?
That means the lift was warm, and the toner needs to be adjusted. Blue-leaning glosses or a cooler beige caramel can calm it down, but the fix depends on how porous the hair is.
Does this style work on fine hair?
It can, and babylights are often the nicest version for fine texture. Keep the ribbons thin so the hair still looks full instead of see-through at the ends.
Should I ask for balayage or ombré?
Ask for balayage if you want scattered, hand-painted dimension. Ask for ombré if you want a visible fade from darker roots to lighter ends. A lot of these chocolate-caramel looks borrow from both.
Can I maintain it at home?
You can protect it at home, but the gloss and placement still need a salon hand. Use color-safe shampoo, heat protectant, and a weekly mask, and you’ll keep the color cleaner between visits.
The Blend That Grows Out Softly
The nicest thing about chocolate caramel balayage on fair skin is that it doesn’t have to look loud to matter. A controlled brunette base, a caramel tone that respects your undertone, and placement that follows the haircut instead of fighting it can change the whole face in one appointment.
The version that wins is usually the one with restraint. A soft root shadow. A beige caramel instead of a loud gold. A few brighter pieces near the face and a little breathing room everywhere else. That’s what keeps the color looking deliberate when the mirror is kind and still looking good when the overhead light is not.
Bring the same photo to your next appointment, ask for one level of depth at the root, and keep the caramel one shade cleaner than you think you need. That tiny bit of discipline is what makes the whole look hold together.