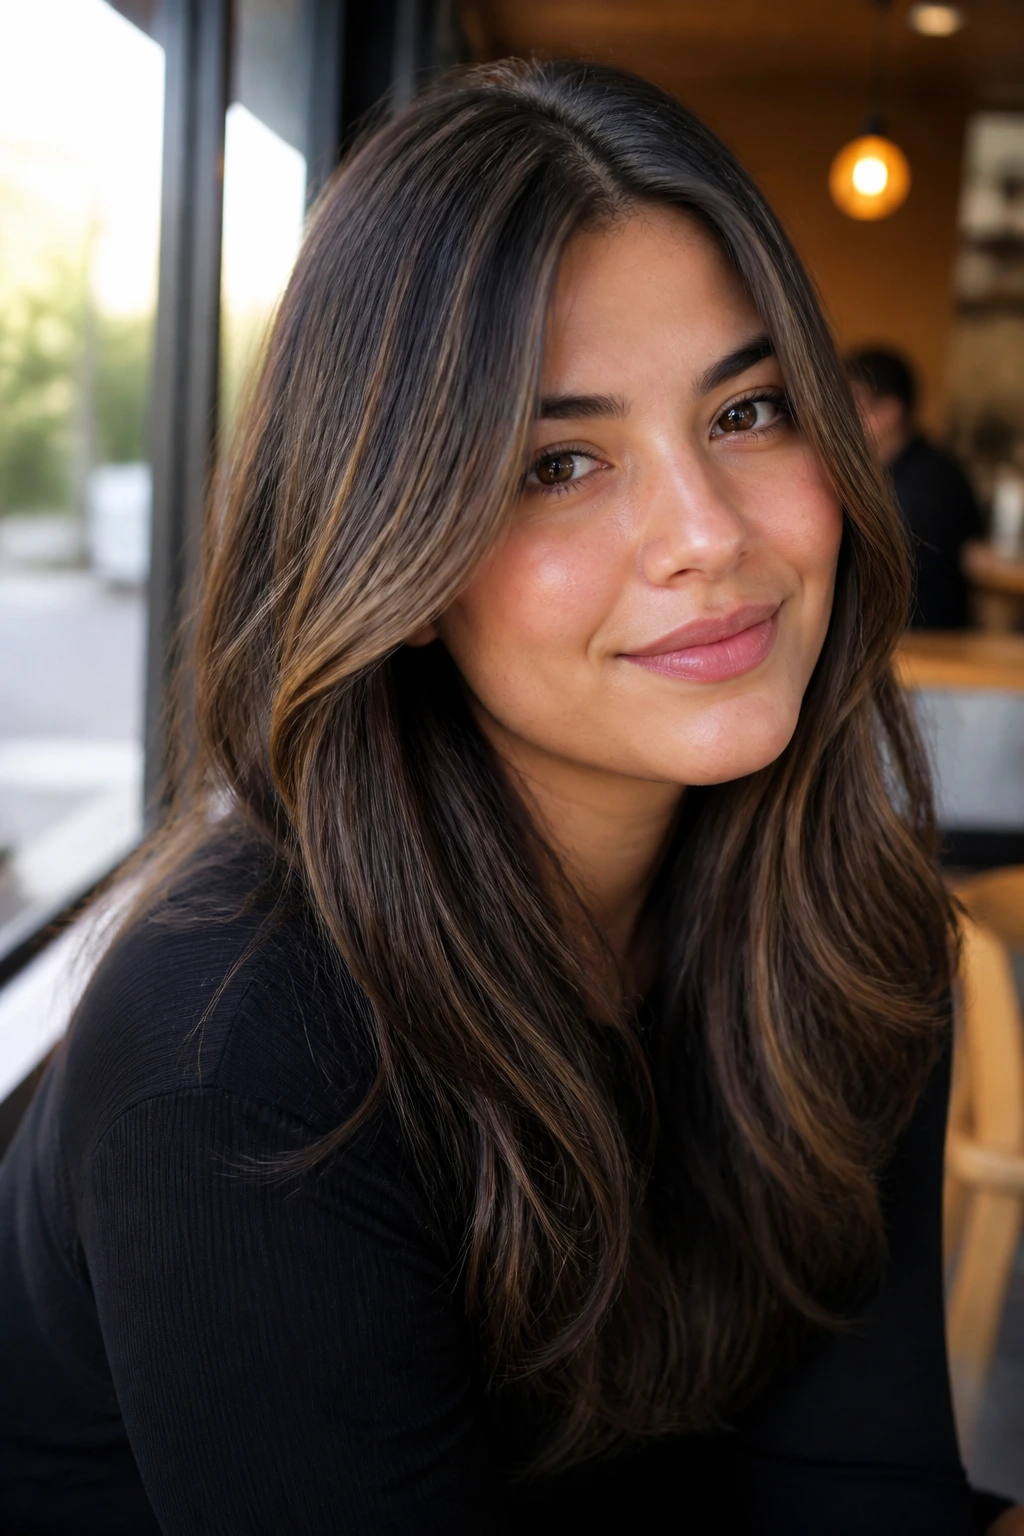
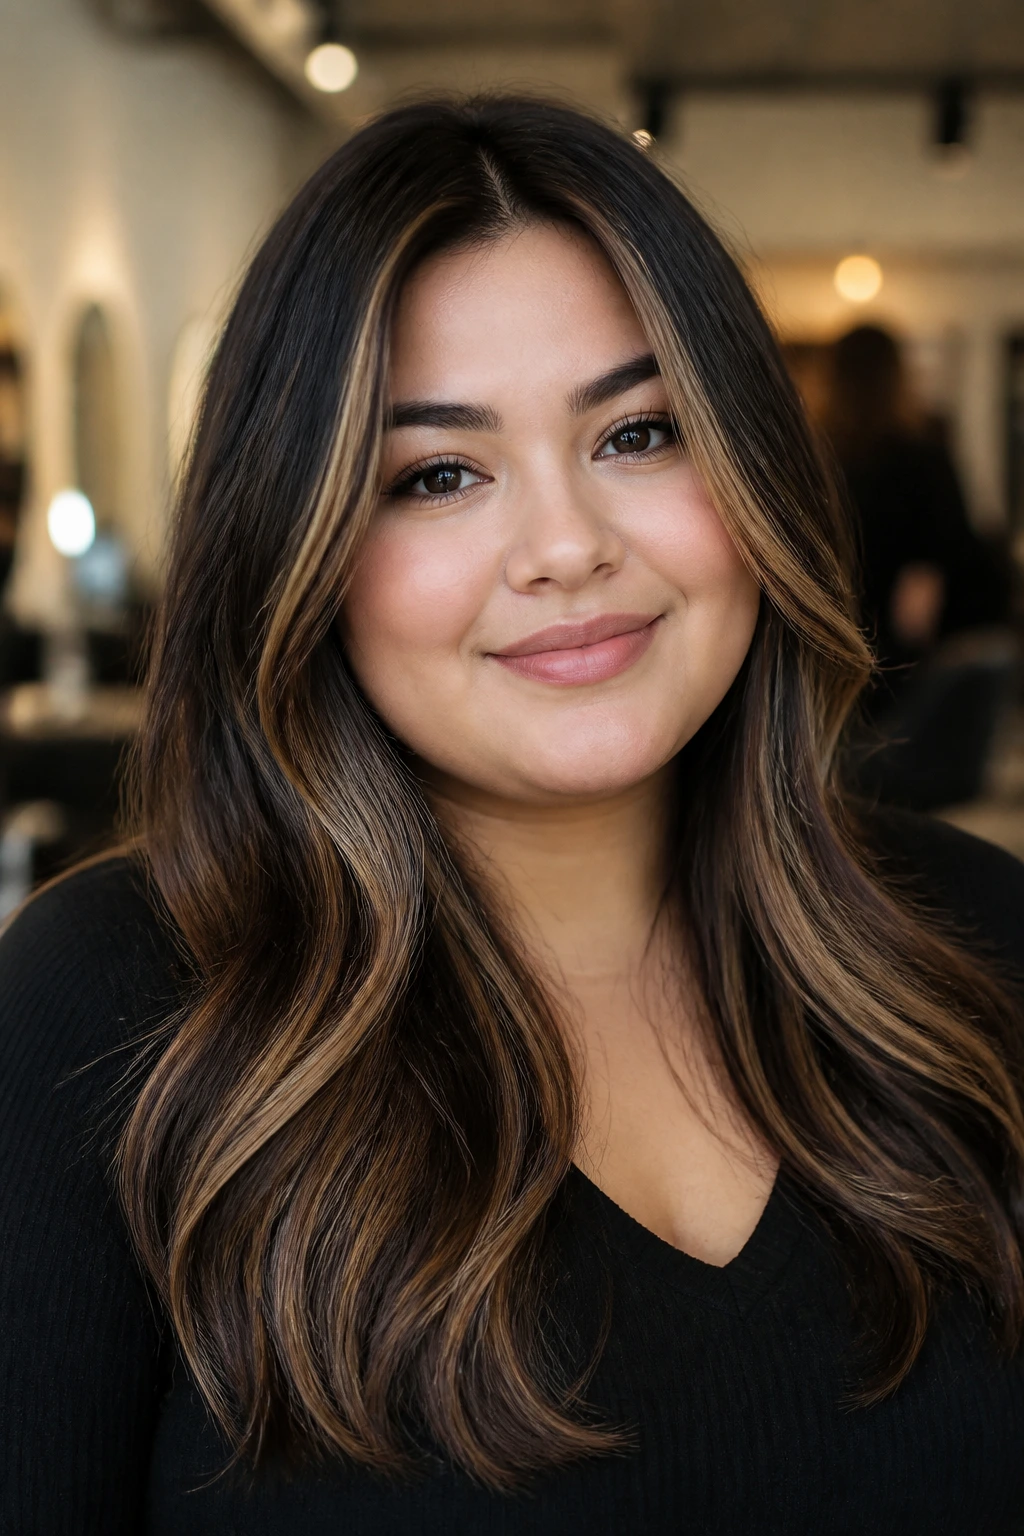
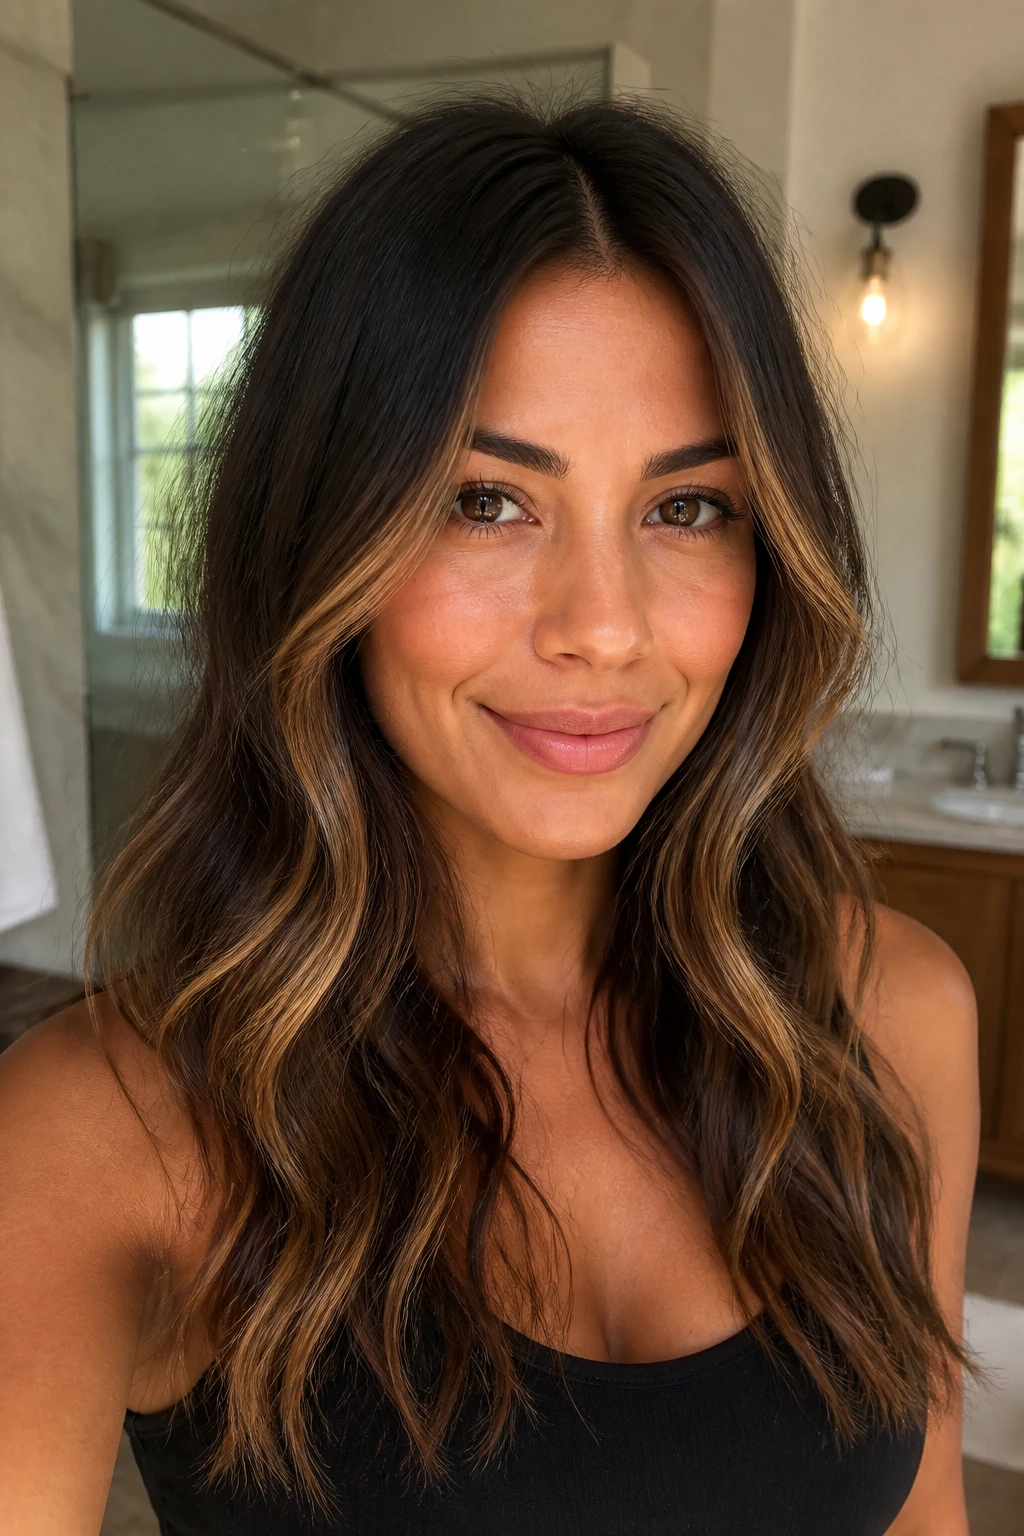
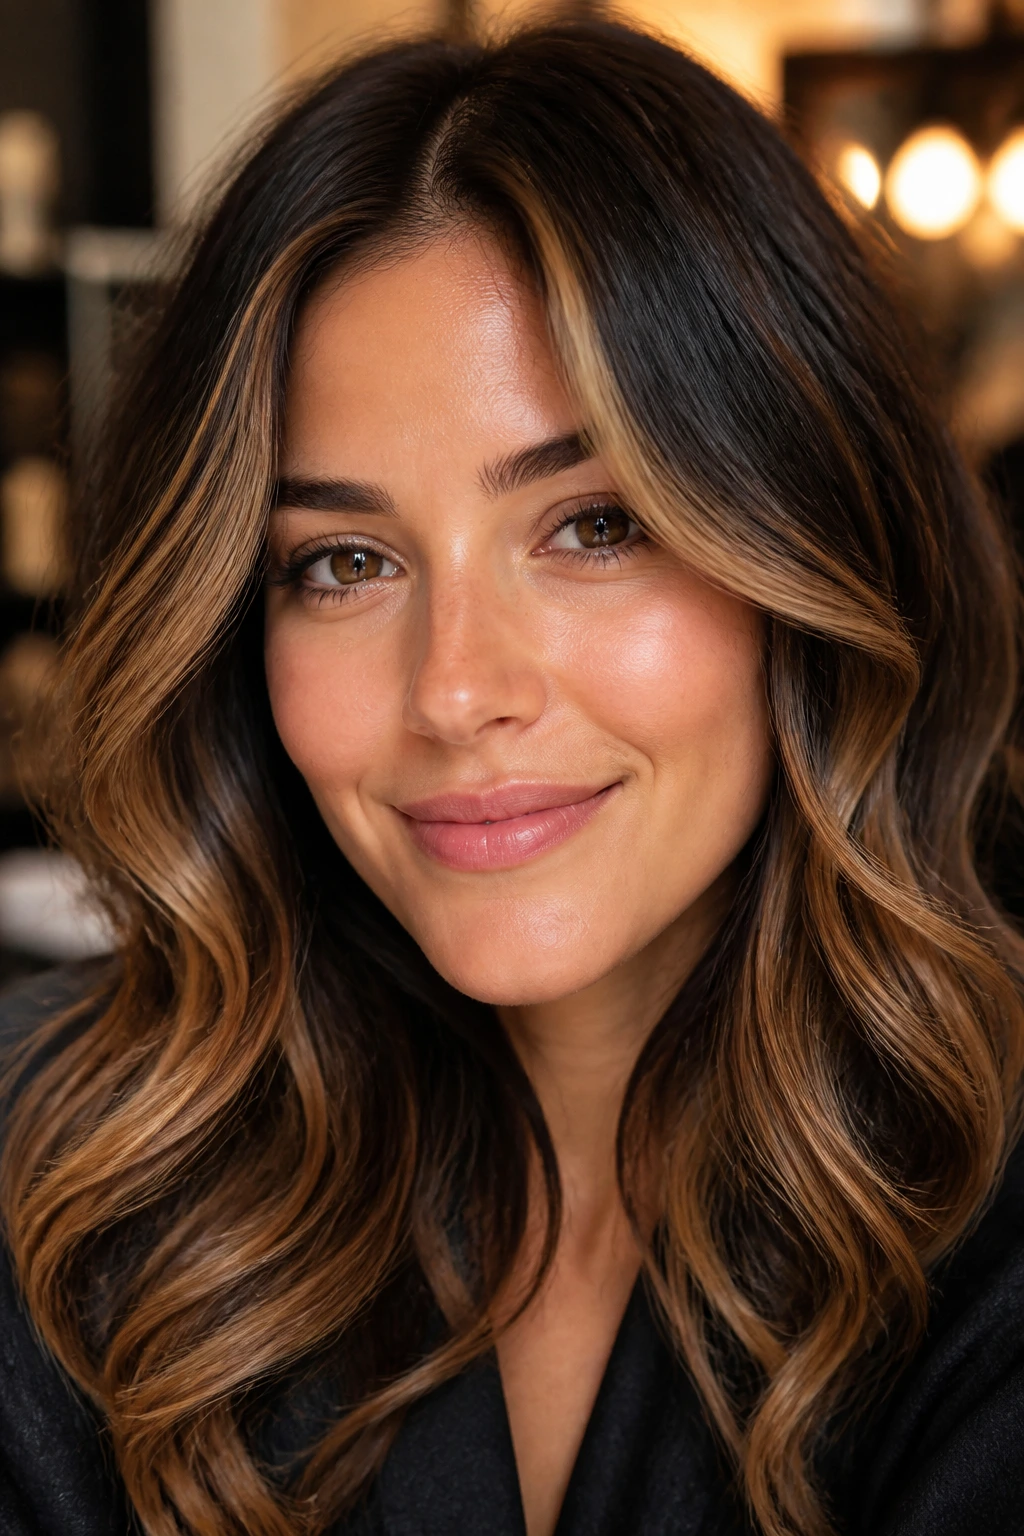
Dark hair can eat a highlight if the tone is too pale, too orange, or placed in thick stripes across the wrong part of the face. Camel highlights dodge that trap when they’re done with a steady hand: warm beige ribbons, a little toasted, a little sandy, never brassy, never flat. On a deep brunette base, that shade gives you light without the high-contrast stripe effect that can make round cheeks look even broader.
The placement matters as much as the color. Round faces usually look best when the eye moves up and down instead of side to side, so the smartest camel highlights don’t sit like a horizontal band across the widest point of the cheeks. They start lower, break up the bulk, and leave enough darkness near the roots and sides to keep the whole look structured.
What I like about camel highlights on dark hair is that they look expensive without shouting. They’re softer than honey, less sugary than caramel, and far easier to live with than a pale blonde money piece that needs constant toner. The good versions grow out with grace, which is half the battle when your base is dark and your face is already doing enough talking.
Why These Camel Tones Earn Their Keep
-
They shape the face instead of widening it: The best placements run vertically through the layers, which helps a round face look a little longer and leaner without harsh contour lines.
-
They stay warm without turning orange: Camel sits in that beige-brown lane where dark hair can lighten cleanly without the pumpkin tone that shows up when lift goes too far, too fast.
-
They work with real brunette bases: These ideas are built for deep brown hair, not fantasy blonde canvases, so you can keep your natural depth and still get movement.
-
They grow out with less drama: A soft root shadow and diffused ends mean the line of demarcation stays quiet for weeks, not days.
-
They play nicely with layers, curls, and blowouts: Camel ribbons look different on each texture, which is the fun part; the same shade can read polished, airy, or a little lived-in depending on the cut.
-
They’re easy to explain at the salon: Ask for babylights, contour pieces, balayage, or a gloss in the camel family, and a good colorist knows exactly what you mean.
1. Face-Framing Camel Ribbons That Start Below the Cheekbone
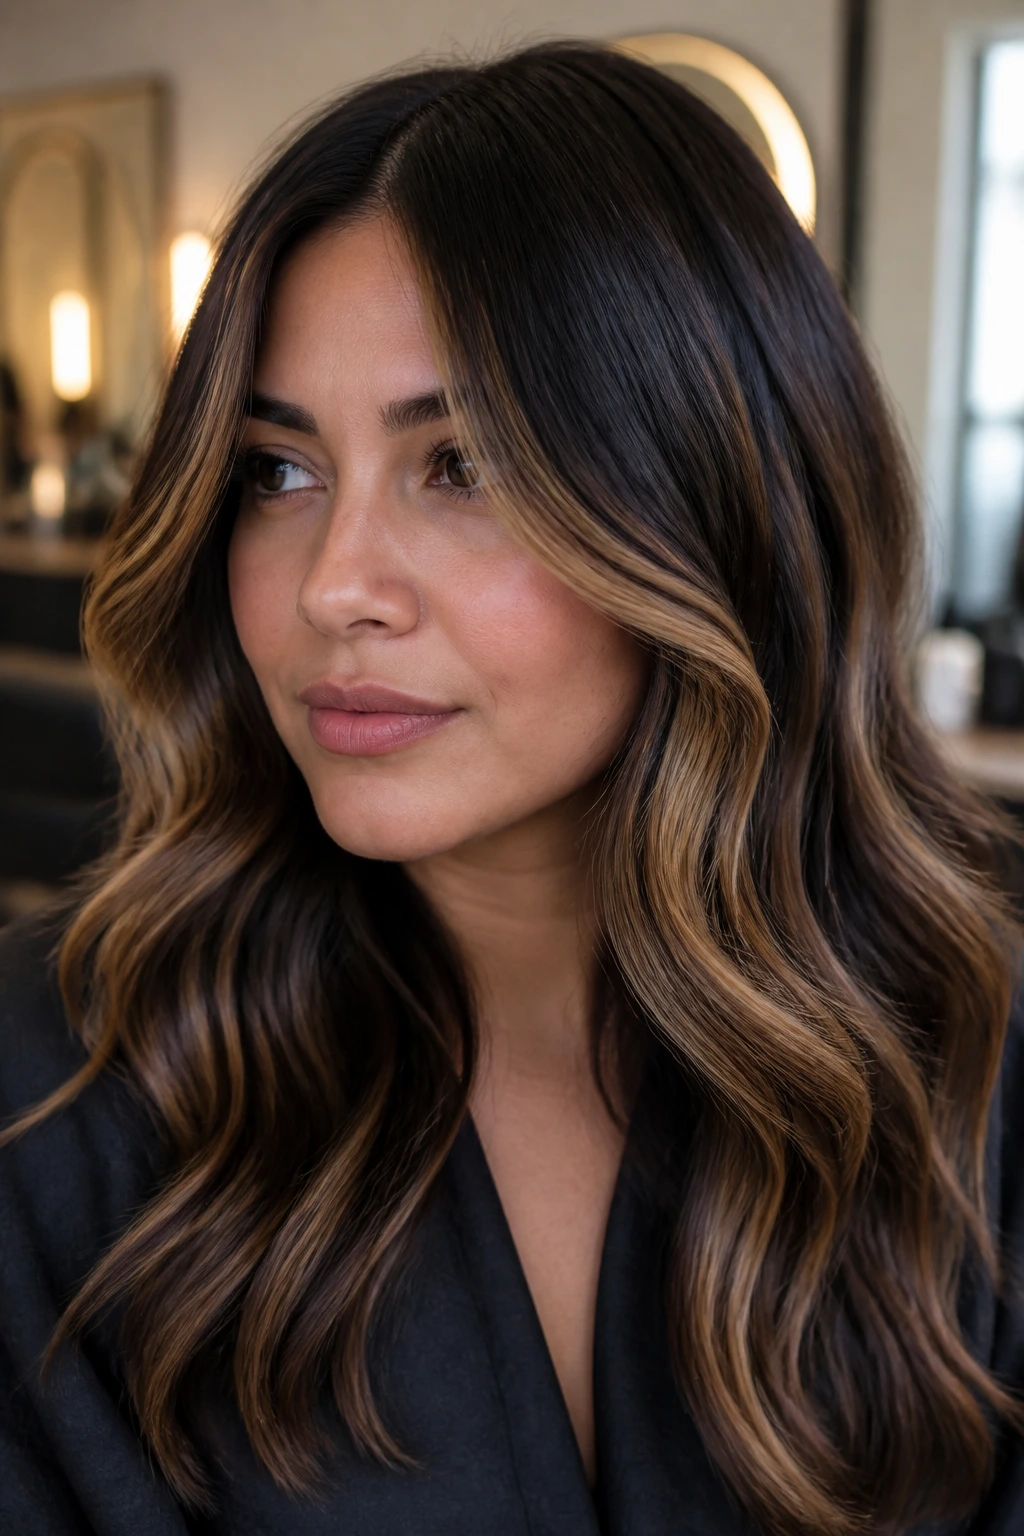
The safest, cleanest version of camel highlights for dark hair and round faces begins with two or three soft ribbons on each side of the face. The trick is start them below the cheekbone, not right across the fullest part of the cheeks. That single placement choice keeps the light moving downward instead of sideways.
I like this look on mid-length cuts and long layers because the ribbons can follow the haircut’s shape. On a blowout, the lighter front pieces swing forward just enough to sharpen the jaw. On air-dried waves, they stay soft and a little hazy, which is prettier than it sounds.
Ask for a beige-camel tone, not a pale blonde strip. If the front pieces are too light, the face loses structure fast. This version works because the contrast is gentle and the line is vertical.
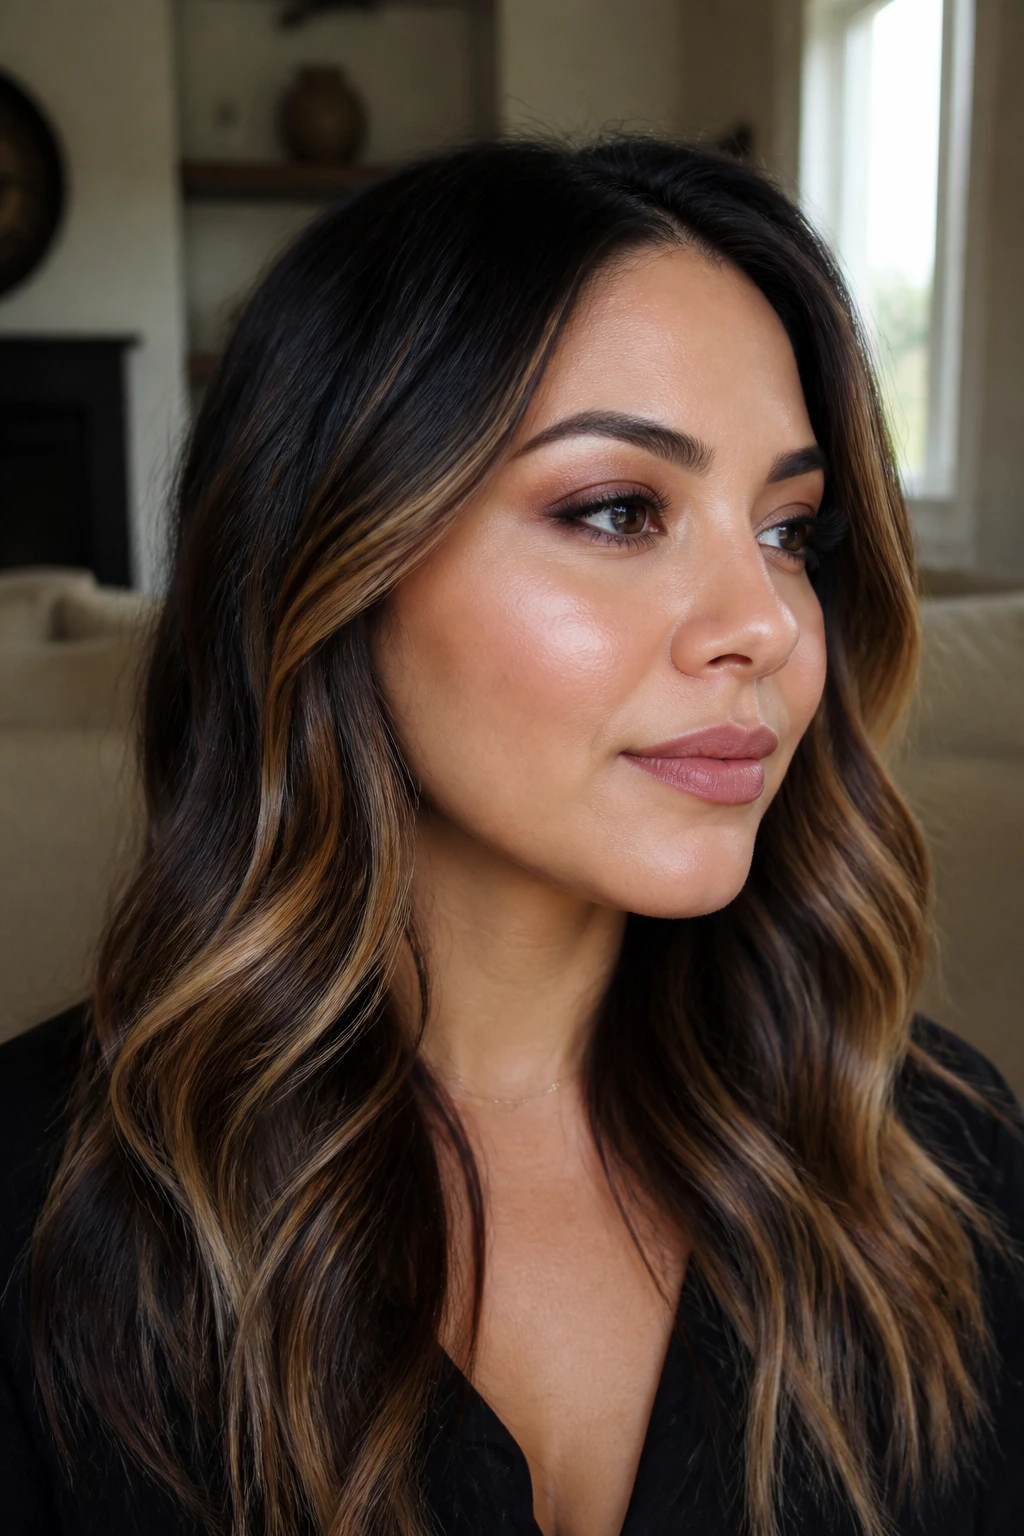
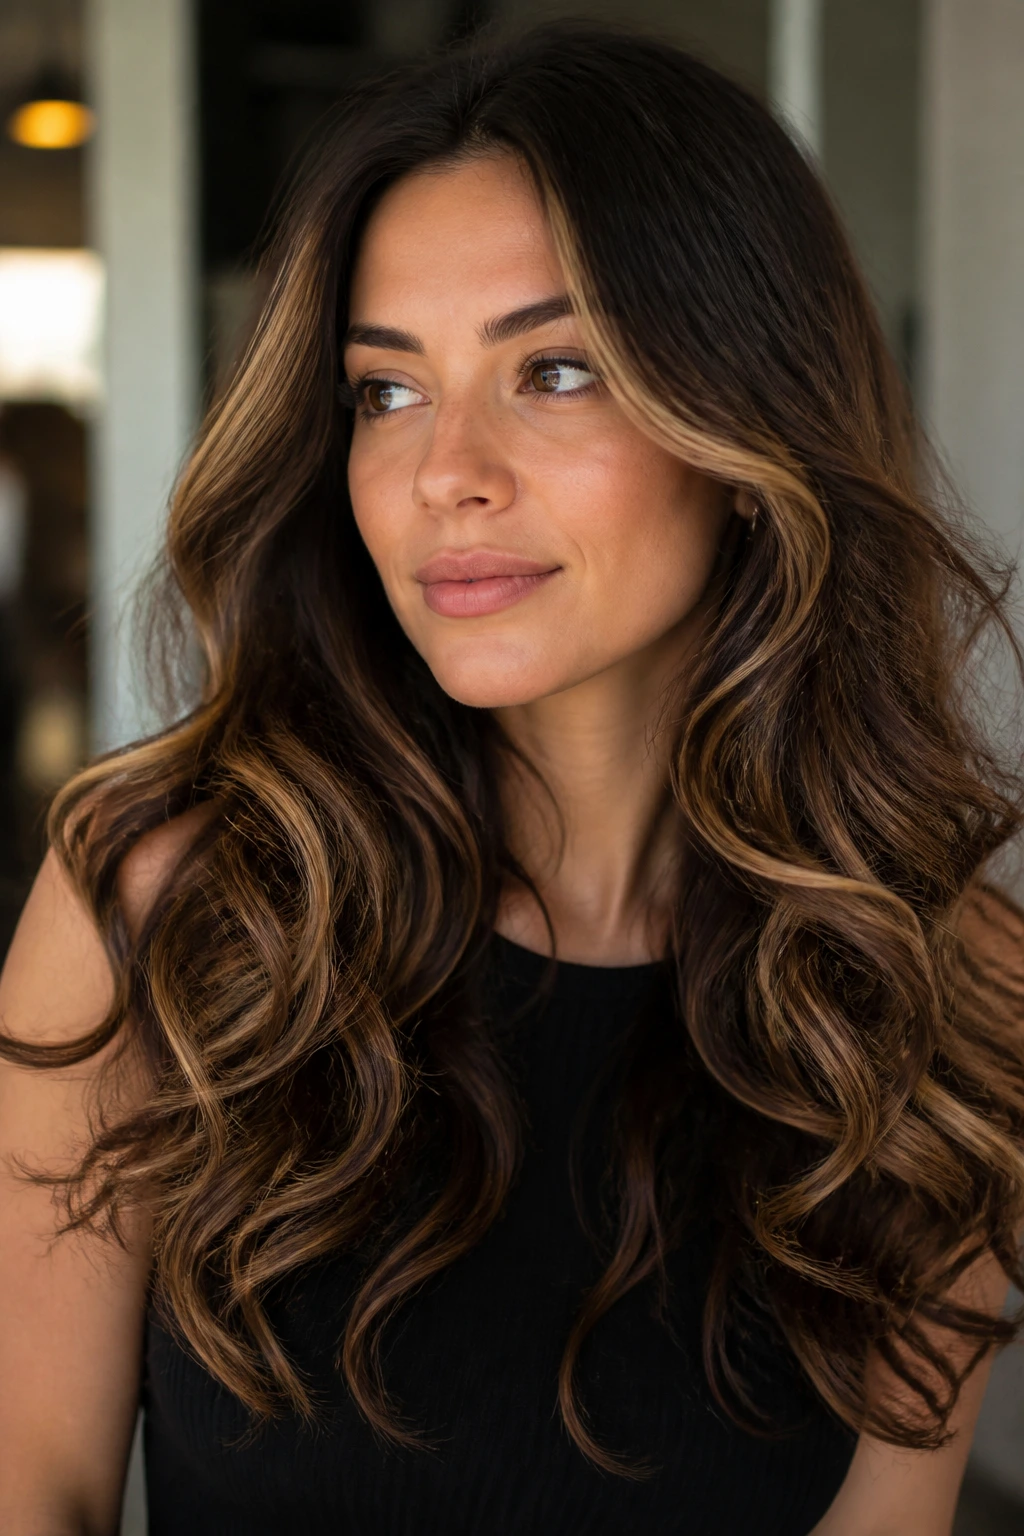
2. A Deep Side Part With Camel Brightness Pulled to One Side
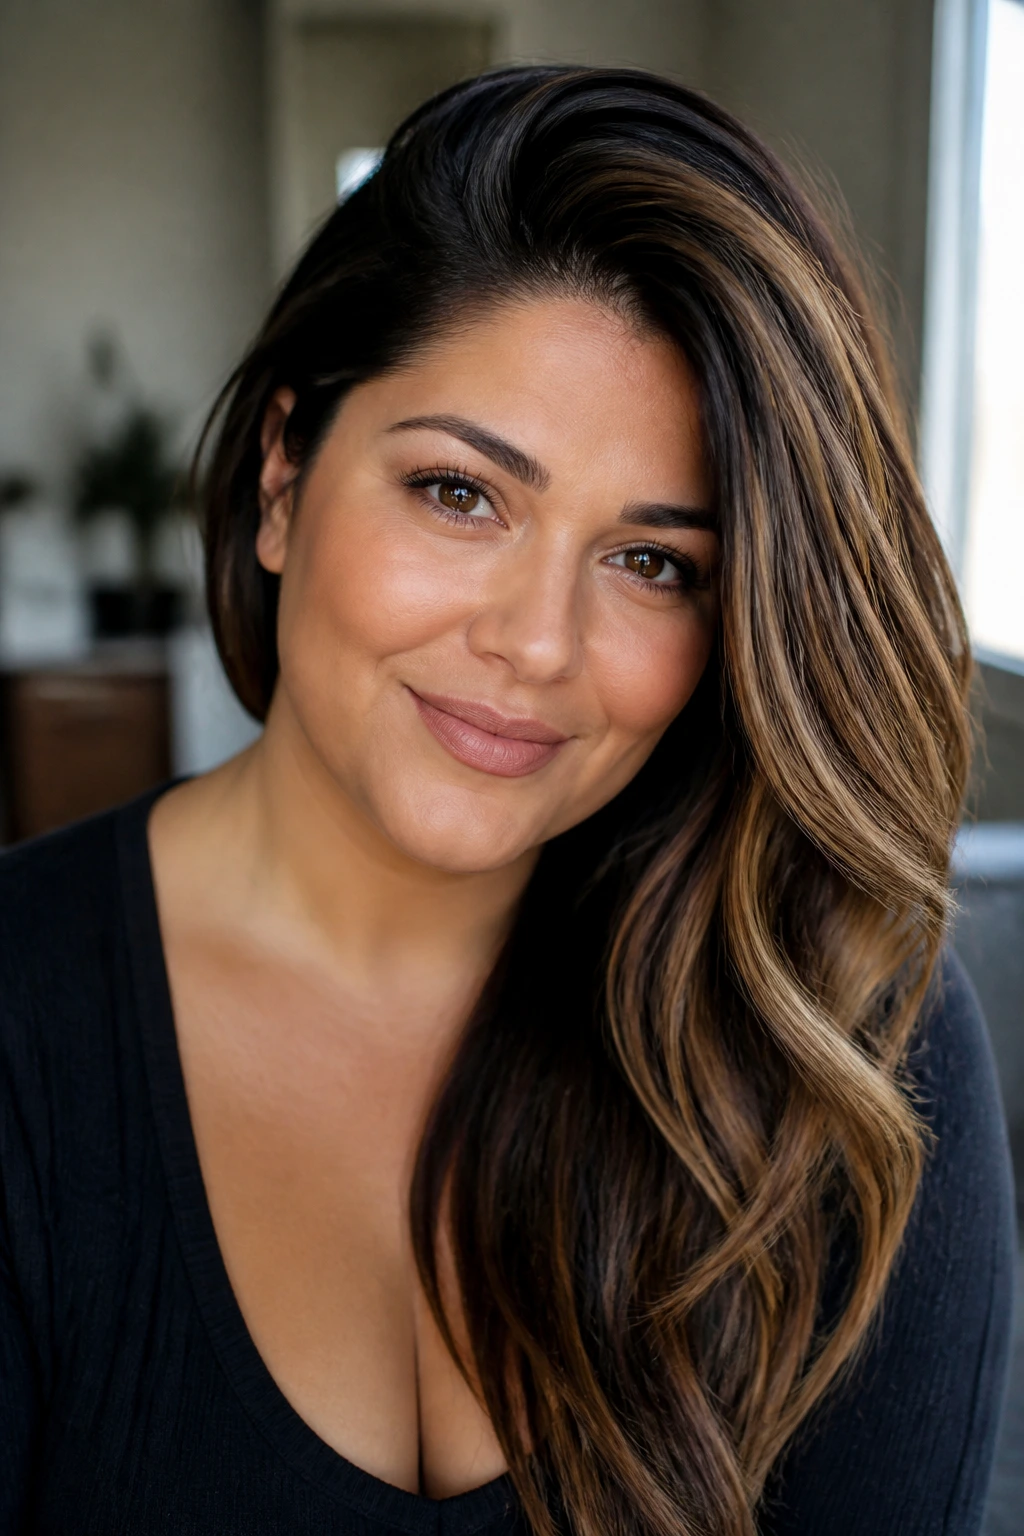
A deep side part does half the contouring work for you. Once the hair shifts off-center, one side of the face gets more lift and the other side gets a soft fall of shadow. Add camel highlights to the heavier side, and the whole shape looks longer.
This is one of my favorite moves for round faces because it does not rely on heavy color placement everywhere. A few brighter threads near the temple and along the front layer are enough. Keep the opposite side a touch darker so the style doesn’t spread light evenly across the full width of the face.
The result is a bit asymmetric, which is exactly the point. Round faces tend to love a little imbalance. It gives the eye somewhere to go.
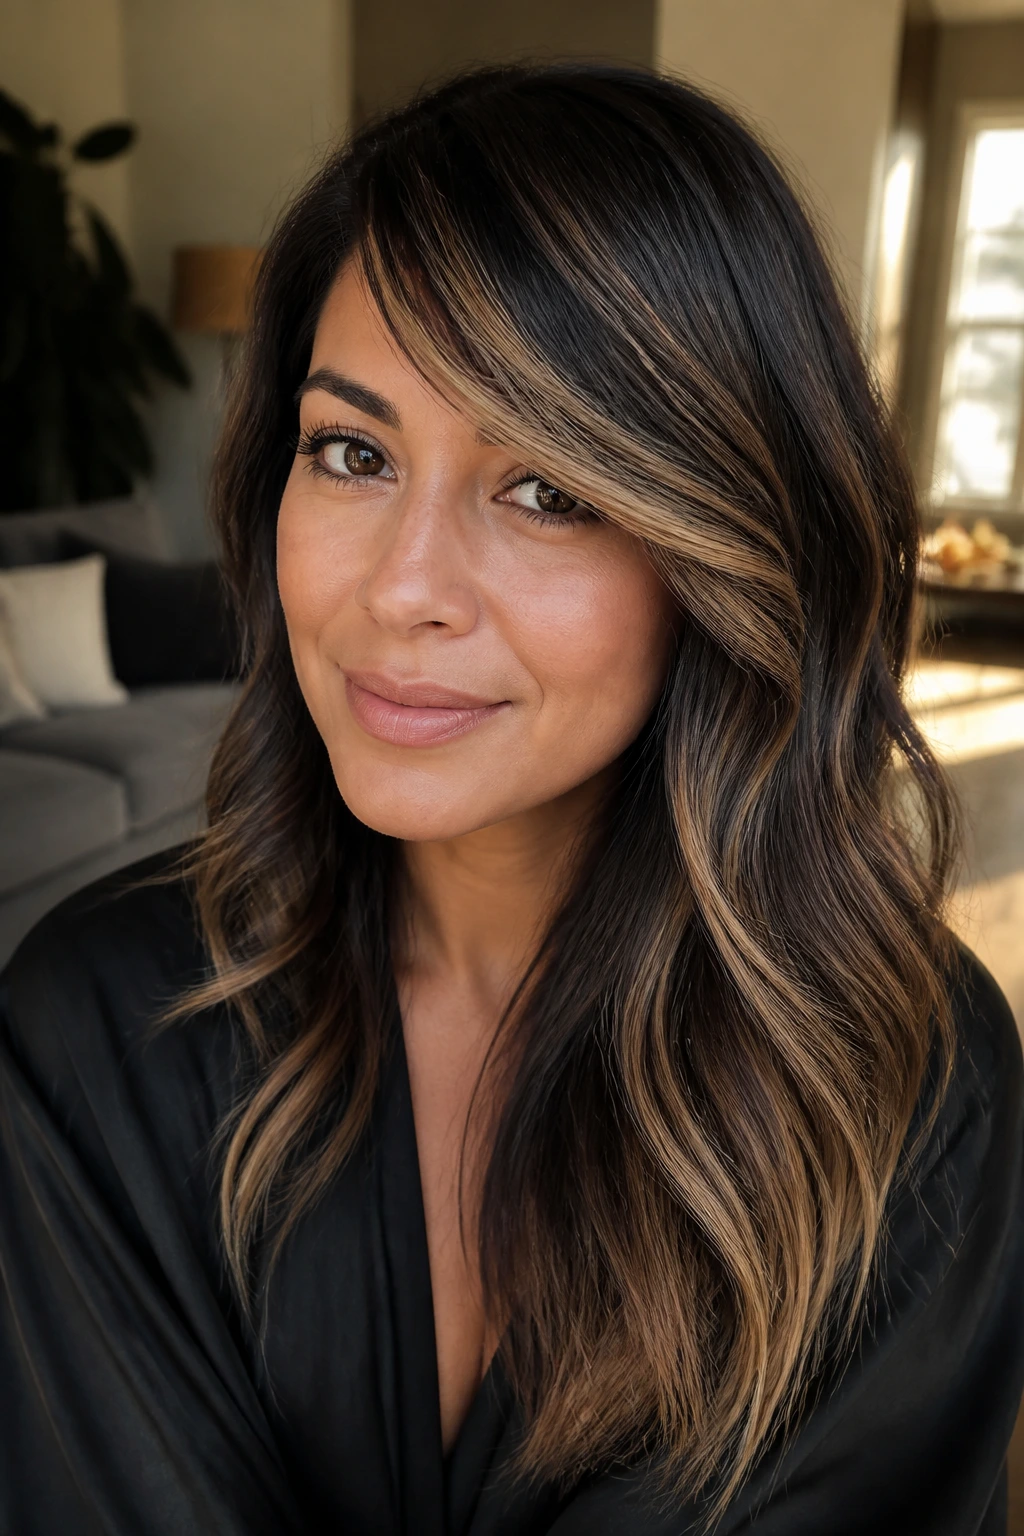
3. Curtain Bangs With a Camel Money Piece
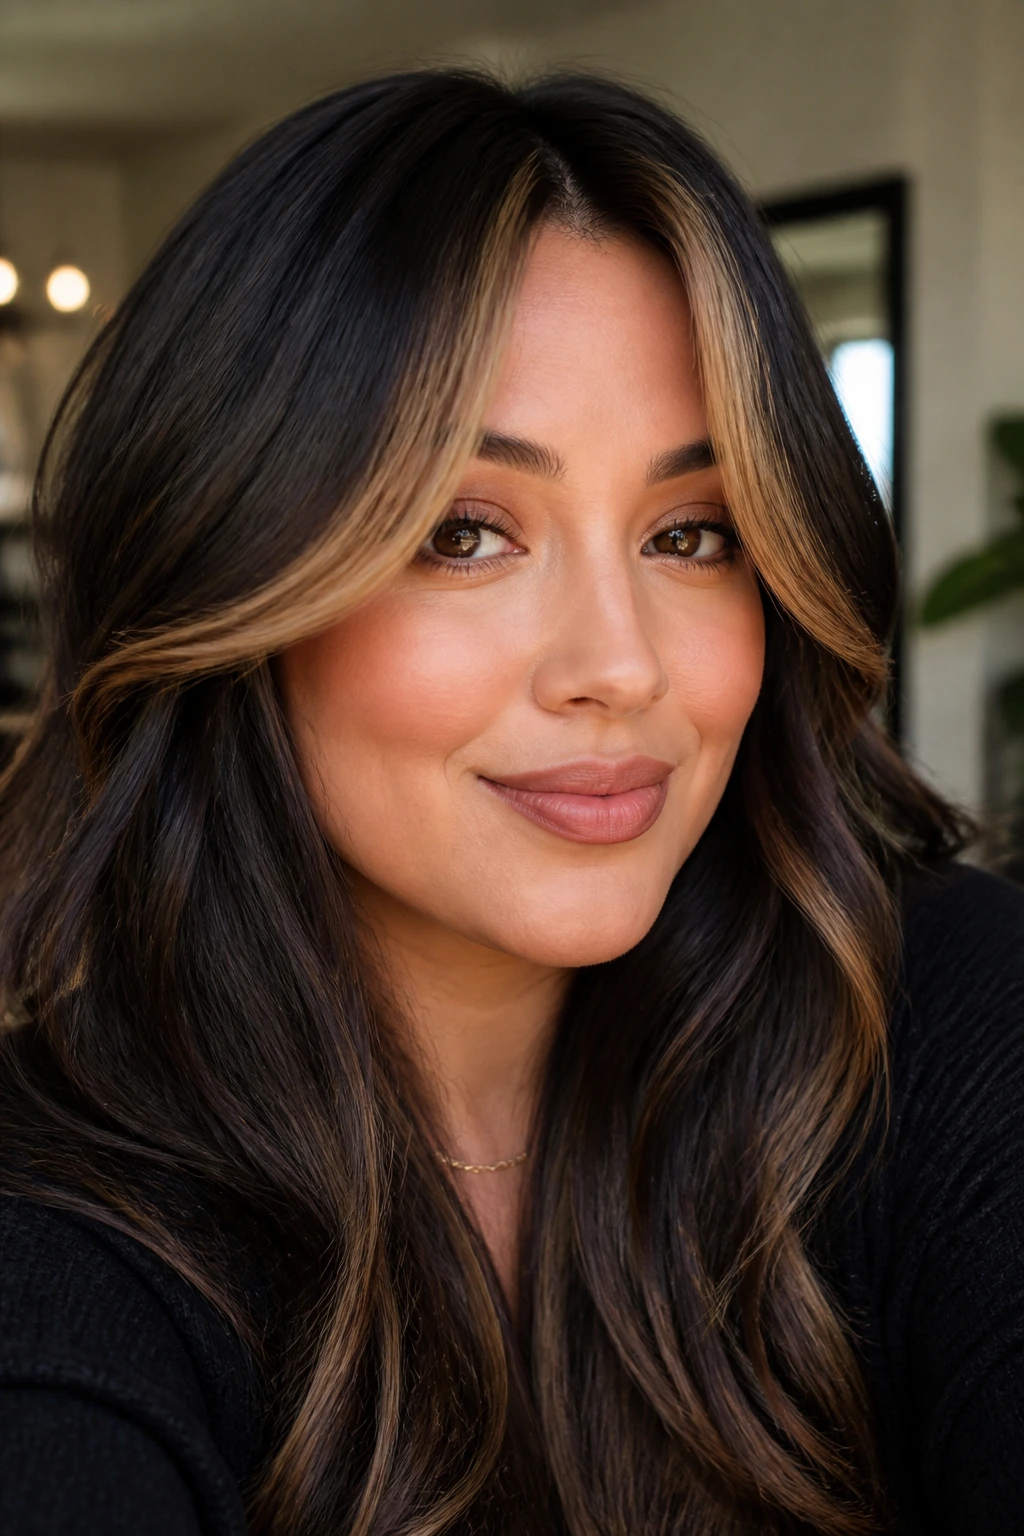
Curtain bangs and camel highlights are a strong pair when the fringe opens in the center and falls long at the cheekbone. You get a soft frame without a blunt line across the forehead, which is where round faces can get stuck looking boxed in. The camel money piece should live on the longer outer edge of the bangs, not all the way across.
Keep the highlight warm and dimensional. A beige-gold money piece that blends into a darker root feels airy; a chunky pale one can look costume-y fast. I’d rather see a slightly darker root and a brighter edge than the reverse.
This style is especially good if you wear loose bends or a round-brush blowout. The bangs split down the middle, the lighter sides sweep away from the cheeks, and the face looks a little narrower without trying too hard.
4. Balayage That Begins Below the Widest Part of the Face
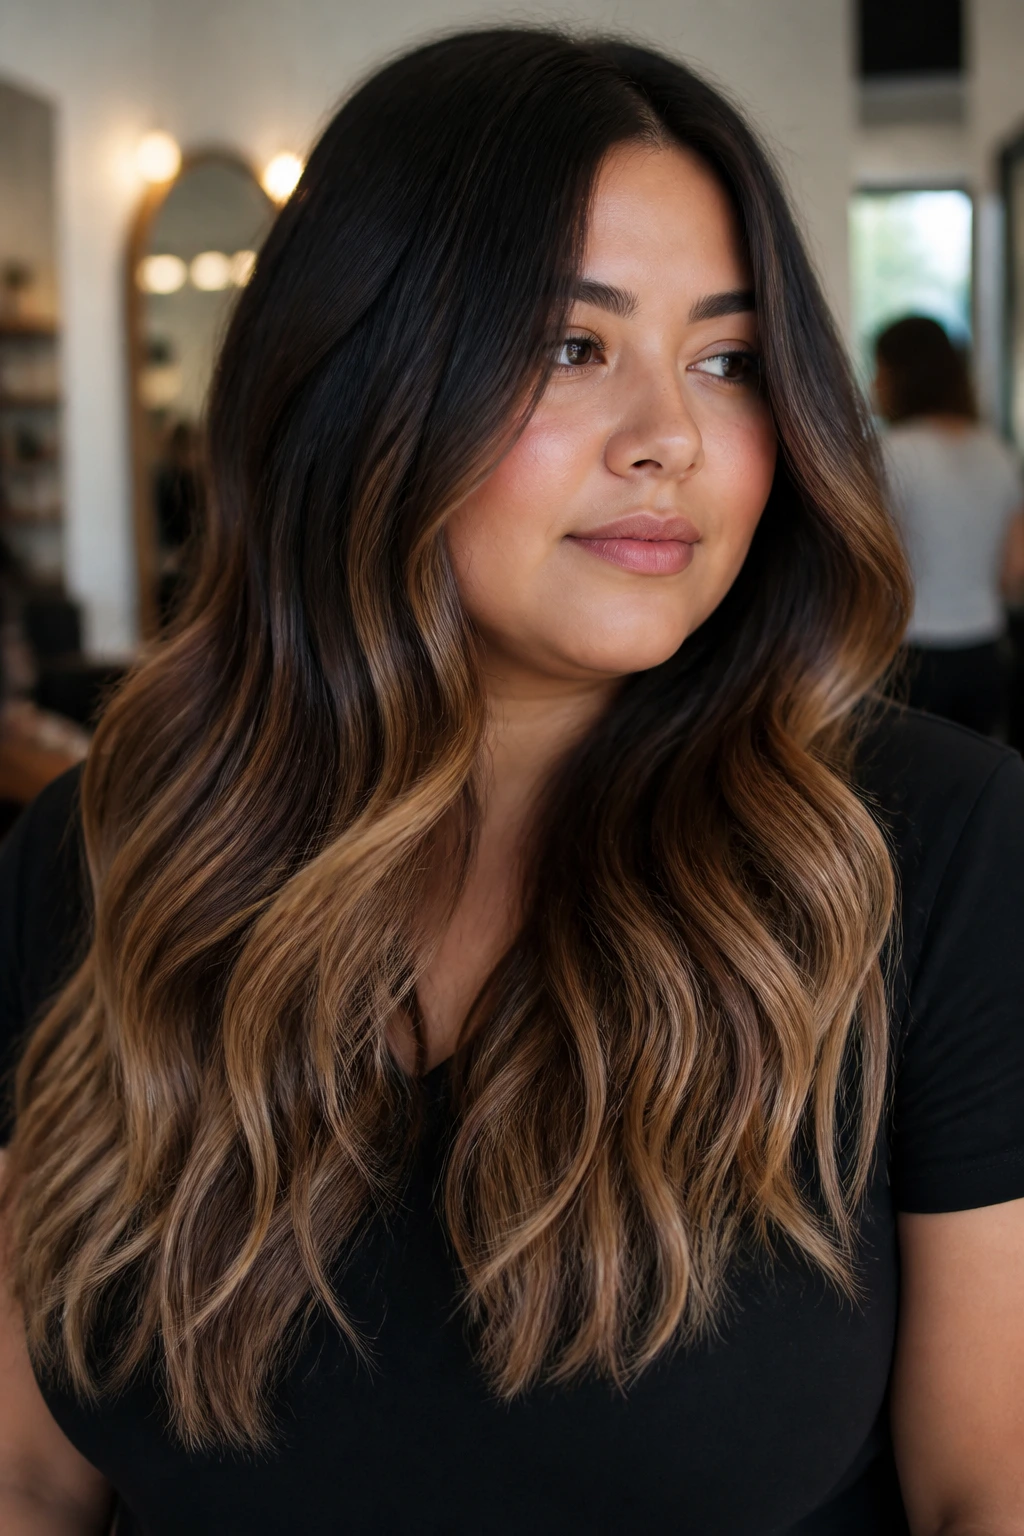
Balayage is the quiet power move here. Instead of foiling bright pieces all over, the colorist paints the camel tone lower down, often from mid-lengths to ends. For round faces, that lower starting point matters because it keeps the light from clustering at cheek level.
The best balayage on dark hair keeps the crown a shade deeper and lets the brightness bloom as it moves down. That means the hair still reads rich at the roots, then soft and warm through the lengths. You get movement, not stripes.
If your hair is thick, this placement is especially helpful. Heavy dark hair can swallow light, and balayage breaks that up without making the whole head look overprocessed.
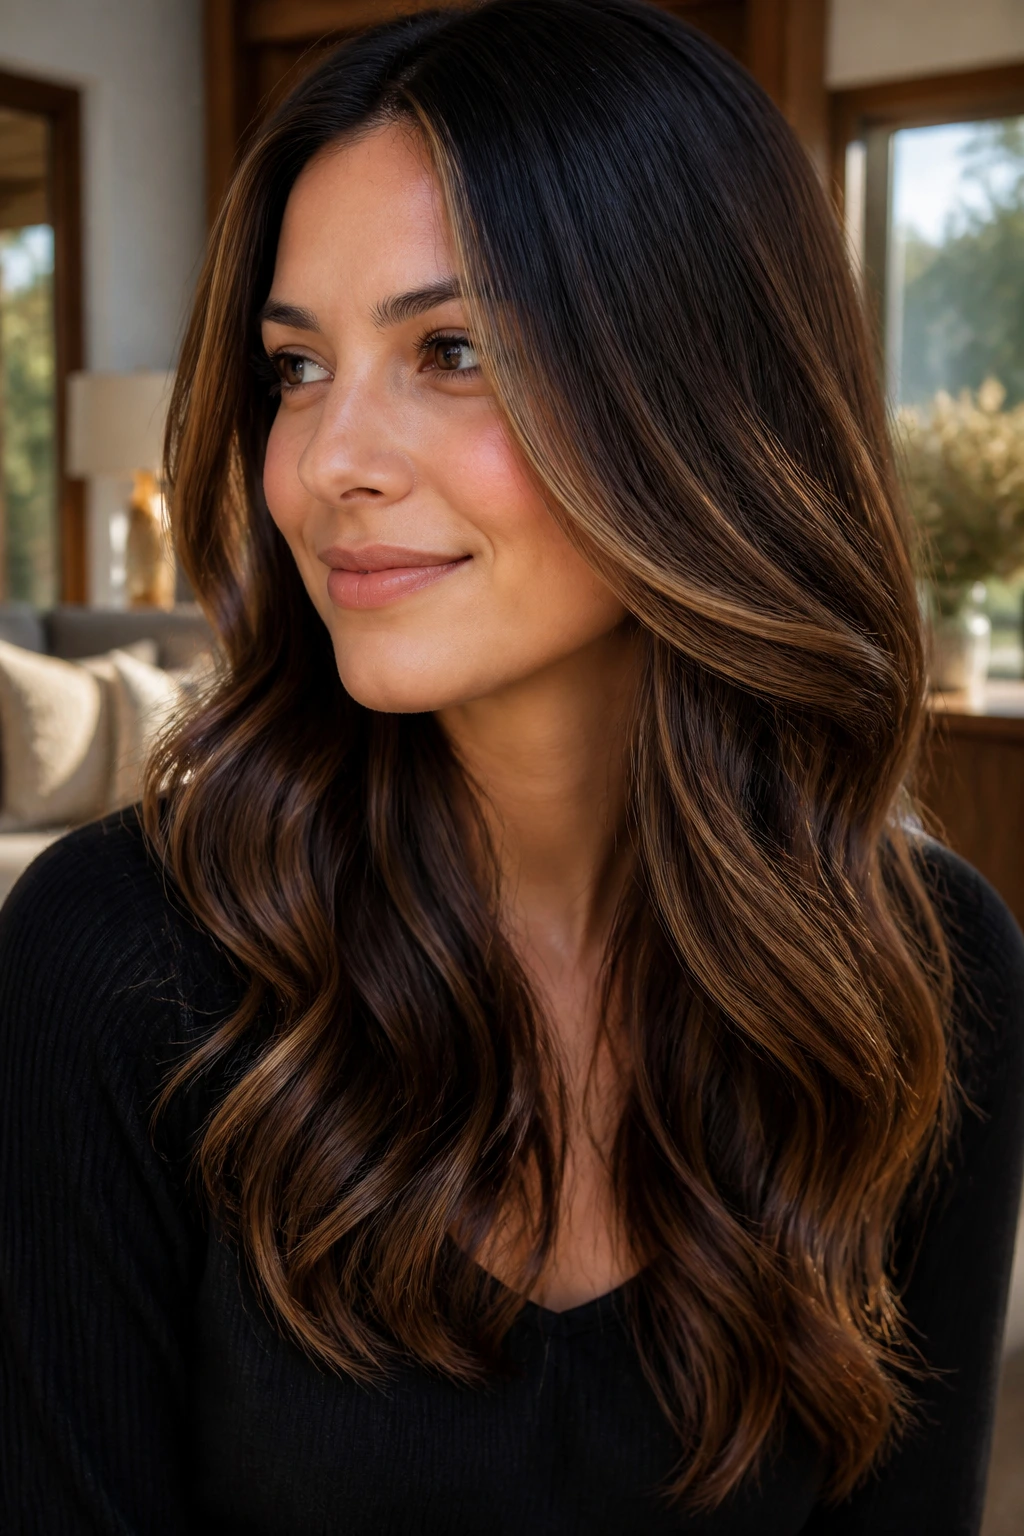
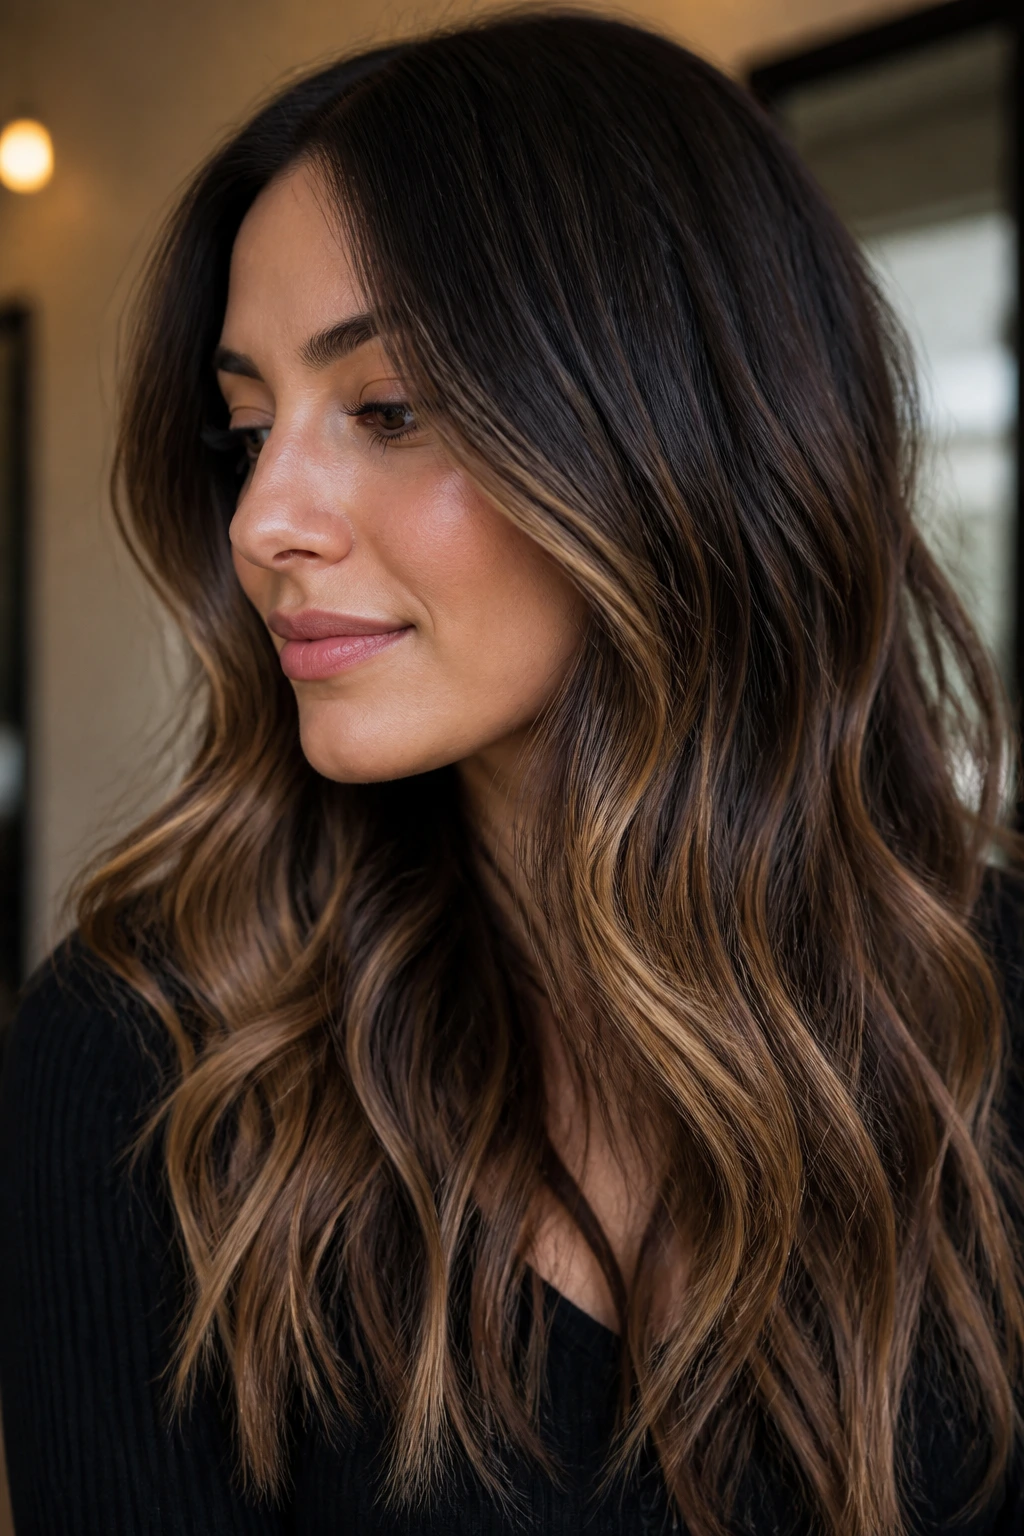
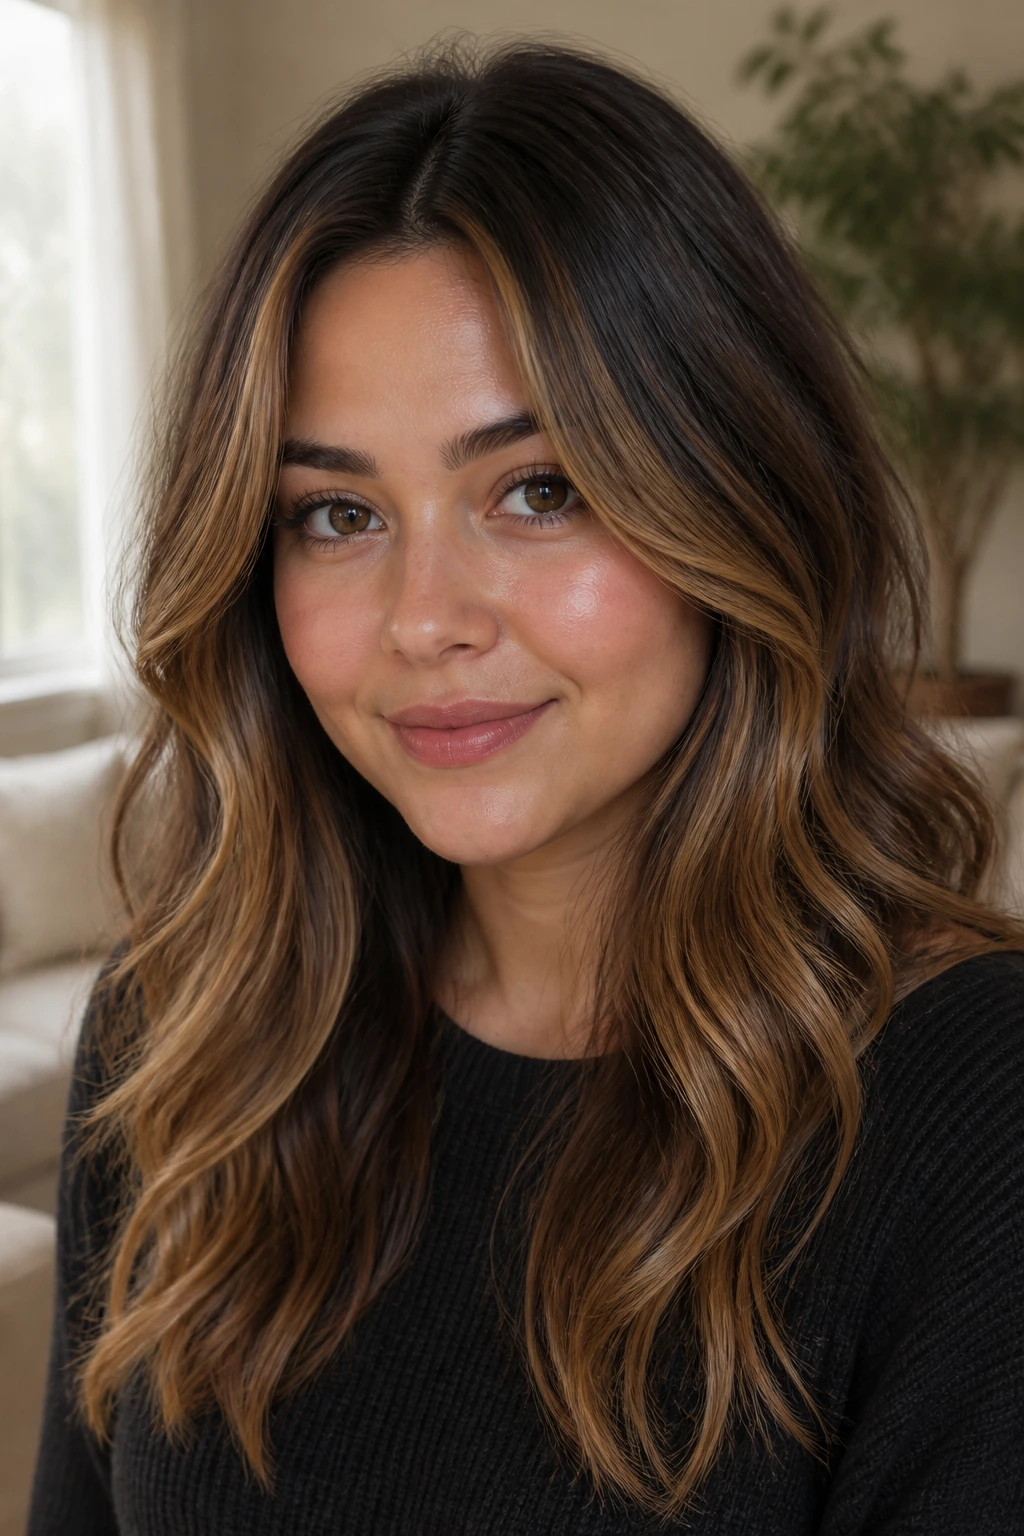
5. Long Layers With Camel Ends That Flick Out
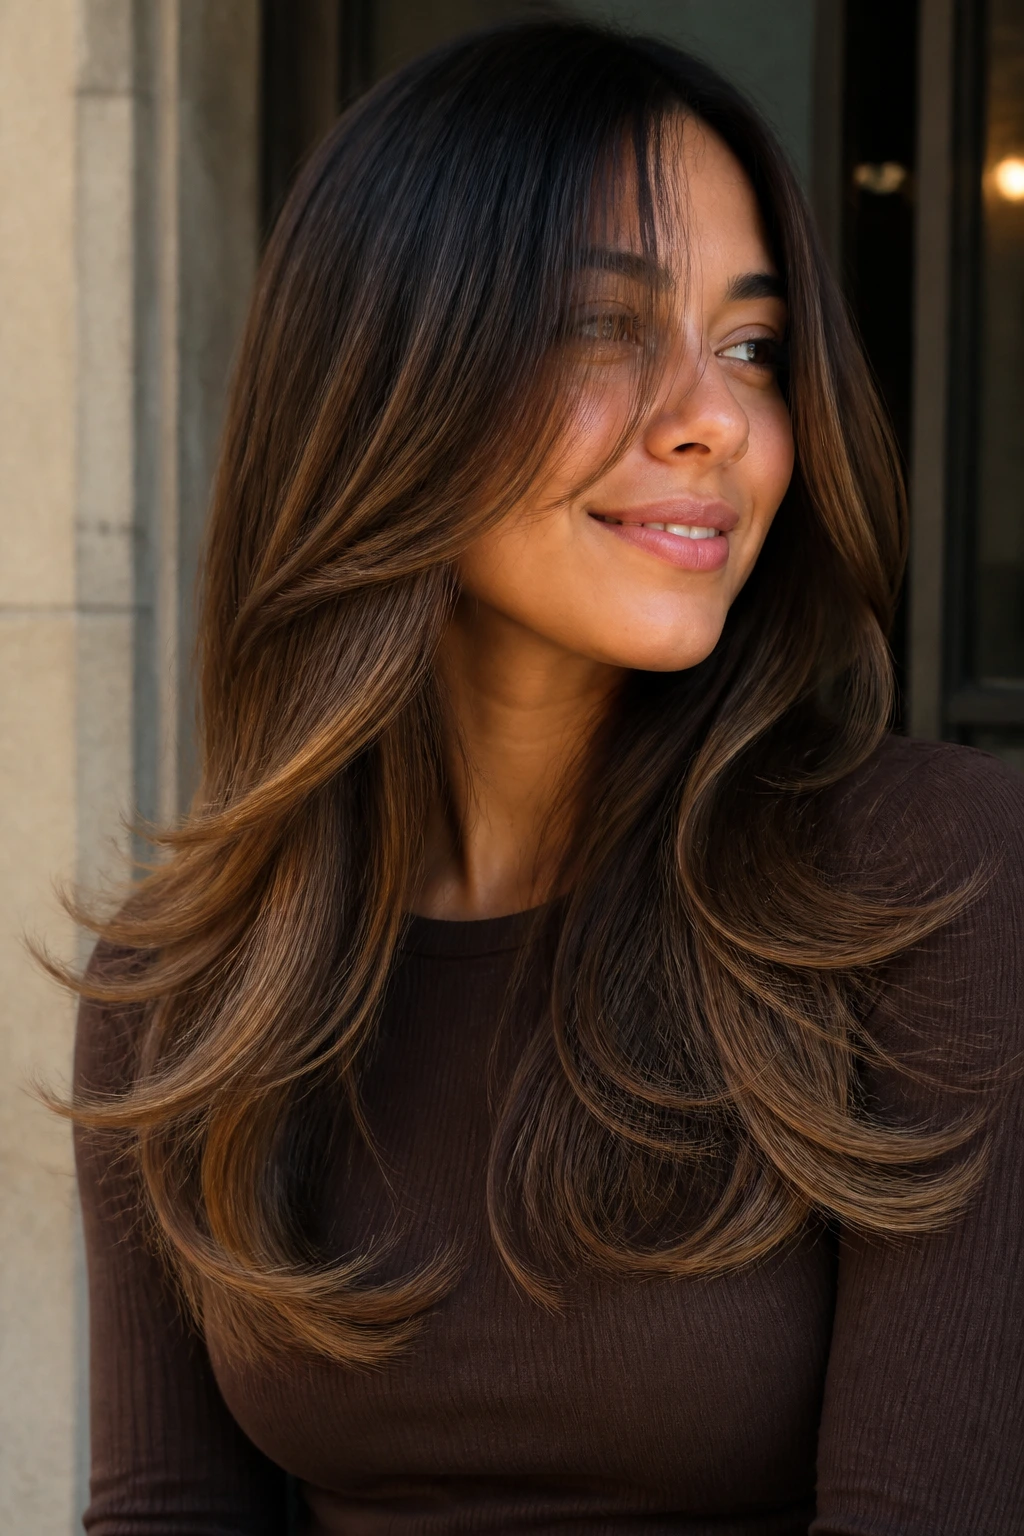
Long layers are where camel highlights can really breathe. When the ends flick out around the shoulders and collarbone, the lighter pieces create a vertical trail that makes a round face look less wide. The ends should be brighter than the mid-lengths, but still in the camel family, not pale gold.
This style works best when the light is concentrated on the lower half of each layer. That gives the hair movement at the perimeter, which is what changes the shape of the silhouette. If the brightest sections sit too high, the width comes back.
I also like this option for people who hate constant root touch-ups. The dark base stays strong, the camel lives mostly where the haircut moves, and the grow-out is easy to ignore.
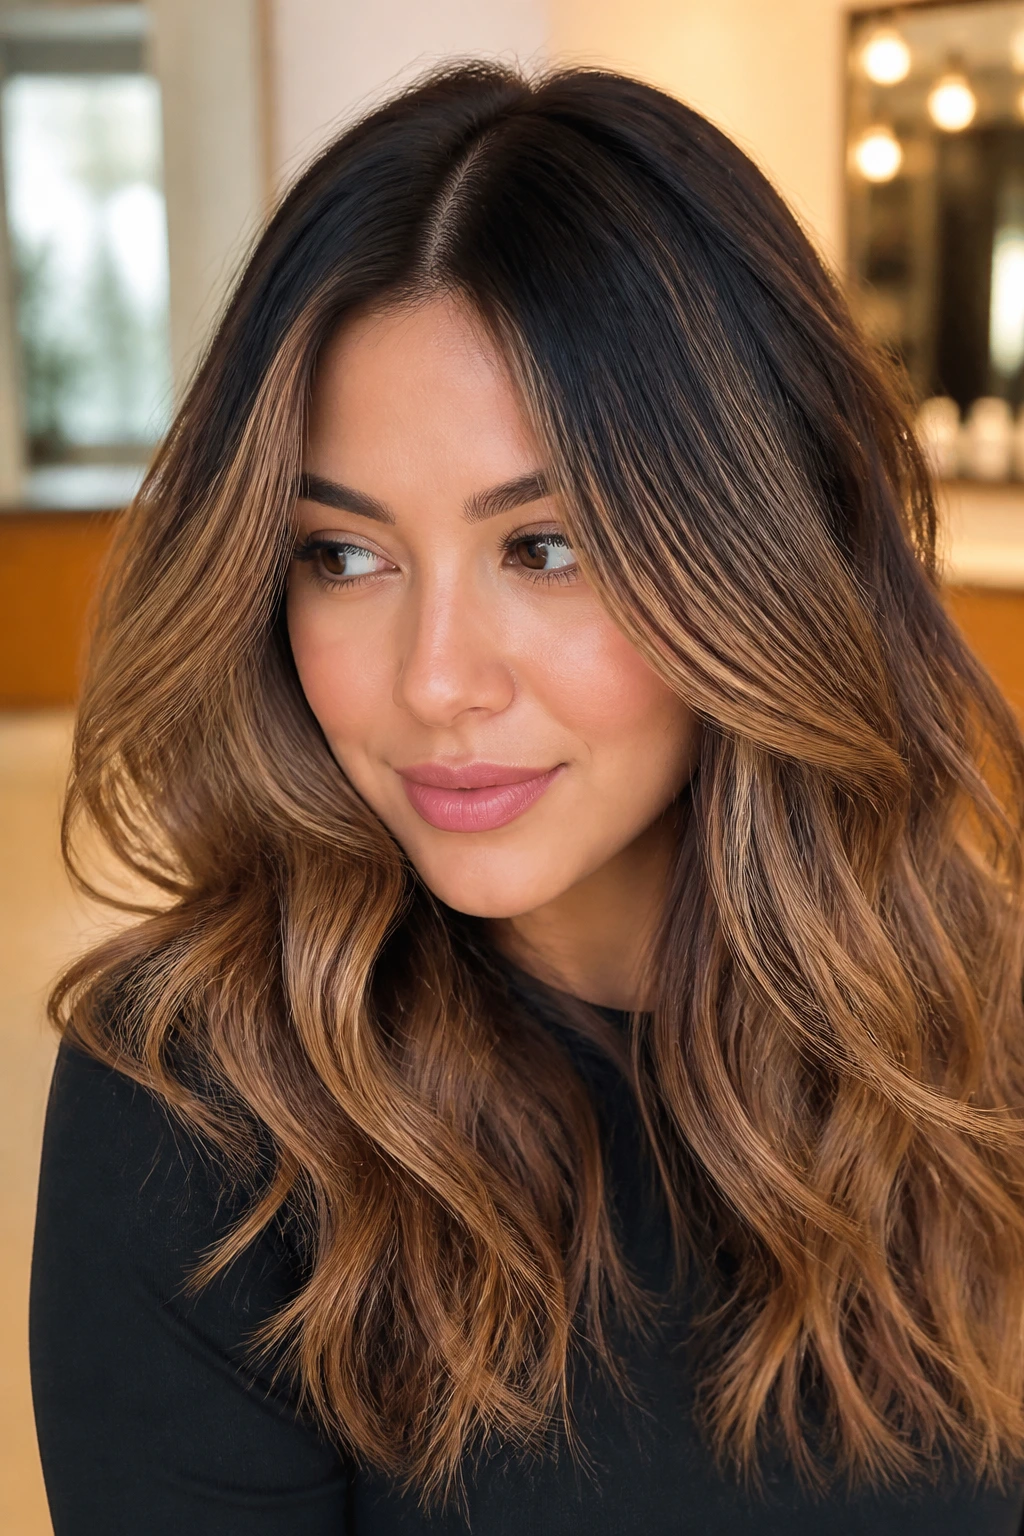
6. Wavy Lob With Scattered Camel Slices
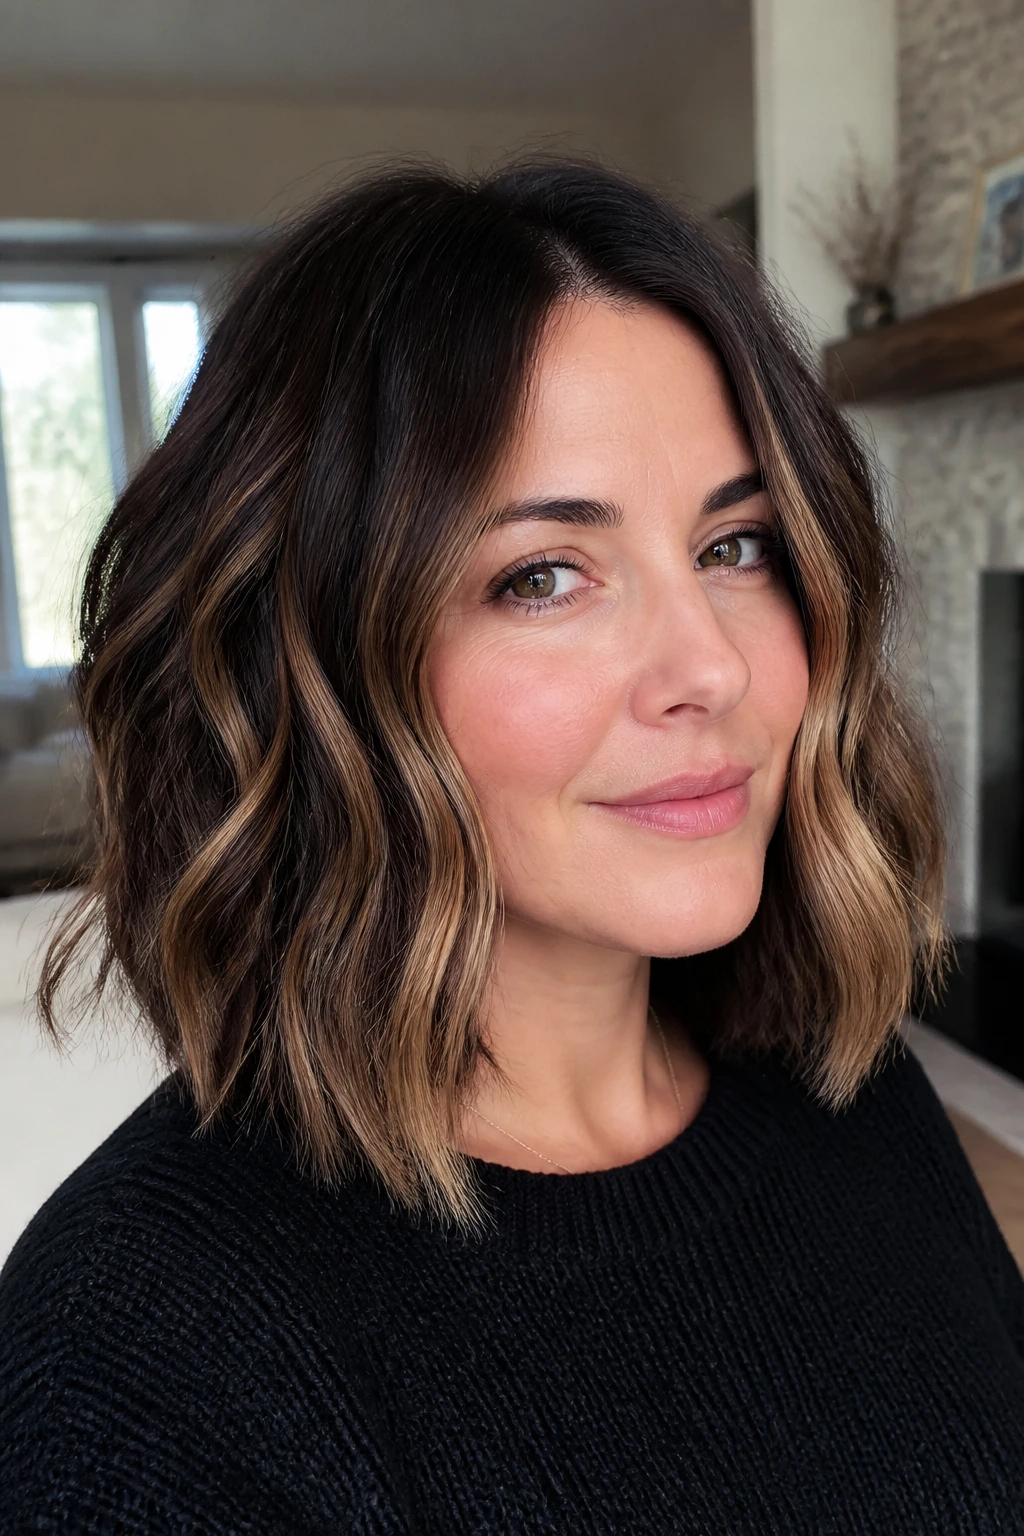
A lob hits at a good point for round faces, especially when the waves are loose and broken instead of uniform. Add scattered camel slices through the top layer and the edges, and the shape stops feeling too circular. The highlights should look like they were placed by motion, not ruler lines.
This is not the place for evenly spaced streaks. A few thicker ribbons near the front, thinner ones through the crown, and one or two brighter ends at the collarbone create enough variation to keep the eye moving. That movement is what flatters.
The look reads modern without being harsh. If your natural hair is a level 3 or 4, this gives you enough contrast to show up in daylight without pushing the base into dull ash territory.
7. Espresso Base With Whisper-Thin Camel Veils
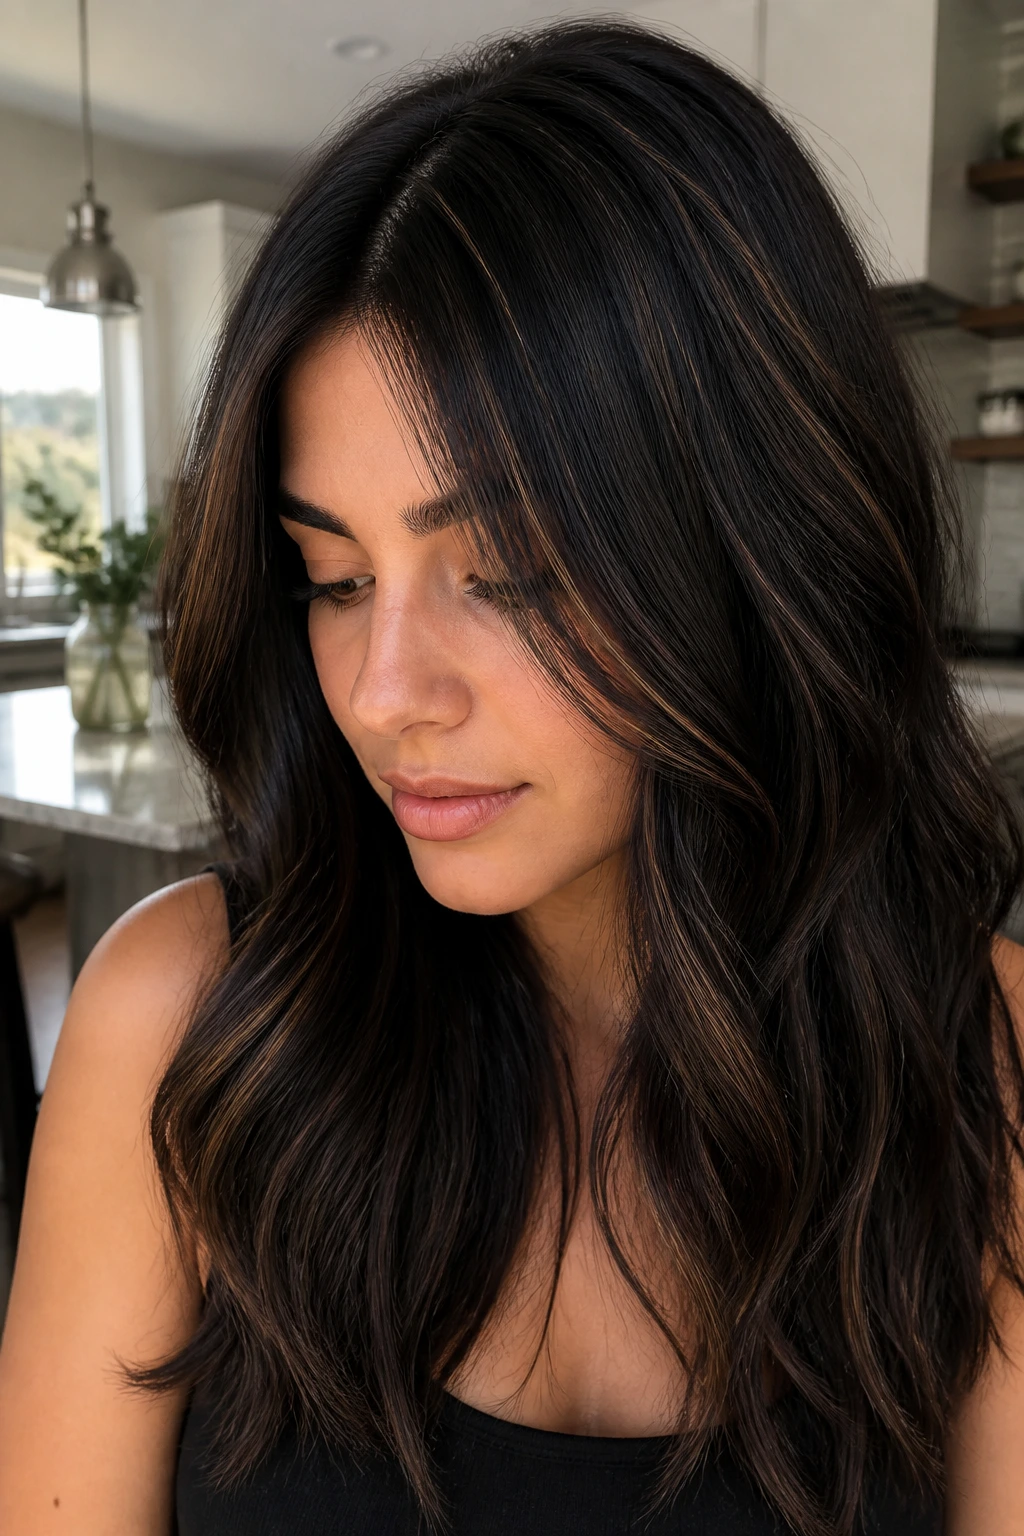
Sometimes the best answer is restraint. On very dark hair, whisper-thin camel veils can look richer than chunky highlights because they preserve the depth underneath. The dark base stays dominant, and the camel just glints through the surface when the hair moves.
This is a smart choice for round faces that don’t want obvious face-framing pieces. The veils are thin enough to soften the shape without drawing a hard line at the cheeks. They work especially well on straight hair and soft bends, where the separation is visible but not loud.
If you’re nervous about going too light, start here. The colorist can always build more brightness later, but once the contrast is too high, it takes months to dial back.
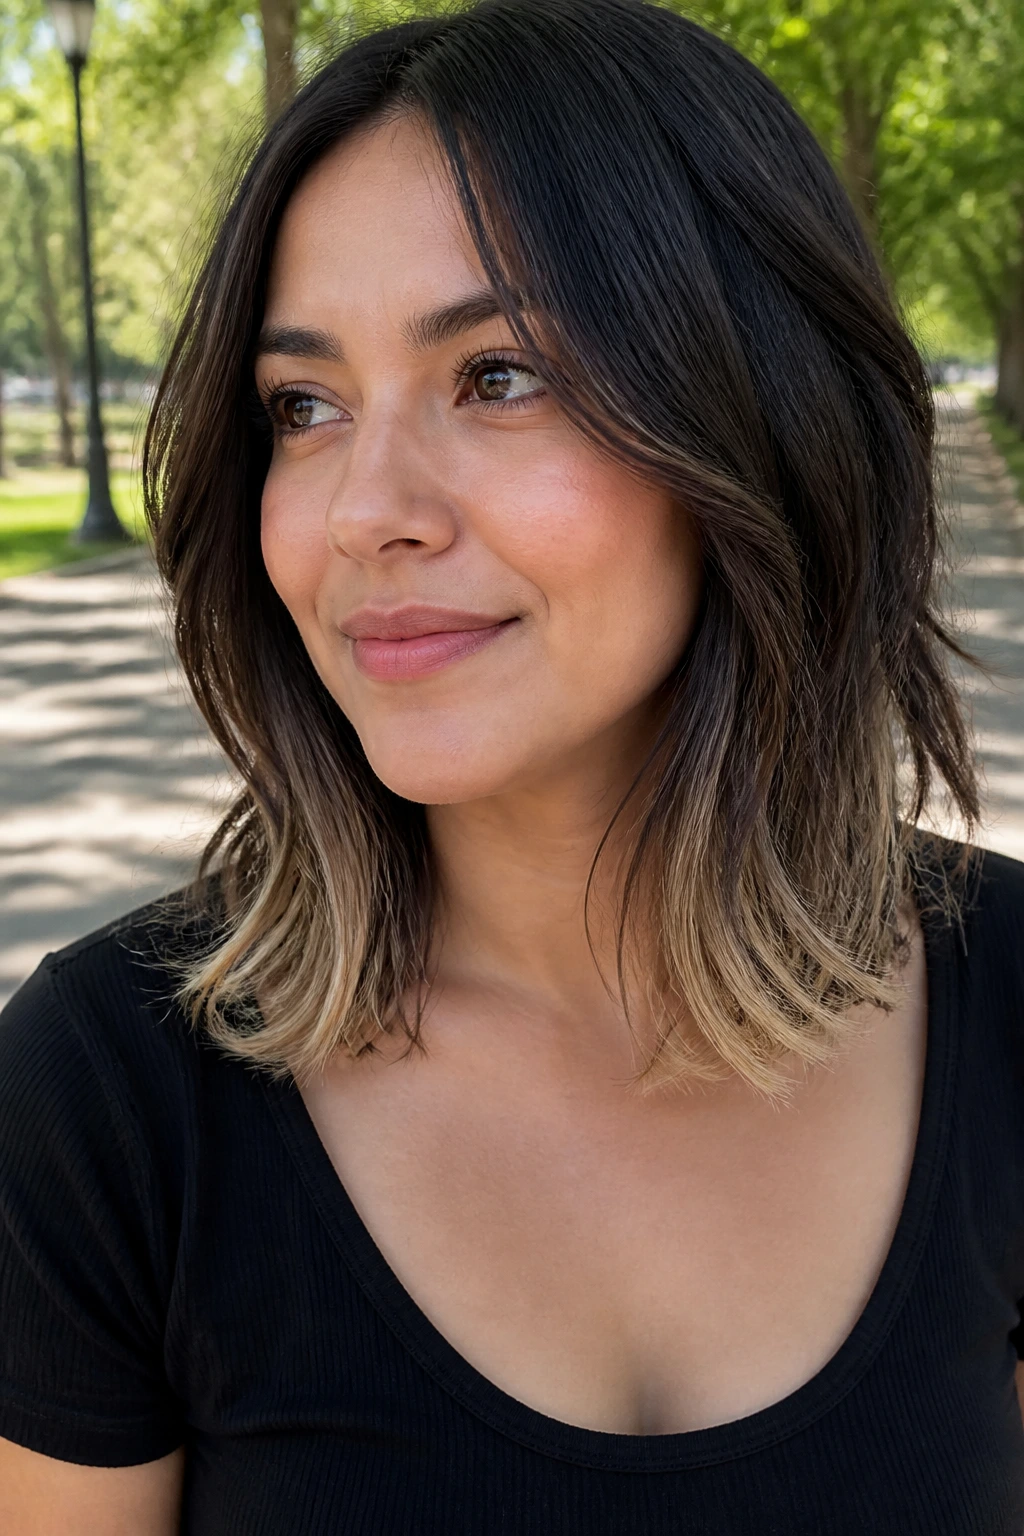
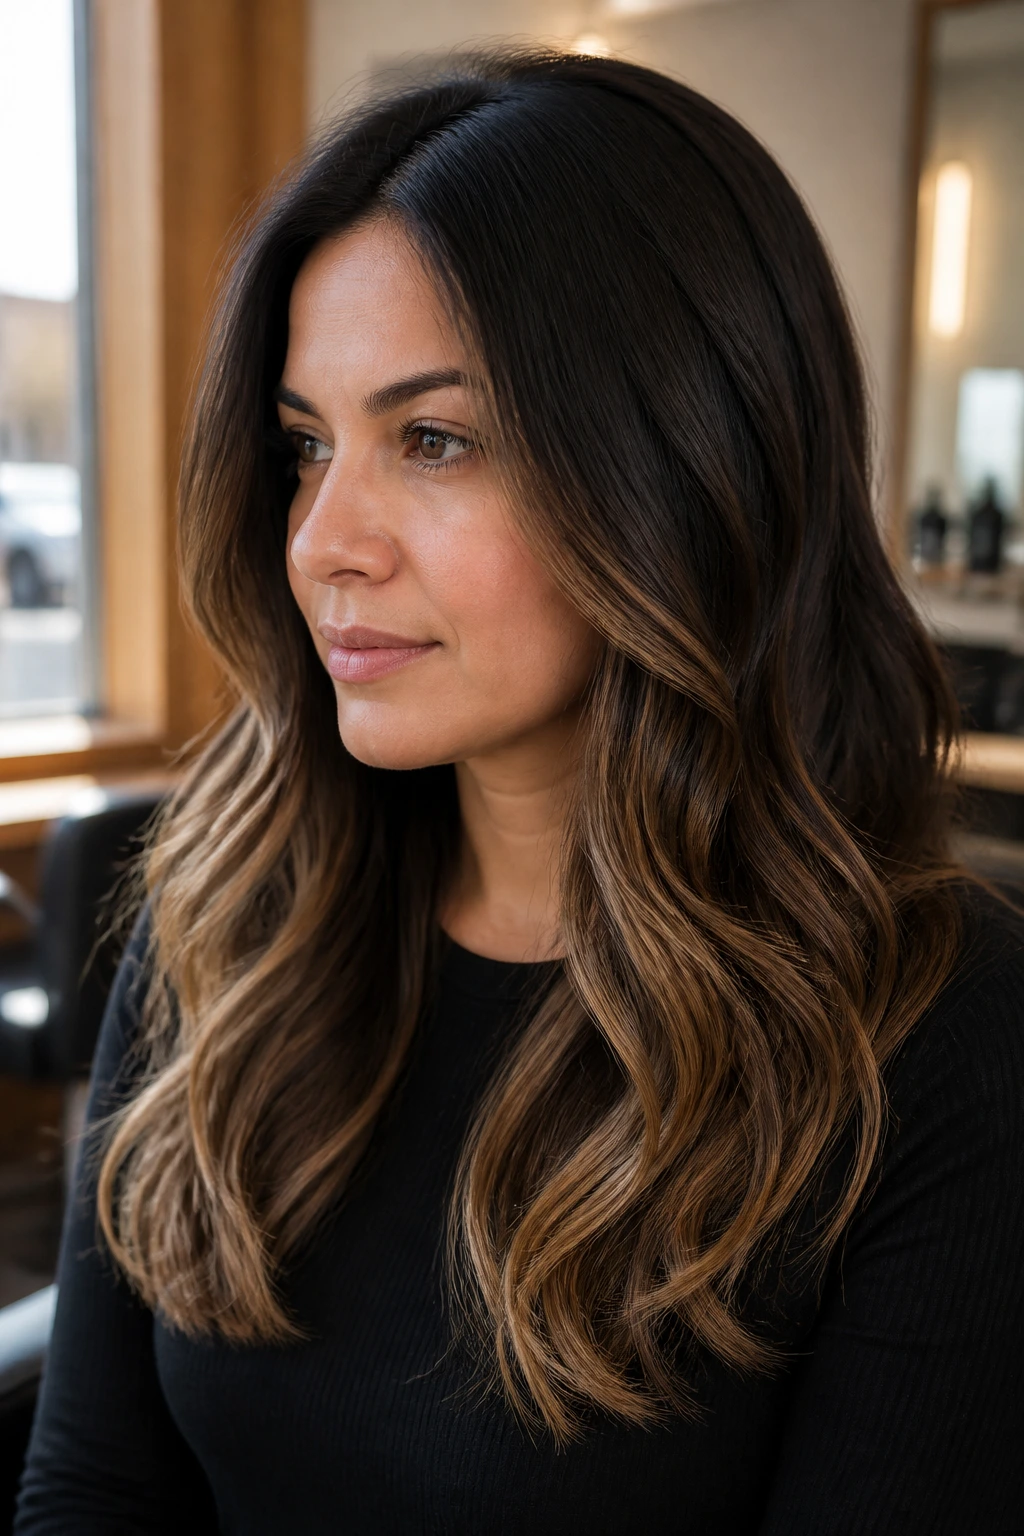
8. An Ombré Fade That Softens the Jawline
A soft ombré from dark roots into camel ends can make a round face look longer because the eye travels downward. The fade should be gradual. No hard line. No chunky break at the chin. Just a slow move from espresso to warm beige-brown.
I like ombré best on shoulder-length and longer hair where the transition has space to breathe. On a blunt bob, the fade can look abrupt if the ends aren’t layered. But with length, the color feels like it melts instead of sitting on top.
The upside is maintenance. Roots stay dark, the face keeps its frame, and the lighter ends can be refreshed with a gloss instead of a full-color appointment every time.
9. Curl-Painted Camel Highlights for Loose Spirals
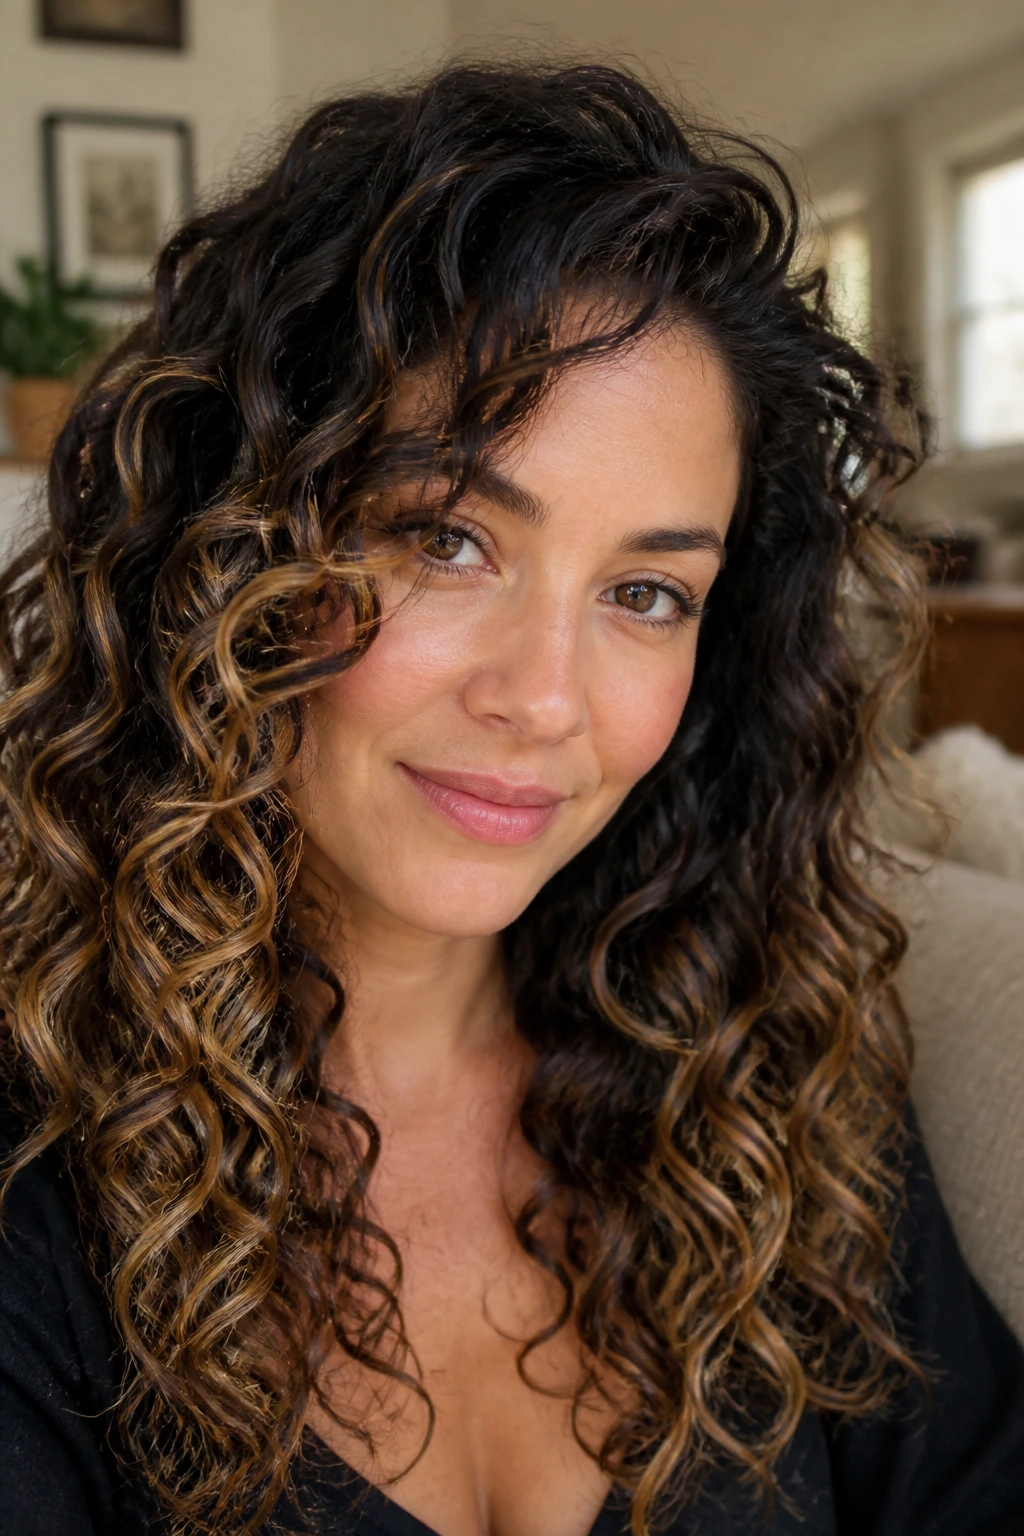
Curly hair needs a different hand. Camel highlights painted onto curls should follow the shape of the spiral, not just the outer shell. If the color sits only on the top layer, the curls can look flat from the front and too dark underneath.
The best approach is to place the camel on the high points where light naturally hits each curl. That gives the hair dimension and keeps the round face from looking extra full. The curls break up the width on their own, and the color strengthens the effect instead of fighting it.
Loose spirals usually show camel beautifully because each curl catches a slightly different tone. The result feels airy, not striped. That is the whole game.
10. A Shag Cut Broken Up With Camel Pieces
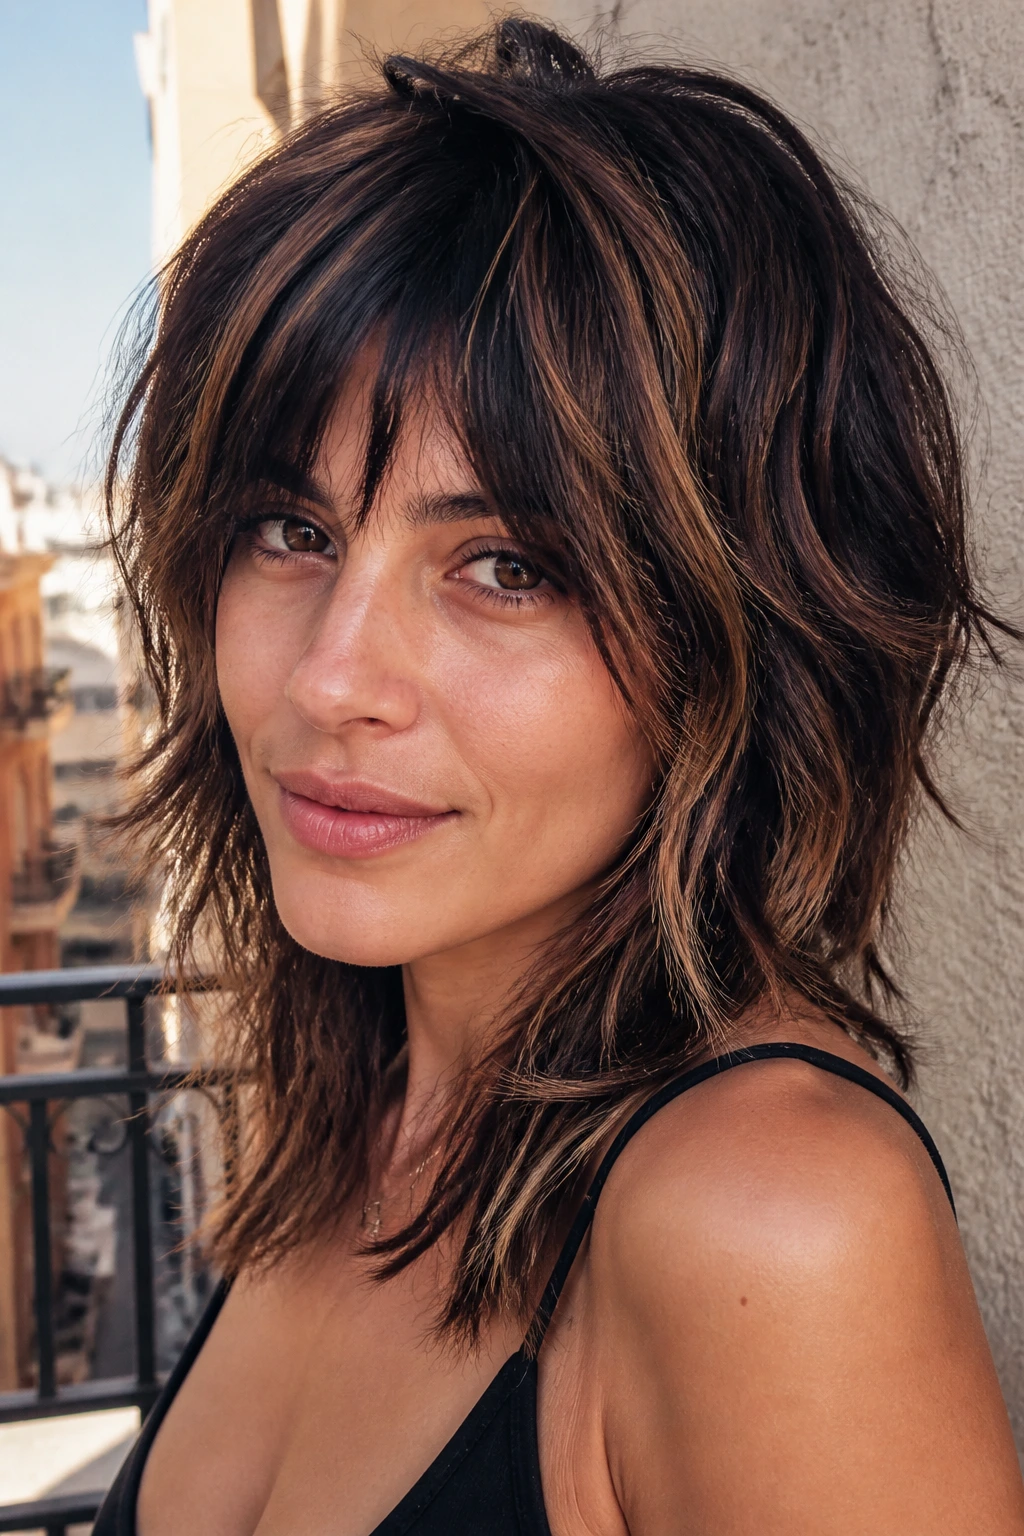
A shag is one of the easiest cuts for camouflaging roundness because the layers already interrupt the shape. Add camel pieces through the crown, cheek level, and ends, and the hair gets a choppier outline that pulls the face downward. The highlight pattern should look irregular on purpose.
This style loves movement. Air-dried texture, a diffuser, or a rough blowout all work. What matters is that the pieces are not too symmetrical. If the front is highlighted the same on both sides, the effect gets stiff.
I’d keep the camel shade a touch deeper here, more toasted oat than pale sand. The cut is already doing a lot. The color should support it, not compete.
11. Collarbone-Length Hair With Bright Bottom Layers
Collarbone cuts sit in a sweet spot for round faces because they don’t cut the face horizontally at the jaw. Put the camel brightness mostly in the bottom layers, and the style gets a little swing every time the hair moves. The light shows when the ends flip, which is more flattering than a heavy front stripe.
This works well if you want dimension without a big maintenance schedule. The roots stay grounded. The brightness lives where the cut has the most motion. That makes the whole look feel lighter, even on dense dark hair.
Straight or slightly bent textures both work. The key is that the lower section has enough contrast to show shape, while the top remains darker and sleeker.
12. Peekaboo Camel Underlayers That Flash at the Right Angle
Peekaboo highlights are underrated on dark hair. The camel lives underneath the top layer, so the color peeks through when the hair turns, lifts, or gets tucked behind the ear. For round faces, that hidden placement is useful because it creates depth without widening the outer edge.
This is especially nice if you wear your hair down a lot but don’t want the front permanently bright. The underlayer gives you motion and surprise. It also keeps the grow-out much softer than obvious face-framing pieces.
I’d choose this if your office or daily routine is conservative but you still want some warmth. The camel reads as movement, not a full-color statement.
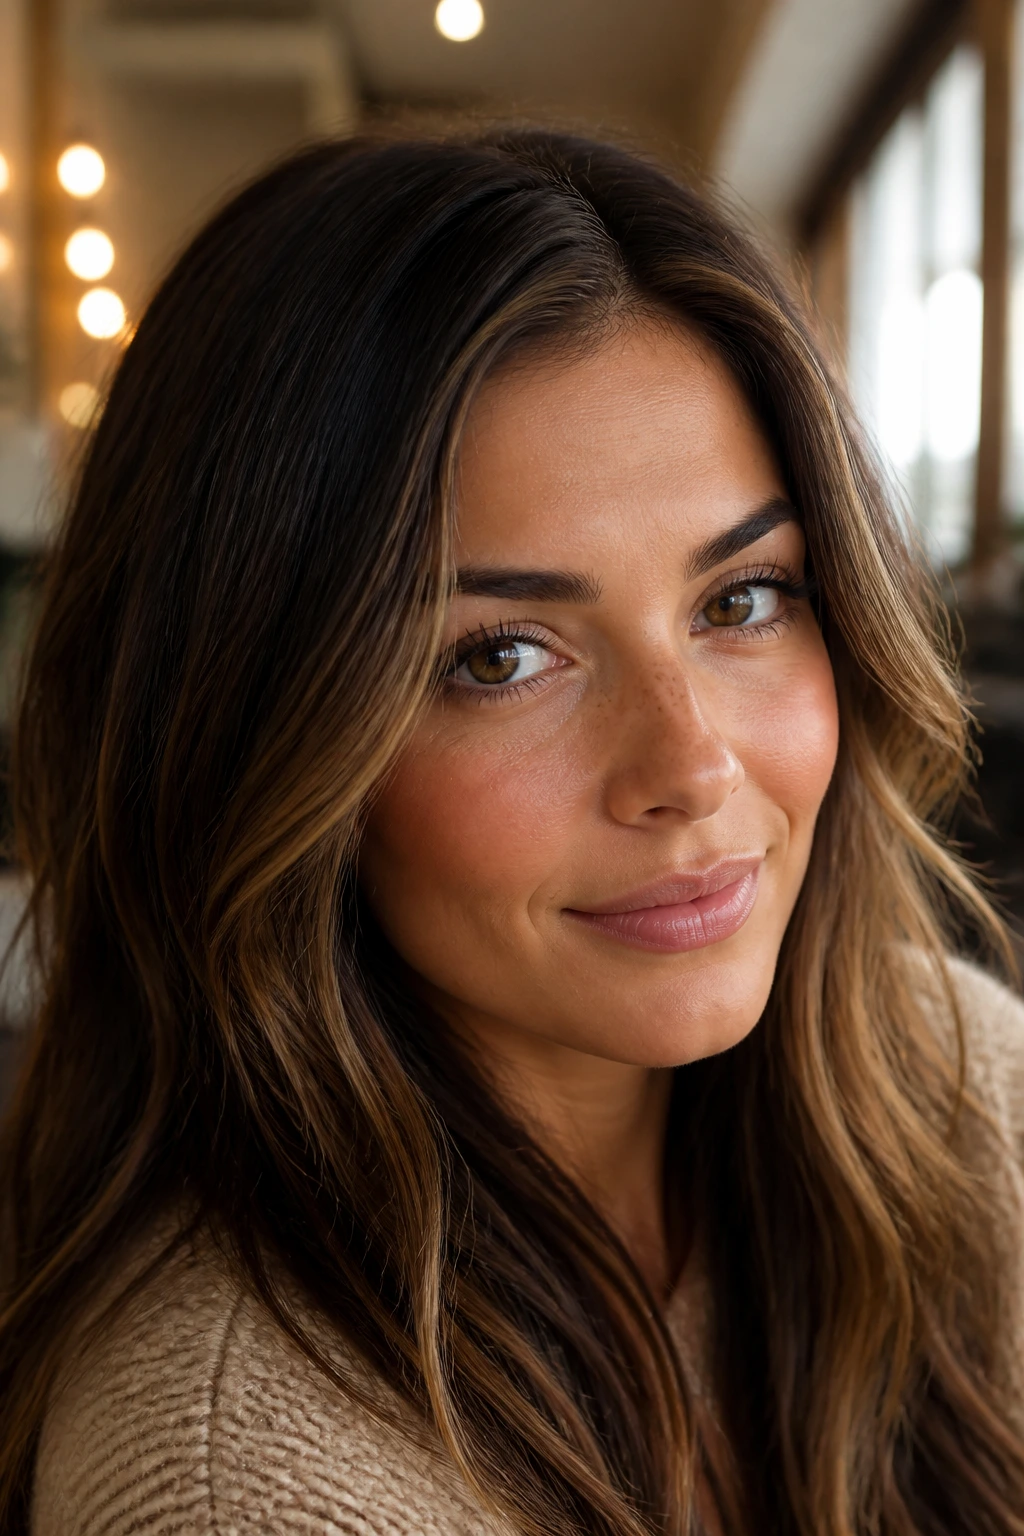
13. Micro-Babylights That Look Sun-Touched, Not Stripy
Micro-babylights are tiny, fine highlights that take time to place, but they pay off on dark hair. The camel pieces are so narrow that they blur into the base instead of sitting on top like lines. On a round face, that softness matters because it avoids adding width.
This is a good option when you want dimension more than drama. The whole head feels lighter, but no one can point to a single chunky streak. That makes the haircut and styling choice do more work than the color itself, which is often the smartest path.
A gloss after lifting keeps these tiny pieces from turning too gold. Camel should look warm and creamy, not orange.
14. Contour Highlights Along the Cheekbone and Jawline
Contour highlights are where hair color starts acting a little like makeup, and I mean that in the best way. Camel ribbons placed near the cheekbone, then continued along the jawline and ends, can carve shape into a round face without heavy makeup tricks. The line is narrow, but the effect is strong.
The important part is not to start the brightest sections at the widest point of the cheeks. Start slightly above or below, then angle the light downward. That creates a narrow frame instead of a wide band.
This style works beautifully with layered cuts and a side part. It’s one of the few highlight patterns that can really change the feel of a face from the front.
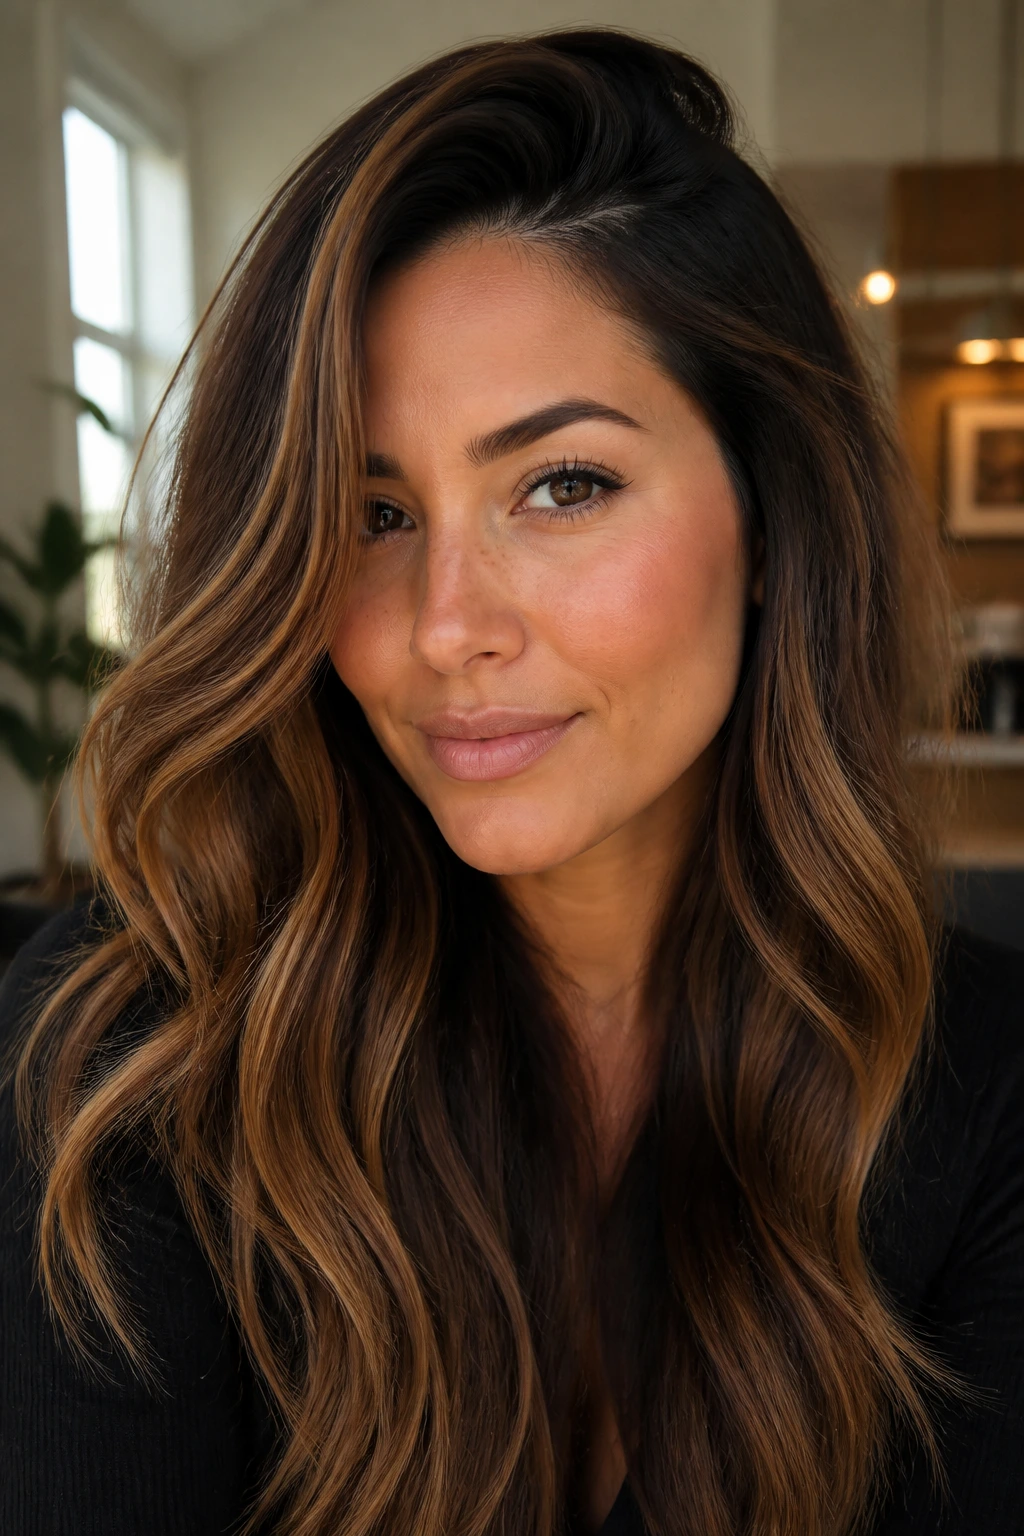
15. A Cinnamon-Camel Blend That Keeps Dark Hair Rich
Camel does not have to mean beige only. A cinnamon-camel blend brings in a little spiced warmth, which can be gorgeous on deep brown hair as long as the red stays muted. For round faces, the bonus is that the warm undertone draws the eye down through the lengths instead of outward across the cheeks.
I like this blend on thick hair and curls because the warmth shows through texture better than a flat neutral beige. It’s also more forgiving if your natural base pulls red when lightened. Instead of fighting that pigment, the color works with it.
The key is control. Too much copper and the highlight becomes loud. Too little and it disappears. The middle is where this one lives.
16. Side-Swept Fringe With Bright Edge Pieces
A side-swept fringe is one of the easiest ways to break up a round face, especially when the fringe is paired with camel edge pieces. The diagonal line draws the eye across the face at an angle instead of straight across. That small shift changes the whole mood.
The highlights should sit along the longer side of the fringe and the front edge of the layers. Keep the opposite side softer and darker so the shape doesn’t turn symmetrical again. You want movement, not a mirrored frame.
This look has a little old-school glamour in it when it’s blown smooth. It also works with waves, where the fringe bends gently and the camel catches the light in sections.
17. Glass-Hair Panels on Straight Dark Hair
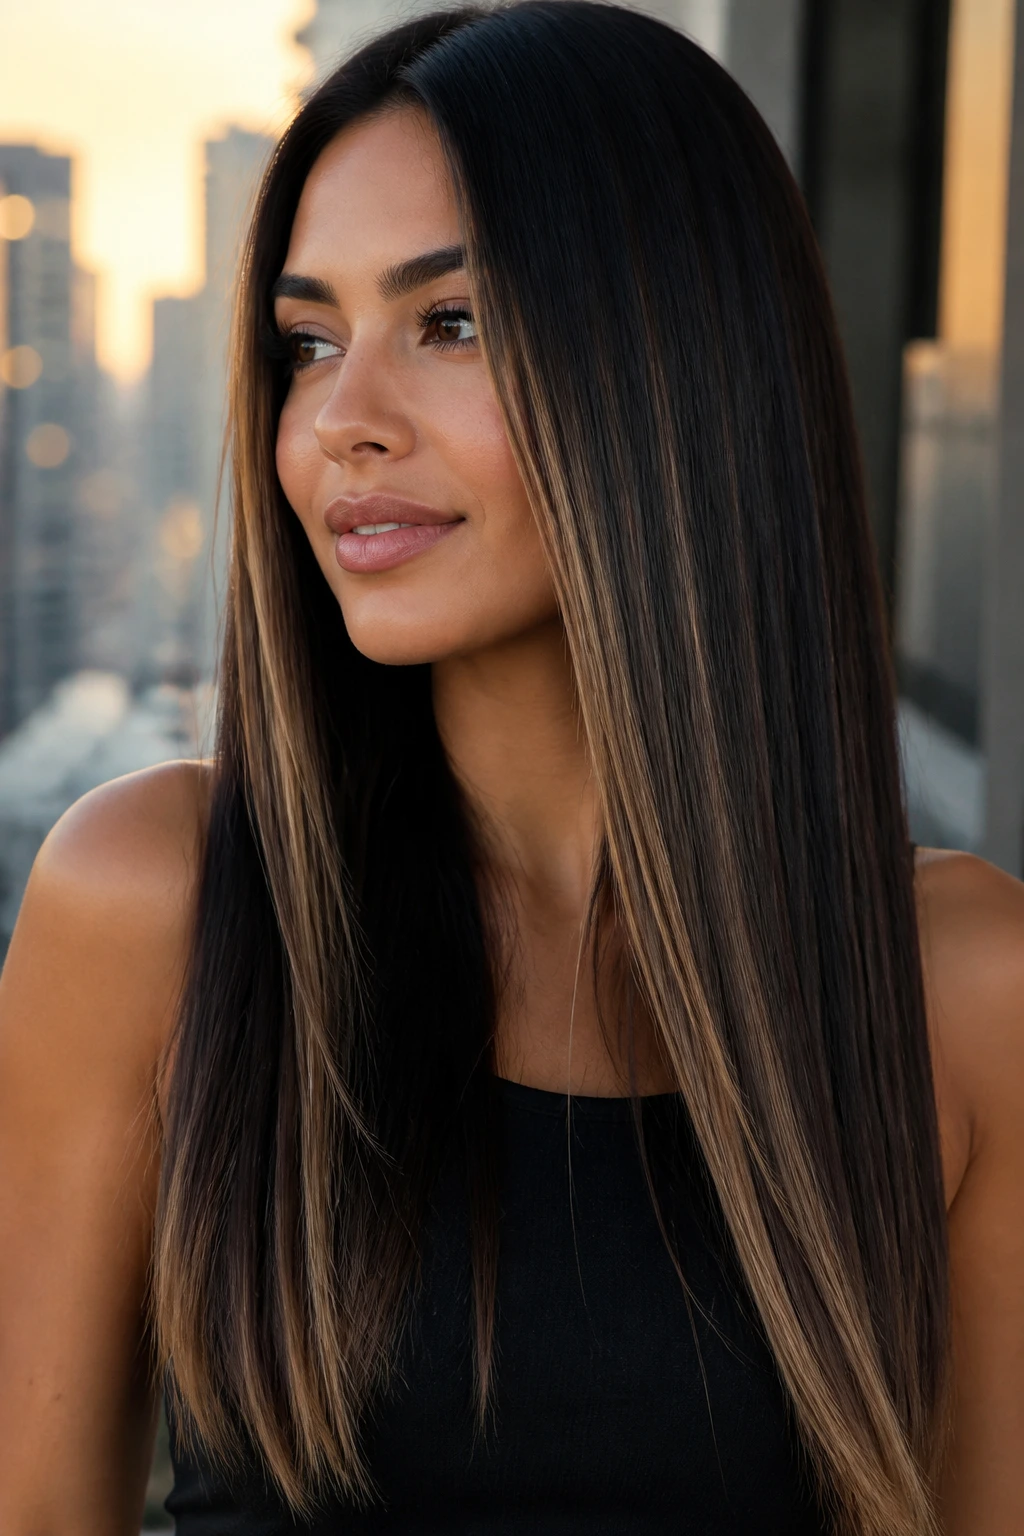
Straight, shiny hair can be tricky because every highlight line shows. Camel panels need to be placed with more thought here. If the pieces are too wide, the face gets boxed in. If they’re too narrow, they disappear. The sweet spot is clean vertical panels that start lower and taper softly toward the ends.
This version is sleek, almost architectural. The shine of straight dark hair makes camel read richer, and the face benefits from the long lines. I’d skip blunt, chunky front streaks entirely on this shape.
A middle part can work if the front panels begin below the cheekbone. A side part is easier, though, because it breaks the symmetry before the color even shows up.
18. A Rooty Camel Balayage That Lets the Base Stay Strong
Rooty balayage is one of the most practical ways to wear camel highlights on dark hair. The base stays intact at the scalp, and the lighter pieces bloom gradually from mid-lengths down. For round faces, the root shadow keeps the top of the face from looking too open or wide.
This style is worth the salon time because it buys you months of easier grow-out. The highlight line is blurred on purpose. The light still shows, but it doesn’t look like a hard stripe that needs rescuing after six weeks.
If you hate feeling “done” all the time, this is probably your lane. It looks good a little grown in, which is more useful than perfect for three days.
19. Camel Slices Through Thick Hair to Break Up Bulk
Thick hair can hold highlight beautifully, but it also needs strategic placement or the color gets buried. Camel slices cut through the density and create little windows of light inside the mass. That keeps a round face from disappearing behind one large block of dark hair.
The slices should be staggered, not even. Some can sit just around the temple, others through the mid-lengths and ends. That unevenness stops the whole shape from looking puffy.
This approach works best when the haircut has movement. Long layers, invisible layers, or a soft shag let the camel show through without forcing the hair to look thin.
20. Airy Camel Threads for Fine Dark Hair
Fine hair needs a lighter hand. Too much highlight can make it look sparse, which is the opposite of what you want. Camel threads should stay airy and narrow, just enough to catch light and give the illusion of thickness.
On a round face, these thin threads are nice because they don’t widen the outline. They add lift around the crown and front without creating heavy bands. The effect is more haze than stripe.
I’d keep the shade warm and close to the base level if the hair is fine. Big contrast can make the strands look separated. A softer camel makes the hair look denser.
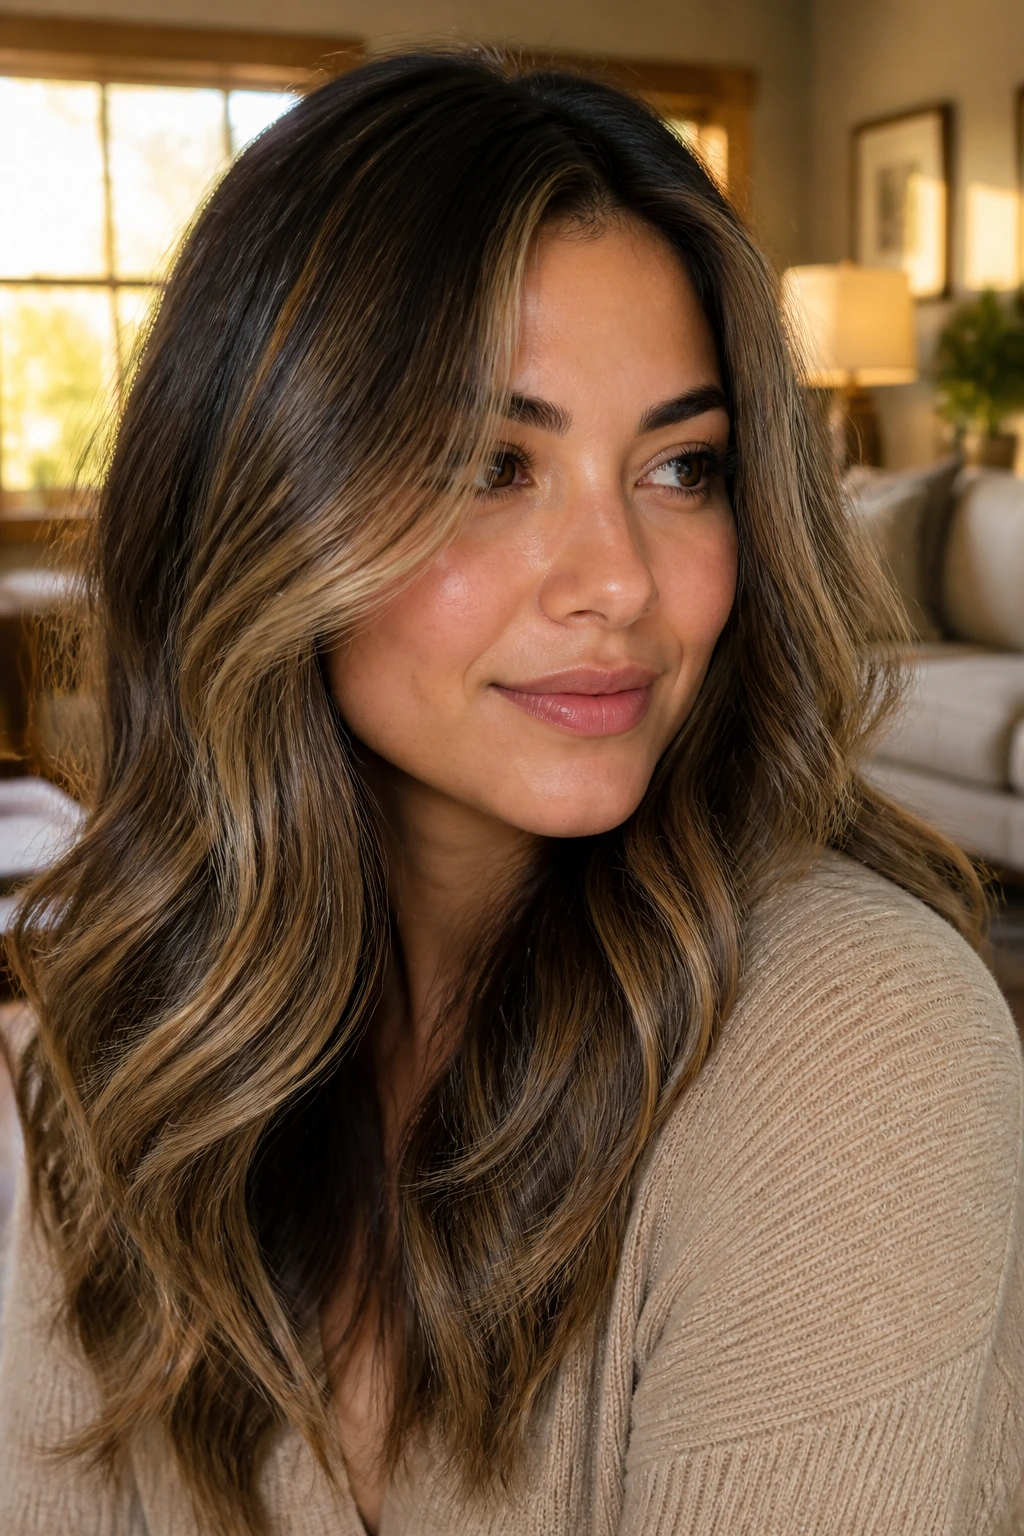
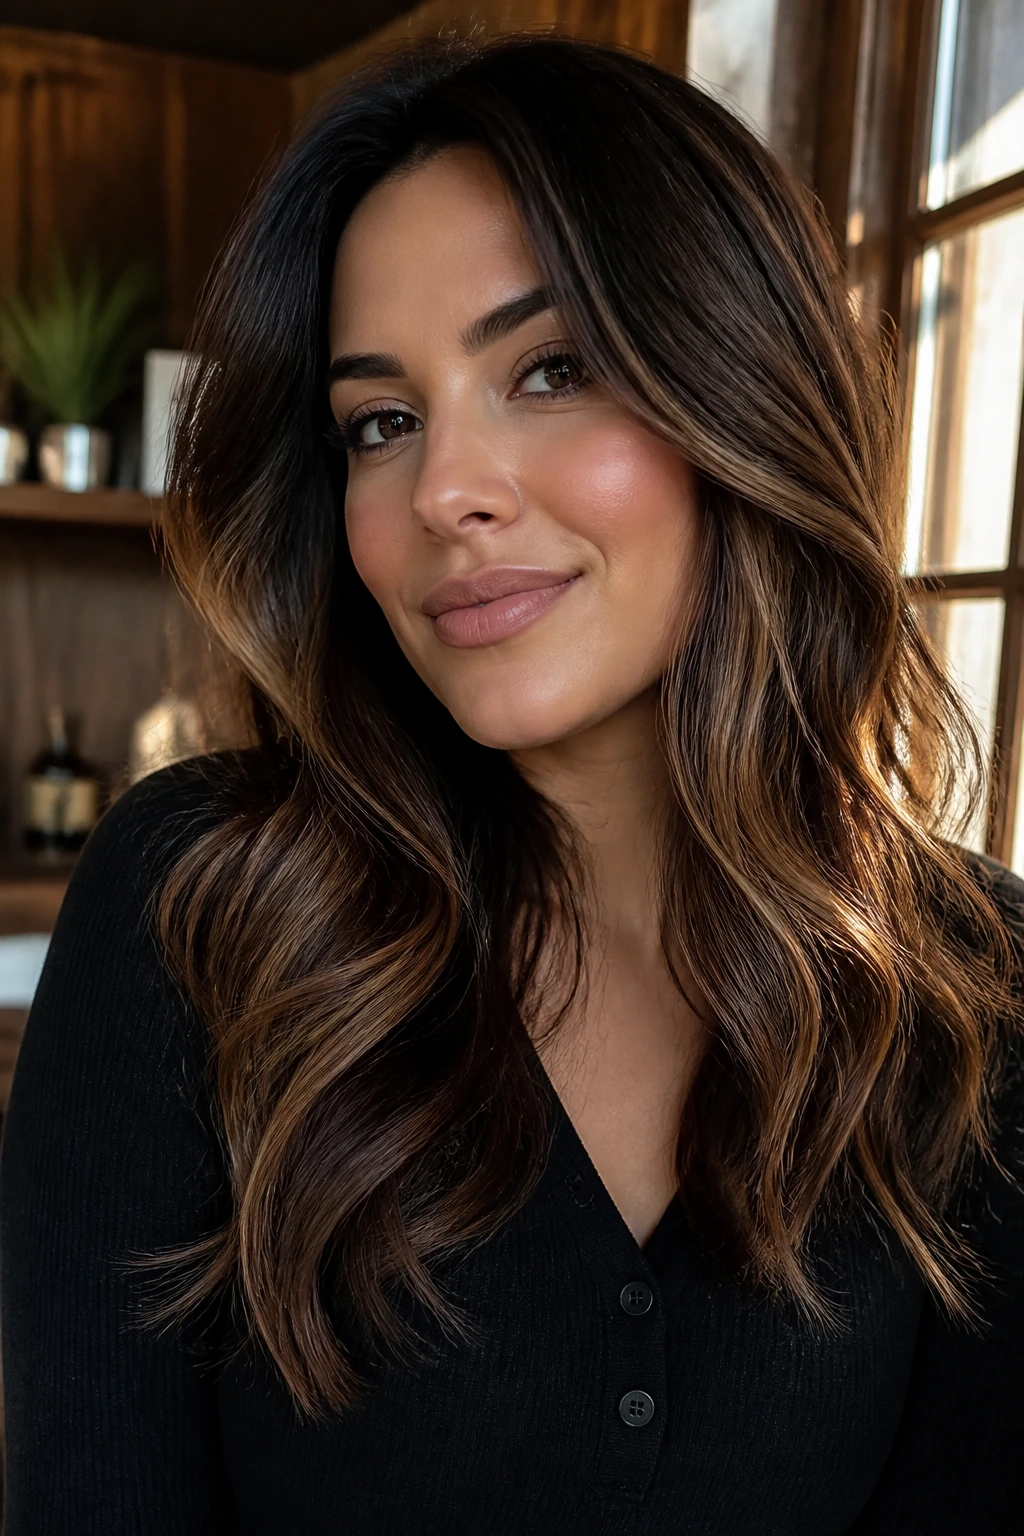
21. Chocolate Base With Sandy Ribboning Through the Mid-Lengths
This one is for people who want warmth but not sweetness. A chocolate base with sandy ribboning through the mid-lengths gives the hair a cool-warm tension that looks especially good on dark brunettes. The placement is key: keep the top darker, then let the light slip through the middle and ends.
That mid-length brightness helps round faces because it creates a visual line down the side of the head. The face reads narrower when the eye follows the ribboning vertically. A band of light right at the cheekbone would do the opposite, so avoid that.
This style works well on hair that already has some movement. The ribbons show best when the hair bends.
22. Long Curls With Face-Opening Camel Ends
Long curls can hide the face if they’re all the same depth. Camel ends open them up. The lighter tips create a frame that starts below the cheeks and keeps going downward, which is exactly what a round face needs.
I prefer this on layered curls where the shortest pieces are still long enough to blend. The camel should live mostly on the outer curl pattern and the lower half of the length. That way the brighter parts show when the curls bounce, not just when the hair is still.
This version has a softer feel than heavy front highlights. It’s warm, flattering, and easy to wear with minimal styling.
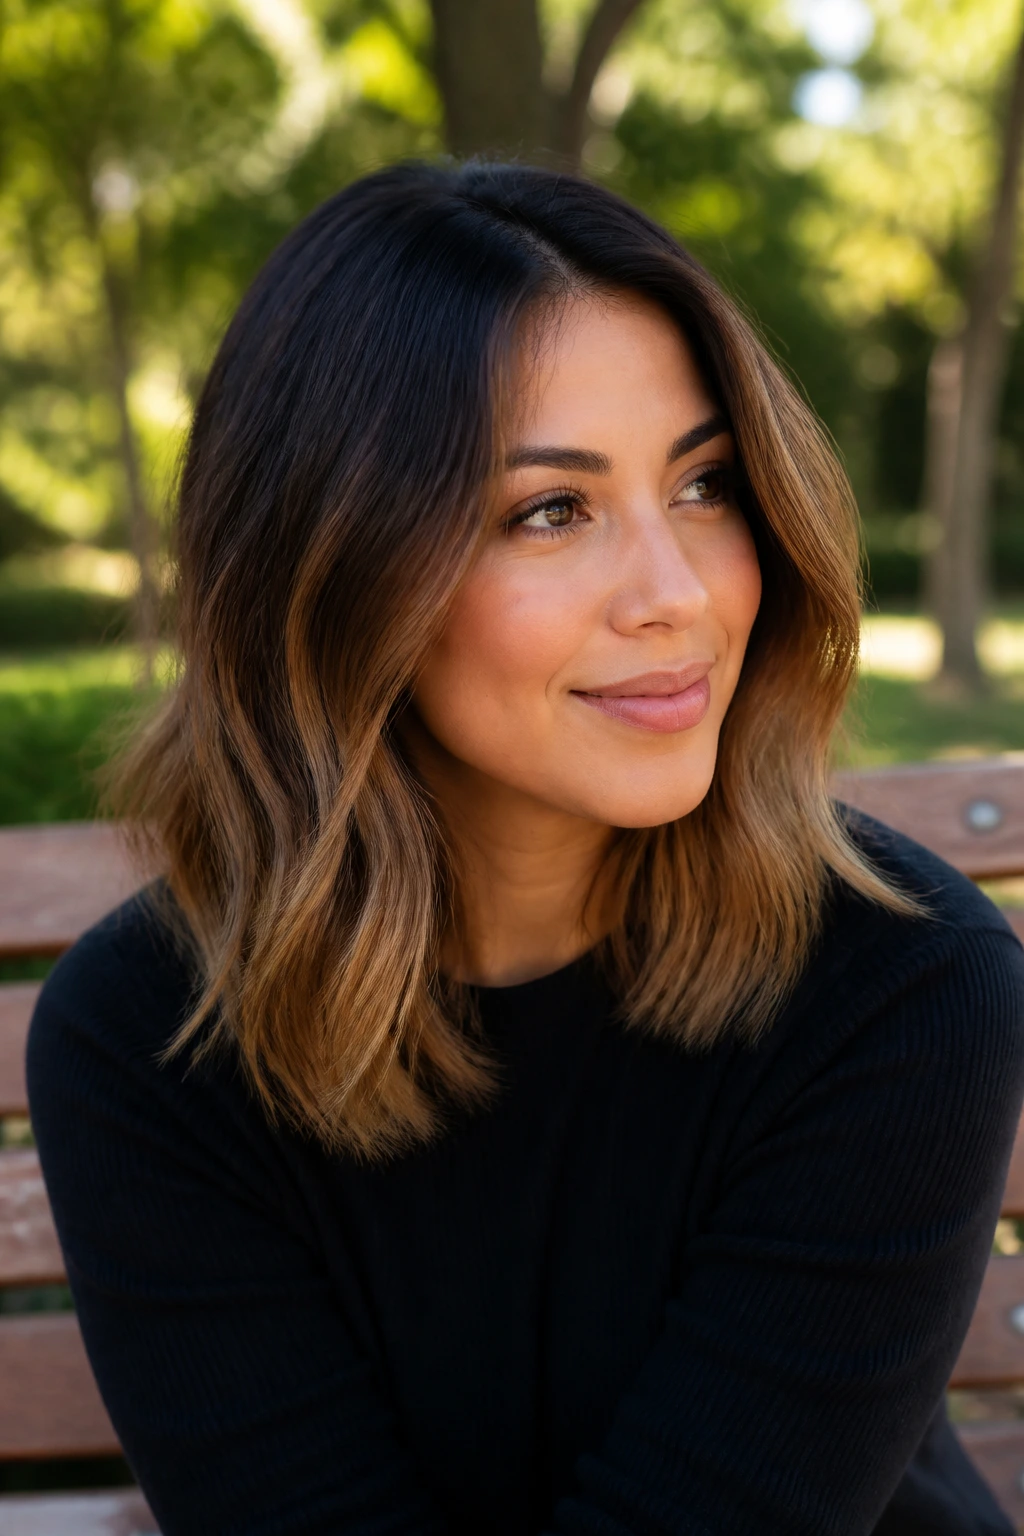
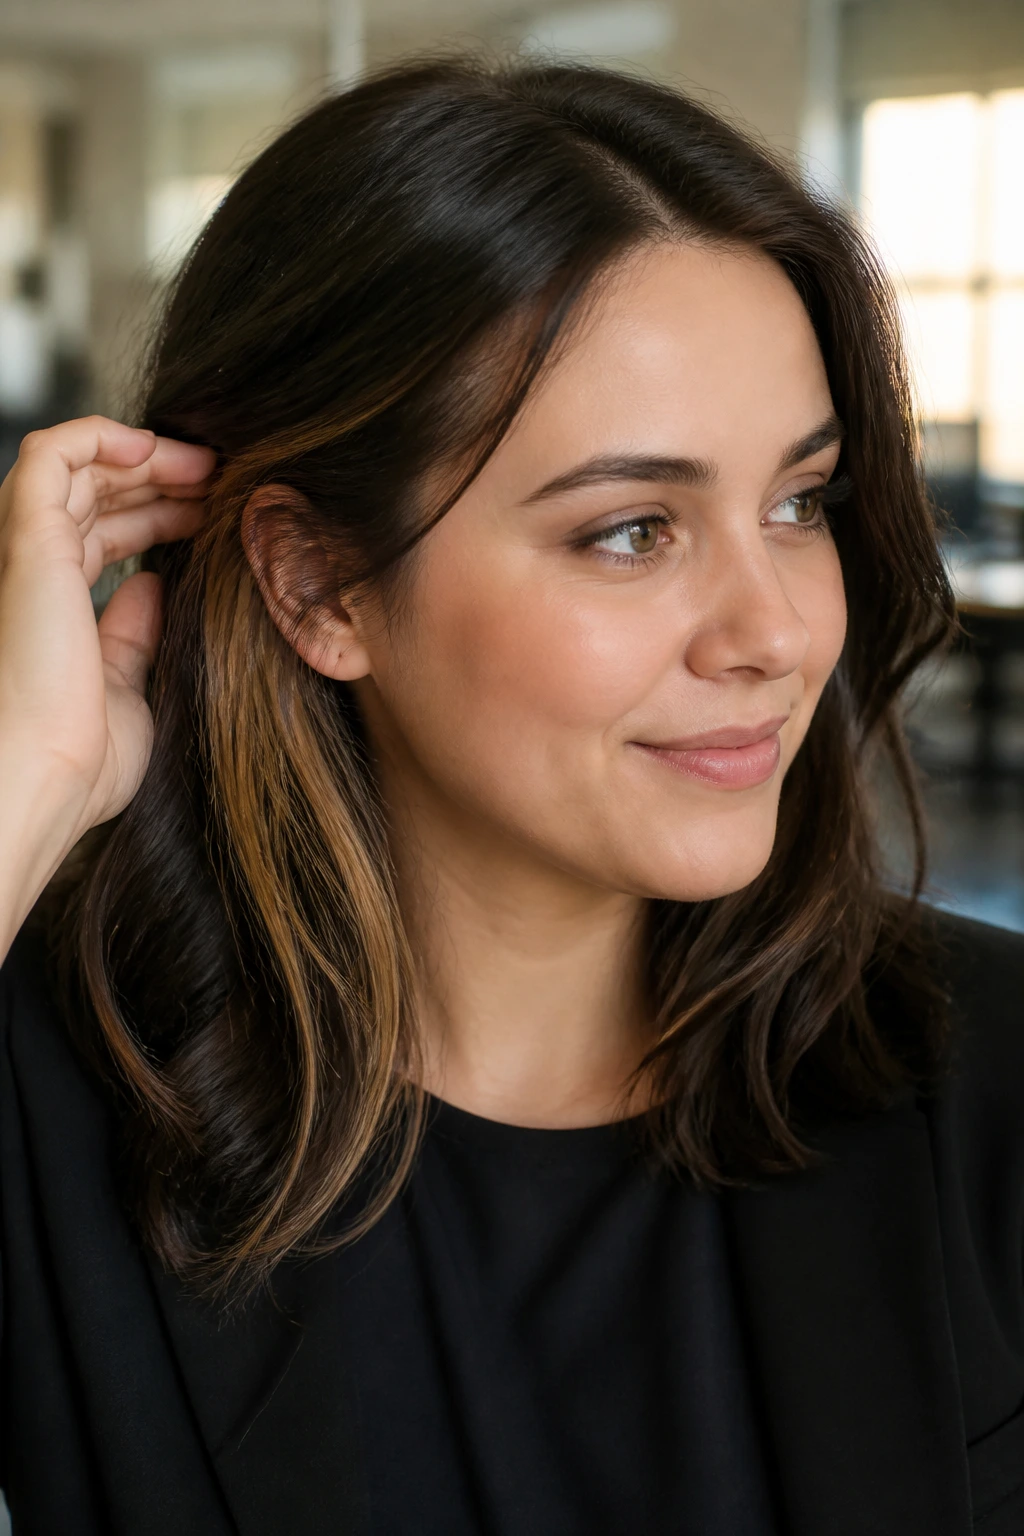
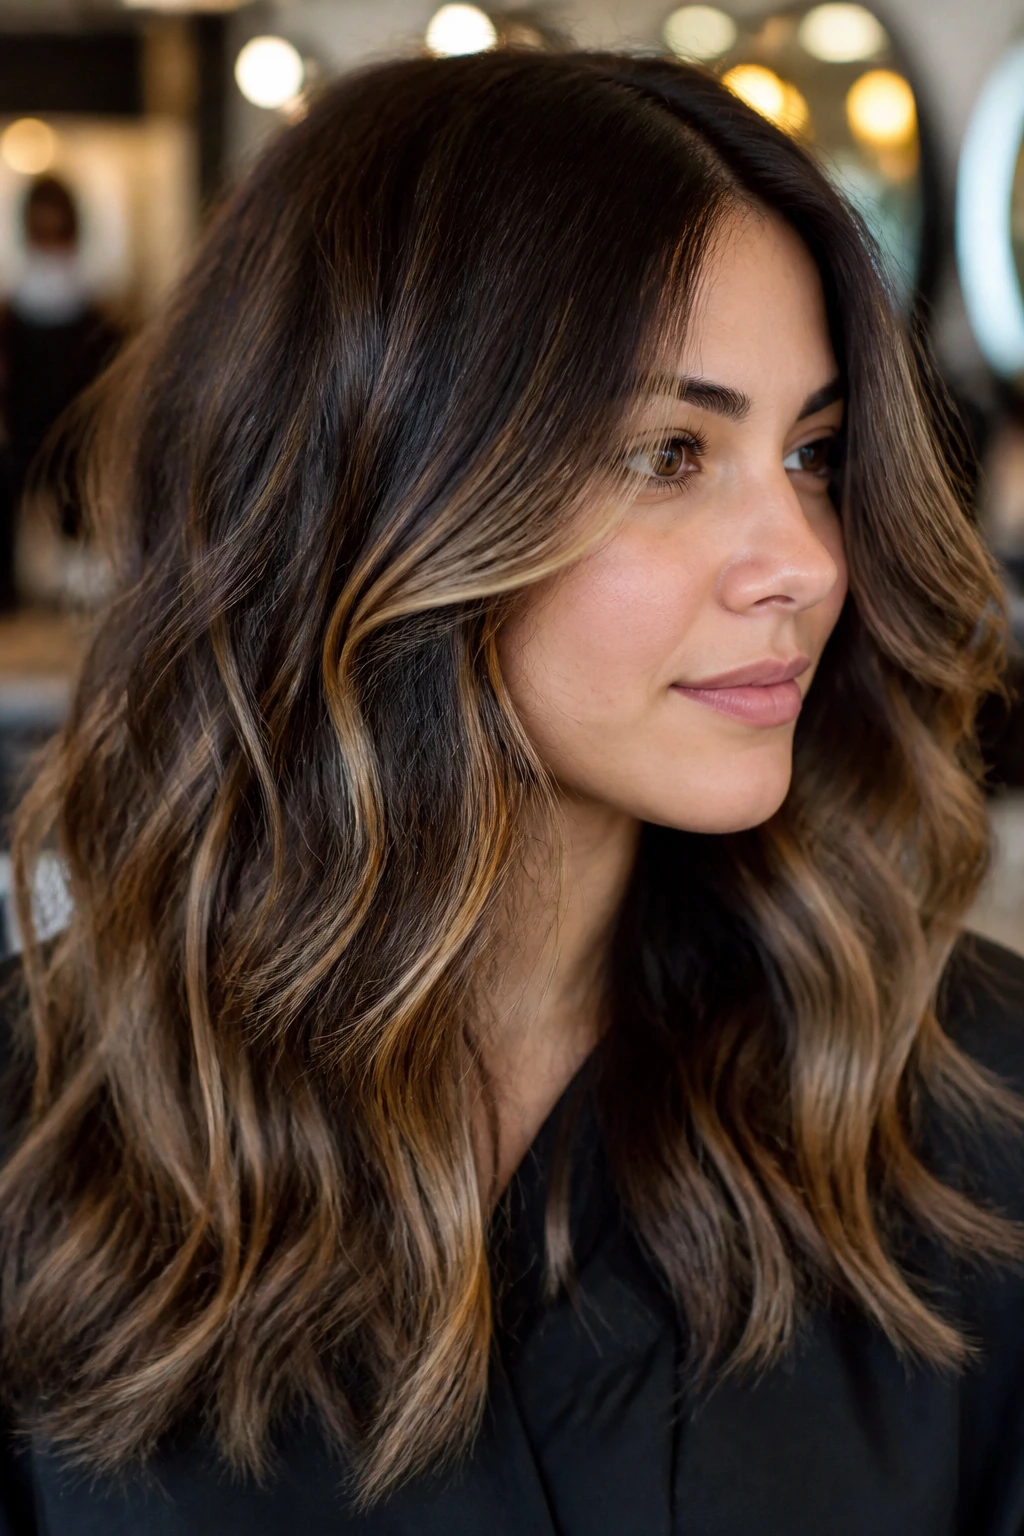
23. A Mid-Length Cut With Soft Diagonal Light
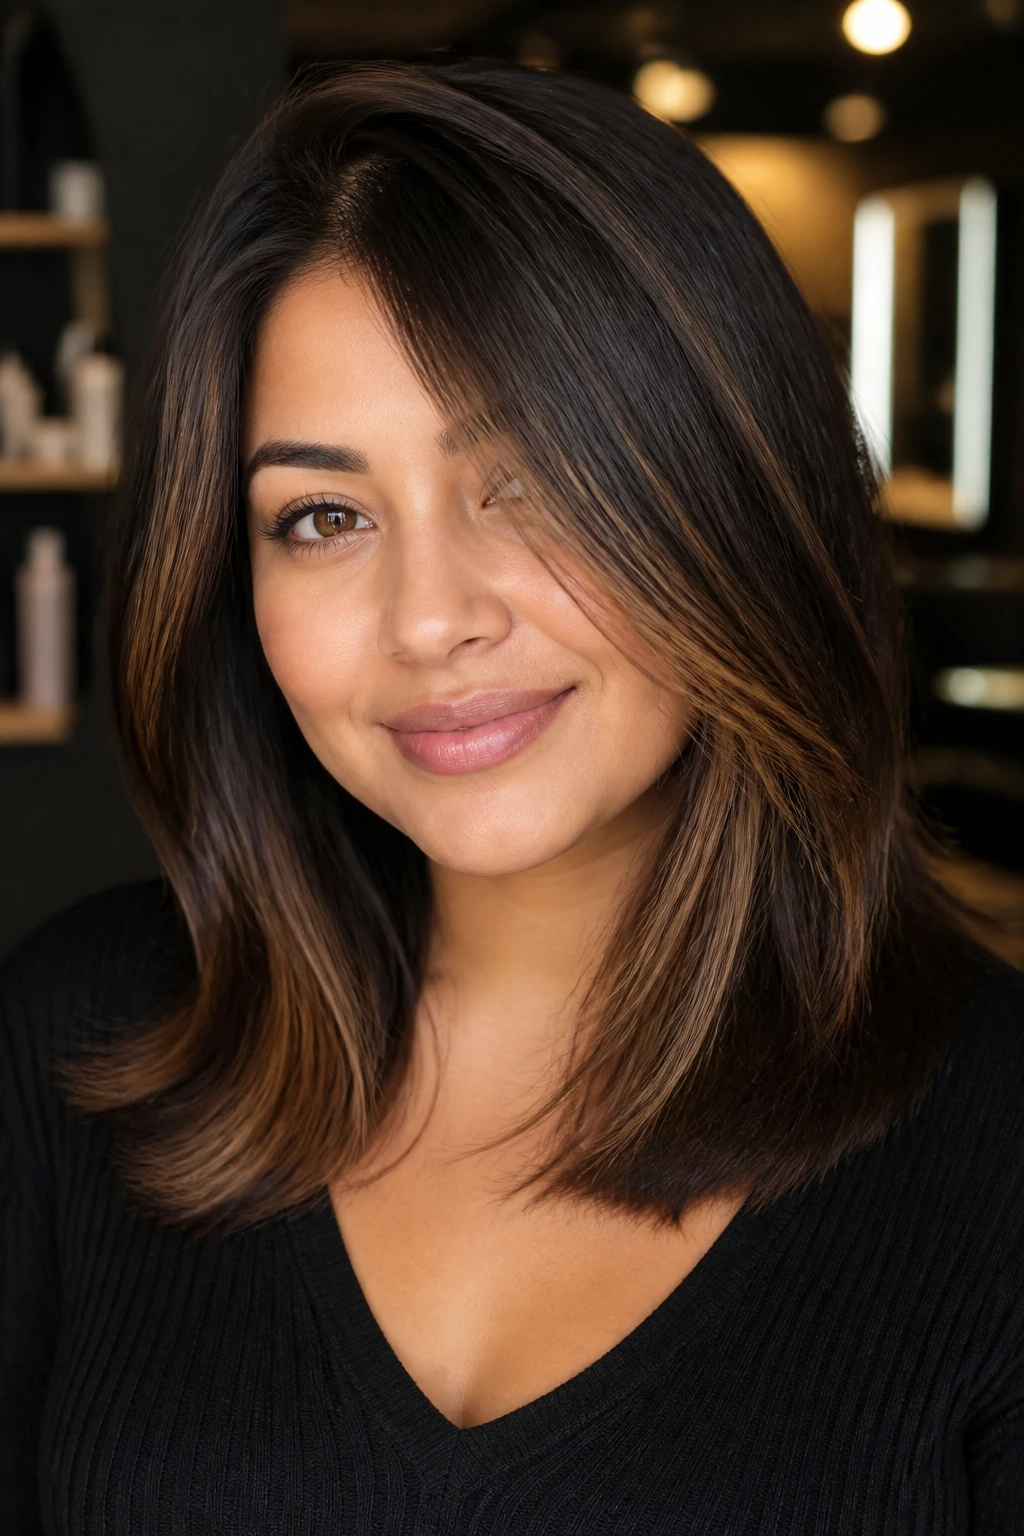
Mid-length hair can sometimes sit in a neutral zone where the shape feels neither long nor short enough to do the work on its own. Soft diagonal camel light fixes that. The highlight should angle from the temple down toward the collarbone so the eye sees movement instead of width.
This is one of the cleanest choices for round faces because the diagonal line interrupts the roundness. The trick is subtlety. If the diagonal is too sharp or too bright, it looks like a stripe. If it’s diffused, it just looks like expensive depth.
A smooth blowout brings this style to life. Loose bends do too, but the diagonal has to stay readable.
24. Mocha Melt With Camel Ends and Low-Lift Dimension
A mocha melt keeps the base dark and rich while the camel appears only where the hair naturally fades lighter. That low-lift approach is kinder to dark hair and easier on the face shape, because the brightness doesn’t start all at once. It trickles down.
This is a smart compromise if you want noticeable highlights without giving up depth around the roots. The darker top part keeps the face framed, and the camel ends add a soft finish. On round faces, that balance matters more than a super-bright front section.
I like this for people who wear their hair up often. The color still shows in ponytails and buns, but the overall look stays grounded when the hair is down.
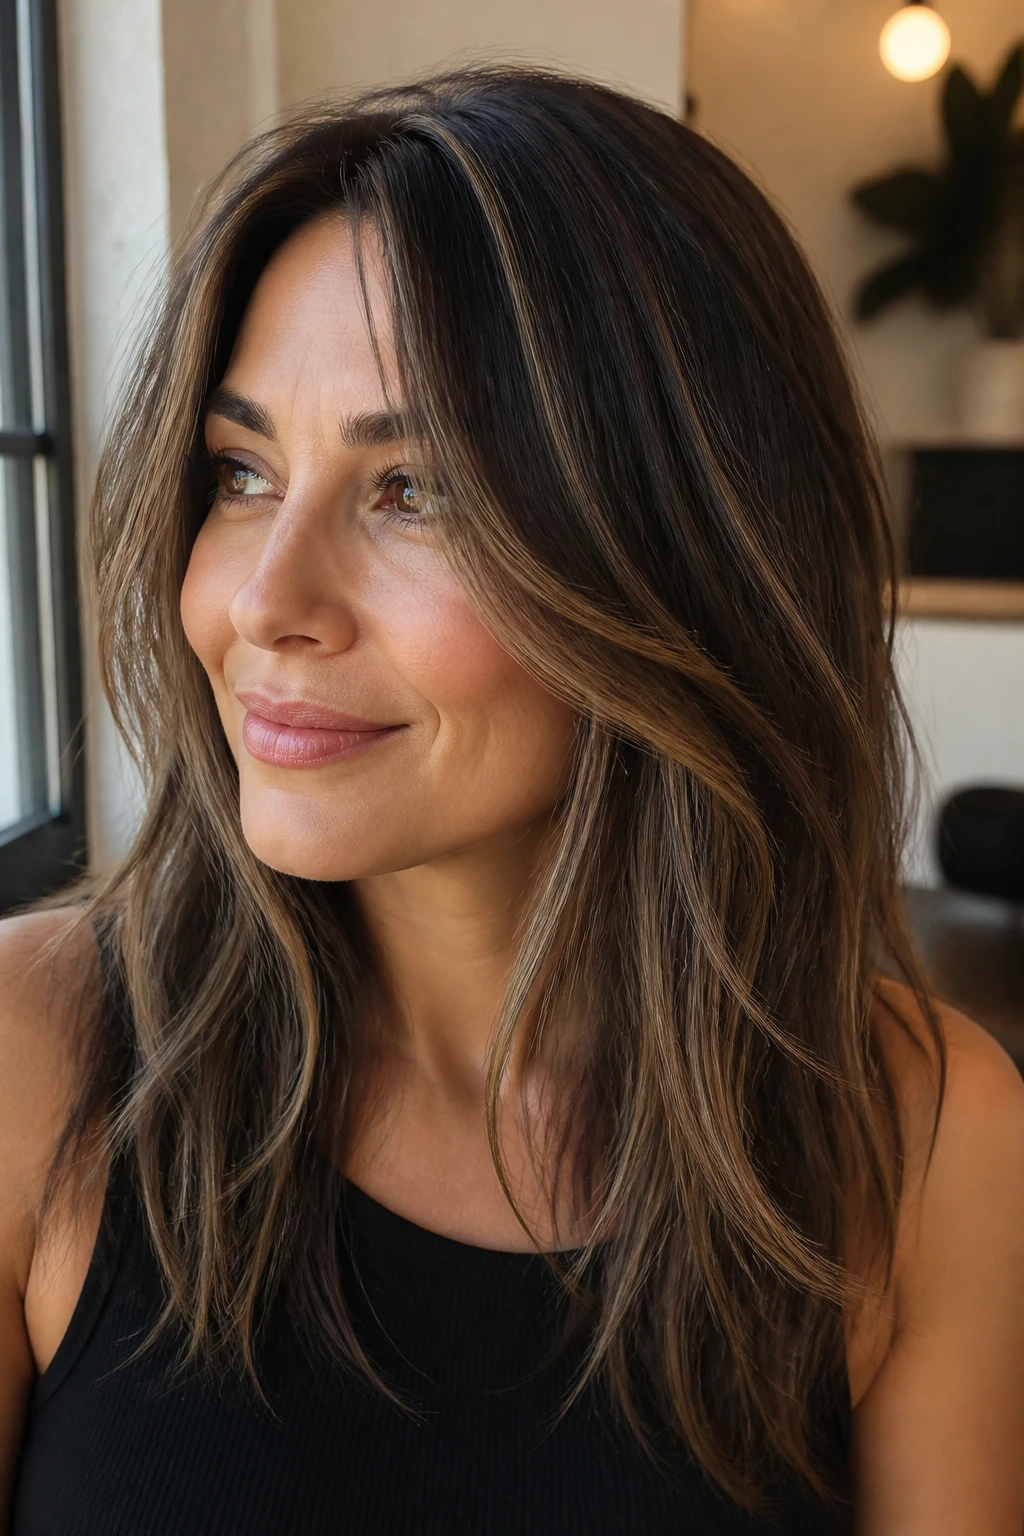
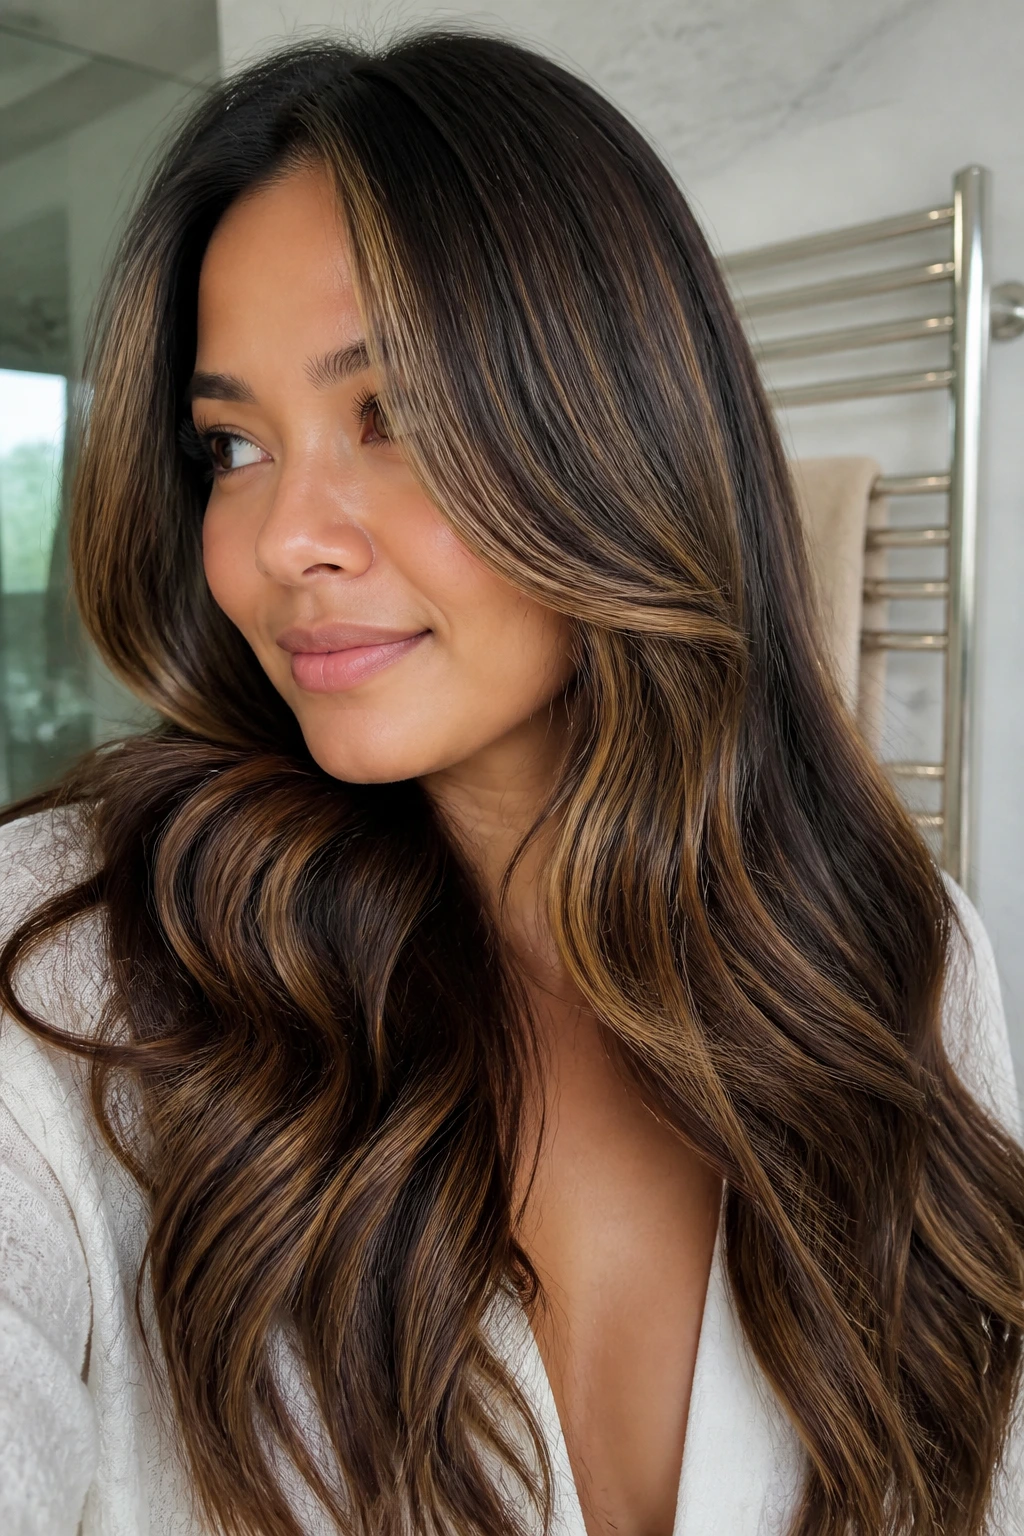
25. Soft Camel Glow That Leaves the Hairline Quiet
Sometimes the best answer is the least obvious one. A soft camel glow keeps the hairline quieter and pushes the light into the interior layers and ends. That lets the face keep its frame while the lengths pick up warmth and movement.
This is especially good if you already have a fuller cheek line and do not want the highlight pattern to sit right there and repeat it. The camel should feel like a glow under the surface, not a spotlight on the front edge.
The style grows out gracefully and looks lived-in from the start. If you want warmth, shape, and a little polish without high drama, this is the one I’d put at the top of the pile.
Why Camel Highlights Work on Dark Hair and Round Faces
Dark brunette hair has a way of swallowing weak color, so camel works because it sits in the middle ground: light enough to show, warm enough to stay rich, and soft enough to avoid the flat beige look that can drain depth from the cut. On a round face, the same tone gets smarter when it travels vertically or diagonally instead of sitting in a band across the widest part of the cheeks.
The face-shaping part is mostly about where the light starts and stops. If the brightest camel pieces begin lower than the cheekbone and taper toward the ends, the eye follows that drop. That is what gives the face a longer outline. A horizontal front stripe does the opposite. It pulls attention straight across, and that’s the one move I’d skip every time.
There’s another reason these highlights work: they let the haircut stay visible. Layers, curtain bangs, side parts, and soft waves all have room to do their job when the color is placed with restraint. The highlight is support, not the whole show.
What to Ask Your Colorist for Without Getting Vague Results

Walk into the appointment with a photo, but also with a sentence that tells the colorist what to protect. Say you want camel pieces on dark hair, with the brightness focused below the cheekbone so the face reads a little longer. That one detail saves a lot of back-and-forth.
Use specific words if you can. Babylights, balayage, money piece, root shadow, gloss, and contour pieces all mean different things. If you only say “highlights,” the result can drift toward chunky foil stripes, which are usually the wrong move for a round face. Mention whether you want beige-camel, toasted camel, or a slightly cinnamon tone.
And don’t be shy about saying what you do not want. If you hate orange, say so. If you want dimension around the face but not a bright strip at the temples, say that too. Good color is a conversation, not a guessing game.
Tools, Products, and Salon Resources That Actually Matter
-
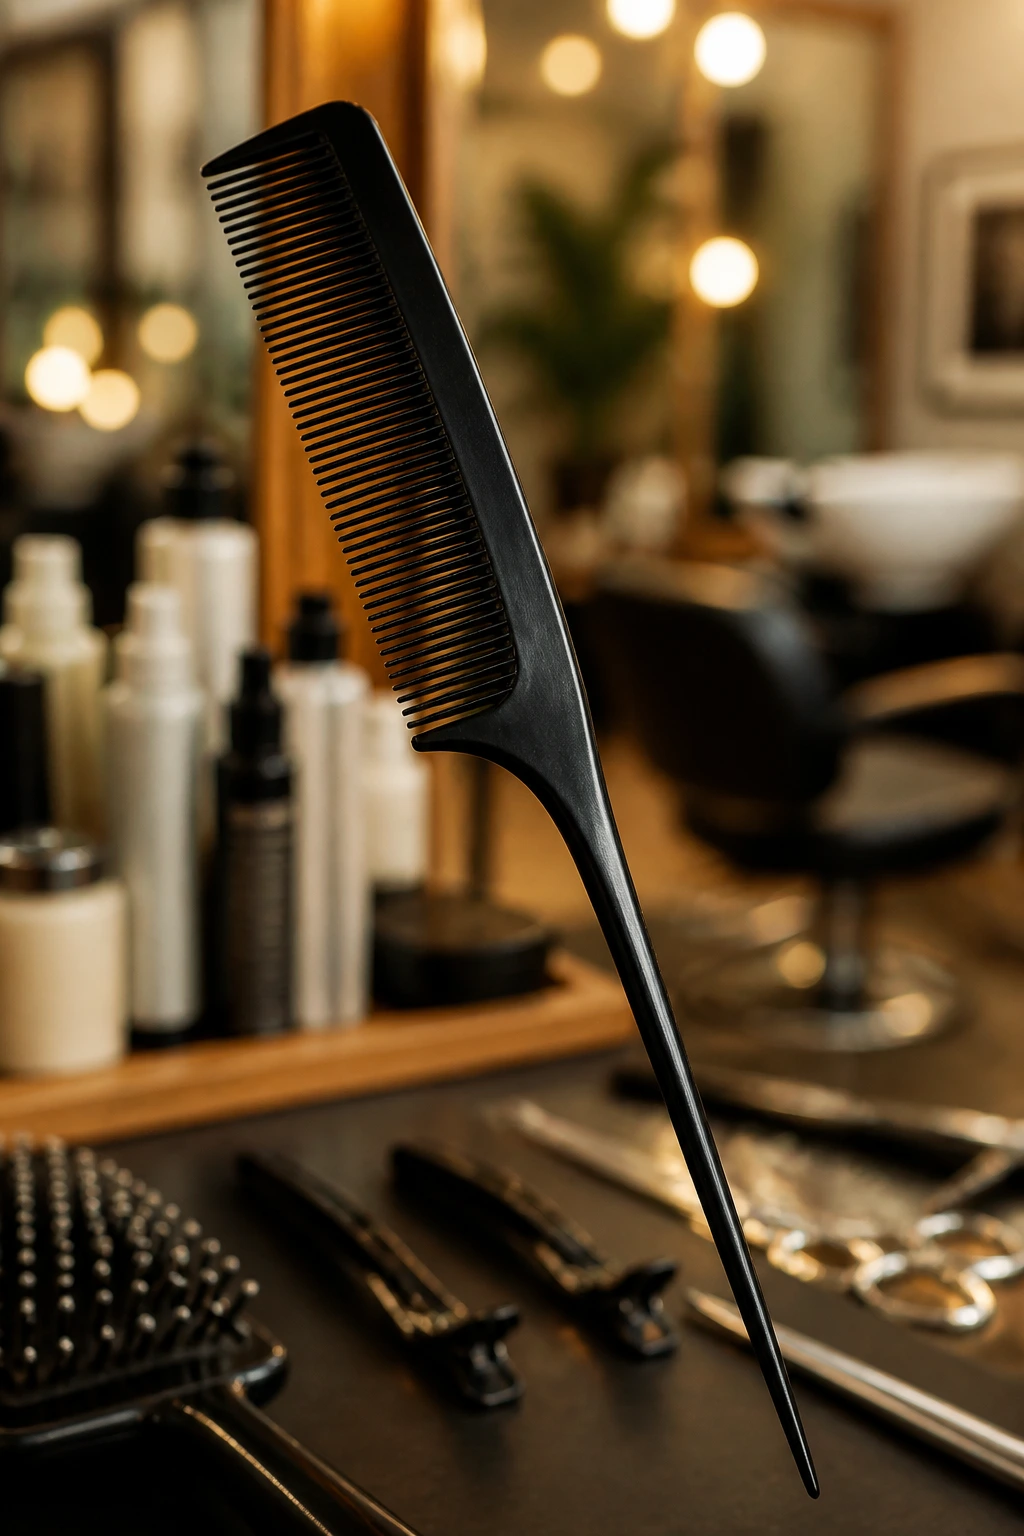
Tail comb: Useful for clean sectioning and for showing exactly where you want the face-framing pieces to start.
-
Foils or balayage board: Foils give sharper lift; a board helps with painted ribbons and softer blends.
-
Tint brush and mixing bowl: These matter if the colorist is placing fine camel babylights or a beige gloss.
-
Sectioning clips: Thick dark hair needs proper clipping or the placement gets messy fast.
-
Color-safe, sulfate-free shampoo: Keeps the tone from washing out too quickly and helps the camel stay soft instead of dull.
-
Gloss or toner: A beige or sand-toned gloss refreshes warmth when the highlights start looking flat.
-
Heat protectant spray: Non-negotiable if you blow-dry or curl; camel tones show damage faster than dark roots do.
-
Wide-tooth comb: Better than ripping through highlighted curls or waves when they’re damp.
-
Deep-conditioning mask: One rich mask a week keeps lightened dark hair from feeling straw-like at the ends.
-
Purple shampoo, used sparingly: Handy only if the camel starts drifting too gold; overuse can turn the color muddy.
How to Style and Wear Camel Highlights So the Shape Stays Long
Parting: A deep side part is the easiest way to stretch a round face because it shifts the weight and makes the highlights fall off-center. A center part can still work, but only if the front pieces start lower and the style has enough length to break the symmetry.
Finish: Loose waves, soft bends, and a rounded blowout show camel ribbons best. Pin-straight hair can flatten the shape if the highlight pattern is too even, so I’d leave a little curve in the mid-lengths whenever possible.
Cuts That Help: Long layers, curtain bangs, shag cuts, collarbone lobs, and butterfly-style layers all give the highlights somewhere to move. A blunt cut can still work, but it needs more careful placement because the outline is less forgiving.
Texture: Thick hair handles chunkier contrast; fine hair usually looks better with thin veils and softer glossing. Curly hair needs color painted where the curl opens, not just on the surface.
Smart Shade Choices and Placement Notes Before You Book
Camel is not one fixed tone. On dark hair, it can lean beige, taupe, sand, toasted oat, or a little honey-beige depending on how warm your base runs. That’s useful, because not every brunette wants the same finish. Someone with a red-heavy brown base may need more beige to calm the warmth. Someone with a cooler espresso base may need a touch more gold so the color doesn’t look dusty.
Placement is the other half of the decision. If your round face has fuller cheeks, ask for the brightest pieces to begin lower and travel down the hairline. If your hair is dense, a few thinner ribbons near the front can open the face without turning it broad. If your hair is fine, keep the width of the highlighted pieces narrow so the base still carries the weight.
A photo is helpful, but it helps more when you point to exactly what you like in it. Tell the colorist whether you want the warmth, the amount of brightness, or the framing. Those are not the same thing, and the wrong assumption can send the whole look in the wrong direction.
Additional Tricks That Make the Color Look Better
Gloss Enhancement: A beige gloss every 6 to 8 weeks keeps camel from drifting too gold. If the color starts looking flat, a quick glaze is often enough to wake it back up.
Placement Trick: Keep the brightest pieces around the temples, collarbone, and lower face-framing layers. Leave the widest part of the cheeks a little darker so the face keeps its length.
Customization: Add one or two lowlights if your dark hair needs more depth. Camel is prettiest when it sits against something rich; otherwise it can look washed out.
Make-It-Yours: For curls, paint the outer bend and a bit inside the curl. For straight hair, use slimmer ribbons. For a softer grow-out, ask for a root shadow so the line near the scalp stays blurred.
Common Mistakes That Make Camel Highlights Less Flattering
-
Placing the brightest light at cheek level: The symptom is a wider-looking face and a highlight band that feels heavy. The fix is simple: move the brightest sections below the cheekbone or angle them downward.
-
Lifting too far toward blonde: Camel is warm beige, not pale yellow-blonde. If the tone goes too light, the hair can look dry and the face loses the soft frame that made the style work.
-
Skipping depth at the roots: All-over brightness can flatten dark hair and make a round face look fuller. Keep a root shadow or lowlights so the outline stays controlled.
-
Using purple shampoo too often: Camel can turn dull or smoky if violet pigment builds up. Use it only when the hair starts to pull brassy, and rinse it out fast.
-
Treating curls like straight hair: Curly hair needs the color painted where the curl lives in space. If you only highlight the surface, the front may look flat and the inside may look muddy.
-
Ignoring the haircut: Camel highlights can’t fix a blunt shape that sits at the widest point of the cheeks. Layers, side parts, and movement do part of the flattering work.
Variations and Adaptations to Try
Smoky Camel for Deep Brunettes: Keep the base almost espresso and add only a soft camel glaze through the mid-lengths. This is the best choice if you want warmth without obvious contrast, especially on thick hair.
Sand-and-Mocha Melt: Blend a darker mocha root into sandy camel ends. It softens a round face by pulling the eye downward, and it grows out without a harsh line.
Curtain-Contour Camel: Pair curtain bangs with lighter edge pieces that start low and sweep away from the cheeks. This works well if you want face-framing without a bold money piece.
Curly Halo Camel: Paint camel highlights around the outer ring of curls and leave the inside darker. The shape feels fuller, but the face stays open because the light is spread in a halo rather than a block.
Low-Maintenance Root Shadow Camel: Ask for a soft root smudge and diffused highlights through the ends. It’s the version I’d choose for anyone who hates salon upkeep and wants the grow-out to stay tidy.
Make-Ahead, Maintenance, and Grow-Out Guidance
Camel highlights are not the kind of color you forget about for months, but they also do not need constant rescue. A gloss every 6 to 8 weeks keeps the tone creamy. Full lightening touch-ups usually land somewhere around 8 to 12 weeks, depending on how fast your hair grows and how much contrast you asked for. If the highlights were painted softly, the grow-out can look decent even a little past that.
At home, wash with lukewarm water and a sulfate-free shampoo. Hot water strips tone fast, and dark hair with warm highlights can slide toward dullness faster than people expect. A weekly conditioning mask helps the ends stay smooth, especially if the camel pieces were lifted more than one level.
Heat protection matters too. Blow-dryers, flat irons, and curling wands can rough up the lightened pieces and make the color look dry. If you style with heat three or four times a week, use a protectant every time and keep the iron out of the same section over and over. The color will hold its polish much longer.
Frequently Asked Questions
Can camel highlights work on very dark hair?
Yes, but the lift has to be controlled. On very deep brunette or near-black hair, camel usually reads best as a warm level 6 to 7 tone rather than a pale blonde, and that often takes more than one session if the base is resistant.
Will camel highlights make a round face look wider?
Only if they’re placed badly. Bright pieces that sit straight across the cheeks can widen the face, but vertical ribbons, low face-framing pieces, and side parts tend to do the opposite.
What’s the difference between camel and caramel highlights?
Camel leans a little softer and more beige, while caramel usually reads warmer and sweeter. Camel is the better pick if you want a muted, creamy brunette highlight instead of a golden one.
Do I need a gloss after getting camel highlights?
Almost always, yes. A gloss keeps the tone from drifting too gold, too flat, or too brassy, and on dark hair that little refresh makes a bigger difference than people expect.
Can I ask for camel highlights if I wear my hair curly?
Absolutely. Curly hair often shows camel beautifully, but the colorist needs to paint where the curls sit in three-dimensional space, not just on the surface. That keeps the shape balanced instead of patchy.
Are these highlights high maintenance?
Not if they’re done with a soft root shadow and diffused placement. The more contrast and brightness you ask for, the more upkeep you buy. Soft camel tends to be kinder to your schedule.
What if my highlights turn orange?
That usually means the lift stopped in the warm stage and needs toner or gloss correction. A beige-based gloss can calm the orange, but if the lift was too strong or too uneven, the colorist may need to adjust the placement or re-tone the front pieces.
Keeping the Warmth in the Right Places
Camel highlights work because they do two jobs at once: they warm up dark hair, and they steer the eye where a round face looks best. That balance is the whole trick. Bright enough to show. Soft enough to stay flattering. Controlled enough to grow out without panic.
The more I look at these placements, the more I like the versions that respect the base. Dark roots, soft beige ribbons, a little shadow near the scalp, and light that moves downward through the layers — that’s the formula that keeps the hair rich instead of overworked. If you want the result to feel polished, bring a photo, point to the exact line where you want the brightness to start, and let the rest stay a little darker than your first instinct might say.