Curly hair and caramel highlights have a particular chemistry. The cut either lets the curls breathe or traps them in a heavy, bell-shaped heap. The color either lifts the pattern or turns the whole head into one flat brown mass. When the layers and the caramel are planned together, the curls don’t just sit there — they move, stack, and catch light in a way that feels alive from every angle.
The reason this topic matters is simple: curly hair behaves differently from straight hair, and highlight placement has to respect that. A curl shrinks, twists, and rebounds. A strand that looks like a small ribbon when it’s wet can turn into a springy coil once dry, which is why a dry cut, a curl-by-curl approach, or at least a stylist who knows shrinkage can make or break the result. Caramel tones help because they sit in that sweet middle ground between blonde and brown; they add warmth without screaming for attention.
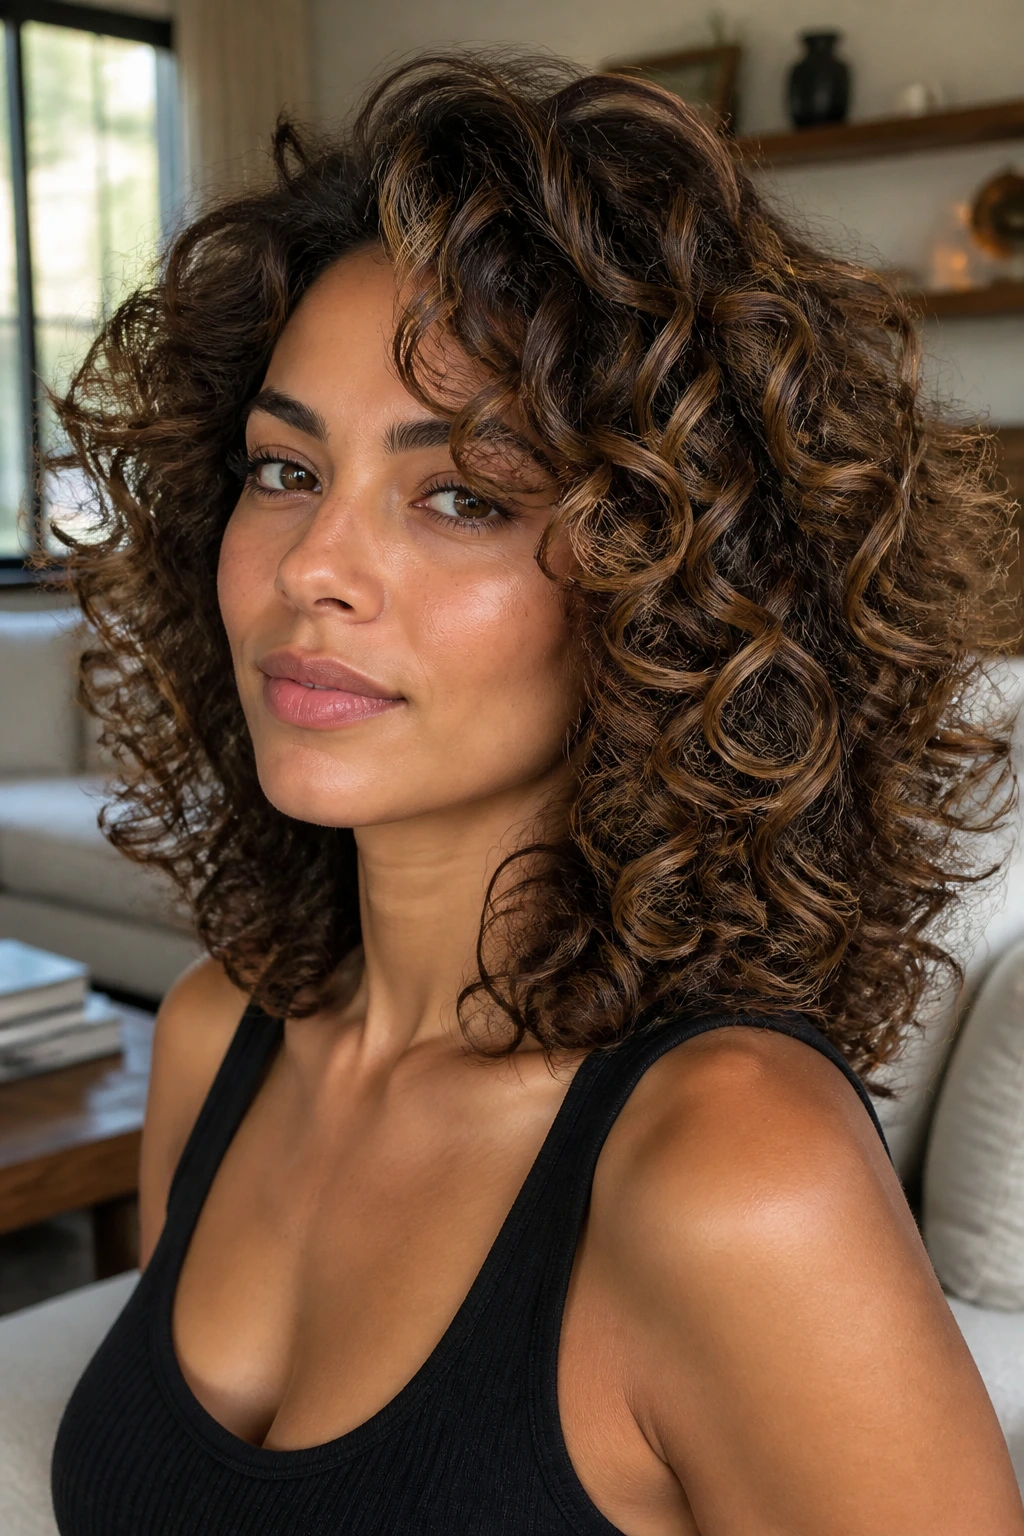
I have a soft spot for layered curls with color placed on the outer surface and around the face. It gives the haircut a little depth without making every curl fight for the spotlight. The 25 looks below lean into that idea from different angles — long spirals, short crops, shaggy shapes, rounded cuts, tighter coils, and a few bolder versions for people who want the caramel to show from across the room.
Why These 25 Looks Keep Working on Curly Hair
- Layering lifts the silhouette: Removing weight from the right places keeps curls from collapsing into a triangle or hanging in a single blunt sheet.
- Caramel adds motion: Warm ribbons placed on the outer layer and around the face show off curl pattern instead of hiding it.
- The grow-out stays softer: Balayage, hand-painted panels, and root shadow techniques don’t leave a hard line every time the hair moves.
- It suits different curl sizes: Loose waves, springy ringlets, and tighter coils all read differently, but each can take some version of caramel dimension.
- The haircut does half the work: Good layering means you don’t need a ton of styling time to get shape back after wash day.
- There’s room to go subtle or bold: You can keep the caramel in a few face-framing pieces or spread it through the canopy for a fuller glow.
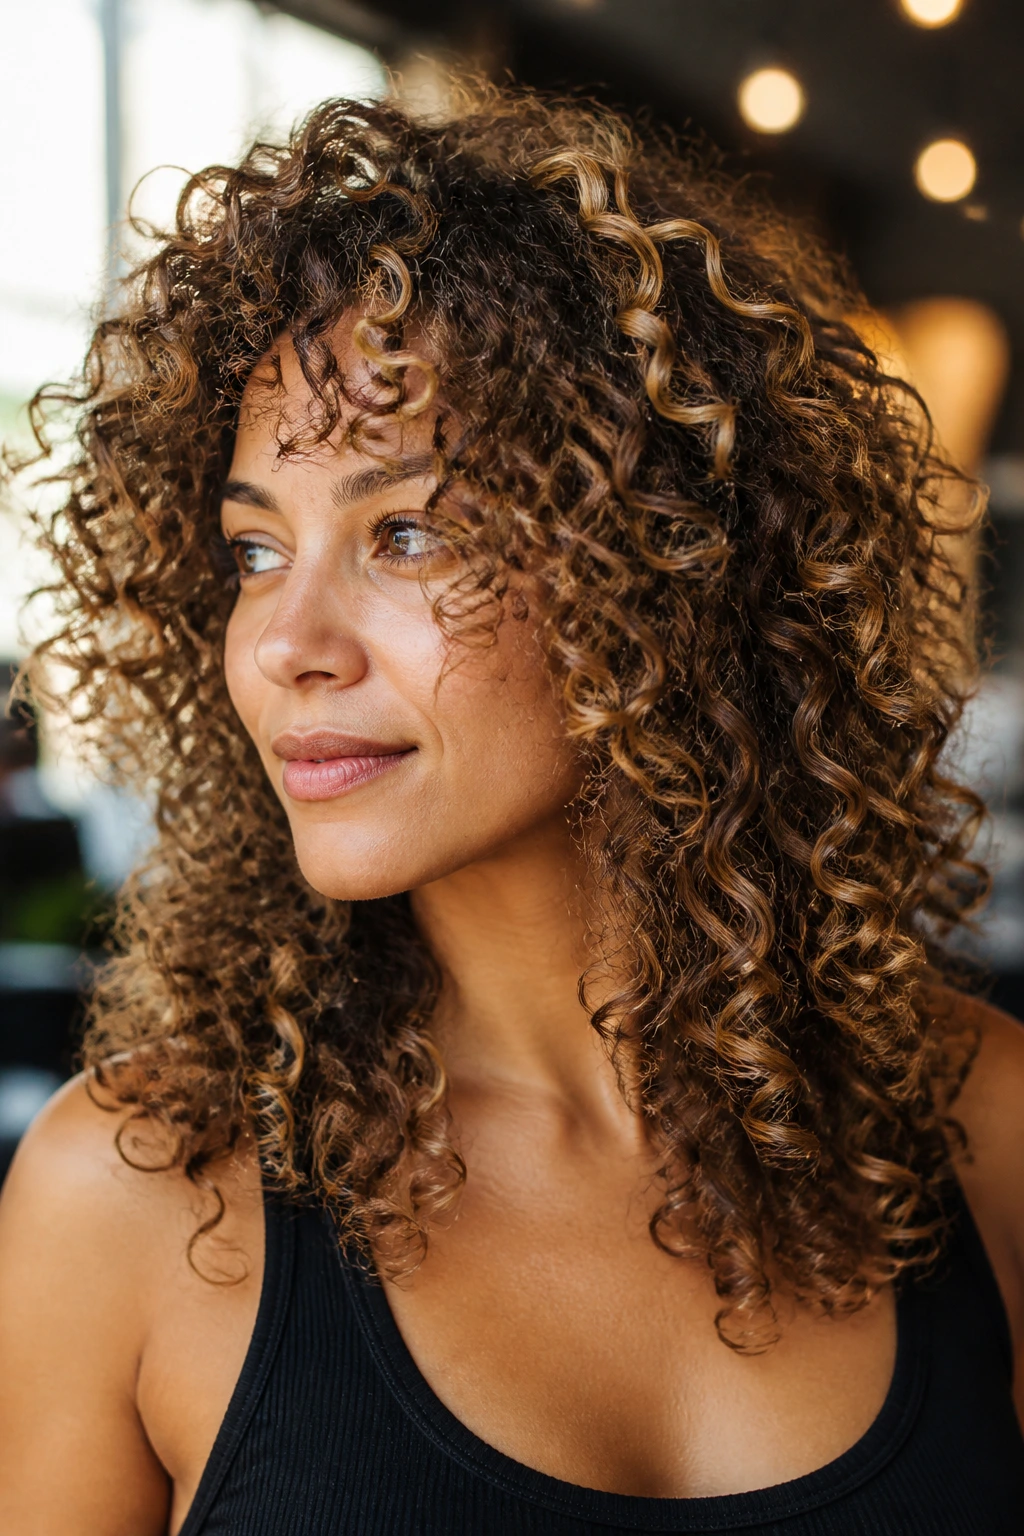
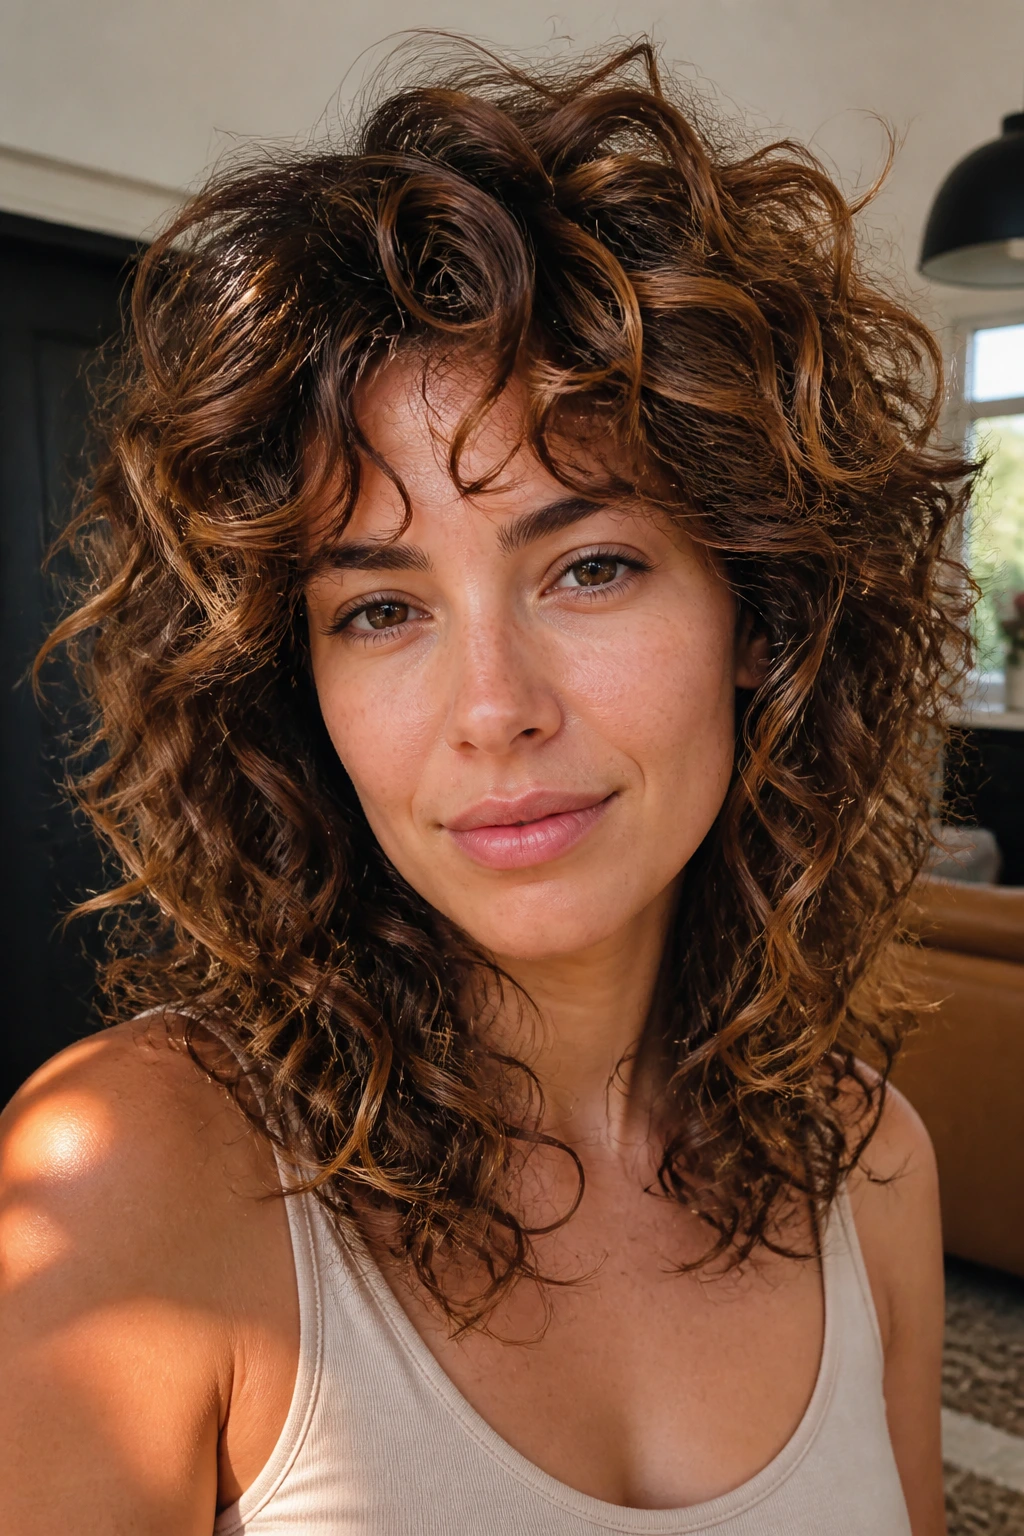
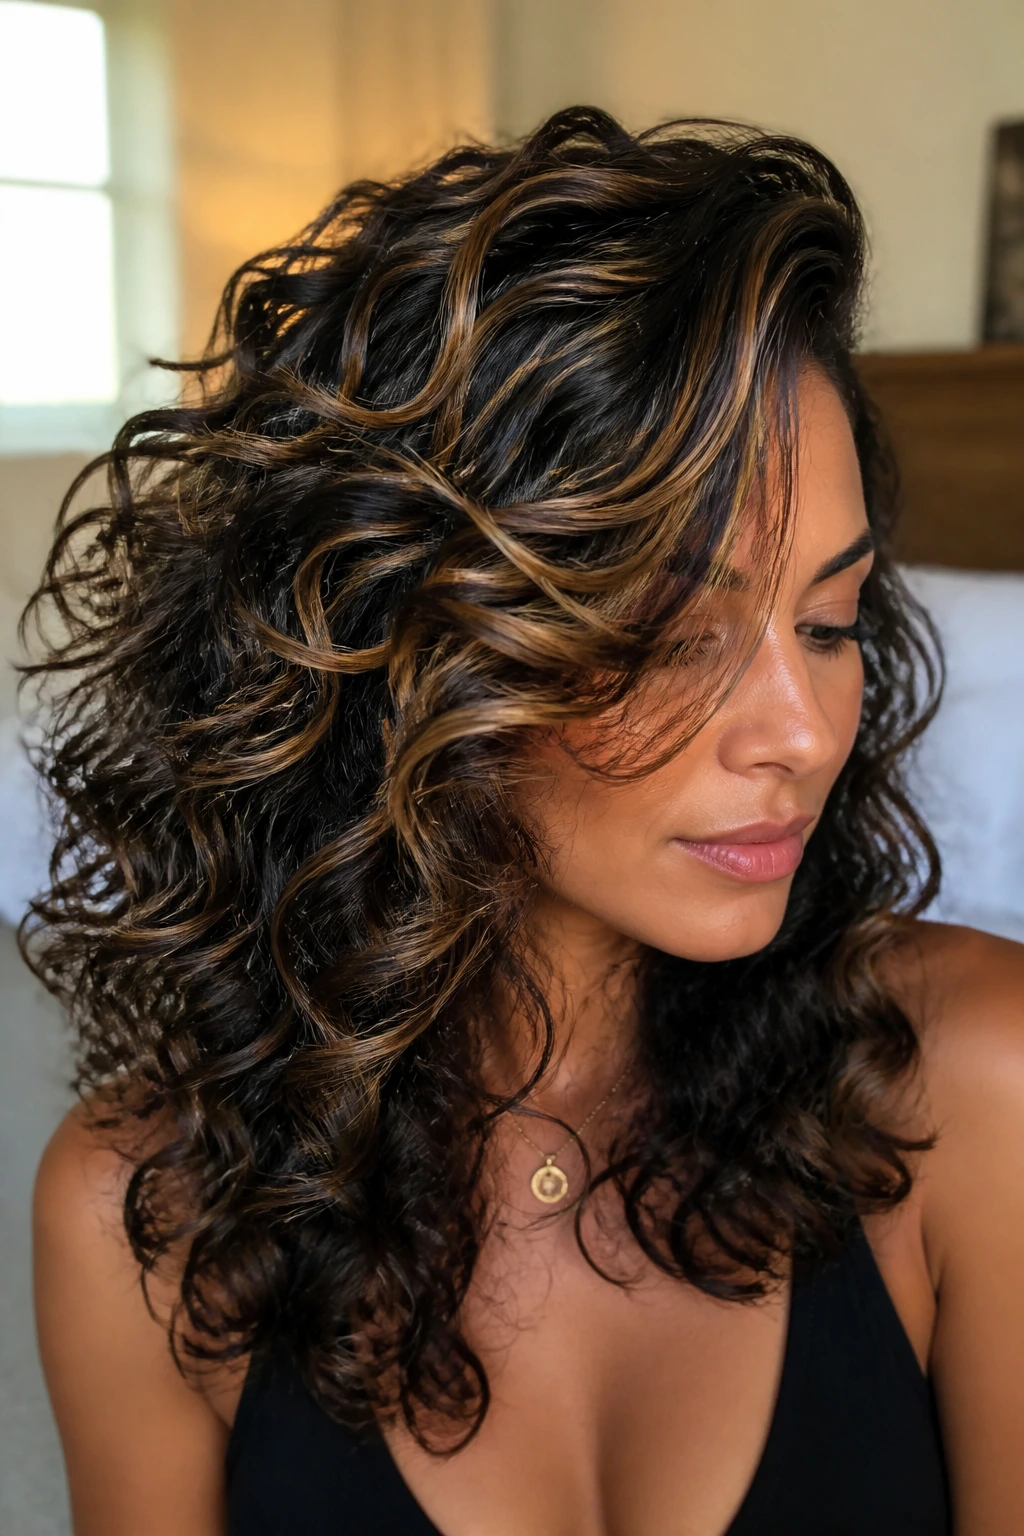
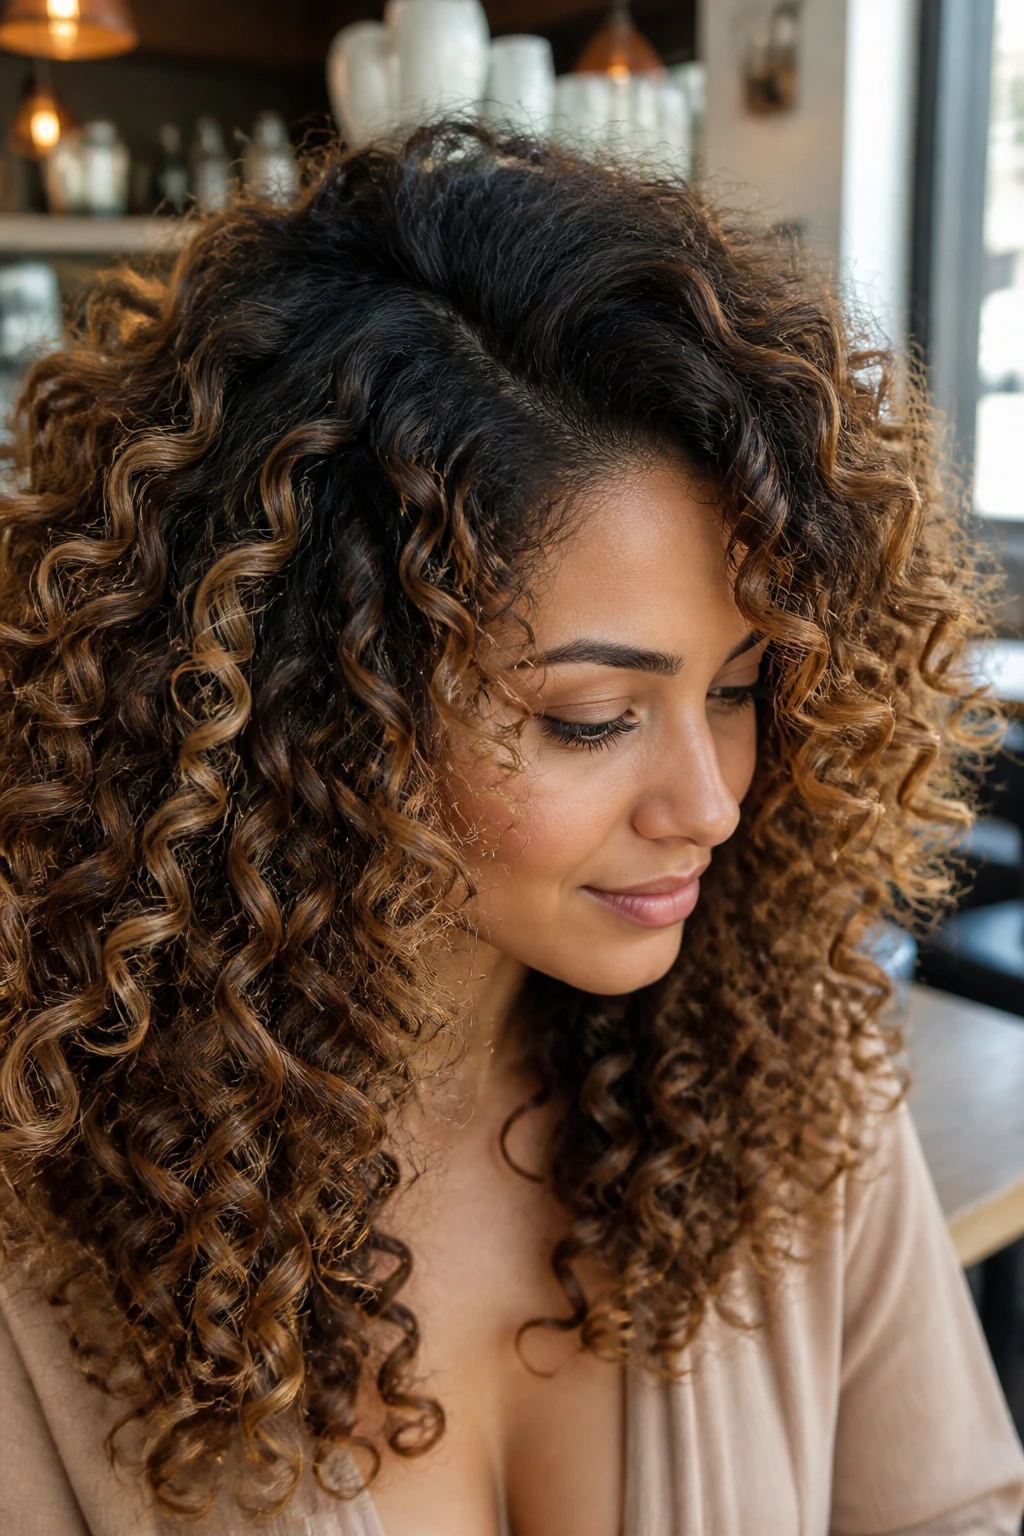
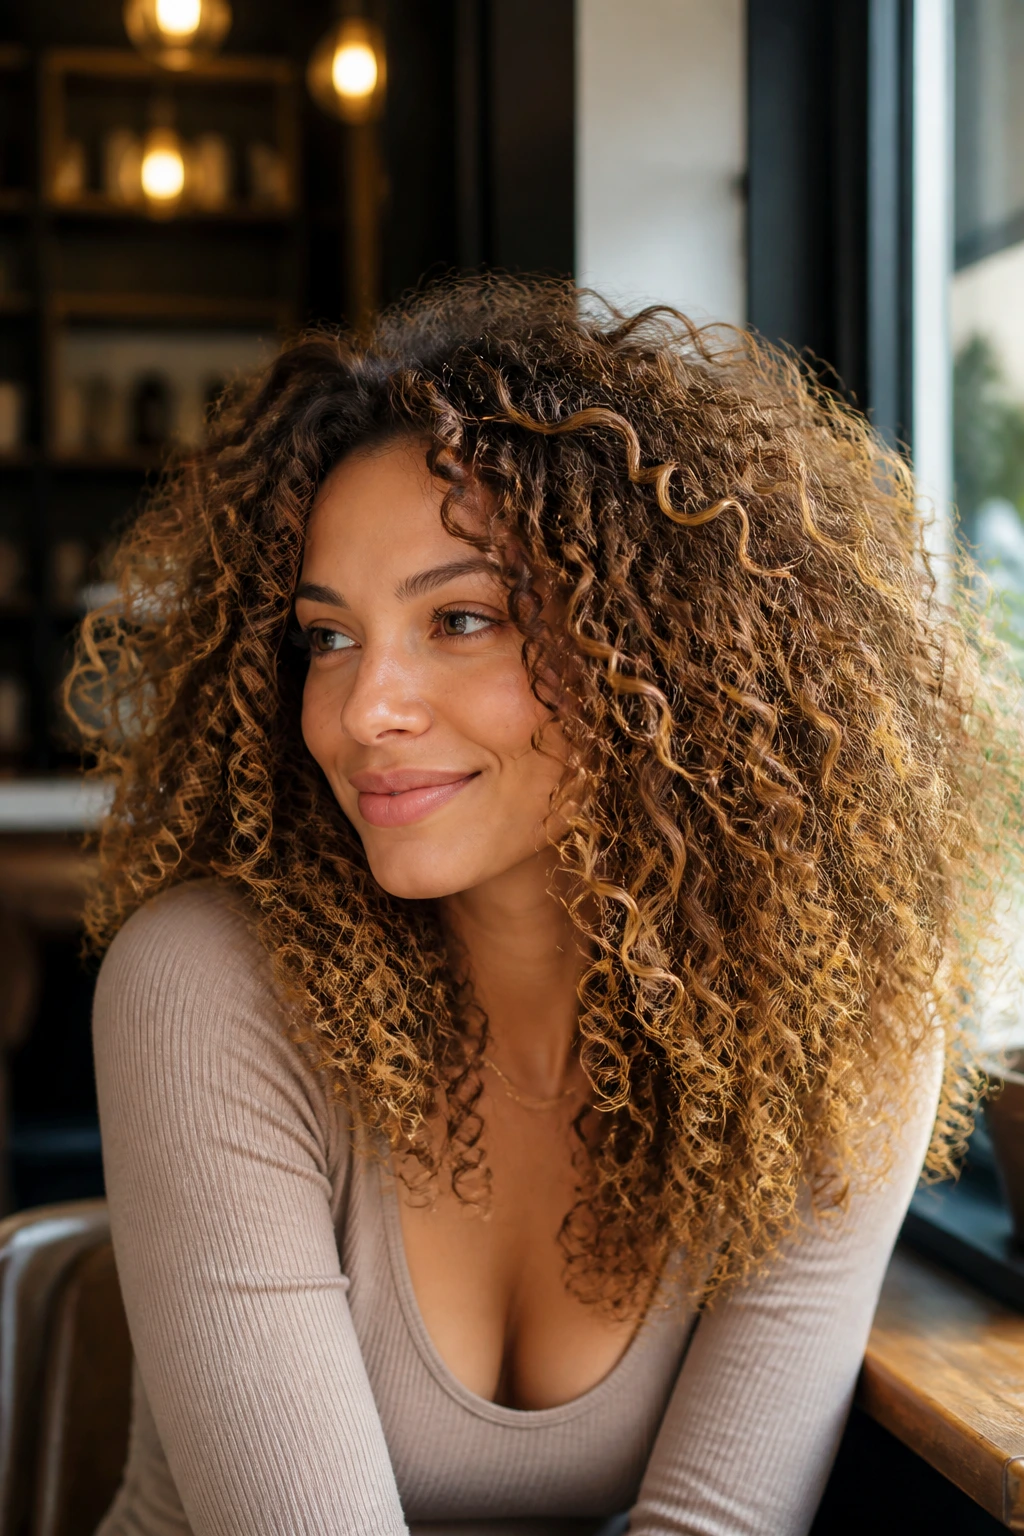
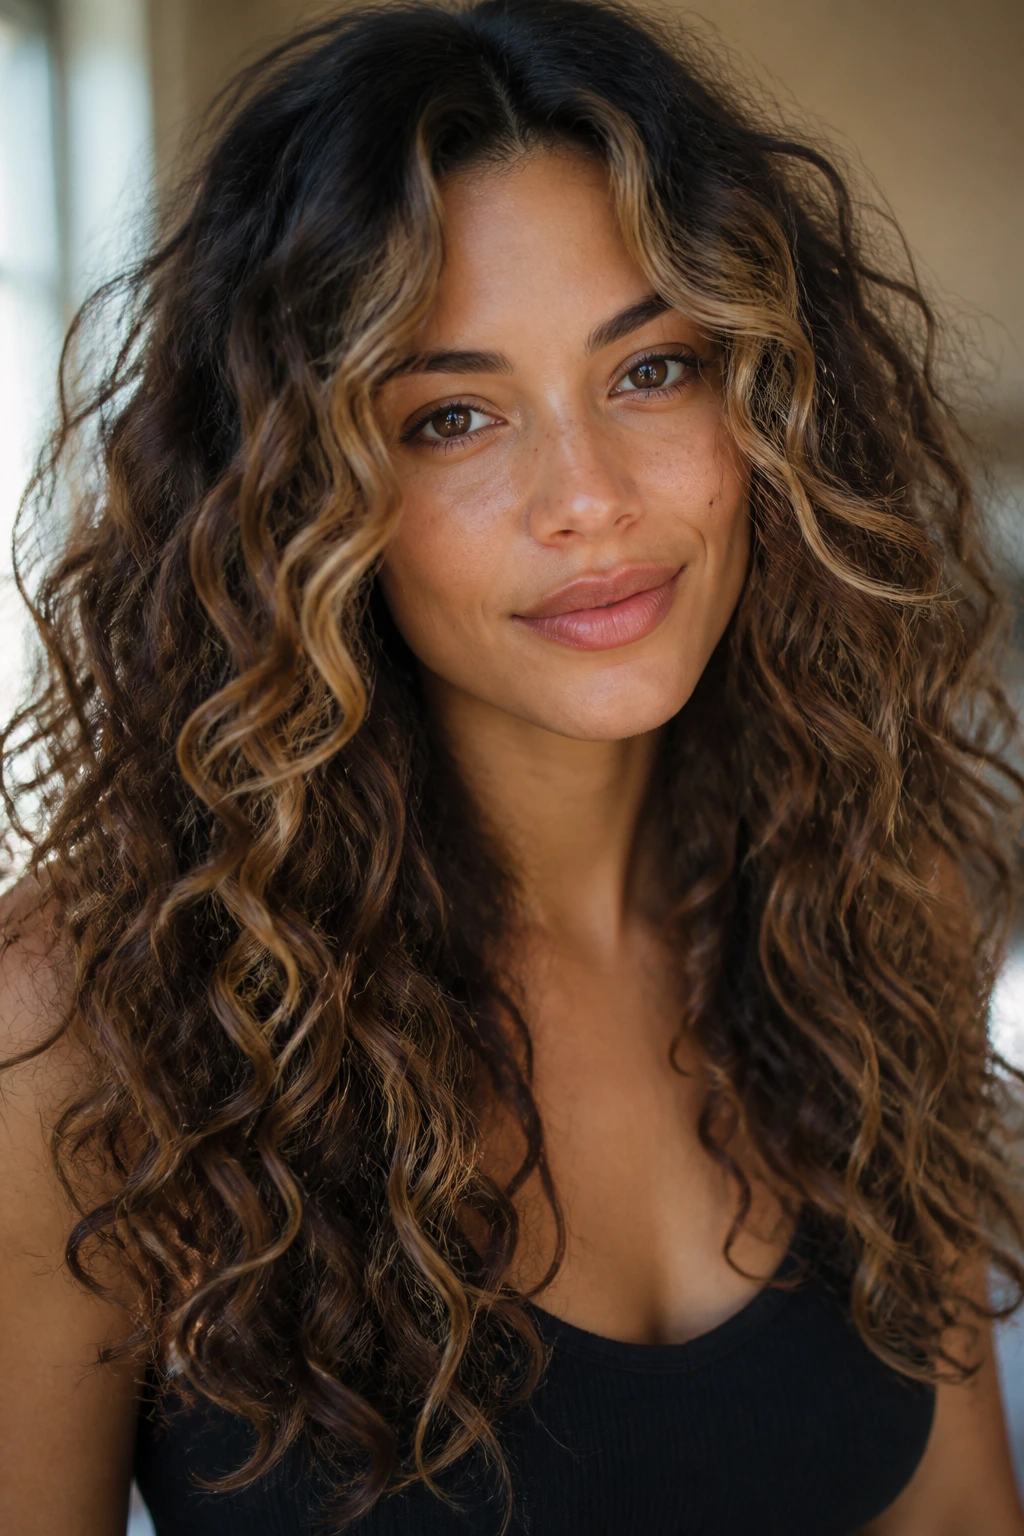
1. Long Cascading Layers with Caramel Ribbons
Long curly hair gets a bad rap for looking heavy, and honestly, that happens when the cut keeps too much weight in the bottom third. With long cascading layers, the curls lift in stages instead of dropping straight down, and caramel ribbons on the top layer keep the shape from disappearing into shadow. It’s one of those cuts that looks expensive without trying to look polished.
What Makes It Work
Ask for long layers that start below the chin and continue through the mid-lengths, not a blunt chop hidden under the curls. The caramel should sit in narrow ribbons, especially around the temples and crown, so the light hits different curl levels as you move. Too much blonde here would flatten the texture; caramel keeps the tone warm and the curl pattern readable.
This is a good choice if your curls are dense and you want movement without losing length. Air-dry with a light cream, then finish with a diffuser on low heat for 8 to 12 minutes if you need volume at the roots. The longest curls will swing, and the color will peek through in a way that feels natural rather than striped.
2. Curly Butterfly Layers with Face-Framing Honey Pieces
The butterfly cut on curls can be excellent when it’s done with restraint. The shorter face-framing layers create that lifted front edge, while the longer length stays in the back, so you get shape without sacrificing the bottom. Caramel pieces around the face soften the contrast and draw attention to the curl pattern instead of the haircut itself.
Why This Version Stands Out
The trick is to keep the shortest layers light enough to flip away from the cheekbones, not so short that they puff outward. A good stylist will place the caramel through the front third of the hair, then leave the deeper interior darker for contrast. That color map matters. It’s what keeps the haircut from looking busy.
If your curls fall somewhere between shoulder and mid-back length, this cut gives you lift where you need it most. It’s especially useful if the hair feels flat at the crown but heavy at the ends. The caramel near the face gives the whole style a soft glow, even on a day when you barely touch the diffuser.
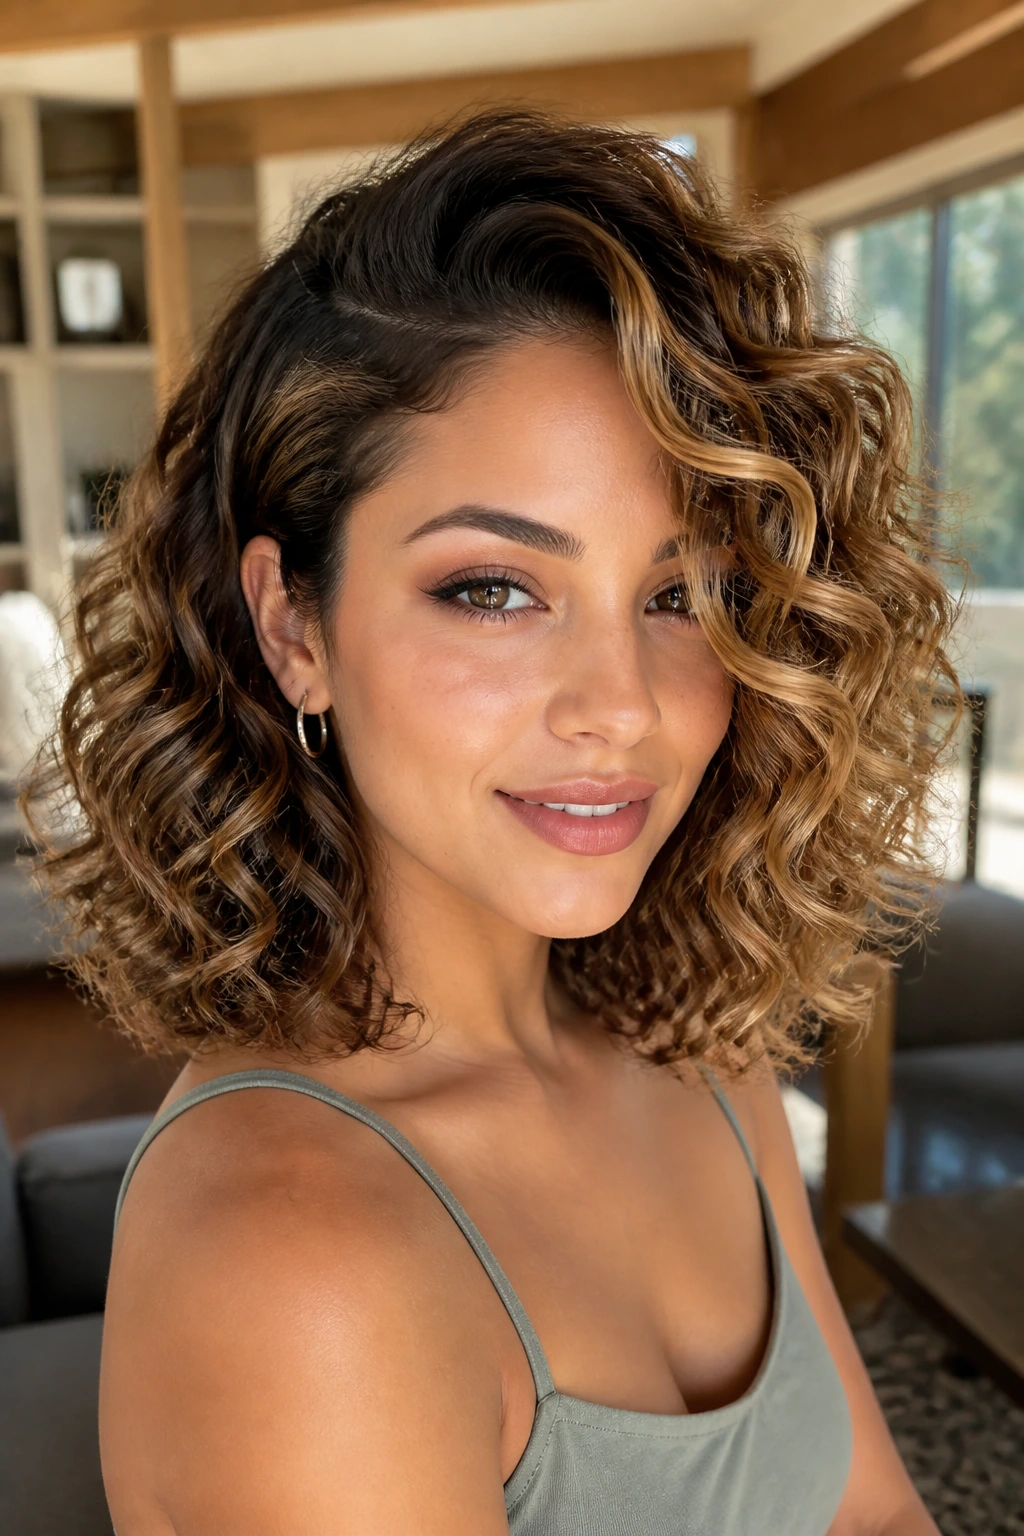
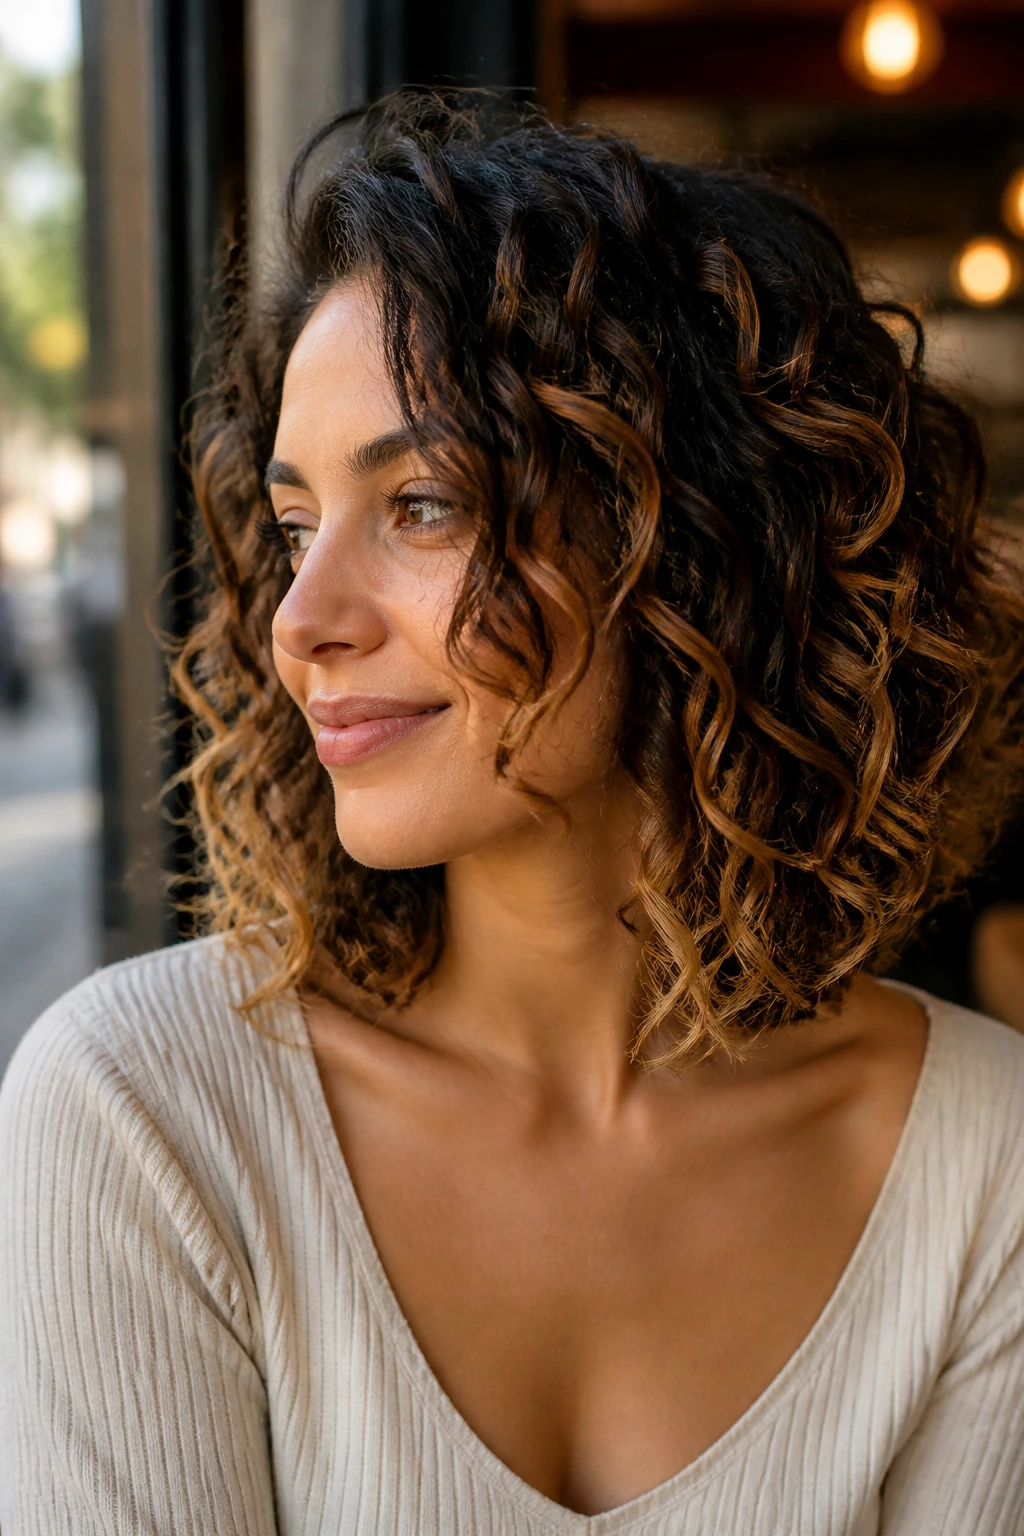
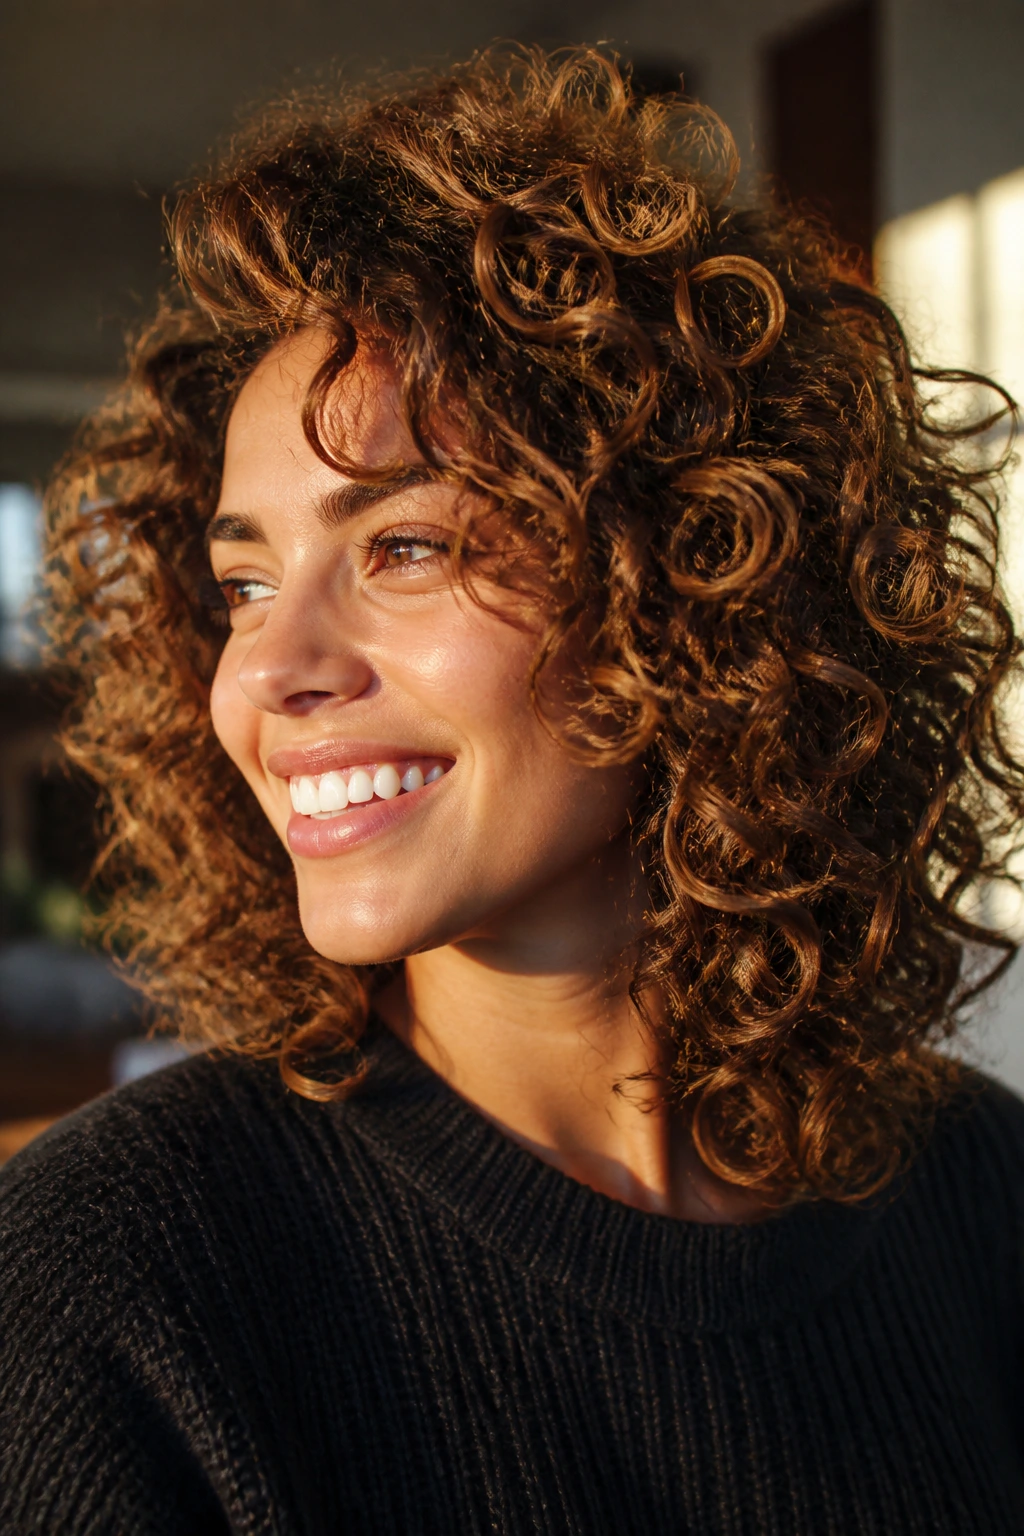
3. Rounded Shoulder-Length Layers with Toffee Ends
Shoulder-length curly hair can go boxy fast. Rounded layers fix that by curving the outline so the silhouette follows the head instead of hanging off it. A touch of toffee at the ends makes the shape look intentional, and because the highlights sit lower, the color moves with the curls instead of sitting like a cap on top.
Best For Medium Density Curls
This shape works best when the bottom line is still full but not blunt. Keep the layers smooth and graduated so the curls don’t separate into uneven chunks. The toffee tone at the tips should be soft, not pale, because lighter ends on curly hair can look frizzy if they’re pushed too far.
If you like a low-maintenance morning, this is a strong pick. Scrunch in leave-in conditioner, add a medium-hold gel, and let the curls dry with a side part or a soft off-center part. The round shape does the rest. No drama. No fuss.
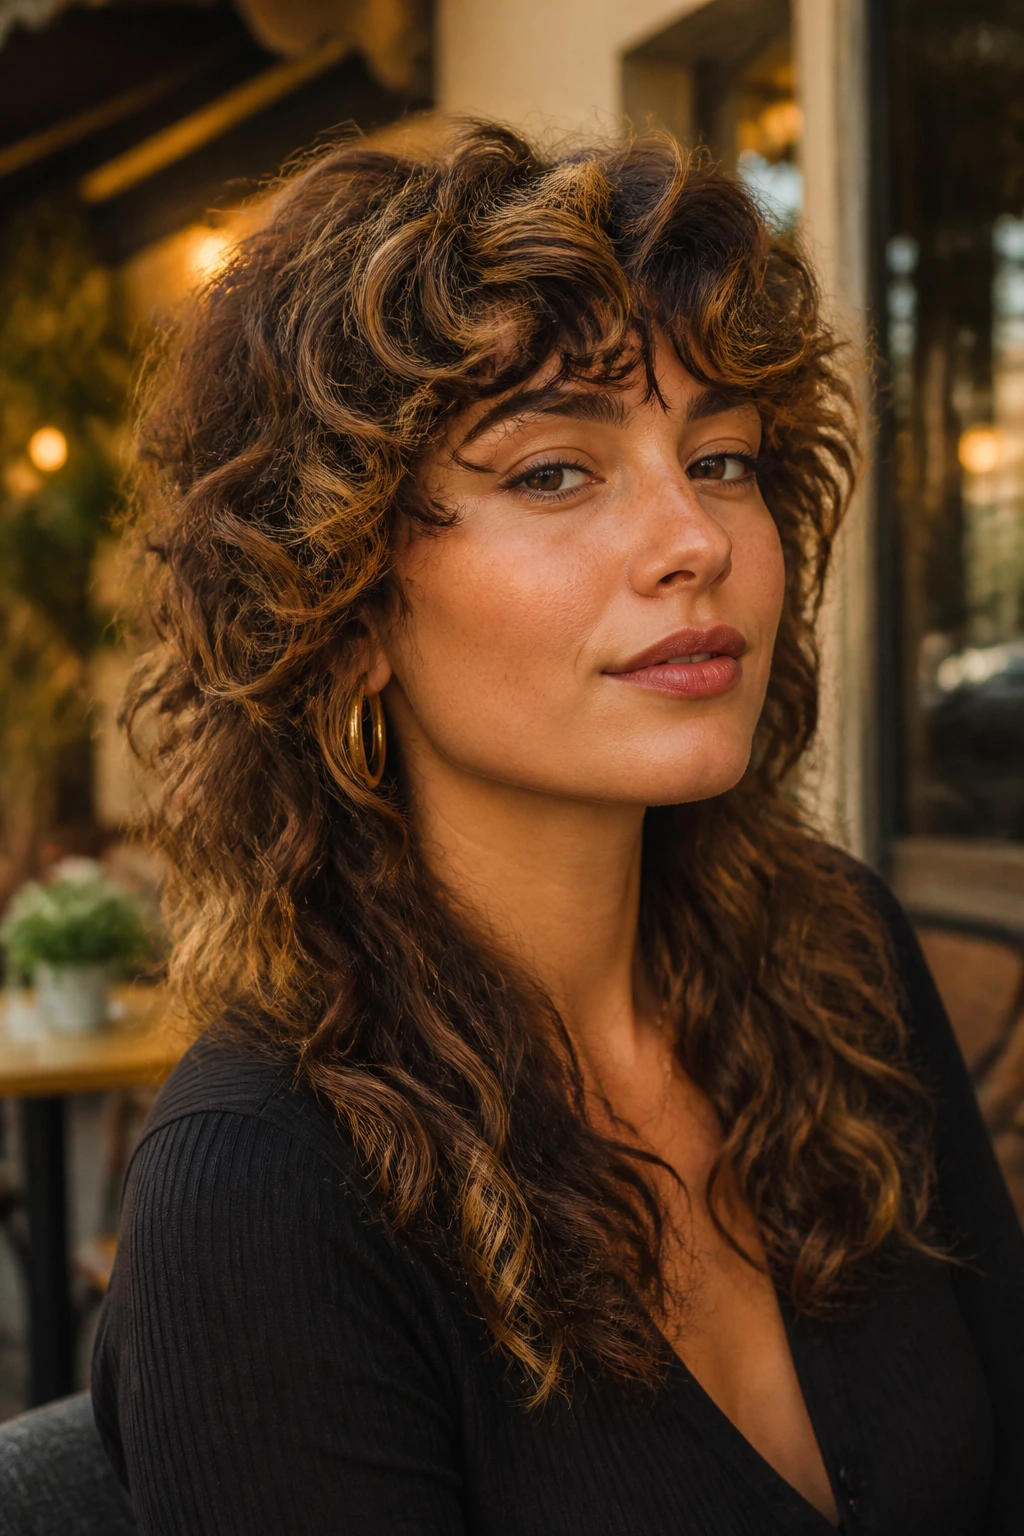
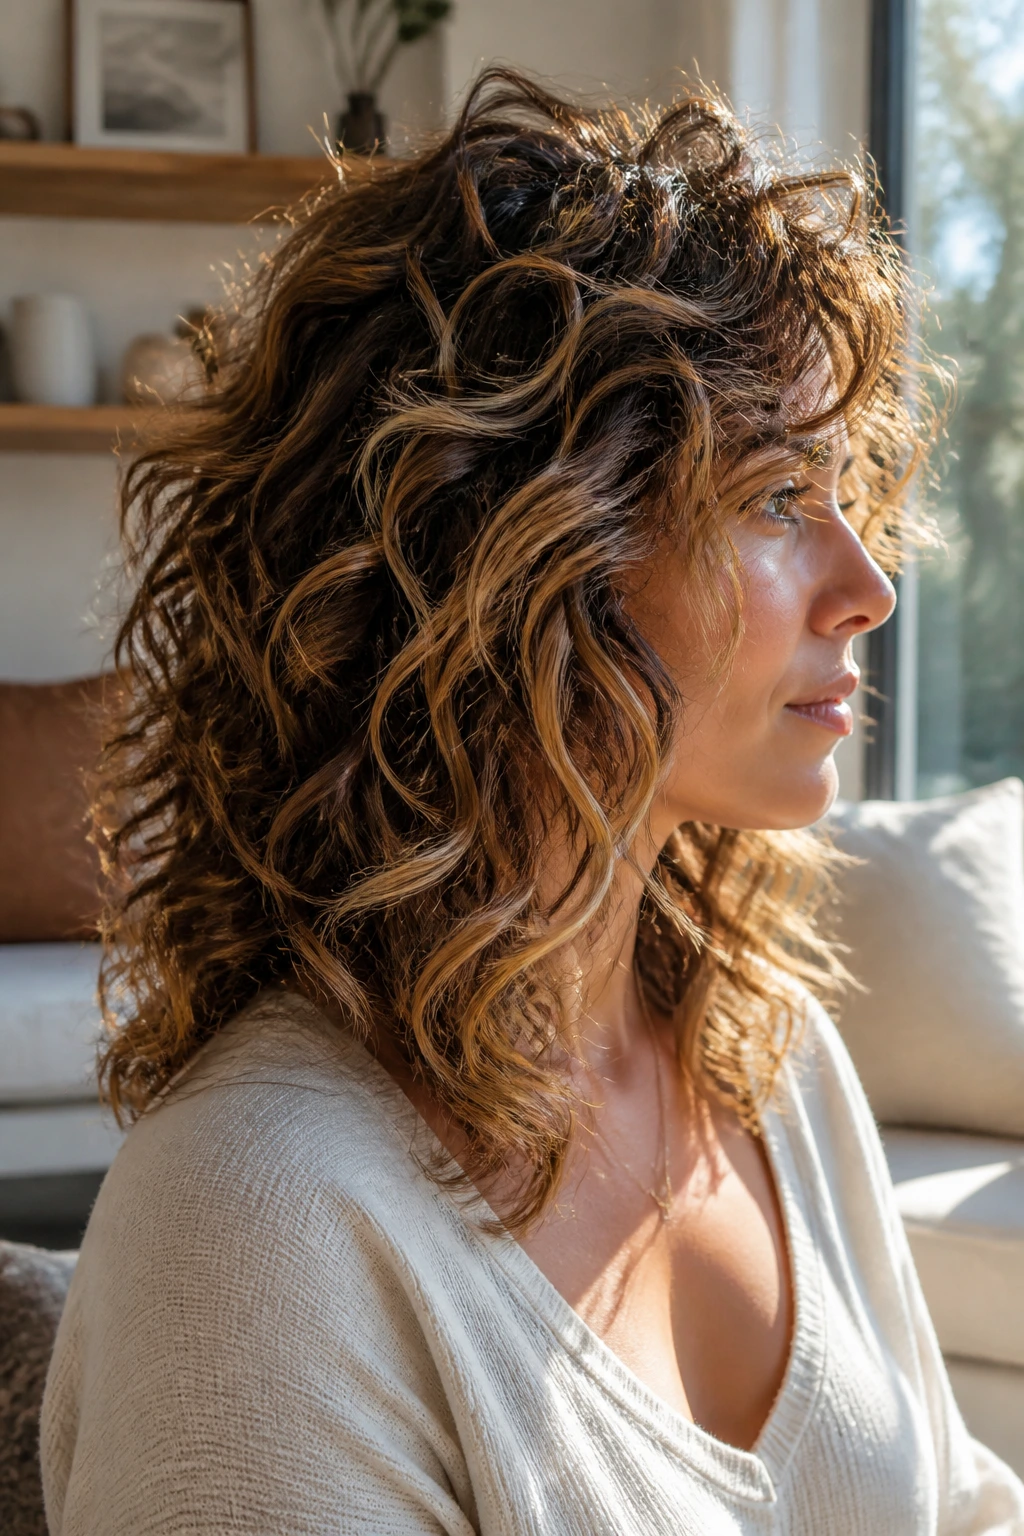
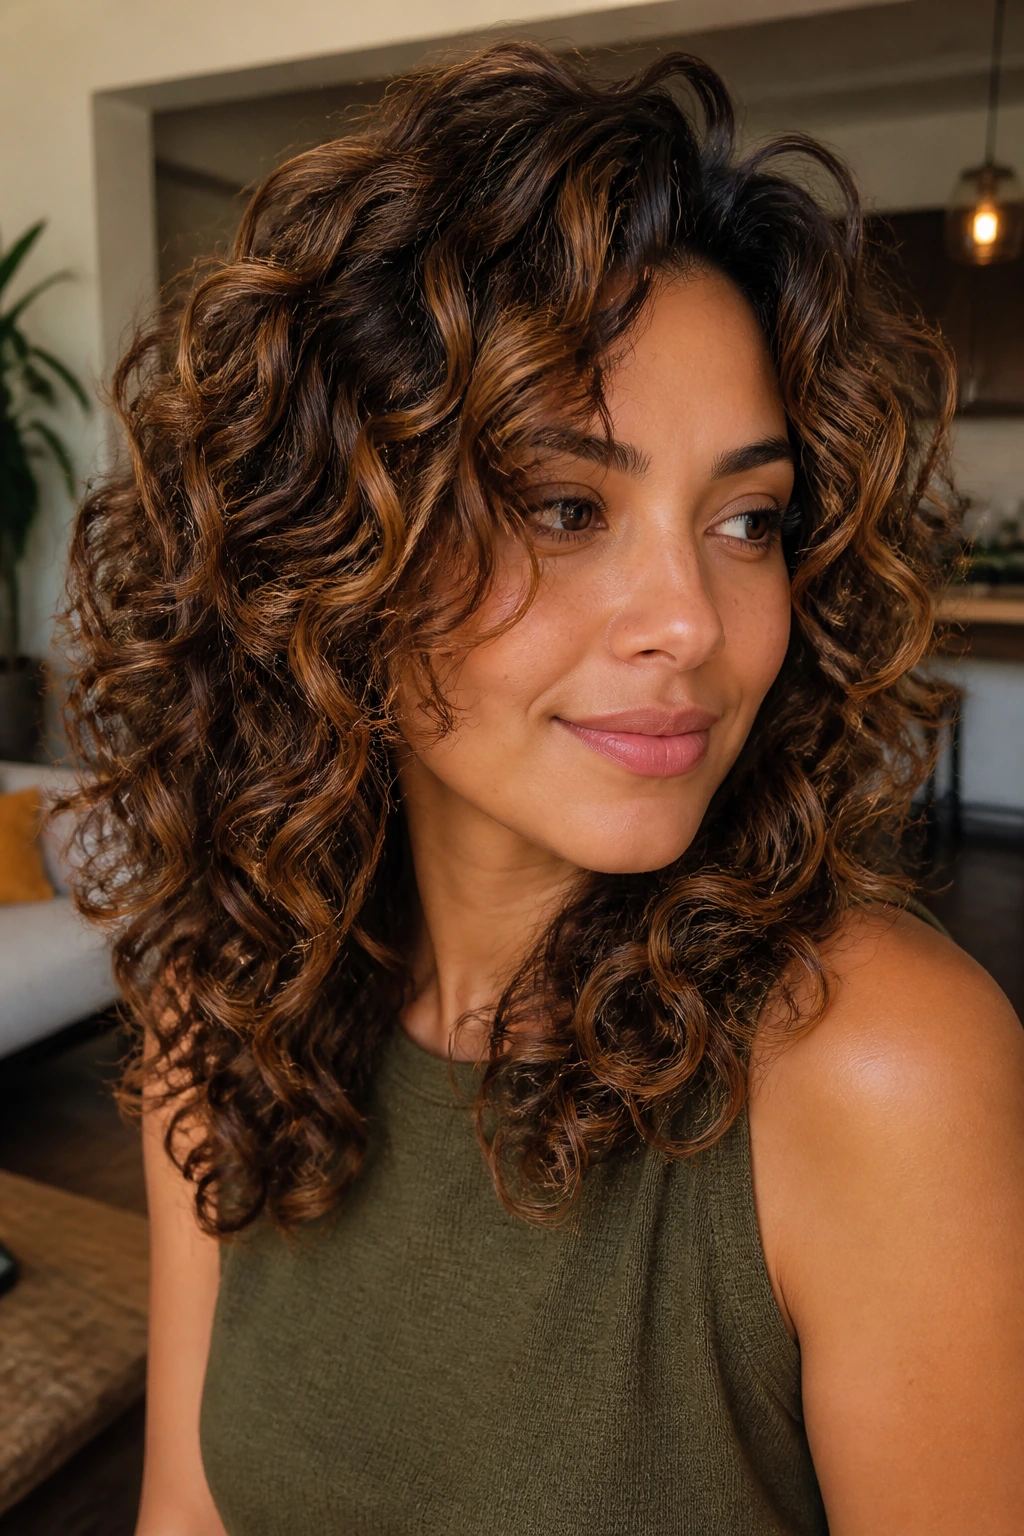
4. Airy Curly Shag with Cinnamon Highlights
A curly shag has attitude built in. The shorter crown layers create lift, the sides stay lighter, and the overall shape feels a little undone in the best way. Cinnamon highlights add warmth without making the layers look sliced apart, which is exactly the wrong thing to do with a shag.
How to Ask for It
Tell the stylist you want movement at the crown, some face-framing pieces, and ends that don’t land in a hard line. The caramel should be painted through the outer curls and around the crown, where it can break up shadows. That’s the part people miss. If the color lives only on the bottom, the shag can look bottom-heavy instead of airy.
This cut suits people who don’t mind volume. In fact, volume is the point. It looks especially good when you diffused it upside down for a few minutes, then flipped the hair back and let the curls settle on their own. A shag with cinnamon tones has a lived-in feel that never looks stiff.
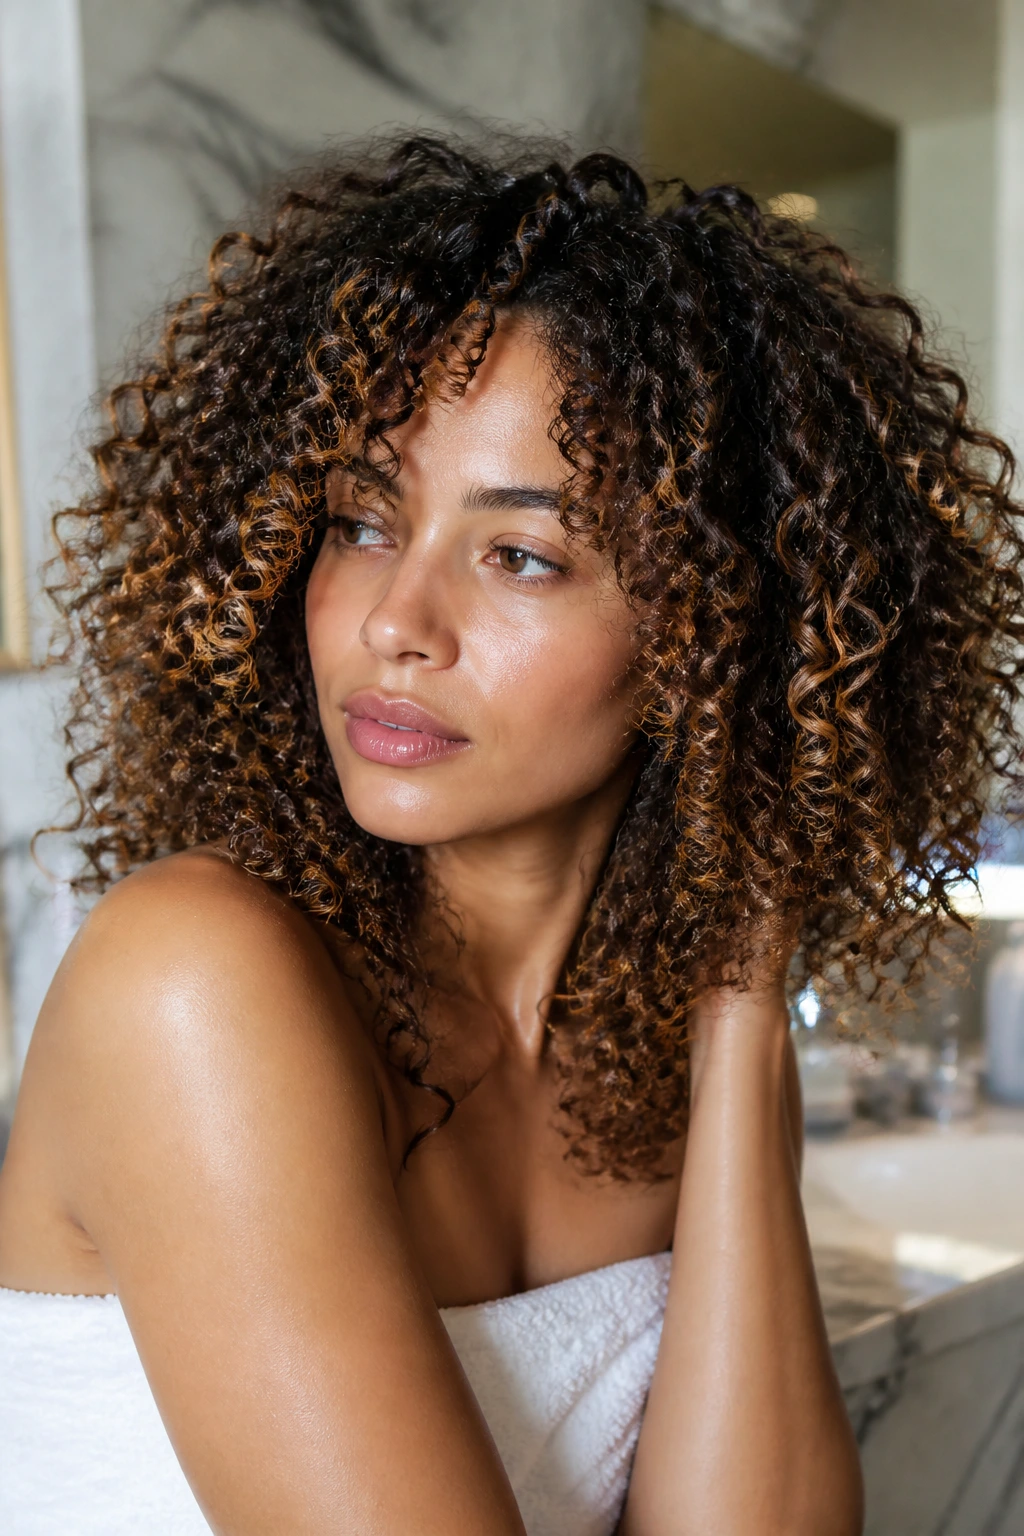
5. DevaCut Ringlets with Soft Caramel Veils
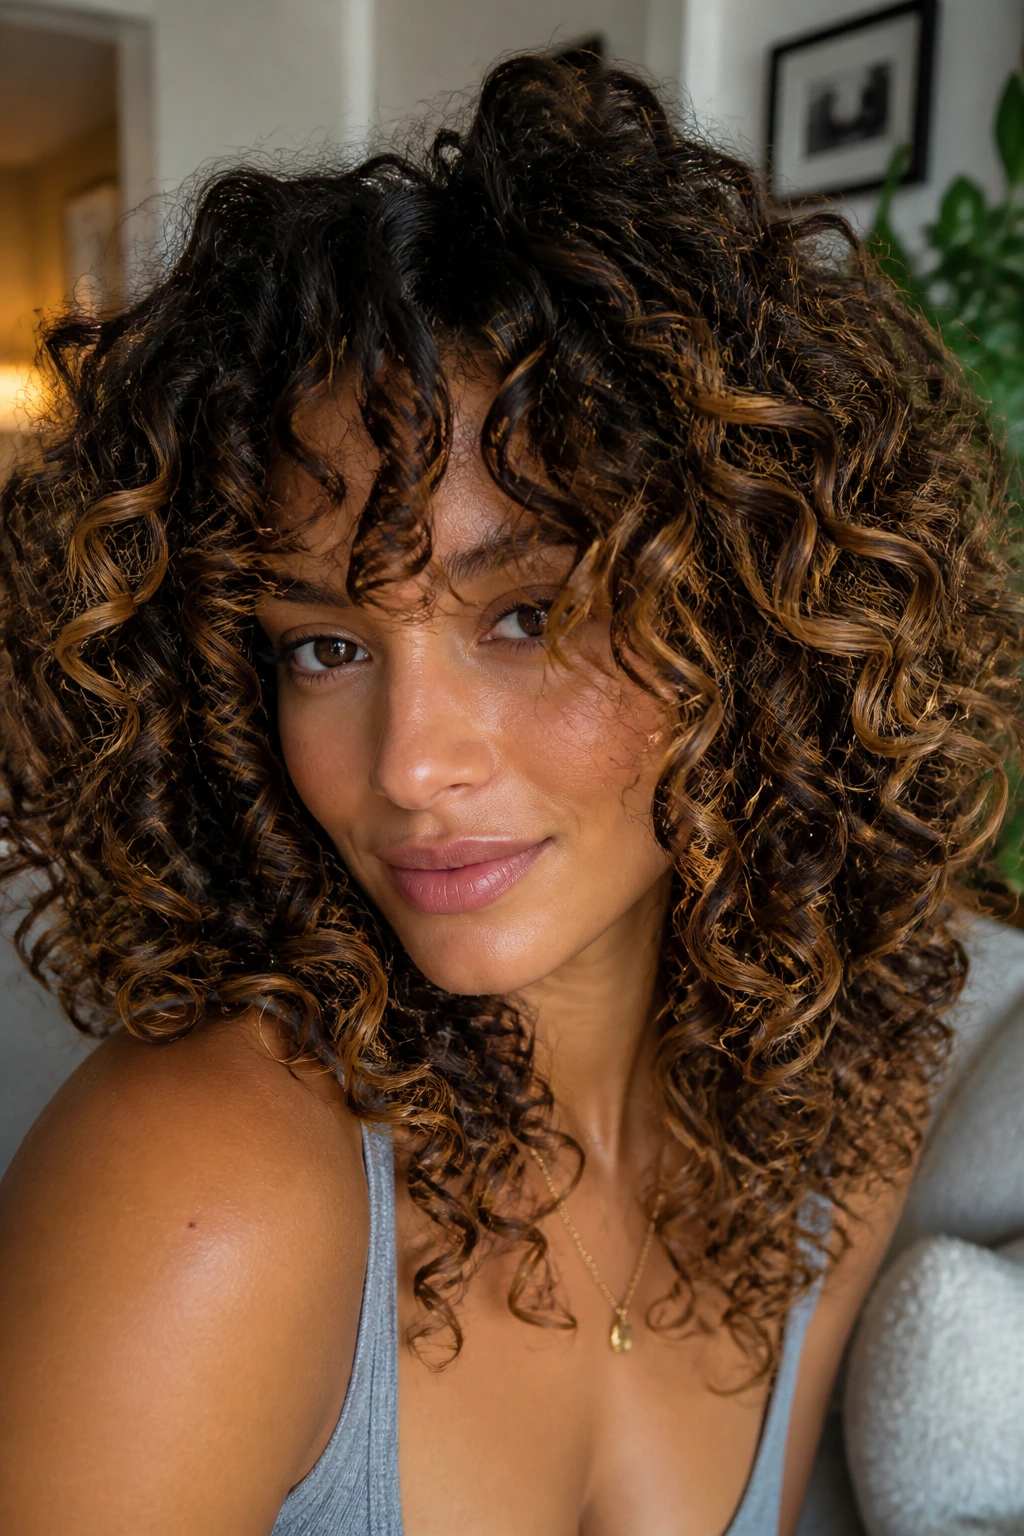
A DevaCut and caramel veils are a smart pairing because both are built around curl-by-curl placement. The shape is tailored to the natural pattern, so the layers follow where the hair wants to land. The color sits in thin veils across the outer layer, which keeps the ringlets distinct instead of turning them into one warm blur.
Why Curl Pattern Matters Here
This cut works best when the stylist checks how your curls cluster in their dry state. Wet curls can lie to everyone. They look longer, flatter, and easier than they really are, then spring up later and expose bad layering. A dry or curl-specific cut solves that.
The caramel should be soft enough that each ringlet gets a little edge light, not a full-on stripe. Think of it like tracing the contour of the hair, not painting a block across it. If you want definition without a lot of styling, this is one of the cleaner ways to get there.
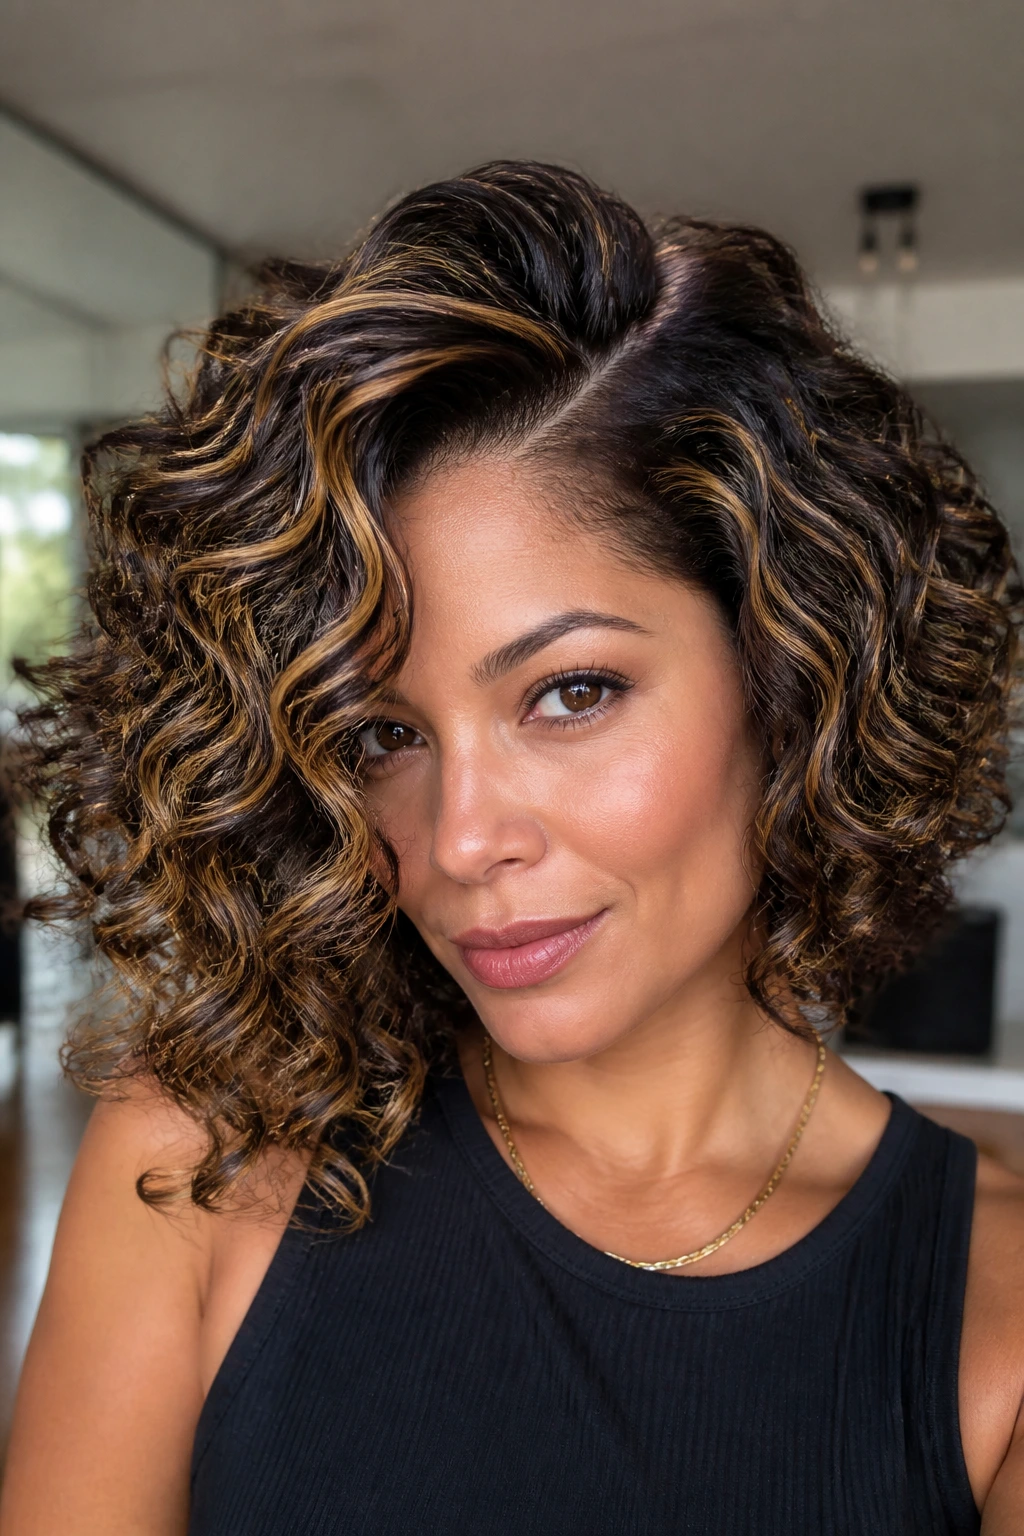
6. Mid-Length Side Part Layers with Golden Panels
A deep side part changes everything on curly hair. The taller side gets lift, the shorter side gets shape, and the whole cut looks more sculpted. Golden caramel panels on the heavier side can balance the visual weight, especially if one side tends to disappear or fall flat.
A Small Shift With a Big Payoff
Mid-length layers keep the hair from ballooning too wide, which can happen when curls hit that collarbone zone and expand outward. By placing the caramel in wider panels rather than tiny streaks, the color reads more like light than like dye. That matters when the curls are medium to large; tiny ribbons can disappear into the pattern.
This is one of those styles that feels polished on a workday but still has personality after hours. Use a diffuser to push the roots up at the side part, then leave the ends soft. The golden panels show up best when the hair has some swing, not when it’s brushed flat.
7. Curly Wolf Cut with Spiced Caramel Contrast
The wolf cut is not shy, and curly hair can wear it better than most people think. The crown stays shorter, the perimeter stays longer, and the shape looks a little wild on purpose. Spiced caramel contrast gives the cut enough definition that the layers don’t blur into each other.
What Makes It Different
Unlike a standard shag, the wolf cut leans a little more extreme through the top and sides. That can be a gift for thick curls that want release at the root. Keep the highlights concentrated on the top layer and around the fringe pieces so the shape stays visible from the front and the side.
If your hair gets bulky at the ears and nape, this cut opens it up fast. The color helps, too. Darker roots with warm caramel through the crown create a little shadow and a little shine, which is exactly what a wolf cut needs to keep from looking too rough.
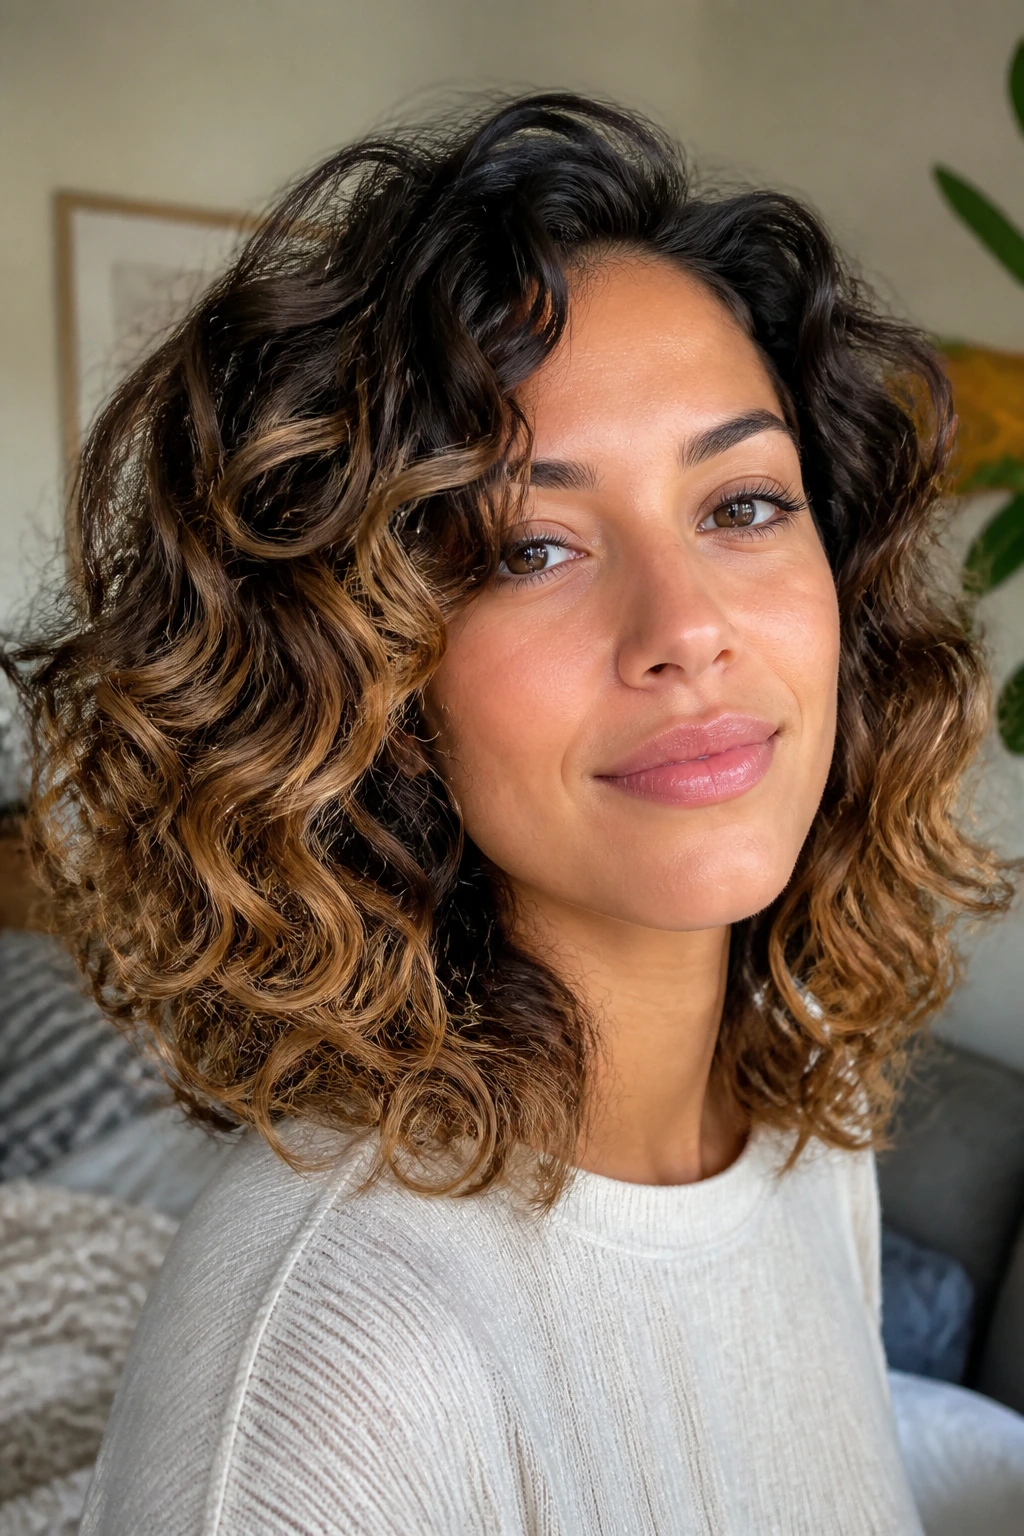
8. Layered Lob with Glossy Warm Balayage
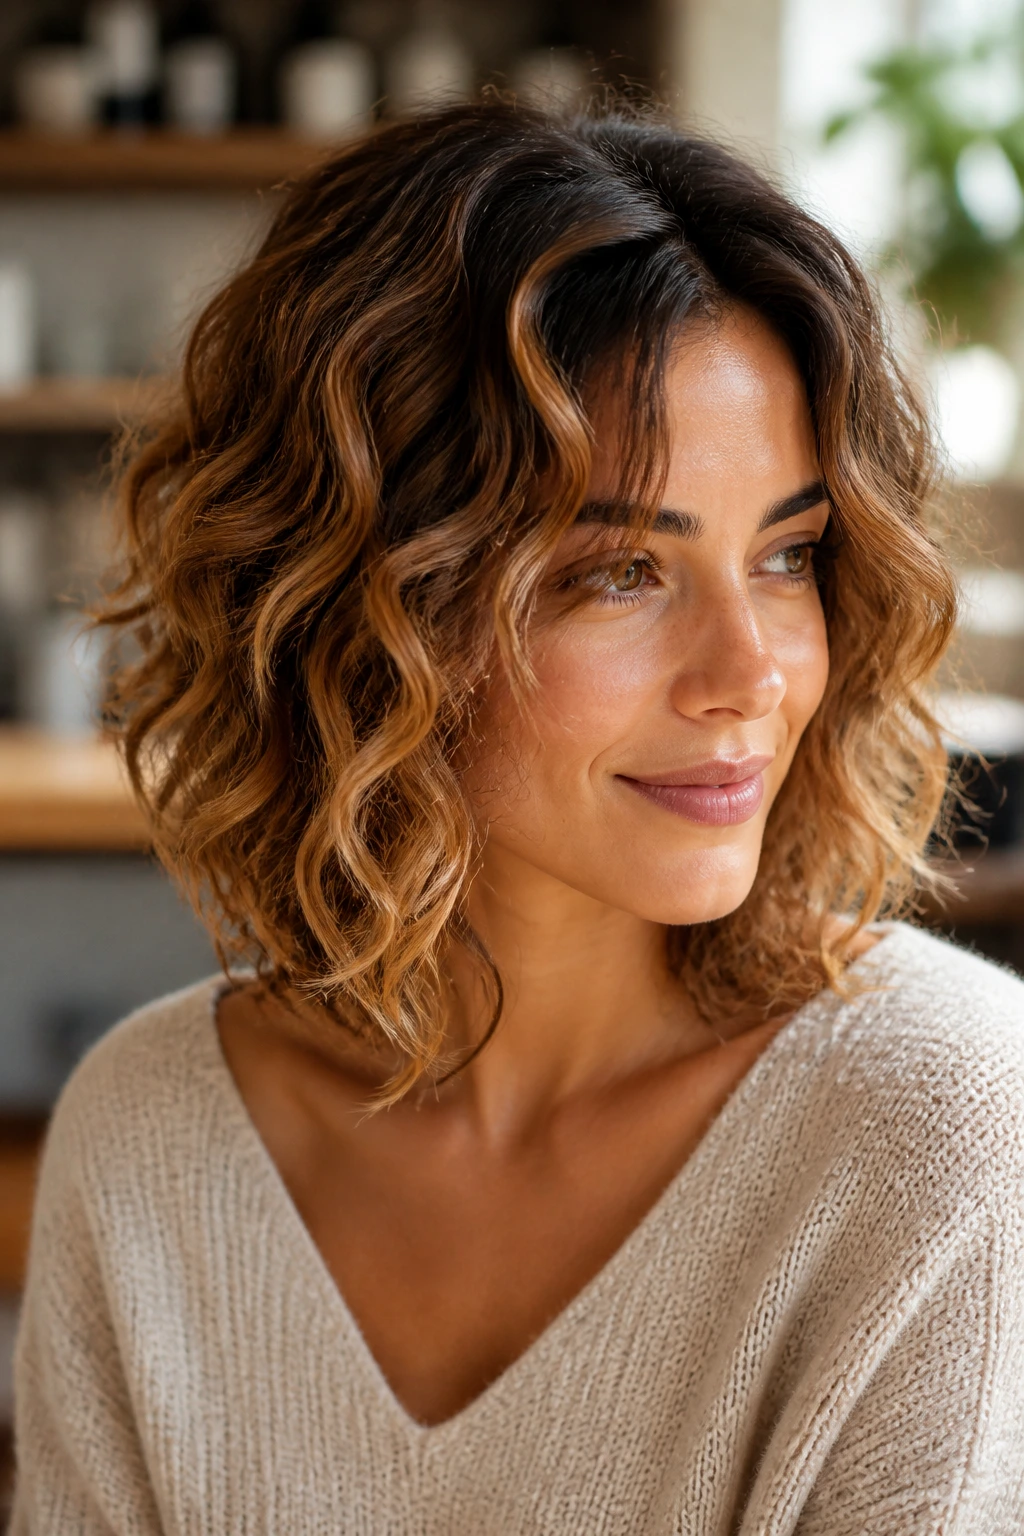
A curly lob is one of those cuts that works because it doesn’t overcomplicate things. The length sits around the collarbone, the layers keep it from turning into a triangle, and the balayage gives the curls a soft glow from root to tip. Warm caramel is a safer bet here than pale blonde because it preserves the fullness of the shape.
A Clean, Easy Shape
This is the haircut for people who want curl definition but don’t want to fight with a lot of length. The best lob layers are subtle, almost hidden until the curl dries and separates. A stylist can paint the caramel through the mid-lengths and finish with a gloss so the tone looks smooth rather than dry.
The result is tidy without being stiff. When you wear it with a center part, the caramel pieces frame the face. Shift it to one side and the same cut feels looser and a little more casual. That flexibility is why I keep recommending it.
9. Halo Layers with Sunlit Tips
Halo layers are a nice choice when you want the top of the head to have lift but you don’t want the overall shape to lose fullness. The outer rim of the hair stays visible, which gives the curls a rounded, floating edge. Sunlit tips keep the finish bright where the curls bounce the most.
The Shape People Notice First
This cut is all about the silhouette from the side and back. The top layers are lightened enough to move, but not so short that they frizz out around the crown. The caramel at the tips should be fine and feathered, because chunky light ends can make curly hair look overprocessed fast.
It’s especially good for medium to thick curls that need help staying off the neck. The halo shape lets the length remain romantic while the highlights create a soft ring of brightness around the outer line. It looks simple. It isn’t.
10. Tapered Crop with Caramel Peekaboo Highlights
Short curly hair can take caramel, too. A tapered crop keeps the sides neat and the top full, and peekaboo highlights tucked just under the upper layer make the color feel deliberate instead of loud. You see flashes of caramel when the hair moves, not a constant wall of brightness.
Small Cut, Big Payoff
The taper helps the head shape read cleanly, especially if your curls are dense at the back and around the ears. The caramel works best in the upper canopy and a few hidden pieces near the temples. That gives the crop dimension without making the shorter sections look busy.
This is a good pick when you want shape on wash day and less bulk around the neck. A little curl cream, a touch of gel, and finger-coiling on the top layer is usually enough. The haircut carries the style. That’s the whole point.
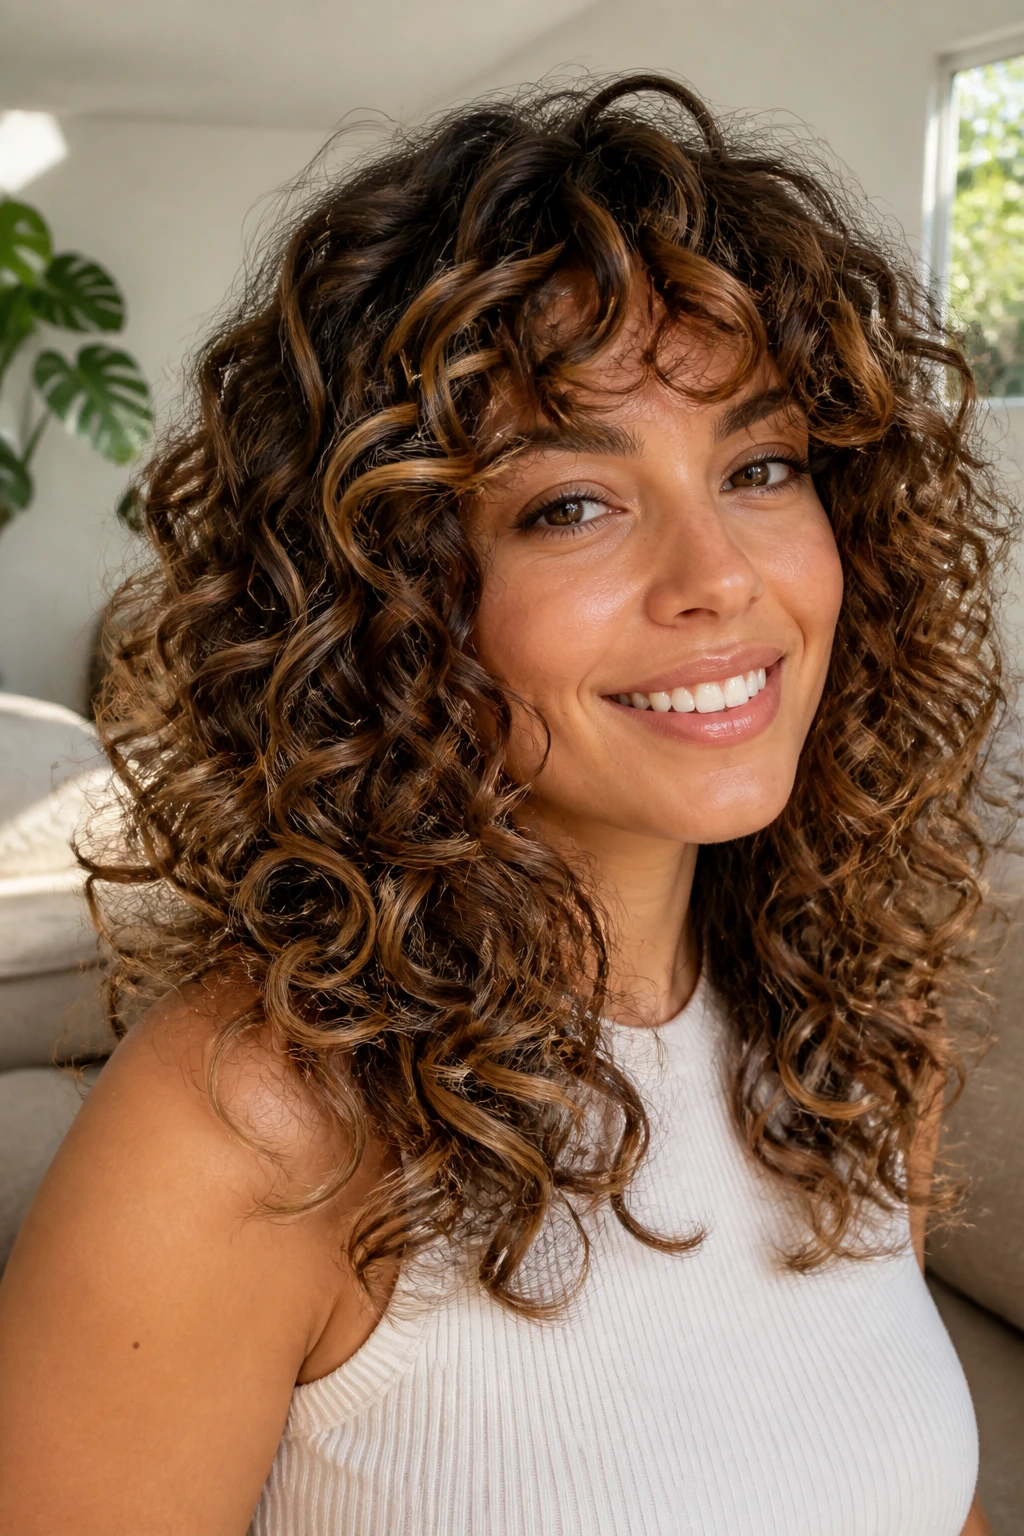
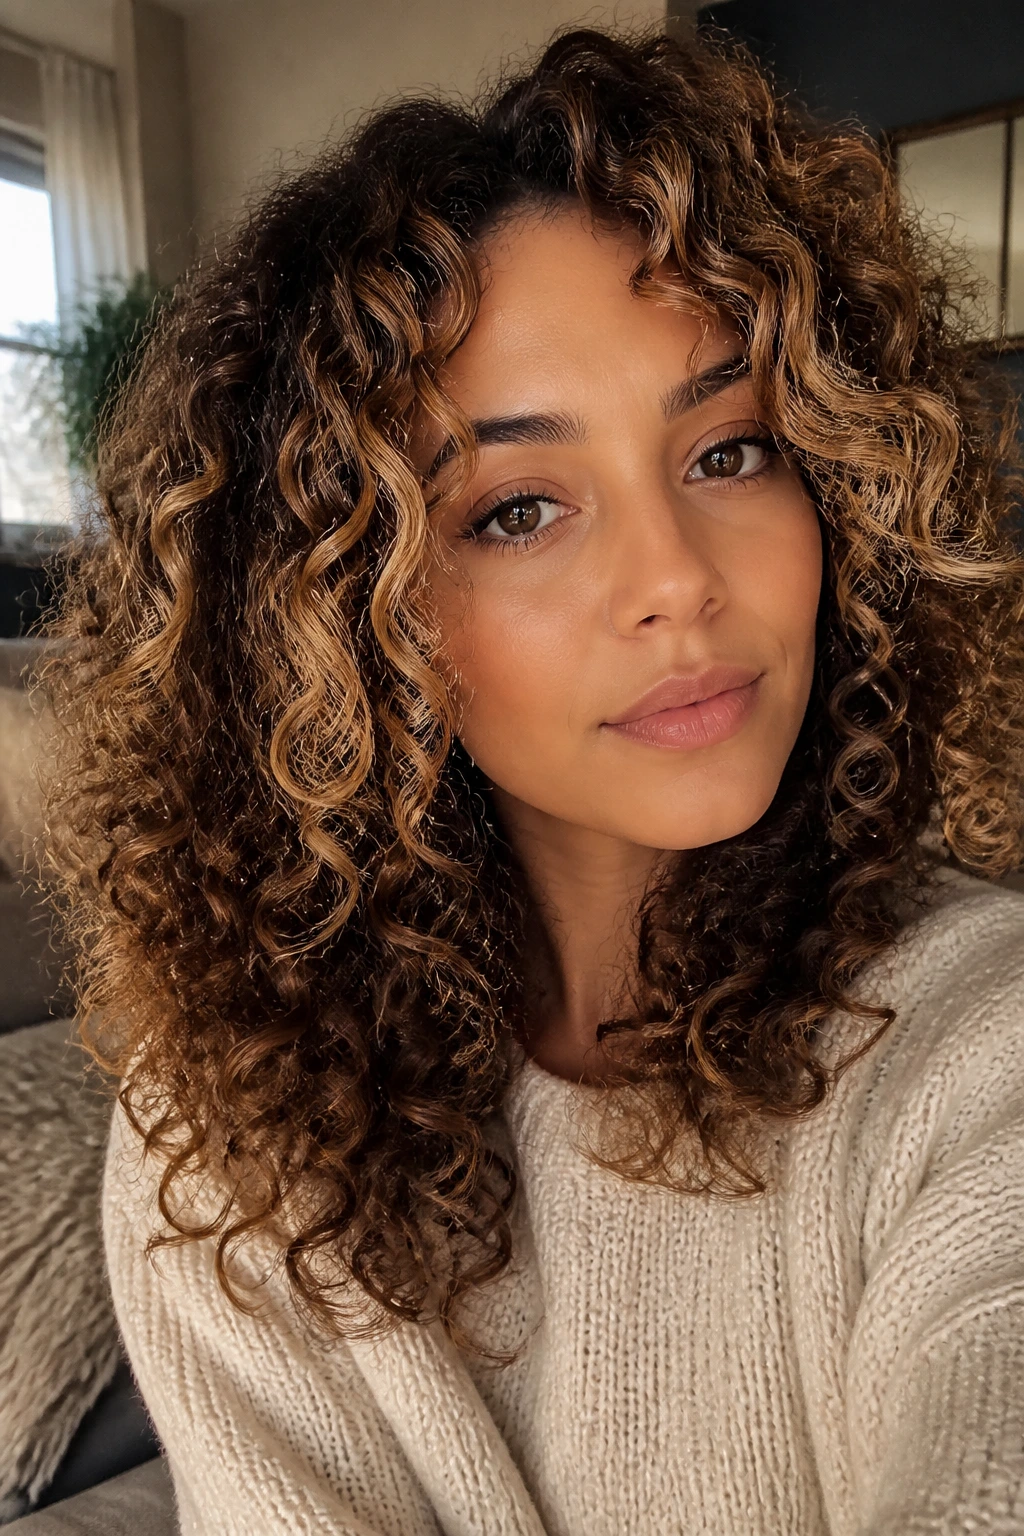
11. Curtain Bangs with Layered Ringlets and Honey Sweep
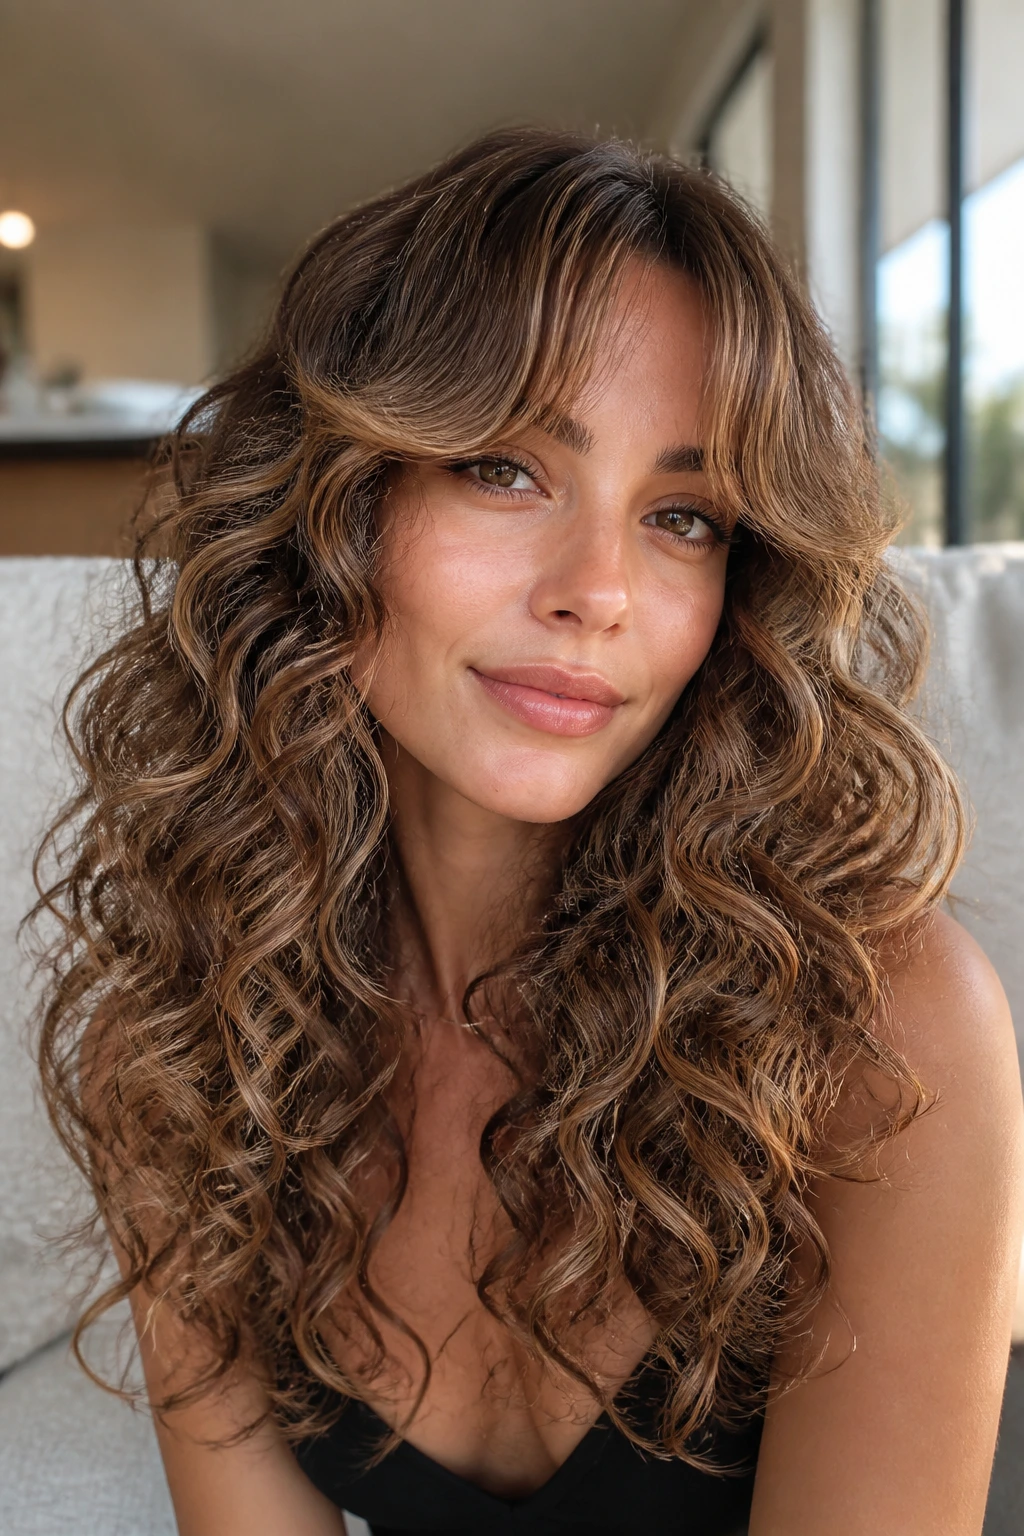
Curly curtain bangs can look charming or chaotic depending on the cut. The difference is length control and how the layers fall around them. Honey-toned highlights make the fringe read soft instead of blunt, and the rest of the ringlets can stay slightly darker for contrast.
Why the Fringe Needs Breathing Room
The bangs should be long enough to split in the middle and skim the cheekbones once the curls dry. If they’re cut too short, they spring up and sit awkwardly above the brow. That’s the part that ruins the look. Caramel in the front pieces keeps the attention where you want it, right on the movement.
This version works best on medium curls with enough spring to frame the face without puffing outward. If you wear glasses, this can be a smart way to keep the front light and open. The haircut has a bit of drama, but the honey sweep keeps it from feeling harsh.
12. Side-Swept Layers with Ribbon Highlights
A side-swept layered cut is one of the easiest ways to make curly hair look fuller without adding bulk everywhere. The longer side creates a soft diagonal line, the shorter side lifts the profile, and ribbon highlights make the movement obvious. I like this look because it feels polished without turning into a formal style.
A Shape That Plays Well With Movement
The caramel should follow the sweep, not fight it. Paint the lighter pieces through the side that carries the most hair and keep the opposite side a touch deeper. That contrast gives the curl pattern a little push-pull effect, which is much more interesting than even coloring all around.
This is a strong option if one side of your hair naturally parts flatter than the other. The sweep gives you a way to work with that. When the curls dry, the ribbons show in the arcs of the hair, and the whole cut has a soft, face-lifting effect.
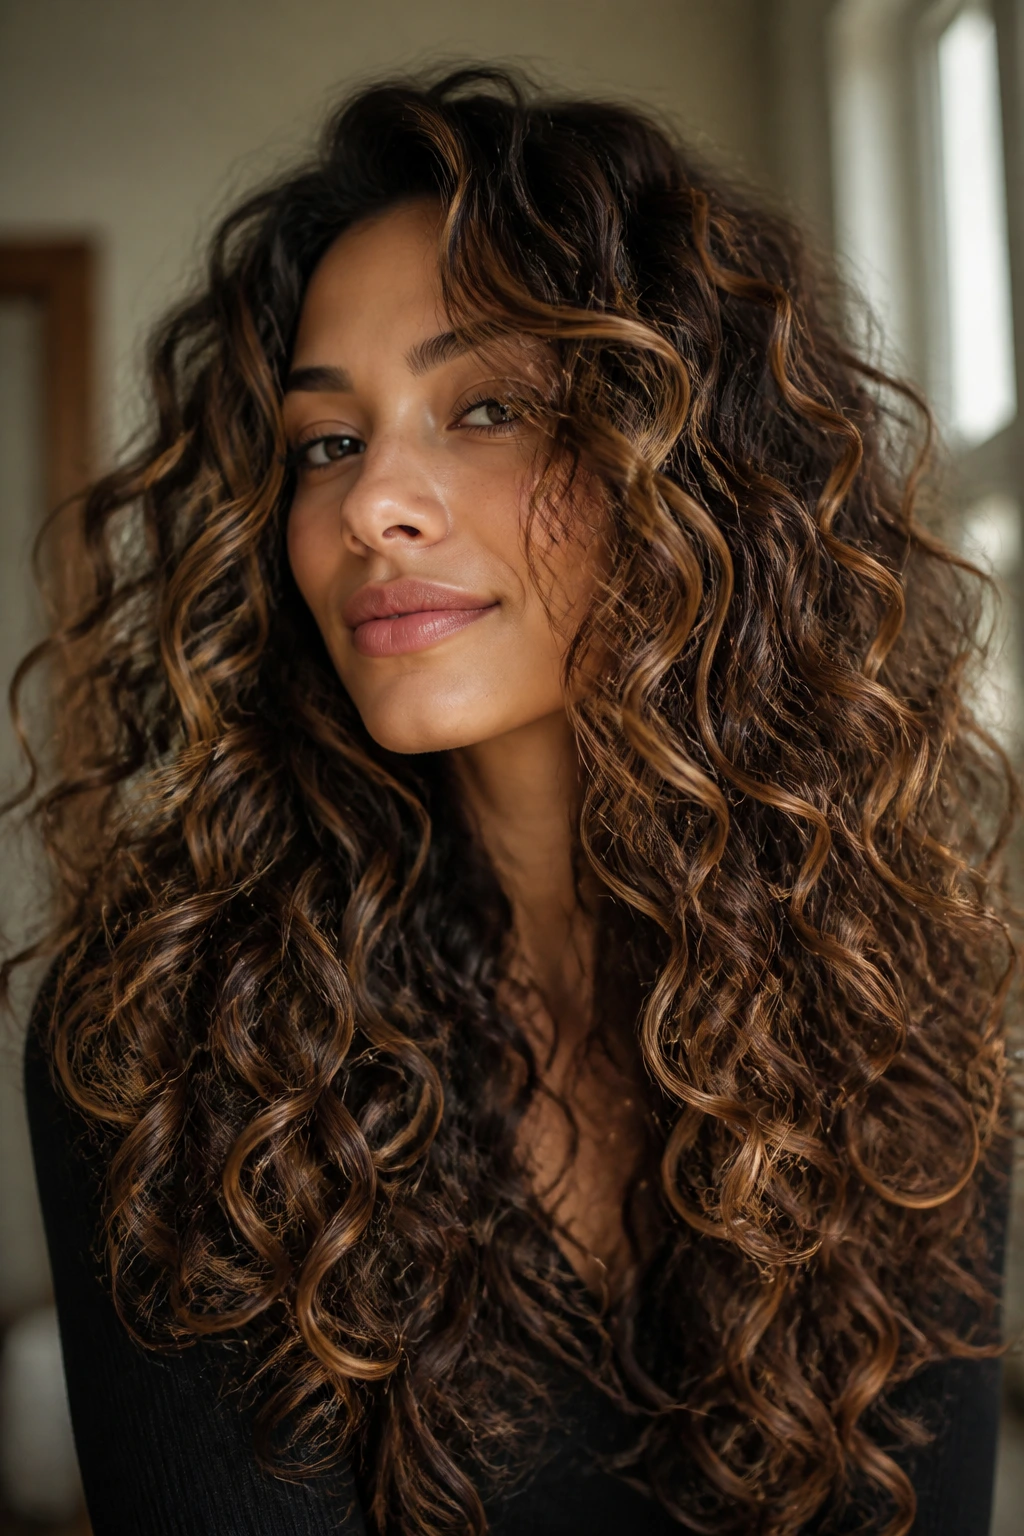
13. Waterfall Layers for Long Spiral Curls
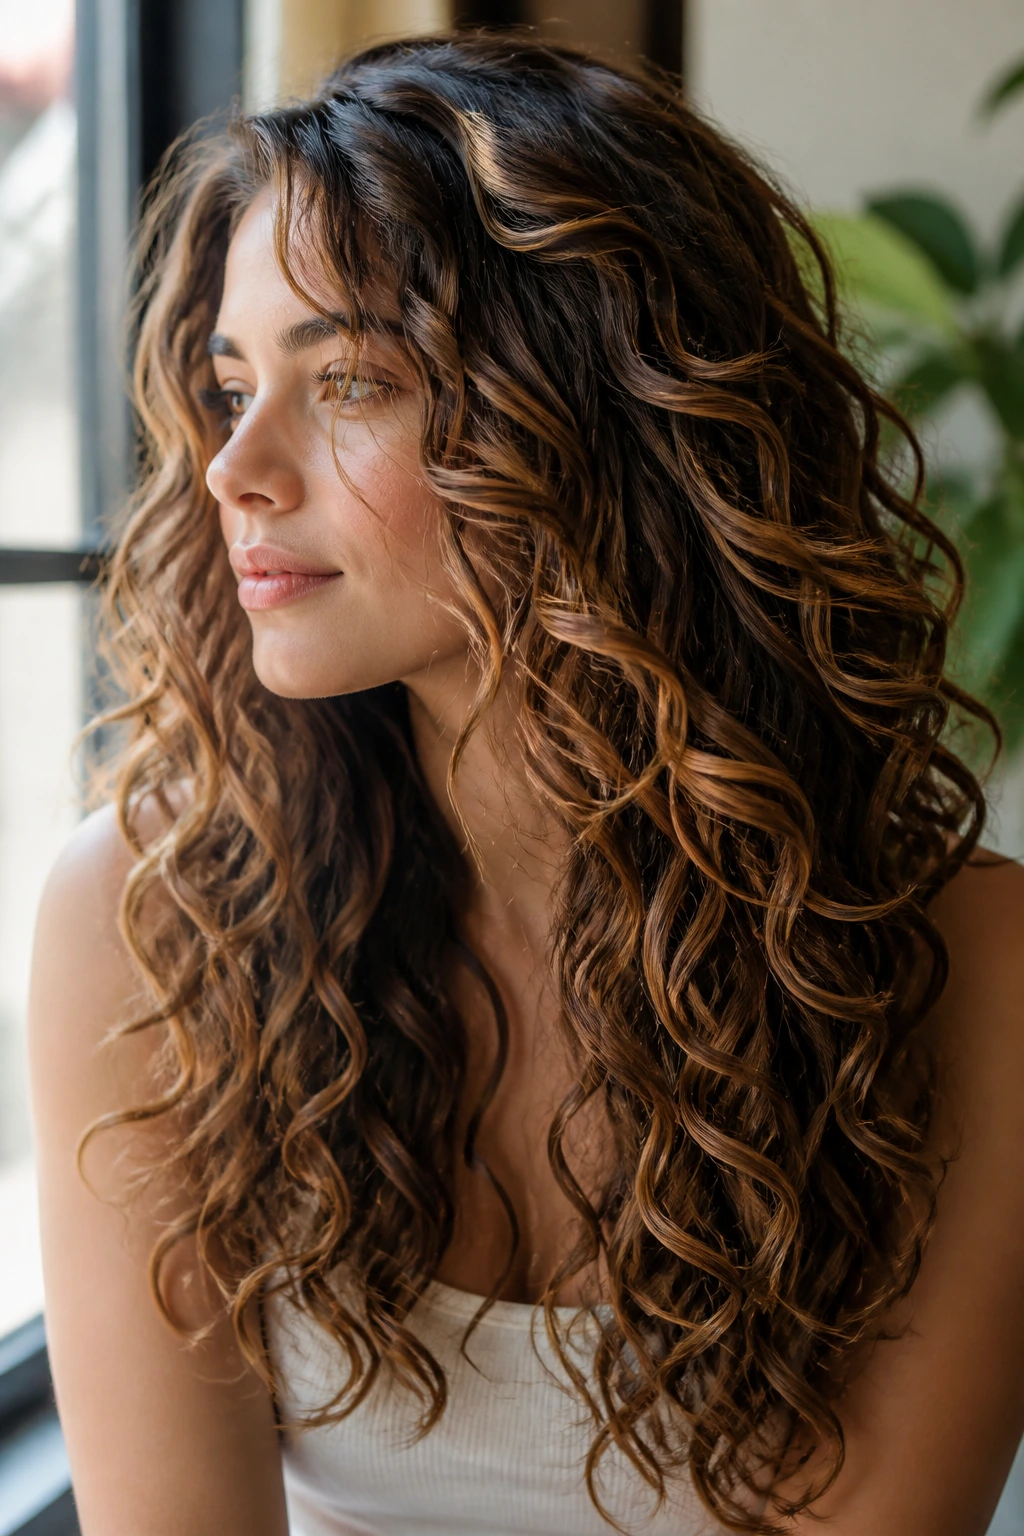
Waterfall layers are made for long spiral curls that want to stack and fall instead of balloon out. The layers descend in a gentle flow, so the hair reads like one continuous shape rather than a stack of disconnected steps. Caramel painted through the falling sections adds the feeling of light catching on moving water.
When You Want Length and Definition
The magic here is restraint. The shortest layers shouldn’t sit too high, or the cut starts to lose that waterfall effect and turns choppy. The caramel can be stronger through the mid-lengths and softer near the ends, which gives depth without risking see-through tips.
This haircut suits people who like to wear their curls loose most days. It looks especially good when the hair has plenty of hydration and not too much product build-up, because the spiral pattern needs room to separate. Clean shine, not sticky shine.
14. Choppy Layers on Thick Curls with Cocoa-Caramel Depth
Thick curls need a cut that knows how to let go of weight. Choppy layers can do that, but only if they’re balanced with enough length to keep the outline from getting ragged. Cocoa-caramel depth gives the curl pattern a richer look, which helps when the texture itself is the star.
Strong Shape, Not a Hard Edge
The layers should be staggered enough to take pressure off the bulk points — usually around the sides and back — while keeping the ends soft. This is one of the better choices for heavy hair that dries into a triangle if nobody intervenes. The caramel should live in medium-width strokes, not tiny streaks, so it can be seen through the density.
I’d steer this look toward people who want their curls to feel lighter after a cut, not thinner in a bad way. That’s an important difference. The cocoa tones give the light pieces a deeper base to sit on, and the cut stops the volume from swallowing the face.
15. Face-Framing Layers on Tight Coils
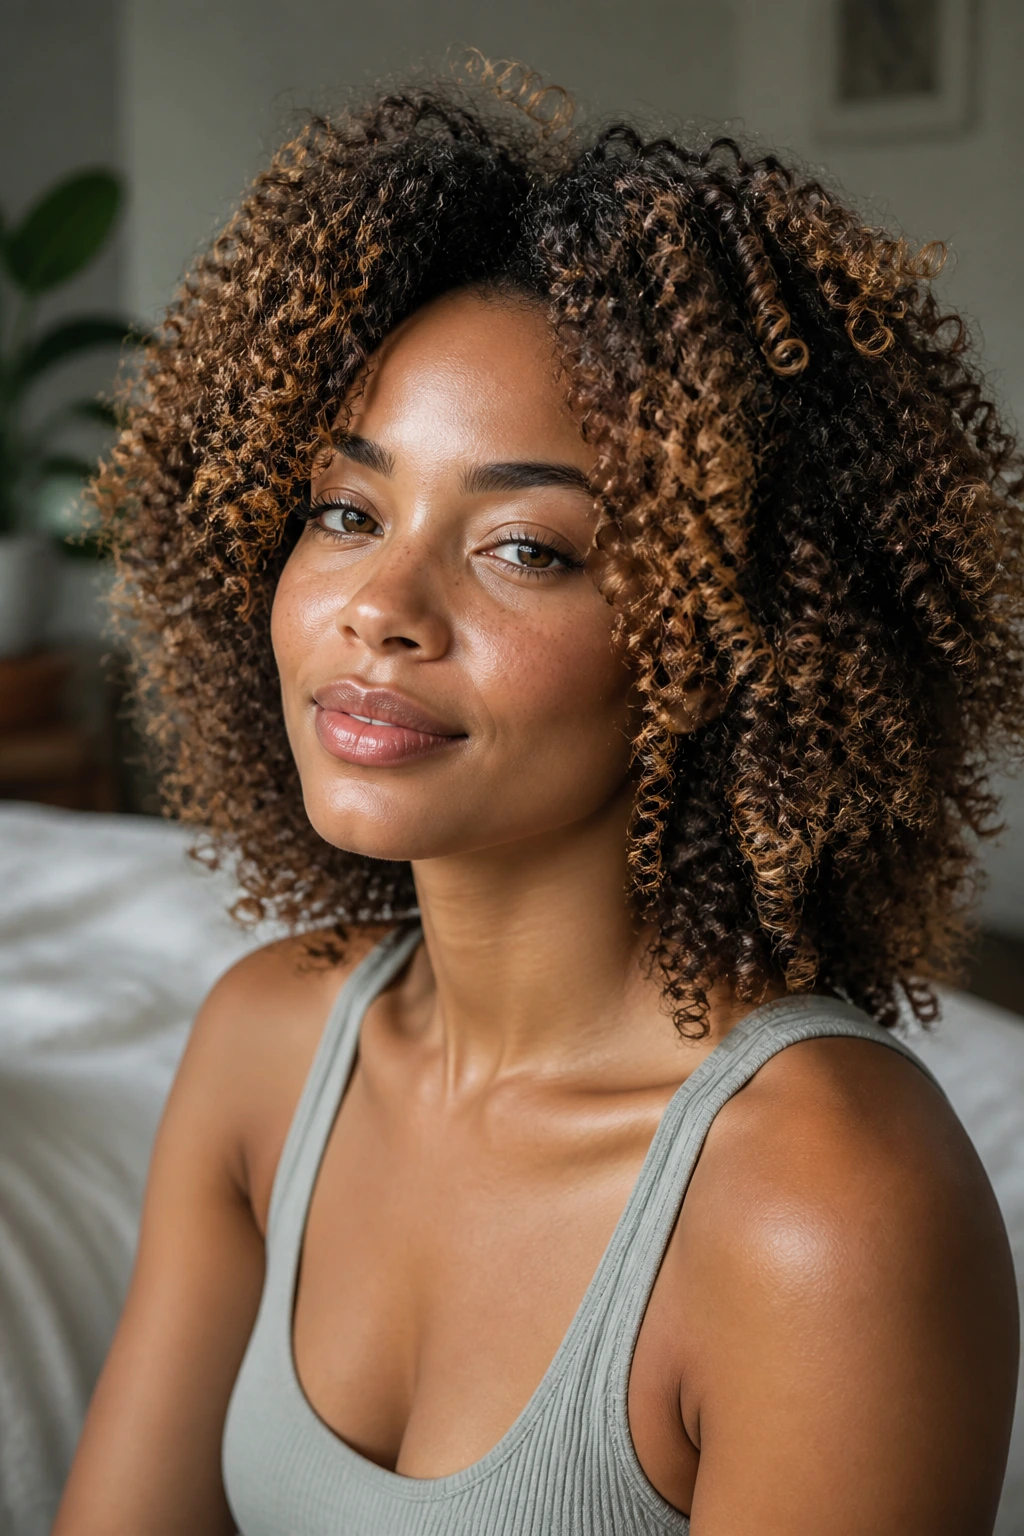
Tight coils often look best when the layers are strategic and not overworked. Face-framing pieces lift the front, caramel detail brightens the outline, and the rest of the coil mass stays full. Done well, the effect is sculpted, not fussy.
Keep the Brightness Where It Can Be Seen
The front layers should be cut to land around the cheekbone or jawline once the coils shrink. That creates a soft frame that opens the face without taking too much length. Caramel can be painted in a narrow halo around the front and crown area, where the coils catch light and the detail doesn’t disappear.
This works especially well when you want structure but hate the look of over-thinned hair. Tight curls need room to keep their spring. The lighter pieces make the shape easier to read, which matters a lot when the curl pattern is dense.
16. Collarbone Cut with Painted Ends
A collarbone-length cut is one of the easiest curly styles to live with. It’s long enough to feel soft, short enough to stay manageable, and the painted caramel ends keep the shape from looking blunt. The color at the bottom acts like a visual finish line.
A Good Middle Ground
The best version of this cut has a slight taper toward the front and layers that start low enough to preserve fullness. That means the curls don’t expand into a round poof. The caramel should be brushed onto the lower third in soft strokes, not placed in a solid band, because curly ends need air and movement.
This is a strong everyday choice if you want a haircut that behaves on both wash day and day three. The length sits nicely under jackets and scarves, too, which sounds minor until you’re dealing with curly hair in real life. Tiny details matter.
17. Layered Pixie-Bob with Warm Caramel Detail
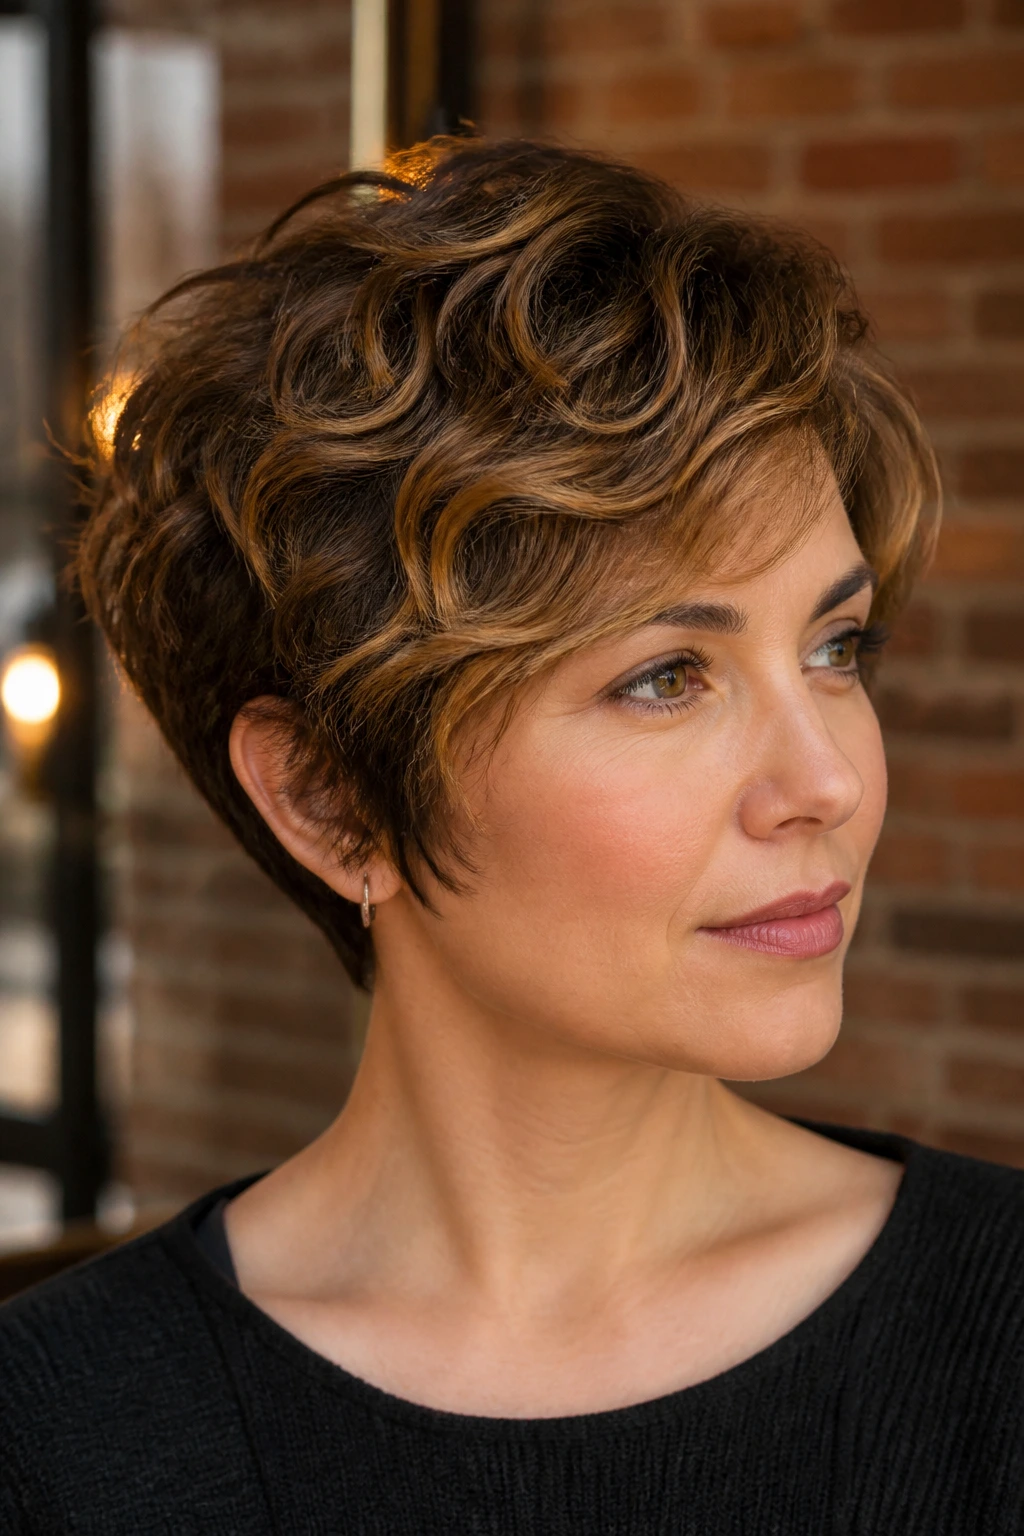
A pixie-bob on curly hair has a crisp little shape that can look either sharp or playful, depending on the layering. Warm caramel detail around the fringe and crown softens the transition between the short sides and the fuller top. It gives the cut a little glow without turning it into a color-heavy style.
Short Hair Needs Precision
Because the length is short, every cut line matters. The layers should be light enough to let the curls sit up, but not so chopped that the shape breaks apart. Caramel around the top and side-swept front pieces catches the eye and keeps the haircut from reading too severe.
This is a good choice if you like hair off the neck and don’t mind a little maintenance with trims. Short curls lose shape faster than long ones. The caramel helps the style stay interesting between appointments, which is handy when the cut itself is this clean.
18. U-Shaped Layers with Diffused Shine

U-shaped layers are a classic for a reason: they preserve length in the middle while letting the sides fall a touch shorter. On curly hair, that creates a soft curve that feels intentional. Add diffused caramel shine through the outer layer and you get a shape that looks full without being boxy.
The Curve Does the Work
The U shape is useful when the center back tends to look heavy. Instead of making the whole cut equally short, it leaves the middle with more length and frames the sides slightly higher. The caramel should sit where the curve lifts, especially near the front and the outer edges, so the outline feels balanced.
This version works across a wide range of curl patterns. It’s not the flashiest look on the list, but it’s one of the easiest to wear every day. If you want your curls to look tidy when pulled over one shoulder and still have body when worn down, this is a strong answer.
19. Shadow-Root Layers for Dense Curls
Dense curls often need a dark base to keep the color from looking overdone. Shadow-root layers solve that by leaving depth at the scalp and placing caramel more through the mid-lengths and outer curl clumps. The result is less stripe, more depth.
Why the Root Shadow Helps
A soft root shadow makes the highlight grow-out less obvious and keeps the top of the head from looking over-lightened. On thicker curls, that matters because the texture itself already creates visual noise. Caramel works better when it has a darker ground under it.
If your hair has been lightened before or tends to catch brass fast, this is one of the safer ways to wear caramel without frying the whole head into sameness. The layers reduce bulk, and the root shadow protects the color story. Practical. Not flashy. That’s the appeal.
20. Soft Mullet with Honey Brown Streaks
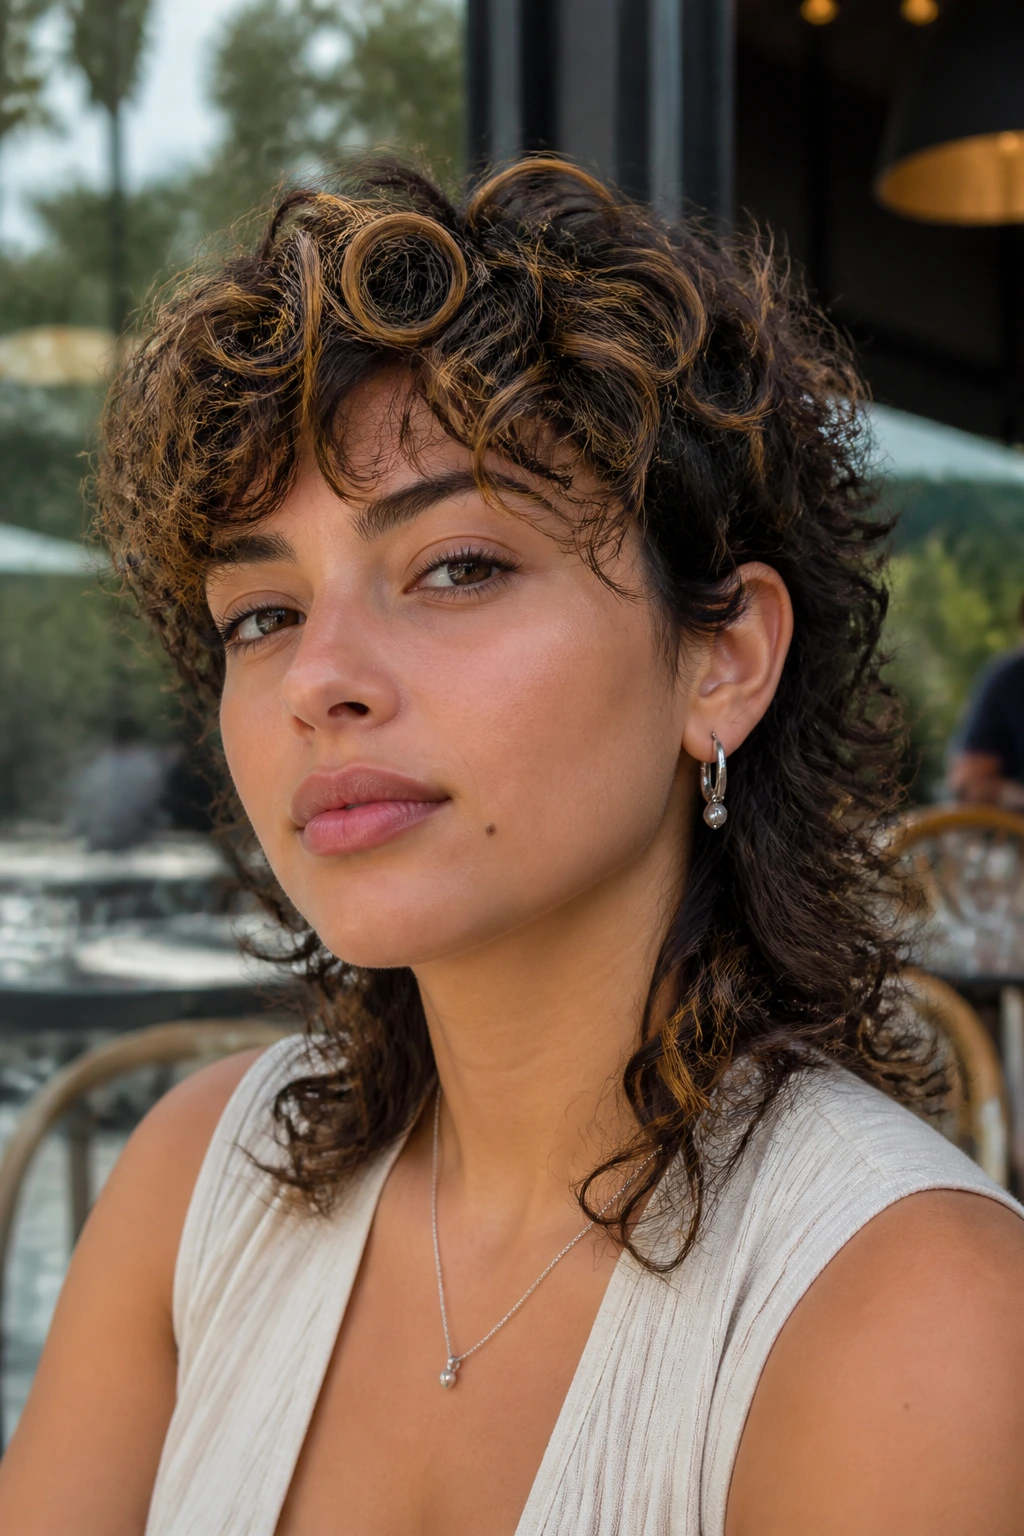
The curly mullet is one of those cuts people either love or avoid until they see the right version. Softness is the difference. Keep the top layered, the sides a little shorter, and the back long enough to swing. Honey brown streaks add motion through the top without making the cut feel too punk.
Edgy, but Not Harsh
The goal is not a hard retro mullet. It’s a curly shape with attitude and a little breathing room around the cheeks and neck. The highlights should be concentrated near the crown and front sections, where they can catch the shape of the cut. If the streaks run too heavily through the back, the whole style can look disconnected.
This suits people who like a haircut with personality and don’t mind drawing a little attention. It’s especially good with a side part or a messy fringe. The honey-brown tone softens the edge enough that the cut feels wearable, not costume-y.
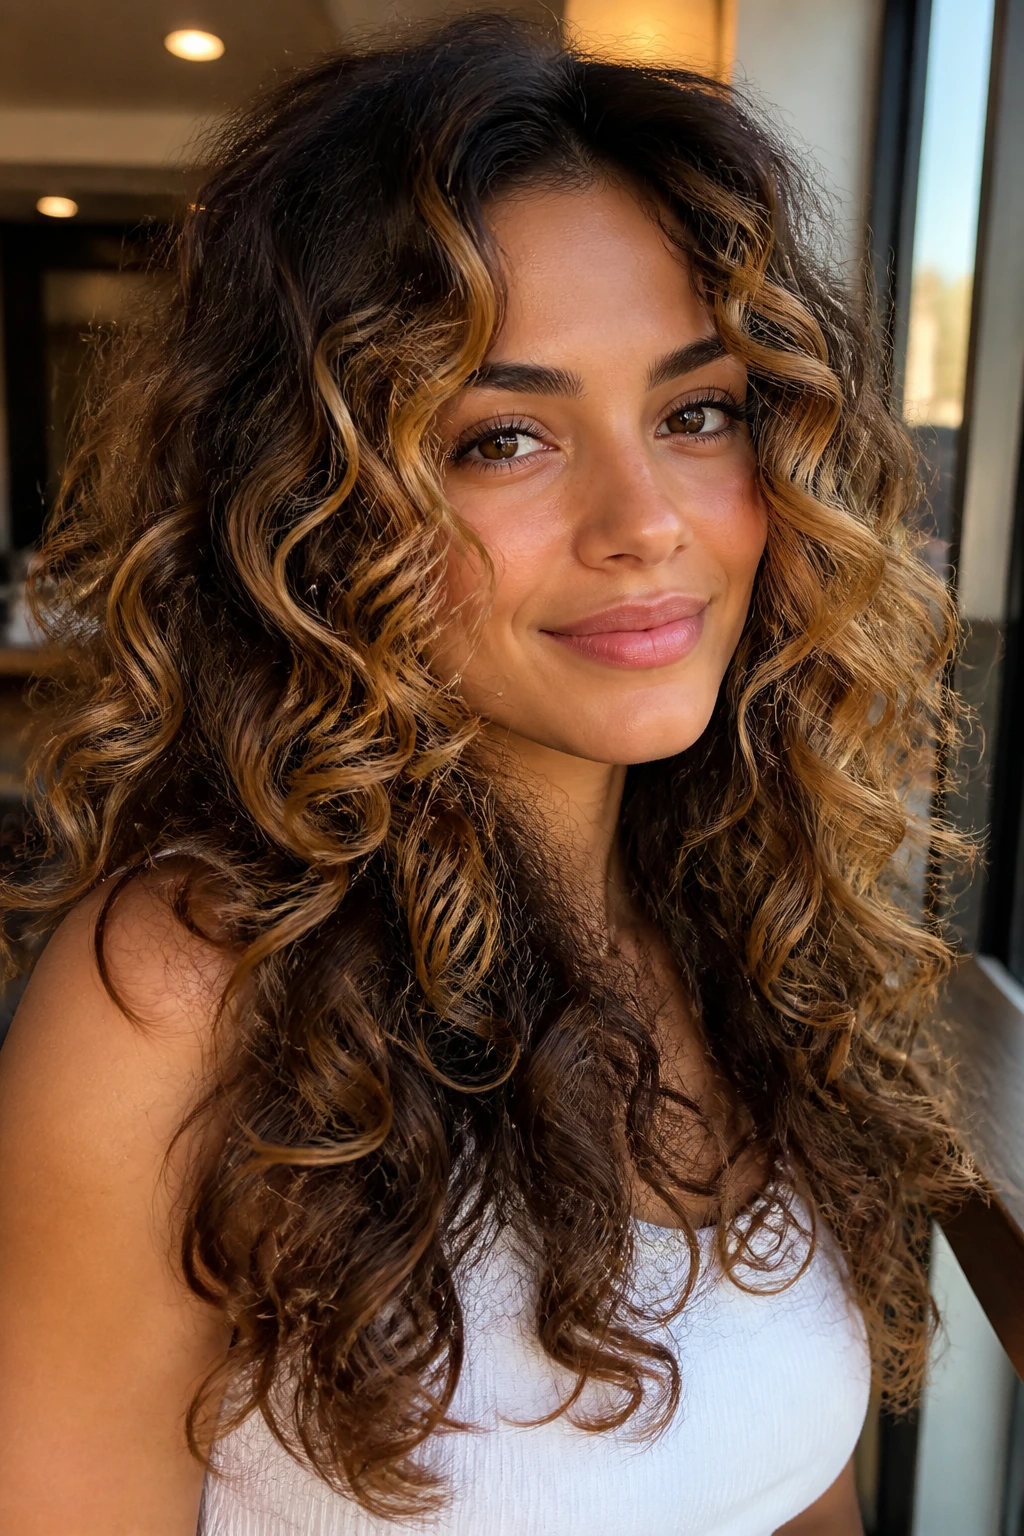
21. Shoulder-Skimming Layers with Brushed-Out Volume
Shoulder-skimming curls can look lush when they’re layered to move instead of sit in one mass. Brushed-out volume gives the shape a softer halo, and caramel highlights through the midsection keep it from reading too dark or too compact. It’s a fuller, airier take on everyday curls.
A Nice Option for Bigger Texture
This cut works well if your curls are large, soft, or somewhere between waves and spirals. The shoulders are a tricky length because the hair can flip, wedge, and puff in odd places. Strategic layers help the curl fall around that line instead of fighting it. The caramel then breaks up the bulk visually, which makes the outline look lighter.
It’s a good style when you want something that feels touchable. Not stiff. Not over-shaped. A little mousse, a diffuser, and a gentle fluff at the roots are often enough to get it there.
22. Deep Side-Part Layers with Ribbon Highlights
A deep side part can be a cheat code for curly hair. It builds height instantly, makes the face frame feel intentional, and gives ribbon highlights a diagonal path to follow. The best part is how much shape you get without changing the actual cut very much.
A Simple Shift That Changes the Whole Head
The layers should be designed to support the side part, with enough length on the heavy side to avoid collapsing. Ribbon highlights work here because they travel with the line of the part and make the lift visible. Caramel pieces placed near the root area on the higher side can brighten the crown without needing a lot of bleach.
If your curls flatten on top by noon, this layout can help. A side part plus a diffuser set at the roots gives the style more staying power than a center part in many cases. Small shift. Big effect.
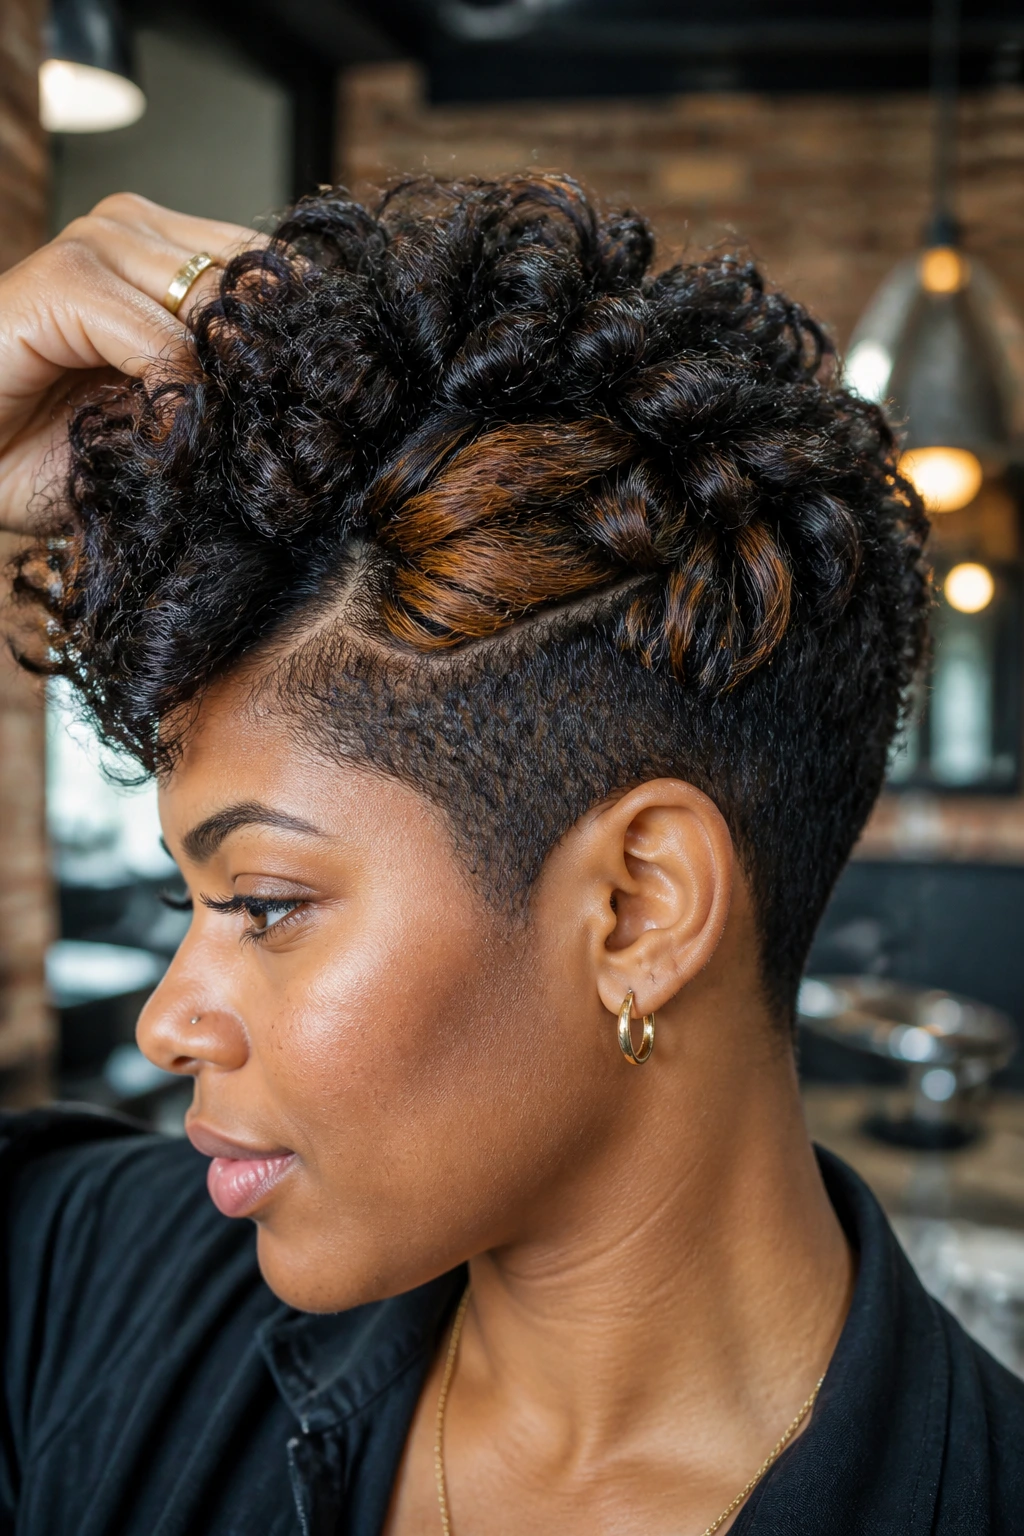
23. Frohawk Layers with Toffee Accents
A curly frohawk is all about central volume and tighter sides. The layers push the curls toward the middle, which creates that lifted ridge, and toffee accents keep the top bright without making the sides too busy. It’s sculptural in a way that flatters a lot of coil patterns.
Strong Shape, Clean Lines
This cut works best when the sides are tapered or closely cropped, while the top stays long enough to form a ridge. Toffee highlights should sit along that ridge and just off center, where they can catch movement. The sides can stay deeper, which makes the shape look sharper from the front.
It’s a great choice if you like a style with presence. There’s no hiding it. The curls stand up, the color pulls the eye upward, and the whole cut feels deliberately shaped rather than accidental.
24. Long Layered Cut with Caramel Money Pieces
Money pieces are one of the easiest ways to make caramel show on curly hair. A long layered cut gives them space to frame the face, while the rest of the hair stays darker and dimensional. The contrast is front-loaded, which means the style looks bright even when the back falls more quietly.
Best for Face Framing
Keep the money pieces soft and blended, not chunky. Curly hair already has plenty of texture, so the lighter strands should feel like part of the pattern rather than a separate stripe. Long layers through the rest of the hair make sure the front doesn’t look disconnected from the body of the cut.
This is a smart move if you want to test caramel before committing to more color. You get brightness where the face needs it most, and the maintenance stays lighter than a full-head highlight. Some people start here and never feel the need to go further.
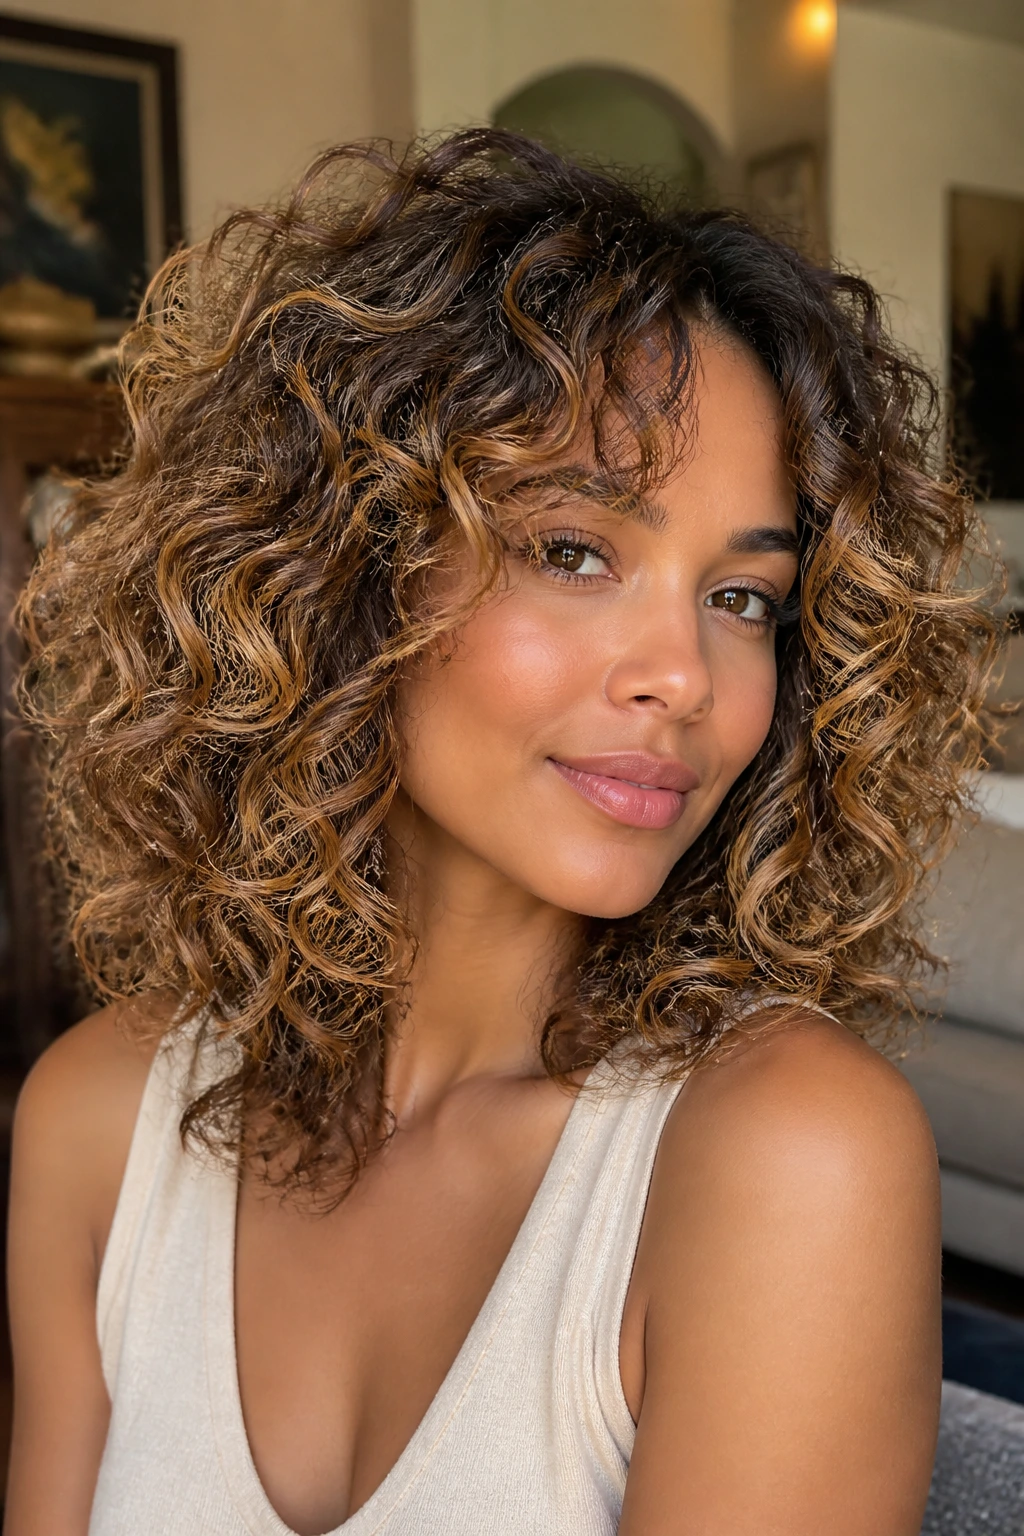
25. Airy Rounded Layers with Espresso-and-Caramel Depth
Rounded layers on curls can look luxurious when the color has depth beneath it. Espresso at the base and caramel on the surface create a richer contrast than light brown alone, and the rounded cut keeps the outline soft. The result is full, airy, and a little moody in the best way.
The Final Shape
This is the version I’d point to if someone says they want dimension but don’t want obvious streaks. The darker base helps the caramel read as glow instead of bleach, and the rounded shape keeps the curls together from root to tip. If the hair is thick, this cut also controls width without flattening the crown.
The whole style works because every part supports the others: the cut adds shape, the color adds depth, and the curls do the rest. It’s a strong finish for anyone who wants curly hair with caramel highlights that still looks like curly hair first.
How Curly Layers and Caramel Color Change the Shape
Curly cuts live or die by balance. Take too much weight from the wrong place and the hair puffs out like a mushroom. Leave too much weight and the curls stretch into a flat curtain. Layering solves that by letting the curl clumps sit at different lengths, which creates movement and keeps the outline from turning boxy.
Color plays a quieter role, but it matters just as much. Caramel highlights can pull the eye up to the crown, widen the face frame, or make a dense mass of hair look less heavy. A warm tone also softens the contrast between dark roots and lighter ends, which helps the cut feel lived-in instead of salon-stiff. That’s why the best curly cuts usually do not rely on one heavy highlight placement. They spread the brightness where the eye naturally travels.
Essential Tools for Styling and Maintaining These Looks
- Wide-tooth comb: Best for detangling wet curls without ripping apart the pattern.
- Microfiber towel or cotton T-shirt: Cuts down on frizz when you blot out water after washing.
- Leave-in conditioner: Keeps the caramel pieces from looking dry and helps the curls clump.
- Curl cream or mousse: Adds shape and support, especially for layers that need lift.
- Lightweight gel: Useful when you want the curls to hold the layered shape longer.
- Diffuser attachment: Helps set the curls without blasting them apart with direct air.
- Duckbill clips: Handy for root lift at the crown or for pinning face-framing pieces while they dry.
- Spray bottle: Good for refreshing day-two and day-three curls before restyling.
- Silk or satin pillowcase: Reduces friction so the layers don’t frizz flat overnight.
- Color-safe shampoo and conditioner: Helps preserve caramel tone without stripping the hair.
Smart Cut and Color Notes to Bring to Your Appointment
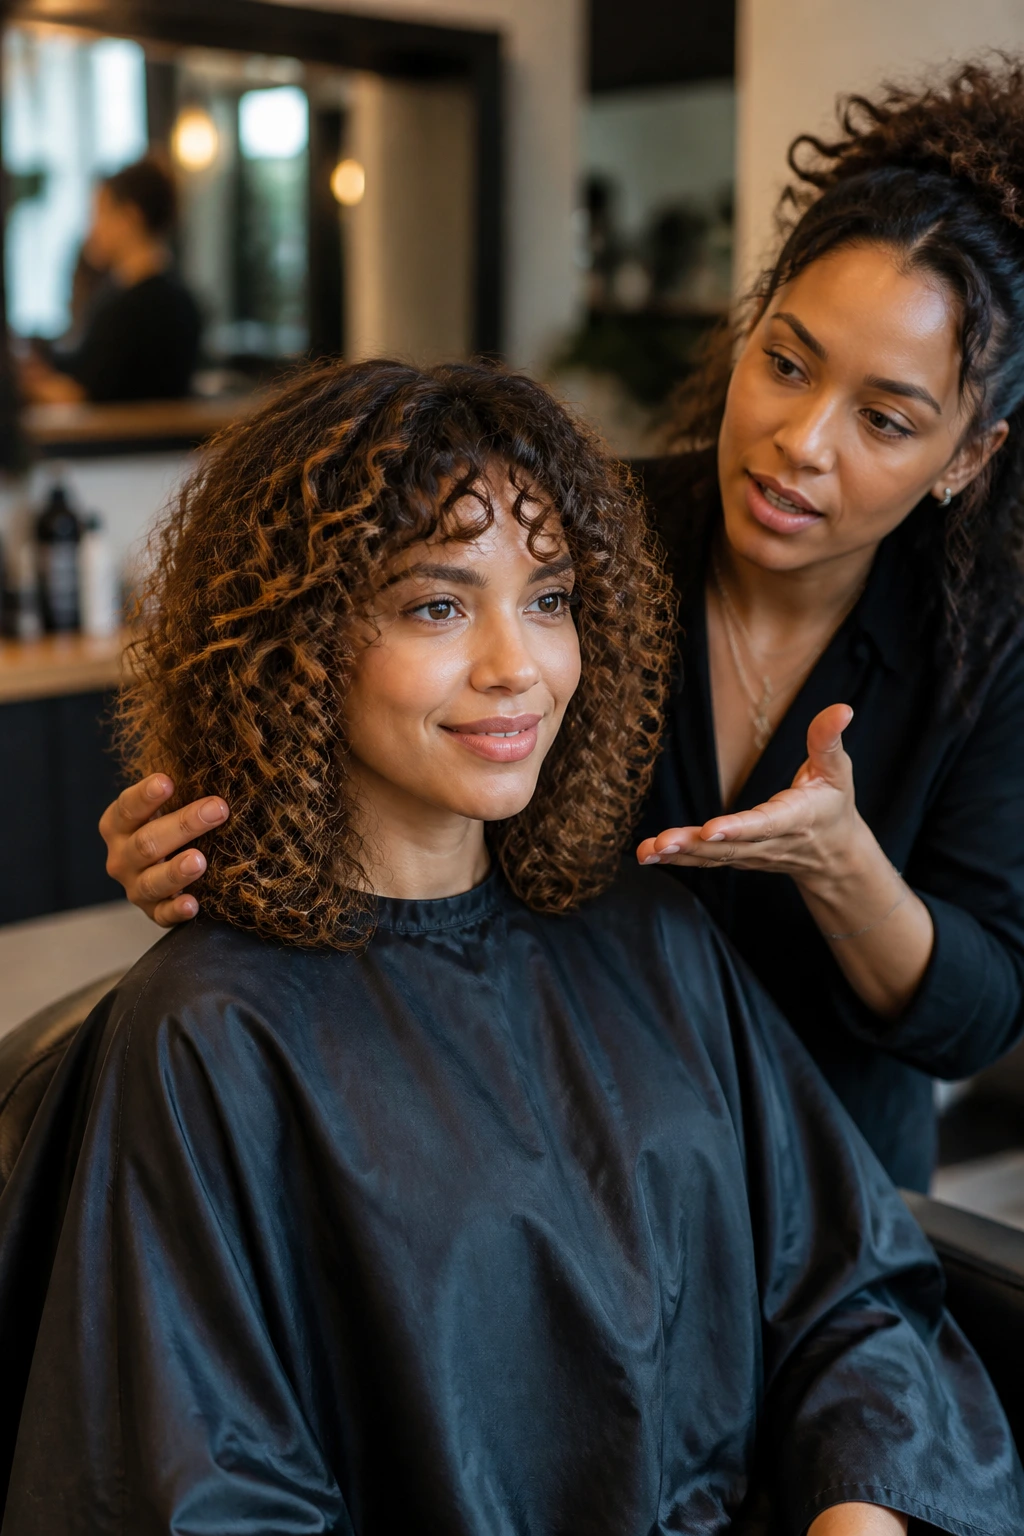
The cleanest curly cuts start with shrinkage. Bring that up early. If your curls spring up two inches or more after drying, the stylist needs to know before the scissors come out. Dry cutting, curl-by-curl shaping, or a method designed for textured hair usually gives a better result than a straight wet cut on curls that change a lot.
Caramel placement matters just as much. Ask for brightness around the face, on the outer canopy, and through the sections that actually move when you turn your head. That keeps the color visible. If your hair is porous, faded, or already lightened, make sure the stylist keeps the warm tones controlled; too much bleach on fragile ends can make the curls look fuzzy instead of glowing.
Bring two photos if you can: one for the cut shape and one for the color tone. Those are not the same thing, and mixing them up leads to bad results. One image can show the layer pattern, another can show whether you want honey, amber, toffee, or a deeper caramel brown.
How to Wear These Layers Day to Day
Defined curls and brushed-out curls give two very different reads, and both can work on the same haircut. For a cleaner finish, set the curls with a gel or foam and leave them alone until fully dry. The caramel will show in separate ribbons, and the layers will look crisp. For a softer finish, break the cast with a tiny bit of oil or serum and shake the roots a little. The shape gets airier, almost cloudlike.
Accessories matter more on layered curls than people think. A narrow headband can push face-framing pieces forward. A barrette can tuck one side and show off the caramel on the other. Even a simple side clip changes the way the light lands.
If your hair lives in a ponytail half the week, choose layers that don’t leave huge holes when pulled back. The best curly layered cuts still make sense when pinned up. That’s the real test.
Additional Shine and Shape Boosters
Shine Boost: A clear gloss or warm toner between full color sessions keeps caramel from going flat or muddy. The tone doesn’t need to be dramatic; it needs to stay clean. Warm curls look richer when the finish has a little reflective sheen.
Shape Boost: A few root clips at the crown while the hair dries can rescue a layered cut that wants to sit flat on top. Use them only until the hair is about 80 percent dry, then remove them so the root lift doesn’t turn rigid.
Customization: If you want more contrast, ask for money pieces or a deeper root shadow. If you want less contrast, spread the caramel through the mid-lengths and keep the front pieces softer. Both choices work; they create different moods.
Make-It-Yours: Fine curls usually look better with fewer, lighter layers and a subtler caramel placement. Thick curls can handle stronger shape and bolder highlights. Tight coils often look best when the color stays on the outer halo rather than buried deep inside the texture.
Maintenance, Refreshing, and Color Care
Curly hair with caramel highlights looks best when it’s hydrated and not overwashed. A good rhythm for many heads is cleansing every 5 to 7 days, then refreshing with water, leave-in, and a little cream between washes. The curls keep their shape better that way, and the color doesn’t dull as quickly from constant shampooing.
Trims usually land well every 8 to 12 weeks if you want the layers to keep their shape. If the style is a shag, wolf cut, or pixie-bob, you may want the shorter end of that window. Longer cuts can stretch a little farther, but the ends still need regular cleanup so the caramel pieces don’t look ragged.
For color upkeep, a gloss or toner refresh every 6 to 10 weeks keeps the caramel warm rather than brassy. If the highlights are balayaged and softly blended, the grow-out can live longer without looking harsh. Night care matters too. A satin pillowcase, a loose pineapple, or a silk bonnet keeps the curl clumps from rubbing apart while you sleep.
Variations and Adaptations to Try
Soft Honey Melt: This version keeps the caramel very fine and blended, with the brightest pieces around the face and crown. It’s a good fit if you want dimension without obvious streaks. The cut can stay almost any of the layered shapes above.
Bold Ribbon Contrast: Here the caramel pieces are wider and more visible through the outer canopy. It works best on dense curls with enough depth in the base color to support the contrast. If you like seeing the highlight from across the room, this is the one.
Shadow-Root Dimension: A darker root stretch with lighter mid-lengths creates a softer grow-out and keeps the top of the head from looking over-lightened. It’s especially useful on porous curls or hair that’s been colored before. The layers still show, but the color feels calmer.
Coily Halo Brightening: Tight curls and coils often look best when the caramel stays around the outer halo and front frame. That keeps the light where it can be seen and avoids flattening the interior pattern. This adaptation can be subtle or bold depending on the tone.
Short-Length Curly Cut: If your hair sits above the shoulders, keep the layers light and the highlights concentrated in the front and top sections. Short curly cuts lose shape quickly, so the color should help define the outline instead of fighting it.
Warm-to-Cool Caramel Shift: A warm amber-caramel tone suits golden and neutral undertones, while a softer cocoa-caramel tone works if you want less orange warmth. The haircut can stay the same; the mood changes with the tone.
Common Mistakes to Avoid

Cutting for wet length instead of shrinkage: Curly hair can spring up far more than expected. If a stylist cuts it too short while wet, the layers may end up sitting above the face in awkward places once dry. The fix is a dry cut or at least a curl-aware approach that accounts for shrinkage from the start.
Lightening fragile ends too much: Caramel on damaged tips can look frizzy and pale instead of dimensional. The symptom is fuzzy, see-through ends that don’t hold curl clumps. Ask for the color to live more on the healthier mid-lengths and outer layer.
Placing highlights in thick bands: Big stripes can look harsh on curls because the pattern breaks the color into chunks. If you want movement, the caramel should be ribboned or painted in curved sections that follow the curl. That keeps the tone soft.
Over-layering fine curls: Fine or low-density curls can lose their shape fast if too much weight is removed. The cut starts to look stringy. Keep the layers longer and the color lighter in touch.
Skipping moisture after coloring: Lightened curls need water, conditioner, and a little patience. Without them, caramel can go dull fast and the curl pattern loosens into frizz. Use a mask weekly and keep heat low.
Choosing the wrong caramel temperature: Too orange can clash with cooler skin tones, while too ashy can drain warmth from the hair. A good stylist will adjust the caramel toward honey, amber, or toffee depending on your base and undertone.
Frequently Asked Questions
Will caramel highlights work on dark curly hair?
Yes, and they often work better than lighter blonde tones because the contrast stays warm and believable. On dark bases, caramel gives depth without forcing the hair into a high-contrast stripe pattern that can make curls look stiff.
Should curly hair be cut dry for these styles?
Dry cutting is often a strong choice because it shows the real shape, length, and shrinkage. Wet cuts can work, but only if the stylist knows how your curls behave when they dry and shrink.
How do I keep caramel highlights from turning brassy?
Use color-safe cleanser, limit hard water exposure when you can, and ask for a gloss or toner refresh on a regular schedule. If your caramel starts drifting orange, a salon gloss is usually a better fix than piling on purple shampoo.
Do these layered looks work on fine curly hair?
They can, but the cut should be softer and less aggressive. Fine curls need enough length to keep fullness, so ask for gentle layers and lighter highlight placement rather than heavy color through the whole head.
What if my curls are thick and triangle-shaped?
That shape usually means the lower half is carrying too much weight. Ask for more internal layering, a rounded outline, and caramel placed on the top and outer sections so the eye moves upward instead of outward.
Can I wear these styles without heat styling?
Absolutely. Most of them are meant to air-dry or diffuse at low heat, not to be blow-dried straight. A leave-in, curl cream, and gel routine is usually enough to let the layers show.
How often should I trim a layered curly cut?
Every 8 to 12 weeks is a solid range for keeping the shape clean. Shorter layered cuts may need trims sooner, while longer cuts can stretch a little longer if the ends stay healthy.
What if the highlights look too heavy after the first wash?
Give them a week of wearing and styling before judging the result. Curls separate differently after the first shampoo, and a gloss or toner can soften any harshness if the color still feels too bright.
The Shape That Keeps Giving
The best layered hairstyles for curly hair with caramel highlights do one thing well: they make the curl pattern easier to read. The layers open up the shape, the caramel gives the eye a place to land, and the whole head gains movement without needing a lot of extra styling.
If you’re bringing one of these looks to a stylist, focus on the parts that matter most in real life — shrinkage, density, face shape, and where you want the light to sit. The right cut and color pairing can make curly hair feel lighter, brighter, and a lot less cooperative in the best possible way.